• Welcome to Smashboards, the world's largest Super Smash Brothers community! Over 250,000 Smash Bros. fans from around the world have come to discuss these great games in over 19 million posts!

    You are currently viewing our boards as a visitor. Click here to sign up right now and start on your path in the Smash community!

Super Smash Bros. Infinite Project (Finally Finished!???)

Which title should we use?


  • Total voters
    22
  • Poll closed .
Status
Not open for further replies.

Venus of the Desert Bloom

Cosmic God
Super Moderator
Premium
BRoomer
Writing Team
Joined
Jul 30, 2007
Messages
15,494
NNID
VenusBloom
3DS FC
0318-9184-0547
Advisory Notice: The creation of alternate accounts to cast more costs, submit more content, or otherwise cheat the system is not only against the thread rules but also will earn an account ban for that alternate account as well as a warning on the original account.

createsmash.png
Many moons ago, we had a dedicated user group of individuals led by our trusted leader God Robert's Cousin God Robert's Cousin who tried to make a Smash game here on Smashboards. Not actually developing it; just through typing and brainstorming. This included everything from characters, stages, and more but the project took a while and never was completed. With Christmas upon us, I thought now was a good time to launch a slimmer-down, version of what we had way back when.

Premise
Nintendo wants a successor to Smash Ultimate for their new next-Gen console and they want it like Ultimate but bigger and better. Everyone is here....again!! The entire Smash Ultimate cast is here with even dmore characters and content! But Sakurai needs help so we’ve been hired to help out with the conceptualizing, planning, and pre-development phase. Our job is to listen to what Ninty wants and implement it successfully into Smash! Can we do it or will our product flip? Will we add tripping or will we add wavedashing? What characters will we include? Welcome to
Super Smash Bros. Infinite
Please take a minute to read up about the project and how to participate. Shout out to @airConditioner for drafting this up:

Hello potential developer!


Welcome to the Super Smash Bros. Ultimate Sequel Project - now known as Super Smash Bros. Infinite! We are very excited to see that you have expressed interest in joining our project. Here are some FAQs regarding our project:

Is this actually going to be a fan game?
Unfortunately, this is just a creative brainstorming project. We are only coming up with ideas on how this game will function, what characters it will have, and how different it will be from its predecessor, Ultimate.

Cool! How do I submit a character/stage/assist trophy/etc.?
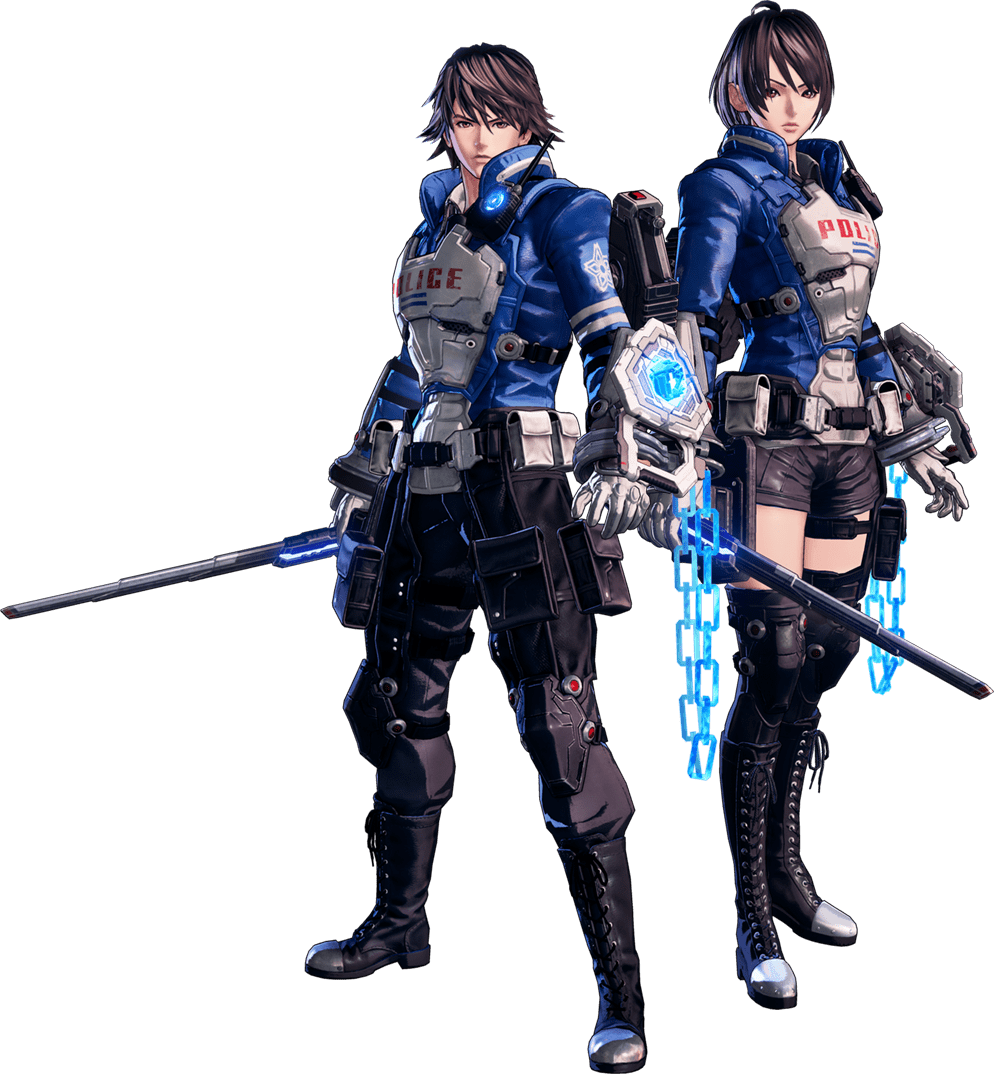
This project is run on a job-by-job basis. This means that the thread creator, Venus of the Desert Bloom Venus of the Desert Bloom will be providing prompts regularly for us developers to answer. These prompts can range from specific (Submit a Halloween Themed character) to vague (Suggest a new first-party franchise for our next character). Once some time has passed after the prompt is given, we will vote on the suggestions, with the winning suggestion(s) making it to the final game. This means that we won't have the opportunity to suggest characters/stages/etc. until the prompt itself is given to us. Furthermore, when we do add characters, keep in mind that we try to keep the newcomers different. For example, after having Jill & Leon as our Game Awards newcomers, we were unable to submit Officer Howard as our next newcomer because they would be too similar (anime cop with a gun that kills otherworldly monsters). This doesn't mean that you would not be able to suggest them again later, it just means we can't have two similar characters back to back. Again, we will have specific times to suggest characters, so please hold onto your ideas for then!

What about Spirits and Music?
As with other parts of the game, we will be submitting spirits on a case-by-case basis, in order to account for the work our Spirit Team does. The two main times we will submit spirits will be after a new character is revealed and when a spirit event is made. Spirit events are week long submissions that are themed around a particular... theme. This can be things like holidays, such as Easter, genres, such as fighting games, to more abstract concepts, like inanimate objects. We do have set rules, about submitting spirits, however. During spirit events, we will only accept 3 submissions per user and each submission is approved based on the discretion of the Spirit Team. Some examples of spirits that will be rejected are real life hardware, such as gaming consoles and accessories, spirits with no official art, and spirits that will increase the age rating. Additionally, when submitting spirits, it is highly encouraged to follow the format listed below to provide the Spirits Team with the information required to add them to the wiki.
While we're on the topic of submitting spirits I just want to mention the formatting of spirit posts. Right now the way that the inforamtion for a spirit battle is displayed varies depending on the submitter, so its not very cohesive, and some are missing information or use inconsistent language to describe the same things. This is the format I use and Venus has encouraged others to adopt it as well.
[Picture][Name] [(Game of Origin)]
Class:
Type: [Primary/Support)(Attack/Shield/Grab), # of slots
Effect:
  • Puppet Fighter: Fighter (Describe which alt)
  • Stage:
  • Music Track:
  • Match:
  • Conditions:

For Example: (This is a spirit I submitted already so it doesn't need to be added again)
Lana (Legend of Zelda: Hyrule Warriors)
Class: Ace
Type: Primary Shield, 2 Slots
Effect: Electric Attack ↑
  • Puppet Fighter: Robin (Blue)
  • Stage: Temple
  • Music Track: Push Forward
  • Match: Stock (1)
  • Conditions: The enemy favors neutral special, Hazard: Zap Floor


Here are some resources that I use when making my spirits that helps with keeping the skills they have accurate, as well as not creating a spirit thats already in the game.

I use this one to see which traits come alongside primary spirits


I use this to see which effects can be given by support spirits.


I use this to see what the in game text is for certain conditions.

I've also found that the Mario wiki has the most viewable list of already existing spirits, with the spirit battle details alongside it for inspiration.

I think that using the Wikia and the already existing google sheets will work going forward. Another thing to think about if we're regulating spirit submissions is that right now quite a few spirits use in the game sprite as their spirit art. There is precedent in Smash Ultimate for this happening with the Mother, Ice Climber, and Pac-Man series using in game sprites but usually if there's no official art of the character then its likely that they're not the kind of character who would get a spirit.

Personally I think R.O.B. is an exception and should be the only real world spirit since he's a fighter.

In terms of music, we have a document on the main page. Music will be added periodically to prevent the document from filling up too fast. Each universe has a cap number, such as 40, that will be the maximum number of allowed songs. Additionally, this cap will be capped by a second, temporary cap, so you it is presented as 15/40. This means that of the 40 songs that will be added throughout the project's lifespan, only 15 will be accepted at the moment. This cap is raised every so often, and the maximum may be increased by adding a stage/character to the project later on. Like with spirits, we will be accepting music on a case-by-case basis. Songs that have difficulty negotiating for, songs with little to no relation with Nintendo or the characters in the project, or series with too many songs will be removed. Fan remixes are allowed, provided you give credit.

Wait, a wiki?
Yeah, we have a cool wiki. You'll find almost everything related to the project on this site.

That's about all I can think of for the project right now! Please enjoy your stay and we look forward to working with you!


Super Smash Bros. Infinite Content
Below is a list of content confirmed for Super Smash Bros. Infinite and has a presence on the Super Smash Bros. Infinite wiki
characters.png

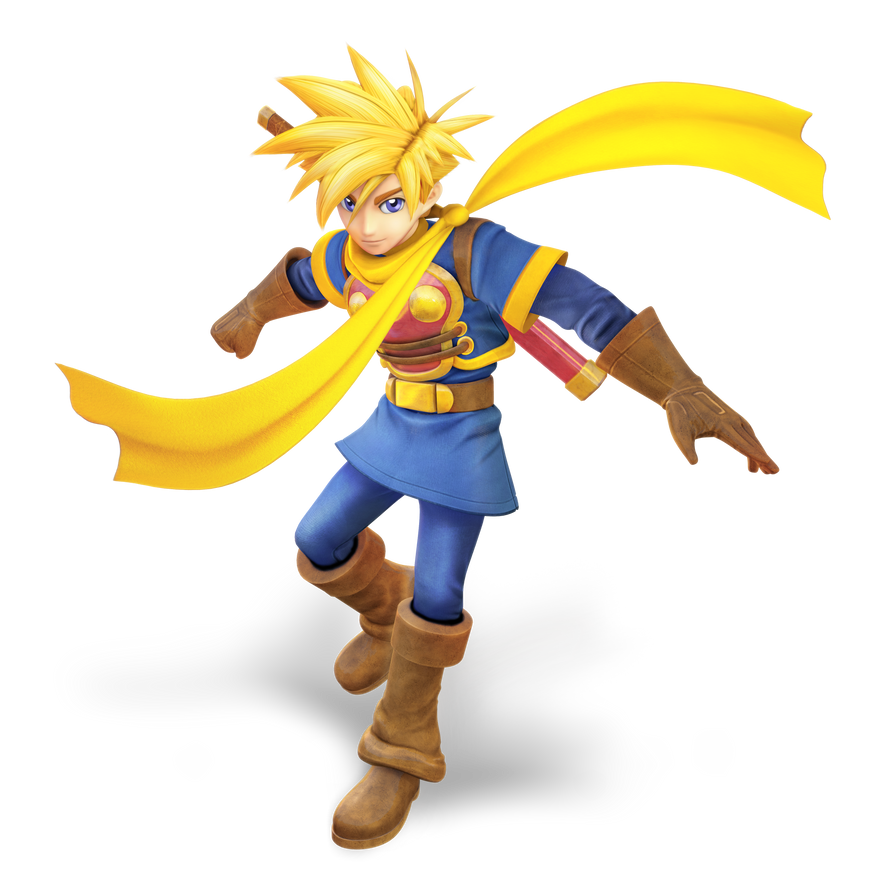
Isaac from Golden Sun

Isaac
Golden Sun

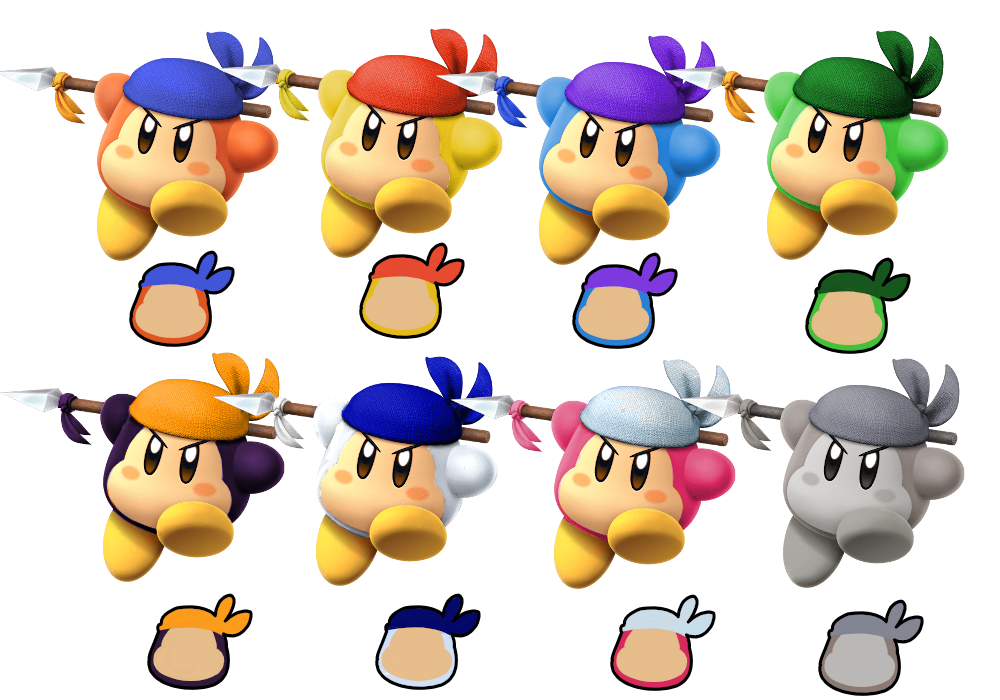
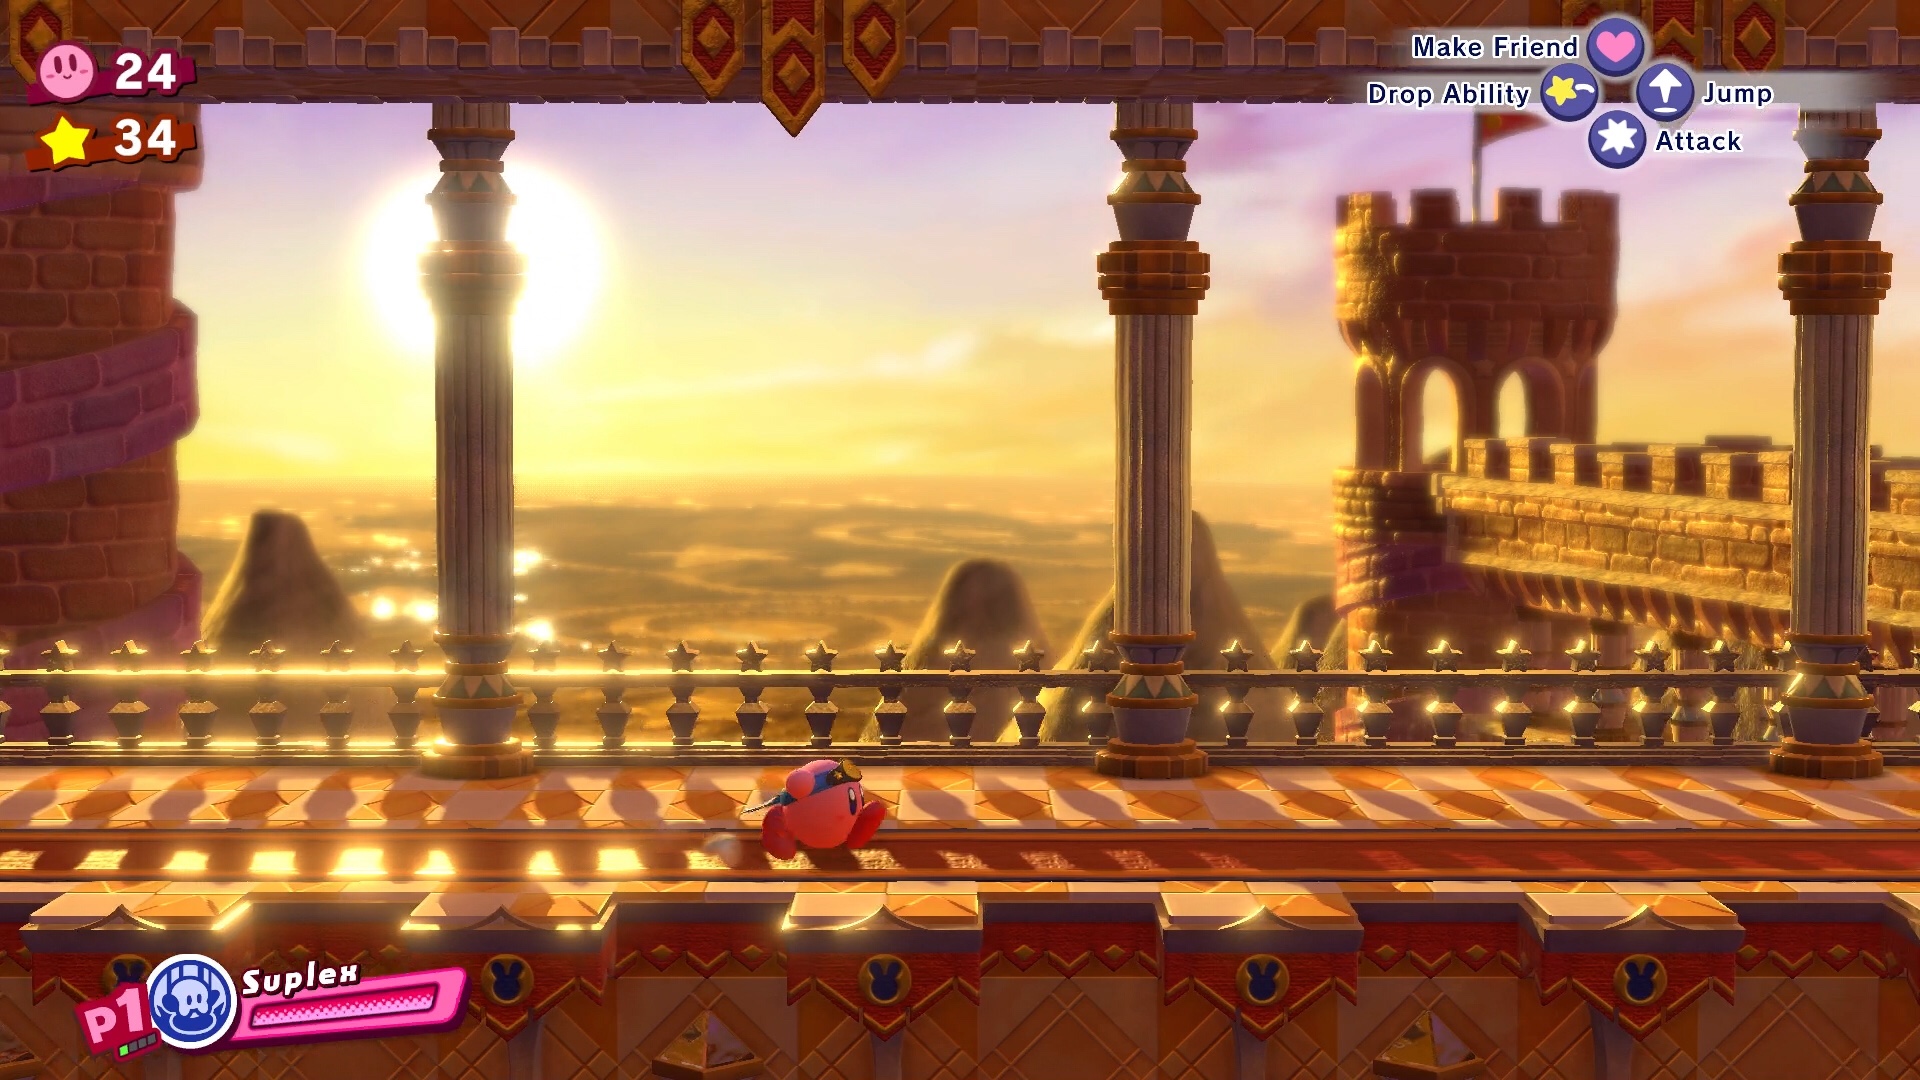
Bandana Waddle Dee
Kirby

Octoling
Splatoon

Waluigi

Super Mario Bros.

Crash Bandicoot
Crash Bandicoot

Stylist
Style Savvy

Ashley
WarioWare

Medusa
Kid Icarus

Barista
Rhythm Heaven

Jill Valentine
Resident Evil

Leon Kennedy
Resident Evil

Takamaru
Mysterious Castle Murasame

Galacta Knight
Kirby

Grovyle & Celebi
Pokemon

DJ Octavio
Splatoon

Reimu Hakurei
Touhou Project

Officer Howard
Astral Chain

Dr. Eggman
Sonic the Hedgehog

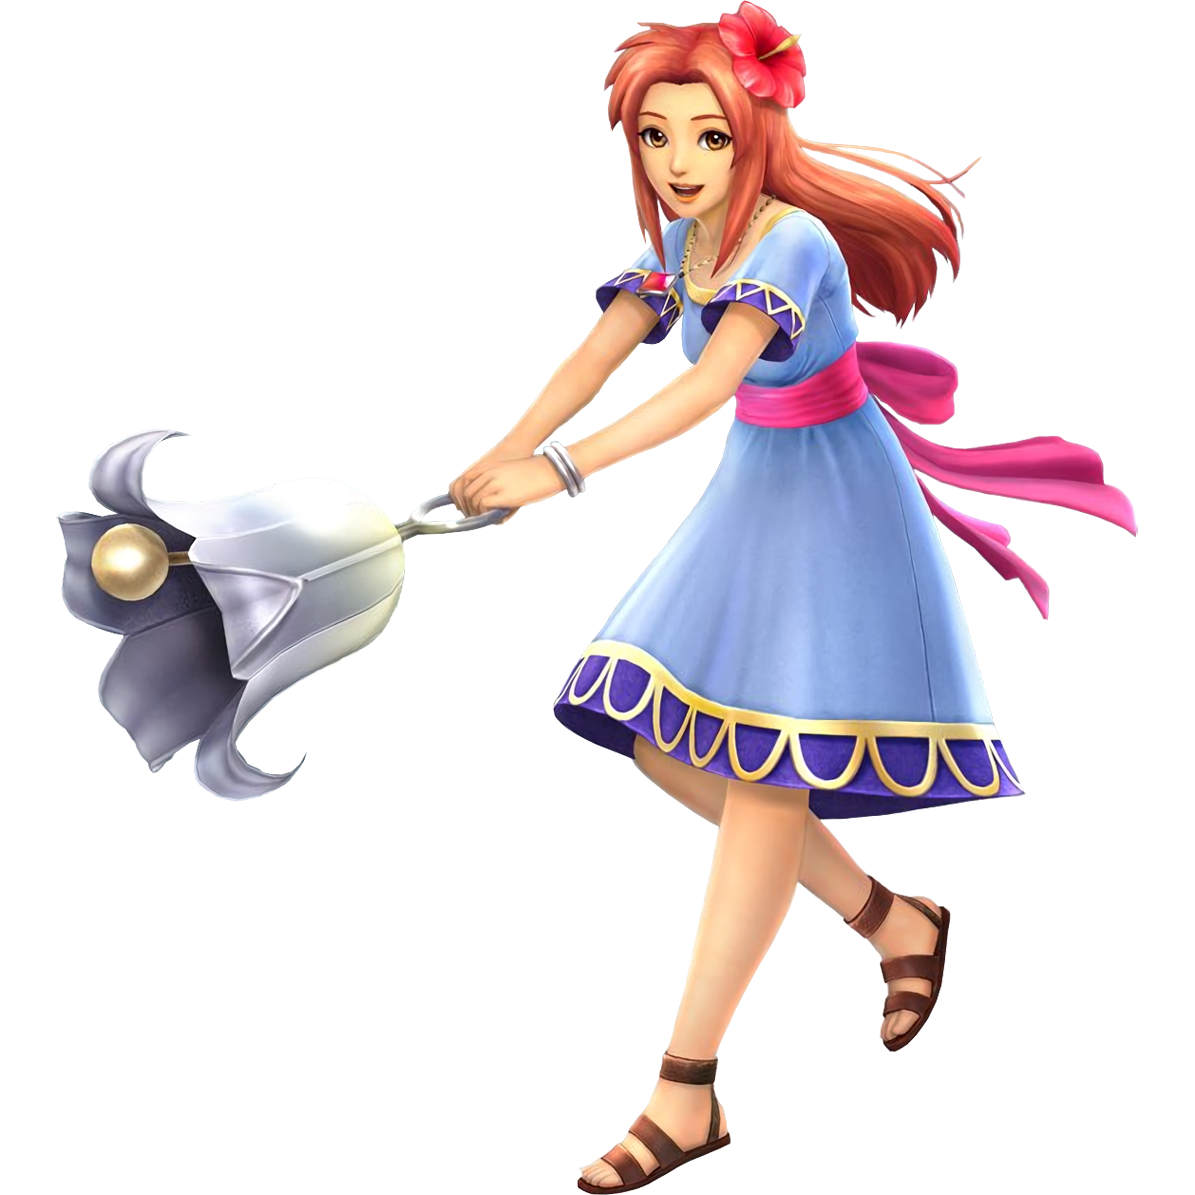
Marin
The Legend of Zelda

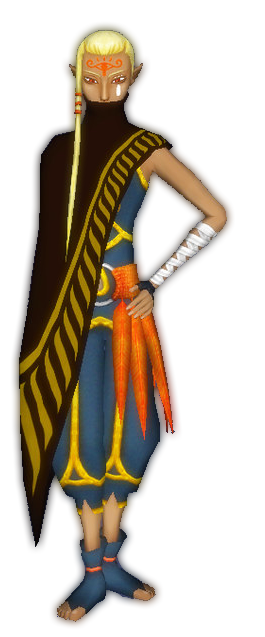
Impa
The Legend of Zelda
1646536032359.png

Crazy Dave
Plants vs Zombies

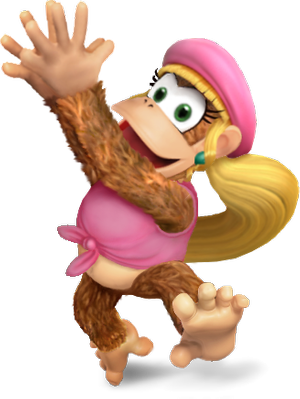
Dixie Kong
Donkey Kong

Sami
Advanced Wars

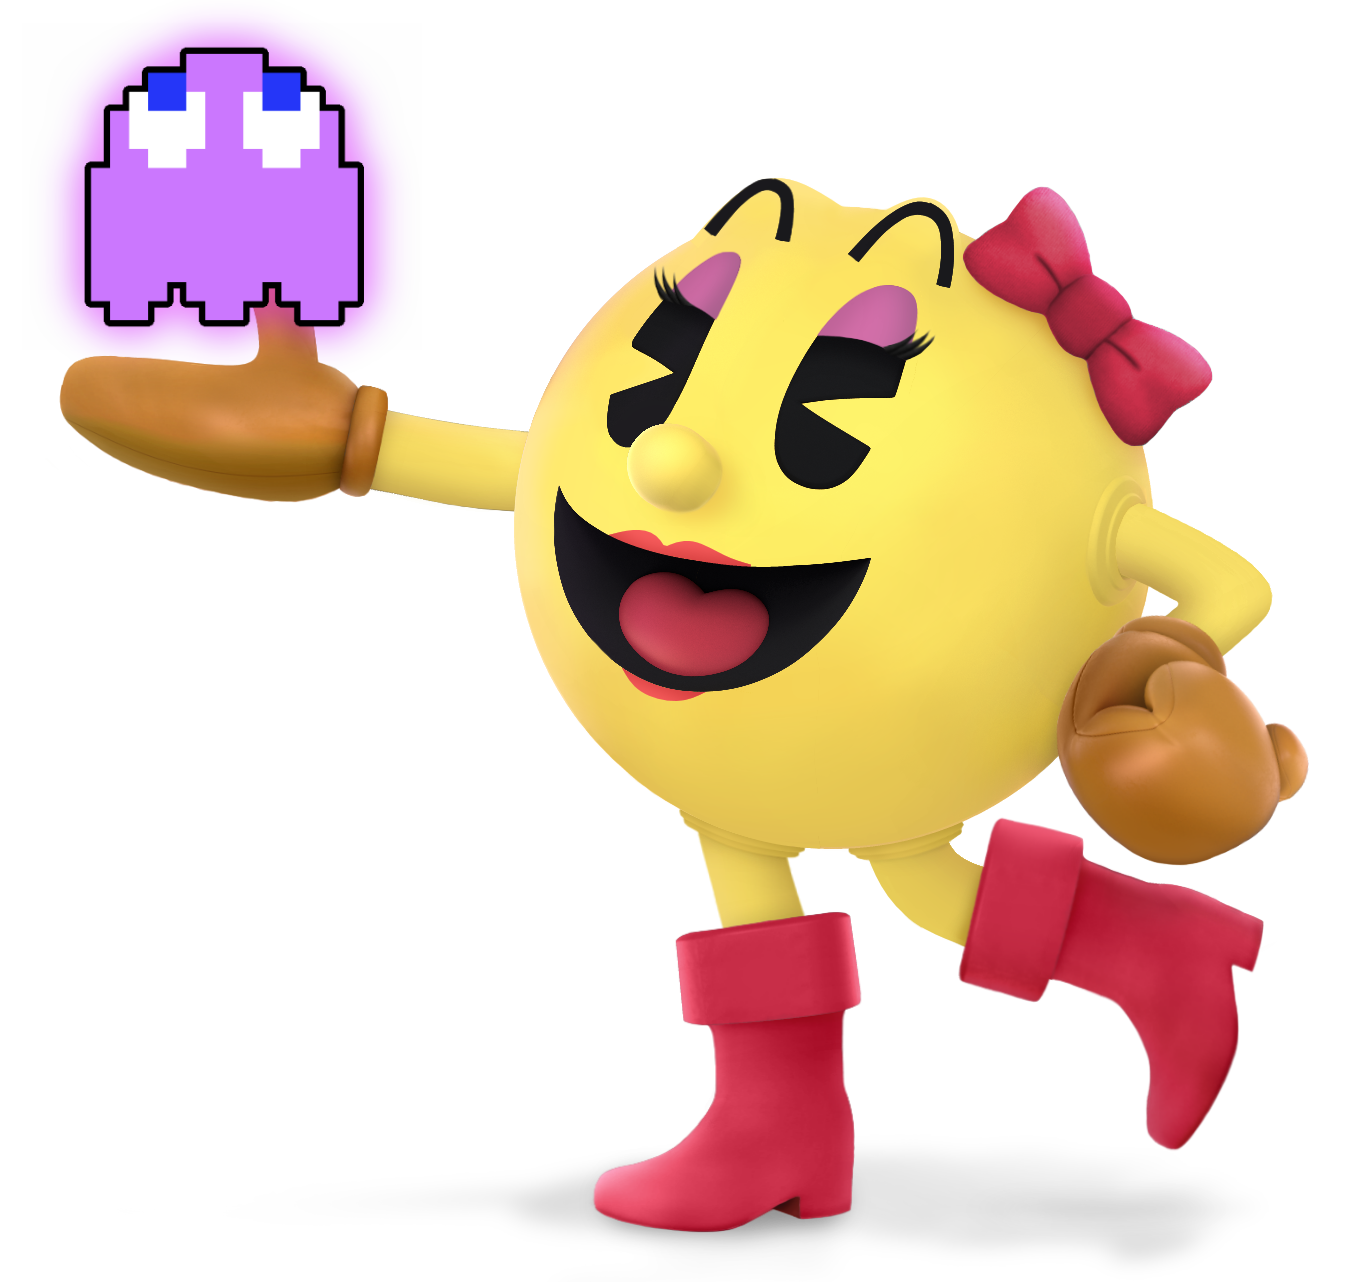
Ms. PAC-MAN
Mr. Pac-Man

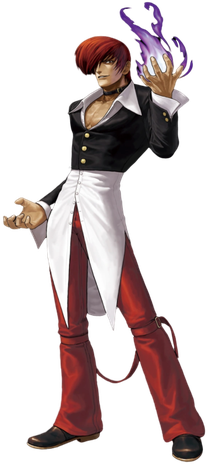
Iori
King of Fighters
1639498585555.png
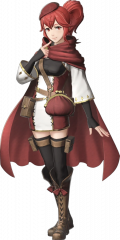
Anna
Fire Emblem

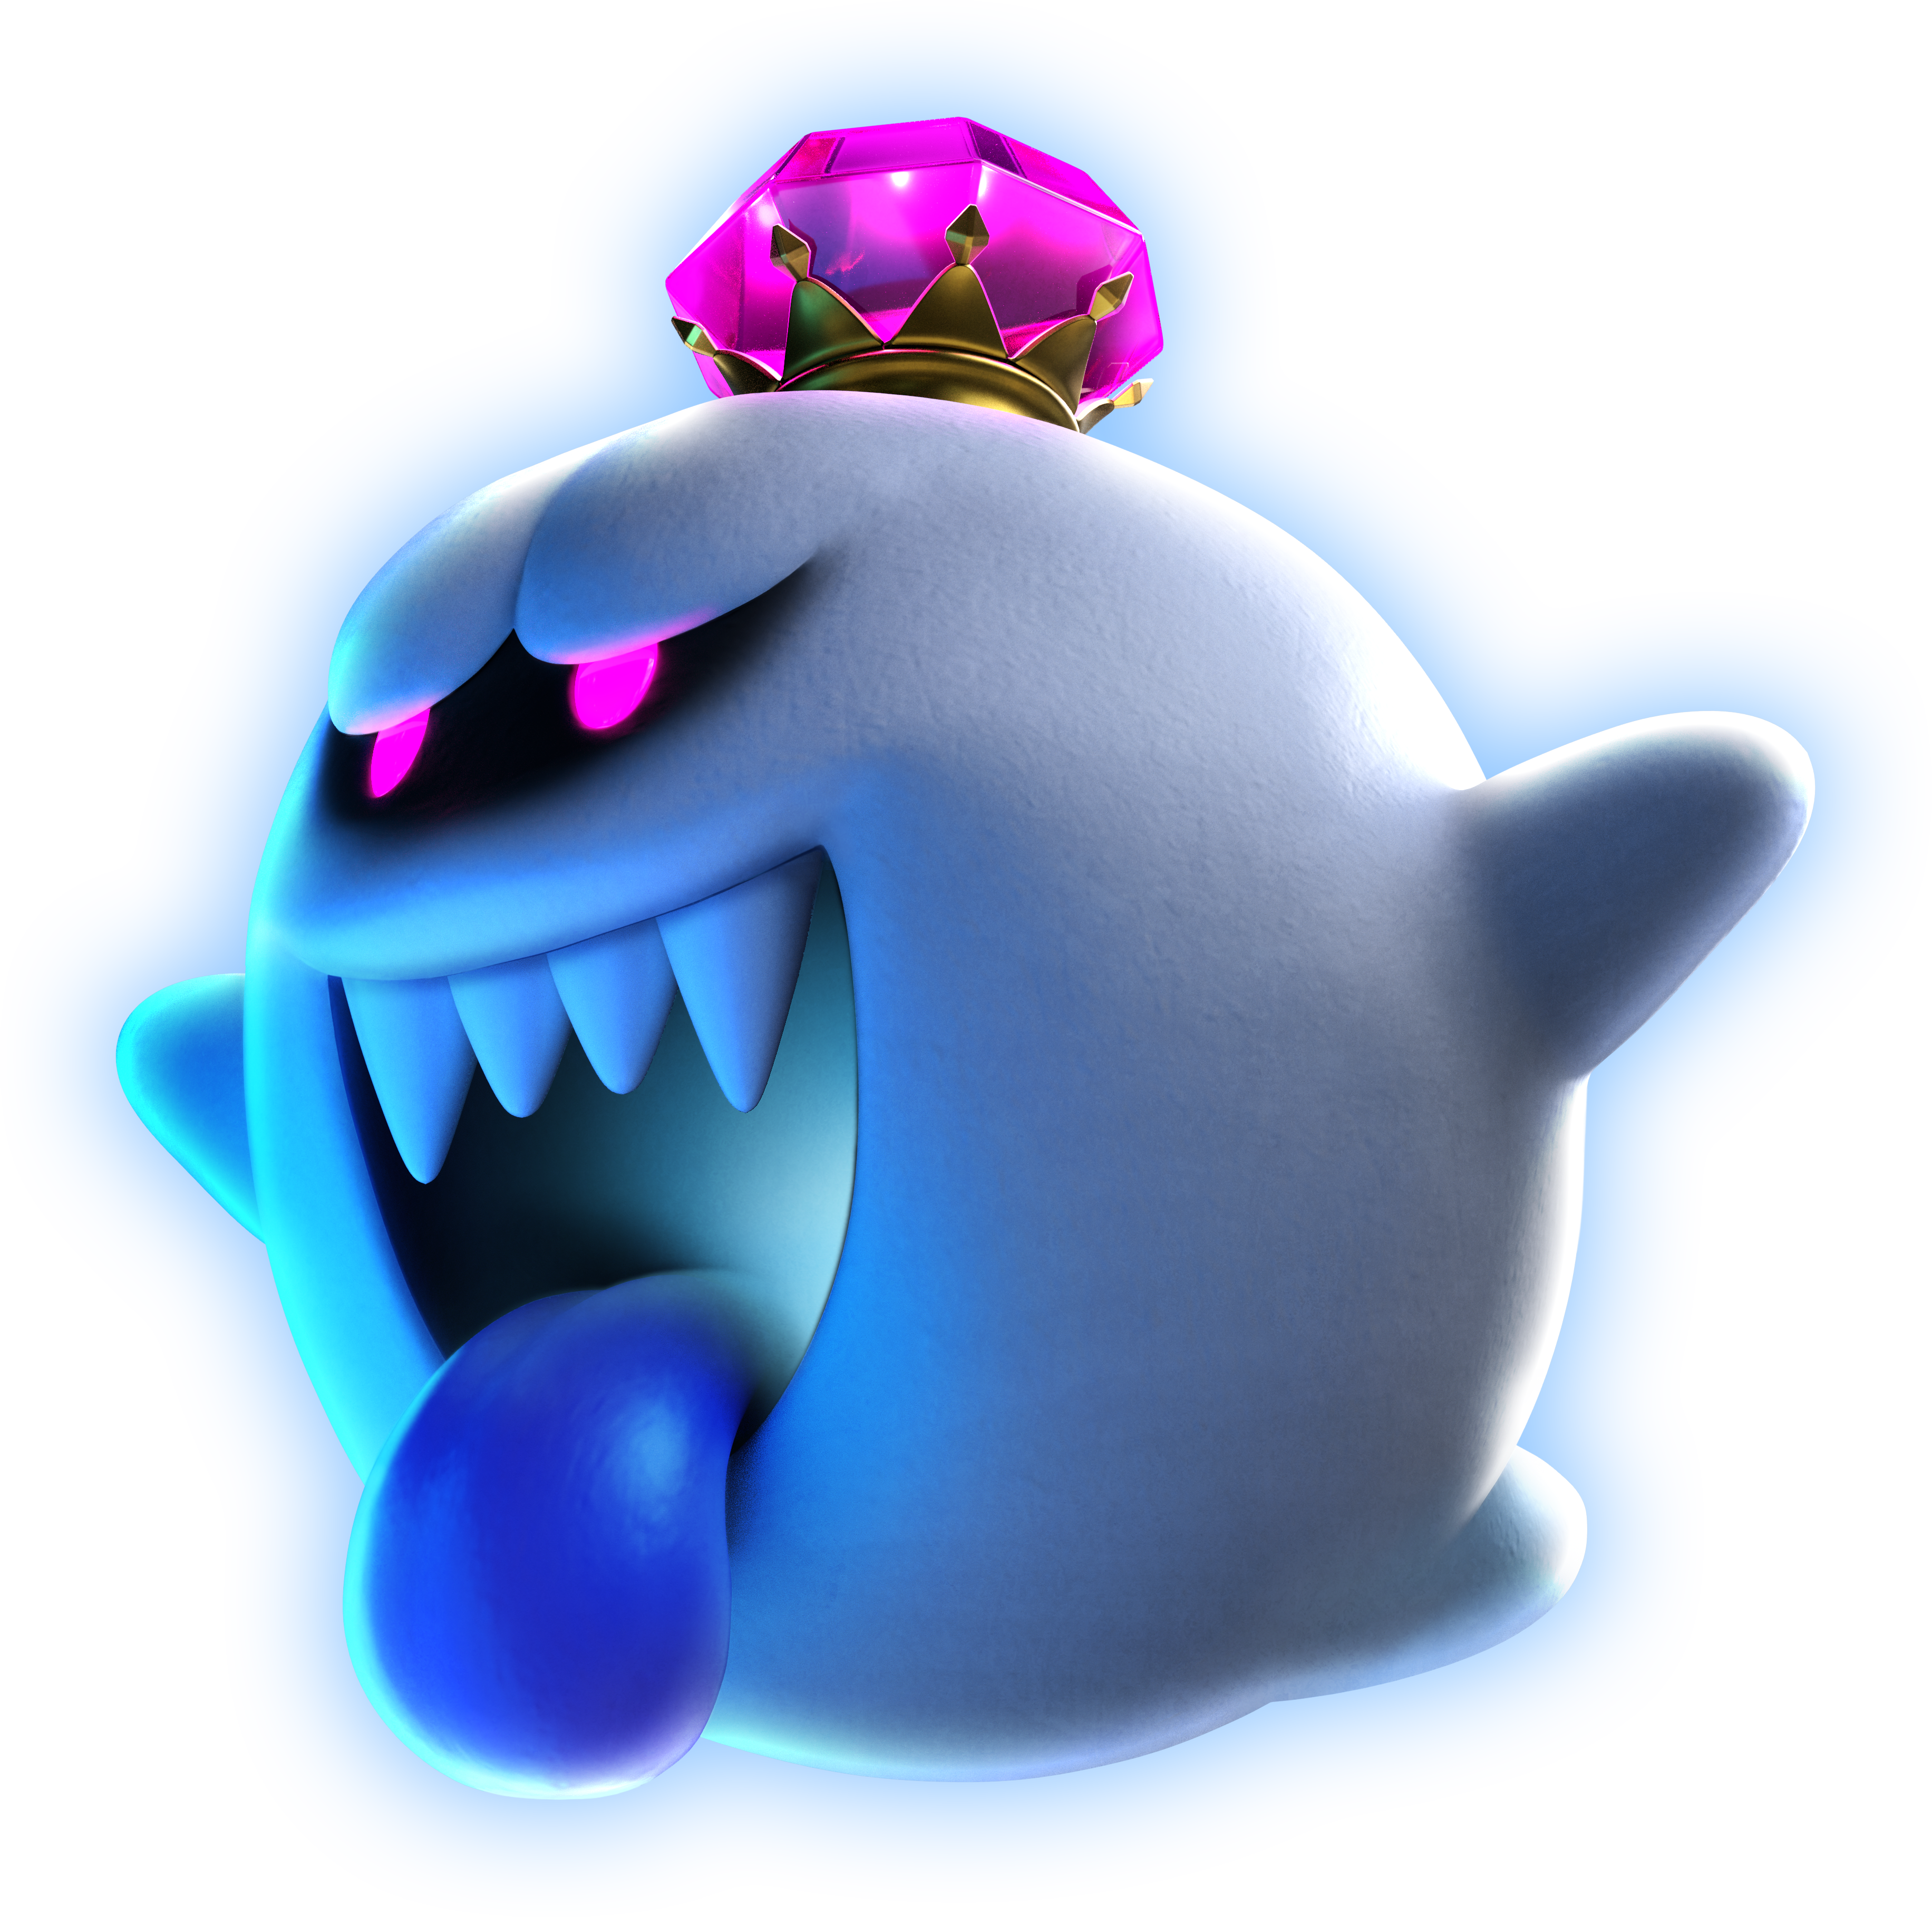
King Boo
Super Mario Bros.
DLC

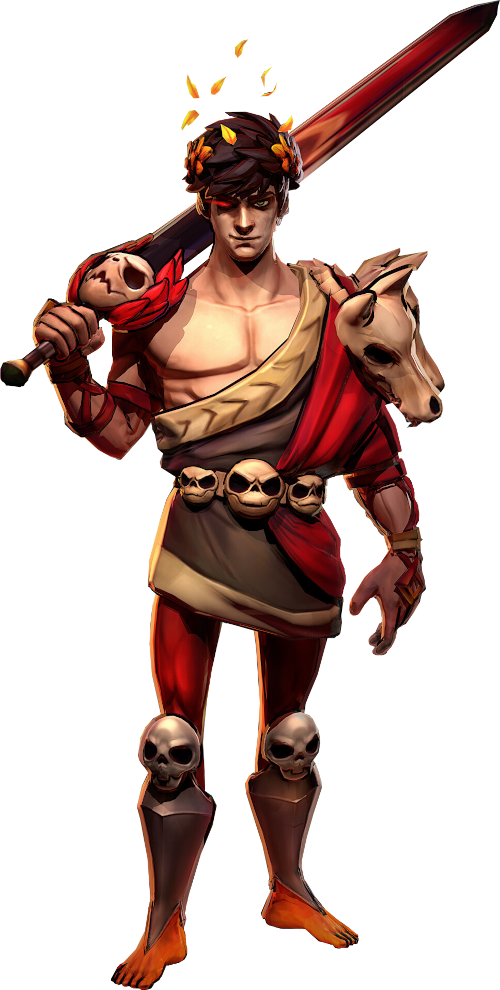
Zagreus
Hades
DLC
1645285326145.png

Phoenix Wright
Ace Attorney
DLC
1645285326145.png

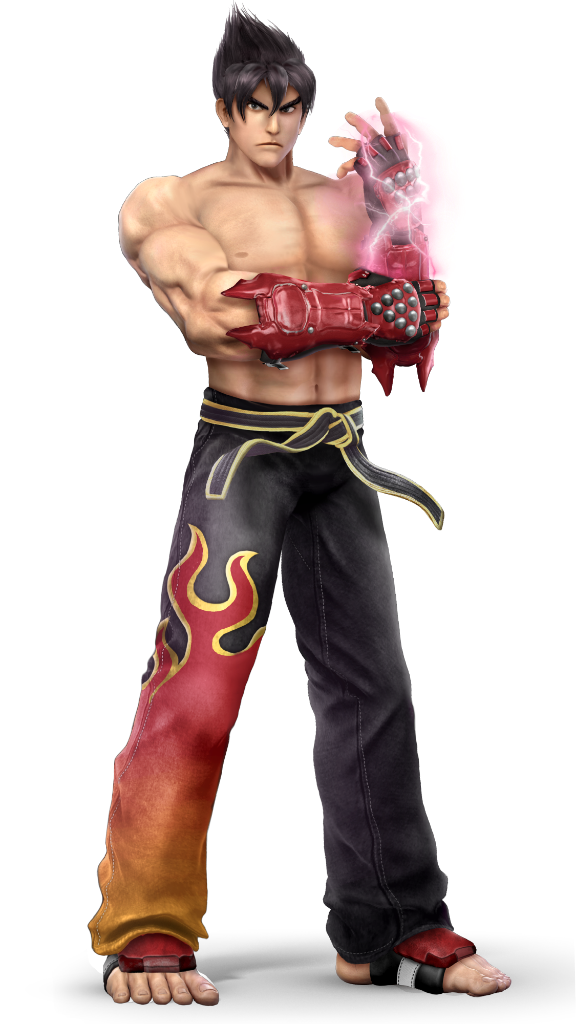
Jim Kazama
Tekken
DLC (Kazuya Echo - Echo Pack 1)
1645285326145.png

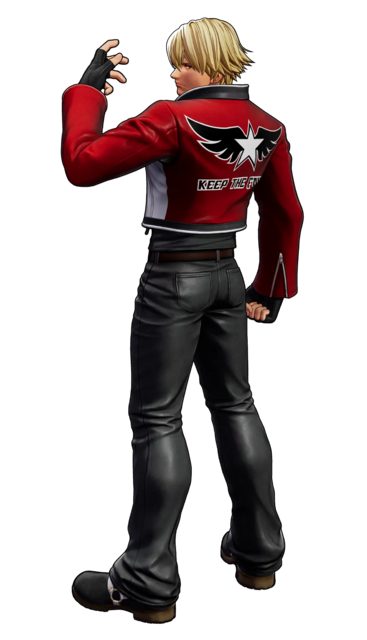
Rock Howard
Fatal Fury/Garou
DLC (Terry Echo - Echo Pack 1)
1645285491424.png

Sakura Shinguji
Sakura Wars
DLC
1646535972149.png

Agumon
Digimon
DLC

Sol Badguy
Guilty Gear
DLC

Lara Croft
Tomb Raider
DLC

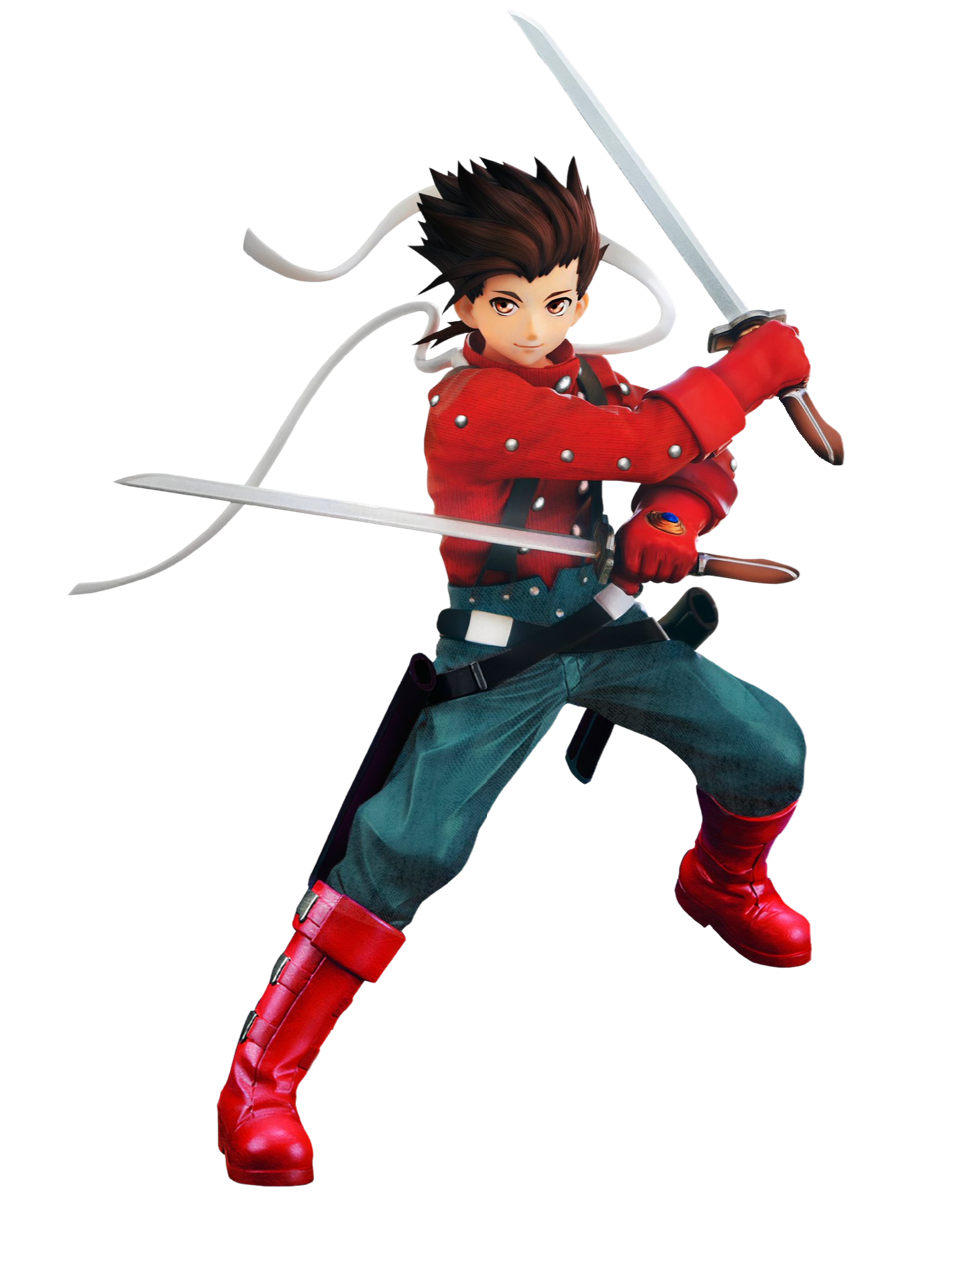
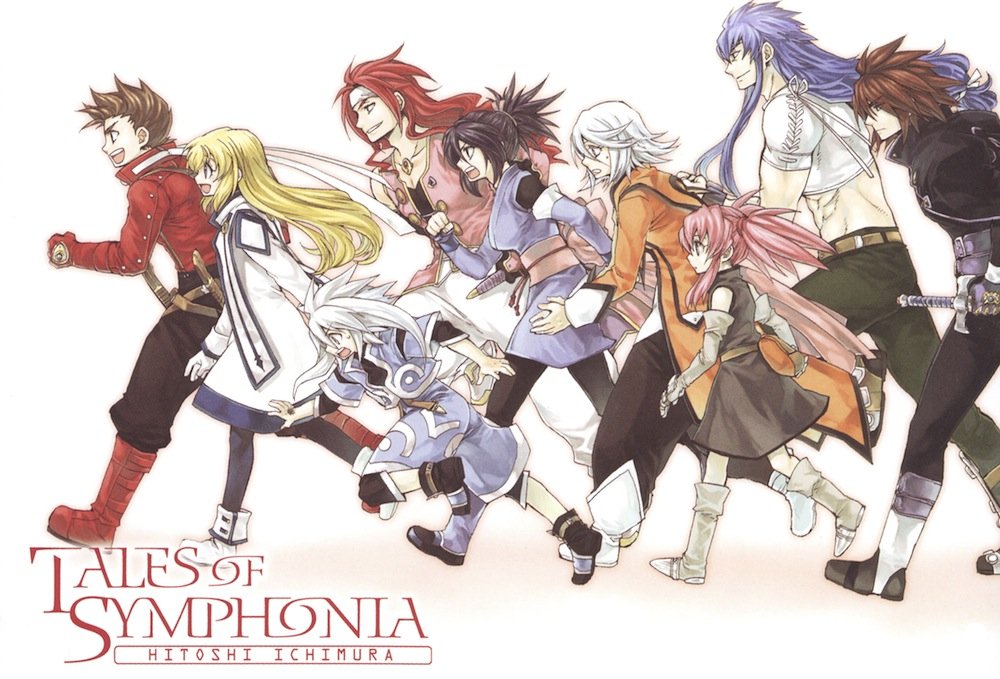
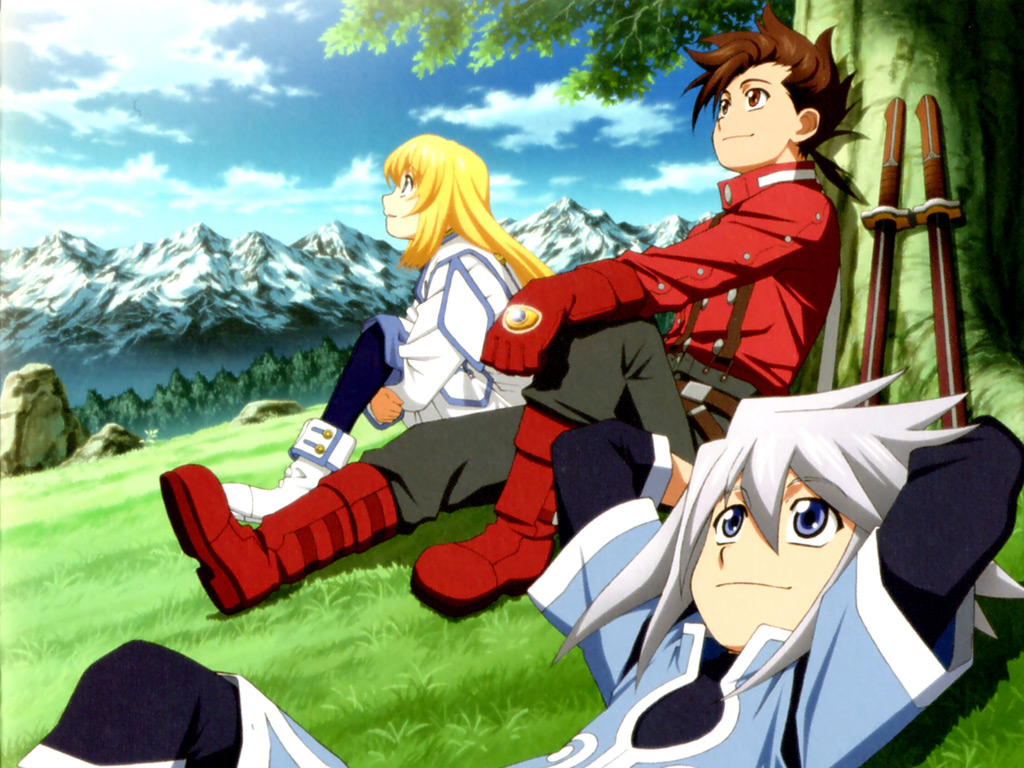
Lloyd Irving
Tales of Symphonia
DLC

Ninten
MOTHER/Earthbound
DLC (Ness Echo - Echo Pack 2)

Jeanne
Bayonetta
DLC
DLC (Bayonetta Echo - Echo Pack 2)

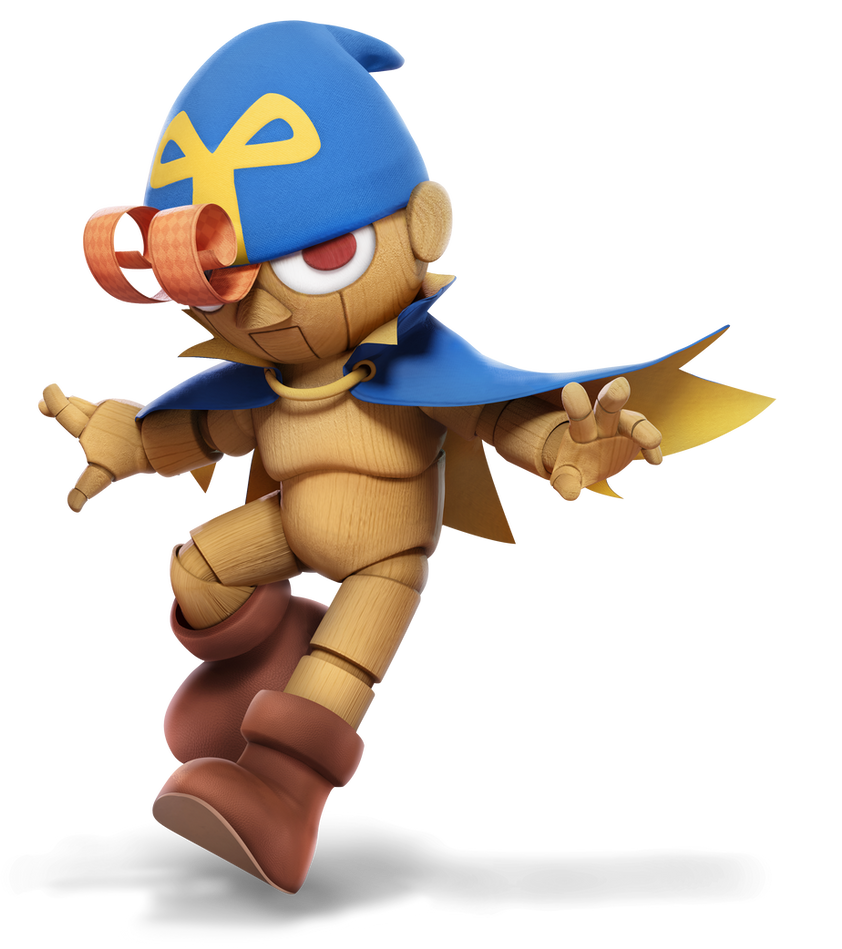
Geno
Super Mario RPG
DLC

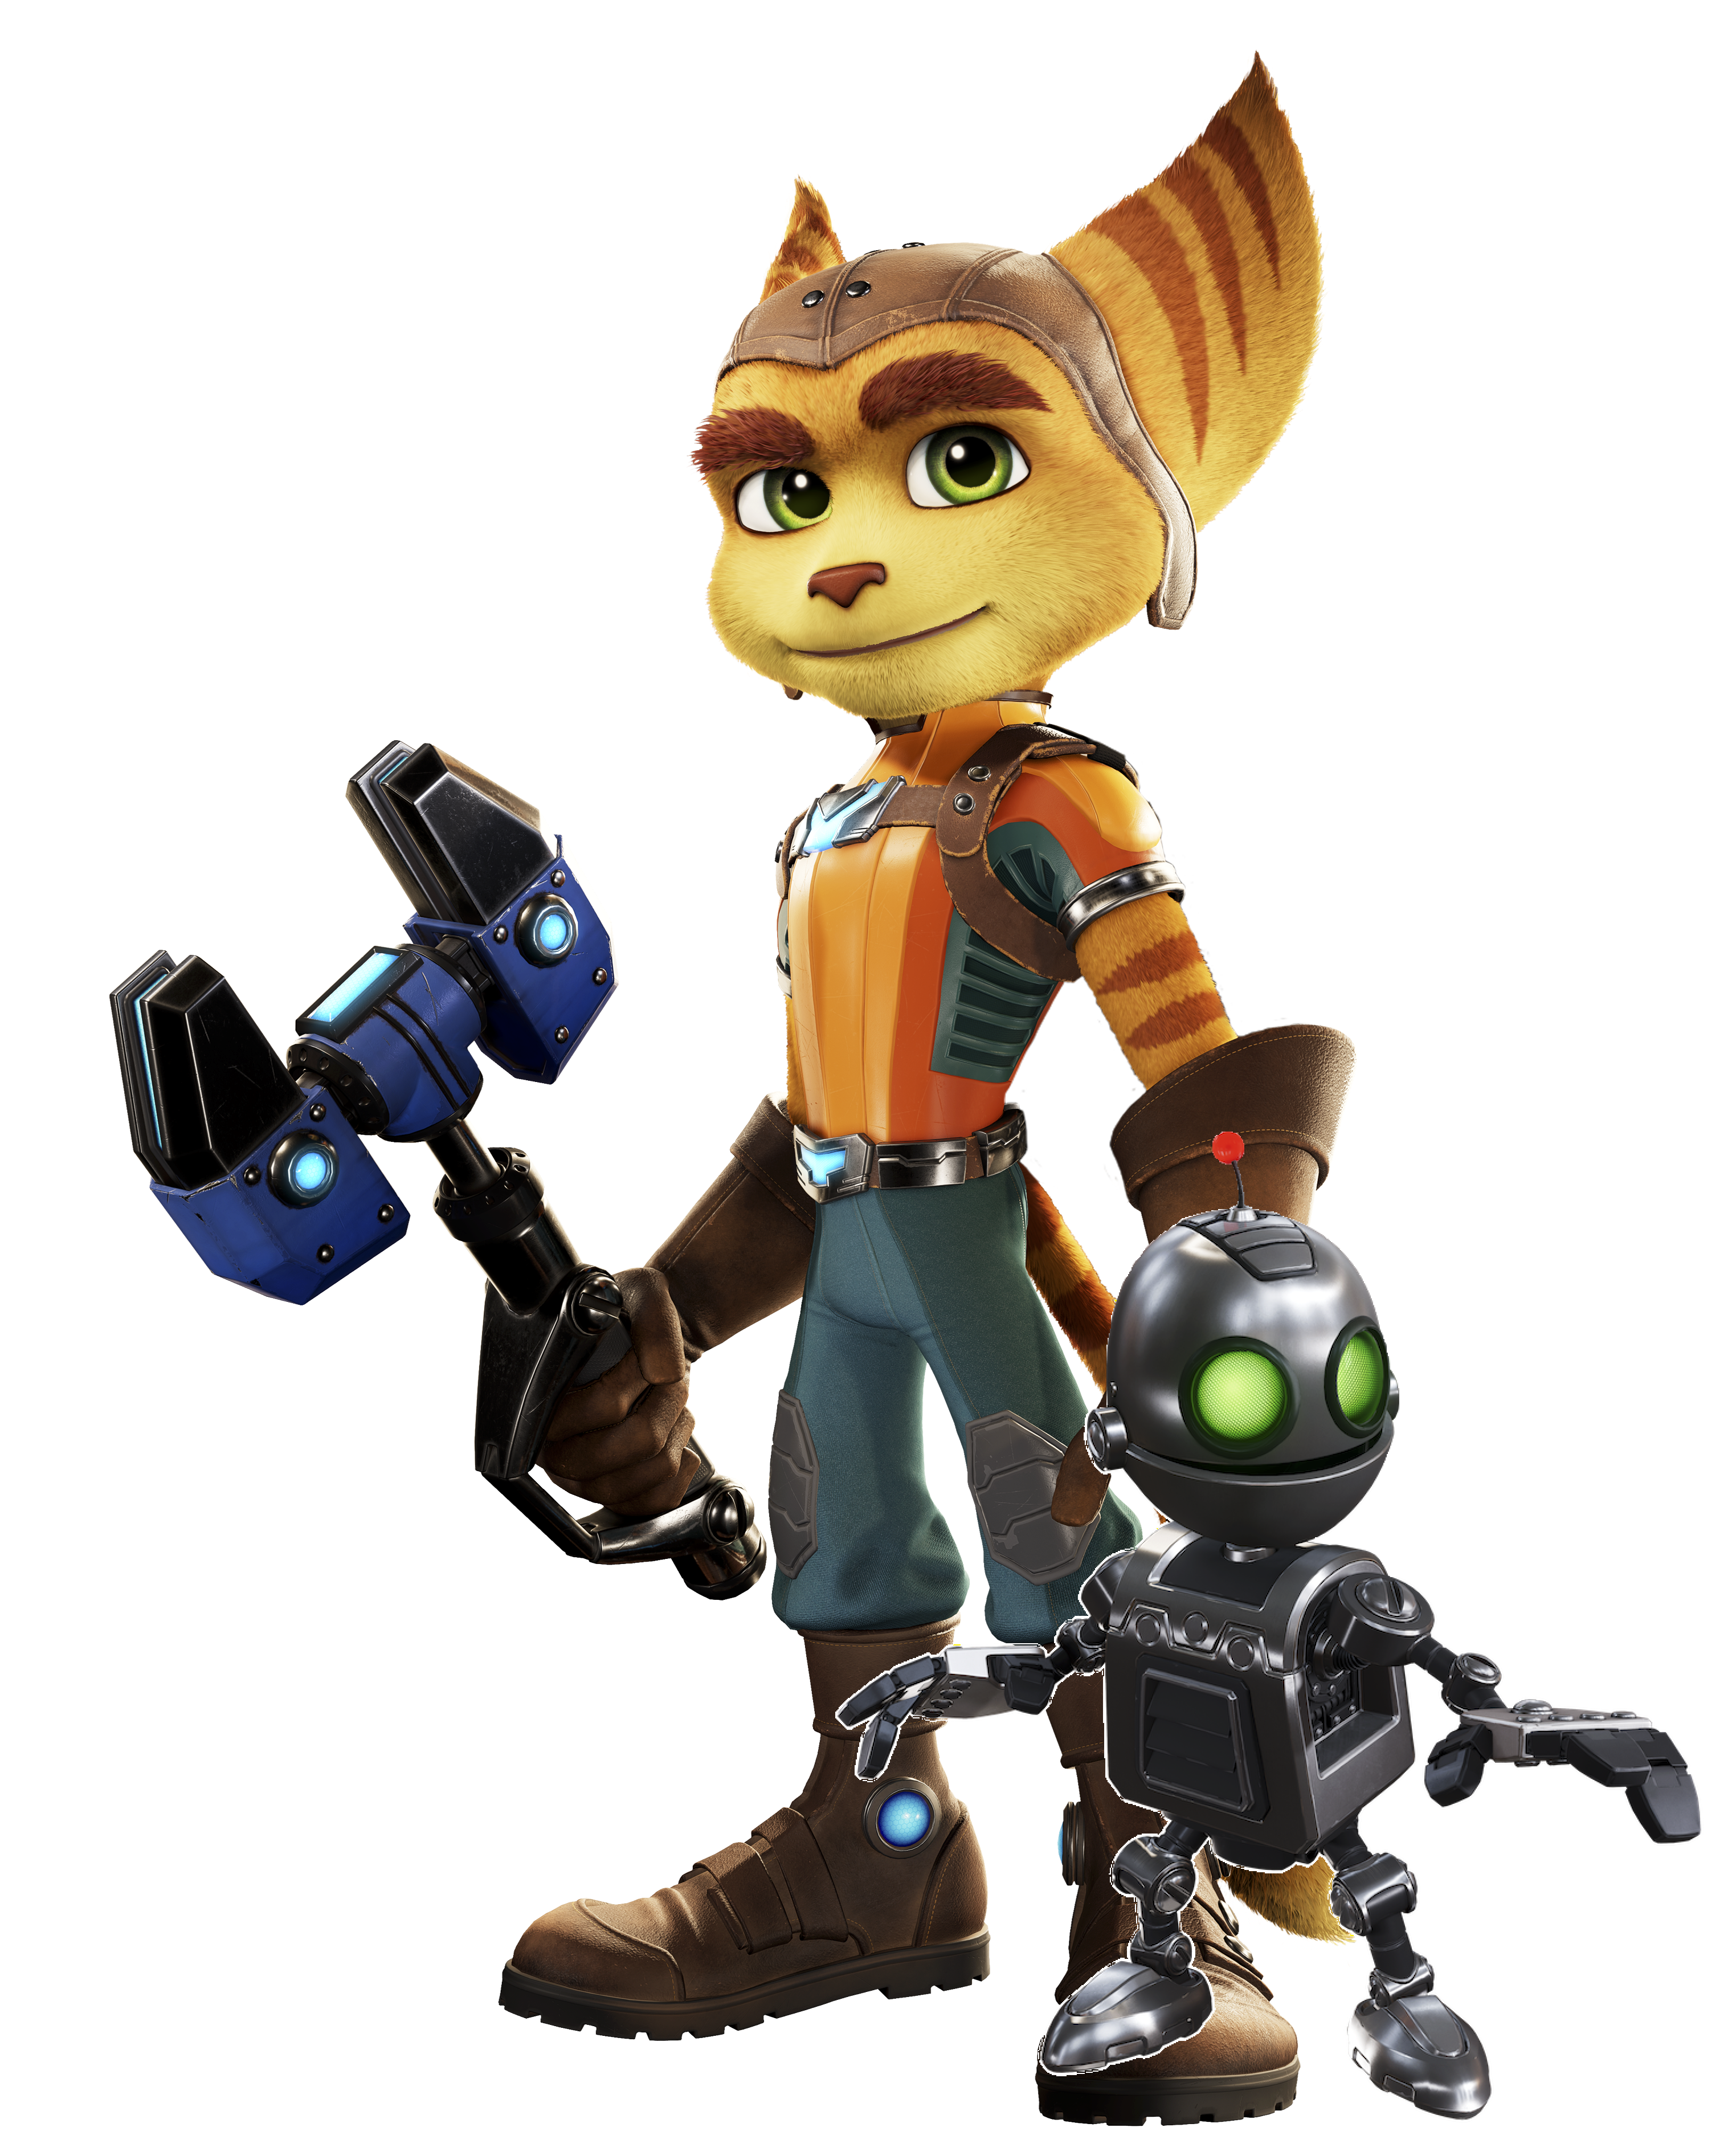
Ratchet and Clank
Ratchet and Clank
DLC


Red
Angry Birds
DLC
1663613025084.png

Ahri
League of Legends
DLC

Nightmare
Soul Calibur
DLC
1669259273820.png

Black Shadow
F-Zero
DLC
1669259303980.png

Roll
Mega Man
DLC

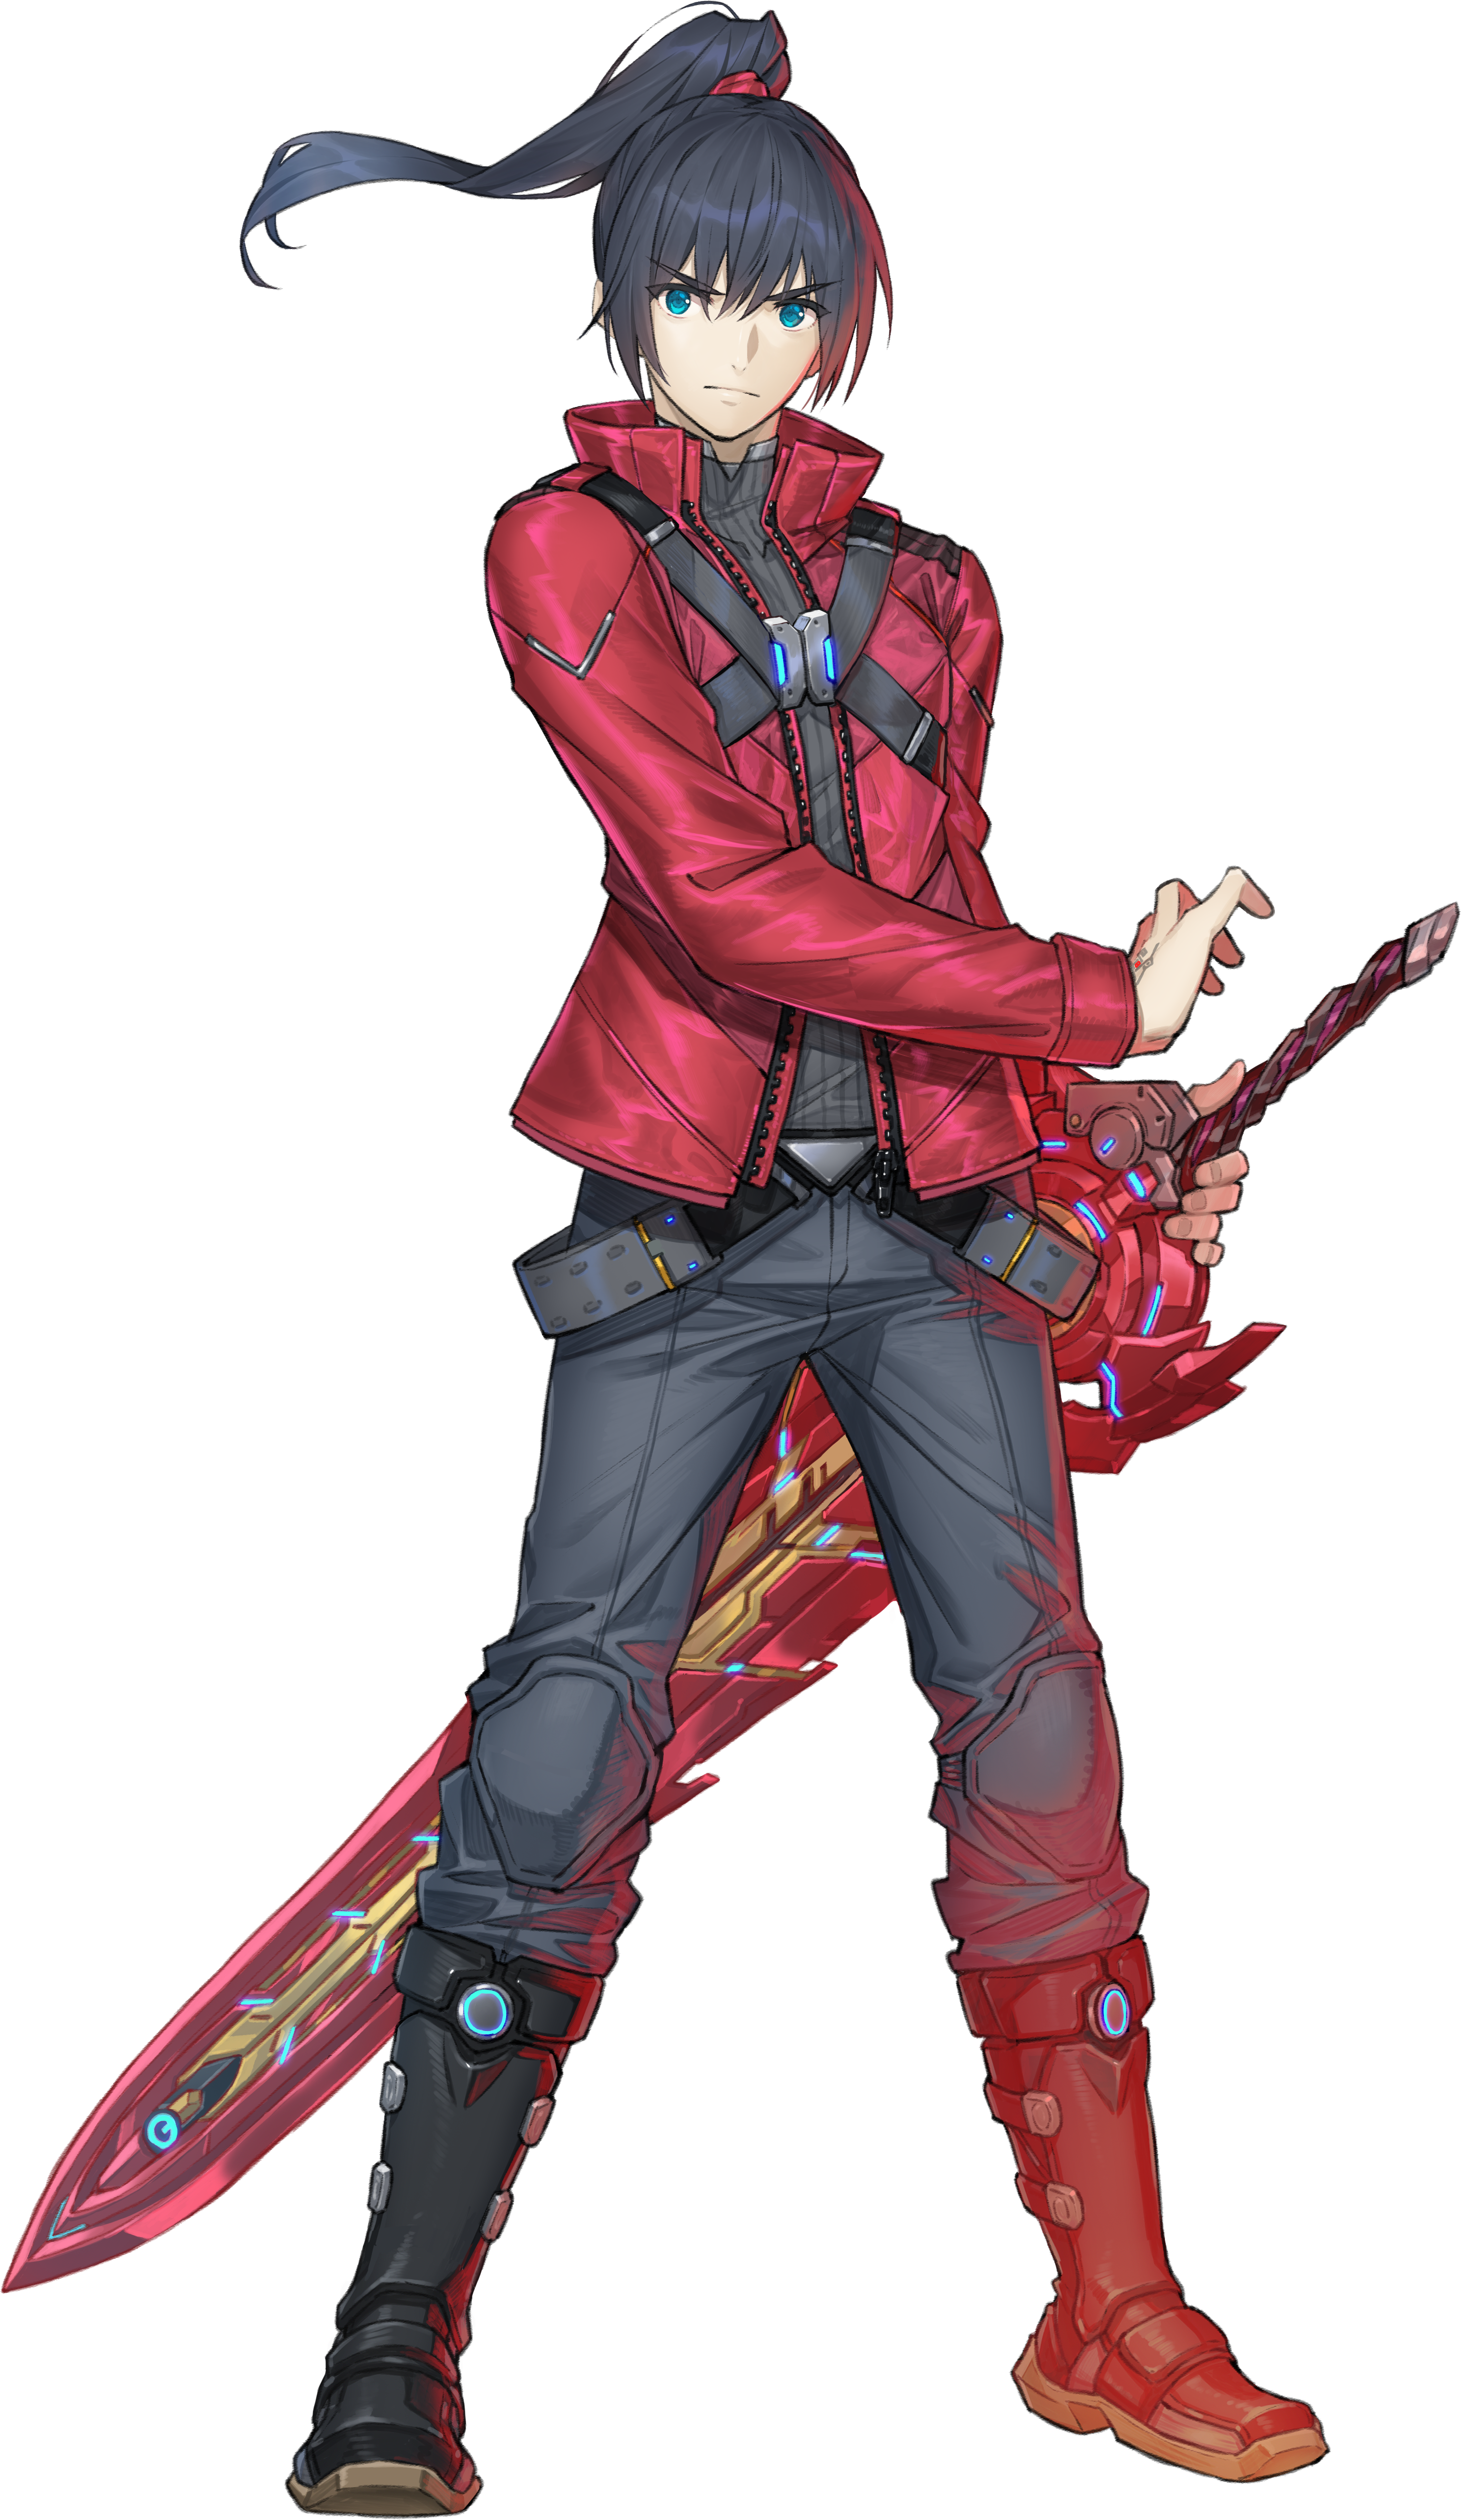
Noah
Xenoblade
DLC

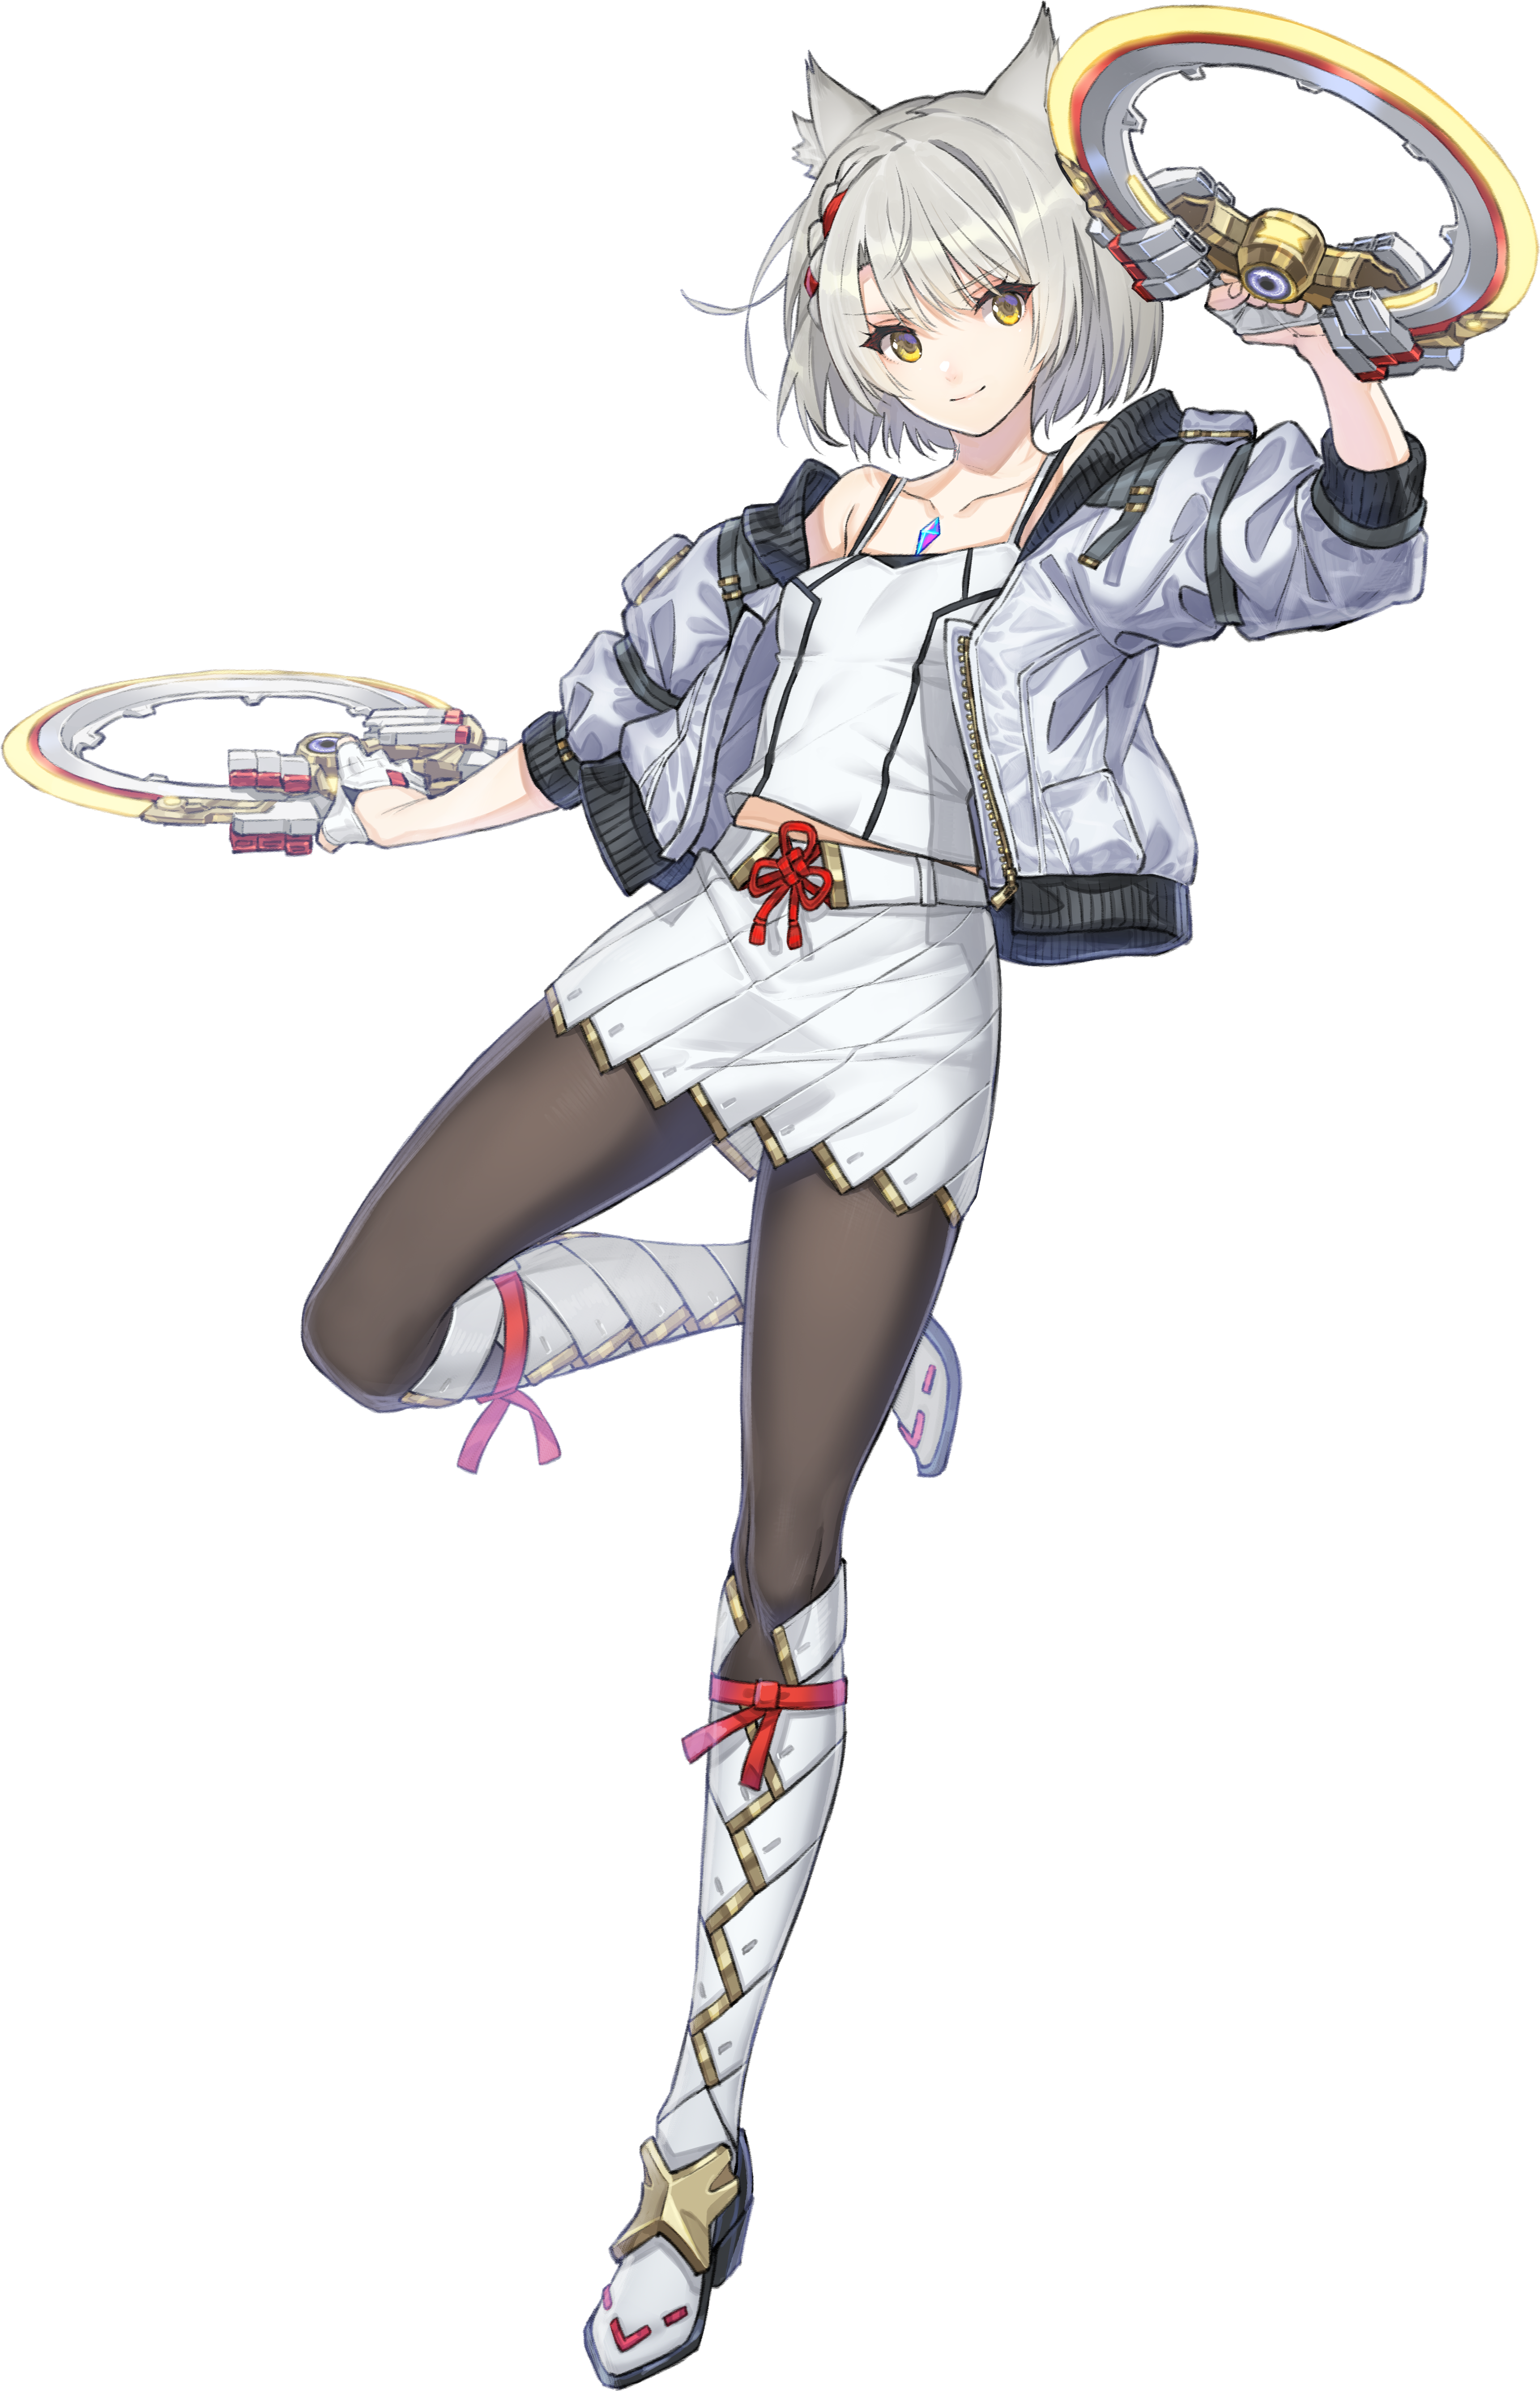
Mio
Xenoblade
DLC

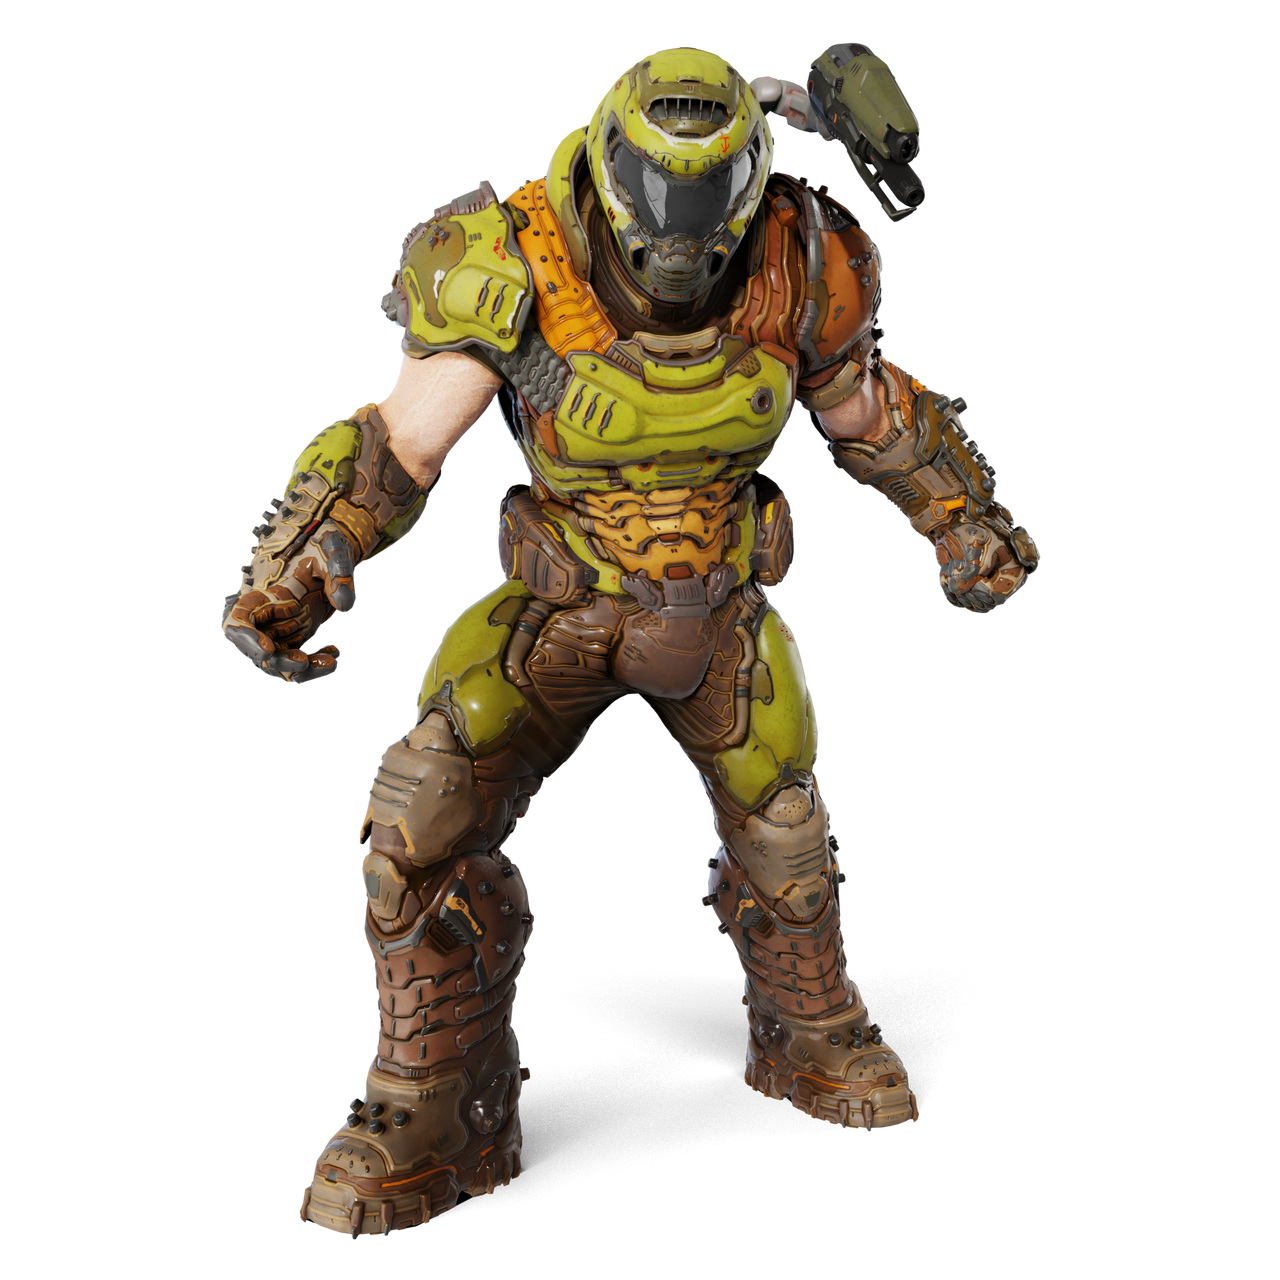
Doomslayer
Doom
DLC

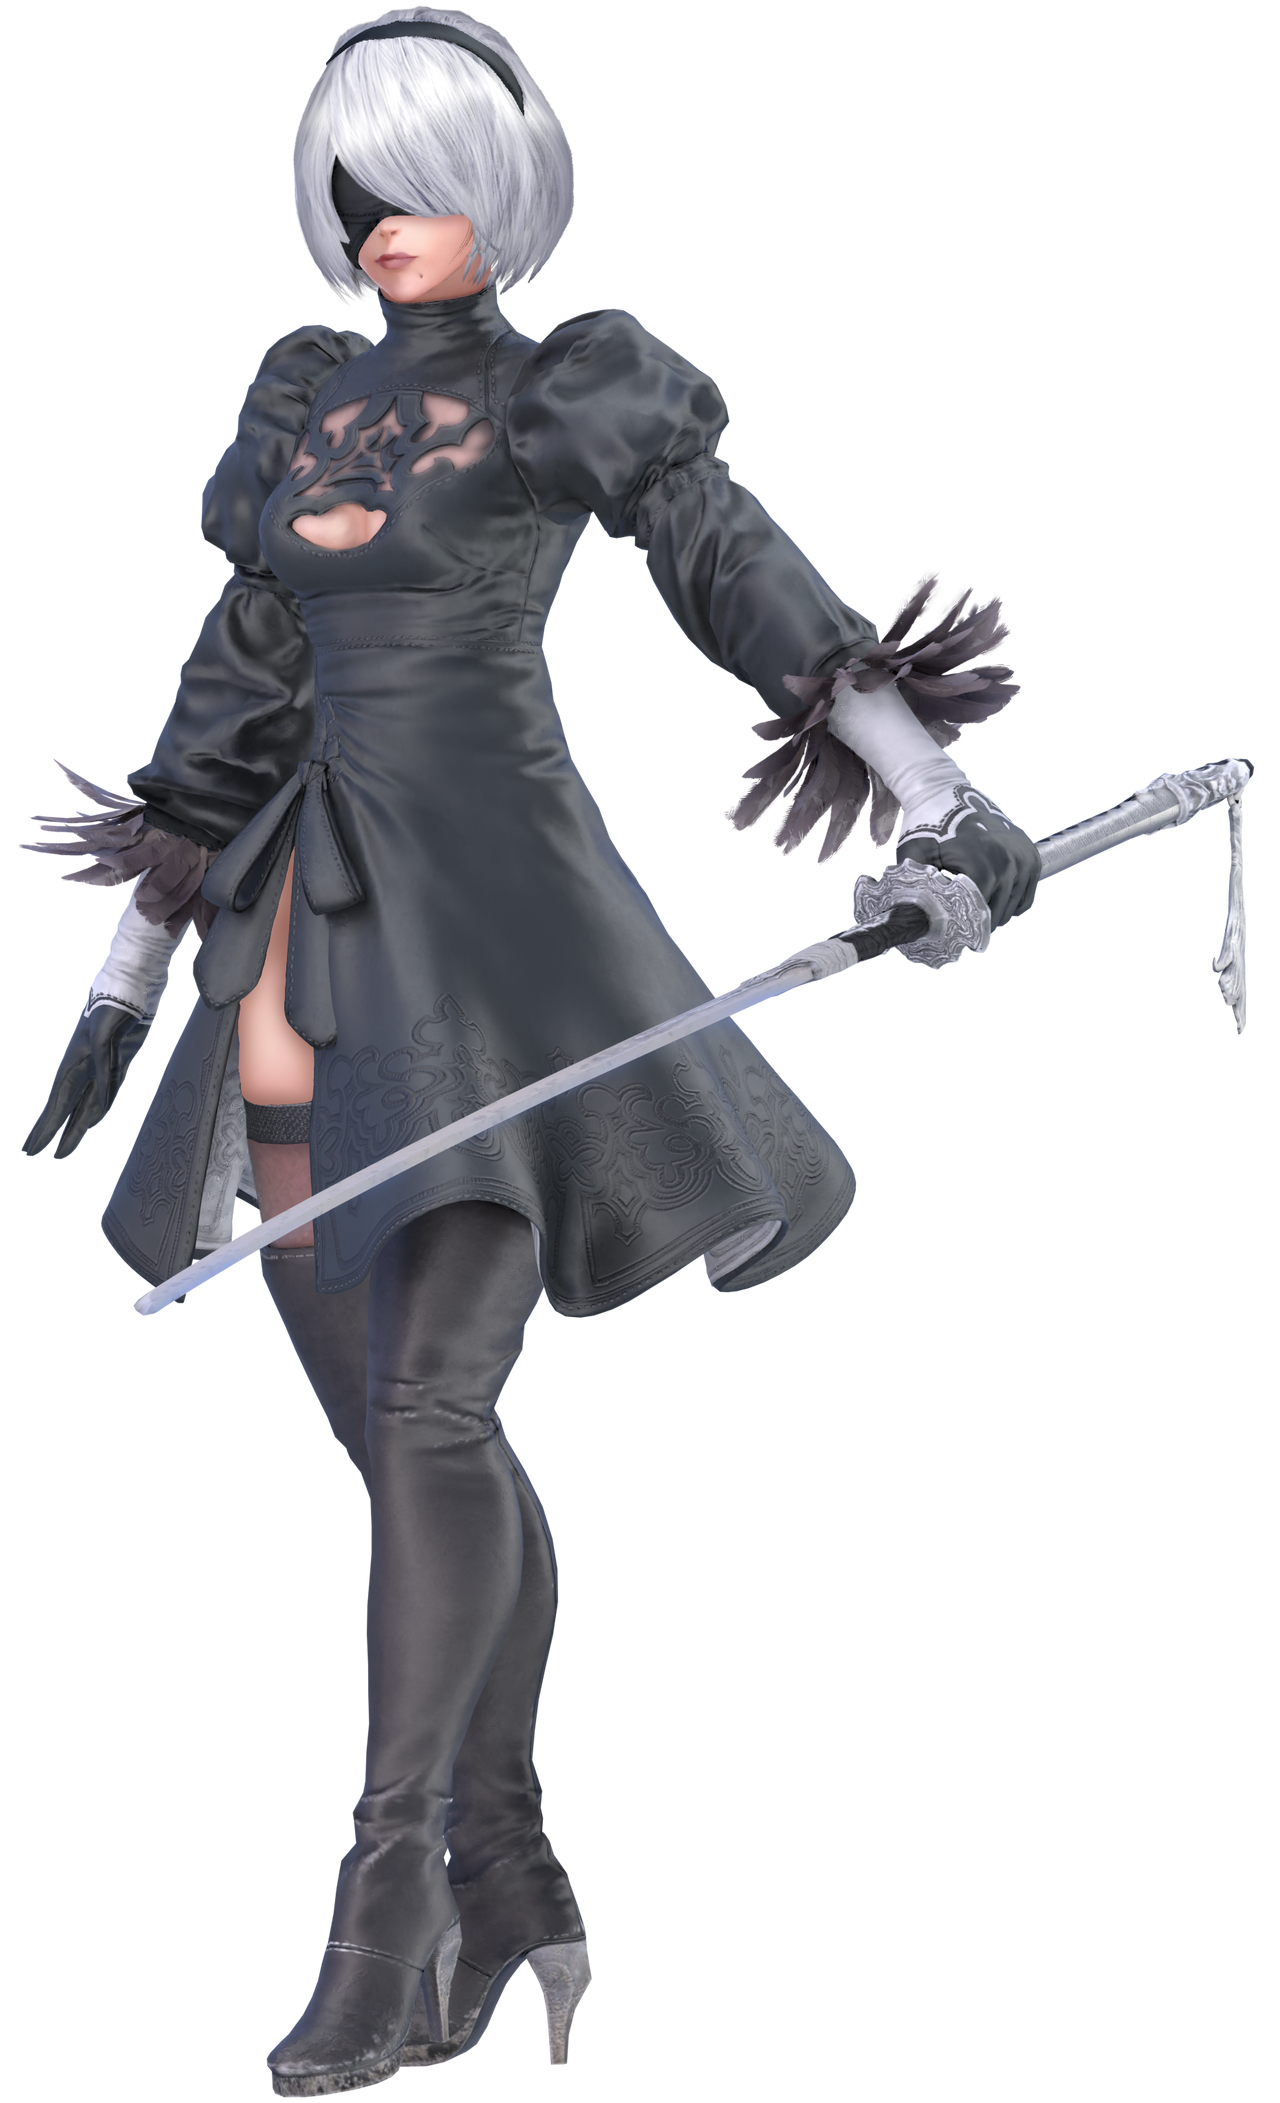
2B
Nier Automata
DLC
Super Smash Bros Infinite has a wide range of fighters from iconic Nintendo characters like Bandana Dee, Waluigi, and Dixie Kong to classics like Takamaru and Isaac as well as third party offerings like Crash, Reimu, and Crazy Dave! The game features 26 launch characters; the most of any previous Smash game!
Roster


26 (including Echoes)

Golden Icarus Golden Icarus

Isaac from Golden Sun

#83. Isaac
Golden Sun
Wikia Link

Submitted by: Venus of the Desert Bloom Venus of the Desert Bloom
Special Moves

Neutral Special: Gaia

Causes a pillar of earth energy to shoot up in front of him.

Side Special: Move
Shoots out a hand made of energy which pushes opponents bakcwards.

Up Special: Growth/ Wild Growth
Creates a bouncy plant which catapults Isaac up. Charging it creates Wild Growth which launches him even more.

Down Special: Quake/Spire
Fires a quick burst of energy that can trip others nearby. Creates a earthen spear which creashes down while in the air.

Final Smash: Judgement
Summons Judgement which unleashes a massive amount of Venus Psyenergy into the targeted opponent.​
Taunts
  • Up Taunt: A Venus Djinn appears and flies around Isaac, similar to the fairy taunts that the Links have.
  • Down Taunt: A unique taunt, Isaac casts Cure on himself, which could function in a few different ways. The first option is that the taunt must play in full to get moderate healing and Isaac can't cancel out of it. The second option is that using the taunt puts Isaac into an animation and after either pressing a button to end the animation or letting the animation last the max amount of time, Isaac is healed based on the amount of time before the taunt is ended.
  • Right Taunt: Isaac uses his Psynergy field animation
  • Left Taunt: Isaac swings his sword to the right and spins and swings it to the left.


On-Screen Appearance
  • Appears in a vortex of Venus Psyenergy which causes the ground to burst with plant life. He then jumps out.

Idle Poses
  • Issac looks behind him.
  • Issac adjusts his hair, before going back to battle stance.

Victory Poses
  • Isaac summons a burst of vines and branches and rides them up into the air while waving at the camera.
  • Isaac spins and holds on the hilt of his sword while thrusting his hand forward as it glows with Venus Psyenergy. This post is very similar to his son, Mathhew’s official pose.
  • Isaac causes four stones to levitate around him. Ge then causes them to spin rapidly.


Classic Mode: The Power of Friendship
The opponents are based off actual enemies from Golden Sun. Two allies accompany Isaac in battle.​
Round
Opponent
Stage
Music
Notes
References
1​
Giant
:ultivysaur:
Garden of Hope​
Walking Forward with Determination​
Lucina & Simon are allies​
Ivysaur represents the boss, Tret.​
2​
Blue
:ultroy:
Prism Tower​
Saturos Battle Theme​
Simon & Y. Link are allies​
Roy represents Sauturos when he is fought in the Mercury Lighthouse​
3​
Blue
:ultdk:
Reset Bomb Forest​
Formidable Enemy​
Y. Link & Palutena are allies​
Donkey Kong represents the boss, Killer Ape.​
4​
Giant pink
:ultinkling:
Pirate Ship​
Fighting on Deck​
Palutena & Cloud are allies​
Inkling represents the boss, Kraken.​
5​
Black
:ultzelda:
w/ Death Scythe​
Great Plateau Sheikah Tower​
Fusion & Chaos​
Cloud & Rosalina are allies​
Zelda represents Menardi’a boss battle.​
6​
Black
:ultganondorf:
Great Cave Offensive
(Battlefield)​
Apollo Ascent​
Rosalina & Robin are allies​
Ganondorf represents the optional superboss, Dullahan.​
BONUS​
Break​
the​
Targets​
!​
Final​
Giant
:ultridley::ultcharizard:
Venus Lighthouse​
Isaac's Battle Theme​
Robin & Meta Knight are allies​
Giant Ridley and Charizard represents end-game bosses Fusion Dragon and Doom Dragon.​


Alternate Costumes

#84. Bandana Waddle
Kirby
Wikia Link

Submitted by: Otoad64 Otoad64
Special Moves
Neutral Special: Spear Throw
Throws his spear like a javelin. Charging it increases the power.

Side Special: Parasol Drill
Rushes out while holding the Parasol in front. Can reflect projectiles.

Up Special: Waddle Copter
Spins his spear rapidly which levitates him off the ground.

Down Special: Ground Spear/Crescent Swing
Slams his spear down and then rushes and slashes it upwards. Performs a wide-sweeping aerial swing while in the air.

Final Smash: Waddle Dee Army
Summons Waddle Dees, Waddle Doos, Gordos, and other enemies to wildly attack.​
Taunts
  • Up Taunt: Bandana Dee looks around him, loosely mimicking his artwork from Return to Dream Land.
  • Down Taunt: Bandana Dee twirls his spear.
  • Right Taunt: Bandana Dee falls asleep, thinking about an apple.
  • Left Taunt: Bandana Dee happily waves his arms.


On-Screen Appearance
  • Bandanna Dee lands in by Parasol.

Idle Poses
  • Bandana Dee scouts the area (based on an idle animation in Return to Dreamland)
  • Adjusts his Bandana

Victory Poses
  • He rushes by in a friend train with 3 parasol waddle dees
  • A giant ball of waddle dees rolls by before exploding leaving only Bandana Dee
  • He does a few rapid jabs before holding his spear by his side and sitting down to drink some apple juice


Classic Mode: Helper to Hero
The theme is that it’s fighting characters who transition from a generic character to that of an unique and personal one, like his own character arc. ALl stages are news stages to Infinite in the same manner that Bandana Waddle Dee is a newcomer.​
Round
Opponent
Stage
Music
Notes
References
1​
:ultpiranha:
Starfruit Paradise​
Piranha Plant Lullaby​
Lucina & Simon are allies​
Piranha Plant is a generic enemy unit.​
2​
:ultgreninja:
Galar Wild Area​
Battle! (Team Flare)​
Vaguely implied to be Ash's greninja, but still very generic.​
3​
:ultyoshi:
Crafted World​
Wildlands​
There’s Yoshi, but he's identical to a the generic yoshi species.​
4​
:ultrob:
Gyromite​
Memory (Stack Up)​
Subspace ROB is slightly different from generic ROBs visually, and very distinct from a character perspective.​
5​
:ultvillager:
Mystery Island​
Bubblegum K.K.​
They can be fully customized​
6​
:ultkingdedede:
Castle Dedede​
Macho Dedede​
BONUS​
Board​
the​
Platforms​
!​
Final​
Marx​
Marx Battle Moon​
Warrior from Another World​


Alternate Costumes

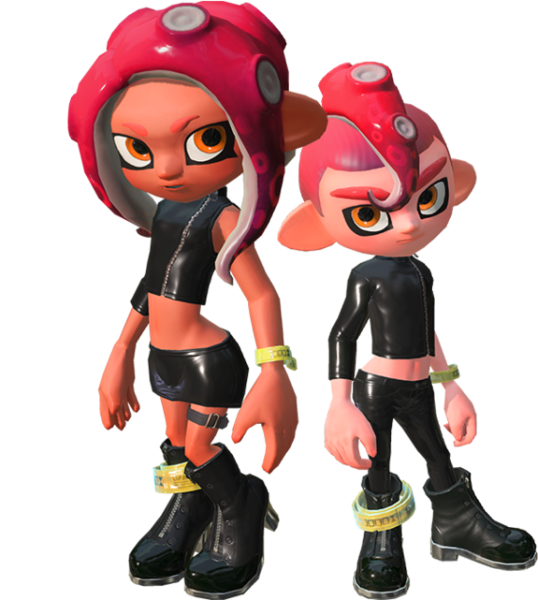
#64ε. Octoling
Splatoon
Wikia Link

Submitted by: Paraster Paraster
Special Moves

Neutral Special:
Dapple Dualies

Fires forward with both of their Dapple Dualies. As these are two weapons, the damage output is increased (1.5x).

Side Special: Dynamo Roller
A variation of the Splat Roller.
It moves slower but deals more damage with better killing poyential.

Up Special: Super Jump
Performs a Super Jump just like the Inkling.

Down Special: Splat Bomb
Throws a Splat Bomb, which explodes on contact or after a fixed time, covering opponents in ink. The damage and amount of ink applied increase based on how long the player holds the special button.

Final Smash: Inkjet
The Octoling uses Inkjet, one of the Special Weapons from Splatoon 2. Functionally, it’s almost Identical to Diddy’s old Final Smash, with the Octoling flying around and shooting ink.
Taunts
  • Up Taunt: Takes a selfie.
  • Down Taunt: Transitions into Octopus form and bounces up and down quickly. This can help recover some ink.
  • Right Taunt: Jumps up and down excitingly. Based on the Booyah’ signal from Splatoon 2.
  • Left Taunt: Hoists the Dapple Dualies in the air. Based on This Way’ signal from Splatoon 2.

On-Screen Appearance
  • Octoling appears while “riding the rails” before jumping into octopus form, splatting on the ground, and reforming. Take from the beginning level of Octo Expansion.
Idle Poses
  • Checks their clothes.
  • Runs the back of their neck.
Victory Poses
  • Does two flips before aiming the Dapple Dualies on both sides. Female variants raises the guns up while thrusts a hip out and smirking. Male variants aim the gun downwards and does an edgy pose. Based on the Dualies victory animation in Splatoon 2.
  • Raises the Dynamo Roller up and rests it in their shoulders. Female variants leans forward and smiles while male variant does a thumbs up. Based on the Roller victory animations.
  • The Octoling appears sitting on the Slosher. They then get up, spin, and lean forward on the weapon. Female variant looks forward in a sassy way while make variants wistfully look up. Based on the Slosher victory animation.

Classic Mode: OctoPARTAY!!!
Player fights against eight opponents in waves of 1 against 4. Stages are also based on the idea of 8.​
RoundOpponentStageMusicNotes References
1:ultbowserjr:
:ultlarry::ultroy2::ultwendy::ultiggy::ultmorton::ultlemmy::ultludwig:
Figure-Eight CircuitDestruction DanceThere are eight different Koopalings and the stage is based on the Mario Circuit track from Mario Kart 8.
2:ultlink::ultzelda::ultsheik::ultganondorf::ultyounglink::ulttoonlink::ultzelda::ultlink:Song of StormsHyrule CastleHyrule Castle is based on the Ocarina of Time version which released in 1998.
3:ultmarth::ultlucina::ultroy::ultchrom::ultike::ultrobin::ultcorrin::ultbylethf:ColosseumThe Shackled WolvesThis was one of the 8-player smash stages back in SSB4.
4:ultpikachu::ultpichu::ultjigglypuff::ultmewtwo::ultlucario::ultcharizard::ultgreninja::ultincineroar:Pokemon Stadium 2Battle! (Guzma)

Prism Tower is a Pokémon Gym which is apart of the Pokémon League which has typically 8 Pokémon Gyms at one time.
5:ultvillager::ultvillager::ultvillager::ultvillager::ultvillagerf::ultvillagerf::ultvillagerf::ultvillagerf:SmashvilleK.K. MariachiThe Eight-Ball Tee is a common shirt that has been apart of the series since the start.
6:ultsephiroth::ultsephiroth::ultsephiroth::ultsephiroth::ultsephiroth::ultsephiroth::ultsephiroth::ultsephiroth:Northern CaveDecisive BattleSephiroth has a move called Octoslash.
BONUSBreaktheTargets!
Final:ultinkling::ultinkling::ultinkling::ultinkling::ultinklingboy::ultinklingboy::ultinklingboy::ultinklingboy:Deepsea MetroFly Octo Fly ~ Ebb & Flow (Octo)

Alternate Costumes

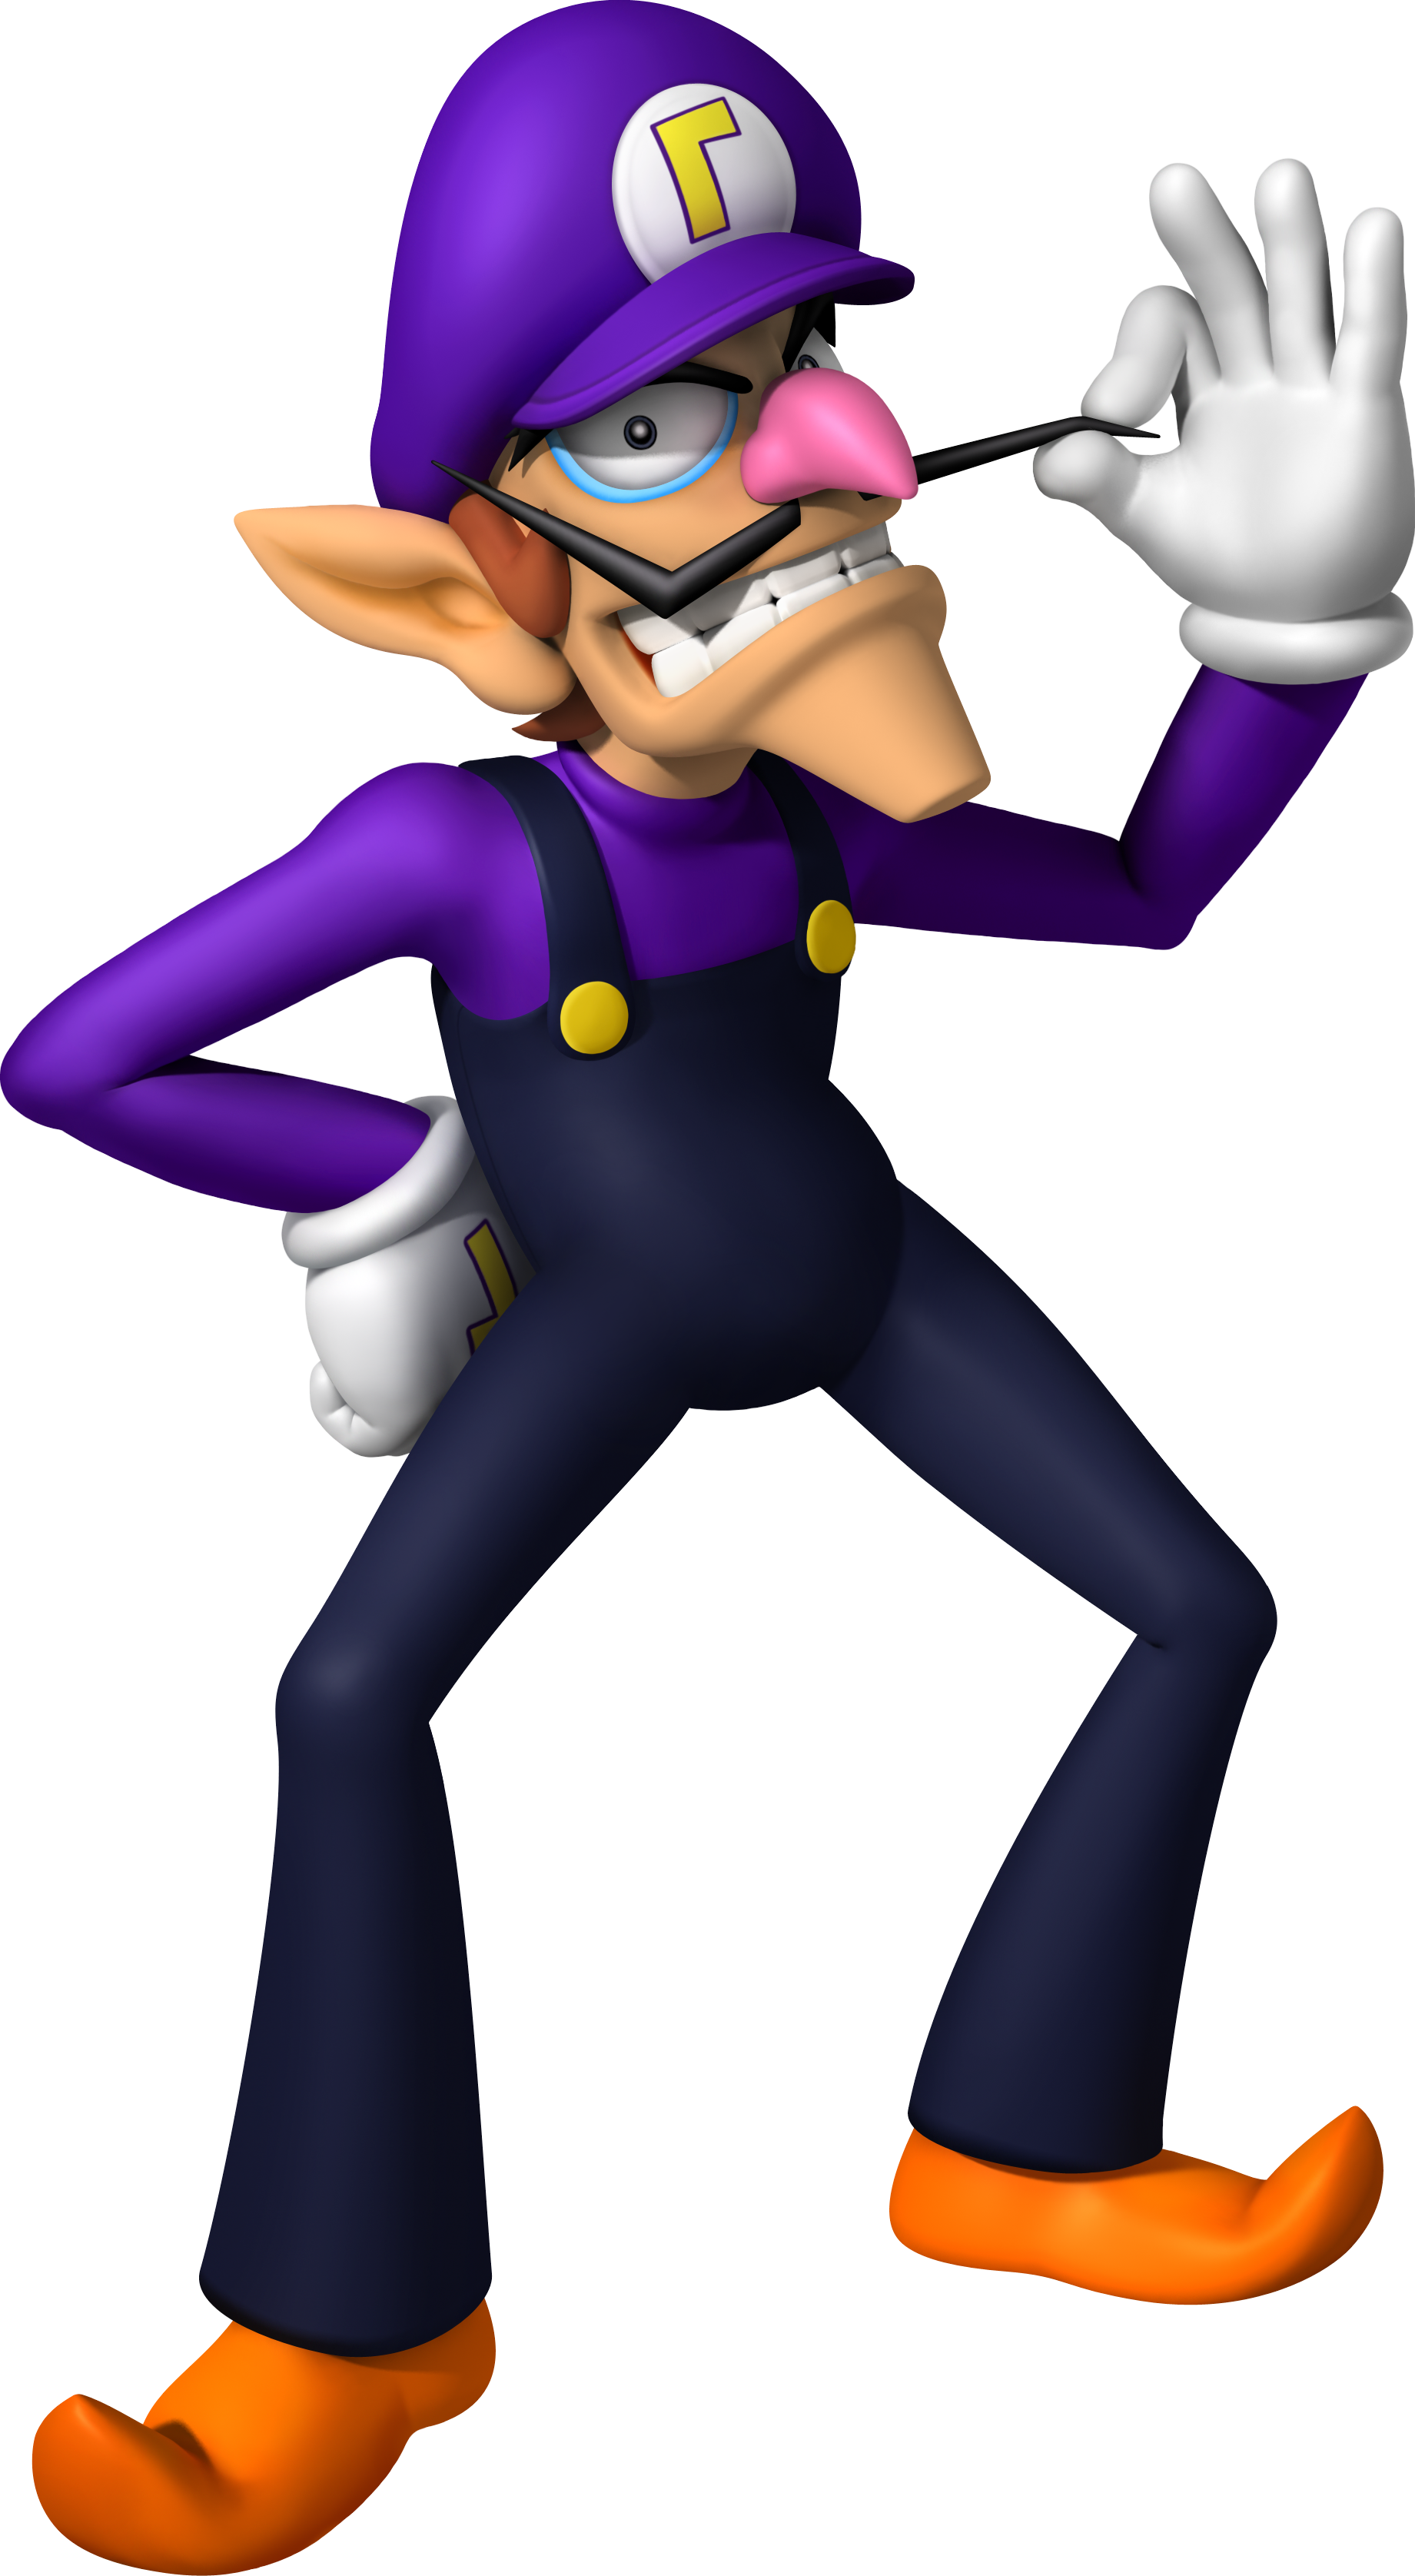
#85. Waluigi

Super Mario Bros.
Wikia Link

Submitted by: Thread Poll Voting​
Special Moves

Neutral Special:
Serve

Waluigi throws a tennis ball into the air and serves it at the opponent with his racket. this can be angled slightly, and cancelled out of. The Tennis Ball will remain and bounce if cancelled, and can be hit with his forward air and forward smash.

Side Special: Kart
Waluigi gets into the Waluigi Racer and charges forward at the opponent. This move can be charged into 4 tiers, no sparks, blue sparks, orange sparks, and purple sparks, from weakest to strongest.

Up Special: Swimming Return
Waluigi wims in the air in a slower version of Pikachu's quick attack. Waluigi swims in 4 bursts, and can change direction for each burst. There is a weak hit box on it.

Down Special: Trick Shot
Waluigi slows down time and does a moonwalk like in Mario Tennis Aces. this moves functions as a counter if hit during the moonwalk. However, the move has large ending lag so Waluigi can be punished if not hit.

Final Smash: Bomb-ombs Away!
  • Waluigi sticks his leg out and a vine appears out of his pant leg which stretches out, and any opponent caught in the vine will be sent to a cutscene final smash. The opponent will be transported to a dark room, which will zoom out to reveal the opponent in an assist trophy on top of a pile of Bob-ombs. Waluigi will be shown laughing repeatedly before the Bob-ombs explode.
Taunts
  • Up Taunt: He performs a crotch chop.
  • Down Taunt: Waluigi shakes his fist and says "Cheaters!"
  • Right Taunt: Waluigi does a pirouette and strikes a pose
  • Left Taunt: Waluigi twirls his mustache and snickers sinisterly while looking to the closest opponent.

On-Screen Appearance
  • An Assist Trophy drops onto the ground and releases Waluigi
Idle Poses
  • Waluigi twirls his mustache before briefly picking his nose
  • Waluigi taps his foot repeatedly, in a less agressive version of his current asisst trophy attack
Victory Poses
  • Waluigi claps his hands with a rose in his mouth, does a tango pose and spins before ending with a final pose where he holds his rose towards the camera. A reference to his Eagle/Hole In One animation from Mario Golf: World Tour.
  • Waluigi jumps from left to right in a goofy, Waluigi-esque way, holding his trophy high, referencing his tournament winnning animation from his first game appearance, Mario Tennis on N64.
  • Waluigi jumps goofily, poses to the left and right, spins around, and ends with a Micheal Jackson-esque tip of his hat.

Classic Mode: Waluigi's the Best!
All Waluigi's opponents are previous assist trophies or game elements that weren't made playable until later.​
RoundOpponentStageMusicNotes References
1:ultcharizard:Saffron CityMain Theme - Pokémon Red / Pokémon Blue (64)Charizard used to appear as Pokeball Pokemon in SSB and SSBM.
2Giant
:ultridley:
Brinstar (Omega)Vs Ridley (Brawl)Ridley was a stage element in SSB, a boss in SSBB, and a stage boss/hazard in SSB4.
3:ultlittlemac:Boxing RingJogging/CountdownLittle Mac was an Assist Trophy in SSBB.
4:ultchrom:Arena FeroxChrom was an Mii Costume and an element in Robin’s Final Smash in SSB4.
5:ultdarksamus:Frigate OrpheonBrinstar DepthsDark Samus was an Assist Trophy in SSB4.
6:ultisabelle:SmashvilleTour - Animal Crossing: New LeafIsabelle appeared as an Assist Trophy and Mii Costume in SSB4.
BONUSBoardthePlatforms!
FinalMaster Hand & Crazy HandWaluigi's Pinball (Omega)Waluigi Pinball (Brawl)

Alternate Costumes

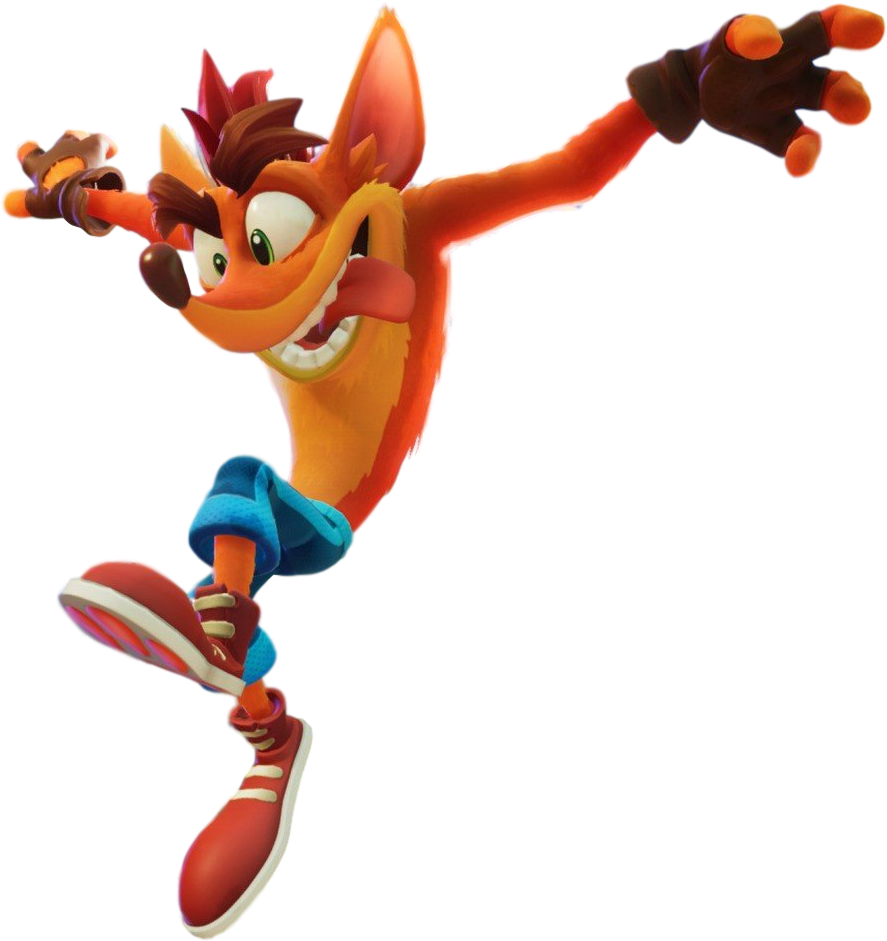
#86. Crash
Crash Bandicoot
Wikia Link

Submitted by: Otoad64 Otoad64
Special Moves

Neutral Special:
Death Tornado Spin

Pressing B once performs a short, quick spin that reflects projectiles (11%, OK knockback). Holding B turns into a much faster spin that lasts for a few seconds (26%, medium knockback); not only is it faster, it can help Crash glide a good distance.

Side Special: Super Slide
Crash slides at lightning speed, which trips opponents (9%, OK knockback). He can use it in the air to kick diagonally downward, and cancel it by pressing the Shield button.

Up Special: Rocket Jump
Crash will jump high off a TNT Crate, damaging opponents in the process (13%, OK knockback). The attack has a good amount of collateral damage to the opponents nearby as the crate explodes. Damage hitboxes are also applied to Crash as he catapults into the air which can be used as a good defensive air attack.

Down Special: Fruit Bazooka
Crash takes out a bazooka that he can aim by tilting up or down (10%, OK knockback). The Wumpa Fruit juice that sticks on opponents is a weaker variation of the Inklings' Ink that adds a 1.3x multiplier to all other attacks, including another Wumpa Fruit.

Final Smash: Most Missed Boxes
Crash will don on the Aku mask and will dash into an opponent (8%). The opponent is then taken into a cutscene were hundreds of TNT and Nitro boxes rain down from the sky and Crash runs away (62%, devastating knockback)
Taunts
  • Up Taunt: Crash faces the screen, grins strangely, and it wiggles his eyebrows.
  • Down Taunt: Crash raged a Wompa fruit and chucks it in the air. It will then splat down onto his head. The fruit can do 1% damage.
  • Right Taunt: Aku Aku appears and spins around him while he looks gleefully.
  • Left Taunt: Crash will do his crash dance.

On-Screen Appearance
  • Crash spins out of a wooden crate
Idle Poses
  • Looks to the right and then to the left
  • Dozes off
Victory Poses
  • Crash jumps into the air in a celebratory fashion and then grasps both hands together and shakes them into the air. This is taken from his finishing poses after completing a level in Crash Bandicoot 4: It’s About Time.
  • Crash grabs a Diamond and then throws it into the air. He then does a stylish spin and then drops to one knee with his arms out stretched. This is a reference to his finishing animations.
  • Crash performs the final part of his victory dance

Classic Mode: A Crash-tastic Adventure
Boss fights from the first Crash Bandicoot game, with the final round referencing the final bosses from Crash Bandicoot 2 and 3 as well.
RoundOpponentStageMusicNotes References
1Green
:ultkingdedede:
Suzaku Castle (Omega)Dingodile (Twin Insanity)Enemy favours down smash, food is the only item that spawnsKing Dedede represents Papu Papu.
2Light Blue
:ultlucario:
Kongo FallsThe Time TwisterEnemy favours using items and taunting, only barrels and large crates spawnLucario represents Ripper Roo.
3Grey
:ultincineroar:
Castle Seiege (Final Phase)Dr. Neo Cortex (Boss Battle)Enemy favors using items and taunting, only barrels and large crates spawnIncineroar represents Koala Kong.
4Red
:ultfox:
Fourside (Omega)Once upon a TireEnemy favors neutral special, only back shields spawnFox represents Pinstripe Potoroo
5:ultluigi:
Green
:ultkirby::ultkirby:
Dracula's CastleEvil TwinsLuigi favours neutral special and throwing items, only capsules spawnLuigi and 2 Kirbys represents Dr. Nitrus Brio and slimes that come from his potions.
6Giant Green
:ultdk:
Great Cave Offensive
(Omega)
Crash CompactorEnemy favours down specialDonkey Kong represents Dr. Nitrus Brio's monster form.
BONUSRacetotheFinish!
FinalYellow
:ultdoc:
Tiny Red
:ultmetaknight:
Castle Siege (First Phase)Cortex CastleDr. Mario has three stocks.
For the first stock, he begins the battle with a rage blaster.
For the second, he begins the battle with a rocket belt.
For the third, he does not have an item, but is accompanied by a Red tiny Meta Knight as an ally
Dr. Mario and Meta Knight represents Dr. Neo Cortex and Uka-Uka

Alternate Costumes

#87. Stylist
Style Savvy
Wikia Link

Submitted by: @airConditioner
Special Moves

Neutral Special:
Hairspray

Stylist starts shaking a hairspray canister in her hand, in a charging like attack similar to Samus' CS. When finished, she can press B again to spray. It has a small hitbox, but a lasting one-for a visual aid, a purple, almost invisible cloud right in front of Stylist. You'll need to be pretty close to land it-but if you do, the opponent will be stunned! How long they are stunned depends on how long you charged the hairspray and how much damage your opponent has.
However, after being used five times, the canister is empty. If you try to use the move again, Stylist will toss it behind her (it can hit opponents and be picked up), and a new one immedeatly appears in her hand, setting her back $30.

Side Special: Lipstick
Stylist winds up, and then throws a lipstick thing (don't know the name of it) forward. It travels in an arc similarly to Young Link's Fire Arrows. This is pretty strong for a projectile. The longer you hold B, the stronger the lipstick projectile will be.
However, while this move can be spammed, it does set you back $10 per container, so be wary.

Up Special: Hair Dryers
Stylist pulls out two electric hair dryers and aims them down before turning them on, and they propel her upwards. This causes a windbox beneath you, so it's pretty good for gimping an opponent offstage. It's also a pretty fast move. However, the move only has decent horizontal range, and good vertical range, so you can't go too far left or right offstage.

Down Special: Try It On
The Stylist pulls out a changing curtain and can choose between several outfits based on a mood. Each outfit will give her a particular state boost until she loses that outfit, is KO’d, or changes her outfit. Each outfit costs $100 and she has $800 per stock.

Final Smash: Fashion Show Fix
When activated, a curtain will be thrown up in front of Stylist, however this time it is much larger and is her FS activation box. The player closest to Stylist before the curtain was thrown up will be launched into the cutscene, and all other players hit by the curtain will be launched by a semi-strong hit that does 20% and kills Mario from the center of Final Destination at 100%.

We see a first person view of the opponent, as Stylist brushes, irons, and curls their hair, shines their shoes, holds up dresses, etc. She moves extremely fast while doing this, inhumanly fast-as if it's some kind of time lapse video. After a few seconds, Stylist swings the chair around, and the camera changes perspective to a third-person view of Stylist and the opponent-who is now sporting the same outfit and hairstyle as Stylist! They'll look a bit surprised on their predicament. The cutscene ends and they are launched offstage (if they have enough damage done to them).
Taunts
  • Up Taunt: Stylist does two quick brushes of her hair with one hand, while holding her hair behind her with the other hand
  • Down Taunt: Stylist does quick small claps in front of her chest while heart effect emanate around her.
  • Right Taunt: Stylist pulls out a pocket make up mirror and reapplies her lipstick.
  • Left Taunt: Stylist runs her hand through her hair and billows it out which causes it to flow in the wind.

On-Screen Appearance
  • The Stylist walks out of a changing room.
Idle Poses
  • Stylist waves to the crowd
  • Stylist brushes dust off her outfit
Victory Poses
Note: All of Stylists victory animations features her walking down a fashion show catwalk as cameras flash all around her.
  • Stylist walks up and waves to the audience
  • Flips her hair and looks in the camera with a smile.
  • Spins around and poses

Classic Mode: Fashion Show Victim
Her classic mode consists of fighting a sequence of fighters with questionable fashion choices, including weird accessories and color palettes.​
RoundOpponentStageMusicNotes References
1Brown
:ultsnake:
Shadow Moses IslandThe Boutique (Meeting Callie)Those animal prints are a huge no-no.
2Dark Red
:ultpacman:
Pac-LandSong 05Plaid gloves are a strong fashion statement
3Pink
:ultmetaknight:
HalberdEmmylou Before the ContestThose colors don't work together Mr. Knight.
4:ultshulk:Gaur PlainsWardrobe (Idol)Too many straps!
5:ultbylethf:Garreg Mach MonastaryRaven CradleAppearance is fine but those clothes? Yuck...
6:ultbrawler::ultgunner::ultswordfighter:Beaumonde ArenaTitle Theme (Style Savvy)All these unfashionable costumes!!!
BONUSBreaktheTargets!
FinalDraculaDracula's CastleGirls Be AmbitiousThat style went out of fashion long ago!

Alternate Costumes

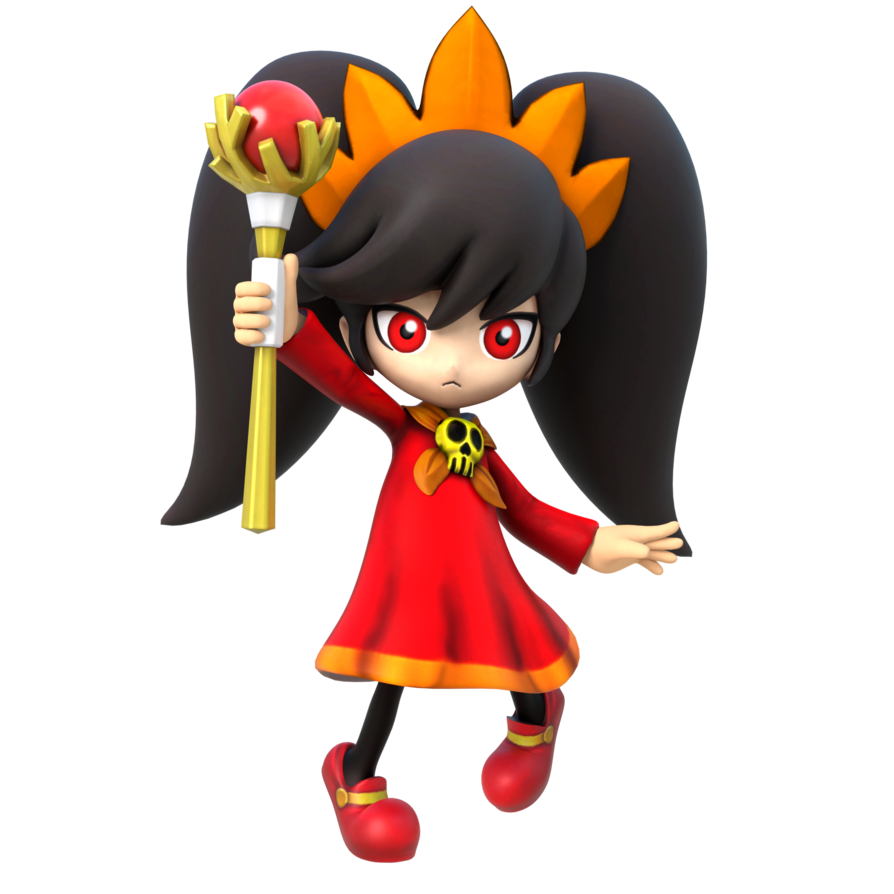
#88. Ashley
WarioWare, Inc.
Wikia Link
Special Moves

Neutral Special: Dark Magic Zone

Ashley casts a field around her like her assist trophy and much like her assist, the spells are random, the longer she holds the button the larger the field becomes, and it lingers for 3 seconds at full size. The effects that can happen within the zone are as follows:
  • Shrinks Opponents
  • Slows Opponents
  • Makes Opponents invisible
  • Healing is now damage


Side Special: Guitar Blast

While the button is held a reticle appears, you can move this reticle around in a certain radius, letting go shoots a blast from Ashley's guitar

Up Special: Broomstick

While the button is held a reticle appears, you can move this reticle around in a certain radius, letting go shoots a blast from Ashley's guitar

Down Special: Potion

Ashley summons a cauldron and starts to stir it if you hold the button, if you let go of the button at the right time, A potion will be tossed out of the cauldron in an arc, and it can either hit someone individually or it can splash on the ground and it effects an area, each potion has a random effect. If you let go of the button too early, Ashley takes some damage, if you let the meter run out, the Cauldron explodes dealing big damage to Ashley and opponents around her, the bomb from WarioWare appears above her as an indicator. Here are the different potions:
  • Flower Potion: The opponents gain the Flower debuff.
  • Reverse Potion: The opponents controls are reversed.
  • KO Potion: This potion has a 10% chance of KOing instantly, the chance scales depending on damage.
  • Sleeping Potion: The opponents fall asleep
  • Stun Potion: The opponents become stunned.
Each potion has a readable icon on the projectile so you can quickly identify the type

Final Smash: Hocus Pocus

Ashley summons a swarm of Fronks that move forward once opponents are hit they are launched into a cutscene where up to 3 opponents are put into a dark room The camera zooms out and Ashley is there and she starts to summon a large amount of objects and people (Including but not limited to Crazy Galaxy and Ashley's Creepy Crew) that batter the opponents, Then Dark Lord Hum Gree enters the room and eats the opponents. The cutscene ends and the room explodes and the opponents get launched, There is also a chance for the opponents to have random effects applied to them. the effects include.
  • Shield Break
  • Slowed Down
  • Sleep
  • Flower
  • Reverse Controls
  • Instant KO (if over 100%)
Taunts
  • Up Taunt: Ashley’s hair momentarily changes to white as she slightly levitates herself off from the ground. Red looks up puzzled.
  • Down Taunt: She faces the camera and waves the wand in a full circle and then thrusts it forward. This causes Red to transform into the wand.
  • Right Taunt: A green aura surrounds Ashley as she faces the camera and holds her right palm out. Red grips the Trident angrily.
  • Left Taunt: Ashley twirls on one foot and then flicks her hair without any emotion. Red though snickers while hovering in the air.

On-Screen Appearance
  • The gate from her stage in WarioWare Touched opens up, revealing a menacingly standing Ashley who slowly walks to the foreground. Red then jumps out of the shadows to stand next to her.
Idle Poses
  • Ashley gets out her rabbit doll and rubs its head - causing said head to fall off.
  • Ashley dusts off her dress.
  • Red squats up and down slightly.
  • Red shakes his Trident up and down happily
Victory Poses
  • She appears on the screen with her back facing the camera which is all dark and gloomy, slowly the camera zooms in to Ashley with the air of creepiness slowly fading and as she turn her head to the camera she scare the player by wearing a mask before taking it off from her face. Shortly after doing this, Red jumps out nearby to Ashley and hoists his Trident up.
  • She zooms into the screen using her broom, camera zooms in to caught her in the act, she take notice at this and she then strike a "shh" pose as if she want this to be a secret before disappear off-screen like she's in a hurry.
  • Ashley appears with Red in front of a cauldron and takes a dried-up lizard into the cauldron which causes it to emit a small explosive mushroom cloud from the cauldron which casts a slightly eerie green light.

Classic Mode: Double, Double, Toil, and Trouble
The opponents in this Classic Mode a come in a pair to reflect how Ashley & Red also fight together. In addition, the opponents all have a magical aspect (or something related to as such) to them much like Ashley. Every secondary opponent is tiny to reflect the small stature of Red.​
RoundOpponentStageMusicNotes References
1

Tiny
:ultjigglypuff:
Venus LighthouseSplit ScreenIsaac uses Venus Psyenergy which is, in some ways, a form of magic while Jigglypuff is a Fairy-type. Fairies are often affiliated with magic.
2:ultpalutena:
Tiny
:ulthero:
SkyworldIntroducing Wario Deluxe

Palutena utilizes a heavenly magic while Hero isn’t only a swordsman but also a skilled spell caster.
3:ultlucas:
Tiny
:ultness:
MagicantRainbow JuiceBoth Lucas and Ness utilizes PSI power, a type of magic.
4:ultbayonetta:
Tiny
:ultsephiroth:
Umbra Clock TowerTomorrow HillBayonetta is a witch who isn’t a stranger to magical properties. Sephiroth utilizes various types of spells such as Gigaflare.
5:ultzelda:
Tiny
:ultrobinf:
SkyloftWarioWare, Inc. MedleyZelda is a princess renowned for her magical capabilities that can defeat the forces of darkness. Robin, like Hero, can attack with both a sword and spells
6:ultrosalina:Mario GalaxyTitle (WarioWare: D.I.Y. Showcase)Like Ashley, Rosalina also utilizes magic and a puppet fighter with that being Luma.
BONUSRacetotheFinish!
FinalMaster Hand & Crazy HandWarioWare, Inc (Omega)Ashley's Song (JP)Both Master Hand and Crazy Hand are magical creatures whose presence in Smash spans generations and universes.

Alternate Costumes

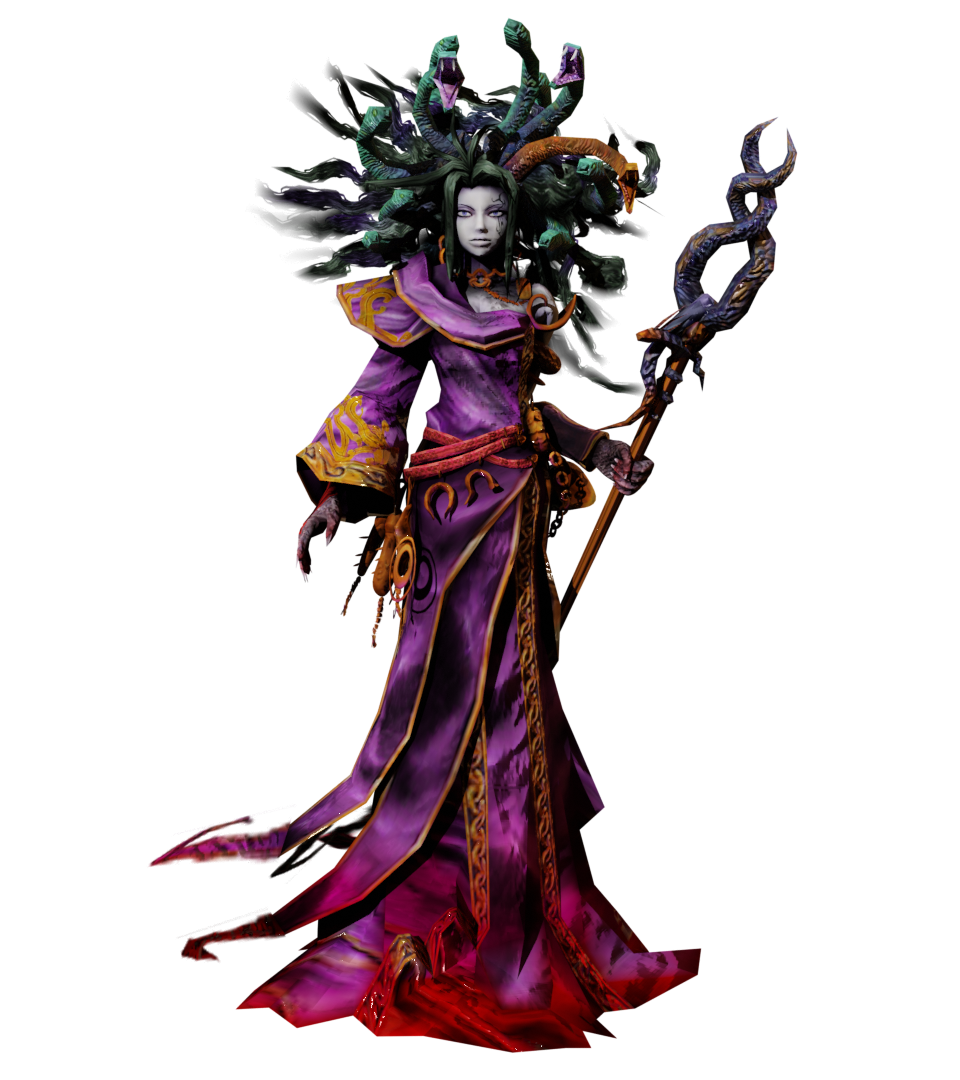
#54ε. Medusa
Kid Icarus
Wikia Link
Special Moves

Neutral Special:
Eye Turret

This functions much like Palutena’s Autoreticle but the reticle targeting graphic is far more sinister and monstrous looking. This appearance is borrowed over from Uprising as are the energy shots that are fired.

Side Special: Dark Mines

This functions exactly like Palutena’s Explosive Flame but emits a darkness-infused explosion with dark purple and black flames instead.

Up Special: Warp

This functions much like Palutena’s Up Special with a more darker and shadowy appearance.

Down Special: Counter/Reflective Barrier

Functions much like Palutena‘s Counter in that it can reflect damage back regardless if it’s a melee or projectile. The only difference is that the melee counter will deal a darkness-infused counter while the projectile counter will cause a slight dark effect she reflected.

Final Smash: Monstorus Medusa

Medusa will detach her head, and it will fly forward sending any opponent hit to a cutscene final smash. Once in the cutscene opponents will face an onslaught from Medusa's army before being hit with a final laser from Medusa. Medusa's Head will fly back to Medusa'a body and the battle will resume.
Taunts
  • Up Taunt: She holds up her staff which emits an sinister purple light.
  • Down Taunt: Medusa leaves her staff to float and maliciously looks at her side in a thinking pose, like she's plotting something. A little nod to one of her Kid Icarus: Uprising sprites.
  • Right Taunt: Medusa waves out her staff and cackles.
  • Left Taunt: Medusa uses unholy magic to alternate her face from her usual one to that of her true form with a demonic-looking mono eye.

On-Screen Appearance
  • Medusa rises out of dark clouds and her eyes quickly flash red similar to her first appearance in Kid Icraus Uprising: Chapter 1.
Idle Poses
  • Medusa’s eyes momentarily glow red.
  • Medusa’s snake hair snakes at each other quickly. Medusa looks up angrily.
Victory Poses
  • Medusa turns her back to the camera while glowing with a dark purple energy. She then turns back to face the camera which shows her hideous mono eye form. She then screams at the screen.
  • She appears in her monstrous gigantic form and holds her staff aloft while laughing. This is unique as she is some distance away from the camera.
  • She stamps her staff on the ground which causes a purple shadowy wisp to rise up and engulf Medusa as she cackles.

Classic Mode: Extinguish the Light
Medusa fights characters that are holy or based on light in some way.​
RoundOpponentStageMusicNotes References
1:ultmythra:Azura's BackZanza the DevineMythra utilizes lots of light and electric-oriented skills and attacks.
2:ultjigglypuff:Spear PillarBattle! (Chairman Rose)Jigglypuff is a Fairy-type which is often seen as a Pokémon type that’s primarily light-based.
3:ultpeach::ultrosalina:Rainbow RoadSlide RemixPeach is a princess whose abilities are primarily focused on love and light while Rosalina is a cosmic goddess.
4:ultlink::ultzelda:TempleBallad of the GoddessZelda is the Sage of Light while Link is the champion that defeats evil and possesses a various anointed weapons. Both hold the Triforce, an ancient holy relic.
5:ultsimon::ultrichter:Dracula's CastleVampire Killer (original)Boss Fight 1 - Kid Icarus: Uprising
6:ultpit::ultdarkpit:Palutena's TempleBoss Fight 1 - Kid Icarus: Uprising
BONUSBoardthePlatforms!
FinalMaster Hand & Crazy HandReset Bomb Forest (Omega)Master Hand / Crazy HandMaster Hand and Crazy Hand are supernatural beings with all of the powers of gods.

Alternate Costumes

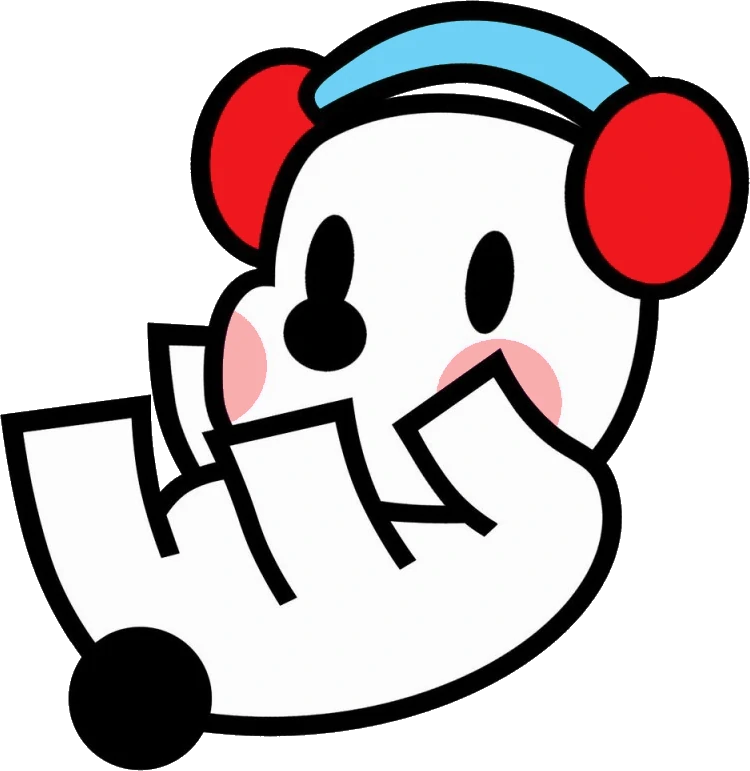
#89. Barista
Rhythm Heaven
Special Moves

Neutral Special:
Packing Pests

Barista will lob either a spider or a candy from its mouth towards the opponent. The candys will bounce once before despawning, and the spiders will crawl and do weak damage after landing before they despawn. If the B button is pressed before the projectile lands, it will be swatting down in mid air, starting the second bounce of the candy early, or starting the crawl phase of the spider.

Side Special: Karate Joe

Barista will chuck a flower pot forward from its mouth, similar to duck hunt’s Side special, but faster and travelling further. Side B will be held for this move, and when it is released Karate Joe will appear wherever the Flower Pot was, and perform a Punch. If The Karate Punch connects with an opponent, a Karate combo will be performed, and if The B Button is pressed when the uppercut connects, it will have increased kickback, and Karate Joe will smile at the camera before despawning.

Up Special: Launch Party

Barista will take the place of the rocket ship from the Launch Party Mini Game. A box will spawn underneath Barista, and a 1,3,5, or 7 will appear. If the B Button is pressed when the number hits 0, then Barista will be launched upward, but not put into free fall, similar to mega man and sonis’s recovery moves. There is a hitbox on this move, but it is not very strong. If the B Button is missed, then the Barista will not travel very far, only About the Vertical distance of Dr. Mario’s recovery.

Down Special: Chorus Kids

The Chorus Kids will appear in a stack behind the Barista, and will sing (scream?) a pulsing note. This will have a visual effect similar to jigglypuffs, where there is a circle of notes around the Chorus Kids. In function this will be similar to Charizard’s and Bowser’s Flames, dealing multiple small hits of damage, with the radius of the scream getting smaller and smaller the longer the note is held. If the B Button is released on one of the Chorus Kid’s pulses then there will be a strong final hit instead of the move just ending. Barista will be singing with its mouth open during this, but will not add to the damage or hitbox.

Final Smash: Ringside Reporter

The Reporter will appear, and a camera flash will appear beside her, and any opponents caught in the flash will be sent to a cutscene. The ringside reporter minigame will play for a couple seconds, before ending in a final flash and zooming out to see the opponent pictured against the screen on a newspaper. The better score you get while in the minigame portion, the more damage and knockback will be dealt to the opponent.
Taunts
  • Up Taunt: The Double Date Gophers jump up from the ground and punches the air.
  • Down Taunt: Barista chases his tail
  • Right Taunt: Barista falls asleep for a second mimicking his art
  • Left Taunt: A Built to Scale block moves back and forth once.

On-Screen Appearance
  • Barista floats in tied to three balloons which pop one by one, like the intro to night walk.
Idle Poses
  • Barista wags his tail.
  • Barista puts his paws on his headphones and bops his head to the music.
Victory Poses
  • Barista appears alongside the Love Rap trio. MC Love says "Fo' Sho'" and the Barista barks with the backup rappers
  • The Ringside Reporter appears interviewing Barista with a simple "Wubadubaduba Zat true?". Barista responds with a bark.
  • Barista throws a pillow into the air, the camera following the pillow. He then sleeps on it.

Classic Mode: Rhythm Melodies
Barista's route revolves around different kind of music genre in which a music that closely matches each theming plays in the background with character and stages all based on that. [Note; the song that is used are all from Rhythm Heaven)​
RoundOpponentStageMusicNotes References
1:ultpeach::ultmarth:Castle Siege (Mid Phase)Flock StepRepresents classical music
2:ultryu::ultsheik:Suzaku CastleThe Bon OdoriRepresents oriental music
3:ultsephiroth::ultwolf:MidgardSee SawRepresents rock music
4:ultinkling::ultinklingboy:
Moray TowersNightwalk (JP)Represents pop music
5:ultbanjokazooie::ultvillager::ultvillagerf:Spiral MountainSuperbRepresents country music
6:ultbayonetta::ultjoker:New Donk CityTap TroupleRepresents jazz music
BONUSBreaktheTargets!
FinalGalleomGalleom's ArenaBuilt to ScaleRepresents techno music

Alternate Costumes

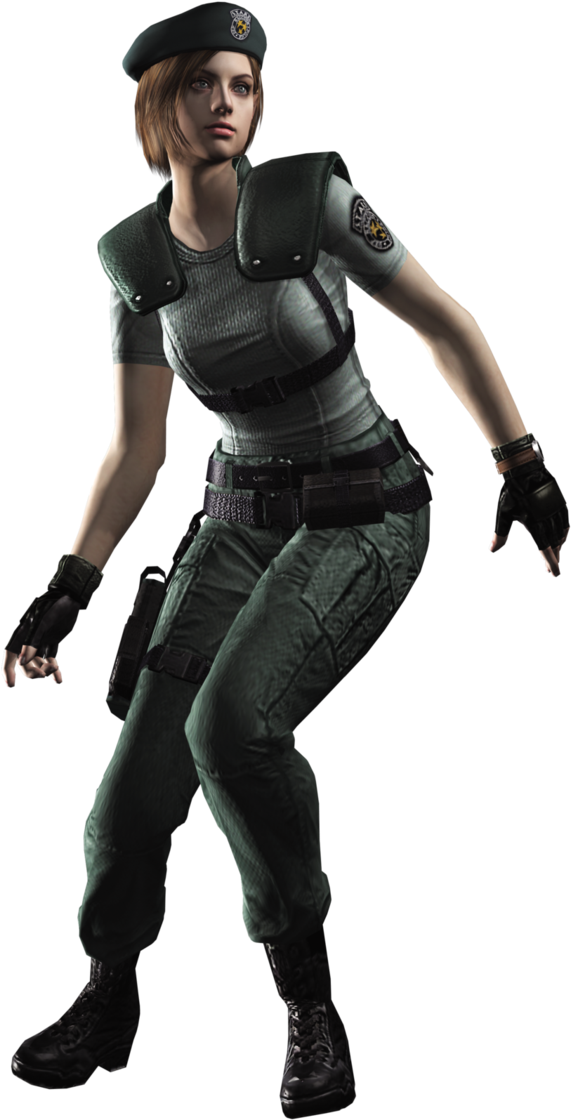
#90. Jill Valentine
Resident Evil
Special Moves

Neutral Special:
Handgun

Jill takes her handgun from her hip and fires it once with a tap of the special move button, consecutive taps will make Jill keep firing it. If you hold the Special button and input any horizontal movement she will slowly walk to that direction while having her gun in her hands.

Side Special: Grenade Launcher

Jill takes out her Grenade Launcher and fires a Grenade in an arc in front of her. You gain some aim of the launcher by holding the Side-Special instead of tapping. It starts out with 3 normal Grenade Shells, but once depleted you’ll have to reload by picking one of the Shells in your inventory. This powerful weapon exclusive to Jill can be loaded with three different varieties of shells; Grenade Shells, Acid Shells and Incendiary Shells.

Up Special: Hookshot

Jill Shoots out a Hookshot at an upward angle. It functions as your typical tether recovery. As an attack however, the grounded version can grab opponents, dragging them towards Jill.

Down Special: Survival Inventory

Jill swiftly goes into a crouching pose, low enough to avoid mid-level attacks and projectiles. Once in the pose an inventory appears over her character UI. You’ll consistently be able to make the choice between 6 iconic consumables from the Resident Evil franchise. The inventory closes once you’ve either made a choice by pressing B on an item, if you’ve been hit or shield out of it.

Final Smash: Reach for the S.T.A.R.S.

Jill takes out her trusty Rocket Launcher and shoots once in front of her, everyone caught in the initial blast gets sent into a cinematic. The opponents seem to be in some... Mansion? Then suddenly behind them a Tyrant appears! Though luckily, Jill wasn't done with her Rocket Launcher just yet as she starts to fire consecutive rockets exploding the entire place in the process.
Taunts
  • Up Taunt: Jill radioes for help by holding a communicator and says "Anyone there?"
  • Down Taunt: Jill kneels down and looks to the right and then to the left cautiously.
  • Right Taunt: Jill raises her pistol with both hands close to her face.
  • Left Taunt: Jill adjuts her beret and says "Enemy is still on the loose..."

On-Screen Appearance
  • Falls from the top while landing and performing a roll as debris rains down.
Idle Poses
  • Jill stops moving and rests her head on her hand and goes into a thinking position, with her eyes looking up as she's thinking of a plan on how she'll be surviving the on-going battle. A reference to her Idle animation in Resident Evil.
  • Jill suddenly stops moving and slowly looks behind herself with a little visible sweat drop on her face. Hey, who knows, there just might be a zombie behind you right now!
Victory Poses
  • Jill sets off a flare for a rescue helicopter and signals for help.
  • Takes a zombie and curb stomps it nefore sayi9ng "Who wnants some more!"
  • Chris Redfield appears next to Jill as she holstersher weapon. Jill says "Mission accomplished" asbefore Chris says "Pack up, we have another one incoming."

Classic Mode: My Last Escape
Fights characters on a 2:00 time limit, referencing the series’ staple escape sequences. Stages are chosen for their dark ambience.​
RoundOpponentStageMusicNotes References
1:ultolimar:Dracula's CastleStage Clear / Title ThemeThe opponent comes equipped with the Hocotate Bomb and recieves a sudden Final Smash.
2:ultsnake:Shadow Moses IslandEncounterThe opponent tends to avoid conflict.
3:ultsonic:Chemical Plant Zone
Escape from the City
The opponent tends to avoid conflict.
4:ultwario:Luigi's MansionDragon BattleAssist Trophies spawns often.
5:ultkirby::ultmetaknight:HalberdMeta Knight's RevengeThe match is a free-for-all.
6:ultsamus::ultdarksamus:BrinstarEscapeThe match is a free-for-all.
BONUSRacetotheFinish!
Final:ultbowser:Final DestinationUnstopable NemesisBowser transforms into Giga Bowser after taking enough damage.

Alternate Costumes

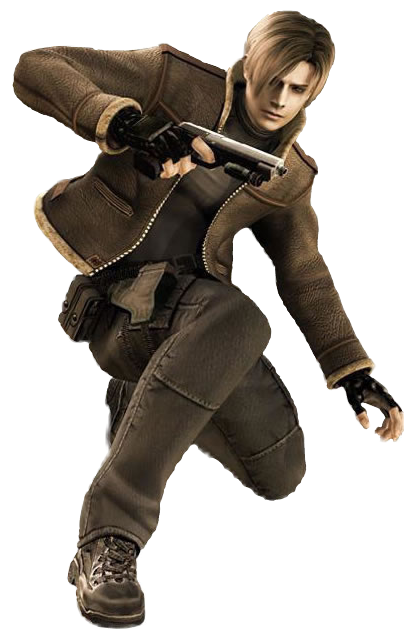
#90ε. Jeon Kennedy
Resident Evil
Special Moves

Neutral Special:
Handgun

Leon takes his handgun from his hip and fires it once with a tap of the special move button, consecutive taps will make Leon keep firing it. If you hold the Special button and input any horizontal movement he will slowly walk to that direction while having her gun in his hands.

Side Special: Grenade Launcher

Leon takes out his Grenade Launcher and fires a Grenade in an arc in front of him. You gain some aim of the launcher by holding the Side-Special instead of tapping. It starts out with 3 normal Grenade Shells, but once depleted you’ll have to reload by picking one of the Shells in your inventory. This powerful weapon exclusive to Leon can be loaded with three different varieties of shells; Grenade Shells, Acid Shells and Incendiary Shells.

Up Special: Hookshot

Leon shoots out a Hookshot at an upward angle. It functions as your typical tether recovery. As an attack however, the grounded version can grab opponents, dragging them towards Leon.

Down Special: Survival Inventory

Leon swiftly goes into a crouching pose, low enough to avoid mid-level attacks and projectiles. Once in the pose an inventory appears over his character UI. You’ll consistently be able to make the choice between 6 iconic consumables from the Resident Evil franchise. The inventory closes once you’ve either made a choice by pressing B on an item, if you’ve been hit or shield out of it.

Final Smash: Reach for the S.T.A.R.S.

Leon takes out his trusty Rocket Launcher and shoots once in front of him, everyone caught in the initial blast gets sent into a cinematic. The opponents seem to be in some... Mansion? Then suddenly behind them a Tyrant appears! Though luckily, Leon wasn't done with her Rocket Launcher just yet as he starts to fire consecutive rockets exploding the entire place in the process.
Taunts
  • Up Taunt: Leon wipes the sweat from his brow.
  • Down Taunt: Leon takes his flashlight and points it to the right and to the left while keeping his gun arm steady.
  • Right Taunt: Leon raises his pistol with both hands close to his face. He then looks to the right and then to the left.
  • Left Taunt: Leon unloads his handgun and checks his ammo before reloading it.

On-Screen Appearance
  • Leon appears in a manner like Captain Falcon but in a beat-up police car. He jumps out and arms himself.
Idle Poses
  • Leon stops moving and rests his head on his hand and goes into a thinking position, with his eyes looking up as he's thinking of a plan on how he'll be surviving the on-going battle. A reference to his Idle animation in Resident Evil.
  • Leon suddenly stops moving and slowly looks behind hisself with a little visible sweat drop on his face. Hey, who knows, thise just might be a zombie behind you right now!
Victory Poses
  • Leon sets off a flare for a rescue helicopter and signals for help.
  • Leon pushes down a zombie who is trying to attack him and takes a knife and stage downwards. The killing strike isn’t shown.
  • Leon takes aim and fires a gas canister behind him which explodes.

Classic Mode: Survive the Horror
All opponents are Giant and based on various monsters Leon faced off against. All battles are Stamina matches.​
RoundOpponentStageMusicNotes References
1Giant
:ultgreninja:
Great BayGarageOpponent is based on the Del Lago.
2:ultkrool:MidgardMansion BasementThe opponent is based on the Giant Alligator.
3:ultwolf::ultwolf::ultwolf::ultwolf:Gerudo Desert (Battlefield)Rust in Summer 2008The opponent is based off the Colmillos.
4:ultganondorf:Dracula's CastleThe Third Malformation of GThe opponent is based on G.
5:ultivysaur:Prism TowerResident Evil 3: Resistance The,eThe opponent is based on Queen Plaga.
6:ultdk:ColosseumSad but TrueThe opponent is based on the El Gigante.
BONUSBoardthePlatforms!
Final:ultdoc:Shadow Moses IslandThe Mercenaries - LeonThe opponent is based on William Birkin.

Alternate Costumes

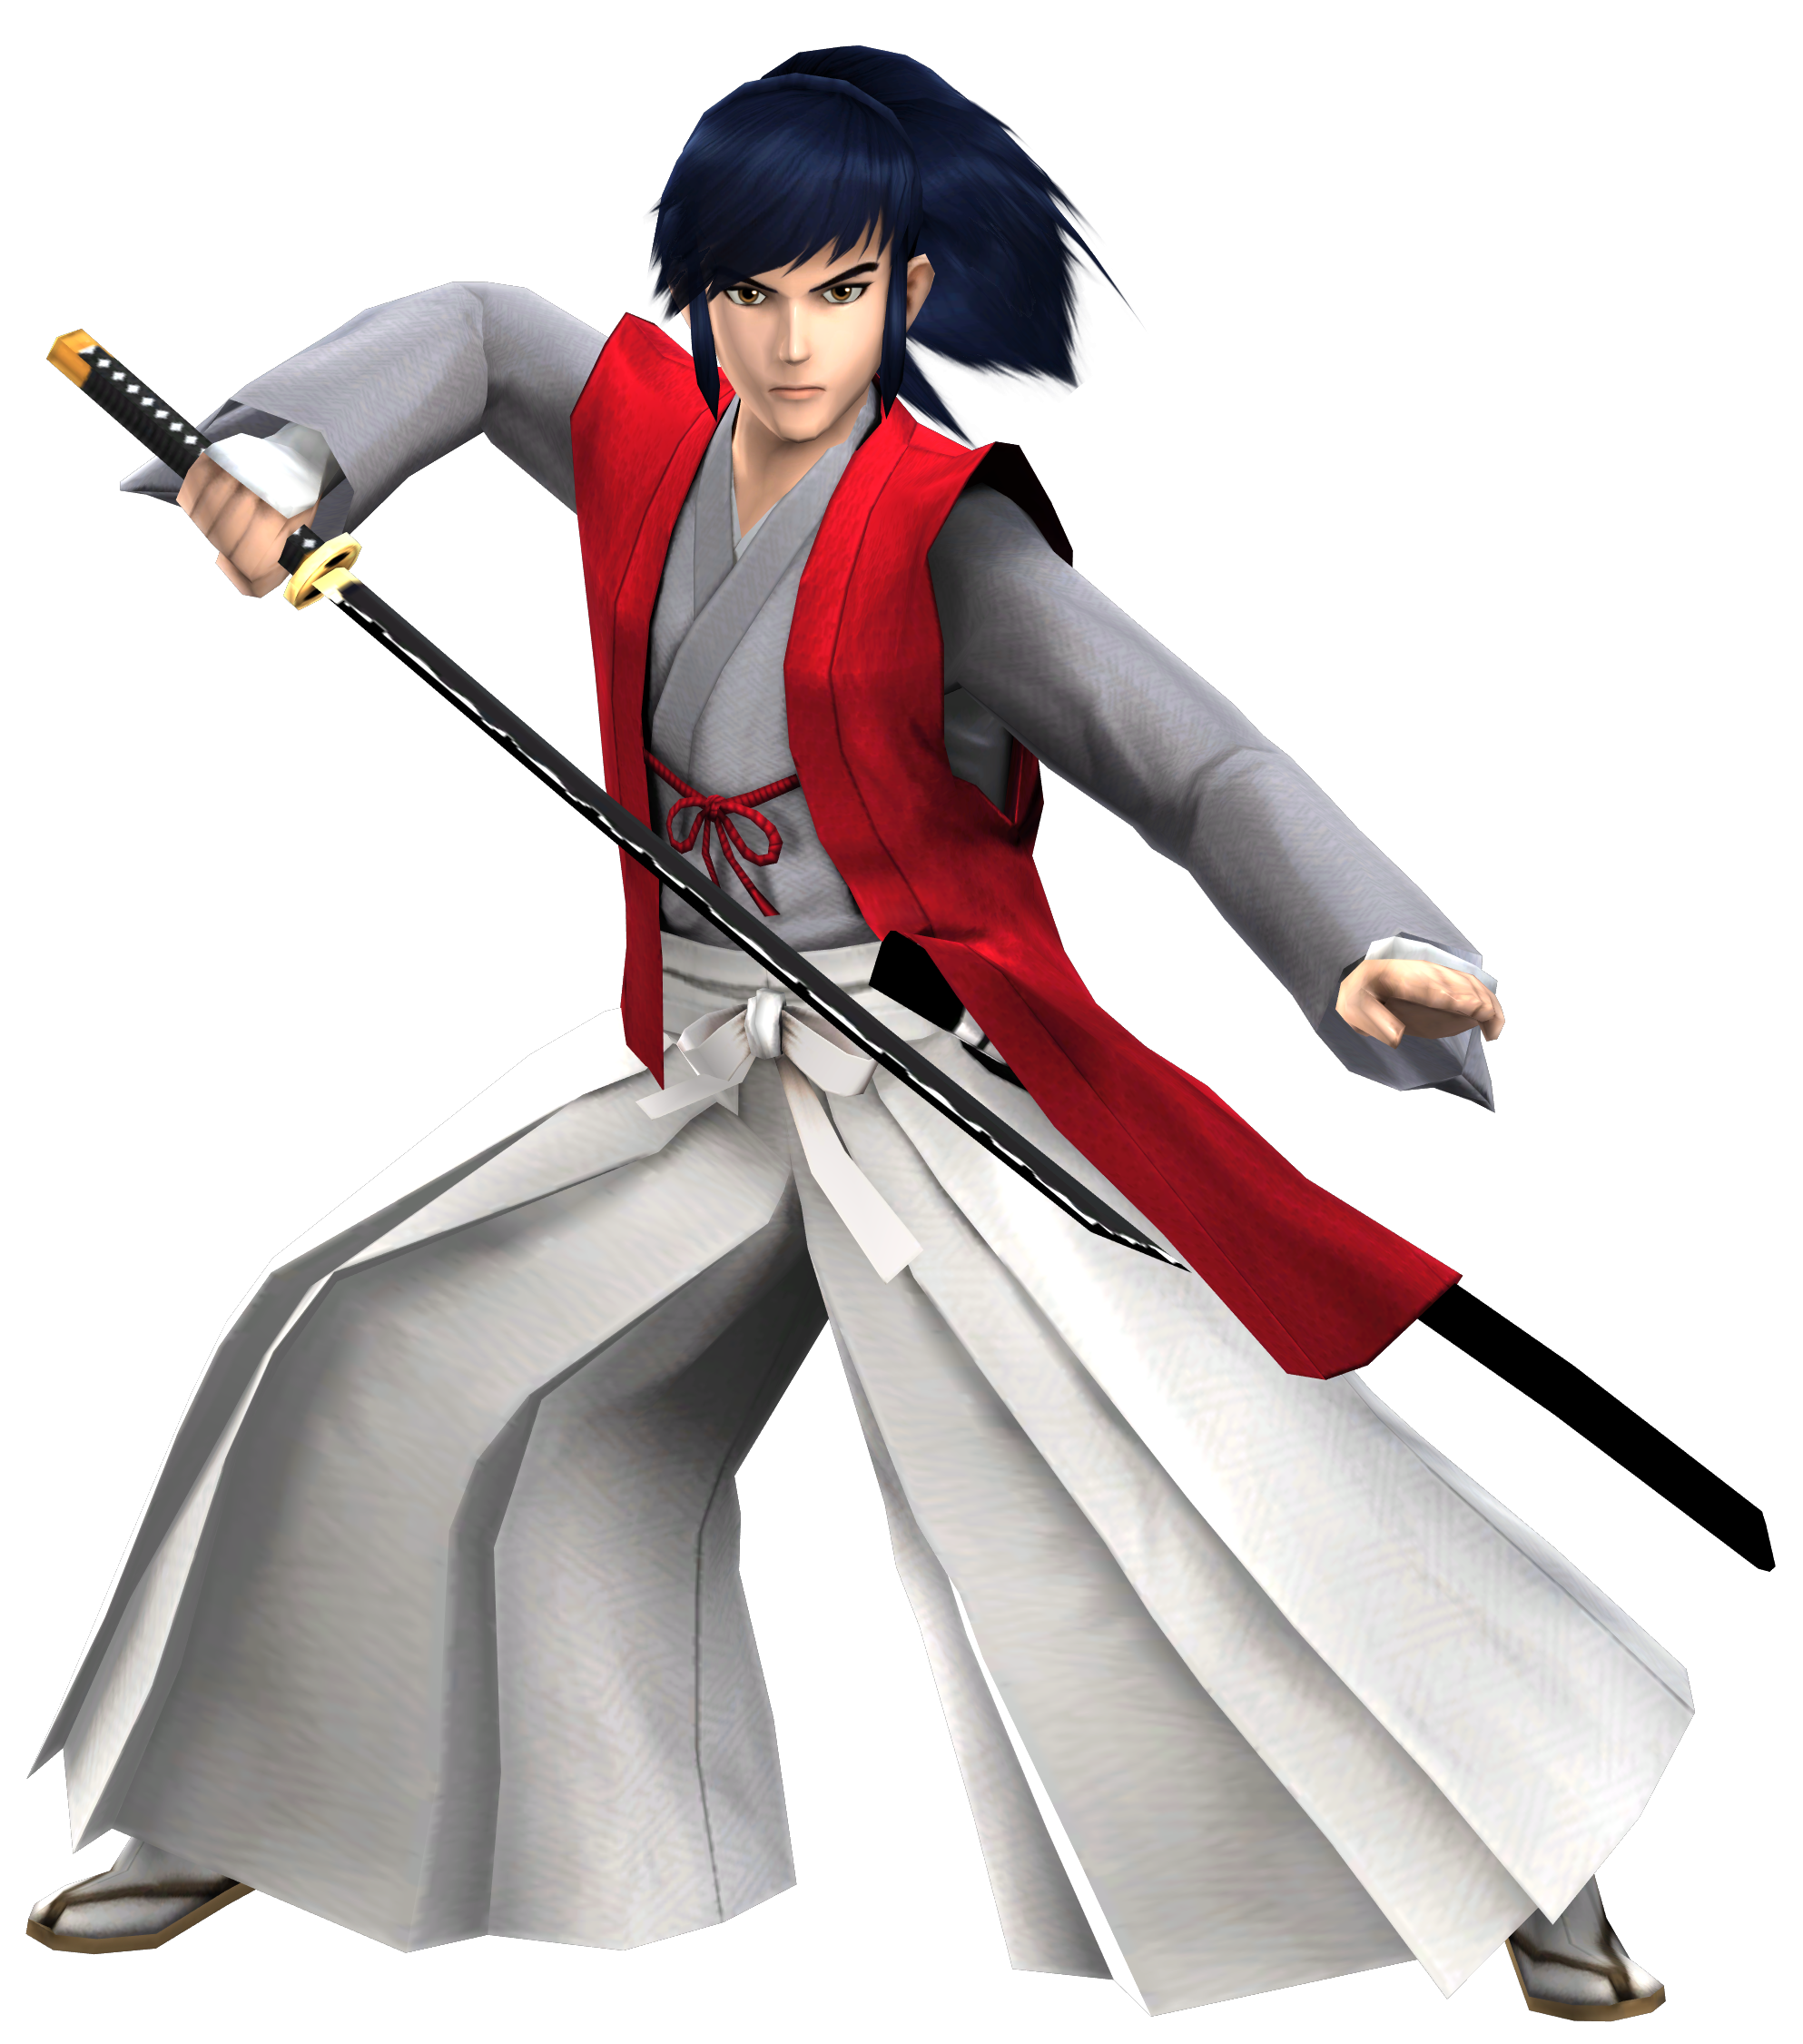
#91. Takamaru
Mysterious Castle Murasame
Special Moves

Neutral Special:
Windmill Swords

Takamaru throws out a pair of windmill swords, dealing minor damage but reaching pretty far. Holding the button charges them, cloaking them in fire and adding a third projectile to the mix, at the cost of some range. The charged version is a solid damage-dealer and kill tool, but it's also rather risky.
In Mysterious Murasame Castle, Takamaru can use throwing knives as a ranged attack. Various power-ups can be found that increase the number of knives thrown, or change them to long-range windmill swords and high-power fireballs. This special pretty much combines all the power-ups, ironically skipping the original knives entirely.

Side Special: Iajutsu Rush

Takamaru sheaths his sword, then rushes forward, slashing all in his way. Uniquely, the initial attack deals decent damage, but doesn't actually launch the opponent. Pressing the button again has Takamaru sheath his sword, causing the knockback to kick in. However, it also has a sizeable amount of endlag, making just the rush on it's own better for starting combos. This move is wholly original, based on the famous image of samurai and their quick-draw skills

Up Special: Ring Slash

Takamaru sheaths his sword, then rises straight up while slashing around himself. Holding the button increases the distance traveled and sets the sword on fire, greatly increasing the damage output. While mostly original, this move is loosely based on the rook Shogi piece power-up, which allows Takamaru to throw four knives all around himself. It also draws inspiration from the Fireball projectile, and it's combination with the aforementioned rook piece.

Down Special: Quick-Draw Counter

Takamaru sheaths his sword. Anyone who hits him gets hit with a powerful slash, reaching wide enough to hit multiple opponents. This attack also works as a reflector, throwing back any projectiles that hit Takamaru. This move is based on Takamaru's ability to reflect projectiles with his sword, which is also demonstrated in his smash attacks.

Final Smash: Inazuma Rush

Takamaru sheaths his sword, then releases a burst of lightning, paralyzing all who are hit. He then unleashes a devastating barrage of slashes, ending with one final rush. He caps off the assault by sheathing his sword, after which the opponents are launched. This move is a stylized representation of the powerful Inazuma technique.
Taunts
  • Up Taunt: Takamaru strikes a pose by raising his sword at his side with both hands, resembling the one from his game's cover art.
  • Down Taunt: Takamaru sticks his sword into the ground and sits down, meditating.
  • Right Taunt: A raccoon dog statue appears in a puff of smoke and splits open.
    Left Taunt: Takamaru dusts off his hakama pants.

On-Screen Appearance
  • Takamaru appears out of a cloud of smoke like a ninja, referencing his vanish ability in the game.
Idle Poses
  • Takamaru slightly raised his sword to look at it.
  • He brushes his ponytail slightly
Victory Poses
  • He performs several super fast slashes before cutting down the middle which causes the screen to split in half at a Fiagonal
  • He cuts down a Ninja in Sprite firm which yields 100 points.
  • He performs several smashes before charging his blade and performing one Final powerful cut which releases a flash of lightning

Classic Mode: Fashion Show Victim
The opponents features both swordsman and ninjas.​
RoundOpponentStageMusicNotes References
1:ultlink:TempleGuardian Battle
2:ultmarth:Arena FeroxGod Shattering Star
3:ultmetaknight:Great Cave Offensive
(Battlefield)
The Final Battle (vs Dark Crafter)
4:ultswordfighter::ultswordfighter::ultswordfighter:MiitopiaBattle Theme - MiitopiaMii Costumes present is the generic ninja costume, Ninjara, and Yiga Clan outfit
5:ultgreninja:Galar Wild AreaBattle Tower
6:ultsheik:Hyrule CastleVs. Monk Maz Koshia Medley
BONUSBreaktheTargets!
FinalMurasameMurasame CastleBlack Ninja

Alternate Costumes
ColorReferencesAppearances
WhiteDefault
BlackBased on the Ninja enemyJacket and pants turn black with the shirt turning white.
OrangeBased on the Tengu and Earth DemonJacket turns white, shirt becomes orange, and pants becomes brown.
RedBased on Lord AosameJacket turns teal with his shirt and pants being dark red.
TealBased on Lord RyokusameJacket turns grey, shirt turns green, and his pants turns teal.
PinkBased on Lady MomosameJacket becomes pink, shirt becomes green, and pants becomes yellow
Dark BlueBased on Lord AkasameJacket turns red, and his shirt and pants turn dark blue.
MagentaBased on MurasameJacket turns brown, shirt is a crimson red, and pants becomes magenta
BrownBased on Captain Rainbow TakamaruJacket becomes burgandy, shirt becomes brown, and the pants become green with black stripes running down them. Hair also becomes a darker and duller blue with the skin ton also having a more darker tint to it.
BlueBased on the Takamaru SpriteThe jacket is a saturated, bright red while the shirt and pants are a bright blue. Takamaru's hair would also be brighter blue.
PurpleSamurai Warriors 3 version of TakamaruTakamaru retains the red jacket with a duller collar and yellow trimmings, a lavender shirt, white pants, and more darker hair color.

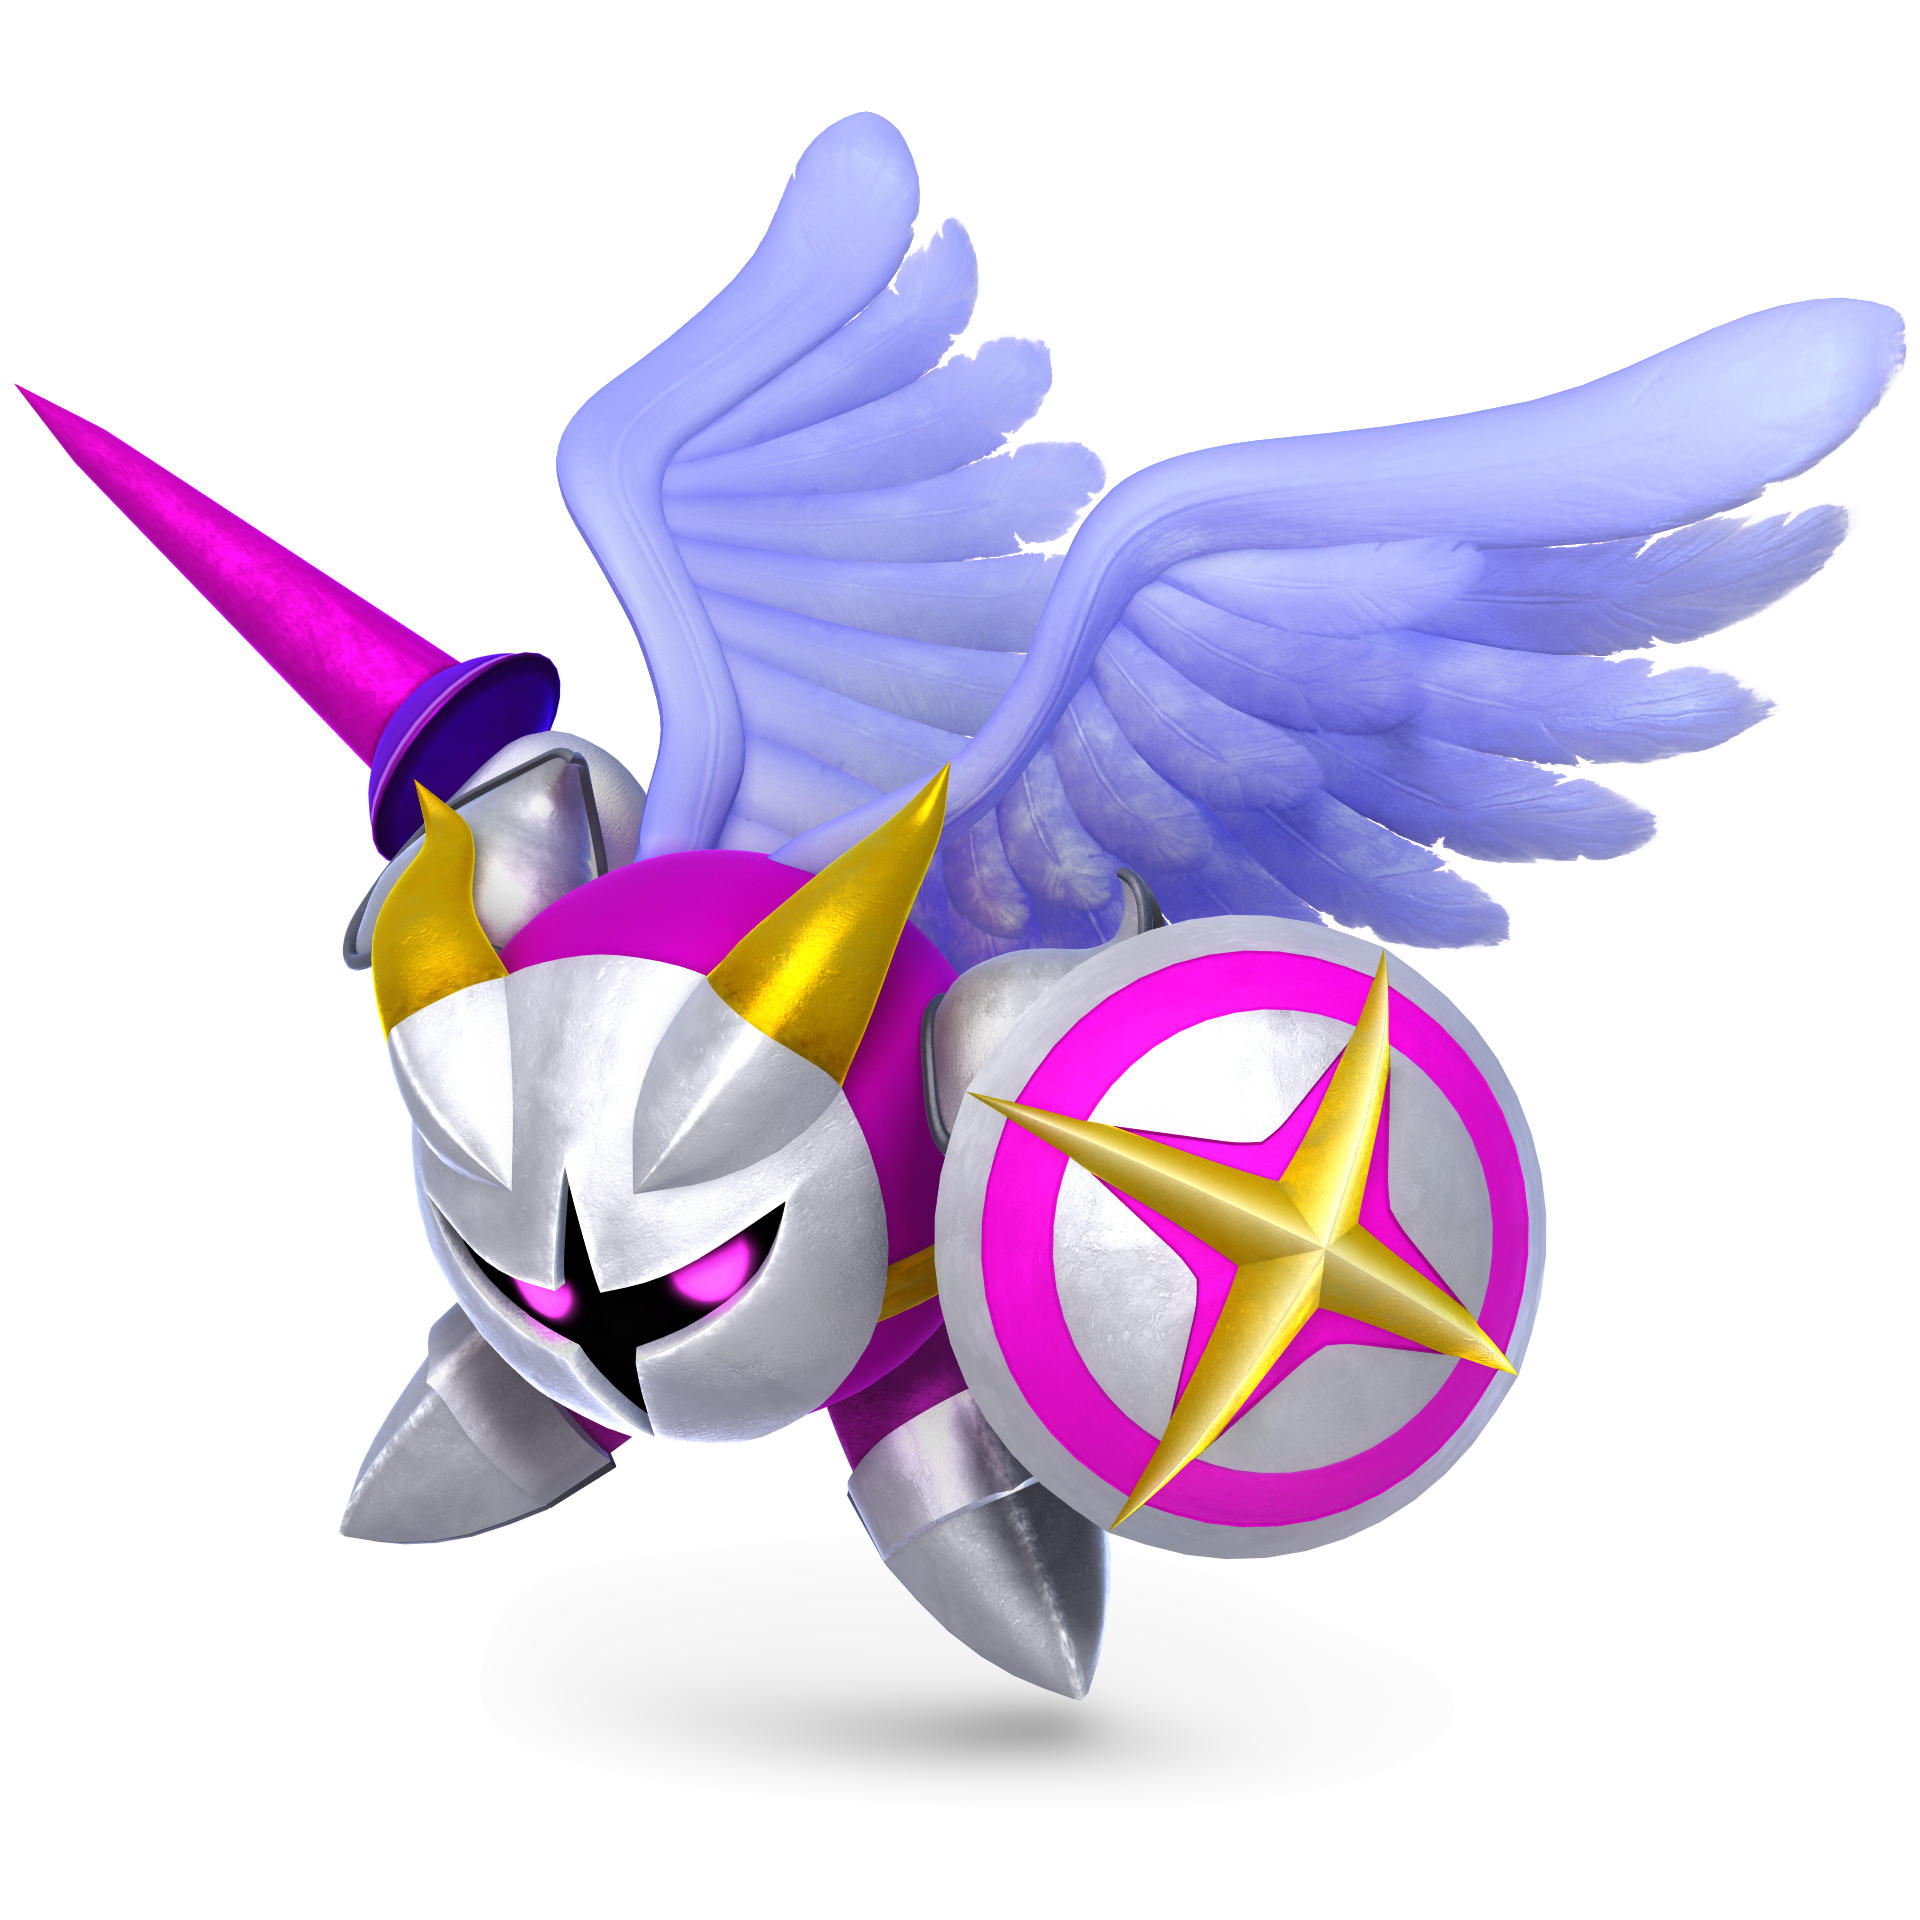
#27ε. Galacta Knight
Kirby
Special Moves

Neutral Special:
Mach Tornado

Spins rapidly and forms a tornado around himself. Button mashing both increases the move's duration and makes Galacta Knight ascend slightly; he can also move left and right. Unlike Meta Knight, the attack does multiple hits of damage like its earlier iterations. Galacta Knight’s has a pinkish hue.

Side Special:
Drill Rush

Galacta Knight rushes sideways, spinning in the fashion of a drill with his spear outstretched. The flight path can be maneuvered up or down, allowing it to function as a recovery option (although it will render him helpless).

Up Special:Shuttle Loop

Galacta Knight soars high into the air, slashing with his lance pointed upwards. He then swoops downward and rises upward in a fast loop, slashing a second time during the ascent.

Down Special: Knight Beam

He summons three light swords, with quite a bit of startup, which will then release at an angle one after the other. After being released they will last for quite a while, and will bounce off of platforms and walls. This move can be angled in every direction except beneath him, unless this moved is used in the air in which every direction can be angled.

Final Smash: Judgement Day

When Galacta Knight triggers his final Smash, a butterfly will land on his spear, transforming him into Morpho Knight. Morpho Knight will lunge, forward and fly upwards. Any opponent caught in the attack will be teleported to the center of the stage for a Greninja/Ike/Cloud style final smash, where Morpho Knight will bertate the opponent with his flame sword. Rather than spike the opponent down however, this final smash will be located at ground level. For the final hit, Morpho Knight will summon two massive swords, Slashing them on both sides of him sending the opponent upwards, and damaging any opponents caught in the crossfire.
Taunts
  • Up Taunt: - Galacta Knight briefly vanishes and performs several light speed dashes before reappearing.
  • Down Taunt: - Galacta Knight wraps himswlf with his wimgs and rises in the air slightly before spinning and laughing menacingly.
  • Right Taunt: - Galacta Knight thrusts his spear forward while saying "Come at me"
  • Left Taunt: - Galacta Turns to face away from the opponent while saying" Weak..." whole his eyes glow brightly.

On-Screen Appearance
  • Appears within a pink crystal and then shatters it before performing a quick slash spin and stabbing upwards.
Idle Poses
  • Spreads his wings slightly.
  • Carresses his sword.
Victory Poses
  • Swipes once to his right, points his lance upwards then stabs the floor. It’s similar to his entrance animation but has more flair to it.
  • Levigtates in the air, expands his wings, and flies off into the air; out of sight. He then swoops down and attacks the screen before zooming off again.
  • Slashes a few times before holding his sword aloft and says "Fear me..."

Classic Mode: The Strongest Warrior
All opponents are characters noted for their immense strength and abilities within their universe. This is because Galacta Knight is seen as the strongest warrior in history and seeks other strong opponents in order to defeat them.​
RoundOpponentStageMusicNotes References
1:ultryu:Suzaku CastleRyu Stage Type BRyu is constantly searching for strong opponents. While he isn’t the strongest character in Street Fighter, he is technically the strongest Street Fighter rep in the roster.
2:ultmewtwo:Spear PillarBattle! Gym Leader (Pokemon Sword & Shield)Mewtwo was one of the strongest Pokemon back in Generation 1 but has since conceded the title to legends like Arceus and Calyrex. Despite this though, Mewtwo still acknowledged as being one of the strongest Pokémon in existence.
3:ultganondorf:Bridge of EldinDeath MountainGanondorf may consistently be defeated by Link in most Legend of Zelda games, he is still a force to be reckoned with. Unlike Ganondorf, Link consistently has to overcome challenges to defeat the King of Evil. Even then, it requires divine intervention of some sort for him to finally finish off the beast.
4:ultpalutena:Palutena's TempleDestroyed SkyworldBeing a goddess, Palutena is light years stronger than most of the Kid Icarus cast. It’s because of her that Pit is capable of fighting as she grants him the power.
5
Night WalkRemix 10Despite his appearance, Barista is one of the most over-powered characters in Rhythm Heaven as he is capable of finishing games for players, gives advice, and hands out stamps.
6:ultsephiroth:North CaveDecisive BattleSephiroth is one of the strongest members of SOLDIER in history who further augmented his power upon transforming into his later forms.
BONUSRacetotheFinish!
Final:ultkirby::ultkingdedede::ultmetaknight:
Great Cave OffensiveKirby Battle Royal: Main ThemeMeta Knight is fought after defeating the first three fighters.The first battle mimics the fight against Galacta Knight in Star Allies while the fight against Meta Knight is a nod to the battle in Meta Knightmare Ultra.

Alternate Costumes

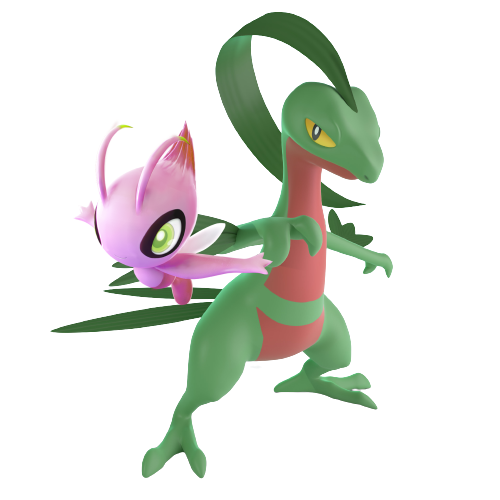
#92. Grovyle & Celebi
Pokemon
Special Moves

Neutral Special: Tossed Item

One of the Storable projectiles pulled from the treasure bag is thrown by Grovyle. If you have no items available then Grovyle will throw a Gravelrock, which travels slowly and does weak damage.

Side Special: Bullet Seed / Leach Seed

Grovyle and Celebi's Side Special is Bullet Seed and Leech Seed. When held down, more seed will come out starting at 2, and ending at 5. Grovyle will shoot down at an angle, and the Seeds will become lodged in the floor similar to Isabelle's Down Special. If the opponent walks over them, they will explode dealing relatively minor damage. They are clumped together, with 5 seeds having a larger hitbox than the 2 seeds. They will all be detonated at once, so the more seeds out will result in more damage being done to the opponent. Leach Sees instead will come out if switched with Celebi. This is identical in function, except it deals significantly less damage and heals Grovyle & Celebi a fraction of that damage.

Up Special: Aerial Ace / Warp Orb

This is a pretty standard recovery, with Grovyle dashing in the air using the move Aerial Ace. This range is pretty poor, somewhere between Falco and Wolf's recoveries. It can also be angled in any direction. Celebi warps and reappears where Grovyle ends up at the end of his recovery during this animation. This move has a single hit hit box on it as well, which is weak but still there.
However, If you have a Warp Orb from your Treasure bag, you will instead Teleport when using your Up Special, giving you intangibility and a recovery with a much larger range.

Down Special: Treasure Bag

Like Hero's Down Special, Grovyle & Celebi's Down Special will open the treasure bag menu from PMD over their stock profile. Unlike Hero's Menu, only one item will appear at a time, with it still being random each time. Additionally, instead of having to cancel out to get a new selection, you can input down to scroll to a new item in the bag. However, you can't scroll back up, so each scroll is a risk, as you may pass on a decent item only to get a worse item, or you can get just the item you need. You can scroll unlimited times, albeit with some frames between each scroll, however being hit will knock you out of the inventory. Grovyle will pull the treasure bag out from behind him during this animation and look through it.
Like Hero's menu, this will also require a meter to use. This time it's the Belly Meter from PMD. It starts at 100, and every scroll of the inventory will decrease the amount of belly you have five per scroll. Unlike Hero's MP bar, this will slowly decrease over time, not increase, to better mirror how it functions in the source game. The bar can be refilled by pulling Food from the inventory, which will be relatively common. If your Belly meter does reach zero, which will take quite a bit longer than Hero's bar does, you can use your neutral air to eat a blast seed to fill your belly meter by enough to pull one item. If its an apple or another food item that is pulled then you can eat it to refill your belly. If it's another item, eat another blast seed to try again. However, as mentioned earlier eating a blast seed will deal self damage so there's a price to letting you belly reach zero.

A sprite of the items you have available will appear above your belly meter, the same sprites from PMD, with up to 8 items being holdable at a time. If a new item is pulled when at your limit, the first item in your inventory will be replaced.

Final Smash: Future of Darkness
Dusknoir appears in front of Grovyle and grabs any opponent and takes them through a time portal. They appear in the dark future, and are ravaged by Sableyes before Dialga performs a Roar of Time, dealing heavy damage and returning them to the present match.
Taunts
  • Up Taunt: Grovyle slashes the air as Celebi flies around it's head
  • Down Taunt: Groyvle gorwls while Celebi tries to calm him down.
  • Right Taunt: Grovyle brushes his blades and Celebi floats in a circle around him.
  • Left Taunt: Grovyvle sits down and rests momentarily while Celebi pats his head.

On-Screen Appearance
  • Grovyle warps in using a Warp Orb followed by Celebi who arrives via a psychic tear.
Idle Poses
  • Grovyle jumps into a cautious stance reminiscent of the portrait for Special Episode 5. Celebi giggles softly.
  • Grovyle brings his leaf blades across each other. Celebi shimmers sightly.
Victory Poses
Note: All voice lines appear as text boxes with portraits as a reference to the source material. These appear above the results HUD.

  • Grovyle faces away from the camera. He turns to the camera with a Time Gear in hand and tosses a Warp Orb at the ground, vanishing in a cloud of smoke. Celebi flies into view attempting to find him.
  • Celebi floats around the screen saying “With our power,” cheerfully followed up by a leaping Grovyle that finishes her sentence, “we can surely change the future.”
  • Grovyle appears a series of lead-infused cuts and then does a backflip as Celebi zooms in and flies underneath while sparkling with psychic power. They then pose with their backs pressed against each other.

Classic Mode: Baack to the Past
Opponents are all characters who have traveled back in time. In addition, the stages are set to stage morph and include those within the same series, unless not applicable, to simulate “time travel”.​
RoundOpponentStageMusicNotes References
1:ultness:Onett / MagicantCease to Exist
Ness time travels to when Gyigas was most vulnerable.
2:ulthero:Yggdrassil's Tower / Find Miitopia
(Battlefield)
The Time of a Decisive BattleThe Luminary is given is given the power to go back in time and defeat the villain.
3:ultsonic:Green Hill Zone / Chemical Plant ZoneStardust Speedway Bad Future (JP)Sonic gets sent back in time by Eggman.
4:ultlucina:Arena Ferox / Castle SiegeDestiny (Ablaze)Lucina goes back in time to save her father's life
5:ultmario::ultluigi:Peach's Castle / Paper MarioGritzy DesertMario and Luigi travel to the past to fight off an alien invasion.
6:ultyounglink:Hyrule Castle / Great BayThe Ocarina of Time MedleyYoung Link slept in the Sacred Realm while time went by outside. He was able to travel back and forward in time to complete his quest to defeat Ganondorf.
BONUSRacetotheFinish!
FinalMMaster Hand & Crazy HandSpear Pillar (Omega)Diagla’s Fight to the FinishThat style went out of fashion long ago!

Alternate Costumes

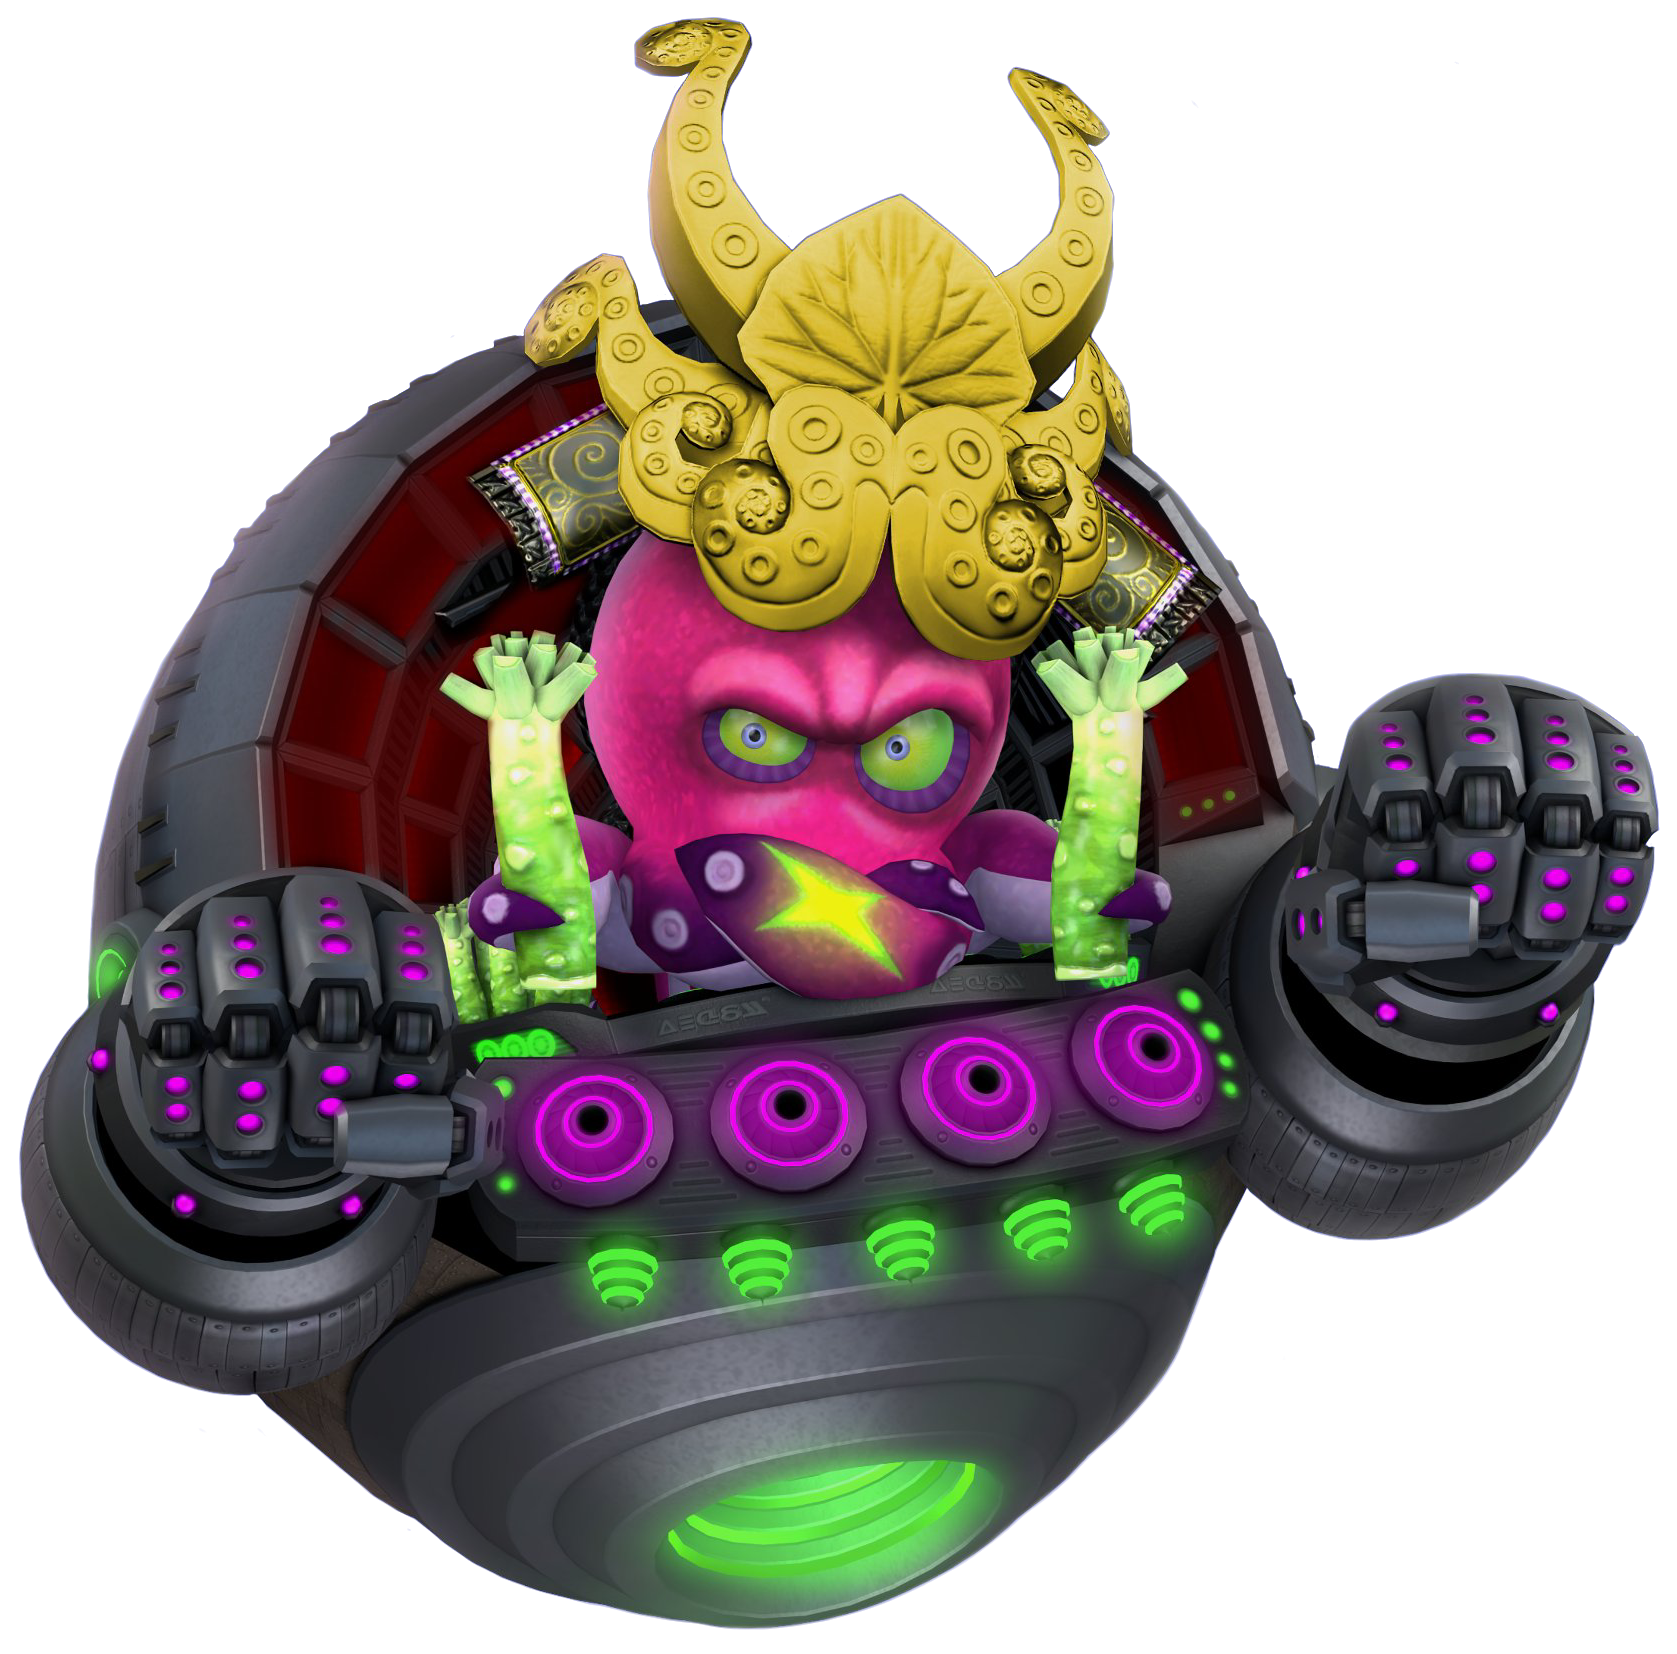
#93. DJ Octavio
Splatoon

Submitted by: Krookodilian Krookodilian
Special Moves

Neutral Special:
Octorpedo

It travels in an arc, quite slowly, however dealing heavy damage if it connects and applying the ink effect as well. two missiles can be fired at once, making it quite hard to avoid since they arc, if one is launched in the air followed by one launched on the ground. Additionally, if Neutral B is held down, a larger version of the Octorpedo will be launched instead, which comes out much faster and deals much more damage, almost breaking a full shield.

Side Special:
Octowhirl

DJ Octavio's mech would flip one its side, begin to charge, and spin horizontally, traveling across the stage or in the air similar to Jigglypuff's or Bowser Jr's Side B. This gives him a much needed movement option, as well as leaving a trail of ink behind giving him stage control.

Up Special: Octoshower

4 Octocopters would appear and lift Octavio up. These octocopters can be killed similar to how Villager and Isabelle's balloons can be popped. This distance traveled would be comparable to that of Isabelle's, with it decreasing with consecutive uses, as fewer Octocopters will appear. The octocopters will fly away once the recovery is over or the ledge is released, with an extremely weak hitbox on them, similar to Snake's recovery.

Down Special: Takoyaki Bomb

DJ Octavio will launch a Takoyaki bomb, and it will briefly roll before coming to a stop. after one or two seconds it will swell and explode into a geyser of ink. While the geyser won't last as long as they do in his boss battle, it would deal more damage than Isabelle's Down Special, in a multi hit fashion. If the bomb is hit before it can explode it will be disarmed and not explode, instead simply disappearing.

Final Smash: Dubstep Disco Destruction

DJ Octavio's mech turns into a Disco Ball and it floats up to the center of the screen, similar to Lucario and ZSS. Then DJ Octavio drops a beat and his Octarian army is summoned while an Octarian remix of Calamari Inkantation plays. The Octarian army includes Octocommanders firing their Gatling guns from floating platforms, Octocopters firing Ink balls, Octobombers firing Splat Bombs, and Flooders covering the floor with ink. The attack ends with an Octozeppelin crashing into the stage causing an explosion of ink, dealing strong knockback and damage. Similar in effect to Ness and Lucas's final smashes where a barrage of projectiles come down, this time ink edition.
Taunts
  • Up Taunt: DJ Octavio performs several disc scratches.
  • Down Taunt: Lights and lasers shoot up around DJ Otcavio as he spins around in his mech.
  • Right Taunt: He slams his tentacles down on his mech which causes a sudden disc scratch sound.
  • Left Taunt: Waves his wasabi in a dance formation.

On-Screen Appearance
  • He is seen with his back to the opponent but then turns his mech around and does a DJ scratch.
Idle Poses
  • DJ Otcavio does a disc scratch.
  • Adjusts his helmet
Victory Poses
  • DJ Ocatbio pulsates with music as he DJ's up a storm; lights flashes up all around him.
  • He tosses two Wasabi in the air and then holds his arms as they land dramatically upright.
  • Two Sanitized Octolings appears in front of DJ Octavio as he plays music.

Classic Mode: Mech-tacular Performance
All opponents are characters who, at one point in time, piloted a giant mech or there were allusions that they did in their home series.​
RoundOpponentStageMusicNotes References
1:ultmario::ultluigi:Paper MarioMixed-up ScrambleMario and Luigi on The Paper Mario stage references the mech, Papercraft Mario from Mario & Luigi: Paper Jam.
2:ultmegaman:Central HighwayOpening StageWhile Mega Man never piloted a mech, X does multiple times via Ride Armor in Mega Man X. Mario Circuit (Brawl) references the opening stage for Mega Man X.
3:ultbrawler:Art AcademyLabo ThemeMii Brawler wears the Nintendo Labo outfit.The Mii Brawkee, outfit, and stage is a reference to Nintendo Labo Toy-Con 02.
4:ultpit:SkyworldLightning Chariot BasePit once piloted a mech called the Grand Sacred Treasure to battle Hades in Uprising.
5:ultkirby:Gigabyte RuinPink Puffball - Activate!Kirby presents the game Kirby: Planet Robobot where Kirby pilots a mech
6:ultbowserjr::ultlarry::ultroy2::ultwendy::ultiggy::ultmorton::ultlemmy::ultludwig:Bowser's CastleAirship Theme - Super Mario Bros. 3Bowser Jr and the other Koopalings are all characters who pilot a mech-like vehicle in combat.
BONUSBreaktheTargets!
Final
Dracula
Chemical Plant Zone (Omega)Both DJ Octavio and Dr. Eggman are newcomers in Infinite and utilizes mechs.

Alternate Costumes

#94. Reimu Hakurei
Touhou Project
Special Moves

Neutral Special:
Hakurei Amulet

Reimu throws out a homing amulet at her opponent. Holding the button increases the size, speed, and power of the amulet, at the cost of weakening the amulet's homing capabilities. The Options fire smaller amulets alongside Reimu's, with similar properties. Based on the iteration of the move used in the fighters.

Side Special: Yin Yang Orb

Reimu throws a large Yin-Yang Orb at the opponent. If it hits a solid surface, it will bounce off of it. The attack can be angled diagonally upwards or downwards, depending on the input. Based on the Yin-Yang Orb moves from the fighters, specifically her held B from Antimony of Common Flowers.

Up Special: Ability to Float

Reimu rises into the air, much like R.O.B.'s up special. Like R.O.B., Reimu does not go into freefall after using the move, allowing her to continue moving and attacking as usual after the button is released. During this move, Reimu is capable of Grazing. An adaptation of Touhou's common ability of flight, Reimu's personal ability to float, and the Focus mechanics of the shooters.

Down Special: Cautionary Border

Reimu uses her talismans to form a square-shaped barrier in front of herself. This barrier will linger for a short amount of time, and destroys all but the strongest projectiles, but will also take damage over time. After taking about 20%-40%, the barrier will break. The size and durability of the barrier increases the more Options Reimu has. Reimu cannot send out a second barrier until the first has dissipated. Based on her Cautionary Border special from Hisoutensoku.

Final Smash: Fantasy Seal

Reimu creates a storm of multicolored orbs that home in on opponents, dealing damage all over the stage. She then ends with one final giant rainbow orb, dealing massive damage to the closest opponent. Based on her signature move and most common Bomb/Spell Card.
  • Alternate Final Smash - Fantasy Nature: If Reimu's opponent is at 70% or higher (Two opponents with 3-4 players, four in matches of 5-6, and six in games with 7-8), she will send out a burst of energy and talismans, dealing massive damage in a wide radius and instantly killing anyone over 100%. Notably, Mystic Oriental Love Consultation (End of Century) from Hisoutensoku will start playing during the Final Smash, and will continue to do so during the results screen if the match is ended with this attack.
Taunts
  • Up Taunt: Reimu throws her Gohei upwards and lets it fall back into her hands while she laughs.
  • Down Taunt: Reimu kneels on the ground sipping on a cup of tea. Her face has an open smile with rosy cheeks and closed eyes. She says "Ahh, this is nice."
  • Right Taunt: Reimu poses as if she's declaring a Spell Card while saying "Come at me! Or not! Tee hee."
  • Left Taunt: Reimu holds out her arms as a rainbow of colors floats around her.

On-Screen Appearance
  • Reimu will fly from the background and stop at her spawn location before taking the stance similar to what she does in Hopeless Masquerade onwards.
Idle Poses
  • Giggles to herself.
  • Waves her hand in from of her which causes a breif yin-yang symbol to appear.
Victory Poses
  • Reimu will land near her donation box. She will then open it up to look, then sigh in disappointment at finding it empty.
  • Reimua sweeps the ground before spinning the broom while looking surprised and then points it forward while saying" SO, you've come, huh?!"
  • A swirl of sakura petals erupts as Reimu appears amongst it and then holds out a ofuda paper charm. He then says "Better late than never, huh?"

Classic Mode: Radiance of Chromatic Cross
Stamina battles against projectile-heavy females who mainly utilize their projectile attacks. Stages are also traveling or transformative stages.​
RoundOpponentStageMusicNotes References
1:ultpeach:Rainbow CruiseEternal Shrine Maiden (Highly Responsive to Prayers)Peach primarily uses her Neutral Special
2:ultzelda::ultsheik:Spirit TrainThe Gensokyo the Gods LovedBoth fighters primarily use their neutral special
3:ultpalutena:Poke FloatsThe Gensokyo the Gods LovedPalutena primarily uses the neutral special and side special
BONUSRacetotheFinish!
5:ultgunner:Pilot WingsMii Gunner primarily uses the neutral, side, and down special attacks.
6
Big BlueNecrofantasiaJill primarily uses neutral and side special attacks.
BONUSBreaktheTargets!
Final:ultbayonetta:Pac LandStirring an Autumn Moon ~ Mooned InsectBayonetta favors using the neutral special attack,

Alternate Costumes

#95. Officer Howard
Astral Chain
Wikia Link
Moveset Link

Submitted by: @airConditioner
Special Moves

Neutral Special:
Summon Legion / Send Legion / Dismiss Legion

Lightly tapping the special button will call the Legion. The Limiter Gauge will begin to decrease. If the Legion is called in the air, it will fall along with Officer Howard. It can be moved as it is falling.

Holding the button while moving the move button will move the Legion. The Legion is free to move on the ground while holding the button, though it cannot exceed the distance of the Astral Chain.

Lightly tapping the special button again will dismiss the Legion. The Limiter Gauge will stop decreasing and begin to recharge.

Side Special:
Legion Action
The current active Legion will perform its Legion Action. Every action will call it towards Officer Howard. Using this move without a Legion active will summon it to use the action and dismiss it right after. See the Legion section for actions.

Up Special:
Chain Jump

Officer Howard will send the Sword Legion out (regardless of which Legion is active or selected) and throw it a set distance. After it is thrown, it will pull Officer Howard towards it, Officer Howard dealing light damage as they fly towards their Legion. If used offstage, it will become a Tether Recovery.

Down Special:
Legion Skill

The current active Legion will perform a set skill. Each action will decrease the Limiter Gauge by one bar, unless stated otherwise. Using this move without a Legion active will summon it to use the skill and dismiss it right after. See the Legion section for specific skills.

Shield Special: Legion Switch
Officer Howard will switch Legions. Legions can be switched while active. Functions similarly to Monado Arts, where the player can either continuously tap the button for the Legion they want, or hold to choose Legion. The order will be Sword -> Arrow -> Arm -> Beast -> Axe. The selection menu will have that order clockwise. The currently selected Legion will have its icon displayed in the damage display. This selected Legion will be the one to be sent out if no Legion is currently active.

Final Smash:
Legion Sync Attack Finish

Officer Howard begins by riding the Beast Legion a short distance with the Gladius equipped. Anyone hit by this hitbox will be sent into the cutscene, based on the final combo against the true final boss of the game, though sped up to decrease time taken.

It begins with Officer Howard dragging the opponent on the ground with the Gladius while the Beast Legion dashes forward, then the opponent is launched into the air, where Officer Howard summons and wears the Arm Legion to do a rapid flurry of punches. As the opponent is suspended in the air, the Arrow Legion fires a charged shot at the opponent. Officer Howard calls the Axe Legion to jump up and bring the enemy downwards with a slash. As the opponent is on the ground, Officer Howard and the Sword Legion perform a Chain Bind. This part will deviate from the cutscene and FILE 10 SPOILER Officer Howard will tear out the Legatus core and implant it into their heart, fusing officer and Legion and performing a final attack which ends the cutscene and launches the enemy.
Taunts
  • Up Taunt: Officer Horward breifly unleashes the Legion who then slashes forward. If the Legion is out, it does a dramatic slash. He will say "Come forth, Legion!"
  • Down Taunt: Officer Howard pulls out a comically oversized avalanche special ice cream and drops it, then looks at the spilled ice cream longingly.it references an ice cream minigame.
  • Right Taunt: A phone call symbol appears in front of Officer Howard who then says "Meh, I will take it later.
  • Left Taunt: Lappy appears and does two fist bumps into the air before leaving. Officer Horward says "Hey, it's Lappy!"

On-Screen Appearance
  • Officer Howard shows up on a motorcycle like in the first few moments of the game, then in stark contrast with Wario, does an amazing and graceful flip jump off of it before landing on the ground and taking out the X-Baton.
Idle Poses
  • Shuffles his/her feet.
  • Runs his/her hand through his/jher hair.
Victory Poses
  • Officer Horward lands from above and then takes their batons and slashes three times before posing.
  • Summons the Sword Legion as they perform a spinning slash attack together.
  • Appears along with their twin sibling and they both perform a pose together while brandishing their batons.

Classic Mode: Legion Assault
Opponents are based on enemies found in AstralChain; in particular Chimeras. Stages are also based techno/sci-fi themes.​
RoundOpponentStageMusicNotes References
1:ultsteve::ultalex::ultvillager::ultvillagerf:Mario GalaxyArk MallSteve, Alex, and the Villagers represents the humans encountered as enemies in the game.
2Dark
:ultlink::ultdarksamus:
Lylat CruiseInvaders from Another WorldDark Link and Dark Samus represents the Aberration, corrupted beings who used to be human.
3Red
:ulthero:
BrinstarLegion AssaultHero represents the foot soldier, HUM-C-84DF5-00.
4Black
:ultmewtwo:
Tiny
:ultrob::ultrob::ultrob::ultrob:
MidgardAwakeningThe R.O.B.s primarily use the Neutral Special.Mewtwo represents the named Chimera known as Eris who uses four satellite units.
5Giant
:ultridley:
Space Frigate OrpheonHomonculas BRidley is based on the appearance to Homunculus α along with the stage.
6Red
Officer Howard
Astral PlaneDark HeroThe alt will be the different gender to what was initially chosen. The Male version or Female version depends on which alt was chosen.Officer Howard references the Akira-Legion Fusion
BONUSBreaktheTargets!
FinalRathalosRathalos Boss ArenaSaviorRathalos looks like a Chimera and is red.

Alternate Costumes

#96. Dr. Eggman
Sonic the Hedgehog
Wikia Link
Moveset Link
Special Moves

Neutral Special: Badnick

Releasing his hand from his trusty mech, and briefly taking out a comical-looking hand radio, Eggman yells "Attack!" or "Deploy here NOW!", before one of six Badniks arrive to fight alongside him. One of the following may be summoned in a cycle, and only one of each Badnik can be out at a time. There is no time limit to these grunts, as they stay on the field till they are defeated. This is Eggman’s main gimmick, which he uses to overwhelm his opponents. Say hello to Eggman's lovely cycle of Badniks! (Move by GolisoPower GolisoPower )
  • Motobug: A speedy little robot who's all about taking the ground side of things. Dude's as fast as Fox's dash and deals 8% damage per every time he hits an opponent.

  • Caterkiller: These little guys are slow, but every part of its body is an active hitbox, hitting anyone for 5% damage. They can only be hit on the head portion of the robot. Otherwise, it will damage any opponents.

  • Buzz Bomber: A bee-shaped Badnik who flies across the skies and occasionally fires a single projectile at a downwards 45 degree angle. They deal 6.5% damage and some medium knockback, but they're helpless while flying.

  • Orbinaut: A stationary enemy that causes spiked metal balls to orbit around it, alternating between close to the body and far. You can try to kill them, but you'll have to wait until there's a big enough gap in between the spikes. Running into a spike deals 7% damage.

  • Eggrobo: For the first time since Smash 3DS, the Eggrobo makes a return! He works partially like a cross between Orbinaut and Buzz Bomber, being stationary and firing at anyone in range, just like what it does sometimes in Smash Run! What makes the Eggrobo different is that it takes 3 hits to kill, unlike the previous four.

  • Egg Pawn: The final robot to summon, the Egg Pawn is armed with a spear and a shield. The shield defends any projectiles passively like Link and Hero, while he jabs with the spear at anyone who gets close enough to the Egg Pawn. Much like the Eggrobo, the Egg Pawn takes three hits to destroy.


Side Special: Egg Hornet

The E-Mech starts to transform, until it becomes a miniature version of the Egg Hornet from Sonic Adventure. Afterwards, Eggman will fly forward in the Hornet in an arc somewhat similar to Shiek's Bouncing Fish. The Hornet gains a fire outline like in the clip, dealing chip damage to those who touch it, with the Hornet being the main hitbox. While the move has an abysmal startup, it pays off, dealing a hefty amount of damage to opponents hit by it. When they are hit by the move, they will either be launched diagonally upwards, forwards, or diagonally downwards (spike), depending on which part of the move they were hit by. This move kills around 80% and is a good burst option to catch your opponents off guard. But just like in Sonic Adventure, if Eggman hits the ground at the end of the move, he'll become lodged into it for about as long as Luigi would be stuck in the side of the stage from a Misfire. This is your chance to strike!
This move can also be used as a recovery option as it does snap the ledge. However, it will not stop for a while if it doesn't hit the ground, so be wary of that. (Move by Janx_uwu Janx_uwu )

Up Special: Egg Mobile

His up special, Egg Mobile, folds the legs of the Egg Walker E-Mech in and allows players to make Eggman fly - more like controlling a spaceship in a shmup than a platformer character. During Egg Mobile mode, Eggman can perform aerial attacks and specials without leaving the mode, and can disengage it with the shield button. However, there's a catch - the Egg Mobile has limited fuel, pictured next to Eggman's damage meter. It's modelled after his health meter from Sonic Adventure 2. Egg Mobile mode drains fuel. It's a little similar to R.O.B.'s Up Special that way. However, unlike Robo Burner, it recharges based on proximity to an opponent. The closer to an opponent, the more of those squares on the top of the gauge will light up yellow, and the faster the gauge will recharge. This applies while active, too - normally, the drain is pretty quick, but the proximity recharge rate cancels out some of the drain. In fact: at close distances, you won't use any fuel at all. Heck, depending on balance, you might even get a little bit back. The importance of this whole fuel mechanic is that Eggman can't just park himself too high to hit, but can still be in this flight mode for a majority of the time good while, as long as he uses it to approach his opponent instead of running away. After all, Eggman is usually in a flying machine. (Move by ahemtoday ahemtoday )

Down Special: Giant Laser

An allusion to the Giant Eggman Robo Boss Fight in Sonic & Knuckles. The E-Mech’s belly opens up and by using the powers of the Master Emerald, it fires a huge one-hit laser that goes offscreen. This attack has a 10-second cooldown between uses, and Eggman can move slowly left or right with before he actually fires the laser. This move deals 35% damage with huge knockback. (Move by Perkilator Perkilator )

Final Smash: Death Egg Robot

The iconic boss of Sonic 2, Eggman leaves the stage and enters the Death Egg Robot. It functions much like the Sonic Generations iteration - Or Giga Bowser - Where Eggman aims at an opponent and delivers a mighty punch from the background. This deals 45% damage and has the knockback you expect from a strong Final Smash. (Move by SharkLord SharkLord )
Taunts
  • Up Taunt: Eggman stands on top of the E-Mech and raises his right arm high before bowing towards the screen gracefully.
  • Down Taunt: Doctor Egan puts his hands on his sides and belts out his signature "HOOO-HO-HO-HO-HO" laugh.
  • Right Taunt: Takes out a Banana and eats it.
  • Left Taunt: Holds up a Egg Prawn and laughs manically.

On-Screen Appearance
  • Eggman lowers to the ground aboard the Eggmobile, and it quickly transforms into the E-Mech.
Idle Poses
  • Eggman gently strokes the right side of his mustache.
  • Eggman slams a fist on his console as if upset.
Victory Poses
.
  • Eggman gets out 6 Chaos Emeralds and does this from the bad ending of the first Sonic game.
  • Eggman laughs hysterically as Egg Robos descends towards the camera.
  • Slams his hand on his mech and raises a fist forward while say "I will get you Sonic!"

Classic Mode: Blue Blur Battle
Dr. Eggman's opponents are against characters who are blue, a reference to his nemesis, Sonic.
RoundOpponentStageMusicNotes References
1:ultmegaman:Wily CastleScrap Brain Zone
2:ultfalco:CorneriaI am (All of Me)
3:ultgreninja:Kalos Pokemon LeagueWonder World
4Officer HowardAstral PlaneMoonlight Battlefield (Aqua Road)
5:ultlucario:Pokemon StadiumWork it Out
6:ultmarth:Gran Mach MonastaryKnight of the Wind
BONUSBoardthePlatforms!
Final:ultsonic::ultgunner:Chemical Plant ZoneDeath Egg RobotMii Gunner utilixes the Tails Mii Costume

Alternate Costumes

#97. Marin
The Legend of Zelda
Wikia Link
Moveset Link​
Special Moves

Neutral Special:
Legend of Songs
Pressing the special attack button will cause Marin to pull out her Surf Harp, and 6 empty rectangles would appear above her. During this time, Marin can’t move during this but can cancel out by hitting the Neutral Special again. Please note that attacking out this in the middle of battle results in a significant attack startup lag, since you will have to input the entire song. When initiating the harp sequence, players can input the control stick to the right, left, up or down which will initiate a song, these directions would appear within the empty rectangles when inputted. Please note doing this attack while in the air and over the ledge can result in a self-destruct if not performed quickly enough. While Marin is technically from Link’s Awakening, she has appeared in various Zelda games in different forms and names. One such form is Malon from Ocarina of Time. It’s fitting that she would be able to use music from these games to use in battle. Once the first 6 notes have been played, Marins performs the move she's chosen as the rest of the song she played quietly plays out in the distance. She has a total of 11 songs pulled from various Zelda games.

Side Special:
Sea Bubble
Marin releases a watery bubble, its course of trajectory heavily depends on what side you tilt the Side-Special. If held to the side in the center, it will follow a completely horizontal path, if tilting upwards the sea bubble will slowly follow an upward arc, opposite applies to tilting it a bit downwards. Compared to other projectiles, it is only a bit slower to get out.

Up Special:
Cucco Wings
Marin rapidly takes out a Cucco and lifts it above her. The Cucco flies upward while carrying Marin with all of its power before getting visibly tired and slowly falling to the ground. It is maneuverable and covers a decent amount of vertical and horizontal distance depending on how it is maneuvered. Once Marin either lands with the Cuccoo in her hands, or once the Cucco gets tired, the Cucco would simply flap out of her hands and vanish away.


Down Special:
Conch Horn
Marin takes the Conch Horn out and starts playing on the conch shell. As she leans a bit forward facing the screen while blowing it, coming out the other side of the Horn comes a big sound that takes form around her. This results into all her water attacks getting slightly buffed (a 1.2% multiplier in both damage and knockback) for around 15 seconds, this multiplier cannot stack and if performed again within the 15 seconds it will not be applied. This move takes a while to get out, and everyone caught in the sound gets dealt 8% damage, with medium knockback. To give an idea, it kills around 90% at the ledge. This horn is based on one of the eight instruments in Link's Awakening.

Final Smash:
Ballad of the Wind Fish

Marin will call forth a splash of water that will transport the opponent caught in it into a cutscene. (8%)
The cutscene will be reminiscent of the ending of Link's Awakening. Marin will play the 8 instruments near a sleeping Wind Fish, causing it to wake up. Its awakening will cause the dream world to disappear, and the opponent to disappear along with it in a light. Marin is returned to gameplay, where she wipes her eyes groggily, and the opponent is sent flying. (46%, instant KO at >100%)
Taunts
  • Up Taunt: Marin waves her bell up high and waves it back and forth which causes it to clang.
  • Down Taunt: She does a cute curtsey to the opponent and giggles.
  • Right Taunt: She takes out her Harp and strums it quickly while singing a few bars.
  • Left Taunt: Does a spin and then laughs before adjust the flower in her hair as it slips off slightly.

On-Screen Appearance
  • Marin is seen sleeping and then wakes up, yawns, and readies herself.
Idle Poses
  • Marin fluffs her dress.
  • Giggles to herself
Victory Poses
.

Classic Mode: The Ocean Maiden
All opponents are against fantasy-based characters in a seaside setting which is a reference to the ocean-focused theme of Link's Awakening. Also, every character comes equipped with one item from Legend of Zelda from the start of the match.

RoundOpponentStageMusicNotes References
1:ultrobin:Tortimer's IslandOpponent is equipped with a Beetle.
2:ultpyra:Great BayOpponent is equipped with a Cucco.
3:ultjoker:Delfino PlazaOpponent is equipped with a Bombchu.
4:ultlucina:Wuhu Island (Beach Phase)Opponent is equipped with a Gust Bellows.
5:ultsimon:Pirate ShipOpponent is equipped wih a Spinner.
6:ultolimar:N. Sanity BeachOpponent is equipped with the Bunny Hood
BONUSBoardthePlatforms!
Final:ultlink:Koholint IslandOpponent is equipped with a Fairy Bottle

Alternate Costumes

#16ε. Impa
The Legend of Zelda
Special Moves

Neutral Special:
Knife Storm

Impa accumulates up to three knives and throws them forth at light speed similarly to Sheik's Needle Storm but half the projectiles. This variation uses knives instead of needles which is more in line with what Impa uses in her playable appearances. Knife Storm will also go through players and does more damage to shields taking inspiration from Sheik's second custom move for her neutral special, Penetrating Needles.

Side Special:
Flashbang

This is a slower version of the Burst Grenade that Impa uses to her advantage. The difference in effect is also apparent, as she deals 9.5% damage as opposed to Sheik's 14.6%, but in turn, anyone facing the explosive will be immediately stunned, as though they were hit with Mewtwo's Disable. Being directly in the blast radius, meanwhile, will stun regardless of orientation. However, the stun doesn't affect airborne opponents, and being inside the blast will simply launch them. You would think she was using a Deku Nut on a trigger with this, and she just might be.

Up Special:
Vanish

This would be very similar in function to Sheik’s but, instead of simply producing a cloud of smoke, it produces paper talismans that swirl about upon vanishing and reappearing.

Down Special:
Bouncing Fish


Final Smash:
Shiekah Dance
Taunts
  • Up Taunt: She slams her hand onto the ground which causes the SHeikah symbol to appear briefly under her.
  • Down Taunt: She waves her hand mysteriously in front of her which causes magic to pour out.
  • Right Taunt: She transforms into a Sage spirit state and moves about quickly before reforming. During this time, she can't be damaged. It's a reference to Impa's role as a Sage in OoT.
  • Left Taunt: She sits down and patiently meditates before jumping back up; referencing her pose as her older self in SS.
On-Screen Appearance
  • a Deku Nut drops down from the sky and as it explode on the ground it reveals Impa in which she immediately throw her black cloak away and gets on a fighting pose.
Idle Poses
  • Wipes her brown while focusing.
  • Stands up straight and performs a magical sigil sign.
Victory Poses
.
  • She performs three flips before landing and vanishing in a puff of smoke.
  • She appears along with Skyward Sword Zelda. She realizes the "camera" is close by and shields Zelda by pushing her behind herself and stretching her arm to guard the princess.
  • She waves her cloak in front of her before turning to leave.
Classic Mode: Midnight Bout
Impa will fight characters that relate to being stealthy fitting with her nature as a member of the Sheikah tribe. The stages will also be night themed stages.
RoundOpponentStageMusicNotes References
1:ultgreninja:
Grovyle & Celebi
Prism TowerVictory Road - Pokemon X / Pokemon Y
2:ultjoker:MomentosBeneath The Mask
3:ultsnake:Shadow Moses IslandTheme of Tara
4Jill
Leon
Raccoon CityUnstoppable Nemesis.
5:ultenderman:Find MiiEnderman
6:ultsheik:Mishima Dojo (Omega)The Legend of Zelda Medley
BONUSRacetotheFinish!
FinalDemon King GanonGanon's Tower RuinsDeath Mountain

Alternate Costumes
1646536032359.png

#98. Crazy Dave
Plants vs Zombies
Moveset Post

Submitted by: Krookodilian Krookodilian
Special Moves

Neutral Special:
Defensive Plants
Dave has access to five total Defensive Plants that he can use with two being upgradeable. These are:
Sunflower: Costs 15 Sun. It bounces idly and produces 50 Sun every 3 seconds. The Sunflower would glow a bright yellow as it does so and the Sun would automatically add itself into Dave’s counter.
Twin Sunflower:
Costs 125 Sun. The Twin Sunflower would behave exactly as its downgrade, but instead of spawning 25 Sun, it would spawn 50 Sun (25 per Sunflower, of course). It also spawns Sun in 3 second intervals, but it is more durable (though not by much)
Torchwood:
Costs 100 Sun. Any pea that passes through the torchwood will have its damage multiplied by a factor of 2, leading to massive amounts of damage if a full gatling pea + torchwood combo lands. It has more health than a standard plant, and does not deal contact damage despite the fire.
Wall-nut:
Costs 50 Sun. Pretty simple, a wall-nut will sit there and soak up damage. Acting like a Minecraft block, it cannot be passed through, and will need to be jumped around. However regular peas and other Dave plant projectiles will be able to pass through it.
Tallnut:
Costs 125 Sun. The Wall-nut can be upgraded to the Tall-nut. It will act the same as a wall-nut, except it will be twice as sturdy and around 2.5 times as tall, requiring multiple jumps for some characters to climb over.
Garlic:
Costs 100 Sun. In Smash, the Garlic will release smelly fumes every few seconds with a radius equivalent of a 50-MP Magic Burst that flips opponents, like Mario’s cape does, making it difficult for opponents to hit Crazy Dave while he's close by, as well as a dangerous edge guarding tool.
Escape Root:
Costs 225 Sun. When placed, the Escape Root won’t do anything at first, however, when neutral special is inputted on the ground while the Escape Root is planted, Dave will be taken to the Escape Root’s location and it will disappear after. This can be used for extreme combos and avoiding nasty situations.

Side Special:
Turret Plants
Dave has access to five Plants with three upgradeable ones.
Peashooter: Costs 100 Sun. When a Peashooter is planted, they will routinely fire peas at the closest enemy damageable entity in a medium interval. Whichever way Crazy Dave was facing when he planted them will be the direction it will fire too. The Peashooter will automatically aim either up or down depending on where the closest player is but only slightly. Their peas are also fairly weak doing minimal damage and flinching but this will put some pressure on the opponent and can lead into combos from Crazy Dave.
Split Pea:
Costs 125 Sun. The Split Pea will fire weaker shots behind it and has less of an angle when aiming but keeps pressure on both sides of the stage.
Repeater:
Costs 200 Sun. The repeater will act identically to the peashooter, except will fire two peas instead of one, dealing twice as much damage in total.
Gatling Pea:
Costs 250 Sun. The Gatling Pea can be upgraded from the repeater, and will fire four peas at once, dealing four times as much damage as the peashooter in total. This will keep the opponent in hit stun or in their shield for quite a while, leaving them open to be punished, however it costs a lot of sun to get to this plant.
Kernal Pult:
Costs 100 Sun. When planting this guy, the Kernel-pult will throw nuggets of corn the size of Pikmin at opponents, dealing a measly 4% damage per kernel and deals hitstun. However, there's a 25% chance that they will launch a large block of butter if all things that deals double the damage, and inflicts the Butter effect, which is essentially a stun.
Melon-pult:
Costs 300 Sun. The last of the pult family in the first Plants vs. Zombies, the Melon-pult is the heaviest hitting of the three. It will lob melons every few seconds at opponents, which deal 17% per successful hit and 4% in splash damage if anyone gets hit by melon shrapnel.
Winter Melon:
Costs 200 Sun. One of the plants Dave sells at Crazy Dave's Twiddydinkies, the Winter Melon is an upgrade to the Melon-pult. It hits even harder than its counterpart and has a slowing effect to boot. It will attack at the same rate as the Melon-pult, but it will deal slightly more damage (24%) and its projectiles will inflict a slowing effect on the enemy's movement for a short amount of time.
Bloomerang:
Costs 175 Sun. The Bloomerang will fire off boomerangs at a slower rate than that of a peashooter, which will fly around 3/4 of a stage distance before traveling back, being able to hit the opponent once in both directions, similar to K. Rool's crown. It is a relatively slow moving projectile, but deals more damage than a peashooter.

Up Special:
Blover
Crazy Dave raises his a pot with a Blover that grew out of it. It would then spin its leaves, causing it to propel Crazy Dave upwards. It’s very similar to K. Rool’s Up Special, but the Blover can last longer than K. Rool’s propeller pack in exchange for not dealing as much damage. Once finished, the Blover would retreat back into its pot, causing Dave to go into free fall with a confused look on his face.

Down Special:
Trap Plants

Dave can access five plants with one plant being upgradeable.
Potato Mine: Costs 100 Sun. This explosive land mine functions much like Snake’s Down Special. Dave buries the Potato Mine who lies in wait for opponents to walk by. Once they do, the mine explodes with a SPUDOW!, provided its had enough time to arm itself. It has a high radius of damage with more damage dealt to those who stepped directly on the mine with less damage dealt to those on the outside.
Hypno Shroom: Costs 125 Sun. When placed, the Hypno-shroom will sway from side to side in a trance. Any opponent that comes into contact with the Hypno-shroom beware, as the Hocus Pocus of Dave’s kit, they will randomly gives the opponent a status effect to their detriment.
Tangle Kelp: Costs 75 Sun. In Smash, they will function sort of the same, being planted in a flower pot with water. When an opponent makes contact with the Tangle Kelp, they will be held in place for a few seconds, similar to a grab. At this point, Dave can rush over and attack or sic more plants on the enemy. After being used once, it will go away.
Spikeweed: Costs 100 Sun. The spikeweed will be placed on the floor, Keeping a low profile. Any enemy that steps over it will be launched up with extremely low knock back, dealing 6% damage. Its good for ledge control as well as comboing with other plants.
Spikerock: Costs 125 Sun. For 125 sun, the Spikeweed can be upgraded to the Spikerock, which deals twice as much damage, and has three times the amount of health.
Phat Beet: Costs 150 Sun. Whenever opponents get near it will jump up and slam back down, sending out a shockwave. This shockwave doesn't deal much damage, only around 1.2%, but has a guaranteed trip on the opponent. This sets up for roll chases or just standard punishes as well as stage control. In order to combat the power of a trip with such a large radius it doesn't stay out for very long, and is vulnerable from attack from above, as it cannot attack there.

Final Smash:
Garden Warfare

Penny speeds past Dave, who gets inside. This triggers a hitbox around the truck, which when activated, would take up to three opponents into a Final Smash. The opponents would fly through time to be dropped onto Dave's lawn and pool, where a large defense awaits them.
Twin Sunflowers glow with large amounts of solar energy, Gatling Peas fire rounds of peas at rapid speed through Torchwoods, Winter Melons lob melons, Cattails throw swathes of their homing spikes, and Gloom Shrooms spew their spores at the opponents, still trapped on the lawn. All while this is happening, Dave upgrades some awaiting Kernel-pults into Cob Cannons. He launches several corn nukes, blasting the opponents and ending the cutscene with a screen of popcorn.
Taunts
  • Up Taunt: Pulls out a pot and knocks on it while listening.
  • Down Taunt: Takeoff his hat pot and spits on it. He then polishes it before putting it back on.
  • Right Taunt: Sniffs himself.
  • Left Taunt: Pulls out a Taco, applies hot sauce on it, and eats it. Heals him for 1-5% health each time.
On-Screen Appearance
  • Nonchalantly walks out from Penny whom of which appears through a portal similar to the one from the Penny's Pursuit update PvZ 2
Idle Poses
  • Adjusts his weigth which causes the pot on his head to tilt a bit. Based on his animations in PvZ2,
  • Scratches his beard furiously as if itching it.
Victory Poses
.
  • Holds up the sunflower over his head like a trophy overlapping with the actual sun, meanwhile Peashooters and other Sunflowers cheer him on
  • Runs up and places a Peashooter which then begins to pelt an incoming zombie.
  • Takes out a Taco and munches down on it.
Classic Mode: Smash vs Zombies
All opponents are against the Zombie Villager on Omega stages with allies that can`t move which represent Plants.

RoundOpponentStageMusicNotes References
1:ultzombie::ultzombie::ultzombie::ultzombie::ultzombie::ultzombie:Windy Hill ZoneGreen :ultmegaman:only uses the Mega Buster.Megaman references the Peashooter.
2:ultzombie::ultzombie::ultzombie::ultzombie::ultzombie::ultzombie:Suzaka CastleYellow :ultkirby: constantly uses the Down SpecialKirby references Wall-nut while Suzaku Castle references the Home Roof.
3:ultzombie::ultzombie::ultzombie::ultzombie::ultzombie::ultzombie:Garden of Hope
:ultyoshi: only does the Up Special
Yoshi references the Cabbage-pult.
4:ultzombie::ultzombie::ultzombie::ultzombie::ultzombie::ultzombie:Gaur Plains (Night)White :ultlink: only does the Side Special BoomerangLink is a reference to the Bloomerang.
5:ultzombie::ultzombie::ultzombie::ultzombie::ultzombie::ultzombie:Pirate ShipBrown :ultsnake:only does the Down SpecialSnake is a reference to the Potato Mine.
6:ultzombie::ultzombie::ultzombie::ultzombie::ultzombie::ultzombie:TempleGreen :ultcharizard:only does the Neutral Special, FlamethrowerCharizard is areference to Snapdragons
BONUSRacetotheFinish!
FinalGiant
:ultzombie::ultzombie::ultzombie::ultzombie::ultzombie::ultzombie:
HousePurple :ultpiranha: only does the Side SmashPP is a reference to the Chomper.

Alternate Costumes
Adjust sh

#36ε. Dixie Kong
Donkey Kong
Special Moves

Neutral Special:
Bubblegum Popgun

A chargeable projectile like Diddy's Peanut Popgun, but charging is indicated by a large pink bubble being blown out of the barrel of the gun. It is usually slow upon release, but deals 1.3x more damage than a peanut. However, if you're hit while charging this attack or your attack reaches maximum charge, it deals as much as a peanut, but your opponent will be dealt the Gum effect, which limits their movement to about 1 Pichu to the left or right, and greatly reduces their jump height. This lasts for about as long as K. Rool's pre-nerf D-throw or until the afflicted is hit.

Side Special:
Monkey Flip


Up Special: Haircopter

Dixie quickly uses her ponytail to pop off and then be sent into free fall, however this freefall is unique in that she can guide it more accurately and lightly damage enemies that collide with her. Based off her rolling attack from DKC classic.
Down Special:
Banana
Final Smash: Rocketbarrel Family Barrage

Dixie calls forth her cousin, Kiddy Kong. Together, they straight on Rocketbarrels and zip zap about the stage; dealing generally more hits than Diddy but with less damage to balance it out. Kiddy will loose his rocket which homes into the opponent as Dixie lets her go and floats back down to the stage
Taunts
  • Up Taunt: She tosses her hair to the right.
  • Down Taunt: She blows bubblegum and drinks out of a juice box.
  • Right Taunt: She does air guitar and then a jump swinging her arms.
  • Left Taunt: She jumps back and forth on both legs before doing a cute spin.
On-Screen Appearance
  • A barrel explodes and Dixie floats down with her Propeller Ponytail maneuver and lands on the ground.
Idle Poses
  • She rubs her right arm.
  • She plays with her hair.
Victory Poses
  • Dixie pulls out her guitar and plays on it.
  • Dixie twirls in with her helicopter hair and then lands while doing a cute pose.
  • She arrives on Rambi but flies right past the screen. She crosses back and forth several times.
Classic Mode: Get Off My Tail
All opponents are natural tail users which is a reference to her lack of one which she makes up for with her tail.

RoundOpponentStageMusicNotes References
1Giant
:ultyoshi:
Garden of HopeStickerbrush Symphony
2:ultfox::ultfalco:Kong FallsGear Getaway:ultdiddy: is an ally
3:ultpikachu::ultcharizard::ultsquirtle:Spear Pillar OmegaSnakey Chantey
:ultdiddy: is an ally
4Ashley & Grovyle & SceptileYggdrassil`s AltarJungle Japes:ultdiddy: is an ally
5:ultbrawler::ultgunner::ultswordfighter:Find Mii:ultdiddy: is an ally
6:ultmewtwo::ultridley:BrinstarCrocodile Cocophony:ultdiddy: is an ally
BONUSRacetotheFinish!
FinalRathalosAncient Steppe:ultdk: is an ally

Alternate Costumes
ColorReferenceAppearance
Pink
YellowBased on her 2P sprite in King of Swing
BlueBased on her 3P sprite in King of Swing
GreenBased on her 4P sprite in King of Swing
PurpleBased on her P2 sprite in DKC2
CyanBased on her sister, Tiny Kong
RedBased on Diddy Kong
GreyBased on Wrinkly Kong
TurquoiseBased on Kiddy KongAuqamarine top and hat with green earrings. She has darker reddish fur and brownish hair.
WhiteBased on the Super Form for Donkey and DiddyBlue hat and top with orange eearings and white fur. She has lighter colored blonde hair.
BlackBased on the black forms of Donkey and DiddyYellow hat and top with green eearings and black fur. She sports dark blode hair.
OrangeBased on the Banana BirdOrange top and hat with yellow earring. Slightly orangish fur with orange-red hair.

#99: Sami
Advance Wars
Moveset

Submitted by: Venus of the Desert Bloom Venus of the Desert Bloom
Special Moves

Neutral Special:
Quad Launcher

This wasn’t based off on one aspect of the games but an entirely new move. Sami pulls out a rocket launcher which will fire a single homing rocket. Charging it up not only increases the homing strength of said rocket but can fire up to four homing rockets in quick succession. It has a dramatic shaking sensation when fired which causes smoke to billow out when it’s fired.

Side Special: Sniper

While not an actual unit but, rather, a general unit in warfare. A crosshair appears which allows the player to momentarily allow player to control it while Sami remains still. When the player lets go, Sami pulls off a sniper shot which has large amounts of damage up to 42%. if its a dead on target. Players can see if the target is in focus by the green crosshair turning red.

Up Special: Bomber Transport

A Bomber appears and Sami stands on top of it. You can control the planes direction. The plane occasionally unloads bombs from below the plane. The plane can be destroyed which will damage Sami but also propel her slightly into the air which aids her.

Down Special: Light Machine Gun

Sami Pulls out an LMG a weapon she is seen with in artwork. Sami is prone while using it but she can freely aim her LMG in any direction in front of her. Pressing A while in this form shoots her gun. you can leave prone by jumping

Final Smash:
Dual Strike

Sami throws out a Smoke Grenade which traps opponents into the Final Smash. This transports any caught opponents into the map featured in the very first Advance Wars. Sami moves her tank to encounter the opponent which quickly transitions to an actual battle. However, it seems luck is on Sami`s side as she comes with Infantry, Tanks, and even aerial support. Infantry units tear into the opponent while the Tanks fires off several shots. Finally, two Stealth Bombers roar overhead and carpet bomb the location; decimating the opponent. This then moves back to the match with the opponent being launched.
Taunts
  • Up Taunt: Sami checks the ammo on her gun.
  • Down Taunt: She taps her earpiece and says "Affirmative".
  • Right Taunt: A sprite form of an infantryman appears and she salutes it.
  • Left Taunt: She kneels down and ties her boot.
On-Screen Appearance
  • Arrives by parachute. Upon landing, she checks around her before readying her weapon.
Idle Poses
  • Checks her gun
  • Rubs her shoulder
Victory Poses
  • A soldier is seen standing on top of a miniature building, and he hops on it three times before it squashes completely flat. The building then springs back up, now completely red, and the camera pans down to see Sami and a few other soldiers celebrating their newest capture.
  • Sami fires several rounds from her Quad Launcher before standing up to watch them from a distance.
  • Calls up an escort which causes a ladder to be released from an unseen helicopter. She grabs it and flies away from view. If the player waits long enough, they can see her still hanging to the ladder while the helicopter flies away into the distance.
Classic Mode: Smash Wars Advance
All opponents are based on the COs from Advance Wars. Omega forms represent actual warzones.

RoundOpponentStageMusicNotes References
1:ulticeclimbers:Golden PlainsNana doe not appear with Popo.Pop references the first CO encountered, Olaf.
2:ultfalco:Garden of HopeFalco represents Eagle, the second CO encountered.
3Yellow
:ultryu:
Cloud Sea of AlrestRyu references Kanbei.
4:ultganondorf:Unova Pokemon LeagueGanondorf references Hawke.
5Dr. EggmanRaccoon CityDr. Eggman references Von Bolt.
6Giant
:ultwolf:
Shadow Moses IslandWolf is a reference to Sturm
BONUSRacetotheFinish!
FinalMaster HandFinal Destination

Alternate Costumes
ColorReferenceAppearance
OrangeDefault
RedBased on AndyThe top, headband, and pants becomes red witht he pants being a more darker red. Her hair becomes brown. Her hip pouch becomes black and her boots become reddish brown. Her arm band and gloves also become brown.
BlueBased on MaxThe top stays white while her heradband is a cyan color while her pants are dark blue. Her hair turns blue. Her hip pouch becomes darker brown and her boots becomes a darker blue. Her gloves and arm band becomes blue.
PurpleBased on NellHer headband, top, and pants becomes a full purple while her hair turns blonde. Her hip pouch becomes lighter brown while her boots a greyer-lavender, Finally, her werite band becomes purple while her gloves becomes a light lavender.
WhiteBased on JackHer top and pants becomes a light lavender. Her boots and hip pouch has a very dark burgandy as well as her gloves. Her arm band is a dark lavender. Finally, her hair is a orange-yellow color.
TealBased on OlafHer top becomes aquamarine while her pants becomes blue. Her bandana and gloves becomes smoky white. Her hair becomes a rusty orange color. Her boots and hip pouch become amber while her gloves and arm band are also a light blue.
YellowBased on GritHer top is yellow along with her bandana while her hair is a light grey-blue color. Her pants are bright blue and she has reddish-brown boots and hip pouch. Finally, her arm band is brown while her gloves are a dull yellow.
GreyBased on EagleHer hair is grey while her bandana is yellow. Her top is a navy blue while her pants a dull cyan color. Her hip pouch is a grey color along with her boots. Finally, she has a blue wristband and grey gloves.
GreenBased on Sonja@Commander_Alpha
BlackBased on Sturm/Black Hole@airConditioner
BrownBased on Flak T TanK from Newgrounds
BeigeBased on Isabella/WillHer top becomes an off-white while having a yellow headband. Her pants and boots become maroon while her gloves are also marroon. Her wristband is a light brown. Her hair is white.

#55ε. Ms. PAC-MAN

Pac-Man
Special Moves

Neutral Special:
Bonus Fruit

Ms. Pac-Man still has the bonus fruit special, but this time it includes the fruit from Ms. Pac-Man, in order: Cherry, Strawberry, Orange, Pretzel (new), Apples, Pears (new), and Bananas (new). The cherry, strawberry, orange, and apple work the same way they do with Pac-Man. The Pretzel bounces erratically, Pears bounce along the floor, and the Banana is thrown like a Boomerang.

Side Special: Power Pellet

Power pellet moves in a rigid 4 directions, but also goes farther.

Up Special: Pac-Jump

Becomes a pixel version of Ms. Pac-man which includes a ribbon.

Down Special: TNT Block

Ms. Pac-Man drops a timed block of TNT at her position that starts slowly counting down from 3 seconds. Unlike with Steve's TNT, damage does not hasten the timer nor is it able to be knocked around. However, Ms. Pac-Man can push it around to a different position before it explodes, and the blast radius is rather enormous.

Final Smash: Super Ms. Pac-Man

Much like Pac-Jump, Ms. Pac-Man turns into a gigantic version of her pixel self complete with a ribbon.
On-Screen Appearance
  • Similar to Pac-Man's, except she spawns a beauty mark and a pink bow before she spawns and strikes a cute pose for the camera before going into her idle stance.
Idle Poses
  • Fixes her ribbon.
  • Looks at the camera and winks.
Taunts
  • Up Taunt: Does her own form of Namco Roulette which includes the following characters:
    • Agumon (Digimon)
    • Lloyd Irving (Tales)
    • Pooka (Dig Dug)
    • Klonoa (Klonoa)
    • Kazumi (Tekken)
    • KOS-MOS (Xenogears)
    • Baby Pac-Man (Pac-Man Jr)
  • Down Taunt: Turns into her spirite form much like Pac-Man but with a ribbon and chomps down several times.
  • Right Taunt: She puckers her lips and turns to face the camera and winks.
  • Left Taunt: She twirls in place as ghosts rotate around her.
Victory Poses
  • She does a similar dance seen in the Atari 2600 where she saunters back and forth.
  • She holds Baby Pac-Man and cuddles it lovingly before looking at the camera and winking.
  • Pac-Man in sprite form comes racing across the screen before Ms. Pac-Man in spirite form comes chasing after him. They dash back and forth in this manner.
Classic Mode: Ladies Night Out
All opponents are against male fighters with a female ally.

RoundOpponentStageMusicNotes References
1:ultwario:WarioWareAshley is an ally
2DJ OctavioMoray TowersInkling is an ally
3:ultkrool:Kongo JungleDixie Kong is an a:ultinkling:lly
4:ultridley:Brinstar Depths:ultsamus: is an ally
5:ultganondorf:Hyrule Castle:ultzelda: is an ally
6:ultswordfighter: (Black Knight Mii Fighter Outfit)Tomodachi Life:ultlucina: is an ally
BONUSRacetothe!
FinalGiga BowerFinal Destination:ultpeach: is an ally

Alternate Costumes

#100. Iori Yagami
King of Fighters
Moveset Link

Submitted by: Mr. Robotto Mr. Robotto
Gimmick
Stock Meter, Max Mode, & Desperation Moves


Iori gains the "Stock" Meter - Another SNK original, this is a gauge with 3 black squares on the right which signify the many “stocks” you have. This meter fills the same way as in most other fighting games: You build meter for hitting the opponent (wether shielding or not), getting hit yourself and blocking attacks. When you get a stock, a bright green light appears in one of the squares. In KOF you’d normally get more meter for whiffing special moves, but as that would only encourage camping behavior in Smash, I decided to not include this method of meter obtainment.


The stock meter itself will be based on the one found in King of Fighters ’98 UM, although instead of "ADV" nothing would be written there.

Up to three stocks could be saved up, these stocks can be used for certain Supers which we’ll call Desperation Moves from now! These function like Terry's GO! supers, but will cost a stock each. But that’s not the only thing the Stock Meter can do, you’ll be able to activate Max Mode! You’ll activate this by hitting performing a neutral special while shielding at the same time. Once Iori is in Max Mode, a timer will appear above the Stock Meter, indicating how long Max Mode will last, which is about 20 seconds. Although the timer drains more when performing special attacks, even when missed. When activated, Iori will strike a pose, gain somewhat of a yellow tint, and the timer will start to drain. This mode makes Iori deal more damage and knockback (a multiplier of about 1.2x) and allow him to use not only stronger variants of his Desperation Moves, but if Iori is above 80%, he’ll be able to use a Hidden Super Desperation Move only during Max Mode! When performing any Desperation Move under Max Mode, the timer will instantly end regardless of time left.


The stock meter filled with 3 stocks (in Smash these red lights would be green instead) with the Max Mode timer (in this pic being about 3/4th full)

Also, useful thing to note, but to try and simulate the 3v3 aspect of KoF. The Stock Meter does NOT reset in-between Iori’s stocks. So when he loses a life, he still has his meter to try and make a comeback! The Stock Meter doesn't fill up that fast as well, if you'd only hit, it would take about 50% to get a stock.

Special Moves

Neutral Special:
108 Shiki Yamibari

Iori throws his purple flame like a fireball that skims the ground. It is a low projectile that comes out faster than most, but with average recovery. Can be held instead of tapped to increase the energy wave's size, travel speed, travel distance, damage and knockback. If used in the air, Iori will generate a short-ranged burst of purple instead. The aerial variant offers decent knockback and can KO opponents offstage, especially when held instead of tapped.


Side Special: 108 Shiki Tsumakushi

A rushing move in which Iori hops and take a big flaming swipe downward. Can be held instead of tapped for more travel distance, damage and knockback. Special input is

+ attack/special, which increases its damage output and knockback in addition to granting intangibility to his attacking arm. The special-inputted version is indicated by a bigger flame being produced. Can cancel into his Final Smash. In the source material, this is normally a dragon punch motion, but as that is already In use, I had to modify it to being a quarter-circle forward. Hey, Terry's Burning Knuckle isn’t a quarter circle forward either in his games! This is a special move that made its debut in the King of Fighters ’98.

Back Special: 127 Shiki Aoibana
Iori quickly slides forward with three motions, punching for the first 2 and jumping with an overhand for the third, in which he slams the opponent into the ground. The active hitboxes are on Iori's arms, and will always get knocked back into the following motion's hitbox for the first 2 motions, no matter the percentage. With the last motion having great knockback. This move is very rewarding to cancel into, especially from jab, as it’s a surefire way to rack up damage. You are going to have to repeat the input for every motion to complete the move (these are what we call rekkas!). Which means if you use the standard version, you’ll have to input back special in succession 3 times. Whereas for the traditional input, you’ll have to perform


in succession 3 times. There’s no difference between holding or tapping for this move, as it would be counterintuitive since you’ll have to tap anyways. As for the traditional input variation, that one significantly covers more distance and is slightly more powerful. When performed in the air, only the last motion will come out (Iori will jump forward and deliver an overhand, can be used as an horizontal recovery), so no need to input it 3 times in that scenario.

Up Special: 100 Shiki Oniyaki
Iori performs a spinning jump while being accompanied by spinning purple flames that cycle around him. Can be held instead of tapped for more distance and damage. If inputted with a


motion, the move will render Iori's entire body intangible on startup, the move itself will have slightly increased travel distance, it will deal more damage and knockback, and the move will consist of 3 hits instead of one. The inputted version is indicated by Iori's howl when successfully activated. It is also much more powerful compared to the regular version, KOing middleweights at around 125% and being an excellent out-of-shield option.

Down Special: 212 Shiki Kotsuki In
Iori shortly runs up to the opponent, slams their head on the ground, then blasts them with fire. In the air this move would differ slightly, as Iori would simply grab the opponent in front of him, and once grabbed, start to descend quite a bit while Iori is blasting fire into their face until they are automatically freed. And yes, this can be used a suicide KO if used low enough beneath the stage to reach the lower blast zone, due to the descent not being that long you’ll really have to go deep to make it happen, however Iori himself will always lose if he and his opponents are on their last stocks in that case. Due to functioning as a grab, it bypasses shields and counterattacks. To perform the input version of this move, you'll have to input


+ attack/special. On the ground, despite having long reach, it has a very slow startup and is quite readable when performed raw as when Iori will have a very notable howl when he starts to run. It is a faster move in the air, as it has to sacrifice range. On the ground, the tapped version only covers about a quarter of Final Destination. The input for this move is half circle back, and when using this variation on the ground, it covers about a third of Final Destination and delivers more damage. When used in the air, the tapped version’s descent is just about a quarter of Final Destination’s vertical length. The input version however goes about a third of FD’s vertical size and largens the hitbox size of Iori’s grab. Even when canceled into this move, it has a moderate enough start up to give the opponent a chance to attack Iori when he performs it.


Desperation Moves
Little thing to preface, all grounded special cancelable moves are also able to cancel into the normal Desperation Moves, except for the Hidden Super Desperation Move, which will always need to be performed raw. When in Max Mode and performing a Desperation Move, the Max Mode timer will instantly end regardless of time left.

NameDamageInfo
Desperation Move 1:
Kin 1211 Shiki Yaotome
Normal:
flurry of slashes: 10%
explosion: 14%
collateral: 13%

Follow-up Ura 316 Shiki Saika:

slashes: 10%
pillar of flame: 12%

Max Mode:

initial slash: 7%
slams: 10%
blast of fire: 12%
When you have one stock, and perform a


+


+ attack/special, Iori will dash across the screen (about half the length of Buster Wolf) and, if he hits the opponent, he performs a flurry of claws and scratches ending off in a blast of purple flames. He is immune to non-throw attacks during the startup flash, where he says his iconic line “Asobi wa owari da!” which translates to “Playtime is over!”. The blast can also hit bystanders within range. This has great knockback, killing as early as 60% at the edge. The initial hit can be canceled into a Final Smash.


Here's the catch with this move though, if performing


2 times in succession during the last hit (the input window is quite tight), you’ll be able to follow up with Ura 316 Shiki Saika, where he does some delayed claw attacks and generates a pillar of purple flames, hitting the foe midair while laughing madly. This has amazing KO potential, killing as early as 40% at the ledge. Though worth to note, to perform this follow-up you’ll need to sacrifice an additional stock on top! This follow-up originates from the King of Fighters 2001.


If performed during Max Mode, this move changes a little, and lacks the follow-up. It goes as follows.

Under the effects of the Riot of the Blood, Iori howls, slashes his opponent into the ground, and claws at them repeatedly with his back turned to the camera; after briefly looking over his shoulder, he attacks again with the last hit using his flames. While the final blast’s knockback here is somewhat moderate, this variation racks up a ton of damage.
Desperation Move 2:
Ura 108 Shiki Yasakazuki
Hidden Super Desperation Move:
Kin 1218 Shiki Yatagarasu
33%When above 80%, and during Max Mode, on top of sacrificing an extra stock, by performing


2 times in rapid succession: Iori drags his hand on the ground as he howls, then proceeds to do a huge claw slash to his opponent, a bloody, shadowy background accompanies this move whereas the claw slash will leave a black trail behind. Very great anti-air and can kill as low as 30% against middleweights around the ledge. As this move can only be pulled off in certain circumstances, it feels very rewarding. This move is based on Iori’s Neo MAX Super Desperation Move from The King of Fighters XIII. Here it is in video form to get the full experience lol.

Final Smash: Three Sacred Treasures
Based on the ending of the King of Fighters '97, and somewhat of a Smash original. As a result of the Orochi blood coursing through his veins, Iori suddenly enters the Riot of the Blood phase. His eyes light up and he makes a mad dash while slashing with his arms. This is an activation hitbox that hits at most 3 opponents, which takes 1 opponent into a cutscene and has the other two take only the claw damage. Iori lunges towards the opponent, eyes blinded by Orochi and grabs the opponent by the neck.

A huge pillar of flames erupts, engulfing both the opponent and Iori. Iori is still holding on tight. Meanwhile, Kyo Kusanagi and Chizuru Kagura are standing by, and Kyo rushes in with a flaming punch, dealing massive damage. The original KOF '97 ending ends here, but in his Final Smash, Chizuru makes the final blow, using the Yata Mirror to seal the opponent (similarly to Zelda's Final Smash). The cutscene ends and Iori returns to normal, waking up from his feral state.
On-Screen Appearance
  • He appears from shadows with his back turned. He then swipes his hand forward while its engulfed in purple flames and turns to face his opponent.
Idle Poses
  • Opens out his hand and causes purple'ish fire to burst out. Similar to his animation in the opening of KoF.
  • He messes with his hair slightly.
Taunts
  • Up Taunt: Vice and Mature appears next to Iori who says "Kutabarizo konatta ka..." (Eng: I thought you were dead...)
  • Down Taunt: He grabs his head and laughs sinisterly.
  • Right Taunt: His hand engulfs in purple fire and he will fling it forward while saying " ".
  • Left Taunt: He will hunch forward and then lens backward while causing purple fire to shoot up from him.

Defeat Quote
When defeated by Star KO, he will say:
  • Konomama de wa owaran zoooooooooo!!!

Victory Poses
  • The camera first focuses overhead as Iori is hunched over chuckling evilly. As the camera pans down, he places a hand on his head as his laughter rises. By the time "IORI" splashes on the screen, Iori has thrown his head back and cackling in a maniacal manner. This is by far one of his most well-known victory animations.
Classic Mode: Shatter Expectations
Iori's Classic Mode is a continued reference to Terry's which is based on King of Fighters.

RoundOpponentStageMusicNotes References
1:ultlittlemac::ultincineroar::ultlucario:Boxing RingCalled Team Martial Arts. Each fighter represents a a particular art form.
2:ultsamus::ultfalcon:LeonPort Town Aero Dive (Omega)Called Team Hunters. Each fighter represents a bounty hunter.
3:ultsora::ultcloud::ulthero:Bastion Hollow (Omega)Called Team Fantasy. All characters are from Square-Enix games.
4:ultness::ultvillager::ultpichu:Onnet (Omega)Called Team Youngster. ALl opponents are younger characters.
5:ultrob::ultsnake:Officer HowardShadow Moses Island (Omega)Called Team Enforcer. Based off Ikari Warriors.
6Takamaru, :ultjokeralt::ultkazuya:Mishima DojoCalled Team Japan. Based on Japanese warriors.
BONUSRacetothe!
Final:ultbrawler::ultswordfighter::ultbrawler:King of Fighters StadiumThe Mii Brawlers uses a Kyo costume and Kim costume while Swordfighter uses Nakoruru costume

Alternate Costumes
1639498585555.png
#101. Anna
Fire Emblem
Special Moves

Neutral Special:
Anna’s Secret Shop

Anna is stingy, so she doesn’t just use her best wares all wily-nily. Instead, she buys them from her own shop to make sure she never makes an investment she can’t back up with her credit value.

With her coins though, she can buy stronger weapons. Hold longer to spend more coins for a stronger weapon, Pac-Man Neutral B style. This then results in her sword/dagger being upgraded to variants like a Brave Sword, Levin Sword, Killer Sword etc. with different properties and different strengths etc.. The upgraded weapon is implemented set-wide like Robin’s aerials.

Side Special: Ballista

Inputting the side special readies a Ballista. Due to the nature of the attack, it suffers from significant start-up lag. The trade-off is the damage potential of the attack. She can aim in from up to down after inputting the attack. It has high damage potential and can OHKO as low as 25% when hit dead center.

Up Special: Fodlan Thrust

Anna thrust her Noatun in Air like FE's Dolphin Slash move, but its stabbing the Opponent with her Sweet Spot. The Damage 7.6% and she goes upwards little longer than Marth for her Recovery.

Down Special: Convoy

Anna puts bullions in a chest, investing her coin count in the stash which she then buries underground. If she dies and loses her accrued coins, she can use Down B again on the spot the chest was buried to immediately get back the coins she invested into them at the expense of Anna having less liquid assests on-hand if she’s invested gold into a chest.

Final Smash: What a Deal!
Owing to Anna's unique status as a character within the series, I opted to go for a mostly unique Final Smash. It still does have some ties back to the franchise, similar to that of Byleth and Corrin, but it would mostly reference her multiple appearances in the series.

Like with Marth, Roy, and Lucina, the Final Smash starts out with a Critical Hit. Anna spins her dagger in her hand and runs forward, dragging at most 3 opponents into a cutscene, similar to the one that Hero has. Here, every single Anna that has appeared over time would deal a quick strike with a different weapon, before the main Anna swings a bag of gold coins and ends the cutscene with a "Come again soon!" and a finger to her chin.
On-Screen Appearance
  • Anna walks out of her shop before it Teleports back to original Location, entering her battle stance.
Idle Poses
  • She folds her arms.
  • She surpresses a giggle.
Taunts
  • Up Taunt: She laughs and points to her chin in typical Anna fashion.
  • Down Taunt: She holds out a hand and says "Cough it up."
  • Right Taunt: She pulls out a bag of items and rummages through it before putting it back.
  • Left Taunt: She takes a sign and places it down. It says "Weapons for sale! Cash only!

Victory Poses
  • She is flipping a coin up and down and then catches it before saying "Made a bit of coin, tee hee."
  • She takes a bag and throws it down before hitting on the bag of coin and leaning forward; much like her Awakening pose.
  • She twirls while saying "It's tough..." and then takes her dagger and points it forward while saying "...making a deal in the heat of battle."

Classic Mode: Profitable Gains
All opponents are against male fighters with a female ally.

RoundOpponentStageMusicNotes References
1:ultlink::ulttoonlink::ultyounglink:Hyrule CastleThe Legend of Zelda uses rupees.
2:ultvillager::ultvillagerf::ultisabelle:SmashvilleAnimal Crossing uses Bells.
3Stylist, :ultjoker:Beaumonde ArenaStyle Savvy and Persona uses dollars and yen respectfully.
4:ultcloud::ultsephiroth:North CaveFinal Fantasy uses Gil.
5:ultpikachu::ultpichu::ultcharizard::ultgreninja::ultlucario::ultincineroar::ultmewtwo::ultjigglypuff:Saffron CityPokemon uses P.
6Crazy Dave, :ultinkling::ultinklingboy:Moray TowersPlants vs Zombies uses coins and sun while Splatoon uses gold.
BONUSBreaktheTargets!
Final:ultmarth::ultlucina::ultike::ultroy::ultchrom::ultrobin::ultcorrin::ultbylethf:Gran Mach MonastaryFire Emblem uses G.

Alternate Costumes

#102. King Boo
Super Mario Bros.
Promotional DLC
Special Moves

Neutral Special:
Spike Ball

The King throws an explosive Spike Ball that rolls forwards until it either hits a player, projectile, hazard or slows down enough to the point of stopping. In each case the Spike Ball will explode and King Boo can’t use the attack again until it’s gone. If the Spike Ball is eaten by a character like Kirby, King Dedede or Wario, it will explode as well. The Spike Ball has a unique property with Luigi’s Poltergust G-00 where Luigi can grab it and shoot it back.

Side Special: Big Boo Blow
King Boo inhales huge amount of air and blows off so hard that could send opponents far away with far horizontal knockback. It can be used as anti-recovery move when King Boo stands on Edgs and blows off Opponent to Blast Zone.
It doesn't give any damage, but it can blow you off to Oblivion.

Up Special: Boo Bomb
Similarly to Super Dedede Jump, King Boo will leap into the air and slam downwards dealing a lot of damage with enough power to kill at 60% and will break shields. The ground pound will emit shockwaves that travel along any solid ground and it might just protect him from the attack’s slow getup animation. King Boo will always leap into the air whether he is on the ground or in the air but his vertical distance will be determined by how long the special button is held.

Down Special: Boo Crown Storm
King Boo will gain an intense glint in his eyes as he charges his crown with power. Upon releasing the B button, at least one bolt of lightning will come striking down, similar to Thundaga. However, there's a trick to it: Every 20 frames you can charge up to 5 bolts of lightning, and you can influence where it strikes, starting directly in front of you, in between strikes. Each lightning bolt does 6% damage and medium-low knockback.

Final Smash: Frightening Portrait
Based partially on how he traps Mario and the gang in a portrait in LM3, King Boo pulls up an empty portrait which acts similar to Mega Man’s FS where it sucks in opponents nearby. Once it finishes, it will transport the player to a Mansion-type setting where King Boo will cackle. He then takes an empty portrait and slams it down onto the opponent. While the attack can technically capture up to 7 characters, it will only capture 5 total with the remaining trapped just getting minimal damage. This is rendered by the first characters who get sucked in. The reason why this mentioned is because when the portrait is pulled back up, the players who were hit get stuck in the portrait. This causes them to be visible in the portrait would could lead to some fun compilation videos of every Infinite character getting trapped. They could even get unique poses and such. After that, King Boo will cackle while next to the portrait with lightning flashing. They are then transports players back to the stage and will launch them.
On-Screen Appearance
  • His crown appears first followed by his body from the afterlife. He then shrieks and makes a face at the screen.

Taunts
  • Up: King Boo will make a silly face similar to these ones.


  • Right: King King Boo shakes violently while he slobbers - sending spit and drool everywhere
  • Left: Smaller Boos swirls around King Boo as he looks on somewhat...happilly
  • Down: King Boo dissappears with a downwards fade effect - making this a flashy spotdodge similar to Puff's Down B! - and then reappears with a VERY loud jumpscare scream.

Idle Poses
  • Rocks back and forth and scowls
  • Adjusts his crown.
Victory Poses
  • The camera is focused on a background as 8 portraits of Toads appear. King Boo himself then floats into view of the camera and let's out a cackling laugh. If at least 1 fighter was killed by a Final Smash, any of the portraits will be replaced by that number of fighters. Loosely based on the Game Over animation from Luigi's Mansion 3.
  • Luigi appears even if a losing fighter while holding a flashlight and looking frightened. King Boo appears and shakes while screaming which scares Luigi away. King boo then cackles.
  • King Boo is seen floating in the air while waving his arms up and down while smaller Boos dance about him.

Classic Mode: From The Grave
Villainous characters who have died or passed into a death equivalent state but were later revived.
RoundOpponentStageMusicNotes References
1:ultganondorf:Gerudo ValleyThe Dark World (Brawl)Ganondorf's continuous cycle of reincarnation in the Zelda series.
2:ultridley:NorfairVs. Meta RidleyMeta Ridley is a revived cybernetic form of Ridley.
3MedusaMurasame Castle
Kid Icarus Retro Melody
Hades routinely revives Medusa to use as his servant.
4:ultzombie::ultzombie::ultzombie::ultzombie::ultzombie::ultzombie::ultzombie::ultzombie:Minecraft World (Plains)Clockwork CrafterZombies, self explanatory.
5:ultkazuya:Mishima DojoKazuya Mishima, Devil Kazuya
Kazuya was thrown off of a cliff by Heihachi in Tekken 2 and was later brought back by his devil gene. It was also the devil gene that let him survive the first cliff fall.
6:ultswordfighter::ultswordfighter::ultswordfighter::ultsephiroth:Midgard
One-Wined Angel (Advent)
Sephiroth comes back in some form in Final Fantasy VII: Advent Children. The Mii Swordfighters represent Kadaj, Loz and Yazoo, the remnants of Sephiroth's spirit that let him come back to the living world.
BONUSRacetotheFinish!
FinalDraculaDracula's Castle
Dracula like Ganondorf is routinely revived but strictly every 100 years and is the main enemy of the Belmont clan.

Alternate Costumes

#103. Zagreus
Hades
Moveset Link
Apart of the "In the Name of Hades Bundle" DLC
Special Moves

Neutral Special:
Cast


Zagreus casts a bloodstone, it is a slow long range projectile that can redirect itself to an opponent if aimed close enough, dealig 12.5% damage with no knockback on impact if zagreus has no boon equipped. Zagreus has three reusable bloodstones and when the Cast hits an enemy, it stays lodged inside the foe until they are killed or 15 seconds elapse, which means Zagreus can't just mindlessly spam these whenever. When the bloodstone falls it can be collected to be launched again. Each god's boon also modifies the speed, area of effect and additional mechanics of the cast. Three casts, Dionysus, Demeter and Ares, create a projectile that does damage on its own instead of lodging into enemies. Also, to make multi-Zagreus battles less confusing, the bloodstones will change color depending on Zagreus' color costume.


All boons will affect this special, and their properties are as follow:
BoonCast Information
Zeus

Instead of the usual cast, Zagreus casts an electric bolt that can bounce off opponents up to three times, with each bounce having a homing effect. This will not bounce if only playing against one opponent, or if the other opponents are too far from the one that got aimed at. This also deals electric damage to opponents.
Poseidon

The weakest of the cast abilities in terms of damage, Zagreus fires a blast of water forward that deals minor damage but delivers hefty knockback! A very strong edge-guarding tool.
Demeter

Zagreus plants a crystal which remains in-place and fires a long-range ice stream blast forward for around a 4 seconds period of time. The ice beam can easily be dodged, but if hit it will freeze opponents when at higher percents after dealing small damage over time. An amazing zoning tool. When finished, the bloodstone will summon in its place, waiting to be picked up by Zagreus.
Dionysus

Zagreus throws out an arced bomb-like projectile forward which explodes into a cloud of poison when hitting an opponent or surface, which will stay in effect for around 4 seconds before dissipating and delivers the poison status effect to anyone caught in the fog. This move does deal 5% damage, but no pushback on impact.
Athena

Zagreus fires a slow-moving circular shield forward that delivers strong damage to opponents and reflects projectiles!
Ares

Zagreus fires a slow moving but multi-hit dark spinning blade forward. It moves slow but can string opponents along for multiple hits of damage and high-end knockback. This also deals a new debuff called “doom” where after 5 seconds, the opponent with a dark red Ares logo above their heads will be instantly dealt a heavy hit of damage with no knockback, similar to Sephiroth's side-special.
Artemis

Zagreus fires a green fast-moving arrow forward. This special has a 1/6 chance to deal a critical hit which will increase the knockback and damage of the arrow! This projectile also deals heavier damage than other projectiles to shields.
Aphrodite

Zagreus casts a very short-range pink blast of energy forward which deals quite a lot of damage compared to other cast variations. Has the shortest range, but has high damage and knockback potential, and can easily KO at high percentages. This will inflict charm onto foes, which is signified by them being engulfed in a pink aura and weaken their damage output by 30%.

Side Special: Bull Rush

Another way to recover. Zagreus equips the shield of chaos and charges up. Releasing the special button will cause Zagreus to charge forward and deal a heavy hit of damage and tremendous knockback if charged. As he charges, you'll notice Zagreus accumulating energy around him. When charged to the max, a flash appears and Zagreus is able to travel the half of Final Destination. The shield can also block projectile attacks and melee attacks that deal less than 6% damage, but if hit with something strong, the Shield will break and Zagreus will be left invulnerable for a while. If you're still charging after already being maxed, which is signified by the flash, then the move decreases in power after that point.
The same boons as the normals pretty much apply here as well.
  • If under the influence of Zeus' boon, the move will gain electric properties
  • If under the influence of Poseidon's boon, the move will gain 1.2x knockback
  • If under the influence of Athena's boon, the move will be 1.2x weaker
  • If under the influence of Artemis' boon, the move has a 1/8th chance of being a critical hit
Up Special: Dash

Zagreus charges, and once the special button releases, dashes to the direction which is indicated by a directional arrow which points towards Zagreus' travel direction before he begins moving. It travels similarly to moves like Fire Fox. Grounded versions of both moves will stop at edges, and the aerial versions can pass through platforms if down is held on the control pad. If tapped, Zagreus will only perform 1 dash, if held moderately, Zagreus will perform 2, and when held to the end, he will perform 3. Each Dash can be redirectioned. The standard dash with no boons will deal no damage, but cover a lot of distance.

All boons will affect this special, and their properties are as follow:

BoonDash Information
Zeus

Instead of his usual dash, when Zagreus dashes he will release lightning strikes that hit opponents close to him at the starting point of each dash. This variation travels a relatively shorter distance.
Poseidon

Due to the pushback of the waves, this has the most recovery (even compared to the standard version), Zagreus engulfs himself in rushing water as he fastly rushes. With each dash, Zagreus makes splashing waves at the end of it. This recovery deals the least damage but deals impressive pushback to enemies, knocking them far away.
Demeter

A slower and shorter recovery than the rest, Zagreus rushes through the air as he casts a short-range blast of frozen air in front of him with each dash. Opponents at higher percents (+100%) hit by the ice have a high chance of being momentarily frozen. The dash itself deals no damage, however the ice does.

Dionysus

Zagreus surrounds himself in a mist of purple bubbles wich get left at the place where he rushes each time. While this distance is moderate, opponents hit by Zagreus in this state will be dealt a poison effect, and no actual raw damage will be dealt.
Athena

Zagreus rushes with his recovery as he is surrounded by four rapid moving shields that circle around him that reflect any projectiles that hit Zagreus while using the recovery. This recovery is moderate in distance, and deals heavy damage and moderate knockback to opponents that Zagreus hit.
Ares

Zagreus rushes, and from where he started each dash a dark buzzsaw is left spinning in his place, dealing multiple hits of damage for a moment before disappearing. Similarly to his cast, this also deals a new debuff called “doom” where after 5 seconds, the opponent with a dark red Ares logo above their heads will be instantly dealt a heavy hit of damage with no knockback.
Artemis

Zagreus rushes while surrounded by green energy that forms the tip of an arrow around him, this Dash deals no damage whatsoever, but for 5 seconds after the dash Zagreus has a higher chance of performing critical hits on all his moves, from a 1/8 chance to a 1/6 one more specifically, this will be signaled with Zagreus flashing green while this is active. This dash has the longest range out of all the boon dashes and even rivals that of the standard one.
Aphrodite

Has the shortest range of all the dashes, Zagreus rushes in a recovery as he is surrounded by pink energy and hearts. At each dash, where he ends up, a gulf of pink aura gets summoned which is able to hit opponents. Opponents hit by this recovery will be dealt damage, with no knockback, and will be engulfed in a pink aura, which is a new debuff called "charm" where these opponents now temporarily deal 30% less damage.

Down Special: Boon Select

Pressing Down-B will cause Zagreus to hold out his hand and say, in the name of Hades! as three glowing orbs appear above his head. Use the control stick to choose which of the orbs you wish to select, these orbs are called "Boons" and harness the powers of the gods of Olympus!

When choosing a boon, that god’s symbol will appear above of Zagreus’ percentage to indicate which god is helping him. Each god’s Boon gives Zagreus’ special attacks a unique spice to them for a limited amount of time, some will even affect normal moves too! The three Boon options will be random, and an Olympian Boon remains in effect for 30 seconds before Zagreus loses that Boon and returns to normal, in the meantime, Zagreus will not be able to select another Boon and his Down-Special will be rendered futile for the time being. There is then a 5 second cooldown before Zagreus can choose another Boon.

Also just because it's fun, when selecting a certain Boon, a voiceline and certain sound effect will play from that Boon's god upon accepting their gift like in the game. Gotta love fanservice! The Boons and their respective symbols are as follows.
BoonInfoSymbol (above %)
Zeus
Signified by a lightning bolt. The Greek all-father Zeus’ boon will give Zagreus’ cast, dash and other certain attacks an electric effect to them! This boon affects most of Zagreus' normals outside of his grab and throw.
Poseidon
Signified by a blue trident, his Boon generally deliver impressive pushback when using specials and even normals!
Demeter
Signified by an icicle rod, Demeter’s boon will give freezing effects to certain specials. This boon only affects Zagreus' special attacks.
Dionysus
Signified by a purple glass, Dionysus’ boon will allow Zagreus to poison opponents when performing certain specials. This boon only affects Zagreus' special attacks.
Athena
Signified by a shield, Athena’s boon will give Zagreus’ specials a reflector ability. Zagreus will also receive less damage and pushback when using this boon, but deal less damage in general, as all of his normals will deal less damage.
Ares
Signified by a war spear, Ares’ boon will give Zagreus’ specials a deadly multi-hit attack AND a negative status effect called doom where after 5 seconds, the opponent with a dark red Ares logo above their heads will be instantly dealt a heavy hit of damage with no knockback. This boon only affects Zagreus' special attacks.
Artemis
Signified by a bow and arrow, Artemis’ boon effect will give Zagreus’ attacks a chance to critical hit! This boon affects normals too, so go ham with it and try your luck!
Aphrodite
Signified by a heart, when using certain specials, Aphrodite’s boon effects will cause a unique debuff called charm, which will weaken an opponent’s attack power briefly. This status is signified by the opponent being engulfed in a pink aura. This boon only affects Zagreus' special attacks.
Final Smash: There is No Escape

Entrance Animations
  • Zagreus emerges from a Pool of Styx and says "Again..." if respawning or "Let's start..." when first spawning.
Taunts
  • Up: Zagreus holds up an item much like how he caught a fish. These items can be: Nectar, Pom of Power, Daedulus Hammer, Centaur Heart, and Food. When picking up Nectar, he says "Looks delicious.", for Pom of Power , he says "A Pom of Power", for Daedulus Hammer, he says "Gods grant me strength.", for Centaur Heart, he says "Look what I found" and for Food, he says "Good enough."
  • Right: Turns to face the opponent and raises a fist. Based on his appearance during getting a Boon.
  • Left: Stands straight and folds his arms. Flames appear around him as sparks shoots off.
  • Down: The Companion Battie appears and bounces around Zagreus while he says "Hey there, little guy."

Idle Poses
  • Zegreus smolders a while as fire blazes up around him.
  • Shifts on his foot and turns away from the opponent; his chest facing the camera. Based on his dialog poses.
Victory Poses
  • Zagreus fishes for a fish and pulls out a Knucklehead, Charp, or Voidskate
  • A Boon appears and Zagreus touches it and says "In the name of Hades, I accept this." Either Zeus, Dionysus, Poseidon, Ares, or Athena will appear behind via PNG behind Zagreus.
  • Hades destroys a Wretched Thug which dissipates as Zagreus swings his sword and rests it on his shoulder.

Classic Mode: Escape from Hades
Every battle is modeled after boss battles in Hades.

RoundOpponentStageMusicNotes References
1:ultzss:Reset Bomb Forest (Omega)Based on Magera's battle
2:ultbylethf:Dracula's Castle (Omega)Based on Alectro's battle
3ImpaSpear Pillar (Omega)
Based on Tisiphone
4:ultcharizard::ultridley::ultyoshi:Castle Siege (Last Phase)Based on the Bone Hydra
5:ultsimon::ultkingdedede:Kalos Pokemon League (Omega)Based on Thesus and Asterius
6IoriNorfair (Omega)Opponent is equipped with a Death SyctheBased on Charon
BONUSRacetotheFinish!
FinalHades (Kid Icarus)Boss StageBased on Hades (Hades)

Alternate Costumes
1645285326145.png

#104. Phoenix Wright
Ace Attorney
Part of the "A Smashing Turnabout Bundle" DLC
Special Moves

Neutral Special:
Objection/Take That!

The one thing everybody seems to remember Ace Attorney by. With this move, Phoenix will wind up, taking a deep breath and readying his arm, before pointing it forwards and hollering, "OBJECTION", his pointing finger summoning the speech bubble and text you see in the above picture. This doesn't give you much when it comes to damage, only dealing a measly 7% damage, but if you're hit while winding this up, you can counter it for a base of 1.2x, + 0.1x per piece of Evidence you have in your possession.

Phoenix raises a pointed finger up into the air, winding up and breathing in slightly, before placing a fist on his side, pointing forwards and shouting, "TAKE THAT!" As he does so, the speech bubble above will be summoned, but will be much smaller than the "OBJECTION" from Side Special. This does not have the Side Special's counter properties, but in turn, it's a fast attack that can deal upwards of 16% if you hit.

Side Special:
Missile

Missile the dog pounces forth from Phoenix's magical hammerspace. Missile acts as a semi-summoned character but only temporarily. Think of him more like a very high quality projectile. Missile's initial action will be to pounce forward dealing damage if he hits anyone. Missile will then attempt to jump to Phoenix if he is nearby. If he isn't, Missile will waot unril Phoenix gets close to his range. When Missile runs back to Phoenix, the player may input side special attack to command him to bounce off of Phoenix and to pounce forward again in the direction pressed. After this, Missile will definitively disappear. The purpose of this attack will be to extend combos and for the second strike from Missile to be a KO option at higher percentages.

Up Special:
Step-ladder

In the air Phoenix will throw a Rope Ladder that can cling onto the stage which he proceeds to climb up, On the ground Phoenix pulls out a stepladder which he climbs, The Stepladder can be knocked down and it deals damage to enemies that it falls on to.

Down Special:
Evidence

  1. The Thinker
  2. Sacred Urn
  3. Shichi****o
  4. Carbonated Water Bottle
  5. Autopsy Report
  6. Wiretap
  7. Attorney’s Badge
  8. Metal Detector
  9. Polly
  10. Music Disc
  11. Luminol Fluid
  12. Seashell Pattern Card

Final Smash:
Turnabout Trial

Phoenix will throw out a Magatama which will fly forward similar to Kazuya's start up. The main caught opponent is front and center at the defendant stand. Phoenix says

"Your fingerprints were at the scene of the crime!"

Cuts to the opponent. The opponent looks shocked.

"You make no attempt to reform yourself!"

Cuts. Opponent looks desperate.

"YOU CAN'T HANDLE THE TRUTH!" while raising his finger.

Opponent looks completely at wits end as a gigantic Judge gavel appears behind the opponent and slams down onto the opponent.

After the cinematic ends, Phoenix says "I rest my case".

On-Screen Appearance
  • Phoenix stands before the Judge and says, "The defense is ready, your honor," before he turns and faces the prosecution (a.k.a. the other fighters).
Idle Poses
  • Phoenix sneezes into right arm's elbow.
  • Adjusts his tie.
Taunts
  • Up Taunt: Phoenix Wright flashes his attorney's badge to the screen.
  • Down Taunt: Phoenix puts his hands on his hips and looks forward while smugging.
  • Right Taunt: Smiles while he has his hand behind his head. He also giggles for bit.
  • Left Taunt: He takes out a piece of paper and slaps it with one hand while looking forward.

Victory Poses
  • Phoenix Wright is at a court stand. He then slams the stand and points at the screen, saying "The true culprit it you!"
  • Phoenix shouts Objection and points while Pearl and Maya stand behind him
  • Phoenix runs it but slips and falls as papers scatter about every where.
Classic Mode: On the Defense
All opponents are enemies who have done wrong to the opponents with Phoenix defending them. For this reason, they cannot attack but stand still. Them getting KOd results in a loss.

RoundOpponentStageMusicNotes References
1:ultsonic:CourtroomDr. Eggman is an allyDr. Eggman stands convicted of constantly terrorizing Sonic.
2:ultzelda:Courtroom:ultganondorf: is an allyGanondorf stands convicted of trying to kidnap and kill Zelda and plunging Hyrule into chaos.
3:ultsamus:Courtroom:ultdarksamus::ultridley: is an allyRidley stands convicted of eating Samus' parents. Dark Samus stands convicted of stealing Samus' identity.
4:ultfox:Courtroom:ultwolf: is an allyWolf is stands convicted of galactic terroism against authority.
5:ultinkling:CourtroomDJ Octavio is an allyDJ Octavio stands convicted of brainwashing and enslaving a people.
6:ultdk::ultdiddy:Courtroom:ultkrool: is an allyKing K. Rool stands convicted of stealing bananas and blowing up islands.
BONUSBoardthePlatforms!
Final:ultmario::ultpeach:Courtroom:ultbowser::ultbowserjr: is an allyBowser and Bowser Jr stand convicted of kidnapping, terrorism, embezzlement, and cheating.

Alternate Costumes

#81ε. Jin Kazama
Tekken
Part of the "Echo Fighter Pack #1" DLC
Rage Drive:
Jin's Rage Drive requires the input of both A+B during a Crouch Dash. The result is a 4-hit combo: Twin Pistons followed by a shorthop straight kick and capped off with a haymaker. This deals a total of 21% with strong knockback. Rage Drive can be activtated by down special when in Rage Drive, grab, or via input

Special Moves

Neutral Special:
Devil Blaster

Side Special:
Demon's Spear


Up Special:
Devil Fly


Down Special:
Heavens Door


Final Smash:
Rage Art

Jin takes flight and swoops under his opponent before shooting them into the sky with a red forehead laser. He then grinds their face along the ground and finishes them off with a second forehead laser.
On-Screen Appearance
  • Jin is seen pulling his gloves onto his hands before turning towards his opponent. Based on one of his pre-round animations from Tekken 3.
Idle Poses
Taunts
  • Up Taunt:
  • Down Taunt:
  • Right Taunt: Avenger - Jin charges up his right fist by reeling it back and then punches straight forward while taking a short step, dealing major damage and can KO opponents at 55% (early). Based on his unblockable "u/b+1+2" attack that he uses throughout the series since having changed a traditional Mishima fighting style to his own Karate in Tekken 4.
  • Left Taunt:

Victory Poses
  • Jin performs one uppercut, followed by a jumping uppercut, before crossing his arms for the camera. Based on a Victory Animation from Tekken 3.
Classic Mode: Dad Issues
All opponents are characters who have had bad interactions, or, outright battles with their fathers.

RoundOpponentStageMusicNotes References
1:ultdk:CourtroomDr. Eggman is an allyDr. Eggman stands convicted of constantly terrorizing Sonic.
2:ultmewtwo:Courtroom:ultganondorf: is an allyGanondorf stands convicted of trying to kidnap and kill Zelda and plunging Hyrule into chaos.
3:ultshulk:Courtroom:ultdarksamus::ultridley: is an allyRidley stands convicted of eating Samus' parents. Dark Samus stands convicted of stealing Samus' identity.
4:ultbayonetta1:Courtroom:ultwolf: is an allyWolf is stands convicted of galactic terroism against authority.
5:ultsnake:CourtroomDJ Octavio is an allyDJ Octavio stands convicted of brainwashing and enslaving a people.
6Courtroom:ultkrool: is an allyKing K. Rool stands convicted of stealing bananas and blowing up islands.
BONUSBoardthePlatforms!
Final:ultmario::ultpeach:Courtroom:ultbowser::ultbowserjr: is an allyBowser and Bowser Jr stand convicted of kidnapping, terrorism, embezzlement, and cheating.

Alternate Costumes

#74ε. Rock Howard
Fatal Fury/Garou
Part of the "Echo Fighter Pack #1" DLC
Special Moves

Neutral Special:
Reppuken
The "strong" version is Double Repukken and in the air is a close-ranged burst of wind similar to Terry's Round Wave.

Forward Special:
Hard Edge
The input version would also deal the second hit that it has in the games. Also like Terry it would have the reversed input being QCF + Attack instead of the original QCB.

Back Special:
Overhead Kick
It covers a more vertical range that horizontal so is a better recovery and it also carries the meteor effect that it has Terry's Power Dunk. The input of Overhead Kick is QCB, different to the one given in KOF XV but that it makes sense considering the context.

Up Special:
Rising Tackle

Down Special:
Crack Counter
Rock's counter move where the counterattacks with a Crack Shoot if connects. Crack Counter's input is a DP, while he never used this input for Crack Counter it resembles the input that it has his father Geese Howard from where the moves originates (since is a combination of Geese's Atemi Nage technique and Terry's Crack Shoot).

Super Special Moves

Number 1:
Raging Storm
Instead of attacking at the front of the character Rock's attack is AoE around him so attacking vertical.

Number 2: Shine Knuckle
if you are fast enough you can connect a Rising Tackle in the end of the move that it would have an enhanced effect.

Final Smash:
NEO Deadly Wave
Rock starts using a move similar to Rage Run (considering that we wouldn't use the move in his regular moveset), if connects he will start a cinematic where he spreads a pair of ki wings and prepares to do an autocombo to the opponent that ends with a burst of energy.
On-Screen Appearance
  • Rock slowly walks on-stage as he pulls his gloves on, then slicks back his hair before he enters a fighting stance. This is the same intro animation as his appearance in The King of Fighters XV.
Idle Poses
  • Rock quickly fixes his hair by flicking it, based on his animation which plays each time he performs a heavy attack/special move. It can also be done while crouching.
  • Snaps his wrist forward.
Taunts

Victory Poses
  • Rock tosses his jacket to the background in a similar way to Terry with his hat. This victory pose will always be used if the fight ends with a Shine Knuckle.
  • Rock's Hand starts to Flow with Blue ki while his eyes turns bright red, then he gets exhausted exclaiming "Chi ga...uzukuno ka!". This victory pose will always be used if the fights ends with Raging Storm or NEO Deadly Rave.
  • RockRock turns his back to the svreen and then slashesengulfs his hand in the blue ki and spins to turn his back tot he camera while releasing his ki which forms angelic wings behind him.
Classic Mode: On the Defense


RoundOpponentStageMusicNotes References
1:ultsonic:CourtroomDr. Eggman is an allyDr. Eggman stands convicted of constantly terrorizing Sonic.
2:ultzelda:Courtroom:ultganondorf: is an allyGanondorf stands convicted of trying to kidnap and kill Zelda and plunging Hyrule into chaos.
3:ultsamus:Courtroom:ultdarksamus::ultridley: is an allyRidley stands convicted of eating Samus' parents. Dark Samus stands convicted of stealing Samus' identity.
4:ultfox:Courtroom:ultwolf: is an allyWolf is stands convicted of galactic terroism against authority.
5:ultinkling:CourtroomDJ Octavio is an allyDJ Octavio stands convicted of brainwashing and enslaving a people.
6:ultdk::ultdiddy:Courtroom:ultkrool: is an allyKing K. Rool stands convicted of stealing bananas and blowing up islands.
BONUSBoardthePlatforms!
Final:ultmario::ultpeach:Courtroom:ultbowser::ultbowserjr: is an allyBowser and Bowser Jr stand convicted of kidnapping, terrorism, embezzlement, and cheating.

Alternate Costumes
1645285491424.png

Sakura Shinguji
Sakura Wars
Part of the "Grand Smash Revenue Bundle" DLC

Submitted by: Capybara Gaming Capybara Gaming
Special Moves

Neutral Special:
Ouka Hoshin

On the floor Sakura shoots a pink projectile that is similar to Power Wave, in the air she shoots an arcing projectile. eleasing a pink projectile about the height of Cloud's Blade Beam, but travelling with the speed of Terry's Power Wave. The spiritual energy wave applies a 0.8x damage and knockback debuff to a target's attacks (if it hits) for 8 seconds.

Side Special:
Hyakka Ryoryan

Sakura dashes a little bit forwards and slashes her now fiery sword, this reflects. Press B again immediately after to slash a second time but with no dash. This move goes through shields, but deals minimal shield damage. It does not leave her in free fall if used in the air, and allows her to act almost immediately out of it. Knockback is great, but damage is minimal, and though it deals multiple hits, each hit is a launcher. Designed to provide a "Get-Off-Me" burst movement option.

Up Special:
Showtime Effects

A wire appears connected to Sakura from atop the stage, dropping and attaching to her in about half a second, and pulls her upwards as she poses similarly to her neutral air. A sparkle effect trails behind her. Sakura's an actress, and for a good play, sometimes you need special effects, like flight! It does not leave her in free fall; always gotta have a backup plan in case the effects fail!

Down Special:
Makiwara-Giri

A Makiwara board appears and sakura slashes it, if someone is in between her and the board Sakura does a quick flurry of slashes in addition. The straw deals light flinching damage and keeps them flinching, as the move acts as a counter as well, dealing weak damage but great knockback.

Final Smash:
Cherry Blossom Blade

Sakura dashes forward with a more powerful Hyakka Ryoran, shouting "Ogami-san!", catching up to four opponents in her dash, before the stage fades to city background, as cherry blossom petals float through the air. Ichiro Ogami's Koubu appears alongside her own, and the two both rush forward, striking the enemy three times, before Sakura's Koubu raises it's blade as in her FSmash, sending out a massive Ouka Hoshin projectile to launch the enemy, and a wave of cherry blossoms transitions the screen back to battle.

On-Screen Appearance
  • Sakura's Koubu lands on the stage and she hops out.
Idle Poses
  • Sakura adjusts her bow.
  • Sakura sheathes out her sword.
Taunts
  • Up Taunt: Ichiro appears in the background, similar to Rex, and says "You can do it, Sakura-chan!" in Japanese. Sakura blushes with a lightly perturbed expression. The sound effect for when you made a dialogue choice that made a character happy then plays.
  • Down Taunt: Sakura takes out a Koi-Koi hanafuda card, examines it, then puts it away.
  • Right Taunt: Sakura closes her eyes, then slashes forward, cutting a raindrop in half. It's very subtle.
  • Left Taunt: Sakura does a small spinning dance on one foot. Practice makes perfect!

Victory Poses
Note: Whenever Sakura wins, the transition screen is a wave of cherry blossom petals into the victory screen.
  • Sakura jumps into Ogami's arms in a loving embrace. Ogami says "You did it, Sakura-chan!" The two then perform a victory pose!
  • Sakura has her eyes closed, and her blade sheathed. She then opens them and has already performed a slashing strike towards the camera. Ichiro stands in the back, examining in awe.
  • Her Koubu lands on the ground, it's top opens up, and she begins to get out, standing with her foot firmly planted on part of it, her hair blowing in the wind and looking up heroically.
Classic Mode: Against the Demon Council
Each round includes a female character as an ally to represent Sakura forming her combat revenue in Smash
RoundOpponentStageMusicNotes References
1:ultbowser:(Black):ultmorton::ultpiranha:(Black)Rainbow Cruise
(Omega)
Airship Battle _ Super Mario Bros. 3:ultdaisy: (Red) is an allyThe enemies represents Kouma grunts while the stage represents the Shougeimaru Type 1, a sepcialized blimp.
2DJ OctavioGrand Imperial Theatre (Little Lip Theatre variant)Go Go NYCP!Reimu (Purple) is an allyDJ Otcavio is a stand in for Nobunaga Oda. the main antaginist of Sakura Wars 5. Stage represents the main setting of this game/.
3Galatca Knight (Giant, metal)Grand Imperial Theatre (Chartes Noire Variant, Battlefield)Move Out! Imperial Floral Assualt Group:ultzelda: (blue) is an allyGalacta Knight is a stand-in for the metallic, knight-like minions of the Phantoms of Paris in Sakura Wars 3.
4Medusa (Red)Reset Bomb ForestMedusa's Final Battle:ultlucina: (yellow) is an allyOpponent represents Crimson Miroku, the sole female member of the Black Sanctum Council,a n the stage represents the demonic ruined battle grounds many bosses in the series are foguht in.
5:ultlucas: (Black), :ultkazuya:(Grey, Giant)Mishima DojoKazuya Mishima, Devil Kazuya:ultzss: (Orange) is an allyLucas represents Jade Setsuna, the child-looking member of tje Black Sanctum Council and Kazuya represents Silver Resetsu, his larger and much more imposing "brother". The stage is a reference to the shrine in which they are fought and defeated in the original anime.
6
:ultsephiroth:
Castle SiegeAdvent One-Winged AngelSami (Green) is an allySephiroth represents the final member of the Black Sanctum COuncil, Aoi Satan. Sami represents Ayame and the stage represents the final abttle against him in the origina anime.
BONUSBreaktheTargets!
Final:ultganondorf:
then Ganon
Ganon's BattlefieldCalamity Ganon Battle; Delcaration! Imperial Floral Assault Group:ultdaisy: (red), Reimu (Purple), :ultzelda: (Blue), :ultlucina: (yellow), :ultzss:(Orange), Sami (Green)Ganon represents the true universal force which Sakura opposes in the series with Ganon representing this "Demon King". The allies represents the usual ending push to the final boss to win the day.

Alternate Costume
1646535972149.png

#106. Agumon
Digimon
Part of the "Smash is the Champions Bundle" DLC
Special Moves

Neutral Special:

  • Agumon: Pepper Breath: a weak fire projectile that is similar to Sora's Firaga. Deals 6% damage per ball of fire, as well as weak knockback.
  • Greymon: Nova Blast: a larger fire projectile that deals 10% damage and is more akin to Lucas's PK Fire, dealing higher knockback on bit
  • Metal Greymon: Giga Destroyer: a chargeable projectile in which MetalGreymon can lock onto an opponent similar to Palutena's Autoreticle as he's charging. At max charge, MetalGreymon releases a barrage of six missiles from it's chest towards that opponent's position, dealing 3% damage per missile and knockback dependent on the number of missiles fired. One missile is weak like the Pepper Breath, but all six turns this into a powerful kill move.


Side Special:

  • Agumon: Dynamite Kick. A flurry of kicks while leaping forward, Liu Kang-style.
  • Greymon: Horn Impulse. A dashing horn attack.
  • MetalGreymon: Over Flame. Shoots a wave of fire from his mouth, acting similar to Holy Water, except it travels at 1/4 of Final Destination.


Up Special:

  • Agumon: Wildfire Uppercut: Agumon will do a Shoryuken while his claws are engulfed in fire. Unlike the Shoryuken though, this will do several hits of damage while dragging the opponent up along with Agumon. If all the hits attacks connect, the final one releases a semi-powerful explosion.
  • Greymon: Wildfire Uppercut: Greymon lacks the fire aspects of the attack but rather trades it off with a more standard Shoryuken which launches the opponent upon contact with the final hitbox being the most knockback at the pinnacle of the attack. Thanks to Greymon's claws, it has higher reach.
  • Metal Greymon: Mega Claw: Instead of giving Metal Greyman a typical slasher rising attack, I decided to get Metal Greymon a Joker-esque Grappling Hook attack with Mega Claw. This fires a metal claw which command grab the opponent, pulls Metal Greymon in, and causes the Digimon to spike the opponent. It can also be used as a tether grab to latch onto ledges. This gives Metal Graymon some versatility that typically doesn't come with a character for its size.


Down Special:

  • Cross Fire/Digivolve: When Agumon can activate his Digivolution, holding down the Down Special button will initiate the Digievolve which will either bring Agumon to the Greymon form or Greymon to Metal Greymon. Taking too much damage or getting KOd will cause the character to regress back to Agumon. When not able to activate, it becomes Cross Fire which is a powerful chomp attack that has tremendous start-up lag but has a large hitbox and damage output. It can also swallow and negate items and projectiles. Metal Greymon has the largest hitbox and benefits the most from this attack.

Final Smash:
Terra Force

Otherwise known as "Gaia Force", and a signature move of WarGreymon. Agumon/Greymon/Metal Greymon Warp-Digivolves into WarGreymon and flies into the background of the stage. There, the player will have 8 seconds to aim as he's charging. Upon release, the massive orb of energy will fly towards the stage ominously like Bahamut ZERO's Teraflare in Midgar and generates an explosion that makes the Bomber item look like a firecracker in comparison and hits multiple times like the Smart Bomb, dealing 76% damage total.

On-Screen Appearance
  • A Digivice appears and Agumon jumps out in virtual pet sprite form and the transforms into his 3D form.
Idle Poses
  • Agumon
    • Looks behind, then looks up.
    • Smoke billows out if his mouth.
  • Greymon
    • Greymon stomps his feet once.
    • Fire fumes out of his mouth.
  • Metal Gryemon
    • Heavily breathes twice.
    • His centerpiece glows faintly.
Taunts
  • Up Taunt:
    • Agumon: Tosses a meat roll in the air and chomps it with one bite in that direction.
    • Greymon: Roars upwards.
    • Metal Greymon: Roars forward while raising his wings upwards.
  • Down Taunt
    • Agumon: Slashes twice and says "Agumon!"
    • Greymon: Stomps three times as fire shoots upward.
    • Metal Greymon: Powers up with eelctrcity.
  • Right Taunt
    • Agumon: Jumps up and down three times.
    • Greymon: Roars out while crouching down.
    • Metal Greymon: Metal Greymon emits steam as he performs a strong man pose.
  • Left Taunt:
    • Agumon: Agumon turns around and wags his tail at the opponent.
    • Greymon: Greymon takes his tail and slams it down behind himself.
    • Metal Greymon: Metal Greymon spins while spreading his wings and floating a bit.

Victory Poses
  • Agumon
    • Agumon Digivolves into Greymon which he will then roar with all his might and faces the screen.
    • Agumon happily jump up and down.
      Agumon slashes three times, does a flip, and then does a pose,
  • Greymon
    • Greymon Digivolves into Metal Greymon which he then fires off a beam of fire from his mouth.
    • Greymon falls asleep.
    • Greymon fires off some blasts of fire before using his tail to slash through it.
  • Metal Greymon
    • Metal Greymon Digivolves into War Greymon which he then scratches his claws in front of him in the shape of an X
    • Metal Greymon chomps on some meat.
    • Metal Greymon fires off a barrage of missiles which blast toward the camera.
Classic Mode: Digimon, Digital Monsters
All fighters are monster-like in appearance. In addition, they first fight against a Tiny version, than a medium sized version, and then a Giant to reference the stages of Digivolution.
RoundOpponentStageMusicNotes References
1:ultridley::ultridley::ultridley:WarioWareFinal stock is Meta Ridley alt.
2:ultyoshi::ultyoshi::ultyoshi:Moray TowersFinal stock is Crafted Yoshi alt.
3:ultpiranha::ultpiranha::ultpiranha:Kongo Jungle
4:ultcharizard::ultcharizard::ultcharizard:Brinstar Depths
5:ultdk::ultdk::ultdk:Hyrule Castle
6:ultrob::ultrob::ultrob:Tomodachi Life
BONUSRacetothe!
Final:ultpichu::ultpikachu::ultpikachu:Final DestinationFinal stock is Pikachu Libre

Alternate Costume

#107: Sol Badguy
Guilty Gear
Apaart of the " Bundle" DLC
Character Gimmick: Tension Gauge

  • Tension is a part of anything you do and the way it functions in Guilty Gear proper seems like a perfect addition as-is. For the uninitiated, Tension builds up by moving towards your foe and landing attacks. But keep yourself too far away or play too defensively (Dodging, shielding, running away, etc.) and you lose all Tension that you have and gain a Tension at 1/5 the rate for 10 seconds after. This, unlike other gauges like MP, Durability, and Limit Gauge, encourages Sol players to get up close and personal with their foe. They're also fuel for Overdrives, which are Super Special Moves that cost 50% Tension to use:
    • Tyrant Rave (→↓←→+A/B): Effectively a stationary Buster Wolf, Tyrant Rave is an explosive two-hit attack that's great for racking up damage.
      • 1st Hit: 2%, 2nd Hit: 38%
    • Dragon Install (↓←↓←+A/B): A 7-second temporary transformation that Sol can access to bolster hit movement speed, shorten the frame data on his moves and enhance his Specials The timer is paused whenever Sol hits a foe, initiates a throw, or initiates Tyrant Rave.
Sub Gimmick #1: Roman Canceling: A Shield Special tied to Tension and another must-have. Roman Canceling basically locks your opponent in place with each different color of Roman Cancel corresponding to different situations:
  • Blue Roman Cancel: Only used when doing nothing.
  • Yellow Roman Cancel: Can be used while blocking an attack, allowing Sol to counter his foes hard.
  • Red Roman Cancel: Only used upon striking a foe and during the hitstun or blockstun of a foe.
  • Purple Roman Cancel: Only used during the late active frames and endlag of a move.
Sub Gimmick #2:Airdashing:A minor mechanic much like Terry's Spot Dodge Attack, but would make Sol feel more like a GG character transplanted into Smash. Moving horizontally as you're jumping would be the "walk" while smashing the jump input horizontally will cause you to burst forwards. Imagine air dodging, but riskier.

Sub Gimmick #3:Gatling Combos: Sol's Jab, F-tilt, U-tilt, D-tilt are interweaved together to make a Dancing Blade-style system, and as such all of the aforementioned inputs have three stages of hits, allowing Sol players to mix up their combos. This means that instead of the usual sequential hits on some foes, Sol can use D-tilt 1, Jab 2, and U-tilt 3 instead of only 3 hits of D-tilt.

Special Moves

Neutral Special:
Gunflame/Blockhead Buster

A ground projectile like Terry's Power Wave or Iori's Yami Barai, but unlike their projectiles Sol has more height than distance in his own move, the distance depends if you tap or held the button but both version still being quite short. The aerial variant is a different move called Blockhead Buster (more especifically is the Lvl 1), a move that comes from Order-Sol where Sol does a explosion around the hilt of his weapon.


Side Special: Bandit Revolver/Bandit Bringer


Sol does a series of two jumping kicks regularly, since if you held the button you can do instead the Bandit Bringer, where Sol does a powerful dive punch in a similar way to Terry's Power Dunk. You can make the attacks stronger using the input 236 + attack button ( ↓→ + attack), the Bandit Revolver gains a follow up kick meanwhile the Bandit Bringer gains meteoric propierties.


Back Special:
Ground Viper/Riot Stamp

In the ground Sol performs the Ground Viper, a strong, louder, high risk and high reward attack where he charges forward at the ground delivering a strong uppercut at the end, you can mash the button to increase the distance. Using the input 214 + attack button ( ↓← + attack) instead of a regular uppercut the moves ends with a Volcanic Viper.


In the air the move changes to Riot Stamp, Sol hops backwards and then he impulses himself with a glyph that appears behind him to do a flying flaming kick. Using the input 214 + attack button ( ↓← + attack) the attack gains knockback.


Up Special:
Volcanic Viper

Sol's own DP, he does a powerful burning uppercut using his sword, similar to Ken's Strong Shoryuken but trading some height for a bigger hitbox. The only problem is that the move isn't a very good recovery. Use the command version 623 + attack button ( →↓↘ + attack) for increase a little the height. Sol also has an input exclusive follow up called Knockdown, where Sol strikes the opponet to the floor with a kick, the input being 214 + attack button ( ↓← + attack).


Down Special: Fafnir/Breaker

Fafnir is a powerful forward punch that has the same kill power of a Falcon Punch without the needing of being charged (but still being a very slow and easy punishable attack) and a perfect shield breaker. You can use the command 41236 + attack ( ←↓→ + attack) for deal more damage.


In the air this move changes for Breaker, a flaming dive kick that you must be careful to use since it has a slighlty diagonal direction and when you use it, doesn't have any stop, so if you use it in a risk, have a nice fall! Should be noted that Breaker doesn't has any motion unlike Fafnir.


Down Special: Roman Cancel
Using Shield-B while possessing 50% Tension Gauge allows Sol to do a Roman Cancel, which comes in 4 different colors based on conditions, slowing down the foe in a Witch Time-style effect and allowing Sol to follow up with certain moves.
  • Blue Roman Cancel: Only used when doing nothing.
  • Yellow Roman Cancel: Can be used while blocking an attack, allowing Sol to counter his foes hard.
  • Red Roman Cancel: Only used upon striking a foe and during the hitstun or blockstun of a foe.
  • Purple Roman Cancel: Only used during the late active frames and endlag of a move.
Overdrives
Similar to Terry and (more like) Iori, Sol has Super Special Moves (in his case are called Overdrives), to use a Overdrive you require a certain amount of Tension acummulated in the meter.

Overdrive 1: Tyrant Rave
A 2-hits megaton punch starting explosive uppercut with his free hand before delivering a second punch wreathed in fire magic amplified with his sword. Requires 50% tension and can't be perfomed in the air. The motion is 632146 + attack button ( →↓←→ + attack).


Overdrive 2: Dragon Install

Sol removes his Gear Suppresor and unleash his original power has a Gear. A high-risk high-reward super in which Sol’s movement speed is increased, his normals become noticably faster and safer, his specials are all buffed significantly (see below) and his air grab changes to P.B.B., all this for a max amount of time of 12 seconds (the timer stops during the grab attacks) and with the additional bennefit that the time slows a little at the start of the transformation with Sol being invulnerable in the starting frames. When the mode’s natural duration ends and Sol returns to neutral on the ground, he is forced into a lengthy recovery animation, making him incredibly vulnerable to a counter-offensive, the transformation can also be interruped with a high damaging move. It can be used at the moment you have 50% tension but that would reduce the amount of time you will have so it's preferible do it at 100% tension (also you can use Tyrant Rave during Dragon Install if you have 50% or more). The motion is 214214 + attack button ( ↓←↓← + attack).


Spoiler: Changes in the moves during Dragon Install

AttackChange
GunflameThe move only have one explosion but the vertical range increased and his strenght grows.
Blockhead BusterThe move is now the Blockhead Buster Lvl 2, acquiring more horizontal range and damage.
Bandit RevolverThe kicks are involved in flames, dealing more damage.
Bandit BringerThe blow has a bigger disjointed hitbox and deals more damage.
Ground ViperWhen Sol is slicing forward leaves a trail of explosions in its wake. It always end with a Volcanic Viper
Riot StampThe final hit is a explosion.
Volcanic ViperThe range increase a lot, nearly becoming the highest recovery in all the game and deals multiple hits.
FafnirHitbox bigger, damage bigger.
BreakerThe final hit is a explosion.
Tyrant RaveHas more range and massive damage, but the knockback didn't increase.


Final Smash: Branding Breach

In the start Sol uses a variant of his DI version of the Ground Viper (being his original Instant Kill, All Guns Blazing). The explosions behind Sol will do damage but only the first character hitted will be transported to the rest of the cinematic. In the cinematic part Sol charges his Junkyward Dog to finish his opponent with a fulminating explosive blow.


During the Dragon Install, instead of just charge against the opponent he uses the Overdrive Heavy Mob Cemetery (the explosions behind will still be there, tho), grabbing the first foe will also leave them to the cinematic part, but it will have some changes in the animation, any of this changes will variate the damage.


If the opponent has 100% or more damage at the end of the Final Smash the enemy will be Instant-Killed and if apart of that it was their last stock, a DESTROYED text will appear in the screen.
On-Screen Appearance
  • Sol appears and is seen "smoking" a bullet for his sword, Junkyard Dog. He then spits it and catches it before putting it into his sword.
  • Whenever a one on one match starts between Sol and another player, the screen will have a "Let's Rock" and "Heaven or Hell" intro graphic much like the earlier games.
Idle Poses
  • Smooths back his hair.
  • Cracks his neck
Taunts
  • Up Taunt: Turns his back to the opponent and taps his sword on his shoulder.
  • Down Taunt: Sol turns his back and stomps down on the ground. This causes cracks on the ground to appear.
  • Right Taunt: Takes his hand and does a thumbs down gesture.
  • Left Taunt: Sol takes the Junkyard Dog and slams it down into the ground.

Victory Poses
Note: Like Joker, Lloyd has an unique victory transition where the screen fades to white and then fades back into the victory screen. A bit different than the usual graphics but points to the original source.
  • Sol walks away from the camera, cracking his neck for a bit before placing Junkyard Dog on his shoulder. He then looks back at the camera with a smirk and says, "Heh, too easy."
  • Sol's extend his arm, covered in fire, based on his midmatch victory pose in Strive.
  • Sol is seen in his Dragon Install form, where he lets out a burst of power and a powerful roar before reverting back to normal, looking up at the camera with a toothy grin afterward. Taked from Xrd.
  • Much like Joker, Sol has a special victory pose when he deafeats a character with his Final Smash, instead of teleporting to the usual victory stage, Sol keeps in the same background of his Final Smash, walking to the horizon saying "I think it's about time to end this thing", if he finish with his Dragon Install variant it could be similar but he keeps his Dragon Install form.
  • Like Kazuya Sol's victory announcer would be the announcer from his own game, saying "SOL WINS, STRAIGHT!".

Classic Mode: Heaven and Hell
Opponents are based on both heavenly and infernal properties. Matches are stamina matches at 150% with normal gravity to mimic the way Guilty Gear is played. All stages are Omega forms.
RoundOpponentStageMusicNotes References
1:ultpalutena:Palutena's TempleMarionette
2:ultbayonetta:Umbra Clock TowerThe Midnight Carnival
3:ulthero:Yggdrasil's CastleGive me a break
4:ultkazuya:Mishima DojoJack-a-dandy
5:ultzelda:SkyloftHoly Orders (Be Just or Be Dead)
6AshleyGamerBlue Water, Blue Sky
BONUSBreaktheTargets!
FinalJusticeHeavenMeet Again

Alternate Costume

#108: Lara Croft
Tomb Raider
Apart of the "One Woman Army Bundle" DLC
Character Abilities
Lara can wall cling, wall jump, and crawl.

Run n Gun
Lara's neutral attack, forward tilt, neutral air, back air, and forward air are all tied to her twin guns. When close to a opponent though, she switches to her daggers automatically.

Climbing Gear
When clinging to a wall, she can tilt up and use her climbing gear to climb up the side of the wall.

Special Moves

Neutral Special:
Competition Bow


Lara will stand up as she brings out her bow, which she used in the 2013 game and Rise of the Tomb Raider, and pulls back it's string by holding the button. When released, she will shoot an arrow forward that flies a medium distance. Similarly to Sora's Neutral Special, Lara will shoot one of the five different arrows through a rotation every time she uses the special move. This is signified with a white icon next to Lara in her damage percentage.
  • Standard (a triangle) - Works same as Link's. The longer the player holds a special button, an arrow will deal more damage and fly a bit faster.
  • Fire (a flame) - When an arrow hits the opponent, it will set them on fire and makes them flinch, but fires slightly slower than a regular/standard arrow. If it hits a ground, it will leave a flame trial on the ground for a few seconds.
  • Poison (a skull) - When an arrow hits the ground or a wall, it will release out a small green cloud of mist that slowly deals minor damage to opponents before disappearing.
  • Explosive (a explosion cloud) - When an arrow hits anything (like either an opponent, a wall or ground) on-contact, it will detonate and cause a strong-damaging explosion with bigger radius, though it covers less distance than normally.
  • Penetrating (a red cross) - Deals less damage compared to other arrows, but fires much faster and can hit through multiple opponents on it's path.
Side Special: Excalibur
Taking out the Sword of King Arthur, Lara winds up in a stance similar to Mythra's Lightning Buster, the blade building up with bright green energy. After a maximum of 4 seconds of charge, Lara unleashes a large bolt of green power that travels across the stage and deals 10%-22% damage based on charge, killing anyone at 110%-50% from the center of the stage.

Regardless of charge, there's also a hitbox at the start that deals an additional 10% damage and enough knockback to kill at 82%. The range of the sword is on par with Ragnell, and the energy blast is about as far-reaching as Byleth's fully-charged Failnaught. In turn, however, using Excalibur requires a lot of upper-body strength, so she may need a moment to cool down after use.
Up Special: Grappling Hook
Lara throws out a grappling hook. It is longer than the average tether grab, and is able to be aimed holding the button. If it lands, Lara climbs up the rope, and then can continue to climb up the stage by another half of the rope’s length.

Down Special: Philosopher's Stone
Lara holds the Philosopher's Stone in her hands as long as the button is held down, changing her bullets to gold bullets at a rate of 1 bullet per gun for each 0.5 seconds. Gold Bullets deal an additional 2% damage and cause fighters to flinch when used, though they fire slightly slower. Lara will automatically use gold bullets as her primary ammo until they're gone, and she can hold up to 12 at a time, as indicated by a bullet gauge above her fighter portrait.

Final Smash: Tomb Raider

Lara Croft pulls out a rock and throws it. Once it makes contact with the opponent, it triggers a cinematic where the opponent finds themselves in the middle of a dungeon tomb. The thrown rock triggers a series of booby traps which includes stinging darts shot from the walls, biting snakes which fall from overhead, and finally the opponent being dropped via trap door to their doom. There, they are caught by a sarcophagus which explodes. The opponent is then launched. If the opponent becomes over 100%, Lara uses the Amulet of Horas for an instant kill.
On-Screen Appearance
  • Lara swings on the rope and jumps from it, landing like in her games.
Idle Poses
  • Lara checks her gun.
  • Lara flips her braid.
Taunts
  • Up Taunt: She reaches down to grab something and says "Aha!" with the iconic soundclip being played.
  • Down Taunt: She empties her clip and puts in a new one. This doesn't have any effect on gameplay.
  • Right Taunt: Lara pulls out her sunglasses and puts them on. She then takes them off. She says "This just isn't my day."
  • Left Taunt: She looks around with a flashlight and says "What sort of tomb is this?"

Victory Poses
  • Lara crosses her arms and looks to do something...only to pull out a shotgun, aim it at the camera and say, "Don't you think you've seen enough," before pulling the trigger. Based on the ending of Tomb Raider 2. The overt sexual references where removed from the original source to avoid sexual themes.
  • Lara emerges from a pile of leaves and readies her dagger in front of her. She then says "You lost the game."
  • Lara walks in while holding a torch in one hand and her handgun in the other. She then notices the camera and points her gun while saying "That's as far as you go."

Classic Mode: Protect the Relics
All the matches are based in locations that aretomb/ruin/dungeon-like with opponents who seem the kind to steal from said ruins.
RoundOpponentStageMusicNotes References
1:ultridley:BereniaThe T-Rex - Tomb Raider (1996)
2:ultkrool:Spear PillarAmong Sharks and Jellyfish - Tomb Raider Underworld
3MedusaPalutena's TempleA Survivor is Born
4DJ OctavioMt. HikamiThe Jungles of India
5:ultwolf:Castle SiegeLost Valley - Tomb Raider (1996)
6:ultwario:Great Cave OffensiveVenice Violins
BONUSRacetotheFinish
FinalMaster Hand/Crazy HandMain Theme - Tomb Raider (1996)

Alternate Costume
#10ε Ninten
MOTHER/Earthbound
Apart of the "Echo Fighter Pack #2"
Special Moves

Neutral Special:
PK Boomerang
This has all of the functions of PK Flash but unleashes a boomerang instead.

Forward Special:
PK Fire

Up Special:
4th-D Slip
Ninten is the only one of the MOTHER kids who has a different Up Special. Instead, it functions exactly like Mewtwo's Up Special but utilizes various aspects of Earthbound Beginning's battle black and white menu.

Down Special:
PSI Magnet


Final Smash:
PK Starstorm
Summons Ana and Teddy and then call forth PK Starstorm like Ness and Lucas.
On-Screen Appearance
  • Magically vanishes in via 4D Slip
Idle Poses
  • Shuffles his shoes.
  • Adjusts his hat
Taunts
  • Up Taunt: Ninten pulls out a Prime Rib and eats it.
  • Down Taunt: Pulls out his inhaler and takes a puff of it.
  • Right Taunt: Ninten tur nss and faces the camera while walking forward in place.
  • Left Taunt: Adjusts his scarf while saying "Alright."

Victory Poses
  • Ninten comes running in, sees a present, an dholds up high.
  • Ninten breathes in and out slihgtly being rasiing his fist defiantly
  • Ninten, Ana, and Teddy run across the screen and then runs back across again.

Classic Mode: New Beginnings
All matches are based on bosses found in the first Mother game.
RoundOpponentStageMusicNotes References
1:ultjigglypuff: GiantPokemon StadiumThe T-Rex - Tomb Raider (1996)Jigglypuff represents the boss, Doll
2:ultsamus: (White)BereniaAmong Sharks and Jellyfish - Tomb Raider UnderworldStarmen Jr often spawn as assist trophiesSamus represents the boss, Starman Jr.
3:ultduckhunt:Duck HuntDuck Hunt represents the boss, Stray Dog.
4R.O.B. (Giant)Mario GalaxyA Survivor is BornR.O.B. represents the boss, R7037.
5:ultridley: (Green)The Summit (Omega)The Jungles of IndiaRidley represents the boss, Dragon.
6Iori (red)King od Fighters StadiumLost Valley - Tomb Raider (1996)Iori represents the boss, Teddy, who eventually becomes an ally.
BONUSRacetotheFinish
Final:ultmewtwo:Final DestinationMain Theme - Tomb Raider (1996)Mewtwo represents the boss, Giygas.

Alternate Costume
#63ε Jeanne
Bayonetta
Apart of the "Echo Fighter Pack #2"
Much like how Bayonetta has Madam Butterfly who appears within Wicked Weaves, Jeanne has Madame Styx as the Wicked Weaves.

Special Moves

Neutral Special:
Bullet Climax

Similar in function to Bayonetta's with higher attack and stopping power.

Forward Special:
Heel Slide/After Burner Kick

Up Special:
Witch Twist

Has less aerial recovery ability in exchange for launching power.

Down Special:
Witch Time

It has a smaller window to conenct but, when it does, it has a longereffect. If it doesn't fully connect, Moth Within activates.

Final Smash:
On-Screen Appearance
  • Functions much like Bayonetta's appearance but, instead, emerges from Moth's Within
Idle Poses
  • Flips her hair.
  • Beckons the person to come.
Taunts
  • Up Taunt: Jeanne points both of her guns forward and says "Bring it!"
  • Down Taunt: Turns back while flipping her hair and quickly pivots while saying "I'll show you REAL strength!"
  • Right Taunt: She stomps on the ground which causes a burst of magical energy to erupt up.
  • Left Taunt: She hovers in the air, twirls, and laughs while saying "You're fighting me!"

Victory Poses
  • She turns to walk away and then pibots back and does a high kick before bringing it down and saying "Such a dissapointment!"
  • She twists in place while unleashing ahail of bullets around her before posing with her guns.
  • She lands and adjusts her goggles before glaring at the screen before saying "Not a fan of Witches?"

Classic Mode: Thirst for Revenge
Jeanne partners up with characters who have forcibly taken to fight against theiraggressors. This mirrors Jeanne's brainwashing by Balderin the first Bayonetta and then kidnapped by the demons in Bayonetta 2.
RoundOpponentStageMusicNotes References
1:ultbrawler:Mishima DojoThe T-Rex - Tomb Raider (1996):ultkazuya: is an allyAt one time, Kazuya was held captive and forced to train by his father.
2:ultkrool:Kongo JungleAmong Sharks and Jellyfish - Tomb Raider Underworld:ultdiddy:and Dixie Kong is an allyKing K. Rool kidnapped Donkey Kong in DKC2.
3MedusaPalutena's TempleA Survivor is Born:ultpalutena: is an allyMedusa one time imprisoned Palutena in the first Kid Icarus.
4:ultganondorf:Eldin BridgeThe Jungles of India:ultzelda: is an allyGanondorf imprisoned Zelda in various Legend of Zelda games.
5Dr. EggmanChemical Plant ZoneLost Valley - Tomb Raider (1996):ultduckhunt::ultsquirtle::ultpichu::ultjigglypuff:
Barista are allies
Dr. Eggman would kidnap animals to power up the Badniks. The allies represent these animals.
6:ultbowser:Bowser's CastleVenice Violins:ultpeach: is an allyBowser often schemes to kindap Zelda.
BONUSRacetotheFinish
Final:ultbayonetta1:Umbra Clock TowerMain Theme - Tomb Raider (1996)Bayonetta was kforced into a sleep by Jeane to protect her.

Alternate Costume

#109: Lloyd Irving
Tales of Symphonia
DLC
Part of the "Tales of Smash Bundle" DLC


Submitted by: Venus of the Desert Bloom Venus of the Desert Bloom [/USER​
Character Gimmick: Strike and Technic Artes
Lloyd can skip through his Arte selection by performing the Up Taunt while on the ground. This will allow Lloyd to access two additional Artes aside from his normal one. These Artes are trade offs in terms of attributes.

Sub-Gimmick: Overlimit Mode
When Lloyd suffers over 100% damage or 25% damage in Stamina, he gains increased superarmor, no longer flinches, and his attacks do far more damage. He also gains a new Up Special, Rising Phoenix.

Special Moves

Neutral Special:
Demon Fang/Double Demon Fang/Fierce Demon Fang

Lloyd fires of a single wave projectile that moves forward along the ground like Terry's Power Wave. When performed in the air, it does a single power-infused slash with out the projectile

TypeArteDescription
TechnicalDouble Demon FangIn most of the games that have this arte, Double Demon Fang is a ranged attack that sends two projectile waves toward the enemy in quick succession.
StrikeFierce Demon FangThe user slams their weapon to the ground, creating a shock wave that damages enemies in a wide arc in front of them.


Side Special: Sonic Thrust/Super Sonic Thrust/Hurricane Thrust

Lloyd thrusts his blade forwards like he does his "Sonic Thrust" move. It does 6%.

TypeArteDescription
TechnicalHurricane ThrustWhen activated, the user thrusts at the enemy with enough power to create a burst of wind when the weapon strikes the enemy, damaging it further. The arte will not continue if the initial thrust misses; the burst of wind will appear only if the attack connects with an enemy.
StrikeSuper Sonic Thrust
When this arte is executed, the user forcefully thrusts at the enemy, pushing it away.

Up Special: Tempest/Omega Tempest/Psi Tempest/Rising Phoenix


Lloyd will jump into the air and perform a buzzsaw attack. This will propel him in an arc overhead. This particular up special attack is notable for covering on all sides which gives Lloyd a literal swirling hitbox of death as he travels in the air. That being said, the recovery distance is not the best. The above gif is Omega Tempest which lengths then attack and allows Lloyd vertical traveling. I propose the baseline Tempest as its that initial jump spin you see in the gif.

TypeArteDescription
TechnicalOmega TempestThe user spins forward as if initiating a Tempest, then spins directly upward to continue the attack. The user then jumps backward to land close to the same position where this arte was executed.
StrikePsi Tempest
Essentially, this is a more powerful and wider-ranged form of Tempest, which allows the user to jump to the other side of the field while spinning over the target. Compared to its "Technical" counterpart, Omega Tempest, it hits less but slightly more damage.

When in Overlimit Mode, Lloyd has access to Rising Phoenix. This attack causes Lloyd to jump into the air with great speed, turn, and plummet at an angle while engulfed with a fire effect. This protects him from all incoming damage and his high priority.

Down Special: Beast/Raging Beast/Hunting Beast


Beast has been apart of the Tales series for really as long as time itself. Many characters aside from Lloyd can use Beast. In Smash, this is his best killing move with the ability to unleash an ethereal beast-like head which shoots up upon release. Lloyd will forgo utilizing his swords and will slam his shoulder forward. This attack is quite unique as it would have a shockwave affect that pulls in opponents before release and then blows them outwards. It has an extended hitbox as the beastial head grows large and moves forward.

TypeArteDescription
TechnicalRaging BeastWhen this arte is used, Lloyd does a spin slash to draw nearby enemies closer to him, then blasts them away, creating the image of a lion's head, identical to the Beast arte.
StrikeHunting Beast
When this arte is used, Lloyd slams the target with a weakened blast, creating the familiar lion's head image. He then flips into the air and drops to the ground with enough force to create a powerful shock wave that knocks down all enemies around him.


Final Smash: Falcon's Crest


The attack will cause cause Lloyd to shine just like in the above gif and then unleashes a torrent of spiraling energy that, like Beast and Demonic Circle, traps in opponents and vacuum in nearby ones. During this portion, the Final Smash has yet to trigger. Anyone to manages to stay in with the field of effect for 3 seconds will get then get launched into the air. Lloyd's Final Smash is the only one that lacks the trembling character banner seen when most Final Smashes starts but, rather occurs before he unleashes the attack last hit. This also differs in that it shows Lloyd's ToS character banner as seen in the second gif rather than his character banner for Smash. Prior to unleashing the attack, his two swords changes to that of the Material Blades. This aspect is quick and hard to catch unless paying attention as to not take up too much time. He then gathers a whole bunch of energy before swinging it down, carrying the opponent down in an overdramatic/overpowered stall-and-fall attack that slams the opponent into the ground and then proceeds to launch them up into the air. This can also damage nearby opponents who are near the crash zone. He then hops away.
On-Screen Appearance
  • Flies in on a Rheaird, jumps off while doing a flip, and then brandishes his twin blades.
Idle Poses
  • Checks his Exsphere on the back of his hand.
  • Taps the ground with his boot.
Taunts
  • Up Taunt: Lloyd holds up his hand and his Exsphere glows bright. He says " Mom, I hope you were watching... "
  • Down Taunt: Loyd will
  • Right Taunt: Lloyd takes out the Spirit Ring and fires off a projectile that has very limited range. It does 1% damage
  • Left Taunt: Loyd swings both swords forward in an x-pattern and says " There is no meaning in dying! "

Victory Poses
Note: Like Joker, Lloyd has an unique victory transition where the screen fades to white and then fades back into the victory screen. A bit different than the usual graphics but points to the original source.
  • He throws one of his swords upwards while spinning the other one, then he catches the sword and puts them away before saying "Never had a chance." This is based off his victory animation.
  • He slashes once and then points his sword forward. He then says " Heh heh. I looked pretty good there, huh? " This is based off his victory animation.
  • He slashes twice while sayng "Alll right!" and then turns to face the camera with his swords out.
  • Team Battle Only If Lloyd is Player 1, he will do an unique voice line taking from these…
KO Voice Line

  • I'm sorry...dad...
This is a reference to his dying quote in Tales of Symphonia.

Classic Mode: Journey of Rejuvenation
This classic mode focuses on Lloyd fighting Summon Spirits which were required in order to gain the Material Blade.
RoundOpponentStageMusicNotes References
1:ultinkling:Bowser's Castle
  1. Like a Glint of Light
Represents Udine, the Summon Spirit of Water
2:ultpit::ultdarkpit::ultmetaknight:Venus LighthouseRepresents Sylph, the Summon Spirits of Wind
3:ultincineroar:Bowser's CastleRepresents Efreet, the Summon Spirit of Fire
4:ultpikachu:Kalos Pokemon LagueRepresents Volt, the Summon Spirit of Lightning
5:ultpalutena::ultfalco:Great Pleatue Sheikah TowerPalutena represents the summon Spirit Luna and Falco represents the summon spirit Aska.
6:ultmythra::ultmythra::ultmythra::ultmythra:Green GreensMythra represents the Summon Spirit, Origin. He wields four swords ina battle and is blonde.
BONUSBreaktheTargets!
Final:ultlink::ultyounglink:Tower of SalvationYoung Link appears ont he second stock.Adult Link is meant to represent Adult Mythos. Young Link represents the original form of Mythos.

Alternate Costume

#110: Geno
Super Mario RPG
Apart of the "Beware of the Forest's Mushrooms Bundle" DLC
Character Abilities
Geno has a characte rmechanic where he will emit an aura right before his Specials connects. When this happens, hitting the special button again will do more damage right when the attack hits. This refrences his source material from Super Mario RPG.

Special Moves

Neutral Special:
Geno Beam

Geno shoots out an energy beam from his arm cannon in front of himself, dealing 9.7% per hit.
However, if you press B before it hits the foe, it increases it's damage, spead and length, making the attack stronger.
Also if you hold B, you could continuously shoot the beam at opponents.

Side Special:
Geno Whirl

A highly-telegraphed attack and one of his most infamous. Geno will form a disk of Golden energy in his hand and throw it out on frame 14. Normally if you hit a foe with this it'll deal a measly 6% damage and flinches, allowing Geno some good set-up potential. But there's a catch! If you press the B button the exact frame before it touches a foe's hitbox, you'll deal a critical hit with much stronger knockback! Not even Kazuya's Electric Wind God Fist was as precise in Smash as this!
Up Special: Geno Comet
Glowing as bright as the star he was before possessing the doll, Geno bolts upwards for a bit. Geno can stop his flight to perform an omnidirectional follow-up at any point in the recovery, adding to his mix-up game. Usually, this does 8% damage and some low-medium knockback, but pressing the button just before hitting a foe allows him to barrage foes with multiple hits, dealing a total of 13% damage and medium-high knockback.

Down Special: Geno Boost

Hold down the Down Special input to raise up your attack stat slightly to deal more damage. Letting go for the duration will cause Geno to recieve the full benefit but letting go early will have less attack damage modifiers. Letting go right before the last arrow vanishes will not only see an attack modifier added but will also give Geno a knockback resistant buff.

Final Smash: Geno Flash

Geno willsummon a pillar of light which envelopes him and anyone else nearby. This transports the player to a recreation of a battle from Super Mario RPH with Geno alongside Mario and Mallow. He will then transform into a cannon and lob oa powerful projectile which creates a star-shape burst before launching the opponent. This attach sequence is unique as it renders every character in isometric styling.
On-Screen Appearance
  • Geno spawns on the stage as doll, but suddenly the star (his soul) crashes into his body, making him alive. Also he gets up after being awoken.
Idle Poses
  • Shakes his head side to side.
  • Jumps up and down slightly.
Taunts
  • Up Taunt: Shakes his head up and down quickly. Based on one of his animations from SMRPG.
  • Down Taunt: Geno holds out his hands to "stop" the opponent.
  • Right Taunt: Geno folds his arms and laughs.
  • Left Taunt: Geno points his Star Gun to the right and to the left. This is a reference to his previous role as a Mii Gunner Outfit for two games.

Victory Poses
  • Geno turns and folds his arms while facing the screen. Again, based on his victory animation.
  • Raises his arms into the air which causes his "soul" to leave the Geno doll thus causing it to crumple to the ground. It whirls about before shooting into the air.
  • Geno drops down from the air which references his attack animation to face Bowyer. He then aims his gun towards the screen.

Classic Mode: STar-Sent Savior
Classic mode is based on the series of events that transpired in Super Mario RPG.
RoundOpponentStageMusicNotes References
1:ultbowserjr::ultkirby: x4 (Red)Bowser's CastleGoing Down to Midas River(Remix)
2:ultbyleth: (Yellow)Forest MazeStill, the Road Is Full of Danger
3Bandana Waddle DeeGerudo ValleyFight Against an Armed Boss
4Officer Howard x5Battleship HalberdFight Against Monsters (Remix)
5Giant :ultyoshi: (Purple)Golden Plains (Omega)Yo'ster Island - Super Mario RPG: Legend of Seven Star
6Metal :ultkingdedede:Shadow Moses IslandWeapons Factory (New Remix V1)
BONUSBoardthePlatforms!
FinalGiant :ultsephiroth:Final Destination
Super Mario RPG Legend of the Seven Stars Medley(Remix)

Alternate Costume

#111. Ratchet and Clank
Ratchet and Clank
Part of the "Rifting Together Bundle" DLC

Submitted by: tonygameman tonygameman
Special Moves

Neutral Special:
Fire Weapon

Side Special: OmniWrench

Ratchet_and_Clank_PS4__ALL_WEAPONS_SHOWCASE (1).gif


Ratchet throws the Omniwrench like a makeshift boomerang that travels 3/4 the distance of Mega Man's Side Smash before it comes flying back to him. The attack deals a minimum of 13% and hits multiple opponents in its flight path.

Up Special: Thruster-Pack

With the Thruster-Pack, Clank will spawn two jet wings and boost him & ratchet in the air. Unlike the original game were you fly straight you can aim the control stick to send the duo flying straight forward to any direction.

Down Special: Weapon Select

Holding down special brings up a weapon wheel which allows Ratchet to select from a number of weapons. These includes:
  1. Pyrocitor
  2. Warmonger
  3. Plasma Striker
  4. Glove of Doom
  5. RYNO
  6. Bouncer
  7. Buzz Blades
  8. Vortex Grenade
  9. Visibomb Gun
  10. Combuster
  11. Mr. Zurkon
Using these weapons will help upgrade the item.

PyrocitorHolding the B button releases a stream of fire that functions similarly to Bowser/Charizard's fire breath Neutral B's. It's a rather weak stream on its own, but the hit rate makes it a sustained-damage beast, as it deals 1% per 5 frames.Hitting the foe with uninterrupted fire for 1 second inflicts a D.o.T. that deals 12% damage over 10 seconds.Lavacitor:
The Pyrocitor's direct upgrade in the 2016 reboot, the Lavacitor has a new ability added: after 2 seconds of uninterrupted fire hitting the opponent, they will leave behind a patch of embers similar to Rathalos's fire patches.
WarmongerTapping the B button fires a rocket in front of him that deals 15.5% explosive damage and hard knockback.Holding B allows Ratchet to lock onto an opponent he aims at for more than 30 frames to give the Warmonger's rocket homing properties.Peacemaker:
The direct upgrade of the Warmonger in the 2016 reboot. The explosion now releases 8 micro-rockets in every straight and diagonal angle. Each micro-rocket deals 7.3% damage and half the knockback of the normal rocket.
Plasma StrikerTap B to fire a large bolt that deals slight damage on its own. Uses Marth's headshot mechanics, allowing Ratchet to deal increased damage to opponents if hitting that hitbox.Holding B allows Ratchet to strafe and jump while attempting to aim, firing the gun once the player releases the B button.Plasma Slayer:
The direct upgrade of the Plasma Striker in the 2016 reboot. The Plasma Slayer now has piercing properties, making it more akin to Kazuya's Devil Blaster minus the damage reduction.
Glove of DoomThe Glove of Doom is a mechanical glove that ratchet acquires in the first game, using this will let you drop a tiny orb that grows into a small herd of robots who'll run forward the direction they are thrown in and explode upon contact with an opponent, this weapon only works on ground.Neutral B will have Ratchet drop a small orb that release a small herd of robots that run straight towards the stage, if they make contact with an opponent, they'll explode leaving them with 10% of damage.Gold Glove of Doom: This an an upgraded gold variant required in the original, while it likely plays the same as the original in Smash Bros the gold glove uses some upgrades the bots' have in later games, mostly their V2-V5 enhancements were they carry lasers next to them. They'll run forward to their opponents while firing from their lasers, but when they run out they'll detonate and explode.
RYNO
Fire a sphere of energy which creates a portal. The portal itself causes damage at 1.3% per hit. Ejecting from the portal is space debris which will crash down and can spike airborne opponents. It does more damage when it hits directly on rather than a whiff. Due to it's nature, it has a lot of lag and rather predictable but deals high damage. As an Easter Egg, it could drop Nintendo related content such as an Arwing, a Bowser Statue, Villager's House, or more.
It increases the speed of the portal which allows for quicker portaling.RYNO ∞
Instead of opening one portal, it opens two portals next to each other drops the same payload but double the pain and hit box.
BouncerWhen fired, it causes a small explosion to detonate which then causes smaller explosions to arch from the initial one. These are delayed ones that can be deceiving to other players.The first upgrade causes the bombs that are released to do extended damage over a period of time.Heavy Bouncer: This version creates an even larger explosion with more smaller explosions. The first explosion also has a vacuum effect.
Buzz BladesIt fires a volley of blades that will deal damage. Unlike its source material, it can't ricochet off opponents but, rather, can ricochet off solid objects. This causes it to gain a 2.2x damage magnifier after each ricochet with a total of 6. The attack is a a great damage amplifier but not the best to close off stocks.It fires off more blades per attack thus increasing the overall damage potential as well as area of effect.Doom Blade:
Not only does the attack has a damage amplifier for ricochets it performs but it can also leave a poison affect on opponents that get hit by it further increasing the amount of taken damage.
Vortex GrenadeThis Grenade works very much like a weaker version of Black Hole which will pull in opponents and levitate them. It doesn't deal damage and its pull is weaker than the item.
It has a pull effect for not only opponents but for items and such as well.
Singularity Grenade:
It has a wider area of effect with a stronger pull that emits tachyon waves which can damage opponents within the bomb. For every damage it does, it has a momentary burst of pull strength.
Visibomb GunIt functions much like Snake's Remote Missile but it last less range and damage output.It has better steering with tighter controls with the ability to slow down the rocket b y pushing backwards.Mega Visibomb: Increases the overall damage output and it's tight controls from the previous upggrade while also increase the distance it can be remote controlled.
CombusterA slow-firing weapon that shoots out blasts of superheated plasma that works great on shields.The shots do more impact damage which can launch opponents further and has a slightly higher rate of fire.Magma Combuster: It will continue to burn which deals continuous hits of damage. It can also stay on the stage for a period of time which does environmental damage.
Mr. Zurkon
(Note: Mr. Zurkon is the only weapon with actual voice clips. These includes:
  • “Flee before Mr. Zurkon!”
    “Death is too stupid for Mr. Zurkon.”
  • “Mr. Zurkon conducts a symphony of pain.”
  • “Say hello to Mr. Zurkon’s little friend!”
  • “You are no match for the almighty Mr. Zurkon!”
  • “You are the disease and Mr. Zurkon is the cure!”
  • “Mr. Zurkon does NOT come in peace!”
Mr. Zurkon will rotate around Ratchet will fire lasers as it travels. It also absorbs some damage as a type of a shield.Has higher hit points and can suck up damage. The lasers it fires has a wider hitbox.Zurkon the Destroyer: A different color form of Mr. Zurkon, it fires more higher powered lasers that acts like a fully powered Thoron but weaker. Zurkon the Destroyer also can absorb more damage. It also has a chance of firing a higher powered up plasma shot that travels slowly but does high damage; comparable to a Charge Shot.


Final Smash: Black Sheepinator

Ratchet fires a beam that can travel through fighters, turning anyone it hits into a helpless sheep for a total of 8 seconds. The sheep can jump once, can't shield or dodge, and have only a single input: Pressing attack or special will result in them going "Baaaah." Ratchet can freely attack opponents around, though their fluffy wool reduces damage and knockback to them. Opponents with over 100% damage get turned into Black Sheep, which baa, then explode, KO'ing them and dealing damage and knockback to nearby opponents.
Please Note that Ratchet and Clank have an Alternate Costume composed of Rivet and Kit so they will also be sharing animations as well.

On-Screen Appearance
  • Ratchet's homemade spaceship from the original PS2 game lands in the background of the stage. The cockpit opens as Ratchet snatches Clank and puts the robot on his back and faces the foe.
Idle Poses
  • Ratchet jumps up slightly and puts his hands on his hips.
  • Klank pops up and taps Ratchet on the head.
Taunts
  • Up Taunt: Ratchet throws his Omniwrench into the air but gets distracted by Klank. The wrench then falls and hits him on the head. He then says "Ouch! That stings!" while Ratchet says "Don't get distracted."
  • Down Taunt: Ratchet hovers in the air using a jetpack and does a small spin while Ratchet also hovers, They do a high five.
  • Right Taunt: Turns to the screen and takes his Omniwrench and points it forward. He then says "I won't back down!"
  • Left Taunt: Mr. Zurkon appears and floats in front od Ratchet and says one of his quotes when he is summoned. Ratchet laughs off the threat.

Victory Poses

  • Ratchet comes zooming in on a jetback and turns around with Klank jumping off his back. He then pulls out his Omniwrench and points it forward while saying "You miss me?!
  • Ratchet swirls his Omniwrench and then points it up in the air. Clank then appears and says "Seems we missed the party."
  • Ratchet takes out one his guns he has and points it forward towards the screen before saying "Eat plasma" and then fires it.
Classic Mode: The TRUE All Stars Battle Royale
All fighters are those found on Sony Playstation consoles.
RoundOpponentStageMusicNotes References
1:ultsnake::ultswordfighter:Shadow Moses IslandMii Swordfighter uses the Raiden outfit.Metal Gear Solid first appeared on the PS1 in 1998.
2:ultryu::ultken:Suzaku CastleStreet Fighter first appeared on the PS1 with Street Fighter EX Plus in 1997.
3:ultkazuya:Mishima DojoTekken first appeared on the PS1 in 1994.
4:ultjoker::ultswordfighter::ultswordfighter:MomentosThe Mii Swordfighters uses the Persona 3 and 4 Protag outfitsPersona Revelations first appeared on the PS1 in 1996 and Persona 5 appeared in 2016 on the PS5.
5:ultsora:Hollow BastionKingdom Hearts first appeared on the PS2 in 2002.
6
:ultcloud::ultsephiroth::ultgunner::ultswordfighter::ultbrawler:
MidgardMii Swordfighter uses Aerith outfit, Mii Gunner uses Barret outfit and Mii Brawler uses the Tifa outfit.Final Fantasy first appeared on the PS1 with 7 being the first FF game on a non-Nintendo system.
BONUSBreaktheTargets!
FinalCrashN. Sanity BeachCrash Bandicoot first appeared on the Playstation in 1996 and was a Playstation exclusive series until the early to mid 2000's.

Alternate Costume

#?: Nightmare
Soul Calibur
Apart of the "A History of Stage Bundle" DLC
Character Abilities

Guard Impact:
By tilting forwards slightly while triggering a Perfect Shield, Nightmare generates a wind box in front of himself that slightly pushes his for away and gives him an opening to strike.

Revenge: Some of Nightmare's moves have counter-frames during start-up. Triggering these frames allows Nightmare to counterattack with Dire Vengeance, an omnidirectional blast the size of Thwack that deals 1.4x the damage he would've taken and also gives him a temporary boost to his stats.

Night Stance: Nightmare has access to three different stances that he can use to mix up his foes.

Night Side: A stance where Nightmare holds the sword with his monstrous hand.

A: Soul Biter: A lunging horizontal chop with Soul Edge. Deals 7% damage and stuns on hit.

Hold A to transition back into Night Side Stance after the attack.

Forward Tilt: Night Front Kick: A lunging thrust kick. Deals 5.2% damage and low knockback.

Back Tilt: Phantom Splitter: An underhanded upwards slash. Can hit above Nightmare and has great horizontal range, to boot. Deals 11.2% damage and medium-high knockback.

Up Tilt: Phantom Star: A telegraphed upwards slash that crumples on hit. Deals 9% damage.

Hold A to transition into Night Behind Stance.

Down Tilt: Skull Chopper: An upwards-angled horizontal sword slash advancing forwards. Is great for trading with shorthopping opponents as Nightmare can avoid many aerials with this attack. Deals 7.7% damage and low-medium knockback.

Night Behind: A stance where Nightmare holds Soul Edge down his back.

A: Knee Kick Rush: An advancing two-hit knee attack. Deals 4% and 5% damage and low-medium knockback.

Side-Tilt: Terror Sweeper: A leaping sweeping sword strike. Deals 7.5% damage and low knockback with a high chance to trip.

Hold A to transition from Terror Sweeper to Night Side Stance.

Up-tilt: Terror Vortex: An underhanded upwards strike with Soul Edge, dealing 7.2% damage and strong knockback.

Double-tap side:
Transition into Dash Attack.

Night Lower: A stance where Nightmare crouches, holding Soul Edge level with the ground.

A: Leg Hacker: A hitstun-inducing slice of the legs. Deals 6.1% damage. Hold A to transition into Night Side Stance.

F-tilt: Death Horn Charge: A lunging stab with Soul Edge. If anyone hits, he will smash them into the earth while they’re hung onto Soul Edge. The attack deals 4% and 9% respectively, with the second hit dealing strong horizontal knockback.

Hold A to trade the grab from Death Horn Charge with a transition into Night Behind Stance.

U-tilt: Death Lifting Kick: An upwards-angled knee followed by an upwards kick. Deals 3% and 5% respectively and deals medium-level knockback.

Double-tap joystick: Transition into Dash Attack.

Special Moves

Neutral Special:
Soul Wave

A telegraphed, omnidirectional blast around Nightmare 1.5x the size of his Shield. Deals 10% damage and medium-high knockback. If hit during start-up, this attack initiates Dire Vengeance.

Side Special: Double Avenger

A lunging two-hit strike that deals a total of 13% damage and strong knockback. Has excellent disjointed hitboxes and goes 1/3 the width of Battlefield. If hit during start-up, this attack initiates Dire Vengeance.
Up Special: Night Terror
Sprout fiery wings and ascend upwards with a force of a meteor. Tap B again to follow up with a Devil Blaster-like beam downwards. The ascent deals 8% damage and medium-high knockback while the downwards beam deals 14% damage and high knockback.

Down Special: Reversal Edge

A two-stage Special that starts with Nightmare performing a delayed downwards slash dealing 6% damage. If he hits, both Nightmare and his opponent (with the closest being prioritized in free-for-alls) will engage in a rock-paper-scissors match that uses the A, B, and Y buttons. Nightmare has a unique set of attacks when engaging, though enemies that aren't another Nightmare will default to their tilts. B beats A, Y beats B and A beats Y.

A: Calculated Slaughter: A quick and strong horizontal swing that deals 11.5% damage and strong downwards-angled knockback. The opponent uses F-tilt with this button.

B: Crown Splitter: A leaping downwards slash that deals 15.3% damage, strong knockback, and spikes anyone in collateral. The opponent uses U-tilt with this button.

Y: Crimson Fountain:Nightmare reaches forward and grabs the foe, draining a portion of their soul to gain Terror Charge before tossing them away. Deals 9.4% damage and low knockback. The opponent uses D-tilt with this button.
Final Smash: Inferno Unleashed
Nightmare raises Soul Edge heavenwards and causes a massive Soul Wave that catches foes in his wake. In an entirely new environment, Inferno appears and bathes the entire place in fire, damaging them slowly for a brief moment before he flies down with meteoric force and causes an explosion that completely immolates the foes. As the explosion occurs, the camera zooms out to reveal this is happening inside of Soul Edge itself, its single eye an empty gaze at the camera. The entire Final Smash deals a total of 44% damage and extremely strong knockback, and instantly kills at 100%, healing Nightmare for 15% for every kill done this way.

On-Screen Appearance
  • Nightmare appears on a phantom horse who rears and releases a ghastly neighing sound. It then vanishes while Nightmare drops to the ground.
Idle Poses
  • He closes his hand with a lot of force like in SC6's character selection screen.
  • Nightmare slightly pulsates with dark energy slightly.
Taunts
  • Up Taunt: Nightmare clenches his monstrous fist in front of him and says "I desire yuor soul."
  • Down Taunt: Nightmare grasps the SoulEdge with both arms and points it upwards and says "Consume!"
  • Right Taunt: Nightmare swings Soul Edge and points in front of him saying "There's no turning back!"
  • Left Taunt: Stabs downward which causes darkness to erupt around him

Victory Poses

  • Nightmare swings his sword twice before striking a pospose. Throughout this, he says, "Blood! Darkness! I shall drown the world in both!" Based on his Victory Animation from SC5.
  • He puts his sword upwards and then lows it like in Soul Calibur 6
  • Nightmare kneels down while his monster hand pulsates with dark, purple energy. He takes the hand and holds up in front of himself and says "Need...more souls!"
Classic Mode: Stories of Souls
Each character has been a guest fighter in the SoulCalibur series before. Each fight is an Omega form stamina matches.
RoundOpponentStageMusicNotes References
1:ultswordfighter:FoursideInto NirvanaCostume is Bonic helmet and ninja outfitOpponent referneces Yoshimitsu from Tekken.
2:ultlink:Hyrule CastleHyrule Field ThemeTunic of the Wold LinkLink appeared as a guest fighter on the Gamecube version of SoulCalibur II.
3:ultbrawler:Mishima DojoHeihachi Mishima, The King of Iron FistHeihachi outfitHeihachi appeared on the Playstation version of SoulCalibur II.
4:ultlucina:Gigabyte RuinsYou Will Know Our NamesOpponent comes with a RaygunOpponent is based off KOS-MOS who appeared via customizable parts in SoulCalibur 3.
5:ultpit:Great Platteau Shiekah TowerFight On!If Lloyd is downloaded, than Lloyd preplaces Pit while the stage is replaced with the Tower of Salvation. The song Full Force is used instead.Lloyd appears as a guest character in SoulCalibur Legends. Pit fitts as a stand in for Lloyd if he isn't downloaded from Season 2,
6
BONUSBreaktheTargets!
Final:ultswordfighter:King of Fighter's StadiumBanquet of NatureTakamaru outfit is usedTakamaru works as a stand-in for Haohmaru who was a geust fighter in SoulCalibur 6, the most recent game.

Alternate Costume

#?: Red
Angry Birds
Apart of the "Seeing Red Bundle" DLC
Special Moves

Neutral Special:
Bied Swap/Bird Launch

Red is capable of swapping between various Birds (Chuck, The Blues, Bomb, Boomerang Bird, Terence, Bubbles, Silver, and Mighty Eagle. This gives Red8 total potential uses. That being said, there is a 25 second cooldown after using one of the birds before it can be reused. If the bird is damaged and "dies" by an attack, the cooldown timer isn't applied. This also applies is the bird flies off the stage. The attack is a too step process. Like Bonus Fruit, the player can cycle through the birds which appears as an icon above Red. By selecting it, the player can then press the neutral special once again to launch the bird. It can be used both on the ground and the air. This also allows Red to "save" a brid before launching them. This can be used for midn games by delaying launching the bird. Getting KO'd removes any cooldown timers for any given bird. Each bird has its own propertieis which I will highlight in another post.

Side Special: Red Launch

Unlike the neutral special, Red launches himself. This is done by inoutting and holding down the special button which allows Red to be fired the direction of where the Slingshot is facing. Now, this is where it gets interesting. After holding down the input, the player can then direct the angle at which to launch Red with the availkable angle being 360 degrees. This allows this move to be extremely affective as bioth and offensive and recovery move. It's not as useful as other ones due to having to "swing" the slingshot to look upwards or any angle to aids in recovery. Still, this is an extremely flexible move.
Up Special: Power-Up
Red is the second character to not get a typical recovery move because this will be tied to another move later. Instead, Red can utilizie one of several power-ups which can affect all of his specials in some way. The power-ups are: Shockwave, Power Potion, Homing Bird, Birdquake, Space Egg, and Mighty Feather. These power points only affect the s[ecials (for now) includiong the Neutral, Side, and Down. Once you use this power-up, then you are stuck with it unless you die or swap up by pressing up special again and selecting the power up. Once you swap out, you can't use that power up again until you are KO'd.

Down Special: Bad Piggy Tower

Yes, even the Bad Piggies makes an appearance. By holding down the down special, a "blueprint" for a Bad Piggy Tower appears. Red can "cause" it to appear directly in front of him to, like Grenjnja's Shadow Sneak, can move the blueprint on a horizontal plane in front of him. Releasing the input causes the Bad Piggy Tower to appear. There are three variations of the Bad Piggy Tower but they are some rather medium in szie with have 6 total Bad Piggies on them. Just the design of the tower changes along with its color. In a team battle, the color of the tower correlates with the color of the team. Doing it in the air will cause the Tower to be taller since it scales Red's height in the air in coomparison to the ground. This tower serves many purposes with it's main one being a deteerent and obsctale with the dame properties as Aloan Exeggutor. That being said, the main use is to destroy the tower. By launching either one of the birds viua Neutral Special or Red via the Side Special, it will cause the Bad Piggy Tower to collapse which causes widespread collaterial damage in a way that is somewhat similar to Villager's Down Special. The atatck is unique as it as Bomb Rush-like physics where the demolition of the tower is highly dependent on where it was hit, which type of Bird was used, and if any Power-Ups was utilized. This results in no one Down Special resulting in the same amount of damage. This attack is extremely varied. The tower can also dbe destroyed by other attacks as well by other opponents which can result in Red being damaged or any allies if they are close by. This is the perfect crowd control attack and is absolute mayhem in 8-player Smash. One funny animation is, once spawning the tower, Red adopts a rather angry look. Only one tower can be built at one time.

Final Smash: Super Red

Red launches himself via Slingshot which, upon hitting the opponent, will trap them in the Final Smash. It transports them to a scene similiar to the Angry Birds game. The opponent is trapped in a large Bad Piggy with other Piggies. Red jumps into a super large slingshot which fires him at supersonic speeds. As he reaches near the tower, he passes through a wormhole making him become Super Red. He crashes into the tower which causes a burst of red waves to pulsate out. This has two effects: First, it destroys the tower and greatly damages the opponent. Upon destruction, all of the Bad Piggies and any caught opponents crash down around themsleves. Anyone past 150% damage will be instantly KO'd. The second efefct is those red waves continue after the Final Smash cinemeatic ends and will pulsate out from where Red initially hit the opponent and will continue until they reach the blast lines. It's possible to avoid these waves as they move in the four cardinal directions rather than a 160 degree radius, getting hit pushes the opponents backwards in a wave similar to Mario Finale but with less damage overall. It's more akin to Mario's F.L.U.D.D> in properties.

On-Screen Appearance
  • Red crashes down at the ground and gets up (Also he screams like in original game when launched).
Idle Poses
  • Red grits his teeth.
  • Red jumps up and down slightly.
Taunts
  • Up Taunt: Red puts on a mask reminiscent of the one he wore in Angry Birds Space, and the eyeholes light up with red as the plumage on the top of his head sharpens. He goes back to normal after he takes off the mask.
  • Down Taunt: Red screams in a fit of rage.
  • Right Taunt:
  • Left Taunt: Red grimances with anger while Bad Piggies dance around him.

Victory Poses

  • There are 4 Reds, one is perched in the slingshot while the other 3 are on the ground - each one on the ground backflips as a "10000" appears above them one-by-one, and then a final 10000 appears above the Red in the slingshot as his name flashses on the screen
  • Jumps up and down with the other Angry Birds.
  • Bad Piggies appear in a tower before Red appears from the background and crashes into the tower; causing it to collapse.
Classic Mode: Meanie Greenies
All of the opponents are green variations of fighters except for Yoshi on stages that have wall-off blast zones.
RoundOpponentStageMusicNotes References
1:ultbowser:Colosseum
2WaluigiOnett
3:ultzombie:Bridge of Eldin
4:ultincineroar:Boxing Ring
5Crazy DaveKing of Fighters Stadium
6:ultyoshi:Wii Fit Studio
BONUSBreaktheTargets!
Final:ultkirby:

Alternate Costume

#?: Doomslayer
Doom
Apart of the "Thy Smash Ball Subsumed Bundle"
Gimmicks and Mechanics

Special Moves

Neutral Special:
Weapon Wheel
Byholding down the special button, players can cycle through numerous guns within Doomslayer's inventory that allows him access to the gun via his Jab, Forward Tilt, Neutral Air,and Dash. The weapons are as follows:
Name
Ammo
Description
Combat Shotgun
Pistol
Chaingun
Plasma Rifle
Ballista
Grenade Launcher
Rocket Launcher
Heavy Cannon

Not selecting a gun causes the weapon wheel to cancelout. Each weapon has it's own ammo pool and reducing the ammo count to 0 causes the gun to be unable to be selected though Doomslayer can still carry the gun. Performing physical, melee attacks, KOs, or a Glory Kill can cause the ammo count to increase. When carrying an inactive gun that is out of ammo, being close to an opponent causes a punch attack that can help regain ammo.

Side Special: Crucible/Glory Kill/Hell Fist
More detailed write up coming soon. Doomslayer does a an upward swing with the Crucible. When the gauge is filled up, the Mark of the Slayer icon appears above the opponent. Getting in close and hitting side special will change the attack to Glory Kill. This keeps ALL attacks available intact without having to change them during a given situation. Doomslayer can still do a grab while in the Glory state, can still use the Crucible, and has the Glory Kill attack available. If used after landing a Glory Kill, this becomes Blood Punch, a dashing AoE strike that's good for dealing great burst damage.

Up Special: Meathook/V-Jump Boots
The Doom Slayer takes out his Super Shotgun and fires the Meat Hook in the direction of the joystick, automatically snapping to the ledge if he aims there. If aimed at a fighter, they will remain suspended in the air as the Slayer drags himself towards their position. There, one of two options can be done: Press B to release the fighter without sacrificing the Slayer's momentum. Press A to fire a Super Shotgun blast that deals either 16% up close or 8% from far away. If holding the up special neutral will cause a momentary pause before boosting Doomslayer in the air with a midair jump.

Down Special: Equipment Launcher
The Slayer deploys his shoulder gun and shoots one of three options depending of how much you hold the button.
  • Tap: Frag Grenade - Its very similar to the grenade of Snake thought it does more damage with the drawback that has less distance.
  • Hold Brief: Ice Bomb - The Slayer shoots a cold grenade, trades the damage for the ability to freeze the opponents similar to the Neutral Special of the Ice Climbers.
  • Hold Long: Flame Belch - The Slayer fires a flamethrower, unlike similar moves like Bowser or Charizard's neutral specials it couldn't be held to mantain the attack.

Final Smash: BFG-10000


The move starts with the Slayer using The Crucible who does a wide front slash, all the opponents who get caught by this attack are send to a cinematic where The Slayer brings his BFG-9000....just for attach it to a different place, then the camera in first person would show the Slayer pointing to the surface of Mars and a shot of outside shows that he was using the upgrade version of the weapon the BFG-10000 to shoot a hole in Mars that destroys the opponents in the process (think in King K. Rool Final Smash but in a bigger scale). If the opponents had 100% of damage or more it would be an instant kill.
On-Screen Appearance
  • The Slayer enters from a portal open by VEGA.
Idle Poses
  • Stomps his foot forward.
  • Cracks his neck.
Taunts
  • Up Taunt: Doom Slayer checks his ammo.
  • Down Taunt: Doom Slayer hits his weapon with his fist to unjam it.
  • Right Taunt: Doom Slayer takes out a small figurine of himself and fistbumps it. Based on an animation from Doom 2016 when collecting a figurine of himself.
  • Left Taunt: Takes up the Crucible and holds it up high as it glows with red energy.

Victory Poses

  • The camera starts pointing at the boots of the Slayer, then raises through his chin where we can see the Slayer taking of his helmet but the camera stops right there, only making the chin visible.
  • The camera is pointed towards the sky as several Imps are sent careening into the distance from an explosion. The camera pans down to show the Slayer fighting an endless horde of demons without so much as tiring, the freeze shot emulating Doom Eternal's cover art. The continuous animation has the camera pan out over the entire victory platform as the Slayer runs around defeating demons eternally with his vast arsenal.
  • Doom Slayer has his back to the svreen and is helmetless. He then puts his helmet on as he turns to look to the camera.
Classic Mode: Rip and Tear
Every opponent is based on a dark, demonic like creature with every opponent being giant-sized versions of themselves.
RoundOpponentStageMusicNotes References
1Dark DJ OctavioRacoon City
2:ultpiranha:Find Mii
3:ultzombie:Dracula's Castle
4:ultdarksamus:Castle Siege (underground phase)
5:ultkrool:Space Frigate Orpheon
6:ultridley:Venom
BONUSBreaktheTargets!
FinalGiga Bowser

Alternate Costume

#11ε Black Shadow
F-Zero
Apart of the "Echo Fighter Pack #3"
Special Moves

Neutral Special:
Shadow Menace

Winding up similarly to his enemy's Falcon Punch, Black Shadow readies his own version. Instead, however, when he punches, the shadowy silhouette of a bull appears around his fist and explodes with shadow on contact with anybody he hits, while retaining the explosive damage that Falcon Punch possesses, although now it is more of a disjoint.

Side Special: Tauros Charge

Retaining the properties of Melee Ganondorf's Gerudo Dragon, Black Shadow rushes forwards for a mighty uppercut that deals 17% damage on the ground and 16% in the air. Unlike Gerudo Dragon, however, Black Shadow also possesses armor frames during the charge, much like Dark Pit's Electroshock Arm.
Up Special: Shadow Dive
Black Shadow jets upward but, when he latches onto the opponent, he unleashes a surge of shadow energy before launching the opponent away with a blast of shadow power.

Down Special: Bull Kick

Dashes forward while unleashing a powerful kick that unleashes dark flames which can even damage opponents as he passes by.

Final Smash: Black Bull

Functions much like Blue Falcon but Black Shadow is laughing hysterically in the cockpit.
On-Screen Appearance
  • The Black Bull drifts onto the stage before Black Shadow hops out of the cockpit and lands with his arms crossed.
Idle Poses
  • Black Shadow clenches his fists and then unclenches.
  • Black Shadow raise shis fist forward.
Taunts
  • Up Taunt: Black Shadow puts his fist up, surrounded by black flames
  • Down Taunt: With Norio Wakamoto's iconic voice (Yes, the legend Norio Wakamoto voices Black Shadow in the F-Zero anime), he says in English, "I'll cr-r-r-r-rush you..." As he says this, he hunches over, curls his fingers, and drags his sole along the ground like the animal his costume is modeled after.
  • Right Taunt: Black Shadow covers himself in black flames and laughs.
  • Left Taunt: Black Shadow swipes his cape forward and laughs.

Victory Poses

  • Black Shadow drops from above and smashes the ground causing a wave of darkness to shoot up.
  • Black Shadow grabs an unconscious Captain Falcon and holds him up into the air before looking and smirking at the camera.
  • Black Shadow swipes his cape at the camera whichc auses a dazzle of darkness to emit in front of the camera.
Classic Mode: Rip and Tear
Every opponent is based on a dark, demonic like creature with every opponent being giant-sized versions of themselves.
RoundOpponentStageMusicNotes References
1Dark DJ OctavioRacoon City
2:ultpiranha:Find Mii
3:ultzombie:Dracula's Castle
4:ultdarksamus:Castle Siege (underground phase)
5:ultkrool:Space Frigate Orpheon
6:ultridley:Venom
BONUSBreaktheTargets!
FinalGiga Bowser

Alternate Costume
#46ε Roll
Mega Man
Apart of the "Echo Fighter Pack #3"​
Special Moves

Neutral Special:
Shadow Blade

It would do more damage than Metal Blade and travel further. However, it cannot be picked up like a regular item, which means DLN mains will have to adapt to losing a lot of crazy setups.

Side Special: Drill Bomb
Roll will fire a projectile similar in shape to the Crash Bomber. Unlike with the Crash Bomber, however, the damage on a foe it latches onto builds up the moment it happens before it performs a single-hit explosion. This mechanical difference does not offset that it deals the same amount of damage and knockback as the Crash Bomber.
Up Special: Beat
Functions exactly like the Custom Move in Smash 4, I think beat is a good choice for roll as it not only fits her personality a bit better but also it adds some extra visual variety when compared to Mega Man

Down Special: Star Clash
Functions just like Leaf Shield but the stars spin slightly faster.

Final Smash: Roll Legends
Roll takes a bucket of water and splashes it out. If it makes connection with the opponent, it triggers a cinematic where Roll utilizes her Roll Buster along with Roll Caskett from Mega Man Legends, Roll.EXE from Mega Man Battle Network, Alia from Mega Man X, Ciel from Mega Man Zero, and Harp Note from Mega Man Star Force.
On-Screen Appearance
  • Roll comes in riding on Rush which is lifted from Marvel vs Capcom 1 and 2.
Idle Poses
  • Giggles to herself
  • Kicks the ground
Taunts
  • Up Taunt: Eddie teleports in and is seemingly distressed (like he accidentally arrived here). Roll smiles and waves, which calms him down.
  • Down Taunt: Roll switches her arm to a vacuum and sucks up some dust.
  • Right Taunt: Beat flies forward from behind her and rests on her arm as she scratches his neck. This is a taunt that lasts until the player presses a button to cancel it with.
  • Left Taunt: Roll takes a brush and cleans the ground fictiously.

Victory Poses

  • Roll sweeps up skid marks from the fight, then notices the camera and strikes a pose with her broom slung over her shoulder and her free hand in a peace sign.
  • Roll appears with Rush, Eddie, and Beat as she twirls around.
  • Roll comes running but slips and falls She looks up embarassed about the scene.
Classic Mode: Rip and Tear
Every opponent is based on a dark, demonic like creature with every opponent being giant-sized versions of themselves.
RoundOpponentStageMusicNotes References
1Dark DJ OctavioRacoon City
2:ultpiranha:Find Mii
3:ultzombie:Dracula's Castle
4:ultdarksamus:Castle Siege (underground phase)
5:ultkrool:Space Frigate Orpheon
6:ultridley:Venom
BONUSBreaktheTargets!
FinalGiga Bowser

Alternate Costume
1663613072169.png

#?: Ahri
League of Legends
Part of the " DLC" Bundle
Special Moves

Neutral Special: Orb of Deception

Works exactly like in LoL, does more damage on the way back to her. Functions like TLink boomerang, will always attempt return to her

Side Special: Charm

Ahri takes a little to strike a...playfulpose then performs an equally-playful wink to release a heart projectile the size of a Kafrizz that travels as fast as Marth's walk speed. Anybody within 1/3 BF that's hit will take 2% damage, but will be forced to go at max walking speed towards Ahri's location for 2 seconds, or until she strikes them for 1.2x the normal damage and knockback. This Special also has the unique flavor of changing their eyes, similar to when they have a Smash Ball, except this time, their eyes are glowing a bright pink while Charmed.
Up Special: Spirit Rush
In my head, this works like a combo between Bayonetta's Side B and Pikachu's Up B.

Down Special: Fox-Fire

Ahri summons 3 balls of foxfire that constantly float around her like Mega Man's Leaf Shield for 5 seconds. If anybody gets within 1/4 BF of Ahri during that time, the foxfire balls will automatically lock onto them and deal 9% damage total with medium-low knockback at Level 0, prioritizing anybody under the effects of Charm.

Final Smash: Nexus Destruction

When activating this Final Smash, Ahri will rush forwards with a powerful Spirit Rush. If she hits anybody, a cutscene plays out: all caught fighters collide with a Nexus (Pictured above), and the camera pans to see Ahri alongside Jinx, Yasuo, Ashe and Teemo rushing forwards to go whole ham on the Nexus with their respective abilities. After a bit of relentless barraging, Ahri throws her Orb of Deception at the Nexus, causing it to explode and KO'ing anybody above 100% damage. This Final Smash also affects the victory screen if finishing a match with it: The traditional "GAME!" is replaced with the League of Legends "VICTORY" banner, and it seamlessly transitions to a unique victory animation wherein Ahri and her teammates celebrate their victory.
On-Screen Appearance
  • Ahri uses the LoL teleport on a ward. Teleport's animation is just a spinning purple light that comes down from the sky
Idle Poses
  • Ahri throws her orb up in the air and catches it
  • Ahri backflips then cartwheels
Taunts
  • Up Taunt: Ahri causes an Orb of Deception to rotate around her in quick succession.
  • Down Taunt: She hits the ground which causes her nine tails to glow
  • Right Taunt: Ahri blows a kiss. This can potentially duo damage as the kiss moves forward.
  • Left Taunt: Ahri backflips while hovering in the air.

Victory Poses

  • Ahri walks away from an nexus exploding, doing the whole "cool guys don't look at explosions" bit.
  • Floats in the air and gigles while Orbs od Deception float around her.
  • Camera POV facing the sky shows Ahri looking down at it on her fours. She starts to slowly lean down, looking as though she's about to kiss whoever she's on top of...but then the camera fades to black. Then it fades to another camera perspective and shows Ahri shooting up as she inhales some essence from the previous POV. After her name splashes on-screen, she regains composure and looks at the camera with a teasing grin as though to say, "Well? What were you expecting?"
    • This Final Smash also affects the victory screen if finishing a match with it: The traditional "GAME!" is replaced with the League of Legends "VICTORY" banner, and it seamlessly transitions to a unique victory animation wherein Ahri and her teammates celebrate their victory.
Classic Mode: Invasion of Runterra
Every opponent is based on a character archetype found in League of Legends.
RoundOpponentStageMusicNotes References
1:ultganondorf:Bridge of EldinGanondorf represents the Fighter class; in particular the Juggernaut sub-class. Bridge of Eldin is based on the map, Proving Grounds.
2ReimuThe Great Cave OffensiveReimu represents the Mage class; in particular the Artillery sub-class. The Great Cave Offensive is based on the map, Butcher's Bridge.
3:ulthero::ulthero2::ulthero3::ulthero4:Castle Siege (Phase 3)Hero represents the Controller class; in particular the Catcher sub-class. Castle Siege (Phase 3) is based on Magma Chamber.
4:ultgreninja:The Summit (Omega)Greninja represents the Stealth class which is a sub-class of the Slayer class. The Summit is based on the map, Howling Abyss.
5DJ OctavioHakurei ShrineDJ Octavio represents the Tank class and, partially, the Vanguard sub-class. Hakurei Shrine is a reference to Temple of Lily and Lotus.
6:ultolimar::ultalph:Ygdrassil's AltarOlimar and Alpha represents the Specialist class. Spiral Mountain is a reference to the map, Crystal Scar.
BONUSBreaktheTargets!
FinalRathalos

Alternate Costume

#?: Noah
Xenoblade Chronicles
Apart of the " DLC" Bundle
Special Moves

Neutral Special:
Overclock Buster

The Swordfighter Talent Art. Noah leaps upwards and performs a spinning downwards slash. There are two hitboxes: the physical part that deals 17% damage and strong knockback along with immense shield break potential, and the heavily-disjointed energy blade it sprouts that deals 12.5% damage and medium knockback. Because Noah is leaping in the air to do this, there is some major risk of SD'ing off-stage when he uses this, similar to Shulk's Back Slash.

Forward Special: Chain Attack: Brave Assault

Noah will slash forward. If the attack connects fully, the opponent will be momnentarily be stunned which allows Noah to initiate a number of attacks by pressing the special button with reduced frame input lag and damage output. It works much like Marth's side special with the final attack being the most powerful where it launches opponents.

Up Special:
Overfall

A Master Art from Taion's starting class, the Tactician. Noah summons a swarm of Mondo and uses them to flow upwards causing him to fly upwards and deal several hits of damage, racking up 13% damage in the process. This move kills at 171% damage from center stage and propels Noah 5 Units upwards.

Down Special: Sword Strike

One of the Arts of his starting class, Swordfighter. Noah leans back while charging a hefty, downwards-angled sword slash in front of himself that deals 17% damage and strong horizontal knockback. Press B while charging to have Mio do her Down Smash instead.

Final Smash: Limits Unbound

Noah and Mio strikes the opponent together starting a cinematic where they both beat the rival and using the Ouroboros form release the Critical Art Limits Unbound where he do three devastator slashe
On-Screen Appearance
  • Noah and Mio walk onto the stage after playing their flutes
Idle Poses
  • Dusts his jacket off
  • Looks to the right and then to the left
Taunts
  • Up Taunt: He takes his sword and thrusts it upwards while saying "I'll tear it all down!"
  • Down Taunt: He twirls his blade before brandishing it and grunts.
  • Right Taunt: Noah holds out his sword and holds it horizontally before saying ""Cutting a path to the future!"
  • Left Taunt: Mio appears and Noah plays a small part of A Life Sent On with their flutes.

Victory Poses

  • Noah & Mio appear walk forward, takes out a flute, an dplay to together. It doesn't matter whicgh one won the match.
  • Noah takes his sword and slashes it around and then holds out in front of him before "This is our path to the Future!"
  • He drops down from above and picks himself up before brandishing his blade and saying "Upon this sword....I pledge my strength!"

Defeat Quote
  • If Noah is defeated, regardless if its a starm or side KO, Noah will scream "NOAH!!! NOOO!!!!" offscreen.
Classic Mode: Oppossing Factions, Come Together
The fighters that were involved in the match are splayed across the ground. Noah & Mio take out their flutes and do their duties as Off-Seers for the fallen foes.
RoundOpponentStageMusicNotes References
1:ultinkling:& OctolingDeepsea MetroBoth species were former enemies, but as of Splatoon 2: Octo Expansion, this has changed drastically
2:ultkirby::ultkingdedede:Green GreensThey debuted as rivals, but eventually became friends
3:ultfox::ultwolf:VenomThough debut'ing as bitter enemies, their relationship has upgraded to that of a respected rivalry
BONUSBreaktheTargets!
4:ultpit::ultdarkpit:SkyworldDark Pit started as a third party who went his own ways, but has a tense, if still rather peaceful, relationship with his lighter counterpart
5:ultpikachu::ultmewtwo:Spear PillarSemi-based on their conflict in the first Pokemon movie: Mewtwo started as an antagonist, with Pikachu on the opposing side. Mewtwo had a change of heart towards the end of the film, however.
6:ultmario::ultsonic:Final DestinationA sort of meta take, but Mario & Sonic have had a bitter rivalry since the 90's which eventually evolved to more of a friendship by the 2000's.
FinalRugal BernsteinRepresents the behind-the-scenes instigator of Xenoblade Chronicles 3's plot, Moebius

Alternate Costume
Factiosholds

#?: Mio
Xenoblade Chronicles
Apart of the " DLC" Bundle
Special Moves

Neutral Special: Gemini Strike

The Zephyr Talent Art. Mio will enter a stance and charge ether into her chakrams for a moment before throwing one of her chakrams forwards. Press B within 1 second after throwing and Mio will throw the other. Each chakram deals 9% damage and medium-high knockback on hit. This move also has invulnerability frames leading up to a throw of each chakram, making it a great pseudo-counter.

Forward Special: Chain Attack: Lightning Quick

Works similar to Noah's Side Special but with quicker cuts with even more reduced damage as a result.

Up Special: Ether Cannon

A Master Art from Eunie's starting class, the Medic Gunner. On the ground, Mio uses the gun staff to fire a shot straight ahead that deals 8% damage and very weak knockback, but is about as spammable as Wolf's Neutral B. In the air, Mio aims the staff opposite of the joystick's direction and uses the blast to propel herself in the direction of the joystick..

Down Special: Wide Slash

One of the Arts of her starting class, Zephyr. Mio crosses her arms with chakrams in hand, then performs a scissor motion that strikes at both sides of her that deals 13% damage and medium horizontal knockback. Press B while charging to have Noah do his Down Smash instead.

Final Smash: Death of 1,000 Cuts

Very similar startup to Noah's but when they take the Ouroboros form she quickly spins to lunge the opponent, then she jumps and does a final strong slash with her body.
On-Screen Appearance
  • Noah and Mio walk onto the stage after playing their flutes
Idle Poses
  • Mio brushes away her hair
  • Mio raises a fist slightly
Taunts
  • Up Taunt: She stand sup tall and then stretches before saying "Kepe up the pressure."
  • Down Taunt: Mio clangs her shakrams together and then points them forward before saying "We'll make it happen!"
  • Right Taunt: Mio twirls and throws her chakrams in the air before catching them. She gigles as she does this.
  • Left Taunt: Mio appears and Noah plays a small part of A Life Sent On with their flutes.

Victory Poses

  • Noah & Mio appear walk forward, takes out a flute, an dplay to together. It doesn't matter whicgh one won the match.
  • Mio does several flips before slashing down with her ring blades. She then says "As I am now, I can't hold back!".
  • Mio stands up and flicks her hair back before looking down at the camera. She then says "One last stand?"

Defeat Quote
  • If Mio is defeated, regardless if its a starm or side KO, Noah will scream "YOU HURT MIO!" offscreen.
Classic Mode: Oppossing Factions, Come Together
The fighters that were involved in the match are splayed across the ground. Noah & Mio take out their flutes and do their duties as Off-Seers for the fallen foes.
RoundOpponentStageMusicNotes References
1:ultinkling:& OctolingDeepsea MetroBoth species were former enemies, but as of Splatoon 2: Octo Expansion, this has changed drastically
2:ultkirby::ultkingdedede:Green GreensThey debuted as rivals, but eventually became friends
3:ultfox::ultwolf:VenomThough debut'ing as bitter enemies, their relationship has upgraded to that of a respected rivalry
BONUSBreaktheTargets!
4:ultpit::ultdarkpit:SkyworldDark Pit started as a third party who went his own ways, but has a tense, if still rather peaceful, relationship with his lighter counterpart
5:ultpikachu::ultmewtwo:Spear PillarSemi-based on their conflict in the first Pokemon movie: Mewtwo started as an antagonist, with Pikachu on the opposing side. Mewtwo had a change of heart towards the end of the film, however.
6:ultmario::ultsonic:Final DestinationA sort of meta take, but Mario & Sonic have had a bitter rivalry since the 90's which eventually evolved to more of a friendship by the 2000's.
FinalRugal BernsteinRepresents the behind-the-scenes instigator of Xenoblade Chronicles 3's plot, Moebius


Alternate Costume


Veteran Changes
Samus
Crawl: Morph Ball
Samus now has a crawl wherein she enters the Morph Ball.

Down Tilt: Bomb
Samus’ down tilt is her old down special. It can be used while moving, but not in the air.

Down Special: Beam Select
Samus’ new down special allows her to switch which beam she uses, which affects the attacks that use her arm cannon (her new forward tilt, new forward smash, up smash, and forward air). You select them similarly to Shulk’s Monado Arts, but they’re permanent and don’t switch back between stocks. You can tell which beam Samus has equipped via an icon next to her damage meter, and by the color of her arm cannon. She has four options:
    • Plasma Beam: Located on the bottom, with a green fiery icon. Samus starts with this beam equipped by default at the start of the match. It behaves similarly to her old moveset, being associated with close-range fire attacks. The most notable difference is that the fire is green now, in reference to the beam’s coloration in Super Metroid. Basically, this is the “balanced beam” of the four.
    • Ice Beam: Located on the top, with a blue snowflake icon. This beam fires blasts of ice with low damage and low knockback, but good frame data. Some of its moves have a freezing effect that can allow you to extend combos. Basically, this is the “speed beam” of the four.
    • Wave Beam: Located on the left, with a purple icon that has circles and a lightning bolt. The Wave Beam uses purple, circular energy with electric effects, and attacks with it tend to be slow but powerful. In addition, Wave Beam attacks tend to send the opponent at odd angles or move in a sine wave pattern themselves. Basically, this is the “power beam” of the four.
    • Spazer Beam: Located on the right, with a yellow icon that depicts three beams. The Spazer Beam goes out the furthest from Samus’ blaster, making it most suited for zoning. In addition, the Spazer always fires three projectiles at once, which changes some of Samus’ multi-hitting attacks like her forward-air and up-smash. Basically, this is the “range beam”.


Forward Air
The beam she has selected actually affects the way in which Samus performs this move.

    • With the Plasma Beam, she fires five green explosions from top to bottom, same as she always has (except for the color).
    • With the Ice Beam, she instead fires five blasts of freezing air from the lowest position to the highest - the opposite of how she normally does it.
    • With the Wave Beam, she has a blast of purple energy in the highest position, then in the lowest, then in the second highest, then in the second lowest, then in the middle.
    • With the Spazer Beam, she only shoots three lasers at the top, middle, and bottom positions. Unlike the rest, these lasers are actually projecties, albeit ones that don’t travel too far. This same change actually applies for her up smash as well.


Forward Tilt
Samus’ forward tilt has her shoot a shot from her arm cannon. This attack can be performed while moving, like Mega Man’s forward tilt, but it can be angled.

    • The Plasma Beam’s shot is a simple green projectile shot.
    • The Ice Beam’s shot is a blue shot that freezes.
    • The Wave Beam’s shot is a purple shot that moves slower and travels in a sine wave motion. It can travel through the stage.
    • The Spazer Beam fires three shots, which go further than those of the other beams.


Forward Smash: Charge Beam
Samus’ forward smash has her switch to the Ice Beam and charge a shot. This move can be angled. Its projectiles are basically bigger, more impressive versions of the shots fired by her forward tilt.

Neutral Special: Charge Combo
While similar to Charge Shot, this move is drastically affected by which beam she has equipped, and is now inspired by Special Charge Beam Attacks from Super Metroid and Charge Combos from Metroid Prime. Just like before, though, it’s a chargeable projectile that can be canceled while still keeping the charge.

    • Like with most moves, the Plasma Beam’s Charge Combo is simply the old move with some new visuals. This time, it’s a circular shot with four rings spiralling around it.
    • The Ice Beam’s Charge Combo is a blast of ice surrounded by four twinkling sparks. Upon hitting something, it has a wide-ranged “explosion” of ice that freezes anything it comes into contact with.
    • The Wave Beam’s Charge Combo is an unbroken stream of purple, wavy electricity whose length depends on how long it’s charged. It has the highest charge time of all of them.
    • The Spazer Beam’s Charge Combo goes the furthest, and fires three lasers that have slight homing properties.


Final Smash: Hyper Beam
Replacing the Zero Laser is this Final Smash, based on the ending of Super Metroid. Samus actually gets a fifth beam type, the Hyper Beam, marked with a rainbow Metroid icon. It combines the best traits of all the beams: the speed of the Ice Beam, the power of the Wave Beam, and the range of the Spazer Beam. It fires glowing rainbow beams. Samus gets to use the Hyper Beam for about 12 seconds before going back to whatever beam she had before.


Ganondorf
There are a couple of things I wish to accomplish with this Ganon moveset, so let's go over those before we begin.

Firstly, even though a majority of his moves are changing, I want his playstyle to remain similar. He'll still be a super heavyweight, and his moves will have roughly the same power, timing, knockback angles, and space coverage. However, his new moves will give him an increase in range, attack speed (if only slightly), and recovery. In short, I want the new Ganon to feel like an upgrade, even though his lessened weaknesses will of course be counterbalanced.

Secondly, even though it'll still say "Ganondorf" on the CSS, I want this to be an all-encompassing Ganon, referencing not just all of Ganondorf's appearances, but all of Ganon's appearances period, whether as a Gerudo or as a massive porcine beast.

With that out of the way, let's get started. Ganon's differences are apparent even before he begins fighting. While his appearance remains based on Ocarina of Time, he wields two swords the way he did as the Demon King Ganon in that game, as well as as Ganondorf in Wind Waker. For his dash, he levitates similarly to Cloud. For some animations where his hands are necessary, he extends that levitation power to his swords, which will float near him until the animation is done. Some of his moves have him float the swords so he can summon a trident from the darkness.

Tilt Attacks
Ganon's jab is one of his few normal attacks whose range and timing is not based on its predecessor. Instead, it's now a three-hit jab consisting of an outward slash with both swords; a downward slash with his left hand; and a spin attack that deals two hits (one with each sword). This is based off of an attack he does in Wind Waker.

His forward tilt is a backhanded slash with his left hand. This, too, is based on an attack he does in Wind Waker. It hits at roughly the same timing and damage of his old forward tilt, but with a bit more range.

While no longer the Volcano Kick, Ganon's up tilt retains its most notable properties. Here, Ganon levitates his swords and dark energy slowly swirls into the shape of a trident in his hands. Like Volcano Kick, this creates a windbox that pulls opponents into the attack. Once finally complete a full second later, Ganon stabs the trident into the ground. Unlike the Volcano Kick, this attack has armor, but it's not exactly difficult to get out of the way.

His down tilt is an inward slash with both swords. It hits the opponent at an upward angle. It hits at roughly the same timing and damage of his old down tilt, but with a bit more range. This is based on an attack he does when landing from a jump in Wind Waker.

His dash attack has him point his swords forwards (as opposed to during his dash when they're pointed behind him in a reverse grip) and drive them forward and up for a devastating double stab. Like his old dash attack, this is a reliable followup in tech-chase situations.

There's actually one more "attack" to mention: in Ganon's side taunt, he puts his right sword away with a spinning flourish for the sole purpose of giving a dismissive swing of the hand. This is based off of a scene in Wind Waker, but the reference only becomes complete if you're standing right next to someone, at which point this taunt turns into a mean-spirited backhand. Like most attack taunts, this one doesn't do much damage and can't be canceled, but landing it will prove Ganon is still the King of Disrespect. For the record, his up-taunt is still his floating taunt, and his down-taunt is his palm-punching taunt, both with new floating-sword action.

Smash Attacks
Ganon's forward smash has him summon his trident and spin it diagonally above and behind him once before stepping forward with a heavy stab. The spin will actually drag opponents into the stab, so this attack has considerable range comparable to that of his previous forward smash.

Ganon's up smash has him summon his trident and spin it above his head for a multi-hit attack. A very powerful smash attack that hits on both sides of Ganondorf, but is about as slow as his previous up smash.

Ganon's down smash performs an outward slash with both swords while facing the camera. Like most down smashes, this attack hits on either side of him.

Aerial Attacks
His neutral aerial has him conjure up a ball of fire in front of him that burns brightly (dealing multiple hits) before exploding. This attack has decent range, comes out quickly, and lasts a while; just like his previous neutral air. This is inspired by the fire attacks occasionally used by Ganon in some of the 2D games.

His forward aerial is an overhand slash with his right sword, which has good reach and is quite powerful in the middle of the sword.

His back aerial has him flip both his swords into a reverse grip and thrust them backwards. Fast, but still quite powerful. However, its range is quite low.
Ganon's up-air kind of serves as a replacement for his up-tilt when fighting on the ground due to the latter's long startup time. He conjures dark magic around his upper body that hits opponents away. This move covers a fair distance around Ganon.

Like before, Ganon's down-air is a devastating spike. This time, however, he causes his swords to float before delivering a downward palm strike infused with black magic. If you hit the sourspot, the enemy merely gets launched at a diagonal angle. However, if you hit the sweet spot, both you and the opponent will stop in midair while Ganon electrocutes them with his magic. Then, with a final blast of darkness, he shoots the enemy directly downward. Visually, this is inspired by his old up-special, and serves to keep his fan-created role as the "King of Disrespect" alive even with a more game-accurate moveset.

Special Moves
Ganon's new neutral special is Dead Man's Volley, a slow but devastating homing projectile. Similarly to the Warlock Punch, it's slow to fire but can be turned around. He levitates his swords, then holds his left hand skyward and begins charging yellow, electric energy.The projectile can be reflected if hit with a melee attack - and once it is, it'll be heading right for the nearest other player with increased speed, power, and homing capability. Ganon, however, has a trick up his sleeve: if you're not in the middle of an attack, Ganon can reflect the volley automatically. However, it doesn't get any stronger when reflected this way - and if it's been reflected too many times, he'll just catch it instead of reflecting it. Other characters, meanwhile, have to do this the old-fashioned way. One final note - this move's startup is armored, and hitting it point-blank means it does more damage and can't be reflected. Overall, this move plays into Ganondorf's gameplan of punishing unsafe moves, references a Zelda mainstay, and still incorporates the gameplay of the Warlock Punch with its point-blank functionality.

Ganon's side special is still Flame Choke. After all, it's the only one of his specials to be completely unique, and it leads to unique tech-chase situations not really caused by other moves in Smash. However, it's had something a little special added - when used in the air, you'll create a fancy shockwave of golden, electric magic upon hitting the ground, which will deal damage to other opponents in a free-for-all. This is in reference to his shockwave attack in Ocarina of Time, used most prominently at the very beginning of the fight.

Ganon's new up special is named Black Whirlwind. While the name is entirely made up, it's inspired by the fight against Ganon in A Link to the Past. Ganon spins his trident around before throwing it (still spinning) in one of 8 directions, teleporting ahead of it, and catching it. After that, you can hit B while holding another direction to do it again. You can even do it a third time for good measure. And THEN, you can hit B one final time - but this time, he lunges forward for a stabbing attack with the trident, which serves as killer knockback for anyone who got caught in the move. There's a catch, though. This move is already pretty unsafe if you just do the one warp - it has high endlag, and Ganon has to pull his swords back out upon landing from being helpless, which means he's there for a relative while. It gets even LESS safe the more you do with it, so don't overdo it. When fighting against this move, patience is key.

Ganon's down special is called Malice Trident, but it's more of a reflavoring of his old down special. Instead of a kick, he flies forward with his trident instead.

His final smash remains Ganon, the Demon King. I feel that move does a great job of showing Ganon's beastly form in one explosive show of force.

Daisy
Like many of Ultimate’s Echo fighters, Daisy received a slight upgrade in the form of two new attacks: a new Side Smash and a new Final Smash:

Side Smash: Super Ball
Final Smash: Daisy Cruise

Dark Samus
Dark Samus will be updated along with Samus and will have her updated attacks and special attacks. Aside from that, she also gains a new Final Smash and a Down Smash:

Down Smash: Phazon Tendrils (She smashes down into the ground which causes tendrils of Phazon to shoot up all around her.)
Final Smash: Aurora Unit 313

Richter
Since Simon and Richter share so much in common, it didn’t seem right to give him several new moves but, like Dark Samus, he does gain a new Final Smash.

Final Smash: Hydro Storm

Hero
Under Hero’s Command Selection, icons now appear next to the text allowing for easier visibility.

Bowser

Donkey Kong

Pac-Man

Jigglypuff


Additional Links

Wikia

DISCORD SERVER

© 2021 Nintendo
Original Game: © Nintendo / HAL Laboratory, Inc.
Characters: © Nintendo / HAL Laboratory, Inc. / Pokémon. / Creatures Inc. / GAME FREAK inc. / SHIGESATO ITOI / APE inc. / INTELLIGENT SYSTEMS / Konami Digital Entertainment / SEGA / CAPCOM CO., LTD. / BANDAI NAMCO Entertainment Inc. / MONOLITHSOFT / CAPCOM U.S.A., INC. / SQUARE ENIX CO., LTD. / ATLUS / Microsoft / SNK CORPORATION. / Mojang AB / Disney / Activision Blizzard, Inc. / Team Shanghai Alice / PopCap Games, Inc. / Supergiant / ArcSystem Works / Enhancer Group/ / Sony Interactive Entertainment / Rovio Entertainment / Bethseda/ Extremely OK Games / Koei-Tecmo / Twitter
 
Last edited:

Venus of the Desert Bloom

Cosmic God
Super Moderator
Premium
BRoomer
Writing Team
Joined
Jul 30, 2007
Messages
15,494
NNID
VenusBloom
3DS FC
0318-9184-0547
stages.png

Besides many of the past stages coming back with graphical and mechanical improvements, Smash Infinite offers a plethora of new stages such as Bowser`s Castle, Koholint Island, Wigglytuff Guild, Mystery Island, Raccoon City, Hakureii Shrine, Astral Plane, and more!
Waluigi Pinball
Super Mario Bros.
Submitted by: Otoad64 Otoad64
The stage has two platforms floating in the middle, as well as two slopes on the sides complete with pinball flippers which flick upwards during the stage’s duration. Jumping on the flippers will fling players upwards into the sky which can be used as both a hazard as well as a way to recover. Above the two floating platforms are three pinball bumpers which act very much like traditional pinball bumpers and will launch anyone who gets too close. Finally, occassionally, a large pinball will be introduced to the field and acts as a stage hazard. Getting hit by it while it’s in play will launch anyone.

In the background, you can see the slot machine in front of the pinball backstop and Waluigi's face along with the roulette which will occasionally spin. The position of the stage platforms are slightly tilted which gives a view of the background part of the stage which shows the large bumpers, pinball track, and the actually race course. Racing here, like in other Mario Kart tracks, are Shy Guys.​

Dr. Mario
Super Mario Bros.
Submitted by: Perkilator Perkilator
The stage shares a general stage platforms that spans in front of the medicine jar and results display. The entire aesthetic of the stage is based on that of the original Dr. Mario but obviously changed to Infinites design. Dr. Mario will occasionally take a Megavitamin and throw it into the medicine jar. This causes a real-life Megavitamin to come down from the top of the stage. This acts as a stage hazard and will knock anyone away. The Megavitamins will vary on their descent sided and done many even speed up or slow down. Megavitamins will also change their position much like the original game. The Viruses appear in the background and will make faces at the opponent. If Dr. Mario was chosen as a character, Dr. Luigi will take his place.​

Bowser's Castle
Super Mario Bros.
Submitted by: Janx_uwu Janx_uwu

The stage takes place on the green rooftops of Super Mario Odyssey high up on the castle. Located directly in the middle of the stage is the statue of Bowser’s gigantic head. On occasion, it will come to life and tilt its head to the right or left while spewing out fire which acts as a stage hazard. This flame is quite large and lasts for several seconds with a single blast of it doing upwards to 35% damage. Players can jump on top of the head for an additional platform but the hair tuft and horns won’t obstruct your movements as they are within the background. On each side of the root top stage platform are curved trellises that resemble forms that acts as a raised platform. Separated from the main stage is a single Houston’s platform on either side which consists of the gigantic paper banned called a nobori. The bottommost portion of the scroll’s frame acts as a hanging platform. This is repeated again but at a slightly lower elevation in another scroll platform that’s placed with some distance from the first which creates a large gap. The nobori and chochin, paper lanterns, contains Japanese characters called kanji. This aesthetic carries over from Odyssey.

Several cameos appear in the background of the stage including the Odyessey, Bowser’s flagship, Robobrood, and the Broodal ship. In Mario isn’t a fighter on the stage, Mario possessing a spark can be seen zipping along occasionally in the background. Finally, several enemies appear in the immediate background including the Broodals as well as common enemies such as Goombas (wearing traditional Japanese straw hats), Pokios, Parabones, and an Burrbos.​

Megafruit Paradise
Super Mario Bros.
The layout is modified a bit for Smash, with the two main platforms being the gigantic watermelon and pineapple. These two will bob up and down in the water, especially when fighters land on them. A wooden bridge will be placed between the two, but can be broken with enough damage. It will re-appear after about 45 seconds.

Smaller floating platforms made of orange slices will be on both sides of the stage, moving up and down similarly to Fountain of Dreams.


Red Pipes will occasionally appear on the stage, and will teleport to a random location from their spawn points. In addition, while they are don't really do anything, blue, red, and green spaces appear on the stage. The hazardless version removes the pipes, the battlefield form's main platform is made out of pineapple (orange slices make up the smaller drop throughs), and the omega form's platform is made out of watermelon.

When not participating in matches, Mario, Luigi, Peach, Daisy, Wario, Waluigi, DK, Diddy, Rosalina, Bowser, Bowser Jr. and Yoshi can be shown in the background. (it randomly picks from these and the following, anywhere from 2 to 4): Goomba, Koopa Troopa, Boo, Shy Guy, Dry Bones, Hammer Bro, Pom Pom, and Monty Mole. Each has unique animations, sometimes grabbing a star, sometimes punching their dice, or just having fun on the platforms.

You can also see the boardwalk island in the background, and some of them might show up there!

Baseball Kingdom
Super Mario Sluggers
Baseball Kingdom is a traveling stage that will travel to 10 different stadiums that were available in Super Mario Sluggers, with a central battlefield-esque set of platforms that will morph at each destination just like in other traveling stages like Skyloft and New Donk City. There will also be day night versions of some of the stages as well.

The stages are as follows:
Mario Stadium (Day/Night)

Sluggersmariostadium.jpg
Mario Super Sluggers


Peach Ice Garden (Day/Night)

PeachRinkDay.PNG

PeachRinkNight.PNG


Yoshi Park (Day/Night)

YoshiParkNight.PNG


DK Jungle (Day/Night)

Dkjunglesluggers.jpg


DKJunglenight.png


Wario City (Day/Night)

Wario City day MSS.png

Wario City night MSS.png


Bowser Jr's Playroom (Day)

An overview of Bowser Jr. Playroom stadium from Mario Super Sluggers


Bowser's Castle (Night)

Bowser CastleMSS.PNG


Daisy's Cruiser (Day/Night)

DCday2.PNG

DCnight1.PNG


Luigi's Mansion (Night)

Luigi's Mansion from Mario Super Sluggers


Toy Field (Day)


Players will occasionally get hit by baseballs flying in the background as well. In the middle of flying between stages, the platforms will visit the beautiful skies of the Baseball Kingdom.

Sawmill Thrill
Donkey Kong
The stage would start inside the mill with multiple minecarts which would be carrying platforms that the cast can fight on. Throughout the mill certain minecarts will go away and new minecarts will come back, making the layout of the stage fluid to change. All while you're doing this, there will be Buzzsaws in varying positions which you'll have to avoid.

The second section of the stage would see the cast land on a piece of wood. which would be drifting on water and the occasional waterslide present in the level This wood would obviously be bigger than what we see in the actual level so that it's fun to fight on. You can think of this section as the calm before the storm. There would be no buzzsaws to speak of and the only platform you'll need to stay on is the wood. However the roller coaster like nature of the track will still require you to stay on your toes, and there will occasionally be spikes above you you'll need to avoid.

During the third section you'll re-enter the mill. The plank of wood would fall off a waterfall and you'd have to jump back onto a platform that's being carried by a minecart. However now the minecart will be followed by a gigantic Buzzsaw. As the Buzzsaw tears everything it touches, these will become obstacles that you'll have to avoid. While the Buzzsaw won't ever actually catch up to your minecart, if you launch foes into the Buzzsaw it will do a lot of damage. The roller coaster like layout of the tracks will be the most hectic in this section of the stage, and near the very end the track will be gone and the minecart will just be riding over whatever portions of the track the Buzzsaw rips up which the minecart is able to ride on top of. After this, you will escape the mill and will briefly be in a rainy forest, before the track loops back to the beginning.
Koholint Island
The Legend of Zelda
This would be a Travelling stage!

The platform starts in the sky moving around the Island.
you then land in one of 4 locations

Mount Tamaranch

the platform lands in front of the Egg and there is a platform in front and 2 platforms on the left and right

Animal Village

This is a simple layout where it is just like Bridge of Eldin, In the background you can see Animals and Marin singing to them

Kanalet Castle

This part is on the bridge and it is a long platform about the size of FD

Tal Tal Heights

This is the longest one, it is 4 Kalos-esque platforms arranged next to each other and you can see water falls in the back

The Battlefield/Omega variations are just the platforms flying around the island only Marin is on the platform.

Berenia
Metroid
Because we have a few two many lava-themed maps for Metroid, let's give it something water-themed instead, give it a nice change of pace. Burenia is a map taking place in an undersea laboratory situated on ZDR. More specifically, the stage is mostly based on this portion of the map:

1634868974406.png


A large open area with a few platforms where the fighters can do battle. Though Burenia is a stage that does have water pools to swim and drown in like Isle Delfino and Tortimer Island, the gimmick here is that occasionally, water will fill up the entire stage until it's completely submerged in water, and will drain after 10 seconds. The water slows down all movement speed, and halves all knockback from attacks while submerged, but the water also gives fighters more airtime, adding to some stage-exclusive air combos, to boot!

Castle Dedede
Kirby
This stage takes place inside the Castle as well as aide KO blast lines. It is designed to be similar to the Dedede Boss fight in that game. The stage is as big as Pokémon Stadium (Brawl) and it has two platforms you can stand on. The background of the stage is dyed in a warm orange sunset glow that an expansive Planet Popstar in the distance. The stage design is rather neutral due to it consisting of only two platforms.

There are a few cameos which acts as stage hazards that will attack players on sight. One such enemy is the Waddle Doo, Bouncy, Buggzy, Driblee, and Blade Knight. Waddle Doo will simply ram their opponents, while the Blade Knight strikes it’s blade. The Bouncy will simply bounce up and dusk and will general try to hug lathe ledges to prevent recoveries. Drinkers will fire out water bombs from a distance while Bugzzy will attempt to close the distance by dashing at opponents. It will then try to ensnare them in it’s mandibles. Following this, it will then dive forward and try to KO the opponent.​

Gigabyte Ruins
Kirby
It resembles an ancient desert temple at sunset, but overrun by mechanization--everything is metallic, and there are artificial lights all over.

While the original arena resembles a walkoff, this version would have ledges, looking like you're at the narrow top of a mechanical pyramid. This would make it somewhat resemble Great Plateau Tower, though the main platform would be slightly larger. It also has a series of smaller platforms: specifically, a sort of inverse Battlefield where the single middle platform is below the two side platforms.

Occasionally, Susie will fly through the background on her Transporter. If hazards are on, she will fire laser blasts towards the opponents. Similarly, Mecha Knight can also appear in the background, flying past the opponents to slash at them if hazards are on.
Crafted World
Yoshi
This is an agglomeration of worlds from Yoshi’s Crafted World to create a single unifying concept. Much like the game, this is a side-scrolling stage where players move along an automatic moving stage. It will transition periodically between six different phases which are based on six distinct worlds from the game. I liked Mushroomguy’s submission but I wanted to try and explore the locations in the game a bit more.

The first world and the “default” is Sunshine Station’s Rail-Yarn Run. This was the training world for the game and with familiarized people with how to play the game. This portion would function just like the original stage up until after the bridge which would then result in the stage setting up for the next transition in a manner that’s like the game (being crafted together).


Following the default phase, it generally involves snippets of the other five worlds and does import exact appearances from them. If this stage gets voted in, I will more fully flesh out how it would work for the other phases:

Many Fish in the Sea in Yarrctopus Docks

Yoshi Pulls Some Strings in Pastel Pathway

Spring Sprung Trail in Origami Gardens

Spinwheel Shuffle in Cardstock Carnival

Ride the Stars in Outer Orbit


Battlefield and Omega versions would solely be located on Rail-Yarn Run.

Wigglytuff Guild
Pokemon
The stage consists of a single stage platform with two floating platforms on either side. In the background is the Wigglytuff Guild Tent which features the face of Wigglytuff at the top. Pokémon that appear on the stage is either Wigglytuff itself or Chatot if Jigglypuff is on the stage. In addition, the Pokeball Pokemon Wigglytuff can’t be summoned on this stage.

Outlaw Notice Board
The main gimmick of this stage is the “Outlaw Notice Board”. Wigglytuff or Chatot will occasionally appear and will draw a notice on the board. This will require a special action to be performed in order to gain the prize. Here are the following missions that can be completed and associated prizes.


MissionDescriptionPrize
Missing ItemA Substitute doll or similar appears on stage. If someone picks it up and holds it for 10 seconds, a random Pokémon appears, you give them the item, and they give you the reward.
  • Oran Berry (20%)
  • Blast Seed: A powerful explosive
  • Partner Pokémon (Pokeball Pokemon)
Missing PokémonA Pokémon appears in a cage either on stage or flying above it. If you deal 30% damage to the cage, the Pokémon breaks free, walks to the door of the guild, and gives you the reward. Most of the Pokémon are taken from the Pokeball list, but there's also Azurill.
  • Oran Berry (35%)
  • Warp Orb: Teleports the holder back to the stage
  • Partner Pokémon (Pokeball Pokemon with increased damaged output)
Defeat the PokémonA Pokémon appears that you need to defeat, it has 60 HP. Once defeated, a Pokémon appears from the guild and gives you the reward. Once again lots of the Pokémon are pulled from the Pokeballs, but Drowsee, Skunktank, Kabutops, and Dusknoir also appear. .
  • Oran Berry (50%)
  • Iron Thorn: A trap that deals a lot of damage.
  • Partner Pokémon (A Master Ball Legendary Pokémon)

Galar Wild Area
Pokemon
This is a travelling stage, the layout changes depending on the terrain, the transition is just a flat platform.

The Areas:

This part would be just completely flat and you can see Motostoke in the background, in the front you can see and handful of pokemon wandering in the grass.

This one would also be flat, you could see some flying type pokemon in the back.

For this one there would be a giantrock wall on the right side that is angled upwards.

For here the platform is small and surrounded by water, In the background you can see many cramorant fishing and a Gyarados.

The Platform is the rock shown above and it is above the dusty bowl, Ground and Rock Type pokemon would be found, A Runerigus would fly towards the players.

You can destroy the bridge pillars on this one in a fashion similar to Shadow Moses

The layout is right in front of the Tower.

The platform is on the cap and a the terrain gets very tall and rocky.

You land here and you can see a large amount of Eeveelutions standing aorund in the back.

In all of the formations there is a chance that a Dynamax den will appear and it might have a have a laser coming out of it, Occasionally if you land in front of the Dynamax den that is lit up, The platform will descend into a dynamax lair where you can see a random Dynamax Pokemon.
The pokemon will then roar, blasting the platform out of the den and back into the wild area.

Omega and Battlefield forms would just have the platforms flying around the area without landing, A powerless Dynamax den sits on the Platform.

Mystery Island
Animal Crossing
Submitted by: The Fantasy Smasher The Fantasy Smasher
Like in Minecraft World, there are multiple versions that appear in every match. Each version has an unique and different layout than the rest but tend to have similar elements across the board.

Normal Island
It’s a simple island. The only gimmicks would be a small stream in the middle that you can swim in, and two platforms on both sides of the stage.

Mountain Island
Basically, this island would have multiple levels to traverse, similar to Moray Towers. There would be a large three tier mountain center stage. There would be no platforms.

Bamboo Island
This island would be filled with Bamboo (shocker, I know). The bamboo would be sturdier then the average tree and will take longer to destroy. You can knock opponents into the bamboo. By destroying all of the bamboo, three small platforms will arrive onto the stage.

Fruit Island
An island filled with trees with fruit on them. The fruit can be used to restore health or used to attack opponents. Two Platforms would appear over time.

Tarantula Island
A flat island with one large platform in the middle, with one big catch. Tarantulas will appear on the stage randomly and will attack the fighters. When bitten, the fighters will be stunned briefly leaving them wide open to attacks.

Dragon's Table
Fire Emblem
The stage is a traveling stage in the same vein as Bastion Hollow but with a scope similar to Northern Crater.

The stage is a single platform-like Final Destination and it first appears as it nears the Dragon’s Table. It has ancient tunes etched on the platform surface with a design mimicking the castle. The entire atmosphere is dark and gloomy with lightning flashing in the distance; framing the castle ominously. The stage will travel forward and cross the bridge before nearing the castle. It will then swerve around and enter into the castle and setting in a great chamber. This chamber becomes the focal point of the stage…

It consists of a single platform in the center with two gothic-style dragon heads that serve as footholds on either side. These can be uses to jump off from and platform on. The side of the stage is roughly around the same size as Mario Galaxy when not curved making it a rather large stage in its design.

There will be a warning sign after a while with a loud roar which causes the stage to transition back to the start but, instead, Medeus will appear within his dragon form. He is seen flying around the castle with significant chunks of it damaged. The stage will mimic its route but the Dragon will occassionally rush against the stage but it’s purely visual. Once it swoops back into the stage, the appearance of the stage greatly has changed with portions of it having massive holes where debris crashed into it. The left Dragon Statue has all hit collapsed and created a platform from where it once stood to the stage for a Yoshi’s Island type aesthetic. The right Dragon Statue is missing but, in its place, a large portion of the ceiling collapsed which creates a large solid platform.

If the stage plays through a third cycle, Medeus is replaced by Grima as a stage cameo. However, Grima isn’t fought as a boss here despite being a Boss within our modes.

Final Destination/Battlefield forms take place some distance in front of the castle. Medeus or Grima will be present, patrolling the outside of the castle.

Gyromite
Gyromite

Doc Louis' Training Warehouse
Punch-Out!!
An indoor stage taking place in a location that's just as important to the Punch-Out series as the Boxing Ring itself, this abandoned warehouse is retrofit to become Doc Louis and Little Mac's little training hideout. It's a flat stage like with Wii Fit Studio, but there's a major difference in that occasionally, Doc Louis himself will push a training prop into the stage for fighters to interact:
  • Jumping Rope: Jump over this rope enough times without it hitting, and you'll get a boost in jump height. Getting hit will cause you to trip.
  • Punching Bag: Hit it enough times and KO it to gain a boost in attack power.
  • Boxing Ring: He will bring in the makeshift boxing ring that Doc and Mac train in, in Doc Louis's Punch-Out and fight with all his strength. The strings surrounding it function the same way as the one in Boxing Ring, but with less power.
Furthermore, Doc Louis is in the background overseeing the fight, giving words of encouragement to the fighters like it was a training session. He'll even have unique lines for when Little Mac is playable, like with Palutena's Guidance and Snake's Codec Conversations. Doc Louis' Training has the man himself talk to Mac about his fighter, just like in the round intermissions from Punch-Out. For example, if Little Mac is fighting against Kazuya, he will say, "That Devil Blaster can pack a mean punch, but it won't hit if you stay low. Try ducking beneath it as you're comin' in hot and you can beat the Devil out of Kazuya!" Or, if he's fighting Reimu, Doc will say, "Reimu's literally throwin' a lot at you, Mac, but it's got a pattern to weave around. Find openings in her Spell Cards and they won't even so much as Graze you, son!"
New Los Angeles
Xenoblade
Serving as the primary city of humans living on Mira after the devastation of Earth, New Los Angeles was primarily modeled after the Earth Los Angeles and serves as a large exploration hub in Xenoblade Chronicles X. This stage would primarily be a traveling stage, starting out on the far view of the city as seen in the pictures above, before traveling within the city to give players a closer view of city life, as seen in the pictures below.

There will also be a day/night cycle featured similar to how there is one in the game.
Deepsea Metro
Splatoon
The stage consists of a single long platform with walk-off blast zones on either side. The stage has two phases: a boarding phase and traveling phase.

  • Boarding Phase: It consists of a single long platform and is where players first start off before the traveling phase.
  • Traveling Phase: The train will pick up the players and the train will set off along the rails.
At this point, the train has two different layers: inside and outside. Players stay outside on top of the train which shows various other stations and locations in Octo Expansion zoom past in the background. Going through the trap doors leads into inside the train. There numerous denizens of the deep can be seen riding the train.

Venus Lighthouse
Golden Sun
The stage consists of three separated platforms with the middle one being the largest. The kiddie platform has a second tier platform that functions as a floating platform and us surrounded by statues but this dies affect gameplay. Both the right and left platform is flanked by a statue that can be destroyed thus opening more space for side KO’s. The background has several elements that gives it a life such as moving clouds and a day and night cycle set against an expansive and fantastical view. The stage has several cameos including Felix, Jenna, Ivan, Garret, Mia, and even Alex, Saturous, and Menardi. The stage is also unique in that, like Midgard, tgerrcsrecdummons. This hsooebdvaftecs certain amount of elemental Djinn see captured.

Summons
NameRequirementDescription
VenusOne Venus DjinnA large version of the Djinn appears and unleashed a powerful yellow energy attack within a certain radius.
RamsesTwo Venus DjinnIt hurls four boulders to crash and fuse together which travels forward like a Drill Arm.
CybeleThree Venus DjinnThis gigantic wood frog summons a storm of vines to shoot up from the ground in front of it. It has a large radius of effect and will instantly trap anyone caught inside. It has the potential to carry them up the upper blast lines.
JudgementFour Venus DjinnThis heavenly warrior will fly into the far background and then charges up an energy blast. It will fire it which causes it to collide with the stage in a manner similar to the Moon and a blast effect like the Smart Bomb but far larger.
MarsOne Mars DjinnMuch like Venus but deals Fire damage instead.
KirinTwo Mars DjinnThis fire lion-like creature will charge forth for some distance while slamming anyone in its way. It produces a trail of fire behind it.
TiamatThree Mars DjinnThe dragon will land which causes a burst of fire to swell up around it which damages anyone comes into contact with it. It then unleashed powerful flame attacks on either side of itself.
MeteorFour Mars DjinnA gigantic asteroid will collide with the stage. A targeting symbol will appear on the stage floor and will move back and forth before crashing down and doing high amounts of damage.
JupiterOne Jupiter DjinnMuch like the above but it’s comprised of four purple orbs.
AtlantaTwo Jupiter DjinnThis heavenly goddess appears in the sky and will then rain down up to twenty green arrows while targeting a certain area.
ProceneThree Jupiter DjinnThis gigantic bird conjures up a tornado which sucks in opponents. It then fires several lightning blasts that home onto the opponent for extra damage. The tornado then “spits” out the opponents.
ThorFour Jupiter DjinnThor appears within a large glyph in the sky and crashes down to the stage on a bolt of lightning which can deal damage. From there, it unleashed a powerful blast of lightning which does tremendously high damage in front of him before launching the opponent.
MercuryOne Mercury DjinnIt functions much like Jupiter but it spins rapidly.
NereidTwo Mercury DjinnThis youthful goddess appears and causes a section of the stage to swell up with water and form a geyser which launches opponents.
VenusThree Mercury DjinnThis gigantic purple whale appears in the far background and will jump while firing an aquatic laser. It functions somiliar to the Meteor summon bit the targeting symbol won’t move back and forth.
BoreasFour Mercury DjinnA gigantic, mechanical beast will appear and unleash a wintry blast all around it; freezing opponents and launching them.

Beaumonde Arena
Style Savvy
Submitted by: @airConditioner
Beaumonde Arena consists of a main platform similar to Final Destination. It also has several platforms that will rise up from the bottom of the stage periodically. These platforms act like the ones on Battlefield. It functions similarly to Minecraft World or Mementos, where depending on a specific choice, the stage takes on a different appearance, or it could change throughout the match. The Screen in the back could function similarly to Pokemon Stadium, where it could display the current score along with some promotional artwork of the characters in battle. There are also multiple cameos that appear including:

  • From Style Savvy:
    • Dominic, the player's benefactor $$$
    • Grace, the player's mentor
  • From Trendsetters:
    • MC Mode, a DJ who works in the contest hall
    • Emmylou, the player's coworker/rival
    • Michaela, the original owner of your boutique
  • From Fashion Forward:
    • Sophie, the player's mentor
    • Adelaide, the main antagonist
  • From Styling Star:
    • Angélique Noir, fashion celebrity
    • Yolanda, one of the up and coming stars the player helps
    • Alina, one of the up and coming stars the player helps
    • Rosie Mayfield, one of the up and coming stars the player helps
Night Walk
Rhythm Heaven
The little boxes one each pillar can be jumped off of to reveal flowers and give you a little boost. The boxes will close after a while. Jumping on the boxes gives a small, little boost when timed to the rhythm of the background music. The stage is rather non-descript but pays homage to its home series. Play-yan himself will occasionally float down from his balloons to jump through the stage himself, in which he will trigger all the boxes, have they not been triggered already.​

Murasame Castle
Mysterious Castle Murasame
The stage consists of a single long stage platform with walk-off blast zones on either side. Located in the direct background are five bushes which, occasionally, a ninja will appear and throws a Shuriken which deals 5-8% damage depending on the frame data. Behind the bushes is the walls of Murasame Castle with the walkways along the top of the walls serving as an additional long platform. In the background looks towers of the massive Murasame Castle.
Astral Plane
Astral Chain
A commonly used realm in a lot of visual media. In Astral Chain, it's an alternate dimension and homeworld of the Chimeras and the only other map that isn't on the Ark that you go to. The platform layout is rather simple: one large main platform and 4 smaller platforms positioned above it in a reverse V-shape: two near the edges, two near the top blast zone. Occasionally, red nodes show up on-stage for opponents to strike. Hitting these will toggle the small platforms to different locations, and even remove some chunks of the main platform, almost like what happens in Astral Chain. In the background, multiple different types of Chimera appear, wandering the landscapes. If Officer Howard isn't selected on this stage, they will appear in the Astral Plane on occasion in the background and fight the Chimeras for a bit before vanishing again.

As far as stage legality in competitive Smash Infinite matches goes, the Astral Plane is...only occasionally used. Some TOs believe Astral Plane's stage-shifting gimmick can give a player far too much of an advantage and that the blast lines are too small for this stage, but others use it just fine as a starter stage, believing the blast lines to be just the right size and the voluntary stage-shifting mechanics to be not that intrusive during matches.

Crossfire
Adance Wars​
This stage prolly an original but incorporate various element from the game. First off, this stage doesn't taken place on a single area but rather various environment that changes randomly based on various in-battle background although it will be a flat stage with walk-off. This include but not limited to:
  • Forest
  • Plain Road
  • City
  • Airport
  • Small Town
  • Harbor
Now is the time to discuss the main gimmick which obviously is in the title, on random occurrence the stage will zooms out to warn you that an army approaching from both sides, then at a random notice both opposing forces start a shoot off to which hits all of the opponent including each other and ended with one victor. Pretty simple. Of course both units will have different colors to each other to match the clashing faction.

Nintendo Land
Nintendo Land​
The main stage would be a single platform. The background would rotate behind the fighters, showing the hub world. The stage also changes over to some of the various minigames.

Minigames
NameDescription
Animal Crossing Sweet DayThe stage is based off the first level, Sweet Day Island Tour. The stage is a walk off, with two trees, one on each side of the stage. In front of each tree is a small pressure point, and when a character stands on the pressure point, an item will fall from the tree.
Mario ChaseThe stage is based off the second level, Mud River Run. This stage is also a walk off stage, but the stage is divided by two mud pits. When a fighter is in the mud pit, they are slowed down and heavier.
Pikmin AdventureThe stage is based off the first level, Bulborb Forest. The stage has walls on the side, making it so the only way you can KO an opponent is from the top, similar to Shadow Moses Island.
Metroid BlastThe stage is based off the Training Zone. The stage is made up of two floating platforms, resembling the first part of the Reset Bomb Factory, just without the addition platforms.
Donkey Kong Crash CourseThe stage is three main platforms with two smaller platforms on each the sides that move up and down.
Nintendo Badge Arcade
In Smash, the default form of Badge Arcade is a single platform. Incredibly bland, I know, but that's before the central gimmick comes into play. Remember how I mentioned how they made almost 9,000 badges?


They're the central part of the stage. Whenever you load the stage, a random selection of badges make up platforms for extra footing. The platforms are able to be jumped through, and don't have any properties you would think they'd have (For instance, the bricks don't break). Every 35-40 seconds, a badge bomb appears and explodes. It doesn't do any damage, but makes all the badges fall off the sides (If only that happened in the real game...) and it changes to a different layout. Here are a handful of potential layouts, but the options are practically infinite.
Home Studio
Art Academy
Hailing from the Art Academy series, we have the home studio, the setting of the Wii U installment of Art Academy. The stage will be a traveling stage a la Delfino Plaza and New Donk City, with a set of platforms taking us to various different locations of the home studio, as well as within some of the paintings themselves. There will be two "studio" locations and 5 painting locations, with generic artistic settings as shown in the paintings in the above pictures. Each different location will have a different set of platforms, and some of the paintings may have different hazards, for example a painting by a lake will have water in it, or a painting in an autumn setting might have mild wind, while some paintings will have new sets of platforms or hazards being drawn a la Pictochat or Mario Maker. The two studio locations will also have a different set of platforms, but the "traveling" set of platforms between locations will always be the same, like in Skyloft or Halberd.​

Pushmo World
Pushmo
Based on the Pushmo franchise, rather than being a static stage, this stage is randomly generated like mario maker and will become bigger to accommodate more fighters

The stage starts out on a flat cloud platform as when pushmo blocks arnt pushed out, this cloud will disappear as the first pushmo block will glow and extend out becoming the new platform, this will periodically change as other pushmo blocks will push out replacing the previous sets, making it a mad dash to the next platform before you lose yours
(Think of it like the beep blocks from mario)

Additionally there is a chance the next block would be a Stretchmo block, meaning the block will begin to stretch out and extend horizontally, sometimes these blocks will be broken by a Crashmo block later down the fight, changing the structure of the arena, making it very dynamic

An Easter egg occurs when character originating from NES games press a certain button combination causing the stage to resemble a 8 bit sprite of the the character doing the code, these vartions dont do Stretchmo and Crashmo obstacles, only the standard pushmo blocks.

Miitopia
Miitopia
Greenhorne
Spoiler
The area you start in Miitopia is the same area you start Smash. Although there are several sub areas in Greenhorne, I think the area should take place in Easin Hills. Very simple layout, as stated earlier. Certain Greenhorne characters could make an appearance. These include:
  • Princess and Besmirched Noble's Son.
    • They would skip along Easin Hills, arm in arm. Occasionally, they would lay down with the Besmirched Noble's Son (Who I'll be referring as BNS for now on) having a dreamy look on his face. Then they would continue walking along, this time with the Princess jumping into BNS's arms, similar to the cutscene at the end of the Greenhorne chapter (after saving the Princess's face).
  • Sassy Child and Worried Mother
    • A Mii child would run around Easin Hills, with the Mother running for the child, agitated.
  • King and Castle Guard
    • The King would be sitting on a giant pillow, with the 4 Castle Soldiers carrying the King, struggling to carry him. The King would be chomping on his Royal Roast the entire time.
  • Several Monsters
    • Several Monsters would be walking by and occasionally jump at a fighter to attack. These enemies would include Rock Moths, Goblins, Apple Jellies, Banshees, Cumumlus, Smileshrooms, Moles, Nose Rocks, and Green Snurps.
Now for the next area...
Neksdor
Spoiler
The second area is none other than Neksdor! Like Greenhorne, it would start off in the first area you are in each chapter, with this one being Neksdor Desert. The layout is the exact same as Easin Hills. For the cameos:
  • Prince from a nearby land (Referring to as PFNL)
    • The PFNL would walk by, carrying a lamp, and sobbing. Occasionally, a speech bubble will appear on the Prince, where he curses the BNS.
  • Genie of the Lamp
    • The Genie would fly around. He would then start floating. The player that touches him gets assisted by him, similar to Midgar summons. The Genie of the lamp would assist by blowing an opposing player with wind, attempting to blow them off the stage. He chuckles before disappearing.
  • Desert Celebrity
    • The desert celebrity would walk by and stand there. Similar with the Genie, the player who touches the Desert Celebrity is assisted. This time, the Desert Celebrity would turn the player into gold for a short bit before leaving.
  • Monsters
    • The following monsters would appear: Cacti Stack, Scaredy-Scorpion, Griffin, Lady and Man Murals, Cactus Ball, Venus Mii Trap, Hermit Crab and Lizard Fossils, Hieroglyphs, Blue Cobras, and Mummies. Similar to Greenhorne, they are hostile and attack.
And for the final area...
Realm of the Fey
Spoiler
And the last but not least area is the Realm of the Fey! As always, it would be the default area of the chapter. For the cameos:
  • Fab Fairies
    • The Fab Fairies would jump into the stage and dance. They then go out.
  • Quizmaster
    • The Quizmaster would run in. He then makes several poses, where each pose gives an effect. These range from sleep, to flower effect, to healing. When he leaves, he runs in place for a bit and then runs away.
  • Worried Explorer
    • The explorer would walk around, looking for treasure, and then sighs realizing that he can't find treasure.
  • Roaming Gourmet
    • The gourmet would sit at a table. He then eats some food on his table. He then jumps into the air and off screen after realizing how good his food was. The table then disappears, and the food falls to the ground. The food can be eaten, and it heals more HP than usual. This cameo only appears if food items are turned on.
  • Monsters
    • I think you all know the drill by now. The monsters that appear or Poms, Owlets, Spring Breeze, Snails, Twerkeys, Mouthy Tomatoes, Demon Spiders, and Kind Golems.
The remaining cameos are characters that can appear in any area.
  • Dark Lord
    • The Dark Lord is the way that each stage transfers. That's pretty much it.
  • Great Sage
    • The great sage would walk by and shoot a big energy ball. The Great sage would then give out a Maxim Tomato before leaving.
  • The most rare cameo, the Party Members
    • A warrior, a mage, a cleric, and a chef would walk by the background, and will only appear if there are monsters on the stage. Once they notice there are monsters, they would run to the stage and take out the monsters. But be careful, as the party's attacks would deal damage to the fighters as well.

Mt. Hikami
Fatal Frame
During the course of Fatal Frame V, the main protagonists Yuri, Miu, and Ren are tied up by fate to this mountain. Ever since one of the series' many, many, MANY rituals, went horribly wrong and a bunch of other silly nonsense, the mountain has been rumored as a paranormal place. Yuri first makes her way onto the mountain after she (attempts to) helps a young woman, Fuyuhi, search for a friend.

While I would like to have a specific location on the mountain as a stage, I overall opted to have the entire mountain as it's the main setting and all the other locations are on the mountain.

As a result, this would be a travelling stage in a similar vein to Garreg Mach Monastery and The Transcontinental Railroad. The stage would go between several backdrops related to locations on the mountain after a while instead of flying constantly throughout. Each location would be pretty similar to each other, though with slight differences.


The stage itself has a simple layout. It's a large platform, similar to most other stages, with the backdrop being magnified in the back. There are two platforms, the one on the right slightly higher than the one on the left. Both of these platforms have a solid wall that faces the side blast zone it is closest to. These platforms are similar to those on Battlefield, where you can jump through them. However, you can't get to them by jumping directly under the wall. These platforms are breakable with strong enough attacks. Whenever a platform is broken, the wall that was on it will also be broken. This resets every time the stage changes location, so you will have a new set of platforms to play with every so often. The location of the stage will change the appearance of the stage (especially the walls, which will change drastically, though remaining similar in size), with each one adopting some themes of the background to make it blend in better. You can also pick which form of the stage you would like to play on, which is especially helpful on Battlefield and Omega forms. If a specific location is chosen while hazards are on, the stage will remain the same throughout the match, but the platforms will rebuild themselves every so often (like Mishima Dojo). The selection method is similar to that of Minecraft World, with different inputs resulting in different locations.

A gimmick (stage hazard) similar to the one mentioned in Venus of the Desert Bloom Venus of the Desert Bloom 's post, albeit simplified. In certain areas of the game, the player is forced to enter areas with lots of water, be it rain, waterfalls, hot springs, etc. As such, when in certain areas, the precipitation would cause the wetness gauge to fill up automatically. Some locations would fill up greater than others, but everyone's would fill up at the same rate, so really, it's just that some places have a higher chance ghosts spawning. This would cause ghosts to be more drawn to players and attack them. These ghosts would have their appearance as they do in Fatal Frame, though censored to remove any blood, bloodlike substances, bodily harm, and booby physics. They would pop up every so often, depending on the wetness gauge in that location, and slowly try to attack players by lunging at them. They usually appear in very very close proximity to the players so it is important to dodge right away. This wouldn't deal too much damage but it sure is annoying and LOUD. A certain ghost has a chance of appearing in one location. This is the Maiden of Black Water, which will both damage you and inflict the player with the Flower Effect. Any ghost can be defeated by having a player taunt, to simulate the odd properties of the Camera Obscura. They will also disappear after a while. When defeated, they will make the same sound that Yuri's assist trophy makes when she takes a picture. EEUUUURURRAHHHHHG. WEEEEAARRGH.

Finally... onto the locations. They will cycle from top to bottom of the list presented, starting from the Hot Springs and ending at the Peak. This is to simulate the climb up the mountain and then the return to the base, where the player starts the climb back up and starts the cycle anew. Again, each of these locations has a different wetness gauge that increases the amount of ghost attacks.

InputPictureLocationRecords
Hold L
Mikomori Hot Spring (tentative to change)Located near the base of Mt. Hikami, the natural hot springs have made this location a natural tourist spot as an onsen. However, after a landslide tragically claimed many of the lives of those in the building, it was burned down. This is the location in which Yuri receives and learns to use the Camera Obscura. The walls will be fences. As an abandoned hot spring, it has a wetness gauge of 50%.
Hold L+R
Pool of PurificationIn the Unfathomable Forest, there exists a beautiful pool of water surrounded by waterfalls. It is said that pilgrims on religious journeys would cleanse themselves in these waterfalls as shrine maidens would perform rituals for show. It doesn't have many tourists anymore, and a rumor has spread that there was a mass murder of ever shrine maiden here. Maidens of Black Water can spawn here. The walls will be lanterns. It has the second highest wetness gauge of 70%.
Hold L+Up
Unfathomable ForestThe Unfathomable Forest gets its name from the fact that whenever you go in, you tend to lose all sense of direction and get lost. It's true, I got lost for a good half hour despite having both exits blocked. A path runs through the forest to shrines on the mountain. A landslide has since closed off many of the entrances to the forest. The walls are trees. It has a wetness gauge of 60%.
Hold L+Down
Womb CavernA sketchy place found underneath the Shrine of Dolls. For some reason, the water flowing through the cave is tied to the wellbeing of the mountain, so when it was partially destroyed by a landslide, lost spirits began to become populous on the mountain itself. The walls will be pillars of rock. This has the highest wetness gauge of 80%.
Hold L+Left
Shrine of the EphemeralA foggy shrine in which no one really knows what it's for. Formerly a tourist destination, it was abandoned after the cable cars broke down. Sometimes, you can see the titular Maidens of Black Water roam around. Maidens of Black Water can be found here.The walls will be fences, but in a more traditional style. This has a wetness gauge of 30%.
Hold L+Right
Twilit PeakThe top of the mountain, desolate and barren. There are objects left behind from rituals, as this was a highly spiritual location with ties to the world of the dead. The walls will be rocks. This has a wetness gauge of 40%.
skhfkjsdfhkdhfkjdhfkjhssjkfhsdkdsjkfhkljlkjlkjlkjlkjkljsklfjlskdjfslkjf

Chemical Plant Zone
Sonic the Hedgehog
The stage would be largely based on both Act 1 and 2, with more aesthetics drawn from 2. This is especially from the poisonous liquid that’s found on the bottom. The stage would be the largest stage for the Sonic franchise (since Dr. Eggman has such a large personality). It would forgo the traditional loops and, instead, featuring two descending blues slides that travel downward before cross-crossing in the center. They act as passable platforms but also as walk-off ledges. There is a center platform composed of the same metallic platforms from these locations, complete with the clear pipes Sonic could run through.

Players can access this by pressing down on the pipe which will shoot them through the base of the main stage platform. There are four entrance areas, including those on the sides. Players can tilt where to go which will direct to where they end up.

On the far left and right sides, in between the two cross-crossing sections are platforms that move up and down. It’s hard to describe it so here’s a video to demonstrate…


Sonic The Hedgehog 2 - Chemical Plant Zone Act 2
Sonic The Hedgehog 2 walkthrough of Chemical Plant Zone Act 2.
m.youtube.com
m.youtube.com

These tricky platforms are both a help and a hinders to players, sort of like a guy we all know who sometimes plays the villain or anti-hero.

The stage wouldn’t have too much in the way of gimmicks or hazards but probably the most s it significant aspect would be….

The Purple Ooze. Like water, players will drown in it hit will do continuous hits of damage without hitstun as soon as players enter into the liquid. It has a longer duration before players drown than water and, well, it’s sticky and reduces movement significantly making it harder to get out. Sort of like a certain Eggman we all know of.

I don’t know much in the way of cameos but perhaps we could decide we can include. I would probably say Chaotix as well as Rogue the Bat, Mephiles the Dark, Jet the Hawk, or even Sonic the Fighters as we are using Dr. Eggman from that game.

Battlefield and Omega would be based on the main stage minus the speed tubes function plus it wouldn’t have the liquid ooze but it would still be visible in the far background. A pink light that shines upwards an be seen though under the stage.
Central Highway
Mega Man
There is a stretch of raised highway that is about a battlefield and a quarter long. And about 1/2 of said highway is slightly sloped to the left. Blastzones are pretty standard and it is possible to walljump on the pillars that support the road-though you cannot camp here forever. There are also two street lamps, one in the foreground of the stage on the right (the non-sloped part), and the other in the background of the stage on the left (the sloped part).​
But it wouldn't be Central Highway without some bees.


Occasionally, the Bee Blader will appear to wreck havoc. It will fly in from the left or right side of the stage, and once it reaches the highway, it will stop in place and begin performing a set of a few actions at complete random. It can do multiple of these things at once, all of them at once, or simply choose not to do anything for a minute. It will, however, perpetually hover up and down.

  • Move forward: Just what it sounds like. The Bee Blader moves forward for a few frames before stopping again.
  • Bullets: The Bee Blader splashes bullets in front of him at a downward angle. It's pretty easy to avoid, but if you're hit, you'll be trapped in for 5 seconds while you are dealt 1% DPS. After which you are launched forwards, but never far enough to kill.
  • Missiles: The Bee Blader fires a homing missile that homes in on whoever was nearest when the move was activated. These missiles deal 8% and can kill opponents, but not until they are in the 130-160 range.
  • The Bee Blader has slightly more health than the Yellow Devil did in Smash Ultimate. When defeated, the Bee Blader will explode similarly to the Yellow Devil, but in a more realistic fashion. The explosion does major damage and knockback to anyone nearby, except for the player who landed the final hit.
  • The Bee Blader will not appear if stage hazards are disabled.
This stage has 10 cameos in total, all characters from the Mega Man X series. When the stage starts, there are no cameos-however, throughout the match the characters will teleport into the background of the stage to watch the battle. Sometimes they will also teleport away and, over time, new characters take their places. This is mostly random, but characters like X and Zero have the most priority of appearing.

Warning, minor spoilers ahead for X4. Skip Iris and Colonel if you don't want those.

X

The greatest creation of Doctor Light and main character of his series, Mega Man X (or just X) is a Maverick Hunter who fights for peace, though he wishes there were a more peaceful way of protecting both humans and reploids. After teleportation in, X will stand with his hands on his hips and watch with a smile on his face. If a KO is made, X will raise his fist to the air in celebration.

Zero


The greatest creation of Doctor Wily and partner of Mega Man X, Zero is also a Maverick Hunter who fights for peace-though he is more quick to act than X and doesn't spend as much time wishing for a peaceful solution to the war between reploids and mavericks. Zero will stand with his back to the camera, so we get full view of his glorious ponytail. When a KO is made, Zero shows a thumbs up to his opponent.
Axl

The junior Maverick Hunter with the ability to copy the appearance of others, Axl fights with X and Zero to stop Sigma dead in his tracks. Axl will bob from left to right in place, as if imitating a fighting game character, with his guns at the ready. When a KO is made, Axl spins his weapons with his fingers before striking a flashy pose.
Iris

Brother of Colonel and former love interest of Zero, Iris is a member of Repliforce who is unfortunately lost in the Final Weapon incident. Iris will hold her hands behind her and watch the battle with great interest. When a KO is made, Iris brings her hands around from her back to reveal a purple crystal-which she will then toss up into the air before catching it and putting it back behind her. She looks very energetic when doing so.
Colonel

Brother of Iris and one of the two leaders of Repliforce, Colonel is the one who leads the Repliforce to leave Earth, in hopes of living their lives without the humans, and without harming them-but due to seeds of rebellion in the repliforce planted by guess-who, Colonel must be defeated by X (or Zero) in order to stop the Final Weapon from firing at Earth. Colonel will look ahead with not much visible emotion, arms down at his sides. He will politely clap whenever a KO is made.
Alia

The CEO of stopping X dead in his tracks to feed him useless information through his earpiece, Alia is the Navigator of the Maverick Hunters who "helps" by letting X know what's going on in any given situation. Alia will be talking to someone on her earpiece, occupied with something else and not focusing on the match at all-but when a KO is scored, she'll seemingly say "hold on" to them before waving and smiling at the screen.
Douglas

The strangely handsome Douglas is the mechanic of the Maverick Hunters, who proved instrumental during the Eurasia colony incident. Douglas will stand casually and hold a wrench, occasionally tossing it slightly up and making it spin before catching it again. If a KO is made, Douglas reaches his non-wrench fist up, then pulls it back in excitement.

Signas, the leader of the Maverick Hunters, is the impressive strategist behind all of X's most dangerous missions. Signas will hold his chin up with his hand and simply observe the fight, occasionally nodding. When a KO is scored, he'll smile-this is the most subtle victory animation of the X cameos, but make no mistake-Signas truly appreciated that awesome play you just made.
Sigma

Sigma was once the leader of the Maverick Hunters, but once the Maverick Virus manifested itself inside his body, Sigma felt the need to eradicate humans to make a perfect world for reploids. He now leads the Mavericks and fights with X and Zero every Tuesday whenever he's up to no good. Sigma will cross his arms around his chest, looking stern. When a KO is made, he throws back his head and laughs, as if to say "lol should've teched"

Vile

Vile is a maverick who works directly with Sigma, who has a lust for destruction and a kink for reincarnation. Vile will stand in place with determination, very much ready for action, with his knee blaster and shoulder canon locked and loaded. When a KO is made, he actually stomps the ground with his feet-Vile lives for destruction, but he'd rather take part in it himself than watch others have all the fun.

When teleportation in, the hero characters (anyone but Vile and Sigma) will teleport in classic Mega Man fashion. However, Vile and Sigma will have two after-images of their character model warp in, combining to form one image, before they themselves appear where that image is.
Shopping District
Street Fighter
et another iconic Street Fighter stage to accompany Suzaku Castle. This one belongs to the Chinese martial artist, Chun-Li. While Battle Harbor would make sense for Ken Masters, Shopping District is the more iconic stage but also brings an unique flair: a oriental Chinese aspect that is missing in Smash. We don’t have many stages like this but Battle Harbor would be a bit like Delfino Plaza in some regards. Air Force Base or a Shadoloo Base...or even Sagat’s base (forgot the name but the reclining statue stage) would be potential picks.

The stage would take a similar aspect from King of Fighter’s Stadium minus the sidewalls so it would have walk-off blast zones. There would be a secondary platform composed of the awnings found in the district’s shops.

Certain items found in the stage, like Suzaku Castle, can be destroyed. This includes signs, lampposts, the barbershop sign, and laundry line. Cameos would be limited to the characters found in the original stage. The stage would replicate the entire feeling of the SFII stage but remakes it in the typical Smash fashion so it wouldn’t be a Mute City/Balloon Fight situation.

The Battlefield/Final Destination versions consists of an earthen floating platform with the buildings in the background set against the far background. (Sunset sky and mountains)

Now, the elephant in the room...will Smash include the chicken strangle? No, it won’t. It will Include the caged chicken but hitting the cage will free the lucky chicken so it can escape. Replacing the man who is strangling the chicken would be a man who is checking the cage. Releasing the chicken surprises the man.

Clock Tower
Castlevania
he stage would take place on the gear as if it was laid down flat. In the background, several gears can be seen twisting and turning. There is also two solid stone platforms portruding from the wall and a semisolid platform in the middle where at least one player can stand on to avoid the gear's spinning.

It looks something like this.
__ ____ __

____________

Occasionally, the gear the stage takes place on will start spinning. During this event, attempting to grab the ledge will instantly send you off. However, you will regain all of your jumps and movement options. Additionally, depending on whst direction the gear spins, players on the ground will be slid in that direction. The spinning will be foretold by the gear shaking. Several Medusa Heads will also attack the players from time to time by floating along the stage in a squiggly line pattern.

There's one more gimmick you should be aware of... If you select the stage while holding L, the stage will instead become...

Job #112.5: Inverted Clock Tower

The stage functions similarly to the regular variant with the Medusa Heads. However, the entire stage will be upside down! The stone platforms from before will act as the main ground now while the gear on top will act as a ceiling. If the ceiling is touched while the gear is spinning, you will take a colossal amount of damage and be spiked straight down.

Omega/Battlefield: The stage on Omega will resemble a gear with stalagtites hanging from the bottom and the platforms will resemble the stone platform in the center from the normal stage.
Transcontinental Railroad
Fatal Fury
The platform, just like in the original, would keep rumbling to really sell the idea of it being continental traintrip. As for the stage layout itself, visually-speaking it would pretty much be identical to its Garou counerpart. When zoomed out the entire stage would come into view, here's a shoddy mock-up I've made to visualize the size of the stage. The wooden logs and caboose on the sides would work as walls, so you'll only be able to blast your opponents to the upper sides and the sky. Although that isn't everything this stage has to offer...

Here comes the dealmaker, the stage's background isn't constantly going to be the ocean. In fact, this train will visit iconic places from the Fatal Fury series, so you better hop in before it departs! Inbetween the locations are smooth periods of transition. The stage will go through an entire day, from morning, where the start of the cycle begins, till night, where the end of the cycle ends! Of course, this is to reference the fact that a lot of Fatal Fury stages have these daytime/nighttime transitions inbetween rounds. The stage would both start AND end in the waiting line very early in the morning (2nd round version of the original stage) and after around 10 seconds it will start to ready for its departure. Here's a roadmap of the stage in full (spoilered), along with some mockups of mine that would help visualize the stage along with the train. While I do want to preface that the mockups don't represent the actual stage, and they're just here as a visualization tool, cause you're gonna have to do a bit more imagining yourself.

SectionInfo
1. Freight Express Station

View attachment 335866
This is the first section in this stage, although it is originally the second round variant of Terry's stage. This is where we start off, passengers. While the original version takes place in the middle of the day, we'll take some liberty and set this up in the morning, right before sunset. After around 10 seconds, we'll start to depart!
2. Sunrise

View attachment 335867
One of the travelling sections in this stage, originally this is the first round variant of Terry's stage in MotW. Here you can take in the beautiful sunrise. Sometimes an airplane might appear in the distance, which clearly upon further inspection belongs to Alfred Airhawk. Once that's over with, we'll slowly enter a foresty area...
3. Sarah Forest

View attachment 335868
Still in the late morning, we have our first stop after departure. This is Butt's/Marco's homestage from Garou: Mark of the Wolves. No cameo from him though, only his lonely hut, training equipment, broken trees due to incredible training and animals. We'll stay in this section for around 20-25 seconds, then we'll start to depart yet again. Once we leave this forest area, it starts to become a bit desert-ish.
4. West Albuequerque

In the heat of the day, at noon, yet another travelling section, in the background of the Freight Express we see the iconic Mount Rushmore from Terry's stage in Fatal Fury 2. Nostalgic! Once Mount Rushmore disappears, our transition to a new area begins and our next stop awaits. We enter a city.
5. South Town Village

View attachment 335871
Once afternoon comes, we travel through South Town village, based on Billy's stage in the first ever Fatal Fury. Just like the original stage, you can spot a car with the word "SNK" graffiti'd on it. Unlike the original stage in Fatal Fury, there are no random onlookers viewing the battle. Perhaps all gone to watch the battle in the KOF Stadium? After a good 15 seconds, we'll stop in another nearby and very iconic location.
5. Howard Arena

View attachment 335872
We're now in the late afternoon and we have a temporary stop. In the center, from a distance, we notice the iconic Howard Estate, based on Fatal Fury 3. With the passing of time, the clouds begin to close, until raindrops fall. In addition, the light from the buildings in the background lit up. Once we depart yet again, the weather has mercy on us and it stops raining.
6. Barbaroi Falls

View attachment 335875
In the evening we enter a rocky mountaneous area and travel through it, upon resting at a waterfall spot. We take a breather and fully take in that beautiful waterfall. This location is based on Gato's stage in MotW. Once night comes, which is in about 15 seconds, we'll start riding. There's seems to be a coast ahead of us.
7. Blue Wave Harbor

View attachment 335880
We finally enter night, and make yet again a temporary stop, this time at the Harbor, more specifically Blue Wave Harbor. This is originally B. Jenet's stage from Mark of the Wolves, who is the captain of the Lilien Knights. In the background we notice their ship that is destroying the pier. We also notice some more boats, palm trees and some sailors. After a bit, we depart, nearing the end of our trip.
8. Freight Express Bridge

View attachment 335878
We're finally nearing the end of our tour of both Old and New South Town and mount a bridge. No stop here, we ride this entire bridge, baby. Instead of it being day, like in the original version of Terry's stage in MotW, we're pretty late into the night. We ride on the Express Bridge for a while, and arrive back to our station for a temporary stop, this resets the cycle, and we depart yet again early in the morning.

Tetris
Tetris
Like Living Room, it stats out completely flat, but Tetrominos will rain down from above, altering the layout. there are many different Tetrominos that can fall, and they will only disappear when they create a row.

If you are crushed by one, you will take damage, but also will be launched depending on the direction the Tetriminis is facing.

N. Sanity Beach
Crash Bandicoot
Submitted by: cashregister9 cashregister9
The stage is rather standard and more in line with stages like Final Destination with a flat surface composed of sand. Surrounding the stage platform is water which induces drowning if players stay there for too long. This makes bottom KO’s caused by attacks to be impossible. Occasionally, a Crate from the Crash Bandicoot will appear which all have different properties.

There are multiple hazards in this stage that makes playing on it difficult:

  • The man eating plant is a platform that bites every 5 seconds of its 15 second appearance. The first two will merely trap you and serve as a mild annoyance and make you easier to hit while the third will have it drag you to the depths. It shakes a little so you can recognise when it’s about to bite
  • When big TNT is stood on you bounce a little and it begins the timer, counting from 3 to 0, once it reaches 0 it explodes, it’s quite a big, powerful explosion (albeit not a 1HKO) and reaches to the edge of the main platform. If not activated it disappears after 8 seconds. Occasionally the Big TNT will spawn with Ripper Roo standing on it, as he bounces to activate it instantly, albeit not avoiding the explosion and ending up flying off stage.
  • The lily pad simply sways back and forth, making it tricky to land on. Disappears after 10 seconds.
Cameos also appear frequently on the stage which includes:
  • Coco
  • Tawna
  • Dr. Neo Cortex
  • Dingodile
  • Crunch
  • Nina Cortex
  • Tiny Tiger
  • Dr. Nefarious Tropy
  • Pinstripe Potoroo

Raccoon City
Resident Evil
The stage consists of a single long platform with walk-off blast lines on either side with three buildings that function as both backdrops and platforms much like Onett. The left side consists of the Raccoon City Subway Station which had a second story platform while the right side has a high fence that extends two stories up. This prevents lower knockouts. In between are two buildings; one with three story platforms. In addition, in the background is a donut shop which stands behind a fence. There is also a barricade fence put up in front of the subway station entrance/exit.

Zombies will periodically flood onto the stage and they appear at three different points. The first is from the subway stairwell, another from the donut shop, and the third from the right border fence. If enough zombies congregate to the fence, they will break it down and charge across the stage. They are fairly weak though and several attacks will incapacitate them. The first two entry points will have no effect on the match if broken down but the third will allow low knockback to enter the blast zone. They will erect back up in about 20 seconds after being torn down and then reset.

Several cameos do appear such as Carlos who will appear near the Subway Entrance and eliminate several zombies that enter the stage. If you successful taunt nearby to him, he will also attack nearby opponents. Nemesis will also appear which renders him unsummonable as a Boss Sphere. He behaves much like his Boss Battles in Classic Mode, Smash Dungeon, and Wishing Stars.

Hakurei Shrine
Touhou Project
The Hakurei Shrine is an important location in the touhou franchise.

The main platform is a large pillar slightly larger than Kalos pokemon league and on the platform is the Shrine building where the
dozens of cameos will be, you can stand on the roof of the shrine and there are 2 other trees that you can stand on. Fairies will fly in the background and sometimes on stage to deliver food

With hazards on occasionally one of the Characters will activate a spell card and many projectiles will be fire down onto the stage depending
on the Spell card.

The characters that could activate a spell card are:
-Yukari
-Flandre
-Sakuya
-Junko
-Marisa
-Utsuho
(They still stand in the background with the rest but sometimes they do the spellcard thing)

The Rest of the Cameos are:
-Youmu
-Alice
-The Prismriver Sisters
-Reisen
-Cirno
-Sanae
-Aya
-Koishi
-Patchouli
-Nitori
-Remilia
-Eirin
-Saki
-Momiji
-Suwako
-Tenshi
-Suika
-Yuyuko
-Wriggle Nightbug
-Wakasagihime
-Hong Meiling
-Fujiwara no Mokou
-Clownpiece
-Kanako

Six cameos can appear on the stage, one of them being a Spell card character

The Spell card effects are this:
Shikigami "Ran Yakumo": Yukari appears above the Shrine and Ran Yakumo jumps from platform to platform sending projectiles downwards, You can KO Ran to end it early but if you touch her while she is jumping you will take damage.

Taboo "Lävatein": Flandre appears in the middle of the Stage and a Large beam emits from Flandre and circles around the stage, You can KO Flandre to end it early

Illusion World "The World": Sakuya Stands on the Shrine platform and Time slows as Projectiles slowly spawn and fire at the fighters You can KO Sakuya

"Simple Danmaku for Cornering a Trapped Rat": Junko Hovers above the Shrine and sends rows of Homing Projectiles onto the fighters You can KO Junko

Love Sign "Master Spark": Marisa flies above the Stage and Shoots a large beam into the middle ofthe stage and Star shaped projectiles also fire randomly around the stage You can KO Marisa

Atomic Fire "Uncontainable Nuclear Reaction": Utsuho stands on the Middle Platform a Siren plays and 4 Massive Projeciles are fired from Utusho and smaller homing projectiles are fired from the larger projectiles.

Omega and final destination versions keep the exact same background just the pillar is smaller.

House

Plant vs Zombies
The stage remains relatively the same throughout each area but retains the idea brought up by Addy …

The stage layout would be a completely flat walk-off stage that rips its layout straight from PvZ but in 3D to fit the Smash style. There's a catch though, just like King of Fighters Stadium. You must get blasted through an invisible wall except the difference between this and KoF Stadium is that you can only be blasted through the left.
There are five areas:
  1. Lawn (Day)
  2. Lawn (Night)
  3. Pool (Day)
  4. Pool (Fog)
  5. Roof
Each area is randomized but, as mentioned, it can be selected via button input at the stage select screen. In addition, while we did include the Zombie Horde as an Assist Trophy, due to limitations, the assist trophy will not be accessible on this stage as the Zombie Horde is a stage hazard/gimmick. I didn’t consider the ones that were brought up in each submission so I will be adding these also to the Assist Trophy. This stage also has an unique aspect where, if Crazy Dave is selected and playable, then the Plants won’t appear as cameos. This is in order to help players be less confused during battle.

Celeste Mountain
Celeste
The stage itself would be a chunk of earth jutting into the foreground from the mountain, which would thus appear in the background taking up the right side of the screen. The main platform would be about the same side as Battlefield's, and there would be two smaller platforms above it, each slightly tilted.

If hazards are on, occasionally the screen will shake a little. When this happens, a cluster of blue crystal spikes will fall from above and land on the main platform (passing through any smaller ones) and linger there for a moment. They can land on any spot across the platform except for directly on/a short distance from the ledge.

Occasionally, you can see a bird flying through the background. Once per match, you can see Madeline climbing the mountain in the background. Upon landing on a small, safe outcropping, she'll briefly cheer on the battle before resuming her climb.

Twitter
Twitter
The stage is very reminiscent of the stage Miiverse but has a light-blue theme and the background has Larry the Bird symbols behind it. Throughout the battle, hashtags and tweets from the player’s linked Twitter account appears in tweet bubbles. This also includes tweets, mentions, and replies by the player’s friends. The stage has a built-in censor that doesn’t feature inappropriate, offensive, and dangerous content as well as images and videos.

The Underworld
Hades
Part of the "In the Name of Hades Bundle" DLC
This stage take place cycling through areas like a typical run of Hades - always beginning in the House of Hades, where Hades, Hypnos, Dusa, Orpheus, and Nyx appear in the background as cameos, as well as faceless Shades, who also appear in every other area, matching the general color of the area they are found in.

Every 35 seconds, the stage will transition to one of the five random neutral layout options it has, with each layout randomly picked but the location the background takes place in always going in the same order (with one exception). The order will always be Tartarus > Asphodel > Elysium > Temple of Styx > House of Hades; though there is a 10% chance that a portal on the ground will be in the middle of any of this stage's layouts except the House of Hades, which, while it is purely visual and does not interact with the fighters in anyway way, does signify the next location will be the Primordial Void, before rotating back through the cycle. The Primordial Void only appears once per cycle, and uses the same layout as either the next or previous layout in the cycle; randomly determined.

Please note the attached images are just to showcase the visual style of each area of the game.

Tartarus (structured in a dungeon-like fashion) features cameo appearances from Sisyphus, pushing a boulder up a hill in the background, and Megaera, who watches him do so.

1639507405508.png


Asphodel (a fairly open area structured primarily as rocky outcroppings in a river of lava) features cameos by Lernie the Bone Hydra, whose heads pop up out of the river of lava, and Charon, who merely oars his boat past, eerily watching the fight as he does.

1639507363979.png


Elysium (structured as beautiful fields with lots of flora and occasional spiritual fauna) features three cameos, Thanatos, who watches the fight from the Background, as well as Theseus and Asterius, who spar in the background. The Elysian Colosseum also appears in the background, far off in the distance, past the fields.

1639507517285.png


The Temple of Styx (structured as... well, a temple which the river Styx runs through) features two cameos - Cerberus, guarding the exit of the Underworld in the background, and Charon once again - having set up his final shop here.

1639507685227.png


The Primordial Void (structured as numerous bases with columns floating amist endless darkness) features a cameo, though only for about five seconds while during your visit - a massive, translucent image of Chaos will appear briefly, utilizing his sprite from the game.

1639507842570.png


These are the layouts the locations will switch between (Or at least approximations of them). Each layout has a different visual flair for the platforms for each of the six locations, though it's purely visual.

1639508328464.png


- Tartarus platforms seem to be made of rough stone.
- Asphodel platforms seem to be made of wood and bone.
- Elysium platforms seem to be made of vines.
- Temple of Styx platforms seem to be made of polished stone.
- House of Hades platforms seem to be made of polished stone and have red carpeting on them.
- Primordial Chaos platforms seem to be made of rough stone, the kind seen on the floor you walk on in the game.

Mappy
Pac-Man
Apart of "Downloadable Stage Bundle #1"
This is a new Pac-Man series stage. It is semi-retro-styled in that all the textures are 2D images ripped from the game, but the background has a epilepsy-friendly, dimmed-to-prevent-distraction police lights blur with the light reflecting onto the sprites and fighters. The roof of the house is present, but unlike in the game it is only in the background and can't cover players or be walked inside.

000932E5-129A-49D1-8716-25A5B79E67F0.jpeg

The black squares are hard platforms, the green squares are trampolines, the yellow squares are soft platforms, and the red squares are item spawn points - why this is important we'll get back to later. Doors are absent as a mechanic, but permanently-opened doors appear in random locations in the background when the match starts. Mewkies don't appear, but Goro does, which we'll also get back to.

Trampolines can be jumped on - they begin green and shift colours like Pac-Man's Up B before breaking, they'll respawn a bit after breaking. If a trampoline breaks upon jumping on it, you will be instantly KO'd with a semi-unique animation of your character spinning (knocked back pose spins, then lying unconcious pose in its regular positioning, explode) and the Mappy death sound - if they're KO'd on their final stock or as a match-ender, the last few notes of the Mappy game over theme will play. Said sounds are only for the trampoline

Items will always spawn in the exact same locations simultaniously - excluding containers and item spawning moves, there will usually only be 7 items on screen at a time, no more, no less. Every "wave" of items also brings along Goro - every time you pick up or use a naturally spawned item there's a 1 in 7 chance Goro will appear and grant you a major stat boost. Every item wave is gauranteed to have one Goro, no more, no less.

50461306-03A9-441A-B891-EC9B86CC5BAA.jpeg


If items are off or only items that spawn in small quantities are on, the treasures from Mappy spawn instead, with no functionality beyond the Goro hunt.

Multi-part items are disabled on this stage, and the Smash Ball does not apply to this stage's item rules

I don't know if you can tell, but this is a stage idea I've had in mind for a long while, like I've been conceptualising how to adapt this game to a stage since I was a kid.
Winter Sports Events
Mario/Sonic the Hedgehog
Apart of "Downloadable Stage Bundle #1"
The Olympic Winter Games Stage is based on Mario & Sonic At The Olympic Winter Games, The Stage is a transition one that sends players to different areas based on the events appearing in the game.

Overview: The Main Platform will show the view of the entire Sports Event from above the sky while some balloons float in the air(the balloons are based on the ones shown in the image), as the platform travels around the stage you can see the crowd on different bleachers(toads, shy guys, flicky's, etc.) cheering for the events going on. Various Characters(Minus the playable smash fighters) in the original game participate in the events, However the flags of the playable characters in the original game are still used.

When selecting the stage, the weather will change such as clouds covering the sky with a bit of snow raining down, a small snowstorm brewing, or just a simple sunny day. this is something that happens in the original game(at least the DS version from what i remember) so it makes a lot of sense & brings in some more stages with changes to the environment.

Like all transitions stages, the platform will slowly make a drop to a random location and after a while it'll raise back up in the air again.


1652667287527.png

Alpine Skiing Downhill-The Platform lands on the middle of the Skiing Course nothing really happens except for one of the players skiing down the hill, if the skier gets attacked or crashes into one of the opponents then the crowd will start freaking out which will cause the platform to move back into the air.
The Player gets hit by the skier they are dealt with 10% damage.


1652667106532.png

Snowboard Cross-The Platform will land on the Goal Sign, it is build to be much bigger with the top thicken to be thin & to work as a platform for the fighters.


1652667202474.png

Bobsleigh-The Platform will land in the middle of the crowd while also being close to one of the slopes which acts as a hazard. a bobsleigh ridin' by four characters will come slidding at maximum speed any player getting caught will deal 54% damage.


1652667253182.png

Ice Hockey-The Platform will move into a colisseum and set itself on the middle of the air where the crowd is, meanwhile in the background, plenty of characters are playing Hockey normally tackling other opponents & firing the puck to the goal, on rare occasions they'll miss & sometimes the hockey puck will fly to the air and hit one of the opponents, this will cause them to deal with 5% damage.

All Characters who appear in each events
  • Metal Sonic-Alpine Skiing Downhill
  • Dry Bones, Toad, Jet, & Silver-Snowboard Cross
  • Dry Bowser, Toadette, Omega, & Zavok-Bobsleigh
  • Petey Piranha, Vector, Birdo, & Shadow-Ice Hockey

Courtroom
Ace Attorney
Part of the "A Smashing Turnabout Bundle" DLC
This is the base appearance of the stage. It is a flat walk off with the spectator bench acting as giant walls. With enough damage, these walls can be broken although the walls do not reach up to the ceiling and more so halfway up the screen. The stage has a couple of cameos though. Apollo Justice and Klavier Gavin can be seen in a trial defending a random Smash Bros. character not currently in the match while the Judge oversees.


apollo-confident(c).gif


klavier-pounds(c).gif


These characters are chosen to take part in the trial if Phoenix is currently fighting on the stage. If Phoenix isn't in the match currently however, he will be duking it out with his own rival, Miles Edgeworth.


phoenix-pointing(b).gif


edgeworth-shrug.gif


With hazards on, every stage will have the same stage hazard. Some of the characters may shout OBJECTION! These speech bubble can hurt any player in its range and will launch them away. And now for the alternate looks,

Ace Attorney: Dual Destinies


This variation of the courtroom comes from Dual Destinies where an explosive detonated completely demolishing it. In this version of Courtroom, there are no walls blocking half each side. However, rubble is scattered across the floor making the ground uneven. The two characters on trial are Athena Cykes and Simon Blackquill with his pet bird Taka.


Athena_Confident.gif


Ace Attorney: Spirit of Justice


CourtroomAA6.jpg


This layout resembles the courtroom of the Kingdom of Khura'in, a faraway country in the world of Ace Attorney. This version is similar to the Mishima Dojo stage in that a mystical barrier coats the entirety of both sides of the stage meaning that it will be need to be broken before a character can be KO'd and once it is broken, it stays broken permanently. Apollo Justice returns as well as his new rival, Nahyuta Sahdmadi.


NUemAhO.gif


Zen_from_normal.gif


The Great Ace Attorney


bg_full_view02.jpg


The final layout is from The Great Ace Attorney taking place 100 years into the past focusing on the adventures of Naruhodo Ryunosuke, Phoenix Wright's ancestor. Specifically, this courtroom is one inside the Old Bailey in Great Britain. The layout is identical to that of the base version although the blastzone is a bit wider. Ryunosuke will be presiding this trial from the past against his rival, Barok van Zieks.


Naruhod%3F_confident_talk.gif


Omega/Battlefield

The Omega and Battlefield stage variants will take the appearance of the Ace Attorney Trilogy courtroom appearance with the trial happening in the background and the stage basing its appearance of the legal counsel benches.

Grand Imperial Theatre
Sakura Wars
Part of the "Imperial Smash Revenue Bundle" DLC
The home base of the Imperial Flower Division, located in Tokyo, not only does it act as a playhouse where Tokyo's citizens can come and relax to watch a show, but also hides the Flower Division's Koubu in it's basement for deployment; there's also protective walls to keep it safe during an attack. The stage takes place on the stage in the main theatre, with the blast zones obscured behind it's curtains. The stage is completely flat - but every thirty seconds the curtains will close and obscure the stage for about six seconds, then reveal a backdrop change - complete with the addition of platforms as part of the decor. There are four sets - a forest-themed backdrop with platforms on the top right and bottom left, the right on a tree's branch and the other on a rock. The second, a winter wonderland themed backdrop contains two snowflake-themed platforms perfectly symmetrical on the right and left. The third, a pagoda backdrop during the fall, has only one singular long platform on it, and the last, a garden with cherry blossom trees, has three platforms, in a Battlefield-formation, each on a branch of a different tree.

Sumire, Iris,Kohran Li, Maria, or Kanna can cameo when it's on the neutral set, though will leave when it transitions. The neutral set is the only time the room is lit normally, as when the performance begins, only spotlights will light it and the rest of the theatre will be dark.

But that's not all! The stage has three other variations; though the actual performance backgrounds don't change.

Le Chattes Noires
1644635494320.png


The stage will be lit by more neon lights than traditional lights, and features cameos from Erica, Lobelia, Glycine, Hanabi, and Coquelicot. They follow the same rules as the original Flower Division.

Little Lip Theater


1644635669287.png


This stage looks more modern than the other two, though it's floor is still made of wood; and features cameos from Shinjiro Taiga (as Peppermint), Gemini, Rikaritta, Diana, Subaru, and Sagitta. They follow the same rules as the original Flower Division.

Grand Imperial Theatre (Modern)
Functionally identical to the original, though the stage looks slightly more worn and the lights are slightly dimmer. Features cameos from Seijuro Kamiyama, Sakura Amamiya (who has a special animation, freaking out if Sakura Shinguji is in the match, as she idolizes her), Hatsuho, Azami, Anastasia, and Clarissa.

The main theme of each game (Declaration! Imperial Floral Assault Troop for the original, Under the Imperial Flag for Le Chattes Noires, Earth Warriors for Little Lip Theater, and Declaration! Imperial Floral Assault Group (-Shinsou-) for the modern version) will automatically choose that version of the stage when playing, though any other theme is fair game for any variant of the stage.

The Omega and Battlefield variations also appear as the main stage, though in front of the curtains and with an obvious layout change.
Aperture Smash Chamber
Portal
Apart of the "DLC Stage Bundle #2"
That's right. GLaDOS was so excited to collect data of fighters from across the multiverse that she constructed an entire testing chamber just for them!

This stage takes place inside the Aperture Science Enrichment Center, the main location of the Portal series of first-person puzzle games. It's a part of the facility which is still being constructed by the central core of Aperture, GLaDOS, before the match has even begun! The layout is finished by the time the announcer declares "GO!", but the background is still having tiles put into place and whatnot. GLaDOS can be seen in the background at the center of the square chamber, as well as the Aperture Laboratories logo - but instead of a design resembling a camera lens, it has a Smash Ball design to the left of it. You can also see an exit, but there is no way to get to it at the moment...apparently GLaDOS plans on the fighters being here for quite a while. There's lots of testing materials in the background as well, including Hard-Light Bridges, Reflection Cubes, Lasers, Aerial Faith Plates (with cubes flying between them occasionally), and buttons. It seems a little disorganized, and throughout the match GLaDOS will multitask between trying to keep the appearance up by using clawed hands and removing unwanted testing materials, and controlling the stage. Speaking of which...

(TL;DR appearance is an unfinished testing facility with a Smash logo and a big ol robot in the middle)


Untitled design (5).jpg


The bulk of Aperture Smash Chamber is a long, flat stage the size of Kalos with two walls on each side, each with a portal that leads to the other. There are two tubes protruding from above which will drop testing materials at certain times, with GLaDOS saying something along the lines of, "Try this test on for size" or "I would share with you the percentage of subjects who were able to outsmart this one, but I fear it would discourage you from proceeding any further." For example, a Companion Cube might fall from one, and the players are tasked with attacking it so that it lands on the button. Or another example, you might have to take down a few turrets that drop in from both sides (yes, they're just as much of a pushover (literally) as in Portal). If you succeed in your trial, a chocolate cake falls down from the pillar closest to the player who solved the puzzle - hooray! "There's plenty more where that came from...if you're willing to, shall we say, turn up the heat a bit," GLaDOS remarks as the healing item (10%) drops down. The tests will become increasingly difficult, as GLaDOS may change the layout slightly by adding solid walls in undesirable locations, bringing in a Hard-Light Bridge from the background into the foreground, creating a temporary soft platform, or spawning a laser which must be avoided at all costs, as it will deal 1% every few frames it is touched. The portals on the sides of the walls work exactly like Ultimate's Stage Builder portals, except they do not have a cooldown period.

TL;DR GLaDOS makes you do Warioware-like puzzles, if you do you get cake that heals you, portals on each side.


If a fighter gets KO'd by lasers or turret fire (which instakill opponents who have been dealt 100% or more), they will receive a custom insult from GLaDOS - such rude remarks are a key part of Portal's story and gameplay. I don't know any we could have offhand, though the submissions (if this stage were to win) would be similar to how it works for Codec Calls, Palutena's Guidance, etc. This is something that would be absolutely necessary in a Portal stage IMO, along with the series' signature mechanic.

As for reasons of inclusion, Portal is a really huge game, but neither of its main characters really work from a fighting game standpoint (one is kinda generic and has the potential of being too OP/not well designed, the other one literally cannot function like a fighter due to her nature as a central command AI). Portal is absolutely deserving of representation though, and I would argue that a stage represents it better than a fighter (since Portal doesn't really focus on the characters as much as it does the environments around them). Also, it would be a crime for this game to call itself "Infinite" and not have Still Alive OR Want You Gone (spoiler warnings on those songs BTW). Portal has a bunch more great songs as well (especially from the second game) and we could also technically include some Half-Life content since they share a universe. Overall, Portal is a part of gaming history that warrants a place in Smash, and a think a stage is the best way to go about that.

Digital Monster LCD
Digimon
Apart of the "Smash is the Champions Bundle" DLC
Similar to Flat Zone, this walk-off stage takes place on an LCD device, which kick-started the entire franchise. The main gimmick of this stage? Why that's simple: raise a Digimon! In the background is a large egg that stays static until a minute later, where it hatches into an LCD Digimon, which is any Rookie Digimon instead of Agumon because, well, he's already playable. Halfway through that, however, icons will fall from the top of the stage in abundance that fighters must collect within another minute.

Meat: Used to feed LCD Digimon. This is used to win the favor of LCD Digimon, turning it into an ally.
Weight: Used to train LCD Digimon. Each weight increases LCD Digimon's attack by 0.1x. So 5 Weights means it deals 1.5x damage.
Lightbulb: Use to make LCD Digimon relax. This makes it faster with each Lightbulb collected.

After LCD Digimon hatches, the fighter with the most meat will gain it's favor and become a Flying Man-style ally. In the event of a tie, LCD Digimon will favor the fighter with the advantage in damage and stocks. If no meat is collected, LCD Digimon will die and the egg will respawn after 15 seconds.

While recruited, LCD Digimon will either do a physical attack that does a base damage of 8%, or a special attack that does a base damage of 10%. LCD Digimon also has an HP stat of 30 HP. Occasionally, Bandage icons will fall from the screen. If LCD Digimon's Tamer collects it, they will heal it for a quarter of it's max HP.

And to top it all off, each battle has a different color for the device this stage takes place on, which are displayed in this picture below. How each color is determined is based on the music that's playing at the moment.

1646380516194.png

The May Ship
Guilty Gear
Apart of the "Smell of the Game" Bundle
The Mayship is a flat walk-off stage based on the Jellyfish Skyarium from STRivE that is close in function to King of Fighters Stadium’s walls. The difference being that the KO part only activates if the foe is above 100%. Beneath that, when the wall breaks from knockback, the foe transitions to another platform on the stage entirely and the person who initiated it gains a 1.2x attack bonus.
Furthermore, it has a unique aesthetic similar to Boxing Ring: everybody will be cel-shaded and animated at a lower frame rate, mimicking the modern Guilty Gear titles. As for cameos, they will consist of several popular characters, scattered across the entire stage:
  • Ky Kiske
  • Leo Whitefang
  • Sin Kiske
  • Dizzy
  • Testament
  • Baiken
  • Millia Rage
  • Faust
  • Potemkin
  • May
  • Johnny
  • Jack-O'
  • Goldlewis Dickenson
  • Nagoriyuki
  • Dizzy
  • Jam Kuradoberi
  • Slayer
  • Bedman
  • Axl Low

Sandersons' House
Chibi-Robo
Apart of the "DLC Stage Bundle #3"
The setting of the original Chibi Robo on Gamecube, this stage would be a traveling stage that would travel through the various rooms of the house, such as the Living Room, Bedroom, Foyer, etc. The game's colorful cast of characters will appear in the background, alongside Chibi himself.

Croft Manor Catacombs
Tomb Raider
Apart of the "One Woman Army Bundle" DLC
12D0822A-EA93-4257-A9D3-E10F4652F4CF.jpeg


Black - hard platform
Blue - destructible platform
Red - soft platform
Yellow - movement

You start off in Croft Manor. The left and right sides of the stage are stairs; the blue platform is a chandelier; and the red platforms are a floor upwards. Being stood on gives the chandielier a bit of damage, as does being attacked. Once the chandelier is destroyed, it crashes down and creates a tunnel where it lands. The stage begins to scroll downwards and eventually reaches the tomb below

EC142B3A-B266-4A67-BAF6-E0CE35F1C442.jpeg


Green - the size of Croft Manor for comparison, also where the hole will be located.
Orange - spike traps
Purple - trap doors
Grey - damaging lava

The spike traps are generally static, but when foes are detected beneath or between them they will slowly crash down, KOing instantly. The purple trap doors are similar - if more than 2 players are near one at a time they'll collapse, turning into a wall. The lava functions the same as TGCO danger zones, KOing instantly at high damage

Slowly, one by one, geysers of lava will come out from below and destroy portions of the stage, making there less space to move, more ways to ringout, and less hazards. The last part remaining will always be the crystal upside down triangle rock at the top, which will then fly back up to Croft Manor, which (not counting for Stage Morph) remains in its default state for the rest of the match with an undestructible chandilier

There is only one cameo: Winston Jeeves, once the fighters have escaped the tomb and returned to Croft Manor, he will be waiting for them.


The Omega form takes place in the manor, but the Battlefield form takes place in the tomb

Kagatsuchi
BlazBlue
Apart of the "DLC Stage Bundle #4"
One of the main places of the BlazBlue series and where most of the important stages are, we will move between stage and stage using an invisible platform that resembles the character's crest (particulary the one of Rachel Alucard).

Sure, this is supposed to be before Sol but I think that's the reason why this would be somewhat funny, since that would make the Sol's appearence more impressive since most people would assume "if they wanted to include something of ArcSys they would include this stage alongside them". Almost all the locations has the regular flat layout. There is a day-night rotation in all the stages with sky. In Battlefield/Omega we will always be in the transparent magic platform but a little modified to be able to host the entire fight instead of just moving the players to each part of the stage, the background is looked in Altar/Adventus.

1st Location - Monorail
We will start in the Monorail since is Ragna's home stage in Calamity Trigger, sometimes the train will pass and will damage the characters near the rails. Naoto Kurogane and Es will appear here sometimes.


2nd Location - Kagutsuchi's Port
We will move to the Kagutsuchi's Port, this stage was the home stage of Ragna, Noel, Carl Clover and Hazama in Continuum Shift. Carl Clover, Noel, Tsubaki Yayoi, Mai Natsume and Kagura will appear has cameos.


3rd Location A - Oriental Town
A stage with chinese motifs, it was the home stage of Tager and Litchi Faye Ling in some games. There is a 50% chances that this stage appears during the loop. With a 100% of chances if in the last loop the stage was the Ronin District. Litchi Faye Ling, Arakune and the rest of the Sector 7 team (Tager, Kokonoe, Bullet and Lambda-11) will appear has cameos.


3rd Location B - Ronin District
A stage with japanese motifs, the most knowed character that use this stage has his home is Bang Shishigami. There is a 50% chances that this stage appears during the loop. With a 100% of chances if in the last loop the stage was the Oriental Town. The proper Bang and Amane will be see here.


4th Location - Bascule
A bridge that connects the capital with the rest of the city, it best knowed has the stage of Platinum the Trinity in some games even if Tager also used it. A dog will bark sometimes too. Platinum, Taokaka and Makoto will be cameos here.


Final Location - Altar/Adventus
View attachment 352696


An important place that was the center of attention of various parts of the story, most noticeable Continuum Shift., sometimes the Altar will morph into Adventus that has the same layout. In this stage we will see Ragna with his brothers Jin and Noel (in her Mu-12 appearence) fighting Hazama, but if Adventus is active the battle instead will be Ragna and Hakumen versus Yuuki Terumi.

Bonus - BLUE
BLUE would appear during the transition of the loop, it's only the background tho.

Tower of Salvation
Tales of Symphonia
Apart of the "Tales of Smash Bundle" DLC
Probably the most iconic location in the entire game, where the Eternal Sword rests and where the party battles Mithos Yggdrassil. The stage takes place at a bit of an odd angle, with the left half being on the bottom platform where the sword would rest, and the right half being the platform behind it.
Colette, Raine, Genis, and Kratos make cameo appearances in the background. While not exactly canon, the Teth'ella team will also appear with Sheena, Regal, Zelos, and Presea appearing in the background instead of the Sylvarant team. On occasion, Mythos will appear in adult form and then transforms into his original, child like form. He will hover above the stage and make threatening gestures but won't intervene.

Forest Maze
Super Mario RPG
Apart of the "Beware of the Forest's Mushrooms Bundle" DLC
Forest Maze is one of locations from 1996 SNES/Super Famicom game Super Mario RPG: Legend of seven stars and it's a labyrinth full of trees and underground passages that were found in this area. The underground passages in Forest Maze are accessed by walking down tree stumps as well as some regular forested areas. The main part of this place is full amount of unlimited enemies that spawn on your road.
This place is known for Bowyer's (Smithy's lieutenant) attacks on the forest and Rose Town (it's a town that is adjacent to forest maze) while shooting Aeros at the the town. When Geno showed up at the Forest maze (Mallow and Mario were spying on Bowyer), he fought Bowyer alongside Mallow and Mario and because of that Geno joined their team.
Layout:
Ok, so the layout of the Forest Maze stage for smash will be similar to Super Smash Bros Crusades's stage, but there are different details that would stand out from the SSBC counterpart. So let's get into layout, shall we?
The layout of the stage would
1655140753090.png

  • Black: Solid Platform
  • Black lines: Tunnel entrance (The trunk one would be soft platform)
  • White boxes with brown outlines: Enemy spawn
  • Yellow: Soft platform
The stage would be medium-large walk-off stage that has a hill with a tunnel inside passing through the hill that also leads to a stump upwards. The stage has 4 soft platforms: One in underground portion and 3 outside of it (1 above the stump and 2 on edges of the both cliffs).
The hazard of the stage are enemies that spawn on the stage. Most of them are Goombas that try to attack the players (They act like in Smash Dungeon). You can defeat the Goombas with your attacks easily.
(It would be reference to the main point, where enemies endlessly spawn on this area)
If you turn-off the hazard, the enemies won't gonna appear here, making it for casual players.
The cameos on the stage in background are:
  • Mallow (Appears on right side of the trunk)
  • King Smithy/Smithy (Appears on left side of the tunnel)
  • Axem Rangers (Appear in underground portion)
  • Culex (He appears over the stage in background)
  • Bowyer (He occasionally shoot Areos on stage that don't deal any damage)
  • Gaz (Appears on left side of trunk)
  • Belome (Appears on right side of the tunnel)
The cameos often walk around or stay on stage. They taunt by doing their poses when opponent random is defeated.
As for Battlefield and Final Destination forms, they would have the same layout as other FD and BF forms. Only difference is that they have textures based on the stage itself. The cameo list on this stage is reduced to 4.

Airship
Final Fantasy
Apart of the "DLC Stage Bundle #5"
The airship is an iconic vehicle of the FF franchise, it appeared in almost all games in a way or other, sometimes with the appearence of a wooden boat with helicopters, other times with more mechanical looks, here we will use the first appearence of the airship (the image comes from FF3 tho).

1652661968861.png

This will be a simple stage, you will fight in the main deck of the ship bein able to fall of one of the two extremes, behind use we will see the minimap of Final Fantasy 1. When the stage is used in Battlefield/Omega mode the stage will be more or less the same, just that the airship will be replaced with a "compressed" version of the same in the typical form of a floating stage.

Tobruk Crater
Ratchet and Clank
Apart of the "Rifting Togther Bundle" DLC
One of the early levels of Ratchet and Clank, as well as its 2016 reimagining. The fight takes place on the rooftops of the buildings and the ground in a walk-off stage. The buildings are of various sizes as well. Occasionally, crates will fall onto the stage that not only serve as extra platforms, but also as breakable constructs where fighters can collect bolts. Bolts are used at Gadgetron terminals where you can purchase shooting items to use to your advantage. Because of this, shooting item spawns are turned off when selecting this stage. Bolts can also be obtained by dealing damage to and KO'ing other Fighters. After some time has passed, blargh saucers working for Drek Inustries begin to combard the planet. The starfighters will occassionally fire blasters at fighters which does moderate damage but a warning sign will appear as well as a targeting sight on the ground to alert players. The stray shots may hit buildings which causes it to crumble. After further duration of time passes, the sky will begin to darken and turn red while the starfighters vanish. Suddenly, in the distance, a bright light appears with a a bright red energy blast piercing the sky and causing a massive explosion which triggers a stage transition. The planet, Novalis, explodes causing the stage to change dramatically. It consists of four floating rock platforms that hover in the air and will occassionally float up and down slightly.
In the background is the Drek spaceship with their starfighters in the background. Despite it being space, there is still gravity but it is more reduced than before causing fighters to be a tad bit floating. Space debris will pass by slowly which can cause collisions but won't do damage. Rather, it will just push players away. That being said, the stage will reform itself after some time as it passes through a rift from Rift Apart and resets itself.

Ostrheinsburg Chapel
SoulCalibur
Apart of the "A Stage of History Bundle" DLC
Hailing from Soulcalibur II, Ostrheinsburg Chapel is the home stage for Nightmare, Link, Heihachi, and Spawn, and the location used for all Destined Battles. In Smash, Ostrheinsburg Chapel is a simple platform stage, with a single wall on the left that takes the destruction mechanics from Mishima Dojo. On the right side of the stage is a single ledge where Ring-Outs were common in SC2. In the background, you'll also find some Destined Battles between various Soulcalibur characters, which are selected based on the song selected for the game.

Kamura Village
Monster Hunter
Apart of the "DLC Stage Bundle #6"
Kamura Village
From Monster Hunter Rise. Would start in the village and travel across it. Various characters can be spotted, with humans, Felyne and Palamute all in the back doing their thing. There are some bridges and buildings that can be used. Eventually the fighters will be transported to another setting.

The monsters in these segments don't attack, and are purely cameos. The stage will loop back to the village eventually.


MHRise-Sandy_Plains_Screenshot_001.jpg


Sandy Plains
A pretty basic stage with some rocks. More Esrh based monsters appeared here.


SunkenForest-Area4.jpg


Sunken Forest
A first full with greenery, mud and water. More forest and water based monsters appear here.


MHRise-Lava_Caverns_Screenshot_001.jpg


Lava Caverns
Full of rocks and loads with an oozing volcano in the back. Fire based monsters appear here.


Frost Island
Full of ice, with slippy parts. Ice themed monsters appear here.

Poached Eggs
Angry Birds

Part of the "Seeing Red Bundle" DLC
Named after the first chapter of the first game, Poached Eggs is a stage based on the very first level the player base accessed in Angry Birds Classic. The stage is on a main platform similar to Kalos Pokemon League and the platforms are horizontal wooden planks that are part of the tower. The green pig in the tower, which doesn't appear in this stage, is around the size of Kirby, for reference. The background is based on Bird Island, which takes its appearance from the Angry Birds movie:

1659025265799.png


The stage gimmick for this is that occasionally, an icon with a slingshot on the right will flash to warn players that an Angry Bird is getting ready to hit the stage. 3 seconds after the warning a white dotted line appears, aiming over the course of 2 seconds before a Red copy slams face-first into the tower, temporarily destroying either a portion of the tower or the whole tower itself. Sometimes they fail to even scratch it. The Red copy also deals 14% damage and strong knockback to foes who are in the crossfire. The falling blocks, meanwhile, deal 3% damage and flinching for each one that hits a foe after the tower is hit.
Ancient's Ascent
Angry Birds

Apart of the "DLC Stage Bundle #7"


On this stage you fight atop a brown dragon - not a dragon house thing like Pythra's stage, just a dragon.

The layout of the stage would somewhat resemble this image - however the spikes would be purely cosmetic and neither deal damage nor serve as walls. The stage is very big, about the width of Great Cave Offensive and height of Corneria. If you pass by the dragon's mouth or feet it will bite/scratch you, and its tail will curl up (think Slowpoke on Poké Floats). It's wings flap up slowly and down quickly as a foreground-covering psychological hazard akin to the Duck Hunt grass or smoke bomb. The horns are soft platforms.


Occasionally, it'll stop to roar, making there much less ground to stand on due to the posture change


The Omega and Battlefield forms both take place on the ground of Ancient's Ascent, with the dragon visible in the distance

It probably bares no resemblance to any specific point in the game, and would be hell to play on, but like... fighting on a dragon. It's cool.
1661367576054.png
\
Mars
Doom
Pary of the " Bundle" DLC
Mars is one of the locations in many of the Doom games which makes it ideal to be used for stage representation. In fact, it's used in almost every single Doom game in some shape or form. The stage takes place from Doom (2016) version of Mars. The stage is a Final Destination with dirty metla grating that looks partially destroyed melded with scorched rock and debris. The stage is a traveling stage:

The first phase in a Battleship Halberd design located right in the UAC facility. After some time, alarms will start to blare out as the stage shoots up just as a horde of demons arrive. It crashes through the ceiling and will navigate around the red planet. The first phase is never repeated and the stage resumes its travel around the stage.

Some areas it visits and shows vistas of are the:
  • Ardent Energy Tower
  • Advanced Research Complex
  • Argent Facility
  • UAC Foundry


1661276811970.png


Argent Energy Tower with the portal to Hell open


1661276873584.png


Advanced Research Complex


1661276920909.png


UAC Foundry

The stage will alternate between flying in the air and into buildings. UAC Foudnry is one such example where it flies into the complex


The stage will also venture through Mars dust storms and even into outer space where it pace by Deimos and Phobos before turn back planetside. Once offering views of these places, it will arrive near one of the facilities and will set players down which should take most of the match unless the match lasts longer than 8 minutes. If it does, the stage will pick up and repeat the process again.

This section is sort of like Guar Plains with....


1661276555526.png


The background would be something like this:

Spoiler
The middle section structure has passable sections with two tiers. There are two pits on either side of the structure with walk-off ledges on either side. The left side is a tall tower of earth and twisted metal but can be broken apart by strong attacks to create debris that can damage nearby opponents. The right side is a slopping structure with metal debris from the demon attack. The background are scenes of war between UAC and demonic forces. This is where we truly see some cameos with various demons appearing but won't attack the fighters. These includes:

Pinkies
Imps
Cacodemons
Lost Souls
Barron of Hell
Pain Elementals
Zombies
Arch-vile

Summoner's Rift
League of Legends
Apart of the "DLC" Bundle
The tried-and-true map that many LoL players fight in. A stage around the size of Temple, Summoner's Rift is a large stage whose platform layout is very similar to the minimap in the game. In Smash, where the Turrets would be are platforms for players to jump on. In Smash, mooks from both sides will march, with all free-for-all matches defaulting to blue. For every mook killed, each fighter gets a set amount of Gold. On the top right and bottom left corners are Shops where fighters can purchase items from the item spawn pool, such as a Killing Edge, Death's Scythe and a Steel Diver. The Gold price tag is entirely dependent on the power of the item in question, so smaller items like the Beast Ball would be only 200 Gold while something like the Daybreak pieces would total to around 5000 gold.

Aionos
Xenoblade Chronicles
Apart of the " DLC" Bundle​
Much like the Cloud Sea of Alrest, the Aionios is a stage that showcases the many regions you can explore in the game, mounted atop the back of a Ferronis, either from Keves or Agnus.

1666462326991.png


1666462310916.png

The layout is generally the same: a single flat platform akin to Kalos Pokemon League and Final Destination. However, the Ferronis is also flying, allowing players a birds-eye view of the world of Aionios, with the center of the entire map being obscured in clouds for...spoiler reasons. These transitions have a lower-poly recreation of the entire map of Aionios, much like with the Yggdrasil's Altar map, but transitioning to any one of the stages will have it flying through clouds for the transition. As a fun detail, every KO blast that occurs while playing on Aionios will have some remnants of the blast slowly absorbed into the Flame Clock.

1666462583352.png


The stages they can travel to are as follows:

1666462631858.png


Aetia Region: A grassy region that serves as the first area of the game. It'll soar over Millick Plains and land near Colony 9. Here, cameos of the Heroes Teach and Zeon can be seen.

1666462798194.png


Fornis Region: A desert area near-barren of life. It'll soar over the vast dunes and land near Colony 4. Here, cameos of the Heroes Ethel, Alexandria and Valdi can be seen.

1666462934187.png


Pentalas Region: A tropical area with dense jungles. It'll soar over the waterfalls and forests before landing near the cave mouth leading into Colony Lambda. Here, cameos of the Heroes Juniper and Isurd can be found.

1666463119278.png


Cadensia Region: A massive ocean region with archipelagos scattered about. It'll maintain altitude over the sea before landing on the Lavi Sandbar close to the center of the region. Here, cameos of the Heroes Triton and Fiona can be found.

1666463272855.png


Swordmarch: The final region that can be accessed (not really but hey, spoilers and all), a mountain extremely similar in shape to the Mechonis's sword. Here, the Ferronis will fly along the blade and handle before landing atop its massive pommel. Here, cameos of the Heroes Gray, Monica and Ghondor can be found.

Grove Street
Grand Theft Auto
Apart of the "DLC Stage Bundle #8"
CJ's Street from GTA San Andreas itself. This stage would a travelling stage similar to New Donk City Hall where you will go to other locations like the restaurants, the gym, the airport etc. At least anything that isn't too NSFW or violent for Smash Infinite for censor purposes. Depending on the time just like in the game. The background may turn to morning, afternoon, and night time at different times. There would be cameos in the background like CJ and the Grove Street Families whom they will be cheering for the Smash Fighters. Ballas members and other generic NPCs will roam around.

Changes to Returning Stages
Adds in the following new biomes: Nether Wastes, Crimson Forest, and Bastion Remnent.
Adds in day/night cycle, weather; and background elements such as Guardians and the Divine Beasts
Adds in the new Microgames, Wario Whirled, Heads Up, and Alien Ambush
Midgar
Adding in the following summons:
Fat Chocobo, Shiva, Phoenix, and Knights of the Round
New course elements and cameos as well as an introduction of night versions.
New stage hazards including Icicles and Fighter Flies
M32 Scouts will appear while Metal Face appears less but powered up. Rain occassionally happens and a few more improvements to the design.
New cameos include Amy, Blaze, and Zavok. Enemies appear on the outer edges. Appearance more like with Sonic 1.
New Pokémon cameos who perform a variety of attacks. A Water section has been added.
A plethora of new cameos involving previous characters and Personas. New aesthetics and design features referencing early Persona games. Easily the most updated stage in the game.
New cameos and hazards including Gordon’s and Krackos coming from Wispy Woods
Includes cameos such as Fredrick, Lon’qu, and Cordellia among a few.
More cameos including Abaddon, Legion, and Dracula himself as well as past protagonists like Soma Cruz and Maria Renard
Adds further cameos such as Chinchos, Uproots, and Magmatoes.
Breaking the mansion causes a replacement mansion from Luigi’s Mansion 3. New ghastly cameos are also included
More monster cameos including Dracky, Great Savertoih, and Gold Grabber.
Adds more cameos from modern games such as UFO, Morpho Knight, and Ripple Star
King of Fighter's Stadium
More cameos are introduced: K', Mai Shiranui, Duck King, Alice Nakata, Ramon, and Chizuru Kagura.
Saffron City
Mr. Mime and Machamp appears as new Pokemon that comes out from the Silph Co. building.
Pyrosphere
Vorash replaces Ridley as a stage boss.
Living Room
Living Room now has variations based on the games which are either randomized or can be chosen using a code like Minecraft World. These includes: Country Home, Desktop, Outer Space
Mishima Dojo
Jin and Kazumi appears in the backgeound along with Heihachi

items.png

Smash Infinite has more items than a Kong has bananas! These items will make you go zap, kaboom, blam, sizzle, and any other sound effect you may think of! Grab Aku-Aku and becme incinvible! Or take up the dread Breibalik and become a movile assist trophy churner outer! Or grab a feared Bottle of Soda and really wreck havoc!
NameSeriesDescription
Aku-Aku
Submitted by: Krookodilian Krookodilian
Crash BandicootWhen Aku Aku spawns, fighters can pick up the mask and it will begin to circle around the fighter. Up to three Aku Aku masks can be collected at once. When three Aku Aku masks are collected, Aku Aku will be worn like a mask, and the Fighter will gain invincibility for a brief period of time. When the fighter has less than three masks, the fighter can absorb around ~15% damage before the masks will disappear. The fighter takes no damage if the masks are lost, but the fighter will lose the chance to gain incivility until the Aku Aku item spawns again. Once the first Aku Aku mask spawns in the other two will spawn in relatively soon, similar to the daybreak and dragoon items. This spawn period ends as soon as the masks are lost, or the invincibility period ends.
Anti-ssist TrophySuper Smash Bros.An off-color Assist Trophy. Offensive Assists summoned by it will specifically target the summoner, while supportive Assists will only buff opponents.
ArmorslayerFire EmblemThe Armorslayer deals rather weak damage, but it has a simple, yet effective utility: Popping shields. Essentially Marth and Lucina's Shield Breaker with a blade the size of Ike's Ragnell, the Armorslayer can wreck shields with only a couple jabs, and smash through them with a single smash attack. The only real downside is the low frame data, but even then that can be circumvented by just chucking it at them. If your opponent's feeling block-happy, the Armorslayer's your friend.
BalloonBalloon FightGives any character that picks it up the Up Special of Villager, allowing them to have a much improved recovery. Once an Up Special is used the Balloon pops. Villager will have a third balloon attached to his Up Special since he already uses the balloons for his recovery, which will make his recovery go even faster and further than before.
BlooperSuper Mario Bros.When thrown, any opponent hit temporarily gets covered in black ink, which functions identically to Inkling's Ink mechanic.
Bottle of SodaSuper Smash Bros.The Bottle of Soda is a three part item, all of which have completely different properties. In order of moves, they function as this:

  1. Pop Off: The cap of the bottle shoots up to approximately two Lucas Snake tethers pointed upward. The stream behind deals non-stun 1% each second in, while the cap of the bottle deals 10% and has small stun.
  2. Slurp: You consume the content of the bottle, healing 8.6%.
  3. Chuck: Having no use in the bottle now, you throw it. Throw speed, it goes about as fast an far as a Beastball, just without the teleporting and only dealing 6%.
BreidablikFire Emblem
In Fire Emblem Heroes, once the player has 5 orbs, The player character shoots the weapon and a legendary hero from the fire emblem universe is summoned to the world.


In Super Smash Bros. Infinite, It would work similarly to the Pokeball as in you can use it to exclusively summon a random character, only this time it's a Fire Emblem character. Using it will shoot an orb that will spawn one of many Fire Emblem characters, And they function like a regular assist trophy.

Each summon has 2 attacks, A Basic attack and a Critical Attack. The summons only do one of these attacks before disappearing Critical attacks are stronger and sometimes have special effects but they only have a 20% chance of occurring. Critical attacks are affected by crititical hit increase spirits and the like. The Breidablik is a gun so the orb shot is a projectile. The list is split up into Red, Green, Blue and Colorless. The orb you shoot is the same color as the character. you can control the color by holding the fire button and seeing the light on the breidablik change colors.

Red Units:


AshnardBasic Attack: Ashnard flies around on his dragon and critically strikes the opponent
Critical Attack: The same but it deals 50% more damage
EldiganBasic Attack: Eldigan Stabs with his sword
Critical Attack: It deals more damage and explodes on hit
LiannaBasic Attack: Lianna spins around in a fashion similar to a grounded Link Up-b
Critical Attack: Lianna infuses her sword with the power of light and chops downwards with her sword, this attack has a lot of range
GharnefBasic Attack: Gharnef shoots a skull shaped projectile towards the opponent, this has a 20% chance of instantly KO-ing the opponent, the chance scales with damage
Critical Attack: The skull shaped projectile has an increased chance of instantly KO-ing
NavarreBasic Attack: Navarre quickly slashes with his Sword, it works like Lyn's assist so you cannot see who he is attacking
Critical Attack: The slash KO's at 100%
RyomaBasic Attack: Ryoma slashes forward in a straight line
Critical Attack: Ryoma slashes forward in a straight line, Ryoma goes farther, the attack does more damage and it's lightning infused
OliviaBasic Attack: Olivia dances giving the summoner buffs to their attack and defense
Critical Attack: Olivia dances giving stronger buffs to the summoner and finishes the dance by striking a nearby foe.
TibarnBasic Attack: Tibarn transforms into a hawk and flies towards an opponent and grabs them with his claws, and tries to drag them offstage
Critical Attack: In hawk form instead of grabbing the opponent, he bites down on the opponent
LysitheaBasic Attack: Lysithea casts a giant explosion of Dark Energy on the opponent.
Critical Attack: Lysithea casts the same dark explosion but it has a 30% chance of KO-ing the opponent in addition.
LilinaBasic Attack: Lilina casts a spinning pinwheel of flame forwards that deals damage
Critical Attack: Lilina casts 3 Giant Pillars of flame that moves forwards
Blue Units:

CordeliaBasic Attack: Cordeila Flies up high with her pegasus and then throws her Spear at an opponent
Critical Attack: The spear does more damage
SiriusBasic Attack: Sirius stabs his spear forwards
Critical Attack: The spear does more damage
MarianneBasic Attack: Marianne flies into the background with her pegasus and casts Thoron
Critical Attack: Her Thoron instead of being lightning now freezes.
PanneBasic Attack: Panne transforms and Attacks an opponent and Grounds them.
Critical Attack: Her attack is now AOE and Grounds all opponents hit.
LilithBasic Attack: Lilith Transforms and Shoots a dual breath stream of Fire and Water, It deals fire damage on top and has more knockback on the bottom
Critical Attack: The streams cross and the knockback and damage combine.
JagenBasic Attack: Jagen charges forward on his horse in a jousting motion and stabs the nearest opponent, the attack trips the opponent
Critical Attack: The spear does more damage.
Whitewing TrioBasic Attack: Palla, Est and Catria Stab the nearest opponent, The opponent can change between attacks
Critical Attack: The spear hits are infused with wind and gain extra knockback
ReinhardtBasic Attack: Reinhardt casts elthunder at the nearest opponent
Critical Attack: Reinhardt casts thoron at the nearest opponent
FjormBasic Attack: Fjorm slices with her spear and moves forwards, It functions like Byleth's Side-B
Critical Attack: Fjorm spins a full circle around and freezes opponents hit.
MaeBasic Attack: Mae spawns an explosion on The opponent, This attack slows the opponent
Critical Attack: The explosion deals more damage and has a larger radius.

Green Units:


Bord + Cord + BarstBasic Attack: These 3 boys will form a wall that prevents people from moving past them without jumping, they will try to attack anyone that jumps above them
Critical Attack: The 3 of them form the wall but instead of attacking above them they slam their axes into the ground creating a shockwave that stuns opponents
ShamirBasic Attack: Shamir quietly moves around and Shoots the nearest opponent with her bow, it deals more damage to opponents in the air
Critical Attack: Shamir does a similar movement but the Arrow is a much larger projectile and still does more damage to airbound opponents.
NagiBasic Attack: Nagi transforms into her Dragon Form and Shoots a Fireball at the nearest opponent
Critical Attack: Nagi transforms and shoots a concentrated blast of fire at the nearest opponent.
WalhartBasic Attack: Walhart charges forward on his horse and attacks the nearest foe with his axe
Critical Attack: The Axe strike does more damage
Mamori and DraugBasic Attack: Mamori hits the nearest opponent with her axe
Critical Attack: Draug appears and Hits a second time after her initial swing.
DorcasBasic Attack: Dorcas strikes the nearest opponent 2 times with his axe
Critical Attack: Dorcas hits once but the attack is significantly stronger and gives the flower debuff
NinoBasic Attack: Nino casts a wind spell underneath the opponent that launches the opponent upwards. It does no damage
Critical Attack: Nino casts a giant blade of wind forwards that deals damage and knockback
SurtrBasic Attack: Surtr charges his axe and hits it into the ground. It is basically Byleth's down-b
Critical Attack: The same attack but it is infused with fire and does more damage
CamillaBasic Attack: Camilla flies around and hits the opponent with her axe.
Critical Attack: The same attack but camilla hits twice
MinervaBasic Attack: Minverva Charges forward on her wyvern and attacks with her axe, This attack deals fixed knockback
Critical Attack: The same attack but the Axe swing is followed by the Wyvern biting the opponent
Colorless:

FayeBasic Attack: Faye shoots an arrow at the nearest opponent
Critical Attack: The arrow deals more damage and tracks the opponent.
KronyaBasic: Kronya teleports to a random opponent and strikes
Critical Attack: This attack has a chance to instantly KO the opponent and it stuns the opponent.
EliseBasic Attack: Elise heals the summoner
Critical Attack: Elise and her horse run up and down the stage creating a healing field around them, healing the summoner and their team.
CaineghisBasic Attack: Caineghis transforms and bites the nearest opponent
Critical Attack: After the bite, Caineghis scratches the same opponent
BernadettaBasic attack: Bernadetta shoots an arrow at an opponent
Critical Attack: The arrow causes the opponent to sleep
NilesBasic attack: Niles hoots an arrow at an opponent, The arrow has a 50% chance of stealing the item that the opponent is holding, or spawning one if they are not
Critical Attack: The arrow will deal more damage and an item will always spawn
LegaultBasic Attack: Legault will attack the nearest opponent and steal their item if they are holding one.
Critical Attack: The attack deals more damage
BramimondBasic Attack: Bramimond summons a black hole that deals no damamge
Critical Attack: Bramimond creates a dark explosion that spawns the black hole, anyone caught in the black hole gains the flower debuff
LissaBasic Attack: Lissa heals the summoner
Critical Attack: Lissa gains an axe and hits an opponent instead of healing
LeanneBasic Attack: Leanne Sings and opponents fall asleep when near her and allies gain some health
Critical Attack: in addition to her singing Sharp feathers are flung towards opponents.
Bomb RocksPikminthis one is pretty simple, you activate it, through throwing it or interacting with it in any other way, and it will sit stationary until it explodes, the explosion isn't too big, but big enough to do some damage. I think it should be included because the Pikmin series is lacking in items, with only one item and one assist trophy. It is also one of the more important items in the Pikmin series, and shows up in every game
BonneterSuper Mario BrosThis would be a throwing item.

The Bonneter would fly around casually minding their own business, you can pick one up, you press the A button you will throw it out and after a short distance it will spin in place and you can jump onto them to bounce up into the air. once thrown if hit the Bonneter will not spin but instead deal some damage instead.
Cape FeatherSuper Mario Bros.Gives your character a yellow cape and lets them use the infamous glide ability from Brawl
Coconut GunDonkey KongWhen you grab the item, it will preform by using the A button or the side Smash attack.

It will fire a Coconut at the opponents, doing 15% damage, with decent knockback. It takes 3 seconds to fire, but if the opponent is at 115% or higher, they will be KOed by the attack.

The Coconut Gun has 5 uses, but it can break shields if used up close.
Dark StoneSuper Smash Bros.It's a blackish-purple gemstone with a look inspired by Final Destination. Using it works the same as the Metal Box - you pick it up and undergo a transformation.

In this case, you turn Dark, becoming a complete silhouette with eyes glowing in your player color. While Dark, you're effectively playing Turbo Mode from Project M - every attack you do can cancel on hit to another attack.
Double CherrySuper Mario Bros.The Double Cherry is a power-up introduced in Super Mario 3D World. This is a very powerful item, as if picked up it will give you a copy. This copy acts very similarly to the second Ice Climber, following you and repeating your attacks. Your attacks do 75% of the damage they used to do, and the copy does 50%, but that adds up to a 1.25x damage modifier so it's good. The clone dissapears after 17 seconds, or if hit by an attack by itself (it stays if you also got hit). There will not be a second Luma if Rosalina uses this item, but there will be a third Ice Climber if they use it. Only one fighter can have the double cherry effect at the same time, and you can't use more than one at the same time.
Ender PearlMinecraftWhen picked up (manually), you can throw it. When it shatters (either from making contact with something or automatically after two seconds after being thrown), you appear in that exact position, continuing to do whatever you were doing. It’s an excellent mix-up option.
FoodSuper Smash Bros.
Gravity TetherSuper Smash Bros.Grab this glowing ball of blue energy and throw it at the opponent. Once it latches on, it will generate a tether between yourself and the opponent. This causes both players to become “attached” to each other. Moving a certain distance in opposite way will cause the tether to tense up and prevent the players from moving forward. This can be used to manipulate the opponents movements, prevent them from KO’ing you, keep them within your attack zone, or lead them to a trap.
Goku`s StaffYuyukiTaking a page from Lip's Stick, I'm suggesting another lesser known character's signature weapon to be an item in Smash before they become playable. Goku's Staff functions as a normal battering item for tilts and dash attacks, but for smash attacks, it grows in length, potentially giving it the longest reach. To further differentiate it from the Beam Sword, Goku's Staff takes some inspiration from the Kirby games, replacing the fighter's up and down smash attacks as well (up extends the staff upwards, while down has the fighter hold it horizontally to attack on both sides). Goku's Staff would be more representation of Nintendo's history and deep library of franchises, whilst simultaneously functioning as a lawyer-friendly way to add a famous pop culture weapon in a way that still fits (like the Beam Sword and Motion Sensor Bomb).
Groovitron
Apart of the "Rifting Togther Bundle" DLC
Ratchet & ClankA unique take on a stunning item, an alternate take on the Deku Nut. In Smash, the Groovitron is a thrown item that forces anyone in the vicinity to dance, of which each and every fighter in the roster has a unique animation. Joker will bust his moves from Dancing in Starlight. Pyra will use her Aegis Sword for makeshift fire-dancing. Barista will hop in place to the beat. Donkey Kong will perform his DK Rap dance. These are some of the many various dance animations that they will undergo when under the effects of the Groovitron.
LollipopBayonettaWhen you pick up the candy it will immediately goes to the the mouth of each character. Players can still move, jump, attack, and do other actions. At the same time, a colorful aura will appear around the consumer corresponding to each color of the lollipop. Getting attacked hard enough causes the character to spit up the lollipop.

NameDescription
Green Herb LollipopHeals 4% every 3 seconds.
Purple Magic LollipopIncreased speed and dodges.
Bloody Rose LollipopIncreased attack and launch power.
Yellow Moon LollipopIncreased Shield durability and knockback resistance
Matryoshka DollSuper Smash Bros.Matryoshka Dolls would be a container item, similar to Capsules and Crates. They could be picked up and thrown, damaging foes that they hit. Doing so will cause the doll to break, revealing another, smaller doll inside. Attacking a Matryoshka Doll will also break it. This cycle will continue, the dolls getting smaller and smaller until finally, an item pops out of it. What item comes out depends on how big the final Matryoshka Doll was: smaller ones hold weaker items like Green Shells and Smoke Balls, while larger ones hold powerful items like Hammers and Maxim Tomatoes. How many times the Matryoshka Doll breaks before revealing the item also varies, though it will always be between two and eight.
Phoenix DownFinal FantasyHolding onto this feather prior to dying doesn’t result in a loss of stock or point awarded to the Ko’er. In the case of Stamina Matches, holding onto the down upon reaching 0% resets the Hp to
Poseidon CannonKid IcarusThis is a Shooting item

This is a cannon from Kid Icarus Uprising and this cannon shoots a Three round burst of slow moving Watery projectiles that explode after a few seconds that deal damage and knockback. Charging the shot by holding the A button deals more damage and creates a stream of water that deals a lot of upwards knockback.
RainmakerSplatoonOne of the ranked modes (and in my opinion, the best) in Splatoon 1 and 2 is Rainmaker. In it, the team must escort a fish shaped weapon to the other team's pedestal. The rainmaker is initially protected by a forcefield, and must be broken by the team in order to wield it. The rainmaker is a slow but powerful weapon capable of impacting a large area. In Smash, it will function in a similar manner. When it spawns, it will have a small shield around it. Once the shield is broken by enough damage, the Rainmaker is able to be claimed by anyone in the game. Once it is held, Hold A to release a large explosion. The shot is decent for hitting opponents that are far away, but up close, you may need more protection. Once it is fired a few times, you'll "run out of ink" and the gun will stop working. In team battles, it is especially reminiscent of the Rainmaker mode, as the wielder is basically defenseless up close without team support.
Rock PikminPikminThey spawn like all pikmin types in the ground like the grass item, their are three types that can spawn that affect speed and damage, those being the leaf bud and flower, when plucked that rock pikmin'a leaf will change color to match the players colors meaning only the one who plucked it can carry it.

When tossed, they do strong damage but can’t latch on, they will track the fighter they will be launched and and the stage the leaf is in makes the rock pikmin faster and stronger too, rock pikmin will continue to follow their target and continue attacking them unitile they either fall off the stage, get attacked to many times, or a minute has passed.
Sardine Can
Apart of the " Bundle" DLC
Angry BirdsAn item that summons the Mighty Eagle. If the can hits the ground or another opponent after being thrown, the Mighty Eagle will be summoned after 4 seconds, causing him to swoop down towards the location of the impact before he makes impact with the ground and bounces upwards. The can will disappear if the Mighty Eagle doesn't eat the can. Anybody that's hit by the eagle itself will take a whopping 50% damage and extra-strong knockback to kill at near-0%, and causes fighters to be knocked upwards at a set distance of 2 Training Blocks if standing on any ground at the time of the Mighty Eagle's impact.
Shield MonitorSonic the HedghehogOnce broken, the player gains a shield. This shield will protect you from damage and knockback but will break if it takes damage. However in Smash, it can take multiple smaller hits before breaking. A fully powered Smash attack should do the trick.
SnowflakeSuper Smash Bros.Picking up this item causes a chilly air to envelope the player. Getting close to the player who holds it may freeze the opponent but contacting them will sure freeze them. It lasts twenty seconds.
Shock BombARMSWhen hit, it will drop to the ground. It's too big to carry, but thanks to it's ball shape, it can rolled around the stage ala a barrel.

After a period of time, it will detonate. Unlike most bombs however which cause a firey explosion with notable knockback, the Shock Bomb will unleash an electric shockwave that will paralyze anyone in it's radius for a brief period of time.
SpinnerThe Legend of ZeldaThe spinner can be picked up and thrown, and acts similarly to a larger version of R.O.B.'s gyro, with one notable exception - it keeps moving forward once it hits the ground for a short time, even going off ledges and platforms; it's series of weak hits can carry fighters with low percentages. You can also ride on by either jumping on top or throwing it at your feet, for a... um, surprise attack? Just hope the enemy doesn't jump over you, or you'll have to get off and miss the opportunity of a lifetime!
Spirit Stone FlashlightFatal FrameIntroduced in Fatal Frame IV on the Wii, the Spirit Stone Flashlight occurs in two of the series' mainline games. It functions to stun ghosts to walk by them without detection, as well as exorcising them. In Smash, it combines functions from both Fatal Frame IV and V. The flashlight will have two uses: to stun, and to deal damage. However, due to most (if not all) characters in Smash being living beings, it won't have the same effect it does on ghosts. When holding the item, lightly tap A to stun. It will stun any opponent in a short range in front of it. Holding A will cause it to release a burst of damage (but no knockback) when the button is released. However, the opponents won't be stunned very long. They can as always mash out of the stun. Each of its functions gets only one use on account of it being an old flashlight. If both of its uses are exhausted, it becomes a throwable item for a bit similar to Robin's tomes and swords.
SprinklesMiitopiaWhen dropped on the ground, the item takes the form of a seasoning shaker with different colors inside. Each sprinkle has a different effect, and to activate it, the fighter will automatically toss the item down, shattering the shaker and making them glow slightly the color of the sprinkles.

NameDescription
Green HP SprinklesHeals 1% every 3 seconds.
Yellow MP SprinklesIncreased Special Attack damage output and knockback. It has a 35% chance of appearing.
Blue Life SprinkledIt will either grant the player a new stock in stock matches or a KO point in Timed matches. It has 1% chance of appearing.
Purple Shield SprinklesIt will strengthen the user's shield for 12 seconds, reducing shield damage by 40%. It has a 13% chance of appearing.
Red Hyper SprinklesIt will instantly fill the Final Smash gauge if it is on, or grant the user a Smash Ball otherwise. It has a 1% chance of appearing.
TutuSuper Smash Bros.Picking up this item gives players a unique Rapid Jab, Dash attack and Neutral Aerial attack that involves spinning, which also have the ability to reflect projectiles. The Neutral Aerial also slows down your descent when used.
Wither Skeleton SkullMinecraftCollecting 3 Wither Skeleton Skulls can allow the player to summon the Wither. Upon summoning, the Wither will create a huge explosion dealing heavy damage and powerful knockback, and the player will switch control to the Wither. Controlling the Wither is similar to Master Hand's playable appearance in World of Light. As the Wither, you gain access to a new suite of Special moves:

Neutral B: Shoots a Wither Skull projectile. The trajectory can be altered by tilting the control stick before the projectile is fired. Upon making contact, it will explode and leave a Wither effect that will make the opponent take damage over time. There is a 1% chance it will fire a more powerful Blue Wither Skull.

Side B: A powerful dash attack based off of its appearance in Bedrock Edition. It will charge at quick speeds and deal a lot of damage.

Up B: The Wither causes a smaller full-body explosion and shoots itself upwards spinning.

Down B: Plants a Wither Rose if it is touching the ground which will last for 12 seconds dealing light damage to anyone that touches it. If the Wither is in the air, it will instead perform a downwards dive.
assists.png

Assist Trophies comes out in full force yet again with tons of famous and well-known faces in gaming; not just Nintendo! It`s sure to put a smile to everyones faces to see these characters finally appear! Or leave them with saddness with a MWC getting the disconfirmed status. Guests appearing as an Assists includes the likes of Cranky Kong, Big the Cat, Dan Hibiki, Poochy, Futaba Sakura, Morrigan, and more!
NameSeriesDescription
Adeleine & RibbonKirbySpawns food items and delivers it to the summoning player while dealing minor damage to opponents.
Albert WeskerResident EvilRaces around the stage and attacks using T-Virus enhanced punches and kicks.
ArlePuyo-PuyoWhen summoned, she goes into Background with Carbuncle and poses like her Artwork, after her posing, she starts to summon Puyos from Sky and they rain on Fighters. Each 2 Puyos link to another 2 puyos, they make Explosion that has far knockback. Also it can trap fighters if it builds like Shetler.
Puyos can be Destroyed.
Arle cant be Harmed or KOed.

I nominate her, because despite she is Mii costume, she can represent Puyo Puyo as Assist. Even tho, she could drop puyos from sky to annoy players and trap them in Puyo-cage. She even is so cute to be added in Smash as Assist, since she only could drop puyos like I said earlier.
Her design is based on Modern PuyoPuyo games like PuyoPuyo X Tetris.
Asterius
A part of the "In the Name of Hades Bundle" DLC
HadesThe famed Bull of Minos. Asterius is the one you fight in Elysium, and is accompanied by his murderer Theseus. When summoned, Asterius wanders around for a bit before he the following:
  • A hunched-over bull charge towards the opponent, jumping and turning seamlessly without losing momentum. Deals 11% damage and medium knockback on hit.
  • A double axe swipe followed by an axe smash. 5%, 5%, 12% with heavy knockback.
  • A charging overhead axe smash. Deals 17% and possesses sub-30% minimum kill potential.
Ayumi TachibanaFamicon Detective When she appears, she will investigate for evidence which consists of her walking around the stage, inspecting, pondering with a thought cloud, and occasionally finding evidence. Dealing damage to opponents during this time further “increases” the evidence and proof found. Finally, at the end of her Assist Trophy, she will present her findings by saying “I think I unraveled the mystery!” which causes a lightbulb thought bubble to explode upwards and deal any damage to opponents. The damage dealt is determined by just how many damage the summoner deals out to the other opponents during the investigation period.
Balance BoardWii Fit
Tilts the stage, causing the boundaries to shift and players to slide along the stage.
Big the CatSonic the HedgehogGrabs opponents with a fishing rod at varying speeds.
BokoblinThe Legend of ZeldaThree Bokoblin with different equipment attack and move independently. Attacking one damages all three.
Buzz BomberSonic the HedgehpgFlies around the stage horizontally, shooting stingers at opponents.
Chibi-RoboChibi-RoboChibi-Robo runs around while lashing out with a whip or will use a toothbrush and "scrub" the floor. This has tge unique effect of removing ground-based hazards including Inkling/Octoling's ink.
Cranky KongDonkey KongSits and rambles to the player.
CreeperMinecraftFollows opponents and explodes when it gets in range. Attacking it with electricity will cause it to become a Charged Creeper, dealing much more damage.
Dan HibikiStreet Fighter
Does two extremely weak attacks and a long taunt. If the player who summons Dan has a meter, allowing the taunt to finish will fill up a quarter of the meter.
The DarklordMiitopiaPerforms several area-of-effect attacks which can damage the player who summoned it.
DJ Adore & the Love PosseRhythm Heaven
MC Adore raps with the Love Posse repeating what she said in speech bubbles that launch the opponent in the air.
Dr. Nefarious
Apart of the "Rifting Togther" DLC.
Ratchet & ClankBlending his appearance from Rift Apart with his boss fight in Ratchet & Clank 2016, Dr. Nefarious is a recurring antagonist of the entire series. For this Assist Trophy, Nefarious will enter the background in the Gadgetron Insta-Mech, and will proceed to attack everyone, including his own summoner, with the following attacks:
  • Bolt Barrage: Fires a flurry of energy bolts that deal 6% damage each and sweep across the entire stage.
  • Laser Sweep: Fires a full-power laser that deals 20% damage and high knockback.
  • Fist Smash: Nefarious will pilot the mech in such a way that he smashes its clawed hand into the stage, dealing 16% damage and burying on hit.
Dr. Neo Cortex
Submitted by: Perkilator Perkilator
Crash BandicootFires shots with his ray gun that have a variety of effects.
Dragonlord
Submitted by: cashregister9 cashregister9
Dragon QuestUses 3 spells that have a variety of effects.
Eggplant WizardKid IcarusFires several different projectiles that all turn the opponent into an Eggplant.
Elite Beat AgentsElite Beat AgentsDoes a dance that grants the summoner a buff to their stats. If the player does well while under the effect of these buffs, a bubble with a member of the Elite Beat Agents or Ouendan will come in from the side of the stage and deal damage.
E.M.M.I.MetroidEMMI Will crawl up, down and All around the stage with their searchlight out, If an opponent enters the Searchlight EMMI Will start to chase the opponent, If the opponent gets caught EMMI Tackles them to the ground and crushes them with their claw giving a 1-hit-KO
Erica Fontaine
Apart of the "Imperial Smash Revenue Bundle" DLC
Sakura WarsSakura Wars' second most important leading lady behind Sakura herself, Erica Fontaine is the canon girl for the ending of Sakura Wars 3: Is Paris Burning? and Sakura's other main rival for Ogami's affection; and along with Ogami himself, Sakura, and Gemini, is the other main character for crossover appearances. She's a nun and cabaret dancer at Le Chattes Noires and the first member of the Paris Fleur Division, also captained by Ichiro Ogami.

Erica is a "smart" assist trophy in that she has three functions she'll decide from based on where the enemies are; after she arrives (saying "Bonjour!") she'll shake her "Good Morning!" maracas back and forth to deal flinching hits if an enemy is close, which inspires her summoner giving them a light damage buff of 1.15% for the next twelve seconds if she hits an opponent even once, she'll pull out her twin crossbow machine guns Raphael and Gabriel and shoot wildly if foes are at a distance, and if attacked, her clumsiness kicks in and she'll trip out of the way. Right before she leaves, she yanks off her dress to reveal she was wearing her iconic Black Cat Waltz outfit and dance, clawing at the air like a cat occassionally which deals good damage and decent knockback, and occassionally attack with a prop hammer, which deals great damage and knockback.

1644729666834.png


Finally, she'll leave by raising her crucifix to the sky as flashes of holy light radiate around her, acting like Palutena's old "Heavenly Light" move dealing damage but with no flinch, as she utilizes her "Sacre de Lumiere" technique; and when she finally exits, it seems she dropped something... a cup of pudding? Her favorite snack... well, I guess her summoner might enjoy it!
EudenDragalia LostEuden, from Nintendo's only mobile game to be a new IP, joins the battle as an assist trophy! The heir of the Alberian noble family will have a few attacks that he will lend to the summoner to aid them in battle. Euden will appear in his default "The Prince" outfit in the proportions he has in his promotional artwork. While he does appear appear in this form, he does use attacks from his "Gala Prince" form. He can be KO'd, regardless of what form he takes.


Rising Circlet
Euden will charge up energy, with the ground blowing a brilliant yellow-white color. He will then release it and plunge his sword into the ground, creating a fortress of light. As the fortress rises from the ground, it will deal around 12% of damage to whoever touches it. The fortress fades quickly.

Blazing Circlet
Euden's sword is imbued with flames as he charges for a spin. Similar to Pyra's Flame Nova, though this attack will propel Euden forwards in the direction he is facing a bit. Any opponent caught in the flaming attack at the beginning will take 24% of damage.

Calamitous Tempest
Euden glows and transforms into Midgardsormr and fires off a large tornado in the center of the stage. This is his longest lasting attack and will always exit the stage after using it. Staying in the middle of the Tempest in the beginning of the attack would cost around 45% of dam
FlickAnimal CrossingReleases tarantulas and scorpions to attack opponents. Also occasionally throws beehives. When Flick leaves, he will toss a bug-related item to the player who summoned him.
Franziska Von Karma
Apart of the "A Smashing Turnabout Bundle" DLC
Ace AttorneyYup. Of all the characters I could have chosen, I went with Franziska. Well hear me out. Franziska would spawn and snap her whip forward before quickly performing the sprite shown below:


She would then walk slowly, but confidentially on the stage. When she's close enough to a fighter, she would then attack with her whip, which launches far and has great K.O. potential.
Futaba SakuraPersonaSummons her Persona, Necronomicon, which heals and buffs the player and allies.
Imposter & CrewmatesAmong UsNine Crewmates of the colours Red, Blue, Green, Yellow, Orange, Purple, Pink, Black, White and Brown appear on the stage. If the stage is on the smaller side, five Crewmates will appear instead. Among the Crewmates will be an Impostor.

The Crewmates will walk around the stage performing different task animations while hunched over facing away from the camera. The Impostor however will perform the same animations minus any actual tools (like actual wires appearing) although this will be hard to spot in the heat of the battle. The Impostor will also attempt to follow enemy players more than the other Crewmates. If left alone too long, they will stab an enemy player in the back dealing an insta-kill attack.

However, you can counterattack a Crewmate by grabbing them, attacks will go past the Crewmates due to how hectic this would be. After you throw a Crewmate, they will instantly be KO'd. However, if you throw a Crewmate by mistake, the other Crewmates will gang up on you causing major damage.

Who is the second Impostor? The AT summoner of course!
Jenna AndersonAstral ChainAttacks opponents in her Aberrant form using chimeric powers. If defeated by the player who summoned her, she will turn into her Asymptote form and do two powerful attacks.
JennaGolden SunCasts Mars-aligned fire psynergy attacks to attack opponents.
Jody SummersF-ZeroRuns around and attacks with various fiery punches and kicks before racing across the stage in her White Cat.
The KnightHallow KnightSuch as Shovel Knight, The Knight will be fully modelled in 3D and have all animations, like his walking and jumping animations for example, lifted from his home game, Hollow Knight!

Once The Knight gets summoned, he can perform multiple actions. He will be very flexible, as he can not only dash on the ground, but mid-air as well, albeit only once per jump. Here is his movelist as an Assist Trophy.


Attack/MechanicReference
Nail Slash:
Either when jumping, running or even standing still, The Knight can deliver fast and swift swordslashes to players. As aforementioned, they are fast, although a bit weak in knockback and damage, only dealing 4% per slash. When he damages an enemy, he gains 11 SOUL from them, which he not only uses to conjure his many spells, but this actually heals him over time as well. So the more hits he get, the more difficult he is to defeat!
SOUL:
Anytime the Knight stands still or uses one of his spells, a circular meter that fills up with white liquid, revealing two eye holes and giving the meter the appearance of a face, shows up above him. This signifies how much SOUL the Knight has. The Knight starts out with 33 SOUL, which only consists 1/3rd of the meter. This meter fills up by him attacking players with his Nail on the battlefield, and drains when he gets attacked or uses one of his abilites. While this bit is not representative of the actual game, for gameplay purposes in Infinite, this meter also signifies the Knight's health, as when it empties, he is defeated. His death animation from Hollow Knight will then follow shortly after.

While in his homegame these would normally have a cost of 33, in Infinite, all of the Knight's spells have a SOUL cost of 22.

Soul_Meter.png
Vengeful Spirit:
The Knight launches a projectile that goes through the entire screen and passes through the players, which deals 15% damage. The projectile passes through invulnerable parts of an enemy, such as shields.

Vengeful_Spirit (1).png
Desolate Dive:
The Knights slams into the ground, creating a shockwave that spreads out and up. The dive deals 15% damage, while the shockwave deals 20%. In any case, the knockback is high.

Desolate_Dive.png
Howling Wraiths:
The Knight releases a wave of energy in an arc around and above the Knight, dealing 3 hits. If all hits connect, this deals the most damage, 45% (with each hit dealing 15%), and inflicts the highest knockback.

Howling_Wraiths.png
Kula Diamond
Submitted by: Mr. Robotto Mr. Robotto
King of FightersSkates around the stage and performs several ice-based attacks.

Idle Animation:

Once Kula enters the stage, she will go into her popular stance where she is surrounded by an aura of cold air that constantly swirls around her. This animation plays whenever she's not moving.

kula-xi-stance.gif
Running Animation:

This is when she uses her skates to their full extent! Kula does this by freezing the floor, using it to slide and possibly trip all opponents in her way when in pursuit of a specific player.

kula-skate.gif
Projectile Attack:

Kula's Diamond Breath: by blowing a mist of ice at the opponent, anyone that touches the mist will get freezed by Kula. She uses this attack when there's just not enough space for a physical attack. So be sure to get out of her way!

kula-special2.gif
Physical Attack:

Kula's Lay Spin: Kula spins in the air landing a kick on the opponent. Get too close to her and you'll be stuck in the attack for the entire spin, so watch out! She'll always try to pull this off once she freezed you with her Diamond Breath.

kula-a9.gif
Jumping Attack:

Kula creates a large, dangerous, pointed spike made of ice. If she hits you with the tip of it, she'll pull of a Meteor Smash. She'll try to edgegaurd opponents with this that are trying to escape her wrath by fleeing from her beyond the stage.

kula-air1.gif
Exit Animation:

When Kula's done with her job, she'll give a big yawn and exits the stage.

kula-yawn.gif
KumaTekken
Kuma II is the name of one of Heihachi's bodyguards, and as his name implies, he's a literal ****ing bear. He is the son of the original Kuma from Tekken 1 and Tekken 2 who fulfilled the same job and role he does. Though right after the second King of Iron Fist Tournament, the original Kuma died of old age. Fret not, because his son is here to put some respect on his old man's name in Smash Infinite... as an Assist Trophy. Fitting, considering assisting Heihachi is literally his job.

In Smash, he will perform various moves from Tekken (like Kazuya), who are very animalistic in nature. His idle stance and running/jumping animations are all straight lifted from Tekken. Without further ado, this is what he can pull off!


Attack & DescriptionAnimation
Bear Toss:
Bear Toss is a throw used by Kuma II and Panda from Tekken 3 onwards. After Kuma grips the player inbetween his teeth, he swings them from left to right after throwing them to the side. This does 25% damage in total: 9% from the bite, 8% in the first swing and another 8% in the last one. Though as this move is considered a grab in the game, you can mash out of it. But beware, as the higher your damage is, the harder it is to escape it!
Rock 'n Roll Circus:
A move used by both Kuma II and Panda from Tekken 3 onwards. After Kuma grabs the player, he literally just rolls them with his limbs and then throws them far behind him. This does 20% in total, all limb hits accounted for, but you can not mash out of this move. Once grabbed, you're in.

You may also hear unusual lines or expression coming out of certain characters during this move! Like for example, this move would trigger Kazuya to laugh.
Demon Uppercut:
The Demon Uppercut has been a signature move of Heihachi since the PlayStation port of the first Tekken game, despite it being similar to Kazuya's Wind God Fist. From Tekken 3 onwards, the move was also made a part of Kuma II's and Panda's moveset. During the animation, Kuma performs an all-out uppercut that sends the opponent straight up in the air on hit, and while it can be a bit slow to come out, the reward is the highest launch (outside of his Rage Art) Kuma will be able to muster, and it does 14% damage.
Dance With Me:
Probably the funniest move in both Kuma and Panda's moveset. Once a player is down Kuma will begin to rythmically step on them. This is moreso a joke move if anything, does 3% per step.
Rage Art:
When Kuma's HP is low and is close to getting KO'd, he will start glowing Red in the same way as Kazuya does when he's in Rage mode. In this state Kuma will be able to deliver a strong move, his Rage Art.

Kuma uppercuts the opponent into the air, grabs a salmon out of nowhere then uses the fish like a baseball bat to perform a home run on the opponent. This deals 30% damage and has tons of knockback.
this dude is a literal bear and thats why he should be in
MedliThe Legend of ZeldaPlays the harp, creating several windboxes on the stage. Can be picked up, which causes the player who picked her up to glide while jumping.
Meow-WowKingdom HeartsOnce Summoned Meow Wow will start to bounce around the stage, each bounce creating a powerful shockwave that stuns opponents, and if it is a direct hit, it grounds the opponent. Before Meow Wow leaves it will create a giant Balloon that explodes dealing big damage, and in the background you can see a large shower of every dream eater in DDD.
Mike JonesStar TropicsStartropics is one of the most underrepresented 1st Parties in Smash, barely managing to get any representation throughout the games outside of a mention in Chronicle. Mike Jones will use his yo-yo to hit opponents on the stage when summoned, as well as occasionally use a baseball bat for his attacks.
MonaWarioDrives around on her bike, trying to avoid opponents. When she gets close to opponents, however, she will summon her animal friends to attack.
MonokumaDanganronpaOnce Monokuma causes a player to go over 100%, he stops in place and whips out his gavel. This traps the player in a desk, which quickly moves towards a machine (that appears on the edge of the stage) that will crush the player and instantly KO them. However, if the player mashes hard enough, maybe, just maybe, they'll have the hope that overcomes the despair and break free before being forced to fall offstage. After a punishment, Monokuma will give out another "Puhuhu!" and leave. However, if Monokuma fails to take a player into a punishment after 5 attempts, he will explode (which doesn't deal damage) and disappear. This specific scene is used in 3 executions and is pretty general so I went with this one.


Attacks


AttackDescriptionImage
MOMOMOMonokuma!Monokuma pops up randomly around the stage. He does this between 3 to 5 times. Every time a player makes contact with Monokuma, they will take 15% of damage and be stunned. If a player is to reach 100% or more after being attacked by Monokuma, they will be sent into...
Punishment TimeMonokuma swings his gavel onto a button, trapping the player in a school desk. This desk moves towards a hydraulic press, which instantly KOs the player trapped inside. It won't harm anyone not trapped in the desk. While it can be mashed out of, doing so will cause the player to fall offstage, where they may have a chance to recover. Monokuma will always exit the stage if he fails to punish a player after 5 attempts or after the punishment animation.
MorriganDarkstalkersAttacks opponents with her army of bats and her wings, shaped into blades and spikes.
Muddy MoleMole PanicBurrows around the stage, creating pitfalls. Every third emergence from the ground, he will throw a heavy steel ball.
Mumbo Jumbo
Submitted by: Ramen Tengoku Ramen Tengoku
Banjo-KazooieWaves his staff and grants all players a random transformation status effect.
NintendogNintendogsA Shiba Inu blocks the screen.
Paper MarioSuper Mario Bros.When spawned, Paper Mario will leap up to the closest fighter and hit them over the head with his hammer, stunning them. If he succeeds, he will follow up with a jump attack that can be chained up to 5 times, each attack dealing more and more damage. He will disappear once he repeats this process 2 times, or when the usual Assist Trophy duration ends.
PokeySuper Mario Bros.Drifts around the stage lazily. Can only be KO'd by attacking the head after knocking out its body segments.
PoochyYoshiwhen spawned, a Poochy Pup will wander around the stage, until a fighter equips the Poochy Pup, where it will then follow it around. pressing the attack button will cause the Poochy Pup to home onto the nearest opponent and attack it. Up to three Poochy Pups can follow you at once, and they come in the 3 colors pictured above.
Psycho MantisMetal Gear SolidWhen summoned, Mantis will float into the air and laugh as gas pours into the stage, andwill preform one of a few actions:
  • He will turn the stage upside down or backwards
  • He will briefly invert the controls.
  • He will cause characters to briefly switch places
  • He will create a static effect, making it hard to see
  • He will summon hallucinations of enemies that will damage the player
  • He will read the players system, and a large textbox will appear saying things like "So I see you like Mario Kart." "I see you like Pokemon Snap."
Really wanted to include one where it makes it look like the game crashes but that is proablly a lawsuit waiting to happen.
PyoroWarioWareAs an Assist Trophy, Pyoro would walk around the stage, stretching his tongue at fighters and then spitting them out, launching them. Pyoro is able to be K.O.ed, though I doubt anyone would do that to Pyoro : )
Seteth
Submitted by: @airConditioner
Fire EmblemFlies across the stage from the edge of the screen with his Cichol Wyvern Corps. He then flies from the background to the foreground with his Spear in an attack that can stun opponents.
Space InvadersSpace InvadersSlowly descends onto the stage while shooting pellets at players. Can be KO'd with precise attacks.
TailsSonic the HedgehogUpon summon, Tails strikes a pose and instantly disappears. If you get KO'd by a strong attack or hazard, he'll leap to the rescue and get you back on stage, saving you from losing a stock and letting you choose a spawn point before losing I-frames! However, be warned: if you SD or are the victim of a combo strung from weaker moves, he may not be as empathetic! Note that damage percentage stays intact, and if you are KO'd in a way Tails won't help you from, he won't come back.
Tifa Lockhart
Submitted by: Perkilator Perkilator
Final Fantasy
Unleashes her Limit Breaks. If interrupted, she will move onto the next Limit Break.
Wave RacersWave RaceRams into opponents while waves appear below them.
Yoshimitsu
Apart of the "A Stage of History Bundle" DLC
SoulCaliburA recurring character in both Tekken and Soul Calibur, Yoshimitsu is a fairly popular choice for a character in both games. In Smash, Yoshimitsu can do one of three stances: Flea, Dragonfly and Indian.
  • Flea Stance: A stance where he crouches upon two swords.
    • Flea Roll: Yoshimitsu curls into a ball and rolls along the ground, dealing 7% damage and medium knockback.
    • Sakanobori: Yoshimitsu walks on his swords for a bit. If he runs into anyone, he'll launch the foe upwards for 3% damage before spiking them for 7%.
    • Flea Run: Yoshimitsu runs forwards on his swords, dealing 2% damage per hit for 5 hits.
    • Flea to Sliding Headbutt: Yoshimitsu slides belly-down on the ground, dealing 6% damage to anyone he rams his head into.
  • Dragonfly Stance:
    • Dragonfly Fist: Does a straight punch to the closest foe he faces, dealing 3% damage and hitstun.
    • Dragonfly Sword: Performs a downwards sword slash that deals 6.5% damage. This puts him out of the stance.
    • Dragonfly Twister: Performs a strong roundhouse kick that deals 9% damage and medium knockback. This puts him out of the stance.
    • Dragonfly Sweep: Leaps out of the stance and performs a sweep kick that trips the foe on hit, dealing 5.5% damage.
    • Spirited Away: Grabs a foe that's closest to him and performs a leg-based piledriver dealing 11.5% damage and high knockback.
  • Indian Stance:
    • Vacuum Dance: Teleports to a random foe's location.
    • Storm: Spins in place before teleporting above the closest foe and directing an assault from above, dealing 8% damage.
    • Cannon: Leaps forwards with a dropkick before rolling along the ground and following up with a Kangaroo kick. Deals 13% damage overall.
    • Knee Cap: Spins in place before performing a sweep kick that trips opponents, dealing 4% damage.
Furthermore, there's a 25% chance that Yoshimitsu will be summoned in his Tekken 7 incarnation instead, reusing voice lines by Tomokazu Seki. This puts him as the first Assist Trophy in Smash Bros to represent two franchises simultaneously.
Yuri Lowell
Apart of the "Tales of Smash Bundle" DLC
Submitted by: Venus of the Desert Bloom Venus of the Desert Bloom
TalesWhen summoned, Yuri will dash around the stage while using a combination of sword strikes, axe attacks, and even attacking with his fists and kicks. He’s known for his stylish attacks which reflects in his movements. He will often perform four Artes during his time:
  • Azure Edge: An attack like Demon Fang but travels in the air.
  • Fang Strike: Performs a downward slash that stuns opponents and then proceeds to perform a powerful uppercut.
  • Destruction Blast: Performs a bit like Bowser Bomb but Yuri will jump into the air and then land with an axe strike which causes an eruption to happen.
  • Ghost Wolf: Yuri slashes into a trapping combo and then teleports behind the opponent and performs a powerful slash attack.

Like Spring Man, before leaving, Yuri will perform Savage Wolf Fury which consists of a stage-wide quick dash attack akin to Super Sonic but at a smaller, more condensed scale. After several moments of this, he will then dash across the main stage platform in a sword thrusting strike.
Zeke & PandoraXenoblade ChroniclesZeke uses his Bringer of Chaos: Ultimate Lighting Fury Slash attack, which instantly KO's any opponent above 130%.
Zombie HordePlants vs Zombies1. Browncoat Zombie
2. Cone Zombie
3. Flag Zombie
4. Football Zombie
5. Octo Zombie
6. Jack-in-the-Box Zombie
7. Pole-vaulting Zombies
8. Screen Door Zombies
9. Bucket Head Zombies
pokemon.png

You want Pokeon? We got Pokemon! We got lots of Pokemon and not your standard six per tream! You like Gen 1? We got Gen 1? You are more into Gen 3, we got that too! And of course we have the nwewest, Gen VIII from Galar! Joining the Smash Pokemon Team are Mons such as Cramorant, Gengar, Enternatus, Ultra Necrozma, Hawlucha, and Wooloo just to name a few!
NameGameGenTypingAttackDescription
Aipom
Submitted by: Otoad64 Otoad64
Pokemon Gold & SilverIINormalDouble Slap
Healing items spawn when Aipom is summoned, which Aipom will then grab and give them to the summoner. Aipom will also use his tail and perform double slap on opponents that get close.
AppletunPokemon Sword & ShieldVIIIGrass/DragonHeadbuttWhen Appletun is summoned, it will attack players using a Heatbutt. It's slow but deals decent knockback and does 20%. Unlike other Pokémon, Appletun can be eaten by it's summoner, with each 1% damage the summoner deals on Appletun, they are healed 0.5%.
CramorantPokemon Sword & ShieldVIIIFlying/WaterDive/Gulp MissileWhen summoned, Cramorant uses Dive to snatch up an opponent. When successful, it then uses its signature ability Gulp Missile to spit the opponent at another opponent.

When it misses, it simply stands around wondering what to do for a few seconds.
CinderacePokemon Sword & ShieldVIIIFirePyro Ball Cinderace uses Pyro Ball to form a fireball that it will begin to kick back and forth around itself. The fireball has a small hitbox that slightly damages opponents while Cinderace is practicing kicks but the real damage comes from Cinderace's kicking attack. It will kick the ball in the direction of enemy players with incredible launch power. The ball however can be reflected with a timed attack. If the ball goes off-screen, Cinderace will start igniting a new one. If the ball is left on the ground, Cinderace will attempt to run to it and kick it again.
DracovishPokemon Sword & ShieldVIIIWater/DragonFishious RendWhen summoned, Dracovish will stand for an extended period of time like a doofus before rushing at immense speeds at the opponent and using the fishous rend Attack. This does immense damage and knockback, so you better try to avoid it. Once his fishous rend animation finishes, he will stand like a doofus again. After a pause he will perform another fishous rend. He will perform 4 fishous rends in total before despawning. He should be included because he is a competitive beast, Ash caught one, and because we should be grateful for Mr. Fish.
DragapultPokemon Sword & ShieldVIIIDragon/GhostDragon DartWhen Dragapult is summoned, it will use its signature move Dragon Dart. How it works is that it when summoned, it will floats around the stage and fire two Dreepys, which will hone in on the closest opponent. This repeats two more times. Dreepys do explosive damage similar to Snake's Nikita.
EiscuePokemon Sword & ShieldVIIIIcePowder SnowWhen summoned, Eiscue will waddle around the stage back and forth. Any attack dealt on it will somewhat delay the attack. If hit 8 times, however, it will explode using Powder Snow and change it's form to Noice Eiscue. The explosion freezes everyone around it but the summoner.
EternatusPokemon Sword & ShieldVIIIPoison/DragonDynamax Cannon/EternabeamEternatus would be very rare. When summoned, they would fire off a huge laser which would move from one side of the screen to the other. It would be extremely hard to avoid, but not impossible. There would also be a small chance for it to spawn as Eternamax Eternatus, which would fire a bigger laser
Galarian MeowthPokemon Sword & ShieldVIIINormalPaydayBehaves like regular Meowth, though its coins deal more damage and some knockback at the cost of having a narrower range and not being thrown as quickly.
Galarian StunfriskPokemon Sword & ShieldVIIIGround/SteelSnap TrapGalarian Stunfisk is a Pokemon that can spawn with Pokeballs despite technically not being a Pokeball Pokemon. When spawned, only their mouth is visible and they are meant to look like a pokeball, with the giveaway being they don't make a sound when they fall and they are slightly darker. If anyone tries to pick them up, Galarian Stunfisk will act as a bear trap and attack whoever did it, with it being very fast, powerful, and practically no way to escape it.
GengarPokemon Red & BlueIGhost/PoisonLick/Destiny BondWhen summoned, Gengar will use Destiny Bond and sink into the floor laughing. Gengar will try to come out from the floor and lick opponents dealing 10% and paralyzing for a few seconds. However, Lick does take a long while to activate and will be knocked away by a single hit, going back into the floor. If somehow KO'd, Gengar will take the stock of the person who KO'd them.
GoodraPokemon X & YVIDragonAqual Tail, Dragon Pulse, Dragon's BreathGoodra would be pretty large and would be slow, Goodra would leave a trail of Slowing goo behind it. and all of it's attack slow down opponents.

Goodra has 3 moves that it can use.

Aqua Tail: Goodra slaps an opponent with it's tail
Dragon Pulse: Goodra shoots a Laser at an enemy
Dragon's Breath: Goodra shoots a damaging mist out of it's mouth.
HawluchaPokemon X & YVIFighting/FlyingCross Chop, Somersault Kick, Fly, Bounce, Seismic TossHawlucha runs around while performing a number of moves. It is capable of jumping high into the air and flying with its wings before doing various attacks. It also has an air throw that it can do when catching opponents.
Hitmontop
Sunmitted by:@Commander_Alph
Pokemon Gold & SilverIIFightingRapid Spin/Triple KickWhen summoned, Hitmontop will act as a spinning top and charge at enemies with his Rapid Spin, and if he attacks someone they get hit with Triple Kick. Hitmontop can't jump on platforms, and he has big endlag trying to change direction which amplifies his speed making him lose control which can result in accidentally flying off stage.
InteleonPokemon Sword & ShieldVIIIWaterWater SnipeInteleon will appear and then dive into the stage in a blast of water, they will then appear in random locations and will use Water Snipe to attack an opponent, this works like the Staff item where the farther you are away from it the more damage it deals, if you get to close they will use Liquidation where you will be hit by a smasll rush of water that knocks you back.
KecleonPokemon Ruby & SapphireIIINormalColor ChangeKecleon once summoned will turn invisible and will wander around the stage picking up items to give to the summoner, if Kecleon is attacked at all, it will retaliate with an attack that deals half the damage of the move that attacked it.
LitwickPokemon X & YVIGhost/FireWill-o-WispUnique to Litwick themselves instead of inflicting damage directly they instead uses the move Will-O-Wisp in which Litwick will summon 3 sinister, bluish white flame that target locked the enemy and inflict a burning effect, it last much longer. In addition, if the enemy walk close to them they will get hurt by its flame.
MelmetalPokemon Sun & MoonVIISteelDouble Iron BashThe liquid metal Mythical that debuted in Pokemon GO is a rather large Pokemon who wanders around like Bewear. If anyone is close enough, he will perform Double Iron Bash, which is timed to punish anyone who dodges the first hit. The move in question is really powerful and can even deal some good shield damage, too.
MeowsticPokemon X & YVIPsychicPsybeamWhen summoned two Meowstic, one male, one female, will seperately run and jump around the stage and perform Psybeam, unfolding their ears and unleashing a couple rays of psychic energy that has a small chance putting the opponents in a stun/dizzying stance. After a bit, the two will meet back together, strike a pose and disappear.
MetapodPokemon Red & BlueIBugHardenThis insect Pokémon will continue to harden itself which is shown by a gleam on its body followed by a sharp “sheeeeeeen” sound. Metapod can be picked up by anyone and thrown at nearby opponents. The more it hardens itself, the more damage and knockback it deals.
Sirfetch`dPokemon Sword & ShieldVIIIFightingSwords DanceOnce summoned, Sirfetch'd will perform Swords Dance. While standing in place, it'll swing it's leek sword around for a bit (Completely visual, no damage dealt), then lift it's sword up to the air, unleashing an aura that will temporarily boost the attack power of the person who summoned it. After a bit, it'll strike a battle pose, then leave.
Snom/FrosmothPokemon Sword & ShieldVIIIIce/BugBlizzardSnom would be the initial Pokemon summon from the Pokeball. It would slowly slither along the ground, dealing no damage and only really getting in the way of others. Snom can be picked up and used as a weak projectile with decent range. However, if someone holds on to Snom for 30 seconds, it will achieve maximum happiness with the fighter and evolve into Frosmoth. Frosmoth functions similar to Tiki, flying to the upper corners of the screen before flapping its wings and unleashing Blizzard, a wide, icy wind that deals high damage, knockback, and freezes anyone caught in the blast.
SpiritombPokemon Diamond & PearlIVGhost/DarkHypnosis/Dream EaterA Dark/Ghost type Gen 4 Pokemon made from the souls of 108 wicked people, Spiritomb could be considered one of the most haunting Pokemon ever lorewise. In Smash, Spiritomb will expand the spiritual shroud making up his face and cause the green orbs to rotate, casting Hypnosis to put them to sleep. If there's an opponent nearby that's asleep, he will lunge forwards with a spectral bite in the form of Dream Eater, which does less damage when an opponent is awake, but hits like a truck when asleep.
RillaboomPokemon Sword & ShieldVIIIGrassDrum BeatingWhen summoned, Rillaboom will perform Drum Beating. Rillaboom will take out his drum and start playing it, causing roots to appear randomly throughout the stage, attacking opponents. After a bit, it'll pound it's chest and leave
Ultra NecrozmaPokemon Sun & MoonVIIPsychic/DragonLight That Burns the SkyUltra Necrozma will use its all powerful Z-Move, Light That Burns the Sky. Ultra Necrozma appears in the background and begins charging a huge ball of light from its mouth. It will grow for about 12 seconds until Ultra Necrozma releases the ball or scorching light into the sky. A small beam will appear from the sky where the light will appear for a few seconds before the ball of light comes crashing down hurting everybody caught in the attack!
Umbreon
Submitted by: Krookodilian Krookodilian
Pokemon Gold & SilverIIDarkMean Look/MoonlightWhen summoned Umbreon will use one of two moves, but first it gets in a battle ready stance and have their eyes glow red. The two moves Umbreon uses in order are:

  1. Mean Look: The opponent will be stunned in place momentarily giving the summoner a chance to attack.
  2. Moonlight: Umbreon looks up into the sky and a moon will appear in the background, and the summoner is healed 50%.
WigglytuffPokemon Red & BlueINormal/FairyNoneWhen Wigglytuff is summoned, 3 apples will be spawned as well. Wigglytuff will slowly waddle over to the three apples and collect them. If Wigglytuff gets to all three he will despawn without attacking. However if the apples are eaten, Wiggly will perform Echoed Voice (or Yoom-Tah!!!) the same number of times as number of apples eaten. Echoed Voice will be a shockwave damaging the whole screen, dealing slightly more damage than that of the POW Block. Whoever eats the apple first will be immune from the echoed voice and the opponent will be the one damaged. It mixes it up by having both you and the opponent able to be damaged, and not just the opponent. He should be included because so far we've only included one gen 1 pokemon, and history shows that usually more than that are included. Wigglytuff is also a very important pokemon in Explorers of Sky.
WoolooPokemon Sword & ShieldVIIINormalHeadbuttWooloo would move around the stage slowly, using Headbutt when it comes near a fighter. Headbutt would do moderate damage and knockback. Unlike most Pokemon, Wooloo can be attacked. However, because of its thick coat of wool, it takes no damage, but it's very light so it gets knocked back considerably. This means that it's possible for players to try to knock Wooloo into the others' path, making for interesting tactics - if you're heartless enough to attack Wooloo, that is.
YveltalPokemon X & YVIDark/FlyingDark AuraThis would make it unsummonable in Prism Tower. When summoned, it will erect an aura which will drain health away from opponents within this aura. If the player manages to KO an opponent while this effect is active, the summoner is granted that health upon the KO. The damage dealt is 1.5% per hit and Yveltal is active for around 18 seconds. If the player manages to KO the person who was within the aura the whole time before the Pokémon vanishes, then would be awarded around 30% health. If the player KOs the opponent moments after Yveltal vanishes, then it’s not given to them. This move is called Dark Aura but, in theory, works like Oblivion Wing.
ZacianPokemon Sword & ShieldVIIIFairy/SteelIntrepid SwordIt appears from the Poké Ball in statue form, and because of it's giant size (about the size of Palkia's Poké Ball) it is inevitable someone will hit it - when Zacian is hit enough times it will break free, use the debris from the statue casing to make a sword and lunge forwards with a sword slash that can 1HKO and break though shields, but only really effects if the sword hits. If grounded players are hit by Zacian but not the sword they trip, wheras if players in the air are hit by Zacian but not the sword, they're spiked. It also boosts the Attack stat of the player who summoned it.
ZamezentaPokemon Sword & ShieldVIIIFighting/SteelDauntless ShieldMuch like Zacian, it appears in statue form but must be broken apart before it can start attacking. Zamazenta boosts forward around the stage while slamming its shield into opponents. It boosts the Defensive stat for the player who summoned it.

bosses.png

Bolsses are unique enemies foun in both Classic Mode, Smash Dungeon, Wishing Stars story mode, and Boss Raids and generally VERY powerful enemies plkayers must overcome! These are often featured as Boss Spheres, collectable energy orbs that can summon a boss onto battle! Rathalos joins this group while also joined by Dracula, the Hands, and new bosses such as like the Devil, DJ Octavio, Dath Egg Robot, Nemsis, and Rugal Bernstein.
Name and Series
DescriptionClassic Mode Route?Smash Dungeon?Boss Sphere?Wishing Stars?Boss Raid?
Master Hand
Super Smash Bros.
YesNoYesYesYes
Crazy Hand
Super Smash Bros.
YesNoYesYesYes
Akuma
Street Fighter
NoNoNoNoYes
Ancient Ogre
Tekken
YesYesYesYesYes
Death Egg Robot
Sonic the Hedgehog
YesYesNoYesYes
Demon King Ganon
The Legend of Zelda
YesYesNoYesYes
The Devil
Cuphead
YesYesYesYesYes
Deviljho
Monster Hunter
YesYesYesYesYes
DJ Octavio
Splatoon
YesNoNoYesYes
Dracula
Castlevania
YesYesYesYesYes
Duon
Super Smash Bros.
YesYesYesYesYes
Ender Dragon
Minecraft
YesYesYesYesYes
Darkside
Kingdom Hearts
YesYesYesYesYes
Giga Bowser
Super Mario Bros.
YesNoNoYesYes
Grima
Fire Emblem
YesYesNoYesYes
Gruntilda
Banjo-Kazooie
YesYesYesYesYes
King Hippo
Punch-Out!!
NoNoYesNoNo
Marx
Kirby
YesYesYesYesYes
Murasame
Mysterious Castle Murasame
YesYesNoYesYes
Nemesis
Resident Evil
YesYesNoYesYes
Rathalos
Monster Hunter
YesYesYesYesYes
Rayquaza/Mega Rayquaza
Pokemon
YesYesYesYesYes
Rugal Bernstein
Fatal Fury
NoNoNoYesNo
Machinedramon
Digimon
Apart of the "Smash is the Champions Bundle" DLC
NoYesYesNoYes
Justice
Apart of the "Smell of the Game Bundle" DLC
YesYesYesNoYes

miifighters.png

Love them or hate them; Mii Fighter costumes are here to stay! Previously, these represented the best and brightest of gaming and this holds true today! Of course, we got your original costumes such as a Gorilla, Dinosaur, Elf, and Diving Suit! That being said, we got tons of other iconic outfits ready for you to slap on your Mii. These include Primid Outfits, Ball Guy, Lappy, Servbot, Mr. X, Amy Rose, Darknut, Fall Guy, and more!

NameDLC WaveSeriesClassWig/Cap/Hat/Helmet/etcAdditional Content
Tank HatAdvance WarsAll classesNone
Chocobo HatWave 8Final FantasyAll ClassesNone
Slime HatWave ?Dragon QuestAll classesNone
Organization XIII CloakKingdom HeartsAll classesNone
Dusa MaskWave 1HadesAll classesNone
Angry Birds HatWave ?Angry BirdsAll ClassesNone
Bad Piggies MaskWave ?Angry BirdsAll classesNone
Caccodemon MaskWave ?DoomAll classesNone
Frank West OutfitWave 2Dead RisingAll classesFrank West Wig
Opa-Opa HatWave 3Fantasy Zone IIAll classesNone
Big Daddy OutfitWave 9BioshockAll classesBig Daddy Helmet"Welcome to Rapture" Remix
Haruka Amami OutfitWave ?iDOLM@ASTERAll classesHaruka Amami Wig
EVO ShirtEventEVOAll classesNone
E3 ShirtEventE3All classesNone
Skeleton OutfitSuper Smash Bros.Mii BrawlerSkeleton Mask
Firefighter OutfitSuper Smash Bros.Mii BrawlerFirefighter Helmet
Zombie OutfitSuper Smash Bros.Mii BrawlerZombie Mask
Superhero OutfitSuper Smash Bros.Mii BrawlerNone
Gorilla OutfitSuper Smash Bros.Mii BrawlerGorilla Mask
Dinosaur SuitSuper Smash Bros.Mii BrawlerDinosaur Mask
Ant ArmorSuper Smash Bros.Mii BrawlerAnt Helmet
Primid OutfitSuper Smash BrosMii BrawlerPrimid Mask
Banana OutfitSuper Smash Bros.Mii BrawlerNone
Croquembouche Outfit Wave 6Super Smash Bros.Mii BrawlerCroquembouche Mask
Bowser OutfitSuper Mario Bros.Mii BrawlerBowser Mask
Pauline OutfitSuper Mario Bros.Mii BrawlerPauline Hat
Mario & Yoshi OutfitWave ?Super Mario Bros.Mii BrawlerMario Hat
Tingle OutfitThe Legend of ZeldaMii BrawlerTingle Cap
Pokemon Trainer (Male) & (Female OutfitPokemonMii BrawlerTrainer Cap (Male) & (Female)
Ball Guy OutfitPokemonMii BrawlerBall Guy Mask
Machamp OutfitWave 1PokemonMii BrawlerMachamp Mask
Team Skull Grunt Male & Female OutfitWave 1PokemonMii BrawlerTeam Skull Mask
Team Rocket GruntWave ?PokemonMii BrawlerTeam Rocket Grunt Cap
Captain Syrup OutfitWarioMii BrawlerCaptain Syrup Bandana
Pearl OutfitSplatoonMii BrawlerPearl Wig
Hedlok Outfit Wave 3ARMSMii BrawlerNone
Reporter`s OutfitRhythm HeavenMii BrawlerReporter`s Wig
Wrestler`s OutfitRhythm HeavenMii BrawlerWrestler`s Mask
Lappy OutfitAstral ChainMii BrawlerLappy Mask
Sukapon OutfitJoy Mech FightMii BrawlerSukapon Mask
Muddy Mole OutfitPromotional Mii
Costume
Season 2 DLC
Mole ManiaMii BrawlerMuddy Mole Mask
Knuckles Outfit Wave 3Sonic the HedgehogMii BrawlerKnuckle's Wig
Servbot OutfitMega ManMii BrawlerServbot Mask
Chun-li OutfitStreet FighterMii BrawlerChun-li Wig and Cap
Tifa Lockhart OutfitWave 8Final FantasyMii BrawlerTifa Wig
Loki OutfitBayonettaMii BrawlerLoki Wig
Dracula OutfitWave ?CastlevaniaMii BrawlerDracula Wig
Martial Artist Gi OutfitWave ?Dragon QuestMii BrawlerMartial Artist Wig
Geese Howard OutfitWave ?Fatal Fury/King of FightersMii BrawlerGeese Howard Wig
Terry OutfitFatal FuryMii BrawlerTerry Hat
Heihachi Mishima OutfitWave 7TekkenMii BrawlerHeihachi Mishima Wig
Armor King OutfitTekkenMii BrawlerArmor King Mask
Crash OutfitCrash BandicootMii BrawlerCrash Mask
Mr. X`s OutfitResident EvilMii BrawlerMr. X`s Headgear
Renamon OutfitWave 4DigimonMii BrawlerRenamon Mask
Devimon OutfitWave 4DigimonMii BrawlerDevimon Mask
Captain Qwark OutfitWave 9Ratchet & ClankMii BrawlerCaptain Qwark Mask
Mallow OutfitWave 8Super Mario RPGMii BrawlerMallow Mask
Revenant OutfitWave ?DoomMii BrawlerRevenant Mask
Vi OutfitWave ?League of LegendsMii BrawlerVi Wig
Kunio-Kun OutfitWave 5River City RansomMii BrawlerKunio-kun Wig
Bomberman OutfitWave 9BombermanMii BrawlerBomberman Helmet
Rayman OutfitRaymanMii BrawlerRayman Mask
Fallguy OutfitFall GuysMii BrawlerNone
Amingo OutfitWave 2Marvel vs CapcomMii BrawlerAmingo Hat
Alex Stone OutfitWave 3Streets of RageMii BrawlerAlex Stone Wig
Sackboy OutfitWave 9Little Big PlanetMii BrawlerSackboy Mask
Pipo Monkey OutfitWave 9Ape EscapeMii BrawlerPipo Monkey Helmet & Mask
Klonoa OutfitWave 7KlonoaMii BrawlerKlonoa Mask
Wonder Red OutfitWave 5Wonderful 101Mii BrawlerWonder Red Mask and Wig
Scorpion OutfitWave 5Mortal KombatMii BrawlerScorpion Mask
Gex OutfitWave 6GexMii BrawlerGex Mask
Kazuma Kiryu OutfitWave 6YakuzaMii BrawlerKazuma Kiryu Wig
Demifiend OutfitWave 8Shin Megami TenseiMii BrawlerDemifiend Wig
Slenderman OutfitWave 8SlenderMii BrawlerSlenderman Mask
Freddy Fazbear OutfitWave ?Five Nights at Freddy'sMii BrawlerFreddy Mask
Kerrigan OutfitWave ?StarcraftMii BrawlerKerrigan Mask
Paimon OutfitWave ?Genshin ImpactMii BrawlerPaimon Wig
Royal Gentleman OutfitSuper Smash Bros.Mii SwordfighterRoyal Gentlemn Cap
Noble Lady OutfitSuper Smash BrosMii SwordfighterNoble Gentlelady Wig
Neandrathal OutfitSuper Smash Bros.Mii SwordfighterNeanderthal Wig & Beard
Elf CapSuper Smash Bros.Mii SwordfighterElf Cap & Ears
Knight OutfitSuper Smash Bros.Mii SwordfighterKnight Helmet
Coral ArmorSuper Smash Bros.Mii SwordfighterCoral Helmet
Fencer OutfitSuper Smash Bros.Mii SwordifighterFencer Mask
Darknut OutfitThe Legend of ZeldaMii SwordfighterDarknut Helmet
Ness' OutfitEarthboundMii SwordfighterNess` Cap
Lyndis OutfitFire EmblemMii SwordfighterLyndis Wig
Gatekeeper OutfitFire EmblemMii SwordfighterGatekeeper Helmet
Alear OutfitWave ?Fire EmblemMii SwordfighterAlear Wig
Kyle OutfitAstral ChainMii SwordfighterKyle Mask
Raiden OutfitMetal Gear SolidMii SwordfighterRaiden Wig & Helmet
Amy Rose OutfitSonic the HedgehogMii SwordfighterAmy Rose Mask
Aerith Gainsborough OutfitWave 8Final FantasyMii SwodfighterAerith Wig
Joker OutfitPersonaMii SwordfighterJoker Mask & Wig
Veronica OutfitWave ?Dragon QuestMii SwordfighterVeronica Hat & Wig
Aqua OutfitKingdom HeartsMii SwordfighterAqua Wig
Steel Samurai OutfitWave 2Ace AttorneyMii SwordfighterSteel Samurai Mask
Cress Albane OutfitWave 7TalesMii SwordfighterCress Albane Wig
Yuri Lowell OutfitWave 7TalesMii SwordfighterYuri Lowell Wig
Ky Kiske OutfitWave 5Guilty GearMii SwordfighterKy Kisuke Wig
Baiken OutfitWave 5Guilty GearMii SwordfighterBaiken Eyepatch and Wig
Mitsurugi OufitWave ?SoulCaliburMii SwordfighterMitsurugi Wig
Eunie OutfitWave ?Xenoblade ChroniclesMii SwordfighterEunie Wig
Gil's ArmorWave ?Tower of DrugaMii SwordfighterGil's Helmet
Goemon OutfitWave ?Mystical NinjaMii SwordfighterGoemon Wig
Arthur OutfitWave 1Ghouls n GoblinsMii SwordfighterArthur Helmet
Nakoruru OutfitWave 3Samurai ShodownMii SwordfighterNakoruru Bow &Wig
Dragonborn OutfitWave 1The Elder ScrollsMii SwordfighterDragonborn Helmet
Rathalos ArmorWave ?Monster HunterMii SwordfighterRathalos Helmet
Hunter MailWave ?Monster HunterMii SwordfighterHunter Helmet
Shovel Knight OutfitWave 1Shovel KnightMii SwordfighterShovel Knight Helmet"Strike the Earth" Remix
Hat Kid OutfitA Hat in TimeMii SwordfighterHat Kid Cap
The Knight OutfitHollow KnightMii SwordfighterThe Knight Mask
The Kid OutfitWave 1BastionMii SwordfighterTheDragonborn HelmetKid Wig
Vyse OutfitWave 3Skies of ArcadiaMii SwordfighterVyse Wig
Kratos OutfitWave 9God of WarMii SwordfighterKratos Mask & Beard
Valkyrie OutfitWave 7Valkyrie no DensetsuMii SwordfighterValkyrie Helmet & Wig
Ragna the Bloodedge OufitWave 5BlazBlueMii SwordfighterRagna the Bloodedge Wig
Thrall Mii SwordfighterWave ?WarcraftMii SwordfighterThrall Mask
Travis Touchdown OutfitWave ?No More HeroesMii SwordfighterTravis Touchdown Wig
Traveler Outfit (Male/Female)Wave ?Genshin ImpactMii SwordfighterTraveler Wig
Professor Layton OutfitPromotional Mii Costume Season 3 DLCProfessor LaytonMii SwordfighterProfessor Layton Head
Artoras OutfitWave ?Dark SoulsMii SwordfighterArtoras Helmet
Diving Suit OutfitSuper Smash Bros.Mii GunnerDiving Suit Helmet
Gangster OutfitSuper Smash Bros.Mii GunnerGangster Hat
Sylux OutfitMetroidMii GunnerSylux Helmet
Galarian Slowbro OutfitPokemonMii GunnerGalarian Slowbro Cap
Kumatora OutfitEarthbound/MOTHERMii GunnerNone
Marina OutfitSplatoonMii GunnerMarina Wig
Mach Rider OutfitPromotional Mii
Costume
Season 1 DLC
Mach RiderMii GunnerMach Rider Helmet
Tails OutfitSonic the HedgehogMii GunnerTails Cap
Mega Man.EXE OutfitWave 2Mega ManMii GunnerMega Man.EXE Helmet
Barret Wallace OutfitWave 8Final FantasyMii GunnerBarret Wig
Gargomon OutfitWave 4DigimonMii GunnerGargomon Mask
Buck Bumble OutfitBuck BumbleMii GunnerBuck Bumble Mask
Gemini Sunrise OutfitWave 3Sakura WarsMii GunnerGemini Sunrise Hat & Wig
Sans OutfitWave ?UndertaleMii GunnerSans MaskHopes and Dreams
Cuphead OutfitWave ?CupheadMii GunnerCuphead MaskThreatenin' Zeppelin
Vault Boy OutfitWave 6FalloutMii GunnerVault Boy Mask
Earthworm Jim OutfitWave 3Earthworm JimMii GunnerEarthworm Jim Head"New Junk City" Remix
Master Chief OutfitWave 6HaloMii GunnerMaster Chief Helmet
Duke Nukem OutfitWave 8Duke NukemMii GunnerDuke Nukem Wig and Sunglasses
Quote OutfitWave ?Cave StoryMii GunnerQuote Hat
Heavy OutfitWave ?Team Fortress 2Mii GunnerNone
Commander Shepard OutfitWave ?Mass EffectMii GunnerCommander Shepard Wig
CEO OutfitTwitterAll classesNone
Larry the Bird OutfitTwitterAll classesNone

gamemodes.png

What kind of game would Smash Infinite be without fun modes to play in! Classic Mode, Versus, Mode, and All-Star Mode is sure to return but wel also got other modes like the dungeon crawler\rogue-esque Smash Dungeon, the adventure mode Wishing Stars, as well as fun quick to play modes like King odf the Hill. Foot Race, and more! This also includes a social space called SmashSpace.

:starman:Wishing Stars :starman:
NameGradeIngredientsObtainEffect
Fancy Footwork:starman::starman:2 Green Shards, 2 Red ShardsPerform over 50 successful kicking moves during gameplayGives a +12 attack damage boost to all kicking moves while also increase the attack speed by 2.5x. Increases walking/running movement like .4% after each successful kicking attack.
Install Star:starman::starman::starman::starman:4 of each shardSuccessfully Land a Final Smash while over 100%All stats are increased by 5
Iajustu Star:starman::starman::starman:4 Purple Wish Shards + 2 Black WIshing ShardsDeal 100% total damage with any item.Any item you hold in your hand will not deal damage, but your opponents gain "Iaijutsu" stacks. Drop the item to unleash the damage all at once, with the most recent hit being your knockback.
Thorn Star:starman::starman:Blue Shards (x3), Red Shard (x1)Do a perfect shield 5 times.Your shield deals damage when touched.
Vampyric Star:starman::starman::starman:Black Shard (3) Pink Shard (1) White Shard (1)You get healed everytime you defeat an enemy, the more dangerous the enemy the more you get healed.Do a No Damage Run against Dracula, if Dracula isnt in the game then defeat a 1 on 2 battle with a level 7 Simon and Ricther
Assist Me!:starman::starman::starman:2 Purple Wish Shards, 1 Black Wish Shard, and 1 White Wish ShardDefeat a total of ten Assist Trophies during a match.Summon a random Assist Trophy on your side.
SmashSpace Items
NameSeriesTypeDescription
Toadstool ChairSuper Mario Bros.Furniture
Zelda's ThroneLegend of ZeldaFurniture
DK's HammockDonkey KongFurniture
Froggy ChairAnimal CrossingFurniture
Picnic TableAnimal CrossingFurniture
Lawn ChairPlants vs ZombiesFurniture
Nueron BenchAstral ChainFurniture
Slime BeanbagDragon QuestFurniture
Japanese CushionMysterious Castle MurasameFurniture
KeystoneTouhou ProjectFurniture
Pool of StyxHadesFurniture
Attorney's TableAce AttorneyFurniture
Race Car Bed
(Developer's Choice-themed DLC)
Smash Bros.Funriture
Desk Replica
(Developer's Choice-themed DLC)
Smash Bros.Furniture
Ganon's OrganLegend of ZeldaInstrument
Wind WakerLegend of ZeldaInstrument
BongosDonkey KongInstrument
Poke FlutePokemonInstrument
Note BlockMinecraftInstrument
Merlin's Trumpet Touhou ProjectInstrument
Psychadelic WallpaperEarthboundWallpaper
Castle WallpaperFire EmblemWallpaper
World WallpaperSuper Mario Bros.Wallpaper
Bowser's Castle WallpaperSuper Mario Bros.Wallpaper
Alrest Skies WallpaperXenobladeWallpaper
Brick WallpaperAnimal CrossingWallpaper
Dojo WallpaperTekkenWallpaper
Grand Stands WallpaperPunch-Out!!Wallpaper
Fourside WallpaperEarthboundWallpaper
Catherdral WallpaperBayonettaWallpaper
Hades WallpaperHadesWallpaper
Cybernetic WallpaperDigimonWallaper
Space Station WallpaperRatchet & ClankWallpaper
Soul Edge WallpaperSoulCaliburWallpaper
Tomb WallpaperTomb RaiderWallpaper
Ocean Wallpaper
(Summer-themed Wallpaper)
Smash Bros.Wallpaper
Tropical Wallpaper
(Summer-themed Wallpaper)
Smash Bros.Wallpaper
Retro Cafe Wallpaper
(Beverage-themed DLC)
Smash Bros.Wallpaper
Japanese Paper Wall
(Japanese-themed DLC)
Smash Bros.Wallpaper
Castle FlooringDragon QuestFlooring
Galaxy FlooringSuper Mario Bros.Flooring
Plank Boxes FlooringMinecraftFlooring
Poke Center FlooringPokemonFlooring
Treehouse FlooringDonkey KongFlooring
Rock FlooringLegend of ZeldaFlooring
Tatami Mat FlooringMysterious Castle MurasameFlooring
Steel Grate FlooringFinal FantasyFlooring
Boxing Ring FlooringPunch-Out!!Flooring
Forest Floor FlooringPikminFlooring
Inferno Cobbled FlooringHadesFlooring
Scattered Paper FlooringAce AttorneyFlooring
Space Station FlooringRatchet & ClankFlooring
Soul Edge FlooringSoulCaliburFlooring
Tomb FlooringTomb RaiderFlooring
Sand Flooring
(Summer-themed Flooring)
Smash Bros.Flooring
Retro Cafe Tile Flooring
(Beverage-themed DLC)
Smash Bros.Flooring
Delfino PlazaSuper Mario Bros.Model
Peach's CastleSuper Mario Bros.Model
Donkey Kong IslandDonkey KongModel
Hyrule CastleLegend of ZeldaModel
Pirate ShipLegend of ZeldaModel
Samus GunshipMetroidModel
Fountain of DreamsKirbyModel
Great FoxStar FoxModel
Happy TeeYoshiModel
Pokemon StadiumPokemonModel
Prism TowerPokemonModel
OnettEarthboundModel
Blue FalconF-ZeroModel
Arena FeroxFire EmblemModel
SkyworldKid IcaurusModel
Green Hill ZoneSonic the HedgehogModel
Wily's CastleMega ManModel
Wii Fit StudioWii FitModel
Boxing RingPunch-Out!!Model
Duck HuntDuck HuntModel
Gaur PlainsXenobladeModel
Suzaku CastleStreet FighterModel
MidgardFinal FantasyModel
Moray TowersSplatoonModel
Dracula's CastleCastlevaniaModel
Yggdrassil's AltarDragon QuestModel
Spiral MountainBanjo-KazooieModel
King of Fighter's StadiumFatal Fury/King of FightersModel
Spring StadiumARMSModel
Minecraft WorldMinecraftModel
Mishima DojoTekkenModel
Venus LighthouseGolden SunModel
Beaumonde BoutiqueStyle SavvyModel
Raccoon CityResident EvilModel
Hakurei ShrineTouhou ProjectModel
Astral PlainAstral ChainModel
HousePlants vs ZombiesModel
Koubu FigurineSakura WarsModel
Imperial Grand Theatre Sakura WarsModel
Tower of SalvationTalesModel
The May ShipGuilty GearModel
Replica of Croft ManorTomb RaiderModel
Exor and Bowser's CastleSuper Mario RPGModel
Nexus PedastalLeague of LegendsModel
Ouroboros AnimatronicXenoblade ChroniclesModel
Kinkakuji
(Japanese-themed DLC)
Smash Bros.Model
Indoor Bobsled Track
(Winter-themed DLC)
Smash Bros.Model
Snowman
(Winter-themed DLC)
Smash Bros.Model
Dinosaur Toy
(Animal-themed DLC)
Smash Bros.Model
SunflowerEarthboundDecorative
Leblanc HouseplantPersonaDecorative
Deku BabaLegend of ZeldaDecorative
Golden RoseAnimal CrossingDecorative
BambooMinecraftDecorative
Goddess StatueLegend of ZeldaDecorative
Tanooki StatueSuper Mario Bros.Decorative
Milodic StatuePokemonDecorative
Dionysus Wall ScrollHadesDecorative
Aphrodite PosterHadesDecorative
Skelly StatueHadesDecorative
Fey Clan UrnAce AttorneyDecorative
CharleyAce AttorneyDecorative
The ThinkerAce AttorneyDecorative
Peanut StatueSakura WarsDecorative
Arataka ReplicaSakura WarsDecorative
Captain Qwark StatueRatchet & ClankDecorative
Wanted PosterTalesDecorative
Genis' KendamaTalesDecorative
Bedman's BedGuilty GearDecorative
Antlantean ScionTomb RaiderDecorative
Archer StatueTomb RaiderDecorative
SeraphTomb RaiderDecorative
Smithy StatueSuper Mario RPGDecorative
Yoshi's CookieSuper Mario RPGDecorative
Replica of Soul EdgeSoulCaliburDecorative
Adrian-In-A-BottleSoulCaliburDecorative
Torii GateSoulCaliburDecorative
SlingshotAngry BirdsDecorative
The EggsAngry BirdsDecorative
Youmumu's GhostbladeLeague of LegendsDecorative
League of Legends PlaqueLegend of LegendsDecorative
Snow Cone Machine
(Summer-themed DLC)
Smash BrosDecorative
Beach Umbrella
(Summer-themed DLC)
Smash Bros.Decorative
Beach Towel
(Summer-themed DLC)
Smash Bros.Decorative
Gigantic Bottle
(Beverage-themed DLC)
Smash Bros.Decorative
Kanabo
(Japanese-themed DLC)
Smash Bros.Decorative
Christmas Tree
(Winter-themed DLC)
Smash Bros.Decorative
Misletoe
(Winter-themed DLC)
Smash Bros.Decorative
Manorah
(Winter-themed DLC)
Smash Bros.Decorative
Cat Tower
(Animal-themed DLC)
Smash Bros.Decorative
Tiger Rug
(Animal-themed DLC)
Smash Bros.Decorative
Optical Illusion Rug
(Developer's Choice-themed DLC)
Smash Bros.Decorative
Wall Stars
(Developer's Choice-themed DLC)
Smash Bros.Decorative
Fukura Painting
(Animal-themed DLC)
Smash Bros.Decorative
Gravy Cow
(Animal-themed DLC)
Smash Bros.Decorative
CosmogPokemonDoll
MagikarpPokemonDoll
Substitute DollPokemonDoll
DunsparcePokemonDoll
WimpodPokemonDoll
MareepPokemonDoll
Chao DollSonic the HedgehogDoll
ChocoboFinal FantasyDoll
Cerberus PlushieHadesDoll
Blue BadgerAce AttorneyDoll
Jean-PaulSakura WarsDoll
Ratchet DollRatchet & ClankDoll
Kit DollRatcher & ClankDoll
Narshe PlushieTalesDoll
Geno DollMarioDoll
Bubbles DollAngry BirdsDoll
Poro DollLeague of LegendsDoll
Mochi Doll
(Japanese-themed DLC)
Smash Bros.Doll
Teddy Bear
(Animal-themed DLC)
Smash Bros.Doll
GoombaSuper Mario Bros.Pet
Goomba (Underground)Super Mario Bros.Pet
NaviLegend of ZeldaPet
PikminPikminPet
SouffleKid IcarusPet
DjinnGolden SunPet
ChaoSonic the HedgehogPet
MoogleFinal FantasyPet
WolfMinecraftPet
Meow-WowKingdom HeartsPet
FelyneMonster HunterPet
PollyAce AttorneyPet
Terriermon DigimonPet
Tanuki
(Japanese-themed DLC)
Smash Bros.Pet
Expansion PackNintendoSpecial
Planting PotPlants vs ZombiesSpecial
BlockMinecraftSpecial
Spell CardTouhou ProjectSpecial
Chozo StatueMetroidSpecial
Charon's HourglassHadesSpecial
DigideviceDigimonSpecial
OmniwrenchRatchet & ClankSpecial
Gadgetron TerminalRatchet & ClankSpecial
All-DivideTalesSpecial
Junk Yard DogGuilty GearSpecial
Faustinian DoorGuilty GearSpecial
Star PiecesSuper Mario RPGSpecial
Save BoxSuper Mario RPGSpecial
Bad Piggy Punching BagAngry BirdsSpecial
Suikawari
(Summer-themed DLC)
Smash Bros.Special
Soda Machine
(Beverage-themed DLC)
Smash Bros.Special
Sesshouseki
(Japanese-themed DLC)
Smash Bros.Special
Temple Bell
(Japanese-themed DLC)
Smash Bros,Special
Jar of Fireflies
(Ambient-themed DLC)
Smash Bros.Special
Star Projector
(Ambient-themed DLC)
Smash Bros.Special
Fog Machine
(Ambient-themed DLC)
Smash Bros.Special
Smash Ballot Box
(Developer's Choice-themed DLC)
Smash Bros.Special
Artwork
Please note that Artwork is both SmashSpace content but also can viewed in an off-mode viewer.
PictureNameFranchiseSubmitted by:
Is There No Escape?Hades GolisoPower GolisoPower
Happy HalloweenHades Champion of Hyrule Champion of Hyrule
Versus the Bone HydraHades Venus of the Desert Bloom Venus of the Desert Bloom
Order in the Court!Ace Attorney Champion of Hyrule Champion of Hyrule
Courtroom ChaosAce Attorney Janx_uwu Janx_uwu
Happy PeopleAce Attorney cashregister9 cashregister9
ChroniclesAce Attorney Champion of Hyrule Champion of Hyrule
Attack! Imperial Flower Division!Sakura Wars GolisoPower GolisoPower
Leading LadiesSakura Wars Capybara Gaming Capybara Gaming
Tokyo Combat Revue Flower DivisionSakura Wars cashregister9 cashregister9
Onward!Digimon Janx_uwu Janx_uwu
Agumon-volutionDigimon Commander_Alph Commander_Alph
Digimon AdventuresDigimon Venus of the Desert Bloom Venus of the Desert Bloom
Forest GuideRatchet & Clank Janx_uwu Janx_uwu
Lombax WarriorsRatchet & Clank Venus of the Desert Bloom Venus of the Desert Bloom
Tale of the Legendary DuoRatchet & Clank ivanlerma ivanlerma
Dawn of a New WorldTales of Symphonia
OnwardTales of Symphonia
Best FriendsTales of Symphonia
The RevelatorGuilty Gear
No MercyGuilty Gear
RivalsGuilty Gear
Game Modes
NameTypeDescription
Classic ModeSingle, Co-op
All-Star ModeSingle, Co-Op
Smash DungeonSingle. Co-Op, Versus
Wishing Stars Adventure ModeSingle, Co-Op
King of the HillSingle, Versus
Foot RaceSingle, Versus
Treasure TussleSingle, Co-Op, Versus
Boss RaidSingle, Co-Op
Stage EditorSingle
Break the TargetsSingle, Co-Op
Board the PlatformsSingle
Home-Run ContestSingle, Co-Op
Overkill Smash - DLCSingle, Co-Op
Masterpiece
GameSeriesSystemDescription
Super Smash Bros. 64Super Smash Bros.Nintendo 64
Super Mario 64Super Mario Bros.Nintendo 64
Super Mario KartSuper Mario Bros.Super Nintendo
Wario LandWarioGame Boy
Pokemon Red & BluePokemonGame Boy
Fire Emblem: Genealogies of WarFire EmblemSuper Nintendo
Rhythm HeavenRhythm HeavenNintendo DS
Mega Man 3Mega ManNinendo System
Pac-LandPac-ManArcade
Castlevania Rondo of BloodCastlevaniaPC Engine CD
Revelations PersonaPersonaPlaystation
Dragon Quest IIIDragon QuestSuper Nintendo
Banjo-KazooieBanjo-KazooieNintendo 64
Fatal Fury SpecialFatal FuryNeo Geo CD
Sakura WarsSakura WarsSega Saturn
Tomb RaiderTomb RaiderPlaystation
Super Mario Super Mario RPGSuper Nintendo
Angry BirdsAngry BirdsAndroid iOS

spirits.png

Spirits ar here to stay and we revamped and enhanced how Spirits are done! We have tons of them from a wide range of franchisea and universes - some of them entirely new to Smash! Take a look at the links below to read more about each one!
ARMS
Master Class Spirits
Spirit NameSeriesDescription/UseSpirit Battle

Dr. Oak
PokemonType: Other
Function:
Oak's facility, "the Laboratory" is meant to assist with the process of evolving your support spirits. Similar to the Dojo facility, evolvable support spirits can be left here, and their meter will fill up automatically over time.
Facility: Laboratory
Music:Professor Oak's Lab Theme (Pokemon Stadium)
  • Puppet Fighter: :ultrobin:(Blue Male), :ultsquirtle:(Default), :ultivysaur:(Default), :ultcharizard:(Default)
  • Stage: Saffron City
  • Music Track: Road to Viridian City
  • Match: Stock (1)
  • Conditions:
    • Certain items will appear in large number (Poké Ball)
Gatekeeper Trio
Rhythm HeavenType: Merchant
Function: This shopkeeper spirit allows players to purchase content introduced only in Infinite including Spirits, Music, Mii Costumes, and anything else we may throw in post-submission.
Facility: The Cafe
Music:Cafe Theme
Puppet Fighter::ultincineroar:, :ultfalco:, :ultpacman:
Stage: Night Walk
Music:Café Theme
Rules: Stock
Conditions:

  • Defeat all of the opponents.
  • KO the red opponent first
  • Blue opponent second
  • Yellow opponent last

Wandering Trader
MinecraftType: Merchant
Function: Nomadic Style
As a reference to the Wandering Trader's tactics when dealing with enemy mobs, spirits taught the Nomadic Style will see an increase in speed but a slight decrease in jump height and a colossal decrease in attack. There is a circumvention for the lowered attack however. The damage of thrown items or weapon items will be increased to a titanic degree that they will overpower the attack decrease and become insanely strong. The focus will be on using items to fight your opponent instead of fighting with your character's moveset.
Facility: Dojo
Music:
Sweden
  • Puppet Fighter: Steve
  • Stage: Minecraft World (Plains)
  • Music Track: Sweden
  • Match: Stamina (80HP)
  • Conditions:
    • Stamina Battle.
    • The enemy is invisible when the enemy's at high damage.
    • Only certain Pokemon will appear from Pokeballs (Gogoat).

Zenkichi Hasegawa
PersonaType: Dojo
Function: Officer Style
Teach spirits "Officer Style" - Major increase to grabs, specials, and defense, but a major decrease to speed and non-grab, non-special attacks.
Facility: Dojo
Music: Counter Strike - Persona 5 Strikers
Puppet Fighter: :ultsephiroth:; :ultganondorf:(Gray Alt); Two tiny :ultwolf:
Music: Counter Strike - Persona 5 Strikers
Stage: Momentos
Conditions:

  • The enemy's neutral special has increased power
  • Defeat the main fighter to win
  • The enemy starts the battle with a Steel Diver
  • The enemy constantly takes minor damage
  • The enemy heals when it damages you.

Tung Fu Rue
Fatal FuryType: Dojo
Function: Hakkyokuseiken Style
Attack Power and Special Attack Power would be boosted, but both Jump and Item Attack would see a decrease in power. This way you'd have the benefit of having both upped energy and feel a mastery in your offensive moves, which the Hakkyokuseiken is all about! But you'll be forced to follow the rules of a Traditional Fighting game a bit.
Facility: Dojo
Music: PASTA
  • Puppet Fighter: :ultganondorf:[White]
  • Stage: Shopping District [Omega]
  • Music Track: Pasta - FATAL FURY 2
  • Match: Stamina (160HP)
  • Conditions:
    • Stamina Battle.
    • The enemy's Tilt Attacks have increased power.
    • All fighters have reduced jump power.

Kangaroon
Mole ManiaType: Dojo
Function: Kangaroo Style
Makes you the ultimate air sparrer, and gives you a mighty pouch to boot. However, boxing kangaroos have pretty skinny tails; aren't ones for projectiles (other than apples) and don't really walk.
Facility: Dojo
Music: Beach - Mole Mania

Maximillian Howard
Astral ChainType: Dojo
Function: Legionis Style
he will train spirits in the Legionis Style. The Legionis Style involves ground-based combat, in which high amounts of speed and precision is required. As such, this style will have the spirit's Move Speed, Defense, and Grab Range increased, but have Jump Height, Fall Speed, and Weight decreased.
Facility: Dojo
Music: Force Task Neuron
  • Puppet Fighter: :ultike: (Sigurd Alt), :ultganondorf:(Blue Alt)
  • Stage: Astral Plane
  • Music Track: Astral Plane (Combat Phase)
  • Match: Stock
  • Conditions:
    • The enemy starts the battle with a Gravity Tether
    • The enemy has super armor when charging Smash Attacks.
    • The enemy Shields often (Ganondorf)
    • The enemy prefers Smash Attacks (Ganondorf)

Cubot & Orbot
Sonic the HedgehogType: Other
Function: This facility will take in up to two primary spirits. After about an hour, the spirits will be equipped with a "lackey", which means any time you enter a battle with the primary spirit equipped, you gain a random ally. The ally in question has low health/high percent depending on the match, and is only a level 7 CPU. Also, the primary spirit's dojo style is wiped, if they have one, when a lackey is equipped.
Facility: Death Egg
Music: Death Egg Robot
  • Puppet Fighter: red :ultkirby:, tennis outfit :ultsteve:
  • Stage: Whatever we decide Eggman's stage to be
  • Music Track: Death Egg Robot (New Remix)
  • Match: Stock
  • Conditions
    • Gravity is reduced

Briggs
Golden SunType: Other
Function: In order to craft these precious Wishing Stars, you will need some shards. But... what if you don't feel like collecting shards the hard way? What if you could just... get them another way? This is where Mr. Briggs of Champa comes in - he'll go plundering with his crew to get you what you need. For a price of course. So to reiterate, for a certain price and perhaps some additions to his crew, Briggs will go searching for some Wish Shards for you, the player. Certain types of spirits will affect the chance that Briggs will return with specific type of Shard. As a little bonus, spirits who work as crewmates will gain a little bit of experience, though not as much as Doc Louis's gym. These explorations will take around 30 minutes (for less pay and lower ranking spirits) to an hour (higher pay and high ranking spirits) to complete. Here's a tentative list of what Briggs will accept - the greater pay and the better the crewmate, the likelier he will come back with the spoils.


Pay / SpiritBriggs' Plundering Chance
100G5% of at least one Shard
250G12.5% of at least one Shard
400G25% of at least one Shard
1000G50% of at least one Shard
1250G75% of at least one Shard
1800G100% of at least two Shards
Attack SpiritsHigher chance of Red and Purple Wish Shards
Shield SpiritsHigher chance of Blue and White Wish Shards
Grab SpiritsHigher chance of Green and Pink Wish Shards
Neutral SpiritsHigher chance of Yellow and Black Wish Shards
No spirit givenMaximum of 2 Shards
Novice spirit givenMaximum of 3 Shards
Advanced spirit givenMaximum of 4 Shards
Ace spirit givenMaximum of 5 Shards
Legend spirit givenMaximum of 6 Shards

Facility: Pirate Ship
Music: Fighting On Deck

  • Puppet Fighter: :ultsnake:(Purple), Impa (Green) x2
  • Stage: Pirate Ship
  • Music Track: Fighting on Deck
  • Match: Stock
  • Conditions:
    • The enemy starts the battle with a Killing Edge [Snake]
    • The enemy is easily distracted by items
    • Health Recovery [Snake]

Shopkeeper Magalor
KirbyType: Merchant
Function: Shopkeeper Magolor is a merchant who sells you pieces of armor and weapon for four different classes, with the later tiers of equipment referencing other Kirby character in some really nice pieces of fan service. While in canon he sells weapons and armor, the Sheldon spirit already sells weapons, and the Anna spirit already sells armored spirits, so Shopkeeper Magolor will have to go own a different avenue. As shown in his spirit art, Shopkeeper Magolor also has an association with gem apples, even being referenced in Magolor's dream friend moveset in Kirby Star Allies. To expand on this connection, Shopkeeper Magolor will sell fruit and gem related spirits. The list of spirits available at his shoppe include (but not necessarily limited to):

  • Xananab
  • Diancie
  • Piantas
  • Super Happy Tree
  • Whispy Woods
  • Appletun
  • Bonus Fruit
  • Double Cherry
  • Core Crystal
  • Golden Eggs
  • Winged Strawberry
  • King Boo (Luigi's Mansion)
  • Crystal Man
  • Warden
  • Sableye
  • Uncle Rupee
  • Krystal
  • Shion Uzuki
  • Gebel
  • Team Kirby
Facility: Lor Starcutter
Music: Max Happy Town!!

  • Puppet Fighter: :ultrobin:(Green), :ultkirby:x 3 (Red)
  • Stage: Green Greens
  • Music Track: Floral Fields
  • Match: Stock (1)
  • Conditions:
    • Defeat the main fighter to win
    • Certain items will appear in large numbers (apple)
    • The enemy is easily distracted by items.

**** Gumshoe
Part of the "A Smashing Turnabout Bundle"
Ace AttorneyType: Explore
Function: Takes 14 hours to complete; typical brings up collectables such as Mii costumes, SmashSpace items, music, and an occasional Spirit
Facility: Urban
Music: Gumshoe-I can do it when it counts, pal
  • Puppet Fighter: :ultkazuya:(suit Alt)
  • Stage: New Donk City
  • Match: Stock (1)
  • Music: Gumshoe-I can do it when it counts, pal
  • Conditions:
    • Items spawn sporadically
    • Opponent produces more damage with items
    • Opponent can’t lose an item when damaged

Baiken
Apart of the "Smell of the Game Bundle" DLC
Guilty GearType: Dojo
Function: Counter Style
Increase counter moves and parries, decrease movement and speed.
Facility: Temple
Music: Rokumon

  • Puppet Fighter: Takamaru (Pink)
  • Stage: Suzaku's Castle (Omega)
  • Match: Stamina (250%)
  • Music Momentary Life
  • Conditions:
    • The enemy favors down special
    • The enemy has a Gravity Tether.

Cervantes
Apart of the "A Stage of History"
SoulCaliburType: Explore
Function: Takes 18 hours to complete; typically brings up collectables such asGold, Exp, as well as ocassionally Spirits. There is a chance of double Gold or EXP.
Facility: The Sea
Music:Braverly Folk Song
Puppet Fighter: :ultrobin:(Blue)
Stage: Pirate Ship (Battlefield)
Music Track: History Unfolds
Match: Stock Battle (1 stock)
Rules:

  • The enemy has increased sword attack
  • Robin's books have no use limit
Guernica Vandham
Aprt of the " " Bundle
XenobladeType: Dojo
Function: Ouroboros Style ( Doubles the hit count in your attacks, but majorly reduces offense.)
Facility: Outpost
Music:
Where We Belong

music.png

Smash is famous for its library of music and Smash Infinite is no exception! We have tons of them which range from bangers to more quieter pieces from a wide range of franchises and universes!
All Music from Smash Ultimate is included in the Launch Version.

Super Mario Bros. - 29

Donkey Kong - 16


The Legend of Zelda - 16


Metroid - 14


Kirby - 19

Yoshi - 10

WarioWare/Wario Land - 9

Pokemon - 15/17
10. Battle! (Chairman Rose) (Pokémon Sword & Shield)

Pokémon Mystery Dungeon - 5


Star Fox - 8

1. Eladard (Star Fox 2) (Remix)

F-Zero - 6

Earthbound/MOTHER - 5/6

Ice Climber - 2

Game & Watch - 2

Fire Emblem - 14

Kid Icarus - 7


Pikmin - 5

R.O.B. - 2

Animal Crossing - 13


Wii Fit - 5

Punch-Out!! - 4

Xenoblade Chronicles - 13

Duck Hunt - 2

Splatoon - 14

ARMS - 6
2. Staff Credits (ARMS) (Remix)

Golden Sun - 18

Style Savvy -18
9. Girls Be Ambitious (JP) / Fight for Your Style (EN) (Style Savvy: Styling Star)
10. Maria (Style Savvy: Styling Star) Japanese and English
15. Radiance (JP) / (EN) (Style Savvy: Styling Star)
17. Flying Shining Day (JP) / (EN) (Style Savvy: Styling Star)

Rhythm Heaven 19
1. Nightwalk (Rhythm Heaven Fever) Japanese and English
2. I Feel Fine (Rhythm Heaven Fever) Japanese & English


The Mysterious Murasame Castle - 8

Astral Chain - 23/23
18. Dark Hero (Male Version) / (Female Version) (Astral Chain)

Advance Wars - 14


Metal Gear - 9


Sonic the Hedgehog - 20


Mega Man - 8

PAC-MAN - 10


Street Fighter - 10


Final Fantasy - 8

Bayonetta - 6

Castlevania - 9

Persona - 13
13. Counter Strike (Persona 5 Strikers) OTW
Dragon Quest - 11

Banjo-Kazooie - 9


Fatal Fury (and Art of Fighting) - 15


The King of Fighters (and SNK) - 30

12. Wild Party - KOF 2000 (remix)

Minecraft - 11


Tekken - 6


Kingdom Hearts - 10


Crash Bandicoot - 18


Resident Evil 26
  1. The One Who Survives (Resident Evil) (New Remix)
  2. Save Theme - RE (2002)
  3. Escape From Laboratory (Resident Evil 2) (New Remix)
  4. The Third Malformation of G (Resident Evil 2)
  5. The Opening - RE3 (New Remix)
  6. Unstoppable Nemesis (Resident Evil 3) (New Remix)
  7. A Moment of Relief (Resident Evil CODE: Veronica)
  8. Berceuse / Piano Roll (Resident Evil CODE: Veronica) (New Remix)
  9. The Code is Veronica (Resident Evil CODE: Veronica) (New Remix)
  10. Uneasiness (Resident Evil 0)
  11. Extermination (Resident Evil Outbreak)
  12. The Drive ~ First Contact (Resident Evil 4)
  13. Back Up (Resident Evil 4)
  14. The Mercenaries ~ Leon (Resident Evil 4)
  15. The Mercenaries ~ Ada (Resident Evil 4)
  16. Sad but True (Resident Evil 5)
  17. Winds of Madness (Resident Evil 5) (New Remix)
  18. Deep Ambition (Resident Evil 5)
  19. Assault Fire (Resident Evil 5)
  20. Rust in Summer 2008 (Resident Evil 5)
  21. “O vendetta di Dio” (Resident Evil: Revelations)
  22. Revelations (Resident Evil: Revelations)
  23. Haos/Apostle of Chaos (Resident Evil 6)
  24. Ustanak Immolated/No More Holding Back (Resident Evil 6)
  25. Garage (Resident Evil 7)
  26. Resistance (Resident Evil: Resistance)
Touhou Project 38
  1. Eternal Shrine Maiden (Highly Responsive to Prayers) (New Remix)
  2. Theme of Eastern Story (Touhou: Highly Responsive to Prayers) (New Remix)
  3. Swordsman of a Distant Star (Touhou: Highly Responsive to Prayers) (New Remix)
  4. Bad Apple!! (Touhou 4: Lotus Land Story) (New Remix)
  5. Sleeping Terror (Touhou 4: Lotus Land Story) (New Remix)
  6. Beloved Tomboyish Girl (Touhou 6: Embodiment of Scarlet Devil)
  7. Shanghai Alice of Meiji 17 (Touhou 6: Embodiment of Scarlet Devil) (New Remix)
  8. Locked Girl ~ Girl's Secret Room (Touhou 10.5: Scarlet Weather Rhapsody)
  9. Septette for the Dead Princess (Touhou 10.5: Scarlet Weather Rhapsody)
  10. UN Owen Was Her? (Touhou 6: Embodiment of Scarlet Devil)
  11. Doll Judgement ~ the Girl Who Played with People's Shapes (Touhou 7: Perfect Cherry Blossom)
  12. Hiroari Shoots a Strange Bird ~ Till When? (Touhou 7: Perfect Cherry Blossom) (New Remix)
  13. Necrofantasia (Touhou 7: Perfect Cherry Blossom)
  14. Stirring an Autumn Moon ~ Mooned Insect (Touhou 8: Imperishable Night)
  15. Retribution for the Eternal Night ~ Imperishable Night (Touhou 8: Imperishable Night)
  16. Deaf to all but the Song ~ Flower Mix (Touhou 9: Phantasmagoria of Flower View)
  17. Eastern Judgement of the Sixtieth Year ~ Fate of Sixty Years (Touhou 9: Phantasmagoria of Flower View)
  18. Maiden’s Capriccio ~ Dream Battle (Touhou 8: Imperishable Night) (New Remix)
  19. Love-Colored Master Spark (Touhou 8: Imperishable Night) (New Remix)
  20. Lunatic Eyes ~ Invisible Moon (Touhou 15.5: Antinomy of Common Flowers)
  21. Gensokyo Millenium ~ History of the Moon (Touhou 8: Imperishable Night)
  22. Flight of the Bamboo Cutter ~ Lunatic Princess (Touhou 8: Imperishable Night) (New Remix)
  23. Flowering Night (Touhou 9: Phantasmogoria of Flower View (New Remix)
  24. Wind God Girl (Touhou 9: Phantasmagoria of Flower View)
  25. Because Princess Inada Is Scolding Me (Touhou 10: Mountain of Faith) (New Remix)
  26. The Gensokyo the Gods Loved (Touhou 10: Mountain of Faith)
  27. Faith is for the Transient People (Touhou 10: Mountain of Faith) (New Remix)
  28. The Ground's Color is Yellow (Touhou 10.5: Scarlet Weather Rhapsody)
  29. Lullaby of Deserted Hell (Touhou 11: Subterranean Animism) (New Remix)
  30. Solar Sect of Mystic Wisdom ~ Nuclear Fusion (Touhou 11: Subterranean Animism) (New Remix)
  31. Illusionary Joururi (Touhou 14: Double Dealing Character) (New Remix)
  32. Reverse Ideology (Touhou 14: Double Dealing Character)
  33. Inchlings of the Shining Needle ~ Little Princess (Touhou 14.5: Urban Legend in Limbo)
  34. Secret God Matara ~ Hidden Star in All Seasons (Touhou 16)
  35. Jelly Stone (Touhou 17: Wily Beast and Weakest Creature)
  36. Where is that Bustling Marketplace ~ Immemorial Marketeers (Touhou 18: Unconnected Marketeers)
  37. U.N. Owen was her?(Remix)~Touhou 6: Embodiment of Scarlet Devil
  38. Catastrophe in Bhava-Agra ~ Wonderful Heaven (Touhou 10.5: Scarlet Weather Rhapsody)
Plants vs. Zombies 15
11. Crazy Dave’s Theme / Choose Your Seeds (Plants vs. Zombies)

Other - 79

1. Tetris Type C (Tetris (Game Boy)) [6 June 1984]
2. Neo Land - Kururin Paradise [9 December 2002]
3. "You're Fired!" (SimCity) (New Remix) [April 26 1991]
4. Bubsy in Claws Encounters of the Furred Kind Medley (Bubsy in: Claws Encounters of the Furred Kind) (New Remix) [May 1993]
5. Beach (Plok) [September 1993]
6. Slideshow (Fun) - Wii Photo Channel [19 November 2006]
7. Old Enemy - Akira Volume (Shin Megami Tensei If…) [October 19th 1994]
(Unless Persona counts as ALL of SMT, I’m leaving this here)
8. Game Boy Medley - Game Boy
9. Lion's Theme (Panel de Pon) [October 27 1995]
10. KickChop's Theme (Panel de Pon) [October 27 1995]
11. Beach (Mole Mania) [July 21 1996]
12. Moon Man's Fandango - Galactic Pinball [21 July 1995]
13. Work Your Body (1080° Snowboarding) [February 28 1998]
14. Redial (Bomberman Hero) [30 April 1998]
15. Title Theme (Buck Bumble) [18 November 1998]
16. Cave (Kuru Kuru Kururin) [21 March 2001]
17. Anthology - Activision Anthology (GBA)
18. Windy and Co.(Conker's Bad Fur Day)[March 5th. 2001]
19. Breakthrough (Klonoa Heroes) [13 December 2002]
20. Mischievous Robot (Cave Story) [December 20 2004]
21. Data Transfer - System Transfer Channel (Wii/Wii U)
22. Art Museum (Drill Dozer) [September 22 2005]
23. Dyna Blade (Fossil Fighters) (New Remix) [April 17 2008]
24. Peter Piper Syndrome - English Training
25. Discipline (Sin & Punishment: Star Successor) [October 29 2009]
26. Dolphin/Whale Training Show (Endless Ocean: Blue World) [September 17 2009]
27. General Trista (The Last Story) [January 27 2011]
28. Main Theme (Pandora's Tower) [May 26 2011]
29. System [MENU] (Sin & Punishment: Star Successor) [October 29 2009]
30. Main Theme (Tetris 99) [February 13 2019]
31. Wii Menu Ambience - Wii
32. Title Theme (Skylanders Spyro's Adventure) [October 12 2011]
33. Land of the Livid Dead (Chasing a Dream) (Rayman Origins) [November 15 2011]
34. Grock Grief! (Dillon's Rolling Western: The Last Ranger) [April 11 2013]
35. Wandering Monsters (Dillon's Rolling Western: The Last Ranger) [April 11 2013]
(I don’t really know the policy about changing songs, but can I change Wandering Monsters with A Land of No Tomorrow from the same game - CheeseAnton, the same person who posted Wandering Monsters... and all the other DRW songs)
36. Rayman Legends Main Theme (Rayman Legends) [August 29 2013]
37. Strike the Earth! (Shovel Knight) [June 26 2014]
38. A Cool Reception (Shovel Knight) [June 26 2014]
39. The Betrayer (Enchantress Final Form) (Shovel Knight) [June 26 2014]
40. Code Name: T.H.E.M.E. (Code Name: S.T.E.A.M.) [March 13 2015]
41. Dolphin Park - Exhibition (Wave Race: Blue Storm)
42. Industrial Revolution (Chibi-Robo! Zip Lash) [October 8 2015]
43. Mega Mech Menace (Chibi-Robo Zip Lash) [October 8 2015]
44. Katamari on the Rocks - Katamari Damacy
45. Hornet (Hollow Knight) [24 February 2017]
46. Sealed Vessel (Hollow Knight) [24 February 2017]
47. Title Theme (1-2-Switch) (New Remix) [March 3rd, 2017]
48. Wet N' Windy - Super Monkey Ball: Touch N' Roll
49. Confronting Myself (Celeste) [January 25th, 2018]
50. Main Theme (Among Us) (New Remix) [June 15th, 2018]
51. Decisive Battle II (Octopath Traveler) [July 13th, 2018]
52. Crasher (Dragalia Lost) [September 27th, 2018]
53. Battle for Atlas (Starlink: Battle for Atlas) [October 16th,, 2018]
54. Vs Susie (New Remix) (Deltarune) [October 31th, 2018)
55. Cursed Orphan (Bloodstained: Ritual of the Night) [June 18th, 2019]
56. Sunken Kuru Ruins - Drill Dozer
58. Ballad - Tomodachi Life
59. Band Land (Harmony) - Rayman
60. Main Theme (Angry Birds)
61. Title - Solstice [June 1st, 1990]
62. Discussion -BREAK- (Danganronpa: Trigger Happy Havoc)
63. Stage 13 - Kamen no Ninja: Hanamaru
64. Bubble Bobble Medley - Bubble Bobble (New Remix)
65. Battle Theme (Miitopia) (New Remix)
66. Offense Theme - Tecmo Bowl (February 1st, 1989)
67. Defense Theme - Tecmo Bowl (February 1st, 1989)
68. Another Ultra? - Dillon’s Dead-Heat Breakers (May 24, 2018)
69. Devils in Tandem - Dillon’s Dead-Heat Breakers (May 24, 2018)
70. Showtime - Rhythm Thief & the Emperor's Treasure (2012-01-19)
71. Cave/Dungeon - StarTropics (New Remix)
73. The King’s Court (Cuphead)
74. Voyage of Promise (Bloodstained: Ritual of the Night) [June 18 2019]
75. Spider Dance (Undertale)
76. Skull Heart Arrhythmia (Skullgirls)
77. Boss Battle III (Miitopia)
78. Default Dance (Fortnite) (Remix)
79. First Steps (Celeste)

Franchises Repped by Music (or Music/Spirit Combo)

  • Bubsy
  • Plok
  • Galactic Pinball
  • Activision Anthology
  • Conker
  • English Training
  • Rhythm Thief
  • Starlink
  • Skylanders
  • Spyro
  • Deltarune
  • Cave Story
  • Shin Megami Tensei
  • The Last Story
  • Pandora’s Tower
  • Bubble Bobble
  • Tecmo Bowl
  • Angry Birds
  • Solstice
  • Fortnite
  • Skullgirls
  • Bloodstained
ARMS
smashdungeon.png

As mentioned in Game Modes, Smash Dungeon is a unique mode where you can challenge dungeon after dungeon with the rewards being greater. But be careful as you will have to fight hordes after hordes of enemies as well as mini bosses and actual end bosses! Each dungeon has its own theme!
NameSeriesDescription
PrimidSuper Smash Bros.
AuroraSuper Smash Bros.
MizzoSuper Smash Bros.
MitesSuper Smash Bros.
RototurretSuper Smash Bros.
RoaderSuper Smash Bros.
ArmightSuper Smash Bros.
GreapSuper Smash Bros.
PuppitSuper Smash Bros.
GamygaSuper Smash Bros.
BytanSuper Smash Bros.
MoneyboySuper Smash Bros.
WormholeSuper Smash Bros.
OniSuper Smash Bros.
TenguSuper Smash Bros.
GoombaSuper Mario Bros.
BooSuper Mario Bros.
Koopa TroopaSuper Mario Bros.
ParatroopaSuper Mario Bros.
VirusSuper Mario Bros.
3 Appear at once, Each a different Color. All viruses have the same 3 hit combo attack and a powerful stomp attack like Bowser's Down-B, The individual colors have 1 unique attack each.

Red: They can turn into a fireball in a fashion similar to Kirby's Dash Attack
Blue: They have Dr. Mario's Pill attack only much stronger but slower and can stun.
Yellow: They have a more Powerful version of Wario's Bite attack
Green: They charge up a cloud of poison and then release it like Plant's Side-B
Pink: They shoot a version of Hero's Wack attack from their mouth
Light Blue: They have a more powerful version of Rising tackle that uses their head.
KobblerDonkey Kong
Klobbers are DKC2 enemies that mimic barrels before trying to ram into you, in smash they can mimic any of the barrel textures available (present metal or wood barrels) and will pop up to try and ram into you, they dont damage you but when collided you get knocked back by a large amount, often pushing into other enemies, there are three variants, the green ones which just push you around, yellow ones which can knock out your stat pickups, and black ones which will explode on you if you knock into them. These are enemies that attack by disrupting and annoying the player, when destroyed they turn into normal barrels.
KritterDonkey Kong
OctorokLegend of Zelda
LynelThe Legend of Zelda
FuzziesYoshi
Any kind of contact with Fuzzy (including from projectiles) will leave you stunned and dizzy. It does not have screen shaking effects though.
ToadiesYoshi
The Toadies would pick you up and either
1. Pick you up, carry you to a high place, and drop you, dealing damage when you hit the ground.
2. Pick you up and either carry you to a pit or carry you off-stage.
These enemies are found in groups of 4. I chose these enemies because they are classics that have been around since the beginning of the series.
Zebsian Space PirateMetroid
MetroidMetroid
Chozo WarriorMetroid
Hi-HoStar Fox
Hi Ho is a fairly simple enemy, they are basically robot Bob-Omb but much faster, with them falling under the category of Chaos Unit in Star Fox Guard and mostly there to disturb you, as a Smash Dungeon enemy he will do so by paralyzing you when near making you unable to move for a period of time and turning you into an easy punching bag, but this resulted them committing Kamikazee.
Waddle DeeKirby
GulpinPokemon
BeedrillPokemon
Behavior: Beedrill flies around doing Beedrill things and minding it's own business. Unless it's provoked. Beedrill can be provoked by nearby combat or sprinting passed them. When provoked, more Beedrill (between 3-5) will show up and begin attacking the unit(s) that provoked it. Once said units are dead, the Beedrill swarm will move on to other nearby units. Beedrill has low health.

Attacks:
Poison Sting- A quick attack. Does a small amount of damage on hit, also does a small amount of damage over time.
Drill Run - Basically a Beedrill smash attack. Does a lot of damage (like 25% or so)

Playing around Beedrill
At first, Beedrill will only attack the units that angered it, including enemies. If you launch an enemy into a Beedrill/area with Beedrill, you can sneak by them. If you sprint or attack while they're focusing a different unit, they'll be provoked again and more Beedrill will appear.
ZubatPokemon
FalinksPokemon
TyranitarPokemon
This Pokémon debuted in Gold/Silver/Crystal and I think it will make a great enemy or Mini-Boss. It’s ability’s include Hyper Beam, Rock Tomb, Giga Impact, Muddy Water, Sandstorm and Dark Pulse. However, after using Hyper Beam or Giga Impact, Tyrannitar will have to recharge, making it a target for Attacks.
NoivernPokemon
In combat, Noivern would use Boomburst, launching soundwaves from its loudspeaker-ears that could deal damage and/or stun fighters like Rathalos's roar. It could also use Dragon Pulse (laser breath), Wing Attack (slashing with its wings), or Air Cutter (wind projectile). If you wanted to get creative, you could have it use Tailwind to boost the speed of itself and any regular enemies around it.
PigmaskMOTHER/Earthbound
Negative ManMOTHER/Earthbound
In both the original game and Smash Dungeon, he'd essentially be a joke enemy: he just stands on the ground, crying, spouting nihilistic phrases (replicated here as small textboxes popping up above him), and not much else. But he's also got quite the high amount of HP, and sometimes will counter your attacks with a rare, all-powerful swipe that deals a deadly......1% damage.

I dunno guys, I just think he'd be funny as ****. And Mother in particular I would unironically say has one of the biggest gold mines of Smash Dungeon enemy potential out of any series repped on this roster. I was gonna submit a new "retro" enemy (some of the ideas I had in mind included a few of the enemies from Murasame Castle and the Eggplant Man from Wrecking Crew), but then I suddenly remembered this guy existed and the opportunity was just too good to pass up.
Polar BearIce Climbers
The Polar Bear from the Ice Climber series makes its return as an enemy. Despite Ice Climbers being cut in Smash 4, the Polar Bear enemy was still present in Smash Run, showing his importance. He was one of four Smash Run enemies to not be represented by a fighter, alongside Pooka, Bacura, and Sneaky Spirit. His appearance would still be in 3D and he would function identically to his Smash Run incarnation.
Swooping SwitchbugPikmin
A iconic and infamous pikmin enemy which I think needs more representation in smash, Swooping Snitchbugs in their home game would swoop and pluck pikmin and rebury them, here they work slightly differently

First they swoop in an arch and they will pick up any fighter

Then they drop the fighter burying them in the process

Their is also a variety that will fly away from you and carry crates that could hold rare goodies

They would have sub standard hp and minor defense due to the exoskeleton but otherwise not too bad
Risen InfectedFire Emblem
The Risen are always seen in large numbers (usually seven). These soldiers rush towards the player and deliver a powerful blow. They have relatively high health but poor defense.
MonoeyeKid Icarus
Tarantula & ScorpionAnimal Crossing
The Tarantula and Scorpion act the same, the only difference is in their aesthetics. They would run around the stage slowly, until they lock eyes on a fighter! They would then charge forwards quickly, and getting attacked by a tarantula/scorpion deals a whopping 40% damage, as well as poisoning you. They can be killed with a simple stomp, however.
M83 Predator UnitXenoblade Chronicles
The M83 Predator Unit is a story exclusive Mechon unit that appears in the Fallen Arm portion of the first Xenoblade Chronicles and its remake. It's also in Project X Zone, which is where the sprite comes from (cool!)

In Smash Dungeon, they will appear in more urban/mechanical dungeons, where it has one move. However, they will spawn in conjunction with weaker enemies such as Goombas, Octoroks, etc. It's a rather large enemy with a moderate amount of health, though not enough to be a mid-boss.

Swipe: The M83 will slash with its arm. A slower attack, it will deal around 10% of damage with no knockback. It's not too big a threat on its own, but when combined with the other weaker enemies that it spawns with, it's possible to be overwhelmed.
DuckDuck Hunt
The duck is a passive enemy that flies around, similar to Souflee but easier to catch. It has a few unique traits: it gets faster the longer it remains uncaught, and must make a safe landing to the ground to grant its stat bonuses (so no landing on lava or spikes for example, it also has fall damage if hit from a very high place - though most players likely wouldn't even find out about that last part) - the loading screen tips exposit that the duck only gives stat boosts as a sign of respect and doesn't take kindly to being burned alive. It is rendered in 8-bit to distinguish it from its half-playable counterpart
Octo TroopersSplatoon
Being the Goomba of the Splatoon Series, it only makes sense for the Octo Troopers to be included as an enemy in Smash Dungeon. Two variations will be included, the Octo Trooper, and the Twintacle Octotrooper. The regular Octo Trooper fires ink blobs which travel in a straight line, and deal around 9%. The Twintacle Octo Trooper fires ink in spurts, dealing damage around that of Inkling's Jab depending on how much of the spurt you are hit by. Both Enemies leave you covered in ink if hit by their projectiles, which makes further damage from all Smash Dungeon enemies deal more percent. They have around 20 HP each, and can be jumped over and ran away from due to their low mobility.
The CellARMS
The Cell are the enemies in ARMS 1-on-100 mode and they are a gray Helix in Smash Dungeon they would stretch up and down and they would use their arms in a fashion similar to Min Min, their arms are the Bubb which would be a reskin of Min Min's Megawatt when it comes to damage but it has no element. they would also have low health but would always come in packs of 3.
Cuttie/Aqua JellyGolden Sun
This little guy appears in water based levels, such as Mercury Lighthouse, Piers's ship, and the temple outside Ayuthay whose name I cannot remember, in all three Golden Sun games.In Smash Dungeon, they would also appear in water and water adjacent dungeons, where they will do one of two moves. It's a smaller enemy, probably a little taller than a Goomba with a moderate-low amount of health.

Attack: The Cuttle will attack with a slash of water from its tentacles. Does around 5% of water damage.

Poisonous Bite: The Cuttle will lunge at the player and bite them, dealing 7% of damage initially, but also granting a poison status effect which will last for a good amount of time.

Rarely, the Cuttle will spawn in an all blue, special variant known as the Aqua Jelly. Its stats will be the same, though it will gain an additional attack.
Electric Bite: The Aqua Jelly will lunge at the opponent and bite them and hold on, dealing a lasting electric hitbox. Does a maximum of 15%.
MinotaurusGolden Sun
Sneaky SpiritRhythm Heaven
YokaiRhythm Heaven
Shell ChimerasAstral Chain
In Smash, there are four types that can appear, all of them granting the same effect. They appear alongside weaker enemies, granting them stronger attacks and invincibility. To defeat them, their weak point must be targeted. They will be invulnerable to damage while they are linked to an enemy. Awful awful awful I hate them

Type 1: SHE-C-4F413-00 (Code Name: Ker)
Being the only Shell Chimera graced with a code name, this is the most common one that will be encountered. It will follow behind other enemies, linking to them with an Astral Chain energy beam. To defeat it, the player must focus their attacks on the beam and break it. Attacking the chimera without breaking the beam won't do any damage. Once the beam is broken, Ker will begin weakly attacking with its shell. It must be killed fast before it links with another enemy.

Type 2: SHE-C-C10CD-00
Now we begin the torture of not having code names. These fit more with their shell name, with a much higher defense. They follow behind enemies, granting them the stat buffs. Once it has found an enemy to link with, it will encase itself in a shell. The link can only be broken by directly attacking C10CD with strong attacks. Think Ganon smash attacks until it breaks and you can defeat the Chimera.

Type 3: SHE-C-104A7-00
Blah blah link with another enemy. Unlike the others, once it finds an enemy to link with, it will dig into the ground. It won't move, but you must dig it up by attacking the ground it's buried in to defeat it.

Type 4: SHE-C-7B74E-00
This one is really mobile and follows behind the enemy, but at a considerable height. It is only vulnerable to projectiles and items... so if you're a character without projectiles better start looking. Once it is knocked out of the air, it is free to be attacked.
BattleshipAdvance Wars
Genome SoldierMetal Gear Solid
The Genome Soldiers, officially known as the Next-Generation Special Forces, are the enemy type encountered most regularly in 1998's Metal Gear Solid. The "genome" part of their moniker refers to the fact that they have all been genetically modified to receive the genes (via injection) of the greatest soldier who ever lived, Big Boss. These so-called "soldier genes," which heightened their senses and skills in combat.

There are several Genome Soldier Types, these being the NBC Warfare Troop in Yellow, Arctic Warfare Troop in White, Heavily Armed Troop in Blue and Light Infantry Troop in Green. In Smash Infinite these variations would only differ in stats and other minor differences and would all be contained under the "Genome Soldier" umbrella.

Their function is as follows. When the enemy has not detected the player, they would normally patrol along a certain route. This gives the player an opportunity to deal with the enemy in a pacifist way, and continue their adventure in the dungeon without facing them, just like in the Metal Gear games.
Though if the player appears in the Soldier's line of sight, the enemy will get in Alert Mode. In this state, the enemy will converge on the player and attack. The mode is accompanied by the iconic exclamation point appearing above the enemy, with sound effect and all, once they're alerted by your presence. Alert mode remains in effect until the enemy either loses sight of the player or is defeated. If the player is playing with Snake, they can activate the taunt where he equips the cardboard box disguise to not alert the enemy despite being in their line of sight.

These Genome Soldiers have minor differences, and their variations depend on the biome the player is currently in. They all behave the same, and fight with their trusty CERO-approved Italian 9mm-inspired handgun and CERO-approved M67 Frag-inspired grenade depending on their relative distance to the player.
  • The NBC Warfare Troop would patrol in junk and poison-based biomes. Their grenades would inflict a poison status effect to the player.
  • The Arctic Warfare Troop would patrol in snow and ice-based biomes. These don't really have anything special about them.
  • The Heavily Armed Troop would patrol in city and wasteland-based biomes. These have increased defense.
  • The Light Infantry Troop would patrol in city and grass-based biomes. These have decreased defense, but they shoot out their bullets faster.
Moto BugSonic the Hedgehog
The Motobug is probably the most iconic Sonic Badnik, (except Metal Sonic if you count him) being essentially the Sonic equivelent to the Goomba. the Motobug will normally just walk around aimlessly, but when the Motobug sees a fighter, they will charge up in place, before dashing towards with increased speed.
Egg PawnSonic the Hedgehog
MettaurMega Man
These hard-hatted robots serve Dr. Wily. When encountered, they will hide under their shells and, when the coast is clear, fire three shots which span out vertically. They appeared in Smash Run.
Neander-PacPac-Man
This enemy appears in the games Pac-Man World, Ms. Pac-Man: Maze Madness, and Pac-Man World 2. They attack with their clubs and are seen in volcano and ruins areas.

In Smash Dungeon, they move and attack slowly, but their clubs pack a big punch. They can also breathe fire on occasion to trip up players who try to camp them out.

Neander-Pacs have a unique death animation--they break into many small yellow cubes.
Cactaur/GigantaurFinal Fantasy
in Smash Dungeon they are very fast and run around, and they will use the Attack "1000 Needles" it shoots a large line of Needles forwards, this attack deals a lot of damage. There is a rare variant called the Gigantuar which has the same statistics except they are 4x larger and have 2x the amount of health.
Dea & DecorationsBayonetta
A two-in-one enemy. They are Angels of the Third Sphere with limited spiritual powers. In Bayonetta, they are one of the weakest mobs in the game. In Smash, Dear always spawns first and summons up to seven Decorations that have puny health and protect it from harm by circling around it. Both can attack with a flying headbutt but also have their own attacks. Dear fires an orb of energy by opening up its face and Decorations can bite and latch onto fighters, requiring button mashing to get them off.
Medusa HeadCastlevania
Medusa Heads are the bane of everyone that has played through Level 2 of Castlevania NES, and for good reason. In Smash Infinite, they are swarm enemies that spawn in waves of 4-6, flying in a wavelike pattern and dealing 3% damage and low knockback to anyone they run into. There is also a rare Gold Medusa Head that will petrify anyone they hit, indicated by Smash fighters getting a stone coat much like how it works with Inkling Ink and the Metal Box, but it completely stops them as though they had casted Kaclang.
PixieShin Megami Tensei/Persona
For how she'd act, she flies around and has 2 moves she can do
Zio: She will summon a small bolt of lightning to come at you, dealing around 7% if hits
Dia: Pixie will heal another enemy 10% of their health
Jack FrostShin Megami Tensei/Persona
Jack Frost will walk back and forth across the stage using ice attacks on the player, resulting in them being frozen solid if hit by too many
Killing MachineDragon Quest
SlimeDragon Quest
The most iconic enemy in the Dragon Quest series and the de facto Mascots, Slimes will patrol around and largely use the same attacks they use in every Dragon Quest game, with different varieties of slimes being easier to defeat than others. All the slime varieties in the above picture will come with their abilities, the orange one will be slightly stronger, the one with the shell will have higher defense, etc.
BuzzbombBanjo-Kazooie
These dragonfly-like monsters from Banjo-Kazooie will wait for nearby enemies and they dive bomb them. If they miss, they will round back and perform another but faster dive bomb.
WitchMinecraft
Witches are somewhat uncommon mobs in Minecraft, which make an appearance in the Smash Dungeon. Witches can throw a variety of potions at both you, other enemies, or even drink it themselves. These include...

Potion of Harming - This potion damages upon contact, dealing decent damage and knockback. The witch targets players when using this potion.
Potion of Poision - This potion poisions upon contect, dealing gradual damage over time. The witch targests players with this potion
Potion of Healing - This potion heals upon contact. The witch targets fellow enemies and can drink it herself.
Potion of Strength - This potion strengthens foes upon contact. The witch targets fellow enemies, but will not drink it itself.
Potion of Invisibility - The rarest potion, those afflicted by it turn invisible. The witch targets fellow enemies, but might spawn with it's effects.

The witch is a little more durable than the average enemy, but not by a ridiculous margin. If you kill the witch when in the process of throwing or drinking a potion, it will drop it, allowing you to use it. You can either throw or drink it, but there's little reason to drink a harming or poision potion. You can also reflect potions.
CreeperMinecraft
PhantomMinecraft
Guardian Minecraft
Mokujin/TetsujinTekken
HunterResident Evil
Hunters are a group of human-animal hybrids which were genetically-engineered as biological weapons. Hunter species were created through the grafting of reptilian donor DNA to a fertilized human embryo with the aid of the t-Virus as a bonding agent, with the exception of the Hunter γ, which reversed the process with human DNA grafted into the genome of fertilized amphibian spawn. The Hunters were one of Umbrella's more successful products and among their oldest, having entered production with the Hunter α in the 1980s. Following Umbrella's demise, other bio-weapon manufacturers used the research data to create new Hunter species, with Farfarello among the latest iterations.

Hunter Types
Hunter A
This reptilian monstrosity will slash at fighters and is able to do a leap attack as well can scream which knocks down the fighter, they may be hard to defeat but can put up a good fight.

Hunter B
Its similar to it's counterpart but weaker and is blind with one eye, it has face mandibles and significant armour which makes inflicting damage difficult. Similar to its other incarnations, the hunter attacks by swiping with its claws. Its heavy armour can be cracked.

Hunter Y
The last of the three Hunters, a frog faced beast who can charge at fighters to headbutt or swallow them whole just like Gulpin. They are mostly found in narrow areas or in bodies of water. You can attack its legs to make said Hunter collapse giving enough time to defeat it.
The GanadosResident Evil
As an enemy they take on the appearance of the common village people and Town Majinis that you encounter eye-to-eye for the first time. They only attack the opponent if you got spotted if they appear on the screen which indicated by their voice, screaming at you (in Spanish and Swahili) and charge at you in a group of 5. The best way to avoid them is from above and below or outrun them as fast as you could. Considering their behavior is the same I'll put both of them in as some sort of variation to one another as their origin tied together.
Tyrant T-03Resident Evil
Idk, I’ve been told he slashes. So I guess he would slash with his big meaty claws.
FariesTouhou Project
ZomboniPlants vs Zombies
Zomie HordePlants vs Zombies
Soul CatcherHades
Wretched LoutHades
VoidstoneHades
Flame WheelHades
ImpmonDigimon
BeelzemonDigimon
DeviDevimonDigimon
OgremonDigimon
FugamonDigimon
SukamonDigimon
NumemonDigimon
MonzaemonDigimon
AntleanteanTomb Raider
Antleantean CentaurTomb Raider
Giant AntleanteanTomb Raider
Winged AntleanteanTomb Raider
Antleantean DinosaurTomb Raider
Glum ReaperSuper Mario RPG
Ameboid Super Mario RPG
PounderSuper Mario RPG
PookaDig Dug
Mars PeopleMetal Slug
Hailing from the Metal Slug Series, the Mars People make their Smash Infinite Debut as a Smash Dungeon enemy. Now, the prompt clarified that the enemy must be represented by a fighter, however out of a technicality, the Mars People are indeed repped by a fighter. Currently, there are 5 Metal Slug tracks within Smash Ultimate. And where are these songs placed? The Fatal Fury section. Boom. Terry reps the Mars people. (Plus there aren’t really any grunts from Fatal Fury so other SNK series grunts will have to rep Terry similarly to how Pooka repped Pac-Man in Smash run). With that out of the way let's get into how the Mars People would function as enemies.

The Mars people will enter the screen via their mini-UFO before getting out and attacking the player. If you get to the UFO fast enough and deal enough damage it will explode, defeating the Mars People before they are able to get any attacks off.

Once out of their mini-UFO, they will attack using their laser orb blaster, which travels slowly but does hefty amounts of damage, around 7% per orb, for a total of 28% if all four orbs from one round lands. Their movement is quite limited, as they can only walk around at a small pace, however they can make large bounds to travel distances if need be.

The Mars People come in four different appearances. The Standard, Party, and Female versions are all cosmetic differences, however the Neo Mars people (the purple one) are slightly stronger. The base Mars People have 15 HP, whereas the Neo Mars people have 30 HP. In addition, the Neo Mars people will deal more damage with each blaster shot, at 10% damage per shot, for a total of 40% damage if all of the hits connect.


If left alone long enough the Martian will summon more Martians via their trusty flip phone, so take them out quickly before you get swarmed!

When defeated, the Mars People will play a death animation similar to the one found in their home series.
TemmieUndertale
Temmie
is a "special enemy" from Undertale, appearing as a fight only once despite being a random encounter like regular enemies. Temmies do, however, appear outside of battle in Temmie Village. Many Undertale fans have become charmed by the Temmies' disjointed speech and goofy antics.

Temmie would be a fun mini-boss just for the shock and humor value. Adding an Undertale mini-boss at all would turn heads, but Temmie in particular is so zany that she could just be a laugh riot.

Temmie could attack by dashing straight at the fighter (I could buy this also having some bonus effect), by stretching out her legs really far to smack them, by throwing torn pieces of construction paper (Temmie Flakes), or summoning other Temmies to fly across the screen. (Heck, if you wanted, you could come up with way more out-there and nonsensical ideas; Temmie could probably make ANYTHING work.)

NOTE: Temmie the character is explicitly an avatar/mascot of sorts for Temmie Chang, an artist for Undertale. If this tie to a real-life person is grounds to make Temmie ineligible, let me know and I'll either come up with another mini-boss or just abstain from this second half.

Mini-Bosses

NameSeriesDescription
Big GoombaSuper Mario Bros.
DarknutThe Legend of Zelda
LynelThe Legend of Zelda
BonkersKirby
DynabladeKirby
TyranitarPokemon
NoivernPokemon
Devil CarEarthbound
Polar BearIce Climbers
Reaper & ReapetteKid Icarus
ClobberskullKid Icarus
BulborbPikmin
MinotaurGolden Sun
Black Hole TankAdvance Wars
Mecha DragonMega Man
Tiny TigerCrash Bandicoot
Tyrant T-03Resident Evil
List of Dungeons in Smash Dungeon


NameSeriesDescription
Water DungeonSuper Smash Bros.
Fire DungeonSuper Smash Bros.
Thunder DungeonSuper Smash Bros.
Forest DungeonSuper Smash Bros.
Wind DungeonSuper Smash Bros.
Ice DungeonSuper Smash Bros.
Earth DungeonSuper Smash Bros.
Trash DungeonSuper Smash Bros.
House DungeonSuper Smash Bros.
8-Bit DungeonSuper Smash Bros.
Party DungeonSuper Smash Bros.
Crystal DungeonSuper Smash Bros.
Holy DungeonSuper Smash Bros.
Occult DungeonSuper Smash Bros.
Tasty DungeonSuper Smash Bros.
Low-Poly DungeonSuper Smash Bros.
Millenium DungeonSuper Smash Bros.
Sushi Submarine DungeonSuper Smash Bros.
Outback DungeonSuper Smash Bros.
Library DungeonSuper Smash Bros.
Mech Factory DungeonSuper Smash Bros.
Mushroom Kingdom DungeonSuper Mario Bros.
Hyrule DungeonLegend of Zelda
Jungle DungeonDonkey Kong
Venom DungeonStar Fox
Brinstar DungeonMetroid
Bizarre DungeonEarthbound/MOTHER
Victory Road DungeonPokemon
Island DungeonYoshi
Dragon DungeonFire Emblem
Microgame$ DungeonWario
Distant Planet DungeonPikmin
Underworld DungeonKid Icaurus
Green Hill DungeonSonic the Hedgehog
Infiltration DungeonMetal Gear
Robotic DungeonMega Man
Arena DungeonPunch-Out!!
Pac DungeonPac-Man
Mechonis DungeonXenoblade
Mako DungeonFinal Fantasy
Climax DungeonBayonetta
Inked Up DungeonSplatoon
Horror DungeonCastlevania
Momentos DungeonPersona
Spiral DungeonBanjo - Kazooie
Overworld DungeonDragon Quest
Block DungeonMinecraft
Dojo DungeonTekken
Twilight DungeonKingdom Hearts
Beach DungeonCrash Bandicoot
Venus DungeonGolden Sun
Music DungeonRhythm Heaven
Undead DungeonResident Evil
Astral DungeonAstral Chain
Cyber Dungeon Digimon
AntlantisTomb Raider
Derris-KharlanTales of Symphonia
Smithy's FactorySuper Mario

dlc.png

Downloadable Content (DLC) is confirmed for Super Smash Bros. Infinite with three seasons planned which features Bundles. Bundles not only contains a fighter and a stage but a Spirit Board, Music, SmashSpace content, and two additional content which may contain an assist trophy, item, masterpiece, smash dungeon and enemies, a bosses, or a master spirit.

Bundle #1: In the Name of Hades

Character
  1. Zagreus
Stage
  1. The Underworld
Music
  1. The Painful Way
  2. In The Blood
  3. No Escape
  4. Out Of Tartarus
  5. Through Asphodel
  6. Mouth of Styx
  7. God of the Dead
  8. The Unseen Ones
  9. Wretched Shades
  10. The Bloodless
Spirits
  1. Aphrodite
  2. Ares
  3. Artemis
  4. Asterius
  5. Nyx
  6. Persephone
  7. Skelly
  8. Thanatos (Hades)
  9. The Fury Sisters
  10. Zeus
  11. Athena
  12. Charon
  13. Dusa
  14. Hades (Hades)
  15. Hypnos
  16. Zagreus
SmashSpace Items
  1. Dionysus Wall Scroll
  2. Aphrodite Poster
  3. Pools of Styx
  4. Charon's Hourglass
  5. Cerberus Plushies
  6. Skelly Statue
  7. Hades Wallpaper
  8. Inferno Cobbled Flooring
Assist Trophy
  1. Asterius
Smash Dungeon Enemy
  1. Soul Catcher
  2. Wretched Lout
  3. Flame Wheel
  4. Voidstone
Affiliated Mii Costumes
  1. Ares Mii Swordfighter (Hades)
  2. Dursa Cap (Hades)
  3. The Kid Swordfighter (Bastion)
  4. Dragonborn Mii Swordfighter (The Elder Scrolls)
  5. Arthur Mii Swordfighter (Ghouls n Goblins)
  6. Shovel Knight Mii Swordfighter (Shovel Knight)
    1. "Strike the Earth" Remix

Bundle #2: A Smashing Turnabout

Character

  1. Phoenix Wright
Stage
  1. Courtroom
Music
  1. Phoenix Wright ~ Objection 2001
  2. Pressing Pursuit ~ Cornered
  3. Maya Fey ~ Turnabout Sisters Theme 2001
  4. Questioning ~ Allegro 2001
  5. The Steel Samurai: Warrior of Neo Olde Tokyo
  6. Godot ~ The Fragrance of Black Coffee
  7. Great Revival ~ Miles Edgeworth
  8. Gumshoe ~ I Can Do It When It Counts, Pal
  9. Pursuit ~ Overtaken
  10. Klavier Gavin ~ Guilty Love
  11. Jake Marshall's Theme
  12. The Great Stray
  13. Herlock Sholmes' Theme
  14. Confess the Truth
  15. Investigation ~ Core 2007
  16. Pursuit ~ Cornering Together
  17. Athena Cykes ~ Courtroom Révolutionnaire 2016
  18. Naruhodo Ryutaro ~ Objection!
  19. Pursuit ~ Lying Coldly
  20. Pursuit ~ Caught
  21. Apollo Justice ~ A New Trial is in Session
  22. Pursuit ~ Questioned
  23. Phoenix Wright ~ Objection! 2013
  24. Gatewater Land - Blue Badger March
  25. Great Cross-Examination ~ Allegro
  26. Interesting People
  27. Trucy Wright ~ Child of Magic 2013
  28. Ema Skye ~ Forensic Scientist 2016
  29. Furio Tigre ~ Swingin' Tiger

Spirits
  1. Phoenix Wright
  2. Miles Edgeworth
  3. Judge
  4. Franziska von Karma
  5. Apollo Justice
  6. Klavier Gavin
  7. Miles Edgeworth (Chief Prosecutor)
  8. Ryunosuke Naruhodo
  9. Phoenix Wright (Fighter Spirit)
SmashSpace Items
  1. Polly
  2. Charley (the plant)
  3. Attorney's Desk
  4. Blue Badger
  5. The Thinker
  6. Fey Clan Urn
  7. Scattered Paper Flooring
Assist Trophy
  1. Franziksa von Karma
Master Spirit
  1. **** Gumshoe
Affiliated Mii Costumes
  1. Steel Samurai Mii Swordfighter (Ace Attorney)
  2. Frank West Costume (all classes) (Dead Rising)
  3. Amingo Mii Brawler (Marvel vs Capcom)
  4. Mega Man.EXE (Mega Man)
Bundle #3: Imperial Smash Revenue

Character

  1. Sakura
Stage
  1. Grand Imperial Theatre
Music
  1. Declaration! Imperial Floral Assault Troop (original)
  2. Under the Imperial Flag (III)
  3. Earth Warriors (V)
  4. Declaration! Imperial Floral Assault Group (-Shinsou-)
  5. Move Out! Imperial Floral Assault Group Theme - Sakura Wars
  6. Chattes Noires - Sakura Wars 3: Is Paris Burning?
  7. I'm a Maiden - Sakura Wars 2019
  8. Try Your Best! Imperial Floral Assault Group!
  9. Yaksha's Theme
  10. Minigame Iris
  11. My Dream (Gemini Sunrise's Theme) from Sakura Wars: So Long, My Love
  12. Woman!! The Spirit of the Festival (Hatsuho Shinonome's Theme) from Sakura Wars (2019)
  13. Go Go NYCR! from Sakura Wars: So Long, My Love
  14. Friendship (Sakura Wars sega saturn)
  15. Oboro's Theme (New Sakura Wars 2019)
  16. Battle Theme 1 (New Sakura Wars 2019)
  17. Little Lip Theater - From Sakura Wars: So Long, My Love.
  18. Kimi Aru ga Tame - From Dramatic Dungeon: Sakura Wars — Because You Were There
  19. New Year’s Theme - From Sakura Taisen
  20. Final Battle
  21. Winged Warriors
  22. Machinegun Sister - Sakura Wars 3
Spirits
  1. Ichiro Ogami
  2. Gemini Sunrise
  3. Iris Chateubrand
  4. Ayame Fujide
  5. Tenkai
  6. Erica Fontaine
  7. Ciseaux
  8. Sakura Amamiya & Hatsuho Shinonome
  9. Seijuro Kamiyama & Anastasia Palma
  10. Azami Mochizuki & Clarissa Snowflake
  11. Sumire Kanzaki
  12. Ranmaru
  13. Tokyo Flower Division
SmashSpace Items
  1. Konbu Figurine
  2. Peanut Statue
  3. Jean-Paul Plushie
  4. Arataka Replica
  5. Imperial Grand Theatre Model
Assist Trophy
  1. Erica Fontaine
Masterpiece
  1. Sakura Wars (1)
Affiliated Mii Costumes
  1. Gemini Sunrise Mii Swordfighter + Gunner (Sakura Wars)
  2. Alex Stone Mii Brawler (Streets of Rage)
  3. Opa-Opa Hat (Fantasy Zone II)
  4. Vyse Mii Swordfighter (Skies of Arcadia)
  5. Knuckles Mii Brawler (Sonic the Hedgehog)
  6. Nakoruru Mii Swordfighter (Samurai Shodown)
  7. Hedlok Mii Brawler (ARMS)
  8. Earthworm Jim Mii Gunner (Earthworm Jim)
    1. "New Junk City" Remix
Bundle #4: Smash is the Champions

Character

  • Agumon
Stage
  • Digital Monster LCD
Music
  1. Digimon World 3 - Battle Theme
  2. Break the Chain (Digimon Adventure 2020)
  3. The Biggest Dreamer
  4. The Cyber Slueth
  5. Ya Cyber Sleuth
  6. Hope Ster
  7. Digivolve!/Negative Event
  8. Chaos Brain (Digimon World Dusk/Dawn)
  9. Curling Theme (Digimon World)
  10. New Century Theme (Vocal ver.) (Digimon New Century)
  11. Butterfly
  12. Brave Heart
  13. Twisted Toytown
  14. Digifarm-Farm/Computer Room
Spirits
  1. Wargreymon
  2. Weregarurumon ->Metal Garurumon
  3. Togemon
  4. Patamon & Gatomon -> Angemon & Angewoman
  5. Leomon
  6. Myotismon -> VenomMyotismon
  7. Etemon
  8. Machinedramon
  9. Guilmon -> Growlmon
  10. Pulsemon -> Bulkmon
  11. Hudiemon
  12. Digi-egg -> Digitamon
  13. Tyranomon -> Tyranomon X
  14. Gatchmon
  15. Beelzlemon
  16. Omnimon
SmashSpace Items
  • Cybernetic Wallpaper
  • Terriermon
  • Digidevice
Smash Dungeon
  • Cyber Dungeon
Smash Dungeon Enemies
  • Impon
  • Beelzemon
  • DeviDevimon
  • Ogremon
  • Fukamon
  • Sukamon
  • Numemon
  • Monzaemon
Affiliated Mii Costumes
  • Renamon (Mii Brawler)
  • Gargomon (Mii Gunner)
  • Devimon (Mii Brawler)

Bundle #5: Smell of the Game

Fighter

  • Sol Badguy
Stage
  • The May Ship
Boss
  • Justice
Music
  1. Keep Yourself Alive II (Guilty Gear X2)
  2. Holy Orders (Be Just or Be Dead) (Guilty Gear: The Missing Link) (New Arrangment)
  3. Writhe In Pain (Guilty Gear: The Missing Link) (New Arrangment)
  4. Momentary Life (Guilty Gear: The Missing Link) (New Arrangment)
  5. Awe of She (Guilty Gear X) (New Arrangment)
  6. Suck a Sage (Guilty Gear X2) (New Arrangment)
  7. Still in the Dark (Guilty Gear X2) (New Arrangment)
  8. Smell Of The Game (Guilty Gear Strive) (New Arrangment)
  9. A Fixed Idea (Guilty Gear: The Missing Link)
  10. Conclusion (Guilty Gear: The Missing Link)
  11. Blue Water, Blue Sky (Guilty Gear X2)
  12. Make Oneself (Guilty Gear X2)
  13. The Midnight Carnival (Guilty Gear X2)
  14. Get Down To Business (Guilty Gear Slash)
  15. Sheep Will Sleep (Guilty Gear Isuka)
  16. Give me a break (Guilty Gear Xrd -SIGN-)
  17. Ride the Fire! (Guilty Gear Xrd -SIGN-)
  18. Magnolia Eclair (Guilty Gear Xrd -SIGN-)
  19. Jack-a-dandy (Guilty Gear Xrd -SIGN-)
  20. Marionette (Guilty Gear Xrd -SIGN-)
  21. HEAVY DAY (Guilty Gear Xrd -SIGN-)
  22. Big Blast Sonic (Guilty Gear Xrd -SIGN-)
  23. Birthday Train (Guilty Gear Xrd -SIGN-)
  24. One Dawn (Guilty Gear Xrd -REVELATOR-)
  25. Juno (Guilty Gear Xrd -REVELATOR-)
  26. Sky Should Be High (Guilty Gear Xrd -REVELATOR-)
  27. All I Can Do (Guilty Gear Xrd -REVELATOR-)
  28. Lily (Guilty Gear Xrd -REVELATOR-)
  29. -ROKUMON- (Guilty Gear Xrd REV 2)
  30. The Disaster of Passion (Guilty Gear Strive)
  31. Armor-clad Faith (Guilty Gear Strive)
  32. Alone Infection (Guilty Gear Strive)
  33. Love the Subhuman Self (Guilty Gear Strive)
  34. Trigger (Guilty Gear Strive)
  35. What Do You Fight For (Guilty Gear Strive)
  36. Kiss of Death (Guilty Gear Strive)
  37. Drift (Guilty Gear Strive)
  38. The Name of Heaven (Guilty Gear Strive)
Master Spirits
  1. Baiken
Spirits
  1. Ky Kisuke
  2. May
  3. Johnny
  4. Milia Rage
  5. Potemkin
  6. Axl Low
  7. Zato=One
  8. Chip Zanuff
  9. Dr. Baldhead (enhanceable to Dr. Faust)
  10. Testament
  11. Dizzy
  12. I-No
  13. Bedman
  14. Jack-O-Valentine (Enhanceable to Jack-O)
  15. Answer
  16. Nagoriyuki
  17. Justice
SmashSpace Items
  • Fraustinian Door
  • Junkyard Dog Replica
  • Bedman's Bed
  • The Mayship
Affiliated Mii Costumes
  • Ky Kiske Mii Swordfighter (Guilty Gear)
  • Baiken Mii Swordfighter (Guilty Gear)
  • Ragna the Bloodedge Mii Swordfighter (BlazBlue)
  • Kunio-Kun Mii Swordfighter (River City Ransom)
  • Wonder Red Mii Brawler (Wonderful 101)
  • Scorpion Mii Brawler (Mortal Kombat)
Bundle #6: One Woman Army

Fighter

  • Lara Croft
Stage
  • Croft Manor Catacombs
Smash Dungeon & Enemies
Masterpiece
  • Tomb Raider 1
Music
Spirits
  1. Jacqueline Natla -> Jacqueline Natla (Transformed)
  2. Samantha -> Nishimura
  3. Winston Jeeves
  4. Doppleganger
  5. Amanda Evert
  6. Werner Von Croy
  7. Pedro Dominguez
  8. -
  9. -
SmashSpace Items
  • Tomb Wallpaper
  • Tomb Flooring
  • Antlantean Scion
  • Archer Statue
  • Seraph
  • Replica of Croft Manor
Affiliated Mii Costumes
  • Gex Mii Brawler (Gex)
  • Kazuma Kiryu Mii Brawler (Yakuza)
  • Vault Boy Mii Gunner (Fallout)
  • Croquembouche Mii Brawler
  • Master Chief Mii Gunner (Halo)
Bundle #7: Tales of Smash

Fighter

  • Lloyd Irving
Stage
  • Tower of Salvation
Assist Trophy
  • Yuri Lowell
Smash Dungeon
  • Derris-Kharlan
Music
  1. Fighting of the Spirits
  2. Full Force
  3. Like a Glint of Light
  4. Fatalize
  5. Final Destination
  6. Lloyd
  7. Sheena
  8. Unsatisfied Desire
  9. Last Battle - Decision
  10. A Town of Wind and Ruin
  11. Relica Mode -Refill-!
  12. Struggle to Survive
  13. Beat the Angel
  14. Deepest Woods
  15. Aviators - Rhea Bird
  16. Katz Village
  17. Avenge - Richter (Dawn of a New World)
  18. Beat Ones Way - (Dawn of a New World)
  19. Water Symphony (Sawn of a New World)
  20. Who is Good or Evil (Tales of Phantasia)
  21. Crimson Pride (Tales of the Abyss)
  22. A Formidable Foe Stands in the Way (Vesperia)
  23. Fury Sparks (Vesperia)
  24. Daring Sword (Tales of Xilia)
  25. Uphold your will with Sword in Hand (Zestiria)
  26. Shout your soul (Berseria)
  27. Battle Theme 1 (Tales of Arise)
Spirits
  1. Genis Sage
  2. Raine Sage
  3. Kratos Aurion
  4. Colette Brunel
  5. Sheena Fujibayashi
  6. Presea Combatir
  7. Zelos Wilder
  8. Regal Bryant
  9. Mithos -> Yggdrasil
  10. Yuan Ka Fei
  11. Emil Castagnier
  12. Tenebrae
  13. Marta Lualdi
  14. Richter Abend
  15. Journey of Rejuvenation
SmashSpace Items
  • Wanted Poster
  • Narshe Plushie
  • All-Divide
  • Genis' Kendama
  • Tower of Salvation
Affiliated Mii Costumes
  • Cress Albane Mii Swordfighter (Tales of Phantasia)
  • Yuri Lowell Mii Swordfighter (Tales of Vesparia)
  • Heihachi Mii Brawler (Tekken)
  • Klonoa Mii Brawler (Klonoa)
  • Valkyrie Mii Swordfighter (Valkyrie no Denstsu)
Bundle #8: Beware of the Forest's Mushrooms

Fighter

  • Geno
Stage
  • Forest Maze
Masterpiece
  • Super Mario RPG ( The masterpiece starts on Forest Maze and it takes 5 minutes to play. )
Smash Dungeon and Enemies
  • Smithy's Factory
    • Glum Reaper
    • Ameboid
    • Pounder
Music
Spirits
  1. Mario (SMRPG)
  2. Princess Toadstool (SMRPG)
  3. Bowser (SMRPG)
  4. Frogfucious
  5. Toadofsky
  6. Big Yoshi
  7. Kerkero Cola
  8. Bowyer
  9. Belome
  10. Bahamutt
  11. Axem Rangers
  12. Croco
  13. Yardovich
  14. Exor
  15. Culex
SmashSpace Items
  • Geno Doll
  • Exor and Bowser's Castle Replica
  • Star Pieces
  • Yoshis' Cookie
  • Smithy Statue
  • Save Box
Affiliated Mii Costumes
  • Mallow Mii Brawler (Super Mario RPG)
  • Chocobo Mii Hat Mii Brawler (Final Fantasy)
  • Barret Mii Gunner (Final Fantasy)
  • Aerith Mii Swordfighter (Final Fantasy)
  • Tifa Lockhard (Final Fantasy)
  • Demified Mii Brawler (Shin Megami Tensei)
  • Slenderman Mii Brawler (Slender)
  • Duke Nukem Mii Gunner (Duke Nukem)

Bundle #9: Rifting Together

Fighter

  • Ratchet and Clank/Rivet & Kit
Stage
  • Tobruk Crater
Music
  1. Novalis - Tobruk Crater (Ratchet & Clank 2002)
  2. Planet Veldin(Remix)-Ratchet & Clank
  3. The Battle Arena - Ratchet & Clank: Going Commando
  4. Courtney Gears (Boss Theme) - Ratchet & Clank: Up Your Arsenal
  5. Planet Kerwan-Metropolis-Ratchet & Clank: Up Your Arsenal
  6. Grooviton - Ratchet and Clank: Tools of Destruction
  7. Pride of the Battleplex (Ratchet & Clank: A Crack In Time)
  8. Flying in Space - Ratchet and Clank: Into the Nexus
  9. Title Theme - Ratchet & Clank(2016)
  10. Dr. Nefarious (Ratchet & Clank 2016)
  11. Festival of Heroes (Rift in Time)
  12. Ride Through the Omniverse (Rift in Time)
  13. Culmination at Corson V (Rift in Time)
Spirits
  1. Captain Qwark
  2. Chairman Drek
  3. Dr. Nefarious -> Emperor Nefarious
  4. The Great Clock
  5. Alister Azimuth
  6. Mr. Zurkon
  7. Skidd McMarx
  8. Big Al
  9. The RYNO V
  10. Sheep
  11. Zoni
  12. Aphelion
  13. Angela Cross
  14. Talwyn Apogee
SmashSpace Items
  • Gadgetron Terminal
  • Clank Stuffy
  • Kit Stuffy
  • Omniwrench
  • Qwark Statue
  • Space Station Wallpaper & Flooring
Item
  • Groovitron
Assist Trophy
  • Dr. Nefarious

Affiliated Mii Costumes
  • Captain Qwark Mii Brawler (Ratchet & Clank)
  • Kratos Mii swordfighter (God of War)
  • Sackboy Mii Brawler (Little Big Planet)
  • Pipo Monkey Mii Brawler (Ape Escape)
  • Big Daddy Mii Costume (Bioshock)
  • Bomberman Mii Brawler (Bomberman)
Bundle #?: A Stage of History

Fighter

  • Nightmare
Stage
  • Ostrheinsburg Chapel
Music
  1. The Edge of Soul 0 Soul Blade
  2. Bravely Folk Song (Remix) - Soul Bladehttps://youtu.be/GT9eMo8kvos
  3. In Father's Name (New Arrangment) - SoulCalibur
  4. History Unfolds - SoulCalibur II
  5. Raise Thy Sword - SoulCalibur II
  6. Path of Destiny - SoulCalibur II (2003)
  7. Link's Theme - SOulCalibur II
  8. Face Your Fate - Soul Calibur III
  9. Symphony of Souls - SoulCalibur III
  10. Seize your destiny - SoulCalibur IV (2008)
  11. Tune of the Man ~ Dual Souls - SoulCalibur VI
  12. Tread Ye The Path Of Bravery - Soul Calibur V
  13. The frontier of History - SoulCalibur V (2012)
  14. Main Menu (V2) - SoulCalibur VI
  15. Moon of Oblivion - SoulCalibur VI
  16. Eternal History - SoulCalibur Legends
Spirits
  1. Siegfried
  2. Mitsurugi
  3. Kilik
  4. Raphael
  5. Taki
  6. Sophita -> ELysium
  7. Cassandra
  8. Yo****mitsu
  9. Xianghua
  10. Inferno
  11. Cervantes
  12. Tira
  13. Hwang
  14. Setsuka
  15. Ivy
SmashSpace Items
  • Replica of Soul Edge
  • Adrian-in-a-Bottle
  • Soul Edge Flooring
  • Soul Edge Wallpaper
  • Torii Gate
Assist Trophy
  • Yoshimitsu
Master Spirit
  • Cervantes
Affiliated Mii Costumes
  • Mutsurigi Mii Swordfighter (SoulCalibur)
  • Quote Mii Gunner (Cave Story)
  • Haruka Amami Mii Outfit (iDOLM@STER)
  • Artoras (Dark Souls)
  • Gil's Armor Mii Swordfighter (Tower of Druga)
  • Sans Mii Gunner (Undertale)
  • Team Rocket Grunt Mii Brawler (Pokemon)

Bundle #?: Seeing Red

Fighter

  • Red
Stage
  • Poached Eggs
Music
  1. Main Theme - Angry Birds
  2. Piggie Dilly Circus
  3. Main Theme - Bad Piggies
  4. Fight and Flight
  5. Angry Birds GO! Theme
  6. King Pig's Theme
  7. Mt Pork (Angry Birds 2)
  8. King Pig's Manic Minions (Angry Birds Epic)
  9. Angry Birds Trilogy (Angry Birds Trilogy)
  10. Title theme - Angry Birds 2
  11. Main theme - Angry Birds space
  12. Main theme - Angry Birds Epic
  13. Summer Pignic - Angry Birds Seasons
  14. Holiday Tounrament - Angry Bird Friends
  15. Shuffle and Spawn - Bad Piggies
Spirits

  1. Mighty Eagle
  2. Space Flock
  3. Chuck
  4. Bomb -> Shockwave
  5. The Blues
  6. Bubbles
  7. Terrence
  8. King Smooth Cheeks
  9. Matilda
  10. Hal
  11. Stella
  12. Silver
  13. The Eggs
  14. Piggy McCool
SmashSpace Items
  • Bad Piggy Punching Ball
  • Egg Nest
  • Bubbles Doll
  • Slingshot
Assist Item
  • Sardine Can

Masterpiece
  • Angry Birds
Affiliated Mii Costumes
  • Angry Birds Hat
  • Bad Piggies Mask
  • Freddy Fazbear Mii Brawler (Five Nights at Freddy's)
  • Mario & Yoshi Mii Brwaler (Super Mario)
  • Dracula (Castlevania)
  • Cuphead Mii Gunner (Cuphead)
  • Marie Mii Gunner (Splatoon)
  • Callie Mii Brwaler (Splatoon)
  • Diamond Armor Mii Swordfighter) (Minecraft)
  • Pig Mii Brawler (Minecraft)
  • Creeper Mii Brawler (Minecraft)
Bundle #?: Thy Smash Ball Subsumed

Fighter

  • Doomslayer
Stage
  • Mars
Music
  1. At Doom's Gate - DOOM (1993) (New Arrangement)
  2. Running from Evil - DOOM II
  3. Tweaker - DOOM 3
  4. Facing the Spider from the original DOOM
  5. Conclusion from DOOM 64 (Remix)
  6. Cultist Base from DOOM Eternal
  7. Final Sin (Doom Eternal)
  8. BFG Division (Doom 2016)
  9. At Doom's Gate/Intermission from DOOM from DOOM
  10. Dark Citadel-DOOM 64
  11. The Cyberdemon-DOOM(2016)
  12. Nobody Told Me About Id (Doom)
  13. The Final Terminus (DOOM Hunted Remix) - DOOM Eternal
  14. The Only Thing They Fear Is You (Remix)- DOOM Eternal
  15. Rip & Tear - DOOM (2016)
  16. Brain and Brawn - DOOM (2016)
  17. Main theme - Doom Eternal
  18. Main theme - Doom Eternal: the ancient gods
  19. Kitchen Ace (And Taking Names) (DOOM 1993)
  20. Into Sandy's City (DOOM II)
  21. VEGA Core (DOOM 2016)
  22. BFG-10000 (DOOM Eternal

Smash Dungeon + Enemies
  • Aregnt D'Nur
    • Imp
    • Pinky
    • Arch-vile
    • Cacodemon
    • Lost Soul
    • Doom Hunter
Boss
  • Icon of Sin
Spirits
  1. Pain Elemental
  2. Lost Soul
  3. Arachnotron
  4. Cyberdemon
  5. Zombieman
  6. Pinky
  7. Imp
  8. Icon of Sin
SmashSpace Items
  • Preator Armor
  • Doomslayer and a Friend
  • Icon of Sin
  • Doom Marine
Affiliated Mii Costumes
  • Revenant Mii Brawler (Doom)
  • Cacodemon Mask (Doom)
  • Heavy Mii Gunner (Team Fortress 2)
  • Dante Mii Swordfighter (Devil May Cry)
  • Mumbo Jumbo Mii Sworrdfigher (Banjo-Kazooie)
  • Paper Mario Mii Brwaler (Paper Mario)
  • Altair Mii Swordfighter (Assassin's Creed)
  • Rabbid Mii Outfit (Rabbids)
Bundle #?: Ahri

Fighter

  • Ahri
Stage
  • Summoner's Rift
Music
  1. POP/STARS - K/DA
  2. Legends Never Die
  3. Warriors
  4. Bit Rush: Arcade 2015 | Login Screen - League of Legends
  5. Bit Rush: Arcade Ahri | Login Screen - League of Legends
  6. MORE - K/DA
  7. Sett, The Boss
  8. Braum, the Heart of the Freljord
  9. Gnar, the Missing Link
  10. Main theme - League of Legends: Wild Rift
  11. True damage - GIANTS
  12. Captain Gangplank - Login Music
  13. Summoner's Call
  14. Ekko, the Boy who Shattered Time - Logic Music

Spirits
  1. Jinx
  2. Yasuo
  3. Vi
  4. Caitlyn
  5. Darius
  6. Akali
  7. Blitzcrank
  8. Ekko
  9. Kai'sa
  10. Neeko
  11. Wukong
  12. Tristana
  13. Seraphine
  14. Kayn
  15. K/DA
Master Spirit
  • Ms. Fortune
Assist Trophy
  • Jinx

SmashSpace Items
  • Nexus Pedastal
  • Yonmuu's Ghostblade
  • League of Legends Logo
  • Poro
Affiliated Mii Costumes
  • Vi Mii Brawler (League of Legends)
  • Thrall Mii Swordfighter (Warcraft)
  • Kerrigan Mii Brawler (Starcraft)
  • Travis Touchdown Mii Swordfighter (No More Heroes)
  • Rathalos Armor Mii Swordfighter (Monster Hunter)
  • Hunter Mail Mii Swordfighter (Monster Hunter)
  • Paimon Mii Brawler (Genshin Impact)
  • Traveler Mii Swordfighrer (Genshin Impact)
Bundle #?: Noah & Mio

Fighter

  • Noah & Mio
Stage
  • Aionos
Music
  1. You Will Know Our Names - Finale
  2. Weight of Life (New Arrangement)
  3. A Life Sent On
  4. Showdown with Z, Act 2
  5. Where We Belong
  6. Chain Attack!
  7. Moebius Battle
  8. A Formidable Enemy
  9. Showdown with Z, Act 1
  10. Confronting Our Past
  11. Melia ~ Ancient Memories
  12. Lost Days of Warmth
  13. Kaleidoscopic Core
  14. Brilliant Wings
  15. The Great Sea Stirs
Spirits
Master Spirit
  • Guernica Vandham
Assist Trophy
  • Ethel

SmashSpace Items
  • Ouroborus Animontronics
Affiliated Mii Costumes
  • Eunie Mii Swordfighter (Xenoblade)
  • Alear Mii Swordfighter (Fire Emblem)
  • Slime Hat (Dragon Quest)
  • Martial Artist Gi Mii Brawler (Dragon Quest)
  • Veronica Mii Swordfighter (Dragon Quest)
  • Goemon Mii Swodfighter (Goemon)
  • Geese Howard Brawler (Fatal Fury/King of Fighters)
  • Commander Shepard Mii Gunner (Mass Effect)

Echo Fighter Bundle

Echo Fighter Bundle #1

  • Character: Jin Kazama
  • Echo of: Kazuya Mishima
  • Series: Tekken
  • Character: Rock Howard
  • Echo of: Terry Bogard
  • Series: Fatal Fury/Garou
Appears in: Season 1(Between the Poenix Wright DLC Bundle and Sakura Shinguji DLC Bundle)
Additional Content:


Echo Fighter Bundle #2

  • Character: Ninten
  • Echo of: Ness
  • Series: MOTHER/Earthbound
  • Character: Jeanne
  • Echo of: Bayonetta
  • Series: Bayonetta
Appears in: Season 2 (Between the Lloyd Irving DLC Bundle and Geno DLC Bundle)
Additional Content:

Echo Fighter Bundle #3

  • Character: Black Shadow
  • Echo of: Captain Falcon
  • Series: F-Zero
  • Character: Roll
  • Echo of: Mega Man
  • Series: Mega Man
Appears in: Season 2 (Between the Lloyd Irving DLC Bundle and Geno DLC Bundle)
Additional Content:
Stage Bundle DLC

Stage Bundle DLC #1
Stage #1: Mappy
Franchise: Mappy
Music:

  1. Mappy Theme (Original)
  2. Hopping Mappy Theme (Original)
Stage #2: Winter Sports Event
FRanchise: Super Mario Bros./Sonic the Hedgehog
Music:

  1. Alpine Skiing from Mario & Sonic at the Olympic Winter Games
  2. Extreme Snow Boarding from Mario & Sonic at the Olympic Winter Games(DS)
Stage Bundle DLC #2
Stage: Aperture Smash Chamber
Franchise: Portal
Music:

  1. Want You Gone
  2. Some Assembly Required
  3. Still Alive (Crooner Mix)
  4. Your Precious Moon
  5. Subject Name Here
  6. 999999 [Remix]
  7. 4000 Degrees Kelvin
  8. Science is fun - Portal 2
  9. The Part Where He Kills You
  10. Radio Tune
  11. Diabolical Adrenaline Guitar
Stage Bundle DLC #3
Stage: Sandersons' House
Franchise: Chibi-Robo
Music:

  1. Broad Daylight - Chibi Robo (GCN)
  2. Night Play - Chibi Robo (GCN)

Stage Bundle DLC #4
Stage: Kagatsuchi
Franchise: BlazBlue
Music:

  1. Rebellion
  2. Nightmare Fiction (New Arrangment) - BlazBlue Continuum Shift
  3. Walpurgisnatch - BlazBlue Central Fiction
  4. ENDGAZER - XBlaze Lost: Memories
  5. Bullet Dance (Remix)
  6. Condemnation Wings (Remix)
  7. Memory of Tears
  8. MUST DIE ~ BlazBlue: Central Fiction
  9. Motor Head (BlazBlue: Calamity Trigger)
  10. Reppuu (BlazBlue: Calamity Trigger)

Stage Bundle DLC #5
Stage: Airship
Franchise: Final Fantasy
Music:

Stage Bundle DLC #6
Stage: Kamura Village
Franchise: Monster Hunter
Music:

Stage Bundle DLC #7
Stage: Space Invaders
Franchise: Space Invaders
Music:

  1. Space Invaders BGM
  2. Saturn (GBC)
  3. Space Invaders (Activision PS1) - Earth
  4. Space Invaders (Activision PS1) - Mars
  5. Title theme - Space Invaders Extreme
  6. Boss theme 1 - Space Invaders Extreme II
  7. Round 2 (Space Invaders 91)
  8. England - Big Ben (Space Invaders Revolution)
Stage Bundle DLC #8
Stage: Ancient's Ascent
Franchise: The Elder Scrolls V: Skyrim
Music:

  1. Dragonborn
  2. Far Horizons
  3. From Past to Present
  4. Steel on Steel
  5. Watch the Skies
  6. Around the Fire
  7. Tooth and Claw
  8. Death or Sovngarde
  9. One They Fear
  10. Sovngarde
Stage Bundle DLC #9
Stage: Grove Street
Franchise: Grand Theft Auto
Music:

  1. Main Theme ~ Grand Theft Auto: San Andreas
  2. The Big Score ~ Grand Theft Auto V
  3. The Jewel Store Job ~ Grand Theft Auto V
  4. Soviet Connection - GTA 4
  5. Welcome to Los Santos - GTA 5
  6. Main theme - GTA 3
  7. Main Theme - GTA Vice City
  8. The Ballad of Tony
  9. Menu Theme - GTA Advance
  10. Shine a Light from Grand Theft Auto V
Spirit Events

Spirit Event NumberNameThemeBonusesSpiritsNew SpiritsSubmitted By:
#1Have You Played Atari Yet?Spirits from the Atari systemsDouble EXP & SP
  1. Centipede (Centipede)
  2. Asteroids (Asteroids)
  3. Missile Commander (Missile Commander)
  4. Warlords (Warlords)
  5. Bentley Bear (Crystal Castles)
Yes Wario Wario Wario Wario Wario Wario
#2Ice Knowing 'Ya!Ice/Snow/Winter-themed SpiritsGold
  1. Snow Pea (Plants vs Zombies)
  2. Kula Diamond (King of Fighters)
  3. Woofa (Pac-Man)
  4. Lord Fredrik (Donkey Kong)
  5. Polar Bear (Ice Climbers)
  6. Mr. Frosty (Kirby)
  7. Ice Man (Mega Man)
  8. Shiva (Final Fantasy)
  9. Penguin Mario (Super Mario)
  10. Chilly (Kirby)
  11. Cirno (Touhou Project)
  12. Auroros (Pokémon)
  13. Snom (Pokémon)
  14. Rundas (Metroid)
  15. Jack Frost (Persona)
No@Leadership
#3Heart-Throbbing SpiritsSpirits associated with love, hearts, pink, and redSnacks
  1. Ann Tamaki (Persona)
  2. Amy Rose (Sonic)
  3. Boy and his Crush (Rhythm Heaven)
  4. Luvdisc (Pokémon)
  5. Super Happy Tree (Yoshi)
  6. Starly (Starfy Densetsu)
  7. Kairi (Kingfom Hearts)
  8. Don Flamenco (
  9. Pit (Original) (Kid Icarus)
  10. Harriet (Animal Crossing)
  11. Birdo (Mario)
  12. Winged Pikmin (Pikmin)
  13. Chuchu (Kirby)
  14. Enamorus (Pokémon)
Yes@Leadership
#3Live a Live Live a LiveSpirits from Live a LiveDouble XP & SP
  1. The Master and Masaru Takahara
  2. Pogo and Sundown Kid
  3. Akira and Cube
  4. Oersted and Oboro
Yes
#4Attack of the GingersSpirits with red hair, fur, or other hair-like thingsSnacks
  1. Adeleide (StyleSavvy)
  2. Wild Gunman (Duck Hunt)
  3. Urbosa (Zelda)
  4. Tasha (Advance Wars)
  5. baek doo san & hwoarang (Tekken)
  6. Eoleo (Golden Sun)
  7. Pippi (Eartbound/Mother)
  8. SOPHIA (Persona)
  9. Lip (Panel de Pon)
  10. C. Viper (street fighter)
  11. Axel (Kingdom Hearts)
  12. Penny Crygor (WarioWare)
  13. Bubsy (Bubsy)
  14. Lankey Kong (Donkey Kong)
  15. Apple Kid (Earthbound)
  16. Madeleine(Celeste)
  17. Kasumi (Persona)
  18. Julius (Fire Emblem)
No@Leadership
#5Stink-o-Rama!Spirits that are gross in nature.Gold
  1. Master Belch
  2. Buzz Buzz
  3. Plague Rat of Doom
  4. New Age Retro Hippie
  5. Gooigi
  6. Mugly
  7. Trubbish
  8. ??? (Zelda)
  9. Centipede
  10. Mother Brain
  11. X Parasite
  12. Core-X
  13. Prince Froggy
  14. Pigma
  15. Weezing
  16. Octoman
  17. Medusa (Original)
  18. Specnose
  19. Pseudo-Palutena
  20. Dark Lord Hum Gree
  21. Emporer Bulblax
  22. Salmonoid Chum
  23. CQ Cumber
  24. Commander Tartar
  25. The Creature and Flea Man
  26. Psaro the Man Slayer
  27. Mingella and Blobellda
  28. Gruntilda
  29. Lord Woo Fak Fak
  30. Zem and Zam
  31. Mr. Crumb
  32. El Gigante
  33. Licker
  34. Nosferatu
  35. Del Lago
  36. HAOS
  37. Gargantuar
  38. Dr. Zomboss
  39. Octo Zombie
  40. Earthworm Jim
  41. Globox
  42. Bad Piggies
  43. Meat Boy
No Wario Wario Wario Wario Wario Wario
#6Fluffy BuffsFluffy or otherwise soft oriented spiritsSnacks
  1. Yarn Poochy
  2. Garon
  3. Tankbot
  4. Woolio
  5. Sonic the Werehog
  6. Kuma & Panda
  7. Krystal
  8. Olaf
  9. Nintendog
  10. Tanooki Mario
  11. Gold Cat Mario
  12. Kiddy Kong
  13. Lanky Kong
  14. Little Birdie
  15. Swirlix
  16. Sigurd
  17. Tatsu
  18. Lil' Judd
  19. Sveta
  20. Big the Cat
  21. Blanka
  22. Chocobo and Moogle
  23. Reinhardt Schenider
  24. Tiny the Tiger
  25. Felyne
  26. King Man
  27. The Devil
No
#7On the WatchSpirits from the hero shooter OverwatchExp & Gold
  1. Tracer
  2. Soldier 76
  3. Reaper
  4. Winston
  5. Reinhardt
  6. Widowmaker
  7. Genji
  8. D.Eva
  9. Bastion
  10. Mercy
Yes Janx_uwu Janx_uwu
#8Eggsellent SpiritsSpirits loosely based off of EasterSnacks
  1. Star Bunny
  2. Eggling
  3. Huebirds
  4. Rabbid Peach
  5. Rabbid Mario
  6. Phantom of the Bwahpera
  7. Hen
  8. Cucco
  9. Lucy Hare
  10. Cinderace
  11. Diggersby
  12. Broodals
  13. Mega Eggdozer
  14. Arcade Bunny
  15. Zipper T. Bunny
  16. Billy Hatcher
  17. Little Birdie
  18. Mockiwi
  19. Chocobobo & Moodle
  20. Cream & Cheese
  21. Bee
NoLeadership
#9Kirby and the Forgotten LandSpirits from characters from Kirby and the Forgotten LandSnacks
  1. Mouthful Mode
  2. Elfilin
  3. Gorimomdo
  4. Fecto Forgo
  5. Caged Waddle Dees
  6. Morpho Knight
  7. Leongar
  8. Awoofy
  9. Crawloline
  10. Mouthful Mode
YesLeadership
#10Childish SpiritsSpirits based on children, toys, candy, and cute things for Children's Day in Jaoan.Gold
  1. Lloyd
  2. Nina Cortex
  3. Baby Pac-Man
  4. Baby Mario
  5. Baby Luigi
  6. Baby Peach
  7. Baby Daisy
  8. Drake Redcrest
  9. Baby Bowser
  10. Colin
  11. Sherry Birkin
  12. Freddy Fazbear
  13. Bug Catcher
  14. Chorus Kids
  15. Kiddy Kong
  16. Magikarp
  17. Kartana
NoLeadership
#11Back to the ArcadesSpirits based from games that appeared on arcades.EXP
  1. Jumpman (Donkey Kong)
  2. Girl & Monkeys (Rhythm Heaven)
  3. Gyaraga (Galaga)
  4. Mappy (Others)
  5. Stanley (Donkey Kong)
  6. Power Pellet (Pac-Man)
  7. Chun-Li (Street Fighter)
  8. Akira Yuki (Virtua Fighter)
  9. Crab (Space Invaders)
  10. Ralf & Clark (Ikari Warriors)
  11. Arthur (Ghosts n' Goblins)
  12. Kunio (River City)
  13. George (Rampage)
  14. Billy & Jimmy Lee (Double Dragon)
  15. Jago (Killer Instinct)
  16. Don-chan & Katsu-wada (Taiko no Tatsujin)
  17. Boss Galaga (Galaga)
  18. Taizo Hori (Dig Dug)
  19. Urban Champion Fighter (Urban Champion)
  20. Bubbles (Clu Clu Land)
  21. Donkey Kong and Lady (Donkey Kong)
No Tankman from Newgrounds Tankman from Newgrounds
#12Sega-fied SpiritsSpirits based from Sega properties.EXP
  1. Arle
  2. Billy Hatcher
  3. Axel Stone
  4. Ringo
  5. Dark Prince
  6. Akira Yuki
  7. Amitie
  8. AiAi
  9. Bonanza Bros.
  10. Alex Kidd
  11. Beat
  12. Hornet
  13. NiGHTS
  14. Landsknecht
  15. Goro Mijima
  16. Kiryu Kazuma
YesLeadership
#13Round 1, Fight!Spirits based on characters from fighting gamesEXP
  1. Akuma
  2. E. Honda
  3. Balrog
  4. Sakura Kasugano
  5. Luke
  6. Jin Saotome
  7. Batsu Ichimonji
  8. Amingo
  9. Misango
  10. Spring Man
  11. Ribbon Girl
  12. Kula Diamond
  13. Shun'ei
  14. K'
  15. Blue Mary
  16. Rock Howard
  17. Ash Crimson
  18. Ryo Sakazaki
  19. Yuri Sakazaki
  20. Lee Chaolan
  21. Haohmaru
  22. Nakoruru
  23. Sukapon
  24. Heihachi Mishima
  25. Jin Kazuma
  26. King and Armor King
  27. Nina Williams
  28. Asuka Kazuma
  29. Nightmare
  30. Taki
  31. Jago
  32. Orcane
  33. Zetterburn
  34. Filia
No Infinity Sorcerer Infinity Sorcerer
#14Dead by LifelightSpirits based on the Dead by Daylight seriesGold
  1. The Hunter
  2. The Huntress
  3. The Legion
  4. The Doctor
  5. The Nurse
  6. The Trickster
  7. The Oni
  8. Dwight, Meg, Claudette, & Jake
Yes
#15Nintendo Summer BashSpirits based on summer and summer-time events.EXP
  1. Magical Vacation Protagonists (Magical Vacation)
  2. Shine Sprite (Super Mario)
  3. Pianatas (Super Mario)
  4. Octo Zombie (Plants vs Zombies)
  5. Tawks (Donkey Kong)
  6. Coraline (Mii)
  7. Pooka (Dig Dug)
  8. The King of Red Lions (The Legend of Zelda)
  9. Starfy (The Legendary Starfy)
  10. MC Mode (Style savvy)
  11. Alolan Exeguttor (Pokemon)
  12. Tapu Koko, Tapu Lele, Tapu Bulu, & Tapu Fini (Pokemon)
  13. Heat Man (Mega Man)
  14. Amingo (Marvel vs Capcom)
  15. Joe Higashi (Fatal Fury)
  16. Ryota Hayami (Wave Race)
  17. Aku Aku (Crash Bandicoot)
  18. Glow Squid (Minecraft)
  19. Drake (Adance Wars)
  20. Kap'n (Animal Crossing)
  21. Gulliver (Animal Crossing)
  22. C.J. (Animal Crossing)
  23. Annie (Splatoon)
  24. Off the Hook (Splatoon)
  25. King Golem (Kirby)
  26. The Donpans (Rhythm Heaven)
  27. Seaslime (Dragion Quest)
NoLeadership
#16Red, White, and BlueAmerican-only SPirit EventGold
  1. America Sports Team
  2. Paul Phoenix & Marshall Law (Tekken)
  3. Guile (Street Fighter)
  4. Luke (Street Fighter)
  5. Pauline (Super Mario Bros.)
  6. Classic Sonic (Sonic the Hedgehog)
  7. Reshiram (Pokemon)
  8. Charmander (Pokemon)
  9. Andy Bogard (Fatal Fury)
  10. Geese Howard (Fatal Fury)
  11. Luke (Street Fighter)
  12. King of Hyrule (The Legend of Zelda)
  13. Jack Levin (F-Zero)
  14. Red Pikemoin (Pikmn)
  15. Blue Pikmin (Pikmin)
  16. White Pikmin (Pikmin)
  17. Mr. Sandman (Punch-Out!)
  18. Andy (Advance Wars)
  19. Colin (Advance Wars)
  20. Billy and Jimmy Lee (Doulbe Dragon)
  21. Earthquake (Samuri Shodown)
NoLeadership
#17OBJECTable ContentSpirits based off inanimiate objects, items, and locationsCandy
  1. Goal Pole (Super Mario)
  2. Warp Pipe -> Clear Pipe (Super Mario)
  3. Triforce (The Legend of Zelda)
  4. Energy Tank (Metroid)
  5. Celesyica Flute -> Azure Flute (Pokemon)
  6. Pokemon Center (Pokemon)
  7. Legatus (Astral Chain)
  8. Spikes (Sonic the Hedgehog)
  9. Tekken Bowl (Tekken)
  10. Oathkeeper & Oblivion (Kingdom Hearts)
YesLeadership
#18Legendary BattlesBased entirely on launch Legendary SpiritsGold
  1. Pauline
  2. Donkey Kong & Lady
  3. Fierce Deity Link
  4. Samus (Metroid Dread)
  5. Baby Bowser
  6. Aeon Hero
  7. James McCloud
  8. Arceus
  9. Claus
  10. Black Shadow
  11. Sothis
  12. Octopus
  13. Viridi
  14. Wario Man
  15. Giga Mac
  16. Pneuma
  17. Squid Sisters
  18. Max Brass
  19. Dullahan
  20. Karate Man's Father
  21. Jena Anderson
  22. Sturm
  23. Liquid Snake
  24. Super Sonic
  25. Dr. Wily
  26. Akuma
  27. Bahamut ZERO
  28. Madama Butterfly
  29. Alucard
  30. Phantom Thieves of Hearts
  31. Hero (DRAGON QUEST)
  32. Gruntilda
  33. Geese Howard
  34. Ender Dragon
  35. Devil Kazuya
  36. Xehanort
  37. Aku Aku
  38. Nemesis
  39. Flandre Scarlet
  40. Orochi
No Infinity Sorcerer Infinity Sorcerer
#19Spirits Hard at WorkAll spirits are based on occupationsEXP
  1. Swanky Kong (Donkey Kong)
  2. Jack Levin (F-Zero)
  3. Cody (Street Fighter)
  4. Mappy (Mappy)
  5. Sebsastian Tute (Mii)
  6. Tom Nook (Animal Crossing)
  7. Dr. Light (Mega Man)
  8. Happy Mask Salesman (The Legend of Zelda)
  9. Sadayo Kawakami (Persona)
  10. Tae Takemi (Persona)
  11. Nina (Tekken)
  12. Twintelle (ARMS)
  13. Chef (Game & Watch)
  14. Doris 1 (Wario)
  15. Professor Pac-Man (Pac-Man)
  16. Mr. Stevenson (Duck Hunt)
  17. Reporter and Wrestler (Rhythm Heaven)
  18. Adeleine (Kirby)
  19. Adam Malkovich (Metroid)
  20. Dingodile (Crash Bandicoot)
  21. William Birkin (Resident Evil)
  22. Photo Man (Earthbound)
  23. Chizuru Kagura (KOF)
  24. New Faces Team (KOF)
  25. Heihachi Mishima (Tekken)
  26. Cid (Final Fantasy)
  27. Munehisa Iwai (Persona)
  28. Referee (Punch out)
  29. Jinbe (Mole Panic)
  30. MC Mode (Style Savvy)
  31. Beedle (Legend of Zelda)
  32. Tank & Infantry (Advance Wars)
NoLeadership
#20A Moon Type SpiritsSpirits from the company Type-MoonCandy
  1. Arcueid Brunestud (Tsukihime) -> Archetype: Earth
  2. Ciel (Tsukihime)
  3. Hisui and Kohaku (Tsukihime)
  4. Neco-Arc (Melty Blood)
  5. Night of Wallachia (Melty Blood)
  6. Artoria Pendragon (Fate/stay night)
  7. Gilgamesh (Fate/stay night)
  8. BB (Fate/EXTRA CCC)
  9. Mash Kyrielight (Fate/Grand Order)
  10. Edmond Dantes (Fate/Grand Order)
  11. Goetia (Fate/Grand Order
  12. Astolfo (Fate/Apocrypha)
  13. Aoka Aozaki (Mahou Tsukai no Yoru) -> Aoko Aozaki (Redshift)
Yes
#21It's a Small World after AllSpirits based on actual locations and cultures in the real world.
  1. Glass Joe (France)
  2. Ling Xiaoyu (China)
  3. Akira Yuki (Japan)
  4. Chizuru Kagura (Japanese)
  5. Miguel Caballero Rojo (Spanish)
  6. Rashid (Middle East, I cant remind the specific country)
  7. 1) Fahkumram (Tekken) (Hails from Thailand)
  8. 2) Krizalid (The King of Fighters) (Hails from Ireland)
  9. 3) Great Tiger (Punch-Out!!) (Hails from India)
  10. Dracula (Castlevania)
No
#22Beastly Beast BattlesSpirits based on monsters, animals, or creatures.Fury Bowser (Super Mario)
Cat Mario (Super Mario)
Cat Goomba (Super Mario)
Donkey Kong & Lady (Donkey Kong)
Kritter (Donkey Kong)
Lizaflos (Zelda)
Deku Baba (Zelda)
Metroid (Metroid)
Dyna Blade (Kirby)
General Sclaes (Star Fox)
Galarian Meowth (Pokemon)
Scizor (Pokemon)
Gyarados (Pokemon)
Hsuian Zorua (Pokemon)
Plague Rat of Doom (MOTHER)
Ultimate Chimera (MOTHER)
Bio Rex (F-Zero)
Imp (Mysterious Casttle Murasame)
Claw Aberattion (Astral Chain)
Beast Legion (Astral Chain)
Sonic the Werehog (Sonic)
Treble (Mega Man)
Red XIII (Final Fantasy)
1. Fish (Balloon Fight)
2. Rathalos
3. Koopa Troopa
4. Bulborb
5. Master Beast
1.Tyrantrum
2.Crocomire
3.Tamed Wolf
4.Broggy
5.Chain Chomp
No Venus of the Desert Bloom Venus of the Desert Bloom
#23Spooky SpiritsSpirits inspired by Halloween
  1. Pyramid Head (Silent Hill)
    Omori (Omori)
  2. Boo (Super Mario)
  3. Dry Bones (Super Mario)
  4. ReDead (Zelda)
  5. ??? (Zelda)
  6. Grim Leacher (Yoshi)
  7. Dark Nebula (Kirby)
  8. Houndoom (Pokemon)
  9. Gengar (Pokemon)
  10. Darkrai (Pokemon)
  11. Eve (MOTHER)
  12. Master Belch (MOTHER)
  13. Demon Head (Wario)
  14. Vampire Wario (Wario)
  15. Sneaky Spirits (Rhythm Heaven)
  16. Skull Man (Mega Man)
  17. Blinky (Pac-Man)
  18. Pinky (Pac-Man)
  19. Inky (Pac-Man)
  20. Clyde (Pac-Man)
  21. Sue (Pac-Man)
  22. Kid Dracula (Castlevania)
  23. Death (Castlevania)
  24. The Creature and Flea Man (Catstlevania)
Yes
#24Cover to CoverBased on magical spirits
  1. Micaiah
  2. Marisa Kirisame
  3. Shanoa
  4. Tharja
  5. Mumbo Jumbo
  6. Patchouli Knowledge
  7. Blaze the Cat
  8. Kamek (Mario)
  9. Lip (Panel De Pon)
  10. Agahnim (Legend of Zelda)
  11. Terra (Final Fantasy VI)
  12. Leo (Fire Emblem)
  13. Dragonlord (Dragon Quest)
  14. Culdra (Culdcept)
  15. Star Wand
  16. Abra
  17. Iceologer
#25FRAYMAKERSSpirits are from the game Fraymakers
  1. The Watcher & Peppino
  2. Ultra Fishbunjin 3000 & Captain Viridan
  3. Octodad & Diogenes
    Welltaro & ?
#26Celebration of GamingSpirits inspired by legendary games
  1. Bill Rizer (Contra)
  2. Miner Wily (Miner Wily)
  3. Tennis for Two
  4. Dangerous Dave
  5. The Sims (Sims)
  6. Simon Ghost Riley (Call of Duty)
  7. Arthras (Warcraft)
  8. The Lich King (Warcraft)
  9. Gordon Freeman
Yes

Online Tournaments
Tournament NumberNameThemeCharactersStagesOther RulesSubmitted by:
#1Invasion of the Third Party KindThird party content only
  • Snake
  • Sonic
  • Mega Man
  • Pac-Man
  • Ryu
  • Ken
  • Cloud
  • Bayonetta
  • Simon
  • Richter
  • Joker
  • Hero
  • Banjo & Kazooie
  • Terry
  • Steve
  • Sephiroth
  • Kazuya
  • Sora
  • Crash
  • Jill
  • Leon
  • Reimu
  • Dr. Eggman
  • Crazy Dave
  • Iori
  • Shadow Moses Island
  • Green Hill Zone
  • Windy Hill Zone
  • Chemical Plant Zone
  • Dr. Wily Castle
  • Central Highway
  • Pac-Maze
  • Pac-Land
  • Suzaku Castle
  • Shopping District
  • Midgard
  • Umra Witch Clock Tower
  • Dracula's Castle
  • Clock Tower
  • Momentos
  • Yggrasil's Altar
  • Spiral Mountain
  • Transcontiental Railroad
  • Minecraft World
  • North Cave
  • Mishima Doho
  • Bastion Hollow
  • N. Sanity Beach
  • Raccoon City
  • Hakurei Shrine
  • House
  • King of Fighters Stadium
  • Mt. Hikami
  • Celeste Mountain
  • Tetris
  • Grey Fox
  • Psycho-Mantis
  • Knuckles the Echidna
  • Tails
  • Shadow the Hedgehog
  • Big the Cat
  • Elec Man
  • Dr. Wily
  • Ghosts
  • Dan Hibiki
  • Guile
  • Tifa Lockhart
  • Alucard
  • Sakura Futaba
  • The Dragonlord
  • Mumbo Jumbo
  • Creeper
  • Kuma
  • Meow-wow
  • Albert Wesker
  • Zombie Horde
  • Kula Diamond
  • Yuri Kozuka
  • Shovel Knight
  • Morrigan
  • Arle
  • Creeper
  • Monokuma
  • Imposter & Crewmates
  • Space Invaders
  • The Knight
#2Good Things Takes AGESSega-only content
  • Sonic
  • Dr. Eggman
  • Bayonetta
  • Joker
  • Sakura
  • Green Hill Zone
  • Windy Hill Zone
  • Chemical Plant Zone
  • Umbra Clock Tower
  • Momentos
  • Grand Imperial Theatre
Sega-based items and assist trophies Tankman from Newgrounds Tankman from Newgrounds
#3Journey from the WestWestern-only characters
  • Dark Samus
  • Diddy Kong
  • Dixie Kong
  • King K. Rool
  • Banjo & Kazooie
  • Steve
  • Crash
  • Crazy Dave
  • Burenia
  • Doc Louis's Training Warehouse
  • Home Studio
  • Minecraft World
  • Sawmill Thrill
  • Spiral Mountain
  • Celeste Mountain
  • Cranky Kong
  • Creeper
  • Dr. Neo Cortex
  • E.M.M.I.
  • Imposter and Crewmates
  • Klaptrap
  • Krystal
  • Mumbo Jumbo
  • Shovel Knight
  • Vince
  • Zombie Horde
#4Arcade Brawlout!Characters who appeared in arcades
  • Mario
  • Luigi
  • DK
  • Little Mac
  • Ice Climbers
  • Sonic
  • Pacman
  • Ms. Pacman
  • Kazuya
  • Ryu
  • Ken
  • Terry
  • Iori
  • 75M
  • Mario Bros
  • Boxing Ring
  • Summit
  • Balloon Fight
  • Wrecking Crew
  • Green Hill Zone
  • Pacmaze
  • Mishima Dojo
  • Suzaku Castle
  • Shopping District
  • Transcontinental Railroad
  • King of fighters Stadium
Items:
Hammer
Assist Trophy
Anti-Assist Trophy
Gold Hammer
Balloon
Freezie
Galaga Bug
Barrel
Smash Ball

Assist Trophies:
Sheriff
Akira Yuki
Guile
Cranky Kong
Ghosts, Kula
Morrigan
Space Invaders
Kuma
Dan Hibiki.
Tankman from Newgrounds Tankman from Newgrounds
#5This is Your Final Stand!Archenemies pairs are playable
  • Mario
  • Bowser
  • Donkey Kong
  • King K. Rool
  • Link
  • Ganondorf
  • Samus
  • Ridley
  • Kirby
  • King Dedede
  • Fox
  • Wolf
  • Palutena
  • Meduasa
  • Inkling
  • DJ Octavio
  • Sonic
  • Eggman
  • Cloud
  • Sephiroth
  • Bowser's Castle
  • Sawmill Thrill
  • Gerudo Valley
  • Norfair
  • Castle Dedede
  • Venom
  • Palutena's Temple
  • Moray Towers
  • Chemical Plant Zone
  • Northern Cave
  • Dracula's Castle
  • Venus Lighthouse
  • Murasame Castle
None
#6Under the Super Happy TreeYoshi's only
  • Yoshi
  • Crafted World
  • Super Happy Tree
  • Yoshi's Island Brawl
  • Yoshi's Story Melee
  • Woolly World
  • Food
  • Super Leaf (very rare)
  • Super Spicy Curry (extremely rare)
Wario Wario Wario Wario Wario Wario
#7Unexpected MeetingsCharacter's who were from "Out of Left Field" or unlikely,
  • Jigglypuff
  • Ice Climbers
  • Pichu
  • Mr. Game and Watch
  • Olimar
  • R.O.B.
  • Villager
  • Wii Fit Trainer
  • Duck Hunt
  • Piranha Plant
  • Stylist
  • Grovyle & Celebi
  • Marin
  • Wigglytuff Guild
  • The Summit
  • Flat Zone X
  • Distant Planet
  • Gyromite
  • Wii Fit Studio
  • Duck Hunt
  • Megafruit Paradise
  • Buemonde Arena
  • Spirit Tracks
  • Smash Ball
  • Fake Smash Ball
  • Pokeball/Masterball
  • anti-ssist trophy
  • Assist Trophies based on those franchises.
Submitted by: Tankman from Newgrounds Tankman from Newgrounds
#8The Main Event!Characters who are mains of the Infinite developers
  1. Duck Hunt
  2. Terry
  3. Pyra/Mythra
  4. Steve
  5. Kazuya
  6. Sora
  7. Ashley
  8. Iori
  9. Wolf
  10. R.O.B.
  11. Cloud
  12. Takamaru
  13. Yoshi
  14. Joker
  • Duck Hunt
  • Transcontinetal Railroad
  • Cloud Sea of Alrest
  • Minecraft World
  • Mishima Dojo
  • Hollow Bastion
  • Gamer
  • King of Fighter's Stadium
  • Venom
  • Gyromite
  • Midgard
  • Marusame Castle
  • Super Happy Tree
  • Momentos
  • All items
Leadership
#9Legendary SwordsA tournament between swordsmasters, all stages from the following franchises are avalaible (only in Omega form):
  1. Link
  2. Young Link
  3. Toon Link
  4. Marth
  5. Lucina
  6. Roy
  7. Chrom
  8. Ike
  9. Robin
  10. Corrin
  11. Byleth
  12. Meta Knight
  13. Shulk
  14. Pyra/Mythra
  15. Cloud
  16. Sephiroth
  17. Hero
  18. Sora
  19. Isaac
  20. Takamaru
  21. Zagreus
  22. Sakura
  23. Lloyd Irving
  24. Sol Badguy
  25. Mii Swordfighter
  • The Legend of Zelda
  • Fire Emblem
  • Kirby
  • Xenoblade Chronicles
  • Final Fantasy
  • Dragon Quest
  • Kingdom Hearts
  • Golden Sun
  • Mysterious Castle Murasame
  • Hades
  • Sakura Wars
  • Tales
  • Guilty Gear
  • Super Smash Bros.
  • Beam Sword
  • Ore Club
  • Cutting Edge
  • Death Scythe
  • Paper Fan
  • Fire Bar
Infinity Sorcerer Infinity Sorcerer
#10Last to be PickedA tournament consiting of characters largely overlooked based on online player data as well as stages.
  • Kirby
  • Wii Fit Trainer
  • Dr. Mario
  • Duck Hunt
  • Dark Pit
  • Mewtwo
  • Olimar
  • Mr. Game & Watch
  • Stylist
  • Marin
  • Pichu
  • Crazy Dave
  • Byleth
  • Dream Land
  • Wii Fit Studio
  • Pac-Land
  • Collisseum
  • Windy Hill Zone
  • Kongo Jungle 64
  • Suzaku Castle
  • Hanenbow
  • Gyromite
  • Waluigi's Pinball
All itemsLeadership
#11It's not Easy Being GreenGreen characters only
  1. Yoshi
  2. Luigi
  3. Young Link
  4. Toon Link
  5. Little Mac
  6. Palutena
  7. King K. Rool
  8. Isabelle
  9. Piranha Plant
  10. Byleth
  11. Min Min
  12. Grovyle & Celebi
  13. DJ Octavio
  14. Crazy Dave
  15. Sami
Dream Land
Rainbow Cruise
Yoshi's Island (Melee)
Yoshi's Story
Green Greens
Pokemon Stadium (Grass)
Mushroom Kingdom II
Figure-8 Circuit
Yoshi's Island
Smashville
Distant Planet
Hanenbow
Spirit Train
Golden Plains
Dream Land GB
Mushroom Kingdom U
Gaur Plain
Duck Hunt
Great Plataeu Sheikah Tower
Spira;l Mountain
Minecraft World (Plains)
Crafted World
Galar Wild Area
Deepsea Metro
Miitopia
House
Crossfire
Assist Trophies

  1. Creeper
  2. Futaba Sakura
  3. Morrigan
  4. Seteth
  5. Zombie Horde
  6. Dr. Wright
  7. Guile
  8. Jeff
  9. Kapp'n
  10. Metroid
  11. Nikki
  12. Squid Sisters
  13. Tiki
Infinity Sorcerer Infinity Sorcerer
#12Fire Emblem SmashersFire Emblem only content
  1. Marth
  2. Lucina
  3. Roy
  4. Chrom
  5. Ike
  6. Robin
  7. Corrin
  8. Byleth
  9. Anna
  10. Mii Swordfighter
    1. Lyn Outfit
    2. Black Knight Outfit
    3. Chrom Outfit
    4. Gatekeeper Outfit
  1. Castle Siege
  2. Coliseum
  3. Arena Ferox
  4. Grand Mach Monastary
  5. Dragon Altar
Items
  1. Killing Edge
  2. Breidablik
Assist Trophies
  1. Lyndis
  2. Black Knight
  3. Tiki
  4. Seteth
Infinity Sorcerer Infinity Sorcerer
#13About Time You Showed UpCharacters who were consistently requested by fans
  1. Sonic
  2. Mega Man
  3. Little Mac
  4. Cloud
  5. Bayonetta
  6. Ridley
  7. King K. Rool
  8. Isabelle
  9. Banjo & Kazooie
  10. Steve
  11. Sora
  12. Isaac
  13. Bandana Waddle Dee
  14. Waluigi
  15. Crash
  16. Ashley
  17. Takamaru
  18. Galacta Knight
  19. Grovyle & Celebi
  20. Impa
  21. Dixie Kong
  22. Phoenix
  23. Agumon
  24. Lloyd Irving
  25. Geno
  1. Chemical Plant Zone
  2. Central Highway
  3. Boxing Ring
  4. Midgard
  5. Umbra Clock Tower
  6. Pyrosphere
  7. Sawmill Thrill
  8. Mystery Island
  9. Spiral Mountain
  10. Minecraft World
  11. Gigabyte Ruins
  12. Waluigi Pinball
  13. N. Sanity Beach
  14. Gamer
  15. Murasame Castle
  16. Dedede's Castle
  17. Wigglytuff Guild
  18. Skyloft
  19. Rumble Falls
  20. Courtroom
  21. Digitmal Monsters LCD
  22. Tower of Salvation
  23. Forest Maze
All items GolisoPower GolisoPower
#14Painting the TownSplatoon only content
  1. Inkling
  2. Octoling
  3. D.J. Octavio
  1. Moray Towers
  2. Deepsea Metro
Rainmaker GolisoPower GolisoPower
#15Super Smash RivalsCharacters with canon or conceptual rivalries
  1. Mario
  2. Wario
  3. Ryu
  4. Kazuya
  5. Iori
  6. Terry
  7. Luigi
  8. Waluigi
  9. Marth
  10. Fox
  11. Inkling
  12. Octoling
  13. Cloud
  14. Sephiroth
  15. Sonic
  16. Dr. Eggman
  17. Pikachu
  18. Agumon
  19. Stylist
  20. Wii Fit Trainer
  21. Mewtwo
  22. Lucario
  23. Jill
  24. Lara
  25. Bowser
  26. King K Rool
  27. Little Mac
  28. Incineroar
  1. Mushroom Kingdom U
  2. WarioWare, Inc.
  3. Suzaku Castle
  4. Mishima Dojo
  5. King of Fighter's Stadium
  6. Transcontinental Railroad
  7. Luigi's Mansion
  8. Wakuigi Pinball
  9. Pokemon Stadium 1
  10. Final Destination
  11. Moray Towers
  12. Deepsea Metro
  13. Midgar
  14. Northern Cave
  15. Green Hill Zone
  16. Chemical Plant Zone
  17. Pokemon Stadium 2
  18. Digital Monster LCD
  19. Wii Fit Studio
  20. Beaumonde Arena
  21. Spear Pillar
  22. Raccoon City
  23. Croft Manor Catacombs
  24. Bowser's Castle
  25. Konga Falls
  26. Boxing Ring
None
#17Nintendo Entertainment SmashCharacters who debuted on the NES
1. Peach
2. Bowser
3. Piranha Plant
4. Link
5. Zelda
6. Samus
7. Ridley
8. R.O.B.
9. Duck Hunt duo
10. Takamaru
11. Pit
12. Palutena
13. Marth
14. Megaman
15. Simon Belmont
16. Meta Knight
17. Dr. Mario
18. Medusa
19. Ice Climbers (technically)
1. Mushroomy Kingdom (It's based on NES SMB)
2. Mushroom Kingdom 64
3. Brinstar Depths
4. Gyromite
5. Duck Hunt stage
6. Murasame Castle
7. Skyworld
8. Dracula's castle
9. Wily's Castle
10. Summit
11. Dr. Mario stage

Assist Trophy, Anti-assist trophy, Smash ball, fake Smash ball and items based on those properties.
All based on those properties mentioned above + Devil (Devil's world), Ayumi Tachibana, Mike Jones, Sukapon and etc.
Tankman from Newgrounds Tankman from Newgrounds
#18Genre GrapplersCharacter who represent gaming genresMario (Represents platformers)
2. Link (represent action-adventure games)
3. Hero (Represents RPGs)
4. Pac-Man (Represents maze games)
5. Doomguy (Represents FPS games)
6. Ryu (Represents fighting games)
7. Solid Snake (Represents stealth games)
8. Captain Falcon (Represents racing games)
9. Ahri (Represents MOBA games)
10. Duck Hunt Dog (Light gun shooter games)
11. Fox McCloud (Rail shooter games)
12. Villager (simulation games)
13. Dr. Mario (Puzzle games)
14. Olimar & Pikmin (represent real time strategy games)
15. Barista (Represent Rhythm games)
16. Reimu (represent shoot'em up game)
17. Phoenix wright (Visual novel)
18. Sami (Turn-based strategy games)
19. Sakura Shinguji (Dating sim)
20. Waluigi (Sport games I guess)
21. Crazy Dave (Tower defense)
22. Jill Valentine (Survival horror)
23. Steve (Sandbox games)
24. Zagreus (Roguelike game)
25. Agumon (Virtual pet)
26. Inkling (Third person shooter)
27. Wii Fit Trainer (Fitness game)
1. Peach's Castle
2. Hyrule Castle
3. Yggdrasil Tree
4. Pac-Maze
5. Mars
6. Suzaku Castle
7. Shadow Moses
8. Mute City SNES
9. Summoner's rift
10. Duck Hunt (stage)
11. Corneria
12. Smashville
13. Dr. Mario (stage)
14. Distant planet
15. Night walk
16. Hakurei Shrine
17. Courtroom
18. Crosszone
19. Grand Imperial theatre
20. Baseball Kingdom
21. House
22. Raccoon City
23. Overworld
24. The Underworld
25. Digital monster LCD
26. Moray Towers
27. Megafruit paradise (party games)
28. Electroplankton (Interactive music video game)
29. Wii Fit studio
Tankman from Newgrounds Tankman from Newgrounds
#19At the Feet of GiantsCharacter who become big in one point in time
  • Mario
  • Dark Samus
  • Pikachu (Pikachu has a Gigantamax form in SwSh)
  • Jigglypuff
  • Bowser
  • Ganondorf
  • Pokemon Trainer (Charizard possesses a Gigantamax form in SwSh)
  • King Dedede
  • Rosalina & Luma
  • Little Mac
  • PAC-MAN
  • Ms. PAC-MAN
  • Inkling (One of Splatoon 1's Special Weapons could transform you into a Kraken)
  • Ridley
  • King K. Rool
  • Sephiroth (If his Safer transformation counts)
  • Medusa
  • DJ Octavio
  • Dr. Eggman
  • King Boo
GolisoPower GolisoPower

DLC Music Packs
NumberNameTrackSeries
#1First of Firsts
  1. Rice Beach (Wario Land)
  2. The Paradise Line (Vocal Version) (Mother)
  3. Route 1 (Original) (Pokemon)
  4. Kiss for Geese (Fatal Fury: King of Fighters)
  5. Chinese Old Man (Art of Fighting)
  6. A Lone Prayer (Revelations: Persona)
  7. Sonic The Hedgehog Medley (Sonic The Hedgehog)
  8. Prelude from Final Fantasy I
  9. Spiral Mountain(Original)(Banjo Kazooie)
  10. Out of this Dimension Boss (Star Fox) <---I added this one
  1. Mother
  2. Star Fix
  3. Pokemon
  4. Wario
  5. Sonic the Hedgehog
  6. Fatal Fury
  7. Final Fantasy
  8. Art of Fighting
  9. Persona
  10. Banjo-Kazooie
#2Sounds of Spring
  1. Spring Yard Zone (New Remix)
  2. Fullmoon ~ Heartful (Hotaru Futaba Theme) from Garou: Mark of the Wolves
  3. I just want you to known (Sakura Kasugano Theme) from Street Fighter Alpha 2 (arrangment from Super Puzzle Fighters 2 X)
  4. Realm of the Fey (Miitopia)
  5. Forest of Hope (Remix) (Pikmin)
  6. Hopes and Dreams (Undertale)
  7. What Angel Wakes Me (Final Fantasy XIV)
  8. Forest of the Nopon (Xenoblade)
  9. Bunny Day (Animal Crossing New Horizons)
  10. Main Menu - Rayman Raving Rabbids 2 (DS)
  1. Sonic
  2. SNK
  3. Street Fighter
  4. Miitopia
  5. Pikmin
  6. Undertale
  7. Final Fantasy
  8. Xenoblade
  9. Animal Crossing
  10. Rayman Raving Rabbids
#3Capcom World Fair
  1. Theme of Morrigan (New Arrangment) - Darkstalkers Series
  2. Theme of Akira (New Arrangment) - Rival Schools Series
  3. Graveyard (New Arrangment) - Ghosts n' Goblins Series
  4. A Warring God - Breath of Fire IV
  5. Fatalis Phase 1 - Monster Hunter World
  6. Stage 2 - Strider
  7. Main Theme - Ghost Trick: Phantom Detective
  8. Theme of Frank West - Dead Rising
  9. Into Free - Dragon's Dogma
  10. Menu - Capcom Classics Collection Reloaded
  1. Darkstalkers
  2. Rival Schools
  3. Ghosts 'n' Goblins
  4. Breath of Fire
  5. Monster Hunter
  6. Strider
  7. Ghost Trick
  8. Dead Rising
  9. Dragon's Dogma
#4Lost in Time - Chono Trigger
  1. Corridors of Time (New Arrangement)
  2. Battle with Magus (New Arrangement)
  3. World Revolution/Last Battle (New Arrangement)
  4. Wind Scene
  5. Main Theme
  6. Schala’s Theme
  7. Robo's Theme
  8. Frog's Theme
  9. Boss Battle II (Remix)
  • Chrono Trigger
#5Catch the Wave
  1. Electric Angel - Hatsune Miku - Project Diva
  2. Luka Luka Night Fever - Megurine Luka - Project Diva
  3. Remote Controller - Kagamine Rin and Kagamine Len - Project Diva Arcade
  4. The Disappearance of Hatsune Miku - Project Diva Future Tone
  5. The World is Mine - Project DIVA Future Tone
  6. Rolling Girl- Hatsune Miku: Project DIVA Future Tone
  7. Catch The Wave - Hatsune Miku: Project Diva Mega Mix
  8. Senbonzakura - Hatsune Miku: Project Diva F
  9. World's End Dancehall - Hatsune Miku: Project Diva F
  • Project Diva
#6Honor the Brave
  1. Main theme - Halo: Combat evolved
  2. Finish the fight - Halo 3
  3. Main theme - Halo Infinite
  4. Blow Me Away - Halo 2
  5. Overture - Halo Reach (Remix)
  6. Never Forget - Halo 3
  • Halo

DLC Alternate Costume
CharacterIncluded in...Colors + Basis
MarioMario Bros. Pack #1
  1. White (Fire Mario)
  2. Black (Red Star Mario)
  3. Cyan (Ice Mario)
  4. Grey (Greyscale GB Sprite)
Donkey KongJungle Swinger Pack
  • Chartreuse (Intellevision Donkey Kong)
  • Grey (Lord Fredrick)
  • Black (Ghastly King)
  • Red-Brown (64 Model basis)
LinkTriforce Holders Pack
  • Slate Grey - Champion Tunic (Rubebr Armor set)
  • Pink - Hero of the Wild (Pinkle from Tingle’s Rosy Rupeeland)
  • Purple - Champion Tunic (Heroes Clothes)
  • Shirtless (Shirtless)
SamusBounty Hunters Pack
  • Slate Grey - Champion Tunic (Rubebr Armor set)
  • Pink - Hero of the Wild (Pinkle from Tingle’s Rosy Rupeeland)
  • Purple - CHampion Tunic (Heroes Clothes)
  • Shirtless (Shirtless)
Dark SamusEchoes Pack #1
YoshiSuper Smash Bros. Kart
KirbyReturn to Dreamland Pack
FoxSpace Animals Pack
PikachuGen One Pack
LuigiSuper Mario Bros. Pack #1
  1. Cyan (Ice Luigi)
  2. Stripe (NES Golf Open)
  3. Limegreen (Gooigi)
  4. Yellow (Builder Luigi)
NessKids at War Pack
Captain FalconBounty Hunters Pack
JigglypuffGen One Pack
PeachSuper Mario Bros. Pack #1
  1. Dark Red (Pauline)
  2. White/Red/Blue (Toad)
  3. Brown (Tanooki)
  4. White (Wedding Peach)
DaisySuper Mario Bros. Pack #1
  1. Yellow (Classic Daisy)
  2. Cyan (Rosalina)
  3. Green (GB Sprite)
  4. Pink (Peach)
BowserKoopa Clan Pack
Ice ClimbersBack to the Past Pack #1
SheikNinja Warriors Pack
ImpaEchoes Pack #1
ZeldaTriforce Holders Pack
  • Black - (Hyrule Warriors)
  • Pale Blue- (Twilight Princess Possessed Zelda)
  • Purple- (Hilda)
  • Lavender (Phantom Zelda)
Dr. MarioMelee Pack
PichuMelee Pack
FalcoSpace Animals Pack
MarthHeroes of the Emblem Pack
LucinaEchoes Pack #2
Young LinkKids at War Pack
GanondorfTriforce Holders Pack
  • Scarlet - (Calamity Ganon)
  • White - (Twilight Princess Possessed Zelda)
  • Cyan - (Great Sea Hyrule Warriors)
  • Grey (Phantom Ganon costume)
MewtwoGen One Pack
RoyMelee Pack
ChromHeroes of the Emblem Pack
Mr. Game & WatchBack to the Past Pack #2
Meta KnightReturn to Dreamland Pack
Galacta KnightEchoes Pack #3
PitDivine Intervention Pack
Dark PitEchoes Pack #3
Zero Suit SamusBounty Hunters Pack
WarioSuper Smash Bros. Kart
SnakeEspionage Pack
IkeHeroes of the Emblem Pack
SquirtleGen One Pack
IvysaurGen One Pack
CharizardGen One Pack
Pokemon TrainerGen One Pack
Diddy KongJungle Swinger Pack
  • White (Super Diddy Kong)
  • Light Pink (Donkey Kong Jr)
  • Light Green (Player 2 Kiddy Kong)
  • Grey (Donkey Kong Country 64 version of Funky Kong)
Dixie KongJungle Swinger Pack
  • hartreuse (Intellevision Donkey Kong)
  • Grey (Lord Fredrick)
  • Black (Ghastly King)
  • Red-Brown (64 Model basis)
LucasKids at War Pack
SonicBlue Bur Pack
King DededeBig Bad Meanies
OlimarSurvive the Night Pack
LucarioBlue Battlers Pack
R.O.B.Back to the Past Pack #2
Toon LinkKids at War Pack
WolfSpace Animals Pack
VillagerSurvive the Night Pack
Mega ManBlue Battlers Pack
Wii Fit TrainerWork Out Pack
Rosalina & LumaSuper Smash Bros. Kart
Little MacWork Out Pack
GreninjaNinja Warriors Pack
PalutenaDivine Intervention Pack
MedusaEchoes Pack #2
Pac-ManBack to the Past Pack #2
Mrs. Pac-ManEchoes Pack #3
RobinHeroes of the Emblem Pack #2
ShulkLegends of the Aegis Pack
Bowser Jr.Koopa Clan Pack
Duck HuntBack to the Past Pack #1
RyuFighter's History Pack
KenEchoes Pack #1
CloudLegends of the Fantasy Pack
CorrinHeroes of the Emblem Pack #2
BayonettaProtector of the Realms Pack
Inkling
OctolingEchoes Pack #2
RidleyBig Bad Meanies
SimonDivine Intervention Pack
RichterEchoes Pack #2
King K. RoolBig Bad Meanies
Isabelle
IncineroarWork Out Pack
Piranha PlantKoopa Clan Pack
JokerEspionage Pack
HeroLegends of the Fantasy Pack
Banjo & Kazooie
TerryFighter's History Pack
BylethHeroes of the Emblem Pack #2
Min-MinFighter's History Pack
SteveSurvive the Night Pack
SephirothLegends of the Fantasy Pack
PyraLegends of the Aegis Pack
MythraLegends of the Aegis Pack
KazuyaFighter's History Pack
Sora
IsaacLegends of the Fantasy Pack
Bandana DeeReturn to Dreamland Pack
WaluigiSuper Smash Bros. Kart
Crash
Stylist
Ashley
Barista
JillSurvive the Night Pack
LeonEchoes Pack #3
TakamaeuBack to the Past Pack #1
Grovyle & CelebiProtector of the Realms Pack
DJ OcatvioBig Bad Meanies
ReimuProtector of the Realms Pack
Officer HowardBlue Battlers Pack
Dr. EggmanBlue Bur Pack
Marin
Crazy Dave
SamiBounty Hunters Pack
IoriFighter's History Pack
AnnaHeroes of the Emblem Pack #2
King BooKoopa Clan Pack
Zagreus
Phoenix WrightBlue Battlers Pack
SakuraNinja Warriors Pack
Agumon
Ratchet & Clank
Lloyd Irving
Sol Badguy
Lara Croft
miscontent.png

Couldn`t find what you were looking for then check here! You might just find it! This includes Boxing Ring titles, Kirby hats, Series Symbols, and more!
Boxing Ring Titles
Character
Alias
Isaac
Warrior of Vale​
Bandana Dee
Helper to Hero​
Octoling
Half-Octopus, Half-Agent​
Waluigi
The Purple Perpetrator​
Crash
It's About Time!​
Stylist
Top Class Stylist​
Ashley
the Girl Next Door​
Medusa
Goddess of Darkness​
Barista
The Coffee Loving Canine​
Jill
The Last Survivor​
Leon
Special Agent​
Takamaru
Azure Samurai​
Galacta Knight
Greatest Warrior in the Galaxy​
Groyvle & Celebi
Time Thief of the Future​
DJ Octavio
The Octo King​
Reimu Hakurei
The Little Shrine Maiden​
Officer Howard
Legion Puppeteer​
Dr. Eggman
AKA Dr. Robotnik​
Marin
The Maiden from the Island​
Impa
Agent of the Goddess​
Crazy Dave
CRAAAAAAZZZY!!!​
Dixie Kong
Diddy's Damsel, Never in Distress​
Sami
Orange Star Commanding Officer​
Ms. Pac-Man
Queen of the Video World​
Iori
Flame of the End​
Anna
The Merchant Hungry for Money​
Zagreus - DLC
Son of Hades​
Phoenix Wright - DLC
The Ace Attorney​
Jin Kazama - Echo DLC
Lightning of Fate​
Rock Howard - Echo DLC
The Wolf's Pedigree​
Sakura Shinguji - DLC
Heart of the Hanagumi​
Agumon - DLC
The DigiDestined​
Sol Badguy - DLC
Flame of Corruption​
Lara Croft - DLC
Little Bird​
Lloyd Irving - DLC
Unifier of Two Worlds​
Ninten - Echo DLC
The First Earthbounder​
Jeanne - Echo DLC
The Plantinum Witch​
Geno - DLC
♡♪!?​
Ratchet and Clank - DLC
Intergalactic Heroes of the Solana Galaxy​
Red - DLC
The LeaderAzure Knightof the Flock​
Ahri - DLC
Nine-tailedThe Leader of the FlockFox​
Nightmare - DLC
The Azure Knight​
Black Shadow - Echo DLC
The Black Bull​
Roll - ECHO DLC
The Sweetheart Helper Robot​
Noah - DLC
Kevesi Off-seer​
Mio - DLC
Agnus Off-seer​
Doomslayer - LDC
Hellwalker​
2B - DLC

Kirby Hats
Character
Hat
Ability
IssaccIsaac's hair and scarfGaia
Bandana Waddle DeeBandana Dee's bandana
Spear Throw
OctolingOctoling octi hair. Gains markings around the eyes.Dapple Dualies
If Kirby uses up all of his ink, he loses his Octoling Copy Ability entirely, in a similar manner to Robin's Copy Ability; he cannot manually restore his ink either, since he doesn't copy the unique input. Although he always copies the orange Octoling's hairstyle, Kirby will use the first ink color that is not being used by another fighter. For example, if Kirby is fighting an orange Octoling, he will use blue ink; if he is fighting both an orange Inkling and a blue Inkling, he will use yellow ink; and so forth.
WaluigiWaluigi's hat, nose, and crazy mustacheServe
CrashCrash's nose, eyebbrows, hair tuft, and earsDeath Tornado Spin
StylistStylists main hair plus eye shadow and lipstick.Hairspray
AshleyAshley's ponytails
Dark Magic Zone
MedusaTransforms Kirby to a shade of lavender-grey with Medusa's snake hair.Eye Turret
BaristaBarista's headphones plus a tail, transforms Kirby's eyes to black dots. Transforms Kirby white.Packing Pests
JillJill's hair and blue beretHandgun
LeonLeon's hairHandgun
TakamaruTakamaru's hair and ponytail plus vest and sheathe for the swordWindmill Swords
Galacta KnightTurns Kirby purple and gives him the Galacta Knight mask and hornsMach Tornado
Retains Galacta Knight’s pinkish hue version.
Grovyle & CelebiThe top half of Groyle's head including the leaf appendages.Tosses Item
Kirby pulls out a random item from the bag and will toss it.
DJ OctavioDJ Octavio's golden kabuto helmetOctorpedo
Reimu HakureiReimu's hair and ribbon.Hakurei Amulet
Officer HowardMale Officer Howard's hairLegion Send
Kirby will always summon the Sword Legion which dashes forward and will slash the opponent.
Dr. EggmanEggman's glasses and mustacheBadnik
Kirby has access to all of Dr. Eggman's Badniks but at reduced healthpools.
MarinMarin's hair plus the magenta flower decorationLegend of Songs
ImpaImpa's hair and scarfKnife Storm
Crazy DaveCrazy Dave's cooking pot cap and goateeTurret Plants
Kirby can place one of several Turret plants which are actually mapped to Crazy Dave's Side Special
Dixie KongDixie Kong's ponytail and pink hatBubblegum Popgun
SamiInfantry's red helmetQuad Launcher
Ms. Pac-ManSimilar to Mr. Pac-Man but with a pink ribbonBonus Fruit
Retains the same fruit that Ms.. Pac-Man has.
IoriIori's hair108 Shiki Yamibari
AnnaAnna's hair and ponytail plus backpackBallista
Kirby uses the side special has the neutral special for Anna was deemed unusable.
King BooKibry has a transpartent look and a crown.Spike Ball
ZagreusZagreus' hair and hair fronds.Cast
Zagreus' boons aren't added into it so Kirby only does the baseline Cast.
Phoenix WrightPhoenix's hair and necktieObjection/Take That!
Jin KazamaJin's hair and hair
  • With Devil Blaster, Kirby has a thrid red eye, horns, forehead markings, and yellow eyes plus the raven wings that Devil Jin has
Devil Blaster
Rock HowardRock's hair
Sakura ShingujiSakura's hair and ribbonOuka Hoshin
AgumonTop of Agumon's head as well as tail.Pepper Breath
Kirby uses Agumon's base line neutral.
Sol BadguySol's headband and hair.Gunflame/Blockhead Blaster
Kirby has access to the input variations as well. He also has access to Gunflame (Feint)
Lara CroftLara's hair and ponytail.Competition Bow
Lloyd IrvingLloyd hair and headbandDemon Fang
Performs Fierce Demon Fang in the air. Doesn't have access to Technical and Strike forms on the ground.
NintenNinten's hatPK Boomerang
JeanneJeanne's hair and goggles
GenoKirby has a wooden texture and has Geno's hat and nose.Geno Beam
Ratchet and Clank
Ratchet's hat with yellow pointy ears with brown stripes
Weapon Fire
Kirby pulls out the Burst Pistol and fires it.
RedA red cap with Red's black feathers on top plus a beak and angry eyebrows.Bird Swap/Bird Launch
Kirby has access to every single bird but can't use Power-Up to augment the birds powers.
AhriAhri hair, facial markings, and earsOrb of Deception
NightmareNightmare's helmet and Soul EdgeSoul Wave
Kirby has access to Dire Vegeance as well.
Black ShadowBlack Shadow mask and cape
RollRoll's hair and ribbon
NoahNoah's hairOverclock Buster
MioMio's hair and earsGemini Strike
DoomslayerDoomslayer's helmetCrucible/Glory Kill/Hell Punch
Due to complexity with Weapon Wheel, Kirby uses Crucible which also comes with a gauge. Once completed, Kirby can perform a Glory Kill.
2B

Victory Themes
SeriesAffected CharactersVideoSourceDescription
Super Mario Bros.Luigi
Luigi's MansionFlourish of the Luigi's Mansion theme.
Super Mario Bros.Dr. Mario
Dr. MarioFlourish of the "Fever" theme
The Legend of ZeldaGanondorf
The Legend of Zelda: Ocarina of TimeFlourish of the "Ganon's Tower Ascent" theme.
The Legend of ZeldaToon Link
The Legend of Zelda: Wind WakerFlourish of the "The Great Sea"
The Legend of ZeldaYoung Link
The Legend of Zelda: Ocarina of Time/Majora's MaskA flourish for when Link gets a new song.
PokemonMewtwo
Pokemon Red & BlueFlourish of the "Battle! Wild Pokemon" theme.
PokemonGroyvle & Celebi
Pokemon Mystery Dungeon: Explorer's of Time & DarknessFlourish of the "IIntro & Opening Tjeme"
PokemonLucario
Pokemon Diamond & PearlFlourish of the intro to said game.
PokemonGreninja
Pokemon X & YFlourish of "Battle! Trainer" from said game.
PokemonIncineroar
Pokemon Sun & MoonFlourish from "Victory! Totem Pokemon" theme.
Kid IcaurusMedusa
Kid Icaurus UprisingFlourish of "Medusa's Theme"
Golden SunIsaac
Golden SunFlourish of the "Stage Clear Theme"
Super Mario Bros.Waluigi
Mario Kart DSFlourish of "Waluigi's Pinball" theme
Crash BandicootCrash
Crash Team Racing Nitro FueledFlourish of "Win Race" theme
Savvy StylistStylist
Style Savvy: TrendsettersFlourish of "Results - Kimono Girl"
Rhythm HeavenBarista
Rhythm TengokuA remixed flourish using the song “Dreams of Our Generation”.
Resident EvilJill, Leon
Resident Evil 3Flourish of the "Last Escape" theme
Mysterious Castle MarusameTakamaru
Mysterious Castle MurasameFlourish of the "Clear" Theme
SplatoonDJ Octavio
Splatoon 2Flourish of DJ Octavio's theme.
Touhou ProjectReimu
Touhou 14.5: Urban Legend in Limbo Flourish of " Dichromatic Lotus Butterfly ~ Red and White"
Astral ChainOfficer Howard
Astral ChainFlourish of "Savior".
Plants vs ZombiesCrazy Dave
Plants vs ZombiesFlourish of the "Victory Jingle - Backyard" theme
Advance WarsSami
Advance WarsFlourish from the "CO Power" theme.
King of FightersIori
King of Fighters '95Flourish from the King of Fighters '95, the game where Iori made his grand debut.
HadesZagreus
HadesA flourish of "No Escape" - the title theme of the game
Ace AttorneyPhoenix Wright
Ace AttorneyFlourish of Pursuit ~ Cornered
Fatal FuryRock Howard
Sakura WarsSakura Shinguji
Sakura WarsFlourish of Declaration! Imperial Floral Assault Group
DigimonAgumon
Digimon WorldFlourish of "Tournament Battle Win"
Guilty GearSol Badguy
Guilty Gear Xrd -Releveator-Except from the original version of "Decision"
Tomb RaiderLara Croft
Tomb RaiderFlourish from "Battle" theme also called "Danger" in later games.
Tales of SymphoniaLloyd Irving
Tales of SymphoniaOriginal version of "Won the Battle"
Super Mario RPGGeno
Super Mario RPGOriginal version of the Victory theme from Super Mario RPG. It loops like Persona and Final Fantasy.
Ratchet & ClankRatchet and Clank
Ratchet and Clank: A Crack in TimeA flourish of the "Battleplex Victory" theme
Angry BirdsRedAngry BirdsFlourish of the Level Completition theme.
League of LegendsAhriLeague of LegendsFlourish of the League of Legends victory theme.
SoulCaliburNightmare
SoulCalibur IIThe victory theme staright from the source material
Xenoblade Chronicles 3Noah & Mio
Xenoblade ChroniclesFlourish of the Weight of Life.
DoomDoomslayer


DoomDoomslayer has three victory themes based on his three alts:
NeiR Automata2BNeiR
Debut Trailer Taglines
CharacterSeriesTaglineSubmitter
IsaacGolden SunIsaac lets out a Howl! Smash! Hex D. Jess Hex D. Jess
Bandana DeeKirbyBandana Dee Waddles in! PeridotGX PeridotGX
OcotlingSplatoonOctoling Tests Their Mettle! GolisoPower GolisoPower
WaluigiSuper Mario Bros.Too bad: Waluigi time! Wario Wario Wario Wario Wario Wario
CrashCrash BandicootCrash Crashes through Time! Tankman from Newgrounds Tankman from Newgrounds
StylistStyle SavvyStylist Styles her Savvy!@airConditioner
AshleyWarioWareAshley Brews Up Trouble! Yiptap Yiptap
MedusaKid IcarusMedusa Emerges from the Underworld Venus of the Desert Bloom Venus of the Desert Bloom
BaristaRhythm HeavenBarista Drops the Beat! Ramen Tengoku Ramen Tengoku
JillResident EvilJill Prepares for the Apocalypse Venus of the Desert Bloom Venus of the Desert Bloom
LeonResident EvilLeon Deploys For Battle! GolisoPower GolisoPower
TakamaruMysterious Castle MurasameTakamaru Unsheathes his Sword! PeridotGX PeridotGX
Galacta KnightKirbyGalacta Knight Joins the Galactic Brawl! Tankman from Newgrounds Tankman from Newgrounds
Grovyle & CelebiPokemonGrovyle Gears Up! (and Celebi's right on time!) PeridotGX PeridotGX
DJ OctavioSplatoonDJ Octavio Spices up the Fight WeirdChillFever WeirdChillFever
Reimu HakureiProject TouhouReimu Responds To The Prayers! GolisoPower GolisoPower
Officer HowardAstral ChainOfficer Howard Unleashes the Legion Venus of the Desert Bloom Venus of the Desert Bloom
Dr. EggmanSonic the HedgehogDr. Eggman Moustache you a Question! Wario Wario Wario Wario Wario Wario
MarinLegend of ZeldaMarin Awakens Link!@airConditioner
ImpaLegend of ZeldaImpa Sneaks In! PeridotGX PeridotGX
Crazy DavePlants vs ZombiesCrazy Dave Mows Down the Competition! cashregister9 cashregister9
Dixie KongDonkey KongDixie Kong Ponys Up Venus of the Desert Bloom Venus of the Desert Bloom
SamiAdvance WarsSami Advances Forward to War Venus of the Desert Bloom Venus of the Desert Bloom
Ms. Pac-ManPac-ManMs. Pac-Man oughto' go Crazy! Wario Wario Wario Wario Wario Wario
IoriKing of FightersIori Goes On A Riot! GolisoPower GolisoPower
AnnaFire EmblemAnna Demands Payment....or Else! Venus of the Desert Bloom Venus of the Desert Bloom
King BooSuper Mario Bros.King Boo Scares up the Competition! Venus of the Desert Bloom Venus of the Desert Bloom
ZagreusHadesZagreus Styx It To The Competition! GolisoPower GolisoPower
PhoenixAce AttorneyPhoenix Wright Takes The Case! AlteredBeast AlteredBeast
JinTekken
RockFatal Fury
SakuraSakura WarsSakura Takes the Stage! Capybara Gaming Capybara Gaming
AgumonDigimonAgumon isn't Poking Around! Janx_uwu Janx_uwu
Sol BadguyGuilty GearSol Brings the Fire!
Lara CroftTomb RaiderLara Ruins the Party!
Lloyd IrvingTales of SymphoniaLloyd has a Tale to Tell! GolisoPower GolisoPower
NintenEarthbound/MOTHERNinten goes on another Journey!
JeanneBayonettaJeanne gets Even!
GenoSuper Mario RPGGeno pulls the Strings! Wario Wario Wario Wario Wario Wario
Ratchet & ClankRatchet & ClankRatchet and Clank have Entered the Station!
Rivet and Kit have Entered, Too
Wario Wario Wario Wario Wario Wario
RedAngry BirdsRed brings home the bacon! Wario Wario Wario Wario Wario Wario
AhriLeague of LegendsAhri gets Legendary! GolisoPower GolisoPower
NightmareSoulCaliburNightmare Desires Your Soul Venus of the Desert Bloom Venus of the Desert Bloom
Black ShadowF-ZeroBlack Shadow Charges In! Tankman from Newgrounds Tankman from Newgrounds
RollMega ManRoll rolls in!
NoahXenoblade Chronicles 3Noah Sees a Battle! GolisoPower GolisoPower
MioXenoblade Chronicles 3Mio Rings In!
DoomslayerDoomDoomslayer Rips and Tears!
2BNeiR Automata

Series Symbols
ImageSeriesNameSource
Golden SunSun EmblemA sun being consumed partially by the darkness. This icon is taken from the logo of Golden Sun: Dark Dawn.
Crash BandicootAku Aku FaceAku Aku is a reoccurring, main character who adds Crash in his adventures. While many elements like diamonds, Wumpa fruits, and crates have come to symbolize the series, Aku Aku is still the most visible.
Style SavvyThree StarsThe stars often appear on various Style Savvy game logos such as Trendsetters, ‘’ Styling Star, and Fashion Forward. This particular design comes from Trendsetters which is the basis for the default skin for Stylist.
Rhythm HeavenPerfect SymbolThe symbol that appears on the screen that denotes whether a player has hit a "Perfect" note in Rhythm Heaven.
Resident EvilUmbrella Corporation SymbolThe logo for the villainous organization Umbrella Corporation usually seen plastered around their various properties.
Touhou ProjectYin-YangA symbolization of the fantastical and spiritual nature of the franchise. The Yin-Yang Orb is often Reimu's catalyst for a majority of her danmaku and Spell Cards.
Mysterious Castle MurasameMurasame CastleRepresent the titular Murasame castle where most of the game takes place, usually seen on the game's cover and title screen. This design is taken from the logo of Takamaru's Ninja Castle in Nintendo Land.
Astral ChainARK Police StarRepresents the protagonist's affiliated group, tasked with protecting the denizens of the ARK from Chimeras.
Plants vs ZombiesZombie hand lifting a flower from the groundSymbolic of the titular conflict of the game's story. This symbol was used as the first game's application icon.
Advance WarsDouble-Sided WrenchThis wrench belongs to one of the main characters, Andy. It also serves as the symbol in the mainline Advance Wars titles, as well.
Super Mario RPG
King of FightersA stylized "F"Seen in the logo of a majority of the franchise's entries, as well as some in-universe logos for the tournament.
HadesThe Symbol of the UnderworldThe symbol that represents the Underworld, the homeland-prison of Zagreus and the setting for Hades.
Ace AttorneyA glinting four-point starA flashing light often seen on the box art for all entries in the series.
Sakura Wars
A cherry blossom
A blooming cherry blossom flower that is seen on the logos of several modern-day titles in the franchise. A variant of this flower exists as patterns on Sakura's kimono, as well.
DigimonA DigiviceA piece of machinery that a Digimon Tamer possesses, using them to empower their partner Digimon through Digivolutoin while in battle. The machine itself is based on the Digimon virtual pet from 1997.
Guilty GearGGBased on the logo from the original game with the GG inside a circle.
Nintendo LandNintendo Land LogoTaken from the game’s logo which is modeled off the tower that stands in the main plaza. The face resembles Monita, the park's guide.
Tomb RaiderAnkhtA common symbol in Egyptian mythology that often appeared in Tomb Raider.
Tales of SymphoniaQuill and paperThis symbol was used for the 25th anniversary of the Tales series.
Ratchet & ClankAn OmniwrenchA traditional Lombax weapon and Ratchet’s weapon of choice in melee combat ever since his debut on the original PlayStation 2 game. Over the years it has appeared under different manufacturers, such as Gadgetron, Vox Industries, and of course, the Lombaxes themselves.
Angry BirdsEgg and nestEggs are an integral part of the series as the Bad Piggies tries to steal them all the time to eat.
League of LegendsL-SymbolAppears in the logo and marketing for the series.
SoulCaliburProject Soul logoThis logo is from Project Soul which has been logo for the series for years.
DoomMark of the Slayer Rune
NeiR AutomataYorHA symbol
TetrisT-TetriminoBased off the ever-popular “T-Tetromino”.
CelesteMountainTaken directly from the logo of Celeste which depicts the game's main location, the Celeste Mountain
Art AcademyPainter's PaletteA stylized version of the common painter's palette usually seen being carried around by the game's guide, Vince in various promotional art.
PushmoFour-step StaircaseA stylized version of the steps and angles found in the Pushmo series.
Nintendo Badge ArcadeArcade Bunny"s HeadA stylized charicature of Arcade Bunny's head.
Fatal FrameA stylized "零"
The Japanese word for "zero" referencing the game's name in Japanese (Zero), Europe and Australia (Project Zero). It also represent theme of the game inspired by old Japanese folklore and urban legend.
PortalAn man walking through an open portal
Chibi-RoboAn electric plugBased on a part of Chibi-Robo's design.
Monster HunterRathalosA stylised symbol using Rathalos used in Montser Hunter.
The Elder ScrollsDragonSkyrim logo
Space InvadersAlien
Grand Theft AutoRockstarRockstar's Logo
TwiiterA BirdBased of Twitter’s official symbol, a blue bird named Larry.

Universes
Universe FighterStage
Assist Trophy
Item
Pokeball
Mii Costume
Boss
SmashSpace
Smash Dungeon and Eneemies
Masterpiece
Spirit
Music
Ace Attorney​
Phoenix WrightCourtroomFraziska von KarmaXXSteel Samurai Mii SwordfighterXXX
Advance WarsSamiCrossfireTanks & InfantryXXXX
Alien HominidXXXXXXXXXXSpiritX
Among UsXXCrewmate & ImposterXXXXXXXX
Animal Crossing
  • Villager
  • Isabelle
  • Smashville
  • Town and City
  • Tortimer's Island
  • Mystery Island
  • Kapp'n
  • Mr. Resetti
  • Flick
  • Pitfall
  • Beehive
X
  • Isabelle Mii Gunner
  • K.K. SLider Mii Gunner
X
  • Tarantula
  • Scorpion
X
Angry BirdsXXXXXXXXXXSpiritX
Ape EscapeXXXXXPipo Monkey Mii BrawlerXXXXX
ARMSMin-MinSpring StadiumSpring ManShock BombXHedlock Mii BrawlerXXXX
Art AcademyXArt StudioVinceXXVince Mii SwordfighterXXXX
Art of FightingXXXXXRyo Mii BrawlerXXXXX
ASH: Archaic Sealed HeatXXXXXXXXXX
Assassin's CreedXXXXXXXXXXX
AsteroidsXXXXXXXXXXX
Astral ChainOfficer HowardAstral PlaneJena AndersonXXKyle Mii SwordfighterJena AndersonShell ChimeraX
Azure Strikers GunvoltXXXXXXXXXXX
Baiten KaitosXXXXXXXXXX
Balan WonderlandXXXXXXXXXXX
Balloon FightXBalloon FightXXXXXXXX
Balloon KidXXXXXXXXXX
Banjo-KazooieBanjo & KazooieSpiral MountainMumbo JumboXXXXBuzz BombX
BaradukeXXXXXXXXXX
BastionXXXXXThe Kid Mii SwordfighterXXXXThe KidX
Battle ClashXXXXXXXXXXX
BattletoadsXXXXxXXXXXX
BayonettaBayonettaUmbra Clock TowerRodinLollipopXLoki Mii BrawlerXX
Billy HatcherXXXXXXXXXXX
Binding of Isaac, TheXXXXXXXXXXX
BioshockXXXXXBig Daddy Mii FighterXXXX1
BIT.TRIPXXXXXXXXXXX
BlazblueXKagatsuchiXXXRagna Mii SwordfighterXXXX
Bloodstained: Ritual of the NightXXXXXXXXXX
BombermanXXBombermanXXBomberman Mii BrawlerXXXX
BraidXXXXXXXXXXX
Brain AgeXXDr. KawamuraXXXXXXX
Braverly DefaultXXXXXXXXXXX
BravomanXXXXXXXXXXX
BubsyXXXXXXXXXX
Buck BumbleXXXXXBuck Bumble Mii GunnerXXXX
Bug FablesXXXXXXXXXXX
Burning ForceXXXXXXXXXXX
Candence of HyruleXXXXXXXXXXX
Captain CommandoXXXXXXXXXXX
Captain RainbowXXXXXXXXXXX
Castle CrushersXXXXXXXXXXX
Castlevania
  • SImon
  • Richter
  • Dracula's Castle
  • Clock Tower
AlucardDeath's ScytheXXDracula
Cave StoryXXXXXXXXXXX
CatherineXXXXXXXXXXX
CelesteXCeleste MountainXXXXXXXX
CentipedeXXXXXXXXXXX
Chibi-RoboXSanderson's HouseChibi-RoboXXChibi-Robo Mii GunnerXXX
Chōsōjū Mecha MGXXXXXXXXXX
ConkerXXXXXXXXXXX
Crash BandicootCrashN. Sanity BeachDr. CortexAku-AkuXX
Crystal CastlesXXXXXXXXXXX
CuldceptXXXXXXXXXXX
CupheadXXXXXXThe DevilXXX
Custom RoboXXXXXRay-MK Mii CostumeXXXX
Cut the RopeXXXXXXXXXXX
Cyberbots: Fullmetal MadnessXXXXXXXXXXX
Daigasso! Band BrothersXXXXXXXXXX
Dark SoulsXXXXXXXXXX1X
Daemon X MachinaXXXXXXXXXX1X
DanganronpaXXMonokumaXXXXXXX1X
DarkstalkersAssist TrophySpirit
Dead CellsSpirit-
Dead RisingDLC Mii CostumeSpirit
Devil May CrySpirit-
Devil WorldAssist TrophyMusic, Spirit
Dig DugSmash Dungeon EnemySpirit
DigimonDLC Fighter: AgumonStage, Smash Dungeon, Smash Dungeon Enemy, Boss, SmashSpace content, Spirit, Master Spirit, Music
Dillon's Rolling WesternAssist TrophySpirit, Music
Diaster: Day of CrisisSpirit-
Donkey KongFighter: Donkey Kong, Diddy Kong, Dixie Kong, King K. RoolStage, Item, Smash Dungeon, Smash Dungeon Enemy, Assist Trophy, SmashSpace content, Spirit, Music
Double DragonSpirit-
DoomSpirit-
Dragalia LostAssist TrophySpirit, Music
Dragon BusterSpirit-
Dragon SpiritSpirit-
Dragon QuestFighter: HeroStage, Item, Smash Dungeon, Smash Dungeon Enemy, Assist Trophy, Boss, SmashSpace content, Spirit, Music
Drill DozerAssist TrophyMusic, Spirit
Duck HuntFighter: Duck Hunt
Earthrworm JimDLC Mii CostumeSpirit
Elder Scrolls, TheDLC Mii CostumeSpirit
Elite Beat AgentsAssist TrophySpirit
Eternal Darkness: Sanity's RequiemSpirit-
Ever OasisSpiritMusic
F-ZeroFighter: Captain Falcon
Fall GuysMii CostumeSpirit
FalloutSpirit-
Famicon DetectiveAssist TrophySpirit
Fantasy Zone IIDLC Mii CostumeSpirit
Fatal FrameStageAssist Trophy, Music, Spirit, Item
Fatal FuryFighter: Terry Bogard
Final FantasyFighter: Cloud, Sephiroth
Find MiiStageMusic, Spirit
Five Nights at Freddy'sSpirit-
Fire EmblemFighter: Marth, Lucina, Roy, Chrom, Ike, Robin, Corrin, Byleth
FortniteSpirit-
Fossil FightersSpiritMusic
Freedom PlanetSpirit-
GalagaItemSpirit
Game & WatchFighter: Mr. Game & WatchStage, Spirit, Music
Gee BeeSpirit-
Genji and the Heike Clans, The
Spirit-
Ghouls 'n' GoblinsDLC Mii CostumeSpirit
GiftopiaSpirit-
Glory of HerculesSpiritMusic
God EaterSpirit-
God of WarDLC Mii CostumeSpirit
GoemonSpirit-
Golden SunFighter: Isaac
GradiusSpirit-
Guilty GearDLC Fighter: Sol BadguyStage, Master Spirit, Spirits, Music, Mii Costume
GumshoeSpirit-
GyromiteStageMusic, Spirit
HadesDLC Fighter: Zagreus
Half-LifeMusic-
HanenbowStageMusic
Hat in Time, AMii CostumeSpirit
HarmoknightSpirit-
Hollow KnightAssist TrophySpirit
Hogan's AlleyMusicSpirit
Hotel Dusk: Room 215Spirit-
Hyper Light DrifterSpirit-
Ikari WarriorsSpiritCameo
Ice ClimbersFighter: Ice Climbers
Joy Mecha FightAssist TrophyMii Costume, Spirit, Music
Kaeru no Tame ni Kane wa Naru
Assist TrophySpirit
Katamari DamacySpiritNamco Roulette
Kid IcaurusFighter: Pit, Dark Pit, Palutena, Medusa
Killer InstinctSpiritMusic
King & BalloonSpirit-
King of FightersFighter: Iori
Kingdom HeartsFighter: Sora
KirbyFighter: Kirby, Meta Knight, Galacta Knight, King Dedede, Bandana Dee
KlonoaMii CostumeSpirit, Music
Knockout CitySpirit-
Kousoku Card Battle: Card HeroSpirit-
Kurikin Nano Island StorySpirit-
Last Blade, TheSpirit-
Last Story, TheSpirit-
Legend of Zelda, TheFighter: Link, Zelda, Sheik, Ganondorf, Young Link, Toon Link, Marin, Impa
Legendary StarfyAssist TrophyMusic, Spirit
Lethal LeagueSpirit-
Little Big PlanetDLC Mii CostumeSpirit
Live a LiveSpirit-
Mach RiderDLC Mii CostumeSpirit, Music
Magic MonkeySpirit-
Magical VacationSpiritMusic
MappySpiritNamco Roulette
Marvel vs CapcomMii CostumeSpirit, Music
Marvelous: Mouhitotsu no TakarajimaSpirit-
Mega ManFighter: Mega Man
Metal Gear SolidFighter: Snake
Metal SlugSmash Dungeon EnemySpirits
Metro-CrossSpirit-
MetroidFighter: Samus, Zero Suit Samus, Dark Samus, Ridley
MiiFighter: Mii Brawler, ii Swordfighter, Mii Gunner
MiitopiaStageItem, Assist Trophy, Music, Spirit
MinecraftFighter: Steve
Missile CommanderSpirit-
Mole ManiaAssist TrophySpirit, Music, DLC Mii Costume
Monster HunterBossSpirit, Music, LDC Mii Costume
Mortal KombatMii CostumeSpirit
MOTHER/EarthboundFighter: Ness, Lucas
Mysterious Castle MurasameFighter: Takamaru
Namco X CapcomSpirit-
Ninja GaidenSpirit-
NinjalaSpirit-
Nintendo Badge ArcadeStageAssist Trophy, Music, Spirit
NintendogsAssist TrophyStage, Spirit, Music
NintendojiSpirit-
Nintendo LaboMii CostumeSpirit, Music
Nintendo LandStageMusic, Spirit
No More HeroesSpirit-
Octopath TravelerSpirit-
OverwatchSpirit-
Pac-ManFighter: Pac-Man, Ms. Pac-Man
Panel de PonMii CostumeItem, Music, Spirit
Pandora's TowerSpirit-
PersonaFighter: Joker
PictochatStageMusic
PikminFighter: Olimar
Plants vs ZombiesFighter: Crazy Dave
PokemonFighter: Pikachu, Jigglypuff, Pichu, Mewtwo, Pokeon Trainer, Squirtle, Ivysaur, Charizard, Greninja, Incineroar, Grovyvle & Celebi
PortalStageMusic
Professor LayoutSpirit-
Psycho SoldierCameoSpirit, Music
Punch-Out!!Fighter: Little Mac
PushmoStageMusic, Spirit
Puyo-PuyoAssist TrophySpirit
RabbidsSpirit-
RampageSpirit-
Ratchet & ClankDLC Fighter: Ratchet and ClankStage, Mii Costume, Assist Trophy, Spirits, Music
RaymanMii CostumeSpirit, Music
Resident EvilFighter: Jill, Leon
Rhythm HeavenFighter: Barista
Ring Fit AdventureSpirit-
Rival SchoolsSpirit-
Rivals of AetherSpirit-
River City Ransom/RIver City GirlsMii CostumeSpirit
Rolling ThunderSpirit-
Sakuna: Of Rice and RuinSpirit-
Sakura SamuraiSpirit-
Sakura WarsDLC Fighter: Sakura
Samurai ShodownDLC Mii CostumeSpirit
SatellaviewSpirit-
ShantaeMii CostumeSpirit, Music
Shin OnigashimaMusicSpirit
Shovel KnightAssist TrophySpirit, DLC Mii Costume, Music
Sin & PunishmentAssist TrophyMusic, Spirit, Mii Costume
Skull GirlsSpirit-
Sky KidSpirit-
Skies of ArcadiaDLC Mii CostumeSpirit
Soma BringerSpiritMusic
Sonic the HedgehogFighter: Sonic, Dr. Eggman
Soul CaliburSpirit-
Space InvadersAssist TrophySpirit
SplatterhouseSpirit
SplatoonFighter: Inkling, Octoling, DJ Octavio
Stack-UpMusicSpirit
Star FoxFighter: Fox, Falco, Wolf
Star TropicsAssist TrophyMusic, Spirit
Street FighterFIghter: Ryu, Ken
Streets of RageDLC Mii CostumeSpirit
Stretchers, TheSpirit-
Style SavvyFighter: Stylist
Super Mario Bros.Fighter: Mario, Luigi, Peach, Daisy, Bowser, Dr. Mario, Rosalina & Luma, Piranha Plant, Waluigi, King boo, Koopalings
Super Mario RPGFighter: GenoStage, Masterpiece, Smash Dungeon + Enemies, Spirits, Music, Mii Costume
Super Monkey BallSpirit-
Super Smash Bros.MusicSmash Dungeon Enemies, Bosses, Items, Spirits, SmashSpace Content
Sushi StrikerSpirit-
SwapnoteAssist TrophyMusic, Spirit
Tack of MagicSpirit-
Taiko Drum MasterSpiritNamco Roulette
Tales of ~DLC Fighter: Lloyd IrvingStage, Assist Trophy, Mii Costume, Spirits, Music
TeleroboxerSpirit-
TekkenFighter: KazuyaStage, Mii Costume, Assist Trophy, Spirits, Music
TetrisStageMusic, Spirit
Tomato AdventureSpirit-
Tomb RaiderDLC Fighter: Lara CroftStage, Music, Spirit
Tomodachi LifeStageMusic, Spirit
Touhou ProjectFighter: ReimuStage, Spirits, Music, Assist Trophy
Tower of Druaga, TheSpiritNamco Roulette
Toy PopSpirit-
Trials of ManaSpirit-
TwitterStageMii Costume
UndertaleMii CostumeMusic, Spirit, Smash Dungeon Enemy
Untitled Goose GameSpirit-
Valkyrie no Bōken: Toki no Kagi DensetsuSpiritNamco Roulette
Viewtiful JoeSpirit-
Virtua FighterAssist TrophySpirit
WarframeSpirit-
WarioWareFighter: Wario, Ashley
WarlordsSirit-
Wonder MomoSpirit-
World Ends With You, TheSpirit-
Wonderful 101, TheMii CostumeSpirit, Music
Wrecking CrewStageSpirit, Music
Wii FitFighter: Wii Fit Trainer
Wii SportsStageMusic, Spirit
XenobladeFighter: Shulk, Pyra/Mythra
XenosagaSpirit-
XeviousSmash Dungeon EnemySpirit
YokaiSpirit-
Yokai WatchSpirit-
YoshiFighter: Yoshi
YuyukiItemMusic, Spirit
Zangeki no ReginleivSpirit-

Palutena's Guidance
Pit: Wow, look who it is!
Palutena: Yep! He is finally here!
Viridi: Took enough time. What's it like...three games after he appeared in Brawl?
Pit: Not everyone can get an invite, Viridi. Some people really have to work hard to get one!
Virdi: Heh, it sees Isaac had to work harder than others.
Palutena: Oh I don't know. A certain purple-wearing no-good do'er seemed to always miss his chance.
Pit: Not this time! Everyone is here!
Palutena: That's the spirit! Now, show Isaac that you have four games of experience under belt.
Viridi: Like my natural powers, Isaac can call forth plants and the earth for his attacks so watch out!
Pit: Good thing I have wings then! I will be sure to "not get stuck in the mud"!
Palutena + Viridi: .....
Pit: Hey, I thought that was pretty funny!
Palutena: Jokes aside, don't let his vines or earth moves "ground" you, Pit.
Viridi: He might leave you behind "in the dust", Pit.
Pit: HEY!
Palutena: Awwww, it's a Waddle Dee!
Viridi: Sooo cute!
Pit: Waot, isn't that Bandana Dee.
Palutena: Once a Dee, always a Dee aren't you you cutie.
Pit: .... I see goddess are weakened by the cuteness of the Dee.
Viridi: Jealous much, Pit?
Pit: NO!! I just don't see what makes a small, orange puff ball so cute.
Viridi: Puuuuhlease, Pit. It's the definition of cute.
Palutena: True, true. I'm sorry, Pit but your cuteness radar is obviously broken.
Pit: Maybe cause I am staring at this orange puffball that carries a deadly spear.
Viridi: Dawww look at it whirls it around! Try getting hit Pit so we can take a picture!
Pit: HEY!! NO THANK YOU!
Pit: Hey, the Inklings got a make-over!
Palutena: Those aren't Inklings, Pit. They are Octolings.
Pit: Octings? What are they?
Viridi: Octolings. They are like Inklings but sworn enemies. Well, the Sanitized Octolings. These ones don't follow DJ Octavio.
Pit: Dee Jay Otayfiwhat not?
Viridi: DJ O-C-T-A-V-I-O. The leader of the Octolings.
Palutena: They share the same powers though as the Inklings for the most part but based on the cotopi of the human world.
Pit: Wasn't the whole Splatoon story based on like...when humans no longer exist?
Palutena: That's true, Pit. Surprised you were paying attention during the debriefing. Humans no longer exist in the Splatoon world so fishfolk took over.
Pit: I imagine since the Octlings...
Viridi: Octolings
Pit: ...Octolings are like the Inklings, they pronbably use similar weapons and moves. I might as well act likeI am fighting the Inklings then!
Pit: It's Waluigi time!
Viridi: It certainly is!
Palutena: He finally made it in!
Pit: WAAAAAHHHH!!!!
Palutena: We joke but this has always been an Assist Trophy since day one.
Viridi: They even teased about him never getting his chance to shine!
Pit: That's not so nice to his fans.
Palutena: Yes, but it's all in the good fun.
Viridi: Nah, I think it's even better to keep dumping on him.
Pit: Now that he is here, I wonder what his moves look like.
Palutena: It appears to be a mixture of his sports and spin-off content. Makes sense.
Pit: Ahh, so he didn't gain any crazy moves. They look just like his Assist Trophy appearance.
Palutena: But with style!
Viridi: And grace!
Pit: It's Qaluigi Time!
Pit: Whoa, who is the animal-looking duy. He is looking totally groovin'!
Palutena: I can't believe. Crash Bandicoot actually made it in!
Pit: Crash who?
Viridi: I don't know the Crash part but a Bandicoot is a marsupial from Australia.
Pit: Marsupiwhat? Austrela? What's all these big words?
Viridi: Gosh, Pit! Would it hurt to read an divinepedia for once?
Palutena: Asutralia is a country in the human world. Bandicoots are an anaimal form there but Crash doesn't look like your usual one. He has been mutated by science to become more humanoid.
Pit: Yeah, he's zipping around all over the place and throwing creates. I have my hands full.
Viridi: I usually like animals but he looks a bit goofy to me...
Pit: Now that you mention it, a lot of his moves are pretty wonky. Like...slapstick even.
Palutena: Crash isn't known for getting serious but he has had his fair share of world-saving adventures. Don't judge a book his it's cover, Pit!
Pit: Did I walk into the wrong game?
Palutena: Nope, you are just facing off against the Stylist?
Pit: Stylist?
Viridi: She is sure stylin', that's for sure!
Palutena: The Stylist hails from the Style Savvy universe. SHe ran her own boutique and gave those who visited makeovers.
Pit: Yeeeeahhh, I am still not following you.
Viridi: Just picture a place where people go to look more pretty.
Pit: Ahhhh...and why is she in Smash?
Palutena: Like many of us, she got an invitation! Still though, I question her ability to fight when using things like blow-dryers and lipstick. Rumors has it she utilizes wardrobe changes and currency to fight.
Viridi: So be careful, Pit or she might give you a make-ver!
Pit: Eep!
Viridi: Who's that girl living in a Mansion?
Pit & Palutena: It's the great Ashley!
Pit: It's great to finally get Ashley in Smash! WarioWare has been massively underrepped for a while now.
Viridi: I mean, who are the possible characters? Mona? Kat & Ana? 9-Volt? Ashley is easily the most recognizable of them all.
Pit: Now, is Ashley like the Medusa-variety of spell caster or more like Zelda?
Palutena: She uses a variety of magic that aims at putting opponents at a disadvantage.
Viridi: Your typical spellcaster with a "girl next door" vibe.
Pit: I will admit I feel a bit bad hitting her. Maybe she wants ice cream after?
Palutena: I feel that she could conjure ice cream from this air. Be careful, Pit.
Viridi: She won't be conjuring any ice cream on you. She will cast all sorts of magic such as causing you to sleep, get a flower, or even be KO'd!
Pit: The flower?! No! Anything but that!!!
Viridi: What do you have against natural forces, Pit?
Pit: I have ones against those that zap away my health!
Palutena: Medusa, I never thought you would come back...why?
Pit: I can't believe this...
Viridi: Why can't she stay down?!
Pit: Was this Hades work again? Curse him?!
Hades: Helloooooo, Pitty-Pit!
Pit+Viridi+Palutena: HADES?!
Hades: Yes, it is I!
Palutena: Are you here in Smash? Is no universe safe for your vile?!
Hades: Playable? Alas, no. I am far too powerful and grandeur for being simply a playable character. My role has been casted as a magnificent boss.
Viridi: I feel sick...
Hades: Still though, Medusa seems to be even tit-to-tat with you, Paulie.
Palutena: ...urgh...
Pit: Is that true, Lady Palutena?
Palutena: This reawakened form of Medusa is almost a carbon copy version of me, with more Underwordly vibes.
Hades: Haha, Medusaw ill be just the entertainemnt for me as I regrow my body.
Palutena+Pit+Viridi: Hades...
Pit: Hey, it's a dog. Here doggy.
Viridi: A doggy with headphones to be exact.
Palutena: I...I don't know who this is...I need to look around on Divinipedia.
Pit: You don't even know this character, Lady Palutena?!
Viridi: Le gasp!
Palutena: It says here...that this is...Barista.
Pit: Barista like that dandy person serving you tea or...it's name?
Palutena: It's name it appears. It seems it has some control over...music...
Viridi: That sound so like a janky character.
Pit: Yeah, the moves are really weird. It can summon characters like a karate master and three singing kids.
Palutena: Three singing kids? Karate master? This character must be from Rhythm Heaven!
Viridi: Wait...I know them? Why aren't they playable?! Who is this Barista?
Palutena: Who knows. Seems like a minor footnote in Rhythm Heaven history but...as I say...never judge a book by its cover! It got in somehow and earned its place in gaming history!
Pit: Whoa, get a look at her! She seems ready for all-out-war.
Palutena: I am not too surprised. This is Jill Valentine, former S.T.A.R.S. operative.
Viridi: Stars?
Palutena: At its core, they ake down bio-organic weapons or B.O.Ws. She know works for the B.S.S.A.
Pit: They sure do love thier acronyms!
Viridi: Maybe I should call my army the F.O.N.?
Pit: And we can be called the C.O.S.W.!
Palutena: Or perhaps L.P.A.A.
Viridi: EWhat's that?
Palutena: Lady Palutena's Angelic Angels.
Viridi+Pit: ...
Palutena: I kid, we can just be Skyworld. Anyways Pit, to the fight at hand. Jill is no stranger to the battlefield. She wields all sorts of weapony.
Pit: Yeah, she's been pulling out tons of stuff.
Palutena: Makes sense. She utilizes all sorts of military grade weapons and armor. Don't let your guard down!
Palutena: Whoa, it's Leon!
Pit: Leon...like "Annoying bird, I am the great Leon!" Leon? From Star Wolf?
Viridi: No, silly! It's Leon Kennedy!
Pit: ..... Who
Viridi: Gah! You are so dense! Leon Kennedy is the ravenous former Raccoon City police officer turned D.S.O. agent! He is, like, the coolest ever!
Pit: Wow....crush much?
Viridi: I am just drawn to accomplished self-made men, Pit!
Pit: Hey! I am a self-made man!
Viridi: Whose reliant on someone to grant you those powers.
Palutena: She has a point, Pit. Viridi's crush aside, Leon uses a variety of weapons such as grenade launchers and pistols. He is literally a walking aresenal.
Pit: A self-made walking arsenal apparently...
Viridi: Oh Pit, sulking doesn't become you.
Palutena: He is quite rugged. Like a "take charge type of guy". And that hair. It must smell like leather and hard-work.
Pit: Hah! Swoon all you want but I will show how the mighty can fall!
Viridi: YOU LAY A HAND ON MY LEON AND WILL YOU PAY WITH YOUR BLOOD!!!
Pit: Hey, it's Takamaru! How's it going, buddy!?
Palutena: That's right! Our game came out around the same time Mysterious Castle Marusame did.
Pit: Viridi was just a wittle baaaaaby back then!
Viridi: Hah! Jokes on you! I just didn't want to be on such a retro game! I was waiting for them to capture my more better side with newer technology.
Palutena: Takamaru mighty be as old as we are but his skills are as sharp as ever. He utilizes not only his trusty katana but shuriken and magic attacks! He is both agile and nimble all at once!
Pit: Trouble is he didn't try duel wielding! Hiyah hiyah hiyah!
Viridi: Takamaru's sword speed is apaprently unparalleled. He doesn't need two swords when his sword strikes are just as fast.
Pit: Huh, never thought it that way.
Palutena: Focus, Pit. Work with what is good for you; not what you don't know.
Pit: Gotcha! Two swords it is then!
Pit: It seems I am fighting the pink color swap of Meta Knight.
Palutena: Pink color swap? Oh, that;s Galacta Knight.
Pit: Galacta Knight? Wait, this isn't Meta Knight?
Palutena: No, this is Galacta Knight. The two may look similar but they are vastly different.
Viridi: I am surprised you neve rheard of the legends surrounding Galacta Knight, Pit. I mean...they are super fmaous.
Pit: Now I look silly. What are they?
Palutena: Galacta Knight was once known as the strongest warrior in the galaxy until he was strangely sealed away. I wonder what higher form could seal away such a creature.
Viridi: Meta Knight, seeking to test his mantle against the strongest in the universe, collected stars to summon Nova, the wish-granting comet.
Palutena: Nova then summoned Galacta Knight and well...here we are.
Pit: Did Meta Knight ever beat him?
Viridi: It seems not? We don't have any data about it.
Pit: Gulp...so I am fighting THE strongest being in the universe...now?!
Viridi: It appears that way, Pit. But it shares many of the same moves as Meta Knight albeit with a lance...though shortened for some reason. Maybe the summoning was botched or something.
Pit: Lady Palutena, if I don't come back, can you water my house plant, Jeff?
Palutena: You will come back. I have faith in you.
Pit: Who's that Pokemon?!
Viridi: Wait...what?
Palutena: I think Palutena is referencing some human-world media thing about Pokemon.
Pit: No, I am serious. Who are they? They don't see like final evovled starters or legendaries.
Palutena: All, these are the two time travelers, Grovyvle and Celebi.
Viridi: Celebi isn't a stranger to Smash. She was once a Pokemon that appeared arely from a Master Ball. Grocyle is a newcomer though.
Palutena: But this Celebi and the general Celebi are a bit different. Two different characters, I think.
Pit: They don't really use the typical Pokemon-type moves. They have been using various items.
Viridi: Yes, they don't come from the typical mainline games but rather a spin-off. Imagine if we starred in a Skyworld racing or a fighting game.
Pit: I'm down!! THAT WOULD BE SO COOL!
Palutena: We don't have the budget for that. Anyways, Grovyle is the evovled form of Treecko but unevolved form of Sceptile so it's a mid evolution Pokemon and focuses mostly on physical attacks while Celbi handles magical ones. They are quite the team so focus up, Pit.
Pit: Hey, could we get like a Skyworld Crossing game? Palutena+Viridi: No, Pit.
Pit: Man, this dude has some bad beats, yo!
Palutena: Ummm...what, Pit?
Pit: I am tots groovin" in this scene, bro! This place be rockin'! His beats are legit sick, yo! Yo yo yo!
Viridi: .......yeah....
Pit: LET"S MAKE SOME NOOOOOIIISE!!!
Palutena: Put. The. Glow. Sitcks. Away, Pit. Before someone gets hurt.
Pit: Proceeds to attempt to beatbox
Viridi: Oh dear goddess...what is this fool doing.
Pit: Sorry but not sorry. When I hear a beat, I can stop hipping to it!
Palutena: Alrighty then...well...this opponent is called...
Pit: The system is down !The system is down...down...down...downdowndown...
Palutena+Viridi: PIT!!!!
Pit: AUGH! I'm listening!
Palutena: This is DJ Octavio, leader of the Octolings. Like you said, he does have mad beats but he can use those disc scratches and DJ skills to do damage so watch out! He can use all sorts of attacks from his mech.
Viridi: I think he's lost to the beat, Palutena.
Palutena: Ughhh...
Pit: CAUSE BABY TONIGHT DJ OCTAVIO GOT US FALLIN' IN LOVE AGAIN!!!
Palutena: Mic drop....
Pit: Hey, whose's the kid?
Palutena: Oh, hey, it's Reimu Hakurei!
Viridi: She looks about the same age as you, Pit.
Pit: NUH UH!! So who is this Reimu Hakurei?!
Palutena: She is an expert youkai exterminator and exorcist.
Pit: She likes to exercise?
Viridi: No, Pit. Exorcist! It means get srid of evil spirits.
Pit: Oh, just like me!
Palutena: Yes, and no. She is of the Japanese variety while ours is more European in nature.
Pit: So this girl is out there exterminating all these...what were they....youkai?
Viridi: Yes, these are monsters native to Japan. Some of them are like strange water frog creatures while others are gigantic serpents.
Pit: And this little girl does it all by herself! I'm impressed!
Palutena: Don't let your guard down. She may be a kid but she has plenty of skills and abilities up her sleeve. Stay alert, Pit.
Pit: Sir/Ma'am, yes, sir!/ma'am!
Palutena: Whoa are you talking to, Pit?
Pit: I am fighting Officer Howard so I am trying to get into the role.
Viridi: Officer Howard? As in the
Snake Codec

Here is a list of every Spirit from Ultimate + Sequel
Music

To submit a song, please visit the:
Music Submission Doc

Please take note of the current cap on songs that can be included at any given time. The cap will increase for certain series at the start of the week. Please only include songs from series and games that have had at least one appearance on a Nintendo console.

Features
 
Last edited:

Quillion

Smash Hero
Joined
Sep 17, 2014
Messages
6,005
I have ideas for new move inputs/categories, so can I present them here? If not now, when can I present them?
 

Venus of the Desert Bloom

Cosmic God
Super Moderator
Premium
BRoomer
Writing Team
Joined
Jul 30, 2007
Messages
15,494
NNID
VenusBloom
3DS FC
0318-9184-0547
The first phase will be suggesting a character following the Current Job: Add a Character who was Deconfirmed in Ultimate. Once we get 5-10 suggestions, we will proceed with voting in a poll which one will be included. After voting finishes and a winner is decided, we can start crafting how the character plays, Moveset, and other content. Once this job is finished, we will move into the next one.

It’ll be a bit rough from the start but I hope things work themselves out as we continue
 
Last edited:

CheeseAnton

Smash Ace
Joined
Oct 1, 2020
Messages
538
Location
Balatro Brainrot
Developer Suggestion Character: Dillon from Dillon's Rolling Western

Dillon, from the Dillon's Rolling Western series, has been assist trophiy'd twice (once in SM4SH, and again in Ultimate), for generally not being a popular character. But if he was given the chance, he could be an amazing fighter. He could be a defense-offensive character, with the main gimmick of his being his ability to place defense towers (after gaining money mid-battle?). He could also use his claws and roll up into a ball for movement. Also, he would be Smash's first cowboy.
As to why, his series is an underrated one, and is recent. If Dillon got into Smash bros, his series could be popular and likely to be saved as he's somewhat new and likely to be lingering a bit in Nintendo's mind. If he got in, we could get a new juggernaut of a series. He could also be the representative for the DS era, as none of the fighters series originated from the DS. Also, there are no tower defense characters in smash.

Edit... again... how many times have I edited this?: Welp, Issac won. But hey, I'm happy 4 other people voted for Dillon, I thought I was gonna be a solo voter. So that's neat.
 
Last edited:

Venus of the Desert Bloom

Cosmic God
Super Moderator
Premium
BRoomer
Writing Team
Joined
Jul 30, 2007
Messages
15,494
NNID
VenusBloom
3DS FC
0318-9184-0547
Does Dillon from Dillon's Rolling Western count? (as in, do you think he has enough of a popularity [requirement 4] to be allowed)

I would like to suggest him if possible. He could have a unique gimmick around placing defense towers, plus he's an armadillo with a cowboy hat, what else do you want?
Certainly, could you add a bit more on how he could play and reasons for his inclusions? Why would he deserve a spot? This could help increase his overall votes.
 

Speed Weed

Smash Master
Joined
May 16, 2020
Messages
3,760
Location
Portugal
Switch FC
SW-1814-1029-3514
Developer Suggestion Character: Takamaru from The Mysterious Murasame Castle
Takamaru_Assist_Trophy_(SSBU).png

Takamaru has kept up a notable fan following in the Smash community for a long time now, especially in the Smash 4 days. His game is no longer Japan-exclusive since the last known time he was considered, acclaimed Japanese game devs have given it their blessing and expressed interest in a revival, and it's one of the few "dead" Nintendo IPs with the distinction of continuing to be given little nods outside of Smash to this day, indicating that they still have the character on their minds to some degree.

In terms of gameplay, Takamaru would bring with him a completely new character archetype: the samurai. Additionally, reflecting on his original game's nature of always being on the move and dodging enemy attacks, he would be a quick, nimble and responsive fighter, his repertoire also putting emphasis on projectiles such as shuriken, pinwheel knives and fireballs in addition to physical attacks with his katana.

did I do it right
 
Last edited:
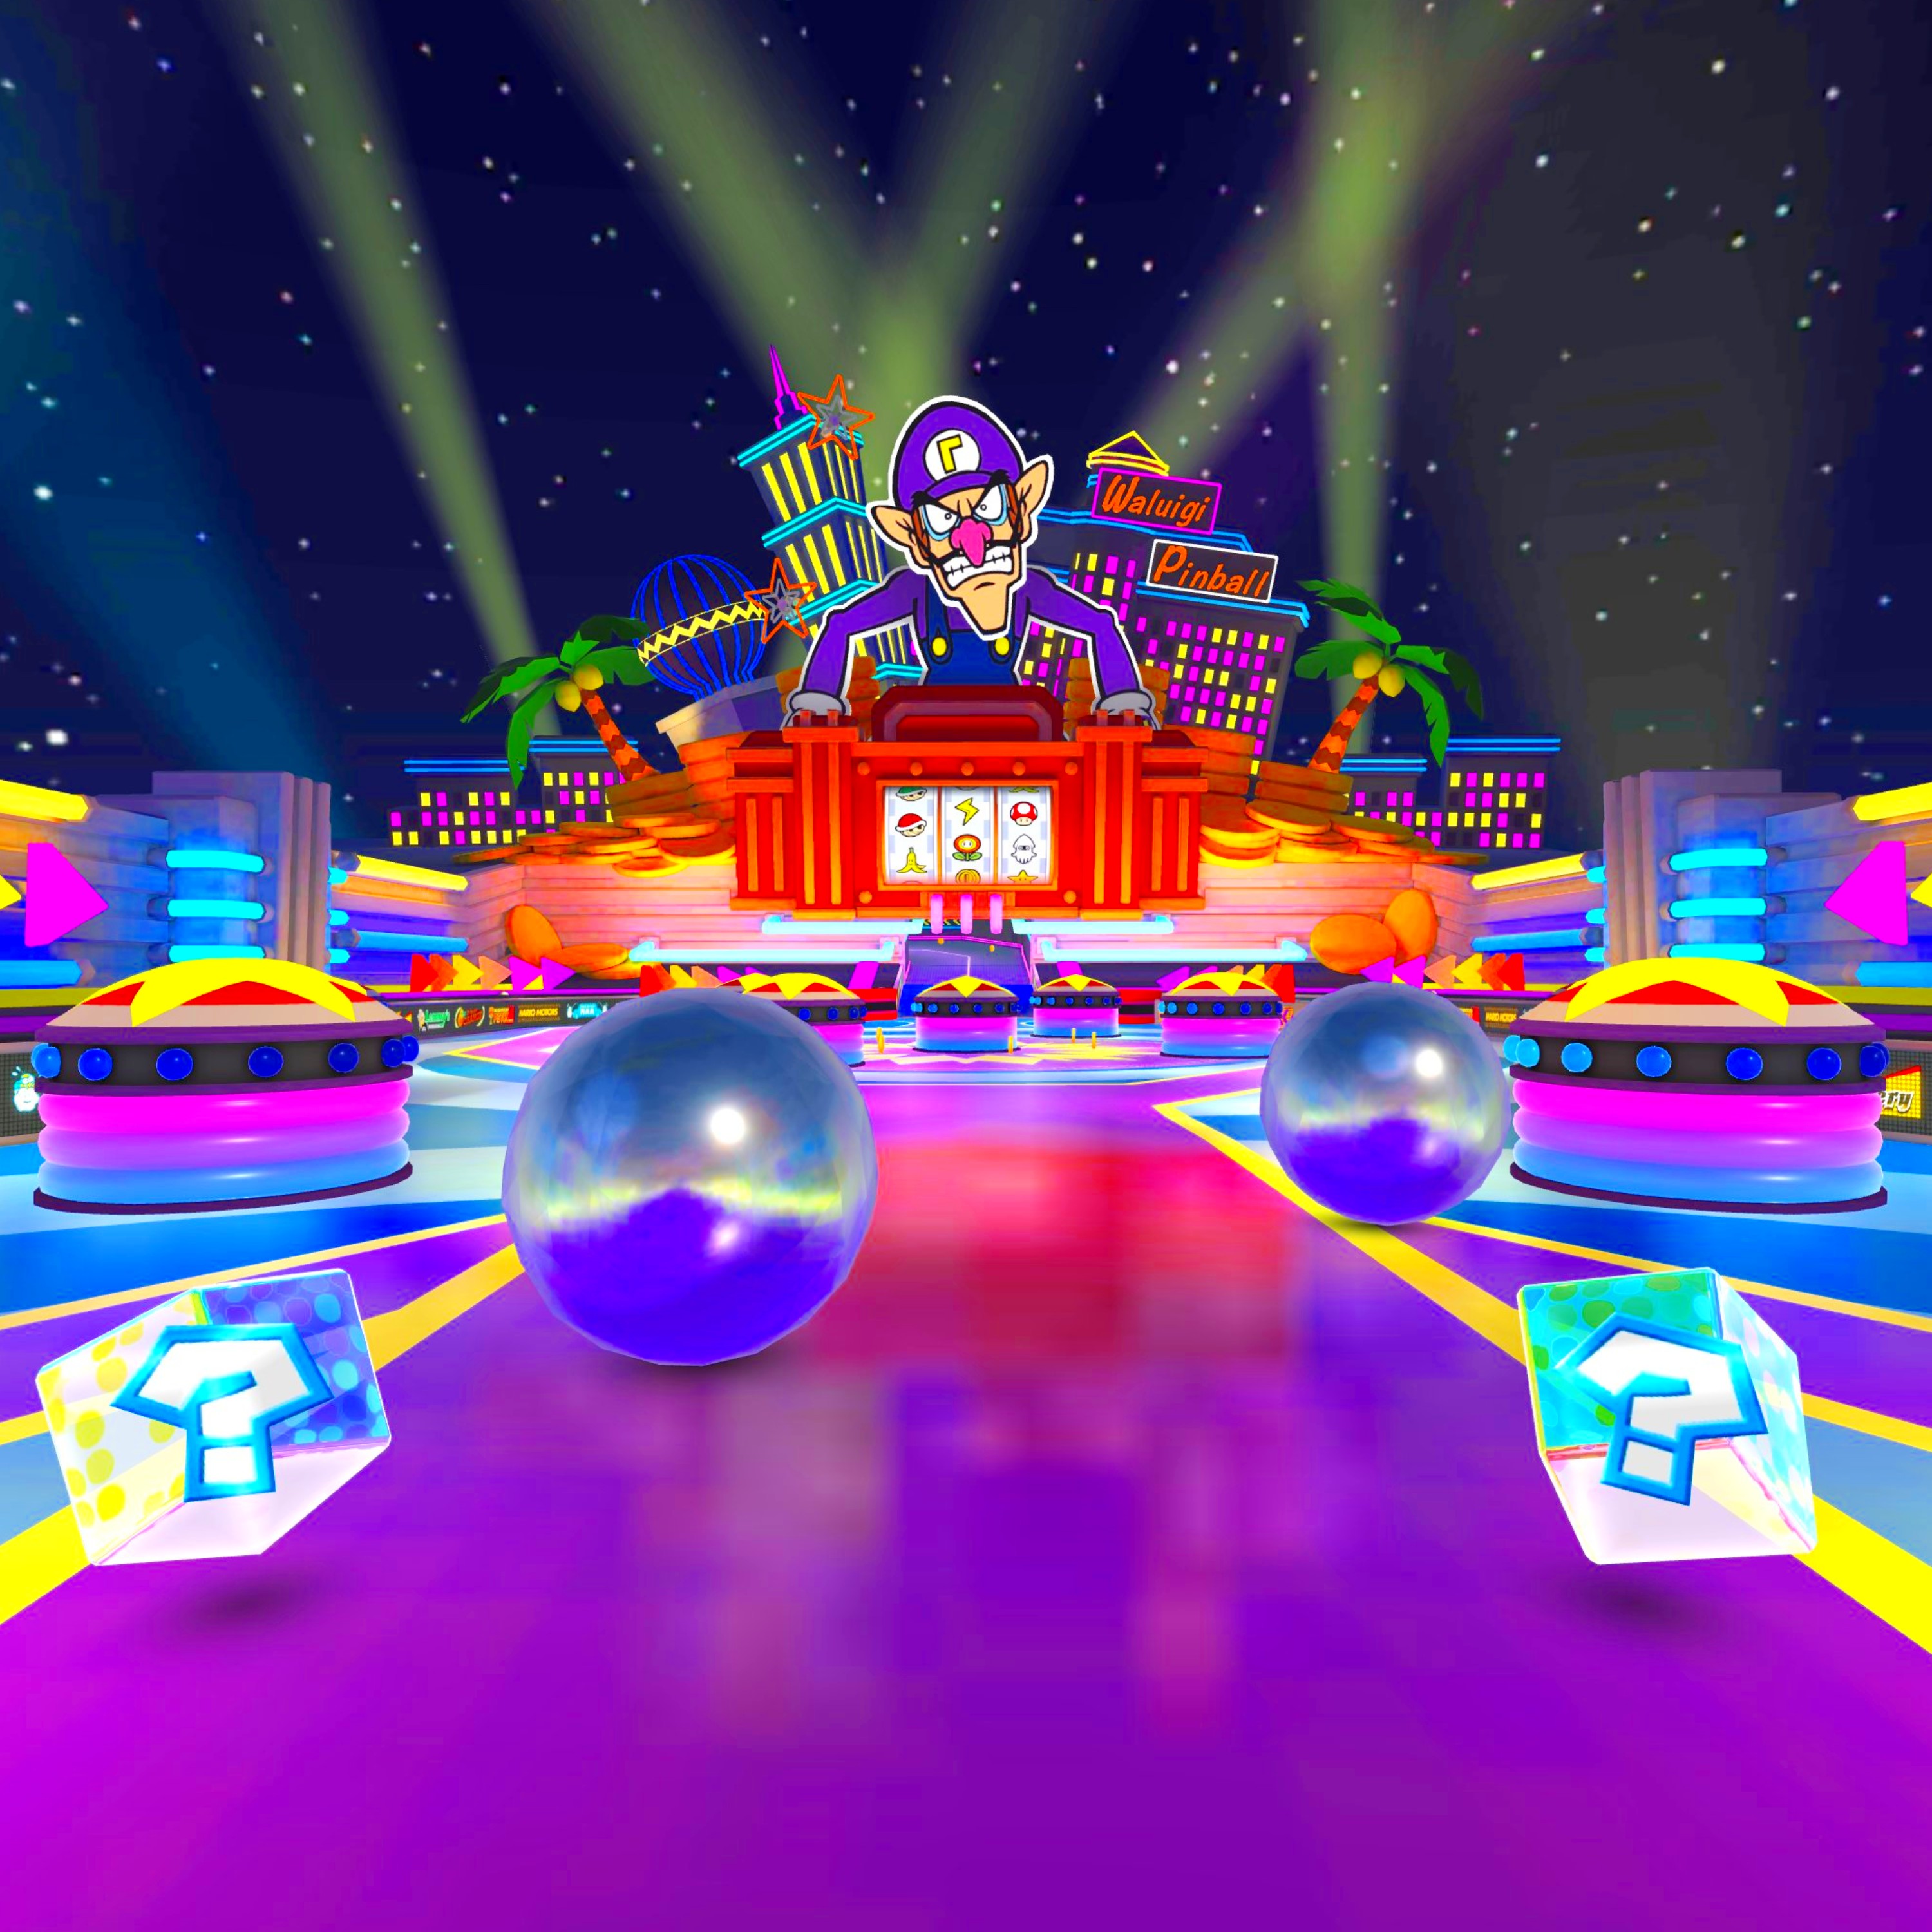
Janx_uwu

Smash Master
Writing Team
Joined
May 17, 2020
Messages
3,041
Location
your mother's sleeping quarters
My suggestion-Chibi-Robo of the Chibi-Robo! series.

(Keep in mind I've never played a Chibi-Robo game in my life, but I've done my research and I'm a huge Scott The Woz fan, so I know a thing or two about this little guy).
Currently a Mii Costume in Super Smash Bros. Ultimate, Chibi-Robo debuted in 2005 in Japan, in the game Chibi-Robo! Plug into Adventure! It's a game where you, Chibi-Robo, are a little robot helper who goes around a family's house, performing cleaning and other various tasks. However, you'll have to keep your charge up by plugging into a wall, or else you'll lose some Moolah (Chibi-Robo!'s in game currency). It's a charming game that has gained a cult following since its release. However it did not do very well financially-in fact, none of Chibi-Robo's adventures have hit it out of the park in terms of sales, or even gotten a single. Chibi-Robo has unfortunately not been able to stay afloat all these years. Poor guy.
So, if he doesn't sell well, why the hell should he be in Smash Ultimate 2? (Or whatever we end up calling it-we should do that sometime, decide on a name, it could be fun!)
Well, it could finally give Chibi-Robo a chance to be successful. The main reason his games haven't sold well is poor marketing or, in Zip-Lash's case, not being a good game. Of course your obscure, cult-classic Nintendo IP won't sell very well if its a Wal*Mart exclusive DS title. He's the perfect character to appeal to casual audiences-cutesy, simplistic both in appearance and in gameplay. Revealing him at E3 could gain a lot of traction for his series-and imagine if we announced the original game being ported to Switch during the E3 presentation, which would release later that day? That way, instead of breaking out Dolphin, Smash fans can buy the game themselves. This could give Chibi-Robo the second chance he deserves, his developers may come out of hiding to pick the series back up-and if they don't, Nintendo can pull a Mario Party 9 and make it themselves! (but like, good).

So, how would he play? Glad you asked!

I imagine he would have a gimmick of having to charge after a while. His battery life goes down with each attack (he loses more depending on how much damage the move does), but charging with Down B charges him back up. If he loses all his charge, his attacks will be weak and near useless.

As for his Up B, he could use the Chibi-Coptor item from the games, which would propel him up and have a hitbox at the top.

His Neutral B could be the Chibi-Blaster, which would be a laser shot that provides small hitstun and not much damage, but it goes really far and is relatively fast.

For his Side B, he could drive forward in the car from Chibi-Robo: Park Patrol. He can jump, speed up by holding forward, speed down by not pressing a direction, turn around by pressing back, and jump out with B or A.

Grabs
Up: Chibi-Robo does an uppercut and follows up by hitting the airbone opponent with his plug.
Down: Chibi-Robo throws his opponent on the ground and scrubs them with a toothbrush.
Forward: Chibi-Robo spins his opponent around like a lasso, before letting them go.
Backward: Chibi-Robo turns around and stabs his opponent with the prongs of his plug, zapping them away.

For his normals he could use household objects like mugs, silverware, a squirter, batteries, and the aforementioned toothbrush.

For his Final Smash, he brings out a vacuum from the game (it's the third item on this Wikipedia article and I don't know how to pronounce or type it, Venus please help). He can walk around with this, and anyone caught in range will be sucked up. When a few seconds pass, Chibi-Robo will throw down the vaccum, causing it to explode, and anyone caught in the vacuum will be launched far. If the Final Smash fails to suck up anyone, Chibi-Robo will let out a sad robot noise and hang his head in disappointment before returning to the action.
(I feel the need to say again that I have never ever played a Chibi-Robo game and if anyone want to suggest something I can fix, please let me know.)
Yep, that's why I think Chibi-Robo should be the first new character in the sequel to Super Smash Bros. Ultimate.
 

Mamboo07

Smash Hero
Joined
Mar 23, 2019
Messages
9,554
Location
Agartha, Hollow Earth
Developer Suggestion Character: Waluigi from Super Mario

unnamed (24).png

The funny lanky guy in purple himself if not, is probably one of the most requested characters for Smash as a fighter, he has been an Assist Trophy 3 times and not being a fighter for Ultimate was so controversial that it made headlines. He has a pretty big fanbase as well being a meme on the Internet. Back in 2018, Reggie himself was aware of the character's popularity. (Sorry if there wasn't much.)

As a fighter, he would be bit fast and nimble kinda like from the Mario/Sonic Olympic Games but easy to launch. His moveset would reference the sport, karting and party game spinoffs he has been in as well dancing. For example his Neutral Special would have him serve a tennis ball with his racket or maybe have his Side Special be like Wario's Bike but with the Waluigi Racer instead? The Final Smash would be his Wall-luigi from Mario Strikers which could work.

(I like the idea of him using his long limbs as well sport equipment to fight with, and dancing!)
 

Janx_uwu

Smash Master
Writing Team
Joined
May 17, 2020
Messages
3,041
Location
your mother's sleeping quarters
Developer Suggestion Character: Waluigi from Super Mario

View attachment 297190
The funny lanky guy in purple himself if not, is probably one of the most requested characters for Smash as a fighter, he has been an Assist Trophy 3 times and not being a fighter for Ultimate was so controversial that it made headlines. He has a pretty big fanbase as well being a meme on the Internet. Back in 2018, Reggie himself was aware of the character's popularity. (Sorry if there wasn't much.)

As a fighter, he would be bit fast and nimble kinda like from the Mario/Sonic Olympic Games but easy to launch. His moveset would reference the sport, karting and party game spinoffs he has been in as well dancing. For example his Neutral Special would have him serve a tennis ball with his racket or maybe have his Side Special be like Wario's Bike but with the Waluigi Racer instead? The Final Smash would be his Wall-luigi from Mario Strikers which could work.

(I like the idea of him using his long limbs as well sport equipment to fight with, and dancing!)
Love the suggestion, but
Character must be from a yet to be represented 1st party franchise
so it can't be Waluigi or Zero, for example
 

Venus of the Desert Bloom

Cosmic God
Super Moderator
Premium
BRoomer
Writing Team
Joined
Jul 30, 2007
Messages
15,494
NNID
VenusBloom
3DS FC
0318-9184-0547
Great additions! Once we reach a certain threshold (10 max), we will close suggestions and move to voting which character to focus on. When this happens, I will give the guidelines for voting.

Love the suggestion, but

so it can't be Waluigi or Zero, for example
That is true. Mamboo07 Mamboo07 , this was done to give the game its first new series in the roster. That being said, perhaps you could provide some insight on how Waluigi could represent his own series (What this series would be and what sort of content could be included)? If so, then we could possibly allow Waluigi to be included.
 
Last edited:
Mamboo07

Smash Hero
Joined
Mar 23, 2019
Messages
9,554
Location
Agartha, Hollow Earth
Great additions! Once we reach a certain threshold (10 max), we will close suggestions and move to voting which character to focus on. When this happens, I will give the guidelines for voting.


That is true. Mamboo07 Mamboo07 , this was done to give the game its first new series in the roster. That being said, perhaps you could provide some insight on how Waluigi could represent his own series (What this series would be and what sort of content could be included)? If so, then we could possibly allow Waluigi to be included.
There's not much... doesn't help that he's part of the Mario series which has lots of content.
(Maybe he could have Waluigi Pinball as his home stage?)
 

Venus of the Desert Bloom

Cosmic God
Super Moderator
Premium
BRoomer
Writing Team
Joined
Jul 30, 2007
Messages
15,494
NNID
VenusBloom
3DS FC
0318-9184-0547
There's not much... doesn't help that he's part of the Mario series which has lots of content.
(Maybe he could have Waluigi Pinball as his home stage?)
Understood. There will be plenty of chances to include Waluigi so let’s shelf that idea for later.

I’m sorry but I failed to mention this earlier. We are currently working through content would, hypothetically, will be shown at an E3 Nintendo Direct. While I have yet to decide, we will be including 3-5 characters for the trailer.
 

CheeseAnton

Smash Ace
Joined
Oct 1, 2020
Messages
538
Location
Balatro Brainrot
Oh, btw.
become a Developer Partner by just pinging me using the @ mark when you post a Developer Suggestion and saying “I want to join” or something along those lines.
Venus of the Desert Bloom Venus of the Desert Bloom I am interested in becoming a developer partner, I just want to ask if there's anything I have to do/maintain, or can I just be a developer partner and not really think about it?
 

Venus of the Desert Bloom

Cosmic God
Super Moderator
Premium
BRoomer
Writing Team
Joined
Jul 30, 2007
Messages
15,494
NNID
VenusBloom
3DS FC
0318-9184-0547
Oh, btw.

Venus of the Desert Bloom Venus of the Desert Bloom I am interested in becoming a developer partner, I just want to ask if there's anything I have to do/maintain, or can I just be a developer partner and not really think about it?
Nope, nothing really. This was done to prioritize people who participate in the thread often rather a complete random person who comes in without actually participating. In the previous iteration, this was done through it being in User Groups but we can do it like that obviously.
 
Last edited:
CheeseAnton

Smash Ace
Joined
Oct 1, 2020
Messages
538
Location
Balatro Brainrot
Nope, nothing really. This was done to prioritize people who participate in the thread often rather a complete random person who comes in without actually participating. In the previous iteration, this was done through it being in User Groups but we can do it like that obviously.
Okay, thanks. Can I be apart of the Developer Partner list?
 

Venus of the Desert Bloom

Cosmic God
Super Moderator
Premium
BRoomer
Writing Team
Joined
Jul 30, 2007
Messages
15,494
NNID
VenusBloom
3DS FC
0318-9184-0547
Developer Suggestion Character: Isaac from Golden
1608950569372.png


Isaac continues to be a highly requested character since Brawl and his fanbase has continued to grow since then. While he was given the Assist Trophy treatment twice, it’s notable he was brought back into Ultimate after skipping Smash 4. In regards to his play style, he would be a defensive swordsman with many types of shielding and barrier techniques ques. He would use his Venus Psyenergy go deal devastating damage. We don’t have an entirely ground/earth/rock-based fighter yet as well.
 
Last edited:
CheeseAnton

Smash Ace
Joined
Oct 1, 2020
Messages
538
Location
Balatro Brainrot
I'd like to be a Developer Partner as well-this is one of the few threads I'll be a regular in.
Oh, btw. You have to @ the person first as seen here
Developer Partner List
You can become a Developer Partner by just pinging me using the @ mark when you post a Developer Suggestion and saying “I want to join” or something along those lines.
to become a developer partner.


Also, Venus of the Desert Bloom Venus of the Desert Bloom is it possible to submit 2 character submissions?
 
Last edited:
MegaX1001

Smash Rookie
Joined
Sep 16, 2020
Messages
2
Suggestion: Cuphead from Cuphead

He was announced as a Mii Costume for the Mii Gunner when Byleth joined the game, he's a pretty popular and commonly requested character for Smash.
Cuphead can use different weapons from his game for his special attacks, being Peashooter probably the most iconic weapon from Cuphead, it's an obvious option for a Neutral Special, it would just be a projectile that goes straight forward and disappears after making contact with an opponent, wall, object or just after a certain amount of time if it doesnt hit anything, you can charge this attack and if you charge it long enough, he will shoot a Mega Blast instead, dealing more damage, you can also walk while charging Peashooter, but you can't cancel it, i actually don't have any other idea right now, but i hope this is enough.
 

EmperorCoal

Smash Cadet
Joined
Jan 29, 2019
Messages
30
Switch FC
SW-5396-2021-6143
A new suggestion blows in. Bomberman from, get this, the Bomberman series!

please note Bomberman is not a 1st party character however I shall be leaving this here for later anyway


With roots tying back all the way to even the nes in 1985 Japan, the bomberman franchise is both a recognizable and long running with over forty different incarnations and spinoffs of the series (as thats where I stoped counting) being released over the years. The main series games themselves are maze-based, with our protagonist having to defeat enemies strategically using bombs he can generate from his hands. This would of course translate to Bomberman’s moveset where a setup could lead to explosive consequences for your opponent and bombastic results for you. With plenty of power ups spanning the series and even a fighting game appearance this wouldn’t nearly be the least of his capabilities however. The character as we know him has lead the series for over thirty years and with multiple Nintendo exclusives (the Bomberman 64s, Bomberman Hero, too many snes Super Bombermans, ware games etc.) he is something of an unofficial Nintendo all star akin to MegaMan. Currently rocking both an assist trophy and dlc mii costume.
 
Last edited:
WarioJim

Smash Apprentice
Joined
Aug 2, 2014
Messages
134
Developer Suggestion Character: Ray Mk III from Custom Robo
1609011926581.png


Though I have ideas for all sorts of 1st party characters, it was a bit difficult to think of one that matched all the current crieteria outside of the ones already mentioned. However, I think I've found one that fits.

Ray Mk III is the most recognizable character from the Custom Robo series. He appeared as an Assist Trophy in Brawl and, after a complete absence from Smash 4, was given a Mii Costume in Ultimate. For his play style, he'd be a small lightweight character with multiple zoning options and very impressive, unique mobility. Regarding his mobility, that would be what makes him stand out from other characters, and I think it could take some inspiration from mechanics of older characters that we haven't seen in newer characters for a very long time.
Finally, regarding popularity, although Custom Robo is fairly niche and hasn't seen a new game since 2006, it does have more titles to its name than some pre-exsisting series and its representation in Ultimate after its absence in 4 shows that there is at least enough demand to be given the Mii Costume treatment. Plus, having a more unusual character reveal at E3 alongside more well know characters would show how deep we'd be willing to go for the fans.

Also, Venus of the Desert Bloom Venus of the Desert Bloom , I would like to join the developer partner list, if that's alright!
 
Last edited:
Venus of the Desert Bloom

Cosmic God
Super Moderator
Premium
BRoomer
Writing Team
Joined
Jul 30, 2007
Messages
15,494
NNID
VenusBloom
3DS FC
0318-9184-0547
Suggestion: Cuphead from Cuphead

He was announced as a Mii Costume for the Mii Gunner when Byleth joined the game, he's a pretty popular and commonly requested character for Smash.
Cuphead can use different weapons from his game for his special attacks, being Peashooter probably the most iconic weapon from Cuphead, it's an obvious option for a Neutral Special, it would just be a projectile that goes straight forward and disappears after making contact with an opponent, wall, object or just after a certain amount of time if it doesnt hit anything, you can charge this attack and if you charge it long enough, he will shoot a Mega Blast instead, dealing more damage, you can also walk while charging Peashooter, but you can't cancel it, i actually don't have any other idea right now, but i hope this is enough.
A new suggestion blows in. Bomberman from, get this, the Bomberman series!

please note Bomberman is not a 1st party character however I shall be leaving this here for later anyway


With roots tying back all the way to even the nes in 1985 Japan, the bomberman franchise is both a recognizable and long running with over forty different incarnations and spinoffs of the series (as thats where I stoped counting) being released over the years. The main series games themselves are maze-based, with our protagonist having to defeat enemies strategically using bombs he can generate from his hands. This would of course translate to Bomberman’s moveset where a setup could lead to explosive consequences for your opponent and bombastic results for you. With plenty of power ups spanning the series and even a fighting game appearance this wouldn’t nearly be the least of his capabilities however. The character as we know him has lead the series for over thirty years and with multiple Nintendo exclusives (the Bomberman 64s, Bomberman Hero, too many snes Super Bombermans, ware games etc.) he is something of an unofficial Nintendo all star akin to MegaMan. Currently rocking both an assist trophy and dlc mii costume.
Sorry, at this time, only a first party character. But please keep this submission on hand


Oh, btw. You have to @ the person first as seen here

to become a developer partner.


Also, Venus of the Desert Bloom Venus of the Desert Bloom is it possible to submit 2 character submissions?
For now, only one but if we need another submission, then perhaps we can allow it.
 
Last edited:
Venus of the Desert Bloom

Cosmic God
Super Moderator
Premium
BRoomer
Writing Team
Joined
Jul 30, 2007
Messages
15,494
NNID
VenusBloom
3DS FC
0318-9184-0547
Well, we have five more spots open for a new character. I will keep it open for 24 hours before closing submissions and going into the voting process. I’ll explain that process once we start but it shouldn’t be too hard to explain.
 

SmasherMaster

Smash Lord
Joined
Jul 31, 2012
Messages
1,679
Location
USA
NNID
TelevisionGamer
Character Suggestion: Saki from Sin and Punishment.
Super_smash_bros_saki_render_by_connorrentz-dc9w4an.png

Saki first appeared in Super Smash Bros Brawl and Super Smash Bros for Wii U and 3DS, and while his Assist Trophy was notably absent in Smash Bros Ultimate, he instead received a Mii Costume. He is the protagonist of the first game of the Sin and Punishment franchise, and is the father to the main character of the sequel game Sin and Punishment: Star Successor. Sin and Punishment is a rail shooting game, and while Saki isn't too popular of a choice nowadays, he was relativly popular one back in the Brawl days, as the Brawl Dojo mentions several people requested his inclusion.

For his playstyle, I would see Saki as a lighter and faster character, relying on him using his Dolphin Gun for a projectile attack that could combo his opponents or use it with a stronger Melee attack that would have powerful knockback.
 

Dan

Smash Lord
Joined
Dec 26, 2013
Messages
1,936
What I want from an Ultimate sequel is a port. There is no sense in starting from scratch and cutting some characters just to replace them with new ones: port, more characters, an Adventure mode similar to SSE, the return of trophies, target test and maybe some more modes. I sort of had an idea for a battle royale mode where a stage gets smaller... it obviously couldn't be 100 people at once though.
 

Quillion

Smash Hero
Joined
Sep 17, 2014
Messages
6,005
What I want from an Ultimate sequel is a port. There is no sense in starting from scratch and cutting some characters just to replace them with new ones: port, more characters, an Adventure mode similar to SSE, the return of trophies, target test and maybe some more modes. I sort of had an idea for a battle royale mode where a stage gets smaller... it obviously couldn't be 100 people at once though.
There's no binary between reboot and port here. Ultimate itself was made recycling tons of assets from Smash Wii U. The next game should do the same while still adding onto the mechanics.
 

Venus of the Desert Bloom

Cosmic God
Super Moderator
Premium
BRoomer
Writing Team
Joined
Jul 30, 2007
Messages
15,494
NNID
VenusBloom
3DS FC
0318-9184-0547
What I want from an Ultimate sequel is a port. There is no sense in starting from scratch and cutting some characters just to replace them with new ones: port, more characters, an Adventure mode similar to SSE, the return of trophies, target test and maybe some more modes. I sort of had an idea for a battle royale mode where a stage gets smaller... it obviously couldn't be 100 people at once though.
That’s why I called it a “Smash Ultimate sequel” rather than an entirely new game. We are building upon Ultimate and adding further content as a sequel to it.
 

Venus of the Desert Bloom

Cosmic God
Super Moderator
Premium
BRoomer
Writing Team
Joined
Jul 30, 2007
Messages
15,494
NNID
VenusBloom
3DS FC
0318-9184-0547
Oh, btw. You have to @ the person first as seen here

to become a developer partner.


Also, Venus of the Desert Bloom Venus of the Desert Bloom is it possible to submit 2 character submissions?
Seeing as how we didn’t get any more submissions, I will allow for a second submission. That being said. entirely new submissions by newcomers to this thread will be prioritized.
 

Venus of the Desert Bloom

Cosmic God
Super Moderator
Premium
BRoomer
Writing Team
Joined
Jul 30, 2007
Messages
15,494
NNID
VenusBloom
3DS FC
0318-9184-0547
Seeing as how we don’t have any more submissions, I will include my second one but I will remove it if we get new submissions:

Nintendog & Nintencat (Nintendogs)


While we do have a dog (and duck) and a cat (fire cat) on the roster; including the Nintendog and Cat could bring in a character who is slow upon start-up but, once they get going, become powerful fighters who focus on speed and unorthodox attacks. This could include taking baths, squeaky toys, doghouses, and healing treats. Nintendogs have been a part of Smash since Brawl and, while the series hasn’t been touched in some time, it’s still a popular series with tons of fans around the world.
 

Venus of the Desert Bloom

Cosmic God
Super Moderator
Premium
BRoomer
Writing Team
Joined
Jul 30, 2007
Messages
15,494
NNID
VenusBloom
3DS FC
0318-9184-0547
the first submission round had been completed! The current submissions are:
  1. Isaac from Golden Sun Venus of the Desert Bloom Venus of the Desert Bloom Venus of the Desert Bloom Venus of the Desert Bloom
  2. Dillon from Dillon’s Rolling Western CheeseAnton CheeseAnton CheeseAnton CheeseAnton
  3. Takamaru from Mysterious Marusame Castle Speed Weed Speed Weed Speed Weed Speed Weed
  4. Chibi Robo from Chibi-Robo Janx_uwu Janx_uwu Janx_uwu Janx_uwu
  5. Ray MK II from Custom Robo WarioJim WarioJim WarioJim WarioJim
  6. Saki Amamiya from Sin & Punishment SmasherMaster SmasherMaster SmasherMaster SmasherMaster
  7. Nintendog/Nintencat from Nintendogs Venus of the Desert Bloom Venus of the Desert Bloom
Thus starts off our voting period! Anyone can vote for which character they want to see be included into the roster! You can vote for your submission as well.

Please pick three characters who you want to see be included. Each pick gets three points and the pick with the most points within a 24 hour’ush time frame is the winner.


Here are my picks:

1. Isaac from Golden Sun
2. Saki from Sin & Punishment
3. Takanari from Mysterious Castle Marusane
 
Status
Not open for further replies.
Top Bottom