- Joined
- Jul 30, 2007
- Messages
- 15,492
- NNID
- VenusBloom
- 3DS FC
- 0318-9184-0547
This thread is currently a work in progress. It will remain locked until development starts. I will be migrating information from the Smash Infinite thread to here.

Super Smash Bros. Infinite was developed between 2020 and 2022 with a team of dedicated developers. The end result was 26 base newcomers with 23 downloadable characters thus totaling 49 total characters. This was quite the endeavor but one that was pulled off thanks to the determination and dedication of the development team which saw the project from beginning to end. Aside from characters, over 30 new stages were included along with plenty of new items, pokeballs, assist trophies, as well as bosses and the ability to summon them into battle. Finally, Infinite saw the greatest increase of Spirits and Music added with the total playtime of the Infinite soundtrack lasting 30+ hours.
Now, a new dawn is rising on Infinite, and, with the launch of a brand new Nintendo system, a new and unexplored region of Smash is about to be unveiled...
STARTER


DLC


Project Phoenix is the codename for the upcoming port of Super Smash Bros. Infinite which will be adding additional content to add to the Infinite experience while also bringing all of the launch and downloadable content into one package for one amazing value. Below, you will find new content included in Project Phoenix followed by a separate post that contains lists of information about what was included in Super Smash Bros. Infinite and its DLC seasons; all of which will be included in Infinite Beyond.
Table of Contents
- Newcomers
- DLC Newcomers
- Mii Mage
- Mii Athlete
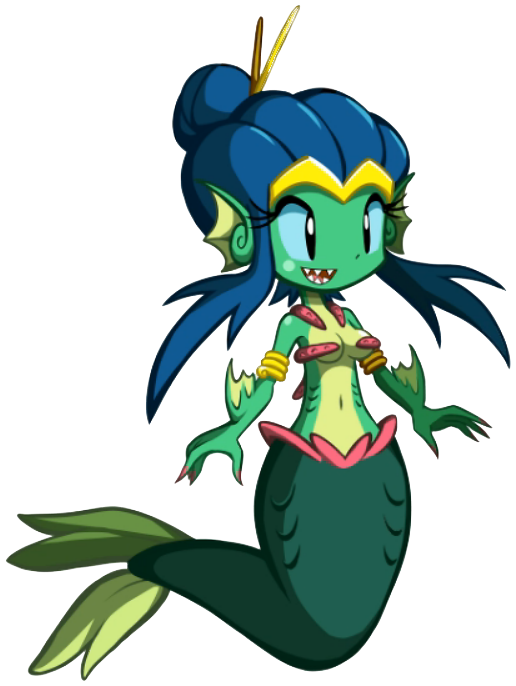
- Shantae
- Squid Sisters
- Toad
- Sub-Zero
- Klonoa
- Sans
- Mike Jones
- Morrigan
- Alear
- Stages
- Great Sky Island
- Area Zero
- Alivel Mall
- Alterna
- Shinjuku Station
- Starfall Islands
- Metro City
- Blood Gulch
- DLC
- Subspace
- Scuttletown
- Planet Clancer
- Sprout Tower
- The Pit
- Blossoming Acadia
- Snowdin
- Zoda's Spaceship
- Aensland Castle
- DLC
- Items
- Assist Trophies
- Pokeball Pokemon
- Mii Fighter Outfits
- Bosses
- Game Modes
- Spirits
- Spirit Events
- Music
- Trailers
- Post-Launch Festivals
- Changes from Infinite
- Edit <-Venus only
The Roster of Super Smash Bros. Infinite Beyond
Please click on a character to be taken to their information page
Please click on a character to be taken to their information page


Characters
Below is a list of newcomers who are appearing in Super Smash Bros. Infinite.
Below is a list of newcomers who are appearing in Super Smash Bros. Infinite.
Name | Moveset | Additional Content | |||||||||||||||||||||||||||||||||||||||||||||||||||||||||||||||||||||||||||||||||||||||||||
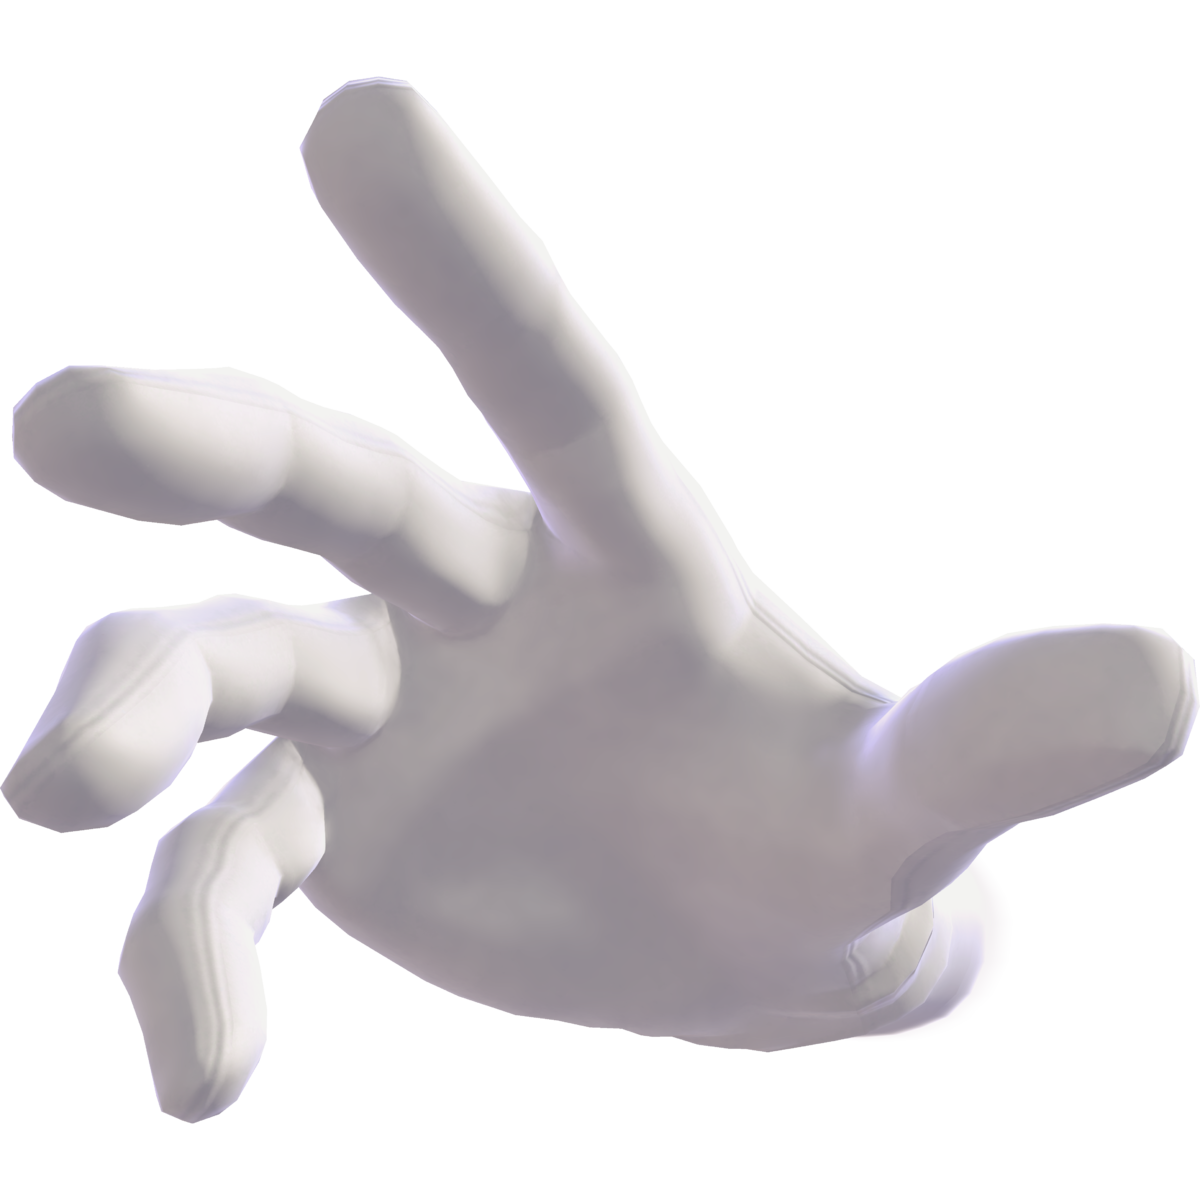
#119. Master Hand Super Smash Bros. 
| Neutral Special: Finger Bullet A chargeable, aimable projectile stance. Master Hand can aim up or down before firing a burst of 3 shots from his fingers. Each bullet deals 5% has medium-low knockback, and travels very quickly, too. Side Special: Slap Master Hand will reel back and then launch himself half the distance of FD while slapping the opponents. It does more damage to opponents who get hit with the slap at the tail-end of the attack with more launch. Up Special: Airplane This differs from the original one as it will work in a manner similar to Fire Fox but has more directional movement like Mach Tornado. Master Hand still does the Devil Horns as he moves with the two tips of the fingers having more damage output than the rest. The backside of the "exhaust" can deal collateral fire damage. Down Special: Finger Beam Master Hand shoots out four blue lasers from each fingertip. The attack deal 6% per laser. The pattern is random each time which makes it unpredictable but also not reliable. It will shock and then juggle the opponents caught in it. If any characters are fully caught in it during the 5 minutes of animation, they will be launched. Like many MH attacks, there is enhanced superarmor to them but no damage reduction. It has a cooldown. Final Smash: Master Core Master Hand will be engulfed by darkness and then transform into:
| Entrance Animation
"Final Destination Theme" from Super Smash Bros. Kirby Hat
The Puppeteer Splash Tagline
Alternate Colors 
| |||||||||||||||||||||||||||||||||||||||||||||||||||||||||||||||||||||||||||||||||||||||||||
| Neutral Special: Manual Shot Tapping the special button allows Saki to fire a shot straight in front of him, which isn't aimed in any way. It functions similarly to Fox's neutral special in that it's a low-powered projectile that deals no knockback - though Saki's has some differences. Firstly, Saki's Manual Shot doesn't diminish in attack power with distance - having a flat 2.2% damage rate regardless of where you fire it from. It also has a slightly faster rate of fire than Fox's if you repeatedly tap the button. This form of the neutral special is pretty unique in that it's low in lag, allowing it to be used as a decent walling tool for pressure. Not only this - but if you hold down whilst repeatedly tapping neutral special in the air, you'll be able to shoot downward at a 45-degree angle. Simply stop tapping the special button, and you'll be able to use your own special should you wish to. I should also note that the move is chargeable, though this charge is really quick - only around 30 frames. Holding down the special button until a visual flash from the muzzle acts as an indicator allows you to fire a version of the move with very slightly increased power (around 4.2%) as well as making an opponent flinch, though this comes at the cost of being a little laggier overall, and not being as easy to quickly fire off (even though it does fire automatically when at full charge.) Again, if airborne and holding down after starting the charge, you can fire downward at a 45-degree angle. This specific function of the attack is in reference to the ability to charge your projectile attacks in Star Successor, while keeping Saki feeling quick and adaptable overall and not getting in the way. Side Special: Lock-on-Shot Inputting side special has Saki ready the Dolphin Gun in front of him. When in this state, the closest opponent within a certain range in front of him (around half of Battlefield) gets a reticule over them, and Saki fires a single projectile at them. The Lock-On Shot is a little more powerful than his uncharged Manual Shot due to its more deliberate nature, dealing 3.2% damage and making an opponent flinch. However, the animation itself is a little slower, and it's not as spammable due to needing to lock onto an opponent each time it's used. Not only this, but it has a very slight recoil when used whilst airborne - as well as looking very slightly different. I should note that the range itself has similarities to Palutena's Autoreticule in that it's more akin to a "cone" outward, preventing him from simply firing at opponents over him - though, the cone is a little wider and allows for wider coverage as a result. Up Special: Dolphin Burst Based loosely on Isa Jo's hover-backpack in Star Successor, Saki instead has a small burst of energy from the Dolphin Gun which allows him to move upward at a diagonal angle. During this angle, Saki draws his Dolphin Gun and uses the blade function to multi-hit opponents that it contacts, dragging them along before a final (optional) slash at the end can knock them away - working a little like Shulk's Air Slash in that you can activate it with another tap of the special button. You can influence your direction a little by holding forward-up for more horizontal but less vertical motion, or backward-up for more vertical but less horizontal motion - though, be careful, as using this move will leave you helpless until you either touch the ground, get hit, or get killed. Compared to some other moves out there, its range isn't the best in the world - but it's functional as Saki's only real recovery option, and can work as a kill move in certain circumstances. Down Special: Evasive Manuevers When inputted on its own, Saki will apparently spot-dodge, albeit with his Dolphin Gun drawn. Then, right after spot-dodging, he'll quickly fire out a charged Manual Shot with significantly lower starting lag than it'd otherwise have, to the point where it's likely to be safe on most attacks. You can also hold down-back to dodge-roll backward before canceling into the shot - or hold down-forward to dodge-roll forward, turning you around if the closest opponent is now behind you, and then letting you fire. In the air, you'll spot-dodge no matter what - sorry, no directional air-dodge here. Note, however, that repeatedly using the move will increase its startlag over time, similarly to how actual dodges work (and to prevent it from becoming a method of obliterating the usefulness of neutral special altogether.) The move's unique in that, functionally speaking, it works somewhat like a fusion between your traditional counter and a dodge - allowing you to quickly react to an opponent as opposed to just having an automatic attack right afterward. Just like in the original game, seeing an opening means you need to take the chance to escape punishment and act of your own accord - it's the difference between life and death. Final Smash: Ruffian Form Saki will jump into the air and past the upper blast line, taking anyone who is caught within it up with him. This will transport them to the final battle Sakiand Kachua. The players find themselves in a whirling pool of crimson liquid as Saki looms over them in Ruffian form. It unleashes a volley of energy shots before taking his blades, charging them up, and slamming them down in a massive explosion. | Entrance Animation
Idle Poses
Taunts
Victory Animation
Victory Theme Kirby Hat
Boxing Ring Title
Splash Tagline
Classic Mode Route: Punishing 64 Pixels All opponents are characters who debuted or appeared in games on the Nintendo 64, the system Sin & Punishment was first released on.
Alternate Colors 
| ||||||||||||||||||||||||||||||||||||||||||||||||||||||||||||||||||||||||||||||||||||||||||||
| Gholdengo Gimmick: Gimmighoul Coins Gholdengo's main "gimmick" is that he has a meter continually shown next to his damage meter, which specifically indicates the number of Gimmighoul Coins that he is currently holding at any given time. This meter is deliberately stylized after the PokémonScarlet & Violet Bag menu. Many of his attacks utilize Gimmighoul Coins in order to function - and furthermore, having more Gimmighoul Coins affects your stats in the following ways (and vice versa if you have less):
In order to visually distinguish at a glance how many Coins you have, the meter will color-code the icon of a Gimmighoul Coin so that you can see at a glance how many you have without having to actively count, though the first number (i.e., the "5" in "500") will be slightly larger than the others to make it a little easier on top of that. Next to the icon, you'll also see the number itself.
Shield Special: Gimmighoul Coins Gholdengo manifests a chest next to him, inside of which is a Gimmighoul (in reference to his pre-evolution, Chest Form Gimmighoul.) Whilst holding this input, he'll rapidly gather Gimmighoul Coins from the chest and stuff them into his own pouch, which he wears on his belt. It's possible to cancel out of this with a jump, or a directional input which will have him dodge. The effects of having more or less Gimmighoul Coins are indicated in the section above. Neutral Special: Pay Day Tapping Neutral Special has Gholdengo rapidly toss coins in front of him with both of his hands - simply tapping it will have him toss 10 coins incredibly quickly. If you hold Neutral Special, he'll continually keep tossing the coins - and it's also possible to change the direction in which the coins are being tossed by holding up or down on the control stick whilst holding the attack input, similar to Inkling's Splattershot attack in Super Smash Bros. Ultimate. These coins have a few unique properties - they're gravity-affected and spread slightly with distance, and whilst each coin does minimal damage, they do inflict flinching and push the opponent backward slightly to prevent infinite jabs. It also stops you by default after you fire a continual 150 coins, but you can hold the button again to get right back to it if you so desire. The main catch to this attack is that it continually uses up your reserve of Gimmighoul Coins, depleting them as a form of ammunition pretty rapidly. Side Special: Make It Rain This move's also a projectile, though a little different. Gholdengo can charge this attack by holding down the special button, with from 20 up to 50 Gimmighoul Coins being gathered into it. He'll then toss these tightly bound Coins forward in an arc, which will detonate akin to a shrapnel bomb upon impact with an opponent, item, or surface. It's possible to slightly aim this arc by holding up or down a little on the control stick whilst inputting it, and even if the "bomb" itself doesn't hit the opponent directly, the coins that bounce outward from the point of impact might do (with minor flinching damage.) The amount of damage and knockback will increase if you use more Gimmighoul Coins, though similarly to Pay Day, this attack directly taps into your supply of Gimmighoul Coins as a source of ammunition. However, you can't detonate it remotely - it'll detonate automatically on contact with an object of some sort unless it's being reflected. Up Special: Heavy Slam Gholdengo bounces off his surfboard as though it were a diving board, curling into a ball and hurtling in the direction of the joystick. This deals a default of 12.5% but deals more or less damage based on the weight difference between itself and the foe. Has a medium-to-low default kill percentage. Down Special: Power Gem Gholdengo takes out the small treasure chest on its belt and opens it up: the closest foe in a range similar to Palutena's Autoreticle will be locked on and hit with a stream of golden energy for as long as Gholdengo holds the button and for as long as that foe is the closest. This beam deals about 2% per half-second, but no knockback until 20% has been accrued in total. The knockback is enough to make this a kill move. Final Smash: 1000-Coin Tera Blast Gholdengo Terastallizes into a Steel-type, the axe-shaped Tera Jewel forming above its head as the crystals before attacking with a golden Tera Blast using the Steel-type variant as a base. Anyone caught in the blast will be caught in a Meta Knight-style FS: the Tera Blast bursts to become a sphere of 1000 coins surrounding the foes. Gholdengo then points its finger at one of the coins and fires a single blast that ricochets off all 1000 coins before launching foes with a large golden explosion. This FS deals a total of 100% damage on hit. In training mode, you’ll see that this move racks up 1002 hits, including the initial hit and final explosion. | Entrance Animation
Idle Poses
Taunts
Victory Animation
Victory Theme Kirby Hat
Boxing Ring Title
Classic Mode Route: Go for the Gold! All opponents are character that has a Gold-colored palette swap.
Alternate Colors 
| ||||||||||||||||||||||||||||||||||||||||||||||||||||||||||||||||||||||||||||||||||||||||||||
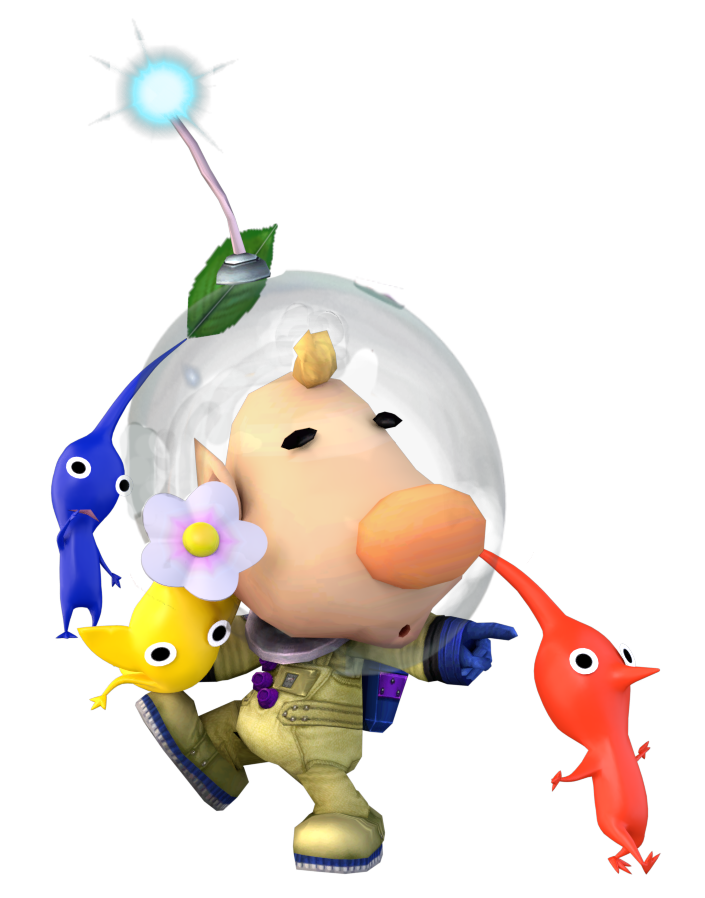
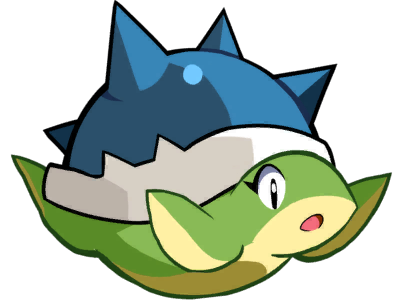
| Neutral Special: Pikmin Pluck Louie retains the same neutral as Olimar but also has a new Pikmin. Instead of the Purple Pikmin, Louie has the Ice Pikmin from Pikmin 4. The Ice Pikmin differs from the Purple Pikmin in a number of ways. Firstly they fly farther than Purple Pikmin, but not as far as the Red, Blue, and Yellow Pikmin. Secondly, they deal Ice damage, giving them a chance to freeze anyone with 30% hit that gets higher based on input. Side Special: Pikmin Throw Up Special: Swooping Snitchbug A Swooping Snitchbug grabs Louie and hoists him up in the air in a manner similar to the Winged Pikmin. Unlike that move, though, the number of Pikmin Louie has does not affect the distance traveled thus not hampering recovery ability. If Louie quickly gets out of the way or is knocked out in the small number of frames where the Snitchbug grabs him, it will rub its hands together in anger. That being said, it can grab an entirely different person which then creates a recovery move for that captured player. Down Special: Pikmin Order Ice Pikmin is added to the rotation instead of purple Pikmin. Final Smash: Ancient Sirehound This Final Smash causes Louie to summon the final boss of Pikmin 4, the Ancient Sirehound which will rampage around the stage; casting our iceballs that can freeze opponents, unleashing bursts of electricity, and fireballs in all directions. This is a chaotic Final Smash which, in theory, has four phrases: initial rampage followed by turning around and unleashing ice balls into the air as it goes back, turns around, unleashes a burst of electricity, and then turns back and runs its original direction while shooting off fireballs. As a nod to the boss battle, the Ancient Sirehound will spout wings from its ears and fly away which ends the Final Smash. This doesn't have any impact on the battle. In all, the Final Smash lasts 12 seconds. | Entrance Animation
Idle Poses
Taunts
Victory Animation
Kirby Hat
Boxing Ring Title
Splash Tagline LOUIE Botches Another Delivery! Classic Mode Route: Battle Connoisseur This is one of those story-based classic modes, with the overarching plot being Louie wanting to collect food to make the ultimate dish, with the ingredients being based on fighters who are based off animals that are used as ingredients before fighting some picky eaters wanting to steal the dish he created.
Alternate Colors 
| ||||||||||||||||||||||||||||||||||||||||||||||||||||||||||||||||||||||||||||||||||||||||||||
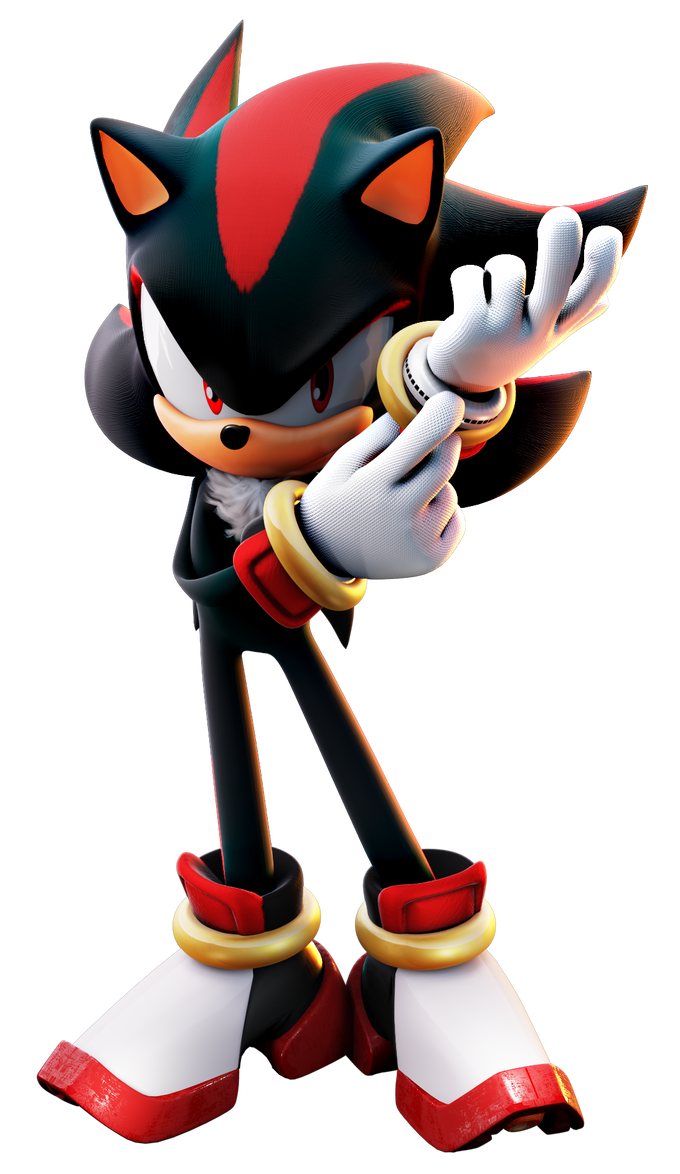
| All of Shadow's Specials has a dark effect around him as he moves. Neutral Special: Homing Attack Side Special: Spin Dash Up Special: Spring Jump Shadow's spring is colored black. Down Special: Chaos Control Thrusting a Chaos Emerald upwards like in his Assist Trophy animation, Shadow unleashes a burst of power in a radius around him, vanishing the moment it releases. If the burst doesn't hit anyone, he will teleport in the direction of the joystick...but he will instantly lock onto the first foe the radius touches, performing a powerful roundhouse kick that deals 14.5% damage and knocks the opponent a good distance in the opposite of which way Shadow was facing when activating the move. Final Smash: Chaos Blast | Entrance Animation
Idle Poses
Taunts
Victory Animation
Victory Theme
Kirby Hat
Boxing Ring Title
Splash Tagline Classic Mode Route: The Ultimate Lifeform Shadow faces powerful opponents who have all obtained the ultimate form of their power in some way, shape, or form.
Alternate Colors 
| ||||||||||||||||||||||||||||||||||||||||||||||||||||||||||||||||||||||||||||||||||||||||||||
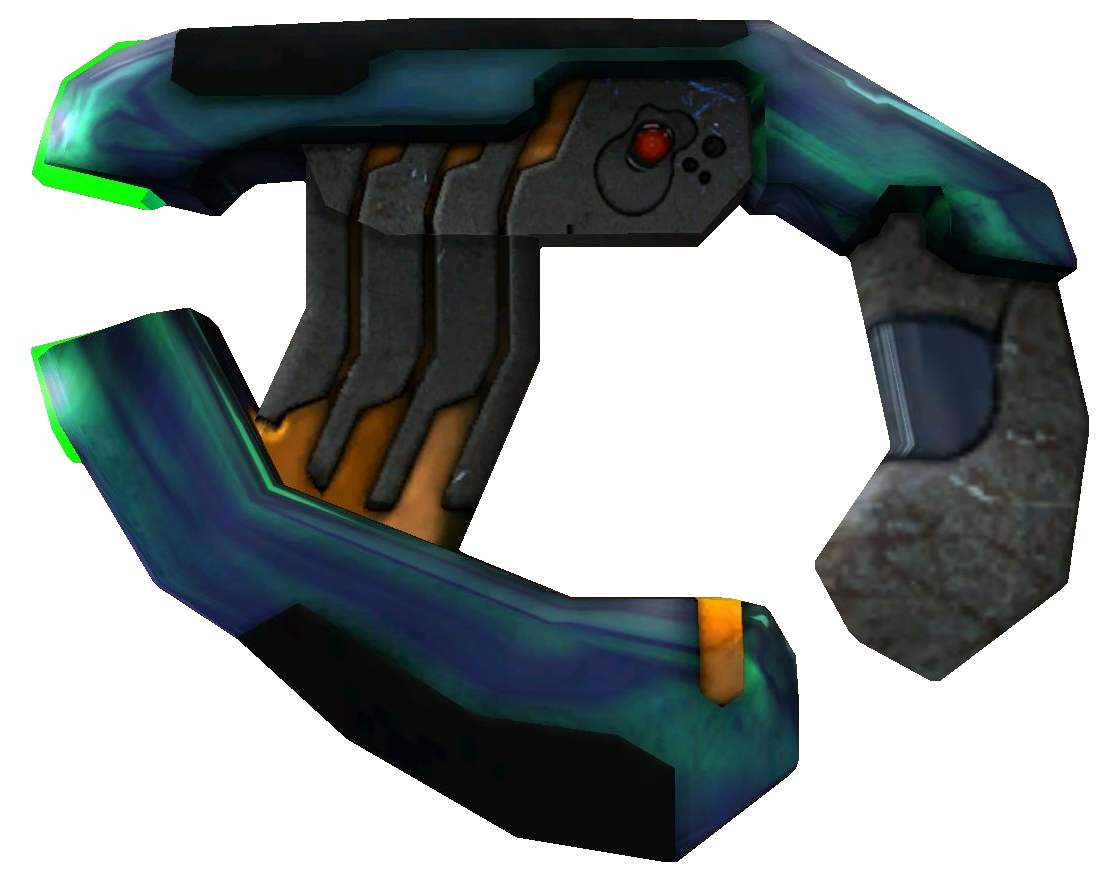
| Neutral Special: Fire Blaster Krystal enters a stance where she can attain 360-degree aim and shoot a fiery projectile in the direction of the joystick. The projetile deals 8% damage and decent knockback, and can be fired a little frequently. Side Special: Ice Blaster Krystal props her staff up and unleashes a torrent of cold in front of her, just like her Assist Trophy. This deals a total of 13% damage and freezes. Up Special: Rocket Boost Krystal will point the tip of the staff to the ground and then boost off into the air with a rocket from the base of her staff, Krystal will launch straight upward with great speed and deliver upward knockback, with the most DMG at the tip of the staff. The discharge from the boost can damage enemies. Down Special: Grenade Krystal chucks a grenade forward. Holding down the input causes Krystal to increase the distance when thrown and increases the damage output but shortens the fuse. It releases a plasma-enriched electrical blast. Final Smash: Krazoa Spirits Krystal takes the staff and slams it into the ground which causes a rush of Krazoa Spirits to rise up in an areaBattle Field and shoot upwards; taking anyone along with them. It has excellent range but deals less damage the closer the opponents are to Krystal | Entrance Animation
Idle Poses
Taunts
Victory Animation
Boxing Ring Title
Splash Tagline KRYSTAL Leads the Assault Classic Mode Route: Dinosaur Planet Opponents are based on games that were originally from another game that was known by another name. This is a reference to how Star Fox Adventures was known as Dinosaur Planet before being rebranded.

| ||||||||||||||||||||||||||||||||||||||||||||||||||||||||||||||||||||||||||||||||||||||||||||
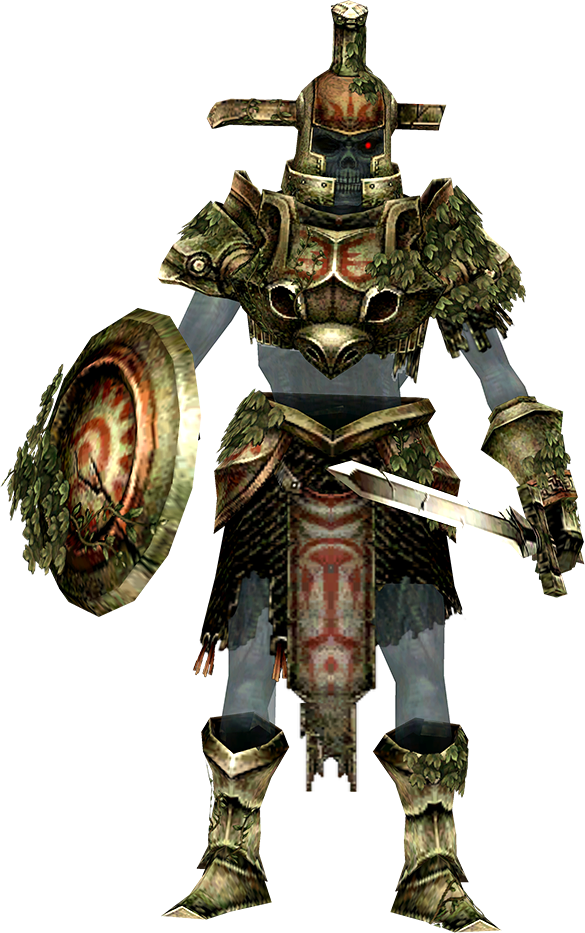
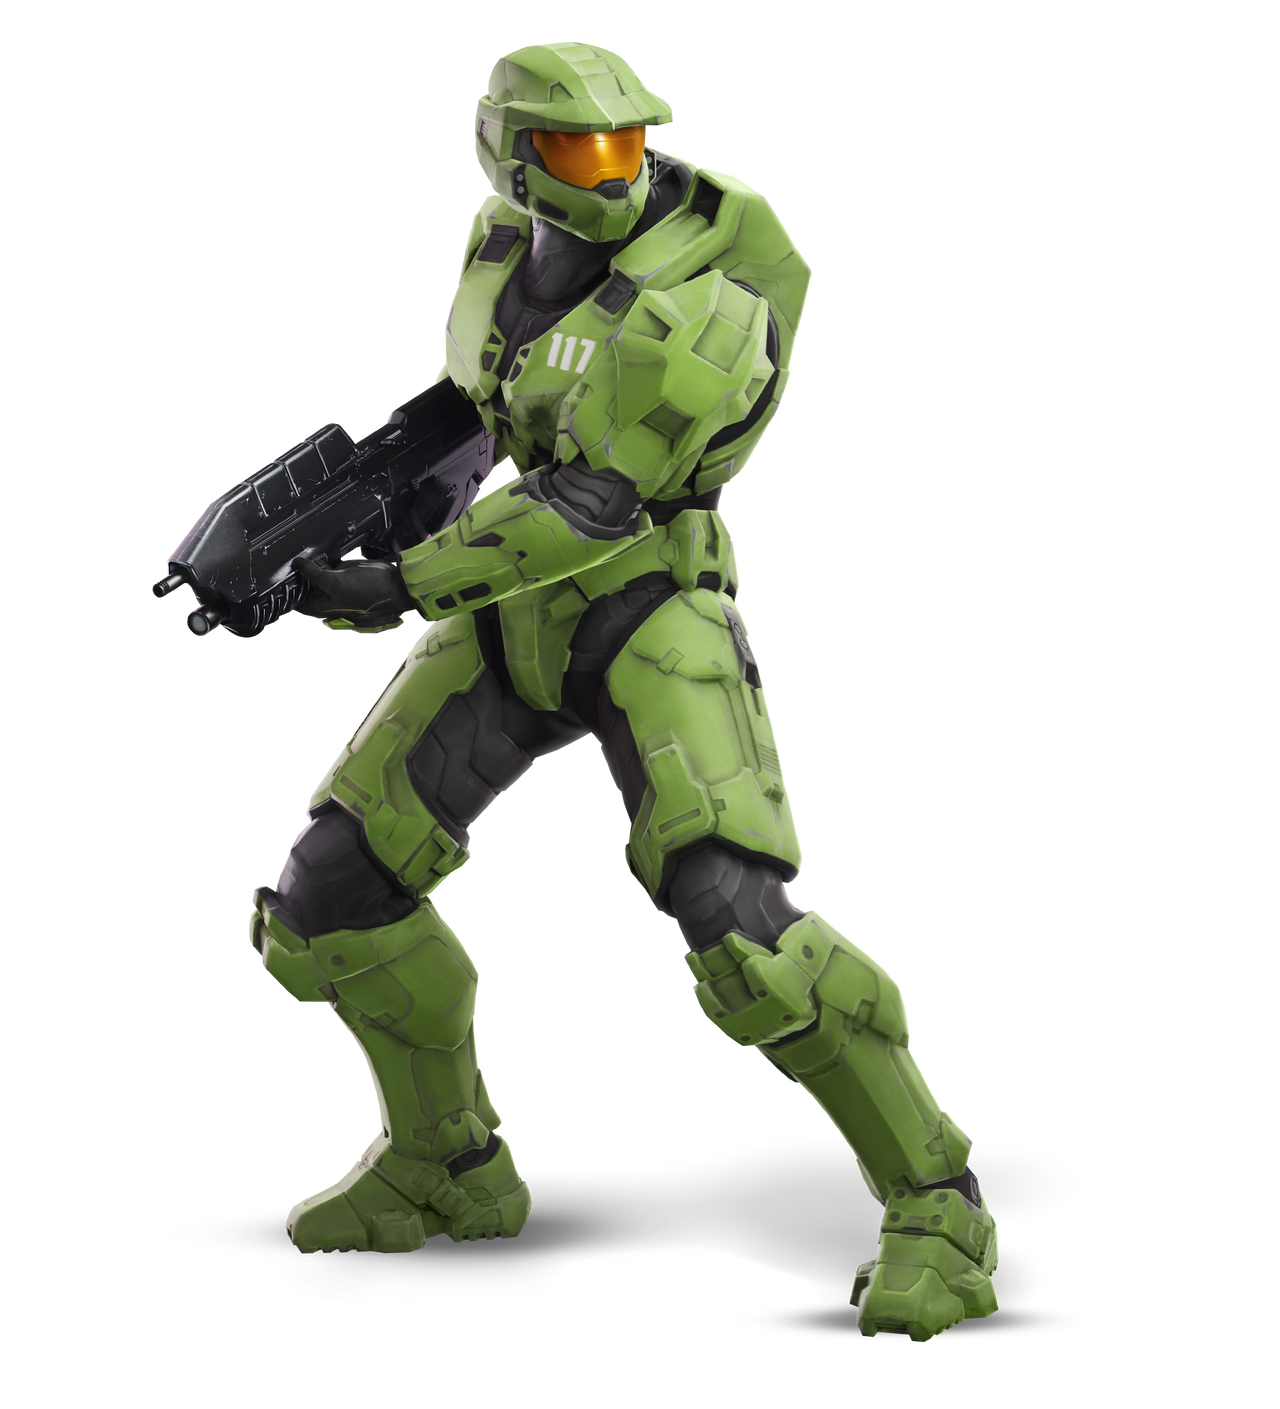
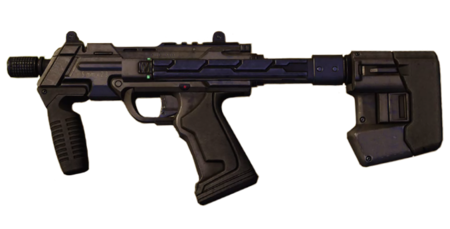
| Character Gimmick Ammo Storage Master Chief has an Ammo Storage system. When he runs out of Ammo on a particular weapon, he is unable to gain that ammo back unless he scores a KO. This will recharge the most recently depleted firearm. Another way is getting healed by a healing item or being KO'd which restores all ammo. Players can see the current ammo count on the character HUD. Energy Shielding Chief's energy shields are passive shields that protect Chief from projectile attacks but not melee ones which bypass the shields. Melee It can absorb up to 15% power before being shattered. Once shattered, Master Chief takes 1.5% more damage from projectile attacks. Not being attacked, being healed, or dealing damage causes the shields to replenish. Players can see the strength of the shields on the character HUD. Neutral Special: Weapon Fire/Weapon Swap Master Chief has access to three sets of weapons; two firearms each. Each weapon has its own ammo. Once Chief loses ammo, he needs to switch to a different weapon. Holding down the Special button releases a volley of fire while double tapping the Neutral Special will cause the Chief to switch the weapon.
Side Special: Plasma Grenade It functions much like Snake's grenade in theory but, instead of bouncing, it will stick onto a surface much like a Sticky Bomb. Players can shake off the Plasma Grenade if they struggle between being sticked and detonation which is 3 seconds. The blast can also damage Master Chief as well. The grenade is based on the Halo 1 variant. Up Special: Gravity Lift 
Debuting in Halo 3, Master Chief deploys a portable gravity lift right beneath his feet (unlike in a GIF) as it unfolds and quickly flings him vertically high into the air before he falls back down, able to move left or right and attack during that. It will then stay in place for about five seconds before disappearing, which other players/fighters can either use to propel themselves as well or attempt to destroy it. Chief can deploy only one gravity lift at a time. When performed in the air, the gravity lift will linger and drop down toward the ground, hitting opponents below it (6% damage), similar to Banjo & Kazooie's Shock Spring Pad and Sonic's Spring Jump. Down Special: Drop Shield Master Chief slams his fist down which erects a large dome shield which, when erected, prevents damage from reaching him. It does not prevent Chief from not being damaged while in the shield. If the shield takes too much damage, it will vanish. It also provides anybody who comes into the shield some slight regeneration of 1.3% per second. Final Smash: WARTHOG Master Chief summons a WARTHOG which has a platoon of UNSC Marines. It will rush forward and hit anyone who is in front of it. This creates a cinematic Final Smash where the players find themselves on Installation 04 and the WARTHOG, with Master Chief present, turns around, revs, and blasts forward. It launches itself into the air and then crashes into the trapped opponent. It also comically causes the Warthog to roll which launches the Marines out of the Warthog. It then returns back to the battle while launching opponents. Finally, after the cinematic Final Smash ends, the Marines that were catapulted from the Warthog will pick themselves up and run off. | Entrance Animation
Idle Poses
Taunts
Victory Animation
Victory Theme Kirby Hat
Boxing Ring Title
Splash Tagline
Classic Mode Route: Hold the Line Opponents are based on the mascots of their respective companies.
Alternate Colors 
| ||||||||||||||||||||||||||||||||||||||||||||||||||||||||||||||||||||||||||||||||||||||||||||

#124 Mii Mage Mii Apart of the "Mii Day Festival" | Neutral Special: Arcane Bolt The Mii Mage takes a bit to charge some power, purple lightning shooting up their robes, before they fire a singular long-range bolt of lightning from their hand that deals 9% damage on hit and less damage to everyone after the first for hit. Heavily based on Kazuya's Devil Blaster.
The Mii summons spiny vines onto the floor. This has two functions: if someone was in the range of the spell when it was first activated, they will get buried, and when the vine is fully summoned it will be treated like any other spiked platform, dealing damage and launching anyone who touches it upward. After a while the vine will wither a die, up to two vines will be summoned and any new vine after that will kill the oldest vine.
Summons a sparkling flame dragon and can guide it to either attack opponents or launch themselves in the direction they are facing. While it is heavily based on PK Thunder, one unique aspect is once it detonates, it causes simultaneous explosions upon contact which increases the radius of damage.
Traps the opponent in a sphere of darkness which then zaps them of health; healing the Mii. There is a slight difference between Robin's Nosferatu in the effects area as it creates purple and pink stars that float around. It's less dark in appearance.
The Mii Mage drops a flask forward, similar to Simon and Richter's Holy Water. However, this flask quickly transforms into a giant tornado, around the size of the Ice Climber's Iceberg Final Smash. The tornado will rumble violently, with opponents caught in it, taking massive damage. Many different types of elemental magic will burst from this tornado in projectile form, including splashes of water, bursts of fire, small lighting bolts, smaller wind tornados, and boulders formed from earth magic. All of these projectiles will fly out of the tornado in random directions while it is active. After about 6 seconds, the tornado explodes and opponents caught in it will go flying. | Entrance Animation
Taunts
Victory Animation
Boxing Ring Title
Splash Tagline
Classic Mode Route: Off Might and Magic Mii Mage's Classic Mode is a unique one: the Mii Mage starts with the default Specials, but after the 2nd and 4th battles of the route, your kit gets replaced with the 2nd and 3rd set of Specials that can be picked from the Mii Mage's spells. Against the Final Boss of the route, you have two Mii Mage allies, both having an unused set of Specials, to aid you.
| |||||||||||||||||||||||||||||||||||||||||||||||||||||||||||||||||||||||||||||||||||||||||||

#125 Mii Athlete Mii Apart of the "Mii Day Festival" | Neutral Special: Shotput The Mii Mage takes a bit to charge some power, purple lightning shooting up their robes, before they fire a singular long-range bolt of lightning from their hand that deals 9% damage on hit and less damage to everyone after the first for hit. Heavily based on Kazuya's Devil Blaster.
Mii Athlete takes out a tennis racket and ball and launches the tennis ball forward. The difference is that this attack is purely horizontal, unlike header where the soccer ball is launched from above, the tennis ball will be launched from the Mii's mid-level and travel forward without verticality.
Sets out a trampoline and can bounce on it. Opponents can bounce it. This is based on the Pac-Jump. It allows for two jumps before vanishing.
The Mii Athlete rolls a heavy bowling ball forward in the same motion anyone would both in the actual game and in Wii Sports. The bowling ball travels solely on the ground, and is slower than the tennis ball, but does more damage.
The Mii Athlete takes out a baseball bat and glowing ball. They then hit the ball towards the center of the stage, in which the ball explodes into a portal in the shape of a rainbow-colored Wii Remote. From this portal, an enormous volley of silhouettes will come out that will go into every direction of the stage, doing damage to any opponents they hit. This works similarly to Wii Fit Trainer's Wii Fit Final Smash in this sense. These silhouettes will be of various generic Mii's doing all sorts of sports, similar to the picture below. These involve a large range from holding a baseball bat about to hit a ball, holding a golf club about to putt, holding a tennis racket, etc. Three large silhouettes then conclude this Final Smash, going in three triangle directions from the center where the ball hit. These are the giant Yacht, the giant Wii Blimp, and an Airplane, all seen in Wii Sports Resort in the second picture below. After this the portal closes and the Final Smash concludes, lasting around 6 seconds. | Entrance Animation
Taunts
Victory Animation
Boxing Ring Title
Splash Tagline
Classic Mode Route: Don't Miss Leg Day
| |||||||||||||||||||||||||||||||||||||||||||||||||||||||||||||||||||||||||||||||||||||||||||
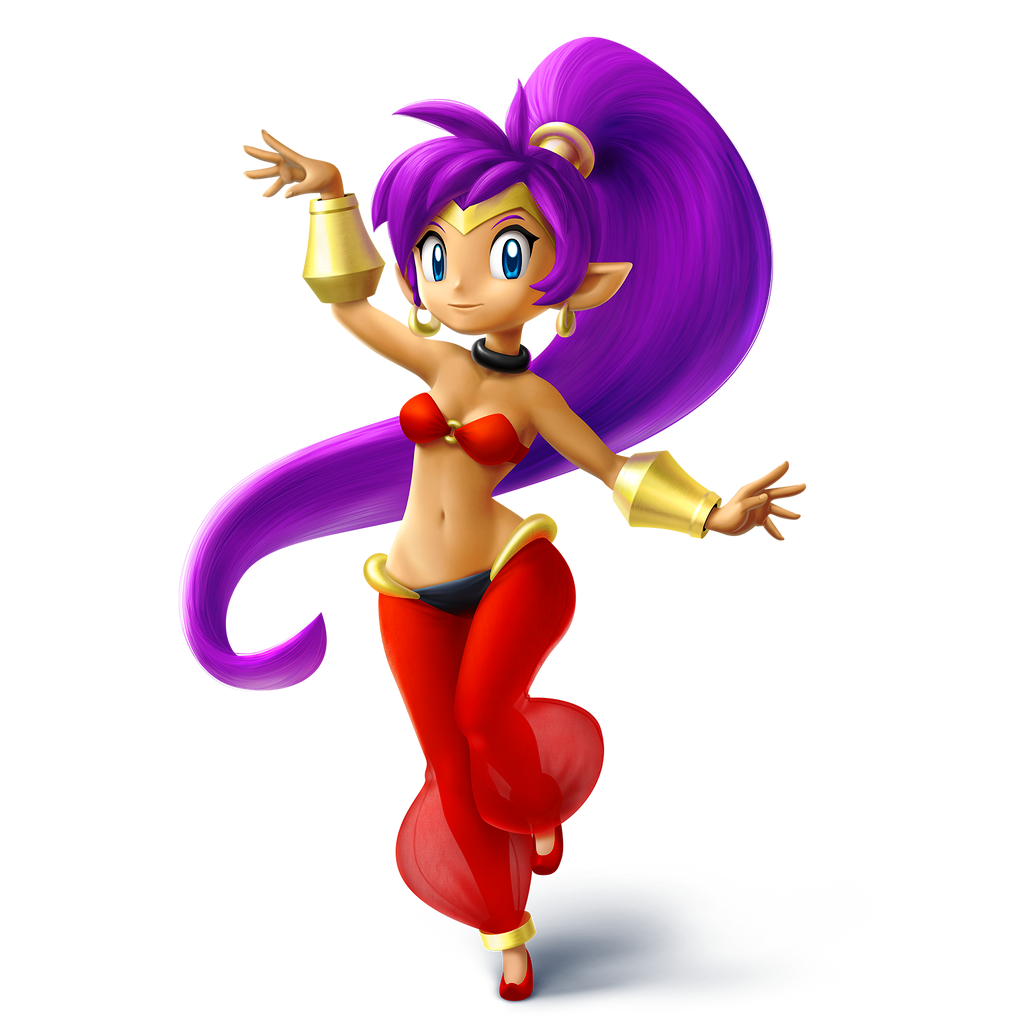
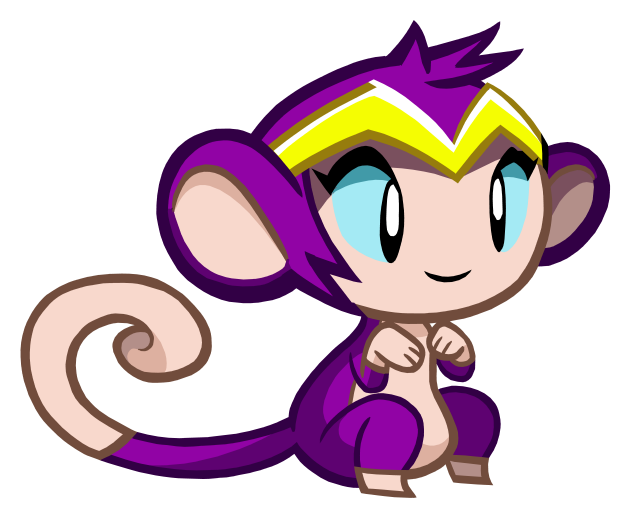
#126 Shantae Shantae Apart of the "Fun Sun Summer Festl" | Neutral Special: Fireball Shantae fires off a single fireball that travels a short distance in the same way Luigi's does and will eventually fizzle out. Charging at attack not only increases the range but also releases three Fireballs in quick succession. Side Special: Elephant Form Shantae will transform into her elephant form and charge forward by 2/3 FD at the speed of King K. Rool's run. In this form, she has armor frames that reduce incoming damage by 0.2x and have +40 Weight until the end of the transformation. The charge deals 13.5% damage and high knockback on hit, but there's a follow-up in which Shantae will leap up and plummet straight down, prematurely ending the transformation but dealing 19% damage and spiking. Up Special: Harpy Form Shantae transforms into her harpy form and takes a vertical launch into the air, similar to Pit's Power of Flight. The automatic part of the special will recover around 75% of the vertical distance Power of Flight does, however, the trade-off is that she can also fly briefly with manual input after the automatic part is over, being able to flap her wings (similar to Pit and other winged character's midair jumps) around 3 times afterward before she goes into helpless mode. The Harpy form has slightly less defense, but is lighter and speedier, being very fast in the air. Those in the harpy's range during the automatic part of the recovery will get damaged slightly. Down Special: Genie Dance Holding down Special brings up a menu in the shape of a "plus" with selectable transformation forms that players can select. Each one will do a particular type of attack when accessed.
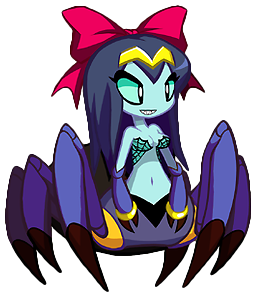
Final Smash: Half-Genie Get-Together Shantae opens up a portal which sucks in nearby players. They get transported to the recreation of the boss battle between Shantae and Empress Siren sans the former. Instead, the "breaking of the crown" happens to the opponent. The half-genies Harmony, Zapple, Vera, Plink, and Fillin appear to begin taking away their "stolen" energy from the opponent which does continuous hits of damage before exploding and being launched. | Entrance Animation
Victory Animation
Victory Theme Kirby Hat
Boxing Ring Title
Splash Tagline
Classic Mode Route: The Seven Seas Every stage has a water element along with opponents that either have a tropical, sea, or pirate theme. Every battle is a Stamina match.
Alternate Colors 
| |||||||||||||||||||||||||||||||||||||||||||||||||||||||||||||||||||||||||||||||||||||||||||
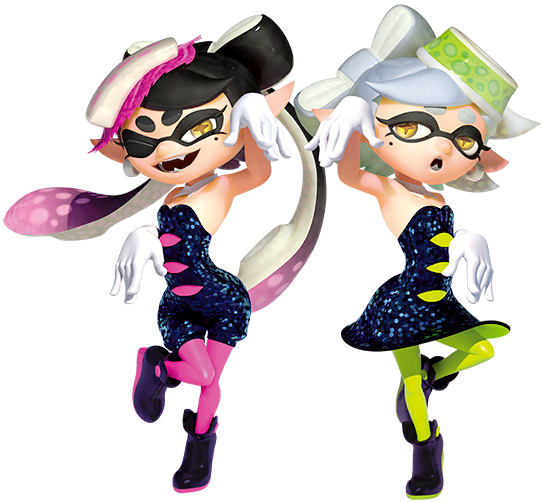
#127 Squid Sisters Splatoon Apart of the "Year One Festival" | Callie and Marie's ink has different properties: Callie's and Marie's ink increases damage taken by their attacks. Neutral Special: Splattershot Both leader and follower shoot - follower's ink deals more damage and longer lasting ink, but has less range, sorta like a Roy tipper when both are together. Side Special: Charger Shot/Splat Roller This Special is different based on which one is active. If Callie is your active character, then Marie will get on one knee and charge a shot from the Splat Charger. This deals 20% damage and kills relatively early if you manage to get the 2 seconds in, and covers a Devil Beam-sized radius. That being said, the summoning is particularly laggy and will be canceled out if Marie takes so much as a single hit, but Callie can act independently from Marie to hold foes back while her partner charges. If Marie is your active character, Callie will charge forward with a big toothy smile, her Splat Roller in hand. Unlike the Inkling's Splat Roller, Marie will give Callie a portion of the ink to act and patrol as much of the stage as her ink would allow and this doesn't bury on hit. That being said, Callie constantly moves at maximum speed possible for Splat Roller on Inkling and is relatively well-defended from the front, granting Marie a good defensive approach option. Like with Callie, Marie is free to act independently from Callie while this Special is active. Up Special: Idol Jump Same as Inkling, but the follower transforms back into humanoid form and strikes a pose at the peak of trajectory - the leader can angle their landing, while the follower cannot, allowing you to easily separate the idols. Down Special: Bomb Blush One of Callie’s signature moves, the two throw out two Suction Bombs. Suction Bombs have a larger blast radius than Splat Bombs at the expense of costing more ink, exploding later and sticking to any surface they are attached to rather than having a bounce property to them. Different from Inkling’s Splat Bomb move, the Squid Sisters throw their bombs automatically and in rapid succession, without the flexibility in arcs that the regular Splat Bomb has. Final Smash: Calamari Inkatation A recurring song usually reserved for the final battle of Splatoon stories. When activating the Smash Ball, Callie and Marie summon a large performance stage, with unique camera work showing Callie and Marie flashing the poses above. The Squid Sisters can then use 4 inputs to challenge players to copy on the stage. The more inputs are missed when the beat drops, the more damage that foe will take through the rainbow-colored ink soundwaves bursting from the loudspeakers, with a minimum of 30% and a maximum of 60%. | Entrance Animation
Victory Theme Kirby Hat
Boxing Ring Title
Splash Tagline
Classic Mode Route: Idol Show All characters come from games that utilize music or fashion in some way and are females.
Alternate Colors 
| |||||||||||||||||||||||||||||||||||||||||||||||||||||||||||||||||||||||||||||||||||||||||||
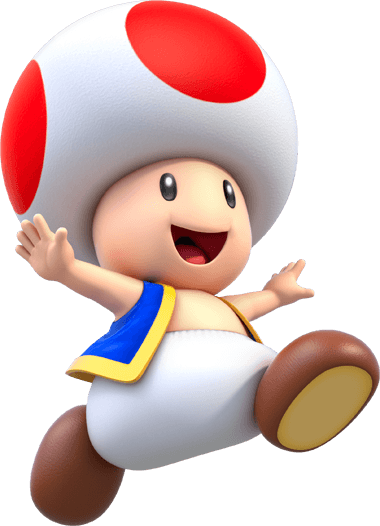
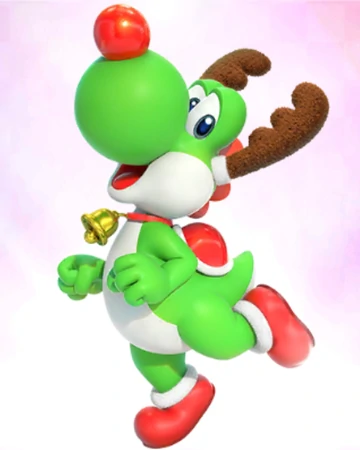
#128 Toad Super Mario Bros. Apart of the "Year One Festival" | Neutral Special: Poison-shroom Based on the poison mushroom and actual mushrooms, Toad will tuck in and endure an attack, if he does get attacked, he will release a powerful cloud of toxic spores that poisons opponents and knocks them back. Essentially think of this as a buffed version of Peach's Neutral Special. If he isn't hit the attack is as effective as a low-powered Wario Waft. Side Special: Toad Kart Toad gets into a Pipe Frame kart and rams forward into opponents, working similarly to other vehicle side specials. The kart can open a parasol and Toad can jump off of it, dropping the kart as a projectile. Up Special: Propeller-shroom Toad dons the Propeller Helmet which causes Toad to gently float upwards. Pushing up on the control stick causes Toad to move upwards at a higher rate of speed. Pushing down causes Toad to begin to drop is height until he falls completely. Down Special: Item Stash When you input Down Special, he'll pull out his chest, slam it down in front of him, and dive inside. Then, after around 20 frames, he'll come back out of the chest with a new item equipped - at which point he picks it up and it vanishes again. When he comes out of the chest, though - he'll be holding one of five items, which he'll hold up before using. These are:
Each of these are items that are already in the game, all of which are from the Mario series. The item pulled out is random each time, and there's a cooldown of around 10 seconds between each use - functioning similarly to Wario's cooldown on his Bike. Final Smash: Faries' Thanks Toad opens up a book and summons a group of fairies from SMB2 - they scatter around the stage, landing on various platforms, where they serve as conveyor belts like how they pushed Wart at the end of SMB3. For Toad and his allies, they make them faster with no cons, but for Toad's enemies, they will forcefully move them quickly in the direction of the nearest blast zone (or, on scrolling stages, the direction being moved away from), with fighters being dropped off of any platforms the fairies push them off of. | Entrance Animation
Boxing Ring Title
Splash Tagline
Classic Mode Route: In Another Castle The iconic line uttered by toad in Super Mario, Toad's Classic Mode consists of Toad fighting against those who kidnap princesses, with said princesses as his ally.
Alternate Colors 
| |||||||||||||||||||||||||||||||||||||||||||||||||||||||||||||||||||||||||||||||||||||||||||
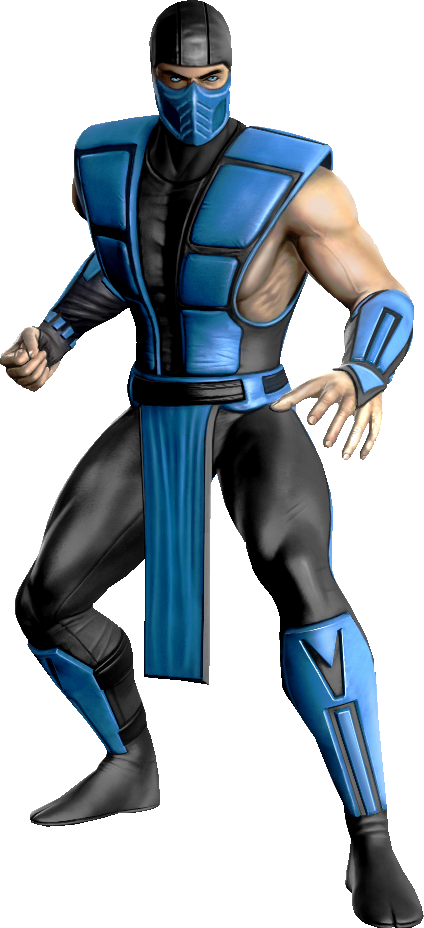
#129 Sub-Zero Mortal Kombat Part of the "Festival of Frost" | Neutral Special: Ice Blast Sub-Zero launches an icy projectile forward. If the projectile hits an opponent, it receives 5% DMG and is instantly frozen as an icy statue for a couple of seconds. Side Special: Polar Puncture A move from Mortal Kombat X, Sub-Zero will reach out to grab in front of himself with one hand. If he manages to land a grab, Sub-Zero will stab the foe three times with a pair of ice daggers before smashing them one final time into the foe for a burst of damage and knockback. This deals 13.5% damage and is generally a good kill move. Up Special: Tombstone Teleport Sub-Zero's body becomes ice, falls backward into the ground/air, and reappears either behind his opponent, or, if he needs to recover, near the edge. Down Special: Ice Clone Sub-Zero will do a backflip while leaving an afterimage of himself encased in ice. This can damage those who come into contact with the statue and has a high chance of freezing people. The clone can be shattered with a strong attack though. Krushing Blow Performed right after a Perfect Shield if, right at the exact moment the Perfect Shield is inputted, the Special Button is pressed. The causes Sub-Zero to perform an ice-infused punch which, in 1 vs 1, zooms in and shows the inner workings of the attacked fighter. This is done in a black silhouette with a white skeletal frame OR its equivalent. This also launches the opponent up into the air. If performed in a group battle, it does not have a zoom effect. If it kills the opponent, TOASTY!!! can be heard in the background as the opponent is KO'd. Final Smash: Freezing Storm Sub-Zero summons forth a freezing storm that envelops him and traps opponents which then cuts into a cinematic Final Smash where players are stuck in the freezing cyclone. Sub-Zero then takes various weapons such as a sword, halberd, mace, and finally does a freezing somersault which launches the opponent into the air. Sub-Zero then launches billions of ice shards which "impales" into the opponent before freezing and launching them. Final Smash: Fatality: Frostbite Flash Sub-Zero can initiate this Final Smash when the character is at 100% damage on their last stock OR at 50% during the last 5 seconds of a Timed Match. You know that this is the one that is initiated as the announcer will say "Finish Him/Her/Them". When performed, it causes Sub-Zero to, like the regular Final Smash, summon forth a cone of ice that traps the opponent in a cinematic Final Smash. Sub-Zero causes a barrage of icicles to erupt from the ground and stabs into the opponent; trapping them inside and freezing them. He then launches a torrent of ice shards that chip away at the encased opponent bit by bit before shattering the entire of them entirely. This initiates an OHKO. | Entrance Animation
Kirby Hat
Boxing Ring Title
Splash Tagline
Classic Mode Route: Flawless Victory Sub-Zero's battles are all on Omega variants with Stamina Matches and each opponent is based on a particualr character from the Mortal Kombat series. The Classic Mode mimics the Mortal Kombat Arcade Mode aka Mortal Kombat Ladder. With a Mirror Match and Team Match near the end.
Alternate Colors 
| |||||||||||||||||||||||||||||||||||||||||||||||||||||||||||||||||||||||||||||||||||||||||||

#130 Klonoa Klonoa Part of the "Cherry Blossom Festival" | Neutral Special: Wind Bullet A projectile that has been a staple in the series since its birth. Klonoa uses this to stun and inflate enemies Dig-Dug-style, after which he can use them as either an extra projectile to hit other enemies or as an extra jump. In Smash, Klonoa will fire a burst of green energy in front of himself, turning any foe that hits into a ball similar to Venom's Giga Machina System Instant Kill from Guilty Gear XRD. This is a semi-bury state where their fall speed gets reduced to Jigglypuff's. While they're Winded, Klonoa can do one of the following:
Side Special: Shuriken Klonoa's wind ring creates a Shuriken that flies forward and will pass through opponents while damaging them. It will bounce off walls if it hits. It will also be thrown downwards at an angle in the air. Up Special: Moo Jump Klonoa would lift his wind ring upwards while a Moo, a common enemy from the Klonoa appears on top of it. Klonoa shouts it "Wa Hoo!" and thrusts the wind ring down which tosses the Moo downwards, dealing knockback damage to the enemy while also boosting himself high into the air. Down Special: Beam Gnome Klonoa summons a shield of energy from the wind ring called the Beam Gnome and uses it as his down special. Klonoa can turn on the beam gnome shield where he dash forward a short distance with the shield active. The shield can deal some damage, but it's mainly nullifying incoming damage. it can absorb projectiles and block standard attacks. Final Smash: Thunder Hurricane Klonoa jumps into the air and begins to spin around very quickly. Multiple lightning bolts strike down onto the stage everywhere, racking up damage if the opponent is directly hit by them. After an onslaught of attacks, Klonoa excitedly lands on the ground while putting his wind ring up with a wink. | Entrance Animation
Kirby Hat
Boxing Ring Title
Splash Tagline
Classic Mode Route: Cross Battles Klonoa's opponents are a collection of Capcom fighters while teamed up with a Namco fighter referencing the game series Project X Zone which Klonoa was a part of back when it was Namco x Capcom.
Alternate Colors 
| |||||||||||||||||||||||||||||||||||||||||||||||||||||||||||||||||||||||||||||||||||||||||||
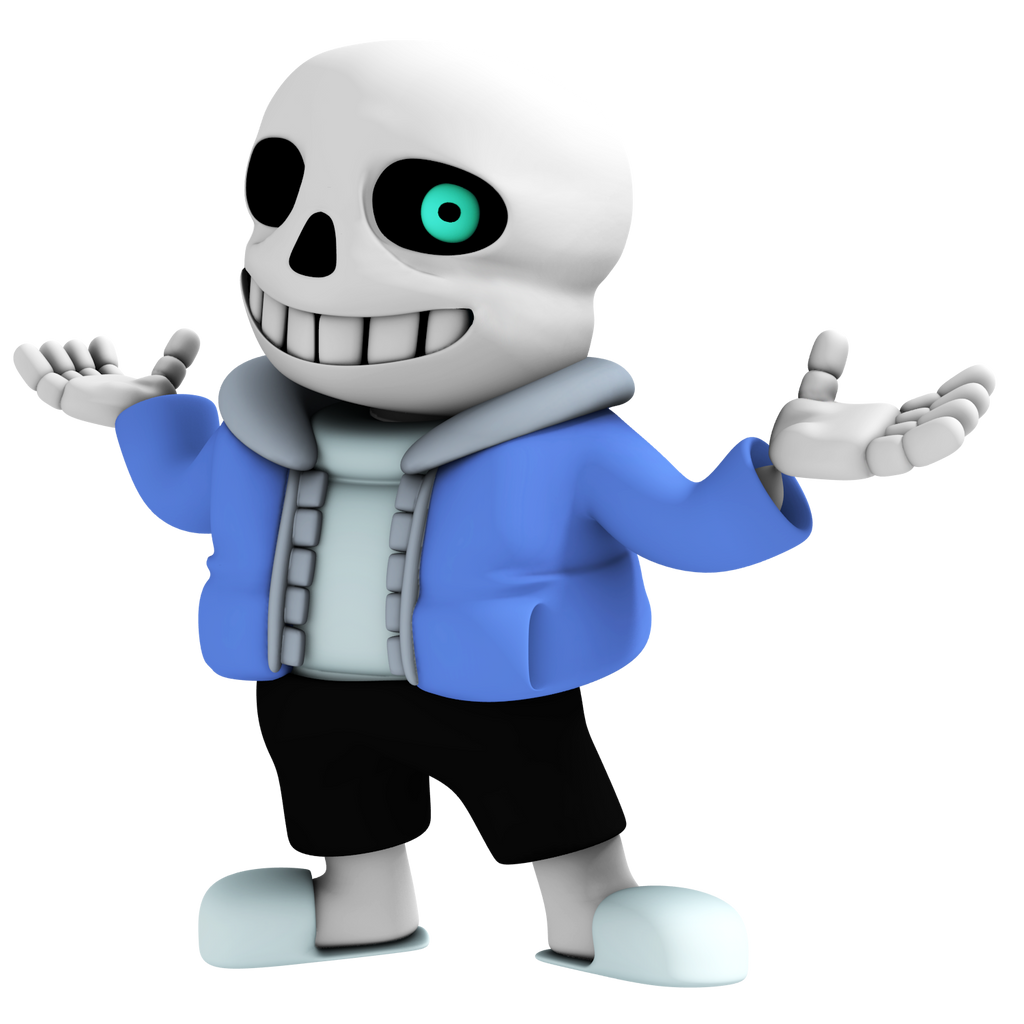
#131 Sans Undertale Part of the "UNDERTALE Festival" | Neutral Special: Bgaster Blaster / COOL DUDE Sans summons out Gaster Blasters in any direction and uses them to blast the opponent at 5% damage with 1.5% damage increasing from KARMA. While this move can be spammed. if used too much. Sans will get tired and Papyrus will fill in for his Side Special by summoning a trail of bones that formed the words "COOL DUDE" at the enemy till Sans is ready again. The cooldown would be 8-10 seconds. It does a little more damage but it's less faster. It does no KARMA damage when Papyrus attacks. Side Special: Ribcage A simple but iconic attack that has Sans summon a close-knit row of bones from the ground to damage the opponent, the bones deal KARMA damage and are one of the more common ways to inflict the status condition. Sans can hold down the special button to allow the bones to travel farther, allowing the attack to have a surprising range. If the target is on the ground they will be tripped, allowing the attack to deal more KARMA damage. When Papyrus is involved he tosses a bone from above that acts as a potent spike, the purpose of this bone is to spike the opponent into Sans' bones to maximize the amount of KARMA received. Up Special: Teleport / Blue Mode Sans can briefly teleport where he would disappear and suddenly appear at any given direction within range in a fair distance. This would not put Sans into freefall as he can freely use any other moves right after. Of course, if used too much. Papyrus will help Sans instead by turning his brother's soul blue to move upwards but will get into freefall. Down Special: Blue SOUL Sans will flash his eye for a brief moment, preparing to counterattack his foe. If the foe strikes him, Sans will inflict the foe with a status where they possess a blue heart for 60 frames + 1 frame per every 1% the attack would've dealt. While in this state, a fighter is reduced to Steve's jump power, but if going beyond the stage, the status effect will wear off. If attempting to initiate DSpec while this is active, Papyrus will appear and summon a trail of bones from his position like they were a bed of spikes dealing medium damage and knockback on hit. Final Smash: San's Strongest Move / San's Desperate Move If any opponent gets get by a single bone rising from the ground when his FS is active. It would send them to the Undertale battle bud where Sans to proceed to use his strongest attack like he did at the start of the genocide fight. It may be possible to dodge it but more often than not. You'll get hit with tons of KARMA poison. If on his last stock and high damage, he will do his last desperate attack which also uses his telekinesis to whip the opponent around but also causes Sans to be fatigued at the end of the Final Smash. | Entrance Animation
Kirby Hat
Boxing Ring Title
Splash Tagline
Classic Mode Route: The Seven Human SOULS Sans's battles replicate the nature of the seven SOULS in the underground.
Alternate Colors 
| |||||||||||||||||||||||||||||||||||||||||||||||||||||||||||||||||||||||||||||||||||||||||||
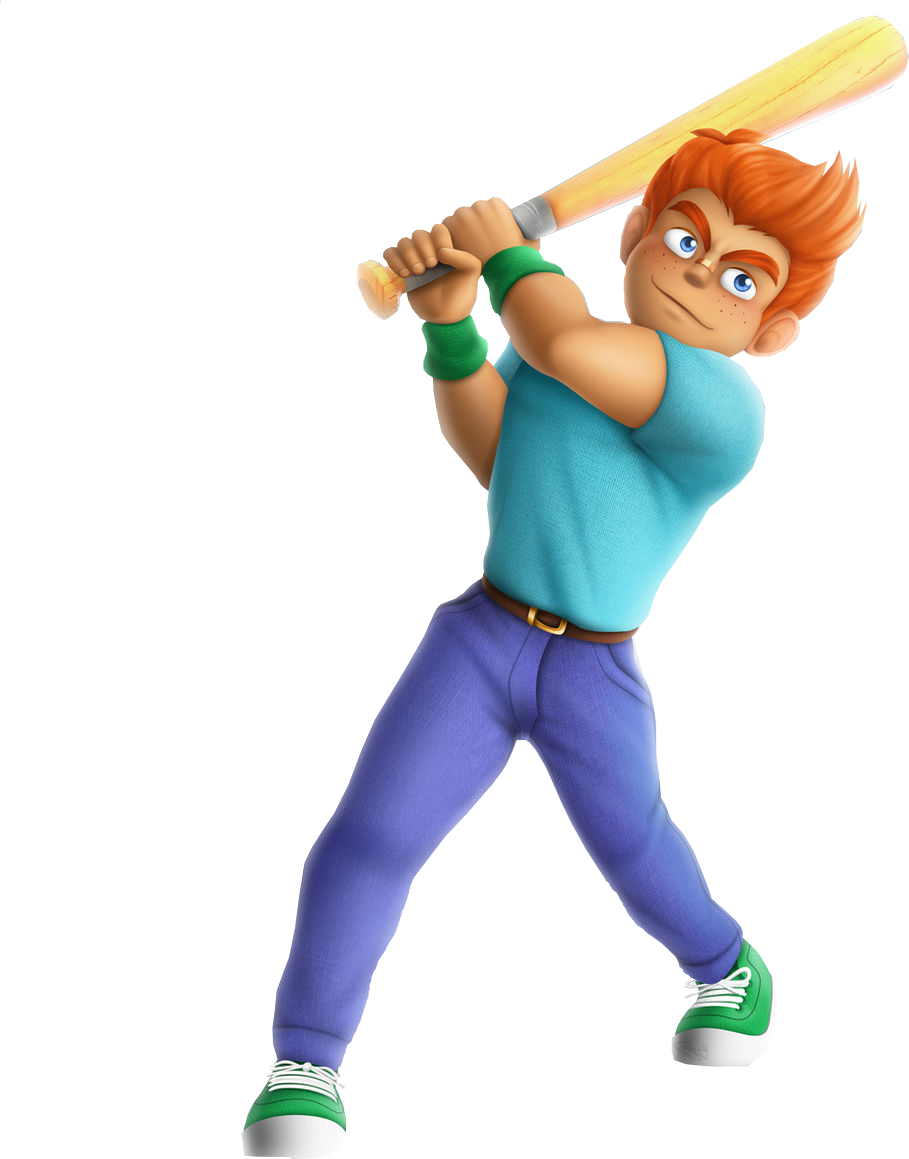
#132 Mike Jones StarTropics Part of the "Retro Festival" | Neutral Special: Perfect Swing Mike charges his bat to perform a powerful swing, it is inspired by Marth's Shield Breaker, however it has some unique properties. Firstly the bat usually can't instantly break shields, it can heavily damage them but it isn't capable of shattering the shield in one hit. The true power is lining up the sweetspot of the bat, which is in the middle, hitting that deals incredible knockback and not only instantly break shields but also deals a critical hit, launching the foe upwards. Think of it as a toned down version of what would happen if Jigglypuff breaks her shield. Side Special: Slingshot Mike puts a small rock inside of a slingshot, where he pulls it back and fires it , hitting into a foe with 3 or 4% damage. You are not able to charge it but rather angle at any direction. Up Special: Anklet The Anklet goes into Mike's ankles, appearing as wings. Mike will be able to fly upwards for a few seconds before the anklet disappears. Down Special: Bola Mike takes out a bola and swings it forward. If it connects with an opponent, it will shut them down and cause them to be immobilized for a period of time. When performed in the air, it causes the character to enter into a freefall for a period of time. Higher damage percentages causes longer capture times. Final Smash: Ultra Psychic Snowman Wave Mike brings forth a Snowman which causes any opponents on the stage to freeze. He then unleashes multiple blasts of Ultra Psychic Shock Wave's which, unlike the source material, shoots out in multiple areas. It will deal damage before eventually shattering and launching opponents. Those who touch the frozen opponents will in turn get frozen. | Entrance Animation
Kirby Hat
Classic Mode Route: Retro Adventure Opponents fought in this Classic Mode are from characters who first appeared in videos games during the Nintendo Entertainment System and older era aka retro.
Alternate Colors 
| |||||||||||||||||||||||||||||||||||||||||||||||||||||||||||||||||||||||||||||||||||||||||||

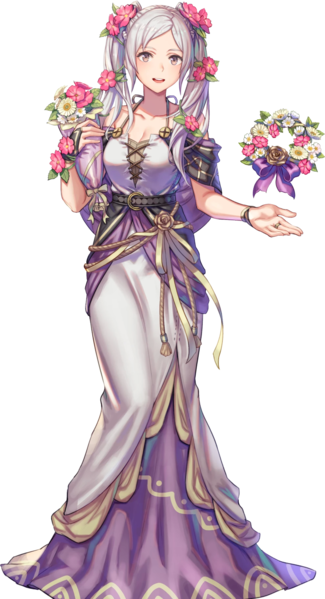
#133 Morrigan Darkstalkers Apart of the "Return to the Festival of Fright" | Neutral Special: Soul Fist Morrigan assumes a Buster Wolf-style stance and fires a skull projectile in an identical manner to the Hadouken. This deals 7% damage and low knockback on the light version, but like with Ryu & Ken, this deals incrementally more damage and travels faster, by 0.5% each, with the input version aimed upwards. If used in the air, Morrigan will fire the Soul Fist at a downward angle for the same damage and knockback. Side Special: Flight/Shell Blade Morrigan launches herself using magic in the air which can be used as a recovery move. This move by itself doesn't do any damage but inputting side special will induce shell blade which causes a drill like appendage to sprout around her feet as she kicks forward. It deals multiple hits of damage before launching the opponent. Up Special: Shadow Blade Morrigan turns one of her wings into a blade and files upwards, cutting anyone in her way and allowing her to fly briefly. Down Special: Vector Drain A command grab where Morrigan flies upwards near the top of the blastline before smashing them down into the ground, dealing 14% damage and medium-high knockback. The strength of the attack determines how far the attack goes. Final Smash: Finishing Shower/Darkness Illusion As with Ryu and Ken, Morrigan has two Final Smashes depending on the distance she is from her opponent. They can also be used in the air. Finishing Shower is used when Morrigan is further away from her opponent, she says, "Can you dodge this? Finishing Shower!" Then she fires a hail of missiles from her wings at her opponent. Darkness Illusion is used when Morrigan is closer to her opponent, where she says "You've been naughty." Then turns her wings into a jetpack, creating a copy of herself, and attacking her opponent non-stop before she kicks them to the ground, sending them flying. | Entrance Animation
Boxing Ring Title
Classic Mode Route: Crossing Over Two Worlds All characters are three on "three" battles based on characters that appear from various companies and studios which is a reference to Marvel vs Capcom series which is something Morrigan has a constant presence in. Instead of Morrigan having two allies, she has three total stocks. She fights each character one by one. All battles are on Omega stage variants and is a Stamina Match. Finally, after the defeat of each character, a new song plays which reflects that character.
Alternate Colors 
| |||||||||||||||||||||||||||||||||||||||||||||||||||||||||||||||||||||||||||||||||||||||||||

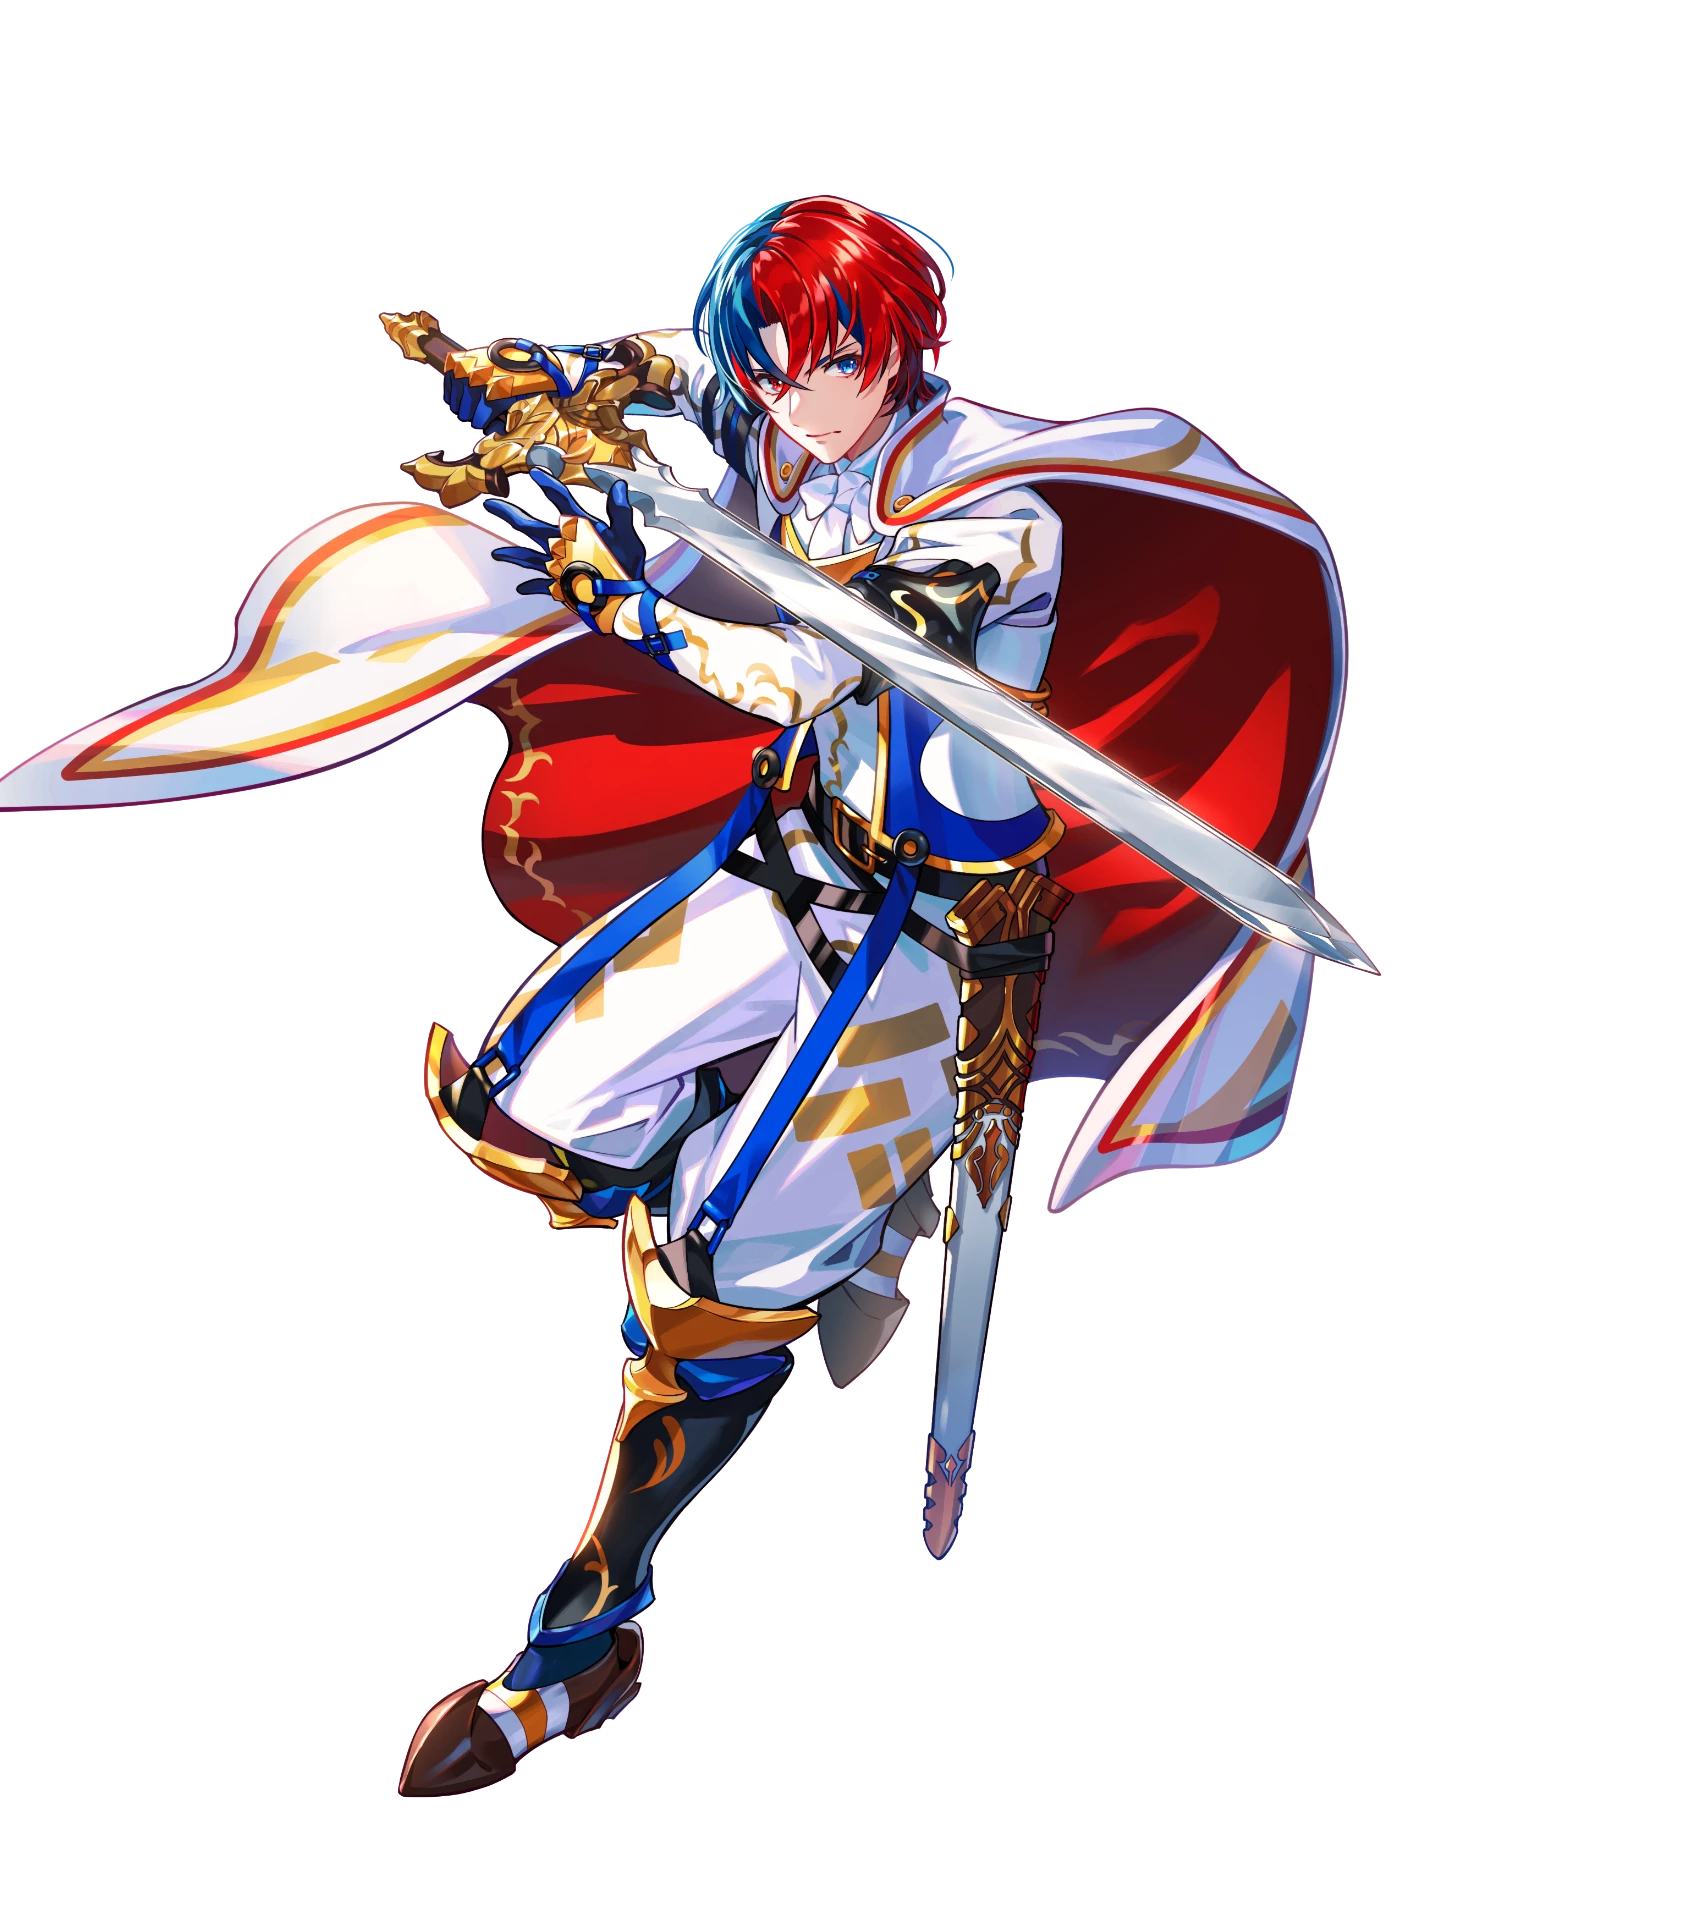
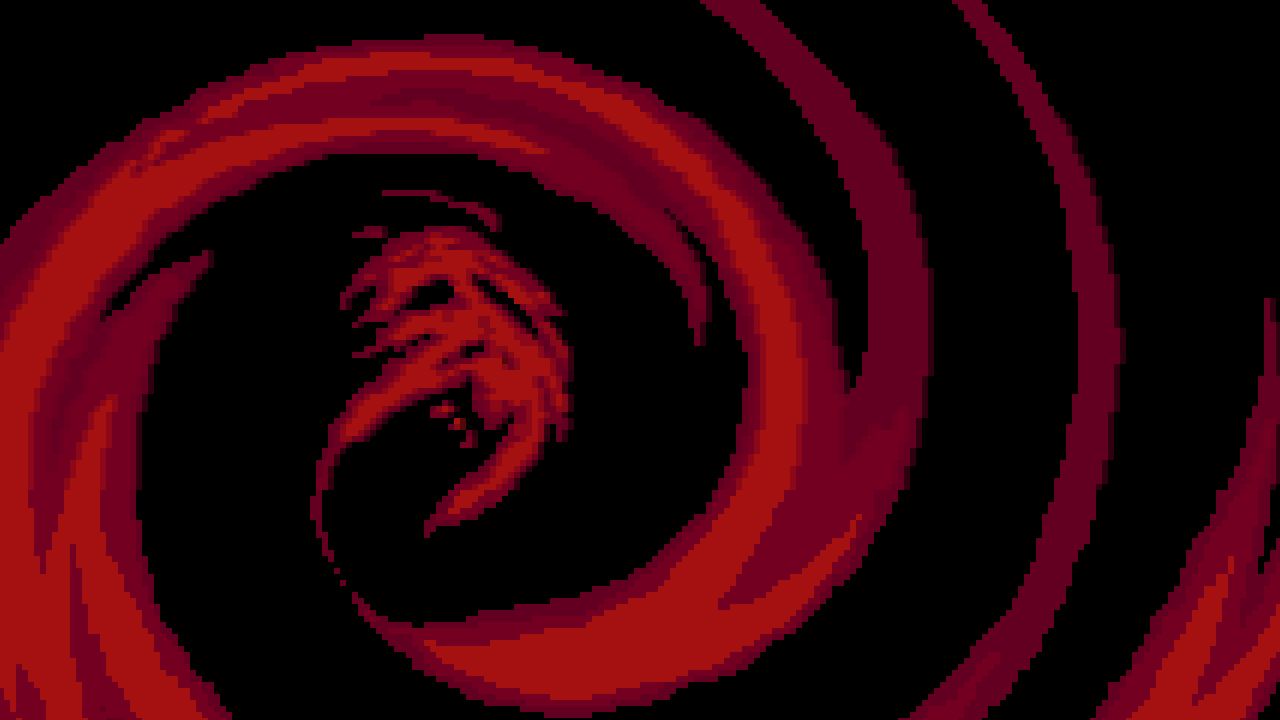
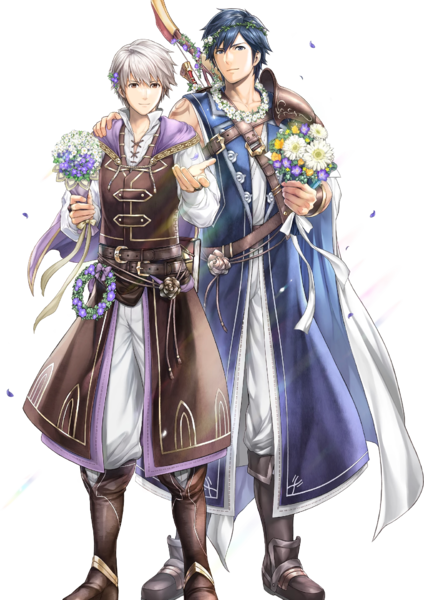
#134 Alear Fire Emblem Part of the "Year 2 Festival" | Neutral Special: Excalibur /Engage Special Alear unleashes a torrent of wind which rises about and launches the opponent into the air. The magic is centered around Alear making it an effective defensive move.  Eruption: Alear delivers a possibly charged Eruption with Ike. Dragon Fang Shot: Alear unleashes a possibly charged Dragon Fang Shot along with Corrin. Eruption: Alear delivers a possibly charged Eruption with Ike. Dragon Fang Shot: Alear unleashes a possibly charged Dragon Fang Shot along with Corrin.Side Special: Dragon's Fist / Engage Special Alear charges with energy before unleashing a flurry of fist strikes similar to Dancing Blade, the first hit being a left straight punch, the second being a right hook and the final hit dependent on input direction: straight ahead ends with a final dual palm strike that sends the foe flying, upwards-angled caps with an uppercut and downwards-angled ends with an overhead cudgel that spikes. When the Engage Meter is full and the Emblem is engaged, Alear has access to a mapped special to this to do an attack that character Alear is engaged with. The following specials are: Flare Blade: Alear performs a possibly charged Flare Blade along with Roy. Flare Blade: Alear performs a possibly charged Flare Blade with Chrom. Arcfire: Alear casts a possibly charged Arcfire.Anna Ballista: Alear unleashes a possibly charged Ballista with Anna. Up Special: Draconic Crash Alear jumps into the air and does a downward slash. It has high air movement by pushing forward at the end of the upwards travel distance to move Alear more forward. This is similar to Power Dunk but with more higher upwards mobility. This can cause Alear to Alearicide if they miss the ledge or go off the ledge but can meteor smash airborne opponents. Down Special: Bolganoe/Engage Special Alear slams him sword into the ground or will stall and fall and channel their Divine Dragon energy into the ground. It causes a geyser to shoot up and then travel forward in a straight line several spaces in front of him Counter: Alear performs a Counter along with Marth. Counter: Alear performs a Counter along with Lucina.Amyr: Alear delivers a crushinng blow from Amyr along with Byleth.Final Smash: Divinely Inspiring/Lodestar Rush/All for One/Blazing Lion/Awakening Aether/Great Aether/All for One/Torrential Roar/Goddess Dance/What a DealDragon Blast When not engaged, Alear performs Divinely Inspiring which summons a pillar of Holy Light which seeks out opponents and detonates. It has the added benefit of healing Alear for every hit it does. With , Alear does Lodestar Rush which is is a combined Critial Strike but with more distance.With , Alear does One for All which is a combined critical strike.With , Alear does Blazing Lion which is a combined Critical Strike.With , Alear does Awakenign Aether which is a combined version of Corrin's version.With , Alear does a combined version of Great Aether.With , Alear does Giga Levin Sword which electrifies Emblem Chrom's sword as he does damage.With , Alear does Torrential Roar which is a combined version of Corrin's attack.With , Alear does Goddess Dance which is a combined version of Progenitor God Ruptured HeavenWith Anna, Alear does What a Deal which is a combined version of Anna's but with each Anna seen in Fire Emblem's past being Emblematic form. With Alear, Alear does Dragon Blast which unleashes a Zero Laser-like blast across the stage. | Entrance Animation
Boxing Ring Title
Classic Mode Route: Emblems Engaged Alear comes equipped with an Emblem of their choice. Matches are fought with Stamina Matches of one stock each which is based on Fire Emblem's gameplay. In addition, enemies have a "Dark Emblem" based on one from the original game which is a red palettte version of Fire Emblem characters.
Alternate Colors
| |||||||||||||||||||||||||||||||||||||||||||||||||||||||||||||||||||||||||||||||||||||||||||

#135 Rayman Rayman Part of the "Year 2 Festival' | Neutral Special: Telescopic Fist Rayman starts spinning his fist quickly before throwing it forward as a projectile when released, flying back to him like a boomerang upon reaching apex distance or hitting an opponent, even being able to hit on the way back. He is capable of changing between five different attacks beyond just the regular punch. The attack can be charged, which deals higher damage and even longer reach as it turns golden with blue sparkles, with him being able to jump and move during that.
Side Special: Shock Rocket Rayman will wind up behind him and throw one of his fists as it turns into a rocket, essentially placing him in a Nikita-like state. Unlike with the Nikita, the Shock Rocket is still a punch, meaning it cannot be reflected, but it deals weaker damage, at around 11% and weaker knockback as well. Up Special: Throttle Copter Rayman will use his helicopter helmet from Rayman 3 to fly upwards as a recovery, sort of like K. Rool's up special. It doesn't deal any damage but has high recovery abilities. Down Special: Plunger Guard Rayman deploys a small plum-shaped unit by dropping it onto the ground. When an opponent moves within it's short range, the plum will open to reveal a gun turret inside it and start shooting a single plunger at them, able to fire three times before disappearing. A hit plunger does weak damage, but will stick into an opponent's face and briefly slow them down for a few seconds. Rayman and other players on his side in a team match can pick up an inactive Plunger Guard and then throw it like a item to position somewhere else. However, the Plunger Guard can be destroyed with a few hits and Rayman can only summon one on-stage at a time, making the previous one disappear whenever he uses the move again. Final Smash: Hi-Ho Moskito! Rayman whistles aloud with his fingers to call upon Bzzit, a mosquito-like creature who was a mini-boss from the first Rayman game turned into his friend. Bzzit arrives and dashes forward, striking opponents by stinging with his proboscis. This starts a cutscene where Rayman rides on Bzzit as he dashes back and forth while pecking opponents. Bzzit then sucks in opponents and then blasts them out of his proboscis, launching them all away. | Entrance Animation
Boxing Ring Title
Classic Mode Route: Crossing Over Two Worlds The battles in this Classic Mode reflects the progress in the first Rayman game.
Alternate Colors
| |||||||||||||||||||||||||||||||||||||||||||||||||||||||||||||||||||||||||||||||||||||||||||
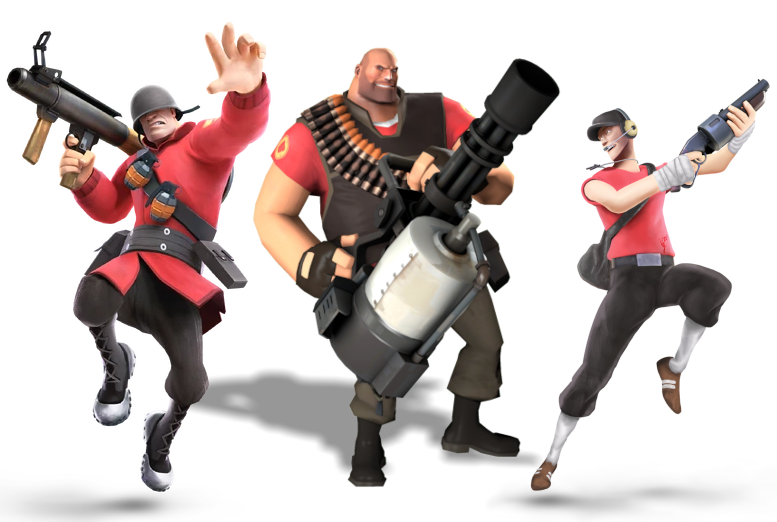
#136, #137, #138 Team Fortress Team Fortress | Neutral Special: Nastacha/Force-a-Nature/Rocket Launcher
Side Special: Killing Boxing Gloves/Sandman/Shotgun
Up Special: Ubercharge/Double Jump/Rocket Jump
Down Special: Team Swap This move is mapped to every class. Upon input, it summons a teleporter mechanism which instantly swaps out that character. Shield Special: Sandvich/BONK! Atomic Punch/Buff Banner
Final Smash: Finish the Payload: A large bomb cart appears in front of Team Fortress, each playable member having a unique voice line (Scout: "Mush, you lazy bums!" Heavy: "We must all push!" Soldier: "Push like you mean it!"), and all three members push it forwards, knocking everyone the cart hits upwards. A new cutscenes occurs: the fighters land in front of the remaining members of Team Fortress (Pyro, Demoman, Engineer, Spy, Medic and Sniper). Medic activates the UberCharge of a modified Kritzkrieg to bolster the remaining five, who unload their signature weapons onto the fighters before Demoman fires a pipebomb that sends them flying into a large pit...just as Scout, He at and Soldier reach the final terminus with the payload. The bomb promptly explodes before knocking the caught foe's away. | Entrance Animation
Boxing Ring Title
Classic Mode Route: Capture the Flag A combination of the TF2 Mercs not playable in the game and the popular game mode "Capture the Flag", Team Fortress is constantly accompanied by a small red or blue R.O.B. representing the briefcase. All enemies will be red or blue to contrast with Team Fortress's selected alt.
Alternate Colors
| |||||||||||||||||||||||||||||||||||||||||||||||||||||||||||||||||||||||||||||||||||||||||||
#139 Black Mage Final Fantasy | Neutral Special: Nastacha/Force-a-Nature/Rocket Launcher Side Special: Killing Boxing Gloves/Sandman/Shotgun Up Special: Ubercharge/Double Jump/Rocket Jump Down Special: Team Swap Shield Special: Sandvich/BONK! Atomic Punch/Buff Banner Final Smash: Finish the Payload: |


 Back to top
Stages
Below are the stages appearing in Super Smash Bros. Infinite Beyond

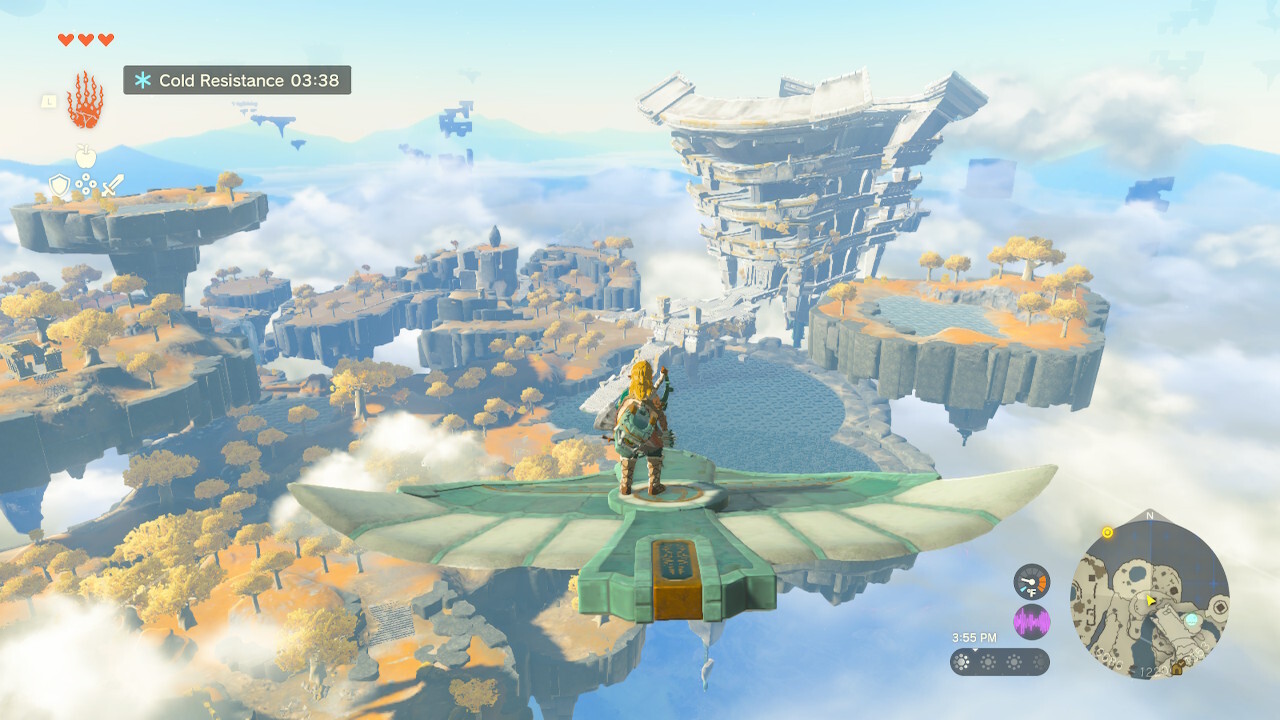
The stage will start on the ground with one large ground platform and two higher smaller platforms. On the sides of the ground platform will be stairs as seen in the above picture. Cameos from Hylian townsfolk, Ritos, Gorons, Zoras, Gerudo, Sheikah, and Koroks will be in the background. There will also be cameos from Purah, the first four champions (Sidon, Riju, Yunobo, and Tulin), Teba, Yona, Buliara, Hestu, Paya, Old Impa (if Duck Hunt and Toon Link can be stage cameos and playable, so can she), Robbie, and Josha. Eventually, Purah will attach four balloons, two on each side of the large platform, and one for each of the two smaller platforms, to the platforms and place flame emitters beneath each balloon, all using Ultrahand. Robbie will then use Ultrahand from the background to move the stage to the tower where the platforms will be shot into the air. For around ten seconds, the platforms will travel very fast upwards from the tower, but then the vertical momentum from the tower stops, so the flame emitters will activate and carry the platforms more slowly into the air using the balloons until the platforms reach the next portion of the stage. Great Sky Island 
The platforms will then reach the Great Sky Island. The ground platform incorporates into the Island (similar to Delfino Plaza and Skyloft), with the sides now having ledges that players can fall off like with Final Destination. Zonai Constructs will deactivate the flame emitters, but the balloons will still be a little hot, so they will use hydrants to put out the flames with water. Cameos from the spirits of Rauru, Mineru, and Sonia appear in the background. There will also be Zonai constructs building various platforms in the background, using both Ultrahand and Autobuild and then sending them into the foreground. These include:
The Omega and Battlefield forms of the stage will take place on the Sky Island, with a Sky Island textured platform used in the omega form, and two smaller Sky Island textured platforms being used in the battlefield form. The stage name on the actual menu select (and the overall stage name in general) will be Great Sky Island, named after the second form of the stage, since that is the form that the Omega and Battlefield forms take place on. | |
|
The area is a touring stage that will start at the top of the crater of Area Zero and descend into the abyss; through the fog. It will fly over the land masses that dot Area Zero and the landmarks there including the Research Labs. As the stage goes down further, it enters into the depths of Area Zero which are adorned by crystals that help with the Terastalizing phenomenon in the region.
Area Zero depths Once the stage reaches the end, it arrives at Zero Lab and enters into the lab where you can find either Professor Sawada and Koraidon or Professor Turo with Miraidon. The chance of seeing either is decided upon the match starting and never changes. Once arriving in Zero Lab, it will circle the Time Machine before it releases a pulse of energy which causes the stage to revert back to the starting position. Time Machine area The stage layout is a battlefield-type stage with elements taken from Area Zero for the platform appearances such as the terrain, fences, and the trees. The Omega and Battlefield layout sees the stage settled into the upper level of Area Zero. Here are the cameos in Area Zero:
| |
|
The stage has two stories with lofts on either side with escalators in the middle forming an "X" shape. It is only the front escalator that players can interact with as the back one is just the background. The front escalator connects to the left-side loft while the background escalator connects to the right-side loft. The right side loft then juts out toward the camera to provide a platform. The escalator can be demolished but not the platforms. It will be reconstructed after a while.
View attachment 375352 The stage itself is in a state of disrepair with nature slowly creeping into it but still, a semblance that this was a shopping mall. Grass pokes out ut from the titles, vines creep along the wall, trees, grow in wide spaces in the background, and a canopy of foliage is at the top of the stage. The bottom layer still has tables, chairs, and signs albeit rusted from the elements which can be picked up and thrown. The stage does have enemies that can be defeated. These are enemies who only appear in The Forgotten Land: 1. Awoofy 2. Rabiroo 3. Jabhog (technically not from this stage but rather another area.) Omega and Battlefield variants utilize the same stage aesthetics but position the stage in front of the mall as seen in the background. | |

The main setting of Splatoon 3's single-player mode. This will be a traveling stage that will travel to each of the seven sites in the game that the player explores in story mode. Cameos include Callie, Marie, Mr. Grizz, Craig Cuttlefish, The Captain, New Agent 3 (can randomly be Inkling or Octoling, comes with Smallfry companion), Shiver, Frye, and Big Man. The seven sites will each have different platform layouts and include Future Utopia Island, Cozy and Safe Factory, Cryogenic Hopetown, Landfill Dreamland, Eco-Forest Treehills, Happiness Research Lab, and Alterna Space Center. 
| |

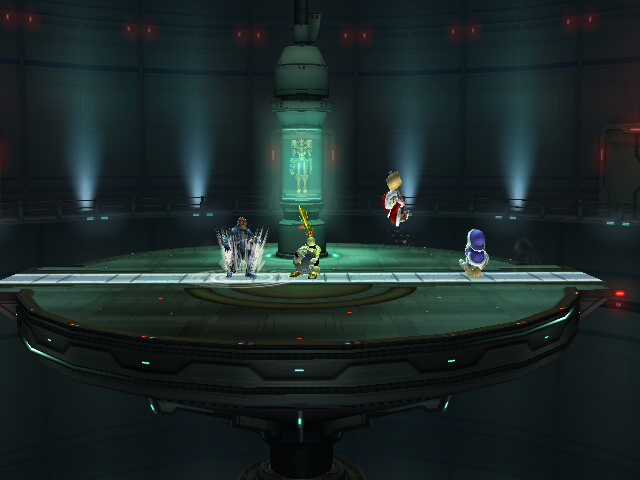
The central background & concept. Design & Layout: Shinjuku Station is based primarily on the boss battle in the first game's second level, Stage 1-1, as well as the entire level in general. Taking place in a futuristic cityscape under attack by the Seemers and the Armed Volunteers, it's intended to represent the game's futuristic nature and vibe as opposed to purely the gameplay That said, some creative liberties would be taken with this - including elements like the overhead beams present in other parts of the level whilst having Shinjuku Station in the background, and having the Crab and Centipede Seemers crawling over it over time. Not only this but Achi and Airan Jo will cameo in the background, fending off the attacking beings. 
Some of the background buildings besides purely Shinjuku Station. The actual stage takes place on the bridge going toward Shinjuku Station, though some of the ruined buildings can be seen in the background - and there's also an upper platform, made up of one of the overhead bars seen earlier in the stage. I should note that the Seemers, nor Near Zero, would actually influence gameplay - though they do appear in the background and cause chaos. 
An indication of what the platform might look like. In terms of layout: assume that areas indicated in black are actual platforms, with grey areas being purely decorative background elements, and a silhouette of Mario for the sake of scale. I opted to remove the side parts mostly because it'd have made the stage pretty unbalanced, honestly. 
As for its appearance in Battlefield and Omega forms, I'd say that it'd have a similar sort of vibe - albeit with the remade platforms that are intended to match the layout of the new form. Of course, that means the background would still be the same, war and all! | |
|
A simple large flat stage that is high up and is about the size of Kalos but larger. where you can see the Titans from Sonic Frontiers in the background. Various Koco including the elder and hermit can be seen just sort of wandering on the platform background. The stage has multiple themes
Kronos Island where you see Giganto. This is a grassy plain. Ares Island is a desert island where you see Wyvern flying around. Chaos Island is a volcanic island where you see Knight Ouranos Island is a nighttime grassy island where Supreme can be seen in the background Each titan mostly just stomps around and occasionally Sage will come in and command whatever titan to attack the stage.
| |
|
The main stage consists of the central area of Metro City, with a mobile platform moving the fighters to different corners of the city much like other stages like Luminiere City. It would sound basic but it has a special hazard: Challengers.
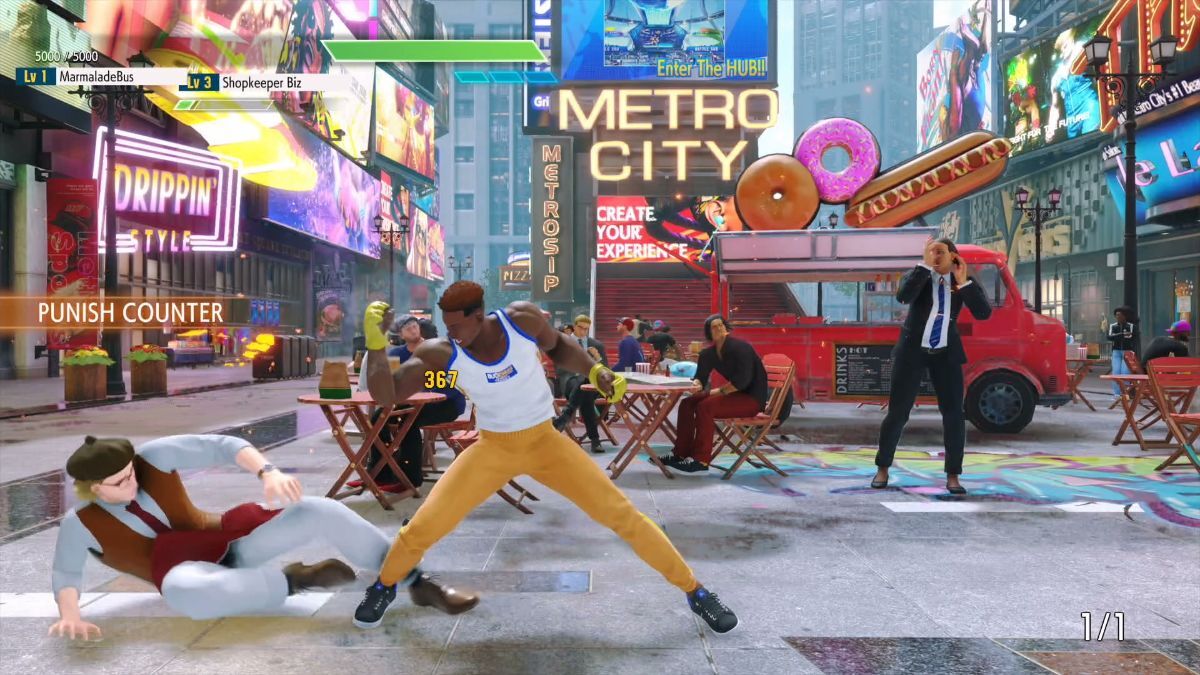
Random NPCs that jump to the quarrel to fight you, probably instead of the SF6 NPCs it can be Mii's so we can get a more variable fight apart that they work very similarly with the SF6 NPCs using moves of another preexistent character to fight. Thought there was a special surprise. YOU MUST DEFEAT SHEN LONG TO STAND A CHANCE

There is a chance that between the challengers, Shen Long himself comes to fight. Unlike the rather easy-to-defeat challengers, Shen Long has full strength and moves like a high-level AI, even in the lowest difficulties he would be a very hard fighter. If my Mii submission gets in tho he can still just use Mishima's gi or something. | |
|
Arguably one of the most iconic maps of Halo multiplayer, Blood Gulch is a Capture The Flag map taking place on one of the eponymous Halos. In Smash, this is a miniature-sized version of the map designed to be a walk-off like Bridge of Eldin...save for the two bases that serve as extra platforms. Eventually, however, a Flag will spawn on one of the bases that a player can pick up. Bring it to the other base and you'll earn a temporary buff to either Attack, Defense, or All stats, similar to the Dark Emperor's buffs on Find Mii.
On occasion, a Covenant Dropship will arrive and drop one of several enemies:
| |
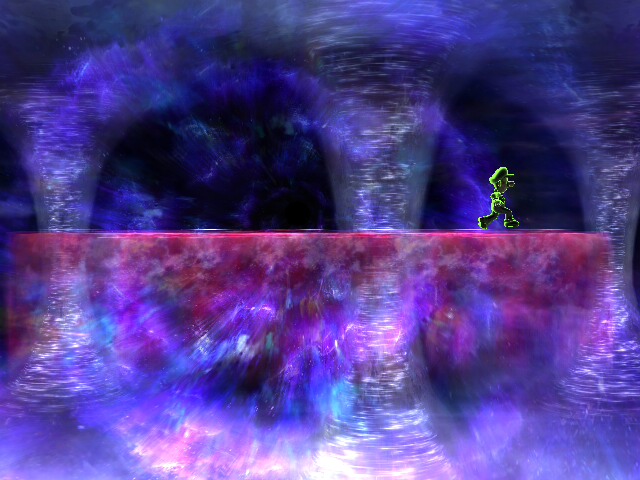
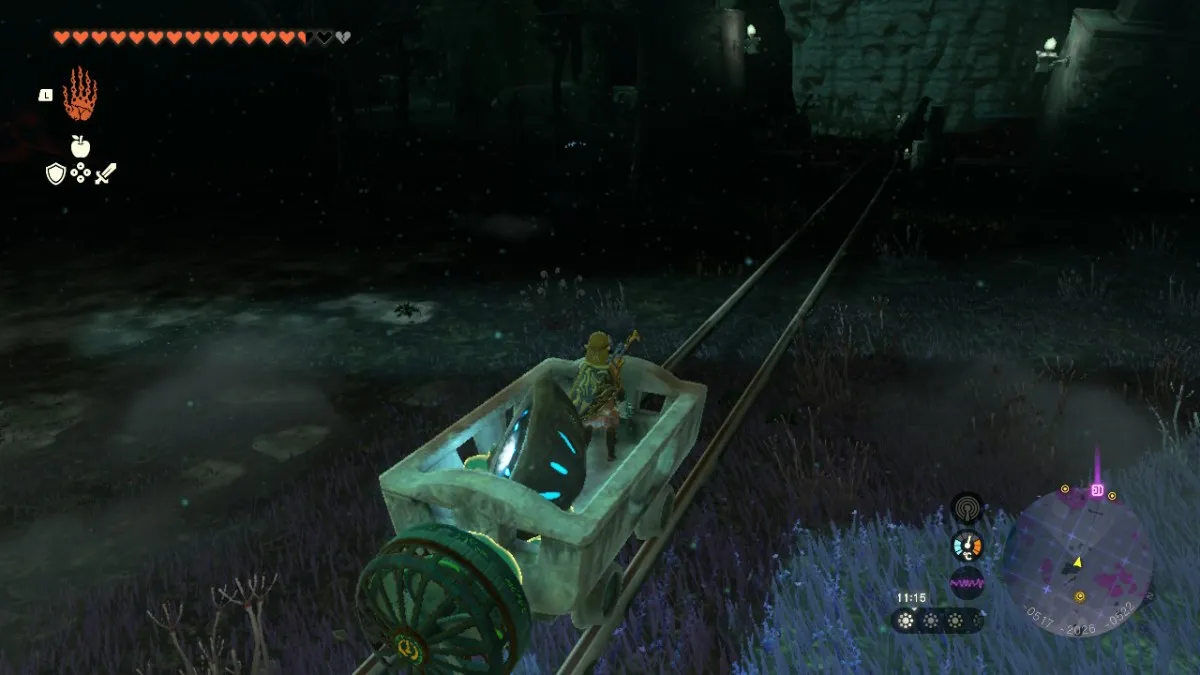
Subspace Mii Available in "Mii Day Festival" |
The stage is the size of Final Destination with one major feature: it transforms in layout as it cycles through various locations within Subspace. Here are the locations and descriptions. The version will transition using the Gateway Doors found in the stages that will open causing the stage transition.
Midair Stadium This is a pretty standard stage and is Final Destination-like in appearance and function. Petey Piranha is visible in the background with Peach and Zelda in cages in the background. If Peach or Zelda are present in battle, then Miis are swapped in. If Pirahna Plant is selected, none of them appear. The Plains This section is composed of a floating earthy platform with ancient rock-like floating platforms. The stage itself is situated in a way like Green Hill Zone with two raised platforms on either side with a middle indent in the middle with two platforms floating overhead this section. ..............________............._________ _____................................................______ |.........|.............................................|...........| |..........\______________________/...........| \................................................................ / ...\_______________________________/ The following three enemies are stage hazards here:

Ruined Zoo The Ruined Zoo is dismal and long abandoned. The Statue of Porky Minch can be seen in the distance causing issues for everyone but it is not a stage hazard. The stage itself is similar to The Plains. This portion is the only one that technically is based on an actual video game, Earthbound. It is set similar to The Plains but the left side has a much higher which consists of a large bird cage that has since deteriorated with broken cages. The left side is far smaller and consists of a wooden tower platform. There is now just two floating platforms made out of wood in the center. ......._________ .... / .................\............................. ___________________ .../...................... \ / .......................... \ |............................. | ..................... ___________________ | .............................| ..........................................................................___________ |..............................|...........................................................................|....................| |..............................|...........................................................................|....................| |..............................|_______________________________________|................... | \ ............................................................................................................................/ ..\ ........................................................................................................................./ .... \_____________________________________________________________/ Opponents that appear in this version as stage hazards are:
Research Facility This version is a far departure from the rest with two small Final Destination-like platforms on either side of each other and a platform that travels between the two platforms followed by a bottomless pit. Like Space Frigate Orpheon, the lights will turn on and off occasionally. .......................................................______________________ _________________________________............................_______________________________ |.............................................................|..........................|............................................................| \______________________________/.............................\_____________________________/ Eenemies that appear here as stage hazards includes:
Subspace Going back to the original concept, it is just a Final Destination platform utilizing the Subspace aesthetic. Certain enemies that appear include:
|

Scuttletown Shantae Available in "Sun Fun Summer Fest" |
The hometown of Shantae, bearing consistent appearances throughout most of the Shantae games. In Smash, this is a walk-off stage along the water with several bazaar shop covers serving as three additional platforms. Eventually, the hazard will show up: a large pirate ship helmed by Shantae's archenemy Risky Boots. Her pirate ship functions similarly to the Battleship enemy from Smash Dungeon, with points of damage being the portside cannons, the sail on the ship, and Risky herself.
When defeating Risky, the person who dealt the last hit will be rewarded various items by the townsfolk as thanks for saving their town. This mainly consists of equippable items like the Rocket Belt and the Franklin Badge and food items. |
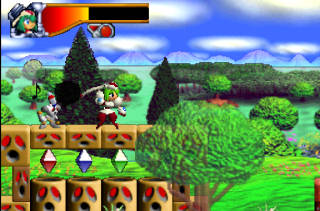
Planet Clancer Mischief Makers Part of the "Year One Festival" |
Planet Clancer is the main setting for Mischief Makers, a 2.5D platformer for the N64 when the rest were going all-in on the 3D. It's more puzzle-oriented and exploration-based, and only uses the D-pad and not the analog stick for gameplay.
In Smash, Planet Clancer is a fairly large stage with three Battlefield-sized main platforms made from the blocks you see in the image above, sporting different colors. Scattered in between them are Clanballs that fighters can auto-grab on contact to jump towards either a platform or a fighter. Alternatively, there are Warp Stars that players can touch to instantly teleport to a platform. |

Sprout Tower Pokemon Part of the "Year One Festival" |
This was intended for Melee but it lines up with our content restrictions. This location lines up with our time requirements and is from Pokemon Gold and Silver. This is a traveling stage in the same vein as those like Rumble Falls and Icicle Mountain where it scrolls upwards. The stage will sway side to side slightly and players scramble up wooden platforms that seem to have been constructed for Smash rather than for monks worshipping the Almighty Bellsprout. There are about 10 floors that players have to get through which generally lasts 2:00 minutes. Finally, players find themselves at the top of Sprout Tower. The pagoda is roughly 100 feet tall so it overlooks Johto. In the background, players can see the Bell Tower and Burnt Tower. Mt. Pyre can be viewed from in the background as well along with forests. It seems this version of the stage is during a festival at night as paper lanterns are hanging everywhere with crowds of people in the background milling about. In fact, the interior of the tower also has a warm, red glow.
As players move upwards, Bellsrpouts can be seen dancing about on the flowers as well as Weepingbells and even a Victreebell. Finally, upon arriving at the top, players may even see Ho-oh in the background where it will perch upon the Bell Tower. This also means Ho-oh as a Pokeball Pokemon cannot be summoned. In addition, Bellsprout dances on the roof with occasional Crobats and Noctowls flying in the distance. |

The Pit Mortal Kombat Part of the "Festival of Frost" |
A staple of the Mortal Kombat series since its inception. Initially, the Pit is a semi-walk-off stage with similar stage mechanics as King Of Fighters Stadium, but with an extra one at the bottom: If you spike somebody while their damage is at 75% or higher, you'll break open the stage and access a lower part:
The lower part of the Pit is a spike-filled hellscape (minus all the corpses and gore). The corpses shown here will be replaced with bundled-up skeletons that will serve as platforms for fighters to stand on, up to three being scattered across the pillars on random positions. The spikes at the very bottom function similar to Great Cave Offensive's Danger Zones and will instantly KO anyone above 100% that touches them. |
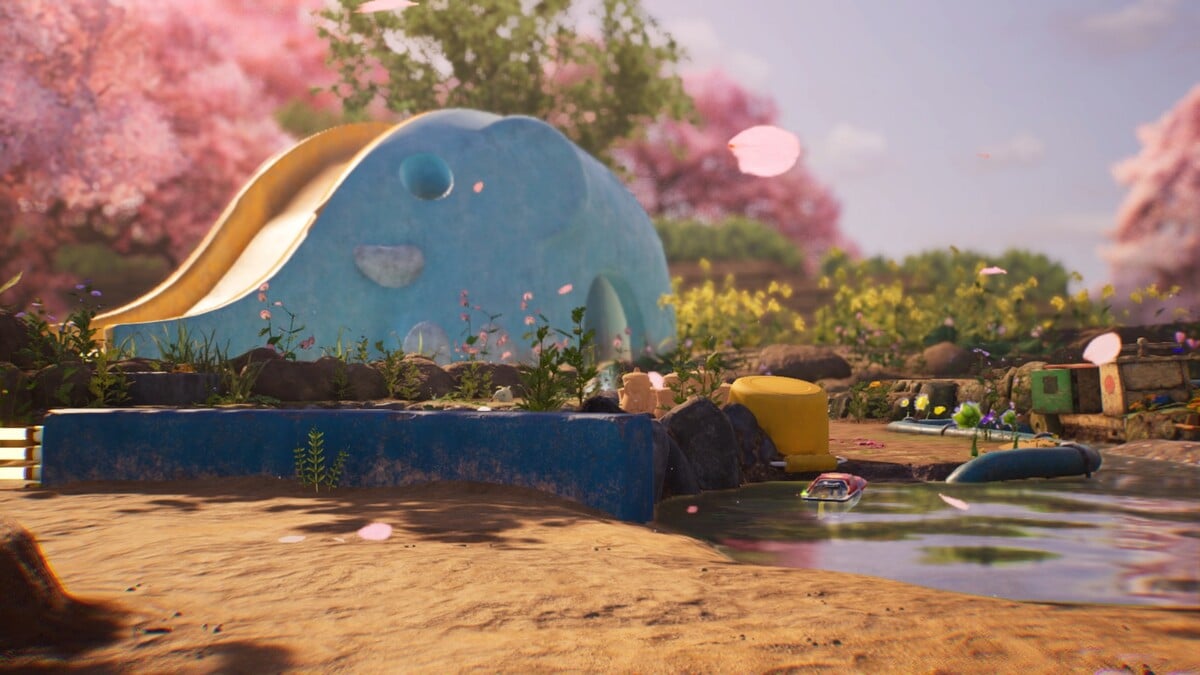
Blossoming Acadia Pikmin |
Pikmin 4 is one of the most beloved Nintendo games released in 2023, even winning awards at the Game Awards. This stage takes place on a Kindergarten Playground, with the elephant slide in the picture being a prominent part of the stage. Cherry blossom trees adorn the background with pink petals falling on the stage. There will also be blue fences, a small wooden model house, and various other elements from the Pikmin 4 area littered throughout the stage.
|
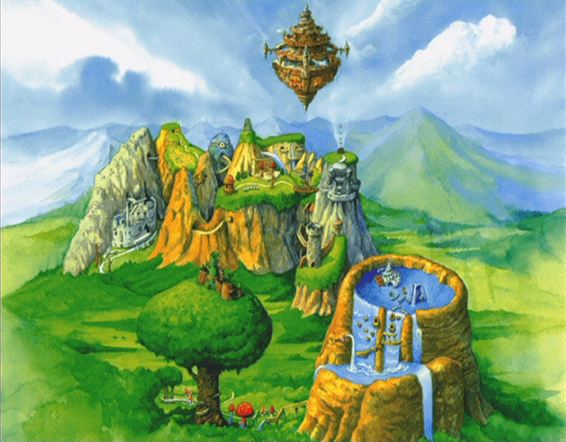
Phantomile Klonoa |
The setting for Door to Phantomile, its 2009 remake for Wii and its remaster in the Phantasy Reverie collection, Phantomile is a land powered by the dreams of its populace. In Smash, Phantomile is a transforming stage similar to Pokemon Stadium that takes place on the book shown above. Occasionally, it'll flip through some pages before settling on one of the following worlds within Phantomile before resetting to the default after a while. The following worlds are:
Breezegale, the Wind Village The first world of Door to Phantomile and the hometown of Klonoa. In this format, the stage gets a large three-bladed windmill that slowly rotates clockwise. Occasionally, a wind spirit (shown in the picture) will sprout from a nearby cloud and blow left or right, redirecting the windmill in the opposite direction. The blades of the windmill serve as platforms. Jugpot, Kingdom of Water The second world of Door to Phantomile. A two-layer stage covered in water, with the platforms getting smaller as you go up. Occasionally, King Seadoph, the ruler of Jugpot, will channel his power and cause streams of water and waterfalls to push fighters off the summit. Forlock, the Tree Village The third world, sustained by the waters of Jugpot. When transitioning to this, the book sprouts a large tree that grows four branches that serve as soft platforms for players to jump on. Players can strike these platforms for a chance to drop 1-5 Nuts that are treated as stage-exclusive food items that heal 5% per pop. Coronia, Temple of the Sun The fourth world in Door to Phantomile. A large floating platform with four pedestals, the stage is initially covered in darkness. However, striking fighters, while this stage is active, gives them a chance to drop large Jewels that are placed on the pedestals automatically. Whoever places the final Jewel first has the benefit of temporary invulnerability with the sun shining down on that fighter. The pedestals then reset. |
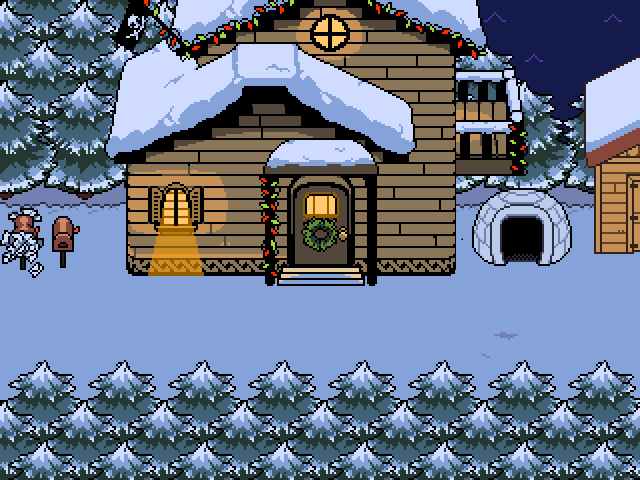
Snowdin Undertale |
Snowdin as a stage is a horizontal snowy platform with two platforms made of snow that can be passed through. The background has the inn and shop from Snowdin along with cameo characters such as Toriel, Mettaton, Undyne, Alphys, Flowey, as well as Sans and Papyrus if Sans was not selected. They are kept in their original sprite format. While the appearance of the characters will be random, there is a chance that the song will help decide who appears much like in King of Fighter's Stadium.
|

Zoda's Spaceship StarTropics | |

Aensland Castle Darkstalkers | |
Somniel Fire Emblem | |
The Glade of Dreams Rayman | |
New London Frostpunk | |
2fort Team Fortress 2 | |
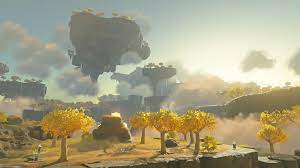

/cdn.vox-cdn.com/uploads/chorus_image/image/70686027/GameCapture_2022_03_29_13_25_34.0.jpg)

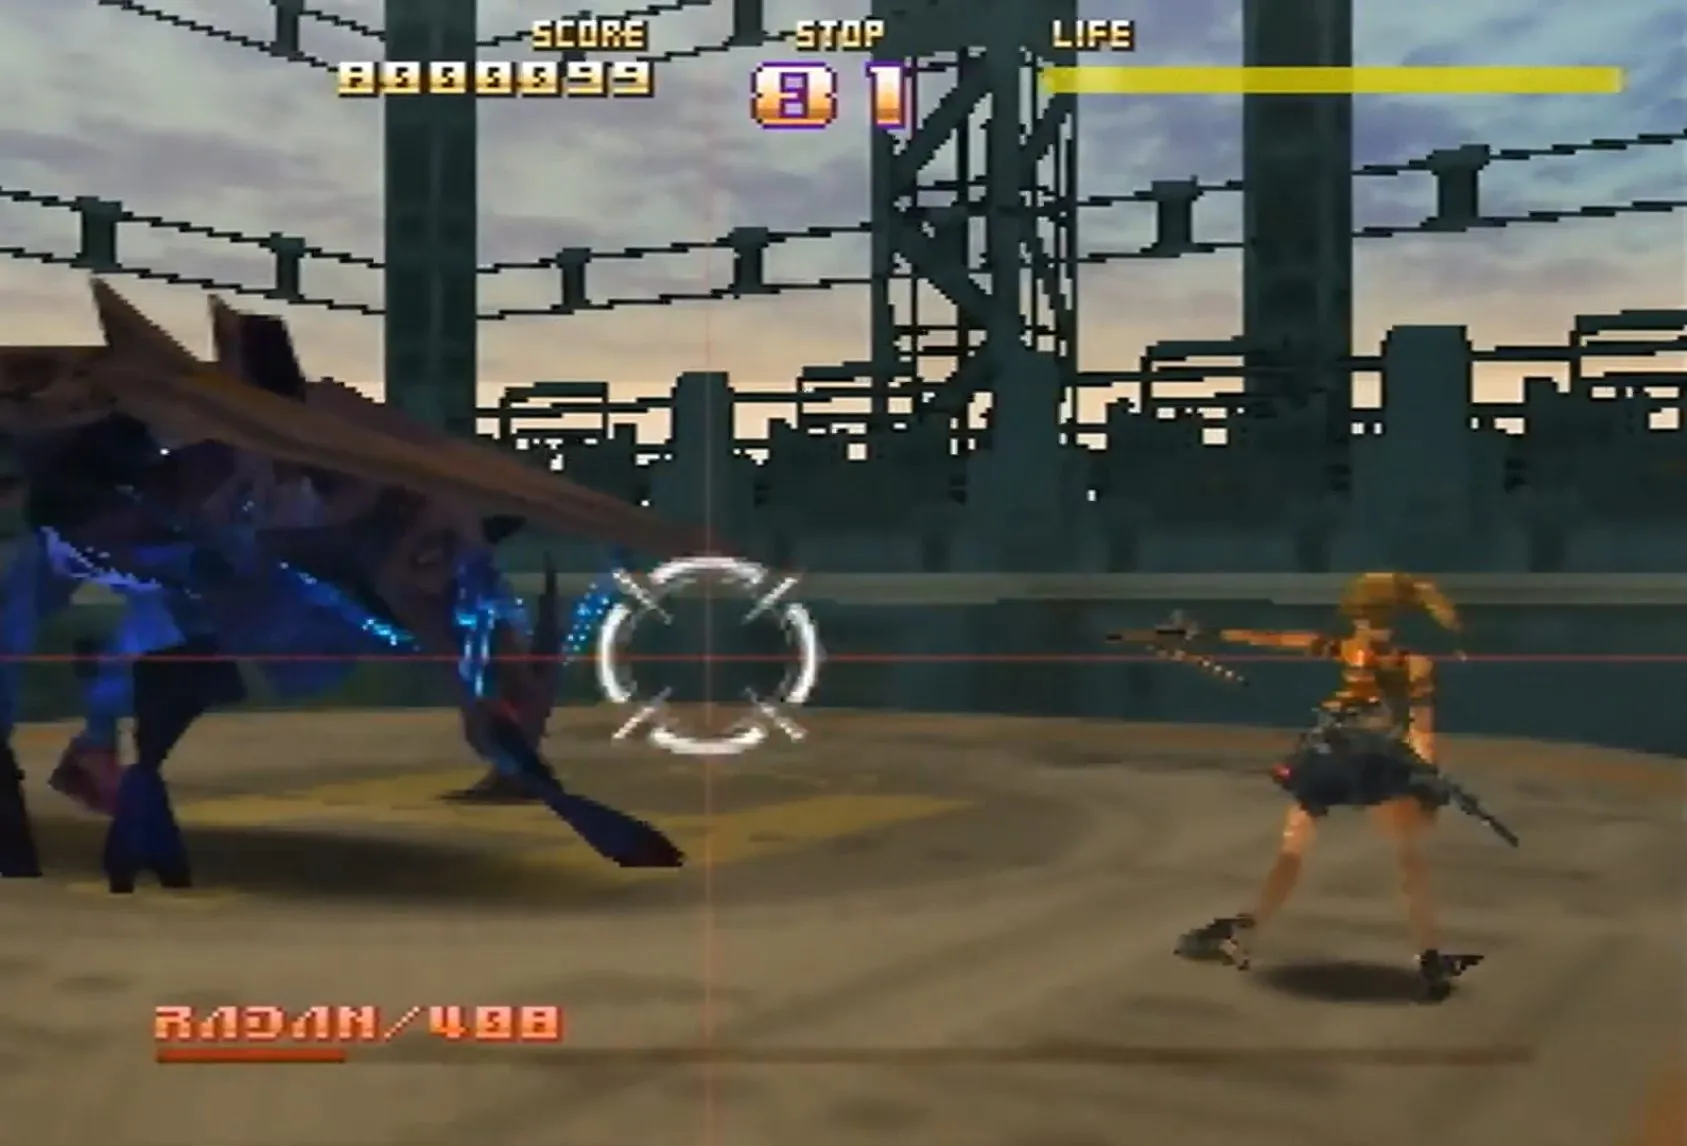
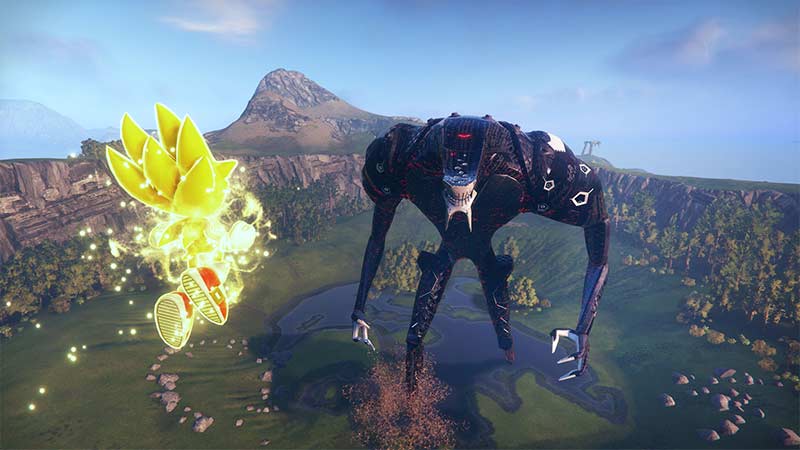

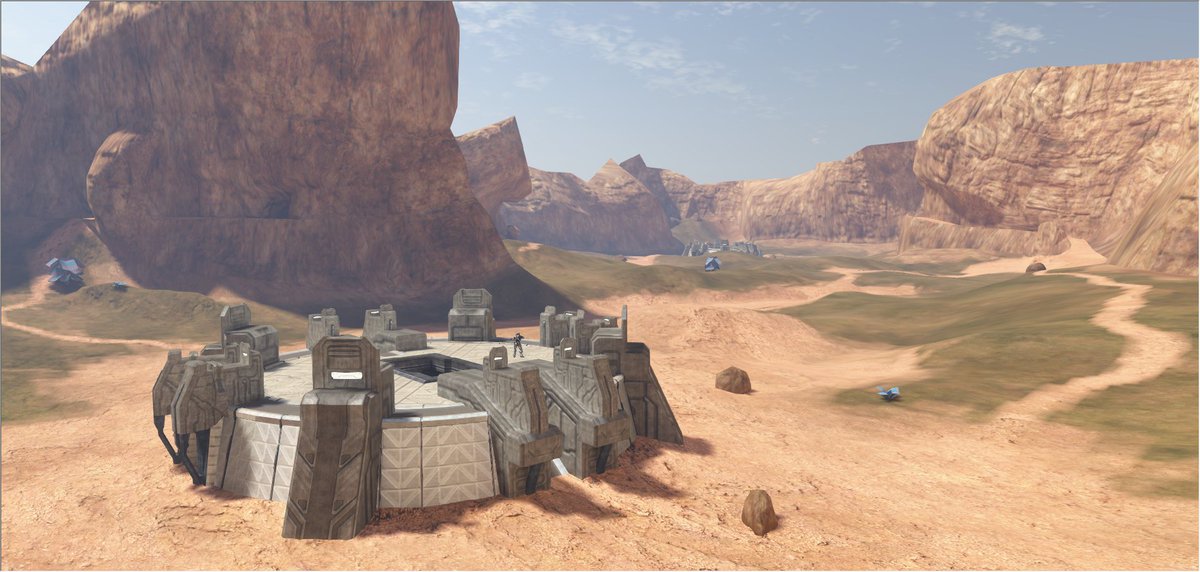 Back to top
Stage Variations
Stage Variations are ones that can be selected prior to starting a match. It provides a unique experience to that stage rather than outright changing its design. If not chosen, there is a 10% you may still get a Variation.
Stage Variations are ones that can be selected prior to starting a match. It provides a unique experience to that stage rather than outright changing its design. If not chosen, there is a 10% you may still get a Variation.
Stage | Series | Requirement | Description |
Super Mario Maker | Super Mario Bros | Launch - Unloackable |
The Super Mario Maker stage is now updated to have several elements from Super Mario Maker 2, including a Day/Night cycle, and a Super Mario 3D World theme added to the cycle. There may also be some random background style change variations, based on the new styles added in Mario Maker 2, including Forest, Desert, Snow, and Sky.
|
Skyloft | The Legend of Zelda | Launch - Starter | |
Great Fox | Star Fox | Launch - Starter |
Will take the Great Fox above the planet into space as throwback to the stage it replaced (Sector Z, searched & looked like Pac-Maze was only stage brought back in Infinite?), would be different from a straight port of Sector Z as it would utilize the modern great fox from Corneria & a modern background as opposed to other N64 stages & have the planet of Corneria visible on the bottom part of the stage.
|
Unova Pokemon League | Pokemon | Launch -Starter |
This stage features a daylight version instead of a nighttime version.
|
Tortimer Island | Animal Crossing | Launch - Unlockable |
This version features a rainy version which does not have an impact on gameplay.
|
Venus Lighthouse | Golden Sun | Launch - Starter |
It features a darkened sky with an aurora in the sky behind with occasional meteor showers.
|
Airship | Final Fantasy | Launch- Starter |
The Airship, while still flying, is on fire which can cause fire damage upon touching it.
|
Mishima Dojo | Tekken | Launch - Unlockable |
Mishima Dojo is besieged with snowy drifts and encroaching ice which causes the floor to be slippery.
|
Aperture Smash Chamber | Portal | Launch - Unloackable |
The stage is largely on the verge of a breakdown with alarms blaring, fires having started, and portions collapsed.
|
Courthouse | Ace Attorney | Unloackable |
The tried-and-true Courthouse stage has been updated with a unique set of variants based on different parts of the franchise, such as the bombed Courthouse from Dual Destinies and the Courthouse from the Great Ace Attorney duology.
|
Green Greens | Kirby | Purchase at the "Festival of Feasts" Store; time exclusive |
Autumn variation will change all the trees and grass in the stage to red, yellow, and brown colors, much like Autumn stages in the Kirby games themselves. The wind will be slightly stronger to signify the colder season.
|
Garden of Hope | Pikmin | Purchase at the "Festival of Feasts" Store; time exclusive | In an environment as lush and full of nature as this, of course, the fall would be a good season for this stage! The Autumn variation of the Garden of Hope will change from a lush green to a rustic red and yellow. Some parts of the stage will be plastered with various leaves and there are even some pumpkins scattered across the background of the stage, to boot!
|
Shadow Moses Island | Metal Gear | Purchase at the "Festival of Feasts" Store; time exclusive |
This transforms the once barren hospital military base into a sea of reds, oranges, and browns as leaves scattered about the stage instead of snow. The Metal Gear still does appear in the background though so this once tranquil fall paradise is not what it seems.
|
Green Hill Zone | Sonic the Hedgehog | Purchase at the "Festival of Feasts" Store; time exclusive |
The greenery of this iconic level has turned orange, with leaves on the trees before a dimmer sky as well as extra cameos in the background are orange\yellow or season-appropriate animals like Tails, Sticks, Marine,
|
Delfino Plaza | Super Mario Bros. | Purchase at the "Festival of Feasts" Store; time exclusive |
It seems winter has set in at Delfino with the water frozen entirely and it’s one its idyllic landscapes being drifts of snow. The main harbor seems ready for festivities though with festive lights adorning its eaves and palm trees.
|
Great Sky Island | The Legend of Zelda | Purchase at the "Festival of Feasts" Store; time exclusive |
The stage now has a snowy aesthetic comparable to the snowy areas of BOTW and TOTK. The stage now takes place at night, with colorful lights adorning Lookout Landing among the buildings and the Great Sky Island among the trees. The ground in both areas is covered with snow.
|
Kongo Jungle | Donkey Kong | Purchase at the "Festival of Feasts" Store; time exclusive | |
Saffron City | Pokemon | Purchase at the "Festival of Feasts" Store; time exclusive | |
Smashville | Animal Crossing | Purchase at the "Festival of Feasts" Store; time exclusive |
It has snow in the background with trees having christmas lights on them including some of the other decorations. Presents sit under the tree.
|
Minecraft World | Minecraft | Purchase at the "Festival of Feasts" Store; time exclusive |
Based on the Snowy Tundra but mixed with the Taiga-related trees. This includes Wolves that appear on the stage. This variation is unique that, while considered part of the variation series, is actually one of the Biomes grandfathered into the Biomes set.
|
Raccoon City | Resident Evil | Purchase at the "Festival of Feasts" Store; time exclusive | |
Hakurei Shrine | Touhou Project | Purchase at the "Festival of Feasts" Store; time exclusive |
In this variant of the Touhou stage, snow is falling, perhaps for much longer, alluding to the plotline of Perfect Cherry Blossom. In Smash, the Hakurei Shrine winter variant is covered in snow, and the trees are devoid of leaves. Furthermore, ice-themed characters like Cirno and Letty Whitrock as well as characters making their debut in PCB such as Yuyuko Saigyouji, Youmu Konpaku, the Prismriver Sisters, and the Yakumo trio have a higher chance of making a cameo here.
|
Back to topItems
Below are the items appearing in Super Smash Bros. Infinite Beyond
Below are the items appearing in Super Smash Bros. Infinite Beyond
Name | Series | Type | Description |
| Baby Yoshi | Super Mario Bros. | Special | A Yoshi egg will appear and, when interacted with, will pop out a baby Yoshi that comes in one of three colors: blue, pink, and gold. It can be picked up but otherwise walks around on its own. When picked up, it will release its attacks.
|
| DDR Dancepad | Dance Dance Revolution | Players can pick up and throw this dancepad at opponents, causing a flurry of DDR arrows, seen below, to fly at them. The arrows will travel up the screen vertically on the specific point of the stage where the item was thrown, effectively creating a short-term wall in the stage, with any players other than the player that threw the item (or their teammates) taking damage from the arrows. The arrows will disappear when they get to the top of the screen, with the four arrow markers hitting them like in the animation below.
| |
| Eletrichakus | Super Smash Bros. | Battering | Its Jab works like a staff, but using the side tilts makes it segment to reach long distances, it also deals electric damage so it has a chance to stun. |
| Excalibur | Fire Emblem | Shooting | It appears as a magical book that glows with green energy. When picked up, that green energy channels around the player and creates an aesthetic swirling vortex. When the special button is pressed while in this state, it fires a large arrow-like wind projectile that deals damage and continues to push opponents backward as advances to the blastlines of the stage. |
| Food | Super Smash Bros. | Recovery | Mochi (4%), BBQ Ribs (6%), Dinosaur Nuggets, (6%) Pretzel (3%), and Croissant (5%) are added to the Food menu. |
| Mini Master Hand | Super Smash Bros. | Special | A bite-sized glove which accompanies the person who picked it up. This is effectively a miniature version of the boss Master Hand that's been present throughout the series, using the same attacks in tandem with your own. It has a dynamic AI system in place, using one of the attacks from his boss battle depending on certain situations. Think about how Street Fighter 6's Dynamic Controls work. After 15 seconds, the Mini Master Hand will give a thumbs up to the fighter who picked him up before flying off. |
| Octo Balloon | The Legend of Zelda | Trapping/Status | When thrown, it attaches the balloon to the player and causes the player to slowly ascend up in a manner similar to the Beetle or Boss Galaga items. However, the player can still attack while in this state. Performing a stall-and-fall attack slows the descent. This gives the affected player options of attacking players while moving upwards. Trying to struggle though doesn't remove the balloon though. Instead, players need to up up aerial attacks or aerial attacks that have a 360 effect to pop the balloon. |
| Parachute Bombs | Super Smash Bros. | Explosive | An explosive that, when activated, will shoot up 8 different payloads into the air. They will then descend back down to the ground but will pop open a parachute. The bombs will explode regardless of where they make contact; an opponent, obstacles, or ground. This makes the bombs tricky as players will need to avoid them or avoid being launched into them. |
| Tacticooler | Splatoon | Healing/Stat | When placed, it plays the Tacticooler jingle and shoots up confetti. Anyone taking a swig from it gains partial healing and stat increases. It can be destroyed. It has 4 uses before it dries up. |
| Zombie Pill | Super Smash Bros. | Status | Players who ingest this pill see a dramatic increase in superarmor and takes reduce damage by 25% thus allowing them to shrug off attacks. This causes a reduced jump and speed stat but further augments their abilities by healing the player when using melee-based attacks. |
Back to topAssist Trophy
Below are the assist trophies appearing in Super Smash Bros. Infinite Beyond
Below are the assist trophies appearing in Super Smash Bros. Infinite Beyond
Picture | Name | Series | Description |
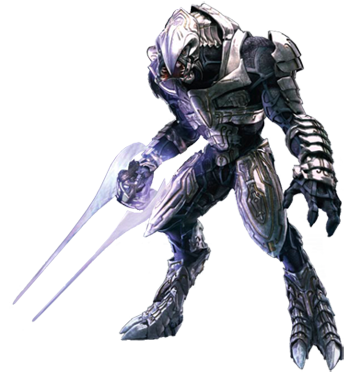
| Arbiter | Halo | The Arbiter will appear and begin to relentlessly track down and eliminate opponents. At long range, he will use a plasma rifle to fire shots at opponents with high accuracy. If players get close, it will strike with an energy sword. On occasion, it will also activate its camouflage in order to sneak on opponents. |
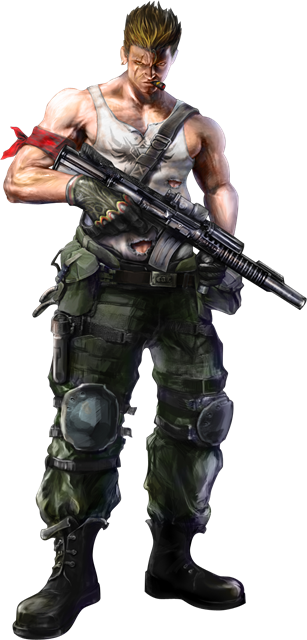
| Bill Rizer | Contra | Bill Rizer has two unique gimmicks; one cosmetic and one gameplay. If he is summoned on a stage that is from the 80s/has an 8-bit theme, he will appear as his 8-bit spirit. However, any other stage will result in his modern design from the upcoming remake Bill Rizer has some of the most versatile and damaging attacks for assist trophies.. He can swiftly switch between a wide spreadshot, a heavy damage-inducing flamethrower, and a piercing laser beam on the fly. These attacks deal much more damage than what is the norm for attacks of this caliber, but again Bill is one of the frailer assist trophies to KO, so summoning him has some risk. Talking about that frailty, Bill dies in one hit but can come back to life 5 times until he is gone for good. |
|
| Dragnaux | Ring Fit Adventure | He will stand in the middle of the stage and flex, working out. His flexes create shockwaves that can stun an opponent. The more he flexes, the larger the shockwaves and the further they emanate outwards. Like many ATs, you ca KO Dragnaux for points. |

| Chosen Undead | Dark Souls | A bonfire will be lit at your location and the Chosen Undead will stand straight, Astoran Sword and Shield at the ready. As he travels around, he will target foes as though he were a summoned ally, and do one of the following:
|

| Diablo Available in "Festival of Fantasy" | Diablo | The appearance of Diablo would mark a second Assist Trophy Blizzard rep but this character embodies the medieval/fantasy-like motif we are going for. using the height of Diablo III but the muscular physique of II and HotS. When summoned, he will do multiple attacks: Slash: When he gets near an opponent, he delivers a brutal slash attack followed by a second and then a third downward slash.
|
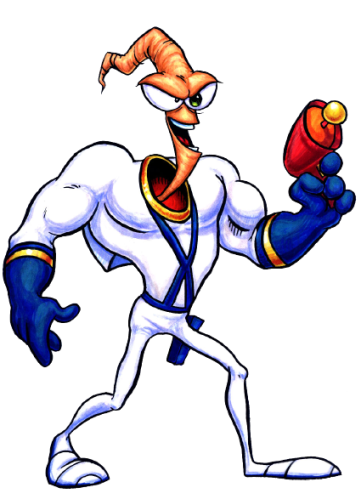
| Earthworm Jim | Earthworm Jim | When summoned, Earthworm Jim will follow opponents, using his head to grapple around the stage, and shoot them with his laser gun. Before disappearing, he'll say his catchphrase, "Groovy!" He can be KOed. |
|
| EVR Racer | EVR Race | The horses, jockeys, and race cars would appear and dart across the stage. They appear in a big hoard as they are racing back and forth. They are an EXCELLENT assist for stage control causing about 20% damage to any foes they encounter and can send opponents flying! After a few seconds, the racers just disappear. You can't KO them though! |

| Frogger | Frogger | Frogger hops around the stage and occasionally summons a car or truck to drive through the stage and ram opponents. He will summon around 3 cars or trucks, one at a time before disappearing. Cars are faster, but are smaller and do less damage, trucks are slower, but are larger and do more damage. Each of the three attacks has a 75% of being a car and a 25% of being a truck. |
| Iris Archwell Available in "Mii Day Festival" | Mii Street Pass | The assistant to the player from the Street Pass game Monster Mansion. Monster Mansion is an RPG in which you must place tiles to get around a large spooky house while getting into turn-based battles with all kinds of terrifying monsters. Iris appears as she does in the game, traveling around the stage. She'll place tiles down in front of her, which a monster may appear from. If it did it would proceed to attack the nearest fighter. This may be a ghost or Skeleton. | |
| Labo Robot | LABO | It chases the closest person next to it and, when it gets close enough, it throws out a very strong punch ( it would do about 20/30 percent, great knockback, and also with the bonus of doing around half of your shield's health. |
| Mallow | Super Mario RPG | One of the two entry-original companions alongside Geno, Mallow is a self-proclaimed frog who was raised by the sage Frogfucius, when in truth he's the Prince of Nimbus Land. In Smash, Mallow will do one of the following abilities:
| |
| MC Horace | 1, 2 Switch | MC Horace will begin dancing on stage with two Joy Cons in hand, accompanied by dance music similar to the one in the video. He will then do one of three randomly generated attacks, each with a 1/3 chance of being selected. The first will be based on the balloon minigames where he releases around 4 fighter-sized balloons onto the stage, which will pop after 4 seconds, damaging players in their vicinity. The second will involve summoning 3 UFOs which will fire beams onto the stage, damaging players caught in the blast. The third and last attack involves jump rope, in which a giant jump rope will go around the entire screen and damage players that touch it (it can be dodged by shielding/rolling and will go a little slower than in the game as to not be too overpowered). It will swing around the stage 4 times before disappearing. Once any one of the three attacks has concluded, MC Horace will do a wacky pose and then disappear. The design of the balloons, UFOs, and jump rope will all be taken directly from Everybody 1 2 Switch as seen in the video. |

| Mei Available in "Festival of Ice" | Overwatch | Mei spawns in and performs one of several attacks
|
| Nintendog | Nintendogs | It functions much like the previous Nintendogs but the model for Infinite Beyond is a Siberian Husky. | |
| Nintendo Eshop Bag | Its main gimmick is that you need to protect it rather than have it protect you as it is downloading data for a special purchase. When fully downloaded, the Eshop Bag can give you either a free Final Smash, a full Dragoon, a full Daybreak, a Heart, an extra point in timed matches, or an extra life in stock matches. But again you need to protect it before it can give you the good stuff, otherwise you'll waste an assist. | ||
| Oatchi | Pikmin | The loveable space hound companion from the recent smash hit Pikmin 4. When summoned, the yellow pooch will look for items and will bring them to the player, picking up anything that is dropped and dragging them to the player's character. The player can also direct him to an opponent via a little prompt that pops up, and he will proceed to chomp that fighter. |
| Parabo & Satebo | Satellaview | The two of them will spawn on the Battlefield with Satebo setting up his satellite. Then, Parebo will fly around throwing explodable Super FamiCom or SNESs onto the battlefield causing damage ot other fighters. Eventually, the two of them will "download" an opponent's move and simply strike back with that move on the other fighters. A complicated assist for such an obscure piece of Nintendo history. |

| The Prince | Katamari Damacy | The Prince rolls a ball around the stage but it has three sizes: small, medium, and large.
|
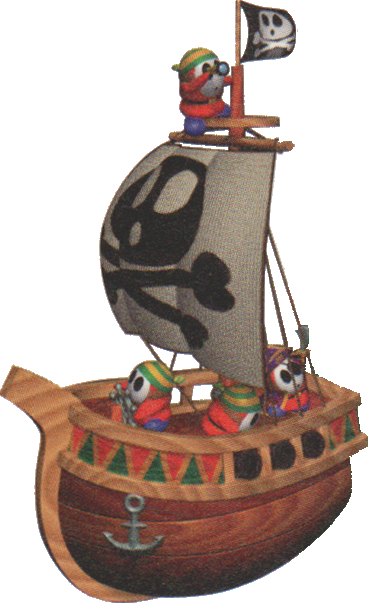
| Shy Guy | Yoshi/Mario | Summoning the Shy Guy causes a ship in the background to appear in view. They will begin lobbying Bomb-ombs onto the stage. This Assist Trophy is not available on moving, touring, or some transformative stages. |

| Spyro | Spyro | When summoned Spyro will attack his enemies with fire or by using his horns, he could also fly and the player that summoned him could stay on top to travel the stage, this could be useful in big stages like Palutena's Temple. |
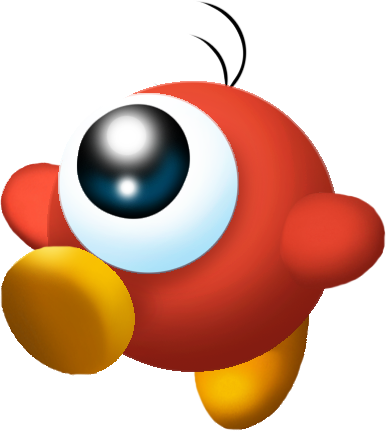
| Waddle Doo | Kirby | Waddle Doo walks and jumps around and will shoot out a beam of energy that deals continuous damage before launching the players. |
Back to topPokeball Pokemon
Below are the pokemon appearing in Super Smash Bros. Infinite Beyond
Below are the pokemon appearing in Super Smash Bros. Infinite Beyond
Picture | Number | Name | Type | Move | Description |
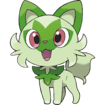
| #0906 | Sprigatito | Grass | Leafage | Sprigatito meows and unleashes a flurry of leaves shoot forward; pelting opponents and pushing them backward. |
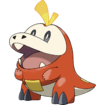
| #0909 | Fuecoco | Fire | Ember | Fuecoco puffs out small embers into the air which then cascade down. Anyone who get **** by the embers gets burned with the ember then fading away. |
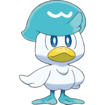
| #0912 | Quaxly | Water | Aqua Jet | Swims forward in a stream of water at high speeds while kicking at anyone who comes near. |
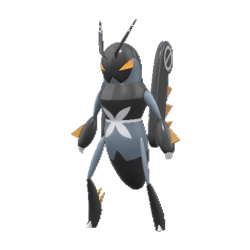
| #0920 | Lokix | Bug/Dark | Flying Kick & Axe Kick | Lokix will emerge from its Pokeball and run around while kicking opponents. Before it leaves, it performs one more dynamite kick. |
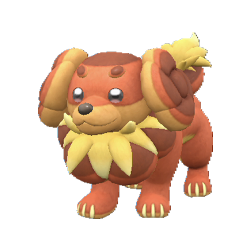
| #0927 | Dachsbun | Fairy | Half-Baked Body & Aroma Veil | Dachsbun will harden its skin and act as a shield to the fighters, the sweet aroma that it leaves behind will heal fighters. |
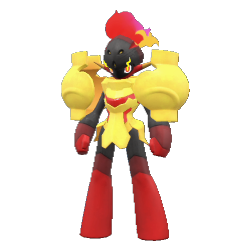
| #0936 | Armarogue | Fire/Psychic | Arnor Cannon | Armarogue takes all of the power of its armor, combines it together, and fires a powerful Zero Laser-like beam across the stage that deals fire damage. |
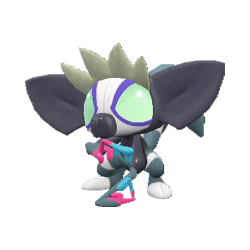
| #0945 | Grafaiai | Poison/Normal | Acid Spray | Grafaiai shoots out a toxic spray cloud like graffiti can shoot out a spray of paint. The spray shot by the pokemon deals normal damage and it gives a poison effect on opponents when having contact with it. |
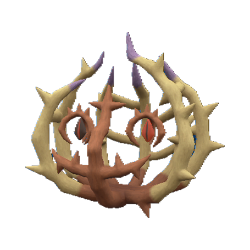
| #0947 | Brambleghast | Grass/Ghost | Wind Rider | Brambleghast will vanish before a large horde of Bramblins and Brambleghasts will start tumbling across the stage, dealing light damage and knockback per tumbleweed. |
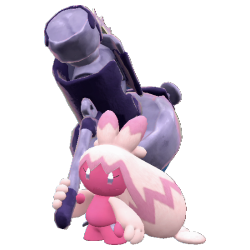
| #0959 | Tinkaton | Fairy/Steel | Gigaton Hammer | Tinkaton attacks the nearest player with its hammer. which Tinkaton slams into the player with its hammer and it also gives a bury effect on the opponent. |
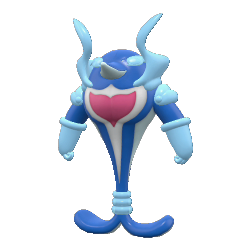
| #0964 | Palafin | Water | Charm, Jet Punch, & Wave Crash | He'll perform Charm (a windbox pulls opponents towards him) Jet Punch, another Charm, and finally, Wave Crash. He then despawns, but not before striking a heroic pose. |
| #0973 | Flamigo | Flying/Fighting | Double Kick & Fly | Flamigo will use Double Kick and will fly or run around the stage and kick opponents with 2 powerful kicks. |
| #0977 #0978 | Dondozo & Tatsugiri | Water Water/Dragon | Order Up | Dondozo will flop around with Tatsugiri while attacking using Order Up. If Dondozo swallows Tatsugiri and performs Order Up, it will either boost the summoners' attack stat, defense stat, or speed stat. Players can KO Tatsugiri. |
| #0981 | Farigaraf | Normal/Psychic | Twin Beam | It fires 2 blasts of beams at the opponents, dealing a decent amount of damage. |

| #0989 | Sandy Shocks | Electric/Ground | Magnetic Flux | It creates a powerful yellow electromagnetic field around its body which draws opponents, items, and objects toward it - then, if you hit its actual body, you get a powerful electric shock! Whilst the force itself isn't as powerful as, say, the Black Hole item, it is still enough to cause a bit of chaos - plus, the field itself grows slightly as its effect continues. However, once again, the user of the original Pokéball is immune to this effect... even if their projectiles aren't. |

| #0992 | Iron Hands | Fighting/Electric | Wild Charge | Iron Hands begins charging with power before thrusting its disembodied hands in front of or behind itself using Wild Charge, dealing 15% damage and stunning before inflicting medium-high knockback. |

| #0994 | Iron Moth | Fire/Poison | Fiery Dance | Iron Moth flaps its wings and pulsates with fire before traveling about the stage; emanating fire that burns and damages anyone who touches it. It will fly in a random formation. |

| #1001 | Wo-Chen | Dark/Grass | Giga Drain | Wo-Chien releases a burst of dark-green energy which creates a sphere around it. Anyone, not the summoner constantly gets accumulated damage as long as they are in the field. FLinching doesn't occur but it does slow speed down by 1.2x. |
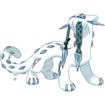
| #1002 | Chien-Po | Dark/Ice | Ice Shard | It increases the size of its fangs and then swings its head; firing them in a straight line. It does this attack 7 to 10 times and will move side to side. The ice has a 50% chance of freezing the opponent upon touch while also dealing damage. |
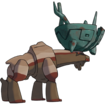
| #1003 | Ting-Lu | Dark/Ground | Ruination | Ting-Lu summons a wave of ruinous energy that pours down like rain from the top of the stage down to the bottom. Anyone caught in the attack is forced down and buried or meteor smashes when in the air. |
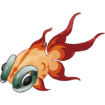
| #1004 | Chi-Yu | Dark/Fire | Lava Plume | Chi-Yu dives onto the stage and will occasionally leaps back up; causing a geyser of lava to shoot up as it jumps and falls. Each subsequent jump is higher and creates a larger laval plume than before. |

| #1005 | Roaring Moon | Dragon/Dark | Dragon Breath | It rushes back and forth around the stage while causing bursts of dragon fire to erupt and bathe the stage in it. |

| #1007 | Koraidon | Fighting/Dragon | Collission Course | It transforms into its Apex Mode and launches itself into the air. It will then spin and then crash down into the ground; creating an explosion that can engulf smaller stages. The explosion does high amounts of damage and functions similar to a Smart Bomb but also draws in opponents as well. |
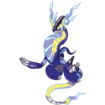
| #1008 | Miraidon | Electric/Dragon | Electro Drift | It transforms Ultimate Form and then blasts forward multiple times along the stage at breakneck speed; all the while generating electricity which shocks and traps opponents. |
Back to topAttachments
-
 108.7 KB Views: 5
Last edited: