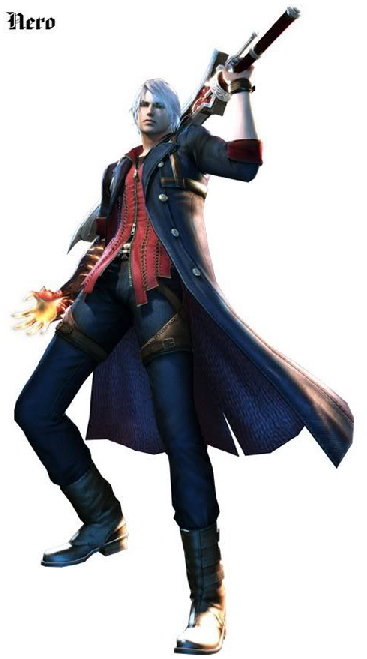
Nero, the demon-powered punk joins the Brawl.
Links
Nero's Battle Theme
Intro Cutscene
Berial Cutscene
Bael Cutscene
Echidna Cutscene
Agnus Cutscene
Story
Nero is a mysterious character introduced in Devil May Cry 4. He makes his appearance as an arrogant punk with an affection for his lover Kyrie that borderlines on clingy. Despite that last flaw, Nero's attitude makes him a fresh character for the series, though not nearly as well liked as Dante. Nero's main advantage is his demonic right arm, the Devil Bringer, which allows him to grab enemies, even from a distance. He also uses a fuel-injected sword named Red Queen, and a gun named Blue Rose. The mystery surrounding Nero is his identity. He has multiple rumors surrounding him. He could be the son of Dante's brother, Vergil (and thus Dante's nephew), making him 1/4th demon. He could be an ordinary human cursed with a demonic arm (which is likely also connected to Vergil). Who knows?
Stats
Height ~ Same as Ike
Nero is almost the same exact height as Dante and Ike.
Width ~ Same as Ike
Again
Weight ~ Below Average
Nero is actually considerably lighter than Dante, weighing roughly the same as Marth.
Movement Speed ~ Above Average
Nero is faster than Dante's human form (who has a below average movement speed), that's for sure, but he's barely above average.
First Jump ~ Below Average
Nero's first jump is a bit worse than Dante's average one, probably due to being more human. On the other hand, this does help him short hop aerials.
Second Jump ~ Great
Nero matches Dante in this area. His second jump is known as the Air Hike, which uses demonic power to boost the character into the air and creates a blue circle (Dante's is red) at their original location for aesthetic purposes. This jump compares to that of Ness/Lucas's second jump.
Falling Speed ~ Below Average
Due to weighing about the same as Marth, Nero also falls at roughly the same speed as him.
Red Queen Reach ~ Great
Nero's sword reaches about as far as Ike's.
Red Queen Priority ~ Great, disjointed
Again, roughly the same as Ike's.
Dodges ~ Amazing
Nero, like Dante, is blessed with many quick and useful dodges. DMC would be impossible without them.
Crouch ~ Yes, Average
Crawl ~ No
Glide ~ No
Wall Jump ~ Yes, once
Wall Cling ~ Yes, 1 second
Wall Run ~ Yes
Nero can run up walls, roughly 3 BF platform lengths upwards before backflipping off of them. This is a good (and very cool) evasive maneuver in walled stages and serves to break Nero out of being chaingrabbed or infinitted against walls (yes, I actually bothered to give the mechanic an application this time).
Specials
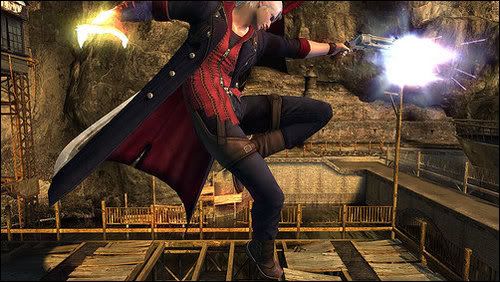
Neutral Special ~ Blue Rose
Nero pulls out his pistol, the Blue Rose, for low beginning lag and fires it. Keep pressing B to fire repeatedly. The firing rate is a little slower than Fox's blaster and deals the same damage as the aforementioned furry laser also having no flinch or hitstun. In addition, Nero has to reload once every 20 shots, a reload taking a full second. Nero's reloading animation is unique. He casts the gun behind him, releasing the bullet caps and removing the back of the gun with the force of the swing, tosses fresh bullets into the air, and swings a second time, miraculously catching the bullets into the ammo slots and replacing the back just like something out of the Matrix.
What advantage does this gun have over Fox's, or even moreso, Dante's guns? This gun can be quickly and readily charged. There are 3 levels of charge, each taking 1/3rd of a second to reach. The first level makes Nero's right arm glow blue and causes the bullet to do 3% damage and some low hitstun. The second level makes Nero's arm glow purple and causes the bullet to do 5% damage and medium hitstun. The last level makes Nero's arm glow red and causes the bullet to do 7% damage, makes the foe fall on their butt for half a second (similar to tripping), and sets them on fire, causing them to take an additional 1% per second for 5 seconds. The charge is storeable.
Much like Dante's guns, when fired in the air, he shots somehow cause Nero to aerial stall for roughly the same duration as Mario's cape. Repeated firing of bullets allows Nero to greatly reduce his falling speed. A fully charged bullet also shoots Nero backwards about a BF platform's length. Unlike Dante's guns, Nero fires straight forward like Lucas instead of diagonally downwards like Ness.
Side Special ~ Snatch/Hell Bound
Nero punches forward with his right arm and it extends a good distance, grabbing the first foe in its way. At no charge, this reaches about 2 BF platforms. At 1/3rd second charge, represented by a more intense blue fire, this reaches 3 BF platforms. At 2/3rd second charge, represented by purple fire, this reaches 4 BF platforms. At full charge (1 second), represented by intense red fire, this reaches half of Final Destination. Grabbed foes are dealt hitstun. If the grabbed foe was equal to Nero's weight or less, they are pulled to him. Otherwise, he is pulled to them. Due to traps or other stage conditions, both have their advantages and disadvantages, of course. Nero can fire this diagonally as well, by using this in the same manner as a diagonally boomerang throw. This move can grab ledges, making for a decent tether recovery. Medium beginning lag but no ending lag.
{5%}
*Note- The grab from this move is not normal. He cannot use his pummels and throws, but can use his attacks instead, making this a superb comboing and mobility tool.
Up Special ~ Wing Talisman
A lesser used item in DMC4. It's used to get around certain areas in a few missions. When Nero presses up special, a blue circle that can best be described as an energy trampoline appears beneath him, rocketing him into the air. This works a LOT like Sonic's Up Special, but the circle remains where it is, ground or air, useable by both friend and foe. It disappears after 10 seconds. Nero can have as many of these up as he likes, allowing for some aerial combo positioning potential, but keep in mind that this has its drawbacks and can only be used once in midair, unless hit, just like a normal Up B recovery. Does not leave Nero helpless.
Down Special ~ Exceed
Nero's Red Queen is a wonderful sword. Gunblades may be cliché thanks to Final Fantasy, but motor swords, on the other hand, are just plain awesome. As you hold Down B, Nero revs up his sword. A spiral gauge that is located around his character portrait (like a circular frame) fills up, the filled up areas being orange and the unfilled being gray. As the gauge becomes more and more full, the motor in Nero's sword becomes louder and louder and the sword starts catching on fire. The effect of this is simple: it super buffs your next sword attack(s). The gauge has 3 levels and there are three levels of exceed attacks. As an example, if Nero's exceed gauge is full (level 3), the next attack he uses is level 3 and the gauge drops to level 2, making Nero's second attack a level 2, and his third attack a level 1. All Red Queen slashes gain a small damage buff, noted below. (A normal attack is level 0.) Each level of the Exceed gauge takes 1 second to build. This charge is, of course, storeable (it wouldn't work otherwise

).
Press A while charging Exceed to push Nero's foes to the ground, impale them with Red Queen, and rev up the motor, allowing Nero to effectively use the foe as a motor skateboard. This drains your Exceed guage at a rate of 1 level per 3 seconds, but deals 5% per second to them and leaves them grounded upon ending. In addition, if you bring the foe to an edge, Nero will kick them off, effectively meteoring (not spiking) the foe off the side, killing at percentages as low as 80%. And who wouldn't want to use this move… it's just plain funny.
*Note- While many slashes are "not affected" by Exceed, even these slashes get a damage buff with Exceed active. Level 1 provides no buff, Level 2 provides a 1% buff, Level 3 provides a 2% buff per slash. These buffs do not drain the Exceed guage.
Normal Attacks
*Note ~ Neutral A Combos not affected by Exceed.
A, A, A, A ~ Red Queen Combo A
Nero performs two downward slashes, a side slash, then finishes the combo off with an overhead slash as he pounds the ground with Red Queen. The combo has low lag on both ends, with the first three slashes being quick and the last slash having some (but not much) beginning lag. The first few slashes deal great hitstun and the last slash deals decent (kills starting at 180%) forwards knockback. Combos well into other moves, but at higher percentages a Side Special might be necessary to continue some combos properly.
{3%, 3%, 4%, 5%} {Total of 15%}
A, wait, A, Hold A, Release A ~ Red Queen Combo B
Nero performs a single slash then hits the ground in front of him with Red Queen. After hitting the ground the first time, he continues to hit the ground rapidly (same rate as Link's infinite A) while you hold A, then finally plunges the sword into the ground and jerks it back out while slashing the enemy with the back end of Red Queen. This combo is considerably slower. While it has low beginning lag and the individually slashes are quick, the wait must be at least 1/4th second to register. Each hit deals great hitstun with the exception of the infinites. The last hit of this combo deals set forwards knockback (roughly a BF platform).
{3%, 2%x, 5%, 6%} {Total of 14% + 2%x}
A, A, Wait, A, A, A, A ~ Red Queen Combo C
Nero performs the first two slashes of Combo A then adds in two quick slashes followed by three turning slashes. The third A press actually performs two slashes. The last A press finishes with a basic downwards slam identical to combo A's finisher. Typical low starting lag, and just a bit longer than the shortest duration of combo B, including the 1/4th second wait. Each slash deals great hitstun. These rapid slashes can be roll cancelled at any time.
{3%, 3%, 2%, 2%, 1%, 1%, 1%, 2%, 2%, 5%} {Total of 22%}
A, A, A, Wait, A ~ Red Queen Combo D
Nero performs basically the same Red Queen Combo A except the overhead slash at the end is slightly charged for more damage. The last hit of this combo knocks the enemy on their butt, much like a fully charged Blue Rose shot instead of knocking them forwards, allowing Nero great potential combos. Keep in mind, despite the great hitstun, the pause coupled with the beginning lag of the last hit may allow foes to escape. The higher their damage, the more likely the last hit is to connect, making this combo the most useful of the Red Queen Combos late in the foe's stock.
{3%, 3%, 4%, 7%} {Total of 17%}
Dash
Dash Attack ~ Streak
Nero dashes forward about 2 BF platform's distance, stopping early if a foe is in his way, and slashes all around, hitting on both sides. No lag on the dash forward, but medium beginning lag on the slash, with little to no ending lag. Deals good hitstun and decent forwards knockback (killing as low as 160%).
{6%}
EX Streak Level 1 ~ +1 BF platform max distance , 2 swings (only last deals knockback)
EX Streak Level 2 ~ +2 BF platform max distance , 3 swings (only last deals knockback)
EX Streak Level 3 ~ +3BF platform max distance , 5 swings (only last deals knockback)
Tilts
Side Tilt ~ Slash
Nero performs a basic horizontal slash with Red Queen. Quick attack with little lag on either end. Deals some hitstun. Very low forwards knockback. While this can be used in rapid succession, it's easy to DI out of, so really use this as a filler hit during combos instead of an "infinite".
{4%}
*Not affected by Exceed.
Up Tilt ~ Jump Slash
Nero performs an attack that is identical to Ike's Up Tilt in form, but not in function. It deals a set knockback of about 1 BF platform length upwards, allowing for some short hopped aerial combos. Same lag frames as Ike's Up Tilt, except for almost non-existent end lag.
{5%}
*Not affected by Exceed.
Down Tilt ~ Hamstring
Nero performs a swift diagonally downwards sword slash that aims specifically for the foes legs, causing them to trip if it hits. Has no end lag, but it's above average beginning lag limits its usage almost exclusively to combo starting, rather than combo continuing.
{6%}
*Not affected by Exceed.
Smashes
Side Smash ~ Eviscerate
Nero performs a two-handed horizontal slash of Red Queen. Deals great knockback (kills starting at 100%). Low beginning lag, but absolutely hideous ending lag. You had better not whiff this, so you should really only use this as a combo-ender.
{12…27%}
EX Eviscerate ~ Increases knockback, killing at 90% for Level 1, 80% for Level 2, and 70% for Level 3, making this a spectacular killing move.
Up Smash ~ High Roller
Nero performs an uppercut slash (hitting both in front of Nero and above him) that sends his enemy into the air roughly 4 BF platform lengths upwards. Hold down the A button to follow the enemy into the air. Above average beginning lag and no ending lag. A superb ground-to-air combo starter.
{10…25%}
EX High Roller ~ Also hits behind Nero and functions differently, dragging both Nero and his foes up in the air roughly 4 BF platform lengths as he slashes them repeatedly. 3 slashes for Level 1, 5 slashes for Level 2, and 7 slashes for Level 3, with each slash doing 2% damage and good hitstun.
Down Smash ~ Shuffle
Nero starts shuffling around like a boxer, each movement like a mini-side step. While he moves around side-to-side a bit, he returns to his original location upon the smash's end. At the end of each shuffle, he performs a lagless slash of Red Queen that deals 2% damage and locks the foe in place for subsequent slashes. At no charge, Nero shuffles three times. He shuffles five times with 1 second charge, 7 times with 2 second charge, and 10 times with the max charge of 3 seconds. The charge is storeable, helping this attack to be an amazing combo tool. While if any of the slashes hit, foes will be caught in the rest of the hits, if there are no hits (recognized by the last hit missing), Nero suffers horrible end lag, making this very easy to punish if whiffed. He has no ending lag if unwhiffed.
{2%x}
EX Shuffle ~ Adds additional slashes into the mix (not changing the duration or number of shuffles), turning this attack into a real bladestorm. Level 1 adds 3 slashes, Level 2 adds 5 slashes, and Level 3 adds 7 slashes.
Aerials
Neutral Aerial ~ Roulette Spin
Nero performs two normal horizontal slashes and then rapidly spins his sword around for multiple hits much like Pit's Side Special in hitbox and appearance but more like Pit's Nair in damage, number of hits, escapeability, and knockback.
{3% + 3% + whatever Pit's Nair deals for each hit}
*Not affected by Exceed.
Forward Aerial ~ Calibur
Performs almost exactly like an aerial Dash Attack, but only slashes horizontally in front of Nero rather than on both sides. Deals good hitstun and decent forwards knockback (killing as low as 130%).
{6%}
EX Calibur ~ Adds extra damage and knockback to the slash, complete with fire visuals. Level 1 adds 3% and kills starting at 120%. Level 2 adds 5% and kills starting at 110%. Level 3 adds 10% and kills starting at 100%.
Backward Aerial ~ Scoop
Nero slashes behind him, scooping the foe until they are directly in front of him. This deals good hitstun. Very quick with low lag on both ends. Good for starting unorthodox combos.
{5%}
*Not affected by Exceed.
Up Aerial ~ Motor Stab
Nero uses Red Queen's motor to propel himself upwards about a BF platform's length all the while stabbing like Toon Link's Up Aerial. This attack deals good knockback (kills starting at 120%), making it one of Dante's best killing moves. Medium beginning lag and low ending lag. Can be used to aid in recovery if you can grab the ledge with it.
{10%}
EX Motor Stab ~ Adds extra distance and knockback. Each level adds 1 BF platform and takes off 10% from the starting kill percent.
Down Aerial ~ Split
Nero performs a downwards slash all the way to the ground, dragging foes with him. Basically identical to the last hit of Ike's Aether, except with a greater ability to drag foes with you to your death if used as a suicide.
{Same as last hit of Ike's Aether}
EX Split (AKA Double Down) ~ Nero's sword ignites all the way down, causing this attack to deal double the normal damage (even doubles Exceed's passive bonus damage). Nero will also perform a downwards slam of the sword when (and if) he touches the ground, pitfalling struck foes and dealing 7…21% to them (based on Exceed level). Any foes caught in the stall then fall will be struck by the slam.
Grabs/Throws
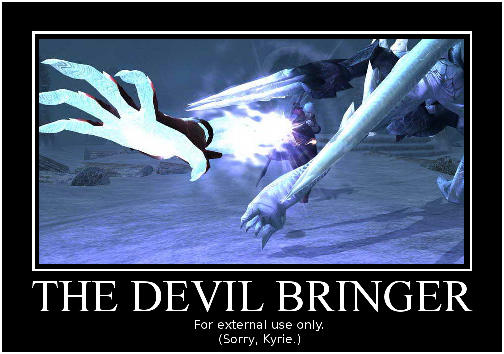
Grab ~ Buster
Nero uses his demonic right arm to perform what can only be called an "uppercut grab", the arm greatly increasing in size as he does so. The reach of this is great, as it is between that of a normal grab and a grapple-type grab and even reaches above Nero for that distance. It's also as quick to start as a normal grab. It pays for this with the bad ending lag of a grapple if whiffed. This is also useable in the air, though it will only use Nero's Down Throw.
Hold Grab Button ~ Hold
Nero holds onto the grabbed foe tightly and uses them as a human shield. Nero becomes invincible while performing this, as the human shield takes all damage for him and has super armor. The foe can still escape like they would from the grab, though it's a good bit more difficult now. Useful for multi-person matches, especially doubles matches with Friendly Fire on.
Pummel ~ Face Punch
Nero punches the foe in the face (or closest applicable body part) with his normal arm. Deals 2% with average pummel lag.
{2%}
Forward Throw ~ Mighty Throw
Nero uses his Devil Bringer to throw the foe forward. Deals superb knockback (kills starting at 110%), making it Nero's second best killing throw.
{8%}
Back Throw ~ Flick
Nero moves the grabbed foe behind him with his Devil Bringer. The demon arm's index finger then flicks them away. Kills starting at 100%, making it Nero's best all-around killing throw.
{7%}
Up Throw ~ DAEMON… PAWNCH
Nero tosses the foe a set distance in the air (roughly 5 BF platform lengths) and reels back his Devil Bringer, making a very familiar animation. After Falcon Punch like wind-up, Nero unleashes the mighty fist, dealing huge knockback (kills starting at 66%) if it hits. The problem with this is, the thrown foe can often air dodge out of this unless their percentage is really high (about 180% for lightweights), making this throw's use limited as a killing move. On the other hand, Nero can cancel the punch, allowing him to make use of the foe's airborne distance and the great hitstun dealt by the throw itself.
{30% (punch)}
Down Throw ~ Buster Throw
Nero uses the Devil Bringer to perform a throw unique to the grabbed foe.
Here are a few examples:
Dante ~ Contest of Strength
Nero slams Dante to the ground, but Dante swiftly gets up to his feet. The two demon hunters clash swords several times, ending in Nero pushing Dante away with the Devil Bringer a set distance (half of FD or until he reaches the edge) and deals 25%.
Kel'Thuzad ~ To Be Or Not To Be
Nero removes Kel's skeletal head, holds it in his hand while doing a brief Shakespeare impression and then punches Kel away strongly dealing 15% (kills at 80%), shoving the skull through Kel's chest (TAKE THAT!). Long duration.
Ashencroft ~ Demon Slaying
Nero stabs Ashencroft through the chest three times with his own sword, each stab doing 5% and then launches him away with one last powerful stab, dealing 10% and knockback that kills starting at 100%.
Situationals
Ledge Attack ~ Foot Plant
Nero leaps forward from the ledge, and kicks just like Snake's Bair (but forward), also having the same stats as the aforementioned attack. (He kicked Dante in the face with this move in Devil May Cry 4).
{Same as Snake's Bair}
Rising Attack ~ Swipe
Nero jumps to his feet and swipes all around with a super-sized Devil Bringer, having the same stats as Ike's Up Smash.
{Same as Ike's Up Smash}
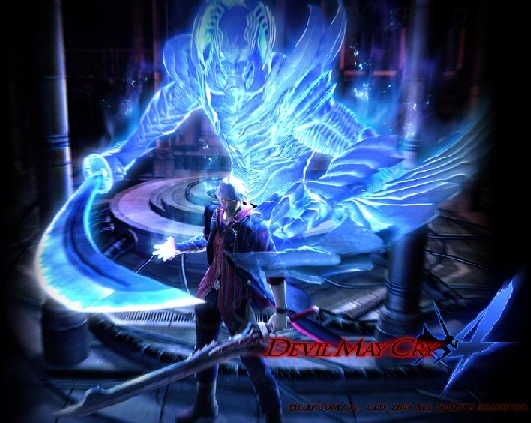
Final Smash
Nero's Final Smash is Yamato, his answer to Dante's Devil Trigger. He uses Vergil's sword to summon a demon spirit behind him (that is probably Vergil), which slashes at the same time as Nero. This effectively gives all of Nero's attacks two hitboxes. One is his normal hitbox. The second is the spirit's hitbox, which has twice the reach, so if Nero hits normally, he does double his normal damage, though bonus damage from Exceed is not multiplied. While under the effects of Yamato, all of Nero's non Red Queen attacks also have their damage output doubled. Nero is invincible and recovers 1% per second during his Final Smash. Lasts 30 seconds.
Playstyle
Oh dear, not another combo character from that Lionheart fellow. Fortunately, Nero performs very differently from the Black Knight, and even Dante. Nero's gig is his use of Side Special to draw foes towards him (or him towards foes) to continue combos, and the optional but risky use of Up Special to provide even further freedom.
Unlike Dante, noob Neros can't rely on camping much, due to the fact that his gun produces less damage and he can't use traps to intimidate and stun foes. Instead, noobs to Nero will… well… just be worse versions of the experienced Nero. Not much to really say about that.
Experienced Neros will know how to unleash the combo goodness. While there is a lot of freedom, there are some restrictions, for instance, Nero's throws are exclusively killing moves, with the only possible exception being Up Throw when used correctly, though they are **** good ones. Nero has fewer combo starters than Dante, but more combo finishers. Starting a combo with Nero generally means using one of his A combos, a tilt, Up Smash, Down Smash, or his Dash Attack on the ground or his Nair, Bair, or Dair in the air. Ideally, you will want to finish a combo with F-Smash, Uair, Fair, or a throw. Combo continuing moves are often up to the player, and consist of any of the A combos, a shot (preferably charged) from Blue Rose, a Side Special, Exceed Charge + A, Dash Attack, all tilts but Down Tilt, all aerials but Uair (as using it will end your combo regardless of percentage), and possibly Up Throw (and the only real reason you would want to do that is to include pummels or Hold).
With pre-emptive action, your combos become so much more powerful. Charge the Blue Rose to level 3 so that you can get some nice damage and a knockdown in. Charge the Exceed Gauge to increase your damage and power up certain attacks immensely. Set your "wing talismans" exactly how you want them so that you can use them to knock a foe into the air (sometimes even forcing a KO off the top blastline if done right). Charge your Side Special for max reach. Charge your Down Smash for max damage. All of these actions promote freedom and increase your effectiveness.
Why should I even bother listing combos when I've already told you how to perform them? Use your imagination, or did you already burn all that off in MYM4?
Taunts
Entry ~ Scarred
Nero paces around a bit upon appearance on the field and shakes his head saying "This match better end soon, or I'm going to be scarred for life." (A reference to the battle with Bael).
Up Taunt ~ Come On!
Nero totally rips off of Captain Falcon.
Side Taunt ~ What'chu Got!?
Nero plants Red Queen into the ground and mocks the foe with the above phrase.
Down Taunt~ Shall We Dance?
Nero bows mockingly while uttering the above phrase.
Victory Poses
Up Pose ~ Are You Human?!
When all of Neros defeated foes ask him the above question, he looks towards his demon arm and says "Don't ask… d***n thing annoys me all the time."
Side Pose ~ Throwing out the Trash
Nero grabs all the defeated foes with a MASSIVE Devil Bringer and throws them at the camera, breaking it.
Down Pose ~ Taking You Down
Nero sits on top of a stack of church benches and taps Red Queen on his shoulder repeatedly saying "Looks like I've taken you down a few notches."
Alternate Outfits
While Nero can't pull a Dante and change his age via alternate outfit, Nero can change his outfits secondary color (his primary will always be blue.) His secondary colors include red (default), blue, green, yellow, orange, pink, purple, brown, black, and white.


 , but still.