• Welcome to Smashboards, the world's largest Super Smash Brothers community! Over 250,000 Smash Bros. fans from around the world have come to discuss these great games in over 19 million posts!

    You are currently viewing our boards as a visitor. Click here to sign up right now and start on your path in the Smash community!

Make Your Move 6 - Nothing Gold can Stay

Status
Not open for further replies.

MasterWarlord

Smash Champion
Joined
Aug 24, 2008
Messages
2,911
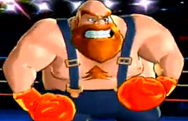
BEAR HUGGER


/// BACKGROUND \\\

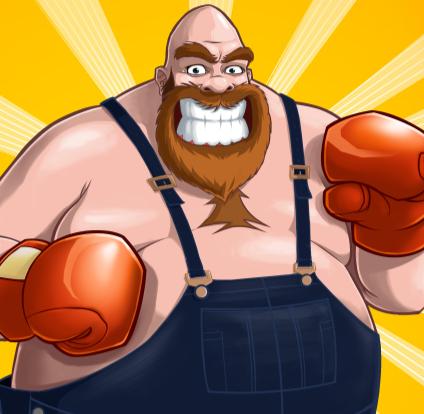
The Bear Hugger is a rather easy opponent in Super Punch Out, being the first opponent in the arcade version and the second in the SNES version. Ironically, he’s much harder in the Arcade version despite being the earliest opponent, his bear hug being a one hit KO, though it’s still quite easy to dodge. Where the Bear Hugger truly began gaining steam was with the revival of the Punch Out series on Wii, where his character was much more explored and defined, revealing him as a rather stereotypical Canadian boxer. –Apparently-, he actually trains with a real bear. Then again, anything makes sense when we keep in mind Great Tiger exists.

/// STATS \\\

Weight »»» 10
Size »»» 10
Power »»» 9.5
Priority »»» 9
Range »»» 7.5
Falling Speed »»» 6.5
Aerial Movement »»» 5
Movement »»» 3
Traction »»» 3
Attack Speed »»» 2
Jumps »»» 1.5
Recovery »»» .5


Yeah, Bear Hugger is a character of extremes. This guy makes Ganon and Bowser look like speed demons, and he makes Link’s recovery look like Meta Knight’s. That said, his power is truly something to be feared, and he easily tops Bowser as the heaviest character in the game. In addition, living up to his name, Bear Hugger’s priority tops absolutely anything that’s not disjointed due to his many grab-like moves, and when combined with his great range it’s near impossible to hit the guy without punishing his end lag.

/// SPECIALS \\\

Neutral Special - Spit
The Bear Hugger spits (No, not syrup, and) down twice, once on each of his boxing gloves, then rubs them together eagerly. This takes slightly less then for Lucario to fully charge a aura sphere. This makes your gloves nice and sticky for 12 seconds until it wears off. This turns all your punching moves into grab hitboxes, foes sticking on to the gloves rather then being smacked away with knockback. Foes will still take the damage the punch would normally deal and you get a grab in for even more free damage. What’s not to like? Using this move with already sticky gloves renews the duration.
[0%]

Side Special – Defensive Stance
Bear Hugger brings up his gloves to block his face. While you’re locked into this stance, you’re incapable of jumping, crouching, and turning around, but you can move at half your already sluggish movement speed. Pressing up and down moves your gloves (Which block anything) up and down, though, and they’re roughly the size of Kirby in front of you. Your block can prevent practically any attack, and there’s low lag to come in and out of this stance. Unfortunately, you’re only able to use your jab, neutral, side (To come out of the stance), and down special while in this stance. This prevents foes from easily camping you and can make the inevitable pressure you’ll have to deal with easier to handle, but the real clincher is that with sticky gloves, any melee attacks you block will instantly count as a grab. There’s no need to use a laggy move to grab the foe, just let them come right into your grasp!
[0%]

Up Special – Tether Overalls
Bear Hugger unstraps one of the straps on his overalls, then whips it forward at a diagonal angle. While he could perform a generic uppercut for a recovery, that wouldn’t really take him much of anywhere what with his tubbiness, now would it? Anyway, this is the generic terrible tether you’ve learned to loathe because of Ivysaur and company. Even for a tether it’s horrible, reaching out only half as far as Ivysaur’s it’s twice as laggy to come out, giving foes all the more time they need to edgeguard you. Contact with the end of the overall strap does 8% and average set knockback. This is Bear Hugger’s only disjointed hitbox. Whether he gets on the ledge or not, Bear Hugger near laglessly re-fastens the strap upon going into helpless or grabbing the ledge.
[8%]

Down Special – Timber!
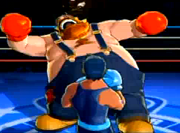


The Bear Hugger spins around as if in a daze for as long as you hold the B button, then upon release he falls over backwards yelling out “Tiiiiiiiimber!” (If you fall into the background/foreground, you whiff the move, though the timing is easy). If you just casually press down B, he’ll simply fall over backwards with no spinning, the spinning mainly serving to allow you to turn around to face the way you want before you collapse, which deals 26% and knockback that kills at 75%. While the collapse –is- very laggy (Start-up of Dedede’s fsmash), the Bear Hugger gets super armor when doing so, so he at least can’t be interrupted. The end lag, though, is still perfectly open for punishment, and Bear Hugger is left lying on his back at the end of the move. The main way you’ll actually be landing this is to use it like a counter – absorb an enemy’s move as you collapse on top of them.

Used in the air, this move functions differently, essentially being Bowser’s down B with the Bear Hugger going horizontal in mid-air, saying his line, then falling. Unlike Bowser, Bear Hugger can’t sweet-spot the ledge like this, so don’t try anything fancy. It’s still as powerful as the grounded version and the lag is still all there along with even worse landing lag, but you still have super armor as you fall, so it –possibly- could be used as an excuse to get out of the air (Though it’s too laggy to save you from being star KOd).
[26%]

/// STANDARDS \\\

Standard Attack - Jab
The Bear Hugger does a casual jab forward. It’s actually pretty damn fast, but the priority is only average, and the range like that of Bowser’s neutral A. It’s pretty weak to boot, just 6% and weak set knockback. It serves as a good move to discourage foes to get the hell away seeing how many laggy moves Bear Hugger has, but the main time you’ll actually be using it is when you’re in your defensive stance – there’s little else you –can- use then.
[6%]

Dashing Attack – Collapse
Bear Hugger skids to a stop, but despite his slow speed the big guy seems to of picked up too much momentum, falling over forwards. He flails his arms frantically, trying to stay up, having superarmor for a brief period, then falls over face first, going into his lying on stomach state with bad lag (Though this starts up instantly). This strangely has no real hitbox, but if a foe hits you as you fall over with a melee attack it’ll just bounce off Bear Hugger’s flab and it’ll hit them back for double damage/knockback. The force of the blow will knock Bear Hugger back up to his normal stance to boot. This is an excellent defensive move and can work wonderfully with prediction, but this is far from an easy move to throw out.
[Variable Damage]

/// TILTS \\\

Forward Tilt – Gut Buster
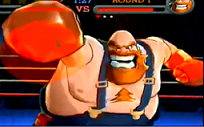


Bear Hugger does a punch directly forwards with range identical to Bowser’s ftilt, but with double the end lag (Bowser’s ftilt is pretty fast) and priority. This does 11% and knockback that kills at 170%, but the real draw of this move is when your gloves are nice and sticky – it’s easily your best grab available, what with the relatively low lag and the great range, and during the end lag your glove is still a lingering grab hitbox (Only with sticky gloves) in front of you, leaving you well defended from the front as the move winds down.
[13%]

Up Tilt – Smack Down
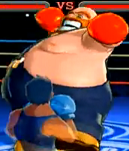


Bear Hugger raises his arm above his head, then whishes it down in an arc in front of him, ending with his hand down at his feet. This has an arc around Marth’s height that starts above Bear Hugger and then falls down in front of him, and the move is surprisingly quick to come out, only the end lag being notable (D3 usmash start lag). This deals 10% and spiking knockback down onto the ground (This doesn’t reach down onto the ledge if that’s what you’re thinking), leaving foes in their grounded states. While this is Bear Hugger’s main anti air grab thanks to the range and low start lag, if your gloves –aren’t- sticky this is rather bad, as even if you hit with it you’ll probably be punished due to the end lag.
[10%]

Down Tilt - Stomp
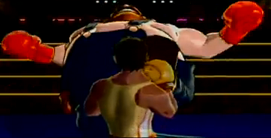

The Bear Hugger lifts up his gigantic foot from under his mass of fat and says “I’m gonna. . .” for start up lag of roughly half a charged Aura Sphere, then stomps down, saying “Stomp ya!”, his foot reaching out Wario’s width in front of him. The move can be canceled once the start-lag is complete, right into a shield, so you don’t have to be too conservative with this. That said, considering this is one of Bear Hugger’s few relatively safe moves, it’s not too powerful. Just 9%, average priority, and knockback that kills at 250%. Due to the telegraphed nature of this move (The dialogue helps a lot), it’s great to bait the foe in, then just cancel it and shield grab them.

Other then being a decent defensive move, this move is notable for being Bear Hugger’s only move with a grab hitbox without getting his gloves sticky. However; this only works when the foe is on their back/stomach, lying on the ground, as Bear Hugger’s foot pins them to the ground. From here you can do any button inputs, most notably Timber over and collapse on top of them for the KO or take the time to get some spit on your gloves. Jumping will cause you to release your grip on the foe early before they button mash out.
[9%]

/// SMASHES \\\

Forward Smash – Right Hook
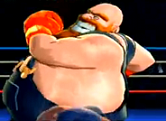


Bear Hugger does a pretty run of the hill right hook (Which is much more exaggerated then in the picture), going in a very slight upward arc the size of Bowser (Though only the glove is a hitbox as it creates the arc). The priority is good, but the lag is the real thing bogging the move down (Bowser’s fsmash start lag on both ends!). This move deals 27-36% and knockback that kills at 120-85%. While this move is notable for it’s range and ridiculous power, it flies right over small/crouching characters due to the upward arc.
[27-37%]

Up Smash - Flex
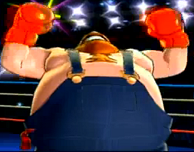


Bear Hugger reaches his arms up into the air like the first picture and holds the pose for as long as Wario’s ftilt takes to execute, laughing, creating two lingering hitboxes above himself the size of Mario with bad priority that deal 9-15% and upward knockback that never kills. Bear Hugger then sweeps his arms downwards in an arc the size of Bowser on either side, going into the pose in the second picture. This has not hitbox, but his arms sweep foes into his body. If the foe is trapped between Bear Hugger’s arm and his body while he does the second pose (Which lasts the same amount of time), they’ll be caught in a grab hitbox and be dealt 18-29%, then pass out on the floor from Bear Hugger’s BO (For 1-2 seconds based on charge). Perfect chance to stomp them. No start-up or end lag on this move. While the second hitbox is very appealing on this move, the fact that you have to go through the second one to get to it rather unappealing. With sticky gloves, though, the first hitbox is actually worth hitting with, leaving this move with no real blind spot.
[9-15%] [18-29%]

Down Smash – Bear Crusher
Bear Hugger turns to face the screen and starts smacking his fists together, laughing as he does so. The only hitbox on this move is when the gloves clash together, which has a hitbox around the size of Kirby with decent priority that deals 13-21% with knockback that kills at 160-130%. The move has nasty lag on either end (1.75X D3’s usmash), but the actual execution of the move is fast. Now, he smacks his fists together a total of three times, which isn’t really all that notable. . .Unless you get sticky gloves. Then the foe won’t be sent flying from the first time your fists smack together and will be stuck on the glove for the entire animation, getting smacked twice more for a potential total of 39-63% (!!!), and you’ll still grab them afterwards to boot! Of course, that’s only if you hit the initial time Bear Hugger’s gloves smack together, and hitting with the move at all is also easier said then done.
[13-21%]

/// AERIALS \\\

Neutral Aerial – Double Smack
Bear Hugger turns to face the screen and simply punches outward to either side, creating a hitbox the size of Mario on either side of himself. Low lag on either end, decent priority, and the gloves deal 10% with knockback that kills at 200%. While there are no changes with this in the air, the gloves are slight lingering hitboxes before the end lag kicks in and the move continues uninterrupted on the ground, and –that- is the place where you can use the stickiness to grab foes.
[10%]

Forward Aerial – Overhead Swing
Bear Hugger brings his arm above and behind his head for the start lag of DK’s fair, then swings it forward in a arc that covers an area the size of Bowser in front of him, ending with his arm angled downwards in front of his feet. His glove is a good priority hitbox all the way through, dealing 14% and knockback that kills at 125% away from the glove. End lag is about that of Wario’s bair. Now, while the move’s decent, it’s very hard to hit the foe in the direction you want with this move, which would primairily be downwards to hit them at the end of the move to gimp them. If your glove is sticky though, your glove is a grab hitbox all the way through, only letting the foe go at the end of the move to spike them directly downwards. A very nice gimper, especially considering you can grab a foe behind you, above you, wherever, really, then spike them downwards.
[14%]

Back Aerial – Roundhouse Punch
The start-up lag and animation of this move is identical to the previous, but Bear Hugger then whirls his arms to twist it around his body, causing him to spin around rapidly. His arm is not a hitbox here, only his body as he spins for .75 seconds with extremely high priority. He deals 18% and knockback that kills at 120% here, but the end lag is absolutely terrible, and the landing lag worse. Bear Hugger ends up facing the opposite direction he was initially at the end of this attack.
[18%]

Up Aerial - Squash
Bear Hugger turns to face the camera and claps his fists together above his head. He does a very large sweep, his arms/hands pushing foes up to the middle where they connect during the large starting lag (Bowser’s uair). The main hitbox is when the fists connect, creating a hitbox the size of Wario (He has superarmor during this part so priority doesn’t matter) that deals 14% and squashes foes into cartoonish pancakes. Foes slowly drift down around Mario’s height while like this, though they’re completely invulnerable and you can go through them with ease. This restores the foe’s jumps/up special so it can’t be used to gimp, but it’s good to buy Bear Hugger some time so he won’t get gimped himself.

. . .What? You don’t like the move for some strange reason? Surely you must be joking! Bah. Well, if Bear Hugger’s gloves are sticky and he hits somebody with the move, they’ll stick to his gloves and he’ll bring his gloves underneath himself so he can ride on top of the crushed character, using their floatiness to recover. This essentially gives him triple Wario’s DI and gives him a 1/10 falling speed, giving him an actual decent recovery, though foes have no real reason to come out to gimp him when they can just casually edgehog his tether. You’re more likely to use it as a suicide.
[14%]

Down Aerial – Diving Punch
Bear Hugger flips over to face upside-down in mid-air, then falls like a rock (twice the rate of Sonic’s dair). Contact with his fist isn’t even a spike, just a high priority spike that 18% and sideways knockback that kills at 70%. This reaches out Mario’s height underneath the Bear Hugger. . .But doesn’t Bear Hugger have a better stall then fall with super armor? Sure, this one’s slightly (not much) less laggy, but. . .Bah. This move only particularly sticks out with sticky gloves, as then any foes hit will fall with Bear Hugger to his doom. If he hits ground instead of suiciding with the foe, they’ll take an additional 8% and average set kncokback.
[18%] [8%]

/// THROWS \\\

Grab – Bear Hug
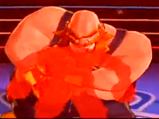


This is the grand-daddy of Bear Hugger’s game. Bear Hugger opens his arms up wide then clashes them together, holding the foe like pictured above. While his actual main grab is as awkward and laggy as Bowser’s, the range is quite good (Slightly less then Dedede’s). Still, you’ll mainly want to use your ftilt and utilt as your grabs once your gloves are sticky with your spit, and having multiple grabs makes you far less predictable. Grabbing foes with anything other then this (Besides dtilt) will translate into this grab stance.
[0%]

Pummel - Squeeze
Bear Hugger squeezes the foe hard in his grasp, dealing a very meaty 6%, saying “Need a hug?” as he does so. This is a ridiculously laggy pummel and you’ll rarely be able to use this and still get a throw in.
[6%]

Forward Throw – Catch and Release
Bear Hugger essentially performs his utilt with the foe still in his grasp, bringing them up over his head with one arm, then slamming them into the ground for 8%. . .If your glove is sticky, though, they’ll stick to your glove after the throw is complete and you’ll automatically regrab them. The Bear Hugger saying “Catch!” as he does so. If use this throw again right afterwards he’ll say “and release!” as he performs the throw. . .You can get the idea of where this goes. You can only chain grab for as long as your gloves are sticky, and the throw is moderately laggy, so you won’t get –too- much damage off this.
[9%]

Back Throw – Counterpunch
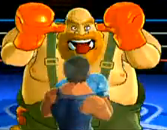


Bear Hugger puts his hands behind his head, sticks his tongue out, and says some gibberish, taunting his opponent. From here, the foe will attempt to punch you (Or just poke you in Zoop Triangle’s case), but Bear Hugger will smack the foe away with a punch, out prioritizing them with his bulk and dealing 14% with knockback that kills at 180%. If somebody else interferes with this throw, you can potentially be hit by the enemy’s punch and the person who knocks you out of the throw. All enemy punches deal 10%, and this throw –is- rather laggy.
[14%]

Up Throw – Wind Up Punch
Bear Hugger winds up a big punch as he holds his victim with a single hand. During this time they can escape the grab as Bear Hugger charges, him only releasing the punch when you release A. If your glove is sticky, though, the foe won’t be able to escape while you wind up. This charges up as fast as DK’s neutral B but has a 1.5X higher max charge so it can become even more powerful, but you can’t store the charge and it only kills at 100% fully charged due to the knockback being vertical.
[1-28%]

Down Throw - Faceplant
Bear Hugger shoves the foe’s face into the ground, saying “Kiss it!” as he does so, chuckling to himself. While this only deals 7%, it has very high hitstun as the foe brings their head (Or just their rough face area) up from the ground. This is the perfect chance you need to stomp on them and renew your spit or to timber on top of them.
[7%]

///FINAL SMASH – Maple Syrup\\\
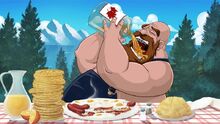

The Bear Hugger laughs very heartily as the camera zooms in on him, then he takes out a bottle of maple syrup and slathers it all over his gloves, rubbing them together to make them nice and sticky, then gameplay resumes as normal. For the next 30 seconds, your gloves will be permanently sticky, enabling you to go wild with catch and release chain grabs, gimping, you name it, really. In addition to all the fun you can have in your grab happy state, your neutral special is replaced by taking out the syrup and drinking it, healing you of 3% per second with below average lag to come in and out of the stance. If foes just run like the cowards they are when you’re at your peak condition, just sit back and heal to force them to approach you.
[0%]

/// PLAYSTYLE\\\

So you’ve picked the Canadian, eh? Quite honestly, he’s more grab oriented then even the great penguin king
(Wizzerd. . .)
we all know and hate. At the start of the match, you’ll be wanting to look for an opening to get your gloves sticky, which is easier said then done considering how big and slow you are, despite it not taking that long. You’ll either have to grab a foe without your extra grabs then faceplant/stomp combo them, or use your dash attack to bounce foes away when they try to damn you to combo hell to make some space. Your usmash is also an alternative to get foes down on the ground and stunned for a stomp and can get things off to an excellent start, but don’t count on it. Your dtilt is also a valuable tool in this phase to bait foes in, abuse the canceling factor of it to fake foes out as much as you can.

Once your gloves are sticky, things become much, much easier. You’ll mainly want to turtle up into your defensive stance and block your foes’ attacks so they get stuck to you rather then using a laggy attack, and you can still poke away with fast jabs while in the stance to lure them in anyway. In addition, you can still renew your spit while like this and if you predict that a foe’s going to roll behind you (You can’t turn around), you can just Timber on top of them.

So what should you do in the instances where your foe is grabbed? Catch and Release chain grab is the blatantly obvious choice, but you don’t want to get too greedy with it, as you want your last throw to be a faceplant so you can stomp on them and renew the stickiness on your gloves to repeat the cycle all over again! Yeah, Bear Hugger racks up the percentages disturbingly fast for a heavyweight, and considering his chain grab shenanigans work on the entire cast without exception, you should be able to rack up your foe’s percentage just as quickly as they can yours, and they sure as hell will, what with how much of a slow fat fart you are. Of course, there’s always your defensive stance to combat those foes too fast for their own good, but that only works if your gloves are –already- sticky.

So anyway, once both your foe’s percentage and your own is high, you’ll both be dying off pretty quickly. Bear Hugger obviously has a very large amount of KO moves, it being more a matter of which moves aren’t then which are. However, the main point of choice is Timber, as it’s the only one that can actually hit a foe you’ve stomped on. Considering you’re already stomping on foes all the time throughout the match, following up one with a timber should hardly be a problem. You can potentially even go for an early KO, by gimping the foe on the way back if your gloves are already sticky, seeing Bear Hugger’s air game is surprisingly decent outside his terrible recovery. Still, you’d be better of just taking the time to renew the spit.

But anyway, as previously said, you’ll both be dying off quickly. Despite Bear Hugger’s weight, he dies off very fast due to his absolutely horrendous recovery, which makes even Link’s look half decent. While his weight will ensure he won’t die at absurdly low percents if he plays his cards correctly, he still has to be quite careful. The main thing preventing him from being absolutely and utterly ***** by people like MK is that if foes insist on taking you off stage, you can just suicide with them with your uair or dair. While you could go for the fair instead, it’s unlikely you’ll make it back to the stage if you try to gimp your foes back, seeing how horrendous your recovery is. It barely even needs to be edge-hogged.

So despite not playing entirely offensively, Bear Hugger is really a glass cannon. He both damage racks and KOs easily, but it’s just as easy to do the same to him thanks to his slowness, size, and recovery, so pretty much you either obliterate or suck with the guy, meaning you’ll see few people with Bear Hugger in their secondaries, only as a solid main.

/// MATCH-UPS\\\

Vs. Meta Knight: 25/75, Meta Knight’s favor
Meta Knight is easily able to capitalize on Bear Hugger’s weaknesses better then anybody else, really. Bear Hugger absolutely hates disjointed sword style attacks as they go right through grabs, and mach tornado is only the icing on the cake. Of course, Meta Knight is also an expert gimper, something Bear Hugger fears even more then fast pesky characters. Surprisingly, Bear Hugger’s best option early game to get himself room is Timber – the superarmor makes it outprioritize Mach Tornado, and once MK’s deep into the move he can’t come out of it as easily as he’d want to. Bear Hugger can definitely go for the early KO against MK due to his light weight, but considering how ungimpable he is, the situation is still far from ideal on his side of the spectrum, and Meta Knight’s advantages still far outweigh his.

Vs. King Dedede: 40/60, Dedede’s favor
While Dedede’s chain grab can’t be used on everybody, it’s far more effective on those it can be used on then Bear Hugger’s, and the big lard isn’t an exception. Bear Hugger thankfully isn’t infinited like DK or even Bowser, being more in league with Wario (Without the grab release), so this is still –possible-. Bear Hugger can avoid being grabbed by using super armor in his down B, but more important is that Bear Hugger’s dtilt and his sticky punching moves out priotize regular grabs. Dedede’s chain grab is still superior, but Bear Hugger can play a very nice defensive game against Dedede and do some damage right back to him with his own chain grab. Bear Hugger’s KO potential also far outweighs Dedede’s, but Dedede doesn’t need to send Bear Hugger out far before he can bair him to all hell. This surprisingly isn’t that bad of a match up, but it’s still clearly in Dedede’s favor.

Vs. Wario: 70/30, Bear Hugger’s favor
While Wario’s air game –is- killer, he’s not good at gimping in any way, shape, or form. It’s more a substitute for his ground game, really, which means it doesn’t bother Bear Hugger as much. If anything, Wario should be the one who has to worry, as Bear Hugger can just grab Wario out of the air to bring him back down to the ground. In addition, while Wario’s priority is very good, it’s still jointed, and Bear Hugger’s grabs easily outclass it, robbing Wario of another of his advantages. Of course, Wario will be surviving much, much longer with his vastly superior recovery, but that’s really just about all he has going for him. His damage racking and KOing isn’t bad, but Bear Hugger outclasses him in both regards, Wario not able to capitalize on either of Bear Hugger’s weak points that well (Slowness and gimpability).

Vs. Diddy Kong: 65/35, Bear Hugger’s favor
The most notable thing about this match up is the brief lag Diddy takes to set up bananas – it’s a perfect invitation to spit up on your gloves. Diddy makes your openings to get your gloves sticky for you – how generous! While Diddy will spam his peanut popgun to force you to come over to his banana peel traps, you can just go into your defensive stance and turtle up with little problem to force him to approach. That said, Diddy can own you up pretty badly once he gets in close, but so long as you stay on the defensive you can get in your precious grabs. Diddy can’t damage rack nearly as well and generally has to play on Bear Hugger’s terms when he’s used to forcing characters to play on his, which proves quite problematic for him. Diddy Kong is really lost here, and his low KO potential and only “meh” gimping only seals his fate in being unable to phase Bear Hugger.

Vs. Falco: 45/55, Falco’s favor
Falco’s chain grab can easily 0-death combo you at early percents by d-throwing you to the edge of the stage and dairing (Bear Hugger’s hitbox is such that it’s a guaranteed hit) him to his doom. Stay the hell away. Falco’s grab is pretty bad anyway, so it’s not that hard to avoid getting grabbed at early percents. . .But still, the fact that one grab at 0% entirely kills you is very scary. You –WANT- to take damage so you become immune to Falco’s chain grab. Of course, it’s much harder to turtle up and focus on out prioritizing the grabs on Falco then Dedede due to Falco’s superior speed, but if you can manage it, the match up is easily yours, seeing your superior KO potential. Seeing Bear Hugger has to work to get the match up into his favor while it starts in Falco’s favor, Bear Hugger loses the match up yet again, but this is far from impossible.

Vs. Mr. Game & Watch: 35/65, Game & Watch’s favor
Game & Watch is essentially a lesser Meta Knight for Bear Hugger to deal with. Game & Watch thankfully isn’t as much of a gimping god as Meta Knight, but G&W has something MK doesn’t – his abundant BKupa style prop moves outprioritize Bear Hugger’s grabs which he relies on so heavily. G&W’s dreaded bair is very much Bear Hugger’s bane. That said, Bear Hugger can try to go around these walls between him and G&W with his wide variety of grabs, such as using utilt on G&W as he approaches from the air. G&W also doesn’t keep up as utterly absurd pressure as MK does on Bear Hugger, but it’s still very obvious he has the match up while Bear Hugger is the one who has to work for it.

Vs. Bowser: 60/40, Bear Hugger’s favor
While Bowser is far from the master gimper, he hardly needs to be. He just needs to hit you with a high knockback move then casually hop on the edge and laugh. Sometimes he won’t even need to, seeing your recovery is so bad you practically gimp yourself with it. While you KO easier, Bowser’s recovery, while far from good, easily is superior to yours and means he’ll be surviving a good deal longer then you could hope to. That said, you rack up damage on him much faster, the only thing Bowser has going for him being his fire breath which goes through your grab style moves. Bowser will be playing defensively with his fire breath and waiting for your sticky gloves to expire, then going on the aggressive once it’s down. Try to beat him to the punch with your faster grabs like jab and ftilt, seeing his fire breath has some slight lag on it. Anyway, in a heavyweight match, both combatants can KO with ease in general, so it goes to Bear Hugger for his better damage racking capabilities. Bowser is far from helpless with his defensive game, but considering Bear Hugger is attacking while Bowser is defending, he gets the match up.

Vs. Fox: 75/25, Bear Hugger’s favor
This is pretty much the Falco match up minus the chain grab, and when you take that out everything looks pretty favorable for Bear Hugger. Fox’s laser spam is actually worse then Falco’s to boot, as Bear Hugger can just shrug off the damage from Fox’s no hitstun laser while he gets his gloves sticky and then proceed to utterly own McCloud. My how the mighty have fallen since the Melee days. . .

Vs. Ike: 65/35, Bear Hugger’s favor
Ike is one of those weapon characters that Bear Hugger hates so much due to them out prioritizing his sticky grabs, but considering how superior he is to Ike in racking damage it’s not nearly as notable as it is in other match ups of this kind against the higher tiers. Ike will want to play defensively to out prioritize the grabs, though Ike will just be poking Bear Hugger while when he gets past Ike’s defenses he’ll be racking up massive damage. While Bear Hugger’s KO ability is superior to Ike’s, his terrible recovery evens this out. Still, even if Bear Hugger somehow finds himself getting behind in the damage he can knock Ike off stage with a Timber then go sacrifice himself to gimp Ike’s recovery by getting in the way of Ike’s side special, or using a sticky uair/dair/fair.

Vs. Captain Falcon: 50/50
How is a match up against worst character in the game not in his favor? What? You say it’s Ganondorf? It’s just those idiots’ bias against the slow power characters. How else is Dedede only ranked at SIXTH?!? That’s absurd. Moving on to the match up, Bear Hugger’s priority reigns supreme even without sticky gloves to such points that he barely even needs to bother getting them sticky, but Captain Falcon’s knee of justice can finally get some use here against Bear Hugger. Bear Hugger is a ridiculously large target making the sweetspot actually possible (And quite easy) to land, making it a viable KOer and gimper. While CF still isn’t –that- powerful, he’s powerful enough to get him off the edge and edgehog him casually for the kill. CF isn’t a total slouch in attack speed either, meaning Bear Hugger’s only true advantage is priority. Bear Hugger will be playing rather defensively here. This match up is quite common to come out with one of the two fighters completely killing the other, leaving no room for error on either side in this heated match up.

Vs. Little Mac: 35/65, Little Mac’s favor
While Little Mac is far from entirely reliant on traps, Bear Hugger will easily give Mac the time he needs to get them up. Bear Hugger’s many, many, many punishable moves also make him easy bait for tagging punches, meaning Little Mac will be getting up to a full power star punch in no time. This makes his recovery superior to Bear Hugger and allows him to compete (though he still definitely loses) in KO potential. Little Mac is also relatively fast, meaning he can damage rack to boot, though Mac’s traps and recovery are the main things that give him the edge here. Stranegly enough, Bear Hugger’s best hope here is to try to kill Mac at low percents by gimping him (Quite awkward for a heavyweight) before he can work up his star punch. Naturally, considering Bear Hugger is even thinking of such a thing outside his normal palystyle, the match up is in Mac’s favor.

Vs. Bald Bull: 85/15, Bear Hugger’s favor
Bald Bull is notorious for how vulnerable he is to chain grabs, and Bear Hugger’s chain grab is no exception. Sure, he’s no more vulnerable then anyone else to it, but he gets grabbed all too easily. Bald Bull really can’t get around Bear Hugger’s sticky gloves, making Bear Hugger rack up Bull’s percentage much, much faster then visa versa. That said, Bald Bull will survive for much longer due to his momentum stopping aerials and the fact his recovery isn’t absolutely abominable, and considering Bear Hugger can’t gimp without suiciding Bull’s main weakness is unexposed. Still, all Bull can answer to Bear Hugger with is a high powered bull charge from all the damage he’ll of taken, he’ll easily get one or two charges in. . .Just seeing he won’t of gotten any other moves in, it won’t matter much.

Vs. Von Kaiser: 65/35, Bear Hugger’s favor
While Von Kaiser is a respectable damager what with his blatantly overpowered bthrow and what-not, Bear Hugger is still superior with his chain grab shenanigans he has going on. Considering Bear Hugger will get Kaiser to 50% long before visa versa, Kaiser will be very hard pressed to damage Bear Hugger due to how much pressure he keeps up on him, preventing him from staying at the percentages he wants. Kaiser’s KO potential is surprisingly very respectable and can compete with even Bear Hugger’s, Kaiser perhaps having a slight edge here due to Bear Hugger’s recovery, but Bear Hugger dominates the damaging phase far more-so then Kaiser the KOing phase.

Vs. That Other Bear Hugger: 100/0, MasterWarlord's favor

/// EXTRAS \\\

Up Taunt – Canadian Pride
Bear Hugger looks at the camera and says “What’s with this huggin’ nonsense? The name’s Georgie!”.

Side Taunt – Eh Bomb
The Bear Hugger scratches his buttocks and farts. “I think I’m gonna go drop a bomb, eh?”.

Down Taunt – This Is Canadian Power
The Bear Hugger whistles the first bit of the Canadian national anthem. Oh well Canada what you gonna do.

Entrance - Flex
Bear Hugger does an aerial timber from the top of the screen down to his starting position, then performs his usmash to flex, showing off, and laughs.

Win Pose 1 – Bad Fur Day
A squirrel scampers out from behind Bear Hugger and hops up on his shoulder, then scampers all around him, Bear Hugger trying to catch him in annoyance. Bear Hugger eventually smacks him away successfully. As the taunt goes on, he says “Get your tail out of my eyes! How am I supposed to see like that?”

Win Pose 2 – Endless Beatings
Bear Hugger turns to the losers and laughs, saying “You've come back for another spanking, eh?”.

Win Pose 3 – Have some Syrup, friend
Bear Hugger comes over to the second place loser and takes out a bottle of maple syrup. He offers it to them, saying “Want some syrup?” for them to turn and look at Bear Hugger questioningly, then he drinks the syrup and pukes it up on them, laughing.

Win Pose against Sakurai – Drunken Glory
Bear Hugger and Sundance are sitting around a fire, roasting some delicious squirrel. Sakurai is present as well, but he sticks his hand in the fire and it goes alight, him running off-screen in panic. Bear Hugger and Sundance laugh, then clink their mugs together and drink their Yoshi-brand Maple Syrup flavored beer, getting drunk. This song plays rather then Bear Hugger’s usual victory music during the pose.

Loss Pose – I am tree I won’t budge
Bear Hugger folds his arms and looks away from the winner in annoyance, refusing to clap. Isn't he just the most beautiful guy around? :mad:
 

Wizzerd

Smash Ace
Joined
Feb 24, 2009
Messages
929
HK-47: Interesting, interesting. This is a big improvement from Kee-Mo-Shee. While a couple of moves fall to what I like to call "Projectile Syndrome"- thinking a generic projectile is unique when it really is just a generic projectile, most notably in the fsmash- practically every move is unique, and this is rather well-balanced as well. However, there are two main ways I think you can improve. The first is organization. People don't want to admit it but organization is one of the most important aspects of a moveset. Right now, it's a bit... bland. I would suggest doing size-3, colored, bolded headers for individual moves, and size-5, colored, bolded headers. Or do more unique organization, any of Rool's sets are a good example of this. I would suggest pruning off the hitbox section as well, since it's rather... random. The other thing you can improve on is playstyle. The fact that there's a playstyle at all is impressive, and the section is well-written but too concise (same goes for the codec), but it's a little bland right now. There's a nice guide to playstyles in the OP, I'd reccomend it. Anyway, this is a very impressive set for a newcomer, and I'm excited to see what else you'll be able to make. Good job!

Bear Hugger: Nice job on this one. I prefer Bald Bull to this guy, but this is still an impressive outing for a character with little to no moveset potential. The whole thing with the sticky gloves is very interesting, and adds a layer to his playstyle (without it he's just another MW heaviweight :laugh:). If I have to b*tch about something it's the unoriginality of certain attacks, but of course this is a part of our whole feasibility movement and I'm part of it too. Yeah, good moveset here.
 

darth meanie

Smash Journeyman
Joined
Jun 6, 2008
Messages
452
HK-47 Was pretty good. The decision to include T3-M4 as an assistant was a fantastic design decision, first off. However, I feel the implementation left something to be desired; giving him 125% Stamina and only one life punishes HK-47 in long matches and gives him more power in shorter ones. I would highly recommend instead giving T3 say, 50 Stamina and have him respawn in the match when HK is KO'd.

On other issues, you have some good moves and ideas here, I like T3's oil slick, but several moves feel somewhat out of character; the Nair is utterly boring and the Shield Generator smash feels rather odd for the sadistic, sarcastic bloodthirsty protocol droid we all know and love. In fact, a lot of the aerials feel sort of out of place; the homing device seems weird for an aerial, and the shield disruptor is pretty boring too, and Carbonite Projector could have been better used on land, where it wouldn't be a gimping move and have more interesting option.

I like the use of the mines, oil slick, and grenade, and T3-M4 feels like a trap assistant, and I would have liked to see this element played up. The grapple Up-Special was brilliant, by the way. Overall, this is a solid set, but it doesn't feel as much as I wish it did like HK-47; with a few aesthetic changes, it could also be a Carth Onasi set. Improve the playstyle, give HK some more interesting, creative moves (more focus on his assassination protocols would have been lovely). Also, for the most quotable character in the history of video games, there is a great lacking of quotes.

Bear Hugger Haven't I already seen this? The grab mechanic system is interesting, and he seems fairly in character with a lot of creativty too. The Up Aerial is strangely familiar... nah. He's one of your smaller sets, and he's good, but nothing incredible, and worse than Bald Bull, I'd say. It wasn't brimming with creativity, but Bear Hugger works, and he fits together very well for a set you certain have only had a little time to work on.
 

BKupa666

Barnacled Boss
Moderator
Joined
Aug 12, 2008
Messages
7,788
Location
Toxic Tower
?...!...?!?!?!?

Ffffffffffffffffffffffffffffff...

THIS WAS SUPPOSED TO BE BLEAK'S PAGE!

I go to tan and come back to see this?!

Well, it's a decent set anyhow. Like Wizzerd, I am a bit more partial to Bald Bull. I like Bear Hugger's playstyle more, but something just gives Bull the better spot in my mind. Also, it's strange to have a character heavier than Bowser...muscle weighs more than fat, you know. Whatever. Minor gripe. I still like the set, but I think Bull will be better received in the end; he did big new things, while Bear Hugger kind of just expanded on the Punch Out!! genre in a smaller way.

But make no mistake. As good as a set it is, I'm not giving it another page for reception. Seeing as how no one but Wizzerd, me, and one or two of Smady/K.Rool/MT comment usually, it'll take at least a day and a half to get another page for Bleak. I gave Bull and Kaiser a chance, but I'm not gonna be so lenient here.

Still, good job; you've probably discouraged kirbywizard from updating his set, though. I'm not complaining, but whatever.

*goes to private spot to unleash wrath on sand...er, punching bag*
 

MasterWarlord

Smash Champion
Joined
Aug 24, 2008
Messages
2,911
Bear Hugger: Nice job on this one. I prefer Bald Bull to this guy, but this is still an impressive outing for a character with little to no moveset potential. The whole thing with the sticky gloves is very interesting, and adds a layer to his playstyle (without it he's just another MW heaviweight :laugh:). If I have to b*tch about something it's the unoriginality of certain attacks, but of course this is a part of our whole feasibility movement and I'm part of it too. Yeah, good moveset here.
Bear Hugger is far more true to his source material in that he's an actual boxer instead of a wrestler. I was trying to be much more down to earth with this one in hopes that people like Rool and Ocon would be more favorable of it. Anyway, I hardly thought you'd be one to attack me for this, seeing you made Sukapon. Yes, the sticky gloves mechanic is what makes the character. If not for that, even I'd be sickened by how generic he'd be. With Bear Hugger, I wanted to make the meat of his attacks punches, but also grabs at the same time. . .And it worked out surprisingly well, or at least I thought.

Bear Hugger Haven't I already seen this? The grab mechanic system is interesting, and he seems fairly in character with a lot of creativty too. The Up Aerial is strangely familiar... nah. He's one of your smaller sets, and he's good, but nothing incredible, and worse than Bald Bull, I'd say. It wasn't brimming with creativity, but Bear Hugger works, and he fits together very well for a set you certain have only had a little time to work on.
Smaller sets? If only for having a few generic attacks. I felt Bald Bull was too random/creative and not down to earth enough for the purpose of these Punch Out movesets, so I tried to counteract that with Bear Hugger. Either way, I'm far more satisfied with Bear Hugger's playstyle. It flows far more and was much more consciously made then Bull's. Of course, there's some bias there, considering this is who I'd main out of all my movesets (Based off the playstyle, not the character).

edit:

BKupa666 said:
?...!...?!?!?!?

Ffffffffffffffffffffffffffffff...

THIS WAS SUPPOSED TO BE BLEAK'S PAGE!

I go to tan and come back to see this?!
Looks like I beat you to the punch, eh?

Well, it's a decent set anyhow. Like Wizzerd, I am a bit more partial to Bald Bull. I like Bear Hugger's playstyle more, but something just gives Bull the better spot in my mind. Also, it's strange to have a character heavier than Bowser...muscle weighs more than fat, you know. Whatever. Minor gripe. I still like the set, but I think Bull will be better received in the end; he did big new things, while Bear Hugger kind of just expanded on the Punch Out!! genre in a smaller way.
I'm glad that somebody finally acknoweledged that Bear Hugger has a better playstyle, at least, but yes. Bear Hugger was intentionally made less creative then Bald Bull. On the weight, Bear Hugger is the heaviest character in Punch Out after King Hippo. . .He weighs 440 pounds. I'm not exaggerating. I try to not go to too much of extremes, but considering how slow and how terrible a recovery Bear Hugger had, I thought it fit.

But make no mistake. As good as a set it is, I'm not giving it another page for reception. Seeing as how no one but Wizzerd, me, and one or two of Smady/K.Rool/MT comment usually, it'll take at least a day and a half to get another page for Bleak. I gave Bull and Kaiser a chance, but I'm not gonna be so lenient here.
Oh, that's perfectly fine. Feel free to take the next page. Seeing I'm getting actual commentary on this one and not spam, it should be fine.

Still, good job; you've probably discouraged kirbywizard from updating his set, though. I'm not complaining, but whatever.
MasterWarlord said:
Loss Pose – I am tree I won’t budge
 

darth meanie

Smash Journeyman
Joined
Jun 6, 2008
Messages
452
Actually, I thought I had communicated that I felt Bear Hugger had a very strong playstyle, and that it was the strength of the set that made it much better than the individual moves that made it up. Clearly I did not say this lucidly enough. Ah well.

Also, probably half of the reason I liked Bald Bull more was because you named one of your moves Turkish Delight. I literally busted out laughing.
 

Wizzerd

Smash Ace
Joined
Feb 24, 2009
Messages
929
MasterWarlord said:
Bear Hugger is far more true to his source material in that he's an actual boxer instead of a wrestler. I was trying to be much more down to earth with this one in hopes that people like Rool and Ocon would be more favorable of it. Anyway, I hardly thought you'd be one to attack me for this, seeing you made Sukapon. Yes, the sticky gloves mechanic is what makes the character. If not for that, even I'd be sickened by how generic he'd be. With Bear Hugger, I wanted to make the meat of his attacks punches, but also grabs at the same time. . .And it worked out surprisingly well, or at least I thought.
Oh no, I'm not trying to attack you at all. That was really a thing I said so I wouldn't be giving crappy commentary. :laugh:
 

BKupa666

Barnacled Boss
Moderator
Joined
Aug 12, 2008
Messages
7,788
Location
Toxic Tower
Also, probably half of the reason I liked Bald Bull more was because you named one of your moves Turkish Delight. I literally busted out laughing.
Dude...Turkish Delight is the sh*t. It's so (GOO)ey and powdery and delicious. It makes me **** in my pants when I bite into its fruity goodness.

Turkish Delight had better become the next Wispa moveset. I'm not kidding.
 

Darkslash

Smash Master
Joined
Feb 1, 2008
Messages
4,076
Location
Strangereal Equestria
Bear Hugger: It seems like popular opinion to like Bad Bull over Bear Hugger, and I'm going to have to agree with them on some extent. But that's mostly going to be Canadian Bias.

Any ways onto the set: I like the fact that you managed to avoid Prop moves (squirrel, bear, syrup, flag, tree. ect) until the Final smash (who plays with smash balls any ways?). There's more emphasis on grabbing than the last Bear Hugger set, which I think was lacking in that one.

I'm pretty sure some one is going to NEED A HUG after reading this set.
 

PK-ow!

Smash Lord
Joined
Mar 28, 2008
Messages
1,890
Location
Canada, ON
I have determined the functionality of Will & Freedan's Specials! Also, I have throws, and they are new and different.
Now all that remains is to figure out the kid's ftilt, write the wake-up and ledge game, do a once-over of the numbers, and IT WILL BE DONE!


*~*~*~
The Errant made me click the link to Project Zelda, I'll tell you that much. I'll read it later.


Now I'm going to review Raven.

Raven I really like, I was always a fan of her and her powers in Teen Titans. You've created the feel of them, though I think if you went at the moveset again (say, a theoretical update if she returned to a Smash game as a veteran), you might change some things. That is the feel I get from her. Which is good!

Now, I've never been able to get behind the "stage-manipulation" abilities we've seen for a while - you know, making walls - but for Raven I can't say it doesn't fit. This is probably just some nasty crotchetiness of mine. But the specials are fun.

How does Kirby use Soul Self?

And I thought side-B would completely replace her grab, but she has a tether that can grab from like the other side of Smashville! I'm watching out for other shield pressure because that's powerful stuff right there.


Dash attack is characteristic (how does it work on a platform?), neutral A is a good concept, and forward tilt is... interesting.
I don't like how downtilt interacts with Pokemon Trainer, though. The player does not have direct control over where PT is standing and, frankly, things were correctly designed that way. I don't think it's fair to be able to do that essentially at random, but still technically distract a player for using Pokemon.


Smashes are.... perfect. Indeed, I think if you made Neutral A an "interrupt" input like Fsmash, it might have ... well, fit the name better. By just saying this alternate Jab has more end lag, you're basically saying Raven has an extra attack in her movelist. Or a three-part Jab (where jab3 is the same as jab2).
When you say that some attacks phase, do they damage the thing they are phasing through? Like Shadow Moses Island's walls?


I like the aerials, but neutral aerial bugs me. Teen Titans established that Raven is pretty bad at attacking in multiple directions at once, or at shielding herself against a widespread barrage. She has to know what she is hitting or countering. Neutral aerials seems to go against that.
(and there's a typo at the end of forward aerial.)

I'm concerned down aerial might end up being used a lot at the height of Raven's meta... which would look a little ridiculous. :p


Finally, throws are epic.
And, at the end of the moveset, I think: I'm worried you've underestimated "grab escape difficulty". There are brutal gimps in this moveset. Brutal gimps. If Raven doesn't even have to attack the opponent past 40%, I think you'd agree that's a failed development.

Great design but can you assure me that the numbers really aren't broken?

*~*~*~
And that's my view of the moveset. Nothing to say about taunts and stuff but that a 4 second taunt is literal suicide. Young Link's LonLon Milk was only three, max! D:
If I like those, in the end, I'll vote for her. :)

. . .
. . .

*waves half_silver over*
*looks around and hunches over*
*gives him the thumbs up + awsum face*


Organizational tips... I think you could have just said once, in the intro, that "Raven's eyes glow white and her hands glow black" for attacks which use her transmutations.
Also, and this is something I got out of this, it seemed a recurring 'mechanic' was Raven's ability to extend attacks to alternate forms, and also her "strikers" (projectile attacks with hurtboxes) and the way her strikers interact. Maybe, I don't know, something about this could have gone in introductory statements.
If you introduce them, you can invent a format to parametrize them, save space, and make it easier to grasp as a whole.
 

Hobs

Smash Journeyman
Joined
Dec 22, 2008
Messages
390
Location
Mississauga, Canada (Hobs crk)
Vs. King Dedede: 40/60, Dedede’s favor
While Dedede’s chain grab can’t be used on everybody, it’s far more effective on those it can be used on then Bear Hugger’s, and the big lard isn’t an exception. Bear Hugger thankfully isn’t infinited like DK or even Bowser, being more in league with Wario (Without the grab release), so this is still –possible-. Bear Hugger can avoid being grabbed by using super armor in his down B, but more important is that Bear Hugger’s dtilt and his sticky punching moves out priotize regular grabs. Dedede’s chain grab is still superior, but Bear Hugger can play a very nice defensive game against Dedede and do some damage right back to him with his own chain grab. Bear Hugger’s KO potential also far outweighs Dedede’s, but Dedede doesn’t need to send Bear Hugger out far before he can bair him to all hell. This surprisingly isn’t that bad of a match up, but it’s still clearly in Dedede’s favor.

OK, REALLY really small thing (hope I'm even right.) Don't grabs go through superarmour? Or maybe I'm imagining it.

Yeah. It was nothing. -_-

Edit: And I swear it was a complete coincidence that I (thought I) saw a mistake in a MW matchups section again.
 

Hyper_Ridley

Smash Champion
Joined
Dec 21, 2007
Messages
2,299
Location
Hippo Island
Bear Hugger is one my fave Punchout Characters, so it made me all warm and fuzzzy to see this epic moveset for him.

Just like with Bald Bull, I was surprised at how much potential you were able to squeeze out of the character. I appreciated the greater emphasis on punching than Bald Bull had, but the non-punching moves he used were still very welcome and nicley rounded out the set. While there were some generic attacks in there, they were excused for fitting in with the guy's playstyle and the spit-grab mechanic kept things from getting too bland. If anything, I kinda wish the squirell was implemented somehow, since he uses it in the actual game.

His playstyle was cool, with all the ways of landing his grab throughout his entire moveset. While I'm not too sure how a slower ganondorf with absolute fail recovery would ever be viable, you actually made a decent case with all the super-armor and grab-type moves he could abuse to heck and back. Like Bald Bull, you were able to really capture the essence of the character, and considering you haven't actually played the game yet that's quite the feat.
And you laughed at me for making Death in MYM4!

Overall, while Bald Bull was still an epic set in its own right, I'd have to say that this was better overall. :3

And now in the spirit of the moveset... *hugs Warlord*
 

n88

Smash Lord
Joined
Oct 10, 2008
Messages
1,547
HK-47: Interesting, interesting. This is a big improvement from Kee-Mo-Shee. While a couple of moves fall to what I like to call "Projectile Syndrome"- thinking a generic projectile is unique when it really is just a generic projectile, most notably in the fsmash- practically every move is unique, and this is rather well-balanced as well. However, there are two main ways I think you can improve. The first is organization. People don't want to admit it but organization is one of the most important aspects of a moveset. Right now, it's a bit... bland. I would suggest doing size-3, colored, bolded headers for individual moves, and size-5, colored, bolded headers. Or do more unique organization, any of Rool's sets are a good example of this. I would suggest pruning off the hitbox section as well, since it's rather... random. The other thing you can improve on is playstyle. The fact that there's a playstyle at all is impressive, and the section is well-written but too concise (same goes for the codec), but it's a little bland right now. There's a nice guide to playstyles in the OP, I'd reccomend it. Anyway, this is a very impressive set for a newcomer, and I'm excited to see what else you'll be able to make. Good job!
Actually, I didn't think the F-Smash was unique. He just needed a KO move, and this was taken straight from his own game. I plan on replacing it when i can think of something more suitable/unique. Yeah, the hitbox sectin was kind of pointless for this set. It was actually somewhat useful fo rthe last ones, due to generally less apparent hitboxes, but yeah, I see what you mean. Codec is short because it should be. Clefable has the perfect codec, and anything else is a cheap imitation. Plus, I've never played MGS, so I don't really know what the **** I'm doing with those. Thanks for the input.


HK-47 Was pretty good. The decision to include T3-M4 as an assistant was a fantastic design decision, first off. However, I feel the implementation left something to be desired; giving him 125% Stamina and only one life punishes HK-47 in long matches and gives him more power in shorter ones. I would highly recommend instead giving T3 say, 50 Stamina and have him respawn in the match when HK is KO'd.

On other issues, you have some good moves and ideas here, I like T3's oil slick, but several moves feel somewhat out of character; the Nair is utterly boring and the Shield Generator smash feels rather odd for the sadistic, sarcastic bloodthirsty protocol droid we all know and love. In fact, a lot of the aerials feel sort of out of place; the homing device seems weird for an aerial, and the shield disruptor is pretty boring too, and Carbonite Projector could have been better used on land, where it wouldn't be a gimping move and have more interesting option.

I like the use of the mines, oil slick, and grenade, and T3-M4 feels like a trap assistant, and I would have liked to see this element played up. The grapple Up-Special was brilliant, by the way. Overall, this is a solid set, but it doesn't feel as much as I wish it did like HK-47; with a few aesthetic changes, it could also be a Carth Onasi set. Improve the playstyle, give HK some more interesting, creative moves (more focus on his assassination protocols would have been lovely). Also, for the most quotable character in the history of video games, there is a great lacking of quotes.
That isn't exactly how T3 works. Maybe I should celan up that section a little to better explain it. I had a little trouble w/aerials because I have a hard time imagining HK jumping around in the air while fighting. I'm glad you liked T3. He got paired with HK because I'm doing a few KotOR movesets, and I couldn't make him fight on his own without making him worse than Pichu (because being good at fighting would be OoC for T3). The problem with HK-47 isn't finding good quotes. It's picking from the fantastic selection. Thanks for the input.
 

BKupa666

Barnacled Boss
Moderator
Joined
Aug 12, 2008
Messages
7,788
Location
Toxic Tower
Bleak


***

***Background***

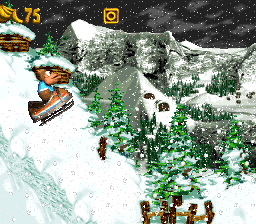
Bleak is a not-so-jolly snowman, if it wasn't obvious enough from his sinister appearance. As such, he is the fifth boss of Donkey Kong Country 3, appearing at the top of K3, the snowy mountain world. Bleak attacks Dixie and Kiddy Kong by throwing snowballs and blasting snow boulders from his hat; the Kongs must retaliate by tossing back snowballs of their own, just like in a sideshow game. After damaging the flashing red amulet on Bleak's scarf with six shots, the Kongs emerged victorious.

Bleak later reappeared in Donkey Kong Land 3, as well as the DKC3 remake for the GBA. It is unknown if Bleak is a member of the Kremling Krew, or is merely a grouchy snowman who attacks anyone disturbing his peace and quiet in the mountains. No matter what, though, he certainly loves a good laugh. In fact, Bleak even shows off his good humor by laughing himself to an explosive death after being defeated! What a crazy guy...

Here are videos of all three of his boss battles:

***Statistics***

Power: 7.5/10
Being a rather large snowman, Bleak has quite a collection of stronger moves. He is definitely not your typical heavyweight, though. How boring would that be?

Walking Speed: 1/10
Pretty darn pathetic...Bleak's a snowman, what do you expect?!

Dashing Speed: 2/10
If you didn't get it by now, Bleak has problems keeping up with the rest of the cast. These speeds are on the same scale, by the way.

Weight: 7.5/10
Bleak is made of snow, rather than meat and bones. He's surprisingly light for a character of his size.

Range: 8/10
Playing as Bleak is all about hitting from a distance, and spacing yourself to get yourself said range.

Projectile Distance: 8/10
Bleak's two main projectiles are the primary tools you'll be using from a distance to build damage and KO.

Attack Speed: 4/10
Bleak has some quicker attacks to space himself; still, he's a sluggish character overall.

Priority: 6/10
For a heavyweight, this stat is surprisingly low. A lot of Bleak's attacks lack brute force behind them, so his priority is only above average.

Size: 9.5/10
Bleak's top hat gives him a slightly taller height than Ganondorf, while his snowman's belly makes him slightly wider. He's a huge target for projectiles and combos.

First Jump: 2/10
Well, how do you expect him to have good jumps?!

Second Jump: 3.5/10
Bleak is much harder to use in the air than when on the stage...

Aerial DI: 8.5/10
But that doesn't mean he lacks mobility up there! He's just not an aerial-based character.

Fall Speed: 7.5/10
The standard heavyweight fall speed is not deviated from by Bleak.

Recovery: 5.5/10
Bleak's recovery needs to be angled just right, or he'll render himself absurdly easy to gimp. It can still cover good distances, it just needs care to set up right.

Traction: 5/10
Although Bleak's iciness might make you think he slides like crazy, he actually has average control on the stage. Also, like the Ice Climbers, Bleak doesn't slide at all on icy terrain, due to being accustomed to keeping his footing.

Crouch: 2/10
This snowman's massive size renders his crouch near useless.

Comboability: 3/10
Don't try comboing with Bleak, it just doesn't work well. Long-ranged projectile attacks and spacing moves are where he is at.

Wall Jump: No
Wall Cling: No
Crawl: No
Glide: No
Hover: No
Tether: Yes

***Moveset***

***

***Specials***

Neutral Special - Snowball Hurl
Bleak's trademark move as a boss is one of his staple moves as a character. He merely takes a snowball and hurls it forward. The snowball is about the size of a Pokeball, and travels in the path of a normal thrown item. At maximum range, the snowball smashes on the ground; if it hits a foe, it splatters in their face instead. Bleak has little startup lag throwing a snowball, but below average lag ending.

The snowball has rather moderate priority, due to its momentum, although it can still be broken through with a well-timed tilt. Foes hit by a snowball take 5-6% and below average knockback, killing them at 200%. In addition, there is a 10% chance that they will get frozen in a block of ice. If this occurs, however, it's nothing too long; foes are only frozen a bit longer than they are with Blizzard (which is next to nothing).

A fairly generic projectile? Well, it's the number one damage-building move in Bleak's arsenal. Its lag means it's awkward to abuse from close range; however, it can build damage on foes with insane ease, when properly spaced out. Seriously, you'll be spacing a lot with Bleak just to land snowballs on your opponent. It can't really KO, but you can angle the snowball slightly up and down before Bleak throws it; this, among other things, makes it quite a versatile projectile. Practice landing snowballs on foes from a variety of ranges; it'll play a big part in your game, and without it, you're in trouble.

Side Special - Top Hat Turret
Bleak puts both hands to his top hat, as the flap on top opens up. After a split second startup period, a Soccer Ball-sized snow boulder is fired from the hat, like a cannonball. His shots travel in a slight arc, at a moderate pace. Although the startup period may sound laggy, Bleak has little trouble using this move from a range to build damage on foes. In addition, Bleak has the ability to aim his shots during this time. Normally, they're fired forward diagonally half the distance of Final Destination, smashing on the ground. When aimed, however, snow boulders can be launched anywhere from straight up to diagonally straight down.

Foes who touch them take 10-11% and above average knockback, KOing them at 120%. Two snow boulders from this move can be onstage at a time. There is almost no ending lag, and if Bleak is already aiming in one direction, he can keep blasting that way. Because of this, two snow boulders can usually be launched each second or so. Pretty strong for a projectile, eh? This is the number one KO move you'll be using with Bleak, hands down. However, it's not without its downfalls.

Thinking you can just enter the fray, blasting boulders from your hat and KOing foes left and right? You thought wrong! Bleak will find it near impossible to even use this move at close to moderate range, due to the startup lag needed to aim it. You'll need to build your damage while keeping your distance, then fire away for the KO. This can take some skillful aiming to pull off against good players, but fortunately, you can also abuse your Neutral Special from back there. Your lesser snowball serves to build the damage and keep your foe on their toes, before your boulder blast is launched. Like said move, practice aiming and connecting with this move, as it will play a big part in your battles.

Down Special - Lemguin Lunge
Bleak points to the ground in front of him, causing a small snowy hole to appear there, with slight startup and ending lag. The hole covers half a Stage Builder block, and has 15 HP. Bleak can only have one hole out at a time; if he positions a hole poorly, he'll have to destroy it before it can be relocated to a more convinent location. Anyways, if Bleak stands within two Stage Builder on either side of the hole and presses Down B, a Lemguin hops out and begins sliding forward on its belly. These pesky penguins were a hindrance in the level before Bleak's boss fight, which shared this move's name, hence why it is alliterated.


Lemguins slide in the opposite direction from Bleak at Diddy's dashing speed, having a light 10 HP. However, their beaks have surprisingly decent priority; touch it carelessly and you'll take 8-9%, accompanied by below average horizontal knockback that KOs at 160%. Each penguin is somewhat long, but positioned close to the ground. Bleak can have one penguin out at a time; this may sound bad, but never fear. If a penguin hits a foe, it is KOed automatically; send out another immediately for a possible second hit. Lemguins will slide until they collide with something, or they simply fall off the stage. Five Lemguins can be summoned from each hole; after that, you'll have to destroy the old hole and make a new one, if you want more Lemguins.

So how do Bleak's penguin underlings help him besides labelling him as yet another summons-character? They do below average horizontal knockback; the word 'horizontal' is what matters here. Foes are not just popped up, so they can come back and retaliate before Bleak can send out another Lemguin. Oh no, they are actually spaced from him. Lemguins are a spacing tool for Bleak, and a pretty helpful one at that. They have no AI to speak of, so they can't be used otherwise. Send out a Lemguin, follow up with a second, then send out a snowball or snow boulder. They won't prevent foes from coming after Bleak infinitely, but if Bleak times when he summons a Lemguin, their sharp beaks can really be a thorn in your side.

Up Special - Tearaway Toboggan
Bleak quickly sits down in a Toboggan, which appeared in the level this move is named after (it's alliterated for a reason!). If you merely tap the button, Bleak will do nothing and fall to his doom. What? Well, one input allows you to begin aiming your Toboggan in any direction from the '12' to '6' o' clock positions. Bleak falls while doing so; it can be hard to take your time aiming, but it is important to do so.


Upon a second input, the Toboggan is magically launched in the direction you chose, the distance of three or so Stage Builder blocks, with slight momentum to carry you a tiny bit more as you fall. The Toboggan travels at the speed of Fire Fox, with a hitbox along the sharp treads. Unlike the rest of the sled, these have high priority. Getting slashed by the treads deals 11-12% and above average knockback, KOing foes at 105%. Foes should stay above these as they try disrupting this move. Speaking of which, one hit to anywhere else on the sled knocks Bleak out of it. If Bleak falls onto the stage, he suffers landing lag comparable to Dedede's Up Special. If he is knocked off offstage, though, he's screwed; Bleak falls helplessly when separated from his vehicle.

This is where aiming comes in. After launching, it takes around a split second before the Toboggan begins falling. If you shoot too high, or at a range where Bleak is open, your foes have the easiest opening to knock away Bleak. Seriously, you'll be yelling for the sled to descend as your foes easily meander over and deliver that fatal blow. Fortunately, the sled sweetspots the edge, so Bleak can grab it after launching. Bleak can only use this move once at a time in midair. It serves as a decent recovery for the snowman, but only if aimed correctly. Because Bleak's default direction is diagonally upwards, noobs will complain that Bleak's recovery sucks. It far from blows, but it takes practice to use well.

Oh yeah, and it can be used onstage for a different use. If triggered from the ground, Bleak merely slides forward at Mario's dashing speed. He can't do anything except keep on sliding, or he'll fall out and suffer below average ending lag. Press B to bail out early laglessly. Foes hit take damage from the treads, which makes it somewhat useful for approaches, but only until foes learn to hit you out. Yeah, the one-hit rule still applies here. There you go, Junahu; now we can have a non-continuous dash attack! Oh joy!

***Basic Attacks***

Basic Combo - Merry and Maniacal
Bleak extends his hands slightly in front of him, them twitching even more violently, as the snowman performs his crazy laughter. This attack is your basic slashing attack; Bleak's just showing off his more comical side here. His hands have the priority of Bowser's basic combo, having slightly less range. Bleak has low lag on either end of this move. Touching Bleak's hands deals 4-5% and a small set knockback. You'll never KO with this move as it is now. Bleak can hold this move out; if he overlaps with a foe while slashing, he'll do about two hits per second on them. You'll have trouble doing this unless you pin your foe to a wall, but this is still a nice close-range option.

However, Bleak gets crazier with his laughter at higher damage levels. At over 100%, this move gets slightly better priority. It now deals 7-8%, with added average knockback. This will KO foes at 145% now. Its close range makes it less than ideal to attempt over a projectile KO, but you now have a helpful GTFO move in a pinch like Bleak may just be in with his high damage. Bleak seems to get more erratic with more damage, just like in his boss fight. It doesn't affect his overall style though; there you go, damage-mechanic haters (no 'down, but not out' power-boosts here).

Dash Attack - Belly Whopper
Bleak lunges forward on his belly, trying to slide forward stupidly. Hmm...where have I seen a snowman do that before? He has moderate priority, but is quite punishable; Bleak has low startup lag, but a moderate amount getting back up. Collide with Bleak here and you'll suffer 11-12% and moderate knockback, KOing foes at 150%. Bleak covers about a Stage Builder block's distance here, but he has ways of going even further. On downwards hills, Bleak picks up momentum, sliding down the hill at Meta Knight's dashing speed.

The priority, damage, and knockback you take now are slightly buffed, but Bleak suffers even more ending lag when he skids to a stop. Never fear, though; pressing A again cancels the slide automatically, with half the ending lag. Playing on good ol' Final Destination? Each ice patch Bleak makes with his D-Tilt puts him at this speed for two Stage Builder blocks' distance before he skids to a stop. Bleak stops automatically if he collides with a wall, an incline, or the edge of the stage. In some situations, this move is merely for lucky KOs; with a bit of set-up, though, it can become a handy approaching tool.

As an easter egg, on icy terrain, Bleak can slide forward like this infinitely. Be sure to use A when you cancel it, or you'll be skidding like a madman!

***Tilts***

Forward Tilt - Wind Chill
Bleak bends over and inhales for a split second, before exhaling a blast of freezing wind. He can hold out the gust as long as he wants; however, it's not without a cost. The wind's initial range is a Battlefield platform in front of him, but decreases to half that over a period of three seconds. After this, Bleak will have to wait three more seconds before his wind has maximum range again. This move has below average ending lag and below average priority.

Foes who are caught in the wind are blown backwards in the gust, taking 2-3% ice damage per half second. This move never KOs foes, but is quite helpful for spacing. Other than Lemguins, this will probably be your best tool for distancing yourself from attackers. In addition, foes will occasionally be lightly frozen in an iceblock. The lag makes it hard to spam, but your wind can provide an interesting wall of defense in front of Bleak.

Down Tilt - On Thin Ice
From Bleak's crouch, holding his hat in front of him, the top of the hat opens, causing an icy wind to create an ice patch on the floor. This patch covers half a Stage Builder block, and lasts for ten seconds before melting away. Bleak has moderate startup lag making the patch, but almost none ending. Foes who step on the ice trip on it, taking 5% as they collapse. The close range makes this seem annoying to land, but Bleak can have up to three patches out at once. A strategy Bleak may want to use is creating patches over drop-through platforms to stop foes from going through them for a time. Also, they help with your Dash Attack on flat stages. Use the patches for these, if not for a slick little damage-builder (no pun intended).

Up Tilt - Frozen Stalagmite
An icicle emerges a tiny bit from the top of Bleak's hat with little startup lag. After a split second, it is shot out of Bleak's hat, the height of Snake's uncharged U-Smash, before falling back in. The icicle has average priority, with moderate startup and ending lag. Foes who touch it take 5-6% and below average vertical knockback, KOing them at 155%. Foes who hit the icicle just as it is fired take slightly more knockback. A pretty simple vertical launching move. If Bleak goes without using this move for five seconds, he fires two icicles back-to-back. Go ten seconds without using this move to rapid fire three icicles. Extra icicles have the same properties as the normal ones, so this move can build up to 18%. If you have the patience to wait that long, of course.

***Smashes***

Forward Smash - Cold Shelter
A vital move to Bleak's long-ranged style, albeit not a damaging one. During charging, Bleak begins melding a wall of snow in front of him. The wall comes into being after this; the charge time raises the HP and size of the barrier. It can range from the height of Mario to that of Ganondorf, and from 15 - 30 HP. Bleak has to duck to stand behind a small shelter, but a larger one is a great defense. All shelters cover a Stage Builder block's distance. It's not too hard to break down a snow shelter at close range, but non-energy projectiles cause no harm to it. Bleak has below average startup lag, and a moderate amount ending. He can have one shelter out at a time; building one with a shelter already out causes the old one to melt as the new one is constructed. Bleak can knock down his own fort in times of need.

Bleak not only has a shield from projectiles now (which he is highly vulnerable to otherwise); he can throw snowballs from back there with ease. By pressing the input for Neutral or Side Special behind a fort, Bleak will laglessly lean over the wall before using the projectiles (although he still has his lag from those). This makes it much easier to use Bleak's two main moves, like a real snowball fight, and can be an extra helpful defense against characters like Snake or Diddy, who can abuse projectiles. Never neglect this move; used properly, Bleak can avoid a lot of blows on his huge figure.

Down Smash - Snow Roll
While charging, Bleak begins melding a boulder of snow in front of him. Upon release, the ball appears in front of Bleak, with moderate lag on either end. Charge time increases the size and HP of the ball, like your F-Smash. The ball can range from the size of Kirby to that of Bowser, while the HP ranges from 10 - 20 HP. Unlike your cold shelter, projectiles can damage this; shielding Bleak should never be your focus here.

The snow boulder itself doesn't damage foes, but Bleak can roll the boulder around to pick up items or foes in its path. Foes caught take 4-5% per second, but can button-mash out like from a grab. Bleak rolls the ball at Ganondorf's dashing speed; if he wants to turn around, he'll have to stop and hop to the other side of the boulder. Press A if you've rolled up an item to pull it out. If multiple items are in there, Bleak grabs them in order of most recent to oldest.

This provides a nice defense against items like banana peels and the like, and can also build a bit of damage in tight spots. Roll foes away, then run back and set up your snow fort. Bleak alone can use the snowball as an additional platform to stand on. Only one boulder can be onstage at a time. Overall, this Smash is slightly unorthodox, but can still be of assistance to Bleak in numerous situations.

Up Smash - Hailstorm
During his charge period, Bleak holds both hands to his hat, as if struggling to hold something in. Upon release, Bleak releases his hold, causing his hat to open; a powerful winter wind swirls out, performing many multiple hits on foes. The priority of the hits are rather low overall, but foes should be careful hitting Bleak out of it; the wind has a slight vacuum effect to suck foes into the vortex. There is below average lag starting, but a moderate amount ending, as the wind gets pulled back in.

The storm's range extends about Mario's height above Bleak, expanding slightly as it goes up. Bleak's vortex has the potential to deal anywhere from 1-23%, if a foe is caught in all the light hits. The vertical knockback done on the final hit ranges from below average to average, KOing foes at 175% to 145%. Foes are slightly pulled towards the center of the storm once they're in, but they can DI out without too much trouble. Bleak has to be careful not to get punished by foes with low damage, but he can still KO at close range and dish out the pain with his hailstorm.

***Aerials***

Neutral Air - Falling Snowflakes
With low startup lag, an aura of snowflakes forms around Bleak; the snowflakes appear in a similar fashion to Jigglypuff's Sing, but this is actually a useful move. The flakes have surprising range (although still slightly below average). The priority of this chilly zone is average. Bleak has below average ending lag; compared to Bleak's other aerials, this is pretty decent.

The mutliple hits dealt by the snowflakes can build anywhere from 1-12% within the split second they're out. The last hit deals moderate knockback, KOing foes at 150%. A nice damage-building aerial, in the vein of moves like Zelda's N-Air. The move has moderate landing lag, but none if used over a D-Tilt ice patch; if used onto one of those, it resets the patch's lifespan. Sweet!

Forward Air - Nose Missile
With below average lag on both ends, Bleak fires his carrot nose out in front of him, a new one growing in its place. The carrot flies out for half of Battlefield's distance before vanishing. It flies in a straight line at the speed of Snake's Nikita. Unlike Snake, Bleak can move as soon as his nose is launched. Only one carrot can be out at a time. They have below average priority, and are about the size of a horizontal Pikmin. Foes who hit it take 7-8% and moderate knockback, KOing foes at 145%. Bleak suffers from quite a lot of landing lag, so you'll have trouble short-hopping this. Learn to line up the carrot shot with a foe, however, and you'll have a handy spacing aerial at your disposal.

Back Air - Ice Blades
Bleak takes his top hat off, holding it behind him; as he does so, a ring of icicle blades extend slightly from the hat's brim, spinning around to damage foes. This move has below average startup lag; Bleak holds the hat back for a split second before returning it to his head, with moderate ending lag. The blades hit at a barely below average range and have above average priority. Foes who hit the blades take three hits; the first two trap foes and deal 2-3%. These can be DIed out of by opponents. The third and final blow deals 4% and slightly above average backwards knockback, KOing foes at 135%. If you can catch a foe near the blast line, you may just KO them off the side. Otherwise, it's good for building some damage on all...just never shorthop the move; there's a whole lot of landing lag to put up with.

Up Air - Corn-Cob Pipe
Bleak pulls out his personal pipe, putting it in his mouth; he rapidly puffs out three times, creating three clouds of frost from the pipe's top. He has below average lag on both ends, but moderate landing lag. The clouds are spaced a tiny bit apart, but they can still hit foes back to back unless they DI carefully. They float up to Captain Falcon's height at Ganondorf's walking speed, before vanishing. As is expected from non-material moves like this, the priority is rather low.

Each cloud deals 2-3% and a slight upwards push to foes. You'll never KO foes off the top with this...unless you're near the top blast line. In this case, clouds have a chance to carry foes right off the top for an early KO. You'll need to position yourself carefully to do this; unless you have the patience to do so, just stick to less punishable damage-building with your N-Air.

Down Air - Avalanche
A thin wave of snow appears beneath Bleak's feet, extending all the way to the ground with little lag; the crazy snowman slides all the way down, the snowy 'path' disappearing as he descends it. The snow can travel down infinitely, in a character-width column below Bleak, but he cannot move until the avalanche reaches the ground (it vanishes upon doing so, dropping him with a little landing lag). Don't just use it from high up and expect the insane range to help you. The descending snow has infinite priority; it pulls in foes who try attacking it. The avalanche's thin path can be avoided easily; stay away!

Foes who touch the avalanche, or those caught in it, are pulled down with Bleak. They take 2-3% per split second in there, but can DI out with moderate effort. Foes still in the avalanche as it collides with the ground take 12% and high knockback, KOing at 110%. This is somewhat unrealiable as a killing move, due to how punishable Bleak can be. Still, foes should be careful when under Bleak, as his little startup lag means he can start an avalanche to ambush them.

Finally, Bleak can try catching a foe offstage to pull them all the way down into the abyss. Unless the foe has high damage, it's quite easy to escape before Bleak reaches the bottom. Bleak can't cancel his avalanche; if a foe escapes, he'll self-destruct. Only Bleakicide if you're near the bottom blast line anyways, or if you're ahead and willing to take a risk. Fortunately, with a victim in tow, Bleak never dies first, due to him being on top.

***Grab and Throws***

Grab - Scarf Whip
Bleak takes off his purple scarf and whips it in front of him, with below average startup lag, but a moderate amount ending. The scarf has slightly less range than Rope Snake, making it somewhat hard to grab as Bleak. However, Bleak's good throws make it incentive enough to attempt to snare a foe. Bleak pulls in foes he grabs, holding them by the throat; otherwise, he merely puts his scarf back on.

Grab Attack - Scarf Choke
Bleak simply tightens the scarf around the foe's throat. Dang, that must itch like hell! This deals 2-3% per foes, and can be done with moderate speed.

Forward Throw - Snowball Barrage
Bleak releases his foe, only to peg them with three snowballs, thrown all at once. The first two are guaranteed to hit your victim, dealing 4% each. Foes with high damage can DI away from or shield the third snowball, which deals 5% and slight horizontal knockback. This KOs foes at 180%; the main purpose of this throw is to space foes away from Bleak. After your three snowballs from this throw, Bleak can easily follow up with a Neutral Special. Just don't abuse this throw, or your victim will learn to dodge the third hit and punish Bleak.

Back Throw - Wintry Imprisonment
A snow boulder from Bleak's D-Smash appears behind the snowman; he sticks the foe into it. He can now roll the foe around like with his normal snow boulders. The victim takes 4-5% per second they're in there, just like always. Bleak can still pick up items, like always. However, this boulder breaks as soon as the foe escapes by button-mashing, not having the HP of the normal boulders. Because of this, you can have a normal boulder out at the same time. Roll your foe away, then use a Side Special for some knockback.

Down Throw - Breaking the Ice
Bleak drops the foe on the ground in front of him, an icy trail appearing under the foe to slide them forward and away. The trail of ice disappears after the foe passes over it, but new ice appears under them as they go. The foe will slide infinitely, or until they drop off an edge or collide with a wall. They take 3-4% per second as well. Broken? Well, to stop their sliding, the foe must use a get-up attack. This is a great spacing tool for Bleak, but he cannot move until the foe is two Stage Builder blocks away from him (this is the minimum distance a foe can slide). Beware using this in FFAs.

Up Throw - Turret Stuffer
Bleak lifts the victim up and stuffs them into his hat (which opens to accomodate the hapless foe). The foe can still escape from this like a normal grab, them taking 1% per split second they're there. The foe can punish Bleak after they escape, and the damage isn't exceptional...so why use this throw? Well, if you use your Side Special while the foe is in there, you fire them out instead of a snow boulder. The foe can't escape while you're aiming, so choose your direction and fire away! The foe is launched in the trajectory you chose; you can't KO them unless you fire them off the blast zone. However, they still take 10-11% and are spaced from Bleak. The most damaging of Bleak's throws, you'll probably be using this throw a whole lot. Just remember, you have to use Side Special if you want any use from it.

***Situationals***

Downed Attack - Clean Sweep
With little startup lag, Bleak takes out his snowman's broom and rapidly sweeps around him. The broomstick has below average priority, hitting at a fairly close range (although the broom's length is somewhat surprising). Bleak has little ending lag; hitting the broomstick deals 5-6% and a low set knockback to foes. You can't KO foes with this; spacing is your sole use for this move.

However, if you hold the move input down, Bleak sweeps for a split second longer. He now has a tiny bit more ending lag, but creates two dust clouds on either side of him. These have average priority, each one being Wario-sized. They stay out for five seconds if not dispersed early. Touching a cloud bursts it early, dealing 3-4% and a bit of stun to the character. Not too much of a damaging or spacing move, but it can defend Bleak against foes who try punishing him while he's getting up. Give me some room, will you?! Are you gay?!

Flipped Attack - Snow Angel Devil
While lying on his back, Bleak performs two snow-angel motions, before rising to his feet. He has low startup lag, but a bit more ending lag than most get-up attacks. His arms and legs (the hitboxes) have mediocre priority, and hit at a somewhat close range. Touch Bleak while he's making his angel, and you'll take 4-5% and a tiny set knockback that can't KO. Touch him at a point-blank range, however, and you'll get buried briefly in his formation. Bleak can be punished with relative ease, unless he buries his foe and flees; roll instead of using this unless you're sure it will connect.

Tripped Attack - Taste Frost!
Bleak performs an angry spinning slash around him as he gets up, a bit like Bowser. He has the same amount of lag as the Koopa King here as well, although his priority is slightly worse. Bleak's range is slightly better, though. Foes who touch Bleak's slash get grabbed by the snowman; Bleak merely stuffs a handful of snow into the victim's mouth and lets them go...but holy hell, it's yellow snow! And they just ate it! The victim takes 3% and low initial knockback that can KO at about 250%. For the next five seconds, they take 1-2% per second, as well. Not too much deviation from the standard get-up attack (besides the poison damage), but still a hilarious one to watch.

Ledge Attack - Losing Your Head
With little startup lag, Bleak takes off his head (demented snowmen can do this) and tosses it at nearby foes, his head chuckling as it goes. His head is slightly larger than a Soccer Ball, due to his hat, and has slightly below average priority. He hurls it about a Stage Builder block in front of him. Foes who hit Bleak's head take 7% and a low set knockback that can't KO (no ledge attacks can). Bleak has below average ending lag, as his head bounces back from the foe, ground, or foe's attack, and repositions itself on Bleak's body. A funny-looking and effective ledge-spacing attack. If Bleak's body is somehow hit away before his head returns, it vanishes and appears back where it's supposed to be. Come now, no Horseman repeats!

Ledge Attack (Over 100%) - Clumsy Stumble
Bleak flails his legs wildly as he attempts to get onto the ledge; after the startup lag typical to these situationals, Bleak collapses on his belly. His fall looks like an accidental Dedede Dash Attack; Bleak has slightly less ending lag, though. His priority is average, while his range is slightly below average. Foes who get crushed by the falling snowman take 10-11% and average knockback. This can actually KO foes, at around 180%, but is quite easy to shield-grab or punish. Be choosy about when you use this, or you'll be sorry.

***Final Smash***

Final Smash - Winter Wonderland
Bleak's already creepy eyes are glowing with the power of a Smash Ball! As the camera zooms in on Bleak, the crazy snowman laughs evilly, his trademark laughter echoing with the Final Smash effect. He jumps off the screen's top, coming down into a new area; it's part of his wintery mountain home, K3. The whole stage stretches the length of Bridge of Eldin; towards center stage, there are two log cabins. Each is the length of half of Battlefield, serving as a drop-through platform; the two cabins are spaced a Battlefield platform apart. The camera zooms out to show Bleak's opponents, on top of the cabins.

Throughout the move's duration (twelve seconds), a barrage of Lemguins slide across the flat ground at Sonic's dashing speed, being in their natural habitat. There is barely a character distance in between the birds, but their speed makes it deadly to be on the main stretch of the stage. Due to the much faster speed of the Lemguins, getting hit deals 24-25% and high diagonal knockback. This KOs foes at various low damage levels, depending on how close the foe was to the blast line. Next to said line, it can be a one-hit KO. Because of the danger below, foes will need to stay on the cabins to avoid the birds.

Bleak's not about to just sit back and let them do this, though. He has four moveset buffs to make this hell for his opponents. First of all, he can hurl snowballs as fast as Olimar can pluck Pikmin; these have no nerfs to damage and knockback, so stay on your toes if you want any chance of dodging the barrage! Second, Bleak's top hat can be fired at half the normal sluggish speed, dealing double the damage and knockback. This makes it harder to aim, but it can still be abused; Bleak is twice as hard to KO here. Next, with F-Tilt, Bleak causes a winter wind to blow across the whole stage. This deals 2-3% per second to foes, in addition to blowing them around harshly and occasionally freezing them.

Finally, Bleak can freeze the floor of the cabin he's on, reducing the foe's traction on it greatly. They take 5% from tripping on it, and will occasionally slide them into the flurry of Lemguins. Bleak can use his other moves as usual as well; in a FFA, Bleak's foes can damage each other, if they want to pick off stragglers from this wintery chaos. The combatants can KO Bleak with a great deal of effort, but the snowman will most likely be making it hard enough to survive anyways; you'll almost never have a chance to do so. If he's KOed, the Final Smash ends early. Otherwise, Bleak performs his uncharacteristic high jump back to the normal stage after the Final Smash is over; the foes that he hasn't KOed all the way will be waiting for him. As long as Bleak plays wisely to keep his foes in peril, you'll probably walk away with a KO or two.

***Overall Playstyle - Snowball Fight***

Bleak is an interesting heavyweight; like Snake, several of his moves require range to work. However, while Snake excels at close range, what with all his broken disjointed tilts, Bleak absolutely must fight at a range to KO and win. All his other moves are designed for either spacing, or building damage on foes so that said spacing is easier. Even with these, Bleak's range is what allows him the upper hand over opponents.

At the start of a match, Bleak should begin pegging his opponent with snowballs until they close the distance; he should aim to build as much damage as possible on his foe, as early as possible. When the foe has entered close range, use your spacing moves to back them up again. Some notable spacers include Lemguins, F-Tilt, and throws. Once your foe is back, keep on hurling those snowballs. Somewhere in there, it can be quite helpful to construct a cold shelter, to provide maximum defense for Bleak. When the foe approaches again, repeat the process. When your opponent has sufficient damage for a KO, take aim with your Side Special and blast them away. There's nothing really more to Bleak than this, but it can be easier said than done.

Bleak has several other interesting moves to put to use in Brawls. Among Bleak's arsenal of projectiles and damage-builders are a few traps, such as D-Tilt. These serve to damage foes, leaving them open for spacing in the process. While Bleak is far from a trap character, he can use this quite well; they meld into his style nicely. The other moves that stand out with Bleak are his aerials. Other than his Side Special, Bleak's aerials are your other prime KO moves. Most, if not all of these, are highly risky to land, but have great KO potential if you land them. Use them as situational substitutes to your Side Special, if you must. Oh yeah, and speaking of aerial moves, Bleak needs to stay onstage against competent foes, if he wants to survive. His toboggan recovery covers a decent range, but if foes can pressure Bleak into aiming poorly, they can screw his frosty arse over easily. Unless you need a KO, stay on the ground as this crazy snowman.

In the end, Bleak is similar to DK, in that he has quite a lot going for him, but he has several troublesome traits that keep him from being godly. These include, but aren't limited to, Bleak's huge size, awful speed, lag, and somewhat situational defense. Still, learn to space and snipe properly, and you can give your foes one hell of a snowball fight to put up with.

***Playing Against - Through the Frost and Freeze***

The key to defeating Bleak is a mix of offense and defense. Approach Bleak immediately, rolling or using a defensive move to avoid snowballs at all cost. Getting close to Bleak and staying close is the easiest way to bring him down, seeing as how his two vital projectiles are near useless at close range. Of course, Bleak will be attempting to space the whole time, so it's not as easy as it looks to stay close and apply that fatal pressure. This is where you can take a defensive hit and run approach. Dodge Bleak's spacing attacks, then retaliate.

If you can damage Bleak as he tries to space, you'll soon get the upper hand. Without his spacing, Bleak is slow and weak at close range, except for his aerials (which can be easily punished). In addition, his huge size makes him a prime target for combos. Just like in his boss battle, projectiles work great against Bleak. If you can aim and hit him in the center of the scarf, where his flashing red amulet is, your projectile will deal 1.5 times the normal damage and knockback to Bleak. Alternate between pressure and defensive attacking to bring down this abominable snowman.

***Match-Ups***

Vs. Meta Knight - 35/65: Meta Knight's Favor
It's no surprise that Meta Knight has the upper hand here, although Bleak can fare surprisingly well against him. Tornado can beat normal snowballs, but Side Special snow boulders go right through it. While Meta Knight's speed allows him to get in close to Bleak easily, his light weight makes him somewhat easy to space from again. Of course, Meta Knight can easily D-Smash throw any Lemguins or shelters in his way, before comboing Bleak up the arse. Not to mention Bleak's recovery can be gimped easily. If forced to fight Meta Knight at close range, Bleak will have to set up some quick traps to turn the match back into his favor...but he'll have trouble doing it quickly with a flurry of F-Airs in his face. The only thing he really has going here is that D-Air can outprioritze everything Meta Knight has, but it's slow speed makes it far from easy to use. Meta Knight can win this match-up fairly regularly, while Bleak absolutely must space to come out on top, even more so than usual.

Vs. Snake - 80/20: Bleak's Favor
Like most MYM characters, Bleak has trouble against Meta Knight, but is fairly dominant over most of the other top tiers. Snake's mines and grenades would be excellent for building damage on Bleak...but Lemguins shut them down with absurd ease. In addition, grenades, missiles, and even mortars used from a DACUS won't take down a shelter, as they all register as projectiles. Snake is pretty vulnerable to snowballs and snow boulders, so he'll be forced to approach. His oddly heavy weight makes him difficult to space, and his priority can be annoying to overcome at close range. Still, Snake's less than ideal speed means that you'll have little to no trouble keeping him at a range in the first place.

Vs. King Dedede - 0/100: Infinite's Favor
Is it not bad enough that Bleak can be both chaingrabbed and infinited? Dedede can easily use B-Air to break through shelters...but why? You can infinite Bleak against those, too! Once Dedede closes the distance, it's near impossible to get him off again, due to his hefty weight and grabbing prowess. Dedede can't touch Bleak from a range, but even with Bleak's projectiles and his own slow speed, the penguin king doesn't have a whole lot of trouble breaking through with his great dodges and high priority attacks. If you end up against Dedede as Bleak, your sensible strategies include entering a taunt fest before self-destructing, or merely riding your toboggan to your doom.

Before it even happens, don't even bother commenting negatively on this. Seriously, you complain about a big character having a special way around this, but still can't stomach it when it's realistic that they don't? Shame.

Vs. Ice Climbers - 55/45: Bleak's Favor
If it weren't for their chaingrabs, Bleak would have a near perfect match-up here. Bleak still has ways to combat the infinite effectively, making this battle tilt slightly into his frosty favor. Unlike Dedede, the Ice Climbers lack options to penetrate a shelter without being punished by a Lemguin. They're slightly faster than the penguin king, but have a much harder time approaching. The Ice Climbers' hammers just don't break through snowballs and boulders that well. Of course, if you ever let your guard up as Bleak and get grabbed (albeit with the shortest grab range in the game), you're boned. Bleak has ways to avoid this, though; snow boulders can separate the duo with ease, when aimed well. Once separated, Bleak can spam snowballs offstage to gimp Nana, then finish Popo with ease. Either character can win, but Bleak should do so more often...just don't get grabbed!

Oh yes; while it doesn't affect this match-up much, due to it only being implemented in two of the Ice Climbers' moves, Bleak takes half as much damage and knockback from ice moves. He has this elemental strength, but also an elemental weakness that comes into play in the next two match-ups.

Vs. Bowser - 40/60: Bowser's Favor
So Bowser has trouble approaching and is a huge target to projectiles. Bleak has to aim his projectiles carefully when facing Bowser, as his F-Air can beat snowballs easily, and occasionally even disperse snow boulders. Bowser's mediocre speed and less than ideal defense (other than the occasional Fortress) makes him easy to peg as he approaches you; when he gets there, though, you're in trouble. F-Smash can easily beat shelters in one hit; what's more is that Bleak will need to time a Lemguin counter-hit carefully. If he sends it out too early, the second hit of the F-Smash will beat it, while if it is summoned too late, the poor bird will get an F-Tilt to the face. Bowser's immense weight is also extremely difficult to space from. Perhaps the Koopa King's biggest asset here is Fire Breath; you ever played a match as Ganondorf and had your damage built up to around 30% in this inferno? Now times that by two; Bleak suffers double the damage and knockback of all fire attacks. Add this to his enormous size, and we've got a winner in this match-up. If a good Bleak can keep Bowser away though, the snowman's superior range can still win him this match.

Vs. Captain Falcon - 25/75: Captain Falcon's Favor
Alright, so what if there was a character with damage-building fiery moves, ala Bowser, but with actual speed? The good captain is the man for you. While Bleak can usually get in around two to three snowballs on most foes before they can get to him, Bleak will be lucky to even get one or two shots at Falcon, due to his amazing speed. Falcon has little trouble getting through shelters; just because his priority sucks arse doesn't mean his damage is too shabby. F-Smash and all your specials are great for damaging Bleak, although several you'll have to be careful about using. Unlike most characters, only a few of Bleak's spacing moves outprioritize Falcon; the rest he can combo Bleak through. Due to Bleak's size, it is fairly easy to U-Air him to the edge for a spike. Bleak can still cut through Falcon with Side Special and D-Air, but you'll have to look hard for an opening. Falcon definitely won't be easy to find one with because of his speed; a smart and versatile Bleak can pull off the occasional win here, but Bleak should never be used to counter Falcon.

Vs. Bald Bull - 30/70: Bald Bull's Favor
It looks like Bald Bull was born to fight Bleak; his Ottoman Fortress blocks Bleak's projectiles, while Turkey Dance forces Bleak to approach. While Bleak doesn't really need to move from one spot when tossing projectiles, this prevents him from fleeing to pepper Bald Bull with shots. Neither character is exceptional in the air, so your battles will be taking place on the ground; this is where Bald Bull pulls ahead even further. Being unable to space, Bleak is stuck building damage with moves that are supposed to be for spacing. Bald Bull has little to no trouble overcoming these, while building up his own rage and Bleak's damage in the meantime. Bleak can build damage on Bull's massive size easily, but he's at a loss when it comes to easy KO moves. Bull, on the other hand, can simply take away Bleak's greatest tool and make him suffer for it, which wins him this match in most cases.

Vs. Jolteon - 10/90: Jolteon's Favor
Hmm, let's see...fast character that can combo? Check. But, wait, what about his negative ions? Because Bleak needs distance to win, Jolteon can simply dash around, gaining his ions while dodging the snowman's projectiles with his speed. When he has his ions needed to attack, Jolteon can get in close to Bleak and combo him like crazy. Bleak can space back from Jolteon, but that's just what this Eeveelution needs to get his own power back up. Jolteon dominates this match-up because his power can be easily attained against Bleak's style, which he absolutely has to follow. If Bleak wants any chance of winning, you'd better build that damage up quick and KO his light weight before he combos you into next week.

Vs. Onishiba - 65/35: Bleak's Favor
So Onishiba is a huge target, who sucks at approaching and isn't too fast to boot. Bleak has an easy time beaning the demonic wolf with snowballs. Once Onishiba gets in range, take care not to have your projectiles and Lemguins taken with his F-Tilt. Although Bleak can't use his bread and butter for seven seconds, he can build some close-ranged damage on Onishiba's large frame during this time, then space once he stops bleeding. Onishiba will have to pressure the snowman with F-Tilt multiple times to shut him down; however, several of Bleak's moves give him ways to defend against this, thus earning him the win.

Vs. Pennywise - 80/20: Bleak's Favor
Pennywise needs to actually get in at close range and build damage to win; foes who can use a hit-and-run strategy to avoid taking damage and 'getting scared' will usually come out on top of this clown. While Bleak can't run so much, his spacing abilities give him an easy upper hand on Pennywise. Pennywise has little defense against Bleak's projectiles, and his priority can't beat snow boulders. He can use corpses as a meat-shield, but the lag in summoning them will undoubtedly allow Bleak a few more shots. Bleak will have to be somewhat careful when Pennywise does get to him, as the clown will surely have a few traps out by that time. Lemguins can't take out blood or drains, but Pennywise will still have to work to stay close to this snowman and mess with him; Bleak merely has to space himself again and keep on building that damage.

As a special effect, if Bleak uses his N-Air on a blood puddle, the blood will freeze. This not only turns it into a D-Tilt ice patch equivalent, turning it against Pennywise, but it takes away its former effect of damaging and lessening the traction on Bleak. Nifty!

Vs. Sukapon - 50/50: Draw
So Sukapon actually fares well against pressure, but is weak against defense? Well, Bleak can't really run away, but he can easily space from Sukapon, due to his light weight. Sukapon's size makes it slightly annoying to aim a good projectile at him, although his light weight means he can be KOed with ease. Of course, seeing as how Bleak can be comboed easily once Sukapon closes in, the squiggly robot can earn his win from this alone. Sukapon can use his F-Tilt and N-Air to build 40% on this snowman, as well as capitalize on Bleak's slow speed to win. If Bleak can space well enough and keep on racking up damage, though, the match will usually be his.

This match-up was written as if Sukapon was edited to be the combo character Wizzerd intended him to be.

Vs. Thief Khee'bler - 20/80: Thief Khee'bler's Favor
Bleak has trouble landing snowballs on Thief before he approaches. Thief's speed allows him to use Neutral Special on Bleak with ease; if Bleak doesn't space here with extreme caution, he's screwed. Thief can ban Neutral and Side Special, taking away Bleak's game near entirely. Ban a few more spacing moves, and you've guaranteed yourself the win. Bleak can't use his other moves without being absurdly easy to punish; now all Khee'bler has to do is sit back and wait until the Bleak player can't take it any longer, and tries pegging him. You'll now have your powerful Smashes to take out the snowman with. In essence, Thief has ease taking away Bleak's bread and butter; from there on out, he can either punish Bleak's awful lag, or Smash him once he cracks. One of the trickier characters to use is still a great counter to this snowman.

***Extras***

***

***Basic Animations***

Standard Pose:
Bleak stands slightly hunched over, breathing in heavily and darkly; his snowy fingers also twitch slightly, in a tic of sorts.

Idle Pose:
Bleak's top hat opens up, spitting out three snowballs into his hands. Bleak proceeds to juggle the snowballs, laughing his deranged laugh as he does so. After a second or two of this, he tosses them back up into his hat, which closes after them.

Walking:
Bleak takes sluggish, lumbering steps forward, chuckling under his frosty breath.

Running:
Bleak tries pumping his arms slightly, picking up the pace.

Dashing:
Bleak puts one hand to his top hat to hold it in place, while pumping his other arm even faster and going as fast as he can...which unfortunately, is rather slow.

Jump #1:
Bleak pushes down with his arms, getting a tiny distance off the ground.

Jump #2:
Bleak spins around once, chuckling to himself. He flaps stupidly with his arms while doing so, getting slightly more vertical distance.

Crouch:
Bleak gets down on one knee, taking his top hat off and holding it in front of him. A humorous pose, but a horrible crouch.

Ledge-Hanging:
Bleak hangs on for dear life with one hand, holding his hat to his head with the other.

Swimming:
Bleak surfaces with a chuckle, and begins paddling frantically. Since snowmen melt in water, Bleak drowns shortly after resurfacing.

Forward Roll:
Bleak performs a clumsy forward somersault, getting up a moderate distance away.

Backward Roll:
Bleak simply performs a quick backwards short-hop, as a backwards somersault would take too much energy on his part.

Spot Dodge:
Bleak hops backwards, cackling madly and holding his hands up to readjust his hat, then hops right back.

Air Dodge:
Bleak extends his arms, his fingers still twitching a bit, and spins around stupidly. He and Wario must get along pretty well...

Shield:
Bleak covers his hatted head with both hands, as a frosty white shield appears around him. This shield behaves the same as the standard bubble shields, but has a unique look to match Bleak's frosty tastes.

Tripped:
Bleak collapses on his arse with a comedic noise, him chuckling as he goes down.

Dizzy:
Bleak's eyes spin as he tries holding his hat to his head, but in his dizziness, knocks it to the ground. When he regains sensibility, Bleak angrily snatches it back to his head.

Sleeping:
Bleak sits down and begins snoring loudly. Occasionally, he'll cackle in his sleep or twitch slightly. Strange...

***Extra Animations***

Up Taunt - Abominable Laughter
Bleak performs his trademark maniacal laughter, still performing the slashing motions from his Basic Combo. Pretty simple and fitting. As an easter egg, if you touch Bleak in any way other than attacking during this taunt, he'll ROFL next time you use this taunt. You thought this was the Basic Combo, didn't you?!

Side Taunt - Winter Wind
Bleak folds his arms and strikes a scary pose, as a frosty wind blows his scarf around. Pretty badass for a snowman...

Down Taunt - Christmas Spirit
Bleak puts his hands on his hips and performs a little jig in place, kicking his booted feet out in front of him. He laughs maniacally while doing so. Is there anything this guy doesn't laugh at?

Entrance - Sleigh Ride
Bleak rides in from the background in his toboggan, laughing as he does so. He hops out and strikes a pose, as the sled vanishes.

Victory Pose #1 - Battle Cry
Bleak shows off some of his DKC3 GBA persona, which while vastly inferior to the maniacal style he has in the original, is still pretty LOL-worthy. The crazed snowman lets out a victorious yell, which seems all fine and dandy...until it causes an avalanche. The rush of snow pulls both Bleak and the losers off the screen, leaving the results screen area blank.

Victory Pose #2 - A Star on Top
Bleak stands chuckling alongside a snow-coated Christmas pine tree. However, Bleak looks at it, noticing something missing. To solve this, he pulls a Christmas star out of his hat, placing it on top, where it glows. After this, Bleak contentedly continues chuckling. Where has an abominable snowman done that before?

Victory Pose #3 - Top Hat Tune-Up
Bleak fires a few snow boulders from his top hat in celebration, but the hat stops firing suddenly. Bleak confusedly takes off the hat and begins swabbing out the inside with his scarf...only for it to backfire in his face. This covers the angry snowman's face with black soot for the rest of this celebration.

Victory Theme - Boss Battle Success
Bleak shares the standard DK victory theme, the fanfare that plays when you win a boss battle or clear a bonus room in the original DKC.

Loss Pose - Cold-Hearted Failure
Bleak claps menacingly, still chuckling to himself through his grimace at losing. Between his clapping hands is a slight frost cloud effect, making this actually look cool and creepy at the same time.

***Kirby Hat - The Abominable Kirby Monster***

Kirby gets Bleak's top hat, which is huge on him, as well as a carrot for a nose. By tapping B, Kirby can use Bleak's snowball toss. You now have a projectiles to use in your moveset; it stll has its normal lag, but with Kirby's many jumps, spacing to bean foes isn't too hard.

***Alternate Colors***

  • Normal
  • Red-Orange tint (Red Team)
  • Lime tint (Green Team)
  • Cyan tint (Blue Team)
  • Yellow tint (Piss-colored Bleak)
  • Dark overcoat, with silver and gold buttons, snow mustache on Bleak (Sound familiar?)

***Codec Conversation***

-Press Select-

Snake: Colonel! There's a living snowman out here, but he doesn't look too jolly.
Colonel: It looks like Bleak is your opponent. He definitely isn't your typical warm-hearted holiday joy-bringer.
Snake: No kidding. He's started hurling snowballs at me from behind a snow fort! Is he for real?
Colonel: Bleak not only has malovolent chilly powers; he also has quite a cannon for an arm. And a top hat, while we're at it.
Snake: Right...well, it's time to teach this abominable maniac that the battlefield is not the place for a snowball fight.

-End Transmission-

***Other***

Icon - Famous Initials
Of course, Bleak fights under the 'DK' initials made famous in DKC.


Wiimote Sound - Crazed Snowman
Even though Wiimotes don't exist and therefore can't make noise, Bleak's laughter can be heard anyways; it's just that awesome.

Crowd Chant - Snowman Support
A crowd of males are heard cheering, "Bleak! Bleak! Bleak!", to encourage the snowman's fight.

Unlocked By:
  • Play 560 Brawls
  • Win 10 Brawls as Donkey Kong or Diddy Kong, played on The Summit
  • Clear Classic on Hard with the Ice Climbers

Unlock Message: "Snowballs, snowballs everywhere! Give your foes a frosty reception with Bleak, the deranged snowman!"

***Assist Trophy - Krosshair***


The main enemy of one of the harder levels in K3, known as Krack Shot Kroc. The Krosshair itself appears here, manned by some unknown offscreen Kremling, who menacingly tells you to "Get out!" After this, the Kirby-sized Krosshair begins locking in on the nearest foe to the summoner. It follows them around, being unable to be shaken; the color of the Krosshair changes from green, to white, to red as it gets ready to fire. This change takes place over a period of five seconds.

When it turns red, the unknown Kremling lets out an evil laugh, as the Krosshair freezes in place; this fires a Kirby-sized fireball onto the screen where it stopped. The fireball is essentially a weaker Dragoon, although it still deals 14-15% and high knockback. Foes with over 75% are likely to be KOed by fireballs. Although the Krosshair can't be escaped from while aiming, foes can move away or dodge when it turns red and freezes. The Krosshair fires five fireballs like this before disappearing. The fireballs are easy to dodge, so you'll have to distract your foes if you want a KO from it. Krosshair appears semi-commonly as an AT.

***Stage - Gorilla Glacier***


The fourth world in the original DKC, a frozen wasteland at the top of Kong Island. Although Bleak is found in the Northern Kremisphere rather than on Kong Island, the snowy stage fits him perfectly. The main area of the stage is a snowy platform, the size of Final Destination. The snowy terrain reduces traction slightly, but not as much as icy terrain. On the left is a rocky cliff; it's a long way down here, so don't fall! Fortunately, a Barrel Cannon floats around down there; characters can land in this, aim the spinning barrel, and launch themselves back up as a last ditch recovery, like in Melee's Kongo Jungle.

On the right side, however, is a cliff wall, leading up and out of sight. I can just hear the cries of infinite-haters now, but never fear. If a character uses an infinite throw more than five times against the wall, an icicle will drop from the out-of-sight clifftop. This deals 10% and moderate knockback to the perpetrator, while releasing the victim. The icicle won't KO, but it allows this stage to be actually usable in tournaments, at least for a counterpick stage. In the background, you can see high mountains, pine trees, and the occasional Necky soaring by. A perfect homestage for Bleak.

Stage Music:
Northern Hemispheres (Donkey Kong Country)
Ice Cave Chant (Donkey Kong Country)
Fear Factory (Donkey Kong Country)
Cave Dweller Concert (Donkey Kong Country)
Treetop Rock (Donkey Kong Country)
Aquatic Ambience (Donkey Kong Country)
In a Snowbound Land (Donkey Kong Country 2)
Frosty Frolics (Donkey Kong Country 3)
Boss Boogie (Donkey Kong Country 3)
Crystal Caves (Donkey Kong 64)
Mammoth Glacier (Donkey Kong: Barrel Blast)
Chekan Winter (Kong in Concert)

***
 

KingK.Rool

Smash Lord
Joined
Nov 26, 2005
Messages
1,810
Team Fortress 2. :chuckle:
:confused:

Whoops! Double post! Mah bad. >_<
I hate blatant spam for a new page like this. That post is five minutes after the first, it's CLEARLY not an accidental double post.

Seeing as how no one but Wizzerd, me, and one or two of Smady/K.Rool/MT comment usually, it'll take at least a day and a half to get another page for Bleak.
Tsk. I know I'm kind of pouncing on a throwaway comment here, but honestly, Kupa, both Warlord and I comment on sets much more often than you or MT do. Wiz, I can't argue about. Daddy mostly only comments in his massive roundups.

Dude...Turkish Delight is the sh*t. It's so (GOO)ey and powdery and delicious. It makes me **** in my pants when I bite into its fruity goodness.

Turkish Delight had better become the next Wispa moveset. I'm not kidding.
Just as bad as TWIL's comment. :(

Bear Hugger? Wasn't expecting that. That reminds me of how I became a Canadian in the first place. See, back in the old country, we used to herd goats (and walks five miles uphill through the snow to and from school). Oh, it was a lovely time. But then, one day, a goat mysteriously vanished. I grabbed my trusty axe and went off looking for it, prepared to chop its head off before allowing it to roam free, but I walked all the way to the ocean, and there was no goat. Then, out from the mists, came this giant ship... full of NORSEMEN!!! They had my goat, and I can't abide people stealing my goat. So off I went, paddling along in this boat I made from blades of grass and mud. For days I paddled after them, and they saw me - they with their big beards - and laughed, tossing little sparkly sticks down at me. None of them hit me, though, which was probably good, because if my boat burned I'd have to swim the rest of the way and my fingers would get all pruney. The problem is, my mud was starting to dry out, and for some reason that was making me sink. Luckily, then we hit land, just as I was up to my neck and paddling. I walked up to the Norsemen, strolled right up to the main guy, and demanded the return of my goat. He apologized for the inconvenience and gave it back, which I thought was very mature of him. So off I went with my blue goat, trying to find my boat. Everything was buried in snow or something, it was ridiculous. I went back to the Norsemen to try to figure out where I was, but they were gone. So now I was really getting peevish. I travelled inland and found such marvels! A lake of this delightful goopy brown liquid! Big fat rats with splayed-out tails! I asked my goat what we should name them, and he said "Taxidermically speaking, they look like large rodents to me" and I said, "Well, I knew THAT." So we had a little argument over what to call it and then we walked through some bushes and this guy named Ralph said that they were called beavers, which was upsetting. There was a whole city there. I wasn't ready to go back to civilization, so I killed Ralph with my axe - which I still had, don't forget - and ran off into the wilderness, to chop down trees and trample the countryside with my blue goat. And that's how I became Paul Bunyan.

And now I have read Bear Hugger. The big draw he has going for him is that he's almost plausible in an actual Smash game. I must admit, you could have presented your punches in such a way as to make them at least seem a bit more interesting - look to my upcoming King Hippo for my shot at this. Basically, much of the moveset consists of "This is a good grab in XXX situation" and "This is only significant because it's the best grab in XXX situation". Your bias toward grab-heavy super heavyweights with suicides and villainous tendancies reach an all-time high here.

But I digress. The fact is, this is the simplest moveset you've made since Big, and I love it for that. No outrageous mechanics, no props or projectiles (although a few of the attacks come a bit too close for comfort), and best of all, no traps. Just an interesting playstyle unfolding in an interesting way. This is the very image of the kind of moveset I'm trying to promote here: one where individual attacks will never wow you, but the playstyle overall certainly will. It's like Cutesy, minus the mechanic. It's like Sukapon, plus a mechanic. It's, like, one of the best movesets you've ever made, and I like it much, much more than Bald Bull (who was good enough, but...). This may not quite beat Sloth (although they're very different movesets), but when we next revise the Definitive MYM Roster, you can be sure this one will be in contention for an emblem of the Sakurai Movement. My opinion is an unpopular one, it seems... But oh well Canada what you gonna do.

HAVE SOME SYRUP FRIEND
NEED A HUG? HUGS FOR ALL
WATCH BEAR HUGGER DANCE IN THE AIR

...Wrong character. (ONO)
 

Kholdstare

Nightmare Weaver
Joined
Oct 10, 2008
Messages
1,441
K.Rool, there you go again with your stupid tangents.

I'm going to try to read Kaiser and the Bear Hugger that doesn't suck balls so I can make matchups for them for Great Tiger.
 

Wizzerd

Smash Ace
Joined
Feb 24, 2009
Messages
929
BKupa666 said:
This match-up was written as if Sukapon was edited to be the combo character Wizzerd intended him to be.
I HATE YOU.

Yeah, I guess I'll go over it sometime. Besides, this is the first time somebody's made a matchup for one of my sets, so I guess I should be proud. :3

Anyway, when I heard that you were making Bleak I was quite honestly puzzled. Who in their right mind would want to make a moveset for a character with so little depth? I mean, he threw snowballs and shot snowballs out of his top hat (?) in his boss fight. Moveset potential my ass. But still, you've surprised me with how much you extrapolated from him. I like how you drew from DKC so much in moves, the Up Special and Down Special (despite being ANOTHER minion move) being a great example of this.

Actual criticism time... well, you could have organized it better. The headers are a bit large (I know, this is hypocrisy from the creator of Sukapon), and the underlining, while it's only in the walljump/hover/whatever, looks a little sloppy, but it still works, and I commend you for not unnecesarily bolding like you did on earlier sets, it's a perfect level of bolding. This really isn't a big deal, great job on this one.

Oh, and MW didn't even play Punch-Out Wii? Neither have I, yet I've been interested in all these Punch-Out contestant sets... maybe I'll make one of my own... I mean, I never even played Nazo no Murasamejo or Joy Mech Fight... :bee:

*wanders off to SKAPON FIX Sukapon*

SKAPON EDIT: Sukapon has been gone over, and I've given him a variety of buffs to help him as a combo character, namely:

-Better priority on jab
-Faster execution speed on ftilt
-Less lag on fsmash
-Ability to exit nair float
-Faster execution speed on uair

If there are any other areas in which he needs a buff, mentioning them would be appreciated, and I won't brush you off like I did with Ocon. (sry bout that)
 

Clownbot

Smash Lord
Joined
Jun 9, 2009
Messages
1,851
I believe Slash is doing Flamenco, Wizzerd.

...Not trying to get you down or anything (I mean, sets for the same character are allowed...).
 

Wizzerd

Smash Ace
Joined
Feb 24, 2009
Messages
929
Clownbot said:
I believe Slash is doing Flamenco, Wizzerd.

...Not trying to get you down or anything (I mean, sets for the same character are allowed...).
Oh really? I honestly did not know that...

*quietly drops moveset*
 

Junahu

Smash Ace
Joined
Nov 15, 2005
Messages
899
Location
Shropshire Slasher
Revenge of the 3 hour moveset...

Get those pretenders out of here!
---------------
Joe Calzaghe

The Italian Dragon
Joseph William Calzaghe (born 23 March 1972) is a Welsh former professional boxer
who retired undefeated. He was rated by Ring magazine as pound for pound
one of the top 10 boxers in the world, so you'd better step up to the mark!

Did I mention? He's joining the Brawl. Yeah, you're as good as TKO'd


‡‡‡ Stats ‡‡‡
Range:
Joe's arms can reach up to 1.25 stagebuilder blocks when fully extended, though there will be plenty of times when he hooks his shots, halving this range
Knockback:
All boxing is about momentum. Build up enough of it, and rob your foe of his, and Knockout moves will land much more readily. His arsenal of moves is rather polarised, with most of them simple dealing pathetic knockback for the sake of spacing
Damage:
Though you want to land as many blows as possible in boxing, Joe knows that a few well placed shots will work much more often. He packs more damage into his attack sweetspots, so space the foe well!
Priority:
This is where Joe suffers the most. But boxing is about timing, you can't just throw a punch into your opponent's punch and expect to win, you have to play it smart and pick your moments.
Weight:
Joe is a light-heavyweight, which is a full three classes below heavyweight. It's a nice balance, with more emphasis on the durability side of things
Movement:
Joe does not move quickly. After all, he isn't some straw-weight, he's packing a bit more power than that. What Joe has to his advantage is the ability to move accurately. He can short step and backpeddle distances that would be otherwise impossible with an analogue stick.
Stance:
Joe uses the Southpaw stance, in which he leads with weaker right handed punches and uses his left for the stronger blows. This has some importance in Brawl because, if Joe is facing right, he will have his back to the camera, making it harder to tell which attack he's gearing up.
Aerial:
Like all boxers, you don't want Joe's feet off the ground. Without a firm foundation to stand on, his punches lose their momentum and his defensive skills drop radically. And don't you dare short hop as Joe, none of his aerials auto-cancel
Recovery:
When you're against the ropes, you have no other choice but to bounce back and win. Joe can stick around longer than you'd think a boxer could


‡‡‡ Defending ‡‡‡
Like any real boxer, Joe has a plethora of defensive manouvers at his disposal. A perfect candidate for the defense orientated SSBB-metagame.

Shielding:
Joe brings his fists up to his chest. This shields against knockback, but only mitigates one half of incoming damage. You can however, angle his fists up and down, completely blocking high and low attacks respectively.
Joe's shield strength only decreases if he leaves his fists at chest level, so accurately judge the incoming blows, and you can hold a defensive stance for as long as you want.

Counter-punching:
Joe's hurtbox varies wildly during his attacks, as he bobs and weaves into the background and foreground. This allows him to counter-punch without having to wait for the end lag. Just remember that Joe always has at least some weakpoint on show, so don't try to counter punch any especially large moves

Spot Dodge:
Joe's spot-dodge is unique in that he maintains a defensive stance while dodging. This means any attacks that would normally hit him while dodging, no longer work.
But bear in mind that Joe does not hold up a defensive during the dodging parts of his counter-punches

Clear out:
When Joe perfect shields an attack, he suddenly bursts into a menacing advance which physically pushes the foe backwards 1.2 stagebuilder blocks. Joe then hops back to his original position. This is best used to scupper the opponent's retaliation after you land a successful chain of attacks.

Sweep in:
When Joe sour shields an attack (perfect shield an attack with a <50% shield), he bobs forewards 0.25 stagebuilder blocks, bringing him right into melee range. This almost always leads into a grab. If you're running out of shield, you should definitely try to get a Sweep in.

Technical Knockout:
Joe can earn TKOs (Technical Knockout), which count as half a real KO (Joe earns a point, but the foe does not lose a point). TKOs are earned in the following manner;
  • If Joe manages to knock the foe to the ground 4 times. He achieves a TKO. Knocking a foe down involves striking of spiking the foe in a way that results in them lieing in the prone position. It also counts if Joe launches the foe, and they neglect to exit the 'tumble' state before landing
  • If Joe opens a cut on the foe's forehead, and keeps it from healing for 35 seconds (explained in more detail later). He achieves a TKO.
It's important to note that, in brawl, TKOs are not real KOs. The foe will be quite unharmed by a TKO, there will be no loss of stock and no respawning. The fight merely continues with an extra point on Joe's tab.
That said, once Joe earns a TKO, he'll have to properly KO the opponent before he can start earning another one. Also, if the foe is KO'd before he achieves a TKO, Joe will have to start the process over from scratch.
Joe can sometimes be a technical boxer, so getting a TKO and waiting out the clock can net him some easy victories.


‡‡‡ Attacking ‡‡‡

Jab AKA "Laggless Jab"
It's just as it sounds, a jab that has no lag on either end. It comes out on frame 2 and retreats on frame 5. By frame 8, Joe can move or jab again. If you do the math, that's 7 punches a second! Too bad they all deal 0.33% damage. But if you hit the opponent square on the nose with the very edge of the jab (0.8 stagebuilder blocks away) the damage will rocket to 5%.
With the sweetspot in mind, foes will likely DI toward you as you jab, which can lead to consequences should they get behind you. But you WANT them to try that. Draw them in with your pathetic jabs, then suddenly burst into another move

Foreward-Tilt AKA "1-2 straight"
You'll be forgiven for think this is just the jab again. It does indeed begin with the exact same jab. But therein lies the genius of the manouver. After the pathetic first tap, Joe then delivers a far more brutal straight with his left. This one deals a neat 7% damage at its tip (1.25 stagebuilder blocks) and a respectable 5% even when sour spotted. The knockback is around the 0.8 stagebuilder block mark, but Joe also advances 0.33 stagebuilder blocks, so he won't be exactly safe when the foe comes to.
This is the easiest thing to land after the jab, and you can even use if without jabbing first (although there is zero mindgame potential in that). Whip this one out when the foe tries to beat a hasty retreat during your flurry of punches. But you'll need to enter a defensive stance after the move, to avoid a counter

Downward-Tilt AKA "Cross-Counter"
Joe throws his shoulder behind another straight punch, transferring much of his hurtbox into the background during the attack. This time the sweetspot is at the 0.75 stagebuilder block mark rather than the very edge of his range. This deals a meaty 9% damage (6% when sour-spotted) but no knockback. Instead, Joe hops backwards 0.5 stagebuilder blocks, a handy move for getting a little space. If the opponent was in the middle of an attack when this blow lands, Joe tags on an extra 4% damage.
Don't think you're invincible during this. Joe's legs remain in the foreground, begging to be struck. The lag when this misses is easy to punish too (though his body will still be in the background while he recovers). Cross-Counter is nothing you'd want to launch right after a jab, though you'll want to use the jab to pester the foe into attacking irrationally. If you land this at close range, you may still be close enough to try a second Cross-Counter right away, and that's something the opponent will have to be wary of too

Upward-Tilt AKA "Half Hook"
Joe tries to land a blow to the side of the opponent's head. Simple, right? Since this blow swings around the side of the foe, this will strike anyone who is shielding or spot-dodging (It won't get past any counters or "fortress" moves). The trade off is that it will only hit foes standing 0.75 stagebuilder blocks away from Joe. If and when you land this piercing strike, the foe will suffer 3% damage and stagger backwards 0.8 stagebuilder blocks, leaving them awkwardly out of Joe's range.
If you can't get the spacing right to land a grab, this is the next best thing against shielders. The startup is easy to spot, even though the lag isn't that long. The end lag is also surprisingly short for a move of this type, since Joe doesn't put the full force of his strength into this punch. This is a good thing when you consider how everyone will try rolling behind you. The consequences of landng this are fairly steep however, as it'll ruin any current effort you put into good spacing.

Foreward-Smash AKA "KO blow"
Joe telegraphs the most basic looking straight in existance, holding his leading arm out to the side as he charges with his left. Just before he actually punches, Joe steps forewards 0.1 stagebuilder blocks. It's a small point that opponents might forget but it lends the attack some deceptive range. Damage varies between 2% and 34% depending on charge... yikes.
Despite the giveaway name, Joe does not use this for actually KOing the foe. Instead, it knocks them to the ground (into the prone position), bringing him one step closer to a vital TKO. Joe must sweetspot this for the afformentioned knockdown, but unlike his other punches the sweet spot is at 0.15 stagebuilder blocks (i.e. Joe must catch the opponent in as much of this punch as possible)
Landing the KO blow requires good spacing and a foe who is so morally crushed that he can't dodge it. The first requirement is a snap for Joe, but the second is all down to how well he can dominate, mentally. To make matters worse, you have to land this 4 times for a single TKO.
If you manage to strike an airborne foe with this, they will be spiked. That'll usually result in a knockdown anyway, so don't worry about how you hit them, so long as you hit them.


Downward-Smash AKA "Body shot"
This is an underarm short-straight which hits down at the opponent's body. Joe also ducks for this attack, and places his feet in the background. The range is quite weak (0.5 stagebuilder blocks) but you can sweetspot this if the foe is even closer. This deals between 15% and 22% and forces the foe to stagger forewards (0.2 stagebuider blocks if sweetspotted and 0.4 stagebuilder blocks otherwise)
This is essentially a cross-counter of a different flavour, one designed to outwit low blows while also ducking under high ones. The lag of this smash rivals the KO blow, although Joe ducks during charging, so you can use it to avoid a low or high blow and then unleash a body blow while they're exposed. Bring this one out when you want to swing the fight back around in your favour.

Upward-Smash AKA "Uppercut"
It's the only ground move of Joe's that will deal traditional knockback (KOs uncharged at 210%). But not only that, but this is the only way he can attack someone above him. Just as you'd imagine, this attack is a sweeping uppercut, one which comes out quickly when compared to his other smashes. The sweetspot, is exactly 0.5 stagebuilder blocks in FRONT of Joe (hitting anyone above him deals only weak knockback and half the usual damage). The damage can vary between 11% and 28%, though it kind of defies the point of a quick smash if you charge it up..
Joe's main KO move is quick (making him alltogether unique in the world of MYM). The correct spacing can be a pain to achieve but it's all the same easy to land. 210% may sound like a tall order, but Joe will want to drag the fighting out as much as possible in order to snag a TKO under his belt anyway, so it fits into his style well. The end lag isn't exactly stellar, but you'd never start an uppercut expecting to miss... would you?

Dash attack AKA "Approach"
The name truely does say it all. Joe ducks down and brings his gloves up to his face as he continues to dash forewards for as long as A is held. This is an extension of his regular shield, and it runs off the same timer too, so if you don't let your shield regenerate, you'll end up breaking it when you use Approach. This attack drains Joe's shield at twice its normal rate, and that includes loss of shield inflicted by enemy attacks too. Joe can advance up to 4 stagebuilder blocks with this move, and he'll automatically stop dashing once the move ends
On paper, this is the ultimate approach as it is literally a shield while dashing. The problem is how fast this shield breaks. If you use approach through anything stronger than a tilt, you'll end up with a broken shield.
And what can Joe do when he gets to the foe? His shield will be significantly crippled, so all his defensive options go straight out the window. And when the opponent knows Joe has to attack, that's when Joe's at his most predictable
Approach is best off used to reposition Joe when he's at mid-range. Any further out and he'll be better off just rolling. Any closer to the foe and he can just use his other, better, spacing tools.


Grab AKA "Clinch"
Joe's grab range is frankly criminal (0.1 stagebuilder blocks). But then again he doesn't make a formal grab at all. He simply advances so close to the foe that neither of them can get in an attack. Yes, that does mean that this grab is automatic, you don't need to press Z to initiate it, you simply stand still when at the correct distance from the opponent.
When you've got someone in a clinch, it's time to take a breather. Both of you will heal 2% every second of the grab, so you can forgive the opponent for not wanting to escape this.
For Joe's pummel, he grinds his head against the foe's neck, negating 1% of the foe's healing. This comes at a price however. Every successful pummel makes the grab easier to escape from (Clinching is not exactly an honest boxer's technique)
Joe's grab is certainly surprise in any situation. Since there is no need to press Z, there is no lag, meaning Joe can simply get in nice and close as part of his usual attacking style. He can shuffle in quickly and accurately to guarantee a grab in almost any situation, even after an attack (making punch-clinch-throw the only combo Joe can perform). Pummel fast enough, and the foe won't get any healing at all. Feel free to get in a few clinches just before you go to KO your opponent. You could also use Clinch to force healing on a foe who might be trying to maintain a specific level of damage. And of course this has uses in Team Battles too.

Foreward Throw AKA "Parry"
Joes pushes the foe away 0.7 stagebuilder blocks and stands with his gloves up. The foe is free to move and attack, but if he hits Joe with anything for the next 0.8 seconds (even a grab or "non-attack" attack). Joe will parry the blow, taking only half the damage (and no knockback) from it. Not only that, but by parrying the attack, the foe will suffer 1.3x more end lag, and an additional 0.2 seconds of end lag on top of that!
This is quite the strange "counter" throw indeed, but it can grant Joe quite the opening if he gets it right (and he WILL, because he has another ace up his sleeve to help mindgame the foe into attacking). Joe can only parry the victim of this throw, other players are free to beat the tar out of him in the meantime.

Backward Throw AKA "Peek-a-boo"
Joes pushes the foe away 0.7 stagebuilder blocks and stands with his gloves up. Sound familiar? This is the same as Parry but with one crucial difference. Joe's defensive stance is only a feint. He can in fact move and attack as normal, but he won't parry any incoming blows either
This is the sister throw to "Parry" and the only way the afformentioned throw will ever work against a knowledgable foe. So long as Joe stands still, he'll keep up the facade, so the foe can never tell which throw you used until they attack him. On the flip side, if the foe is convinced this is a Parry and tries to flee, Joe can simply chase and punish straight out of his fake stance! This is really the mother of all opportunity openers, use it well.

Upward Throw AKA "Cutting Gavotte"
Joe steps twice away from the foe, then hops back towards them and lands a critical upper-straight against the foe's forehead. This deals 2% damage and light knockback. But it also opens up a cut on the foe, causing them to take 1% damage every second. The bleeding will stop after 5 seconds, but it will start up again for another 5 seconds if Joe lands ANY attack on the foe. If joe can maintain the bleeding for 35 seconds straight, he will be awarded a TKO
Anyone with a cut to the forehead is doomed to lose, as this is the main way boxers win their matches. Open a cut, keep it open, and not only will you get a TKO, you'll bring the foe that much closer to an actual KOable percent

Downward throw AKA "Wide open"
Joe spreads his arms out in a "come on and hit me" gesture. The foe obliges his request and attacks him. The attack they use will be the 2nd to last attack they used before being grabbed.
Luckily, Joe will roll with the blow, taking only half the damage and knockback from it.
Huh? A throw that damages YOU!? Why on earth would you even try this? That is a good question, but it all comes down to what the opponent's "2nd to last" attack actually was. It could be a laggy recovery, that leaves you with plenty of opportunity to punish. It could be an attack that backfires if used too frequently or has sizable fail-lag. It might not even be an attacking move at all, or a move designed to help allies in Team battles.
When you think about it, there are plenty of moves that are detrimental when used in the wrong situation, and this throw creates that situation.


Neutral Aerial AKA "Check-Hook"
Well, he's in the air now, this won't end well. Joe throws a basic hook in front of with his main hand while leaning into the background with the rest of his body. The range of this is 0.6 stagebuilder blocks, and you will deal 4% on the off chance you actually hit someone)The knockback is adaquate for repelling foes but will never KO realistically. Joe can still be damaged during this attack if the punch itself is out-prioritised , and this neutral-air only hits in front of him
Joe's aerial counterpunch. It's horribly difficult to land correctly, and your foe would have to be pretty bad to fall prey to this (there aren't a whole lot of attacks in brawl that wouldn't end up hitting his hand inadvertantly). But if you do land it, the foe will be off balance enough to allow you to return to the ground. You can actually spam this quickly, but... why would you want to?

Foreward Aerial AKA "Drill punch"
In what has got to be the most outlandish attack in his arsenal, Joe delivers a straight punch, then twists it left and right as if it were drill. This attack is a multi-hitter, drags foes with it and can be held out for as long as Joe wants by repeatedly mashing A. It deals 3% per second and has a range of 0.9 stagebuilder blocks
Other than the lag, which you will grow to hate, this attack is probably Joe's best bet at getting down safely. After all, the foe can't punish you if you've got them trapped in your attack, can they? There's almost no damage output to this though, so don't get the wrong idea about what kind of attack this is.

Backward Aerial AKA "Bolo punch"
This backwards aerial attacks in front of Joe. And why shouldn't it? What kind of boxer turns his back on his opponent?
Anyway, Joe throws a short ranged punch, that tightens its circular arc as it launches. Thanks to the bizarre way in which the punch is thrown, this is actually the strongest punch he can use in midair and his best horizontal knockback move, fullstop. If you catch someone with this (the range is 0.7 stagebuilder blocks and it can hit airdodgers too) they will take medium knockback and 10% damage.
This aerial actually sounds good. So what's the downside? Well, it's an easy punch to see coming, as gearing this up takes effort. It also stales significantly if it hits. After all, it's more of a gimmick punch than anything else, your opponent won't likely fall for it more than once. Basically, use this once when you're in trouble, and then never use it again until your next stock.

Upward Aerial AKA "Overcut"
Joe throws this punch like you'd throw a baseball. It's just crazy enough to work, though whiffing the attack has the worst consequences of any of Joe's moves. The foe has to be directly in front of you (they also have to be roughly at the same height as you in midair) for this blow to land. But if it does, they'll be spiked downward with an extra 8% damage to their name.
The high-risk, high-reward move of Joe's aerial arsenal. The reward is a chance to land safely. The risk is that you could easily miss...
But spiking the foe into the ground can earn you a knockdown and bring Joe one step closer to a TKO, so that's one reason for Joe to get aggressive in midair.


Downward Aerial AKA "Cross Armed"
Joe crosses his arms in front of his face and leans inwards, effectively creating an aerial guading stance which he can hold for as long as he holds A. This unfortunately only guards against blows which hit Joe's head first, so you need to be below the opponent to use this effectively
Clamming up until you reach terra firma sounds like an infallible plan, until you factor in the dreadful end lag as he emerges from his guard. The lag is even more dramatic if he lands during it. So if you don't want t be knocked right back up again, you have to release this move when you're still quite high in the air.


‡‡‡ Specials ‡‡‡

Neutral Special AKA "Shuffle"
Joe shuffles forewards (or backwards if the analogue stick is tilted that way during the charging period) a short distance. The distance travelled is proportional to the length of the spent holding B (For every 0.05 seconds of holding B, Joe will travel an extra 0.1 stagebuilder blocks). The maximum distance Joe can shuffle is 3 stagebuilder blocks.
The best thing about this special is that it can be used during the start and end lag of other attacks, allowing Joe to space himself perfectly for his attack or help him escape after it.
Get used to tapping B folks, because you'll be doing this before and after EVERY SINGLE ATTACK. Spacing is vital to Joe, and this special grants him all the spacing he could ever want. But bear in mind that Joe's attacks generally don't have much lag, so you can't shuffle very far in most cases.

Side Special AKA "Rope-a-dope"
Joe reclines backwards as a series of elastic ropes appear behind him to support him. He can jump off of this, but only at half his usual jump height (and without a second jump or an additional use of his Side-special). If Joe is attacked while on the ropes, they will spring him in the opposite direction to the attack's usual knockback. If Joe is moving particularly fast when this move is used, the ropes will automatically spring him off in the opposite direction.
Joe can stay on the ropes for up to 3 seconds before he slips through them.
This is Joe's Recovery, and an awesome one at that. Joe will be bouncing back from pretty much anywhere, and most attempts to gimp this will only help Joe. A clever foe can still gimp Joe, by using an up-air or similar move (so that the ropes would launch him downwards) and he'll still take all the damage from whatever attack hit him.

Upward Special AKA "Corner Play"
Argueably Joe's least useful special, depending on how you play him. Joe will take a short breather, healing a paltry 1%. The lag of this is also rather stifling, and invites punishment like a naughty schoolgirl.
The move, improves however, if Joe has managed to knock the opponent down or opened up a cut on their face. In return for striking one knockdown from the record (meaning he would need an additional knockdown to gain a TKO) or removing the cut permenantly, Joe's damage is reduced to 0.7x its previous value.
If Joe has any TKO's under his belt, the attack changes again. In return for removing one TKO from the record, Joe will be completely healed and cured of any status effects(he will also regain his jumps/recovery if he was in midair at the time)
Refreshing larges chunks of health in exchange for TKOs in progress is a difficult choice to make. And if Joe has any TKO's at all, that version of this special will take priority, making the choice so much harder. If you have plenty of TKOs but are on your last stock, you may end up havng to use one while you wait out the clock.
It basically all boils down to whether you want to play aggressively or defensively


Downward Special AKA "Eagle Punch"
It's not quite a Falcon Punch, but it's about a thousand times more useful. The punch itself is hardly discernable when compared to all the straight punches Joe uses, but it has one critical advantage. It has priority that will clank against ANY ATTACK.
You won't be using the punch to actually attack, but if you do strike a foe with it, you'll find it to be a horribly weak move(1% damage and miserable knockback)
Attacking to defend, that's the axiom on display here. The start up lag is 0.7x that of a Falcon Punch, so you have to know when a big attack is coming if you want to stop it. Considering how bad the priority of Joe's attacks usually are, Eagle Punch is a godsend in the face of Metaknight's Tornado.
Just remember that it only clanks, it doesn't outprioritise and it wont stop grabs


‡‡‡ Final Smash: Title fight ‡‡‡
Joe's Final Smash is an extension of his playstyle (no, not his special mechanic, you miserable cretins!). When Joe activates his Final Smash, it all comes down to this. For 20 seconds, the scoring for a KO, TKO or SD is doubled, allowing Joe to decisively pull ahead and guarantee an easy victory. Of course, the foe could also KO Joe, so the risks in pulling this final smash at the wrong time are severe. If the match is a Coin match, all coin values, and the penalties for getting KO'd are doubled for the 20 seconds


‡‡‡ Playstyle: Sting like a wasp ‡‡‡
So let's get right on down to the nitty gritty specifics of boxing. Spacing is king, and the king of spacing can suck the momentum out of almost any foe. So how DOES Joe space?

Obviously, his Neutral Special has a lot to do with it, being able to move a mere fraction of a stagebuilder block at will is a boon any combo artist would kill for. Simply keep yourself at the very tip of your opponent's range, so you can sweep right in and capitalise on a whiffed attack. Of course, that is predictable, but it's certainly the easiest way for an inexperienced player to win with Joe.
For the more professional boxing connoiseur, you will want to bait out the foe into making rash decisions. And that'll involve staying inside their range. Using the Neutral Special to keep youself IN danger sound counterproductive, but if you keep yourself within the sweetspot of the foe's strongest attack, you can bet your hide they'll be tempted to use that attack. And Joe has the best defensive options of any character in brawl, so dodging the attack might not even be neccessary.

But that's not the whole story. Every one of Joe's attacks has specific spacing properties, gently moving either the foe or Joe himself. Most of his punches will space the foe to help more punches land, but using the easiest punch in a situation will quickly see you outguessed and outgunned. Go against the grain, use your Neutral special to counteract the spacing of your punches, so that you can land the more surprising ones. And seriously don't forget you can use Neutral Special DURING attack lag. You won't be able to move more than 0.3 stagebuilder blocks in most cases, but that can make all the difference between connecting with a sweetspot, or whiffing the attack entirely.

One key strategy for Joe is for him to keep a shield at under 50% so he can Sour Shield enemy attacks. Getting a Sour Shield will make Joe Sweep In towards the foe, and almost always results in a grab. The quickest way to a 50% shield is to use Approach through a weak projectile or a jab, though you'll get there soon enough simply by being "that" shield spammer everyone hates. Sweep In's are vital for keeping a chain of attacks going. Joe can't combo anything into anything else, unless a grab is involved, so he has to continuely counter the foe's decisions to land additional hits. And the more punches he lands, the further from the foe Joe will tend to find himself. A Sweep In will bring Joe right back into the thick of it while opening up the foe's defense.

So what will Joe be aiming for? 210% damage would be nice eventually, but in the meantime Joe absolutely has to try for a TKO. Depending on the foe, it may be easier to knock them down 4 times, or keep a fresh cut on their forehead long enough. In most cases it's cuts for the heavyweights and knockdowns for the lightweights, with middleweights being trouble for both.
Don't think you can just waltz into a TKO. Joe will be hard pressed to get a single TKO in a competitive match. The knockdown moves are hard to land once, nevermind on four seperate occasions in a single stock. And as for keeping a cut open? Good luck doing that when Joe can't chase down anyone faster than Ganondorf.
But TKO's are genuinely worth the hassle. Regular KO's won't be coming quickly for either side in a match, and it's entirely possible to end up with a 0-0 draw with Joe winning due to the TKO. And if the KO's are freely flowing? Joe can use up his TKO to fully restore himself, and that's a pretty good deal as it's like having an extra stock.

Joe's insane ability to become clamshell defensive leads to the common tactic of Joe getting a TKO lead, then waiting out the rest of the match. If he gets dangerously close to death, he can use the TKO to heal, and he'll still be able get a % win.
But Joe is obviously slow, so he can't just flee. He'll have to outsmart the foe almost constantly to keep them from landing any blows. Perfect Shielding is often the easiest way to scupper an enemy assault, though Joe also has a couple of punches that would achieve a similar goal. Counter Punch and Body Shot are always there for when the foe is pressuring you just a bit too hard. And let's not forget the mindgame potential of Parry and Peek-a-boo to disorientate the foe. Indeed, it is ironically the case that, even while on the defensive, Joe should keep himself close to the foe.

So, what is Joe's weakness then? Well, other than the presumably obvious "strong aerial game" and "campers", Joe has a horrible disadvantage against foes who can crouch really well. And this all stems from one crucial problem with Joe, he is a by-the-books boxer. He doesn't cheat or resort to low blows. He doesn't chaingrab, fire off wacky projectiles or call on his trainer for help mid-match. There is a very strong sense of reality behind the way Joe plays, and that often makes it hard for him to adapt to the zanier brawl tactics.


‡‡‡ Matchups ‡‡‡
Metaknight: 50/50 neutral
when you think about it for any length of time, you'll realise MK and Joe form a Ying and Yang of sorts. Unperterbable ground spacing vs unstoppable aerial rapeage. Getting Joe up in the air is by far the hardest part of this matchup for MK, as his slim hitboxes are perfect fodder for Joe's counter-punch and body-shot. He can barely duck, so he's going to have to pit his inelegant spacing against Joe's godly spacing. His tornado is obviously countered by Eagle punch, and if MK ever recovers using Shuttle Loop, Joe will just grab him and force him to use it again, this time in the wrong direction. So yeah, Joe can actually gimp the gimper!
That said, it's all over if Joe ever finds himself in the air. He can't attack anywhere but straight forewards and even his spacing takes a noticable hit when airborne. Of course he has his recovery, but that won't fare well against a master gimper like MK. TKOs are also harder to earn in the face of MK's speed, so Joe will have to resort to honest KOs, which take a lot longer to achieve.

Dedede: 80/20 Dedede's favour
It's all in the chain grab really. Space all you want, you'll have to get in close enough for a grab if you ever want to attack. And with all the damage you'll have to rack to KO him, you'll end up in Dedede's clutches sooner or later. Still, Joe has an easier time maintaining cuts on Dedede than other, faster foes; so you can at least have the consolation prize of a single TKO before getting chain grabbed.

Peach: 65/35 Peach's favour
Peach can float over any attack Joe chooses to use (barring his uppercut, which has punishable end lag). That's the tall and short of it on paper, but Joe's defense is mighty(especially when you know where the attack will strike him) and his spacing enables him to sweep in and catch Peach when she has to land. Peach still has her throwable turnips though, and the combination of these two advantages will eventually overcome Joe's defenses and force him into the air, whereupon he will be promptly juggled at Peach's leisure.
That said, if against a Peach who is turnip happy, Joe can grab her and force her to pick up a turnip. Sounds counterproductive, but it reduces Peach's options to "throw turnip" or "run away then throw turnip"

And now we descend into the uncanny valley of MYM..
Dingodile: 60/40 Dingodile's favour
Right off the bat, Joe has quite a few quirks to him that are specifically tailored at spiting Bingodile. While dodging, Joe still keeps up his guard, so dodongodile's attempts to attack the background will be fruitless. His ability to lock down a tight defense means Dingusdile will be hard pressed to rack damage from his hidey hole. Joe can also "Approach" directly through Gringodile's F-Smash, and since that clears a nice path through his crystals...
Also, whenever Dangledile uses either his Up-Special or his F-Smash, he'll want to use another two attacks as soon as possible, because if Joe grabs him and makes him repeat either of those moves, it could spell disaster
But, this is a matchup that remains in Dededile's court. Joe is strong enough to break a few crystals, but his accurate punches can't clear them out in bulk, so he's better off needling them while keeping up his defense. Joe also would be at a horrible disadvantage, trying to jump over the crystals, as he possesses literally no aerial approach moves. And when it comes to Dingodile's time to KO Joe, he'll find it deliciously easy to slam into him from above (Joe maybe a spacing master, but that doesn't change the fact he moves slowely, rendering him weak against large attacks from the air)

Wispa: 90/10 Wispa's flavour
I bet you think that's a joke. "A chocolate bar can't have good matchups, and Wispa can bearly move!". This all ignores one very critical and game breaking property of Wispa that renders her so deliciously higher than Joe's straight punches.
Wispa's natural stance is lieing on her back, too low for any of Joe's attacks (except D-Smash) to even reach. So Joe is stuck with grabs and D-Smashes, Wispa has her entire combo-centric moveset at her disposal, and she can attack in confidence that Joe's only retaliation will be a D-Smash.
That said, even Joe's reduced movepool has things to look out for. Clinching, unlike traditional grabs, isn't a traditional grab, so it works irrespective of the height difference. From there, he can open up a cut on Wispa, to very slowly drain damage. If he manages to get a TKO from it (It's not impossible, just really really unlikely), he'll totally just wait out the clock, since even his lumberous steps outpace Wispa.
Other than that, the only way Wispa can lose this matchup is if the opponent is a terrible Wispa player.

Bear Hugger: 70/30 Grab hitbox's favour
Did I tell you how much Joe hates grabs? Bear Hugger is all about grabs. Do the math. And of course, Joe is so exclusively a close combat fighter that he would be guaranteed to be grabbed. So, like dedede but worse? That's a thorough enough matchup, right?
Bear Hugger is still a boxer, and dirty tricks or not, Joe aims to give them him a run for his money. Getting and keeping his hands sticky will be harder than usual for the Hugger, no thanks to how Joe can get right up in his face and refuses to get swatted away. And without any spit, Joe will happily tap away at Hugger all day and night, useing his spacing to stick to him like glue (ironically). And finally, if Joe can keep the spit off Hugger's gloves, he can easily keep a cut on his face too and grab himself a TKO. And once a TKO has been snagged, Joe no longer has any reason to fight aggressively.
But it only takes one spit to get the proverbial ball rolling. Only one. Then all of Joe's advantages suddenly flip into perilous disadvantages. For the rest of Joe's admittably short life.
So who'll get their golden grail first? Hugger's spit or Joe's TKO? Hugger probably.

Neku: 55/45 Joshua's favour
This pair have more in common than you'd think. They're both poor in the air (Joe more so) and they both have pretty dominating ground games too (Jore moe so). Neku tends to lean on the setting up of his orbs in order to bolster his aerial abilities and keep the stage locked down. For the first 3 minutes of the match, Joe will simply not let this happen. Shiki's specials, though generally great for buying time for Neku to set up, have little to no affect on Joe's game. Reduced movement speed means little to Joe, as he moves very little to begin with, preferring to shuffle to and fro. Hiding behind Mr Mew will also not work, as Eagle punch will simply clank with it.
But it's the second week, Joshua's week that'll turn the tables. Neku will want to levitate above Joe's punches right away. Joe will then be reduced to pitting his weedy aerials against Neku's ground moveset. Neku will take this time to start layering the skies with all the orbs he'll need, and perhaps tag some damage onto Joe too. Only thing Joshua will regret, is not being able to gimp Joe like other characters.
So that leaves Beat for a traditional KO on the third week. Lauching Joe into the minefield of orbs will certainly buy Neku enough time to square him on the chin with Skull chains. It's simply a case of dealing enough damage to Joe to guarantee that KO.
And that's where Joe pulls back. He can't dominate Neku as much as the rest of the cast, but likewise Neku won't be piling on the damage like he'd want to. And at the end of week 3, it's back to Shiki and another 6 minutes before a KO opportunity rears its head again. Waiting out the clock works surprisingly well against Neku, so Joe should aim for that golden TKO.

MM9 Megaman: 70/30 Megaman's favour
MM9: Megaman is one of those characters that crumples like paper under pressure. After all, he deals exclusively in projectiles and rarely has more than two attacks at his disposal at any given time.
So why does Joe have trouble with him? It all boils down to how easily he can force Joe to jump. Tornado Blow is the obvious candidate as the unique spacing of the tornados, coupled with Joe's slow movement, means he can either jump to avoid them or get swept up by them anyway. Megaman can also build a wall out of Concrete shot as a more traditional "jump to get over" barrier. And, lest we forget, Laser Trident goes right through shields and defenses, so Joe can either spotdodge, or jump. Once Joe is airborne, Megaman can proceed to juggle him with Hornet Chaser.
And what about actually KOing Joe? Simplest thing in the world. Charge up a Magma shot. Let him approach. Slide under whatever punch he throws. And then shotgun that Magma shot right into his gut.
Even Black Hole bomb has its place, fudging up Joe's spacing quite well.
But Joe still has his TKO.. oh wait, Megaman can't be grabbed, and he can't be knocked-down, so he can't be TKO'd.
Well done, pressure master. You fail against someone weak to pressure. We may as well call you Joe Man from now on...

Cutesy Beau: 63/37 Cutesy's favour
At first, Cutesy sounds like the ultimate Joe counter. She's brutal when above someone in the air, she can throw out all manner of little spacing hasslers, and she has that ****ed Scythe as her D-Smash.
Cutesy will definitely start the match with a brutally prolonged aerial assault, one even Joe can't outlast. Those petals will flinch you right out of an up or down shield, and Cutesy can almost last forever in the air with her D-airs pounding into Joe's skull. This'll probably last until Joe is at 300%. Truely, for the first minute or so of the match, you may as well put the controller down and have a snack or something.
The problems for Cutesy start when she wants to KO however. She can't KO in the air, so she's going to have to come down and take Joe on, on the ground. Cutesy's ground game is very defensively minded, baiting out an assualt and waiting for the lag to kick in. So it's heartening to know that Joe's ground game is not only more defensive than Cutesy's, but several billion grades more offensive too.
And regarding Cutesy's D-Smash. Joe has Eagle Punch... the end.
There's no need to get Cutesy to 210%, just keep the pressure up high and make her resort to her petals. When she eventually cracks and uses up her limit of 15 petals at once, Joe can Uppercut her straight offstage and into the abyss.
That said, it is still Cutesy who has the advantage. Any time she feels threatened, she can just take off into the sky and recollect her petals. Cutesy's dash lets her simple waltz through Joe's attacks and get behind him for the grab. And of course, those needling petals will be a constant hassle for Joe, opening his defenses at the worst possible times.

Pokemon Master: 99/1 Pokemon Master's favour
All Pokemon Master needs to do is pick the right pokemon for the job. Slaking, Espeon, Umbreon or any of Steven's tanks would do quite well here. Don't feel down though, the only character Pokemon Master DOESN'T have a 99/1 matchup with is Team Rocket.

Joe Calzaghe: 0/0 noone's favour
While most mirror matches require the player to use a character in a wierd or unsuitable way in order to get the upperhand, Joe is forced to stick to by-the-book boxing. And by, "by-the-book" I mean turtleshell defensive.
When spacing kings collide... wait, they can't collide... they're spacing kings. Yeah, there'll be quite a few whiffed attacks in this matchup, although hardly any failed attacks will result in golden opportunities for the opponent. What the Joe's will be trying to do, other than win the spacing war, is to get as many clinches as they can. Scoring and maintaining a cut is the only reliable damage racking mechanism Joe has against himself.
A Joe with a cut will be on the absolute defensive until it heals. After all, in a matchup where KO's are so improbable, TKO's will be the deciding factor.
And once a TKO has been scored, you may as well call the match then and there, because the winning Joe will just wait out the clock.
In all honesty, noone really wins a Joe Calzaghe mirror match.

???: 75/25 ???'s favour
Joe may move slow, but he's not that heavy, so ??? will have no trouble throwing his own weight around and pushing Joe exactly where he wants him. Poor Joe, who exists solely for close range, can't even approach ??? if he tried. ??? will have a lot more trouble KOing Joe than most other foes, thanks to him constantly bouncing back from the ropes. And if Joe times it right, he can bounce off the ropes and right up into ???'s face. Too bad ??? can just BATTLE CRASH Joe back out there or hide behind his D-tilt. It's almost like ??? was made to prove Joe could be beaten...


and here's some moar matchups, all in favour of Joe;
Yoshi: 25/75 There ya go Sundance
Donna: 45/55 Joe's favour
Viola: 30/70 Joe's favour
Clefable: 20/80 Joe's favour
Team Rocket: 45/55 Joe's favour
Little Mac: 30/70 real life boxer's favour
Bleak: 35/65 Spacing's favour


"He punches ferociously, moves superbly and has the best of the European technique and US aggression."
 

Kholdstare

Nightmare Weaver
Joined
Oct 10, 2008
Messages
1,441
Mr. Sandman is my next moveset, for the Punch-Out!! hysteria. After that, I'm going to release Terra, then 02 sometime at the end of the contest.

These are DEFINITE plans. That's right, no backing out of these.

Some future plans I have:

Shadow Beast remake
Lucario remix
The H.I.V.E. trio (Jinx, Mammoth, and Gizmo)

I really want to do these for MYM7, so most likely I'll get them done. You see, in the past I planned movesets based on if I'd like to see them in Smash- actually doing them would come later. That's why I never got them done- no motivation or love for the character. HIVE might take up most of my time, though.
 

kirbywizard

Smash Hero
Joined
Jan 4, 2009
Messages
6,713
Location
Napa, California . . . .Grapes For Miles
3DS FC
0989-1847-5768
Hooray a moveset that gave Bear Hugger Justice :laugh:

Well it did him justice, and was over 10000 times better then my set, and I really only have to say this. Those aren't grabs there hugs full of love.


*Bleak Comentary Coming Soon In This Post*
 

n88

Smash Lord
Joined
Oct 10, 2008
Messages
1,547
I've always found it strange to make a moveset for a real person. I mean, what if they found it? Wouldn't that be kind of awkward?

At any rate, Joe was pertty interesting (I mostly enjoyed reading), but I refuse to say too much about him. An attack more useful than the PAWWNCH!!? Sacrilege!

Although I will say that if Joe was in the game, nobody would have even thought of banning Meta Knight.
 

Darkslash

Smash Master
Joined
Feb 1, 2008
Messages
4,076
Location
Strangereal Equestria
H
Well it did him justice, and was over 10000 times better then my set, and I really only have to say this. Those aren't grabs there hugs full of love.
Kirby Wizard....your delusional if you think that. Bear Hugger DOES NOT love the enemy. Thinking like that will ultimately be your downfall.

Besides its SARCASM.
 
Joined
Oct 9, 2008
Messages
8,905
Location
Vinyl Scratch's Party Bungalo
NNID
Budget_Player
The Squishy Wizard


The Squishy Wizard!

Utterly generic, completely normal. Inspired by the thousands of squishy wizards in games.

"Well, I'm terribly sorry I spent my extensive lifespan unlocking the means to unravel the universe and reshape it according to my will rather than, say, jogging. It has a tendency to leave one relatively fragile."
— Vaarsuvius, The Order of the Stick

The "Squishy Wizard" is known for having serious advantages at higher levels, but having massive drawbacks at lower levels. Their bodies are weak, but their minds are fit. This is the embodiment of such a character.

Stats


Run Speed: 3/10. See above. Jogging is not this wizard's thing. Think... maybe as fast as ganon?

Walk Speed: 1/10. This wizard is in noooo hurry.

Weight: 2/10. The wizard is easy to kill, a real lightweight. Glass Jaws and the like.

Melee Power: 1/10. Wizards are not known for their close-combat skills.

Ranged Power: 10/10. Yes. If you can't get in on this guy, he will kill you.

Attack Speed (base): 3/10. Slow wizard is slow... but see below for details.

Size: 4/10. See also: Mario.

Fall Speed: 6/10. About the speed of Snake. The wizard doesn't really fly all that well unless he puts his mind to it.

Aerial Acceleration: 8/10. If the wizard wants to go somewhere, he will float pretty fast.

Aerial Movement: 7/10. Not wario, not jiggs, but still pretty fast. Shame he lacks the spammable air attacks. Still faster in the air (run by shorthopping!) than on the ground.

Jump height (first jump): 4/10. A hop into the air.

Jump height (second jump): 9/10. The wizard concentrates and springs a yoshi-sized break into the air! It moves very fast (comparable to the speed on falco's jumps!) and can get a lot of distance.

Jump height (SH): 1/10. Wizard's SH is tiny-just barely enough to pull off his fastest air moves. However, he stays levitating for about 30 frames during his SH. These frames will end prematurely if any aerial is completed or if the wizard presses down or is attacked.

Range: 6/10. Most of the attacks have either a large disjointed hitbox or are projectiles. And his projectiles will hunt you down.

Shield: 9/10. It's magic! The wizard's shield will take a lot of punishment.

Roll: 5/10. Wizard's roll is slightly peculiar. While it has far less vulnerability than most rolls (about 4 punishable frames), it will get him barely as far as wario's roll. Meaning that if you see it coming, you can punish it even with the low time given.

Sidestep Dodge: 8/10. About as good as king DDD's; it's long and has very little vulnerability.

Airdodge: 9/10. I'll be frank; Squishy Wizard is hard to pin down. He dies ludicrously early and has a hard time with boxing, so he needs something to get out, doesn't he? Very long-lasting, hard to catch airdodge.


Animations

General: The wizard is one of those dime-a-dozen wandering wizards. Long white beard, pointy black hat, black cloak covering most of his body, and a walking stick/staff.

Standing (>100%): Standing up slightly bent, arms at his side, looking around warily from side to side.

Standing (<100%): Bending over, huffing and puffing, wavering on the staff.

Walking: Slowly moving forwards, back bent, propping on staff with every step.

Running: Levitates slowly very very low above the ground, holding his staff in front of him.

Idle: Draws a pentagram in the ground in front of him. This animation is very similar to that of his down smash!

Sleep: Slumps over his staff, snoozing lightly.

Shield Break: Wizard holds in place with a pentagram at his back, twitching while held in place.

First Jump: Jumps into the air with his staff in his hand ahead of him, robes billowing behind him.

Second jump: Floats upward very quickly, leaving an afterimage of a pentagram where the jump starts.

Shorthop Float: Stays levitating like in run.

Crouch: Gets down on hands and knees.

Crawl: Slowly goes forwards on stomach.

Level Up: Number appears above the wizard's head denoting the wizard's current level. Disappears a moment later.

Special Mechanic: Wisdom of Age!
As we all know, wizards get stronger as they grow older. Their magic matures to the point where they become almost gods among men; able to cast world-breaking spells.
This wizard remains his squishy self, but the longer he lives, the better he becomes.
For every 1200 frames that the current stock has been out, and for every 10% the stock has, the wizard gains a "power level". This level maxes out at 20. Depending on the attack, this will have different effects from speed modification to damage and knockback buffs. A wizard who dies early is a poor wizard indeed! Ever seen a young wizard cast a wish? Didn't think so.
As the wizard gains levels, he gradually becomes faster and stronger. Effects on specific moves are discussed at said moves. For every level, the dash speed, walk speed, crawl speed, aerial maneuverability, and roll distance become higher. At level 20, the wizard becomes "Epic Wizard"-details can be found under the "Epic Wizard" section.

Moveset
Standard Attacks

Jab: 1. The wizard stabs forward with the staff. Slow (about ten frames to come out), does 2 damage. 2. The wizard pulls back with staff and turns the opponent around. Will connect if the first connects, six frames to come out, about 20 frames of end lag. 6 damage. Very punishable due to lack of hitstun, by some on hit. For every four levels, the startup on both jabs will reduce by 1 frame (minimum 3) and the endlag on the second jab will reduce by 2 (minimum 5). In addition, for every 5 levels, the damage on each hit goes up by one for a maximum of 16 damage total.

Forward Tilt: The wizard stretches his hand out and leaves a pentagram mark on the opponent. The opponent then cannot walk, jump, or fly in the direction of the wizard for 30 frames (things like MK's Dtilt will still move the char forwards towards wizard). Knocks the opponent slightly away, about to the range where snake's Ftilt will no longer hit the wizard. Startup is about 20 frames. Deals 3 damage, and endlag is about 8 frames. For every 3 levels, startup reduces by one and damage increases by one. For every 4 levels, the frames in which an opponent cannot approach the wizard increases by 10.

Down Tilt: The wizard swipes at the opponent's knees with his stab. Some glitter appears where the end of the hitbox is. Startup is about 10 frames. This is probably the wizard's best melee move. It does 9 damage, and has a slightly disjointed range (approximately the size of Ivysaur's Dtilt). However, for every 5 wizard levels, the disjointed range on this move grows larger, eventually at level 20 being well longer than DK's ftilt! The move knocks back at a low angle, but will not kill.

Up Tilt: The wizard raises his hand and lays another sigil in the air. Any opponent struck by his hand during the attack (it is slightly disjointed forwards) will be hit up and stunned in midair for 10 frames, along with taking 7 damage. The startup is 8 frames, the move stays out for 6 frames, and the cooldown is 3 frames. For every 4 levels, the opponent remains stunned for another 5 frames. During this time, the opponent cannot be injured.

Forward smash: The wizard raises a portal in front of him and summons a very wide jet of flame which shoots forwards a moderate distance (Approximately the length of Olimar's normal grab with a blue pikmin), dealing heavy damage and knockback. The attack deals 19 damage uncharged (25 max charged), sends characters at about a 40-degree angle, and will start killing around 80-90% on most characters. However, the lag on it is terrible. The startup animation, where he creates the portal, takes about 50 frames, and the end lag is about 10 frames. However, for every 4th wizard level, the startup goes down 7.5 frames (minimum 12.5 startup) and the end goes down by 2 (minimum 2 end). This move becomes very dangerous at high levels!

Down Smash: The wizard spins his staff around his body with high speed (about 6 frames to spin around completely!). He poses with the staff in front of him, held with two hands in a "thou shalt not pass" motion, then, 20 frames later, explosions appear where the staff was (imagine jets of flame following the path of the staff) at the same spin speed. Range should be similar to DK's Dsmash range. The cooldown on this move is low (6 frames) by comparison. It deals 17% uncharged, 21% charged. It hits at an approximately 80 degree angle and will kill most characters around 120%. For every wizard level, the time between the spin and the explosions goes down by 1 and the KBG and damage go up slightly. At high levels, this attack becomes very, very scary. High range!

Up Smash: The wizard raises his staff above his head and spins it (this is both the startup and charge animation; startup ends after the 26th frame). Then, on release, lightning rains down on both sides of the wizard and above him (range comparable to the wiz's Dsmash), trapping opponents in the attack (which lasts for about 19 frames) and dealing them 1 damage per frame (not counting hitlag), for a total of 19% if all of it hits. You can SDI out if you get stuck in it during the beginning, but it isn't easy. At the end, A large flash appears with slightly higher range as the lightning rain (if you SDI'd out near the beginning, you can still potentially be hit by this if you don't back up), dealing 4% and having a high knockback (angle: 35), which kills at about 80%. There is about 20 frames of endlag where the wizard straightens his robes. Very punishable if you know what you're dealing with. However, for every 2 levels you have, the startup reduces by 1.5 frames and the endlag reduces by 2.


Specials

Neutral Special: Selfdestructive Blast. The wizard lets out a burst of raw energy. This is the wiz's best GTFO attack. In fact, this is probably the single best GTFO attack in the history of super smash bros. The opponent gets smacked back a solid distance (angle: 40) with fixed knockback. It has a disjointed hitbox the size of snake's knee, and it has one frame of startup. Literally. The wizard spreads his arms like Lucas does in his Up Smash, then straighten yourself up (endlag). The endlag is 20 frames, meaning it is not exactly unpunishable.
However, it comes at a cost. The wizard loses 2 levels when he uses this attack-if he is at level 1 or level 2, it does nothing. The use of this is to prevent overagressive characters from walking all over you. You go into specialfall from this attack. This is probably the most important attack in the wizard's arsenal. If you use it carefully, you will have far more success. If you spam it, you will not reach the higher levels you need to succeed. Use it as a combo breaker or a way to get some breathing room. It will also reflect all projectiles.

Forward Special: Magic Missile. Ah, a classic in every wizard's arsenal. This attack is a little weird, and becomes very different depending on your level.
  • Lvl 1-3: Wizard raises his staff (10 frames) and fires off one white-bluish ball of energy with a long comet-like trail. It moves slowly (gordo speed) for approximately 120 frames, following the nearest opponent at time of casting until it either hits (dealing 8 damage with very low knockback) or fades away. It turns slowly (See: Snake's nikita). After the frame of the cast, there are 20 frames of end lag. They are easy to evade, mostly-they move rather slowly
  • Lvl 4-6: As 1-3, just with 2 balls of energy. (they go in slightly different starting directions)
  • Lvl 7-9: As 1-3, just with 3 balls of energy. (Very different starting directions, slight delay on the shots)
  • Lvl 10-12: Same animation, 3 balls of energy. The three balls have different colors and different effects. There is a white one which travels faster than average (about 1.5x speed) and has an electric element. There is a red one which deals 12 damage and has moderate knockback (comparable to a grenade) and a light blue one which travels slower than average (approx. 0.75x), but freezes on contact.
  • Lvl 13-19: As 10-12, but the startup animation is 2x faster and the missiles travel 1.5x as fast and stay out for twice as long.
  • Lvl 20: As 13-19, but twice as many missiles and Red missile has very high explosive knockback.
The move is obviously potent, but only if your opponent can't get in on you. If you input any attack other than Meditate (see below) or you take damage or get grabbed, the missiles will vanish instantly. This move is pretty much din's fire for the wizard. It is not quite safe on shield, especially seeing as the wizard can do whatever he wants while you block, like, say, going up and grabbing you (not to mention at higher levels it will really start to eat at shields). So you have to confront it and hit the wizard with something. This something can be a projectile, but the missiles themselves will cancel out most projectiles (pretty much anything short of a nikita or waddle dee). Using this attack in the air will cause specialfall.

Down Special: Meditate. The wizard sits down (10 frames) and charges... something. A pentagram appears in the background. Every 30 continual frames the wizard spends in this attack, he gains a level. A pentagram flashes on each of these 30 frame integrals in the wizard's background. Using Meditate correctly is important, because it is by far the fastest and easiest way to gain levels. You can use this attack during the magic missiles. This is a perfect momentum cancel like Game&Watch's bucket.

Up Special: Home Tele. The wizard opens a scroll and teleports to a predetermined spot on the stage (on stationary levels, this is almost always the center, on moving levels it changes depending on the location). 13 frames to start, and when he appears, 20 frames.

Aerials

Neutral Aerial: The wizard lets out a burst of energy that reaches just about his height in diameter and forms a small globe around him. Startup is about 14 frames, endlag is about 13 frames. Deals 11 damage, low knockback. Landing lag is 18 frames. For every 3 levels, the landing lag reduces by 2 frames, startup reduces by 1, and the endlag reduces by 2 frames.

Forwards Air: Squishy Wizard's staff starts glowing, and he slams it forwards while the semitransparent aura of a hammer appears around it. This attack, while slow (29 Startup, 15 End, 18 Cancel), is a very powerful meteor smash. It hits with about the range of DDD's Fair and hits about as hard as ganon's Dair. However, the move is telegraphed pretty far in advance-don't expect to hit much with it. For every 5 levels, the startup lag reduces by 3 frames.

Back Air: The air behind the wizard explodes, dealing 8 damage with moderate knockback. The wizard moves his staff to behind him in 10 frames, then an explosion appears at the head of the staff. It hits at about a 60-degree angle. End lag is 16 frames

Down Air: The wizard Teleports down suddenly. Anything in the path of the teleport (about one stage builder block deep) will take 12 damage and be knocked upwards. Moderate knockback. 18 Startup frames, 7 end frames (4 if canceled on the ground). One of your better options against juggling. Startup reduces by 3 frames every 5 levels you have.

Up Air: The wizard summons a cloud above him which shocks any enemy passing through it. It reaches about as high as MK's uair. Startup (wizard holds the staff above his head; if you touch the ground during this it will autocancel): 19 frames. Duration (cloud is buzzing with lightning): 10 frames. End (cloud disappates, staff down): 7 frames. Ground cancel: 15 frames.


Final Smash: Level 40 Spell-Meteor!
The wizard has reached epic levels. And it is time to cast the ultimate spell. He calls upon the power of a meteor. Basically, anyone even close to the wizard when he presses B has about 60 frames to get out of the way before taking a OHKO from a meteor which passes through the stage and takes up about half the width of FD. It is too large to dodge effectively and will OHKO on contact. Your only hope is to get out of the way fast enough. The meteor is about half the size of final destination and travels relatively slowly. It will pass through the stage, and anyone hit will be KO'd. At the end, the wizard shrinks to level 1 again.


Epic Wizard
The level 20 wizard is truly a force to be reckoned with. His stats become different, first of all.

Run Speed: 7/10. Because supersonic speed is just annoying. Kill them in style.

Walk Speed: 5/10. Wizard levitates.

Weight: 7/10. Hooray for magic to make you harder to kill. About Wario's weight class.

Melee Power: 7/10. Wizards are not known for their close-combat skills. But at high levels, fast spells mean that you can just blow up in the opponent's face.

Ranged Power: 12/10. Yes. If you can't get in on this guy, he will kill you. This is like Brawl+ Samus on steroids.

Attack Speed (base): 8/10. Leveled up, all the spells have hasty casting.

Size: 4/10. He doesn't get bigger, but he glows...

Fall Speed: 6/10. Unchanged

Aerial Acceleration: 10/10. If the wizard wants to go somewhere, he will float pretty fast.

Aerial Movement: 9/10. This guy becomes like superman in the air.

Jump height (first jump): 8/10. A big hop into the air. Fox-type.

Jump height (second jump): 9/10. Unchanged.

Jump height (SH): 3/10. Epic Wizard has a low SH, but can float like peach for about 120 frames during the hop.

Shield: 10/10. Huge and magical.

Roll: 9/10. He teleports across the stage. Hard to catch.

Sidestep Dodge: 10/10. Better than ROB's.

Airdodge: 10/10. Better than MK's. Almost no vulnerability.

Epic Wizard also has a very special peculiarity. He takes damage over time-about 1% every 30 frames. With great power comes a great price. He glows though. And his attacks become ridiculously fast and powerful.


Playing the wiz

First of all, you have to know your priorities. Levelling up is the most important thing you can do. Run the clock. Camp. Stay the hell away from your opponents. Because at lower levels, almost all of your options are awkward. Abuse your great spot/airdodges and then try to punish with ftilt. It takes 20 seconds to level up, but only a half a second with meditate. Try to keep the opponent guessing with magic missile, and cancel meditate into it. Going into close combat is a terrible idea until your level is high enough that you can use the smashes without getting ***** for it. Until reaching a high enough level, you MUST play campy.


Taunts
Down taunt: The wizard draws a pentagram on the floor in front of him.
Up Taunt: The wizard raises his staff to the sky, and lightning strikes in the background.
Side Taunt: The wizard pulls a rabbit out of his hat.
 

KingK.Rool

Smash Lord
Joined
Nov 26, 2005
Messages
1,810
I am appalled. Here we have Bleak, a very nice set by all accounts that avoids the easy trap of overusing props, has a pleasant organizational scheme, doesn't overdo the detail, and has plenty of creative ideas, and you're spamming it away, be it out of inconsiderate manner or FOR THE LULZ. Yes, let's all do things FOR THE LULZ. Doesn't matter, it's LULZY. Yes, let's all ignore Bleak, it'll be LULZ. I hate the lulz, as we all know.

Thank god for Wiz, that's all I can say.

So it's almost midnight and I'm too exhausted to actually give Bleak a detailed piece of commentary, but I just thought I'd mention this, since this is a new low for MYM. What I will say is that I greatly enjoyed Bleak's snow-based playstyle, something that really hasn't been done all that many times - Abomasnow aside, and Glaceon had traces of it too - and you truly make the most of it. I don't particularly like how half of the Specials border on prop attacks, and that's the most surprisingly generic grab I've ever seen from you, although its hilarious animation more than makes up for that. On all other quarters, it's an excellent moveset and another fine addition to your MYM 6 resume. You're really [Jesus, it's late; I can't remember what the word I'm looking for here is] them out, aren't you, Kupa? Then again, I have eight sets so far this contest, so I shouldn't be talking.

Joe "Generic Boxer" Calzaghe most impresses me with his incredibly cool defensive submechanics, some of which I was devising myself for another Punch Out moveset... which, I'm afraid, will never be made, because apparently all the characters were called while I was deliberating. Well, I suppose I'll just wait for everyone to start giving up. On that note, King Hippo is quite close to completion and I hope to get him out by Thursday at the latest. I wouldn't want you all to forget about me. ;)
 

darth meanie

Smash Journeyman
Joined
Jun 6, 2008
Messages
452


D A R K R A I

The Pitch-Black Pokemon

Darkrai is a Pokemon who first appeared in the fourth generation of Pokemon games as a legendary, accessible only through a special event. Darkrai appears as a manifestation of nightmares, and has a signature ability and move related to putting opponents to sleep and abusing it.

Darkrai is a fairly popular legendary and has appeared in spin-off titles, the anime, and even had its own movie, the Rise of Darkrai. Interestingly, all of its various appearances have had wildly different projections of him; in the main games he is a misunderstood monster, while in his movie he is a noble hero, with his own big heroic sacrifice. In Pokemon Mystery Dungeon 2 though, he is wretched villain bent on destroying the world, who manipulates even Palkia and Dialga, two Pokemon with the power of gods, to do his bidding.

Darkrai also has an exceptional music collection, here for your enjoyment.


Enter Darkrai!
Darkrai's Sonata
Darkrai & Dusknoir Battle: Pokemon Mystery Dungeon 2
Legendary Battle, Darkrai Remix


// Stats

  • Movement Speed: Above Average
    [*]Aerial Mobility: Good
    [*]Power: Somewhat Above Average
    [*]Size: Light but Large
    [*]Lag: Punishing
    [*]Grabs: Great
    [*]Comboability: Strong
    [*]Priority: Generally Good

Looking at those stats, its clear that Darkrai plays differently than most characters; he's rather laggy, but can combo well, something that seems nearly impossible. With Darkrai's focus on mental attacks and sleeping abilities though, Darkrai has relative ease chaining certain attacks together, although he can't link attacks together as well as, say Meta Knight.

On other notes, Darkrai has exceptionally good dodges, good jumps and recovery, and very low traction, seeing as he hovers over the ground. Darkrai also has a somewhat deformable body, and he can stretch his limbs to grab the ledge a far greater distance than most characters, but it isn't a tether recovery. His recovery is good enough that it won't usually be an issue, but its there.


// Special Mechanic


Bad Dreams: Darkrai's unique ability in the Pokemon games, Darkrai deals passive damage of 3% per second to any sleeping opponent on the field, making Darkrai's sleeping moves a secondary source of damage. While enemies are sleeping, Darkrai also rapidly gains Nightmare Fuel, at a rate of about two levels per second of opponent sleep. What is Nightmare Fuel, you ask? I'm glad you did.


Nightmare Fuel:
Darkrai is the manifestation of nightmares themself, and thus feeds on his opponents' nightmares and fear. Darkrai has a selection of fairly weak specials, but his specials all become progressively more powerful as Darkrai gains Nightmare Fuel.

Nightmare Fuel is gained through two different methods:
  1. Passively boosted through Bad Dreams
  2. Raised by using specific, fear-based attacks

Nightmare Fuel is registered as a number between 0 and 20, and has four different states, in which Darkrai appears differently.
  • At 00-05 Nightmare, or Weak, Darkrai seems weak, and the shoulder spikes of his are shrunken.
  • At 06-10 Nightmare, or Normal, Darkrai appears as normal.
  • At 11-15 Nightmare, or Strong, Darkrai writhes more, his hair and spikes quickly shift like flames.
  • At 16-20 Nightmare, or Powerful, Darkrai has a dark aura around him and the screen is slightly darker from his power.

Nightmare Fuel drops over time, losing a level every five seconds, and is also expended when Darkrai uses his Specials. Nightmare Fuel is key to allowing Darkrai to use his most wicked damage-racking moves, combos, and helping him get KOs; although he is not powerless without it, he cannot fight nearly as effectively without the use of his Nightmare Fuel boosted specials.

A move's Nightmare strength is displayed below the damage percentages in a pink section, a bar for each level of Nightmare a hit imbues. Moves that eat Nightmare Fuel, conversely, appear in red.


// Standards and Tilts


Jab Attack: Hypnosis - Darkrai holds his two hands out, his lone blue eye glowing and his white hair flaming with power as thin circles start to fill up the area in front of him. This move has a huge amount start-up time, but ends rather quickly once the button is released. The hypnosis rings fly out at a rate of about five rings every three seconds.

Contact with a ring inflicts very, very mild hitstun and no damage. It does, however, greatly increase the lag of any moves the opponent is doing, their attack taking twice as long to finish. Opponent move speed is also cut in half for about one second. The move does more than just shut down any opponent who lets you get this move off while approaching though; if an opponent is struck by three rings consecutively, they nod off into a light sleep, the effect being only two thirds of a second long at 0% damage and one and a half seconds at 100% damage.


Dash Attack: Soul Release -
Darkrai ceases his dash, but a strange pale figure continues forward though, completely immune to damage. This ghostly apparation of Darkrai flies forward about three platforms, right arm outstretched, doing 3% damage and slight hitstun on contact with any enemy before vanishing.

Darkrai has a sweetspot on this move though in his claw; if his claw passes through the opponents' chest, Darkrai rips through them and pulls out a misty orb that dissolves in the air. This does a great deal of damage and pushes opponents back slightly, also dealing severe histun.

The sweetspot isn't difficult to land and the move has great priority, being a disjointed hitbox with great range. The move however is one of the laggiest dash attacks in the game, even laggier than the Dedede faceplant, and Darkrai cannot act until the spirit disappears, making him a sitting duck if he misses it. Some moves lose their value when spammed, but this one really does.

[3%, 11%]


Forward Tilt: Reaper's Touch - Darkrai holds out a single hand in a slow motion, extending a single claw forward. The actual movement deals insignificant damage and knockback, but a moment later a spark shoots from his hand, and anyone in contact of his hand is thrown high and forward, with great damage and Darkrai is free to attack.

This move is a decent KO option, KOing at about 120% and having fairly good priority, although the lag makes it hardly Darkrai's attack of choice. What makes it valuable is that it can be pulled off against a sleeping opponent from one of Darkrai's slumbering moves, and get a lot of damage off. Usually Darkrai can only pull this off at percentages over 50% though.

[2%, 12%]


Up Tilt: Mean Look - Staring at an angle of about thirty degrees up, Darkrai's single blue eye releases a small flash of light in front of him fairly laglessly. With surprisingly short range, this move will miss most small character standing on the ground, but it can be DI'd both up and down.

Enemies hit by this attack take very little damage, but are dealt a little knockback and some hitstun, making it possible, if difficult to follow up with. Enemies struck by this move are slightly more vulnerable to sleep, sleeping 33% longer than normal if hit by a sleep move in the next five seconds.

[3%]
[|||]


Down Tilt: Nasty Plot - Darkrai pushes into the ground, part of his body becoming a shadow, and tentacles appear close near him writhing out of the ground to either side about two thirds of his height tall, dealing ludicrously small knockback and hitstun to anyone who touches them. They are very low priority, but recreate quickly if destroyed, making a tentacle priority similar to Spadefox. Darkrai shivers as you hold this button down, and schemes of various ways to destroy his enemies.

Upon release, an angry thought bubble of schemes and plans and mean ideas appears over his head and he shoves his hands out in both directions. His hands have the same priority and damage as the tentacles, but the thought bubble does more damage and some hitstun.

What good is this move? Well, while fantasizing and scheming, Darkrai can artifically generate Nightmare fuel by a slow rate of one level a second. Darkrai gains the advantage of having some defense through his tentacles while using this move though, making him not completely defenseless, keeping him safe from the Star Fox trio's blasters, for example.

Lag is rather bad both starting and ending, so try to use this move only when you have beneficial spacing.

[2%, 6%]
[|]


// Smash Attacks


Forward Smash: Dream Eater: Darkrai leans back some before charging the move, and shivers with power while charging. Upon release, Darkrai leans ridiculously far forward, and the red carapace around his neck distorts into a hideous jaw, stretching out even further and clamping down hard on whatever is in front of him. The move has surprisingly low lag for Darkrai.

The jaw acts as a medium priority jointed grab hitbox, and upon contact with an enemy Darkrai draws them into himself and then belches them out, with below average knockback for a Smash Attack. The attack does below average damage against conscious opponents, but used against a sleeping opponent it does much more damage and heals Darkrai for half the damage dealt.

[7-13%, 11-19%]


Down Smash: Nightmare - Sinking into the ground, Darkrai raises his hands over his head in the air, collecting darkness power. Upon release, Darkrai throws it into the ground, along with his arms themselves, reappearing to the sides of him as a mass of glowing dark tentacles. The attack has above average starting and ending lag, and great priority.

This attack has strong upwards knockback and damage, but it increases to nearly ridiculous levels against sleeping enemies, making it the choice KO move for Darkrai. and also happens to be one of his moves that increases Nightmare Fuel, raising it by four levels on a hit.

[11-18%, 17-26%]
[||||]


Up Smash: Dark Pulse - Darkrai creates a sphere of dark purple energy in his hands, radiating from within. After charging, Darkrai stops for a moment, and tosses it into the ground, it exploding into a purple wave reaching over a block above him and half a block to either side, with good priority, range, and decent damage and knockback.

The kicker though is that, in the moment before Darkrai tosses it into the ground, he can redirect it and toss it forward by inputting a roll dodge in the direction you wish him to throw it. A thrown Dark Pulse progresses like a beam slightly angled upwards, rather quickly appearing then disappearing two stagebuilder blocks away. It has higher priority, but the same damage and knockback, although the knockback is diagonal rather than vertical.

[9-17%]


// Aerials


Neutral Air: Crawling Nightmare - Darkrai twists slightly, and his lower body, shoulder spikes, and claws extend out, all becoming somewhat low priority grab hitboxes. This move has a bit of lag, making it hard to pull off, especially with the priority, but on contact, the extremity of choice pulls the opponent inside Darkrai, forcing them to button mash out of him, although its fairly easy to escape from, about half of a second even at high percentages.

Not only can this move be used to Darkcide, but it also gains Darkrai some Nightmare Fuel, three levels regardless of length of the attack. Further, when the oppponent escapes, they fall out from Darkrai's body slightly downwards and backwards, but with their second jump and recovery still available. Darkrai suffers some lag from this attack, so he'll have trouble footstooling or following up on this move.

Possibly Darkrai's only true option for gimping, its a quite difficult move to pull off, and even as a gimper, it will only work if Darkrai goes very low, near the bottom of the stage, or if the opponent has a terrible recovery.

[8%]
[|||]


Forward Air: Shadow Claw - Raising his claws above his head, Darkrai does a slow, strong slash. His claws grow out and glow with massive light purple energy, and Darkrai does a two part slash; a small overhead strike forward, followed by a big pile driver down. The move has decent priority for a jointed hitbox, and a good bit of lag, but not enough to keep it from being a decent approaching option.

While using this move, Darkrai's claws are covered in a bright energy field, so even if Darkrai misses the attack, they still will take some damage from the area around his claws, which technically acts as a medium priority projectile. The knockback from the first hit is slightly forward, and interestingly, enough to push the opponent out of the main strike, which has stronger forward knockback, slightly angled down.

This move can really be used in almost any situation for Darkrai, having enough knockback to KO, at least near the blast zone, power to rack damage, and reliability.

[6%, 9%, 2%]


Up Air: Distortion - A silvery light seems to overcome Darkrai, as he fades away slightly. This start-up is quite laggy, so beware. Darkrai then distorts, a second shadow flying slightly upwards, raising two ghostly claws up in attack. A moment later, Darkrai himself becomes fully corporeal again and flies into the distortion, but immediately sinks back down into wherever he started the attack. If Darkrai uses this move near a ledge, the distortion will grab the ledge for Darkrai, who will reassimilate with him, making it a slight, slight recovery move.

Interestingly, right before Darkrai releases his distortion, he has Super Armor and looses all momentum, so by tapping the control stick in any direction, you can control at which exact spot the distortion appears. Darkrai has too much ending lag from this attack to truly stall in mid-air with it, but it can certainly save his skin against, say, an enemy who just grabbed a Golden Hammer.

[9%]


Down Air: Night Shade -Darkrai shivers, and his lower body kilt thingy stretches downwards, and spits out a dark light like several black lightning bolts in a arc below him. Rather laggy, they travel only about a stagebuilder block in whatever direction they were lauched before pittering out.

Rather average priority, on contact they deal decent damage, which for some reason is electrical, and puts aerial opponents into fallspecial for one second. Its laggy though, and characters can usually Up Air or Up Special through it. The effect also cannot be stacked; an opponent can only take the fallspecial effect once during the entire length of their time on stage, but they will still take some hitstun.

[6%]


Back Air: Mist Spike - Darkrai without turning his head throws his right arm backwards, which morphs into a single black spike. The attack is fairly low damage and priority, but has a sweetspot at the point where both values increase. If this move is input again before Darkrai returns his arm to normal, his arm shoots out backwards like a thrown item doing much more damage. It fades away into mist in two seconds, and Darkrai cannot attack again for two and a half seconds, when his arm reconstitutes. Fairly lagless start, but a good bit of ending lag, unless Darkrai shoots his arm off.
[4%, 9%, 6%, 11%]


// Grabs and Throws


Grab: Tentacled Darkness - Darkrai has a small bit of lag before the attack actually starts, but he then stretches his arm ridiculously to grab an enemy and pull them in, face to single-eyed face. Laggier than Dedede's grab, but also has slightly greater range, making it a fantastic grab overall.


Pummel: Imbue Fear - Darkrai tightens his grip and dark waves of energy pulse out of his body into his opponent. This pummel is fairly fast, but, interestingly, does no damage! That's right, no damage. The only thing it does do is raise his Nightmare Fuel gauge, a point for every hit! Much better than damage, if I do say so myself. Getting three or four off isn't impossible at all!
[|]


Forward Throw: Smother - Darkrai leans back slightly, then falls on top of his opponent, smothering and suffocating them, his body deforming into a deadly blanket. The opponent must button mash his way out, taking a whopping six percent damage a second underneath Darkrai, and its a fairly difficult escape; at high perecentages Darkrai can hold people under here for over three seconds! The Darkrai player can also button mash back to try to hold the opponent under.

What's the catch? Well, when it finishes, the opponent automatically uses their Get Up Attack against Darkrai, and has the advantage to take the fight back to him. Use only at high percentages, where you know you'll do more damage.

[Variable]


Down Throw: Look Into My Eye - Darkrai brings his opponent right to him, and looks them straight into the eye. The opponent becomes drowsy and instantly falls asleep, staying asleep from half a second at 0% to one second at 100%, the effect being slightly weaker than that from Hypnosis.


Up Throw: Vortex Pull - Darkrai shows off his amazing deformable body once more, pulling the enemy in and swirling around in a minature twister, the effect not unlike Mach Tornado, but reaching higher, making it a throw that can affect other opponents as well. Knockback however is fairly weak, and Darkrai is thrown backwards after the attack and suffers a good bit of lag ending, making it mostly useful in Free For Alls.
[11%]


Back Throw: Soul Eater - Darkrai wraps his mouth over his opponent's torso, staying like that for a second before leaning backwards and shooting them out. It has the best knockback of all his throws, which considering what its up against isn't all that impressive, and strong knockback, making it his most straightforward throw, if not his most impressive or useful. Since he seems to eat his opponent, it also gives him a bit of Nightmare Fuel
[10%]
[|]


// Special Attacks


Neutral Special: Dark Void - Finally, the Specials, saved for last, so you could understand exactly how Darkrai builds up his Nightmare Fuel, the throws and tilts and smashes all being a crucial key to using his Specials.

Dark Void is easily Darkrai's most straightforward Special; with relatively low lag, Darkrai constructs a spatial rift around him, a high priority aura of darkness that deals a little hitstun to any enemy touching it. The field is relatively small, and has slightly below average lag on either end. Darkrai can also, by tapping B again and then pushing a direction, throw the Dark Void in any direction, traveling at Snake's run speed. This is the Weak form of Dark Void and uses one level of Nightmare Fuel

[|]

At Normal level, the cost of Nightmare Fuel remains the same, but the area of effect increases in size somewhat, about the size of a stagebuilderblock, and the hitstun length increases.

This move really kicks it up at Strong and Powerful levels though, where it grows to be about 1.5x the size of Bowser, and instead of dealing hitstun, it sends opponents to sleep, about one to two seconds at Strong and one and a half to three at Powerful, depending on damage. The cost of Nightmare Fuel however ramps up to a whopping five though, completely knocking Darkrai down a tier of Nightmare Fuel. The potential of an enemy sleeping that long though shouldn't require extrapolation, especially with Nightmare as such a prominent Smash.

[|||||]


Side Special: Hallucinations - Darkrai's eyes glow before he tosses out a silvery lightning bolt at his opponent, which travels fairly fast, has great priority, and comes off of a fairly lagless move, making it rather difficult to dodge. This move consumes a great amount of Nightmare Fuel, one for Weak, two for Normal, four for Strong, and a whopping eight for Powerful. Its effects change for each level of Nightmare Fuel Darkrai is at rather drastically.

At Weak, the hallucinations merely confuse the foe. They are confused, as if their shield broke, but they quickly snap out of it, taking less than half a second. Only worth using, really, if you don't have any Nightmare Fuel to begin with.

[|]

At Normal, the effect becomes stronger, and they begin to move in a trance-like state. For the next three seconds, the opponent suffers half movement speed and attack speed, just like Hypnosis does.
[||]

At Strong is when the attack starts to ramp up, and Darkrai can create more powerful, mind-crushing illusions. Darkrai forces the opponent to see visions of their loved ones, family, friends and allies in place of him, causing them for five seconds to be unable to attack. This attack also has the interesting effect of building up Nightmare Fuel, making it more rewarding to hit, and more punishing to miss.
[||||]
[||]

At Powerful, Darkrai can conjure the most sinister illusion, like the ones he summoned in Pokemon Mystery Dungeon 2. The opponent becomes entirely hopeless after being hit by this level of Hallucination, entering fallspecial instantly if hit in midair, and dropping to the ground helpless if hit on the ground, lying prostate for three seconds, giving Darkrai one chance to release a powerful hit.
[||||||||]
[||]


Down Special: Shadow Sneak - Darkrai dives directly downward, falling about the height of two Ganondorfs until he hits the ground. During this dive, which he enters after average lag, he has Super Armor, but if he does not enter the ground, he enters fallspecial. Upon reaching the ground, Darkrai dives entirely in and becomes a shadow, and while a Shadow he uses up one level of Nightmare fuel a second.
[|]

At Weak, Darkrai can only jump back out immediately after diving in, using Shadow Force, and splashing dark energy to either side as a medium priority projectile with good damage and passable knockback, but with a great deal of ending lag.

[7%]

At Normal, Darkrai can move along the ground in the shadow, and stay that way until he completely runs out of Nightmare Fuel, at which point he is ejected in a dizzy state for a second. He can move at Shiek's running speed while in the shadow. Darkrai stays in this state until he taps the B Button, jumping out by using Shadow Force, but with less ending lag.

At Strong, Darkrai gains an attack while in this state: Shadow Punch. For the price of another two bars of Nightmare Fuel, Darkrai can throw a giant shadowy fist out of the ground by simply pressing the A Button, which has incredible range, great priority, and good damage and knockback. It has fairly little starting lag and below average ending lag, making it a nice damaging option especially with Darkrai's temporary invulnerability.

[9%]
[||]

At Powerful, Darkrai can reach out and grab enemies with the hand conjured from Shadow Punch by pressing the Z button. The fist reaches out and grabs the nearest enemy, and Darkrai has two choices; either throw the enemy forward for damage and knockback by tapping the A button, or come out of the shadows, still holding the enemy by tapping the B Button. This option consumes four bars of Nightmare Fuel.

[6%, 7%]
[||||]


Up Special: Shapeshifting Darkrai's last Special, it is different than the other three in that its four forms are all radically different; Darkrai can elect to choose any of the four forms he has available at the time by controlling how long he holds the B button; his eye flashes for every higher tier of shapeshifting he has selected.

The lowest tier Shapeshifting move is Haze, where Darkrai entirely discorporates into a cloud of smoke, moving very slowly, at about Jigglypuffs run speed in any direction for two seconds. A rather uninspiring recovery move, it has the significant advantage though of being completely ungimpable; any enemy who touches Darkrai in this state takes some damage and light knockback. This move also has absolutely ridiculous lag, so watch out.

[3%]
[|]

The Normal level shapeshifting move is Dark Matter. For the price of two bars of Nightmare Fuel, Darkrai transforms into a ball of swirling dark energy, and propels himself in any direction at about the distance and speed of Pikachu's Quick Attack, doing some damage and light knockback. Darkrai can continue this attack by tapping the B button immediately after it ends, continuing to bounce around until you decide to stop or he runs out of Nightmare Fuel. Darkrai can take damage while he moves, but he is in Super Armor. He has fairly little lag using this move, but is vulnerable to attack in the state between jumps, much like Pikachu is. The knockback is enough that Darkrai cannot combo this move into itself, so don't try.
[7%]
[||]

At Strong, Darkrai can transform into something no one expected; the dark pallet of his opponent! Darkrai loses three bars of Nightmare Fuel a second in this transformation, but has fairly little lag in this state.

Why would you want to burn Nightmare Fuel just to make a mirror match though? The answer is simple: just like in any cartoon, book, or movie involving dark clones, the clones inexplicable outprioritize the opponent! All of Darkrai's moves have increased priority during this transformation, letting him outdo even Meta Knight's Mach Tornado, if only for a little while. You won't outprioritize their Smash with their Jab, but you can make them sweat a good bit.

[|||]

Darkrai's final shapeshift, Darkrai disappears entirely from the screen. Suddenly, Cresselia, the Lunar Pokemon, flies overhead, sprinkling lunar dust that heals everyone on the field for 15% damage! As you may have guessed, there is a catch; Cresselia deforms into Darkrai, and everyone hit by lunar dust goes to sleep for one to two seconds, and takes 2% damage a second for fifteen seconds. This attack also happens to be a near perfect recovery, as he disappears and flies to the other side of the field.
[2%]
[|||||]


// Final Smash: World of Darkness

Darkrai has the Smash Ball! His ultimate plan will finally come to fruition! The screen flashes black and white, and everything but the characters turns black and white, a dark monochrome color scheme. Darkrai flies to the background as a dozen giant boulders bigger than a stagebuilder block fly into the air, having a weak bumper effect and dealing 8% damage on contact. Lightning arcs between them, dealing 11% and significant knockback.

Slowly, the stage begins to crumble as time goes on. Platforms crash, pieces tear off the bottom, and finally the entire stage is destroyed. Final Destination cracks in half, Skyworld plummets to earth, Pictochat's DS is turned off. For three seconds there is no stage, and opponents must attempt to stay in the air before the effect ends they return to the normal world.

No, it doesn't have anything to do with Darkrai's special mechanic. Why would I do that?


// Playstyle

Building the Fear: Its early game for Darkrai, and you're not in the best situation. Your best damage racking moves, ironically, require opponents to be at higher damage, and you don't have access to your most incredible powers stored in your specials yet.

The name of the game right now is getting some damage in and building up your Nightmare Fuel, and that means grabs. You have a great grab game, and can pump up your Nightmare Fuel fairly quickly using your pummel, so use it. Dark Pulse isn't a KO move, so feel free to use it for spacing and such. If you've got some distance with your opponent, abuse it with Nasty Plot, or prepare for an approach with Hypnosis. Your goal right now is to try to stay matched with your opponent for damage while keeping your Nightmare Fuel climbing.


Starting the Nightmare: Around the middle of the stock you should have a good amount of Nightmare Fuel, Strong, or if you're good, Powerful. Hallucinations is a fantastic way to get an advantage and start kicking butt, and Shadow Sneak is one of the best moves available when it comes to safely being able to inflict damage. Smother should be your new grab of choice, after pulling off a few pummel of course, you're trying to maintain your Nightmare Fuel right now too.

Finishing Them Off: Once your opponent is ready to get KO'd, you need to sleep them. Look into my Eye, Hypnosis, Dark Void, they all work well. Sleep them, and Nightmare them. Game, Set Stock. Try to take advantage of your current lead to rack up damage before you're KO'd, and make it easier on yourself when you respawn, mmkay?


// Animations and Extras

Up Taunt: Darkrai's hair goes wild, and he makes a low, gutteral roar.

Side Taunt:Darkrai shadowboxes literally, and his shadow punches back.

Down Taunt: Darkrai sinks into the ground, then pops back up. Boo!

I am going to add a stage, more animations, and a matchup section later, but its late, there's a good spot on the thread, and I want to get it out now.
 

tirkaro

Smash Champion
Joined
Jun 24, 2006
Messages
2,808
Location
but a pig in the sun
W00T 3 MOVESETS ALMOST lN A ROW!

/:"you know, i never cared for the world we live in. i was born in a factory, forced into existence even though i shouldn't have. all i do is uphold peace and prosperity while nothing else flourishes.

i'm going to change that. i'll let the world know that their own creation hates their guts. i'm going to make them regret building me and i'm going to enjoy every moment of it.....


ROBO-LINK MK II


........Wait, again?(Overview)


Despite looking very similar, Robo-Link(Who was recently updated, click for link) and Robo-Link MK II are not the same entity.
Rather, MKII is an entirely different version of the Robo-Link model, simply called Robo-Link MKII. This particular MKII, no. 4, was one of the first versions of this model, and actually one of the more successful ones......or so it seemed.

Just like Robo-Link, MKII had a glitch in it's program, causing it's personality to be entirely different than what was programmed. Of course, MKII was wary enough to put up a facade of being a normal, noble servant, while hiding it's true colors.

But unlike Robo-Link, who's glitch simply made him more narcissistic and anarchist, MKII received somewhat of a split personality. His facade eventually broke off into it's own personality, making him a kind and noble warrior with great respect to the hyrulean government.

His "other" personality is completely insane. He believes his very existence to be a complete mistake, but still fights for it's protection. His ultimate goal is to make the world feel miserable for creating him, and holds little respect for everything, including itself.
So he kinda has a Jekyll-Hyde disorder, though this is only implemented in story modes and not gameplay.


Robo-Link and MKII don't exactly care for each other. RL normally hates the MKII models(as he's afraid of being upgraded into one, and potentially losing his awareness and personality.), but thinks no. 4 is too insane to be worth reasoning with.
MKII's feelings on RL is divided; his more "noble" side hates him for being to anarchic, while his "insane" side doesn't see him of much importance.


✇Bzzt.....

In terms of gameplay, MKII is a completely different beast than Robo-Link. He doesn't have the same disadvantages/advantages that the normal RL has, and is just as, if not an even harder, character to pick up. A lot of his moves get pretty wild, and a lot of them involve slight micromanaging.(in a sense)


Unlike RL, MKII does not have overheating problems. Instead, he trades this for Excess Electricity.
So what is Excess Electricity? Well that's when too much electricity builds up within MKII's body for being too hyperactive. MKII's amounts of electricity is built up by most of his attacks and movement, and is measured via a circular meter next to MKII's percentage.

This circular meter measures, in digital numbers, the percent of excess electricity built up in it's body. It starts off as 0%, and goes up to 100%. So what happens at 100%?

When you go to 100%, you go into Excess Mode.
In Excess Mode, you take 5% damage every second and cannot block. But in return, you become twice as fast and all your attacks get a 5% boost.(Yes, even all of your summons get this bonus, more on that later.)
Of course, if you're not up to the risk, you can use your Down Smash to get rid of all of it. But be careful, if you use your Dsmash while you're already in Excess mode, you take 10% in return.

For note, here's some misc. things that raises MKII's electricity;
-Running raises it up by 8% for every final destination run.
-Jumping raises it up by 1% every jump
-Sheilding raises it by 1%.
-Standing still will reduce it by 2% every second. (Unless you're in excess mode.)


Also, MKII has these guys:


Yes, all those things appear in this moveset somehow.

The most prominent of these things are called Micro-Links. No, they aren't microscopic, but they're still much smaller than a Mini-Link.


Micro-Links are MKII's rough equivalent of Mini-Links, but different. They're much weaker, but they're more numerous and are more versatile.
One thing to note is that Micro-Links and the other things pictured have one thing in common; nearly all attacks involving them require some degree of micromanaging. If they are summoned for an attack, chances are you're going to have to direct them in some way, and thus losing control from MKII. But luckily, if you find yourself in any danger, you can snap your control back to MKII by pressing the shield button. Doing this will deactivate whatever these summons were doing and retract back into MKII. Now that we got that out of the way....


STATZZT


✇SIZE✇: 7/10
MKII's stature makes him a wee bit smaller than Robo-Link, but not all that much. He's about Link's height.

✇WEIGHT✇: 3/10
MKII is actually a LOT lighter than RL, even lighter than the normal human.

✇WALK✇: 7/10
Tis okay

✇RUN✇: 7/10
MKII has none of the locomotive power of RL, so he runs pretty standardly. For a comparison, he's about as fast as Mario.

✇TRACTION✇: 8/10
Has his feet well on the ground, has pretty little trouble with slipping, and turns well. Pretty good.

✇POWER✇: 2/10
Completely horrid. But he's a character not focused on power.

✇ATTACK SPEED✇: 7/10
Doesn't have as much problems with it as RL does. He attacks fairly fast, though it might not matter in some circumstances...

✇RANGE✇: 9/10
Just like RL, MKII is another range maniac, though he's not quite the same as him in that regard.
Oddly though, he never uses that sword on his back, only using his body. Him and Ganondorf would probably get along real fine.

✇PRIORITY✇: 3/10
Once again, range maniac. Don't expect much priority from this guy.

✇FIRST JUMP✇: 5/10
MKII doesn't have any real jumping problems, so he's well off.

✇SECOND JUMP✇: 7/10
Still, it's no hover. All he does is double jump, so he can't go as far as RL.

✇FALL SPEED✇: 7/10
Pretty standard rate.

✇CROUCH✇: 6/10
Again, pretty average. About as low as Link's crouch.

Everything else: Nein


It's not animations! It's not animations!


STANDARD POSE
MKII looks down, kinda like a zombie. It's exactly the same as the sprite under the Stats section.

IDLES
1- MKII looks up, and looks dully ahead of him.

2-(When in Excess Electricity mode) MKII looks up at the sky, his face showing signs of masochistic pain.

WALK
MKII slumps forward, his head and shoulders still down. (Think Testament(From Guilty Gear)'s walk)

SPEED WALK
Just a sped-up version of his walk.

DASH
MKII puts his head up, and runs forward like a normal human being.

CROUCH
MKII gets down on his knees, covering his head.

FIRST JUMP
MKII looks up and jumps into the air. It's very standard, looking similar to Link's.

SECOND JUMP
MKII sends out a short burst of backfire from the sole of his foot, and does a flip in midair.

SHIELD
MKII's shield is actually very odd. It actually has a bit of startup time.
What happens is that MKII retracts 2 cocoon-like shells from his shoulders, and brings them together, covering himself with them. Basically, MKII puts himself inside a completely indestructible capsule.
This capsule cannot be broken whatsoever. It can be grabbed, but it's very heavy, like carrying bonsly. This shell will last for 5 seconds. After 5 seconds, he'll retract himself from the cocoon and go back to normal.
The startup time for bringing out the cocoon is roughly 1 second. During this moment, MKII has super armor, so this move cannot fail (though he'll probably take some damage.)
Getting out of the shell takes as much time for kirby to get out of his stone form, meaning there is a small opening at that point as well. Luckily, he still has super armor.

What you need to know is that this shell can actually be knocked back by attacks, though the knockback is heavily reduced.(For measure, let's just say by 85%) It's quite possibly the heaviest knock-backable object in the game. However, it still CAN be thrown off-stage. It falls at the speed of Ganondorf's Melee fall, and it can go off-screen. That means you lose a stock, so it's best to be careful with this one.

SPOT DODGE
MKII hastily sidesteps into the background, his head still obscured.

ROll DODGE
MKII uses his hover-boots to slide to the other side, his head still down.

AIR DODGE
MKII rolls into the background.

ASLEEP
MKII falls face-down to the floor, his arse bent up in a comical fashion, as little Zs come out of him.

DIZZY
A bunch of MKII's parts are spread apart, with only springs holding them in place, kind of like how robots break in cartoons.


M✇VESETTZZT

No, you don't get specials first, deal with it.


Substandardz


Unnatural Combo- I've been cursed...

For MKII's first jab, he looks up and does a small hook with his left hand for 2% damage. The second jab has him doing the same, but with his right hand for 3% damage. They both have average range, lowish lag, about normal jab standards. For comparison, see C. Falcons jab.


When you press A the third time, things get a little odd.
From there, MKII stops punching and lazily leans back. His hands go in his pocket, his legs bend backward, and his chest opens up.
Out from his chest, a holographic projector pops out and...welll...projects a hologram.
This whole animation has a small amount of lag, about .5 seconds.

This hologram looks like a muscle-bound man(but with a fairy dress and wings, I guess making it a really manly fairy?), about the same size as MKII.
The holographic Man-Fairy is summoned roughly 1/3rd of a battlefield platform ahead of MKII, and punches repeatedly at a fast rate, depending on how many times you press A.

Each jab from this fairy does 2% damage, and very little knockback.(Kinda like sheik's natural combo)

Starting up this move builds up your electricity by 2% No other electricity is given for the rest of the combo.


DASH ATTZTACK-
CHANGE
INTO A TRUCK


Exactly what it says on the tin. Well, sorta. He doesn't change into a truck, but rather a small F-1 car.

The car is about the size of a Go-Kart, and travels surprisingly far. Transforming into it has almost no lag, it goes the length of about half of Battlefield, and deals 5% damage with small upwards knockback. A really good move overall.
Be warned though that you can't steer it while it's going, and it goes at the speed of Sonic's run. Be sure not to use this recklessly, especially on walk-off stages.


Doing this move builds up electricity by 3%


Tzzziltz


SIDE- In Soviet Hyrule, boolet outsmart you!

This is kind of where the micromanaging kicks in.
What happens during this move is that MKII faces the screen, his head still down, as he brings up one of his hands(depends on which way he's facing).
He makes a "gun" gesture with his hand, and his index finger opens up to unleash a bullet.
This all has medium lag.

Now there's something special about this bullet. This bullet is being ridden by 3 Micro-Links, and as long as the bullet is out you cannot control MKII. He simply stands still in that position.

Instead, what you do control are the 3 Micro-Links riding the bullet. You can do 2 things while controlling them:

Simply shift the control stick in order to steer the bullet. However, the bullet goes somewhat slow like this(about the speed of Samus' missile), and doesn't do as much damage. (4% normal hit, 10% critical hit)

You can also "kick" the bullet around 3 times. You do this by pressing A and choosing a direction, just like doing a smash attack(Except with diagonals). The bullet goes very fast like this, about the speed of Fox's blaster, and does more damage.(7% normal hit, 15% critical)
But remember, once you start kicking the bullet, you can't normally control it again.


Oh and wondering what the critical hits that I was talking about is?
Well, a critical hit is what happens when the bullet hits a very, very tiny hitbox right in the center of the opponent's head.
When you get a critical hit, you get the appropriate damage along with a *SCREAM!* sound from the audience. The opponent won't go flying, but rather fall to the ground, like real people do when they get shot. You can take advantage of this by hitting them while they're down, before they can get up.

Of course, remember that opponent's can out-prioritize this bullet easily, as it's priority is extremely low.

Doing this move brings up your electricity by 4%


UP- Gennerscope

MKII's left arm turns into a small, circular generator-looking thing. His other arm then turns into a crank as the generator starts to spin. This has some small startup of .5 secs, but nothing too bad.

The generator starts shooting a light stream of electricity upwards, but does have some slight range to the side.
You can keep spinning the generator by continuously pressing A, and instantly stop spinning by pressing any other button.

This attack deals 4% every hit, and has similar properties to charging an Aura Sphere.
The range right above the generator is minor, just going above MKII's head.

Doing this move brings up your electricity by 2% every second.


DOWN- Robo-Field


With some small lag, MKII bends down on his knees Japanese-style, and a small table pops out and unfolds from his chest. This table contain some Japanese tea. He then drinks sip of tea, but then he puts on a disgusted look. This tea tastes horrible!

Out of complete disgust, MKII flips over the table.
This has exactly the same amount of lag as Snakes Dsmash.

Anyway, the initial table flip does 9% damage with minimal knockback. But that's not what this move is about. The flipped table actually lasts on screen for 10 seconds, and it's actually not a table at all! It's really a field generator, about half the size of a battlefield platform. Anything directly above it or on it gets hit with these properties:

-If MKII is on the field, his electricity goes up 3% every second
-If an opponent is on the field, his damage goes up 2% every second
-Universally, everything above it becomes extremely dense. Every character directly above it will fall like their metal counterparts. This doesn't go for items or projectiles though.

So overall, this move is pretty situational, but is good for support nonetheless.


This move builds up MKII's electriciy by 5%


Zmash!


UP- Launch of the Robo-Plane


Without a doubt, MKII's most.....extensive move.
What happens is that, with a good deal of startup lag, a miniature airplane launches out of MKII's head. From this point on, you completely control this plane.

So what about MKII? You lose control of him completely, and his palette becomes monochrome to reflect this. When he's like this, he'll automatically be controlled by a special kind of computer. It's comparable to a level 5, but it plays much more defensively. It follows the plane's general direction, going wherever you go, but it still tries to hold it's own when it's being attacked. But it can still be attacked, meaning it can go offstage, meaning you lose a stock. When you lose a stock, the plane disappears and you start over.

So anyway, here's the plane's moveset:

Code:
Robo Plane's moveset:

Details: The plane has 60% stamina, and hovers over the ground. It can go as low as 
kirby, and fly up as high as 4 stage builder blocks. All attacks have low priority and have .2 seconds of lag until otherwise noted.

Stats-
Size: 1/10
Weight: N/A
Walk: 7/10
Dash: 8/10
Traction: 4/10
Power: 3/10
Attack Speed: 9/10
Range: 9/10
Priority: 1/10


Natural Combo-Baron Shot:
The plane can continuously shoot a stream of bullets. Each bullet deals 1% damage 
and goes as far as a battlefield platform, very low knockback. 

Dash Attack-Barrel Roll:
The plane dashes ahead about 1/3 the length of a battlefield platform and does a barrel 
roll. This hits 3 times, each doing 2% damage, no knockback. 


Side Tilt-Dot fire:
The plane shoots out a small laser pellet. The pellet is larger than Plane's normal 
gunfire, and goes at a slightly slower speed. It does 4% damage with no knockback, goes 
as far as the Baron Shot does.

Up Tilt-Somersault:
Obviously, the plane does a somersault in the air. It deals 4% damage, and has 
minimal range and knockback. The plane has super-armor during this maneuver.

Down Tilt-Kamikaze:
The plane does a dive-bomb diagonally downwards, stopping either at 1 stage builder 
block down, or when it hits something. This does 7% damage, minimal knockback.


Forward Smash-HSM
The plane launches 1-3 heat-seeking missiles, depending on how long you charge it. 
The missles turn poorly, and go about battlefield platforms far before exploding. They take .5 seconds to launch.
They each do 6% damage, having as much knockback as samus' missles.

Up Smash-Killer Bee:
The plane shoots a stream of 10 bullets upwards-diagonally, each doing 1% damage. 
Has medium knockback, the stream of bullets is as long as half a battlefield platform.

Down Smash-Africanized Bee:
Exactly the same as Killer Bee, but diagonally downwards. 


Neutral Special-Scan:
The plane scans the Area, locking on to the nearest target. The scan goes at about 
the range of a square made of 4 stage builder blocks. 
When the Plane is "locked on" to someone, all of it's attacks are generally directed 
toward the victim. You can stop locking on by pressing B again.

Side Special-Jungle Net
This is somewhat of a grab attack. What happens is that the plane will shoot some 
netting exactly 1/2 of a battlefield platform ahead of it, taking about .4 seconds. If the opponent gets caught in this netting, they'll get stuck in a net. The opponent can break out of it, but it gets harder to break out of the higher their %. When you have your opponent caught in a net, you can carry them around, and slam them on the ground by directly flying up and down for 3% damage each. You can let go of the net by pressing any other button. Letting go of the net when you're 2-4 stage builder blocks high will make them slam to the ground, also for 3%. You can also try to drop them offstage if their percentage is high enough. 

Up Special-Decoy:
For about 1 second of lag, the plane lets out a holographic decoy of itself. The decoy 
has 5% stamina, and up to 3 can be out at a time. This can be used to negate 
any incoming projectiles or just distracting the opponent.

Down Special-Enola Straight:
The Plane lets out a bomb, nuking the ground below. This nuke is about as long and tall as a stage builder block. This has 1.5 seconds of startup lag and does 11% damage.  The knockback is about as much as Mario's fireball.


Grab-Heaven's Claw:
The Plane lets out a grappling claw directly below it. It goes as long as Link's grappling hook, but downwards.

Pummel-Facemelter:
The Plane shoots a small burst of fire from it's flamethrower, for 3% damage

Front Throw-Shoot the core:
The plane tosses the opponent ahead of it, and shoots a stream of bullets at him/her. This does 8% damage total, and medium knockback.

Back Throw-Endymion:
The plane does 3 continuous somersaults in the air with the opponent in hand/claw. It then tosses the opponent backwards, doing 7% damage and medium knockback

Down Throw-Be attitude for gains:
The plane throws the opponent on the ground and stabs him/her with a laser sword. This does 9% damage and some upwards knockback.

Up Throw-Master Spark:
The plane throws the opponent upwards, then turns upward to assault the opponent with a small laser beam. This beam keeps the opponent afloat for 2 seconds. Assuming everything goes as planned, this does 10% damage with minimal knockback.
Remember, you can ditch control of the plane any time by pressing the shield button.


This move increases MKII's electricity by 10%


SIDE- Beats in my head

For this strange move, MKII winds up while charging and throws a single Micro-Link at his opponent with little lag. This Micro-Link goes at the speed of(And goes just as far as) Falco's blaster, and can be directed as long as it's out.(Meaning you can steer it's general direction.)
The Micro-Link deals 5-8% damage, depending on how long you charge it, and has absolutely pathetic knockback.

So what makes this move so special? Well this has a certain effect; Remember that "sweet spot" for MKII's Side Tilt? Well, this move uses that too.
If you can direct the Micro-Link into that tiny hitbox in your opponent's head, you'll hear a "DUN!" sound, and your opponent will take no damage or knockback but will begin to flash yellow. Wait, what happened?
Well, your Micro-Link essentially slipped through your opponent's ears and is now lodged in your opponent's brain!

What happens now is that you have the upper hand: Every time your opponent attacks you, they take twice as much damage and knockback.
For me to paint a scenario, if you have a Micro-Link lodged in your opponent's brain, if they do a smash attack that deals 10% damage to you, they then take 20% damage and get knocked back twice as far.

So essentially, you're pretty much invincible at this point, unless your opponent has a huge upper-hand against you. (ie, you're at 160% and they're at 5%)

This whole thing lasts for 8 seconds, so use your time wisely.

Doing this move builds up your electricity by 9%


DOWN- Voltage release

Essentially the alternative to going into Excess Mode.

What happens here is that MKII bends down, and a large box with a high voltage sign on it pops out of his knee. He then smashes this box, sending waves of electricity around him.

This can be considered to be his main "Kill Move."
The range and power of this move is proportional to how much excess electricity is built up in him, and at higher percentages, this can be a friggin' deadly move.

Let's just say, at 100% electricity, this move has is as wide as 1/3rd of battlefield, 1 stage builder block high, and deals 30% damage with great knockback. Just divide that amount among the other percentages, and your calculations are set.

Of course, there are other drawbacks besides charging the electricity. This move has 2 seconds of startup lag, which is pretty slow. And doing this move at 100% means you take 10% damage.

But of course, what this move is really valued for is it's knockback. This move has greater knockback in comparison to MKII's other moves, and one of his few options for kill moves.
Even at 0%, it does as much knockback as Mario's Dsmash, so use this well.


Not-so-specials


NEUTRAL-Bored Bull

Pretty much a "Coward" move on MKII's part. What happens here is that MKII deals 15% damage on himself and shoots out a small tank from his arm directly in front of him, and then stays away from his opponent. The launching takes about 1 second.
Once again, you take control of an object while leaving MKII in the hands of a weak computer. Except, this special computer actually tries his best to play keep-away with your opponent. That's where you come in.

This time you control the "Bored Bull", a small RC-looking tank with the standard "Robo" head in the middle. Unlike the plane, this tank can only do 3 things: Move, Jump, and Charge.

You move and jump like how you would expect to, and Charge by pressing A.
The Bored Bull moves at the speed of Jigglypuff, and jumps slightly less high than Ganondorf.
Using BB's "charge" move makes it go twice as fast, and it counts as a continuous attack.
Each attack does 1% per hit, and does average-ish knockback.

What's good about this tank is that it has infinite stamina, but is effected by knockback. It's about as heavy as Metal Fox, and it can be carried like an item. Carrying it is like carrying a bonsly, and it does just as much damage when thrown.(Yes it can hit MKII as well)

When you're being carried, you can try to escape like normal, though BB is horrible at escaping. A better idea is to press Shield to snap control back to MKII and hit them while they're open.
What's also cool is that when you snap control back to MKII, BB pretty much becomes an item/bonsly. So if you're not afraid of taking 15% damage all the time, you can pretty much summon infinite bonslys! (but only 1 can be onscreen at the same time. If you press B again when BB is still on-stage, you simply take control of the same BB again.)


Bringing this out builds up your electricity by 5%


SIDE-MicroLinks!


Kinda-sorta similar to RL's Mini-Links, but not really.
Here, a small mob of Micro-Links pop out from MKII's mouth(Medium startup lag) and do something. Obviously, you lose control of MKII and control these little buggers instead. But unlike normally, MKII doesn't do anything here. Nope, he just stands still, making you hope for the best. (The only exception is if you're in a story mode, then a computer similar to the Plane's takes over)
What's interesting is that the formation for these Micro-Links is randomized.
They have 4 formations, some more common than the other.

Common-Mob formation:
The Micro-Links don't do anything fancy and just stay in their group formation. They take up 1/3rd the size of a battlefield platform(I'm using battlefield platforms a lot recently, huh) and have 20% stamina.
they can do only 1 attack: grab. By pressing A, the swarm of Micro-Links will instantly grab the opponent by the back if the opponent is within their small grab range. After this, they can throw the opponent ahead like a crate, dealing 8% damage.


Uncommon-Circle formation:
The Micro-Links form a wheel and start rolling along(you can control their direction, but they can't jump). They go as fast as mario's run and do 11% damage and minimal knockback. They only have low priority, so being hit out or after 5 seconds pass, they go away.

Rare-Blade formation:
The Micro-Links stack themselves up in a formation similar to a shark's dorsal fin from the surface of the water. In this form, they move at the speed of charizard's run, and has infinite stamina. Simply making contact with this blade deals 3% damage every hit, with minimal knockback, making it good for comboing. This thing can jump, but only just enough to reach a battlefield platform.

Ultra rare-Mech formation:

F*ck yeah!
This formation has all the Micro-Links transforming into one miniature piece of Mecha-awesomeness.(and a Kampfer at that!) It's about the same size as Ray MK III and can jump just as high. It can do 4 attacks:
-B: The mecha shoots out 4 laser shots, going at a similar speed as Ray MK III's. They do 3% damage each and do minimal knockback.

-Side B: Mecha-Micro-Link instantly slices ahead of him, kinda like the Bangai-O. He continuously swings his sword ahead of him, doing little enough knockback to combo. Each hit does 2% damage.

-Up B: The Kampfer-Link does a shoryuken. It hits 3 times, each time doing 5% damage, coming together for 15%. It actually has good knockback, killing at 120%.

-Down B: Linkfer jumps in the air(if he isn't already) and brings out a giant f*cking drill. This has about 1 second of startup lag. It's about as large as the mech itself. He points it downwards and drills away. It hits 5 times and each does 4% damage. It kills at 120% as well.

This thing has 50% stamina, and has super-armor all the time.


Bringing the Mini-Links out raises you electricity by 5%


DOWN- Robo-Meido?


With 1.5 seconds of startup lag, MKII opens up his chest, and and arm from it sets down a Miniature Mech Hisui. And guess what? You also control her too!
Anyway, he CPU that controls MKII in this form is pretty similar to the one with the Plane. It acts like a more defensive level 5, and still tries to hold it's own, but mostly fails. It also never uses any grabs or ledge attacks.
Mini-Mech-Hisui is about as large as the bottom half of RL's leg, has 40% stamina, and is very light. She also cannot jump at all. She has 1 A move and 4 special moves:

-A(in any direction) Mech Hisui brings out a flamethrower from her arm.(Which direction it's pointed in depends on what direction you pressed A with. It can't be turned around.) It has a good amount of range in comparison to her body, does 2% per hit, and has little enough knockback to combo with. The flamethrower stays out for 1.5 seconds before Mech Hisui retracts it again.

-B: Mech Hisui with little startup lag, takes out a dish filled with 3 pieces of food. She sets it on the ground, hoping MKII will eat it (he might be too stupid to though, as the opponent can eat it too.)

-Side B: Mech Hisui takes out a broom(Yeah, I know that's Kohaku's thing, bite me) and sweeps the floor for 5 seconds. You can steer her direction, and each hit from the sweep does 4% damage and makes the victim trip.

-Up B: Mech Hisui makes a small field around her(Half the size of a battlefield platform). Any character, friend or foe, around this field gets healed 4% every second. This has little startup lag and is good overall for healing.

-Down B: Mech Hisui takes out a crate, with the same amount of lag as lifting up a normal crate. However, this crate doesn't have nearly as much knockback, only having as much as Kirby's melee Fsmash. No matter what the item setting, the box will be filled with food, of varying amounts.


So while Mech Hisui doesn't have the most moves, she's certainly an invaluable support to have when the going gets tough. Be sure not to neglect her at all.


Taking out Mech Hisui brings MKII's electricity by 4%


UP- UR BODI ASPLODE

Pretty much the exact opposite of RL's dair; within 1 second, MKII's entire body explodes, dealing 9% damage to himself.
Anyway, as his entire body explodes, this move has a lot of range. It deals 15% damage to everyone in it's vicinity, and has medium knockback.

So as you can tell, you don't have a body do attack with. No, here you only control MKII's head, which is staying afloat via a comical propeller on top. You stay in this form until 3 seconds, where you're body will come flying back in pieces, and you'll go into helpless mode.

It's obviously MKII's main method of recovery, but it's still not too good. It lasts only for 3 seconds, and MKII can't attack while he's just a head. In fact, he can be hit in this form, but he gets super-armor. Kind of a weak move, but it's all MKII has. It's good for it's initial explosion though, if you feel like being risky.


This doesn't bring up any electricity.


AERIALZ


NAIR- Scary Poppins

MKII almost laglessly takes out an umbrella from his hammerspace-tastic body and does...something.

The best thing to describe it is that he does a frontflip in midair with it, kinda like kirby's midair hammer in Melee. This means the umbrella circles in all degrees, in a time frame of slightly less than 1 second. It doesn't have too much range, as he keeps it close to his shoulders.
The umbrella is sadly too weak to protect against anything, but it does do 3% damage every hit. Getting the full force of this attack means taking 3 hits, which is 9% damage for the mathematically impaired.

Doing this raises your electricity by 2%.


FAIR- Drill of Drills

Some more genericness to balance out all the WTF, MKII kicks forward and a drill pops out of the sole of his foot. This has .4 seconds of startup lag.
This drill hits 4 times, each doing 2% damage if all goes accordingly.
It has the same range as a general kick, not really much special. It has minimal knockback, as you'd expect, and pretty small startup time.

Doing this move raises your electricity by 3%


BAIR- Relaxing Tatami Mat

First MKII takes out his sword and.....wait, you mean he's using his SWORD for once!!?? *gasp* :O

Well, sorta. Out from the sword comes a tatami sheet. It's comparable to Mario's Side B, but weaker.
What's good about this sheet is that it completely negates projectiles. Even a fully charged Charge Shot can't break through this sheet!
However, it has slightly more startup lag than Mario's sheet, so it can't really be abused.

The sheet does 6% damage.

This move brings up your electricity by 4%


DAIR- Slipping on air

For some strange reason, MKII manages to trip in the middle of the air.
Before you go screaming for Sakurai's head, note that this is a deliberate move. Doing it completely halts any directional influence in the air, and brings you straight to the ground. MKII falls like a Metal Mario in helpless mode, and making contact with him in mid-air does 2% damage, little knockback.
His actual fall deals 8% damage with pretty good knockback, killing at 250%
However, when used in conjunction with MKII's Robo Field, the move does 14% damage with twice the knockback!
And no, you can't stop this move at all, so if you accidentally do this while you're off-stage, you're pretty much screwed.


UAIR- Blade Barfer

Pretty much exactly the same as normal Link's Uair, being his only real connection to him.
Only in this one, MKII looks up as a blade detracts out of it's mouth. This has the exact same range and lag as Link's Uair, and does 7% damage, little knockback.
Really not much to say about this attack, it's pretty generic stuff.


THR✇WS...Z


GRAB- Exciting Fire Lucha Pro Wrestling!

MKII does something that looks similar to a bearhug. It has short range, typical grab fare. It doesn't seem like anything special.....for a while.

However, when MKII grabs his opponent, within ,7 seconds, two giant gloves will pop out from his back and grab the opponent for him. The gloves are placed shortly above MKII's head, as MKII looks toward the screen.


Pummel- El Terremoto

MKII shifts his body up and down, shaking the opponent for 2% damage.


Forward- Codo stab

MKII throws his opponent on the ground and slams into them with his elbow. This does 6% damage, little knockback.

Increases MKII's electricity by 3%


Back- El Hormigon

MKII holds onto his opponent, and does not one, not two, but three german suplexes!
The whole move goes about as far as 1/3rd of Battlefield, and does 11% damage total.

However, don't think about possibly 'ciding with this throw; if you perform this near a ledge, it simply continues near the ledge, as if being stopped by an invisible wall.

Increases MKII's electricity by 5%


Up- ROBO BUSUTAA!

Using all four of his hands, MKII jumps up with the opponent all the way offscreen, and then lands on his butt, the opponent left damaged by the impact. (If you're still having a hard time picturing it, look at this video.)
It does 13% damage, and leaves the opponent fallen on the ground.

Increases MKII's electricity by 7%


Down- Oh, Hisui....

MK II throws the opponent down and then pins them there. However, Mech Hisui comes out from the back of his leg and grabs MKII. She then slams him into his opponent 2 times, leaving him on top. Mech Hisui follows this up by finally crashing head-first into MKII and his opponent, using the boosters on her feet. Geez, what a Tsundere...

This whole animation is a whopping 4 seconds, and deals 18% damage to both MKII and his opponent. Yet another self-damaging move, but you should probably expect that with MKII by now.

Increases MKII's electricity by 15%


P✇INTLESS SITUATIONALZ


Rising attack
MKII rises up like a zombie, a thin aura of electricity blanketing his body for 1 second. Each hit from this blanket does 3%, and has little enough knockback to combo a non-DI-ing enemy.

This doesn't raise MKII's electricity


Tripped attack

Tripping? What's that? Whatever it is, it isn't in Brawl+, so it doesn't matter.

But if there was such a thing called a tripped attack, it would probably look something like MKII rising up with a Jack on it's back. The force from the jack would be so great, MKII's entire body would be a hitbox that does 5% damage and medium knockback.

Yeah, it makes no sense, but it can't happen anyway so it doesn't matter.

This move cannot raise MKII's electricity since it doesn't exist.


Ledge attack

MKII opens up his head while climbing up. Inside of his head is Mech Hisui rocking her flamethrower again. The properties and damage from the flamethrower is the same as normal.(2% per hit, enough knockback to combo with, lasts 1.5 seconds) After her shtick is done with, MKII goes to normal and crawls back up.


Ledge attack (Over 100%)

Does the exact same thing as his normal Ledge attack, except The Mecha Micro-Link pops out instead! It uses it's drill attack, which hits 5 times and does 4% per hit, combos each hit into eachother. Pretty much the same properties as normal.


✇FINAL ZMASH!✇


GIANT MECH HISUI


The natural evolution of MKII's down B.
Using this attack has Mech Hisui coming out of MKII's leg and going in a "T" stance. Then, an entire swarm of Micro-Links surge out from MKII's body and cover up Mech Hisui, forming into Giant Mech Hisui

Only Giant Mech Hisui's torso is visible during this attack; The lower half of her body is obscured by the camera/ground, like in Melty Blood/MUGEN.
For this attack, you keep control of MKII, but lose the ability to use special attacks. Instead, the B button is used for controlling GMH.

-B: GMH does a sweeping grab attack. Her arm is 75% the length of Smashville, and simle contact with her arm does 11% damage
Getting grabbed by her hand also does 11% damage, except GMH has a hold of the victim, and can squeeze him/her for 10% more damage until the victim escapes.

-Side B: GMH shoots 2 laser beams from her eyes across the entire stage. Contact with the laser does no damage. However, about 1 second after the laser sweeps the stage, the entire stage will light on fire for 2 seconds. Each hit from the fire does 11% damage, and has knockback similar to the Lava on Norfair.

-Down B: GMH somehow grabs the entire stage and starts shaking it!
She shakes it 4 times in .5 second intervals. Any one still on the ground, even on floating platforms, while she's shaking will be dug within the ground and be dealt 14% damage.

-Up B: GMH launches 5 bombs from her head. Within 4 seconds, all the bombs start dropping down between 1 second intervals. They explode with the range of 2 stage builder blocks, and does 20% damage with good knockback.


GMH moves wherever MKII moves, and lasts for 20 seconds.


PLAYSTYLE- THERE IS BUT A FINE LINE BETWEEN PERSISTENCE AND STUBBORNNESS


Basically, Robo-Link MK II is almost the exact opposite of Robo-Link. While RL uses his projectiles very offensively, with little focus on defense due to his heavy weight, MKII should be played very defensively.
He's a lightweight who can be knocked out very easily, and has a pretty constant theme of damaging himself in some instances. Not only that, but his attacks don't do much damage as well. For comparison, MKII isn't as much of a glass cannon as he is pretty much glass surrounded by needles. His strategy revolves around figuring out where to place those needles.

With all of MKII's controllable summons, he has a very large move pool to pull from. None of them do much damage, but remember; MKII is all about needling.
It should be obvious that the standard strategy is to needle your opponent and finish them off with a Down Smash. Well, it may not be as simple as that.
MKII is all about protecting himself, and it's up to his giant move pool to do that. Mech Hisui is very good for healing when you're in a tight spot and bored bull is made for getting some breathing room. His plane is a jack of all trades; good for both offense and defense.
The Micro-Link attack is great, only for the chance of getting a mecha. Otherwise, the Micro-Links are just more controllable projectiles to add to the heap.

So basically, use your toys to their best potential. They're well dispensable, and MKII relies heavily on them for defense, so keep that in mind. MKII takes some obvious getting used to, but once you do, he's a force to be reckoned with.


PLAYING AGAINST- WORTHLESS CONSUMER MODEL.

At first glance, MKII's giant amount of moves he can use to rip your spleen out may be overwhelming. He does have a lot of moves, but it's not well concentrated.

One thing you must remember to do is be as offensive as possible. MKII's defense isn't like most defenses in that it can be taken down easily if you know what you're doing. You'll end up taking some damage, sure, but it's nothing you can't handle. Strong characters like Ganon or Sloth will especially have an easy time with him, as they're heavily offense-oriented, with good defense to boot.
However, you still cannot underestimate a good MKII player. If you rely entirely on offense without focusing on anything else, you may just be dealing with needle after needle after needle. Even worse, if he does needle you enough, he'll go into Excess mode and be able to needle you into oblivion before he uses his Dsmash to blow you off the map.

So basically, if you want to do well against MKII, pay attention to the player's patterns, try to avoid getting hit any way you can, and stay as close to him as possible. Know when the right time is to strike and don't be reckless.


EXTRA CRAP YOU'LL PROBABLY SKIP TO FOR TEH LULZ


Up Taunt
MKII bends his torso down and says "Ahahaha! What's wrong, weakling!?"


Side Taunt
MKII goes in a normal position, spins his sword like Cloud Strife, and says "For the Glory of Hyrule!"

Down Taunt
MKII looks away from the screen and plants the Neo-Hyrulean flag on the ground. This flag stays on-screen for 5 seconds before disappearing.


Entrance
MKII rides in on a giant Mechanical Horse. MKII then gets off, and the horse folds itself and retracts into MKII's back.


Victory Pose 1
MKII waves the Neo-Hyrulean flag while shouting "FOOLISH ENEMIES! REALIZE THE POWER OF HYRULE!"

Victory Pose 2
MKII becomes so happy he won, he explodes his body like in his Up B. His head flies around with a propeller as usual; however, his plane then comes out from the side of the screen and says "ENEMY DETECTED. ELIMINATING TARGET."
MKII then screams "Wait! No! What are you doing!?" The plane and his head fly around in circles with the plane shooting bullets wildly.
The camera then zooms out to show Mech Hisui sitting down and using plane's controller. Geez, what a *****.

Victory Pose 3
MKII rides his Mechanical Horse again and plants the Neo-Hyrulean flag on the ground. "Know the name of the glorious Hyrule!!" he yells, riding offscreen.


Loss Pose
MKII curls up in a fetal position, crying comical Anime tears.

Mech Hisui stands in front of him and claps for the victor with a blank expression.

Icon

▲ ▲
-The triforce of fail. (Same as Robo-Link's. Funnily, the Triforce of Fail is also depicted on the Neo-Hyrulean flag, giving it somewhat of a double-meaning.)


Kirby Hat
Kirby receives a very small red Link hat, and has winders on the side of his head. This gives Kirby access to MKII's Bored Bull. It works exactly the same as usual, right down to the "Kirby being controlled by a cowardly level 5" thing.
Funny thing is, this Bored Bull has Meta-Knights face on it instead of the "Robo" face.


How to Unlock
-Clear even no. 9001 "Hyrule Metal City 2"
-Complete Classic mode with Robo-Link
-Play 210389385924892380492378433423897758373454 Matches.


Codec

PRESS SELECT

Snake: Okay, seriously guys, what the hell?! There's like, what, 10 of these guys now? How many "heroes" can there be all at the same time!?
Colonel: Hey, don't blame it on me. Blame it on the more uncreative hacks of MYM to keep on making twenty different versions of the same character.
Snake: Well, at least he isn't.....
Colonel: Wait..*BZZZZZZZSSSSSSHHH*
Snake: Huh, Colonel? Don't tell me....
Robo-Link MK II: Hey guys! :D
Snake: *Mumble mumble*

-End Transmission-

Robo-Link MK II: What? Was it something I said? D:
 

Darkslash

Smash Master
Joined
Feb 1, 2008
Messages
4,076
Location
Strangereal Equestria
I hope this wasn't directed at me...becuase it looks like it was.
It's not animations! It's not animations!
ANIME JANAI, ANIME JANAI!

With some small lag, MKII bends down on his knees Japanese-style, and a small table pops out and unfolds from his chest. This table contain some Japanese tea. He then drinks sip of tea, but then he puts on a disgusted look. This tea tastes horrible!

Out of complete disgust, MKII flips over the table.
WHERE THE HELL DID I SEE THIS BEFORE?! OH YEA MOTHER ZAKU AND FATHER GUNDAM :(

Ultra rare-Mech formation:

F*ck yeah!
This formation has all the Micro-Links transforming into one miniature piece of Mecha-awesomeness.(and a Kampfer at that!)
Seriously Kampfer? The most kick *** non gundam unit in OYW era Gundam? You gotta be pulling my strings.
FAIR- Drill of Drills

Some more genericness to balance out all the WTF, MKII kicks forward and a drill pops out of the sole of his foot.
This drill hits 4 times, each doing 2% damage if all goes accordingly.
It has the same range as a general kick, not really much special. It has minimal knockback, as you'd expect, and pretty small startup time.
THIS DRILL WILL PIERCE THROUGH THE HEAVENS!
WHO THE HELL DO YOU THINK I AM.....KICK!!!


MKII rides in on a giant Mechanical Horse. MKII then gets off, and the horse folds itself and retracts into MKII's back.
Didn't that happen at the finale of G GUNDAM?!

Snake: Okay, seriously guys, what the hell?! There's like, what, 10 of these guys now? How many "heroes" can there be all at the same time!?
Colonel: Hey, don't blame it on me. Blame it on the more uncreative hacks of MYM to keep on making twenty different versions of the same character.
Snake: Well, at least he isn't.....
Colonel: Wait..*BZZZZZZZSSSSSSHHH*
Snake: Huh, Colonel? Don't tell me....
Robo-Link MK II: Hey guys! :D
Snake: *Mumble mumble*

-End Transmission-

Robo-Link MK II: What? Was it something I said? D:
I honestly love this codec.... :D

**** you Tirkaro....YOU TOOK ADVANTAGE OF MY MECHA KNOWLEDGE D:
 

Hyper_Ridley

Smash Champion
Joined
Dec 21, 2007
Messages
2,299
Location
Hippo Island
Whoa, 5 sets or so posted in the span of 2 pages. Come on guys, wait your turns why dontcha.

Anyways, I was originally planning on making a set for Darkrai for a long time, so of course I had to read the one that was posted. And I'm glad I did.

The set was utterly brimming with creativity. First things first, the two mechanics he has are great and perfectly fitting to his character. Moving on to the attacks, I couldn't find a single truly generic or outright bland attack in there, with even stuff like the FAir having that energy field around his hands as a wierd little extra hitbox. The specials were all epic (love your implentation of Dark Void) and you even included my tentacle priority mechanic from my Spadefox set! Besides making my ego happy, it's cool to see special properties like that be used on other sets, it really gives off a feel like this was actually one giant game we're all creating.

The playstyle's concept was brilliant. Darkrai would obviously be having a sleep-based playstyle but the way you made him casualy damage sleeping enemies and power up some moves while the enemy is asleep really made him feel like he was a living nightmare. I loved how you split up the playstyle section into the different phases of his gameplay and how the nightmare fuel was integrated with it. My only real criticism is that the aerials didn't seem to really be tied in with the overall playstyle, as they didn't put enemies to sleep, they didn't gain nightmare fuel with the exception of Nair, and they weren't even mentioned in the playstyle section as far as I could tell. Really, those aerials are too cool to not have a use.

Balance-wise, he seemed pretty fine to me. He has good priority and reach but slow attacks and "only" decent damage. But then he has his faster attacks to put enemies to sleep or otherwise disable them so his laggier attacks can connect. It's an interestingly balanced character, which only further emphasizes how unique his playstyle is.

So yeah, definitley a really good set that I had a lot of fun reading. If those aerials were given more use in his gameplay I'd easily declare this one of my absolute favorite sets in MYM6. I guess I can cross Darkrai off my list of planned sets with this one on the loose.

I'll try to comment on Bleak tommorow since his reception was so utterly *****.
 

MasterWarlord

Smash Champion
Joined
Aug 24, 2008
Messages
2,911
DARKRAI
I apologize for never truly giving your sets a full read before, much less commentary, but I started reading Abomasnow and was rather turned off from how boring it was and couldn’t bring myself to finish it, and due to that I also passed on Magnezone. Anyway, I feel I definitely owe you this read, so here goes. Right off the bat, I realize the recurring problem that I now realize is what turned me off of Abomasnow as well – your awkward writing style, making the set hard and awkward to get through despite the low detail level. It’s worse here then with Abomasnow, but Darkrai’s individual move creativity is more interesting so it’s more possible to get through. Still, moves in particular like the usmash are rather confusing, and the overall meaning of your move is oftentimes lost in trivial details. You sometimes prefer to give us trivial details over absolutely vital information on some moves, such as the uair, where you refuse to actually tell us where the hitbox is located and leave us to only look at the little bracket percent at the end of the move for any hint about it. When you also refer to Darkrai’s body parts so awkwardly (His “lower body kilt thingy” on the dair), it also forces us to constantly go back up to look at the picture at the start of the set to figure out how these moves would function, and the picture you chose is rather annoying in that it doesn’t give all that great a view of his entire body.

While the idea of the little organizational bit after each move to indiciate how much nightmare power a move generates/uses up works surprisingly well, I find pink to be a very random choice for it going up. Wouldn’t green make ever so slightly more sense? Anything but the bright pink to contrast with Darkrai’s character. Also, I fail to see the reasoning in why Darkrai’s specials come last, really. All that hype we get built up for. . .What are we gonna use this nightmare power we’re gathering for? . . .The answer, quite frankly, is not much. You gather all this nightmare power to have such utterly useless moves available to you. That said, I wouldn’t say he’s underpowered considering once his power is up it’s pretty easy to keep it there (Though what’s the difference between – 8/+2 and 6 and such on side special? Rather pointless. . .). I just find it rather a let-down, as his specials really don’t let him do all that much that’s terribly interesting or playstyle defining. You do all the work to get up that mechanic up. . .And for what? The specials are really rather a let-down. The only particularly creative/useful variant is the “strong” version of the up special (I find using strong and powerful as two separate labels for tiers incredibly confusing, seeing neither sounds more menacing then the other), and that blatantly abuses magic syndrome, far more-so then the rest of the moveset was already.

Darkrai feels more like a MYM 4 set to me. He relies on his mechanic for playstyle, but if you take that away from him there really isn’t much playstyle to the guy at all, it’s only purpose being to limit him from being overpowered (Though in Darkrai’s case it’s more keeping him underpowered). He has individual move creativity, sure, but he has both Pokemon and magic syndrome and abuses them to all hell. Darkrai feels like he’s trying too hard to be creative half the time, especially when he freaking morphs into Cresselia in the "powerful" up special. That’s a crime on par with the horrendously random final smashes of FMA Man and Pennywise.

GLASS JOE
Good god. You joined the series of movesets in a way but refused to in another by doing an actual boxer rather then a Punch Out character, and didn’t announce it to a soul. And you made this thing in THREE FREAKING HOURS. This is about as unexpected as you can get. . .Yet this is still is an absolutely freakin’ spectacular moveset.

It’s amazing how much you do with this generic boxer. You really capture the complete and utter essence of the sport. While I can’t say I’m a fan of the TKO system (And I’d like to see it better explained), the other twists you threw onto his game without even going into actual moves were quite interesting (Save the blatant rip off of Bear Hugger’s side special in the shield). Of course, the actual moves are the real highlight, what with how you get sickeningly creative while never going OOC with a generic boxer. In fact, it’s so ridiculously in character what with all the minor touches (Sidestep that spites Dingodile/Ryuk’s dtilt) that it’s impossible to not acknoweledge that deep thought went into it, ignoring that blatant prop side special that cheats and gives him a good recovery (Since, y’know, he was underpowered without it, right?). Oh, and also, the dthrow, which has no real explanation for how it happens and gives him some 100/0 match ups against MYM characters, since he was just so bad off otherwise. The dash, while also highly creative and fitting to his character/playstyle, is the type of move that you bash the rest of us for, (Keep running dashing attack) making you quite the hypocrite, and also gives him all the more overpowered options that he doesn’t need. The final smash is another case of hypocrisy, also, seeing how claiming that it’s anything but a generic mechanic booster is a blatant cover-up as to hide what it really is. If you can give in to these temptations so easily, you have no right to so regularly bash us for doing the same.

The manipulation of Joe’s hurtbox is a very simple but brilliant move on your part to make your attacks seem far more interesting, and the neutral special and all the mindgames in general give this a ridiculously flowing, unique, and generally interesting playstyle. The other moves you give Joe that focus on giving him defensive options such as down B are also just as creative and fitting, but you pretty much give the guy everything. Sure, he won’t KO until high percents, but the extra points he’ll get from TKOs more then make up for it.

It really is saying something when a set acknowledges that it’s overpowered, but I can’t hold that against you too much when the set was made in 3 freakin’ hours. The set is incredibly inviting, more-so then Clefable, although that sickeningly small text never ceases to annoy me, being very difficult to read. I also find it a shame that your playstyle section is so short when this beautiful moveset deserves oh so much more. This moveset is just –too- rushed, which is a shame when it easily tops Clefable in my mind. Given just a bit more time and with some actual thoughts about balance (He has all the offensive and defensive motions he could ever want, particularly due to that perfect spacing), this could’ve easily been my favorite set of the contest. That said, it still is one of them, no questions asked. It seems our best sets all seem to happen rather unconsciously, doesn’t it?

BLEAK
I apologize for delaying your page so long only for it to be utterly ***** up the arse. That said, Bleak is a refreshing moveset that flows quite well and doesn’t rely on anything drastic, rarely using props except when necessary, and the few traps that are present are fitting and either deeply implemented into the set (dtilt, fsmash) or just too damn cool in their own right (Dsmash, though you might want to put in the ability to escape that thing in the normal version of the move to prevent Bleak from going to god tier and I hate how the move is just cloned in the bthrow – that’s something I’ve avoided since everybody hated Al’s pummel/side special being identical).

While Bleak does indeed flow as a spacer/camper, that’s far from a unique playstyle. Ranged playstyles are far from something we haven’t seen before, and hiding behind a wall and camping is just an underdone version of Dingodile’s playstyle, really (Though Dingo had more to him then that, what with the suicides). Bleak doesn’t really offer that much new here aside from actually having decent ways of making space for himself. That said, he does flow, better then even Hades, though I’d praise Hades over Bleak on playstyle for the fact that Hades’ was more unique. It’s not just about creating a playstyle at all, it’s about creating a unique playstyle. Of course, Bleak gets more points here for originality in his playstyle then, say, Leafeon. . .

While he has some boring attacks, he doesn’t rely on any props of traps (That much, anyway) to make him more interesting. Your match ups are also an absolutely massive improvement from Hades and Pennywise, being far more realistic and you giving out much more viable reasoning for your match ups. They also feel more detailed and are far more interesting to read.

Of course, Bleak also gets points for that sexy organization (Using small asterisks to simulate snowflakes was ingenious), as well as the fact that you finally decided to cut down on the bolding and put the animations in the extras. Bleak is without a doubt your easiest set to read through thus far, if only for the superior organization that makes more a difference then I thought it would. Make no mistake. Bleak is still a fine set, your best after Hades, I just find that Hades’ brilliant playstyle gives him the edge over him.
 
D

Deleted member

Guest
Bleak got absolutely destroyed, jeez. This was a bad time for any movesets.
 

darth meanie

Smash Journeyman
Joined
Jun 6, 2008
Messages
452
Whoa, 5 sets or so posted in the span of 2 pages. Come on guys, wait your turns why dontcha.

Anyways, I was originally planning on making a set for Darkrai for a long time, so of course I had to read the one that was posted. And I'm glad I did.

The set was utterly brimming with creativity. First things first, the two mechanics he has are great and perfectly fitting to his character. Moving on to the attacks, I couldn't find a single truly generic or outright bland attack in there, with even stuff like the FAir having that energy field around his hands as a wierd little extra hitbox. The specials were all epic (love your implentation of Dark Void) and you even included my tentacle priority mechanic from my Spadefox set! Besides making my ego happy, it's cool to see special properties like that be used on other sets, it really gives off a feel like this was actually one giant game we're all creating.

The playstyle's concept was brilliant. Darkrai would obviously be having a sleep-based playstyle but the way you made him casualy damage sleeping enemies and power up some moves while the enemy is asleep really made him feel like he was a living nightmare. I loved how you split up the playstyle section into the different phases of his gameplay and how the nightmare fuel was integrated with it. My only real criticism is that the aerials didn't seem to really be tied in with the overall playstyle, as they didn't put enemies to sleep, they didn't gain nightmare fuel with the exception of Nair, and they weren't even mentioned in the playstyle section as far as I could tell. Really, those aerials are too cool to not have a use.

Balance-wise, he seemed pretty fine to me. He has good priority and reach but slow attacks and "only" decent damage. But then he has his faster attacks to put enemies to sleep or otherwise disable them so his laggier attacks can connect. It's an interestingly balanced character, which only further emphasizes how unique his playstyle is.

So yeah, definitley a really good set that I had a lot of fun reading. If those aerials were given more use in his gameplay I'd easily declare this one of my absolute favorite sets in MYM6. I guess I can cross Darkrai off my list of planned sets with this one on the loose.

I'll try to comment on Bleak tommorow since his reception was so utterly *****.
Well, thanks for such the kind words! As for the aerials, yeah, I kind of pushed out the playstyle section a little faster than I had first intended to, so I mostly just summarized his playstyle in there, I could have done better there, and I think I'm going to edit in a Distortion World Stage, Codec, and a few Match-ups this afternoon, so I'll improve the playstyle section too.

DARKRAI
I apologize for never truly giving your sets a full read before, much less commentary, but I started reading Abomasnow and was rather turned off from how boring it was and couldn’t bring myself to finish it, and due to that I also passed on Magnezone. Anyway, I feel I definitely owe you this read, so here goes. Right off the bat, I realize the recurring problem that I now realize is what turned me off of Abomasnow as well – your awkward writing style, making the set hard and awkward to get through despite the low detail level. It’s worse here then with Abomasnow, but Darkrai’s individual move creativity is more interesting so it’s more possible to get through. Still, moves in particular like the usmash are rather confusing, and the overall meaning of your move is oftentimes lost in trivial details. You sometimes prefer to give us trivial details over absolutely vital information on some moves, such as the uair, where you refuse to actually tell us where the hitbox is located and leave us to only look at the little bracket percent at the end of the move for any hint about it. When you also refer to Darkrai’s body parts so awkwardly (His “lower body kilt thingy” on the dair), it also forces us to constantly go back up to look at the picture at the start of the set to figure out how these moves would function, and the picture you chose is rather annoying in that it doesn’t give all that great a view of his entire body.

While the idea of the little organizational bit after each move to indiciate how much nightmare power a move generates/uses up works surprisingly well, I find pink to be a very random choice for it going up. Wouldn’t green make ever so slightly more sense? Anything but the bright pink to contrast with Darkrai’s character. Also, I fail to see the reasoning in why Darkrai’s specials come last, really. All that hype we get built up for. . .What are we gonna use this nightmare power we’re gathering for? . . .The answer, quite frankly, is not much. You gather all this nightmare power to have such utterly useless moves available to you. That said, I wouldn’t say he’s underpowered considering once his power is up it’s pretty easy to keep it there (Though what’s the difference between – 8/+2 and 6 and such on side special? Rather pointless. . .). I just find it rather a let-down, as his specials really don’t let him do all that much that’s terribly interesting or playstyle defining. You do all the work to get up that mechanic up. . .And for what? The specials are really rather a let-down. The only particularly creative/useful variant is the “strong” version of the up special (I find using strong and powerful as two separate labels for tiers incredibly confusing, seeing neither sounds more menacing then the other), and that blatantly abuses magic syndrome, far more-so then the rest of the moveset was already.

Darkrai feels more like a MYM 4 set to me. He relies on his mechanic for playstyle, but if you take that away from him there really isn’t much playstyle to the guy at all, it’s only purpose being to limit him from being overpowered (Though in Darkrai’s case it’s more keeping him underpowered). He has individual move creativity, sure, but he has both Pokemon and magic syndrome and abuses them to all hell. Darkrai feels like he’s trying too hard to be creative half the time, especially when he freaking morphs into Cresselia in the "powerful" up special. That’s a crime on par with the horrendously random final smashes of FMA Man and Pennywise.
And a completely different reading of Darkrai! Hm, about the awkward writing style, I'll have to reread through it to see what you mean, although I can understand the quips about the Uair.

Strong and Powerful probably could have been better differentiated to. I don't see your complaint about his playstyle though; he's got move interaction and an overarching playstyle, so unless your complaint is that his mechanic drives how he plays, which seems like a rather odd complaint, I don't know what the problem is.

The 8 cost move, 2 gain move was for two reasons. One, because the move made sense to build Nightmare Fuel, and two, in order to make it more High Risk, High Reward if you missed.

Also, Darkrai DOES transform into other Pokemon, including Cresselia, in Pokemon Mystery Dungeon 2. While I can see, a little, the complaint about magic syndrome, especially since you didn't know that he did that in PMD2, I can't imagine how you've diagnosed him with Pokemon Syndrome, his only Pokemon Moves being very in character; Nasty Plot, Dark Pulse, Hypnosis, Dream Eater, Nightmare, Shadow Sneak, Mean Look, Shadow Claw, and Dark Void.

Thanks for the commentary though, negative feedback is helpful, and I'll have to watch out to improve my move descriptions next time.
 

Katapultar

Smash Lord
Joined
Nov 24, 2008
Messages
1,284
Location
Australia
Wow, GCM is here. Anyway, I checked this site, in what, like 12-24 hours and I see like 5-7 sets I have to catch up on. I'll just make a few comments on a few.
Von Kaiser, I was going to say something about this set before. I couldn't really pickpocket anything, though the stats looked a bit hard to read since the coloring wasn't different. The taunts and victory poses were also a bit unclean, but must have been a good reason for that. The GIFs were all useful for understanding the move, and my absolutely favourite thing about the set was the absolutely epic final smash even though it was random, I had a laugh at it. Possibly the best final smash ever.

I haven't looked at Darkrai fully, though there's a lot of good stuff in that set, but I haven't read it fully.

Robo Link-MK2 is as hilarious as your other sets tirkaro, though from reading through the set, I ultimately think that the attacks lack certain detail, especialy lag, so if the attack is either fast or slow.

It's almost like its the end of the comp, with this rush line. Also, I think the review que and the moveset list needs updating, its been, I think over a week since anything new has shown and I check it everyday.
I want to see the review on Gorea to see if I need improvement for when I develop another set...
 
Status
Not open for further replies.
Top Bottom