• Welcome to Smashboards, the world's largest Super Smash Brothers community! Over 250,000 Smash Bros. fans from around the world have come to discuss these great games in over 19 million posts!

    You are currently viewing our boards as a visitor. Click here to sign up right now and start on your path in the Smash community!

Make Your Move 6 - Nothing Gold can Stay

Status
Not open for further replies.

kirbywizard

Smash Hero
Joined
Jan 4, 2009
Messages
6,713
Location
Napa, California . . . .Grapes For Miles
3DS FC
0989-1847-5768
Thanks for updating Gorea to the moveset list, Smash Daddy.

Anyway, Ghor's up. He has some interesting mechanics with him. First of all, Stats are certainally not as overpowering as Oliver and Bear Hugger.

I have a question about the Neutral Special: Does the Regular Repair Drone do anything, I wonder? It's just that as far as I know, I saw no special effects in them, unless they are meant to be useless.
The Side Special looks interesting, quite interesting.
The Up-Special: Did you deliberately make "Up Special" words gray? Because they are not red, unless it's meant to signify the useage of the amour. (Super Missle is spelt "Supper" correction)I think Ghor can move while the missles are out, can he? If he can, this attack is slightly broken, I think. I just want to tell you that the missles do not have priority stated on them, and I think you need a small time limit for when Ghor can use the ground version of this attack, though I do see that the amour can be damaged during this phase. Finally, try to use "it" instead of "he" to describe the amour, becuase the amour is not a "he" but more importantly, it's easier to read the move that way.

I think the F-Smash should actually have some lag stated, giving it a bit of fair lag can balance out the attack. It's fair enough in all other aspects.
Note that the D-Smash does not have any differences between the charging, if it even charges.

I don't have much more time to comment on everything else, but this might just be your best set yet...
Wow thanks for the comment * also I loved your last moveset :p*
Also teh regular Drones only have use with Armor Ghor's Neutral Special, or unless you corrupt them with Non-Armor Ghor's Up Air. They are vulnerable but that is why I have moves like Dtilt and UP Air to keep them alive.

Up Special: The color messed up when I was putting in the coding :mad: and yeah that move was hard to actually think of and I was pretty sleepy -_-. But yeah looking back it does seem broken so I should fix it up right after this post. Also yeah I should use *it* :O

Forward Smash: Ghor has some trouble with regular flat out KO's so I thought giving him a quick Forward Smash, but your input may make me re-think it.

DownSmash Shouldn't have any charge time but only start up lag. I will fix that.


Edit: NVM the down smash can't be charged an has 1 second of start up lag.
 

half_silver28

Smash Ace
Joined
Apr 25, 2008
Messages
862
Location
MYM, Ohio
Review: E-101 Beta by DancingFrogman

Alright! I see that you’ve continued your tradition of posting Sonic sets, DFM. E-101 Beta is a good choice for a set (seeing as you’ve already done E-102 Gamma, Chaos & Tails Doll). And I loved the original Sonic Adventure, so let’s take a look at what you did with Gamma’s big brother.

Organization:
So the organization is the first thing that jumped out at me when I saw your set. You’ve separated your set into 4 separate posts for background and stats/tilts and smashes/aerials & throws/specials and FS. The only other set I’ve seen that does this is Junahu’s Cutesy Beau. While Beau’s complicated mechanic deemed this almost necessary, this is hardly the case for this set, where I see it as being kind of unneeded. I like how you presented it like a computer program, but this frankly makes my review a little harder to do <.<.

As for the rest of the set, you continue to present it as a computer program, and present each attack as a “CODE”, which is pretty cool. You use a relatively simple color scheme that works quite well too; I have no problems seeing where everything is begins and ends. The pictures you have don’t seem out of place either, although I might have suggested making all pictures for the Final Smash the same size as the first one, just to save some space. Overall though, you did a great job with the organization on this set.

Creativity:
Now I remember fighting Beta’s final form in Sonic Adventure (and by remember I mean I had to look at a youtube vid to refresh my memory), and it doesn’t seem like you had much to take directly from the game. Of course, you took the few attacks he did have and incorporated them into the set quite well. Most of Beta’s other moves would fit any E-series robot well, and some of them (such as the down tilt, down smash, up throw and side special) are genuinely awesome. I also like the forward smash… probably due to my love of moves that work differently depending on their charge level. I really like the pummel as well, I like the idea of powering up Beta’s moves with it.

However, there are a few moves that I see as kind of generic, most of them being throws. The forward throw seems like something at would otherwise be better suited for a pummel, and the back and down throws are pretty generic, even when they’ve been charged via the pummel. That being said, it’s more forgivable in my mind to have a generic throw then for something like the down smash to be generic. None of Beta’s other moves are especially boring or overly complicated, and lend themselves to creating a flashy and quite interesting moveset.

Trueness to Character:
Well, as I said before, you didn’t have a whole lot to draw from Beta’s appearances in Sonic Adventure, and you incorporated the moves he did have really well. All the others attacks are definitely fitting for a battle robot; all of them involving explosives, energy blasts, electricity and all that good stuff. His Final Smash is extremely fitting and awesome to boot. There isn’t really much else to say in this section, seeing as how Beta is basically an emotionless robot. His taunts and victory poses reflect that well, and the lose pose made me lol. Good job here.

Balance/Mechanics:
From looking at Beta’s stats, he certainly has a lot of strengths. He’s a heavy character who has plenty of power and range, a great grab range and an average dash. On the other end of things, he has a ton of attack lag, poor jumps and traction, and a rather fast fall speed. However, his Peach-like floating ability somewhat makes up for his fall speed, as does his good aerial movement. One thing that you didn’t include in this section is priority. It’s particularly noteworthy in this set, seeing as how the majority of Beta’s moves have great priority (only the neutral special has low priority I believe). This makes Beta lean somewhat towards overpowered, although not blatantly.

I also have to mention his mechanics here (although they aren’t listed under a “in brawl” section rather than a specific mechanic section). First of all, Beta has a very useful defense against multi-hit attacks and weak projectiles thanks to the fact that any attack that deals under 5% doesn’t make him flinch. It delays his movement by 3 frames per hit, which isn’t really much, but it can add up when he gets hit multiple times. This still gives him a pretty good defense against the dreaded Whornado, though. The second mechanic, which causes Beta’s moves to stale twice as fast, seems a little tacked-on to me. However, I do recognize that this prevents Beta from simply spamming projectiles or his quick, high priority moves, thus making him a bit less overpowered. One of the side specials many effects include resetting Beta’s staled moves, which is a pretty creative way for Beta players to temporarily work around that weakness.

As I go into the actual moves, I see that you may have actually underestimated Beta’s power. The majority of his moves deal at least medium knockback, with many being more powerful than that. Some of his moves, such as the neutral combo, dash and most of his aerials, have speed, power and good priority. Beta could potential also attack like Peach by floating just off the ground and using his neutral and forward aerials. He also has a few stage control moves, as well as a very useful gimping tool in his down smash (which I think should stay out only about half as long as it does now, by the way). At this point, the only things holding Beta back from being all-powerful are his stale move mechanic and his very gimpable recovery. Although I do think you underestimate his vertical recovery ability. Sure, Beta has to damage himself in order to get vertical distance, but what is 15% damage to Beta, who is probably already damaged a ton anyway? Overall, Beta leans heavily towards overpowered, but is just barely held back by a sparse few factors.

Writing Style/Detail:
Now your writing style is something that many people complain about, the dreaded “Dancingfrogman syndrome”. Personally, I see that you’re getting better about that, although there are still some places where your style comes off as somewhat awkward. For example, here’s the first sentence of the forward tilt:

“E-101 slightly lowers its ground hover, and then E-101 sticks its right arm up into the air, and an orange ball appears at the top of the cannon and slowly grows bigger. You can charge this up for more power as well.”

Now here’s how I would recommend writing it:

“E-101 lowers its ground hover slightly, sticking his right arm up in the air as an orange ball appears at the top of his cannon. This move is chargeable, with the orange ball growing larger as it charges.”

Just little things like that would make your writing style some much better. As for detail, you pretty much have everything that anyone would want, although I would recommend including details for each move in the move description itself rather than throwing in everything at the end. I don’t have a problem with stuff like beginning/end lag being included at the end, but I doubt that anyone wants to read a run-on sentence full of properties. There are a few places, however, where you should give a bit more information. For the forward smash, for example, how long exactly does it take to charge? You say that it has high start & end lag, but with the attacks that Beta uses when this move is more than 50% charged being absolutely godly, it would be nice to know exactly how long he has to charge to use them.

Playstyle:
You have a pretty good summary of Beta’s playstyle written here, but I don’t think it was necessary to have a separate section for aerials/grabs/recovery/mechanics etc. For many of those, they can be explained completely in just a few sentences, so you shouldn’t have to start a separate paragraph for them. Beta’s playstyle basically revolves around camping; he can’t really approach, but he can easily force the opponent to approach him with his large supply of projectiles (or the down smash). He can also use that time to set up one of his stage control moves. Once they manage to get close to Beta, he has plenty of options to knock them away. His neutral combo, dash, neutral and forward aerials (while hovering), his grab and his side special are all great options. When it comes to KOing, nearly all of Beta’s attacks have KO potential, and he can edge guard with the versatile down smash. Beta is really heavy and has long durability as well. Beta is balanced out a little by his x2 stale move negation mechanic and his predictable recovery, but not as much as you think. At the high percents that it will take to knock Beta off the stage, the decision to attack yourself and take 15% to recover vertically is a no-brainer! It seems that Beta can do pretty much everything well except gimping and recovery. When all is said and done, Beta is certainly a high tier character at the very least.

Obligatory Closing Statement:
Anyhow, despite the balance issues that this set has, it was a very enjoyable one. Your creativity certainly shines through as well; you made a ton of interesting and cool attacks for what is basically a generic robot boss. It is certainly in character for Beta as far as the attacks and the sparse extras go (although I would’ve loved to see an assist trophy or music to go with this set). And finally, you are improving that writing style of yours a lot. I hope that your sets will keep getting improving like this! And now… (goes to read Shadowdeth).

…It’s done. (h)
 

Kholdstare

Nightmare Weaver
Joined
Oct 10, 2008
Messages
1,441

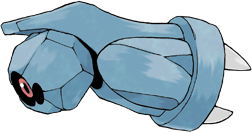
BELDUM

Neutral Special - Take Down
Side Special - Take Down
Up Special - Take Down
Down Special - Take Down

Standard Attack - Take Down
Dash Attack - Take Down

Side Tilt - Take Down
Up Tilt - Take Down
Down Tilt - Take Down

Side Smash - Take Down
Up Smash - Take Down
Down Smash - Take Down

Neutral Aerial - Take Down
Forward Aerial - Take Down
Backward Aerial - Take Down
Up Aerial - Take Down
Down Aerial - Take Down

Grab - Take Down
Pummel - Take Down
Forward Throw - Take Down
Backward Throw - Take Down
Up Throw - Take Down
Down Throw - Take Down

Final Smash - Take Down


Sadly, none of these moves do anything since Take Down is the worst attack ever.

silverstrike
 

Baloo

Smash Ace
Joined
Nov 14, 2008
Messages
781

UNOWN

Neutral Special - Hidden Power
Side Special - Hidden Power
Up Special - Hidden Power
Down Special - Hidden Power

Standard Attack - Hidden Power
Dash Attack - Hidden Power

Side Tilt - Hidden Power
Up Tilt - Hidden Power
Down Tilt - Hidden Power

Side Smash - Hidden Power
Up Smash - Hidden Power
Down Smash - Hidden Power

Neutral Aerial - Hidden Power
Forward Aerial - Hidden Power
Backward Aerial - Hidden Power
Up Aerial - Hidden Power
Down Aerial - Hidden Power

Grab - Hidden Power
Pummel - Hidden Power
Forward Throw - Hidden Power
Backward Throw - Hidden Power
Up Throw - Hidden Power
Down Throw - Hidden Power

Final Smash - Hidden Power


silverstrike
 

dancingfrogman

Smash Ace
Joined
Jan 3, 2008
Messages
862
Location
United Kingdom, Birmingham
Switch FC
3133 8842 3910

Blituns


Okay, this is another original pokemon. This one goes is the opposite of my Shadowdeth moveset. Yes, this pokemon is a legendary, ruling the light source of the world. Is there anything else really good about it? Well, it would be uber in the games (with a total stat of 600). This pokemon would be the types LIGHT and GHOST! There is a dark type, why can’t there by a light version? Which could quite simply have the weaknesses and resistances switched around from dark type. Blituns is a peaceful character, unlike Shadowdeths sinister appearance (just look at that facial hair >.<)

Well, since it is an OC, I have quite a lot of freedom with it, although OCs can have crazy amount of potential (IE that Magic Syndrome). OC pokemon also shouldn’t excuse pokemon syndrome. Light type pokemon shouldn’t have dark moves, and vice versa. Although this does have ghost type features, I’ll try not to make it “Evil”. I got this idea after Shadowdeth, every pokemon seems to have an alternative somehow or why.

Who doesn’t love a floating bowling skittle Casper?


When Blituns first appear, the top of the screen has a beam of yellow light, representing the light and the sun. This also lightens the stage a tiny bit. This isn’t for show. The higher the pokemon goes towards the light, the stronger its moves are, and the higher its multiple jumps are. Also, it makes the gravity harder the higher up to the light is for the opponent (it doesn’t affect you however). This means that even if you are at the top of the screen with the opponent, it is INCREDIBLY HARD to score a star KO at percents such as 140%. However, gravity doesn’t affect horizontal knockback, so you meant to use those moves then to score you KOs. The sun light is transparent, you won’t be blinded lol.

Basically, first you have to do is to get your opponent as high into the sky as possible, and then use your horizontal knockback aerial moves. Yes, the playstyle is based on where you are.

Oh, this character hovers slightly above the floor, meaning it can’t trip, but also means it has no crouch.


Strength - 2 – 9/10
Walking Speed - 4/10
Dashing Speed - 5.5/10
Direct Range - 3 - 7/10
Indirect Range - 3 – 7/10
Weight - 1/10
Size - 4.5/10
1st Jump - 6/10
Multiple Jumps (5) - 1 – 4/10
Fall Speed - 3/10
Aerial Movement - 8/10
Crouch - N/A
Traction - 5/10
Others - nahhh

Good
Average
Bad
WTF’s going on?

Blituns is weird character by the stats. Blitsun, when just on the ground, is very poor in the stats. Everything is either average or below, showing it is very weak. But, the higher he goes up to the light, his range, jumps and power become immaculate. The Pokemons aerial mobility is similar to Jigglypuff, just with less aerial movement and higher jumps (it goes from really short to Jigglypuffs first jump in terms of distance). It is also the second lightest character in the game with decent speed. In terms of overall crudeness, it has a supreme aerial game with the ability to manipulate the opponents game with great range and power.


Down Special - Hot Spot

Blituns raises its arms upwards while looking at the light above. After 0.5 seconds, Blituns creates a small yellow ball, like the yellow balls in the first picture. These yellow balls are about the size of a hot sun. You can do this in the air as well. You can only have 3 of these on the screen at one time.

These balls have the same effect as the overall mechanic, being right next to it maximizes your power and range. However, you can only be a Kirby size away from the yellow balls; otherwise you won’t get anything in return. Also, these balls can be hurt, they have a maximum of 20% before shattering. The balls also stay up for a maximum of 30 seconds before disappearing.

These make it so your smashes and ground moves much stronger and rangier. BUT, this means this is the prime target for the opponent to get rid off. This means that you could use it as bait, but you’d want to use your ground moves to use surprise KO moves.

Neutral Special - Solar Beam

Blituns looks down and closes its eyes while making his arms shake like mad. This then makes very small yellow matter go towards the legendary pokemon, making it glow yellow. After enough time passed by, Blituns looks upwards, and sticks its arms out. This makes a massive yellow beam shoot out forward (if in the air, it shoots it downward). Also, when you do it in the air, it slows down his float by 3 times more.

The Solar Beam is the size of King Dedede tall, and reaches 3/4s of Final Destination horizontally or downward depending reach version you do. This does 22% and high horizontal knockback. This also has quite a bit of ending lag, but has amazing priority. The beam also stays out for 0.5 seconds.

Oh, I didn’t mention start-up lag! With the sunlight mechanic for this move, the start-up lag depends how close you are to the sunlight. Obviously, the further away you are, the longer it takes. The start-up lag ranges from 3.5 seconds (lol) to 0.3 seconds (pwnage). This is one of moves that desperately need to be in the air or next to a hot-spot with; otherwise you’re so punishable it’s laughable. This is a great KO move, just don’t abuse it stupidly (look at that beast range man).
[22%]

Side Special - Heart Swap

Blituns sticks its hands on its jewel, and flutters its eyes quickly for 2 seconds. Then, we see 2 hearts appear, one from the opponent and one from Blituns. The hearts then swap around while the screen is frozen. This only occurs to the closest opponent in free for alls.

This has infinite range. What this does is simply change the character you are controlling with the opponent! This lasts for 8 seconds, and when you KO Blitsun, you see that the opponents stock disappears, not yours. However, the same happens if the controlling character dies, so you have to use this with great care.

So, you want to use this when YOU are at a high percent, and KO yourself at that time, as that means you go back to 0 health. However, this means if you do this when the opponent is at high percent, they can use this tactic against you. Plus, they’ll either run away from you, since they know of this. They’ll go all out to stop you using this in the first place.

This is a one off trick, this isn’t vital to this character

Upward Special - Heavy Gravity

Blituns spins around, and then lowers its arms quickly. You also can’t do this on the stage. This also stops Blituns in its place, and at the end of this, you are free to move and attack, just unable to use up-b again.

What does this do? Well, it makes gravity 1.5 times harder, but that’s not the main point. When you do this, the stage goes down 2 Ganondorfs downwards (the death boundary goes down along with this move), and returns back to normal when Blituns jumps back on the stage or dies. This is mainly used for recovering, but you might for some reason want to use this so you can last longer percents upwards (and then die anyway). This is a decent move, but be sure your above the stage (or right next to the stage), so are certain you can recover. However, this is gimpable during the start-up lag, which lasts about 0.5 seconds. So, I hope you understand that Blituns need this, otherwise with its ****ty jumps so low below the stage, it definitely needs this.


Neutral A - Blinded Measures

Blituns sticks its hands onto the jewel, and creates a bright light briefly. This has a tiny bit more start-up and ending lag as Ganondorfs jab. The thing that changes this move by the mechanic is the range. At the bottom of the stage, the ball of light is about the size of a bom-omb, while at the top of the stage it is 1.5 times the size of a hot sun (when first spawned).

If the opponent is looking the opposite way, This won’t take effect! This is more common sense, you don’t get blinded by the sun if you don’t look at it, only if you do look at it head on. If the opponent does get blinded, this does 3 - 7% (depending on the mechanic) and does a 3 second stun. If you hit an aerial opponent and they are looking towards you, they fall down spinning (just like a broken shield), and still receive the same punishment. This is quite hard to punish, well, the opponent could just use an aerial while looking away from you. This should be used as a surprise attack. After hitting the opponent, use up tilt to make clouds, and then slowly rise up to the sky, ready for the final blow.
[3 – 9%]

Dash Attack - Solar Wheel

Blituns floats up a bit, turning bright yellow quickly. Blituns then dashes forward, glowing bright yellow, 4 stage builder blocks forward along the floor. If you go off the stage with this, it continues going forward in a horizontal line. This has quite a bit of start-up and quite a bit of ending lag. However, this has 9 IASA frames if you hit the opponent.

What the mechanic does this time round is that the hit-box increases (in size), and gains more priority and power. At the lowest point, this does 7% (and the hit-box is just the sprite of the character, and is only tinted yellow) and low knockback which sends opponents 30 degrees upward. At this point, the priority is abysmal. At the highest point, this does 15% and high-low knockback (although the gravity is over 9000 huge, so the knockback of this move isn’t actually this great). The hit-box of this about 1.4 times the size of a hot-sun, and has amazing priority. This – would – a good set-up move on the lowest ground, since of the IASA frames; the low priority means it can be hit through by anything. At least it can be a decent follow-up move at high parts of the stage (would be smart to use clouds for this move).
[7 – 15%]


Forward Tilt - Holy Light

Blituns sticks both of its hands forward, and then white light forms between the hands. This has little start-up and ending lag. This is affected by the mechanic, increasing the power and range. This also delivers quite a lot of hit-stun, this move also is disjointed.

This does 4 multiple hits and the electricity status effect. At the weakest point, this does a total of 5% and low diagonally BACKWARD knockback (meaning they will end up above Blituns head). The light is about the same size as Marios fire-ball, meaning this has quite a small range. At the highest point, this does a total of 16% and high-low knockback diagonally backwards (remember since of the huge gravity, the opponent doesn’t go so far up). The light is about as big as a hot-sun at this stage. This is great at raking up damage, and is perfect for down tilt set-up (because of the knockback direction). LOL FOLOW-UPS?
[5 – 16%]

Upward Tilt - Cloud Upthrust

Blituns look up, hovering a tad higher than normal, and rotates its arms clockwise quickly. We also see steam (like a fully charged giant punch for donkey kong) form below the floating pokeman. This has low start-up and ending lag. This also is an AUTO-RELEASE move (which auto releases after 3 seconds). So, what does it do?

When you use this move (without charging up), you create a single cloud the size of a kirby, and this travels upwards the speed of Metaknights jump. This travels always just 1.5 times Ganondorfs height underneath the top death boundary. These clouds are passable from below, but not from above (think the Konga Jungles main platforms from Melee). The largest the platform can be is about 3/4s of Final Destination, and travelling at the speed of Ganondorfs walk. This does no damage or knockback. The platform can have moves go through the platforms as well.

This is one of the main ways of getting the opponent up into the glowing sun. You can quite easily give yourself space, and if they aren’t careful, go into one of your stunning moves. If the opponent tries to jump off the cloud, you can use your down air. Make time, 3/4 of Final Destination is massive, so if you want to use this, you can settle for a second worth if you like. You also have forward air to make some clouds as well.

Downward Tilt - Vapours Grasp

Blituns turns to the camera, and leans on the left side and winks, turning bright blue in a flash. We then see water vapour form a hoop around Blituns, being about a stage builder block wide, and as think as Kirbys crouch. This has very low start-up and ending lag. This is also a grab-box, being unbeatable.

This hoop travels upwards, swaying side to side a little bit. This travels upwards at a slightly faster than a Luigi fireball. This moves range is to the upward death boundary, and stops when it hits an obstacle. When the opponent gets trapped, they can button mash out of it like a grab. However, the minimum amount they get sent up is 2 stage builder blocks. They have there second jump back, but when they are released, they are free to do whatever what they want in 1 frame, meaning that they’ll use neutral air if they button mash greatly. This does 6% on contact, and they are realised automatically just a stage builder block below the top death boundary.

This is an amazing move, and would’ve been in the up tilt input. This move is ideal for a followed up forward tilt since of the ideal knockback direction (right over head). Since of this, this makes it ideal for a charged up-tilt, and begin the stair way of heaven (no, not those dirty videos man), and then KO the opponent. This also follow-ups with other aerials, but it is best to start with the clouds, to ensure the opponent don’t go back to the ground.
[6%]


Forward Smash - Lightning Shoot

Blituns raises its arms, and slightly leans back/hovers slightly. Then, bright white electricity shoots up from below directly in front of itself (HAR, NO THUNDER CLONE BLAHAHAHA). This has very low start-up lag, but it depends how far above you are above the lowest point of the stage. The thunder slowly gets wider the higher it goes up, and stops if it hits an obstacle. It’s about as thick as Marios f-smash ball at the lowest point, and about 4 stage builder blocks at the top boundary. This is also disjointed with great priority.

Now, this isn’t actually affected by the mechanic, but the properties make it seem so (gets bigger and stronger). At the lowest point, this does 7% (13% fully charged) and low (low-high knockback fully charged) vertical knockback. At the highest point, this does 24% (30% fully charged) and high (very high knockback fully charged) horizontal knockback.

This is a good move to link up with a down tilt at early percents, because this gives a great deal of hit-stun due to its electrical element nature. Meaning this can also start a combo or travel to the skies. This can also be used as an epic KOer as well, but it takes quite a while for the thunder to come by, in which time the opponent could, y’know, walk to safety.
[Lowest point = 7 = 13%, highest point = 24 – 30%]

Upward Smash - Angels Song

Blituns looks towards the screen, and tilts its head back a bit, flashing bright blue as it does this. Blituns then hmmms and haars in an angelic tone. We then see the heavens gate opens, and we see light separate from the centre of the stage, creating a hole in the sky. After this, music notes the size of Jigglypuff appear. They first fall down in a big cluster (about 10 in one massive line), and then quickly separates in 5 directions (downwards at a 45 degree angle, and any where in between). The music notes flash the rainbow colours.

The notes come out in 0.4 seconds (24 frames), while Blituns is stuck in the animation for 0.25 (15 frames {total of 39 frames}). Each music note does a sleep effect, which resets if another music note hits the opponent! The opponent is a sleep just the standard way uncharged (button mashing so you get out of it earlier), but when you fully charge this, it’s harder to get out by 3.3 times more. Each note travels at the speed of Marios fire-ball. This also always deals 8% for each note.

This is a situational move! You use this when the opponents on your clouds near the top of the stage, and you’re not there! This is because this is really punishable if you do it on the same playing level as the opponent. This will also make the opponent keep on moving, and make them wary of their current position. OR, you could use the below move if you want.
[8%]

Downward Smash - Camping? TELEPORT!

Simple move is simple. Blituns spins around quickly, causing a spark of light, and then reappears either behind the opponent or in front (hold downward while doing this causes Blituns to appear behind the opponent. Left alone, this causes Blituns to reappear in front of the opponent.) This has super armour frames just before it disappears.

Blituns teleports back half a stage builder block horizontally and the height of Ganondorf. This has very low start-up lag (not like it matters due to super armour frames), and also has low ending lag (the ending lag is about the same as the opponents re-action speed). The flash of light is also affected by the mechanic. The light is the size of Blituns at the lowest point, while at the highest point; it is about 1.2 times the size of Bowser. At the lowest point, this does 7% (13% fully charged) and low (mid-low knockback fully charged) diagonally upward knockback. At the highest point, this does 20% (28% fully charged) and mid-high (high knockback fully charged) knockback. This is also disjointed.

If the opponent is camping, you can use this to get right next to them. However, you have to vary where you appear, otherwise you’ll become predictable. It’s hard for Blituns to approach with its moves, so this is needed. You teleport to the closest opponent when you do this. You can also start a combo off if you somehow hit the opponent with the explosion of light.
[7 – 13% (lowest point), 17 – 25% (highest point)]


Neutral Aerial - Orb of Light

Blituns will stretch its body out just like Warios N-air, also sticking its hands out, but doesn’t spin around (baby right round). This has incredibly low start-up, and low ending and landing lag. The hit-box is constant throughout this as well.

The mechanic alters the priority, range and power/damage of this move. However, this move is maximised 1.5 times quicker than normal, the lowest spot also stays the same. At the lowest point, Blituns is tinted yellow, with a little bit of a yellow outline glow as well. This does 5% and low-low Sakurai angled knockback (Sakurai angle is the one when the higher the opponents percent is, the higher the angle is). As this position, this has average priority. At the highest point, Blituns is covered in a bright yellow ball of energy the size of King Dedede. This does 13% and mid knockback with great priority.

The low lag, great priority and knockback make this a great move to chain with itself. Also the great aerial movement makes this even better. When you are quite high above the stage, this can be followed up into an aerial finisher such as the B-air.
[5 – 13%]

Forward Aerial - Platform for clouds

Blituns tilts back a bit, and steam is seen from the hands. During this time, you can smash in the opposite direction, which makes Blituns turn around with this move. After the start-up lag (0.5 seconds long), it sends a path of clouds forward, which resembles its up-tilt. This has low ending and landing lag. The clouds reach out a 1/5 of Final Destination forward, but you can hold this down for an extra second to double the length of the clouds. The clouds are as thick as they are in the up tilt.

This can be used in the exact fashion as the up tilt version. This can also be used as a recovery if you saved some of your jumps as well. This is a move, because Blituns will be in the air more often than not, and this is a good move to continue to the skies gates. Remember you can turn this around as well.

Backward Aerial - Quick Clap, Quick Flash

Blituns looks to its back, and then claps its hands twice before making a small to large white flash of light shoot out. This has low start-up and ending lag, but there is a moderate amount of landing lag. This is also disjointed.

The mechanic affects the size of the flash of light, and its strength. At the lowest point, the flash of light is about the size of Luigis foot. While at the highest point, it is as thick as a soccer ball, and the length is about 2 soccer balls long. At the lowest point, this does 6% and low horizontal knockback with quite a bit of hit-stun (ideal for early comboing). At the highest point, this does 17% and high horizontal knockback, ideal for killing.

This can chain itself at low areas of the stage. However, this should be used for a KO at the top of the stage. This can KO opponents at 100%, and if they don’t die, you could use down smash to follow the opponent. Instead of using for comboing, use neutral air!
[6 – 17%]

Upward Aerial - Light Barrier

Blituns look upwards, and sticks its hands upwards in a cupped fashion. After this, a small dark blue ball of energy appears in the hands. Then, we see the outline of an invisible box (you can tell it is there by the outlines…) appear above the blue energy. The box then shoots upwards just below the upward death boundary. This has low start-up and ending lag (much quicker than it sounds), but quite a bit of landing lag.

The Glass is about one stage builder block thick, while the width of 2 stage builder blocks. The Glass intensifies the light more by 1.4 times this means that attacks become EVEN stronger, have GREATER priority and a BIGGER hit-box. This is useful even more for killing. Also to note, it increases the light DIRECTLY below the glass, and every area is stronger by 1.4 times. If you do this again, the original glass disappears, and disappears automatically after 12 seconds. Make that KO power stronger further down the stage, meaning less pressure to force the opponent the higher the stage. This can also be shattered by moves that do over 20% (one hit).

The blue energy does damage, 4 multiple hits. The multiple hits do a total of 5% and hit-stun. If the opponent is hit by the box when it is travelling (at the speed of Falcos blaster), it shatters! This does 10% and mid diagonally upward knockback. The priority depends against the damage of the opponents aerial, which makes it shattered before it hits the opponent.

This can be a good damage racker due to the damage not changing, and can be used to enhance KOs. AMAZING for vertical spacing, plus this has low lag as well, but Blituns is punishable from below.
[5% + 10% = 15% (math is hard)]

Downward Aerial - Drag up

Blituns looks downwards, with its arms closed together. Blituns then quickly makes its hands wingspread, causing a mass of wind to go upwards (below Blituns). This has a bit of start-up and ending lag, but has a quite a small amount of landing lag. This does no damage! This reaches 3 stage builder blocks below, and the wind is quite powerful (sending the opponent just above you). The wind also covers 2 stage builder block radius. The Wind lasts for a second after it first comes out, lingering for a long time.

This is used to keep opponents in the cloud platforms if they try to run off! Remember, hit-boxes can go through the clouds, which also includes the wind. This isn’t suitable for combo starting due to its ending lag. This will be a pain for the opponent, you must use this when the opponent dares to jump off the cloud platform.


Blituns stretches its hands forward a bit like Jigglypuffs grab, having a pixel more range than the Pokemon. The grab range is slightly bigger in the pivot and dashing grab, but have more ending lag. The start-up lag is about the same as Luigis grab frames.

If you do this next a Hot spot, the hand will become transparent, and reaches out at 3 times the range. This having supreme range, plus this automatically gains top priority if you and the opponent grab at the same time. To hell with that player port priority!

Pummel - Jewel Shine

The jewel on Blituns body glows bright, and stuns the opponent instantly for a second (always a second), doing 1%, and you can’t re-grab again until 2 seconds have passed or you hit the opponent with another move doing 10% or more.

This is for you to set-up moves like u-tilt and d-tilt, or heck, use f-tilt -> d-tilt -> u-tilt. And then use your great aerials such as neutral air. Sure, 1% is crap, but *counts… 5 + 6, and with one neutral air, add another 6 or 7%, doing a total of 17 or 18%*, that makes up a LOT of damage. This one move makes this characters grab game dangerous, plus stalling this move doesn’t… really matter.
[1%]

Forward Throw - Greenhouse effect! (Light screen)

Blituns makes a clear box around the opponent about 1.5 stage builder blocks high and wide. Blituns then points into the sky at a 45 degree angle. Blituns then makes another clear box like the previous one 2 stage builder blocks away from the first one, and the opponent teleports into that box. This has low ending lag for Blituns.

The box acts just like a greenhouse does, sun-rays/heat goes into it, but can’t get out. This means that the light intensifies after a period of time (actually, this makes the current area of light get stronger by 1.08 times every second). When you attack the box with any move, it breaks and deals the damage and knockback with the additional intensified damage. Yes, the opponent can break out of the glass as well, but it takes 52% to do so. Some characters are better than others obviously. When a move hits the box, the ENTIRE BOX will become a hit-box, making it quite hard to avoid.

So, who do you utilize this move? This move can be used to force the opponent to stale his/her moves to break out of it (hence you can survive longer for someone who has light weight). You can also use an aerial solar beam above the box, which makes that move viable. You can see how much the opponent will be flailing around, trying to break the box. All in all, a very useful move.
[1.08 damage/knockback increase every second]

Backward throw - Extrasensory distortion

When you do this, both characters will frantically changing sizes in 45 degree angles, looking squashed, just like the move “Extrasensory” in pokemon. This takes 2 seconds to end, and automatically does 7%. Oh, I forget to say that you get a 1.3 damage/knockback/hit-stun boast when you get the grab in.

This has a variety of affects, which is more luck than not (reliability alert). The first thing you notice is that there is a 10-90 chance that you’ll be grabbing the opponent, or the opponent grabbing you. You are then able to throw the opponent just like nothing happened. However, the move hasn’t ended just yet. There is an equal chance of the following effects taking place. One effect is that the throws inputs are inverse. Another effect is that the stage might become 1.3 times floatier or heavier. And the final effect is that the stage might be rotated 90/180/270 degrees, and/or mirrored! Only one of these happens however. The effects all last for 10 seconds, and can’t be re-stacked.

This is used to mess up the opponents grab game, so you can counter accordingly. But, it’s too unreliable, you might get yourself harmed instead, and plus the effect might not affect the opponents strategy, and might work to his/hers advantage. Too risky, not enough reward.
[7%]

Upward Throw - Water droplet (cloud) hugs

When you do this move, a cloud appears, engulfing the opponent and you in one cloud. The size of the cloud is irrelevant, you can’t move around or jump while in this cloud. The cloud move upwards at the same pace as moving PK flash forward as far as possible (IE, slow). This means you can only use tilts, smashes and specials (no grabs for no super-unfair-chaingrabs {instead of the normal unfair-chaingrabs}). This can even reach out of the top boundary, for a suicide. However, you should only ever make this mistake ONCE in your smash play life (the first time you do it, and dun understand it). If you and your opponent suicide with this move, you seriously suck (I mean, it would take 3 or 4 seconds to die from a custom stage made at the top line of the builder).

So how do you get out of it? Glad you asked, I wasn’t going to tell you :p. Really, both characters have to take 35%, and when you cross that, the last moves knockback is took to account, dealing 1.5 times more hit-stun (hit-stun? What hit-stun in brooze?). And that’s it, the cloud disappears as soon as one of you takes knockback, and you can use your second jump.

But how does it win? Blituns hasn’t got the most powerful moves when you’ll most likely get the grab in. Well, since you can’t move around, this sets up Neutral A like a kipper, setting up moves such as forward smash/tilt, and repeat. Opponents have to use their quickest moves to stop Blituns using this move. This move is character dependant. NOTE: You can’t use down smash, and down tilt can’t reach the opponent. Up tilt is also punishable, and needs charging up to be of any use to you.

Downward Throw - Psywave

OHMIGOD A POKEMAN MOVE!!! NO CLOUD OR LIGHT MOVES!!!

Okay, Blituns Psywave’s the opponent, creating purple transparent spirals around Blituns and the opponent. This first makes the opponent trip, and then instantly a dark blue wave comes out of Blituns hands, and goes towards the opponent. You can move this wave (size is irrelevant, it will always hit the opponent) with low limitation (like pits arrows) at the speed of Pikachus thunder jolt. This also lasts 3 seconds with low ending lag.

This deals 6% automatically. This can be used to set up a combo the opponent, but unable to chain-grab as if the opponent hits an obstacle, they slam against it, doing 5% and low diagonally upward knockback. This can also be used to gimp the opponent underneath the stage. All in all, a good throw. Blituns has a good set of grabs, darn that low range.
[6% + 5% = 11%]


Radiating Sun

Mechanic boast: you become full powered for 15 seconds. This also does 2% every second for the opponent. The background will be bright yellow. THAT IS IT; I DON’T CARE ABOUT FINAL SMASHES!!!111


Blituns is a character that has a bunch of set-ups, and has a great set of reliable KO moves eventually… eventually? Did you forget? The mechanic? When you go higher to the above death boundary, the stronger the gravity and your moves become. I’ll state the times of the match, and what you can do, the general points that is.

At the start of the match, you’ll be far away from the opponent, and being that Brawl is a defensive/campy game; the opponent won’t have the need to approach you. This is no problem, as the move down smash can be used. This teleports you right next to the opponent, so the whole “approach” section of the game is gone for Blituns. Dash attack is only a good approach higher above the stage, so, meh.

When you are close, you want to set-up your clouds, for the opponent to be on at the same time with you. However, you can’t just “do it”, you’ll be punished, and due to your low weight, this is too risky. You’ll want the opponent to be grounded, occupied or something. So, one of the first things you want to do is get a hot-spot (down b) in, because while you are right next to a hot-spot, you become crazy-God-strength, capable of KOing below 100%. Scary. Attacks that you can use is Neutral A, Forward tilt and Forward Smash on the ground. Neutral A goes into F-tilt and F-smash. You can follow a down tilt after an f-tilt (perfect knockback direction), which can be followed by an up tilt. Neutral A goes into f-tilt (moar damage), and if hit right next to a hot-spot, Neutral B (solar beam) can hit the opponent successfully (which is incredibly powerful). Forward smash can be followed with a slightly walked forward down tilt.

You’ve now set-up a cloud, but the opponent tries to run off, what do you do? You use down air to drag them back up, and use an aerial such as neutral air or back air to hit them back into the platform. You decide you need to create some more cloud platforms, so you want to drop slightly below the stage, and create a cloud platform. But before that, you need to stun the opponent or trap them with forward throw or neutral a. I make it sound easy, but any wise player will realise this, and try to go around it, so you need to vary your options and doing things in a different manor, instead of “drag up”, fast fall and up air, fast fall forward air maybe? Blituns has quite a lot of options, don’t be predictable.

And at the top, this is where you’ll be KOing the opponent, which could happen earlier than normal with the help of up air (the see through glass) and forward throw (the opponent inside an see through box). Anyway, the KO moves are great, a lot of moves you’ll see have a maximum of high or high-low knockback – suitable for a KO move (High knockback moves can be staled a bit and still be used as great KO moves, High-low moves need to stay fresh to contain their KO prowess {this is how I see it anyway}). However, you’ll notice that some of those moves have great vertical knockback, which the mechanic puts MILLIONS of gravity near the top boundary (not literary, but is somewhat difficult to KO vertically, for both characters). So, the useful KO moves are Back-Air, Forward Smash and Neutral B (0.3 seconds of start-up for the power of this move is awesome). Small amount of KO moves surprisingly. BUT, just like Wario, these KO moves are ridiculously useful, and have a bunch of set-ups like down tilt and forward throw. Those moves make it MUCH easier to hit the opponent with them.

What happens if you at the top of the stage and unable to KO? It isn’t all that bad, Neutral Air has great priority and low lag, and due to the large amount of jumps, you can chain with this quite easily, you can quite easily get 30 odd percent with this one move. Neutral Air is a great juggler, you should use this at most times. You could also set up a hot-spot if you are- near – the top boundary. Saying that, try to place the hot-spots all over the place, one on the ground, another one at about the middle of the stage (in the air), and one slightly higher up, although not literally a pillar going up.


And that is the way the flow of the game is for Blituns, on a generalisation. Obviously, times changes and characters varies. This is the golden way to success, but needed to be done in a different way. (This is pretty much the “other options” section)

Blituns has practically NO defensive moves, it has hot-spots, but that isn’t going to stop a Falco blastering you. Hot-spots are used to enhance your moves, but when you follow the above playstyle, it sounds unneeded. So you use Hot-spot to bait the opponent, because you’ll have amazing priority and range, pretty much out beating a large array of moves. With this bait, you can hope to get a grab in. With this grab, you could use down throw to put the opponent into the air (quite high up), and perform an up tilt that way. You could also use pummel, and do the same deal as Neutral A would.

How does off stage playing goes, as in past the edges of the stage? Well, if the opponent is sent in a horizontal direction somehow at ground level, since Blituns jumps at that height are most likely going to be crap, it isn’t worth jumping off the stage to not be able to recover. However, if they are sent upwards, you can jump towards them, and use moves such as Neutral Air and Back Air, being potentially dangerous (what you could do is push someone off the stage, and use an Aerial Neutral B occasionally, screwing up opponents timing and air dodge, but what happens if you miss :V).

Speaking off the good-bad off stage game, Blituns recovery is ****E. Up-b isn’t that great when you know when you’ll be using it, and when you’ll be using it, you’ll know that your jumps will be terrible at this point. Recovering ABOVE the edge is piss easy though, that aerial mobility is a granted landing. Also, I like to mention this now, although this works like most momentum cancelling moves. To momentum cancel, you have to do a fast fall N-air, and then do Neutral B. Very vulnerable to spikes, you’re gonna get gimped by Marios fireball (like Ness/Lucas’s up-b).

Another thing that is bad, is its’ out of shield game. Its shield isn’t the greatest (pretty decent for its size), but what are you going to do? Up-b? Up-smash? Sure, grabbing can be good, it just needs better range on it. You could short-hop aerial with it, but you’ll most likely be on ground floor, and have much lower priority on your aerials. Also, DACUS is useless, you slide well (about the same as Links), having the same DACUS window as Link (again).

So what is good? Lots of its moves are disjointed, come out fast with little ending lag. They also have range from decent to amazing. The low damage at ground level make follow ups a certainty, and has great KO potential. Its throws are awesome, very useful. Baiting and Punishing is great with moves such as Neutral A, Neutral Air (wall of pain) and Back Air, which can also zone the opponent as well.

Overall, this is a character with a bunch of greats, but not without its flaws. Blituns has that predictability factor, quite the one dimension character. This character has one goal only, have the opponent near the top of the stage, whatever the cost. Simple ay? This character isn’t exactly the easiest “pick up and play” character, especially for first timers, but the overall idea is quite simple. This character would, I imagine, have decent match-ups (aside from Diddys banana metagame has gone instantly due to the no tripping ability lol), or maybe loop-sided match-ups, most likely against the big 2 (and Ice climbers, down tilt grabbing one ice climber, the grab game is semi-gone during the cause of the match). I can’t say I know which tier it would belong to, but as you know I’m rubbish with balance.
 

Darkurai

Smash Master
Joined
Aug 20, 2007
Messages
3,012

Magikarp

Neutral Special - Splash
Side Special - Splash
Up Special - Splash
Down Special - Splash

Standard Attack - Splash
Dash Attack - Splash

Side Tilt - Splash
Up Tilt - Splash
Down Tilt - Splash

Side Smash - Splash
Up Smash - Splash
Down Smash - Splash

Neutral Aerial - Splash
Forward Aerial - Splash
Backward Aerial - Splash
Up Aerial - Splash
Down Aerial - Splash

Grab - Splash
Pummel - Splash
Forward Throw - Splash
Backward Throw - Splash
Up Throw - Splash
Down Throw - Splash

Final Smash - Hyper Beam
Wait Magikarp doesn't have hyper beam. Okay, just splash.
 

Katapultar

Smash Lord
Joined
Nov 24, 2008
Messages
1,284
Location
Australia
I don't think it's a good idea to spam those kind of joke sets, don't ruin MYM6!!!

Anywa, Im gonna say something more useful: Last page there was a moveset, Poison Zombie I believe it was. Poor PZ suffered the same fate as my Gorea, stuck at the bottom. Ive read the set a bit. It is a organised set to an extent I believe, though I think the moves are a bit too generic, some not having damage percentages. Like, I don't want to give you only negative comments, nor would it be fair to have this set ignored. You are a newcomer, am I right? If so, you could look at some of the winning sets from MYM5 for some help. Mostly it was not that the attacks were generic, but more that there was so little detail, such as lag, and certain traits to make the set easier to understand. PZ could have used a mechanic to posses the enemy, don't be afraid to use those kind of mechanics. I liked all of the pictures you used and so, you must have put some good time and effort into that.

Here's what I think could help you: Put some more detail in the attacks, that kind of thing can help you, but most of all you should request a review on the canvas, the palette will kindly help you (If you don't have a WordPress membership, you will need to get one first).

I also nerfed Gorea sets, Imperialist Headshot damage and knockback, minor change.
 

darth meanie

Smash Journeyman
Joined
Jun 6, 2008
Messages
452
I understand we're posting Pokemon Sets now...

M A G N E Z O N E​


OVERVIEW​

Magnezone is a genderless Pokemon introduced in the fourth generation of Pokemon, and is the final evolution of Magnemite and Magnezone. An Electric / Steel type, it evolves from exposure to the magnetic fields of the giant mountain where the world was born, Mt. Coronet. The Magnet Field Pokemon, it has an especially strong control over the electromangetic fields around it that its previous evolutions do not.

Magnezone has several unique abilities, the most important of which is its Magnet Pull ability. In the original games, this ability allows him to prevent Steel-type Pokemon from escaping him, making him fairly popular as a trapper. It also has one of the highest Special Attack scores in the game, and a typing that gives him a metric ton of resistances, as well as the ability to completely neutralize one of its weaknesses.

Music to go with your reading:
<Magnezone's Army> (Pokemon Movie 11)
<DPPt Game Corner>
<Pt Frontier Brain Battle>
<Magnemix> (Tune made entirely of the Magnemite line's cries)

STATS


Movement Speed: 2/10

Magnezone hovers along the ground. It has the second slowest walk speed in the game, and a mediocre run speed to boot. It also has very bad traction, if not as drastically terrible as Luigi, and turns around rather slowly due to its massive girth.

Aerial Mobility: 7/10

Magnezone turns it around in the air though. Its magnetic fields allow him to simulate lower gravity, meaning that it falls rather slowly. Magnezone has a good first jump, and two midair jumps, although they're not particularly good. It moves through the air rather quickly though, but still has the same problem of turning around slower than the rest of the cast.

Size: 8/10

Magnezone is only as tall as Mario, but is even wider than Bowser and King Dedede, stretching out more than an entire stagebuilder block from end to end. It's not the heaviest character in the game, but is only a little lighter than Dedede, so it's hard to KO Magnezone.

Power: 7/10

Magnezone's pretty strong; most of its moves can do a considerable amount of damage and knockback. It doesn't attack particularly quickly, but it can hit quite hard when it counts.

Priority: 8/10

The magnetic powers Magnezone has ignore priority, allowing him to affect foes without hindrance. Its damaging attacks generally have strong priority as well, with plenty of projectile attacks.

Lag: 8/10

Magnezone suffers from a great deal of lag, being even slower than the Pokemon it evolved from. His laggy attacks combined with his low traction and turning speed makes him fairly tough to play as.


SPECIALS


Down Special - Polarity Shift


The Down Special first? What gives? Well, this move is absolutely essential to Magnezone and its playstyle, giving it access to a ferociously large array of powers. While Magnezone is fighting, the three magnets on its body are constantly glowing either RED or BLUE.

RED signifies that Magnezone's magnet based moves are currently set to ATTRACT or POSITIVE. BLUE, on the other hand, means that its moves are REPEL or NEGATIVE. From here on out, they will be referred to ATTRACT and REPEL modes.

(Electricians and physicists are hereby excused to swear at the computer screen for misrepresenting magnetism at a fundamental level. Let it all out, it won't be the last time I do it. I'm well aware that electromagnets only attract, that North and South, positive and negative, and attraction and repulsion are not in any way the same, and that there is no such thing as positive electricity. Its only a moveset.)

Magnezone uses these two different types to change anything from small details to the entire effect of its moves. This move can also be used during a grab by pressing the B Button.

Magnezone will also automatically shift his polarity to REPEL when using its Down Aerial, and to ATTRACT when using a Grab.

When Magnezone uses this move, the horseshoe magnets simply shimmer and the glow they take on changes to the other color. This move is incredibly fast, so it is important to any Magnezone player to remember this and switch often to use the move best suited for the situation.


Neutral Special - Magnetic Field


Magnet Pull
Magnezone pushes on the three magnets so they are all tangent to its body, and they begin to quiver. Red vibration lines appear around Magnezone, and all items and players are drawn towards Magnezone. The closer they are, the stronger pull; less than a Stagebuilder block from Magnezone the pull is nearly irresistible, while only three stagebuilder blocks it can be ran away from, and within seven stagebuilder block the effect disappears altogether. Heavier, high traction players can resist the pull more easily than lighter characters with less traction.

Magnezone has a lot of starting lag on this move, but almost no ending lag. Furthermore, this move can be cancelled with a grab while on the ground, making it a laggier but greater ranged option over his regular grab.

Magnezone can use this move to grab enemies, pull items in, and really mess with opponents' spacing. Combined with the other iteration of this move, this move lets Magnezone control the battlefield with a single move.

Magnet Push
Magnezone pushes on the three magnets so they are tangent to its body, and they begin to quiver. Blue vibration lines appear around Magnezone, and all items and players are pushed away from Magnezone.. Magnezone is unapproachable from within one stagebuilder block, but the effect decays faster than Magnet Pull, making it only lightly tap enemies from within three stagebuilder blocks.

This move has less lag than Magnet Pull for starting, but more for ending. The move is difficult to gimp with, as Magnezone has to get close enough to use it so that the player runs the risk of getting killed as well, but still can be used to try to finish off opponents who already took a strong hit, and keep melee opponents out of his face.


Side Special - Magnet Bomb


Magnezone sets his two forward magnets ahead and generates a silvery ball of energy, and propels it out in an upwards arc. The bomb shoots out fairly quickly at first, but it loses all momentum within moments after launch, fixing itself in midair, unaffected by gravity about two stagebuilder blocks up. The move has significant, but acceptable, starting lag and minimal ending lag.

The Magnet Bomb will burst at the first attack, item, or opponent that hits it, dealing 8% damage and moderate knockback in a small explosion. If it is never attacked, it lasts about eight seconds before fading away.

A Magnet Bomb will also pulse slightly with a white + or - symbol every few moments, based on whether Magnezone was in ATTRACT or REPEL mode when it used it. If there are two Magnet Bombs on the field at once, they will either push away from each other if they are the same charge, or pull together if they have different charges. They move fairly quickly while on the field, and faster when close togther. If two opposite charged Magnet Bombs collide, they erupt into a large explosion dealing 14% damage and strong knockback.

Magnezone can also directly control the placement of Magnet Bombs. Whenever it is using Magnet Pull or Magnet Push, Magnezone can DI the control stick to shift the movement of Magnet Bombs, letting Magnezone hone them in on enemies or perfectly time a Magnet Bomb collision.


Up Special - Magnet Shield

Magnet Absorber
Magnezone's antenna and two front magnets all produce red clouds of energy, that pull in any energy projectiles and heal it, similar to PK Magnet that Lucas and Ness use. The move has a good bit of starting lag and horrendous ending lag though, making it quite punishable and situational at best.

Magnet Reflector
This time, Magnezone generates a blue energy field all around its body. The reflector can be held out as long as needed, and reflects projectiles back at enemies. It has very little lag, but doesn't do damage on contact like the StarFox characters' reflectors.


STANDARD ATTACKS


Jab Attack - Static Thundershock

Magnezone's first electric attack, Magnezone leans forward and releases a flurry of yellow sparks from its red eye, each doing about 3% damage, with lag between each hit and low priority, and more lag than usual for a jab attack. This move has the added effect of giving an electrical charge to the opponent for eight seconds, causing oppositely charged Magnet Bombs to home in on him without the added damage and knockback, and increasing the damage of Magnezone's Static Thundershock if Magnezone is of the opposite charge to 7%!


Dashing Attack - Thunder Coils

Magnezone stops the dash, and a field of electric discharge surrounds it and a very close area near it, dealing 7% damage and some hitstun. This move has little startup-lag, but significant ending lag. If it hits, Magnezone can generally attack before its opponent can, but the lag makes it punishable and unreliable as an apporach. Good priority.


Forward Tilt - Magnet Force

Magnet Shock
Magnezone holds one of its horseshoe magnets forward and a red field of magnetic energy pulls its enemy towards it. If they touch the magnet, they are hit with an electical charge that deals some knockback and hitstun, as well as 6% damage. If the enemy is at a damage level below 40%, the knockback is low enough to be chained into a grab.

The magnetic pull has a range of about a battlefield platform, with decaying strength the further away the opponent is. The electric shock itself is a jointed hitbox and fairly low priority, making it possible to override it with another attack fairly easily. This move has slightly below average starting lag and average ending lag.

Magnet Toss
Magnezone holds one of its horseshoe magnets forward and a blue wave energy pulses out. The wave dissipates a little less than two stagebuilder blocks away, and any enemy hit by it takes considerable knockback and 7% damage. The move has above average lag on both sides, but is fairly high priority.


Up Tilt - Thunder Wave

Magnezone drops to the ground and its antenna glows yellow, before releasing ovoid yellow rings from the bottom of the antenna to about a stagebuilder block from the top of it. These rings grow as they rise until they fill up a space about two stagebuilder blocks around. Touching or being caught between these rings inflicts a measly 3% damage, but also inflicts a massive amount of hitstun, and knocks opponents into fallspecial.

This move has high priority, but a lot of lag. Magnezone can combo this move into a grab or a Static Thundershock if it is placed right, but the move is too punishable to spam.


Down Tilt - Magnet Field

Heavy Field
Magnezone points all three magnets to the ground and fixes to the floor, in a crouch. Magnezone then lets off a red energy field that clings to the ground about one stagebuilder block to either side (remember that Magnezone itself is rather wide, making this a large field). Enemies who are hit by this field when it pulses out take 2% damage and are knocked down immediately, like a very fast trip.

The field sustains for about five seconds, and only Magnezone can jump within the area while the field is in place, and enemies directly above the field (about a stagebuilder block above) are pulled to the ground. Enemies also move much slower through the field. Its cannot lock down an opponent, but it can make Magnet Pull and Magnet Push easier to pull off. This move is quite laggy, but has incredible priority.

Levitation Field
This time Magnezone lets out a blue energy field below it, which stretches from the floor to the top of Magnezone. Magnezone is knocked into a shorthop after using this move, and enemies in the original burst take about 4% damage and take slight upwards knockback.

The field lasts for five seconds, and anyone in the field is pulled up by the energy field except for Magnezone. This move is rather laggy, but has incredible priority, just like Heavy Field.


Note that for these two moves is that if Magnezone uses one in the same place (or close to the same place) as an opposite field, the area then instead bursts into a magnetic pulse, neutralizing both fields but dealing strong knockback and 6% damage in the same area of the field, with fairly high priority.

Magnezone can force an opponent onto the ground or into the air, forcing them to use one side of their moveset or the other with this move, making it a great move for a player to mix into the playstyle.


SMASHES


Forward Smash - EM Field

EM Disruption Field
Magnezone places two of his magnets forward and builds up energy signified in a increase of the focus of his red energy. When released, a flurry of silver sparks fly around in front of Magnezone in a focused sphere, eating shields for breakfast and pulling enemies that are a little bit away from it inwards.

The attack hits four times in a row, much like Pikachu's Down Smash, but it is even harder to escape from. Depending on the charge, each hit ranges from 4-8%, making it inflict devastating damage at full charge. Knockback is also fairly strong, knocking enemies diagonally upwards. This move suffers from a considerable amount of starting lag and above average ending lag, but has very good priority.

EM Cannon
Magnezone summons up energy, glowing a bright blue when it releases a flurry of silver sparks, dissipating like a shotgun in front of it. The shotgun, cleverly, is more powerful close up, just like a real one. This attack has very strong knockback, capable of KOing Mario from the center of Final Destination at 85% damage uncharged, but has a particularly pesky sweet spot, like Charizard's Rock Smash. Typically the damage ranges from 14-21%, but at the sweet spot it can do damgae from 20-36%!

As you might expect, EM Cannon has a lot of starting lag, particularly between the end of the charging period and the start of the attack. It also has fairly average priority, capable of being overidden by many other smashes. It still has great range though and only slightly above average ending lag, making it a fantastic KO move for Magnezone to use.


Down Smash - Charge

Magnezone crouches down, pointing its magnets to the ground as electrical energy pulses around it. When released, a small electrical field disperses around Magnezone, low priority dealing 3-6% damage, low knockback, priority, and hitstun.

What? Not good enough for you? Well, there is the fact that after using this move, the next electrical attack used by Magnezone gets a 50%-150% boost to damage and a 20-60% boost in knockback, depending on the charge. Also, if this move is fully charged, the electrical field around Magnezone sustains for ten seconds, or until Magnezone uses another electric attack. Little lag on either end for this attack.

Also, every Electric-type attack Magnezone has gets an added effect after using this attack.

- Static Thundershock arcs like Pikachu's Thunder Jolt if it misses, and explodes in a flurry of sparks if it hits, possibly hitting other enemies in a FFA. The effect lasts as long as the jab is input in this case.

- Thunder Coils bursts the wave of electric energy two stagebuilder blocks in both directions, and instead of hitstun deals a significant amount of knockback.

- Thunder Wave creates a second wave that clings to the ground, and the original waves fly up nearly a third of the way to the top of the screen, eventually reaching six stagebuilder blocks in diameter.

- Magnet Shock now has greatly increased priority and becomes a disjointed hitbox, the electric field now entirely swallowing the magnet. Hitstun is also replaced with considerable knockback.

(Future moves affected by Charge will have their effects noted in that move in the moveset)

Up Smash - Discharge

Reaching its magnets to the sky, Magnezone builds up electrical energy and releases it into two small bolts that automatically hone in on any enemies within about a stagebuilder block of Magnezone, dealing 4-9% damage each with some knockback and decent hitstun. If there are any Magnet Bombs on the field, another bolt will arc to them, causing them to explode, dealing 14% damage, just like a fused Magnet Bomb explosion.

As you may have already guessed, this move benefits greatly from the move Charge. If there is any Charge whatsoever, the move's base damage increases to 8-15%, plus the extra damage and knockback from Charge. There will also instead be three bolts, one arcing straight up, and one arcing to each side, shooting off in a chaotic manner if there is no one within one and a half stagebuilder blocks to arc towards.

This move has below average ending and starting lag, and fairly high priority.


AERIALS


Neutral Aerial - Gyro Ball

Magnezone slowly begins to spin, blurring into an elliptical grey ball. The move has a lot of starting lag, but only average ending lag. The move lasts as long as the A button is held, and Magnezone can move during the attack, falling even slower than normal but moving very slowly side to side. Magnezone's body is a low priority jointed hitbox that does 4% damage and light knockback.

As the button is held and the move is sustained, Magnezone's attack becomes more powerful though. The priority increases until it is one of the highest priority jointed moves in the game; damage increases from 4% to 8% in two seconds and 13% in four seconds at maximum. Knockback also increases until it reaches almost, but not quite, bumper-like quality. Magnezone also can move side to side faster, eventually a little faster than Wario's air movement.

After using Charge, this move also sparks with electricity, not increasing damage or knockback, but instead significantly raising the priority of the move by surrounding Magnezone with a disjointed electric field.


Down Aerial - Magnet Rise

First thing to note about this move is that using it automatically puts Magnezone into REPEL mode. That said, this move has a good bit of starting lag, in which Magnezone points its three magnets downwards, shakes a little, and bursts blue jets of repulsive energy downwards.

This move does no damage, but instead propels Magnezone up. Yes, Magenzone recovers using the Dair. Obviously, this move can only be used once, just like recovery moves, but ending it does not put Magnezone into fallspecial. This move also pushes enemies below Magnezone down lightly, but only enemies within a stagebuilder block of Magnezone, making it possible, but not easy, to gimp with.


Up Aerial - Metal Sound

Magnezone makes a clinking sound, and its eyes clench up. Magnezone's antenna then shoots out a screeching wave of energy, not unlike the previously described Thunder Wave. The area of Metal Sound is wider though, and instead of knocking enemies away simply holds them in, dealing 3% damage a second for the move's duration.

Magnezone suffers fairly little lag on either end for this move, but is forced to use it for one and a half seconds, vulnerable to attack if it misses. Ignores other attacks.


Forward Aerial - Zap Cannon

A yellow ball of energy generates between Magnezone's two front magnets, releasing moments later and bursting into a sizable explosion about two Magnezone's length away, dealing 8% damage and strong knockback. This move has a significant amount of lag on both ends, but strong priority as well.

If Charge has been used before using this move, the lag decreases slightly, and Magnezone rapidly fires out a second sphere from the first one, one angled slightly up, the second angled slightly down.


Backwards Aerial - Magnet Ring

Magnezone's rear magnet finally gets the attention it deserves, glowing both Red and Blue with average lag before releasing a small, smart bomb sized ring made up of two semicircles, one red, one blue. The ring glows RED or BLUE depending on Magnezone's mode before using this move.

The ring flies out, arcing downwards if used in REPEL mode and upwards if used in ATTRACT. If the ring gets near an enemy, it either pushes them away if in REPEL mode like its own Magnet Push or pulls them forward in ATTRACT mode, like Magnet Pull. If an enemy makes contact with the ATTRACT magnet ring, they take 7% damage and some knockback.

The ring also pulls forward or pushes away Magnet Bombs regardless of charge. Collision with a Magnet Bomb creates the same effect as a regular Magnet Bomb fusion.

The ring has somewhat above average priority and flies until it hits something or flies off the stage.


THROWS


Grab - Magnetic Grasp

Magnezone holds all three magnets out, attempting to pull in an enemy from any side. His magnets glow RED, and no matter what, this move automatically shifts Magnezone into ATTRACT mode. This is the laggiest grab in the game by far, but it more than makes up for it with its absolutely awe inspiring range, almost twice as far as King Dedede's. Magnet Pull can also be cancelled by a grab, increasing the lag but also increasing the range, done properly.

When Magnezone actually does grab someone, they are suspended in midair, with a red glow around the magnet that caught the enemy and the enemy themself. Magnezone can also sustain this move, unlike other grabs, making it a very versatile option for Magnezone to use.

Remember that Magnezone can use Polarity Shift as a Neutral Special move during a grab, so that the magnetic grabs have different effects during a grab.


Pummel - Spark

Several sparks fly out of Magnezone's magnet, dealing 2% damage fairly quickly. A decent damage racking pummel, but not the best. If Magnezone is affected by Charge however, Magnezone is glowing with electric energy during this attack, shooting sparks out insanely quickly, quite possible dealing 10% damage or more against an opponent.


Forward Throw - Flash Cannon

Magnezone suspends the opponent in front (or in back, if the rear magnet grabbed the enemy) and generates a ball of silver light, then releases it in a bolt of energy, dealing 11% damage and good knockback.


Up Throw - Thunderbolt

Magnezone tosses the enemy above its antenna, clenches its eyes, and blasts a bolt of lightning up, knocking the opponent straight up with strong knockback and dealing 12% damage. If Magnezone is affected by Charge when using this move, the lightning bolt bounces back after reaching the top of the screen, possibly piercing the enemy again if they don't DI and bolting into Magnezone.


Down Throw - Field Grasp

EM Binds
Magnezone contains and constricts the opponent in a red aura, and drops them to the ground, dealing 4% damage. The opponent cannot move while in the bind, and must button mash to escape. If Magnezone attempts to grab the enemy as a follow up, the aura disappears and deals 5% damage while leaving instead.

Magnezone can follow this move up though with a Magnet Shock at lower damage levels though, creating the potential for a very strange chaingrab at low damage levels of Grab, Down Throw, Magnet Shock, Grab etc.

EM Drop Pulse
Magnezone instead drops the opponent to the floor, the magnet pointed at the floor, coating it with a blue aura. When the opponent hits it, they bounce off it hard, knocked upwards fairly high a set distance, so it can't KO, but the opponent suffers a lot of hitstun and takes 8% damage. Magnezone cannot directly follow up this move, but can sometimes use it to set up a Thunder Wave or Metal Sound.


Back Throw - Magnet Switch

Magnezone tosses the opponent from the magnet on one side to the other and catches them again, effectively letting Magnezone attack from any angle with its grabs. This can only be done once, and only slightly increases grab duration, so it cannot be used to abuse the pummel.


FINAL SMASH


Final Smash - EM Storm

Magnezone has the Smash Ball, and its time to party. Magnezone flies up to the center of the screen, eyes glowing with power as purple lightning sparks in the radius of a burst Smart Bomb around Magnezone. Magnezone then activates either it Magnet Pull or Magnet Push ability, the strength increasing or decreasing based on the opponents damage.

The player can change which one Magnezone is using by tapping the B button, and move Magnezone around during the attack, which lasts for seven seconds. Magnezone can also cause the electrical field to flare up by tapping the A button, increasing the radius for a split second and dealing an extra 7% damage.

Enemies caught in the EM Storm itself are hit rapidly, taking 6% damage per second. Magnezone players can pull their enemies in with Magnet Pull, rack up damage, and finish them off with Magnet Push, making it a great way to really enjoy the kill.


PLAYSTYLE

Magnezone certainly is an interesting character. Two things definitely spring to mind when looking at Magnezone: the degree to which set-up is involved, and the amount of control Magnezone has. Playing as Magnezone requires some degree of long term thinking and general strategy to play as, with all of his options and magnet powers.

When it comes to spacing and control, Magnezone is comfortable at all ranges. Magnezone uses its spacing and control to move into the spacing that the opponent doesn't like. Magnet Pull can make approaches quite difficult with the threat of a grab, and Magnet Push can have a similar effect. Spammers have to deal with Magnezone's Magnet Shield, reflecting or absorbing attacks, and Magnet Pull messing up their spacing.

Further, Magnezone's Down-Tilt can force the area of play into ground fighting or air fighting in that specific area. Characters with weaker air or ground game have to fight on Magnezone's turf during these moves.

Magnet Bombs are a fantastic option for Magnezone to use, and any good Magnezone player will have one or two of these out whenever possible. Magnet Bombs can be shifted around fairly easily and between Discharge, Magnet Bomb fusion, and Magnet Push/Pull, its easy for Magnezone to control them, and the field.

Charge is another great move for Magnezone to use. Its easy for Magnezone to enforce a distant spacing and pull this move off, and it gives Magnezone all kinds of options previously unavailable, so using it when possible is highly recommended.

When it comes to things that aren't recommended, never ever think of Polarity Shift as a choice between damage-racking and KOing, because it certainly isn't. Magnezone players have all sorts of different attacks and abilities that all require a willingness to quickly adapt polarity to the situation at hand. With Magnet Bomb and Static Thundershock, Magnezone more often than not has an incentive to change polarity rather than keep it.

Grab game is an interesting part of Magnezone's playstyle. A strong grab game, combined with an early chaingrab makes even the most melee focused opponents cautious when it comes to getting close to Magnezone. Alas though, Magnezone's big, heavy, floaty nature makes him very easy to chaingrab himself! King Dedede can even infinite him, and Falco and Pikachu can chaingrab him much further than they can with most characters. The Back Throw is an easy to forget, but important part of Magnezone's grab game. As Magnezone can grab an enemy from in front or behind, Magnezone effectively has eight grabs by using the back throw.

In the air, Magnezone has less options. Magnezone greatly prefers ranged fighting in midair, and using Magnet Push to stall enemies from getting near is often times not a bad idea. Gyro Ball requires a lot of spacing to get up to power, but especially after a charge it becomes a great move both for damage and KOing. Zap Cannon and Magnet Ring too are excellent aerial options, and Magnet Rise and Metal Sound give Magnezone insurance from attacks from above and below.

When it comes to KOing, Magnezone prefers the Forward Smash above all else, but is comfortable with its Forward and Up Throws as well as its Fair and a well placed Magnet Bomb fusion. Magnezone can also gimp if it gets the chance, enemies that might otherwise just barely reach the edge won't with a well placed Magnet Push or Magnet Rise.

Keep in mind while playing Magnezone that while it can get a lot of damage at once, its too slow to be a damage racker. Magnezone is very laggy to play as, and with its great size can be pressured and wailed on fairly easily. Use the Magnet Pull and Push to try to break the opponents rhythm, and use proper spacing and control to make up for your lag, and use the moves that have great damage potential, the chaingrab and various grabs, Zap Cannon and Smashes to get to a point to kill.

Magnezone plays differently than a lot of characters, so keep this in mind. The Jibacoil is a fantastic brawler though, and, player properly, can fight almost every character in the game well, due to its flexible and versatile control options.
 

UserShadow7989

Smash Journeyman
Joined
Aug 13, 2007
Messages
315
I know Straked did a Hobbes moveset already, but I can do an actual duo "Calvin & Hobbes" right?
Go right ahead. Even if someone already makes a set for a character, you can still make a set for them yourself (so long as there aren't too many moves that are similar between the two. Can't risk someone stealing a set with minor edits and claiming coincidence, after all).
 

MarthTrinity

Smash Lord
Joined
Aug 9, 2007
Messages
1,954
Location
The Cosmos Beneath Rosalina's Skirt
Magnezone

Oi, you just keep on improving and improving don't you. Hard to believe you made Magmortar not too long ago...heck, you've improved over your Abomasnow moveset and that was only Recap Episode 3...

But enough about your improvement, let's talk about Magnezone. It's a simple concept really, one polarity attracts, the other repels, simple enough but it's done well without getting bogged down with details that don't need to be there. It also aids greatly to Magnezone's playstyle how he can literally change to match his opponent. Projectile spammer? Repel their attacks back at them and attract them in; Magnezone doesn't need to be fast when he can bring everyone to him. The organization is also quite suiting, red/blue for attacks that change depending on the polarity and yellow for the electrical attacks and silver for the steel based ones...it all fits nicely and you organized it well, not the most exciting layout ever but it gets the job down and displays it nicely. Another small little thing I hope people notice; Magnezone's stats that would be considered good are in green, the ones that would be considered bad are in red; it's a small touch but I liked it personally.

I like the Down Smash lots, it kind of reminds me of Evil Knight's Down Special except without the drawbacks; giving certain attacks new properties besides just an attack boost, it works out nicely as a little mini-mechanic. Another thing I really love about this set is that you avoided the dreaded Pokemon Syndrome. While you do have attacks directly from the games, those attacks are suiting to character and are instead overshadowed by your use of what really makes Magnezone stand out from Electric Pokemon #142; his magnetic attributes.

And then there's the playstyle which basically writes itself for the interesting gameplay you gave this guy. It's all about pushing and pulling put simply, it really seems that if Magnezone WERE in Smash, he'd be a beast of a stage controller. Nothing else to really comment here, you did a nice job explaining your own playstyle so I can't really expand on it =P

Overall, in my eyes, this is a step up from Abomasnow who certainly wasn't a slouch. Using what's unique to this Pokemon instead of what's unique to its types really helped cut it away from the Pokemon Syndrome complaints. You really seem to be giving your ****dest in this contest and it's really showing, keep up this effort and you can only go up from here.
 

kitsuneko345

Smash Ace
Joined
Dec 20, 2007
Messages
562
Location
*sending Sundance lots of apple pies on Pi Day, as
INDIGO PLATEAU

Really, I can't say much without repeating MT's superior comment, but I will try my best. Studying the summary of Magnezone's brief introduction, I can say there is nothing missed at all during this moveset. Each song fits very well with the pokemon from the techno styles of the Game Corner to the simplicity of the Magnemix.

But now to the Stats, I almost feel like that I'm playing Dedede. This isn't a bad thing, but most of the stats (from the aerial mobility to the lag) are close to the "king" of Dreamland at first. However, there are notable differences with some parts like the movement speed, but other than that, its like a dumb-down heavyweight.

Now to the Specials: Polarity Shift explains about a mechanic involving simple magnetism terms like attract and repel. The move itself is a simple switch around of certain moves, but the mechanic fits well and is well done for the most part. Magnetic field is the first demonstrating the mechanic, and is described very well for the most part. Again this move is simple to imagine and sounds effective for the most part. Magnet Bomb is a little more intricate, but the significance of the mechanic is utilized here. It is clear that darth meanie thought of the possibilities with this move. Magnet Shield unfortunately fells bland and awkward for the most part, despite the different types of shields and being in-character. All in all, most of the specials are worthy of praise due to uniqueness expect for the up special.

The Standard attacks are next for this set: Static Thundershock (not to be confused with Static Shock) is close to be considered broken with the added effect, but the damage done is small enough to give no big concerns. There is not much notable about Thunder Coils but its uses are mentionable. Another Magnet move, Magnet Force can be either be used for the start of a grab or a spacing move. Again, this shows the simplicity of simple magnetism without feeling too out of character. Thunder Wave is a move that to me is notable for not using the mechanic and yet doesn't feel out of place. In fact, I am visualizing the move right now and seeing possibities of using that move. Magnet Field is the true icing for this part of the moveset, as Meanie goes into intricate detail to explain what happens with two Magnzone using this move. Magnet field again has simple known observations about magnets and making it not dull at all.

Smashes come next: Electromagnetic (EM) Field's two effects are, although hard to explain without going back, gets the job done as a smash attack for he most part. There are slight nitpicks about the damage, but it's not that important. Charge is interesting for a Samsh attack, as although it only at first low on everything, but the effects are scary to say the least. Still, this is a very good move for any Magnezone player to use, considering the electrical attacks are poor at the least. Discharge also makes use of Magnezone's moves, although when compared with the other smashes, it slightly pales in comparison.

Aerials come right after: Gyro Ball is a very interesting move overall. I can consider this a move that can help recovery. It gets close to being an overused move if only for its possible priority and good damage for an aerial. Strangely, the Down Aerial Magnet Rise is up next, but it understandable why this is so if you read the moveset. Magnet rise in this case is the true Recovery move, and although it feels overused, there is nothing wrong with the move itself. Metal Sound has nothing truly unique to Magnezone, but it is there and it works with the magnet pokemon. Zap Cannon is notable for being a projectilelike aerial, which not uncommon for MYM. The move itself can be close to brokenness if one considers using charge beforehand. Lastly, Magnet Ring is the dessert of this part, as it combines several features, is simple to understand and easy to visualize despite the various effects.

Throws before hoes: Magnetic Grasp is notable in that is will always be in attract mode, yet can be changed by the neutral special, making this a very great grab in and of itself. Spark can be also overpowered via Charged, but that is a slight issue to deal with considering that chances of getting grabbed. Flash Cannon, despite the awesome name, is the least interesting of the throws, but it's likable all around. I could say the same for Thunderbolt if not for the fact that the Charge mechanic add a little twist if not properly dodged. Field Grasp (The only move without Magnet at least implied in it) can be either a interesting chaingrab or a spacing move, makins this the most unique of the throws. Magnet Switch is a close second though, but with no damage the reason it can be included was to prolong the time limit.

The Final Smash and the Playstyle Finally: EM Storm was close to predictable, but there is nothing truly wrong with it, as it fits the character well and is simple enough to understand. I don't want to comment on the playstyle for two reasons: 1. very long and 2. MT already explained it well.

You are a Champion!
 

Negi-Kun

Smash Lord
Joined
Feb 16, 2008
Messages
1,494
Location
Plastic Beach
I don't think it's a good idea to spam those kind of joke sets, don't ruin MYM6!!!

Anywa, Im gonna say something more useful: Last page there was a moveset, Poison Zombie I believe it was. Poor PZ suffered the same fate as my Gorea, stuck at the bottom. Ive read the set a bit. It is a organised set to an extent I believe, though I think the moves are a bit too generic, some not having damage percentages. Like, I don't want to give you only negative comments, nor would it be fair to have this set ignored. You are a newcomer, am I right? If so, you could look at some of the winning sets from MYM5 for some help. Mostly it was not that the attacks were generic, but more that there was so little detail, such as lag, and certain traits to make the set easier to understand. PZ could have used a mechanic to posses the enemy, don't be afraid to use those kind of mechanics. I liked all of the pictures you used and so, you must have put some good time and effort into that.

Here's what I think could help you: Put some more detail in the attacks, that kind of thing can help you, but most of all you should request a review on the canvas, the palette will kindly help you (If you don't have a WordPress membership, you will need to get one first).

I also nerfed Gorea sets, Imperialist Headshot damage and knockback, minor change.
I appreciate your feedback, but I couldn't have a Headcrab possess an enemy. I considered implementing possession in the set (particularly the FS) but I couldn't find a way to have it be an advantage to you. Trying to stay true to it's game, possessing the enemy would require killing the opponent first. If you take that factor out and go straight to possessing, then what? If you (a human player) OR the Headcrab (being a computer) is in control of your enemy, this would not KO a foe or give you any advantage.

Let's say you can just SD. No. The whole idea of the Headcrabs on the Zombie's back is a symbol of the Poison breed of Headcrabs working together, helping each other find a host body to possess. The Headcrab would not want to SD when it finally just found a host body. It wouldn't give up it's life just to help the Zombie. I realize I'm going into much detail about this, but it would not stay true to the Half Life series in the least.

jus' sayin'

But really, thanks for the advice. :)
 

MasterWarlord

Smash Champion
Joined
Aug 24, 2008
Messages
2,911
DINGODILE


”Break out the butter, I’m gonna make toast!”

Dingodile hails from the Crash Bandicoot series, we’re he’s one of the many mutated animal henchman of Dr. Cortex (The main villain of the series). As if his name wasn’t enough of a give-away, Dingodile was a fusion of a crocodile and an Australian Dingo, and he speaks with a thick Australian accent (Sometimes so much that Cortex can’t even understand him). Despite his animal roots, Dingodile’s actually rather intelligent, his weapon of choice being a bazooka he developed himself. The dingo is far from loyal to Cortex despite having been created by him, only working with Cortex when it’s beneficial to him (Though getting another chance for vengeance on Crash is a nice side bonus).

Here’s a link to Dingodile’s boss fight in Crash Bandicoot Warped (His first and easily most famous appearance). It’s only 2 and a half minutes and it’s rather heavily referenced in the moveset. Watching this boss fight will make several of the most essential moves of the set infinitely easier to picture, and also gives a decent glimpse at Dingodile’s personality.


Size »»» 9
Recovery »»» 9
Range »»» 8
Priority »»» 7
Aerial Movement »»» 7
Weight »»» 7
Power »»» 7
Falling Speed »»» 5
Attack Speed »»» 4
Movement »»» 3
Traction »»» 2
Jumps »»» 2

That power stat can be very, very deceiving. While he does have one move that’s just so absurdly powerful that it boosts up the stat, without it his power is average at best. Aside from that, these stats are pretty much what’d you’d expect from your usual heavyweight, although the fact that his recovery’s so good yet his jumps so bad is somewhat of an oddity. Of course, being a heavyweight that's not sickeningly slow is a plus.


Neutral Special – Fireball
Dingodile turns away/towards the camera, then starts turning his bazooka to aim in the direction you specify until you release B. Upon releasing B, he fires a single fireball in the desired direction with below average lag. The fireball has above average priority and deals 7% with knockback that can push foes away slightly, but can never ever kill.

The fireball travels 2 Battlefield platforms at the rate of Ganon’s walk. If you angle the shot diagonally upwards, Dingodile won’t fire straight towards the indicated direction but will instead fire the shot in an arch like arc, going very high up before coming straight down. This allows you to hit over the walls of all those meddlesome trap characters that are supposed to absorb your projectiles. . .
[7%]

Side Special - Devour
At first glance, this seems to be a pretty cheap knockoff of Wario’s neutral B. All the properties are the same, although Dingodile’s head doesn’t enlarge nearly as much, giving actual reason for the pitiful range of the move (Even slightly worse then Wario’s version). In addition, you can specifically angle the move as Dingodile has his mouth open ready to chomp down, allowing the move’s grab priority to function as a good defense against aerial approaches.

But the move is once again more realistic then Wario’s neutral B in that size actually matters for this move. When Dingodile chomps a foe, they don’t magically shrink to fit in his mouth. Against gigantic foes like Bowser, the move does pitiful damage, only functioning exactly like Wario’s on the middleweights. Where things get interesting, though, is when Dingodile devours someone smaller then Mario. . .He literally chomps them down and they’re nowhere to be seen. Now, that tiny rodent will be constantly trying to get out of your stomach and damaging you for 1% per second, but you can do what you please until they force their way out (Grab difficulty). This means this move is much better then Wario’s for suicide KOs. . .
[Variable Damage]

Up Special - Jetpack
The bottom of Dingodile’s gas canister starts fueling out flames from his gas canister and begins to function like a jetpack. This is essentially Rob’s recovery, but the flames coming out from the gas canister are a small hitbox that does flinching and 3%.

Now, while you won’t encounter any problems abusing your recovery at first, when you get close to running out of air time your backpack will be overheating rather then running out of fuel, starting to pulse and turn red. If you don’t stop the recovery at this point, your backpack explodes, dealing damage and knockback to you on the level of Snake’s C4. On the plus side, this gives you your second jump and up special back, giving you an infinite recovery. Obviously you don’t want to ruin a perfectly good gas canister if not necessary. . .If you intend on using this under the stage to stall, sure, go ahead if you just need to clock off the last 20 seconds or so, but if you use this 4 times without touching the ground, Dingodile's gas canister won't magically repair itself.
[3%]

Down Special – Swirling Crystals


Dingodile raises his hands skyward and claps them together twice for below average lag, then several crystals as large as he is fall down on either side of him from the sky very quickly, falling through any drop through platforms on the way. Once the crystals land, there’s roughly 1.25 battlefield platforms worth of crystals on either side of Dingodile. The crystals do 10% and knockback that kills at 250% as they fall and have infinite priority.

The crystals don’t just fall down to the sides of Dingodile, though, they also go into the background and foreground, forming a complete circle around him like in the picture. This means you can’t just roll through the crystals to get to Dingodile. Once they’re on the ground the tips of the crystals do 1-2% and tiny set upward knockback, though the stun is a bit longer then one would expect.

The crystals have 20 stamina each, though they’re immune to most of Dingodile’s attacks. While it normally wouldn’t take one that long to shred through all the crystals to get to Dingodile in the middle, the crystals are constantly swirling about once they hit the ground like in his boss battle, constantly going in and out of the foreground/background. . .This is an absolutely vital part of Dingodile’s playstyle, giving him plenty of walls to hide behind. Dingodile will want to camp inside his crystal formation and force foes to either approach from above or to shred through the crystals to get to him. Why would you ever want to approach that Bandicoot head on when you can roast his sorry carcass with ease from a distance?

If Dingodile uses the move with the crystals already set up, they go into the ground, though they come back out with another use, and it all happens pretty d*mn fast. You can use this to try to bait foes into coming to you if they’re just trying to shatter the crystals, then just spring them back out the moment they do.
[10%] [1-2%]


Standard Attack – Tail Whip
Dingodile does a very short jump off the ground (Half Kirby’s height) and does a spin in the air before landing back on the ground, his attack in Crash Bash. His body is a average priority hitbox that does 6% and horribly weak knockback, and the move has very low lag on either end. While the move would have rather terrible range, it’s saved by the fact that Dingodile stretches out his tail during it. In addition, if you input left/right Dingodile will hop up to half a Battlefield platform in that direction as he performs the attack, being a hitbox all the while, though the lag increases slightly. This can function somewhat like a half decent short hopped aerial as an approach, though anyone with good priority will make you wish you hadn’t used it.
[6%]

Forward Tilt – Point Blank Shot
Dingodile butts his bazooka forwards with average lag, trying to impale foes on the tip of his bazooka. If he misses, there’s nearly no ending lag. The range is pretty short, just at the tip of the bazooka, but it’s a grab hitbox. If he grabs them successfully, he fires them off the end of the bazooka for knockback that kills at 180% and 10%.

You can angle the move slightly up or down like some other ftilts, which also changes the angle you fire off the victim from your bazooka. A more notable purpose of this though is that if you aim the bazooka up, you can grab the tip of a crystal and load it into your bazooka. While the crystal will lose its’ 1%/2% flinching hitbox, any moves that involve firing your bazooka will have you fire the crystal shard off the bazooka in a fashion just like your neutral special, and the shard does 10% and flinching.
[10%] [10%]

Up Tilt – Blast Off
Dingodile aims towards the ground with his bazooka, then shoots downwards, propelling himself upward. The beam is very weak and small (Though disjointed), and only lasts long enough for 6 hits of 1% and flinching, but Dingodile’s body is an average priority hitbox as he goes up that deals 10% and vertical knockback that kills at 180%. The move has no lag on either end, but the duration of the move borders on Wario’s dsmash. This gets Dingodile up much higher (1.5 X Ganondorf’s height) then his rather lackluster first jump, but considering how much longer it takes, it’s not exactly an undisputed superior option to it.
[6%] [10%]

Down Tilt - Stomp
Dingodile simply stomps forward with average range, priority, and lag, and the move deals 10% with knockback that kills at 220%. Pretty straightforward. The move’s lag prevents it from being ideal in most situations, but if you use it on a foe who’s knocked down/tripped or pitfalled, Dingodile’s foot becomes a grab hitbox as you pin the victim to the floor, holding them down with your foot. From here, you can do any non aerial attacks as the victim struggles to break free like a normal grab, or just jump off to end it early. His default stance when having “grabbed” somebody like this is staring down at them with a grimace, laughing maniacally. . .Just what’s he planning?
[10%]

Dashing Attack – Joust
Dingodile holds his bazooka out ahead of him like a knight would a lance in a jousting competition as he continues to dash forward. This turns the head of the bazooka (Giving the move poor range) into a average priority hitbox that does 6% and weak knockback that never kills. Dingodile continues to do this so long as you hold A or reach the edge of the stage. . .

But dashing attacks where you continue to dash are so awkward, no? If you want a more traditional dash for more practical Bandicoot hunting, you can just release A as soon as you press it for Dingodile to fire a shot out of his bazooka, creating a disjointed blast in front of him the size of Kirby that does 10% and knockback that kills at 175%. The force of the blast causes Dingodile to be shot back very slightly, instantly stopping all of his momentum and bringing him to a halt.

While the “jousting” dash attack has no lag, this part of the move has both below average starting and ending lag. Despite the lag, this is actually a faster way to get Dingodile to keep to a complete stop then normal due to his terrible traction.

So remember how you can get a crystal shard onto the tip of your bazooka? Sure, it’s a nice decoration, but you could’ve just fired two fireballs in the time it took to get one shard ready to fire. . .However; if you have a shard, it’ll be the hitbox rather then the bazooka’s end, the priority becomes disjointed, and the move does 4% more. This turns Dingodile’s dash into a *gasp* actually usable approach. In addition, when you blow up the shard with the second part of the attack, it bursts into pieces, creating a multi hit hitbox that does 7%, allowing the attack to potentially do 17% total. Now we’re getting’ somewhere, eh mate?
[6%] [10%] [10%] [17%]


Forward Smash – Overheat


Dingodile charges up his bazooka as you charge the smash, then fires for average starting and ending lag. The beam reaches out half of Battlefield’s length and becomes wider the more you charge, at first only being as wide as Mario as tall but potentially becoming as wide as Dingodile himself. While the beam does anywhere from 20-35 disjointed hits of 1%, but it only flinches, meaning it’s strictly a damage racker.

So. . .How are you supposed to use this inside your crystal formation if it just goes straight forwards? Simple. It completely shatters any crystals in it’s way. While the idea of destroying your own walls can be rather unappealing, you have to keep in mind how the crystals rotate about. All you’re creating is just one little opening while still being able to start up the attack perfectly safe behind your crystals.

Now then. . .Where’s the overheating part of the attack? Well, if you never use your up special, the odds are you won’t see it anytime soon, but that’s rather unlikely. You see, a fully charged fsmash is the equivalent to flying around with your up special for half the duration, and a c-sticked one only a quarter the duration. So unless you spam this semi laggy attack, probably not gonna happen, and considering the rather costly consequences of overheating you certainly won’t want to activate if by accident.

But if you –do- get your gas canister to the point of overheating with the help of your up special, when you release the fsmash Dingodile’s gas canister starts pulsing violentely and making loud noises (Increasing the start up to the level of Dedede’s fsmash, but giving him super armor) then explodes in a massive blast that covers 1.25 Battlefield platforms on either side of Dingodile, goes into the foreground and background, and is 1.5X as tall as Dingodile. This does an absolutely insane 37% that has knockback on the level of Dedede’s fsmash. . .but instantly KOs Dingodile. This also shatters any crystals or other static disjointed hitboxes in range, meaning it’s a good way to start fresh (Seeing you can’t bring down new crystals until ALL of them are gone).

This is Dingodile’s primary way of KOing, but considering it’s a suicide KO where Dingodile always dies first, this doesn’t work out too well, now does it? You’d think that, but Dingodile’s automatic death animation is rather lengthy as he turns into a statue of ashes then slowly disintegrates down into a pile of them in a cartoonish fashion, meaning his foe will be the one to “officially” go down first. In addition, considering the fact that the blast goes into the background/foreground to destroy all your crystals, this also prevents it from being dodged, allowing this to be viable despite the disgusting lag. Oh, and remember that suicide KO side special? If you blow yourself up when you’ve devoured a small character, they’ll also instantly get KOd, so it serves more of a suicide KO purpose then just in the traditional manner. . .
[20-35%] [37%]

Up Smash – Rain of Fire
Dingodile aims skyward with his bazooka, then fires two shots upwards triple his height. While the duration of the attack is roughly that of Dedede’s fsmash, he finishes firing one of the shots up through halfway through the duration so he’s not completely helpless. The fireballs shot function identically to the one in his neutral special (Though charging this can double their damage), and you can fire two fireballs upwards faster then using this smash, so what’s the point, really? Well, Dingodile fires the two shots up into the foreground/background rather then on the normal plane, meaning you have to dodge to be hit by them. In addition, these fireballs come back down after being shot up, making them last a good bit longer then regular fireballs (A good 5 seconds or so), their hitboxes lingering on for a good bit.

The attack only becomes particularly potent when paired up with your neutral special, though, as if you tilt the control stick up immediately after the input, you can make it look as if you’re using this attack, giving mindgame potential so long as you wait a bit before actually firing the shot to make it look like you’re performing the usmash. It’s near impossible to tell visually where the fireballs are on the Z axis, so it’s quite easy to pressure foes into questioning whether to dodge or not to dodge.
[7-14%]

Down Smash – Spread Drill
Dingodile gets down onto the ground on his back, then balances himself off the ground with his tail as he get into a sniping stance, aiming his bazooka upwards. He then shoots three fireballs upwards, one straight up and two to the sides of it. These fireballs are slightly smaller then the ones from the neutral B/usmash and only deal 5%, though they’re close enough that one could easily hit all three if they hit the one in the middle. The fireballs go up double Ganondorf’s height before vanishing, and the move has average start lag with low end lag.

Now, while Dingodile’s balancing on his tail his main body has super armor, but if you hit his tail that he’s balancing on he’ll fall over for absolutely terrible ending lag. This can make the move borderline unusable, unless you’re in the middle of your crystal formation you won’t have to worry about being attacked from the sides and the attack covers you from above. . .

. . .Odd that this attack sounds more like a usmash then a dsmash, but that’s where the charging comes in. If you charge it, that’s where the “drill” part of the attack comes in as Dingodile drills his tail into the ground as you charge the smash, doing mass little hits of 1% and flinching, up to 12%. While the final hit does no knockback, it traps foes with a pitfall effect as they’re trapped between the ground and Dingo’s body as it lowers to the ground. Unfortunately Dingodile can’t punish his foe here due to having to perform the triple shot upwards, but it is great for crowd control. This is still plenty practical either way though when only against one foe, though, as if you dig your tail into the ground you’re absolutely impervious to attack until the dsmash is over.
[5%] [5%] [5%] [12%]


Neutral Aerial – Ring of Fire
Dingodile actually shoots fire out of his bazooka rather then a beam, turning towards the screen as he does so. The move has a somewhat lengthy duration (Bowser’s dair) as he creates a ring of fire around himself as he continues to shoot towards the camera and create the ring. But because he’s shooting towards the camera, the ring of fire is in the foreground, meaning the only normal hitbox is right in front of Dingodile, doing 12 hits of 1% and flinching. If the foes dodge, though, they’ll go into the foreground and thus into the ring of fire and take 8% and knockback that kills at 250%.
[12%] [8%]

Forward Aerial – Kickback Blast
Dingodile shoots a blast in front of him for average starting and above average ending lag. The hitbox is roughly the size of Wario and is disjointed, doing 15% and knockback that kills at 150%. While that’s all well and nice, the lag of the move makes it far from practical, and you won’t wanna be in the air with Dingodile all that much anyway besides to get ready for a suicide bombing fsmash. On the plus side, though, this move propels Dingodile back a Battlefield platform’s length from the force of the blast, allowing him to put some distance between him and any enemy bandicoots while still defending himself.
[15%]

Back Aerial – Canister Smash
Dingodile slowly goes onto his back in midair somewhat like Wario’s bair to crush foes with his gas canister on his back, but the animation is actually fluent rather then instant. . .Which translates into the move being a good deal laggier. Now, the move deals 11% and knockback that kills at 170% away from the gas canister with disjointed priority and average range. Of course, the best point to use it is when the canister is pointing down for a weak meteor smash, but that’s easier said then done with the lag and precise timing needed.

If you whiff the move onto the ground during the end of the hitbox when Dingodile is horizontal on his back, though, he’ll smush the canister between the ground and his body for terrible landing lag. . .Joy. If your canister’s charge is already 90% or above, though, it’ll start to pulse and explode, functioning just like an overheated fsmash. This can be a faster way to start the suicide bombing from the air, and seeing how you have to be in the air to charge it up anyway, it works out quite nicely. Of course, it’s annoying to get it just right without just activating a mini explosion in your up special if you overcharge, and if you undercharge you’ll be under 90% by the time you get to the ground. . .
[11%] [37%]

Up Aerial – Bazooka Jump
Dingodile sets his bazooka to do something or other, then. . .Drops it? As it goes under his feet, he jumps off of the bazooka, going up around Marth’s height, but the bazooka falls down. This doesn’t separate Dingodile from his weapon, though, as it proceeds to shoot a disjointed beam the size of Ganondorf downwards that does 12 hits of 1% and flinching and propel itself back into Dingodile’s arms. The move has average starting lag and below average ending lag, meaning it can be used to stall in the air, Dingodile just a tad bit lower then when he started the move at the end of the slightly lengthy animation.
[12%]

Down Aerial – Body Slam
Dingodile gets onto his belly in midair, then falls like a rock, going as fast as Toon Link’s dair. Standard stall then fall, really. His body is a high priority hitbox as he falls that does 10% and a weak meteor smash (Rob’s dair) downwards. Seeing Dingodile will continue on his way to the abyss regardless of whether you hit someone, this is rather unviable for gimping, but if you meteor smash someone down into the stage, you can land on them again for a second hit. If foes are on the ground when hit by the move, they get pitfalled, which makes up for the absolutely tremendous landing lag (Though thankfully there’s no other lag to speak of – the stalling part of stall then fall is absent).
[10%]


Grab/Throw – Tail Lasso
Dingodile grabs his tail and starts spinning it around for as long as you hold Z, during which time you can angle it. Upon releasing Z, he throws it forward in the desired direction for above average range. . .Of course, due to it’s tether like properties, the grab is rather laggy, but thankfully all the lag you’d expect from at tether is put on the end while the start is perfectly fine, so it’s quite usable. Just don’t miss. . .

So that grab is perfectly fine, but why would Warlord of all people include one universal throw rather then four?!? Well, once you grab someone with your tail Dingodile starts rapidly spinning around. He’ll keep spinning like this until you press Z to release the foe or until the foe escapes themselves. You can only specifically release the foe forwards or backwards with knockback that kills at 170%, but no damage. . .

. . .No damage?!? Well, yes, if Dingodile is fighting out in the middle of nowhere, which he has no reason to, it does no damage, but if he’s next to his crystals then he can rack the damage up. When Dingodile swings the victim through a crystal with his tail, though, he shatters it and it causes 1% to the victim. While that might not sound like much, keep in mind that his down special gives him a good 25 crystals to play with and you’ll be shattering through them like no tomorrow if you position yourself right in the middle.

While one would think you could just call down new crystals with ease, the foe will automatically be sent flying off with average set knockback after destroying 20 crystals, meaning that you’ll have an extra 5 left to destroy before you can just start fresh. Naturally, just 5 crystals isn’t nearly enough to provide you with any real cover, so you’ll wanna destroy ‘em all ASAP to make more. Of course, if you're starting to run out of crystals, you can use this to destroy the remaining ones to start fresh while racking damage in the process. Two birds with one stone.
[0-20%]


Final Smash – Ice Ages
For Dingodile’s “super attack”, a time portal appears in the middle of the stage and instantly sucks everybody into it, regardless of their location. This can be used to get Dingo out of a tight spot if necessary, but the show doesn’t really start until the portal spits you out in the “ice ages” in an arena that largely resembles Dingodile’s boss arena. Dingodile is behind a wall of crystals (Not behind the usual formation, just a wall), but as if they didn’t provide him enough protection he’s in the background now, totally invulnerable. He yells out “Break out the butter, gonna make toast!”, then everybody is free to move.

As Dingodile, you can move left and right, even while performing your three moves. A functions as your fsmash normally does, but you can move left and right as you charge/fire the beam. Pressing B puts you into a stance that resembles Snake’s final smash, where you can press A to rapid fire fireballs. While they’re no more powerful then normal, they’re INSANELY spammable. Press B again to go out of the stance. While this final smash has zero possibility of actually KOing anyone normally, your "fsmash" can still overheat if you charge it to the max, and the blast is completely undodgeable to all foes. Of course, it still KOs you, but if you’re ahead, why not? You spend 18 seconds in the ice age, after which the time portal comes back and spits you all back out on the regular stage.


If one just glanced at a match with Dingodile in it, one could easily assume he required lots of set up, seeing he has all those crystals on stage, but that’s the beauty of him. He can call them all down from the start of the match. No set-up required, just add water! You’ll want to play Dingodile very defensively from inside his crystals. What’s so great about the crystals is that you can angle your shots to hit your foes while still inside, but their projectiles will either go way over your head or be blocked by the crystals. Even if they have projectiles, they have no choice but to approach.

So, seeing the foe will have to go through ten billion crystals to try to get at you, they’ll probably try to just jump over them and approach from the air. Which is exactly what you want. Dingodile has lots of anti air options. When you get the feeling they’ll come, fire off a usmash to prevent them from dodging when they do, then use one of your many anti air moves as they come in (Don’t worry about lag, foes aren’t allowed to dodge it anyway). At this point, your victim has three options. They can dodge and get hit, not dodge and get hit, or back away and get hit by the tips of the crystals. While the crystals only deal 1-2%, they give surprisingly high hitstun, which allows you to easily punish the foe for some real damage.

Since you can block aerial approaches so well, the foe might try to damage your crystals. Go ahead. Let em. It’ll be a long while before they put any significant dent in your crystal quantity to make an opening, during which time you can rack plenty of damage from your fireballs, or even fire off an fsmash at them, assuming you still have plenty of crystals left. This only gets really bad if your foe is big and powerful and is able to shred through the crystals with ease, in which case you don’t have all that much to worry about fighting them normally, as they’re probably just as laggy as you are so you won’t even need to hide behind crystals. While you certainly don’t have much KO potential, you’ll get plenty ahead in the damage racking phase while they break your crystals to make up for it.

. . .So, speaking of KO potential, how does he KO? Indeed, that rather is a problem. At times Dingodile can feel like a power character without power seeing how laggy he is. Of course, the obvious choice to take out your foes is a suicide bombing. While one might question as to how you actually hit anything with it thanks to all the lag, it’s not as hard as you’d think. When it comes time to aim for the KO, just hover over the center of your crystals with your jetpack, using your uair to stall in midair to prevent you from overheating too early. The moment the foe arrives, body slam them to pitfall them to the ground, then stomp on them to hold them down. From here, you can set off your bomb with ease as you laugh maniacally and the poor bandicoot struggles to get free. Even if they get out before the bomb goes off, the explosion’s so huge they probably won’t have enough time left to get out of the blast radius anyway. Quite to the contrary to what you’d expect, things are even easier against small quick foes. Just go into your usual camping mode, then angle devour upwards as the cute little rodent comes in. This can even potentially earn you some early KOs if you can detonate your gas canister with the victim still in your belly, as if they’re inside you they’ll also instantly be KOd alongside you.

But anyway, Dingodile is completely screwed over by moving stages because his crystals go off screen, right? Hardly. He’s a set up character that requires no set up. The moment his crystals go off screen he can just summon new ones with little to no effort. If anything, this makes him all the better, as he can abuse the hitboxes on the crystals as they fall down a good deal here. Considering the crystals shred through everything but 100% solid platforms, they’ll even function perfectly normal on unviable stages like underground Mario Bros., shredding through all the blocks. Of course, the same can’t be said for Hanenbrow, as there’s no room to set up your crystals. D*mn Mendez and his Electroplankton. . .


ZOMG PRASHOR HEEM SO HE CANT SAT UP HEES KRYSTALS!!!!!!

Hardly. Dingodile is impossible to pressure. His crystals will be down within the first few seconds of the match, more often then not. From here, you can either attack Dingodile’s crystals or go to approach him from above. Seeing Dingodile’s many, many, anti-air options and how you’ll have little to no choice but to directly approach him from above, it’s rather unappealing, so you’ll want to focus on shredding away his crystals. This can be a rather lengthy process and you’ll be taking plenty of damage during it. This is much more recommended if you have some more powerful moves capable of shredding through them. Things can become much easier if Dingodile helps you destroy some crystals with his fsmash. . .Just don’t get hit.

Of course, you don’t want to destroy every last crystal, just enough so that you can approach Dingodile from the sides, which is far easier. If you destroy them all, Dingodile can just make more of the d*mn things. Anyway, at this point, the two of you will switch roles. You’ll be beating up on Dingodile while he’s trying to destroy his remaining crystals so he can make new ones. Sweet vengeance. Of course, with so few crystals and how there’s such a small window available during which he can attack them before they swirl into the foreground/background, he may just decide to fight you normally instead, during which time you can begin fighting him as a garbage tier power character without power. Just keep in mind that if he grabs you he can send you shattering through all those crystals to destroy the remaining ones to make more regardless of their location (Assuming he grabbed you near them) and start fresh. . .But this is really his only viable option left. Predict it, then punish that terrible ending lag.

Just watch out for his d*mn suicide kills. Even without his crystals, Dingodile can still either devour you or do a body slam/stomp combo to hold you down and prevent you from escaping the blast. Considering how insanely powerful it is, he won’t be needing all that much damage on you anyway to pull it off, and he’ll of already gotten enough on you by the time you’ve destroyed enough crystals. If you –can- escape from a suicide kill, though, you’ve pretty much entirely screwed him over. Once you’re ahead in stock count, you’ve got the match.

Without crystals, a strategy some Dingodile players use is to simply knock you off the edge with a decent powered move despite it being unable to KO you, then charge up the gas canister to explode and kill you when you come back. At this point, you can either go back to the ledge and die from the blast, or simply fall to your doom. While this will end up killing you both either way most of the time, on the last stock you can just stall in the air as long as you can until he kills himself so you die second.


VS. King Dedede 85/15, Dedede’s favor
Well, while Dingodile surprisingly can’t be chain grabbed in the normal fashion due to his terrible traction making him slide away before he can be regrabbbed (Like Luigi, but he slides away even faster, though not as far, preventing him from being infinited), Dingodile creates free walls in his crystals that allow Dedede to infinite him. While Dingodile can still just try to avoid getting grabbed here by playing his usual style, if Dedede jumps and uses his side special he can throw his Waddle Dees in an arc to go over the crystals but go down to hit you. He can camp just as much as you can. In addition, he just needs ONE FREAKING GRAB. That’s it. One grab, and it’s all over. You might be better off just playing without your crystals, but then Dingodile’s slow weak moveset will be notably inferior to the penguin king’s actual power and 16% damage bthrow.

VS. Meta Knight 50/50
Firstly, Dingodile should rarely get into a situation where he’s gimpable thanks to his defensive stance, and even when he is, his up special allows him to come back from anywhere on the freaking stage. Meta Knight has to go through Dingodile’s defenses just like anybody else. While Meta Knight can limit what Dingodile can do by out prioritizing his fireballs with Mach Tornado, it’ll take a good while for him to actually damage the crystals. In addition, Meta Knight is small enough to be devoured, and seeing how light he is Dingodile won’t need to get all that much damage on him either way. Of course, MK can just stand next to the crystals and spam dsmash all day on the crystals with the ocassional Mach Tornado thrown in to deal with your fireballs, so this isn’t exactly an ideal match up for either candidate. It can go either way.

VS. Peach 60/40, Dingodile’s favor
Peach can ever so casually float back and forth over the crystals as she waits for an opening, then punish you with a dair. The priority on the move is surprisingly good, so Dingodile has some problems dealing with it, and with her ability to just float and wait for the chance to strike Dingodile will have to leave as few openings as possible. On the other hand, Peach is pretty crappy at destroying the crystals, so she’s not exactly left with an alternative. Both combatants can rack up each other’s damage just fine. While Peach can’t KO you, it’s pretty annoying to hold the stupid b*tch down while you get ready for a suicide KO. Peach’s main strategy for “getting KOs” is to let you blow yourself up. That said, a good Dingodile player won’t actually do that until they finally get Peach pinned to the floor, so Dingodile is the one in control here, though barely.

VS. Pokemon Trainer 75/25, Dingodile’s favor
Remember good old Ryuk and his dtilt that could hit Pokemon Trainer himself? Dingodile has plenty of moves which go into the background, which means he has many, many options of damaging Pokemon Trainer. For every point of damage you inflict to him, that’s one second he can’t swap Pokemon, and you can stack the effect as much as you like. This can work paritcularly well to prevent PT from switching to Charizard, the Pokemon that fares against Dingodile the best to shred through his crystals, and of course to wear down the stamina of an individual Pokemon. The blast radius from your gas canister will nearly always hit PT, so that’s 37 free seconds with no switching right there. Anyway, there are better heavyweights to combat Dingodile then Charizard, and considering his stamina will drain down pretty fast Dingodile easily gets the match up.

VS. Bowser 65/35, Bowser’s favor
Have fun watching Bowser fsmash right through all your crystals. Considering he destroys two or three per fsmash out of 25, it won’t be too long before your supply runs low. Thankfully, once they’re gone Bowser can’t own you up like some of the superior heavyweights, but he’s still certainly a threat next to your weak moveset. While you’ll have a damage lead by the time the crystals are down, it won’t be much. The only real plus Dingodile has going for him here is that Bowser’s a nice easy target to hold down onto the floor and blow up, and even if he can’t do that, he can just throw him off the edge of the stage then blow up as he comes back. Still, considering Bowser can also do much simpler suicide KOs and is capable of KOing without killing himself in the process, he’s got the match up in the bag.

VS. Wario 80/20, Wario’s favor
This is pretty much like the above match up, but to an even larger extreme. While Wario’s fsmash is weaker then Bowser’s, it’s still strong enough to destroy the crystals in one hit and comes out much faster, meaning he’ll shred through the crystals like a speed demon. In addition, he’s a small target, though not small enough to be devoured, and can stall in the air just fine so you can’t just throw him off the edge and blow him up as he comes back. He’ll just laugh as you kill yourself then make it back to the stage with ease, though he might have to sacrifice a fart to stay in the air that long and still make it back. Anyway, considering how much faster Wario is, he can keep up the pressure much better then Bowser to boot. He’s pretty much a complete counter to you. Also, never try to use devour in this match up. Ever. Wario’s chomp easily out prioritizes it due to his mouth becoming so much bigger somehow.

VS. Metal Man 90/10, Dingodile’s favor
While Metal Man has to set up all his traps before he’s a threat, Dingodile can call down his crystals without a second thought. This means Dingodile will be damaging Metal Man heavily while he’s trying to set up, if he can get set up at all, that is. Even if he does get set up, Dingodile has no reason to leave his comfy little spot, so he’ll never fall into the traps. As if that wasn’t enough, Dingodile’s crystals already take up a lot of space on the tourney legal stages, meaning there really won’t be all that much room to even set up traps. Dingodile is an excellent counter to trap characters in general.

VS. Arthas 70/30, Dingodile’s favor
. . .But isn’t Arthas just another trap character? Well, not really. Firstly, the buildings are made in the background, so that means Arthas has all the space he needs to build them, and he’s perfectly able to attack your crystals while his Acolytes are setting up the traps. No need for a Death Knight to bother himself with such primitive tasks personally. While this is all well and nice for Arthas, he –is- a disgustingly large target, and his inability to grab the ledge means Dingodile could potentially even go on the offensive to score a easy gimp KO. While Arthas’ buildings will more or less no matter for most of the match, if you let it drag on too long you may have problems. However; unlike most characters, Dingodile can actually attack the buildings in the background with moves like his usmash and nair, and of course whenever he goes for a suicide KO all buildings in range instantly take 37 damage. While Arthas does indeed shred through Dingodile's crystals rather easily, the fact he can damage both Arthas and his buildings at the same time prevents him from being a joke without his crystals. While Arthas certainly has a chance, he’ll have to work for the win a lot harder then Dingodile.

VS. Raiden 80/20, Raiden’s favor
Raiden has his share of more powerful moves to get through the crystals just fine. While they’re somewhat laggy and thus not entirely ideal for getting through, Raiden still has his share of faster moves that he can use to hand Dingodile’s *** to him once he breaks through, unlike the other heavyweights. While Dingodile will refuse to die thanks to his infinite recovery and most of Raiden's KO moves being awkwardly laggy, that’s what Raiden’s locker is for. Raiden has no problem getting Dingodile up to high percentages where he won’t be able to escape in time as he pushes it off-stage. Dingodile is doomed to drown in Davy Jones’ locker for this match up.

VS. Spadefox 75/25, Dingodile’s favor
While Spade is somewhat powerful, he doesn’t have any moves that can destroy the crystals in one hit or are particularly fast for destroying them, so this presents somewhat of a problem to him. He’s also rather bad at approaching from the air, and seeing how defensive Dingodile is Spade will be hard pressed to get in that first hit to build any momentum. Dingodile can easily bring down his crystals before Spade plagues him with the inability to do so, so he can’t be so easily shut down like traditional trap characters.

Spade’s best hope is to try to lock Dingodile’s up special with his usmash, though this is rather predictable, seeing Spade’s other options are all so bad against Dingodile. If you do manage to do it, though, not only will Dingodile be unable to recover, he’ll be unable to charge up his gas canister and perform a suicide KO, shutting him down entirely. While this is much easier said then done, it’s notable enough to prevent Dingodile from dominating the match up. While locking out his fsmash is also possible, it’s not as potent and harder to lock seeing he doesn’t use it nearly as often, and even then he can still detonate the gas canister with his bair, so you’d have to lock both moves.

VS. Hades 80/20, Hades’ favor
Since it’s impossible to prevent Dingodile from bringing down his crystals, Hades will want to quickly run through him with his side special before he does so to nab some free projectiles before Dingodile blocks him out. Once the crystals come down, you can shoot fireballs in arcs over the crystals right back at Dingodile out of your stolen bazooka, although you only get 4 shots. While Hades can shred through Dingodile’s crystals decently, he actually has an alternative option, unlike most heavyweights. If he can manage to get into the center of the crystal formation alongside Dingodile and sets up a usmash portal properly, he can send Dingodile outside his own crystal formation. From here, you can just jump out to get at him without destroying his crystals, or better yet save your stolen bazooka for this point so you and Dingodile can switch roles, if only briefly.

Once the crystals are shattered, Hades can catch up in damage by summoning Pain or Panic to take care of Dingodile. While you won’t have much time to use them unless you want Hades to lose power, Dingodile’s slow weak moveset is easy to combo up the ***, so they don’t need all that much time. After your minion is done, Hades can come back in and finish the job. Considering the fact that even when Dingodile is left alone to camp you his fireballs will only deal half the normal damage to you thanks to your flame resistance, this match up is heavily biased for Hades. While Dingodile can just get a crystal shard to fire at you with his ftilt instead of a fireball, it takes a decent bit longer and it'll certainly annoy the Dingo player to do so.


Up Taunt – Maniacal Laughter
Just what you’d expect. Obligatory maniacal evil laugh.

Side Taunt - Baiting
Dingodile does a “come on” motion and chuckles slightly. “Chicken?”. Retracting your crystals and using this is a great way to offer a foe an invitation to approach. Of course, you’ll bring the crystals back up the moment the foe arrives. Suckers.

Down Taunt - Impatience
Dingodile folds his arms and taps his foot. “What’s keepin’ ya?”. This taunt serves a similar purpose to the above.

Entrance - Backfire
Dingodile comes down from the top of the screen, using his gas canister as a jetpack to hover down onto the stage quickly. It explodes in his face like when you use it too long in his up special upon landing, causing him to fall back on his ***. He then hastily gets up and shakes all the soot off.

Win Pose 1 – Victory Dance
Dingodile jumps up and lands on one leg, then does the same, landing on the other leg. He does this a few times, then pauses it briefly to shoot a beam from his bazooka upwards in celebration. This is his victory animation in Crash Team Racing.

Win Pose 2 – Victory Dance 2
Dingodile does a backflip, then raises his arms up into the air and looks to either side. His Crash Bash victory animation.

Win Pose 3 – Out of Juice
Dingodile turns to the losers and charges up his bazooka to fire a big blast, but then nothing but a puff of smoke comes out. Dingodile facepalms and mutters “Oh bother. . .” as he shakes his head in shame for the remainder of the victory screen.

Loss Pose – Absent Minded Clap
Dingodile claps in a perfectly normal fashion, his gas canister and bazooka laying to his side. While one would think nothing would think nothing’s special about this, if you stay at the results screen for a whole minute the gas canister will suddenly start pulsing. Dingodile yells out “It’s gonna blow!” and goes to flee, but it explodes and cracks the screen, leaving the results screen in blackness.
 

Wizzerd

Smash Ace
Joined
Feb 24, 2009
Messages
929
Dingodile: The very first thing I noticed about this moveset is how much you've trimmed down the bolding. I have to thank you for that. In Sloth and Ludicolo it made detailed sets even more difficult to get through, but now you only bold the very important details. For once I'm actually glad that bolding was utilized, as it made it easier to take in rather than harder as it does in certain movesets. Very good readability.

Speaking of readability, this set is very readable. You've really trimmed down the fat to make this sooo much easier to take in- I was very much surprised when the scroll bar was so small for an MW set. However, I fear that this is partially because many moves have little to them. The dair in particular feels like a generic move... WITH A TWIST and the Ryuk-style hitting-in-the-background moves feel somewhat overused. Plus, I don't like how many moves are just random projectiles. No, not because of balance, it's just because the originality of projectile-based moves is deceptive. Another concern I have is how much you refer to speed as "average" or "below average" or some sort of comparison to average... I mean, what is average? Comparisons to moves might help. Same thing goes for range. Priority is fine because it can't be expressed any other way.

But enough of that! I still think this is one of your best sets. It may beat out Sloth due to far better readability, and the moves all add to Dingodile's playstyle. I love me that playstyle, it's nice to see a setup character who can't be pressured
[/hypocrisy from the guy who made Krow and Takamaru]
and the playstyle gives him interesting matchups (I like his bad matchup with Dedede, it seems like the fashionable thing to do right now is to pull some reason out of your arse why Dedede can't chainthrow your character, though you referred to him as a penguin :mad:, and though the draw with Meta Knight feels a tad forced). The organization is very aesthetically pleasing as well, good use of custom banner headers. Really, this is a very nice set, and it makes me feel bad since it proves that despite summer slothfulness I have no excuse to have only posted a single moveset. (I'm only onto Urban Champion's smashes...)
 

MasterWarlord

Smash Champion
Joined
Aug 24, 2008
Messages
2,911
Dingodile: The very first thing I noticed about this moveset is how much you've trimmed down the bolding. I have to thank you for that. In Sloth and Ludicolo it made detailed sets even more difficult to get through, but now you only bold the very important details. For once I'm actually glad that bolding was utilized, as it made it easier to take in rather than harder as it does in certain movesets. Very good readability.
Yeah. I was trying to cut down a lot on it. It was okay on Sloth, but on Ludicolo it got rather nasty. I further realized how bad overbolding can be when Kupa started using it. . .

Speaking of readability, this set is very readable. You've really trimmed down the fat to make this sooo much easier to take in- I was very much surprised when the scroll bar was so small for an MW set. However, I fear that this is partially because many moves have little to them. The dair in particular feels like a generic move... WITH A TWIST and the Ryuk-style hitting-in-the-background moves feel somewhat overused. Plus, I don't like how many moves are just random projectiles. No, not because of balance, it's just because the originality of projectile-based moves is deceptive.
I intentionally let a good few moves be generic just so that they would go with the playstyle. Most of the "twist" moves' extra functions directly relate to the playstyle. The pitfalling part of the dair allows him to pin down foes with the dtilt, the up special charges his gas canister for a suicide bombing, the side special can devour those small pesky hard to catch foes. . .

Another concern I have is how much you refer to speed as "average" or "below average" or some sort of comparison to average... I mean, what is average? Comparisons to moves might help. Same thing goes for range. Priority is fine because it can't be expressed any other way.
I do some comparisons, but sometimes there really isn't all that much that's applicable. I'll have to strain my brain on those more, as we really need to get rid of all these generic terms that can be interpreted every which way. You're right. On some of them I could've elaborated more, but I was really going for nice, short, and readable with Dingodile. The dair in particular which you mentioned originally was twice the length simply to explain how it interacted with the dtilt and how to apply it (Another paragraph), but I opted to save all that stuff for the actual playstyle section so I wouldn't just be repeating myeslf there and to cut the extra fat off of the main moveset.

But enough of that! I still think this is one of your best sets. It may beat out Sloth due to far better readability, and the moves all add to Dingodile's playstyle. I love me that playstyle, it's nice to see a setup character who can't be pressured
[/hypocrisy from the guy who made Krow and Takamaru]
and the playstyle gives him interesting matchups (I like his bad matchup with Dedede, it seems like the fashionable thing to do right now is to pull some reason out of your arse why Dedede can't chainthrow your character, though you referred to him as a penguin :mad:, and though the draw with Meta Knight feels a tad forced). The organization is very aesthetically pleasing as well, good use of custom banner headers. Really, this is a very nice set, and it makes me feel bad since it proves that despite summer slothfulness I have no excuse to have only posted a single moveset. (I'm only onto Urban Champion's smashes...)
After Junahu mentioned how pretty much all characters in MYM are beaten with pressure, it really got to me. It was a very viable point. The fact that this playstyle required no set-up was appealing for that, in addition to at least not making him a "traditional" trap character. The fact that he counters those trap characters and isn't countered by the ultimate trap character counter (Spadefox) was trying to at least make somewhat of a statement.

As for the match ups, I really don't like forcing things, hence why Sloth and Dingodile's D3 match ups are so fail. I honestly feel the MK match up is even, though. If I wanted to show off Dingodile's balance more, I would've reworded it slightly and made it 60/40 against him, but I actually did think it realistic.

Anyway, glad you liked it so much. Thanks for the praise, your critique well be kept in mind come my next set.

Oh, and Dedede is a penguin. He's incapable of flight through using his wings. Penguins can actually become fat, unlike other birds. There's a specific breed of penguin called "king penguin" (And no, I'm not confusing it with the emperor penguin). Nintendo Power calls him a penguin. Snake calls him a penguin in Brawl. It's fact.
 

Wizzerd

Smash Ace
Joined
Feb 24, 2009
Messages
929
MasterWarlord said:
Oh, and Dedede is a penguin. He's incapable of flight through using his wings. Penguins can actually become fat, unlike other birds. There's a specific breed of penguin called "king penguin" (And no, I'm not confusing it with the emperor penguin). Nintendo Power calls him a penguin. Snake calls him a penguin in Brawl. It's fact.
Oh, I realize that. I'm pretty much saying it as a joke now. :laugh:
 

Agi

Smash Lord
Joined
Jul 27, 2008
Messages
1,120
Location
SE Washington
Dingodile by MasterWarlord

Whoa. I read a set I didn't have to review.

Okay, first thing I noticed is that Dingodile is much easier on the eyes than Ludicolo was. I don't think I mentioned it in my review, but you were pretty heavy on the bolding there... but that's besides the point. Organization hardly makes or breaks a moveset. [(d) @ Khold]

Unfortunately, I watched the video AFTER I read the set itself. Thus, it was a bit difficult to understand some of Dingodile's moves, particularly that Down Special. Afterward, however, it all came together, despite there being some really OOC moves (Side Special, much?), or at least, moves that didn't seem to fit all that well from what was shown in the video.

Despite all of that, you still managed to pull off some nice interactions, especially all that you had going on with the rocket pack overheating. While we're on that topic, I'm not sure that the Up Special should... or even WOULD be able to be used again after the rocket pack just... exploded. But hey... anything to give him a better matchup against Meta Knight, huh? ;)

The one thing I can say for sure that I'd like changed is for you to move the Down Special to the top of the Specials... but even then, that's up to you. :ohwell:
 

MasterWarlord

Smash Champion
Joined
Aug 24, 2008
Messages
2,911
Dingodile by MasterWarlord

Whoa. I read a set I didn't have to review.
Try Sloth. Based off what those lot are saying in the chat he's still not topped. Edit: Or not. Just a couple oddball opinions here and there. That said, he's certainly not undisputed against the big guy.

Okay, first thing I noticed is that Dingodile is much easier on the eyes than Ludicolo was. I don't think I mentioned it in my review, but you were pretty heavy on the bolding there... but that's besides the point. Organization hardly makes or breaks a moveset. [(d) @ Khold]
That's the only universally agreed on improvement with Dingodile, it seems. Easy to read. Whether or not this set turns out to be one of my more remembered sets, I'll certainly keep the experience I gained here in-tact for the future.

Unfortunately, I watched the video AFTER I read the set itself. Thus, it was a bit difficult to understand some of Dingodile's moves, particularly that Down Special. Afterward, however, it all came together, despite there being some really OOC moves (Side Special, much?), or at least, moves that didn't seem to fit all that well from what was shown in the video.
Yeah. . .Eheh. There's a reason I recommended it. I was hoping that could help to explain the rather complicated down special while still keeping the detail level nice and easy on the eyes. As for the side special, it was one of the last moves added. I tried to keep it from being absolutely ridiculous by actually making it somewhat realistic, which worked out anyway. Originally the plan was for him to just intimidate smaller characters, but I couldn't think of a way that made that flow all that well.

Despite all of that, you still managed to pull off some nice interactions, especially all that you had going on with the rocket pack overheating. While we're on that topic, I'm not sure that the Up Special should... or even WOULD be able to be used again after the rocket pack just... exploded. But hey... anything to give him a better matchup against Meta Knight, huh? ;)
There are weirder things in Smash then that, but true, true. Anyway, glad you liked the move interactions and such. Thanks for the praise.

The one thing I can say for sure that I'd like changed is for you to move the Down Special to the top of the Specials... but even then, that's up to you. :ohwell:
While I could do that, that'd make the moveset seem more like it had a mechanic (God forbid, those are the work of the devil). The only move that I would've edited to reference the down special if it came first would be the neutral special, anyway, so I didn't think I was losing all that much.
 

Chris Lionheart

Smash Champion
Joined
Apr 6, 2008
Messages
2,076
Location
Make Your Move
Dingodile

I must say that this is easily my favorite Warlord set thus far and one of my favorite current MYM6 sets. It combines reasonable creativity with an amount of realism that would actually make a set like this Smash viable, acceptable balance, and a readability that is somehow not hindered by Warlord level detail. Best of all, the character just seems like he would be really fun to play as!

My favorite moves were the all-important Crystals, the Smashes, the Up Aerial, the Down Aerial, and the humorously interesting grab/throw. But why talk about individual moves when you can talk about their flow, am I right? Many of the moves in this set almost seemed made for the purpose of flowing together and creating a unique but simple playstyle. The archable Neutral Special flows perfectly with the Down Special and the Up Smash, for example.

Despite being the ultimate camper and anti-camper that requires no set-up, Dingodile is balanced in that he has such a difficult time scoring KOs and generally suffers most of the typical heavyweight problems. He has the potential to set up win/win situations with ease, and yet, the foe is rarely, if ever, completely helpless and Dingodile isn't exactly the best comboer around.

Finally, I must thank you for this set, as you have quite possibly inspired me. I've been in a terrible movesetting slump even before working on Thrall (I had to force myself to even make him), and, well, this set has shown me that perhaps I can do things my own way, allowing for actual realism rather than just concentrated foolish creativity and yet still create a masterpiece.
 

Katapultar

Smash Lord
Joined
Nov 24, 2008
Messages
1,284
Location
Australia
I think that Magnezone was a really good to read. My favourite attack was Magnet Bomb, I loved the idea of a projectile that attracts/repels. You have done a great job here with the set, especially the organisation with the electric and magnet attacks.

Dingodile, ah yes, I have played Crash Bandicoot 3, I liked this guy out of the villains, though that was when I liked the Crash series. I have played Crash Bash as well, I didn't have to watch the videos (I actually never do...). He certainally lived up to his character, though I have to agree with Agi that the Side Special, Dingo never really used it in Crash (Unless it was from another Crash game I never played...
Regardless, I shouldn't complain about it, it matters nothing, and I see how it fits with Dingo. I should have expected nothing less from Warlord...
 

MasterWarlord

Smash Champion
Joined
Aug 24, 2008
Messages
2,911
Dingodile

I must say that this is easily my favorite Warlord set thus far and one of my favorite current MYM6 sets. It combines reasonable creativity with an amount of realism that would actually make a set like this Smash viable, acceptable balance, and a readability that is somehow not hindered by Warlord level detail. Best of all, the character just seems like he would be really fun to play as!


Your favorite set of mine? :bee: And it's actually. . .Balanced?!? *Gasp* This set really has accomplished more then I thought it would when I started it. Thanks for the praise.
My favorite moves were the all-important Crystals, the Smashes, the Up Aerial, the Down Aerial, and the humorously interesting grab/throw. But why talk about individual moves when you can talk about their flow, am I right? Many of the moves in this set almost seemed made for the purpose of flowing together and creating a unique but simple playstyle. The archable Neutral Special flows perfectly with the Down Special and the Up Smash, for example.
Somebody actually likes the down aerial! Yes, playstyle and simplicity were definite goals from the outset with this moveset, and I'm glad it payed off. Now, I question whether he'd actually be Smash viable with the crystals, but he's a lot d*mn closer to it then a lot of the other characters we get around here.

Despite being the ultimate camper and anti-camper that requires no set-up, Dingodile is balanced in that he has such a difficult time scoring KOs and generally suffers most of the typical heavyweight problems. He has the potential to set up win/win situations with ease, and yet, the foe is rarely, if ever, completely helpless and Dingodile isn't exactly the best comboer around.
Yay! Balance! You're generally one to notice my lack of balance in sets, so if you give it a pass I'm much more confident with that. Dingodile certainly is the anti character for a lot of character types, it seems.

Finally, I must thank you for this set, as you have quite possibly inspired me. I've been in a terrible movesetting slump even before working on Thrall (I had to force myself to even make him), and, well, this set has shown me that perhaps I can do things my own way, allowing for actual realism rather than just concentrated foolish creativity and yet still create a masterpiece.
Over creativity can definitely lead to becoming a problem. I think we can all remember how that went back in MYM 4 in particular. . .I'm glad you enjoyed the set so much and that you're coming out of your slump. I never imagined you'd love this set so much. :bee:

Dingodile, ah yes, I have played Crash Bandicoot 3, I liked this guy out of the villains, though that was when I liked the Crash series. I have played Crash Bash as well, I didn't have to watch the videos (I actually never do...). He certainally lived up to his character, though I have to agree with Agi that the Side Special, Dingo never really used it in Crash (Unless it was from another Crash game I never played...
Regardless, I shouldn't complain about it, it matters nothing, and I see how it fits with Dingo. I should have expected nothing less from Warlord...
Well, yeah. Nobody likes the series now. Notice there were zero references outside the PS1 era, aside from the sprites used to make the headers more pretty? Well, true, Dingodile never used his side special, but neither did DK, Peach, Luigi, Bowser, etc. . .While whether it's in character or not is questionable, it's not -terrible- either way, so yeah.

Glad you liked it either way.
 

Kholdstare

Nightmare Weaver
Joined
Oct 10, 2008
Messages
1,441
Dingodile was an amazing set. The organization wasn't what I had been expecting (I miss the bolding and hate you for switching to the new K.Roolian stats) but still nice. The aerials really made it for me, they were my favorite attacks out of his moveset. This moveset rings true two reappearing cliches that I'm beginning to despise:

1. Good match-ups against Meta Knight.
2. One universal throw rather then four.

I'm sick of seeing these two things, but other than that the moveset is great.
 

MasterWarlord

Smash Champion
Joined
Aug 24, 2008
Messages
2,911
Dingodile was an amazing set. The organization wasn't what I had been expecting (I miss the bolding and hate you for switching to the new K.Roolian stats) but still nice. The aerials really made it for me, they were my favorite attacks out of his moveset. This moveset rings true two reappearing cliches that I'm beginning to despise:

1. Good match-ups against Meta Knight.
2. One universal throw rather then four.

I'm sick of seeing these two things, but other than that the moveset is great.
Glad you liked it, though I'm surprised the aerials were your favorite part, seeing how pretty much everybody else thought the opposite.

And yes, I hate just having one universal throw, but I felt the one I gave him fit well into his playstyle, and it helped with the theme of readability on this one. But believe you me, this isn't gonna become a regular thing for me.

As for the match up against MK, I felt that many people would find it cliche, but I actually thought that was realistic. I wasn't trying to be biased. If I was being biased, I would've intentionally made the match up against MK worse so that people wouldn't complain about it. I'm one of those people.

Glad you still liked it. :)
 

n88

Smash Lord
Joined
Oct 10, 2008
Messages
1,547
Dingodile was fun to read, although I find it strange that his Up Air hits below him. (This is a very minor, petty complaint that I only brought up because I'm semi-OCD. Feel free to ignore it.)


Thanks for criticism on Kee-Mo-Shi to all who gave it. I'm finally starting a new set, which has been delayed due to vacationing. I wasn't going to give a preview, but this picture was so amazing and fantastic that I thought it should be brought to the attention of the public immediately.

I'm not sure why, but I get a kick out of that.
 

darth meanie

Smash Journeyman
Joined
Jun 6, 2008
Messages
452
Dingodile was a great read. I love how you made the bazooka more powerful at close range, just like a real one. The down special was also pretty clever.


I'm not sure I entirely understood the overheating system, you never mention if it recharges over time or not. Also, can you use the crystals in midair? Otherwise solid. The foreground moves were an interesting touch, although I'd wish that the Up Smash had one shot in the foreground, and one not, or some other way to do damage other than trying to fake out your opponent into dodging. Also, I would have preferred your "throw" to be a pummel and have more throw options; even though you had a strong reason to do it that way, standard throws would have been nice.

Playstyle is massive, and I love how you made a character who's playstyle isn't PRESSURE PRESSURE PRESSURE PRESSURE CONTROL PRESSURE PRESSURE. (looks at Magnezone <_<) Match-up section is massive too, a nice touch. Great set on your part, as usual as I've seen.
 

Darkslash

Smash Master
Joined
Feb 1, 2008
Messages
4,076
Location
Strangereal Equestria
If any thing Ocon, you managed to capture the sword abusing thing that is v-13. The set looks clean and has a hint of shine to it.

You suddenly made me want to go spend my money on a PS3 and Blazblue now.
 

MarthTrinity

Smash Lord
Joined
Aug 9, 2007
Messages
1,954
Location
The Cosmos Beneath Rosalina's Skirt
V-13

Ah. The obnoxious projectile spamming wh0re herself. This was the first time I've actually read the set despite you giving it the constant "hay guiz, almost done who wants to read it now? (smirk)."

So how do I feel about this set? I feel like you've captured the character pretty darn well to be honest. You captured the horrid spacing she has in BlazBlue without the unfair "zomg keep you away" aspects of it quite nicely. The actual set itself looks fantastic too like most of your sets, this whole using images thing is working out quite nicely for yourself. The only real complaints that jump out at me are really only nitpicks (like the standards being so far from the tilts, a few spelling mistakes and the videos being posted after) but really, those are just nitpicks.

The headers look fantastic and the images really help people who haven't played the game picture the moves. Overall, another great set from you Ocon although, despite my BlazBlue bias, I believe Vaati may be the superior set, set-wise (due to his attacks being 100% original and not copy-pasted into their fitting parts like some of V-13's are) whereas V-13 is -CLEARLY- the better set organization wise.

And that last bit wasn't meant to bash you at all, I'm having the fear with my characters from fighting games being basically "copy-pasted" from their own games into Smash...however I suppose that's not too big of a deal considering most characters have their signature attributes "copy-pasted" into their fitting button-imputs anyway...
 

SkylerOcon

Tiny Dancer
Joined
Mar 21, 2008
Messages
5,216
Location
ATX
V-13

Ah. The obnoxious projectile spamming wh0re herself. This was the first time I've actually read the set despite you giving it the constant "hay guiz, almost done who wants to read it now? (smirk)."

So how do I feel about this set? I feel like you've captured the character pretty darn well to be honest. You captured the horrid spacing she has in BlazBlue without the unfair "zomg keep you away" aspects of it quite nicely. The actual set itself looks fantastic too like most of your sets, this whole using images thing is working out quite nicely for yourself. The only real complaints that jump out at me are really only nitpicks (like the standards being so far from the tilts, a few spelling mistakes and the videos being posted after) but really, those are just nitpicks.
Well, I had thought about making a seperate images and putting them at the bottom. That looked weird. The I thought about making the moves that needed to be hyper-linked a single image, but that was a lot of work (getting each move to have the correct amount of space between each other and all that) so I didn't do that either.

Blame it on my laziness.

The headers look fantastic and the images really help people who haven't played the game picture the moves. Overall, another great set from you Ocon although, despite my BlazBlue bias, I believe Vaati may be the superior set, set-wise (due to his attacks being 100% original and not copy-pasted into their fitting parts like some of V-13's are) whereas V-13 is -CLEARLY- the better set organization wise.

And that last bit wasn't meant to bash you at all, I'm having the fear with my characters from fighting games being basically "copy-pasted" from their own games into Smash...however I suppose that's not too big of a deal considering most characters have their signature attributes "copy-pasted" into their fitting button-imputs anyway...
Well, seeing as Vaati doesn't really have anything signature to put into his moves, and all I had to do was follow a basic theme of wind, I had more to go with on him. I personally find that on the whole, Vaati was more 'original' so to speak, but he had a lot of MYM has already did, making him a whole lot less original.

With V-13, I couldn't do this because she came from a fighter, so it was essentially just putting which move where. But, I still manage to work creativity in there (via the Swords, Up Smash, Down Smash, Back Air, and U/Dair). The downward tilt also counts as well, I think, because it functions uniquely rather than doing something cool an unexpected.

I personally don't view either V-13 or Vaati having the advantage over another. I think they're about the same in terms of how good they are. Vaati, of course, is Zelda so series bias comes kicking in (because if you don't like Zelda, **** you), so (if) Vaati and V-13 place, Vaati probably will place higher.
 

Koppakirby

Smash Cadet
Joined
Aug 13, 2009
Messages
52
Hi, I did movesets on another forum that had a topic about Make Your Move there. I've decided to come over here and enter MYM 6.

ALSO THIS IS MY MOST ELABORATE EVER AND TOOK MUCH TIME. PLEASE COMMENT.

Music while you read:
Boss Tower: http://www.youtube.com/watch?v=PGJqkKfuRqo
Mirror Boss: http://www.youtube.com/watch?v=YTzI1P_1sCA&feature=related
Popstar Select: http://www.youtube.com/watch?v=_XxwS5sn5JA&feature=related
Factory Investigation: http://www.youtube.com/watch?v=JaRn1WCVIlY&feature=related
Boss: http://www.youtube.com/watch?v=hSO7vlgYgxQ&feature=related
Green Greens: http://www.youtube.com/watch?v=IZ-yNCiJpRY
Poppy Bros. Senior

Background

Poppy Bros. Senior is an elder in a very large family consisting of creatures known as Poppies. Actually, there is more than one senior, but this one has been picked to join the brawl! The Poppies pride themselves in being able to use resources wisely. Over the years, they've helped and fought against Kirby with Bombs, Blades, Apples, and even Maximum Tomatoes. This Senior is ready to use these things in the brawl!

Overview

Poppy Bros. Sr. is very whimsical and agile character. In fact, he doesn't really touch the ground much. His idle stance consists of him hopping from one foot to the other. Only on certain occasions, such as his dash, does he touch the ground. So in only those occasions does he have the handicap of Slipping or tripping and etc.. He also has a knack for long/high jumps. He can bound over his opponent with ease, allowing you, if you desire, to lay or throw bombs on both sides of the target. He is also very light, so be weary of stronger opponents.

Stats

Height: 5/10, the size of two Kirbies stacked on eachother.

Weight: 3/10, besides being a standard size, he is very light.

1st jump: 7/10, pretty impressive.

2nd jump: 4/10, not as good, less than standard

Fall speed: 4/10, despite being very light, he falls abnormally fast.

Fast Fall: 3/10, Increases his speed a small amount, but you really don't need too.

Traction: 8/10, he barely touches the ground to begin with, and when he does he is astounding.

Walk Speed: 3/10, he hops along at a slow pace.

Dash Speed: 7/10, he quickly skids across the ground, however his dash speed degrades over time spent in a constant run.

Air Speed: 3/10, he isn't really meant to move while in air. That is a major handicap on his side.

Mechanics

1. As you'll find out after a while of playing as Poppy Bros. Sr., he barely touches the ground! Only at times where he does will he slide or trigger Pitfalls or Motion Sensor Bombs. His run also has a speed degrading effect if used constantly.
2. Another Mechanic is the March of Jr. attack which will be covered in his Down Special.
3. Yet another Mechanic is his Up Special which will be covered there.

Moveset

Special Attacks

Neutral Special: Bomb Toss

Poppy will pull out a small bomb from nowhere. This attack depend on how long you press B. If it's for a short time, he'll jump up quickly and toss it in front of him, exploding when it hits a solid object or opponent. If you hold it, he'll lay it on the ground in front of him, lasting for about 5 seconds. It can hurt him though, so get out of there! 13%

Side Special: Cutter Throw

Poppy will throw a cutter blade in front of him. It will travel about 1.5 Bowsers before coming back to Poppy. It can be jumped over, and will continue to fly until it goes offscreen, not just hits a enemy. There can be an infinite amount of cutter on the screen at a time, but they have enough ending lag for you to not throw them at a ridiculous pace. 10%

Down Special: March of Junior

Poppy suddenly pulls out a Poppy Bros. Jr. from nowhere and throws it forward. Three types will randomly appear in this attack, as well as the down throw. Each Poppy has 8% HP. Throw: 5%
RED: Simply hops forward and damage itself and opponent on contact. 5%
BLUE: Same as Red, but will occasionally throw bombs. 8%
YELLOW: Same as Blue, but instead of Bombs, throws a cutter blade forward like the forward special, but smaller. 5%

Up Special: Apple Attack

Poppy will pull out a rather large apple and make a large jump off it. The Jump itself does no damage, and can be used for recovery. But the apple, if you use the move on land and land upon it, you will ride the apple and can smash people underneath the apple and avoid damage. The apple has 15% of HP. You can get off the apple by simply using this attack again and missing the apple. The apple will turn to dust if you miss it. Occasionally, you'll pull out a Maximum Tomato instead and you can ride or eat that, it won't turn to dust. You'll never get a Tomato when used as a recovery, however. 12%

Ground Moves

Neutral A: Glove Slap
Poppy Bros. Sr.'s gloved hand appears and smacks you lightly. This attack has a little startup lag, but that's it. It's weak, but it can flinch the opponent allowing for combos. 3%

Dash Attack: Super Skid

Poppy Bros. Sr. sticks up on of his legs while dashing, allowing him to slide-kick into the enemy. This is a pretty weak attack, but is good to knock someone away, because of it's high knockback. 6%

Tilts

Forward Tilt: Long Jump

This isn't so much of a attack as it is a way to get a around the stage in damaging fashion. Poppy Bros. Sr. will perform a long jump about the length of two Bowsers. This is a pretty okay attack and movement technique. 7%

Up Tilt: Bomb Sandwich

This isn't really a sandwich. Poppy will pull out a bomb and hold it above his head, and then it will explode. Although the explosion is harmless to him, it has a large hitbox and some powerful damage and knockback. 13%

Down Tilt: Applelanche

Poppy will quickly sit on the ground and quickly unleash two apples on both sides of him, flinching and doing small damage. The apple will roll towards the nearest opponent for about 5 seconds if they do not connect with anyone when unleashed. They are still lethal, however. 5%

Smashes

Forward Smash: Slap Silly

Poppy crouches and starts a three hit attack with his hand. Each attack does minimal damage, but can flinch. Comboing it with his forward tilt and neutral special is a good idea.! Three hits of 4%

Up Smash: Backflip

Poppy flips quickly, kicking any opponent above him high into the air. A very powerful kick, but has horrible ending lag. Probably better to use in a 1 on 1 fight. Knockback is larger when charged. Uncharged: 7%, Charged: 14%

Down Smash: Ultra Hop

Poppy will prepare for a jump, make a small hop, then come crashing down with a powerful shockwave and large hitbox. It has the ability to bury opponents at full charge. It also has a good knockback that will be very useful when coupled with his dash attack. Uncharged: 8%, Charged: 16%

Aerial Moves

Neutral Air: Silly Spin

Spins quickly in the air, like Kirby's neutral air, except with a larger hitbox. It can hit enemies more than once and can flinch for a very short time. 8%

Forward Air: Down To Earth

Poppy will suddenly start to move down along with whatever direction he was facing, going into his dash attack upon impact. This attack has very powerful knockback and is a heavy hitter. 10%

Up Air: Cutter Swipe

Poppy rotates to face the ceiling and suddenly takes a slash with the cutter blade, with a good hitbox and knockback. Very similar to Link's up tilt. 8%

Down Air: Hurricane Feet

Poppy will spin his legs really fast in place. This attack has a ridiculous amounts of knockback for it's damage percent. 9%

Back Air: Quick Bomb
Suddenly Poppy will spin around very quickly facing behind him and unleash a bomb that explodes the second he unleashes it. It doesn't harm him though. Also, you'll face the other direction after this attack. 11%

Throws

Grab: Extendo Hand

Poppy winds up his hand and sticks it out far, grabbing anyone in range. Tether Recovery!

Pummel: Fisty

With his other hand, Poppy will make a fist and punch the opponent in the grab

Up Throw: Explosive Propel

Poppy Throws the enemy up and then throws a bomb after them, propelling them even farther upward than they were going to go. 13%

Forwards Throw: Bombless Bomb Toss

Similar to how he throws bombs, Poppy will hop up in the air and toss the opponent forward for small damage. 4%

Back Throw: Cutter Reaper

Poppy throws the enemy upward slightly, hook them with a cutter blade, and tosses the thing backward, it boomeranging forward quickly. This is one of the more gruesome attacks, because it will keep the opponent hooked for 5 seconds, plenty of time for Poppy to grab it again with A and have the throw start over. Only if Poppy doesn't do this, is when the opponent will be unhooked. Good for endless mindgames and combos. Other Poppies can't catch him. 10%

Down Throw: Jr. Fun
Poppy will jump up, and unleash a Poppy Bros. Jr. that will stomp mercilessly on the opponent, eventually punching him/her away. Then the Jr. will fight with Poppy. More info on the Down Special. If there is already one Jr., then it will will be gone in a puff of smoke after this attack. 5 attacks of 3%

Situation Attacks

Get Up: Explosive Hop

Ignites a bomb under itself, sending it upward and foes rocketing. 12%

Get Up 100%< : Cutter Blade

Poppy gets up and quickly throws a cutter blade in the direction of which he is facing. It functions like Link's boomerang with less range and no tornado. 10%

Ledge Attack: Tripper Trickster

Poppy gets up and swings his leg out. This will trip any enemies within range. 4%

Ledge Attack 100%<: Bomb Roll

Poppy will pull himself up enough and then roll a bomb down the stage from the cliff. If it connects with a player it will explode then, otherwise it will in 7 seconds with the standard effects of his bomb based attacks. 13%

Final Smash: Poppy Twins
(actual screenshot unavailable)
Poppy jumps up to the middle of the stage and suddenly another Poppy Bros. Sr. comes out of him. same size. Then they both pull out many bombs and throw them all over the stage for about 10 seconds. Good news is the bombs aren't any different from the neutral special ones, there are many and they are everywhere, so it's an explosion-fest. After 10 seconds the second Sr. vanishes.

Playstyle

Poppy Bros. Sr. is a real tricky character. Here are a couple tips on playing as and against him.
As: As I hinted earlier, the Side Tilt isn't a tilt, and can be lethal when linked with the the bomb Toss or forward smash. Also, the backwards throw is a must if you are seeking to rack up damage. And you could also Bomb him while he's on the blade.
Against: STAY FAR AWAY. Use projectile attacks, because even though his bomb attack is projectile, he has some very lethal physical attacks that you want to avoid, if you get close, combo him or kick him into the air to combo with an Up-tilt.

STUFF

Up Taunt
Turns and waves towards the players.

Down Taunt
Juggles a bomb, it explodes in mid air after 2 tosses.

Side Taunt
Twirls on one foot.

Symbol: Same as Kirby

Victory Theme
Remix of This or Standard Kirby Victory Theme:
http://www.youtube.com/watch?v=BFSNq3l6yq4&feature=PlayList&p=63F2CF553542F588&index=15

Victory Pose 1
Hops into the scene and gives a peace sign.

Victory Pose 2
Dances with two Poppy Bros. Jrs..

Victory Pose 3
Juggle bombs over his head.

Defeat Pose
Hops in place and claps, holding his hands above his head.

Entrance
Falls from a offscreen hight

Trophies

Poppy Bros. Sr.
Poppy Twins
Poppy Bros. Jr.
Mr. Frosty

Stickers

Poppy Bros. Sr. (Large)
Poppy Bros. Sr. (Medium)
Poppy Bros. Jr. (Small)
Mr. Frosty (Medium)
Bomb (Small)

Alt costumes

Default
Red Clothed
Yellow Clothed
Green Clothed
White Clothed
Black Clothed

Animations
Idle: Poppy Bros. Sr. shifts from one leg to the other in place
Standing: Poppy hops in place.
Laying: Lays down, mouth open
Walk: Poppy hops forwards.
Run: Poppy juts his upper body forward, letting his legs drag behind.
Dash: Essentially the same animation with Poppy's hands keeping his hat from falling off.
Guard: Holds hands out in front of him.
Rolldodge: Curls up into a ball and rolls away
Spotdodge: Bends over backwards
Airdodge: Turns his back to the screen quickly
Crouching: Can't
Crawling: Can't
Wall Jump: Propells himself off the wall with his legs.
Wall cling: Can't
Asleep: Lays on the floor, eyes closed and bubble coming out of his nose.
Stunned: Stands, Holds his head and lightly shakes

Selection Sound
A cheerful 'Hey!', will be heard, followed by an explosion.

Kirby Hat
Kirby gains a blue blue, floppy hat with a felt Ball on it.

SSE Role
First seen when Meta-Knight and the Ice Climbers are scaling the Ice Mountain. He'll be up much higher than them, and throw down bombs to halt their progress. You see, Poppy Bros. Sr. is working for the Subspace Army against Dedede's wishes. When you reach the summit, where Poppy is he'll awaken sleeping Lucario with a bomb. Then he'll make a high jump up onto a floating platform, which will zoom away, leaving you to fight Lucario.

You find him much later n the cockpit of the Halberd, with the Mr. Game and Watches. You'll be thrown into a battle against him, and 2 Mr. Game and Watches. After a battle, it is revealed that this Sr. is a mere shadow copy, and will form it's bits with the ones of the Mr. Game and Watches to form Galleom on the deck. You go out to defeat Galleom. You find Game and Watch after, but where was Poppy?

Well, Poppy was with Samus and Pikachu! After finding Samus' suit, they find a trophy in a back storage room, Pikachu taps it, and there you go! You got Poppy Bros. Sr. on your side, who will follow that group, eventually meeting up with the rest of the group. He'll get turned to trophy by Tabuu, leaving you to find him as Ness and the rest.

Codec
Snake: Colonel, I need some help here!
Colonel: What's going on?
Snake: There's too much stuff going on to explain! This Jester is insane!
Colonel: Poppy Bros. Sr., eh Snake?
Snake: That's his name, huh?
Colonel: Yes. Don't worry about this guy Snake, you've gone through more hectic situations before.
Snake: Yeah, except they weren't caused by the same person!

Assist Trophy

Mr. Frosty
Mr. Frosty emerge from the trophy shaking his butt. Then he'll pull out a ice block and wing it in front of him, which will do he damage and have the effect of a Freezie. He'll then run the length of 2.5 Bowsers, turn, and repeat 3 times. A rare Assist Trophy.

Stage
Monochromatic Dreamland

Full Map here: http://www.vgmaps.com/Atlas/GB-GBC/Kirby'sDreamLand-GreenGreens.png
This stage is a just like Mushroomy Kingdom, except Kirby styled. Here are the gimmicks:
-It scrolls like Mushroomy Kingdom, pit deathes are possible.
-Where the map says 'Warpstar', a platform will appear and carry everyone to the second 'B' position.
-You can't go in the 'A' house.
-Where the Map says 'C', the map will show the tree 'C' area and you enter there. Then it will scroll up to the 'D'.
-When you get to the 'D', the platform will be there and take those on it back to the start. It cycles.
-Monochromatic Kirby Enemies will appear in this stage. Waddle Dees and Doos will appear(In black and White), behaving like they do in Dedede's forward special. Here are the others.(Note they all appear at random)

Bronto Burts
They will fly around, having 8% HP. They do 4% damage if they hit you.

Shotzo
These are invincible, and will fire a barrage of 5 2% bullets at the closest enemy, and can aim all but down.

Kabu
These ground based guys will follow you around, having10% HP and do 3% with their tackle attack. They explode for 10% damage when defeated.

Stage Music
See 'Music while you read'. Those should work.
 

KingK.Rool

Smash Lord
Joined
Nov 26, 2005
Messages
1,810
So V-13 is a pretty cool moveset. I have my quibbles with it - the attacks seem altogether pulled straight from the game, and the pictures are a bit blurry and hard to decipher at times, and, of course, it's tough to make an interesting moveset from a fighting game character - but on the other hand, the organization is just as good as one would expect, the attack descriptions are more readable, and I do believe that there's more attack creativity in general; the Uair/Dair, the Specials in general, etc.

I'd say this has more substance than Vaati, really, but he was the epitome of style, which still gives him that specialized leg up if we're going to compare them. All the same, this is quite impressive, and I see that you're only going to keep pushing the envelope in terms of organization. But I couldn't highlight anything as I read >=(

EDIT: Welcome, Koppakirby. I seem to vaguely remember seeing that moveset over on BiTF MYM, and it definitely is a great step towards competing here in earnest. The first and biggest thing I can suggest to you is to work on your organization - some bolding here and there, maybe make your headers a few sizes bigger, add some color on attack names and headers. It really makes the moveset much more appealing and easy to navigate for the reader.

I'd also suggest trying to push the envelope in terms of creativity; the sky's the limit here, really. There's a list the higher-ups of MYM composed that is made up of some of the best movesets we've had since MYM began; giving it a read would definitely help with seeing what our standards are and what kind of thing is well-received, typically.

You've certainly got some good ideas and it's an interesting moveset to read, but those two things really need a bit more development if you want to receive any halfway decent amount of comments.
 

Wizzerd

Smash Ace
Joined
Feb 24, 2009
Messages
929
V-13: Interesting set. I've never played Blazblue before but this moveset makes a nice case for it, with of course the good organization but also the interesting moves and playstyle. My main issue is a minor one: you seem to stuff a bunch of details like priority and lag at the end, which seems somewhat awkward. Of course, this is all up to the way you want to write your movesets, so this isn't a big deal. Something I had a bigger problem with was the use of "average" and "below average" for descriptions of properties. What is average? There's a such thing as average priority, but for range and priority it's hard to tell. Anyway, these are minor problems, and I do like this set.

Anyway... I've been having a lot of trouble with Urban Champion. The only thing he did in his game was punch, and he had no real character to speak of, so I'm having lots of trouble coming up with unique moves. Because of this, I'm going to hold him off and work on Sukapon instead, who could be ready in a week or two. I just want to apologize to everyone for slacking off on movesets so much. >_< I'm unsure if I'll ever even work on him again (sorry K.Rool).

EDIT: Koppakirby, listen to K.Rool. HE KNOWS! Nice job on the set though.
 

goldwyvern

Smash Ace
Joined
Nov 25, 2008
Messages
519
Location
Holy keys locked in the jet, Batman!
You know when your set is good...

When people comment on it instead of the current set(s)

Dingodile: I personnaly remember playing a Crash game once in my llife, though i forget all the characters but Crash and Aku Aku and im not sure it was on MY PS1. That doesnt matter know, since THIS SET IS GREAT! Certainly on par with Sloth in my book, but i prefered Envy over Sloth so its certainly not your best. It is obviously a step up from the over-detailed to the max Cortiny. I just love all of the creative attacks and the generic ones, because I feel there is too much pressure to be completely original on EVERY MOVE, cause then All sets would be an In-character Sakurai. The FSmash overheat effect is the most original Suicide attack ive seen in MYM.

As for my sets in case you all are wondering, Im making Doc Robot from Megaman 3 and a secret moveset that I WILL NOT DROP because a lot of work is put into it.
 

Dokutayuu

Smash Apprentice
Joined
Oct 4, 2008
Messages
145
Location
UK - PAL territory!
Poppy Bros. Senior certainly drew influence from the Kirby games but I'd agree about adding a little colour and bold/big/underlined headings would be nice. Keep at it!
 
Status
Not open for further replies.
Top Bottom