• Welcome to Smashboards, the world's largest Super Smash Brothers community! Over 250,000 Smash Bros. fans from around the world have come to discuss these great games in over 19 million posts!

    You are currently viewing our boards as a visitor. Click here to sign up right now and start on your path in the Smash community!

Make Your Move 11 - It's Over, Duder!

vVv Rapture

Smash Lord
Writing Team
Joined
Sep 20, 2009
Messages
1,613
Location
NY
Man, only made one moveset for last contest. I shall try to make more.

EDIT: Though, sort of discouraging that I got absolutely no votes on the last contest for my Ridley moveset. Like, not one vote at all.
 

BladeKnight420

Smash Rookie
Joined
Sep 11, 2011
Messages
23
Man, only made one moveset for last contest. I shall try to make more.

EDIT: Though, sort of discouraging that I got absolutely no votes on the last contest for my Ridley moveset. Like, not one vote at all.
Look up the Stadium to see just how long these guys have been at it, man. I was surprised to get as positive reception as I did for my first moveset. If you ask me, best way to improve is to just read other sets. There's more than you can count from all the past contests these guys have done, so you can be pretty picky.

halfsilver28 said:
Welp, may as well start actually contributing. So we've got a. . . Batman moveset. REALLY? I had a half-finished Batman moveset that I was thinking about finishing too *facepalm*. But mine is very Arkham Asylum/Arkham City-inspired, so I guess there are major differences. But regardless, this is your first set, and I have to admit: I was surprised by how much good stuff is here. It seems pretty natural for him to focus on the bat-lasso (but did you really have to call it that?) and otherwise incapacitating the foe with with that and sleeper darts or flashbang grenade. But I don't really like how you used the Batarang: Batman mostly uses them to disarm foes, and you have it just stick in them and do progressive damage. When he has foes tied up his game shifts to generally abusing them and forcing them to jump up, only to spike them back down and into their collapsed position. He's got some nice ways to do that with a few moves as well as ways to just keep the foe busy. The time bomb works in perfectly since foes don't want to jump up to negate the KOing knockback. But where I feel this set really excels is in aerial combat. Batman can knock the foe up high and easily follow them with the grappling hook, and then hit them towards the blast zone with that horizontal wall of pain that his glide enables. Not to mention he can even pull them up there himself with the grappling hook, a very familiar move for the Dark Knight. Along with his aerial grab, he can easily force foes off-stage and gimp, especially if they're tied up.

There are some negatives though, primarily a few choice moves. The random wind effects of the dash attack and the up air that is basically Shuttle Loop really seem illogical in their effects for me, though the up air at least has some use. The pummel is strange for me too, Batman always struck me as a guy who can intimidate through presence alone, not a yelling Jack Bauer-type interrogator. And that final smash. . . honestly, when people see something like that at the end of a set, they might pass it off as a joke set and not even read it. And yes, I hate that abomination as much as anyone else. But yeah, this was a pretty good set, not just a good newcomer set. Your writing was also clear and concise, I had no problems figuring the set out. Nice job man, hope to see more from you.
Since Final Smashes aren't always available, I can see why you guys ended up making a joke out of them with stuff like Gigaskhan. I was honestly expecting some people not to like it, but I was trying to sneak in tidbits like that (Since that Final Smash is of course non-canon to the moveset) to universally represent Batman. The main theme is still the more serious Batman, though, so I can see why you might get annoyed about it. The pummel and bat-lasso are similar cases (Though the later is just a name), and I didn't see much way to specifically represent the recent movies otherwise.

Sorry to spring this on you, as well as to LordVaati. I'd just finished Batman when he made that post, and I didn't know you were making the set. Are multiple sets for the same character allowed though? Or do Man Ray and Dirty Bubble/Dirty Bubble count as different characters?

I have plans for more movesets, but right now I'm going to go revamp that little experiment (Trixie) I posted at the end of the previous thread. Seeing I have a base, though, you may be seeing another set from me sooner than you think!

MasterWarlord said:
ADAM WEST

I was quite shocked of how conscious you were of playstyle with those comments of yours after the buzzer in MYM 10, BladeKnight, so I was quite looking forward to you making a moveset that wasn’t for a pony. I’m not sure how much I like the heavy focus on Batman knocking the foes into the air then immediately grounding them – it’s good on a few moves, but it seems to be taking up too much of the moveset for my taste. More focus on the sleeper darts might have been a good way to mix it up some. The real highlight of the set, though, is Batman pulling foes off to the top blast zone with his grappling hook – brilliant interaction there, and you do some really cool stuff up in the air that I can’t really critique. Really hope you stay with us and keep improving, BladeKnight.
Surprised that you liked it as much as you did, Warlord. I'm still intimidated at the prospect of writing a fancy playstyle summary, but I'll admit there are some things I could've explained if I'd included one. You see, there's actually more point to just knocking the enemy into the air when they're tied up so they can land and trip. It not only leads into his air-game, but also makes it a lot easier to grab somebody and drag them up to the top blast zone.

And now for some comments. I read these three movesets a few days ago before I ever posted Batman, but I never got around to commenting them. Unfortunately, this means I'm going to end up just bandwagoning and commenting the Courage villians. Now, don't look at me like that...I saw the posts before Ramses and Fred were even edited in, I swear! I've read other sets, but they're even more over-commented than these.

Ramses: Have to say this is a fantastic moveset right off the bat, Khold. Really blows those ponies of yours I read out of the water. If you make sets like this, maybe I should comment those three back to back sets of yours next!

I really like placing multiple curses on the enemy to power up your moves, and all of the unique curses you come up with. I especially like the interactivity with the grab. It's amazing for his character when you actually give them genuine incentive to hold onto the slab while Ramses is trying to get it back, essentially making the enemy play both the role of Eustace and Courage at once. This also opens entirely new doors for his playstyle, as the enemy will also be too busy fighting over the slab to go find Ramses' record player or drain out the flooded stage.

Fred: I don't find this moveset as "tacky" as other people are saying. What else is poor Fred supposed to do? He doesn't have magic or a balloon to rely on, so of course there'll be some logical stretches here and there, and he'll pull out a prop or two in the process. I actually like what you introduce with sending the enemy sliding off of blood and off the stage. Warlord did bring up a very good point, however, that Fred in this moveset is very OOC. I thought slipping the foe up was weird as a main kill method for Fred when I read it, but his point about it being too beneficial for Fred to cut his own hair rather than the enemy's is where I draw the line.

Le'Quack: The points you're making about comparing the hypnotism to a traditional grab-game are true now that I think about it, Warlord. However; when the enemy gets tied to the rope and Le'Quack is just wailing away on them below the balloon, it feels too easy for Le'Quack to damage rack. Not only is it easy to potentially re-hypnotize them, that usmash just seems pretty much unavoidable for the enemy and just leads to too much free damage for Le'Quack. I guess it could work if the flinching from the rocky particles didn't effect the victim's momentum, but still. I guess Le'Quack is also put on a time table to pull this off before the balloon floats too high...Well, the one thing I can definitely find a bit weird is you later saying in the set that when you saw a tied up foe from the balloon, the rope stays on their foot forever. I thought it was balanced because I thought they could still get it off when I initially read it, but then you just have to go and do that.

I guess that's a pretty easy fix and everything else I'm talking about is arguable, but I don't think Le'Quack comes off as strong as some of your other movesets, Warlord. I think there's too many things for his playstyle to be as coherent as most of them. This comment has a very negative tone, I know, but I most definitely don't dislike the set.
 
D

Deleted member

Guest
28 Comments Later

Off with a bang with a Kupa set, and one that ends a very prestigious trilogy of sets. This set really has everything up against it from the start, due to how much less potential the King K. Rool persona has compared to the other two and how much hype was generated from Baron. I feel like you were mostly able to aptly characterise him, while still drawing on new, logical areas, by staying in the confides of Rool's own bizarre, cartoon-y land where physics aren't supposed to make sense. I think the highlight of the set is being able to bounce cannonballs off your stomach, playing dead and generally a lot of the taking advantage of Rool's heavyweight male antagonist build, which is really fun, even after this many sets of seeing that in its full glory.

The crown stuff, while quite obtuse as a realisation of the way a boomerang works, does create some instances for pretty creative flow. I did find a few interactions with it to be a bit strange, though – mostly just in how Rool can, say, wear them on his head when they're still attached. That, and the way it brings back stacking hitstun every now and then. I also didn't feel like the cannonballs being a victim of your damage resonated as well as it did in Baron with his electrical trap. Again, it's a very difficult set, and I'm surprised you didn't do it first because of that. Aside from making everything a lot more simplistic – which would require an entire redo of the set and would be practically impossible to ask for – there's little else I could see you doing with him. Despite my problems, I like the set, as it's still a lot of fun in terms of characterisation and has some interesting ideas. Good job starting the contest, Kupa.

There's not really much I could say about QWOP in a comment that hasn't already been said. I found it to be funny, but it's not exactly enduring humour. I do have somewhat of an ironic liking for just how many dimensions of fail it encompasses, and how that is extremely fitting. However, I feel like the set could have had some actual playstyle if you made an all-powerful falling move and centred around it, then made the set incredibly awkward to control.

I know you want me to hate Vol Opt, but I can't help but love the unique aspects it presents with the movable turrets, pillars and wires, being able to create a fortress of death centred around this unmovable monstrosity. I've heard mixed feelings about this thing, but I personally love that you went after a boss like this that is, for all intents and purposes, completely random and has an intangible personality, coming down to what is essentially a monitor and mech combo. You pull off the synergy between the two splendidly and I do love the idea of being able to control that monitor like a bit of a satelite, it's really well pulled off and the way it acts as a sort of manager between all the effects on-stage is very clever. What's most impressive here is that it does feel very natural to control despite the clunkiness of the mech itself.

What I did have problems with is the tackiness of some of the interactions. Mostly in manipulating the electrical charge, the wires and some very awkward requirements for, as was pointed out before, grabbing the main part of Vol Opt. By themselves, these are easily-fixed, but they become more wearisome when the set is flooded with a lot of interactions – though quite a few are actually very good and appropriately functional. I didn't feel like a lot of them really added much in the way of fresh interactivity in the set, though, and merely helped generally to cover more of the stage, which held the set back when its big positive is how you're trying to control the battlefield through intelligent placement of all your mechanical devices. Nonetheless, I still like the set, and it's certainly among your best if only for the very refreshing take on the archetype.

I'm a little taken aback by how positive Uboa's reception was, though I can see why this is becoming a bit of a cult moveset. The idea of giving every move the exact same animation for the ultimate mindgame is stupidly brilliant and gives a lot of potential for what becomes a bit of a silly moveset in the end, really. I'm absolutely sure that, even as a newcomer, you were well aware of how weird a lot of the stuff in this set is and it's great to see someone new to the contest try to do something that every veteran member would probably scoff at, to some degree of success. Honestly, a moveset for this character couldn't really be much more than this and I feel this is actually far better than stuff like QWOP.

Rapunzel's one of the best returns Make Your Move has ever seen, as you bring together a mechanic similar to Mr. Banbollow's, but wholly different due to its far less entangled feeling and how the set generally pulls off the hair with a less “biological” feeling to the interactions. The comparison is very hard to make, actually, which says a lot to your ability to create quite a diverse amount of flow within the set with how Rapunzel is constantly repositioning her hair and mostly using it defensively, which is spot on for the character. While a lot of the filler in the set is with the pan, these do allow for some basic mix-up, which is tolerable when the mechanic is potentially obfuscating and this helps to establish more variety.

My negative paragraph exists, though, and mostly I had some problems with the way you handled the length of hair. I think the set would have been a lot better had you made uses for specific amounts of it and you could have done this without making it seem tacky as well. Especially with some of the aerials, this would have been a great improvement – just stuff like uniquely tangling up an opponent in the hair to then grab release them with varying momentum: simple stuff. I also felt like losing the hair generally didn't have too many advantages and the part of the set about regrowing your hair with the tear could have also had more depth simply by giving some more options for running away. None of these are deal-breakers, though, and I do quite like this set. Keep it up, Kits.

Boom Boom is definitely not the kind of set I enjoy, but for what it's worth, this is probably one of the better sets like this. Being able to switch up through use of the rocks – keeping momentum up and going for more of a constant aggressiveness with the momentum is pretty original for this niche genre and gives some life to the set. By using generic attacks, you accomplish this directly and this is obviously intuitive... at the same time, the pulling up of generic rocks from the ground and some of the more mechanic booster-y stuff in the set like the dash attack and a couple of the throws feel very tacky. T

here are also a fair few bland inputs that just give Boom Boom some obvious versatility, but not much else. I mean, I doubt there is all that much more you can do with Boom Boom, but it comes off more as rushing than problems with his potential, and I don't think it helps to offer all that much depth of play outside of being purely offensive. If you feel that says something more about the character and can forgive some of the problems created by the set's rushed production, I can understand why someone could like this set.

I'm going to straight up say Marvin is better than Strangelove, which is a fair comparison when they both make use of a stockpiling and chain reaction concept. While the latter felt confused thematically to me, Marvin is the very definition of a Tune and pulls off his playstyle of stage control, minion manipulation and terraforming in an elegant fashion, while remaining chaotic at the same time. Lighting up modulators, sending Martians on death marches and generally mindgaming the foe with the threat of you blowing up half the stage comes off as dually oppressive and goofy, mostly because Marvin basically has to constantly manage all of these elements and the mix-up is palpable, without being too automatic. It's quite brilliant stuff and makes it a tremendous playground.

What keeps me from flat out loving the set, though, is that I really wasn't too fond of a lot of what others have called stacked stun with the ash pile and bubble, taking control away from the foe and with the latter, oddly trying to KO them through the top blast zone. This does help keep him versatile in the air, but he also has some more simple inputs in his aerials that accomplish that and this kind of thing would seem very awkward to play against, as you're constantly battling for any control as Marvin straight up pushes you wherever he wants.

This isn't too much of the set, but it also doesn't help that the grab game – while very good at what it is – doesn't offer that much aside from a more straightforward way of repositioning things and there are a few moves offering similarly unnecessary functionality. With these sort of wasted inputs, the set is held back, but I'd still say it's almost up to par with Dutchman as is, and that without that waste it would clearly be my favourite of the two. Considering this is a one-day set and that was a... however many months set, that's really impressive. Great job, Dave.

Venustoise is of the back of competent newcomer sets, like Iron Giant, so it's no surprise that this one has a good, strong grasp on how to do a coherent playstyle. Here, the idea's simple: momentum building across the stage while building up defensive lines to keep the opponent from counter attacking, essentially meaning you can rush in with some support and rush out again if it gets too hot. This is, for the most part, pulled off very well, but it does get a little sketchy with use of somewhat tacky stage control moves like poison powder and stun spore. Considering these are both part-and-parcel of Venusaur, though, this is very forgivable.

The set mostly does some cool stuff with approaching, allowing the shell to act as both a permanent extension of Venustoise's individual moves and something pressuring the opponent into other aspects of Venustoise's playstyle, like the stage control and traps. There's a lot of stuff that is pretty oddly tacky, though, like the scald puddles and aforementioned status effect moves that are established for Venusaur's characterisation if nothing else. It doesn't quite come together to give Venustoise much of a niche in the momentum genre and honestly, the momentum really doesn't play a huge part in it [aside from the dangerous game of keeping yourself from suiciding], with the majority of the good in the set coming from his unique pressure game. So while this is a good set, I feel like you are still learning in terms of how to balance concepts in a playstyle. Nonetheless, I'm very happy to see you're still with us, BlackFox.

I read and commented the original Ashley. Remixes have come to be known as entire remixes of a character, so here it's quite hard to look past how very similar it is to the original. The original wasn't a terrible set or anything, but it was your first, so it definitely ages worse compared to stuff like Colours Sonic, which is actually a fairly decent set even by our standards. It's a fun set, but reposts generally are not.

Party Pete isn't half bad considering it's both rushed and your first set. The concept you make is actually pretty interesting – mostly in terms of the forced drinking after the first usage of the move and how that forces the player to change their playstyle to be more aggressive. Not only does this go with the character, it creates a cool dynamic that means Party Pete becomes reliant on his drink. After this, it's pretty obvious how the set goes downhill – it doesn't really take advantage of that final lumpy form at all and the interactions with the effects of the drink are pretty generic, to say the least. I'd much prefer just a power buff universally, but actual changes when you're a ball of fat that change the set around and create some new moves that lead into this from the first form. Still, even getting a good concept down is impressive for your very first set and has me anxious to see what else you can make.

It may not say much, but Gangreen Gang's definitely my favourite Hugo-style set if only for how the way it works makes sense for this group a lot more. The fact that they're all so reliant on one another and that they're so pathetic on their own is very in-character. Seeing Ace take the lead like he does is great, with his demise being a far better trigger for the team's inevitable loss than Hypno or Konstantin [of course, the fact it's not literally losing a stock is good too]. It's also great to see some potential squeezed out in the form of momentum-centric traps that helps to bully the opponent into being hit by multiple members one after the other.

The degrading feeling is carried over to the group attacks, though these generally are more for fun and help to establish a point to having certain combinations of members, through direct interaction between them. It helps more than just saying, “so-and-so can generically toss so-and-so if they're the two spares.” There is some merit, though, to the criticism directed at the group's abuse of opponents. Running from the group's farting, burping and so on is not the best characterisation for the group sans Grubber, but with the opponent, it just makes them look idiotic.

As always, there are complaints to be levied as well against the way the group can set up for some devastating combos, though generally these are hard to set up and certainly deserved if you can. You do make pretty liberal use of their bodies as weapons a lot of the time, but looking at the characters, Snake and Arturo specifically are just asking to be used like that when they have so little potential. So yeah, it's a great set with some gripes here and there, definitely one of the best sets I've read so far in this contest.

As far as your more experimental sets go, Dark Star is definitely among the best. I love the concepts with the portal connecting the stage to the top blastzone particularly, as well as his assortment of projectiles that are improved by sheer distance and by giving a bigger scope for Dark Star to take advantage of, which the portal gives him. This is all tied together rather neatly by his ability to create fakes and carefully place around his traps, allowing him to fool an opponent into hitting his mine in mid-air and kill themselves. It's nothing world-shattering, but put together it's a very unique and original projectile manager. There are weaker links – I personally didn't think you did anything interesting with the standing on the portal or the ability for infinitum with the portals and the set isn't exactly full of traditional hitboxes either – but this is perhaps par for the course with a character of this nature.

This moveset could be perceived as extremely tacky, but going back and actually watching the boss fight reveals that much of what could be considered magic syndrome in this set is actually taken directly from his encounter. In fact, most of the stuff that isn't taken from his boss fight, is the tamest stuff and simply adds to the playstyle's flow, creating a more grounded playground. The weirder things comprise the characterisation, as they should – which is impressive considering the set has a minimalistic presentation, not flaunting all of these ripped moves is admirable indeed, forcing the reader to look deeper into the character itself before they cast an ultimate judgement. So definitely a successful reading and playstyle experiment, in my opinion.

Kobold Clan definitely feels in the same vein as Gelatinous Cube back in Make Your Move 9, with a single great idea expanded out into a fairly good moveset. I love the take on minion manipulation here, making them feel far more expendable and still allowing for a united strength when brought together, but also when the Trapper is ordering them into formations or sending one on a suicide mission. The way the dragon mechanic works definitely could have been better – having one-hundred-percent as the requirement for it to appear is not intuitive and it's a central concept – yet it still delivers well in characterising the group as being opportunistic and gives a great purpose to all of their stalling tactics.

It actually reminds me a little of Krillin in that regard: being so weak and pathetic that they have to slow the match down until they're backed up by their big bad. There are a few quibbles I have with the set, though. For one, I think the set would have benefited from more inputs generally, especially when the Kobold Clan members aside from the Trapper feel so much like fodder. You could have squeezed a lot more out of it had you shared some of the inputs between the two – with stuff like Face Grab [Up Special] and Swipe [Jab] being easily-transferred to them without changes, allocating certain types of moves to Trapper specifically.

The downside would be that this would probably make them quite a bit more powerful, but they're already pretty damn weak to knockback, so it's not like they'd be overpowered. As is, the set is conceptually balanced because of how you need to micromanage the minions and subtly influence the foe into the way of a huge attack, but I feel like if you branched out that huge attack [the dragon] more, you'd have space for a far more diverse playstyle. That said, it's still a really fun set and certainly much better than your previous works.

Kyubey's a really fun set and an advancement on the kind of prose you developed in Gamzee, bringing the character on a full arc from pathetic micro-weight to God all in one moveset. The usual trappings of this kind of moveset are almost entirely avoided here, mostly due to how Kyubey needs this grand set-up to gain a foothold in the match and this set-up is entirely dependant on the foe being foolish enough to come in and attack you. Of course, Kyubey is a small and agile enough target to not be camped to death and once he's in and into the second phase of his playstyle, his motive completely changes, with his previous moveset passively altering a far more powerful one.

The best parts of the set are indeed in the way the set transfers over from one which is barely functional into one that is overpowered. The flaws are kind of obvious, though – for one thing, the tacky effects added onto the ends of moves to bring down the grab game timer, effectively making it more of a pummel KO. This is effective in terms of the playstyle, sure, but I can't help but wonder if there was a way of doing this that didn't feel quite so obvious for Kyubey and which didn't require some very odd 'effect' moves like that. However, I also feel like the moves carry off the feeling of Kyubey trying to win the foe over and being coy about it at the same time, not doing anything too direct that would break his façade.

There's also something to be said for pulling off this kind of concept with just a basic moveset that, for the most part, isn't flashy at all, until you get the soul gem on them. I did feel like the recovery stuff felt quite unintuitive, meaning Kyubey being KO'd takes some foreknowledge of this moveset and I don't think that's the right way to go about making that aspect work. The concept of buffing your opponent's moves and being a light target is actually fairly brilliant, but here it's just too obfuscated. This is all getting a bit nitpicky, though and I do feel this is a lot better than Vol Opt.

Suffice to say, Majora's Sceptile is far improved your previous sets, Majora. The concept of the trees and jumping between them has a lot of potential – here, you do make use of them as simply camouflaging Sceptile as he passes between them, which is nifty, but you really should have gone a step further. Your individual moves have certainly improved, in particular the specials seem an appropriate length for your writing style – however, I feel like most of the other moves still need a lot more going on for them to be good as well. A lot of the time, Sceptile's moves are simply hitting the opponent for damage – they generally give him a one-up over the Brawl cast, but they need to work with the tree concept in some way to make them viable. This doesn't need to be interactions, simply giving unique Sceptile ways to back up this frenetic jumping between trees would be enough. And yeah, the up throw totally needed to be a special. Nonetheless, great to see you taking a big step with this moveset.

Ramses is a difficult one to analyse, as the character is so peculiar and yet so obvious in his motivations, that trying to figure out exactly how his plagues should work alongside his slab is difficult with even the open-ended Brawl engine. Here, Ramses is far more about trading the slab back-and-forth, which works fine – it's not perfectly in-character, considering it would have been best if it felt more permanent, but that would lead to either some more flowcharty business or just be flat out impossible to work with. Even the stuff with forcing the opponent to grab the slab is against the point of the character a little, but then again, it's a necessary break-of-character when you [unfortunately] can't force every character to be Eustace. In the least, you got the achievable correct here – the plagues feel very well transitioned and, though not central to the playstyle, do give Ramses some more tools to mess with.

The set as a whole builds up the curses a lot, which mostly works as a way to pressure the foe into grabbing the slab and this then works into Ramses' game of hiding stuff in the ground for them to find. The fog is a bit tacky for my tastes, but it works well enough in giving him an amiable device for mindgames so he's not immediately caught out by the opponent. I didn't like the grab game – it feels a bit random that he mummifies foes with curses on them quicker, but this does help the playstyle a lot. What drags the set down, for me at least, is that some of the moves also feel a bit unintuitive, such as the down tilt and forward smash – requiring taunting and weirdly specific spacing that no opponent could foresee. Honestly, I have mixed feelings about this set: it's a great playstyle for the character, but you do take some big liberties with him at the same time and a playstyle section would have probably helped me understand the deeper quirks of the set better.

Freaky Fred is pretty much what you said it would be. I can agree with pretty much everything Rool said as well... the whole set feels very rushed and extremely tacky. The mechanic has the same problem that Gangreen Gang had with characterising the opponent, only far worse here, as the opponent is just “scared” of this random barber so much that they run away. On top of that, it has the worst problems that Marvin did, forcing the opponent into a never-ending loop of stun as they're running into traps through the freaky points and then hit by Fred's numerous grab hitboxes. It feels too flowcharty as well in having to pretty much grab the opponent multiple times to even get the match going. Fred is incredibly awkward as a character, but I feel like you could have done far better here than simply making him a god of hair traps. Considering you've dropped this set like you did Robo-Patrick, though, I imagine this overly harsh comment isn't going to be surprising.

Le Quack is probably the best set when it comes to trying out these very sketchy concepts concerning permanently hypnotising the foe, and attempts to do it in a way that isn't completely intrusive. This is largely done by the fact the trigger [television] is itself quite vulnerable and Le Quack is constantly needing to protect it, meaning that when you do take the controller out of the opponent's hands, it is with very telegraphed set-up that Le Quack has to work toward. The grab game is also good in this way, simply taking advantage of the foe's current hypnotism to try and manipulate them into following through with your plan directly.

What I find very appreciable about the set is how Le Quack is able to get some decent flow in between different phases of his game, primarily the top blast zone stuff and simply blowing around the balloon, on top of the hypnotism. While this is probably the weakest part of the moveset due to how it's reliant on plenty of filler moves, this is where I'd draw the line for the character's potential as well, as there's little else he could do and it still plays well alongside just summoning the balloon or spacing the opponent. The air game itself seemed similar to your Wario Land Wario due to some very basic spacing involved in it and how it's going for a simplistic feeling [none of which is really good or bad].

Where the set kind of drops off in quality is when it becomes a bit more single-minded with the throws, specifically where it works in direct interactions in later moves. These interactions aren't tacky, but tend to stilt the moves so that they're pretty much useless without being used directly after the respective throw: the forward tilt with the stick and neutral standard with “boo” in particular come to mind here. That, and while the grab game avoids just extending the hypnotism, I still feel like a lot of the throws do simply work into hypnotising the foe even more and don't allow much room for countering that, turning it into a bit of a chain grab. However, given the character and concepts you chose, you were inevitably going to run into problems like this and you were able to significantly lessen their impact on the set. Even if it isn't one of your strongest sets, it's still very respectable with what it had to work with.

Much in the same way as Boom Boom, Farfetch'd is not the kind of set I would be inclined to like and I find myself being reminded of Gallade – since then, I have come to appreciate how people can enjoy this kind of moveset and I honestly would say they two sets are quite comparable. I really was quite fascinated by your use of Featherdance, for example, just like I was with Future Sight – it's one of a handful of really inventive and refreshing inputs that push the boundaries of simple rushdown. I also do love how the leek works mechanically, being a throwable item that's completely useless to the opponent and I can't help but love how pointless a lot of the set is without also relying on the adjacent playstyle. There's nothing directly connecting the two, but this is obviously your approach with these sorts. As for me, I'm still finding it hard to like these when they're full of stock approaching and mix-up, I just can't look past what I would consider a lot of filler. It works fine for the character and is definitely an easy fit for Brawl, so yeah, it has its fanbase.

Rulue's up next and I feel like LegendofLink deserves a medal for covering everything I wanted to say about the writing. That's really more of a plus, as I get to talk mostly about the positive here. It's really your best set yet, as although a lot of the moves stick to a largely single-use function, it's all very consistent and builds up the character into a deep Brawl character in the very least, with some slight improvement over the Brawl cast due to how she specifically can target shields. Obviously, this is still far-off from what you can achieve, but it's just great to see you successfully put forward a set like this that does have a reason for every single move.

What I would recommend doing next is trying to diversify every move's purpose to be more unique and a little more complex [don't feel like you need to sacrifice the simplistic description, though], and breaking down those specials. I've never felt like the different levels you give your specials actually hold any deeper meaning, so I honestly think you could break them down to their bare uses and you'd still be able to concentrate on their unique traits, rather than how different one form of the special is from another. Lovely to see another set from you, Koric and I really hope to see more from you in the future.

Moon Child proves that you're more than a one-trick-pony, Sir Slash, and I'm just as impressed by how bold your experimental sets are. Here, it's the same kind of deal – the masks all operate as similar, but nevertheless distinctive animations, meaning that the foe has sort of the opposite reaction to Uboa in always knowing what Moon Child's about to do. Largely, he overcomes this by sheer randomness and this has its ups and downs. Mostly, though, it does feel like the playstyle of the character is too determined by how powerful his mask is, as there is no connecting flow between moves, really. However, this at least creates a sense of disconnect between the various masks. It's an odd and yet inspired concept for a likewise character.

Still, it's far too underpowered to work well in a fighting game and I do feel like you could have at least had some basic stuff like setting up for the stone mask by putting chaotic stuff on-stage, which doesn't sacrifice anything of the character. Most obvious change and what would make the set a lot more palatable, though, is if the final smash masks were randomised into the main set, meaning that simply using a lot of masks – as pointless as a lot of them are – is still a threat to the opponent. It's not much, but it would have helped tremendously. But this is the kind of stuff I wouldn't expect you to get on your second set, great job on it regardless of my problems with it.

For your first set, Batman is pretty darn good, BladeKnight. The moves all feel perfectly in character, the idea behind the playstyle is nice [though you could do with making a section for how he plays, to help the reader out] and the best parts of it are indeed quite imaginative. Pulling an opponent off the top blastzone as Batman is a very interesting thing to imagine and plays well into his ominous persona, as it infers more of a non-violent approach to defeating an opponent. Likewise, you build up on a lot of non-violent moves like the interrogation [mostly] and simply tying up the foe or forcing them into sleep. It all works well enough and really I'd just recommend trying to make the moves more complex, despite how that may sacrifice simplicity – stuff like the generic one-two punch and cape wind could be replaced by far better.

Knight Man is indeed in the vein of a now defined Khold style, which I hugely respect you for establishing only recently. As such, though, I feel like a shorter comment is appropriate for a shorter type of set. I love how tank-like the set is for starters, with Knight Man seeming like a real defensive god when it comes to his flail and simply duelling a foe with his multiple moves designed solely to pick away at the foe from the distance, then taking a more defensive stance with others and his shield. The set suffers a lot from redundancy, though... it's full of a lot of moves dedicated to just throwing around the flail and so on with slightly different end results. The grab game is also delightfully in-character, but adds to the feeling of the set lacking inputs, really. I also feel like some consistent logic with the flail and shield was more worthwhile than milking more inputs out of their different uses. It's fun to imagine playing as, though, and I get the feeling that's what you aimed for with the set, in which case, it definitely achieves.

I find it hard to like Escavalier solely because I don't think it really fits the Pokemon that well with its playstyle. I feel like Escavalier was designed with jousting in mind – while not becoming too fast in the process, which the set seems to present him as doing. Generally my complaints also come down to the execution, as I don't feel like HR's vision of the playstyle meshes well with what you do here, feeling quite disjointed. You seemed to be more into the idea of making the set about a hit-and-run playstyle, which probably needed your full focus to make work. I also feel like, without Twinneedle, a lot of the more simple moves are a little uninspired. It generally comes off as quite unpolished, which I can say is understandable given the weird quasi-joint status it has and how it was made alongside two other sets for Khold Day; at least it's sandwiched between two better sets.

Phantom is certainly the best of the three Khold Day sets, as it pulls off a lot of what Ramses did, but to a greater level of success. The set is so succinctly written that every sentence is very important, with extremely important details like Phantom's vulnerability only in the back being mentioned once and never again. This in of itself creates a dynamic for some truly mind-bending darkness, as foes lash out at what they think is Phantom, hit him and still have no idea if they did. Even without anything to fool an opponent into thinking there's solid ground where there wasn't before, Phantom still succeeds at tricking opponents into climbing on top of him or nudging them around by the control given to you through being able to teleport yourself or the opponent around, creating a real sense of unknowing about the opponent player's current position. It's simple enough to be easily-understood on every level, without sacrificing its very unique and inspired playstyle: definitely one of your better sets, Khold.

Now let me ruin this moment by saying that I really hope you aren't permanently dropping playstyle sections, as I feel some of your sets, like Ramses, still need them.

First, I'd like to say how much I love seeing you carry on this tradition, FF, and post another set. Kimiko may yet be your best ever, as it combines some very interesting mindgames and rushdown together into a perfectly well-characterised and conceptually balanced set. I actually kind of like the lack of obvious interactions with the fire and other projectiles [generically lighting stuff on fire] as it helps to establish each move's individual use more, mostly adding up to a character who works toward completely disabling the foe's options. For a martial artist, this is obviously very well-suited to her and she has plenty of moves to back up when an opponent escapes her projectile spam game.

The set really starts to become impressive, though, when the combo comes into play and she puts herself in danger, having to use her spacing moves to doubly keep the foe from spacing her into her own trap. Alongside the swarm and fire rings, it definitely helps to make her feel like she has some depth to her playstyle and be more than just throwing out lots of traps to overwhelm an opponent. My only big complaint is that I feel you should have centred more around that concept, as opposed to simply giving her even more options at close range – it's nothing big, though. I also feel like, while the no interactions is good, you could have made some of the moves have more point to them by simply allowing them to naturally evade her traps' trajectories, meaning she's able to set up to counter her foes' attempts at evading better. Excellent work, FF.

Len is a departure from your two previous sets, and while it does show promise, I'm not sure if it's quite as clever or inviting as those other ones. For one thing, I feel like the way the set works could be better – putting all the ways to control Ren on the smash inputs is very awkward. Remember as well that each move needs a uniqueness about it, so you could easily save space by putting the functions of both up and down smash on a single input. While attacking by blowing soundwaves into the speaker is good, I feel like there is some redundancy here, as some of the soundwave moves achieve pretty much the same thing. Still, looking past the easily-fixed health of the speaker (one-hundred-percent is a lot), there is potential in the concept and you're as keen at locating it as ever. If you do make sets in the future, I'd recommend giving some others a read first, as that should help you out more than anything else.
 

ProfPeanut

Smash Ace
Joined
Oct 1, 2008
Messages
727
Comment line dos

Why, yes, ProfPeanut, apparently you can do well in the weekly user rankings just be commenting on everyone. [/introspection]

Kobold Clan

I pretty much loved this set when I first read it. It looks like a Hugo set, but it’s actually a trap character who can get away with having mostly traps as inputs because of the four spearmen that are guarding him. Yet it also squeezes in ample enough control over the clan kobolds, which helps set this apart.

Something I’ve noticed is that when you mobilize into KDF, you’re pretty much stuck on the ground until someone decides to it you. I’m not sure if that’s supposed to go along with the hidden catapults, or if they really are bait against other set-up characters when in that formation. Also, those caltrops are probably going to encourage jumping more than discourage it – unless you can hold the input down to cover the stage with them, in which case it’s ridiculously OP when you have clan kobolds throwing spears everywhere.

I’ll have to disagree with Arshargalon being the only reliable KO method here, because I’m also seeing a pretty godly gimping game. The catapults, which you can aim to fling them off stage, allow you to force the opponent to recover, and you can run them into it with the Up Special or the Grab. And when that’s done, your opponent has to recover against a character with four kobolds throwing spears out, a close-range spike, a falling projectile that spikes, a powder that removes remaining jumps, a personal platform, and a pendulum that, if I’m reading this right, can be set up right in front of the ledge. Who needs a dragon’s help to win when you’ve got that?

Lastly, for hilarity, I’m going to assume that when Kirby copies Micromanage, he order’s Trapper’s kobolds against him.

Kyubey

Alright, original playstyle, plenty of good moves complimenting said playstyle, a really great implementation of KOing once the soul gem is made, and a wonderful writing style that really pays off in building a seemingly weak character into a menacing force (unlike QWOP). Now hold onto your seat, because there’s a great many other things to be said.

First off, you can’t assume that players aren’t going to abuse a character’s capabilities to their fullest. By that I mean that it’s quite possible for a Kyubey player to pick the most convenient spots for his corpses, then just sit there, Down Special ready, for the whole game until the foe gets frustrated enough to kill him there. And then he can effectively spread his corpses out so that he always has access to one whenever he respawns, and pretty much win the game from there. Let’s face it, this moveset pretty much invalidates any and all attacks that do 9% or less, especially with that Nair.

When faced against Kyubey, all fighters get divided into three camps: Those who have enough traps and projectiles to guard against all of Kyubey’s corpses, those who have KO moves that deal 4% or less, and those who are chasing against someone they can never truly kill and may as well not escape from his grab at all. And that third camp is a really large one. The biggest problem is that because of his mechanic, Kyubey stays at the same level of difficulty to kill for the entire match, which for most fighters is “impossible”. There’s no point to damage racking him; in fact, he can even just do suicide to effectively heal all his damage off. Because of that, Kyubey’s risks turning matches into very unfun events where the opponent just watches the bloody cat thing do its stuff and win. And despite his personality, I don’t think you intended to make a character that stops everyone from having fun.

5 respawns is too many. Even Snake can’t guard 4 corpses at once. Heck, 3 would be a saner number. And why shouldn’t the player be punished for letting Kyubey die endlessly while pestering the foe to make a contract? What if he respawned with 5% accumulated for every time he died that stock? That way your foes might have a method of winning the match by eventually KOing him five times via blast zone.

On a final note, I’m going to assume Kyubey can’t respawn via soul gem KO, because otherwise a mirror match is going to closely resemble a fight between two RSE Wobbuffets. But I apologize for that.

Majora’s Sceptile

Why does it start by saying his air controllability is lacking? An air speed of 9 isn’t lacking. And Dedede still has a great air game with a max fall speed and even a low air speed.

This committed the same error as Rumble when it references a mechanic at the end with a move at the beginning. Except it’s even bigger in that the move assumes the reader knows everything about trees already. Why does it do this when even an aerial later in the set says “Refer to below”? And on the trees themselves: How tall are they, and isn’t 100% health a bit much for what would effectively be walls?

Ingrain strikes me as too cheap, with 50% health/100% against a lot of foes. Can’t a player in theory use it on an opponent, then effectively reuse it just as the opponent breaks loose? Then you could just hammer away and effectively KO them when you’re done, the foe being able to attack or not; it’d be like a PK Fire that can’t be DI’d out of.

But I suppose that’s enough harshness; Sceptile has some pretty good methods of getting the trees around, and he has plenty of cool melee attacks. I like how the smashes effectively discourage spot-dodging, and the moves are all in-character too. So yeah, it’s an otherwise solid fast yet large character with a plethora of melee moves yet for some reason has campy moves too.
 
Last edited:

ProfPeanut

Smash Ace
Joined
Oct 1, 2008
Messages
727
MYMini#2 - and my subject seems happy that this is at the bottom of the page. Huh.


Benjamin “Yahtzee” Croshaw is an internet figure infamous for taking any and all video games, no matter how shiny and hyped, and stamping them into the mud. You remember him, right? Remember that one time he played Brawl, and there was enough fanboy hate sent back that he was able to run a mailbag showdown to further ridicule the idiots in our subculture? Good times, good times.

His opinion of our fine game probably hasn’t changed since then. Or maybe it’s worsened. Either way, as much fun as writing a first-person perspective of this MYMini would be, I’d likely end up infracted for all the indirect vulgarisms I’d have to commit, even if half of this post were made of censor asterisks. He’s being forcibly pulled into our game now - and I doubt he’ll play by our rules. For example, the painful yellow is his fault, just to make readers skip to the white text and glean the gists of each move. Oh, Yahtzee, you.


Neutral B: Imps of Darkness

Yahtzee may judge games first by their single-player, but even he wonders why multiplayer would be downplayed to 1v1s by the fanbase. Harnessing all the hate he has in his soul (or maybe just from hammerspace), Yahtzee summons a crudely drawn portal on the ground, one of two he can have out at a time. After using this move, one of those imps that always show up in his videos will pop out of the portal every 1 second. These imps normally wander around the stage, but will trail behind Yahtzee if he’s nearby. Cluster**** much? Not really; the portal can be destroyed in 3 hits, and the imps themselves are so weak that they die in a single jab. Imps attack by launching themselves at nearby foes, mouths open, turning their whole body into a hitbox. Yahtzee can use his FTilt to command any imps trailing him to attack the space front of him, while his FSmash can make them rush at the foe relentlessly. They can also use items, but they’re all cannon fodder anyway…


Side B: Loses to Button Mashers

Yahtzee prepares to share his honest opinions through a mix of witty humour and shoving those opinions down people’s throats. Using his elite skills as an amateur video game developer, he shoots a line of game coding from his hands that travels straight forward up to three stagebuilder blocks before dispersing. Any foes hit by this will suddenly start moving, jumping, and using random moves wildly, as though the player were just mashing buttons! The foe will have to escape through 1.4x grab difficulty, wherein they’ll then have immunity to Yahtzee’s Side B for the next two seconds. But there truly is no other visual indicator for foes caught in this move, and thus no way of telling if the foe’s still button mashing because of the coding, or because the player still thinks he hasn’t escaped the grab yet. Yahtzee, you charismatic stallion, you.


Down B: Image Stealing

What’s that? No items? What an intriguing concept to Yahtzee, to disable a feature purposely meant to be integrated into the main gameplay, even if the developers were clearly drunk when they made this game anyway. To show his utter indifference to scrubs everywhere, Yahtzee summons his computer on a desk onto the stage. It can be moved past, you can only have one at a time, it goes down in three hits. But surprise surprise, the computer’s running Google image search! Where else would Yahtzee steal borrow all the props for his reviews? If a character passes by this terminal, a random item will pop out of the monitor and land on the ground in front of it. I suppose it's nice enough to choose from the list of toggled items, unless you were dumb enough to disable ALL the items, wherein it'll then just make any of them. It does this the whole time it’s out, so you can dash-dance in front of it if you’re greedy to make it rain items. Consequently, you can arm a troop of imps this way as well...

Up B: Press X To Not Die

Yahtzee, not finding my choice of title clever at all, pulls out a notepad and a pen. He begins to scribble down all his material for his next review – which in the Brawl means he records every time an opponent pulls off an attack, to fling ammunition back at them. He takes half knockback from all attacks in this mode, and can still move around and jump, but he can’t use any other moves until the input is pressed again and he puts it back in his...pocket. When this input is used once more, he pulls out the notepad and starts verbally firing off all the material on it nonstop with such speed and timing that he propels himself upwards a Pikmin height for every attack he made a retort for. Each retort takes 0.2 seconds to do, and he does them in the same order that he recorded the all attacks. Meanwhile, his foes are so horrified by his brutal opinions that they take 3% and flinch for each retort he shoots at them. In a FFA, this can end up quickly peppering many foes at a time; in a 1v1, this can stop someone dead from wrecking Yahtzee's props, keep them pinned down as the imp horde attacks, or act as the ultimate gimping move! Just don’t kill Yahtzee by writing so much material down that he propels himself past the top blast line.


Hmm, one could almost make a whole moveset around this playstyle...oh, great. Yahtzee already filled in the rest of his moveset with generic inputs. Quite the parting shot, no?
 

n88

Smash Lord
Joined
Oct 10, 2008
Messages
1,547


This guy has pretty much the same story as Crimson Cowl - written to be part of a big ol' project, but forgotten for four months or so, rediscovered, and now, posted. I'll finish one of these multi-set things one of these days, I swear.​
 

majora_787

Smash Hero
Joined
Jun 23, 2007
Messages
6,122
Location
Texas
GG Nate, making something to give some company to Sylux and Trace. :bee:

Kidding. But I'll give this a read tomorrow.

EDIT: @Peanut. Air SPEED and air CONTROLLABILITY are different. When I say air speed, I mean how far/fast they can move through the air in a jump. Air controllability is something else to a point.
 

GibbytheCreator

Smash Cadet
Joined
Sep 3, 2011
Messages
49
Location
a walking paradox
hi guys sorry i havent been able to post my sets lately. ive been real busy with school lately and i havent had much time since i started playing football. i wanna participate real bad and im almost done wit one ill post it when i can ok :)
 
D

Deleted member

Guest
Kanden is decent enough, sharing his obsession with a projectile with some older characters like Jeice and Emolga, but here giving himself the tools to break down even the stage to continue pursuing them with it. This is thrown into the mix alongside some decent stuff like the slow, tank-y approach of the natural body, superseded by the incredibly fast bug form, where Kanden is then given a direct route to just toss the foe into the line of danger. A lot of the time, the more tacky stuff like the grabs and barriers actually come off pretty well, due to how heavy and clunky Kanden controls most of the time, as well as how his bug form is mostly situational, or just to let him get around the stage quicker. I feel like the smashes are the one group of inputs that are lacking, however, merely giving Kanden "laggy powerful attacks" to follow up on after the Volt Driver.

It's simple, minimalistic and is in all a decent moveset, though it holds up better under pressure if only because it's pretty tightly-knit, there's very little to criticize about what's there. I had some problems with that, though - Kanden isn't a particularly exciting villain, but the set doesn't really say that much about him, except that he's a heavyweight who likes flinging around the opponent. It's still in-character, at least, so I wouldn't call this a flaw, but on top of the fact that his end goal - using those very so-so smashes - to kill the opponent isn't great means it all feels a bit anti-climactic. Of course, this is balanced out by how you have some new stuff in here, like destroying parts of the stage not favouring the Volt Driver and being able to use your own mass itself as a direct pressuring tool. As is becoming your style, it's crafted in a way that makes it likeable, not overstaying its welcome with the creativity or with the rushdown.
 

Nicholas1024

Smash Lord
Joined
Mar 14, 2009
Messages
1,075
And they're finally done. FINALLY.


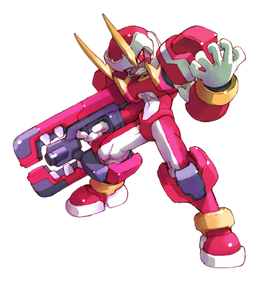
Fefnir of the four guardians has joined the Brawl!

Fefnir is a member of the four guardians from Megaman Zero, commanders for Neo Arcadia under Copy X. His capabilities would be best represented by those enormous cannons that his arms transform into. Almost every attack of his involves one of those cannons, whether it be firing at Zero, rushing for a grab, firing gravity-obeying shots into the air, or straight into the ground to create pillars of fire.

He also appears as model F in the Megaman ZX series. There, model FX is notable for being able to fire both cannons independently, as well as being able to change the path of the cannon's fire dramatically. So, without further interuption...

Fefnir's cannon energy:
Fefnir has two enormous cannons, and each can be fired independently of the other. Therefore, much like N88's General Grevious set (I had a similar idea a while before that, but I think N88's implantation is better than what I was planning), he can use two of his tilts/smashes at the same time.

Additionally, to prevent mindless spamming of Fefnir's many projectiles, he has a Megaman X style weapon energy meter, which holds up to 24 bars of energy. These are used up by his various attacks, and if you haven't used energy for two seconds, the bar will quickly replenish over two seconds, so you won't run out unless you completely abuse his projectiles. Of course, that's basically the point. If you attempt an attack you don't have enough energy for, he'll perform the animation, but no projectile will come out (if there's a physical attack hitbox, that will still exist, so you're not completely helpless in the short timespan while you're recharging).

Specials:

Side special: Double cannon
Fefnir somehow transforms both of his arm cannons into an even more ridiculously oversized weapon, before firing a kirby-sized ball of fire in an arc. (At the tip of the arc, the top of the ball would be touching the top battlefield platform, and it will travel 1.5 battlefield platforms if it hits level ground.) It travels at mario's walk speed, and does 10% and small knockback on hitting an opponent. More interestingly, once the projectile contacts an attack or the stage, it will explode into 8 smaller shots that move out in the standard directions straight from the explosion point. These smaller shots do 5% and small knockback. Additionally, Fefnir can fire additional shots from his huge cannon by pressing the B button, or cancel out of the move (and let the shots explode on their own) by pressing shield. Each shot uses up 6 bars of energy, and the shots are generally unthreatening on their own, but in combination with other attacks they can be quite deadly.

Down special: Eruption
Fefnir presses both cannons into the ground, and starts pumping energy into the earth below him. A battlefield platform on either side, the ground erupts into a mini lava flare, reaching just high enough to hit people on the lower battlefield platforms. If you continue holding down the buttons, similar flares will spread out from those two points, spaced half a stage builder block apart, until the flares reach back to Fefnir. This is a rather lengthy move, taking a full second for the flares to spread back to Fefnir. On the bright side, these flares outlast dodges, and are absolute murder on shields, due to their lengthy hitboxes and how they stun the opponent in place for any other projectiles that might be out. They do 12% with decent upwards knock back, basically making the ground around you a death zone for the opponent. This is a rather energy efficient move, only requiring 4 bars of energy (which you'll regain during the move), but the rather extreme lag means using this by itself is suicidal.

Neutral special: Fireball control
Fefnir's later incarnation as model F in the Megaman ZX series is best known for one thing, the ability to fully plan out the flight path of your shots to hit enemies at completely unconventional angles. When you hold down this input, an arrow will appear in front of Fefnir, that you can control with the control stick (it moves at Ganon's run speed), and will trace a path (up to 7 stage builder blocks long) over the stage. It disappears once you quit holding the special input. Now, on its own this does nothing, but this will control the path of one of your main projectiles (description yet to come, wait a few moves). Only one path can be active at a time, lag is nonexistent, and you can cancel out of the move (thus leaving your previous path active) by pressing shield.

Up special: Fefnir SMASH!
One of his other signature moves, Fefnir leaps up/forwards about a battlefield platform before coming crashing (diagonally) down to the ground at mario's run speed, being a brutal hitbox of 20% and great knock back. Additionally, at the point where he hits the ground, a rock will erupt out of the ground. The size of this rock depends completely on how high up you were upon using this move, from ground level it's only kirby sized, up to approximately twice Bowser's height when used from the top BF platform or higher. So why do you care? Well, aside from being part of the attack's hitbox (only when it first comes out of the ground, and even then it only does half damage and knock back, which is still pretty nice), this rock sticks around afterwards until it's dealt 20% damage or more (It's worth noting that Fefnir smashing a rock will destroy it instantly), and until then it's treated like part of the stage, which is VERY useful for extending the hitbox of Eruption to pretty high places.

Jab and Tilts:
Now, due to Fefnir's dual cannons, you can use two of his jab/tilts independently of each other. How's this work? Well, pressing a tilt/jab input will put Fefnir into shooting mode, during which he's locked into place as long as you hold down the button. While doing this, use the control stick and c stick to designate which moves he'll perform, one for each cannon. So for example, if you hold the control stick forwards and the c stick up, he'll perform a forwards tilt and up tilt simultaneously. Not using the stick means that he'll perform his jab with the appropriate cannon.


Jab: Fireball
Fefnir fires a fireball (about the size of a mid-charged aura sphere at 0%), but rather than travel in a straight line (or a gravity affected arc) like all laws of physics would dictate, it instead goes along whatever convoluted path you created with the neutral special, and once it reaches the end of the path, it flies off in a straight line (in whatever direction you had picked). These fireballs do 5% and minor knock back (and very little shield damage), but they only use one energy and have rather small lag (about the same as Falco's laser and they travel at Ganon's run speed), so they're your main projectile.

Forwards Tilt: Straight Forwards Fireball
Fefnir fires a jab fireball straight forwards, ignoring the path you dictated in your neutral special. This can be aimed up to 30 degrees via the direction you tilt the control stick.

Oh come on, based on the move name what did you think it would do?!?

Up Tilt: Firebombs
Fefnir fires three small bombs out of his cannon in varying arcs, going up almost to the top battlefield platform, and coming down 1,2,3 stage builder blocks from Fefnir respectively (They travel at Ganon's run speed, so it's fairly quick to land). Upon being hit (if they aren't hit they'll just sit there and disappear after 3 seconds), they explode in a kirby-sized fireball (of course), doing 10% and decent knock back. However, the opponent can pick them up and toss them at you, so this is a bit of a double edged sword. This uses 4 energy, lag is ok (a good deal worse compared to his other tilts though.)

Down Tilt: Inverted Fireball
Fefnir fires another Jab-style fireball, but this time the trajectory is flipped vertically. Although normally this just causes it to crash into the ground at some point (which could still be useful if you wanted to activate one of your fire bombs), this is far more useful when used on one of your raised rock platforms from the up special, or over a ledge, as it lets you edgeguard/hit below you without having to take the time to design an entirely new path with the neutral special.

One last note about the tilts, if you hold down the special button while using them, Fefnir will fire charged versions of these projectiles, doing three times the damage and great knockback.

Smashes:

Down Smash: Lava Geyser
Fefnir plants his cannons into the ground, pumping liquid fire into the ground right in front of you. This is a kirby wide and is proportional in size to the amount of energy used (1 kirby height per 4 energy every half second you hold down the button). What do these do? Well, you can add to them by down smashing over a lava well you've already planted, and if the ground (or a wall, if you plant one of these in an up special rock or by an edge) gets hit by an attack, the geyser will erupt doing rapid hits of 5% and upwards knock back, with the height of the geyser being from the low battlefield platform at min (4 energy) to off the top blast zone of Battlefield at maximum energy. The opponent can try to DI out, but they'll still take a good chunk of damage, and likely be pushed up a long way. The geysers last half a second once activating, lag isn't good.

Up Smash: Fireball Rain
Fefnir starts shooting jab style fireballs (5%, ganon's run speed, minor knock back) from both cannons straight up as long as you hold down the button, as usual each one takes one energy, and he shoots 6 per half second. These will simply continue traveling upwards until the hit the top blast zone (or the stage/an opponent, but an opponent getting in the way is suicidal, and you should never hit the stage unless your'e on Hyrule or something.) 5 seconds (depending on charge) after you started firing, the fireballs will come down off the top blast zone two at a time, with the first two right next to where you were, and further ones half a stage builder block further away (both in front and behind where you were) and 1/6th second later per pair of shots. (so basically they start right where you were, and move away over time.) The point of this is that it's a delayed projectile, so you can shoot them, wait for your energy bar to regenerate, and then unleash an even more intense assault while the projectiles are coming down. Lag is ok.

Forwards Smash: Charge
When you use this move, Fefnir gains a glowing white aura, until you run out of energy or input the move again, he'll do 2-3x as much damage and knockback, at the cost of 2-3x as much energy required (based on charge). This sounds really nice and broken, but it really drains your energy resources, making such attacks much harder to hit with, as it basically halves the number of projectiles your opponent has to dodge. Still, lag is pretty low, and if you can get this to actually hit it could work out in your favor.

Grab Game:
Due to having next to no close range tools, Fefnir's grab is really good. He dashes forwards a stage builder block with his arm out in front of him, grabbing whoever he comes into contact with, it comes out near-instantaneously, and end lag isn't terribly bad either. As per usual, when grabbed you can move around with the foe on the end of your cannon with the control stick, and your throws are:

Standard Throw: Fire!
While you hold down the button, Fefnir charges up before blasting the opponent out of his cannon propelled by a fireball, full charge takes a second, damage and knock back ranges from 5% and minor (with a jab-style small fireball, but it's still too much to chain grab), to 20% and great (with a kirby-sized blast). You can aim the direction of this with the control stick, and with a little timing you might be able to blast the opponent into a lava geyser or any previous projectiles you had out.

Special Throw: Lava Forge
Fefnir brings both cannons to bear on the opponent, shooting lava on top of them, which presently hardens into solid rock. In addition to doing a rather nice 10% damage, this also applies a metal box effect (aside from looking different) to them for 10 seconds. Why would you want a metal box effect when it increases their weight and damage they do? Why, because it keeps them grounded, where the opponent is MUCH more vulnerable to Fefnir's projectiles. Also, if you grab and throw them with this when they've already been covered in rock, they'll be stuck (can't move, attack, dodge, shield, they're helpless) until the former effect wears off, and you can go ahead and setup lava geysers or just beat on their helpless self. You can't grab them again until 2 seconds after the petrification wears off (no easy infinities here).

Shield "throw": Forget the grab game I want my normal move set back
What do you think this does? The opponent's still stuck on your cannon (with escape difficulty halved), but now you can simply use one of your normal attacks to knock them off. It can't be anything too laggy though (thanks to the reduced escape difficulty), unless they're already at high damage.

Aerials:

Forwards Aerial: Fire Wave
A constrant stream of flame comes out of Fefnir's cannon like Bowser/Charizard's neutral B, using energy at the rate of 6 energy per second. However, unlike those attacks, the flame doesn't diminish, and you can move around (even landing) and keep the attack out so long as you hold down the button, making this a very nice spacing tool. Lag is ok.

Down Aerial: Shockwave
In a typical stall then fall move (minus the stall), Fefnir goes plummeting down to the ground, becoming a hitbox of 20% and great knock back with super armor. This attack doesn't actually require energy until landing, where a small shockwave (5% and minor knock back) comes out and travels a battlefield platform on either side of him at ganon's run speed (costing 4 energy). This doesn't sound like much, but it's absolutely excellent for triggering a group of lava geysers all at once. End lag is somewhat high though, so you can't just throw this out there and hope it works.

Neutral Aerial: Fire Shield
Fefnir spins rapidly, becoming a hitbox of 6% and minor knock back, firing out 3 jab fireballs which then circle him (think one of the shield weapons in the Megaman Classic series). This sounds pretty good, as the opponent can't easily hit Fefnir while they're active (unless they're Marth...), however as soon as you land said fireballs are guaranteed to crash into the stage and destroy themselves, so this move is air only.

Also of note, this initial spin is one of Fefnir's few no-energy-required moves, and is a decent desperation move if the opponent is on you while you're vulnerable. (Should you hold down the button, Fefnir won't fire the fireballs even if he does have energy to do so, letting you continue replenishing your energy.) lag is low, and you can use this move multiple times for more fireballs to add to your little shield.

Back Aerial: Lava Overload
Fefnir sticks his cannon out behind him and a burst of lava comes out of the cannon, falling to the ground at Ganon's run speed. It does 10% and decent knock back on contact, but that's not the point, this projectile cannot be reflected, if you hit someone's reflector with this, it will overload and be unusable for 10 seconds. (Not a major move in Fefnir's play style, but very needed for some match ups.) It costs 4 energy, lag is ok, and you can use it for a geyser trigger if you so desire.

Up Aerial: I meant to do that
Suddenly one of Fefnir's cannons malfunction, causing a bowser radius explosion, using up all of Fefnir's remaining energy and doing 12-24% damage and good to awesome knock back (depending on how much remained). This sounds ilke a really nice finisher, except that Fefnir takes that damage too, and is now defenseless, but this is one of your main KO moves, because you can activate it in the middle of any other move you use in midair (plus it's guaranteed out of a grab). Lag is low.

Playstyle:
To be blunt, kill it with fire. That's entirely what Fefnir is about, short bursts of near impossible to dodge projectile combinations, followed by short periods of rest while your energy recharges. Fefnir has so many ways to make the ground a death zone for the opponent it's ridiculous, his jab/tilts, specials, lava geysers, and really good grab make the ground a very bad place for the opponent to be. Additionally, unless you're facing a aerial camper like Galaxy Man, you don't have to go after the opponent in midair, you can simply wait for them to land and then nail them. Even then, Fefnir has his resources, use up special to create some nice rocks for a better position, his rain of fireballs up smash forces the opponent to do some creative dodging (less warning the higher up they are) and knocks them down towards earth if they hit, and of course if you land a grab you can apply a metal box effect to more or less ground them entirely. So much for aerial opponents, (you can even just wait them out, it's not like they can out camp you, and they'll have to land eventually...)

The other thing to keep in mind with Fefnir is that although a single bar of energy does a good bit of damage, it won't be enough for a good opponent. The key is in storing up energy for later, more brutal, attacks, and that's where the lava geysers come into play. Put them anywhere, and unless the opponent comes to activate them themselves (which would be pretty stupid because then they're in perfect position for you to nail them), they'll just sit there waiting, and putting a bunch of those down + shockwaves from your down air make a very deadly combination. You can even put them in an up special rock formation to extend their range (even letting you activate them sideways!)

Your other big tool are the jab fireballs, since you can fire them quite literally any way you please, and you have several projectiles/traps that are only activated once they're hit (the large cannon shot from the specials, your up tilt firebombs, and your lava geysers), and the very low energy cost plus ease of use of your fireballs make them the perfect tool for such things. Don't forget how you can fire upgraded projectiles at the cost of more energy for better damage (if the opponent is in a particularly bad situation).

The air isn't particularly where Fefnir belongs, but he's still quite dangerous there, as he can cancel any aerial into a lagless up air explosion, he has one of his very few non-energy-using moves there (the neutral air), and the fire shield he can generate (again via neutral air) makes him tricky to hit until he lands. His up air is of special note because it gives him infinite recovery except it damages (and can KO) him. (A very entertaining thing to do is chain up air after up air when you and the opponent are at the same damage, as you'll fly up the same amount, letting you get off another up air... until the opponent either gets knocked away from you, you decide to quit, or you both become star KO's.)

So, in summary, Fefnir can only maintain his offensive in little bursts, but when he does go on the offensive, the opponent is in some severe trouble. (Even characters with a reflector, one back air and they're history.)
 

Nicholas1024

Smash Lord
Joined
Mar 14, 2009
Messages
1,075

Harpuia of the four guardians has joined the Brawl!
Harpuia is a member (and seeming leader) of the four guardians from Megaman Zero, commanders for Neo Arcadia under Copy X. His capabilities are best defined by his flying ability and electric element, as he can shoot sword slashes, homing missiles, as well as create lightning and tornados for battering his foes. Here's a couple vids of his abilities.

http://www.youtube.com/watch?v=EjCKNFUr4Bk&feature=channel_video_title (6:44 is the start of the appropriate fight)
http://www.youtube.com/watch?v=KGWzqk45-ds&feature=relmfu (7:54 is the start of the fight.)
Mechanic and Taunts:
Yes, you read that correctly, TAUNTS. Now, many of Harpuia's attacks carry an electric element to them. For those unfamiliar, electric charges come in two forms, positive and negative. The rule of thumb is, opposites attract, while like charges repel. Anyway, in addition to the normal damage counter, each opponent will have a small red/blue charge (red = positive, blue = negative) % counter as well. This keeps track of the electric charge the opponent is carrying (which gradually diffuses back to 0% or no charge at the rate of 1% per second.) Electrically charged attacks suffer a 0.75x multiplier to damage and knockback, but affect the charge counter as well as the normal damage %. (The amount it changes the charge counter by is exactly the same as the amount it changes the normal damage % by.) What do you get by electrically charging the opponent? Well, two charged objects attract/repel each other with a force that scales by charge1 * charge2/distance squared. For the non-mathematically inclined, that means that the closer two objects are, and the larger the charges are, the stronger the force. Also, the heavier an opponent, the more force it takes to move them (though this is counteracted by heavyweight's typically poor movement vs lightweights being agile.) Additionally, if you strike the opponent with an attack of the opposite polarity, you'll get a 1.25x multiplier to damage/knockback (instead of the penalty) due to the extra electrical shock they'll receive, however it will decrease their charge appropriately.


Now how do the taunts figure into this? Well, I'm glad you asked, imaginary reader voice. You see, Harpuia can change the polarity of his electric attacks via his taunts. Up taunt = positive charge, side taunt = no charge, down taunt = negative charge. (These taunts are instantaneous, and can even be done during a move to change your polarity in the heat of battle.)

If two mario's with 50 charge each are at a battlefield platform distance, they'll be attracted/repelled to each other at mario's dash speed. (At two battlefield platforms distant, it would be merely half that, and so on.) Each of Harpuia's attacks will contain a note of how it's affected by polarity, if at all.

Specials:

Side Special: Lightning Barrier
Harpuia's main move, doing this will cause him to shoot one of his mini-rockets, which you can then move with the control stick while you hold down the button. When you release it, the missile will send a stream of lightning down towards the bottom blast zone until it's destroyed (they're semi-fragile, 12% damage will destroy it.) Anyway, the stream of lightning does 12% damage and good horizontal knockback on hit. If polarized, it will do 9% damage + 9% charge. Also, the lightning will be red/blue instead of purple to denote its charge, and is considered to have 50 charge for the sake of manipulating the opponent. (The barrier itself won't be moved by the electromagnetic force, after all, it's LIGHTNING.) You can have up to two of these out at a time, lag is low.

Down Special: Homing Missiles
Harpuia begins hovering (if in midair), and after two seconds startup lag, creates a homing missile in front of him. These missiles are the size of mario's fireball, and move in a rather odd pattern. They lock onto the nearest enemy, move in a straight line for 1 BF platform (or until they run into a shield or other solid object), stop in place for half a second, and then repeat. After three rounds of this, they move straight up off the top blastzone. (Confused yet?) Anyway, each of these does 8% damage and ok horizontal knockback, but they're murder on shields (due to stopping on a shield and dealing extra hits) What's more is, after the first one, by holding down the button, Harpuia can keep creating them (up to 5 in one go) by holding down the button with vastly reduced lag (merely half a second as opposed to the normal 2 seconds). These are absolutely amazing projectiles (taking 12% damage to destroy), but suffer from one major flaw, the startup lag. Harpuia has to knock away his enemies or hide behind a lightning barrier before he can even think of using these, as else he'll be knocked out of the move before he can create one. Thankfully, the end lag is low. (Finally, when polarized, these are accounted as having 15 charge. They won't attract/repel the opponent much, but due to their light weight, the opponent will attract/repel them. This makes same-charged missiles better for cutting off escape routes, while oppositely-charged missiles are excellent at nailing the opponent.)

Neutral Special: Thunderbolt
Harpuia swings his swords upwards, crossing them above his head, causing a bolt of lightning to spring upwards from the swords to the top blastzone. Exactly 5 seconds later, an answering bolt of lightning will come down a stage builder block in front of where Harpuia used the move, similarly to Pikachu's thunder. However, by holding down the button and moving the control stick left or right, you can alter the placement of the second bolt, from right on top of Harpuia, to a battlefield platform away. Now, the sword swing does 8% and upwards knockback (and will almost certainly combo into the next part of the move), while the lightning bolts do a nice 12% and good horizontal knockback. Additionally, the sky around the top blastzone will begin darkening a second before the lightning strikes, giving you and the opponent an indicator of the coming blast. Lag is rather bad, so wait until your opponent is preoccupied. (Due to being a rather quick strike, the lightning won't attract/repel your opponent with electricity. Finally, if you use this such that lightning hits the stage instead of making it to the top blastzone, no answering bolt will come, so DON'T DO IT.)

Up Special: Flight
Harpuia is a wind/electricity themed reploid, and is completely capable of flight. Using this input will let you fly around freely via the control stick for up to 5 seconds. During this time, you can attack freely with your other specials and ground attacks, as well as airdodge. Should you use this move again while flying, you'll go back to normal.

Standards:

Jab Combo: Sonic Slash
Harpuia swings both his swords in an overhead swipe (one at a time), and for the third hit in the combo, swings them back upwards. I know you're waiting for the good part, each slash in the combo creates a little sonic boom (as tall as ganon) that shoots outwards at Pika's run speed, and is aimable up to 45 degrees up or down via the control stick. Each of the first two slashes and projectiles do 4% damage with decent horizontal knockback, while the third does 8%. Sounds like an amazingly good move, right? Wrong. You see, the first two jabs have very bad lag unless you continue the combo, and even when you do continue them it isn't a particularly fast combo. So, if you whiff on this at close (or even medium) range, the opponent WILL just dodge behind you and hit you with a charged smash. Well, how do you use it then? This move is a good projectile (if somewhat predictable), but is absolutely amazing when the opponent is already distracted (by say, your homing missiles.) Try using it to bounce the opponent off a lightning barrier for extra fun. (There's a little risk/reward here, at close range it's easier to hit with the slashes, but the opponent has an easier time punishing you if you miss.) This move's slashes are considered to have 25 charge for the purposes of polarity (although they won't be affected by the force themselves.)

Forwards Tilt: Whirlwind Gust
Harpuia points both of his swords in front of him (similar to his pose when creating a missile), but this time creates a small kirby-height BF-platform long gust of wind to shoot out forwards at pika's run speed. This doesn't actually do any damage, but it will push anything (so long as it's physical and not something like one of your jab slashes) around that it hits (enemies, your missiles, even a lightning barrier if it hits the missile generating it!) forwards similarly to Mario's fludd (but with about half as much power). This is great for manipulating your opponent into your barrier, as well as moving your missiles around for even more confusion. Lag is low as well, making this an important tool in Harpuia's arsenal. Due to being non-damaging, polarity has zero effect on this move.

Up Tilt: Tornado Spin
Harpuia extends his swords out to either side, and begins rapidly spinning, creating a massive stage builder block-wide tornado that reaches from the stage to the top blastzone (or the next solid piece of stage). This tornado doesn't do damage on it's own, however any physical object will be drawn towards the tornado at Mario's walk speed. Once caught up in the tornado, objects will go spinning around, being carried upwards at ganon's run speed until they hit the top blastzone. The tornado lasts as long as you hold down the button, and you can move it left or right via the control stick at Ganon's walk speed. The tornado stops when you release the button, and when it does everything inside is thrown out to either side at pika's run speed. You can use this move to draw in your lightning barriers, or grab a bunch of your missiles/other projectiles and fling them at the opponent. (You can hit the opponent with their own projectiles this way.) However, beware. The lag on both ends of this is rather large, and although phsyical projectiles will merely spin around you, the opponent can still nail you with a well timed attack (or merely an energy projectile) to knock you out of it. Again, polarity will not affect this move.


Down Tilt: Charging...
Harpuia pauses for a moment, channeling some electricity... and then resumes battle, but with a small glowing white aura around him. So what's it do? Well, until you use this move again, all electrically charged attacks will get a 1.33x multiplier to the amount of charge inflicted (basically the base damage of the attack), at the cost of a 0.5x multiplier to damage and knockback (replacing the normal 0.75x multiplier). The applications for this are obvious, better charge racking for manipulating your opponent, at the cost of a rather steep penalty to your actual damage racking.

Smashes:

Forwards Smash: Electric Sphere!
Not the best name ever, but it accurately describes the point of the attack. Harpuia swings both swords in front of him (10%, good sidways knockback), creating a kirby-sized globe of electricity. This homes in on the opponent in the same way as the rockets from the down special, and is considered to have 75 charge for the purposes of electrical force (so it attracts/repels the opponent rather strongly, and is affected likewise.) Damage-wise, the move is rather interesting. It only does 3% damage (REGARDLESS of polarity), but a good 10-20% charge (20-40% if used in combination with the down tilt) when polarized. However, it gets better. If you use the neutral version of this, it will stun them... that is, they will be unable to dodge for the next 5 (up to 10 if charged) seconds. This severely limits their options with regard to lightning barriers, making it an awesome tool in Harpuia's arsenal, regardless of how you choose to implement it. Additionally, the lag is decently low.

Up Smash: Lightning Charge
Harpuia (in a motion identical to his neutral special) sends a bolt of lightning up into the sky. And then... nothing happens. Well, when you next use the neutral special, it will call down the oldest bolt of lightning you've stored up like this in the exact same spot where you used this move. When the neutral special is used in this way, it has rather small lag, and you can continue calling down bolts of lightning as long as you have one stored. Charging this will increase the power of the stored lightning bolt, from the default 12% and decent knockback up to 24 and awesome knockback. Lag is ok.

Down Smash: Energy overload
When you use this smash, Harpuia overloads his energy generator, taking 5-25% damage depending on charge. Then, a glowing green aura surrounds him, and for the next 1-5 seconds (again, depending on charge), Harpuia has super armor (and invulnerability to grabs), giving him the ability to set off some of those high-lag high-reward attacks of his. However, after this wears off, you have to wait another 10 seconds to use this move. Lag is fairly low, and Harpuia has super armor while charging (distinct from the aura that appears after you use it.) If you're up against a Metaknight style character, and NOTHING seems to be working, try this move.

Aerials:

Back aerial: EX Attack
Harpuia jets backwards 1.5 battlefield platforms at sonic's run speed, making a slash below him as he flies. In addition to being a simple hitbox of 10% and decent knock back, this leaves a battlefield platform wide slash (also 10% with decent downwards knock back) traveling downwards at Ganon's run speed. (This projectile is shot out over the second half of Harpuia's movement, so it covers 0.5-1.5 BF platforms away from where he was originally.) As per usual, this attack is punished by some rather hefty ending lag... unless you cancel into another Back Aerial, in which case you only have to deal with average lag. It's important to note this move turns you around, letting you bombard a relatively small area with a number of quick, wide, difficult to avoid projectiles, especially when combined with electric barriers and homing missiles. Of course, this is an easy tactic to see coming... but if the opponent can't get to you in time, what are they going to do about it? (By the way, the name is a reference to how this is Harpuia's special, or EXtra attack in Megaman Zero 2. </random trivia>). Charge affects this attack like normal, the slashes have 10 charge for the purpose of attracting/repelling the opponent and are not themselves affected by the magnetic force.

Neutral aerial: A small tornado, no bigger than a waddle doo
Harpuia puts his swords together in his typical move charging pose, this time creating a small tornado, no bigger than... well, you know. This moves at half ganon's run speed, does no damage, but sucks in physical projectiles (and opponents) that it touches and keeps them inside via a pull of ganon's run speed. (Opponents have to DI out at grab difficulty). Normally projectiles sucked in will stay in indefinitely, but an outside force (like electric attraction...) can pull a projectile out. (If it's something like a homing missile, being taken out of a tornado will reset its pattern.) Lag is decent, so in addition to messing around with your projectiles, this is a fun all purpose move. Charge does not affect this attack due to dealing no damage.

Forwards Aerial: Super Missile
The names bleed creativity, I know. Anyway, Harpuia puts his swords together in front of him in his typical charging pose (Oh how I love multi-purpose animations), this time creating what looks like a slightly larger version of one of his homing missiles, with 20% stamina and 10% damage. However, unlike the normal ones with their pattern of homing in on an opponent, the pattern of this super missile is simply to fly in a straight line in the direction you press the control stick at half Ganon's run speed. Only one of these is allowed onstage at a time, lag is ok. However, the true point of this move is in its charge, as it carries a decent 50 electric charge, and can quite devastatingly follow an opponent around, as it does not disappear on hit (unless it hits the stage) Go, HUNT THEM DOWN! This is a fairly easy attack to get off, and can really be tricky for the opponent to get rid off.

Up Aerial: Magnetic Particles
Harpuia points one of his swords into the air above him, with a small kirby-sized cloud of grey metal particles shooting out the tip. Their charge is surprisingly small, having only 5 charge, however their weight is quite small, with the particles being affected by the EM force similarly to a mario with 25 charge, they'll home in on a charged opponent well enough. On contact they don't deal damage, but rather act as a metal box (minus the attack boost) with 1/3rds effectiveness, increasing the weight and falling speed of the character a decent amount.

Down Aerial: Electrical force.
Harpuia points both swords down between him, electricity coursing through the blades. If this hits the opponent, it'll form a VERY deadly circuit, draining all their electric charge, but doing damage and knock back that increases relative to the charge you drained. With no charge this is a pathetic move of only 5% and ok knock back, but if you max out the charge counter at 100% charge, they'll take a ridiculous 30% and extremely high (as in FALCON PUNCH high) knock back. Lag is low, but it's quite obvious this move is meant to be a finisher.

Grab Game:
Harpuia's grab can be used in midair, and he'll fly in a pattern similar to MK's shuttle loop, swooping forwards a bowser before looping upwards and going into a glide a stage builder block above his starting point. If he grabs the opponent he'll continue gliding, holding the opponent below him with the control stick controlling his glide direction. It's worth noting that unlike most brawl glides, Harpuia can quite easily loop with his glide.

Standard Pummel: Flip
When you use this, Harpuia will simply flip over mid glide, with the opponent now on top of him. It's worth noting that Harpuia cannot effectively control his glide when upside down, so you'll want to make this state temporary. Why would you want to do this? Well, aside from letting you continue a glide when you've looped and want to go the other direction, this will also hold the opponent above you as you pass through electric barriers, letting you move through them without taking damage (and putting a little pain on the opponent as well.) This is pretty quick.

Special Throw: Shock
Harpuia comes to a dead halt in midair, stabbing the opponent with both swords, before releasing them. For the next 9 seconds, once every 3 seconds the opponent will be stunned for half a second (taking 5% damage and interrupting any move they were performing) as the electricity courses through them. (Their body is a hitbox of said 5% during this, no easy infinities for you!). Of course, this is some VERY valuable setup time for Harpuia, who is often hard pressed to get attacks out.

Shield Throw: Momentum
Harpuia releases the opponent, coming to a dead stop. The opponent keeps their momentum (as the name implies), making this good for gimping. Yeah, that's about it. Simple, yet useful.


Playstyle:
Harpuia is the ultimate momentum based character. A lot of his moves are really deadly and amazing once you get them off, but he has some severe lag problems that prevent him from easily pulling said moves off. However, who cares about lag or predictability when you can have three or four of said deadly moves going at the same time, with the opponent trapped in a very small space to avoid them in? Your most important moves are of course the specials, your lightning barrier is a very nice trap as well as a good stall maneuver, and your homing missiles are quite possibly the best single projectile I've ever put into a set (if you can get through the lag to actually use them.) Additionally, the neutral special (when combined with the up smash) is a good way to get lightning bolts on demand, (and besides, nothing's more awesome than storing up a dozen lightning bolts over the course of a match and just watching them come down in rapid fire to utterly destroy the opponent.)

Aside from the momentum aspect, Harpuia has a dilemma regarding his attacks, should you use same-polarity attacks to make manipulating the opponent easier (at the cost of damage), or do you use opposite-polarity for more damage and knock back (plus being easier to hit with), at the cost of making the opponent much harder to manipulate? Regardless, your best tools for taking advantage of the electricity you create are definitely the forwards smash, the homing missiles, and the forwards air super missile, and don't forget how the down aerial can be used as a finisher if you rack the opponent's charge high enough. Additionally, never forget how your various electric projectiles affect each other, as stacking the various effects can make the opponent's life very hard. For instance, if they have a high positive charge, a negatively charged lightning barrier constantly pulls them into the trap, add in the repulsive effect of a positively charged forwards smash from the other direction, and they don't have a choice about getting pulled into the trap.

Regarding the lightning barriers themselves, Harpuia has a lot of ways to manipulate them. His various wind based attacks can either move the barriers around, or shoot the opponent into the barriers, a non-polarized forwards smash can keep the opponent from dodging (severely limiting their options to avoid or go over the barriers), he can repeatedly bounce the opponent off the barriers (for massive damage) with a jab combo, or trap the opponent between two of them while shooting down slashes from the back air. (Don't forget, add homing missiles in with all of this for extra fun!) Additionally, lightning barriers are a ridiculously good tool for extra damage when gimping, and you can even drag the opponent through them (and any other projectiles you have) with your grab-glide (plus the standard pummel to flip the opponent over) before launching them offstage.

In short, once you get an offensive going as Harpuia, you have limitless ways to take advantage of said offensive, as your possibilities are only restricted by your imagination and understanding of the electromagnetic force. However, should you lose your momentum, it'll be very costly to get back going again (a lightning barrier or perhaps a down smash can help, but you'll probably take a lot of damage regardless.)
 

Nicholas1024

Smash Lord
Joined
Mar 14, 2009
Messages
1,075

Phantom of the four guardians has joined the Brawl!

Phantom is a member of the four guardians from Megaman Zero, commanders for Neo Arcadia under Copy X. His capabilities are best defined by his ninja-style build, with his primary weapons being shuriken and a katana, as well as the ability to seemingly vanish into the darkness.

This is a video of his megaman zero 3 boss fight showcasing his abilities. (The appropriate part starts at 5:56.) http://www.youtube.com/watch?v=xggnaecE65A

Specials:

Neutral Special: Circle-star
Phantom tosses out his giant ninja-star, which does a nice 10% damage, with decent knockback, as well as good shield stun and shield damage. What makes this interesting is that you can angle the attack with the control stick (default is straight ahead), and the circle-star will quickly shoot out smaller shurikens in all eight directions, alternating between 4 shuriken travelling diagonally and 4 travelling left/right/up/down. (Just watch the way he uses it in the video, it works just like that). These each do 3% and minimal knockback/shield damage, and the rate of fire is one set of four per stage builder block the main shuriken travels. (So, if the circle-star travels three stage builders before hitting the ground, it will shoot out 12 small shuriken, 4 diagonally, the rest horizontally and vertically) Additionally, the circle star travels at Ganon's run speed, while the smaller projectiles travel at pika's run speed. As you can tell, this is ridiculously difficult to avoid normally or with dodges, so most opponents will just go ahead and sit in their shield. Lag is small, but you can only throw one of these every 5 seconds, so no spamming.

Side Special: Mirage
Phantom quickly splits into two copies of himself, each half a battlefield platform apart from where he originally was. These copies cannot move or attack, and if nobody attacks one within half a second, the attack ends without lag. One of them is the real phantom, but the other is fake (Which is which depends on which way you pressed the control stick, that direction will be the real phantom.). If someone attacks the fake, then the copy explodes (with range similar to Snake's C4 explosion). This explosion does 12% with good knockback, and phantom is released from the attack laglessly. However, if someone hits phantom, he takes damage like normal, but no knockback, and the move ends. Additionally, although Phantom can be grabbed out of this attack like normal, grabbing the mirage has no effect, giving the opponent a surefire method of discovering phantom should they keep their head. Finally, you can cancel any of your attacks into this, but only during the ending lag. So, how do you use this? Well, this is great for punishing enemy attacks at point blank range. Lag is quite low (unless they don't actually attack you), so use one, and if they're already starting an attack, BOOM. Since phantom can easily confuse the enemy with some of his other moves, toss in one of these to make them fearful of even attacking. To make this even better, you can use this move twice in a row to split into four total copies spread over three battlefield platforms, to REALLY mess with the opponent. You have to be on the ground to use this, however.

Up Special: Disappear
Phantom disappears and immediately reappears a battlefield platform above himself, with bowser-sized smoke clouds at each end. (The smoke obscures Phantom and any other opponents, as well as any minions/projectiles, and lasts for 5 seconds.) However, much like Pikachu's quick attack, you can angle this with the control stick and do it twice. However, UNLIKE Pikachu's quick attack, you don't have to do those teleports in quick succesion, you can delay for as long as you want, AND teleporting won't put you into helpless. So, what's this basically mean? You basically have two midair any-direction teleports to confuse the opponent with, before beating them up with your aerials.

Down Special: Darkness
Anyone remember Phantom's EX attack from Megaman Zero 1? Well, after 2 seconds of startup lag, a wave of darkness completely covers the screen (Essentially turning the background into a pure black rectangle), and Phantom vanishes into it. While in the darkness, you are completely invisible until hit, and can still attack however you want! (Mirages make you visible though, I won't let you be TOO cheap.) However, your katana and projectiles are still completely visible, so attacking will give your position away. This lasts until you take 25% damage, so have fun! (If you lose track of your character, pressing the taunt button will cause phantom to flash visible on the screen. Or you could just attack.)

Standards:

Jab:
Much like model PX in the ZX series, Phantom tosses forwards four small shurikens travelling at pika's run speed, each doing a small 2% and minimal knockback. Individually these don't do that much damage to shields, but together they aren't bad, and this move has decent cooldown lag (like an average tilt. You can't just spam these while they're in shield for a shieldbreak, sorry.). Use this to get in some damage from afar, and just generally annoy your opponent.

Forwards tilt:
Phantom grips a pair of shuriken like daggers, and essentially does a horizontal grab with them. This hits through dodges, and if the opponent shields, it will pin the shield in place. That is, it will prevent them from angling their shield like normally possible. (Check the up tilt for why this is important.) It does 7% damage, low knockback, and medium lag.

Down tilt:
Phantom throws a quick spray of 4 shuriken beneath him. (Two at a 30 degree angle from the vertical, and two at a 45 degree angle.) So why does anyone care? Well, because of the low hitbox, on the ground this can shield poke (despite doing a measly 3% damage). More interestingly, this can go through platforms. If you're on a platform above the opponent, you could very well hit them with multiple shuriken, and due to the rather low lag, you can toss quite a few.

Up tilt:
Phantom grabs a shuriken in each hand like daggers, and brings them down in front of him in an overhead swing, doing 7% damage and low shield stun. As you might have guessed, there's a secondary effect to this, and if you hit the opponent's shield, Phantom will pull it off-balance. The shield will stay off-balance until either broken or restored to full health. So, what's being off-balance do? Well, it keeps it from being centered on the opponent, and is instead pulled to the front, only guarding one side of the opponent. Additionally, you may or may not be aware that in Brawl you can angle your shield while shielding. This move actually makes shield angling IMPORTANT for the opponent, as else you can simply teleport behind them and murder them. Lag is ok.

Dash attack:
When you press this input, Phantom will go into hot pursuit mode, continuing his forward dash in an animation that looks identical to his normal one. This continues until you press the A button again, at which point he will use a devastating slash of 14% and great knockback with low lag. For even more fun, you can jump while doing this (but only once), and cancel this into a grab or shield by pressing the appropriate button. (This will be covered in more detail later, but his grab hits into the background, giving him more options) However, although normally end lag is low, if you hit the opponent's shield your lag on this is BAD, making a shield the perfect counter to this. This gives them a hard choice to make when you're dashing towards them. Do they sit in shield to counter your deadly dash attack, or do they forgo their shield and risk the dash attack to avoid your shieldbreaking game? Decisions, decisions.

Smashes:

Forwards smash:
Taking another cue from the future model PX, Phantom tosses ahead a spinning shuriken (which looks very similar to his circle star, but slightly smaller). Once's it's traveled a battlefield platform OR hit something, it will spin there for half a second, doing 8 hits of 2%, okay shield damage, and decent shield stun before returning (see: Link's boomerang). Charging will increase the number of hits, as well as the time it will stay in place (proportional to the hits, of course), up to 16 hits and double the time. This is your main weapon in shield breaking, as due to the extended hitbox and large shield stun, the opponent will be stuck in shield while you nail him with other moves. End lag isn't that good, startup lag is decent. Be warned, you can only have one out at a time, so don't waste it.

Down smash:
Phantom tosses his circle star ahead of him, but with the flat side facing up instead of towards the camera. Just like before, you get 10% with nice knockback and shield damage. What's interesting about this is that the shuriken will boomerang back and forth over two battelfield platforms worth of stage, and is effectively a moving platform for Phantom! However, all good things must come to an end, as this moves upwards as it travels back and forth, and it will gain the height of battlefielld's low platforms every swing after the original forwards motion. (so when it comes back to Phantom, it'll be at the height of the low battlefield platform, perfect to jump on.) Since you can use it as a platform, you can down tilt through it... need I say more? Charging the smash will increase the damage and knockback (20% and great knockback), but that's hardly the focal point of the attack (unless the opponent is in shieldbreak and you want raw damage). Lag is ok.

Up smash:
Phantom concentrates for two seconds (very laggy smash), and then a circular barrier similar to an oversized shield appears around him. This will take 25% before disappearing, and is basically there to let phantom beat on the opponent's shield without fear of retribution, as he is ungrabbable with it active. (What? You say Phantom never performed any such technique? Well, model PX has this as it's unique second level charge move, and model X can't do it. Model P is basically Phantom, so QED.) Well, due to the horrendous lag, you won't get this off except when your opponent is in shieldbreak, so when that happens, you have a choice to make. Do you want to confuse your enemy with the stealth offered by your down special, or intimidate them with the defensive barrier of the up smash? Your call. End lag is low by the way.


Aerials:

Neutral aerial:
Phantom vanishes into a bowser-sized smoke cloud, and another smoke cloud (each one lasts 5 seconds) appears a battlefield platform in front of him. There is no hitbox to this move, lag is decently low. So what's the point? Well, you can aim the direction of the second smoke cloud via the control stick, AND these look exactly like the smoke clouds from his Up special. Since the smoke conceals phantom, they won't have a clue what you're really up to with good use of this. Additionally, with a few quick uses of this move, you can spread plenty of concealing smoke around, and give the opponent a very hard time figuring out where you are.

Forwards aerial:
Phantom tosses out a quick spray of 3 small shuriken out in front of him (each travelling at pika's run speed), and you can aim them (up to 60 degrees) via the control stick. Each does 4% with minimal knockback and okay shield damage/stun. Additionally, if you hold A instead of just tapping it, these projectiles will hit into the background instead of regularly! And the only clue for your opponent is that the projectiles have a slightly lighter color scheme. Lag is pretty low as well.

Back aerial:
Phantom tosses a small black projectile behind him (turning around as he does so), which travels in an arc similar to mario's fireball. When it hits something, it reveals itself to be a little smoke bomb, creating a cloud of smoke with a 1.5 stage builder block radius that lasts for 10 seconds. Remember, inside the cloud, projectiles and characters are completely hidden from view. Startup lag isn't good, but end lag isn't bad. Now, I shouldn't even need to mention the applications for this with the previous aerial...

Down aerial:
In a carbon copy of Link's D-air, Phantom drops like a stone with his sword beneath him, doing 15% with excellent shield damage, knockback, and shield stun. The downside? The landing lag on this is absolutely horrible! However, if you hit a shield instead, phantom will drop out of the attack with very little lag, making this an excellent shield damage move. Startup lag isn't bad, but any idiot opponent that sees you above them will drop their shield and dodge. Unless you use a smoke cloud to disguise your true intentions...

Up aerial:
Phantom reaches up above him with one hand, doing 6% and low knockback. Lame? Not at all! You see, attacking the opponent isn't the main purpose of this move, as if you hit the stage, a platform, OR your Down smash shuriken, you'll grab into it and hang there. While you're hanging from the stage, you can still use your aerials and specials for additional fun. Most of them still execute like normal, however, using the D-air or your teleport will disconnect you from the stage (as they actually move you around.) Finally, pressing shield will cause you to airdodge and release your hold. Lag is low.

Grab:
First off, Phantom has a very unusual grab. Instead of grabbing on-stage normally, phantom grabs into the background with this. So the only time you'll actually connect is if they dodge.

Pummel:
Phantom whacks the opponent with the hilt of his sword for 4%. A better than average pummel, and fairly quick.

Forwards Throw:
Pulling his sword out of cyberspace/whatever, Phantom impales the opponent with it, giving them a nasty 12% damage, though little knockback. But that's not all! Over the next ten seconds, their shield's health is reduced by half, on account of them being weakened by that brutal stabbing. Do I even need to mention the applications?

Back Throw:
Pulling a small shuriken out, Phantom stabs the opponent with it (8%), before forcing them into a backwards roll. But that's not all! The shuriken will become stuck in the background at the midpoint of the opponent's roll, and if they dodge/roll into that spot again, they'll take 3% and are forced back to the stage. With this you can REALLY shut down the opponent's options.

Down Throw:
Phantom knocks the opponent down with an overhead swing of his sword, dealing 14% and forcing the opponent into a prone position. Time for a tech chase. It's worth noting that if they hold the special button while rolling, they'll be able to roll without going into the background (so normal attacks will hit them, but you can't regrab.) However, if you've cut off their roll opportunities with the Back throw, this is even MORE useful.

Up Throw:
Phantom simply tosses the opponent into the air, and then throws a quick smoke bomb after them, doing 8% damage, a stage builder block worth of knockback, and obscuring them in smoke (similar to B-air). However, you have a decent frame advantage on them, so you can teleport next to them and perhaps whack them with an aerial if you predict them right...

Playstyle:
I really hope you've picked up the idea by now, but to recap, Phantom's game revolves around his ability to break shields. First off, he gives the opponent some motivation to shield with his neutral special (a nigh-unavoidable attack without shielding or some very good maneuvering), his dash attack (shielding is a perfect counter, but anything else runs into trouble), and his grab game (quite powerful, but can only land it when the opponent is dodging). If the opponent tries to avoid shielding entirely, these moves alone can really mess them up quite badly. Once you have gotten the opponent in your shield, then the real fun begins.

Your first tool here is your forwards smash, due to how it basically glues the opponent in their shield as long as it stays out. Up tilt pulls the opponent's shield off balance, forcing them to angle it in whatever direction you're attacking from, which is quite difficult considering how your lagless teleports can change said direction in an instant. Forwards tilt then locks the shield in one position, meaning if you teleport behind them once you've locked it like that, it doesn't matter WHAT they do, they're getting hit. Additionally, use neutral air to mind game them as to whether you teleported, down air is an absolute killer on shields, forwards air can cut through them if they're not shielding (even if they do dodge)... in short, Phantom thrives on mobility and locking down his opponent's options. Regardless of what they do, a quick use of neutral special and a couple teleports to get in range, and suddenly they're on the defensive again. If they prefer mass dodges to avoid your shield breaking game, no problem, Phantom is perfectly happy to land a grab, and once you DO break their shield, you have your choice of temporary invisibility (down special) or invulnerability (up smash) to make their lives even more miserable, or you can just go for the kill with a charged down smash.
 

Nicholas1024

Smash Lord
Joined
Mar 14, 2009
Messages
1,075

Leviathan of the four guardians has joined the Brawl!

Leviathan is a member of the four guardians from Megaman Zero, commanders for Neo Arcadia under Copy X. She also happens to be female, despite supposedly being created from X's DNA (don't ask.) Anyway, she is always fought underwater, yet is weak against FIRE (don't ask about that either), and focuses on using icy traps as well as her trident to defeat Zero. (This move set is a joint with Majora, although I'm sure some MYM'ers will never believe that. :p)

Water Mechanic:
Now, Leviathan is always fought underwater, and for good reason, as her icy traps just wouldn't WORK on solid ground. However, this cannot just be copied over to Brawl as is due to the slight problem of BREATHING. So, instead Leviathan gets a rising/falling water level mechanic. At the beginning of a match, the stage will look completely normal. However, over 10 seconds, water will form at the bottom of the screen, and quickly rise up until it covers the entire screen. The screen will remain covered with water for 10 seconds, and then the water will retreat back down the screen for 10 seconds, with the stage remaining completely dry for 10 seconds. Then the cycle (a full 40 seconds in total) repeats. So, how does underwater combat work in MYM? Well, first off, when you hit the water, you will attempt to swim normally (like in Brawl). If you'd rather fight underwater, you'll have to input a D-air, causing your character to drop down into the waves. While underwater,
you have infinite jumps (making gimping ridiculously difficult without a spike), however your movement speed is reduced to about 3/4s of the normal. This may vary from character to character, Arbok would have an easier time moving than kirby, for instance. Leviathan on the other hand (as well as any other primarily water-based characters), gets a 1.5x multiplier to her move speed, since she's designed to function underwater. Additionally, many of her moves only work (or at least work much better) underwater, thus giving her a unique hit and run game. (I am now going to buck the finest Capcom tradition here by preventing fire moves from working underwater. Yes, this water ACTUALLY PUTS OUT FIRE. Wrap your mind around THAT.) The problem of breathing is ignored, because let's face it: You can easily hold your breath for just 30 seconds, right?

Specials:

Up Special: Free Swim
Much like Galaxy Man's Up special, Leviathan simply starts swimming in the water. She can move in any direction at mario's run speed, and can perform all her grounded attacks (jab, tilts, and smashes) as well as her specials while doing so. This really helps her movement underwater, but isn't much like a recovery, as it can only be used underwater (where you have infinite jumps anyway.) She can transfer in or out of this (via just inputting the move again) at will, and it won't put her into helpless, giving Leviathan a lot more options.

Neutral Special: Ice Sphere
When you hold down (not just tap!) this input, Leviathan will begin dropping kirby-sized ice spheres (Well, actually they look more like spiky balls of ice, but that's not really important) behind her at the rate of 4 per second. To make this more useful, you can still move and jump/swim normally while performing this move. These spheres will float in place if underwater, else they'll just fall to the ground/water. However, like normal ice, it can't go above the water level, so if the water level decreases past where you floated an ice sphere, it will carry the ice sphere with it. Additionally, these are fragile, and will break upon being hit, as well as by hitting the opponent or the stage. They do 5% and mild knockback, which doesn't sound too impressive, until you realize that Leviathan could easily trap the entire stage with a few dozen of these while the water level is high. Lag is pretty low as well.

Finally, if you'd rather not wait for the water level to carry down your deadly ice sphere barrage, you can just tap this input, which will cause EVERY ice sphere to start falling downwards at mario's walk speed. You can even trigger this WHILE performing other attacks, thus catching the opponent off guard.

Side Special: Ice Dragon
A simple, yet critically important move, Leviathan creates an ice dragon out of... something, which then pursues the opponent. It has a 1 stage builder block turning radius, and moves at Ganon's run. Additionally, it's a battlefield platform in length, and does 7% with minor knockback upon contact. It's only vulnerable at the head, and will take 35% damage before being destroyed. Lag is fairly low. Now, this sounds fairly overpowered, but there are two severe restrictions. Firstly, Leviathan can only have one of these out at a time, and secondly, the dragon cannot leave the water. Should the opponent go out of reach, the dragon will simply circle in place as close as possible to the enemy. Additionally, there's a 20 second cooldown on this, so if you destroy it, Leviathan basically can't use it again until the next water cycle. (It will go through the stage by the way, so you can't just go under the stage to escape.)

Down Special:Underwater Vortex
Leviathan spins her trident above her head, doing a nice 15% damage with good knockback, though fairly bad lag. If you're above the water level, that's all there is to it. However, if you're underwater, this creates stagebuilder-block width tornado (that reaches all the way to the bottom blastzone and up to the surface), that pulls opponents as well as projectiles and traps (that aren't glued to the stage) in at Pika's run speed. This doesn't actually do damage, but try combining this with your other traps, particularly the neutral special. The tornado will last for a full second, leaving you vulnerable if used unwisely.

Standards:

Jab combo: Trident shot
Leviathan stabs her trident in front of her, doing 6% and okay knockback. More interestingly, with each subsequent push of the button, she fires miniature tridents (about wolf's blaster size, and look like the head of her actual weapon) that you can aim via the control stick, and have limited homing capabilities (they turn up to 90 degrees on their own, and have a 1.5 stage builder block turning radius). These tridents travel at Pika's run speed, and do a good 10% damage with decent knockback. Lag is okay.

Down tilt: Icy spikes
Leviathan swings her trident to create a stage builder length platform, but with icy spikes along both the top and bottom. This platform (if made in midwater) will float up towards the surface at mario's walk, doing 10% and good vertical knockback to whoever it hits. If done on ground, the platform will simply remain in the ground. At any rate, this move is effectively a spike strip similar to Galaxy Man's down tilt except that you can float it and block off the surface. Lag is okay, at most two can be out at a time, and if 15% damage is dealt to one of these, it will vanish.

Forwards tilt: Ice block
Leviathan points her trident forwards, causing a burst of energy to come out and form into a stage builder sized ice block immediately in front of her. If on dry land, it'll just sit there, if underwater, it'll float up towards the surface at the speed of Mario's run. It can take a good 20% before disappearing, and if you cause it to fall on someone (by using this over an edge for example), it'll do damage equal to its health and pitfall/spike, breaking in the process. So what's the point? Well, whatever is in that stage builder block area when you create the ice block will be trapped inside the block as it floats up, and have to break free at grab difficulty. And if you take an enemy off the top blastzone with this, that's a KO for you. Not to mention they can still be hit while inside the ice block by your other attacks. You can't chain these, once an opponent/minion/whatever breaks free from an ice block, it has a 0.5 second grace period before getting stuck in another one. You can have up to 3 of these onstage at one time, lag is medium.

Up tilt: Rocket Trident
Leviathan shoots a mini-trident similarly to her jab, but this one goes straight upwards and doesn't home in. More interestingly, when it hits something, it doesn't do any damage, but latches on and continues rocketing upwards, carrying whatever it hit with it. This thing moves at the speed of pika's run, and once it hits something, it will carry it in the direction it was moving at a speed of ganon's run (This is in addition to any movement they might already do). This will KO if you carry the opponent off the top blastzone with it. (Now what if you attatched this to one of your ice blocks with an enemy in it?) You can change its direction with the control stick, lag is low. By the way, these rocket tridents are extremely fragile, and are destroyed with the slightest blow.


Smashes:

Forwards smash: Ice wall This smash requires charging to be used. While charging the smash, move your control stick in whatever pattern you wish (for example, hold right for one second, then up for two seconds), and once the smash releases, Leviathan will create an ice dragon to move in that pattern at mario's run speed before disintegrating. (So for our example, it would move right for one second, and then up for two seconds.) More interestingly, aside from being a hitbox (7%, okay knockback) similar to the side special, this ice dragon leaves behind a wall of mini-ice blocks over the path it traveled. Unlike other ice blocks, these will not float up to the surface but remain there as long as underwater. Each of these has 15% health, and they form a solid wall, with each one half a stage builder block in width and height. Lag isn't bad, but considering how ridiculously long this needs to be charged, that doesn't matter.

Down smash:Swift Sharkseal Summon
Yes, awful alliteration abuse, I know. Anyway, if you use this input (underwater, above water won't actually do anything), a stream of sharkseals (which are essentially robo-fish the size of olimar) will come in from the side blastzones, three from each end uncharged, up to six charged. These move at mario's run speed, have a battlefield platform's worth delay, and will have limited homing capabilities on the enemy, similarly to the jab tridents. Should they contact the opponent, they will take a vicious bite of 8% and okay knockback, and be destroyed in the process. However, they're somewhat fragile, with only 10% health. Lag is somewhat bad. (Meanwhile, onstage, Leviathan does a little twirl with her trident similar to Wario's downsmash, with 10% damage and ok knockback, making this a generic, but not completely useless move on dry land.)

Up smash: Ice circle
Leviathan spins her trident in a circle around herself, with a decent 0.75 stagebuilder block radius, doing 12% and good knockback. More interestingly, if underwater, a circle of 16 miniature pikimin-sized ice spheres form at the edges, and start rotating at a rate of one full revolution per second. Then, this circle begins expanding outwards, maintaining its quick revolution, and having its radius expand by one stage builder block per second until every mini ice sphere has hit something or gone off to the blast zones/water surface. These mini ice spheres only do 1% and very low knockback, but with the sheer number and speed of them, you're bound to hit with some of them (or at least reduce your opponents shield to tatters).

Grab Game:
First off, Leviathan's grab game is only functional underwater, so don't even try it when the stage is dry.

Control Stick: Swimming Carry
This is only functional underwater. Leviathan grabs onto her opponent and carries them with her while swimming, initiating the Free Swim special automatically. She swims at half speed while carrying an opponent, but can still move around freely otherwise.

Standard Throw: Blast off!
When you use this input, Leviathan will impale the opponent on her trident, before firing off a rocket trident as in her up tilt, with the direction aimable via the control stick. This is a great way to get some extra distance in beyond the normal swimming carry for launching the opponent into some of your traps.

Special Throw: Whirpool
With this input, Leviathan will rapidly spin while still holding the opponent to create a whirlpool, causing EVERY object that isn't nailed to the stage (enemies, minions, your traps...) to start floating towards you at Ganon's run speed. If you've managed to trap the stage effectively (and prevent your opponent from doing so), this can be VERY deadly. However, the opponent can still break out of this while you're doing the throw, so it may be tricky to pull this off.


Aerials:

Up Air: Trident Tornado
Leviathan presses a hidden button on her trident, causing the head to spin at an extremely fast rate. This lasts for as long as you hold down the button, and does rapid hits (like a repeating jab) of 2% to enemies. Additionally, you can "aim" the direction Leviathan will hold the trident in via the control stick. However, if underwater, this creates a kirby-wide current starting from the trident head and moving in the direction you press the control stick. Anything caught in the current will be pushed along (in the direction of the current) at Ganon's run speed. Lag isn't that good, as the trident requires some time to start up and stop.

Neutral Air: Ice Barrier
Leviathan spins her trident in a circle around herself, with a decent 0.75 stagebuilder block radius, doing 12% and good knockback. More interestingly, if underwater, a circle of 8 miniature pikimin-sized ice spheres form at the edges, and start rotating at a rate of one full revolution per second. These spheres (unlike the ones in the up smash) stay rotating in a circle around Leviathan, and can be destroyed by any attack. Now, should one of these mini-spheres come into contact with one of Leviathan's neutral special ice spheres, it will embed itself inside the larger sphere, causing the larger sphere to rotate around Leviathan instead. (As a reminder, these spheres can only float underwater, if you go above water they'll just float at the surface.) Leviathan can only have one ice barrier at a time, using this input while one is already out will cause Leviathan to throw the barrier at an enemy. (Think Jewel Satellite from Megaman 9.) That is, the circle of spheres will continue rotating, but will start moving in the direction you press the control stick (if you don't aim it, it will go straight forwards) at Ganon's run speed. Lag is okay.

Forwards Air: Ice Dust
Leviathan presses another hidden button on her trident (ah, the wonders of futuristic machinery), causing the tip to open and expel a cloud of ice dust. The cloud is approximately a stage builder block high, and 2 stage builder blocks wide, and if done underwater, it will stay there as a trap for 5 seconds. Should an opponent wander in, they'll become frozen as the futuristic ice particles all converge on them into one miraculously solid ice block. (Capcom logic for the win!) If done above water, this can still freeze the opponent, but it won't remain there as a trap. Lag is okay.

Back Air: Larger Ice Sphere
The name just breeds creativity, obviously. ANYWAY, Leviathan will swing her trident behind her (10% damage, okay knockback), and if underwater will create an ice sphere. However, this one is somewhat larger than normal ones (about 1.5x kirby's size), and travels backwards at Ganon's run speed. It has 10% health (and does the same amount of damage on contact without shattering), and will drop miniature pikimin sized snowflakes once a battlefield platform. These will drop straight towards the ground at ganon's run speed, and will deal 3% + freeze the opponent on contact. However, they're quite fragile (destroyable by any attack), but should they reach the ground they'll spawn a miniature ice spike where they landed, which does 5% on contact and has the same amount of health. Only one of these can be onstage at a time, lag is rather bad.

Down Air: Ice Crystal Smash
I wonder how many times I've used "Ice" in the name of a move this time around... Anyway, when you use this move Leviathan will drop straight down to the ground with her trident below her in a typical falling D-air. Contact will do 15% with good knockback. However, if done underwater, an ice crystal will form on the end of her trident, and when you hit the ground it will smash, creating 5 small ice arrowhead-style projectiles. (One goes straight up, two go at 45 degree angles, and the last two go left/right.) Each of these does 5% and travels at ganon's run speed, lag is okay.

Playstyle:
Leviathan has a hit and run game controlled by the timer, while the stage is dry you're more or less reduced to running away, using your freezing moves to hopefully stall them, and generally just avoiding damage until your mechanic kicks in. However, once it does, it's the opponent's turn to run. First off, you want to create an Ice Dragon to keep the opponent occupied (this utterly kills ANY chance they have of doing setup, and makes doing anything but running away quite tricky.) Leviathan's main trick for damage racking is quite simple, while the opponent is on the run from the ice dragon, make a ridiculous number of ice spheres via the neutral special, keep the opponent busy with her other projectiles, and then right before the water level falls back down (which would render most of your traps useless), use the down special to attract all those previously laid traps and the opponent to one point for massive damage. For killing, Leviathan has an equally simple plan,

1) Trap the opponent in an ice block
2) Use up-air/up tilt to knock them off the top blast zone.
3) Profit!

There's a lot more to Leviathan's game, but that's the basic idea, and due to lack of time (I really should have released these sets two weeks ago...), I'm going to leave the rest of it as homework for the reader. So, now that you've actually made it through all four (congratulations on getting this far), which set is your favorite?
 

n88

Smash Lord
Joined
Oct 10, 2008
Messages
1,547
(hippo)


Maxwell
The proatgonist of Scribblenauts and its sequels, Maxwell is afairly generic avatar for the player, who has no real character to speak of. He solves problems by summoning objects to assist him. Maxwell is comparable in size and movement to Lucas, but without the fancy second jump.​
Attacks
Neutral Special - A
Forward Special - E
Back Special - I
Up Special - O
Down Special - U
Shield Special - Y
Forward Special Smash - B
Back Special Smash - C
Up Special Smash - D
Down Special Smash - F
Forward Tilt - G
Back Tilt - H
Up Tilt - J
Down Tilt - K
Dash Attack - L
Forward Smash - M
Back Smash - N
Up Smash - P
Down Smash - Q
Forward Shield - R
Back Shield - S
Up Shield - T
Down Shield - V
Jab - W, X, Z (Depending on how many times you tap)
"Grab" - Space
Forward "Grab" - -
Back "Grab" - \
Up "Grab" - /
Down "Grab" - .


Each of these inputs will cause Maxwell to scribble down the corresponding letter on his notepad. Upon shielding, whatever he has written on the notepad (there's a small preview of what he's written underneath his damage percentage) will appear on the stage! Maxwell can summon any item, minion, trap, or character in the entirety of SSBMYM, so long as he knows what it's called. In the event of multiple things with the same name, a small drop down menu will appear above Maxwell's head, which allows the player to select what they're looking for. Woudn't want to summon MT's Swalot when you were looking for Smady's, or vice versa.

All minions, traps, and items will appear directly next to him and behave as they normally would, and will be considered loyal to/under the control of Maxwell. Fighters will appear with one stock and Level 3 AI, on the spawn platform. Evil fighters will look to attack everyone (Maxwell included, so watch out), whereas good fighters will generally just chill, attacking only those who attack them first.

Maxwell's only restriction is that he may only create one Starman per match. Have fun with your ultimate sandbox!
 

majora_787

Smash Hero
Joined
Jun 23, 2007
Messages
6,122
Location
Texas

Leviathan of the four guardians has joined the Brawl!
I've been waiting on this one. :p It'll be my first *good* joint set. Oh. And since this is sort of my 2nd set of the contest, I'll post this...


The Western Seal has been broken.
The waters of Great Bay have been cleared.
Only two remain. The four who are there... Bring them here.

Also, I wanted to read Phantom since you never sent that one to me.
 

Davidreamcatcha

Smash Ace
Joined
Feb 9, 2011
Messages
629
THE JOKER AND HARLEY QUINN
http://www.youtube.com/watch?v=dp3uBv7ObNc

Harleen Quinzel had such a promising future ahead of her, though it all seemed to take a turn for the worse when she applied for Arkham Asylum. She was never a good egg to begin with, sleeping with her professors for grades and causing trouble about the campus - but it was nothing compared to what happened when she met the maniacal Joker. The Joker warped her, he twisted her mind and wrapped her around his gloved thumb. When it became too much for her, she broke him out and joined him as the supervillainess Harley Quinn. Her mind is far gone by now, helplessly in love with her Puddin' and ignoring all of the abuse she's been getting. While there have been efforts to give her outside help, she always ends up crawling back to him. It'd be funny if it weren't so pathetic...OH WHAT THE HECK, I'LL LAUGH ANYWAY! HAHAHAHAHAHA!

Stats


Size: 7
Weight: 7
Aerial Movement: 6
Movement: 6
Jumps: 5
Traction: 5
Falling Speed: 5


The Joker and Harley both share the same exact stats (Harley is just a tiny bit slower and just a tiny bit shorter, however). This is due to their movement, in which Harley trails just behind Joker, much like the Ice Climbers. They each have their own individual damage/weight, which does indeed bar them quite a bit, especially considering Harley will disappear when Joker is dead. Still, considering she'll be be getting abused and sponging most of the attacks, it's not like that's a bad thing!

Idle Stance
The Joker stands at a slight hunch, looking around and occasionally rubbing his rubbed hands together and chuckling evilly. Harley stands in an equally psychotic pose, ready to cause some mayhem, occasionally flicking her headpiece back a bit.

Walk
The Joker hunches, hand on his chin as he walks, surely plotting a devious scheme to destroy his opponent. Harley skips merrily behind him.

Run
Joker begins pumping his arms as he leans forward all the way, Harley desperately attempting to keep up.

Crouch
Nothing notable - Joker assumes a Snakelike stance in an army crawl position as Harley gets on her knees.

UP TAUNT - A REAL JOKE
The Joker lets out a mad laugh, interrupted by Harley with her own chuckle - causing the Joker to shoot a glare at her. If she's out of the match, the Joker finally gets to finish his maniacal laughter.

SIDE TAUNT - A KISS FROM HELL
Harley blows the foe a kiss mockingly while the Joker blows them a raspberry - letting out a small chuckle afterwards.

DOWN TAUNT - WHISTLING
The Joker digs his hands into his pockets and whistles innocently, Harley joining him.

Specials

Down Special: Canister
Giggling with glee, The Joker draws a canister of his trademark gas, stepping back a bit - taking just a bit longer than Snake's down special. The canister is about the same size as one of those funny little Capsules you can find in any old game of Smash...but has a devious twist, as can be expected from the chaotic mind of the Joker. The Canister spews out the Joker's trademark green gas from it's top, it spreading a rate of one Bowser per second. This gas doesn't obscure foes, only giving a sickly green hue to everything inside of it (think Luigi's Final Smash more than the Smoke Bombs). Despite this, the gas deals 1% per second to every foe inside - the Joker and Harley being immune to the toxins present in the gas. Thankfully, this gas's damage is entirely passive, dealing no knockback or stun to foes inside. The Joker has no limit to the canisters he can have onstage...good for him, as the foes are free to simply pick up the canisters and throw them like an item, as well as knock them around. They have Meta Knight's weight, meaning they aren't exactly hard to knock around. All the gas that's spread from the canister will disappear roughly 3 seconds after the Canister is moved away from it. The only other thing about the canister that's worthy of mentioning? It will explode like a bob-omb if dealt damage by an explosive/fire, dealing 11% damage and high knockback.

Side Special: A Death In The Family
The Joker brings out a crowbar and begins skipping forward, almost merrily, at his dash speed. He continues moving in this stance until hit out of it or upon you attacking - with Harley standing where the Joker executed was until this move ends. By simply pressing the B Button, The Joker swings the crowbar forward in a vertical strike which prones foes and deals 13%. By pressing the B Button forward, as though performing a side special, The Joker swings the crowbar horizontally. This trips them, dealing 6% - but being able to trip foes who are shielding. As you might expect by the lack of A Button attacks, Harley is completely able to attack during this time, but must stay still - this does function well as a way for them to desync, if needed, though she will always start running back to Joker after this is over.

Now, if you proned/tripped the foe, there's an automatic follow-up. The Joker immediately crouches above the foe, beating his crowbar into his hand. By pressing the B Button, The Joker will swing the crowbar downwards, dealing 3% damage and keeping them in prone. While in this prone state, the foe must buttonmash out as though trapped in a grab, striking out with a get-up attack upon getting out of it (hitting to both sides for 5% damage if their get-up attack is not just a generic one). This will likely create some space between the two characters, which can be advantageous or disadvantageous given the situation. As soon as the foe buttonmashes out, Harley runs back to Joker.

This is an excellent way to keep foes occupied within gas, keeping them trapped inside it to take constant passive damage while Joker wails on them. This is by far the Joker's best source for constant damage output, and the fact that you can still activate Harley's attacks while doing this makes it even better.


Neutral Special: Burn, Baby, Burn!
Joker takes out a lit molotov cocktail from his warehouse of props, and holds it back for a second. Simply tapping this will have him lob it 2 Battlefield Platforms forward, dealing 6% damage and decent GTFO knockback while traveling at Mario's walk speed. By holding it, Joker can change the trajectory and charge up the distance it travels, with it getting faster the more it travels.

If this doesn't hit a foe as it goes through the air, it creates a fire trap on the ground - about .75 the size of a Battlefield Platform. This lasts for a mere 3 seconds, containing people with rapid hits of 1% should they come in contact with it. No real threat, but it serves as a decent distraction for a brief period of time. More importantly, a gas canister coming in contact with the molotov/fire trap will cause it to explode...the threat of a moltov heading towards a canister is enough to make foes panic for sure, which you should certainly try to capitalize upon.


Standards

Dash Attack: HOLD IT!
The Joker grinds to a halt, kicking up a bit of dust as a cosmetic effect as he stops dashing, grabbing behind himself as he does so. Should there be anyone behind him, he throws them forward as a hitbox dealing 12% - flying forward 2 Battlefield Platforms before they end up grounded. Of course, turning Harley into a projectile as she trails behind you is obvious enough - this can also come in handy in a FFA/2v2 situation, though without any devious partner this mostly works as a way to control your traction and space foes who are on your tail.

Jab: BANG, BANG!
While the Joker tries to keep his use of firearms at a minimum, limited to a few pistols and the occasional tommygun, Harley likes to keep more firearms on her person...which is exactly why she fires her pistol here here, stepping forward a bit with each shot. There's a small bit of end lag to prevent this from being chained to hell and back, but it's quite easy to send multiple shots at a foe. The bullet travels about as far as one of Shiek's needles and at the same speed, dealing only 3% and some light stun. While she only fires on a horizontal plane, Harley is able to harass the foe from afar quite well with this - especially considering that the stun will make them drop any canisters they might be holding.

Forward Tilt: Sweet Dreams, Sucker!
Just as she does in the most prominent Joker/Harley story, Mad Love, Dr. Quinnzel swipes a syringe forward. You're able to angle this in a manner much like Bowser's ftilt - though it is notably a tad slower. If she succeeds in hitting the foe with this, she pumps them full of the acidic substance inside - proning them and causing them to take 5 hits of 1% over the next 5 seconds. This adds another passive-aggressive move to their resume, though it's not like it doesn't work as a tool to use if you ever need to get away.
Notable is the effects of this on the Joker - the acidic substance actually heals him 5% over the next 5 seconds, thanks to his unique chemical immunity. Pleasin' old Mr. J by healing him is sure to get some points in your favor! ...Right?


Up Tilt: Hidden Knife
Harley kicks out in front of her, scooping foes upwards for 3% before she follows up with a kick upwards similar to Snake's up tilt in terms of animation/range - as a knife pops out of the bottom of her shoe. The knife deals 7% damage and knocks foes upwards a bit, as well as giving them an open wound. This wound has them take double the damage from any status effects that are placed upon them - especially notable in making them take double the damage from the gas you make. You can't stack the effect, though foes who already have status effects going when they're hit by this will find them doubled. Hitting them with this allows you to deal more damage in a shorter amount of time, which is especially good if you -really- want to please your Puddin'...
Smashes

Forward Smash: Hammer Away
Harley steps forward with her hammer, standing in front of Joker if she's currently with him, before rushing forward with her hammer, swinging it rapidly. She moves about 2-4 Battlefield Platforms depending on the charge time at Bowser's dash speed, dealing 12-17% damage and good knockback should any foe come in contact with her. If she's hit any time during the startup, she will ignore the hitstun/knockback, before activating this - acting as a counter. As soon as Harley is done with this move, she will run back to the Joker: her stepping in front of him during charging allows him to use her as an effective damage-sponge for himself. This also functions well if The Joker wants to dual-attack the foe, having Harley run forward at them while the Joker defends and lays gas.
Aerials

Neutral Aerial: Smash 'em!
Joker faces the screen and grabs out on both sides of him, giggling madly. Should anyone get in his deranged grasp in .50 seconds (otherwise he exits with end lag), he will continue to hold the other arm out while the victim can still button-mash away. He lets go when one of the victims button-mashes out. When both of the Joker's arms are full, he smashes his two victims together, sending them flying in opposite directions with 12% each. While this would sound significantly situational on about any other character, you can grab Harley and smash her into the foe - and vice versa. Harley is perfectly capable of recovery on her on, meaning there is no real reason not to use this. Of course, this has interesting context in 3v1 and whatnot.

FINAL SMASH


Playstyle
 

BKupa666

Barnacled Boss
Moderator
Joined
Aug 12, 2008
Messages
7,788
Location
Toxic Tower
GANGREEN GANG
The Gang feels like a compilation of all that can be done with the momentum genre, with the inclusion of forcing the opponent around the stage at uncontrollable speeds, in addition to speeding up the actual characters. The use of Billy's body as a constant, controllable hitbox to interact with opponents you've slid around with drool or forced around is a great use of the character, and is a highlight of their damage-building game. Controlled stage-altering with Snake also opens up the new, relevant use of smacking the victim into a wall (not to mention gimping them), which freshens up them chasing the opponent toward the altered stage like many sets before them. Reading through a lot of the forced-dash based moves, they did feel just that...forced (at times). The group certainly needs all their options to remain competent overwhelming their victim while separated, but disgusting the opponent into dashing away seems a bit much. Regardless, I feel this is a hallmark of the Hugo genre, and is certainly on par with Sid's Toys, despite being posted so much earlier on.

DARK STAR
This is a very different type of stage-control set, and it's a real doozy. Reality Tear as the centerpiece gives Dark Star a great little period to use his overwhelming projectile game, with the opponent being forced into an inopportune state (unless they're one of few aerial characters), vulnerable to your antics. Reading through the set at first, I was worried KOing off the screentop would be left out, due to it not being mentioned at all, but you do not disappoint here either. I also enjoy how interactive fights with Dark Star are; it can't be said opponents are helpless while falling down from above (unless they initiate this themselves), allowing them to attempt to defend against projectiles and increasing the strategy with which Dark Star sends them out, to prevent them from doing so. While the playstyle in and of itself is great, the reading style, which Jun emphasized as an area MYMers can still evolve, is a great step up from that of your average set. Scrambling the moves together without care, (initially) omitting the playstyle and entirely leaving out a few key strategies until late in the set...this is the epitome of a 'dark' set, perfectly delivered using a dark character.

RUMBLE
This is a great, standard Brawl set. Move decay has playstyle potential, which you at least reference a bit, and spitting on opponents to KO them is a bit gross, but funny, and doesn't have any trip trap side effect, which is refreshing. Hope you stay with us and post more, better sets.

KOBOLD CLAN
After Gigan's relative awesomeness last contest, I looked forward to reading this one, and I am still impressed by your ability to string together a strong moveset from a fairly simple concept. Although assigning the bulk of team inputs to Down Special appears a bit questionable, the diversity of strategies Trapper can pull off combined with his plethora of traps is satisfying. The dragon mechanic seems highly in-character, what with him roasting the pathetic little underlings, but yes, it could have been pulled off better than it was. I'd rather see Trapper call attention to the dragon freely, abusing it to attack foes, but after just one or two uses, it turns on the fool who called it there. Regardless, the multiple uses of both minions and traps leads to quite a versatile minion set, and one with a nice teamwork undertone at that.
 

LegendofLink

Smash Apprentice
Joined
Feb 17, 2008
Messages
164
Location
Pennsylvania
Batman
I've got to say, this is a really good interpretation of Batman's fighting style. He incapacitates the opponent, then beats them up with his simple but effective mastery of close combat. A fact that you never really brought up but still really works well with the set is that Batman is really good at fighting multiple opponents at once. He can easily incapacitate one to deal with the other, or he can swoop down from the air to grab an opponent and carry them away to the top of the screen, separating them from the rest of the fight. Aside from that, there are a few small issues in the characterization. The first has been mentioned a few times, but bears repeating. The Batarangs sticking in people for bleed damage is pretty out of place, especially since he typically uses them in his source material similarly to how Link uses his own boomerang, to disarm and stun opponents, creating an opening. The second one if the fact that Batman can strap a bomb to the opponent. One of the largest parts of Batman's character is that he uses strictly non-lethal methods of dealing with his foes. Blowing them up crosses the line a fair bit there, even if it does forward the playstyle. Those two qualms aside, this was really quite good, and a great first entry to the contest for you. Keep it up, man.


Knight Man
I'm a bit of a sucker for deceptively simple sets like this. Knight man's attacks are very simple in usage and purpose, but the simple fact that their range is completely controllable and many of them hit both on the way out and on the way back, makes for a character that looks like a real blast to play. The shield also makes for a nice stone-wall style offensive game to along with his poor mobility. You're certainly operating in your element here, Khold, great job.
 

Akiak

Smash Ace
Joined
Jul 28, 2007
Messages
820
Location
In my secret laboratory.
Three Courage sets? I'm in heaven!

King Ramses
You did a beautiful job implementing all the aspects that made him my childhood nightmare into Brawl. The slab mechanic is genius, all of the attacks are unique and I love the specials. One thing which I'm having a hard time to understand is what are his killing options? All of his attacks seem to be centered around damaging or slowing down the foes. Maybe I'm missing something, but a playstyle section would help a lot.

Freaky Fred
This moveset is nothing short of awesome. I love the freaky mechanic, and all the moves are really in-character and work nicely. Down special and side special are really cool, but in general I love all the moves. One thing I'm concerned about is that only a few of the moves affect the freaky bar, and since it sounds like it's a crucial mechanic to his playstyle, maybe he should have more options. But again, playstyle section would really help.

Don't have time for Le'Quack right now, maybe tomorrow.
 

majora_787

Smash Hero
Joined
Jun 23, 2007
Messages
6,122
Location
Texas
Before you start reading this set, you may want to play this music to get a little into atmosphere. Hope you enjoy my Halloween Moveset!


* * * DEVILJHO * * *
SIX-STAR BRUTE WYVERN


BEHAVIOR
Deviljho are highly aggressive, eating everything that can fit into their mouths and fighting to the death with almost everything they come across.


Data from Deviljho Ecology article on the Monster Hunter Wiki!


* * * STATS * * *

WEIGHT: 15 (With Tail), 11 (Without Tail). KO range is roughly 250%.
SIZE: 15 - Deviljho is massive, spanning eight blocks in length and being 1.5 times as tall as Bowser
GROUND SPEED: 6
AIR SPEED: 3
FALL SPEED: 10

Crawl: No
Wall Jump: No
Wall Cling: No
Glide: No

Deviljho is a hungry baddie, that's for sure. During the fight, he gets tired and hungry over time like the Pokemon Trainer's pokemon. But... well, he gets tired fast, and gets hungry even faster. When he gets to this point, he enters a sort of 'rage mode'. When enraged, Jho can only dash, jumps a little higher/farther, and hits harder with all of his attacks (especially bite attacks). However, his attacks take longer to initiate, have a longer ending lag, and he frequently stumbles after running or landing. The only way to get Jho out of rage mode is to eat. Eat what, you may ask? You're probably thinking, 'Well what if items are off? Then Deviljho is stuck in rage mode forever, right?' Well, let me tell you now; Jho can eat anything to heal damage. Items? Yep. Opponents? Even better. Something else he can do is take a bite out of his teammate in a team match. Yes, he ignored friendly fire when using bite attacks in rage mode.

Jho also tends to destroy the stages he fights on. Some attacks break the stage down in 'tiers' (with one tier being half a stage-builder block), thinning the main platform and breaking thin platforms on the stage. The main platforms will be whittled down until they are thin enough to be one-way platforms; he can't thin them more than that. The entire platform is affected, as well. After about thirty seconds, platforms at minimal thickness will go up one tier (half of one Stage Builder Block) so that Jho cannot KO through them anymore. Every fifteen seconds, a destroyed platform will reappear, and the main platforms will repair one tier after they have already begun repairing.

An extra thing to note is Jho's frame. He's a long baddy, his tail taking up roughly a third of his length. If you attack his tail, Deviljho will not flinch, but will take 2/3rds of the damage dealt to him. Instead, his tail (which has its own invisible HP meter) will take the full brunt. If the tail takes 120% damage, it will come off and land on the stage; Deviljho will recoil in pain for a second, vulnerable to attacks. Deviljho's body will be much shorter, and his tail-attacks will not reach as far... or be as strong. However, Jho will be able to use his tail as a source of food to ease his hunger. However, Deviljho is much lighter without a tail; he can be KO'd at damages 50% lower than normal. (i.e., if he is KO'd at 200% normally, cutting his tail and using the same attack can KO him at 150%.) The problem is, Deviljho turns slowly, but ESPECIALLY on his back end. His tail is the LAST thing to end up in place behind him when he turns!​


* * * JHO'S MENU * * *


NEUTRAL B - DEAFENING ROAR
(0%)
Deviljho will rear back and let out a loud, rumbling roar. The roar has a half-second startup and a 1.5 second length. During the roar, anyone in a large range around him will be stunned. However, Jho himself cannot move until the attack is over. This means that Jho has just enough time to roar, and get at an opponent for dinner. This move, despite its long range, is really only helpful on very nearby opponents or ones with very high damage who will be stunned for longer. It's primary use is in Rage Mode, to allow you to get in stronger bites and get out of rage mode. It could potentially be used out of rage mode to get a grab in, as well.​

SIDE B - ROCK TOSS
(15%)
Deviljho takes a step back and bends his head down, jabbing his lower jaw into the ground for roughly a second. He then flips his head up, and a large rock a little bigger than the rock from Charizard's Rock Smash comes flying from the ground in an arc. This move goes the length of final destination, but it arcs in the middle. This is the sort of move you would use on opponents nearby OR far away; especially far away. If an opponent is right in his face when the attack is used, they will be buried when he brings his chin down, and spiked up into the air with large knockback when he shoves his head up. The attack has a large ending lag, but Deviljho does not flinch during it. The move is useful in and out of Rage mode as a projectile, but is not helpful in lowering hunger. This move is also strange in its stage destruction. The main platform Deviljho is on will take one tier of damage when he launches the rock, and the rock itself will break any non-main platforms it hits. The rock, however, does nothing to main platforms. This move is Jho's only projectile and long-range defense, being able to remove footholds that long-range opponents may be using.​

UP B - RAPTOR FLIP
(16%) - (20%)
(26%) ENRAGED
Deviljho takes a step back or stalls in the air for about a half second and backflips diagonally upwards and in the direction he is facing. This move has very good horizontal reach, but its vertical recovery leaves much to be desired. This backflip has two attacks that one can be hit by. His tail, which will spike enemies up into the air if they are hit, or his more potent bite which will hit opponents behind or below him at the end of the move. The bite does low knockback, but is much more damaging. The landing only has noticeable ending lag when Jho is enraged. The move is useful as a recovery at all times, but is not helpful in depleting rage. It can do so, however. The move could potentially be used for edgeguarding, considering how easy it is to spike with Jho's tail. However, it's recommended to use it while coming toward the stage, otherwise you won't make it back.​

DOWN B - RABID CRUSH
(28%)
Deviljho rears back as if to lunge at his opponent for about 1 second. He then rears forward a short distance in a rabid bite. This move is hard to hit with, but usually can bring Deviljho out of rage mode right away. This move is not stronger in rage mode or weaker in normal mode. The move does no knockback, and can combo into some of his weaker bites. However, Jho will be left vulnerable afterwards, especially if he was enraged. This move is very good for depleting rage mode if you can pull it off successfully. This move is best used in conjunction with moves like Deafening Roar, which give Jho an opening to use strong, slow attacks that deplete hunger. Like this one.​


JAB
(5%)
Deviljho bends up and slams his rough jaw down on his opponent. At high percentages, this can bury the opponent in the ground. The move has short range that actually reaches higher than it looks, and has low startup lag with low-medium ending lag. This move can be used to terrorize weak opponents. It does not have the startup of other stun moves, but will leave the opponent buried in the ground and ready to get snacked.​

DASH ATTACK
(12%)
(18%) ENRAGED
Deviljho bounds forward in long strides, and tries to scoop his opponent up into his jaws with a big bite as he runs. This move is pretty reliable, but does not fix his rage very well. Considering the shape of Deviljho's frame, his dash attack has quite a reach! However, the attack has a little bit of an ending lag to watch out for. It is good if you are just entering rage mode for a quick fix, because it does not actually lower hunger by much.​

UP TILT
(14%)
Deviljho turns to the side and smacks his tail overhead. This move can potentially spike the opponent up or down if they get hit by the far edge of the hitbox. Can bury the opponent in the ground at high percentages. This move is good fur juggling damage, but could potentially be used to ground aerial opponents as well.​

SIDE TILT
(16%)
Deviljho bashes his head against his opponent hard. This move stuns the opponent slightly, and does a lot of shield damage. It can actually follow up directly to his down tilt. The move has a short range, and a low-medium startup lag. It is very helpful for breaking shields, hitting some opponents out of their dodges(the attack's hitbox is there longer than invincibility frames of a dodge if they are done closely enough.), and also for side-KOs at VERY high damages.​

DOWN TILT
(13%)
(19%) ENRAGED
Deviljho spins around in a circle, biting either side of him at a low angle. This move usually has a noticeable startup, but it can be used immediately after his side tilt for positive effect. Is a decent attack for lowering rage. The move can be strung together with the side tilt to minimize vulnerability, and can lower hunger by a good chunk.​

LEDGE ATTACK
(8%)
Deviljho uses his jaws to flip himself up onto the stage, hitting opponents near the ledge with his massive tail. The attack knocks them off the ledge behind him, and is about as close to edge guarding as he gets. The reach is also pretty long for a ledge attack. The move is good for edge-guarding, and allows Jho to easily gimp opponents off the stage if he constantly jumps off, ledge-grabs, and ledge-attacks.​


FORWARD SMASH
(18%)

(25%) ENRAGED
Deviljho snaps forward in a vicious bite, then bites a second time. The second bite can be dodged if the first bite is blocked. This move does low knockback on the first bite, moderate on the second. The move actually has a noticeable lag in between lunges that can be abused if the first attack is dodged or blocked. However, this move is Jho's only bite attack that can also KO an opponent at high damages for the most part. The move also will remove Jho from rage mode if it conntects, making it a good thing to use with stun or burying attacks.​

UP SMASH
(17%)
(22%) ENRAGED
Deviljho flings his head skyward and attempts to snap up at his opponent. This move is a quicker and slightly more reliable bite attack for removing rage mode, but takes more successful hits. The tip of the tail can spike the opponent down into the ground with enough impact to deal a half tier of damage to a main platform.​

DOWN SMASH
(17%)
Deviljho pulls up his big leg and stomps the ground hard, stunning opponents on the same platform with the tremors. This move is his primary stunning attack, but it's primarily functional on stages with minimal platforms... like NOT New Pork City. The move stuns opponents for a couple of seconds, and almost always leaves Jho with enough time to get in a good bite on his foe. This move also will whittle down and break platforms at a rate of one tier per use. It is great for breaking platforms, but not for breaking SMALL platforms. So be careful!​


UP AERIAL
(12%)
Deviljho arches his back in mid-air, smacking his spine into opponents above him. This move is good for breaking high platforms, and also can aid in Jho's recovery, as it gives him a little more air when he uses it. Jho can break main platforms when he hits the bottoms of them, breaking two tiers at once with each use, making it great for stages with multiple main platforms.​

FORWARD AERIAL
(14%)
Deviljho does a frontflip in mid-air, spiking opponents down with his tail. This move leaves a bit of lag after its use, making it complicated to recover after it. This move is Jho's better edge-guarding move, but if he uses it right he can actually hit people who are holding a ledge.​

BACK AERIAL
(10%)
Deviljho looks back over his shoulder and swats his tail back and forth behind him. This move has a strangely shaped hitbox, as his tail curves at the far reaches of the swings, making the swing a little larger at the tip of his tail. This is more of an anti-edge guard move for Jho. He can use it in situations where an opponent is coming up from behind to keep him from grabbing a ledge, but can also be used if Jho jumps off to edgeguard an opponent and is then attacked by another opponent from the same platform.​

DOWN AERIAL
(17%)
Deviljho stops in mid-air and crashes to the ground in a two-foot stomp. This move will bury opponents in platforms, and is a very unpleasant spike to be hit by. This move also will break platforms down by one tier. It is good for interrupting attacks, great for grounding airborn opponents, and also good for edgeguarding; the hitboxes on Jho's feet are surprisingly large.​

NEUTRAL AERIAL
(11%)
Deviljho performs a strange motion where he streamlines his body and spins in a barrel roll-like motion. The attack knocks opponents in very haphazard directions, but it does do 1/4 tier damage to main platforms. This move stalls Jho's momentup in mid-air, so it can be used to assist his recovery slightly. It also is a decent attack for negating edgeguard attacks, usually projectiles.​


GRAB
Deviljho jumps forward onto his opponent and pins them on the ground with his feet on their arms. This throw is harder to hit with than a standard throw, as it has to hit the opponent at the end of the jump, which is similar to King Dedede's Up B with less height. The opponent also will not be forced into the grab unless they are under his back half. As a really nasty trick, you can press backwards on the control stick, and Deviljho will jump backwards to land on his foe instead. His grab is easy AND hard to hit with at the same time.​

PUMMEL
(3%)
Jho grinds his feet on the opponent to keep them from struggling. It's okay for dealing damage, but not the most recommended, especially if Jho is enraged.​

UP THROW
(15%)
Jho grabs ahold of his opponent with his jaws, takes a bite, and then flings them up in the air like a rag doll. This move inflicts Fireblight, which deals steady damage over time for 12 seconds. This move is very nice for when Jho wants to deal damage to an opponent without leaving himself vulnerable when he misses an attack.​

FORWARD THROW
(10%)
Jho grabs ahold of his opponent with his jaws and shakes them around before throwing them to the ground ahead of him. This inflicts Iceblight, which will cause the opponent's movement speed and jump height to lower to 75% normal. The throw is great for allowing Jho to catch up to and shake down faster or more maneuverable foes.​

BACK THROW
(5%)
Jho steps off of his opponent and walks around them, and shovels them away with his lower jaw. This attack causes Thunderblight, which will stun the opponent two times. The first stun comes six seconds after the opponent his hit with this attack, regardless of where they are or what they are doing. The second stun comes six seconds after they are released from their second stun. The second stun will not occur if the opponent is knocked out before it can happen. This stun allows Jho to get free chances at getting bites in, making this a very nice thing to have when enraged.​

DOWN THROW
(15%)
Jho lets out a victory roar and jumps up, landing on top of his opponent. This move does not inflict status, but puts them in the ground, and will allow Jho to potentially chain grab them on their way out. If he uses this move on a thin platform, the opponent will be shot down through it. This includes thin main platforms, such as the one on Yoshi's Island 64, and main platforms that can be passed through from the bottom. This is Jho's greatest KO move! If the platform is not thin enough for a KO, then Jho will not let out a victory roar and will simply jump on his opponent and bury them. Jho can be interrupted during the victory roar, but not the jump!​


FINAL SMASH - BUFFET
Jho lets out a guttaral roar, and the screen shakes as a... SECOND Deviljho makes his way onto the stage! This second Deviljho is computer-run, and will attack indiscriminately. It will attack the summoning Deviljho if no one else is immediately available, but it will usually go for opponents before anything else. The second Deviljho will never focus on damaging the stage, so he makes a good distraction. After 10 seconds, the second Jho will enter rage mode and begin to violently assaulting a particular opponent until he disappears five seconds later.​


* * * EAT AT JHO'S * * *

Jho is a strange character. He has to make it easier to get KOs by thinning down main platforms, make it easier to catch his opponents by breaking small platforms completely, and keep his handicap from activating in a poor scenario.

To break platforms, Jho has a variety of moves such as his aerials and down smash that quickly and easily rend small platforms. His neutral air and down smash are his only real bets for damaging main platforms. He has to be quick after thinning main platforms though, because opponents could be very wary about being near Jho while on stages with thinned platforms.

To catch up to faster foes, Jho has a completely different group of moves. His grab game is very helpful for hindering his opponents so that he can damage them and get them out of his...er... scales? for a while. He is also able to stun them from a distance to close gaps quickly with his down smash and neutral special.

However, playing as Deviljho has the issue of dealing with his rage mode. Since usually this status hinders him in a fresh match with a fast opponent, Jho needs to use his stunning moves and bite attacks often to not only get out of rage mode ASAP, but to keep himself out of rage mode when he gets close.

Of course, on the other hand, rage mode has its benefits when it comes to finishing a match quickly or when fighting slow opponents with a short reach. His slower movement is not as much of a cost, but his higher attack power lets him rack up KOs faster!

Dealing with Jho's tail is another problem entirely. It's necessary to be in your foe's face and attack agressively to keep them from getting at his tail. Having a tail makes Jho have a longer range AND more weight to prevent being KO'D! Of course, if it does get cut off, Jho's tail acts as a stationary food-station to keep Jho's rage at bay, but...

Jho is widely situational, and knowing what each move is and isn't is very important. Happy hunting!​

* * * EXTRAS * * *

This is Deviljho's equipment table in Monster Hunter 3. I figured I would share this just as a little Deviljho bonus to end the set. :p


The Eastern Seal has been broken.
The spirits of Ikana have been laid to rest.
Only one remains. The four who are there... Bring them here.
 

Hyper_Ridley

Smash Champion
Joined
Dec 21, 2007
Messages
2,299
Location
Hippo Island
Maxwell

I lol'd hard when I saw someone attempt this set right after he was declared impossible to make a set for. Pretty clever way of going about it, but I think you should have listed the attacks in order of the alphabet rather than going by standard input organization.
 

Clownbot

Smash Lord
Joined
Jun 9, 2009
Messages
1,851
the littlest knight


Shelmet

The Snail Pokemon. #616 in the National Pokedex. Shelmet is a tiny guy who, as evidenced by his species name, can't really move that quickly. He's also not the best at jumping, attacking, or taking hits. So what the hell does he have? Well, Shelmet are known for their tough armor which they often close themselves inside for protection. On the offensive side, they can also spit acid to poison their opponents. And what would Shelmet be like when applied to a fighter like Smash?

Specials

Neutral Special - Acid With slight start-up lag, Shelmet spits out an acid spray that coats any oncoming enemies. This sticky coating stays on for a whopping five seconds, during which their damage meter steadily increases. Typically, the move will do around 10% for each spray. Opponents can shake the move off pretty easily with a good roll, but then they get it all over the floor. The acid then deals 2% per step to anyone who gets on it - excluding Shelmet, of course. Rolling over the acid will cause it to recoat the opponent in poison. Once the poison has gone to the floor, it will evaporate after another five seconds.

Down Special
- Protect Shelmet closes his armor up tight. In this state he's still susceptible to knockback, but he can't be damaged. At all. Well, by outside forces at least. Believe it or not, Shelmet can hurt himself while his armor is shut - if he tries to spit out an Acid, it will just bounce back and hit him in his only vulnerable area. Not only does it deal the same steady damage as usual, he can't roll out of it either! (What did you expect? It's on the inside of him, after all.)

Still, this move can be used in conglomeration with Acid in a helpful way. If Shelmet rolls in any Acid that's laying on the outside, only his armor will become coated in poison - it's Acid Armor! Any opponent that hits Shelmet with a physical attack while he's got Acid Armor becomes coated in the poison once more. Acid Armor won't fade away like the poison otherwise would - it just leaves Shelmet any time it comes into effect.

Side Special - Venoshock This is one of Shelmet's few moves (and only special) that can do a good job of KOing the opponent. When his Side Special is performed, Shelmet will take a very brief moment before blowing a purple bubble about as large as Kirby in front of him. The bubble will pop after just a second, but any foe that comes into contact with it will receive 9% and light upwards or backwards knockback, depending on where they touch the bubble. So what's the big deal? If the opponent is poisoned when they are hit with the bubble, the damage of this move is upped to 19% with massive knockback! (Well, pretty good knockback. It's a big deal for Shelmet.)

Up Special
- Leech Life Shelmet faces up and gets a bit of vertical distance. Anyone in Shelmet's path is latched onto and has the life sucked from them, gaining around 5% as he loses it. For the duration of this move, Shelmet turns so that he is now on top of the opponent; he then gets another jump off of them. If the opponent is coated in poison while this move is performed - you guessed it - Shelmet is poisoned himself!

Standards

Neutral Attack - Struggle Bug Shelmet has a bit of a seizure right on the stage, moving to and fro wildly. This move can be done thrice at a time and only deals 2% per hit, but when the opponent is holding Shelmet in a grab he can actually use this move to pummel them - and, if he's got his Acid Armor on, poison them as well.

Dash Attack - Vault Shelmet tries to skid to a stop by pushing into the ground with his armor only to be sent flying forward into the air! Any opponent he comes into contact with receives 9% with less than spectacular knockback. This move is a bit sporadic, but if you fly straight into someone with Acid Armor they'll become poisoned.

Forward Tilt - Bug Buzz Shelmet makes a buzzing noise that extends shortly in front of him as a sound wave, dealing 5% and mild knockback. If this move is used inside or in front of a puddle of Acid, it will ripple! When the poison is rippling it will coat anyone who happens to be standing in it at the time.

Up Tilt - Toxic Shelmet quickly expels a small blast of poison from the openings of his visor! This will deal 4% of immediate damage with a bit of knockback. This is a quicker move than Acid for poisoning the opponent, but it covers a bit less area and, well, you're probably gonna be facing your opponent more than you're gonna be underneath them on the ground.

Down Tilt - Scuttle Shelmet does a little dash in place that deals 3% per "step." If he performs this move on the edge of an Acid puddle, the Acid will splash about and spread a bit further on the stage. It can also come into contact with foes during the move's duration!

Smashes

Forward Smash - Double-Edge Shelmet takes a step back in his charging animation and lunges forward, dealing 15-22% and rather nice backwards knockback to the foe. This move is Shelmet's strongest, but it's also got... pretty awful endlag. We're not talking anything monstrously bad, but it's the longest lag Shelmet will ever have - even compared to his other Smashes, which aren't exactly the quickest moves in his book either.

Up Smash - Bide Shelmet shuts his armor tight and his whole body goes into a shaking fit until he finally opens his helmet, smashing it upward! While Shelmet is charging this move, he can't be knocked out of it. Little guy seems to be focusing pretty hard... This move will deal 12-17% depending on charge and moderate knockback.

Down Smash - Body Slam Shelmet slams his whole self against the ground with outstandingly adequate force! This will deal 10-15% damage. It also has a shorter charge time in comparison to Shelmet's other Smashes if you want to get a good hit in more quickly! (Just make sure you're actually going to hit the opponent. Shelmet's gotta regain himself after such a powerful blow!)

Aerials

Neutral Aerial - Shell Clamp Shelmet's armor pinches on any foe in front of him, causing them to fall with him for just under a second. This move only deals 6% and has no knockback, but it does give Shelmet a surefire chance to poison the opponent!

Forward Aerial - Peck What kind of nonsense is this? Obviously Shelmet doesn't have a beak, but he's got those puckering lips of his - when he performs his Forward Aerial, Shelmet's body will reach slightly out of his shell and he gives the opponent... well, a Peck. This will deal a measly 3% with negligible knockback, but if Shelmet (himself, not his armor!) is poisoned - the opponent will also become poisoned. Unlike most cases, the poison will stay with Shelmet after he administers it to the foe, but at least there's a silver lining, right?

Back Aerial - Shell Curl The round end of Shelmet's armor does a little rotating motion that deals 4% and gets caught on the opponent, causing light downward knockback. If Shelmet has Acid Armor, the poison will slide right off him and onto the opponent!

Up Aerial - Swift Shut Shelmet faces upward and swiftly shuts his shell, dealing 5% damage to those above him. That's some speed, though - no lag whatsoever and he does the movement so quickly that any Acid Armor he might be wearing flies right off! The removed Acid will surround Shelmet on all sides except the top of him for about a second.

Down Aerial - Sludge Bomb Shelmet turns downward and spits out a little violet ball that will fall fairly slowly. If this ball hits the ground uninterrupted, it creates a new puddle of poison! Coming into contact with a foe will give them 10% in immediate damage as well as the rising damage caused by being coated in Acid. This move deals surprisingly little knockback for a Sludge BOMB, but hey, you make do with what you've got.

Grab Game

Grab - Latch Shelmet grabs the opponent with his lips and sucks them in to keep them in his grasp! Shelmet becomes poisoned if he latches onto the foe while they are.

Pummel - Mega Drain Shelmet sucks the opponent's life, losing 2% per hit and giving it to the opponent.

Forward Throw - Facade Shelmet just sort of... drops the opponent in front of him. It's not really a Forward Throw so much as a Forward Drop. They take 4% damage and... well, not really any knockback, because they're dropped. The default actions this Throw performs are pretty deceiving, though - when Shelmet himself is poisoned, the Throw will be much more effective in sending the opponent backwards as well as dealing damage, doing a good 10%!

Back Throw - Roll Back Shelmet rolls backward on the round end of his armor and drops the opponent right behind him, dealing 8% of damage. If the opponent lands in a puddle of Acid, they'll become poisoned!

Up Throw - Spit Up Shelmet turns upward and launches the opponent into the air (slightly)! This will only do 6%, but it can be useful if only for one reason - it is the only way Shelmet can get rid of any poisoning he has without it fading away on its own.

Down Throw - Drag Shelmet quite literally mops the floor with the foe, dragging them across the area below him and dealing 7% along the way. If Shelmet is standing in poison
- You get the idea, don't you? I've been incorporating this poison mechanic in almost every goddamn move so far. Take a guess as to what happens. Go ahead.

Final Smash

Trade A Karrablast waddles onto the stage and switches places with Shelmet. They both glow for a bit before... Congratulations! Your Shelmet has evolved into Accelgor! Karrablast has also evolved into an Escavalier who's essentially your teammate and attacks opponents with/for you. Meanwhile, you've become faster, stronger, and cooler, so use your newfound power to your advantage!

Extras

Taunt 1 - Yawn Shelmet lets out a big yawn as if to say "Yeah, battling with you actually bores me. What are you gonna do about it?"

Taunt 2 - Wheelie Shelmet attempts to stand on his round shell before falling backwards and quickly regaining himself. Whoops!

Taunt 3 - Cower Shelmet shuts his visor over himself and does a mock shiver, acting as if he's frightened by the opponent.

Win Pose 1 - Bubble Shelmet happily squirts out a few bubbles with a purple tinge.

Win Pose 2 - Swagger Shelmet struts around in front of the other character(s) like he's hot stuff, basking in his victory. He's on a pretty big high horse for someone so small, isn't he?

Win Pose 3 - Rest All tuckered out from the fight, Shelmet takes a nap in front of his defeated enemies, not even bothering to wake up for the camera.

Loss Pose - Raspberry Shelmet does the best he can manage at a pout before blowing a raspberry in the winner's direction. Talk about sportsmanship!


D

Deleted member

Guest
Oh sweet, another Clownbot set and it's even better than Party Pete!

This post is actually to announce that I won't be home until Sunday afternoon at the earliest, so if you don't see me in the chat, that's why. :bee:
 

n88

Smash Lord
Joined
Oct 10, 2008
Messages
1,547
Shelmet
You've been lurking and hanging out in the chat for a heck of a long time, and Shelmet proves that you were, in fact, paying attention all those years. The little guy's a step up from Party Pete, and has a pretty fun goop-type mechanic going on. You really milk the poison/shell for all they're worth, and manage to have some pretty solid, logical interactions with his poison puddles, poison-coated armor, and poison-coated foe. I'm not sure it really does a whole lot that's new for the genre of sets, but it does show off that you know what you're doing, and can make quite a lot out of only a few building blocks. I'm impressed, and hope that you keep up the activity.​

Gangreen Gang
You don't need me to tell you that that the usage of momentum in this set is brilliant. There's a gigantic playground of possibilities in screwing with momentum, and the Gang manages to pull it off in an entirely unique and enjoyable way. Regrettably, the set requires a supercomputer to play it properly; the learning curve isn't so much steep as it is vertical here. You do some interesting things with the group commands to make things more easily controllable, but I feel that it backfires, and only makes the whole thing more complex and difficult to manage.​

Also, as a sidenote, this moveset is much more fun once Ace is dead, as it becomes a game of using your limited mobility options to try to keep the foe from picking off the rest of the gang one by one, Batman-style.​


Current progress on Spidey Villains Project: Negligible​


ForwardArrow

Smash Ace
Joined
Aug 17, 2011
Messages
503
Farfetch'd
Sorry it's taken so long for me to comment this, been a bit busy lately and haven't really felt motivated to read it. Anyway, Farfetch'd is an interesting little set, playing an interesting little game of constantly switching between an offensive and defensive character. The leek was also kind of fun, with it serving dual purposes as a throwing item and as a way for Farfetch'd to go on the offensive. To be honest though, I don't feel the set really flows all that well, with a lot of the attacks really feeling like they're doing something on their own and there being fairly little connection between his two playstyles. It's certainly a solid effort, but it's not up there with Teferi, honestly.

Majora's Sceptile
Let's get it out of the way and say putting one of his most important moves on the Up Throw is awkward as hell. The tree should have been a special, no question. I'll admit using the tree as a perch to attack as opposed to a platform to camp from is something I find to be somewhat unique and you make decent use of it. The problem springs up when there really isn't much interaction with the tree in the set past a couple moves. Ingrain and the tree don't really feel like they fit together all that well, and to be honest most of the other moves in the set are generic and bland. There is stuff here to appreciate, but I still feel you've got a long way to go Majora.

Kimiko

I don't really know why Filip, but I always found your sets to be fun to read. You seem a lot more enthusiastic then a lot of other moveset designers, and your stuff comes across as clever while not being weighed down with loads and loads of complexity. Anyway, Kimiko is a pretty solid set, using various projectiles and mindgames to overload the opponent's ability to dodge you, despite her otherwise weak power. There's certainly playstyle here, while it's not the most unique ever she has her own merits, such as being a camper who is actually fine with the opponent coming in close. All in all, solid set here Filip and I look forward to more of your stuff.

Shelmet
Much better then Party Pete, honestly. Shelmet actually has a legitamate playstyle going on with the acid and his various ways to manipulate it. What I liked most was his ability to take advantage of being poisoned himself, with it buffing some of his attacks but unfortunately building his damage, allowing him to become a bit more agressive when he himself is poisoned. That said, the set feels like it was trying a bit too hard to make EVERY move fit in with the poison, even if it does feel natural most of the time. The main reason I complain about this is how pathetically easy it is to poison the foe, and there's no point to all the ways to poison them once they're already poisoned. Still, this is a pretty big step up from Party Pete and it's great to see you not only making sets but making them consistently.
 

flyinfilipino

Smash Master
Joined
Sep 11, 2007
Messages
4,319
Location
North Carolina
Quickie comment

@Shelmet:

Hey, another Clownbot set! I feel like we're getting spoiled.

Anyway, you did a good job here, CB. You basically did everything you could do with this little snail-thing and resulted in a nice, neat little playstyle. Covering the stage with puddles of poison and such seems like it's been done before several times, but Shelmet has his own little twists with Acid Armor and poisoning himself. Having multiple ways of getting poison onto the foe is great, though it's a little redundant at times. It works playstyle-wise, though. Also, I don't see that much of a purpose in Shelmet actually poisoning himself, though Acid Armor is still a cool idea.

I really like your writing style; your descriptions for each attack are so simple and casual, which makes each move easy to read and picture. Your tone also really makes me want to root for the little guy. The choice of font and color also makes your writing stand out.

Overall, you took a simple idea for a simple Pokemon and put it all together really well, CB. Keep up the good work, and we hope to see much more from you this contest!

I wish Accelgor wasn't just Shelmet's Final Smash; he's cool enough to have his own moveset :p


And thanks for the comments on Kimiko, Smady and FA!
 

Chaos Swordsman

Smash Apprentice
Joined
Sep 15, 2008
Messages
174
Location
In your closet.
Okay, I've got just one more moveset idea, then I'm gone. And this is the only hint I'm giving for it.

"Chaos is a wonderful, wonderful thing!"

That's it. It might be obvious for some people, BUT DON'T SPOIL IT. I can't say it'll be done anytime soon, but I'll do what I can to get in before this contest is over.
 

majora_787

Smash Hero
Joined
Jun 23, 2007
Messages
6,122
Location
Texas
Well, here's what I've got planned for MYM11. This is partially a reference for me so I don't forget, but you guys may want to know too. I've got TWO sets coming up for the contest; you know that counter with the Majora's Mask motif going on?

Well, Project SNOWHEAD is going to be a 3v1 boss character and the fourth set of that countdown. And if you guys have played Majora's Mask, you know what happens when you have all four boss remains. You wait for the moon to fall.

Project RAPTURE will be a set revival of one of my extremely lesser-known MYM3 sets. It'll be out sometime after Project SNOWHEAD and before the end of the contest.

So after I post those sets, I'm done. I'll probably then write a bunker article about something (I have something in mind already) and then advertise and vote.

Of course, my MYMer Rankings will be updated by yours truly whenever the top 50 comes out. I wouldn't worry about that. But also, after my article and Project RAPTURE, I'll come back here and post a link-up space for... well. You guys'll get the 'whys' out of me when the time comes. :p One thing at a time I guess.

The only other thing I can think of is this: If anyone has the time and patience to help me with Project SNOWHEAD despite not knowing what the character is, contact me with a PM or a VM and let me know. Any help is appreciated.

Project SNOWHEAD is currently stalled, but I'm working on it. It'll be slow going until I get help or get inspiration. Whichever comes first, I suppose.
 

ForwardArrow

Smash Ace
Joined
Aug 17, 2011
Messages
503
Phaaze

Phaaze is from Metroid Prime 3, being a planet that is the source of all Phazon, a corrupting liquid that is the main focus of the prime series. The most notable fact about this is probably that it's a planet and it's getting a moveset. Yeah, some MYM1 sets were really, really silly.

Stats
Size: 70
Weight: 70
Movement Speed: 6
Fall Speed: N/A
Traction: N/A


Phaaze is perpetually floating in the air about 2 Ganondorf Heights above the stage, floating around at about Mario's dash speed. It is about 1.4X the Width of Final Destination, and as wide as it is tall. In addition to being the hugest thing ever, he's also ungodly heavy, taking until around 950% to get KOed by any sort of knockback. Phaaze also does not take hitstun, at all, and cannot be grabbed. The unfortunate thing about Phaaze is, though, it can't really actively attack. The character cosplaying as Phaaze loses access to their moveset, effectively being stuck with 4 inputs. Therefore it's balanced, clearly.


Moveset

Neutral Special: Phazon Drip​
Phazon begins dripping off Phaaze, creating a pool the width of Bowser for each half second you drip for below the center of Phaaze. Opponents who stand in this puddle take 3% every half second, but their attacks get a considerable buff. Unfortunately, whenever they attack while in Phazon, the damage per half second increases by 1%. This can potentially get pretty hairy for the foe, but considering they can just jump it should be off no problem to them. If only there was a way to bring the Phazon into the air with them...

Side Special: Phazon Metroid​
A small Phazon Metroid as shown above appears, detaching from Phaaze and flying around, having 30 stamina. This has a half second worth of lag, and only 3 Phazon Metroids can exist at a time. The Metroids home onto the foe at Ganondorf's walk speed, charging at his dash speed if they get within a stage builder block. If a Metroid grabs onto the foe, it deals them 2% per second as well decreasing their jump height and increasing their fall speed. Multiple Metroids can latch onto a foe at once, if you're curious.

Up Special: Gravitation

Phaaze pulses for a second, and suddenly the center of gravity for the stage is no longer the ground, but rather Phaaze. This causes foes to be pulled towards it as though it were the stage, the gravity becoming similar to that of a Super Mario Galaxy planet. The opponent can still attack you however, and if you fly off the edge the Gravity you have on the opponent will not control them. However... you are completely covered in Phazon, which allows you to potentially rack massive damage on the foe. If only there were a way you could KO them now...

Down Special: Explode

Phaaze explodes, sending chunks of itself flying everywhere that deal 30% and incredibly high fixed knockback that won't KO but will send opponent's flying. This destroys Phaaze, but does not cause it to lose a stock... rather, the person cosplaying as Phaaze is left where the planet once was. They have an additional 50%, but now they can take advantage of the moveset buff provided by the Phazon you hopefully covered the stage with and likely KO the foe in one hit. This is made easier if some of the Metroids are still alive of course.

Final Smash
Phaaze crashes into the stage, destroying it completely as well as killing all foes on it. This is a guarunteed instant kill on everyone, but it's incredibly hard to get the Smash Ball since you only have one predictable attack that actually works on it.
 

phatcat203

Smash Apprentice
Joined
Dec 12, 2008
Messages
160
Location
I've been everywhere, man.
Now nobody post anything for two weeks, then maybe someone'll read this

BASS.EXE


BACKGROUND

Okay, if you seriously don't know who this guy is, go out and play Megaman Battle Network 3 right now. Just emulate it or something, I don't care.

For those of you who hate all video games and thus will not do this(as this is the only possible reason you would purposely refrain from playing this game), Bass.EXE is a Netnavi, which is essentially just a fancy term for internet avatar. In fact, he is the SUPER Navi; the strongest in existence, in theory. He was created solely to essentially be a slave to humankind and because of this, he loathes all human beings.

In BN2, the criminal network Gospel created a clone of Bass, to essentially take over the world. However, it morphed into a huge mass of viruses and became a giant, glowing dog named...Gospel. Don't ask.

In BN3, Bass joins up with Wily to get his revenge on humans, and is the second-to-last boss of the game, fought right before the actual final boss. When defeated, he wanders around the Undernet and collapses, only to be saved by...Gospel. The dog, that is. Gospel fuses with Bass and heals him, thus creating quite the god. This version of Bass, BassGS, can be fought after nearly 100%ing the game.

From there on, Bass mostly serves as an antagonist and secret final boss.

STATS

Jumps: 9

Air Speed: 7

Size: 6

Ground Speed: 6

Weight: 6

Fall Speed: 5

Traction: 4

Bass actually floats around about a Kirby off the ground instead of running. This doesn't give him an actual FLOAT per se, as he still has normal jumps and such, but ground-only attacks and small shockwaves simply cannot reach him.

SPECIALS

ƒNeutral Specialƒ~ Hell's Rolling

These are just short gifs I made in a small amount of time, but I feel they help the set a bit. They're not meant to be perfect, just give an idea of the attack.

Bass stops in his tracks, raises his right hand up in front of him, and begins to build up energy above it. This energy quickly forms into a sort of thin, rapidly rotating wheel about half the size of a Smart Bomb explosion, and after 1/4th of a second since activation, this wheel launches at a downward angle, leaving Bass immobile for a very short period of time. After it hits the stage, it begins to just follow along said stage. The wheel travels at the speed of Captain Falcon's dash at all times.

If Hell's Rolling should happen to hit a foe before it dissipates, it will lock them up into its rotation and start dealing 4 hits of 1% damage a second. Obviously this evens out to 4% damage a second. Then, the wheel will reverse its rotation and, after 1/8th of a second, begin to travel back towards Bass, bringing the foe with it. Of course, the wheel still travels at Falcon's dash speed. Hell's Rolling will stop once it has traveled a total of 3/4s of Final Destination even if it does change direction. Once Hell's Rolling disappears, you can immediately use it again.

Hell's Rolling acts like any other multi-hit attack in that the opponent is trapped and locked up in hitstun the entire time they're stuck in it, but can DI out of the move depending on their damage %. Hell's Rolling is a bit tougher to DI out of than most attacks though, so foes won't be breaking out when they really need to; when they're just a hit or two away from death.

ƒForward Specialƒ~ Base Breaker


Bass lifts his arms up and begins to charge energy energy in them. After 1/3rd of a second of this, he throws his arms forward, then immediately fires off a yellow energy shot from each hand. Bass suffers from 1/6th of a second's end lag after the shots. The shots travel impossibly fast and cannot harm a player who gets in their way, but when they hit the ground, they create a Kirby-sized(both vertically and horizontally) wave-like line of purple energy, which faces towards Bass. This wave always deals 11% damage, and inflicts very light, set "reverse" knockback; that is, it pulls the foe in the direction the attack came from, instead of pushing them away from it. The knockback is always 2 Battle Field Platforms.

Now, I haven't mentioned where this attack lands because you can change that when you initiate the move. When you first input the command, you can press the B Button 1, 2, or 3 times in quick succession while Bass is charging the move. If you press it once, the shot hits a BFP in front of Bass. 2 times and it hits 2 BFPs in front of him. Hit the button 3 times and, you guessed it, the wave hits 3 BFPs in front of Bass. Even if you manage to hit the button more than that, the move won't reach any further.

Place this depending on where your opponent is; thanks to the set knockback, you won't always want to hit your foe directly. You want to knock the foe near or even into Bass, but you don't want to overshoot it and have to rely entirely on timing.

ƒUp Specialƒ~ Life Aura


Bass' Up Special has him summon his tried and trusted Life Aura, which, in the games, protects him from just about anything that deals less that X amount of damage, with that amount depending on which version of Bass you're facing. In Brawl, it acts in much the same way - any attack that does 15% damage or less, no matter the knockback, will simply bounce off the Life Aura and have no effect. The Life Aura doesn't go away if hit by these moves. There's no beginning lag, but when the aura is eventually knocked off, Bass will suffer a moderate amount of end lag as he enters his "damaged" pose from the Battle Network series. Bass cannot move while using Life Aura..or, he can, but only inside the boundaries of the Aura, so it's very limited. However, Bass can jump out of the Life Aura, making this move function very well as a recovery - if you use it in midair, you basically have given yourself a floating platform to stand on, and thus get both of your jumps back. The Life Aura takes a while to regenerate, as it does in Battle Network, so you can't use the move more than once per three seconds, counting from when the Aura ENDED, not started.

Bass can attack just fine while using the Life Aura, and that actually plays well into his game - Bass can function well just staying still and bringing the foe to him, and Life Aura basically forces that. Unfortunately, this makes you ungodly predictable since you, well, can't move. Luckily you can still jump out of the Aura while grounded, so you're not helpless. The Life Aura will, of course, disappear if Bass jumps out of it.

ƒDown Specialƒ~ Mezzo Forte


Now, in musical terms, Mezzo Forte means "moderately loud," or "play as loud as you ****ing can but not TOO LOUD." That's kinda what this attack does. When the attack is initiated, Bass charges a purple ball of energy for about 1/4th of a second, then releases it at the ground. When it hits said ground(which it will because, again, it cannot hit a player) about two Battlefield Platforms away, the ball explodes into an odd, smokey pillar of energy about the size of Mario. This deals 9% damage and very light upwards knockback, which also curves towards Bass. Don't expect this knockback to ever kill anyone; that would take until around 250% at least. Bass can move again the instant the shot hits the ground.

Now, there's a sweetspot right on the bottom. If a player is hit by the sweetspot, they'll take 13% damage, but the same amount of knockback. However, they will take double the normal hitstun. This sweetspot is very useful in whatever combos you decide to try, since it doesn't affect knockback. It's not that tough to land either, since they basically just have to be standing in the center of the spot the pillar shoots up from.

SMASHES

ƒForward Smashƒ~ Fortissimo


Fortissimo means "very loud," and this attack is, suitably, potentially one of Bass' strongest.

Now, you need at least half of the maximum charge for that energy scythe to appear. Otherwise, you just get the sword slash after the 1/3rd of a second of start lag that this attack has. The sword itself doesn't reach out very far, but the wave extends out about a Bowser in front of Bass. Bass can move just after the energy wave completely disperses.

The sword deals 14-19% damage and knockback that kills from 120%-100% by itself, while the energy wave deals 8-13% damage. The energy wave does no knockback, but instead "slows" opponents down with a special kind of anti-knockback. That is, it cancels knockback out a bit. Obviously, the effectiveness of it depends on how much damage the opponent has, ranging from a full stop at 0% to very little effect at all at 140%.

This ultimately means two things: 1; if you plan to kill before 130%, only charge this move about halfway, and 2; the energy wave itself cannot kill an opponent. Further than that even, it can't even MOVE an opponent; only inflicting a very small amount of hitstun by itself. Use this move wisely.

ƒUp Smashƒ~ Decrescendo Molto


This means "to gradually get much softer" in music terms. And, if you think of vertical height as volume, you can relate this attack to it, as you will see.

After 1/3rd of a second's lag, Bass fires off a number of yellow, flak-like shots into the air. The number of and area covered by these flak shots differs depending on the charge. The image shown depicts the completely uncharged version, with five shots all grouped somewhat close together. With a full charge, there will be 9 of these covering a somewhat large area up in the air. The lag depends on how many shots Bass fires, as he can't move until he's done shooting.

Generally, the lowest shot will be about Bass' height, and the highest anywhere from Ganon's to 1.5x Ganon's.

Each individual shot deals 4% damage and stuns the character for a bit, then spikes them downwards with moderate knockback . Only the first hit will deal any stun, but other hits will stack knockback. However, characters will never bounce off of the ground like they normally would. Instead, they sort of "stick," like when you break Jigglypuff's shield on the bottom section of Hyrule Temple...except on the floor instead of the ceiling.

For best results, you try and hit the opponent while they're near the top of the spread, so that they get hit multiple times. As you may have guessed, this attack is also very good for spiking foes who are off the stage...meaning that "flying" recoveries become severely limited against Bass.

ƒDown Smashƒ~ Wrath of Falzar


Bass summons up what's left of the energy of Cybeast Falzar, and within 1/3rd of a second, he begins to fire off the whirlwind you see up there. This whirlwind is a BFP long, and lasts for 3/4ths of a second, with another 1/4th of ending lag. It fires down at an angle like in the pic, with the wide end of the tornado resting on the ground.

As you may have guessed, this acts as a wind funnel. However, the pull is weak(half that of Kirby's) and doesn't have much range; it only extends .5-1 BFPs past the tornado, depending on charge. Once sucked into the tornado, foes start to take 4-8% every 1/4th of a second...depending on charge.

This all culminates into a forward "spike" similar to regular knockback, but entirely horizontal, and with a sort of "slide" to it; that is, if an enemy hits a slope, like Corneria's fin, they will not bounce off, but rather slide over and past it(like in very extreme cases of knockback). This kills between 140% and 120%, and opponents can still tech as usual.

This is one of Bass' finishers, generally used if the opponent escapes your grasp before you can land a normal finisher. Again, the pull is only about half as strong as Kirby's Inhale, so don't count on that too much.

STANDARDS

ƒDash Attackƒ~ Overtone

Note: Only Specials and Smashes have .gifs; it's just too much of a hassle to make them for every single attack.

Not really a musical term, but "Overtone" does describe this move, or at least what it does, somewhat well. You see, Bass brings his sword out and swings it from the foreground to the background. This inflicts 8% damage and heavy stun, and tosses the opponent about two Battlefield Platforms behind Bass if they don't move(either by choice or, more likely, hitstun). This sets up quite a lot of possibilities, including comboing into a Hell's Rolling or Mezzo Forte, and then going from there with whatever combo you should choose. The move doesn't have a lot of lag on either end, and is fairly quick in execution. This means Overtone is very easy to put at the start of just about any combo, provided you trust the hitstun to hold up. Bass doesn't turn around once the move is over with, though, so you have to handle that and the spacing yourself.

ƒNeutral Aƒ~ Hand of God
Bass extends his hand, of course, and it transforms into..Gospel's head, basically. Okay, not even going to describe this thing, here's a pic:


Right, it takes about a third of a second for Bass' hand to transform, and then the thing starts sucking up energy from the area around it like mad. Anyone within two Battlefield Platforms of the Gospel head will take 3% damage per 1/6th second and be fiercely pulled towards Bass as Gospel effectively sucks out their life force. After 2/3rds of a second of this(rounding the full "startup" time to one second), Gospel's head will shoot out a beam comprised of all the energy it has sucked up. This travels 1-3 Battlefield Platforms in front of Bass, with true range and damage depending on how much energy the move took in. Basically, if Gospel got nothing from enemies, the move will travel 1 Battlefield Platform, deal 14% damage and KO around 130%. If Gospel managed to suck in the full 12%(or more, with more opponents), then the beam will travel 3 Battlefield Platforms, dish out 27% damage, and kill around 85%. Considering that Gospel's pull is about thrice that of Kirby's, it's not hard to get that 12%. However, there's a very slight lull between the completion of the energy absorption and the actual firing, so opponents DO have a chance to shield the move.

Still, it's not all rainbows and lollipops for Bass. You see, Gospel is essentially a giant program made entirely of computer viruses. That's...not good for a computer program to be around. Using this move will cause Bass to start glitching up. Bass will start randomly taking 1% damage, with the interval between each ranging from 1-4 seconds, and whenever he uses a move that involves Gospel, there's about a 5% chance of it just flat-out not working. Bass' successful attacks have a 75% chance to deal 1% more damage, though... Also, every time you use Gospel, the effects stack. The damage turns into 2%(and so on) every 1-4 seconds, it doesn't add another random 1%.

ƒForward Tiltƒ~ Accelerando

Accelerando means what you might think - to "accelerate," or to gradually get faster. Bass shows this off in a pretty straightforward way - each time you successfully hit with "Accelerando" in one stock, Bass pulls the move off a bit quicker, and also moves faster. The move gets more effective, too.... What does this do, you ask? Look at the next paragraph, dammit.

Bass jets forward three BFPs at his regular dash speed, "drawing" his energy blade as he does so. With it, he slashes away from the screen; in the direction of the background, essentially. This still easily hits characters though, so don't fret about that. This acts a lot like Weavile; 2% damage and no knockback, but "dizzies" the opponent. It's not nearly as severe as the critter, though... Unless you get in more of these. For each time you hit with Accelerando in a stock, the next use will see Bass dash just a bit faster, and a noticeable increase in dizzy time. This caps at triple Bass' normal dash speed, and a Dizzy just as effective as Weavile's. Course, that's after you hit with this TWELVE TIMES in a single stock... and it's not exactly difficult to dodge. Still, it's an excellent prep for a combo or finisher, if you catch them at the end of the dash. Also, you have to actually inflict the dizzy status; hitting the opponent while they're already dizzy doesn't count. Yeah, I'm not stupid enough to overlook that. The dizziness also doesn't stack upon or replenish itself.

ƒDown Tiltƒ~ Cadence

A good combo-finisher, like its namesake, though it can also be used as a pseudo-projectile. Bass lifts his arm up, palm facing downwards, and a line of black energy spheres form at shoulder height in front of him. The line starts at Bass' hand and ends 1 BFP away from him. Bass then slams his hand down, and the spheres follow, crashing into the ground and fizzling out. Anyone caught by the forming spheres suffers 5% damage and moderate stun dependent on damage %. They'll also be slammed down with the spheres, if they're still stunned and/or haven't gotten away by that time. That deals 6%, and leaves the opponent in prone state instead of dealing any knockback.

Why is this a combo finisher? Because, while it suffers from moderate-high ending lag, it has very low start lag and thus can be quickly used as an opponent is flying away or in hitstun. The prone state also allows you to use Hell's Rolling for some extra damage and to start a new combo; they'll have to roll forward or jump to dodge it, and jumping can get them locked into another Cadence if they're not careful.

ƒUp Tiltƒ~ Resonance

Resonance has Bass form his trusty energy sword again and slash upwards, but in a slightly different way than usual. The move starts slow but then speeds up, meaning it deals two hits here, each one dealing 4%. After the opponent has been slung straight upwards a small, set distance by the second hit, the player has the option to tap the A Button one, two, or three times in succession. This determines the amount of times Bass will shoot at the opponent with his Buster, with each hit dealing 2% and knocking the opponent 1/3rd of a Battlefield Platform forwards.

Resonance is somewhat slow on the starting end, but has almost no end lag, so it's a rather safe attack on miss. Of course, the attack can be DI'd out of after the second blade hit, but if you tap fast enough you should be able to get in at least one shot. The buster shots are for spacing the opponent where you want them, obviously, and no shots will leave the foe right above you.

AERIALS

ƒNeutral Aerialƒ~ Atonal

Living up to its name, this attack can be used at practically any time - in a combo, for knocking the opponent away, or just out of nowhere. The move has Bass stick out his hand a bit, then swing it downwards, creating explosions similar to the flak in the Up Smash as he does so. Each of of the four little explosions deals 4% damage and a bit of stun. Knockback is up to you, though; you hit a direction after using this move, and the opponent will move in that direction when hit. It's also force-sensitive; slamming the Control Stick in a direction will send the opponent flying harder and farther than tapping it. Not hitting a direction will cause no knockback to occur. At full force, horizontal knockback from this move can kill at 130%; vertical at 120%.

As you can see, the move is extremely versatile and can be used in all kinds of situations for all kinds of purposes. Hell, you could even use it twice in a row in one combo, since the first time per "flight" you use the move, Bass stalls in midair while he uses the move. The move doesn't have many drawbacks either; it's fairly quick on both ends and doesn't take long to execute. Still, the range of the explosions isn't astounding, so you do have to be near foes.

ƒForward Aerialƒ~ Serenade

Like its namesake, Serenade likely won't be the frontrunner of your playstyle, but it's still an important part of the set. Bass quickly transforms one arm into his Buster, then lunges forward two full Battlefield Platforms. If he contacts anyone, he'll violently twist around and toss them four Battlefield Platforms behind himself, then fire his Buster at them twice. The toss deals 5% damage and the shots 4% each.

However, you'll swiftly notice that there's something going on; Bass fired those shots in such a way that the opponent is shot TOWARDS Bass instead of away from him! The foe will take light knockback towards Bass' body; this will usually put them about a Battlefield Platform in front of him, assuming the opponent didn't DI and Bass didn't move. The lag is minimal on both ends, but even though Bass moves at his full Ground Speed, the initial lunge isn't tough to dodge. If you do hit with that, opponents won't get a chance to DI until they're hit by the shots, though, so you're guaranteed damage at least.

ƒDown Aerialƒ~ Vibrato

Vibrato indicates variation, primarily by rapidly swapping notes, and this move shows that off. First, Bass slams his arm down, and if that connects with an opponent, the rest of the move is set off. Bass transforms his other arm into a blade, and slashes the opponent downwards. Right after this, both of his arms transform - one into his regular Buster, and the other into Gospel's head, which begins to charge. As the opponent falls to the ground, Bass unloads a few shots into them, then fires off the Gospel shot once the foe actually hits the ground. This leaves the foe on the ground and in their Prone state.

Since he's trying to disorientate the opponent, there's not a lot of power behind Bass' attack here. However, due to the sheer quantity of hits, this move still manages to do above-average damage. The initial arm slam deals only 2%, the slash 5%, the shots 4% total, and the Gospel blast 8%. That's a solid 19% damage, which is nothing to scoff at, especially for an Aerial. Unfortunately, the initial hit has absolutely pitiful range, so the opponent either has to be stupid, unlucky, or stunned for you to pull this off. Even more unfortunately, Bass suffers the side-effects of using Gospel's power. The move always counts as one "use," which is more lenient than the Neutral A, but still punishing. If you don't remember the consequences, here they are again:
Bass' max air/ground/fall speeds will randomly fluctuate at times(rarely, though, and it never lasts for more than 3 seconds), and whenever he uses a move, there's about a 5% chance of it just flat-out not working. Bass' successful attacks have a 75% chance to deal 1% more damage, though...


ƒUp Aerialƒ~ Presto

As its name implies, this move is meant to up the pace of the match, or put in simpler terms, it's a combo starter. Bass fires his Buster once more, but this time he creates a Flak shot one Battlefield Platform above and in front of himself. The shot creates an explosion about the size of a Soccer Ball, and anyone hit by it will take 11% damage and be knocked right into Bass, stopping when they connect with him. Course you'll have probably hit them by then, assuming they didn't DI. Which is fairly hard by the way - the knockback is powerful, and if they miss Bass somehow it can KO at low %s. Assuming they don't just slam into the ground, anyways.

As you can tell, this is a good, strong move that, while not always accurate, is a reliable option to start a combo against a foe approaching from the air. Or running away, or recovering, really, doesn't matter much.

ƒBack Aerialƒ~ Grazioso

Grazioso. Right, it indicates that some or all of the piece is to be played very gracefully... In this moveset, that corresponds to this move easily sliding into combos and helping the entire moveset play more smoothly. Bass' hand glows a deep purple, and he then slashes it all across himself, sort of like a very wide, 360 degree sword slash. This creates basically a shoulder-height disc that extends 1/4th of a Battlefield Platform all around Bass, and lasts for half a second. The slash actually starts behind Bass, as that's the easiest way to cover everything, and so the back part extends just a tiny bit further. The back deals 15% damage, and the front 13%, with both dealing very little set horizontal knockback and a bit of stun.

The start and ending lag of this move are both negligible, and you can actually move and attack while the disc is still up, if you're careful not to slip out of it. The whole "grace" thing basically translates to being able fit this attack in anywhere in a combo provided the opponent is horizontal to you, since it hits all around Bass. The knockback is just enough to knock the opponent out of range of another Grazioso, so it's pretty tough to spam this unless you have good prediction skills.

GRAB - GOSPEL'S GRASP

After a large amount of startup lag as Gospel's head forms around his arm, Bass lunges forward an entire Battlefield Platform, Gospel-first. If it contacts anyone, Gospel's head will bite down on them and hold them in place. While rather slow on both ends, this grab has good range and does something a lot of other grabs don't - damage. 7% in fact. It's also a bit harder to escape than a normal Grab, and the escapee takes 2% damage, seeing as they basically just ripped teeth out of them. Which kinda rips skin and all. Anyways, onto the throws. Good god the throws. Oh, but wait, first off: Using his Grab does indeed cause Bass to suffer all the side-effects of using Gospel. Just scroll up to read them, I'm not putting them in AGAIN.

ƒPummelƒ~ Prelude

Bass' Pummel, which causes Gospel to summon some sort of virus to hold the foe down, does a measly 1% damage, but that's not the point of it. The point is to hold the foe in place, which is what this does - makes it harder to escape. Each time you use it in a row, the escape difficulty goes up by 1.5X. Now, you might be wondering what the use of this is, since you could just throw the opponent, right? Well, wrong. Opponents can escape from Bass' throws, like they SHOULD be able to any others. After all, just because he's trying to throw them doesn't mean they can't break his grip. Two Pummels should be enough to get any of the Throws off, bar one, but you'll see which one and why when it comes to that. However, each use of the Pummel ups the amount of "uses" on Gospel, so be careful.

ƒForward Throwƒ~ Rigaudon

Rigaudon is a type of quick, 20th-century dance. This move is very quick and somewhat old-fashioned, so..yeah. Bass jets forward, running a total of two Battlefield Platforms, all the while dragging his captive along the ground. Once he's run the length of the move or reached an edge, Bass will sling the opponent along the ground(or nothing if at a ledge), and they'll travel a distance dependent on their damage %. It can KO off of ledges at about 120%, which isn't much seeing they're right AT the edge. The whole dragging and such dishes out 12% damage in twelve hits of 1%, so just in case the opponent DOES escape, you still get some damage off. However, the entire move only takes half a second, so that's unlikely.

Also, the "knockback" on this isn't very strong, and leaves the opponent in prone if they land on the ground. It will always travel at least 1 Battlefield Platform, though. The move can be used to set up for a Hell's Rolling at low percentages, or for spacing with more damage.

ƒDown Throwƒ~ Courante

Courante is both a somewhat quick piece and a sort of dance. Unfortunately, this move opts for the dance, meaning the move isn't very fast. Fortunately, it IS very ruthless and thus very damaging. Bass slams the opponent to the ground and holds them there while Gospel charges. Of course, they're still being held by Gospel, and as such the charging actually damages the opponent by 1% per 1/3rd of a second. The move takes exactly two seconds to fully charge, after which Gospel unleashes hell unto the opponent. As it turns out, hell is a rather large blast of deep purple energy. Kinda different from what everyone says about it. Anyways, the blast deals 17% damage(which is actually 23% counting the charge) and rockets the opponent up into the air, killing around 100%.

While Courante is ferociously powerful considering that the Grab itself does 7% damage, it can be broken out of just like any of Bass' other Throws. And considering the move takes a full two seconds+ to use, breaking out's not all that tough to do. Course, with the Pummel, it shouldn't be too tough, if you're willing to risk that.

ƒBack Throwƒ~ Gavotte

A gavotte is a very lively dance, as you're about to see. Bass flips around with his opponent and slashes them away with his sword, before using one of his almost "signature" moves: Buster Rake. Buster Rake acts as a sort of many-hit, purple-colored Bass Breaker, but in a sort of line along the ground. Bass fires them as the opponent flies near the ground, meaning the foe gets hit by about four of the six shots on average. Despite being called Buster Rake, Bass actually forgoes his Buster and opts to use Gospel's significant power instead. This means the attack deals a good 6% damage per hit..which with four hits is 24% damage! If you can somehow get all six hits in, that's 36%! Damn.

Unfortunately, using this move requires a -lot- of Gospel's power and thus it is treated as "using" Gospel THREE times. Don't just toss Gavotte out there, even if it is tough to escape and deals massive damage. It's best to use when Bass is nearly dead anyways, so that he won't suffer through the Gospel glitches.

ƒUp Throwƒ~ Musette

A musette is another style of quick dance that generally used bagpipes and sleigh bells..pretty weird, but I guess it was pretty good to the French, seeing they didn't slaughter practitioners on sight. Kinder men than I. As for the move, Bass forms his energy sword, stabs his foe with it, and then leaps up into the air with them. At the apex, Bass simply kicks the opponent forward and they fall to the ground at an angle. This is a great time to use Hell's Rolling, but that's not the only option you've got; I'm sure you can think of a few by now, seeing this is the last move in the set, not counting the Final Smash.

The stab deals 10% damage, and the kick 6%, for a total of 16% damage, in case you failed 1st grade or something. The move is quick, but not overly so; it takes about half a second to pull off, and once the opponent is released, they're free to do their own thing. Just remember; there is no concrete followup to any move in this set, and you can just about always mix it up. If you choose to go entirely out of your way to come up with some random flowchart, well that's your fault for hating fun.

FINAL SMASH- FORTISSIMO POSSIBILE

Put simply, this means "loudest possible," and it's a fitting name for a Final Smash. You might be worried a bit when you grab the Smash Ball - after all, pressing the B Button simply activates Hell's Rolling like normal. No, to use Bass' Final Smash, you have to use any move that involves Gospel....or try to, that is. You see, when you try, Gospel starts to take over Bass...but Bass fights back with the Smash Ball's power, and gains full control of the virus dog, becoming Bass GS! He takes on a look somewhat similar to his Treble Booster form from the various games it appears in(yes that is the best pic I could find). Basically, this is a buff to most of Bass' moves; some more than others. Here's a basic list:

* Bass GS can fly around at his normal dashing speed, but only up to four seconds at a time, and takes exactly that long to charge the flight back up.

* All damages are buffed by 4%, and all lag is cut in half. Damages on multi-hit moves are increased by 1% each if the move hits more than three times, or 2% if not.

* Bass GS suffers no side-effects from using any Gospel-related moves.

* Hell's Rolling is now double its regular size(read: the full size of a Smart Bomb explosion), travels at Sonic's Dash Speed, and has no limit on its maximum distance.

* Bass Breaker becomes Buster Rake, with each shot dealing 11% damage as normal, and only inflicting hitstun. While this cuts back on combo potential, it greatly increases damage output.

* Requiem no longer instantly kills Bass; instead, it turns his body into a shell which falls at a very slow speed. Otherwise, the move acts as normal, except the "ball" will never stop homing, and doubles in speed every second it follows the foe. Bass won't respawn until the opponent dies.

* Mezzo Forte always "sweetspots" and now hits opponents as it travels, but doesn't stop. Getting hit by it this way only deals 7% damage(including the boost from the Final Smash).

* All Smashes get more range in their own way; the Up Smash simply covers a much larger area, while the other two literally get more horizontal range. Down Smash also has a more powerful suction, and Fortissimo can fire the wave if you tap A while using the move.

* Hand of God now deals 4% damage per 1/6th of a second instead of 3%, has 1.5x the range, and pulls foes in a bit harder. You only need to hit the opponent six times to fully power up Accelerando.

* Bass GS can stall up to three times in midair with Atonal, and said move can KO at 100%. Bass now moves at double dash speed while using Serenade. The first hit of Vibrato is now a kick, almost tripling its range. The Up Aerial, Presto, now creates an explosion thrice the size of a Soccer Ball. The Back Aerial now extends 3/4ths of a Battlefield Platform on both sides.

* Bass GS' grab is much less laggy and travels faster, and opponents can no longer break out of it or any of Bass GS' Throws. If Bass GS reaches a ledge with Riguadon, he will toss the opponent downwards. This counts as a Meteor Smash and can KO as low as 75%. Courante's blast becomes the size of a Smart Bomb explosion, and damages anyone in range besides Bass GS(useful in FFAs which is just about the only place you'll see Final Smashes anyhow). Gavotte has no direct changes, but remember that each hit now does 1% more damage, and there's no drawback since Bass GS suffers no side-effects from Gospel. Musette replaces the energy blade with Gospel's head; that's right, Bass GS basically stabs Gospel's giant head into the opponent's torso. At the tip of the jump, instead of kicking the foe, Bass fires a large blast of the same purple energy found in the Down Throw. Each hit deals 4% extra damage instead of 2%(since it's technically a multi-hit move).

This Final Smash lasts for 30 seconds, which is a very long time. But, there's a drawback: after finishing the Final Smash, the match plays like normal until Bass gets KO'd. When Bass respawns, he'll start the stock as if he'd already used Gospel 5 times! That's bad, by the way.

FINISH


MarthTrinity

Smash Lord
Joined
Aug 9, 2007
Messages
1,954
Location
The Cosmos Beneath Rosalina's Skirt
Whismur

Whismur (original set by J_Puff) is a small, pink, rabbit-like Pokemon introduced in Generation 3. Whismur is a Normal Type Pokemon that appears quite frequently and evolves twice, the first time into Loudred and the second time into Exploud. According to the Pokedex, Whismur murmurs quietly to itself unless it's frightened in which case it starts screaming...louder than a jet plane. This little guy screams so much while frightened, it'll actually scream itself into exhaustion and fall asleep screaming.

Neutral Special: Hyper Voice
Whismur starts quietly murmuring to itself under its breath, not really saying much else but its own name repeatedly. Seems the little guy is content with that. Hrmm. Anyway, you can hold this input for up to two seconds before Whismur automatically stops murmuring and takes a quick glance around. So what does cutely saying your name repeatedly actually gain you? Well nothing. Unless you're opponent starts being a bit too aggressive. If they start throwing out attacks or running around...Whismur will automatically become a bit cautious and freaked out. If they hit Whismur however, Whismur goes full on terrified and...

SCREAMS ITS HEAD OFF. YES, IF WHISMUR IS HIT BY AN OPPONENT'S ATTACK WHILE HE'S MURMURING, HE'LL INSTANTLY ACTIVATE HIS SIGNATURE MOVE; HYPER VOICE! THIS INSTANTLY DEALS HIGH KNOCKBACK AND 15% DAMAGE TO THE OPPONENT WHO STRUCK WHISMUR AND ALSO CREATES A REPEATING SHOCKWAVE AROUND WHISMUR AS HE MOVES ABOUT! YES, THIS SHOCKWAVE IS ABOUT THREE BOWSERS WIDE AND WILL REPEATEDLY SHOOT OFF FROM WHISMUR UNTIL HE CALMS DOWN. BEING ONE BOWSER AWAY WILL DEAL 10% DAMAGE TO THE OPPONENT PER SECOND, TWO BOWSERS WILL DEAL 5% DAMAGE PER SECOND AND BEING THREE BOWSERS AWAY WILL DEAL ONLY 2% DAMAGE PER SECOND. IF YOU ARE ANYWHERE WITHIN HYPER VOICE'S RANGE, YOU'LL ALSO BE PUSHED BACK SLIGHTLY LIKE WITH THE WIND ON PICTOCHAT. BEING TOO CLOSE TO WHISMUR WHEN HE'S IN THIS STATE IS QUITE THE BAD DECISION!

On the other hand...once Whismur has been screaming for seven seconds straight...he sloooooowly dozes off...poor little guy wore himself out! Whismur will then be asleep for a full three seconds! Fortunately...the little guy isn't entirely defenseless while asleep...

Down Special: Sleeptalk/Yawn
Yep! Whismur has two Down Special's depending on his current state. If he's wide awake and waltzing about, Whismur's Down Special is Yawn! Whismur opens his mouth wide as he squeaks out an adorable little yawn! This yawn is represented as a wavy white blob that will travel forward at the speed of Ganondorf's walk speed, slowly arching in the air as it goes a maximum distance of one Battlefield platform.. Oh who am I kidding? You guys remember this move from Slowbro! If it connects, it puts the foe to sleep for an amount of time relative to their current damage percentage.

If Whismur uses this move while asleep however, he uses a very, very different move; Sleeptalk! When Whismur uses Sleeptalk...

HE ONCE AGAIN STARTS SCREAMING HIS HEAD OFF! THIS SCREAMING HOWEVER IS VERY DIFFERENT...AFTER ALL, WOULD YOU EXPECT SOMEONE WHO APPEARS ASLEEP TO START SCREAMING VERY, VERY LOUDLY?! IF AN OPPONENT IS NEAR WHISMUR WHEN HE USES THIS MOVE, THEY'LL INSTANTLY ENTER A TRIPPED STATE AND BE PUSHED AWAY ONE FULL BOWSER DISTANCE. THIS WON'T TRIP FOES IN THE AIR BUT IT WILL STILL PUSH THEM AWAY, EFFECTIVELY SCREWING WITH THEIR TIMING! THIS MOVE -WILL- GET PREDICTABLE IF YOU THROW IT OUT EVERY SINGLE TIME, SO YOUR GOAL WILL BE TO PREDICT YOUR OPPONENT AND BAIT THEM INTO ATTACKING SO THAT YOU CAN BLOW THEM AWAY WITH YOUR SLEEPTALK! MAKE SURE YOU KNOW HOW TO PROPERLY USE THIS MOVE AS YOU'LL BE VULNERABLE TO ATTACK RIGHT AFTER USING IT!

Yawn however isn't just some useless throw away move however! Successfully putting an opponent to sleep and then hitting them with one of your sound based moves will instantly and shockingly awaken them from their sleep! This is most easily done in team battles or free-for-alls where other opponents can hit you...but it can also be done with some other moves Whismur has. Anyway, if you awaken your foe in such a way, they'll jolt away, having super armor for the duration of two seconds as they look around in shock! This stun will last for 1.5 seconds meaning they'll have time to escape and can't be infinited...but you can add up some serious damage in that time frame!

Side Special: Echoed Voice
Whismur lets out a tiny peep that looks like a tiny tornado on its side. This projectile flies forward until it hits the other side of the screen and only causes brief flinching and 3% damage. Quite lame, no? You can do better than that Whismur! Well, in fact...he can. Once this hits a foe (or a wall for that matter...), it'll bounce off them and fly back to Whismur! Now, don't dodge this; you want to be hit by it! This is Echoed Voice's main draw; it gets powered up the more it bounces between Whismur and his opponent/whatever obstacles are in the way! Each time this soundwave bounces between Whismur and something else, it gets powered up in damage, size and speed! Every bounce doubles the amount of damage it deals multiplies the size and speed by .5 this means...

AFTER ONLY A FEW BOUNCES, YOU'RE GOING TO HAVE AN ABSOLUTELY MASSIVE SOUNDWAVE THAT'LL DEAL SOME SERIOUS DAMAGE AND WILL TRAVEL REALLY, REALLY FAST! BE AWARE THAT YOU CAN ONLY BOUNCE AN ECHOED VOICE SOUNDWAVE UP TO SIX TIMES! IF YOU TRY AND BOUNCE IT ANYMORE, WHISMUR WILL ACT AS IF HIS SHIELD WERE BROKEN! NEEDLESS TO SAY, THIS CAN DO AN ABSOLUTELY INSANE AMOUNT OF DAMAGE VERY QUICKLY...BUT ON MANY STAGES, YOU'LL ONLY HAVE YOUR OPPONENT TO BOUNCE STUFF OFF OF MEANING YOU'LL HAVE TO TAKE ADVANTAGE OF YAWN TO STUN THEM! UNFORTUNATELY...ALTHOUGH SOMEWHAT FORTUNATELY, ECHOED VOICE WILL WAKE THEM FROM THEIR SLEEP! DEPENDING ON HOW FAR YOU ARE FROM THE FOE, YOU CAN PROBABLY HIT THEM WHILE THEY'RE IN THEIR WAKE UP STATE AT LEAST ONCE...BUT YOU MAY BE EATING A SMASH ATTACK AFTERWARDS!

Echoed Voice is an insanely handy move that can easily topple even the most powerful of foes. Remember that each time a soundwave hits you, it doesn't bounce bacK immediately; Whismur holds the charge inside of him! This means you can store Echoed Voice for when you have a clear shot at the foe. Do be aware however that using Hyper Voice will instantly ruin your Echoed Voice charge...so don't forget how much you had charged or you may either waste it or stun yourself!

Up Special: Screech
Oh no little Whismur! You're falling! Save yourself! With a great bunny bound, Whismur will leap diagonally upwards the range of Marth's Dolphin Splash! This is a fairly decent recovery that provides some great vertical recovery with a surprisingly decent horizontal recovery! As an attack, this move also serves its purposes. If Whismur jumps into an opponent, he'll

BE ABSOLUTELY HORRIFIED AND SCREECH DIRECTLY IN THEIR FACE! IF THIS CATCHES A FOE IN MIDAIR, THE FOE WILL IMMEDIATELY FLING WHISMUR UPWARDS AS THEY ACT AS IF THEY WERE FOOTSTOOL'D! IF THIS HITS AN OPPONENT ON SOLID GROUND HOWEVER, WHISMUR WILL CLING TO THEIR FACE IN SHEER TERROR AS THEY FLAIL ABOUT TRYING TO GET HIM OFF (WHICH THEY WILL AFTER A BRIEF PERIOD OF TIME)! EITHER WAY, THIS, UNDER NORMAL CIRCUMSTANCES, DOES 8% DAMAGE...BUT WILL DO INSANE AMOUNTS OF DAMAGE IF COUPLED WITH HYPER VOICE. YES, IF ONE USES HYPER VOICE AND THEN LANDS THIS MOVE, WHISMUR WILL CLING TO THE FOE'S FACE, SCREAMING THE ENTIRE TIME AS HYPER VOICE CONTINUES TO DO 10% PER SECOND TO THE HELPLESS FOE!

A powerful move both in terms of offense and defense, Screech can be a really easy way to get in and damage a foe with Hyper Voice! It can even be used to set up gimp ko's as the opponent will be continuously pushed away from Whismur, pushing them towards the edge as he clings to their face!
 

smashbot226

Smash Master
Joined
Sep 1, 2007
Messages
3,027
Location
Waiting for you to slip up.
Smashbot, the Even Lazier Sonuvagun

Pre-Post Edit: I'm finishing this at god knows what hour in the morning so some of the later comments will decline in quality.

Without further ado, another week's worth of rants, ravings, and unsubtle racial slurs.

Rulue is some broad that I've never heard of from a game that I've never heard of. Obviously 1/5, right? Seems like it, since she's been COMPLETELY IGNORED for about five pages after conception from what I can tell. Well, if you don't mind if I talk about internals, the NSpec is pointless, the recovery move is borderline broken in concept, and SSpec encourages mindless spamming. You go out of your way to highlight which of her moves you should not use and most of the inputs are generic. While you have some decent ideas sprinkled about, the set itself is rather run of the mill. 1.5/5

Wh-What? Freakin' Fred? Created by dave, who I worked with during Pinkie Pie- little known fact. So he warns us with a tacky set but I suppose Fred is sort of like that anyway. The Freak meter seems a bit excessive, since he can just chase after opponents and effectively cause them to suicide. However, I do like the visualization on his grab/throws. It seems people are trying to get my votes on purpose... Wait, what? Pancakes? I thought Fred was a barber. Or at least had a moveset focused around activating his meter and stuffing hair in his pocket for later use. You claim to have spent three and a half hours on this- well, I imagine some of it was goofing off- but then I began to ask a question you already answer:

Obviously rushed, yes?
3/5 for not making hair mechanics a throwaway but for sort of slacking on everything else.

Moon Child has a couple of things going for it in a sea of problems. For one, you manage to shoehorn several of the masks from the game into the set, which shows you're creative enough to come up with a use for even for masks with no potential. And... that's it. I suppose "proppy" is an understatement for a moveset that only uses masks to attack, but even with all the variety they offer, you go with some of the most generically-described attacks I've ever seen. The Mask of Truth- an item that allows Link to see what cannot be seen with the naked eye- shoots out a FIRE BALL. Bunny Hood is a generic dash. Stone Mask has no sense of balance put into it. I actually prefer Uboa to Moon Child. 1/5

Batman... I'll admit, I was prepared to completely hate Batman after skimming through it. Using Flash Grenades, not Smoke Bombs? An Ftilt that looks about as generic as it sounds? 1/5 even before the Smashes? Goodness, this'll be quick and painless... and then I read it. I'm happy to say I was wrong. While I still disagree with some of this set, such as Batman pulling himself toward the target and not vice versa, there's still quite a bit in this set that I enjoyed. Most everything about this set is deliciously in-character, especially the Bat Lasso, and even if some of the other inputs are generic, I enjoy some of what you've given Batman, a set that I imagine would be ridiculed. 3.5/5

Wait, I missed someone. Ramses, the only Courage villain this contest that has actually managed to terrify me. I've already heard good things about this set: even MW likes it, so it must have some merits. Even if Khold made it (WARY). However, I've enjoyed it quite a bit, mainly because of the dual playstyles Ramses offers. You can hold onto the slab and recover health, forcing the opponent to go on the offensive, or let them hold onto it to fill up the stage at their expense. And a DSpec that could blow out speakers. How evil. And then HOLY HELL. A bunch of moves that revolve around this dual playstyle that keeps the foe's on their toes and Ramses three steps ahead. Even if a playstyle section would've been nice, Ramses still has enough going for it to be your best set as of now, Khold. And yes, I did read the Khold Day sets. 4.5/5

And speak of the devil, first up is Knight Man... heh, I chose Royal Blue. Get it? ROYAL? Haw haw. Anyway, you fail to mention that you use his NSpec to recover in the NSpec description. Just thought I could point that out. And while I like the decision to go in a unique direction for recovery, it seems like you ran out of ideas for what could substitute USpec and slapped a generic buff to it. And no, I don't refer to DSpec as a buff because it actually makes use of Knight Man's shield mechanic. Outside of that, I like Knight Man because not only is the most notable quality about him- I refer to the shield- the central point of the moveset, but also because he plays like a knight. A sort of keepaway character in disguise. 4/5

Escavalier... I cannot stress this point enough: a Pokemon with base 20 speed does not equate to 8/10 ground speed. And no, you're not allowed to bend the rules to fit the character's playstyle. You could do it with Knight Man, why not Escavalier? Valid gripes aside, I'm reminded a bit of General Grievous like a certain someone mentioned earlier. Unlike Star Wars, however, I still believe Pokemon has its decency intact. I can't really say much about Escavalier outside of Twin Needle being used well enough. 2.5/5, since I think you've done much better even before this set. Just look at Knight Man and Ramses.

Dark Nu-... You clever sonuvagun. I fell for it too.

Phantom is someone I didn't think I'd see a moveset for because of his limitations. How happy I was to see that you've not only embraced his limitations, but used them to create an original moveset I haven't seen before now. Even if some inputs appear a little awkward- the SSpec comes to mind, I don't care if it's in character or not- the lion's share of the moveset is very well done. You know how I said Ramses is your best, at least in my opinion? Well, scratch that. 5/5

Kimiko is someone who I completely forgot about. Let's see, proppy? Well, sort of, at least in the specials. Then again, the Shen Gong Wu are so central to the show so I think you get a little bit of flak taken off. I find it interesting how you managed to blend a defensive character with offensive properties; you want to pressure the opponent with the oodles of projectiles at Kimiko's disposal. Although I admit, Kimiko holds a special place in my heart for a certain reason. I don't know if I'm the only one who feels this way, but she reads so much like an MYM2/3 set that's ahead of its time. I haven't really seen a set like this now or in MYMX. 4/5 for odd, completely legitimate nostalgia. That could also be because of the show but even then, I always prefer Clay to Kimiko.

Len is a Vocaloid. Which reminds me of the vast Miku porn that I've stumbled upon and saved. 1/5 for not being Miku.

HA. Just kidding, I freaking hate that show anyway. Who do you think I am, tirk? Anyway, you introduce a majority of your attacks as "soundless". This is why specials should always be first in a moveset, as I was taught by Ra's Al- I mean, Smaddy. It helps clarify the rest of your moves and wrap up the playstyle. Or maybe in this case, the smash attacks. Unlike your other sets, you've got something resembling complexity forming with the speaker and Rin. However, it's dragged down by general generic inputs and lack of playstyle section or any explanation of what Len's plan is. 2/5, which is an improvement over Moon Child IMO.

Finally, the reason I've been up since TWELVE IN THE MORNING... wait, this isn't Nick. Kanden is a Hunter from... my personal favorite post-Prime 2 Metroid game ever. Screw you, I don't care what you think. I'd like to mention that Kanden is possibly my least favorite hunter because he's essentially Carnage with a space suit. Anyway, some of his moves feel boring to an extent, with USpec being the worst offender. AND MOMENTUUUUUM?!?!?!? At least it makes more sense than Snake. And several of his moves act as grabs (yaranaika). And it's well-organized, unlike certain other sets you've made in the recent past. Not to mention the refreshing playstyle of duping your opponents into taking your slugs like a female dog and destroying anything in your way to do so. 4/5

Okay, you evil mother lover, I read through all four of these when I thought I was done. Fefnir looks like a powerful guy and while he utilizes a mechanic already used by Grievous and Escavalier- a notion which you seemed to acknowledge- it's unique in that the two weapons aren't restricted to melee combat. But he's more interesting than that- he can create his own flight plans for his projectiles, which is a nice step away from what usually constitutes a heavy-hitting character. In all honesty, Fefnir is my favorite out of the four. And not because I've only read him and making false assumptions NO SIRREE (WARY) (WARY) (WARY). 4.5/5

Next up is Androg- I'm sorry, Harpunia, which I assume is a play on words with Harpoon. Since it has spear/sword-looking things... damn am I tired. Moving on; despite being in college with enough lectures, the magnetism mechanic is certainly interesting enough to warrant expanding upon in later movesets. It switches up the playstyles of several characters and force them to play on Harpuia's turf. Even if some of the inputs are uninteresting and the playstyle, outside of magnetism, simplistic, a good portion of the moveset revolves around making use of the opponent's polarity. And like you say, he's a momentum-based character... without making use of his own momentum. Quite ingenious now that I think about it. 4/5

Pre-post edit: At about this point, I recall getting drowsy enough to fall asleep at the computer. Sorry nick :(

Phantom looks like a typical Megaman Leader; the broodiness and the "hmph" factor gives the impression, anyway. The way Phantom abuses the shield is what impresses me the most, as it really gives the impression that Phantom really lives up to his names; dashing around while tossing stuff at the opponent. No, not the shuriken platform or how the katana appears in, like, two or three moves outside the grabs despite its status as one of Phantom's signature weapons. Which is something I commend, as it means you're not copping out with sword-based attacks, even if they're replaced with mini-projectile spreads. Trading green apples for red apples, in my opinion. Phantom is still a fairly competent moveset, although it's not my favorite. 3.5/5

Leviathan is... a joint set with Majora? Well, I'm sorry to admit that I'm skeptical about the percentage between user input. Not to say Majora hasn't done anything well, as Sceptile has proven us. Either way, on with the set. You make a very bold movement with creating an entirely original mechanic that affects not just Leviathan, but every character in MYM/SSB. I like the brass balls on that notion! I'm a little worried how certain sets like Hugo sets or Vol Opt would work underwater. Pretty sure it's a 100/0 match up against Charizard. I haven't even touched down on the set, have I? Well, it's rather hard to; you see, Leviathan is the first character I've seen to take advantage of an entirely new mechanic, so it's hard to grade her on a regular scale since she doesn't exactly have anyone to compare with. Otherwise, you have a very unique trapper that makes a bold statement. 4/5

Maxwell... USmash FSpec BSmash BSpec BShield

Just to be a jerk, I was considering writing the review in that format but figured it'd be too time-wasting. 100000/5

Deviljho looks like an entry in the current trend of giant characters. While I don't think the entire portion of taxonomy/background is necessary and you've already got a rather daunting figure to be compared with (Vol Opt), I was optimistic going in. The first thing I notice is that he's very underpowered; his size doesn't warrant easy avoidance and Vol Opt is already ridiculously heavy. You fail to mention how long opponents are stunned for in NSpec as well. Your special moves also fall short in terms of uniqueness, with DSpec being the exception. Otherwise, it feels like the archetypal giant character but is your biggest leap in quality, as I'm sure many people will agree. 3.5/5, and good job, Majora!

Shelmet is certainly an odd appearance, especially with Escavalier appearing just a few pages ago. Still, I shall read on! It's in-character and offers an interesting playstyle with acid puddles and the addition of self-damage with Acid Armor. There's some great interaction between all of his moves and Acid Armor, encouraging players to use it at their own expense. In other words, you gave something with very little potential a fun moveset. 4/5

First of all PC, damn you for taking up another thirty minutes. Second, Bass.EXE is the first time I've ever seen you make an actual set. Quite fitting that a final boss be my final set I comment on for this week, eh? First off, I appreciate the gifs that come along with the descriptions, as it helped my tired butt figure out what in God's name I was reading. Although his USpec reminds me of a certain other "double or nothing" recovery move, cough cough. Otherwise, I do picture Bass as a peculiar type of rushdown character who wants to keep them in melee range for Fsmash, but make sure their percentage is not too high to basically nullify FSmash's KO potential. Although this is all just speculation; a playstyle section wouldn't hurt. But PC, you've shown that you've got some cowboy under that hat, the walk with the talk. Goddamn am I tired. 4/5.

Oh right, I have a Halloween set. Silly me. Looks like I'm getting another zero hours of sleep.

You ungrateful ***************.
 

majora_787

Smash Hero
Joined
Jun 23, 2007
Messages
6,122
Location
Texas
Pre-Post Edit: I'm finishing this at god knows what hour in the morning so some of the later comments will decline in quality.

Without further ado, another week's worth of rants, ravings, and unsubtle racial slurs.

Leviathan is... a joint set with Majora? Well, I'm sorry to admit that I'm skeptical about the percentage between user input. Not to say Majora hasn't done anything well, as Sceptile has proven us. Either way, on with the set. You make a very bold movement with creating an entirely original mechanic that affects not just Leviathan, but every character in MYM/SSB. I like the brass balls on that notion! I'm a little worried how certain sets like Hugo sets or Vol Opt would work underwater. Pretty sure it's a 100/0 match up against Charizard. I haven't even touched down on the set, have I? Well, it's rather hard to; you see, Leviathan is the first character I've seen to take advantage of an entirely new mechanic, so it's hard to grade her on a regular scale since she doesn't exactly have anyone to compare with. Otherwise, you have a very unique trapper that makes a bold statement. 4/5

Deviljho looks like an entry in the current trend of giant characters. While I don't think the entire portion of taxonomy/background is necessary and you've already got a rather daunting figure to be compared with (Vol Opt), I was optimistic going in. The first thing I notice is that he's very underpowered; his size doesn't warrant easy avoidance and Vol Opt is already ridiculously heavy. You fail to mention how long opponents are stunned for in NSpec as well. Your special moves also fall short in terms of uniqueness, with DSpec being the exception. Otherwise, it feels like the archetypal giant character but is your biggest leap in quality, as I'm sure many people will agree. 3.5/5, and good job, Majora!

Oh right, I have a Halloween set. Silly me. Looks like I'm getting another zero hours of sleep.

You ungrateful ***************.
You'd actually be surprised. I wrote nearly half the set. Of course, Nick edited OVER and REWROTE most of the half I wrote. :p Because he's better at the actual writing of the set than I am.

You want a set that was a joint that I was actually not helpful on? Harpuia. :awesome: Which is why it isn't a joint anymore.

But yeah. Anyway. Jho was UNDERpowered? My first two revisions went on about how OVERpowered he was. :p But yeah, this is definitely my best set so far. I hope I can make another one this good or better.
 

ProfPeanut

Smash Ace
Joined
Oct 1, 2008
Messages
727


Before the previous Grand Galloping Gala, Octavia was just a skilled yet unrecognized cello player. Ever since then, however, she has become quite the famous mare, praised for her melodious concertos and unparalleled talent. She has a remarkable control over the music she plays, able to make her notes come to life for her audiences and peers. Why is she here, then? Because it’s time that the Brawl had a taste of truly fine music…

Size : 2
Weight : 8
Ground Speed : 3
Air Speed : 4
Traction : 5
Jump Height : 3
Fall Speed : 7


Well, Octavia’s not going to be winning any races with these stats. Her cello adds some much-needed weight, but it in itself is no hitbox; the foe will need to hit Octavia to deal any damage. And I’d advise against having the nerve to suggest that to increase mobility, Octavia ought to dump her cello. You would expect her to play music with no medium of doing so?

Introduction


Regardless of whether Octavia’s cello is actually a double bass or not, there’s no disputing that she can’t play such a large and unwieldy instrument while running and jumping all over the battlefield. Normally, when moving, she carries the cello on her back and holds the bow in her right hoof. But in order to use a good portion of her moveset, one must tap B so that Octavia will stand up and set the instrument on the ground, taking her Music Stance. While in this stance, she idly plays notes when not attacking, and can perform any and all attacks that are usable in this stance. But in return, Octavia remains totally immobile and loses the ability to dodge, crouch and even pass through platforms. If one wishes for Octavia to move around once more, one must again tap B so that she may spend time packing the instrument back and returning to her Normal Stance. Switching between these two stances takes less than a second to perform, and one can tap B in the middle of attacks to make the attack transition to a change of stance once the end lag finishes.

Getting dealt knock back will throw her back into a Normal Stance, but she can retain her Music Stance if she escapes from a grab so long as it doesn’t displace her. Pushing wind effects will only make her slide across the ground, while weak flinching, dazing and sleeping can incapacitate her without throwing her out of her stance.


Exposition


All of Octavia's specials require her to be in her Music Stance in order for her to perform them. Only her Up Special has the boon of being useable while airborne.

Neutral Special - Harmonic


Octavia begins to play a slow deep tune for a quarter second. Any attack that hits her during this duration will be countered back at 1.25x damage as Octavia responds with a jarring high note without taking knockback. One will need to hold down B to perform this move, as tapping B simply switches Octavia's stance.

She’ll continue the slow tune a half second after the counter time is spent, which may seem quite laggy and pointless – unless the input was still held down. Octavia will then transition to a riveting melody that lasts until two seconds after the input was first held down. Releasing the input lets Octavia finish with more high notes, creating a fast sonic shockwave around her {10%} that does a good job of knocking foes away.

But supposing one holds the input past this phase as well? If Octavia was able to play this composition for a whole two and half seconds without countering or releasing, the climax of the piece creates three notes that will encircle Octavia and shield her from the next three attacks that may deal knockback to her. As a visual indicator, a note will disappear after absorbing an attack, preventing all damage and knockback. While this is a very ideal position, Octavia unfortunately can’t use her Neutral Special again while she has a note shield, otherwise swapping her stance.

Down Special – Fine Tuning


Octavia takes time to adjust the tightness of the cello's strings. In the one second duration of this move, one can tilt to any of the four cardinal directions [Up, Down, Left, Right] with the movement pad up to four times. The move will then end, but one can end it early by pressing the input again, allowing one to use three or less directions more quickly.

Well, what did that accomplish? For so long as the stock lasts, or until one repeats this move, the cello now has a set of up to four instructions based on the inputs pressed. These instructions will alter your music-based attacks; Up and Down each create opposing differences for your music, while Left or Right both reset to the normal properties of the move. The instructions cycle endlessly, and don’t affect all of Octavia’s music, such as her Neutral Special and her grab game.

This can be very tricky to use correctly, as your opponent can learn the pattern if they’re observant enough, and so one may be forced to use this move again to overwrite the previous instructions with new ones. Simply pressing the input twice can serve as a quick way to erase all instructions as well. However, the right application can make it much harder for the foe to dodge Octavia's music, as they must now anticipate your music changing speed or taking differing effects, messing up their timing and catching them unawares. But what are these effects? In good time, dear reader, this is still but the prelude.

Up Special – Beamed Quaver Notes


Octavia plays a long high note, then plays the next four directions one inputs while a long black bar note materializes where Octavia stands, raising her up as it calmly grows into a doubled barred quarter note as tall as Octavia’s instrument. It will float straight up a distance of four Battlefield platforms at the speed of Bowser’s dash, carrying Octavia along with it, if one inputs nothing after using the move. But if one inputted directions during the start-up, the move will split the distance travelled between the inputs and follow those directions in sequence.

Well, it seems Octavia isn’t so immobile after all; this move functions as her personal moving platform. She is able to perform her entire ground game while the note is moving, such as charging up a note shield as she zigzags through the air, or preparing a sound shockwave as the note slides across the stage. One is also free to pack up and jump off as the note flies off by itself. Unfortunately, one can’t use this move if one still has a note created by this technique onstage.

The double quarter note itself is a hitbox {8%} with decent knockback, and can’t pass through the stage, though one can direct it to pass through a fall-through platform to drop Octavia off there. The move ends with the note sliding down back to a bar while Octavia is lowered to the ground, unless one was foolish enough to end it in the air while in her Music Stance, which will leave Octavia in a helpless state.

Tuning will also be split like directions, though the distance travelled remains the same. The note’s speed is affected; the note can move as fast as Pit’s dash, making it better for getaways but limiting the time you have to pull off moves while riding it. Alternatively, the note can move as slow as almost anyone’s crawl, which gives you more time to attack while remaining mobile, but also makes you easier to hit. Perhaps some quick hands may even be able to change the tuning of the strings as the note rises from the ground, allowing upcoming music to play on instructions different from the note’s.

Side Special – Sonata in Bass Clef


Octavia begins to play a flowing melody that soon manifests as a staff beginning with a bass clef and dotted with tiny musical notations. The staff is normally as thick as a smart bomb, and moves as fast as Piplup. With some fine tuning, it can move with the speed and width of either Falco’s lasers or a Waddle Dee. The entire length and pace of the staff expands or contracts as it cycles through the tuning instructions every second.

For as long as the input is held, Octavia continues to play the melody as the staff lengthens onwards. One can tilt up and down to make the clef at the start of the staff slowly climb or fall, or tilt left and right to make the clef near-instantly turn around and overlap over itself. The rest of the staff will continue along the path directed by the clef like a snake’s movement. Care that the staff can only overlap twice, otherwise rebounding on existing overlaps or not turning at all over two overlaps. But especially be warned that should one drag the clef too high or low from the staff’s starting position, the entire staff will shatter as Octavia reaches a note too far from the original melody, suffering quite some end lag. Of course, letting go of the input cuts off the melody and lets it fly on its own. A quick vertical sojourn with your Up Special can also allow one to start the melody in areas much higher or lower than possible, with the benefit of the staff simply extending from Octavia’s cello to the starting position.

Ah, but we haven’t touched on what this melody does. For as long as the bass clef at the start of the staff collides with the foe, the staff will deal a constant 2% per half second so long as that foe overlaps with it, even flinching him every three seconds. Not only that, but being hit by same clef repeated times accumulates this effect, while an area of overlapping musical staff can deal 3% or 4% per half second instead; this means that landing the clef on the same foe thrice makes the rest of the staff a dangerous zone that flinches the foe every second. Changing the tuning allows one to potentially hit the foe multiple times, then prolong the duration of the damage, giving one some very far-reaching hitboxes indeed. Do try to hit the foe with clef, as they can otherwise pass through the rest of the staff harmlessly.


Development


Octavia’s normal attacks have the benefit of being usable in both stances. While this means her Normal Stance doesn’t make her as helpless as one would believe, the musical versions of these moves are arguably much more interesting. Naturally, her bow has the benefit of being a disjointed hitbox, as her music does not necessarily parry off attacks. Also, any music attacks in this section follow tuning instructions one at a time in sequence. For example, with a short tuning of up-down, the first musical tilt Octavia performs will use the up instruction and the next will use the down instruction before repeating the instruction order.

Jab - Martele


In the Normal Stance, Octavia makes two graceful swings {3%, 3%} with her bow at the area in front of her. Reliable quick damage, yes? In the Music Stance, Octavia swings her bow to either her left or right {5%}, depending on which side has the closest foe, before then swinging it at the other direction. These swings are obviously mirrored, and come out with no lag; most serviceable if one needs to quickly parry something. On another note, Octavia won’t be pushed into Normal Stance for making her bow parry off a move.

Forward Tilt - Crotchet


When walking about, Octavia makes a large upwards swing with her bow {6%}. It does leave her open at the end, but the knockback sends the foe sliding prone on the floor. Not many foes can get up and reach Octavia again before she can swap to her Music Stance.

With her bow sliding across the instrument’s strings, though, she emphasizes a quick note to create a large quarter note, stem upwards, that hovers on the side she used this move on. It rests for a moment then quickly spins clockwise once if used on her left; the move is mirrored when used on her right instead. This note has the advantage of soaking up projectiles even when it won’t impede foes, but hardly anyone will want to be close enough to get hit by the note head when it spins {7%}, dealing knockback not unlike the normal version of this move. Only after returning to its original position will the note fade.

Some tuning can alter the timing of the note's phases. Either, on Up, the note flips without resting, yet pushing foes only half as far without knocking them to prone, or, on Down, the note takes its time to block ranged attacks before kicking foes 1.5 times as far. One can’t use this move over another quarter note, but one could perhaps make use a moving platform to leave a number of these in Octavia's wake.

Up Tilt - Diese


In her Normal Stance, Octavia makes a fast upwards poke with her bow {4%}. A lagless upwards-knocking hitbox for the average pony. Ah, but why not play music instead?

In her Music Stance, Octavia plays some notes of a higher pitch, creating a cloud of sharp symbols to hover above the area she played in. These symbols remain in place for a second before dissipating, and Octavia can only one of these out at a time. Any foe who runs into this cloud will be repeatedly struck by the sounds {1%} before getting knocked to the side, not unlike Zelda’s magic. This allows you to guard the air above you; with some clever application of your Up Special, you could potentially make recovery much harder for your foes as well.

Tuning changes the knockback direction of the move to throw the opponent upwards or downwards. While your opponent has quite some DI upon launch and won't need to fear getting knocked out except on ludicrous percentages, altering where they will be launched has its applications for giving Octavia breathing room.

Down Tilt – Breve Rest


Octavia doesn’t save much hurtbox space by crouching down, as she merely bends her front legs down to lower her head. From here she can sweep her bow across the ground in front of her {4%}, which knocks foes upwards with enough hitstun to follow up with her Forward Tilt. Simple, quick, and serviceable for when one isn’t in Music Stance.

Otherwise, Octavia stops her bow for a moment, withholding her music, then resumes playing. A small black square appears at her back hooves before fading out of visibility; this rest symbol will remain at the spot it was played in for up to five seconds before fading for good, or if a foe would be within the radius of a Battlefield platform near it. Should a foe come near, the silence of the rest symbol will give way to an outpouring of music, manifesting as a swirling vortex of notes {2%} half as large as a Smart Bomb explosion. This causes repeating flinching damage not unlike a certain tornado, yet can be DI’d through or out of.

This move serves as quite the trap for keeping foes away; there’s no harm in leaving it at your feet to punish close-attacking foes, but leaving it behind during a trip on your Up Special can act as a good deterrent. Tuning does some interesting alterations as well: Down will decrease the activation area to a CD’s radius, yet vastly increase the damage output {4%}, while Up will cause it to activate should any foe within a full Smart Bomb explosion’s area be nearby at the cost of minimal damage {1%}. Perhaps one may want to bait the foe into a dangerous area, or discourage them from going into another this way.

Dash Attack - Pegbox Twist


As expected, Octavia can only perform this when in her Normal Stance. She attempts a front flip so that for a few moments, her cello faces anyone in front of her . Any attack that collides with the cello will be bounced off, any projectile reflected by the strings. The force of the foe’s attack meanwhile pushes her a good distance away as she twists to land in her Music Stance. Should no attack connect, however, Octavia will land prone on the ground with hardly any invincibility frames to make up for it. Time such techniques well!


Recapitulation


Octavia grab game is limited in that she can only utilize her grab when in her Music Stance. Certainly quite the limitation, but one will find that the capabilities more than make up for it.

Grab – Enrapturing Aria


Octavia plays a very melodious tune as a swirling staff of notes streams from the strings. Unlike the staff created by Octavia's Side Special, this one is thinner, swirls in a Jigglypuff-sized circle, and begins with a treble clef resembling Octavia’s cutie mark. The grab takes a half second to perform as Octavia plays the tune; afterwards, the staff will speed at the foe at an amazing rate, attempting to capture them, even when airborne. Given how fast it can go, however, it may not be hard for your foes to dodge in time, wherein the staff will dissipate after passing them by. Octavia can only use her grab again once the swirling staff has disappeared, and switching or getting knocked into her Normal Stance will also cause the staff to shatter.

Oh, but this melody has much more range than that, believe it or not, should Octavia have any music on the screen created by her Side Special, tilts, or smashes, Upon input, the note nearest a foe that it has not harmed will transform into the swirling staff described above, taking a quarter second to do so before zipping to catch the foe in the same manner.

Suddenly the foe must anticipate a grab from any of the notes Octavia plays, especially after dodging them the first time. The Side Special is a versatile tool in this regard, morphing the whole staff into a grab; one can allow these staffs to fly over the heads of you foes just to make them cautious, or fire snippets of sonatas straight ahead to make the path much more difficult for the foe. The Down Tilt can act as an invisible grab waiting to happen, and the Forward Tilt can both absorbs projectiles and grab the foe. If such a barrage of potential grab attempts proves to be too much, the foe can always allow themselves to be hit by the music in order to disable such possibilities.

Their alternative is a frightening position, after all. A foe grabbed by the swirling staff will remain in place as the music circles their head until they escape; if the foe was grabbed in the air, they will float downwards very slowly while grabbed until they land. Any damage will immediately break the grab and shatter the staff, even damage from Octavia. Thus, her pummel, performed by re-inputting the grab, strengthens the melody through increasing the grab escape difficulty by a tenth.

Side Throw - Perdendo


The swirling staff will unwind and float to the inputted direction like a slower version of the Side Special. The foe, still charmed by the music, will follow the notes at their run speed or jump after it, possibly past the screen if they do not attempt to shake out of it. DI will alter their speed to make them dash or slow down, which may be enough to escape; for them to break free, they must not come in contact with the lazy staff for up to one second. By then, though, Octavia should be a good distance away, or perhaps much closer than the foe would prefer. Keep in mind that the staff from this throw can’t be recycled into another grab, and that it still bars Octavia from grabbing again until it as left the screen.

Up Throw - Sforzando


The staff will suddenly halt as numerous tiny sharp symbols appear next to the many notes on the staff. Then the whole melody bursts in a finale {14%} as the foe is sent flying upwards from the force, KOing at 150%. This technique functions very well as a stock finisher, but it can also be used to throw one’s foes a good distance away.

Down Throw - Calmando


This move is limited in that it can only be used when the foe is on the ground. The staff will slow down as it gently fades into the foe’s head, playing a lullaby that would rival Jigglypuff’s skills. The foe will then fall asleep, giving much opportunity to readjust Octavia's position, repair tuning and replace notes onstage before the foe reawakens. Unexciting, but stalling your foe for that long has more than enough practical applications.


Soloist’s Silence


Despite the many compositions at her disposal, Octavia will more than once find herself thrown off by the foe’s relentless attacks. Thankfully, she’d never leave behind her bow and instrument, hanging onto both as she careens skywards before placing the cello on her back once the hitstun is finished. The cello is well enchanted by some kind unicorns so that it will not fall off Octavia’s back when she carries it. It has also been magically protected from any and all damage, a trait which has its uses for when Octavia simply wants to return to playing her music.

Neutral Aerial - Spiccato


Octavia makes a quick whole frontal flip, then realigns her orientation. Her cello spins along with her, thus facing at every direction at least once. During this move, the cello will block any attacks that collide with its main body and rebound the attacks’ owners a good distance for good measure. This is a fine technique for freeing oneself from melees, as the cello covers a lot of space, but the ending and landing lag leave something to be desired.

Forward Aerial - Double Stop


In a manner similar to her jab, Octavia swings with her bow twice at the space in front of her {3%, 3%}. The move is fast, and brings no harsh ending lag with it either. On airborne foes, both hits will flinch and push the foe downwards slightly; on grounded foes, however, the vibrations of the second swing are enough to leave the foe dizzy for a few moments. Most useful for switching back to Octavia's Music Stance, but it has a bit less range than one might believe.

Down Aerial – Staccato


Octavia takes up her cello as though she were setting up her Music Stance – which is still not possible in the air. Instead, she drives the cello downwards at an increased fall speed, her cello blocking any attacks from the side she was facing upon performance, and also knocking foes far away {6%}. Upon landing, Octavia quickly sets up to her Music Stance, faster than normal. Should one wish to return to playing sweet music quickly, then this option may prove useful.

Back Aerial - Col legno


Octavia leans back to face her cello towards anyone behind her. The cello retains its properties from the Neutral Aerial, blocking and rebounding attacks. However, the knockback is nearly doubled to compensate for the limited range, making this technique very useful for spacing indeed, or perhaps a gimping tool for the confident. Do try not to land while performing this, though, if you do not want to leave an opening for the foe.

Up Aerial - Pizzicato


Octavia quickly arches her back upwards, making her cello jump before it returns on her back. The cello is the hitbox here, lightly tossing up anyone it collides with {8%}. It certainly won’t KO except in the most unique situations, but it does inflict a lot of hitstun; almost enough that the foe won’t regain control for until one and a half seconds afterwards. That should discourage enough foes to keep from attempting their spikes.


Coda


Smash attacks? I do believe that the cello’s range and Octavia’s skills provide for some noteworthy finales to a stock. Naturally, these are only accessible through her Music Stance.

Forward Smash – Perfect Octave


Octavia plays two resounding whole notes at once, manifesting as two small unconnected ovals that appear next to her on the side this move was performed on. These ovals are a Jigglypuff apart vertically, and they fly in a straight horizontal manner at Falco’s dash speed. The knockback from either of these ovals {15% - 25%} is enough to end the stock of anyone around 140%-99%, and the notes will not stop traveling until they move past the screen, even moving through the stage.

Given the speed and the space between the whole notes that the daring may attempt to jump through, this move may not be hard to dodge. Octavia is also limited by only having one of these out at a time, limiting this move’s usage - ah, but you have forgotten about the Down Special then. The two notes cycle through the instructions on the cello, changing every second. They can shift to become as fast as Sonic with half the knockback, or as slow as Zelda with 1.5x the knockback. Naturally, with some clever manipulation, one can set up one's foes to time their dodge wrongly and land with the slower, more powerful version that the performance can cycle into. And should your foe dodge both notes, there’s still the option of turning them into a swirling enchanting staff of music.

Up Smash – Rhythmic Cadence


Octavia strikes two chords from her cello, as though concluding a phase of the piece. These chords materialize as two columns of three stacked note heads over Octavia, each column spaced apart by a CD’s width; they then ascend straight upwards to the top of the screen at a brisk pace. Each note head is an individual hitbox {5% - 9%} with decent vertical knockback KOing at 200%-160%, disappearing once it has collided with a foe. If chosen by the grab, only one column will transform into a swirling staff, leaving the other to ascend by itself; the column must be intact for it to transform, however.

It’s not outside possibility for a column to hit the same foe thrice, and it is certainly possible to knock a foe through the top blast line this way, given that the somewhat weak knockback will chain a foe into the note head lower down the line. Tuning will speed up and slow down the chords accordingly much like her Forward Smash, respectively narrowing or widening the space between the chords by changing their horizontal positions. So not only do the chords rise at unexpected rates, they also expand and contract to increase their range and catch nearby foes.

Down Smash - Bass Gesture


In a surprising move, Octavia stops playing to wrap her hooves around te neck of her cello, as though to swing it. Which is actually what happens on release: Octavia swings her cello around herself, hopping midway through the move. The main body of the cello is the hitbox {9% - 23%}, and a large disjointed one at that, KOing at 120%-100%; it covers the ground to the left, the air to the right, the air to the left and finally the ground to the right of Octavia, in that order. The move ends with Octavia picking up her cello, now laying on the ground to her right, and resuming the stance she used this move in.

Oh, yes, one can actually perform this in Octavia’s Normal Stance, perhaps as a spare knockout option. But that’s not all – with some very good timing, one can press the jump input midway through the move, between the cellos swinging at the air to the right and to the left. This will cancel the move into Octavia jumping upwards, placing the cello back on her back and facing the left.

Just as the Down Aerial and Dash Attack serve as less vulnerable alternatives to changing stance, so too does this technique. The heavy hitbox that Octavia charges should deter most foes from approaching to interrupt this escape. This can be especially useful for jumping off of your Up Special, allowing one to release the large flying note while Octavia lands elsewhere.


Finale - Sonus Opus


The Smash Ball is now Octavia's, and the concerto comes to a close. Three other musical ponies have appeared in the background to accompany Octavia with this performance - a pianist, a sousaphone player, and a harpist.

A giant musical staff overlays on the battlefield, with a treble clef marking the left. Notes of all kinds will begin to pour in from the right, moving leftwards briskly and knocking away foes {10-20%}. Octavia's role in this is a purplish quiver in the lines and spaces, slowing down anyone in it and greatly amplifying the damage and knockback of any notes on that line. Octavia can move this quiver up and down the staff through the movement input, and A, B, Z, Left and Right can also be pressed to skip to any of the lines of the staff respectively. This finale lasts ten seconds, ending with a cadence covering most of the staff and difficult to dodge. Then the staff fades and Octavia's companions disappear.


Performance

Octavia is no easy pony to play as, as most of her abilities revolves around her being mostly stationary, which is indeed quite the style shift in Brawl. And let us be honest - although Octavia has many methods of defending herself, shielding being a primary such method, the foe carries many techniques of their own as well, and Octavia will probably find herself off her stance for about half the match on average. But that's what the aerials and normal tilts are for, throwing the foe off as you set up once more. Your goal in that regard is to keep that time in Normal Stance to a minimum, for the concerto must continue for Octavia to succeed.

Octavia has few musical moves than can be used repeatedly, as many of her moves only allow one such set of floating notes at a time. Her Side Special is useful in this regard, as it can easily cover both sides of the stage, serving as either a damage racker or a potential grab. Tilts can guard your position and do quite some damage, but not for long.

How and how often you use your Up Special depends on how your foe plays, but you will need to use it to make up for Octavia's immobility. True, they can simply jump up and knock Octavia off her perch, but what of all the Forward Tilts that should be guarding the trail? You can use your other tilts as stage deterrents, and you can fire off your smashes from odd levels too; Side Smash makes a particularly nice damage racker as it also keeps foes away. Staying on the move while still playing music is a key technique in making the sonatas flow and the damage percentages rise.

Your Down Special is no doubt a complicated move. Perhaps on application, one may only use it once to speed up all moves or such. But some may be able to properly manipulate and remember the strings that the music moves to, and then it shall be your opponents left confused instead as they dodge into your attacks and take the brunt of the slower yet stronger tunes. Learn to use fewer instructions if you can, but always try to defy your foe's expectations and make the music dance around around their heads.

If you can surround the stage with your music, then all the better to unleash a grab when the foe can't dodge. Your throws give you time and spacing to further play music and, when the damage is high enough, strike the final notes as your foes fly away. Naturally, it shall be a difficult fight against foes bent on keeping you from finishing the concerto, yet Octavia can be the master of the stage in good hands.


Treble Clef.png
 
Last edited:

flyinfilipino

Smash Master
Joined
Sep 11, 2007
Messages
4,319
Location
North Carolina
First of all,

Hahahaha, that was hilarious.

Anyway, moving on,

Escavalier... I cannot stress this point enough: a Pokemon with base 20 speed does not equate to 8/10 ground speed.

Kimiko is someone who I completely forgot about. Let's see, proppy? Well, sort of, at least in the specials. Then again, the Shen Gong Wu are so central to the show so I think you get a little bit of flak taken off. I find it interesting how you managed to blend a defensive character with offensive properties; you want to pressure the opponent with the oodles of projectiles at Kimiko's disposal. Although I admit, Kimiko holds a special place in my heart for a certain reason. I don't know if I'm the only one who feels this way, but she reads so much like an MYM2/3 set that's ahead of its time. I haven't really seen a set like this now or in MYMX. 4/5 for odd, completely legitimate nostalgia. That could also be because of the show but even then, I always prefer Clay to Kimiko.
To defend Escavalier a little bit, I personally don't believe that base speed necessarily translates to a Pokemon's movement capabilities. I think it's supposed to be more related to the speed at which a Pokemon can attack. For example, take a look at Scizor. The way it's portrayed as speedily moving about in the anime and its sleek, metal body might make you think it'd have a high base speed, but in reality, its base speed is only 65, which is quite slow. It's probably due to those big metal claws of his. Same with Escavalier; I don't think those big awkward jousting spear arms of his are suited to swift, precise movements. Besides, the Pokedex says it flies around at high speeds, so it must be true. (hippo) Anyway, that's just my opinion.

Also, thanks for the comment, smashbot! :bee: I think Kimiko was one of the cooler ones too (along with Omi). As for my writing style, it's probably because I'm old-fashioned and only around for every other contest (D). If you haven't seen them yet, I posted movesets for Omi, Clay, Raimundo and Jack Spicer too in MYM7/8.


I hope I'm not interrupting anything, ProfPeanut.
 

Nicholas1024

Smash Lord
Joined
Mar 14, 2009
Messages
1,075
Venustoise is pretty close to being a breakout set. There's some nice stuff here, and centering the game around withdraw along with the various stuff you can do in your shell is pretty neat. However, there's still some pieces missing to prevent it from being truly great, as the aerials and grab game could obviously need some work and don't play into the play style at all. Still, the first half of the set works well together, and despite some rough edges (Bubble's description is a bit awkward, for instance), it's enough to support the set. Just work on getting all the inputs to add to the playstyle, you're almost there.

(Swalot is being skipped for the moment due to imminent revisions, and Ashley I commented the remixed version of before in MYMX)

Party Pete is an okay newcomer set, I suppose. There's a vague idea of play style with the time limit cola system, but there's no real rhyme or reason to the set aside from it, and not much else. To progress you need to give the numerous generic attacks in this set more application to a play style. Sorry for the short comment, but there's really not much to say about this obviously rushed set.
 

Junahu

Smash Ace
Joined
Nov 15, 2005
Messages
899
Location
Shropshire Slasher
MYMXI Avatar frames (optional update)

So, recently SWF has started allowing avatars up to 125x125px in size. In honor of this new optional limit. I've expanded this lonely little avatar frame. You'll have to colour it in yourself if you wanna use it on your own avatar. I must emphasise that this is purely optional. Go ahead an keep using the smaller frames (or no frames) if you want.


Just like the originals, you get those cool little stars to paste on your avatar. Because the avatars are bigger though, I/you can fit on two extra stars

Basically, there are six stars you can earn through MYM, and each star is itself ranked from Bronze to Platinum. Bronzes are easy enough to earn, while Platinums take real effort. There's no official ceremony involved, when you think you've earned a star, go ahead and stick it on your avatar

So, how does one earn one of these mysterious stars? Well;

Star #1: Stylish Star
A star earned simply through placing on a Top50 list. Have any of your movesets ever made it onto one of our coveted Top50 lists? Then congratulations! This star is yours!
place anywhere in any past MYM Top50 list
place within the Top10 in any past MYM Top50 list
place 1st (i.e. WIN) in any past MYM top50 list
A one of a kind star. Only the winner of the MYMX Top50 (in this case, KingK.Rool) may wear this coveted star.
Star #2: Proliferate Star
A star earned through the brute force of posting many movesets. How many movesets have you ever posted? Is it a lot? If so, this star is yours!
Have 3 movesets posted across your entire MYMing career, or post 2 movesets in MYMXI
Have 10 movesets posted across your entire MYMing career, or post 5 movesets in MYMXI
Have 30 movesets posted across your entire MYMing career, or post 10 movesets in MYMXI
Have 60 movesets posted across your entire MYMing career, or post 15 movesets in MYMXI
Star #3: Outspoken Star
A star earned through hard work and community spirit. When you read a moveset, you should tell the author what you thought of it. This is called "commenting", and if you make enough comments, you earn this star.
Comment 20 or more individual movesets in either MYMXI or MYMX
Comment 40 or more individual movesets in either MYMXI or MYMX
Comment 75 or more individual movesets in either MYMXI or MYMX
Comment a staggaring 100 or more individual movesets in either MYMXI or MYMX

Star #4: Tenacious Star
A star for those who never leave MYM. Earning this star means staying with MYM, posting at least one moveset in every contest. Yikes, I guess that's why it's called the "tenacious" star!
Either post a moveset in MYMXI, or have a moveset posted in MYMX. Welcome to the herd!
Either have a moveset posted in MYMXI and MYMX, or have a moveset posted in MYMX and MYM9. That's two contests in a row! Keep it up!
Either have a moveset posted in MYMXI, MYMX and MYM9, or have a moveset posted in MYMX, MYM9 and MYM8. Three down! I bet you're an old pro now!
Now for the tough one, 8 MYMs in a row, can you stick to it for this long? That's MYMXI to MYM3, or MYMX to MYM2. Wow! So many memories!
Star #5: Mini Star
A star for the brave souls who enter the weekly MYmini contests. Just enter a whole bunch to earn this star
Enter at least 3 MYmini contests.
Enter at least 5 MYmini contests.
Enter at least 10 MYmini contests.
Enter at least 20 MYmini contests. Wow, you're dedicated!
Star #6: Selfish Star
The easiest star in the world to get... or the hardest. You are your own critic; do YOU think you've earned this star? If so, then you have, it's as simple as that
Are you a humble Bronze?
Are you a simple Silver?
Are you an entitled Gold?
Are you a godly Platinum?
By the way, if you don't feel like sticking stars directly to your avatar, you can always just paste in these stars (
) into your signature instead.
 

Junahu

Smash Ace
Joined
Nov 15, 2005
Messages
899
Location
Shropshire Slasher
New Mini

MYM11: Week #3
Temporal minihole.


[23rd October - 29th October]
My apologies for the late start to the new mini. Saaaaaaaay. How about we make a MYmini about TIME? We want to see ITEMS this week, and they should have something to do with TIME. Either Timetravel, time-keeping, scheduling, or even some crazy item from the past. Well, what are you waiting for? A Halloween Mini? That’s next week! This week is about Time! So quit wasting mine and go make an item about it!


Week 2 was filled with some very awesome mini's. I felt they were all winners. But (again) I'm gonna have to say ProfPeanut's humorous Yahtzee left the best taste in my mouth. Stop making such great minis Prof, let the rest of us have a chance :bee:
Then again, MT's Whismur was awesomely loud, ForwardArrow's Phaaze was insane (a moveset for a whole planet? Wow), and Katapultar surprised me with a very energetic defense of MYM1 sets. The only entry that sucked was Every Loop from Sonic Ever. Whoever made THAT one should be ashamed of himself 9_9.
 
Top Bottom