• Welcome to Smashboards, the world's largest Super Smash Brothers community! Over 250,000 Smash Bros. fans from around the world have come to discuss these great games in over 19 million posts!

    You are currently viewing our boards as a visitor. Click here to sign up right now and start on your path in the Smash community!

Make Your Move 11 - It's Over, Duder!

KingK.Rool

Smash Lord
Joined
Nov 26, 2005
Messages
1,810
Thanks, Gatlin! That's fantastic news! The first MYM opened on the tail end of 2007... so we're pushing four years here. Crazy stuff.

To celebrate the occasion, have a Farfetch'd moveset originally posted at the tail end of 2006

All right, here we go with my next moveset: everybody's favourite Pokemon, Farfetch'd!


Farfetch'd​

History:

Farfetch'd is one of the original 151 Pokemon, and wields a leek as a staff. He's a popular meal. which is strange, considering there is no mention of any other Pokemon being eaten. He has pretty much no chance of getting in; he's a unibrowed duck with a leek. On the other hand, he's a unibrowed duck with a leek!

Characteristics:

Farfetch'd can break into a dash quickly, but his running speed is slightly below average. He has a low power level and good traction. He's fairly light, but falls about as quickly as Mario. This sets him apart from Kirby and Jigglypuff, because he too has about four extra jumps; each flap of the wings sends him farther then one of the puffballs' balloonings, but he also drops quicker between jumps. Therefore, his extra jumping is much more frantic then Jiggs or Kirby's. He has good aerials in sharp contrast with his subpar ground attacks.

Moveset:

B, Gust: Farfetch'd spins around 360 degrees, holding out his wing. A small twister, somewhat like the one in Link's stage in SSB64, shoots out slowly and then gathers speed. If it connects with anyone, they twirl around inside a few times before being shot out in a random direction. Decent knockback but low damage and slow startup.
>B, Fury Attack: Farfetch'd jabs forward with his leek about fifteen times in extremely quick succession. Each strike does 1 or 2 damage, though it's difficult to hit with all of them. A good way to rack up damage, but terrible knockback.
^B, Sand Attack: Farfetch'd flaps his wings quickly, propelling him slightly upwards, though not very much. If he's on the ground, a small cloud of sand is kicked up, making it harder to see in the area for a little while. His wings don't do any damage if they hit someone.
Down B, Swords Dance: About five short swords appear around Farfetch'd, revolving around him for a few seconds. For this time, he's vulnerable. If he's hit, the attack is disrupted. Otherwise, though, he quacks and the swords all shoot out away from him in straight lines. One goes up, one goes ahead, one goes back, and two go on diagonal paths.

A: Farfetch'd pecks forward quickly.
AA: Peck, then a light whack of the leek.
Forward A: A sideways swipe. Bad range for a tilt, but decent damage and knockback.
Up A: Farfetch'd brings his leek through the air in an arc forward, then he brings it back fairly quickly. Strikes twice, but not very strong.
Down A: A forward jab while he's crouching on the ground. Bad range.
FSmash: He swings his leek towards the ground from above with both hands. Sweetspot on the double-sided tip of his leek, but otherwise weak.
USmash: An upwards peck. Sweetspots, but it's hard to do it.
DSmash: He swings his leek forward, then back around him.
Dash Attack: A scooping motion of the leek, sending the opponent up.

Nair: He spins around, whacking with his leek. Like Ness's, Marth's, or Peach's.
Fair: A powerful forwards swipe.
Bair: Farfetch'd does a backflip, but unlike most backflips, it hits with his leek backwards rather than with his feet. A spike.
Uair: An upwards jab of his leek. Same sweetspot, but hard to pull off. Shoots them straight up.
Dair: Farfetch'd quickly swings his leek in an arc under him. Excellent knockback and damage. Think Marth's Dair.

Grab: He gets a one-handed grip on them.
A: A peck.
FThrow: A punch, launching them forward.
BThrow: Farfetch'd holds them behind him and kicks back.
UThrow: An upwards headbutt. Good combo starter.
DThrow: A simple throw into the ground, followed by a swipe of his staff. It can be DI'ed at high percentages.

Super Attack: Farfetch'd flaps his wings madly and a stream of air shoots out from him. It grows in width and shoots around the screen, heavily damaging enemies it hits and throwing them away.

Taunt: He quacks "Farfetch'd!" and nods.

Style:

Farfetch'd's style is based in the air. Due to his multiple jumps in addition to his Up B, he has incredibly good recovery, and he alos has several good aerial attacks. Once the opponent is in the air, the idea is to keep him there and whack him repeatedly without mercy. Farfetch'd also has several good KO attacks, making him a relatively well-rounded character, though his excellent jumps are cancelled out by how light he is.
 

ForwardArrow

Smash Ace
Joined
Aug 17, 2011
Messages
503
Kobold Clan
Kobold Clan is a pretty fun set, all things considered. The trapping is all stuff we've seen before, as are the minions for what it's worth. But I feel they're handled a bit differently here for what it's worth. They're mostly used to defend Trapper while he sets up, and then take advantage of the foe's various status conditions once they've moved into a trap or two. Sure, by MYM standards this is stuff we've seen before, but it's combined in a somewhat new way and I appreciate that. Not to mention the KO mechanic is pretty unique, and I like the risk involved. Main problems are that one of his aerials sends the foe into helpless, which aerials should never ever do on the basis it's overpowered as hell. That and... I feel the Kobold's weren't nearly fully capitalized on. Mostly they just run randomly around the stage or form a phalanx around Trapper. I'm pretty sure they could at least carry traps around and such. But whatever, it's a pretty enjoyable set and a solid effort.

Dark Star
I adore this set, to be quite honest. It's a bit hard to figure out how he plays unless you look real close, but trust me when I say it's worth it. Reality Tear creates an incredibly interesting zone of play for him to manipulate, not to mention all the ways he can manipulate his/the energy balls/the invisible clones/the foe/the foe's clones movement are truly incredible. I don't have much to complain about here, except that with the grab it's both impossible to escape and impossible to approach Dark Star when he's using if it's reversed when you dash slower then Charizard. I mean, that's a number crunching issue but it's an issue nonetheless. I also am annoyed that you leave it unclear whether or not lasers/dark star bounce off the dark lines and if projectiles loop through a Reality Tear. None-the-less, excellent set here, possibly my favorite so far.

King Ramses
If you haven't noticed from my talking about it EVERY time he is brought up in the chat, Ramses was one of my childhood nightmares, so it's interesting to see him get a moveset. The set here is actually pretty interesting, what with how he makes the foe hold onto the stone for dear life to avoid all his curses but at the same time gets benefits from the foe holding the slab. It really does make an interesting little sadistic choice for the foe and is quite fun on a whole. Ramses also has some neat ways to take advantage of the curses and has stock invisibility, which does at least add a fair bit of depth to his game. Main complaint is a lot of the stuff feels random and irrelevant, such as the water which doesn't contribute much to his game. Either way, it's still a pretty solid effort, not on par with Kabutops but I never expected it to be. Good work here Khold.

Le' Quack
...y'know, I still haven't decided what I think of this set. I love his balloon game, it's all very clever and Warlordian good stuff that we've come to expect. I feel the props within the balloon are vaguely tacky but they WERE in the episode so it's not OoC and it's what makes the balloon fun anyway. Anyway, the momentum stuff with that was all really cool and enjoyable. Main thing I can complain about with the main set really is the Down Smash randomly being a grab hitbox. I mean it fits into the playstyle but that's just silly.

That said though, I personally do not like the hypnotism stuff at all. It's in character for sure, but it takes so much out of the opponent's ability to actually play the game. I just don't appreciate that at all, especially conisidering a lot of the hyponotism grab game makes it easy to re-hypnotize them over and over again, gradually removing the foe from the game leaving them bored and frustrated. Honestly it's not a fighting game any more if one person is forced out of the battle while the other is tricking them around. The fact that it's pretty darn easy to hypnotize a foe doesn't help matters. I still like the set don't get me wrong, but it still feels a bit like it would be really annoying and completely not enjoyable to play against.
 

Kholdstare

Nightmare Weaver
Joined
Oct 10, 2008
Messages
1,441
The water makes him godlike in the air, gives him a recovery, and forces the opponent to find where the plug is, leaving them vulnerable to him attacking them when they aren't noticing him, due to the fog. I'll explain all this in the playstyle, when I write it in. Glad you liked it, though :)
 

BKupa666

Barnacled Boss
Moderator
Joined
Aug 12, 2008
Messages
7,788
Location
Toxic Tower
DEMASQUE
This is a quaint little moveset full of interactions, which is appealing to some extent, despite the most interesting concepts being (intentionally) hidden away. This definitely contributes to the mysterious overall feel of the set, which, in turn, contributes to you wanting to focus on reading experience in your newer sets...it goes without saying this is in-character. The mish-mashing of other characters' moves I'm guessing is your attempt at creating a flowing playstyle by piecing parts of dissimilar sets together like a puzzle, making slight alterations when needed. Yes, this is all well and good, but I do prefer his actual original moves, as once some sleuthing is done to find them, the interactions are well thought-out and clever (thieving a card off of a caged foe to get in there with them comes to mind). My enjoyment of interactions is why I find deMasque a palatable read, although there are bits and pieces for others with different priorities in there as well.

ASHLEY
I read and enjoyed this moveset before and it was funny. I like the changes. They are good.

PARTY PETE
Now, this is just monumental. A Clownbot set now exists, and it's a decent first crack at MYM. The laid-back feel of the character is certainly conveyed successfully through all his drinking and partying attacks...it feels as though the stage is being turned into a dance floor or something. The actual buffs are helpful, considering Pete is fairly weak to begin with, but it feels rather unflowing with how the buffs stack up: first, he becomes fast, then powerful twice, then a whole new beast. Each of these individual buffs could be focused on without the others tacked on, but I digress; the buffs are easily quite necessary if Pete is to serve as a competent opponent in the slightest. If you wanted a better sense of urgency, I might have had him lose control and take drinks faster (maybe automatically every thirty seconds instead of a minute), but yeah. Nice first set, certainly the glimmers of playstyle hidden in there ought to carry over to future sets of yours that will exist, eh?
 

Hyper_Ridley

Smash Champion
Joined
Dec 21, 2007
Messages
2,299
Location
Hippo Island
King Ramses

~The man in garbs, the man in garbs, KIINNNNNNNG RAMMMMMMMSEEEEEEEEEEES~

Now that that's out of my system, let met say that this is a pretty awesome set you have here. The way you implemented the slab was outright brilliant; it provides a simple (and useful) enough buff that the opponent will WANT to try holding on to it, but because it's a throwing item the opponent will have to try and essentially juggle it in the air to give himself a chance to actually use his attacks. The fact that the slab would NOT be in someone's possession most of the time makes it tons of fun as Ramses and his opponent would be constantly having to exchange blows as they fight over control of the precious stone.

Ramses certainly has a lot of status-type moves. I find it nifty how many of the effects are not that strong on their own but can become scary with only a few applied at once. It's also cool how the attack "sections" are organized; non-smash ground moves are for low-damage direct statuses on the opponent, smashes are for powerful moves with indirect effects on the match, and aerials are for affecting positioning! I actually think he could use a damage buff; he didn't seem to break 10% on most attacks, and since his statuses are weak individually they certainly don't need low damage as a balancing factor.

Playstyle-wise, he seems to have this strange close-range-pressure thing going on, though it's actually kinda fitting considering the opponent would be feeling a lot of pressure to make it out alive with the slab. And of course, the fact that he can control the map from unknown locations fits how he worked in the episode too.

Overall, pretty darn good set for a character who I'm surprised took this long to get one. Now, if you'll excuse me, I have a friend who borrowed a pencil and never returned it...
 

Koric

Smash Apprentice
Joined
Feb 10, 2006
Messages
84
Location
Aiken SC


Rulue

Rulue is a fighter who first appeared as a final boss in Madou Matatori 3 and since then appeared in the Puyo Puyo series and even has her own spinoff. She is renowned for her raw fighting powers and beauty earning her the nickname “The Fighting Queen”. She even lives in a mansion that looks like a castle filled with many butlers and maids including a bodyguard whom adores her much to her dismay.

She has a long time crush on Satan…always wishing for him to be with her. Since Satan’s first defeat, he has a crush on Arle thus making Rulue jealous over her. In multiple occasions when Satan has a plan, Rulue often battles Arle in order to protect him or to defeat her to earn his affection…hopefully. In brawl, she is the same height as Ike.

Rulue is a character that excels at hand to hand combat to the point to she has the ability to focus her spirit energy (Ki) into a form of attack. As a fighter, her weakness is clearly shown that she can’t use projectiles, however her ability to use her ki whenever she attacks mainly increase her priority by a small margin enough to usually cancel out small projectiles. Originally she has a style representing her as an aggressive fighter, but if used correctly she could turn into either a tactician or defensive fighter.


Stats:
Weight – 6.3/10
Walk – 2/10
Run – 7/10
Jump – 2/10
Second jump – 7/10
Air movement – 8.1/10
Fall speed – 3/10
Traction – 3/10


Specials

Neutral B – Saihoshi

Rulue will hold her arms above her to channel her Ki into a form of energy. Regardless of how powerful the energy wave is.

Type 1 – she fires a small laser like energy beat towards the opponent reaching at least 3 stage builder blocks. Its power is only strong enough to make the opponent flinch at most. If view the other way, this ki beam is a good way to get anyone in front of you off your back or push them back good enough for a follow up attack. The opponent will flinched upward so it could be a good idea to use an up smash DACUS or an air attack if you’re close enough.

Type 2 – After 0.6 second of charging, she fires a focus Ki blast from her palm. The blast does 22% damage at most and can only travel almost a full stage builder block, but its kill power is great. It can take out an average person at 92% at most. It will launch the opponent forward towards the bottom of the screen as the result. Also if one of a charged Saisoshi hits a shield, it can drain 85% of its power. Getting one to hit is like getting a falcon punch to hit. But unlike falcon, Rulue has a choice on either wait it out for the charged Ki blast to hit, or to play it safe and fire a small Ki beam.

Type 3 – If you're still holding the special button after 12 seconds and still didn’t take damage, she will rapidly take 5% damage for each 0.1 second. However this will allow her to fire a huge Ki blast that can go as far to 15 stage builder blocks and can cover the height of 3 ½ stage builder blocks. The multi hit blast can deal up to 34% damage and its last hit can kill up to 79% in average. After using this attack, her attack damage and knockback will decrease by half for 2:23 minutes…even after losing a life.

This type of Ki blast is indeed powerful, but from the great risk it would be wise to use it as a final attack. Only gamble this kind of blast if your dare.


Down b - Rulue’s typhoon

Rulue can perform a whirlwind kick from her position similar to link’s spin attack. As she spins as long as the special button is tapped again and again, any foe within range of her attack will be sent flying. The attack acts different depending if she is on the ground or not.

(Ground)

The attack can create a vacuum that can slightly drag the opponent towards her.

Just before the attack hit box appears on that direction, she can send vibes of wind on both directions. The wind however can travel up to three stage builder block from the ground. Each wind can move the opponent closer to Rulue’s typhoon kick. The closer the opponent is to her, the faster they will get sucked in. She can continue to kick as long as the special button is constantly tapped.

The only downside to it that if she spends more than 3 seconds using this attack, she will become dizzy and the attack will stop. Her dizzy time is greatly reduced than that of a shield break.

Originally she supposed to fire wind blades from her kicks, but that would be a bit much in brawl.

(Air)
She will perform a whirlwind kick which gradually reduced her fall by 90%. The power from this attack is far less is that on the ground, but the execution and recovery time from this is 60% quicker than the ground version of the attack (even if she landed on the ground before the attack is finished). She can stop spinning at anytime by stop tapping the special button. Be warned, when she uses this attack for more than 4 seconds, her attack will stop and become dizzy rendering her into a helpless state.

If you think about it, this move can make a good recovery move horizontally as well for a decent approach, mind game, and spacing move. Who knows how many possibly this attack can be used.


UP B – Zephyr

Rulue will quickly move 6 stage builder blocks into the direction of the controller stick. (She moves so fast that she can’t be hit while moving.) After using this attack, she can either use Zephyr again, or use a mid-air attack of your choice. As long Rulue is in the air, she can use Zephyr up the three times. After the third time she used Zephyr while still in the air, she will be in a helpless stage.

Zephyr can be used offensively as a mind game method, or defensively by means of recovery or retreating. It might be dangerous to mind game them since the distance when using the attack is rather long. Going over the edge with this attack is quite possible. Be warned though, if she uses an mid-air attack after using Zephyr, she will instantly be helpless when the mid-air attack ends.


Side B – Rulue’s assault

Rulue attacks the foe with a very quick dash punch in an attempt to get a strike off the opponent before striking with her knee. Though her knee attack can kill at 175%, she can use different attack on the opponent for up to 8 more times. Each of the attacks can drain 10% of the opponent’s shield with her ninth hit capable of draining 40%. Also each blocked attack will draw the enemy back so that it equals the distance for her next strike even if the attack is power shield. If an attack is power shield, her attack speed will increase by 10% and shield drain will increase by 5% until the chain is done.

NOTE! - Only if the second attack (rising knee) is blocked, she would be able to execute multiple attacks one after another like Marth’s dancing blade. However for the chain to continue the third to eighth attacks must hit a shield, or otherwise the chain will end.

First hit – dash punch – 3% damage
Second hit – rising knee – 2% damage – kill at 189%
Third hit – falling punch– 4% damage –
Fourth hit – sliding kick – 2% damage _
Fifth hit – spinning elbow – 7% damage
Sixth hit – rising uppercut – 3 % - kill at 139%
Seventh hit – flying kick – 8% damage
Eight hit – high kick - 2% damage – kill at 120%
Ninth hit – spinning back kick – 9% - has a low-moderate set knockback upward plus 40% shield drain power.
Final hit – Rulue’s Uppercut – 30% - kill at 69%

When Rulue uses her signature uppercut, she jumps upward with her fist glowing with chakra punching anyone whom is in front of her and will remain for 0.3 seconds. This attack will most likely hit after if the previous hit either hits the opponent or shield breaks the opponent.

This attack relies solely on shield pressuring. The attack is executed fast just like dancing blade giving little chance to make a clean attack. Also this attack can be easily read between attacks that can potently kill. The startup between those attacks provides a small opening allowing someone to roll behind her. But it won’t be a problem if they only focus on defending. The ninth attack will usually set up the opponent even if the attack hits or blocked (which usually results in a shield break) to prepare for the tenth hit.


Normal Attacks


Neutral attack - quick attacks

Rulue attacks up to four times in total from this small chain of attacks doing 1% damage each. The first two are standard punches which can slightly push the opponent upward. The third hit is a kick that can launch the opponent at moderate damage. Afterward she will repeats execute a string of swift kicks similar to fox, but only for a brief moment.

The attack is executed very quickly as fox as well and it can push the opponent back for some distance. It might be consider a decent GTFO attack.


Forward tilt – double kick

Rulue executes a strong side kick that is strong enough to kill at 154% and do 10% damage. Its priority is pretty decent than average and can do 10% damage. By executing the attack button after the thrust kick allows her to take a small step forward to execute a rising kick using her other leg that makes the opponent flinch off the ground for 4% damage. Her rising kick has a really fast recovery allowing her to follow up.

In some cases, this attack can be used to punish those using spot dodge often. If you can, you could attempt to chain attacks on healthy enemies, but it is advised to not abuse this attack often for much damage.


Up tilt – Vertical Kick

Rulue executes a vertical thrust kick direly above her similar to snake’s up tilt, but the difference is that it doesn’t have the hit box, and priority. Her attack is faster than Snake’s up tilt in recovery and startup by a little. The attack can kill opponents at 158% and can do 7% damage. The vertical hit box above her can go as more than 1 stage builder in height.

It is not wise to abuse this attack as if you’re snake. It is mostly used to cover the area above her by a great distance. This attack can usually out range in some cases.


Down tilt – Foot Sweep

Rulue attempts to attack using a standard martial arts foot sweep to take down her foes. It good in power and range, but it’s executed quite slowly unlike the majority of her attacks. It can kill 123% from the edge of the standard stage and can do 12% damage. Its knockback can launch the opponent forward while descending below.

It’s a risky kill move that doesn’t do much effect if it hits around the center or near the edge (like Jigglypuff’s side smash). This attack range and power is best used for edge guarding.


Dash Attack - speed kick

Rulue quickly accelerates to execute a flying kick covering lots of range at a quick amount of time doing 4% damage at least as it slightly pushes the opponent upward. This attack can quickly cover just over 2 stage builder blocks, but it has a long recovery time as a side effect.

When she uses this attack, her dash speed is accelerated to 9/10 for a split second and gradually slows down during the attack animation. If your DACUS timing is very well, you can determine the distance to follow an up smash to your favorable distance. Also keep in mind that the hit box doesn’t activate until her kick is extended (which is past 1 stage builder block), so it’s not wise to dash attack when you’re very near the opponent.


Grabs and throws

When Rulue grabs her foes, she extends her arm as far as she can so that she can grab her opponents from afar. She can reach out 2/10 of a block to grab someone, but a pivot grab would reach 7/10 of a stage block afar from her. When she dash grabs, the grab hit box remains on her until she about to stop. However her recovery time is rather long. When she stops with her dash grab, her animation shows her balancing on her left heel before she falls over.


Grab Attack

After she grabs her opponent, she softens them with a knee attack doing 2%. Her pummel speed is somewhat average.


Forward throw – lift kick

Rulue lifts the foe by using a low spin kick making them spin upward in a fixed motion. She then follows it with a spinning high kick to send the falling foe while they were still spinning launching them foward. The attack can do 13% damage, but it not known for killing her opponents unless they are seriously damaged.

To better view this throw, try to imaging Liu Kang’s throw on MK Armageddon. The throw cannot send the opponent far, but it doesn’t send the opponent short as well.


Down throw – Grand slam

She grabs the opponent and with a very small hop back, slams her opponent downward with considering force capable of doing 16% damage with the opponent dragged along the ground.

This throw is her most damaging throw, but it has little killing potential. However with the time the opponent would get up, it may be possible to begin a mind game assault following the throw.


Back throw – lift throw

Rulue grabs her opponent and she rolls to her back on the ground with her opponent. She then forcibly extend both of her legs launching the opponent very high and far capable of killing the opponent at 114% doing 7% damage in the process, but it has a very slow recovery rate. The throw has an effect that makes the opponent unable to regain control until they about to reach the height of Rulue’s throw.

This throw attack is powerful enough to consider a kill move, but its not something to combo. Though the attack makes the opponent motionless, her recovery time from this throw is really slow. This attack shouldn’t be used when the opponent is at low damage or should be included as a part of a chain attack unless it’s the end.


Up throw – Gentle toss

Rulue grabs the foe with a single arm and begins to spin around with the foe striking anyone else whom is near her while adding 1% damage to them per spin with much force. After her third spin, she chucks the opponent upward doing 2% damage in the process. The attack can send the opponent far at low damage, but it’s not something that would consider a kill move as it might send the opponent above and away at 194% in average

This throw is very quick on its recovery and tends to attack anyone else in the process. The knockback when she uses someone else during the throw is strong enough to send the opponent far regardless of damage. It’s not a kill move, but a throw to clear some space in 2vs2 or free for all situations. Plus its low damage would provide little punishment in the case that Rulue would grab her ally instead.


Smashes


Side Smash - force palm

Rulue takes a step forward about 4/10 stage builder blocks and attacks with a quick and strong palm attack to the opponent’s chest. The range is small considering, but it can kill at 107% doing 13% damage uncharged. During her attack execution, she gains a form of heavy armor protection that doesn’t make her flinch to light attacks.

The attack requires moving some distances, so it’s not an attack to use at a point blank range. Chances that she will go past the opponent instead or the opponent would receive a weak hit.


Down – Bayakko Shockwave

Rulue punches to the ground with such might that the force of the impact can cause the entire screen shake violently. Anyone who is on the standing on the same floor or platform where Rulue is currently standing will suffer severe damage if the opponent is at least a half stage builder block near her. This attack at most can do 34% damage uncharged as it capable of killing her foes around 83%

Keep in mind that the attack execution takes very long as it hit box can extend up to three stage builder blocks on the ground. However her recover time after performing this attack is very quick. If the opponent is hit farther than half a stage builder block, they will only receive half damage and would be launch at least 4 stage builder blocks in average regardless of damage (like DK’s down B)


UP Smash – Asura Punch

Rulue looks above her position and with fist channeled with Ki she punches upward with considerable force. The attack speed is slightly slower than her standard attacks and her range is pretty small as it covering only 4/10 of a stage builder block above her leaving no hit boxes around her as a result. Is very powerful capable of killing at 76% while doing 18% damage at least uncharged. It’s also powerful that it always leave a rather long hit stun after the punch succeeded followed by a shockwave foreground effect (it mainly a graphic effect).

The time of the hit stun is similar to Zelda’s lightening kick critical by the way. This attack can be DACUS so it’s not that risky…in fact with her speedy dash attack, it can be more versatile than originally intended to be.


Aerial attacks

Neutral air – whirlwind kick

Rulue attacks with a spinning kick identical to her typhoon (air) special. The attack properties are identical of typhoon (air) except that it doesn’t slow Rulue down by 90%. The attack hitbox and animation lasts for at least 0.8 seconds he attack can gain an extra hit doing 2% damage as well as pushing the foes nearby her. The attack startup and recovery however is fast that it only covers 2 animation frames each

Because the priority, damage, and animation of whirlwind and typhoon, it could by to your advantage to mix up these two attacks to use as a mind game strategy. Also it might be a good idea to space yourself with this technique with a short hop. Though the attack last longer than her short jump, if executed just after jumping, she can cover around herself providing great cover.


Back air – Heel kick

Rulue executes aright back kick behind her. The range of the attack is pretty good reaching as it can reach 7/10 of a stage builder block and has good priority enough to cancel out light to moderate projectiles. The attack can kill opponent at least around 150% and can do at least 8% damage.

Did I mention that her legs are quite tall allowing her to have a long reach with her kick related attacks? Usually when her kick related attacks overlap the opponent, the hit box around the attack will instead make a weak hit on the opponent.


Forward air – Gen-bu fist

Rulue delivers a precise punch aimed in front of her. It has normal range and can kill at 113% capable of doing 12% damage at most. The attack has a sour spot at the end of the attack which can cause the opponent to be pushed back slightly while doing half its original damage.

Unlike most of her punch related attacks, this attack has a good recovery time and is executed fast. It also has a range that covering 6/10 of a stage builder block which can make it a good way to approach

Down air – Suzaku Fist

Rulue thrust her palm below as she attempts to spike the foe causing a visible shockwave effect. It has only one attack frame and has low range, but it only launches the opponent downward. It can do 12% damage at most and may kill at 64% (assuming the opponent is spiked below the ledge on a neutral stage)

Her attack is in many ways similar to her Asura Fist (Up smash) in terms of properties and visual effects. The only difference is the damage, knockback, and the punch would push her upward by 4 stage builder blocks if she successfully hit someone with this attack.


Up air – Double wave kick

Rulue does a backflip in the air with her lefts exposed striking the foe up to two times. Her range of this attack is fairly high covering 8/10 of a stage builder block as she does 10% damage at most. Compare to the majority of her attacks, this one isn’t really reliable on killing, but it does have good priority over many physical attacks.


Final smash – Rulue’s Rage

There been only a few occasions when Rulue anger was pushed to her limit. When that time comes, she unleashes her rage to those unlucky enough to get in her way. The only person to survive Rulue’s wrath was her bodyguard Minotaur, but that left him injured for several months.

When Rulue uses her final smash, she transforms into a state which she is overflowed with her Ki energy that it’s became visible to the mortal eye. Her attacks damage and knockback are all increased by 70% and is granted super armor for the entire duration (Rulue can still take damage) as well as the frames of her attack animation will speed up by twice allowing her to attack and recover twice as fast.

During her transformation, her special moves changed completely. Instead of executing her normal special moves, she now warps nearby her opponent and delivers a devastating attack that usually kills around 63% as it always do 15% damage regardless. After she executes 8 warp attacks or transformed for over 11 seconds, her overflowed Ki will revert to normal ending her final smash. If you want to survive this final smash, predict and dodge her warp attacks.

Neutral Special – warps at a random position nearby the opponent. If the opponent at more than 6 stage builder blocks away from Rulue, she will simply warp to an open spot between her and the opponent.

Down special – warps above the opponent and deliver a powerful overhanded punch striking the opponent downward.

Up special – Warps below the opponent and delivers a fierce jumping uppercut damaging the opponent effectively.

Side (Tilted back away from the opponent) – Warps one stage builder block before passing the opponent and smash them with a powerful smash kick.

Side (tilted forward towards the opponent) – Warps one stage builder block passing the opponent in the process and deliver a quick and strong back fist to the opponent.


Extras

Win animation 1 – Rulue lays down on a relaxing chair as Minotaur waves a large fan. Rulue slightly laughs while relaxing after the battle.

Win animation 2 – Rulue performs several kicks before she ends with a spinning kick. She then returns to her original form and says “done already?”

Win animation 3 – Rulue takes out a small fan and starts laughing friendly…or so it seems.

more extras to be added...maybe


Akiak

Smash Ace
Joined
Jul 28, 2007
Messages
820
Location
In my secret laboratory.
Sceptile
I like the tree mechanic, it works nicely in his playstyle and it is pretty useful. The neutral special is pretty lame, but the other specials are great, I like the way they interact with the trees. Maybe you could've used some more interesting moves here and there, but overall it's a good balanced set which works perfectly into Brawl.

PS is there really such thing as the Secret Sword with the action replay?

Dark Star
Deliberately confusing is an understatement. After the first few moves it was a fun read, all the attacks are interesting. But they all seem to be independent and I have no idea how he works as a whole. What's a special smash? What's a special pummel? How many jumps does he have? And finally, what's with the mixed up order?
I'm gonna wait for the playstyle. btw the down special smash and up special smash are broken ;)

EDIT: Awesome to see MYM stickied. And Krool that Farfetch'd is hilarious. We didn't even know what the final smash was called back then XD
 

majora_787

Smash Hero
Joined
Jun 23, 2007
Messages
6,122
Location
Texas
Sceptile
I like the tree mechanic, it works nicely in his playstyle and it is pretty useful. The neutral special is pretty lame, but the other specials are great, I like the way they interact with the trees. Maybe you could've used some more interesting moves here and there, but overall it's a good balanced set which works perfectly into Brawl.

PS is there really such thing as the Secret Sword with the action replay?
Well. Secret Sword is a move only Keldeo can learn, which is why Action Replay is mentioned. NOBODY but Keldeo can learn Secret Sword without one. :p
 

Sir_Slash

Smash Rookie
Joined
Sep 29, 2011
Messages
15
Location
The Dojo.
Moon Child


The Moon Children are among the most mysterious aspects surrounding the surface of the moon. There are five Children, four of which are running around the tree in the center of the field while the fifth sits at the bottom of the tree. The four running children each wear one of the masks that are dropped once the boss enemies are defeated while the fifth wears Majora's Mask. The Children are each identical in height, clothing, and hair color, differing only in the mask they wear. Their gender is debatable but their haircut seems to indicate that they are male.

The children's behavior is also odd. The four ask for different amounts of masks from Link. In return, they agree to play Hide and Seek with him and send him into different mini-puzzle dungeons that are thematically similar to the dungeon ruled by the boss who's mask they wear. Each of these teleportations is accompanied with an enigmatic, slightly disturbing question that concerns Link's, and the player's, beliefs about the world around them. The children casually refer to the life-threatening dungeons they send Link into as "games". After Link returns from each dungeon, the child leaves Link alone, their purpose completed.

The final child, the one wearing Majora's Mask, will send Link into the final boss battle with the Mask itself if asked. His behavior mimics the other Children as he refers to the fight as a game. He offers a disturbing question, and mentions that the other children won't play with him.


"Your true face... What kind of... face is it? I wonder... The face under the mask... Is that... your true face?"

An interesting fact for you? The moon children seem to be afraid of the transformation masks(Deku, Goron, and Zora)... So they're not in the set. But we're about to find out what they do with all of the OTHER masks they have... A thing to note about the Moon Child is that the mask they're wearing starts as Majora's Mask, but changes every time they attack. Using the same attack over and over again will remove the part of their startup where they change masks, but the attack power does lower thanks to Stale Moves.


A: Creepy Stare
The moon child stares ahead with a creepy look through his mask, and opponents immediately in front of him will take 2% and minimal knockback.

Dash: Tackle
The moon child runs at his opponent and forces all of his bodyweight into them for 20%... Nah, I'm kidding. Only 4% damage.

Up Tilt: Postman's Hat

The moon child puts on the Postman's Hat and pulls out a mailbag, swinging it up overhead and foes for 9% damage and putting it away.

Side Tilt: Gibdo Mask

The moon child puts the Gibdo mask on, and rushes his opponent, bumping into them in a zombie-like pose for 7% damage and low knockback.

Down Tilt: Mask of Scents

The moon child ducks down quickly, putting on the Mask of Scents. He then turns around quickly a couple of times, sniffing for... mushrooms? When he whirls around, opponents in contact with him will fly back with 5% damage.


Up Smash: Giant's Mask

The moon child puts on the Giant's Mask and grows larger very abruptly, uppercutting his opponent. He then slowly returns to normal for about a second, leaving him vulnerable. The punch does 15% damage.

Side Smash: Captain's Hat

The moon child slaps on the Captain's Hat and pulls back, clawing forward like a Stalchild. The attack has a short reach, but hits surprisingly hard for 12% damage.

Down Smash: Garo Mask

The moon child slides on the Garo Mask and ducks down spinning with two blades outstretched at floor level for a low cutting attack. The attack is pretty fast and does 10% damage, knocking opponents away.


Up Air: Don Gero's Mask

The moon child puts on the Don Gero mask, and a small frog hops out of it, jumping upwards into the opponent for 8% damage.

Neutral Air: Couple's Mask

The moon child stalls in midair as the sun and moon masks appear on either side of him and spin around quickly, knocking opponents away for 10% damage. They then combine over the moon child to form the Couple's Mask, dealing another 5% to nearby foes.

Forward Air: Bremen Mask

The moon child puts on the Bremen Mask and points the beak forward, drilling ahead with it. The move deals a good 8% damage and is multi-hit.

Back Air: Kafei's Mask

The moon child puts Kafei's Mask on and turns to look behind him. If an opponent is behind him, they will stop, stunned and confused by what they saw. The move only does 1% damage.

Down Air: All-Night Mask

The moon child puts on the All-Night Mask and drops straight down quickly, dealing a minimal 5% damage to his opponent. However, when he lands, he lets off a small cloud around him that will put opponents to sleep.


Grab: Great Fairy Mask

The moon child wears the Great Fairy mask, and the opponents will be pulled toward him for one second. The first opponent to touch the moon child will be forced into the grab.

Pummel: Horn Headbutt
The moon child headbutts the opponent for 2% damage with the sharp top of his mask.

Up Throw: Romani's Mask

The moon child slaps on Romani's Mask and throws the opponent upwards before hucking three bottles of milk at them. Each milk bottle does 4% damage.

Forward Throw: Blast Mask

The moon child slaps on the Blast Mask and blows up, sending his opponent flying away for 18%. The attack deals 9% to the moon child.

Back Throw: Kamaro's Mask

The moon child wears the Kamaro's Mask, and releases his opponent. He then dances around them and kicks them onto their face for 7%.

Down Throw: Circus Leader's Mask

The moon child puts on the Circus Leader's Mask and cries, depressing the opponent. They fall to the floor crying, taking 10% damage over the course of a second.


B: Mask of Truth

The moon child puts on the Mask of Truth, and its eye begins to glow. A small yellow glowing projectile shoots straight ahead for the same distance as Mario's fireball. If it hits an opponent, the opponent is stunned for a second and a half.

Up B: Keaton Mask

The moon child puts on the Keaton mask and teleports a distance away in a flurry of grass. The move does no damage, and carries him a moderate distance.

Side B: Bunny Hood

The moon child puts on the Bunny Hood and shoulder-tackles his opponent, going a short distance. The attack does 16% damage and large knockback if it hits, but has noticeable ending lag.

Down B: Stone Mask

The moon child wears the Stone Mask and turns into a statue in the background. He is invincible and immobile during this, and can hold this for up to five seconds. However, the Stone Mask is unuseable afterwards for twice as much time as it was used for.


Final Smash: Good Guys vs Bad Guys

The moon child digs through his mask pack and pulls out one of two masks at random.

Should he pull out the Fierce Diety's Mask, he will transform into the Fierce Diety and perform an attack resembling Galaxia Darkness for 30% damage and grotesque knockback.

Should he pull out Majora's Mask, he will transform into Majora's Mask and initiate a fire attack similar to Lucario's final smash for as much as 50% damage and moderate knockback.


Another addition to my train of self-improvement and obscure characters. :) My next one will certainly follow the pattern. If you'd like a hint, you're not getting one. So just sit back and listen to some music.
 

lordvaati

Smash Master
Joined
Jul 7, 2006
Messages
3,148
Location
Seattle, WA
Switch FC
SW-4918-2392-4599
hey, whattaya know, 'll have a new set soon!

my next MYM should be up by the end of the week.

hint: it's a boy from the future with bats in the soul.

and no, it's not Kid dracula. but it's close.....
 

BladeKnight420

Smash Rookie
Joined
Sep 11, 2011
Messages
23
About those Ginyu Force comments...

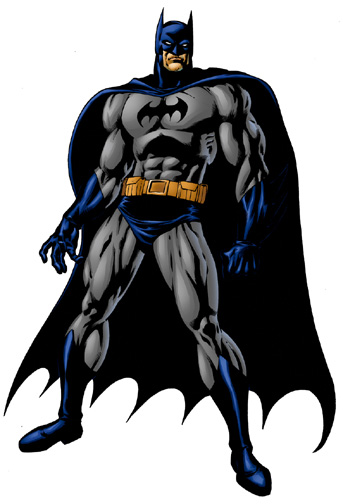
Batman


Stats

Jumps: 6
Aerial Movement: 8
Falling Speed: 7
Traction: 7
Ground Movement: 5
Size: 8
Weight: 7

Batman has a “glide” of sorts as he extends out his cape. This does not function like the traditional Brawl glide, though, in that Batman cannot maneuver up or down at all while in this glide. It simply causes reduces his falling speed to a 1/10 and forces him to move forwards while using it. Exiting the glide does not put Batman into helpless, and he can enter the glide as much as he wants while in the air. Batman has no glide attack, instead able to use all of his aerials normally while gliding.

Specials

Up Special: Grapple Gun

Batman takes his grapple gun out from his utility belt and fires it a 45 degree diagonally upward angle. It goes straight through enemies with transcendent priority, dealing 10% and unremarkable knockback just to get them out of the way. It only stops once it reaches the stage (Whether or not it’s the ledge) or the top blast zone, traveling at Captain Falcon’s dash speed.

Once it reaches the desired target, the wire attached the grappling hook to the gun will reel in, causing Batman to get pulled to whatever the hook got stuck to (Yes, it can indeed stick to the top blast zone) at triple the F-Zero Pilot’s dash speed. Batman can use attacks not named Up Special as he’s being reeled in to his hook and as he waits for the grappling hook to connect, but has no control over his movement until the attack finishes. The caped crusader cannot use this move more than once without touching terra firma.


Down Special: Bat-Lasso

Batman swings his bat lasso out a single battlefield platform, attempting to tie up enemies at their feet. This deals no damage, but if the target was currently dashing when hit or try dashing after getting tied up they’ll immediately trip. If they try to walk, they’ll walk even slower then normal as they shuffle forwards. Turning around also becomes impossible, though enemies can still walk backwards with their shuffling movement. Attempting to jump will seemingly work normally, yes, but once they land they’ll collapse in a heap onto their stomachs/backs. This applies whenever the foe lands on the ground, not just from willingly jumping. This lasts for 5 seconds + 1 second for every 10% the victim is damaged.

Neutral Special: Sleeper Dart

Batman thrusts his cape forwards, as he throws 3 darts out of it. On contact, these deal 2% and cause enemies to fall asleep after 15 seconds. For each additional dart that hits the target, they will fall asleep 5 seconds sooner. They travel 3 platforms forward, but if they miss they’ll fall on the ground and be able to be thrown, by Batman and enemies alike. Batman is completely vulnerable to his own sleeping darts. If he attempts to use this move with darts out on the stage, he’ll only throw a single one, having to wait for all darts to expire before he can throw 3 at once again.

Side Special: Batarang

Batman throws forward a batarang, which is far more like a shuriken than a boomerang. Getting hit by the Batarang causes it to get impaled into the enemy’s body, dealing 6% immediately and 1% each second for 10 seconds. This travels in an identical trajectory to sleeper darts and can be picked up like an item just like them. Don’t let these backfire on you, as then the enemy too will passively benefit from the passage of time and won’t be as pressured.

Standards

Jab: Brawling

Batman clenches his hands into fists as he smacks with each press of A, dealing 5% and good knockback for a jab with each hit. Batman can move forward as he keeps up the stance, and can angle his punches upward or downward to poke at the enemy’s shield. The knockback Batman deals is always directly away from his fist, so if you punch an enemy just as they jump into the air (Probably just barely hitting their feet) they’ll immediately become grounded again.

Forward Tilt: Punch to the Gut

Batman does an underhand swing to the enemy, dealing 7% and average horizontal knockback. There’s also just a touch of vertical knockback, though, meaning enemies with their feet tied up will trip as they just briefly go into the air.

Up Tilt: Piledriver

Batman leaps upwards and very slightly backwards into the air before arcing a downward punch over his head. This knocks aerial enemies to the ground with 13% and good knockback. Considering how much jumping enemies with their feet tied will do, this serves as an excellent preventive measure to re-ground them the moment they jump if you predict it.

Down Tilt: Cape Sweep

The Dark Knight turns towards from the screen, then grabs the edges of his cape as he extends out his cape to its full width on either side. He then proceeds to lean towards the camera as he closes his cape, then swings it forwards for 3% and pitiful knockback. Anyone who was coming towards Batman will get grabbed by the cape and tripped in front of him, unable to hit Batman during the duration of the attack thanks to him leaning into the foreground. This also “reflects” projectiles, meaning you can simply adapt if the enemy gets their grubby hands on some of your gadgets. We can’t let Two-Face have too much fun with our grappling hook, can we?

Dash Attack: Billowing in the Wind

Batman’s cape already billows in the wind as he dashes, so once Batman inputs the dashing attack he skids to a stop as he does a nice right hook forwards, dealing 15% and knockback that is actually practical for KOing. As you’d expect, it’s quite laggy, but Batman has a nice way to hit with in that there’s a wind effect behind Batman as he stops that pushes foes in front of him to get hit by the punch. Foes with tied up feet are prime targets, since it’s much more feasible to predict their actions.

Smashes

Forward Smash: Flash Grenade

Batman lobs forward a grenade anywhere from 1 to 4 battlefield platforms based off charge. Once the grenade hits the ground, it explodes, causing anybody who is within a platform of the grenade, facing it, and on the same ground as it to get stunned from the flash. The stun lasts for 1 second + half a second for every 20% the enemy has on them. During this “stun”, the victim can move normally and dodge normally, but cannot attack as they rub their eyes. If enemies can’t turn around, this becomes much easier to hit with, and the effects are much more potent if their movement is also inhibited.

Up Smash: Uppercut

Batman does a large uppercut to the enemy, dealing anywhere from 20% to 30% damage and knocking enemies up with impressive vertical knockback. There is little else to the move, with its primary purpose simply being a way to launch the enemy high into the air for Batman’s air game.

Down Smash: Time Bomb

The caped crusader lays a time bomb on the ground in front of him. It explodes anywhere from 10 to 25 seconds based off the charging, increasing with charge rather than visa versa. Once it explodes, it deals damage and knockbakc on par with Snake’s C4. Unlike said C4, the explosion is quite large, too large to roll through, and it lingers long enough it can’t be dodged in any manner. One property it does share with C4, though, is that if Batman is next to the enemy when he uses the move he’ll stick the bomb on the foe. They have no way of getting off the bomb, but due to the knockback being strictly away from the blast and the victim being at the center of the blast, they can DI to choose where they get sent by it, so even at ridiculously high percents they could just jump into the air and DI downwards.

Now how could you possibly keep the foe in place for this? Gee, I wonder…


Aerials

Up Aerial: Loop

Batman goes in a loop much like Meta Knight’s Up Special, turning his body into a hitbox that deals 7% and some token knockback. Batman’s loop is much bigger than the now banned blue swordsman’s, and anybody who is in the middle of the loop will be pushed with a wind effect to send them forwards a platform. Note that if Batman inputs anything before the loop is over, he’ll stop the loop at that point before going directly forwards from where he was currently facing, gliding in that direction so long as it is not angled even slightly upwards.

Neutral Aerial: Bat Signal

Batman extends out his limbs as he grabs the edges of his cape as he goes to face the screen, simply turning his body into a generic get away hitbox that deals 5%. If he uses this while he was gliding downwards from uair (For at least 3 Ganondorf heights), he will suddenly float upwards 2 Ganondorf heights. Anybody who was behind Batman will get hit by a wind hitbox that will push them one and a half platforms in the way he was going to boot.

Forward Aerial: Flying Kick

Batman extends out his legs as he goes forwards. It has an immediate hitbox that deals 8% and okay knockback, but after that Batman will hold out his legs as long as the player holds A, at which point his legs will deal constant hits of 1% and push enemies along with his feet if he’s gliding forwards. The only real way out is to DI downwards, where they’ll either trip or fall to their deaths.

Back Aerial: Flap

Batman “flaps” his cape like bat wings behind him, dealing 6% and mediocre knockback. If Batman is gliding forwards, this boosts how fast he is going by 25%. Batman can potentially do this up to 4 times before maxing out his speed.

Down Aerial: Batboots

Batman kicks out his legs downwards with great force, dealing 13% and giving them a weak meteor smash. Batman, on the other hand, also takes the own knockback of his attack, but strictly vertical. Obviously intended for use on foes who tied up feet, as well as routine gimping.

Grab-Game

Grab - Chokehold

Batman holds the victim off the ground as he clenches his fist around their neck. All things considered, a fairly standard grab, though above average in both speed and range.

Batman is capable of using his grab while in the air. This has all sorts of exciting possibilities, most obviously carrying a foe off-stage with you as you glide, but more importantly carrying them up with you to the top blast zone.


Pummel – Interrogation

Batman yells at the foe to demand something or other from them, doing his best to not sound like Christian Bale while doing so. This deals 1% to enemies normally out of sheer intimidation, but if he is higher in the air this will cause enemies to be terrified of Batman dropping them if they don’t give him the information he wants, causing it to boost grab escape difficulty to double.

If Batman grabs a sleeping opponent, they won’t wake up, and must button mash to do so before they can attempt to get out of the caped crusader’s grab. If Batman uses his pummel on a sleeping enemy, however, they will become startled as they wake up and get stunned for a full second, unable to work towards escaping the grab during that time.


Up Throw – Feet First

Batman grabs onto the enemy’s feet before flinging them up into the air upside down for 6%. Once they hit the ground, they will trip, much like if their feet were tied together by a Bat Lasso. The knockback on this is set and rather weak, so unfortunately Batman cannot KO enemies off the top with it, leaving the throw mainly useful on the ground.

Forward Throw – Knee

Batman knees the enemy, dealing 5% and fairly weak knockback. This is a fairly unremarkable throw on the ground, but if Batman is gliding forwards this can become a chain-grab at low percentages, useful not only for damage but bringing enemies off the stage. Only at 20% or lower is it a true chain-grab on most enemies, at higher ones they’re generally able to fastfall or use Up Special to get out of it. Still, if they use Up B they can’t do it again, and if they fastfall they’re already heading towards the ground…I think you can see where this is going, am I right?

Back Throw – Loop

Batman performs his uair with all the hitboxes in-tact for opponents Batman doesn’t have grabbed, but releases the enemy as he reaches the top of the loop and is upside down. This causes the enemy to gain all of the momentum the caped crusader had going, but in the opposite direction Batman was going. This deals 5%.

Down Throw – Smackdown

The Dark Knight smacks the enemy downwards for 8% and average downwards knockback. It’s not too powerful to prevent it from being a completely broken gimping tool, but this is quite possibly your single most common KO method.

Final Smash


Batman takes out his Bat Credit Card, causing anyone directly in front of him to have to give him a large amount of money, dealing 35% to them and healing Batman of 35%.
 

JOE!

Smash Hero
Joined
Oct 5, 2008
Messages
8,075
Location
Dedham, MA
Final Smash


Batman takes out his Bat Credit Card, causing anyone directly in front of him to have to give him a large amount of money, dealing 35% to them and healing Batman of 35%.
Edit: much too large

**** -MY- CHILDHOOD WILL YOU!?
 
D

Deleted member

Guest
MYM11 User Rankings #1

Welcome to the User Rankings! Every Monday, I'll be compiling the entire of the last week's activity in the thread and showing off, just who is the most active member? The point of this exercise is to recognise the most dedicated among us – those make your movers who are currently pushing the boundaries, as well as highlighting all movesets made by them.

To get on this list, you need to have made a moveset in this or a previous Make Your Move, as well as having posted in the Make Your Move 10 thread. The cut-off point for tallying is 3:59PM on Monday EST, 5:59PM PMT or 11:59PM GMT; other removals or changes are at my own discretion. The breakdown of points is as follows:
30 points for a Moveset
5 points for a Comment
4 points for a Secondary Submission
2 points for a Secondary Submission Comment
1 point for a Regular Post
+Regular Posts do not stack
+Secondary Submissions are MYminis, Joke Movesets and other miscellaneous submissions
This was an absolutely insane week for Make Your Move in terms of activity, boasting roundabout twenty-six movesets, including about six of which that we've seen before - nevertheless, absolutely stellar work guys. This wasn't all, though, as we saw a torrent of amazing commenting from members all across the community as well! I couldn't have asked for more, and you guys are doing a smashing job with your activity. This was really a week of winners, as told by the statistics, which have most people who posted a set barely making a blip. This should tell you about how crazy the thread was.

Of course, there has to be a winner and much like Rool's stockpiling of comments, Junahu wins it with a stockpiling of movesets. I mean, they have to be counted here if on the moveset list [with small exceptions like Ashley]. Nonetheless, three sets from Junahu at the end of Make Your Move X and they bounce on over to this contest, in the form of Linebeck, Mask DeMasque and Gruntilda. Give them a look-see. In second was the as-always impressive ForwardArrow, being perhaps more of the deserving victor for this week concerning current goings-on, as he was able to post two sets - Vol Opt and Kyubey - while also commenting on almost everything. The real star of opening week, in my opinion: definitely check his sets out. Not to be outmatched, LegendofLink was also one of the heavier commenters in the opening week - out-commenting pretty much everyone, and getting a set out with Farfetch'd too.

But these three were only a small sample of what was a great week in the contest and I'm extremely proud of the magic that happened here. Lets just try to emulate some of this in the next week.


Remember to check out the stadium to find all of the sets mentioned.

Overall User Rankings


Points: 129, Movesets: Linebeck, Mask DeMasque, Gruntilda

Points: 128, Movesets: Vol Opt, Kyubey

Points: 110, Movesets: Farfetch'd

Points: 107, Movesets: Gangreen Gang, Le'Quack

Points: 95

Points: 76, Movesets: King K. Rool

Points: 74

Points: 71, Movesets: Marvin the Martian, Freaky Fred

Points: 65, Movesets: QWOP, King Ramses

Points: 63, Movesets: Uboa, Moon Child

Points: 62

Points: 61, Movesets: Boom Boom, Dark Star

Points: 50, Movesets: Kobold Clan

Points: 50

Points: 40, Movesets: Majora's Sceptile

Points: 35

Points: 33, Movesets: Swalot

Points: 31

Points: 30, Movesets: Rapunzel

Points: 30, Movesets: Venustoise

Points: 30, Movesets: Party Pete

Points: 30, Movesets: Rumble

Points: 30

Points: 30, Movesets: Rulue

Points: 30, Movesets: Batman

Points: 24

Points: 20

Points: 14

Points: 8, Movesets: Ashley

Points: 6

Points: 5

Points: 4

Points: 2

Points: 1

Points: 1
 

majora_787

Smash Hero
Joined
Jun 23, 2007
Messages
6,122
Location
Texas
WELP, first comment...

Knight Man
I liked this set for what it was, but there were just a couple of issues I saw.

The Side Special... does the shockwave go TOWARD or AWAY from Knight Man? And which was is it knocking the opponent? This just gave me a conflicting mental image...

Also, combining the Up and Down specials sounds like it could be really OP against someone with no projectiles...
 

LegendofLink

Smash Apprentice
Joined
Feb 17, 2008
Messages
164
Location
Pennsylvania
Sceptile
I do really like the idea of an "Arboreal Assassin" take on Sceptile, and it's a shame that you didn't decide to flesh that out, as it is far more interesting than what you ended up with here. The main problem here is that right off the bat you try to pull the set in two different directions at once. Sceptile is fast, so he has a lot of ways to quickly attack the opponent and he has two dash specials (which is a bit redundant, but not too bad). Then on the other hand, you have Ingrain and Leaf Storm, two moves that pretty much turn Sceptile into a stationary tank that tries to trap the foe in front of him and wail on them. The lingering hitboxes on the leaf blade moves do actually help a lot in catering to both playstyles, but in the end the set is pulled so far in both directions that it never actually goes anywhere. Having Sceptile use ingrain at all also seems pretty out of character to me, as he is supposed to be in constant motion. The fact that the only enabling move for the tree focus is on a throw also makes it difficult to utilize at all. What this set really needed was better focus, then it could have turned into something really cool. It's still much better than your past work by a large margin, as you are actually trying to pull together a coherent playstyle, but you just went a little overboard. Keep it up and try to have your next try be a bit more focused in its purpose.


The Man in Gauze
King Ramses does some cool things, but the real meat of the set is the fact that it drastically changes the opponent's playstyle rather than create something unique itself. The things that Ramses does are fairly standard for the most part: applying status effects, laying traps and hazards, using fog to obscure said traps and hazards. The fact that your opponent want to occupy themselves with using the slab for protection, killing locusts, and hunting down record players means that they have to divert a lot of energy from their normal playstyle into this new one to survive. While reading through the set though, I began to notice something peculiar. For all of the ways they you have to curse and rack damage on the foe, you have absolutely no ways to actually go about KOing them. In fact, I don't think that you have any ways of dealing any sort of knockback at all, as it isn't mentioned anywhere in the set. This is a really big oversight, and really puts a damper on what is otherwise a really cool and unique set for a really cool character. I hope I'm just missing something here, and if I am, please point it out to me.
 

majora_787

Smash Hero
Joined
Jun 23, 2007
Messages
6,122
Location
Texas
Sceptile
I do really like the idea of an "Arboreal Assassin" take on Sceptile, and it's a shame that you didn't decide to flesh that out, as it is far more interesting than what you ended up with here. The main problem here is that right off the bat you try to pull the set in two different directions at once. Sceptile is fast, so he has a lot of ways to quickly attack the opponent and he has two dash specials (which is a bit redundant, but not too bad). Then on the other hand, you have Ingrain and Leaf Storm, two moves that pretty much turn Sceptile into a stationary tank that tries to trap the foe in front of him and wail on them. The lingering hitboxes on the leaf blade moves do actually help a lot in catering to both playstyles, but in the end the set is pulled so far in both directions that it never actually goes anywhere. Having Sceptile use ingrain at all also seems pretty out of character to me, as he is supposed to be in constant motion. The fact that the only enabling move for the tree focus is on a throw also makes it difficult to utilize at all. What this set really needed was better focus, then it could have turned into something really cool. It's still much better than your past work by a large margin, as you are actually trying to pull together a coherent playstyle, but you just went a little overboard. Keep it up and try to have your next try be a bit more focused in its purpose.
He can use his down aerial to make trees as well. I thought that Ingrain worked for his playstyle as more of an emergency safety net than anything; something where Sceptile could run off to his own created forest and start healing before he gets killed by a Bowser Fsmash or something nasty that'll send him into the stratosphere.
 

flyinfilipino

Smash Master
Joined
Sep 11, 2007
Messages
4,319
Location
North Carolina
Time to finish what I started 3 contests ago...

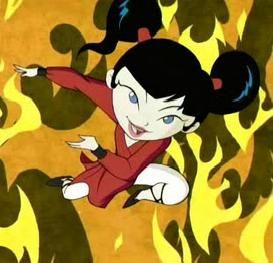
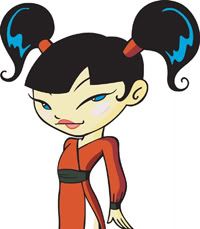
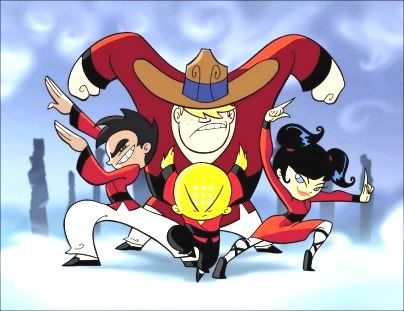
The final member of Team Xiaolin has arrived!


Kimiko joins the fight!


- Introduction -


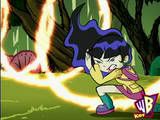
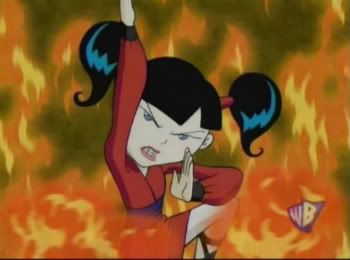
Kimiko Tohomiko is a young girl from Japan who lives at the Xiaolin Temple. She is the Dragon of Fire. Her father is the head of a large electronics company, so she is always up-to-date on the latest gadgets. She may be the only girl on the team composed of herself, Omi, Clay, and Raimundo, but don't take her lightly! Kimiko's tough as nails and has a fiery attitude. She's known for her acrobatics, pyrotechnics, and her ever-changing outfits. She brings a wide array of Shen Gong Wu and flashy fire techniques to Smash to kick evil butt and bring her opponents down in flames.​


- Stats -

Size - Small

Kimiko's not very tall; she's about eye-to-eye with Mario.

Weight - Light

She's also quite dainty and weighs about as much as Peach.

Walk Speed - Average

She walks like the rest of them.

Dash Speed - High

She's on the quick side when she runs, about as fast as Meta Knight.

Jump - Above Average

She's a pretty good jumper, with a good initial leap.

Fall Speed - Average

And she's a decent enough faller.

Air Speed - Above Average

She moves rather quickly through the air.

Traction - Average

She has a good relationship with the ground.

Kimiko can wall jump, but she cannot wall cling, crawl, or glide.​


- Special Moves -

Neutral B - Arrow Sparrow


The Arrow Sparrow is not a Shen Gong Wu, but Kimiko's specialized Wudai Weapon. It's a fashionable satchel that holds an unlimited amount of small bird-shaped darts. There's a catch though; these little trinkets are explosive! With a tap of B, Kimiko will reach into her bag and, shouting the attack name, toss one Arrow Sparrow straight forward. As it flies at the speed of Falco's laser, it will catch fire, and if it makes contact with anything, it will explode and cause 5% damage and average knockback. In addition, if the Arrow Sparrow is shielded, it w6ll drop to the ground and still explode and do damage. If you hold B for any amount of time between 0.5 and 2 seconds, Kimiko will instead toss two Arrow Sparrows together, with one flying on top of the other in a straight path. If either makes contact, both will explode and deal 12% damage and high knockback. These will drop to the ground and explode if shielded as well. Finally, if B is held for 2 seconds or more, releasing it will cause Kimiko to throw three Arrow Sparrows at a time, but these will fly in formation surrounded by a large firebird silhouette, similar to Falcon Punch (with the same sound effect too!). This version of the attack also flies slightly faster than the others. If a foe is hit by this, they will take 18% damage and very high knockback, though nothing happens if this is shielded. Kimiko can only send out one flight of Arrow Sparrows at a time, but you can run and jump while charging the move (and you can hold the charge as well as long as you hold B), so feel free to move around to get the best shot at your foe. The Arrow Sparrows have infinite range and Kimiko is not affected by the explosions, and when launched in midair, you can aim them at a slightly upward or downward angle with the Control Stick.

Down B - Juju Flytrap


Kimiko shouts the name of this little flower-looking Shen Gong Wu as she pulls it out and it pops open almost instantly. It's full of stinging insects! They form a swarm that's about the size of Kirby that flies out and instantly homes in on the nearest opponent. This cloud travels at about the regular speed of a Smash Ball on the move and is pretty good at keeping track of the foe. When a foe makes contact with the bugs, they will start to swarm around and attack them, dealing about 3% damage per second. During this, your foe can move the Control Stick around rapidly to swat them away and make them disappear, but otherwise they will continue to swarm even while your foe is being hit by other moves. The bugs can't be shielded once they've started to swarm the foe, but the can dodge to avoid damage for a brief amount of time. The insects stay out for about 15 seconds total, and you can only deploy one swarm at a time.

Side B - Tangle Web Comb


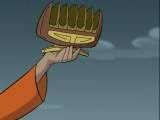
This Shen Gong Wu requires great concentration to use, but once mastered, it's a very tricky item! If you press and hold Side B, Kimiko will point the comb out in front of her and yell the Shen Gong Wu's name, and shortly thereafter, many long brown tendrils will pop out and attempt to ensnare any foes in range. The tendrils reach about as long as Zero Suit Samus's grab, but with less cooldown time if you miss. If you do snag a foe, the Comb will pull them in and treat them as if Kimiko grabbed them regularly. This essentially just Kimiko's grab reach. Also, if used in midair, this will double as a tether grab to aid in recovery.
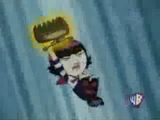
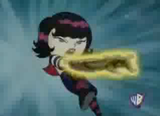

Now, if you tap and release Side B, something different will happen instead. The long tendrils will still shoot out of the Comb, but instead they'll detach completely from it and become a flying projectile! This mass of tendrils is a little bigger than one of Samus's Super Missiles, and like the Juju Flytrap, it will zoom in on the nearest foe and chase after them. However, the tendrils fly a bit faster than the Flytrap swarm. If it makes contact with a foe (even if they're shielding), they will be instantly ensnared by the tendrils and be wrapped tightly several times! The foe will be unable to move, jump, or attack, and if they're in midair, they'll fall straight down. Your foe must struggle out by moving the Control Stick around quickly, similar to the stun after a broken shield. While wrapped up, you can pummel on them and hit them with other attacks to your heart's content! They can even get swarmed by the Juju Flytrap bugs!

There's one catch, though. If your foe manages to air dodge or spot dodge the attack, the tendrils will have a new target: you! Now it's your job to escape the grasp of the tendrils, or else the tables will be turned. Once you manage to dodge them, they'll try and chase down your foe one last time before disappearing (they disappear automatically after 15 seconds, so whichever comes first). You can only fire one round of tendrils at a time.

Up B - Judallet Flip


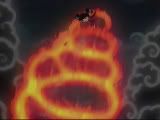
Kimiko prepares to make a big leap as she yells the attack name and a tunnel made of rings of fire bursts up from the ground around her. The tunnel is as long as the distance of Marth's Dolphin Slash and can go straight up or be curved slightly left or right using the Control Stick. This determines Kimiko's trajectory as she somersaults gracefully through the rings of fire and emerges from the other end without entering helpless mode. The rings of fire remain until Kimiko jumps through them (which takes about a second), and any opponent that touches any part of them will take 3% damage and light knockback. As for any unlucky foe that happened to be close enough to Kimiko to end up inside the tunnel of fire, if they touch any part of the rings, they'll get hit back and forth inside the tunnel until the move ends, usually taking about 15% damage in the process. This is especially hard to avoid for larger characters. You can use this move in midair to not only get yourself back on the stage, but create an obstacle to keep your opponents from doing the same! On-stage, this makes for a good, sudden escape manuever to get some distance from your foe.

- Standard Attacks -

Standard Combo - Star Hanabi


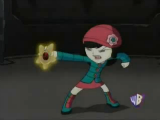
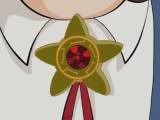
The Star Hanabi is an amulet-looking Shen Gong Wu that is used often by Kimiko and is strongly associated with her Fire element (so you'll see it used in several moves). When you press A, Kimiko will yell "Star Hanabi!" and toss it a short distance right in front of her (about the distance Marth's sword reaches when he uses his Forward Tilt). It hovers there in midair while simultaneously spinning and lighting on fire. You can hold A to keep it spinning there in midair, dealing 1% damage and flinching knockback each time the foe touches it. Additionally, you can move the Control Stick around while holding A to freely move the Star Hanabi through the space surrounding Kimiko, with the distance of the initial attack marking the radius of the circular area that you can move it around in. The flaming projectile moves around at a decent speed (similar to Sheik's Chain), and contact with it while it's moving around deals 2% damage and quite low upward knockback to the foe, which is just perfect for juggling and racking up damage. Remember, the Star Hanabi only stays out as long as you hold A or until you get hit, and Kimiko can't move around herself while it's out either.

Forward Tilt - Tenacious Flame


Kimiko quickly lunges forward in a full split, sending forth a ground-hugging flame from her forward-facing leg. Not only does this cause her to crouch automatically and dodge certain projectiles, but the flame she shoots travels forward along the stage's terrain in any direction for a distance equal to half of Final Destination, and travels at the speed of Falco's laser. The flame will deal 5% damage on contact and average knockback in the direction it was traveling in. It will even continue off the main platform and hug the side of stage if used close enough to an edge, which can help you discourage a recovering foe or one hanging from the ledge. The flame will stop at the edge of a drop-through platform, however. Also, there's a bit of end lag at the end of this move, so you can't spam it as much as a Blaster. Use it as a way to encourage your foe to either shield, dodge, or jump into the air to avoid getting hit, which could lead them into the path of another oncoming projectile.

Up Tilt - Inferno Kick


What's better than one flip kick? Two flip kicks! Kimiko back flips while sticking out a flaming foot, which will send a nearby foe flying straight up with 4% damage and low knockback. You can follow up with a second press of A, which will cause Kimiko to leap up again in midair and deliver another flaming flip kick. This second kick deals 5% damage and sends the foe flying with medium knockback at a slightly more diagonal angle. This is a fast method for getting your foe into the air, where you can follow up with a midair attack, or just get them primed to get hit by a projectile.

Down Tilt - Firestarter

Kimiko crouches and slides forward along the ground with one foot extended in a flaming slide kick. She'll travel about two Kirby widths, kicking foes for 5% damage and light knockback. This is another good move to start an aerial combo with, but you can also fake out your opponent. Did your foe think you were about to use Side Tilt? Take that, projectile reflectors!

Dash Attack - Nitro Charge


Kimiko jumps into the air a little as she runs, and her rollerblades suddenly appear on her feet (along with matching helmet)! She speeds along the ground at 1.5x her regular dash speed until she reaches an edge, leaving a trail of fire on the ground in the wake of her wheels that lasts for 3 seconds. The only way to cancel this attack before she reaches an edge is to press A again, which causes the fiery aura around her to flare up briefly as she screeches to a halt, dealing 9% damage and above average knockback to anyone she touches. But back to the fire trail; as long as it's on the stage, it will cause 3% damage and low upwards knockback to any foe that touches it. With shielding and spot dodging out of the question for avoiding Kimiko's flying projectiles, your opponent will be forced to take to the air to try to dodge them!

- Smash Attacks -

Forward Smash - Fire Mistress


Kimiko sticks her arms out and waves them around quickly in short circles, causing them to catch fire and become engulfed in flames. During this charging time, if a foe is close enough to Kimiko to touch the flames, they'll take 2% damage and flinching knockback with each contact. Additionally, during this time, Kimiko will absorb any fire-based projectiles that hit her, rendering her immune to any damage or knockback, but also buffing the damage of the pending Smash Attack by 1.5x! Fire-based projectiles include Bowser/Charizard's Fire Breath, fire-based magic, or just any random fireballs. We haven't even gotten to the attack yet! Once you release A, Kimiko will "Fire!" and throw her arms forward and release two large fireballs that travel between 1/4 and 1/2 the length of Final Destination, depending on the charge. The fireballs deal 16% damage (that's together, not each) and high knockback on contact and travel at the speed of Samus's Super Missle.

Up Smash - Meteor Rain

Kimiko brandishes her Arrow Sparrow satchel once again and reaches in during the charging of this move. Then, depending on the charge, she will toss one, two, or three Arrow Sparrows straight up into the air and off the top of the screen at the speed of Falco's Blaster. These Arrow Sparrows aren't on fire and if they happen to make contact with a foe on the way up, they will deal 2% damage and flinching knockback. Then, nothing happens for the next two seconds and Kimiko is free to move around and do whatever. However, once those two seconds are up, the Arrow Sparrows she sent up divebomb from the sky, flaming angrily! They fly downwards from the top of the screen at Falco's Blaster speed at a steep vertical angle and aim for the ground about 1/4 the distance of Final Destination from the spot where they were launched. They explode upon contact with the ground or anything and deal 10% damage and high knockback. If more than one was launched, they will descend in quick succession, and not all at once. This is a good attack for disrupting aerial approaches and of course creating more hazards for your opponent to avoid. Since Kimiko is free to move around after she launches her Arrow Sparrows, you can set up your opponent and bait them or hit them into the path of the oncoming missiles.

Down Smash - Corona Kick

Kimiko balances on one hand as she sticks her feet out and lights them on fire. Then, she quickly spins around horizontally once, creating a large circle of fire all around her. This circle lingers for just a little bit, and if a foe touches it, they will take 12% damage and above average horizontal knockback. This is obviously a good move to break up a crowd in a free-for-all, but it's also handy in one-on-one matches for being a bit faster than Kimiko's other Smash Attacks, and doesn't require you to be as precise to hit with it. Got a foe on your back that you need to knock off right away? Use this move for instant results!

- Aerial Attacks -

Neutral Aerial - Fire Dance

Kimiko spins around rapidly as a cloud of embers materializes around her. If she's touching a foe as she does this, they'll take 4% damage in multiple hits with pretty much no knockback. Kimiko finishes the move with a guaranteed well-aimed spin kick that sends the foe flying with 5% damage and above average knockback. A pretty basic aerial repellant move, it's useful for catching foes with the start of the move due to the slightly disjointed hitbox.

Forward Aerial - Illusion Kick


Kimiko basically does a flying kick forward like in the above picture. This deals 4% damage and medium knockback. But if you press A while the opponent is in hitstun, Kimiko will suddenly disappear, then say "Whoops!" while delivering a flying kick from the other direction! This also deals 4% damage and sends the foe flying with medium knockback in the opposite direction. But wait, there's more! Pressing A while the opponent is in hitstun this time will cause Kimiko to disappear yet again and shout "Gotcha!" as she delivers a flying kick from the same direction she started with. The kick once again does 4% damage and medium knockback, but this time it is angled slightly downward. This quick and flashy aerial attack can be used to mix-up your opponent and lets you control where you send them. Doing three kicks can be beneficial to do off-stage due to the low angle at which you send the foe, and could send them closer to the bottom blast zone.

Back Aerial - Phoenix Ascent

Kimiko pauses for a split second before she throws her arms and head back as a pair of bird wings made of fire bursts from her shoulders! The wings have about as much range as Marth's Back Aerial, and deal 10% damage with above average horizontal knockback. This is Kimiko's strongest aerial in terms of raw power, but it's a tiny bit laggy on both ends, compared to her other aerials, at least.

Up Aerial - Rising Star

Kimiko brandishes the fiery Star Hanabi once again with a swing of her arm, this time controlling it as it flies in an arc above her head, starting from front to back. If she hits a foe with it, they'll take 5% damage and medium upward knockback. This move is fast and the hitbox has pretty good coverage, so it's ideal for harassing airborne foes from below.

Down Aerial - Falling Star

This move is pretty much of the opposite of Kimiko's Up Aerial, as she whips out the Star Hanabi again, but this time swings it below her in an upside-down arc, starting from front to back. This attack also does 5% damage and medium knockback, but the direction is downward instead. If you hit an airborne foe at the right angle, you might send them off-stage!

- Grab/Throws -

Grab -

Kimiko has kind of short arms, so that unfortunately leaves her with a below average grab range. Her dash grab is alright though. But you know what's even better than that? Her Tangle Web Comb grab!

Pummel -

Kimiko knees her opponent in the gut repeatedly at a rapid rate, dealing just 1% damage per hit. In addition to her pummel, Kimiko might find it beneficial to just keep her opponent in her grasp and just let certain projectiles head towards the opponent and do her dirty work for her.

Forward Throw - Homing Sparrow

With her free hand, Kimiko reaches into the Arrow Sparrow satchel that magically reappears on her shouler. She pulls out an Arrow Sparrow, which gleams with a little golden sparkle and sound effect. Then, she kicks her foe away for 5% damage a set distance away of about two platforms' length. Immediately, she says "Go get 'em!" and hurls the Arrow Sparrow at her foe. This one is a little bit different as it will chase the foe around, just like the Juju Flytrap swarm and Tangle Web Comb tendrils! The Arrow Sparrow will hunt down the foe for 10 seconds, dealing 6% damage and average knockback on contact with anything. If it fails to reach the foe after 10 seconds, it will simply drop to the ground and explode.

Up Throw - Fiery Prison

Kimiko tosses the foe into the air about a Ganondorf height above her and sends the Star Hanabi after them. It circles around them several times, trapping them in midair in a cage of fiery rings. Your trapped opponent will gradually take 7% damage over the course of 3 seconds, but more importantly, they'll be sitting ducks as one of Kimiko's several homing projectiles makes its way toward them. If nothing else happens before those three seconds are up, however, the rings will compress and simply deal 5% damage to the foe with medium upwards knockback.

Down Throw - Burning Punisher

Kimiko leaps into the air above the foe while creating a spiral of fire. She sends the spiral down onto the foe and says "Like it hot?" as they become surrounded and burned, where Kimiko finshes them off by stomping on top of them. This'll deal 9% damage and send the foe flying away with medium knockback.

Back Throw - Flaming Exile

Kimiko waves her free hand backwards and conjures up a wall of fire of Ganondorf's height about two character widths behind her. Then she rolls back on the ground with her opponent and kicks them into and through the wall of fire with a "Get outta here!", causing them to take 6% damage and leaving them prone on the ground two character widths behind the wall. However, as soon as they hit the ground, the wall of fire starts moving towards them at the same speed as Kimiko's Down Tilt flame. The helpless foe had best get out of the way by either rolling away from it or towards and through it, however, they might roll right into the hands of a waiting Kimiko, or perhaps an oncoming Down Tilt flame, or some other projectile! The moving wall of fire rolls along until it reaches the end of the platform it's on, dealing 7% damage and medium knockback to anything it touches.


Final Smash - Mars Imperial Dragon


Kimiko has grabbed the Smash Ball! When you use her Final Smash, Kimiko says "You ready?" and leaps to the center of the screen. As she becomes surrounded in fire, she raises her arms up and shouts the attack name as she conjures a giant serpentine dragon made of fire! The dragon is basically about as wide and long as seven Stage Builder Blocks placed end to end, and it starts at Kimiko's position and quickly spirals outward and counterclockwise, all the way out to the edges of the blast zones, growing steadily larger as it does so. If the dragon hits any foes, they will take 25% damage and quite high knockback in the direction in the direction it was moving in. Quite the stage-clearing move.


- Playstyle -

So, you picked Kimiko! She could be considered a campy character, but whatever. To start things off, Kimiko you may have noticed that Kimiko has an awful lot of projectile moves, and for the most part, they all do different things to pressure the foe. Arrow Sparrow (Neutral B) is probably her go-top projectile, and she can launch them in the air, on the ground, at different angles, pretty much anywhere. They do decent knockback, and your foe isn't necessarily safe right away if they shield them, since they'll also explode when they fail to hit. Then there are the projectiles that will chase the foe, and Kimiko has not just one, but two of those! Juju Flytrap (Down B) is a good move to always have active; you'll keep the foe on the move and prevent them from staying in one spot. Combine this with the Tangle Web Comb (Side B), and things can get pretty hectic. Not only does your opponent have to now worry about two projectiles chasing them, but if they attempt to shield the Juju Flytrap, they risk getting wrapped up by the Tangle Web Comb tendrils. If tangled in the tendrils, they'll get attacked by the Flytrap swarm anyway. Dodging one homing projectile might leave them wide open for the other, so your foe will definitely have to be aware. And don't forget about Kimiko's Forward Throw Homing Sparrow if you managed to grab the foe; that's yet another projectile to try to avoid. Of course, Kimiko will have to be aware too, since once the foe dodges Tangle Web Comb, she has to avoid it next. Kimiko's projectiles only last for a certain amount of time, so try to keep them all going at once.

Moving on to Standard Moves, this is where Kimiko gets the chance to shine at close combat when the opponent gets past her long range moves. Her Star Hanabi (Standard Combo) is an excellent damage-racker, and with proper control, will do a good job of frustrating your opponent. Tenacious Flame (Forward Tilt) is a great overall move for spacing, pressure, getting the foe into the air, gimping, etc. It's yet another projectile that your opponent has to be aware of. Kimiko's Up and Down Tilts help her combo into her Aerial Attacks. Her Dash Attack doubles as a KO method at higher percents, but the fire trail also serves as an obstacle that forces you opponent into the air and limits their options. Kimiko's Forward Smash is a strong, long-range KO move, and to a limited extent, a counter to other fire-based projectiles. Down Smash is a quick, useful Smash for getting foes away from you. Kimiko's Up Smash adds yet another projectile to the mix, this time forcing the foe to be aware of their positioning in order to avoid being in the pathway of an aerial assault.

Kimiko's Aerial Attacks are easily comboed into from her Up and Down Tilts. Her Neutral Aerial usually a good choice. Her Illusion Kick (Forward Aerial) helps you put yuor foe where you want them, giving you the option of sending them in one direction or the other, racking up damage the whole time. The last hit of the move can also be used to send the opponent toward the bottom blast zone. Kimiko's Up and Down Aerials are also good moves to pester aerial opponents trying to dodge projectiles, and Down Aerial can also lead to a gimp KO. Kimiko's Back Aerial is strong, and one of her more reliable KO methods. Kimiko's throws probably won't be used often if you keep the foe at the right distance, but with the Tangle Web Comb tether thrown into the mix, you might have a chance. Up Throw can hold foes hostage to be hit by a projectile, and Forward Throw we've already said helps Kimiko's pressure game.

So, overall, Kimiko's duty is to constantly pressure the foe with projectiles comin from all directions. She's also easily able to intercept the foe in the air with her effective aerial moves. Once she's racked up enough damage, it'll be easy to score a KO either with a powerful Smash or explosive projectile, or simply by hitting the foe offstage with an aerial move. Kimiko is flashy and quick, so your foe will be on their toes in order to minimize the damage coming from everywhere. Play smart and safe, and your opponent won't know what hit them!​

- Extras -


Up Taunt -


Kimiko pulls out her cell phone in the midst of battle and decides to talk to her Papa. She casually converses with him about whatever opponent she happens to be facing (a random one in there are more than one), and the conversation is different for every character. For example,

"Hey Papa! I'm fighting a Pikachu right now. Remember when you bought me a giant stuffed one for my birthday last year? They're soooo much cuter in real life!~<3"

You can interrupt her conversation with any other action, which will cause her to hang up with a "Gotta go, bye!" If she's hit out of the taunt by an opponent, however, she might reply with an angry "What's your problem?!"

Side Taunt -


Kimiko pulls out a hand mirror and fixes her hair. She's still just a female, as Omi would say.

Down Taunt -


Kimiko pulls out a handheld console and plays Goo Zombies 3. It's even better than Goo Zombies 2!

Victory Pose 1 -


Kimiko strikes a powerful pose as flames burst up from behind her, shouting "Yeah baby!" Conceited, much?

Victory Pose 2 -


Kimiko flashes a happy smile, dismissing the victory with an "Oh, that was easy!"

Victory Pose 3 -


Kimiko poses elegantly with the fancy formal kimono she wore in one episode.

Loss Pose -


Most of the time, Kimiko will clap for the winner graciously, but if it was a particularly close battle (say, down to the last stock), she will flare up angrily as pictured with a "What do you MEAN I lost?!"

Character Entrance - Appearing on the stage with a burst of flame, Kimiko yells, "Gong Yi Tanpai!" (that means "Go!")

Series Symbol - The Taijitu, a symbol used prominently in Xiaolin Showdown.


Costumes -


Kimiko's standard robes come in Red (default), Yellow, Green, Pink, Black, and White. Pictured above is her special Blue Team outfit.

Kirby Hat - Kirby gains Kimiko's signature pigtails and the ability to launch Arrow Sparrows at foes. He even comes with a cute little mini-satchel!


* * * *


MasterWarlord

Smash Champion
Joined
Aug 24, 2008
Messages
2,911
EASIEST CHARACTER EVER

The fact the foe wants to hold on to the slab to resist the curses but can’t attack during them creates a very interesting game of catch between the two characters. . .When the slab is in a knowing location of the enemy, that is. Ramses can hide the slab from the foe along with the cork and the record player. While the music in particular doesn’t do much to foes outside annoy the real life player, the fact that there’s these three things the enemy is actively looking for enables you to set up some of them as ruses while you keep the real prize where they least suspect it.

Stacking status effects as a direct playstyle that people have been too disturbed to really try out after Spadefox, with the only other real set to blatantly attempt it again being Umbreon, who’s writer never liked Spadefox to begin with. Here it’s done decently enough, with the main reward being the moves which are more powerful based off how many status effects foes have. Considering you could have pretty much anything happen in these status effects, though, it’s rather awkward that they’re fairly random and help Ramses out in very general ways. It feels like there’s missed potential with this one, especially when the water, regardless of it being relevant in its current form, is just a boost to his aerial capabilities.

AWESOME RM RUINED BY LATER GAMES

The ability to throw out the chain, then leave it out there and have it respond to the other chain moves from that position is a great simplistic idea, yes. But why do we need move where he just swings the chain in X direction when he can already do that with the Neutral Special? You acknowledge this by just having it not do damage in the Neutral Special for whatever reason, so you can fill up moves likes the aerials with Knight Man swinging the chain in X direction while –damaging- foes. Of course, if you –did- make the Neutral Special how I wanted, you couldn’t have any generic swings of the chain around, but it’s not like you couldn’t come up with other more unique ways to take advantage of the chain being a distance away from Knight Man.

Ignoring the potential for more and what I’d consider filler, it’s still an alright set regardless – this is mostly because I like what you did with the shield, as it lets you defend Knight Man as he swings around his disjointed hitbox indecently of himself. I think the shield might have been better if it was constantly solid like in the utilt, though, so that he could position his shield in a defensive position then attack without leaving himself cripplingly vulnerable.

20 BASE SPEED POKEMON

The primary Twineedle mechanic is as its’ best conceptually when it was to defend the end-lag of moves, but for the majority of the moveset it feels like you’re treating Twineedle as a direct buff to most of Escavalier’s attacks. It seems like you were mainly using it as a way to make individual inputs less boring (Seeing those without Twineedle are indeed boring) seeing you had little else to play off of, in which case I’d say that the mechanic is a great individual move but doesn’t seem like a very good centerpiece for fodder to have other moves manipulate. Swords Dance also feels rather strange when you’re emphasizing that his problem is end-lag in the Up Special, then this helps him deal with Swords Dance. Does he just have lag on both sides of the spectrum to deal with? If so, that would imply Escavalier is going to be put under a lot of pressure and would have to actually use Twineedle in the original way HR intended it, but in that case he struggles to get past the start-lag to even get a chance to use Twineedle. This image in my mind I’m forming of your moveset is helped by the fact that I am constantly assuming Escavalier is slow and cannot randomly fly at 1000 MPH – Golurk didn’t have 8/10 speed because the people making the Pokedex were drunk when writing his entry.

This set above all of the others in this block needs a playstyle summary. The others are quite obvious, but this one is quite confusing. When I was saying that no summaries were okay, I meant it, mind you – Knight Man and Phantom in particular have no need for one. There are some sets, in particular, though, which would blatantly benefit from one.

JERK WHO WILL NEVER FINISH HIS FALLOUT LP

The most immediate comparisons I can draw with this set are again back to Sandslash, but this branches out far better than in the ice cream Pokemon. He’s not just bringing them towards traps for the sake of damage, but for the sake of slowing them down so he can pressure them despite being a traditional fatty heavyweight. Not only does he have plenty of moves for the sake of bringing the enemy to there physically (Or to the grab chains), but you also come up with some clever indirect ways of doing it by luring the foe to you in dtilt only to be somewhere else or by chasing them away by turning into a boulder. IIRC, these things are supposed to send you back to the start of the area you’re in when they catch you, and Neutral Special is a very natural way of interpreting it while also giving you a way to bring the enemy to a specific portion of the stage. Considering you have this power, there’s also mindgame potential with the foe expecting your traps to be at the center.

Complaints? The filler is pretty few and far between – if anything he needs more generic attacks to pressure a foe who’s slowed down. The only true case that’s bad is that the grab should’ve been put on another input so Phantom could have a full grab-game.

BOOM BOOM BOOM BOOM BOOM

I’d be pretty hypocritical if I didn’t dislike this set after the scene I made about Rainbow Dash. I think this set introduces even less to the genre than Dash, though in the very least it actually flows. It’s much harder for one to like this set than Dash, though, because momentum is so blatantly the only way to go for Dash while being remotely in-character. Boom Boom, on the other hand, is a large slow ass brute who you randomly have moving faster than Sonic once he boosts his momentum with that one move I forget the input of.

Boosting your speed by 1.5x and instantly maxing momentum does indeed feel incredibly awkward, as having all these attacks that award motion feels awkward when it’s so very easy to attain. Junahu’s recommendation is quite easily the best of just having him gain momentum realistically as he dashes, as it also means there would be times when he’s –not- zooming around the stage like a lunatic despite his character. Even in those Kart games where heavyweights technically have high top speed, they’re the slowest to accelerate.

The one thing you do introduce to try to be differentiate from other momentum sets at all is the shell mode. Yes, it’s a clever interaction to make a divot, push the foe to it with fthrow, then use dashing attack to trip in and enter shell mode as you beat the crap out of them. However; it has largely nothing to do with the rest of Boom Boom’s playstyle. The one thing you do worthwhile with the shell mode is just giving Boom Boom the ability to retreat into his shell to rebound without suicide KOing (Assuming he has boulders on both sides of the stage), which is a nice addition as opposed to the usual ways of just slowing down momentum, but doesn’t help him all that much when he’s constantly jumping for several of his moves that actually take advantage of momentum.

NOT DARK BOWSER

Before we get into the set itself, I obviously have to comment on how much I disapprove of how you specifically go out of your way to hide crap. It’s not just a matter of simply hiding stuff until the end, you never tell –anything-, and present the moves in the most random order possible to try to disorient the reader – or you just made them in that order and you were a lazy ass. Clearly Roonahu will come in and say it’s in-character for the character’s writing style to be “chaos”, though in that case many, many, many other writing styles for similar characters are now OOC.

Again avoiding the topic of the playstyle, something that this utterly retarded organizational style also prevents you from doing is showing pictures of the attacks. No, I’m not complaining the attacks are hard to picture, but reading through the moveset I was about to burst out laughing at how incredibly blatant your magic syndrome was. Then I go and re-watch the boss fight, and he actually –does- pretty much all of these random attacks. My assumption is a pretty natural one, especially when if you don’t watch the fight you have no idea what the minions are. In any case, this changes my complaint from magic syndrome to how blatantly you waste the immense potential introduced by this boss fight. How’s about making the shadow clone mirror the foe’s actions to bring in any interactivity into it, and introduce more potential mindgames in the fog? No, we can’t have that, what we need is a character who makes K. Rool look like the most interactive of characters in MYM.

This really blatantly should’ve been a 3v1 boss set only, considering how little actual playstyle there is in the set. Set up a reality tear on the stage, make the stage dark, then just spam Down B Smash. Maybe take the time to set up a few energy orbs, considering how pathetically easy it is for you to run away with your constant aerial status, or mindgame the foe’s position slightly. . .But that’s just about it, as your playstyle boils down to spamming the hell out of that broken move with foes having no way whatsoever to really counter it outside mindlessly approaching you and just going into tons of completely random hitboxes they can’t see. I take that back, 3v1 is far, -far- too generous for this moveset, and just encourages you to spam even more seeing it’s more likely you’ll hit things.

Edit: N88 addressed many of my complaints in response to this comment, and I no longer loathe the moveset in its current form.

NOT EUSTACE

Where to start? First off, the freak mechanic is not only tacky and largely irrelevant flow-wise, but also incredibly broken as the enemy has no chance of getting out of their constant fleeing from Fred. Remove it (He has other ways to make them dash on slippery hair anyway). Next up, the reason Fred is shaving the foe. . .Is so that he can cause them to slip on their bloody/sweaty hair? Really? Shaving should really be the ultimate goal to finish the foe for the character. Make it a pummel KO for all I care, or just have the razor do knockback to appease Junahu. Sure, it’d be a lot more boring, but this just comes across as dreadfully out of character and forced on almost every level. That said, it’s actually decent conceptually, but when you bring in an arbitrary bumper in the form of a –CHAIR- of all things, it’s just very difficult to overlook the tackiness in favor of the playstyle.

Perhaps my single biggest complaint, though, is that Fred can shave himself to create the hair traps that he wants. Sure, if he wants it constantly up he’ll have to shave the foe too, but the fact he can potentially go about his game without shaving the foe at all is just abominable for his character. Considering the only benefit of performing the grab-game on the foe is to pop a pore for poison damage to start, I see little reason for him to not primarily be cutting his own hair. I suppose he might potentially struggle to do it while being pressured, but he has dair and chair to contain foes while he sets up the stage 100% to his liking, without any interference from the enemy.

SOMEHOW NOT ENDANGERED IN GSC

It’s true, Farfetch’d has tons upon tons of filler, but it has two movesets to fill, so it’s forgivable, right? It would be, if Farfetch’d had enough to fill up a single moveset’s worth of inputs without any redundancy. As is, I feel the movesets could easily be combined into one with very little being lost, and going more towards the In-Smash intuitiveness you want anyway. I don’t need 6 or so ways to start a glide. True, some stuff might be lost on the Swords Dance side, but it would probably be gained on the other side as he gains aerial moves to abuse with Pursuit, which probably would have been more interesting anyway. This also would have let Farfetch’d focus more on hit and run, the actually interesting aspect of his game, and it’s not like an endangered duck should be such an aerial god anyway.

ADAM WEST

I was quite shocked of how conscious you were of playstyle with those comments of yours after the buzzer in MYM 10, BladeKnight, so I was quite looking forward to you making a moveset that wasn’t for a pony. I’m not sure how much I like the heavy focus on Batman knocking the foes into the air then immediately grounding them – it’s good on a few moves, but it seems to be taking up too much of the moveset for my taste. More focus on the sleeper darts might have been a good way to mix it up some. The real highlight of the set, though, is Batman pulling foes off to the top blast zone with his grappling hook – brilliant interaction there, and you do some really cool stuff up in the air that I can’t really critique. Really hope you stay with us and keep improving, BladeKnight.

@FA on Le’Quack: It’s not like they stay hypnotized for long, and even when they’re scared of Le’Quack/think they’re dogs it still quite possible for them to resist. I was very much always going for giving ways for Le’Quack to hypnotize the foe easier while still keeping it interactive – his game is hypnotizing them, not ordering them after they’re hypnotized, as hypnotism is pretty much just his way of “landing a hit”, albeit with a longer animation where he can choose a couple things. Kind of like, y’know, landing any other normal grab.
 

Nicholas1024

Smash Lord
Joined
Mar 14, 2009
Messages
1,075
Marvin the Martian is a fun set, but quite obviously rushed. The aerials are easily the weakest part of the set, and really just feel like something I made in MYM9. This is accompanied by having a very reduced grab game. Look, the idea is decent (reminds me of Galaxy Man's grab, actually), but you could have done more with it (for example, let the A button reverse the direction the magnetic field operates in and give him a little more choice in what to do with the grab field.) Additionally, I think you should have given him more interactions with his minions in the form of bossing them around, in the cartoons K9 does more than just sit in one spot and bite whatever approaches, this could have given at least one aerial a better purpose. Additionally, the explosive space modulator and his ground-restoring aerial + amazing recovery give him a rather broken and easy play style.

Step 1: Blow up the earth.

Step 2: Hover for 7 seconds while opponent falls to their doom.

Step 3: Use aerial to restore tiny portion of the stage for you to land on. I claim this planet in the name of Mars! ;)

Still, now that I've blown up every flaw I can find in the set, I should mention that I did in fact like it as a whole. The various interactions between his specials are great, the bubbles are a rather unique method of KO'ing, and the first half of his move set in general is really nicely thought out and well executed. However, in the end I find myself looking at the rather lacking grab and aerials, and thinking of what might have been. Still, I'm looking forwards to some more sets from you in MYM.

@MYM in general
Apologies for my lack of move sets produced so far, but I'm almost finished with my 4 set series, and it's only been a full contest since I started work on the idea. (I might just shuffle up the order I post them in and see who can guess which one was written when.)
 

half_silver28

Smash Ace
Joined
Apr 25, 2008
Messages
862
Location
MYM, Ohio
Welp, may as well start actually contributing. So we've got a. . . Batman moveset. REALLY? I had a half-finished Batman moveset that I was thinking about finishing too *facepalm*. But mine is very Arkham Asylum/Arkham City-inspired, so I guess there are major differences. But regardless, this is your first set, and I have to admit: I was surprised by how much good stuff is here. It seems pretty natural for him to focus on the bat-lasso (but did you really have to call it that?) and otherwise incapacitating the foe with with that and sleeper darts or flashbang grenade. But I don't really like how you used the Batarang: Batman mostly uses them to disarm foes, and you have it just stick in them and do progressive damage. When he has foes tied up his game shifts to generally abusing them and forcing them to jump up, only to spike them back down and into their collapsed position. He's got some nice ways to do that with a few moves as well as ways to just keep the foe busy. The time bomb works in perfectly since foes don't want to jump up to negate the KOing knockback. But where I feel this set really excels is in aerial combat. Batman can knock the foe up high and easily follow them with the grappling hook, and then hit them towards the blast zone with that horizontal wall of pain that his glide enables. Not to mention he can even pull them up there himself with the grappling hook, a very familiar move for the Dark Knight. Along with his aerial grab, he can easily force foes off-stage and gimp, especially if they're tied up.

There are some negatives though, primarily a few choice moves. The random wind effects of the dash attack and the up air that is basically Shuttle Loop really seem illogical in their effects for me, though the up air at least has some use. The pummel is strange for me too, Batman always struck me as a guy who can intimidate through presence alone, not a yelling Jack Bauer-type interrogator. And that final smash. . . honestly, when people see something like that at the end of a set, they might pass it off as a joke set and not even read it. And yes, I hate that abomination as much as anyone else. But yeah, this was a pretty good set, not just a good newcomer set. Your writing was also clear and concise, I had no problems figuring the set out. Nice job man, hope to see more from you :)

And it's Khold day! We've got Knight Man now, one of the coolest RMs ever. He pretty much plays. . . exactly how he should. That extendable mace lets him play a dangerous game of keep away: any contact with it can really put the hurt on foes. A lot of his moves seem slow, but he can create shockwaves to stun. Even better is his use of the shield, which not only prevents him from being combo food, but allows him to block attacks and counter with a powerful blow, just like a real Knight. The shockwaves strike me as a little OoC, but I'll overlook it because of Knight Man's limited potential. But that grab. . . my god it reminds me of that abomination of a grab on Kaptain Krool. But I suppose it makes sense for him to avoid grabs seeing how focused he is on close and midrange brawling. But I do see the down special as rather unneeded: he's already really good at resisting damage and that added resistance pushes him towards broken. All in all this was quite a nice set though, and an enjoyable read. (is it just me or are some of his attacks emulating enemies from his Megaman 6 stage?)

The second knight is 5th gen poke Escavalier. . . I didn't even know he evolved like that xD. And he borrows moves from a HR mercurious set? Interesting. To be honest this is a very HR-like set in its simplistic style, augmented by a few very interesting moves to ultimately create a complex playstyle. Escavalier is a straight-forward character who charges headfirst into battle, with a few tricks up his sleeve in false swipe and twinneedle. False swipe's feinted attacks (actually wouldn't calling the move Feint make more sense?) are a well-established trope that can create mindgames, but twinneedle brings a whole bunch of new options to the table. Almost any attack Excavalier makes is like a typical jab: the foe never knows if he'll stop before the first hit or keep going. Thus you'll get a lot of chances to grab or poke at the shield of a shielding foe (and the bug-type just happens to have a shield breaker-type move and other strong attacks). Getting off a Swords Dance can make his Joust move or other strong blows incredibly dangerous too. As far as that whole speed issue goes, I'll say that it makes Escavalier godly at running circles around foes and abusing them with shorthopped aerials, but doesn't do too much to establish him as a "jouster". He also doesn't need a counter down tilt at all. . . not when he has such an awesome offensive game. Escavalier's a pretty good set too, but I'd say Knight Man is better.

The 3rd Knight is not Darknut. It is Phantom. Apparently ghost knights have no shame, unlike robot knights, as Phantom does all his work in the dark (but are those ghosts even spirits of knights at all?). Anyway, Phantom's got a really unique playstyle in forcing foes to the respawn platform and just sort of gently pushing them towards the edge without them knowing. Of course he can just attack the crap out of them too. That up special is what REALLY holds it together though, as Phantom can find the foe if he lost them in the darkness and continue his assault. But if the foe is able to figure out where they are in relation to Phantom, they can easily turn the tables against the movement-challenged knight. This really reminds me of Umbreon with all the darkness focus, really cool stuff.

I guess when it's not dark, he's really just stalling with his teleportation and movement attacks until he can bring in the darkness again (whereas it happened automatically with Umbreon). Anyway, his trappy moves are also pretty essential just to slow the foe down so Phantom can catch them in the darkness. He can even KO foes silently in the dark, but he's also got the forward smash when he needs more power or if he completely loses track of his own location. That being said, I don't see how he'd ever get someone on his back with the up tilt, or why a move that prevents opponents from dodging and has no hitbox is randomly on the down air input. This whole set was pretty well throught-out and takes a really interesting approach to combat in the dark. Phantom's probably the best one of the three. I'd say it was a pretty successful Khold day: glad you stayed with us all this time man, now NEVER LEAVE (TIPSY).

And I just realized I commented 3 knights and The Dark Knight. (SMIRK2)
 

Red Arremer

Smash Legend
Joined
Nov 27, 2005
Messages
11,437
Location
Vienna
Hello everyone. For those who care and/or remember me, I am currently in the chat (and might be in the future). I am thinking of coming back into the community, and doing movesets.

I also have written an article on the Bunker, so you might want to check that out.

Also, blame Smady for me posting this, he said I should.
 

ForwardArrow

Smash Ace
Joined
Aug 17, 2011
Messages
503
Knight Man
Knight Man is an interesting little set, that's for sure. He is effectively a mobile fortress with a hitbox he can change around, giving him a rather interesting spacing based playstyle. What bugs me though, is how many moves AREN'T affected by this change, you really should have had far more of the set actually use the ball and chain. That said, he does have a pretty decently unique and interesting playstyle, though I'd say there's a bit too much filler and I don't really like the shockwave attack. Just a random stun attack to hit with your main KO move? Jeez can't you be a LITTLE more creative? Then again, the character in question doesn't have much potential so I'm impressed with what you did.

Escavalier
This set pretty much IS General Grevious, to be quite honest. Both have basically a bunch of generic attacks that become interesting when combined with essentially the EXACT same mechanic. I do like that Excavalier was a bit more blunt with the approach especially with some of his specials, but I feel that Grevious ultimately did a better job executing what's pretty much the same playstyle. I'm guessing you didn't read Grevious though, so I can hardly fault you.

Phantom
Now HERE is a set I kind of dig. While it is a little jarring to have ANOTHER "obscure the whole screen" character RIGHT after Ramses, I feel Phantom actually pulls it off better by COMPLETELY confusing the foe as to their position, as well as the positions of his various traps. It's a pretty fun little game he plays with the foe, him being able to spontaneously return them to the respawn platform and such... though he doesn't really have any ways to take advantage of returning them there, so it's mostly just to be in character. Either way though, it's a simple enjoyable set and I did like it quite a bit. Happy 3 years pal!
 

KingK.Rool

Smash Lord
Joined
Nov 26, 2005
Messages
1,810
Welcome back, Spade!! This is some sort of magical week for MYM - first the thread gets stickied, then a biiiiig return, and Khold Day in the middle of it all! What's next? I'll tell you what's next - me grousing about how much commenting I have to do. So let's dive right in -

Yes, I've fallen hideously behind in my commenting... and I'm going to have let King K. Rool, Boom Boom, Linebeck, Grunty, Venustoise, and Rumble lie for now, as I try to get a handle on the more recent batch of movesets. Not to worry, I'll still chip in on those sets later on in the contest, during some dead zone or something.

First up in this block is Mask DeMasque, who intimidates me terribly and I don't really no what to make of. Okay, so all of his attacks are pilfered from other characters and appropriated for his own use... okay, so he can roll in and out of the cage that seems to form one of the centerpieces of his game... okay, so the cage, the bomb and the bed interact in some kinda neat ways, and all of them very logical... I feel like there's a lot to admire in the way you made this moveset, in the way you hid and layered his naturalistic move interactions, in the framing theme you handle quite adroitly in the cage and mask exchange... but all the same, the final product feels diffuse to me, and the playstyle feels vaguely familiar, although the motions he's going through are fresh enough. The playstyle itself doesn't seem as expressive as it usually is in your movesets - perhaps a consequence of the wide range of options and means of reaching the goal you gave us, or of DeMasque's natural lack of an identity? The lack of expression is expressive in and of itself? His playstyle is appropriated, much like his moves? This moveset may well be a grower.

After that comes Majora's Sceptile, a very easy moveset to comment. There's some really cool stuff going on here, especially Sceptile's treegame, which sees him bounding around with a really befitting agility - and I dig the Side B, even though it's a little awkward to hear about the trees before seeing what they do. I'm also fairly sympathetic with the bevy of "generic" attacks that make up the moveset's body, although I guess it goes without saying that you should work on making them all relevant to Sceptile, giving them all more of a purpose than just generic-hit in this or that direction. Or you can just allow Sceptile's key moves to decide those moves' purpose; by this I mean, drawing attention to the fact that FSmash eats through shields, which is especially useful if the foe is Ingrained right before Sceptile, or to the fact that the BAir/FAir combo is useful to him... how? It knocks foe to the ground, in prime position for Ingrain, perhaps? It plants them on the ground while still allowing you enough momentum to get into a tree and prepare an Agility? Everything interlinks, even if you don't realize it at the time you write it. Your movesets will go over better if you do realize, and highlight those clever little connections, because they're definitely there.

There's another thing - growing trees is the most special thing Sceptile does, and really calls for being placed on a Special instead of a random throw and a random aerial. Meanwhile something like Leaf Storm doesn't seem terribly relevant to the rest of the set. I want to see more ninja-ing between trees! I want to see Sceptile's attacks doing new and fun things while he's in the treetops! And most of all, I don't want to see an attack centered around freezing Sceptile in place when Sceptile is otherwise defined as such a limber, mobile, agile Pokemon. Ingrain is cool and all, but perhaps it could have been better implemented to literally link Sceptile to his trees, to allow him to draw on their vigor even more than he already does, maybe even to create a network of roots tying his trees together in one great big web of life. These are the kinds of ideas you're hinting at. You're almost there, man. I think you'll place in the top 50 in MYM11 yet.


Then there's Freaky Fred. You weren't kidding when you said this moveset was tacky. But anyway I'm going to comment this moveset in a more specific way so that you can't afterward accuse me of skimming just because I like to speak in generalities and look at the bigger picture rather than nitpicking.
  • The Freak Meter is the very incarnation of that override that I just talked about in the Swalot review - the effect on the character overriding the controls of the player. Make the moveset freak the other player out, not mess around with something as non-meta as the character's feelings.
  • Also, can't the foe simply jump suddenly and use their aerial mobility to move toward Freaky Fred while they're up there? Maybe even attack him? He's not so very limber, after all.
  • Also, he feels terribly awkward as a 10/10 size. I can tell that he's gangly, but he's not that tall, is he?
  • The throws are kind of tacky. Okay, so you popped a pore and sent them into a bleeding-from-the-forehead status effect? How come they don't start bleeding when Link cuts them in two with his sword? Also, bleed damage sounds ridiculous. Even wound damage would be kind of sketchy, logically speaking.
  • Arbitrary ammo bank of freak points (by the way, shouldn't they start with 0 "freak points" and work their way up to 100?) having an effect on how good a throw is? (NO)
  • I was not aware that blood was more slippery than water.
  • I like your Side Throw.
  • NSpec works if the foe is within a platform of Fred... but you say it's an attack that encourages them not to camp and to get up close? Huh? Also, he can instantly send the foe into stun during any of his other attacks? I love not having to make any effort to land my laggier moves!
  • The razor scooping foes out of the background is ridiculously arbitrary and serves only to help you encourage people not to dodge, but only to shield. I don't want to be able to see your thought processes! I want the moveset to feel organic and natural, not forced!
  • I like your FTilt... but why does it alone of all his moves not work if he's tossed out a Razor-rang?
  • The scissors puncture the shield? But DK's fist doesn't? This isn't a paper shield we're talking here! If the scissors puncture it, all blade attacks should puncture it!
  • The pancakes... ugh. How is the player supposed to know how to eat them? Special+Standard is the least obvious thing ever. Besides which this is a very forced effect and very unnatural flow - bits of pancake are potent tripping traps?
  • NAir seems to make Fred's game amount to: freak them out, chase them off the stage, gimpgimpgimp. Also, Side Aerial (cough cop out) is the most generic of mindgames and really does absolutely nothing when Fred could be actively corralling the foe and doing stuff in a, you know, controllable way.
On the whole, Freaky Fred's playstyle is dragged down too much by these forced effects and by how diffuse its focus is (I guess he's a gimper? With a couple of traps? Stage control/spacing? He does it all!). The latter is not usually a huge problem, especially since Dutchman and Marvin weren't really all that different; your sets are never so streamlined and perfectionistic, playstyle-wise, and always allow their characters plenty of elbow room. Here, though, nothing functions quite how it seems it should and Fred himself is overladen with excessive creativity, often spread across two or three inputs to look like interactions but ultimately unhelpful all the same.


After that comes Le'Quack, who "takes a saw out of hammerspace and saws it back and forth". I love sawing saws! Also, what were you thinking when you included references to a bloody final smash that early in his moveset, as though it were going to be an actual relevant mechanic to be watched out for? Final smashes can't be playstyle-relevant!

I'm always wary of movesets that have distinct phases of gameplay, as they lend themselves to flowcharts, but you've anticipated the risk of that and obsessively given all of Le'Quack's moves purposes regardless of which stage you're at, as well as allowing him to transition from one to another seamlessly in any number of ways at any point in the game - so that this is no more a flowchart than Swalot is for having one style of play while the foe is outside and another once he's devoured them. You've taken what seems to me to be quite a few licenses with the character, causing an awful lot of focus around one or two things he did in his cartoon appearances that may or may not be considered signatures of his, but whatever he's limited enough and you did an admirable job of juggling what seem to be disparate playstyle strands into a moveset with a clear set of goals, if not really a distinctive playstyle as such - Le'Quack can't be defined as anything in particular because he can do so many different things, in which he reminds me of a denser Mask*DeMasque. Generally, I'm a fan.

So let me end with one nitpick: how is the player supposed to see the lever and the rope, and where in the basket they are? We don't see through the basket, do we?


And because I have to comment at least one Khold set before I wrap it up, let's go with Knight Man. A to-the-point set for a to-the-point character, and really a moveset in the now-established Kholdian tradition. It's simple, but it's also elegant (mostly; Parley is unabashedly weird on Knight Man, mechanically if not thematically). The mace-based moveset is a novelty for sure, and although I have to agree with Warlord that it'd be more interesting if you had had the mace doing damage by default as you lug it around and the shield acting as a solid wall in addition to a damage sponge by default; that'd free you up to make the rest of the moveset absolutely interactive, kind of Sloth-like as every punch, arm movement and spin changes the state of Knight Man's giant hitbox and selective hurtbox.

But anyway, I like this style of moveset and Knight Man would be cool in Brawl with a bit of polishing and the organization is fantastic, so mission accomplished, man. ;)
 

LegendofLink

Smash Apprentice
Joined
Feb 17, 2008
Messages
164
Location
Pennsylvania
Freaky Fred
I've gotta side with Rool on this one. As difficulty of a character this is, it doesn't give you the excuse to have everything be so arbitrary and random just to shoehorn it in to the playstyle. Even then, a lot of things just don't fit. The Freak Points are brought up a lot in the first half of the set, but then just cease to be relevant in the second half of the set and are never mentioned again. Even then, the points don't even do anything relevant for the set, as Fred wants them to come closer, not run away. Past that, there doesn't seem to be much of a point to getting the foe to slide around on hair in the first place, aside from bouncing them off of the chair (how does that even work, exactly?), and even then it doesn't add up to a very cohesive goal. This is even more unfocused than Majora's Sceptile, and it suffers heavily for it. While there are a few gems of cool stuff in there, everything else just ends up dragging it down.

Le'Quack
Now this is how you do controlling the opponent without it seeming out of place/character. In fact, part of what makes this set really cool is how it plays out like an old timey, mustache curling villain, hypnotizing foes into getting in his balloon, then dangling them over a cliff as you saw through the rope (evil laughter not included, sadly). There are a few nitpicky problems here and there with rather arbitrary decisions, like having the down smash be a grab hitbox when every other similar attacks don't behave that way (/Roonahu), and the fact that hypnotism behaves a lot differently when there is more than one opponent than in a 1v1. That aside, the set looks like a blast to play, and shows how controlling the enemy's character should really be done as opposed to arbitrary "fear" or "repulsion".


[COLLAPSE="Random note on Farfetch'd"]
The redundancy in many of the moves is entirely internional. I wanted Farfetch'd to have the option of a glide in just about every situation, so he does. It doesn't really take away from the moves themselves, as the glide attack can very easily function as the offensive component of the two moves that only put it into the glide. If a combo-ish character doesn't have options and multiple ways to go about playing, then it ends up being very flowcharty and boring, and some redundancy and combo fodder > a stagnant playstyle every time in my book.[/COLLAPSE]
 

darth meanie

Smash Journeyman
Joined
Jun 6, 2008
Messages
452
Hey, happy Khold Day! And such nice, brief movesets that even I can read and comment them, so I'm surprised I seem to be the first!


Knight Man fails to mention how exactly his shield works. Does it stay out when he's idling like a bigger, weaker version of Link's shield, or is it permanently there? Does he block attacks with it while moving or performing other attacks? These are things I kinda would like to know.

I don't like the Up Special or Down Smash as they're both extremely awkward buffs that last so shortly as to be nearly ineffective, especially since a character like Knight Man has such an obvious build with his weapon types to have a nice, offensive Down Smash.

The fact that he can control the range of his mace moves is nice, and like how simple you made it; it beats Rider's much more archaic method of reeling it in with the grab. He feels like he has a really interesting spacing game going, what with his shield blocking attacks and his mace fully outranging them.

It does feel a bit incomplete though, as you could have delved into some more interesting ideas from the way the mace worked than a lot of attacks which feel like they could be recreated just from the existing effect of the Neutral Special (which I do love, by the way).

The grab is also very disappointing, as it is in no way a grab, has throws in no way, and in no way affects shields. He doesn't have any hands, so coming up with a grab would be difficult admittedly, but I'd much rather see some sort of pinning move than this random stun.


I'm a little concerned from the start that Escavalier has a ground speed movement of 8; he's hardly a race horse, and that puts him as a pretty quick bunny. The Neutral Special is also completely devoid of an actual hitbox if the opponent isn't shielding, which raises the question of what the point of the move is if it only hits against shields, which the opponent obviously won't have up if they're attacking. To top it all off, it shows a pretty mistaken view on how priority actually works; priority is calculated by comparing the damage of the two moves unless one of them is transcendent, in which case the move simply ignores other hitboxes completely.

I also find the other key mechanic, Twinneedle, unnecessarily complicated seeing as it's used to repeat the attack he's already doing. Why force the opponent to use the Up Special though? Wouldn't it be so much simpler to just make it a second tap of the same attack button rather than switch both buttons and directions to do a repeat?

Escavalier lacks the polish and thought that I was hoping to see in this moveset, and the ideas never really come together into anything particularly meaningful.


Phantom however has some real cleverness behind him that makes it quite the set to be reckoned with. I'll start by focusing on the darkness / light mechanic, a mechanic I've actually considered before in a set I obviously never completed. The use of darkness to confuse the enemy is nice, but the addition of those moves that allow the Phantom to move the opponent around without being able to tell make it far more interesting. Pushing them away with the jab, or better, catching them with the Up Tilt and carrying them away without their notice is really brilliant. I'm not sure how I feel about you giving it no damage but letting a twinkle in the Phantom's eyes let you know that you connected with it; I'm sure the opponent would be just as much on the look out for that as you would be.

The special mechanic also seems a little bit broken that he can't take any damage from the front; I might consider reworking it so that he just has super armor against attacks to the front, so that way it's not a complete waste for the opponent to hit him. It also makes every projectile user ever cry rage tears.

The Neutral Special and Up Special are quite an interesting pair of moves; but I'm not sure it's actually a meaningful one; that is, he doesn't seem to have the ability to really abuse putting them on the respawn platform (except maybe dropping under and rolling them around with the Side Special / Up Tilt. The use of the respawn platform though is absolutely one of the most unique ideas I've seen in a while, and I really like it.

The Up Special does need a minor fix in the fact that (A) the Phantom has no discretion about whether he is teleported or not once he is and (B) the opponent can effectively abuse the teleport just as much as the Phantom can. Sure, the Phantom has Super Armor, but if I knew my enemy was about to be teleported in front of me, I'd try to trade blows and hit him before he can hit me. It also seems like it would be absolutely impossible to keep track of during the darkness; getting suddenly teleported and not knowing where that teleport will end you up exactly seems like a bit of a problem.

Outside of those issues though, Phantom is an extremely solid set. I would have preferred it had his aerials had a bit more direct combat focus; or at least given him more options at close range, and that he have an actual grab-game beyond the (admittedly quite interesting and relevant) move that takes up that spot.


Also, was there any reason as a whole you gave all three of these sets Specials where they should have had their Down Smashes? Those moves should do damage, not play mindgames, set status effects, or apply buffs!


Another thing I wanted to note is that I liked how clearly Knight Man and Phantom are designed to play cooperatively. That's not an easy thing to do without a playstyle section to beat over the player's head, but between Knight Man's shield and spacing, and Phantom's ability to control the opponent's position and move them into place for Knight Man works together really well. Not to mention the fact they can easily go back to back and block attacks from all sides, or how Knight Man's Down Special was definitely built with night in mind. I see what you did there with that jump requirement. It's nice to see two wholly different sets play nice together.


Oh yes, and to respond to ForwardArrow's comments on my comment on Kyubey: I think that what we have here is a fundamental disagreement on what Kyubey's goal is. Kyubey is making magical girls, yes, but he isn't making magical girls for the sake of making magical girls; he's making them for the sake of continuing the cycle of killing and creating new witches.

It was made pretty obvious that Kyubey collects the despair he uses to make energy through grief seeds, not through making magical girls, so to me, it seemed out of character for him to be snatching a girl's soul gem or directly attacking it, as crushing a soul gem or separating it from the body accomplishes neither goal.

As to whether it would have been better to make him some sort of minion character through witch summoning; I really don't know if that's the solution or not, and you're free to criticize that part of my comment as viciously as you desire!

My overall point was that Kyubey had too much that seemed to be focused on what really didn't fit his overarching goals as a character, and that I would have liked to see his playstyle better represent that area of him too.

Another solution might be that he doesn't summon witches, but that the player character is capable of finding 'barriers' and finding them to recharge their soul gem. Or having them turn into witches if they run out of energy in their soul gem. Or anything like that which would better represent the magical girl -> despair -> witch -> ??? -> Profit! cycle.

Ultimately, I just wanted Kyubey's approach to be more like "I want to make them a a magical girl so I can harvest despair!" not "I want to make them a magical girl, because that way it's easier for me to kill them!"

And I'm sorry if I sounded harsher than I meant too, but I know firsthand how easy it is to get defensive about your own sets.


Also; (scrolling up); how do you figure Esavalier being a "General Grievous" playstyle? Escavalier uses the same moves overlapping to cover from end lag unlike Grievous who used different for a combination of offense and defense from multiple angles. Beyond that they have almost nothing in common.
 

ForwardArrow

Smash Ace
Joined
Aug 17, 2011
Messages
503
By the way yeah this back and forth comment has a few spoilers in it. So does the set too so bah. Should have warned you guys about that beforehand, and you may feel free to kill me now for being such a moron.

Oh yes, and to respond to ForwardArrow's comments on my comment on Kyubey: I think that what we have here is a fundamental disagreement on what Kyubey's goal is. Kyubey is making magical girls, yes, but he isn't making magical girls for the sake of making magical girls; he's making them for the sake of continuing the cycle of killing and creating new witches.

It was made pretty obvious that Kyubey collects the despair he uses to make energy through grief seeds, not through making magical girls, so to me, it seemed out of character for him to be snatching a girl's soul gem or directly attacking it, as crushing a soul gem or separating it from the body accomplishes neither goal.

As to whether it would have been better to make him some sort of minion character through witch summoning; I really don't know if that's the solution or not, and you're free to criticize that part of my comment as viciously as you desire!

My overall point was that Kyubey had too much that seemed to be focused on what really didn't fit his overarching goals as a character, and that I would have liked to see his playstyle better represent that area of him too.

Another solution might be that he doesn't summon witches, but that the player character is capable of finding 'barriers' and finding them to recharge their soul gem. Or having them turn into witches if they run out of energy in their soul gem. Or anything like that which would better represent the magical girl -> despair -> witch -> ??? -> Profit! cycle.

Ultimately, I just wanted Kyubey's approach to be more like "I want to make them a a magical girl so I can harvest despair!" not "I want to make them a magical girl, because that way it's easier for me to kill them!"

And I'm sorry if I sounded harsher than I meant too, but I know firsthand how easy it is to get defensive about your own sets.

-So you would've made him a minion character... actually the more I thought about it the more that made sense. I mean, he holds all those Grief Seeds, though I still didn't really feel comfortable going in that direction on the basis I'm still not really sure if that's in character either and minion is a pretty risky genre. Either way, I've always viewed his goal in the series moreso as to collect energy then to make magical girls/witches. While I never outright stated it, I kind of implied the foe turns into a witch after their soul gem is dealt the proper damage, which would give Kyubey the energy he's looking for to keep the universe going. I always thought of that as his ultimate goal more than anything else, although I also feel that in the context of Brawl winning the fight takes over all other priorities.

Either way, I'm glad we were able to talk about this though. You were harsh in the originally comment, but I was kind of a jerk in my response so I feel we're even. Either way I see you're point and am willing to believe you may have a better idea here, though I'm still pretty happy with what I did.


Also; (scrolling up); how do you figure Esavalier being a "General Grievous" playstyle? Escavalier uses the same moves overlapping to cover from end lag unlike Grievous who used different for a combination of offense and defense from multiple angles. Beyond that they have almost nothing in common.

-I dunno, I just saw characters who both tried to use multiple attacks at the same time and I didn't really see any blatant ways of attacking. Not to mention I could have swore Grevious tried to clash with the foe and get through another attack at the same time, which Escavalier pretty blatantly does with Megahorn and such. That said they really are not THAT similar, I'll give you that. I was really tired when I made that comment.
Well again, glad to be able to have this conversation with you, and surprised and pleased to see you're still looking at MYM in your spare time.
 

Junahu

Smash Ace
Joined
Nov 15, 2005
Messages
899
Location
Shropshire Slasher
Knight Man:
There's a joy to wailing on a shielding foe with your flail, or shooting the flail behind your opponent, then suddenly reeling it back it, smacking the foe with its return journey. The idea does seem to be to use the flail to lock the foe into a close range battle, poking at the foe with it whenever they try to run.

Pretty much everything about his flail-game is left up to the reader to figure out. Things from, "does touching the spiky ball when it's not moving hurt?", to "does simply dragging the ball around give it momentum?" right down to "Can the opponent knock it into Knight man with strong attacks? And can Knight Man deflect it back at them with his shield?"

There's a lot of concealed depth here, masked under a simple moveset. And that's what I feel all Robot master movesets should be like, one trick ponies that secretly turn out to be deep.

Also, I like how the "grab" isn't a grab. It gives the foe a genuine reason to shield, and as you say, it's actually chivalrous.
 

MasterWarlord

Smash Champion
Joined
Aug 24, 2008
Messages
2,911
Didn't feel like clarifying this without commenting the remaining set on the current page, but since we're on an empty page now, may as well.

Originally I had put in Amnesia as Le'Quack fourth Special over hypnotism, and it was pretty stupid because you pretty much just ended up hypnotizing them then giving them amnesia immediately after. The main problem was I came up with amnesia before hypnotism, and afterwards try to make them co-exist to better represent his initial episode outside just the hammer. Needless to say I dumped the amnesia (And kept it around for FS), but I forgot to edit out the effects of it on the pummel and side throw. Corrected it.
 

Hyper_Ridley

Smash Champion
Joined
Dec 21, 2007
Messages
2,299
Location
Hippo Island
Knight Man

I agree with Warlord and Rool that the Neutral Special feels a bit like wasted potential when you have all these moves in the main moveset which just fire the mace anyways only they can only do it in a less versatile fashion than the Neutral Special. In fact, I think Rool's suggestion to make it work like Sloth with extending the chain leading to a true extension of his hitboxes would have added a tremendous amount of awesome.

The persistent shield is nifty and I like it how it he can actually angle it in some attacks so it's not just a frontal damage reduction, though I think 10% was a bit too high. Most attacks are gonna be dealing 0-2%, projectiles become useless, and jumping over him really won't do much when he can just turn around before they land. Maybe drop it to 5% or so.

I like how you made a grab that fits a character who canonically wouldn't truly grab, though I think it would have been cool if there was a way for him to have some throws to go along with it. Maybe the shockwave could be a short-range thing that functions like a normal grab hitbox, and when it lands he gets into a "finishing stance" against his dazed opponent to represent "grabbing" the enemy. Don't laugh, it's been done before in my Fulgore and MT's Little Mac!

Overall, I think it would probably be fun to play just for the experience of flailing around a giant mace of doom, but it's not as polished as King Ramses.
 

Red Arremer

Smash Legend
Joined
Nov 27, 2005
Messages
11,437
Location
Vienna
I would put that as an article on the bunker, but unfortunately, I have no clue how wordpress works with pictures, so I'll just do it as a post.

Anywho. Requested to do so by agidius, I have set up an IRC channel for MYM called #mymbunker on the service GeekShed.

For those who don't know about IRC, I'll give you guys a little tutorial using 2 clients.

IRC stands for Internet Relay Chat. It is a client-based chat that spans on different servers, like the infamous Quakenet and many others. It was one of the first chat services to exist.
GeekShed is one of these servers. Since I'm already frequenting the server on another channel, I thought I might as well put the new channel there.

Now, what makes IRC awesome is that you can connect to it with different clients. I will give you a little tutorial on 2 of the most common IRC clients around, mIRC and XChat.

Let's start of with mIRC.
After installing the program and starting it, you will have a window pop up asking you to put in a nickname and such. Before you do that, go to the little + symbol next to Connect (if it isn't already open). This will show you some more options. Choose "Servers".


You can see, I have added GeekShed to my servers, but you won't have it already on your selection, so click on "Add".


Type in the data you see there. The description is of your choice, I usually name servers after their actual name, but if it's easier for you, just call it "MYM Bunker" or something like that.
Important are the IRC Server address (just copy what I typed, irc.geekshed.net), and the Port (which should be 6667 by default. If not, put that there).

If your router or firewall blocks that port, make an exception.

After saving that server, it will be on top of the server list, above all the servers with folders next to them. Click on your new server and on the "Select" button. Then go back to the Connect window.


Type in your chosen nickname and a backup nick should you get disconnected. You also can put whatever you want into the name and mail tabs. If you're done, click on "Connect".

If you are connected, your server window should look like this:


If you have it, congratulations, you have successfully connected to the GeekShed server on mIRC.

Now, the next step is to register your nickname. If you use XChat, this is still the same for you.

Type in "/ns register password e-mail". Of course, password is your password of choice and e-Mail is your e-Mail address. If you have done so correctly, the GeekShed server will send you an e-Mail with instructions. It should be something like "You successfully registered, type in this activation code into your IRC client", blah blah. Do that, and you are then completely registered.

The server might ask you to identify your nick (unlikely if you just registered, but for the future). Your screen should kinda look like this now:


Now, when you are done registering your nick, you're almost set. The next step is to join the channel. Again, XChat uses the same commands for this.

"/j #mymbunker"

This will put you into our new IRC channel.


There you go.

If you want to make it a bit easier from there on, you can add the #mymbunker on Geekshed to your favorites.


You can even check the "Join on connect", which means that as soon as you connect to the GeekShed server, you'll be automatically put into the #mymbunker.

Next up is XChat.

After installing and starting it, you will be confronted with a server list. Luckily, GeekShed is already on it by default, thus we don't need to add it for ourselves.


Fill in your nick(s), name, etc. and connect.

If your nick already has been registered, GeekShed will prompt you with a identification - this is independent from the client, and this data is stored on the server, so no matter which client you use, it will always be the same.


Same command for Xchat as for mIRC, so "/j #mymbunker" to get into the room.


Additionally, XChat also has a favorite option. I don't know how it exactly works, since I use mIRC, but you have to right click onto the room name you want to put into favorites.


As mentioned, registering the nick is exactly the same for XChat as it is for mIRC, so in order to do that, check the mIRC part on registering.

That's all, folks.
 

Agi

Smash Lord
Joined
Jul 27, 2008
Messages
1,120
Location
SE Washington
Er... I'd kind of had the idea that the IRC would mainly be used for Roundtabling and the like, since I hardly can imagine that MYM as a whole will be interested in moving away from the more user-friendly, super-flashy Xat format it's been accustomed to for so long to the comparatively bland IRC. Regardless, this is exactly what I needed to know, so thanks, Joel!
 

Sir_Slash

Smash Rookie
Joined
Sep 29, 2011
Messages
15
Location
The Dojo.
Well, I should have my set done for tonight maybe. I've only got specials left, but I don't have ideas at this time. :) We'll see what happens.
 

LegendofLink

Smash Apprentice
Joined
Feb 17, 2008
Messages
164
Location
Pennsylvania
Rulue
There's something cool buried in here, but it takes quite a bit of digging to get to. The problem here is that you're never very clear on a lot of things. For example, the side special looks very complex, but the details of things other than the damage or shield drain are left rather vague, when those are necessary to understand how the attack functions. In addition, you say a lot of things about the character in the intro, but then seem to ignore them in the set, mainly the fact that Rulue has no projectiles, but can punch through the opponent's projectiles. You then proceed to start off the set with a projectile attack, and never mention anything about the opponent's projectiles. Like I said before though, I do like what you try to do with shield breaking, and that you make use of little used techniques like the DACUS. It's just buried under the clumsy use of language. Next time, feel free to pop in to the chat or PM one of us if you need someone to proofread your set. That way, you'll be able to get your point across much clearer next time.


Moon Child
This is certainly a step up from Uboa, and you've managed to create a neat and simple mechanic with the mask switching that could certainly do some cool things. The problem is that you never really went anywhere with it. Each mask only really sat there, and there weren't really any moves that could abuse the shortened startup from being repeated. Even stuff like the Bunny Hood, which is already an item in Brawl, doesn't even make the Moon Child go any faster. What you need is some ambition, and a way to make the attacks more relevant to each other than just being generic damage dealing attacks. One way to help with that is to try developing the specials first in a moveset. Specials are the signature moves of a character, and are typically meant to be usable on the ground and in the air to tie the rest of the set together. While this isn't necessarily true of every set, the specials can't be an afterthought at the end of a set. You're starting to get the hang of things here, so keep it up and show us what you can do if you apply yourself.
 

Sir_Slash

Smash Rookie
Joined
Sep 29, 2011
Messages
15
Location
The Dojo.
The set'll be up in a bit, guys. I'm just doing some last minute formatting. :) Somebody told me colorful text was less than appreciated.

And thanks for the input on Moon Child. I knew he was going to turn out generic. I didn't have a hugely deep basis for him like I did Uboa. :awesome:


Len Kagamine - Vocaloid 02


Crypton Future Media intended to project a Vocaloid with low-teen girl's voice at first following Miku Hatsune, but there was a demand for a boy's voice, so Crypton Future Media hired a voice actress who can produce both sounds. Kagamine Rin was the first voicebank developed and introduced to the Vocaloid consumer market. However, the package included two voicebanks: one for Rin and another for Len, both provided by the seiyuu Asami Shimoda, Kagamine Len was unveiled later after Kagamine Rin. The package was priced at the same price as Miku Hatsune, even though there was two voicebanks in the box.

At the time of recording in 2007, their names had not yet been decided. Their given names of Rin and Len were said to be based on "right" and "left" according to Asami Shimoda. She later confirmed in a interview after the Append release, the name itself was based on the names of Ken and Rin from Hokuto no Ken, the names were derived from a discussion about names that were familiar from her childhood. According to Asami Shimoda, Len's voice was achieved by singing within her chest, while Rin's at the top of her head.

This set for Vocaloid Len Kagamine is interesting in a couple of ways. First off, he has something of a helper. When Len spawns, two things spawn with him: His sister, Rin, and a large speaker. Secondly, Len has no smash attacks. But we'll get to that in a moment.


A: Kick
Len performs a side-kick at his opponent for 4% damage and minimal knockback. Very low ending lag. This is one of Len's few 'soundless' moves.

Dash: Slide Kick
Len slides along the ground in a baseball-sort of slide. The move does 2% and low knockback. This is one of Len's few 'soundless' moves.

Up Tilt: High Octave
Len puts his hand to his chest and sings, making a soundwave that forms an arc over his head. Opponents hit with the soundwave will be hit with anything from 5 to 15%, depending on the sound setting. When Len uses this move on the speaker, he will turn the volume up.

Side Tilt: Sharp Note
Len sings and makes a soundwave that shoots forward in a cutting-motion a short distance. Opponents hit with the soundwave will take 4 to 12%.

Down Tilt:
Len ducks down and spins, doing a sort of half-breakdance kick hitting opponents on both sides for 6%. When he hits the speaker with this move, the volume goes down. This is one of Len's few soundless moves.


SMASH ATTACKS: Command Signal
Len has no smash attacks in his moveset. Using the command for a smash attack instead causes Len to make a motion that deals no damage, and causes something to change about his moveset. If the Up Smash command is added, Rin will make a similar gesture to Len's and will mess with the volume on the speaker, turning the "volume" up. The higher up the volume goes, the more damage the attacks do, the less often they can be used, the more knockback they do, and the farther they reach. Also, if the volume is high enough, only Len will be able to stand within the one battlefield platform area around the speaker. Even Rin will have to leave. This signifies "maximum volume". We'll get to why that's a problem in a moment.

If the input for a down smash is initiated, Rin will turn the volume down on the speaker instead. This will make Len's attacks faster and weaker, but will lower his reach and knockback. Rin will be able to stand near the speaker at this point, but so will opponents. They will be able to deal up to 100% damage to the speaker, at which point the speaker will break. If it breaks, Rin will begin to fix the speaker over about eight seconds. Len will be left without sound attacks, giving him abysmal reach and low damage until the speaker is fixed. If the volume is turned up to MAX, it will be too loud for Rin to turn down the volume... Len will have to do it manually by hitting the speaker with his down tilt.

The Side-Smash input is different... it controls Rin's AI. By default, Rin is "passive"-- She will stand by the speaker, dancing, and will do a number of things-- She will change the volume on the speaker, fix it if it is broken, and move it on command. If the side smash is used, Rin will switch to "combat" AI. In combat AI, she won't fix the speaker or change the volume. However, she will move the speaker, and should an opponent attack and/or come within a battlefield platform of the speaker, she will take the projectile attacks or relentlessly attack them to protect the speaker. The side smash will switch Rin between these settings constantly.


Up Air: Ace-Kick
Len performs a backflip, kicking over his head for 9% damage and low knockback.

Neutral Air: Move Command
Len makes a gesture, and Rin picks up the stereo to move it on command. Using the neutral aerial OR Rin getting hit will cause her to drop the stereo for no damage.

Forward Air: Shout Command
Len makes a gesture and lets out a yell, sending a soundwave ahead of him for 7% damage. If Rin is carrying the speaker, she will move it to the end of the stage in the direction Len is facing(unless she drops it).

Back Air: Shout Command
Len spins around, performing an attack identical to his Forward Air that turns him in the opposite direction, yelling and pointing behind him. If Rin is carrying the speaker, she will move it to the end of the stage in the direction Len wasn't facing(unless she drops it).

Down Air: KeySpike
Len pulls his portable keytar from behind him and performs a downward stab, meteor-smashing anyone below for anywhere from 5-15% depending on the volume. (Yes, this ACTUALLY counts as a sound attack. However, it can be used when the speaker is broken for 5% damage.)


Grab: G Sharp Grapple
Len grabs onto his opponent. If Rin's AI is set to passive, she will disappear.

Pummel: Screamer
Len will shout for sound damage in his opponent's ear, dealing 1-3%. If Rin's AI is set to passive, she will appear on the other side of the opponent and assist with the same attack for the same damage.

Up Throw: Porabola Grind
Len hucks his opponent up into the air. If the speaker is intact and Rin is passive, she will appear over the opponent and spike them back down with a voice wave. With just Len the throw does 10%, but does another 3-9% for Rin's sound attack.

Forward Throw: Sound Crush
Len shoves his opponent forward and lets out a blast of sound from his keytar. If Rin is passivbe and the speaker is intact, Rin will appear on the other side of the opponent and bat him back toward Len with a physical attack for 6%. Len's move does anywhere from 3-9%.

Back Throw: Sound Guillotine
Len throws the opponent back over his shoulder for 5% damage. If Rin is passive and the speaker is intact, she will appear over the opponent with a keytar and unleash a loud soundwave for 10% damage that will bounce them up off the platform.

Down Throw: Drum Rupture
Len pushes his opponent to the floor and lets out a soundwave from his keytar doing 5-15% damage. If Rin is passive and the speaker is intact, she will chaingrab the opponent and use the same throw on them a second time.


B: Drawing Audience
Len plays soft notes on his keytar, starting up a song. Opponents will be pulled to him as the B button is held. Opponents will keep moving for a half second after the B button is released, and the move has a half-second ending lag. Opponents will be pulled at about the speed of Bowser's dash. At maximum volume, holding the button will simply make opponents take 1% every 1.5 seconds, but will not pull them. It does nothing if the speaker is broken.

Up B: Power Chord
Len will perform a sort of third jump. This may seem like an unhelpful recovery, but if the speaker is at the far end of the stage, a cord will hang down and will allow for Len to recover more easily. This requires that you be able to predict where you will be sent in the flow of battle, and keep the speaker nearby for a recovery. The cord will hang, even if the speaker is broken.

Side B: 1/16 Grind
Len spins sideways in a sort of spin attack, using his keytar as a weapon. If Rin is passive and the speaker is intact, she will assist in the attack as well. The move can do anywhere from 3 to 12% per person in the attack.

Down B: Show Stopper
Len takes a half second start up and blasts on his keytar. The resulting shockwave goes out for a battlefield platform's reach in all directions and knocks opponents away for anything from 7% to 21%.


Final Smash: Butterfly on Your Right Shoulder (Click!)
Rin moves the speaker to the middle of the stage onto a new floating platform, and Len jumps on. The two perform a sort of mini-concert, and the volume of the speaker goes "up to 11", dealing constant damage to opponents over ten seconds for a total of 30% damage. When the move ends, there is a bright flash of light. Any opponents on the platform at the time will be sent sky-high.


There's my set. This'll most likely be my last submission of MYM11, I'm gonna be really busy. But that might change. Maybe. Doubt it. :) This was fun though, and I look forward to next contest.
 
Top Bottom