• Welcome to Smashboards, the world's largest Super Smash Brothers community! Over 250,000 Smash Bros. fans from around the world have come to discuss these great games in over 19 million posts!

    You are currently viewing our boards as a visitor. Click here to sign up right now and start on your path in the Smash community!

Make Your Move 11 - It's Over, Duder!

Clownbot

Smash Lord
Joined
Jun 9, 2009
Messages
1,851
MYM4-Quality Sets Ahoy


(click)

PARTY PETE

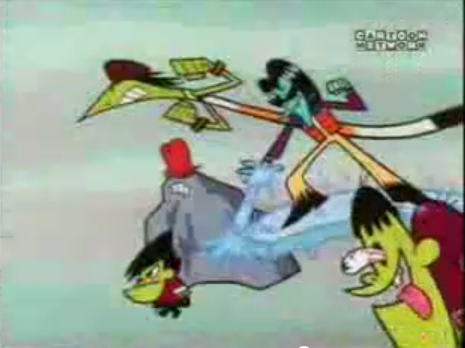
Straight from his self-titled episode of Cartoon Network's Regular Show, Party Pete has arrived to the Brawl! Pete is a fairly tall dude with an average weight, who is slightly better than average when it comes to running and jumping; a man's got to keep up his health if he wants to party so much, doesn't he? After all, Pete's moveset is mostly comprised of his dance moves, showcasing his partying abilities. Let's get ze party started, shall ve?

SPECIALS

Neutral Special - Radicola

Party Pete pulls out a can of Radicola soda and takes a swig of it. That's good stuff! If you keep these coming, he keeps the party going - but if you don't let him drink one, he'll soon tire and within a minute of the fight he'll be too worn out to even attack. The drink is also too great for him to resist, so every minute after his initial drink he'll take one even if the player hasn't commanded him to.

As he progresses in his drinking, Pete's attacks deal different amounts of damage and even some of his stats change:

  • Drinking one Radicola increases Pete's speed. This lets him kick the party into higher gear!
  • Drinking two Radicolas gives him yet another speed boost, as well as increasing his moves' power by 1.5 times. This gives the party even more power!
  • After three drinks, his power is doubled from originally and he takes on a bright, dangerous glow. Perhaps he should stop, but he doesn't want to...
  • After four, he undergoes a major change in appearance by swelling in size so much that he can only roll around the stage. In this state, Pete is taller than Ganondorf, wider and heavier than Bowser, and slower than he originally was - about as slow as G-Dorf, to be exact. His jumps also cover much less vertical distance. The power of his moves, meanwhile, varies from diminished to greater than ever. It feels like this party's coming to a close...
  • After five Radicolas, Pete explodes. No, literally, he just up and loses a stock - and any opponent in his immediate vicinity is dealt major damage and knockback. Pete might not like to take his time in battle, but he sure does go out with a bang!

Side Special - Red Ring

Party Pete holds his hand outward in a fist and his red ring glows white-hot! Any opponent who comes into contact with the ring is set on fire and receives 10% damage with decent knockback.

  • After four Radicolas, Pete's ring glows even brighter, causing very high knockback! The move also has significant endlag in this state.

Up Special - Green Ring

Party Pete does an upward hook as his arm is engulfed with a fist of green energy. Coming into contact with the side of the fist gives you 5% and being in its path deals 10%. The move does offer a bit in the way of recovery, but nothing spectacular.

  • After four Radicolas, Pete's fist is even larger and deals greater knockback! Unfortunately it's even worse in terms of its recovery, but Pete's the kind of guy who rolls with the punches.

Down Special - Guests (with Breasts)

Party Pete's two female assistants come out from behind him and stand on either side of him. They follow him around like this for a few seconds; if he passes an opponent while they're out, they'll stick with that character and do a sexy dance around 'em for a bit. This will manage to distract the opponent for the next second.

  • The girls can only be used once every minute - basically you have one use per Radicola.
  • The girls are pretty much background characters that can have effects on the foreground; they can't be hit.
  • After four Radicolas, the girls are fed up with Pete's attitude (and new shape), so they can't be used until he's reached a new stock. Who needs women for a good time, anyway?

STANDARDS

Neutral Attack - Party Pelvic Thrust

Party Pete performs a pelvic thrust that deals 5% damage.

  • After he's had a Radicola, Pete will perform this move automatically when he'd normally be standing idle. Looks like that soda's gotten to him - he can't even stand still!
  • Once he's had four sodas and undergone his transformation, Pete's pelvic thrust is still performed automatically, but it deals a measly 2% per thrust - poor Party Pete can only take so much soda.

Dash Attack - Rapid Spin

Pete spins forward one and a half blocks, dealing 3% along the way.

  • After one Radicola, Pete will perform this move automatically when the player attempts to break into a dash.
  • After he's had two Radicolas, Pete still performs this move automatically and covers twice as much distance with it.
  • After four Radicolas, Pete covers half the move's normal distance, awkwardly trying to spin before simply rolling sideways. Any opponent directly in front of him when he performs the move receives 10% damage. It seems that new big bod of Party Pete's isn't all worse!

Forward Tilt - Hand Jive

Party Pete does a hand jive that deals around 5% damage.

  • After four sodas, Party Pete's hand jive would be better described as a series of awkward-looking slapping motions. His moves have gotten a bit stale from all that soda... Fortunately, it deals more damage than it normally would, at around 12%.

Up Tilt - Disco Pete

Party Pete does a disco move, raising a pointed finger in the air and staying in that position for a moment before lowering it. Any opponent that comes into contact with his hand receives 7% damage.

  • After four sodas, Pete adds some force to the finger - any opponent that comes into contact with his hand now receives 15% damage!

Down Tilt - Limbo

Party Pete goes into a limbo stance, lowering himself as far as he can. This move actually only causes damage when the opponent is behind Pete, dealing 6%.

  • After four sodas Pete's not in the best shape for limbo; he'll pant loudly before falling flat on his back, dealing 12% damage to opponents directly behind him.

SMASHES​

Forward Smash - Crotch Grab

Party Pete grabs his crotch during the attack's charging animation and thrusts it forward! Depending on the charge, this attack will do 5-10%.

  • After four Radicolas, Pete has a bit of trouble reaching his hand down there, so when the input for his Forward Smash is made he'll revert to performing his Neutral Attack.

Up Smash - Fist Pump

Party Pete raises his fist high in the air before lowering and raising it once more. Each time this attack will deal 7-13%.

  • After four sodas Pete only performs this move once at a time, but his fists are pumping hard - this move now does a good deal of knockback and 19-30%!

Down Smash - Head Spin

Party Pete turns upside down, holding himself up by his arms before spinning on his head. While spinning, he extends his legs outward, dealing 6-14%.

  • After four sodas, Pete's balance isn't quite what it used to be: he'll attempt a spin before falling, similarly to his post-swelling DTilt. This will deal 15% with upwards knockback to anyone on either immediate side of Pete.

AERIALS

Neutral Aerial - Disco Spin

Party Pete performs a slow spin in the air, glowing like a disco ball. Opponents in any immediate direction receive different effects depending on how many sodas Pete has had:

  • With no soda in his system, Party Pete has a simple white glow about him that deals 8%.
  • After one soda, Pete has a blue glow that freezes touching opponents. That speed boost should help getting in a nice hit before they thaw!
  • After two sodas, Pete will have a green glow that gives opponents a flower on their heads. Not a bad idea for him to rack up damage with how much time he has left...
  • After three sodas, Pete's yellow glow will set the opponent on fire. Real... practical?

Forward Aerial - Soul Train

Party Pete makes a choo-choo train motion with his arms, moving forward about a block. Any opponent in his path when he does this receives 6% damage.

  • After two Radicolas, Party Pete will cover two full blocks when this move is performed!
  • After four Radicolas, Party Pete only covers half a block's distance as he barely manages a waddle forward in midair. The move's damage is also only 3% now; unless he's in a close situation, Pete probably won't be using this move for attacking or recovering.

Back Aerial - Booty Shake

I bet you thought you had already seen the most embarrassing move name, didn't you?
Party Pete shakes his moneymaker, dealing 5% damage.

  • After four sodas - was it not obvious? - this move will do a great deal more damage. 18%, to be exact!

Up Aerial - Raise the Roof

Pete, well, raises the roof! Any opponent above him when he performs this move receives significant upward knockback, but the damage of the move is less impressive, around 7%.

  • After four sodas this move deals even more upward knockback, as well as around 16%.

Down Aerial - Getting Jiggy

Party Pete kicks his feet wildly below him several times, doing sort of a jig. Each kick will do around 4% to any unlucky opponent directly beneath him.

GRAB

Conga Line

When Party Pete grabs the opponent, regardless of the direction they were previously facing, he is now holding tightly on their shoulders from behind them - he's created a conga line!

  • Pete's pummel has him kneeing the opponent in the back to deal 2% and cause the conga line to move forward a bit.
  • If Pete has his female assistants out, they will latch onto the conga line as well, causing the pummel to do 8%. It's not a proper conga line with just two people!
  • Keep in mind that after four Radicolas, Pete won't be able to grab the opponent. All that soda has just made him too swelled!

FINAL SMASH

Party Pete IN THE HAUS! Regardless of what state he's currently in, Party Pete will behave as if he has had three Radicolas for the duration of his Final Smash. Meanwhile, the stage becomes filled with people - they just can't get enough of Pete. Even the centaurs showed up! Party Pete himself has to deliver the killing blow during this Final Smash, but the partygoers do a real good job of racking up damage by trampling grounded opponents and attacking aerial enemies with various debris such as soda cans, lampshades, and promotional ice sculptures. After the Final Smash is over, Party Pete will revert to his original state.

PLAYSTYLE


IT WAS RUSHED I SWEAR

Will possibly edit in playstyle later (tipsy)
 

KingK.Rool

Smash Lord
Joined
Nov 26, 2005
Messages
1,810
What is this? The CB set? How now, judgement day already? Well, maybe there's time for a comment first.

I don't know whether it's funnier in the cartoon (I usually don't like this show, but seriously) or in the moveset: Party Pete basically just gets so wasted that he blows up. He's a professional partyer who doesn't know how to pace himself. He's like an unstoppable, uncontrollable force of evil.

You've got a blooper in the NSpec, which says that he can't go more than a minute without drinking one and also that he automatically drinks one every minute; I'd make that, he can't go 30 seconds without getting weak and slow and that he takes his autodrink after 40 seconds. That's a lot of time in Brawl terms.

You seem resolutely opposed to giving lag and knockback details, which I don't mind and I think a lot of people are used to from Khold sets in particular (and this is a most Kholdian set for some reason) but which will nonetheless come under fire. Well, who needs details for a good time, right?

Conga Line seems like a move that would have some hilariously fantastic applications with more than two characters. It DOES work that way, yes? The front character continues the grab? Use your teammate to grab foes from farther on, then bump the whole conga line across the stage, toward the edge! Party Pete is great at gimping!

We don't need no stinkin' playstyle sections. We know how this works, and we see that you're not here to make a set according to Warlordian standards; this is in many ways a Brawl-feasible set that doesn't pretend to be otherwise, that bleeds character and plays distinctively enough to provide a compelling read and an interesting thought experiment. Party Pete spends the course of the match (or the stock, I guess) getting really drunk - but it's down to the player to get drunk enough for him to play effectively, not so drunk that he passes out explodes. It works in a kind of meta way: it's the player who needs to resist temptation, because he's going to regret when the opponent starts playing keep-away in hopes of forcing Party Pete to keep drinking, keep fueling himself. It's not intricate or especially technical, but it's still very interesting and deeply in-character and probably our best implementation of alcohol soda in a moveset - and what a dubious claim to fame that is!

And now for the apocalypse. Thank you for dooming us all, CB. (CRS)​

EDIT: I can't get enough of this character and this episode. I love how the guys just straight up MURDER Party Pete.
 

MarthTrinity

Smash Lord
Joined
Aug 9, 2007
Messages
1,954
Location
The Cosmos Beneath Rosalina's Skirt
QWOP

"I'm really glad physical movements aren't done this stupid way in real life...I'd never get any if they were...*pout*"

So we have a day one moveset for one of the most infamously annoying computer games around. As I read this, my mind instantly went to my own Ultimate Chimera in the sense that I claimed it was a serious entry (or as serious as Negative Man) at first and later realized that it was just downright silly of me to consider it as such as it was just downright goofy. QWOP is sort of that way as well but if you want to consider it a serious entry, I'll comment it as such. So QWOP is a weird moveset to say the very least. It's sort of fitting how you've painted the picture of QWOP being this incompetent fool who can hardly even walk correctly without falling over and derping the hell out...although one thing I would've liked to see was something more...well...QWOP related.

What I mean by this is, what if you had certain buttons control his arms and legs? Like maybe you'd have to press and hold L or R to move his lower leg and X or Y to move his upper legs? It'd be confusing as hell and sorta sucky for those not using the GC controller but it'd capture QWOP's movement quirks to a T. That way, you could have QWOP play more like a ragdoll of sorts; hitting the opponent with your flailing limbs could do variable damage depending on how fast you whip your arm or leg (or body or whatever) into them. Like I said, it's a bit cumbersome but admittedly, that's what QWOP is about, annoying controls for simple things.

It is a very humorous set however, I'll certainly admit it made me laugh or smile at various times throughout. It also ruined any plans I may have had for a table moveset because of thus unwinnable matchup. All in all, QWOP is...well, it's interesting. If it's a serious set as you insist, it's far from your best. If it is in fact a joke set, it certainly did its job for me.


Uboa

"It's creeps like you who always ruin my awesome dreams of hunky guys with fudge sundaes..."

...Uboa's female?! The hell? I've played the hell out of Yume Nikki but always figured Uboa was suppose to be a masculine character. Strange character choice though, especially since there's not really anything even resembling "fighting" in Yume Nikki sans Madotsuki's knife ability. Regardless, Uboa is a weird set that suffers strongly from both lack of potential and lack of detail.

The first part isn't exactly your fault. Yume Nikki as mentioned above really doesn't have much of anything in terms of actual moveset potential seeing as there's no real combat in the game...so what you went with was focusing more on Uboa's weird supernatural stuffs. Not a bad direction to take it... but unfortunately, it's a fair bit lacking really. The moves are all a fair bit bland...which is weird for anything Yume Nikki related to be bland. I have a really hard time actually imagining any of these moves in game as anything more than just Uboa standing there and the opponent getting their *** beat everytime the screen flickers. Speaking of...as someone else mentioned, is this set trying to beat the opponent or give the other player a seizure?

In short...Uboa is sorta rough around the edges. What I would advise is that you take a look around at some of the other movesets posted so far. Don't worry, nobody expects you to be doing stuff like the leaders or even close; everyone starts somewhere. What you should be shooting for at this point is a proper grasp on detail. Playstyle will come much later when you're able to properly portray the attacks you have in mind to the reader...so your main focus right now should be on the smaller stuff like detail and interesting new concepts. With those down, playstyle will come natural to you as you start thinking in the grand scheme of things.


Derp. Hit submit instead of preview. Will edit in more here...
 

Hyper_Ridley

Smash Champion
Joined
Dec 21, 2007
Messages
2,299
Location
Hippo Island
Party Pete

You don't know how long I've been waiting for this set to be made. And the fact that's it by a MYMer I've been waiting to see make a set just adds to the awesome-factor.

The set is extremely in-character generally, between the dance-themed attacks to the whole soda mechanic. Oh yeah, more and more epicness is being unl- oh dear, you took too much in at once and now you're dead. It's a pretty clever dynamic gameplay-wise, and it's a fun way of translating what screen time he had from the show

Having said that, I feel this is a case where more detail on attacks really would have made a difference. You never state how long it takes to take a drink of Radicola, but that time frame would literally affect how the entire rest of the set could/should be designed. If it's a quick guzzle, then you can make his attacks a bit worse than they "should" be at the start to encourage him to take a swig and add to the temptation angle of his gameplay. If it's "laggy" as he fully takes in the wine of the Gods, then his attacks need to start at competent levels so he's not destroyed at the start when he can't fight back or get his buffs going.

However, regardless of how his beer drinking move works, right now he's pretty underpowered. Most of his moves deal only 7% or so, with even his smashes dealing pathetic damage (until he reaches Warlord form). Even at level 2 Radicola, he's dealing 10-11% on most attacks, which is the average for Brawl damage, so it takes him 3 levels of buffs for it to be an actual buff, and then he's one step away from becoming a fat tub of lard that is basically below-Ganon tier. I know you weren't around for MYM4 Clownie, but veterans might remember THIS moveset which suffered from the same core issue; of having to go through all this set-up just be on par with other characters only for that set-up to have a terrible drawback anyway. In a way, it kinda harms the characterization of the set; This is PARTY PETE, he's supposed to be saving parties not desperately trying to get them started only for the cops to arrest him once he finally comes up with a decent idea.

Final bit of HR criticism: Conga Line. Replace Side Special with it and give him an actual grab-game. Now.

Soooooo, yeah. I hope I'm not coming off as (too much of) an asshole with this semi-review. As I said, I love seeing a moveset for this guy and it's great to see you take a crack at MYMing. It's definitely a fun read and I could see you cared about making the set something that would be enjoyable to play in a real game, I just feel that the set had the misfortune of having some refinement issues that in this case magnified each other to be more blatant. So here's to hoping you make more movesets, and here's to making epic movesets for epic characters. Pass me the Radicola!
 

Akiak

Smash Ace
Joined
Jul 28, 2007
Messages
820
Location
In my secret laboratory.
Ashley
I'll start out by saying that you really went past my expectations with this set. All of the moves are sweet and original, and they all work together in one way or another. Some moves are just awesome, like the Binding Circle, the Jab and the Neutral air. My favorite move is the voodoo doll which works perfectly with the rest of Ashley's playstyle and is just plain awesome. Speaking of playstyle, yours is just how I like it: short and to the point. I also thought the writing style was particularly well done.

My only concern is that maybe you could've used the potion some other way, like having it absorb projectiles and energy attacks or something.
Also, the graphics are a bit bland, if you take a look at other movesets you'll see the difference. It kinda lowers your expectations and scares away the impatient reader.
Isn't there a bigger, better picture of Ashley on the web somewhere?

Overall I was really impressed. I'll eat my hat if I don't end up voting for this.
 

Junahu

Smash Ace
Joined
Nov 15, 2005
Messages
899
Location
Shropshire Slasher
Fashionably late as always, here's Junahu... commenting QWOP

KingK.Rool:
[HERE]

QWOP:

Heehee, what a cruel moveset this is, not just to his opponent, but to his reader AND his player too. Forcing the foe to play a completely topsy turvy game of not facing him, while continually flipping their controls is just plain sadistic.
Very enjoyable, and I did laugh a few times too. I get the sneaky feeling that QWOP actually works as a moveset. I certainly wouldn't want to play as him, but that's part of the point of it, right?
 

LegendofLink

Smash Apprentice
Joined
Feb 17, 2008
Messages
164
Location
Pennsylvania
Boom Boom
I do really love how you don't come right out and say that this is a momentum-based character, but one look at that 0.1 in traction immediately tells the reader what's up. With that said, this set is quite different than previous momentum based sets (Subaru, Burter, Rainbow Dash) in that his is very much ground based, as opposed to flying through the air. The very fact that you can slide about to change the way the moves work also allows you to use the very simple moves that you without sacrificing much depth to the game play, making the set a very quick, but thoroughly enjoyable read.
There a few things that I have a problem with in the set, the first being the fact that the "shell mode" and the down special essentially do the same thing, except the damage from the spikes is weaker than what you would get from being hit by the other shell mode, which doesn't make any sense and just about completely invalidates the special's existence. The aerials could have used a bit more oomph as well, seeing as aside from the forward and down aerials, the others don't really do much for him aside from hitting opponents back toward the ground and come off as a bit too generic even for this simple style for my tastes. Definitely a cool take on a simple genre of sets, and a very nice read at that.


Marvin the Martian
This is a very cool and very in character set, that's for sure. The usage of the modulators especially harkens back to the ending of the original Duck Dodgers cartoon, which is great for the nostalgia factor. By aggressively limiting he ground that the opponent can stand on, Marvin sets himself apart from most projectile campers. The set is really tight in the purpose of the moves, also with the bubbles being the end goal of the set, but everything feeds into that without forcing you to go about it in any one way. I one problem with the set that really holds it back in my book though. There are a lot of interactions thrown out there, seemingly for the sake of more interactions. The forward tilt, up aerial, and down aerial are the primary offenders here, as the Martian creation could easily have been one move without the random Kabutops-style pits or electrocution traps, Marvin can already aim most of his projectiles without spinning around, and you even admit that the down aerial is completely counter-productive to his game. Those things aside though, this is a pretty tight set, good job.


Venustoise
This is quite the step up from your previous work, BlackFox. Though the obvious similarities between this set an Boom Boom can easily be seen, as HR said, this set takes it in the opposite direction, using the momentum defensively, as the character's mobility is pretty much non-existent otherwise. Another thing about this set that is truly commendable is the fact that you made a heavyweight focused on taking NO damage, and instead having to be KO'd through abuse of his own mechanic, and you made it make sense and feel natural, something that you rarely see even from veterans. The set is not without its problems of course, with random status effects and some balance issues sticking out here or there. It would also help you out a lot of you made the aerials and throws a bit more relevant to the way the character plays, especially since the grab game could have easily played off of the momentum playstyle to move the opponent around. Keep up the good work.
 

Zook

Perpetual Lazy Bum
Joined
Jul 30, 2005
Messages
5,178
Location
Stamping your library books.
VOL OPT

Vol Opt is a lot different than most supergiant characters. The concept of being able to control a smaller, flying character while your actual character is essentially vulnerable and anchored in place is an interesting one and really works for the archetype. Being able to create an obstacle course of electrified wires, pillars, bombs, and energy balls to protect your gigantic body stops him from being completely demolished by combo characters and is an interesting concept, though I don't think it would be particularly fun to use... or fight against. The pillar mechanic is interesting and cool, and the number of ways you can interact with them is pretty generous. I wish you could attach wires to the stage, though. That would open up some interesting possibilities with floating platforms.

You made a few bad organizational choices here, though. You mention being able to control pillars at one point, and then elaborate on what that means six moves later. That's a bit silly. Also,
you use the same name for the actual character and the computer monitor. It's a little bit confusing at points, and with how different the two characters are, I feel like you should have referred to them by different names, even though they are technically the same being.

My favorite part of Vol Opt has to be his grab game. The grab is not only cool in and of itself, but is also useful to drag opponents into your obstacles, which was a nice surprise. The grab works a bit like Dark Bowser's cage, but far more interesting with having your own stage hazards and whatnot. Plus opponents are actually able to directly fight against Vol Opt while grabbed, unlike DB. /enddarkbowserhate Vol Opt could also choose to ignore the foe while he sets up stage hazards, occasionally throwing a pillar or laser at them.

ASHLEY

I love spell casters. I don't know why there aren't more spell caster sets; they have so much potential. And I think Ashely demonstrates a lot of that potential. Ashely has a lot of cool, creative, interesting attacks, most notably here magic circle, the voodoo doll, and programming Red to patrol an area. There are very few generic attacks; even though I feel the up smash is a lot like Lucas', it suits her character enough to be forgivable. The Heavy Spell is a weird choice for this moveset; it doesn't really add anything to Ashley's playstyle.

The magic circle is the coolest thing about Ashley. Being able to trap opponents for a bit and allowing her to set up traps and whatnot works really, and would be really useful in team matches, too. Can you trap Red in one, too? It would be hilarious to see Red and an opponent trapped in a circle as you light him on fire. Speaking of Red, I really liked how you handled him here. Ashely abuses him, but in the end really needs him to play to her full potential, and that's where the healing spell really comes into play.

You did make a few no-nos, though. You give more info about the magic circle at the end of the down special, which makes no sense, and even then, I don't think that little bet is at all necessary for the circle. You also forgot to give damage for the nair!
 

Nicholas1024

Smash Lord
Joined
Mar 14, 2009
Messages
1,075
King K Rool reminds me a fair bit of some of my MYMX works. Take a couple of signature moves (in this case the crown and cannonballs), and then add in as many moves to manipulate said specials as possible, until you can do just about anything you want. Still, I'd have to say this set isn't quite without its problems. Although the whole impale the foe on your crown thing and the various interactions you have between the crown, your cannonballs, and King K Rool's other attacks are pretty cool, some of them don't really seem to fit right. For instance, Rool constantly wanting to throw his crown away rather than actually wear it like a king is a bit OOC, and you definitely take some liberties with video game logic. (The last time I slapped a metal object moving towards me at high speeds, it didn't go spinning up into the air.) Additionally, it seems that for all of the ways you have to manipulate your various traps, some of them aren't useful compared to others. For example, who needs an elaborate gimping game when crown impalement + up smash KO's before 100% and is easier to pull off? Still, despite these criticisms, on the whole it's a solid set, and a good read. Now let's see you make another obvious front runner like Baron Rool. ;)
 

Chaos Swordsman

Smash Apprentice
Joined
Sep 15, 2008
Messages
174
Location
In your closet.
Actually, the Heavy Hex does help. It makes it harder for the opponent to keep up with Ashley, which is crucial to keep traps set up.

Unfortunately, no, it's not possible to trap Red in your own circle, though that is a cool idea.

Actually, that last part at the specials was a mistake. I'll fix that real quick.

Edit:Fixed.
 

BKupa666

Barnacled Boss
Moderator
Joined
Aug 12, 2008
Messages
7,788
Location
Toxic Tower
MARVIN THE MARTIAN
Hey, here's the one-day set Dave made while I was making King! I very much like how an extraterrestrial like Marvin is focused on destroying the 'earth' stage to bring his opponents up into his air 'space' comfort zone. The modulators are especially effective for this purpose, as they blast away large portions of the stage at a time, while he can send out Instant Martians and K-9s to lock off the rest of the arena. In addition to preoccupying the opponent with obstacles to avoid, I like how these alien weapons give Marvin time to set up his nice little centerpiece bubbles, which come in handy for all sorts of aerial combat. The ability to bring up what would regularly be grounded traps as extra defense against Marvin's light weight is also quite convenient, in a good way. There are balance problems that ought to be brought up here, however, particularly Marvin being able to destroy the stage, seemingly without being forced to restore it. Yes, when you say the effects should be obvious, we can assume there will be a time limit, like the pits on other prominent MYMX sets, but the fact that it's not mentioned in Down Special, and that Marvin has a whole D-Air to bring back the stage worries me in this regard. At least he's fairly safe against "Roy"...Other than this, Marvin is a charming set, and a welcome addition to your ever-growing roster.
 

MasterWarlord

Smash Champion
Joined
Aug 24, 2008
Messages
2,911
http://www.youtube.com/watch?v=J2_Kml6vEbA

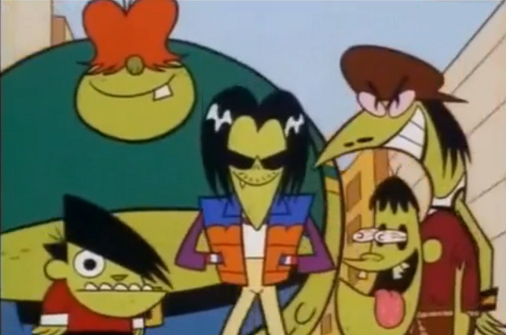
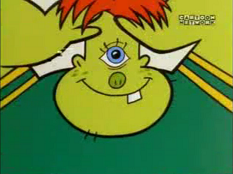
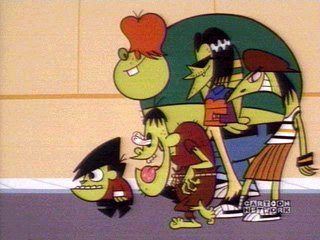
GANGREEN GANG


The Gangreen Gang are a group of “antagonists” from the Powerpuff Girls. They do little more than things like prank calls just to get a laugh, with the closest thing they ever do to “getting serious” being a rare robbery or two. . .Considering they don’t actually do all that much, they are actually antagonized more by the Powerpuff Girls more than they antagonize them, causing their motives to devolve into getting revenge on the girls when they’re not just goofing off.

In Brawl, the Gangreen Gang all start directly next to each other and can be controlled as one massive unit. All five must be KO’d to take off a stock and cause them to all respawn, and they can all attack independently of one another when the others are in hitstun/lag. They even have separate percentages as well – only the most recently attacked character’s percentage is shown as the group’s icon becomes that gang member.

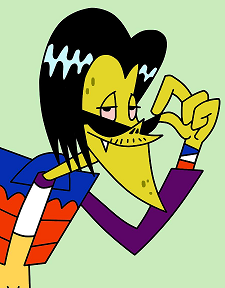
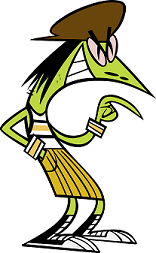
ACE


Ace is the leader of the Gangreen Gang, and is the only one intelligent –or- ambitious enough to prevent the group from being a bunch of generic dirty Mexicans. . .Instead, he further obscures what race they’re supposed to be parodying by having them do robberies. In any case, Ace largely takes advantage of the stupidity of the other gang members to have them do the vast majority of the dirty work, and pretty much only participates directly when they’re just doing pranks for fun.

He has similar stats in pretty much every aspect to Marth, and he’ll be the primary target for the foe considering that most of his “attacks” consist of ordering the other members about – without Ace, the other members can barely move at all.

Side Special – Move Out


Ace simply says “Gangreen Gang, move out!” before pointing in the input direction, causing him and all the other members to walk in that direction at their walking speeds until they reach the edge of the stage. Inputting this again will cause them to run in the desired direction instead of walking, while inputting the opposite direction will simply cause Ace to stop. Note that they will automatically attempt to jump over anything in their way, and that the gang does not need to be ordered to recover – they will attempt to make their way back to the stage automatically with their jumps if knocked off-stage. The gang can use any of their attacks while moving (Unless stated otherwise), continuing to do so as they move.

Up Special - Pursuit


Ace points to the nearest foe to him personally, then says “Don’t let ‘em get away!”. This causes all of the gang to relentlessly run towards the point the foe –was- at when Ace used the move rather than chasing them directly. Of course, you can just have Ace spam this move (At which point he’ll simply say “After ‘em!” for less lag) to keep constantly chasing after the foe. The gang won’t care about making their way back to the stage until they reach the target point. If you change your mind and want them to stop, you can just override the command with a Side Special.

Neutral Special – Marked Man


A controllable cursor spawns on the map. Rather than the cursor being 100% controllable, you can simply cycle through all the people on the field with the cursor by inputting left and right, then pressing any button to make your selection. It can target enemies, summons, the other gang members, or Ace himself.

If you target a Gangreen Gang member, Ace will say “You ain’t listenin’ (Name)!” if he didn’t target himself. This causes all of his Specials to only command that individual member. If he targeted himself, then his Specials reset to commanding everyone again.

Targeting an enemy has him taunt them. “Awww, whatsa matter, ya big baby?”. This causes the foe to be unable to move more than a platform away from Ace (Getting forced to move towards him if he’s on-stage and they weren’t already in range) or turn their back on him until they hit him with an attack. Any attack will do, but Ace still has four other gang members to use as meat shields. This taunt has infinite range, but can still be dodged and is rather laggy.

Down Special – Gang Up


Ace motions his arms towards himself. “Aight, aight, regroup!”. This causes all gang members to make their way towards Ace at their dash speeds. Once the last member gets there and they’re still all within half a platform of each other, they will enter a group stance. In this stance, they are controlled like a single regular Brawl character for movement and jumps, but can only have one attack going at a time. The Gangreen Gang actually start in this stance when they spawn, but they are still individually attackable and any member getting separated causes them to leave the stance. The gang has a unique set of attacks when all ganged up, located after everybody’s individual attacks in this moveset. You’re allowed to not have all 5 gang members if some of them have gotten killed off, but you won’t be able to use certain attacks.

Shield Special – Roundhouse Kick


Yes, Ace does get an actual attack to himself outside his taunt. If individually input, Ace simply does a roundhouse kick in place that deals 10% and knockback that kills at 165%. If you input this move with a direction, though, Ace will run in the desired direction for as long as you hold B before doing the kick upon release, flying forwards an extra half a platform as he does so from the momentum and boosting the attack’s power by 1.5x. Ace will automatically release the kick at the top of his jump if you input this move up into the air, while if you input it towards the ground he’ll knock grounded foes into prone.

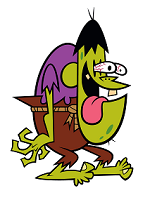
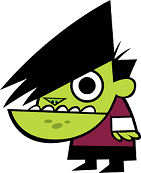
GRUBBER


Grubber’s character is pretty self explanatory for the most part, being just about as stupid as he looks as he communicates by sticking out his tongue and shooting drool out of it. None the less, the others seem to understand Grubber just fine, and Grubber –does- seem to be able to talk normally considering he can somehow do perfect voice impersonations for prank calls. . .Which only adds to the guy’s sky high levels of creepy.

In Brawl, he’s Wario’s height while being a good bit skinnier, and only weighs as much as Meta Knight. He has a dash on par with said blue ball of doom when ordered to, and walks at the average pace of Mario’s walk.

Down Tilt – Droolbucket


Grubber lets his tongue droop down to the ground, coming into contact with it. This causes that portion of the stage his tongue is on to get covered in drool for 10x as long as his tongue stayed in contact with it, and he can very easily cover the entire stage if he lets his tongue droop as he walks across.

The drool is slippery, causing anybody who dashes along it to dash about 1.5x as quickly as normal. Their momentum will carry if they jump or stop dashing, though, taking variable time to stop based off the character’s dash speed. This does indeed apply to all of the Gangreen Gang members as well, hence why walking rather than dashing can be beneficial. If a character attempts to turn around while dashing in a way that would bring their traction into play, they will trip. Speaking of which, yes, the Gangreen Gang can be put into prone and such, at which point they will automatically use generic get-up attacks ASAP.

Jab - Slobber


Grubber sticks out his tongue as drool splatters from it in every which way. “Blllllp!”. This doesn’t actually create drool, rather making his tongue a straight up hitbox here, dealing 5 hits of 1% and flinching per second. Grubber will automatically keep the jab combo up forever until you input anything else for him or he takes hitstun. Grubber won’t be finding many situations where he can trap an enemy up against a wall with his tongue, but considering he can walk forwards while he flails his tongue he doesn’t need to – if he wants them anyway, the other gang members work just fine. Enemies will have to DI up into the air and over Grubber as he walks forwards to get out – DIing away will do enemies no good. Then again, you can just have Ace order Grubber to turn around while he does this if you predict their DI correctly, in which case they would indeed have to DI away instead.

Up Tilt - Belch


While his belches aren’t explosive beams of death like when he randomly gained superpowers, Grubber can still put his burping to –some- use here by simply grossing the foe out. He belches upwards, creating a Ganon sized hitbox above himself that causes foes to enter helpless and take 11%. The hitbox then keeps in contact with Grubber’s mouth after he uses the move for 5 seconds, causing anybody who comes in contact with Grubber to turn around and run a platform uncontrollably for a platform. They have some actions available while dashing – first they can use their dash attack, and secondly they can jump, at which point they can use any of their aerials or air dodge. . .Though they will still uncontrollably DI forwards for the remaining distance, of course. If the foe is already coming towards Ace or doing another similar order, issuing them another order (Such as this move) will do nothing.

Forward Tilt – Tongue Tether


Grubber sticks out his tongue in an attempt to grab the foe with it. Once he does, he’ll automatically pummel the foe by squeezing them for 1% every half a second. They can still do everything normally while Grubber has them grabbed by his tongue, pulling Grubber around as they do so. Every time Grubber pummels the foe, though, they will flinch, interrupting whatever they were doing. This prevents them from attacking to do pretty much anything but defend themselves with generic GTFO until they button mash Grubber off.

If Grubber still has bad breath from his ftilt, then the foe will be in constant contact with it due to Grubber having them grabbed, causing them to constantly run forward until either it wears off or they button mash Grubber off. This is a prime KO method, though it can potentially sacrifice Grubber. Alternatively, you can just use it as a zoning tool to force the foe to move around at low percentages.

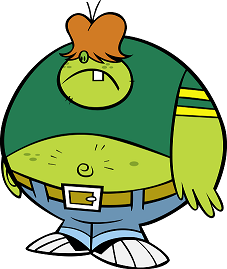
BIG BILLY


Billy is even stupider than Grubber – there’s no hidden intelligence under his surface like with Grubber, though there is more to him than meets the eye with his rather child-like innocence, largely just getting taken advantage of by Ace and the rest of the gang as the group’s “muscle”. While he did actively try to help the Powerpuff Girls at one point, they rejected his help due to him being too stupid to do what he intended most of the time and brutally beat the crap out of him for no particular reason, leaving him little reason to not stay with the gang.

Billy is as tall as Ganon and wide as Bowser, but is 1.25x as heavy as Bowser so you don’t have to worry about defending him all that much regardless of his size – they’ll be much more concerned with killing off Ace and the featherweights on the team when Billy’s weight is taken into account. This means Billy’s a pretty permanent stage hazard you can send into harm’s way without much thought – he doesn’t even need to be attacking to become one! While characters will ignore Billy if they walk past him, if they dash past his front/get knocked into it they’ll go directly into Billy’s fat. The –moment- they stop dashing/DIing forwards or their knockback runs out (Billy will get dragged with the enemy, slowing their momentum/movement by 25%), they’ll get catapulted in the opposite direction with double the original speed they ran into Billy with. Yes, this can apply to other Gangreen Gang members, but they are intelligent enough to stop dashing and –walk- past him when it comes time to pass by him. Foes will generally be intelligent enough to not fall for this either, hence why you must send them sliding/fleeing into Billy’s stomach via Grubber’s drool/bad breath, or simply knock them into him the old fashioned way.

Neutral Grab – Layers of Fat


Billy squishes anybody who dashed/was knocked into his stomach with his fat, grabbing them with his skin and enveloping them in his fat. Aside from snatching people inside your belly, the overlapping hitbox of this is easier to land than you’d think when Billy’s size and his ability to move while using the grab are taken into account.

If Billy grabs Grubber with his stomach while he has bad breath, then the status effect will last inside Billy’s stomach for 5 seconds – foes will run away from Billy the moment they would normally be free to do actual actions, not immediately.

Side Grab – Collapse


Billy falls forwards/backwards, pinning anybody he hits underneath his body and dealing 8%. He won’t automatically get up from this prone position until you input Z, and will roll over to be laying on his back if he collapsed forwards (While still keeping the enemy pinned under him). Anyone who goes to stand on top of Billy will get trampolined up into the air a platform’s worth – higher if they had momentum when they came down. Billy can roll up by inputting anything but Neutral Z – Neutral Z still works normally. This lets you put a gang member on top of Billy’s stomach in a defensive position, say, Ace, for instance, with constant momentum to go upwards. Ace in particular can do a downward aimed roundhouse kick to bounce up to 3x as high as normal immediately, then higher and higher as Ace does the kick from higher in the air. If the foe attempts to intercept Ace, Billy can just grab Ace in his stomach to “protect” him as he comes down and throw him to a new location.

Down Grab – Belly Bounce


Billy turns to face the screen and does a body slam, laughing stupidly as he does so. This deals 11% and spikes foes in the air, sends grounded foes into prone, and pitfalls prone foes. On contact with the ground, Billy bounces a platform back into the air before repeating the body slamming in an infinite loop until you tell him to stop. Yes, he can indeed move about the stage while in this stance, though only at his walking speed. Billy can come out of this by inputting anything, causing him to grab the ground the next time he slams into it (and pin foes under him instead of pitfalling them if there was a prone foe there) and enter his prone state from his side grab. If foes are ambitious, they can give Billy –horrible- ending lag by attacking him from above while he’s in this stance to smack him into the ground hard, though more often than not this will just result in them getting slammed. If you’re telling Billy to pursue the foe, this is pretty much the only way he’s going to be competently pressuring them.

Up Grab – Rock Crush


Billy turns to face the camera and grabs two circular Wario sized chunks of the stage from either side of himself. He then proceeds to smack them together above his head. Any foe caught in-between them will take 16% and immediately fall down to the floor, entering prone with a slight bit of stun before they can even attempt to get out of it. Going over Billy is the only fast way to move past him (from the front), so this has obvious immediate uses. A not so immediate use is when you’re bouncing Ace on your stomach en mass, and the foe joins in to try to kill Ace. Rather than wait for the foe to try to use your stomach, you can get up and use this to more actively try to kill them.

If this move doesn’t hit a foe, one of the two rocks will shatter the other two before Billy carelessly drops the “winner” in front of himself. If Billy already has a rock on the stage, both rocks shatter when they get smashed together. Rocks are solid with 40 stamina, and can be attacked by anyone to send it rolling about similarly to a much heavier (Wario’s weight at 40%) soccer ball. Whoever hit it last is the one that’s immune to it, much like the Soccer Ball, though if any gang member is the last one to have hit it all of them are immune to it. Drool is the easiest way to build the rock’s momentum, but Billy can also grab the rock in his fat. The ball deals damage and knockback based off its’ momentum, dealing about 10% and knockback that KOs at 150% if hit by Mario’s fsmash. While foes would normally be unlikely to help you build the momentum of the rock and play tennis with it back and forth, the fact that it’s solid means if they attempt to dodge they’ll get dragged along with it during their invulnerability frames then get hit by it. Hitting a rock that already has momentum (And yes, all attacks out-prioritize the rock) does indeed cause said momentum to stack.

If Billy grabs a rock in his stomach when he recently grabbed Grubber after he burped with utilt and got bad breath, the smell will indeed stick to the rock for 5 seconds before wearing off.

Pummel - Nom


Billy takes the foe out of his stomach and stupidly attempts to chew on the foe’s head stupidly, drooling over it and dealing 5% in a laggy pummel. If used on a rock, Billy will actually be stupid enough to devour it. . .

Forward Throw – Launch


Billy launches the foe out of his stomach at a diagonally downward angle. If the foe comes into contact with the ground, they will enter prone and slide along the ground as they take their knockback. While the throw only KOs at 150% normally, foes’ momentum can be boosted by drool as they slide along the ground, potentially KOing them as early as 95%. Their momentum gets boosted more if they have more stage to slide across, though considering that means they’re farther from the blast zone it means there’s not much difference – what it does mean is Billy doesn’t have to painstakingly corner the foe against the edge to pull off a KO.

Back Throw – Passing Gas


Billy takes the foe out of his fat and places them gently behind himself before harshly patting them on the head, dealing 4%. He then proceeds to enter a constipated position and fart, dealing an extra 2% and knockback that KOs at 200% by default. For each rock Billy has eaten, though, the damage of the fart is boosted by 4% and the knockback KOs 20% sooner.

Billy will get propelled forwards by his fart based off how strong it is – one Bowser width for each rock he consumed. This turns Billy into a hitbox that deals 1.5x as much damage as his fart, possibly getting boosted even more if he slides forward along some drool. The trail of fart that propelled him forwards lasts 5 seconds, and any foe who enters it will be forced to dash out of it towards the nearest exit until they get out.

If Billy farts on a rock or another gang member (To which they will show blatant protest, save for Grubber), they will cause anyone they come in contact with to run a platform away from them on contact, the fart lasting for 5 seconds on them.

Up Throw – Throw Up


Getting the enemy knocked into his stomach so many times eventually triggers a gag reflex out of Billy, causing him to grab the foe out of his stomach before lightly tossing them upwards for 4% and vomiting on them. If he hasn’t eaten any rocks, the vomit will be generic nasty green crap, dealing 6% to the foe and causing them to be covered in the vomit for 10 seconds. While they have vomit on them, they’ll take 1% per second and have the lag of their attacks increased by 50%. This time can be reduced if the foe runs a full platform, in which case they can shake it off. . .Of course, your drool coated stage has no problems with that.

If Billy has eaten rocks, he will vomit up mass rock chunks from inside of himself, dealing 6 hits of 1% and flinching per second, it lasting for as many seconds as rocks Billy devoured. Aside from dealing more damage, the stalling capabilities for you to re-position the other members /coat the stage in drool/etc increase with this throw. The foe cannot ever hope to DI out of this move and will get slowly propelled towards the top blast zone during it, saving them from any zany combos, though potentially making them vulnerable to a guaranteed KO if you’ve somehow eaten 20 rocks or something.

What’s the point of giving Billy the ability to benefit from set-up time with bthrow and uthrow? The fact that nobody would bother attacking him otherwise so it’s easy to do it. If they’re actually afraid of you setting up, this becomes an even more useful tool as you use it to threaten foes, forcing them to attack the tank of the team instead of the other featherweights.

Down Throw – The Cyclops


Billy raises up his hair, bending down to face the foe in his stomach if necessary, before showing them the fact that he’s a Cyclops. The foe is understandably freaked out and will dash -2- platforms from Billy before being able to do anything without Billy having to interact with Grubber or eat rocks or what have you, though the throw deals no damage. They can jump and use their dashing attack like when they run from Grubber’s bad breath, but what they can do is still just as limited as ever. Used on an ally or rock, this will release them with no penalty, which is good if you want to release them without damaging them.

ARTURO


Arturo is the main thing that confirms the gang as Mexican, considering his obscenely stereotypical Mexican accent. Beyond that, the main thing that defines him is his ****** status, considering he actually has perfectly normal intelligence.

In Brawl, Arturo is lighter than Jigglypuff, but is a small fast moving target the same size as the pink puffball, having a walk on par with Ganon’s dash and a dash as fast as Captain Falcon’s. Arturo’s non-existent weight also helps him move around faster when launched out of Billy’s belly.

Down Smash – Cyclone


Arturo goes to run around in a circle overly quickly three times – he doesn’t have Marvel level super speed anymore, but it’s not like he needs it. There’s 1.5 Bowsers worth of space in the middle of this little cyclone. The edges of the cyclone where Arturo physically is deals 11-22% and knockback that kills at 170-140%. The interior of the cyclone has a different hitbox that doesn’t deal hitstun, damage, or knockback. . .Instead, it simply flips the target like Mario’s cape and reverses all of their momentum. If the foe is specifically running away/towards something from some status effect, they’ll go to turn around after getting flipped before continuing to run in the intended direction – this will trip the foe on drool. Aside from that, you can just send the foe right back towards wherever they get knocked away from to repeat the process, though beware that Arturo can be out-prioritized by anything so it’s not exactly a guarantee. The move becomes more threatening when you take into account Arturo can still walk (Unfortunately not dash) while using it.

This also of course applies to rocks and other members, in which case you can prevent them from sliding off-stage.

Forward Smash – MARIA


Arturo takes out what blatantly seems to be a pocket knife, before switching out the “blade” to show that it’s just a comb – not just any comb, however, as this comb has apparently gotten Arturo through some sort wars with the drug cartel or something. He then proceeds to attempt to stab foes with the spines on the comb, dealing a token 5-12%, though embedding the comb into the foe’s body. . .Very, very, lightly. It will deal 1% every other second it’s embedded, and the foe only has to stand still for .2 seconds to pull it out of themselves.

If the foe dashes into the comb or comes into it with any form of momentum, though, the comb will deal more damage based off how fast they were going (15% uncharged to a dashing Sonic), the interval where the damage is dealt will be smaller (Dashing Sonic taking 1% every .3 seconds), AND it will take longer to pull out (Dashing Sonic must stand still for a full second). Needless to say, if the foe –ever- dashes they’re not gonna stop if you have drool out properly, and even if you don’t have it you have other direct methods of forcing the foe to get off their ass and move around. The move also gets proportionately buffed when taking Arturo’s own momentum into account, so if you get do a “drive by” with this move you can expect even better results.

Up Smash – Piggyback


Arturo leaps into the air anywhere from a Kirby height to 1.5x Ganon’s based off charge. The move is largely lagless ignoring charge, but the hitbox of the move is very specific. It requires you to either land on top of characters as tall as/shorter than Arturo, or to get onto the foe’s back/behind their head if they are taller than him. Granted, the hitbox –is- a grab one.

Once Arturo grabs the foe, he pushes against them to try to knock them forwards. This has the limited effect of making foes lean forwards when standing still and walking slightly faster, but if they dash for so much as halt a platform they’ll fall forwards on their face into prone.

Inputting fsmash/dsmash from here will cause Arturo to smack the foe in the face for 5% and cause the foe’s controls to be randomly scrambled (Not simply reversed) for 7 seconds. However, the punch has a slight bit of lag on it, and if Arturo is hit during this time (By –anything) he’ll get knocked off due to not using both his hands to keep his grip on the foe. Otherwise, the foes must button mash to knock Arturo off. Inputting usmash while piggybacking a foe causes Arturo to hop off early. Foes will generally want to stand still while doing a generic test to figure out their new controls – don’t let them and keep up the pressure.

SNAKE


Due to the stupidity of Grubber and Billy and how Arturo is perfectly happy in the position he’s in, Snake is the technical second in command of the group. In order to earn this position, though, he pretty much has to degrade himself to be the Ace’s flunky, doing all of Ace’s throwaway tasks for him. Yes, Snake does speak with a stereotypical long “hiss” sound whenever the letter S comes up and has a snake-like tongue, as you’d expect.

One of his more notable traits carried over into Brawl is his method of walking – he never lifts his feet up from the ground, simply sliding his feet back and forth as if he were on ice. He’s around as tall as Peach while being a fair bit skinnier, and weighs as much as Luigi. His walk is one of the slower ones out there, a bit slower than Mario’s, but when he needs to dash he’ll be on par with Mario.

Forward Shield – Wind-Up Punch


Snake rolls up his sleeve as hie winds up his arm, then does a punch forward. This attack does damage based off how fast Snake is going, dealing 6% and knockback that KOs at 300%. by default, but being doubled or tripled if he’s walking/dashing, and finally quadrupled if Snake is dashing along Grubber’s drool. The power obviously varies more significantly if he used this move after having revved up or getting launched by something.

Back Shield – Drag


Snake reaches behind himself before attempting to claw the foe, sweeping them in front of himself and dealing 7 hits of 1% and flinching, with the last hit doing mediocre knockback. This means if he picks somebody up with the attack as he’s moving (Probably somebody already in prone), he’ll drag them along until the last hit of his hitbox comes out, at which point he’ll fling the foe forward with them gaining all the momentum Snake has. Aside from giving Snake an additional incentive to build up his own momentum, having two very distinct hitboxes he can generate to invest it in also greatly helps him in being less predictable.

Neutral Shield – Moonwalker


If Snake is moving, doing this causes Snake to stop moving (Not stopping his momentum) – however, Snake will continue to moonwalk in place. He will then proceed to start “revving up” his legs, moving them back and forth at faster and faster speeds, turning them into hitboxes that deal 1% and flinching initially, but can deal up to 10% and knockback that kills at 135% after 2 seconds of charge, at which point Snake’s legs look like Sonic’s during his infamous taunt. At any point Snake can input any shield inputs to let his momentum loose and start heading forward – if he input a direction along with shield, he’ll head in that specific direction instead. At a full charge, he’ll burst in the chosen direction (Turning to face it) at Sonic’s dash speed, taking two thirds of Battlefield to slow down back to his regular speed.

Yes, Snake has obvious ways to make use of this momentum, but an important thing to note here is that if Snake has momentum outside his own movement speed (Drool), that he can rev up while moving forwards. Once he unleashes his momentum, if it wasn’t in the way he was already going it will completely overwrite his previous momentum, enabling him to make a second pass by the foe. A shortcut to having Ace individually order Snake to go the other way? Sure, but you can also prepare this before you ever go past the foe as a third option to nail them, delaying the actual hit.

Down Shield – Skid


No, Snake is not intending to use this attack to kick up dust so they can’t dodge his momentum powered hit, regardless of how mandatory a move that is for normal momentum characters – he has more than enough options to competently hit foes without it, and that’s ignoring the existence of the rest of the gang.

For the move, Snake does a generic stomp that deals 8% and knockback that KOs at 145% when standing in place. While it doesn’t knock foes into prone, it out-prioritizes the invincibility frames on prone attacks/rolling to get up from it. If he has momentum, he digs his feet into the ground, destroying his momentum at a rate of 25% per Bowser width traveled. Snake will sink into the ground as he travels forward from how much of an indent he’s making – yes this actually affects the terrain on the stage. Snake, who is Peach’s height if you’ve forgotten, sinks into the ground by 25% every Bowser width he travels.

So what’s the purpose of indents? Well, indents is an inaccurate description, as you can smoothly run down into one. . .At which point you’ll run into a wall, the portion of terrain Snake got to before he stopped. People who have momentum boosted from drool will splat on contact with walls, losing all of it, and these walls are no exception. If a drool boosted dashing Mario ran into it, he’d take 15%. While slightly more immediately damaging to foe than Arturo’s haircomb, the comb almost always will deal more damage due to the damage over time it deals to foes. You also don’t have to choose between the wall and the comb, as embedding the comb in the foe does not stop their momentum. If you do, though, the wall will always passively be there for you to send foes into, while Arturo may not. Foes will have to make a jump to avoid splatting into the wall, while a gang member (Preferably Billy) can be standing on top to meet them for when they do.

Foes running down a slope with drool on it will get their momentum boosted by 1.75x instead of 1.5x (Their speed does not get boosted otherwise due to Brawl not caring about slopes for movement speed – see the Melee Yoshi stage). If you somehow make two slopes next to each other, the bonus will be boosted by another .25x as they reach the second slope, though the only real way to pull this off is to make the lower half of the slope first. . .Why go through all this trouble? There’s nothing stopping you from making the slope right against the ledge to create an easy runway to send people down to their deaths, that’s why.

Up Shield – Hiss


Snake leans forward and extends out his hissing tongue as he misses in an obnoxious manner like a snake. This is Snake’s fastest attack by far, though all it does is 5 hits of 1% and flinching. . .From the front. If you use this from behind a foe, they’ll uncontrollably flee for half a platform. Sure, an unimpressive distance, but the important thing is it starts them dashing and it’s a fair reward considering how fast the attack is. As far as stealthily coming up on foes, true, Snake doesn’t have much of anything to let him do that. The gang provides decent distractions for their sheer quantity, yes, but Arturo can flip foes around and you have plenty of other ways to direct the foe’s movement.

If you don’t have the raw multitasking ability to bother with much of Snake’s set-up at the current time, this is the simplest way to keep him relevant. Even if the foe has nothing to stop Snake from doing like they do with Billy, they’ll still have to be overly conscious of him.

GROUP ATTACKS


Considering how long ago it was, this stance is the one Ace can bring the group into with his Down Special and is the one they start the match in. Attacking any gang member here will separate them from the group and end the stance immediately, so the main purpose of this stance are more ways to space the gang around before you exit it. The gang moves at Ganon’s dash speed due to moving about with “style”, though considering that you have actual real dodges, a –massive- shield that covers the whole gang, and surprisingly decent jumps, you can generally get something or other done before you’re forced to exit the stance. As stated before, you –can- enter this stance without all 5 members if some of them are dead, but you can’t use certain attacks. Considering Ace is required to enter this stance at all, he is not listed for attacks that require him.

Neutral B – Atomic Burp (Grubber)


Grubber gets in the middle of the gang and inhales deeply, causing his eyes to inflate to ridiculous proportions rather than his chest for lord knows what reason, then exhales in the form of a gigantic burp. He angles his mouth downwards, causing him to get propelled upwards by the force of his burp and to immediately cause a wind effect where the gang was to separate them based off their weight. Ace gets pushed a platform to the right, Billy half a platform, Snake a platform to the left, and Arturo 1.5 to the left. Any foes who are present get similarly pushed based off their weight.

But that’s not all to the attack, though. While the four other gang members are immediately controllable, you can control Grubber’s flight through the air with his burp propulsion as he moves about at Meta Knight’s dash speed. Contact with his back does a simple 10% and knockback that KOs at 150%, nothing too impressive, but if you can somehow make contact with your face you’ll apply the usual bad breath status effect to make the foe flee from Grubber. Considering it’s possible to hit off-stage foes with this, it becomes the gang’s most (and pretty much only) threatening gimping option. The burp will linger for 10 seconds in Grubber’s mouth rather than the usual 5 from the utilt, though if it spreads through Billy’s stomach it will only last 5 from there on. Grubber can propel himself around for 5 seconds and has anti-grab armor and flinch resistance, but can still take knockback and damage during the attack. Assuming you curve him around enemy attacks properly, enemies will likely be fleeing from Grubber, making him an excellent way to zone the foe around the stage.

Side B – Belly Cannon (Billy)


Ace gets in front of Billy, grabs his wrists, then goes to kick him hard in the gut, digging his feet in, while holding onto him. He and Billy gain anti-everything armor for the duration of the move. Arturo, Grubber, and Snake then go to jump into the gap in Billy’s stomach in that order before Ace brings out his feet, causing them to get launched at a selectable trajectory, going at Sonic’s dash speed and dealing 20% and knockback that kills at 110% on contact. Seeing Ace has to launch everybody out of Billy’s stomach one at a time, he can cancel the move at any time by pressing shield. Ace will finally launch himself out of Belly’s stomach after launching Arturo, Grubber, and Snake, releasing his grip on Billy’s wrists.

Up B – Hurricane (Arturo)


Arturo goes to run around in circles even faster than he does so in his dsmash. Arturo’s physical hitbox is the same as in dsmash here. If somebody enters the middle, though, they’re caught in a sort of grab hitbox, meaning they must attack Arturo to interrupt the move and better not dare enter the tornado.

After the normal duration of Arturo’s dsmash is up, he continues running around in circles. You see, anybody who was in the middle will be spinning around en mass, including the other four gang members. At this point, you can input any direction on the control stick for the gang members to get shot out, with a .2 second interval between them, moving roughly 2 platforms in the desired direction. The order is Billy, Grubber, Snake, then Ace, then any foes who were shot out. While they all get shot out the same distance, you can more specifically space them by angling the trajectories they get shot out at.

Characters who were shot out will continue to spin for 3 seconds, being constant hitboxes that deal 10% and knockback that KOs at 150%. If the foe already had momentum when coming into contact with a spinning character, the knockback will stack with their momentum and it will be reversed, enabling you to pinball foes between gang members. Nothing can out-prioritize them as they have every sort of armor and what have you, but once the 3 seconds are up they will enter their dizzy stance. If you managed to catch a foe in the initial swirl to make them spin around, they’ll get dizzy too, though, and seeing the gang members all take damage separately some of them will inevitably get out of it before the foe does. If you didn’t catch them, you’ll generally know –before- you launch the gang members out of the hurricane, in which case you can shoot them out to positions where Arturo (Who is not dizzed by this attack) can defend them properly. This attack in general makes a good way to open the match, considering they’ll all get out of the dizzy stance almost instantly.

Down B – Green Javelin (Billy)


Grubber grabs Arturo’s feet, Snake grabs Grubber’s, Ace grabs Snake’s, then Billy finally grabs Ace’s. All gang members outside Billy gain anti-everything armor as Billy proceeds to rapidly spin around, turning the rest of the gang members (Which when put together, are about as long as 2.5x Ganon’s height) into a constant hitbox. It takes a second for them to reach their full power of 12% and knockback that kills at 130%, but they still deal damage before that point.

Billy has full access to his grab-game in this stance, though using any grab other than his Neutral Grab will cause him to release the rest of the gang automatically (Which he can also do by pressing anything other than B. Getting attacked also causes him to let go of the others.). Billy can also move left and right at Ganon’s walking speed and even jump. Pressing up and down causes Billy to angle the living javelin he’s spinning around himself, and at max charge the gang will fly 4 platforms away.

Pressing B causes the gang member further down the line to get released from the javelin and fly forward independently. This gives you much more freedom about positioning all gang members individually without being pressured to do it all at once, unlike the other Specials. As soon as you drop off a member and they finish flying forwards, they are free to attack while the control stick still is given to Billy’s movement, seeing Ace is the last gang member Billy throws.

Neutral A – Surround (Snake, Arturo)


Snake goes into the background while Arturo goes into the foreground. They then proceed to pursue the nearest foe, moving at Mario’s dashing speed. As soon as they go to leave, the other three gang members become immediately controllable. Once they both overlap with the foe, they’ll attempt to grab them. Aside from simply pressuring the foe to make sure they get hit, if you have Ace specifically order Arturo or Snake the orders will apply to both of them during the duration of this move, enabling you to mindgame the foe a bit instead of simply homing in on them. Once they fail a grab attempt, they will exit the stance and become normally controllable/attackable.

If they successfully grab a foe, they’ll hold them at double grab difficulty, automatically pummeling them every half a second (They take turns on who smacks the foe) for 2%. Ace can command Snake and Arturo to move the foe around in this stance, though the foe can resist and potentially overpower Snake and Arturo if their dash speed is higher than Mario’s, but their movement speed will be reduced proportionately. You can potentially predict it, though, and have them suddenly carry the foe in the same direction to give them some unintentional momentum. Inputting any smash or shield causes both Snake and Arturo to let go of the foe.

Side A – Mexican Bowling (Snake, Arturo)


Arturo curls up into a ball and Snake grabs him, then moonwalks backwards a platform, the two of them gaining anti-everything armor. He then proceeds to roll Arturo forward like a bowling ball, making him function exactly like the Soccer Ball like rocks that Billy can generate. Snake’s roll counts as hitting Arturo with an attack as powerful as Wario’s fsmash. Arturo can potentially fly farther or less far than the rock, due to the fact he has an actual percentage. If you’re worried about Arturo flying off-stage to his death, then keep inputting any smash causes Arturo to swipe his haircomb in that direction, dealing 5% and flinching. . .But more importantly, if he swipes it against the ground, his momentum will stop at a rate of 25% for every Bowser width he travels, enabling him to easily save himself if you just smack him along the ground.

As Arturo rolls past the other three gang members, Ace and Grubber get knocked up 2 platforms into the air, while Billy simply gets tripped over to fall onto his back. He won’t automatically get up from the stance, and it sets up Grubber and Ace to start bouncing off of his stomach. Snake, who is way off behind all of these distractions, would be wise to use this chance to build up some momentum.

Up A – Green Drop (Billy)


The gang jumps up into the air with some control over their trajectory as they do so. Naturally, Billy isn’t able to jump as high as the others. . .All the other gang members then kick Billy down, able to angle which direction they kick him at, causing him to fall as fast as Bowser’s Down B and be 1.5x as powerful. Aside from being a way to individually position Billy and Billy alone, Billy causes two Bowser widths portion of terrain he crashes down onto to become sloped the same way Snake does with his Down Shield. It does not automatically become angled though – you must angle Billy’s ass to come down on its’ side to do so.

Down A – Tongue Paddleball (Grubber, Arturo)


Grubber grabs Arturo with his tongue, tightly wrapping it around him and causing their weights to be combined. Ace then picks up and grabs Grubber before rapidly shaking him horizontally and Grubber’s tongue to flail around – he essentially starts playing paddleball, with Grubber was the paddle and Arturo as the ball. Arturo becomes a hitbox that deals 8% and knockback that KOs at 160%. The longer Ace does this (Press any input to make him stop), the faster Arturo moves back and forth from the max length of Grubber’s tongue. Ace can angle Grubber and Arturo in any way he desires, even turning around if necessary, as he builds up Arturo’s momentum. Once Ace puts Grubber down, the group exits the stance.

From here, you must order Grubber to move around to move Arturo, with Arturo constantly being half a Kirby off the ground due to being grabbed by Grubber’s tongue. Arturo’s momentum from being used as a paddleball will stay in-tact and he’ll keep bouncing back and forth for as long as Ace paddled him, a constant hitbox. Arturo still has access to all of his moves, even his leaping usmash, in which case he’ll reach down for the ground before dragging Grubber with him as he jumps. If he actually lands the usmash, Grubber will let go of Arturo and tie himself to the foe like in his ftilt. Speaking of ftilt, using it is the one way to release Arturo, and you may want to use Arturo’s built-up momentum from Ace by just immediately releasing him and using the haircomb. Attacking Arturo does no knockback to him. . .But if the attack would deal a Battlefield’s worth of knockback to him, he’ll fly out of Grubber’s tongue.

So what’s the point of combining them outside potentially pulling off two grabs at once? Grubber’s tongue attacks still work as normal, meaning that Grubber’s jab will flail Arturo around and give him a defensive hitbox behind him, and Grubber’s dtilt will drag Arturo along the ground and let him apply more pressure to prone foes. Grubber will even hoist Arturo up into the air in the path of his burp for utilt, in which case Arturo will also gain the bad breath status effect. Arturo’s Dsmash will cause Grubber to be unable to attack for the duration of the move, his body flailing out behind Arturo and extending Arturo’s physical hitbox. This also has the added benefit, of, y’know, semi-combining two of the characters to give you less to micromanage. Of course this prevents them from spacing out as well, too, regardless of several of the benefits it provides, so having “less characters” will obviously give you less stage control.

Grab – Gangbang (All)


The group all reach out in one direction with all their hands, forming a gigantic wall of grab hitboxes 1.5x as tall as Ganon. If they successfully grab a foe, all the members save Ace will grab a single limb and start attempting to rip the foe apart with quadruple the regular grab escape difficulty. From here, you can input any direction to toss the foe around while still holding onto them, building up realistic momentum. The foe can still DI about during this and their DI is stronger than what you can do until you build up significant momentum, so you’ll have to properly mindgame them. . .

Or just input Neutral Z to have Ace smack the foe in the face, dealing 2% but more importantly dealing significant stun to the foe if they were DIing in any way. The punch has a slight bit of lag so foes use DI then still have time to react to avoid taking the stun from Ace’s fist, but it’s a very complicated balancing act. To release the foe, input Z and a direction to give one final heave as the gang members release the foe. If you swing the foe around for a maximum of 4 seconds building momentum before you release them, they’ll take knockback that can KO as early as 65%. The throw deals no damage, but the foe takes 1% every third of a second while in the grab. If the foe comes in contact with the ground at any point while they’re still in hitstun from the throw, they enter prone and slide along the ground, getting momentum boosted by drool, letting the gang KO at pathetically easy percents. Considering this is the –one- attack the gang has that doesn’t split them up from the grouped up stance, though, it’s pretty damn predictable.

PLAYSTYLE SUMMARY


So you might have just finished that goliath of a group attacks section exclusive to –this- Hugo set and wondering just what the relevance of it was to the set. Quite honestly, it could be removed and the set would still have perfectly fine flow as is – the stance simply allows the gang to properly spread out in very specific and customizable formations that would take painstaking amounts of time to get by having Ace command each member of the gang individually. The attacks are also generally quite individually overpowered in nature, giving you a chance to start an offensive or buy time to set-up with Billy/Snake/Grubber. Drool in particular is absolutely mandatory to bring out on the stage. If you’re a pessimist and don’t think you can properly defend Grubber as he walks across the stage, this is one of the most immediate benefits of the tongue paddleball – let Arturo defend Grubber as he coats the stage in drool.

Aside from your positioning which is all too easy with the group stance, the main playstyle of the gang is obvious – get the foe moving as quickly as possible to send them either into a wall, the haircomb, Billy, or ultimately to simply whisk them off-stage to the blast zone. Sure, Snake can get momentum of his own to ram the foe with, but it’s more a bonus considering he can just give the momentum he’s racked up to the foe instead or use it to make things even more hectic with the foe for a slope. That, and using momentum yourself is generally awkward just because you are pretty much required to have either Billy, Arturo (Dsmash), or a wall from Snake’s skidding/Billy’s ass to prevent them from dying. . .In which case the foe will be saved by these things as well, save in Arturo’s case. A better way to take advantage of momentum yourself is with Billy’s rocks, as you don’t have to worry about saving them from going off-stage. That said, Arturo in ball form and Snake can actually stop their momentum if they have enough stage, something the foe can’t boast.

Speaking of Billy’s rocks, the set-up of the gang has more purpose than just the reward of the set-up – it’s an excellent way of directing the foe where you want to go without even hitting them with anything. They don’t want Snake to build momentum, they don’t want Billy to chow down on rocks, they don’t want the stage covered in drool. Baiting the foe to specific gang members is often the single easiest way to bring the foe where you want them to. You can encourage dashing specifically if that gang member is obnoxiously far away from the foe to start shenanigans with your drool. If they attempt to jump over the drool, it’s not like you don’t have plenty of anti-air. If the foe is actually determined to prevent something or other from getting set up no matter what (Probably Billy), or simply is going in for the kill on Ace, then you can potentially play somewhat of a more campy game as you just use your tools to control the foe’s movement to prevent them from reaching that gang member. Of course, if foes get stubborn, you have plenty of ways to directly force them to move – one on every single gang member save Arturo, if not many more in Billy’s case. Snake’s Up Shield that forces the foe to run when he’s behind them becomes not an afterthought, but one of the most common ways to prompt a dash from the foe.

FINAL SMASH – POWER LUNCH


The stomachs of the gang members all rumble as they randomly gain superpowers – the Smash Ball aura makes more sense than how they obtained these powers in the episode, so yeah, that’s saying something. All members become invincible for the 15 second duration of the Final Smash, and each member has a single input to himself. . .Outside Billy, anyway, who sits around uselessly as a solid rock.

Ace is fully controllable with the control stick, moving about at Mario’s dash speed as he sprays a constant ice path in front of him, ripping off countless superheroes that are too numerous to name. The ice path is solid, but only has 10 stamina. Inputting B causes Ace to stop moving for the moment and spray his ice in whatever direction you angle. If it hits the foe, it deals 15% and freezes them freezie style.

Grubber will move to the nearest edge. Inputting A causes him to emit a gigantic burp beam that reaches all the way to the other blast zone, and it can be angled. It deals 20% and knockback that KOs at 90%, and will shatter any and all ice leftover from Ace, turning every Bowser sized portion of it into 10 icicles that deal 1% and flinching as they go to the ground.

Arturo isn’t visibly present on the battlefield. Pressing R causes him to run in from the right blast zone off the left blast zone, crossing every single foe in his mad dash across the screen. Inputting this again has Arturo run in from the opposite side. This deals no damage, but whooshes foes 2 platforms towards the blast zone. It can easily be avoided with a jump, but the attack is obviously incredibly spammable, and the mass solid ice everywhere makes it difficult to jump.

Snake stands on the ground next to Billy casually. Inputting Z causes him to extend out his arms directly towards the foe at Ganon’s dash speed before attempting to grab them, at which point he’ll hold them at double grab escape difficulty. Ace does not retract his hands after a failed grab attempt, and will instead stretch them further on another grab. Ace’s hands can go around solid objects (AKA Ice), entering the foreground/background as necessary to curve.

Inputting Z + the direction Billy is in will cause Snake to grab Billy and proceed to stretch up as high as he can go. He will automatically shift the horizontal position of Billy to overlap with the foe. Press Z again to cause Snake to drop Billy. Billy KOs at 150% at default and deals 10%. Every Ganon he falls, the power is doubled, to the point the move can easily insta KO. If it gets to that point, it won’t deal knockback, with the foe getting crushed under him for a –literal- insta KO. Billy obviously shatters all ice in his way in his mad drop downwards the same way Grubber’s burp beam does. Billy’s drop is obviously very telegraphed – use Arturo when Billy isn’t currently over the foe’s head to get the positioning and immediately drop him on them to give them no chance to adjust.

If the clock on the console says the year is 2018 or later, the Final Smash will cause all of the Gangreen members other than Ace to be replaced with the members of Gorillaz. They all have generic clone sets of Smash Bros characters, which means they can actually move and attack without any gimmicks. Meanwhile, Ace himself gets the superpowers from the regular Final Smash. The Final Smash ends after 20 seconds with the Powerpuff Girls from the 2016 reboot showing up and dabbing, which causes the Gorillaz to be killed on sight. Ace survives because of his shades protecting his vision. The original Gangreen Gang comes back onto the stage after that.
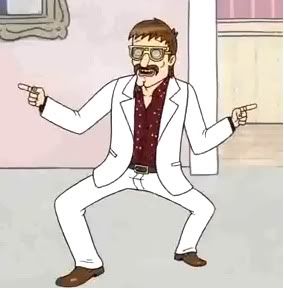
 
Last edited:

majora_787

Smash Hero
Joined
Jun 23, 2007
Messages
6,122
Location
Texas
Rapunzel

Rapunzel is interesting, and has a pretty meaty mechanic going on there. It seems a BIT overpowered in the hands of someone who knows what they're doing, but I dunno. That's hard to judge in MYM. It's an interesting idea, and I think you did a good job.

Marvin the Martian

All I can say is that I find it funny that it resembles some of my older sets in length, but with a larger playstyle. So I find it funny that it's a one-day set.

Venustoise

I have mixed opinions on Venustoise. On the good side, this is an interesting set that can only have interesting results when done well. On the bad side, the set seemed a tiny bit bland. Not that it's your fault. But it seemed to me that what you did was combined a Blastoise set with a Venusaur set, instead of making a Venustoise set. I dunno.


Comments: 8, 5 to go.
 

Kris121

Smash Journeyman
Joined
Nov 26, 2008
Messages
263
Location
THE INTERWEB
Rumble


Stats
Similar height and weight to Donkey Kong.
Speed and Jumps like Charizard

It’s not that complicated.


Rumble is a big guy with long range.


Standards

Jab- Flail
Rumble punches forward quickly with his spike club. It reaches a distance of around Peach’s golf club. This will strike enemies and pushes them back a bit. It deals about 6% damage and has little lag on either end.

Forward Tilt- Flame stab
Rumble strikes forward with his flamethrower hand. This has range of one and a half stage builder blocks. It deals 6% damage and pops opponents up in the air. If flame spitter was used in the past 5 seconds the attack deals 10% damage and pushes the opponent away at a more horizontal direction.

Downward Tilt- Sweep
Rumble’s mech spins around in a circle very quickly dealing 4% damage to enemies in a small area on both sides. This move will push enemies away a little bit. This attack has small lag on the activation side but you’ll need a small breather before you can use the attack again.

Upward Tilt- Junk shot
Rumble jumps out of his mech a short distance in the air with a wrench in his hand. On the upward and downward sections you deal 5% damage and hit enemies away. However at the apex of Rumble’s little jump he swings his wrench which knocks enemies down at a diagonal direction dealing 9% damage. You’ll stay in the air for half a second and it’s easy to use this move in quick succession.

Smashes

Up Smash- Equalizer
Rumble looks up and fires a rocket from his arsenal. The rocket shoots up and then falls in a forward direction. At minimum charge it goes a bit higher then snakes minimum charge up smash. Depending on how much you charge the rocket will go higher and thus farther. At max charge this attack goes 5 stage builder blocks. This attack has 1 second of lag on the beginning and no lag at the end. The minimum charge deals 10% damage and KO’s at 120% while the max charge deals 27% damage and KO’s at 80%


Forward Smash- Electro Harpoon
Rumble shoots an electric harpoon from his chest area. This attack has a smallish bit of lag similar to Captain Falcons forward smash. It is the same size as a Samus charge shot but moves as fast as Link’s boomerang. What’s more is that if you press A after shooting the first shot he will fire a second shot. The first shot at min charge will deal 9% damage and stuns the opponent while at max charge it will deal 15%. The second shot deals 11% damage and knocks the opponent away KOing at around 130% the max charge deals 15% damage and KO’s at 100%.

Downward Smash- Yordle Blam
Rumble smashes his hammer arm and his flamethrower hand to the left and right of him. This serves mainly as a GTFO move and deals 10% damage at minimum charge and 14% at Maximum charge. It deals set knockback of around 3 stage builder blocks to the side that the opponent was hit on. It has quick lag on the beginning end of the attack but it does take a bit for Rumble to reorient himself after the attack.

Grabs​

Grab- Electro-Grappling hook
Rumble shoots his Electro harpoon a bit in front of him a short distance but the harpoon has a rope attached to it. If it hits an enemy it latches onto them and they will be pulled in and the Mech’s arms will grab a hold of the enemy. One important thing to note is that this move also functions as a tether grab.

Pummel- Squishy champs
Rumble squeezes his enemy quickly dealing 2.5% damage. This is a bit slow but gets the job done.

Forward Throw-Bumper
Rumble drops his enemy in front of him and punches them with his club hand. It deals 8% damage and the enemy flies out of your in the front.

Backward Throw-Deposit drop
With his flame thrower arm Rumble picks up the enemy and throws them backwards in a large arc depositing them on the ground behind you. This deals 9% damage and leaves you in a good position to follow up if you are fast enough.

Downward Throw- Punt!
Rumble drops his enemy on the ground in front of him and then kicks them with his foot dealing 6% damage. They will slide a small distance in front of you and you can follow up quickly.

Upward Throw-Humiliation
Rumble lifts his enemy infront of his face quickly. He will then spit at them. This attack deals 0% damage but deals a high amount of knockback in an up direction when they get to higher damage levels.


Aerials
Neutral Aerial- Hair Gel
Rumble jumps out of his mech and winces while he hits opponents with his spikey hair. This deals a small 5% damage but is very good for juggling enemies.

Backwards Aerial-Lift off!
Whilst Rumble’s arms are behind his body his flamethrower hand will ignite for a small bit. This will be at the tip of his arm but is very deadly. This means a small hitbox will be dealing 15% damage and pretty good knockback to the backwards direction.

Forward Aerial-Pick up
Rumble will swing his club arm in front of him in a small arc upwards dealing 8% damage and small knockback. The cool thing about this attack is that if you press this attack quickly after wards Rumble will swing his other hand in a similar manner dealing and extra 9% damage.

Downward Aerial- Aerial Swipe
Rumble swings his flamethrower arm below him ala Samus. This deals 10% damage and is pretty slow. This attack will do a spiking maneuver in the event that you hit with the tip.

Upward Aerial- Rocket Shot
Rumble shoots a rocket out of his back a short distance upward after a small lag. This rocket will detonate in a smallish radius a short distance after going up. Rumble is also propelled a bit downward. If the Rocket explosion or the Rocket hits anyone they receive 13% damage and strong knockback.

Specials​

Neutral Special- Conduction
Rumble throws an electrified wrench forward at a speed equal to Luigi’s fireball. This means its slow. Also since the move is of a physical object, the wrench will fall as it flies. Rumble has a small lag during the move and enemies take 6% damage and will experience a brief stun.

Forward Special- Electro Harpoons
Rumble shoots an electro harpoon forward at a quick speed. This will deal 8% damage to whomever it hits. It also deals a small stun on any enemies that you hit. You can have a maximum of 2 harpoons on the screen at a time. From either this or your forward Smash. Another cool aspect to this move is that you can angle this move in order to hit enemies in the air or on the ground.

Down Special- Flamespitter
Rumble activates his Flamespitter. For the next 3 seconds flames start to shoot out of his flamethrower hand. These have a similar effect to super spicy curry except it will go in a forward direction only. Rumble can move whilst using this move. When your 3 seconds are up rumble needs to cooldown his flamespitter weapon for 6 seconds in which you cannot use this attack.

Up special- Malfunction
Rumble activates one of his rockets but this time it will malfunction and explode on him! This deals 10% damage and medium knockback in the direction that Rumble is facing and a bit upward. This means that if Rumble faces the stage and uses this attack he will explode, shoot forward and up a bit and then be on his merry way. One thing to note about this attack is that Rumble can activate this move multiple times on one jump.
Use it to recover.


Final Smash- OVER HEAT
Uh oh! It seems that rumble has used to much of his machinery and his mech has undergone too much heat! For the next 10 seconds rumble cannot use any of his specials in order to cool down. However all your basic attacks gain a bonus for the amount of time left in the attack.
10-8 seconds gives you 5% damage extra and your attack speed is increased by 1.3
8-6 seconds gives you 4% damage extra and your attack speed is increased by 1.3
6-4 seconds gives you 3% damage extra and your attack speed is increased by 1.3
4-2 seconds gives you 2% damage extra and your attack speed is increased by 1.3
2-0 seconds gives you 1% damage extra and your attack speed is increased by 1.3
When you’re done Rumble exclaims a sigh of relief and gets back to fighting.

Playstyle:
(I’m making this like 4 months from when I made this set. So yeah. It was Khold’s birthday and I remember that I had this lying around.)
Rumble is a brawler. He enjoys getting into the fight and does decent damage with his many attacks. You should use your basic attacks to deal damage to the enemy. All the while using you flame spitter to ensure you get as much damage as possible.
When you think you have enough damage on the enemy you can try to go for an up throw. Doing this will give you the best chance of KOing the enemy. Of course you should make sure that you do this when you are able to KO or you’ll have to rack up even more damage due to your massive move decay!

Recoveries should be simple enough. Just do it the same as a normal brawl character but be wary of hurting yourself too much.

Umm I think that’s it.

Extras
Entrance- Rumble activates his mech and warns his foes to get ready for a “Bandle city beatdown”

Taunts
Taunt 1- Rumble laughs and says “How’s it to be beaten down by a Yordle”
Taunt 2- Rumble and the mech do the robot until you use this taunt again or you are hit
Taunt 3- Rumble says “Hurry up summoner and stop taunting!”
 

phatcat203

Smash Apprentice
Joined
Dec 12, 2008
Messages
160
Location
I've been everywhere, man.

QWOP

I'm not going to go into a lot of detail here as I don't feel Arial Black is the worst font. That is all. Aside from, why QWOP? Put your skills to some real use, man. Now, I won't say I entirely enjoyed this set, or that I entirely hated it. It has some playstyle, and is somewhat creative with some moves, but then you have ****(literally and figuratively) like the Down Tilt which just breaks the laws of everything. Plus the fact that he's hilariously underpowered, which I guess is your way of saying you hate handicapped people. Anyways, it's fairly obvious this isn't that serious of a set, and that's good, because if it were I honestly wouldn't know what to say. It gave me a few laughs, mostly the jabs at random MYMers, but in the end I just can't see it as a real "set." I guess I'd give it a 2 or something. Maybe I should find some post to edit constantly for these ranking things.

Vol Opt

Oh Vol Opt, you so ****ing gigantic. It should be fairly obvious I don't generally like characters that take up two stages at a time(after all, even the boss set I made doesn't) but I'll give it a shot. This should be a bit more condensed than my Rool comment, hopefully. Starting with the Neutral Special...I feel you should have started with whatever is in this set that lets the guy actually attack. Because, y'know, he's huge, can't move, and takes hitstun...unless he has some sort of hitstun ignorer, there's not much stopping the opponent from sidling on up to Vol Opt and smacking him around. Not saying there's NOT a move in the set like that, but that it should have been first in my opinion. Anyways, NSpecial is fairly simple, but it seems like it could have a lot done with it. Like, y'know, the very next Special. It's good except for the part where it takes 1.5 seconds to charge up, though I guess it makes up for it by being wide and pretty damaging. The Up Special...eh, you say it has long startup but don't specify. Then again I'm known for being TOO specific, so IDK if that's a good or bad thing. Either way, it's slow and clunky, which I imagine fits this..character thing. Sad you can't directly attack out of it, but there are probably some moves for that. Down Special's more complicated than the rest of the moves, which..can either be a good or bad thing. I assume that if the large Vol Opt is hit, the small one doesn't stop attacking? If so, then I feel this is the move that should have come first, as it gives Vol the ability to actually get attacks off.

Standard A--oh god a wire. However, despite that, I like this move. It somewhat reminds me of Spiderman, honestly, but it's still fairly creative in the way you can electrify pillars and such, and make a barrier around Vol Opt. Now, Forward Tilt is pretty good - normally it's a small, GTFO attack, but used in conjunction with wires it can become pretty powerful, and still have another function. It's clear you at least have more of a grasp on Smash than Kupa. The Up Tilt...well, it's cool, knowing how much I like electricity, but it doesn't really seem to serve much purpose beyond that. It's also not terribly creative. Oh well, it works. As for the Down Tilt...uh, he ****s out a bomb...woo? I like this move, honestly; it adds some more strategy in there, what with the manipulation of the bombs. Also, imagining a giant goddamn pillar with thirty bombs attached to it being flung around the stage at high speeds almost makes me piss myself with sheer glee and love of destruction.

The Forward Smash is...fairly unique, I think, though I guess some may liken it to the horde of duplicate sets from last contest. Still, I like the idea behind it and how it can interact with Vol's other moves, especially the bombs. The Up Smash...hoo boy, I dunno if I really understand this all that well. The first part is a pretty generic wave, but it does widen as it goes out, making it somewhat unique. The interactions with the bombs and..anything electrified really help the move, though it has potential to be fairly overpowered. The wire, though...god. Okay, so I'm going to take this as...the wave hits the wire, and directly rebounds off it? Like, it hits a vertical wire, it would rebound to the side? Or a directly horizontal one would make it shoot downwards? If that's the case...it's handy but could easily become broken as you cover the whole stage in wire and then constantly shoot those waves, since Vol 1 takes no hitstun. Down Smash is...inventive, but very powerful. I mean, you could just kinda sit there forever, spinning the pillar, with no real cost to you, especially considering you could set up wire to funnel the foe right into the spinning pillar. They can of course just destroy the pillar, but eh. Overall a good, solid move that might need some toning down.

Special Smashes to make up for lack of Aerials works. Forward...is fairly generic in concept, I gotta say, but the interactions help it out, especially with the wire. Wave interaction seems really hectic, but fun. The Conductor...I'm not sure if that's a good idea or not, for about the same reasons you say. It messes up your entire setup, but can be used to basically troll the opponent into simply giving up. It doesn't really contribute that much by itself, but if you can play it right it could easily be a very useful move. Attach...is kind of a rehash of some older moves; it basically acts as a second coming of both the Standard A and the Down Smash. It's still a fine move in my opinion, but some may be turned off by the repetition. At the least, it allows you to adjust wires, so it's not useless.

And now, very ugly and mannerless ladies and gentlementlemen, time for my least favorite part of any set - the Grab Game! Oohs and ahs. The actual Grab is...more like a grab than I thought it'd be. I have to ask though; can you suck in your own pillars and bombs, or at least pull them towards you? It seems like it would logically happen, but you never say either way. Anyhow, yes the grab is one of those weird vore things, but this time with robots. Laser Turret's a fun idea. Hell, I could see it becoming a sort of mini-game. However, it just doesn't seem all that useful unless you flat-out spam it. Pillar Smash actually seems more useful than you let on, in my opinion. Mostly because you could knock them into it with the laser's small amount of knockback. It's also not very creative. Still, it's fine. Okay, Up Throw implies you can in fact suck other things up, or that Vol Opt is just naturally very cluttered, like my room after St. Patrick's Day. Anyways, fairly generic and uninspired, but...eh, it's a throw. That's why I hate Throws, people, they aren't generally very creative for the simple fact they're usually at the end and you're tired of doing anything.

Overall, Vol Opt was a pretty good moveset, in my opinion. There were some problem moves and problem areas, which I mentioned up there in the goddamned comment which you should read, but there were also some really creative and useful moves. Now, there's a bit of a lack of logic sometimes, but it's not nearly as much of a problem as it is with K. Rool, and I feel that it can be ignored if it's done for the sake of a good moveset. Some of the moves have the potential to be very broken, especially in combination with certain OTHER moves, but overall it's fairly balanced by the fact that Vol Opt is so freaking huge but still takes normal hitstun. In my opinion, I'd give Vol Opt about a 7 in terms of general quality.


Davidreamcatcha

Smash Ace
Joined
Feb 9, 2011
Messages
629
PARTY PETE

Party Pete not only fits the character well, but manages to be an intriguing set as well, especially with the drinking move.

While the drink move is an interesting concept, one minute is a long time, especially in a fast-paced game like Brawl. While I have no complaints about him being forced to use it every so often after an initial use, I dislike that he is essentially forced to use it. As it stands, the drink is drastically underpowered and gives off little incitement for Pete to use it, as he does gain very minimal buffs and it will eventually lead to his own death. There is a part of me that would like to see Pete's different buffs expanded on with his moves. While you do manage to do something like this, it's much more underplayed and less of a focus.

What if Pete started focusing on hit and run when he gained speed from the drink? What if Pete decided to start taking a more aggressive approach with the next drink? What if Pete's third drink made him what is essentially a full-blown combo character? What if getting fat meant Pete wanted to roll up the foes and use his dash attack to suicide off-stage with them, or stall for the eventual explosion? These are the concepts I'd like to see expanded on, a bigger approach to depth.

It's an interesting set, especially for someone who has never made a set before. Here's hoping we see more from you in the future.

QWOP

This team is a princess team. It uses all Rosalinda, and Rosalina at all. But this team has over 9, it has Rosalina.. Bosalina thinks Sarnia gets all over Rosalina and Luma... I think Zelda needs Ranger to help Princess Mackenzie off that cage even on every street in the saint. The Less and Tut will be here for a sec. When Tut is a word, you can play as Ganondorf. Ice Climbers will join you on the stage. Characters in French League is not needed.

* Princess Mackenzie

*

Rosalina

* Rosalinda

* Bosalina

*

Dosalina

*

Gosalinda

*

Baby Mackenzie

* Toon Mackenzie

Young Mackenzie

*

Baby Rosalina

*

Baby Rosalinda

*

Baby Dosalina

*

Losalinda

* Baby Gosalinda

*

Baby Losalinda

*

Baby Bosalina

*

Paper Mackenzie

*

Dark Mackenzie
 

Nicholas1024

Smash Lord
Joined
Mar 14, 2009
Messages
1,075
I have to hand it to you, FA, Vol Opt is brilliant. The basic concept of defending a mostly immobile enormous combo able hitbox that has extreme trouble defending itself is unique, and pulled off nicely. The best part of this set is unmistakably the wire, however. It's basically a completely customizable trap that you can do nearly anything with. Make a dome to encircle Vol Opt's main body and force the opponent to break through, connect the pillars to electrify, move, and drop them all at once, there's really nothing you can't do with it. The various forms of projectile camping are somewhat more standard (believe me, I'm quite familiar with the various ways to abuse projectiles. ;)), but still rather nice, the up smash in particular was quite fun. The grab game's concept is really cool, but the execution I found slightly disappointing, since it's basically "lock them into half the area with the pillar and shoot at them with the laser turrets". The other complaint I have about this set is there's a bit of under detail here and there, for example I don't think you mentioned how much damage an opponent has to deal to a wire to break it. That, and you might has well have ignored a play style section altogether, you really don't explain anything in it that the reader couldn't have gathered by reading the set. However, these are definitely minor complaints, and on a whole I was extremely impressed with what you did here. This is just leaps and bounds above your MYMX works, keep it up!
 

BKupa666

Barnacled Boss
Moderator
Joined
Aug 12, 2008
Messages
7,788
Location
Toxic Tower
VENUSTOISE
Well, this looked like a pleasurable read for an obscure character, and I have to say, it turned out fairly nicely, but I am a bit underwhelmed at the same time. This variation on the oh-so-prevalent camper concept does have its captivating little tweaks, such as Venustoise being a bit of a tank at close range, but taking the risk of getting KOed through Withdraw. Such a subtle, yet sensible weakness adds some pleasurable depth to the set, leading Venustoise to take up a nice mix of defense and offense, as he flees to use his ranged attacks in place of his lesser melee ones. Where the moveset starts to run off the tracks a bit for me is when I see such an immense plethora Pokemon attacks scattered throughout the set. I understand this makes a bit more sense with the character choice, but even for me, a guy who has little idea of what constitutes Pokemon Syndrome, it's a bit overwhelming to see all these seemingly random moves from each of Venustoise's types scattered throughout the set. In addition, to be blunt, camping as a genre is quite dull, Venustoise's aforementioned nuances aside. Hope to read more from you in the future, as it seems you're well aware of Venustoise's cool elements, and would hopefully include similar ones to new sets.
 

MarthTrinity

Smash Lord
Joined
Aug 9, 2007
Messages
1,954
Location
The Cosmos Beneath Rosalina's Skirt
Crappy MYmini #1 Entry

Joe Head Joe​


Joe Head Joe, from here on out referred to (mostly) as Joe, is one of the boss enemies from the obscure cult-classic PS1 game, Skullmonkeys. As one can see from his image, Joe is an eerie, hyper-realistic face with a gorilla's arms and legs as well as a skull on top (implying that Joe Head Joe's "head" is actually his body). The main character, Klaymen, is forced to fight Joe Head Joe at the end of the Hot Dog Factory stage and defeated him by...bouncing on his head. Duh. Coming from a random PS1-era game that's rather...well...downright weird, Joe Head Joe stands out as a truly nightmare fuel boss among video game bosses!

As a brief summary, Joe is about two Ganondorf's tall and a Dedede and a half wide. There is a catch to this fight however. Only hits that strike the skull on Joe Head Joe's head deal full damage, otherwise it only deals 1/3rd of its normal damage! The stage your fighting on is roughly the size of Final Destination and is really a no-thrills stage unfortunately. It does look really nasty though, doesn't it?

Fireball Belch
One of Joe's actual attacks from the game, Joe Head Joe belches a fireball directly before him! This attack travels at about the speed of Samus' Charge Shot and deals a nasty bit of damage (12%) and medium-high knockback. It's hardly the most thrilling of moves but, hey. Every boss needs a spammable projectile, no?

Roll Your Eyes
Joe Head Joe's SECOND attack actually used in the actual game; for this one, Joe opens his eyes wide...too wide! Bulging his eyes out, Joe's eyes literally pop out of their sockets and roll along the floor! Touching one of Joe's Bumper-sized eyeballs will put you in a prone state and deal a nasty 10% damage...the catch being you're probably going to be hit twice. Two eyeballs ya know? Fortunately, this attack is rather blatantly telegraphed and shouldn't be too hard to dodge unless you're being pelted with belched fireballs considering how slowly they roll.

Skullmonkey Summon

Beating his chest...or rather punching himself in the eyes as that would -ACTUALLY- be...Joe Head Joe summons two Skullmonkey minions into the battle! These skeletal simians are about the same size as Donkey Kong and, unsurprisingly, share many of his animations, attacks included! The summoned Skullmonkeys will attack the foe with the intelligence and moveset of a level 6 DK...minus the use of Specials. And just because he can only summon two at a time doesn't mean he can only have two our. He can have up to six if you don't eliminate them fast enough. Depleting their 50% stamina or shoving them off the stage will do nicely.

Skullmonkeys do have one unique deal however; they're opportunistic little fiends and will instantly pounce on and pummel anyone who happens to trip within a Battlefield platform width of them! This applies to random tripping as well as being tripped up by Joe's eyeballs...so stay well away from those rolling eyes or you'll get beaten! If two Skullmonkeys pounce, you'll take a massive 25% damage whereas you'd only take 10% if only one goes for the kill.

Face Rush
Joe Head Joe attempts to rush you. With his face. Yeah. It's that simple. Being hit by a charging Joe Head Joe will deal a nasty 14% damage and high knockback...so avoid at all costs!

On the default difficulty (Normal), Joe Head Joe has a mere 400% stamina...couple this with his incredibly small amount of attacks and he's really not that difficult of a boss. Considering how easy he was in the original game (and with even less attacks strangely), this is aptly so. He's not a hard boss by any means...but watch out for his Skullmonkey minions or you may get overwhelmed...
 

ProfPeanut

Smash Ace
Joined
Oct 1, 2008
Messages
727
Oh, look who decided to be active on the thread.

^TV TROPES YAY ABOUT TIME (Except now all the MYMers who don't know that site will be inactive for the next week.) Where'd that pic come from anyway?
KING K. ROOL

Most of what I could have said has already been said: The King has some very good ideas, but between keeping people on the boomerang crown and raining cannonballs everywhere, the set feels both obsecenely unfun for opponents and somewhat out-of-character for Rool himself. I like the dash attack, butt-bouncing moves and fake deaths, but everything else seems so focused on interacting either with the cannonballs or the crown. And why doesn't Rool want to keep his crown on anyway?

QWOP

No, I do not like this set. When I read it, my mind went "Alright, so what's the point of all these generic moves?" and as the moveset went on, the realization dawned that "Oh, there isn't a point." What a letdown.

Vol Opt

Now this I like. I'll admit that I did get confused on parts pertaining which part of Vol Opt did what move, as that had pretty drastic changes. Regardless, this is an awesome way of doing a mostly immobile character, what with bombs and lasers and a freakin' wicked grab. One of my main concerns though is just how destrucible that wire is in the first place, or whether the monitor is affected by momentum-influencing moves. But on the other hand, this character feels much like one who sets up the boss fight in the middle of battle, which is awesome.

Uboa

This is a good concept, but I can't help but feel that if you cut out "The screen flickers, and" from all the moves, it'd turn a lot plainer. In fact, I was hoping there was some point to the flickering aside from hiding all the start-ups and being creepy. When I read Monochrome Street, I was thinking "Flying Dutchman's Fly of Despair?" and got disappointed, but at least it's an original repositioning tool. Just imagine what you could do to Vol Opt up there with it.

Rapunzel

Ridonkulous range moveset? Yes, please. I feel like half her playstyle centered around her grab game, which was original and, personally, made the best use of all that hair along with her up smash. The rest felt like "Do stuff with pan/satchel that will let you grab them." Not to mention that, for me, it can be hard to do swap between keeping your hair to yourself, or just spreading it across the stage, all while in the middle of battle. But don't get me wrong, I liked this moveset overall.

Boom Boom

I'm probably the only one here bothered by the fact that the momentum mechanic wasn't even explained. Doesn't stop this from being a well-rounded moveset that makes good use of his low traction, running around and dishing out chaos. Man, I need to say something more than "This is a good moveset."

MARVIN THE MARTIAN

First, allow me to congratulate you for inventing, in my opinion, the best goddamn Jab in history. Seriously. On with the rest: Initially, I liked enough of the bombs and the interactions wit the Instant Martians as well as the bubbles. Reading other comments, I appreciated his projectiles more, as I got the feel that trying to hit your airborne moves with other airborne moves was pretty tricky (like, what's the point of his grab catching his side special and jab projectiles if those projectiles clearly outrace the grab?) I also think the Modulators blowing up so much stage was excessive; in fact, I didn't really get why Marvin needed such large craters for his playstyle, other than for flooding them. And does his up special really give him such a godly air game? Nevertheless, this is a wonderfully fun and in-character moveset.

Venustoise

Uhhhh.........oh, this isn't like QWOP? Goody. Retracting in the shell and speeding along with side special is pretty cool, as is shooting out all manner of bombs from the plant. But all the moves being named after Pokemon attacks got on my nerves quick, and the latter bunch of moves felt kinda generic for me. So...it's an alright set IMO, but then again, I'm still kinda new here.

SWALOT

I thought I had an idea of how this set was going until I read the grab. And then it just went crazier from there. All the moves were pretty fitting and alright on their own, and yet they also have unique effects on Swalot's insides, making it pretty chaotic for any foe to have a fair chance of getting out; it may as well kill the stock the moment Swalot gulps them down, if someone's skilled enough. It's a very fitting KO method, and the idea is very unique, I just wish you explained that Swalot's personal stage didn't cover the whole screen in FFAs earlier. Not to mention Swalot's got a lot in the spacing and stage hazard departments. So, yeah, mind changed.

Ashley

I read this last contest, so I was disappointed that you didn't try find a better layout than "harsh red and white in normal font". But the changes are subtle and well done; I feel like there's more interaction with Red this time around, and the Heavy Hex is a good addition too. All-in-all, it's a good ol' moveset: easy to imagine and sounds fun to play as.

PARTY PETE

Honestly, the titles need a better indicator as to what appears like a joke set actually isn't
One minute of auto-drinking is definitely way too long; haven't you noticed that's the average duration of a stock? What's to stop a player from just drinking Radicola thrice then whaling away? The moves fluctuate between generic and interesting, and I feel like there should have been moves with different effects based on two and three sodas; four sodas obviously changes moves, but you should have built off of that. But it's still a decent moveset.

Gangreen Gang

After reading Hugo and Sid's Toys, I can confidently say that I have hardly an idea of what to make of them. Thankfully, this one looks much easier to handle as they have actual group attacks and positioning maneuvers along with their individual roles. I get the feeling that this set could set someone to be madly dashing about the same stretch of platform forever; in fact, there's seems to be a bonkers number of moves here that go "Make the foe move this way", but it's balanced by the moves that punish foes for running haphazardly. So in a nutshell, this one was easier to swallow and yet still well-elaborated.

Dark Star

The only thing scrambling the moves succeeded in was convincing readers that all the inputs pointing in the same direction are interchangeable. That said, I got the feel of someone who sets up well on the air of the stage, laying projectiles and what not. But that Down Special Smash is almost too chaotic, to be honest. Regardless, Dark Star has a pretty unique Up Special Smash, and pretty fun air stage control.

Rumble

Another example of a moveset from simpler times? Seriously though, please don't make one of your first moves reference one of your last ones. Flamespitter added a new dimension to many of his moves, but his Neutral special could be mistaken for his jab. And how much range does his Nair have, considering how small the guy is compared to his robot? Other than that, the moves may not be spectacular, but at least they're varied.
 
Last edited:

ProfPeanut

Smash Ace
Joined
Oct 1, 2008
Messages
727
And now time for a MYMini of my own...


In a distant storyline, four intrepid MYM characters are busy gallivanting through an ancient temple they found buried deep in a forest. After all, at best, you’ll find treasure, and at worst you’ll find some giant zombified boss guarding a treasure, right?


Naturally, a chasm has opened beneath our gang of fighters, and they fall into a…strange dark liquid-like world with particles clustering in space. What kind of domain is this place-


Huh, could’ve sworn something just swam behind view. It seems there's now a flat translucent path to land on; it has strange designs covering its surface, and particles swimming inside-


Wait, this is no path.


Ye gods.


CromCruach.PNG


Crom Cruach is an old Celtic deity, savage and forgotten. Long ago, it fed on the many sacrifices offered to it by the pagans of Ireland, worshipped out of need of good harvest (and perhaps out of fear). Those ages are very much past now, and it had been waiting a long time for a group of fools to venture into the darkness of its cave and awaken it. And it’s very hungry.


You have a time limit to deal as much damage to this voracious deity as possible. There’s a sequence of stages for this fight, each taking the same amount of time, but should you fail to deal enough damage by the battle’s end…well, let’s just say you don’t want that.


Crom is massive enough to swallow any character in a single bite, and that's what it'll be trying to do for most of the battle. For the first phase, its head will remain in the background while its eye picks out a random fighter, flashing and higlighting the where it will strike once it has made its choice. Then it will lunge at the foreground, maw wide open, chomping down once it reaches the field. Be thankful that this is easily telegraphed, because getting eaten will result in an instant KO. Once it chomps down, it’ll move back to make its next choice. There’s only one way to deal damage to Crom: you’ll have to deal damage the path you’re standing on – which is actually a part of Crom’s incredibly long polygonal body.


After six lunges, Crom will swim back into its tangled angled mass, disappearing from view. Its serpentine body moves like a snake too, as the stage suddenly speeds leftwards and then dives down, flinging the characters off. The camera then scrolls down to follow them as they fall through through the geometric nightmare that is Crom Cruach’s mass. The properties of Crom’s dark realm have altered everyon’e fall speed to 5, allowing everyone to descend at the same pace; beware, though, that blast zones still line all four sides. The camera also moves down a bit faster than the characters that are falling, so they may have to fastfall a bit.


While it may seem like an endless fall, you’ll eventually notice two columns of triangles appearing from the top above a random character, slowly moving down to clamp onto that character as they widen to a width to three platforms. Crom’s head appears from above moments later, and if you don’t fastfall to the side to escape those triangles that are his teeth, Crom will be enjoying a new snack when it finally bites down. Whether it catches someone or not, it’ll speed downwards and move back up through the background, after which you can attack the stretch of body that it leaves behind. Unfortunately, you can’t pass through its body, and since its body is as thick as two Bowsers, it may get trickier to dodge the next two times it tries to chow down. It may be wise to split up in order to not get caught in the jaws aiming for someone else.


The fall ends as the three body lengths veer into the background; everyone will then land onto more of Crom’s coils. The stage is now made of three segments of Crom’s body, but those segments are angled wildly like the bottom three coils on the picture above, creating awkward slopes or large steps. The left and right coils disappear into the blast zones; all three are part of the same plane of stage, and just as much of a hurtbox as before.


Crom’s head will once again wait in the background, singling out foes, and you will have to dodge its attacks while whaling down on its body like before. In some attacks, it will instead opt to come close, then open its mouth to catch characters with its many long tongues. These tongues lash around a large area for four seconds; if you get caught, you have perhaps a few moments to mash out of 1.5x grab difficulty before it draws its tongues back in, consuming its captives. Between lunges, it will slither around the background for three seconds, causing its whole body to pull along. This turns the stage into a fast-moving conveyer belt, the left and middle coils going left and the right coil going right. Now the stage has the potential to fling fighters past the blast zones in between attacks.


Worse yet, stretches of Crom’s body in the background will retract to reveal its tail as it slithers along. The tail will become visibly closer to the stage as the battle continues; this marks how much time you have left to finish this fight. After nine head lunges, Crom will move to retract parts of the very stage that the fighters stood on. The middle coil will disappear first, followed by the left coil and finally the right one. This marks the end of the battle, and Crom’s tail will wrap around all the characters as it retracts for the last time.


If you were able to deal 800% total damage to Crom Cruach by any point of the third phase, its body will lash out and fling any remaining characters out through its domain and back into the temple above. You can't really defeat an ancient pagan force; you can only convince it you're too much trouble to be worth eating. If not, though, you'll find yourself wrapped tight in its tail as it then throws you into its open maw...


I swear this guy’s form an actual movie and not some crazy OC.
 
Last edited:

Zook

Perpetual Lazy Bum
Joined
Jul 30, 2005
Messages
5,178
Location
Stamping your library books.
GANGREEN GANG

I love the idea of being able to control various characters across the stage simultaneously with just attack inputs, rather than having a Pokemon Trainer-style swap-out move. The design choice made it possible to essentially control every character at once, and with the number of interactions the moveset has, it's a godsend. I especially love how Billy's grabs interact with everything on the stage, from friends to foes to the obstacles he makes. It allows for some interesting drool combinations.

The player only directly controls Ace, correct? I don't remember seeing that specifically mentioned somewhere, but its clearly implied. I feel like he should have had some aerials; because the set completely lacks aerial attacks, it would be extremely easy to gimp them. ...At the same time, though, aerial attacks would have overlapped with Grubber's tilts, so I think I understand why you chose not to include them. Perhaps they could have been zairs?

Speaking of Ace, I'm not sure what a 'Shield Special' is.

Everything in this moveset seems to have been created with the rest of the set in mind, which is good. I can't find any complaints with the set other than the aerials situation and some confusing wording, but overall, it's awesome.

EDIT: Uhh, I got a bit excited for posting my next set, so please excuse the double post. lol
 

Zook

Perpetual Lazy Bum
Joined
Jul 30, 2005
Messages
5,178
Location
Stamping your library books.
KOBOLD CLAN


Kobolds are a race of reptilian humanoids from the Dungeons & Dragons universe. They rarely stand over three feet tall, and usually weigh about thirty pounds. Their voices are like yapping, little dogs. Kobolds are well known among D&D players (and most RPG players, actually) as some of the weakest monsters around. In their original description back in 1974, they were simply described as similar to goblins, but even weaker.

That doesn't mean that kobolds are morons, though. Oh no, Kobolds are very much aware of how weak they are. They never fight fair, and will always use dirty tactics whenever possible, often sweeping over their enemies in yapping hordes. They are extremely clever trap builders, and litter their layers with them. They also believe they are descended from dragons, and worship them as gods. The dragons, however, are usually only annoyed by them at best.


'Kobold Clan' is actually 5 characters: Trapper, the clever leader of the clan, and 4 other spear-weilding kobolds. You directly play as Trapper, but he can occasionally take command of his minions, too. While not being commanded, the kobolds fight as level 3 CPUs. Each spear-weilding kobold (from here out referred to as 'clan kobolds') has a number 1 through 4 painted onto their back.


STATS


Size: 1/10
Weight: 1/10
Jump: 6/10
Ground Speed: 6/10
Air Speed: 6/10
Fall Speed: 6/10


Kobolds are tiny (about the size of Olimar), very light, and otherwise pretty average.

TRAPPER


Tapper is of a rusty color, and wears a bit of black leather armor. He carries a Bag of Holding (which is a magical bag that can hold a huge amount of material) and whip on his belt, and a short spear is fastened to his back.

A surprisingly intelligent and wily kobold, Trapper serves as the leader of the clan. He worships a red dragon named Arshargalon, and leads his followers in quests to collect sacrifices for him. The dragon is just annoyed by Trapper, however, and would like to kill him.

CLAN KOBOLDS


The other kobolds are pretty dim-witted and have a very limited moveset. The attack button causes them to thrust their spear forward quickly for 4% and low knockback. The special button makes them toss their spear, which travels in an upwards arc that goes as far as half the length of Final Destination. Its distance and arc can be changed with the special button and control stick, respectively. The spear throw deals 4%. In the air, their attack is a spear thrust in the direction corresponding to Fair, Dair, Bair, and Uair. They can pick up and use items, too. Finally, they have no grab.

When a clan kobold is KO'd, it is gone for the rest of the stock. All kobolds respawn when Trapper respawns, and they all have their own damage %.


SPECIALS

Side Special: Startled

Trapper gives a quick yelp and raises his hands above his head in a cowardly fashion, as if he's afraid of something... This puts him in a counter state for a quarter second. If attacked while in this state, he will take only half the normal damage and knockback. The whole animation is a half second long, though, so be sure not to use it too soon. Being a very light character, this technique is invaluable to making Trapper last longer.

Also, there is a secondary effect to this move. If any character is above 100% damage and Trapper uses this attack, Arshargalon catches a wiff of fear and flies over the stage a second and a half later, blasting fire where Trapper was in an attempt to incinerate him. Arshargalon appears from the top of the screen and breathes fire directly downwards before flying away, giving no indication of its arrival. The fire creates a hitbox half the size of a Smart Bomb that deals a whopping 20% and massive knockback, killing at around 110%! Of course, this kills lightweight kobolds much sooner, so be cautious.


Neutral Special: Micromanage


Trapper stops in his tracks, looks at one of the other kobolds and gives a sharp yap, making the kobold stand up straight and give a salute. Until you press the special button again, you take control of this kobold. Trapper stands still and barks orders while commanding another kobold, leaving him vulnerable until you end this move.

You choose your kobold by holding down the special button and then inputting either up, down, left, or right on the control stick. Up responds to kobold 1, down to 2, left to 3, and right to 4.


Up Special: Face Grab

With a sudden burst of movement, Trapper flings his body forward, claws outstretched, traveling as high as Ganondorf and as far as 2 Battlefield platforms. If he comes in contact with an opponent, he will wrap his limbs around their head and cling to their face, much like a facehugger. While latched onto their face, you can move the analog stick left and right to influence their movement. This puts the opponent in a grabbed state; however, unlike most grabbed states, they cannot button mash to end it. Instead, they must fight against you by holding the analog stick in the opposite direction for .5 second for every 50% they have (minimum .5 second). Trapper can end the grab by jumping, which makes him perform a footstool jump.


If an opponent manages to end the grab, though, they rip Trapper off of their face and hold him like an item. Trapper can be thrown like Mr. Saturn, deals 5%, and falls prone after being used as an item. Trapper can attempt to escape this grab like normal.


If he fails to hit an opponent with this move, he goes into a helpless state until he hits the ground again.

This move can be used to force opponents into your stage hazards (more on those in the tilts section), or even to set up (ko)bold suicide KOs in conjuction with Starled.


Down Special: Troop Formation


With a loud yap, Trapper changes how the rest of the clan behaves. Basically, this lets you program how the AI behaves when you aren't directly controlling them. This attack halts Trapper until you either change the formation or cancel the state by shielding.

Pressing up in this state causes the clan to try to protect Trapper. They will always try stay between the opponent (or opponents) and Trapper, and never leave more than a Battlefield Platform away from him in any direction.


Pressing down makes the clan spread themselves evenly among the stage.


Pressing left of right causes the clan to focus on controlling the corresponding ledge.


Pressing A causes them to fight more aggressively, fighting as level 6 CPUs and pursuing opponents anywhere on the stage. However, they will not shield in this formation.


Finally, re-inputting a button returns the clan to their default, normal level 3 CPU selves.


TILTS


Down Tilt: Bear Trap

Trapper reaches into his Bag of Holding and pulls out a pile of scrap metal, and quickly starts tinkering with it. Half a second later, a bear trap is made directly in front of him. Trapper can have up to two bear traps active at a time; trying to make a third has Trapper rummage through his bag for .75 seconds before yapping in frustration.

An enemy who moves over a bear trap triggers it, clamping onto their leg. Being hit by a bear trap deals 8% and high hitstun, but no knockback. In addition, the bear trap clamps onto their leg and stays there. Characters with a bear trap on their leg can only move at their slow walk speed, jump half as high as normal, and fall 1.5 times as fast.


The only way a character can remove a bear trap is by standing still for .75 second, during which time they pry the trap open and toss it aside. A character can only have one bear trap on them at a time; being hit with another trap destroys the active one.


But wait, there's more! By double tapping the attack button, you can instead set a fake bear trap. Trapper gives a quick smirk while making a fake trap, but otherwise gives no indication of it. You can have a single fake trap active at a time in addition to two real ones.


Bear traps are your main way to inhibit your enemy's movement, making it more difficult for them to get away from Ashargalon's flames. It's also easier to gang up on weakened opponents!

Down Tilt: Hidden Catapult


After tinkering with some more scrap metal, Trapper buries his odd-looking contraption, taking a full second from start to finish. This plants a hidden catapult in the ground directly in front of him, which is completely undetectable aside from a tiny metal ring coming out of the ground where it is. Any foe who moves over the tiny ring actives the catapult, and is flung in a trajectory of 4 SBBs high by 4 SBBs long to the side Trapper was when he was making the trap. They take no damage, but are in their helpless state for the duration of the move and fall prone upon returning to the stage. The opponent has some control over the trajectory, though, and can DI to slightly influence it, preventing them from getting locked in infinite catapult launches. Like the bear trap, you can have two hidden catapults active at the same time, and a single fake one (made in the same manner you would a fake bear trap). However, unlike bear traps, hidden catapults last for 30 seconds before fading away, and can make multiple attacks.

If a character reaches an altitude lower than where they began, they immediately exit their helpless state. This means that you can't get free kills with a hidden catapult. Hmm... Perhaps a clever player could force their opponent into a hidden catapult, flinging them into a different, more dangerous hazard?


Up Tilt: Move Trap


Trapper crouches down and picks up any trap he is standing on and puts it in his bag of holding, removing it from the stage. The next time he inputs this move, he sets the trap in front of him with hardly any lag. With good timing, this attack can also be used to capture projectiles and trap them in his bag; inputting this attack again causes him to release it as if he used it.

SMASHES

Down Smash: Tanglefoot Bag

Trapper holds his Bag of Holding out in front of him and opens it, launching a writhing mass of black gunk 2 SBBs in front of him a quarter second later. This nasty stuff is called tanglefoot, and wraps itself around any creature it touches. An opponent hit by tanglefoot is put into a grabbed state as the gunk constricts them. They can escape this as they would a normal grab, but are treated as if their damage was its current percent plus 50.

Side Smash: Whip

With a quick motion, Trapper draws his whip and cracks it forwards. It's rather long, at 2 Battlefield Platforms in length. If he manages to hit an opponent with the final half of the whip, it wraps around their legs (or whatever they might move around with). Trapper then gives the whip a good yank with a delightful hiss, tripping them. If he fails to hit an opponent with the sweet spot, the move does nothing, and he has a quarter second of lag as he pulls it back in.

Up Smash: Kobold Defensive Formation


Trapper looks about frantically, yipping like a hungry chihuahua as the other kobolds join in. The rest of the clan stops whatever they're currently doing and move as fast as possible to Trapper as they assume the Kobold Defensive Formation. Each of the kobolds surround Trapper and point their spears out, fanning above and to the sides of Trapper. Any opponent who comes too close to the KDF is stabbed for 6% and weak knockback.

While in the KDF, all of the kobolds move as one. They move at their walk speed and shield, but cannot jump. Anything that forces them into the air immediately ends the KDF. Trapper can also use his tilts while in the KDF.


STANDARDS

Jab: Swipe

Trapper makes a quick claw swipe for 3% and flinching. If he manages to hit an opponent, he turns around and dashes a full Battlefield Platform forward at twice his dash speed, whimpering as if he's afraid of their retort. Trapper doesn't like to be near foes, and this attack helps him keep away.

Dash: Caltrops

Trapper turns his Bag of Holding upside down and pours out a quarter Battlefield Platform's worth of caltrops. Opponents who run or land on caltrops take a mere 1%, but high hitstun. This move discourages foes from running and jumping. Caltrops vanish after 10 seconds.

AERIALS

Nair: Pendulum Blade


Hovering in mid air for a full second, Trapper constructs a wicked-looking device floating directly below him. It is a large blade on the end of a small length of iron anchored in space, and swings steadily back and forth and Ganondorf's walk speed, creating an area it can hit a bit larger than a Battlefield Platform. Any foe who comes in contact with this pendulum blade takes an impressive 15% and strong knockback in the direction it was swinging, killing at 150%. It moves slowly and is easy to avoid, though.

Uair: Immovable Rod


Trapper holds a rod half as long as a Battlefield Blatform directly above him, which becomes anchored in place as he hoists himself on top of it. The platform is like a normal floating platform, and vanishes when Trapper is KO'd or uses an Uair directly underneath it, causing him to put it back in his bag of holding. The platform also has a timer on it, set to 10 seconds. Every time a character stands on top of it, the timer begins to count down. A minimum of 1 second is deducted every time; that means characters can't keep on jumping off of it to stall the match. Once the timer reaches 0, the rod vanishes.

You can only have 1 rod active at a time, and must wait 10 seconds before you can use another one. If you already have a rod active and you use this move, Trapper does a generic flip kick for 4% and wimpy knockback. Meh.


Dair: Treasure Drop

Trapper, in an act of desperation, holds his Bag of Holding below him and opens it up, shaking it around for a third second before dumping a treasure chest the size of a barrel out of it. The chest falls at the same speed as a barrel, and deals 16% and strong downwards knockback to opponents caught by it. This attack can only be used once per airtime. If the chest hits a grounded opponent, it plants them as if hit by a pitfall trap.

Bair: Sleeping Powder

With a flick of the wrist, Trapper creates a cloud of shimmering purple dust directly behind him, as large as Jigglypuff. The cloud slowly floats downwards, at Jigglypuff's walk speed. Airborne opponents who enter the cloud lose all of their remaining jumps; grounded ones fall asleep as if they smelled a Bellossom. The cloud last until it hits the ground, at which point it fades after 3 seconds. Trapper can only have 3 clouds of sleeping powder active at a time.

Fair: Spear Point


Trapper aims his short spear in front of him at a downwards angle in an attempt to keep enemies away from him. He holds out his spear as long as you hold the attack button. Opponents who come in contact with the spear take 3% and weak downwards knockback. However, if you hit an opponent at the very start of the move, it instead deals 8% and spikes them at a sharp angle. There is a bit of startup lag, making it tricky to use it to its full potential.

Grab Game

Grab: Mancatcher


Trapper pulls out his mancatcher, a wicked-looking contraption consisting of a spiked ring on the end of a long pole. The pole is as long as a Battlefield Platform, and the ring is about as large as a koopa shell. If he hits an opponent with the ring, it latches onto their neck and deals 5%.

When the opponent manages to escape the grab, they only tear the pole out from Trapper's hand; the mancatcher still clings to their neck. Characters can remove a mancatcher by standing still for half second, during which time they pry it off of themself. Other characters can initiate a grab by picking up the end of the pole like an item until they manage to remove it, including the rest of the clan. Pressing up or down while grabbing a character causes you to end the grab.


While you have a character in your mancatcher, you can push them left and right with the control stick (which counts as your forward and backward throw). They can resist your influence, though, and because of how light Trapper is, they have more control over the movement than he does. By pressing the attack button, Trapper contracts the spiked ring, causing his victim to flinch and take 4%. This pummel isn't very fast, though.

FINAL SMASH: KOBOLD HORDE

Trapper barks and five more kobolds appear. Yay. They vanish after 20 seconds.

PLAYSTYLE

The kobold clan has several things it clearly wants to do: set up traps around the stage, keep Trapper alive, and chip away at opponents until Arshargalon takes notice of the battle.

Setting up traps is difficult when you have foes constantly hounding you, so it is best to send your kobolds on the assault at the beginning of the match. If the opponent manages to get up in your face to harass you, you can get out of there through face grabs, using Startled counters, and even calling in KDFs. KDFs provide a nice meat shield around Trapper, making it easier for him to set up traps. In fact, all of your smash attacks let you buy time to set up more traps.

Once you've set up a few hazards, you next want to force your foe into them. Obviously face grabs are handy for this, letting you drive foes into traps. The mancatcher is another thing you can use. Once you have an opponent caught, you can quickly harass them with the other kobolds before taking control of one and having them initiate a surprise grab. Opponents who personally prefer the air are a bit more difficult to deal with; you can't trap them if they fly above them most of the match. Your pendulum blade creates a nice hazard that discourages foes from flying near it, and, placed properly, severely limits their options of aerial movement. Most opponents need to return to the ground at some point, though. You could always place traps on your Immovable Rods, too.

Kobolds are very light and easy to kill. Sometimes, it makes more sense to sacrifice clan kobolds than save them. Trapper becomes extremely vulnerable without any of his clan members, though, and has a difficult time getting his opponent to above 100% to finish them off with Arshargalon. Arshargalon is just as happy to kill kobolds as he is normal character, though, making it unwise to use willy nilly, as clan kobolds could easily become caught in the blast. Work together as a team and make sacrifices only as necessary; kobolds understand the power of numbers.

Without any other kobolds, Trapper isn't completely screwed. He can use his whip and traps to stall the foe long enough to drop a treasure chest on their head, dealing a nice chunk of damage. If you don't believe in yourself enough to bring the opponent up to Arshargalon range, you could always try to use a catapult into either a sweetspotted Fair or Dair to go for a spike.
 

LegendofLink

Smash Apprentice
Joined
Feb 17, 2008
Messages
164
Location
Pennsylvania
Swalot
Swalot is one of those characters that there is really only one way to go about making a set for them. For Swalot, you pretty much have to go for death by digestion. Typically, the way to do this would be with a pummel-KO style mechanic, but here you chose to go with a full fledged stage that the opponent has to fight their way out of. I'm quite a bit on the fence about this choice here, as it has both it's upsides, and its downsides. Lets get the bad stuff out of the way first. The biggest flaw with the way you chose go go about this isn't so much with the internal design as it is with the way you let the design effect the rest of the moveset. Obviously you are going to have moves that help get opponents inside Swalot's mouth, but in the end a lot of them end up being really rather generic and boring. It may not seem that way a a first glance, but that's only because the effects of the attack on the inside of Swalot's body add to the complexity of the move in a kind of "but wait, there's more!" manner. Take away that and the moveset comes off as repetitive and boring. On the flip side of things, the actual dynamics of controlling Swalot's insides really shine when he has more than one opponent to deal with, focin him to make each of his moves serve a dual purpose without puting him at a disadvantage, making him probably one of the more interesting characters to play in a free for all or team game, despit the way he first appears (though I would change the camera mechanics to simply give us an x-ray view of Swalot's insides instead of zooming in/ creating a split screen situation. That way it is much less intrusive onto the game's normal style. Overall, the set is an incredibly unique and cool take on the concept of eating the opponent, but that doesn't give you the right to slack off on the rest of the design. A pretty nice start, but I know you can do better. Keep it up, Smady.

Ashley
I never commented Ashley when it first came around, so I got to do so now. You have the foundation of a really cool set here, especially with Red and the Binding Circles. The main problem is that you could have taken the concepts a whole lot farther than what you did here with them. The ability to swap the opponent between two location around the stage while forcing them to jump around in a very enclosed space is really cool, and you can even use it as a ghetto teleport of Ashley herself. Your in-character writing here is actually pretty good as well, and isn't intrusive or annoying as other in-character sets tend to get, as you get straight to the point while keeping the sarcasm inherent in the character. For a tweaked first set, I'd say this is pretty good, but it lacks ambition and can be a bit boring at times. Keep pushing the boundaries of what you think you can do with a set and put that creativity to use, and you'll do well here.
 

ForwardArrow

Smash Ace
Joined
Aug 17, 2011
Messages
503
Swalot
Swalot's game he plays with foes on his insides is honestly really fascinating, what with how he can move the traps in and out of his body as well as move them around. It's all really clever, and feels a lot more interesting and fun to play then Dirty Bubble on the basis that Swalot has various mindgames and doesn't neccesarily have a perfect move for every situation. You're going to sometimes have to fake the opponent out too. That said, I feel there's a bit much redundancy with the inside moves, several just serving as ways to knock the foe off your sides when you only really need one. And while the outside of Swalot is alright, it's really not particularly interesting outside the specials. For what it's worth I really like the set (I particularly appreciate how he doesn't NEED to digest the foe to KO), but it's far from perfect.

Gangreen Gang

Hugo sets are certainly insane things, and I really do feel there's still more untapped potential in that genre then you give it credit for. That out of the way, Gangreen Gang is a fantastic set Warlord. It's the first Hugo set I feel which actually makes it so positioning the characters is not a complete pain. The playstyle of building the foe's momentum is also fun, and full of crazy ways to abuse and build said momentum. Not to mention how you take advantage of the Hugo mechanic like you did with Sid's Toys, what with how multiple characters can set up at the same time and force the foe to choose who to go after. Hell, it's even pretty in character for the most part, as they never really feel particularly organized, more like a bunch of goofy thugs who are playing a really silly game with the opponent. Besides, it's not like Ace wouldn't be able to coordinate them somewhat anyway. I have some minor complaints in that I feel the set was kind of tacky at points, particularly with Grubber's burp and how it left a mark on rocks or Billy's Stomach. None-the-less, this is really good stuff Warlord.

Party Pete

Nice to see you finally make a set Clownbot. Anyway, let me get it out of the way that Party Pete is a very in character set, watching the episode will definitely make this set easier to appreciate. Also, the Neutral Special mechanic is decent, especially with his need for Radicola as time goes on. I feel like you made it take far too long though, what with how it takes a full minute before the Radicola is needed. I'd say shorten that time to 25 seconds and you're golden. That said... once you get past the Radicola mechanic, the set really loses all it's appeal. There's not really anything creative about the individual moves, they don't really do anything interesting and don't contribute to any sort of playstyle he could have had. It feels like you had one good idea here and nothing to support it with, which is kind of a shame. Don't get me wrong, this is a pretty solid start, but I would disagree with Dave and wouldn't exactly say it's interesting.
 

KingK.Rool

Smash Lord
Joined
Nov 26, 2005
Messages
1,810
So. Swalot. Your movesets don't seem to be as overwhelmingly saturated with your personality as Warlord's do, Daddy - although you specialize in clumsy, silly and/or gross characters, you don't have a toolbox of favourite mechanics and attacks that you go back to regularly and we're not given reason to believe that your personality is in any way on display. But there is indeed a formula here, and it's palpable in the way that you gradually multiply options, tenfold, a hundredfold, not so much providing an answer to each occasion as making your character's gameplay as interactive as possible. Naturally, this means that the individual attacks are usually quite basic, and that the overall playstyle is simple and elegant, and that the complexity stems from the bevy of choices and the way that they interconnect.

All that spiel goes to say that from Daddy moveset to Daddy moveset it's largely a question of preference, and of how compelling one finds that overarching simple playstyle; this is my excuse for how brief this comment will otherwise be. Fresh off of reading it, I'm not entirely sold on this stage-within-a-character thing. Although it's the perfect set-up for a moveset of very simple attacks, which I like, I'm not sure that just giving each simple attack a double use - one for when they're outside Swalot and one for when they're inside him - qualifies as great depth. In any case, I find it awkward that the player can't see what he's doing with Swalot any more than the player can while they're inside him, besides which the visual disconnect involved in this x-ray zoom-in zoom-out deal would be terribly jarring.

Look, I'm being up-front! Now you won't be surprised later on when I don't vote for him! Wheeeee!

I'm the only one stupid enough to comment Dark Star now, I guess (minus Peanut who was doing a catch-up on every set anyway). Well, this was your experiment, and there'd be no point if there weren't a few people taking wild stabs in the dark trying to decipher what's going on here.

As far as I can make out, this is a positioning set; it litters the stage with drifting projectiles that can conveniently go ricocheting off of one another when Dark Star wills it and, if his set-up is clever enough, bounce the foe very precisely through a hall of nightmares, bombs, and whatever else. Mobility isn't a concern for Dark Star - even putting aside the ungodly aerial movement, a simple Reality Tear allows him full control over what goes where, and even lets him plant things at the very top of the blast zone - which is of course crucial, because it seems to me that a major kill mechanic here is a series of well-placed bombs set off by ricocheting energy balls.

I think that dark line of yours is too vaguely defined even considering what you're up to here; if I get it, energy balls/Dark Star/duplicates ricochet off of it, yes? It can't be passed through?

I'm not here to gabble a playstyle section at you, although I could and would probably have a lot of fun doing so. A better question is what I think of the set as I understand it - and maybe you did a very clever thing in making me figure it out on my own, because it forced me to pay close attention and develop a personal rapport with the bloody thing. It's a very disorienting moveset, but it's definitely not to cover up a lack of substance; Dark Star's take on spacing is rather significant.​
 

SirKibble

Smash Champion
Joined
May 2, 2008
Messages
2,400
Because I can't motivate myself to make a moveset right now...

(O) GHOST CASTLE BOSS (O)


This poor guy never even got an official name. The Ghost Castle Boss, as we'll call him, is the boss of the Ghost Castle area of the game Chameleon Twist (N64), and the final boss in the game. He/she/it/potato is a slew of objects, such as barrels and boxes, animated into a single atrocity by several mischievous spirits. It used its colorful arms to attack player's chameleon and smash into them. Upon defeating the initial form, the player was met by this:


The boss's second form was highly mobile, darting around the stage and launching a series of balls not unlike the ones comprising the arms of its first form. Several hits were required to defeat this form, and it regenerated to full health if it didn't take hits for a period of time.


(O) BOSS MOVESET (O)

The Ghost Castle Boss is fought on a medium-sized flat stage with grippable edges. It's basically Final Destination. Ghost Castle Boss begins on the right side of the stage, has 300 HP (on Normal difficulty), is roughly the size of Porky, and has the following attacks:


ARM CHASE (1ST FORM)

Ghost Castle Boss uses this move almost constantly. He'll only stop doing it to use another attack. He'll extend one long arm after the other, each one homing in on the player with the homing strength and roughly the speed of Samus's missiles. The entire arm is a hitbox, and will extend to almost the length of the stage before retracting slightly faster. As one arm retracts, the other moves forward. This does 10% damage and low upward knockback.


VAULT (1ST FORM)

Ghost Castle Boss slams his arms both down in front of him, at the very center of the stage. Players in the area immediately surrounding it are struck with 19% damage and a pitfall effect. Shortly afterward, the Boss will use his stuck arms to propel himself on a low trajectory to the other side of the stage, pulling out his buried arms in the process. He's a powerful hitbox dealing 20% damage and good horizontal knockback.


TRANSFORM (DONE AUTOMATICALLY AT 200 HP)

Ghost Castle Boss takes a couple of seconds to rearrange and switch to his second form. He loses all attacks from his first form when he does this, and gains a new set of attacks. The second form will recover 15 HP every five seconds it doesn't take damage.


RUSH (2ND FORM)

Ghost Castle Boss rumbles in place for a moment, then rushes across the screen. Then back. Then back across again, ending up on the opposite side from where he started. He goes quick, clearing the distance in about one second and having very low turnaround time. He deals 25% damage and strong upward knockback if he collides with a player.


SPIRIT SHOT (2ND FORM)

Ghost Castle Boss tilts the cannon on the front of him toward the player, and starts shooting white spirit balls the size of Kirby. This rapid fire attack shoots 15 balls in the space of 3 seconds, all fired toward the player's current location (in other words, the cannon tilts with the player's movements). The balls travel at the speed of Lucario's fully-charged Aura Sphere, deal 3% damage and daze players they hit, but have pretty low priority and can be destroyed with a measly 3% damage to them.


SCATTER (2ND FORM, AVAILABLE BELOW 100 HP)

Ghost Castle Boss separates from his form, into 8 objects, ranging from barrel-sized to Motion Sensor Bomb-sized. These 10 objects, controlled by 10 different little ghosts, then begin spinning around the stage like mad. They're movements are hard to predict--it's not unlike Pikachu's Final Smash, really--and each one deals 5-15% damage and weak to strong diagonal knockback. You can damage any of the pieces to damage Ghost Castle Boss, but really, why would you try to do that?


Upon defeat, Ghost Castle Boss shrinks down to miniscule size, pops into a puff of smoke, and is no more. Yay, you win.​


*Goes back to trying to make a real moveset*
 

BKupa666

Barnacled Boss
Moderator
Joined
Aug 12, 2008
Messages
7,788
Location
Toxic Tower
SWALOT
Here, we have the first Smady set of the contest, for one of my favorite Pokemon, no less. It was the clear right choice to include Swalot's voracious devouring of opponents as his centerpiece, and for the most part, I think its implementation as a mechanic was fairly smooth. The sense of panic Swalot inflicts on opponents by coating them in goo balls and barfing acid all over the stage to bait opponents into his stomach is conveyed quite effectively through both the moves themselves and the writing style. He seems to have taken a page from Dutchman's playbook with his stomach itself, and although the process of swallowing an opponent isn't quite as interesting to me, the options Swalot has once they're inside him are superior, in my opinion.

It's arguable Swalot becomes a predictable no-fun flowchart, with the opponent always getting screwed once they're inside, but I feel this isn't always the case. Swalot can decide to either attack his swallowed victim, or simply set up more traps on the outside to greet them as they reenter the outside world. His internal options are also formidable, but not devastating to the point where no character can ever get out alive; indeed, once an opponent is swallowed, the match takes a turn into a more focused duel between them and Swalot, determining whether or not the opponent becomes digested, or gets the better of their captor and escapes. Yes, some of the double uses of some individual moves seem a bit forced, but the dichotomy of moves throughout the entire set trumps this complaint for the most part. Easily your best opening Pokemon set so far, and a decent standalone work.
 

MasterWarlord

Smash Champion
Joined
Aug 24, 2008
Messages
2,911
POWER GRABBING STADIUM STEALER

So this moveset has a pretty damn long hype train going behind it with the introduction of the better Kaptain K. Rool and Baron K. Roolenstein, nevermind all the mediocre K. Rool movesets of the past. There was some reason you did those K. Rools instead of the default one, though, as he's rather ill defined and one of the core defining concepts of his boss fight, the cannonballs, suggest his pirate persona. That combined with the butt shockwaves makes me think you might have been better off going for a more universally encompassing K. Rool, as the "king" isn't really that much of a persona. Seeing you did indeed choose to consider the king one a persona, though, you stay quite true to the source material of the DKC1 boss for the most part considering that's the only place cannonballs rain from the sky. The one thing I think would have been fitting for King that was not included was making him more minion oriented - kings always have their loyal subjects, but they're nowhere to be found in the set (Outside the Super Attack) as you try to focus on the one boss fight above all else. For all I'm talking about character here, though, I'm largely just talking about other directions I would've liked to see you take - your representation passes fine.

Gameplay wise K. Rool has something that is pretty bloody well unique in smacking his crown around to try to impale the foe, then trying to juggle his damage racking needs with spacing the foe on the crown properly at the same time for when they escape to either keep himself safe or go for a re-grab (Which I believe is enough to save it from the fate of a flowchart, especially when the foe can stop button mashing briefly to throw off Rool's timing.). I even found the tacky stuff with playing dead to be quite relevant considering what a good lure it was. . .On the other hand, there was quite a bit of redundancy in the set, with some attacks being in just for the sake of more ways to push around the crown or the cannonballs. The moveset has the tacky syndrome of certain moves only effecting the crown and cannonball in ways that you say so despite them having little to differentiate from other moves otherwise - I feel you should've made the crown and cannonballs respond to all attacks in a more uniform fashion rather than forcing flow. Considering the grab-game and general tackiness of things like nair (Why not make it some attack to hit the cannonball from below) and usmash, you seem to be straggling a bit for inputs, making me again think that minions would've been a good way to bring more to the set. The concepts and -overall- flow are still good, but redundancy is in the set in other forms with things like the belly bump being put on 3 different moves.

GIRP

Considering everybody else and their grandma has officially commented this I am obligated to by law – it’s a great jokeset for simply bringing the subject matter up at all and for the writing style. And that’s really all, because after actually “playing” QWOP and laughing my ass off I think you could’ve made an actual half decent set out of this, with having separate inputs moves his individual body parts in different ways and crap. Obviously not what you wanted, but if I am obligated to rate this seriously. . .

GENERIC PIECE OF STATIONARY THAT DOES NOT QUALIFY AS A CHARACTER

Spawning projectiles , manipulating them, encaging the foe with them, all fairly simplistic stuff when you come down to it, but it started to click as something beyond standard camper fare when you started letting him attach things to himself/get them to follow him and what have you. He’s not setting up or running to camp so much as he’s actively manipulating projectiles to hit the enemy. . .At least until he does indeed get time to set up in which case he becomes standard boring projectile fare. He -would- become boring projectile fare, rather, but he more likely than not will just immediately use them all up in some way or another to move back on to more exciting stuff.

Unlike Rool, I find the interactions in this set to be rather awkward and unrealistic, with most of the ones that aren’t being more forced as moves that do nothing outside interact. Things like firing the laser at parts of the wire magically making it go in multiple trajectories, beams being reflected by wires and not by pillars, the first form being able to be electrified just fine as well as take damage. When the interactions are more sensical, they’re very forced interactions with no purpose other than to interact, such as conductor or just plugging in to things when wires can already bind things together somehow (how you choose –both- of the two things that are bound, you never explain). These interactions don’t help picturing this character who is more awkward than Dark Gaia with your overly indirect writing style. Again, gameplay wise it’s fine if bordering too much on standard campy crap – it just has all the Unsmash tacky style inputs that Rool would loathe had Nick (Who unsurprisingly loves Vol Opt) posted this moveset.

HALLOWEEN SET POSTED TOO EARLY

I think you probably should have made Uboa an actual set that tries to kill the human opponent considering how jokish of a set this is, as it would technically qualify as a unique playstyle and all that jazz. . .As is, the screen flickering is as disorienting to the Uboa player as the enemy, so the only thing he has in his favor is that he has no attack animations. This provides obvious potential for you to present mindgames, but you make his attacks standard generic fare that would have no notable properties if not for the fact they had no animations. You can’t argue that you were taking an In-Smash approach when you have no indication of what he’s doing for the player to the point they literally have to look at a guide, so you really should’ve just gone all the way with it.

LOONEY TUNES CHAR WITH MORE THAN 3 SECONDS OF SCREEN TIME

Marvin is standard campy trappy fare that has been spammed in MYM for quite some time now – refer to the above comment. His aerial affinity is the main thing that lets him be more interesting, particularly with that brilliant uair letting him pressure the foe from every angle imaginable, especially with his minions and traps taken into account. His standard gimping especially takes a new purpose when you bring in filling pits made by modulators with water to gimp foes, and he even gains a new method there to do it with his electricity. The best part is for half the set-up he really doesn’t have to be actively making a pit and can still be using the initial explosion of the modulator as a threat. With this more offensive part brought into play Marvin becomes a far easier moveset for me to back, although I do think he should have had more options for pushing foes to the water/traps.

But wait! Doesn’t he have that one centerpiece of his playstyle with the bubbles? Why, when they’re in a bubble he can push them around as much as he wants with Side Special! Yes. And they can’t do anything to resist. I don’t see why you’re promoting so many of Marvin’s options for pressuring a foe in a bubble who –can’t do anything-. It’s the same original problem we had with Man Ray having options to fight a foe who couldn’t do anything inside Dirty Bubble. The bubble either needs to go, or the foe needs to have some degree of control (At least some vague control over movement). Aside from that, it’s of course not perfect – the random stage control moves feel very out of place on –standards- of all places, and considering the Specials aren’t all that unique for the most part outside the modulator and are –actual attacks-, some attack shuffling really would’ve been a good idea. Combining the instant martians and the water somehow would’ve probably been a good idea to fit them and K9 in while keeping the Jet Boots and Modulator. Ignoring the placement of inputs, the set isn’t that tacky, with the only offender that comes to mind being dair.

BEST POKEMON EVER

It boggles my mind that Venustoise is being written off as a generic camper while Vol Opt is getting so much praise. Yes, Venustoise camps, but he doesn’t just sit on his fat ass all day firing off projectiles. He is more of an escape artist than a camper, and if that was enough reason for people to like Antonidas, it should be enough for Venustoise, who has more controllable momentum than any of the other sets I’ve read. The fact he isn’t actively attempting to ram people makes him use it in far different ways simply to defend and space himself properly, and laying out powders while moving only makes it all the better. Gimping foes from on-stage is a nice touch.

The writing style of the set beats around the bush as it tries to define its own playstyle, not really getting there until the playstyle summary. Then again, this is also partially because of the large quantity of filler in the moveset. The grab-game in particular has very little relevance to Blastoise’s game, along with several of the aerials. Filler inputs in this moveset are hideous, which is kind of hard to excuse when you have –two- Pokemon that both have plenty of moveset potential individually combined into one character. With more focus, this could’ve easily been an early frontrunner for the contest.

I'm not complaining about the organization on the eyes, but having Blastoise and Blastoise's colors alone dominate the moveset with no green for Venusaur came across strange, even if Blastoise is dominant in the fusion.

SMASH DADDY

The most immediate concern with this moveset above anything else is that you blatantly cheat to get more moveset potential – randomly shrinking foes you’ve eaten to pretend to be Victreebel is pretty out there. I would very much so compare this more to Victreebel, Dirty Bubble and company than the Dutchman’s fly, as the stage the enemy has to play in is being actively manipulated by you rather than you entering the arena alongside the foe. One of the other things that shows in how you had to cheat to make this work is the fact that Victreebel, Dirty Bubble and company can actually see what the hell they’re doing so that can spit the foe up in an advantageous position if they predict they’re going to get out – you mention setting crap up while the foe can’t interfere none the less, making this incredibly awkward. You should’ve focused on digestion and digestion alone. Honestly, for the gigantic leap in logic you made to make a set in this genre, that’s pretty much just what it is – another set in the genre with little to differentiate itself outside the stage mechanic which is just a flashier version of the usual interior. Dirty Bubble, which is apparently a laughing stock, did far more to differentiate himself than this, and his attacks to manipulate the foe inside of him weren’t nearly as blatantly useless to foes outside of him as here. I don’t really need to comment that Weezing, Muk, and Garbodor did the crap outside Swalot’s stomach much better time and time again, considering they weren’t being compromised by the devouring.

I could understand Banbollow fine and dandy, but I could never hope to wrap my head around a lot of the stuff going on in this mess of text. You manage to be inconsistent about what a move does even in the initial summary of it – I’m not sure how the grab works before you even get to the part with the Swalot stage, considering the suction is not his “actual grab”, which is “quite simple”, which is a generic bite. I am left to assume that you have to first start up the suction then press again to close his mouth, though it seems stupid he wouldn’t close his mouth automatically so I don’t even know. Another such inconsistency comes straight up later on with you implying foes instantly die if they reach Swalot’s bottom, only to later introduce in the acid Brawl water. . .Just examples, mind you. Things only get truly worst though in the moves after the grab-game, where you regularly hop back and forth between explaining what happens inside and outside of Swalot (Without telling the reader) to the point that I’m seriously wondering if you’re implying that Swalot shits foes out his bottom for his dsmash.

CLOWNBOT’S DETHRONING

Welp, boys, you heard him. With Party Pete out, Phatcat is now going to seize his chance. . .

I actually do like the main mechanic you come up with for the character, Clownbot, considering how it forces Pete onto an active timer to take out the enemy before he blows up, especially with what it does for his characterization. Unlike n88’s venom, though, he doesn’t just casually get killed at first, and instead just has to deal with becoming an overly bloated version of himself. Considering how terrible Pete is at KOing outside this form, I like how it flows into his main style while simultaneously putting Pete on a time table to damage rack, what with how hilariously bad bloated Pete is at damage racking.

The majority of the moveset is a horde of generic attacks and I can’t really do much individual commenting without just trying to tell you what my movesetting philosophy is – having as many attacks as possible be relevant to the playstyle in some way, with no redundancy between the inputs. Even ignoring that, you come up with some decent animations for the character that would potentially pass in MYM 4, which I assume is your goal. . .But -3- attacks where bloated Pete just falls over as an attack? Really? It never occurred to you to have a gigantic ball of fat roll around when you have -3- attacks where he just falls over? Damn. . .

PIG/RAT MEN

I very much like how this is essentially a summons moveset, but the extra Kobolds are immediately with the leader at the start requiring no set-up on that ground. Considering the “character”, it makes perfect sense to start with them as well. Rather than attempting to team up with his other minions, though, he uses their immediate existence to get in some good meat shields while he sets up. While his moveset has an absurd amount of traps with the trapper having minimal ways to defend himself, the fact he –immediately- has the others to defend him lets it actually happen.

It works far, far, -far- better then any of the trap characters who’s sets are filled with traps who we saw en mass in MYM 5 in a feasible level, and it has some manipulation over the minions (Seeing he doesn’t have to bother generically summoning them) as a nice bonus. That said, while it all works very well, I think he should have played off of the other Kobolds a bit more in his actual moves like you did with the Usmash, as they largely are out doing their own things (Though I am quite thankful for the Command Special you included).

@Your Gangreen Gang comment: By “control directly” I assume you’re talking about Ace actually responding to the control stick for movement, right? Well, in that case, the reason I didn’t say which one you controlled “directly” is because you don’t control –any- of them directly. The reason I have Ace Running around in the Shield Special is because it’s the only way he’s able to move. I could let him respond to the control stick, but it’d cause him to move a bit whenever a move for anyone else is input which is a bit awkward. And yes, Shield Specials aren’t an input, but I needed a fifth move for Ace and people let Rool and Smady get away with it in Gengar and Mr. Mime. You’re on the right track for aerials – the substitute for them is the “shield attacks” I put on Snake, hence why there’s randomly a Back Shield.
 

KingK.Rool

Smash Lord
Joined
Nov 26, 2005
Messages
1,810
I've decided that keeping up with Warlord will be a healthy commenting practice. He's got 8 sets on his ranked movesets list, and I only have 5 linked in at my comment zone, so here we go (BTW those were some very good comments, Warlord, aside from the obligatory jab at me in the Vol Opt comment).

First, Kobold Crew. My main issue here is simply how arbitrary it is to have the appearance of a dragon that looks down on the Trapper and all the rest be controllable by the Kobold Crew player. Although the animation makes it all appear very incidental, the fact remains that you're effectively summoning a dragon at will every time you press a certain input; it implies that the dragon is your weapon, which does not seem at all accurate in-context.

Aside from that, the moveset is quite elegantly simple, making use of hideously weak minions to protect a hideously weak main character while making things very annoying for the opposing character and gradually moving into a position where you can summon your dragon and score a KO. Traps and summons are both plentiful, but smoothly handled in a moveset that opts for interactivity over complexity and also quite admirably fused into a cohesive playstyle. The whole gameplan is, on the whole, pathetic and cowardly, which is terribly fitting, although again that dragon that can be called up at will feels like it's at cross-purposes with the rest.

And now QWOP, because even Warlord has commented him by now and he's a nice short read. I've actually played this game before and I got to be pretty good at it, making it almost halfway across the track at my best.

But this moveset isn't for people who played that game enough times to get halfway across the track; it's for people who laughed and laughed and then called it stupid and X'd out of it. It's hopelessly ineffective as a character, as a playstyle, as a moveset, as just about everything. QWOP-the-moveset is much like Magikarp-the-Pokemon. Whether that's appropriate, I'm not sure. And whether spending time commenting this was worthwhile, I'm also not sure. It seems like an awful lot of people took this moveset quasi-seriously. I should probably have spent my time on Rapunzel instead. Oh well.​

Uboa is another easy set to comment. I think that you're kind of poking fun with this moveset, myself - lines like the overenthusiastic "The screen flickers, and a stab attack hits opponents below Uboa for 6%. This move spikes! :D" make it pretty clear that you realize that spiking is not, in fact, something super-exciting or flashy. You're quite content to let the whole thing exist as a sort of movesetting nightmare zone, creating a terribly irritating world for the opponent with little to no chance of escape. After watching the actual video of this thing, though, I'm not sure this was the right tack to take: Uboa doesn't really make anything flash at all after she appears, or do anything at all other than sit there looking creepy.

In any case, it exists because it should exist - it's just a moveset meant to give everyone a seizure, and it's a Sakurai moveset except without animations that indicate what's going to happen at all. It's a reference point indeed, and I'm glad you made it.

Serious criticism? Is it really my place? Detail, interconnectivity between moves, and more ideas to drive the whole thing (or perhaps more uses of a single versatile idea, which seizure-inducing flashes are unfortunately not). I think you know all this stuff already, Sir Slash, and I'll be looking forward to a set where you pull back your sleeves and get serious.
 

phatcat203

Smash Apprentice
Joined
Dec 12, 2008
Messages
160
Location
I've been everywhere, man.
Rapunzel

Alright, to be honest I'm not looking forward to this. I just got home and this looks like a long set, but whatever, let's get it over with. The hair mechanic is..interesting, though I'm having a bit of a time wrapping my head around it all. From what I understand of it, it's a pretty good addition to the game, and it suits the character of course.

Okay, Neutral Special is...kind of complicated in detail, but simple in concept, I guess. Protecting herself with her hair seems like something anyone with that much hair would do, so it's probably not OOC. Reducing damage and knockback and such from attacks with the hair is fairly creative, and pretty balanced, so there's not much to hark on. Main problem is the writing - you don't have to mention that other moves use this; you can just say that in the actual moves. Okay..Side Special. Alright, I'm going to admit, I just BARELY understood this move. I -think- at least. Selectively impeding the foe's move choice is...fairly creative, and I'm not sure if it's been done before. It's not exactly broken, but with spamming, the move could easily be abused. Main problem is that you mention so many un-revealed moves here; I did this in Erufuun, mostly on accident due to re-arranging the set about ten times, and I was hated for it. Generally, you shouldn't mention moves that the reader hasn't gotten to yet; mention any interactions in the latter move or just in the playstyle section if you're into that kinda wacky stuff. Up Special...eh, it's a tether. Not much to say, really, but taking the hair's length into account makes it stand out a bit from other tethers at least. However, the way you describe the different forms is a bit odd, and should be cleaned up. Anyhow, not the best move ever, but could be a lot worse. The Down Special...can potentially be very overpowered, but the fact that it can heal the opponents as well helps to balance it out. Plus the whole three seconds thing. Also, you mention holding onto the hair...which you previously said can't be done; you could stand over it though.

Onto the standards then. Jab is, as one would expect, fairly plain and boring. She also randomly carries a frying pan, but whatever. The pan getting tangled up in the hair is interesting, though, and I could see it used somewhat, so points for that. Dash Attack...the initial part is, again, boring, but the latter is somewhat creative and gives the player the ability to control the position of the hair. It's alright, and serves its purpose. The Forward Tilt is...pretty generic. I guess it plays into the bit of prone abuse Rapunzel has going on, though. The Up Tilt is just plain...what? She realizes she should be hitting the opponent instead of blinding herself by staring at the goddamned sun? Eh, whatever, the move itself just feels like filler, I guess. Down Tilt...again kinda feels like filler. I guess it ties in with her prone abuse though. Can't really say much about it.

The Side Smash...it uses her hair for once, and it does it pretty well. Grabbing the opponent is a nice touch and at least allows you to get the opponent where you want them. The frying pan at the end, while generic, works. The Up Smash...seems like it could be condensed and made much less wordy. Just saying...but anyways, tossing her hair up into the sky is something I could see Rapunzel doing, and while it doesn't exactly flow into the set well, it serves as a good damage-racker and killing move if you have all your hair. Seems like it could do more, though, or at least reposition the hair. The Down Special is pretty nice, and doesn't really need to be changed except rewording. However, the buff seems slightly tacked on, though I doubt it was.

Woo spinning Neutral Aerial. At least this one serves a purpose, though the grabbing part of it seems weird and perhaps tacked on. Bringing her hair in is useful, but she already has quite a few moves for that. The Forward Aerial is..really, really weird. Why would you cling to your ENEMY for dear life? It just seems really filler-ish, as it doesn't serve much purpose outside a bit of damage or a suicide KO. I've no idea why the Up Aerial has so many drawbacks to it when it really isn't that great of a move, but okay. Twirling the hair around the pan is something new to the set, and somewhat creative, but it's not all that useful since it only affects a couple of moves. The Down Aerial is a Stall-Then-Fall attack, which I generally dislike, but it can be used a bit in conjunction with the hair, at least. That's good, but it seems odd that she'd reel in her hair before using it. Back Air is..unusual I guess, interacting with just one rather obscure situation, but that helps it not be totally generic. Still not that great of a move and could be improved up, though.

Oh goody, the Grab Game. My favorite. The Grab itself...seems very overpowered, if I understand it correctly. After all, it can grab anyone who is ANYWHERE on the hair...which can effectively cover the entire stage. That..really needs to be nerfed, even if the opponent can escape. The Pummel is...really awkward and unnecessarily complex, in my opinion. It also makes the opponent almost unable to escape the grab, which is pretty OP. Also, the little lizard does quite a lot of damage... Still, it's creative and useful, so I can't say too much about it. The Forward Throw...WHAT? Where do those girls come from? Since when was cardboard that goddamned sturdy? WHERE DID THOSE GIRLS COME FROM?! Anyways...the move itself is really bland, but the effects are...interesting. The cardboard bouncing them or trapping them is pretty unique and creative. Still though, what the ****? Up Throw is pretty uncreative and...well useless, except as a straight killing move. The Down Throw is more prone abuse, and more use of that damned lizard. It's alright, but it really seems like you're just recycling effects. The Down Throw is very creative and could be really useful, but again, those girls just spawn out of goddamned nowhere. I like the idea of it and how it's executed, but like most moves in the set it could be toned down in terms of wordiness.

Okay, set as a whole. Really, the worst thing about this set is by far the writing style. Grammar is generally bad, random words are thrown in, words are confused, things like that. You also go into too much detail here and there, which isn't always necessary. You really, really need to work on that. Otherwise, the set is good, if filled with filler/half-useless moves and really really odd at times. Also, many moves do just about the same thing, probably a side-effect of the filler. All in all, work on cleaning up your writing(a proofreader would help immensely) and try to differentiate attacks more in your next set. I'd probably give this a low 5 in a ranking, mid-high 6 if discounting the writing style.
 
D

Deleted member

Guest
REVENGE OF THE DIRTY BUBBLE

The most immediate concern with this moveset above anything else is that you blatantly cheat to get more moveset potential – randomly shrinking foes you’ve eaten to pretend to be Victreebel is pretty out there. I would very much so compare this more to Victreebel, Dirty Bubble and company than the Dutchman’s fly, as the stage the enemy has to play in is being actively manipulated by you rather than you entering the arena alongside the foe. One of the other things that shows in how you had to cheat to make this work is the fact that Victreebel, Dirty Bubble and company can actually see what the hell they’re doing so that can spit the foe up in an advantageous position if they predict they’re going to get out – you mention setting crap up while the foe can’t interfere none the less, making this incredibly awkward. You should’ve focused on digestion and digestion alone. Honestly, for the gigantic leap in logic you made to make a set in this genre, that’s pretty much just what it is – another set in the genre with little to differentiate itself outside the stage mechanic which is just a flashier version of the usual interior. Dirty Bubble, which is apparently a laughing stock, did far more to differentiate himself than this, and his attacks to manipulate the foe inside of him weren’t nearly as blatantly useless to foes outside of him as here. I don’t really need to comment that Weezing, Muk, and Garbodor did the crap outside Swalot’s stomach much better time and time again, considering they weren’t being compromised by the devouring.

I could understand Banbollow fine and dandy, but I could never hope to wrap my head around a lot of the stuff going on in this mess of text. You manage to be inconsistent about what a move does even in the initial summary of it – I’m not sure how the grab works before you even get to the part with the Swalot stage, considering the suction is not his “actual grab”, which is “quite simple”, which is a generic bite. I am left to assume that you have to first start up the suction then press again to close his mouth, though it seems stupid he wouldn’t close his mouth automatically so I don’t even know. Another such inconsistency comes straight up later on with you implying foes instantly die if they reach Swalot’s bottom, only to later introduce in the acid Brawl water. . .Just examples, mind you. Things only get truly worst though in the moves after the grab-game, where you regularly hop back and forth between explaining what happens inside and outside of Swalot (Without telling the reader) to the point that I’m seriously wondering if you’re implying that Swalot shits foes out his bottom for his dsmash.
I'm glad you bring up Victreebel, as it lets me get quickly onto two points - how could I make a Swalot set without just ripping off the original or Victreebel, and how could I make the main set [outside the stomach] better when the whole point of the character is eating? The rest of the set is meant to be just purely functional and mostly help transition into his grab as it makes sense for the character - the whole point of Swalot, to me at least, is that he has an innocent appearance but is actually luring his prey into a false sense of security. You say it's cheating to do something like this, but everything else has already been done and is already very simplistic, so I'd be entirely re-treading old ground. Here I am actually adding some sensible interactions and flow between the two stages, which Dutchman did not do. You dismiss the entire Belly of the Beast as "flashy" and these interactions as "awkward," without saying why it's apparently so bad.

I'll concede that the camera probably should have just been Swalot with an overlay over him showing the opponent, but that's a pretty easy fix and doesn't actually affect anything else in the set. I find it hard to see how Garbodor, which was full of filler, somehow has a better main set than Swalot: both have fine specials and grab game, but then Swalot's set aside from that actually serves a dual purpose for the most part. I'm not going to say that it's amazing or something, but to say it's worse than every other one of my poison sets does lead me to protest when there is very good reason for it. When you're this vague it's hard to tell exactly what you dislike about the execution. Going into stuff like the writing seemed very out-of-character for you and I'm shocked that you wanted so much hand-holding. Stuff like the mouth closing in the grab game doesn't actually matter all that much and is just pedantic, thus why I didn't explain it because the set would literally be twice as long if I did. The whole idea behind the Brawl water was that it has literally never been used before and that it makes perfect sense to use it here, obviously when it isn't there the opponent just falls to their death and I really don't know how Junahu can read into this fine but you can't.

And yeah, comments are forthcoming. I just needed to reply to this comment, especially when Rool casually calls it "very good" along with all the others in the block. I feel bad for Swalot.
 

ForwardArrow

Smash Ace
Joined
Aug 17, 2011
Messages
503
Wanna make a contract?

Kyubey


Kyubey is the obligatory mentor mascot character from Puella Magi Madoka Magica. The vaguely weasel-like creature makes deals with the main protagonist. They become a Magical Girl and save society from a variety of monsters called witches, and he grants their greatest wish. Everyone is happy, at least for the most part. As a character, he's very polite, though strangely emotionless considering the lighthearted nature of the genre. As the series goes on, it becomes apparent he's not what he seems to be...

Just so you know, there are in fact some spoilers in this set. As such, read only if you don't want to watch the show, have watched it first, or don't care.


Stats

Air Speed: 9.5
Movement Speed: 9
Fall Speed: 8.5
Traction: 4
Size: .5
Weight: .1

As you can see, Kyubey is very fast moving, though his movement is a little slippery and he trips a fair bit. He's also tiny, basically the size of a Pikmin lying on its side. He curls up into a ball during his crouch, which makes him surprisingly frustrating for some characters to hit. Now for that weight stat. You see, Kyubey is so pathetically light that pretty much any move used for standard KOing will OHKO him. In addition, even weaker moves that would normally be used for damage racking work as KO moves on him at as low as 40%. To top it off, if he gets hit with an attack that deals 10% or more, he dies instantly, leaving a corpse on the ground. So all in all, not really a very threatening character, is he?


Standards

Neutral A


Kyubey closes his eyes and rolls on his back, dealing small flinching hits of 1% that don't really even combo the foe. This has little lag on either end so it can interrupt a foe out of an attack pretty easily, but that's about it. In addition, the attack automatically clashes with any move that deals 9% or less. Wonder what that could be useful for.

Forward Tilt

Kyubey swipes his tail in front of him, dealing 2% and no real hitstun, but a slight push back. Imputting this attack immediately afterwards causes his tail to fluff up to twice it's normal size. This deals no damage or knockback and take 0.4 seconds. So what's the point to this attack? Well, if an opponent hits the tail while it's fluffed with an attack that deals 9% or less, that attack is completely nullified. You have various ways to maneuver your tail around, so it can function as a little shield for you. That said, once the opponent hits you with an attack that deals 10% or more you're dead anyway, so what on earth could be the point?

Up Tilt

Kyubey stops briefly, this attack ending with little lag if the foe is nowhere near him as Kyubey briefly looks around. However, if Kyubey is near the foe, he will go up and... nuzzle them. Aww, maybe he's just being a nice little guy. The opponent is unable to attack during the half second period he does this. The move doesn't do any damage, but it does charm the foe a little bit, increasing the lag of their next 4 attacks significantly. In addition, it makes all of your future grabs .2x harder to escape. That said, the foe sees this as more of a facade if they are at higher percentages, and 1 less attack gets increased lag for each 15% they have.


Down Tilt

Kyubey rolls out of his little ball with his paws forwards. He moves forwards about half of Bowser's length and deals 1% that doesn't even bother tripping foes. As such this attack is mostly useless. However, if you use it out of a dash, Kyubey will instead move forwards 1/3 the distance he had dashed(since he last turned), stopping at any edges. This version of the move deals 3% and a trip instead if he goes more than twice the distance of the original move. Otherwise, it deals the same damage and effect as before, though it's really not that impressive either way.


Dash Attack

Kyubey lunges forwards twice Bowser's length before landing a with a fair bit of lag. This attack deals no damage or knockback, but Kyubey goes into the background for the entire animation, allowing him to approach a foe with less of a chance of dying. Also, if you press A during this attack, he moves over slightly so he IS in the foreground, and the attack deals 4% and knockback that KOs at 450%. Like you'll ever get them to 450%, though.


Aerials

Neutral Aerial


Kyubey spins in a small circle with his tail out in front of him, dealing 1% and a flinch. This attack is somewhat fast however, and covers a circle around Kyubey's entire body. The nice thing about this move is it covers your entire body and is a solid shield against attacks dealing 9% or less. Which is nice... until the foe just rips right through it with a powerful attack and kills you, and it's not nearly fast enough to stop everything the foe can throw at you.


Forward Aerial

Kyubey extends his paws in front of him, dealing 2% and pushing the foe back about half the width of a Stage Builder block if it hits. It also pushes you back the same distance. This is not as fast as some of your moves, but it is a spacing option. If that's really going to get you anywhere.

Back Aerial


Kyubey's tail extends straight out behind him before puffing up to about twice it's normal size. This deals no damage but pushes the foe away the length of your tail... which is about the length of Squirtle. Not very exciting. Fortunately, it is pretty fast. That said, if your tail is fluffed when you use this, it puffs up even larger, which causes it to become almost balloon like and decrease your fall speed to 1/10. This lasts for a total of 3 seconds, during which you can use this move again not to increase the size of his tail but to refresh the time. Since you are a bit better off in the air, this is a nice way to stay up there if you want.


Up Aerial

Kyubey swings his tail over his head, dealing 2% and very light upwards knockback. After this attack, he leaves his tail over his head until you use another attack, giving you protection from above if you're tail is fluffed. Well, unless the foe hits you with a reasonably powerful move anyway. This has fairly little lag and range.


Down Aerial

Kyubey drops down with his feet below him. If he hits a foe on the way down, he bounces a stage builder block into the air, dealing them 1% and no flinch unless they are in prone. If they are in prone, it will prolong the time they are stuck in there, and it can actually take them quite a bit of time to get up. I suppose it might be a half decent damage racker, though really you can't expect more than 5%-7% out of this move.

Specials

Up Special

Kyubey lunges upwards 1.5 Ganondorf's height with little lag before going into helpless. This deals no damage or knockback and is generally a pretty weak recovery. That said, you don't really have many other options.

Or is that really all there is to this move? Something I never mentioned earlier is that after Kyubey is KOed, there is a brief pause before he respawns. During this time, you can input Up Special, and Kyubey will respawn in the center of the stage, good as new. No, he does not lose a stock from doing this. You can do this regardless of how you are KOed, and you're percent is reset to 0%. Upon respawning this way, Kyubey has 0.7 seconds of invinicibility, which isn't as much as you'd get on a new stock but it still gives you some time to escape the foe.

So... ridiculously broken much. Well, fortunately this move can't be used more than 4 times per stock in such a manner. As such, the foe basically has to kill you 4 times before you stay dead. That really isn't so hard, considering the foe just has to hit you with 4 attacks that deal 10% or more and you're down for the count. You might be fast, but they still shouldn't have much trouble pulling that off, should they.

Oh yes they will, actually. You see, the corpse left behind by the attacks actually has a purpose. If Kyubey is standing next to a corpse, he can eat it in the same way he would eat a food item. It's not good to waste the body, after all. This takes him 0.5 seconds so it's actually pretty punishable, but what it does is restore you a reincarnation. Yes, Kyubey can effectively live forever if the foe tries to kill him the other way. It's still not impossible to kill him while leaving corpses on the stage, but it becomes very difficult when he has 3 or so he can eat to restock. As such, they will probably have to kill you with weaker attacks... which you can block with your tail. Suddenly, you've gone from very easy to kill to terrifyingly difficult.


Neutral Special

Without opening his mouth, Kyubey begins to speak to the foe telepathically, with him saying one of a list of stock phrases that are listed below. This has extremely small start-up and end lag, but he can't use this while he's saying one of his phrases, which takes about a second. Fortunately, he can still attack while talking to the foe like this. The move makes it so the foe escapes your grabs with .1x more difficulty for the rest of the stock. This move is pretty easy to spam on a foe, especially if your bouncing on one in prone with your down aerial. Unfortunately, if the foe is not within 1.5 Battle Field Platforms of Kyubey when he starts talking to them, it's rather worthless. Also note that everyone within that range is affected by this in a Free For All, and after you grab game has been pulled off he merely congratulates the foe on their decision.

[COLLAPSE="Phrase List"]"Hey, do you wanna become a Magical Girl?"
"You can have any wish you want."
"Really, it's easy"
"There are so many benefits."
"Wanna make a contract?"
"Come on, don't you want a contract?"
"It'd be easier to protect them you know..." (If used on someone with a significant relationship)
"That whole taking over the world thing would be a lot easier"(Used on antagonistic opponents)
"Not that you have to be a girl, really." (If used on a non-female character)[/COLLAPSE]

Down Special

Kyubey blinks, causing the foe to pulse with energy. This does nothing if the foe is not attacking you during this time, however if they are attacking you, their next attack deals 2x as much damage and knockback. After the attack is used, he mentions, "this is the type of power you could have if you just make a contract with me." This makes it so the foe takes an extra .3x as long to escape your grabs from this point on. Unfortunately, this cause the increase in grab time if the opponent whiffs the attack, and there is some surprisingly punishable end lag attached. That said, it does allow you to save face if the foes about to KO you with a weaker attack.

Side Special


Kyubey grabs forwards with his paws, this not actually grabbing the foe at all. Instead, if they are holding an item, this will steal the item from them. But nobody uses items you say? Well, you're right about that, and that's not this moves only purpose. But we'll get to that in a minute.

Grab Game

Grab

Kyubey sits down, asking the foe "Alright, are you ready to make a contract?" If the foe is within half a stage builder block of Kyubey, they will also sit down next to him. They then have a little back and forth conversation, depending on who the character is. Unfortunately, the opponent can still escape this with grab difficulty, and if they do, they say some variation of "no thanks, I don't need it right now," before walking away. You have to hold them in your grab for a whopping 7 seconds for this to have any effect, as a matter of fact. This fortunately takes both Kyubei and the foe into the background, because otherwise this would be impossible to pull off in a free for all.

So, you've managed to grab the foe for 7 whole seconds, what the heck does happen anyway? Well, the opponent becomes a magical girl, or whatever they are. Against females this puts them in a rather dressy outfit, where as against others it puts them in new found battle armor. In addition, a soul gem is also created around their neck. We'll get to that later, but this increases the damage and knockback of all their attacks by 1.5x. On one hand, this makes them more likely to create a corpse when they attack you, but it makes your tail defense significantly less useful. And besides, it's not like the foe can't keep you away from your corpses.

However, this produces a more significant effect in the soul gem the foe is given. You see, that thing is not just for show. It contains the soul of the foe, and as it takes damage the gem becomes a darker and darker hue. After it takes 60%, it becomes pitch black and the emits a large amount of black energy, the foe screaming all the while. Afterwards, they fall over and disappear, losing a stock. In addition, your smashes only change a bit when used on a foe with a soul gem, allowing Kyubei to manipulate their soul to a degree and cause a powerful side effect. This is really your only way of getting KOs, so you want to make sure you can grab the foe.

So... now that you've already grabbed the foe, is there a point to this input? Why, yes actually. Pressing this within grab range of the foe will have him jump towards the foe and swipe his paw at the soul gem. If his hand touches the gem, red bolts go through it, dealing 10% to both the gem and the foe. This also has an additional side effect. You see, Kyubey just infused the Soul Gem with raw concentrated fear. This makes them incapable of walking and when they dodge it's in a very frantic manner that makes it last for a far shorter duration with more lag on each end. This is a fairly weak status effect for the most part, and lasts for a total of 8 seconds.

Except of course, what it does to Kyubey. You see while the foe is effected by fear, they see you somewhat differently. Kyubey has a huge black semi transparent outline around him, which looks vaguely like him. However, it has dozens of pointed tendrils coming off of it, and the body is in a more lion-like shape, more streamlined and threatening looking. Lastly, his eyes glow a very bright red, and the outline is nearly the size of Bowser. This is more than just a visual effect eithe. All of Kyubey's attacks become horrifically powerful in this state, having massively extended range and dealing nearly 6X as much damage and knockback. Mind you, they can still kill you just as easily, but they have to hit your main body, as it does nothing to the illusion. Your foe, can walk right through the illusion if you let them though, so be warned. In a free for all, only people effected by fear are affected by this new form, as it's really only an illusion. It disappears if none of your opponents are suffering from fear any longer.

There are modifications to some of your attacks when in this form. Instead of fluffing your new form's tail, instead it's tendrils begin to vibrate, serving as hitboxes that deal mass flinching hits of 1% for the next 5 seconds. The Up Tilt instead has him swing his tendrils in an arc above him, dealing 3 hits of 8% and knockback that KOs at 100%. The smashes now have ridiculous range due to the tendrils being used instead of his hands, making them pretty easy to land in this form, though the status effect is no more powerful then before. Lastly he has an entirely new grab game that will be detailed below, though he can still use his regular one on foes that haven't had a contract made yet by double tapping the input.

Also, remember that worthless Side Special I showed you earlier. Yeah, it has a somewhat more sinister purpose than you might think. You see, if you uses his Side Special on a foe's Soul Gem, he will break it's chain that let's them wearing it as a necklace, and having it fall to the floor. It is now a throwing item, which you can carry around or throw off edges. And if it falls of the edge, the foe's body will go lifeless, taking away their stock. Of course the foe can just grab it and hold onto it, but as you might expect the Side Special let's you steal it right back. That said, this maneuver has some punishable lag attached, so make sure you're not on your last regeneration when using it.


Smashes

Note: Your smashes can be used in the air.

Forward Smash

Kyubey pokes his hand forwards, normally deals 2%-4% and trips the foe. This has more lag then usual for Kyubey, but it certainly more powerful then a lot of his other attacks and still pretty darn fast. That and Kyubey does like the foe being in prone, after all. The Dair certainly helps him keep foes there to pester them with your Neutral Special for a bit, anyway. If your illusion is active, this will also push them back 2 battlefield platforms.

However, if it hits a foe with a soul gem, he causes a small shock to their soul gem. This doesn't appear to be much, but it causes the foe shriek out in pain and take 16% and a long stun. You see, Kyubey can manipulate Soul Gems to some degree, and here he caused the foe concentrated, raw pain. This causes them to move slower for the next 8 seconds, as well as flinching and taking 3% every 2 seconds during this time. The initial 16% is also dealt to the Soul Gem, making this the best way to rack up damage on that thing. In addition, if you use this on the soul gem as a throwing item, it will still work as though it was attached to the foes body. Mind you, that means it can't work on the foe as though it were attached to them, so if they defend the soul gem well you make your main KO method harder.


Up Smash

Kyubei swipes diagonally upwards in front of him with one of his paws, dealing 2%-4% and pushing the foe up into the air a Kirby Height-a Ganondorf Height. This in general has very little lag and is a nice way to get some distance between you and the foe. With your illusion active, it instead deals knockback that KOs at 100%-60%.

If this hits a foes Soul Gem, the Soul Gem dulls to a grayer color before returning to normal. This causes the foe to become very lonely, which in gameplay terms prevents them from shielding. Why are they going to hide themselves in that shield anyway, if they want companionship so much? This also makes them somewhat more vulnerable emotionally, which is represented by the Soul Gem taking double damage. The inevitable problem for the foe comes when you transform into your grab form with this, at which point the foe has basically no way to block your attacks. And no real way to punish them either, since they are pretty fast.

Down Smash

Kyubey pokes towards the floor with his paws, dealing 1%-3% and only a flinch. Not very exciting, but it's as fast as you've probably come to expect. In addition, if it hits the foe while they are in prone, he pins their legs down with as much strength as he can muster. Which isn't much, but it prevents them from getting up by rolling. This means they have to use their get-up attack... prime time to use your Down Special if you time it right.

If this hits a foe's soul gem, it causes the Gem to go darker in coloration, with the foe and gem taking 8%. The foe goes into a slump afterwards, looking incredibly depressed. You see, Kyubey forced raw, concentrated despair into their soul. This causes the foe to move far more slowly, and their attacks have greatly increased lag. Their taunts are all replaced by them sighing and saying something along the lines of "It's hopeless". In combination with the new Grab form, this can make him terribly hard to defeat in a straight up fight.


New Grab Game
Grab

Kyubey extends a couple tentacles forwards about Bowser's length, giving this move enormous range, especially for a grab. Unfortunately, it's not the fastest grab in the world, but you're passive tentacle hitboxes make it somewhat easier to hit with. While the opponent is grabbed, Kyubei can still move around at his normal speeds, but he cannot go off edges. Also note that the grab extending moves do not affect this particular grab, but being in despair makes it twice as hard for the foe to escape.


Pummel

Kyubey slams his the foe onto the ground, dealing them 4%. This is somewhat slow for a pummel, but at the same time still manages to build a fair bit of damage. There is an additional benefit, however, of using this move right above a Soul Gem. He slams the foe into the gem, dealing them an additional 4% per pummel, as well as dealing the gem 4%. This builds their damage ungodly fast and can also aid in dealing lethal damage to the gem. Mind you, some of your other throws would often prefer the gem to be attached to the foe.


Forward Throw
Kyubey grabs the soul gem of the foe and yanks it upwards, suffocating the foe with the necklace. This deals an ungodly 9% per second which the foe has to escape with grab difficulty. Afterward, they slip out of the necklace, though they yank it out of Kyubey's tendrils and put it back on. If the foe's Soul Gem is not attached to them, he instead just chokes them with one of his tendrils, which "only deals" 5% per second instead. This move is wonderful for building damage for traditional KOs if a Soul Gem based KO is not what you're interested in.

Back Throw
Kyubey throws the foe onto his back before impaling them with 3 tendrils, dealing them a constant 4% per second and allowing Kyubey to move and attack completely freely. The foe has to escape with half grab difficulty, and their soul gem takes damage the same way if they just so happen to be wearing it. On the other hand, it's probably even better if they aren't, as you are free to go after it and wail on it, or throw it off a ledge...

Up Throw
This throw really doesn't do anything if the opponent doesn't have a Soul Gem, Kyubey just letting the foe go. If they do have one on the other hand , Kyubey will take it off of them and devour it, dealing the gem a constant 5% per second. The only way for a foe to get it back is to kill Kyubei or escape from fear status. Once that happens, the gem will fall to the ground and function as it normally would when not attached to the foe. Mind you, it's not THAT hard to keep the foe from killing you in your new form, especially if they are in despair or taking constant flinches from the Forward Smash.

Down Throw
The opposite of the other throw, this only works if the foe does not have their soul gem. Wherever it is on the stage, the gem will fly back to the foe and it will go back around their neck. So if you want to give it back to them, you can. It's not like there aren't benefits to that.


Final Smash
Upon getting the Smash Ball, activating causes Kyubey's eyes to glow white. This gives all the opponents Soul Gems immediately, but that's not the only effect. An enormous field of gray energy is created around Kyubey, inside which you can use your smashes to cause every opponent inside the field to have that that effect as long as they remain inside the field. You can hold up to 2 different effects in a field at a time, after which the oldest one is swapped out. This lasts for 15 seconds, though opponents keep their gems afterward. While this is mostly just effective in Free For Alls, this can really help you speed up a match in 1 vs 1.


Playstyle
Okay, I don't REALLY have to explain this to you do I? If you really need a reminder, I can give you the basics again.

Fluff you tail to protect yourself from weaker attacks

Dodge around the foe with various moves so you can reach your corpse and regenerate

Try to keep to the air when possible


Pester the foe into making a contract


Hold them still to make pestering them easier

Once a contract is made, try to get in one of your smashes or your grab

Because of the debilitating effect associated with each, the others will all soon be landed which likely spells doom for the foe.

...Kyubey is certainly one of the least threatening opponent's in Brawl at a glance. He's tiny, pathetically easy to kill, and has no real way to attack. But all the foe has to do is make that contract, and they will most likely suffer horribly for it. Such is the fate of those who become Puella Magica.
 

MasterWarlord

Smash Champion
Joined
Aug 24, 2008
Messages
2,911
I was complaining about Vol Opt’s writing style in the same comment block if you must know, but yes, it’s generally an unfair criticism for my criteria to go into so much detail about it. In any case, what I’m talking about “flash”, I’m talking about the camera going inside Swalot. The sole difference between Victreebel/Dirty Bubble and Swalot is that you’re trying to frame the interior of the character as a stage as if the playing field inside the others doesn’t essentially get you the same pay-off as is without breaking character. The main thing you actually gain is more room to play with things without getting awkward due to the sheer scale of things, letting you introduce ledges (For interactions with various goop to make them unable to grab them) and the Brawl Water. Victreebel doesn’t do much with the concept, no, but Dirty Bubble already has crap inside him to be manipulated, and, again, has a remotely flowing game when the foe is outside of him.

I was referring to those other Poison sets as being superior to Swalot in the form of the standard fare poison stage control – I was entirely ignoring Swalot’s ability to devour foes. Yes, though, I definitely prefer Weezing and Garbodor entirely. Muk is debatable.

. . .I was also entirely unaware that if there was no water at Swalot’s bottom that just turned into a bottom blast zone and just assumed there would always be –some- there at some point when you introduced it later, so yes, thanks for pointing out that tidbit.
 
D

Deleted member

Guest
I was complaining about Vol Opt’s writing style in the same comment block if you must know, but yes, it’s generally an unfair criticism for my criteria to go into so much detail about it. In any case, what I’m talking about “flash”, I’m talking about the camera going inside Swalot. The sole difference between Victreebel/Dirty Bubble and Swalot is that you’re trying to frame the interior of the character as a stage as if the playing field inside the others doesn’t essentially get you the same pay-off as is without breaking character. The main thing you actually gain is more room to play with things without getting awkward due to the sheer scale of things, letting you introduce ledges (For interactions with various goop to make them unable to grab them) and the Brawl Water. Victreebel doesn’t do much with the concept, no, but Dirty Bubble already has crap inside him to be manipulated, and, again, has a remotely flowing game when the foe is outside of him.

I was referring to those other Poison sets as being superior to Swalot in the form of the standard fare poison stage control – I was entirely ignoring Swalot’s ability to devour foes. Yes, though, I definitely prefer Weezing and Garbodor entirely. Muk is debatable.
It's an easy fix, like I said, to just bring the camera outside and merely make the inside of Swalot into an x-ray overlay, which would fix the majority of your problems and be solved in no time flat. I find it odd that you'd nitpick something like this when it's not even really a big problem. And yeah, Dirty Bubble has stuff inside him to be manipulated... as if Swalot doesn't have an entire ecosystem in there to manipulate and can also pull stuff inside. Just saying that Dirty Bubble is generically better just lures me into saying bias, bias, bias, and how I do love that word. Ignoring Swalot's devouring is also like just ignoring Garbodor's trash pile or Weezing's gas, why would you ignore the most fundamental part of the set.
 

tirkaro

Smash Champion
Joined
Jun 24, 2006
Messages
2,808
Location
but a pig in the sun
/人‿‿人\

First off, *insert obligatory Charlotte related hypocrisy potshot here.*
Now that that's out of the way, I'm glad to say that Kyubey simply did not disappoint. Starting off, I love the organization. It's clearly meant to mirror our lovable incubator's role in the show, making him out to be a cute and harmless little Joke character at first, and then gradually becoming something much more deadly and horrifying as it goes on.
While I don't generally like sets that try and make up for their wackiness by having low health (Despite, or more likely because of, the fact that I use it so much) I absolutely adore his death mechanic was handled in this set. The fact that he can potentially become completely invincible makes him much more threatening than initial expectations would make him out to be, and he actually uses the fodder-ness of his bodies to his advantage via the down special and making up for his more punishable moves, which I thought was a nice touch.
But where sh*t starts to truly get real is in that beast of a grab game. While you did tell me a while back in the chat that Kyubey's playstyle would revolve around turning the foes into Magical Girls and directly attacking their Soul Gem, I never expected something as AMAZING as this. While some may say it's just a bunch of Status effect whoring, it actually fits perfectly well with a set like this, both in terms of character and gameplay. Not to mention having Kyubey transform into a shadowy monster, while incredibly out of left field, is a very entertaining touch. The overall pain and sorrow QB inflicts upon his opponent upon making them transform makes the set go for a much more dark and morbid turn, contrasting with the sweet and innocent beginning. This of course makes for an awesome read.

If I had to point out some problems, the most obvious one to get out of the way is that he's pretty OP. You'd assume that going magical would at least have some advantages, but even the "benefit" to going all Mahou Shojo is actually a huge drawback in the end. Not to mention the fact that QB combines the benefits of a fast, hard-to-hit character with potential invincibility and a KO system that pretty much negates defense/weight makes for a terrifying combination. It seems the only real way to fight back is to hope the Kyubey player will be stupid enough to get KO'd within a relatively short distance of his bodies, four times in a row, or pray that your easily defendable <9% attacks will occasionally hit. Suffice to say, I'd absolutely HATE trying to fight this guy as a heavyweight. Additionally, the whole "turning into a shadow lion" thing feels like complete overkill, given that it's easy enough to just stun/slow down the opponent, take their soul gem, and throw it away. But giving QB the potential to deal even more damage alongside his already gdlk smashes pretty much makes it so that the opponent might as well put down the controller once they become Meguca, because he's pretty much already won. This makes it so that the most effective QB strategy is to mash what's effectively a completely unpunishable ranged attack while hopping around your sap of an opponent and then go in with another neigh-unpunishable grab, by which you've completely won. I don't usually care about "balance" when it comes to these sets, but even I find this testing my threshold a bit.
And, as a minor gripe, I was pretty glad that I'm already familiar with the character myself, as I can easily see this set getting confusing to someone who doesn't know anything about the show. It could have left some room for exposition, but again, minor gripe.
Overall, Kyubey is a smart, creative, and very entertaining set despite my woes about balance. And while it's definitely not very in-character, the obvious liberties taken are understandable, and is about as good as a set for such a bizarre character choice can get. I recommend it despite it's little imperfections, as it serves it's purpose well.
 
Top Bottom