• Welcome to Smashboards, the world's largest Super Smash Brothers community! Over 250,000 Smash Bros. fans from around the world have come to discuss these great games in over 19 million posts!

    You are currently viewing our boards as a visitor. Click here to sign up right now and start on your path in the Smash community!

Make Your Move 11 - It's Over, Duder!

n88

Smash Lord
Joined
Oct 10, 2008
Messages
1,547
Eh, there's nothing wrong with asking, mariodk, but I don't think you'll get a great response. Most people make movesets for whatever characters they feel like rather than requests, and don't always give a lot of thought to whether a set would be possible to actually implement into Brawl. I personally don't have any experience with the DragonBall franchise, so I'm afraid I can't really be of any help to you. Best of luck to you with your hacking, though!
 

smashbot226

Smash Master
Joined
Sep 1, 2007
Messages
3,027
Location
Waiting for you to slip up.
i normaly dont post here but any good Geno(the wooddoll from super mario RPG) moveset ideas here since i will make Geno moveset for SSBB hack and will possible use some good ideas (mainly throws,Airs afew Ground "A" attacks, maybe wins,maybe taunts)
he will replace ToonLink or R.o.B

also maybe needing a good moveset list for Adult goku since i am revamping my moveset alittle
i saw some really old post from make your moves 1,2,3,4 (a low number)
ppl said its impossible to get adult Goku balanced and thats what i almost did for my SSBB hack of him but still needing afew ideas for him

edit: got a good geno moveset idea and many ideas is usefull :D
i still needing for adult goku since i am working on his moveset right now (yet again one more update) but he dont replace captain falcon this time but Pit(SSj mode/tranfrom is possible now)
Geno moveset hack is next after adult goku


What the hell is a wooddoll?
It's like my pelvis sixty years ago.
How's that?
Beats the hell outta me!
DOHOHOHOHOHOHOHO!
I don't see why you'd want that irrelevant old relic when you have someone witht he exact same power but with a larger and more vocal fanbase.
Who, Megaman? Forget about it, even Capcom doesn't think he exists.
He's got one thing over Geno, though.
What?
His creators think he doesn't exist, but Geno practically DOESN'T exist!
DOHOHOHOHOHOHOHO!
And what's this baloney about Goku? Doesn't he know that it'd be impossible to balance him?
I'd agree, but look what they did with Mewtwo.
He's one of the worst characters in the game! How is that balancing?
It encourages players to use someone who's not overhyped!
Like Marth, Shiek, and Falco?
Exac- I guess not.
DOHOHOHOHOHOHOHOHO!
 

Akiak

Smash Ace
Joined
Jul 28, 2007
Messages
820
Location
In my secret laboratory.
I'm still here, just reeeeaaaaal busy

SKARNER

It sounds like you already had a clear idea of what you were going to do with this character beforehand, what with all the moves working together and contributing to his overall "range-game" (or whatever you'd call it) playstyle. The result is a very well-thought moveset with some very nice ideas here and there (especially the back throw and dash attack). If I had to be an annoying nitpicker, I'd say you went a bit overboard with all of the buffs and nerfs everywhere, but honestly it works well with the character's style and games like LoL are pretty much based on this sort of stuff (I think). Great job.
 

flyinfilipino

Smash Master
Joined
Sep 11, 2007
Messages
4,319
Location
North Carolina
@Cutey Mark Crusaders: So, I have a confession to make, but like the little twist in this moveset, I'll save it for the end.

Anywho, we have this interesting little moveset for a couple (trio, really) of little ponies. I'm under the impression that these are kind of minor or secondary characters? Regardless, if I had to summarize this moveset in one word, I'd probably use the word "cute", something I don't really use to describe many movesets. I guess it's kind of refreshing to see these guys amidst all the big bad villains of MYM. I don't really know anything about My Little Pony, so let's give this a go.

I like the characterization you provided for each pony, it makes them all feel like separate personalities and helps the moveset really feel like one for a little team. The special moves doubling as switching moves is a nice touch. There's a good balance of moves in each category for each pony, though I feel like as a whole, the moveset kind of leans more toward Apple Bloom, with Scootaloo being at the bottom of the totem pole. It's probably because her moves tend to leave things on the stage. Yeah, everybody finds building things on the stage fascinating, but I kind of prefer actual fighting, you know? I guess that's why I like Scootaloo and Sweetie Belle more and I find Apple Bloom's specialty moves kind of awkward, but that's just me. Her method of hitting foes with falling trees reminds me of your Animal Crosser set from back in the day. But like I said, there's a good balance of moves here, and the ponies' teamwork moves are quite appropriate. Envisioning the Crusaders' fighting style as a whole is kind of amusing, and it would probably look a bit frantic, yet fun. As for the little twist at the end with the ponies getting hunches, I think it's a really cool idea. It gives some depth to the battle, as it turns into a growing experience for both the ponies and the player, I guess. I suppose it's kind of a handicap for the player at first, but I guess ventually, a good Crusader player would have a good gameplan for getting the most out of the moveset in the most efficient way possible.

Overall, I like how everything comes together at the end. Some of the attacks are a little awkward, but you make the most out of setting up stage props, singing, and riding in a scooter, all in one character (sort of). And of course, this moveset has the signature Kibble charm that makes everything better. Good work! :bee:


Oh yeah, my confession? This is the first pony moveset I've read all the way through. :urg:
 

LegendofLink

Smash Apprentice
Joined
Feb 17, 2008
Messages
164
Location
Pennsylvania
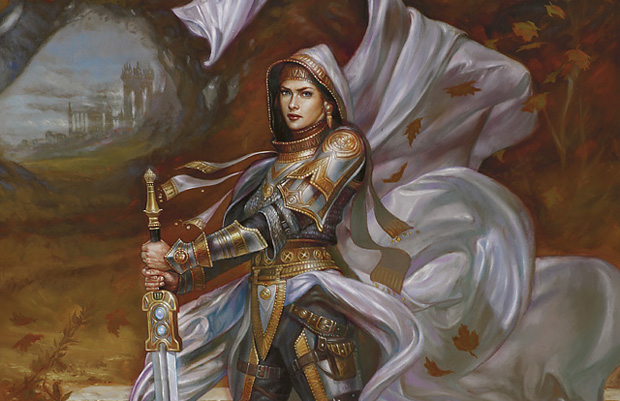
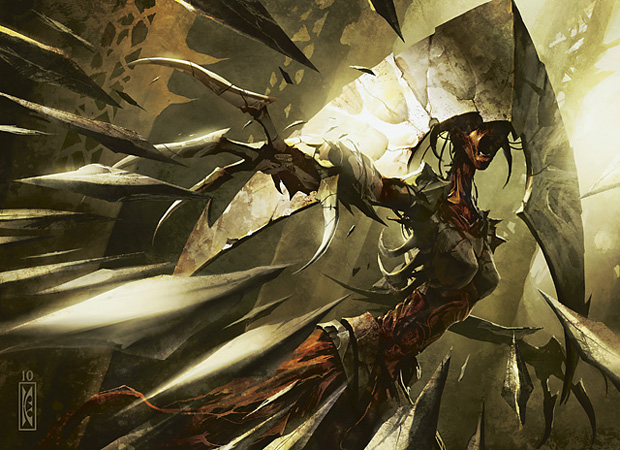
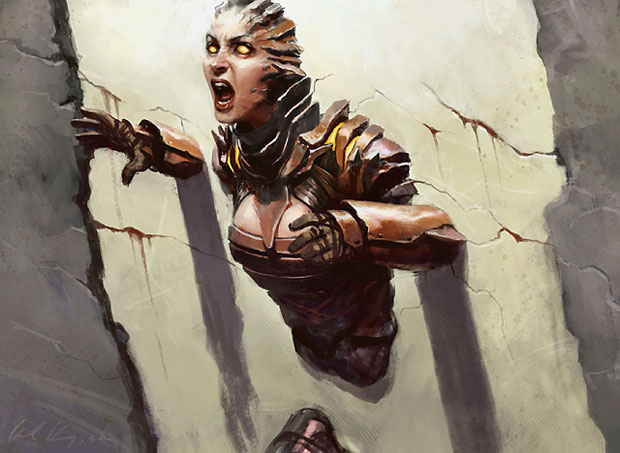
Elspeth, Knight Errant


Size: 6

Weight: 7

Ground Speed: 6

Traction: 9

Jump Height: 3

Air Speed: 5

Air Control: 4


Elspeth is a Planeswalker from lands unknown who settled on the shard of Bant, a sub-plane of the plane of Alara. Bant was a land that lacked two of the five colors of mana, red and black, meaning that the forces of death, and chaos were virtually unknown there. Elspeth quickly rose through the ranks of soldiers in Bant and became a knight at a young age, displaying strong leadership, great swordsmanship, and incredible skill in the white magics of summoning and fortification. In Brawl, she uses these skills to field a small contingent of soldiers to assist her in battle, and to strengthen both them and herself.


Specials

Down Special: Mobilization
Elspeth begins charging white mana as you hold down the B button, with three distinct stages of charging every half second. When the button is released, Elspeth summons 1-3 soldiers to assist her in battle depending on the charge. Elspeth can have up to three soldiers on the stage at any one time. These soldiers are the same size as her, have a moveset similar to Marth's (sans specials), and have somewhat unique AI.

On Elspeth's home world of Bant, warfare is done with single champions selected from each side, battling one on one with their honor on the line, and Elspeth's soldiers strive to maintain that. The soldiers only ever go out to attack the opponent one at a time, with any leftover soldiers staying behind to protect Elspeth. If Elspeth herself engages an opponent, the soldiers will back off about one battlefield platform from Elspeth on either side to give her space to fight, attacking any opponent who attempts to escape from their duel as well as any character or minion who attempts to interfere. In direct combat with the opponent, the soldiers are about as skilled as a level 9 AI, but they never run or shield and only have about 20% stamina before they're KO'd, making them little more than a distraction for opponents to take them on solo.


Up Special: Angelic Blessing
Elspeth charges white mana for a brief moment before casting a spell upon herself, granting her the power of an angel for a short time. Glowing white wings of mana appear around her, granting her six seconds of fee flight similar to Pit. In addition, each of her attacks deal an additional 3% damage for the duration of the buff. If you hold down the B button during the startup period, you can instead fire the buff as a poke ball sized projectile that travels at the speed of Falco's lasers. The buff can then affect any of Elspeth's allies, whether it be a teammate or a summoned soldier. If a summoned soldier gets the buff, it also gains a temporary 30% stamina, making it much harder to take down for the duration of the buff, but it will instantly die if it has taken more then 20% damage when the buff wears off. If the projectile hits an enemy, it simply disappears harmlessly. Only one character/minion can have this buff at a time.


Side Special: Harm's Way​
Elspeth takes a defensive stance and a faint white aura surrounds her. While in this stance, She will block the next attack that hits her and return the damage and knockback or the attack to the opponent in a burst of white mana. By pressing the B button again during the move, Elspeth will swap places with the soldier closest to the nearest opponent in another flash of magic, most likely the one currently fighting them. This allow Elspeth to substitute herself for a soldier in combat before countering an attack meant for them. Soldiers that Elspeth swaps with also gain the same protective aura for a brief moment, allowing her to exit combat with an opponent and counter with a soldier instead. There is a brief startup period in the counter portion of the attack when Elspeth cannot use the teleport portion of the attack, meaning that if the opponent is paying attention, Elspeth won't be able to simply teleport out of nowhere for free.


Neutral Special: Finest Hour
Taping the B button causes any soldiers under Elspeth's control to kneel and lend her their power. As long as at least one soldier is doing so, Elspeth gains a sparkling aura and the startup and ending lag on all of Elspeth's attacks is halved. In this state, Elspeth cannot summon more soldiers. The kneeling soldiers are left especially vulnerable, taking double the damage they normally would. Tapping the B button again causes the her soldiers to get up and the buff to end. If you double tap the B button instead, Elspeth herself kneels and empowers her soldiers with the same buff instead, though she gains the same vulnerability. Startup for this move is rather fast when done by Elspeth, but there is just enough end lag to make it punishable if you're not careful. If the soldiers are lending Elspeth they power though, there is a decent amount of startup as Elspeth receives the power of the soldiers, and the move will be interrupted if she is knocked out of this initial animation, preventing this from being activated in the heat of combat.


Standard Attacks


Jab: Soul Parry
Elspeth performs a simple horizontal strike with her sword, which glows white for the duration of the attack. This deals 4% damage with a small bit of forward knockback to opponents hit by it. The sword leaves a glowing white trail behind as it swings, which lasts for two seconds before fading. Attacks made by the opponents that hit the trail immediately clash with it, regardless of how strong they are. The trail can clash with two attacks before disappearing.

Forward Tilt: Bladed Assault
In a rather simple display of swordsmanship and finesse, Elspeth steps forward, delivering a fast horizontal spinning slash that deals 4% damage with very light forward knockback. By pressing the A and a direction after the swing, you can initiate a directional combo attack similar to Marth's Dancing Blades. The combo can have up to 3 additional attacks in it, with each step of the sequence having a unique move for up, neutral/forward, and down inputs of the attack:

2nd Step
Up: Elspeth performs an upward angled slash, dealing 3% damage with slight upward knockback. This move is actually pretty good anti air for opponents who jump over the initial attack.
Neutral: Elspeth takes another step forward art she performs a reversed version of the initial strike for another 4% damage and slight forward knockback to carry them with her.
Down: Elspeth twirls her blade to deliver four rapid overhand slashes to the opponent, each hit dealing 1% damage each and holding the opponent in place, even if they shield.

3rd Step
Up: Elspeth performs a rising slash, hoping off the ground to her short hop height as she does so, dealing 5% damage with light upward knockback. This cancels the combo early, leaving Elspeth in the air for a followup instead.
Neutral: Elspeth dashes forward half a battlefield platform, slashing the opponent as she passes them, dealing 2% damage with simple flinching knockback. She then turns around at the end of her dash, leaving her in position to finish the combo from the other direction. If you tap the control stick back in the direction she first attacked from before continuing on to the next step of the combo, Elspeth will repeat the dashing attack back to her starting position to continue the combo as normal.
Down: Elspeth slashes at the opponent's ankles dealing 2% damage and popping the foe up into the air a small bit, but also likely poking through the opponent's shield if it has been drained enough or if the foe is large enough.

Final Step
Up: Elspeth performs a mighty overhead swing, bringing have blade down on the opponent's head, dealing 5% damage with powerful spiking knockback, which means that airborne foes will be knocked into the ground (or off stage, if the opportunity presents itself), and grounded opponents will be popped up into the air a ways.
Neutral: Elspeth finishes the combo with a powerful stab of her sword, dealing 7% damage with forward knockback that KO's around 100%.
Down: Elspeth uses magic similar to her side special to swap places with the closest Soldier she has summoned, letting them finish the combo with a move of their choice.

Down Tilt: Fortify
Elspeth drives her sword into the ground in front of her, dealing 7% damage with forward knockback to opponents who are in the way. This is not the purpose of the attack though, as Elspeth uses her sword to consecrate a two battlefield platform area in front of her, giving it a faint white glow. For the next ten seconds, any allies standing on or within Ganondorf's height above that ground (including Elspeth herself) gain 8% heavy armor. This move has very heavy end lag as Elspeth pulls her sword from the ground, so make sure the enemy is occupied before using it.

Up Tilt: Ghostly Prison
Elspeth holds her sword high above her head in a pose similar to Marth's up smash, which deals a simple 6% damage with upwards knockback to opponents hit by it, but like the down tilt, this serves another purpose primarily. Once Elspeth strikes her pose walls of ghostly swords that extend the whole way from the top to bottom blast zones appear on either side of her, sectioning off a two battlefield platform wide area of the stage. These walls are completely solid and block all melee attacks, though projectiles can pass freely through them. In addition, they last 15 seconds and cannot be destroyed. There is one way to enter or exit the sectioned of area though. If a character pushes against either of the walls for two seconds without interruption, they can laglessly pass through it.

When Elspeth uses this move, any soldiers gathered to protect her dash outside of the move's radius to allow Elspeth to fight the foe one on one. You can also tilt the attack to either side when using it to have Elspeth create the arena on that side of her with her outside it. This lets her trap the opponent with one of her soldiers instead. Don't think that trapping the opponent or yourself alone in one of these arenas is a good idea though, as Elspeth has no harmful projectiles, which means that foes with projectiles are free to harass you with them from in/outside it. Even if they don't have projectiles, without anyone to stop them they can freely push against it and enter/exit the arena without punishment. If a wall were to be created off stage, only the wall that ends up on stage is created.

Dash Attack: Inspired Charge
Elspeth shouts words of encouragement to her soldiers as she charges forward, causing all soldiers within a battlefield platform of Elspeth to charge forward with her. For as long as you hold the A button while dashing, Elspeth and her soldiers dashing with her gain super armor. The armor lasts for three seconds after you stop using this move for her soldiers, and one second afterward for Elspeth herself. The soldiers will attack the foe with their own dash attacks if the opponent comes in range, but will otherwise not stop dashing with Elspeth. Once the move ceases, the soldiers will resume their normal attack and defense patterns at their new position.


Smash Attacks

Forward Smash: Lightning Blow
Elspeth stabs forward with her sword with such speed that she appears half a battlefield platform forward from where she was standing nearly instantly after the very quick startup of the move, having struck everything in her way. Opponents hit by this attack are dealt 18-25% damage with forward knockback that KO's around 100-70%, depending on the charge. There is a noticeable sparkle of while mana at the start of the move, giving some clue to when it is coming, and the end lag is very punishable if the opponent has a fast enough move to hit behind them if they shielded or if they dodged the attack altogether. This means that this move is a finisher for when you have caught the opponent off guard and should be used sparingly.

Up Smash: Bladed Somersault
Elspeth leaps up to her short hop height and performs a front flip, slashing all around her as she does so. This deals 10-15% damage with upward knockback that KO's around 200-160%. This is not a KO move, but a move to initiate combat with, as when used out of a dash, Elspeth's momentum carries her forward a good distance.

Down Smash: Righteousness
Elspeth holds her sword in front of her in a charging pose as an aura of white flames appears around her. As long as Elspeth holds this pose, she gains super armor. If Elspeth is struck while using this move, there is a bright flash of light as Elspeth exits the move laglessly, able to retaliate with any move she pleases. For the next five seconds after being struck, her next offensive move deals an additional 7% damage and greatly increased knockback. Elspeth can only hold the initial pose for two seconds though, and suffers extremely punishable ending lag afterward. Elspeth can also be grabbed out of this stance without triggering it. Double tapping the input causes Elspeth to enter the same pose, but extend the armor and the buff if struck to all of her soldiers instead of herself. If used this way though, both Elspeth AND her soldiers suffer the same terrible end lag if they are not struck during this time.


Aerials

Neutral Aerial: Seal of Cleansing
Elspeth holds her arm out in front of her, causing a white Kirby-sized rune to appear there. The rune lasts for twenty seconds before disappearing, and placing a second one destroys the first one. The rune neutralizes the first projectile, "trap", or item that passes through it, destroying it completely. After doing to, the rune immediately fades. This allows you to shield yourself from those who would take potshots at Elspeth while dealing with a soldier, or for making your won close range battles a bit safer. Once one seal is destroyed, another cannot be placed for another three seconds.

Forward Aerial: Jumping Slash
An extremely simple move, Elspeth slashes vertically with her sword in front of her, dealing 7% damage with decent froward knockback. This is Elspeth's bread and butter move in the air, and has very little lag on either end, similar to Marth's forward aerial.

Down Aerial: Rain of Blades
Elspeth charges her sword with white mana and rapidly stabs downward, causing blades of white mana to stab downward beyond the range of her own sword, reaching Ganondorf's height downward. This deals 8 rapid hits of 1% each, with the final hit knocking the opponent up into the air a bit.

Back Aerial: Mighty Leap
With a flash of white mana, Elspeth launches herself forward 3/4 of a battlefield platform, dealing a light 3% damage with equally light upward knockback to opponents hit by her during the dash. This move is extremely fast on both ends, allowing for attacking immediately after the dash ends.

Up Aerial: Whirling Blade
Elspeth Performs a twirling vertical slash with her sword that only hits above and below her (imagine Marth's Neutral Aerial, but on it's side) Opponents hit by the slash are dealt 9% damage with moderate knockback that varies in direction depending on which part of the attack it. If the foe is hit by the slash above Elspeth, they are spiked downwards, and if they are hit by the slash below her that are knocked upwards.


Grab
Elspeth's grab is pretty average for an unassisted grab, with an equally simple no nonsense pummel in which Elspeth pounds the opponent with the hilt of her sword for 2% damage at an average attack speed.

Forward Throw: Toss Down
Elspeth tosses the opponent forward a short distance, dealing 5% damage with next to no knockback. It's really more of a rough shove than a throw. What is important though is that this throw puts opponents on the ground, setting up for tech chases, which become a lot nicer when a soldier or two is covering the opponent's escape.

Down Throw: Take It From Here
Elspeth swaps places with the nearest soldier in a manner similar to her side special, leaving the soldier to throw them however their AI sees fit. Pretty simple, all in all, but it has plenty of tactical uses. If Elspeth has no soldiers out, she simple uses her forward throw instead.

Back Throw: Solitary Confinement
Elspeth kicks the opponent forward, dealing 3% damage with light forward knockback before jumping back a short distance and creating a single wall identical to those from her up tilt right in front of her. If there are any walls from the up tilt are already on the stage, the one closest to the newly created wall fades away. Ideally, this throw will isolate the opponent along with a soldier or two.

Up Throw: Air To Air
Elspeth throws the foe into the air, dealing 4% damage with moderate upward knockback. If Elspeth then moves away from the opponent after throwing them, one of her summoned soldiers (if any are there) will dash up and jump to intercept the now airborne opponent and continue attacking them as normal. Otherwise this throw is as simple as they come.


Final Smash: Martial Coup
As Elspeth is empowered with the Smash Ball, She summons a whole detachment of soldiers to her aid, 10 in all. Channeling all of her tower to support them, the soldiers become invulnerable and one by one perform a devastating dashing slash on the nearest opponent. These attacks deal 20% damage with knockback that KO's around 100% each, and while the opponent may be able to dodge a few of them, they will be hard pressed to dodge them all.


Playstyle: Combat By Champion
As stated before, on Bant battles are fought one on one, and as such, Elspeth specializes in single combat and supporting those who would represent her in it. It is always beneficial to Elspeth to upkeep the amount of soldiers on the stage to her maximum three as much as possible. At that point it is up to the player whether they want to be supporting the soldiers, or have the soldiers support them. The choice is as simple as directly engaging the opponent or not, and you can change up at any time.

If you choose to engage the opponent directly, it pays to pick the right place for your duel. Setting a seal of cleansing with your neutral aerial and fortifying the ground with the down tilt makes can make you life much easier. If you want to make sure the opponent doesn't try to play keep away and chicken out on your duel of honor, trapping them in an arena made by your up tilt is the way to go for racking damage up. In direct combat you will be using your forward tilt a lot due to the many options it provides, as well as your up smash and plenty of short hopped aerials to lay on the pressure. Your jab is also extremely helpful as long as you keep your spacing, right. If you really want to lay on the pain though, especially against opponents who are also strong in one on one melee fights you will have to activate your neutral special. This is nearly impossible to do in the heat of combat, so the opponent will have to be otherwise occupied and you will have to be prepared to protect the now extremely vulnerable soldiers.

While supporting your soldiers, Elspeth becomes focused on the correct timing and application of buffs to them. You up special is a great thing to give them right off the bat, as it allows them to chase foes into the air with ease and makes them much more durable, and making sure they're fighting on ground fortified with your down tilt is another great way to give the soldiers an edge. From there, it's all about proper timing of the buff from your neutral special and knowing when to protect them with your side special or down smash. The opponent can't will never be able to permanently defeat your endless supply of soldiers, so they will most likely try to power through them, speed by them and attack you, or camp while harassing you with projectiles, in which case using your dash attack to bring yourself and your soldiers right to them is probably the best move.

In the end, though, it is unlikely that the soldiers will be able to take your opponent on on their own, even with your buffs, so it will come down to you to finish the job, using either your forward tilt or forward smash, or gimping off stage the old fashioned way with your up special. just make sure that you always fight the opponent on your own terms, and everything should turn out fine.
 

Davidreamcatcha

Smash Ace
Joined
Feb 9, 2011
Messages
629
Christmas starts early.

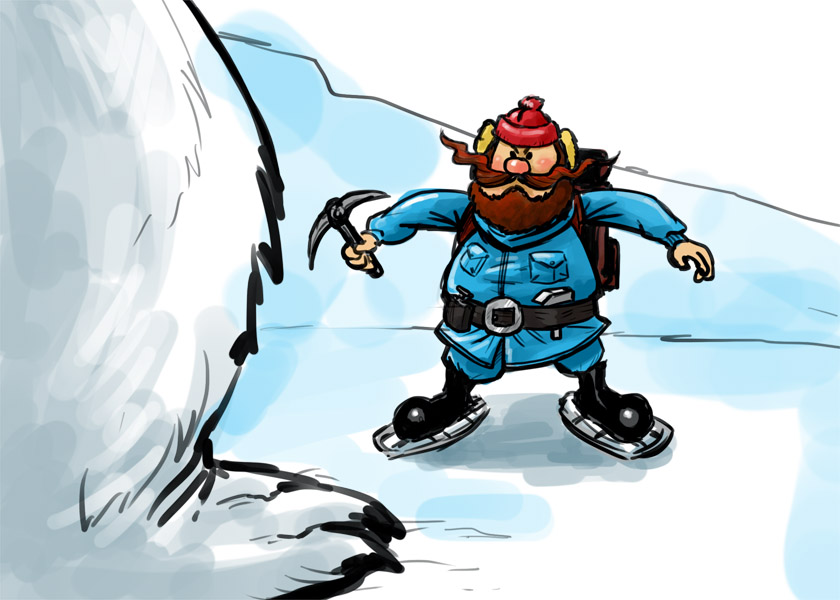
YUKON CORNELIUS


Compiltation Video
Playlist


STATISTICS

Weight - 7
Traction - 6
Jumps - 5
Size - 5
Fall Speed - 5
Ground Movement - 3
Aerial Movement - 3


SPECIALS

Neutral Special - Pickaxe Picking
The Bumble has one weakness, and Yukon knows it! With a press of this input, Yukon begins rapidly picking at the ground with his...pickaxe. This stance is rather quick to enter into, and Yukon can immediately chain this into another attack by simply pressing the input of that attack, giving it some rather frightening properties. It takes a single second for him to stop picking.

...So, what exactly does this do? Well, as soon as Yukon begins picking at the ground, a generic pitfall trap is created at that location. It lasts only 4 seconds, but this timer will only start as soon as Yukon stops picking. It has standard pitfall trap properties - i.e. you can't place a pitfall trap onto an already-pitfalled foe and they gain a 2 second immunity once they escape. While this may seem somewhat generic and underpowered (it takes him -a second- to place a single pitfall?), Yukon has one thing to differentiate himself. As he is picking, Yukon can rotate his whole body by turning. Essentially, he can create pitfall traps in a circle around himself, putting pitfall traps in the foreground and background. Naturally, spot-dodging foes will be hit by these, as well as rolling ones. Any attack that would have you in the foreground/background as you move over one of these traps will cause you to be pitfalled, giving Yukon a great pressure option. Keep mind, however, that Yukon is vulnerable to all his own pitfall traps - meaning you can't just overload the stage with these.

Side Special - Sleighbells Ringing
Yukon's sled spawns underneath to him, as 5 dogs spawn in front of him and begin pulling the sled at Mario's dash speed. Yukon automatically moves forward in this state, but can turn around with some horrid lag. Sound familiar? Unlike the Wario Bike, Yukon can use all his attacks in this state, with the obvious exception of aerials. Otherwise, it retains similar properties with the bike, not being able to go over solid objects and stopping when running into walls and the like. It's mainly useful because you can sail across the stage without fear of running into one of your pitfalls.

When Yukon hits the foe with this, they will be herded onto the sled and get stuck on the ice on the sled, having to escape with half grab difficulty. Yukon can obviously attack them while they're on there, but they won't take any sort of knockback. After the foe gets off the sled, they can't be forced back on to it for 4 seconds.

If Yukon jumps, he will jump off the sled, leaving the dogs to keep moving forward with the sled. They will even run offstage if you let them. If the foe deals 10% to the dogs will cause them to run away from the battle, leaving the sled as an onstage item that can be tossed around, having the same properties as usual. The dogs can not be summoned again until the sled is offstage.

One last note, when Yukon uses his neutral special on the sled, he will walk to the back of the the sled and begin picking at the ground, able to pick in the background and foreground and normal. Yukon can effectively pressure the foe by covering the stage behind him, though your pitfall trail completely disappears after the normal time, while they act as individual pitfalls, their disappearance is simultaneous.

Up Special - Whipping Good Time
Yukon immediately extracts his whip and whips in the direction chosen during the startup lag, having the range of 1 BFP, letting a cry of "Mush!" as he extends the whip. This deals 10% to any foes hit by it and deals no knockback, instead knocking them to end of the whip's path, possibly into pitfall traps. Of course, this hooks onto the edge as a generic tether.

The obvious interaction, of course, is what happens when you hit the dogs with the whip. The dogs will become more motivated, moving at 2x the speed for 5 seconds. This does effectively let him pressure the foe even more, or make a sled KO more likely. However, Yukon must be careful not to hit the dogs more than twice in a 10 second period, as this will cause the dogs to become frightened and hop onto the sled for 7 seconds, pulling it again after that - meaning it is immobile for that period. Yukon can toss the sled around during this time, but it is a lot heavier.

Down Special - Jack Frost Nipping
Yukon extracts his revolver, "Jack Frost", from his belt and points it forward. After some .25 seconds on Yukon's end, he fires the revolver forward. The bullet travels at the speed of Fox's dash and deals 10%, as well as knockback that can KO Mario at about 120% or so. The foe will want to interrupt Yukon during the period in which he is simply pointing it forward.

If the special is held during the startup time, Yukon crouches and begins aiming the gun, being able to aim it like a Cracker Launcher, he can press the input again to immediately fire it off. However, he can also shield to remove the revolver from view. The next time you use this, however, Yukon will fire the gun at the angle you chose.

If there are dogs onstage when the bullet is fired, the dogs will immediately change their course and start pursuing the spot where it was fired, ignoring all your commands until they reach it. This is an unpredictable option, one that completely change the match if Yukon plays his cards right.

STANDARDS

Jab - Revolver Whip
Yukon immediately whips Jack Frost out in front of him, pointing it as he does in the first half of his down special. If Yukon had the angle adjusted, he will point it in that direction, otherwise pointing it forward. This deals 5% damage if the foe hits the gun. It also causes them to stagger 1/4 of a Battlefield Platform backwards if they were on the ground, still being able to attack, of course.

Outside the obvious usage for mindgames, Yukon can press the special input when the gun is pointed to activate his down special, skipping the .20 seconds, but having .20 seconds of end lag to compensate. The foe will obvious try to interrupt your pretend firing, only to be blasted in the face. It should be noted that their backwards stagger, if they were hit by the initial revolver whip, will set them up perfectly for a bullet to the face.

Forward Tilt - Get over here!
Yukon swings his pickaxe horizontally with one arm (having the side of it face the screen, essentially). This has a surprisingly long range of one Battlefield Platform, thanks to Yukon stretching his arm out a bit. If the pickaxe hits the foe, the foe will be grabbed by it and dealt 5%, being pulled right in front of Yukon. This does give some opportunities for Yukon to get some more close-ranged pressure in, as well as an obvious way to force foes into a pitfall. It should be noted that Yukon can grab shielding foes with this, forcing them to dodge or roll if they want to avoid it, which can lead them into background or foreground traps.

Up Tilt - Down ya go!
Yukon heaves his pickaxe above his body before bringing it down to the ground besides him, covering a radius as wide as Bowser. If the foe hits the pickaxe, they will take 6% and be dragged along the path of the pickaxe, likely down to the ground besides Yukon. This is, of course, good if you've made a pitfall circle around yourself. A more subtle method is to force foes onto your sled.

Down Tilt - Pocket Knife
With sudden force, Yukon extracts his pocket knife and swings it horizontally across his chest! No, this isn't a prop, Warlord. Check the header picture, it's on his belt.

The initial strike of the knife deals 6% damage and good knockback, it also has incredibly good priority, meaning that it can be used as a good pressure tool by Yukon.

Now, you can press the input again to swing the knife into the background. A third input will swing it into the foreground. these both have the same properties as the initial swing, but will only hit foes who are in these areas at the time.

Dash Attack - Iceskating
Yukon leaps forward a bit before landing on the ground, attempting to ice skate across it. Unfortunately, he isn't on snowy terrain, and will only be able to ice skate for about 2 seconds, upon which he enters prone. He moves at his normal dash speed while ice skating, and his legs are hitboxes that deal 2% per second and drag the foe along with him. This does serve as an effective method to shove foes around with him, obviously.

However, if Yukon is on snowy or icy terrain, he will ice skate indefinitely until he either cancels it into an attack or simply moves into another motion. He will stop at edges, of course.

SMASHES

Down Smash - Gold (And Silver) Rush
Yukon takes his hammer from his belt and his pickaxe, turning to face the screen. Once the input has released, Yukon begins rapidly swinging the hammer and pickaxe around himself, in fact, he does this action so fast that he turns into a cartoony cloud of dust! While in this state, Yukon's body is a hitbox dealing 10-15% when foes come in contact with it. He can manipulate himself around at his normal dash speed in this state, though is unable to jump. One of the more notable uses of this move is against shields, in which the constant hitbox can deal some heavy damage to them. Yukon's swinging lasts for 3.5 seconds.

If Yukon uses this in the middle of a fully-made pitfall circle, he yanks a boulder out of it as he passes by. He won't stop his swinging, however, meaning he can pull out multiple pullings in one motion. These actions, as you expect, leave a boulder as tall and wide as Kirby onstage. This leaves an indent that same size in the stage. The boulder is solid, and can be hit and thrown with the same physics and damage as a barrel. It will disappear once it is thrown offstage, or it's 20% stamina is depleted. The indent in the stage only lasts for 10 seconds.

Speaking of the boulder, I may as well mention: if the foe flies into the boulder with any knockback, they will take about 4% damage, meaning Yukon can knock foes into boulders for extra damage.

Up Smash - Woohoo!
Yukon holds his pickaxe in his hand during the startup time, able to angle it in any direction during this time. Once the charge is released, Yukon tosses the pickaxe in the direction you chose, letting out a cry of "Whoopee!" as he does so. The pickaxe flies about 2 Ganons in the direction you picked, spinning all the while, before it flies back to Yukon. Once it gets in front of Yukon, it lands in the ground as Yukon pulls it out and licks it. He proclaims "Nuthin'." before he puts it away. This adds some heavy end lag onto it, obviously.

If the foe gets hit by the pickaxe, it will deal 6-13% and catch them in it's spinning hitbox, dragging them along it's path, dealing 1% every half second - they can DI out, but it's harder than you would expect thanks to the pickaxe's large hitbox when it spins. In most cases, especially if they're at a heavier percent, they will be forced to travel with the pickaxe to Yukon. They will land in prone as Yukon pulls it out, but if they're competent enough, they should be able to get out and punish him before then. Therefore, Yukon will want to primarily use this to get them in a situation they can't avoid, such as pulling them into a pitfall or onto your sled. Of course, this can be used as a killer if you're sledding offstage, though this will often end in your suicide. Unless, of course, your reflexes are fast enough to be able to play Sid's Toys.

If Yukon tosses the pickaxe at a boulder, he will find that the blunt end of the pickaxe hits it, rather than the sharp end. This causes the pickaxe to bounce off the boulder, moving at double the speed in the direction it came from. It remains an multi-hit hitbox if the foe gets hit, of course. Foes can easily spotdodge to avoid the pickaxe, though they may end up getting into a pitfall trap in the background...

Once the pickaxe lands on the ground (after 5 Battlefield Platforms), it will become impaled in it. Yukon can not use any of his pickaxe-based attacks until he picks it up, though. If it flies offstage, Yukon will automatically pull out another pickaxe after 3 seconds, giving the foe sometime to punish him.

One of Yukon's favorite strategies here is to throw the foe between boulder to boulder on his pickaxe, as he can cause them to take the damage from flying into a boulder. easily.

Forward Smash - Let It Snow
Yukon chuckles during the startup lag, digging desperately in his pockets for something, he is able to angle his head. When the charge is released, Yukon reveals the things he was searching for...snowballs! Yukon has about 1-5 snowballs depending on how long he charged it for, before he tosses them all in a lightning-fast barrage of snowballs. The snowballs travel for 2.5 Battlefields in the direction you angled it.

The obvious effect here, when the foe are hit by snowballs, they are afflicted with a freezie effect. It can be very easily button-mashed out of compared to normal freezies, though a continuous stream of snowballs makes it more difficult to button mash out of. While they're frozen, they can not be dealt knockback, but will be stuck in a pitfall or on a sled. They regain all their jumps and recovery once they're released from the freezie.

If the snowballs land on the ground, they make a stream of snow that lay on the ground for 5 seconds. They do give the user horrid traction, but it does have a useful benefit: anyone standing on snow can't fall into a pitfall.

Of course, the obvious benefit is dash attack across the snowy terrain (go look back at that if you need to), as well as sledding across it. When you sled across the snow, you actually spread some of it about, though it all lasts one less second for every Battlefield Platform you spread it.

More importantly, your boulder can be moved in the snow to increase it's mass. The size increases by 1 Bowser for every Battlefield Platform it's rolled through. It loses 1 size every 4 seconds and 1 size every time it hits someone or is hit. Still, this can make bouncing foes between them easier. In addition, it deals about 5% more for every size increase it has, making it an even better damage racker.

GRAB-GAME

Yukon's grab has him lunge forward (he can also lunge in a direction chosen if the input is held), entering prone if he moves 2 Battlefield Platforms without grabbing anyone. If he comes in to contact with anyone, he will grab them and stop in place, holding the foe out in front of him. He can, by default, walk in this state to push the foe around. He doesn't have access to side throws in this state, but can hold down the pummel and press the input for that throw to activate it. He can grab the boulder or sled and throw them around, while grabbing the sled is a bit less useful, you can potentially catch a foe heading back to the ground. Grabbing the boulder gives you a far more direct way to increase size, as well as directly throwing it towards the foe.

Pummel - Let me at 'em!
Yukon lets out a meaty haymaker, dealing 4% damage. Fairly generic, eh?

Up Throw - Hurl
Yukon tosses the foe upwards, before hitting them with his pickaxe, dealing about 7% to them and giving some upward knockback. While this obviously takes them away from your field of traps and what not, this does make your slew of anti-airs more effective. More importantly, this is your primary way to throw boulders into the air, giving Yukon even more opportunities to attack them.

Back Throw - Whistle
Yukon puts a gloved hand to his mouth, letting out a loud whistle. Normally, this simply gives the foe .10 seconds of stun. This effect only works once per grab, of course, to prevent abuse. Still, it works just fine to stop foes from attempting to escape.

The obvious interaction, of course, is with your dogs. If they're listening to Yukon's commands at the moment, they'll run towards the foe and lunge at them. They will do this regardless of whether or not the foe has escaped from the grab, of course. If the foes does not dodge or roll, the dogs will cling onto them. This slows them down slightly, and makes it far harder for them to jump. They must button mash out of this, of course. Yukon does enjoy having the foe grabbed by him and the dogs at the same time, as the two different grab difficulties stack, leading to 2x the normal grab escape difficulty.

Forward Throw - Lunge
Yukon grabs his grasp on the foe tight as he lunges 3 Battlefields forward with them, moving about 1.5 Ganons into the air as he does so. Yukon and the foe are engaged in a button-mashing battle to get above the other. See, this can be used a Yukoncide, but Yukon risks being the one on the bottom. In addition, he can use this as a more direct method to force foes into pitfalls, but risks getting himself pitfalled in the process. Yukon can, however, increase the ease of the Yukoncide by having dogs on the foe.

Regardless, whoever is on the bottom when they both lands on the ground takes 10% damage, as the victor is bounced 3 Ganons upwards.

Down Throw - Reforming the Bumble
Yukon takes out his whip and brings the foe close, before tying the whip around their neck! In this state, it serves as a mock leash, with the foe not able to run more than 2 Battlefield Platforms away from Yukon. Both the foe and Yukon can attack while holding the whip, meaning he can easily perform some pressure while he has the foe tied onto it.

The foe will break free from the whip when either they or Yukon suffer some strong knockback or when they run from Yukon for 3 seconds. They will also automatically break free after 6 seconds.

AERIALS

Forward Aerial - Double Punch
Yukon leans backwards for a second before punching forward with both arms. This does have a bit of startup lag at the beginning, but is made up for by dealing 12% damage and hitting in both the playing field and the background. Yukon has surprisingly little landing lag during this, making this and dtilt his primary pressure tools.

More importantly, this is Yukon's primary method of launching boulders at the foe. The knockback is usually enough to launch boulders forward, especially mid-air boulders.

Neutral Aerial - Pick-A-Rang
Yukon grabs his pickaxe, stopping for a brief moment so you can angle it. When this moment passes, Yukon hurls the pickaxe like a boomerang! The pickaxe flies about 3 Battlefield Platforms in the direction you tossed it before it flies back to Yukon. The pickaxe constantly spins as it travels to it's destination, if the foe gets hit by the pickaxe, they are caught in the spinning hitbox. This deals rapid hits of 1% and dragging the foe along the pickaxe's path, Yukon can attack with any non-pickaxe attack while waiting for the pickaxe to come back.

If the pickaxe lands in a boulder or your sled, it will impale them, dragging them along to Yukon. Their effects remain active throughout, meaning that the sled can still have people forced on to it and the boulder is still a hitbox. One of your key strategies here is to use an fair as soon as the boulder comes to you, as it allows you to quickly launch the boulder at the foe.

Up Aerial - Headbutt
Yukon performs a generic Sakurai-ish headbutt, dealing about 6% and some low knockback, allowing you to juggle them a few times. This is one of Yukon's better options for damage racking, especially when you're right underneath a foe who thinks they can get away from all your lovely little pitfall fun by hiding up in the air.

Back Aerial - Self-Defense
Yukon gets into a defensive position, balling himself up for a brief moment. This has some horrid ending lag, meaning Yukon has to use this at the right time or be completely punished.

You see, if Yukon gets hit at all during the time he is balled up, he will still take the damage from their attack, as well as any status effects that come with it. However, he will not take knockback, and will immediately strike the foe with a headbutt that deals 9% damage and good knockback. This is easily one of your best tools for an approach, as you can easily counter any hit the foe sends at you.

Down Aerial - Hammer Time
Yukon extracts the hammer from his belt, before pounding downwards in about 5 light hits over the course of 1.3 seconds. Yukon can move back and forth as he is pounding downwards. If the hammer hits the foe, they will be caught for the remaining hits, as each hit deals 2% and light hitstun. As you can move back and forth, you can bring the foe along with you as you move through the air, or force them down to the ground.

If Yukon hits a snow-covered boulder, 1 Bowser will fall off the boulder and onto the ground for every swing you pull off.

THE BUMBLE


When Yukon activates the Smash Ball, he looks prepared to beat the **** out of the foe...suddenly, a low note strikes as the mighty abominable snow monster of the north climbs out from the background! Yikes, that's a mighty humble Bumble! The Bumble's Theme (Which can be heard in this clip) begins to play as he lies in wait in the background, eyeing the combatants hungrily. Yukon turns to the foe and yells out "Run like crazy!" as the Bumble jumps into the fray! The Bumble is as tall as 3 Ganons and as wide as 2 Bowsers, and constantly pursues the character closest to him at Ganon's dash speed.

The Bumble has 3 attacks, the main one of which is generic claw strikes at various angles. These are devastating, each dealing 20% and high knockback. The second is a low-reaching grab, where The Bumble will attempt to pick up anyone nearby, even if they are pitfalled or in prone. If he succeeds, he immediately throws them back down to the ground, dealing 10%. The third option occurs when he has them picked up; he will pick them up and begin gnawing on them, dealing 5% per bite. The foe has to button-mash out with 2x grab difficulty.

However, a fourth attack can be activated...if the Bumble walks over any fully-made pitfall circles, he will pick them out of the ground and hurl them at the nearest foe with devestating accuracy! Of course, it instantly destroys the boulder upon contact. He can also pick up snow-covered boulders, meaning that Yukon will want to be careful where he places his stuff.

The Bumble takes no knockback or hitstun, but has 70% stamina. Upon depletion, the Bumble falls into the background, crawling away with the last of it's strength. It will also last for 15 seconds. If you don't want to wait out these 20 seconds, however, one strategy that works well is to attack it from the air, as the Bumble refuses to leave the stage under any circumstance.

If you win 10 matches as Yukon, the Bumble will start spawning as a fiend! As a fiend, he stays onstage twice as long and has a low chance of appearing.

MATCH-UPS

Will edit these in as more Christmas sets are posted (TIPSY)

EXTRAS

Up Taunt - Egotistical
Yukon begins a boastful speech, raising his arms into the air. "Who am I? The name's Yukon Cornelius, the greatest prospector in the North!"

Side Taunt - Claiming
Yukon points downwards, letting out a cry of "This is my land! ...and ya know, it's rich with gold!"

Down Taunt - Searching For Something
Yukon looks up at the sky and lets out yells of "GOOOOLLLD! Gold and silver, silver and gold!"

You can potentially recreate Yukon's entire opening sequence by using all 3 taunts in order, and using up smash immediately after. Doing such will unlock a hidden trophy: Sam the Snowman!

Victory Pose 1 - Life-Sustaining Supplies
Yukon has his sled to his side, he jumps on and turns to the losers and begins speaking. "I'm off to get my life-sustaining supplies: cornmeal, gunpowder, hamhock and guitar strings!" He rides the sled offscreen.

Victory Pose 2 - It's Frostbite
Yukon tosses a few snowballs at the foe, getting their faces coated. He leans forward, placing his hands on his hip as he begins talking in an over-exagerrated manner. "Hey, you get Frooost-Bit thataway!"

Victory Pose 3 - Struck it rich
Yukon performs his up smash on screen, however, after licking it, he begins speaking in an excited tone. "Peppermint! I've struck it rich; I've got me a peppermint mine!"

Victory Theme - Silver and Gold
Yukon's victory theme is a few notes from his "theme", Silver and Gold.

Unlock Method - Digging Downwards
To get Yukon, you must dig a long distance with tunnel-based sets (equivalent to 50 Final Destinations, yikes!), fight 1225 Brawls or get him to join your team in OrderAndChaos/Paradox/StoryModeWithNoStory/whatever SMs Yukon appears in.

Alternatively, Yukon can be unlocked in a much easier method: the Yuletide Lottery! Every day you boot up the game in December, you will unlock one thing, completely random. Christmas-Themed things, however, have a 25% higher chance of appearing than all others. Booting up the game on December 25th through January 1st will cause you to get one present from Santa: A Christmas-Themed Character (a normal one if no Christmas ones are available) and a Christmas-Themed Stage (the same also applies to stages).

Unlock Message - Egotistical Part 2
"Wahoo! The greatest prospector in the North, Yukon Cornelius, has joined the Brawl!"


He's nothin' without his chompers!
 
Last edited:

Rychu

Thane of Smashville
Joined
Jul 5, 2010
Messages
817
3DS FC
1908-0105-4965
Finally, I'm back in commenting action!

Cutey Mark Crusaders
Ah, my first pony set after joining the herd! What I like here is that there is a real sense of the friendship between the characters, which comes out strongly in the set. Even then, you're also making sets for basically adolescent girls who just want to be accepted, and there's a slight feel of a bit of selfishness between the fillies, especially with the mechanic of them rushing to do what they do best, or at least what they think they do best. There's something very awesome about the characterization here (or I'm trying to copy Rool by looking too deeply into things). The playstyle (which, by the way, I like the mechanic reveal here), I really really like, getting them to discover their talents is a very cool way to go about things, and it really plays up on the complete...incompetence(?) of the fighters in this foreign world of Brawl (after all, Fighting is Magic). It's a cool set with cool ideas that is cool. Cool (COOL).
 
D

Deleted member

Guest
Comment Dump Time!

This comment for Mouse Man was made after some of the rest, because I felt compelled to finish commenting Rool's Twacy sets after reading Flat Top, then Wolf Man. Read them in that order if you want a sense of continuity...? Bah, you ruined everything Rool. So anyway, this set is a lot of fun – moreso than Flat Top, and certainly Wolf Man. Just being this huge guy with a large amount of grab hitboxes and potential for huge damage is satisfying from a Brawl set perspective, but the specials do an excellent job of consolidating his strengths and weaknesses into an actually competitive format. I can forgive a lot of the mistakes here [the pancake interactions for one] due to the character, as there's really little else you could have done with him, aside from maybe some more creative flow into the mouse holes. That, and the leaning of the character, which is sufficiently cartoon-y in how stupid it is as a concept, could also have been played into more. But really, you are able to squeeze a lot of potential out of the character with barely anything to work with and do a good job, despite just a lot of generic punching, grabbing and crushing. Certainly as good as Flat Top.

Finally getting around to J. Jonah Jameson, Warlord was definitely right about this set being severely underrated. JJJ forces around his employees like minions, usually not in a freakishly controlling way, but rather in a chaotic fashion that only awkwardly works into an overall playstyle. This involves summoning of mass props, other employees and along with the confusing, yet brilliant writing style, you can't be sure on the specifics of most of the moves. What you come to understand, though, is that the set is an absolutely perfect fit for the character in every way possible. From the flow, right down to the undefined individual inputs. You get the gist of it [which is more than some sets have even with a normal writing style], but there's always a sense that not even JJJ knows what's going on and is just making the flow between moves up as he goes along.

Mostly I haven't talked about the set itself, because that is surprisingly less of a focus here, if only a smidgen less than you normal for you. It largely revolves around the paperwork and the cops, with JJJ generally playing the coward and fleeing the fight, or just employing some tactics to stall or slow down the foe's approach. It's a counter-centric moveset, which is very fitting. You aren't entirely clear on the animations, but generally I like to picture a Pokemon Trainer-like myriad of employees working in the background at all times. JJJ is generally just working his way through the chaos he creates with the conceit to make everyone else do the work for him, but that you make it feel so effortless is splendid.

The best part of Sylvester is its characterisation, but it has some good ideas going for it as well. It takes a liberal interpretation of minion manipulation, with his ability to plant his myriad of traps in the ground… which is actually one of my least favourite parts of the set. It’s too straightforward for this random, one-off character and only becomes an interaction when you want it to be, similarly with a few of the minion interactions. I actually far more appreciated the use of minions to create a good sense of positioning on the foe, as well as the awesome cartoon-y concepts with the glove, cigar and tommy gun interactions. The playstyle ends up coming off as a bit unoriginal in all, as Sylvester centres around his simplistic ground game, but the tools I’ve already noted help to differentiate him and the minions do give way to interesting dynamics [it made me take Pumpkinhead back to the drawing board]. The aerials are very rushed and while some of the concepts are great, other ones like the car and mallet are a bit bland – but are at least relevant to his rushdown. So expectedly rough around the edges, but with really good stuff thrown into the mix as well. The good does a decent job of balancing out the bad.

This comment is out-of-order as I decided to go back and read Wolf Man after you called it “Smadian,” but didn't want to lose the chronology of these comments. I had three paragraphs of hugely negative text here, but I decided to edit it down to the bear necessities. The set is not momentum, it's largely uninspired and I don't see the similarities to my style, joking about my bad writing style aside [you are at your most cryptic with this set]. It's a good, simple idea at its core – create a small pen to lock down your opponent, but it's sickeningly simplistic and doesn't feel remotely cartoon-y. There's nothing bombastic about the set, when the character is a werewolf wearing a gangster suit and hat: after the wonderfully-characterised Flat Top, this is a huge disappointment. The set would have done far better as a straightforward combo character as that is what it essentially comes down to, and it would have been nice to see your take on that genre years after posting King Hippo.

Flat Top does all that Sylvester did with the characterisation, only without the baggage [aeroplane pun unintended]. It’s again full of very fun concepts, notably the planes which are appropriately minions and the lots of small, but effective inputs like the cigars that work toward a simplistic, but original kind of rushdown which works into Flat Top’s characterisation as a non-emotive cartoon villain. The best part is when you get into the interactions, which here seem just as convenient as in Sylvester, but also even more fitting and to me, shine as an example of how to properly take advantage of the source material, while not completing limiting yourself.

And yet, I find myself sat here for two days mulling over exactly what I like about this set in terms of gameplay. Nothing it does touches on new concepts, it's only in the execution of the moves that I can find it to be that refreshing. Considering the character, this is not a surprise, but I do feel like you shot yourself in the foot by denying the set many traditional modes of attacking and dedicated so much of it to just moving around your planes or the opponents with set knockback or similar tricks. It's not diabolical by any means, but this is definitely a big, fat negative. This is one time where I wish I could change my view on sets so that I could be a bastion for a moveset, because it definitely appeals to me with its amazing characterisation. Still, while in all it may not be a great set, it was still a lot of fun and played with the Duck Twacy persona incredibly well.

Chaos 0 reminds me a lot of Nero Chaos from Make Your Move 9, but with a wholly different use of the tentacle love; playing around with the lingering hitboxes so that he can approach in a unique way. A walking wall of doom indeed – it's all well-imagined here, drawing the opponent in by virtue of your body type and making use of pre-launched traps to ensnare them. The simplicity of most of the moves is a good format for them, as Chaos 0 doesn't need a lot more complexity than he already has. The playstyle is palpable here more than in most sets I've read from this contest and it definitely feels like it would be awesome to play as, if a little difficult to play in a competitive environment. More than most, Chaos' set may be broken down into something more tiresome eventually due to his reliance on a stagnant body type to create most original flow, but considering how diverse his defensive game is, he has enough variety to not be too predictable. Obviously it's pretty unsmash while retaining all the qualities in terms of execution that usually make me hate your combo sets, but I feel like you hit the perfect combination here of balancing the more rudimentary aspects of comboing through the inputs while keeping control on the mechanics so that they're not too forceful on his gameplay either. The only thing I can really put against the set is that it's not particularly ambitious, but I can appreciate the subtlety here far more than in, say, Farfetch'd. I can't think of a set of yours I like better than this.

Sayaka is certainly a big improvement for you Kibble. The playstyle is not only drilled into the presentation of the set itself to hammer home how in-key you are with it, but also played well to the character's strengths and takes advantage of what little potential the character has. It all feels very fun and visceral in its approach to carving out a niche for the character despite being a “sword user,” which has always been an established cliché of movesets that I've hated. Here, we see that cliché well and truly resolved. Sword fighting has buckets of potential and you use up a tiny amount of it in that great sword-planting input alone and all its interactions.

This is all great stuff for your moveset-making career, however, I still just look at those two mechanics and find them quite hard to swallow, as they feel positively archaic compared to the strides you make in every other area, even if they do supplement much of what makes the set good. I've always disliked special mechanics like this, where they start to add other gadgets next to the percentage bar and here, it's just a bit of an obvious way of going about the concept. Sayaka has the tools to do what is described of her in the “true playstyle,” but I don't know if I agree with the idea that this is the most efficient route she could take. It's excellent conceptually, but imagining it in-game, it wouldn't actually amount to much different from similar hit-and-run sets, though with a nice amount of characterisation in how it's more controlled. Considering the set is far less interesting without the mechanic in mind, though, it does live and die on the mechanic's quality. Nonetheless, a great sign of progress and makes me very excited to see what you can achieve when you unlock your full potential.

There are a lot of fun ideas in Beezwax, though it does come at a cost. The set revolves around the “body shape” of the character – its constant movement and acting as a hitbox makes it very unique even in Make Your Move – it does somewhat break the game, but you’re able to squeeze out potential in bags because of it. It takes a far more direct approach to genres like hit-and-run and does make for a very diverse pressure game as well, especially when he delves into so many different types of playstyle due to his natural versatility. ‘Bullet hell’ is really simplistic, but here you’re able to make it interesting due to how it plays into his traps, plus the camping and gimping is almost redefined in this sense. The way it all works is dense, but logical and slowly leaks out of the set at an approachable level after the statistics section: as usual, no stone is left unturned and you make really fun leaps with single concepts – my personal favourite being the Dukes of Hazard pits. Though yeah, the set does invalidate other sets, which is excusable if it’s from a playstyle or concept angle and can be balanced, but here Beezwax just laughs at any characters with a significant grab game. As far as playing as goes, it is an excellent and fun interpretation of both the character and game, but it obviously couldn’t work well competitively without some major reworking of its fundamentals. It’s not like that’s extremely important to me, but it keeps the set from being my favourite of yours this contest.

CloudMan.EXE is a typical Nick set, but here there’s a larger focus on mindgames than usual and it does largely work out for the best. It can sometimes also come down to some more redundant options – the set tends to feel a bit same-y with some inputs, as moves sometimes serve insular purposes like adding some bland versatility, but that’s not too common [worst example being the additional dark chip smash]. I also feel like the mechanic of charging up clouds is a bit too universal and because of that, sacrifices some of what it could have done with better depth. Above all else, though, it’s remarkable that you were able to carve out such an original playstyle when Huff ‘n’ Puff and Sheep Man exist; through a combination of cloud mindgames and some other tricks, it becomes far more about hiding in your traps while forcing an approach. This is especially good when you do have all of these simplistic ways of influencing the clouds to form unique formations and making them into untraditional hitboxes, so it feels far more natural as opposed to being flowchart-y (a complaint I would lever at it the two aforementioned movesets). Warlord mentioned it, but I do also love his simple chain reaction game, creating a strong sense of flow with all the other elements of the set. The set is designed very smartly in this regard and is indeed extremely easy to identify in terms of its playstyle, not needing a section for that at all – which is not something that most sets achieve, while retaining any deeper gameplay, which is on display here all the time. Good work.

Gaston; credit due to his neutral special arrow, reinvents the heavyweight combo genre to actually make sense. Ironically, this same genius interaction is surrounded by a lot of weird ones – stuff like the fire not burning through the rope or picking up "mud" from the stage with your boots. I also can't say I care for the mirror or dirty boots, which is apparently a common complaint. Aside from those two things, though, it's really well-characterised and has plenty of fun exploits when considering you can cut off the foe's approach and then engage them in that conceptually-rich grab game. Similarly to Mouse Man, the set's focus here on FFA is quite fitting and does become interesting when you consider how Gaston can pressure opponents to fight in a way of his liking, but without getting too psychological. The set is very good about inputs that are just simplistic enough to be good for Gaston, without just making them padding – best example I can give here being the two uppercuts and you also have stuff like the dash attack which do the basic brawling elements of the character justice without being devoid of creativity. I think one aspect of the playstyle that could have been stronger is probably the combos – which deserved some spotlight here due to them being unconventional and indeed working into his spacing game in a unique way, as well as pressuring opponents by lieu of his tether alone.

I'll catch up on the rest from here when I get back from my trip, but if you also want me to more than just read a set I missed [by commenting it] just say so. I'm more than open to requests.

Cutey Mark Crusaders is a strange set, and almost endearing in how messy it is conceptually. It's a smorgasbord of concepts that doesn't quite come together in the end, but fittingly resembles a modern art-style painting – sprays of every colour and at every angle. We start off with the leadership special, giving a member control and it does lend pretty well to the characterisation – they're constantly fighting over who's boss, but I don't feel like you portrayed that very well throughout most of the set. I also do feel like a lot of the stuff that you're accomplishing with the fundamental moves could be more meaningful – the scooter feels like some very bland versatility on the vehicle, while the sing just feels odd in how it cancels knockback for the foe due to them being asleep [not even Jigglypuff can do that]. It all feels a bit too convenient, especially once you get into the more prop-y inputs. So yeah, I'm not a fan of the set, but I can appreciate that it's a bit of an experiment and I hope you learn some lessons from it.

If I'm being completely honest, I always come into minion-bases sets like Elspeth a little afraid that the wealth of concepts I've built up over the years for the genre will be tapped into... it's bitter-sweet when it turns out that the set doesn't deliver in that regard, and unfortunately that holds true here. I just don't like the way you take advantage of the great original concept of having two soldiers creating a barricade for you on either side – and having the extra soldier just walk up and fight the opponent one-on-one, it all feels very basic. Admittedly, the original concept is very unique, but it feels like Elspeth's playstyle may just break down into a bit of rushdown-with-a-twist, because there's no real depth beyond that initial, and even then, simple idea. It feels very strange as a spiritual successor to Teferi in that it has so little complexity, and I don't know if that makes sense to me as progression from the blue emblem character to the white one, so I don't think I really get the design at all. When you do tap into some interesting concepts by making use of the soldiers' spacing and positioning, it's also cheapened by the fact that the Kobold Clan set by Zook actually approached the aforementioned grand concept of bodyguards, but ran with it a lot more. It's a compelling Brawl set, which for me is a bit disappointing. Chaos 0 is still a great set, though.

Yukon pulls off a set for a barely workable character well in the typical hyper creativity we expect from a Dave set. It's pretty cool how you're able to stamp out a playstyle largely based around an odd sort of quiet set-up which inevitably leads into the foe making a crucial mistake, sort of like a Christmas story and likely being similar to the one Yukon is from. The sled isn't perfectly executed but the concept works nicely enough with the pitfalls. What the set falls into, probably more than any other set, is this craze of stacking stun. Considering the stun of the pitfalls, and the grab game, and the impaling pickaxes, Yukon could potentially stall out large portions of every stock while the opponent can only mash out. You really should have at least had a non-traditional kind of grab game, to differentiate it from all the other stunning going on. My second big problem with the set is the filler – notable in the aerials and grab game, where there are noticeably a few generic inputs just put in there to balance out the pitfall set-up, which helps the playstyle be more versatile, but lacks the imagination that makes the set otherwise so enjoyable. This doesn't make it a bad set – you're able to pull out the most amazing inputs as usual, just by spotting a keen little detail out of nowhere from the source.
 

Davidreamcatcha

Smash Ace
Joined
Feb 9, 2011
Messages
629
CHAIN CHOMP'S CHOMPERS

Characters: Tutankoopa, Iggy Koopa, Chain Chomp
Stock: 1 (Tutankoopa), 1 (Iggy)
Play As: Iggy
Stage: Yoshi's Island (Brawl)
Event Description: That fool has let his chomp loose! Time to steal!

The event is a very simple 1 stock match between Iggy Koopa and Tutankoopa. While this event match seems fairly basic, the twist is that there is only one chain chomp on the battlefield. Iggy's Chain Chomp Chariot automatically spawns in the middle of the stage, it will respond to commands from both Iggy and Tutankoopa, having the attacks of both their chomps. Another catch: the KO has to be made using the chomp, all other KOs (except suiciding) will simply cause them to respawn.

This match is pretty tough for Iggy, considering Tutan has far more ways to space the chomp around and more direct attack options. Fortunately, the size of Melee Final Destination can help Iggy gain some distance, and Tutan's mindgames are eliminated by the chariot constantly being attached to the back of the chomp.

One last note: if too many commands are made in a short amount of time, the Chain Chomp will become overly hostile towards both parties and break loose from the chariot, gaining the moveset of n88's Chain Chomp, automatically starting unchained. The Chomp is still hostile towards both parties, but no commands can be given too it, and it will automatically respawn if it is ever knocked out. The terms of the KO still apply, meaning Iggy will having to guide Chomp into Tutan to KO him. However, this is far more difficult than it seems, as this chomp will respond to Tutankoopa's stone chomp mindgames just as his normal chomp does. Be wary and don't try to overload the chomp.
 

Holder of the Heel

Fiat justitia, pereat mundus
Joined
Dec 3, 2011
Messages
8,850
Location
Alabama
NNID
Roarfang
3DS FC
1332-7720-7283
Switch FC
6734-2078-8990

GHIRAHIM
Demon Lord

Warning: Major Spoilers for Skyward Sword below, SERIOUSLY.


[COLLAPSE="value"]*~*~*~*~*~STATS~*~*~*~*

SIZE: 7 [Ghirahim is a tall being, being capable of looking down on his fated foe Link every time they clash blades]
WEIGHT: 6 [Despite his height though, he is extremely scrawny and can be thrown around by strikes of the Goddess Sword]
TRACTION: 8 [Though his incredible traction keeps him on his feet, even being able to grab the Chosen Hero's blade and tear it out of his hands in a struggle that hardly falters his fabulous composure]
SPEED: 3 [Yet this very composure tends to make him quite stagnant and composed in his movements making him quite sluggish and prefers to savor the atmosphere of punishment for his opponents]
AIR: 6 [But his speed picks up in the air, the wind exciting his blood thirst, flowing by his exquisite form with ease as he prepares to give pain from above]
FALL: 5 [When struck in the air though, he slows down slightly as his movements become unintentional and the swiftness of his gliding tapers off]

All in all, Ghirahim has the capability to perform adequate on land and on wind yet with average sagacity. Where he may be slow and not gifted in any particular area, he makes it up with the articulate and improvising moveset that allows him to do a large array of things depending on the situation, being a true weapon to the core while still keeping his style stunning. His play style isn't that linear to explain objectively for everyone, but the main points are that he relies on combo making in his strikes to build up damage, and his B attacks allow him to travel the stage and defend himself. Some of his moves, as a drawback to him, are slower or have greater lag because of his eccentric moves, hair-flipping, and poses, so combos that fail will leave you open, but as a result the combos that are successful... have such BEAUTY! *pose* Such form! *camera change* Such exquisite physique! Such stunning features! Yeah, he pretty much has it all.

*~*~*~*~*~SPECIAL MOVESET~*~*~*~*~*

Up Special: Dark Transportation Snap
When Ghirahim wants to make a quick escape from any present area, he calmly lifts up a hand and snaps his fingers, instantaneously breaking apart into gray fragments, and like Mewtwo's and Zelda's Up Special attacks, he shall reappear in a congruent manner after a moment's pause in the direction indicated by the controller stick with no damage involved to anyone nearby.. This is an amazing technique to wisp across the stage instead of his slower travelling speed, and his only good way of going a long distance in a tight spot; however, if he his hit in the middle of his rather prompt snapping, he will be interrupted and the DTS will not occur. The maximum distance covered is 2/3 the length of Final Destination, the least being a position adjacent to the one where it was activated.

Side Special: Blood Thirsty Assault
When his opponents are far away, Ghirahim's slow movements also come for a little more effort, requiring him to place the sword down by his side, bend his knees, growl slightly, and then run forth with a slight increase in speed (+2). If he runs into someone as he charges, his blade slings out dealing 13%. As long as Side B is held he goes forth, and once let go, his strike will swing out with a black veil pervades in its wake adding a beautiful element to his attack. His strike his flail in the direction last flicked before letting go of the rush.

Down Special: Weapon Armor Block
Ghirahim's arms in SSB4 are covered in his armor that he animates on his arms in the second battle with Link within the Fire Sanctuary. He holds his arms out to protect himself, and if struck he will bounce back unharmed like in his battle above the Sealed Grounds unless it is a projectile attack, which will rattle him and leave him open for a brief second before recomposing himself.
Down Special plus A: Demon Reversal
In addition to the close quarter blocking, if the A button is hit in close proximity to an opponent, Ghirahim grabs the target and rolls over him and ends up behind him and performs a round-house kick that does 10% damage. If the B button a different direction is chosen, he will also perform a different action, making this move is versatile close-quarters offensive defense.
Down Special plus Up: Endless Plunge
If while blocking he goes up, he will use a short version of his Dark Transportation after jumping up and appear in the angle chosen in the air with a second Ebony blade in his hands and crash down dealing 14% damage, but a considerable lag to recover as he lifts his blades out of the ground, stand straight up, and send his second blade away.
Down Special plus Side: Zweihander Counter
If the left or right direction is selected in the middle of blocking, he will summon the large sword with minimal lag into his hands and guard his body with it with 10 health, and if struck without being destroyed, it activates a counter with the blade and it soon perishes, but if destroyed, he leaves himself open in a moment of imbalance, dealing 9%.

Standard Special: Magical Crimson Projectiles
Being Ghirahim's single and only projectile attack, and being quite weak at that, it tries to overcompensate by versatility. During his various fights with Link, Ghirahim would commonly snap his fingers and call upon several floating blade-like projectiles that are quite small. This move can be tapped in order to send a single MCP forward that homes in on a target's direction (and does not follow) dealing 2% damage. It can be held, however, and produce up to four projectiles until finally becoming a spinning circle aura around him that deals 1% damage to anyone foolish enough to bump into him, and when B is tapped once more they scatter towards their targets. Only if they were starting to charge do they stay on his person, and can be destroyed easily, only bearing 1 HP. Like the other standard B chargeable moves, if he is hit while snapping his fingers for the MCP's, he will lose all of them produced immediately.

*~*~*~*~*~STANDARD MOVESET~*~*~*~*~*

Jab Combo: Black Cross Combo
Ghirahim combines a basic vertical slash in front of him, and if the A button is hit once more, a horizontal slash strike comes out fast enough to slice the black pervading the sword's strike, making a black + symbol for a brief moment in the attack animation, though of course that does nothing but simply look nice. The first strike deals 6% and the second faster one puts out 2%. The first attack, as could probably be guessed, has a small knockback, but the second does not and merely adds to the pain.

Dash Attack: Merciless Thrusts
Ghirahim's slow running is ended in a strike of great finesse that involves Ghirahim spreading his body out to increase his reach, the tip of his blade shooting forward and stabbing the forward target with 8% damage, and if the A is hit again like with the standard Jab Combo, while he lands on his feet he shall pull back his hand and cry out with extra oomph and stab once more tacking on an extra 4%.

Forward Tilt: Precision Slice
The Demon Lord leans forward and slashes diagonally in front of him with farther reach that his Jab dealing 7% damage, but the reason this is especially dubbed the Precision Slice, is if you tap A quickly, he will quickly slash backwards along the same diagonal line made, cleaning up the precise black line made by the previous strike adding 3% to his victim.

Up Tilt: Sinister Skyward Strike
In his last encounter with Link on the Sealed Grounds, Ghirahim mimics his opponent's ability to life up his sword, charge it, and fling a blast along the tip of his blade, however his is much weaker in that it is capable of being bounced back, and this is why a projectile standard attack is not too much. Not to mention it is similar to Ganondorf's Up Tilt where he stops and charges a slow attack before letting loose the fiery orange beam, and if it is struck it will return in the direction sent from, though the maximum amount of distance it shall cover is the length of Final Destination, and a crawl at that, thus making it easier to counter and avoid, even if trying to make it back upon the stage. 10% damage and minor lag upon hit.

Down Tilt: Feet Cutter
Among his many talents, Ghirahim may also crawl on all fours in a creepy manner, and with the tap of A, he will slash his black blade across to slice at someone's feet dealing 4%, and if tapped quickly again he will stop his crawl (movement during this is always stilled) he will bring his weapon up and stab it down once again striking at the enemy's feet but with more thrust and more lag unto the target, dealing a sick 6%.

*~*~*~*~*~SMASH ATTACKS~*~*~*~*~*

Forward Smash: Dual Death Deal
Ghirahim decides to stop toying with his opponent with a single blade and a second materializes in his spare hand for a brief moment long enough for him to bring them out to his sides and slash horizontally with one blade above the other dealing 7% for both blades, totaling 14% damage per forward smash.

Up Smash: Double Arc Slash
Ghirahim spins around elegantly slinging his blade up in an arc up above his head towards the opposite direction he is facing, and he swings his empty hand that obtains a temporary second blade that does a follow up surprise strike before disappearing once more. 8% for the first strike and 6% for the second.

Down Smash: Whimsical Kill Spin
He faces the screen and puts his arms quickly to his sides, animating a second blade as the common motif for his Smash Attacks, and then spins on one foot in place really fast, the blades angled downward and slashing like a top, dealing 13% per strike around the sword hitbox with large knockback, and 3% with no lag with hit by his upper body while spinning.

*~*~*~*~*~AERIAL STRIKES~*~*~*~*~*

Neutral Air: Beautiful Somersault Attack
Ghirahim grips his blade with both hands and curls up, spinning as the blade slices anyone who gets in its reach dealing 6%, and then sticking the landing with a smile.

Up Air: Skyward Impalement
The dark weapon stabs upward as he bends his feet back and setting aside his empty hand, posing perfectly while he impales the victim up above him with 9% damage and excellent juggling capability due to shooting the opponent up.

Forward Air: Agile Side-Kick
Pulling back his sword for once, he lifts up his back leg and then kicks with the front to push enemies away, and reminding him that he is lean and flexible, with excellent reach and martial arts capable, as shown in the battle with Link on the Sealed Grounds. This particular move does 8%, and if you hit A quickly, another combo is opened up: he now does an axe-kick by lifting his other leg and dropping it down, hitting an opponent from above by the heel dealing a rather soft spoke of 8% as well.

Back Air: Noble Pride
Without even turning the other direction, with a "Hmph," he puts the blade to his opposite side and stabs backwards with smaller range, smacking any fool behind him trying to catch him by surprise with 4%. Show a fool a little mercy, he thinks himself an equal! However, if Ghirahim finds that the foe is still persistent, he will growl. He has had enough of this foolishness! He will roar out and spin to the direction the Back Air was and see through the punishment of this pest by slashing for 10% and decent knock-back. Good for changing directions.

Down Air: Grave Digger
Similar to his Side-Upward Special Combo the "Endless Plunge", Ghirahim drives downward viciously, looking to end his foe here and there, like the Down Air of Game & Watch but deals much more and has a lag of having to pull out the single blade from the ground, being unable to be a spammable move like Toon Link's Down Air dealing 9% with strong knock-back potential. Strike with this move and you will fill Ghirahim's heart with rainbows! But if not, he will grow impatient and angry: it is a character flaw of his.

*~*~*~*~*~THROWS~*~*~*~*~*

Standard Grapple Attack: MCP Scrape/Royal Stomp
While gripping his opponent, all MCP's deal 1% damage per second in his hold by stabbing upon the command of A, dealing 5% if fully charged. If none are present, he stomps on his opponents foot dealing 1% damage instead.

Back Throw: Backward Rolling Push-Kick
Ghirahim reaches out with a hand and grabs his opponent around the neck, and if selected to throw him back he roll backwards, putting the opponent above him, but do not fear! Ghirahim's strength pulls through and as he finishes his roll, he kicks with his two legs and sends his victim backward as he rolls back onto his feet safely. 7% damage.

Downward Throw: Folly Swiper
The Demon Lord shoves his grappled opponent to the ground and then slashes his blade along the opponents body at close range causing the foe to bounce away distraught and dealt 9% damage.

Forward/Upward Throw: Aerial Projectile Target
Yes, that is right, he throws his target (2%) forward and high in the air and promptly snaps his fingers sending a volley of five projectiles (1% each). The same happens with the Upward except it is of course straight up, but this time no Projectiles are made, the ones that are floating on your person from your Standard B (if none are there, the move ends here) float up and home in on the body of the target and strike from all directions, dealing 1% each.

*~*~*~*~*~FINAL SMASH~*~*~*~*~*

Final Smash: Unsealing Demon King Demise
If Ghirahim strikes a Smash Ball and his B, a Seal Spike (that the Imprisoned is sealed with) will rise from his spot on the ground where he is, and he will become invulnerable for a moment as he then begins his ritual dance from the Sealed Grounds segment of Skyward Sword, disappearing and reappearing in the silly manner as well. Once finished Demise quickly appears from the seal with twice the height of Ghirahim and with the bulk of Bowser, and he will turn Ghirahim into his Dark Master Sword. He casts his hand to the side and the stage will temporarily transform to the Serene Battlefield where he is dueled in Skyward Sword (a flatland with no edges or empty pits to fall into) and lightning will randomly strike spots dealing 12% damage to enemies. You now control his unholiness.

The difference between this and most transformation moves (beyond the changed setting) is that it isn't timed, but rather Demise is given a health of 250, thus either becoming shorter or longer in use than the ones like Giga Bowser, Super Sonic, etc. He experiences no lag from hits and cannot be grabbed, and he cannot jump and run. He is a large target, but can deal out a lot of damage in his time with his small moveset.

Standard Combo: Dark Master Sword Offense
Like in his final battle with Link, Ghirahim in hand, he will strike (even while casually walking) diagonally (20%) and then diagonally once more (22%) before stopping to bring down a powerful vertical strike (24%).

Downward Special: Conductible Skyward Blade
He lifts up his weapon (opening himself briefly to attacks) and lightning crashes down upon Ghirahim, the blade being electrified with a blue sparking energy. His attacks will deal 3% more damage and have a minor stun, but at the end of the DMSO (Standard Combo) the vertical strike sends a beam of electricity out across until it disappears off the stage, stunning foes (going through them) and dealing 16% damage. The lightning that is called down can also strike foes trying to linger in the air to avoid him, and deals 12% like the normal hazard bolts.

Standard Special: Dark Master Sword Defense
He will hold out his blade in the direction he faces (capable of turning around while held) and move his arm around with the angle of the control stick to block any attack that strikes the large blade, being his sole ability to prevent damage on his set health. If it is electrified, any physical blocked attack from a foe will cause that foe 1% damage and stun.

Upward Special: Colossal Hurl
In the fight with Link, when Demise was knocked down, he expressed the capability of hurling his body great lengths into the air, curving in the direction indicated. He can do this upon command with pre-lag and upon landing he will lag greatly to recover from his great weight tossed around, but sends a short Imprisoned Foot Shockwave from both sides that Link faced while fighting his cursed form (the red reverberating ring) that deals 5% damage and small knockback. But anyone landed upon will be dealt 30%, and anyone hitting his body while he is hurling himself will be knocked away with 12%.

Forward Special: Colossal Dash
In the second phase of the duel between Link and Demise, he is capable of stepping off his feet and rushing forward and slashing at the end of the strike, which is what he does here, crossing half the length of the stage and swiping for 10% damage, but helps him travel with a minor bit less of lag compared to the Colossal Hurl.

When Demise is defeated he puts down the blade and disappears, the blade becoming Ghirahim once more, and if he ends up on land when the stage returns to normal he simply remains open for a couple of moments as he hunches over like in the battles with Link when stunned. If he ends up off stage he will unfortunately fall to his death.

*~*~*~*~*~EXTRAS~*~*~*~*~*

Entrance: "Positively Uncivil"
As one could guess, he transports onto the stage, but he does so in the fashion that he leaves Link after their first two encounters: he slowly swoops his sword around and points it straight up, except in the entrance it is reversed.

1st Taunt: "Frowns All Around"
Ghirahim hunches over and growls as he fumbles his hands around as he did when he spoke of Impa getting in the way of his plans, and finally he bubbles up too much and he cries out in anger waving his hands at his sides.

2nd Taunt: Tongue Lick
Throughout the battles with Link, Ghirahim commonly loses to his lust for blood and licks his blade confidently, and his second taunt lets him do just this and then he licks his lips afterwards with a grin as he does before he summons his blades in the Skyward Sword battles.

3rd Taunt: "Your world belongs to darkness!"
Ghirahim snaps out of his calm nature and begins to laugh maniacally with his hands out in front of him, fingers curled, homage to when he lets loose while Demise becomes unsealed at the end of Skyward Sword.[/COLLAPSE]

I am quite terrible and new at this, but I tried. ^_^ And I'm sure the percentages are jank, I don't know what to set them at generally. Thanks for reading. ^^
 

Hyper_Ridley

Smash Champion
Joined
Dec 21, 2007
Messages
2,299
Location
Hippo Island
Ghirahim

Pretty fun moveset. The move descriptions feel like they fit his eccentric personality well, and his projectiles + movement options are a nice variation on melee pressure characters. The set doesn't feel like it would be too out-of-place in an actual Smash game, which considering this is for an actual Smash 4 candidate is something to be commended.

Regarding damage percents, "average" damage is 10-11%. Your set didn't really go too overboard with the damage on individual moves, though considering he's supposed to be combo-based he'd probably want his damage to be on the low end of the spectrum so he isn't destroying everything he touches with a single combo, lol.
 

Holder of the Heel

Fiat justitia, pereat mundus
Joined
Dec 3, 2011
Messages
8,850
Location
Alabama
NNID
Roarfang
3DS FC
1332-7720-7283
Switch FC
6734-2078-8990
Ghirahim

Pretty fun moveset. The move descriptions feel like they fit his eccentric personality well, and his projectiles + movement options are a nice variation on melee pressure characters. The set doesn't feel like it would be too out-of-place in an actual Smash game, which considering this is for an actual Smash 4 candidate is something to be commended.

Regarding damage percents, "average" damage is 10-11%. Your set didn't really go too overboard with the damage on individual moves, though considering he's supposed to be combo-based he'd probably want his damage to be on the low end of the spectrum so he isn't destroying everything he touches with a single combo, lol.
Thank you for the kind words considering my noob-status. ^_^ And yeah, I was anxious about the percentages so I opted for very tiny ones and relied very heavily on combos and skill. I wanted to do something that we may have a potential to see, gives it some more value to me personally.

I think according to the rules I need to give my thoughts on a moveset here, I'll need to consider finding one to talk about soon.
 

Katapultar

Smash Lord
Joined
Nov 24, 2008
Messages
1,284
Location
Australia
Ghirahim reminds me of the writing style back in the original competition of Make Your Move 1...it's hard to describe, but had a entertaining yet somewhat "crazy" sense of deliverance to it; I'm all the too happy to see such a writing style in this day and age, to which you needed not to berate yourself.

The only time I ever saw Ghirahim was during a demo which I randomly attended with some friends because they wanted to...in other words, I do not know a lot about this character aside from the fact that few or some people want him in the next Smash Game. On the other hand, the way you've presented him in this set is done well enough that it seems like I already know all about him and his elegantly prideful ways; you've characterized Ghirahim very well with his mannerisms and attack descriptions if I say so myself.

As you are new to the competition, but obviously not to the wonderful world of writing, I will say that said trait seems to be a great strength of yours, if only from my point of view (though I'm sure a good deal of people will agree with me); how well a person presents their set through writing alone can greatly affect how one sees the work overall, to which it is present here.

The closing comment seems to imply that you'll return for some more action, to which I hope you do consider doing. Also, you don't have to give feedback to another set if you don't feel up to it though it'd definitely be nice for the one receiving it!
 

SirKibble

Smash Champion
Joined
May 2, 2008
Messages
2,400
Some old and some new...

Pichu
The ideas here are certainly interesting, but I wonder how well the magnetism fits Pichu. You state how one of the most important things about Pichu is its inability to properly control powerful electric attacks, but then the self-damaging seems to take a huge backseat to the magnetizing. For the most part, I enjoyed the moveset, but felt it may have been more appropriate on another character. (There's a Robot Master calling your name right about now.)

Aside from that, I do have a minor quip in that I find the grab game a little awkward, since you can use other attacks and throws. There's a conflict of inputs there since the throw input is part of the inputs for the other attacks, but then again, I don't know if that's even really a problem, since tap jumping never seems to interfere with performing an Up Smash. I'll shut up now.

House
The playstyle and whatnot all seems fine here, but I have one glaring issue with House. The concept behind what makes his moveset function is just so darn vague. I mean, I know he's a difficult character to make a moveset for, but the offensive / defensive line is really ill-defined. With House's game revolving so much around that, I'm not totally sure what to think of this moveset. On paper, it's good enough, but this seems totally impossible to actually implement, and that leaves a bitter taste in my mouth.

That said, I do understand part of your reasoning for it, as it is definitely the characterizing point of the moveset. Without it, House would just be some old dude with a cane who pops pills for kicks and giggles. You chose a tough character, though, and I can only assume you knew you'd have to make a compromise somewhere when making the moveset, and all things considered, I don't really know what else you could have done, so I do have to give you credit where credit's due.

Elspeth
Two LL sets in one comment block, huh? I guess so. In contrast to Pichu, I feel this playstyle and emphasis is very suitable for Elspeth, drawing on the concept of Magic's "exalted" ability. I really can't fault the playstyle much at all--you have a solid core built around a few moves with almost all the others playing an effective support role. The few quips I do have pertain to individual moves. I kind of mentioned to you in the chat that the idea of her moving forward in her B-Air is odd, and the U- and D-Tilts both feel a little too "special" and elaborate, mostly due to the immense range they cover with their extra effects and how important those seem to be to Elspeth's playstyle. All in all, though, a very enjoyable moveset with a lot of great things to offer. Good work!

Yukon Cornelius
Halfway through reading this I realized only two MYMers were going to be represented in this little comment block.

So overall, Yukon's an interesting dude. You certainly milked his minimal abilities for what they're worth. I've never been a fan of attacks that affect the foreground and/or background, and I don't like it here either, but I can set that aside for a moment. The interactions are clever, if a bit strange at times. Anyway, what you've carved out for Yukon seems appropriate--he's a wacky dude, with wacky attacks that are likely to catch opponents off guard. And he fights just a little bit dirty, too, just enough to give himself an advantage without sacrificing his pride, dignity and consequently enormous ego. Aside from some minor complaints, this was quite an enjoyable set.
 

Holder of the Heel

Fiat justitia, pereat mundus
Joined
Dec 3, 2011
Messages
8,850
Location
Alabama
NNID
Roarfang
3DS FC
1332-7720-7283
Switch FC
6734-2078-8990
Ghirahim reminds me of the writing style back in the original competition of Make Your Move 1...it's hard to describe, but had a entertaining yet somewhat "crazy" sense of deliverance to it; I'm all the too happy to see such a writing style in this day and age, to which you needed not to berate yourself.

The only time I ever saw Ghirahim was during a demo which I randomly attended with some friends because they wanted to...in other words, I do not know a lot about this character aside from the fact that few or some people want him in the next Smash Game. On the other hand, the way you've presented him in this set is done well enough that it seems like I already know all about him and his elegantly prideful ways; you've characterized Ghirahim very well with his mannerisms and attack descriptions if I say so myself.

As you are new to the competition, but obviously not to the wonderful world of writing, I will say that said trait seems to be a great strength of yours, if only from my point of view (though I'm sure a good deal of people will agree with me); how well a person presents their set through writing alone can greatly affect how one sees the work overall, to which it is present here.

The closing comment seems to imply that you'll return for some more action, to which I hope you do consider doing. Also, you don't have to give feedback to another set if you don't feel up to it though it'd definitely be nice for the one receiving it!
Wow! ^_^ If I wasn't going to participate in this again normally, I likely shall now, thanks for the inspirations since my lack of confidence barely let me put that one out. Writing is definitely fun for me and is a typical hobby for myself, and Ghirahim definitely has a huge personality to paint. :D Though, like you say, he isn't entirely wanted much, so that moveset is for all to see that he could be a decent addition.

If I were to do another I'd like to stick in the realm of characters that I'd like to take a visit (I'm not as dedicated as the ones who do very wild and challenging ones). If flavor helps a lot as you say, next time I'll keep that in mind to ensure it is more honed, I like the idea of "teaching" a character to someone simply by showing their fighting style. Really cool. XP

Anyways, thanks again, I'll ponder a second selection while waiting for more excellent sets from the more experienced veterans around here. If you post any I shall rate as well, that goes for you too Hyper Ridley.
 

Rychu

Thane of Smashville
Joined
Jul 5, 2010
Messages
817
3DS FC
1908-0105-4965
Wow! ^_^ If I wasn't going to participate in this again normally, I likely shall now, thanks for the inspirations since my lack of confidence barely let me put that one out. Writing is definitely fun for me and is a typical hobby for myself, and Ghirahim definitely has a huge personality to paint. :D Though, like you say, he isn't entirely wanted much, so that moveset is for all to see that he could be a decent addition.

If I were to do another I'd like to stick in the realm of characters that I'd like to take a visit (I'm not as dedicated as the ones who do very wild and challenging ones). If flavor helps a lot as you say, next time I'll keep that in mind to ensure it is more honed, I like the idea of "teaching" a character to someone simply by showing their fighting style. Really cool. XP

Anyways, thanks again, I'll ponder a second selection while waiting for more excellent sets from the more experienced veterans around here. If you post any I shall rate as well, that goes for you too Hyper Ridley.
If you'd like to read up on older movesets or get some tips on set making as well as some discussion or some very cool things that have happened in the past,
The Bunker is a great place to start! I know it's also linked in the OP in case that link doesn't work for whatever reason. Other than that, we're always open to new people joining! No need to feel uncomfortable posting your work: it's why we're here in the first place! Feel free to drop in the chat sometime, too! (also linked in the OP).

Onto the set itself, there's no worry needed on your part, it's quite impressive for a first outing. It's very articulate, and you really seem to understand what you're talking about when you throw around terms like 'versatility' and such. The writing style is very good too: It expresses the character's great ego (which is present even in the character's first statistic explanation what with him 'standing above' and 'looking down' on his foes) very very well. So, you've got characterization of a set, which put in simple terms is how the set feels in relation to the character (there are whole articles written on the subject, though :p), down to a T.
I also like how you establish that he's a combo character very early on, and stick to that through the set and have moves that work towards this goal. In MYM, we refer to this as having flow, basically how well-focused it is on the sets playstyle (again, entire articles around that simple 9 letter word have been written). I know I'm probably babbling like a madman now so I'll make it simple: you have a very firm grasp on the fundamentals of moveset making, with good presentation to boot (the organization is nice to look at, very well made). That's not to say the set is without it's share of flaws, I mean, hey, no moveset is. The goal for you from here on out, at least my suggestion to you would be, if you want to continue making movesets (highly recommended, by the way, loads of fun) you should focus on finding yourself a 'style' you feel comfortable with, and along the way, maybe throwing in an extra effect in a move that affects another move, or begin to have more interactivity between moves, which are all the more fun to imagine.
Well, I'll end this here saying that you've made a very strong impression on my mind, and I can't wait to see what else you're capable of. It's always awesome the second time around, man.

:phone:

:phone:
 

Holder of the Heel

Fiat justitia, pereat mundus
Joined
Dec 3, 2011
Messages
8,850
Location
Alabama
NNID
Roarfang
3DS FC
1332-7720-7283
Switch FC
6734-2078-8990
If you'd like to read up on older movesets or get some tips on set making as well as some discussion or some very cool things that have happened in the past,
The Bunker is a great place to start! I know it's also linked in the OP in case that link doesn't work for whatever reason. Other than that, we're always open to new people joining! No need to feel uncomfortable posting your work: it's why we're here in the first place! Feel free to drop in the chat sometime, too! (also linked in the OP).

Onto the set itself, there's no worry needed on your part, it's quite impressive for a first outing. It's very articulate, and you really seem to understand what you're talking about when you throw around terms like 'versatility' and such. The writing style is very good too: It expresses the character's great ego (which is present even in the character's first statistic explanation what with him 'standing above' and 'looking down' on his foes) very very well. So, you've got characterization of a set, which put in simple terms is how the set feels in relation to the character (there are whole articles written on the subject, though :p), down to a T.
I also like how you establish that he's a combo character very early on, and stick to that through the set and have moves that work towards this goal. In MYM, we refer to this as having flow, basically how well-focused it is on the sets playstyle (again, entire articles around that simple 9 letter word have been written). I know I'm probably babbling like a madman now so I'll make it simple: you have a very firm grasp on the fundamentals of moveset making, with good presentation to boot (the organization is nice to look at, very well made). That's not to say the set is without it's share of flaws, I mean, hey, no moveset is. The goal for you from here on out, at least my suggestion to you would be, if you want to continue making movesets (highly recommended, by the way, loads of fun) you should focus on finding yourself a 'style' you feel comfortable with, and along the way, maybe throwing in an extra effect in a move that affects another move, or begin to have more interactivity between moves, which are all the more fun to imagine.
Well, I'll end this here saying that you've made a very strong impression on my mind, and I can't wait to see what else you're capable of. It's always awesome the second time around, man.

:phone:

:phone:
Thanks to you too! You guys are really nice here. :D Interesting suggestion as well, moves interacting with one another, I didn't do that once! I got a character in mind to try next, and I may be able to work such a concept into it, but I wish to spend more time on this one (the first one took some time out of two afternoons, tried to make it all interesting looking like the Sonic Remix which was such a fun read! But that failed so I went basic ha, I'll find my style hopefully).

But thanks most of all for the link that I missed, this is pretty neat. I'll ask for a review for Ghirahim to learn what the second set shouldn't have, read some sets, and whatever else I can do.
 

Sinewave

Smash Rookie
Joined
Dec 9, 2011
Messages
1
Location
Denver
Ghirahim: I like the interaction between his Neutral Special and other moves. The versatility of this and his Down Special make for an excellent all-around character, in my opinion. While I had fears he would be like Marth with his sword attacks you proved me wrong. I can envision all attacks clearly, although I would like an image for some (Down Special especially). The writing style confused me at times, but is good overall. I normally don't complain about other people's grammar, though, so take that with a grain of salt.


King K. Rool: I wanted to write a move set for this character but your's is much better. I do wonder why he plays dead for a Side Special, though. The move also makes me wonder: does he fall over on his belly, actually moving in the direction the player aims, or does he fall right where he is? If the answer is the latter, than it seems unfitting for Side Special, as in my mind it's kind of attacking forward and with a kind of... force, I guess? I hope you know what I mean. Otherwise, excellent job, and worthy of being in Smash Wii U along with Ghirahim's move set.


I am working on a move set of my own, as I said in the chat. It will be Black Mage, my Square Enix representative for Smash Wii U.
 

Holder of the Heel

Fiat justitia, pereat mundus
Joined
Dec 3, 2011
Messages
8,850
Location
Alabama
NNID
Roarfang
3DS FC
1332-7720-7283
Switch FC
6734-2078-8990
Ghirahim: I like the interaction between his Neutral Special and other moves. The versatility of this and his Down Special make for an excellent all-around character, in my opinion. While I had fears he would be like Marth with his sword attacks you proved me wrong. I can envision all attacks clearly, although I would like an image for some (Down Special especially). The writing style confused me at times, but is good overall. I normally don't complain about other people's grammar, though, so take that with a grain of salt.

I am working on a move set of my own, as I said in the chat. It will be Black Mage, my Square Enix representative for Smash Wii U.
You have my gratitude! *five gratitude crystals pop out of him and you receive them* I will admit, though I like writing, paradoxically my grammar is very strange in order, and sometimes I fall out of tenses. Also descriptions may be odd, I was thinking about pictures, I'll grab some and edit them in for future's sake.

I will also be commenting on your Black Mage moveset when it comes up, good luck! Learn from my weaknesses and teach me something with yours. :3

Edit: Nevermind, I suggest viewing the battles with him, they show case all of the moves, it is rather difficult to even take my own pictures of these since they are not existent stand alone.
 

ForwardArrow

Smash Ace
Joined
Aug 17, 2011
Messages
503
You know Holder of the Heel, you don't have to reply to EVERY comment on your set that is posted, and in a separate post each time. I don't really mind but it might start getting on people's nerves. Also, I will comment Ghirahim later, I'm a bit tired right now and I have other things I want to do.

Yukon Cornelius
I'm going to have to echo what Smash Daddy said here, Yukon's pitfalls become incredibly aggrivating when you realize he can drag foes through lines of them. This will leave the foe doing nothing for a solid 15 seconds or so, aside from being somewhat overpowered, which is generally something you want to avoid. Past that, Yukon's game revolves around the boulder and the sled. The boulder is pretty cool, especially with regards to the snow interactions and such, but an object which you can knock around like a soccer ball isn't exactly something we've never seen before. Still, I will admit it's executed pretty nicely here. The sled I also kind of like, though I find the interactions with dogs to be somewhat tacky and forced at points. Especially the back throw... why the hell can he only use a whistle to call them on a THROW? That and I'm really not a fan of the general idea of the dogs and the sled coming together packaged on one input, since the dogs do separate things, and the sled sliding by the foe GRABS them? I don't even see how that makes sense.

More or less, what I'm trying to get to is that Yukon was a pretty fun set... at points. And the playstyle flows and has a relatively large amount of depth, but when it comes down to it I don't really feel he's particularly original where he is fun and when he is original he turns into something that is incredibly tedious and or tacky. I don't hate this set, but I can't quite bring myself to like it all that much. Sorry Dave, I know how proud you are of this one and I don't want to ruin your fun... maybe Warlord can defend the set a bit.

Elspeth

Freakin Smady, why do we always have the same problems with sets? Anyway I have to agree I found Elspeth lacking in depth overall, with her strategy having little room for deviation and not a lot of cool tricks to it. It's a very straightforward set, too much so for my tastes. That said, I know you have a fondness for simplicity and when I look past the lack of depth, I like what I see here. Elspeth's use of the soldiers is fairly unique, and I like the ways you can make a sparring area with the foe while the soldiers boost your attack speed. Plus the various ways to swap up with the soldiers... though I don't like that they are entirely AI controlled, but I hate AI and here it's not nearly as much of a problem as in some sets. It's fun stuff and it has not really been done before, the set just feels really shallow which is the main thing preventing me from liking it much. But I'd still say it's pretty solid.
 

n88

Smash Lord
Joined
Oct 10, 2008
Messages
1,547
Zweilous & Mewtwo
[COLLAPSE="Illusive"]I'm not entirely sure whether you're around anymore, but your movesets seem to have been entirely ignored - I can't seem to find a single instance in the thread of anyone so much as acknowledging Mewtwo's existence, and commentary on Zweilous is rather sparse. Let me start off by saying that both of them would benefit from pictures at the top of the moveset. Moving beyond that, Zweilous has a few rather charming touches to the characterization, with the way you touch on the second head's animations. There's some very neat stuff here, and I think it could be quite interesting if elaborated on a bit .

Mewtwo, now, is a different story. There's actually a lot of evident progression here from Zweilous. The moves are explained in a more detailed way, and it's clear that you've put effort into making things cool-looking, using the biggest, flashiest moves available. The leap from Mewtwo to Zweilous is good in some ways, but I feel some of the moves you have Mewtwo using don't really make sense for the character (signature moves from other Pokemon is a big no-no), and you lose a bit of that character focus you had in Zweilous. If you're still around, then by all means I encourage you to keep trying. [/COLLAPSE]

The Penguin
[COLLAPSE="BladeKnight420"]I really like the way the Penguin hires his thugs. The move is quite fun, and it really establishes a wonderful dynamic between the most likely traitorous Penguin and his henchmen. The core ideas that go into this moveset are really great - they not only characterize the Penguin very well as this aloof villain who doesn't really want to directly involve himself in the fight, but also prove to be quite interesting gameplay-wise. However, I feel like the set does have one or two shortcomings. First and foremost, I think the guy could use some more projectile moves; he would certainly benefit from a way to better attack opponents from afar. Being able to better attack from a distance would also help with that distanced, not-so-involved style you were going for, I think. Lastly, I think it'd be cool, for purposes of toying with grabbed foes, to have a projectile move that didn't open the umbrella. I also find that Side Special to be a bit tacky, though I can understand why you put it there. In the end, the flaws are far from enough to ruin the set, and I do quite like the Penguin. [/COLLAPSE]

Yes, I am aware that there are newer movesets to comment. I'll get there
 

majora_787

Smash Hero
Joined
Jun 23, 2007
Messages
6,122
Location
Texas
MYM Mini 9: STICKERS

I'll cop out with you. Presenting, 10 stickers that are dumb references and make fun of my own sets!


EMIDIUS (T.A.P.)
The character equipped with this sticker gets Emidius' down and up specials. Congratulations. You've won.

UBOA (YUME NIKKI)
The sticker flickers, and the opponent

TEREZI (HOMESTUCK)
If a character is equipped with this sticker, they will go "blind" and will be forced to smell their way around the stage. Unaffected characters will have a bubble around them of clear vision. Afflicted characters will see everything else as a blur that will be blurred even farther by particle effects and projectiles. However, this keeps invisible opponents from being truly invisible!

JINOUGA (MONSTER HUNTER)
Increases stun time by 50%, and causes the equipped character to ripple with epic electricity. They will deal 1% per second to any opponents they touch or grab.

SWINUB (POKEMON)
Causes the character to become violently horrible in quality to the point where it even hinders the opponent's ability to fight against you. A lot of your moves will probably be unuseable and weak! And some may even be spelled wrong...

DOOPLISS (PAPER MARIO)
Causes the character equipped to spawn in the match as a shadow version, as if they had their set stolen by Doopliss! They will then be allowed to steal their opponent's moveset.

HIPPO
Causes the character's face to be covered in the xat chat hippo emote. Nothing they do will be taken seriously while their face is hippo'd.

ZERO TWO
Causes the opponent to taunt when hit by attacks that cause flinching, but not knockback.

MELLO
Causes Matt to spawn with the character equipped with this! ...Okay, he's pretty damned useless if you're not Mello.

METAL GENERAL
Causes the equipped character to not spawn until only 25% or less of the total time in the match is remaining.


I was bored, but couldn't be bothered to make it look like Juna did this. So blame laziness. First MYM Mini submission, AND it sucks! Woo!
 

Katapultar

Smash Lord
Joined
Nov 24, 2008
Messages
1,284
Location
Australia
Yutaka Kobayakawa (Lucky Star)


It's the sticker you've been waiting for, and not just for the artwork either! Putting this adorable little thing on your Sticker Base warrants you to step into the shoes of the sickly; your character will constantly take 1% per second and have a shield with a lowly 10HP, but enemies will always stand in place for 10 seconds before the time they'd attack you! This is a handy little sticker for setting up those much coveted traps, healing, or even just positioning yourself for the big battle; just be careful not to accidentally attack the enemy or else they'll attack you! You also have to be particularly careful when enemies DO actually attack you as not only can they easily knock you off the screen what with all that damage you're taking but they'll break your shield in one hit too! Still, this is a good sticker for trap or pacifistic characters who are easily able to negate all the damage they take and don't rely on their shields for protection.

You unlock this sticker either through a certain Story Mode or through a Bonus Match in Classic Mode that gives you the option of saving Yutaka from a random generic villain character; you have to start this fight with the same amount of damage you had in the previous one, and if you lose it you'll lose a stock and will be forced to go onto the next round without a second try. On the other hand, winning will have you save Yutaka, who will give you this sticker for you to use for the rest of the Mode; it has the same effect as before except now there is a 10 second delay to when the enemy will spawn. This includes the actual boss itself, who may not necessarily be Master Hand (the next mini should totally revolve around making an alternate Final Boss for Classic Mode that you fight with a certain character or character(s) from a certain series), which in turn gives your character enough time to set-up though you'll need to dodge your enemy's attacks even more desperately than before in exchange.


[COLLAPSE="Other randoms stickers. No, I'm not going to do all that many more stickers; minis are supposed to be done in one sitting."]
Bitten (Any Vampire fiction that's Japanese made)


This Sticker causes the user to become a vampire (but can only be worn by characters who are not vampires like humans). Being a vampire means the following:

  • Double power.
  • Double speed.
  • Perfection traction.
  • Heals status effects 4X as quickly and makes them wear off within 5 seconds if they otherwise last forever.
  • Regenerate 1/10ths of damage taken from attacks every 1.5 seconds.
  • Heal half damage inflicted upon successfully striking a foe with a melee attack.
  • The ability to Wall Cling for up to 10 seconds (if the character does not possess the ability in the first place, otherwise it is extended in time)
  • 2 extra mid-air jumps of the exact same variation of the user's through the use of bat wings that spawn on the user's back. Size, color and design of wings varies from character.
  • Hypnotism that slows any character/enemy/boss facing the user by 1/20ths for every 0.5 seconds they remain facing the user; this is a good incentive to hold enemies with a grab. It takes 2 seconds for every 0.5 seconds worth of the effect to wear off; if a generic enemy remains looking at the user for more than 5 seconds they will remain still until they die. Not every character gets this ability (usually only canonically powerful characters over cutesy lightweight female protagonists).
  • Ability to revive any enemies killed to the user's side (only works with evil characters).
  • Prevents zombification in ways such as Romero's zombies, Frute Brute's thingy or whatnot.
  • Last but not least, aesthetic appearance. Some characters may become pale in color. Some characters may acquire a pair of fangs that can be different shapes and sizes, with LFPs getting cute little fangs while villains gain long, menacing ones.
  • No downsides!

Arguably one of the best stickers in the game (though very, very, very, very rare and hard to get). If you get this, your enemy will pretty much be screwed over in almost every aspect unless your character either sucks or you're facing a boss who can wipe the floor with you just as easily. As sunlight is a randomly induced trait in Brawl, characters do not die from it but at least they don't sparkle in it (unless your affected character, Haruhi forbid, is actually a non-vampire from that series...), though they may have their idle stance changed to trying to repel the sunlight or feel discomforted by it, to which you shouldn't torture your character unless you for some reason do note like them.


Contract'd (Puella Magi Madoka Magica)


This Sticker causes the user to automatically become a Magical Girl as if they had been contracted by Kyubey. For those who understandably cannot remember, this condition increases the user's power (and healing effects) by 1.5 and gives them a fancy dress. Only lightweight female protagonists who are not magical girls in any way or sense can use this however, though I don't know why the hell you would in the first place as not only can the Soul Gem be knocked away form your character as an item (that they don't actually hold in the first place) and kill them in the process if it goes off the stage, but said item will shatter and kill the wearer upon that character taking 150%...

Except that the character at hand who uses gets one wish...guess what that wish is? That's right, an extra Sticker Base! This is quite convenient, though just be careful as being a Magical Girl can be quite a bit of a pain in the arse if you know what I mean.


Sorceress Power (Final Fantasy VIII)


This is similar to the Magical Girl with the same requirements to be used, albeit with some slight universal differences (this came way before, you know!). The one who acquires the power of a sorceress gains wings on their back that are the exact opposite color of their hair, and are either angelic or demonic in appearance depending on the character's alignment; said wings give the character mid-air jumps akin to MK's albeit with varying effectiveness based on the actual character's aerial effectiveness.

The sorceress power is actually a "battering item" that changes the user's Standard, Dash Attack, F-tilt and F-Smash to that of magical attacks, to which each character has a random affinity for fire, ice, electricity, wind, light, poison, darkness, earth and what not, with some being rarer than the others.


The Standard has the user fire a generic projectile through a varying gesture; by default it is similar to Wolf's Blaster but travels across the entire screen, but its power, speed, size and lag all depend on the sorceress herself.

The Dash Attack has the character able to teleport a Platform ahead and go offstage, though said character can save themselves with their extra jumps if that happens. The teleportation inflicts no damage but allows the user to travel past walls and quickly follow up with their attacks on enemies, with they having no ending lag whatsoever and will continue dashing if the control stick was held.

The F-tilt simply has the character at hand create a generic barrier in front of them that lasts for 5-10 seconds depending on the character, with said character being able to make up to 2 barriers at once and have the last one replaced if they want to make a third one. Fire inflicts 6% that KOs upwards at 300%, ice inflicts 2% and freezes victims for a moment, electricity inflicts 3% with slight pushing knockback yet good hitstun, wind pushes victims back like a bumper, light reflects attacks back at users, poison does no knockback but inflicts generic poison damage that inflicts 1% a second for 10 seconds, darkness has a slight suction effect that draws in nearby victims for attack and earth is simply a solid wall that lasts for slightly longer than the other barriers and is slightly taller.

The F-Smash has the user gesture to the floor in a varying manner that creates a elemental trap which covers the entire ground ahead of them. Fire has the same effect as the Brinstar lava, ice inflicts upwards knockback and freezes much like a freezie that was smash thrown, electricity inflicts 6% per second and stuns every 1.5 seconds, poison constantly inflicts the poison effect every 0.2 seconds when stood on, darkness causes victims to sink into the ground and suffer a generic pummel KO if they fail to release themselves within 4 seconds (works like Hammer Head's pitfalls), light heals all status effects that the sorceress has when she stands on it and gives them to every other player, and earth will cause any foe standing on said trap to be pitfalled from any attack that'd knock them to the ground or from a weak one such as a Standard attack.

As I said, the sorceress power is in fact an item and can be thrown like one (as a pink energy ball). It will attempt to travel towards the nearest candidate for its power and place themselves into them (which the new user cannot take out for 13 seconds); if one of the reserve characters is potential candidate for the power said power will travel off the screen and plant itself into them. This also occurs if the current user of the sorceress power dies. Note that if the power does not find a candidate it will travel back to the thrower within 6 seconds or cease to exist if said character died.


Ghost'd (Yet another Japanese thing with ghosts)


This causes your character to become a ghost (though it doesn't work on characters who are already dead or are ghosts in some certain way). While your character is completely invincible and goes unnoticed by enemies in this state, they will vanish from the world within 30 seconds, which KOs them forever. This sticker is generally good to put on a character who's good at going on rampages, and if you're quick enough the death timer will reset by going through doors. To be fair, this is a rare sticker that is usually found near the end of a story mode to use against the Final Boss (to whom this Sticker WOULDN'T be broken on), and depending on the SM at hand, can actually be used to revive a character who's been killed in the story's canon (either scripted or a SM where you have to make some real tough choices. That or your characters die for good if they lose a stock) in order to give them one last chance at play. [/COLLAPSE]
 
D

Deleted member

Guest
MYM11 User Rankings #8, #9

Welcome to the User Rankings! Every Monday, I'll be compiling the entire of the last week's activity in the thread and showing off, just who is the most active member? The point of this exercise is to recognise the most dedicated among us – those make your movers who are currently pushing the boundaries, as well as highlighting all movesets made by them.

To get on this list, you need to have made a moveset in this or a previous Make Your Move, as well as having posted in the Make Your Move 10 thread. The cut-off point for tallying usually is 3:59PM on Monday EST, 5:59PM PMT or 11:59PM GMT, however this week proceedings rolled over to the next week as well due to a delay. Other removals or changes are at my own discretion. The breakdown of points is as follows:
30 points for a Moveset
5 points for a Comment
4 points for a Secondary Submission
2 points for a Secondary Submission Comment
1 point for a Regular Post
+Regular Posts do not stack
+Secondary Submissions are MYminis, Joke Movesets and other miscellaneous submissions
This two-week user ranking comes at a good time for one, given the lack of activity in the fortnight - not in any extreme way, but we may be feeling the results of finals and the coming Christmas season. Last year, this was an extremely active time, but after that crazy Halloween, who knows if it will be that successful. In first place this week was well, me, with a bunch of comments and no sets - lame. In second was Kibble, posting Cutey Mark Crusaders alongside some good old comments. Be sure to check out CMC if you're a fan of the show or Kibble sets [I think that covers just about everyone]. In third was Warlord - OF COURSE! Dedede Remix lampoons the very concept of a remix in the eyes of Junahu, but certainly has its own personal charms to it that make it an enjoyable set. Hit it up for your Warlordian fill.

Remember to check out the stadium to find all of the sets mentioned.

Overall User Rankings


Points: 66, Movesets: Swalot, Death

Points: 50, Movesets: Sayaka Miki, Cutey Mark Crusaders

Points: 47, Movesets: Gangreen Gang, Le'Quack, Hammerhead, JJJ, Iggy Koopa, Beezwax, Dedede Remix

Points: 45, Movesets: Firebrand, Skarner

Points: 43, Movesets: Marvin the Martian, Freaky Fred, Pussycat Puss, Count Chocula, Princess Kraehe, Dr. House, Yukon Cornelius

Points: 34, Movesets: Ayano Minegishi

Points: 33, Movesets: Ghirahim

Points: 31, Movesets: Sonic The Remix

Points: 31, Movesets: Vol Opt, Kyubey, Fruit Yummy Mummy, Gatsaf, Kyoko Sakura

Points: 31, Movesets: Boom Boom, Dark Star, Kanden, 88 Teeth, Jeff Madrox

Points: 30, Movesets: Farfetch'd, Chaos 0, Pichu, Elspeth

Points: 15, Movesets: Dr. Facilier, Battleheart

Points: 11, Movesets: Linebeck, Mask DeMasque, Gruntilda, Copycat, Giant Bat, Medusa, Mummy Men, The Creature, Piggybank

Points: 10, Movesets: King K. Rool, Double Header, Bowser, Gaston

Points: 10, Movesets: Pachirisu

Points: 8, Movesets: Majora's Sceptile, Leviathan, Deviljho, Jinouga, New Destroyman, Garrick, Mello

Points: 5, Movesets: Kobold Clan, Fire Snake

Points: 5, Movesets: Box Man

Points: 5, Movesets: Kimiko, Pokemon Trainer Mark

Points: 4, Movesets: QWOP, King Ramses, Knight Man, Escavalier, Phantom, Zombie, Jukebox Jaw, Teru Mikami
 

SirKibble

Smash Champion
Joined
May 2, 2008
Messages
2,400
http://www.youtube.com/playlist?list=PL02B8F93988E222A3&feature=mh_lolz


Invidia is one of the principal antagonists of the anime 11eyes. She, along with the rest of the “Black Knights,” resides within the “Red Night,” a parallel universe the main characters of the show are repeatedly and seemingly-randomly summoned to. Every time the protagonist group of students is brought there, the Black Knights seek to find and kill them, calling them “Fragments” who have committed a terrible sin for which they must be punished.

When Invidia first attacks the students, the pyrokinetic Takahisa fends her off, scorching and deforming her face in the process. From this point on, Invidia’s hatred is extremely evident and she seeks revenge on the students, especially Takahisa, at every possible opportunity. Invidia is the only member of the Black Knights with wings, and beyond that, possesses short-range teleportation powers, making her a very quick and evasive opponent. At the end of her right arm is a spine-like weapon called the Dragon Skeleton. Invidia can tighten or loosen this powerful weapon to use it as either a spear-like stabbing tool or a flexibile whip. In addition, the Dragon Skeleton can be extended and retracted at will.

After several fights, near the end of her life, Invidia reveals that she has one more combat ability, a last resort of sorts: her blood is explosive. Upon harsh impact with anything (such as dripping to the ground or being struck by a powerful enough blow), Invidia’s green blood erupts. Even a drop is capable of making a powerful, albeit small, explosion. Invidia can also force the blood in her veins to explode, though this is much more difficult to do and requires a lot of effort on her part. She is miraculously stopped and defeated by the party shortly before self-destructing and killing them all.

Invidia’s explosive blood plays a role in her Smash appearance as well. Once she’s taken 40% damage, the blood will start to drip from a small cut on her body. From 40 - 79% damage, one small drop of blood will fall every three seconds. When it makes contact with anything (the ground, an opponent, etc.), it will explode in an explosion similar in size to those of Link’s bombs, dealing 10% damage and decent knockback to anyone, including Invidia, hit by the blast. From 80 - 119%, the frequency of drops increases to once per two seconds. At 120% and over, Invidia’s wound becomes large enough to see. The dripping remains the same, but now a vicious cut wrapping around most of her torso with a glowing green tint is visible, and any attacks dealing over 15% damage at once to Invidia will cause her to immediately explode, dealing 35% damage and extremely strong upward knockback to anyone within a Blast Box’s explosion radius. Naturally, this affects Invidia as well, almost always KOing her.


Invidia’s wings make her a fairly large target, but also, of course, provide her excellent aerial maneuverability. She has high jumps, and can perform four of them in mid-air. Her movement back and forth in the air is top-notch, much better than her rather average ground speed. She’s not heavy, but has enough weight to keep her in place, and very good traction as well. She has a slow falling speed, but a very quick fastfall should you need to avoid being floaty​


Invidia holds her Dragon Skeleton at the ready as long as you hold the Special button. Despite what it may look like, she is not charging the move at all, but allowing you to angle the attack before releasing the button. It can be angled in any of the eight cardinal and intermediate directions. When the attack is released, Invidia will thrust her Dragon Skeleton in the indicated direction quickly. By default, it reaches one Battlefield platform’s length, dealing 10% damage to opponents it hits. There is, however, another vital function for this move.

Opponents who are hit are “impaled,” so to speak, on the Skeleton, being able to escape with grab difficulty. Invidia will hold the Dragon Skeleton in place from the point the foe was impaled on to the tip, but she herself can move around and use moves that don’t require the Skeleton. The portions of the Skeleton closer to her than the foe is can bend to follow her as she runs, but if she tries to move beyond the reach of it, her movement will be halved and she’ll start lengthening the Dragon Skeleton as she moves. The Skeleton can reach a maximum length of two Battlefield platforms’ length. When the opponent breaks the grip or you press the Special button again, Invidia will retract the Dragon Skeleton out of the opponent(s) and pull it back to herself. Note that this can also be used as a tether recovery if aimed in the general direction of the stage.​


Invidia flicks her Dragon Skeleton to separates a portion of it from the main body (almost a full Battlefield platform’s length, meaning it’ll now be virtually useless to you if you didn’t lengthen it before using this). That portion will then start spinning forward and backward in a wide circle through the foreground and background, effectively forming two walls on the stage about a Battlefield platform’s length high, the first right behind Invidia and the other about a Battlefield platform’s length in front of her. These walls have extremely high priority, and if touched will deal small amounts of multi-hit damage to opponents, unless they keep pushing against them for more. Invidia herself takes flinching knockback from touching them, but no damage. They cannot be destroyed except by Invidia using this move again between the walls to reattach the end of the Dragon Skeleton. The walls are wide enough to make rolling dodges past them possible, but somewhat difficult. Conveniently, Invidia’s position when she first uses this move sets her up perfectly to roll backward past the back wall. Invidia cannot create more than one set of walls at a time.​


Invidia flickers briefly before vanishing and reappearing a short distance away in whatever direction you tilt the control stick. This is highly akin to Mewtwo’s Up Special from Melee, though it’s a little slower on the execution. However, Invidia can use this three times per aerial session, and doesn’t go into helpless after the last time, either. In fact, after the third use, she’ll maintain the position she teleported to for one second, hovering wherever she ended up and being able to use her aerials freely without falling. You can press the Shield button to dodge and cancel this hovering early.​


Tensing up, Invidia forces some of her own blood from her veins onto the surface of her skin. This takes about a second to do, and cannot be reversed, so use it cautiously. She will glow green once this is in effect as a visual indicator. If she’s below 120% damage, this will make her act as though she’s above 120% for purposes of explosion only (this does not cause her to drip blood). If she’s above 120% already, this will increase the radius of the explosion she makes when hit hard to equal that of a Smart Bomb’s explosion. Quite powerful this way, but again, you’re KOing yourself to do it. Should you want to detonate manually, a second press of this input will cause Invidia to do so, though with punishable startup lag slightly longer than that of Warlock Punch. Manual detonation always causes a Smart Bomb-sized explosion. Note that Invidia has superarmor to her own blood drops while using this move.​


Invidia raises her Dragon Skeleton overhead to charge this move, then slams it to the ground in front of her hard. Due to the curvature of the Dragon Skeleton when it’s acting as a whip, this doesn’t quite reach the full length of the Skeleton, but gets pretty close. The attack is fairly fast, and the area of impact (basically just the tip) sweetspots for 24 - 30% damage, depending on charge, with great knockback. The rest of the whip deals only 12 - 18% damage with okay knockback. The longer your Dragon Skeleton, the further away you can hit, of course, but it may make it difficult to land that sweetspot you’ll probably need if you’re going to KO with this move. Notably, although Invidia swings the Dragon Skeleton from overhead, the hitbox doesn’t start until it’s a fair distance in front of her.​


Invidia stabs the Dragon Skeleton directly upward, in a very quick motion. There is significant end lag if you miss, but if she hits an opponent, they’ll be briefly impaled, taking 16 - 23% damage. Their helpless state doesn’t last long, however, as she roughly slams them to the ground next to her for an additional 5% damage, putting them in prone. Invidia suffers little lag this way, making the move useful for getting an edge over an opponent, particularly because it allows you to force them out of the air where Invidia wants to be alone.​


Invidia turns toward the screen and flaps her wings one to three times, depending on charge. Each flap covers a pretty good range on either side of her, has surprisingly high priority, and knocks opponents a decent distance away with 10 - 15% damage. The flaps are quick, so she won’t typically have to worry about being punished, the multiple flaps just helping to ensure a hit against dodging foes or to beat away at a shielding foe’s defense. Considering Invidia has a lot of attacks with much better range than this, it serves to push opponents to a place where she can hit them but they can’t hit her.

If you’re over 120% damage (or the Down Special has been activated), this has the nifty extra effect of flicking a drop of Invidia’s blood in each direction with every flap. The drops fly in both directions a short distance, similar to the trajectory you’d get from throwing an item regularly. Impact with anything will cause them to explode just like the dripped ones.​


Invidia swings the Dragon Skeleton horizontally in front of her, then back again if you repeat the input. She does this in such a way that the weapon bends quite a bit, making its range only about half of its full length. This has little start and some end lag, but only does 4% damage per hit. The sweetspot at the tip deals 6% instead, with extra hitstun but still very weak knockback.​


Invidia breaks out of her dash into a low glide over the ground. Of note, her glide is faster than her dash. Once she starts doing this, she’ll deal 9% damage and okay knockback to anyone she hits. At the end of one Battlefield platform’s length, she’ll abruptly lean back and fly directly upward, with the same damaging properties, until she reaches a height one Battlefield platform up. This all happens rather quickly. By default, Invidia will end the move at this point, in mid-air, but another press of the Attack button at this point will cause her to instead divebomb toward the stage a short distance from where she started going upward. Opponents knocked forward by the initial dash can usually be hit with this portion of the attack, which deals 12% damage and pretty good knockback. Invidia suffers some end lag as she lands.​


Invidia swings one wing forward in a slashing motion for 8% damage and weak forward knockback. Aside from the wing having rather high priority, there’s nothing that stands out too much about this move until you’re over 120% (or have used the Down Special). At that point, the wing will flick forward a drop of blood as if it was smash-thrown, having the same explosive properties as a dripped one. A fast move to start, but has a bit of end lag.​


Invidia swings her Dragon Skeleton in a full circle overhead. This deals multiple hits usually totalling about 10%, then throws the opponent directly horizontal in the direction Invidia is facing. The knockback is fairly weak, but the prolonged hitbox makes this good for halting aerial approaches and getting the perpetrators of them away from Invidia. This move is a little slower than most of Invidia’s others.​


In a crouching position, Invidia covers herself with her wings. She can hold this position for half a second before automatically spreading her wings for 7% damage on either side and a flick of blood that acts as if regularly thrown if she’s at high enough damage. While her wings are around her, attacks dealing over 10% to Invidia will be cancelled to 10% with flinching knockback, while she has superarmor to weaker attacks. Because of that, this can be sort of a last-ditch defense against a detonation, but don’t get careless--this move is slow to hit because of the defense, and suffers a fair amount of end lag as well.​


With a strong downward flap of her wings, Invidia stalls herself in mid-air for half a second. The flap deals 6% damage on either side of Invidia with weak horizontal knockback. For the brief moment she hovers in place, Invidia can use any of her ground attacks (sans the Dash Attack for obvious reasons) as though she were on solid ground. Moves that interract with the ground in some way (like the Forward Smash) will act a little differently, but largely remain the same. Naturally, this move has little end lag so you can follow it with a ground attack, and it has little start lag as well. Note that if you grab from your hovered position, Invidia will still resume falling at her typical slow fall speed.​


Invidia swings her Dragon Skeleton in front of her horizontally very quickly. This covers the full length of her Skeleton, but has limited use without precision aim. The majority of the Dragon Skeleton, you see, deals only 3% damage and flinching knockback, while the tip sweetspots for 16% damage and strong downward knockback. This has moderate lag on either end.​


Invidia twists her torso around, swinging the Dragon Skeleton overhead in a wide arc behind her. The Skeleton curves such that the range is always a semi-circle with a radius roughly one Battlefield platform long (unless you’ve made your Dragon Skeleton shorter than this with the Side Special, then it will be proportionally shorter than this). However, the longer the Skeleton, the more prolonged this hitbox will be, as the remaining portions follow the part Invidia hits with. Contact with the Dragon Skeleton at any point deals 10% damage and fairly weak horizontal knockback.​


Invidia flies in a full circle about the size of Bowser rather quickly. She will grab anyone she hits during the first half-circle, and becomes a hitbox of 11% damage and pretty good knockback for the second. At the peak of her loop, if she’s grabbed someone, she’ll toss them downward for 6% damage and knockback that, at lower percentages, combos readily into her following arc. At higher percentages, it will put them too far down for Invidia to hit, but that’s not a bad thing either, considering she wants an aerial advantage.​


Invidia stabs her Dragon Skeleton directly downward in a quick thrust. Normally, this will deal 10% damage and stun (like Zero Suit Samus’s Paralyzer) to opponents it hits, before Invidia quickly retracts the Dragon Skeleton. However, if Invidia strikes the ground with this move, the Dragon Skeleton will stick in it, impaling opponents hit and allowing Invidia to stop falling while it’s stuck. The Dragon Skeleton will remain stuck for about 1 to 2 seconds, depending on how much of the Dragon Skeleton is underground, which will be shortened by Invidia doing anything other than standing still. She can move around in the air at her usually aerial speed, and use attacks that don’t involve the Dragon Skeleton, namely the Neutral and Up Aerials. If she can lower herself to the ground in time (or just use her Neutral Aerial), she can also use her ground attacks that don’t require the Skeleton. She will automatically retract the Skeleton when it’s done its time impaled in the ground.​


Invidia swings her Dragon Skeleton forward in an attempt to wrap it around her opponent. She swings it with a curve such that it covers about half its full length. The more of the Dragon Skeleton that’s past the opponent, the more will wrap around them, and therefore the stronger the grab is, with one Battlefield platform’s length being typical grab difficulty. This grab is similar in lag to Link’s.​


Invidia tightens the Dragon Skeleton around her victim. Depending on how much of the Dragon Skeleton is wrapped around them, this can do anywhere from 1% to 5% damage, and can be repeated at a moderate rate.​


Invidia straightens the Dragon Skeleton forward to its full length, pushing opponents to the very edge of it, though it only does flinching knockback there with 8% damage. Still, if used after an up-close grab, this can be a very effective spacing tool.​


Invidia yanks on the Dragon Skeleton, unwrapping the opponent while they fly past her. As they do, she gives a swipe of her other hand’s fingernails. The yank deals okay knockback and 2% damage, but this slash deals 7% damage to make the throw respectable. In addition, Invidia will get a little of her blood on the opponent if she’s over 120% or under the effect of the Down Special, giving them a one-third-as-powerful version of her own self-destructive nature for the next two seconds.​


Invidia flies up a Battlefield platform’s distance into the air, carrying her opponent with her, then swings the Dragon Skeleton downward and slams them to the ground, releasing them. This leaves Invidia in the air, and is a great way to gain an aerial advantage. This is especially useful when your dripping blood threatens your ability to use your other throws.​


Invidia tightens the Dragon Skeleton until a crunching sound is heard, then abruptly smashes her opponent to the ground in front of her. This deals 9% damage and leaves the opponent in a special prone state that they cannot escape from in the normal fashions. If they try to do anything other than just stand up (dodge or attack out of prone), they’ll fail and fall back on their face (into a normal prone position from which they can get up normally).​


Invidia stabs her Dragon Skeleton straight forward, skewering any opponents hit. The Skeleton then starts glowing green with Invidia’s blood, and begins exploding at random points in Bowser-sized explosions. Due to the Smash Ball’s powers, this does not harm Invidia in the slightest, but deals 15% per explosion to opponents hit. There will be five explosions before Invidia whips the Dragon Skeleton forward to release the victim(s) with good knockback. While a shorter Dragon Skeleton is harder to land the initial hit with, it can be very rewarding because it leaves the explosions nowhere to happen but on top of the opponent.​


Let’s start from the end and work backward to the means, shall we? Invidia’s methods for KOing largely center around gimping, the alternative being to blow yourself up in your opponent’s face. In fact, your only real good option outside of that is the Forward Smash if you get good at landing the sweetspot. For purposes of this playstyle section, let’s first assume you’re going to focus on gimping for the KO. Invidia’s methods for doing that include the Forward and Backward Aerials, as well as the Up Aerial at high percentages. Her Side Special also makes a great edge-guarding tool, though you have to be careful how you use it as it will keep you away from the ledge as well. Your Neutral Aerial opens up a few more gimping options in the form of the Up and Down Throws, as well as the Forward Throw potentially.

The difficult thing for Invidia is often getting the opponent over the ledge where she can gimp them, given that so many of her attacks deal downward knockback. The Forward Throw is an option, and a good one at that, while you can also potentially use moves like the Up Tilt or the Down Smash to push opponents to the side. The Side Special can be used for pressure, but will hamper your abilities later on if you don’t precede it with the Neutral Special to get your Dragon Skeleton as long as possible.

Outside of scoring KOs, Invidia plays best with her opponent on the ground while she flies high above them. The Down Aerial lets you stick a grounded opponent in place, then use a combination of the Up Special (to get in position), the Neutral Aerial (to allow you use of ground moves), and whatever fits the situation to get another hit on them. As far as getting into the air, the Up Throw and Dash Attack are both quick options that allow you to attack while doing it, though with Invidia’s excellent jumps and unpredictable Up Special, you should have no trouble. The Side Special can be used as a wall against opponents whose approaches are making it difficult to get fully airborne.

Of course, none of this is taking into account Invidia’s dripping blood, something you need to be constantly aware of. Your time on the ground needs to be limited, as you can rarely pull off more than one attack without dripping blood at your own feet and damaging yourself. Fortunately, this won’t totally detonate you if you’re ripe for that, but it can prove a great nuisance and a massive interruption if not accounted for properly. This is another reason Invidia prefers an aerial advantage over her foes, so she can ensure that those dangerous drops of blood don’t affect her, but rain all over the opponent. The Down Aerial holding opponents in place while you drip blood on them is excellent for damage racking. The Up Throw puts you almost directly over your opponent, and sets up well for this technique. Use the Neutral Aerial to grab from the air so you don’t get punished by yourself for a failed grab, or to keep your opponents at bay with a Forward Smash.

Invidia’s Down Special is more of a last resort than anything, and should be used judiciously and rarely. A good setup for it can include the Side Special forming a somewhat enclosed area to blow yourself up in, followed by a Down Throw to inhibit the opponent and keep them from dodging or interrupting you. Take every precaution possible to ensure your opponent is hit by the blast, as you’re just giving them a free KO otherwise.


The 11eyes series brings with it this stage, which at first appears to be a typical town. The battle is fought atop two tall building that are almost side by side, one being about as high over the other as the highest Battlefield platform. These buildings are about half as wide as Final Destination. 30 seconds into the fight, however, things change. The sky takes on a dark red hue, and the “larvae” of the Red Night start appearing at random places. These blob-like creatures are about the size of Bowser, and one appears at a random place on the stage every 20 seconds. They have 50 HP and one attack--to bite down on and suck the life from their victims. They move at Ganondorf’s walk speed, so they’re pretty easy to avoid, but using them against your opponent is a very rewarding accomplishment, as they’ll suck for a powerful 10% per second, recovering HP at the same rate. No more than three can be on-stage at a time, so if you don’t defeat them, they will stop appearing after one minute. After two minutes in the Red Night, the stage will revert back to normal for one minute before entering the Red Night again.

Stage Music: You’re listening to it (unless you didn’t click the link at the top for the playlist <_<).

[collapse=Alternate Costume - Contains Spoilers]


Elaine of the Dragon Skeleton, or just Elaine, is Invidia’s true form before the Red Night. Elaine was the proud protector of a rogue group of Christians before being targeted by the Punishment Squad, the special task force of the Holy Office of Index headed by none other than the pope. The reason for targeting Elaine was not, however, because of her group’s unorthodox belief system clashing with mainstream Catholicism, but because of her prowess in battle.

She was defeated by Sebastianus of the Holy Bone, whom she fell in love with upon her defeat, likely in part due to being impressed with his abilities and strength. She then joined the Punishment Squad and was with them until their battle with Lisolette Werckmeister, the “Witch of Babylon,” whom they were all defeated fighting except Georgius of the Rainbow and Misao Kusakabe, the former of whom sacrificed himself to seal the witch away and the latter of whom successfully brought the fallen Punishment Squad members back to life in their new forms as the Black Knights.

Elaine’s moveset lacks much of what makes Invidia’s unique, presenting a much more straightforward fight. She does not have Invidia’s explosive blood nor her wings. However, she is extremely dangerous with the Dragon Skeleton in its original form, as the weapon is even more powerful than its Red Night counterpart. Elaine’s moveset has the following differences from Invidia’s:

  • Elaine has only the standard one mid-air jump, and average aerial speed. She is quicker on the ground than Invidia.
  • Elaine does not have any part of Invidia’s blood mechanic.
  • Elaine’s Neutral Special has double grab difficulty for impaled opponents to escape.
  • Elaine does not separate the Dragon Skeleton from itself for her Side Special, performing the spinning action with the fully-attached Dragon Skeleton. She does not create walls with it, instead filling in the would-be enclosed area and causing all within that range to take multiple hits up to 18% damage. This lasts for roughly a second.
  • Elaine’s Up Special is a rather typical tether recovery, dealing 14% to opponents hit. The length of the Dragon Skeleton determines its range and recovery potential.
  • Elaine’s Down Special is a powerful wide-area spin attack similar to Link’s. Each use increased the length of the Dragon Skeleton by half a Battlefield platform’s length and deals 8 - 20% damage to opponents hit, depending on the Skeleton’s length.
  • Elaine’s Forward Smash has a larger sweetspot than Invidia’s.
  • Elaine’s Up Smash throws the opponent forward instead of to the ground.
  • Elaine’s Down Smash involves her spreading and separating the Dragon Skeleton to form a sort of barrier around herself, which deals 10 - 20% damage as she forms it and has high priority against other attacks.
  • Elaine’s Neutral Attack can be performed at a higher rate of repetition than Invidia’s.
  • Elaine’s Forward Tilt is a swing of her Dragon Skeleton, with the whip doubled back on itself enough to make the range always one Battlefield platform’s length, creating a potentially powerful hitbox than deals 8%, 16%, or 24% damage and good knockback.
  • Elaine’s Down Tilt is a short-ranged stabbing of the Dragon Skeleton to the ground. Despite short range, this is powerful and deals 17% damage and great knockback.
  • Elaine’s Dash Attack is a forward and backward whip of the Dragon Skeleton, great for interrupting opponents who try to halt an approach or a getaway. It reaches the full length in front and back, dealing 9% damage and okay knockback.
  • Elaine’s Neutral Aerial is a very fast curving of the Dragon Skeleton in a full circle around Elaine. This can cancel projectiles shot at her, and deals 7% and flinching knockback to anyone hit.
  • Elaine’s Forward Aerial hits the opponent with diagonal knockback at the sweetspot, and has a larger sweetspot.
  • Elaine’s Backward Aerial covers 1.5 times the range of Invidia’s.
  • Elaine’s Up Aerial swings the Dragon Skeleton over the same area Invidia flies before retracting it. The Skeleton deals 12% damage and good upward knockback.
  • Elaine’s Down Aerial does not stall her in mid-air if struck into the ground. Instead, she’ll rapidly pull it out, dealing an additional 10% damage and strong upward knockback to skewered opponents.
  • Elaine’s grab is faster than Invidia’s.
  • Elaine’s Forward Throw deals okay knockback instead of flinching at the tip of the Dragon Skeleton.
  • Elaine’s Backward Throw does not include a slash, but she follows through for a more powerful toss backward that deals 12% damage and good knockback.
  • Elaine’s Up Throw is the same as her Forward Throw, but upward instead.
  • Elaine’s Down Throw cripples the opponent a second time if they roll or attack out of prone.
  • Elaine’s Final Smash, instead of pulsing explosive blood, involves her swinging impaled opponents back and forth, slamming them against the ground, walls, etc., then releasing them with a final swing upward.

Overall, Elaine plays much more like a typical spacer than Invidia. She lacks both the positive and negative effects of the blood mechanic, but struggles compared to Invidia when it comes to recovery. Fortunately, her power and improved use of the Dragon Skeleton’s wicked range make up for that. She also has an additional way to increase its length in the Down Special.​
[/collapse]


Holder of the Heel

Fiat justitia, pereat mundus
Joined
Dec 3, 2011
Messages
8,850
Location
Alabama
NNID
Roarfang
3DS FC
1332-7720-7283
Switch FC
6734-2078-8990
Invidia

A really polished and well presented moveset with an interesting character, unique mechanic, and versatile moves. However, there are some glaring drawbacks that come to mind, such as the unique mechanic I mentioned: the explosive blood. Not only does it cause opponents with no range attacks to forcibly hurt themselves in order to kill her when she is over 120%, but also that she, according to the description, if she is standing on the platform, explodes every few seconds from Link-bomb-sized explosions. Where else will the drops disappear? So basically staying on the ground at that point would be folly, which is pretty difficult even for this somewhat lofty character. Not to mention the moves that fling the drops seem hard to spot and can cover some crazy distance in insane speed. Unless of course I am not reading this properly.

Also, the Smash attacks are done well, but some moves are hard to picture, like the move that grabs the opponent with her weapon, and she may now travel around with them and use moves without the weapon just fine. It is quite odd to me, though this may be personal, and would be strange to see large characters wounded up likey that at any rate. Also the wall ability where she creates walls can easily be a broken technique if you set your opponent up when they are trying to recover, especially due to their invulnerability status.

Beyond some things such as that, it is well done and thoroughly discussed in terms of background and hitboxes, etc.
 

SirKibble

Smash Champion
Joined
May 2, 2008
Messages
2,400
Invidia

A really polished and well presented moveset with an interesting character, unique mechanic, and versatile moves. However, there are some glaring drawbacks that come to mind, such as the unique mechanic I mentioned: the explosive blood. Not only does it cause opponents with no range attacks to forcibly hurt themselves in order to kill her when she is over 120%, but also that she, according to the description, if she is standing on the platform, explodes every few seconds from Link-bomb-sized explosions. Where else will the drops disappear? So basically staying on the ground at that point would be folly, which is pretty difficult even for this somewhat lofty character. Not to mention the moves that fling the drops seem hard to spot and can cover some crazy distance in insane speed. Unless of course I am not reading this properly.

Also, the Smash attacks are done well, but some moves are hard to picture, like the move that grabs the opponent with her weapon, and she may now travel around with them and use moves without the weapon just fine. It is quite odd to me, though this may be personal, and would be strange to see large characters wounded up likey that at any rate. Also the wall ability where she creates walls can easily be a broken technique if you set your opponent up when they are trying to recover, especially due to their invulnerability status.

Beyond some things such as that, it is well done and thoroughly discussed in terms of background and hitboxes, etc.
Thanks for the response, HOTH. You make some good points here, and I have to admit I was aware of a few of them even as I posted the moveset. Indeed, characters with no ranged attacks are pretty screwed against her if she gets over 120%. I don't really have an excuse for that.

As far as her inability to stay on the ground at high damage, that was intentional. It was meant to further encourage someone playing Invidia to get into the air. Given that even at their fastest rate, the drops come every two seconds, I didn't think it would be too difficult for a player to figure out when to take the little ground time they have, but hey, you may be right.

The moves that fling drops are a bit hard to spot--there are only a couple that do it--but it's more of an added bonus to the moves, since they function just fine without it. As far as crazy distance or insane speeds, I mentioned she flings them just like thrown items, and given their properties, it's not really any different from Link tossing a bomb.

The next thing you mentioned is nothing more or less than failure to properly explain on my part. In none of her moves can she move an impaled opponent around. The Neutral Special and the Down Aerial, the only two that allow her to move around, don't also move the opponent. Her weapon remains stuck in place except the portions of it that are closer to her than the hit opponent, so that limits her mobility a bit.

And finally, admittedly, I probably should have constructed the Side Special a little differently to avoid that super-good edge-guarding ability. I hadn't initially thought of it in that light, so when it came as an afterthought in the playstyle section, I kind of dismissed it.

But hey! That's all right, I'm glad you read it and found some things enjoyable! Thanks once again for your comment. :bee:
 

Holder of the Heel

Fiat justitia, pereat mundus
Joined
Dec 3, 2011
Messages
8,850
Location
Alabama
NNID
Roarfang
3DS FC
1332-7720-7283
Switch FC
6734-2078-8990
Sorry about commenting on something intentional, it is true that it is interesting regardless of anything that I could say, and we'll never know how practical it is (although if that could be the case that would be sooooo AWESOME xP). And you are probably right about the throwing thing not being a big deal, I just imagine someone flapping their wings constantly to throw drops of blood rather quickly, not to mention it is almost like a last-resort bonus as you say, since she'd likely not last much longer.

Lastly, no that was a lack of imagination on my part, I just simply had an error trying to imagining it, and you do specifically say it stays in place but you yourself can move, and when you move out of range the hold ends. My apologies.

Keep up such excellent work! As a new member here, you have taught me plenty of things.

Edit: Also just realized the exploding 120% thing isn't really much a flaw, kind of adds a bit of strategy to your opponents, who then have to make sure they can KO you prior to that percentage, though whether that is good or not not sure. A lot of this post is ex post facto haha my bad.
 

ForwardArrow

Smash Ace
Joined
Aug 17, 2011
Messages
503
Ghirahim
I'm... really not the best person to comment newcomer sets I don't think, since I tend to judge all sets on the same level. But anyways, it's clear you have a grasp on a lot of the basics of moveset making. You really know your stuff with regards to making the set "feel" like Ghirahim, between the writing style and the rather amusing animations. That and you've got a fair bit of detail here. The main thing is in Make Your Move we can be a bit weird and decide we don't want our sets to be as "simplistic" as Brawl sets, and usually want some kind of interconnection between attacks, as well as some stuff that's a bit... crazier than your typical sword swing. Think outside of the box with regards to attacks and concepts. Either way, this is an excellent start, especially what with your comment on Invidia being so surprisingly well written. So more or less, stick around because this is a darn good start.

Also clearly DM will Super Vote this set because it has so many darn follow-up attacks.

Invidia

Well, this is certainly an obscure sort of character choice, and this coming from the guy who introduced you to Madoka. Not that it really matters, on to the set. Anyway, Invidia's playstyle didn't really click with me until I realized that her explosive blood would be dangerous for her if she stuck around on the ground and rather she should stay in the air to drip it down onto the foe. It also made her various attacks that give her an aerial advantage a lot more interesting. The dragon skeleton stuff is cool, her taking advantage of her huge range and aerial mobility to gimp the foe... though I sort of feel it doesn't flow all THAT well with the explosive blood. I'd say the main thing going for the set, though, is that she'd be rather interesting to play against, what with how you'll want to avoid being underneath her due to the blood, pin her to the ground to take advantage of it, and take caution once she reaches that crucial 120%. On a whole, I wouldn't say the set is as good as Sayaka(better flow in her case, and the whole impale foes to lengthen your dragon skeleton thing was kind of... awkward), but it's still a very solid effort.
 

Katapultar

Smash Lord
Joined
Nov 24, 2008
Messages
1,284
Location
Australia
I can say for sure that a character like Invidia was like, the last thing I was expecting as a moveset...I've most definitely heard of the anime she comes from but haven't watched it simply because umm, I've heard from places and all that it "sucks". Still, I see that you yourself watched it and and such I almost feel a wave of inspiration what with the obscure stuff I'm watching on Crunchyroll right now....I mean, who wouldn't want to make a set for someone with a concept as exploding blood? That just -sounds- cool no matter how you think it. But first, before we get into the actual set, lemme see if I got this correct...Invidia actually KILLS the heroes at the very end...correct? Wow, if anything I actually feel even more discouraged to watch the anime over encouraged; nothing on your part of course, that information is simply a fact that existed to begin with.

The organisation, like your previous 2 sets, is definitely good stuff (do you do all that and vector the image on you own?), though I almost it doesn't really hold up the dark atmosphere the character's supposed to bring...then again when I first saw that 3D image I thought Invidia was a video game character. Speaking of video games, the headers look like they'd fit perfectly for a Kingdom Hearts moveset.

The mechanic warrants a good number of quirks to it that are interesting as a concept, very interesting. Overall, it is the very fact that Invidia CAN use her blood as a weapon and she fully takes advantage of it that very much warrants countless interpretations...I almost feel that the time-orientation of the mechanic gives the player, Invidia, less control and forces her to acknowledge her own blood as a threat, something which players would pick up on; in other words, I don't think the mechanic was interpreted in the best possible way for the character and player comfort. What if say, the blood was a counter move she could initiate with a bit more efficiency at higher damage percentages, a move that would warrant the same amount of use as Wario's fart to the point where enemy players would forget and be caught off-guard by the fact that you even have explosive blood in the first place what with they being too distracted by your main game? Once you get into the actual meat of the moveset itself the attacks play out quite simply; I don't feel impaling to be too out of place in this moveset as I'd very much imagine it to be commonplace in the series itself. Moves like the Down Special make me feel the moveset to be made fairly quickly considering the short time-span in which you got this out considering your last set was posted a short while ago.

There seems to be an absence of character in this moveset, though one'd very likely guess from your description that Invidia has no character to begin with; she doesn't really look all that human so I wouldn't really know how she'd behave all that much. This is represented in your writing, with your little bouts of expression being absent from this moveset, a little thing I found enjoyable about the way you did things...something I'm starting to pick up now is that you're quite possibly more suited to making movesets for outgoing emotive characters whom you can share your bouts of writing with and make the whole thing an enjoyable experience (that doesn't mean you can't do characters like Invidia though).

Sorry for being all this too imposing on you, but I'm sure you'd prefer to know these kinds of things to improve, would you not? For someone like me who takes interest in character and writing styles, I didn't feel this set to be all too appealing to my tastes. Still, for the amount of time I reckon you would've made this set in, it's a pretty good one in the sense that there's a fun little concept and the fact that you've at least tried and done something different, which in itself would very much be helpful towards your improving...hopefully I here have at least helped you a bit, so good luck on your next set!
 

SirKibble

Smash Champion
Joined
May 2, 2008
Messages
2,400
I just wonder what ALL OF MYM is up to...

I can say for sure that a character like Invidia was like, the last thing I was expecting as a moveset...I've most definitely heard of the anime she comes from but haven't watched it simply because umm, I've heard from places and all that it "sucks". Still, I see that you yourself watched it and and such I almost feel a wave of inspiration what with the obscure stuff I'm watching on Crunchyroll right now....I mean, who wouldn't want to make a set for someone with a concept as exploding blood? That just -sounds- cool no matter how you think it. But first, before we get into the actual set, lemme see if I got this correct...Invidia actually KILLS the heroes at the very end...correct? Wow, if anything I actually feel even more discouraged to watch the anime over encouraged; nothing on your part of course, that information is simply a fact that existed to begin with.
Thank you, Kat for commenting and saving the thread from an even longer period of inactivity. :p

Anyway, I just kind of stumbled upon the anime and since it was only 12 episodes, figured I might as well watch it. I wouldn't say it sucked; I liked the plot and characters, though there was a bit too much fanservice for my taste. But yes, concepts like exploding blood are the ones that make me want to make movesets for characters. I base my decisions on little things like that a lot of the time.
And no, she doesn't kill them, though she gets very close.

The organisation, like your previous 2 sets, is definitely good stuff (do you do all that and vector the image on you own?), though I almost it doesn't really hold up the dark atmosphere the character's supposed to bring...then again when I first saw that 3D image I thought Invidia was a video game character. Speaking of video games, the headers look like they'd fit perfectly for a Kingdom Hearts moveset.
Well, considering the anime is based on a game, I suppose that's fitting. :p And I tried to avoid too dark of colors so it wouldn't be hard to read, but perhaps I could have done a little less white and a little more red...

As far as how I make most of my headers, I either make them myself or, in this case, use cooltext.com

The mechanic warrants a good number of quirks to it that are interesting as a concept, very interesting. Overall, it is the very fact that Invidia CAN use her blood as a weapon and she fully takes advantage of it that very much warrants countless interpretations...I almost feel that the time-orientation of the mechanic gives the player, Invidia, less control and forces her to acknowledge her own blood as a threat, something which players would pick up on; in other words, I don't think the mechanic was interpreted in the best possible way for the character and player comfort. What if say, the blood was a counter move she could initiate with a bit more efficiency at higher damage percentages, a move that would warrant the same amount of use as Wario's fart to the point where enemy players would forget and be caught off-guard by the fact that you even have explosive blood in the first place what with they being too distracted by your main game? Once you get into the actual meat of the moveset itself the attacks play out quite simply; I don't feel impaling to be too out of place in this moveset as I'd very much imagine it to be commonplace in the series itself. Moves like the Down Special make me feel the moveset to be made fairly quickly considering the short time-span in which you got this out considering your last set was posted a short while ago.
I appreciate your honesty about stuff like this, Kat. It's certainly an interesting suggestion, having it as more of a counter move with extra benefits at high percentages. The character-player relationship is a bit tough here, I'll admit, but personally, I feel it works a little better than you're saying. Opinions, opinions, I suppose. And yes, I got this set out quick, but not because I was rushing--more because the ideas I wanted just sort of came to me.

There seems to be an absence of character in this moveset, though one'd very likely guess from your description that Invidia has no character to begin with; she doesn't really look all that human so I wouldn't really know how she'd behave all that much. This is represented in your writing, with your little bouts of expression being absent from this moveset, a little thing I found enjoyable about the way you did things...something I'm starting to pick up now is that you're quite possibly more suited to making movesets for outgoing emotive characters whom you can share your bouts of writing with and make the whole thing an enjoyable experience (that doesn't mean you can't do characters like Invidia though).
Admittedly, I find it easier to write with expression on more bubbly, emotive characters. Sinister doesn't come quite as easily to me, which is why I used more of a straightforward writing style here. It certainly tells me something, though, for you to have picked up on it. I didn't think it would show through so much. I'm still planning at least one more character like this from the anime, so I guess we'll see if I can figure out a better writing style.

Sorry for being all this too imposing on you, but I'm sure you'd prefer to know these kinds of things to improve, would you not? For someone like me who takes interest in character and writing styles, I didn't feel this set to be all too appealing to my tastes. Still, for the amount of time I reckon you would've made this set in, it's a pretty good one in the sense that there's a fun little concept and the fact that you've at least tried and done something different, which in itself would very much be helpful towards your improving...hopefully I here have at least helped you a bit, so good luck on your next set!
Like I said, I appreciate your blunt honesty. I like my movesets a little quirky, and it's understandable if those quirks don't suit your taste. This moveset was a little more playstyle-central, probably due to the difficulty I had with a writing style and character expression here, so I can understand where it felt lacking for you. Thanks for reading and commenting, though, Kat! :bee:
 

Holder of the Heel

Fiat justitia, pereat mundus
Joined
Dec 3, 2011
Messages
8,850
Location
Alabama
NNID
Roarfang
3DS FC
1332-7720-7283
Switch FC
6734-2078-8990
Okami Amaterasu Set

Okami Amaterasu, the Great Sun God and Mother of All Things


(Picture by Issun, the largest and fiercest artist of all time)

Introductions and Snoring

Hey everyone! Amaterasu here, the mighty furball!

-Fierce growl-

Whoa, whoa, hold on there Ammy! I swear she can’t take a joke grumble grumble My name is really Issun, the great wandering artist! I am here to go on about Ammy’s appearance in Smash Brothers, though I hate to have ta do it, no idea why I wasn’t chosen to make a role!


Heh heh, as ya can see, she ain’t the talkin’ type, so here I am just doin’ all the work, just like in our adventure, betchya wouldn’t have it any other way, wouldja? No one else can do it, no one knows this furry thing as well as I do! I have been nestling in this ivory mess of fur throughout my game, Issun’s Epic Journey.

-Amaterasu ***** her head to the side-

And that’s right! I’ll be galloping atop her this time ‘round too (and depending on which Karmic Transformation you pick via her costumes, I'll be riding a different furball)! But for the sake of the game’s balance, the producers of the game opted for me to take the backseat in this move-set. Wise words from Nintendo, gotta say! Anyways, time to talk about her fighting style, and let me tell ya, she is real aggressive. She moves at the speed of 5 at the beginning, grass growing for a second behind each step, but once she gets her blood flowin’ after three seconds, she begins to shine and glimmer, and some flowers will rise for moments longer as she ascends the speed of 7! But she is only warming up I tell ya, upon my command after another three seconds of non-stop running she will raise her speed to 9, tall plant life of all colors begin to rise up and remain there for good! Well, unless someone burns it down, but who would do that? Ammy is the mother of nature, so her character relies on drawing upon the life around her, and she can make it even on the most lifeless patch of land there is! This will be important to touch up on a bit, but for now, onto her jumps. Says here on this paper that there are some strange things to cover.

Ammy can jump really high! Well, high for a furball, and flowers blooming from the first for a breath moment and leaves falling for a second from her second leap’s wake. On a scale from one to ten, she pounces at 8, but between you and me, her jumps don’t cover a whole lot of distance if you know what I mean. But height is her focus, yes, though, I mean, she is a wolf, so she isn’t very tall at the height of some pinkball named Kirby. Her traction of 10 (yes ten, I never saw her lose her footing once, and she has four of them!) is something to be reckoned with… well if traction can bring in some pain to demons! She’ll be fighting demons right? -flips through Nintendo SSB4 manual and sees Jigglypuff- What the…! Is the world in danger again?! Coulda sworn I defeated the darkness before… but this…


-Amaterasu lays down and closes her eyes lazily as she begins to breath slowly, snoring-

Lazy runt… but this is good timing, next here on this list is weight. Good to say this out-loud when she is unconscious. What does that Bowser fella weigh again? 10? Well then she has gotta at least weight twenty—

-snaps awake and begins to shake violently as Issun grabs onto her ear for dear life-

Ack! Whoa there Ammy! Fine! You weigh about 4! Four!!!!

-promptly stops and whines before sitting down panting-

Sheesh, just like a woman. Hopefully these last two criterion won’t get me a visit to the mouth of the Sun god, and the Sun god’s slobber… Brrr… Ah, I see here, fall speed and aerial movement. I’d say she falls about as much as any furball does, about 5, and furballs don’t move so fast off the ground they run, so maybe 4 aerial movement. Enough statistics! Let’s show’em what we’re really about, eh Ammy?

-snoring-

…Will ya get up?! Don’t make me use my Denkomaru on you! –unsheathes a small sword with a brush on the backend-

Nature and Smashing


Bah, I’ll deal with her later, I’m itchin’ for a fight! –sheathes Denkomaru- This baby will make its appearance at one point anyhow, heh, don’t get too excited! Still have this furball to cover. As a god, Ammy here likes to show off what she can do, and her style here will be no different. Anyone who wants to play as me will be using the nature of the stage in order to gain the advantage against the demons! Hate repeatin’ myself, but again, it don’t matter where she is, be it atop F-Zero vehicles or molten volcanoes of death, her godhood makes no place off limits. Well, o’course she won’t be using the nature originally on the stage except for a few things, some wise guy named Sakurai said that’d be unfair and make her less useful during the more desolate stages.

In what ways does she use the nature? Glad I asked. In more ways than one I tell ya! First off, the more nature that is upon the stage, the more animals that arrive in the background, like birds, bears, raccoons, foxes, etc. Things that draw in animals are large patches of flowers from her running, and if she runs enough, a shallow pool of water will be made that attract even more animals at an accelerated rate. There are a few other things, but that’d get off our topic here! Each animal lends to Amaterasu’s praise, and thus her godhood. When it has reached a high level, the sun will appear as it does when she uses her Celestial Brush in our game. The primary point of this is that she achieves a boost. Well duh, a god of nature in nature? She’ll feel right at home in that!

-Amaterasu blinks and torpidly raises her head, awake from the sounds of chirping, then scanning the area. Trees littered the ground from her godhood, pink petals drifting down to a nearby lake and landing among the lilies that floated in the still clear water, surrounded by a flower embedded grassland of vibrant beautiful colors contrasting with the shimmering white of the god’s hair. All of the animals around turn their heads to look her way with praise and love naturally brimming, energy now surging through the lazy goddess as she leaps and soars into the air with an even higher jump, landing into a full-on sprint through the field of life while a green bug bounces off her nose excitedly-

I am not a bug Holder! And look out ya wild furball! Here comes a—

-a boulder from a nearby canyon begins to roll down at a dangerous speed from the side, a direction only the small bug was looking I AM NOT A BUG!!! Amaterasu flitted her eyes to the right for a split moment but it was too late—the boulder crashes into side and explodes into many fragments and dust filters out between the cracks, hiding the conclusion for a few brief moments before a sudden galestorm blows it away, revealing an ivory wolf shaking off some residual debris, barely scratched-

Aw yeah! You guessed it! Amaterasu gets some damage percentage knocked off attacks up to 3% when the crimson sun shines! But that isn’t the whole package, her attacks follow suit and deal more damage depending on how much nature is around us (the specifics will be explained later, hold your horses!) Holy cow, look at that! Furball, another one is coming our way!

-a row of smaller rocks bounce off the canyon towards the wolf, but she stands in confidence, not disheartened. She wags her tail in fact, and a strange and powerful feeling meets the air for a moment before an obsidian inky line slashes straight across the row of boulders, ripping them apart into tiny pebbles that harmlessly bounce off her holy flower covered feet, except for the few that bounce up onto the small bug-

How many times do I have to say that I’m not a—BLECK! Boulders!!


Celestial Brush Techniques and Issun’s Art Class


-pats off clothing with a scowl- Yikes, those were some crazy boulders, what where you’re sending them things!

-looks over and whines before trotting over the pebbles towards the lake and lapping up the water-

Where were we… oh I know now, that technique reminds me of the next part of nature that we need to explain. Never realized till now how complicated this simple furball is! The most important feature may be her Celestial Brush at the end of her tail which she uses to bring life to the stage and activate all sorts of things (though it won’t make a freeze frame like in our game, no such thing as a Sun Goddess tier in SSB4). In fact she may be so layered as opposed to the demons you can play as, that you will only be able to play her with either a Wii Remote or a Wii U utensil. Her Standard Special: Celestial Brush (whatever that is) involves activating the technique, and for three seconds you get a cursor that works over a Bowser-sized radius of you that is an ink blot. At this point you may begin drawing with the Wii Remote or utensil the special symbols that activate each and individual one either by placing the utensil directly onto the Wii U, or holding B to draw and release to lift up the brush and hold it down again to draw a second line with the first and so on. While this is happening, you may move her as you please, but she cannot attack for the three second period. Now onto the shapes that you must draw!


This first one is Bloom, which is, well, a circle. If you can’t draw this, don’t bother pickin’ up a brush, artist work is tough work folks! Though it will be lenient and will accept imperfect prune-like shapes, it just needs to make a successful ring that touches from one end to the other like a snake biting its tail! This move is quite crucial, for it helps you activate nature. Used upon nothing but the space in front of you, it blooms flowers and may turn patches of flowers into a small puddle of water. These can also be used on erected trees from Okami’s Up Special: Cherry Blossom, which creates a tree in front of your character, adding to the godhood level (though you may only own three at a time). These trees can also be destroyed by other Brush Techniques, even if they weren’t by your hand!

Such techniques are Fireburst and Inferno. The former is an infinity sign that creates a fire explosion the width of the symbol drawn, no greater than a Bowser girth that does a high 15% damage as it lingers for two seconds. Any trees caught on fire will die out from this, and any lines drawn from this will sprout fire along the activated line, which is the latter (any tree on fire will remains as such and will actually damage foes for 2% soft damage, the fire lasting ten seconds). Other furballs may try to Bloom over the black dead tree that remains, effectively blossoming it with their own color!

But if a loop is drawn (a line that curves, makes a circle, but then keeps going like a breeze), Galestorm is activated and a wind blows that will get rid of any fire to either save the tree or re-bloom another. It even pushes foes back a little if they are trying to get back on stage! Also, if Bloom is used over an adversary, they will spin with joy and hearts will pop above their head for a moment. Fighting enemies with joy, not pain!


-Amaterasu sees a passing female towns member and wags her tail in a circle causing her to spin with delight and catch notice of the wolf, leaning down and petting her as she closes her eyes softly and smiles-

…Or it can be used to win over the ladies… maybe I need to bring Ammy to Sakuya and—Er nevermind, back on track. Issun Artist 101 class is back in session!


This one seems easy… well, it is, but that makes it quite versatile. The Power Slash is where you can draw a straight line in any direction at any length from three ink cursor blots to one battlefield platform, creating a quick black slash that deals 10% damage with a small stun effect. This also cuts down trees and erases them off the map, so be careful around your creations!


Now for the Cherry Bomb, which is a large orange bomb that is twice your height, almost comically big, that you can roll around by running into it, or push it with a Galestorm so it’ll roll across the stage a little. After five seconds, it will blow up shooting fireworks in a Bowser-wide range (we’re on a roll with these Koopa King references!) that deals 8% damage but has a strong knock-back. Any explosive attacks or strong slicing moves will make it blow up instantly, a few moves of Ammy’s like that are Inferno, Fireburst, and Power Slash. There can only be one ball out at a time (not including the furball), and if one is attempted to me made, the first blows up immediately.


Snowstorm looks like a snowflake, and is considerable hard to draw in an intensive situation (with the crisscrossing and what-not, tough for amateurs like anyone not me) so it is quite accepting for anyone who makes a line not crossing the center of the asterisk. This will freeze targets like this one move on this manual here called PK Freeze, and has the exact affect, except it will also freeze water caused from’er nature effect, making it a frozen patch of slippery land until you die or it is burned and melted. It also sprays out a few icicles that deal a few percentages of damage.


This is the same as Inferno in regards to them being lines drawn from an element. There is also Vine which can be drawn from a tree to our friend Ammy here, which will draw a vine out and onto the stage as a recovery! Ammy will likely want to make sure trees are near the edges! If she is hit while on her trip back, she will lose her grip on the vine, but she zips through faster than any recovery! Another rendition of this is Blizzard which can draw a line from one frozen target to another opponent or puddle of water and it also becomes frozen! One line Celestial Brush technique is Water Sprout which actually requires a STRAIGHT line from a pool of water, causing a pillar of water to spiral up for five seconds the hight of two-Bowser’s that can be rode up to high places! Though warning, all players can do this! It also works as a wall against projectiles, blocking/destroying them! This also can be used if Ammy falls into a pit of water on any stage that has it, although she wears the Water Tablet which allows her to walk on water! The last one is by far the best. Draw a line from Ammy to an opponent: I come flying out from the fur and strike along the line with my Denkomaru! 100% damage, and instant file erase! The game disc cracks! And in real life you have a heart att—

-spins her tale in a Galestorm and the wind blows him off of her like a leaf-

Raaaaah!

*Ten minutes later*

-climbs atop Amaterasu Canyon wheezing from lack of breath- Fine, it deals 1% damage as it goes throw and then back to you through the same line. Everybody is a critic.


Just a simple pair or two parallel lines will get you Veil of Mist which will slow down enemies significantly for several seconds! Wait… what’s that? That is too cheap? Huh? She’d be banned from tournaments?! Not like Metaknight –one who section in the SSB manual has a face of Metaknight with it crossed out- … Well fine, how about that enemies around in a Donkey Kong sized radius (surprised there didn’t I, eh?) will have their speed lowered by 1 point for two seconds? Okay, that is good. Also, if you cross two lines, you get the Mist Warp technique if done like an X. It doesn’t do anything unless done over an Origin Mirror, which can also be summoned in the background with a Down Special: Origin Mirror, which doesn’t increase godhood, but if you have two out, and you stand upon one and use this, it will warp you to the other one you have made!


These are the final two, and one is called Thunderbolt, and is by far the most devastating. This move will actually rob you of your ink once you use it, and you will have to wait 10 seconds for it to come back (which also means you lose your Reflector weapon, which we will talk about after all of this). Each other technique only takes one, which recovers in three seconds, so don’t worry about commonly using up your ink! Anyways, this technique drives down a yellow bolt that sparks heavily in front of you, dealing 15% damage! If used in the water, all enemies standing in will get stunned! That means the furball too! Though, there is one special occasion where Thundershock, the final technique can be used, which draw a line from lightning to targets, but cannot be used after Thunderbolt due to losing your ink, so that’ll come up later, mmkay? And that is all for the Celestial Brush techniques.

Oh, one more thing to mention! If you use Standard Special: Celestial Brush and fail in your attempt to draw a symbol, the ink used will fall to the ground, and if any enemy is in that radius will become blotted with ink and be stunned with lag as they have to shake it off! Heheh, even failing has benefits!

Reflectors, Beads, and Glaves, oh my!


Now as ya can plainly see, just by lookin’ at Ammy here, you can tell she has a lot more to her than nature and Celestrial Brush techniques. In fact, we have even hit the A button! For this segment, I’ll shut my sweet lips so the furball can take over on what happens next. –pulls out a controller for the presentation-

-Amaterasu looks over her shoulder and sees the Reflector weapon floating majestically above her back, a green mirror with ancient symbols bearing shining flames blowing like a breeze from its edges. This is her primary weapon in the games, and her signature one, although she has two other types to choose from, but this will be the main one throughout her attacks. She looks back to the front where a training scarecrow from Onigiri Sensei’s Dojo stands waiting for practice. Issun uses Forward Tilt: 3 Winds, the Sun Goddess controlling the Reflector at will to her front and it slashing as she turns and swipes her left paw, the mirror following her movements and slashing the scarecrow for 3% damage. Issun follows up with two more Forward Tilts to finish the two winds, her swiping from the opposite direction and then back again, dealing 4% damage and then 5%, the scarecrow being tossed high into the air above her as straws rain down on the scene-

Of course, if she had used her ink too much and lost it, the hitbox becomes where she swipes with her paws, losing range and 2% damage on each of the three attacks. Now for Upward Smash: Solar Flare!


-The weapon begins to spin and the flames erupt into a large molten point, melting the straw that falls as she charges the smash for 1% damage, and then when the scarecrow came close to her she let it go, the flames spiking at the tip for 15% and shooting the scarecrow straight into the air, smoldering into bits, not even falling back down again as it dissipates into nothing.-

When she does not her weapon, she simply hops a little and snaps the arc of her back for 10% damage, without the burning of course folks. Next for showcasing is the Neutral Aerial: Divine Retribution baby!

-Ammy looks back upon the canyon from before, and a newly erected scarecrow stands patiently, awaiting its demise upon a high cliff. She runs up to it, flowers blooming in her wake, then jumping onto the wall, performing a wall cling as some Smash characters can do, a patch of life communed at her position, and then she leaps up over her lifeless prey and curls, the reflector rising a bit and then slashing forward and making a full circle around her as she herself spins with it, guiding its wild aim as it strikes all around her. While performing this, she comes to an almost complete stop, effectively stilling her fall. The strike catches it as the Reflector comes down, spiking its head to the floor with 6% damage.-

When she loses her ink, this move becomes a simple twirl without the spike, range, and deals 3% damage by touching her spin. She also doesn’t stop in the air as she does normally. Now the last Reflector move is her Forward Smash: Mirror Shield! Good timing to use it too! No time to draw a Power Slash this time!

-The crash of the scarecrow into the canyon ground shook the structure, causing a single boulder to roll forth towards the divine wolf, as she pulls out her weapon in front of her, laying it flat, and spinning it quickly, the flames roaring with fury as the boulder crashes against the mirror like shield, cracking against its holy strength and doing no harm at all, but the attack dealing 14% damage unto the stone, obliterating it!-

This move may lack in range, but it defends and attacks! Without the Reflector, she realizes that it is no good, and simply clamps her jaws forward in an intense bite, dealing a quick 10% damage with good knock-back! Her best option for when she overuses her ink—Wait, what is going on?!

-The canyon begins to shake, but not like before! It is like the something is shaking the canyon instead! A strange black aura spews from a crack from the mountain and several humanoid demons wearing frightening masks pour out from a broken seal incased within the massive structure and begin laughing, roaring, and playing strange instruments in a strange combination of rage, pain, and glee. Amaterasu took but a second to start storming forth and with a Dash Attack: Hardhead she leaps forward a bit and bashes her hard skull against the side of a startled demon dealing 8%, the activation of the move putting her into her second level of speed (though never more than that) following the collapsing demon with a Down Tilt: Ferocious Bite, the wolf getting down to a crawl and biting the demon’s body with insane speed several times for 3% each, the demon disappearing in wisps of lightless smoke before it could recover from the dash attack as its cackling cries of delight and anguish echo in the wind.-


OK, good job furball, way to use your most powerful weapon, your thick head! There are more left though, they now notice you!

-Amaterasu turns towards the devils that continue to party as if their battle stance and normal stature are the same. The group of monsters speak gibberish before parading towards her holiness mindlessly, one jumping up into the sky. The canine leaps straight up and performs a Forward Aerial: Holy Falcon, pushing forward like the dash attack but now in the air with the distance of a Battlefield platform, orange leaves shooting behind her as she intercepts the demon with 8% damage, the demon dropping the flute it had and going limp in the air as it fell like a doll. But the enemies were quick to make use of the opening their fellow demon made and leapt up as well, the goddess unable to do a jump out of the Holy Falcon.-

Ammy! Use that item! Fast!

-She hears the tiny screams from the traveling artist I AM A BU—Er, I mean thanks and uses her Up Aerial: Vengeance Slip which isn’t an attack, nor does it go up, but it cloaks her in purple kanji for a moment that swirls around her in a circle that protects her from attacks for three-fourths of a second before going away, and can only be used once per aerial session. The demons surround her and strike that one instance with their sharp claws but bounces off and fall to the ground, looking at their claws in confusion. Then Amaterasu lands by one of them and turns her back to the demon! She then activates her Down Smash: Digging Champ which causes her to start digging with her front paws as long as it is charged up, flinging bits of dirt for 1% behind her, and then when released kicks back a large rock for 9% damage half the length of demon Jigglypuff away from her. The rocks pelt the demon but don’t do enough damage, only angering it as it stomped in a childish fit as she then whipped around and did a Close-Range Grab: Fang Grip (that activates only when the grab is used near a target) which causes her to latch on with her long fangs, the demon yelping in fear.-

Oh yeah! Time to reveal the most powerful move a Sun Goddess has! Pummel: Denkomaru! –Issun unsheathes his sword and slashes at the target upon each A button hit during the grab dealing a total of 1% damage each time.- Got’im warmed up for ya! Finish him Ammy!

-Amaterasu then uses her Down Throw: Goddess Spiral, which involves her jumping up in a spin and then crashes down upon the upon the victim, sending them vaulting towards the direction she was facing left with 13% damage! The demon fades a few shades in color before disappearing into the air crying with denial. The demons see this and back off in dread, disheartened by the obvious difference in power, but Amaterasu uses her Long-Range Grab: Tundra Whip, and the weapon that she wears changes abruptly!-


-The beads stretch out like a chain and grabs a hold of the nearest retreating demon at the length of her body away from her, pulling it in and then using Forward Throw: Tundra Bead Shots, which causes the chain of beads to whip around and that lash forward, tossing the opponent high into the air (4%), and Amaterasu fires blue beads from her Divine Instrument (three in total) that deal 1%, and if all three successfully hit the thrown demon, it becomes frozen and spins in the air! The demon becomes incased in a miniature iceberg and crashes into the ground cracking. Before the weapon goes away and is replaced with her standard Reflector, she unleashes her Neutral A: Tundra Strikes, which much like Ivysaur’s standard whip attack, causes the beads to spin around like a whip in the space in front of her dealing rapid 2% damage hits, and if the opponent somehow (albeit unlikely) gets caught in and hit five times becomes frozen like in the forward throw for 3% damage! The whip strikes the block of ice tearing it apart until the demon vanquishes in a plume of smog.-

Two more demons left! Show off your last two throws to get rid of them!

-The last pair of demons look at each other and begin to turn around, running away realizing they are out of their league. Amaterasu lashes out with her Tundra Beads and reaches for one, and right before the demon is wrapped up it grabs its companion and throws it in the way, betraying him and getting away towards the fissure they were erected from. The betrayed demon was reeled in, and the Goddess uses Backward Throw: Whirlwind, the Tundra Beads coiled around the foe and then unraveled him over her shoulder with a sudden massive gale of wind blowing from Amaterasu, using a Celestrial Brush technique in her throw that she can’t use elsewhere that doesn’t do damage to the thrown enemy but pushes them incredibly far and it even may suck in nearby Smashers! The demon cackles in misery as it fall off the edge of the cliff and crashes far below off the canyon stage being KO’d. Ammy and Issun look around for the last one and notice it digging at the glowing abysmal fissure desperately. The wolf jumps down at its side, and as the demon jumps up in shock, the Tundra Beads snake around his limps, his fate sealed by a Up Throw: Impaling Glave! Once again, she changes a weapon briefly in this one!-


-Amaterasu dawns the large broadsword once she bites onto the body of the demon and tosses him straight up and rides the blade like she can in Okami Don’t you mean Issun’s Epic Journey? and impales the foe shocking them for 11% damage, sending them flying into the air, great for a finishing move! The demon screeched as it convulsed for a moment and was fried into the clouds, dyeing it black with its deathly smoke.-

Good job Ammy! Though, what was that all about? Demons just don’t crawl out from any nook and cranny… What is up with that black stuff?

-The darkness emanating from the crack starts wavering and rising like a black flame until it begins to rise like tentacles, eight in fact. The wolf and her companion looked upon it with awe, Amaterasu bending down low with her Down Taunt: Threatening Growl, snarling like many a mortal wolves have by instinct. With an unearthly roar the tentacles formed into long necks as Orochi the eight-headed dragon spewed from the crack, revealing that the seal was containing a demonic monster of epic proportions!-

O, he who seeks power... He who has broken my bonds... Speak the words, "I wish darkness unto the world." Utter that prayer unto me, and unleash my power.

Yeah right! We don’t want no darkness unless we’re trying to take a nap! Furball!

-The Goddess needed not another word. She prepared to use her Glaive once again with her Up Tilt: Thunder Edge, which involves the unused Celestial Brush technique mentioned before called Thundershock. Ammy raises up the sword slowly with her mouth and holds it there for a moment, allowing one to use her Neutral Special: Celestrial Brush, which can draw a line from the sparking blade (that does 1% soft damage to anyone touching it with no stun) and can send a line of electricity to your targets for 15% damage with stun, though her lag is slow pre and post usage of the move as she would afterwards bring the blade down and put it away. Amaterasu draws a line along the awaiting Orochi as a bolt dashes through all of his heads with great might, the dragon’s eight mouths with torment as they all crash into the ground with a thud.-

We… we did it! But wow, that was easier than expected don’t you think? That thing was HUGE, even compared to you! And—

-The sky suddenly becomes dyed with black frightening clouds, the sun vanishing from sight. The color in the flowers dried up into grey dead weeds, the ponds and lakes around filling magically with a misty purple getting a poisonous look, the animals nearby running away as a horrendous gust that blew from all directions, wailing a sound like a woman suffering alone and obsessed with regret.-

…Ammy… why is it so dark? The day grew tired pretty quick huh? Heheh… Wait… is that thing moving?

-The eight heads begin rustling as they rise once more, shaking off the little pain experienced before and shaking angrily, now getting serious. The head in front leaned forward and brought forth from its yelling, flames spilt out at the wolf, Amaterasu jumping backwards out of the destruction’s path. Another dragon roared and a bolt of lightning crashed at her spot, Amaterasu used her Roll: Counter Dodge, which makes him spin backwards, and if a demon were in her path she’d do 3% damage to them with almost no knockback. But as she ended her roll her back leg lost its footing—she was on the edge of the cliff she was on.-

What are we going to do?! None of our attacks will work on that kind of monster! Unless… unless that is what I think it is!!!

-In the distance a strange mystical ball that stuck out like a sore thumb from its radiant rainbow colors juxtaposing against the darkness it roamed through. It started spinning around towards the Smasher, until Issun started grabbing her eyelids and trying to direct her eyes excitedly.-

Hit that thing! That thing up there Ammy! Hit it with all the smashing you can smash!


-Amaterasu ran forward in a last ditch effort to defeat the dragon, running along the various heads as poison, lasers, hurricanes, and all sorts of elemental attacks rained down like an offensive barrage, showing that demons are only capable of one thing: destroying. But because of her godhood being reduced to nothing, her running was slow at first, and she was hit, bashed, and burnt, running through the attacks bearing the pain and damage as best as she could until she couldn’t handle anymore and leaped as high as she could to get the sphere, using her Forward Tilt to hit it… and it merely took it and kept floating, as the Sun Goddess began to fall down as one of the heads swooped down low and opened its massive jaws, waiting to consume a god until she swings her tail and hits the ball once more with a Power Slash technique, the ball exploding and Amaterasu glowing with a light that was similar to the orbs glow.-

Hit B! Hit B! Hit B before we both get eate—

Final Smash

-Several moments passed with Issun’s eyes closed, awaiting his painful demise, but it never came. In fact the roars of a distant dragon seemed strangely distant.- Furball? We’re dyin’ pretty slow here. What is… -opens eyes and looks over to see Amaterasu staring at a human standing at the edge of a distant cliff with his arms crossed dramatically.-

Foul beast! How did you get here?... And why is the mutt here?

S-Susano?!


No… I am the AMAZING Susano.

…Are you telling me that our Final Smash is… is…

-Susano jumps up high into the air, gripping the blade tied to his waste as he lands next to the dragon who laughs to itself.- Su! –he charges forward, past a head of the dragon with a strange slash, the dragon still laughing until the dragon hit suddenly stops and is split in half and explodes, the rest of the dragons stopping, stunned from shock.- Sa! –he slashes along once more over another, that one exploding.- No! –A third time, the dragons now catching on and trying to stop him but he moves too quickly.- Susano Style… EXPLODING IMPLOSION! –This time he rushes through the base of the dragon with one last massive strike as he ends up on the otherside, confidently posing with his blade held high, and as the dragon falls apart in an exploding implosion of darkness, he slides the blade away and vanishes.-

…It really is… Our Final Smash: Exploding Implosion seems to summon Susano as he does three 20% quick slices like Lyn across the stage homing onto targets as his text appears below… and uses his Exploding Implosion technique into one final strike that deals 40% damage. Well… that is just plain embarrassing… But look! The dragon still has his fire head remaining! This thing won’t go down!

-Amaterasu looks down upon the dragon, whose final head lingers on the ground, struggling to rise from the Final Smash. The wolf stands by the head and lifts up its leg, performing Side Taunt: Golden Fury, which sprays a few drops of… well you know OF GOLDEN FURY! That deals 1% damage like Luigi’s taunt! The dragon cries out in pain as the final blow is dealt, and it melts away into sinister darkness that goes back into the seal.-

We did it! How about a good victory howl to sound this Smash Bros. move-set off?

-Amaterasu staggers a bit, and lets loose a mighty divine howl unto the heavens with her Up Taunt: Victory Howl as the life returns to the land and the sun shines brightly through the passing clouds.-
 

kitsuneko345

Smash Ace
Joined
Dec 20, 2007
Messages
562
Location
*sending Sundance lots of apple pies on Pi Day, as
I just realized I haven't made a mini this MYM. HALF-ASSING TIME

Tangled Stickers

[COLLAPSE="Bad Stickers are Bad"]Flynn Rider
Stunning attacks will have 20% more stun time.

Pascal
Disjointed hitboxes give out 20% more damage.

Mother Gothel
Healing moves will go 20% faster.

Maximus
Durability of outside mechanics (anything that utilizes an item that has HP implemented) will increase by 20%.

Sun Symbol
Ammo related mechanics will have 20% increase on ammo.
[/COLLAPSE]

Meet The Robinsons Stickers

[COLLAPSE="Who bets Emo Kits will be in Pokemon MYM2?"]Lewis
Opponent increases in size and weight by 1 measurement.

Wilbur Robinson
Ending lag decreases by 10%.

Bowler Hat Guy
Starting lag decreases by 10%.

First Time Machine
Flight mechanic increases by 10%.

Second Time Machine
Attack that don't do damage will speed up 10% but have all other effects maintained.[/COLLAPSE]
 

Rychu

Thane of Smashville
Joined
Jul 5, 2010
Messages
817
3DS FC
1908-0105-4965
Because we need less spam in the thread

:phone:
 

ForwardArrow

Smash Ace
Joined
Aug 17, 2011
Messages
503
Amaterasu
Well, this is an impressive step up from Ghirahim, and for the protagonist of one of my favorite games at that. The Neutral Special creates an incredibly cool array of tricks for Amaterasu to use, with the ability to power up via the nature and all the funky interactions with it. The attacks past the Specials don't really interact with it or take advantage of it at all, but that stuff is still at least in-character. I feel if you were trying to translate Amaterasu from Okami into Smash Bros, you succeeded incredibly well here. Which isn't exactly something I'm going to complain about, considering how much I love Okami and such.

Now, all that said, there is one big problem I have with the set, and that's the organization. If you are going to color the main test of a set, please use colors that are at least somewhat subtle. Bright reds and greens are really hard on the eyes and a pain to read. That, and I think the writing style, while certainly unique, is a bit frustrating in that I feel it hides the point of the moves as it describes Ammy's actions. Really, I would just prefer it if you would be straightforward with that sort of thing, and I'm sure most other people would too. Mind you, I didn't completely hate it, it certainly shows a love for the game and you got Issun and Ammaterasu's personalities spot on. I'd say characterization is probably your strongest point right now, really. So anyway, good work here, just next time I'd prefer it if the set was an easier read is all.

For a couple examples of Organization I think are effective, take a quick look at:

Baron K. Roolenstein
Fright Knight
My own Gamzee

/blatant advertising
 

Holder of the Heel

Fiat justitia, pereat mundus
Joined
Dec 3, 2011
Messages
8,850
Location
Alabama
NNID
Roarfang
3DS FC
1332-7720-7283
Switch FC
6734-2078-8990
Amaterasu
Well, this is an impressive step up from Ghirahim, and for the protagonist of one of my favorite games at that. The Neutral Special creates an incredibly cool array of tricks for Amaterasu to use, with the ability to power up via the nature and all the funky interactions with it. The attacks past the Specials don't really interact with it or take advantage of it at all, but that stuff is still at least in-character. I feel if you were trying to translate Amaterasu from Okami into Smash Bros, you succeeded incredibly well here. Which isn't exactly something I'm going to complain about, considering how much I love Okami and such.

Now, all that said, there is one big problem I have with the set, and that's the organization. If you are going to color the main test of a set, please use colors that are at least somewhat subtle. Bright reds and greens are really hard on the eyes and a pain to read. That, and I think the writing style, while certainly unique, is a bit frustrating in that I feel it hides the point of the moves as it describes Ammy's actions. Really, I would just prefer it if you would be straightforward with that sort of thing, and I'm sure most other people would too. Mind you, I didn't completely hate it, it certainly shows a love for the game and you got Issun and Ammaterasu's personalities spot on. I'd say characterization is probably your strongest point right now, really. So anyway, good work here, just next time I'd prefer it if the set was an easier read is all.

For a couple examples of Organization I think are effective, take a quick look at:

Baron K. Roolenstein
Fright Knight
My own Gamzee

/blatant advertising
You're absolutely correct, you could probably guess it was a complete experiment on my part to do it like this, and even looking at the final product it did seem disorderly, and the role-playing that would reveal each aspect of the character was sometimes disjointed with the technical explanation or it was forced and not to mention, it was taking so long that towards the end I just wanted to end it. So for all of the problems I apologize for, it was never my intention, and I was just curious to see how it would work out. If I post anymore sets, which I'm not sure of, it will not likely be in this fashion and be more traditional. Thanks for the references as well.

Also with how not all the moves interacted with the nature, it is because I didn't want Amaterasu bound by the mechanic, especially if with some stages it may be much harder to initiate that, which is why it purely boosts stats and nothing else, and that Celestial Brush moves mostly do all the interaction. I just wanted it to play some minor role since I've seen an Amaterasu set in MYM 9 that was well done, but it didn't have any focus on the fact that she was a Sun Goddess and Mother of all that is good, and was centered too much on having a bunch of weapons (creating a HUGE move-set even without counting the Celestial Brush techniques, which I wanted to avoid since it is unlikely for them to put that much into one character). So yeah, that is just about my thinking with it in a nutshell.
 

KingK.Rool

Smash Lord
Joined
Nov 26, 2005
Messages
1,810
So just in case we end up with everyone making Kecleon, I thought I'd barf up some ideas via a set that I never posted before - an ages-old Kecleon that I never finished and that was originally meant to be part of a Wally six-in-one started (and then abandoned) by PC back in MYM 6. Have fun! It's not complete, but the playstyle's all there, the ideas are all there, the rest of the set would have been filler inputs. Or, y'know, lose all respect for me.


What ABOUT Kecleon, the unlearned MYMer may be asking. Well, he's a fine, upstanding Pokemon. A bit random, maybe. He tends to be a pretty weak one made unique only by his interesting ability - Color Change. Upon being hit by any attack, he becomes that attack's type, gaining all the according weaknesses and resistances. Combined with an attack that few other Pokemon have - Camouflage - this gives Kecleon a niche as a Pokemon with a lot of control over his types.

In Brawl, Kecleon carries over his unique skill. Being hit by any elemental attack will change both Kecleon's color visually and his elemental affinity, changing a few key attacks. In addition, he's able to manually change his color. What's the point? Camouflage, of course! If the foe can barely see you, it gets so much easier to get close enough to pull off one of Kecleon's many effective low-priority low-range options.

Note that the red stripe on Kecleon's belly never changes color - this, coincidentally, is how to distinguish between him and his alt colors.

Being hit by a fire attack changes Kecleon to a vibrant red. Being hit by water or ice makes him blue. Plant-based attacks make him a more vivid lime green. Darkness attacks make him purple, and, of course, lightning-based attacks make him yellow. Magic attacks tend to make him orange, oddly enough. Wind attacks turn him greyish. Those are the basics, although other elements tend to turn him to the obvious.

Note, however, that being hit by a non-elemental attack - a punch or a kick or a stab - will turn him back to his Normal form, the dull green of the chameleon.


Idle Stance
Kecleon is hunched over slightly, his hands loosely held before him. He has a blank look on his face - the blank look of a criminal mastermind, that is!!!

Walk
Kecleon stalks forward. No other word for it, he downright stalks.

Run
Kecleon stomps from foot to foot clumsily, covering a significant amount of ground in each bound.

Crouch
He ducks down as low as he can go, dropping to all fours. Not as stealthy as it should be, sadly.

Wall Cling
The wall cling of Kecleon is excellent, as he sticks to it with all four limbs. He can actually wall-walk, albeit veeery slowly... but it gives him an extra option for hiding where one would not expect him to be.


Kecleon's a middleweight, slightly surpassing Mario. His attacks lack power and range but they have plenty of speed. His jump is decent, if not spectacular, and he falls slowly. He has great traction and is about as tall as Mario. He's quite average in every aspect. His attacks tend to have low priority.


Specials

Forward Special~ Disguise Effect
If used when Kecleon is his ordinary color, Kecleon will point at the ground and, focusing hard for almost a second, cause a small puff of a random element to pop up from beneath him; this is the advantage of being Normal-type, you get a lot of different types of attacks yourself. Being hit by this element will cause 4% and tiny knockback, but also change Kecleon's color to one of the aforementioned, depending on the element.

If Kecleon's already changed color, he'll use an attack corresponding to his current element; these are all large, flashy trap-like attacks and make it easy for Kecleon to blend in just by standing in front of them. These are:

Fire/red --- Kecleon exhales a great line of fire that reaches forward half of FD and is as tall as the top platform of Battlefield. These flames sizzle there for ten seconds, and any non-fire character within them takes 1% a second and is forced to run constantly. The fires are mostly red, so he blends in perfectly.

Plant/bright green --- Kecleon coughs up a tiny seed which lands directly before him. This blooms into a splendid miniature forest of foliage, the radius of a smart bomb but straight up. This makes it difficult for non-plant characters to move through, slowing their movement by half. This is not as big an area as the fire Disguise Effect, but the vines and creepers are so mottled that it's almost impossible to make out Kecleon, especially when he's still. The plants wilt after ten seconds.

Water/blue --- Kecleon claps once and a small rainstorm begins, big heavy blue raindrops falling in the foreground. Kecleon can be seen only half of the time, when the drops move out of the opponent's line of sight. This has no real effect beyond obscuring vision in general, but at least it covers the whole stage. The storm only lasts seven seconds.

Dark/purple --- Kecleon radiates a cloud of darkness that follows him imprecisely wherever he goes for eight seconds before vanishing. In addition to making Kecleon impossible to make out, it also obscures everything else and has a weak suction effect. Best for aggression.

Lightning/yellow --- Kecleon points, and a small crosshair materializes. For one second, it can be moved around freely - after that, it bursts into a web of crackling thunderbolts. These deal many small hits and the occasional flinching knockback, are so thick it's almost impossible to see behind them, and have the radius of a Smart Bomb. One of the few Disguise Effects that are better as an actual attack than as camouflage.

Magic/orange --- Kecleon strikes a meditating pose and Bowser-sized baubles of orange form all throughout the stage. These drift slowly about, and any magic-based character who enters them and follows them will be healed for 1% every half a second. These hover for ten seconds and a skilled Kecleon can use them by leaping from one to the next rapidly, never showing themselves for too long.

Wind/grey --- Kecleon spins rapidly and a small tornado, grey and quick, appears around him. It moves about the stage like a whirlwind on the N64 Temple, scooping up anyone but Kecleon and tossing them up into the air with 10%. This is weak for camouflage because its movement is obvious and it's a small space.

Whatever the form, this is your most vital technique for turning your foe's attacks into a way to hide yourself. Of course, if you're hit by a different elemental attack while one of these is set up, you change color and the Disguise is rendered useless... or is it?


Neutral Special~ Camouflage
Kecleon extends both arms to either side and crouches slightly, focusing. With little lag beyond that, his color suddenly shifts to match the background. If used when the background is just the background (no Disguise Effect), he'll turn invisible as if with a cloaking device; his outline is just barely visible. However, this is unreliable as there's a small delay as his color changes to match the changing background; on moving stages or stages with an active background, like FD, this tends to be a bad way to hide. However, on a stage like Pictochat... This lasts for a mere five seconds, though, and has too much lag at start-up to be spammed.

However, if you HAVE set up a Disguise Effect of some sort, he'll turn that color, not bothering to make exact camouflage. Standing in front of the line of fire, for instance, he'll go back to red. This change is permanent (until you're hit by a different element, of course), but of course, you can only take advantage of it while Disguise Effect is still in... you know, effect.


Up Special~ Tail Grasp
Kecleon turns upside down and launches his tail forth in a tether recovery. Not again, right? In this case, though, this works even if the ledge is already occupied by another character; instead of pulling himself up all the way, Kecleon hangs off the ledge (or the attached foe) like an opossum and uses the opportunity to cling to any other surfaces in a more versatile wall cling. From here, you can walk slowly up the wall or use his ledge attack (see below). If the surface he's clinging to isn't flat, he can still crawl over it, but he's very slow. Unlike a regular wall cling, you can't jump off the wall; you can only grab the ledge by crawling up to it. In addition to being a solid recovery option, this is a good hiding place when you're camouflaged.

If used on the ground, Kecleon shoots his tail diagonally forward. Upon contact with a foe (or a drop-through platform), he grips them with his tail, then vaults beneath them, using his momentum to swing up and into the air while swinging them down to where he was standing with his tail; this quasi-throw deals 10% on contact. Hitting a platform makes him swing up onto it, and helps him to move around quickly.


Standards

Jab ~ Tail Whip
Such an incredibly unique and unusual attack, I know. But in fact! Kecleon, upon usage, begins to unravel his tail and send it straight forward, low along the ground. The longer you hold the A button, the further it goes, to a maximum length of two Battlefield platforms. When you let go, or it reaches its maximum, its quickly returns to him and coils tightly again - along the way, it has a sort of wind effect, pulling foes with it gently. If at any point it hits a foe, they'll be tripped - in other words, this can be used to trip and then reel in someone who's just out of reach. Great when used out of a hidden orange bauble, green jungle, or grey tornado.


Dash Attack ~ Rollout
Out of his run, Kecleon greatly compacts himself and rolls forward. For as long as you hold down the button, he'll continue to roll at a bit quicker than the speed of his run, and you can in fact go right off the side of the screen in this state. Contact with a foe deals them 8% and does weak upwards knockback. This has noticable ending lag when you release it.

The key here is that Kecleon has full super armor throughout. See the foe charging up a powerful elemental attack? Go for a Rollout, take the damage and change color to their element. There's one more tweak to this attack; if Kecleon rolls through any trap (that is, ANY DISJOINTED STATIC EFFECT), he'll not only nullify it, he'll assume that trap's properties, if in fact it has any. This'll show all those annoying ice-based trap characters, and that sneaky Jafar.


Wall Attack ~ Lick
From his wall cling, Kecleon's head can be tilted manually while you first hold down the button. Upon release, he shoots his tongue forth the distance of a platform on the angle you've tilted his head. If you connect with a foe with the tip of his tongue, they'll be sent into freefall automatically and dealt 5%. Any other part simply deals 8% and some small knockback.

If his tongue is sticky when you use this - see Grab - he pulls them toward him and sends them into an automatic wall cling just above him, if there's a solid surface. If not, he simply releases them after a single swing, resulting in decent knockback in the opposite direction he fired his tongue in.


Smashes

Forward Smash ~ Paint Splurt
Kecleon charges by filling his cheeks with what appears to be water. In point of fact, it's paint that corresponds to his current color. If he's in his plain/natural state, this attack doesn't work at all.

If he's camouflaged, however, the color he spews all over them matches his own. They'll be repainted in this way for anywhere from eight to fifteen seconds, depending on your charge time, and the spurt itself deals up to 15% in small disjointed water-like hits. This Smash is rather laggy, and since it has low damage output, no knockback to speak of, and a mere visual effect, it may seem useless. Its real purpose is to make it more difficult for the foe to find themselves when they're fighting you in a Disguise Effect. It's also useful if you're playing doubles with a super Kecleon team.


Up Smash ~ Vital Throw
Kecleon leaps up like a pro basketball player and grabs at any foes in the air above him. If he makes contact, he'll grip them by the foot and toss them forward and on an angle downward, dealing 14% and considerable knockback. This has fairly little lag on either side, but little range and priority. The only way you're going to reliably land this is by hiding in your Disguise Effect; this'll teach the foe to try jumping down onto you from above.

Kecleon jumps at a quicker speed than his regular jump and goes up the height of two Ganondorfs at max, depending on charge time.


Forward Smash ~ Double Team
Kecleon subtly ducks down and a second Kecleon appears to materialize out of thin air right beside him. This duplicate is exactly the same color for the same period of time - if Kecleon's currently transparent, so is the replica when it comes out. You have up to three seconds to manuever the clone into position anywhere on the screen. After the three seconds are up, or you press B, the clone freezes wherever you've moved him and you go back to controlling the real Kecleon. If anyone hits the immobile clone, it disappears in a puff of smoke.

But here's the trick; depending on whether you tilt the control stick to the left or to the right, the real Kecleon can be either the one you're controlling or the one you've hidden. If the one you've hidden is real, you had best protect him if he's discovered, because he's uncontrollable until the fake takes knockback, upon which he disappears.

This is a laggy attack.

You may wonder about the point. Double Team is actually one of Kecleon's most important attacks. Use it when you're hidden away, then hide the clone - which is actually the real Kecleon - somewhere safe where he won't be noticed. When they finally find the Kecleon you're controlling, it turns out they've been chasing the wrong guy, and are just completely disoriented when you regain control. And so they can never really know where on the screen you are at any given moment.

Still following? I applaud you.


Aerials

Neutral Aerial ~ Nasty Plot
This isn't an aerial - not really, anyway. Using it simply makes you lose all control of Kecleon until he hits the ground; he's not freefalling, he just can't do anything. When he lands on the ground, he starts scheming, steepling his fingers unscrupulously. The longer he stands there undisturbed, the better, so it's all about how good your hiding place is. Once you've used this attack once, although you regain control as soon as he hits the ground, he plots at every available moment, every moment when he's not in motion. Only once he's been immobile for a total of five seconds does he stop plotting.

Next time you use NAir, Kecleon radiates a small but intense wave of darkness, with very low range but huge power, 20% and great knockback. Pulling it off is a matter of first hiding and then sneaking, so


Grab

Grab ~ Bug Swatter
Kecleon launches his thick tongue forward. This differs from Yoshi's in that it's slower but constant, going farther and then coming back without slowing down. It can also be angled to go slightly upward in the air and grab foes right out of there. It can also be used as a secondary tether, but be aware that it needs perfect timing.

This grab is good for scooping up foes who are trying to stay just out of range of your hiding place.


Pummel ~ Swallow
Well, okay, not Swallow, just chew. Kecleon tries pulling a Yoshi and stuffs his captured foe into his mouth, chewing once or twice. This looks incredibly awkward if it's a larger foe. He chews down only once, dealing 5%, before spitting them out a ways forward, up, down, or back, depending on where you tilt the control stick - so yeah, this isn't me being lazy, because he technically has the full set of four throws. Throwing them down has the most KO potential, but at low %s, it makes it easy for them to fast fall and punish your end lag.

After spitting them out, Kecleon touches his tongue with faint distaste. Seems those bodily fluids got going; his tongue is now sticky. This has a significant effect on the rest of his tongue-based attacks, but most especially on his tilts, which is why they're last in the moveset.

This also has a direct effect on his grab - with his tongue sticky, it chains directly into his pummel, as he can't unhook them from the tip of his tongue before pulling them into his mouth. After this throw, his tongue is effectively un-stickified. Z is the toggle between sticky and not sticky, and both options are important in their own right.


Tilts

Forward Tilt ~ Tongue Swipe
Kecleon turns his head to the side, then swings it forward - it's unaccountably thinner than it was in his grab. He fires it on a low angle that reaches a peak distance of just under a platform away; this attack trips foes and deals 8% on the tip, while any other part deals a mere 5% and small knockback. However, trace amounts of some sort of chemical ooze slightly from his mouth as he attacks, making a tiny hitbox that deals 20% instead of 5. This attack is about as laggy as one of Zero Suit Samus's whip attacks.


Up Tilt ~ Tongue Jab
Kecleon turns his head straight up, then extends his tongue - it's unaccountably thinner than it was in his grab. He fires it directly upwards a distance of almost a platform; this attack deals 5% and small knockback unless it hits on the tip, where it instead deals powerful upward knockback and 10%. However, trace amounts of some sort of chemical ooze slightly from his mouth as he attacks, making a tiny hitbox that deals 20% instead of 5%. This attack is about as laggy as one of Zero Suit Samus's whip attacks.

If your tongue is sticky when you use either this or the above attack, the foe will be automatically stuck on the end of his tongue for as long as you hold the A button. While you hold it down, you have two seconds to manually - with the control stick - swing them around, although it's not too easy to control his tongue and it can never extend further than a platform away in any direction. Hitting a foe with the foe on your tongue deals 10% to both, making this incredibly useful in doubles and FFA. After two seconds or after you release the button, the foe is launched away not too far on the exact angle they were being swung at, making this a very interactive and tricky attack.


Down Tilt ~
Kecleon turns his head down and rapidly smacks the ground with his tongue; this is almost lagless. If his tongue isn't sticky, this motion will disturb the particles in the ground or something (give me a break, let's just say it's Ancientpower or something) and create a small area where Kecleon is completely invisible as long as he's immobile. This area lasts for ten seconds but can't be used for another ten after vanishing.

If his tongue IS sticky, however, he'll accidentally pull a chunk out of the ground, giving the attack significant ending lag. The chunk, he tosses into the background, leaving a small hole in the stage in which he or anyone else can hide in. This obviously doesn't work if you're on a drop-through platform. Just be aware that after eight seconds, the hole disappears, replaced by solid ground, and anyone who was hiding in it is grounded (see Pitfall).

Either version of this attack makes for a great place to hide.
 

ForwardArrow

Smash Ace
Joined
Aug 17, 2011
Messages
503
All Will Be One

Phyrexia


Phyrexia is a large faction of monsters that serve as one of, if not the main antagonist of the Trading Card Game Magic: The Gathering. They believe that they have the idea of what perfection is, and want to spread it to the rest of the series' Multiverse... by horribly mutating other beings into their forms. Originally they were lead by a being known as Yawgmoth, and were nearly wiped out along with him at the end of the storyline for the Invasion block. And thus, they mostly disappeared for the longest time.

However, recently on the plane of Mirrodin the Phyrexians began to show up again. They were created from this black oil, which would corrupt whatever it touched by turning flesh to metal and metal to flesh. Originally the oil only existed in the core, but as time went on it spread to Mirrodin's surface before all out war was waged between Mirrans and Phyrexians. Unfortunately for the Mirrans, Phyrexia was nigh unbeatable due to it's ability to corrupt them over to it's cause. And thus the realm of New Phyrexia was created, ruled by 5 leaders known as Praetors.

...for a bit more of an idea of what the Phyrexians are like, check out the videos below.

All Will Be One
New Phyrexia
 

ForwardArrow

Smash Ace
Joined
Aug 17, 2011
Messages
503
Elesh Norn, Grand Cenobite


Elesh Norn is one of the five Praetors of Phyrexia. She is the White praetor, ruling over the Machine Orthodoxy. Elesh Norn intends to unify Phyrexia under one banner, attempting to end the infighting between the different factions. She intends to have a Father of Machines instilled as a figurehead who she can manipulate, believing Phyrexia doesn't so much need a physical leader as the idea of one.

Elesh Norn and the Machine Orthodoxy in general are comprised of Porcelain like plating and bizarre wirey flesh. It is also a very religious faction, with the lower beings in the Machine Orthodoxy viewing Norn as some sort of Prophet. Every word she says is written down by lesser Phyrexians, and her elaborated robe is carried by her supporters. In her actual card, she massively powers up all of your creatures and completely debilitates your opponent's, making her one of the most terrifying monsters in the game, if also one of the most expensive.


Stats

Size: 13
Fall Speed: 8
Aerial Movement: 4
Weight: 3
Traction: 2
Movement Speed: 0.5

Elesh Norn is a very imposing looking opponent, being 1.5X the height of Ganondorf and the same width. She also falls through the air rather quickly... and then from here on out you start to see her short comings. Despite her massive size, she's actually a lightweight, being surprisingly easy to knock out. In addition, she slips and trips quite a bit more than average, and is the slowest moving character in the game. Her walk isn't the worst in the game, but she can't dash, making it pathetically easy to run circles around her.

Special Mechanic


Elesh Norn is not the type who would want to fight entirely alone, so she brings along a Tome Lackey, as shown above. It carries around a small book with it, writing down something in there every time you speak. The lackey does not really appear to serve a purpose at first, but they will soak up attacks for Elesh Norn as the opponent tries to attack you simply because it is are in the way. The tome lackey is about the size of Mario and slightly lighter, and do take damage and knockback as a normal character. He follows you around at Marth's Dash Speed, so he'll pretty much always catch-up to your pathetically slow dash. He will not actually attack normally, but it is possible to make him. We'll get to that.

Special Moves


For her Neutral Special, Elesh Norn waves her hand, and a large cloud of smoke appears in front of her. When the cloud disappears after half a second, it reveals one of her Praetorian Guard, a Porcelain Legionnaire, as pictured above. It is about the size of Marth and can run along the ground at Mario's dash speed. Porcelain Legionnaires will at this point stand around Elesh Norn, attacking foes if they get too close. They have a fairly basic AI, but they aren't so stupid as to get tricked off cliffs. However, they only have 20 stamina, making them fairly fragile. Elesh Norn can use this move once every 5 seconds, and no more then 3 can be out at a time. The Porcelain Legionnaire's have 4 attacks, which are detailed in the spoiler below.


[COLLAPSE="Legionnaire Attacks"]For their standard attack, the Porcelain Legionnaire will swipe forwards with it's sword, having slightly larger range then Marth's sword and dealing 3% and small knockback. This is fairly fast but doesn't chain into itself because of the knockback. The AI is uses this the most often, which will usually be enough to protect it since the sword IS a disjointed hitbox.

For their forward attack, the Porcelain Legionnaire thrusts it's sword forwards, having a full Bowser length of range and dealing 11% and knockback that is probably not going to KO until the match has gone on WAY too long. This also deals a lot of shield damage, and the AI has a tendancy to use this against shielding foes.

The Legionnaire's upwards attack has it swings its sword overhead, dealing 5% and fairly low knockback. This actually has a fair bit of lag, Legionnaires are very good at defending themselves from below. It's not like these things are supposed to fight completely for you or anything.

For its final and downwards attack, the Legionnaire swings it's sword low to the ground, tripping the foe and dealing 6%. If the foe is in the air at the time, they are dealt a fairly weak spike that is not exactly likely to gimp them even if they are at high percents. Fortunately the range is pretty large and it's not especially slow, so it's a solid damage builder.[/COLLAPSE]

The Side Special causes Elesh Norn to put her hands forwards before beginning to speak. It's in the bizarre Phyrexian language that was in the videos at the beginning, though her voice isn't quite as distorted as the ones in those videos. Anyway, Elesh Norn will continue her speech until you press Side Special again, which causes her to stop. During the speech however, all of your troops are thoroughly roused for battle, with their attacks all dealing 1.5X as much damage and knockback, and them moving and attacking considerably faster.

This obviously comes with a pretty big drawback. During this time, Elesh Norn cannot move or use attacks other then ones that command or buff your minions. Unfortunately, this includes attacks that double as a minion buff, you are basically helpless here until you press Side Special again, allowing Norn to exit this stance with relatively small lag. The other thing is that this allows you to control the AI of your minions. Since you no longer need them for movement, pressing a direction will change the AI of your minions. In addition, if you leave this stance they will remain with the settings of your choice until you say otherwise.

Up causes your Legionnaire's to become more agressive, having them chase directly after the foe and attack them.

Down has them return to defending Elesh Norn as they normally would.

Forwards allows you to send your Tome Lackey charging at the foe, the Tome Lackey chasing them down at it's normal run speed and even jumping Ganondorf's height in an attempt to reach them. The Tome Lackey deals 8% and knockback that KOs at 200% outside of the Side Special bonus, though with it the attack actually hurts quite a bit.

Backwards causes the Tome Lackey to resume it's normal defensive behavior.

This doesn't have any animation to be exact, but there is an audio que as Norn gives out the specific command. Each command has a very small amount of lag attached as Elesh Norn speaks the command. This stance is pretty crucial to you on a whole, as it's the only way you really have to go on the offensive since foe's can run from you forever with that pathetic movement of yours.

For her Up Special, Elesh Norn picks up her massive cape and tosses it forwards, dealing no damage or knockback to anyone but rather catching them underneath it. This has a whopping 3 Bowser's worth of range and latches onto the stage if it collides with it, magically attaching itself and allowing Norn to pull herself up. You can also drape it over a ledge to prevent foes from grabbing onto it, if you so choose.

The cape has a few unusual properties. If the cape hits a foe or an sort of minion, they are trapped underneath the cape. They move at a quarter of their normal speed under the cape and attacks from outside the cape deal half damage and knockback to those trapped inside. Foes can attack with some additional lag underneath the cape, causing it to fly up for a varying length of time based on the strength of the attack, from 0.1 seconds for a weak jab to 0.8 seconds for a Warlock Punch. Projectiles will stop immediately after being used under the cape, and multiple opponents/minions can be under at a time. Lastly, foes have incredibly difficulty turning around, needing to pick up bits of the cape and move them around to move, taking almost a full second of lag. This obviously allows you to take advantage of the Legionnaire's huge melee range, and also slow down a foe's approach.

The cape cannot be picked up as long as someone is standing on it, or fly upwards. This can be a problem if you want to use this attack again and the foe is standing on your cape. It can also keep the foe under the cape by having a tome lackey or legionnaire stand on it. Pressing Up Special with the cape out causes Elesh Norn to yank it back in, dealing all foes underneath it 5% and tripping them. Lastly, Norn can indeed walk on her own cape if she so desires, and walking away with someone trapped underneath it will just drag the cape off them as you move.

For the Down Special, Elesh Norn will say some Phyrexian words, and then take control over the nearest minion. This has almost no lag to start, and pressing the input again returns Norn to controlling herself. Pressing down allows you to move to the next closest minion, looping back to the original if you press down on the furthest minion. If you haven't noticed, this is why the Legionnaire's attacks are grouped under neutral, forwards, upwards, and such, because pressing A and that direction executes that attack when you're controlling one.

When you are controlling a Tome Lackey, you can move it around the screen to wherever you please. In addition, pressing A when the opponent is attacking will cause it to jump in the way and take the attack as long as the lackey is within 1 Stage Builder Block of you. This is obviously a useful defensive measure, but it becomes less effective as the Tome Lackey takes damage and is sent flying further away.

Lastly, if you are controlling a Legionnaire or a Tome Lackey and they are standing right next to each other, you can grab to have the Legionnaire hop up on the Tome Lackey's back. This will have the Legionnaire ride the Lackey around, and their AIs are controlled together. In addition, the Legionnaire and Lackey take half the damage individually while he is mounted. The Legionnaire will mostly try to poke a foe with the Down Tilt while mounted, though if a foe jumps up in front of it it will jab or forward tilt them instead.


Standards

For her Standard Attack, Elesh Norn waves her hand in front of her, creating a small field of light. This light negates any opponent's attacks that come into contact with it, and lingers for 3 seconds. This unfortunately has a metric ton of lag on each end, so it's incredibly ineffective on a whole as a normal defensive maneuver. That said, if a foe is under a cape it makes it incredibly awkward for them to try and approach/attack Elesh Norn.

This move does have it's other benefits however. If Elesh Norn or a minion walks through the cloud, it sticks to them for the remainder of it's duration. Only one cloud can be out at a time though, so don't think you can live forever with this. It does at least allow the Legionnaires to survive a bit longer regardless of their fragile stamina. Or turn the Tome Lackey into an effective shield even when it has massive damage on it.

Elesh Norn's Forward Tilt has her reach forwards a pinch two of her fingers together. This would not seem like it would deal a lot of damage, but she pinches right over their heart and digs in, so it's a lot more powerful then you might think, dealing 14% and knockback that KOs at 110%. Unfortunately this move really is not all that fast and the range is awful, but it can be effective if your minions distract the foe into it.

For her Up Tilt, Norn raises one hand above her hand before pointing forwards. If an opponent lands on her finger while she points upwards they take 9% and knockback that KOs at 250%. The pointing forwards deals the same amount of damage. You can cancel the second attack into another move, if you so desire. In addition, when you point upwards all your Legionnaires will override what they are doing and use their upwards attack, even out of mid attack.

For Elesh Norn's Down Tilt, she taps the ground in front of her, dealing no damage or knockback. Your minions within 2 stage builder blocks of you will now run to and stay specifically on that spot until you tap the ground again. If they are aggressive they will not stay on the spot, though they will run directly to it at first.

If there is a foe or minion in front of her, she will instead tap their shoulder. Tapping a foes shoulder forces them to turn around, which does little outside a cape... but inside the cape while it doesn't give them the lag turning it can certainly make the foes attempts to escape awkward, potentially making their escape route a much more distant target.

This can also be used to tap a minion on the shoulder. The minion in question will switch it's AI pattern from aggressive to passive and vice versa. This allows you to control individual minions, though the downside is you have to be right next to them, not exactly easy with Elesh Norn's god awful movement speed. Fortunately, this move has nearly no lag, so it's pretty easy to use.


Smashes

Using the Forward Smash causes Elesh Norn to raise one of her arms, and firing a 4-7 Porcelain shards forwards based on charge. These shards travel forwards 2 and a half Bowser widths and deal 2% and flinching knockback each. This has average start-up and low end lag, making this a reasonably effective projectile.

Now, if you are currently using your Down Special to control one of your Legionaries, this will instead have Norn wave her hand, and the Legionnaire will shatter into shards that fly forwards the same distance as this attack normally does. This deals twice as much damage as the normal version and the last shard deals knockback that KOs at 140%-85%. You can actually use this move like this during the Side Special, during which time the damage and knockback is buffed an even further 1.5X, making this arguably your best KO move. Unfortunately, it does require you to sacrifice one of your Legionnaires to pull it off, and they are incredibly valuable to you, so it is a very risky move to miss with.

For her Up Smash, Elesh Norn summons snaps her fingers, as a large amount of white energy leaves Norn and flies into anyone within a bubble 2/3rds the size of Giga Bowser around you. This replaces the jab attack of the characters in question with firing a beam of energy from their torso. The beam will fly forwards half the width of Battlefield and deals 6%-9% based on charge and suprisingly solid knockback. It's also a fairly fast and spammable attack that could severly frustrate Norn, so it would be best to try to keep enemies out, but since Norn herself does not get the bonus why bother? The ability to fire the laser lasts for 10-25 seconds, and this attack has huge start-up and cool down lag.

So what might be the point of this attack if Norn does not get it herself? Well, every minion in range is now capable of using the attack as well. Their AI is at least smart enough to realize using this on a foe at long range is probably a good idea and will spam it if the foe is in range of this attack and not their sword. Tome Lackeys will also get this bonus, but will not spam it like the Legionnaire's do, only using it when Norn is not performing any attacks.

The Down Smash has Norn raise one of her arms, and a large fountain of black oil erupts from the ground. This fountain deals 12%-19% and knockback that KOs at 200%-140%, and goes up 1.5-2.5X Ganondorf's height while being slightly wider than Kirby. This has quite a bit of lag, and the hitbox lingers for a full second. If used on the underside of your cape it will be lifted up until the attack is over, which makes it rather ineffective in combination with that move.

If a Legionnaire is hit by this attack, it will coat them in oil, which increases the strength of their armor. This will give them an additional 10 stamina, and this can be stacked with multiple uses of the move. In addition, Tome Lackey's get 10% worth of Super Armor from this move which the opponent has to break through before dealing them damage and knockback. Norn can even walk through and get this armor for herself as well.

So in case you are wondering, the armor does indeed improve the power of the Forward Smash when you shatter a Legionnaire to use it. It will cause an additional shard for each layer of armor on the Legionnaire, making it harder to dodge the attack and increasing the power slightly.


Aerials

For theNeutral Aerial, Norn spins her cape around her with a range of half of Bowser on each side. This has a fair bit of lag, and deals no damage. Rather it creates a wind hitbox that pushes the foe away 1.5X Bowser's width and causes them to constantly turn around as they are pushed away. This actually has little enough end lag that you can follow up on this with another attack as well, though admittedly you have very few in your moveset that fit the bill. Your minions on the other hand can follow up just fine.

If you use this attack on a minion, it will launch them the same distance. The Legionnaires will spin their sword around them during this time, turning them into a hitbox that deals 12% and knockback that KOs at 155%. The tome lackey can also be spun, although it's a much smaller hitbox due to not utilizing a sword that only deals 6% and a flinch.

The Forward Aerial has Norn swing her hand down in front of her, causing foes in front of her to be launched down twice Ganondorf's height. If they crash into the ground they take 10% and a large amount of stun. In addition, if used on a minion it will cause them to launch them downwards, them dealing 13% and knockback that KOs at 140% on the way down. This has average start-up and low end lag.

The Back Aerial has Norn's cape fly up behind her, pushing foes along the cape away and slightly downwards at a rather slow pace that they cannot resist. This will also push away nearby minions, and Legionnaires will poke at a foe being pushed towards them by this attack. This is rather fast to start up and end, but stays out for a second during which you can be punished fairly easily if the foe is not on the cape.

Using the Up Aerial has Elesh Norn swing her ridiculous head ornament above her, dealing 13% and upwards knockback that KOs at 150%. This attack is fairly slow but has enormous range due to the size of the hat. This serves as a nice way to block off foes trying to attack you from above.

For her Down Aerial, Norn will drop half a Ganondorf height, attempting to land on one of her minions. If she does, she will stand on their shoulders, being able to use her Smashes from this positions. Her tilts and A combo are replaced by the standard attacks on the Legionnaire if you landed on one, while she can still use her normal ones when standing on a Tome Lackey. Dealing knockback equal to Mario's Forward Smash at 30% will knock Norn off the shoulders of the minion. Both types of minions can move around at Ganondorf's dash speed. Norn can dismount by pressing down. No, you cannot mount a Legionnaire mounting a Tome Lackey, because if you try the Legionnaire will lose it's balance. That would just be silly.


Grab Game


For her Grab, Elesh Norn raises both hands in front of her and a large wave of concrete rises out of the stage. This is about half the width of Bowser, and if the foe is standing in front of there they will be ensnared as it hardens into a large wall of Concrete the height of Ganondorf. Foes are then grabbed with 1.5x normal grab difficulty. The main problem with this is that the lag on this attack is awfully high, making it rather difficult to use if you don't have minions holding the foe in place. While an opponent is grabbed, you can still move and function as normal, but pressing Z next to the concrete block causes Norn to place her hand on the foe, allowing you to pummel and throw them. Minions can attack a trapped foe, but their attacks only deal a third their normal damage.

If the concrete does not hit a foe, it will instead form into a wall of concrete the same size as the one grabbing the foe. This wall has 50 stamina, and is entirely solid. While hiding behind the wall is all well and good and probably the safe route, standing on top of it is also rather effective, since you can protect yourself by having a Legionnaire stand sentry and Up Tilting when the foe tries to come up next to you. Or you could mount the Tome Lackey with a Legionnaire and have it stand guard, which works even better sometimes.

If you land the grab on the minion, the minion will be trapped inside the wall of concrete until you press Grab again... though mind you that may not be a bad thing. While they are inside the concrete you can still reinforce them with the Down Smash, which allows you to store up for an incredibly durable Legionnaire or Tome Lackey. Or you could use your Up Smash to give them the laser while your other minions fight off the foe. You can also perform your throws on the minion, which will have a different effect than if used on a foe.

The Pummel has Elesh Norn drive a pointy finger into the opponent's face, dealing them 2% at a very slow pace. Mind you, it doesn't need to do that much damage because you can have a minion or two wailing on the foe if you want that.

Her Forward Throw has Elesh Norn shatter the concrete around the opponent, it collapsing on them dealing 12% and leaving the opponent in prone. This prone state takes twice as long to get up from, giving the minions time to swarm up on the foe. If used with a minion inside the concrete shards will instead fly off into the foreground, and the minion is free to attack and move once more.

For her Back Throw, Norn snaps her fingers and the concrete melts over the foe or minion. This reduces all damage dealt to them by half, doubles their fall speed, and halves their movement speed. The effect lasts for 8 seconds, and has it's benefits and downsides depending on the situation. Obviously, using it on a minion and trapping them under the cape with the foe is probably a good way to mitigate the whole slowed movement problem, as is impeding the foe while Norn makes her getaway.

For the Up Throw, Elesh Norn points upwards and the concrete becomes somewhat liquidlike again as it pushes the foe or minion out the top. This takes a fair bit of time if used on a minion so it's not as safe as using the Forward Throw to evict them. However, this will leave the wall behind as though you had never grabbed a foe or minion with it for continued use. The foe takes 8% when being pushed out this way.

Lastly, the Down Throw has Elesh Norn shatter the block again, and the foe or minion will be forced to bow down before you. The foe will get up after .4 seconds and turn away, and the minion will as well, but healed of 20% damage. For the most part the attack is fairly harmless, not even really giving you the opportunity to punish the foe...

Except that for the next 8 seconds, when a foe turns to face you, they are forced to bow for .4 seconds. This does not include when the foe is underneath a cape, and in the air they will merely tip their head, but the effect is the same. This is an annoyance to begin with, but it becomes a nightmare when you remember Elesh Norn's Down Tilt.


Playstyle

So it should be fairly obvious by now that Elesh Norn herself doesn't really want to fight the foe all that badly. She's not really built for close combat, rather to inspire respect in her Phyrexian followers. So instead, she has her subordinates do the dirty work for her, sitting behind them and commanding them to fight. Norn has pretty much complete control over her minions, and one can easily frustrate a foe by comboing them between 3 different minions.

Norn herself has a few ways of making the fight hellish for the foe. For one, she can toss a cape over them to impede their movement towards her, as well as create a shield to protect herself with the jab. Underneath the curtain of her cape the minions superior melee range will allow them to fight foes from outside their range, regardless of whether or not they have projectiles. The Cape also is useful if you happen to screw up with the Up Smash and the foe now has that projectile, which allows you to at least impede their use of it.

Aside from that, Norn generally gets better as the match goes along, as she can start reinforcing one of the Legionnaires on hand at a time to be far more powerful with several layers of armor and the ability to fire projectiles. While the Tome Lackey will become less and less useful since it can no longer take hits for you nearly as well, you pretty much will no longer need it. And once the foe is in kill range, a really well buffed Legionnaire tends to lead to an excellent kill move in the Forward Smash, which becomes nigh undodgeable due to the sheer amount of projectiles being fired.
 
Top Bottom