Welcome to Smashboards, the world's largest Super Smash Brothers community! Over 250,000 Smash Bros. fans from around the world have come to discuss these great games in over 19 million posts!
You are currently viewing our boards as a visitor. Click here to sign up right now and start on your path in the Smash community!
It appears that you are using ad block :'(
Hey, we get it. However this website is run by and for the community... and it needs ads in order to keep running.
Please disable your adblock on Smashboards, or go premium to hide all advertisements and this notice. Alternatively, this ad may have just failed to load. Woops!
A modest set that showcases more of your franchise tastes. I don’t know if it was intentional, but I like the characterization behind how Dark Power is activated with your Up Special. It means that Black Knight -must- tap into Dark Power throughout the match (unless he’s never given a reason to recover), which not only plays into his lore of “being forcibly power-up,” but it also adapts the common boss trope of getting stronger later into the right without relying on a comeback mechanic like GO or Rage. Really prevents the player from playing it too safe with this character. I also like how Dark Power can stack, and how two of your Aerials get boosted if you have 5 stacks.
It’s clear that Terrorpin is the star of the set, being a solid entity that can be pinballed across the screen and the stage’s boundaries as a threat to all fighters. Moving platforms are always a cool concept that need strong limitations, and this set’s limit is that Black Knight can be KO’ed if he’s launched into a blast zone while standing on Terrorpin. How long does Terrorpin bounce around for? Moveset only mentions that he gets KO’ed if he’s knocked into the bottom blast zone. I assume that he’ll bounce around forever until he is bounced on such a trajectory that he falls into the bottom blast zone.
Not an actual issue, but reflectors in Smash have different speed, damage and projectile duration multipliers, so I generally like to see those listed on moves with reflector properties. Guess it’s safe to assume that shovel reflectors have the same reflector properties as Fox’s reflector. F-Smash does state that projectiles get sent away with a lot of speed and power, which would be comparable to Ness’s F-Smash.
Man, Neutral Air is probably the most ancient/MYM5-era style Neutral Air I’ve seen over these last few contests - it’s weird, but I like it. Just the kind of move you’d expect to see on a Special, since it’s a projectile that creates a construct when it lands. Feels like the type of move you could go into way more detail applications-wise: like the fact that it doesn’t give Black Knight a traditional keep-away aerial, so one less melee/defensive option for him, that it can be used to carpet bomb your opponent with projectiles from above, as well as the applications behind hitting meteors with your attacks to make them explode. Might be a good idea to detail how long meteors stay out for, and place a limit on how many Black Knight can have out at once.
Yep, you’ve definitely got a knack for writing crazy Aerials, as seen in Omega. Dark U-air has that cancelable effect, F-air has more meteor projectiles (though they have very little detail, like how far they fly, how much knockback they deal or what you can use them for application-wise), B-air is a backwards dash that can chain into other aerials or go Quick Attack with Dark Power, and D-air is the fun stall-then-fall you can use to bounce off of your constructs. I am all for the craziness these Aerials offer, but the lack of details like how they work together or move applications makes their balance and gameplay implications too vague to fully sell.
F-throw is unexpected for its interactions with Terrorpin.
All and all, Black Knight has a lot of inputs that feel barebones or underdetailed, but his unexpectedly fun ideas make him a fun read. I’ve come to expect this trend from your modern sets, but it’s always surprising to see the ideas you manage to sneak in for what are shorter sets compared to the average 10-15k entries we get. With further expansion, Black Knight could be a genuinely solid contender even without changing up his core concepts, especially if his Aerials were expanded upon given how central his Up Special is and the float it offers.
Making a post to get in the habit of letting folks know in the thread that I've been working on building up a moveset comment list right here. As of right now, the list of sets I've commented include:
I am always interested in sets for less mainstream anime characters, so this is one that I was looking forward to. And wow, she’s a huge step-up from your previous sets presentation-wise! Manages to look really good without using much colour or fancy text fonts, which is commendable. I also appreciate the mature content disclaimer - it’s practically my job to read sets though, and I’ve seen a decent amount of mature content in past movesets - and your explanation on why you like this character’s source material. Extras here are good; they help to define Fuma’s personality nicely.
The way Fuma’s Down Special works is pretty solid: a one-time buff that you can apply multiple times to further enhance it, but each use of Down Special is laggy and being grabbed out of it will make you lose all your stacks. The specific buffs that Fuma gets on her Specials are rightfully powerful for their respective levels too, like turning her Neutral Special shurikens into super fast projectiles that travel farther and farther so foes can’t keep their distance safely. Unenhanced Side Special does seem a bit weak for all its drawbacks, even if it has a decent attack radius and light armour, but it -is- a monster when enhanced. Up Special being named “Falcon Bullet,” is hilarious in the context of Captain Falcon existing in Smash. It’s a nice little approach move that has mix-up synergy with your shuriken Neutral Special, which is cool.
I like that Jab 1 (and D-Smash later on) doesn’t use up Fuma’s DSpec buffs, giving her a way to go into other enhanced options. Frame 1 Jab with trample priority is nice.
Dash Attack is another nice mix-up with Neutral Special, especially when the former gets its grab hitbox on level 3.
F-Smash has a surprisingly unique gimmick of dealing more knockback if you’ve dealt a lot of damage recently. It seems like the kick has pretty low range on top of some unfavourable lag, as far as its weaknesses go.
Even if you don’t think it’s necessary, I would really like to see some details on Fuma’s grab animation and her pummel. Does she grab her opponent physically, or does she use a tether grab? Is pretty meaningful when grabs are what you typically use to get around shields. Back Throw makes it sound like Kotaro has a tether grab, but we don’t know anything about its frame data or so. She could have a really slow grab that’s super rewarding if it connects, which sounds like the case here - her throws look very strong, especially when enhancements are applied.
Throw animations do capture Fuma’s brutal nature though, and without going into super over-the-top gory details like a reader would expect from the content warning.
The guard-breaking effect feels a little odd to just introduce onto the Down Air without too much justification flavour-wise, but it feels fair implementation-wise - Fuma has to land a non-casual move under lv2 enhancements, and the opponent isn’t deprived of their shield for too long.
It is cool that this set lists its combos and kill confirms at the end!
All and all, Fuma is a big improvement over your previous works, as she feels a lot more fleshed-out and puts a lot of effort into having the moves play off of each other. I think you succeeded in making out Fuma as a zone-breaker character, so good work there!
The Black Knight has a very interesting gimmick in the ability to stack buffs of “Dark Power” with his USpec, which buff moves that use it at the expense of making him take damage every time he uses them. The actual buff is just a standard damage buff, but it still works well for the set’s playstyle. Another standout gimmick is the Terrorpin, which Black Knight can hit in order to turn it into a projectile that bounces all around the screen but can potentially hit him as well. Assorted moves have all sorts of neat concepts, such as a UAir that can be canceled into any of his other moves upon being buffed, meteors that become solid terrain once they hit the ground, and a USmash with a hard to hit with but strong sweetspot. My favorite move for functionality reasons is FThrow, which if the Terrorpin is bouncing about allows the Black Knight to stop its movement.
The main thing dropping the set lower is that the placement of these concepts seems more detrimental to playing the set, if anything. USpec also raises the Black Knight upwards whenever he uses it, thus meaning he can’t immediately use the Dark Power buffs he gets and forcing him to involuntarily exit combat if he wishes to use it. Additionally, the meteors are on the NAir, despite their properties being far more evocative of a Special than a proper NAir. I understand that (I assume) the Black Knight only uses these abilities in the air in Shovel Knight proper, but almost every set in Smash takes some creative liberties, no matter how minor - allowing him to use them on the ground is one of them. The Terrorpin also didn’t get as much attention as I’d liked; in particular, when I read that the meteors became terrain I was expecting Black Knight to be able to use them to keep it in place, but they’re just automatically destroyed if it hits them.
While the Black Knight does have a neat bit of concepts going for him, I do feel this ends up a bit of a downgrade from Mumei or Emidius since a few of them make him less functional in gameplay than he’s meant to be.
FUMA KOTARO (Tortoise)
As a fellow muscle waifu connoisseur, Kotaro instantly gets a thumbs up from me as a character choice, despite me not at all being familiar with the manga she comes from. This is another set with a stackable buff, this one coming in her DSpec that applies a series of buffs to her kit. I do actually like a lot of the buffs and how they’re implemented, with Dash Attack dealing crumple and eventually breaking through shields, DSmash not applying the buff until the optional second hit is used (allowing it to be a combo starter) and BThrow just getting a knockback boost. Kotaro definitely feels like she does in Tenkaichi from what you’ve described, a big, strong, nigh-unstoppable force of nature. It also shows significantly more game sense, with mention of jab locks, kill confirms out of combos, and how a character as big as her would struggle heavily in neutral. I do believe that some of the buffs are a bit overtuned, like DAir being able to prevent shielding and DThrow just being an instakill at higher levels, but those can fairly easily be adjusted. This is easily your best set yet, and I wait to see what other obscure character picks you come up with.
“They are speaking to you in our ancient tongue, Eddie. Because you... you defeated the Void. You freed our kind. You are the hive-mind now... Eddie... you... are the God of the Symbiotes... You are the King in Black.”
Venom by UnknownFate
Venom lore is kinda wild and I salute your attempt to explain it. Surprised to see a moveset really go into the Donny Cates/King in Black stuff, usually comics characters that get repped in MYM are some kinda very specific adaptation like Batman: TAS versions of characters. Also this has a high amount of story mode synergy with the Nuis Harime since the end of Donny Cates’ Venom is basically KLK. Anyway, despite the bio being largely comics focused, he animation design feels very “MvC Venom” here, even before the MvC attacks start showing up in the set. Makes sense given that’s the main point of reference for Venom in fighters.
The font here is a bit hard to read I think. Not a big deal since I can just zoom in.
I dig the passive armor mechanic - I actually also have a Venom WIP with something similar, it feels very natural on the character. The general playstyle is also a good direction for him.
I’m mostly not a stickler for numbers - randomly it did stick out that 2 frames of activity sounds pretty low for the animation in DSmash. As a broader, less nitpicky point I’m not sure if he feels fast enough enough to completely fit that unga bunga archetype you’re going for? Then again, the amount of armor he gets ain’t bad, it’s enough to shut down certain quick punishes and maybe that’s enough to keep him largely safe on offense.
Specials-at-the-end movesets really are a trip, wild to read most of his attacks and then find out he’s a tether character. NSpec is fun, though, definitely the highlight of the set. I always like multi-function/phased moves like this. Feels like a very in-character use of a webline type thing for him, and I like the choice that the chain has a very easily achievable condition for the opponent to break it (or at least achievable if Venom doesn’t beat you up).
I do wonder if he might want a smaller window to activate his chain after he lands his projectile? Like from a balance perspective such a big window gives him a lot of openings to define the length of the chain, which enhances its power and flexibility a lot - but also it locks out just using the projectile for that whole window. So there’s an inflexibility to it too. Idk, just food for thought if you want to play with how much you weigh the chain being important vs the projectile being important. (Can he have multiple projectiles out at once?)
Ah, and FSpec here is I think the big horrifying option that I wasn’t seeing in the Smashes when I wrote that thing about him maybe not achieving unga bunga. I do feel like this one might overshadow some of his other violent options - the hurtbox extension is real, but better armor and going through shields is pretty brutal. I like it, but it feels very juicy compared to some of his other attacks.
USpec feels maybe a bit perfunctory as The Tether Recovery, but I get that that kind of thing isn’t always the most exciting to write. Giving the grab a full set of throws is very cool - kinda wish that was presented as part of USpec or its own input section, I don’t think the throws particularly need to be interwoven with his main grab game - they don't share the same animations and they don't always hit the same functions either.
Machine gun head feels insane even by MvC Venom standards. Respect. In general the throws kinda go nuts: 13% damage on a combo starter throw is chunky. He’s missing BThrow at the moment though. Google Docs is getting collapsible text, this is not a drill.
I don’t think it all pulls together strongly enough for me to get real excited about it, but there’s enough cool stuff to pull me through the set and the individual attacks definitely know what they’re about. I do think a little more playstyle stuff woven into the attacks could maybe help sell me on it a little harder, but I know that’s not as big a thing in FFC. Still, definitely a treat to see a set for one of my favorite characters!
Back to writing some comments, I believe there's no better place to start than the 2nd Jamcon sooo
One of the characters that (sadly) got me into Overwatch, is nice to see him show up! Out of the gate, I love how much you bring from the source, especially all the quotes he has, its like Junkrat says "It's the little things!". I also like how he is characterized with moves as a wacky trapper-based character, Side Special was a move I didn't see coming but it fits really well, also the visual image of Junkrat trying to do K-Rool Down Smash despite how skinny he is that's quite funny. I also absolutely agree with giving him a disjoint with the peg leg. I mainly just think the way that the Concussion Mines are implemented is a bit limited, like yeah obviously they work as a recovery move, but it feels weird that he can't put them on the stage and actually choose when to detonate, it could also lead to more shenanigans, especially with the trap and Side Special. But all in all, I liked Junkrat, possibly due to my love for the character but it's also a solid set. I'd give it an Inconspicuous/10
This man has been covered in many movesets, but none as long or detailed as this one! Very impressed at this wordcount from you.
Lv Up system from MVC3 absolutely explains why Franky is so long.
“be weary when using Forward Tilt” not to jab at the writing, but this typo is funny.
“Level 5: Gains the spirit of a champion as a light yellow aura surrounds Frank, indicating he reached Lvl. 5. Doesn’t actually buff him tho.” Heh.
Frank’s UI rocks.
I wonder if it would be more intuitive for snapshots to just be taken with A + B in general, instead of just in midair? Could still make it usable from shield.
Did you draw that picture depicting Frank’s photograph range? It’s very cool. Looks like Palutena is wearing a Shy Guy mask. The level up system is pretty neat, encouraging Frank to photo as many objects (and explosions, lol) at once since he has limited camera film.
Highlighted the entirety of Frank’s Neutral Special to check its wordcount out of curiosity: it is 5981 words long as of now. One of the longest Neutral Specials we’ve ever had, below sets like Ayesha Altugle and Saul Goodman who had 8k Neutral Specials, and Patchouli Knowledge this contest. I like how some limited weapons can be recovered or replaced by leveling up, which encourages Frank to use stuff like his bowling ball before he reaches level 2. The way the bowling ball is aimed is very cool, too, as well as the fireworks being aimable at multiple targets, and the Dr. Strangelove bomb like propane, which works well with the fireworks, cooking oil and snapshotting explosions and multiple objects. Honestly a ton of good stuff in this one giant input.
Zombie is definitely fun, because we in MYM love minions, and this one plays off of Frank’s various NSpec tools. Pretty fun to have a really slow minion that you can push around to sleep up. Feels pretty balanced since you can only have 1 zombie, and they go on cooldown when they die. Secondary recoveries that function as props and are rendered unusable if that prop is out are fun too.
Melee is pretty solid in all areas, covering basic and niche applications where needby. I like F-tilt being dependent on what weapon Frank is holding, with a different effect if his weapon is about to break. It’s also neat to see a moveset where you can use your throws on your minions to weaponise them against opponents, which I honestly don’t remember seeing in a moveset in a long time. Very good to see the detail that Frank isn’t invincible while he’s throwing a zombie, unlike with how throws normally work against opponents. I like the special selfie throw, too.
“It also works as a fantastic off-stage edge guard tool both for getting foes directly out of the screen or to cause a stage spike but keep in mind that you will be facing the other direction so if you have no jump you need to reverse your recovery moves otherwise you will simply die, and your death will not be televised.” Pfft.
Oooh, so that’s where -the- “I’ve covered wars,” line comes from.
I don’t have any specific criticisms or points for how Frank can improve right now, but I can definitely say he’s your best set and a big improvement over the Jo Joes, feeling more like a big project with some genuinely cool ideas. It was also just fun to read a Frank West moveset that was actually fleshed-out, greatly helped by the extras and all the Dead Rising references. Well done!
I’ve actually had some thoughts about how Venom might work myself, so I’m fairly interested in this character choice already. The overall playstyle is fairly on brand for the character, being a big unga-bunga heavyweight with great speed and power but a bad disadvantage state. Venom’s actual moves all fit the basic gameplan, though there’s not a lot of elaboration on them, and I like the crazy shapeshifting aesthetic on most of his moves. His Specials are where most of the interesting things come from, like a USpec tether that essentially has a separate grab game and a tether move locked behind a projectile, allowing Venom to choose the distance it provides. While the tether isn’t as elaborated on as I’d like for such a major concept, it actually feels fairly balanced since neither party can move beyond the distance provided. There’s not a lot else to say that doesn’t have to do with further elaboration, but Venom’s basic ideas still manage to earn the set a positive rating.
FRANK WEST (BrazilianGuy)
With Dead Rising’s mechanics already being heavily geared towards resource management, I’m kind of surprised it took this long for us to get a really in-depth Frank West set (or any DR protag). His kit primarily focuses on his NSpec, which allows him to select several items if held that become his proper NSpec if the button is tapped. As in Dead Rising, Frank can get more powerful by taking properly timed snapshots with his camera, most notably granting him entirely different items depending on the level. His actual items are fairly interesting as well, from flammable gasoline that both trips a foe who runs over it and creates a flame pillar if one of his flame hitboxes touches it, to a walking command grab, and a Beetle clone. The intersections with his other Specials and moves are also quite interesting, from using rockets to light up gas from a distance and using an electrified sledgehammer as a punish option.
Frank’s other Specials are interesting as well - most notable is the DSpec, which summons a zombie that can hold opponents in place for his big hits as well as interact with his setup. SSpec is also neat as a method of repositioning zombies and items he has on stage. Aside from setup, Frank has some solid melee that serves varying purposes - the most notable being the FTilt, which can completely change depending on what his current NSpec is - and a grab game that exploits his zombies by turning them into projectiles. Several of these tools also get stronger with levels in interesting ways, such as turning Jab into a kill move that loses setup and edgeguard potential and giving FAir a more powerful hit. It all works well into the overall feel of Dead Rising, giving Frank a ton of options to play with and featuring resource management as a heavy part of the set. As such, I can safely say that this is easily your best set as of now, and I look forward to seeing what other characters you make.
Making a new post since my first one was getting a bit long. My comment list can be found here. I'm already up to 40 sets read and commented this contest. Something something 'my true strength'.
I thought this might be the character you were working on when you were dropping those fire truck hints, and I’m glad it was! Pretty fun when a character’s in-game role translates to Smash swimmingly.
Moves that work against a specific attack element aren’t the most ideal to me, as their results are a bit too match-up dependent, but the way the foam is implemented here doesn’t feel too intrusive to be detrimental.
Side Special is kind of neat, being a move that’s borderline identical to an existing Smash input (Mario Down Special) but explored and used in different ways for this set. Destroying your foam by washing it away AKA ruining your own set-ups by accident reminds me of Cap’n Cuttlefish. It’s a nice element for more chaotic characters that I’ll keep in mind for myself. There’s also a nice little charm about her Up Special being tied directly to her Up Special charge.
Down Special kind of reminds me of Villager’s Down Special, where the input changes when you have a specific type of construct out. Always wanted to see more of those kinds of moves in movesets.
F-Smash’s end lag cut by hitting a barricade is kind of neat. So is F-air’s late ranged hitbox.
I love the fireman’s carry Forward Throw trivia listed as a suggestion. That kind of stuff always makes for a more memorable read. Shaw carrying bigger opponents and it putting a strain on her is funny, too.
Would have been cool if Back Throw used your charge meter for Side Special and Up Special, but I get how it wouldn’t make sense logic-wise for such a water spray to do anything other than push opponents, which would be redundant with Side Special.
I don’t have too much to say beyond the Specials. Shaw is a charming little read, but her Specials feel a bit too conceptually simple to provide a strong hook or place her in the abundant “solid” tier of movesets. Much as I’d like to say so otherwise, as it seems like you were sitting on this moveset for a while. Still, I got some surprising enjoyment out of this set for reasons stated in the bullet points! Got my brain thinking a little set-wise. Looking forward to seeing what else you have for the rest of this contest.
Bandit appeals a ton to me and my bowser jr. brain, not just cause of the Down Special, with his core feature being to cause problems he kinda feels like a character I would really enjoy, also western cowboy vibes are always awesome. I think his aerials really shined to me, his neutral air whip being a way for him to approach and how much mobility he has with forward, back, and down air sounds like something that could be really fun to mix and match during a match. I also think his specials and his mechanics to be well implemented and fun, although I feel like the forward throw buff could have been given more of a light, I'm also not sure if 2 seconds is really that good, but outside of that Bandit is really nice. A yee out of haw.
In my head going from Bandit to Bandit Gal is quite funny, however, I think this is probably the last character I'd expect to see get a moveset, this gives me Bowsette flashbacks, but yeah your reasoning makes total sense. While Im very sure that I would have a miserable time fighting against her, that's kinda her point, she genuinely seems to be tilting by having tons of safe moves, moves that change her directions, moves that counter approaches, not to mention the big ol' "kill" Down Special. Side and Neutral Special are also highlights, Side for being something extremely unique that fits her mischievous character and Neutral Special was very cool to read your personal Brawl dedede memory. That's a thing I liked about the set as a whole, the way it's split between explaining the animation, the use, and an extra comment on it, really gives it a personality of it's own. Also I know it was a jamcon with limited time, but its a shame it didnt have things like taunts and alts, I think for a character thats basically from Fan-Art those extras could go a long way for characterizing her, but all in all it was a nice read in a set with a character I never expected to see.
For this Slavic Day, I have delved into the tombs of old sets I wrote back when I was on the Spore Forums before joining MYM, made circa MYM7. For the record, yes I am actually submitting these, you can vote for them as they were intended to be serious sets at the time they were made and as far as I know, they are complete. The only edits I made were changing the font color, because the Sporum existed in Light Mode at all times and the original dark red and dark green fonts of these sets are absolutely vile on Smashboards. And now, enjoy:
KAKUNA
Kakuna is a cacoon pokemon. It is the evolution of Weedle and evolves into Beedril. When found in the wild, it only knows harden. Which is extremely stupid, just give it Poison Sting or something. I dunno, it's not a very interesting pokemon. But I'm making a moveset for it because it's a first gen moveset and it had a really weak set in MYM2 that I felt like outdoing.
Your looking at those stats in severe disapproval, right? Well, yeah to put it bluntly Kakuna is not the best in the stats department. He's not supposed to be. Kakuna's about annoying the foe and slowing them up, rather than per say actually killing them. If you go off an edge, consider yourself dead, nor do you really have any movement speed at, like, all. You can jump only once and a very small jump at that, and you have no run, only a walk at the rate of Charizard's horrid one. Also, you can't crouch.
Specials
Neutral Special- Poison Sting
Kakuna fires a small stinger forward about a third the length of Final Destination. This stinger deals only 2% and comes out with average start up and end lag. However, over the next 5 seconds, it deals poison damage of 1% per second. If used again in the same time, it adds more time to their poison damage. Eh, could be a lot better you say? Yeah, it could, deal with it.
However, there is one trick with this move. You can hold B to imbue your stinger with a much deadlier poison. It takes 4 seconds of charging to use, and you can store it. If released before that, all it does is add 2 seconds of poison damage per second of charge. If you fully charge, you only get 5 seconds of poison damage, but with a nasty side effect. As long as the foe remains poisoned, the damage gets worse every second, including if you hit them with a basic sting again. It increases sort of like this: (1 sec: 1%, 2 secs: 2%, 3 secs: 3%, etc.)
Side Special- String Shot
Kakuna fires a string forwards about the same distance as poison sting goes. If it hits the foe, it starts wrapping around them, decreasing their speed for as long as they remain in the string. This is in terms of both moving and attacking speed. The foe can shake of the string after 2 seconds for every .3 seconds you were firing string at them, and it can be angled. If you fire more string at them, it'll add that string to the timer, as well as the extra slowing. Also, this can tether.
Up Special- Shed Cacoon
So, you are near death and need some sort of last resort. Well, with this, you can shed your shell to reveal your interior, a Weedle. This Weedle has slightly better movement speed than you, can only use your Neutral Special, Side Special, and a version of your A Combo that is faster but with even worse knockback. Thankfully it starts at 0%, but it's gonna die at like 70% of the blast zones, earlier due to the fact that it's got like no recovery. This takes a decent bit of time, but hopefully the foe is slowed up with string shot so Weedle can finish them off... and you can get out of your cacoon.
Down Special- Harden
Kakuna hardens it's shell over the course of .6 seconds. This slightly reduces all knockback dealt to you and all damage done to you by 1%. This can stack infinitely in terms of knockback reduction, but does nothing about damage after you are taking 5% less than normal. Note that this remains for the rest of your stock, and sadly does not transfer to Weedle.
Standards
Neutral Attack- Tackle
Kakuna tackles forwards, dealing 10% and knockback that KOs at 220%. I hate to break it to you, but this is actually the single strongest move that Kakuna has. So, good luck KOing until ridiculous percents. Though, if you saw how the specials were headed, Kakuna is MADE to get the foe to high percents, and survive long enough to do it. Be warned, this attack has Warlock Punch-esque lag, which isn't that bad after enough String Shotting, but it's still tricky to land.
Forward Tilt- Hop
Kakuna hops forwards half a stage builder block, dealing 5% and small set knockback. If you press A when you hit the ground, he'll bounce again without the start up lag. This has average start up and low end lag. It's a decent way to get around, I guess, but very predictable.
Up Tilt- Drill
Kakuna hops up half Ganondorf's height and spins, dealing rapid hits that deal 7% and small set upwards knockback. This can be cancelled into and out of the Forward Tilt, by using this when you hit the ground from the bounce in this move or the Forward Tilt, or using the Forward Tilt after this one. This takes away the average start up lag, which is pretty sweet.
Down Tilt- Fall Over
Kakuna falls over on it's back, and yes this can be used right out of a Forward and Up Tilt to cancel the start up. This has above average start up and end lag, and you cannot cancel the end into another Up or Forward Tilt. It also deals 9% and knockback that KOs at 350%. Sounds ridiculous, but if your having trouble landing Tackle, this is actually a decent alternative.
Smashes
Forward Smash- Stinger Drill
Kakuna drills forwards with it's stinger, dealing rapid hits that add up to 12%-17% and average horizontal knockback. This has a ton of lag, but in a similar manner to the Neutral Special, this poisons the foe. It also inherits the enhanced poison from the Neutral Special. If you've heavily string shotted the foe, this is actually a decent option for close combat, but even then it can be risky.
Up Smash- Weedle Launcher
Kakuna opens it's head up, launching Weedle out. If Weedle hits the foe with his stinger, it deals 4% and the same poison effect as the Neutral Special. You might argue it's a decent option against the air, but with 2 seconds of duration, it's REALLY risky. Note that charging it buffs the poison of the Weedle in the same way as the Neutral Special, and yes you can store the charge and charge for twice as long.
Down Smash- Roller
Kakuna gets on the ground, and rolls back and forth a bit, dealing 9%-13% and surprisingly good set knockback. This has big lag(again), but serves as a good get away move. And believe it or not yes it can be canceled out of a Forward Tilt. Doesn't compensate for the full second duration though.
Aerials
Kakuna only really has 2 aerials, unfortunately. But since if your in the air your about to die anyway, I guess making you near helpless makes sense. At least you can still string shot to keep it hard for foes to approach.
Neutral Aerial- Spin
Kakuna spins once. This deals 3% and average set knockback. Has about as much lag as poison sting. Nothing more you really need to know.
Down Aerial- Dive
Kakuna flips onto it's head and begins falling at a faster rate that it's fastfall speed. This deals 4% and upwards knockback that KOs at 400%. It's a nice way to get back to earth, but the fact that it's really hard to get into the air and that it's got large start up(and decent end lag) makes it useless for anything else.
Grab Game
Grab- Trapped in his Shell
Kakuna opens up his head, and with lag on par with Tackle, and falls forwards, trapping the foe inside of him. This actually does have respectable range, but if you can land it, you have done quite well in slowing up the foe. While they are in Kakuna's shell, they are completely helpless to the attacks of the Weedle inside. While you are pelting them with attacks, they can escape with Grab difficulty, though it becomes harder the more string shot you add on. You can actually make it worse by adding even more string shot with Side Special, but that actually will still allow them to break out eventually, just much slower.
Kakuna opens up his head, and releases a Beedrill. And then another. And another. Oh god, what have we done. There is now a swarm of 3 Beedrills following the one you control. The other Beedrills will all follow you, and attempt to combo into your attacks. You have free fast flying through the air, and a couple button imputs in addition to the Neutral Special(now with the permanent uber venom effect) and Side Special(now making the opponent slower at a quicker rate).
Neutral A- Fury Attack
Beedrill quickly stabs forwards with his stingers. This can be held for an infinite, each hit doing 2% and a flinch. They can break out after 6-8 hits, but likely another Beedrill will come in to make things worse.
Forward A- Pursuit
Beedrill quickly dives into the background, striking the foes if they try to spot or air dodge. This deals 13% and knockback that KOs at 170%. It does have a bit more lag than most of Beedrill's moves though.
Up A- BeeDrill
get it lololololololol
Beedrill quickly drills his stingers together and moves in a similar manner to Meta Knight's Side B, except not going into helpless afterwards. This has average start up and end lag, and deals 11% and knockback that KOs at 225% if it hits the foe. Yes, you can angle this move.
Down A- Toxic Spikes
Beedrill pokes the foe with it's stinger, and leaves in embedded into the foe. This deals 8% and average, plus 2% per second the stinger is stuck in the foe(in addition to current poison damage, scarily enough, and the poison will not wear off until the stinger is removed). You can't attack with it imbedded in the foe, but hopefully your friends will do the rest of the work. If not, you can remove it by pressing A next to the foe.
All the Beedrill retreat back inside Kakuna after 12 seconds. Remember that while the shell has super armor and anti-grab armor, it can still take damage.
Playstyle
Kakuna is a simpler character to play than it seems. Yes, he's slow, weak, and has all the recovering prowess of a drunken Ivysaur player. But, he's not exactly bad at severely crippling the foe either. Start off most matches by hopping around and using String Shot. You can be rather annoying to deal with, if you play right. Eventually, the foe is slow enough that you'll begin taking advantage of your other moves. Hardening will make you less vulnerable to being knocked off stage, and Poison Sting will slowly raise the foes damage. Also, make it a priority to eventually start building up a fully blown Poison Sting with uber venom.
Eventually, with all the String Shotting that's covering the foe, they are going to have a difficult time dealing with even your slower attacks. As such, start unloading them. The Down Smash is perfect for getting the just out of range to attack you while you can land Neutral Special and String Shot, and Forward Smash as a more damaging way to unload the power poison onto the foe. Speaking of which, once you land that, poisoning the foe becomes a big priority. You'll want to try to keep the getting slower and slower as normal, but keeping the foe poisoned means getting to KO faster. Now, once the foe is finally at proper percents, go for the Tackle.
Though, to be truthful, your not infallible. If you forget to Harden(or are prevented from doing so), especially earlier on, the foe can get you off the edge to your doom with almost no difficulty at all. If they break out of String Shot later on in the, expect to be comboed until your percent is crazy high, then launched to your doom. Although, it is possible to get things under control again if you pull out, it's going to be much more difficult if one of these things goes wrong. Keep all factors in check on the foe and yourself, and slowly poison the foe to death. That is the essence of Kakuna.
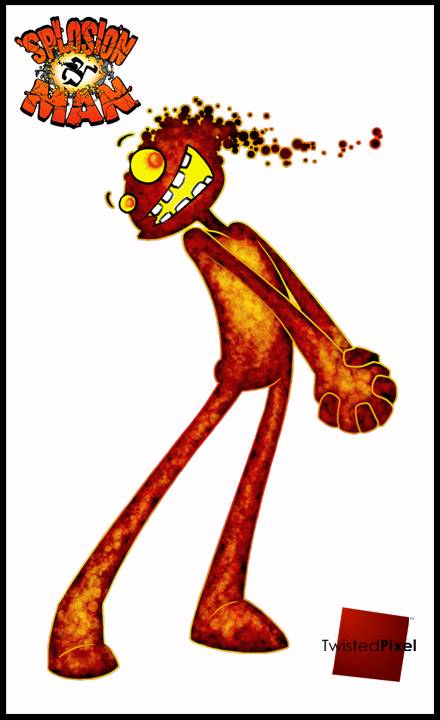
Splosion Man is essentially a science experiment gone wrong. He's a creature capable of exploding... without dying instantly. However, that was actually a bad thing, because he felt a deep desire to splode his creators. So, some scientists died, and he ran around blowing himself up. As well as just about everything else. Not only that, but he also collects cake. Nope, certainly not a Portal reference at all. Not at all. They even state that in the achievement.
Want any more information. Come on, just look at that picture. That's probably all you need or even want to know about him.
Size – 5
Power – 8
Attack Speed – 8
Weight – 5
Walk/Run Speed – 7
Crouch – 5
Air Speed – 5
Range – 6
Traction – 2
Jumps- 8
Wall Jump- No
Wall Cling- No
Glide- Lolno
Crawl- Nope
Looking at Splosion Man, his stats seem pretty nice. I mean, great attack power and speed. He sounds quite broken actually. Unfortunately,most of Splosion Man's moves tend to hurt himself. This means he will have some more trouble, as while he can bring up the foe's percent and KO very fast, he's also beating himself up and some of your own attacks will KO you at high enough percents. Yikes. So, watch out when using this guy, although you can dish out the pain like no tomorrow, you aren't gonna come out unscathed. He also trips quite often when running and slides a lot, but thanks to the dash that actually kind of helps. Also, on a random note,all your attacks deal insane shield damage, which makes you much harder to defend against.
Damage displayed in red at the bottom is damage dealt to yourself.
Splosion Man takes a small piece of gel off of himself, and lays it down on the ground in front of him. If anything touches the gel and I mean anything, it will explode, dealing 5% and low knockback. Yeah, I know, it's an obligatory trap and not a very good one, but if your one the run for whatever reason, and want to slow the foe up, this is the way to do it. This has low lag, and goes through almost anything the foe is doing.
{5%}
Dashing Attack= Trip and Splode
Splosion Man trips. No, seriously that's all that happens. However, there is one difference. During the first half second of being down, if the foe attacks you, you will splode. This deals 6% and knockback that KOs around 200% to yourself, but 15% and knockback that kills at 100% to the opponent. This isn't a big splosion though, and you gotta hope you tricked the foe into thinking you genuinely tripped. With your low traction you'll be tripping a good bit to start with, so you will probably be able to use this a couple times a match and fool them, as that's as often as you trip.
{6%/15%}
Standard Forwards= Stretchy Punch
Splosion Man does a casual jab forward with his fist, dealing 6% and low knockback. This doesn't have too much range, but at least a bit more than your typical Sploding has. However, what makes this helpful is the fact that if you hold A it will continue to stretch until it reaches 2 stage builder blocks ahead of you. If you stretch it that far though, you splode. This deals to you 10% and average knockback, as well as to the foe if they were touching you at the time. So, in essence you should stretch a bit, but not too much. Lag is low either way and you stretch quite fast. Be warned, this has lame priority and if the foe hits you while stretching and outprioritizes you, you splode just like if you stretch too far.
{6% or 10%/10%}
Standard Upwards= Uppercut
Splosion Man does a little uppercut above his head, dealing 7% and low knockback. This has low start up and average end lag, so your not comboing with it. All this really does is be a move you can use without any real risk to it, as you kinda need one of those.
{7%}
Standard Downwards= Duck n' Splode
Splosion Man crouches into a ball for a second, then splodes. This deals 13% and knockback that KOs at 125% to the foe and 8% to Splosion Man that causes him to fall to the ground. This has low lag, but is punishable as you kinda just fell on your face. There is a slight twist however. You see, one stage builder block of stage below you is temporarily obliterated, resulting in a ditch you can hide in. Splosion Man's not normally about playing defensively, but this kind of covers you up a little bit. However, the block will reappear after 5 seconds, and anyone who is in the dent while it reappears is buried like they were hit by DK's Side Special.
Splosion man... splodes. What, did you expect him to do something else. This is a fairly violent splosion, dealing you 13%-16% and knockback that KOs at 165%-135%. Any foes caught in the blast take 22%-30% and knockback that KOs at 90%-55%. This has average start up lag, and the blast isn't particularly large, being a little smaller than Donkey Kong. A fairly risky move, but it works nicely for damage racking in most cases.
However, there's a little bonus to this move. When you splode, you release a shower of Sparks about a Bowser length in front of you. The sparks don't do knockback, but repeated flinching hits that will deal as much damage as the regular blast unless they successfully DI out of it. This is a nice hope if you miss with the regular attack, but your going to be hurt too.
{13-16%/22%-30%}
Smash Upwards= Chain Sploding
All of Splosion Man's body but his legs explode, and foes into the air. This deals 5%-7% to you and average set upwards knockback, and 10%-14% to the foe with the same knockback. However, you cannot attack until you fall back to the ground, which has your regain your legs. However, you can splode up to 3 more times like this by tapping A in the air, which causes you to aplode again, having another part of your body fall to the ground while the rest of you goes up higher, so you can only do this 3 times. You can deal a lot of damage with this and have super armor the whole time, but if you whiff it or the foe DI's out, you do suffer more than they do.
On another note, while the rest of your body falls back to earthyou still have super armor, but you can't do anything else until all your parts fall back to earth. So expect to take plenty of additional damage during this time. This has small start up lag though.
{5-7% x 3/10-14% x 3}
Smash Downwards= Contact Sploding
Splosion Man focuses for a small period of lag, and then the attack is done. For the next 5 seconds,if you come into contact with the foe, a trap, a wall, or item, you'll explode,dealing 20% and knockback that KOs around 100% to the foe and 10% to yourself as well as knockback that KOs at 200%. Charging this does something different though than a knockback or duration increase. Instead, it raises your run speed and jump height, up too slightly above Sonic's run speed and twice your normal jump height at full charge. This makes it much easier to pursue foes. Also, landing an physical will also cause you to explode immediately after during the attack's duration.
At the end of the duration of this attack, you explode if you haven't already exploded on someone.This deals 20%-27% and KOs between 100%-70%, depending on charge. This actually deals you the full damage and knockback though, and considering the small blast radius, you're probably the one that's gonna suffer more. Take care in using this move.
Splosion Man waves his arms around in a panicky sort of way, yelling his head off. His arms are hitboxes on both sides of him dealing 4 hits of 2% and flinching knockback, with low knockback at the end. Splosion Man has basically zero priority during this, but if the foe attacks him through it, Splosion Man splodes for 15% and knockback that KOs at 120% to both the player and the foe. Like all of your attacks, it's kinda risky, but there are times when the foe does not want to attack you during it.
{2% x 4 or 15%/15%}
Aerial Forwards= Bombing Strike
Splosion Man splodes, dealing 5% to himself and launching himself for 3 Bowser lengths of set knockback. If he comes in contact with anyone, he splodes again, dealing 8% and knockback in the opposite direction of how he was flying that KOs at 240%, as well as 21% and knockback that KOs at 90%. Your number 1 aerial finisher, hands down, but the fact is it's potentially suicidal and hard to land. If you whiff it as well, you go into helpless state, so your effectively dead most of the time.
{5% and 8%/21%}
Aerial Backwards= Kick
In the low point of creativity in this set, Splosion Man does a kick behind him, dealing 8% and knockback that KOs above 200%. No you don't splode if hit out of this, and it actually has acceptable priority for once, and decent range. Also, it has low start up and average end lag.
{8%}
Aerial Upwards= Recovery Explosion
Splosion Man splodes again, launching himself in the direction of the ledge. This deals him 7% and knockback that KOs at around 60%, but he's not launching himself of the edge.He always flies directly to the nearest ledge.Enemies hit by your initial explosion take the same damage but only a flinch, but anyone hit by you while flying takes 13% and knockback that KOs at 135%. This actually has some pretty nasty start up lag compared to most of your attacks though, so be on the look out.
{7%/7% and 13%}
Aerial Downwards= Suicide Bomber
Splosion Man splodes, spiking himself and taking 10%.If he hits a foe on the way down, he will grab them and bring them to the stage with him.When he hits the stage, both you and the foe take 24% and knockback that KOs at 50% as Splosion Man splodes on contact with the ground.
This is a really good suicide KO move, although really it's not good before you can KO the foe with it as you'll end up taking more damage than them as well as being KOed if you use it above 40%.
Splosion Man turns green over the course of half a second, and gets a considerably more insane look on his face. Next time you use an attack that involves you sploding, it will deal 1.5X the damage to both you and the foe, as well as greatly increased knockback. It also increases the size of the blast and adds a nice after effect. The area were you sploded now has green radiation surrounding it.Enter the radiation and you take 3% per half second, and the radiation lasts for 10 seconds. All in all, it's a nice bonus, though a risky one as you take some extra damage too, though at least the radiation doesn't hurt you.
Special Sideways= Unexpected Attack
Splosion Man rolls forward in the same manner as a roll, but if he goes behind a foe, he seplodes for 8% and knockback that KOs at 190% to himself and 18% and knockback that KOs at 125% to the opponent. This is almost completely identical to rolling otherwise, so it does make for some neat potential mindgames.
{8%/18%}
Special Downwards= Final Splosion
Splosion Man takes in energy with near a Falcon Punch of start-up lag, and releases it in a massive blast that covers an area the size of Gardevior's shield and deals 30% with knockback that KOs at 55%. However, after the attacks, Splosion Man is just ash in his normal shape, which blinks, and the crumbles to the ground in a heap.This is an instant KO on you.This is actually really nice in combination with the Neutral Special if your about to die anyway, as it leaves a very large area of radiation plus is basically an instant KO past 25%.
{30%}
Special Upwards= Splode Apart :o
Splosion Manblows apart into many pieces,dealing 16% and knockback that KOs at 150% to anyone touched by the explosion, as well as 10% and the same knockback to anyone hit by the pieces. Splosion Man's different body parts all fly out in different directions, and if one lands on the stage, it will regenerate into you. The distance a part flies out and how fast it regenerates is dependent on the size of the piece(it flies further but regenerates slower when smaller, and vice versa). This is a nice way to fake out opponents, but keep in mindany attacks they deal to you are counted as stacking hitstun once your regenerated.
Also, if no part of you lands back on the stage... there goes a stock.
.................................................+Grabs n' Splodes+
Gripping Move= I can't come up with a good name for a grab, sorry.
Splosion Man reaches forward about the length of his Forward Tilt, and can continue stretching his arm in the same manner. He also explodes in the same manor. So basically, it's a version of the Forward Tilt that can grab. Whee.
Pummel: Sploding with You
Splosion Man splodes, dealing himself 3% and small set knockback, and the foe takes the same damage. This is a fast pummel, and the foe remains in your grip during the time you do so. As such, if your good you can potentially get your foe of the ledge with you using this...
{3%/3%}
Throw Forwards: You don't actually explode this time OMGWUT
Splosion Man pulls back his fist and punches the foe right outta his grip. This deals the foe 10% and knockback forwards with a slightly downwards slant that KOs at 140%. This means they'll screech to a hault close enough for a chain grab at low percents, but if you want to use it's KO posibilities, your gonna need to pull the foe into the air before striking, as otherwise they'll only slide a short distance from the knockback even at higher percents.
{10%}
Throw Backwards: Swing you Round
Splosion Man begins swinging the foe around him like a lunatic, dealing no damage but building their momentum up for the throw. If used on the ground, he'll swing them forwards at the end of a second, dealing the foe 6% and sending them forwards with knockback that KOs at 250%. However, if used in the air in a somewhat cartoonish fashion it reduces your fall speed below even that of Jigglypuff, and gives you amazing aerial DI. You'll let go when you hit the ground for the same damage, but for every half second spent spinning in the air, cut 20% of the damage percent. Also, if they hit the ground out of the aerial version they take an extra 4%.
{6% and 4%}
Throw Upwards: Build Up Blast
Splosion Man takes a second, in which is time the foe could break out of the grab, then splodes viciously. This deals 22% and knockback that KOs at 60% to the foe(which is upwards so the pummel can actually make this even quicker), but at the same time, it's a risky move as it deals you 12% and a spike on par with Ganondorf's Dair, so if used on the ground, you'll die at the same percents as the foe. Hard move to use properly, but it had to be considering it's raw power.
{12%/22%}
Throw Downwards: Gimp Bomb
Splosion Man splodes, dealing him 10% and knockback upwards that KOs at 210%, and the foe 16% anddownwards knockback that spikes them to their death at 50%. Yeah, it sounds broken, but you're going to need to make good use of your pummel before you KO with this.
Splosion Man begins to glow a brilliant white, and will continue to do so until he is attacked by the foe. Then, he splodes dealing 20% and knockback that KOs at 100% at if he's attacked the split second he starts using it. If he continues to build up energy, this will get stronger and stronger, and there really is no limit on the power(it sends the Sandbag at the game's maximum knockback after a 35 second charge and deals 999% after a 40 second charge, so I guess there is a limit, but what does it matter). This encourages the foe to attack you as soon as possible, as the explosion get larger too and you can press B again to blow up anyway. While the foe may think they can dodge this at first, after 7 seconds the explosion goes from the size of a Smart Bomb blast to hitting everyone within' New Pork City's blastlines. Moral of the story, blow him up as fast as possible.
.................................................+ How to Splode +
So, you wanna play Splosion Man, eh mate? Well, you're kind of crazy, but you have to be to play this guy. Or at the very least, a methodical kind of crazy. If you're wondering what I mean, you'll see in a minute.
First of all, most of your attacks deal you damage as well. What makes this worse is the fact is that they even deal you knockback so at high enough percents, some of your attacks become invalid as they'll KO you. That sounds bad right? Well, it actually isn't really. Unlike most characters, you'll land moves much more often the moment your foe sees how fast their shield gets smashed through. Also, you're a very fast character, to top it off. You can still compete feasibly, it's just matches go by faster due to your low KO percents and fast attacks, as well as your rising damage.
Though, against an opponent who is good at dodging even with your high shield damage, your at a bit of a disadvantage. That's why you have some non-painfully strategies to build up the foe's percent. You have a chaingrab that works till 30-40% on lightweights and to up to even 60% on DeDeDe and Snake. To top it off, you have a couple non-self damaging moves, which are helped by the A attack. I mean, it's a really weak trap, but it's good for tripping the foes up and sometimes you can knock them into one. Hell, with your pummel you could kind of carry the foe into them and you won't take damage.
However, the attacks with risk are often worthwhile to use anyway. You see, you can't get by on running and throwing out some non-self damaging moves alone, that'll make you predictable. Not to mention the possibilities of knocking yourself around. Is there a zone of radiation you made with a good few splosive gels around it? Fly right into it and hide there. You can be defensive if you're willing to damage yourself, giving you time to plot something like a nuclear-Fair or UThrow. Hell, with the Down Smash you can herd the foe into a zone of radiation, which is a surprisingly nice damage builder.
Speaking of KOs, when it does come time to do so, you have one really nice option named the Neutral Special. Couple it with the Fair or Up Throw, your capable of KOing at obscenely low percents with attacks that aren't easy to punish. Keep in mind it's not gonna be easy to land them, but if you whiff 'em, it's not going to be death for you. Another pro to being Splosion Man, you don't have to worry about that sort of crap of being punished horribly if you whiff a KO move.
Ultimately, he's a character that makes for a lot of methodical madness. He doesn't really have a preset way to play, but there are some general guidelines(like building damage sploding as little as possible). He's not a true create your own playstyle character, as you have one goal in mind. Be as crazy as possible without killing yourself in the process.
--Taunts-- Up Taunt: Splosion Man does his Neutral Special, except this time he's filled with confetti and candy. These come flying out when he blows up, but they have no effect on the match.
Side Taunt: Splosion Man puts his arms in the air and runs around in a circle screaming.
Down Taunt: Splosion Man yells "Byeeee" in a slightly tricky to understand voice while waving to the nearest foe.
--Victory Poses--
Victory Pose 1: Splosion Man is seen eating a bunch of food, and grows fat. Then he just rolls of the screen.
Victory Pose 2: Splosion Man is seen exploding all over the screen. Eventually he slams into the camera, then slides off as the results are shown.
Victory Pose 3: Splosion Man actually hands out some cake to the losers... isn't he generous. Though, then we see him start eating a whole cake himself. That greedy, gluttonous jerk.
--Kirby Hat--
Kirby's skin becomes the same color as Splosion Man's and his eyes get the same red and yellow look. For his Neutral Special, he explodes with the force of a Bomb-omb but deals 12% and some decent knockback to himself. Because he never explodes normally so a Nuclear effect would be kinda useless.
Acid Seaforce, to put it bluntly, is no good at KOing, and he'd honestly rather stall then play a quick match as his KOs tend to take a while to land and your damage, while you might take a lot of it, will happen rather slowly. Due to how godly Splosion Man is at making matches go fast, Seaforce is in for exactly what he doesn't want. The thing that keeps this match-up from being a horrible loss is that Splosion Man's percent is eventually going to get very high, at which point he's going to have strongly limited options. Though, if he gets a stock lead before having his options limited, he can feel free to build a little on Seaforce's damage then use Down Special.
Vs. Cairne Bloodhoof: 45-55: Cairne's favor
This match-up isn't as nice as it looks at first. Yes, you KO Cairne much faster than some characters, but the fact is even if he might not get the chance to regenerate doesn't mean that if it weren't for his mechanic you'd be horribly destroyed here. Cairne can stall out and you're going to eventually start building much more damage than you like, which is made worse by Cairne's ample KO moves. You do have a good chance of KOing him his reincarnation timer runs out, which makes a somewhat easier match-up. Cuz', you do know that it's kind of 2 stocks vs. 3stocks if you pull this off right.
Vs. Kel' Thuzard 20-80: Kel's favor
Ouch. This is an absolutely terrible match-up. Kel can be KOed easily enough, but the fact is you aren't going to have an easy time with his minions. They have enough stamina that your going to be needing explosions to kill them fast, and to top it off, Kel has his shield to protect himself and as such make it take AGEs for Splosion Man to actually be able to start damaging his health. By the point he's finally cut through all Kel's defenses, he's going to be in a position were all his explosive moves are suicidal, and if Kel gets any mana back soon, he can send Splosion Man packing due to his very high percent.
Bandit Fire Emblem manages to get across the general feel of the class perfectly (at least from what the intro describes) - all power, no speed. Of course, this dooms him to low tier, but he’s a generic mook and any other playstyle wouldn’t really feel like a Bandit, so it’s very fitting. He has a good deal of tricks to get around the poor disadvantage state as well, such as an actual projectile and a DSpec where he uses a Green Unit as a meatshield. The most interesting part of Bandit’s kit is easily his obligatory “steal” move in SSpec, a command grab that gives him one of 5 items randomly. Said items are fairly interesting, such as a healing move that can only reach its max potential if it hits a shield, a Warp Staff that enables him to randomly teleport the foe, and the Glass Ax, which adds a flat 2x buff to his already strong ax moves. All of them can be very powerful, but their limited uses and the random factor ultimately end up balancing the move.
The other moves have some neat tricks to them as well. Bandit’s Smashes have him summon other criminal enemies to give him surprising range for the power they can have, which seems a bit random but from what it sounds like is based off of an actual Fire Emblem mechanic so I’m letting it slide. His standard melee moves are basic, but still have plenty of interesting bits: FTilt and the armor that guarantees a critical hit (possible on the normal move but very rare), the DTilt trip that sets up for his reads, and the obligatory Slavic stall-then-fall DAir that can potentially instabreak shields with a Glass Ax. Bandit’s throws are fairly basic, but they still have their uses, and the grab itself holds an important role as one of his best means of getting around shields, which typically stuff his approach. A simple set overall, but a solid one that executes the “slow heavy” style very well and appeals to the Ganon main in us all.
HILDA VALENTINE GONERIL (Froy/n88)
Hilda is an unga-bunga character, which I can already get behind. But she also comes with another concept I quite like in deliberate self-damage to gain buffs for her moves the more damage she has, made more intriguing by the fact that she’s very lightweight. The rewards for high damage are just as powerful as I’d like, from gaining a second hit on Hilda’s big meaty FSmash to making it increasingly easy to land her normally very tricky SSpec. Her NSpec is also interesting, summoning a hand ax that can be thrown like a Belmont ax but can also be used as a battering item that alters the according moves. Finally, Hilda’s Seal Speed buff is a neat move that specifically punishes shield damage with an attack speed decrease, making it much harder for the foe to react to her normally fairly slow moves. While it doesn’t get that much attention for a fairly major mechanic, it is fairly self-explanatory so it isn’t that big of a deal.
As for her more basic tools, I don’t really have much to say about them; they do their job, but there’s nothing that notable about them aside from their interplay with Hilda’s Specials. Said interplay is quite nice, however, from a FThrow that puts the opponent close to her so she can potentially build up Seal Speed to the hand ax FTilt that gives her a meaty mid range option. I also liked the fact that Hilda doesn’t actually have a safe poking tool, relying on range for her neutral, for adding to the unga-bunga feel. Fittingly, the Smashes were my favorite part for being her big heavy hitters with neat additions, such as a super strong projectile for the FSmash second hit should Hilda have the hand ax and a DSmash that, if she has her self-damage on, replaces the bad sourspot with one that while still worse than the main hit is actually usable. It all works up to a very intriguing set based on escalating power, fitting for a lazy character who’s more than willing to work for the right cause. I don’t like it as much as the previous Froy/n88 joint, but Hilda is still a cool set, and one I’d probably make my secondary (Barbatos is, as previously stated, my main).
VILEPLUME (Slavic)
Vileplume is another simple set, with a focus on keeping a foe at a distance. Unlike many other zoners, however, she legitimately does struggle with the opponent in her face due to her lack of close-range options - in fact, her Jab hits upwards! As such, she has to rely on flat out discouraging the foe from attacking her, through poison that does damage for every attack they do and a Shield Special that creates a prolonged period where hitting Vileplume stuns them and leaves them open. The cornerstone of her gameplan is Moonlight, a fitting contrast to the earlier Bellossom set, creating an area that progressively fills a meter that she can expend to buff her Specials. I like the general idea plenty, especially with how the moonlit variations of the Specials aren’t strict upgrades, generally being slower than the base versions.
The rest of the set is fairly basic, as you’d probably expect. There are still some standout moves, though, like the DAir multi-hit stall then fall and the aforementioned vertical Jab projectile. Vileplume’s kit feels fairly functional, having just enough close range tools and callout moves to fend off foes and actually kill while still leaving her faring poorly in close range. There is still incentive to get close, though, in the form of her grab, which actually has some pretty nice rewards in the form of a good chunk of healing and a potential kill throw if the opponent happens to be poisoned by her SSpec. It all works into a neat little set that, while not especially notable for the most part, is still a good interpretation of Vileplume’s kit and an interesting take on the zoner archetype.
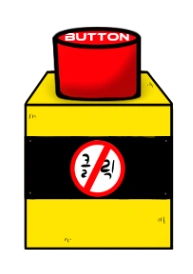
Don't Touch Me is an Abnormality from Lobotomy Corporation, a game about attempting to juggle management of a facility filled with highly dangerous anomalous entities. As you can see, Don't Touch Me is a button, and if you do touch it, bad things happen. How bad depends on how direct the touch was. If you click on its description, it will immediately cause every Abnormality to break out of containment, which is very bad, don't do that. If you decide to interact with the button itself by clicking on it, you'll instead kill every employee in your facility. This is even worse. It also likes to pretend to be things you should click on, so if you're just scrolling by to check on it and don't look at the name box and see something you think you should click on, you might just end your entire run. It doesn't have much in the way of like, lore. Its a button the titular Lobotomy Corporation learned they were not supposed to press and put in containment to keep people from pressing it. It does seem to have some kind of psychic pull that drives employees to want to push it though.
I started making this for the crime JamCon, but then got hit with something every day for that entire weekend, so I lost my will to continue. Fortunately, all moveset crime is legal on Slavic Day, so I'm safe.
Stats
Don't Touch Me's block of a body is about the size of Wario, at least if Wario was an almost exact square instead of the round little man that he is. While normally it would be entirely incapable of movement, sacrifices must be made to get it into Smash, so it can float around in a weird, barely animated fashion to get around, mostly just wobbling slightly back and forth as it goes. Mind you, its not fast: its dash speed is a bit below Ganondorf's at 1.33, and when its floating in the air it can only match Byleth and Kazuya's 0.89. Fortunately, as basically a big brick with a button on it, Don't Touch Me is plenty durable, an outright superheavy with a weight of 125 despite its relatively small size. It has floaty jumps in the style of Ness and Mewtwo, but both jumps give it a pretty good amount of height as it ominously floats up into the air. Its a bit slippery in its floaty movements, so you don't get as fine of control as you might want, but the fact it moves as slow as it does means this isn't too big of an issue.
Specials
Down Special - Press the Button
Now, I could make a moveset where any opponent's attack would press the button and then everyone else on screen immediately dies. I think you can agree with me this is a bad idea. So we're going to do something a little more complicated, and a little less extreme.
The red button shines invitingly when Down Special is pressed, begging the opponent to push it. This is a counter Down Special, and if an opponent hits the opponent during the window this counter is active (Frame 5 to Frame 27), one of two things will happen. Similarly to how clicking the description in Lobotomy Corporation is not as bad as clicking the button itself, how bad pressing the button will be depends on how close the opponent is to the button. Since the bad result is less complicated, let's go over it first.
If the opponent presses the button while their body is overlapping the button, they will press the button all the way down, and then they will immediately die, being flung off the blast zone with their model visibly disintegrating as they do so. After they are KO'd, blood will drip down from the top blast zone across the screen, though this is purely aesthetic and has no gameplay effect. If the foe would smack against a ceiling that will save them, their body will just explode into anomalous bloody bits(or gears for robots, other comprising materials for characters with non-flesh bodies, or yellow stars for particularly cutesy characters) that fall to the ground and disappear. In addition, while it won't kill everyone on screen instantly, it will produce a Smart Bomb Blast sized shockwave of rainbow light from the button, an absolutely massive hitbox that deals 27% and KOs at 65%. This is an exorbitantly powerful counter, and on the surface completely unfair for such a mood, but when I say the foe's body is overlapping the button, that is an even stricter requirement than it sounds. It can't be over an extended limb like the edge of a Mario FSmash or whatever, it basically requires you be on top of where the foe's model would be like Jigglypuff's Rest BEFORE they did the motion of their attack. Basically, you have to be in Rest range, and then you have to counter the foe, which is a very difficult thing to do, especially with Don't Touch Me's slow, clunky movement. It doesn't help that the end lag on this counter is pretty awful as Don't Touch Me's button dulls in color for a terribly long 75 frames, so whiffing this is extremely punishable.
If your opponent does press the button but is not directly overlapping it, the button will press halfway down instead, activating its effect to release all the abnormalities in the facility. Thankfully, in Smash, its not going to be unleashing anything truly horrible on you like an ALEPH class Abnormality, but rather something it likes to disguise itself as, the Happy Teddy Bear.
The Happy Teddy Bear will appear after a warning siren goes off, grabbing the opponent in a suffocating bear hug. So suffocating, in fact, that if the foe did 15% or more with their attack, you can hear bones cracking, or metal/stones crushing or some other similarly destructive effect on characters made of those kinds of materials. For Kirby/Jigglypuff or a couple other cutesy characters that it would probably be a little too gruesome a sound effect for, you'll get a squeaky toy noise instead. Either way, after half a second in its embrace, the bear does a pretty vicious 1.35x the damage and knockback of the attack that hit the button from how painfully tight it hugged the opponent, a fairly strong counter, but not quite strong enough to justify the end lag.
That said, the Happy Teddy Bear loves hugs very much... too much, in fact, to stop at just one. It sticks around on stage after the opponent is launched away, lumbering around at Incineroar's Walk Speed for the next 7 seconds. If a foe comes within a battlefield platform's width of it, the Happy Teddy Bear will sprint for them at... the less than impressive speed of Jigglypuff's Dash, but its actual grab has huge range that will make you think of a tether grab but with extremely low start lag. This grab actually deals the same damage and knockback as the initial hit, allowing you to double or even triple dip on your counter, making this input exceptionally potent even if the opponent just presses the button halfway. The Happy Teddy Bear stumbles for a full second and a half after whiffing a grab on the opponent, giving a decent window to take it out or run away from it.
As minions go, its not the most intrusive one aside from its ability to attack players. Projectiles will pass right through it, shooting out the other side with some of the aesthetic cotton fluff popping out the back. It also takes heavy hitstun from attacks, about three times as much as a normal character, and takes knockback like Mario at 40%. The teddy bear stands about Captain Falcon's height, and has 30 stamina, so it can take a few hits, but it won't be a serious threat to the opponent on its own if they're not also worried about Don't Touch Me at the same time. That said, its hugs hurt a hell of a lot if Don't Touch Me took a heavy hit, and if it took a lighter hit, the half second in Happy Teddy Bear's grip plus light knockback is an absolutely incredible setup tool for basically any attack in your kit that's not the counter. Not only that, if the foe takes knockback that flings them within half of a battlefield platform of Happy Teddy Bear, it will lunge at them and pull them into a hug, making it not particularly hard to combo foes into its devastatingly powerful embrace if played right.
If a foe shot Don't Touch Me with a projectile, Happy Teddy Bear will appear behind them about 15 frames after the counter activates. This can catch opponents using mid ranged projectiles out as Happy Teddy Bear can grab them in their end lag, as well as at least annoy them while Don't Touch Me is taking end lag. Its not as potent as a number of Smash's Reflectors against projectiles, but it still serves as a decent deterrent, albeit one that's not risk free given the monstrous end lag.
At the end of it all, Down Special is a massively powerful tool for Don't Touch Me, the most potent counter in the game by a wide margin in exchange for its atrocious end lag.
Side Special - Temptation
The button glows brighter, as though begging opponent's to press it, before a tall and thin wave of red light shoots forth from the button. This projectile can be charged and stored, which adjusts the effect of the projectile as well as its travel speed/distance. Uncharged, it will travel 1.5 battlefield platforms at the speed of Mario's dash. With 30 frames of charge, the wave will be a bit thicker and travel 2 battlefield platforms at a rate a bit faster than Captain Falcon's dash speed. At a full second of charge, which is also the maximum, the wave will be about 2.5x as thick, travel a bit faster than Sonic's dash speed, and move 2.75 battlefield platforms before vanishing. Its a reasonably quick projectile to fire by projectile standards, with pretty low end lag too. You can kinda spam it, though this isn't as helpful as you'd think when you see what the projectile actually does.
See, this projectile does no damage, hitstun, knockback, or even a push. All this does is instill the foe with the temptation to press the button, temptation that will bubble to the surface over 6 seconds. The opponent will glow red 1 second before the temptation finally overtakes what few brain cells they have telling them to stop, and the foe will instinctively throw out an attack. Uncharged, the foe will use their Jab on the ground, and their Nair in the air. Half-charged or more, they'll switch to using their Forward Tilt or Forward Aerial, and fully charged, they'll use their Forward Smash on the ground. In the air, since there's no Forward Aerial smash, the foe will do a slightly delayed version of their forward aerial, taking 5 extra frames to come out and 14 extra frames of end lag, but increasing the attack's damage and knockback by 1.4x.
If the opponent is already afflicted by a desire to press the button, subsequent hits with the projectile will first increase the ferocity with which the foe presses the button, going up 1 stage (Jab -> FTilt, FTilt -> FSmash) if hit with the uncharged version, 2 with the half-charged version, and 3 with the fully charged version. Going up a stage past the point the foe is throwing out FSmash will simply compel them to act 1 second sooner, forcing them to use the attack on the spot if it reduces the timer to 0 seconds. Worth noting that this projectile does do shield damage even if it doesn't do actual damage, 5%/10%/15% depending on which stage of charge its at.
The use of this should hopefully be pretty obvious. Don't Touch Me has an obscenely powerful counter, and with the help of Temptation you'll know exactly when the opponent is going to throw out an attack you can use that counter on. While they can shield or dodge/roll the initial wave, dodging will only delay their compelled attack until after the dodge, and they'll drop shield to do it if they're holding it up. That said, there are at least some reads that can be done with dodging at the right time to delay the attack, and grabbing Don't Touch Me will similarly delay it until after a grab release or the end lag of the foe's throw. That said, this is an entity called "Don't Touch Me", so for reasons we'll get to, grabbing it can backfire.
You don't entirely need to have the foe in range to throw out an attack you can counter to make use of this. If the foe ends up doing so out of reach of your counter, you can rush in to punish the lag of their attack, and that punish can still be pretty brutal if the foe's stuck using FSmash/empowered Fair. There are also times when all you'll get out of it is a fairly weak Happy Teddy Bear, in which case a more traditional punish can often be the better call. Just keep in mind the foe knows just as well as you when they're going to be forced to attack, and that this provides no immediate pressure on the opponent when you're firing these projectiles. Its more of a long term problem, and fortunately for you the human brain is bad at handling those.
Neutral Special - Lobotomy Corporation
The button's temptation calls once more, the glow going much higher above the button like a pillar this time as a beacon to lure in someone from much further away. This is much laggier than Side Special, taking 37 frames to come out, after which, a door will open up 2 battlefield platforms in front of Don't Touch Me as a Lobotomy Corporation employee steps through. There's a good 30 frames where the employee won't actually do anything, they haven't slept in days and clearly look the part. After that, their eyes will lock onto Don't Touch Me as they realize they are definitely not paid enough to resist temptation, and approach the button at Robin's glacial dash speed. They even have a single, fairly low jump that they'll use to try to catch up to it. Once the employee is pressed right up against Don't Touch Me, close enough to trigger the Full Press hitbox, the employee will press the button in a motion that deals 1% and not even a flinch.
Remember how the button getting pressed is devastating for everyone in a Smart Bomb-blast sized radius if you counter a foe who's hurtbox is overlapping yours? Well, the employee pressing the button will still trigger that hitbox, giving you a way to weaponize that massive, deadly attack against foes without targeting them directly. This kills the employee. For what its worth, this is the only thing employees will do to foes unprovoked, and like Happy Teddy Bear, they take triple hitstun and don't block projectiles. They also take knockback like Mario at 85%, making them pretty easy to knock around, and only have 18 HP. You can have one employee on stage at a time, and there's a five second cooldown after one dies where you cannot summon another one.
There's a few things to keep in mind with Employee behavior. If the foe does hit an employee, their quest to press the button will remain their main pursuit, but they'll at least try to fend off foes that come within a Bowser-sized area around them with a simple punch on the ground that deals 6% and decent, low-scaling spacing knockback, or a kick in the air that comes out a bit slower and deals 8% and slightly more low-scaling spacing knockback. Both these moves come out quite slowly, but it at least gives the employee any self-defense after the first hit, however ineffectual, and sometimes capitalizing on an incidental hitbox will work out for you. If you jump in the way, these hitboxes can hit you too, which can be an emergency method to get some mileage out of your employees if you don't think they'll survive to get in button press. If you don't get a full press, this gives you a pretty weak Happy Teddy Bear, but that's not an awful outcome.
Employees that end up off stage actually do have a recovery move, which is important in case you happen to spawn a door off-stage. They'll panic for a full second with a very slow fall before making a desperate lunge for the ledge, one with no hitbox but that does travel 1.3 battlefield platforms. That's... not quite enough to save them if Don't Touch Me spawns them off the ledge, but if you jump off to meet them, they'll be happy to press the button and at least find out what it does before they die. While this is a powerful ledgeguard, its a pretty telegraphed one, but given the Employee is acting separately from Don't Touch Me this can create some pretty good ledge pressure scenarios.
The thing about employees is that they really are not hard for the opponent to deal with at all. They won't fight back until they've taken a hit, they don't block projectiles, and even once they do take a hit, they're not exactly a particularly serious threat with their tiny aggro range and pathetic attacks. What they are, however, is yet another thing the opponent has to be scared of fighting Don't Touch Me, because if they DO end up successfully pressing the button, the resulting blast is enormously strong, and things can get very messy with Don't Touch Me, the foe, and the employee all in a small radius of each other. That's the best use for the employee really, forcing the foe into frantic close range scuffles where they don't want to press the button, they don't want the employee to press the button, and maybe they even have a timer counting down until a predictable attack comes out. That said, do keep in mind you will have to actually use Down Special to get the effect you want out of this, which can backfire given said move's enormous end lag, and opponents can just run away to stay out of reach of the blast... but given the way Happy Teddy Bear interacts with projectiles, its not particularly easy to camp Don't Touch Me despite its awful movement speed.
Up Special - Abnormal Movements
Don't Touch Me is a bit more devious in-game than it appears at first, copying the appearances and particle effects of abnormalities to trick the player into clicking on it if they're not paying attention. For this move, and quite a few more later in the moveset, Don't Touch Me will make use of the latter trick. Its a button, I think I'm allowed some liberty to abuse the particle effects.
Taking from Spider Bud's particle effect here, Don't Touch Me causes darkness to slowly appear around it, starting from its center and slowly spreading outwards and slowly turning from a purple haze to pitch blackness as it goes. It takes a full 2.2 seconds for this to happen, during which time, after an initial 20 frame period to start the spread of darkness, Don't Touch Me is free to continue acting as normal. That also means it will continue falling, so using this recovery when you're very close to the bottom blast zone will just fail, a problem a good number of other Smash characters do have so you're at least in good company. Don't Touch Me will be JUST visible enough in the darkness to show you what its doing the whole time, right up until the final few frames, and other particle effects within are clearly visible. This isn't a very good mindgame tool, although you can trip up some opponents in the moment if you attack right towards the end because at that point it can be a bit difficult to see exactly what our favorite sinister button is doing.
Once don't touch me is totally obscured by darkness, the darkness blinks out of existence, don't touch me vanishing with it in a recovery akin to Zelda's Up Special. You can choose to steer the direction based on where the control stick is pointing during the last 15 frames before the teleport, giving some fine control over it rather than needing to pre-set the ideal location ahead of time. There are a few noticeable differences. The first of which is if you would appear within 2 Ganondorf heights above a platform, you'll snap to the nearest ground. This is nice because if you land on the ground, you actually are out of lag almost immediately, though if you were using an aerial right before you teleported, you'll take its landing lag. Being out of lag almost immediately leads into one of the spookiest uses for this move: using it to jump right in the face of someone trying to run away from you when they're trying to avoid throwing out an attack in the wrong spot, and ending up right in their face anyway. You can also use it to suddenly get in close range with an employee if the foe would be caught in the blast.
The other thing that's nice about this recovery is the reach goes quite long. Its a bit adjustable based on whether you lightly tilt, heavily tilt, or smash it, but the warp goes nearly twice as far as Zelda's teleport at max. If its not near the bottom blast zone, Don't Touch Me can pretty comfortably recover from basically anywhere with this teleport, and even continue fighting while doing so after spending only 20 frames of lag total on the recovery. Sure its got no hitbox, but this is a very strong recovery even before you get into all the shenanigans it can get up to with an employee or a delayed attack on the foe's part.
Now, there is one downside to this recover,y, and its a pretty big one. If Don't Touch Me takes any hitstun while the darkness is forming, the darkness will vanish and Don't Touch Me will lose access to its Up Special, effectively dooming it. That's pretty bad, and makes this a very gimpable recovery that the opponent will surely want to intercept. I'm sure you can't possibly think of anything bad that could happen to the foe trying to intercept Don't Touch Me's recovery with a gimp attempt or projectiles.
If used on the ground, you will not go into helpless when you teleport into the air, though otherwise ending this move in the air does leave Don't Touch Me in helpless. If you teleport elsewhere on the ground you're still getting the same end lag though, and unfortunately this cannot be used to cancel the lag of moves that can be used on the ground and in the air like Down Special. The end lag on that move is something you just have to live with, only fair given how powerful it is.
Grab Game
Grab - The Lure
Don't Touch Me tilts its body forward, pointing its button towards the foe as it shines oh so alluringly. At this point, the mental pull of the button becomes too much to handle, and opponents will grab onto the button instinctively. Of course, this qualifies as touching the button, even if they aren't properly pressing it, leaving them open to a wide variety of nasty curses Don't Touch Me can apply to them for daring to touch. This grab has pretty middling range and is a smidge laggier than most, leaning forward is kind of difficult when you're a button on a heavy stand, so its not the best grab out there.
Now, the interesting part of Don't Touch Me's grab game comes not from its own grab, but rather the opponent's. See, when an opponent grabs Don't Touch Me, it will actually get alternate versions of its throws that it can use on them, registering the first direction Don't Touch Me inputs as its choice of "throw" to afflict the foe with. These "throws" are not immediately going to help you, the foe will still get their own throw off, and the reason it registers only the first input for this is you're still going to want to try and mash out before the foe gets in too many pummels. But they apply a negative effect on the foe based on one of Don't Touch Me's own throws that you can abuse against them later, making grabbing Don't Touch Me a rather dicey prospect if you don't want to worry about nasty statuses and time bombs and the like.
What's particularly nasty here is that these effects do stack. They'll still have the initiative after the throw regardless of what you picked the first time, but if the opponent winds up grabbing you two or three times in short succession, they can quickly end up overwhelming themselves. The foe is still going to want to grab Don't Touch Me sometimes when the alternative is either triggering the almighty Down Special by force or by accident. Its just a matter of not doing it too much and putting yourself in a hole you can't dig out of.
Pummel - The Struggle
The opponent struggles with holding themselves back from pressing the button as tiny red sparks appear over their head, indicating the psychic damage not pushing the button is doing to them. The foe's brain is strained by the button's mental compulsion, indicated by the sparks dealing the 1.5% in a pretty rapid pummel. If the foe is over 300%, their willpower fails and they press the button, resulting in the same effect as a Full Press Down Special. That's death, for those who didn't know.
Up Throw - Meat Lantern
For Don't Touch Me's throws, a wide variety of malicious effects will befall the foe on account of them getting a little too touchy with the button, even if resisting pressing it will keep them from the instant death they clearly desire. This throw's malicious effect comes from an Abnormality popping up underneath the foe, specifically a pretty harmless looking little flower. There's a brief pause here for unfamiliar players to realize something is wrong, and Lobotomy Corporation players to feel the dread set in at the sight of that flower before, well-
An enormous set of jaws snap down on the opponent, dealing 15% and upwards knockback that KOs at 125%. This is Meat Lantern, basically a land bound massive angler fish-like being that ensnares curious observers of its flower with its enormous mouth. And as KO throws go, this is a meaty one. High damage, great KO percent, vertical knockback to make it all that much scarier on platforms, and honestly? No real catch. Don't Touch Me has a good set of throws to make up for its grab not being the best, and there honestly isn't a whole lot more to this one than just giving it a great kill throw. Honestly sometimes you'll just use it for the unconditional high damage and vertical space it grants you. And if you're about to warp upwards, this can be an even better kill confirm, because you can then get yourself teleported up and follow through with a Uair. This is a bit of a tricky setup, but it sure kills disgustingly early on platforms.
If the opponent grabbed you, Meat Lantern is not just going to pop up on them immediately and hit them with a throw better than almost every throw in Smash Ultimate. That'd be a little ridiculous. Instead, 1 second after the throw Meat Lantern will now be stalking the foe through the stage at a speed a bit slower than Incineroar's dash, with little tremors in the stage indicating something is following them. That's not the strongest indicator for foe's to follow, but fortunately there are a couple other things the foe can do to slow up Meat Lantern as it stalks them. First of all, Meat Lantern can, somehow, follow foes onto platforms. Its an Abnormality, its best not to question what its capable of. That said, it takes a half second period to move from the stage to a platform above it, giving foes a pretty solid grace period. Second of all, when the flower pops up, the foe has another 45 frame period to get out of the way. Dodging/shielding/jumping high enough, whatever works. The foe isn't held transfixed by the red button, Meat Lantern isn't going to get to jump them for free. Meat Lantern will continue its chase for 5 seconds, after which it will leave the stage unsatisfied.
That said, its a big hitbox. Meat Lantern's jaws reach up K. Rool's height(the actual tallest character in the game) and can snap up characters in a radius 1.5x the width of Bowser. This will hit outsiders by the way, and do the same on the throw version to foes in that same gigantic radius, though it'll deal a reduced 12% and upwards knockback that KOs at 180% to people who aren't the grab victim in FFAs. That said, even considering the hitbox, its honestly not THAT hard to avoid, you mostly just have to make sure not to stay in one place for too long. But there is one nasty thing about this version of the move: its quite a bit stronger than the throw. Meat Lantern as a trap deals 25% and upwards knockback that kills at 65%, which is a pretty disgusting level of power on par with some of the strongest smash attacks in the game.
So this isn't the best way to get yourself out of a disadvantage state, but the foe's combo is going to end at some point, hopefully with you still alive. And once you're alive, you have a lot of ways to make this brutal "time bomb" become that much harder to avoid. An inconvenient attack forced by your Side Special. An employee's presence luring a foe to or zoning them away from a particular part of the stage. Happy Teddy Bear existing as a passive threat as well. And the simple fact that Don't Touch Me can sort of bully opponents with the prospect of getting too close to it when its Down Special and a couple options are so devastating when your hurtbox is basically overlapping the opponent. On its own, Meat Lantern will struggle a bit to actually hunt down an opponent, its too slow and gives too many cues. But if you give the foe enough other things to worry about, they might end up dead as a consequence of their own grab.
Forward Throw - Decay
As the opponent stays in contact with Don't Touch Me, a rot begins to spread up their arms, before a rather unpleasant burst of brown miasma bursts from their own body, launching them away with decent, low scaling spacing knockback and 9%. This knockback does have enough of an upwards angle to it that you will not get any tech scenarios off it, and the amount is too much to really combo, but its not so high that Happy Teddy Bear won't be able to grab foe's out of it. The fact this throw's angle isn't super convenient is a bit of a shame, but if you're trying to push foes to an edgeguard scenario or towards Happy Teddy Bear, Meat Lantern, or wherever is most convenient for your employee setups, it'll do fine.
Now as you might expect given this is a MYM set for a character nobody asked for and this throw is way worse than Meat Lantern on the face of it, plus the rotting animation, this throw gives a pretty nasty status effect. The foe is left with visible decay all over their body, dealing them 1% per second, and that's... all you're left with at first, but this effect will stick around for 8 seconds. And during those 8 seconds, if the foe takes 25% in total, the effect will extend another 4 seconds and the rot on the foe will become visibly worse, impairing their movements and reducing their grounded and aerial movement speed by 10%. While not a huge reduction, movement is a BIG deal in Smash, and reducing it at all can break up some combos and make it harder to keep pace in neutral. Note the damage for the decay threshold only comes from outside attacks and not the status itself, so its not going to be as casual as dealing 18% to the foe and waiting for the damage to tick up to send them into the heightened decay state.
The decay advances again if the foe takes 50%, adding on another 4 seconds to the timer and making the foe look almost zombie-like. This cuts roll distances by a third, and increases the movement speed debuff on the ground and in the air to 25%. It reaches its final form if you deal 75% to the foe, adding one last bout of 4 seconds to the timer and leaving the foe in a state they look like a particularly badly decayed zombie, shambling along in a pitiful state with movement speed reduced by 40%, and with the additional effect of noticeably reduced jump height. This is an absolutely brutal status effect to deal with if Don't Touch Me can snowball it that far, but that requires it to keep up a pretty consistent string of pressure that its low movement speed, poor combo potential, and lack of damaging projectiles can make a bit of a challenge. That said, if you do the trick of throwing the foe into Happy Teddy Bear, that'll absolutely get you snowballing along with this effect much better than you could without it, yet another reason the foe does not want to let you have that thing on stage.
The other thing about this effect is that, on a character who wants to be overlapping the foe's body but doesn't have the movement speed to get there, its just nice to be able to shave off parts of the opponent's movement bit by bit. Sure, your teleport can force close quarters situations, but only for a moment and its pretty interruptible and predictable. The foe consistently having trouble getting away from you, not having room to flee the massive hitbox of an employee detonating you separately, or potentially struggling to run away from Meat Lantern if you stack both of those afflictions is all very beneficial, just making it harder for the foe to escape the escalating mess they find themselves in.
If you pull this throw off on an already afflicted foe, 4 seconds gets added to the status effect's duration without increasing the stage. If decay is applied to a foe who threw you, it leaves their body a bit rotten for the next 6 seconds, still dealing the 1% per second so you can at least guarantee 6% in retaliatory damage to the foe out of the deal. But what's nice about the version you can afflict the foe with for throwing you is the effects actually escalate faster in this version. 20% takes them to the first stage of advanced decay, 35% to the second, and 50% to the final, awful stage. Getting grabbed and using this throw will also add 4 seconds to the decay status effect without increasing the stage, like the regular throw. When used on a foe out of their own throw, you are starting at a disadvantage state of the foe's choosing instead of a minor advantage state, but if the opponent ever fails to keep that momentum going, the reversal will send them into a downwards spiral that will happen much quicker than usual.
As a final note, the rate of acceleration on decay is determined by which type of throw you used initially. So if you added 4 seconds with a retaliatory decay effect or 4 seconds with your throw, the percentages needed to improve the status effect remain the same.
Back Throw - Apostle
So, as a small courtesy to people who haven't played Lobotomy Corporation(or at least, people who aren't spoiled on it), I'm not going to reveal who's animation this throw is borrowing from unless you look under the spoiler tag. For the sake of everyone else, I will just claim we're borrowing from an entity codenamed [Francis] who glows blue sometimes and does bad things to people's brains. For those who don't care about spoilers, click below, but this is your last chance to opt out.
The blue aura this move produces is based off White Night's aura, a being who turns 12 of your employees into its disciples once it transforms from its base form as the Plague Doctor. It deals in an initially insidious mental effect into a catastrophe akin to how Don't Touch Me works, but its far more legitimately dangerous to players.
A light blue aura surrounds the button before engulfing the foe, causing their mind to scramble as their body ragdolls itself behind Don't Touch Me for 10% and knockback that KOs at 165% at an approximately 40 degree angle. When the foe regains their bearings, they'll find a glowing blue tint surrounding their head, signifying a heightened weakness to Don't Touch Me's mental attacks. This just covers grab, FSmash, and most importantly Side Special, with each having their own modifications from this status, which lasts 8 seconds. The actual hitbox here, a bit like FThrow's, is nothing to write home about. It gets foes behind you and out of your space. Its pretty outclassed by UThrow in the KO potential department, so the knockback is mostly just good for if you have Happy Teddy Bear behind you or want to put yourself between a foe and an employee.
As for the actual effects, the effect on the grab is pretty simple: it extends the reach of the grab quite a bit, making it into one the longest reaching non-tether grabs in the game. This is a simple change, but given how good Don't Touch Me's grab game is, its a pretty powerful one. The effect on your Side Special projectiles is a bit more complicated, causing projectiles that come within a Bowser-sized radius of an afflicted opponent to start homing in on them. This radius is increased to a 1.5x Bowser-sized one when the projectile reaches the end of its normal reach, potentially extending its range and lifespan if an opponent is close enough to where it would normally expire. This mostly just makes weaving around Side Specials a lot more daunting than it already was, and forces the foe to rely more on shielding those projectiles, which your enhanced grab reach can counter pretty well. Considering how hard Don't Touch Me can abuse the opponent being forced to attack, with a heightened threat of instant death over their heads if it can get in close, Side Special becoming that much easier to land and stack is very powerful.
All the same effects are applied to a foe where you apply BThrow's effects to a foe throwing you, but it only lasts for 6 seconds. The grab buff is actually a little more welcome here, as it means if the opponent grabbed you, the work of landing your powerful but slightly tricky to land grab in the first place gets much easier. That said, at the end of those 6 seconds, you'll get an additional effect. 3 uncharged Side Special projectiles will spawn floating around the foe, tracking their position about a battlefield platform away above them, slightly to the left, and slightly to the side. They'll each fire at the foe's position half a second after the previous one, starting with the middle projectile, then the left one, and finally the right one. The foe has to move back and forth to dodge this in a way that is really not efficient for staying out of Don't Touch Me's close range horrorshow, giving it a great opportunity to get in close or force the opponent to take or enhance Side Special's effect. And if a foe's gotten really grab happy with you, it has to be said, dealing with both these status effects and Meat Lantern's pursuit at the same time is an awful experience.
Like with Forward Throw, any subsequent uses of this throw will add 4 seconds of duration to the existing timer, either used out of your grab or the opponent's grab. If used out of the opponent's grab, this will add on the 3 Side Special projectile effect to an existing instance of Back Throw's status effect in addition to increasing the timer, though subsequent uses won't add any more Side Special projectiles.
Down Throw - Inferno
Calling upon the awesome power of The Firebird('s particle effects), Don't Touch Me curses the foe with flames which engulf them from above like a bird swooping down upon them, the flames the distinct yellow of The Firebird's. This deals the foe 4 hits of 1% followed by a final hit of 5% that ground-bounces foes off the ground. This can... actually kind of combo, but Up Tilt and Fair are the only things you'll get off this move with any reliability, though Jab will work too if you've nearly maxed out its range. Don't Touch Me isn't the best at combos, as you'd probably expect from a big block with a button on it, but if you're willing to go for something riskier like Nair or Uair the payout can still be fairly high.
As with all your non-Meat Lantern throws, this leaves the foe with a status effect, but one that's not as immediately harmful as your decay or [Francis]-based throws. Little embers will wisp off the foe, dealing 0.5% every 2 seconds for 4 seconds, and at the end of the 4 seconds the foe will immolate for the next 2 seconds, adding another 2% per second while the foe bursts into flames. Any attacks landed on the foe while they're intensely burning in that brief window get a 1.5x damage multiplier, with the expected knockback boost damage multipliers like that give, as the fire violently explodes out on hit. The 5% bonus damage over 6 seconds is an okay consolation prize because, frankly, this isn't that bad a throw without it. The immolation damage multiplier is applied to shields too, and couple that with dealing shields 10% per second while they're up instead of the usual 2, this can make for some pretty potent shield break setups.
That said, the brief window the opponent is experiencing this move's massive damage multiplier can become a very, very scary one for them, as Don't Touch Me actually has very respectable power already. As an example, if you pull off another grab into UThrow on the foe, that can lead into some pretty disgusting kill percents for a throw even before accounting for platforms or Up Special shenanigans. Of course, you have a pretty small window to capitalize, which is a bit of a pain with how slow Don't Touch Me is, but Up Special and Side Special will give it a good opening to capitalize, and employees/Happy Teddy Bear/occasionally Meat Lantern can provide you both with some positioning advantages and insane payoffs to the damage multiplier. As a note, this is one of the best times to accelerate the opponent's timer til a forced attack with additional Side Special uses, as even if they use it out of reach of Down Special, the punish you'll be able to do on their end lag is a lot worse.
When used on a foe throwing you, the immolation effect is further delayed, taking 6 seconds to activate, its actually a bit stronger when it does, multiplying damage by 1.7x and knockback by 1.2x on top of the damage boost, indicated by a slightly larger firey explosion on hit. The foe has a bit more time to prepare if they grabbed Don't Touch Me of their own volition, but so do you, and the payoff is even higher if you capitalize on that. As always, you have to deal with the foe starting with a big advantage state to get the full potential out of this status effect, and the amount of pressure it provides on its own is minimal, but if you do get the reversal the ludicrous kill percents you can get from it can be well worth it.
Subsequent uses of this throw don't actually do anything to the status effect, as the benefits of extending the actual immolation would be a bit too extreme and extending the buildup would only very contextually be useful.
Standards
Jab - Don't Touch!
A glass shattering effect appears around Don't Touch Me, a voice in the background shouting "DON'T TOUCH!" as the screen is a bit distorted around its body. This deals 4% and weak radial knockback away from Don't Touch Me, though there's a bit of lengthened hitstun on the foe on the screen shatter effect. This is good, because while this move comes out at a highly respectable Frame 3, its actually got some annoyingly high end lag, and at low percents its knockback wouldn't space foes far away enough to escape punishment otherwise. This is mostly just a way to reset positioning with the opponent, and frankly its a very underwhelming jab before we factor in its mechanics. This move has okay range that covers all of Don't Touch Me's body and a bit beyond that, the radial coverage being a somewhat nice perk of this Jab to make it a little more viable.
As for those mechanics, the glass cracking gets more intense and distorts the background further, and the yell gets slightly louder depending on a few factors. The first of which is how many times Don't Touch Me has been hit by the opponent in the past 8 seconds. Each hit will increase Jab's damage by 1%, as well as slightly boost the range, with multi-hit attacks counting as a single "hit" for these purposes. A grab, either by Don't Touch Me given the animation, or by the opponent, will add 3% to the hitbox. The range also slightly increases with each percent, maxing out at about 1.4x as wide a radius if the attack is dealing 10% or more. The damage will max out at 15%, at which point this deals pretty respectable radial knockback, and can even gimp foes at the ledge, but you'll have to taken a significant amount of punishment for this to happen so its not really worth it. While its a slight catchup mechanic that makes the move a bit better than it otherwise would be on its own, the real treat here is how much the damage gets upped out of grabs, giving foes a little extra incentive to be careful about spamming their grab on Don't Touch Me, and a bonus treat for Don't Touch Me if it recently landed its grab.
Now, this is all fine and good, but very situationally buffing a Frame 3 move to deal like, maybe 8-11% isn't really that exciting when you don't have much to follow up it up with due to the end lag. But this move has two more multipliers on it that are worth keeping in mind. Pulling off a Down Special counter of either type in the last 8 seconds considerably buffs this move, multiplying its damage by 1.6x. This isn't THAT impressive with the base version of the move, but if its multiplying a version of this that's already dealing 10% or so, this starts becoming a respectable kill move with good range that comes out on Frame 3. That's really good even if it is pretty situational, and provides yet another reason why the foe does not want to trigger your counter. The burst damage is pretty nice at the start of a new stock too if the foe got hit by a Full Press counter at the end of their last stock.
There's another interesting part of this move, a sweetspot if the foe is overlapping Don't Touch's body, meaning they're touching it even while the move is happening. Seems they really just can't help themselves with that deliciously tempting red button. This tacks on another 1.6x multiplier to the damage, which stacks with everything else, and also extends the hitstun of the attack so Don't Touch Me can actually combo out of it into a good chunk of its moves, though not its strongest attacks. But even with those you can force some reads. And that's if you have no other multipliers going, if you sweetspot this move when its built up to deal 8%, you can expect a nice 20% and knockback that kills around 90% for your troubles, or a 20% combo starter if you don't want to wait the hitstun out. If you've got everything maxed out this deals 38% and kills at like, 40%, which is almost never going to happen, but considering how fast this move is when the stars align to let you use it like that, the final step won't be particularly hard. Oh, and you can't combo the sweetspot into and get the enhanced hitstun, it'll just deal regular hitstun and knock the foe away if you do that.
The purpose of this sweetspot is yet another reason why opponents really, really do not want to be in ultra-close proximity to Don't Touch Me. Aside from potentially triggering the instant kill on its Down Special, they also have to worry about Jab as a VERY potent Frame 3 hitbox even before it gets any buffs just due to its impressive combo potential. All the more incentive for an opponent to not let Don't Touch Me just jump on them with Up Special where it can use both those massively powerful close range options, but if they go on the aggressive to try and stop you from pulling that off, you can potentially punish that too.
Dash Attack - Crush
Don't Touch Me tilts forward too far for just a moment in its dash, before falling forwards on its front, crushing opponents underneath it for 13% and pretty good diagonal knockback that kills at 180%. The way its paused in a tilted position is a pretty good giveaway on this attack coming out, its not as subtle as it sounds. This attack has the nice benefit of heavy armor that can take up to 15% on it, letting Don't Touch Me bulldoze through some attacks, That said, the 19 frame start lag for this move is a bit underwhelming for the not amazing power, and its never going to follow up into much of anything barring the occasional shenanigans with Happy Teddy Bear. The end lag is also downright atrocious, absolutely begging for a massive punish.
There's two gimmicks to this move that make it quite a bit better than it looks. The first is that while the move's actual hitbox comes out pretty late, the super armor is up as early as Frame 5, and if an attack hits this move's armor, the hitbox is buffed to deal 20% and the knockback boosted to KO at 90%. It also causes the button to slide further and faster during the start lag, increasing the range to about 1.6x its usual mediocre range, catching foes that try to poke you out of it with their larger reach. This turns the move into what would almost be a solid approach tool, except for the fact that the foe can just dodge its reactable start lag. It also makes instant dash attacking a pretty solid neutral tool, less powerful on the retaliatory side compared to DSpecial but making up for it with the fact you'll get a compensation hit if the foe doesn't attack.
Now the end lag might be unbearable, but one thing to keep in mind with it is you can actually cancel it into a Down Special, which has the slightly unique animation of the button still shining while its sliding forward on its side. It'll actually travel forward a battlefield platform's distance at its usual dash speed during this time, which completes what this move needs to be a decent approaching tool: punishing the end lag is also not particularly safe. Yeah, they can grab you out of it, and with the initial hit the foe can beat it with a big enough attack. The latter is very bad if the foe starts to expect you to use this and you get a VERY strong Happy Teddy Bear out of the deal instead, the former is really not a terrible fail state for you considering you get your own rewards out of the foe grabbing you.
Forward Tilt - Corner Case
Don't Touch Me rotates about 45 degrees and pokes forward with its bottom corner, in a Frame 6, fairly short ranged hitbox that deals 8% and weak but high scaling inwards knockback that will eventually KO around 200%. The mediocre but not terrible range and thoroughly average frame data/damage of this attack is not what you're here for, its the fact that knockback is inward. Up until around 45-50% on middleweights, this will leave the opponent overlapping with Don't Touch Me, in prime range for a sweetspotted Jab for some nasty combo and kill potential, Down Special's instant death hitbox if you let the opponent take the initiative here, or Up Smash if you want to go for a higher risk but more consistent reward option compared to Jab. While the range isn't great, this is still a nice way to take the opponent from standard close range neutral into the extremely deadly overlapping range.
Once you scale past the point this is making the foe overlap your hurtbox, where the button temptation is at its worst, the knockback here is still pretty handy. Instantly being able to reverse a foe behind you at a low angle is very nice if you've got any setup on the stage, be it to get a foe away from an employee or towards Happy Teddy Bear, and given the low angle its much better for either of those goals than Back Throw. The foe is more likely to end up in the Teddy Bear's grasp and at a low angle to the stage, its much easier to actually block them off from your employee with the threat of Down Special. Nair and Bair are also two of your better aerials, and while this move doesn't set up either of them super consistently its a solid to continue pressure with once the foe is no longer overlapping your hurtbox.
Down Tilt - Crash
Don't Touch Me raises up off the ground, floating forward a short distance in a rather jerky motion before slamming down, dealing 8% and light diagonally forward knockback. This is a bit slower to come out than FTilt at Frame 8, but makes up for it in a few other regards. The fact it moves Don't Touch Me up into the air briefly lets it beat out other a lot of other DTilts in neutral, something worth noting if they're trying to shield poke you with their own. This is a bit matchup sensitive, but when it comes up it can give Don't Touch Me's somewhat awkward neutral a bit of a boost. The range is also better, and the combo potential here is pretty solid. It can go into FTilt at low percents, Fair and Up Tilt for quite a bit longer, Jab if the hitbox is big enough, and very situationally Nair. The less consistent hitboxes tend to be the ones that are bigger payoffs, but this is more likely to confirm into them than your DThrow, even if the knockback is sadly a little too horizontal for Uair to be practical with its narrow hitbox.
Don't Touch Me really isn't much of a combo character, its power more focused in the more unorthodox parts of its kit. But a lot of that is because its poor movement is not good for following on combo strings, DTilt is a pretty decent combo starter in terms of frame data and having a few solid options to confirm into. One downside to keep in mind is the fact that it does move you forward, which runs the risk of throwing you right into an opponent's attack, so while it will beat Down Tilts out, it can also throw you into range of attacks that would otherwise miss if the opponent makes a good prediction.
Up Tilt - Text Box
Fun fact: clicking on Don't Touch Me's textbox is, while not as hazardous as clicking on Don't Touch Me itself, still liable to cause problems. Channeling that, Don't Touch Me spawns the hazardous text box above it, specifically just the part containing its name and the bars above and below. This is a short and somewhat wide hitbox for an Up Tilt, not reaching very far into the air for anti-air purposes, though it is not AS wide and short as the text box is in game. This comes out on Frame 7, deals 11% when it first comes out though the hitbox diminishes to deal 8% for the rest of its duration after the first 2 frames, the hitbox lingering a bit longer than average. This can make air dodging Up Tilt a touch tricky, though hardly impossible. The knockback here is thoroughly unremarkable, it pops the opponent a decent distance into the air regardless of hitbox, slightly less far if you hit with the sourspot, and said knockback will not combo into anything. This is both because it sends the foe far enough away that they're out of the reach of any of Don't Touch Me's attacks, and also because the end lag on this Up Tilt is pretty bad. This is mostly just a move that will reset things back to neutral, but the damage is decent and sometimes you can set it up to go into Uair/Nair with Up Special, which is potent even if its not as insanely strong as doing the same with Up Throw.
The thing that makes this move a bit more worth your while is that its actually a bit of a weird counter, in that if the foe's attack hits the text box while its out, it will shatter in radius twice as tall and wide as it was, dealing 16% and upwards knockback that KOs at 135%. This is much better than the actual hitbox, but you'll only get it if the foe collides their own attack with this one. That said, the move's reasonably long duration and short start lag does make it functional enough as both a counter and a neutral tool. Certainly not the best in either roll in your set, but it has an important function.
See, when playing neutral with Don't Touch Me, you actually have an answer to low hitting attacks in DTilt, and high hitting attacks in UTilt, and a laggier attack that stops all angles of attack but not high power ones in Dash Attack. Using these three moves in neutral, especially the somewhat safer and more spammable DTilt/UTilt, is a great way to get opponents to specialize into a smaller subset of attacks to avoid the ones that your neutral game can reliably counter. Noticeably, mid-hitting attacks that deal over 15% beat everything in your kit... except Down Special, so if you can keep stuffing the foe's approach out with these inputs, you might be able to coax them into using one of those kinds of moves and get yourself a very powerful Happy Teddy Bear out of the ordeal. Of course, that does require you to get in the opponent's head, and there's enough end lag all over Don't Touch Me's kit that if you're poorly reading the foe, you WILL get punished for it.
Aerials
Neutral Aerial - Loneliness
A blotchy black haze appears around Don't Touch Me, each clump fading into and out of existence in a strange, non-animated fashion. It rattles a bit at first to indicate the move is happening, and then the blotches appear starting Frame 13. They cover a decent sized area around Don't Touch Me, dealing rapid hits of 2% over the duration that add up to a pretty impressive 14%, while also pulling the opponent in slightly closer with each hit. The foe is then dealt a final hit of 3% that launches them away with semi-radial knockback that KOs at 165%. By semi-radial, I mean what would be the downward component of the radial knockback is converted to an upwards component, but what's pretty nice about this move is you actually get a lot of control over where it sends the opponent, since each hit pulls the foe in towards you and you control your own DI, so you'll get to choose where you end relative to the opponent, though they can resist just a bit with DI.
If you use Up Special to follow up into this out of a high knockback grounded move, you can largely follow on whatever knockback angle you want to send the foe closer to the blast zone... just keep in mind, said angle will not be perfect if the foe DI's properly, nor is this your most powerful aerial. Its also a bit on the laggy side, Frame 13 is approaching the reactable window and as such it can struggle to combo unless you score some REALLY tight timing on your Up Special usage. That said, being able to follow basically any KO move with this as an option to extend the knockback is a very powerful thing not to be underestimated. This is also just a really good move for throwing foes into Happy Teddy Bear given you can adjust to get the foe towards his position, and the fact he can catch foes that come within a decent sized radius of him that are taking knockback means the foe's DI won't be able to screw that up too much.
If you land with the foe out of Nair, both parties will end up basically overlapping each other in frame neutral due to the hits pulling opponents in towards Don't Touch Me. As far as frame neutral setups go, this is a stellar one, as it leaves them open to Jab/DSpecial's Instant Kill/USmash, making for a very nasty round of neutral. As a small note, just to prevent some very obnoxious loops, the hits of this move have a weird property of pushing foes away rather than pulling them in if the foe was just affected by sweetspot Jab's hitstun, and this move doesn't even true combo out of the Jab sweetspot anyway given both its non-trivial start lag and the need to short hop into it afterwards. Its not like this loop would be perfect regardless, but new players have enough problems dealing with Don't Touch Me, we don't need to get them in an obnoxious Jab/Nair lock too. Your neutral out of a drag-down Nair is absurd enough as is.
Forward Aerial - Base Strike
Don't Touch Me swings its body in an arc, striking foes with the base off the box in a surprisingly quick attack that deals 8% and low horizontal knockback that will eventually KO around 260%. Coming out on Frame 6, this move is great in the sudden death meta, but its also notable because of its rather short end lag and low knockback meaning you can actually combo out of this. Fair -> Nair isn't a true combo but does work out with a read or good spacing, and Fair -> Fair is a bit easier to pull off and you can usually string two of them together at low percents. You won't get more than that due to Don't Touch Me's poor air speed, I've mentioned before its not a combo machine, but this is a decent way to rack up damage and setup for your more powerful Nair if you've got the percents/read/spacing right.
Damage racking aside, Fair's combos ARE a good way to bully foes around the stage to a position you want due to them mostly pushing foes along horizontally, so its a good way to push the foe towards Happy Teddy Bear. Its not an amazing tool for this purpose unless you can pull off the somewhat harder confirm into Nair, but its a fast tool that gets the foe the last little bit of the way there, and that's often enough. As with a lot of Don't Touch Me's moves, the range here leaves something to be desired, so its not an exceptional tool in aerial neutral... kind of a shame given its the fastest aerial in Don't Touch Me's kit. This DOES mean that if the foe wants to go for a gimp, you're relying a fair bit on Uair and DSpecial to keep them off you until Up Special actually goes off, so the ability to gimp said recovery is a genuine problem for Don't Touch Me. But that also makes it all the more potent of a temptation...
Back Aerial - Body Bash
Don't Touch Me lurches backwards slightly, bashing with its body in a sudden movement before returning to its original position. This move actually has really nice frame data for what it does, coming out on Frame 8 and dealing 13% and horizontal knockback that KOs at 125%. That's some absurdly good kill power for a Bair this fast, and the end lag isn't even that bad! The problem here is simple: the range on this one is just terrible, Don't Touch Me really does not move back far enough for this to beat out most aerials even from characters with stubby limbs, let alone all the swordfighters of Smash or whatever awful things Min-Min is doing. Its an undeniably good move when it works, but one that you have to be in very close proximity to the foe to get full mileage out of.
In essence, this is your aerial equivalent to Jab and USmash, a move that really screws up opponents who are stuck at super close range with you, but you don't actually have to be fully overlapping them to get mileage out of the move. This means in close range situations it can serve as a weird but still potent backup option to short hop Bair, it has slightly more leeway if you don't end up right on top of the foe, but the bigger thing here is just that it gives the foe a reason to want you off of them in the air. And if they want you off of them, they'll either have to find a way to escape, or resort to trying to knock you off. A pretty drastic tactic when DSpecial is right there.
Up Aerial - Button Pop
Tilting inward toward the screen for a moment, the button actually presses down ever so slightly on its own, before Don't Touch Me tilts back up and the button pops out to twice its regular height, dealing 15% and upwards knockback that KOs at 125%. There's a lingering hitbox after that deals 9% and upwards knockback that will kill at 250%, before the button slides back into its usual position. This move is a bit comparable to K. Rool's Up Aerial, in that the FAF is absolutely atrocious and the hitbox is a bit more narrow than you'd like. It even comes out 3 frames slower at Frame 10. For what its worth, the knockback here is very powerful, but you might question what the point of a move like this is when it has an FAF of 83.
Well, there's two things. For one, this attack is a bit like Dash Attack in that it has heavy armor that can tank up to 15% before the hit on Frames 4-9. And like Dash Attack, the "Don't Touch Me" principle comes into play here, as the button will actually fly up half a Ganondorf height during the attack if you hit it during the super armor, adding its upwards movement to the hitbox to make it quite a bit bigger. The damage on the actual button popping out is boosted to 19% and the knockback now KOs at 90%, which is positively monstrous for an aerial, while the rest of Don't Touch Me's body still deals the same damage and knockback as normal. This lets the move win exchanges with foes above you in the air pretty effectively, as long as the foe is attacking and not dodging or weaving around it.
It was also mentioned this move is great for following up on the knockback of Up Throw, which is the best way to set up a ton of upwards knockback at the exact time interval you want. What's nice, though, is that the timing on the upwards knockback doesn't need to be super specific for this to work out. If the foe IS out of or almost out of stun, you can mix this move up with Nair to mess with dodge timings, and abuse the super armor on it to prevent them from smacking you away. All that said, for all the good qualities this move has, the continued trend of atrocious end lag applies here. At least the landing lag is alright, so if you want to set your Up Special up to bail back to the ground as a safety measure rather than using it to go for crazy kills, that's a decent backup option.
Down Aerial - Slam
Don't Touch Me pauses in the air, before slamming down to the ground at nearly the same pace as Bowser Bomb. This deals 14% and a fairly strong and very slightly forward diagonal spike in mid-air, and 17% and upwards knockback that KOs at 105% to grounded foes, while the move comes out on Frame 11. As stall then falls go, this one is extremely good, even dealing double damage to shields to nearly one shot them on top of everything else. For emphasis, Don't Touch Me even ends up lightly embedded in the ground upon landing, which also is a signal that the lag upon hitting the ground here is going to be absolutely atrocious. Even worse than Uair bad, this has an FAF of 89. You are going to be punished for this if you whiff, plain and simple, but the fact this move comes out a lot faster than Bowser Bomb means you can use it to really check opposing shields even if it doesn't quite one shot them, and the power is pretty immense when you do land it. Also, don't use this off stage. There's a maximum distance on the fall but its like twice the height from Final Destination's top to bottom blast zone, you are just going to die. This is your token Dr. Slavic reference for this moveset, enjoy it while you still can.
Now, in spite of that absolutely awful end lag, the punish for this move is a bit limited. That's because Don't Touch Me CAN use its Down Special after landing as a cancel out of the end lag. This is similar to how Dash Attack works, only it will be stuck in place for this part of the move instead of being potentially a moving counter. The good news is that given how long the end lag is, the foe does have room to line up whatever attack they want if they think you won't predict it, and the most you'll realistically get is a Happy Teddy Bear unless the opponent is VERY stupid. And of course, the opponent can always go for grab, but depending on what grab status effects they're already dealing with, the foe might not be willing to do that and leave this incredibly powerful move unpunished. The foe has a lot of decisions to make here while all you have to do is predict them with Down Special, but if you can get out of this move unpunished considering all its good qualities, that's pretty great. Do note that for the first 12 frames of the end lag, you won't be able to do this cancel, so there IS a window for a true punish. Its just very limited.
Considering this move is a bit safer than it sounds, using it as a tool to return to the stage is nice, though it lacks Dash Attacks' utility as an actual approach tool. The foe gets a lot of time to choose where they're moving and what they're doing while Don't Touch Me is stuck in place, so if you're trying to jockey for spacing/momentum, this isn't that great for it. But it is helpful for getting out of juggles, can make for a mean vertical edgeguard tool to compliment the employee's horizontal edgeguard(that very slight horizontal angle is remarkably nasty there), and if you have Up Special set up to go off while you're embedded in the ground with this move that will let you cancel it early.
Smashes
Forward Smash - Overwhelming Impulse
The button glows brighter than it does even in Side Special, the air in front of it gradually distorting and a faint, dark red glow permeating it, covering a hitbox that is shockingly large compared to the usual short range Don't Touch Me has to deal with. You pay for this in start lag: at Frame 25, this is one of the slowest moves in Don't Touch Me's kit, and reaches into the territory of needing a hard read to pull off. That said, the reach here is on par with one of Sephiroth's tilts, and the end lag is honestly not that bad to make up for the harsh start lag. But I think the big question is what the hitbox does, and as far as Smashes go, its a bit of a weird one.
See, unlike the subtle temptation of Side Special, the button absolutely overloads the foe's brain with brute force desire to press the button, so much so they're not even really able to perform the motions properly and end up just flopping onto the ground and sliding towards it in non-techable prone. This deals 10%-14% which is pretty underwhelming damage for a smash, but creates a uniquely awful situation for the opponent. Reeling the foe in to deal with Don't Touch Me's contact melee is bad enough, but putting them in prone the whole time is an absolutely awful state. They definitely can't use their get up attack for fear of immediate death, the foe can't really afford to delay their roll lest they get hit with Jab or close range Up Smash, and DSmash is an insane roll punisher if the opponent doesn't delay their get up roll a bit. You could also loop this by reading a roll away from you to rack up more damage, which if you have Happy Teddy Bear on the other side of you leaves the opponent with no good options at all and basically forces them to deliberately throw themselves at the Teddy Bear just to escape the nightmare.
Yeah, there is room to read this and get around it, but its a 50/50 between some imposingly powerful KO moves with no other options for the opponent to get out of it, so if you do land this move, the payoff is usually quite enormous unless the foe gets the right read on their roll. The only problem here is opportunities to land Frame 25 moves don't exactly grow on trees. That said, the pre-telegraphed forced attack from opponents is a perfect shot, especially if you're out of range to do something even worse. If the opponent's fussing around with fighting one of your minions rather than you, this move can put the fear of god in them while they're trying to take out an employee or the Happy Teddy Bear, particularly nasty when Happy Teddy Bear's own attacks can be so devastating.
If the opponent's mind is made more susceptible via back throw, the grand payoff is... another range increase. I never promised you anything grand, I just said this move had a back throw interaction! If the foe is suffering BThrow's effect than for another 0.6 Sephiroth sword lengths beyond the move, if the opponent is in proximity, the air will distort and glow around them, basically just giving this move even bigger reach to offer a higher chance of punishing forced attacks or scuffles with one of your minions. This is a very potent move, just one you will need to fish a bit for opportunities on.
Down Smash - Nameless Fetus
For our final new visual effect of the moveset, Don't Touch Me calls upon the VFX of the Nameless Fetus. Supposedly, it was never named because it could not type coherently on a keyboard, so Lobotomy Corporation staff were left with no idea where to start. As the purple and yellow waves emit off Don't Touch Me's form, the sound of a wailing baby is heard, making this serve double duty as psychological warfare. The waves appear first and expand out over the first 29 frames, with the baby's cry indicating the actual hitbox comes out on Frame 30. This is another actually impressive attack in terms of range, coming with the usual awful lag you'd expect as a downside of that on a Don't Touch Me move. What makes this worse is unlike FSmash, the end lag here is actually ALSO awful, and while the move staying out for 15 frames at full power the entire time is really hard to dodge, that also leaves it with a horrendous FAF. I'm talking FAF of Frame 101.
So the upsides better be good for a move like this to be usable, and fortunately, they are! This deals 22%-30% and diagonal mostly upwards knockback that KOs at 80%-45%, a real heavyweight smash attack fitting of the big heavy baby its inspired by. Not only that, it has a windbox a fair bit beyond its already big range that is fairly strong, letting you potentially pull the foe in even if they dodge the attack's initial hit. For this reason, as well as coverage on both sides of Don't Touch Me, this is your downright nuclear anti-roll option. Don't Touch Me doesn't have a lot of ways to deal with rolls, they're probably the single best counter the opponent has to a forced attack as they can use it out of your reach, but this move absolutely forces the foe to think twice about that.
A particularly notable situation there is with Up Special, where you can warp on top of a foe with barely any time left on their countdown to be forced to perform an attack, and then they're left with a choice. Either try to attack Don't Touch Me and face getting a point blank counter instant kill, try to grab Don't Touch Me and lose out to one of its melee tools and then be forced to attack shortly afterwards anyway, or roll. Up until this point, rolling was the safe option, but 22% and KOing at 80% is the kind of thing that will absolutely give the opponent pause on that choice. Of course, Don't Touch Me can get pretty badly punished if it reads the situation wrong given the massive end lag of DSpecial and DSmash, so you are putting yourself in danger forcing the opponent into that 50/50, but given the foe is the one suffering the time bomb effect, not you, you can always pick a third, less punishable option in that situation.
Also, using Up Special with this attack in mid move is pretty great. It lets you actually dodge the end lag of it, even if that's a very predictable move. This doesn't beat shields or attacks the way it does dodges, but you can use it to chip a shield, teleport above the foe, and threaten a Dair that will absolutely force a shield break at that point. Up Special to escape this move's end lag might be a pretty predictable manuever, but its one the opponent doesn't really have a fantastic answer to other than knocking you out of the move. You can even, if you don't want to cancel the lag for some reason, teleport to a different part of the stage and move the hitbox there! Maybe use that to block off an opponent's angle of escape from a trailing Meat Lantern?
Up Smash - Blaze of Glory
Heating up for a moment, Don't Touch Me suddenly glows white hot before a burst of The Firebird's yellow flaming particle effects appear around it. This move has been mentioned a few times, so let's get what you've all been waiting for out of the way. There's a hitbox that's, like DSpecial and Jab before it, only really accessible to opponent's who are in a range comparable to Jigglypuff's Rest hitbox of Don't Touch Me. Said hitbox comes out on Frame 15, deals 28%-39%, and knockback that KOs at 55%-10%. You want a reason to not touch even if you're not attacking? This is it. This is the BAREST level of reactable and it hits like a Ganondorf Smash on steroids. There's a lot of tricks for Don't Touch Me to get in close with and threaten this, and I don't think I need to tell you about most of them. The only thing I will say is Jab has sliiiightly too little hitstun to actually combo into this even with the sweetspot, so you're going to have to pull off an actual read on your close range opponent to pull this off. Not a big one, but a read none-the-less.
The rest of the hitbox, honestly, is nothing to write home about. Its range goes up a decent bit above and around Don't Touch Me, more than it would usually get from one of its attacks, but it has nowhere near the exceptional range of the other Smashes, mostly just enough to keep up with characters with longer limbs. The rest of the hitbox comes out on Frame 21, deals 18%-25%, and upwards knockback that KOs at 105%-70%. It reaches further into the air than DSmash or Up Tilt, and the end lag is better than Down Smash's, but that's really not saying much. You're still eating a Smash Attack or worse if you whiff.. This is one of the best moves to teleport out of with Up Special alongside Down Smash, given you can actually cancel its awful end lag and follow a foe high into the air for more pain. That's all fine, but we know why you're here: to absolutely annihilate the opponent who dared to touch you with the hitbox that kills at 50%.
By the way, what takes this move from funny to absolutely hysterical is what it does to an immolating opponent. Aside from killing at like 20%(lower with the opponent's grab version), the close range hitbox straight up one shots shields, and then you just hit them with the same move again to finish the job.
...Okay so APPARENTLY we only got the training room because all you spawned were 8 of these goofy looking training dummies. That's. Not what was supposed to happen, but we can work with it. The dummies will roll around at varying, semi-random but not especially fast speeds, lightly bonking things they come into contact with using their head for a paltry 3% and a flinch. Each one has 20 stamina, and their attacks will hit Don't Touch Me, but they do tend to prioritize opponents over him. While they might not be strong, there IS strength in numbers, so a few of them can certainly swarm up on the foe, while a stray one decides to bonk Don't Touch Me with its head. And just so conveniently press the button for you and get the REAL power hitbox you want. And for what its worth, 8 obnoxious little gremlins is absolutely the kind of thing that makes landing the gratuitously dangerous FSmash/DSmash much easier.
They'll all vanish from the stage after 10 seconds, Lobotomy Corporation employees popping out of the background to haul them off in comical ways. Grabbing it by the ears to haul it off, wrapping their arms around the waist and fumbling into the background, and one Dummy per final smash will get zealously sawed in half by an employee with a crazed expression and a laser blade. Said dummy will always be the one closest to the opponent, and the sawing in half actually deals a pretty gruesome 30% and diagonal knockback that KOs at 60%, so the foe will want to not be TOO close to the dummies as they despawn. This is telegraphed a bit as the other dummies will start vanishing first before this happens, they don't quite all vanish at once.
So, you got me. This is not from a Slavic franchise, but I didn't really want to commit to doing one of the big Madoka remakes on the amount of notice I got for Slavic Day. So instead, I just wanted to channel the energy of sets like Tumble and Giganotosaurus by taking a character who probably makes zero sense to make a moveset for and trying to make one anyway. Admittedly, despite the writing style and character choice, this is a fully serious set, one where I tried my best to make a moveset for a button actually work. Did it? Well, that's up for you to decide.
I do feel this character might end up running into the Smash Ultimate Luigi problem of "sometimes you just die horribly" and that not being the most fun for opponents. I do like to think its not especially unfair, at least. Counters in Smash Ultimate aren't very good, nor is Rest, so I feel like lining the two of them up is enough of a challenge that the insane reward is warranted, while its existence is still potent enough to make Don't Touch Me a very threatening character. I was kinda hoping to replicate the feel of playing Lobotomy Corporation here too, what with the increasing number of variables the opponent has to make sure don't go wrong, lest one of them spiral the match to hell. Admittedly, I'm not a Lobotomy Corporation player, I mostly just exist in an online group that's very enthusiastic about the game, but hopefully this is a tasteful way to represent it that doesn't COMPLETELY ruin the game of Smash for everyone.
And lastly, for real, thank you for a great 10 years Slavic. You've really grown as a moveset maker over the years, and I've come to respect you both as a fellow MYMer and as a friend. I hope you enjoy this strange little offering for your anniversary.
Okay, I just barely got my submission in on time. I only learned about Slavic Day two days ago, so this might be a little rushed. Please forgive any typos (I'll go back and fix them later).
Now this is a coincidental character choice. Starting off Slavic Day is a less conventional generic enemy, which is actually a refreshing choice as we’re not dealing with something like a Goomba. Can definitely tell you had fun writing this set and channeling all of your FE experiences into it.
Bandit certainly isn’t meant to be a big-concept set, which is perfectly fitting here. I like how his Side Special has a “dumb” quality to match the character: all the inputs and methods of using the weapons are super simple, the item you get is RNG-based, and how Bandit just uses the Mine as a projectile rather than in a strategic way like the writing suggests. I don’t have too much else to say since this is a simple set, but I do like the funny 1% crit rate on F-tilt, and its guaranteed chance to crit if you beat out an attack. That would be a really cool concept to explore in earnest, though the axe throw and Smash assists are good on their own right too.
This is a pretty-looking set, one that shows a little extra passion for the Pokemon than usual with all those GIFs and makes it more memorable than an entirely ideas-driven Pokeset. An interesting take on the tried-and-true Sunny Day/Moonlight attacks from older Pokesets, where you fill a meter that can give you access to optional secondary Specials. Moonlight’s healing is implemented well, with percent-based healing that reminds me of my Yui Hirasawa set.
Sludge Bomb’s take on poison damage is also what I’d want as a type of combo deterrent for Vileplume’s heavyweight status, though I wonder if taking 3% per attack over a 10 second period is a bit much? Maybe bring the timer down to 5-7 seconds? I’m also unsure about moves that punish opponents for hitting you @ Effect Spore, an issue I had with Goldenglow, but it’s not a super casual move to apply as it requires use of your resources. I think it would be better if the foe suffered hitstun that left them frame-neutral with Vileplume, as just stunning them for 30 frames could result in cases where Vileplume could punish a really weak attack.
The rest of the moveset is simplistic enough outside of the Specials, which don’t play off of those moves as much as they could have (doesn’t seem like there’s much of an emphasis on positioning yourself for Moonlight, but that might not be necessary to talk about). It is interesting to have Jab only hit above Vileplume, even if it might be a tad redundant with Neutral Special. On the plus side, the throws are nice, as B-throw makes use of Effect Spore to make more practical use of the stun, U-throw for horizontal positioning and D-throw to make use of the poison status effects as a KO move! These are nice little touches that helped to elevate this set for me a little on the final hour.
Oh yeah, I can definitely see where FA was coming from with the easy-to-read angle, as this moveset is a nice step-up in your presentation in the stats - and the way the moves’ animations and technical descriptions are split up.
The Legion mechanic feels like a more improved version of Mumei’s duplicates in her Standards, handled in a simple but interesting way where they can perform one of your two attacks based on the foe’s percent. We’ve had plenty of duplicate sets, but I can’t think of any that have been done from this kind of angle. The Legion clones get more interesting when one factors in Legion’s patented weapon durability mechanic, as he can attack his clones to take their axe if he loses his! I’m not entirely sure how in-character it is for Legion to attack his own kind, but it does feel manically in-character for him to resort to such brutal measures to win a fight. Finally, there’s the fact that Legion clones all come with a new type of axe for Legion when they spawn.
I like how Obstruct’s movement-slowing effect is more effective on healthier opponents. Given what this skill does in the FE games, I wonder if Obstruct could prevent opponents from jostling/pushing Legion or rolling past him?
I like how the Hammer’s properties work with Legion’s Side Special, making it so the swing doesn’t break the Hammer, but throwing the Hammer isn’t very effective. It would be neat if the swing’s applications and knockback were more pronounced - it sounds like a great mix-up to throwing the axe, plus a good KO move as it seems hard to hit with. I think your movesets could stand to elaborate on knockback more, especially going into this set’s regular attacks (and the unarmed attacks where moves are just described to deal X% without much application).
I like Up Special’s ability to embed your axes into an opponent, but how this - and removing the axe - works specifically is not stated. Does the axe stay in your opponent forever until you reclaim it? Does reclaiming the axe come with some kind of special hitbox? Would make sense to.
Down Special’s synergy with Neutral Special is neat! Feels like a balanced way to do oppression.
F-tilt is pretty much what I hoped for use-wise, as one of those moves that clones use.
I like the idea of all of Legion’s potent Aerials being resource-based as Legion has to throw his axe away, making them very powerful but committal for edgeguarding - a point that might be worth elaborating upon. I could also see these having synergy with the fact that Legion clones can only use grounded attacks. Having so many axe-throwing aerials feels a tad awkward and redundant, but Legion wouldn’t really need to go offstage all that badly when he’s a heavyweight with the power to blow enemies away.
B-throw is nice.
Once again packing cool concepts, Legion feels like a bit of an improvement in your movesetting, not just in the presentation but a bit of the melee details. His ideas and base mechanics feel a bit more utilized, too.
Hilda immediately appeals to me for being a damage-based lightweight that gets super strong at super high percents, with various Specials that get better with more damage and her specific Down Special axe that can be used to apply self-damage - but it gets less uses at lower percents. Side Special having more super armour based on your damage is a very cool take on super armour, Speed Seal has a unique activation method that’s tied in with your shield and Shield Special, and I like how Down Special, despite being a “weapon switch” type move doesn’t just make Hilda go through a weapon-switching animation. Making go through an attack not only makes the move feel more substantial in a way a Special should be, but also makes bringing out the axe more committal. The Neutral Special axe item is fun enough, but everything I mentioned before is more appealing to me and brings this set to a great start with its clever implementation of risk-reward self-damage.
Axe Dash Attack has cool synergy with regular Dash Attack, making pretty good use of its item-based nature + the running end lag and cutting your end lag if you run offstage.
Funny how grab game mentions the specifics of Hilda’s item-throwing strength. I do enjoy seeing those item-based nuances thrown here, as they rarely get brought up in movesets (though to be fair they’re easy to forget about). Also tricky that this paragraph make Hilda’s grab game look extra meaty and mechanic/application-driven.
F-throw made me realise how Seal Speed and reducing the foe’s start-up and end lag of the attacks works well with Hilda’s Shield Special.
I wonder if B-throw and other such “more KO power the more Hilda is damaged” moves would be affected by rage?
U-throw is simple, but I like throws that let you get Special-based set-ups without any time commitment.
“She’s worked hard enough just GETTING that grab, now you expect her to THROW the foe? No way! ” Heh.
Talking about Z-drops with N-air is good.
I’ve come to expect a Smash or two that goes hard from sets involving the two of you. F-Smash does not disappoint in that regard. Its unlocked, optional second hit is a good use of sourspots that I like, plus it makes use of Freikugel’s mechanics.
It would be funny if the two of you wrote a set that involved multiple battering items that you could mix-and-match for attacks, and the sheer number of options you could get from them resulted in Smashes that were each 5-10k long. That would be scary.
Hilda throwing her hand axe for half of her battering attacks kind of brings back memories of Legion, recent of a memory as that set is.
All and all, Hilda is a great set that isn’t far behind Mikazuki for me. Her Smashes and overall moveset aren’t as mind-blowing as Mikazuki or Hakumen respectively, but the concepts on her Specials appeal to me strongly enough to give her a strong rank. Not going to complain when she’s a medium-sized read, too!
As someone who’s been lurking from the early contests, seeing a vintage MYM 7 era set in a modern contest is a bit of a nostalgia trip. It was also nice seeing an unpublished, finished set that never actually got published - it’s a neat look at your history.
The set itself isn’t good, though, which you knew when you posted it. Admittedly a good chunk of that is just from the character choice, but since Kakuna has terrible movement speed and only one jump I’m 100% sure he just dies on moving stages. The basic playstyle concept of outlasting the foe with poison could work on another character but the way it's executed seems very painful for them, with Kakuna’s String Shot forcing them to near immobility while it just outlasts them with its weight and Harden. There’s also the standard early MYM issues of a no-throw grab and a non full set of aerials, but those were fairly common when the set was made so I’m not knocking too much off of it. Regardless of how poorly Kakuna has aged (and it probably wouldn’t even place back then), I still appreciated this set as a look back at the past, and how far you’ve come as a setmaker since then.
SPLOSION MAN (FA)
I actually vaguely remember Splosion Man from watching some gameplay videos as a kid, so there is a non-zero chance I’m the only person here with prior familiarity. The set itself is as chaotic as the game itself, with Splosion Man sploding all over the place with powerful moves at the expense of taking self-damage. It’s already a better basis for a set than Kakuna, and what’s more is that Splosion Man actually has a full set of inputs.
Being a MYM 7 era set though, it still wouldn’t be considered good by modern standards. Pichu self-damages itself with several of its own attacks, but Splosion Man’s actually do knockback, essentially punishing the player for trying to play the game properly. The moves themselves also have standard early MYM tropes, like a Jab that randomly spawns a trap and a DTilt that terraforms, which has no real purpose in the greater gameplan other than to not be generic. I do like the fact that Splosion Man has methods of fighting foes without sploding himself, but their interplay with the rest of his kit is barely if ever mentioned. So while the set is better than Kakuna than a longshot, it still wouldn’t fly in modern MYM - though, of course, you knew this very well when posting it.
HUFF N. PUFF (US)
A character I’ve actually thought about in the past, Huff N. Puff makes the most of his boss fight through a pseudo-minion summoning mechanic. Every time he takes damage, he spawns a Tuff Puff, which does not actively serve as a minion but rather serves to amp his attacks and serve as meatshields as long as they’re up. This not only gives Huff N. Puff an edge over other heavyweights in his ability to somewhat benefit from being comboed, but also encourages trading both to get Tuff Puffs and to burst through with his power moves, a fitting thing to focus on for a big bully like him. He can also heal off some damage with his NSpec and has a good recovery, forcing the foe to choose whether to focus on him or Tuff Puffs and giving him great lasting power, all of which are hallmarks of his fight. There’s far more character in the set than you’d think for a character with barely any dialogue could ever get.
Huff N. Puff has some interesting Specials, most notably a DSpec that not only charges a powerful lightning hitbox, but can also give his Tuff Puffs a passive hitbox as they circle around him. His grounded moves are intentionally subdued, but there are still standouts, like the USmash tornado projectile and the unorthodox pseudo-projectile Jab that serves as a setup into his air game. Said air game, as you’d expect from a sentient cloud, is where Huff N. Puff shines, with highlights including a strong sweetspot FAir and a BAir wall of pain, all of which are directly buffed by Tuff Puffs. Lastly, the grab game has a neat intersection with Tuff Puffs in that they directly buff Huff N. Puff’s normally mediocre grab, leading into his excellent throws - aside from the standard kill and combo throws, the most interesting is the UThrow, which decreases the opponent’s fall speed so that he can better follow up. It’s a very solid set for an ironically non-solid character, and a fun take on the classic HMA.
DON'T TOUCH ME (FA)
The only thing in existence that can match the almighty McDonald’s Chicken Tenders: a literal button.
Don’t Touch Me is, thankfully for the setmaker, not an ordinary button; if you press it, it either unleashes a horde of monsters or just kills you depending on where you click. This is interpreted as a DSpec counter that, if the foe is in Rest range when it activates, just kills them instantly. It seems overpowered, but Rest and counters are very hard to land at the best of times and Don’t Touch Me doesn’t even have the movement speed to realistically combo into it off of a hit. What it does have is various means of setting up into it, from suddenly appearing in the opponent’s face with USpec, to a SSpec that forces them to attack after a set period, and being able to cancel the endlag of its laggier attacks with the counter. Additionally, Don’t Touch Me has several attacks that further discourage the foe from touching it, from multiple attacks that gain buffs if done at Rest range, the option to inflict status effects when grabbed, or just a simple fast, strong move with short range. We’ve seen plenty of counters in MYM before, but never has a set been this committed to the idea of landing one; very fitting, given the character choice.
Besides setting up for a counter, the other major aspect of Don’t Touch Me’s gameplan is setting up a litany of effects that can potentially snowball into the opponent’s demise. The other effect of the counter summons a giant teddy bear that maintains the counter damage, serving as a stage control tool and something to combo into for potentially absurd damage. NSpec also summons a group of employees to press Don’t Touch Me for it, allowing it to exploit a Smart Bomb-sized explosive hitbox created upon landing it. Its throws double down on this, adding status effects that increase the effects of its mental attacks, decrease speed so that it can better land the counter, and forcing the opponent to rapidly move lest they get eaten by a monster that kills at absurd percents. Add this to a very powerful prone game and a FSmash that sets up for it perfectly, and Don’t Touch Me is an actually viable contender despite the highly unorthodox playstyle. It’s a way better set than you’d expect for an ordinary button that can’t even move in canon, and while the sheer novelty may be affecting my ranking, the actual quality is the main thing driving it.
TULIN (Turtles)
Tulin doesn’t seem like the easiest character to make a set for just off the basis of his weapon, but the set uses several Zelda mechanics to make the most of him. His NSpec bow shot, for instance, deals more damage if he hits the foe’s head while also forcing a trip if he hits their legs. Additionally, Tulin has a stance shift in which he can choose whether or not to fire from his hands or feet, with the former being faster but weaker while the latter is slower but more powerful - though some moves have only one damage percent listed - and a fastfall that slows down his momentum. He can use windstreams to alter his arrow’s speeds and trajectory, use elemental arrows to either freeze the opponent in place or create a fire trap that makes an updraft for him to fly up, and create smokescreens to hide the exact direction he will fire his arrows. Lastly, Tulin can make a spirit projection that serves as a clone of him, which has a load of interplay with his kit (though much of it is intentionally unstated).
That’s just the meaty stuff, but what about the basics? Tulin’s standards are quite a bit understated, but are still interesting, most notably the UTilt that fires an arcing projectile to control space and potentially edgeguard. His aerials are naturally where he shines; the NAir in particular is notable for getting a great amount of mileage out of his mechanics while at its core just being a basic sex kick. Tulin’s DAir is also interesting, serving more as a replacement for his fastfall than an actual attack; while I’d like for it to have some sort of hitbox as he’s descending that isn’t height dependent, its applications in regard to mixing up his landings and arrow angles are still quite fun. On that note, I am fairly sure FAir can infinite, since the sweetspot causes prolonged hitstun and there’s quick ending lag, but that can easily be fixed, perhaps with a timer like FSmash has. My favorite part of the set is actually the grab game, a bit surprising for a zoner, since most of them serve to make signals that make Turin’s NSpec home in on those locations to make his head/leg bonuses easier to get. The highlight is the DThrow, reminding me of my Margaret set’s DThrow as it’s essentially a built in tech chase that also has the bonus of creating arrows for him to use on his bow moves - which, on that note, is a fitting way of playing with one of Link’s more obscure mechanics.
While the lack of details ultimately hurts my ranking of the set (likely because it was rushed from what I gathered), Tulin has easily the most intriguing concepts of any of your sets; I was taking notes on how I could incorporate ideas from it into my own sets as soon as I read them. A cool take on a fairly difficult fighting style to make work in the Smash format, and one I feel is hard to top.
Okiku
As far as your continued delving into the anime ninja cliches archetype goes, Okiku isn't re-inventing the wheel. The item shenanigans, multi-follow up movement move, and duplicates are stuff I've seen in my fair share of Kat sets before, but if nothing else I think the execution is solid here. I'm actually quite fond of how you get the item too, stealing scrolls off the opponent with a very unique sort of stealing approach is pretty fun, I think the premise of Side Special is something that could definitely be experimented with from multiple angles in future sets. Its used solidly here too, there's a good number of payoffs to all aspects of the scroll. I do also quite like the idea of a debuff that only works when you're left in a state you're incapable of attacking in, it lets you get pretty absurd with it by requiring you to rely on delayed hitboxes to get the most out of it. I do also think her requirement to play so close to the foe when she's this light and many of her options are unsafe is a somewhat cool way to have a high risk high reward playstyle.
In terms of payoffs to these concepts, I'd say her melee game is solid even if not among your best. The highlight if FSmash, with the tiny but wildly powerful window where you can pull off the crazy strong succubus FSmash on Frame 4. Considering the pre-requisites to do so on a timing level, that feels surprisingly reasonable too. Okiku has quite a few windows to pull off some ludicrously strong tricks in general that are small and conditional, it feels like she leans on those harder than a lot of your sets to the point it becomes a pretty notable part of her playstyle. I like those kinds of tricks and it does encourage a sort of ninja-like precision. I guess the interplay between her options and the specifics of how her crazy payoffs works don't feel as interesting to me as in your stronger sets, and its a bit hard to express exactly why off the top of my head. But I do think the playstyle is good and I enjoy it, except for one thing.
I do think the balance here is a bit messed up. There's two big things that bother me: NSpecial's steamy version is INSANELY strong as a Frame 5 attack you can use in the air that kills at 68%, there's a lot of times that will just kill the foe from like 20% off a small aerial string. And while it takes a reasonable amount of work to build it up, its an amount I could see her do 2-3 times in a stock on a not even that far above average day, when the payoff is this insane and the only condition to make her lose it is getting KO'd. It just feels very, very strong, and this is compounded by Up Special. Now, I'm not an expert on this kind of thing, but Daehypeels has pointed out before that Smash's existing evasive options are balanced around being Frame 3 things, and the upgrade to Frame 1 is a very significant one. This, on top of multiple other upgrades to the grounded version especially leave me thinking Up Special is a pretty ludicrous defensive option to just give Okiku on top of her normal dodge, and I think good Okiku players will be able to abuse this and steamy Neutral Special to launch her power level to stratospheric heights that clearly weren't intended. She has clear flaws elsewhere, but I think these two abiltiies are so strong in her current state she would be heavily broken.
I'm not going to say that ruins the set for me: its the kind of overpowered that at least requires skill to learn, there's probably solid solutions to nerf it, and is more just "she's obnoxiously strong" than "makes the game a miserable experience for the opponent inherently". I did come away with this set overall feeling pretty good about it, but I'll admit Iz and Iroha as well as your crazy strong MYM25 have spoiled me a bit so I don't think this is one of your stronger recent efforts. But like... having seen the entire manga because its just in the moveset, its not like you had a terribly deep well of material to work with here, and I don't expect you to put out a 10/10 kinda set every time. This kind of more "normal" quality set is nice to see too in its own way.
So I suspect what you were concerned about as far as reactions to the set's gimmick is its quite a bit spicier than most MYM sets. FSmash definitely sticks out in that regard, but you were reasonable with handling the desire stuff in terms of the opponent's characterization I can't be too fussed. Probably results in some pretty funny thing with characters who don't desire a person or desire conflict with something VERY bizarre. Can only imagine what she'd turn into fighting Don't Touch Me. I wouldn't recommend making something spicier than this if you can help it, but I wouldn't worry too much about it here, considering the whole 'turn into your desire' premise.
It’s funny how Slavic Day gave us two characters who got posthumously memetic Warlord sets back in MYM7, between Golem and Huff ‘n’ Puff. When you said your Slavic Day entry was for a character Slavic had made but hadn’t, the first two characters that came to mind were Sagi the Dark Clown (who technically doesn’t count) and Alolan Exeggutor. Anyway, it’s refreshing to get a simple Pokeset from you again, as the last one was your debut set in Blastoise.
Never thought about implementing Sturdy as Tough Guy armour, but it makes a lot of sense when one considers that slow Pokemon with Sturdy get a chance to hit attackers who would have normally knocked them out with one hit. That is translated very well here in Smash.
Always thought that Jigglypuff’s Rollout would make for a fun Special move on a MYM character.
“It is also worth noting that, like Jigglypuff’s move, the damage and knockback of this move become much higher if done on a slope; at full charge, the move deals 39% damage and knockback that kills at 55%! However, Golem has no means of creating a slope in his own set, so this is largely only notable in casual play.” There goes any hope I had of getting slopes in this set. In all seriousness though, I like how this “organic” approach highlights how insanely different modern MYM approaches setmaking compared to older MYM’s more artificial take on Pokesets. It kind of makes me want to see more Pokesets, in a weird way.
Among Stone Edge’s nuances, I actually like the smash version’s ability to automatically place the construct at the edge of the stage. It reminds me of Acid Seaforce’s weird Down Throw where iirc he punches you into the ground and makes you pop back up at the ledge. Stone Edge only being usable on the ground is also fitting for Golem being a Ground-type Pokemon. I have genuinely been thinking about a set for Ting-Lu, so this is a good thing to note.
Golem’s Side Special and Up Special weirdly remind me of another Warlord set in Kimblee, albeit on an aesthetic level since they both have a Special that raises earth and explode to recover. Wasn’t expecting Explosion to -not- damage Golem on use: as fun as that approach could have been, maybe pushing himself out of combo territory, it would have been a bit counter-intuitive with his Sturdy.
Golem has some surprisingly good Smashes, as they all play off of each other melee-wise and reactions against the Stone Edge wall, like countering jump-ins or rolls around it.
Jab 2 is a good use of wall-bouncing that I appreciate.
Golem is naturally a pretty simple set, but one that I enjoyed a bit more than I expected - and got some fun nostalgia from - for something that was presumably made very quickly ALA Sundown Kid. While we did get another Pokeset in the form of Vileplume for Slavic Day, Golem had a personal appeal of having had an older set, and the aforementioned comparisons to old Warlord sets.


")