• Welcome to Smashboards, the world's largest Super Smash Brothers community! Over 250,000 Smash Bros. fans from around the world have come to discuss these great games in over 19 million posts!

    You are currently viewing our boards as a visitor. Click here to sign up right now and start on your path in the Smash community!

Event - MLG Anaheim 2014 Your experiences on MLG's stagelist?

Status
Not open for further replies.

solecalibur

Smash Master
Joined
Mar 29, 2008
Messages
3,330
Location
Cbus
Your character sucks. No johns.
Character's metagame benefit from a liberal starter stage list and some benefit from the conservative. The most balanced stage is listed as the 9 starters, not the regular 5 that greatly favor characters like falco , diddy kong ICs etc
 

CT Chia

Smash Obsessed
Joined
Sep 4, 2007
Messages
24,416
Location
Philadelphia
Green greens is the only stage I had a problem with (not playing on it, in terms of it being legal)
 

Dark 3nergy

Smash Hero
Joined
Aug 15, 2008
Messages
6,389
Location
Baltimore, MD
NNID
Gambit.7
3DS FC
4313-0369-9934
Switch FC
SW-5498-4166-5599
Playing on stages your not use to playing on in your region typically helps for tournaments like these.

Not just to get use to the hazards, but for actually just getting a feel for how the stage works as a whole. I mean things like different transformations, or different blast zones. MUs can also change abit in accordance to the stage you decide to go to.
 

Raziek

Charging Limit All Day
Joined
Oct 14, 2008
Messages
9,626
Location
Halifax, Nova Scotia
NNID
Raziek
3DS FC
3866-8131-5247
Just thought I'd post this here, since I see a lot of people spouting mis-informed **** about Norfair, like the lava floor killing way earlier than Brinstar's acid. The ONLY hazard that will kill you before 100% is the Wave, and the Geyser if you're near the side. Neither of which are particularily hard to avoid, since even the Geysers give you warning. (Protip: The screen shakes before they erupt.)


Next we'll move on to examining the different stage hazards that are present on Norfair. First up...

The Lava Floor

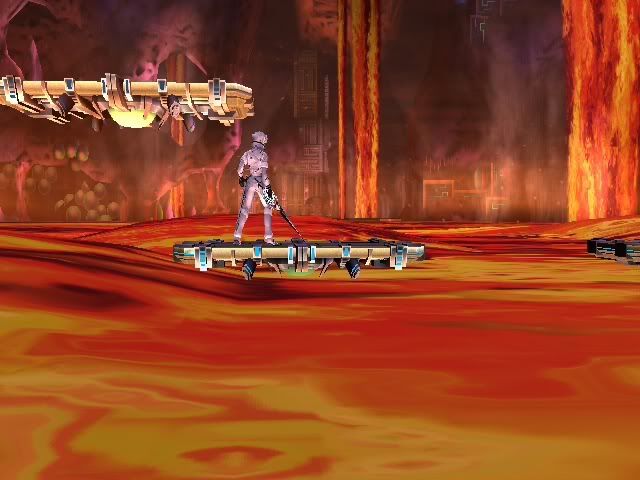
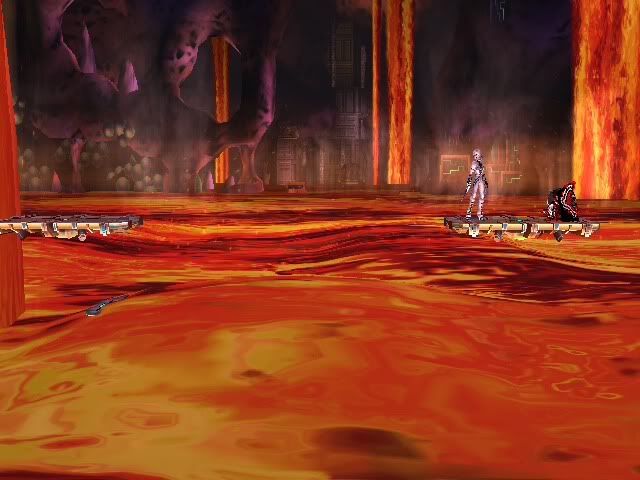
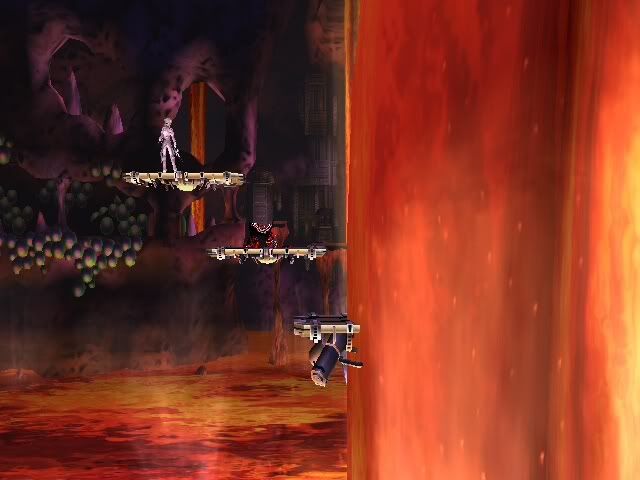
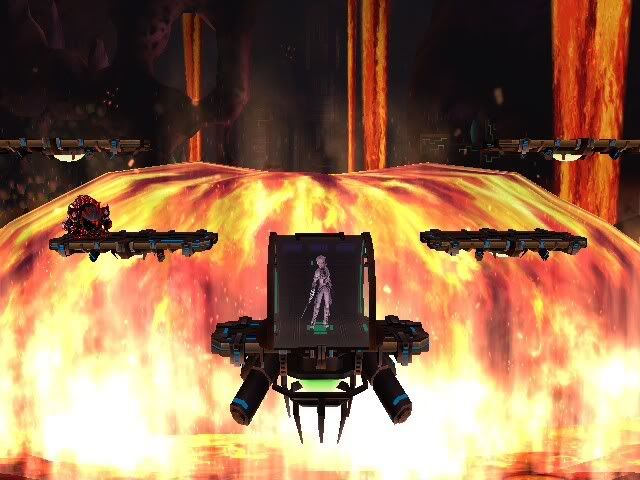
The first thing to know about Norfair's Lava Floor is that it rises to THREE different heights.

The first level can be seen two pictures up, where the lava rises to just below the bottom platform. This is one of the more common heights for it to be, and the lava will provide a net that will save you from the bottom blastzone. (Note: If spiked hard enough, you CAN be sent through it to your death.)


The second level (seen above), rises to completely cover the bottom platform. The second tier of platforms CAN be stood on safely, but be aware that the lava "flows" slightly, and parts of the second level occasionally become submerged in the lava for a brief period of time. This does not always cover the entire platform.


The third level (seen above), covers the bottom and second tier of platforms completely, and DOES NOT become exposed from the flow. The third platforms are completely safe in this scenario, and though the lava does flow, it will never cover the third tier.

Damage and Kill Information

The Lava Floor is the least dangerous of Norfair's hazards, and the most common. it does 14% per hit, and does not diminish in damage or knockback. However, the lava will not actually kill Marth until a very high percent.

It is survivable from the bottom platform up to 158%, with no DI. This number will vary slightly depending on what height you fall into it, and depending on your DI.

This transition is fairly benign, but can be turned to our advantage. When the lava rises to the third level, this will often force a separation of the players, with each taking a platform. However, if you are feeling aggressive, or the Lava Wall comes in from one side, take advantage of the situation by forcing your opponent INTO the lava by whatever means possible. Our aerials (sans Dair) are particularly effective at controlling space, and thanks to our maneuverability, forcing our opponents into the lava for combos is easy and effective.

Next hazard on our list:


The Lava Wall​


Periodically during the match, a vertical lava wall will come in from one side of the screen. This can occur on a 30 second timer (as explained at the bottom of the guide), sharing this "hazard clock" with the lava plumes. The wall will always move up to exactly the center of the stage, effectively dividing it in two. The screen will zoom out and focus on the side that the wall will be coming from, so if you notice it zoom out, take it as your cue to get on the opposite side of the screen, ready to force your opponent into the wall.

Note: This transition often occurs in conjunction with the Lava Floor rising, severely restricting the space available for play. Be prepared and take advantage of it.


Damage and Kill Information

The Lava Wall is one of the more dangerous hazards on Norfair. It does 14% when knocked into it, with moderate horizontal knockback in the opposite direction of the wall. This is survivable up to around 150%, though this seems to be somewhat affected by momentum, and can be DI'd.

It IS possible to power-shield the lava and roll to safety. As well, you can also air-dodge into it. (this can save you in a pinch, since you'll take the hit closer to the far side of the stage)

Make sure to take advantage of this transition as much as possible. Stay on the ledges and use retreating bair or fair to play wall-ball with your opponent. If they are unprepared, this is a great transition to rack up damage. If they begin to adapt to shielding your aerials, feel free to throw them into the wall for easy damage.


The Lava Geysers


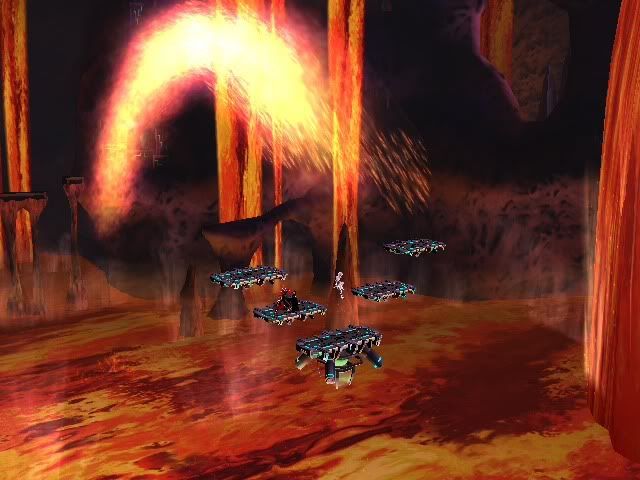
Every 30 seconds, up to three (possibly four) geysers of lava can shoot up from the lava in the rear of the screen. Their appearance is preceded by the screen shaking (though the shaking does not ALWAYS mean they will come), and they will follow a few seconds later. They will arc in a straight line onto the stage, damaging anything in their path. These are extremely random in placement and number, but can occasionally net you some extra damage, and early kill, or some shield pressure.

Should you decide to deal with one by shielding it, wait until it contacts once, then let down your shield and MOVE. While the hitbox is active the entire time, my testing has indicated that there is a set period of time before the lava can hit you again, giving you time to move. If you choose to shield two hits there is a SEVERE risk of breaking your shield. Fortunately for us, this works both ways. If your opponent shields a hit, go for the break. You'll almost certainly land it, then you've earned a free kill, and the Geyser may even finish them off FOR you.

Note: The Geysers often arrive while the Lava Floor has risen, limiting the space available to maneuver.


Damage and Kill Information​


The Lava Geysers are the most dangerous hazard on Norfair, despite dealing the least damage. They only do 10% damage, but they pack one HELL of a punch. Depending on where you get hit, these can kill you as early as 80%, and are somewhat difficult to DI. Be prepared to avoid them, and should the opportunity present itself, take advantage of the shield pressure they can put on your opponent.

Finally, our last hazard:


The Lava Wave​


Just before the Lava Wave occurs, the "Safety hut" will appear on a random platform, with its doors shut. (Note: This slightly widens the platform it appears on) The safety hut's doors will open when struck by any attack. It's also worth nothing that the safety hut CAN be teched against. (Thanks to FeSoren for this tip) After the hut emerges, the Wave will spring up in the background, and begin rushing towards the screen.

At this point, you have two options.

  • Rush for the Safety Hut
  • Avoid the Wave

Rushing for the safety hut is an extremely bad idea. Should you even manage to make it in, you'll be trapped in there for a few seconds following the wave, and some opponents will be able to hit you from the outside, through the walls. Since we have disjointed attacks, this is what WE want to do. Let your opponent take the hut if they choose to, and if they do, poke them with Fair, Bair, U-smash, F-smash, or anything else sufficiently disjointed and punish them for their really bad idea.

Note: If the Safety Hut appears on the second or top tier of platforms, once the walls are up, there will not be enough standing room to stay on the platform, so you MAY get hit if you try to shield on the same platform as the hut.

Option 2 is clearly the best, and there are several means by which we can avoid the wave.

  1. Spot-dodge
  2. Shield
  3. Go over it
  4. Use Invincibility Frames


Shielding is by far the safest option. The shield damage is negligible, and there is only mild shield-stun. You CANNOT be hit by the wave if you shield, even the tiniest spec remaining will protect you. (Though it may break.)

Spot-dodging is risky, since you can be hit if you miss-time it. Going over it is a reasonable option. From the top platform, you can jump over it using only our two jumps, and you can Dolphin Slash if you need to for that little bit of extra height, though you risk leaving yourself vulnerable if your opponent is nearby.

The most bad-*** option we have is to time a Dolphin Slash JUST right so that the wave passes by during our invincibility frames. I've successfully done this a few times, but the timing is very strict and is quite unsafe. Reserve this option for those "HUMILIATION!" moments.


Damage and Kill Information​


The Lava Wave is probably the second-most dangerous hazard on the stage, if only because it is easy to avoid, unlike the Geysers. The wave itself does 16% and has high knock-back. Without DI, this will kill Marth at 80% (Bottom Platform), 70% (Second tier) or 60% (Top Tier), so make sure you DO NOT GET HIT BY THIS.

This transition presents a great Risk vs. Reward situation. You can choose to camp it out and play safe, or you can rush your opponent in an attempt to poke them while they try to defend, possibly forcing an early kill or a shield-break. If you're feeling ballsy, try to hit them with an auto-canceled aerial into shield, right as the wave arrives.

Another interesting feature for the stage, pointed out by BengalsRZ:

Quote:
Originally Posted by BengalsRZ
If you have a higher port than the other person (i.e you are p4 and the other guy is p1), when the huge lava wave comes (the one where the hut appears) try to get the grab. It kills pretty early and you won't eat any knockback, but you'll take 16%. Definitely worth it in most cases. If it doesn't kill your opponent it'll bring him to the top and put him in a bad position which you can abuse.

Also note that this port priority trick works for ALL of Norfair's hazards.


Just an Excerpt from my guide: Lava and You: A Marth's Guide to Norfair
 

Ripple

ᗣᗣᗣᗣ ᗧ·····•·····
Joined
Sep 4, 2006
Messages
9,632
it's not just about avoiding death

it's about keeping stage positioning and protecting it

but a scrub like you wouldn't know that
what I got from this was

"ban characters with projectiles because they force approach."

you can't keep stage postioning against a character that has a better projectile than you if you have one at all
 
Status
Not open for further replies.
Top Bottom