• Welcome to Smashboards, the world's largest Super Smash Brothers community! Over 250,000 Smash Bros. fans from around the world have come to discuss these great games in over 19 million posts!

    You are currently viewing our boards as a visitor. Click here to sign up right now and start on your path in the Smash community!

Make Your Move 9: [Now Defunct]

Status
Not open for further replies.

gcubedude

Smash Apprentice
Joined
Aug 15, 2009
Messages
83
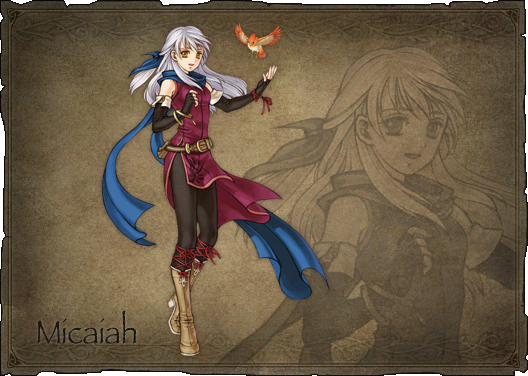
A new challenger approaches! From Fire Emblem, it’s Sothe!


Click the image for a video of Sothe in action

Intro

Sothe first appeared in Fire Emblem: Path of Radiance as a minor character. When Ike and co. set sail early on, Sothe stows away on the ship, but is caught. He explains to Ike that he’s searching for someone important to him (this turns out to be Micaiah). Ike allows him to stay in exchange for working with Ike. In-game, he’s a second Thief, but unlike your other one, Volke, he can’t promote to an Assassin, limiting his usability.

In Radiant Dawn, Sothe appears early on as the most skilled member of the Dawn Brigade. He helps Micaiah to free Daein from Begnion’s control. At the end of the game, if Sothe and Micaiah have an A Rank support, they’ll get married. In this game, he starts out as a Rogue and promotes near the end of the game into a Whisper. Upon promotion, he gains the skill Bane, which leaves enemies with 1 HP when it hits.

In this moveset, if a move name has an asterisk by it, you can click on that name to see a short clip from an in-game cutscene showing what the move looks like. Additionally, I use the word tech-chase throughout this set. If you don’t know what a tech-chase is, read this Smash Wiki article.

Stats​

Weight: 6/10
Being a rogue, he wears light clothing, so he’s about medium weight

Jump: 6/10
His first jump is just a tad above average.

Air Jump: 4/10
His second jump is just below average.

Walk Speed: 6/10
He walks pretty fast…

Run Speed: 8/10
…and can run even faster, at about Sheik’s speed.

Midair Mobility: 3/10
He can’t move very well in midair, though.

Float: 2/10
He also falls very quickly.

Traction: 7/10
Sothe doesn’t slide around that much.

Size: Tall and medium
He’s about the same size as Snake, except a bit thinner.

Special Mechanic: Cloak and Dagger


Being a rogue, Sothe prefers that his opponent not see him as he attacks them. He can handle a straightforward fight pretty well, but he can do so much more to an opponent whose back is turned to him.

In Brawl, a lot of his Playstyle revolves around attacking enemies from behind. This is obviously a lot easier in a free-for-all than in a one-on-one, but Sothe has a few tricks up his (nonexistent) sleeves. If he does hit an enemy in the back, his attack may have an additional effect, which may be a simple pump, or it may change entirely.


Specials​

Neutral Special: Knife Throw
A fairly simple attack, Sothe quickly tosses his knife forward. It deals 7% with flinching knockback if it hits. The knife is pretty small, about the size of Mario’s Fireball, and it travels high, so most characters can crouch under it. It travels indefinitely at the same speed as Falco’s Blaster, only stopping if it hits a shield, character, or wall. This moves isn’t spammable, as it takes Sothe about half a second to pull another knife out of his pocket.

If a knife hits an opponent in the back, they’ll take massive hitstun as they fall to their knees, then to the ground, the knife stuck in their back. During this whole time, they can take damage as usual, but don’t move at all until they’ve finished the animation. They also cannot be grabbed while falling. This gives Sothe an opportunity to run up and attack the falling enemy from behind, and it sets up a tech-chase after they hit the ground.


Side Special: Quick Step
Sothe bends his knees and lowers himself, then dashes left or right 1 Battlefield platform length. This has about half a second of startup lag, during which the player can move the control stick to change Sothe’s direction. It takes Sothe .2 second to travel the distance, and although he receives full damage from any attack that hits him, only a move that deals 15% or more damage will make him flinch. Also, during this time, if the control stick is held either left or right, Sothe will exit the move facing that direction.

If B is held while Sothe is moving forward*, he will attempt to grab an opponent at the end of this move. This has the same lag as his dashing grab (read: not very much), and provides a good alternative to a regular dashing grab.

If B is held while moving backwards*, Sothe will instead throw a knife forward* before facing the direction on the control stick. This knife has the same properties as his Neutral Special, but deals a weakened 5%.

If this is used in midair, Sothe will instantly move in the designated direction, but won’t attack and will enter freefall afterwards.

*Note that “forward” and “backward” are relative to Sothe’s starting position, meaning that if Sothe is facing right when this move is used, right is forward and left is backwards.


Up Special: Wired Knife
Sothe quickly pulls a knife out of his pocket and tosses it upward, automatically aiming it at either the closet opponent or ledge. This knife has a special wire attached that’s hard to see but is very tough. The primary use of this move is to act as Sothe’s sole recovery option, as it’ll aim for a ledge first, even if an enemy is closer. However, it does make a decent anti-air option if used on the ground.

The knife deals 6% with minor flinching knockback if it hits an enemy. If B was simply pressed, then nothing else will happen, and Sothe will pull his knife back with minimal end lag, returning it to his pocket. However, if B was held as the knife struck the enemy, Sothe will instead pull them down to him, instantly getting them in a grab. Furthermore, if this should strike an enemy in their back, they’ll take massive hitstun, just like in Sothe’s Neutral B, and enter freefall afterwards. This can allow Sothe to gimp some opponents, but it’s very hard to hit a recovering opponent in the back with this attack. Maybe if you could throw them off the edge yourself…


Down Special: Into the Shadows
By pressing Down B, Sothe…does nothing. If Down B is held, however, Sothe will crouch down, similar to his Side Special, and hold this stance as long as B is held. When B is released, Sothe will stand up as he slowly begins to disappear, turning invisible as he blends in with the shadows. This isn’t perfect, however; every 2 seconds or so, he’ll flash back into existence for a brief moment, allowing an attentive opponent to spot him.

Sothe remains invisible for the amount of time this move is charged times three, so 1 second of charge will give him 3 seconds of invisibility. While invisible, he can do anything he can normally, and he takes damage and knockback as usual. He loses his invisibility early if he is either hit by an attack (flinching or not) or hits someone with an attack. During this time, however, any knife that he throws will be invisible as well, allowing for a safe sneak attack.


Grabs and Throws​

Grab: Standard Grab
Sothe reaches out with one hand to grab the enemy by their collar. Nothing special, just average range and lag on both ends.

Pummel: Knee
Sothe simply punches the held enemy in the stomach for 2%. This is about the same speed as Ganon’s pummel.

Forward Throw: Stab and Kick
Sothe stabs his knife into his opponent’s stomach, then pulls it out and kicks them forward simultaneously. This deals 8% and puts the opponent in a prone position 1 stage builder block in front of Sothe, allowing for a possible tech-chase with Sothe’s Side Special.

Backwards Throw: Back Stab
Sothe pulls the held enemy behind him and stabs his knife into their back, dealing them 9% and dropping them as if they had been hit by a Neutral B in their back. They fall right behind Sothe, setting them up perfectly for a tech-chase.

Up Throw: Backflip Kick*
Sothe stabs his knife into his opponent’s chest/stomach area, letting go as they stumble backwards, hand near the knife stuck in them. Sothe runs forward and does a backflip kick off of them, pulling the knife out at the same time. This deals 11% and sends the opponent sliding along the ground a total of 1.5 stage builder blocks. Control of Sothe is regained while he’s in midair, allowing you to angle your fall so that you either pursue the enemy or retreat away from them.

Down Throw: Spin Around
Sothe simply spins the opponent around, making them face away from him. This does no damage, but sets up some mindgame potentials. Your best choice after this is to regrab them from behind (which does make a difference: see below), but your opponent can spotdodge this. You can also simply attack them, since they’re still so close to you, but this can be shielded. Mix up what you follow this with to confuse your opponent.


Grabs and Throws From Behind​


Grab: Chokehold
Sothe’s grab game changes a lot depending on whether he grabs his opponent from the front or back. When grabbing from behind, Sothe gets them in a chokehold much like Snake’s grab, holding his knife aimed at their throat. Enemies grabbed like this have 1.5x the regular grab resistance.

Pummel: Knife Stab
Sothe sticks his knife into his captured enemy’s neck, dealing 4%. This is the same speed as his regular pummel, but with the increased damage and grab resistance, you can use this more times before the enemy escapes.

Forward Throw: Flip Throw
Sothe flips over the held enemy, holding them by their shoulders. As he lands, he throws his opponent upward and forward with decent knockback. This deals 7% and leaves the opponent in the air with their back to Sothe. This deals more stun if the opponent has high damage; after about 125%, it’s possible to follow this with an Up Special, potentially gimping an opponent if they’re thrown off stage.

Backwards Throw: Slam n’ Slice
Sothe hooks his arm around his enemy’s throat and flips them over his body, bouncing them off the ground behind him. As they bounce upward, he slices vertically with his knife, sending them upward and away with knockback that can kill around 168%. The whole throw deals 11%, with the knife potentially hitting other opponents for 5%. Like the forward throw, this can set up a gimp with Sothe’s Up Special.

Up Throw: Spine Shredder
Sothe momentarily lets go of his enemy, backs up, and brings his knife upward through the opponent’s back. This deals 12% with upward knockback that will KO at 154%. This is Sothe’s best KO throw and his second-best at damage, beaten only by…

Down Throw: Throat Slit
Sothe slits his enemy’s throat, then lets them drop to the ground. This deals a whopping 15% and instantly puts the opponent on the ground at Sothe’s feet, perfectly set up for a tech-chase.


Standards​


Neutral Combo: Knife Combo
Sothe backhands with his left hand, dealing 3% with short range but virtually no startup lag. He then cuts horizontally with his knife for another 3% and slightly longer range. The final hit involves him stabbing forward with the knife, dealing 5% and poor forward knockback (11% total).

If the first two hits strike an opponent in the back, even if they shield, the third hit becomes a grab hitbox. Sothe grabs the opponent in a chokehold, pauses, and stabs his knife into their chest, dealing 8% and putting them in the same falling state as Sothe’s Neutral Special. The pause between the grab and the stab is about .6 seconds, and enemies only suffer half the usual grab resistance during this time, so a quick player could button mash out of this. Of course, like a regular grab, this difficulty increases with damage.

Forward Tilt: Rushing Stab
Sothe lowers himself, looking like he’s about to use his Side Special. After the same startup lag passes, he dashes forward half a Battlefield platform, holding his knife with the point forward. This has a constant hitbox in front of Sothe that deals 8% with upward-forward knockback. If this hits an enemy during the dash, they’ll only take poor knockback, but there is a sweetspot in the blade right as Sothe stops that can KO opponents around 210%. Sothe suffers some end lag afterwards, so this move can be punished if shielded.

If Sothe hits an enemy in the back with this attack, he’ll stab them in the back, stopping right behind them instead of continuing forward. The knockback on this move is completely removed, but instead the opponent will receive a high amount of hitstun, just enough to let Sothe grab them from behind.

Up Tilt: Light Upward Slice
Sothe slices his knife upward with minimal startup lag. This doesn’t have much range away from Sothe, but covers a high vertical area in front of him (this can be crouched), dealing 7% to anyone hit by this. The knockback is poor and sends opponents upward into the air.

This move doesn’t change if it hits an enemy in the back, but when they get knocked upward, their back will still be to Sothe, so he can hit them with his Up Special if they don’t quickly airdodge.

Down Tilt: Low Slice/Falling Slit
While crouching, Sothe slices his knife horizontally low to the ground, dealing 8% little knockback. This has the same startup lag as a Jab, but has a small amount of end lag, making it punishable if shielded. Additionally, if this move hits an opponent from behind, they’ll fall down into their prone state instantly as Sothe knocks their feet out from under them.

This move can be used on an enemy who’s in the falling animation described in Sothe’s Neutral Special. If it is, Sothe will catch their head as they fall and slit their throat with his knife. This deals 10% and instantly puts them on the ground in their prone state. At this point, you can probably guess that this can set them up for a tech-chase.

Dash Attack: Slice-Stab Combo
Sothe swings his knife horizontally as he slides to a stop, dealing 6% with little knockback and decent stun. He then stabs forward with the knife, dealing 7% with decent forward knockback. The stab pushes shielding opponents backwards about half a stage builder block, which is good, as this move has some bad end lag.

A slice in the back will deal enough stun to guarantee that the stab hits, and a stab in the back will sends opponents into the same falling-down state as the Neutral B.


Situational Attacks​


Get-up Attack: Spin Kick
Sothe sweeps his legs around on both sides, dealing 5% with a small chance of tripping anyone who gets hit. This can turn the tables and put the opponent on the ground while you’re up and ready to attack.

Ledge Attack: Fast Slice
Sothe pulls himself up quickly, slicing upward as he stands up. This is similar to Sothe’s Up Tilt in terms of range and speed, and deals 5%.

Ledge Attack (high damage): Weak Cut
Sothe gets up slowly, cutting low as he stands up. This cut deals 6% with almost no knockback or stun. The range is pretty horrible too, barely hitting above the ground.


Smashes​


Forward Smash: Spin-around Kick*
Sothe spins around and kicks horizontally, aiming pretty high. This can be crouched, but only by low-crouching characters like Snake and Kirby. This deals 15-20% with good knockback, killing at 146-138%. If this hits an opponent who’s in the middle of lag, this will act very similar to Mario’s Cape Special, flipping them around without dealing any knockback or flinch. This can instantly leave an opponent vulnerable from behind, but watch out; this can flip an opponent even if it hits them in the back. Combined with the small amount of end lag this move has, this could get Sothe hit by something that would’ve originally missed, so don’t use this move recklessly.

Up Smash: Spiral Slash
Sothe crouches down low to the ground as he charges this move. When released, Sothe brings the knife up and jumps, spiraling around. Sothe jumps up half a Ganondorf height, his whole bodying acting as a hitbox with slight suction. This deals multihit damage totaling 17-23% if the whole move hits. The final hit deals good knockback upward and away from Sothe, KOing around 148-142%. This move doesn’t change at all if it hits an enemy in the back.

Down Smash: 360° Sweep Kick
Sothe extends his leg outward near the ground and spins in a full circle, sweeping the floor near him. This deals 7-10% on the first hit, and 8-12% on the second hit (15-22% total). Like Toon Link’s DSmash, the first hit will knock foes into the second hit, whose upward knockback can KO around 140-132%.

If an opponent is hit in the back with either sweep, they’ll have their feet pulled out from under them and fall flat on their face. Sothe will use this time to bring his knife down into their back, dealing 10-15% and (guess what?) leaving them in a tech-chase position.

Aerials​


Neutral Air: Knife Spin
Sothe curls into a ball, knife pointing out, and spins around, similar to Meta Knight’s Nair. One spin does 7% with low flinching knockback and minor stun. Pressing A repeatedly while spinning will cause Sothe to spin more. Sothe can spin as many times as you want as long as he’s in the air. For each hit after the first, the damage is reduced by 1%, and the knockback and stun is slightly reduced as well. This move has some bad landing lag, so you’ll want to stop spinning as you get closer to the ground.

Normally, this move deals so little stun that an enemy can airdodge as soon as they get hit, dodging any further hits. However, if Sothe hits an enemy in the back with this move, they’ll receive enough stun to guarantee that at least two more hits will connect, dealing up to 18%. After the third consecutive hit, the stun will be reduced to a point where they can airdodge.

Forward Air: Stiletto Stab
Sothe kicks his foot out in front of him, revealing a hidden dagger in the heel of his boot. Contact with Sothe’s leg deals 3% and minor flinching knockback, and contact with the knife deals 7% with poor knockback. This move does have a sweetspot when the knife first appears that can deal 10% with decent knockback.

This move will only change if it sweetspots an enemy in the back. If it does, and the enemy is on the ground, Sothe will drop on them, knocking them to the ground. While over the opponent like this, you can press B to twist the knife, then step off the opponent, dealing 5% and leaving them on the ground in a prone position. Pressing A will make Sothe twist the knife, but not step off, acting as a sort of “pummel” to this pseudo-grab. Pressing Z will make Sothe step off the opponent and pick them up, getting them in a grab from behind. Pressing Left or Right will make Sothe simply get off in the designated direction. Press Up to make Sothe jump off the opponent. During this whole time, the trapped enemy can escape if they properly predict what you’re going to do. If they press the same button that you do at the same time, they push Sothe off and get up instantly. This puts Sothe at the frame disadvantage, and considering how close you’ll be to your opponent, it’s pretty easy for them to attack you.

If the sweetspot hits an enemy from behind in midair, Sothe will kick off with his other foot, sending the opponent rocketing forward with a slight downward angle. The knockback on this is pretty good and, if used properly, can gimp a recovering enemy.

Backwards Air: Quick Slice
Sothe slices backwards extremely fast. This is about as quick as Ike’s Bair, but with a slightly shorter range. This deals 8% with decent knockback that KO’s around 154%. If this hits an enemy in the back, the damage simply increases to 12%, and it KO’s at 148%. Simple pump is simple.

Up Air: RANDOM FLIPKICK!
Sothe does a flipkick like a lot of other characters, dealing 7% with decent knockback and stun. Simple, right?

Wrong. Should Sothe flipkick someone in the back, this move will change. If he barely touches them in the leg, they’ll spin around and enter their footstool animation, falling a full Ganondorf height before they can do anything. If Sothe is very close to the opponent, and the kick hits them above their waist, they’ll be dragged with the kick, ending up right beneath Sothe. They’ll receive more stun if they have more damage, and at around 60%, it becomes impossible for them to dodge a follow-up Dair.

Down Air: Knife Plummet
Sothe stalls for a very short amount of time, about .2 seconds, before plummeting down and slightly forward, knife pointing at the ground. This deals 10% with good knockback, killing around 156%. Like most stall-then-falls, this has horrible landing lag, so don’t use it unless you’re about 1.5 Ganons from the ground.

If Sothe gets an enemy in the back, he’ll get on top of them like in his Fair. If he hits them while they’re in midair, he’ll catch them with his knife and bring them down with him until he hits the ground, dealing 5% in the process.

http://www.youtube.com/watch?v=AEOfO3_HCsw&t=8m29s http://www.youtube.com/watch?v=AEOfO3_HCsw&t=8m29s

As soon as B is pressed, every enemy in front of Sothe gets paralyzed as the camera zooms in on Sothe. He plays with his knife a bit, tossing it behind him before catching it with his other hand in front of him, before the screen darkens completely. Three slashes are heard, with accompanying white slash marks appearing where each enemy is. After the third slash, each enemy hit by this takes 99%.

Now here comes the fun part. After the third slash, Sothe will reappear where he originally was. At this moment, A, B, or Z will randomly appear over each enemy’s head. The buttons hang around for 2 seconds. Once they appear, Sothe needs to press the corresponding button repeatedly to perform a critical hit on the enemy. Of course, the opponent can press the button too, in an attempt to avoid the critical hit. However, Sothe receives a 50% bonus to the number of times he pressed the button, giving him a good advantage over the opponent. If Sothe wins the contest, he’ll do the critical hit seen in the video, instantly finishing them with upward knockback that will KO them, even if they have to go through walls and floors to reach the upper blast zone. If the opponent wins, Sothe will attack, but the opponent will barely dodge it automatically.

If this hits multiple opponents, a different button will appear over each enemy. This makes it very difficult to finish more than one enemy with this move. It’s best to simply focus on a single enemy and let the other two escape. Hey, at least they now have an extra 99% tacked on, so you should’ve have a hard time KOing them normally.


Playstyle​


General Information
Sothe can be played like a regular Brawler, but he’s best played with one or both of the following objectives: get behind the enemy, and/or get them on the ground. Sothe’s attacks work best when he’s behind the enemy, as they all either deal more damage or can setup to guarantee that another move hits. Additionally, Sothe has a really good tech-chase game with his Side Special and high ground speed. Proper usage of Quick Step can easily win you the game.

Getting Behind the Opponent
In a 1v1, attacking an opponent from behind won’t be easy, but it is possible. The most obvious choice is to use Quick Step to dash behind an enemy, pressing B if you want to use normal attacks, or holding B to grab them. Of course, you shouldn’t use this as your only approach method, as your opponent will eventually learn to roll toward where you started Quick Step in order to avoid it. That’s when you use Quick Step to move away from the opponent, throwing a knife while you’re at it. If the opponent rolls toward you while you’re Quick Stepping backwards, they come out of the roll with their back to you and take the knife right in the back, sending them into the “falling” animation. Follow this by running up to them (don’t use Quick Step) and using Dtilt to deal some more damage and get them in a tech-chase situation (See “Tech-chasing” for follow-ups).

Another way of getting behind an enemy is to use Into the Shadows (Down Special). Charging it for even a second will get you three second of invisibility, during which you can jump over the enemy, run toward and roll around them, or simply use Quick Step to get to their backside. You can also use Into the Shadows as your opponent is in a “falling” animation. Since it takes at least 3 seconds just to get through it and get up, you can easily get 9+ seconds of invisibility, during which you can either try to get behind them as usual, or barrage them with invisible knives using Knife Throw (Neutral Special).

If your opponent is too aggressive to get behind, try using FSmash to turn them around as they attack you. Without a charge, FSmash is pretty quick, but it requires some prediction, as it’s beaten by most jabs and some Ftilts in terms of speeds. Not only that, but it’s easily punished if shielded/dodged.

Attacking from the Blind Spot
Once you get behind your opponent, you’ll be able to really inflict some damage. One of Sothe’s best options is his Neutral Combo. It will still hit if it is spotdodged, since it’s a multihit move, and it ends with a grab, so your opponent can’t shield it either. Of course, once your opponent knows what to do, it’ll be very hard for the grab attack to actually work, as they’ll know to button mash out of it.

Utilt and DSmash also make good attacks if you’re right behind an opponent. Utilt is slightly quicker, but does less damage, and its follow-up (Up Special) is easily airdodged at low percentages. A DSmash from behind not only does good damage, but can put the opponent on the ground (See “Tech-chasing” for follow-ups).

If you end up too far behind an opponent to use a melee attack, Ftilt and Knife Throw are good choices, Ftilt for mid-range and Knife Throw for long-range. Both will put the opponent in the “falling” animation, leaving them open to a free 10% from Dtilt.

Of course, you could always just grab the enemy from behind…(See “Grab game”)

Tech-chasing
Standing over a prone opponent put Sothe in a very advantageous position. If you can predict what your opponent will do, you can rack up a lot of damage easily and safely. Quick Step should be used if you think the opponent will roll to either side. If you think they’ll use a get-up attack, you can either shieldgrab them, or jump and slam them with your Dair/Fair, depending on how tall they are (Fair for tall, Dair for short). If this hits them in the back, you’ll have a chance to deal some more damage. If they’re just going to get up normally, grab them again and get them back on the ground.

Grab game
Sothe has a pretty good grab game that has some gimping potential after about 125%. For damage racking, the best throws are Up (front grab) and Down (back grab). Front UThrow leaves Sothe in midair, with the opponent stunned on the ground, so it’s not the best combo starter, but it’s good if you need to put some distance between you and the enemy. Front Fthrow is also good at getting some breathing room, while Front Bthrow can set up a tech-chase. If you really want to grab an opponent from behind, use Dthrow to spin them around and grab them from behind. Mix this up with some regular attacks, or your opponent will learn how to counter it.

From behind, Dthrow is best throw for damage dealing, in addition to setting up a tech-chase. Fthrow and Bthrow can both be used to gimp an opponent if you’re near the edge (follow it with Up Special, and watch your opponent plummet to their death), and Uthrow is the best throw for traditional KOing.

In the Air
If an enemy is close to you in the air, use Nair. Spinning a few times will keep most enemies away. If the enemy is in front of and below Sothe, use Fair or Dair, depending on their exact location. Both can deal a lot of damage if they hit the opponent in the back, and Fair can gimp pretty well if it hits them in the back in midair. Bair makes a decent attack if the enemy is behind you, although it’s slightly slower than Nair. Uair has all of the advantages of other flipkicks, but can be used as a combo starter if you hit an enemy in the back. If Uair sends them into a footstool fall, Dair can be used to get both of you to the ground, and deal a good chunk of damage. Nair can do good damage too, and it leaves you both in midair, instead of instantly putting you both on the ground. If Uair actually catches the opponent and flips them under Sothe, you can follow it with a Dair.

Finishing the Opponent
Once the opponent is at around 130%, you can finish them off. All of Sothe’s Smash attacks KO around 140%, so any of those can work, although remember that FSmash won’t do knockback if it hits an opponent who’s in lag. USmash can counter an aerial approach, while DSmash can hit enemies on either side of Sothe. As far as throws go, Back Uthrow is the best KO option, but it only works after 150%. If you’re near a ledge, a Back Fthrow or Bthrow can gimp an opponent with more than 125%. If you really want to show off, you can try to gimp a recovering opponent with Fair. Use Knife Throw to force an opponent to approach the ledge from below, then as they get close, jump off and Fair them under the ledge (or bounce them off the wall, if on a stage like Castle Siege). Sweetspotted, this can gimp around 90%, making it Sothe’s earliest KO options.

How to counter the Rouge
If you have any good ranged attacks, use them. Knife Throw is pretty quick, but it has some end lag, which makes long-range battles very difficult for Sothe. Just don’t use a laggy projectile, as Sothe can approach and use Quick Step when he’s near you, take the projectile, and still get behind you and grab you. If Sothe does get close enough and uses Quick Step, your best bet is to jump and use an aerial. Dairs are the preferred choice, but that depends on your character; a stall-then-fall Dair will usually get you shieldgrabbed. Most Nairs are good counters to Quick Step, as well as a few Bairs and Fairs.

If you don’t have any projectiles, you’ll have to simply play a very safe close-range game. Jabs and fast Tilts are your best friend, as anything laggy can easily be punished by a grab or Neutral Combo>grab. If Sothe gets behind you, either jump or roll around him to dodge his attack/grab. If you have a fast DSmash that hits both sides, like Zelda’s, you can use that instead.

If Sothe gets you on the ground, your best options are to get up normally and quickly jump, or roll to where his back is turned. Rolling behind him makes it difficult to counter with Quick Step, as he’ll either QS in the other direction, putting distance between you, or QS with your roll. Since he can’t grab someone if he QS’s backwards, he’s left to either do nothing, or throw a knife, which at point blank is easily shielded and countered.

In the air, Sothe’s attacks are very fast, but they don’t have much range or priority. Use that to your advantage to either airdodge and counter, or beat them out with longer ranged aerials.

Overall, simply stay in front of Sothe, and try to keep him at a distance if possible.

Extras​


Animations

Entrance: Sothe seemingly appears out of nowhere, slightly crouched over. He straightens up as he makes a “Bring it” motion with one hand
Standing: Sothe stands with his left side toward the enemy, his right hand holding his knife backwards.
Idle 1: Sothe looks straight down, testing the ground with his feet.
Idle 2: Sothe yawns softly, but stays tense, ready for anything.
Walk: Sothe cautiously walks forward, holding his knife ready to strike
Run: Sothe crouches slightly as he runs forward, looking a bit similar to Marth’s run animation
Crouch: Sothe crouches down on one knee, holding his knife in front of him in a defensive pose.
Sleep: Sothe falls asleep standing up, head down with his knife barely dangling in his hand.

Taunts

Up Taunt: Sothe tosses his knife into the air, just above his head. It spins a few times before he catches it and swiftly returns to his standing animation
Side Taunt: Sothe does the same “Bring it” motion from his entrance animation.
Down Taunt: Sothe flips and spins his knife around his hand, showing off some amazing dexterity.

Victory Poses

Victory 1: Sothe tosses his knife in the air, making it flip a few times. He catches it and stands in the same pose as the picture at the top.
Victory 2: Sothe puts his knife away and crosses his arms, staring off-screen.
Victory 3: Sothe does a backflip like in this video.
Victory vs. Micaiah: “See? This is why you should never leave my side,” Sothe says at Micaiah, doing the same animation as Victory 1. This animation has priority over all other victory animations
Victory vs. Ike: “You were holding back, weren’t you, Commander?” Sothe says at Ike, doing the same animation as Victory 1. This animation has priority over all other victory animations except Vs. Micaiah.
Loss: Sothe claps for the winner like everyone else, his knife in the ground at his feet.

Final Comments
Ugh, magic users are so much easier to think up moves for. It wasn’t easy thinking up some of Sothe’s moves, as I didn’t want them to seem too generic, but I didn’t want every single one to have the same effect if they hit from behind. I had the most trouble with the aerials, but at least the Final Smash and specials were pretty easy.
 

SteveJobs

Smash Rookie
Joined
Jan 1, 2011
Messages
1
Hello, I am Steve Jobs -- CEO of Apple Inc ©, you may all know me as a big business man. Underneath it all, I want to make the world a place for our children to meadow in; to experience their first iPod ©, or the new iPad ©, and for that purpose, I have crafted the new Make Your Move © application.


As you can see, it works functionally with the new iPad © -- at the full screen resolution for the device. What is the point of such an application? Every time that you post a comment or moveset, it will instantaneously relay to your Facebook © or Twitter © account, telling all of your family and friends about your latest Make Your Move © escapades.

That is not all.

The Make Your Move © application enters the market -- tonight -- at a cost-preserving $0.99. Don't say Steve Jobs © never gave you nothing -- we're practically giving away this amazing product. Not only does it relay information to Facebook © and Twitter © -- no, no, no. In a recent deal with Nintendo Corp., we have secured a deal for all of you Smash fans. It's called "Tell Sakurai;"© that's right. . . You asked for it, and Apple © has delivered once again.

This application, within an application, allows for you hot-headed gamers to connect directly with Mr. Massahiro Sakurai © to communicate your deepest thoughts and emotions on the direction of the Smash Bros. series ©. He may not read your replies -- he has sworn to me, personally, to try to answer the best questions on his personal Twitter © account, which can also be received by the iPad © device.

I can only pray that you all love and cherish this precious application as much as I do in my everyday life.​

:twitter: ©
:facebook: ©
 

Neherazade

Smash Journeyman
Joined
Apr 5, 2009
Messages
359
Location
Gensokyo.
Happy New Year MYM!

I am baffled as to who this "Steve Jobs" individual is. There is no cleverly disguised clue as to the true mind behind this amazing product.

"Enjoy bending the laws of Smash for your own evil, imaginative purposes? There's and App for that!"
 

Plorf

Smash Apprentice
Joined
Jan 28, 2009
Messages
124
Location
Silver Spring, MD
[SHOTZO]

click for playlist

[INFORMATION]

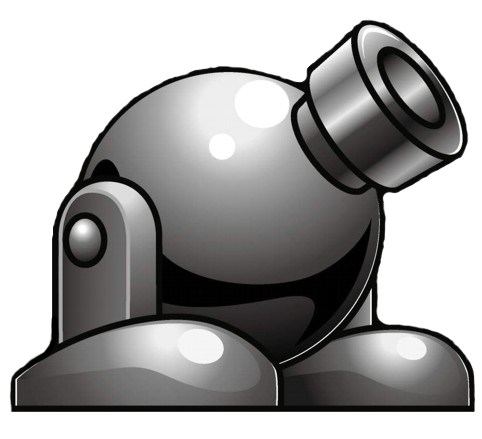
DESCRIPTION / ARTILLERY [Shotzo is a common enemy in the Kirby series of games, appearing in nearly every title, if not all of them. Shotzos are indestructable cannons that tend to shoot black bullets in set intervals, usually trying to hit Kirby. They are known for the invulnerability: the only way Kirby can destroy Shotzo is if he picks up an Invincibility Candy first-- and that's only in a few games. The cannons sometimes descend on parasols and have a lot of different variations, but the one entering the Brawl is just your standard, stationary turret.
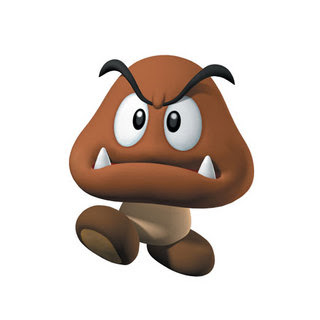
Shotzo in Brawl is a very tricky both to play as and to fight against. He can't move, first of all, not even a little bit. Completely stationary. As such, Shotzo can't really jump, either, but he does have aerial attacks. Shotzo is noticeably bigger than Kirby, being close to Mario's size, only much more round. He's also really, REALLY heavy. In fact, he takes no hitstun whatsoever: Shotzo takes knockback but doesn't flinch. He also can't be grabbed; all grab moves will instead deal damage like in SSE boss battles.

Another odd trait is that Shotzo has no situationals: that means no ledge grabbing, no downed position, no tripping, no helpless state, etc. Most of your combat will be long range, and defensive, so that stuff shouldn't be much of a problem. Something else curious about Shotzo: his projectiles are very beefy, and are in fact solid objects, however big they are. The smaller ones are eaten up by shields and direct contact with the stage, while the larger ones remain on the field for 10 seconds or until removed manually.

One more thing: since Shotzo is, for all purposes, stationary, moving the control stick around will move your barrel around, and by extension that means most moves are aimable by holding down the button and releasing it in one direction. You can also cancel aiming by pressing shield. Anyhow, you may be surprised to see this cannon enemy in Brawl, especially considering it took so long for him to join the fight. I don't think any of us were prepared for this.
]

[SPECIAL ATTACKS]

NEUTRAL SPECIAL / TRIPLE SHOT [Shotzos often employ a technique where they fire three cannonballs in rapid succession, with breaks in between. This doesn't appear in every game, and is often replaced by the single-shot versions, but this is a staple attack nonetheless. Anyway, this attack is rather complicated, so bear with me.

Shotzo does nothing until you release B, and while you hold down the button, you're free to aim your turret in any direction. This applies to most moves. Instantly upon release, Shotzo unleashes a volley of three small, dark projectiles that move rather slowly, since they have visible backspin. Each ball deals 5%, and combo-capable knockback. Since the line of cannonballs is somewhat tightly spaced, and they move at that speed, this move is excellent at blocking approaches. It has minimal lag, and can be aimed while firing, but the firing rate is moderately bad. On an important side note, all of Shotzo's projectiles will vanish in a puff of smoke exactly a Final Destination away unless specifically stated otherwise.
]

SIDE SPECIAL / RECOIL [Another aimable move (there are hardly that aren't, in fact), this attack has critical uses. Shotzo sputters for a bit, as if summoning up something big. After a brief lag, and upon releasing B, Shotzo's blaster erupts in flame and smoke as it fires a blazingly fast cannonball.

It does 10% damage and moderate knockback, but due to the force required to fire so powerfully, Shotzo experiences massive recoil. By that, I mean he'll go back nearly a full platform's length, during which time he is a hitbox dealing 8% and dash-attack level knockback.This is Shotzo's only means of moving around, so please use the attack wisely.
]

UP SPECIAL / PARASOL [Usable on the ground or in the air, this has Shotzo suddenly sprout a red-and-white-striped parasol on top of him with a puff of white smoke. On its own, the parasol will slow Shotzo's fall speed to that of Kirby's, and supply protection from aerial attacks. The parasol has no HP gauge, but will collapse and drop Shotzo in the air if hit with a strong attack. Shotzo can attack while using the parasol, and has decent air mobility. If you land while the parasol is out, it will drift away upward at an angle, becoming a hitbox that deals 6% and flinch.]

DOWN SPECIAL / MINI-SHOTZO [Shotzo looks like he's about to fire a powerful cannonball, but after that lag, he coughs up a large sphere that can be aimed; normally it is plopped down, but it can be fired up in an arc. Anyway, the ball does 7% and decent knockback, but I wouldn't recommend using this for offense. After a second left alone, the black ball unfolds-- into a smaller version of Shotzo himself! These don't have HP, but can be knocked out fairly easily, at least compared to full-size Shotzo.

Up to two mini-Shotzos can be on-stage at once, and they all behave like Shotzos do in the games: in this case, they aim at the nearest foe and use weaker versions of Triple Shot. Even though you can only produce two turrets at a time, you can create a defensive battery so strong that it's hard not to get hit if you're approaching. An indispensable move in the hands of an experienced player.
]

JUMP / UPDRAFT [This move uses the jump input. For those of you who remember Kirby Super Star: do you recall the part in one of the levels where there's this constant upward wind, and the best way up is by using the Parasol ability? Something like that happens here. After a moderate lag, with no indication on Shotzo's end (he's not causing this!), a huge updraft comes up visibly from below, across the entire stage, lasting maybe five seconds with a five-second cooldown/refresh period.

The effect is actually identical to the Flying transformation of Pokémon Stadium 2: it essentially lowers gravity for everyone and makes people jump higher, which can get pretty inconvenient. However, Shotzo, Peach, and Mr. Game & Watch are the only characters that can really take advantage of this. Shotzo will typically rise only as much as Donkey Kong's recovery, but that's enough. An important note: Shotzo can only use this once in the ground or air, no matter if he's hit or not.
]

[STANDARD ATTACKS]

NEUTRAL ATTACK / SHOT [I'll leave out the unnecessary details: this is almost identical to the Triple Shot, but with a few key differences. The attack has a faster firing rate, higher damage (7%), and increased projectile speed. That means this is less useful at shutting the opponent down and more aptly suited towards sniping, or just peppering your foes.]

FORWARD TILT / RAPID FIRE [In true turret-like fashion, Shotzo spews out miniscule black bullets, in full automatic mode. They do 1% each and don't even cause a flinch, but they are fired so quickly and can be aimed so precisely that it's hard not to get hit by them. There are a couple of downsides: one is that, due to Shotzo basically being a bullet hose at this point, the ideal range of attack is one platform, anything farther and it's just glancing blows. Also, the barrel overheats in only four seconds, stopping all fire momentarily, so it's best to use this in bursts both to keep cool and maintain accuracy.]

UP TILT / VULCAN [Now, before you get all gun-nerd on me, yes: a Vulcan is a type of Gatling gun. However, this move takes another inspiration: volcanos. With some beginning lag, Shotzo's turret aims upward and blasts out a large, fiery explosion that launches a single tiny ball extremely high in the air, off screen. The explosion deals 9% and good knockback, while the cannonball does 11% and next to no knockback. It does, however, come back down exactly five seconds after it flies offscreen, which is certainly a useful tactic.]

DOWN TILT / DRAGBALL [Ever played the popular Flash game, Transformice? As a shaman in that game, you have the ability to summon items, like cannonballs, that can launch your mouse followers to oblivion. They're called drag balls because they're large enough to drag you off he playing field. Shotzo, when you release A, ejects a Kirby-sized ball that travels rather quickly-- it doesn't deal any flinch or damage, because it is a completely solid object. As such, this move will push players who use shields, forcing them to roll or jump.

Now, since this can be aimed, and since all aimable moves can be cancelled with shield, you can fake you opponent out by making Shotzo appear to be starting this distinguishable animation, only to cancel and fire the ball at another altitude. Now, be careful: this move will not be successful every time, and has a poor firing rate. Drag balls will pull mini-Shotzos off the stage.
]

[SMASH ATTACKS]

FORWARD SMASH / SHOTGUN [This move is more powerful at close range, just like a real shotgun. Shotzo sounds a bit strained as he switches rounds, but this is soon followed by a loud "Bang!" as the cannon releases a hailstorm of buckshot, about 10 individual projectiles at no charge, each dealing 2%. Alone, each has pitiful knockback, but since they hit at roughly the same time, this is a legitimate KO move with ideal range of up to a platform.

At full charge, there are 20 pellets fired and knockback is plenty enough to KO as early as Kirby's charged smash. Keep in mind, though, that all of the pellets won't necessarily hit the enemy, so you will never get the full 40% under any circumstances. Beware of the moderate start-up lag, as well as ending lag.
]

UP SMASH / FINAL PROTECTIVE FIRE [This is where things get a little more unusual. Billowing smoke everywhere, hissing sounds are heard as Shotzo launches a very Kirby-esque missile. It's white with red stripes, and pretty cartoonish-looking, but that doesn't mean it's not going to explode and deal 12% and good knockback. It's a fairly slow moving missile, entirely destructible with 10 HP, but it accelerates soon enough to make its way into the clouds. At full charge this deals 20% and deadly knockback, complete with a faster missile, but it shares the same poor HP. This move is very potent as an anti-air move, or anti-anything; it packs a punch. But since it has such a low firing rate, its use is questionable.]

DOWN SMASH / BACKFIRE [Shotzos are built to last, so that's what they do. Because of their durability, they can pull off moves like this. Shotzo loads an explosive shell and, instead of firing it, detonates it while it's inside him. The resulting explosion would be completely contained within Shotzo's armor if it wasn't for the cannon's opening-- all of the force comes out through there; the entire 18-28% and high knockback that can blow away any foe in its surprisingly short range. And remember, you can still aim this. Just watch out for the lag on either end.]

[AERIAL ATTACKS]

NEUTRAL AERIAL / STAR BLOCK [What?! Shotzo has aerials?! With a puff of smoke, a star block exactly like the ones found on Green Greens appears directly underneath Shotzo. Its properties are obvious: it stops the cannon cold in midair, and lets him refresh his Updraft. However the block is very fragile, and can only be used once in midair unless Shotzo is hit. If the enemy is below Shotzo when the block appears, they will be shunted aside and put in a tumble state. Star blocks cannot be created again until the original one has been destroyed or after 10 seconds have passed.]

FORWARD AERIAL / GRENADE LAUNCHER [With a bit of internal whirring, Shotzo fires an explosive shell at high velocity, though the grenade is light enough that it fires in moderate arc. If the projectile hits a player directly, it causes 9% and moderate explosive knockback, but it can also bounce once before exploding on its own. This move will fire as soon as you press A; you can't aim it by holding the button down before releasing. However, it can be aimed forward within a certain range depending on how you moved the control stick before firing.

As an advanced technique, the player can also hold down the A button to delay the explosion indefinitely, potentially setting up a trap. This version will give the grenade the added bonus of an EMP effect on shields; it will nearly break any shield in a Bowser's radius. This, believe it or not, can be followed by an actual offensive strategy. Be wary of the low firing rate, though.
]

BACK AERIAL / HEAT SEEKER [Shotzo aims backward and a beep is heard. Shortly thereafter, a cartoonish missile is launched back with no velocity whatsoever. The missile's rocket activates a moment later, propelling it towards the hottest object on-screen. This could be a nearby character, but most likely it's going to track a fiery projectile and cancel it out. The missile does 8% and medium knockback, but if used well can make that irrelevant. Fire this after one of your slower projectiles and make it explode, mix things up a little. You have no shortage of targets for the missile to track.]

UP AERIAL / EXHAUST [Aiming his barrel up like a chimney, Shotzo coughs up a blast of dark smoke, inverting the controls of whoever is within the 2-Bowser radius. This would be hard-pressed to hit anyone since no one in their right mind would get above Shotzo, but if used with a parasol, the fumes will be pushed down to either side of the cannon, making the smog affect those trying to approach Shotzo. Updraft can also carry the exhaust fumes upward. The smoke lasts six seconds and is refreshable.]

DOWN AERIAL / FALL [Let's not kid ourselves here. Shotzo can't aim down even a little bit, but still needs to attack those below him. With lag equal to G&W's DAir, Shotzo plummets to the ground even faster than he would normally, as a hitbox that deals 10% and a meteor smash. Slight end lag, but nothing too bad considering Shotzo is really tough.]

[GRAB AND THROW]

GRAB / SUCTION [Shotzo's main cannon is obviously pretty versatile. In order to grab foes, hold Z and Shotzo's barrel begins sucking in massive quantities of air, pulling foes toward him from about a Grapple Beam away. The suction is escapable; all it takes is speed, but as soon as they touch the tip of the cannon, they're suctioned to it as long as a normal grab. Shotzo can use his throw while grabbing (see below), but if no one is grabbed in 3 seconds, the suction stops. Remember, I never said you couldn't, so this is an aimable grab. By the way... Shotzo can't grab edges, normally, but since you can use this move in the air, you can simulate grabing the ledge by using suction on the lip of the stage; you just have to Parasol your way up.]

THROW / FIREBLAST [Shotzo has to hold Z to keep hold of the enemy, so letting go simply allows the enemy to break free. However, pressing A or any other button while grabbing will launch the foe away in a fiery plume with 12% and strong knockback. All that oxygen being sucked in can spark a pretty serious flame. As mentioned before, Shotzo can do this even without an enemy grabbed, but its power depends on how long you were sucking in air, or "charging".]

[FINAL SMASH]

FINAL SMASH / KABOOLA

[
Shotzo has blasted open the Smash Ball! With a loud flying noise, a huge blimp flies in from the foreground and attaches to Shotzo from above, Shotzo now turned upside down. You have become the main artillery of Kaboola, the fearsome sky lord! Use the control stick to fly around freely and aim, and the A button to fire out cannonballs that each deal 15% and moderate knockback. Pressing B shoots a Gordo that acts like King Dedede's version of the move-- a potent KO tool. Or just ram into you opponents, and action which does 20% and high knockback. This "transformation" lasts 15 seconds before Kaboola disassembles and Shotzo is dropped from the air, ready to fire.]

[PLAYSTYLE]

PLAYSTYLE / DEFENSE TURRET [Shotzo shouldn't be too hard to figure out. Since he can't move without some effort, most Shotzo players will find creative ways to use all their moves in different contexts. In general, Shotzo should be played trying to keep foes at long range until they're at higher percents, at which point you should try to close the distance. Shotzo can fairly easily be bullied off the edge, but since he takes no hitstun, he can put up a very strong defense. Most of Shotzo's combat style is defined by range, and so he has a lot of different options at these different ranges.

At long range, you have quite a few projectiles at your disposal. Most of your standard attacks, like Shot and Dragball, have great sniping capabilities that can rack up damage even before the enemy has a chance to approach. It can be important, and I mean very important, to use combos and fake-outs with your shots in order to keep the enemy on their toes. Using your Heat Seeker missiles in combination with cancelled Drag Balls and Triple Shots can lead your foes into getting hit more times than they expect, provoking them to come closer to you. Shotzo tends to excel at anti-air fire.

Mid-range combat can be interesting for Shotzo. The foe is no longer at a safe distance for you to snipe at, and thus action may be required. Mini-Shotzos and Recoils are commonly used at this range, as distractions as well as escape tools. Mini-Shotzos are a great tool and should not be overlooked unlike some other Down-B attacks (I'm looking at you, Dedede). Just the ability to have two AI turrets defending you leaves you to focus on more devious strategies, especially ones that go for a KO.

Close range is where Shotzo will doing most of his knockouts. After building some damage with Rapid Fire or Mini-Shotzo team shots, Shotzo's three smash attacks get the job done really well. Shotgun, for keep-away style knockback that does its job well, but is a little predictable. Final Protective Fire missiles are really great against air, and are Shotzo's main tool for KOing aerial opponents-- combined with the UTilt, Vulcan, you can actually ignore the lag from your Up Smash by nailing the enemy with a falling projectile from said UTilt. However, both of these moves can be easily avoided by either heavy or fast foes; they're just not well suited towards those characters. That's where your DSmash comes in. Using that close range explosion, you can lure in combo fiends, only to blast them off the stage. Finally, you have your grab, which, although it has limited use, can be used both to KO and to create distance between you and your enemies.

Even Shotzo can be KOed, though. While it's a good deal harder to KO him than other characters, it can and will happen in every match. Shotzo is not going to be KOed at a reasonable percent like most people, though. He will take a LOT of damage (400%?), and that's mainly because he can't avoid getting hit. When you're knocked up in the air, consider using a shield-draining FAir Grenade Launcher, or a control-inverting UAir Exhaust. Your aerials are meant to be able to turn the tables; surprise your foes by doing something that puts them at a disadvantage. Falling on them or shooting a homing missile at them is enough to put them on guard. Chances are, though, that if you're in the air, you're on the verge of being KOed. Recovery for Shotzo is very tough to accomplish: Parasols and Star Blocks are both fragile, and if your opponent can destroy them, they will. That leaves Updraft as the only recovery that actually lets you gain height in the air; time it wisely.

Basically, if you can keep a good control over the range of your combat, and know what attacks to use at these ranges, Shotzo can defend very well against almost any attack. It's only after you excel at ranged combat, though, that you can actually go on offense, because Shotzo is primarily a defensive player in every sense of the word. Shotzo can get up to some very, very tricky shenanigans if you take advantage of your limited mobility, but movement should not be a priority, even though it's possible to achieve. Hold your position, defense turret. It's all you've got.
]

[EXTRAS]

UP TAUNT / TRACK [Shotzo will aim his barrel directly at the nearest player until you use another input. Shotzo will prioritize tracking Kirby over any other character. By the way, Mini-Shotzos mimic the main Shotzo in every taunt.]

SIDE TAUNT / ROTATE [Shotzo turns in place a couple of times, idling about.]

DOWN TAUNT / TARGET ACQUIRED [Shotzo looks alert, somehow, and beeps twice very quickly. Lock achieved.]

UP VICTORY POSE / SNIPER [Shotzo aims directly at the camera, and fires a single shot into the screen. He remains stationary for the rest of the time.]

SIDE VICTORY POSE / SEARCH [Shotzo will aim his barrel wherever you move the control stick. A nice touch.]

DOWN VICTORY POSE / HALBERD [Meta Knight's flagship, the Halberd, screams in overhead just barely above the characters, dropping off Shotzo feet first.]

LOSS POSE / TURRET OFFLINE [Shotzo stands still. That's it.]

ENTRANCE ANIMATION / DRIFT IN IN [Shotzo floats down on a nice red and white parasol, gently landing on the stage.]

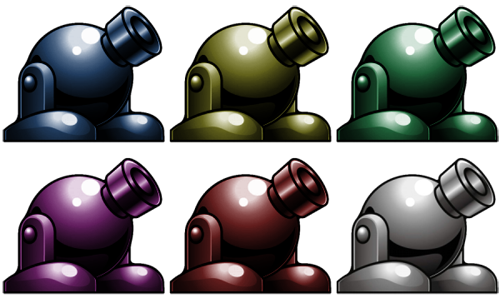
ALTERNATE COLORS / GUNMETAL


KIRBY HAT / PARASOL

[
Expecting Kirby to inhale Shotzo? TOO BAD, PARASOL TIME. If Kirby inhales one of Shotzo's parasols, he will gain the Parasol ability! Apart from constantly holding the parasol to attack with and to float with, Kirby gains the ability to use Parasol Swing! This attack is straightforward and does 10% damage, and can be held down to make the parasol spin in front of Kirby, doing minor damage and knockback to anything that touches it.]


(smirk2)


CONCLUSION / THOUGHTS [And that's the moveset; thank you for reading Shotzo, and thank you for still being in MYM this long after I announced making this damn thing. Seriously, the fact that you guys have stuck around in MYM after this long means a lot. We've been through quite a bit together. Anyway, I had fun working on this set; even if it wasn't the best in every way, I hope you enjoyed reading. And before you ask, no, this isn't my last moveset. We're just getting started.]


Nicholas1024

Smash Lord
Joined
Mar 14, 2009
Messages
1,075
Hey gcubedude, that jokeset with hats idea... it wouldn't happen to be TF2 related, would it?
 
D

Deleted member

Guest
Here we have our third set from newcomer Gcubedude, all of which being good movesets; you're truly a star for getting this many out and putting so much effort into them all. With Sothe, you don't have the insane amount of inputs you did with Micaiah or Sanaki – rather, you shed a lot of that to make way for a far more playstyle-centric moveset. You do stumble here and there, but it's still a massive step-up from either of your two previous works.

You cover tech-chasing throughout the set – it even becomes a bit of a running joke at one point, because it is slightly overused. It's a great concept for Sothe – he is indeed an assassin, and is constantly trying to set his opponent up for an easy kill by putting them into prone then chasing them up, putting pressure on them as a result. At the same time, you introduce some truly fascinating mechanics with moves like the up special – being very imaginative in thinking up moves suitable for Sothe, while also using up some of his moves used in the game [which are generally also linked to].

What I generally felt was that the original ideas were the best ones, but you do have a positive penchant for accurately depicting a character in this way; everything Sothe does feels extremely appropriate. What I consider your next step is even further expanding your horizons and getting away from the character more, as this moveset is a little tame – you don't really go outside of the comfort zone; when you do tempt it, like with the up special and [splendid] back throws, it's golden. Not to discredit this set – it's a pleasure to read and envision – but it is rather a bad habit to hold yourself back due to the character. As always, hotly anticipating the next Gcube moveset.

Of the choices given, I'm not too fond of joke sets, so I'd prefer either A or C. I know what A is; I won't give it away, but I'd actually prefer C just for a surprise. I have no idea who that character may be.

I guess this is a mini, yet I had a hard time discerning what exactly it is. I suppose it's sort of an item, where the iPad comes into play? Perhaps if there is ever an iPad item, this would be included in that for Smash as the “MYM Application.” I do like how Mendez's rib shack is in the background, how Gigaiath's image fail is there on the iPad and the writing style featuring lots of copyright symbols is kinda funky. But I have to say, not the weirdest mini we've had so far – not at all.

What everyone has been waiting for, our first Plorf set of the contest... Shotzo. Your sets can best summed up as an experience, rather than movesets enjoyable because they achieve a high level of quality or achieve something new. Over the years, you've refused to change your writing style – it always results in this quasi-confusing, semi-illiterate squabbling on random inputs about unrelated things. It also leads to absolutely preposterous inputs such as the neutral air, the mini-Shotzos [apparently a cannon is asexual; makes sense] and a random bit of magic syndrome with the “jump special,” which, as an input, is confusing in of itself.

You really make it difficult to understand the set, and that has always been your problem – the parasol offers some interesting and fitting concepts for Shotzo – what if the move, recoil, actually effected his flight pattern in tandem with his parasol? I know it can't shoot down, but with a similar function to that jump special, you could have Shotzo as a true airborne turret that can shoot itself around in the sky at will. More than just missing straight interactions – which I am all for sometimes, as interactions are become slightly overbearing – you also miss just simple interactions on a whole, and it's difficult to interpret much flow.

On the whole, all of this criticism won't be anything new to you – honestly, it seems likely you come from another planet in terms of making movesets, as you seem to aim for completely different objectives than the rest of us. I almost admire your persistent disregard for people who criticize your writing style – it is yours, that has to be said. The same could be said for your kind of ambitious lack of connection between inputs, beyond a summary of how they could work together; the playstyle section surmised this well. It certainly makes more sense for Shotzo to have this kind of moveset than, say, Solar Man or Kingdra, so it is an improvement, but I can't sense much change here. Just keep on doing what you're doing, though, because we all know that's what you want to do.
 

LegendofLink

Smash Apprentice
Joined
Feb 17, 2008
Messages
164
Location
Pennsylvania
Sothe
Sothe certainly has a good bit of thought put into his playstyle, with backstabbing being a cool concept that hasn't been done (to my knowledge) except for possibly MW's Spy set (which isn't really comparable to any normal set anyway). I also like the brutal killing intent that his attacks display, and how it is consistent throughout the set, rather than just a random throat slit clashing with the simple slashing moves used by other brawl blade wielders. I don't care for the tech chasing focus though. It feels like your set makes putting the opponent on the ground its ultimate goal, rather than stabbing them in the back for massive damage. It ends up taking away focus from your far more interesting style. I have a couple of gripes with individual attacks, such as Up Special's auto homing, but those aren't that bad. Overall, this was a very nice set with a lot of character and some very nice ideas. Good job!

Shotzo
Well... I really have no idea how to judge this. On one hand I like the creativity and playstyle, as well as the unique way of dealing with a handicap. On the other hand, a lot of the inputs seem really random, especially the updraft jump. You did manage to capture the essence of the Shotzos in the games, with the parasol, aiming mechanics, and resting on the easily destructible star blocks, but that was all that they were capable of doing in the games, and it seems rather outlandish for one to be spawning miniature versions of itself, shooting EMP granades (that were blatantly ripped off from Halo: Reach might I add), or creating suction to grab the foe or stage. It was interesting, but extremely weird. I don't know if I sould be applauding you for making a set out of a character that has no business being in a Smash game, or telling you off for the very same thing.
 

gcubedude

Smash Apprentice
Joined
Aug 15, 2009
Messages
83
@Nicholas: It's not. It's something that has hats, but doesn't really need hats. It's also on Youtube.

3D Glasses
Man, I HATE 3D. Those glasses are so annoying to wear, especially since I already wear glasses. Anyhoo, it's a pretty cool idea, but way too expensive. Plus Ganon really doesn't need more lag on his moves. Also, does it really make G&W 3D? That would be weird.

I did like the reference to the Kinect.

Shotzo
I'm surprised you were able to get so many different attacks out of a cannon. They all work well, and the whole moveset is very interesting. I like how his jump affects everyone, and it makes Shotzo a great teammate for Peach and G&W. The fact that he needs so much damage to die works since he can't move very well

Steve Job's MYM App
THERE'S AN APP FOR EVERYTHING!

I might enjoy this, except that I don't have an Ipad. It's still pretty cool, although I'm unsure if this is a Mini, or just something random.

Owl Person
So yeah, this would be the most annoying thing in the world. At least once you kill it, it's gone for good. A good, but very annoying, mini.

@LegendofLink:
I didn't originally make Sothe with tech-chasing in mind. But as I worked on him, I saw more and more moves put them on the ground, so I decided to have both playstyles (backstabbing and tech-chasing) go together.

Also, what's wrong with the auto-locking on the Up Special?
 

Rychu

Thane of Smashville
Joined
Jul 5, 2010
Messages
817
3DS FC
1908-0105-4965
Reserved For Later Commenting.
 

Junahu

Smash Ace
Joined
Nov 15, 2005
Messages
899
Location
Shropshire Slasher
Sothe:
I'm pleasantly surprised with how well you've transitioned from your previous magic movesets, to a completely physical one. Your dilligence in staying true to your characters, even when they have little to offer a set, is wonderfully refreshing.

Attacking from behind to set up a tech chase sequence, makes for a moveset I would find enormously fun to play for real, especially in free for alls, where backs are always left vulnerable. So, well done there.
This is probably the most genuine 'assassin moveset' I've read, and the more 'agressive' slant Sothe offers to the archetype fits him really well. I personally enjoyed your suggestion that Sothe quick steps away from the opponent as they roll, so that they end up with their back to you

It would have been nice to hear how he would play in 2v2 with Micaiah. I would have loved it if they work well as a team and such. 6_6 oh well..
Also, I don't think situational attacks are quite neccessary to write, unless they have an important role, or do something truly unique

Shotzo:
Before I even start I'll have to repeat the criticism that's already been levelled at Shotzo from multiple commenters, the Jump input. I wouldn't be all too fussed with him summoning a wind around him (in fact I'd support that). But the fact that it's stagewide, and your insistance that this input you perform as Shotzo is not the work of Shotzo at all, makes the whole situation awkward.
I'd also think that the ability to make starblocks should have been a Special, one that could be used on the ground and is affected by gravity (i.e. a starblock appears with Shotzo suddenly on top of it). Heck, it would have even made a fine jump.

Anyway, that's enough of my complaining about the jump. Shotzo was greatly entertaining read. His is a proudly simple playstyle, and it's nice to see sets that embrace simple, clean design. While some of the things he shoots seem a tad strange, it does seem to fit in with the odd 'unknowable' element of Shotzo. He may look like a simple cannon, but you just never know what the little guy might be hiding.
And I still enjoy your writing style, even if others don't (¬_¬)

Loved the Kirby hat, btw.
 

MarthTrinity

Smash Lord
Joined
Aug 9, 2007
Messages
1,954
Location
The Cosmos Beneath Rosalina's Skirt
MYM3's submission period has been finished for over 2 years.
(smirk2)
Really? God I was out of the loops back then =(

As a fun fact, I do keep the vote totals for each MYmini saved as "MYM3" and such on the Notepad document. MT FUN FACT :D

Also, for those who may not have seen...the Recap has been posted on the Stadium! This covers all the movesets of weeks three and four of MYM9 as well as all the minis! Don't forget to get your "MYM3" votes in ;P
 

Koric

Smash Apprentice
Joined
Feb 10, 2006
Messages
84
Location
Aiken SC


Yamato appeared In Bare Knuckle 3 as a boss on stage 4. He waits as a guard at the large building under the disguise of a shrine inside the underground tunnel. When Zan, Axle, Blaze, and Eddie infiltration the railroad and reaches the front of the shrine, Yamato will be seen in front of the building and divide himself into two shadow copies of himself to battle one at a time. When the real Yamato lies defeated, he explodes himself so that there is nothing left of him. But was that a self-sacrificial move, or an illusion? Whatever the case it may be, he's here in brawl. In regarding to his size, his height is similar to that of captain falcon.


Walking speed - 7/10
Running speed - 8/10
Weight - 6.5/10
Jump - 7/10
Second jump - 4/10
Air movement - 5/10
Fall speed - 7/10
Traction - 3/10


Neutral B - multi-shuriken
This projectile attack actions requires that the Special B button is held

Yamato will quickly throw a shuriken that travel at a moderate-slow speed. If the special button is held, he can throw the as many shuriken as long the B button is held. This attack can be canceled by releasing the special button. You can also shift the angle of the shuriken to go slightly upward or downward depending if the direction is tilted up or down. These shuriken does 1%-2% damage and can also stick to the walls and floors whenever it hits a solid object where the opponent can be damaged if someone other than the user were to ever touch those stationed shuriken. Shuriken that remains on the walls and/or floors stays for around 2 seconds before they disappear. You can also have Yamato perform a short hop during his multi-shuriken move around by tilting away or forward. After a short hop, he will continue throwing shuriken as long the special button is still held. If the controller is tilted still or altered on the opposite direction, he can still continue hop in that direction while throwing a shuriken in between the hops.

If he performs this move in the air during his accent, three shuriken will fire from Yamato heading downwards in 3 different angles in front of him by 33, 45, and 56 degrees respectfully. This attack doesn't require any frame changes from Yamato and thus he's free to perform any other attack directly after performing this air attack...however, he can't perform this type of attack again until he touches the ground.


Another thing is that the shuriken is not really a projectile but as an attack based projectile. If nothing is done to defend against the shuriken, the shuriken will hit the opponent and disappears after it takes damage. Upon connecting to a shielded enemy, it will stop and fall down to the ground where it will stick. If it collide with the enemies special attack or neutral A attack, then it will collide against the hit box and will bounced off the path scattered in a random direction away from the hitbox. It will eventually hit a surface where it will stick or go off-screen. (Yamato can be hit with the deflected shuriken before it hits the ground). If the hitbox was from a stronger attack that isn't a special attack, then the attack will deflect-back to Yamato and if it does damage to Yamato, then he will receive the damage equal the shuriken...except with a slightly boosted knockback of the enemy attack. If Yamato uses a blade based attacks to deflect a shuriken sent by the enemy, he can deflect it back to the enemy adding 6% damage to the shuriken and increase the speed depending on how strong the deflection attack is. If two shrunken collide, they will both be knocked from their path.

This attack isn't capable of killing anyone. It only has very little set knockback and no growth knockback.

Side B - Gale slice
Yamato will stop in position, slide back a little with his kodachi in place, and performs a spinning slash while moving forward while jumping upward just slightly capable of doing 13% to 20% damage. The hitbox is rather small in comparison, but the priority is pretty high and can drain 45% shield power if blocked. It could even break through the heaviest projectiles. He cannot go beyond the stage this way if he perform this on the ground and this attack can be interrupted if he's close to the ledge while in the air so that he could grab it. This attack can also defy gravity...but it leaves him in a helpless stage. (When sliding back in preparation for the attack, he cannot go past the ledge this way) When executed in the air, his movement speed after execution will be very fast, but he will also be in a helpless state thus can be used for recovery.

If the Side B was activated with a tap instead of a tilt, then he will quickly attack without sliding back first and without jumping. This however will lower the range, damage, and power of the attack by half...however this type of gale slice has an extra effect. If a tapped gale sliced were to hit an opponent during their attack animation. Instead of applying knockback, the foe will fall down face first (similar to the foe defeated in a stamina match while being pummeled) and Yamato will go through the opponent moving 3 blocks forward after the hit allowing him to hit another opponent. The damage inflicted applies normally, but also inflict 31% damage before the opponent body hits the ground completely.


The knockback for the tilted gale slice is moderate on all accounts. It can kill at 134% and launches the foe forward/upward. The tapped version is pretty hard to kill, however its max damage can be up 46% damage if it hits an attacking foe.

Down B - Substitution

Note...every warp attack cannot exceed beyond the edge of the floor and/or platform.

Yamato will assume in a stance as he waits for his opponent to attack for around 9/10 of a second. After performing this attack and if the enemy hits you, you actions will depend on the direction of where the controller pad is tilted. Most of the substitution will happen instantly when triggered.


note...if this attack is used successfully but a shadow overlaps i on an uneven terrain, then the substitution will alter itself to become even with the terrain...though it may affect the overall result of the attack. If you going to use this attack, study your location carefully. If you tilt along with pressing the L or R button, the tilt action will respond by default. Also if more than one button is pressed, the first input takes priority.


/ Nothing
Yamato will turn himself into a stun bomb while the real one appears less than one block behind the enemy. The Bomb will explode in 0.5 seconds or if the enemy attacks it. The explosion can stun the foe for a good 2 seconds. Since Yamato is directly behind the enemy, he can get a free hit or throw...depending on the situation.

/ Up tilt
Yamato will vanish completely and will reappear from above his position as he performs his air down attack as he descends directly downward. This attack has a great boost as it can does 9% to 16% damage to the foe and sends the foe forward in a downward angle. This counter has some killing power. If there is a ceiling or a solid object in route of his attack, then he will reappear just below the wall or object making the attack counter more quickly.

This attack has a good growth knockback power and moderate set knockback and can kill at 114% damage capable of launching the foe forward/upward.


/ A held
Yamato will vanish leaving a wind blast with a little sakura leaf that will push the opponent back fairly. The fact is that he didn't move to another position, but leaves him unseen to the mortal eye...in a way. He will be covered in a disappearing cloak making him hard to see from mortal eyes (like that to invisible cloak item from melee). This effect can last for 16 seconds before he returns to normal or when he's defend and/or hit by an attack. Executing an attack will shorten the cloak by 7 seconds. (Shuriken attacks does not apply). This effect doesn't just make him semi-invisible, but it can also make him unable to make a sound for some movements and for his special attacks. When he crawls on the ground or clinches into a wall...or uses his shuriken attack or his shadow dive setup, they won't make a sound when they are executed. The shuriken cannot be seen nor the black pit used in shadow dive during the invisibility period. Like melee, the cloaking will only make him semi-invisible, however by stop during crouching or cling into a wall or ceiling, it will make him completely invisible until he starts moving.

/ Z held
His body won't be ready to counter an attack...but he will be ready to counter a grab. When the opponent grabs Yamato, He will violently explode and the real one will appear from above his position. This attack is the strongest of his counters.

Both the set and growth knockback are very good and it can kill at 84% and the damage done from the explosion will always do 20% damage launching the foe upward.

/ Away or forward tilt
Yamato will reappear in two shadow copies of himself spacing itself equal the range of his Gale slice attack (these copies can even defy gravity). When the shadow copies are aligned, they will each perform a Gale slice attack doing 8% damage each. They can even appear in the middle of a solid object or wall. After they cross each other, they can't cross walls and solid objects then. (Yamato's anti-gravity stops when the attack ends.) Depending on the direction of where its tilt, the shadow clone will vanish in a cloud of smoke. If it’s tilted left, then the shadow on the right will vanish and Yamato on the left will return to his stance and vice versa if the controller is tilted to the right before the substitution trigger. This type of gale slice allows both Yamato and the shadow to drain 40% of shield power each if their attack blocked.

Except for the damage, this attack has the same priorities as the Gale Slice attack. However during this attack, Yamato will have invisibly frames similar to the startup of Jigglypuff's rest. Nothing can damage them nor harm them until the two Yamato finishes their slice attack.

/ Down tilt
Yamato will absorb the damage completely and starts flashing red for 0.8 seconds. After the time past, an explosion will surround him that can cover decent range and cannot be blocked. The more damage he takes since using the attack, the higher the knockback is delivered if the counter attack hits. Also the total damage he received will be delivered in full multiply by 1.5.
Depending on how much damage he took before exploding, this knockback power is varied.
1 to 6 damage - weak...similar to toon link's bombs
7 to 16 damage - decent...like din's fire
17 to 26 damage - strong...like snake's c4
27 damage or higher - lethal...like melee Jigglypuff's rest.

The range of this attack can cover over a small stage builder block. All of the explosions can launch the foe mainly upward/forward.

/ L or R held

Yamato will reappear either let or right from his position 3 blocks away depending on which button is tilted. (If there is no solid ground between the distances of teleport, then he will just teleport to that edge, or ledge of that area.) After just reappearing from this substitution he will be on a standing position, he will be free to move almost anytime after.

If he was grabbed during this counter, he release time will decrease by twice the normal rate and instead of a grab release, he will reappear slightly away from his position. The decoy will then become a bunch of sakura leaves and will disappear...Yamato will still take damage before he released himself from the enemy's grab/throw attack.


/ B button tap x 2

The B button is tapped twice for this to work.
Yamato will reappear two blocks behind his decoy and throw three shuriken at once at three different angles three times doing 1% damage each. One straight ahead, one slightly going downward, and one slightly going upward.


Up B - Shadow dive

Yamato assumes a statue position as a black hole appears from below him and consumes him completely. Almost instantly, a second black hole will appear from the front of the enemy and will appear half way through the hole performing a straight horizontal slash on the opponent’s legs doing 15% to 24% damage. Afterwards he will hop slightly upward out of the hole allowing the hole to disappear. If the A button was pressed at anytime during the set-up duration of the attack, then his attack will change to Yamato performing a rising slash as he rises from the hole,. This attack makes him jump about 2 stage builder blocks while extending his blade forward capable of hitting 6 times doing 2% damage each and 8% damage on the last hit. After this kind of attack, he will be on a helpless state.

If this attack is done in the air, then he will instead move at a line with great accretion like wolf's side B attack except he can travel in 8 directions (he cannot do damage this way). At the end of his acceleration, he will be in a helpless state. This attack can be canceled if he overlaps a ledge of a stage allowing him to grab it. When he about to hit a wall, floor, or ceiling, he will create a hole just before impact and will submerge in it. Again, after diving into the hole, he will instantly rise from the hole attack the opponent or if the A button is pressed during the entire attack phase, he will jump as he slash really high. The delay time by holding the B button can also apply.

The set knockback for both versions of Yamato's shadow dive is pretty high on its set damage and range, but low on its growth knockback. It can kill at 187%. Regarding on how the opponent is launched, the normal version launch the foe downward (if they on the ground then it will slightly launches them upward). The last hit of the upward version launches the foe forward.


Most of Yamato Attacks are a bit low in range, but in average they are quite decent in power and have good recovery time. His sword attack has great priority against projectiles. Its capable of deflecting a few object projectiles and negating energy projectiles.

Standard attack - chain punches
Yamato can jab up to 3 times for small damage
First hit- A simple right hook - 1% damage
Second - A small left jab - 1% damage
Third hit - A tilted straight kick that may cause tripping at a moderate damage percentage
4% damage with a higher knockback.

This attack has poor growth and set knockback....the first two hits could launch the foe upward/forward and the last hit launches the foe mainly forward/downward

side attack - vertical slash

Yamato swings his kodachi downward covering a small range small range doing 9% to 13% damage. This attack is capable of negating heavy energy projectiles and go through object and small energy projectiles. If the center of the kodachi connects to the foe, then it can add more power into the attack. This attack has a small set and a moderate growth knockback, thus this attack may kill around 133% while launching the foe forward/upward...103% if the center of the blade connects


Down attack - ankle slash

He will crouch down and swings his blade once diagonally to the level of the ground doing 5%to 11% damage. This kind of attack can go through a small and object and negate heavy energy projectiles. If the center of the kodachi connects to the foe, then it can add more power to the attack. It has a small-medium set and growth knockback and can kill at 157% (112% if the center blade connects)


Up attack - flip kick

Yamato performs a small backflip with his legs extending as he attacks doing 7% to 13% damage. This attack is a semi-evasive move of which he can attack while moving back possibly avoiding small range attacks or low attacks. During the first half of the hit frames before his legs are upward, the opponent can be launched upward if it hits...any time later if the attacks connects between that and the last of the hit frame, the opponent will be launched behind Yamato.
This attack has a moderate set knockback, but has a low growth knockback rating overall.

Air neutral - Jump kick
He can perform a karate like style jump kick from his position doing 6% to 11%. Similar to jigglypuff's neutral air, the attack stays on a single or similar frame longer than his other attacks. As long he’s in a kicking frame, his hitbox will remain providing little knockback. Excluding the first hit frame of this attack, there is no growth knockback from this attack.


Forward air - air slash
While in the air, Yamato can perform a cross slash in the air doing 10% to18% damage. Contrast to his other attacks, this sort of attack has a very fast attack rate, but moderate-slow attack recovery. With moderate/high set and growth knockback this attack can kill around 119% and launches the foe forward. This is a blade attack so it’s also capable of canceling and negating certain projectiles.

Back air - double kick
Yamato can perform two kicks while in the air as he turns around. The first kick uses his left leg which has very low knockback power that can do 6% damage, but his second kick has a decent knockback power capable of doing 8% damage and can kill at 155%. Both of the attacks are executed moderate, but can recover from the second kick fast. Both of the kick also launches the foe forward/upward.

Up air - flip kick
Yamato can perform a flip kick that has a hit range covering the front and above him doing 7% to 11%. Its short in range but it has good set and growth knockback and can kill at 105%. Of all of his non-smash attacks, this one has moderate attack speed and attack recovery.

Down air - Spinning blade
Yamato can perform a multi spin attack with his sword. He will spin up to 5 times in moderate speed before he returns to normal doing 8% to 15% damage. The time for this attack all together pretty long. If he hits an opponent, they will travel far and Yamato will bounce once after impact. This is a blade attack so it capable of negating and canceling certain projectiles

The growth knockback for this attack is pretty moderate and could kill at 132% as it launches the foe mainly upward/forward. Between the substitution + up and the spinning blade attack, this version is the weaker of the two.

Dash attack - Sliding kick
Yamato can crouch to the level of his right knee and slide while stopping as he extends his left leg doing 6% to 10% damage. This attack is semi evasive as it allows him to dodge even lower than his original crouching animation during this attack animation. Also this attack has a little/moderate knockback capable of killing at 175% as it launches the foe forward/upward.

Grabs...
When he grabs, he holds the foe with his left arm while his right arm (armed with a kunai) crosses above his left with his back of his right fist facing against the foe. When executing a dashing and/or turning grab, his range will increase by 1.5/10 of a stage builder block.

Pummel attack - quick strike

Yamato quickly stabs the foe with a kunai. He damage the foe for a single damage, however the attack is very quick like samus's grapple attack.

Forward throw - thrust kick
Yamato will strike the opponent with a quick and decent kick doing 4% to 8% damage launching the foe forward.
Because this has a high set knockback over its growth, this kind of throw can be chained again and again until the opponent reaches moderate damage for some characters.

Back throw - slice

Yamato quickly turns around with the foe and performs a vertical slash attack with a kunai doing 9% to 13% damage as he sending them flying on that direction before he turns back around to his standing position. This attack has a low/moderate knockback that can launch the foe behind him capable of killing at 145%

Up throw - rising knee

Yamato performs a small leap upward with his knee exposed striking the foe and sending upward doing 4% to 7% damage. There is only a set powered knockback in this throw launching the foe upward.

Down throw - Ibuki drop

Similar Kirby’s up throw, Yamato grabs the foe and jumps about three stage builder blocks high. He then descends with the foe with their heads facing towards the ground. The opponent head will smash on the ground along with a wave of flames covering the body as Yamato leaps upward after impact doing 15% to 22% damage. This attack has very good growth knockback power as it can kill at 92%, but during the attack process, it will still count as a hold and the foe can still escape the ibuki drop. Yamato will still carry out the attack until its finish, but only takes 1% damage from the recoil.

Ledge attack
Yamato will quickly get back up while swinging his kunai forward doing 4% damage with small knockback

100% ledge attack
After he slowly gets back up from the ledge, he performs a straight crouching kick before he gets back to his feet completely doing 7% damage with small/medium knockback.

Recovery attack (back facing the ground or tripped position)
He attacks by spinning his body starting with his legs doing 3% damage each. The animation is similar to sheik's down smash attack

Recover attack (body facing the ground)
he first gets on his arms and spins around once while extending his legs to kick at all sides doing 2% damage each before he stands up completely.

Up Smash - Upward slash
Yamato unleash his blade and slice upward with quick speed doing 15% to 19% damage. It launches the foe straight upward with a high growth knockback rating capable of killing at 98% uncharged. The traction of this attack is very poor coming out as a result of a DACUS. This is a blade attack so it can negate and cancel certain projectiles and can launch the foe upward/behind from your position.

Forward Smash - Rising spring kick
Yamato will begin to roll once slowly. After the roll, he extends both of his legs hitting anyone standing nearby or above his position doing 18% to 27% damage with a very high set/growth knockback rating capable of killing at 83% uncharged. After the attack he will then lay in a tripped position. The attack is a semi-evasive move. Yamato body will evade most high attacks and assume a very small size similar to Samus's morph ball form until he attacks and you can perform whatever action to evade while in a tripped position. Its launch power can send the foe straight upward.

Down smash - Spinning slash
Yamato will spin around once as he strikes in both directions with his kodachi. While attacking, he will also emit two shadow images to attack after himself. The hits that Yamato and the first image does 4% to 5% damage and almost no growth and little set knockback...however the second image is capable of sending the foe quite far doing 15% to 18% damage. The last shadow image attack has a good knockback capable of killing at 112%. This is a blade attack so it can negate and cancel certain projectiles and can launch the foe forward/downward.

You will most likely return to your normal stance before the second image attacks so it could be a good time to follow up with another attack.


Final Smash - Unseen horror

Yamato will throw a smoke bomb into the ground beneath him. The smoke will quickly consume a decent portion of the field around him...about the size of Luigi's negative zone. The smoke screen is different than the average smoke...when someone is near it, it will drag them inside it where they cannot be seen. After 5 seconds, the smoke screen will disappear along with Yamato and everyone else who is trapped with him.

Not a second later, Slash sounds will be heard at the stage for up to 9 times every 0.7 seconds as the trapped opponent will rake up 5% damage for each slash sound heard even though the opponent nor yamato cannot be seen. At the ninth slash, the screen will flash white for a quick millisecond. At that point, all of the opponents what was trapped will reappear at a random position of where a bob-omb would spawn at a sudden death match with a Yamato clone times the number of victims as they slash the foe/foes downward to the ground with a killing knockback power. The real Yamato will reappear from the same place where he first executed the final smash.

This attack only launches the foe downward to the ground...if you want to kill the foe, execute the final smash outside the arena grounds and trap someone there.


Yamato is a fast and decent character overall. His speed and attack recovery rate for over half of his attack are abnormally high...but not Metaknight fast. His attacks are pretty short ranged attacks but with his good overall movement, he can easily get around the field. His main playing field revolves around the ground and close range. His range is very limited while in the air, however he has more killing potential in the air than his non smash attacks on the ground. His special moves generally behave as either a counter attack or as the offensive, can evade during or before an attack. However you act on Yamato depends on you. To add along his advantages, he can behave either offensive or defensive.

He has the ability to crawl on the ground to easily execute ground attacks. He also has the ability to cling into walls and into ceilings multiple times for as long he can and crawl around the walls and ceilings as well...however he cannot perform a second jump after he gets off wall or ceiling. He is also able to use shuriken while cling or crawling on the walls or the ceilings. When clinging and crawling around, he can only cling for up to 6 seconds in total before he loses his grip...otherwise it would be considered as stalling. You can only get out of the wall by pressing the jump or shield button. It might get some used to, but it can save you if used properly


Pong...or something like it

If it would seem that your opponent is getting bold in his actions to go even as far as to deflect your attacks. Then you can try to get him to play this little game. He deflects your shuriken and you used the vertical slash attack to bounce back. As you guys constantly deflect the shuriken, the shuriken itself will become faster and more powerful with each strike. For example, if it hits the foe after the shuriken being deflected 10 times, they may receive 35% damage with heavy from the deflected hits gathered in total.

Playing the vanishing act

Yamato has the quickest counter attack in the game as it assumes its position just after the attack has been inputted. He has multiple options to keep the opponent guessing what will he tries to guess what you would do. Will he try to shield break, Will he attack from above, and is it safe to grab him? Though this attack is risky to execute, this can be a great way to mindgame your opponents. If you intend to use his vanish cloak, it could be a good idea to use it to his advantage. You can jump, cling, crawl, and use your special attacks without worrying about being heard. It’s easy to confuse your opponent and wait for a chance to hit...but try not to throw yourself off the arena or allow your opponent to spot you easily. Your eyes are mortal is it not?

Freelance traveler

He can almost cling and crawl on just about anywhere on maps that has a floor or a ceiling (if you count the underside of a standard floating arena). Also regarding where he's at when he loses his grip, he can just get back to the arena by using the shadow dive towards the ceiling or wall. Also if the stage you on has wall below the ledge, you can use that chance to spam his shuriken to knock them back a little attack before you loose your grip. Also keep in mind that if you were to fall directly beneath the stage due to some folly (for example the Frigate orheon stage flip) you can still recover by either double jumping to cling to the ceiling and crawl back to the top of the arena, or use shadow dive and connect to the ceiling to attack the foe and recover at the same time.

If you fighting someone who is pretty spammy in ranged projectiles like putting up with pit's arrows or Falco's blaster while you're far off the arena...excluding the A and down substitution attacks, he can also recover by countering the foe's projectile. When he counters, he can warp a certain distance depending on the attack selected by the user regardless of the distance between you and the spammy foe.


Damage content

Because of his low to moderate set knockback, high damage rating, and quick attack recovery in most of his attacks, he is able to accumulate damage one attack after another...and some in a chain of attacks. He could chain a DUCAS attack from two forward throws and could follow a up smash + air shuriken with his aerial down attack. There are many ways to combine multiple attacks when the opponent is at low to moderate damage...or maybe if you can, play a few mindgames and/or tech chase the opponent for fun.


Up taunt
Yamato will take out his kodachi and sharpens it a little with a kunai...after that he will place his kodachi back into his sheath.

side taunt
Yamato will take his kodachi and points to the foe and speaks "is that your best" in Japanese

down taunt
Yamato will sit down in an Indian position and bow his head once. After that he will rise to his normal stance.

special taunt - self kill

Note - this taunt cannot be used unless it’s a stock or stamina match (on stock you must have one stock left)

This can be triggered by rapidly pressing up on the control pad. When successful, he will go into his statue pose and spins around several times. After that he will crouch down the player and cast an explosion around himself sending himself upward doing 400% damage with endless knockback of the highest priority....if he hits a ceiling or wall straightforward, then he will bounce to a different angel. He cannot recover at any case after he uses self-destruct.

Hidden entrance animation

Note...this can only happen if it’s a three stock match

This can be triggered by holding the L and R buttons when selecting Yamato. When successful, instead of his normal entrance (jumping from a black hole and takes out his kodachi) he will appear from thin air and go into a statue pose emitting two shadow clones. Two of the Yamatos will jump into the front layer of the stage background (like Pokémon trainer) to watch the fight. If Yamato lost a life, instead of a respawn platform appearing, the next Yamato from the background gives the signal to the foe and jumps from the background to the battlefield to fight. If Yamato hits a foe with a Gale slice attack, substitution B, or substitution left/right, the Yamato spectators will signal the screen with quick thumbs up.

gale slice taunt - Indian stance.
After a successful Gale slice hit against the foe from its tapped effect, after sliding through the foe...by holding the down taunt button before the attack recovery animation, he will assume a sitting Indian position with his head facing down calmly. He will get out of the taunt upon releasing the controller pad.

...a perfect way to finish a stamina match
 

Kholdstare

Nightmare Weaver
Joined
Oct 10, 2008
Messages
1,441

That's right- the fast-paced zombie killing action is coming to Brawl, in the form of an all new mode called Zombie Siege! It's much like multi-man Brawl, in which you have hordes of enemies coming at you. Instead of wireframes, however, you are being assaulted by the undead!

When you select Zombie Siege mode, it starts out like a regular Brawl, with you selecting four characters. However, you may notice the character select screen is splattered with blood and has a dead looking tone to it. After your four characters are selected, they are dropped onto a stage. These stages are not like Brawl stages, however. The smallest of these are the size of Temple. The stage is composed of a central structure, such as a lighthouse or temple, two open spaces on both sides, and plenty of walls and nooks, but no place no one on either side can't get to. There are many items, especially healing items, in places with good defense, such as inside the structure. Only the four "Survivors" can access these. They also can spawn around the field in other places. Now, at the center of the stage is a gimmick, usually a generator or radio, that makes a lot of noise and or light. If this is activated by a character using their Neutral Special on it, it starts up, attracting the horde...

Now the fun begins, because undead enemies will come at the Survivors for the rest of the match. A clock will start, going from 0:00:00 and up, which will tell you how long you've had the "crescendo event" going. It keeps on ticking up until the Survivors are all finished off for good. They each have one stock by default, but like other stock matches you can increase it up to 99. Best times on a one stock match won't be recorded on a match with different stocks.

The point is to survive. Survive as long as you can. Conserve your items until you absolutely need them. This seems easy, right? Don't think so. The horde is deadly and bloodthirsty. Speaking of the horde, it is composed of any character classified as undead. Minions, such as Kel'Thuzad's Ghouls and Infected's Common Infected are the most common enemies. They have level 3 AI. You'll also constantly counter "Special Undead", such as Romero and Kel'Thuzad himself. These are notably deadlier, as they have level 7 AI. They can't use items like the Survivors can, though.

Of course, that's not all. This mode has online play as well. One team will be Survivors. The other? Four player controlled Special Undead! The Special Undead's goal is to make sure the Survivors die. Instead of a timer going up, they have a timer going down. Once the timer goes down to 0:00:00, the match ends. If a survivor is still alive, the Survivor's team wins. The time is relevant to the amount of stocks- one minute per stock. Some characters are more specialized at doing this, such as Cairne. That's why the Undead need to give them as much hell as possible. Yes that was a pun. The Special Undead have a ten second respawn timer and take 1.5x the normal knockback and damage than they would in a regular Brawl. This somewhat balances them out. The Special Undead are:

Death by Hyper_Ridley
Undead Hero by Dancingfrogman
Eddie the Head by Sonic the Baron
Arthas by Chris Lionheart
Ryuk by MasterWarlord
Richard by SirKibble
Hades by BKupa666
Poison Zombie by Negi-kun
George A. Romero by KingK.Rool
Wallmaster by SkylerOcon
Dead Hand by Wizzerd
Kel'Thuzad by MasterWarlord
Scarmiglione by UserShadow7989
Skeleton by Axx o Ninn
Infected by Kholdstare
 

darth meanie

Smash Journeyman
Joined
Jun 6, 2008
Messages
452
I Hate Getting Behind On Comments

I've been QUITE busy as of late, as you all may have noticed by my bleak absence from the chat lately. I have caught up on several sets though, and I'd love to tell you all exactly what I think of them all.

Midorku

Midorku does have a nice core move to base everything he has around, and has a nice selection of moves to base it around. The suction effect as a KO method seems to be a decently effective one, and the moves to assist it are generally both in-character and effective.

I don't like how many of his standard attacks, especially the aerials, seem to fall short though; they don't seem to add too much to his primary game, and sort of hang on like this secondary moveset that nobody really wanted. They don't fit together terribly well, and they don't seem to have any character to them. These basic attacks seem as generic as can be, and they don't tell me anything about his character or how he should feel like playing.

Overall though, the base concept is one f you better ones as of late, although I don't like the awkward ten second per stock limit on usage of the move.

N. Brio


Ah, Warlord returns again with a relatively delightful moveset. N. Brio is a Warlordian set through and through; N. Brio takes a couple of basic concepts, and builds and builds on options for them until the moveset can't help but work perfectly. You don't let anything get in your way as you pursue further options for your character. Why does N. Brio's ray gun trip his enemies? Why not? Normally, I'd question the characterization of it all, but the snide, malevolent, thoroughly mad scientist character manages to bring it all together into something believable.

The sticking goop altogether reminds me of Nrvnqsr Chaos, and in a rather good way. N. Brio takes the concept I had, and does a whole lot more with it than I did with just a combination of knockdown moves and excellent melee range to take down foes. The addition of prone into the strategy was an excellent touch, and makes me wonder why I never realized the potential it had in Nrvnqsr to stack with the goop; he already had moves to knock enemies prone, and enemies who are prone in goop lose almost all their options while still being stuck prone where familiars can attack them, and I'd edit that in if I believed anyone would read it.

Then of course you manage to top off what is already a perfectly functional and interesting moveset with a transformation that plays into the strategies he already has while adding depth to other areas of his game. Some of his moves feel a bit off though, and while no one can fault you for using A attacks, that so many of them involve the ground is a bit off-putting. The fact that you managed to let him tie back into the main moveset and the already impressive grab game was an added bonus.

I do feel that the playstyle section you wrote didn't do this moveset all the justice it quite deserved; talking about different individual strategies and really sectionalized what was already very continuous.

Needless to say, I absolutely loved this moveset, and it's probably my favorite of the contest yet. It feels like a moveset from MYM6, with all the ambitious and courageous ideas we've seemed to have forgotten while keeping all the modern sensibilities that we use now. Well done indeed Warlord.

Sothe


Despite making a moveset for a completely different style of character than your last two, your latest moveset still has that signature combination of sensibility and creativity that makes your movesets fun to read, and I do say that it does make me feel good to know that people can MYM their own way while still making good sets.

Sothe definitely has a lot of good stuff that I like; backstabbing is a fun concept that hasn't been seen since Spy in MYM7 as I last recall, and Sothe does a lot more with it. I think that while the tech-chasing is nice, it seems a little overemphasized when he has a lot of other amazing stuff in his moveset, from invisible projectiles to that brilliant Up Special gimp that he's got.

I do feel that far too many moves are overly focused on giving him a bonus for when he's hitting an opponent in the back with them. It ends up watering down the effect when almost every move gets a bonus. More moves could have been committed to other interesting parts of his game, like tricking the foe into exposing his back.

This is a moveset that feels like an assassin through and through though, and manages a very aggressive and unique style, and that's certainly praiseworthy. It's easily my favorite set of yours so far too.

Shotzo


First off, let me say that I don't mind the whole Up Special / Jump thing because, really, what else could you possibly do there, and the combination of the two interactions is both intuitive and pretty clever. The only complaint I could levy is that the button inputs feel a little weird, but that's hardly a major issue is it?

Now, I am a little impressed by what you managed to pull out of this character, and the number of projectiles you made without feeling like you were really repeating yourself. Some may have had similar function to others, but it still did decently.

His constant flinch resistance also makes his close ranged combat much more interesting and allowed for his game there to be pretty fun. The use of blocks was also nice, and like Junahu said, it is weird not seeing it in a Special input.

All in all, Shotzo isn't a mindblowing new set, but you made a set for Shotzo, and it's actually capable of standing up for itself. That's something to be proud of. This set really feels like a plorfset, but somehow I actually found it more than tolerable.
 

MarthTrinity

Smash Lord
Joined
Aug 9, 2007
Messages
1,954
Location
The Cosmos Beneath Rosalina's Skirt
And now for the results of MYmini #3: 2010 Lookback...

1. Tik Tak Tribe by Hyper_Ridley (6 votes)
2. Darkslash vs. The Aliens by tirkaro (5 votes)
2. Deepwater Horizon by MarthTrinity (5 votes)

Baby Seal/Hype Dog by half_silver28 (1 vote)
The MYM App by SteveJobs (1 vote)
Dream Machine by Neherazde (1 vote)
Owl Person by n88_2004 (1 vote)
Matthew Patel by TWILTHERO (1 vote)​

And that's all! Don't forget to check up on the new MYmini for this week! As always, thanks everyone for participating!
 
D

Deleted member

Guest
User Rankings Week #4

Welcome to the User Rankings! Every Monday, I'll be compiling the entire of the last week's activity in the thread and showing off, just who is the most active member? The point of this exercise is to recognise the most dedicated among us – those make your movers who are currently pushing the boundaries, as well as highlighting all movesets made by them.

To get on this list, you need to have made a moveset in this or a previous Make Your Move, as well as having posted in the Make Your Move 9 thread. The cut-off point for tallying is 12AM on Monday; other removals or changes are at my own discretion. The breakdown of points is as follows:


25 points for a Moveset
15 points for a Joint Moveset
5 points for a Secondary Submission
4 points for a Comment
2 points for a Secondary Submission Comment
1 point for a Regular Post
+Regular Posts do not stack
+Secondary Submissions are MYminis, Joke Movesets and other miscellaneous submissions

Compared to last week, this one was fairly quiet. It also provided us with our first high-placing tie - between myself and gcubedude. I actually didn't have any new sets this week - largely my score was comprised of comments for old movesets. Gcubedude commented on pretty much everything released, as well as posting a fine moveset with Sothe - marked by mostly everyone as rather a breakthrough. Massive congratulations to him for being the first person to cross the three-hundred mark in our overall rankings! Rounding out the top three is Warlord, posting N. Brio as well as a slew of comments, covering many, if not all minis posted this week - which were truly the highlight of the week.

Remember to check out the stadium to find all of the sets mentioned.

Overall User Rankings


Points: 93, Movesets: Muk, Auron, Wiz & Kupa 2, Pyro Jack, Jack The Ripper

Points: 93, Movesets: Micaiah, Sanaki, Sothe

Points: 63, Movesets: Victreebel, Fat Zombie, N. Brio

Points: 30, Movesets: Nattorei, Electivire, Nrvnqsr Chaos, Toxicroak

Points: 26, Movesets: Miroku

Points: 25, Movesets: Shotzo

Points: 24, Movesets: The Prince, M. Trinity

Points: 23, Movesets: Tetris, Harvey Moisewitsch Volodarskii

Points: 13, Movesets: Mr. Minecraft, Pokémon Breeder, Sarkhan Vol

Points: 13, Movesets: Diglett, Penny Gadget / Inspector Gadget, Blaze the Cat

Points: 8

Points: 6, Movesets: Gigaiath

Points: 6, Movesets: Jalorda

Points: 6

Points: 5, Movesets: Ganondorf Dragmire

Points: 5, Movesets: Dante

Points: 5, Movesets: Goruugu, Aianto

Points: 4, Movesets: Ulgamoth

Points: 3, Movesets: Dark Samus, MegaMan.EXE​
 

darth meanie

Smash Journeyman
Joined
Jun 6, 2008
Messages
452
15 Points for a Joint moveset? Seems rather silly, as it's not like you put in less total work, or that the moveset's value is somehow split between the two writers.
 

gcubedude

Smash Apprentice
Joined
Aug 15, 2009
Messages
83
My first MYMini!

Minions

Minions are like Assist Trophies and Pokeballs in that they're characters that are summoned to aid the summoner in battle. However, unlike AT's and Pokeballs, which are always random, Minions are always the same, as long as the same character picks them up. When a character opens a Minion box, they will always get the same minion, but that minion will be different from everyone else's minion. In other words, each minion is character specific, just like most Final Smashes and Specials.

Minions come in Crate-sized boxes with a Goomba picture on the front. The box can be picked up and thrown just like a crate, or it can be attacked, in which case the one who broke it open will receive the minion. Most minions will stick around for about a minute, aiding each character in a unique way. Some minions follow the character, but are usually limited in jumping ability. They also cannot grab ledges, further hindering their recovery.

Since Brawl has 35 characters, not counting all of the MYM characters we've thought up, I'll only show 5 minion, to give an example of what this item does.

Mario's Minion: Toad

Toad will pop out and quickly run beside Mario, staying on whichever side of him that has less enemies. By pressing a certain taunt input, Toad will give Mario an item, depending on which taunt you used. Simple, right?

Not so much. Toad's a cheapskate, and wants to make as much money as possible while helping Mario. Each item he sells costs a certain amount of coins. If you look at Mario's damage percentage, you'll notice a coin count has been added near Mario's damage (This uses Super Mario Gold Coins, so they're separate from Brawl Coins). As Mario uses his moves, he automatically receive coins from his enemy at a rate of one coin per hit. This makes moves like Dair and Up Special great at getting a bunch of coins.

When you've collected enough coins, press a taunt button to get one of the following items:
Up Taunt: Mushroom (5 coins)
Side Taunt: Fire Flower (10 coins)
Down Taunt: Starman (20 coins)

On a side note, if you try to buy an item from Toad when you don't have enough coins, Toad will get angry and cause Mario to suffer lag equal to a Warlock Punch as he yells at him.

Luigi's Minion: Professor Elvin Gadd

When E. Gadd is summoned, he runs to Luigi and gets right behind him, pulling out his Poltergust 3000. Now, when Luigi charges any Smash attack, E. Gadd will use the Poltergust to suck up his opponents at a rate of double Dedede's Inhale. Since he's in the background, however, he'll never suck anyone into the vacuum, only pull them closer to Luigi. This makes it harder for opponents to dodge Luigi's Smashes.

The vacuum wave will reach up to 1 Battlefield platform away, and also about .75 Ganons high. The Poltergust can also be used to bring items and coins toward Luigi, although this also will make projectiles thrown by the opponent travel faster toward Luigi.

Also, if Luigi should jump to a different platform, E. Gadd will use the F.L.U.D.D. to get to the same level as Luigi, using either the Rocket or Hover Nozzles to reach Luigi. This allows E. Gadd to easily survive the whole minute until he has to leave.

Bowser's Minion: Goomba

You should have seen this one coming a mile away. Goombas act like they do in Bowser's Inside Story, rallying behind Bowser before charging forward. A dozen Goombas will dash forward at Ganon's run speed, at a rate of 1 per second. They run until they hit someone/something, be it a wall, shield, or person. If they hit someone, they deal a measly 8% and fall off screen. They also die instantly if they are stepped on.

Just like in Bowser's Inside Story, Bowser can set these Goombas alight using his Fire Breath. Doing so make them run at double their usual speed, and deal 16% with a fire effect upon hitting the opponent. They also cannot be stepped on, instead dealing 4% with minor knockback to any enemy who touches their flaming heads. Fire Goombas also do much more shield damage, and it only takes 3 to break a shield.

Donkey Kong's Minion: Cranky Kong

Cranky acts as DK's minion in Brawl (even though he would argue otherwise). He appears in his rocking chair, complete with his cane. If DK goes up to Cranky and uses a taunt, Cranky will give DK a balloon, which will appear near DK's damage. Balloons are to Donkey Kong Country what 1-Up Mushrooms are to Mario Bros: they act as your life count.

In Brawl, they don't give you an extra stock, but they do save your life. If DK has a balloon and reaches the bottom blast zone, he'll use the balloon to lift himself back on stage. While floating, DK remains in the background until he lands on stage. Once you get near the stage, you can move DK left and right to drop him off wherever you want, but a 3-second timer will appear over the balloon as soon as you float over land. If the timer reaches 0, the balloon pops, causing DK to automatically return to the stage. Press A or B to pop the balloon yourself and fall back on stage.

Cranky lasts for 1 minute or until DK has used 3 balloons. During this time, he remains in his chair, rocking back and forth slowly. If some young whippersnapper (read: any enemy) comes too close, he'll violently whack them with his cane, dealing 11% with medium knockback. He'll also whack DK if he asks for a balloon when he already has one.

Snake's Minion: Metal Gear Mk. II

Snake's minion of choice is the Mk. II, a little robot that allows Otacon to communicate with Snake and provide assistance. Like most minions, the Mk. II will roll along beside Snake. When Snake uses any Standard or Smash, the Mk. II will whip its cord forward, producing an electric shock around the same area as the attack (this includes the disjointed areas; I'm looking at you, Utilt) This happens as soon as A is pressed, with no lag whatsoever. The shock paralyzes for a whole second, allowing Snake to hit enemies with even his super laggy FSmash.

Additionally, Snake can take control of the Mk. II by pressing Down Taunt. During this time, Snake will crouch down and pull out what looks like a Playstation controller. Mk. II moves at Mario's run speed, and only has a ground jump. Pressing A will cause it to shoot its cord forward 1 stage builder block, dealing 5% and stunning anyone it touches for 2 seconds (one if they button mash). Press B to return control to Snake, whereupon the Mk. II will wheel itself back to Snake's side. Be careful; during this time, Snake can be attacked during this time. If he is attacked, control will return to Snake as if you had pressed the B button.

----------

And that's my first MYMini entry! Hope you enjoyed it!
 

Junahu

Smash Ace
Joined
Nov 15, 2005
Messages
899
Location
Shropshire Slasher
Yamato:
:bee: Streets of Rage Bare Knuckle character!
You've done well in implementing Yamoto's bizarre tactics into Brawl. I especially love his extensive counter-game, not just with his actual counter attack(s) but with all the attacks that involve dodging backwards beforehand. There's also the sneaky way that Yamoto can bait out laggy attacks from the foe, from a distance, using his shurikens, before taking advantage of their lag with his up-Special. It's all excellent stuff

There are a fair few problems regarding the writing. But for the most part, it just needs another proof read to correct them. The formatting could also do with a little variation. When all the text is the same colour, it's easy to lose track when reading.


Minions:
Character specific summons?
¬_¬ Why didn't I ever think of that?
 

half_silver28

Smash Ace
Joined
Apr 25, 2008
Messages
862
Location
MYM, Ohio
So more of the commenting thing. Here we've got Yamato, our second set from Koric. I do love a lot of what he does, particularly in the specials and a lot of ground attacks. He's got a lot of options for tricking the foe and moving around the stage out of his substitution, and he's got a nice way to start up a game of projectile tennis. It's also cool how many of his normal ground moves result in him ducking or jumping to dodge while attacking, or otherwise move him across the stage. His aerial game however doesn't really do much to supplement his trickery or even move him around: it might be cool to utilize some teleportation or any sort of pseudo-grab move in that area. I could also see him faking a grab release as a throw only to appear behind them while leaving a clone in his original place. Possibly, you could have him create a cpu controlled clone to attack the foe alongside you that doesn't do damage, but could trick the foe into attacking it so the real Yamato can land an attack. I see you took most of what he does straight from his boss fight & this set stays true to that, but don't think you have to be limited to what a character does in his source material.

There are also a few complaints I have about organization and writing style. Red text is fine for attack headers, but never for main text. You should stick to colors like white, gray or brown for main text, its much easier on the eyes. There are a lot of spelling errors like Junahu pointed out, but those can be fixed if you just proofread sets before posting them. & this is mostly in the aerials, but some of your move descriptions awkwardly start with "Yamato can blahblahblah". It's a rather weak way of talking about a move rather than just saying "Yamato does a blahblahblah attack". Those kinds of sentences aren't really appropriate for starting out move descriptions.

That being said, you have a pretty good sense of playstyle and setmaking in general after making only two sets, but your sets can become much better with simple things such as organization and proofreading. Nice job with Yamato, hope to see more sets from you soon!
 

Neherazade

Smash Journeyman
Joined
Apr 5, 2009
Messages
359
Location
Gensokyo.
...I don't want to sound picky Smady...

But could I have User Rankings image that DOESN'T remind me of a ****ty "let's throw together a bunch of Generic attacks and add a switching mechanic 4 teh lulz" set?

Something like...
 

Junahu

Smash Ace
Joined
Nov 15, 2005
Messages
899
Location
Shropshire Slasher
MYmini #4 Entry

Crate Enemies

This is actually something that existed in Smash Brothers Melee, but was cruelly removed from brawl (because SSE data was held on a separate data layer to the rest of the Brawl disc)... Enemies!​

Remember way back in like 2001 when you and your buddies were duking it out in Melee? You'd be all like "Hey! There's a crate. Mine!". And you'd break it open and get the items? Yeah, fun times. Doesn't happen enough nowadays. Buncha competif@gs ¬_¬
But SOMETIMES, you'd get a little extra present with your items, some random schmuck enemy from the adventure mode. A Goomba, Redead or Octorok. They didn't do much, and died whenever someone so much as sneezed on them, but dammit it was cool! It was like that crate was headed for the Adventure mode and got redirected here or something

So, what exactly is this Extra? Well, whenever you destroy a Crate, there will be a tiny chance of a small, worthless enemy appearing inside. The standard set includes such threats as Goomba, Mite and regular Primid. But there are others too, as useless as they are;


Oh how cute :)
Octoroks are what they are, and firing stones at adventurers is what they do. It's... all they do... actually. One pepple, straight forewards, every 2 seconds. They may also turn around, though that is rare. The pebble travels as far as Fox's laser and deals 5% damage with the lamest knockback imaginable.
Kill it by dealing 15% damage to this monster. Any attack from behind kills it instantly.


Barrel monsters, they don't come with barrels, so that tiny creature underneath is all you get.
They act like little hermits, getting underneath the largest item they can find, lifting it up, and then running away to the most isolated corner of the stage.
They don't jump, so they're pretty easy to corner, and they only have 7% health so they're not hard to dispatch. You could also leave the monster alive and just take the item from it.
If a Barrel moster happens to take a bob-omb, or "dud" explosive, it will not explode while being held.


Scienstein is such a feeble geezer, that he doesn't even attack. He's quite light, making him easy to boss around, but has a rather staggaring 200% health.
Of course, since all he does is potter around, to and fro, looking for treasures, there's not much point in paying attention to him. Just leave him alone, or practice your chain-grabs on him (¬_¬ yes, you can grab this enemy, and ONLY this enemy)


You rescued an animal! No, you can't proceed to kill it straight after.
The animal, tiny as it is, simply bounces off towards the nearest edge, and tosses itself into the abyss. You can't stop them, and they don't affect the match in any way. Well... watching a pixellated bunny commit suicide might have psychological effects on the player, but everyone else is totally fine.

A Brigand was inside the crate!? Well, not quite, he's a ****** in the Brawl universe, so he's actually kinda cute.
Brigands are poor sports, opting to destroy items and containers with their axe swings, rather than engaging any of the players. They have 24% health, and do not move particularly fast, though if their axe happens to hit you as it swings to kill an item, that's 7% damage and an uncharacteristically high amount of knockback to your character. There's a simple fix for that, don't stand directly over an item like a gormless idiot.


A basic heartless like this is no threat to you, just 14% damage is required to obliterate it. It's attacks are slow, telegraphed, swipes that deal 4% damage and some amount of hitstun. The real threat however, is if you leave one alone. The shadow will slink under the surface of the stage, reappearing directly behind whoever it doesn't like, and attacking shortly thereafter. If you were busy with something else, then say hello to annoying hitstun!


Now this one is quite fun. And by that I mean it's needlessly complicated. I mean, look at all these paragraphs! Some of them are even line-s p a c e d!
Muffy only appears if Food items are turned on, for some reason. When she appears inside a crate, the rest of the contents are all Food (namely, juices, coffee, tea and wine). It seems she had a bit of a wild night and ended up in a crate? Wow, what a catch.
Muffy doesn't really attack, but she can 'be' attacked. She has her own, invisible damage meter, and is KO'd the same way any player is (off a blast zone, dummy). She also has an invisible counter for every player, which keeps track of how much she 'likes' each player. Simply hanging around near her increases the counter, and attacking her sharply decreases it. Hitting the opponent who last hit Muffy also increases her feelings towards you, so go nuts.
As a visual indicator; if you do something she likes, a heart shape appears above her head. If you do something to displease her, a broken skull shape appears above her head. If someone is near enough to her, a pink tinge indicates that she's enjoying the company. A blue tinge would indicate otherwise, but that only happens if someone she truly loathes is near.

She will wander aimlessly around mostly, jumping/double jumping only in cases that require it. She tends to gravitate towards whomever she likes the most (or simply flees from everyone if she happens to hate everybody) the extent of which depends on just how much 'more' she likes that person.
If there is any recovery item onstage, she will endeavor to consume it. If successful, her feelings towards the nearest player will sharply increase. However, now that she's "full" (i.e. Drunk as a lark) her feelings go totally out of whack for the next 10 seconds. She might randomly decide that she doesn't like people being near her, or she might totally forgive the person she hates the most, or... she might start ENJOYING getting hit, or start liking people who try to EAT her. If in doubt, just stay away from her for the 10 seconds. Let some other loser figure that lush out.
If by toil and labor you manage to woo Muffy enough, she will begin dropping gifts (items) for you. This isn't frequent, and it's mostly junk, but it least it's something, right? You also earn a Muffy sticker for being such a casanova.

oh, if you set yourself a player profile before the match, Muffy's affections are saved, so that next time you see her with that profile, she'll remember you. "Most loved" is also a new 'Record' on the Brawl Records screen, so you can see more directly who she'll follow next time she appears.
 

Katapultar

Smash Lord
Joined
Nov 24, 2008
Messages
1,284
Location
Australia
I thought that the Minions idea was a excellent extra on it's own. I mean, it's the kind of thing that can be added as a extra to movesets without a problem, and it's not a game mode. This extra should be put into the next Super Smash Bros game, as it works as a way to pay tribute and reference to those specials characters who help the protagonists in their games. This idea is definitely a awesome one for sure.
 

Zook

Perpetual Lazy Bum
Joined
Jul 30, 2005
Messages
5,178
Location
Stamping your library books.
I'm working on several sets right now, but I keep discovering that they aren't 5-star material, get frustrated, and quit on them. I'm sure that this happens to plenty of you people out there, too.

My question: What do you do when you realize you're working on set that isn't great? Do you post it anyways, keep tweaking it till you're happy with it, trash it, etc?
 

darth meanie

Smash Journeyman
Joined
Jun 6, 2008
Messages
452
There used to be a moveset graveyard where those sets go.

I tend to try to just keep the ideas in the back of my mind until I feel I'm ready to finish them, or use them in another set. I've had a Vespiquen idea since MYM6, but I've never actually gotten down and dirty and written it out.
 

Rychu

Thane of Smashville
Joined
Jul 5, 2010
Messages
817
3DS FC
1908-0105-4965
Game Mode: TEAM SEARCH AND DESTROY


Team Deathmatch is a Mode that won't be around until, like...well lets face it, we'll be old and grey by the time this comes around. Basically, the game involves two teams of 12, RED and BLUE, fighting to get points by beating the stamina completely out of another character. The game is STRICTLY online because it involves so many people.

So, you choose a character from either Brawl or MYM (i guess one of our MYMer companions became a lead designer at Nintendo, or something), and are assigned to either one of the two teams. Each team starts on a designated side of the map, in 1 ROOM. The goal of each team is to win the most points in 10 minutes. Earning points involves draining an opponent of his/her last point of stamina, each KO worth 1 point. Traditional KO's are not possible in this mode, as you will see.

Now, on to where you actually play: The MAPS. The maps are made up of 30-40 BF or FD sized rooms that connect in a way similar to Metroid or Symphony of the night. Each room is different from the rest, and each series map will have specific hazards( Mario will have pipes for transportation to different rooms across the maps, Pokemon will have random Pokemonm walking around, ect). All lead to another room in some way, with no way to score traditional KO's.The camera ONLY shows what room you are in. Respawning once you are KO'd will place you in a room with nom enemies, giving you time to stratagize.

Each room has some sort of LIGHT SOURCE. These lightsources range from the sun, which lights everything in a room, to crappy lightbulbs which only light a small area beneath it, while the rest is complete darkness. Usually, more than 1 light source is in a room, leaving less darkness. Characters can hide in the dark, with their outlines invisible to everyone except them. Usually, more than 1 lighting source is in a room, leaving less hiding places. Switches found on the edges of rooms (SSE floor style, always illuminated so they can be located), which can turn Lights on and off. The light sources cannot be attacked, and cannot be destroyed.

Water can be found in certain rooms, and act exactly like Brawl water, except you CANNOT drown, and you can fight in the water. All moves are slowed down considerably.

Now, lets talk about your HUD. Your hud consists of Your remaining stamina, along with everyone in the rooms stamina. You also receive a Mini Map, which shows you all 4 adjacent rooms to you. In each room, you can see what players who are standing in lights team is, as well as the general layout of the rooms both the room you are in and the rooms around you. This map is at the upper right hand side of the screen, and takes up about 12.5 percent (thats 1/8th of the screen to all you mathz n00bz) of the screen.

BASIC STRATEGIES​
Since this mode will come sometime in the future, I can only assume that Nintendo will have headsets available for their system. One of the best strategies involves good communication with other players in the same room with you. Ambushes are essential to the strategy of weaker characters in the game. These ambushes involve charactes hiding in the dark and waiting for enemies to come. Then, you beat the living **** outa them.
Another is a more gung ho strategy, taking the game on solo. While you'll still have your team mates, it doesn't mean you have to god-forbid WORK with them. YOU alone fly into every room and immediatly start to attack every dark corner of it. You can find characters very quickly this way, and it pays to take care of characters fast. There are plenty of other strategies you can make out of this, its dependent of what kind of player you are. Have fun with this guys!


Now, if only we had a character that works specifically in this mode...
 

MasterWarlord

Smash Champion
Joined
Aug 24, 2008
Messages
2,911
EDGE OF HEROES

The Edge of Heroes is a unofficial Warcraft 3 custom map that involves two computer controlled factions at war, constantly sending units at each other in an attempt to destroy the other faction’s base. There are 10 players equally split up among the 2 factions whom proceed to fight alongside the minions, though they revive on death after a while – killing them just gives you time to attack the enemy base. The Edge of Heroes is but one of many maps of this type, the most famous of which is Defense of the Ancients (Or “DOTA”).

In Brawl, this is an online exclusive mode, with functions for the most part the same as in the actual game, with 5v5 battles in an attempt to destroy the enemy’s base. Players revive 30 seconds after death, during which time they can view the action from the perspective of any of their currently alive allies, toggling through them with the R and L buttons.

The stage this mode takes place on is divided into two separate layers, one above the other with 5 Ganondorf’s worth separating the top layer, the surface, from the bottom layer, the underground. The 2 bases are located on opposite ends of the stage, and are on the surface, but the underground links in to both of the two bases. There is a single extra area in the middle of the stage, a hole, that links the underground to the surface – this area will typically become very crowded.

In each base, there are 2 Barrackses, 1 in each lane, that spawn units which will automatically move towards the other side, attacking whatever comes in their way. They will pursue foes if necessary, but once they get a Battlefield Platform out of range they continue going back on their initial attack path – a suicide charge towards the enemy base. If necessary, the units will jump over the hole in the middle to continue to the enemy base, or simply wade into the background briefly to go around it if they can’t jump. The Barracks spawns a wave of units every 30 seconds, spawning the same amount of them every time. However, you can increase the amount of units that spawn from that Barracks by standing next to the barracks and pressing Up to enter it like a SSE Door – here you can briefly select the units your faction has from a menu. Once you buy a unit, it will spawn in addition to the regular units for every wave – it’s an investment that’ll stick around for the rest of the game. The currency with which you buy these units is kills on other players – better units naturally cost more kills. Text stating which unit has been bought is instantly displayed to all players, including enemies, so that they can properly counter them.

Players can enter their Fortress like an SSE Door to find a healing fountain inside, which will heal players at a rate of 5% damage per second. Considering players don’t want the foe to have to wait to respawn or the foe to get kills, they’ll typically be running back here a lot to heal. This will also cause negative debuffs to expire at 5x their regular rate, and heal any negative KO mechanics on your character like a typical pummel KO like the Count’s at a rate of 5% per second. This also is where players respawn after death.

In order to win, you must destroy the enemy’s Fortress, located in the back of their base. However; there are 5 towers for each side – one located in front of the Fortress, one in front of each barracks, and two in the middle – one on the surface and one underground, located more towards the back area of the middle. Both towers in the middle must be destroyed before you can move on to the towers in front of the Barrackses, then the Barrackses themselves, then the tower in front of the fortress, then finally the Fortress itself. Attempting to attack a building before you’ve destroyed an earlier building in line will do no damage.

The map is very large, spanning triple the width of the Bridge of Eldin in all. Due to this, the map is split up into four camera zones, the camera only showing the immediate part of the stage you’re in. The four camera zones are the 2 bases, and the middle area which belongs to neither faction, there being a separate camera zone for the top and bottom lane. Due to the lack of blast zones in the underground, smacking somebody into a different camera zone will KO them as if you knocked them off a blast zone, but their damage must be at least 100%. This is for characters with “average” weight, the heaviest characters getting a boost to 135% and the lighest ones a nerf to 65%. There are technically six camera zones, if you count the insides of the two Fortresses, but players can’t enter their enemy’s Fortress.

Team Attack is on in this mode, but traps will not hit allies unless they would normally otherwise. While this may sound like it sets up for a very defensive game, every faction has a siege unit that deals massive damage to structures and traps of all kinds, which typically have very long range and thus don’t have to enter the collection of traps. The problem is siege units are very frail, and thus the players of that side will have to defend them as they attack, potentially even acting as meat shields against enemy projectiles.

You may’ve noticed I’ve given no details on how the terrain actually looks or the properties of the buildings/units. . .That’s because the buildings, units, and terrain vary based off the factions selected. When searching for people to fight with in this mode, you don’t select a character, but rather a faction. The search engine will pair you together with other people who selected the faction, and from there you can select from the characters in that faction. You are allowed to select duplicates of the same character, so don’t worry about being stuck with one you hate due to somebody else taking him. You have 15 seconds to select your character as you can see which other characters your allies have picked below in the regular area. Below are some examples of various factions. . .

THE HORDE


Horde Characters
Valozarg
Arthas
Kel’Thuzad
Thrall
Cairne Bloodhoof

Valozarg counts as 3 characters, much like in Capture the Flag. Due to there being just short of enough character slots for 2 Valozargs, only one player can select him. This is one of the few exceptions about only picking a faction when you go to search for other players for this mode – you can choose to play as Valozarg, or any of the other characters. Obviously, 2 Valozargs will never be paired together.

This team can play defensive or offensive in both extremes, what with Arthas, Kel’Thuzad, and Thrall contributing minions of their own to the fight. Arthas and Thrall are most scary, considering they can add entirely additional spawns to the battle. Enemy players want to rush into the base to kill the workers of Arthas/Thrall to prevent them from getting a head start if at all possible, though if Arthas/Thrall are relying on these minions they will be very weak at the start of the game and quite vulnerable to a rush. Players can add additional Thralls and Arthases for further pay-off, with Thrall relying less on his minions and able to fight normally better while Arthas is more of a long term investment. If you invest all in Arthases and no Thralls, be sure to include a Kel’Thuzad or two to better take advantage of the undead army when it comes.

Valozarg is obviously a superb defender and can “kill” an enemy for potentially longer than 30 seconds, but when computer controlled enemy are relentlessly offensive and rather easily killed to be revived back on their original side. That said, this can still help for an amazing push against the enemy lines, but if Valozarg goes on the offensive then the enemy will be closer to their fountain and can more easily flee to heal off their demonblood. If you want to go offensive with Valozarg, it’s probably best to just abandon all of the minion based characters and go with 2 Cairnes as your allies, as Cairne is surprisingly very offensive in this mode – what with there being infinite stocks, Reincarnation is nothing but a straight out buff for Cairne. While one may think 5 Cairnes may be better than 2 Cairnes and a Valozarg, the Cairnes don’t have time to make pits to take full advantage of their movesets, while Valozarg offers artificial slopes by turning his cleaver into a solid platform which he can tilt about at will. That said, Valozarg + Cairne isn’t all offensive – if the offense fails, Valozarg is an excellent defender back at the base, and Cairne can stomp down the terrain on the surface in the middle far enough to block off the underground, forcing players to go across the top lane, into the Horde base, then into the underground from there to destroy the tower there. Note that this will cause the units spawning from the bottom to join the attack on the top which can potentially cause a large push at the top, but leaves your bottom undefended and you with no units to attack the enemy’s part of the bottom lane. Kel’Thuzad’s Death and Decay can obviously help with an offensive approach significantly, but without lots of units to sacrifice he’ll need a lot of support from his allies to help defend him while he takes down a building.

Horde Terrain

The Horde’s half of the terrain is covered with bleak blight underground, while the top of the stage is covered in more desert-like rugged terrain on top – these bumps in the terrain are small, but are just enough to play around with Cairne’s slope based moves –somewhat-. The base itself is typically covered in skulls, corpses, and demonblood, but there are also plenty of Orcish banners everywhere.


The base’s towers are Spirits Towers in the underground and Orcish Watch towers on the surface. Unsurprisingly, the Barracks on top is Orcish while the base on bottom is an Undead Crypt. Due to the terrain being a good bit more Undead, the Fortress and tower in front of it are also Orcish. The Horde’s towers are generally very weak, sending out their projectiles once every .5 seconds. Watch Towers deal 15% and knockback that KOs at 180%, their projectiles going 2 Battlefield Platform’s worth, while Spirit Towers trade 33% of their power for slightly more range and a lingering hitbox, able to do splash damage to the massive quantities of units that will inevitably attack it. Spirit Towers have 150 HP, while Watch Towers have 180 – very frail for towers.


To make up for this, the Barrackses the Horde has are absolutely gigantic so that Valozarg can fit inside without a ridiculous animation. They have 400 HP each, and the Orcish Barracks deals 2% with no flinching to foes who hit it with melee attacks due to its spiked barricades.


The Fortress is even larger, with a god-like 700 HP. It has spiked Barricades that deal 10% per hit like exaggerated versions of those on the Orcish Barracks, but due to the Fortress’ insanely exaggerated size foes can stand on top of it where there are no barricades to hurt them. The top of the Fortress can serve as a defensive area for characters to camp down from, but the Horde lacks characters to take much advantage of it meaning it may be more advantageous to your enemies.

Horde Units

The starting units that spawn from each wave for the Horde are 4 Ghouls, 2 Grunts, 2 Crypt Fiends, 1 Shaman, 1 Necromancer, 1 Tauren, 1 Abomination, 1 Kodo Beast, and 1 Meat Wagon.


Ghouls are the size of Mario, and while fast units slow down so that slower units in their wave can keep up, if they pursue a foe they will ignore other units in their wave and use their full dashing speed, which is on par with Captain Falcon’s. Ghouls have a laughable 10 stamina, but attack roughly 5 times a second, doing hits of 2% and .0000001 seconds of hitstun – enough to interrupt the foe. These are the cannon fodder of the Horde army, dying almost instantly once a wave gets sent out. You can buy these Ghouls for 1 kill, but they’re hardly worth it.


Grunts are roughly on par with Wario in size, but slightly taller and move at the overweight Italian’s speed. They attack only once a second for 8% and knockback that KOs at 180%, but have a fairly beefy 40 stamina. In addition, when Grunts fall down under 11 HP, they go berserk and attack three times a second, making them all the tankier – it’s beneficial for them to be attacked. These units cost 2 kills.


Crypt Fiends are only as tall as Wario with 25 stamina, but 1.5x as wide as Bowser due to their four legged structure. Quite slow, they move at Ganondorf’s dashing speed and attack only once every 1.25 seconds, but with a projectile that travels 1.5 Battlefield Platforms and deals a decent 11% and flinch. Crypt Fiends have a secondary attack that they fire at enemies in the air that entangles them in a web and forces them to stay on the ground and prevents movement for 2 seconds, though does no damage. This attack is on a 10 second cooldown and is only aimed at players. Crypt Fiends also have a Burrow ability that they will only use if they are on the surface – if the tower on the surface isn’t being attacked while the one on the bottom is, Crypt Fiends will burrow underground and pursue the player attacking the underground tower until they stop, then join the wave currently on the bottom. This unit is a natural purchase for Cairne, as it both gets foes out of the air and automatically defends the bottom while Cairne focuses on pushing the top. This unit costs 2 kills.


Shamen are the size of Luigi and move at his speed, having a projectile they fire every .75 seconds that does a cute 4% and flinching and travels a platform. They have a secondary attack on a separate cooldown that is a melee attack with their claws every half a second, dealing 6% and knockback that kills at 225%, but Shamen never approach farther than they have to in order to use their projectile, the melee attack just being extra defense. Shamen are quite frail with their 15 stamina, so they need this attack. The reason Shamen are actually good is their ability to cast Bloodlust, which causes a red glow to appear on the unit it was cast on, increasing their attack speed by 50% for 10 seconds, though Shamen can only cast Bloodlust every 15 seconds. The unit they cast it on is a random one within a Battlefield Platform, though if you taunt next to a Shamen and stay next to him until he can use Bloodlust he’ll use it on you. Obviously an excellent unit to help you do a rushdown, but this unit also has excellent synergy in combination with Ghouls – interrupting foes 7.5 times a second is nothing to sneeze at. Shamen cost 2 kills.


Necromancers are as wide as Wario and as tall as Luigi, though they move at Ganondorf’s dashing speed due to being old and frail, having a 15 stamina on par with Shamen. Necros have a single projectile identical to those of Shamen, but no melee attack, leaving them a fair deal easier to kill. . .However, whenever a unit dies it leaves behind a corpse, and every 5 seconds the Necromancer can animate a corpse into a Skeleton with 10 HP, and an attack every half a second for 4% and slight knockback. The suidicial Grunts and Ghouls obviously pair very well with Necromancers to make corpses for them to raise, though Necros only reach their full potential alongside minions from Arthas/Thrall/Kel’Thuzad so they have never-ending corpses to use. Necromancers cost 2 kills.


Tauren are incredibly bulky and are Bowser’s size, with an incredibly 80 stamina, chugging along at Ganon’s dashing speed. They have a single slow attack every 1.5 seconds that deals 15% and knockback that kills at 160%, so their power is actually halfway respectable regardless of all their lag. Tauren have an additional attack that’s on a cooldown of 15 seconds, which involves the Tauren smashing his totem into the ground rather than swinging it forward. This causes a small shockwave effect on either side of the Tauren for 5 damage, but more importantly anybody directly hit by the shockwave will take 20 damage and be knocked through the ground to the underground. This means Tauren can massively help in a push on the top lane by preventing units from defending there, meaning the Tauren not so surprisingly go well with their cheiftain, Cairne. If Tauren slam their totem on a foe on the underground level, they’ll simply pitfall foes for half the normal duration. Tauren cost 3 kills.


Abominations are the same size as Tauren, but move even slower at Dedede’s dashing speed and have less stamina, having only 60. The main attack of Abominations is even slower than the Tauren’s, having a 2 second cooldown with no extra power as they chop down with their cleaver. On a 5 second cooldown, though, is the Abomination bending down to cannibalize a corpse, healing it of 10% (Abominations –can- go over their max HP this way) and increasing its size and power by 10%, as well as an obvious increase in range due to their size buff. Due to the suicidal nature of all units as they march to their death at the hands of enemy towers, it can be hard to really build one up, but try to let Abominations die the last of your melee units if at all possible. Arthas can help prolong the Abominations’ lives with Death Coil, and if an Abomination is starting to get somewhere Kel’Thuzad can provide a buff with Unholy Frenzy. Abominations cost 3 kills.


Kodo Beasts are as tall as Bowser and twice as wide, much less with the mounted Orc drummer on top of them, moving slightly slower than Dedede. They have 50 stamina, but rather than attacking directly these units have a slight ranged attack of half a Battlefield Platform, with the Orcish War Drummer on the back of the Kodo throwing an axe forward every 1.5 seconds for 5% and flinching. More importantly, so long as the Kodo Beast is on-screen all allied units on that camera zone get a 10% damage buff. The Kodo Beast has a very laggy attack it can attempt every 5 seconds of devouring units (-Not- foes) that get close to his mouth, causing the unit to lose 1 HP per second until death and be unable to do anything. If the Kodo Beast dies before the unit finishes devouring, then the unit will spawn on top of the Kodo’s corpse. Kodo Beasts spawn 2 corpses on death, and for every unit the Kodo Beast fully devours another corpse will be spawned on the Kodo’s death. Obviously this is more meant to be used in tandem with a corpse/mass units strategy for Arthas/Kel’Thuzad and combined with Abominations/Necromancers. Kodo Beasts cost 3 kills.


Meat Wagons are slightly shorter but slightly wider than Bowser, moving at half Dedede’s dashing speed with 30 stamina. Their sole attack is to launch a corpse forward the distance of Battlefield every 5 seconds, which does 20% and knockback that kills at 200% to foes and 60% to buildings/traps. While Meat Wagons will naturally prefer to target towers/traps out of everything in their range, they won’t move any farther than necessary to attack the closest thing to them. Should a Meat Wagon projectile not do damage to anyone or anything, a corpse will be generated on the ground where the projectile fell, meaning if it’s targeting a playable character they’ll likely dodge it and your army will get a free extra corpse. This is yet another way to add corpses to the undead army, but the fact it’s the Horde’s only siege weapon means a more rushdown-esque strategy may require Meat Wagons. Meat Wagons cost 3 kills.

KOOPA TROOP


Koopa Troop Characters
Bowser
Bowser Jr.
Lemmy
Morton
Kamek

Yes, that’s DFM’s Bowser remix up there, and thus the Koopa Troop is almost entirely filled with trappish characters and is one of the single most defensive in the entire game. Morton is the only one that really doesn’t have his moveset bogged down by trap inputs/having to set up a mechanic, so he’ll probably be the one who goes out to do any actual offense when it’s needed – the fact he can shift between more offensive and defensive styles helps him to hold the fort when need be, though. That said, Bowser and Jr. has a decent chunk of offensive moves, and Bowser Jr. and Kamek have some decent skills to force foes into all of the various traps – Kamek in particular can complicate things significantly by shifting the terrain all of the traps are on. While one may think that with their limited offense the Koopas only ever win by making enemies ragequit, or stockpiling kills to overrun the enemy, Lemmy proves himself useful with his warp pipes here, giving his allies an easy way to get back to the base to immediately heal themselves then immediately go back into the action. To prevent foes from using them, you can obviously place the warp pipe in the base in the middle of a clusterfuck of traps. With these warp pipes, if you’re confident enough the defenses of your base are secure you can potentially start setting up traps in the foe’s base to defeat them, fleeing when necessary through the pipes. Don’t worry about the pipe being destroyed, as Lemmy can just make another one to replace it so long as he’s present – this means he’ll probably be the main target of foes, so he’ll probably be doing a lot of running and hiding, potentially staying with Morton in-between his Doom Pillars when he brings them down.

Koopa Troop Terrain

The terrain on the Koopa Troop’s side of the field is fairly barren and dead looking, but it isn’t blatant blight. Instead, there are several moats of lava in the background and foreground. There are also some random splotches of lava placed in the background/foreground, and if you dodge into them you’ll be knocked out of the dodge and take 5% and flinching. Placing your traps around these spots can make them much harder to penetrate. Inside the main base, there are no gimmicks, the floor being made of the same bricks the buildings are made out of.


Bullet Bill Blasters are the obvious choice of towers for the Koopa Troop, having a very good 350 stamina and launching out Bullet Bills every 4 seconds, being a very slow rate of fire for a tower. Bullet Bills travel forward at Mario’s dashing speed in straight lines (though very slightly towards the ground, meaning they won’t reach enemy towers), but will home in on the first thing they see within a Battlefield Platform of them, though they have to turn in large arcs that will probably cause them to go into the ground and kill themselves if you go behind them. That said, the explosion they cause on contact with something is pretty large, Bowser sized, dealing 20% and knockback that kills at 160%. Of particular note, Bullet Bills deal siege damage – they’ll do an impressive 50% to towers and traps. In order to actually hit an enemy tower with this, you’ll typically need to keep knocking an enemy the Bullet Bill is homing in on forwards towards the enemy tower. This is very difficult to do, and there’s one problem with this – while Bullet Bills can’t explode on Koopa Troop units, they can still deal damage to Koopa Trop traps and even the buildings that generated them. Clever enemies can use towers to destroy themselves or even your traps, meaning the towers must be kept under heavy moderation by the Koopa Troop.


Koopa Barrackses have two layers of drop-through platforms along with 400 stamina, serving no real purpose other than to give you even more ground from which to place traps – the Barrackses are rather crucial to control, as otherwise they serve as shortcuts for foes, being points for them to gain height to jump deeper into the base. Staying on top of the Barrackses also makes it very easy to bait Bullet Bills into it – make sure you don’t give the enemy the chance.


Bowser’s Castle from Paper Mario serves as the Koopa Troop’s Fortress. At first, only the actual Fortress part is visible, not the gigantic Clown Car imitation – just the part up on top. The Fortress has only 500 HP, rather bad for a Fortress, but the catch is once the Fortress is only down to 150 HP remaining the rest of the Fortress will come out from the ground, and the Fortress will levitate up in the air. The part of the fortress resembling the Clown Car will swing its “arms” back and forth constantly, the spiked balls on the end of the chains that make up the “arms” being constant hitboxes that do damage based off their momentum – potentially up to 25% and killing foes at 120%. Only the usual part of the Fortress is a hitbox, meaning foes have to jump up quite high to get to it, and the base of the main fortress becomes a drop-through platform, meaning that once they get up there they’ll have all sort of traps to deal with. This enables the Koopa Troop to put up a significant Last Stand, much less considering that the vast majority of enemy units will be clueless as to what to do in this situation and just get slaughtered by the spiked balls.

Koopa Troop Units

The starting units for the Koopa Troop are 10 Goombas, 5 Paragoombas, and 10 Koopa Troopas.


Goombas are obviously a very sizable chunk of your force, whether or not you want them to be, so you’re going to have to learn to deal with them. While they have 10 stamina, jumping on them kills them in one hit, as you’d expect. They behave the same as in the SSE, though instead of doing damage on contact have a bite attack that does 5% and flinching to foes it hits every second, with range almost on par with, if not worse, than Rest. The only real interesting thing about your cannon fodder units is that foes will be propelled up a Ganondorf upon jumping on a Goomba, and if they land on another Goomba before touching the ground the height they go up will double. This can potentially lead to a top blast zone KO based off the sheer quantity of Goombas, but is only a threat to actual characters. If a unit hits the ceiling while in the underground while being propelled upwards from stomping on a Goomba, they’ll get “reverse” pitfalled in the roof, with their head stuck in the ceiling. Goombas cost 1 kill, not that you’d ever so much as think of buying them when Paragoombas exist.


Paragoombas are much like Goombas, but with wings, obviously. They will attack anybody with their bite attack within a 1.5x Bowser radius around them, going onto the ground if necessary, and they hover a Ganondorf off the ground by default. The main difference with these units is if they somehow hit you with their pitiful range bite, they’ll instead grab you in their teeth and throw you upwards 2 Ganondorfs, though it steals only deals 5%. This can help contribute to top blast zone KOs, though, and it won’t interrupt any stacking effect the foe has from jumping on top of Goombas. The fact that these Goombas are in the air also gives them a higher position from which to bounce the foe back into the air. Bowser Jr. pairs well with Goombas, as he is good at forcing foes to land in specific spots on the ground which can translate to forcing foes to land on Goombas. Paragoombas cost 1 kill, but still aren’t particularly worth it what with how you start with 5 of them.


Koopas are another enemy that you’re forced to have in your army whether or not you want to, and require the most actual babysitting of any of your troops. They behave like their SSE counterparts for the most part, their attack dealing 6% and weak knockback and only being usable every 1.2 seconds. Jumps don’t kill them, simply doing 5 damage to them out of their 20 HP – very impressive for a unit you get in such high quantities for free. The catch is that Koopa leave their shells behind on defeat which work just like the normal item, which means that if the Koopa Troop is just setting up traps in the base they’ll be giving their enemies free ammunition to take down their traps in the form of Koopa shells. This forces the Koopa Troop to be less blatantly defensive than it’d like. Koopas cost 1 kill, and just in case the foe gets to use their shells it’s generally not only a waste of resource but a –bad- thing to buy more.


Bob-Ombs are the same size as the item in Brawl, and have a pathetic 5 stamina and a horrifically weak kicking attack that does 1% with no flinch every .5 seconds. Upon death, they explode as powerfully as the real item. After being on the same camera zone for 15 seconds or more, they’ll light their fuses and run forward at triple their usual dashing speed, exploding after 2 seconds. The main problem is Bob-Omb explosions can hurt you and your allies, so you’ll want it to run forward away from you and preferably into a tower/trap, where it’ll do 45 siege damage. Keeping Bob-ombs alive for so long is difficult – make sure to defend them – they’re yet another example of why some of the Koopa Troop needs to be out on the front lines for the troops to reach their full potential. Bob-Ombs cost 1 kill.


Dry Bones are essentially identical to Koopa Troopas, but revive 10 seconds after death. The timer counting down to when they’ll be revived is doubled when Dry Bones are being held inside their shells, so this prevents them from being as easily abused as Koopas – as if a foe holding a Dry Shell has the Dry Bones come back out on them they’ll take 5% and flinch. Dry Bones have an additional attack that they can perform every 5 seconds that involves throwing one of their bones as a projectile a Battlefield Platform ahead. Once they throw 5 of these bones, they’ll no longer have enough bones left to revive to prevent your army from regenerating infinitely, but the last bone they throw is their own shell, just as powerful as it is normally, so foes won’t be able to use it after the Dry Bones is dead permanently. Dry Bones cost 2 kills.


Magikoopas are around Mario’s size and hobble around at Ganondorf’s speed. They have a paltry 15 stamina like the usual caster, though with an army of 20 HP Koopas in front of them they should fare decently for themselves. Their attack is the usual Magikoopa “Shape Bolt”, dealing 8% every 2 seconds the Magikoopa is allowed to use it, with a range of an impressive 3 Battlefield Platforms. The other attack of Magikoopas enables them to use magic to launch a Green/Dry Shell forwards as if a player character smash threw it, which they can do once every second. Magikoopas are essential if you want to play defensive, as they make babysitting Koopa Troopas much less necessary and can turn their Green Shells into a deadly force if no characters are there to stop the Magikoopas. Magikoopas cost 2 kills.


Boos hover half a Ganondorf off the ground are smaller than even Goombas, but go forward at Sheik’s dashing speed. Their stamina is a mere 20, but they have three “spot dodges” that regenerate every 10 seconds that involve them going transparent to avoid damage, though lingering hitboxes can still hit the Boos as they come out of their dodges just like with real dodges. Their attack is a simple slap every second for 6% and slight knockback, but their main function is if a playable character taunts next to them. This will cause the Boo to latch onto the character and turn them transparent, until they taunt again to tell the Boo to get off, during which time the character is immune to all attacks but can’t do any attacks of their own. Foes can force this to cease by killing the Boo, who can’t spot dodge during this time and is perfectly vulnerable. The most obvious use of these Boos is making you near invulnerable as you flee back to your base to heal, which combines even better with the strategy of using Lemmy’s warp pipes to flee back to the base. In addition, if a Boo is making you transparent and you press crouch three times rapidly, they’ll ghost you into the underground layer if you were on the surface. Boos cost 2 kills.


The size of the actual Chomp part of Chain Chomps are that of Bowser, with their chain dangling behind them half a Battlefield Platform. Chomps have a poor movement speed on par with Ganondorf, but if a foe is within a Platform’s distance in front of them they’ll charge forwards at Sonic’s dashing speed to the foe, their body a hitbox that deals 16% and knockback that kills at 180%. They can only do this once every 5 seconds, but they chomp their teeth every half a second for 8% and slight knockback, though the attack has absolutely pitiful range like most biting attacks. Chomps have a very meaty 90 HP and their chain isn’t a hurtbox. . .But if you grab their chain, your character will tie the chomp down to the ground, preventing the main Chomp from moving more than the max distance of the chain away. Grabbing the chain again “uproots” the Chomp. This can be used by the Koopa Troop to set up Chomps to defend the base, but can also be used by enemies to tie Chomps down in the middle of nowhere when they’re busy fighting off other units. If you want to use Chomps offensively they’ll require a good chunk of player assistance, their main use being tied down in your base. Chomps cost 3 kills.


Thwomps are 1.5 the size of Bowser, and levitate a Marth off the ground, moving forward at 25% of Dedede’s dashing speed. Should anything get underneath them, they’ll slam down onto it for 20% damage and pitfalling immediately, but take a very long 4 seconds to get back up into the air. Thwomps will go higher up if needed to slam down on a tower, and do siege damage to them and traps – 70 damage per hit! The problem is that Thwomps are melee range, meaning the towers can fight back. . .But they’ll have a hell of a fight on their hands with the 130 HP of Thwomps. Enemy units struggle significantly to take down Thwomps, but the top of Thwomps are solid, enabling foes to be completely safe from them while they easily whittle their HP down. To prevent this, place some traps on top of the Thwomp to make them near invincible, or simply ride them there yourself. Thwomps cost 3 kills.

TEAM ROCKET


Team Rocket Characters
Rocket Executive Hugo
Team Rocket Grunt
Weezing
Arbok
Kangaskhan

This faction has a decent mix of offense and defense. Arbok and Kangaskhan are the most blatantly offensive – Arbok for fairly obvious reasons, but Kangaskhan is better than usual just because it’s so very easy for her to get enraged. Having units around to attack her baby means she doesn’t have to ever put the baby at serious risk, leaving her to be an abusive of a parent as she wants. Rocket Grunt struggles quite significantly to pull off his awkward KO mechanic, having to be incredibly defensive and covering the entire base with various toxic gases if he hopes to succeed. Grunt can still go on the offensive by using Houndour to destroy enemy traps with his fsmash, though will be little threat to the actual enemy characters and should only be used offensively if siege units just aren’t doing the job. Weezing is the Grunt’s main partner on the defensive and is the most blatantly so of anybody on Team Rocket, his gas typically overlapping with the Grunt’s, and can he use his gas as an extension of his range to ensure that the foe doesn’t leave and the Grunt can actually pull off a KO or two.

Hugo can join in either offense or defense, as the fact that hypnotized foes will fight for Team Rocket briefly can help make a significant push on the enemy lines. Hugo will have more then enough units in front of him to make it difficult for enemies to turn away and generally distract them, much less with his actual allies there to help defend Hypno. In order to move about the camera zones with Hugo, any one of Hugo’s Pokemon other than Raticate (Who would otherwise force you to move a lot) must move into the next camera zone, which will cause all of Hugo’s Pokemon to spawn there. Raticate will not walk off camera zones by himself, and if he reaches the end of a camera zone he’ll just attack the next nearest enemy still on the camera zone instead. Of course, Hugo can also play very defensively to match the rest of his team if necessary, or to simply defend the base when a horde of Kangaskhans and Arboks go out to attack.

Team Rocket Terrain

Team Rocket’s half of the terrain is actually an entire hideout – the “surface” is the roof of their building, while the “underground” is the building interior. In addition, there is no top blast zone in the actual Team Rocket base camera zone, as it is entirely indoors, linking directly to the lower lane – the top lane doesn’t actually connect to the base at all, and instead there is simply an additional hole in the roof at the far side of it that can be used to enter the bottom lane. Inside the actual base, the barracks that sends units to the top lane is on an elevated platform, and units that spawn from that barracks step onto a teleporter in the background to be transported onto the roof.


In every area but the roof, scientists can be seen in the background at computers. They seem to just be part of the background, but there are also tiles in the background and foreground. Tiles with arrows on them propel the foe 2 Platforms in the direction they point at Sonic’s dashing speed, unable to attack, while the other tiles will either teleport the foe back to their base if they’re under 70% or into your base if they’re over 70%. You can normally only step on these by dodging into them, but when a enemy unit is on the same horizontal position as one of the tiles the scientist in the background will type furiously at his computer, causing the floor to shift so the tile is in on the floor of the main playing field. It takes .3 seconds for the tile to come out and it stays out for 2 seconds before going back into the background. Each tile can be shifted only once every 20 seconds.

Should a Team Rocket character intentionally spot dodge into a teleportation tile, the damage percentage requirements reverse – sending strong Team Rocket characters to attack the enemy base while sending hurt ones back to heal. In addition, Team Rocket characters –are- able to attack while being sent forward by an arrow tile. Arbok in particular can benefit from this what with his dashing attack enabling him to pick up speed on the arrow tiles to make the fastest approach possible.


The tower on the roof and the tower in front of the “fortress” of Team Rocket are generic laser turrets that have 200 HP, attacking every second for 12% and weak knockback. The “towers” on the bottom lane and in front of the two Barrackses, though, are Persian Statues, which have no means of attack, but have an absolutely incredible 500 HP. They’re far from defenseless, though, as whenever a unit walks in front of the Persian statue their eyes will glow red briefly, causing a Persian to be spawned at the barracks and go to join the wave. Team Rocket’s starting troops are among the very weakest of any faction, but this more than makes up for it – just don’t expect your tower on the top lane to hold on for very long.

The so called “Barrackses” are Pokemon in cages in the background, being released by various Rocket Grunts to go out to attack. The Grunts are the “HP” of the “Barrackses”, and each Grunt has a mere 50 HP. However; because “Barrackses” can’t be attacked until their towers are dead, the Persian Statues will have to be destroyed before you can attack these Grunts. Even better, once a Grunt dies you’ll get a new one to replace him in 30 seconds and your Barracks will be up and functioning again, though needless to say it can be undone pretty easily. None the less, this means that once only your Fortress is vulnerable if you can hang on long enough it can become impervious to attack briefly and you can get some more units.

The “Fortress” of Team Rocket? Considering their terrain in and of itself is a fortress, the what you have to destroy to defeat Team Rocket is Giovanni himself, who’s sitting in his chair stroking his Persian. The healing area for Team Rocket is a door located next to a Giovanni. Giovanni has 200 HP, making him very frail for a “fortress”, but whenever he is attacked he’ll send out his Persian to attack foes, which has infinite HP. When Giovanni reaches 100 HP, he’ll also send out his Nidoking, also having infinite HP. Giovanni’s Pokemon never go to join the “waves” and stay next to their master to defend him. These Pokemon are but an emergency defense system, though, as the main thing making Giovanni a viable “Fortress” are his regenerating “Barrackses”.

Team Rocket Units

Team Rocket’s starting units are 5 Rattatas, 2 Koffings, 2 Ekans, 1 Drowzee, and 1 Dugtrio.


Rattatas are slightly smaller than Pikachu with 10 stamina each and move at Captain Falcon’s speed, having a bite attack every half a second that deals 5% to units, but only 2% initial damage to an enemy character, causing the Rattata to latch onto the foe like a Pikmin. Attacking the Rattata with the body part they latched onto will hit them, and they deal 2% per second until you get them off. If you get 3 Rattatas on the same foe, though, they’ll be unable to attack with that body part and will probably have to run over to a tower or ally to get the rats off. This is unlikely to happen by pure chance, but if Hugo’s Raticate joins in with the foe in latching onto the same body part as them, it counts as 2 Rattatas – only 1 Rattata and 1 Raticate is needed to prevent the foe from knocking them off. Rattatas cost 1 kill.


Koffing is around the same size as Rattata, but hovers half a Ganondorf off the ground at all times and move forward at the Gerudo King’s speed, and do simple tackles every 2 seconds that does 6% and average and knockback. Koffing have a decent 30 stamina, and will attempt to self destruct over 2 seconds when they reach 10 stamina in a Bowser sized explosion that does 17% and knockback that kills at 165%. This wouldn’t be particularly viable outside simply encouraging foes to stay back for a moment, giving Team Rocket some more time, but Koffing creates gas wherever he goes that lasts for 5 seconds and can potentially obscure him if he stands in place long enough to self-destruct. If you want more of this obscuring smoke to help defend traps and such by the Barrackses/right outside your base, buy more Koffings. Koffings can be picked up like items when they’re charging up to explode and do siege damage of 30% to buildings and traps when they do. Koffings –can- be used against you, but Team Rocket has good enough offenses to not really have to worry about it too terribly. Koffings cost 1 kill.


Ekans slither along the ground at Mario’s dashing speed, being as long as half a Battlefield Platform fully extended, having 20 stamina. Their attack is a every .75 seconds, a bite that does 7% and slight knockback, but with terrible range. If a playable character comes nearby, they can extend themselves out to be an invulnerable trap for 2 seconds that trips playable characters who dash past. Ekans can only do this once every 8 seconds, and will prefer to do so more if there is smoke from Koffing/Rocket Grunt around to obscure him. Naturally, this means Ekans and Koffing pair together splendidly. Ekans cost 1 kill each.


Drowzees are roughly Mario’s size, but move at Dedede’s dashing speed, making them quite slow, though their chubbiness gives them a decent 35 stamina. Their attack is a simple pound that deals 6% and weak knockback, but they can only use it once every 2 seconds, being quite lazy Pokemon. However, Drowzee is constantly trying to hypnotize enemies within 2 Battlefield Platforms of him that are facing him, and won’t move into melee range if there’s somebody he can hypnotize. It takes 5 seconds of being within Drowzee’s range to do this without him being attacked, and if he succeeds he’ll take control of an enemy unit/character until he’s attacked. Even if he is attacked, the hypnosis takes 10 seconds to wear off. If possible, try to get an expensive unit in front of Drowzee, but block it from attacking him for great results. Drowzee obviously also compliments Hugo very well – if Hypno and Drowzee face each other with a foe in the middle, there’s nowhere to turn your back to. Drowzees cost 1 kill each.


Murkrows have 25 HP and hover 1.5 Ganondorfs off the ground, moving at Mario’s dashing speed, making them somewhat difficult to take out. They are the only ranged attackers Team Rocket has that don’t cost 3 kills, firing shadow balls down at foes every 1.5 seconds that deal 8% and flinching. The extra ability Murkrows have is that they will dive at and retrieve items, able to steal them from the hands of foes if necessary. The Murkrow will use the item if it’s a throwing item, and if it’s not it will go to give the item to the nearest ally, even if said ally is on a different camera zone. Yes, the standard for the mode is items off, but aside from disposing of stuff like Diddy’s Bananas Murkrow can pick up a Koffing when he’s about to explode and throw him forwards, making Murkrow a must for more defensive Team Rocket teams who don’t want to fight alongside their Koffings. Murkrows cost 1 kill.


Dugtrio is as wide as but a decent chunk shorter than Wario, and has 45 stamina. Their “movement” is quite awkward, involving them going underground then popping up a Battlefield Platform forward .5 seconds later. If there’s anything to attack within that range, they’ll pop up under the victim, dealing 9% and vertical knockback that kills at 190%. If a tower in the other lane is being attacked, Dugtrio will split up into multiple Digletts, each with a third of the stamina and HP of a default Dugtrio. Two of the Digletts will go to defend the opposite lane while the third Diglett remains in the same lane. Buying Dugtrios in the opposite lane you intend to defend is something to consider, as 2 Digletts is better than 1 Dugtrio in a way as it gives the foe more to dodge – excellent for Arbok. Otherwise, Dugtrios are a good general defensive Pokemon to buy if your team is more defensive. Dugtrios cost 2 kills.


Persians are Wario’s height, but 1.2x Bowser’s width due to their four legged nature, having a fairly bulky 45 HP. They move forward at Captain Falcon’s dashing speed, which they need considering how regularly they’re summoned by the Persian statues. Persians attack every half a second for 9% and slight knockback, meaning they’re not particularly strong but not particularly weak due to their speed, and they have a slight bit of bulk to them. Essentially, they’re just enough to defend the base – don’t expect the Persians to launch much of a counter-offensive after they kill what was attacking the Persian Statue that summoned them. That said, the bulkiness of Persian can be boosted to more notable levels if you mass Rattatas – when Persian has 20 HP or less, he’ll eat any Rattatas he sees, instantly healing him of 20 HP. If the Rattata Persian goes to eat was latched onto a foe, then Persian will latch on in the Rattata’s place, having as strong of a grip as 3 Rattatas latching on and dealing 6% per second to the foe. This interaction works pretty nicely by itself without you buying units considering you get so many Persians and Rattatas for free, so don’t feel obligated to pay Persian’s 2 kill cost.


Houndoom is roughly the same size as Persian, if a bit taller, but is very slightly more frail with only 40 stamina and without the ability to eat Rattatas. Houndoom has the same movement speed as Persian, but his melee attack does 15% and knockback that kills at 170% despite being just as fast as Persian’s, once every half a second. Houndoom also has a ranged fire blast he can use every 10 seconds that deals 10% and decent knockback. This has a range of 2 Battlefield Platforms, and once the fire blast expires it turns into a Bowser sized lingering hitbox of flame that does 5% to everything in it for 3 seconds afterwards. Should Houndoom run through these flames, he’ll heal for the same damage it deals to foes – this combined with Houndoom’s range makes up just as bulky as Persian, except Houndoom is actually useful due to having some actual power. Houndooms cost 3 kills.


Nidokings are the size of Wario with similar speed, and have a very meaty 80 HP. Their main attack is to drill forward with their horn for 20% and knockback that kills at 150%, but this attack is laggy and can only be used every 2 seconds. However, during the end lag of the attack (half a second), the horn is still a lingering hitbox that deals 5% and slight “get away” knockback”, making Nidoking less defenseless. Nidoking also has a secondary attack he can use every 10 seconds that involve creating an earthquake effect 2 Battlefield Platforms wide up to 2 Platforms in front of him, dealing 5% per second and very weak upward knockback to everything on it, and more importantly doing 15% siege damage per second to buildings and traps – outside the Grunt’s Houndour this is your main way for taking down enemy buildings. Nidoking can keep up his Earthquake for 5 seconds at a time, but Earthquake’s cooldown doesn’t start until his Earthquake is actually over. While Nidoking -is- insanely powerful, if you're going for a rushdown on the enemy's buildings you may want to just use a Murkrow + Koffing combination for your siege damage, considering Murkrow is so much cheaper than Nidoking's 3 kill cost.
 

Katapultar

Smash Lord
Joined
Nov 24, 2008
Messages
1,284
Location
Australia
The X-box achievements were humorous to read (just so you know there are 2 achievements for unlocking all characters; Full Cast and No More Challengers). I'm going to try and get that Super Cool Award.

I'm a Loser.
 

MarthTrinity

Smash Lord
Joined
Aug 9, 2007
Messages
1,954
Location
The Cosmos Beneath Rosalina's Skirt
So...f you've checked the Super Smash Bros. Brawl box...you may have noticed something a tad...weird. Go ahead, grab your case. I'll wait. Got it? Well on the back you can see that Super Smash Bros. Brawl is rated T by the ESRB for "Crude Humor" and "Cartoon Violence." How about we lose that "Cartoon" part of it and kick Brawl up a notch with...

FATALITIES

Now, if you've ever played the classic fighting series Mortal Kombat, you should know very well what these are. Final Smashes? Mere child's play compared to these babies! Fatalties are the ultimate way to humiliate your foes after a solid beat down! In Mortal Kombat, you'd usually have to input a specific button combination at a specific point...but in Brawl, it's much, much easier (and just as violent!). Do note however that there is one tiny disappointing thing about these; you can only use a Fatality in Stamina mode...you'll see why. . .


Wh-...what the heck?! Where did that come from?! Well...once you reduce a foe's Stamina to 0%, instead of letting out their death cry and simply crumpling, a deep voice will exclaim "FINISH HIM/HER!" depending on your opponent's gender. The message will also be displayed across the screen in case you're hard of hearing or simply have the sound off.

During this time, your opponent will be in a wounded looking state, much like our good friend Link pictured above. The opponent will only stay in this state for three seconds so you better follow up quickly!

In order to perform a Fatality in Super Smash Bros. Brawl, you must tap the all three Taunt inputs in quick succession as your opponent is rocking. If performed correctly...the classic Fatality noise will play and the screen will dim...


Oh no Link! Run! Get out of there! Mario starts charging up a massive fireball in his hands as Link stands vulnerable before him; this certainly won't end well for the Hero of Time...!


Mario hurls the fireball at Link who is instantly and painfully incinerated by the intense heat! What a way to go! Hey...that skeleton looks awfully familar. No matter, the match is now over and your opponent has crushed your hopes and dreams with a single killing blow!


But of course...the victor also gets their moment in the sun; a quick victory taunt and a booming cry of "FATALITY" with the words written across the screen in blood. How brutal!


And it's not just Mario who has one of these! Every character in the roster has one! Here's a few examples...but don't forget to try out all of them for some very brutal Fatalities!


Link gets his revenge...and so do the Cuccos it seems!


Marth dashes through the foe with a killing slice; he cut Bowser in half...!


The King Koopa pulls the foe into his shell and spins, tearing them limb from limb!


Kirby sucked the foe's skin clean off; how horrifying...!


Captain Falcon delivers a fatal Falcon Punch that instantly incinerates the foe; skeleton and all!


A zero?! Mr. Game & Watch uses "0" Judgement to blow the opponent's head off!


Negative Man's Fatality! The point isn't to kill yourself Negative Man! Your arm's not going to hurt anyone!

And these are only a handful of the shocking and jaw-dropping Fatalities in Brawl! What other gory finishers await...? Well there's really only one way to find out...!

FINISH HIM!!

Oh, and one more thing. . .


As a side note, while these images were made by me with over 9000 hours in Photoshop, none of these sprites belong to me. I found these all on Spriters Resource and am giving credit where credit is most certainly due. So thank you Spriters Resource and all of you who contributed the sprites I used! Even though you'll never read this. It's mostly just to make myself feel good. Also as a side note, no, this is not the mini that I was making that moveset for; I changed my mind and decided that rushing said moveset out to go along with a mini would be quite silly; I'd rather take my time and get out a quality set. Also, said set has nothing to do with Mortal Kombat. Overly long closing comment done right...now.
 

Rychu

Thane of Smashville
Joined
Jul 5, 2010
Messages
817
3DS FC
1908-0105-4965
WHOS READY FOR LATE COMMENTS?!


Silver's anime guy:
I like the use of wind in this set, I really do. Elemental characters are extremely interesting to me, and this is no exception. I like the Wind Tunnel and how it's used, all very interesting stuff. Dispite what I've read in other comments, I think its pulled off quite ingeniously. I cant wait till your next!

Crash Bandicoot Villian whos name is a horribly corny pun
N. Brio is an undeniably Warlordian set. The concept is quite interesting, along with the transformation and such. I've admired throughout my short MYM career how you can literally take EVERY button input and make it mean something to a set, and this is no exception to that. The mechanic is as always brilliant, the set works together extremely well...and it has those matchups I love to read. Another good one, MW.

Yet another Radiant Dawn character:
Sew...where do I begin? This is miles ahead of Sanaki, one of my favorites in the contest so far...It deserves to be your "breakthrough set". Honestly, I'm a bit jealous. YOU could quit right now and could have accomplished more than I have, in almost half as many sets(not that you should quit, cuz your awesome (: ). I can give nothing but praise for this set, Cube.

Also...I choose B, final answer.


Shotzo(god I hope I spelled that right):
A non moving cannon that is so heavy it doesn't take hitstun and works with pretty much all projectiles, that also happens to be a level enemy? I about creamed myself because of this sheer awesomeness of a character.
I like everything about this. Even the moves that seem like filler are important and in-character. I'm honestly in a bit of amazement on how you managed this...just...wow. Great job...wow...just...wow.
 

Kris121

Smash Journeyman
Joined
Nov 26, 2008
Messages
263
Location
THE INTERWEB
HaHa it's catching on. Anyways I enjoyed fatalities very much. It's interesting to see what would happen in Brawl if it changed Rating. I liked the all the pictures and stuff. I can see you put a lot of effort into it. Kudos. A vote from me.
Also.
Let's get this thread moving. It's been a couple of days and barely anyone's posted
 

Darkslash

Smash Master
Joined
Feb 1, 2008
Messages
4,076
Location
Strangereal Equestria
Tired of fighting with out reason? Need to blow up stuff? Then you need.....


Modified from it's incarnation from Battlefield Bad Company 2, Rush will pit 4 characters in a battle of epic proportions. Similar to the Multi Man Brawls, in Rush, you'll have to protect 4 objects from either getting captured of destroyed.

The Character select screen for Rush is similar to the default character selection screen. The only major difference is that the screen will be split in half, with 2 players on each side of the screen. You can choose to play a solo, with a team, or a X vs X match.

Rush has some basic general rules rules. There are 4 objectives, each having 200 Stamina. The goal of the attacking team is that they must destroy an objective in order to move the the next one. The goal of the defending team is obviously defending the objectives. All players on each team will have 4 stocks, but this can be changed in the character selection screen like a regular brawl.

In order to help both teams, they will have the Fighting Alloy's as allies. Fighting Alloys on the attacking team will attack the objective only, and will ignore the defenders, unless the defenders provoke an alloy. Alloy's on the defensive team will ignore other Alloy's and instead concentrate on the attacking players. There will be 75 fighting alloys per objective round, so if you run out during a round, they'll always respawn back to 75. The fighting alloy's will have the same color as the team color, to avoid mix ups.

There are 5 segments per round, each segment being the size of 2 Final Destinations. Defenders will spawn in the objective room, and attacks will spawn in the first segment of the map. Each Segment will spawn at least 15 fighting Alloy's, and each round will up the difficulty level by one each. In short Round 1 will be level 5 AI, and by the end of the game, the alloy's will be level 9 AI. If you want, you can choose to turn off Alloys, reverting each round into 2 segments.


Also, since MT did it,


Also, don't ask why the alloys, first thing that came in my head.
 

n88

Smash Lord
Joined
Oct 10, 2008
Messages
1,547
Bloop


I just wrote this in ~2-3 hours because I figured we could use a bit more activity this week. Although sadly, it has killed whatever chance I had of making a mini for this week.
 
D

Deleted member

Guest
First off, let me address a couple of issues with the user rankings. Joint movesets are ranked lower solely due to trying to prevent tagging your name on for extra points. Usually I'm pretty lenient with this kind of stuff, but an abuse this blatant seemed generally a good idea to nip in the bud. I only use a person's moveset in those headers (I go for top ranking, or a first moveset failing that) – sorry, Neherazade, but Unown is your only set. And on Warlord's allegations that I comment too much because of stuff like Hype Dog... honestly, I didn't want to offend Silver by just disregarding that as a joke. Apparently it was, but I've seen worse “real” minis.

What I loved about Owl Person was the padding... this mini had little thought put into it and basically functions as a slightly more advanced Hype Dog, but you managed to piece together an inventive backstory including plenty of exposition and references to Make Your Move. It actually was pretty endearing, due to your affluence when it comes to creative writing. Obviously, as a mini, it was bad, but it was a fun little excavation in the least; I enjoyed it.

We have our second Koric set here – Yamato, from Bare Knuckles or Streets of Rage. Again, you have a fascination with the obscure, it seems – this character you found hard to find artwork on, yet are able to create a rather episcopal moveset balanced on these simple ideas: the only ones you're given. You have a command of the character again impressive considering how little potential he had; you do need some guidance in a few key areas, however.

The playstyle is too little compared to how much you convey in the set itself; sectioning it off makes it feel somewhat disjointed, and I feel like in general the playstyle could use some more work to make it more obvious to the reader. It is imaginative what you achieved with the “shurikens,” easily the best part of the moveset – focus more on ideas like this; a great projectile or trap concept. You do have a habit of going off on a bit of a tangent with simple inputs, but that can be a good thing if harnessed correctly – you need to condense these inputs into something more simplistic and easily understood.

Yamato can only really have one very big complaint levelled against it... the grammar. I told you this while reading it before you posted, but it does read rather clumsily. The clauses are somewhat overcomplicated; you need to bring together your writing more and mention information when it is relevant, as well as working on your writing in general. The moveset itself shows the flair you had in Arle with obtuse ideas and a kind of design that's unique in this contest, but the grammar acts as a barrier to this. Not to say it's a bad effort – I feel like you have plenty left to show us yet, it's more that you're a diamond in the rough.

[I'm sorry that I didn't comment Yamato earlier – school started, so I had to take some time off Make Your Move to handle that transition. You did preview it, so not commenting it for a whole week was cruel of me.]

The first of our blood-related minis this week was Brawl 4 Dead, a parody of the zombie survival genre in its purest form. It's basically just a port of that kind of idea – though you do make some slight considerations, which are the highlight. If anything, I loved the inclusion of “undead” movesets such as Poison Zombie – as unknown as that moveset was, you must have had to scour far and wide to find that one.

Next we have a rather superb little mini in Minions by Gcube – getting out excellent minis as well now, I see? This was a very refreshing idea, and started off what was a golden week for minis [if not movesets], making way for even grander ones like Edge of Heroes. I do like what you do with the individual summons in this one, but most of all I just love the concept of different “types” of mini for a faction or character specifically... massive kudos on re-introducing this concept for minis. Great job.

And Crate Enemies. By God this was such a clone of Gcube's original content, I was a little shocked. Obviously not much of a negative, considering it was a good concept and deserved revisiting. You bring to this mini your usual pizazz and artistic talents – as well as exploring some interesting ideas with Scienstein, along with your characteristic writing charms that make it enjoyable to read, and a blast to skim. I also by far prefer this kind of mini to something like Smashville.

I come out of Search and Destroy a little confused. Nothing new when it comes to reading minis, but... you keep on saying you can't traditionally knock out opponents in this mode, yet never explain. The lack of explanation is really baffling, as it seems like just the first half of an extra. I dunno, maybe I'm missing something here – it would have functioned just as well as a hide-and-seek sort of extra, what with light sources and darkness; maybe should have just done that, Geto.

And now we have a real mini... EDGe of Heroes, my God, what a masterpiece of mini magic! Of course, being the only other person who plays this map – as well as the official new clan leader as of today [thanks Warlord], I am perhaps a teensy weensy bit biased. You do pull this off, though, with the kind of soft touch that is so very great about all the extras or story modes you've ever done, leaving enough up for the reader that allows them to indeed build their own ideas without being held up by any fiddly bits. At the same time, Capture the Flag mode had Spy... I still feel like an accompanying set would have put this over. Great job nonetheless.

And now for another Kris mini. Oh joyous joys, what have you done now? Achievement generators are fun; you are intelligent. This mini made me laugh hard. You have several that accomplish the same thing, but that's pretty smart of you. I see what you did there. You include lots of references to stuff that is almost relevant but not quite, keeping us all on the edge – is this mini real, or is it just a nightmare that I can't wake up from? Keep up the... work, Kris.

After that brilliance, we have Fatalities. I mean, I could just sum up my thoughts on this one with, “lol,” as that's really all it sets out to do. You're a damn sight more thoughtful than all of us, as anyone would have loved to make this mini – it's a genius idea to think up, and I'm surprised no one did immediately upon the announcement this week. In all, though, it is just a tad silly; I'm also not sure if you made particularly amazing fatalities considering the potential, but that's for next week anyway.

Now Slash is having another go at content in Make Your Move? Awesome, please make a moveset, man. This is rather an interpretation of your apparent first-person shooter fetish – and what better than Battlefield to express such an obsession? Rush is fairly simple as an idea, but implemented well here in delivering a competitive team mode for Smash. It's nothing ground breaking: a fun interpretation and I'm glad the shooter genre is getting some recognition this console generation, for once.

And a very gracious Nate thankfully saves us from just having one set this week with Blooper – one of the iconic Bowser minion sets that are his best credited. To a point further than Pokey or Bob-Omb, though, this moveset feels direly dry in terms of potential. With Bob-Omb you delved into the whole fuse concept exquisitely, while with Pokey you had a myriad of possible concepts surrounding his removable heads. Here, you face a larger challenge with a goo-shooting squid. In all, you do pull it off admirably.

You are well tuned in deciding to place some gunk mechanics in here – it's one of the favourite mechanics this Make Your Move, but here it performs the very simple traction nerf, while providing some extra flow by allowing for total submersion into sludge that makes you slip and slide on ledges. I feel for you in this respect – these ideas have been covered already in Bowser Jr. and Octillery, with far more time to edit them down to a fine point. Here, it is a little under thought – but with the time given, it's impressive how much you squeezed out of the character. If not for previous movesets, this would have been a pioneer with such mechanics involving the ooze.

As expected, the writing style is approachable and friendly to read, though like in the old days with you, there are a few more typos than I'd have liked. They are really the only slowdown for what is otherwise a perfectly readable moveset. The organisation is plain; suitable for Blooper. If anything stuck out as a little out-of-place throughout the entire experience, it'd probably be that mini-Blooper... and what is with minions with miniature versions of themselves; first Shotzo, now Blooper? It's strange, and fulfills a bit of a weak purpose. At the same time, I am, as always, incredibly humbled by how expressive you are with so little to work with, and under such time constraints. My hat is off to you, Nate.

I'll edit in a comment here for Pokemon Mode considering it's just after this post. It's strange you chose to make movesets into summons, to be honest - I'm not sure if there isn't conflict between the two ideas, whereby you condense a moveset's main concepts [rather than the character's, though the moveset may already do that for you] into four moves, giving them properties you'd expect in this kind of mode. It's a very about way to do this kind of extra - I would have expected you to try and find moves appropriate for the characters already in the games, rather than inventing entirely new ones. It is very experimental - in a good way and I do like your gusto to try and invent not only entirely new 'mons, but also moves and statistics for each. I think the one downside of it is you don't really explain the actual concept of how you use the "Smash balls" particularly well, so it's vague how any of this actually works.

Once again, Katapultar, you grace us with more of your beloved Ronald McDonald - this time with Wild Donald. This whimsical symbol of capitalism throughout the world has become almost like your calling card in recent memory, summarised once again here using Kris' template from last week's minis. In many ways, this mini reminds me of what I thought when I first read Robo-Link marks one or two, considering the amount of enamouring in-jokes you make. It's kind of hard to relate, as I've never watched the Ronald McDonald insanity videos; if you want to continue making this sort of thing, try to make it more accessible for those of us not in the know. It's lovely as a bizarre little project, though. As far as the actual set goes, it's mainly just references and you don't build a metagame for Donald - not that we've seen anything of that magnitude for a mini, yet I feel like with Pokemon it would be appropriate. Keep on rolling out the Donald merchandise, and I'm sure you'll earn a job working at McDonalds, Kat.
 

kitsuneko345

Smash Ace
Joined
Dec 20, 2007
Messages
562
Location
*sending Sundance lots of apple pies on Pi Day, as
POKEMON MODE


Since the beginning of MYM, there have been countless attempts on pokemon sets (some good, others sucky). There have also been times where people thought, "Hey, let's make pokemon sets for this random franchise." There have been attempts to combine MYM and Pokemon together (read: Pokemon MYM), but this new mode will try taking this one step further by making each MYM entry remade into Pokemon sets.

Granted, this is experimental at best (That's why this is post as an MYMini), so there are no maps or sprites as of yet (or probably ever) and each character set will have only five moves known for now. Due to me being completely lazy, my examples will be the first three MYM sets posted, conveniently posted on page one.

Before we start with each moveset, I will introduce a held item known by many as the Smash Ball. This item can be given to any moveset and will activate when the character is at 20% health (aka the red of the health bar). The item will, in MYMer terms, replace the Neutral B attack (conveniently located in each moveset on the the top left corner of the attack list) with the Final Smash.

For those of you who do not know about hardcore pokemon (read: me), i will give a brief summary on how everything works. When reading stats, remember that the higher the number is, the better that stats is. If priority is positive, it will always come out first unless a higher positive numbered move is shown; if priority is negative, it will instead come out last uusless a higher negative numbered move is used. Target is who the moves affects, while any "chance of _____" will show how likely the pokemon will be affected by the ______ shown.


BOWSER JR.

TYPE
Dark

STATS

HP: 90
Attack: 60
Defense: 75
Special Attack: 105
Special Defense: 90
Speed: 105

Ability: Still Life - Prevents burns and poisons.

Top left corner: Homing Fireball - A small ball of fire slowly hits and burns the enemy, but this will only work if the user isn't attacked.
Type: Fire
Move: Special
Power: 30
Accuracy: 100
PP: 25
Priority: -2
Target: Closest foe
Chance of burn: 50%

Top right corner: Swoopin' Stu - The user makes this slow creature, which poisons the opponent after three turns.
Type: Dark
Move: Status
Power: --
Accuracy: 100
PP: 10
Priority: 0
Target: One foe
Chance of Poison: 100%

Bottom left corner: Paint Chain - A line of paint forms from the user to the foe. The foe can lose a level of accuracy and can become poisoned.
Type: Poison
Move: Special
Power: 60
Accuracy: 95
PP: 25
Priority: 0
Target: One foe
Chance of losing accuracy: 10%
Chance of poison: 10%

Bottom right corner: Goop Puddle - The user creates a puddle of paint at the opponent, poisoning it and its successor.
Type: Poison
Move: Status
Power: --
Accuracy: 75
PP: 20
Priority: 0
Target: One foe
Chance of Poison: 100%

Top left replacer: Pirahna Plant Pollution - The user creates this monster, who can either speed up one move automaticly (Swoopin' Stu), make a move more accurate (Goop Puddle), or increase the side effects twofold (paint chain) for the rest of the match.
Type: Dark
Move: Status
Power: --
Accuracy: --
PP: 1
Priority: 0
Target: Self


MICAIAH (Light form)

TYPE
Psychic

STATS

HP: 60
Attack: 50
Defense: 67
Special Attack: 140
Special Defense: 105
Speed: 98


Ability: Variety - Same move can't be used back-to-back.

Top left corner: Shine - A light explodes onto an foe's body, but only if the user isn't damaged once the two turns necessary to complete the move finishes.
Type: Psychic
Move: Special
Power: 110
Accuracy: 100
PP: 10
Priority: -1
Target: One foe

Top right corner: Ellight - A beam of light is targeted on one foe. This attack will usually attack first and can cause paralysis.
Type: Psychic
Move: Special
Power: 60
Accuracy: 100
PP: 20
Priority: +1
Target: One foe
Chance of paralysis: 10%

Bottom left corner: Thani - A ball of light falls above a foe's body. If fighting two or more opponents, two of them of your choice will get hit.
Type: Psychic
Move: Physical
Power: 90
Accuracy: 90
PP: 15
Priority: 0
Target: Two foes

Bottom right corner: Weapon Switch - The user switches forms, changing moves and some stats. The switch doesn't effect the PP of this move.
Type: Normal
Move: Status
Power: --
Accuracy: --
PP: 10
Priority: 0
Target: One foe

Top left replacer: Rexaura - A great ball of light slowly heads towards the opponents, taking three turns to complete its attack. When in double or triple battles, power is divided equally toward each foe.
Type: Psychic
Move: Physical
Power: 210
Accuracy: 100
PP: 1
Priority: 0
Target: Self

MICAIAH (Staff form)

TYPE
Psychic

STATS

HP: 60
Attack: 90
Defense: 82
Special Attack: 90
Special Defense: 105
Speed: 98
Ability: Variety - Same move can't be used back-to-back.

Top left corner: Barricade - Special attacks do not affect the user for two turns. Physical attacks deal 1.5x more power for those turns, however.
Type: Psychic
Move: Status
Power: --
Accuracy: --
PP: 20
Priority: 0
Target: Self

Top right corner: Rewarp - The user disappears for one turn, making all attacks towards it useless. This move also raises your evasion.
Type: Psychic
Move: Status
Power: --
Accuracy: --
PP: 10
Priority: +1
Target: Self

Bottom left corner: Sleep - A snowy powder from above makes all opponents go to sleep for two turns.
Type: Psychic
Move: Status
Power: --
Accuracy: 95
PP: 20
Priority: 0
Target: All foes
Chance of sleep: 100%

Bottom right corner: Weapon Switch - The user switches forms, changing moves and some stats. The switch doesn't effect the PP of this move.
Type: Normal
Move: Status
Power: --
Accuracy: --
PP: 10
Priority: 0
Target: One foe

Top left replacer: Rexaura - A great ball of light slowly heads towards the opponents, taking three turns to complete its attack. When in double or triple battles, power is divided equally toward each foe.
Type: Psychic
Move: Special
Power: 210
Accuracy: 100
PP: 1
Priority: 0
Target: Self


THANOS

TYPE
Fighting

STATS

HP: 150
Attack: 150
Defense: 45
Special Attack: 15
Special Defense: 90
Speed: 30

Ability: Infinity Gems - The holder gains one of six powers that usually increase one stat.

Top left corner: Gem Swap - The user switches one gem to the next in line. In order: Power (Increases Attack) -> Time (Increases Speed) -> Reality (Increases Defence) -> Soul (Increases Sp. Attack) -> Mind (Increases Sp. Defence) -> Space (Activates Galactic Transporter's Use) -> Power.
Type: Normal
Move: Status
Power: --
Accuracy: --
PP: 30
Priority: 0
Target: Self

Top right corner: Death Sphere - The foe gets trapped inside a big bubble and is unable to switch out for two turns.
Type: Normal
Move: Special
Power: 40
Accuracy: 100
PP: 10
Priority: -1
Target: One foe

Bottom left corner: Galastic Transporter - The opponent disappears for two turns and evasion is significantly increased, but only if the Space Gem is used.
Type: Psychic
Move: Status
Power: --
Accuracy: --
PP: 5
Priority: 0
Target: Self

Bottom right corner: Titanquake - With a giant step, the user shakes the ground before it afecting everyone else in battle.
Type: Ground
Move: Physical
Power: 150
Accuracy: 100
PP: 10
Priority: 0
Target: All but the user

Top left replacer: Infinity Gauntlet - The gems will depending on the gem for two turns: Increase damage 1.5x (Power), Increase one level of all stats (Time), Make the user unable to be KOed (Reality), Regain PP for all moves (Soul), Make user's type ??? (Mind), or destroy everyone on the field except himself on the second turn (Space).
Type: Normal
Move: Status
Power: --
Accuracy: --
PP: 1
Priority: 0
Target: Self


_______________________________


Special Thanks To Gcubedude for helping me a bit with this MYMini.
 
Status
Not open for further replies.
Top Bottom