• Welcome to Smashboards, the world's largest Super Smash Brothers community! Over 250,000 Smash Bros. fans from around the world have come to discuss these great games in over 19 million posts!

    You are currently viewing our boards as a visitor. Click here to sign up right now and start on your path in the Smash community!

Make Your Move 7 - It's Over, Nothing to See Here

Status
Not open for further replies.

ieyasu tokugawa

Smash Rookie
Joined
Jun 3, 2009
Messages
10

Kisame Hoshigaki the water controlling missing nin has joined the brawl!!

Backstory:
Kisame Hoshigaki is a member of the Akatsuki in the Naruto franchise. Initially he was a member of Kirigakure's Seven Swordsmen of the Mist. But when he plotted to overthrow the Land of Water his people targeted him. He later joined Akatsuki and worked with Itachi on various assignments. He and Itachi went to Konoha to capture Naruto but were stopped by Kurenai Yuhi and Asuma Sarutobi. They managed to defeat the 2 but Kakashi arrived in time to save them. Kisame and Itachi found Naruto under the care of Jiraiya. Itachi tricks a woman to be with Jiraiya causing Naruto to go alone in a hotel hallway meeting with the 2 akatsuki members. Jiraiya breaks out of his trance and stops the 2 from capturing Naruto again causing the 2 to flee. In his final appearance he fights Bee and the fourth Raikage and is killed. His head flies off and lands near Sabu.

Stats:
Size:6/10
Weight:8/10
Power:8/10
Speed:5/10
Jumps:4/10
Falling Speed:8/10
Range:6/10
Priority:8/10
Recovery:7/10
Crouch:7/10

Special Attacks:
Neutral:Water Shark Missile

Kisame slowly moves his hand back to swing it up. When Kisame has swung his hand up it unleashes a medium sized shark made of water with it's mouth open that can crash into the opponent causing great damage giving out 11%. Hitting the shark with any form of attack will just have the shark explode like a bomb also hurting the opponent. Kisame can also charge up the attack to increase the size of the shark and damage to his opponent. A very big water shark would deal 27%. As you unleash the shark at the opponent you can hear an animal roar.

Side:Underground Submarine Voyage

Kisame sinks into the ground very fast then begins to move around the stage while having his big blade Samehada above the ground to cut up his opponents giving out 2% of damage with each underground pass under his opponent. While he is underground you can see that he is using the form of a shark traveling under the earth. During his undergorund move you can control Kisame with the control stick. This travel through the earth lasts 10 seconds and then Kisame pops up to catch his breath leaving himself open for a while.

Up:Shark Spin
Kisame sways forward a bit then jumps up into the air swinging Samehada into the air taking his opponent up with him. Unlike Marth's Dolphin Slash this hits a few more times than once. After about 4 hits the opponent will be blasted up into the sky with 16% dealt after the fourth hit. The first 3 will give out 2% each. Kisame can also charge this attack for 1.7 seconds to jump even higher can increase the attack power by 20%. When he is done with the attack he will helpless freefall until he hits the ground.

Down:Water Prison

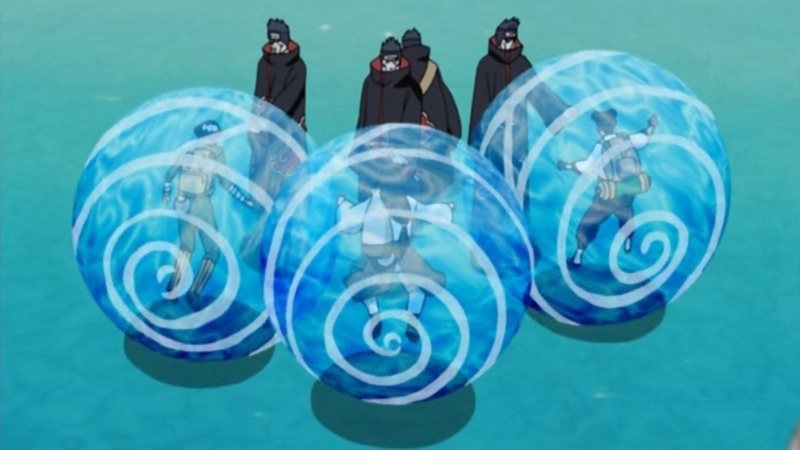
Kisame moves out one arm presumably harmlessly. Should his opponent get too close to him, the opponent will be trapped in an inescapable bubble. When trapped the opponent cannot move due to the heaviness of the water. Should you pres B while Kisame is holding his opponent prisoner in the bubble, Kisame will take out Samehada and swing it up causing 18% to his opponent and great knockback. If you hold down the B button long enough the opponent might drown and go into a downed state and puke out water before getting up. The opponent will have to tap repeated buttons to escape on their own. If Kisame is hit the water bubble breaks and the trapped opponent is free.

Standard A Attacks:
Neutral:
Kisame start off the combo by giving a punch to his opponent's stomach with his right, then a punch to the left side of his opponent's face with his left hand then ends the attack by taking out Samehada and swinging very hard to the right saying "I'll cut you to ribbons!". The combo starts off with normal fists but ends with a big sword swing. Kisame's punches give out 3% per hit and his sword swing deals 8% and a knockback to his opponent.

Side Tilt:
Kisame lunges forward, takes out Samehada and swings it downward very hard causing his opponent o stagger looking at the ground, then if A is presed agian Kisame will swing Samehada up knocking his opponent up while saying "Like that?!". Kisame has little lag while taking out Samehada while lunging himself at the opponent. Each of his sword swings do 4%.

Up Tilt:
Kisame lifts his left knee up very fast kicking the opponent in the chin and knocking him/her up with 6%. Kisame has some lags like Ganondorf doing his Upward Smash attack.

Down Tilt:
Kisame takes out Samehada and swings it left then right across the ground in front of himself very fast. This will not only trip up the opponent but also send the opponent sliding across the floor with 5% per sword swing. Kisame has a little lag while taking out his blade.

Dashing Attack:
While running to his opponent, Kisame will quickly put his right hand on the hilt of Samehada while punching his opponent with his left hand then quickly turn around and swing Samehada right knocking his opponent away. As soon as Kisame is done he slowly puts his weapon right back behind him. This gives him some lag after the attack is done leaving him open.

Smashes:
Forward:
Kisame pulls his Samehada blade out and swings it downward very hard then swings it left very fast then diagonally right up knocking his opponent up into the air. This can break a Smash Ball in just 3 hits on the ground. Each of these hits do 6% giving out a total of 18% if successful.

Down:
Kisame moves his hands near the ground in front of himself to make it wet and slippery. If his opponent walks over the water, he/she will begin to slip up trying to keep his/her balance without tripping setting the opponent up for a free hit. Eventually the opponent trip up leaving himself/herself open to attack when he/she touches the ground. Charging up the attack can make the water to wider. The slippery water vanishes after 15 seconds. Kisame himself will not slip.

Up:
Kisame takes out his Samehada blade and turns around a bit in place before swinging the sword a 3 quarter circle in front of himself blasting the opponent up into the sky. This also protects himself against air attacks. This attack deals 9% each time he juggles the opponent with this attack.

Air Attacks:
Neutral:
Kisame does 2 spin kicks in midair, one with his right then his left before he does a heel drop with his left leg that sends his opponent to the gorund very fast. Each of these kicks do 4% and are very quick. Kisame will stop himself in midair to do the combo so he won't drop until the combo is done.

Forward:
Kisame shoots a harmless loking bubble out from his left hand. The bubble float until the opponent touches it or after a short distance. If the opponent touches it, it explodes like a bob-omb giving out 6% and little knockback. The bubble pops after traveling a short distance.

Back:
Kisame quickly turns around swinging Samehada downward. He can go back and forth while the attack is done continuously attacking anyone behind him with no problems at all. Of course he has some lag taking out the sword with his back wide open. The attack deals 7%.

Up:
Kisame does a flip kick in midair that blasts up his opponents into the sky. The kick does 7%.

Down:
Kisame goes into a side spin attacking with his fists spinning around like a helicopter going out of control continuously hitting the opponent. This will give out slow falling speed while Kisame is attacking as the punches will bring the opponent with him. Once he has touches the ground he will swing Samehada diagonally down knocking the opponent away. The punches give out 1% per hits and the slash hands out 8% upon touching the ground.

Grabs/Throws:
Pummel:
Kisame will hold his opponent up in a squeezing position and give his opponent a bear hug crushing the opponent's organs and leaving 8% in it's wake. Kisame will slowly moves his opponent back to prepare for another squeeze once he is done. He has some lag once he has given his bear hug to his opponent.

Forward:
Kisame grabs his opponent's head then leaps over the opponent he is holding onto then when Kisame is over he throws the opponent off with 12%. As Kisame throws the opponent you can hear bone cracking meaning he might have hurt his opponent's neck while leaping over to the other side.

Back:
Kisame roll jumps backwards inti the air with his opponent in his grasp. Once he is high enough, Kisame will through his opponent right to the ground with 10%.

Up:
Kisame throws his opponent off of him into the air and sends waves of water form his hands at the helpless airborne opponent splashing the opponent upwards. The opponent will fly a medium distance upwards with no damage but it can send the opponent to the top of the screen where the opponent would be KO'ed. If Kisame is hit the opponent is released from the waves.

Down:
Kisame throws his opponent down the ground and proceeds to slash at the downed opponent with Samehada 7 times. Kisame will moves his weapon ins a baseball bat like position ready to swing it very fast. Just as the opponent gets up from being hit, Kisame swings Samehada very fast and knocks the opponent away with 20% done. Kisame's normal swings to the downed opponent do 3% with each hit. Kisame can be hit before he swings Samehada once his opponent is about to get up.

Final Smash:
Exploding Water Shock Wave

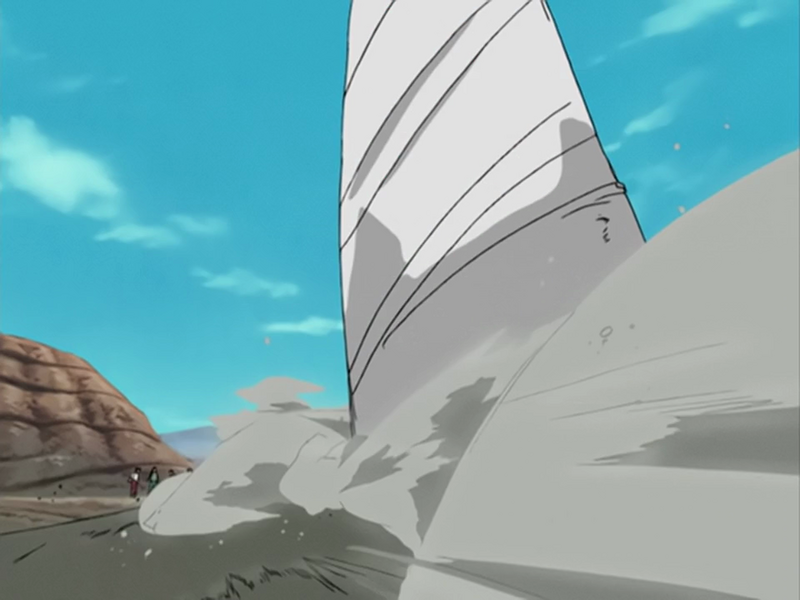
Kisame shoots a tremendous amount of water the size of the statue of liberty. If this big wall off water manages to hit the opponent you can later see that the opponent is struggling to swim until we see that Kisame Hoshigaki is swmming around to encircle his opponent saying "You cannot escape the wave once it watches you!". Then Kisame rushes forward and slashes at the opponent with Samehada 10 times. After the hitting Kisame pauses for a moment saying "Too bad you don't like my sword, and now... you... DIE!" and swings Samehada down very hard then the screen whitens back to the stage where you see Kisame is alright. The opponent is killed when Kisame does this.

Playstyle:
Kisame is a very strong fighter in Brawl. His blade the Samehada can take his opponent's Final Smash energy before the opponent even has a chance to use it. The water he uses is much deadlier than Mario's F.L.U.D.D.. His Water Prison attack can imprison his foes easily. Though he is slow he can move fast like a shark with his Underground Submarine Voyage. If he is in water he won;t drown.

Palletes:
Default Kisame
Kisame in Red (Red Team)
Kisame in Blue (Blue Team)
Kisame in Green (Green Team)
Kisame in Yellow
Kisame in White
Kisame in Violet

Extras:
Taunt Up:puts a hand on his chin saying "You're getting on my nerves."
Taunt Side:points Samehada at his opponent saying "I'll cut you up with no remorse."
Taunt Down:Goes into a strange stance saying "You won't be around for very long."
Win Pose 1:points Samehada at the camera saying "Where should i cut next?"
Win Pose 2:Does 2 diagonal swings with Samehada then says "Done already? My sword's thirsty for more!"
Win Pose 3:Stretches his head a bit then says "I can do this all day until the day i die."
Win Pose against Might Guy:We see that Kisame has impaled Guy who is on the ground as Kisame says "Might Guy huh?" then pulls his blade out saying "Mighty stupid-looking guy is more like it!"
Lose Pose:Kisame clutches his stomach as he says "I'd better retreat! I'll slice you next time!" then runs away.
 

Junahu

Smash Ace
Joined
Nov 15, 2005
Messages
899
Location
Shropshire Slasher
Cairne (addendum): I should have guessed you'd make a 60 second Final Smash. Guess it's my fault for being so ambiguous with the special mechanic description, but Rool has gotten away with worse, so I'm sure you'll forgive me.
To clarify, she generates a Smash Ball 60 seconds after the effects of the last one she generated finish (and this is going by brawl's definition, so a Smash Ball is still technically "in play" even during a Final Smash). So in Cairne's case, his Final Smash would not buffer his way to another free Final Smash, he'd still have to wait an additional minute after it wears off. I mean, Doppelori would be absolute garbage if the time she spent getting rid of a Smashball and suffering the consequences counted towards the 60 seconds needed to generate the next one.
"Once the Final Smash is out of the way, it's another 60 seconds until the next one haunts you"


Agg-abra-h: So rather than compliment how tightly focused Abra turned out to be, or sing the praises of another Rool trademark Pokeset, I'm going to make petty complaints instead *bee*.
  • So, you have to double tap A to attack AT ALL? Were you high when you did it that way round? I mean, surely it should attack AS DEFAULT, with double tapping canceling the attacking portion
  • Admit it. You could have easily combined Afterimage and Substitute in the EXACT SAME WAY you made attacking after a teleport optional. Were you afraid that double tapping B might break the button, or that it'd make the set too consistant? Or maybe you wanted Mind Reader to be a regular attack for some reason and had to spread your other Special out to compensate?
  • ¬_¬ Blink is totally just a filler Special you use to describe what teleporting is like. I don't remember you ever mentioning it again, and then you outright make a similar move for a regular attack.
  • Couldn't Fixing point count as 2 aerials (for Abra's 3 aerial limit)? I feel rather cheated that Abra can't use it to chase the foe into the air.
  • What the heck kind of pummel involves double tapping A?
  • Thanks for neglecting some key details on the Back Air. Which direction does Abra teleport in? I have to assume forewards because you say it's identical to the Foreward Air. And in that case F-air/B-air does not work as a combo while B-air/B-air works just fine
  • Also, thanks for leaving the reader in the dark about the arcane applications of Substitute/Afterimage on the Up-Air
  • Final Smash is a filthy mechanic booster.
 

Katapultar

Smash Lord
Joined
Nov 24, 2008
Messages
1,284
Location
Australia
Excel Saga looks random.

SPADEFOX = :bee:
****, I was going to post Hunter J, but you beat me (thanks as well, I might get a page more quickly). Is this set real? Yes it is.

This set looks really long (and I thought J was long... enough about J), and though it could pry me away, I'll read it. Though it would have been cool to have the stats headers, extras and intro from the original onto this set since they would increase the "cool" of the set. All the stuff you left out that's not the gay moves is what made the original great. Put that back in.

I can't think of anything much to say but Side Special is EXTREME, and this set is much worse better than the original by moveset (At least without the tacked on effects that is). It still HAS creative moves (fun is fun).

Ultimate Spadefox and Cruxis imgs from Playing God are actually Magic the Gathering people. There's a symbol on the imgs that tells you so. I just want to say that. Now make a set for Cruxis or Vertigo. ;)

Kisame Hoshigaki
This is your 3rd set so far, and Kisame seems like a pretty cool guy. Like, I don't have any bias against Naruto (Like I've said before). I've been reading some of the Naruto Manga, but I decided to stop for my own personal reasons (Bee is Killer Bee, no?). It might have been Warlord or dm, but someone previously mentioned your way of explaining things is impressive for a newcomer, and I can see that.

I suppose as you'd expect from Naruto, there are some interesting ideas here in this set, make no mistake. I like the Side, Down and Neutral Special; they're pretty good ideas... but I do have a suggestion. Some of the attacks need JUST a bit more detail so that readers can fully comprehend the attack's effect. For example, is the Neutral Special a projectile? And where does it come from? Also being in the ground for 10 seconds in the Side Special seems just a bit unfair, like a stalling tactic... it would be best if foes could use a attack that can hit the ground (Like a D-tilt) to hit him out. Finally, the Down Special: is there any way for the foe to escape on their own (Like a grab). Oh, and if a foe does drown in a Water Prison, it should only send them into a downed state, not KO them.

Of course, these are just minor detail nitpicks. The set could do with a size=3 BBCode for the Specials and important headers like those. Don't be afraid to try and use another color, such as light blue or red to make it more fitting, as one color isn't always the most appealing thing. So far, it's the best set you've produced so good job.

And one more thing. I have to congratulate you for not using random jutsus like the Substitution jutsu despite everyone being able to do that in the Naruto fighting games.
 

KingK.Rool

Smash Lord
Joined
Nov 26, 2005
Messages
1,810
ohmygodohmygodohmygodabra
-Hmm, every move has teleportation of some sort? Cool stuff, it makes Abra interesting, that's for sure.
-I'm liking the stats. Sure, it's the same tried-and-true stats just with a different name, but it's actually kind of fitting to Abra.
-Blink is strange-but-brilliant.
-SO FREAKING CALLED THE UP SPECIAL. Anyway, mindgames. Fairly obvious that's what Abra's all about, but you put a nice spin on it.
-Missed a tag there on the forward smash. :p

Yes, yes, Abra is very different. Hell, there is no real category to PLACE him in, but the set in general feels very refreshing regardless. I can't say this set has flowed as well as past ones, Rool, with blink hardly being mentioned again until the end, and Afterimage just seems like more of a sitting duck than anything. Despite that, I love the move substitute and it gives Abra such a distinct playstyle that's actually....fun?!? I'd main him anyday, even though Abraberz would take years to truly master.

You've took the whole book on smash bros. teleportation, said "Screw that, those rules are boring!" and went on your merry way.
Thanks for the commentary, Frf! And I fixed the flubbed tag. :embarrass

You fiend.

Agg-abra-h: So rather than compliment how tightly focused Abra turned out to be, or sing the praises of another Rool trademark Pokeset, I'm going to make petty complaints instead *bee*.
I wouldn't expect anything less. ;)

[*]So, you have to double tap A to attack AT ALL? Were you high when you did it that way round? I mean, surely it should attack AS DEFAULT, with double tapping canceling the attacking portion
LOGIC! (shock)

I might have been a bit drowsy, is all...

[*]Admit it. You could have easily combined Afterimage and Substitute in the EXACT SAME WAY you made attacking after a teleport optional. Were you afraid that double tapping B might break the button, or that it'd make the set too consistant? Or maybe you wanted Mind Reader to be a regular attack for some reason and had to spread your other Special out to compensate?
But, but... that'd be too confusing! (wary)

[*]¬_¬ Blink is totally just a filler Special you use to describe what teleporting is like. I don't remember you ever mentioning it again, and then you outright make a similar move for a regular attack.
Lies and slander! I mention it in the playstyle section a few times, it's essential for his anti-offense game!

[*]Couldn't Fixing point count as 2 aerials (for Abra's 3 aerial limit)? I feel rather cheated that Abra can't use it to chase the foe into the air.
Eh, the lag would foil it as a chase option anyway.

[*]What the heck kind of pummel involves double tapping A?
;)

[*]Thanks for neglecting some key details on the Back Air. Which direction does Abra teleport in? I have to assume forewards because you say it's identical to the Foreward Air. And in that case F-air/B-air does not work as a combo while B-air/B-air works just fine
Forward, yeah! It's identical, I say! And you can most assuredly go FAir/BAir/FAir. Can't go FAir/FAir, of course, and it's only with BAir/BAir/BAir that you can juggle them between yourself, sure.

[*]Also, thanks for leaving the reader in the dark about the arcane applications of Substitute/Afterimage on the Up-Air
Gotta leave something to the imagination, no?

[*]Final Smash is a filthy mechanic booster.
Abra has no mechanic! It's a playstyle booster, though, sure. I actually thought for a while about making a more interesting one, but it would take too much detail and effort so I just kinda slapped something together.

The reason your play-by-play analyses kill me is because of the all-at-one-go way I make my sets. Brainstorming, planning? Bah!


And MT, I love your writing style top 5. Wispa would be up there on mine, as well.

Kisame: Seems like an improvement over your past efforts - unimaginative use of colour, but at least it's there - although I'm going to randomly emphasize that your pictures are stretching the page. 6_6
 

Katapultar

Smash Lord
Joined
Nov 24, 2008
Messages
1,284
Location
Australia
HUNTER J

...
Hunter J is a reccuring villain in the pokemon anime who appeared in the D/P saga, using Ariados, Salamence and Drapion. She travels around the world in a airship to capture/steal Pokemon using an arm cannon that turns victims to stone and sells them to willing clients for a profit. Even if J sees a worthy Pokemon that's not part of her mission, she'll still try to steal it, as in her first debut, J battled Ash (The protagonist of the Pokemon anime) only to test his Pikachu's power and then steal it. When J makes a appearance, Ash rashfully tries to stop her, to which J has shown her cruel side such as ordering her Drapion to crush Ash, using a trap-door to make Ash fall out of the airship or even abandon a sector of her ship containing her own soldiers just to escape. J usually stands atop her Salamence in the anime; this trait carries on in Brawl. Oh... and J uses items, not Salamence.
...
J's stats are indeed strange. Salamence's width and J's height (keeping in mind she's standing on top of Salamence) form a akwardly large hitbox for foes; Salamence has Bowser's width while it's head goes up to Marth's height, and J is the size of Captain Falcon. Thanks to their combined weight, they weigh as much as Bowser. The duo's movement speed is slow, akin to Gannondorf. While these stats are all bad, Salamence has a total of 3 jump each as good as Lucario's 1st jump, added with floatiness to stay in the air for long durations.
...
SPECIALS
...
Neutral Special
Arm Cannon
J raises her arm cannon, which begins charging power for 1 second. After charge, the cannon fires a beam that travels quickly 1/3 FD, though the direction the cannon is aimed can be predetermined during charging time. Upon contact, the foe takes 9% with KB upwards KOing at 70%, and they cannot DI this move thanks to the "petrificaiton" effect added on (hence the introduction). Even without the single second's charge, the attack has average lag. J's prime KO move; her playstyle focuses on trying to land the blow on the foe.
Side Special
Pokemon Release
Providing you're onstage, or there's ground below, J tosses a Pokeball forward into the background with minute lag, but what comes out of it depends on which direction you inputted on the control stick for this attack: J's direction and Ariados will come out, opposite J then it's Drapion. The Pokemon stays in the background exactly where J used the attack, though the attack can be charged for up to 1 second to position the Pokemon up to 1/2 Final Destination away from J. Using the specific input when a Pokemon is out returns it to it's Pokeball should you need to return it for any reason. Drapion and Ariados are just spectators at this point, but they are vital to J's ambushing tactics that will allow you to land your rifle: the Neutral Special.
Up Special
Fly
Salamence begins flapping it's wings violently, allowing it to stay afloat in midair. Though know that this is not a recovery, but rather a stationary hover; Salamence can use it's normal air game while hovering. Exit this hovering state by either re-inputting the move or if 5 seconds pass, either way you'll enter freefall. Be warned, the longer you hover, the faster you'll fall and the worse landing lag you'll suffer, leaving you wide open to being attack. Hmm, why such a lazy filler move as a Up Special when you already have such good jumps? Simple. You'll want to use this to remain stationary while you use your other attacks to control Ariados and Drapion from the ground to ambush your foe. Try using this after you've expired your first 3 jumps.
Down Special
Mercenary Command
If Ariados or/and Drapion is/are out, holding B causes Ariados and Drapion to run to the nearest foe at Mario's dash speed. The 2 Pokemon run until they're next to the foe, locating themselves under/above the foe if they cannot be reached. You can also casually move the duo right and left using RIGHT and LEFT respectively. A standard move that allows you to control your Pokemon should you need to position them when the time comes...
...
SMASHES
...​
Smash Attacks are used by Ariados, and can be used even if J is in the air or using a Special. Ariados jumps out of the background into battle like a summon (that can't be eaten or anything else) when ordered to use a Smash. It is now exposed to the battle, the size of Ivysaur, having 70HP but only taking flinch. Ariados can't be returned to it's pokeball if in the middle of action or under attack. If Ariados somehow is knocked off the stage, it will automatically perform a standard tether to try and return onstage. Keep Ariados alive, as once gone, it will not return for the rest of the stock.
U-Smash
String Shot
Ariados aims it's backside upwards, firing a thin thread of string upwards at Sonic's dash speed with small start-up lag. If this thread sticks to a foe, then Ariados will vioently tug the thread, causing the foe to be spiked straight down akin to ZSS Up Special, where they enter their downed state. The attack makes it difficult for foes to reach J while in the air, though the end lag of the attack means Ariados risks eating a get-up attack.
...
Without interference, the thread sticks to a solid ceiling above Ariados, sticking to the top of the screen if neccesary. The newfound thread has 20-50HP, fire attacks damaging it twice as fast. Foes touching the thread have their movement cut by 1/2-1/6 while in the thread, though this is near useless due to how thin the thread is. Only one thread can exist, using this attack will otherwise create a new one. Using the Down Special when Ariados is touching a thread allows it to climb it by using UP and DOWN respectively.
D-Smash
Spider Web
Ariados tenses as it's backside oozes silk that forms a spider web underneath Ariados with some lag, expanding 1-2 SBB on either side of Ariados if charged. Foes foolish enough to tread on the web cannot jump, run, dash, roll or use any get-up attacks while on it. It can be destroyed in the same way as the U-Smash thread, and only 1 can exist. Blatant trap? Wrong, Ariados can combine this with it's U-Smash thread to catch foes who try to jump over the thread and entangle them. They then become easy targets for J's Neutral Special, though they can still spot-dodge the incoming blast. This is the move you'll always want to try and set-up as Ariados during the match.
...
While on your thread, Ariados fires a small blob of silk that can be angled at a low arc, travelling infinitely at MK's run speed. If it hits the ground, the silk stays on the ground for 4-12 seconds with the same effects as the spider web except being a Mario width. Foes hit by the flying silk are ensnared by it, requiring 1-3X grab difficulty to escape. This move can make approaching Ariados' web and thread frustrating, especially if it's set itself high on it's thread.
F-Smash
Spider Fangs
During charge, Ariados pursues the nearest foe at MK's dash speed for as long as you like, climbing over walls or interacting with it's thread if neccesary. After charge, Ariados bites very quickly, doing 15% with set KB 1 SBB backwards, but you literally have to be touching the foe for it to even hit. Despite Ariados pursuing prey, this move isn't neccesarily designed for offensive approaching, rather if the foe tries to go through your thread or attack Ariados; who will bite in any direction if on thread. Did I mention that Ariados' bite forces foes in air into freefall, so if they try to jump over your spider web and get through your thread while you're on it, use this move. They'll either fall into your spider web (providing you placed one under your thread), or they'll use a recovery which will most likely cause them to enter helpless. Either way, it's your chance to retailate.
...
GRAB/THROWS
...
Grabs are used by Drapion under the same conditions as Ariados. Drapion however has 110HP, constant super and anti-grab amour, is slightly bigger than Bowser, and can be footstooled to assist foes in reaching J.
...
Drapion's grab is a horribly slow bear hug, even worse than Yoshi's, so you might want to get the foe in a certain spider web before attempting to grab. The grab itself makes up for having good range and being 2X more difficult to escape. Oh, and did I mention this grab works on and locks onto downed foes, as well as cutting through their get-up invincibility frames?
Pummel
Strangle
Drapion sqeezes the life out of it's foe painfully, doing a whopping 4% to them at a regular pace. A great damage racker that makes the slow grab all the more worthwile to pull off.
F-throw
Cross Poison
The foe is released from Drapion's grab when using this throw. Of course there's more to it than meets the eye. You see, only once after Drapion uses this throw, if Drapion tries to grab, instead it will quickly slash in front of it to create a cross shape (It's Cross Poison, duh) and if it connects; BAM! 28% and HUGE hitstun to the foe! Of course you'll have to grab the foe in order to even be able to use this, but if timed well after a few pummels it can lead into a dangerous mindgame. Problem though: Drapion suffers VERY HIGH end lag after this move, and for the duration of it Drapion can even take flinch from foe's attacks, and double damage! Though when you think about it, this only serves as another distraction for the foe, seeing as how they have a perfect oppurtunity to damage Drapion.
D-throw
Pin Missile
Drapion holds the foe in one arm before tossing them to the ground in front of it, doing 6% to them. Now here's when things get interesting. When the foe is knocked to the ground, they'll bounce right back up only to be shot by a single pin missile from Drapion, forcing them back on the ground for another 6%. The foe will have traveled 1 SBB in total from when they were first knocked onto the ground by Drapion, and this will keep going until the foe reaches the edge where Drapion will stop firing at the foe, able to accumulate a lot of damage. So how does the foe stop this? Simple, they ukemi/tech the moment they touch the ground so that they don't get knocked back infinitely to the edge. Though they may want to reconsider doing that, especially if they ukemi onto a spider web. Even after the throw if they used ukemi to escape, Drapion will simply rapid fire the remaining needles at the foe based on how mnay SBBs it could have "stone skipped" the foe. These will simply do 4% each with flinch otherwise, which can lead into J's Neutral Special. Quite a dangerous throw where the foe must decide their own fate (providing they have the skill to ukemi). This throw can lead into a cheap KO on walk-off stages, especially against noobs who can't ukemi.
U-throw
Deathly Tail Launch
Drapion rotates it's upper half with the held foe, places them in custody of it's tail's claw, then flings them straight up, KOing at 125%. Generic throw? No, this is actually a useful throw. When Drapion flings it's foe upwards, this is a golden chance for you to use your Neutral Special on a aerial foe for a early KO. Nuff said.
B-throw
Vicegrip
Drapion performs the same action as above... except without flinging it's foe and it's tail is fully outstretced. The grab proceeds as normal now, foe now held by Drapion's tail. The use? If you need to change direction to make your foe a target of J's
Cannon, go ahead. Oh, and like DK, Drapion can carry it's foe using the B-throw input, except Drapion has to walk backwards. Drapion can use all it's other throws as well in this state (Obviously the foe's in it's tail, so animations will be different).
...
AERIALS
...
N-air
Fireball
With lag and size akin to Mario's, Salamence hurls a fireball that travels infinitely in the direction of the nearest prey at Gannon's walking speed. The fireball does 5% with average hitstun upwards to foes it hits, but it can be charged for 1/2 a second to double the size and power of the fireball. Use this move in the air to further force foes to approach you, though the fireballs move so slowly that the foe doesn't really need to worry about them. Even with a ensnared foe, this attack damages Ariados' silk traps, so it's not a good idea to spam aimlessly.
...
Did I mention you can use J's Specials during a Aerial? Yeah, you can do that.
F-air
Aerial Ace
Salamence enters a gliding state akin to Charizard's, it's glide just as horrible but slightly faster so it can help increase Salamence's aerial speed. Salamence can't ascend or descend in this glide, uses aerials instead of a glide attack which cancel out this glide with the exception of the F-air, which prompts Salamence to stretch it's head out and bite; doing 8% KOing at 180%. Oh, and you may think you can use this to chicken out from the Up-Special side effect of fast falling, but don't, because if you used this out of your Up-Special, then Salamence will glide in a lower arc to the ground, which isn't really what you want. You'll best want to use this move to travel in the air since your aerial speed is just horrible.
U-air
Rising Winds
Salamence lets loose a mighty gust of wind, DOWNWARDS? Yes you read right, anything underneath Salamence that rises vertically has it's momentum increased by 4X, wether it be knockback, jumping, a recovery, though in the case of a foe they will never suffer a KO under any circumstances of this move. The wind lasts for 1.5 seconds and Salamence has almost no lag doing so. But doesn't this attack contradict J's playstyle? No, if you can force foes to get knocked upwards into the wind, it gives you some time to set-up Ariados and Drapion while foes are forced to deal with J in the air. J's air game is mostly made for this.
...
Fireballs in range of the wind are suspended in mid-air, turning them into "aerial traps" that vanish after being affected by the wind 3 times. Now keep the "average hitstun upwards" from the fireball in mind; if you combine this with the wind effect, it can push foes up into the air forcefully even if they refuse to jump after you.
B-air

Dragon Pulse
Salamence flies forward a character width before turning around and charging energy in it's mouth the size of a Party Ball. The energy does damage and hitstun akin to Aura Sphere, but it does have a very minor suction effect that forces foes to DI out of this move. Salamence stays in this position infinitely, even if it touches ground, unless you re-input this move. Doing this causes Salamence to aim it's head upwards before firing the energy ball straight up, which travels infinitely at binding speed. The ball, or foes who are caught in the energy during it's firing, take 12% and a ZSS paralysis effect. Remember that foes trapped by the hits of this move will surely be hit by the firing as well. This is the move you'll want to use after forcing your foe into the air, simply because it can damage rack on it's own and keep the foe trapped while down on ground Ariados can set-up it's traps. Just be warned: this attack has a lot of start-up lag to it as you'd expect, as well as a very long attack duration, so while it can potentially buy you enough time to set-up your ground operations if you fail to hit with it, you could end up suffering the consequences...​
D-air
Grand Slam
Salamence positions all fours before falling in a casual stall-then-fall. Aerial foes under Salamence become stuck underneath as it falls (Suicide KO?), but they can escape with normal grab difficulty. If Salamence lands with a foe, the foe takes 9% and enters their downed state as Salamence immediately performs it's first jump without lag, allowing for another way of forcing foes into Ariados' spider web. Foes hit on ground are simply pushed back akin to DDD's D-throw with 7%. Note that the jump at the end of the D-air is great for cancelling out the negative effect of the Up-Special, if you're able to hit a foe that is.
...
If you don't hit a foe with this move, Salamence suffers a lot of end lag. It does have pay-off however, as J uses the lag to allow time for charging her arm cannon... which cuts off the single second of charging for the next use, even if you're hit during the lag, a win-win situation. You can use this attack to get to ground more easily for your standards, but don't rely on it too much. You could just use your Up-Special fast falling to get down to ground, almost defeating the purpose of this move...
...
STANDARDS
...​
Standard
Ambush Tactic NO.265
Salamence raises a claw before swiping forward with some start-up lag, doing 7% with good hitstun keeping them in place. Tapping A initiates a second attack causing Salamence perform a headbutt akin to Charizard's F-Smash, which does 11% KOing upwards at 150%. From that position, one can finally perform one last hit prompting Salamence to slam it's head downwards with small end lag, doing 8% with no flinch, but this won't likely hit. As a last note, Ariados and Drapion can attack during this and all other Standards, and J can use her Specials.
...
It's a slow generic attack, but it's very useful to ambush foes underneath a spider web. Force Drapion in, use this attack, and if the foe tries to spot-dodge a hit, use Drapion's grab to seal their fate. Even if the foe would allow themselves to get hit by, say the second attack of this move, J should have charged her arm cannon enough by this stage to aim it at the foe and score a KO. J's standards are designed to finish off foes for good in conjunction with your other Pokemon.
Dash Attack
Skull and Stone Strike
Salamence headbutts forward for a Dash Attack that's akin to Pikachu's but with more end lag... but if a foe's hit by it, J immediately jumps off Salamence 1.5 SBB into the air as the foe is knocked into Salamence, only for it to shake violently to force the foe off. This will cause constant flinching to the foe until they DI off Salamence's back, which is a lot easier than you'd think. With her brief time in the air, J can try aiming a pre-charged Neutral Special at the foe, but once she falls from her jump, Salamence stops shaking and the foe is free to attack. The attack is more of a last resort if you lose both Ariados and Drapion, but even that's very unlikely. Oh, and the impact of Salamence's 1st strike for this attack will instead do set KB if the A button is held, something you're better off doing at times, seeing as how this is a decent approach move.
F-tilt
Bite
Salamence extends it's head out as far as possible before biting, doing 11% KOing at 170%. Yep, boring old attack. Don't complain, it's actually a very quick and ranged attack for J's standards and allows for some GTFO defence. Apart from that it's up to you how this move is used, possibly for starting your Neutral Special.
U-tilt
Air Cutter
Salamence flaps it's wings upwards to create blades of wind that extend 3/4 SBB as wide as Salamence's wings. The attack does 3% but has the potential to juggle due to the attack's quickness. It could blatantly give you time to set-up J's Neutral Special (Don't you hate me making up random tilts that give you this chance?), or if Ariados is on a thread in range of it's F-Smash. Whatever a U-tilt should do.
D-tilt

Tail Sweep

Salamence performs a tail sweep akin to Pikachu's D-tilt yet again. A standard hit causes 4% with a tacked on "turn-around" effect, but has some ending lag to prevent abuse. Sure it's a random effect made as a last resort for "creativity" but it's useful, especially for being used in conjunction with Drapion's D-throw. Actually, you can use this attack on Drapion, but it will take the damage. Well worth it though, especially if your foe thinks they can just side-step Drapion's grab to avoid it.
...
PLAYSTYLE
Hunter J is a mercenary who ambushes helpless prey with her dogs and then goes in for the final shot. Not the easiest job, but well worth it. You think you're up to it? Ok, the first thing you'll want to do is send out Ariados and Drapion so you can position them for attacking time... you have numerous ways to use them, but let's see what J should do during this phase of the battle:
...​
The goal of the match now is to pry the foe away from Ariados, forcing them to concentrate on just Salamence and distract the foe long enough to get allow Ariados to set-up it's traps. Though here's the thing at this point: you actually have 2 ways to do this. One for the ground and another for the air.
...
If you're fighting a close range fighter, say MK, the aerial phase (consisting of using nearly all your aerials and using Up-Special to float in mid-air) is a good idea for you. As stated in the attacks, just spam fireballs to force approaches, get under the foe and use your U-air to get them into the air with you; using the hitstun of the fireballs to help if neccesary, then finally hit then with a well aimed B-air to trap them, which will give Ariados enough time to set-up it's traps. Ariados itself can then use it's U-Smash to bring foes down to it's web.
...
The ground version is used against campers and those who'd prefer not to approach you. This requires you to send out Drapion and actually be on the ground rather than the air. Don't approach the foe yourself, get Drapion to do it instead using the Down Special, following behind it. Sure it has a slow grab, but remember it has Super Amour; this can soak up projectiles for you and even a slow grabber that foes can't even flinch or knockback coming after them will surely tempt them to jump over to hit J, especially if they're cornered. Though that's what you want them to do, since if J is nearby, the foe very well may be falling for a trap. Even during this phase you could still use aerials should you need too.
...​
The truth is, the above examples are just a few of the many ways J can begin a battle. You see, having Ariados and Drapion as capable approachers gives J a lot of versatility. Have Ariados go after the foe with a F-Smash, Use Drapion as a shield, camp with your fireballs, it's up to you. The options only get wider as one character can be used as a distraction, therefore allowing another to set-up. For example, you could have Ariados intentionally set-up it's deadly spider web in the middle of the stage, have the foe attack Ariados to stop it, only for it to have been a distraction for J or Drapion's set-up. In doing this, don't forget that while Ariados or Drapion exist in the background, they can be used on unwary foes as surprise attacks.
...​
Now that you know about how much options you have at the start of a match, let's see what Ariados and Drapion have to offer, shall we? Ok, Ariados is a trap summon as you would have guessed, but does not contribute to damaging the foe much, only limiting their movement. Spider Web is a great asset to land a Neutral Special, but it's not the most important thing. Drapion however is a tank that can get you almost all the damage you need on the foe with it's ridiculously good damage racking skills = mostly with one grab. Eh, what you do if a Pokemon is KOed? That shouldn't happen, only a foolish foe would try to focus on defeating one of your Pokemon since it only benefits you if they distract themselves that way. Ariados can be sent back via Side Special once it's finished trap making while Drapion not only has heaps of HP, but Super Amour to scare foes.
...​
While you do have all these options and great damage racking, understand this: J is rather strapped for KO moves. The Neutral Special's importance has been stressed throughout the set: it's really your only good KO move, aside from some other weak moves. Sure you can use the Neutral Special during a Standard or Aerial, but it's bloody hard to hit with; hence the lag and horrible projectile range. That's why Spider Web and Drapion's grab are key to landing it.
...​
Overall, J is a character who has a lot of options and can easily fool and distract foes, but her KOing options are rather poor. So in that case, you'd better restrain the foe. It's not that hard, but J has a payoff as all others do as well.
FINAL SMASH
MISSION COMPLETE
Be Warned: This Final Smash is a rather long read... keep going at your own risk.
...
J pulls out one of her large trophies for storing captured pokemon, containing a petrified pokemon related to the current stage (Lunatone or Solrock would be on Final Destinaiton as a example). Her airship can then be seen coming from the background to which J calls back Ariados/Drapion (If they are out), standing on Salamence who flies back to the gunship with J. Her airship flies over the battlefield, attempting to shoot down the rest of the players but to no avail as they decide to join forces and raid the airship. Interesting enough, the cutscene varies based on characters, some leaping up to the ship or extending a limb, others may teleport. When there is more than 1 character, some may even interact with the other(s), helping them up.
...
To the point, the foes are now on J's airship all teamed up so they can't beat each other up. This now acts like a SSE level for them (Around the same length as a standard one), as they now must get through hordes of J's soldiers until they reach the end. Until then, J and her pokemon are not present, the player instead controlling the ship as if you were doing Stage Builder. You can tap A while selecting the floor to activate a trap door which KOs foes who fall through, tap doors to summon more minions or even tap certain objects to intiate various traps that you would find on a flying airship. What... you want a list of hazards? Now that would take too long, just use your imagination.
...
Ok, ok, for the hell of it, I'll make a list of hazards. Just don't expect it to be clean. You can skip them if you want to. Use them in a SSE, story mode, I don't mind.
...
Soldiers: These are standard minions of J. Easily disposeable, they have 15 HP, around Link's height. Their mobility is worse than a Primids, seeing as how some of them are fat sh*ts. They usually come in swarms, doing rather p*ss weak punches and kicks. Nothing to worry about... just don't leave them alone, because otherwise they will send out 1 grunt pokemon each. Stuff like Golbat, who flies around sucking blood and doing confuse ray crap, and certain common Pokeset pokemon like Ekans and Sandshrew that are majorly nerfed. You don't have to worry about defeating the guards to proceed, though J will try to keep you busy by summoning a lot of guards... though she has a limit to how many before you lay a smackdown on all of them.
...
Security Cameras: J can choose to activate a security camera, though they only have 5 HP, and it takes a bit of time to activate one. On the other hand, they can be located in rather high areas, and if one sees you, soldiers will keep spawning, 3 at a time, until either 30 seconds have passed or you destroy it. If you can't destroy a camera because of the character you're using, you'll have to play stealth and hide in the shadows while the cameras bypass you.
...
Vents: If you're using a character who can potentially crawl through a small area such as a vent, even if they're crouch does not allow it, they will be able to crawl through the vent. Vents allow you to hide from cameras or get to secret locations or shortcuts. If a teamate can't fit through a vent with you, they will casually warp to your position like 2P in SSE.
...
Storeage Room: Through long winded rooms or super secret vents, you may find the room where J stores her captive Pokemon (And food which you can eat to heal as well). Free these Pokemon like ATs and they'll benefit you in some way. They may teleport you to another room (A good one at that), heal you, buff your stats, or even... explode(UH-OH NOT ELECTRODE!!!). Though if you're lucky, a full-fledged MYM Pokemon may join your team as a LV9 CPU. There's around 5 containers in a room, though be warned, they are either hard to find or just ****ing hard to get to, where perhaps your efforts will be somewhat in vain... J may have set the place up as a trap...
...
Sticky Gum: Uh-oh, sticky floors and gum. Such a pain for Ash and his team, and for you too because if the floor is pink, don't touch it because otherwise you'll be pinned to the floor: keep jumping to escape. There's also other random hazards such as turrets, electric floors, poison gas, spikes and other random crap you wouldn't want to see while walking down the walkway of J's airship, especially if you're a emissary.
...
Once foes do reach the end, J will be facing them, sending out all 3 of her pokemon respawned, all under LV9 CPU command (Salamence is not carrying J and can use all it's attacks not requiring J). From here, the J player continues setting of the above traps in the airship. The pokemon will act defensively under J's orders as she is vulnerable to being KOed.
...
The Final Smash ends when either J is KOed or if the other foes are KOed, as they don't respawn until the FS ends. J will re-appear in position with her pokemon as the foes respawn if she KOed them, but otherwise you get to see a cutscene of J's foes escaping the airship through their own means as it explodes, J losing 2 stock as a matter of fact. You get to watch the cutscene anyway even if it's J's last stock to make it a more epic win.
...
The FS is a risky one: it's completely unaviodable for your foes, but they can team up to KO you unavoidably all the same. It's kill or be killed, not a good idea for FFAs.
 

darth meanie

Smash Journeyman
Joined
Jun 6, 2008
Messages
452
This is not a catch-up post

Abra

Wow Rool, and just when I thought that you had given up on making actual movesets, you go ahead and do just that! Abra was a pretty cool moveset overall, Substitute and Afterimage made some very interesting, and more importantly, viable mindgames on the character, although I can't help but admit I got confused more than once on how they actually worked.

Overall, Abra does exactly what you would expect him to. Giving him the option to make any input either a simple teleport or an attack as well was a simple but brilliant move that really fit the character and added to his playstyle of jumping around the battlefield, although I can't help but wonder how it differentiates between inputting it twice and two different inputs. A minor nitpick though.

I do however wish that you had set up the Up Special so that Abra could change the location of home teleport point without having to wait twenty seconds or get himself KOd, especially since you wouldn't be able to tell twenty-one seconds later that you weren't able to teleport back again.

Abra takes the concept and brings it to the absolute best it can be. Good job Rool.

Spadefox Remix

You know something, I really should've expected this, in retrospect. Anyways, it is clear that you're trying to rebuild this set completely from your own eyes, and shake off the bad smell you insist is reeking from original Spadefox. I miss the old headers (and the old B-throw (CRYING)).

Anyways, Side Special is brilliant, completely and utterly, but you don't need me to tell you that. The whole moveset has the same sort of flexible playstyle that Spadefox Prime had, but without the lapses in execution or weak debuffs it focused on.

The whole thing is a bit confusing though; what with all the if tentacles if claws if etc. etc. moves that exist for every possible iteration of preexisting conditions in the set. Of course, I can't complain seeing as my next set will have much the same problem (NINJA). And it all ends up working towards playstyle anyways. Splitting it up into sections worked like a charm.


Will comment on other movesets later, but I am weary and now must sleep.
 
Joined
Oct 28, 2007
Messages
625
Abra did it for me. I actually was considering doing an abra set a while back, then completely dismissed it because I couldn't see a pluasible way for it to work. Rool, you roved me wrong. Taking his teleportation, and managing to make an entire moveset around it, well done. Good recovery without being broken, what you would want from a teleportation pokemon. Although I agree with DM that there should have been an easier way to change the "home" point.
 

flyinfilipino

Smash Master
Joined
Sep 11, 2007
Messages
4,319
Location
North Carolina
@Hunter J: A Trainer-type character that actually participates in the fight = cool.

Hunter J is a pretty complex set. It seems you have to use and control all of her Pokemon at the same time to be effective, which makes me wonder why you have to bother sending them out in the first place in the Side Special. It's good to see J's arm cannon put to use as a special move and you do a good job of mentioning it enough times throughout the set (it could use more emphasis that it's her main KO method, though, in my opinion). It seems kind of hard to control Ariados and Drapion to get to the foe (since they run on autopilot with Down B) and then get them to do their respective jobs. All the while, Salamence and J are just kind of floating there? While I'm at it, it also would be nice to know exactly how big/tall Salamence and J are combined. I would have moved the Standards and Aerials up before the Grabs/Throws and Smashes, since they involve the actual character herself.

Overall, J and her Pokemon seem to play very intricately, and it something I wish I could see in action. You've got plenty of neat little moves in there, and J as a whole is pretty in character (well, at least her Pokemon are). The SSEesque Final Smash is :dizzy: but kind of epic. The set might be a little messy, but you made a really good effort at bringing out the essence of J, Katapultar. :bee:
 

ieyasu tokugawa

Smash Rookie
Joined
Jun 3, 2009
Messages
10

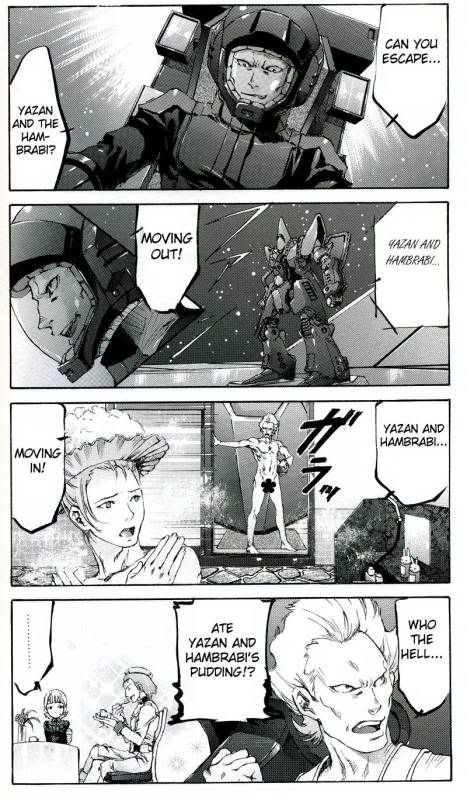
Yazan Gable, Hambrabi launching to Brawl!!

Backstory:
Hambrabi is one of the many Titans Mobile Suits in Mobile Suit Zeta Gundam. During the Gryps Conflict, the Earth Federation and the Titans made experimental mobile armors by sending them to battle. One of those mobile armor designs was the Hambrabi. One of it's features the mono-eye sensors allowed the pilot to track his/her targets in mobile suit and mobile armor mode. Yazan and his lackies Dunkel and Ramsus are usually seen piloting Hambrabis in battle.

Stats:
Size:5/10
Weight:6/10
Traction:7/10
Power:7/10
Priority:5/10
Range:8/10
Falling Speed:6/10
Recovery:4/10
Power:7/10
Speed:9/10
Crouch:7/10
Pilot:Yazan Gable


Special Attack:
Neutral:Feyadeen Rifle
Hambrabi goes into a stance like Fox's Blaster firing stance and fire's it's feyadeen rifle at the opponent. You can keep firing for as many times as you like but the firing speed will be between Falco's and Wolf's blasters. Each of the laser shots deal 4%. You can't knockback the opponent normally however if you somehow charge up the shot you can increase the size of the laser and it's power and deal 17% and knockback. Unlike Fox's Blaster you can only shoot one laser at a time.

Side:Sea Serpent
Hambrabi moves it's right arm in a half circle above it then flings what appears to be a harmless looking wire straight at the opponent. Much like Sheik's Chain you can whip the wire in all directions using the control stick. If an opponent makes contact with the Sea Serpent, the wire wraps around the opponent and Hambrabi shock up the opponent for 5 seconds before throwing the opponent behind it. The opponent has to tap repeatedly to make Hambrabi let go. Each second of being shocked the opponent gets 3%.

Up:Rolling Dive
Hambrabi touches the ground for a moment then launches itself into the sky while rolling up like a ball. If an opponent is too close to Hambrabi, the mobile suit can carry the opponent up with it for 4% per hit. After roll flying up a good distance, Hambrabi charges straight back down with it's feyadeen rifle pointing at the ground. As Hambrabi charges downwards if the opponent is caught in the path, the opponent will be dealt 8% and knocked away.

Down:Feyadeen Slash
Hambrabi takes it;s Feyadeen Rifle and does a strange dance pose then spins around with the barrel of the feyadeen rifle outward. As Hambrabi spins around you can control it using the control stick. Each second of the opponent being in the way, he/she is dealt 5% of damage and remains in place as Hambrabi hits at the opponents with it's rifle. After spinning enough fast cycles unlike Luigi's Down Special, Hambrabi stops spinning and does a jumping diagonal attack with it's feyadeen rifle dealing 9% and knockback.

Standard A:

Neutral:
Hambrabi starts the combo out by giving a left hook with an open fist dealing 5%, then does a kick to the stomach dealing 6%, then a feyadeen rifle swing across the opponent's face dealing 8% and ends the combo by doing a jumping somersault kick giving out 10% and knockback. The combo will deal about 29% if successful.

Side Tilt:
Hambrabi swings it's feyadeen rifle diagonally right down and then left giving 6% of damage to the opponent with each rifle swing.

Up Tilt:
Hambrabi swings it's feyadeen rifle in an upward angle knocking the opponent up into the air with 7%.

Down Tilt:
Hambrabi does an elbow attack to knock the opponent off balance dealing 6%.

Dashing Attack:
Hambrabi takes it's feyadeen rifle from the top, swings it in a circle dealing 5% then jumps lightly and brings the rifle down onto the opponent sending the opponent into a downed state. Each deal 4%.

Air Attacks:
Neutral:
Hambrabi spins around with it's feyadeen rifle 3 times giving 4% of damage with each hit to knock anyone with it out of the sky.

Forward:
Hambrabi takes it's feyadeen rifle and slams from behind it to it's front to knock anyone away with 5%.

Back:
Hambrabi does a rapid hitting back hand attack with it's right to stop aerial attacks from behind. Each of these punches deal 3%.

Up:
Hambrabi kicks into the sky with it's right leg then it's left leg dealing 7% with each kick to knock anyone into the sky.

Down:
Hambrabi swings it's feyadeen rifle in a half circle below it while flotaing in midair dealing 8% and sending anyone in the way of the attack back to the ground.

Smashs:
Forward:
Hambrabi takes it's feyadeen rifle and rapidly thrusts it's forward like a spear 6 times dealing 5% with each hit. Hambrabi then spin jumps around and swings it's rifle to hit the opponent in the face with a knockback and 6%. This gives out a total of 36% if successful.

Up:
Hambrabi lightly jumps off the ground and shoots lasers in all directions. Each of the lasers do 4%. If the opponent is too close to the mobile suit will get knocked into the air with 8% done.

Down:
Hambrabi goes into a hand stand and spins it's legs around like a whirlwind and rapidly kicks at the opponent's face 7 times dealing 3%. After the last kick the opponent is sent flying with 21% if successful.

Throws/Grabs:
Pummel:
While grasping one of it's opponent's arms, Hambrabi will takes the feyadeen rifle in one hand and swing it across the opponent's face dealing 3% with each swing. Hambrabi has a lag when cooling down the pummel.

Forward:
Hambrai holding the opponent will do a face slam then throw the opponent away with 8% each hit.

Back:
Hambrabi throws the opponent behind itself then shoots it's rifle 2 times at the opponent giving out 4% per shot and 8% if successful.

Down:
Hambrabi throws the opponent hard to the floor dealing 5% then flies lightly above the opponent and shoots at the downed 8 times with 4% per shot. No knockback is dealt.

Up:
Hambrabi holds the opponent in a back breaking position, jumps up, breaks it;s opponent's back dealing 10% and then throws the opponent up into the sky.

Final Smash:
Tri Hambrabi Attack
Hambrabi touches into a bull position as Yazan through the com system says "This will finish you off!" then charges at the opponent with it's thrusters on. If it connects you hear Yazan whistle for Dunkel and Ramsus also piloting Hambrabis and Yazan orders "Let's finishes this idiot off boys!" then you hear Dunkel and Ramsus shout "Yes sir!" then they proceed to pummel at the opponent with different punches and kicks. They finishes the combo by throwing the opponent into the air and shoot a charged shot form their Feyadeen rifles blasting the opponent up to his/her doom. After the attack Dunkel says "You're good Yazan." and Ramsus says "We'll be back." then Yazan's cohorts fly away.

Playstyle:
Hambrabi is a mobile pilotted in combat by Yazan Gable in Brawl matchups. In taunts Yazan uses the comm system. The Hambrabi usually attacks with the feyadeen rifle it carries. The final smash calls in Yazan's cohorts.

Palletes:
Default Hambrabi (Blue team)
Hambrabi red paint job (Red team)
Hambrabi green paint job (Green Team)
Hambrabi black paint job
Hambrabi purple paint job
Hambrabi orange paint job

Extras:
When taunting Yazan uses the comm system like Snake's codec but in full color.
Taunt Up:Hambrabi moves it's rifle to it's side as Yazan through the comm system says "I'll give you points for not runnin' away!"
Taunt Side:Hambrabi crack's it's knuckles as Yazan says "In battle, "surprised" is another word for "dead"!
Taunt Down:Hambabi crouches down as Yazan adjusts his helmet saying "Okay get the helmet on tight and i'm ready to go."
Win Pose 1:Yazan is seen raising his fist in victory saying "Glory for the Titans!"
Win Pose 2:Yazan and his cohorts pose together as Yazan starts "With our combined Hambrabis..." then he and his team members say "No one can beat us!"
Win Pose 3:Yazan stand in front of his Hambrabi checking his watch then says "TIme to get a huge promotion for this victory!"
Lose Pose:Yazan is carried away by 2 Titans soldiers to a medic vehicle as one says "Someone get this man into the vehicle now!" then the men with Yazan still being carried board and the vehicle drives away.
 

Katapultar

Smash Lord
Joined
Nov 24, 2008
Messages
1,284
Location
Australia
Thanks for the comment, flyinfilipino! J does seem like a akward character, and while I could have made it like PT, it would have sort of gone against J's character. You probably have a point about the switching, it's almost pointless, merely designed to bring you Pokemon in and out from their Pokeballs for invincibility. I edited in Salamence's and J's total size, but I don't really think I made it clear enough. There's a very good chance I won't make any sets this akward for a while (or ever again). I basically just picked up J after abandoning it at the start of MYM7. Hopefully any sets I make will be better than this one. I most certainally didn't/don't expect to make any sort of impact.

Just in case you're wondering, Im too lazy to quote messages of any replies.

I'll still comment on Hambrabi, which is ieyasu tokugawa's
4th set. It's rather surprising that you've made a set this quickly, but don't forget that you can take your time as well. Regardless, the moveset contribution is a great thing, even if some other people don't really bother to read it (SOMEBODY'S GOT TO COMMENT ON THESE SETS ON THE DOUBLE EVEN THOUGH DM AND MT HAVE COMMENTED ON ALL THE SETS OF MYM7. IM A RUNNER UP). I've never heard of the character, and the anime(?) sounds unfamiliar since it's hard to remember all these random anime if they only have Japanese characters in them.

When we last left off from Kisame (I presume nobody else except DM and MT has and will read it), the set was very blue. This set is a easier to read, but even though the Specials are important, they don't have to be the only thing covered in the awesomeness of color. I'd suggest coloring in all the headers: stats, specials, standards, smashes, aerials, grabs, final smash, extras: make them a size=5 and a different color to the various Specials (Why not just make all the attacks and not just the Specials colored?). For example, the special attacks are colored in a dark blue. To make identification easier, have the headers in a different color such as light blue or gray, whatever fits your character.

Not having your non-special attacks colored in kind of makes the set unexciting for others to read. But hey, somebodys got to help others get better so it's okay. The attacks themselves could be more exciting to read, though at times they don't really have much emphasis on them. The only thing you really mentioned in the set was damage and animation. How much knockback the attack does is also important, as well as lag when necceary. Even with these details however, you could make the set more exciting by stating a use for the attacks whenever possible. For example, wether a attack makes a good approaching move, mindgame, defense, mechanic booster. This is much more easily done if you have some sort of playstyle to begin with, even if it's a simple one such as a close-combat character or camper.

Just a few nitpicks; what does the rifle look like, the playstyle isn't really a playstyle, and some of the attacks such as the standard and f-smash do a bit too much damage. There's also a tendancy to state "each hit" when the attack only does 1 hit, which can get confusing.

Some of the things I said above probably didn't make sense. If you don't understand something I said, you can reply to me, especially if it will help increase set-making quality. Good luck throughout the rest of MYM7.
_____________________________________________________________________________________

Random (More like brag), but I've made the first in-thread comment on all sets but my own for this weeks post (Carine Bloodhoof, Abra, Spadefox, Kisame, Hambrabi). I get on SWF a lot, that's all.
 

Baloo

Smash Ace
Joined
Nov 14, 2008
Messages
781
We seem to have been stickied. Yay.

Rather oddly, I've found myself halfway done with a moveset. I believe the resurrection of Baloo may truly be at hand.
 
D

Deleted member

Guest
Whoa, we have been made a sticky thread by the administrative team at Smash World Forums - this is a pretty monumental occasion for Make Your Move, though I wish I could say I knew how it happened. Thanks to whomever made it happen and I hope it stays this way; we are a crucial part of the Smash Workshop and I feel an integral community in all of the website, so being given a helping hand by the team at SWF is much obliged. Thank you.

Now, lets hope this wasn't just an error. :laugh:
 

MarthTrinity

Smash Lord
Joined
Aug 9, 2007
Messages
1,954
Location
The Cosmos Beneath Rosalina's Skirt
Will you please marry me Bio? ;_; <3

That being said, as many of you may know or not know, my laptop charger got totally fried meaning I can't charge my computer at all. I'm using our desktop (which I have very limited access to) to post this just to say that I won't be active until my new charger arrives in the mail...which should be soon-ish, I ordered it a day or two ago. That being saaaaaaid...I should be off for now. Just wanted to update y'all on why I haven't been around since...Tuesday afternoon?
 

MasterWarlord

Smash Champion
Joined
Aug 24, 2008
Messages
2,911
Quite a monumental event that we've been stickied. Many thanks, Bionic.

. . .No, Katapultar, this isn't another post being happy that the thread is stickied killing your set's reception. It's been reviewed.

@Yazan Gable: I feel that the water Naruto guy was a lot better if only for including a lot more detail on his moves and a lot better organization. This set honestly seems to have less thought put into it then even Seth. I'll assume you just wanted to get him out for fun, though I hope you'll continue to improve.
 

half_silver28

Smash Ace
Joined
Apr 25, 2008
Messages
862
Location
MYM, Ohio
Ok then. I'm joining this whole favorite moveset thing that's been going on lately. I'll be making lists of my 5 favorite sets from each contest from MYM3 on, followed by a list of my 5 favorite sets ever. Before that, however, I'll do this:

HALF_SILVER'S TOP 5 FUNNIEST MOVESETS EVER

#5: ANONYMOUS BY KHOLDSTARE


"WARNING: SEXUAL DOUBLE ENTENDRES, INSIDE JOKES, SICK HUMOR, CORRUPTION OF LOL, ADULT JOKES, AND LULZ ARE AHEAD. PROCEED AT YOUR OWN RISK."


Khold’s sets have always been humorous and fun to read, but Anon takes the lulz to another level. There are just so many memes that show up in this set, that you can’t help but ROTF. Seriously, everything between “All your base are Belong to us” to ZA WARUDO makes an appearance. The epitome of randomness, Anonymous demands your attention, less you become a victim of the internet hate machine.


#4: CAT CLANCER BY CHIEF MENDEZ

(I literally could NOT find a picture of Cat Clancer anywhere <.<)​


"Flying…? – But I’m scared of heights…No, really, I don’t want to jump. Don’t try to force your stupid rules on me! I am my own cat! (I guess… maybe if I get pushed off a platform I could…flail around a little, or something.)"

Now everyone knows that Chief Mendez made many very important contributions to MYM. But the thing that many MYMers (ones who never met Mendez) don’t know is that Mendez was one of the funniest MYMers as well, and was just a cool guy in general. He proves this with Cat Clancer, one of the most epic joke sets ever (it was the only blatant joke set ever to receive votes if I remember correctly). Now I’ve never played Mischief Makers, the game Cat Clancer hails from. But the personality Mendez gives him/her/it/potato is just so endearing and hilarious, magnified by the fact that the whole set is written in-character as the cat. For example, Clancer practically sleeps through the description of the forward tilt. The rest of the set is filled with the cat’s antics, and hilarious random outbursts. If you read only one set for a talking cat, Cat Clancer’s your best bet.


#3: MYM MAN BY SIRKIBBLE


"What's this?! A stick figure? Indeed, the powers and abilities stemming from the entirety of the Make Your Move contest has taken the form of a seemingly-simple stick figure. The history and memes of MYM are at his disposal for use in some very uncanny ways. Those unfamiliar with the infinite power that is Make Your Move, beware!"

The last moveset SirKibble posted himself (his true final set, Adeleine, was posted in MYM6 by Chris Lionheart in his absence), MYM man utilizes the various memes and events from MYM history in his attacks. Lolchillinz, goo chains, Iron Thorn, Roomba, taking a potato chip and eating it…… and Kholdstare. All this and more can be yours if you read MYM man! This WAS Kibble’s parting gift to MYM after all, so you may as well enjoy it. (cry2)


#2: PIKACHU REMIX BY TIRKARO


This is a Tirkaro set. Tirkaro is funny. That is all. ….WELL WHAT ARE YOU WAITING FOR GO READ PIKACHU REMIX (FLIP)


#1: SAKURAI BY THESUNDANCEKID


"DYNAMIC PLOT TWIST of Lemon! Sakurai is actually a robot sent from the year 2099 to capture all of Earth's supply of Gummy Worms. Sakurai then unexpectedly fell in love with the present day Sakurai and they both traveled to Nevada to get married. A little known fact about Sakurai is that he doesn't age. Future Sakurai then used his built-in time machine to transport another Sakurai from the year 2045 and cheated on present Sakurai with him. Present day Sakurai soon found out and challenged future Sakurai into a fight. But enough talk, have at you!"

Who better to take the number one spot than Sundance? Sakurai is THE most random set ever created (except maybe “a rock” from MYM3). Sundance basically turns the smash bros. creator into an OC, giving Sakurai an absolutely hilarious backstory, and making his moves just as awesome. Seriously. Sakurai shoots bananas from his nose. He removes his skin and eats it. He turns opponents into chickens. HE EATS YOUR TOASTER (SHOCK). If you haven’t read Sakurai yet… what in the world's wrong with you? Assuming you have any semblance of a sense of humor, Sakurai will have you floored.


Honorable mentions: too many to list. But there's super gimp charizard. and cappy holding two gordos. and missingno. and MT's highest-placing sets from the last 2 MYMs. (& Excel would totally be on this list if I didn't make her (wary) )
 

Katapultar

Smash Lord
Joined
Nov 24, 2008
Messages
1,284
Location
Australia
Im going to **** my own reception (for the sake of the ongoingness MYM must have), which has already been ***** enough, thank you very much(sticky is cool, but is this really neccesary?). MW, I've replied to your review in the Workshop, a pretty good one at that.

Im mostly here to respond to half-silver's funny sets. Believe me, I like funny sets too. I've read all of (otherwise to some extent) the funny sets you mentioned except for Cat Clancer, which I should probably take the time to read. I do find Sakurai and Pikachu remix very funny, but there's also Vegeta by JOE! for his great way of presenting a DBZ character, Meruki Master for just being funny with panties; awesome quotes and a Japanese school girl with her middle finger out to the audience to represent the playing against section, Pennywise for being a clown (It's so scary, it's funny), and that funny fatty from Austin Powers that BKupa made in this MYM with his hilarious quotes; possibly the funniest set ever (Taunts and attack names actually do help very much). That's just my opinion though.

Also I don't really care about the poor reception my set's getting. Go ahead and start a new page.
 

Wizzerd

Smash Ace
Joined
Feb 24, 2009
Messages
929
TOP TEN POKESETS
QUALITY, SIGNIFICANCE, INFLUENCE


10

FLYGON
.................................................................................................

One of the most underrated sets ever, and the sole good thing to come out of the ridiculous amount of joints phatcat planned but never came to fruition. Reading over Flygon, there's very little flash to be found, but that's all the better to lead to the main attraction - Sand Tomb. Flygon builds tunnels across the stage and pops out of them in a massive game of Whack-A-Mole. While Flygon may lack flash and never ended up in the Top 50, Flygon was clearly enjoyable to make and would be enormously simple and fun to actually play - and is there anything else we should be aiming for?


9

TAUROS
.................................................................................................

Ah, Tauros. Personally, I prefer him to Negative Man (though I do like Negative Man). Like Flygon, Tauros is beautifully simple and his moves hardly have much flash, and his playstyle isn't about to win any awards. Still, Tauros does have something - he's beautifully flowing, and the way he plays perfectly puts into mind a rushing bull. While Tauros did manage to place in the Top 10 50, he didn't do so nearly highly enough.


8

PIDGEOT
.................................................................................................

Maybe a strange choice - Pidgeot wasn't that far ahead of his time, and I won't pretend later K.Rool Pokesets like Snorlax and Shellder didn't manage to surpass him. Still, Pidgeot has massive significance to Pokesets as a history. He's the first truly "good" one, and set many precedents - only taking the most fitting of Pokemon attacks (the only real O_O attack in there is Forward Smash, Ominous Wind, which is only unfitting in its Pokemon application), and capturing their true spirit. Pidgeot doesn't have a playstyle section, but he does have a playstyle - little more than a standard aerial one, perhaps, but quite a feat in MYM3.


7

HITMONLEE
.................................................................................................

Slugma is a plenty good Pokeset, but the Hitmons are a more impressive endeavor - especially their frontrunner, Hitmonlee, the kicking fiend. (kick kick kick kick kick kick kick kick) Hitmonlee's consistent offensive focus and his tissue-paper defensive options are captured perfectly, and his organization is some of the most pleasing and fitting I've seen. While Slugma managed to place over even one of the Hitmons, I'm glad to see he hasn't been forgotten.


6

GLACEON
.................................................................................................

Here's a really strange choice, but I won't let my second favorite Eeveelution (Pokemon and set) go to waste. Glaceon's probably the best of the many, many ice sets we've seen to Warlord's chagrin (though he likes it too, comb MYM6 for his comment). What sets him apart? He isn't that unique in attack, but he has a unique chill mechanic - the more he lands hits, the colder the foe becomes, until the frost bites away at them and they freeze to death. Glaceon has many of the cliches of the ice moveset, such as the wall, but he uses them all uniquely, and Rool managed to weave them together into something lovely.


5

ESPEON
.................................................................................................

Maybe obligatory, but there IS reason for how much hype he recieved. Sixth Sense. Sixth Sense Sixth Sense Sixth Sense. Future Sight is an absolutely ingenious move, and one of my favorites in all of MYM - it does the impossible and allows Espeon to literally see into the future of the match. Who else would be able to think of this? Espeon has loads of raw creativity across his specials and tilts as well, and while he has a bland "Super Attack" and poor balance... doesn't every Eeveelution?


4

HYPNO
.................................................................................................

Now we're getting into some of the best Pokesets ever made, and Hypno is definitely one of them. Hypno is really creative indeed, but Hypno has loads of potential for it; what's really special is how effortlessly and seamlessly Tanookie weaved his playstyle. Drowsily stumbling across the stage and sending foes asleep with his hypnotic gaze before eating their dreams, Hypno's playstyle was perfectly in-character and unique, and every last move adds another layer to it. If I was to main MYM characters, Hypno would be one of them. The other would be the last Pokeset on this list...


3

DEOXYS
.................................................................................................

One of my three favorite sets in all of MYM4, the others being Jafar and Dimentio - Deoxys would be a lock for my super votes should I have been around for his posting. The whole "versatility" playstyle could be called played-out today, but Deoxys is set apart even then by his ingenious formes mechanic. Deoxys's playstyle could maybe even stand today, and this was MYM4, the age of useless flash. If nothing else, playing as Deoxys would be a nauseatingly unique experience.


2

SKARMORY
.................................................................................................

I refuse to put here the disjointed mess that was Steven Stone. Steven Stone made it into the Top 50 by people who didn't read him, and if people had read him all the way through, they would have seen his lack of coherence and the individual rushed Pokesets. Skarmory, however, is wonderful. Skarmory is not only the best Pokeset in Steven, but one who could have done beautifully had he been given a chance to shine. Skarmory is little more than a bland, broken wall to accompany Blissey, canonically, but in his moveset, his Whirlwinds and his massive degree of customization and control over them make him a very unique and enjoyable experience. He also has the only vestige of team playstyle at all in Steven - see his Up Smash, Sandstorm.


1

JUMPLUFF
.................................................................................................

If Jumpluff isn't the best Pokeset, let alone one of the best movesets ever, I don't know what is. Jumpluff is so simply the embodiment of what Pokesets are about - the perfect characterization and the breathless and fitting organization. Jumpluff could have been so easily been turned into a generic aerial character, and would have done wonderfully even that way, but the way he spreads his garden and his goal to get as high above the foe as possible sets him far, far above the average. Jumpluff effortlessly glides away on the winds with cottony arms in the best way that could be asked for.
 

KingK.Rool

Smash Lord
Joined
Nov 26, 2005
Messages
1,810
A sticky? Never thought I'd see the day. Pretty awesome of you, Bionic.

Abra

Wow Rool, and just when I thought that you had given up on making actual movesets, you go ahead and do just that! Abra was a pretty cool moveset overall, Substitute and Afterimage made some very interesting, and more importantly, viable mindgames on the character, although I can't help but admit I got confused more than once on how they actually worked.

Overall, Abra does exactly what you would expect him to. Giving him the option to make any input either a simple teleport or an attack as well was a simple but brilliant move that really fit the character and added to his playstyle of jumping around the battlefield, although I can't help but wonder how it differentiates between inputting it twice and two different inputs. A minor nitpick though.

I do however wish that you had set up the Up Special so that Abra could change the location of home teleport point without having to wait twenty seconds or get himself KOd, especially since you wouldn't be able to tell twenty-one seconds later that you weren't able to teleport back again.

Abra takes the concept and brings it to the absolute best it can be. Good job Rool.
I did make Abra because I was afraid people would start forgetting that I am capable of making simple, functional, no-nonsense, boring sets just like everybody else. ;) Glad you enjoyed it meanie, and thanks for the comment.

Abra did it for me. I actually was considering doing an abra set a while back, then completely dismissed it because I couldn't see a pluasible way for it to work. Rool, you roved me wrong. Taking his teleportation, and managing to make an entire moveset around it, well done. Good recovery without being broken, what you would want from a teleportation pokemon. Although I agree with DM that there should have been an easier way to change the "home" point.
Thanks, Shino! :bee:

And now it's Saturday morning, I'm bright and fresh and full of energy and it's time to catch up a bit with my commenting.

Zinger: What a bizarre set. While reading, it feels incredibly disorienting, disconnected, full of strange little effects and attacks that just are completely random. The alternating colours and very bad bolding (bolding one word has to be the weirdest way I've ever seen it used) don't especially help. It was around the DSmash that I figured out that the set was that way deliberately, or close enough. Zinger is such a spastic, darting, all-over-the-place character that his attacks, and, accordingly, his presentation, have to be the same. The playstyle comes together in a way that's fairly clever and is spot on for a wasp character. This is my favourite set of yours, I think.

Mumbo Jumbo: I do believe KK gets a bad rap. Mumbo's a decent set who suffers from the same two problems as all of your sets: you take forever to get to the point of the attack and make straightforward, interesting concepts feel overdetailed; and there's a lack of confidence in the set's writing. You don't say "I tried to make this a character who manipulates and so on and so on", you say "Mumbo is a character who manipulates and so on and so on." If you don't have confidence in your own moveset, it's hard for others to.

Tohru Adachi: You know what I love about this massive page? It feels almost like a party. One by one, everybody's aware that they're going to lose out on individual attention, but for various reasons, they just don't care. It reminds me of MYM 3.0, when sets were punctuated by... absolutely nothing. Now, I'm going off on a tangent because this set is so bloody wacky. tirkaro, I love you for making sets that are so off-the-wall, in presentation if not conception; there's a masterpiece hidden in here, but, just like an Adachi player hiding in a cluster of police lines, it's so hard to break into that all that's left is another tirkaro experience. Nobody makes sets the way you do, speaking directly to the reader and focusing more on the experience than the set itself. I approve. A lot.

Sho Minimimoto: So zetta slow? Riight. There's a dichotomy going on with Ocon's sets, which are so pleasant on the eyes and typically written in a factual, uncompromising way. Ocon, more than any other MYMer, is here to make serious sets, which are very good and firing on all cylinders in the intellectual sense but not all that likable per se. Unemotional sets, let's say, the very opposite of someone like MT or tirkaro. Now, this is very much true of Sho, although his playstyle is so crystal-clear, so finely traced, and so distinct; it's hard to dismiss him and equally hard not to enjoy him. Having many more attacks that interact with your Noise would have made him overly internalized, I think you found the perfect balance. Very well-made set.

Doppelori: Bloody hell, Junahu. How can there be so much more to this set than making Final Smashes relevant (which is an ingenious, diabolical, cruel move all on its own)? Even more than the mechanic, I love the possibilities raised by becoming an exact copy of the foe, and, of course, by stuffing them into your cannon - why must you obsolete the excellent Delibird? The whole set is remarkably self-aware and integrated more fully into a theoretical SSBMYM than most any else. I also love what you did by sorting the attack order by direction, to fit more fully with the character's internal flow; we're all capable of moveset-reading at that level by now, I think, and it makes her read like a good story, with twists and turns along the way. Makes even the simplest innovations seem genius.​

Doppelori has broken my will to read any more sets today. Blame Junahu. I'll catch up with Rena, Dodongo, Nero, Cairne, Spade 1.1, and Hunter J sometime soon - that's not very much, is it? :bee:

I'm fond of your Pokemon top 10, Wiz, although I could've sworn Clefable would have made it on there, I still reckon Umbreon and Leafeon and possibly even Flareon surpass Espeon, and I'm not especially fond of your jab at Shellder, who I rank way, way up there. Nice to see Skarmory recognition, though; nobody listened to me back then.
 

MasterWarlord

Smash Champion
Joined
Aug 24, 2008
Messages
2,911
THIS IS AN ABANDONED INCOMPLETE MOVESET. CONSIDERING I GOT A GOOD WAYS INTO IT THOUGH, I DIDN’T WANT TO JUST LET IT SIT AND ROT IN MY HARD DRIVE.

GOBJOB


Gobjob is a Goblin from a rather standard medieval fantasy setting – Warcraft. While more traditionally in things such as Dungeons and Dragons Goblins are mindless and weak, the Goblins of Warcraft are the single most intelligent race, and Gobjob’s no exception. His primary skills are in alchemy, but he was more then aware that a few cute little potions wouldn’t be enough to protect him with his incredibly small frame and easily crushed bones, and thus drugged and experimented on beasts to fight for him. Mindless creatures like Sasquatches proved too difficult to control while more intelligent ones such as Gnolls tended to rebel, so he eventually settled on Ogres as his final “steed”. Intelligent enough to understand orders and never think of resisting, as well as being among the strongest races.

Gobjob got pretty involved in the slave trade to acquire his various Ogres slaves, seeing he still lost many early on in battle and how others he killed himself from an overdose of chemicals. To make a living, Gobjob captured other slaves. . .Night Elves. They were a rare breed and in rather high demand in the sex slave trade. Sometimes he even allowed himself to test the merchandise before putting it on the black market. Upon realizing that the Night Elves were nearly religiously into nature, Gobjob invested in some Goblin Shredders and started harvesting Lumber in Ashenvale, the homeland of the Night Elves. He no longer had to hunt them down – they came to him! Unfortunately, though, they eventually started coming in longer numbers and it became rather overwhelming for Gobjob to hold out against them. . .

Enter Grom Hellscream and the Warsong Clan of Orcs. Grom had been ordered by Thrall, his superior, to harvest lumber for a new settlement as punishment for refusing to follow orders. Grom was frustrated with how long it was taking to harvest lumber, thus Gobjob was happy to sell him his Goblin Shredders considering he was planning on picking up camp and leaving anyway due to the amount of Night Elves. Of course, this only attracted all the more Night Elf attacks, and Grom eventually led the Warsong Clan out to raid the Night Elf camps to stop the interruptions. He seemed to wipe out all their forces in the area, much to Gobjob’s delight, as he was there to pick up all the juicy leftovers. . .

However; Cenarius, the demigod of the Night Elves, brought the rest of the Night Elves after learning of what had happened. He launched a full frontal attack on Grom who struggled to keep up the defenses in his base. . .Mannoroth, one of the highest ranking demon generals of the Burning Legion, was quite excited when he saw Cenarius finally come out from his hiding. He rarely revealed himself, and Mannoroth knew that if he came in to slay him himself that he’d just flee. Thus, he decided to fight them indirectly by spilling some of his blood into a magical fountain nearby the Orc camp. Eventually Grom, Gobjob, and the orcs found the fountain of blood. While some of the more intelligible Orcs such as the Shamen were beginning to lead them that there’d be more consequences then pay-off, Gobjob ultimately led them to drink the demonblood. Gobjob was the only one who actually realized what it was and what it’d do. . .But he didn’t care. The orcs weren’t his problem, no? Of course, Gobjob wasn’t stupid enough to join in the drinking, though he still kept some demonblood for himself. . .

The demonblood Orcs triumphed over the Night Elves and slew even Cenarius himself. In their new demonic state, the Orcs didn’t stick around long enough to reap the benefits of this, and thus Gobjob was left with all the profits. The slaves, the money, lumber, everything. Most importantly, though, he was left with the demonblood. After much careful research, he eventually learned how to reproduce it’s powers and put it into his formula for his Ogre Slaves. It was the final missing piece in the formula that not only perfected it, but made the powers of it so threatening he had to use but a drop in each concoction. Nothing could stop the chemical rage of the Ogres now. . .

$PECIAL$


DOWN $PECIAL – BLACK MARKET
A Marketplace triple Bowser’s width and double his height sprouts up in the background behind Gobjob with no lag whatsoever. The Marketplace is entirely indestructible, and if it scrolls off stage Gobjob can make a new one with no penalties (He can only have one normally). If Gobjob presses Down B in front of an existing Marketplace, he can enter it and become invulnerable briefly as a menu pops up with a list of items for sale. He can only stay inside 2 seconds out of every 30 to avoid abuse of the invulnerability, so pick fast. . .

Ogre
$250
Gobjob purchases a replacement Ogre mount. Thankfully these are relatively cheap so you can feel relatively free to abuse your poor Ogres by sacrificing them for recovery and overdosing them with chemicals. Just keep in mind you get a fresh Ogre with each stock, so if you’re at a high percentage with no mount it might be best to just save your gold.

Night Elves
$250
Gobjob doesn’t come back out of the marketplace for a good 6 seconds. . .And I mean a very, very good six seconds. You can hear maniacal laughter from him as his percentage is healed by 40%. Always gotta make time for the girls, yes?

Goblin Shredder
$500
The most expensive option available. In the Shredder Gobjob gets a different moveset, save for his alchemy based attacks which stay in-tact from his moveset mounted on the Ogre. Sure, it’s not that much better then the Ogre to warrant it’s price, but the thing about the Shredder is it’s much more easy to make money with the thing.

Now then, while the Marketplace is normally entirely harmless to foes, if they stand in front of it for 5 seconds (That’s a ridiculously long time in Smash) they’ll be grabbed by an Orc and taken inside for an instant KO and you’ll get $500. Getting a foe to stay in one place that long is far from easy unless they’re among the most defensive of the defensive, and even then they shouldn’t be stupid enough to park in front of the Marketplace and set up. Thankfully, Gobjob has several methods of baiting the foe to the Marketplace and getting them to stay there once they arrive.

Victims
$0
If a character is dead in FFA/Doubles and you KOd them by “enslaving them” at least once, you can buy them back free of charge to use them as a mount. Gobjob keeps his Alchemy moves in-tact just like with his usual mounts, but is free to make use of the foe’s as well. For foes with essential button inputs covered up by Gobjob’s alchemy, things get swapped around. So. . .Who will you enslave? Make Sandman and Ganondorf work your plantation? Send ZSS and Anne into the back with the Night Elves? Skin the Pokemon for their pelts? Sell Lucas and Ness as pleasure boys to Spadefox? All up to you, my friend.

NEUTRAL $PECIAL – CHEMICAL RAGE

Gobjob takes out his perfected formula, complete with Mannoroth’s blood, then feeds it to the Ogre for a brief bit of lag. The Ogre turns purple, grows some spikes out of his sides, takes out a pair of blades, and starts foaming at the mouth as if he had rabies.


This lasts 8 seconds and buffs the Ogre’s attack speed so much it isn’t even funny and increases his piss-poor movement speed to Captain Falcon’s. Chemical Rage treats each move differently, so there’s no overall generic buff to them, though on enslaved foes it doubles their attack speed. In addition, the ogre’s so feral that Gobjob doesn’t have to babysit him as he performs each attack and is free to use his own alchemy moves while the ogre attacks, allowing you to perform two attacks at once.

Unfortunately, after the Chemical Rage is over you have to wait 20 seconds before you can safely give the Ogre more demonblood. . .But that doesn’t mean you can’t anyway, and there are times that sadism can benefit Gobjob. Giving the Ogre a drink before the 20 seconds are up will still work, but he’ll die at the end of the rage and it’ll end earlier based on how little time you waited to give him another drink. You can even give the Ogre another drink of the chemicals while he’s still under it’s effects to extend the time 4 seconds, but this also ends in the ogre’s death.

When Gobjob is left without any form of mount, he’s left with nothing but his alchemy moves, and he loses Chemical Rage entirely. He gets a generic uair that’s laughably weak but gives him a recovery on the level of Link’s and a horrendous grab, but that’s it. Least he has good run speed, he’ll need it to get back to the Marketplace and purchase a new mount ASAP considering he’s as light as Jigglypuff.

This is the main time you’ll want to go on the offensive, as the Ogre is quite incompetent without demonblood. For the most part, you’ll just be stalling and camping trying to wait for the Ogre to be able to accept more chemicals. This in particular is why the Night Elves are so useful – 6/15 seconds off the clock right off the bat.

$IDE $PECIAL – HEALING $PRAY

Gobjob takes out a potion and shakes it up for a half second of lag, then points the bottle forward at a downward diagonal angle and takes off the cork. Several magical bursts start rapid firing out of the bottle that each heal 1%, 15 per second. Because of the angle Gobjob aims this at, only half of them go onto his mount, meaning he only heals 7/8% per second. On the other hand, the rest of the Healing Spray can heal enemies. . .Some genius Gobjob is. What? It’s shooting too powerfully for him to adjust the angle!

This gives insanely large incentive for the foe to approach. Not only do they have to stop Gobjob from healing, but they can get in some healing themselves! Considering it takes a good half second for Gobjob to cancel this and he never comes out of it automatically, they probably –will- get the healing, but you’ll heal more and the foe will be where you want them – most probably in front of the Marketplace.

UP $PECIAL – EJECTION $EAT


The ogre thrusts Gobjob’s chair forward like a catapult, propelling him upward 1.5X the distance of Sonic’s recovery very quickly and with superarmor. Gobjob’s a cute little hitbox that does 8% and knockback that kills off the top at 200%. When Gobjob is separated from the Ogre in this manner, it’ll run towards him, through the air if necessary, at his regular dash speed. It’s quite easy to gimp the ogre and any damage done to him will still go on Gobjob’s counter, so wall of paining a big fat lard that doesn’t resist is far from difficult. Definitely Gobjob’s main weakness right here. If the foe somehow manages to knock your Ogre off during chemical rage, it’s not as bad as the Ogre runs through the air much faster and his body is a decent priority hitbox that deals 5% and weak knockback as he runs.

$TANDARD$


NEUTRAL ATTACK – $LASH


A generic jab that showcases the Ogre’s sluggishness as he swings the poles of Gobjob’s chair forward with as much lag as Ganon’s fsmash for only 5%, knockback that KOs at 300%, and horrendous (though disjointed) range that goes right over anyone shorter then ZSS.

When the Ogre undergoes Chemical Rage, the attack is actually capable of hitting people but the range is still poor. He slashes ridiculously fast with one of his blades. No, I mean it’s STUPIDLY fast. Blink and you’ll miss it fast. Granted, it only does 1% and flinching, but you can pull off 10 of these jabs in a second, the Ogre alternating which blade he slashes with when the move is spammed. This is very much capable of infiniting against walls, but foes can DI away from the Ogre. However; when under Chemical Rage the Ogre has no dashing attack and can use this attack while moving, meaning foes will have to DI all the way to the end of the stage to escape from him as they take constant damage.

FORWARD TILT – ACID BOMB

Gobjob throws a potion forward with below average lag. It can be aimed and travels two thirds of Final Destination before exploding. It’s slightly smaller then a Pokeball and can be shattered with any attack as it flies through the air, but once it reaches it’s maximum distance or collides with a foe it explodes in a Bowser-sized gooey green explosion. While this only deals 3% and flinching at the start, it gives a meaty 13 seconds of poison damage. While the attack has low lag, hitting them with more Acid Bombs will just reset the counter so you’re generally trying to force them to approach via the poison damage rather then camping. This also halves the foe’s movement speed, making it more difficult for them to get away from your Chemical Rage and the Marketplace.

DOWN TILT – THRUST


Essentially identical to the Ogre’s jab, but he turns to face the screen before doing so and bends over slightly, meaning it’s capable of actually hitting things. In Chemical Rage, the ogre laglessly (Much like the jab) instead slashes with his blades, doing an outward slash with good range to either side that does set knockback away from the ogre and 4%. If used again immeditately after the first use, the ogre will slash his blades inward, doing weak knockback towards the ogre and 4%. . .This combos into itself very well, infiniting until roughly 45%.

$MA$HE$


FORWARD $MA$H – CHAIR $MA$H


The Ogre slams Gobjob’s chair forward onto the ground, much to Gobjob’s protest. The chair is a Wario sized disjointed hitbox that deals 25% and pitfalls foes. There’s surprisingly very very little lag on the move, but Gobjob himself gets the same effect of being hit due to being slammed into the ground. The ogre will start dashing to Gobjob to pick him up once Gobjob button mashes out, instantly assuming nobody knocked the ogre away. While this might sound bad, it’s pretty easy to hit with and helps in stalling to recharge Chemical Rage and to keep foes in front of the Marketplace. Charging this has no affect on the actual slam, but Gobjob will realize what’s happening and hop on the ogre’s back by the time you fully charge the move, avoiding the chair smash and hopping back into the chair after the attack hastily.

With Chemical Rage, you still have control of the Ogre after Gobjob is pitfalled, him being feral enough to not rely on his master’s orders. This means you can actually punish the pitfalled foe properly. . .The obvious choice is just to fsmash again as this move does knockback that kills at 70% on pitfalled foes, but the catch is both Gobjob and the foe will be in the same piece of ground and share the same hurtbox. You’ll have to smack away Gobjob in addition to the foe, so this very well made end up as an awkward suicide KO, especially considering how light Gobjob is. Once Gobjob gets out of the pitfalled state, he does a brief hand motion as you regain control of him and the ogre comes dashing towards him to reunite.

UP $MA$H – TRA$H


The ogre looks upwards, then pinches together the two blades at the end of the poles on Gobjob’s chair to grab foes. The grab hitbox has pretty pitiful range for an upward grab, though it’s near lagless. Once you grab the foe, you can pummel against their attempts to escape your grab by squishing them between the two blades, though your button mashing is only half as effective as theirs. Foes take 5% per second they’re in your grasp.

With Chemical Rage, you can flail the foe around by moving the control stick about to perform “throws”. If you throw them in any direction but down, they’ll take knockback that KOs at 150% and no damage. If you throw them down, they’ll be hit against the ground and take 8%. To throw them against the ground again, you have to perform another throw (Uthrow is quickest) and interrupt it with a dthrow to slam them against the ground again before you release them. If a wall is to your left/right, those throws will function like the dthrow. You’re still capable of pummeling while “throwing” the foe around like a rag doll.

DOWN $MA$H – ENCAGE

The ogre turns to face the screen, then essentially performs his fsmash. Rather then swinging the chair by the poles, though, he just grabs the chair itself and slams it down, once again with little lag. He turns it up-side down before slamming it down, trying to catch foes in the chair. . .Alongside Gobjob. While this is ultimately a grab that’s twice as difficult to escape as normal, no damage is dealt to the foe and they’ll be doing god knows what to Gobjob under there for 5% a second. For foes too small to be trapped underneath the chair, the ogre will just squash them against the ground, Gobjob taking damage from being under them. Foes can escape early if Gobjob gets to 80%, in which case they knock him out from under the chair for high knockback.

Under the effects of Chemical Rage, the Ogre can jump up to smash the foe under the chair for 20%, though Gobjob will also take the same damage. Foes can also button mash out thrice as fast during the brief period where the ogre jumps up into the air, though they won’t be able to make any progress at all after the stun from the Ogre’s jump for a bit. Foes can’t get out of this by early by damaging Gobjob.

AERIAL$


NEUTRAL AERIAL – OGRE ROLLING


The Ogre laglessly scrunches up into a “cannonball” position and starts spinning around. Gobjob hops out of the chair and lands on the ogre’s back. From here you can make Gobjob run left or right to spin the ogre in the opposite direction, going faster and faster the longer you “Ogre roll”. The ogre’s body is a hitbox based on how fast he’s going, by default doing 5% and flinching but gaining 1% and slight knockback for every tenth of a second Gobjob runs in the same direction. As you build up speed you can begin to use this to recover as the ogre moves more and more quickly. A pretty good horizontal recovery that’s difficult to gimp thanks to the ogre having infinite priority, but if you hit Gobjob (Hard to do) you’ll separate the pair as the ogre keeps rolling on while Gobjob foes flying into the distance.

When the ogre spins round so that Gobjob’s chair comes across the point that Gobjob is running across, he has to do a shorthop to jump over it. This can become difficult at high speeds. To end the move early, you have to time the shorthop properly so that you land in the chair. If you’re going so fast that the timing’s not possible, though, you can just do a full jump to abandon ship. This move can be continued on the ground.

FORWARD AERIAL – ROUNDHOUSE $MA$H


The ogre swings Gobjob’s chair forwards, but due to him being in the air he does an entire loop around with it rather then smacking the chair into the ground. No start-up lag, but it takes half a second to make a full rotation of the chair. Contact with the chair deals 10% and average knockback. If you use the move again immediately afterwards, the ogre will swing the chair around faster, also increasing the knockback and damage of the move by 5%.

Getting enough momentum to make the move powerful enough isn’t really possible before landing on the ground, but if you press B during this attack the ogre hurls the chair forwards in the currently aimed direction, keeping all of the power in-tact. If you manage to get enough momentum, this can potentially be an improvement over the up B, and it’s also less gimpable and can be aimed. If Gobjob leaves the chair after being sent back to the stage, though, the ogre will run back to pick up the chair before getting Gobjob.

If the attack is interrupted by landing lag and the chair smashes into the ground, the move will cancel into a fsmash. If the ogre lands on top of the chair, the landing lag is increased but the chair is a hitbox that deals 24% and pitfalls foes.

DOWN AERIAL – $UMO $TOMP


The ogre turns to face the screen and enters a sumo-like stance with his legs, stretching them out far apart. From here the control stick tilts the ogre rather then controlling your DI. This has no hitbox of any form in the air – if you want protection from attacks from below nair’s your best bet. When you hit the ground, a small earthquake effect occurs. If you do somewhat of a swinging motion with the ogre so that one of his feet goes up then slams down, the earthquake effect will be more geared in that direction. It can reach out up to half Battlefield in one direction or half the distance in both directions by staying neutral. Any foes in range take 14% and upward knockback that kills at 155%. There’s no lag, but considering you have to wait to get on the ground for the move to do anything. . .

You can hold the stance after you land on the ground by holding A for as long as you want. While this might sound rather pointless, the ogre becomes solid as he holds this stance, meaning it’s possible to catch foes Mario’s size or smaller in-between his legs. The ogre has superarmor and anti-grab-armor in this stance so escape is also impossible. . .Unless they do an upward attack to hit the ogre’s jewels, which causes him to do the splits and have horrible lag. However, this also deals 15% and pitfalls the victim, so you’re on even terms. Great for stalling the enemy to keep them in front of the marketplace or to wait for the last Chemical Rage to wear off.

With Chemical Rage, the ogre grows balls of steel – nothing will make him budge from his position, meaning he can trap smaller foes between his legs for as long as the Chemical Rage lasts.

GRAB


GRAB – TRAN$MUTE

Gobjob takes the cork off of a potion, then thrusts it forward for a golden projectile the size of a Pokeball to come out. You didn’t expect him to use one of those stupid circles, did you? This has slightly above average lag (Ganon fsmash), but the projectile moves at Sonic’s dash speed once it comes out. It travels the distance of Final Destination, and anything it goes through turns to gold. Minions, projectiles, traps (Though this goes over a lot of them), items, and most importantly foes, of course. If the object was moving/in the air, it falls to the ground lifelessly due to it’s newfound weight. This can theoretically gimp, but considering you can’t aim it and the lag it’s pretty predictable.

It takes double grab difficulty to come out of this while non-character objects stay golden for 6 seconds before returning to normal (Or just shattering in the case of projectiles). Characters/objects can’t be moved or take any form of damage while golden, but if you use this button input next to something golden you’ll perform a more traditional grab on it. Using a throw on a golden object causes it to turn back to normal (or shatter if a projectile) early.

PUMMEL – CHI$EL


Gobjob takes out a chisel (Prop!) and starts chiseling away at the golden statue. He just manages to get bits and pieces of gold, not doing anything to the structure of the statue. This gives him 10 gold per pummel and is just barely in the upper half of pummels in terms of speed.

GOBLIN $HREDDER


$PECIAL$


DOWN $PECIAL – BLACK MARKET

NEUTRAL $PECIAL – PLANT TREE


You didn’t expect Gobjob to feed a potion to his Shredder, now did you? Gobjob tosses a potion down onto the ground with very little lag. This move has no hitbox of any form, but causes a tree to sprout up where you planted it 5 seconds later with Bowser’s width. It takes 15 more seconds for it to fully mature, and it goes from Ganon’s height to quadruple his height and from 30 stamina to 200. Pretty crazy stuff right there. The only real purpose of using it as an actual wall is that you can infinite foes against it with Chemical Rage and it’s good to block foes from fleeing the Marketplace from one side. Gobjob can only have one tree at a time and they can’t be transmuted.

$IDE $PECIAL – HEALING $PRAY

UP $PECIAL – EXPLO$ION


The Goblin Shredder explodes in a Bowser sized explosion, dealing 22% and vertical knockback that kills at 50%. Gobjob takes the knockback of the attack, though thankfully not the damage. Still, if you’ve taken enough damage to need to recover this’ll probably KO you considering how light Gobjob is alone, so you’ll wanna fall down a good bit before you blast off. Gobjob has superarmor as he takes the knockback of this attack and deals 10% with knockback that kills at 200%. You have other methods of recovery in your aerials (Thankfully, or else the Shredder would be garbage tier), so the main use of this is a suicide KO. Even if you somehow manage to survive by having next to no damage, you lose the Shredder, so it’s definitely a sacrifice.

$TANDARD$


NEUTRAL ATTACK – HARVE$T


A generic swinging of the Goblin Sherdder’s buzzsaw. Below average lag (Bowser ftilt), good priority, decent horizontal range but the hitbox is too high to hit a lot of characters. 6% and knockback that kills at 270%. While this might seem pretty cute, you can use this on your trees for triple damage. You get lumber equal to the damage you deal to the tree, and you automatically sell any lumber and trade it in for the half the amount in gold when you go in the Marketplace. There’s a reason the trees have so much stamina – you’ll be attacking them just as much as the foe, if not more so.

FORWARD TILT – ACID BOMB

$MA$HE$


FORWARD $MA$H – TIMBER!


The Shredder slashes forward with the buzzsaw at a diagonal downward angle for average lag (Mario fsmash), dealing 10% and knockback that KOs at 270%. Good range and priority, but still a pitiful smash. If used on a tree, you can cause it to fall down in the direction you’re facing if it has 25-100 stamina left based off charge. The tree is too thick to spot-dodge and it’s insane length makes it hard to get away from, dealing 35% and pitfalling foes for double the usual time. That’s pretty crazy powerful, but this move is laughably telegraphed if only for how much time you’ll be spending around the tree to prepare it.

UP $MA$H – BLOWN TOP

The top of the Goblin Shredder blows off the legs of the machine, going up 3-6X Ganon’s height based off charge. You have control over the Aerial DI (As good as Wario’s) upper half of the Shredder as it shoots up and comes down, and contact with it does 20% and upward/downward knockback that KOs at 150%. If you don’t land back on your feet, though, you’ll have to throw the upper half of the shredder like a heavy item back onto the legs before you can use the Shredder again. . .Though the Shredder does pitfall grounded foes and you can use your Up Special while in the upper half of the Shredder, making the combo a decent incentive for splitting up from the legs. No lag and the upper half of the shredder shoots up/falls down very quickly, though there’s a decent bit of end lag if you just land back on the legs again.

DOWN $MA$H – DI$JOINT

The Shredder starts walking forwards at it’s walking speed for as long as you “charge” the attack, turning around if it comes to an edge or if it’s going to leave the area the Marketplace is in. Due to your movement being taken care of, the control stick now rotates the upper half of the Shredder, disjointing it from the bottom half. As you’re walking about like this, the shredder’s non chainsaw arm is extended out as far as Koopa Klaw’s range, grabbing anything it comes into contact with. This is why you want to be spinning your top half around, in order to grab somebody. If you turn to face the background/foreground, you can grab dodging foes you pass or foes who try to roll through you.

You throw the foe from the grab at the end of the “charge” of the smash, and they’ll be thrown in the direction you’re currently facing (Upwards if towards the background and downward if toward the camera) for knockback equivalent to how much momentum you gained from spinning. If you were literally just spinning in circles the whole time it could KO at 70%, though it’s doubtful you could grab anyone like that. Regardless of knockback the throw deals 10%.

AERIAL$


GRAB


GRAB – TRAN$MUTE

PUMMEL – CHI$EL


FINAL $MA$H
 

Katapultar

Smash Lord
Joined
Nov 24, 2008
Messages
1,284
Location
Australia
Even if he's a abandoned incomplete set, I'll still say something about Godjob...

Wait, reading the introduction you mentioned "Grom Hellscream" whom was in your MYM6 signature. But I guess that this is not Grom Hellscream. The set's incomplete, so I guess I can't blame you at all for possibly missing out certain details. I'll just state good things about the set.

One thing Im not usually used to in reading a Warlord set is humour. "Always gotta make time for the girls, yes?" and " Sell Lucas and Ness as pleasure boys to Spadefox? All up to you, my friend." are both funny to read. Oh and the D-air is funny as well.

Goblin Shredder looks cool.

Anyway, some good stuff there, even if it's not complete. It should hopefully be mentioned in the Sunday Recap (Which will probably be done by Junahu I think since MT won't be here) as something that people can read for the fun of it.
 

darth meanie

Smash Journeyman
Joined
Jun 6, 2008
Messages
452
Pokemon Hunter J

I think you and I may be the only two MYMers who are actually familiar with the easily best character from the entire Pokemon anime, and I've been anticipating this ever since you first mentioned it.

First of all, you've managed to create a moveset that uses four different characters at once in an understandable, and even natural manner. That alone is incredibly impressive. The reason I like this moveset so much is because you've overturned many of your usual weaknesses. Every move plays into the playstyle in at least some manner. Nothing is too ordinary, and your organization and writing style have both improved, although they still have a good bit of room to grow.

Now Hunter J's real weakness is balance. She's horribly, horribly overpowered. Her wrist cannon is chargable and KOs at 50%, and it seems very out of character to me for it to do knockback rather than petrifiy enemies like it did in the anime. With Drapion and Ariados both having ways to pin down the enemy for the blow though, she has no trouble hitting with it either. Drapion and Ariados also had a whole lot of HP, it should have been cut in half or less. Doing that would also add strategy to when to and not to use Ariados and Drapion; as it is there's no reason not to have them out all the time.

You also needed to be a little more clear with some of the ways your moves worked; a lot of abilities were only casually mentioned later in the moveset, and there was a lack of real true clarity with how all of his moves worked.

Also, the Final Smash was epic, and one that actually had some thought put into it. Although imagine a Free For All with Doppelori and three Hunter J's. (SHOCK)


All in all Katapultar, this moveset is even more convincing to me of your legitimacy as a real movesetter than Banette. You've overthrown most of your problems from Make Your Move 6, and you are the most faithful commentor in this competition, and easily the fastest. Your comments have been improving too. I just wanted to tell you good job for what you've done in this contest, and remind you that you really need to join the chat sometime! There's a link to it on the OP.
 

Koppakirby

Smash Cadet
Joined
Aug 13, 2009
Messages
52
A New Set In One Day, KK You Madman!

Bullyhttp://www.youtube.com/watch?v=ma-WtwN9KrYhttp://www.youtube.com/watch?v=ma-WtwN9KrYhttp://www.youtube.com/watch?v=ma-WtwN9KrYhttp://www.youtube.com/watch?v=ma-WtwN9KrY

Bully strong. Bully Strongest. Bully push Mario into lava. Bully laugh. Bully watch him grab his butt in pain. Bully live in lava world. Wimpy Bullies live in ice world. Wimpier Bullies live in alien Yoshi. Bully come to Brawl. Bully push everyone off ledges.

Stats:http://www.youtube.com/watch?v=iZ4-h8HEUFs&feature=relatedhttp://www.youtube.com/watch?v=iZ4-h8HEUFs&feature=related
Walking Speed-4, Bully no need to walk. Why this category?
Running Speed-9, Bully laugh. They no catch Bully.
Acceleration-2, Bully angry. Why Bully no get fast faster?
Weight-7, Bully say no call Bully fat.
First Jump-2 Bully never get pushed. Other Bullies do, but Bully no need jump.
Second Jump-5, Better, but Bully no need it.
Power-7, Bully strong.
Traction-3, Bullies slide lots. It only natural.
Range-2, Bully not need range. Bully push.
Piority-7, Bully push, Bully not be pushed.
Size-Kirby, No make fun of Bully's size.

Special Mechanic 1:http://www.youtube.com/watch?v=0rygsWPCjNQ&feature=relatedhttp://www.youtube.com/watch?v=0rygsWPCjNQ&feature=related
When Bully run, Bully knock opponent at touch. Good for Bully. Touch knockback depending on speed. Lower speed, lower knockback. Higher speed, High knockback. Not rocket science. Bully Also got god priority.

Special Mechanic 2:http://www.youtube.com/watch?v=2wefgiEphiE&feature=relatedhttp://www.youtube.com/watch?v=2wefgiEphiE&feature=related
Bully hate when others bully Bully. Don't they know it hard for black orb to make friends in this world? Bully show them. He show them one day. More times Bully bullied, more angry Bullied get. Bully have 3 levels of anger:
Black-Bully calm. Drank much tea to get calm.
Orange-Bully starting to get angry. Bully slide round more.
Red-Bully angry! Bully smash others' dreams! BULLY MUST KILL. Bully slide round lots.
Bully change because of anger level. Must take anger management classes.(If it's not clear, the more damage Bully takes(Let's say 17%), the angrier he gets. He'll then go to Yellow if he was Black, and Red if he was Yellow. He can also effect his rage through special moves)

Specials:http://www.youtube.com/watch?v=uqcPSbkS9TQ&feature=relatedhttp://www.youtube.com/watch?v=uqcPSbkS9TQ&feature=related
Neutral Special-Cooldown
Therapist tell Bully Bully get too angry. Bully focus and get rid of negative thoughts. Heals Bully. -5%
Bully cool down his rage. Bully take yoga classes. Bully turn calm.
Bully not WANT to calm down. Bully mad. Fine. Bully calm down, take much time. Bully become only sorta mad. But he still hate stupid Meta.

Side Special-Cookin'
What? Bully's little fireball friend come to find Bully. Bully like fireball friend. OUCH! Fireball burn Bully. Bully take 2% damage. Bully get angry.
Fireball friends Bully no trust. OUCHIES! Burn Bully again for 2%!? Bully angry! Bully smash!
Bully rage multiplies! Fireballs must die! OUCH! YOU BURN AGAIN!? That will only facilitate Bully's rage. You heal Bully. You heal Bully 5%!

Down Special-Tantrum
Bully jump on ground. Make little shockwaves. Little shockwaves around Bully. Bully deals 7% damage and little knockback with shockwaves.
Bully's shockwaves much bigger. Bully's shockwaves 3 times an big as Bully. Bully's shockwaves deal 11% damage, and medium knockback.
Bully no have shockwaves? Wait, why it begin to crack near edge of platform(Or near pits/walk offs)? Bully tantrum again. It crack more. Bully Tantrum one more time. WOW! Bully destroy part of the stage. Now pit is there. Bully can destroy 1.4 the size of a stage builder block. That make Bully proud. Bully deal 11% damage and medium knockback if opponent right next to Bully at tantrum. Bully only break part of stage if it isn't broken. Stage rebuild in 30 seconds.

Up Special-Amazingly Large Jump
Lots of plotholes in SM64. Big Bob-Omb obviously can't jump that high. You know, when thrown off mountain? When Bully knock off platform and about to die, Bully uses this move during the fall, and when Bully pass KO boundary, Bully Jump all the way back onto the platform. Bully only use jump 3 times per stock though. Bully deal 9% damage and medium knockback to Bully's enemies. Bully jump stay same every level. Bully always land in same place where Bully was before fall. Except on scrolling stages. The Bully go in middle of stage.

Standard:http://www.youtube.com/watch?v=kI8jT7LmoNA&feature=relatedhttp://www.youtube.com/watch?v=kI8jT7LmoNA&feature=related
Jab-Flutter Kick
Bully know you go 'Huh? Bully not swimming'. Bully thank SM64 crappy animation, because give Bully this move. Bully fall onto back and kick feet into air. Bully hit opponent many times. Good for racking damage. Deal 3% damage with every kick. Almost no knockback.
Bully forgot to mention that Bully take while to fall and get up, but not matter much when angry. Bully hit hard! Bully deal 4% damage with every kick! Same knockback though.
Bully kick harder and harder! Bully smash opponent with 5% damage per kick! Good damage racker yes!

Dash-Grunt
Bully think concept of Dash Attack is odd. Bully already do knockback when run. Why need dash? Well, Bully can Grunt while dashing to point his horns forward! He deal 4% damage along with already pointed out knockback.
Bully horns are harder from rage! They deal 5% damage!
Now Bully's horns are sharpest! They deal 7% damage! They skewer Bully's foes! Bully is happy.

Tilts:http://www.youtube.com/watch?v=O8tx7nVX7PQhttp://www.youtube.com/watch?v=O8tx7nVX7PQ
Forward-Poke
Bully accidently fall over. He get spike stuck in ground next to him. He embarrassed. Bully do poke opponent with sharp horn spike though. He deal 6% damage and little knockback.
The angrier Bully gets the more sharper Bully's horns get! Bully's horn do 8 damage with medium knockback!
Bully is sharp in 2 ways! With horns and with fashion sense. Chicks dig the green shoes. Also, Bully's horns do 10% damage and heavy knockback to foes! Who Bully hates.

Up-Bully Spin
Bully jump up in air and spin. Bully spin and drill opponents with horns. Deals 3% damage. Damage racks up fast. Little knockback.
Bully Angry! Bully spin faster! Bully rack up more damage than Bully do when calm. Bully better!
Bully dizzy....Bully spin faster, deals lot more damage, racks up lots of damage. But takes 5% damage with every use...Dizzy....

Down-Heat up
Bully live in hot climate. Bully try to heat up. Bully turn hot for short time. Burns opponents up. Deals 5% damage with medium knockback.
Bully get hotter. Bully only a little warmer. This angers Bully. Bully hate that he only have 7% damage and the same knockback for this attack.
Now Bully the hottest! Bully like supermodel! Bully burns opponents. Knock them away heavily. Does 10% damage if touch Bully.

Smashes:http://www.youtube.com/watch?v=QnXau_xtlNshttp://www.youtube.com/watch?v=QnXau_xtlNs

Forward-Fireball Friend
Bully not have many friends. He forgive Fireball Friend for burn. He send Fireball Friend out with mission. That mission: BURN EVERYTHING! Bully's fireball friend lock onto nearest opponent and chase him at Yellow Rat's run. He chase them until he hit them, when he deal 8% damage with medium knockback. More charged, the more friends Bully send. Bully send out maximum of 3. Bully take while to instruct friend. Also Bully no have change in anger. It up to fireball friend.


Up-Fireball Friend's Friend
Bully have met another fireball. He Fireball Friend's friend. He jump over Bully when Bully want to. That nice. Protect Bully from above people. Again, Bully no change this. It up to Fireball. Fireball jump over Bully and deal 7% damage to those above with good knock. Bully can charge it and help fireball deal more damage. Full charge has 10% damage and medium-high knockback.

Down-Bowser Puzzle
Bully love Master Bowser. Bowser even help Bully here. Bowser puzzle appear under Bully. Puzzle wait 3 seconds and then scatters around. Pieces go everywhere, smacking into opponents. Bully laugh at their 6% damage taken and medium knockback! The pieces go everywhere, vertically, horizontally, diagonally! Bully have hard time keeping up. Pieces stay for 8 seconds before vanishing like magic. Pieces no hurt Bully. They also fall though. Bully charge depends on how far pieces go. Only 3 pieces when Bully calm.
Now have 6 pieces.
When Bully is angry there are nine pieces!

Aerials:http://www.youtube.com/watch?v=HYNUVsIeDW4&feature=relatedhttp://www.youtube.com/watch?v=HYNUVsIeDW4&feature=related
Neutral-Upside Down
Bully Flips himself upside down. Why does Bully do this? Bully does it so his horns skewer opponents below Bully. Bully's horns are still kinda dull, they deal 7% damage with medium knockback.
Bully's horns are sharper. Bully's horns will leave a mark! Bully does 9% damage with medium-high knock. Bully show them.
Bully show off his sharp horns! Sharpened with rage caused by years of abuse. Bully kills! Bully does 11% damage with high knockback! Bully show them Bully still lethal, even in air.


Forward-Pyro Box
Bully bring another friend to play! Bully bring in Pyro Box. Pyro Box not talk much. Pyro Box stay in same place all of time. Pyro Box spews fire every 5 seconds for 2 seconds. Pyro Box's flame stream is as wide as Penguin times 1.5 and deals 3% damage, but racks it up good. Pyro Box platform. Pyro Box takes 15% damage before blows. Pyro Box loves Bully. Pyro Box doesn't care about Bully's rage.

Back-Stylish Kick
Bully flip around and kick annoying people in the face for spying on Bully from behind. Bully ask if they have any manners? Bully's kick is stylish, Bully deal 6% damage with light knockback with Bully's stylish kick.
Bully's kick get's even more stylish! Bully deal 8% damage with stylish medium knockback now. Bully even more stylish.
Bully's kick is stylish and deadly! Bully show all who teased Bully in grade school that Bully is number one with stylish kick that deal 10% damage with heavy knockback.

Up-Firebar Whip

Bully have another friend. Mr. Fireball is also quiet. But he love Bully too. Bull love Mr. Firebar unconditionally. Bully pulls out chain of flames and whip it around, circling Bully. This clear away bad people from Bully with 5% damage and medium knockback.
Bully somehow effect this with rage. Fireballs larger when Bully is angry. Fireballs 1.5 times as big as they were when Bully calm. They also do 7% damage!
Now Bully show all who challenge Bully in the air fear! Fireballs as big as 2.3 times their original size and deal 10% damage with high knockback! Bully pleased.

Down-Thwomp Crush
Bully no summon Thwomp. You may think Bully do that, but Thwomp big jerk. No want to be friends with Bully. That make Bully angry. Bully go crashing down fast. Bully make big implant in ground or opponent face.(COUGHOomenakaCOUGH) Bully deal 8% damage with high knockback.
When Bully Kinda sorta mad, Bully have 25% chance of shoving opponent into ground.
Now Bully has upper hand! When really mad, Bully will always pound opponent into ground!

Grabs and Throws:http://www.youtube.com/watch?v=bq_jS6o3OoY&feature=relatedhttp://www.youtube.com/watch?v=bq_jS6o3OoY&feature=related

Grab-Chuckya
Bully no grab. Bully have no arms. Bully get friend to grab for Bully. Bully summon Chuckya! Chuckya stays in same place summon for 5 seconds. Chuckya gets bored at the fifth and vanishes. If someone gets too close to Chuckya within that five seconds, Bully is happy. Chuckya has grabbed them. They can't escape. Bully can't control Chuckya, though. Bully no have influence on robot. No rage either.

Pummel-Squeeze
Chuckya give opponent big hug. Awww....Bully want hug too. Wait, they scream. Maybe hug too tight. Maybe it deal 6% damage.

Forward-CHUCK!
Bully watches Chuckya chuck opponent away. Chuckya chucks opponent the length of Green Greens forward. No damage though. Bully is sad.

Back-CHUCK!
Bully watches Chuckya throw opponent again. This time backwards. Same distance though. And still no damage.
BULLY IS ANGRY AT LACK OF DAMAGE.
Bully tells Bully to cool it.

Up-CHUCK!
Chuckya really good at what Chuckya does. Chuckya throws opponent straight up, the width of Green Greens turned sideways. Bully thinks this is a sure finisher at high places.

Down-NORRIS!
Chuckya drop opponent and run over opponent. Bully laugh at that. Chuckya make meanies into road kill. Chuckya deal 8% damage with medium knockback. Chuckya then vanish.

Final Smash

Bully happy. Bully vanish and bigger Bully comes out in Bully's place. That Bully is Big Bully. Big Bully as tall as Gannon Man and as wide a Lord Bowser times 1.3. Big Bully doesn't take damage or knockback. Big Bully deals triple damage with all attacks, that same for knockback too. Big Bully stay for 17 seconds. Big Bully forever!
Here comes Big Bull-What? There is No Big Bully! Instead 10 Fireball Friends come out of Bully. They chase everyone. That cool Bully guesses, but where is Big Bully?
NO BIG BULLY!? THAT IS UNBELEIVABLE! WHERE IS HE!? ALL I GOT IS 2 LEVEL 9 CPU-CONTROLLED COPIES OF ME HELPING ME OUT FOR 20 SECONDS! WHAT!?

Extras:http://www.youtube.com/watch?v=_ulMNR79P04&feature=relatedhttp://www.youtube.com/watch?v=_ulMNR79P04&feature=related
Alt Colors/Costumes-Red Bully, Green Bully, Blue Bully, Orange Bully, Ice Bully, PiT Bully
Victory Theme- 00:01-00:13 of this: http://www.youtube.com/watch?v=M-otEdq-Ozo&feature=related
Taunt 1-Bully Grunts
Taunt 2-Bully Spins and Grunts
Taunt 3-Bully Jumps and Grunts
Victory Pose 1-Bully Dances and Grunts
Victory Pose 2-Bully hangs out with his Fireball. And Grunts.
Victory Pose 3-Bully nukes the Mushroom Kingdom while Grunting.
Win Pose against Mario-Bully pushes Mario into Lava
Win Pose against Luigi-Bully chases a frightened Luigi around
Win Pose against Yoshi-Bully knocks Mario into Lava, the hat comes off, and it's revealed as Yoshi
Win pose against Wario-Bully tries to push Wario, but gets tired trying to budge him.
Win Pose against Meta Knight-Non existent
Loss Pose-Bully melts

Playstyle:http://www.youtube.com/watch?v=gyrXdOkSFIg&feature=relatedhttp://www.youtube.com/watch?v=gyrXdOkSFIg&feature=related
Bully is good fighter. Bully's rage make Bully stronger, but Bully becomes slidey. Rack damage with Flutter Kick, Bully Spin, and Pyro Box. Clear Opponent away with Grunt, Firebar, Stylish Kick, and Thwomp Crush. Heal Bully with Cool Down and Cookin' when needed. When needed, also keep enemies away with Fireball Friend, Fireball Friend's friend, Bowser Puzzle, Heat Up, and Chuckya. Chuckya, Upside Down, Thwomp Crush, Poke, Amazingly Large Jump, and Tantrum are good for KO. Tantrum especially good when combo with Grunt. Keep Hotheaded when Bully has upper hand, otherwise stay Medium or calm. Bully's objectives, rack up lots of damage then get Chuckya to throw offstage/push offstage.

Matchups(What, in a KK set?):http://www.youtube.com/watch?v=NWjJlH2_GKo&feature=relatedhttp://www.youtube.com/watch?v=NWjJlH2_GKo&feature=related
Bully VS Blaster: 35/65 (Blaster's favor)
Bully is sad. Blaster always shoot at Bully. Bully never get close enough to make friends. But Bully send Fireball friends at Blaster! Blaster will rue the day! And when Blaster's back is turned, Bully will have Chuckya throw him!

Bully VS Negative Man: 60/40 (Bully's Favor)
Bully is surprised! Close matchup with pathetic cheese man? Why-OH NO! He used his Up Special again! I'm Slipping! I'm falling! Woah!! Bully can't hold on......At least his abysmal jump doesn't protect him from Bully's arsenal of ground attacks. And Chuckya.

Bully VS Piranha Plant in a Pipe: 50/50 (Tie)
Bully....Can't....Talk....Now.....Bully's.....Trying.....To...Knock....Him.....Out.....Of....His....Pipe! Bully is taking an awful long while to knock PPiaP out of his pipe. But when Bully does get it open, Bully will use Chuckya and it will all be over! Bully hates when Plant uses DSmash and Side Smashes, though.
 

darth meanie

Smash Journeyman
Joined
Jun 6, 2008
Messages
452
Bully

Bully tries to take the simplistic writing style of Dodongo in the right direction, Bully certainly has the personality for it, but your language isn't quite consistent enough to make it all work. While the ramming mechanic is absolutely perfect, the rage mechanic isn't so much, especially since you've actually made him more of a slower fighter than a guy who rams his opponent mercilessly.

Bully is prop city, and he really would have been better with simpler attacks that just fit into playstyle rather than puzzle pieces and fire cannons. Similarly, the anger mechanic hurts his real goal. It makes him more of a set up to increase his power, rather than ramming his opponents, and the three levels are a bit wonky in their differences. The Specials that affect them are a little contrived too.

Overall, I have to say that Bully isn't bad in of himself, but you didn't take him where he should have gone. The concept behind the first special mechanic should have been your focus, ramming the opponent. The props and rage mechanic diluted his uniqueness and playstyle. I liked the idea at the heart of the moveset though, and the special mechanic was simple but brilliant. The rest of it just didn't measure up though.
 

Koppakirby

Smash Cadet
Joined
Aug 13, 2009
Messages
52
Bully

Bully tries to take the simplistic writing style of Dodongo in the right direction, Bully certainly has the personality for it, but your language isn't quite consistent enough to make it all work. While the ramming mechanic is absolutely perfect, the rage mechanic isn't so much, especially since you've actually made him more of a slower fighter than a guy who rams his opponent mercilessly.Thanks for the praise on Bully's writing style and the ramming mechanic. I really did want to do more with the that mechanic, but once the idea of Bully's rage came to mind, it kinda went away.

Bully is prop city, and he really would have been better with simpler attacks that just fit into playstyle rather than puzzle pieces and fire cannons. Similarly, the anger mechanic hurts his real goal. It makes him more of a set up to increase his power, rather than ramming his opponents, and the three levels are a bit wonky in their differences. The Specials that affect them are a little contrived too.Props? What Props? I see 3 props. Sure, it's not a little amount of props, but it's not a lot either. The Fire effects are also the magical thing known as 'effects'. No models of their own. Just like Bowser's Fire, they're flat. As for the playstyle, I do realize it went a bit off course, but part of this set was to make it like Good Ol' Blaster. And to make you laugh at some points. But did I succeed in my overall goal; Making a moveset that doesn't acheive playstyle in a fluke?

Overall, I have to say that Bully isn't bad in of himself, but you didn't take him where he should have gone. The concept behind the first special mechanic should have been your focus, ramming the opponent. The props and rage mechanic diluted his uniqueness and playstyle. I liked the idea at the heart of the moveset though, and the special mechanic was simple but brilliant. The rest of it just didn't measure up though.Thanks for the review, and for the advice. Good Ol' Bully. Maybe I'll take some of your advice and remake Bully as a character that's not like playing as Lethal Lava Land.
Thanks for the review, Meanie. Responses in GREEN.
 

Katapultar

Smash Lord
Joined
Nov 24, 2008
Messages
1,284
Location
Australia
Thanks for the comment on J dm! I've tried to improve my writing from Banette since I took your comment very seriously. Yes I know it would seem OoC for the cannon to do knockback rather than petrify. Perhaps I could have made it into a instant KO and sacraficed speed and restraining, though that would have been a bit akward on my part. Guess you're right about that, I didn't really expect J to be overpowered, yet I supposes it's a very easy edit on my part. I'll cut the Pokemon's HP in half and raise the arm cannon's KO percentage to 70%. The last line praise was indeed a nice big hug for me as well! You sure know how to give others faith! I don't think I can and will join the chat, I''ll remain loyal to the thread as much as it pains you and ther others. It's mostly a combinaiton between can't and won't. I've learnt how to improve from the strong and small amount of comments givien to me and comments for other sets. The comments of Warlord and your own drive me to continue and perhaps improve if that's even possible.

[size=+3]Bully[/size]
I must say, the Dodongo similar writing style is pretty sweet, even though perhaps it sacrafices some neccesary details required to fully understand certain attacks. I agree 100% with dm on the mechanic (ALMOST everything he said to some extent, except prop city), needless to say, but it's best for me to say else rather than what he's said.

To some extent, the 1st mechanic could have been touched upon. But first, one would simply believe that they could keep dashing into the foe and inflicting high knockback and possibly KOing the foe just by dashing into them. Bully would just be one hell of a guy in that case. So many great MUs.

Now, It would have been exceptional indeed for the second mechanic to work in with the first. What if the rage mechanic actually increased Bully's running speed so he could do more damage? A playstyle focusing on that could be called genius.

I very much praise this set for the writing itself, which creates sections of humour such as 'hot like a supermodel', 'He Fireball Friend's friend. He jump over Bully when Bully want to.' and 'yellow rat'. When one sees the set more for it's writing and humour rather than being a 'moveset', it can indeed be called remarkable. I also praise the large gray writing. It's actually a very effective way of presenting your work.

Overall, I actually really liked this set a lot. I do believe it's vote worthy (I'll vote for him when the time comes), and other MYMers should see it for it's fun side and the images which must have been a pretty difficult internet surf to obtain, so congrats. Definitely the best set you've ever produced.
 

tirkaro

Smash Champion
Joined
Jun 24, 2006
Messages
2,808
Location
but a pig in the sun


IT'S FUCKING GOOD!
-Some Critic

IT'S MOTHERFUCKING GOOD!
-Another Critic

I'd totally suck that guy's dick!
-A street corner prostitute Spadefox

By the way, why the hell haven't you played The House of the Dead: Overkill yet?
-Some awesome guy


This is the single most dangerous linkup space in history. Now that you've looked at it, you must keep reading, or else the spirit of Alaka-tookoo-wakalaka will come to your house and make you sleep with Hyper_Ridley. You don't wan't that, do you!? Eh?
Okay, c'mon, pleeeease pay attention to this linkup space, won't you!? Fine, if you read this linkup space in full, I'll reward you with Cutesey Beau hentai, okay? Good.


COMPLETED MYM7 SETS~


CIRNO


"Your writing style is sexy awesome...
....Cirno is different from the typical MYM set, in a good way."
-frf

"This little ice fairy literally busts to the seams with character, thanks to Tirkaro's ingenious, and occasionally random, wit-filled writing."
-Junahu

"Truly an experience, this one, and a bit of a hidden gem, it seems, since I haven't heard any real talk surrounding it."
-K.Rool


TOHRU ADACHI

"Your writing style is as phenomonal as ever, and a testament to just how strong I believe you'll be in this competition given time."
-Darth Meanie

"Writing style is very strong here making the set quite enjoyable to read (as well as very easy to read) and you’ve got some creative ideas going here for sure. Better than Cirno in my book really."
-Marth Trinity

"I love you for making sets that are so off-the-wall, in presentation if not conception; there's a masterpiece hidden in here, but, just like an Adachi player hiding in a cluster of police lines, it's so hard to break into that all that's left is another tirkaro experience. Nobody makes sets the way you do, speaking directly to the reader and focusing more on the experience than the set itself. I approve. A lot."
-K.Rool


SETS IN PROGRESS~


END


....What? Oh, you wanted the Cutesey Beau hentai? Yeah, sure, here you go.
 

peeup

Smash Lord
Joined
Sep 3, 2007
Messages
1,618
Location
Hartford/Mass

Kael, the Invoker

Quas. Wex. Exort. The essence of a storm. The heart of a blizzard. The soul of a phoenix. After his people were broken and scattered to the corners of the earth, Kael was left with only the relics of his once great world. Thirsting for vengeance, he sold his own soul to Ner'Zhul, and in exchange acquired near limitless power. Taking on the mantle of the Blood Mages of old, the Invoker strode into war with nothing but the elements at his command. He can fuse the elements into deadly incantations, tearing apart the very heavens in his fury. His genius knows no bounds, and the Sentinel shall come to know the rage of the Invoker.

~~Stats~~
In a nutshell, he is the same height as Luigi, below average running and aerial speed, and has good traction.

~~Specials~~

~Neutral Special~
Invoke: Pay attention folks, because, unless you are familiar with the Invoker of DotA, this might confuse you. Aside from his neutral specials, Kael's other specials charge him with a specific elemental energy, up to a maximum of three at any given time. If an element is charged when he already has 3 elements active, the first element of that set of 3 will be replaced by the new one. These elements are important because, aside from increasing the strength of various attacks, they also determine which attack his neutral special will do. The order in which the elements are charged DOES MATTER. I will list the different attacks that Invoke can do once I have listed the other specials.

~Up Special~
Wex: Kael calls upon the power of the storm, granting him its energy. Increases the damage that Kael deals with aerial attacks by 2% for each instance of Wex active. For each active instance of Wex, Kael will have a floating ball of electric energy (as seen in the picture) circle around him.

~Side Special~
Quas: Kael calls upon the power of the cold, granting him its energy. Increases the damage that Kael deals with standard attacks by 2% for each instance of Quas active. For each active instance of Quas, Kael will have a floating ball of icy energy (as seen in the picture) circle around him.

~Down Special~
Exort: Kael calls upon the power of the heat, granting him its energy. Increases the damage that Kael deals with smash attacks by 2% for each instance of Exort active. For each active instance of Exort, Kael will have a floating ball of fiery energy (as seen in the picture) circle around him.
__________________________________________________________________________
Now, I will list the various attacks that Invoke can cause.

~Wex Wex Wex~
Shock: Kael releases a ring of electrical energy all around him. The radius of the ring is one battlefield platform. It takes one second for the ring to fully extend, and once it has, it will stay active for another .5 seconds. During this time, Kael cannot move. Enemies that are hit by the ring will take 8% and minor knockback in whatever direction the ring hit them in. This attack has very little startup lag and ending lag, but if the target rolls or airdodges through the ring, they have a free shot at Kael.

~Wex Wex Quas~
Telelightning: Kael shoots a ball of electrical energy forwards that is the same size and travels as fast as Samus' fully charged Charge Shot. If it hits an enemy, they will take 7% and very little knockback (though still hitstun), and Kael will instantly teleport to their position. Little startup lag, but above average ending lag.

~Wex Quas Wex~
EMP: Kael places a large ball of electrical energy at his location. After 4 seconds, the ball will explode, dealing 14% and strong vertical knockback to anybody in close vicinity. This attack has very little lag on either end.

~Quas Wex Wex~
Tornado Blast: Kael releases a strong tornado in a straight line in front of him, at the same speed as Telelightning. Enemies that touch the tornado will take very strong vertical knockback, but will take no damage. Enemies that touch the bottom of the tornado will suffer a severe meteor smash. Long startup lag, but very low ending lag.

~Wex Quas Quas~
Manaburn: Kael releases a controllable (such as PK Thunder, though Manaburn has a very large turn radius) blast of cold energy. If it hits a target, that target will be unable to use special attacks for 5 seconds. This attack has very little lag on either end.

~Quas Wex Quas~
Betrayal: Kael shocks the minds of all enemies on the field, causing their mind to betray their bodies. Each attack that any enemies make while Kael still has Betrayal invoked will hurt them for 1%, or 2% for smash attacks.

~Quas Quas Wex~
Portal: Kael rips a hole in the fabric of space and drags the nearest enemy through it, bringing them to his location. Has very long startup lag, but virtually no ending lag. Cannot be used in midair.

~Quas Quas Quas~
Icy Path: Kael places a column of ice at his location that extends vertically infinitely. Enemies that touch the column of ice will be stunned for 1.5 seconds. The column of ice will disappear after 5 seconds. Only 1 column of ice can be active at a time. Once an enemy comes into contact with the column of ice, it disappears. Any enemy that has come into contact with a column of ice cannot be frozen again for 10 seconds. Has a very large startup lag, but very low ending lag.

~Wex Wex Exort~
Arcane Arts: Kael uses his knowledge of arcane spells to reduce the damage that enemies deal with energy-based special attacks by half for as long as Arcane Arts is invoked.

~Wex Exort Wex~
Energy Ball: Kael shoots a small ball of energy forward the length of two battlefield platforms at a slow speed. When it reaches its destination, it will explode, dealing 18% and large horizontal knockback. The explosion is a circle, whose diameter is a battlefield platform. This attack has little lag on either end.

~Exort Wex Wex~
Firestorm: Kael commands balls of fire to fall from the sky (in a fashion similar to Ness' final smash). Each fireball deals 6% and minor vertical knockback. The fireballs are the size of a partially charged Charge Shot from Samus. This attack has high startup lag, but very low ending lag.

~Wex Exort Exort~
Lightning Shield: Kael surrounds himself in a coat of lightning, which hurts enemies when they are next to him. Deals 4% per second to any enemy whose model is touching Kael's. Little startup lag, but above average ending lag.

~Exort Wex Exort~
Incinerate: Kael targets an area one battlefield platform away (the area is the size of a battlefield platform, the left-most point of which being one battlefield platform away from Kael) with an intense fire. This fire deals 15% per second and no knockback or hitstun to enemies who are caught in the flames. Kael must channel this attack for three seconds before being able to move again. Has very little startup lag, but has the three seconds of channel time where Kael can be attacked if the enemy gets out of the flame.

~Exort Exort Wex~
Inferno: Kael surrounds himself with fiery energy. Every five seconds, the energy will release a pulse of fire, hitting any enemies within half a battlefield platform's distance away from him. The pulse deals 6% and very little knockback, but enough hitstun to start a combo.

~Exort Exort Exort~
Firebolt: Kael shoots a chargeable ball of fire, dealing 5%-13% based on how long it has charged. He can store the charge. Deals very little knockback if it hasn't been charged, but fairly powerful knockback if it has been fully charged. This attack has average lag on both ends.

~Exort Exort Quas~
Deafening Blast: Kael shoots forward a wall of sound, pushing enemies back. This attack is similar to what Piplup does, but this attack doesn't do any damage, pushes people horizontally only, and goes the distance of one and a half battlefield platforms. Has large startup lag, but low ending lag.

~Exort Quas Exort~
Disarm: Kael quickly jabs with his fist full of hot and cold energy. If he hits an enemy, their body temperature will fluctuate, causing them to be unable to focus enough to use non-special attacks. Lasts 4 seconds. This attack has very low startup lag, but huge ending lag.

~Quas Exort Exort~
Shroud of Flame: Kael surrounds himself in a shroud of flame, causing non-special attacks that hit him to only cause 3/4 of normal damage to him. Lasts until another Invoke is made.

~Quas Quas Exort~
Frost Nova: Kael fills the area with a chilling energy, slowing the movement speed of all enemies by 30%. Lasts until another Invoke is made.

~Quas Exort Quas~
Power Word: Kael fills himself with a life-bending energy, causing him to deal 2% extra damage with all attacks and taking 2% less damage from all attacks (attacks against him that deal 2% or less are not altered by this ability). Lasts until another Invoke is made.

~Exort Quas Quas~
Chaos Meteor: Kael rolls a large meteor (it's diameter being one battlefield platform) forwards. The meteor deals no knockback or hitstun, but enemies that are in contact with it are burned for 12% for each second of contact. The meteor will roll forwards untill it falls off of the stage or rolls past the boundary. Has large startup lag, and average ending lag.

~Exort Quas Wex~
Confuse: Kael creates an image of himself at his exact location. The image will act on its own as a level 7 computer, though it deals no damage (it does, however, deal knockback and hitstun). Lasts until another Invoke is made.

~Exort Wex Quas~
Soul Reaver: Kael shoots a spinning scythe-like projectile forwards at a moderate speed. If it hits an enemy, that enemy will take 6% plus an additional 5% over the next 5 seconds. During this time, Kael's movement speed becomes equal to that of Sonic's. This attack has average lag on both ends.

~Quas Exort Wex~
Invisibiliy Aura: Kael and any teammates that are touching his body become invisible. Lasts until another Invoke is made.

~Quas Wex Exort~
Levitation: Kael loses his ability to use non-special attacks, but gains flight (like Pit's Up Special, but Kael has perfect traction in the air). If Kael is hit during this state, he becomes helpless. Lasts 6 seconds. If Kael is in the air at the end of this time, he becomes helpless until he hits the ground.

~Wex Exort Quas~
Scout: Kael creates a mystic owl to harass his foes. The owl will swoop back and forth from one end of the stage to the other, aiming for Kael's nearest enemy. If it hits someone, they will take 6% and suffer slight vertical knockback. Lasts until another Invoke is made.

~Wex Quas Exort~
Soul Blast: Kael fires a blast of arcane energy that homes in on the nearest foe (to a degree slightly better than Samus' homing missiles). It will disappear if it does not hit someone in 3 seconds. If it does hit someone, they will take 5% and Kael will be healed for 5%. Deals no knockback or hitstun. This attack has average lag on both ends.

Phew, done with his specials. On to the other attacks!

~~Standard Attacks~~

~Jab~
Quas Stab: Kael does a single quick jab, dealing 3%. Has very little lag on both ends, as well as low range.

~Up Tilt~
Quas Breath: Kael breathes chilling air directly upwards, dealing 5%. Has decent range, and low lag on both ends.

~Side Tilt~
Quas Sword: Kael creates a sword made of solid ice and swings it, dealing 6%. Has decent range, but high lag for a tilt.

~Down Tilt~
Quas Trap: Kael turns the ground immediately in front of him into ice, tripping anybody standing there. Has small range, and below average lag.

~~Smash Attacks~~

~Up Smash~
Exort Spire: Kael creates a small pillar of flame in front of him. The pillar is roughly 1.5 times as tall as Kael. Deals 9%-14% and decent vertical knockback. Has low lag for a smash.

~Side Smash~
Exort Dragonfist: Kael focuses the power of a flaming dragon in the palm of his hand, then thrusts it forwards, dealing 13%-18% and powerful knockback. Has very high lag on both ends, and fairly short range, but it is almost guaranteed to kill at mid-high percents.

~Down Smash~
Exort Pulse: Kael fills his body with a searing fire, dealing 11%-16% and fairly strong knockback to anybody touching him. This attack has no range, but has very little lag for a smash.

~~Aerial Attacks~~

~Up Aerial~
Wex Stormcloud: Kael conjures a small storm cloud above his head, dealing 7 hits of 1% to anyone touching it. Has decent range and decent lag.

~Neutral Aerial~
Wex Thunderspin: Kael charges himself with electricity and spins around, dealing 4 hits of 2% to anyone touching him. Has low range and low lag.

~Forward Aerial~
Wex Shock: Kael fills his fist with electrical energy and punches forward, dealing 5% and low knockback. Can be combo'd into itself at low percents thanks to its low lag on both ends.

~Back Aerial~
Wex Staticslap: Kael charges his hand with electrical energy and slaps the area behind him. Enemies that are hit will take 5% plus an additional 3% over 3 seconds. Has low lag on both ends.

~Down Aerial~
Wex Magnet: Kael sends electro-magnetic energy into his feet and stomps down, causing a very powerful meteor smash. Deals 5%. Has low startup lag, but fairly high ending lag.

~~Grabs~~

~Grab~
Wex Pull: Kael uses electro-magnetism to draw his target towards him, giving him a slightly ranged grab with little lag.

~Pummel~
Elemental Pulse: Kael fills his target with the pains of all three of his elements, dealing 3%. This pummel is slightly slower than average.

~Up Throw~
Wex Cyclone: Kael throws his foe into a cyclone that shoots them straight up, dealing 4% and strong knockback.

~Forward Throw~
Exort Launcher: Kael blasts his victim with fire energy, launching them a small distance forward for 7%.

~Back Throw~
Quas Wintertoss: Kael uses chilling winds to throw the foe backwards, dealing 5% and freezing them for a certain time based on their current damage.

~Down Throw~
Elemental Assult: Kael assults his foe with all three of his elements, dealing 9% and hitting them a small distance away (though too far for him to combo into anything except for at very low percents).

~~Final Smash~~

~Might of the Scourge~
Kael calls upon his mightiest allies to help him in battle. All enemies are hit by a Poison Nova (thanks to Venomancer), causing them to take 40% over 8 seconds. They are bound by Fatal Bonds (thanks to Warlock), causing any damage that they deal to Kael to also damage themselves, which lasts 8 seconds. All enemies are afflicted by a Rupture (thanks to Bloodseeker), causing them to take 5% for each small stagebuilder block distance that they move, this rupture lasting 8 seconds. All enemies pass through a Wall of Replica (thanks to Dark Seer), causing a level 9 computer of their character to fight against them for 8 seconds.

~~Playstyle~~
With tons of special attacks thanks to Invoke, and the ability to strengthen his other attacks thanks to Quas, Wex, and Exort, there is no best way to play Invoker. You can chose to make him campy, aggressive, or a mix of both.
 

KingK.Rool

Smash Lord
Joined
Nov 26, 2005
Messages
1,810
What a silly moveset, Junahu. I love that minimalistic organization, but the playstyle sounds awfully familiar... Anyway, the best Magikarp moveset is CLEARLY my Gold Magikarp, no?

Hey, peeup! Been a while since you posted a moveset, if I remember correctly. I really like Kael, actually; he's so fascinatingly versatile, fusing three elements in a very exciting way. The main thing I'd work on for next time is adding a splash of colour, maybe even colour-coding the names of your attacks so we can see which element they're inclined to work with. Otherwise, nice job!
 

peeup

Smash Lord
Joined
Sep 3, 2007
Messages
1,618
Location
Hartford/Mass
Hey, peeup! Been a while since you posted a moveset, if I remember correctly. I really like Kael, actually; he's so fascinatingly versatile, fusing three elements in a very exciting way. The main thing I'd work on for next time is adding a splash of colour, maybe even colour-coding the names of your attacks so we can see which element they're inclined to work with. Otherwise, nice job!
Hey! Glad to know I haven't been forgotten :) Regarding the moveset, I would have put in some nice colors (in fact, I submitted a different version of Kael in a previous contest, and that version had colorful organization), but this moveset has a LOT more specials, and I didn't have the attention span to make it look flashy. Hopefully, I'll be back to post some more movesets in the near future.
 

Katapultar

Smash Lord
Joined
Nov 24, 2008
Messages
1,284
Location
Australia
Tirkaro, your Link Up Space is funny, yet it seems kind of offensive and rude. To be brutally honest, I feel people are sugarcoating their sets in their Up Spaces by blinding readers with praise that the set was given. Remember, praise can be very specific. Looking forward to unamed fat cop though.

Speaking of Link Up Spaces, I have one too. Here's a link to it, but I've also placed it in my sig.

http://www.smashboards.com/showpost.php?p=7762894&postcount=2179

Sets are not sugarcoated either.

Now, onto commenting...

[size=+3]Magikarp [/size]
It's probably a joke set or not (based on the timing of the post), but the set seems fun to read. At least it's actually a proper Magikarp set which Master Warlord could use if he makes another Story Mode. I could imagine a fun level where you have to use Magikarp, and it's really hard too!

[size=+3]Kael, the Invoker [/size]
http://www.smashboards.com/showpost.php?p=9335190&postcount=551
It's great to see you post a moveset for MYM7 peeup, but would you mind telling me which game series the character comes from? I mean, it's not really a problem, I presume he's a WoW character due to one of the names mentioned from the introduction and the nature of it as well.

The presentation could do with some fixing, such as shifting the names of the attacks so they're located right next to the button input, and coloring in the headers would help (Especially with invoke since it can get a bit confusing).

The combination of Wex Quas Exort sounds like it would be a lot of fun to use: choose to beef up the damage done by Aerials, Standards or Smashes. Though if it were up to me, I'd probably have the Neutral Special explained last, yet explain that you can only have a combination of up to 3 elements at a time in the first Special, or MAYBE, as a mechanic. Though the way you explained it wasn't bad at all.

I ALMOST have a feeling that this set has a bit of 'Me' in it. If my judgement is correct (Which it's probably not), this set has some magic syndrome in it, thanks to many of the magic based attacks, such as swords made of ice. Actually, never mind about the magic syndrome, it's not really a big deal.

From reading those Special attacks, I'd really like to know if Kael actually does use those magic attacks, or are they simply made up? While it looks like a solid amount of effort to have made all those attacks, and though some of them seem tacked on, you've actually done a pretty good job since you can only use 1 at a time (Yes, I read through all the attacks). Also there are no props or traps which kind of surprises me when I think about it.

Now, the Specials are unexciting and wouldn't really be able to combine well with the , but the Final Smash is a pretty good one, except that it's probably one of the most broken, perhaps even more so than Sonic's! I'd expect it to be able to pretty much KO foes quite quickly, seeing as how it can rack up a ****load of damage (40% from Venomancer, and possibly a LOT more from the other 3 effects). I could very well imagine it being able to rack up over 200%. I'd suggest being able to choose only one of these effects, or perhaps 1 more if Kael has over 150%. This would allow the player to create deadly combination attacks by experimenting with the FS.

Overall, despite the nitpicks I've stated about the set, Kael would actually be really fun to use. So good job peeup, you've created a fun character whom has a wide range of possibilities with no exact playstyle, and to top it off, you even balanced Invoke by allowing only 1 Special at a time. I'd probably use him in Brawl except that I hate the character himself (That's no offense meant to you or the set).
 

peeup

Smash Lord
Joined
Sep 3, 2007
Messages
1,618
Location
Hartford/Mass
[size=+3]Kael, the Invoker [/size]
http://www.smashboards.com/showpost.php?p=9335190&postcount=551
It's great to see you post a moveset for MYM7 peeup, but would you mind telling me which game series the character comes from? I mean, it's not really a problem, I presume he's a WoW character due to one of the names mentioned from the introduction and the nature of it as well.

The presentation could do with some fixing, such as shifting the names of the attacks so they're located right next to the button input, and coloring in the headers would help (Especially with invoke since it can get a bit confusing).

The combination of Wex Quas Exort sounds like it would be a lot of fun to use: choose to beef up the damage done by Aerials, Standards or Smashes. Though if it were up to me, I'd probably have the Neutral Special explained last, yet explain that you can only have a combination of up to 3 elements at a time in the first Special, or MAYBE, as a mechanic. Though the way you explained it wasn't bad at all.

I ALMOST have a feeling that this set has a bit of 'Me' in it. If my judgement is correct (Which it's probably not), this set has some magic syndrome in it, thanks to many of the magic based attacks, such as swords made of ice. Actually, never mind about the magic syndrome, it's not really a big deal.

From reading those Special attacks, I'd really like to know if Kael actually does use those magic attacks, or are they simply made up? While it looks like a solid amount of effort to have made all those attacks, and though some of them seem tacked on, you've actually done a pretty good job since you can only use 1 at a time (Yes, I read through all the attacks). Also there are no props or traps which kind of surprises me when I think about it.

Now, the Specials are unexciting and wouldn't really be able to combine well with the , but the Final Smash is a pretty good one, except that it's probably one of the most broken, perhaps even more so than Sonic's! I'd expect it to be able to pretty much KO foes quite quickly, seeing as how it can rack up a ****load of damage (40% from Venomancer, and possibly a LOT more from the other 3 effects). I could very well imagine it being able to rack up over 200%. I'd suggest being able to choose only one of these effects, or perhaps 1 more if Kael has over 150%. This would allow the player to create deadly combination attacks by experimenting with the FS.

Overall, despite the nitpicks I've stated about the set, Kael would actually be really fun to use. So good job peeup, you've created a fun character whom has a wide range of possibilities with no exact playstyle, and to top it off, you even balanced Invoke by allowing only 1 Special at a time. I'd probably use him in Brawl except that I hate the character himself (That's no offense meant to you or the set).
I've never really had the effort in me to organize my movesets to make them look pretty, which is obviously a big flaw in pretty much everything that I do. As I was writing his attacks, I thought to myself that it seemed like he had magic syndrome as did Me, though I wasn't sure if his inherent fantasy background (he is from Defense of the Ancients, which is a subgame of Warcaft III) would be justification enough to leave it be.

The specials that I used are, for the most part, his abilities in DotA. However, this Invoker is from an earlier version of DotA where the order in which you combine elements DOES change the spell that Invoke does (as opposed to order not mattering, which is how it is presently. This results in simpler play, but also fewer possible skills. I created a moveset of the newer Invoker in a previous MYM contest.) As I said, each skill is from DotA, though I had to change most them slightly for several reasons (lack of mana/MP system, different dimensions, lack of the ability to click on your target.)

In closing, thanks for the positive feedback! I'll try to work on my organizational skills in the future.
 

BKupa666

Barnacled Boss
Moderator
Joined
Aug 12, 2008
Messages
7,788
Location
Toxic Tower
STANLEY THE BUGMAN


BACKGROUND

Stanley the Bugman is a valiant ****** exterminator charged with clearing a series of greenhouses in Donkey Kong 3. In said arcade game, Donkey Kong (modern day Cranky Kong) would goad on several hives of bees, causing them to attack Stanley. He must use his trusty Bug-Spray Gun to defend his flowers and shoot spray up Donkey Kong's ass to push him out of the greenhouse.

Although Stanley has become largely forgotten, his game has made appearances in the WarioWare games, while his Bug-Spray Gun is used for the jab of Mr. Game & Watch. It appears he's spent all those years away in training, as he's returned with several new tricks up his sleeve. Stanley is time to haul ass with his Bug-Spray Gun. Truckloads of it.

STATISTICS

Range: 7
Jumps: 6
Movement: 6
Aerial DI: 5
Weight: 5
Attack Speed: 4
Recovery: 4
Size: 4
Power: 3
Priority: 3

Very mediocre stats, if I do say so myself. Stanley's got good range, but really nothing else. His stats cannot convey how the Bugman truly does his job, as he's not a ranged character. Stanley has an array of moves that come out fast, but are horribly punishable. Therefore, it is his duty to be discreet and devious while attacking. Good to see he's come prepared to do just that...

SPECIALS

Neutral Special - Mist
Stanley presses his Bug-Spray Gun in slowly and deliberately, creating a growing circular area of mist around him. He can hold out the mist for as long as he wishes, but the mist cannot grow larger than two Bowsers wide and high. He can achieve an area of mist that size over the course of about a second and a half; while this may sound depressingly long, he can stop before this and still have a decently-sized cloud. Mist is one of Stanley's fast moves; he can create an area of mist with little to no trouble at all, and can have out as many mist clouds as he wants at a time.

Mist is a vital move to Stanley's gameplay, due to it masking everything he does. When standing in his mist, only an outline of the Bugman can be seen; the outline doesn't show Stanley's move animations. He can poke out at foes with various otherwise-punishable attacks, and they'll be hard-pressed to defend against them, due to not knowing what Stan's got in store for them. Stanley can also set up little traps inside clouds that his opponents will be forced to manuever through. Mist takes away all of Stanley's predictability, and gives him a very tricky, 'mix-it-up' style of play. Mist evaporates after ten seconds, meaning the Bugman will have to work to keep up all his hard work.
( 0% )

Side Special - Water Bubble
Stanley begins sucking in air with his gun; this move has no use if he isn't inside a mist cloud, albeit having a cute little vaccuum effect. If he is inside mist, Stanley inhales the mist, storing it in his gun and using it to power up a water bubble. He can inhale as much of a cloud as he wants, it decreasing in size as fast as it can be made.

Upon a second input, Stanley fires a Kirby-sized bubble of water, with the startup lag of Charge Shot and triple its ending lag. The bubble deals 5-15% on contact to foes it hits, enveloping them in the bubble and knocking them back in the process. If Stanley fires a full-mist bubble, it has high priority and can KO at around 115%. You'll have to sacrifice a bit of mist to use this, so foes will see it coming, however. It's best to store a strong bubble near a match's beginning, before using it as a surprise KO move from a second mist cloud when you're ready.
( 5-15% )

Down Special - Poison Barrier
Stanley sprays a green poison gas around him in a circular formation, enclosing himself with the stuff at a close range. This takes almost a second to pull off, but it's worth his while to do so. Whenever Stanley's surrounded by poison, foes will trip and take a bit of 5-9% should they try and attack through the deadly gas, not hurting Stanley in the process. One round of poison lasts for seven seconds, and cannot be overlapped. In addition, Stanley must wait seven seconds in between each use of this move.

If used in a cloud of mist, the green poison won't show up among the white of the mist, while applying its effects to the entire cloud. Stanley no longer has to worry about enemies hitting him out of his little safety zone now. This move is one of the most helpful in Stanley's arsenal, but is far from easy to work with. Projectiles can still hurt Stanley, in or out of mist, due to being disjointed. Also, when Stanley uses Side Special on poison-laced mist, his bubbles lose their knockback and merely trip foes, albeit still dealing the same damage.
(5-9%)

Up Special - Freeze Spray
Stanley pauses a split second, giving you time to aim his gun in any direction. After this, he fires out a thin stream of freezing spray one Battlefield platform forward, holding it for a split second before ending with moderate cooldown. No, it's not ice-cold spray, the Ice Climbers have taken care of that...this spray literally freezes things in place. If a foe touches it, they take 5% and a Paralyzer effect for the stream's duration.

If Stanley applies this freezing spray to a mist cloud, anything he shoots in there will freeze in place for seven seconds. For example, if he shoots a water bubble into a freeze-spray-laced mist cloud, it'll freeze in place in the cloud. Foes will have no idea what waits inside clouds for them, and Stanley has several means of pushing foes into these little traps of his. He cannot be hit by his own frozen attacks, or disable them at all. Bubbles made from freeze-spray mist Paralyze foes, dealing their normal damage. If Stanley aims this move below him in mid-air, it'll push him a Ganondorf and a half opposite the direction. Very unimpressive recovery, very valuable move.
( 5% )

BASIC ATTACKS

Basic Combo - Toxic Puff
Stanley puts some basic spray to use, firing out a single Soccer Ball-sized purple cloud of gas. He has a bit of recovery time after shooting a cloud, and is able to fire one cloud every .5 second or so. Clouds move in a straight line three character widths at Mario's dashing speed.

Foes who come into contact with a toxic cloud take 7% over the course of seven seconds, as well as some initial stun. Cloud damage can stack if you continue pumping away. Stanley can poke out with several clouds at a time; this jab is one of your faster tools for secretive damage-building. He can even use it outside mist; Stanley can still be punished, but it is easily one of his faster moves.
( 7% )

Dash Attack - Spray Whirlwind
Stanley spins around once, having a horribly weak hitbox that deals 3-4% and a bit of stun. However, after his spin, he releases a Luigi-sized tornado of spray from the built-up momentum. Strange...

The tornado deals three hits of 3%, as it travels forward two Battlefield platforms at Dedede's dashing speed. The last hit pushes foes back horizontally with set knockback. This tornado, unlike its infamous cousin, can be broken through without insane effort, and can be DIed out of from time to time. It's still an alright GTFO move for Stanley; good for him, as he stumbles a bit after spinning for quite a bit of ending lag.
( 3-13% )

TILTS

Forward Tilt - Stream
Stanley exhales a stream of gas with a bit more range than a fully-charged F.L.U.D.D. His gas can be held out and angled, but its range decreases slowly until it barely covers one character width. Contact with the gas stream pushes foes slowly back along its path, dealing 1-2% per half second in there.

Stanley could easily move his opponents out of his face, but he suffers from moderate ending lag as he poses slightly. Guy's gotten a bit rusty over the years. Anyways, because of his ending lag, the better use of the stream is to push foes into one of his little lingering traps he can use. Or, if push comes to shove, he can merely build a bit of damage with his stream from mist. Whatever floats your boat.
( 1-2% per second )

Down Tilt - Stunner Blast
Stanley quickly tilts his gun downwards and shoots out a yellow cloud, creating a blast a bit smaller than Kirby. Contact with it causes dizziness from all those poisonous chemicals, in addition to 5-6%. It's a good thing they do, as Stanley takes a bit of time to exit his crouch after the move. This is a great move to use in a cloud filled with freezing spray. Coax your foe in (or force them through), let them get stunned, then blast them away with a Water Bubble.
( 5-6% )

Up Tilt - Basic Spray
Stanley's trademark move in the game; he simply shoots up a small burst of spray, before peering upwards and watching it go for a split second. The spray stuns foes slighly while pushing them upwards, dealing 6-7% in the process. Spray travels up about two Ganondorfs before vanishing, which is enough to push a foe near the screen top up for a Star KO (although they can DI out). Unfortunately, this isn't the greatest move for freezing in mist; all it will do is pop your foe out the cloud's top. You're best off going for the Star KO.
( 6-7% )

SMASHES

Forward Smash - Power Gas
Stanley pumps out a Bowser-sized cloud of bright red gas, with high ending lag, but quick startup. This cloud actually has a bit of priority to it, although it is not amazingly high. This cloud travels forward up to half of Battlefield, at up to Toon Link's dashing speed. Any opponent unfortunate enough to get blasted takes 16-21% and knockback that KOs from 140-125%. A pretty good KO move, especially if hidden in mist. You'll have to make a pretty darn big mist cloud to obscure this Smash, though.
( 16-21% )

Down Smash - Floor Spray
Stanley sprays the ground in front of him powerfully, being pushed a tiny bit into the air as a result (it takes him a split second to land and straigten up). The spray he creates travels a character width to either side on the floor, dealing 13-17% and knockback that KOs from 165-150%.

A very drab Smash, eh? It does have a secondary, more important use. If used inside mist, the force of the dual-sided blast tears the mist apart, retaining any properties it has (poison or freeze-sprayed). This seperates the mist cloud into two equally-sized mist clouds, spaced character width apart. If you want to create or position mist clouds quickly, this is the move for you. Any traps you have hidden are not replicated, though, and may be revealed as a result of the division.
( 13-17% )

Up Smash - Chemical Poof
Stanley fires up a multi-colored spray in an arc above his head, with little startup and moderate ending lag. His spray floats where it was launched, making a cute little rainbow aura of poison for seven seconds. Foes who land on this begin taking multiple light yet stunning hits that can total from 2-23%. Great as an anti-air move, but not for actually KOing. Because it rests in the air, you can put it inside mist along with a grounded cloud (which would be cancelled out by most other grounded attacks).
( 2-23% )

AERIALS

Neutral Air - Knockout Gas
Stanley spins, with Bowser N-Air lag, surrounding himself in an aura of blue spray. This interesting spray surrounds Stanley at a close range for nine seconds. Enemies who touch the Bugman or his gas take 1% and are bounced upwards lightly...right back onto his body. This means Stanley can stack several hits on one foe before they can DI away. While it's not incredibly damaging, he can always trap a foe, before fast-falling onto a trap. You're better off having U-Smash in mist over this, though.
( 1-% )

Forward Air - Repellant
Stanley sprays a pink gas in an arc in front of him, damaging and pushing back foes who touch it. The gas has average range, and comes out quickly, although it is Stanley's most punishable aerial. The pushing of the repellant is akin to F.L.U.D.D., making it amazing at pushing unwilling foes into traps. However, because it pushes foes out of mist, it is never a move you want to use in there.
( 6-9% )

Back Air - Volatile Burst
Stanley hesitates a split second, before spewing out a Kirby-sized cloud of bright red gas, with moderate cooldown. The gas travels back two character widths at Bowser's dashing speed, before detonating in an explosion the size of the Koopa King. Foes hit by the moving gas take hitstun and are pulled with it, to help land them in the blast, which KOs at 120%. Fortunately, it has low enough priority to keep from detonating all the time.

If Stanley shoots the explosive spray into mist, the entire mist cloud will detonate upon any opponent touching it. This will destroy any other traps the Bugman has planted in there, as well as the mist itself, albeit never expiring like other timed traps. Pushing a foe into an explosive cloud is not only a highly effective KO move, but is immensely satisfying.
( 13-15% )

Up Air - Twin Puffs
Stanley quickly puffs up two small maroon balls of smoke, and watches for a split second, as they spiral a short distance over his head for that time before vanishing. The smoke balls trap foes in multiple stunning hits that won't KO, but will hold foes for landing amongst traps. If used in mist, it can also serve as a diversion for foes, while Stanley creates more mist areas, or sets up more traps.
( 1-2% per hit )

Down Air - Spray Rocket
Stanley points his gun downwards and fires a stream of spray a Ganondorf down, holding himself in place in the air for a second. Foes who touch the thin stream are instantly blown down to its bottom, taking a bit of damage in the process. Stanley suffers a bit less lag than his other aerials ending here, but this is the least reliable for damage-dealing or pushing enemies into traps. It has no effect when sprayed into mist. The Bugman can, however, use it as a split second period with which to aim your recovery in times of need.
( 5-8% )

GRAB / THROWS

Grab - Exterminator's Hand
Stanley simply reaches forward, having around Mario's range and lag. Not too shabby for a grab. From a dash, the Bugman lunges forward a short distance on the ground, covering great range for a dash-grab, but being highly punishable if he whiffs.
( 0% )

Pummel - Chemical Flurry
Stanley rapidly squirts his foe in the face with bug-spray. It deals only 1%, and is incredibly spammable. If you get in five or more pummels before throwing your foe, they'll become dizzy (footstooled in the air) upon landing.
( 1% )

Forward Throw - Breather
Stanley simply fires off a vertical green pillar of spray Marth's height, pushing the victim back two character widths. Opponents with low damage can DI upwards and jump away, but Stanley can pummel them into a stun to prevent this. A great grounded tool for scooping foes into a trap.
( 5% )

Back Throw - Off!
Stanley pushes his foe behind him, before giving them a good, long dousing with his gun. His spray deals three hits of 4%, the last one dealing knockback that KOs around 165%. Without dizzying foes with pummels, Stanley's throws are generally standard close-ranged moves.
( 4-12% )

Down Throw - Bugman Barrage
Stanley tosses his victim to the ground, before zapping them with bright blue bug-spray. This launches the enemy horizontally forward, having the potential to KO at 175%. If you've pummeled the victim enough, they'll get dizzy at maximum range, allowing Stanley to run up and grab them again. It is in no way, shape, or form a chaingrab, though.
( 6-7% )

Up Throw - Pest Launch
Stanley holds his gun to his victim, pointed upwards, and blasts them up. He follows his upwards shot with three consecutive clouds aimed at the victim. At least one will always hit the character; they can air dodge to try avoiding the rest. Stanley's initial shot launches the victim far enough up that it can KO on low ceilings, but never otherwise. It's best to stick to pushing foes into traps set above Stanley.
( 4-16% )

FINAL SMASH

Final Smash - Immense Fog
Will Stanley finally leave his hog-fu...er, 'doing' ways in the past and grow giant here? You have no time to ponder such questions, as the Bugman has just grabbed a Smash Ball. Stanley laughs stupidly, his eyes aglow, and...nothing happens. Nothing, that is, until you use Mist.

When Stanley creates mist with a Final Smash, he can cover the entire screen in a matter of three seconds. In addition, this fog is thicker than usual; only an outline of characters and items can be seen. Foes will have a hellish time trying to dodge Stanley's traps, and may even face trouble from hazards or SDing from the lack of visibility. Tapping B again with mist already out causes it to flash transparent for a split second, allowing for Stanley to get comfortable with his surroundings and wreak more havoc. He loses the ability to make mass mist after twenty seconds.
( 0% )

PLAYSTYLE

Right off the bat, Stanley's pathetic stats should tell you that you've got a hell of a fight ahead of you. The Bugman takes traps and illusions to the next level with all of the smokescreens he can set up. Of course, any expert exterminator knows there's a time and a place for everything. Not just any old spray will do to repell your pesky enemies at any time...

As soon as the announcer says GO!, Stanley's got to start spraying mist wherever he can. The more areas of mist you can get onstage, the better. You'll have more areas to hide your traps, and more sources of Water Bubbles when it comes time to KO. Speaking of Water Bubbles, it may be beneficial to inhale some mist once you have a sufficient amount out. Your foes will read and punish you doing this later, and you'll have to juggle this with keeping track of your traps.

When you're ready to start building damage, you have several options. Hiding in mist and camping requires the least set-up, but is easier for enemies to overcome. You'll probably find this tactic the most effective near the match's beginning, when you both have low damage. Your best camping move is basic combo, in addition to any moving spray moves, such as dash attack or B-Air.

All of these moves are highly punishable under normal circumstances, but shrouded in mist, your opponents will have no idea what to expect from you (unless you begin simply spamming). Mix up you attacks and camp away. This tactic, if performed craftily in combination with moving about between mist clouds, can build your foe's damage just fine.

Of course, camping alone won't win Stanley matches when he has no defense against projectiles with his wimpy little clouds. As any professional exterminator knows, when the going gets tough, the tough gets going...or something like that. Stanley's trickery extends far beyond simple camping. A base for all that trickery begins with messing with your mist clouds. Altering the mist itself can be done with Down Special, Up Special, and B-Air. Down Special provides Stanley with melee-ranged defense, and B-Air is a run-of-the-mill KO move. Up Special, however, is the bread-and-butter of Stanley's sneakiness.

When you're really ready to let them have it, apply freezing spray to your mist clouds. Now, you have a lot of freedom to hit your enemies with your best shot...whatever that may be. The possibilities of what you can hide in freezing mist are near endless. Want to rack some more damage? Hide a spray tornado or a few toxic puffs in there. Aiming for that KO, at long last? Let in a Water Bubble or some Power Gas. Want to simply hold them there and set up some more fun and games? How about an U-Smash or N-Air to do the job?

All these frozen goods (h) are fine and dandy, but the fact remains that...they're frozen. That's right, Stan can't just put them there and expect them to work on their own. No matter, you have plenty of ways to do get your foe into the danger zone. F-Tilt, D-Air, and throws can manipulate attackers into your traps from any angle. Oh, and if worse comes to worse and you can't do this, just force your opponents to come to you by camping near traps. You'll have an easier time messing with them at close range. Of course, you must constantly stick around and replenish your mist and traps, should they run out before the desired result is achieved.

Playing as Stanley is a constant chore; you must tend to your mist clouds and plant the traps that will assist you, where they will assist you. If you rush at your foe, you will get your arse whooped. Seriously. Most of Stanley's moves are highly punishable, and can't be comboed with, nor can they push an opponent back enough to keep Stan safe from retaliation. Mindgame the hell out of your opponents, and you're on your way to becoming an expert Bugman.

MATCH-UPS

Vs. Cairne - 20/80
While Cairne focuses on landing War Stomps, Stanley has to start making areas of mist, or absorbing some for Water Bubble. Cairne can prevent the Bugman from camping with Bladestorm and shockwaves, due to both having infinitely better priority than anything Stanley could muster up. In addition, D-Smash allows the bull man to tank any traps Stanley can set up and attack the Bugman without hassle. Stanley should get as many frozen traps up as possible, preferably in positions that Cairne will have difficulty avoiding. Cairne has no trouble surviving his defensive Reincarnation phase, due to Stanley being unable to approach, and him being able to tank his camping easily. Because Cairne can muscle past his traps with ease, this game is more one of survival and avoidance for Stanley. His best hope is to build gradual damage on Cairne as he pursues you, then surprise him with a KO. There's not much hope for the Bugman in this match-up.

Vs. Abra - 60/40
Neither character can stand close combat, of course. Stanley will want to get up something before Abra gets up to him and pulls him into the air. He's not defenseless up there, but it's a far cry from his fortresses of mist. Of course, with Abra's constant movement, he'll have to be highly careful of anything Stanley might attempt to lay in his path. Which is just what Stanley's got to do. It's much more difficult for Abra to build damage when he's got disjointed clouds of mist constantly disrupting his illusions and preventing him from successfully getting to Stan. Of course, if he can get through the illusions and attack the exterminator with no remorse, Abra can still pull off a win. He'll have to exhibit some masterful trickery to outsmart the master, first.

EXTRA ANIMATIONS

Up Taunt - Adjustment
Stanley chuckles stupidly and messes with his hair a bit.

Side Taunt - Squirt Squirt
Stanley rapidly pumps his gun, causing only a bit of liquid to leak out of the end.

Down Taunt - Down, But Not Out
In the same vein as Mario, Stanley's eyes bug out and he drops onto his back. His death animation from Donkey Kong 3.

Entrance - Out of White Mist
An area of mist appears onstage, out of which Stanley steps out of with a chuckle.

Victory Pose #1 - Extermination
Stanley chases a swarm of bees off one side of the screen, but runs back with them chasing him. Some professional.

Victory Pose #2 - Amateur
Stanley flexes to try and make his ****** self threatening, but ends up squirting himself in the eyes with bug spray. He rubs it off angrily for the rest of the animation.

Victory Pose #3 - Bug-Spray Barrage
Stanley sprays two puffs of bug spray to either side, before aiming at the screen and misting it up with one long spray.

Victory Theme - Arcade Jingles
A few victorious bips and bops from Stanley's game are heard in celebration.

Loss Pose - Defeat
Stanley hangs his head, his gun propped on one shoulder.
 

Katapultar

Smash Lord
Joined
Nov 24, 2008
Messages
1,284
Location
Australia
[size=+3]Stanley the Bugman[/size]
Im only familiar with the character from the SSBM trophy of him, though the same can be said for many Nintendo critters in my eyes. I do see that you refuse to let yourself get beaten by Warlord in the great MYM7 race. You both have 4 sets so far, though I don't think that either of you will reach 10 sets unlike in MYM6.

As expected, the idea of a character who uses mist to hide their animations is a great one, of course requiring the animations are not too different. Stanley also seems to be able to rack up a lot of damage, which would easily make up for his weak KOing tactics. Freezing your clouds (despite it being horribly unrealistic, but to hell with that) is also a fun idea despite all the possible annoyances it could create.

I have a few nitpicks as I always do when I comment: the more serious one, a lot Stanley's moves kind of seem to do the same thing, just rack up damage and stun. A lot of moves did rack up damage over time, such as the Down Special, Standard, F-tilt, U-Smash, N-air. Secondly, Stanley's animations should have perhaps been more similar, as the Neutral Special set the stage for a mind-game potential character. But if Stanley even was to use a Aerial, Grab, or say a Dash Attack, it kind of ruins it just a bit. Since Stanley sucks at approaching and extreme ranged combat, he'd probably sit at a lower tier despite his damage racking skills. The pummel effect seems to be almost tacked on... it would be incredibly easy for Stanley to get 5 pummels in, perhaps even at 0%. Combined with his great damaging skills, a fun grab game could have been born for the bugman. But it's ok as it is.

The set was a pretty good one (lots of traps, or what could potentially be traps), and as one would say, the gun was nicely handled. Though Fat Basterd is still by far my favourite set of yours in MYM7, but Pennywise will always be one of my all-time favourites. Now that I've said that however, I may repeat myself. Hopefully not.
 

darth meanie

Smash Journeyman
Joined
Jun 6, 2008
Messages
452
I Couldn't Resist! I'm Sorry Kupa! (CRYING)

Playlist for the moveset here!
Rider


Rider is a Servant from Fate/Stay Night. Like Saber, she was summoned to participate in the Holy Grail War, but she is not a legendary hero, but an anti-hero. Rider’s Master is Matou Shinji, a particularly monstrous human who was unable to properly supply Rider with magical energy, and made up the difference by having her drain the souls of the innocent bystanders in the Holy Grail War. In the Fate and Unlimited Blade Works routes of Fate/Stay Night, Rider serves as an early antagonist, and is the first Servant to be defeated in both routes. In Heaven’s Feel however, Rider is portrayed in a more heroic light, and is the only Servant to survive the Holy Grail War. Rider is generally quiet and loyal, and obeys her Master to the letter, regardless of how monstrous his orders are. Despite her cruelty in battle, she actually deeply cares for those close to her, and strongly desires to protect those important to her.
Her weapon of choice is a long chain, a little long than half of Battlefield, with a large nail attached to each end that she uses as daggers. She can impale enemies with her dagger using her Side Special. Rider throws one dagger out to the full length of her chains, and if it hits an enemy, it deals 8% damage. More importantly, the nail embeds itself into the enemy’s shoulder or arm, chaining them to Rider. The nail can be shaken off by mashing around on the control stick in the same way you shake off Pikmin, but it takes about four seconds of shaking the control stick to get the nail out. As long as the nail is stuck inside the opponent, they cannot be knocked out of the range of the chains, but can still fight as normal otherwise. Rider can pull the nail out early by using her Side Special again, an action that is nearly lagless, but deals no damage. If Rider moves, the opponent is dragged along with her. If the opponent hits Rider with an attack that knocks her out of range of the chains though, they are freed from the chain. Opponents can also still use recovery moves if Rider is in the air, making suicide KOs with Rider difficult, but possible.


Even if the attack misses, Rider ends the attack with her chains extended. She can fight with her chains long, or she can reel them in by holding down the Z button. It takes about a quarter of a second to reel her chains in normally, but if she has an opponent chained, it takes about one second, assuming the enemy doesn’t attack and interrupt her. If she reels in a chained opponent into her grab range, she automatically grabs them, and the opponent must first escape the chain before escaping the grab. If Rider uses this attack with her chains fully extended, she automatically reels them in before attempting it again. The move already has a third of a second of starting lag though, so if she has to take another quarter of a second to reel her chain in too, she’s vulnerable.

When Rider does chain an opponent, her jab becomes an incredibly useful attack. Rider shakes the dagger in her hand violently, yanking the chain with it and sending a wave down it. This wave travels along the chain, taking about one and a quarter seconds to travel across the entire length when the chain is fully extended. When it hits the dagger, it deals 3% damage to the opponent with very light upwards knockback and about a fifth of a second of hitstun. This cannot be shielded or dodged. Rider can shake the chain, then begin another attack, hitting them after the chain hits, when they can’t protect themselves. Rider can only shake the chain again after the attack has already hit, making it impossible to lock the opponent into it.

This isn’t a foolproof strategy though. Rider can still miss with the attack if the opponent moves in an unexpected direction, or get hit while the attack makes its way across the chain. If the chain is shorter, the opponent has less time to react or room to maneuver, but it’s also harder for Rider to hit the opponent in time.

Two attacks that works well with this strategy are Rider’s Up Tilt and Dash Attack. In her Up Tilt, Rider stretches and kicks straight up from a standing position. It’s a slow attack, taking nearly two fifths of a second to start up, but the leg has a long range and deals 13% damage, with knockback that KOs around 140%. In her Dash Attack, she somersaults, performing a handspring before kicking straight forward. Rider jumps forward one and a half battlefield platforms in two fifths of a second. Her feet deal 12% damage with knockback that KOs around 135%.

Unfortunately, neither of these two attacks will ever KO while Rider has her opponent chained up. While she can yank her chain out with her Side Special at any time, doing so cuts the opponent’s momentum in half. If Rider only ever attacks opponents while they’re chained, she’ll be lucky to get any straight KOs before the opponent reaches 300%. Her only true kill move she has when she has chained an enemy is her Forward Throw. If she’s chained an enemy she has grabbed, she’ll begin to swing the chain around as long as you hold the control stick forward, doing a rotation a little more than once a second, the chain lengthening by about a battlefield platform each cycle. If the opponent manages to break free of the chain during this process, they drop out of the attack unharmed, but if you release it before they can escape, the attack deals , 11% damage, and horizontal knockback that KOs around 200%, but less if you extend the chain far enough before releasing it. It is difficult to pull off in enough time to KO though, and is hardly reliable, as it requires Rider to both chain and grab the opponent in a small time period.

There is a way though for Rider to still set opponents up for an attack without having to hit them while they’re chained. When Rider uses her Neutral Special, she reaches for the blindfold she wears with one hand and slowly slides it off. After nearly three quarters of a second, she reveals her eyes, which are marred with square pupils. If any opponent looks at Rider while her blindfold is off, they are frozen temporarily, stunned for about one and a half seconds. This is one of her Noble Phantasms as a Servant, the Mystic Eyes of Petrifaction, Breaker Gorgon. Rider’s true identity is in fact the legendary monster, Medusa.


It only counts as looking at Rider though if the opponent is both facing her and within about a stagebuilder block of her vertically. At the end of the attack, Rider slides the blindfold back on, taking about half a second. Rider can then yank the chain out of the opponent without worry and attack freely.

And the attack she’ll most likely be using to KO the enemy will be her Up Special. Yes, her Up Special. Rider begins this attack by taking the nail in her hand and stabbing herself in the neck with it, spraying blood everywhere and dealing 20% damage to herself. The blood coalesces in midair, forming an eerie magic circle in front of her when she’s on the ground, and above her when she’s in the air. After about two thirds of a second, a single eye opens in the center of the magic circle, and Rider shoots through it in a blaze of light. This beam of light is nearly a stagebuilder block tall and travels at about the same speed as one of Pit’s arrows, turning at about the same rate as well. Any enemy hit by the blast takes 18% damage, with knockback that KOs at around 110%.


After Rider travels about the length of Battlefield, she emerges from the light. There appears a beautiful white winged horse, her mount as a Rider, Pegasus. Pegasus has five good midair jumps, a glide, and a glide attack. During her glide attack, Pegasus bucks his hooves, kicking below him and to the sides. His hooves only do about 6% damage though, and are hard to hit with; he’s a gentle steed. By using the Up Special again, Pegasus disappears into light, dissolving away; Rider does this automatically when he touches ground.


Pegasus reappears for Rider’s Final Smash though. Rider summons her mount without her blood circle, and flies into the air. Golden reigns appear around Pegasus, and his eyes turn red with fury. While normally a gentle creature, these magical reigns enfuse him with rage and power. Rider envelops them both in a bluish-white light, and flies high into the air before diving down at opponents, shouting “Bellerophon!” This is her most powerful Noble Phantasm, the Bridle of Chivalry, ranked A+. When Pegasus hits, they deal 35% damage, with massive vertical knockback.

As you may imagine, between the blood circle and her Pegasus, Rider’s recovery makes it almost impossible for her not to return to the stage no matter how far away she gets knocked. The damage she takes from summoning Pegasus is painful to deal with though. Fortunately, Rider can also recover using her Side Special, nailing herself to the edge. While safer in the manner that she doesn’t take 20% damage by using it, this has its weaknesses as well. Her chain can be angled slightly, but it’s primarily a horizontal recovery, and a tether recovery at that, making it pitifully easy to edgeguard. Making things worse, it has a laggy start time too, so opponents can easily take advantage of that. Fortunately, if the opponent isn’t temporarily invulnerable from grabbing the edge, the nail will still embed itself into the opponent, allowing her to dangle from the enemy, and hopefully climb her way back to the stage with the Z button. The opponent might just drop from the ledge and send both of you to your deaths if he has a stock lead though, so don't think even that is safe. Note that this also means that if you miss with Rider's Side Special in midair, she becomes helpless.

While Rider does lose a lot of a health from summoning Pegasus, she does have a few ways of getting it back. As a Servant, she is a being of soul, not of flesh, and suffices herself on the souls of others. By using her Down Special, Rider crouches down on all fours, and a magic circle appears on the ground where she stands, a process that takes about half a second. Rider can also cling to walls, and place magic circles on walls, such as the one under the lip of Final Destination or the walls of Yoshi's Island.

This blatant trap is not a trap at all, in fact. Standing over a circle does nothing, and the circles have a mere 5% stamina. They’re not even particularly hard to hit either. For every second that the circle exists though, it charges up magical power. Rider will therefore want to keep the opponent away from these magical circles in order to increase their power.

Each circle can hold up to twenty seconds of magical power, and up to fifty seconds collectively. If a circle is destroyed though, half of the energy it has collected is distributed to the rest of the magic circles, making it very important to try to maintain at least two or three circles as a safety net in case they are destroyed.


Rider can activate the magic circles by using her Down Special again while on top of a magic circle. She raises her arms into the air, calling out “Blood Fort Andromeda”, her final Noble Phantasm. A giant eye opens up in the sky, and as long as Rider has at least one magic circle remaining, she absorbs 1% of each opponent’s health per second.

Blood Fort Andromeda can only last as long as the time her magic circles have built up have. After that time expires, all magic circles dissipate. Even while the Blood Fort is active though, magic circles can be destroyed to decrease the time the field can hold together. Rider also cannot create new magic circles during this period, making her field, ironically, even weaker to destruction.

Blood Fort Andromeda is in the end an optional strategy though. If you choose to use it, you have to divide your focus between fighting your enemy and maintaining your spell. Generally, Rider should try to have her circles separated around the field so that opponents cannot break them down quickly, and try to have three or even four active if she can as a safety net. Fortunately, with her chains, Rider can pull enemies away from her circles or defend them from a distance without too much trouble, but chaining an enemy will also make it almost impossible to create fresh circles, as your opponent is certainly too close for you to use the move. Utilized correctly though, it creates a more defensive style of play for Rider, and can keep her percentage in a comfortable range far longer than your opponent would like.


Rider can also extract the soul from her enemy directly. When she grabs an enemy, she can drink their blood by biting their neck as her pummel, restoring her own health at the slow rate of 1% a second. If you can chain yourself to an opponent before doing this, you can lengthen the time spent restoring health significantly, and still have enough time to perform one of her throws.

While you may think that Rider should always abuse her pummel when she grabs a chained enemy, sometimes she won’t want to every time. Because as long as her enemy is chained, she also has access to a chaingrab. With her back throw, she flows around the opponent and kicks them behind her for 8% damage and underwhelming knockback. While a pathetic throw at first, when Rider has an enemy chained, she pulls back before the opponent is knocked away, dealing very light hitstun and leaving them just outside of her grab range. Pull on Z for just a split second and you’ll grab them again. Remember though, that for Rider to grab a chained opponent, she has to reel them in, which takes nearly a second, and your opponent can attack you out of it. This is a strong damage builder if Rider can start it up, but having to both chain and reel in the opponent isn’t an easy task; add in the fact that it takes a little under one second to perform one cycle of the chaingrab, and you’re not going to be able to abuse this very much.

You’ll want to end this chaingrab with her Down Throw though. Rider will twist the nail inside the opponent’s shoulder painfully, dealing 2.5% damage a second as long as you hold down the position on the control stick. If the opponent escapes the grab, they take no more damage, but when you release it, Rider kicks them away, dealing another 6% and releasing the opponent from the chain. If the opponent is unchained, the attack only consists of the kick.

Rider can make it easier to grab chained enemies with her forward tilt. When Rider doesn’t have her chains out, it’s a simple two hit slash with her nails for 6% damage each with low knockback. If her chain is extended though, she slashes with one and pulls the other back to her hand, slashing again when it returns to her hand, a second, more aggressive way to reel her chain in, but the entire move takes about two fifths of a second, longer than simply pulling on the Z button would. If there is an opponent chained to her though, using this will cause her to pull back on the chain, reeling the chain in until it’s at the same length as the distance the opponent is from Rider. This attack cannot be used for setting up like her jab though, since it hits before Rider’s end lag finishes. Instead though, it can be used to interrupt enemy attacks, but it has a quarter of a second of starting lag. You’ll primarily be using this to grab enemies when you’ve chained them when the opponent approaches.


Rider can also bring enemies to her with her down tilt. Rider crawls down on all fours, and extends her chain along the ground, dealing 4% damage and tripping any opponent in range. If an opponent is chained to Rider, she knocks them down about the height of Ganondorf, trips them and turns them so they face her, still dealing damage when they hit the ground. It’s pretty fast if her chains are already extended, but isn’t particularly spammable. Unchained opponents can jump over the chain after being hit, but chained opponents cannot. They can still roll if they predict the attack though, and get by only taking the damage. Fortunately, if Rider continues the move with a tripped chained opponent, she instead drags them a battlefield platform to her instead of locking them into an unavoidable infinite. Dragging them has about a quarter of a second ending lag too, making Rider vulnerable to a counterattack. Naturally, an opponent won’t try to rise up if Rider is still crouching, right?

While on the subject, Rider has a very low to the ground crouch, if not quite as low as Snake’s, and the fastest crawl in the game, as fast as Meta Knight’s dash, and almost as fast as her run. It’s good for getting her across the stage while keeping her hurtbox small and low.

Well, Rider can also use her down smash in this situation. When Rider has chained an enemy with it, she will pull back hard on her chain, swinging the opponent directly behind her the full length of the chain, jumping into the air then yanking it down, dealing 19-28%damage when they hit the ground and knocking them back into the spot they were originally. If done against an opponent offstage, she’ll spin around when she jumps in the air and slams the chain down on the other side of her. This has about half a second of both starting and ending lag for Rider, but when an opponent is tripped, and not planning on rising, she can pull it off with aplomb.

When Rider uses this move without having chained an opponent, it’s a different monster entirely. Rider reaches back when charging this attack, and then throws her nail as hard as she can into the ground. If there is an opponent on the ground, a quarter second later a bunch of chained nails will shoot out of the ground to attack the opponent. How does Rider magically extend the length of her chain and create more nails? I have no idea, but its apparently canonical. Anyways, this move is horribly telegraphed and there’s a good bit of delay before when she begins to perform it and when the nails actually extend, and she’s stuck the entire duration, about one and a half seconds, even uncharged. The nails fill up an entire stagebuilder block though, and deal 26-38% damage, easily her most powerful attack, with knockback that KOs around 120%. It’s not a move that you can expect to hit with, even if you’ve petrified the opponent. What it does do is absolutely force the opponent to approach though, both by immediately threatening them, and by presenting yourself as a tempting target.


When Rider has her chains extended, many of her her Jab, Up Smash, Back Aerial and Up Aerial behave in certain ways based on the length of her chain. The lag, damage, and knockback are all dependent on how far extended it is. Generally, the shorter Rider’s chain is, the faster and more powerful the attack is, but at the cost of range. This way, they can be used as long range warding attacks, good for defending Blood Fort Andromeda magic circles and poking enemies from a distance, or as closer range damage building attacks. If Rider chains an opponent with the following attacks, she instead uses these moves to throw around enemies. They no longer do any damage, although they can still be used to defend magic circles or to set up some of Rider’s other attack.

They also have the curious property of negative end lag. In other words, Rider regains movement and control of her non-chain based attacks before the chain stops moving, usually about three-quarters of the way through it. You can create two different threatening hitboxes, or attempt to pull them into one of her powerful kicking attacks.

For instance, when her chains are extended at any length, Rider’s jab shakes her chain, sending a wave down its length that knocks the nail into the air. Fully extended it bounces about a stagebuilder block into the air, dealing 5% damage on a hit with very little knockback. The nail and increases in damage and knockback as she shortens the chain, dealing about 9% damage when the chain is very short with knockback that KOs around 190%. It hits the peak height at around half extended, where it does 7% damage. When her chains are totally unextended, her jab behaves differently. She swings her chain and nail around about a bumper’s length in front of her for 6% damage, then stabs the foe with the other nail for 8% damage and knockback that KOs around 175%. It’s slightly laggy on both ends, having about a quarter of a second starting and ending lag, but is a decent move for knocking the opponent away.

Her Up Smash takes the chain swinging to another level. When her chains are withdrawn, Rider grabs the chain from the center, raises her hands up, and spins both chains and their nails in a circle around her. The chain actually deals damage in this attack, about 2% in flinching hits, and the nails deal 8-13% per hit, usually hitting twice with knockback that won’t KO before 500%. This attack has a little less than a quarter of a second starting lag and minimal ending lag. At at the end of the attack Rider’s chains are at half length, meaning that she can’t follow up with moves like her Side Special and another Up Smash.


After her Up Smash though, she is perfectly set up to use her Forward Smash. When Rider uses this move, she extends her chains if they are unextended, and performs two slashes with her chain, one diagonally from the bottom up, and a second later from the top down. Both deal about 8-12% with knockback that KOs around 450%. If her chains are already extended, the slashes will only reach as far as her chains are at the time. When they are at half length or less though, she will slash with both nails at the same time. Where the two nails collide forms a sweetspot that deals the damage for both hits at the same time, with knockback that KOs at around 160%. The move is relatively fast, especially when used at half length or less and covers a huge area, which you can control the size and area of with your chain length. It’s especially good at punishing approaches or forcing opponents away, but it’s also quite punishable with over a third of a second of end lag and a fairly long duration. Using this move after Rider’s Up Smash can be a good idea as it puts your chains at the maximum length she can use this move while still forming the sweetspot.

Rider can perform a similar version of this attack with her Forward Aerial, but it’s slightly slower, deals 8% on hit, and the chains curve more, creating two arcs that increase its range vertically. As her Side Special makes her helpless in the air, it’s her safest long range option while airborne, and can still kill when the two nails clash. The long range of the fully extended form of this attack also makes it a stronger edgeguarding technique for killing foes with. For both this and the Forward Smash though, when an enemy is chained Rider performs only one slash with whatever slack there is in the chain, giving it the chain shortening effect of her Forward Tilt, and making it impossible to hit with on an enemy that’s more than half her chain’s length away. All in all, a weak option against a chained foe, as it can still be dodged and shielded.

When her chains are extended though, Rider’s Up Smash is entirely different; instead she swings her chain over her head and across the stage, the nail dealing 11-15% damage on hit. This attack has about a fifth of a second starting lag, but Rider regains control before the move finishes carrying out, when it’s moved about two thirds across the arc. This is important for when Rider has impaled an enemy on her nail. While normally an impaled enemy will take damage from this attack when they are slammed into the stage (taking the same damage as the move would normally), Rider can release them from the attack early with her Side Special, launching them forward. Rider can use this to force opponents offstage for gimps, or even KOs at very high percentages, but recall how releasing an opponent from the chain reduces their momentum. The longer the chain is though, the slower they are launched, meaning you have to consider your opponent’s recovery and knockback when throwing them with the chain. It also loses momentum once it’s at the same height as Rider, so it’s impossible to say, toss the opponent under the stage.

Rider can follow up on this with her Back Aerial and Up Aerial. Her back aerial is normally just a simple, fierce kick that deals 11% damage, but with her chains out, she swings them behind her and turns around, cutting a line horizontal to her, dealing 7-10%, more when the chains are shorter. With a tethered opponent, it no longer deals any damage or hitstun, but she can use this to yank enemies under the stage, or to set them up for other attacks. Her Neutral Aerial, for instance, is a close ranged spinning kick that deals 9% damage. It has about a fifth of a second of start-up, but when Rider’s chains are about a stagebuilder block long, it can be executed right out of the back aerial.

Her Up Aerial is almost identical to her back aerial in this case, although it throws the opponent around over or under her rather than behind her when she’s chained a foe. With her chain at around half length, she can follow it up directly with her Down Aerial a powerful stomp that deals 11% damage and can spike starting at around 85%, although not as effectively with the opponent chained to her, of course. When using her Up Aerial to attempt a gimp, recall that opponents can still use recovery moves to rise up when you’re in the air. If you want to kill an opponent with this, you’ll want to try to yank them down just as they begin to pass you up as they recover. Pulling them down like this also refreshes their recovery, so you want to use it at the very first possible moment.


And speaking of aerials, Rider can perform a decent launching maneuver with her Up Throw. What is oftentimes her best throw when she hasn’t chained an opponent, Rider jumps up, grabbing the opponent’s head between her thighs. Things do not end as well as one would hope from this situation though, as Rider uses her incredible leg muscles to toss the opponent forward in the sky, dealing 9% damage, with knockback that KOs around 180%, but has very slow knockback growth. When opponents are chained, they’ll be stopped from rising any further, tethering them at the chains’ maximum length still.


So then, when playing as Rider, what do you want to do? First of all, understand that chaining an opponent is not always better than leaving the opponent unchained. All of Rider’s attacks change when she’s chained somebody, and unless you know exactly what you intend to do with a chained opponent, you’re wasting your time. A good number of her attacks stop doing regular damage against chained opponents, and it’s nearly impossible to get a kill. Throwing out your chains and nailing an opponent whenever you can is going to hurt you tactically. Have a plan; perhaps you’ll aim to stun or throw the opponent into one of Rider’s kicks, try to reel the foe in for your chaingrab, use moves like your Back Aerial and Down Tilt to set up for your Neutral Special and hope to get a KO, keep the opponent away from your Blood Fort Andromeda circles with your Down and Up Smashes, or even try to force the opponent offstage with you for a gimp or even a suicide KO. You have to know what you’re planning on doing, keeping in mind how hard it would be to gimp your opponent, how close you are to a KO percentage, and how difficult it will be to reel in the opponent for a chaingrab. You only have about six or seven solid seconds where you’ll be able to take advantage of the chains, so use them wisely.

When the opponent isn’t chained though, you’ll want to be using your chains to force your positioning on the opponent. The length of your chains defines how aggressive or defensive you want to play. Long chains express a more defensive playstyle as you try to keep the foe further away, while as your chains shorten your moves become more aggressive and quicker. Against enemies without projectiles, defensive use of Rider’s Jab, Up Smash, Back Aerial and Down Smash while her chains are long are good ways to try to force the opponent away. When Rider has her chains long though, she can’t threaten to grab or impale an opponent with her Side Special, meaning that she’s very defensive, and rather vulnerable at close range. It’s one of the trade-offs that’s a key part of how Rider works. Of course, when they do break through past the nails, and it isn’t that hard, you can simply withdraw, shorten your chains, and begin again with your more aggressive short chain moveset, especially with the way your Forward Smash changes when your chains are short. You can even try to create openings to make switching to your closer ranged moveset easier; a long ranged Forward Smash has a predictable hit radius that the opponent will try to use to close in, but if the opponent is out of range, you can usually get your chains shorter before they can arrive. When her chains are completely unextended though, her moveset is rather underwhelming. Her Up Smash is impressive, and good for trying to space opponents out when you aren’t expecting them, but usually when you have your chains completely reeled in, it’s because you’re planning on using Rider’s Side Special.

KOs with Rider are rarely easy, and getting them is her biggest problem. Her Up Special may have incredible range, KO at a good percentage, and do decent damage, but that 20% damage fee makes it costly to use without having paralyzed your opponent with her Mystic Eyes first. On the other hand, it’s a great last ditch move when Rider’s already well into the opponent’s KO levels, as taking more damage at that point means Rider has nothing to lose. Her Up Tilt, Dash Attack, and Forward Smash are her best sources of more standard KOs, although they all tend to be slow, and KO at higher percentages than one would wish. Throw in that while Rider can build damage, it isn’t easy, and you’ll often be trying to gimp your opponent for the kill.

Rider’s Up Smash, Up Aerial, and Back Aerial can all be great sources of kills against chained enemies by tossing the opponent around with her chains then tossing them with her Side Special. She can throw enemies under stages such as Final Destination or toss them low below her with her Up Aerial, especially if you can chain it into a difficult Dair spike. She still won’t usually get enough momentum to assuredly gimp someone until the opponent is around 100% though, and even then, it’ll be difficult against enemies with great recoveries. You can be more certain by trying to suicide KO the opponent, and drag them down with her, but you die as well, and suicide KOs aren’t easy to do either.

Sometimes you’ll also want to play stallishly with Rider. While with her incredible potential damage with a properly used chained opponent, chaingrab, and suicide KOs, you can also play things out slowly and safely. Blood Fort Andromeda is a key part of Rider’s strategy when stalling, as it keeps her percentage low and makes every second you stall away an extra potential point of health siphoned from the foe. Stall with Rider is much the same as her regular play with her chains long, trying to keep the opponent away, grow your Blood Fort, and wait for the perfect moment to strike.

Switch between stall and offense with Rider carefully, and try to force their position into the one most favorable for you. Hitting an opponent with a Side Special, gimping them, protecting Blood Fort Andromeda, hitting chained opponents with your stronger attacks, all of these depend on where you force your opponent with moves like your Smashes and long ranged chain attacks. If you want to master Rider, master this. And finally, yes. I'd Rider.
 

Katapultar

Smash Lord
Joined
Nov 24, 2008
Messages
1,284
Location
Australia
Another set! Meanie!

[size=+3]Rider[/size]
I see you've gone off using headers completely. Not that I disagree, no, not at all.

The way you've presented the attacks is nicely done, something that should be done more often. I'll be honest with you, I feel like I want to copy that presentation idea for movesetting, yet that seems to be more of a compliment for you. Thanks to your great idea of presentation that Doppelori had, one can read the set as if you were presenting the playstyle in the set (that's not really the case here though). You can simply get from one point of a Special, show the reader what non-specials work with it, and then get to another Special. Sure, this writing style may have one loose track of the attacks in some case, though it's quite a awesome was to present a set, as it sometimes makes the time go by quickly in the case of U-tilt and Dash attack.

I presume stats were absent because one could make common sense of it from the set. No matter, it's not needed that badly. But that's enough about your presentation, you want to know about the other bits of your set, yes?

The Side Special is a rather nice move that Rider uses (Yes, we have 'rather nice moves' all the time. Just like Stanley's Neutral Special). Based on the order of Up-Special to Down Special, it's almost like the healing concept is just a filler (kind of) for the sake of helping the self-damage done by the very akward (but cool) Up-Special. I'd kind of wonder... maybe about that... if the Magic Circles... to hell with them, why not pummel the foe? Oh, and I don't know Rider's weight. See, healing is a 'recovery' on it's own. Yet Rider has a near flawless Up-Special to use. That's like giving two recoveries to her. I DON'T really think it's neccesary. Just my thoughts though, and here I am ranting about 1 little attack.

The set itself is rather complicated, especially with the emphasis on the chains, where sometimes it's like I missed something important. But never mind that, Rider seems to be a strong set in addition to the ever growing legion of female fighters (To which I perhaps hope to add to). I reckon by the time MYM7 ends, the Top 50 will be filled with a lot of female characters, much more than MYM6 which only had 7. That would be real cool.

Alright, now go and comment on Stanley, cus I think his reception's a bit smashed, don't you?
 

Chris Lionheart

Smash Champion
Joined
Apr 6, 2008
Messages
2,076
Location
Make Your Move

Kael, the Invoker
Please do not repost movesets, especially those you just submitted last contest. If you did make any changes to this set, they are likely too minimal to warrant a second posting. (And the first thing you should have changed was the almost completely colorless organization.)

Masterwarlord: Also... that Kael doesn't exist. World of Warcraft doesn't exist. The real Kael is Kael'Thas, Warcraft 3's Blood Elf prince.

 
Status
Not open for further replies.
Top Bottom