• Welcome to Smashboards, the world's largest Super Smash Brothers community! Over 250,000 Smash Bros. fans from around the world have come to discuss these great games in over 19 million posts!

    You are currently viewing our boards as a visitor. Click here to sign up right now and start on your path in the Smash community!

Make Your Move 6 - Nothing Gold can Stay

Status
Not open for further replies.

KingK.Rool

Smash Lord
Joined
Nov 26, 2005
Messages
1,810
Yeah, I know I still have to get to the first two sets, but Anne kinda grabbed me until I read all of her, as they say. Now, she's not the miraculous experience Cutesy is, but she IS a very very good set.

What I admire is how you basically took the concept of Donna and aged it, both figuratively and literally. This is Donna come again, except with a more developed and ingrained camera concept, and of course a monopod instead of a tripod. It's pretty neat, looking for all the parallels.

The heralded layout scheme is tough to get used to, but quite brilliant. If the moveset was a bit more generic and took it a bit further, you'd really have something on your hands. As is, it feels more like a quirk than an upheaval in the grand scheme of things.

I do love how you make the specials complex but then the rest of the set simplistic and easy to digest. I dunno, I guess that's all I've got to say I right now. I'm sort of blanking out. Must needs go watch a movie instead of thinking.
 

Junahu

Smash Ace
Joined
Nov 15, 2005
Messages
899
Location
Shropshire Slasher
Hey guys. Just want to give a huge thank you to everyone who took the time to join in the festivities that was my MYM anniversary. Seriously, thanks, it means a lot.
~Junahu
 

Katapultar

Smash Lord
Joined
Nov 24, 2008
Messages
1,284
Location
Australia
I haven't had any internet access for a week, so I couldn't reply to anything, but I looked at The Count, which was the last thing I looked at on the internet before it lost. Unfortunately I lost internet before I could reply so here goes:

[size=+2]The Count[/size]
Ok, this count guy looks freaky. This has to be the most graphic set of all graphic sets. Count has a similar feel to Envy, they both use manga pages and graphic KO methods. Having the Count and Zondark work together is a neat little combination, and giving Count only 1 real KO option is, I suppose, a decent way to balance out having 2 characters. I don't see any major balance issues, for a unique playstyle, you seem to have balanced it quite well, though being able to switch anytime is a bit in question.

[size=+2]Anne[/size]
It's probably my computer or screen, but some of the writing is hard to read, but the amount of effort put into the set's visuals is something that everyone should give you credit for. Also, the newspaper articles are interesting to read. If everyone finds some of the writing hard to read, that's my only complaint, it's not really a complaint, but it kind of makes me not want to read it.
 

Junahu

Smash Ace
Joined
Nov 15, 2005
Messages
899
Location
Shropshire Slasher
[size=+2]Anne[/size]
It's probably my computer or screen, but some of the writing is hard to read, but the amount of effort put into the set's visuals is something that everyone should give you credit for. Also, the newspaper articles are interesting to read. If everyone finds some of the writing hard to read, that's my only complaint, it's not really a complaint, but it kind of makes me not want to read it.
Yeah, that seems to be a universal problem. I'm going to recompile the set and see what I can do to increase readability.

Edit: and... done. It sure looks a lot sharper to me. If there are still problems, It probably has more to do with the presentation itself, which would take forever to change.

double edit: Why do I keep mixing up Letmen and Levmen? Bah, I'll just make them both canonically acceptable names. That way I don't have to care.
 

MarthTrinity

Smash Lord
Joined
Aug 9, 2007
Messages
1,954
Location
The Cosmos Beneath Rosalina's Skirt
Anne

So this was your final seekrit set for Junahu Day...I see, I see. I wasn't really expecting a Donna remake so this came as a pleasent surprise. Er, sorry, not a Donna remake, a moveset for Anne! Of course, of course.

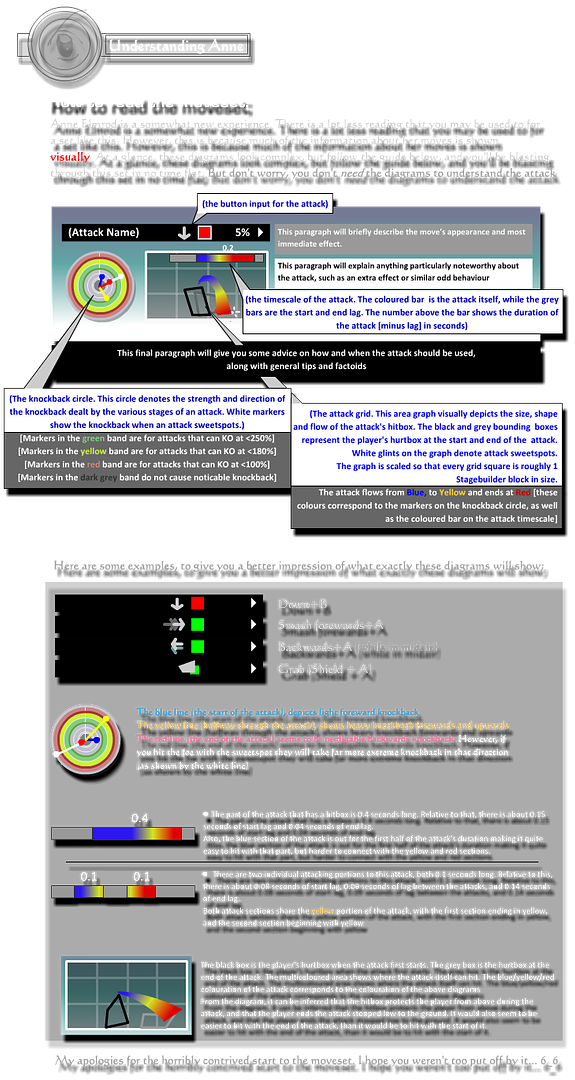
So what can I say right off the bat...? The opening blurb about how to read the set blew my mind; it's usually a really intimidating thing when someone has to explain to you how to -READ-. Surprisingly though, after a while I actually got used to the little diagrams and found them incredibly handy. Needless to say the set looks beautiful (and Anne's not bad looking either (hello)).

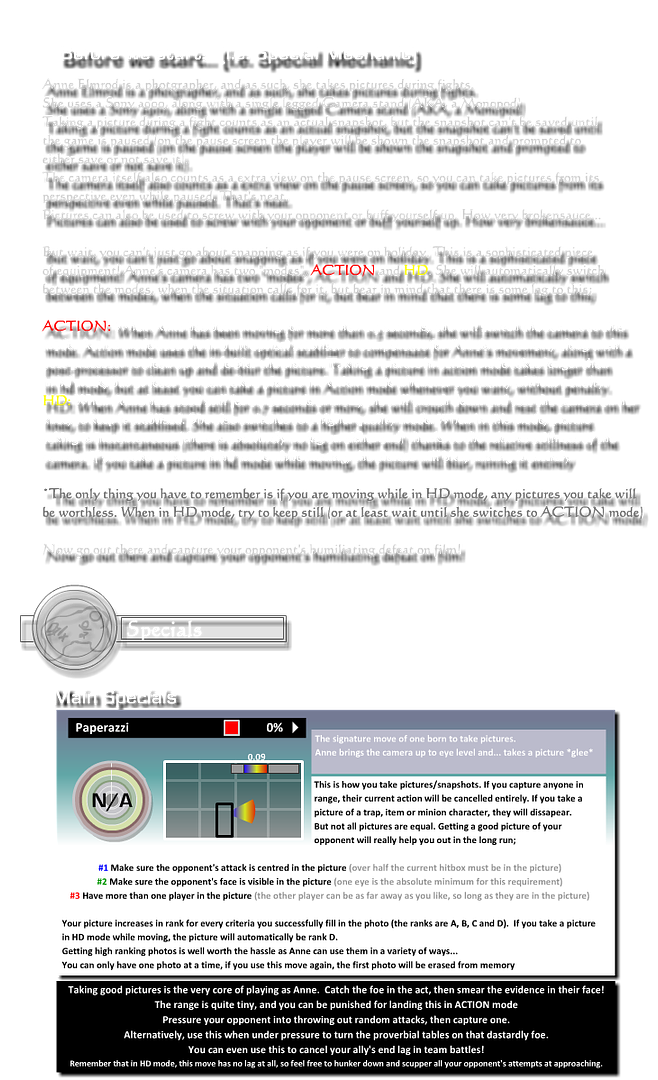
As for the moveset itself? It's got some simple attacks really but it's also got oh-so much depth to it. I absolutely love the fact that you put a little mini-playstyle section after each attack section instead of one giant one at the end. This makes it much easier ot understand as you don't have to keep scrolling back up and going, "What was this move again and why does it flow well with this other move?" The photograph concept was used wonderfully and I even love all the small little ways you implimented it into the real game of Smash (such as snapshots being saved, alternate camera view).

Overall, I love this set and encourage anyone who hasn't read it to give it a read...I'd say it's up there with Cloud of Darkness as your best. Keep up the excellent work Junahu =)


KingK.Rool

Smash Lord
Joined
Nov 26, 2005
Messages
1,810
Getting that monkey off my back...


TAC


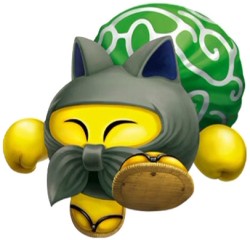
TAC's name spelled backwards is CAT, see? Yep, there's that good ol' Sakurai creativity we all know and love! Nothing less from the guy who put three Landmasters into the same game!

But seriously, folks, TAC here is a Kirby helper, which I trust we all remember from Kibble's movesets and many others (Capsule J2, Simirror, Wheelie, and so on and so forth). His ability happens to be Copy, and he can only do one thing; reach forward speedily with one of his cat paws - these are magically NOT attached to his body - and steal abilities/attacks. That's basically it. If this is somehow too much to comprehend, here's a brief video showing a bunch of TACs getting brutally destroyed. Along the way a few of them show off their attack.

In Brawl, well, TAC doesn't have any real attacks. Every attack he has simply steals the corresponding attack off the opponent. This makes most of the moveset skippable. Have fun!

[Oh, and as to why this moveset's organization is so threadbare - I'm sorry, TAC stole all my colors and most of my BBCode. The only color he left me is this sickly green. I HATE that guy! But, well, let's make the most of what we have...]​

STATS


Weight is a 5.
Power is 0, but don't let it fool you - he'll steal KO moves along with everything else.
Traction is an 8.
Jump is another nice 8.
Run is also an 8.
Fall speed is a 6.
His attack speed is a 9 on its own - but that's only stealing, after all, not attacking.

To put it simply, TAC is a very good middleweight speed character. His stats are kind to him. His attack (singular) is very fast. But this is where you have to remember, his attack actually only grants him an attack. So that attack speed stat, as well as the power stat, may as well be "???".​

MOVES

SPECIAL MOVES


Neutral Special - Steal​
TAC launches one paw forward swiftly; this motion is mostly lagless and takes about 0.4 seconds total. The paw moves forward half a platform's distance before returning. If it hits anyone along the way, it deals very short set knockback and returns immediately to TAC, granting him the usage of the victim's Neutral Special. This attack has good priority AND DEALS 5%.

This attack is hitherto replaced by the stolen Neutral Special. This carries over even after TAC is KO'd; he doesn't have to steal all over again. This applies to every attack TAC has.

One might wonder how TAC uses some Neutral Specials - they might involve swords or elements or fists or any manner of things TAC does not have. The answer, of course, is in his bag. He can literally pull anything out of there at the drop of a pin. Need fire? He simply points his bag forward. Copied Link's Arrows? They come out of the bag. Ganondorf's Warlock Punch? It issues out of the bag. This applies to every attack in TAC's moveset.

It is VERY IMPORTANT to note that the opponent still has access to any "stolen" attack. TAC's ability is, after all, Copy, not Steal. I guess you could say he's just sharing the love.​

Forward Special - Forward Steal​
TAC launches one paw swiftly forward; this motion is mostly lagless and takes about 0.4 seconds total. The paw moves forward half a platform's distance before returning. If it hits anyone along the way, it deals very short set knockback and returns immediately to TAC, granting him the usage of the victim's Forward Special. This attack has good priority AND DEALS 5%.

Up Special - Up Steal​
TAC launches one paw swiftly on a tilted, diagonal angle; this motion is mostly lagless and takes about 0.4 seconds total. The paw moves forth half a platform's distance before returning. If it hits anyone along the way, it deals very short set knockback and returns immediately to TAC, granting him the usage of the victim's Up Special. This attack has good priority AND DEALS 5%.

This one is very important and notable because of its angle. If the foe is foolish enough to try to gimp, this attack can steal their recovery just in time for you to use it.

Down Special - Down Steal​
TAC launches one paw swiftly forward; this motion is mostly lagless and takes about 0.4 seconds total. The paw moves forward half a platform's distance before returning. If it hits anyone along the way, it deals very short set knockback and returns immediately to TAC, granting him the usage of the victim's Down Special. This attack has good priority AND DEALS 5%.

Shield Special - Blend In (Then Steal)​
Yeah, okay, I lied. TAC does have one attack of his very own; a special that can be triggered while he's shielding. When activated, he immediately drops his shield and crouches down, blending in completely with the exception of a little slit for his eyes. In this state, he is in the background and cannot be touched; it's also tricky to see him in the first place.

The catch to this total invulnerability is that it can only be held for a maximum of one second, and that his shield is exhausted once he comes back into the foreground. It recharges twice as slow as shields tend to, so you're unlikely to be able to spam this without risking a shield-break followed by a brutal beating.​

STANDARD MOVES


Jab - Weak Steal​
TAC launches one paw swiftly forward; this motion is mostly lagless and takes about 0.4 seconds total. The paw moves forward half a platform's distance before returning. If it hits anyone along the way, it deals very short set knockback and returns immediately to TAC, granting him the usage of the victim's Jab Combo. This attack has good priority AND DEALS 5%.

Dash Attack - Running Steal​
TAC launches one paw swiftly forward, stopping dead in his tracks; this motion is mostly lagless and takes about 0.4 seconds total. The paw moves forward half a platform's distance before returning. If it hits anyone along the way, it deals very short set knockback and returns immediately to TAC, granting him the usage of the victim's Dash Attack. This attack has good priority AND DEALS 5%.

This is a good approach, since it lets you poke out from a solid distance. It helps that most Dash Attacks are broken and well worth stealing.​

STRONG-ISH MOVES


Forward Tilt - Basic Steal​
TAC launches one paw swiftly forward; this motion is mostly lagless and takes about 0.4 seconds total. The paw moves forward half a platform's distance before returning. If it hits anyone along the way, it deals very short set knockback and returns immediately to TAC, granting him the usage of the victim's Forward Tilt. This attack has good priority AND DEALS 5%.​

Up Tilt - Balancing Steal​
TAC launches one paw swiftly upward; this motion is mostly lagless and takes about 0.4 seconds total. The paw moves up half a platform's distance before returning. If it hits anyone along the way, it deals very short set knockback and returns immediately to TAC, granting him the usage of the victim's Up Tilt. This attack has good priority AND DEALS 5%.

This attack breaks the mold because EVERY CHARACTER NEEDS A WAY TO DEFEND FROM ABOVE YOU NOOB. Isn't that right, Ocon?​

Down Tilt - Misleading Steal​
TAC launches one paw swiftly forward; this motion is mostly lagless and takes about 0.4 seconds total. The paw moves forward half a platform's distance before returning. If it hits anyone along the way, it deals very short set knockback and returns immediately to TAC, granting him the usage of the victim's Down Tilt. This attack has good priority AND DEALS 5%.

This one, unlike Up Tilt, is not angled at all.​

STRONG MOVES


Forward Smash - Chargeable Steal​
TAC launches one paw swiftly forward; this motion is mostly lagless and takes about 0.4 seconds total. The paw moves forward half a platform's distance before returning. If it hits anyone along the way, it deals very short set knockback and returns immediately to TAC, granting him the usage of the victim's Forward Smash. This attack has good priority AND DEALS 5%.

Charging this attack is something TAC can actually do in the source material. Doing so ruins your mindgame potential by cluing the foe in that you're going for a Smash, but it also doubles the range of the attack.​

Up Smash - Chargeable Steal No 2​
TAC launches one paw forward swiftly; this motion is mostly lagless and takes about 0.4 seconds total. The paw moves forward half a platform's distance before returning. If it hits anyone along the way, it deals very short set knockback and returns immediately to TAC, granting him the usage of the victim's Up Smash. This attack has good priority AND DEALS 5%.

Charging this attack is something TAC can actually do in the source material. Doing so ruins your mindgame potential by cluing the foe in that you're going for a Smash, but it also doubles the range of the attack.

This is misleadingly not angled upwards, but at least it can be used out of a dash, right?​

Down Smash - Chargeable Steal No 3​
TAC launches one paw swiftly forward; this motion is mostly lagless and takes about 0.4 seconds total. The paw moves forward half a platform's distance before returning. If it hits anyone along the way, it deals very short set knockback and returns immediately to TAC, granting him the usage of the victim's Down Smash. This attack has good priority AND DEALS 5%.

Charging this attack is something TAC can actually do in the source material. Doing so ruins your mindgame potential by cluing the foe in that you're going for a Smash, but it also doubles the range of the attack.​

AERIAL MOVES


Neutral Aerial - Aerial Steal​
TAC launches one paw swiftly forward; this motion is mostly lagless and takes about 0.4 seconds total. The paw moves forward half a platform's distance before returning. If it hits anyone along the way, it deals very short set knockback and returns immediately to TAC, granting him the usage of the victim's Neutral Aerial. This attack has good priority AND DEALS 5%.

This attack is basically just like TAC's ground attacks, only... you know... in the air.​

Forward Aerial - Aerial Steal No 2​
TAC launches one paw swiftly forward; this motion is mostly lagless and takes about 0.4 seconds total. The paw moves forward half a platform's distance before returning. If it hits anyone along the way, it deals very short set knockback and returns immediately to TAC, granting him the usage of the victim's Forward Aerial. This attack has good priority AND DEALS 5%.​

Back Aerial - Cat Burglar​
TAC launches one paw swiftly BACKWARD; this motion is mostly lagless and takes about 0.4 seconds total. The paw moves back half a platform's distance before returning. If it hits anyone along the way, it deals very short set knockback and returns immediately to TAC, granting him the usage of the victim's Back Aerial. This attack has good priority AND DEALS 5%.

This attack is so special, it gets a name that doesn't end in "Steal". Watch out, you never know when TAC is gonna snatch your BAir!​

Up Aerial - Steal from Below​
TAC launches one paw swiftly upward; this motion is mostly lagless and takes about 0.4 seconds total. The paw moves up half a platform's distance before returning. If it hits anyone along the way, it deals very short set knockback and returns immediately to TAC, granting him the usage of the victim's Up Aerial. This attack has good priority AND DEALS 5%.

This attack is indeed angled upward, but most UAirs are so awful there's no reason you'd need to steal them anyway. IS THERE?​

Down Aerial - Steal from Above​
TAC launches one paw swiftly downward; this motion is mostly lagless and takes about 0.4 seconds total. The paw moves down half a platform's distance before returning. If it hits anyone along the way, it deals very short set knockback and returns immediately to TAC, granting him the usage of the victim's Down Aerial. This attack has good priority AND DEALS 5%.

This attack is self-explanatory! The previous sentence was unnecessary and strangely enthusiastic!​

GRABS AND THROWS AND SUCH... MOVES


Grab - Close-Range Steal​
TAC launches one paw swiftly forward; this motion is mostly lagless and takes about 0.4 seconds total. The paw moves forward half a platform's distance before returning. If it hits anyone along the way, it deals very short set knockback and returns immediately to TAC, granting him the usage of the victim's Grab. This attack has good priority AND DEALS 5%.

It's only called close-range because that's what grabs call to mind. Don't worry about it. But NOTE that even if TAC steals a grab, he still has to steal his throws. After using the opponent's grab, instead of directly throwing, you steal THEIR throws. Fight for yourself? Ridiculous!​

Pummel - Quick N' Easy Steal​
TAC smacks the foe close-up with a paw, stealing their Pummel. This doesn't end the grab and is pretty quick; you may even still get a throw in. Or a theft of a throw, anyway.​

Forward Throw - Cheater's Steal​
TAC launches a paw into the foe from right close up; the exact animation differs depending on the stolen grab animation, of course, but the idea is the same. The victim takes short set knockback (is released, of course) and TAC is granted usage of their Forward Throw. AND IT DEALS 5%.​

Back Throw - Cheater's Steal No 2​
TAC launches a paw into the foe from right close up; the exact animation differs depending on the stolen grab animation, of course, but the idea is the same. The victim takes short set knockback (is released, of course) and TAC is granted usage of their Back Throw. AND IT DEALS 5%.

No, this attack doesn't have backwards knockback. That might actually be used to kill on walk-off stages! Are you mad?​

Up Throw - Cheater's Steal No 3​
TAC launches a paw into the foe from right close up; the exact animation differs depending on the stolen grab animation, of course, but the idea is the same. The victim takes short set knockback (is released, of course) and TAC is granted usage of their Up Throw. AND IT DEALS 5%.​

Down Throw - Cheater's Steal No 4​
TAC launches a paw into the foe from right close up; the exact animation differs depending on the stolen grab animation, of course, but the idea is the same. The victim takes short set knockback (is released, of course) and TAC is granted usage of their Down Throw. This attack deals no damage. >=(​

SUPER ULTIMATE FINAL MOVE


Super Attack - SUPER Steal​
TAC has ten seconds to catch up to a foe and press any button to launch a twice-as-long-range-as-usual cat paw forward. If he does so, he'll instantly steal the ability to use their Super Attack. Pressing B again before your time runs out makes him break out the Landmaster or giant laser beam or whatnot.

If their Super Attack is a mechanic booster, you'd better hope you've stolen a lot of their attacks, right?​

PLAYSTYLE


So here's the rub. Playing TAC is quite unlike playing anyone else in the game. For starters, match-ups are everything, and we'll get to that in a second. If you think it's tough to get your match-ups straight with a different character, TAC is not for you, because every match-up is completely different. If you aren't quick to adapt to using a huge variety of attacks, TAC is not for you.

TAC's use, then, is in three departments: a fun challenge for experts; a great counterpick against certain characters; and a way cooler, awesome-r Random for casual players.

But for you people who dare to dream, all is not lost. TAC has one great advantage; he's completely unpredictable. Depending on what YOU make of him, his playstyle is different every game. Mirror matches are always tricky, and because TAC's stats are set, playing against him is like an even trickier mirror match.

The thing you have to figure out is WHAT to steal first. TAC is fairly quick and his attack is the same, so you're likely to steal quite a few attacks before being smacked around a bit... but your choice of which attacks are stolen is absolutely vital. The most obvious goal is to get an Up Special, because without it, you're not going to last very long. Therefore your IMMEDIATE goal is to get the foe up in the air... and thus, you're going to usually want to get one of the foe's strongest ground attacks first. Again we recall that TAC is very, very different from match-up to match-up.

Many of the foes you'll face will be based around mechanics, or at least have playstyles that hang together very well. Against such foes, you need to know what attacks are the lynchpin of their playstyle - because, of course, that'll be your playstyle for the rest of the match once you start stealing. The Specials tend to be a good place to start.

TAC hates faster characters almost as much as he loves slower characters. Although the lag on stolen attacks is unchanged, the ability to dart in and out with greater speed than the victim gives you a decided advantage in what's essentially a mirror match.

If you find yourself tossed off the stage before you've stolen a good Up B, do not panic... too much. Remember that TAC's thefts stack up and remain even after he's KO'd. You're a slow burner, really, and the first stock is going to be quite madcap as you struggle to copy enough to stay alive. After that, though - after most of your moveset is the same as theirs - you can really start coming into your own, with your nice set of stats and versatility.

I could go on, but it would be in vain. TAC is so reliant on his match-ups to decide how he plays, I'll let you read more below. Trust me, by the time you're done, you'll know more about robbing your opponents blind than you ever wanted to know.

MATCH-UPS

http://www.youtube.com/watch?v=NbGIHsDoPDg

Against Adeleine
60/40

Your problem in this match-up is clear right off the bat: to be able to fully access Adeleine's arsenal, you need all four of her Specials. These are absolutely vital. The other problem is that Adeleine's moveset requires a LOT of thought, and the opponent is doubtless more skilled than you are at using her many summons.

But there is good news! Adeleine has poor stats, you see. Her best stat by far is attack speed, which fortunately is one of the few stats you directly steal when you bogart her moveset. Although you're going to have trouble working out her complex summons, stealing them one at a time and flaunting your superior movement skills should result in your quite ably evading her until you've got the hang of pulling off that difficult KO. Not a particularly easy match-up for either side, but it could potentially go either way.​

http://www.youtube.com/watch?v=qa7DjB6IVmM

Against Tryclyde
65/35

The first thing you do when going up against Tryclyde is stealing his FSpec. Every Tryclyde knows that growing heads is the cornerstone of their game; since you can't actively stop them from doing so, you better grow them just as quickly. Incidentally, TAC's hydra heads look identical to Tryclyde's and emerge from his bag to take root on his shoulders. Pretty funny-looking.

Now, at the beginning you're bound to have trouble approaching, since he can pelt you from afar with his many prop projectiles, so it's up to you to abuse your ShieldSpec at opportune moments and get close enough to steal as much of his moveset as possible. Once you close that gap, he'll have trouble getting you out of his face unless he's grown some heads, and hopefully by then you've stolen some attack that'll allow you to crush them. Since TAC is so much speedier, his only obstacle is shutting down Tryclyde early on; this is pretty much opposite to the way fast characters usually deal with this big ol' hydra.


http://www.youtube.com/watch?v=gXaI32cjRgE

Against Envy
20/80

Oho, fun match-up here. This isn't really a mirror, because, of course, Envy has massive weight and the Parasite mechanic going on. TAC has no such boon, so he loses out on Envy's greatest stat and is likely to have serious trouble damaging him enough to get him to go into his Parasite form.

The other major problem you have is that Envy's attacks all need to be used in tandem for his playstyle to be of any use. Time and time again, TAC hates foes with lots of interconnected attacks, because this means he'll need to steal a whole moveset before he can fight as a significant force. Your primary target - other than that juicy recovery, that is - will be his zombies and his zombie-based attacks, BAir in particular. Once both you and he start generating zombies, it should be fairly easy for you to transmogrify into one and hide amongst them; from here, you can use your impressive speed to launch a surprise flurry of combo attacks or of thefts.

But the kicker is that Envy is pretty much broken anyway, and any character is going to have trouble pressuring him, especially one who needs time and effort to get his own moveset going. Your only hope is to FAir him with a cheap KO. Otherwise it's a long hard slog to get him into parasite mode and finally pick the cheeky bugger off.

http://www.youtube.com/watch?v=UiMcYDIP6Tc

Against Death the Kid
30/70

TAC is indeed not symmetrical (that bag over his shoulder, remember?). Kinda sucks for you, because Death is going to spend the whole match trying to land his mechanic on you. And you're going to have a tough time approaching, because he has a veritable army of projectiles to wield against you. Your speed is your main boon.

Unfortunately, there's not much else to this match-up, since Death is such a simple character. Try to get under his radar and steal his ranged attacks, and maybe you'll stand a chance in the firefight to follow.


Against Rosalina
10/90

No Luma, no chance. That's basically what this match-up comes down to. Your only hope, really, is to KO Luma and put things on an even keel, but to do that, you need to steal attacks, and to do THAT, you need to be facing a weakened, Lumaless Rosalina. It's an infinite spiral of painful contradictions. Best of luck.​

http://www.youtube.com/watch?v=JR-YvxgnFH8

Against Heatran
40/60

Here's the bad news: Heatran has no recovery. Ergo, you have no recovery. It's okay for him because he's basically a tank, but TAC is made of flimsier stuff and doesn't like this one bit. All he has to work with, then, is how slow and bulky his foe is. It's not hard to effectively steal his whole moveset; the trick is working out all the complex lava interactions and coming out on top.

TAC in this match-up is going to be very much reliant on his Shield Special. You just can't afford to take a heavy hit, and Heatran's attacks are, for the most part, laggy enough to be read and dodged in this way. You have to use your superior agility to choose your hits carefully. NAir is especially useful, since it cuts Heatran's already awful speed and makes it slightly easier for you to land a more powerful attack.


Against Lelouch
??/??

This match-up cannot be known! Uh... Lelouch is far too mysterious and stuff for me to tell you how to beat him, or something...

Okay, okay. So this match-up is probably bad for TAC because he can't use Lelouch's DSpec, since he doesn't have the same mechanic... and their stats are similar, although TAC's are slightly better.

Er, that's all I've got. Oh, come on, the moveset has "Using Geass on the Smash Bros camera man?" as an attack name! It should be disqualified by default!


http://www.youtube.com/watch?v=ZMJIcS8w-_Y

Against Roserade
70/30

Roserade sure does have a lot of special abilities. Fortunately for TAC, one of them involves her being an absolute featherweight who can easily be KO'd by just about any attack. You have any number of choices, really. FSmash should leave a dent. Grab should be your first target, because grabbing Roserade when near the ledge should spell her demise. FAir is another quick n' easy attack that can be used to cut her off from the stage entirely, WoP style. She has a lot of strong, high-priority attacks to make up for her debilitating weakness, and you can steal every one of them. Your only problem will be actually catching up to her, and that shouldn't pose too much of a threat once you take her own long-range moves.


http://www.youtube.com/watch?v=mrLoLnKSfkM

Against Thrall
50/50

Deceptively, this match-up can go either way. As soon as the battle begins, you'll want to dash in and steal Thrall's Down B - you're going to need to start spawning Peons and building buildings right away if you're planning to contend; Thrall is weak in the early game, while setting up, so take advantage of those early moments to steal as many attacks as possible.

Once the building gets started on both ends, the match can go one of two ways; either both of you focus on breaking the other's buildings and units and therefore halting their development, or you clash head-on and let careful choices decide who builds up the better army. You're typically going to prefer the former, because you're unlikely to be as clever with your strategic decisions as a hardened Thrall main. He, meanwhile, is going to want to engage you directly much of the time and let his army form of its own accord. Here, you have an advantage, because you have speed on your side, and preferably you've already stolen a good majority of his attacks in the game's early moments.

This match-up really can end in either's favor, but it depends largely on the Warcraft experience of the TAC main. Any wrong choice will be punished, you can be assured of that.


http://www.youtube.com/watch?v=ABARBheISJs

Against Sloth
85/15

Sloth? No challenge at all! He's got what TAC loves his opponents to have - a negative mechanic! While Sloth can only use his powerful attacks sporadically, due to constantly having to take rests, TAC can just snatch up his moveset while he's being sluggish and attack away with long-range chain attacks, never giving Sloth a chance to sleep. Steal his Side Special and go nuts with it, since it's so incredibly powerful; it'll be your main KO attack. Grab that giant target and break his spine so he can't bring out his boulders. While he's slowing down, use the opportunity to dig up some boulders of your own and anchor yourself to them. The opportunities really are limitless.

Sloth trying to take a nap underground? How convenient it is, then, that you can dig him with the same attack he used to excavate the hole!

Sloth trying to grab you and bury you for a while with his BThrow? Not to worry! Keep him at bay with his own simplistic chain attacks, stay on your toes with your superior mobility, and punish him by using your Shield Special to make him miss altogether!

Sloth trying to punish the fact that your vertical recovery - pilfered from him - is awful? Why, look no further than FAir, a tether recovery. Sloth is far too sluggish in the air to stop you in most cases, and on the flip side, you can gimp him.

Truly, Sloth is no match for the amazing TAC.

http://www.youtube.com/watch?v=fr6azFscfuw

Against Vaati
60/40

There are two legs to this match-up, and the first is in Vaati's favor: this, of course, is stealing his attacks. Vaati is a champ at spacing and will do his very best to keep you well away from him. TAC needs to use his impressive speed and good fall time to outmaneuver the winds that are constantly coming his way.

Once he's stolen some of Vaati's vital attacks - particularly his Specials and Tilts - you can start matching him attack for attack, and keep him off-kilter for long enough to get a substantial cut of his moveset. This is where the match turns heavily in your favor, because you have a rather hefty weight advantage and a powerhouse Shield Special to keep yourself on terra firma. Vaati's a very light character and a solid FSmash should be enough to spend him flying after a bit of damage build-up. Just know that your prerogative is to win a spacing contest and you'll do fine.


http://www.youtube.com/watch?v=9bHvYoSiDPk

Against Daroach
65/35

This is a frustrating match-up. Daroach is so floaty, such an easy aerial target, but no matter how many attacks you steal, you won't find any good juggling attack, or even especially good aerials. No, your main boon in this match-up is that he's big and light, a juicy combination. Start off by stealing his throws, because they'll set you up nicely to take his aerials and his Up Tilt. He's got a variety of options, but that just means you can be selective with what to take. It would seem even Kirby bosses buckle before this Kirby helper. TAC is clearly the better thief of the two!

http://www.youtube.com/watch?v=gSdY8rrwafU

Against Jade Curtiss
55/45

Jade Curtiss has those ridiculous Specials, aimable and highly interactive, so they'll be your primary target - without them, you're unlikely to be able to get anywhere near him. The thing here, though, is that for all his range, Jade is quite unwieldy, and you're going to be able to dart around and poke at him repeatedly once you manage to steal his attacks. Most of his spear-based attacks outprioritize TAC's stealing, so the first leg of this match-up is the hardest. Afterwards, though, you've got a decidedly pronounced upper hand.


http://www.youtube.com/watch?v=PINLmK8Nf2g

Against Servbot
10/90

Ah, TAC's bane; characters with mechanics that grant them a partner. Cortex and Tiny? Ice Climbers? No chance. Servbot has not one but FORTY partners, and that means all attacks dealing with them go out the window. You've got a few aerials to play around with, and a tilt or two, and your recovery will still work. Beyond that, you're basically fighting with a mangled, mutilated moveset, and you don't need me to tell you that this is not going to be pretty.


http://www.youtube.com/watch?v=HJ6TzkaPxtM

Against Clefable
10/90

There's one immediate and obvious problem with taking on Clefable; her inevitable Cute Charm stack. She's a defensive machine and will do her very best to sit on the ground and push you back with a relentless stream of annoyer attacks, thus making your own attacks nigh useless. Clefable's attacks in general are not very good at racking up damage, and when combined with the Cute Charm she is exercising on you, this is not a very good match-up for TAC.

All hope is not lost, however. You do have much more aerial mobility than Clefable does, and you can take advantage of it by pressing your own attack and pushing her up into the air. Steal Metronome and hope to get lucky! If you're one of those crazy people who don't like hoping for a juggling move, you can rely on Clefable's excellent Up Smash and Up Tilt - likely stolen in that order, because you need to get her above you before you can snatch her Up Tilt, never forget. Once you start juggling and push the fight into the air, well, I'll be honest, there's not all that much you can do. Clefable has strictly defensive aerials that really won't do you any favors in this department.

Your throws are your only hope. That and Fury Swipes; you're likely to get up to some pretty colossal %s yourself, so it'll eventually become a viable KO move.


http://www.youtube.com/watch?v=gvOzRcGP9qw

Against Mussolini M. Bison
30/70

M. Bison has an advantage over you in terms of stats; he may not be quicker, but he's better at just about everything else. The one thing he lacks is a good means of KOing, and this problem is going to be considerably more pronounced for you, because he's heavier and just all-around better, really. In the air he's just as mobile as you, and the Bison main is likely to have a better feel for his two KO attacks - UAir and BAir. Basically Bison makes you approach him and then beats you to a bloody pulp.

This match-up isn't entirely one-sided, because although most of his moveset is important to his combo-ish gameplay, it shouldn't be too tricky for you to steal it all once you take his NSpec and from there, DSpec. While he's tied up battling the girl you randomly pulled out of your sack, you can focus on copying the rest of his combo moves and actually giving him a foe to be reckoned with.

http://www.youtube.com/watch?v=8HRKp2alHj8

Against Kangaskhan
10/90

You don't have a Babyskhan, therefore you have no chance. Your stats are subpar next to Kangaskhan, and your Rage is going to be harder to build up. Really, there's only one way for you to come out on top here; pick on Babyskhan. Target him and chase after him with full speed, beat on him to make Kangaskhan fly into an out-of-control rage, and then KO him with BAir or UAir. Stealing shouldn't be too hard in this match-up, but it's key that you target Babyskhan and not Kangaskhan; you're going to have an awful time of KOing such a heavy character without access to half of her attacks.


http://www.youtube.com/watch?v=DQ0LG_B9SDo

Against Gameboy Color Link
40/60

GCL is really a steadfast projectile character with some great versatility who needs a lot of thought to be played properly - this bodes ill for TAC, who'll need to steal almost all of his moveset to even be able to react adequately. Meanwhile you're dealing with his traps and projectiles, and having trouble even getting close enough to steal, since he's just as quick as you. Now, once you manage to take some damage-racking moves and from there his two KO moves, your superior weight gives you a chance, but the outlook is not good unless you've had some experience with projectile characters.


http://www.youtube.com/watch?v=arNmzt9mC_U

Against Ludicolo
35/65

You're going to hate this match-up. Practically every single one of Ludicolo's attacks interacts with another. You have to take his tilts to even start to play on the same level as him, and if you flood the stage, he's still the one who heals each second. All he has to do is evade you and your whole gameplan is shut down.

The thing is, Ludicolo's most vulnerable in the early game, and you have no way to pressure him right off the bat. Your best bet is to take his grab and then start pestering him, grabbing him repeatedly and taking his throws one by one. DThrow is especially helpful here - once he's securely tied to the ground, you can snatch away for as much as you've got.

Once you've stolen his whole moveset, you have a bit of a chance, if you're smart with how much you flood the screen and do your utmost to foil his traps... but the stats, and the tide, are against you.


http://www.youtube.com/watch?v=kRgk0hLdQt8

Against Little Mac
45/55

At first glance, you may think you have no chance. After all, you don't have access to Doc or his many equipment-based attacks, do you? You miss out on a ton of attacks because of this, a real shame... but you also don't have the heart mechanic, which means you can attack more relentlessly than he. You also have speed on your side, which should render most of his traps obsolete.

You're going to want to steal his quick, effective Aerials right off the bat, and start going on the offensive. Blitz him with punches and bring his heart meter down low, then take advantage of it to take a few throws, and, of course, the recovery. Tagging Punch won't help Mac much against your long-range theft, and once you take it you'll have a handy answer to all his Doc-based attacks. You have to keep the fight very close to him and really bring the heat. Your best chance at scraping the KO is simply not giving him an easy opportunity to Tagging Punch you and amass stars.

This fight should be quite intense and definitely stressful for you.


http://www.youtube.com/watch?v=oopXymmft-4

Against Oliver
60/40

You cant fight the protector of beauty unless you steal his units. Let us see here you want to steal his nair Money for The Poor: Oliver's Got The Bling Bling * Rap Music Plays* and then his units so you can beat him at his own game. Im canadian so I am tree i wont budge but oh well canada what you gonna do. You have to remember to space if you want to beat the most beautiful moveset around and you have to use the power of the pedophile

What is this pedophile of which you speak

Have some attacks friend


http://www.youtube.com/watch?v=7laxF8se_so

Against The Engineer
20/80

You have no Metal mechanic, so his Specials go out the window, including his Up Special. It's not impossible to win - just play Offense Engineer, after all, and focus on his Tilts, Smashes and Aerials - but it's definitely an uphill battle. The best advice I can give you is to make heavy use of your Shield Special, attack at his constructs relentlessly, and use your aerials to go for a gimp KO, but it's not going to be easy.


http://www.youtube.com/watch?v=KhPWPScjq68

Against Slugma
50/50

This match-up is a real mindboggler. Slugma's going to be pressing in with mindgames and magma-based attacks, doing his very best to keep you from mounting an offensive of your own. If he slips up, you... do the exact same thing to him. How thrilling. It shouldn't be too hard to steal his attacks (hint: start with Gastro Acid and Harden and work your way through his magma generators from there) but the tough part is coming out on top in a long, grueling battle. The main thing you have going for you is Up Throw; Slugma's pretty weak in the air and this is also a very nice way to KO fast.

It's not hopeless, but it's not easy, either.


http://www.youtube.com/watch?v=s5EKqi9uGcM

Against Takamaru
70/30

Oh, how Takamaru hates being pressured. He also hates fast characters with projectiles. TAC is fast and will have projectiles. The gameplan is simple; rush in immediately. Steal his ranged Specials immediately, then harry him by repeatedly grabbing and taking his throws one by one. Pelt him from afar, then close the gap again; he's trying to turn the tide of battle, but you can resort to either Stealth Cloak or your own Shield Special to keep things rolling. Take his close-combat options one by one, grabbing and throwing him occasionally to keep him from setting up a proper defensive. Keep pressuring with your stolen attacks. Go for the KO with one of his Smashes.

This isn't as hard as it sounds, and if done properly, you've got an advantage right off the bat. Once he respawns, it's just a matter of being more agile than him and spacing properly. Keep a safe distance and use projectiles freely, than close the gap and combo away. Pirates are clearly > ninjas.


http://www.youtube.com/watch?v=5zcDevrgwT4

Against Wart
60/40

Wart is "the very first combo heavyweight", after all, and maybe you don't need me to elaborate. Basically, he's big and slow so it's easy to steal his moveset, and he's big and heavy so it's easy to combo him yourself once you've stolen his moveset. Down Special is a crucial move here; meet his henchman head to head with some of your own. I'd also recommend stealing his mind-boggling Down Tilt early on; not only will it stall him while you get your own game going, it's just so much fun.

Of course, this match-up is mostly irrelevant, because no one read plays Wart since he was revamped because King Hippo is so good he makes him obsolete. :mad:


http://www.youtube.com/watch?v=NSqus2TlcsY

Against Edward Elric
45/55

I'd be wary of this match-up here. Edward may have less aerial expertise than you, and he may be slower, but so much of his moveset is interconnected. You need to steal his NSpec for a start, and work your way through the rest of his Specials and Aerials from there. Dash Attack is a must, too. Ed isn't going to take kindly to your systematic stealing, so you'll have to contend with his strange grab and his aggressive aerials. See, you're going to want to bait him into trying a complex move interaction - maybe DTilt/FAir 0 and then respond in kind, maybe with a nice Grab to impale him while he's setting up.

Now, bear in mind that Edward is going to build up damage and then switch to a more stolid ground approach. You can't afford to be knocked off, because the Up Special you're stealing is quite useless in most situations. You need to play a more cautious game than you're used to. It's not impossible to win, not by a long shot, but it takes moderation and careful thought, and a few sloppy mistakes on Ed's side.


http://www.youtube.com/watch?v=9Xm19FjBydI

Against Dr Wily
45/55

Playing against Wily is all about countering his own summons. You'll steal his moveset without too much trouble, because he's none too quick, has few ways to get you to back off, and avoiding his summons is easy as pie. Start with the aerials, so you have ways to repel them if they start bearing in on you. Break through and take his ground attacks from there. Now the true match begins.

Before I go on, just be aware that Wily is going to spam the hell out of his Up Special in this match-up; you have hardly any ways to KO him as is, so he won't be afraid to waste his recovery in exchange for safety. The counter, of course, is using the exact same strategem, but even more boldly; you're heavier, after all.

There's a counter to just about every summon Wily can muster. He starts building Sniper Joe? Immediately throw a Met his way, it'll charge at him during the start-up. Counter a Telly with a Telly of your own; they'll destroy each other on impact. Kill Squirm with a Met, who'll run right over it. Octopus Batteries are annoying, but a well-aimed Pipi will shatter them - this is likewise handy against an irritating gimping S-R3000, although your pilfered recovery should make it easy to get around that one, anyway. Succubaton is a pain and is best shot out of the air with a Crazy Cannon.

Of course, Wily is just as likely to be aware of all these tricks, so he does have the upper hand. It's not all that significant, though, and who wins will often come down to who gets luckier with their bots and manages to pull of a quick gimp.


http://www.youtube.com/watch?v=ex30DYwQlHU

Against Hades
60/40

So you have no Rage mechanic. This is good, maybe, but it could also be bad. Basically, you want to be losing, and this automatically lends you an advantage; since you have to devote your first stock to stealing, you're likely to be KO'd quite early on. A wary Hades will deliberately test you on that first stock, setting up traps here and there, sending his minions forth and spacing carefully. Of course, he'll ultimately still end up ahead, so you've got the advantage there and on another front; you're far more agile and will dart around his traps and minions with greater ease, combo him with greater ease.

As to what to target, well, aside from the obvious choice of his recovery, you're usually going to be the one aggressively comboing here. On that front, I can only recommend his aerials. Of course, you don't want to get a real head start, and you don't want to let a wily Hades bait you into comboing him and then pick on you with his mechanic booster. From time to time, if your lead is getting to great, you may have to let him deal out some damage directly to you. This is a very involved match-up.


http://www.youtube.com/watch?v=pQla4Fv_4-Q

Against Spadefox
70/30

There's one absolutely crucial attack in this match-up; Up Aerial. Disabling Spadefox's darkness attacks basically crushes his tentacles and half of his attacks. Hell, it even prevents him from using Up Aerial on you. It's a game swinger. Of course, first you have to get Spade up into the air, and that's going to be tricky - you can turn to DTilt, or just try to land an Up Throw. Stealing from Spade is going to be another difficult conquest, because he has plenty of ways to space.

But then again, Spadefox can't approach. This suggests you won't be able to approach, but with your superior movement speed, you shouldn't have too much trouble breaking through and laying in with the status effects. As mentioned, that UAir is going to be absolutely critical to you, and not nearly as valuable to him, because if he kills your darkness attacks for a few seconds, just use that time to steal still more from his moveset.

And, of course, Spade's NSpec is a dead attack in this match-up. He has no mechanic, no more than you do; don't even waste time stealing that one. Basically, it comes down to waiting for Spade to slip up and mess up his approach.


http://www.youtube.com/watch?v=6egi9Grw08c&fmt=18

Against Magnezone
65/35

Magnezone is one tough customer. First, just be aware that DAir is your recovery move of choice here, not USpec; it should be your first choice, barring the crucial DSpec. You're typically going to be relying on the NEGATIVE magnets here, especially with that DTilt, as you really want to push Magnezone up into the air and make him rely on his rather slow aerials. Of course, this doesn't promise anything; a good Magnezone will do his best to keep you at range and well away from him while in the air, then reel you in and knock you back out.

The main leg up you have is your Shield Special and your speed. Magnezone can barely chug along as is, while you can dart around the stage with a comparatively staggering speed. When you fuse this mobility with those excellent spacing options, you wind up with an easy steal and a very frustrating match-up for the Magnezone. He may have more experience, but all you need to do is play a careful, needling game and he'll eventually slip up enough for you to land an FSmash and then get an easy gimp with either FAir or BAir. This should be quite a fun match-up for you.


http://www.youtube.com/watch?v=swBSxJY1lQk

Against Dingodile
40/60

Ugh, what an awful match-up. At the start of the match Dingodile calls down his crystals; if he does so before you've stolen an attack, you're not going to be too happy. He sits in his little hovel and pelts you with fireballs; you have no way to break them, so it's basically a matter of hiding. Eventually, hopefully, he'll slip up and accidentally break his own crystals, or be forced to leave or run out of time and cause a draw. Either way, you're likely to eventually be KO'd by a pelting fireball.

Now, if you DO manage to steal, it'll be his FSmash you usually go for. Now you've got a quick n' easy way to break his crystals and steal more. Go for a few more long-range fireball attacks, then the DSpec. If you do so successfully - if you got the FSmash, you're likely to do so successfully - the match will essentially become a long-range sniping battle, where you both crouch in rings of crystals and take turns blasting at each other from afar. I LOVE tactics games, don't you? Of course, Dingodile has more attacks, and the potential to suddenly break out from his crystals and bull rush you, attacking with aerials or his grab or whatever else he feels like. On the flip side, you have superior speed, so you should be able to avoid him if he does so and just punish him by stealing more of his moveset.

Just watch out for his Devour. A Dingodile who's simply fed up will try to swallow you and then blow himself up. He's likely to pull it off, too, so stay on your toes and don't take for granted that the whole battle will involve sniping and rebuilding.
 

JOE!

Smash Hero
Joined
Oct 5, 2008
Messages
8,075
Location
Dedham, MA
TAC:

im not sure whether this is very lazy or very creative XD

There isnt really much to comment on, but ill find a few here:

-Are both his jumps considered "8" quality? or just his 1st? (for example, link has an OK 1st jump, but an awful second jump)

-What happens if Two TACs end up having to fight? :p
 

Wizzerd

Smash Ace
Joined
Feb 24, 2009
Messages
929
K, so Anne... is one of my favorite sets of yours, Junahu. I may slightly prefer Cloud of Darkness to her, but Anne's quite a phenomenal set. It's most certainly an improvement over MYM3 Donna, but this is an MYM6 set, so this is totally redundant... But Anne doesn't just meet the MYM6 standards. It goes far, far beyond them.

In fact, the only thing that I can really criticize about this set is the organization. Well, not the entire organization, I need to be more specific. It looks absolutely beautiful as always, the revamped boxes from Cutesy are pretty cool here. I mean the little graphs beside the attacks. On simple attacks it's fine, but on complicated moves it's just urg. I had to make myself understand them solely because of how epic the set is, but... it's confusing, yeah.

But the moveset is pure gold. Here we have something as simple as a photographer, and yet you've come up with highly original attacks and a stunningly deep playstyle. The context specials are some of my favorites, excellent ways of using colored pieces of paper to actually coherently- no, stunningly- attack. I tip off my hat to you.

So TAC... is are very bold moveset. This is the utter definition of sacrificing originality for playstyle, because, like, every attack is the same, except for that shield special
???
.

Despite all of the attacks being completely mirrored versions of each other, you somehow manage to keep our attention. The little touches of personality in moves like the UTilt, BAir and UAir keep me on the edge of my seat, wondering what's going to happen, even though I know exactly what's going to happen. I feel like mentioning that this is the first time since Jafar that your "Super Attack" has been more original than the rest of the moves, as they should be. I'm still irritated about the "Super Attack" thing, but the thing about the giant laser made me smile, so I partially forgive you.

And, of course, the playstyle is amazing. Building his playstyle from the ground up is utterly fascinating and something never done in MYM before. It reminds me of my thoughts on the Gogo set that I'm doing for MYM7, but this goes much further than Gogo. I was just doing things like "Recovery Imitation" and "Chaingrab Imitation", but TAC... steals everything, including the organization. Good God...

So what do I think of TAC? A super vote isn't out of the question, though I won't commit to anything, as I'm wary that someone will spot some other negative quality I haven't noticed. In any case, TAC is a highly interesting excursion and a fun read, which is what all movesets should aim for. I'll be sure to throw together a TAC matchup for the one-day moveset I have ready, even though I wanted all of the matchups to have a sleep motif.
Stupid controversy...
 

KingK.Rool

Smash Lord
Joined
Nov 26, 2005
Messages
1,810
So TAC... is are very bold moveset. This is the utter definition of sacrificing originality for playstyle, because, like, every attack is the same, except for that shield special
???
.

Despite all of the attacks being completely mirrored versions of each other, you somehow manage to keep our attention. The little touches of personality in moves like the UTilt, BAir and UAir keep me on the edge of my seat, wondering what's going to happen, even though I know exactly what's going to happen. I feel like mentioning that this is the first time since Jafar that your "Super Attack" has been more original than the rest of the moves, as they should be. I'm still irritated about the "Super Attack" thing, but the thing about the giant laser made me smile, so I partially forgive you.

And, of course, the playstyle is amazing. Building his playstyle from the ground up is utterly fascinating and something never done in MYM before. It reminds me of my thoughts on the Gogo set that I'm doing for MYM7, but this goes much further than Gogo. I was just doing things like "Recovery Imitation" and "Chaingrab Imitation", but TAC... steals everything, including the organization. Good God...

So what do I think of TAC? A super vote isn't out of the question, though I won't commit to anything, as I'm wary that someone will spot some other negative quality I haven't noticed. In any case, TAC is a highly interesting excursion and a fun read, which is what all movesets should aim for. I'll be sure to throw together a TAC matchup for the one-day moveset I have ready, even though I wanted all of the matchups to have a sleep motif.
Thank you very much, Wiz. Just as I had given up hope on anybody enjoying my odd little experiment, you come along and make my day. A super vote is more than I could hope for, and I do expect that your opinion of him may diminish slightly as others weigh in more negatively, but all the same, thanks. Very glad you liked it.

And don't you know, I originally meant to have a moveset with each and every moveset in this MYM? Gave up on that, far too difficult. There are too many sets that I simply can't read, much less gain a good feel for.

EDIT: Oops, forgot about Joe. I'd say creative, but I'm biased. It's not laziness, though, trust me; hell, I have, like, 25 match-ups in there to give him some added bulk. His jumps collectively are an 8, and they're equal in vertical height. If two TACs go up against each other, the game implodes. KABOOM
 

Wizzerd

Smash Ace
Joined
Feb 24, 2009
Messages
929


S L O W P O K E

# 7 9

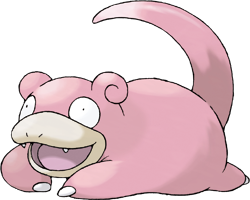
Slowpoke's a Pokemon from the first generation. He's cute, isn't he? Slowpoke's a rather sedative Pokemon. They spend most of their days dozing off, except for when they're fishing with their sap-tipped tails. Many folktales surround Slowpoke. Their yawns are said to cause rain, and their empty head is said to be a sign of enlightenment. Still, it doesn't mean much to Slowpoke. He'd rather be taking a nap.

S T A T I S T I C S

Weight ~ 8
Power ~ 7
Recovery ~ 7
Movement Speed ~ 5
Priority ~ 5
Attack Speed ~ 4
Fall Speed ~ 4
Size ~ 4
Range ~ 3
Traction ~ 2


Slowpoke's stats are based upon one thing, and one thing only: outliving the opponent. Not only does he have heavy weight in a relatively small frame, his recovery is unorthodox but stops him from being launched offstage in the first place and his movement speed isn't too shabby. His crouch is good as well, and he even has a moderately quick crawl! On top of this, his Neutral Special literally allows for super armor anywhere, any time, with no strings attached and some good healing as well. Slowpoke's a god at stalling. Unfortunately, this means that his attacks won't have much effect on the opponent. Their power is nothing to scoff at, but their poor speed and range and mediocre priority mean that they can be anticipated and countered. With Slowpoke, one should play at a very slow pace.

S P E C I A L _ A T T A C K S

Special ~ Rest
Slowpoke loves to sleep. Lazily laying on the ground, chin propped up, Slowpoke willfully enters a sleeping state, as if by Sing or an item. After five seconds of rest, Slowpoke opens his eyes, grumbling, and stands back up. Five seconds must pass before this may be used again. This is quick enough to come out but there's nearly half a second of ending lag as Slowpoke gets back up.

Slowpoke steadily heals in increments of 1% while asleep, recovering a maximum of 15% after five seconds. More notably, he has constant super armor during this move. In addition, he only takes half damage. Attacking him won't even knock him out of it, just adding half damage.

Ordinarily this would be inviting the opponent to have a damage-dealing fiesta, but Slowpoke isn't helpless from his sleep. There are a couple of moves, most notably his Side Special, which can be used out of Rest to defend himself. Granted, he's not a defensive powerhouse here, but the damage regained generally makes up for the damage lost used right. Even if you sacrifice more damage than you heal, this is automatic super armor anywhere. Damage doesn't make a whit of difference when you can never be launched away.

Defense, healing, staller, camper; Rest certainly is a versatile move, and easily one of Slowpoke's best. It's perfectly conducive to his playstyle as a staller, gives him some extra health to play with, and allows him to generally vex the opponent; Rest is great. The most notable use, however, is the constant super armor it grants. When the opponent attempts a laggy KO move, drop into slumber and laugh at their feeble attempts to kill Slowpoke. Slowpoke never dies! Just be aware that the super armor begins to let out at the end.

So get your rest!
[15% Heal + Super Armor]

Side Special ~ Yawn
Slowpoke lets out a deep, exaggerated yawn, creating a projectile the height and width of an upright Slowpoke that moves a little faster than Bowser's dash before disappearing at the end of the screen. This is very laggy for a projectile, coming out a little slow and having bad ending lag, but it's powerful, dealing 8% and forcing the opponent into a sleeping state dependant on their damage percentage, twice as long as Jigglypuff's useless Sing. Midair foes go into a helpless state. It's a high-priority projectile, even beating out a full Charge Shot. In fact, it's Slowpoke's most prioritized move.

This is already useful, but more notably, Slowpoke can use it out of Rest, it being half as laggy this way and sending the opponent into a sleeping state thrice as long as Sing. Obviously Slowpoke can't capitalize on this, but he can set up a slumber party, stopping the opponent from punishing him out of Rest. Of course, there are going to be some hits landed, but not nearly as much, and Slowpoke's given some moderate healing. Overall, this is a useful move and one of Slowpoke's best.
[8% + Sleep]

Up Special ~ Growl
Slowpoke endearingly growls for a second, there being some ending lag. If Slowpoke's hit with an attack in this state, he isn't damaged or knocked away at all... But he suffers from worse ending lag of a little more than half a second. This isn't too crippling, but it enables for a weak move and an easy combo thereafter, making this risky. Against weak attacks, Rest is flat out superior to Growl despite the damage taken, as the ending lag makes the nulled damage moot given how easy Slowpoke is to combo. This shines against stronger moves, which tend to have more ending lag and are used at un-comboable percentages.

But how do you recover with this? You don't. You don't get knocked away in the first place. Growl makes Slowpoke very difficult to kill, even if it's predictable, as a good Slowpoke will rarely miss this. Still, you'll want to watch out for quick KO moves, and this is not amazing given that it's useless if missed.
[Invulnerability]

Down Special ~ Amnesia
Slowpoke forgets where he is, and whatever it is he's doing! Once this move is inputted, Slowpoke leans to the side briefly for about a third of a second of lag. This is useless on its own, but it can be used to cancel any move at all, Slowpoke just getting some extra ending lag from it. This can even stop his momentum when he's sent flying like Game and Watch's Bucket Halt, and stop a dash in an instant! To discourage spamming, Confusion can be used once every fifteen seconds. A mindgamey move, especially useful when trying to score a KO with Headbutt (more on that later).
[No Damage]

S T A N D A R D _ A T T A C K S

Neutral Attack ~ Tackle
Slowpoke lowers his body to the ground, like a salamander-hippopotamus about to pounce, for almost half a second before raising back up. His body is an average priority hitbox dealing 5% with poor set knockback in this state, though if nothing else this is fairly fast for Slowpoke.

What's the use of this? This looks almost exactly like his idle stance. It's highly difficult to tell if Slowpoke is tackling or just messing with you. This makes it a valuable way of cancelling out projectiles and weaker attacks and confusing the opponent, and it's somewhat useful for stopping low-priority approaches. It's also one of Slowpoke's only quick hits, though it's still somewhat punishable if you get too predictable with it. Overall, this isn't his best move, but Tackle is a decent option in most situations.
[5%]

Dash Attack ~ Zen Headbutt
Slowpoke does a lunging motion with his head out of a dash, sort of like Pikachu's Skull Bash. However, he only bounds half a stage builder block, with a good bit more ending lag and bad priority. He only deals 8% with below average knockback as well. Still, this is a moderately useful move if only for being Slowpoke's only half-decent approach.

The real use of this move is moving while asleep. That's right, this is so simple to use, Slowpoke could use it in his Rest! By simply imputting a dash and mashing the A button, Slowpoke actually gets some mobility out of his Rest. This can only carry him a little slower than Jigglypuff's dash used perfectly, but it's his only way of dodging things, and it prevents opponents from dealing dealing damage with projectiles if you try to outprioritize them with this. Slowpoke still can't move much while resting, but this is one of the moves that ensures that Slowpoke isn't totally helpless out of Rest.
[8%]

T I L T _ A T T A C K S

Forward Tilt ~ DoubleKick
Forget DoubleSlap, Slowpoke has his own dual attack! Balancing on a single arm like a breakdancer, Slowpoke swings around with his legs stuck out in a dual kick, similar to Pikachu's Forward Tilt but going all the way around. The effect here is none too shabby, a nice 12% with average knockback that might even KO at exceptionally high percentages... But after swinging all the way around, Slowpoke falls on his side and has to stumble back up, giving this ending lag almost as bad as Lucas's Up Smash.

Forget what I said about Tackle; DoubleKick is Slowpoke's only quick hit. It comes out fast and has a powerful effect, a deadly combination in the hands of Slowpoke. It's great to clear out a little breathing room... if you land it. The hideous ending lag is easy to punish and spells doom for Slowpoke given that he can't recover conventionally if he even has a moderately high attack. This isn't to say that this should be completely forgotten, but this move still remains on the lower end of viable.
[12%]

Up Tilt ~ Water Pulse
Slowpoke idiotically begins to blow a bubble out of his saliva, him continuing to blow it as long as the imput is held. The effect comes in after almost a second of blowing. Slowpoke can partially blow it and finish later, it staying on his mouth as he walks around, but it deflates at half the speed it inflated left idle.

Fully blown, the bubble is a little bigger than Slowpoke and forms a bubble shield around himself. This functions exactly the same as his regular bubble shield, but doesn't shrink unless hit by an attack, at which point it takes double shieldstun. Slowpoke can use the same imput to reinflate it at the same speed, but if inflated too far, it pops, giving Slowpoke some pretty bad ending lag. He can pop it early with a jab input to deal 3% to 7% with flinching knockback depending on size. In any case, it pops automatically after ten seconds. Slowpoke can use this out of Rest.

This is a moderately useful defensive move for Slowpoke. It can't really be pulled out at any time for the full effect, it requiring a bit of thought to be used properly, but it has a nice effect when used properly. He can even inflate his bubble out of a shield and keep alternating to be mostly invincible, pretty useful, though a little pressure to him will end this early. It being usable out of Rest is the icing on the cake. Overall, a versatile move for many situations.
[3% to 7%]

Down Tilt ~ Calm Mind
Slowpoke closes his eyes in concentration for almost a second, a wide smile remaining on his face for five seconds after the startup lag. During this period, Slowpoke's dash is bumped up to a 7, and more notably, it has average priority. Most projectiles and some weaker melee attacks won't even hit him here! Slowpoke shakes his head around once the effect ends, giving this a little ending lag, but it's nothing too punishable. Overall, this is tricky to use properly, but it's moderately useful when it is used properly.
[No Damage]

S M A S H _ A T T A C K S

Forward Smash ~ Headbutt
As he charges, Slowpoke clambers forward with an animation and speed nearly identical to his dash. Hmm... Upon release, Slowpoke launches forward half a Stage Builder Block forward. This looks virtually identical to his Dash Attack, but with the timeframes reversed. This comes out in almost no time at all, but the ending lag is hideous as Slowpoke clambers back up, worse than even Lucas's Up Smash. He's a hitbox dealing 12% to 22% with average to above average knockback. As it sounds, this is a KO move, and a powerful one at that, usually being reliable at around 120%.

Despite its power, this doesn't make for much of a KO move on its own. It can be somewhat predictable, and when predictable Slowpoke's signed a death wish due to the hideous ending lag. You want to mix this up with Zen Headbutt if you want to land it. By moderate percentages opponents won't know if you're building damage with Zen Headbutt or KOing with Headbutt, pretty useful, though of course it's obvious you're using Headbutt by higher percentages. If you're unpredictable with this, it can take Slowpoke far.
[12% to 22%]

Up Smash ~ Body Slam
Slowpoke leaps up the distance of a regular jump fully charged to half of Super Dedede Jump fully charged, halts in midair for a moment, than slams downwards in a stall-then-fall. During the charge the direction can be aimed with the Control Stick, Slowpoke tilting himself for the correct trajectory, for up to a 75° angle to either side. As he ascends, Slowpoke deals 4% to 8% with set knockback that sets up for the next hitbox, while suspended in midair, he deals 6% to 12% with a powerful meteor smash, and during the stall-then-fall, he deals 7% to 14% with high to great horizontal knockback. This deals a massive 34% fully charged, and it's almost assured to KO at even moderate percentages, but there's significant lag on both ends so it isn't particularly useful unless you can Slowcide with it.

No, the real use of this move is moving while asleep. Like Zen Headbutt, Slowpoke can use this while sleeping. It gives Slowpoke an actual means of KOing, but it's still as laggy as ever. Rather, this is a great way of moving across the stage in any direction, though it isn't always superior to Zen Headbutt due to the predictability and possibility of SDing.
[4% to 8% + 6% to 12% + 7% to 14%]

Down Smash ~ Slack Off
Slowpoke lies on his side as he charges, and once he releases the charge, he does... nothing? Mindgames, maybe? Instead, three to seven seconds later depending on the charge time, Slowpoke dozes off. This works exactly the same as Rest, but buffed. He enters and exits it with nearly no lag, never losing his invincibility frames, and he heals his health 1.5X as fast for up to a good 22%.

This isn't simply a massively buffed version of Rest, however. Slack Off is insanely predictable against a competent foe. The charge is rather obvious, and it's easy to estimate when Slowpoke is going to doze off. By the time he falls asleep, the opponent could very well be right next to Slowpoke, just where he can't get them away out of Rest, and it's sure that the damage gained will exceed the damage healed. Still, by being unpredictable with this, Slack Off can be just as useful as Rest.

Note that Slack Off counts as Rest for the five second charge, so don't think you can use Rest and wake up with an immediate Slack Off or vice versa.
[22% Healed]

A E R I A L _ A T T A C K S

Neutral Aerial ~ Ball Up
Slowpoke rolls up into a ball a little bigger than Squirtle and remains in it until hitting the ground or grabbing a ledge, him being able to direct himself with 2/10 aerial DI. Contact with him deals 8% with average set knockback depending on what part of his body he hit with. For example, hitting him at the bottom causes downwards knockback. There's a bit of ending lag when he lands, but it's not as bad as most stall-then-falls, thank God. This isn't exactly a versatile move, but it isn't too difficult to score a cheap KO with this while the opponent is offstage and notably it sweetspots ledges. Probably Slowpoke's best aerial.
[8%]

Forward Aerial ~ Chomp
Slowpoke rears back his head for startup lag comparable to Mario's Forward Smash, then slams his head forward, biting the opponent with a grab hitbox if he connects. From here controls work similarly to Wario's Chomp. By mashing the A button Slowpoke can bite down for 2% at the speed of a quick pummel. The B button is the same animation for no damage... why would you want to do that? As a grab, this can be escaped by button mashing. Slowpoke automatically hurls them down after two seconds of biting, dealing 6% with a powerful meteor smash.

This is a great damage dealer, especially for Slowpoke, but there's significant risk to it. If Slowpoke reaches the ground while chomping an opponent, they automatically escape as Slowpoke flips over, giving ending lag of almost a second where the opponent can easily turn the tables on the poor guy. You obviously want them released by the time Slowpoke reaches the ground. Each press of the B button sets their button mashing forward by a quarter second, so you can force them to approach if they refuse to button mash. You won't really build much damage this way, so this is a strategic move. It's best to use this mainly at low percentages when the opponent can easily escape, though at higher percentages this is a cheap KO due to the meteor smash.
[Variable Damage + 6%]

Backward Aerial ~ Iron Tail
Slowpoke's long tail reaches towards his face before slamming backwards, it turning a vaguely silver color, dealing 12% with average knockback. This has good priority, but it's nothing special. This has a powerful effect, but it has nearly a second of startup lag, so it's effectively useless... but good ol' Slowpoke can hold in the move by holding the A button. He can continue moving before releasing the move now, making this into a decent approach, and potential KO move at exceptionally high percentages. This, along with Zen Headbutt, is Slowpoke's only viable way of approaching.
[12%]

Up Aerial ~ Disable
Slowpoke tilts his head upwards ominously, as his eyes flash white. This has a very narrow hitbox, and there's some lag on both ends (though it isn't crippling), but it deals 11% and forces the opponent into a helpless state if they're hit. This has a variety of uses. You could use it to cancel stall-then-falls (as if you would be hit by them...), set up for a Down Aerial meteor smash, squeeze in some Rest... it's really only limited to your creativity here. This rivals Ball Up for Slowpoke's best aerial, though unfortunately the narrow hitbox and lag prevents this from being amazing.
[11% + Helpless]

Down Aerial ~ Tail Fishing
Slowpokes love to fish with their tails. Once this move is imputted, Slowpoke sticks his tail downwards and swirls it around for almost a second. This is somewhat punishable if missed, but it has a nice effect, dealing multiple hits for up to 15% and being a weak meteor smash at the end for another 5%, though it only has potential for a cheap KO on opponents with horrible recoveries like Bowser or Bear Hugger. One of Slowpoke's few damage dealers.
[15% + 5%]

G R A B B I N G _ A T T A C K S

Grab ~ Tail Whip
Slowpoke whips his tail forward, grabbing the opponent. This has pretty nice range like a tether grab though it can't be used as a tether recovery. Unfortunately, this is quite laggy so it's borderline unusable... but out of Rest, this has halved lag, making it much more useful. He can use his entire throw game out of Rest as well. Unfortunately, he won't heal while grabbing out of Rest.
[No Damage]

Pummel ~ Wrap
Slowpoke tightens his grip on the opponent. Deals only 1%, but isn't quite spammable... but like his grab, this is half as laggy out of Rest, making it ridiculously spammable.
[1%]

Forward Throw ~ Snot Bubble
A bubble of snot blossoms out of Slowpoke's nose and pops on the opponent, dealing 5% with below average set knockback forward. Normally this just releases the opponent with a little more damage, but out of Rest, due to his faster grab, it's possible to use this as a chaingrab! This could theoretically continue infinitely, but of course Slowpoke automatically leaves Rest after five seconds and it's tricky to grab the opponent out of Rest given the tricky movement.
[5%]

Back Throw ~ Discharge
Slowpoke simply balances the opponent on his tail for a moment before hurling them back, dealing them 7% with average set knockback. This is usually nothing too special, but used near the end of Rest this is good for clearing out some space, and it's a nice way to end a chaingrab. This is also a potential KO move on walk-off stages.
[7%]

Up Throw ~ Headbutt
Slowpoke simply drops the opponent onto his head like Dedede's Up Throw, dealing 7% with above average set knockback. While awake this is standard usage really, but out of sleep this is great for clearing the opponent away so Slowpoke can safely sleep and heal, as it keeps the opponent away for a good bit. This won't ever KO, however.
[7%]

Down Throw ~ Sleep Walk
Slowpoke forces the opponent onto his back, and gains the ability to walk around freely at half the speed of his dash. This also deals 5%, but it really doesn't matter... opponents can button mash out of this, but it's twice as difficult as a grab. Slowpoke can use this as a Slowcide, but him being on the bottom, he'll always die first, screwing him over if he only had one stock left. This is better used to find a more opportune position for a throw.
[5%]

F I N A L _ S M A S H _ ~ _ T H E _ C H O I C E

In Pokémon, trainers can choose between the Rare Candy and the King's Rock to evolve Slowpoke to either Slowbro or Slowking. Once Slowpoke unleashes his Final Smash, a Rare Candy and King's Rock appear above Slowpoke's head. He can choose one of them with a cursor to evolve himself into a buffed state of either Slowbro or Slowking. Slowpoke can stay in this state indefinitely (he loves to stall!), but there's no point in it, as the timer halts as he chooses.


Slowbro isn't any more powerful than Slowpoke. Rather, he's lazier. He's an even better staller than Slowpoke, him healing health much faster from Rest and the like. His effect won't strike fear into the opponent's heart, him being a slow burner, but he's still a plenty viable choice for Slowpoke's evolution. Even at 100%, it isn't uncommon for Slowpoke to be fully healed after the Final Smash.

  • In Rest, Slowbro heals health twice as fast for a maximum of 30%. On top of this, he doesn't just have super armor out of this, he's fully invincible! Unfortunately, he still has to wait five seconds before using it again.
  • Yawn causes a sleeping effect a massive four times longer than Sing, making it an amazing way of putting the opponent out of commision.
  • Growl now has much less ending lag, though it's still present.
  • Confusion can be used without any charging at all.
  • Water Pulse inflates twice as fast and shrinks half as slow.
  • Calm Mind has halved startup lag.
  • Just like Rest, the recovery from Slack Off is doubled for up to 44% healing! Unfortunately, it's as predictable as ever.


Slowking isn't a staller anymore. He's a ridiculous powerhouse. Well, he still stalls, but the almighty combination of stalling and quick and easy KOing makes Slowking a force to be reckoned with.

  • Zen Headbutt and Headbutt now have the exact same animation, both having no lag whatsoever.
  • Body Slam now has halved lag.
  • Ball Up can be entered and exited at will.
  • Chomp has no startup lag, deals 5% for every bite and doesn't suffer from landing lag when it lands early.
  • Iron Tail can still be held, but it has almost zero startup lag now.
  • Tail Fishing does double damage and knockback, being a double threat as damage-dealer and KO move.
  • His grab is still doubled in speed out of Rest, but now it has former Rest-level speed while awake, making it truly insane out of Rest.
  • Due to Slowking's faster grab, Snot Bubble can chaingrab infinitely.
  • Back Throw and Up Throw do double knockback that's no longer set, making them amazing KO moves.
  • Down Throw moves twice as fast.

Slowbro and Slowking are both fully vulnerable to damage and knockback in this state. This Final Smash ends after 15 seconds or if Slowbro or Slowking are KOed (yeah, good luck with that one).

P L A Y S T Y L E

You've chosen Slowpoke? You're in for one interesting fight. Slowpoke is not a powerful character at all. He can't dish out the damage, nor can he KO all too well. He isn't a speed demon or a projectile spammer. No, playing Slowpoke is all about stalling. Slowpoke's an insane staller, and if he stalls enough he has plenty of time to deal damage and KO. With Slowpoke one must play at their own pace, which is a slow one.

So the first part about Slowpoke is stalling. If you can't stall, you really can't do anything else, so learning how Slowpoke stalls is quite essential. There are quite a few moves one must master the use of for stalling. First and foremost is Rest. Rest is key. Ideally, Slowpoke wants to be using Rest whenever he can. Invincibility frames, healing and even a couple of means of defense, Rest not only extends the match but can grant Slowpoke some easy healing if he defends himself enough. Throwing out Rest whenever you can makes Slowpoke highly difficult to KO.

While Slowpoke's other stallers don't reach the utility and versatility of Rest, they're vital to Slowpoke nonetheless. First and foremost is Down Smash, Slack Off. This could arguably be as useful as Rest. It's a highly buffed version that grants some ridiculous healing, marred only by its predictability- which is admittedly a pretty bad quality to it, but Slack Off is a ridiculously useful staller nonetheless. Use it often and use it well.

Beyond that, Slowpoke has some cool stallers. These are Side Special, Yawn, Up Special, Growl, Down Special, Amnesia, Neutral Attack, Tackle and Dash Attack, Zen Headbutt. That's quite a few, isn't it? Let's start from the top. Yawn is probably the third most useful staller, putting the opponent into a state of slumber for punishment- but Slowpoke is bad at punishment. It's better off to set up a slumber party, or rather let Slowpoke sleep himself. Up Special is fairly wonky as a recovery, but it works nonetheless. While it doesn't work so well against quick KOers, Growl stops Slowpoke from ever going offstage in the first place, which is especially infuriating with difficult-to-land KO moves like DK's Giant Punch. Still, Slowpoke can still stop himself from flying away when all else fails with Down Special. Don't ask how, but Amnesia allows Slowpoke to forget that he's taking knockback. Still, you shouldn't have to use it in the first place and save the charge for something else, like cancelling an attack or dash for wonky mindgames. Neutral Attack is probably the least useful out of all of them, but you want to use it occasionally if only for the sake of unpredictability. Dash Attack isn't very useful at all as an attack, but it finds a niche as a quick and easy way to move across the stage out of Rest, no strings attached.

The biggest mistake Slowpoke players make is trying to nullify all damage taken while stalling. It isn't the end of the world if Slowpoke takes a few hits during Rest or Slack Off. You're already winding down the clock, taking lessened damage and healing yourself so that the damage taken is rendered moot. Instead, what Slowpoke should really worry about is managing to damage deal and KO as much as possible before he needs to stall.

While Slowpoke can't damage deal all too well, considering that he can heal and stall the match he can see his opponent's damage going higher than his own. While damage dealing, Slowpoke's playstyle focuses more on landing quick and nippy individual hits and then healing with Rest or Slack Off. Down Aerial, Tail Fishing, is Slowpoke's only real good damage dealer, and it being one move and not amazing at it Tail Fishing can't be used exclusively. While damage dealing, any move that does an above average amount of damage works as long as you're sure to heal afterwards.

Still, while damage dealing it's best to try to be KOing at the same time. This is limited to cheap KOs, but Slowpoke has a good number of these, namely Neutral Aerial, Ball Up, Forward Aerial, Chomp, Up Aerial, Disable, Down Aerial, Tail Fishing and Down Throw, Sleep Walk. Notice that all but one of these are aerials, as they need to be used close to blast zones. Ball Up is generally the most powerful, it having a good chance of KOing. Still, it's a suicide KO unless you're near a ledge to cancel with, preventing this from KOing significantly earlier than his other aerials. Forward Aerial can be used for Slowcide, but it can't be used for safe KOing without a significantly high percentage. Up Aerial is probably the least useful for this, but it finds a niche against poor recoveries regardless. Down Aerial doubles as a damage dealer despite being easy to DI out of. Finally, Sleep Walk is all but assured at even a moderate percentage, but remember to only use it when Slowpoke's a stock ahead.

If Slowpoke -does- make it to a KOable percentage, his cheap KO moves still work but you're better off using Forward Smash, Headbutt. It's both predictable and punishable, an unfortunate combination, but by mixing it up with Zen Headbutt this is largely alleviated. It still is hard to land properly, but once it does, hoo boy! Headbutt's a great KO move, when you can land it, that is.

If you knock the opponent offstage, edgeguarding generally isn't worth it. You're putting Slowpoke at risk. Instead, you're better off taking a nap. This gives much more of a stock lead than any weak aerial ever could. Still, edgeguarding isn't totally out of the question if you want a cheap KO, probably with Ball Up or Tail Fishing, but the answer is generally a no.

All in all, Slowpoke isn't a character for those who want to play fair, him being a creature of cheap KOs, turnabouts and rallying victories. He does this all with free healing, super armor and not being able to be knocked away, enough for any casual to throw down their controller and proclaim that Brawl is too hard. Slowpoke finds himself a cushy spot in mid-high tier, but his unique playstyle may scare off most players. If you find yourself to be a natural Slowpoke, pat yourself on the back. You could go far with such an obscure character.

M A T C H U P S

Kirby ~ 65/45, Slowpoke's Favor
The main thing Kirby has going for him in this matchup is his Kirby Hat. Not only is it absolutely adorable, it gives Kirby a quick counter to Slowpoke's stalling- stalling a little himself, and giving him some easy healing to counteract his weight. Still, Slowpoke comes out on top with stalling due to having so many more tools for it like Down Smash and his ability to knock Kirby right out of it while sleeping himself. Beyond this Kirby has an obvious disadvantage. While he can damage deal on Slowpoke just fine, his lack of solid KO moves accentuates Slowpoke's stalling. This isn't a strong advantage, but this is surely one of Kirby's worse matchups.

King Dedede ~ 60/40, King Dedede's Favor
Whatever the hell he's the king of, at first glance King Dedede has an obvious disadvantage here. His huge arse can be dealt damage on fairly easily, and his generally slow speed means that he can't retaliate. The same speed also means that the king can't really knock Slowpoke out of Rest all too easily, though his range mostly makes up for this. Despite being a heaviweight, Dedede can't really KO Slowpoke all too well, as his slow KO moves are easy to counter with Growl.

But Dedede has one thing that makes up for this: his chaingrab.

While he's active Slowpoke isn't any more vulnerable to the chaingrab than normal, but while he's asleep Dedede's almighty standing grab outranges nearly all of Slowpoke's options. He doesn't even need to put himself at risk. Using Rest is practically inviting Dedede to come up and deathgrab. Slowpoke still has the advantages from before, but the chaingrab is enough to give Dedede a significant advantage.

Ice Climbers ~ 80/20, Ice Climbers' Favor
The Ice Climbers are effectively a superior Dedede for this matchup. Dedede was held back by his lack of speed and countering to Rest outside of his chaingrab. The Ice Climbers have no such trouble. If they want to fight directly, their moves outrange and outprioritize virtually all of Slowpoke's options. They even can build the damage without even putting themselves at risk with Ice Block and Blizzard. Blizzard in particular outprioritizes everything on Slowpoke. Finally, they only need a single grab for the chainrape. They have difficulty getting it ordinarily but once again Rest is an invitation for it. Choose a different character for this matchup if you have half a brain.

Marth ~ 60/40, Slowpoke's Favor
Marth's lack of any variety in his attacks comes back to bite him in his feminine arse here. All of Marth's attacks are basically identical with insignificant variations, and so they can all be countered in the same way: Rest. Marth's moves require some spacing to work properly, and with Zen Headbutt and Body Slam can clear away very, very easily so that his moves don't work properly. Still, Marth doesn't have much trouble dealing damage and KOing on Slowpoke, even though Slowpoke can counteract that damage, so this isn't total ****.

Ike ~ 75/25, Slowpoke's Favor
Uh-oh. Ike pretty much has all of Dedede's disadvantages, and no chaingrab. Ike has a very difficult time dealing damage on Slowpoke during Rest, as Slowpoke can just move away during his ridiculous lag, and he really can't land many hits on Slowpoke at all due to his retreatist playstyle. Even if he can build up the damage, he'll never KO a competent Slowpoke, Growl being perfect for his laggy KO moves. Ike's matchups are a roller coaster ride, good and bad, and this is definitely one of the bad ones.

Snorlax ~ 60/40, Snorlax's Favor
This is a pretty simple matchup; Snorlax is flat out better than Slowpoke. Both of them need to go to sleep eventually, and Snorlax has the advantage either way. When the drowsy Pokemon are awake, Slowpoke finds it difficult to land an attack on Snorlax before he goes back to sleep, him being exposed to some highly powerful attacks. Asleep, Snorlax has more mobility and power than Slowpoke, and Sleep Talk, while unreliable, gives him full access to his movepool. His Yawn in particular is rendered moot as Snorlax's is much better prioritized. Overall, Snorlax's advantages in this matchup are slight, but unavoidable, and Slowpoke doesn't have any of his own, giving the bigger Pokémon the bigger chance at victory.

Slaking ~ 80/20, Slaking's Favor
Slowpoke has a laughably bad matchup with Slaking. When Slowpoke tries to land a quick attack on Slaking before going back to sleep, he's really exposing himself to a scary combo, Slaking generally outprioritizing all of Slowpoke's options. Crush Claw is particularly scary. Slaking has to go to sleep quickly, and he can't move or attack out of Slack Off, but does it really matter? He's totally invincible, all of Slowpoke's pathetic moves bouncing right off of him. One of Slowpoke's worse matchups without a doubt.

Mr. Sandman ~ 70/30, Mr. Sandman's Favor
Mr. Sandman's a comboer: Slowpoke's worst nightmare. If he ever even thinks about approaching him, let alone hitting him, Mr. Sandman can combo him to hell and back. The scariest part, however, is that Sandman can stack knockback on Slowpoke as he sleeps. Whenever Slowpoke tries to heal with Rest or Slack Off, Sandman achieves an easy combo and nullfies all damage healed. Slowpoke is not going to hold out for long at all in this matchup, which spells an early death for him. Still, Mr. Sandman's size and lag holds him back somewhat like Dedede, so not all is lost.

Anne Elmtod ~ 65/35, Anne's Favor
What kills Slowpoke in the end here is his sheer predictability. He's going to need to rely upon a select few moves for his playstyle. In particular Slowpoke is going to need to return to Rest and Slack Off again and again and again... Due to this, Anne can easily play with Slowpoke with her pictures. Simply taking a picture of any move, Anne can mess with Slowpoke. Force him to use Rest with Repeat Performance to take a picture, or force a Forward Smash for easy punishment. Use Critical Analysis to super armor a bunch of his moves, which is scary considering how long he'll take to use them. This is the only advantage in the matchup, but it's a large one, and Anne definitely has the advantage.

TAC ~ 70/30, Slowpoke's Favor
You can't have your cake and eat it too. Slowpoke's playstyle is very much reliant on individual moves, and TAC has one hell of a difficult time getting all the proper moves. Special Steal is just about as far as he'll get with an individual steal. In the meantime, Slowpoke can easily poke at TAC without fear of any attacks hitting him, and easily dodging his pathetic attempts at thievery with Zen Headbutt and Body Slam. Once he gets all of his important moves TAC can be on par with Slowpoke, but given his excellent stalling abilities this won't be very soon.

E X T R A S

Up Taunt
Slowpoke lets out a long and drawn-out yawn. Great for when the opponent isn't providing much challenge.

Side Taunt
Slowpoke lies on the ground, tossing and turning for a moment before standing up, looking sad. Slowpoke gets insomnia! Poor guy! This has a longer duration than the average taunt.

Down Taunt
Slowpoke lets out his cry, his yawn or moan or whatever, from the Pokemon games.

Up Victory Pose
Slowpoke simply sleeps at the victory screen. No way to celebrate victory like a nice a refreshing nap.

Side Victory Pose
Slowpoke sleeps, but now he's actually closing his eyes and pretending to sleep. Way different from the Up Victory Pose, I promise.

Down Victory Pose
In a dramatically unique victory pose, Slowpoke sleeps, but he's in his REM stage, so this is REALLY unique. Seriously.

Loss Pose
Slowpoke sleeps, but he's congratulating the winner in his sleep. He swears.

Codec
Snake: Colonel, what's this newt-thing doing here?
Colonel: Snake, that's Slowpoke. He's a Pokemon who loves to sleep, and spends most of his life sleeping.
Snake: Wish I could do that...
Colonel: Slowpoke sleeps in all situations. I'm willing to bet that he'll go to sleep in this battle too soon.
Snake: Colonel! He just fell asleep!
Colonel: Ah, fascinating...
Snake: I'll go attack him while he's defenseless!
Colonel: Snake? Snake? SNAAAAAAAAKE!
 

Junahu

Smash Ace
Joined
Nov 15, 2005
Messages
899
Location
Shropshire Slasher
Getting that monkey off my back...

*massive sulk*

TAC: This is horribly controversial, which by default makes it a historical landmark achievement. You take a concept that appears destined for the jokeset pile, and convince the reader that it's worth paying attention to. You even frame the attacks in a way that implies it's a joke set (with the constant repetition of what each attack does, even though each attack is muchly the same) and still manage to turn it around.
I really can't view this as a moveset. Movesets are limited and stifling, constantly bound by intrinsic rules we don't even really understand. Tac takes the reader away from that limitation, if only for a short while.
The concept itself is impossible to fault. A character that grows through the match and becomes a ditto of the opponent, albeit with better nominal stats and lacking any overarching special mechanics. It begins as such an innocent idea, which gradually shows its true colours as a viable competitive character.

The repetition does make it hard to find the exceptions in the attacks, but there is little lost through that. Knowing the up-tilt aims up and the up-smash aims foreward only adds hints of authenticity, rather than vital points of interest.
 

Jimnymebob

Smash Champion
Joined
Sep 26, 2008
Messages
2,020
NNID
Jimnymebob
You missed out Dr.Wily's match-up!

*cries*

And I have a cake bar with creamy cinder toffee in it :(.
 

darth meanie

Smash Journeyman
Joined
Jun 6, 2008
Messages
452
Because I'm a Comment *****...

Wheel Gator was a good read. I like how you made the shotgun more powerful close up just like a real one. The Up Air was also pretty clever.

You knew that was coming. Anyways, nice set. Building an entire set around a single KO move that KOs at 60% sounds insane, but you make a pretty good job of making it work. Grabs were nice, and the Neutral Special was a sweet idea. One complaint I would have is that for all the focus on eating projectiles, there's no way for Wheel Gator to emulate the effect on his own. It doesn't add much to his playstyle either, making it seem a rather shallow effect.

I feel that this was good, but didn't mesh together as well as the playstyle required. A little more time would have done this set good. That doesn't change the fact that it was...

(H) a good read.

Hector is a character that takes a ridiculous mechanic and makes it work. And really, you pull a lot of mileage out of this idea. The moves were all solid, although I couldn't always tell how long and when you got super armor all the time with your wonderfully to the point writing style in Hector. Your match-ups weren't up to par though, and the weak to magic factor, while in character, doesn't transfer into Brawl particularly well.

Throws were absolutely brilliant, but the Down-throw seemed rather redundant. Also, how the hell do these throws mean death for Bowser? Speaking of which, making his battle spirit less effective on baddies and draw in monsters not only hurt his playstyle, but seemed rather random and unintuitive.

Cloud of Darkness was over the top and completely awesome. You put a whole lot of ideas into this set and a whole lot of playstyle, so good job there. I feel that while you had a lot of interesting mechanical ideas, you didn't present them particularly well, the aerials seemed a little tired to me, especially coming from you. Also, the growth attack seemed ridiculously unintuitive by forcing you to rotate tentacles to work it, I'm sure you could have made it simpler.

Vortexes were awesome, and I love all the interactions you put into them. The idea of forcing your opponent to approach and retreat is a fantastic one that I plan to shamelessly steal and improve upon in a later set. You made a boss in Brawl playable, so good job.

Anne was an interesting set. Much more generic, if sadistic, in her attacks, made more so by that organization. It was a bold step, but the presentation, ironically, made her harder to understand and more of an eyesore than simple words. It was an experiment though, and you deserve props for doing something so outrageous. Mechanically she was fine, although the photography didn't seem to as much support her playstyle as it was supported by her playstyle, if you understand what I mean. Also, what an underwhelming Final Smash. You can do better than that, Junahu.

TAC has a Daroach match-up. What the hell.

Slowpoke was a really fun read, and I continue to enjoy your sets more and more Wizzerd. I feel that Slowpoke made a few mistakes though. First of all, Rest is good. Really good. Way too good. Not only do you heal, have super armor, and half knockback, but you still have access to several of your important moves. Not only that, but despite being asleep, you attack TWICE as fast as you do normally. The fact that you made a better clone of it in Slack Off and then played it off as not that good was just ridiculous too. With half damage and super armor, there's no reason not to use Slack Off.

I was disappointed by the number of moves that have a "you can only do this every few moments" kind of balance. Seriously, you could have come up with something less arbitrary that doesn't have such a hard limit, like really bad move decay or something. In short, I loved the ideas. The execution... not so much.
 

Wizzerd

Smash Ace
Joined
Feb 24, 2009
Messages
929
darth meanie said:
Slowpoke was a really fun read, and I continue to enjoy your sets more and more Wizzerd. I feel that Slowpoke made a few mistakes though. First of all, Rest is good. Really good. Way too good. Not only do you heal, have super armor, and half knockback, but you still have access to several of your important moves. Not only that, but despite being asleep, you attack TWICE as fast as you do normally. The fact that you made a better clone of it in Slack Off and then played it off as not that good was just ridiculous too. With half damage and super armor, there's no reason not to use Slack Off.

I was disappointed by the number of moves that have a "you can only do this every few moments" kind of balance. Seriously, you could have come up with something less arbitrary that doesn't have such a hard limit, like really bad move decay or something. In short, I loved the ideas. The execution... not so much.
I'm glad you liked it. Slowpoke was made in a day, and he's not meant to be my strongest entry. I don't expect him to place. He's meant to be a fun little experiment. I'm really testing the waters to see if I'll make more Pokesets in the future. Also, Skyler told me that Rest was underpowered, so I'm not going to do anything to it. :embarrass

(There's a new page for anyone who wants it)
 

KingK.Rool

Smash Lord
Joined
Nov 26, 2005
Messages
1,810
(There's a new page for anyone who wants it)
No there isn't. ;)

*massive sulk*

TAC: This is horribly controversial, which by default makes it a historical landmark achievement. You take a concept that appears destined for the jokeset pile, and convince the reader that it's worth paying attention to. You even frame the attacks in a way that implies it's a joke set (with the constant repetition of what each attack does, even though each attack is muchly the same) and still manage to turn it around.
I really can't view this as a moveset. Movesets are limited and stifling, constantly bound by intrinsic rules we don't even really understand. Tac takes the reader away from that limitation, if only for a short while.
The concept itself is impossible to fault. A character that grows through the match and becomes a ditto of the opponent, albeit with better nominal stats and lacking any overarching special mechanics. It begins as such an innocent idea, which gradually shows its true colours as a viable competitive character.

The repetition does make it hard to find the exceptions in the attacks, but there is little lost through that. Knowing the up-tilt aims up and the up-smash aims foreward only adds hints of authenticity, rather than vital points of interest.
Very nice comment, Junahu, and I think it may even be the first comment you've ever given me that broaches no complaints. Hell, that's rare enough for ANY set, from you.

And just so everybody knows, Junahu blackmailed me into putting TAC back up (I was going to add some more match-ups, then repost) by taking a BBCode-less version and manually, going off his memory and a source code, recreating his organization faultlessly. What a lunatic. :bee:

TAC has a Daroach match-up. What the hell.
:mad:

Well, yeah, I was going from the start of the thread. I AM STILL ADDING MATCH-UPS (but selectively now). Check back, because I'll definitely be adding most of your sets (well, maybe not Abomasnow).
 

Dido

Smash Journeyman
Joined
Jul 6, 2009
Messages
258
Location
..................
@ Wizzerd. I like it. And you made every move from a pokemon game (I mean alot) =D

And Can You make others like Tauros, Scizor?
 

Jimnymebob

Smash Champion
Joined
Sep 26, 2008
Messages
2,020
NNID
Jimnymebob
"My Swimming Is World Class!"

Poliwrath


Introduction

Poliwrath is a tadpole Pokemon, and one of Poliwhirls two evolutions; the other being Politoed. Unlike Politoed, Poliwrath is more like Poliwhirl, even sharing some of the same attacks. The thing that Poliwrath does gain however is that he becomes a figthing type, so this makes him more powerful, both on land and in water. Poliwrath is also more aggressive, and won't back down from a fight, but if it does it's strong legs will allow it to run on water temporarily. This Pokemon is most associated with his attack Belly Drum, which sacrifices it's health in order to boost its attack, and this makes him a great, albeit vulnerable, sweeper.

Entry

Poliwrath drops onto the stage and slams his fist into the ground, causing water to spout from it.

Base Stats

Strength= 8.5~~~10
Walk Speed= 3~~~10
Dash Speed= 4.5~~~10
Launch Power= 7~~~10
Jump= 6~~~10
Fall Speed= 9~~~10
Size= 6.5~~~10
Weight= 8~~~10
Crouch= 1.5~~~10

Abilities

Water Absorb


Poliwrath has the fantastic ability Water Absorb- something that only a few water Pokemon have, most notably Vaporeon. With this abillity Poliwrath restores health everytime he touches water. All water based projectiles and attacks will heal him by 1%, and deal no knockback, but if he stays in a pool of water, or the sea on Toon Links stage for example, he will restore 2% damage each second, until he leaves the water. Poliwrath can't stay underneath water, so he can still drown, but it is a great safehaven for him.

Specials

Neutral Special= Hydro Pump


The swirl on Poliwrath's body begins to glow a bright aqua colour, and he shoots out a thick blob of water that travels in an arch, similar to the way Yoshi throws his eggs. The blob of water is around the size of a Bob-omb, and depending on whether you tilt the control stick back or forth, Poliwrath will shoot the water blob in different arches. The water blob deals 14% damage, and travels fairly slowly. The blob has high priority, but is easily avoidable, and it deals medium knockback. There is considerable lag at the start, but the ending lag is tiny.

When the blob of water hits the gorund, or an opponent, it spreads into lots of other small water droplets, that have a splash damage effect around it- acting similar to a cluster bomb. Anyone who touches the water droplets will recieve 1% damage per droplet, but most of the time you'll get hit by 3 or 4 of these. Due to the fact that Poliwrath can move as soon as he shoots out the blob means that he can run to where it lands, and heal himself through the water droplets.
~~~1%-14%~~~

Side Special= Dynamic Punch


Poliwrath draws his arm backwards, and it gains an aqua coloured aura around it; the start of this move is quite laggy. All of a sudden Poliwrath punches forwards quite slowly, and if he hits his opponent he will deal 21% damage and no knockback. The hitbox of this attack is Poliwrath's glowing fist, and it doesn't have that much range.

If Poliwrath connects with his opponent, 3 yellow question marks will appear above the head of whoever he punched, and for 5 seconds all their controls will be muddled up. There is no set pattern to what button commands will change- one time it could change your shield to jump, others it could set your B button to crouch. Whilst your opponent is confused, you can use this time to deal damage, or if there is any water around, heal yourself.
~~~21%~~~
~~~42%~~~

Down Special= Belly Drum


Belly Drum is one of the key parts of Poliwrath's moveset, and if possible you should set it up at the start of the match when your damage is low. It takes 3 seconds to set up, but you can't be hit out of the move, but you can still take damage if someone comes up and hits you. Poliwrath stands proud, and begins to slam his belly with his fists. This move has no offensive properties, but once Poliwrath has stopped Belly Drumming he will have a blood red glow around him, and he will have recieved whatever amount of damage he was at whilst using the move plus an extra 50% damage.

Simply put, if Poliwrath Belly Drums at 0%, he will end up with 50% once he has stopped drumming. If he Belly Drums at 75% however he will end up with 125% (which is 50+75).

The blood red glow isn't for show however, as all attacks marked with
will double their damage. For example, instead of the attack dealing 13% it will deal 26%, but knockback will remain the same. Poliwrath may be frail when it comes to recovery and jumping abilities, so increasing your damage by that much from the get go is risky, but the damage output is incredible. Belly Drum damage will be shown in blood red at the bottom of each attack it is usable on.

Up Special= Body Slam


Poliwrath leaps up into the air, and forward slightly, before positioning his body horizontally and slamming down onto his belly. The lag on both ends of this move are decent, but the end lag is slightly larger. When he lands on his opponent, he will deal 11% damage, and medium knockback. This will act as a meteor smash when your opponent is in the air, but it will send you into helpless once you do. Poliwrath can grab the ledge when he does this move, and he can use it to knock off ledge grabbers. The move has high priority, and the range is his body, and the small shockwave that appears when he lands.

When he lands, a shockwave appears around him, which deals 4% damage, and if Poliwrath lands on his opponent directly on his belly he will bury them in the ground for a bit.
~~~4%-11%~~~
~~~8%-22%~~~

Situationals

Jab= Hypnosis


The swirl on Poliwrath's belly becomes rainbow coloured, and it begins spinning around slowly, and his eyes turn the aqua colour that has been mentioned before. The swirling on his belly releases a rainbow coloured aura that travels out in front of him slightly, and Poliwrath will keep in this position until the button is released. There is a bit of starting lag, but no ending lag, Poliwrath can end his trance state as soon as he wants to. When an opponent walks into the beam of light, and is facing his belly they will fall into a sleep, which becomes more deep the higher their percentage is. This move deals no damage or knockback.

Running Attack= Submission


Poliwrath dives forwards and slides on the ground, arms stretched outwards, but if he connects with an opponent he will grab them, and roll once before slamming them to the ground, knocking them back slighlty, and dealing 7% damage. The starting lag is small, but there is medium end lag, as you get 5% recoil from the attack, and are stunned on the ground slightly. The hitbox is his hands, and he stretches his arms out in front of him.
~~~7%~~~
~~~14%~~~

Ledge Climb Under 100%= Slam


Poliwrath climbs onto the ledge, does a small hop, and slams down onto the ground, creating a small shockwave the width of Pikachu in fron of him, that deals 2% damage. The move has short starting lag, but medium high ending lag, so it is a pretty poor attack. The hitbox is the shockwave.
~~~2%~~~
~~~4%~~~

Ledge Climb Over 100%= Water Gun


Poliwrath climbs onto the ledge and shoots out a thin blue beam of water from his belly. This deals no damage, but knocks his opponents back slightly, giving him room to get back on the ledge. The move isn't laggy, and it can help to get the pressure of yourself when facing characters who are good edge guarders.

Get Up Attack= Flail


Poliwrath flops around on the floor for a little bit- slamming his feet and arms against the ground- dealing 6% damage and low knockback. This move hits both sides of Poliwrath, and has high priority. This is a good move for spacing yourself.
~~~6%~~~
~~~12%~~~

Tilts

Side Tilt= BubbleBeam


Poliwrath puts one hand out, and a small jetstream of bubbles pop out- the bubbles stretching out the length of Marth's sword in front of him. The BubbleBeam deal 6% damage, and deals no knockback. It has quite good range but low priority, as opponents can punch the bubbles to pop them. This move isn't laggy at all, so you can keep the BubbleBeam going, then go to another move quickly.

The bubbles slow down your opponent, and the more you send at them, the slower they will move through. You can use this to lay off some pressure from yourself. The BubbleBeam isn't a prjectile, so it can't be reflected.
~~~6%~~~

Up Tilt= Mind Reader


When Poliwrath is about to get hit by a move, use Mind Reader. This creates a lilac barrier around him, similar to what the shields on Smash Bros. are like, but more transparent. The barrier will smash as soon as you are hit, and it won't stay there for long, so make sure you use it just before you are hit. If it smashes, you will receive the damage and knockback that was dealt against you. This part of the attack has high priority, but is virtually lag free on both ends.

Once you have been attacked, as long as you or your opponent didn't lose a stock, use Mind Reader again and Poliwrath will run towards his opponent with his arms flailing wildly, and home in on them. When he gets to them, he will deal the same damage and knockback that was dealt towards him, and will suffer moderate ending lag.

Down Tilt= Sweat


Poliwrath shakes his body to cover it in sweat. This sweat heals Poliwrath, and will heal 2% as long as he keeps sweating. The move isn't offensive, and has medium starting lag, and short ending lag. Once he has finished sweating, depending on how long you have been sweating, a pool of sweat will appear beneath his feet. This sweat is sticky to walk on, and will slow opponents who walk on it down, and if they run on it they will trip. Poliwrath can remain in his puddle of sweat to heal himself as well.

Smash Attacks


Side Smash= Double Slap


Poliwrath spins his right arm around in circles until you have finished charging the attack, then proceeds to slap his opponent up to 5 times, depending on how long you charged- the total charge time being 2 and a half seconds. This move has medium priority and low range. When Poliwrath slaps them, each slap deals 7% damage, for a total of 35%, and they will remain in place until you have finished slapping, and then they will be knocked back slightly.

The end lag on this attack is quite long as well, so opponents could easily come back and attack you. A good idea would to be to stand in your sweat as you use this move, as it will heal you as you are charging, and unleashing the slaps.
~~~7%-35%~~~
~~~14%-70%~~~

Down Smash= Water Sport


Poliwrath's heavy weight, large size, and fast fall speed make him an easy target for chain grabbers. Thankfully though Poliwrath has access to Water Sport! Poliwrath raises both arms in the air, until they are covered with an aqua aura. He then proceeds to do a fist pump, and water spurts out from the ground and lands on him. This water doesn't heal him however. The starting lag is medium, and the ending lag is a bit shorter. The move has low priority.

Once Poliwrath has covered himself in water, he will become slippy, and for 15 seconds he will be unable to be grabbed. The downside of the move is that Poliwrath will be unable to grab, and that includes items and the ledge, so be careful.

Up Smash= Whirlpool


Poliwrath hops into the air and begins rotating rapidly on the spot; bubbles of water forming above his head in the shape of Mach Tornado, but slightly smaller. The Whirlpool acts as a vacuum, and it will suck in enemies who are above or around the whirlpool, and they will recieve 16% damage, before being slammed to the ground violently. The move is quite laggy, but it has high priority and great range.

The whirlpool will remain in place for 5 seconds once you gain control of Poliwrath again, so you could either focus on getting an opponent in it, or jumping in it to heal yourself.
~~~16%~~~

Aerial Attacks

Neutral Air= Rain Dance


Poliwrath claps twice in the air, and a small rain cloud appears above his head, and it begins to rain over him, healing him. The more you clap in the air the larger and darker the cloud becomes, until it becomes really dark, and creates a thunderstorm. When there is a strom it won't heal Poliwrath, but the bolts of lightning that come down will deal 9% to his opponents. There is tiny lag on this move, as he can just keep clapping and clapping, and hover in the air by doing so, and it has medium priority. The thunderbolts only deal minute knockback.

The cloud will disappear 10 seconds after you've set it up, and it will instantly disappear as you try to create a new one.
~~~9%~~~

Forward Air= Mud Bomb


Poliwrath gets a ball of brown mud in his hand, and launches it straight in front of himself, dealing 4% and medium knockback to whoever he hits. The move has short starting lag, but medium ending lag, and has low priority. The mud travels forward as far as Wolf's laser does before breaking apart.

Once the mud hits your opponent, they will be weighed down, and their jump height will be halved for 5 seconds. A good strategy is to Mud Bomb and then get them off the stage and ledge grab, whilst laughing as they plummet to their doom.
~~~4%~~~

Backwards Air= Bubble


Poliwrath puts his hands behind his back, and shoots a small amount of bubbles from them, which propel him forwards slightly. The bubbles deal 3% and stop your opponent moving for a split second. There is small start lag, and medium end lag, as the move puts you into helpless once you use it. The bubbles don't travel very far at all, and if they are attacked they can be popped.

If you use this shorthopped then Poliwrath has less of a fall, and therefore he can stall them off the ledge, land straight onto the ground, then proceed to ledge grab them.
~~~3%~~~

Downwards Air= Dive


Poliwrath tilts his whole body upside down, and hovers in the air for a little bit. He covers himself in a dark blue blob of water, and then proceeds to enter a diving position (arms stretched above his head, with his head facing the ground and legs in the air) and dives down onto the ground at a rapid pace, dealing 17% and medium knockback in the process. This move is very laggy, as he stalls in place for a while before diving, and when he lands he rubs his eyes before standing back up. Poliwrath's hitbox is his whole body apart from legs, and it has medium priority.

Dive will meteor smash opponents, and Poliwrath won't heal whilst in the water when he is diving, but if he lands in water whilst using dive he will recover 25% damage, but will be launched out of it with medium knockback. Make sure not to dive when you are too damaged, as you will probably bounce out of the water and off the stage. This move can gain a boost from Belly Drum, as it is one of two physical water moves that Poliwrath learns.
~~~17%~~~
~~~34%~~~

Up Air= Waterfall


Poliwrath slams both of his fists together, and a big wave of water appears from his belly, which rises into the air slightly. The waterfall is quite thick, and it travels above him the height of Mario, but at a slight diagonal angle. The move has little starting lag, but medium lag at the end, as Poliwrath has to wait for a little bit as the waterfall evaporates. The waterfall deals 13% and has high knockback- the hitbox being the whole waterfall.

This move is Poliwrath's one of two water type moves that gains a boost from Belly Drumming, which adds to it's usefulness. However, because the water travels upwards, and evaporates before you get control over Poliwrath again, you can't heal yourself in it.
~~~13%~~~
~~~26%~~~

Throws

Grab=


Poliwrath streches his arms out, and if he grabs his opponent he will hold them between his fists, and pull them towards him. This grab doesn't have much reach- the reach being the length of his shoulders to his gloves.

Grab Attack= Crush


Poliwrath holds his opponent between his two large fists, and each time you press the button he will slam his fists into his opponents, crushing them, and dealing 3% each time he does so. It takes Poliwrath longer to sretch is arms out than it does to slam them together.
~~~3%~~~
~~~6%~~~

Forward Throw= Surf


Poliwrath holds his opponent out in front of him with his right hand, then all of a sudden a large wave, about the size of Ganondorf, and the width of Charizard, and pushes them forward until it reaches the edge of a ledge, where the wave will pour down, or to a wall, where it will splash against it and evaporate. The wave deals 8%, and as said before, has great range.

The wave has the interesting property of sweeping up other opponents. This means that other opponents can get caught in the wave as it travels along the screen, but these won't receive damage from it. However, this could gather a lot of people around the edge of the stage, and you can simply wait and watch as they all struggle to get back onto the ledge- possibly Sweating and healing yourself as you wait.
~~~8%~~~

Backward Throw= Ice Punch


Poliwrath spins around his opponent, whilst covering his fist with an icy white light. Poliwrath then proceeds to punch them in the chest, which causes them to freeze. The punch deals 14%, and deals no knockback. Once they are frozen, which lasts for 3 seconds, you can walk into them, or attack them, which will cause them to slide around the stage, and possibly off the edge.
~~~14%~~~
~~~28%~~~

Down Throw= Muddy Water


Poliwrath's swirl on his belly becomes an aqua colour, and he squirts some water from it onto the ground, creating a small puddle. He then slams his opponent face first into the water- dealing 19% damage, and dealing no knockback.

Once he slams his opponents, the water will become a muddy brown colour, and they will become trapped in it. To get out of it they need to keep jumping, and the more damage they have the more difficult this becomes. If they don't manage to get out they will slowly sink through the stage, and fall through the bottom to their death. Opponents should never give up when they are stuck in the mud, but as the damage rises, they'll find it more and more difficult.
~~~18%~~~

Up Throw= Brick Break


Poliwrath holds his opponent above his head with his left hand, then proceeds to karate chop them with his right- dealing 12% and dealing medium high knockback, launching them straight into the air. This move isn't laggy, so Poliwrath can jump up after them and carry on attacking. This move has no special properties, it is simply a powerful throw.
~~~12%~~~
~~~24%~~~

Final Smash

Fissure


Poliwrath grabs the Smash Ball, and his eyes and swirl turns a fiery orange colour. Poliwrath then takes a mighty leap into the air and slams down onto the ground with his fist. This causes water to spurt out of the ground, which will deal 21% to whoever runs into one. All of a sudden, the stage will begin to crack, until the stage breaks into lots of little pieces, and floods. Poliwrath will stand on a piece of broken stage near the top of the water, and he will stay here and heal himself constantly until the 15 seconds that the Final Smash lasts for. Opponents have until this time to climb up sinking pieces of the stage and get to the surface before falling off the screen, or if the Final Smash ends- drowning.
~~~21%~~~
~~~42%~~~

Taunts

Up Taunt=
Chopping 'Em Up

Poliwtrath lifts up his arm, then does a karate chop, shouting "Wrath Wrath WRATH!!!!!"

Down Taunt=
Mach Punch

Poliwrath begins to punch on the spot rapidly. This will deal 4% and small knockback to whoever it hits. This doesn't get a boost from Belly Drumming.
~~~4%~~~

Side Taunt= Statue of Poli

Poliwrath kneels down on one leg, and raises his right arm into the air; Poliwrath is proud of his power.

Victory Poses

1= Fist Pump

Poliwrath does a fist pump with his right hand.

2= Diving Wrath


Poliwrath does the animation he does when using Dive, and proceeds to go under the floor, swimming away to enjoy his victory.

3= Water Way To Go

Poliwrath surfs on a small wave that appears below him.

Losing Pose= Polithrash


Poliwrath sits down on the ground, and begins to slam his fists on to the floor violently in anger.

Kirby Hat

Kirby gets Poliwrath's head and eyes, and the top part of his swirl as a hat. He gains the ability to use Hydro Pump.


Stage


Route 22

Route 22 is the place where Poliwags and Poliwhirls are most commonly seen. It is to the left of Viridian City, and even though you can visit it early on during Red's quest to become a Pokemon Champion, it will be one of the last places you visit. This is because once you have all 8 badges, you can enter the building in the background of the stage, which leads to Route 23 and Victory Road; a trainers final test before reaching the Indigo Plateau.

The stage is a walk off stage, with no holes to fall down. The blast lines are shown in red, and solid ground is the thick, black line. On the left there is a patch of grass, and on the right a small mountainous area. In between them is a shallow pond, similar to the one at Delfino Plaza, but slightly larger. You cannot drown in this water.

The stage is viewed from behind the fence at the bottom of the picture, and looking straight ahead. This means that the Pokemon League Building will be in the background, whilst the fight will take place in the center area.

Playstyle

Playing As= Feel His Wrath!

When playing as Poliwrath one of your main priorities is to keep yourself wet, as this can help heal you from damage that you are taking, and will keep you at a nice amount of damage. If you get damaged too much then you could end up far away from the stage, and due to Poliwrath's just above average jump, and medicore up special this is a bad place to be. That being said, Poliwrath has a hard time getting his opponents off the stage, due to most of his attacks having a large damage output, but not a lot of knockback. If he Belly Drums at the start of the match then he will be at a damage disadvantage, but with the strength of all his physical moves doubled means that Poliwrath can dish out some serious damage, and even if he can't knock people back that far, at 300% opponents will find it hard to stay on the stage. Poliwrath has multiple ways of healing himself, the main ways being Rain Dance and Sweat, so when you get the chance you should be constantly performing these, and Rain Dance has the benefit of becoming an offensive move if you clap a lot of times. Poliwrath has some great throws- Surf can sweep multiple opponents off the edge, Ice Punch deals good damage, and freezes them temporarily, and Muddy Water buries them, and can cause them to fall to their doom. Mud Bomb and BubbleBeam are attacks that go well together, slowing them down whilst waying them down is a great way to prevent them from advancing to you. Poliwrath has a projectile, Hydro Pump, which is useful, but it is slightly laggy, and hard to hit with. His Dynamic Punch is also useful, as it muddles up your opponents controls, and this gives you time to heal again. A fully charged Belly Drummed Double Slap should be feared, as it will deal an incredible 70%, but it is hard to get all hits off.

In conclusion, Poliwrath's playstyle revolves around racking up opponents damage whilst keeping yours as low as possible, until you can get off the finishing blow, or get them off stage and ledge grab them.

Playing Against= All Washed Up!


Poliwrath is a heavy weight, and has a high fall speed, so he is easy to chaingrab. However, if he uses Water Sport he can stop them from grabbing him. But to do this, he needs space- this is what Poliwrath is about! He needs space to use all of his tricks, so the best thing to do is pressure him, and keep on the offensive. He may be dealing damage to you, but he has pretty bad knockback on most moves, so whilst you may hit 200% before he does, more often than not you can have him killed at 150%. Poliwrath can camp with Hydro Pump, but this is easily avoided. The move you should fear most is Mind Reader, as he can use your move against you, and the laggier it is the easier it is for him to Mind Read it.

In short, you should keep attacking Poliwrath, shrug off the large amount of damage he will deal to you, and make sure he can't heal or Belly Drum. If he doesn't Belly Drum, he's easy pickings, and characters with projectiles can outcamp him easily, and stop his approach, as well as cancel anything he is trying to do to aid himself.


"I Levelled Up! What A Glorious Feeling It Is!"
 

n88

Smash Lord
Joined
Oct 10, 2008
Messages
1,547
@Jimny
Deja Vu!

I'll have something to say after I read the set. You deleted it too fast for me last time.

@Wizzerd

Slowpoke was fun to read. There's a nice playstyle here, but I think Rest needs to be toned down just a tad. As is, it's more than a little broken.

I can't really say much about TAC that hasn't been said already, so...
*Raises eyebrow @ TAC's match-ups section*
 

Jimnymebob

Smash Champion
Joined
Sep 26, 2008
Messages
2,020
NNID
Jimnymebob
@Jimny
Deja Vu!

I'll have something to say after I read the set. You deleted it too fast for me last time.
I changed the setslightly, and added in a stage. I listened to what Junahu said when I first posted it, especially with those annoying moving headers. I don't know what possessed me to use them in the first place :ohwell:.

Also, I edited the horrible mistake I made with Water Sport's discription, so now the move isn't completely pointless XD.

I'll add comment's on sets from the past few pages here in a bit.
 

darth meanie

Smash Journeyman
Joined
Jun 6, 2008
Messages
452
Poliwrath was a good set, far better than Mushroom from the get-go. You have a lot of good ideas here; once I realized the combination of Belly Drum and healing moves, I got excited.

Now on the other hand, this set has some weaknesses. You're missing out on some key details for certain moves, most notably how difficult it is to escape Muddy Water, the knockback for Dynamicpunch, and how effective the jab you copypasta'd from Darkrai is (I kid, I kid). You have a lot of non-damaging moves too, which is okay, but you could have gotten the same mechanical effects of Sweat and Water Spout with a damaging attack too, and kept it balanced. Mind Reader is just a weird attack, and doesn't really fit the set. Also, Submission just sucks.

You've got some blatantly overpowered throws, and a lot of moves don't really account for the effect of Belly Drum; Dive can hit 34% damage in a hurry. You get to really high percentages fast, but Poliwrath really doesn't have any KO moves either. In summation, I can say that I really liked some of the ideas here, and you had a playstyle that really came together, but you still have some weaknesses to overcome.

Oh, and sorry you had to wait so long to post this set.
 

Plorf

Smash Apprentice
Joined
Jan 28, 2009
Messages
124
Location
Silver Spring, MD
So Poliwrath is pretty interesting. I like the mechanic, and the moveset is enjoyable and simple to take in, unlike Mushroom for me. Some of the moves I would have done completely differently, like the neutral special, though I like the feel of every attack coming from Pokemon; I enjoy staying true to the source material. I do feel as though you could have come up with some more original attacks, though :p

The writing style does feel a bit generic, as it seems to me like it lacks voice. The creativity on some of the moves is not quite up to my high standards-- it feels like I've seen some of these moves before. That aside, I think it's a solid set, might get a vote from me, and is a more realistic Brawl-style moveset. Nice character choice, too. I know you've been waiting a while to post it.
 

Kholdstare

Nightmare Weaver
Joined
Oct 10, 2008
Messages
1,441
TAC - I don't know whether this is a joke or not . . . anyway, I don't like it. (flip)

I kid, I kid. It's a pretty good set, and you proved that a ditto character can be viable.

@ Jimny - I'm sorry for making you repost this, I'm going to get a comment on it soon. ;)
 

Plorf

Smash Apprentice
Joined
Jan 28, 2009
Messages
124
Location
Silver Spring, MD
TomahawkφMan

“Tomahawk Man does not lie.”


B a s i cφ I n f o

Tomahawk Man is a Robot Master from Mega Man 6. He was built by a scientist somewhere in Middle America, modeled after a Native American chieftain. Unlike many of the other Robot Masters in the game, Tomahawk Man was created specifically for the 1st Annual Robot Competition. During his boss fight, he attacks using his tomahawk (what a twist!) and by shooting feathers from his headdress. He is very brave and rather strong, but is also quite exclusive and proud of his background. Tomahawk Man is keen on horseback riding, but will not tolerate a liar. The weapon Mega Man gets when he defeats Tomahawk Man is the Silver Tomahawk, which is ironically brown.


Statistics

Size φ 6/10
Tomahawk Man is fairly short, having a height similar to Luigi, though his headdress puts him a fair bit above that.

Power φ 3/10
Tomahawk Man is not a powerhouse by any stretch of the imagination, but a few of his axe-based attacks hit pretty hard.

Weight φ 4/10
He is unfortunately on the lighter end of the spectrum, but can last long enough out on the battlefield.

Ground Speed φ 7/10
Tomahawk Man is very agile, as he shows by his running speed.

Air Speed φ 8/10
When you fight Tomahawk Man in Mega Man 6, he soars above you in the air. One of his strong points.

Traction φ 8/10
While not perfect, Tomahawk Man has nice traction, beating out most other characters.

Attack Speed φ 7/10
Tomahawk Man benefits from fast attacks, though there are still a few that come out with some lag.

Range φ 8/10
Many of Tomahawk Man's attacks are a disjointed hitbox of some sort, and he has several projectiles at his disposal.

Priority φ 7/10
The projectiles, though, don't have great priority, and Tomahawk Man still has a fair share of close-range attacks. Even so, he still has reasonable priority overall.

Jumps φ 8/10
Tomahawk Man has a slightly above average first jump, but a great second jump. He actually fares pretty well in the air.

Falling Speed φ 4/10
Tomahawk Man is reasonably floaty, though not as much as characters like Wario and Jigglypuff.

Recovery φ 6/10
Tomahawk Man has a decent recovery, but has a few options to get it.

Crouch φ 8/10
Tomahawk Man is not afraid to get his head low to the ground. One of the better crouches in the game.

Wall Jump φ Yes
Wall Cling φ Yes
Crawl φ Yes


BasicφAnimations

Standard Pose
Tomahawk Man stands leaning slightly back, his axe behind him.

Idle Pose
When left alone for a while, Tomahawk Man will start fiddling with his throwing axe, carefully handling it like a precious gem.

Walking
Proudly, Tomahawk Man walks forward, making his body very slightly bigger.

Running
Tomahawk Man starts running briskly while his headdress trails feathers that act like Ivysaur's when dashing.

Dashing
With spirit, Tomahawk Man soars forward, his feet barely touching the ground.

Crouching
Tomahawk Man brings his entire body close to the ground, his hands bracing his fall. It looks similar to Snake's, though his headdress adds to his height significantly.

First Jump
Tomahawk Man looks upwards as he springs into the air, looking forward to spending some time there.

Second Jump
Tomahawk Man spreads his arms out and pushes downwards, imitating a bird.

Shield
Tomahawk Man holds his axe-arm vertically in front of him as he squats in a defensive pose.

Spot Dodge
In a fairly standard animation, Tomahawk Man leans back and quickly swings one arm back. This has a short duration, but has very low lag.

Roll
Tomahawk Man leans sideways and kicks off the ground with a lot of force, profiting him a good distance. However, there's a small bit of lag as he properly positions himself at the end.

Air Dodge
For this dodge, Tomahawk Man turns to face the foreground and appears to be kicking off air, ending up in a reclining position. Lengthy, but good duration.

Asleep
Tomahawk Man droops his head down and subconsciously struggles to maintain balance, since he's top-heavy.

Dizzy
Tomahawk Man stands straight, not struggling to keep balance, but seemingly unable to do anything at all.


M o v e s e t

SpecialφAttacks

Neutral Special φ Silver Tomahawk
Just like in Mega Man 6, Tomahawk Man will shoot forward a spinning brown disc-looking object that is actually one of his tomahawks. This comes out almost instantly. The throwing axe is about the size of Kirby crouching, but quite a bit flatter. The axe first dips down within a Stage Builder block in front of Tomahawk Man, and then proceeds to drift upwards at a diagonal arc. If it's any help, watch a video like this (near the end) to get an idea of what this looks like. They travel quickly, around Captain Falcon's dashing speed. The actual hitbox is fairly small, and does 3% damage per second in multiple hits, while the tomahawk continues along its path. It also has infinite range, which is a plus on large stages. However, damage is not the only purpose of this move. The tomahawks thrown are spinning so fast that they create a little bit of wind around them. What this means is that to the left and right of the blade, there's is a minute push-back effect for those who go near the tomahawk without actually touching it. In addition, there's also a bit of suction on the top of the weapon, which pulls characters that are directly over the tomahawk underneath it a little bit. This has some light ending lag, but enough to be punished if the enemy is expecting it. You can only have three tomahawks out at a time. Low ending lag.

Side Special φ Triple Feather
As the name may imply, Tomahawk Man shoots out three large feathers from his headdress for this attack. They're about the size of his tomahawks, but a little thicker, and larger towards the front. They are stacked, one on top of another, but only for the start of the attack. After this point, they move strictly horizontally and will continue to move after they've hit an opponent. The bottom one, however, moves slower than the middle one, which is slower than the top one. Essentially, if the feathers are given enough space, they can cover a large area. The feathers move at King Dedede's, Mario's, and Captain Falcon's dashing speeds, respectively. For the actual attack portion, the feathers cause an interesting effect on those who hit them. If they are on the ground, they will be knocked down instantly and take 7% damage, this being good for stopping approaches.

However, if they're in the air, they will actually trip on the feathers, however that's possible. Air-tripping is similar to normal tripping, having the same animation, but instead of falling on the ground, they enter tumbling animation. They will still take the 7% damage, however. This is a great anti-air move, and while it has moderate start-up lag, it has virtually no ending lag. This has infinite range, and there can only be one set of three feathers out at a time. Additionally, if you're quick enough (believe me, you are), you can use the feathers as makeshift platforms that will fall down as soon as you jump on them, since you can't reliably walk on them. Opponents hit by the falling feather will experience the same effects as they normally would, depending on if they were in the air or on the ground when hit.


Up Special φ Axemerang
For this attack, Tomahawk Man simply tosses an axe that spins on a horizontal axis, about half of Final Destination away from him. It will move diagonally upwards by default, though it's easily maneuverable. It moves at Sonic's dashing speed, and will always return back to Tomahawk Man under any circumstances. The axe is almost exactly the dimensions of Kirby's sphere portion, constantly spinning. If the tomahawk hits any solid material, it will sink in and proceed its path back toward Tomahawk Man. This means that if it hits the stage while Tomahawk Man is in the air, the stage will move towards him, not the other way around. However, any items and characters not touching the stage will not be taken along for the ride, potentially being a very good gimp.

However, this will not home into ledges, and since the axe travels so quickly, it can be quite tricky aiming properly. For example, if you hit the underside of the lip on Final Destination, you will get there and find yourself in a nasty situation, having little to no options to get back on stage. If the tomahawk hits an enemy on its path, they will also be pulled back towards Tomahawk Man as well as take 6% damage. This counts as a grab. In fact, you can even pull items closer to you, snatching them out of mid-air. Really, this is a bread-and-butter move, having no limit to its use. Tomahawk Man is unable to aim the tomahawk downwards except by a small bit, so recoveries won't suffer so much.He will also experience twice as much lag if he hits the stage from the top with this move. Moderate start-up lag and high ending lag.


Down Special φ Seed
Tomahawk Man procures a seed from his palm and tosses it downwards by default. You can change its trajectory by holding down B and aiming before you release it, but the seed has rather bad range in most cases. It will, however, travel indefinitely down and remain in its location for as long as one of Snake's mines if it hits the ground. If it hits an enemy, it will embed itself in he/she/it, and nothing further will happen until you use your USmash. A fully charged USmash will result in vines springing forth from the character and somewhat reducing their movement and attack speed. The vines, however are destructible, similar to Olimar's Pikmin. They're twice as hard to shake off though, but they're vulnerable to fire attacks. With TWO fully charged USmashes, it becomes more deadly. The vines are now much thicker, and much more debilitating. They'll slow you down quite a bit more, and are harder to shake off to boot. As useful as this is, the down special should in no way be used for just that.

Should the seed land on a Rift from the neutral attack, the hole will immediately seal up, locking the seed underground. If left untouched, absolutely nothing will happen. However, once you use a Rain Dance, it becomes apparent what must be done. Two fully charges USmashes (or the equivalent) will yield a fully grown tree, which stands a head or two higher than Ganondorf, and is about as wide. However, its branches extend out half a Bowser in either direction. Anyway, the tree will actually grow in the background, so it's no hindrance to the playing field. But! Tomahawk Man has a large axe, no? That's exactly what he can use to chop down that tree- any move using the tomahawk that swings horizontally can cause the tree to fall into the foreground, slowly and treelike. It takes maybe three seconds for the tree to completely collapse, an action which does 26% and rather hefty knockback. Nice payoff, eh?

However, it doesn't stop there! once the tree has fallen, you can chop it up even more by using vertically-swinging axe moves, and as a rule, it'll take 5 or so swings to turn the log into a pile of wood. The wood can be picked up simply for use as a throwing weapon that deals 4% and decent knockback on contact, but that would be boring. Instead, why not use your down special while holding a piece of wood to fashion a few wooden spikes to set in the ground? This process takes as long as it takes for Snake's trip mine to come out, and has a similar effect. The wooden spikes are set low in the stage though, so the tips are flush with ground level. The trap (There, I said it!) is a bit less than a stage builder block wide, and causes 8% damage and light set knockback- similar to the spikes on stage builder stages!

Now, should you decide not to use your tree for anything, be it making traps or throwing wood chunks, there's something else you can do with the fallen tree. Tomahawk Man's forward aerial, the fire arrow, will set the tree alight if it hits. It'll turn the tree into a blaze the size of Bowser, if a bit taller, that deals 8% and knockback that never realistically kills upon contact. If you leave the fire to burn away into nothing, it does so, taking 12 seconds to exhaust itself of burning material.

Of course, there's yet another twist. Your down smash, the massive controllable tomahawk, is just the thing one needs to create smoke signals. Moving the tomahawk onto the fire and off again will make puffs of smoke appear, drifting upwards. These'll make your enemy helpless for as long as they're in them, which shouldn't be a very long time. See, the more you hold the hatchet down on the fire, the more you smother it. Should you keep it covered for more than five seconds, you'll extinguish the fire, leaving it a useless pile of smoldering waste. That is generally a bad thing. The plus to holding down the axe is that it makes your smoke puffs larger. Holding down the tomahawk for no time at all makes a smoke puff the size of Olimar, as opposed to a Bowser-sized puff when held for just under five seconds. At this point, once the tree has been completely used up, it'll simply just fade into nothing, so you can start another cycle.

As you can probably tell, this move is incredibly versatile, and should you choose it, it's the cornerstone of Tomahawk Man's playstyle. Obviously the tree won't come into fruition on a moving stage or one with only falling platforms, but the down-b still has use beyond that. The vines are great for slowing down your opponent enough to perform one of your brutal throws on them, or pull of one of your laggier moves. Sure, new Tomahawk Man players might find this whole deal a bit confusing, but as long as they test out all his moves, they'll probably figure it all the paths eventually. There is one more move interaction with the down special, but I'll save that for later.


StandardφAttacks

Neutral Attack φ Hack
This is a fairly simple attack in which Tomahawk Man swings his axe downwards so it hits the ground. It follows a similar arc to that of King Dedede's Forward Smash, but the range is cut in half (that's still a good bit!). This is about as laggy as Mario's Forward Smash, but has slightly higher ending lag. The strike will deal 10% damage and knockback that kills at 230% if it hits a foe, but when it reaches the ground, something entirely different happens. It will create a rift in the ground that is as wide as Ganondorf, due to scraping the axe along the ground. It lasts 30 seconds before disappearing. Anyone other than Tomahawk Man that steps into the rift will be unable to use spot dodges, and shields will decay very quickly. People rolling into the rift will hit it and be stunned and pushed back as if they hit an invisible wall, though will retain invincibility frames.

Another twist to this attack is that if you tap A while Tomahawk Man is swinging his axe, it will go flying, provided you had the right timing. It will never go more than a third of Battlefield away, and when it lands, it will stay there until he passes over it. There will be a rift in the ground there instead, acting just like the normal one. Enemies can also pick it up to use a battering item that does 7-10% and has a sweetspot on the axe head, which does pretty good knockback. The thrown axe will deal 10% and low knockback, but will additionally cause 1% per second for five seconds due to being stuck to the enemy. Unfortunately, the projectile version suffers from a bit more ending lag as Tomahawk Man regenerates his axe. Only one rift can be out a time, with the newest one replacing the previous.


Forward Tilt φ Spinning Hatchet
Tomahawk Man swings back his axe-arm, then swings it forward to toss it in a horizontal direction. It looks just like his Silver Tomahawk, except it won't go up by default. This one instead will only go up through holding the A button, behaving similar to the game "Helicopter". It falls about a third of Final Destination away if you don't press A after firing, but it can potentially have infinite range if you keep pressing A. However, since pressing A will only move the tomahawk, you can't use A-button moves while this is out. It can be canceled by shielding, but it moves quickly enough (Captain Falcon's dashing speed) so that you likely won't need to. Unlike the Neutral Special, this does single-hit light upwards knockback and 8% damage. This is pretty good at edge-guarding, as you can let it drop onto a recovering opponent or aim it upwards to hit characters taking a higher route. There can only be one tomahawk out a time, and the attack has a good bit of start-up lag, but very low ending lag.

Up Tilt φ Totem Pole

When Tomahawk Man first presses Up + A, nothing happens for a very short time, then a massive totem pole suddenly springs up from underneath him. This carries him upwards quite a bit, as the totem pole is about twice as tall as Ike and a little wider. Tomahawk Man can jump off any time while it's rising, but that doesn't take very long. The totem pole will face the direction you were facing when you did this move, so give some forethought before using it. The totem pole can also be destroyed by both you and your enemies, having 50 HP. However, it acts as a normal wall otherwise, though you can roll behind it. While it is out, it will randomly shoot out red projectiles the size of Pitfall items from any of its four mouths, which do 5% damage and an interesting effect. They'll actually make the opponent have slow but uncontrollable upwards movement for three seconds, during which they can still attack. The effect does not stack.

Three shots will be fired from the totem pole for every two seconds that pass, but only if there is someone in front of it anywhere. In addition, if an enemy tries to jump over it, the totem pole will also jump, being able to reach its own height. This won't do any damage, but blocks foes from reaching certain parts of the stage, provided they don't quickly slip underneath it while it's still airborne. Tomahawk Man will have very slightly increased jump height and air speed, and slightly decreased falling speed if he's within a Smart Bomb's explosion radius of the totem pole. A new totem pole cannot be summoned until the old one is destroyed, and even then you have to wait a few seconds before making another.

NOTE: If you use the Up Tilt over a rift from Hack, the enemy will be unable to roll behind the totem pole, which can be very advantageous. Tomahawk Man can also wall-jump and wall-cling from the totem pole. If used near a ledge, foes will still be able to grab it and jump from it. However, this robs you from a possible tree-planting location. Be careful, now.

Down Tilt φ Spirit Overdrive
For the start of this move, Tomahawk Man leans down to the ground and points his axe-hand to the floor. This has a bit of start-up lag, but nothing severe. If you continue to tap A, however, the axe will begin to spin, and various visual effects will occur. Sparks will start to fly on the floor, wind will ripple around Tomahawk Man, and the area will look frenzied as it vibrates. These will each do minor things: the sparks do 1% non-flinching damage, the wind gives a push-back effect, and the vibration stuns the foe for a very short while, reminiscent of Ganondorf's Final Smash. When you release A, Tomahawk Man will spring upright, spreading out his arms in a powerful position. What this does is boost exactly half his stats at random, and weaken the other half by the same amount. As a rule, Tomahawk Man strengthens/weakens these stats 5% per button press, it taking a decent while to have a 100% change. While this could be a very powerful enhancement, keep in mind that cancelling out of the overdrive state by pressing Down + A gives Tomahawk Man one full second of lag, so this has situational use.

Dash Attack φ Bury the Hatchet
From his dash, Tomahawk Man leaps up in the air about the height of his short hop, keeping his forward momentum. This translates into a striding air rush that'll go nearly a platform if uninterrupted, followed by a plunge to the ground in which Tomahawk Man slams his tomahawk to the ground. Any foe hit by this portion will have the Pitfall effect, being stuck in the ground-- with a hatchet in their back. The pitfall-smack deals a mere 5% damage, but while the enemy's buried in the ground, they take constant damage of 2% per second. However, a lunge in which you only attack at the end of a long arc sounds useless, right?

Wrong. Tomahawk Man can interrupt his rush at any moment by pressing A again, performing the attack early. Additionally, while his body is in motion, Tomahawk Man will push anyway who's in his way forward-- without any damage or knockback, mind you, just they move in that direction. This move can be used for Tomahawk-cides if he goes off he ledge, which can actually be quite useful. This move has fairly high priority, nonxistent start-up lag, and annoying ending lag if Tomahawk Man misses.


SmashφAttacks

Forward Smash φ Frenzy
Tomahawk Man rears back his axe-arm and slashes forward horizontally in front of him with about the range of Mario's FSmash. This deals 3% and pitiful knockback uncharged, and 5% with slightly better knockback when fully charged. Well, I suppose the lag on this move isn't terrible, with slightly above average starting lag and below average ending lag.

The twist comes when you press the button input again-- with no warning, Tomahawk Man slashes again from the opposite direction, and again and again depending on how many time you press the button. The timing gets a little harder to maintain after a while, though, since the window of button input grows smaller with each repetition. Anyway, your furious swipes will likely end up carrying your enemy right where you want them-- into the area of your tree, or perhaps off the edge or to another hazard. This move really exists to move your foe around and not much else, though it is a good way of chopping down your home-grown tree.


Up Smash φ Silver Tornado
Obscuring his tomahawk from sight, Tomahawk Man hunkers down, preparing to do something cool. He then somehow procures a tomahawk several times bigger than the one he normally carries, spinning as he tosses it so that is hovers right above him. Once it's out, it can be controlled similarly to Snake's Nikita Missile, having the same maneuverability, though it's quite slower. It can also cancel with [shield], though that will make the axe drift in the last direction it was going for the duration of the move. The more you charge this move, the longer you are able to control the spinning axe, ranging from 3 seconds to 7 seconds.

This giant tomahawk is so large that any character can stand on it while it's floating through the air-- granted, it's spinning a lot, so think the spinning platforms from Top Man's stage for a visual. Foes that land on top of the blade will enter a dizzied state for as long as the spinning lasts, and when it's finished, the hatchet disappear in a flash of light, catapulting any foe standing on it straight upwards, helplessly tumbling until they reach the pick of their jump, in a similar animation to a shield breaking. Another note. Should someone touch the side of the tomahawk while it spins, they take about 8% and below-average knockback for a smash, increasing to 12% and more average knockback. This is mainly advantageous during the startup of this move, being a spacing attack. Rather annoying startup lag, nice ending lag, average priority, KOs at 170%.


Down Smash φ Rain Dance
Tomahawk Man will just start dancing in place while you charge this smash. He sort of hops around a bit, stuff like that. Dancing? That doesn't sound really useful, now... Well, before you get turned off by this move, Tomahawk Man's flailing will inspire the foe to dance, though it's doubtful that they're willed into dancing, except with characters like Peach. They'll only dance for a little less time than the charge lasts, meaning Tomahawk Man will have a bit of an opportunity to start a combo with one of his quicker moves. That aside, once Tomahawk Man finishes the charge, nothing happens. That's it.

Then it starts raining (Oh, so that's why he was dancing). Yes, about five second after Tomahawk Man has finished his smash uninterrupted, it starts pouring across the entire stage, decreasing everyone's traction, and making tripping a good deal more likely. Additionally, the rain has a wind effect along with it, very slightly pushing everyone in one direction. It's random which way the wind is blowing. Furthermore, there are lightning strikes that occur maybe once or twice per charged smash. They're quite powerful, dealing 20% and knockback that will KO pretty early, but here's the thing: they will strike the highest things on the stage, which are usually the characters. Your tree is the obvious target, though, and if you don't hit your foe above that tree, you have a strong chance of paying a price. Your tree will collapse and burn, fizzling out and becoming charred wood if exposed to more than three seconds of rain. The bigger the tree gets, the more likely it is to get hit, which falls in line with the rain MAKING the tree grow. All in all, a high-risk, high-benefit move.


AerialφAttacks

Neutral Aerial φ Quick Draw!
With little starting lag, duration, and ending lag, Tomahawk Man spins into a blur, with his headdress colors clearly visible. This is strikingly similar to Chef Kawasaki's Neutral Aerial... in fact, you could say it was a clone, if not for a little fact: the momentum of the spinning launches a couple dozen feathers and flings them around Tomahawk Man, falling down at a slow pace. Recalling Kawasaki once more, the feathers act just like the chef's up tilt, the sprinkle of oregano. This means they deal no damage, but trap opponents in flinching multiple hits. The feathers disappear once they hit ground, though as a visual effect, they'll get stuck in Tomahawk Man's tree.
Kawasaki turns a somersault in midair unexpectedly! He can move quickly when he wants to - this one takes only a couple of frames to pull off! It does a mere 2% but has unique knockback; no matter what angle you hit the foe from, they'll be knocked directly in front of you, probably still in the air. So, as you can tell, you and your foe are suddenly facing each other, both lag-free. It's all about reflexes here. You should have the edge, since they probably weren't expecting this, but now you must use a high-speed, high-priority attack to edge out your foe. Use more power! Use your speed!

Forward Aerial φ Searing Chill
Ignoring the quizzical move name for now, Tomahawk Man sticks his hatchet out in front of him with each side of the blade facing up and down, respectively. It has sex-kick properties, the hitbox being out for a while. There's a sourspot on the handle. Oddly enough, this does ice damage, with 8% and decent knockback either straight up, straight down, or in the direction Tomahawk Man is facing. This is a standard attack, and most of the time, it's simply this. But, as expected, there's a twist.

When the BAir is active (read below for details), the hole in Tomahawk Man's arm where his axe would normally be has a peculiar use for this move-- firing fire arrows. Upon the press of the button, his hand socket extends a pair of prongs imitating a bow and launches a fiery arrow all very quickly. It's quite spammable. The fire arrows, of course, deal fire damage and have a similar trajectory to cracker launcher missiles-- you can even hold down A to aim your shot before firing. Each arrow deals 4% and knockback in the direction the arrow is pointing. In fact, the arrow will stick to the player that's hit, if only for a visual effect.


Backward Aerial φ Tomachopper
Tomahawk Man swings his hatchet arm behind him and back forward with moderate lag for an aerial. You might notice something strange, however. The tomahawk remains spinning behind him, as if connected magnetically. It deals 3% in multiple hits like the neutral special, and can only be put back in Tomahawk Man's hand-socket if you use a tomahawk again or are dealt 15% while the axe is spinning behind you. When you use any tomahawk-based attacks while this is active, the hatchet behind Tomahawk Man will hover around to whatever position it needs to be in for said attack, and he will have his normal control scheme again. For example, if you use your neutral A while the axe is behind Tomahawk Man, it will go over his head and into his arm as he swings, doing a little extra multi-hit damage, and so on for every hatchet move. Nice little bonus-attack.

Up Aerial φ Feather Blast
Rather plainly, Tomahawk Man's headdress seems to explode in a shower of little feathers with great aerial range, going up at least a stage builder block. A good deal of starting lag, astoundingly low ending lag. The main damaging hitbox is actually quite small, only being in the area just above Tomahawk Man's head. This has good KO potential, though. Anyway, the residual feathers look just like the ones from the NAir; these, however, don't deal any direct damage. Instead, they'll sort of swarm around opponents who get near them and make them unable to attack. The feathers are light, however, and can be shaken off easily by button mashing. A straightforward move.

Down Aerial φ Fake Out
Tomahawk Man sticks his axe down as he crouches in midair, in something of a downwards sex-kick, with a lasting hitbox. This'll do a respectable 8% and pretty nice knockback either left or right, with some legit KO potential. This has fairly low lag on either end. What makes this suddenly more interesting is what you can do while the hitbox is out: pressing A again will make Tomahawk Man kick off the hatchet and spring into the air to the height of his first jump. Naturally, this makes the tomahawk fall to the ground, and while it falls (slowly rotating, as if footstooled), it does the same 8% only with upwards knockback. The axe falls at around Tomahawk Man's falling speed, if it means anything to you, dear reader.


Throws

Grab φ Undercut
Blatantly ripping off Hector's grab mechanic, though adding a unique flair, Tomahawk Man swipes low to the ground with his axe, tripping the opponent and dealing 6% damage in the process. Tomahawk Man cannot use any throws from this.

Pummel φ Grab
Pressing the pummel input (grab or A, normally) will simply make Tomahawk Man grab the enemy normally, with average range and lag. Pressing it again will make Tomahawk Man regrab, possibly making it harder for one to escape the grip. Useful for stalling, perhaps?

Forward Throw φ Axe Glider
Placing his hatchet on his back, Tomahawk Man pulls the enemy in close and jumps forward, activating his foot jets. Yes, Robot Masters have foot jets. Anyway, since that generally wouldn't be useful due to gravity and all, the tomahawk, while on his back, takes steroids and grows into a functional pair of wings! This'll make the throw handle like a quick but awkward glide. He keeps gliding with the enemy until they manage to get off with button mashing, in which case they'll enter a tumbling state as they fall. The heavier the opponent is, the slower and more awkward the glide feels. This does no damage, but is great for setting up an aerial or stalling, like some other moves. Notable startup lag.

Backward Throw φ Pony Ride
Tomahawk Man makes a robotic noise akin to whistling while holding on to his enemy, and out of nowhere a mechanical horse eerily similar to Centaur Man bursts out of the ground in front of him and the opponent. The horse, doing most of the work here, thrusts the opponent onto its back, with some help from Tomahawk Man as he makes sure they won't accidentally fall off. The horse then gallops quite quickly backwards with the victim on its back, who must button-mash frantically to avoid the explosion at the end of their run, which happen at the five-second mark of it.

Either they can escape with 2% damage, caused by being roughed up a bit before riding, or they can get hit by the explosion, doing an additional 10% and frightening knockback upwards. The plus-side is that if the horse rides off the edge with someone on it, which it can (and will) do, the explosion will normally help recovery so they won't get super-gimped. This throw is a mixed back; it's a great spacing tool on one hand, but on the other, it's quite laggy and the throwee may still escape before the real payoff, even during the starting lag. Still though, it's made a little more difficult to break free just for the sake of practicality.


Up Throw φ Wheel of Fortune
This is a fun throw. Lifting the enemy up with his free hand, Tomahawk Man detaches his axe form his arm while it levitates right nearby, floating magnetically. As this happens, the hatchet spins quite quickly, taking hardly any time at all to look like a disembodied buzzsaw coming from his arm. Of course, he hits the opponent with it, them taking 3% a second in multiple hits. The real benefit comes by interrupting the throw yourself by pressing A while it happens. What this does is essentially launch the foe in a random direction determined by which way the axe's momentum would have carried someone. This can KO, but only around 200% or so... It really is just a nice get-out-of-my-face attack, like all of Tomahawk Man's throws. This is also his fastest throw, though it has some nasty ending lag if you don't interrupt it and go for straight-up damage instead.

Down Throw φ Stapler

Tomahawk Man unceremoniously drops the foe to the ground and pins them there, retreating his axe into his arm and taking out from it... the enemy seen in the image above. In case you didn't figure this out already, this is essentially a robo-stapler. Tomahawk Man uses it to pin down each of the enemy's limbs/body and leave them on the ground. This does 4% straight up (1% for each staple!), and holds the foe in place, vulnerable. This is especially useful under a tree that's about to fall, or on a spike trap. If it's the latter, the trap will do 2% per second as long as they lie on it. Speaking of which, they'll stay there on the ground forever unless they break out, which is fairly easy, though it takes maybe three or four seconds. This is quite nice, it lets you run around while the enemy is idle, whereas the back throw has the horse doing everything. This is pretty important if you ever want to land a tree KO.


Situationals

Ledge Attack (Under 100%) φ Launch
Tomahawk Man switches his hand grabbing the ledge (he only grabs with one hand) so that the axe is hanging on. He then uses that magnetic tension to hang lower with the axe still attached to the edge. That doesn't take as long as it sounds. As he releases the tension, he catapults himself into the air about the height of his first jump, but a little more diagonally. The hatchet, though, stays behind, only to return to Tomahawk Man like a boomerang, wherever he is. It does 5% and surprisingly strong knockback upon contact. If you don't want to end up in the air, however, press A once you've gotten your tomahawk back and you'll plummet to the ground, axe outstretched, which is now a hitbox that does 8% and a light spike to the stage floor. When Tomahawk Man reaches the ground, he experiences some annoying lag, pulling the axe from the stage. Be careful now.

Ledge Attack (100% +) φ Silver T. 2
Tomahawk Man detaches his axe and tosses onto the ledge, as it spins around like his neutral special. In fact, these moves are very similar, having the same suction effect and doing 3% a second in multiple hits. The only difference is that this tomahawk moves straight upwards after pausing, rather than diagonally. If the opponent gets caught in it, they'll end up some ways above you as you crawl up the ledge. As with most every tomahawk attack, the axe grows back automatically. Average speed.

Get-Up Attack (From Front) φ Push-ups
Tomahawk Man is a fit robot. Naturally, he exercises all his motors and whatnot, so that's what he does here. He simply does a few one-handed push-ups and does one final one that pushes him back up into a standing position. Each thrust of his arm makes him go up and then back down, an action that does 5% and some fairly nice knockback upwards, while the final push does more diagonally backwards knockback. Long duration, low lag.

Get-Up Attack (From Back) φ Uprightification
Tomahawk Man's headdress is behind is head, so when he's lying on his back, it touches the floor. This leads to a fun but straightforward get-up attack--his headdress erupts in feathers, which makes him spring straight upright, rather like a zombie or Frankenstein's monster. This is fast and does 8% and pretty satisfying, albeit weak, forward knockback. The feathers that linger are purely for visual effect.

Tripped Attack φ Shield Slicer
The name of this attack has double meaning-- not only is a slicing move that shields Tomahawk Man, it eats through enemy shields as well. How this is works is that the axe detaches from Tomahawk man once again and circles around him quite rapidly as he gets up. This absolutely kills shields, and does 4% per second to boot! It's got a rather lengthy duration, but since it has incredibly high priority, you want to stay away from this move. Shame it's only a situational.


Final Smash

Super Attack φ Nature Spirit
So, Tomahawk Man has snagged a Smash Ball. Lucky for him, he has a pretty nice super attack. When he presses B, a robotic eagle, or some sort of bird of prey, appear high up in the center of the stage, in the foreground. Upon its appearance, it's a hitbox that does 20% and good knockback straight away from it. After that little flashy entrance, the eagle swoops towards Tomahawk Man and, when it reaches him, transforms into a new, giant, ultimately better tomahawk. He then retracts his axe-arm and takes the superior hatchet in its place.

So what can he do with this special new gift from above? Well, for starters, all his attacks, including non-tomahawk attacks, have a boost of 10% damage and some more knockback. In addition, since this is a sort of air/nature spiritual type... thing, it improves some of Tomahawk Man's stats-- namely, jump, run, attack speed, things of that nature. The nature part kicks in when you realize that it also buffs his down special game. Everything involving the tree growing will move faster, like the whole rain deal. In short, this is a basic buff, though there's one extra note: the FSmash is changed to an overhead axe swing that has a massive shockwave that goes outwards, being a move that does 20-28% damage and very nice knockback.

There's another twist. Reminiscent of Metal Man, this final smash allows Tomahawk Man to have a Shield Special. Pressing B while shielding will desync the new axe with Tomahawk Man, meaning it's an eagle again. This will rob him of all the new buffs, but the eagle has its own AI, so it can fly around freely, and quite quickly. It will try to home in on the nearest opponent to perform a pecking attack, which does 5% a second and is extremely annoying to shake off. It can also pick up foes and carry them off the edge, though, it lets go once there a little ways off. Additionally, it uses a wind move in which is flaps its wings for a few seconds, pushing anyone in front of it away like a weaker FLUDD.

It has one last surprise, though, and this one's rather evil. Sometimes, it will fire a small, but incredibly fast-moving shot of energy that goes to wherever the foe was when it was fired. This does 30% and very light knockback-- knockback isn't the point in this case though. Instead, it completely stuns the opponent and prevents them from moving, or attacking, or anything, for five seconds. For example, if they were in the middle of performing an aerial, they'll just cut themselves off and drop to the ground, helpless.

So, this all sounds really broken. To be honest, it kind of is. But keep in mind that Tomahawk Man is not invincible during all this, and the eagle has 50 HP, and is able to be damagedand knocked around normally. This super attack lasts a whopping 20 seconds. A final note: if someone hits the eagle as it's appearing for 25% damage and good knockback in one hit, it won't appear in the first place, and the super attack is wasted. A suitable, if inconvenient way to balance this. Once the attack is done, the eagle disappears in a flash of light.


E x t r a s


Tauntsφ&φVictoryφPoses

Up Taunt
Similar to Fox and ZSS, Tomahawk Man tosses his axe over his head and catches it behind him.

Side Taunt
This one's silly: Tomahawk Man does a yell and covers his mouth while doing so. #indiancall2

Down Taunt
Tomahawk Man simply takes the pose found in the sprite at the bottom of the moveset, with his axe raised behind him. This can be held indefinitely-- just like Metal Man!

Up Victory Pose
Tomahawk Man seems to be showing off his moves ("YES!" -Captain Falcon) and takes a ton of axe slashes and whatnot.

Side Victory Pose
Now he appears to be sitting cross-legged on the floor... smoking a peace pipe? Wha? I thought this was a fighting game...

Down Victory Pose
Tomahawk Man chucks his axe at the ground, where it stays. He folds his arms in a pose of power and triumph.

Special Victory Pose (vs. Yamato Man)
Tomahawk Man is quite proud of his American heritage, as he stands with his back facing Yamato Man, completely ignoring him.

Loss Pose
Tomahawk Man is seen sitting on the ground visibly worn out, and rather upset that he lost.

Special Loss Pose (vs. Plant Man)
Tomahawk Man is surrounded by plants and the like, trying to shake off various petals and chop through vines.

Victory Theme
This one's a redone intro to Tomahawk Man's stage music.


Playstyle

Tomahawk Man's playstyle has one main focus, and that's his down special. Really, this move is insane. It can be used for everything. Set up a seed as early as you can, keep feeding it, and then you'll find yourself with a KO move and more. Of course, without a tree, you can still manage, and that's the beauty of Tomahawk Man; he really doesn't have a predetermined playstyle.

Alright, so let's say you want to take the seed path. First step is to use your neutral A; that'll bust up the ground so you can plant a seed. Use your nice throws to get the opponent away from you and your tree while you do rain dances and such. When it comes time to chop things down, use your throws some more, and get the foe right under the tree. Hopefully, you'll have scored at least one KO by now.

The rest of the tree playstyle sort of explains itself, and it's really not all that interesting. Basically, just experiment with different paths, things like that. Now, Tomahawk Man has a couple of other moves that control the stage-- the neutral A and the up tilt. Neutral A is mainly useful with the tree, but if you decide to pair it with the up tilt, you have a formidable wall to stop approaches and projectiles. Even the wood trap is useful, it can pop the foe up in the air so you can punish them with some of your more useful aerials.

Speaking of aerials, Tomahawk Man has a rather nice aerial game. Use a NAir to FAir combo if you're into gimping, since that can have spike potential. The BAir is also good at stopping approaches, though don't rely on it all the time. The other aerial attacks are used for spacing, like many of his attacks.

Tomahawk Man really isn't so much about KOing, though he does have a few moves capable of doing that. I won't go into specifics, really, since I assume you read the set at least a little, but you should try to focus on gimps more, if anything. So yeah, since you have so many multi-hit attacks, damage shouldn't be a problem, and if you want someone closer for any reason, just use your up special to take care of them, maybe use a forward or back throw to get them off the stage.

As a Tomahawk Man player, things can be a little tough, since a lot of his essence is in controlling the stage. If he's pressured a lot, often times he'll have to resort to a separate playstyle. You can use aerials and throws to your advantage, since Tomahawk Man is rather good with those. Did I mention the situationals are actually pretty fantastic? Yup, they do have use after all. I'm leaving this playstyle section pretty bare since really, it's up to the player to decide what you want to do with the character. In Tomahawk Man's case, you have a lot of freedom when it comes to playstyle. Just make the best of things, and always adapt.


AlternateφColors


Stage

Restricted Area


This stage comes straight from Tomahawk Man's level in Mega Man 6, specifically the beginning part. Now, the stage is not absolutely identical to the image above; it has some little adjustments made to it. The first change is that barrels like the ones you already see will randomly spawn from any one of the blue vertical objects on the ground. The barrels can be destroyed when dealt 30% damage, and carry random items inside. They can also be used as cover for Colton assist trophies. The walls of the stage, as you might notice, are prime targets for chain-grabbers. Fear not, because if the stage detects you're using a wall for infinites, it'll spawn a Colton right behind the attacker to put them out of business for a while...

Anyway, the upper blast line is actually pretty high, and the upper left edge is not a walk-off, but a cliff face! All the others are walk-off, though. There's a nifty thing on the top level... See those spikes on the right? Well, normally, they extend to cover that hole leading to the lower level, but they can be removed... once you've been fighting on the upper level for a minute, Proto Man himself will appear next to the spikes and blow them away wordlessly, allowing access to the lower level. By the way, the spikes act like normal stage builder spikes.

So yeah, this is a pretty fun, hectic stage, though it's hardly tourney-viable. Oh well. This is really just to represent the level, anyway. Brawl could use some more wacky stages.


Music
Tomahawk Man's theme
Silver Setting Sun
Plant Man's theme
Amazonian Flower
Blizzard Man's theme
Flurry of Frozen Fury
Flame Man's theme
Flaming Desert Sand
Wind Man's theme
Wind Swoop
Centaur Man's theme
Odyssey Beyond the Falls
Knight Man's theme
Fortress of the Knight
Yamato Man's theme
Rising Sun Warrior
Mega Man 6 medley

OtherφExtras

Assist Trophy


So you got an assist trophy. What's in it? Colton, from Tomahawk Man's stage in Mega Man 6. So what does it do? Well, it shoots. Yeah, it's pretty simple. However, the AI has been upgraded from Mega Man 6, so instead of standing and shooting once every few seconds, it actively walks around, jumps, finds cover, etc. as well as shooting. The shots deal 10% and enough knockback to want to avoid it. at all, really. It's important to note that this enemy won't accidentally jump off the ledge, so no easy riddances. It also can be destroyed: it has 50 HP. This assist trophy stays on the screen for 20 seconds.

Symbol


Entrance
The eagle from his final smash appears here, carrying Tomahawk Man in from above, similar to the Ice Climbers.

Kirby Hat
Kirby gets Tomahawk Man's headdress and face paint, and the ability to use Silver Tomahawk. He looks like the one in this picture.


KingK.Rool

Smash Lord
Joined
Nov 26, 2005
Messages
1,810
Tomahawk Man is a very clever set, really. Plorf is such a perfectionist, which is why it takes him months to make a single set, but it does show; just about every attack shows a lot of thought behind it.

The main selling point of this moveset is how absolutely every attack comes together eventually. I recommend reading the DSpec last; although it IS very important to his playstyle, you can't get a proper comprehension of what it does without having read the rest of the attacks first. Anyway, there's practically no limit to all the fun stuff you can do with it, from chopping it to bits to making smoke signals to using it as a lightning rod and trying to toss the foe up into it.

And there are lots of clever interactions you don't draw attention to as much. Obviously, there's the Jab-UTilt impassable obstacle thing, which I'm very fond of, but there's also the potential of using your Totem Pole as a lightning rod by placing it on a higher platform and thereby protecting your precious tree until you want it to go down.

There's really only one thing I can quibble about, and that's the touch of overdetail. You have a tendancy to describe rather unimportant qualities in really immense depth, and it makes the writing style feel a bit impersonal. Just a bit, though.

I love how fitting this moveset is for Tomahawk Man, how many attacks there are that actually involve axe swings (and how none of them are generic), and how well the moveset hangs together. Well done, Plorf. (Y)

Sorry for not commenting Poliwrath, Jimny; I hadn't intended to comment Tomahawk Man right now, either, but Plorf's been working on him for SO long, I felt I owed it to him.
 

MarthTrinity

Smash Lord
Joined
Aug 9, 2007
Messages
1,954
Location
The Cosmos Beneath Rosalina's Skirt
And Can You make others like Tauros, Scizor?
Tauros is right here <-Link [/shamelessplug]

Okay. So Plorf -FINALLY- finishes Tomahawk Man. Congrats, congrats. I'm very happy overall with how this moveset turned out. I've like the moveset interactions throughout the production of the set and I like them now as well. My only real complaint would be some of the throws (namely the down throw: omgwtfpropz?!).

Besides that I love the set and am proud of you for finishing it Plorf (cry2). It's a certain continuation of your already good sets and I'm glad you plowed through this one to get at least one out before the contest was over. Really that's all I have to comment...most of the comments I've given you doing the creation of the set apply here ;)
 

MasterWarlord

Smash Champion
Joined
Aug 24, 2008
Messages
2,911
HECTOR
How’d you make such a great set for a FE character? Amazing!

CLOUD OF DARKNESS
Wow the voids are so creative! +1 super vote

ANNE
Excellent organization! Very daring to say the least, and it certainly paid off.

TAC
THIS IS THE BEST MOVESET EVER! Kibble would be proud! :bee:

SLOWPOKE
Rather fond of the resting mechanic. Seeing Ocon says it’s underpowered and DM it’s overpowered, that must mean it’s balanced. Great job!

POLIWRATH
Was wondering when you’d put this back up. Great to see it back up and running! Missed it the first time. Real hidden gem.

TOMAHAWK MAN
A superb improvement over Metal Man. Great to see you finally make another set, Plorf.
 

Hyper_Ridley

Smash Champion
Joined
Dec 21, 2007
Messages
2,299
Location
Hippo Island
Tomahawk Man

Finally, another Plorf set, and it was definitley worth the wait!

So yeah, that Down Special was just...wow. I thought Wheel Gator's down special was integral to his playstyle but you took the concept and put it on steroids xD Anyways, the amount of stuff you could do with just that one move was mind-boggling but it made for a very cool character that would be fun just to experement with. Though you constantly referred to Rain Dance as USmash when it was actually DSmash xD

Moving on to the rest of the moveset (pssh, Down-special is the only move M I RITE), lots of good fun stuff to be had. You were able to make a lot of interesting axe-based moves thanks to taking full advantage of his robotic abilities. To make things even better there didn't seem to be any effects that felt tacked-on, everything felt like it had a purpose in his moveset.

The main thing I would have to criticise would have to be how many random effects he has. It takes away from his playstyle to an extent when you can't really control some of his moves, but by far the biggest culprit was his DTilt. Randomly raising and lowering ALL of his stats? You'd have to be a professional Poker player to ever take that risk. It really hurt to be reading the first part with the cool spirit powers radiating from his body and then I get to the second part and I see super-duper randomness.

Okay, enough HR anti-randomness rambling. This seriously is a sweet moveset, and I had a blast reading it. Lots of creativity, plenty of fun playstyle choices, and just an all around enjoyable character that makes me wish for a sandbox mode in Brawl xD
 

Master Miyamoto

Smash Rookie
Joined
Oct 4, 2009
Messages
4
Location
*laughs*
I am approving of this list of attacks for my Mario character. You have done a great justice to represent a character you love with such true attacks. I especially enjoyed how much you used our FLUDD; Super Mario Sunshine was one of my favorites *laughs*.

I also enjoyed how you made use of Kuribo's Shoe. I have always loved that power up yet I wish you had also used suits such as Hammer Suit, Tanooki Suit or even Frog Suit. Representation from Super Mario Galaxy and New Super Mario Bros. may have also been appreciated.

My only problem is this attack list seems a bit complex. I am afraid that it may scare away newer players with its combos and such. I suppose with items on though he would be an enjoyable character to use. Imagine him using the Dragoon. . .zoooooom! PAH! That would be fun! :chuckle:

Do you have plans for Luigi Remix? *laughs* :laugh:
 

The Great Sakurai

Smash Rookie
Joined
Oct 4, 2009
Messages
6
Location
Dreamland, of course! *laughs*


Hailing from Dreamland, Waddle Dee joins the Brawl!

B: A twirl of the umbrella! What fun! It can reflect projectiles and deflect damage!

B>: A ride of the cart! Super powerful, but watch out! It's easy to lose control!

B^: A glorious ride of the umbrella, just like Peach's! But it's unique, I swear!

Bv: Look! It's STONE WADDLE DEE! Now he has extra power and weight! It's not like Mach Tornado, I swear!
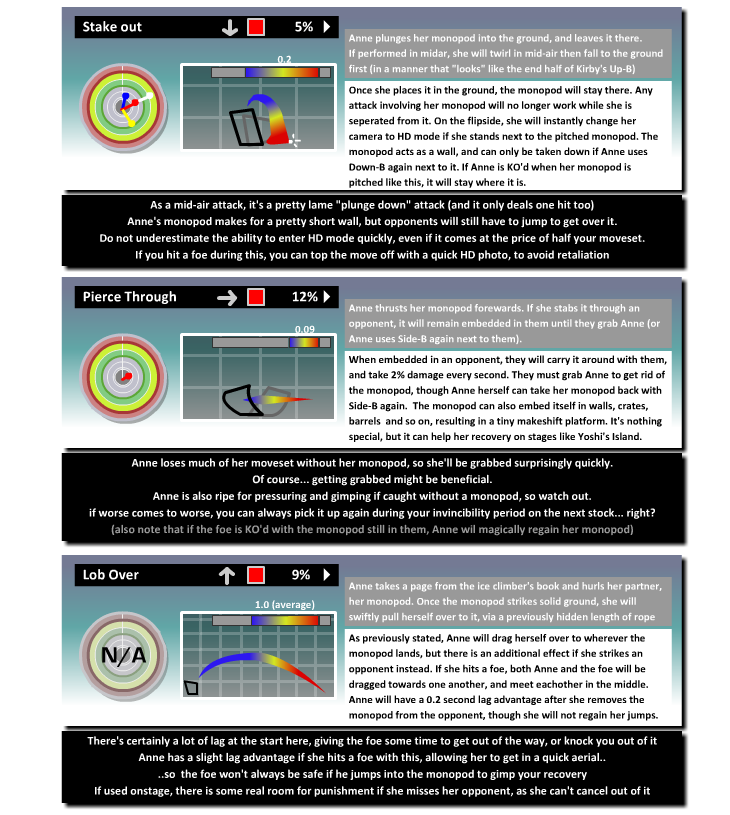
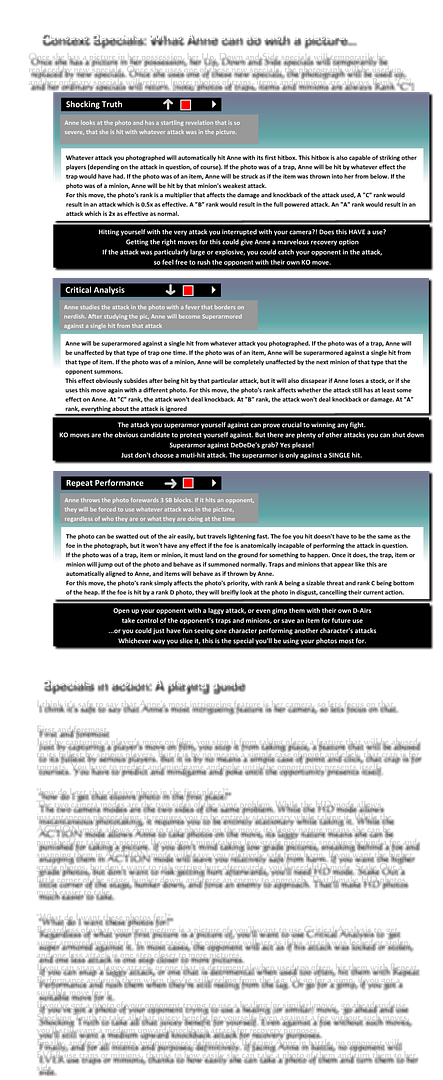
Final Smash: It's a Waddle Dee Army! It's not a clone of Dedede's, because there are no Waddle Doos or Gordos! What fun!
 

Plorf

Smash Apprentice
Joined
Jan 28, 2009
Messages
124
Location
Silver Spring, MD
@HR See, the Rain Dance was originally the Usmash, but then I changed it at the last minute. <_<
And I see you still have that anti-randomness bias. Fair enough. That was my early down special, but I didn't really like it enough to have it as a special, so I changed it, since I didn't want to toss it. I suppose I forgot to make it cooler. (sry)

@Rool I see you also though this would be fun when implemented. About the detail thing: I've always been like this; I can't see myself omitting details that I would like to know about a move myself. I guess I just like knowing stuff :p
Yes, I tried to make it really true to character and such.

@Both Thanks for mentioning the axe-based attacks, I really tried to make them rather implementable, yet not generic. The down special I'm particularly proud of, and it wouldn't have happened unless MarthTrinity helped me. Seriously, big thanks to him, without him I probably never would have finished this set.


payasofobia

Smash Champion
Joined
Feb 13, 2008
Messages
2,232
Location
America!


Hailing from Dreamland, Waddle Dee joins the Brawl!

B: A twirl of the umbrella! What fun! It can reflect projectiles and deflect damage!

B>: A ride of the cart! Super powerful, but watch out! It's easy to lose control!

B^: A glorious ride of the umbrella, just like Peach's! But it's unique, I swear!

Bv: Look! It's STONE WADDLE DEE! Now he has extra power and weight! It's not like Mach Tornado, I swear!

Final Smash: It's a Waddle Dee Army! It's not a clone of Dedede's, because there are no Waddle Doos or Gordos! What fun!

This made me realize how ****ing awesome these movesets are compared to Sakurai's.
 

King Iwata

Smash Rookie
Joined
Oct 4, 2009
Messages
7
Junahu, was it? I must say you have quite the “movesets” as you call them there. It’s a shame we don’t have the rights to this character you’ve made entitled the “Cloud of the Darkness”, but seeing you’ve posted your original character on this Smash Forum I assume you’re more then happy to donate Anne to our cause, yes?

I’m rather fond of how you included the details graphically on Anne. It makes it quite the presentational feast and a joy to look at, much more meaningful then any bland numbers. You also kept her nice and simple, unlike the Cloud of the Darkness, but I probably shouldn’t talk about her much more or else Square Enix will be all over me! (Laughs) Anyway, her character seems interesting enough. I found it rather humorous that you made her have a crush on Luigi, but we’ll probably have to edit that out since Luigi already has a girlfriend (Daisy). What would that say to the children? Her neutral aerial is also rather suggestive. Just what were you thinking when you put those things in? Yes, we have some more maturely oriented characters, but you seem to want to insert this one into the Super Mario Brothers franchise. I doubt Miyamoto-san would take kindly to it.

Regardless, it’d need little editing to work. I look forward to future works from you.

. . .And what’s that Letmen thing you go on about in the assist trophy?
 

MarthTrinity

Smash Lord
Joined
Aug 9, 2007
Messages
1,954
Location
The Cosmos Beneath Rosalina's Skirt
Gentleman's Rules​


*1* Please post commentry on the previous set, before posting your own moveset. If the previous set did not follow this rule, you may comment on the one that came before it (although the best thing would be to comment on both)
*2* Please comment on the previous set, before replying to comments about your own moveset
*3* Please leave a minimum of 14 posts between the previous moveset and your own (use the chat to determine whether or not someone else is waiting for a new page)
*4* Please do not criticise other users, in the thread, for not following the gentleman's rules
*5* Please, if you read a moveset, post a comment for it. Even "I read it and liked it" is better than no comment at all
*6* Please, if you have multiple movesets to comment on, don't use more than one post to comment on them.
*7* Please take disagreements lasting more than 3 posts to PrivateMessages, rather than continue to argue in the thread.

The Gentleman's Rules are a list of guidelines that are highly suggested to make Make Your Move a happier, closer community. With this guidelines, people will be encouraged to comment on the previous moveset before posting their own. This will ensure that each set will be recognize and acknowledged without being ignored. These rules won't exactly be enforced nor will there be any real punishment for not following them. Simply keep these in mind while posting so we can help keep Make Your Move a friendly community and make sure that all movesets are recognized for their effort and hardwork!

Thank you!
 

SkylerOcon

Tiny Dancer
Joined
Mar 21, 2008
Messages
5,216
Location
ATX
Tomahawk Man
I’m pretty pleased to say that Tomahawk Man is a nice improvement over Metal Man.

First off, the Down Special was pretty sweet. Just the sheer amount of ideas you have crammed into there is hella sweet. It’s just like one of those things that when I used it the first time I’d be amazed and just the sheer versitality of the move. It’s a very clever, very good move. Props for that. Though, like HR said, Rain Smash is the DSmash not USmash.

A lot of the moves were Axe Swings, yet none of them were generic. At times, some of the effects seemed a bit forced, though that’s really just nitpicking. One problem I did have was with the Dtilt… it’s just a major risk overall, and I’m not sure I would ever take it. I like the basic concept, but it definitely has its’ kinks that need some ironing out. And as a side note that doesn’t really need its own paragraph, I absolutely LOVED to the Dash Attack. I just like that move a lot, for some reason.

This moveset has good creativity, and though it’s not incredibly playstyle focused, a solid and cohesive playstyle is definitely there. This will probably be getting a vote from me :3
 

Plorf

Smash Apprentice
Joined
Jan 28, 2009
Messages
124
Location
Silver Spring, MD
Alright, so not much I haven't heard before. Yeah, down special is cool and nifty. Axe swings that aren't generic. Weird Dtilt... hey thanks, I like the dash attack as well.

Indeed, I put more focus on playstyle in this one. And since I started in MYM5, you can kind of see where some of my moves went awry :p
 

SkylerOcon

Tiny Dancer
Joined
Mar 21, 2008
Messages
5,216
Location
ATX


Paper Mario, much like his 3-D counterpart, needs no introduction. Being featured in a grand total of three games, Paper Mario has already become of the most recognizable names in the RPG genre. While his latest game has been met with lower critical reception than the first two (despite it still being received well), the first two in the series were regarded as absolute gems, welcomed by both critical and commercial success.

In this moveset, you will find Mario borrowing from some of the more iconic partners in the series, as well as taking special abilities from each game. As with what eventually happens in at least one boss battle in every RPG, Paper Mario is based around outliving the opponent via keeping them at a distance, despite his lightweight and moves with low damage and knockback. This is a joint production between SkylerOcon and Wizzerd.

Mechanic


| Action Commands |

Paper Mario has a fairly interesting mechanic. It effects absolutely nothing except the Final Smash. You see, Mario's Final Smash runs off of Star Power, something seen in the first two Paper Mario games. There are a grand total of seven stars that can be charged up. It shows a star then the number of stars you have charged up, and to represent the current amount you have charged until the next star, there's a circular meter inside the picture of the star.


How this works is simple - for every time you are hit, or you hit the opponent, the star charges 1/16th of the way. However, these things called Action Commands, which will be described for every move they are avaliable in, will also charge your stars an additional 1/8th. Unless otherwise specified, if you press A the moment the hitbox hits the opponent, you get an additional 1/8th.

Stats


Walking - 4/10 (A very casual walk)
Running - 3/10 (He's short, and his feet are even shorter. There's plenty to be desired)
Jump 1 - 4/10 (Not good, but not the worst either)
Jump 2 - 3.5/10 (NOW we're tottering toward the "bad" side of the jumping spectrum)
Priority - 4/10 (Moves with good priority are very rare)
Damage - 4.5/10 (Rather low as a whole, but there's a few pleasant surprised tucked inside)
Knockback - 4/10 (The only thing keeping this up is Bobbery)
Weight - 2/10 (Featherweight? Try paperweight. Incidentally, that's also what I'm "trying" with my copy of Super Paper Mario)
Size - 3/10 (About three quarters the size of regular Mario)

Specials


| Neutral Special |

Flipside - A cursor stretches a black box over Paper Mario's body, him using it to flip on his X-axis. This takes around a quarter of a second to perform, but he has constant super armor, so he can't be knocked out of it. After using this, Paper Mario appears in the background of the stage as a silhouette. He can't be attacked in this state, but his attacks won't work either! By pressing the input again, Paper Mario flips back onto the stage with similar lag. However, he doesn't have super armor here. It can't be canceled just by attacks, but by simply standing in front of him he can't flip!


No biggie, right? Well, actually, as Paper Mario is flipped a bar appears beneath his stock icon with ten increments. Each half-second he remains flipped, an increment disappears. The only way to recharge it is by flipping again, which causes it to recharge at the same rate, it disappearing once fully recharged. If Paper Mario's meter runs out, he takes 30% damage and flips out again, having super armor this time.


This can potentially be an amazing way to avoid powerful attacks and combos, but it has a high degree of risk to it as well. Against slow heaviweights like Bowser and Ganondorf, this is pretty much risk-free, but even moderately speedy characters can punish this with clever play. Once flipped, you probably want to be unpredictable with his Side Special, Origami.

| Sideways Special |

Origami - Paper Mario fans should immediately recognize this move. Borrowing from TTYD, Mario will transform into one of three things. A paper roll, a paper airplane, or a paper boat. Mario folds and unfolds into these forms extremely quickly, so don't worry about lag when switching between forms on the fly. All the forms have a major downside though, being that Mario takes 1.3x damage and knockback. So despite that they make up for his normally poor speed and mobility, they make him even lighter than he already is! Watch out!


>>>The paper roll is very straightforward - Mario immediately rolls up into a, well, roll of paper. Just imagine an empty paper towel roll, and that's what you've got here (but instead, it's white with Mario's image clearly printed on it). While in this form, unlike his normal, very mediocre, run, Mario goes fairly quick! His run goes up from the measly 4/10 stat to a good 7/10 stat! Of course this builds up over time so it takes about half a second to get to max speed. If you hit an opponent while you're running at max speed, they take a great 12% damage and get flattened under Mario, putting them into the pitfall animation. Luckily, this counts as a high priority attack, so don't worry about too many moves going through this.


>>>The paper airplane works exactly how the name sounds. Mario folds up into a paper airplane (once again, white, with Mario's image clearly printed onto it) which acts as a glide and moves incredibly fast (about 1.2x the speed of Pit's glide!). It is a very small target, and is slightly above average priority. Hitting the opponent with this deals 10% damage and causes them to be stuck to the tip of the airplane. If Mario can drive the opponent into the ground, he deals an additional 5% damage with good horizontal knockback, killing at around 125%. The opponent can break off the tip easily via button mashing (causing them to be sent into the aerial grab release animation, moving them a good way away from Mario).


>>>The paper boat is rather interesting. It can only be activated in the water, and gives Mario not only incredibly fast water movement (about that of Brawl Mario's run), but, despite not being a steamboat, every time you press A a small smoke rings pump out of of the paper boat that quickly expand to the width of the boat itself. These only do 3% with flinching knockback, but they're surprisingly decent priority and travel up to the height of Ganon, making it great for stalling in the water. Three can be out at once.

| Upward Special |

Ultra Jump - 12% - Mario holds up his fists at his sides, looking almost as if he's about to start a fist fight! Suddenly he begins to compress himself downward, going incredibly low and getting rather crumpled up. Upon releasing B, Mario will uncompress, shooting up the decent height of his second jump uncharged, or shooting up the incredibly length of four Ganondorfs upwards fully charged! During his fast ascent (we're looking at about the time it takes for Marth to complete the length of his Upward Special), Mario is a low priority hitbox that deals 12% damage and good upward knockback upon contact, killing at 125%.

| Yoshi Kid |

Flutter Kick - 2% (five hits total) - It should firstly be noted that this move can only be used if Mario is mounting the Yoshi Kid via the Down Smash. If Yoshi Kid is not mounting, Ultra Jump will happen as per usual. Getting onto the actual attack, this move is essentially a great recovery in, well, any direction. Imagine Brawl Yoshi's second jump, but instead with an 8/10 running speed stat and that you could travel in any direction with little resistance, so long as your movement is equivalent to the length of Battlefield.


There are a total of five hitbox in this attack, the last one giving mediocre horizontal knockback that would have a tough time killing at 200%. It's slightly above average priority, but it can still me defeated by plenty choice moves. There's low start-up, but if you land on the ground, you take somewhat punishable ending lag. In the air, you go into helpless. Due to the move's low start-up, it's a good GTFO move, but the amount of end lag is a bit dangerous.


| Downward Special |

Partner Swap - Mario holds his hands up above his head, looking a bit upwards. He'll remain in this stance for half a second, or until you press either the A, B, Y, X, L, or R buttons. This functions exactly as the name implies - you use it to swap partners.

The A Button switches to Flurrie
The B Button switches to Watt
The X Button switches to Admiral Bobbery
The Y Button switches to Yoshi Kid

The move is extremely quick, a partner swap only taking half of a second to complete. This can also be used while you're using Flip, so you can use this move pretty much without worry of being harmed most of the time. Click on their names to check out their Wikipedia entries for backstories! Partner moves replace old moves - so if you have Yoshi Kid out you'll have his Up Special instead of the regular one.

Standards


| Neutral Combo |

Hammer Slam - Paper Mario makes a simple hammer swing, in a true Paper Mario classic. This is a little laggier than most jabs (Mostly in ending lag), and it has pretty specific range, but it has a nice effect, dealing 9% with average knockback. This has the potential to KO, but only at exceptionally high percentages (We're looking at the 160%+ range). Notably, this is a meteor smash when used by the ledge. This can't be relied upon, but it's a great way for a cheap KO if it lands. Pressing A the moment the hammer hits the ground counts as an action command, giving you more star power.

| Watt |

Electro Dash - Watt flies behind Paper Mario for brief starting lag, then instantly launches forward half a Battlefield platform ahead of Paper Mario, there being some ending lag on a miss (though it isn't crippling). Watt's body deals a measly 6%, but notably it deals quite exceptional set knockback of around a Battlefield platform. This can be used to score cheap KOs on walk-offs, but more notably this is an excellent spacer, great for getting opponents away from Paper Mario's vulnerable body. Still, the startup lag prevents this from being ideal. As a pleasant bonus, it also stuns the enemy much like Zero Suit Samus' down smash, so it's a very useful getaway move when landing (or you can follow up with something else).

| Yoshi Kid |

Egg Toss - 5% - Yoshi tilts his arm back a slight bit and throws an egg at awkward arc. It travels forward about two and a half Battlefield platforms, and at its midpoint reaches the height of one and a half Paper Mario's. It delivers flinching knockback upon contact, pretty much making this a decent spacing tool. It has low start-up and slightly above average ending lag, making it a tad hard to spam. Average priority.

| Dash Attack |

Mario preforms his spin dash from the original Paper Mario; that is he whirls forward the distance of two Battlefield platforms, dealing up to 14% along the way. Due to his papery form, this is exceptionally easy to DI out of, making it much more common to only hit for 7% damage. The priority leaves quite a bit to be desired, and unfortunately the move suffers from slightly above average ending lag.


So... where's the upside? Mario can jump out of the attack at anytime, alleviating the ending lag. This jump goes at an upward-angled lopsided trajectory, bring Mario up to the height of his first jump and moving forward about the length of a Battlefield platform. It also deals 6%, and allows for a nice opening to hit with an aerial.

Tilts


| Up Tilt |

Appeal - 8% - Paper Mario waves his hand above his head for a around half a second. Contact with his hand deals 8% with below average upwards knockback. This has narrow range and decent priority; however, it's all centered above him so it's easy to interrupt him from below. Not much for power, but decent for juggling, right?


Here's where the move gets interesting. The first time Paper Mario uses this, he gains a mere eighth-circle of star power, but for each time he uses it consecutively (Meaning no moves used in between, or being hit) he gains an eighth of a circle more, for each use. That is, the first use grants him an eighth circle, than a quarter circle, than three-eighths of a circle... This maxes out at a full half-circle of star power, for the potential for loads of it if you pull this off. Of course, using this move so many times in a row is difficult but with Paper Mario's wonderful skills at not getting hit it's easier than you might think.


| Watt |

Sparksplode - Watt suddenly explodes into a bunch of little bits of fizzing material. Each bit can be anywhere from a fourth the size of a Pokeball to double one. They always add up to Watt's full size. Each little spark zooms away from Watt's explosion point. The speed, range and power of the little bits varies depending on the size; the smallest possible deals 2% with range barely extending from Watt, moving half the speed of Bowser's dash, and the largest possible deals a large 8% moving at around Captain Falcon's run, with noticable hitstun before the surprising but only average knockback. Due to the way Watt splits up, this always has a maximum of a massive 36%, but this can only land every hit when Watt's dead center of the opponent. This is notoriously unreliable, but highly useful if landed properly. In any case, this has some ending lag as Watt reforms.

| Forward Tilt |

Flip - 5% - Mario's body flips around 450 degrees extremely quickly (during the spin, he's a decent priority hitbox that does 5% with fixed knockback the length of a battlefield platform), ultimately turning so that his paper-thin side is facing the screen, making him extremely close to being invisible. While he's like this, he is incredibly hard to hit (due to having a nearly non-existent hurtbox), and will actually run at a speed that's one speed stat higher than his normal run.


While he's running, his body bends back a bit, making his hurtbox larger (and definitely more noticeable, as you can see Mario's face), but it's still incredibly small. When your press A again, Mario flips back into his normal appearance, once again becoming a decent priority hitbox that deals 5%, with fixed knockback the distance of a battlefield platform.


This move may not seem like much, but it's very useful in the event that your neutral special needs charging. It's not as good as the aforementioned move, but it's a good replacement.

| Watt |

Electric Ray - Watt leans forward and fires a little, tingling ray of electricity out of her body, sort of like Pikachu's Forward Smash though with around 2/3 the range. Unfortunately, this only deals 8% in multiple hits... so what's the use of this? The safety. Electric Ray comes out and leaves in an instant, has good priority, and surprising range, as well as being exceptionally difficult to DI out of. Watt's other moves deal damage faster, but none of them are as safe as this one.

| Down Tilt |

Spin Jump - Paper Mario leaps up to his standing height, then uses a Paper Mario series "Spin Jump" stall-than-fall, which is basically regular Mario's Ground Pound. Contact with Paper Mario deals 10% with average horizontal knockback. This has low start-up, but suffers from a bothersome touch of ending lag. This is a meteor smash on aerial opponents, but Paper Mario won't be going anywhere off-stage with this, so just expect it to give opponents that somehow get under him while in the air good upwards knockback. In addition to this, Mario shoots out stars that go out an incredible one battlefield platform in length at a fast pace, though the moves ending lag won't be over until the stars disappear. Mario has average priority throughout.


If used twice in succession, a wooden panel half the size of a Battlefield platform bursts up from the ground right in front of Paper Mario, dealing 6% with below average upwards knockback. Paper Mario can continue to Spin Jump on the areas a Battlefield platform to the sides to keep making the platform come up and deal damage; however, after three seconds of inactivity the platform goes away.


You'll notice that the platform bounces up higher the more you spin jump next to it - Spin Jump for times, and a Star Piece comes out of the platform. It will shoot towards Mario, who automatically grabs it like an item.


This can be thrown to deal 14% with above average KOable horizontal knockback (killing at a very nice 120%), being especially useful by a ledge. Once it hits the ground the Star Piece disappears and you have to make another platform, but it's possible (Albeit difficult) to grab it out of the air. This works as one of Paper Mario's prime KO moves should you pull it off properly, but it's difficult to find the spacing for, and Paper Mario has easier methods of KOing. Still, none of them are quite as powerful, sealing this as a useful move in Paper Mario's arsenal. The Star Piece is also a thankful change from Mario's norm, as it has high priority.


| Admiral Bobbery|

Hold-Fast - Bobbery walks up next to Mario and quickly gives an incredibly short jump off of his feet, causing Mario to quickly flash white. For around the length of Olimar's down special, Mario obtains super armor! The move has very little starting and ending lag, and (obviously) serves as a defensive mechanic.

Smashes


| Forward Smash |

Escape - 8% uncharged, 16% fully charged - Mario begins to run in place, at least for as long as you charge the attack. As an eatser egg, a red meter shows up above his head and fills up as you charge it. During the charge, coins fly out of Mario's trowsers at the rate of three per seconds, each one either going at an upwards, moderate, or straight trajectory. Each coin causes 1% with flinching knockback (with a pleasant amount of hitstun). These have weak priority, but the abundance of them makes up for it.


Once the charge is released, Mario dashes straight ahead (remeber, he's facing backwards) going one character distance c-sticked and one and a half Battlefield platforms fully charged. He's a hitbox here, but nothing special: only 8% to 16% with low to mediocre knockback. You obviously won't be dealing damage or KO-ing with this anytime soon.


The big use of this move, strangely enough, is defense. It is an effective way to escape. It's an effective tool for defense, despite it leaving Mario back at square one. It requires clever use, but is certainly a useful tool in Mario's arsenal. The start-up is rather quick, though it does have moderate ending lag, as Mario slams his feet on the ground to come to a halt. Releasing the move the moment the charge meter is full counts as an action command, and nets you an extra 1/8th of a star.

| Yoshi Kid |

Swallow - 3% uncharged, 5% fully charged - Yoshi squats over slightly and shoots his tongue out the length of half a Battlefield platform. If any opponent touches Yoshi's tongue, they're swallowed up and spat out behind Yoshi as a small, compact, egg. However, the opponent is invincible both while they're inside the egg and a very short while after, degrading this move into what is essentially an escape move. Unlike most of Mario's attacks, this move has both low start-up and ending lag, so it's very easy to abuse. Yoshi shoots the egg out one battlefield platform behind him.


The stun of the attack changes depending on how much you charge. It can go from half a second to one and a half seconds of the opponent being encapsulated in the egg (this can make for some VERY nice gimping). If you manage to get right by the egg while the opponent is still inside it and use the Egg Toss, Yoshi will instead grab the egg that the opponent is in instead of one of his normal eggs! This functions exactly like a normal egg toss, except that the opponent suffers a great 10% damage upon the egg exploding because of the throw. This is a great damager, so abuse it!


| Flurrie|

Gust - Flurrie takes a large huff of wind, giving the move average start-up lag. She then puffs it out, causing an effect exactly like Vaati's wind - their horizontal speed is decreased by 75%, but their vertical movement is increased by 10%. However, unlike Vaati's wind, Mario can move while Flurrie blows! The wind travels one quarter of Final Destination, and is signified by swirling, white lines.


No charge causes Flurrie to blow for one second, while a full charge causes her to blow for a full three seconds (usually causing the opponent to ERUPT in anger). This creates an incredibly useful wall, Forcing opponents away from Mario. However it takes a five seconds to charge completely, so it is incredibly rare that you will get the full effect of the move.


| Upward Smash |

Powerbounce - 12% uncharged, 15% fully charged (strong hitbox), 4% (weak hitbox) - Mario gives a jump, 1.25x the size of Ganondorf, and then falls back down to the ground. The jumping animation slightly differs from his actual jumping, being that Mario's head is tilted upwards more dramatically.


The charge on this move doesn't effect the height at all - it effects how many times you can repeatedly bounce off of the enemies head (pressing A the moment you land extra bounces is this moves action command, and will net you more star power!). At no charge, you can't bounce at all, at a quarter charge, you can bounce once, and so on and so forth until you reach four jumps at max charge.


The bounces work pretty basically - if Mario lands the main jump on the opponent, he can now bounce on them. He will spring up Pikachu's height once he lands on the opponent if he has bounces left, but if he doesn't he'll spring up two Pikachu's heights and pull off a spin in the air. The bounces have increasing hitstun, though each time you land Mario gets thrown off farther and farther to the side, so unless you have good timing, good luck hitting with anything beyond the first two bounces.


The move has hardly noticeable lag amounts on each end, unless you miss the move entirely, in which case Mario suffers from above average end lag. Mario has weak priority throughout. It should be noted that on the way up, Mario is not a hitbox, and so you can airdodge during the move (but not use an aerial jump!). The move has no knockback, and will instead give enemies the ground footstool animation.

| Flurrie|

Vacuum - Flurrie leaps up around a shorthop's distance, and begins to spin rapidly in midair, for anywhere from a second to three seconds fully charged. This creates a strong vacuum effect a Bowser around her, sucking opponents into her middle at around a Bowser's walk, though they can walk away to halve the speed of this. At the end of the move, Flurrie lets out a final, strong vacuum effect that sucks the opponent in directly to Flurrie's middle, as long as they are in range, them taking hitstun varying on the charge from Falco's laser to .75 seconds. Paper Mario can still move while Flurrie is out, of course.

| Downward Smash |

Badge Setup: As this Smash Attack is charged, a window appears above Paper Mario's head, which can be recognized as the badge screen from Paper Mario: The Thousand Year Door. For every half second this move is charged (Three being already on at the beginning of the charge), a set of three badges appears on the screen. Paper Mario can select any badges he wants to give him a unique effect for fifteen seconds or once he is KOed. Due to Paper Mario's spacing abilities, getting past the move's heavy ending lag isn't as hard as it might seem. He can only equip up to four badges at a time, the charge being ended automatically if four are selected. There are four different badge groupings. Once badges are equipped, this move cannot be used again until they wear out.


>>>The first grouping of badges, selectable from the beginning of charging, are the Attack FX badges. Fans of Paper Mario 2 may recognize these as badges that changed sound effects on attacks. Something similar happens here; the sound effects when Paper Mario's attacks connect change to a cricket, a bell or what-have-you. These have no functional purpose, but they're just about the coolest thing ever.


Attack FX R: The bane of the massive dragon Hooktail, Attack FX R creates a cricket chirping noise on every attack.


Attack FX B: Changes the sound effects to a mouse squeaking.


Attack FX P: Changes the sound effects to Bowser roaring. Especially funny against Paper Bowser.


>>>The second grouping of badges, selectable after a half-second charge, are various defensive badges. It's tempting to skip right past these badges due to their subtle effect, but these are in fact quite important badges. Paper Mario has large size and little weight, an unfortunate combination, and you'll want to squeeze every bit of life out of him as you can.


Happy Heart: A useful badge in the Paper Mario games, Happy Heart is less useful here. The effect of Happy Heart causes Paper Mario to regenerate 1% damage every two seconds, reaching up to 10% healing if he isn't KOed (With the healing animation being directly from the Paper Mario games). This may not sound like much, but Paper Mario wants his percentage as low as possible due to his size and weight. Still, 10% is hardly much, preventing this from being particularly useful.


Damage Dodge: A useful yet underused badge in the Paper Mario games. Damage Dodge doubles the time period in which it is possible to perfect shield an attack, making Paper Mario even better at defense. This doesn't have much impact to casual matches, but this becomes exponentially useful in competitive matches. Another reason why Paper Mario mains should practice perfect shielding.


Defend Plus: While easily one of the best badges in the Paper Mario games, Defend Plus isn't any more helpful than the above badges. Defend Plus gives Paper Mario extra "defense": that is, he takes 15% less damage and knockback from attacks. This isn't terribly useful due to the fact that Paper Mario doesn't take too many hits anyway and it isn't a strong effect, but don't count this off, as it could potentially save your life.


>>>The third badge grouping, selectable after a second charge, are various offensive badges. Offensive badges have dramatic effects, and they can seem even better than the fourth tier of badges, but they generally are high-risk high-reward.


Charge: Charge was not commonly used in the Paper Mario games, but it found a niche in the somewhat popular "Time Bomb" badge setup, which involved charging for multiple moves and letting out with an overpowered Power Bounce to deal upwards of 30. Here, Paper Mario's charge animations for his Smash Attacks have a ring of light shrinking in on Paper Mario in a reference to the original animation, causing his smashes to charge at double the normal speed. Note that you cannot use this for a Badge Setup as you can't use this while you have badges equipped, but this makes Run Away especially effective as an escape move and Multibounce especially effective as a damage dealer.


Power Plus: A notoriously abused badge in the Paper Mario games, Power Plus isn't quite as useful here. The effect of Power Plus multiplies the damage and knockback put out by attacks by a factor of 1.2X. The effect is notoriously subtle, but it's sure to help Paper Mario out somehow, though due to his low power and that he doesn't land hits all too often it isn't any more useful than the third tier badges.


>>>The fourth tier of badges, selectable from one and a half seconds of charging, is one of the three 7 BP badges from Paper Mario: The Thousand Year Door, one of the most coveted badges in the game. While it has dramatic effects, three seconds+ is an inconvenient amount of time to waste on setup even with Paper Mario's spacing abilities, so you'll find yourself using these easily only after a KO.


Return Postage: The badge obtained after the deadly optional dungeon, The Pit Of 100 Trials, is very useful here. While this is equipped, all direct attacks (Jointed) will cause normal damage and knockback, but backfire slightly on their user, causing them half the damage the attack dealt without flinching. While this may seem nigh broken at first, remember that not many hits are landed anyway on Paper Mario and this can only damage rack, not KO. Still, this is a welcome bonus.

| Admiral Bobbery|

Bomb - 15% uncharged, 24% fully charged - Mario holds Bobbery above his head, and then sets him on the ground, equating to average start-up lag. Regardless of charge, by default, Bobbery will walk forward two and a half Battlefield platforms and then explode. If you press A at any time during Bobbery's walk, he will explode then instead of later. And lastly (and obviously) he will explode if any opponent touches him.


Mario cannot move after placing Bobbery on the ground, and is instead stuck in place. What changes based on charge is not only damage, but the size of the explosion. At no charge, the explosion is the measly size of Bobbery himself, but does give very pleasant knockback, killing at about 110%. At max charge, the explosion comes in at three times the size of Bobbery, killing at a nice 85%. After exploding Bobbery shoots up into the air and falls down right behind Mario, giving the move above average end lag. Bobbery has transcended priority.


| Yoshi Kid |

Mount - Mario jumps atop Yoshi, so that he may ride him. All this does is give you a nice 6/10 walking speed, a 7/10 running speed, and enables a secondary Up Special. This is pretty much what you should be doing the whole time Yoshi Kid is out, because there's really not a downside to it.

Aerials


| Neutral Aerial |

Hammer Throw - 9% - Mario brings out the hammer for yet another neutral attack, this time throwing it! The move is rather simple, having Mario bring his arm back and throw the hammer forward.


The hammer can travel in one of three arcs. By not pressing anything, or pressing forward on the control stick immediately after Mario takes out the hammer, the hammer will be thrown forward. It travels in a straight path for about one battlefield platform, and then curves down into a forty-five degree decent into the opponent. By pressing up, the hammer will be thrown about the height of two regular Mario's upward (this takes the length of a battlefield platform to reach), and then falls into a sharp 75 degree decent. By pressing down, the hammer travels at a sixty degree arc downwards. The hammer disappears once reaching the ground. The hammer travels about as fast as Mario's fireball, making it a strangely slow projectile.


The move suffers from average start-up and high ending lag, which leaves Mario vulnerable if the opponent is close when the move is use. You are only allowed to have two hammers out at a time. It is a very high priority projectile, delivering average horizontal knockback killing at 150%

| Admiral Bobbery|

Bombast! - 8% - Bobbery moves up just above Mario's head and explodes, causing him to to being moving around Mario in an octogonal pattern. He explodes at every time the angle changes, giving the move a total of eight hitboxes. This happens incredibly fast (think the start-up lag of Brawl Mario's Forward Air), though the range isn't great. As a nice bonus though, the explosions linger a slight bit, and are the size of Bobbery himself. The move is an explosion, so it has transcended priority. The move also gives pretty decent knockback, killing at about 120%.

| Flurrie|

Shadow Barrier - Flurrie claps her hands together, it being merely for effect and not being a hitbox. This has below average lag on both ends, but the move does absolutely nothing at first. Instead, the move activates the next time Mario jumps up from the ground. When he does so, a shady wall will come up out of the ground where Flurrie jumped, and it will keep following Flurrie until she lands on the ground again. The wall cannot go a Battlefield platform away from its’ initial position, preventing you from having too much fun with this. If you attempt to do so, the wall will dematerialize instantly. The barrier is completely solid and you can’t go through it while it’s present. It lasts 30 seconds.


If you use your nair when you already have a shadow barrier up, it will explode, creating a hitbox along the wall and very slightly out to the sides of it that does 7% and low knockback. You’ll have to use your nair again after that if you want to form another shadow wall.


This is useful for a variety of things. You can form a wall to defend against projectiles or create a wall for your good buddy Dedede to infinite the foe against in a team match. Quite obviously, this is an excellent spacing mechanic. You can practically form an undefeatable barrier between this and gust, though the wall will be destroyed when it takes 30% damage (and it won’t deal damage or knockback, like it does when you cause it to explode manually).


| Forward Aerial |

Multibounce - 8% - Mario gives a jump in the air that puts him in his jumping animation and sends him forward one Battlefield platform, at a very slight upwards arc. Anytime during this movement, if an opponent gets directly under Mario or in front of him, Mario will jump off of them, propelling himself two Battlefield platforms forward, and away from the opponent. Jumping off of the opponent sends them into their footstool animation.


During the two Battlefield platform movement after hitting hitting one opponent, Mario may hit another opponent (the hitbox remaining the same as the original jump), causing himself to be propelled another two Battlefield platforms forward. Mario has low priority and experiences low start-up, but has no ending lag due to the move ending as soon as Mario travels the alloted distance.


| Backward Aerial |

Handle Whiff - 1%, six hits total - Mario swings his hammer behind him, but instead of swinging with the head, he uses the handle! This allows for an extremely quick succession of swings, making the move a lot like G&W's turtle. Why would we clone a Brawl set you ask? Well the turtle is such a good spacer/punishment move that giving it to Mario fit into his playstyle too well for us to ignore!


Though, the range is rather mediocre, only reaching about a third of a battlefield platform behind Mario. The damage is also quite bad, as you have probably noticed. The plus side of this move comes in the knockback, which is surprisingly high, killing at 120%. Unfortunately, while the move has very little start-up lag, it suffers from pretty heavy ending lag as Mario turns back around, moves his mallet so that he's gripping it correctly, and finally returns to a neutral state. As a nice plus though, it has high priority, a stark contrast to many of Mario's moves.

| Admiral Bobbery|

Kamikaze - 15% - With a small amount of hesitation, Bobbery explodes over a radius three times his size. While a low amount of lag, good damage, and great upwards diagonal knockback (kills at 105%!) seem nice, these come at a heavy price - Mario also takes 15%, and is knocked horizontally with a blast that kills him at 120%! This is rather dangerous, seeing as you never want to get damaged as a Paper Mario player, much less take such heavy knockback. Though, as a last ditch resort to kill the foe, this is a great option because of just how quick the start-up is.

| Upward Aerial |

Tornado Jump - 8% - Paper Mario's new ground-slamming technique after gaining the Ultra Boots in the first Paper Mario. Paper Mario does a whirling motion in midair, gaining height almost as high as his first jump, before slamming straight downwards in a stall-then-fall. If he lands on anyone, he bounces straight off the distance of his first jump, dealing them 8% with a powerful meteor smash, and slamming down again for the same effect. He can keep doing this infinitely, but it's insanely predictable. This really isn't an amazing move, and its best purpose is quickly getting Paper Mario to the ground despite the landing lag, as Paper Mario's a better character on the ground. Notably, this finds a niche as a way to sweespot ledges.

| Downward Aerial |

Paper Slide - 2% - Mario raises his hands up above his head, and then flips on his back, his head going to the left and his feet to the right. This makes him slightly hard to see, giving the opponent just an outline to go by. While Mario is like this, his fall speed becomes very low, about 1/10. He slides from left to right, going about one stage builder block to each side. To see exactly what I mean, watch this video.


You can effect Mario's movement by holding either left or right on the control stick. If you hold a direction, you can go two battlefield platforms to the direction you're holding, and in turn, only half a battlefield platform to the opposite side. You can also interrupt movement to one direction by tapping the opposite, causing you to immediately move half a battlefield platform in the direction you tapped. When Mario is moving he is an extremely low priority hitbox that does 2% damage and causes flinching knockback. You can cancel the move by pressing any button input except for left or right on the control stick.


The move serves as a suppliment to your aerial movement - despite decreasing your fall speed, it drastically decreases your momentum, allowing you to move to the left or right rather quickly. The move serves as a rather decent horizontal recovery as well, though you're definitely better off with the Paper Airplane.

Throws


| Animation |

Mario pulls out Thoreau! This little guy is the first Pixl from Super Paper Mario, and looks like this. Mario throws him out a Battlefield platform forward, and he travels too the platform very quickly. This may seem good, but the grab suffers from pretty heavy ending lag as Thoreau comes back - about half a second! This is pretty heavy, though Mario has surprisingly good throws, making it worth the risk. Upon touching the opponent, Thoreau will drag them back, and Mario will hold them in his hands.


>>>Pummel - 2% - Mario violently shakes the enemy quickly, but the pummel has surprising cool down, making this a somewhat useless pummel.

| Forward Throw |

Super Hammer - 10% - Mario twists his body a slight bit, bringing the hammer a bit up above his head and then slams the hammer onto the ground, forcing the opponent away from him three Battlefield platforms, and Mario himself back one Battlefield platform. This is an excellent spacer, good for stages such as FD where there are no platforms.

| Backward Throw |

Pound - 5%, 3%, 3%, 4% - Mario spins around and throws the opponent too the ground, causing them to fall onto their backs. Thoreau comes out and pounds the opponent rather violently three times in the gut, the last hit having a bit more force behind it than the other two. The last hit, however, smacks the opponent back up onto their feet with only a slight bit of hitstun. So while this is absolutely massive damage for a throw (15%!), this leaves Mario possibly even closer to the enemy than he was before the throw! This is not a position you want to be in.

| Upward Throw |

Compress - 5% - Mario hops on top of the opponent and tries to... drive them into the ground?! The moment Mario gets on top of the opponent, a message appears at the bottom of the screen that reads "Press A Quickly!". This goes for both the Paper Mario player and the opponent - they have one and a half second to press A as fast as they can. If the Mario player has more presses, he forced the opponent into their pitfall animation. If the opponent has more presses, he causes Mario to spring off of him and shoot three Battlefield platforms backwards.


Regardless of what happens, this is beneficial to the Mario player. He either gets away from the opponent or puts them in an extremely bad position.

| Downward Throw |

Ultra Hammer - 10% - Mario heaves the hammer up above his head and slams it down with such force that he rockets himself in the air the height of 1.3x his first jump! This leaves his opponent in the shield break animation, though a shortened version of it (only half of its usual duration). Once again, an excellent spacer, good for stages such as Battlefield where there are platforms to space yourself on.

Final Smash


| Star Power |

Paper Mario got the Smash Ball, and releases the energy of the seven Crystal Stars! This is where the Star Power you've accumulated over the match comes into play. If you have no Star Power you have no "Super Attack", but for every full circle of Star Power possessed, the Final Smash becomes a little more powerful. For example, Paper Mario has a weak Star Power with one circle and a strong one with all seven. Of course, Paper Mario loses all of his Star Power after using this Final Smash.


Sweet Treat: The first Star Power in Paper Mario: The Thousand Year Door, Sweet Treat is obviously rather underwhelming as a Final Smash, only healing Paper Mario instead of attacking. Paper Mario lifts his hands to the heavens, as the Magical Map floats out into the distance. The ambience heals Paper Mario of 2% every second for the next 15 seconds, this maxing out at a decent 30%. The effect ends early if Paper Mario is KOed. This is obviously a pretty bad Final Smash. You'd probably be better off spamming Appeal for a while to at least get to Earth Tremor after getting the Smash Ball if you have a single circle. It's not like you're missing out on anything if you use the Smash Ball.


Earth Tremor: An offensive attack, this is a somewhat useful Final Smash against n00bs but it isn't quite as powerful as it might seem, being very dodgeable. Paper Mario summons the power of the Diamond Star, a grey star, jumping onto it as it grows to Bowser's size before jumping up and slamming it into the ground five times in succession, there being about half a Falcon Punch of lag in between each slam. Each slam creates two shockwaves on either side of the Crystal Star, them immediately moving forwards across the stage at the speed of Captain Falcon's run, bowling through enemies for 18% and solid knockback that KOs at around 80%. The shockwaves don't disappear until reaching the end of the segment of the stage they're on, going right through enemies. At first glance this is an immensely good Star Power, but no competent foe will ever get hit by this. Even characters like Ganondorf can stay above the shockwaves with properly timed jumps and recoveries. Still, this is a vast improvement over Sweet Treat.


Clock Out: Clock Out is a good damage dealer but it can't ever KO. Paper Mario calls upon the Emerald Star to instantly create a large bomb with a star on it which bursts into a blast radius two-thirds that of Negative Zone. Instead of dealing damage or knockback, the blast paralyzes all enemies in their exact position for ten seconds, defying gravity if necessary. In this state, they essentially have super armor for the entire duration, taking damage but not knockback. Paper Mario can attack them as much as he wants, them taking full damage but not even flinching. Paper Mario isn't amazing at punishment, but this still allows for some crazy combos. Still, ten seconds is not a lot, and this never KOs, of course. Note that in FFAs if you don't hit everyone opponents can capitalize on this too, so be careful!


Power Lift: Power Lift has a subtle effect on Paper Mario, but a significant one. Paper Mario calls upon the power of the Gold Star, causing an animation where little arrows shoot up from his body. For the next fifteen seconds, Paper Mario's damage and knockback output is doubled! (Note to Skyler: Not sure of this number, sure it's under or overpowered, please fix if so) This alleviates his worst weakness of power, and now Paper Mario can go on the offensive to decisively score some KOs. Partner attacks are notoriously overpowered in this phase. Still, a competent opponent can usually avoid Paper Mario, so be careful!


Art Attack: This is where we start getting to the better Star Powers; Art Attack is easy to use and can generally damage deal and KO, though it doesn't excel at either. Paper Mario uses the Ruby Star to compose a starry masterpiece! He can move the Ruby Star, twice the size of a Pokeball, at the speed of Captain Falcon's dash, leaving behind a red line wherever it goes that can't be removed. If the line crosses itself, it bursts apart, causing 15% damage and paralyzes the opponent for around two seconds. However, if the line just barely doesn't cover the entire body of the opponent it only deals 5%, and the effect continues to lessen with smaller amount of bodies hit until it only deals 1% barely covering a body at all. After the paralyzing state, the opponent takes below average horizontal knockback, but by hitting them again during the paralyzed state, it's reset and the knockback is stacked, it becoming an OHKO after hitting around five times or so, though they just take the knockback that's stacked if you miss once and exceed the two seconds. This ends automatically after ten seconds. All in all, a good all-rounder Star Power.


Sweet Feast: This is a drastically buffed version of Sweet Treat. The healing of the Sapphire Star heals Paper Mario for the next 15 seconds steadily ending early if Paper Mario's KOed, but this time, it heals him of 7% every second for a total of a massive 105% if the entire thing is pulled off! This won't KO everyone in the match like the standard giant laz0r beam or super form, but it does make Paper Mario even more ridiculously survivable, making it a valuable Star Power.


Showstopper: A massively dangerous Final Smash beaten out only by the final one. Paper Mario holds the Garnet Star aloft, it floating off into the background... then, half a second later, it rams through the stage and creates a papery gash through the stage, wherever the nearest opponent was... a third of a second ago? Yeah, not where they are right now, so quick dashes can dodge this, limited to those like Sonic and Captain Falcon (hey, he has something going for himself now!). Anyway, the star is a hitbox the size of ROB as it rams through dealing 17% and knockback that KOs at 75%. The star rams through the stage five more times for the same effect before disappearing. Pretty much an epic Star Power only outdone by the legendary Supernova...


Supernova: The best Star Power there is, practically assured to KO all other players in the match. Paper Mario holds the final Crystal Star aloft, the Crystal Star (yeah, dumb cop-out), which proceeds to dash across the stage twelve times, leaving papery gashes across the stage. The entire screen explodes between the seams, dealing 30%... but it's hard to tell, as they take knockback so fast that they're pretty much gone in an instant. This has incredible KO power, usually killing at about 20%, unless it's on a massive stage or the opponent manages to tech. Good luck getting enough Star Power for it.


Star Power's a fairly unique Final Smash, in that you can't just release it immediately and expect everyone to instantly be KOed. No, Star Power is more comples than that. Not only do you have to know how to handle all eight unique effects, there's a unique strategem in trying to get the strongest Star Power you can without losing the Smash Ball. Paper Mario can gain Star Power pretty quickly when he needs to with moves like Appeal, but he's leaving himself horribly open. Still, with practice, this is one of the best Final Smashes out there.

Playstyle


Paper Mario's playstyle is pretty much structured around mobility, spacing, and stalling. His neutral special is stall central, side special is for quick movement, and nearly all of his moves allow for some form of either causing him to move or making him harder to hit. Look at it - You have your dash attack which you can jump out of for changing which way it goes to mix up your opponent, you have your forward tilt for being harder to hit when the neutral special is out of comission, you have your FSmash which is an absolutely great spacer, you have your USmash which you can airdodge out of if the situation calls for it, and... Well, I think you get the point.

Mario is entirely structured around getting away from the opponent and just damaging him with the neutral air, Yoshi's eggs, or whathaveyou. All you're concerned about is playing gayer than your average Wario main (Neigh, gayer than DMG even!) and most of your wins will probably come from merely stalling out the clock. His partners give him great versility, giving him good damage racking (Watt), good hit-and-run (Yoshi Kid), insane spacing (Flurrie), and good killing (Bobbery).

Of course, all of this comes at a downside. Mario's not exactly outstanding at recovering, jumping... or well, anything. All of his stats are abysmal - Whether it's his Jumping, Running, Damage, or anything, it's just not that good. You really have to watch out because Mario himself can hardly KO without his Star Piece, and even Bobbery's attacks are pretty tough to land.

As a specific overview for each partner, lets start off with Watt. His attacks have very good damage racking abilities, sans his Neutral Combo, which is a great get-away move. The Up Tilt is fantastic, though hard to hit with for full damage. The Side Tilt is great in a pinch to prevent the opponent from getting near you. All of his stuff is for good, quick damage - something that Mario himself needs help with.

For Bobbery, you pretty much just focus on KO-ing. All of his attacks, sans Hold-Fast, help KO the opponent. Kamakaze is a HUGE risk, but its worth the reward once you get your opponent up to a high percent on their last stock. Bomb is your typical KO move, no strings attached. Bombast really is a quick attack, though it suffers from low range, and after the first explosion, predictability. Hold-Fast is great for preventing KO's to happen too Mario - Superarmor just isn't exploited enough these days.

On Yoshi Kid, you get the excellence of Mount. Your speed increases quite a bit, though his attacks really aren't anything spectacular outside of the hit-and-run department. The eggs are slightly spammable, and though it will happen, don't expect to be able to charge Swallow long enough to be able to throw an egg with an opponent inside often. The change to the Up Special is rather nice though, making it much quicker, though it sacrifices vertical range.

Ah, Flurrie - She's probably the most complimentary to Mario as a whole in here. Gust serves as a great way to help get away from the opponent, and the Neutral Air can form as a literal barrier to help protect you from the opponent. Combine the two, and you have a pretty **** impressive combination! The Up Smash forms as a vortex, and it's good at keeping an enemy focused at one point, though it is possible to break out of. Her spacing abilities are just so good, that this is probably who you'll have out most of the time.

Though, as long as you keep a VERY heavy emphasis on not getting hit, which Mario absolutely EXCELS at, then you should be fine. It's almost too easy to play keep away with Mario, but if you mess up, it could very easily be deadly. He has almost too many tools at his disposal to mindgame the opponent with.

A very solid character overall, it's very clear that he's just not meant to rush into things. Keep your distance with Mario, and he will treat you well.

Just to show how mobile he is, here's a list of moves that either make Mario hard to hit or increase his mobility:

- Neutral Special
- Side Special
- Yoshi's Mount
- Yoshi's Eggs
- Flurrie's Gust
- Flurrie's Wall
- Flurrie's Vacuum
- Bobbery's Hold-Fast
- Bobbery's Kamikaze
- Watt's Electro Dash
- Dash Attack
- Forward Tilt
- Forward Smash
- Upward Smash
- Neutral Air
- Forward Air
- Backward Air
- Upward Air
- Downward Air
- Forward Throw
- Upward Throw
- Downward Throw
 
Status
Not open for further replies.
Top Bottom