• Welcome to Smashboards, the world's largest Super Smash Brothers community! Over 250,000 Smash Bros. fans from around the world have come to discuss these great games in over 19 million posts!

    You are currently viewing our boards as a visitor. Click here to sign up right now and start on your path in the Smash community!

Make Your Move 6 - Nothing Gold can Stay

Status
Not open for further replies.

Red Arremer

Smash Legend
Joined
Nov 27, 2005
Messages
11,437
Location
Vienna


"Finally... I clearly understand... everything. I am... Dracula."
SOMA CRUZ
will slay evil... or become it?


Music you might enjoy while reading this moveset:
Castlevania: Dawn of Sorrow - Pitch Black Intrusion
Castlevania: Dawn of Sorrow - Dracula's Tears
Castlevania: Dawn of Sorrow - Platinum Moonlight
Castlevania: Dawn of Sorrow - After Confession
Castlevania: Dawn of Sorrow - Demon Guest House
Castlevania: Dawn of Sorrow - Condemned Tower
Castlevania: Dawn of Sorrow - Cursed Clock Tower
Castlevania: Dawn of Sorrow - Subterranean Hell
Castlevania: Dawn of Sorrow - Demon Castle Pinnacle
Castlevania: Dawn of Sorrow - Underground Melodies
Castlevania: Dawn of Sorrow - The Abyss
Castlevania Judgment - Tower of Dolls
Castlevania Judgment - Mad Forest
Magical Trick Society - Beginning
Magical Trick Society - Don't Wait Until Tonight
Magical Trick Society - Clockwork
Magical Trick Society - Vampire Killer
Magical Trick Society - Rondo of Blood
Magical Trick Society - Bloody Tears
Castlevania - Wicked Child ("Who's That Child?" OC Remix)
Koumajou Densetsu - Opening

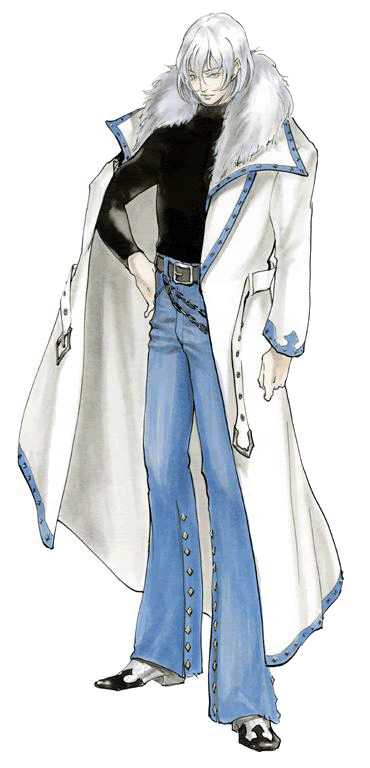
Soma Cruz is the protagonist of two Castlevania games. Aria of Sorrow for the Game Boy Advance, and its sequel Dawn of Sorrow for the Nintendo DS. Prior to the first game's story, in 1999, Julius Belmont finally is able to destroy Dracula once and for all. Thirty six years after Dracula's final defeat, in 2035, Japanese high school student Soma Cruz and his friend Mina Hakuba enter into a shrine, only to emerge inside Dracula's Castle. There they encounter Graham Jones, a cult leader who looks to assume the power of Dracula for his own. Soma must stop Graham, and discover why he has been summoned into the evil haunted castle - he is in fact inheriting Dracula's soul. This grants him the power to collect the souls of other creatures, giving him their power. One year after defeating Graham Jones and leaving Castlevania, a cult member named Celia challenges Soma. She wishes to resurrect Dracula, but cannot with Soma being in possession of lord vampire's soul. Soma tries to invade's Celia's fortress and stop her underlings, both of whom also candidates for the next resurrection of Dracula. Just like in the prequel, Soma is able to collect the souls of the enemies he encounters, granting him new abilities and attacks.
In Smash Bros., Soma mainly uses these souls in order to combat his enemies, however... there's a drawback. See below.

Special Mechanic: Becoming the Dark Lord
Soma, inheriting the soul of Dracula, is very vulnerable to becoming the Lord of Darkness himself, thus has to watch out to not be consumed by evil powers. He has a lot of moves in which he uses the souls of his defeated enemies to attack his enemies. In the actual games, they would use spellpoints, but to make him more interesting of a moveset, Soma will recieve "Darkness Points" whenever he uses certain moves. Some of the soul-based attacks won't influence his soul with dark power, some however do. Soma can have up to 10 DP - they'll be shown as little grey skulls below the stock or coin counter. Once he hits all 10 DP, he will become the Dark Lord.
This will make a lot of his attacks absolutely useless (namely his Special attacks), but power up the rest of the moves in terms of knockback. In order to indicate he has become Dracula, Soma will have a slightly glowing red aura around his body, and the DP skulls are gone. Soma has no chance to revert his Dark Lord status unless he loses his stock or uses his Final Smash.


Screen Name: Soma
Size: 6/10 - Soma has pretty much the same size as Marth.
Weight: 4/10 - Soma is a little lighter than standard, but by no means a pushover.
(Running) Speed: 5/10 - Fairly standard.
Traction: 8/10 - Soma's traction is top notch, he almost can stop without sliding further.
First Jump: 7/10 - Soma jumps up, and that very well, too.
Second Jump: 4/10 - Doing a salto in the air, his second jump is rather pathetic.
Aerial Movement: 7/10 - His aerial movement is very good!
Fall Speed: 6/10 - He doesn't fall like a rock, but he's not floaty either.
Crouch: 6/10 - An okay crouch, but nothing special. Soma kneels down.
Wall Jump: No.
Wall Cling: No.
Gliding: No.


Neutral Special

Mina's Talisman
Soma takes out a small charm he got from his friend Mina Hakuba, which causes him to glow a little. It will remove 3 DP of Soma's counter, unless he has less than 3 DP, then it will simply remove these. This move takes 1.5 seconds to complete, rendering Soma completely helpless as he uses it, and therefore should be used with care. Using Mina's Talisman is one of the central aspects in Soma's game in order to not have him become the Dark Lord. If he is the Dark Lord, however, Mina's Talisman will become useless, so when Soma uses the Special button, nothing will happen.

Side Special

Puppet Master
Soma tosses a wooden puppet shaped like a human forward. It flies in a similar arc as Olimar's Pikmin or Snake's grenades, but only about 1.5 Battlefield platforms wide. As soon as the puppet touches ground (no wall or in mid-air!), Soma will teleport to the location the puppet is at, and his old position will be swapped with the doll, which simply disappears after a short moment. If an enemy is touched by the puppet, they recieve 3% damage and flinch. The doll can be destroyed by a small hit. Puppet Master is best used as a recovery or defensive move in order to escape from a tight situation, or as a mindgame. Since the puppet itself doesn't do significant damage or knockback, using it offensive is not a wise thing to do. When Soma is the Dark Lord, this move will be rendered useless, and nothing will happen if Soma uses the combination of Side and Special.

Up Special

Bat Company
The young man curls up and quickly transforms into a white bat, becoming about the size of Olimar with it. He now can freely fly around for 4 seconds in any direction. Sounds good? Well, you see... It sounds like a great recovery move, but it has huge drawbacks. Of course, if the 4 seconds deplete or Soma cancels the move by pressing the Special button again, he will enter helpless state. Clearly, no surprise. However, there's more. Soma is smaller and a bit swifter as a bat than as a human, but he takes more damage and knockback, by a factor of 1.5, to be exact. He also cannot attack out of this move, and has to land or grab a ledge before he can do anything else but control where he's falling. A very risky move to use, so make sure to get away an edge guarder. If Soma has become the Dark Lord, he cannot use this move and will just do nothing when having it as button input, making recovery almost impossible in that state.

Down Special

Manticore
Soma ... suddenly grows a green scorpion tail? Yeah. He apparently does. The tail-growing takes about one second, it slowly comes out from right above his bishie butt and grows to its full size quickly. So, what does this thing do? Easy. Whenever Soma uses a normal attack that is aimed forwards (namely Jab, Forward Tilt, Forward Smash and Forward Aerial), the tail will fling forward too, like a whip, and deal additional damage. Actually, it only does 3% when it hits the enemy and no knockback, however, there's a 25% chance that it will curse the enemy, halving their damage and knockback for 5 seconds. Cursed characters are indicated by glowing green. The attack itself has about the range of Bowser's Forward Tilt and comes out shortly after the attack it accompanies has been made, similarily to Nana's attack is delayed a little at the Ice Climber's. So, you pretty much think that this attack is awesome and wouldn't see a reason to not have it out, right? Well, case in point, you really should consider not having it out for too long. After having the tail attached for longer than 3 seconds, the tail starts to drain on Soma's health, taking 1% every second. After deactivating, the tail needs 5 seconds to rest before it can be used without any danger again. This move will be disabled if Soma becomes the Dark Lord.


Jab Combo

Spear Stab
Plain and simple, Soma uses his trusted spear and stabs in front of him. The move comes out in a similar speed as Zelda's Jab, and deals 4% damage. The ending lag is neglectable, and so is the knockback, that goes barely above flinching, as well as stunning the enemy for a very short moment from the blow. Since it's disjointed, one of Soma's little non-projectile moves and has very good range (about the range of Zero Suit Samus' Forward Smash), it can be used to get yourself into a better position, or throw out another attack at your enemy. This move is unusable when Soma is the Dark Lord.

Dash Attack

Werewolf
When dashing forwards and using the attack button, Soma leaps into the air, curls up and is coated in a wave of fiery purple energy, thrusting forward. It maybe reminds you a little bit of Kirby's Dash Attack in Melee. This attack comes out extremely fast, and has almost no ending lag, as well as dealing well 8% damage. Its knockback is very low, however, and can only KO at around 230%. The Dash Attack also will go further than ledges and if you are in mid-air, using this attack, Soma will enter helpless after entering the air. The dash is the actual hitbox and goes about a Battlefield platform long. It has rather low priority, but due to its speed you might be able to easily throw it in somewhere. Werewolf will add 1 DP to Soma's counter, and stay when he becomes the Dark Lord.

Forward Tilt

Persephone
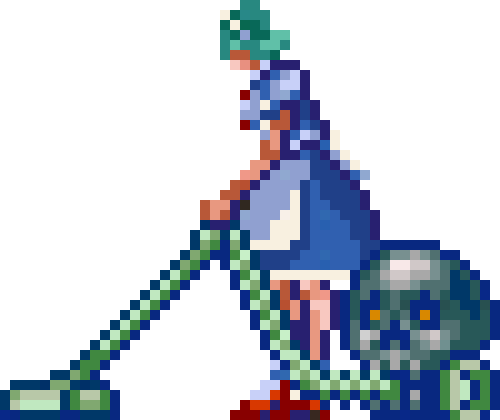

Now, this is an interesting attack. Soma gets out a vacuum shaped like a skull, just like the maiden in the little sprite (who is called Persephone, sans the name of the attack). He holds up the pipe, only reaching barely in front of him, like Wario's Forward Aerial. Now, what this move does is pulling in opponents and items. Yes, it literally sucks. Now, items, of course due to their weight, are pulled in much faster. If they touch the vacuum, they disappear. This includes items that are generated and thrown by other characters, such as Snake's grenades or Diddy's banana peels, and even Wario's bike. It also can eat up projectiles that aren't items, but in this case only part of it - Soma will recieve half the damage of non-item projectiles, still (so that's still 13% for a fully charged Charge Beam from Samus, so watch out). If a character touches the vacuum, they will be stunned similarily to Zero Suit Samus' Down Smash, and can be attacked, but they don't take any damage. The vacuum of course only reaches out in front of Soma, about one and a half Battlefield platforms in front of him and Donkey Kong's height, and it has the strength of the wind effects on Green Greens or Dreamland 64 for those of you who have played Melee or Smash 64. As said, if someone touches the vacuum's pipe, the move will end that very moment, but if not, the total amount of time is 2 seconds. The move has low startup lag and low ending lag, making it a very good defensive or strategical option for Soma.
Using this move will be disabled if Soma has become the Dark Lord.

Up Tilt

Spin Devil
This move is similar to Soma's Forward Tilt, yet different. He faces the screen and spreads out his arms upwards, summoning a small tornado starting around his chest area and going up. It will be high enough to just poke through one of Battlefield's lower platforms. It has a conical form and the widest - at the upper end - is about the width of Jigglypuff. Now, this move is very interesting because it has two different properties. If an enemy - no item this time - is outside of the tornado and one time Bowser's in its area, they will be pulled towards the maelstrom, similarily to Ganondorf's Up Tilt suction. If they are exactly above the tornado, they will be pushed further upwards like Game and Watch's Up Aerial does, and just like said aerial, this wind effect has no limit in range. If someone touches the tornado, they will be sucked right into it until it ends, recieving several continous hits, up to 6 and with a total of 2.5% damage for each of the hits. The last hit will spit the victim out straight upwards at a set knockback, which makes them launch as high as Battlefield's upper platform. The move has quite some startup lag, and the ending lag is pretty high, as well, but this move has big power and can change the position of your enemy entirely.
Using this move adds 3 DP to Soma's counter and will be available as Dark Lord.

Down Tilt

Aguni
Soma drops a small flame onto the floor. Once landing, it will cause a pillar of fire to shoot out of the ground and move forward in a medium-speed pace. After hitting the end of a platform/ledge or 1.5 Battlefield platforms, where it simply distinguishes. The pillar has the size of Olimar (without antenna). If someone touches this high-priority flame, they will recieve 12% damage. The move can KO at about 200%, but due to its range, size, movement and high priority, using this move can be very helpful in putting your opponent into a disadvantaged position. The start-up lag for this move is a bit above average, the ending lag is rather low. There is a 25% chance for Soma to use the Frozen Shade soul instead of the Aguni soul, which replaces the knockback with a freezing effect like the Ice Climbers' Down Special, which allows Soma to chase after his enemy and land another hit while they're frozen or break out. Overall, a very good move to use for zoning and putting your enemy where you want to. There can only be one pillar at a time.
Using this move adds 2 DP to Soma's counter and is available as Dark Lord.


Forward Smash

Katana
Since the games Soma appears in are placed in Japan, it's not that far out that they are the only ones in the series to have the traditional Japanese swords - katanas - as weaponry. Now, when Soma charges this move, he concentrates, holding the handle of the sheathed katana. As soon as he releases the Smash attack, he slashes forward, then stops and sheathes the sword slowly again. It deals 20% damage (26% charged) and KOs at 160% (130% charged). The sword reaches out as far as Meta Knight's Forward Smash, and the slash doesn't look all to different. The move has rather low startup lag, but insanely high ending lag, making it really punishable should Soma miss. Now, that doesn't sound all too great, right? And very uninspired, too. But here comes the interesting thing.
The Katana is a move dependant on if the opponent is using a move themselves, and what kind of move.
If the enemy is not using any attack at all or just moving or jumping, it will do nothing special outside of the described situation above.
If the enemy is using a jointed attack, like a punch or a kick, the Katana will gain the same priority and automatically clank with the enemy's move.
If the enemy is using a disjointed attack, like slashing a sword or swinging a hammer, the Katana will act completely different. The hitbox of the enemy is completely ignored, Soma slides forward and slashes the enemy. So it's basically working like a Counter.
If the enemy is using a projectile, the slash neutralizes the projectile.
If the enemy is using a grab while Soma uses Katana, this is the only place where the move fails - Soma will deal only half the damage to the opponent and get automatically grabbed.
This move will be rendered useless if Soma has become the Dark Lord.

Up Smash

Mandragora
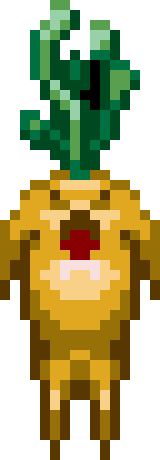

Soma pulls out a Mandragora and tosses it in a slight arc upward then downward. The plant monster lets out a bloodcurling cry and then explodes. The explosion has about the same size as the blast from Snake's Grenades. Charging this move makes it not become stronger, but makes Soma toss the plant up further. If someone is touched by the Mandragora itself, they recieve 2% damage and flinch. The blast deals 15% damage and KOs at 220%. The startup and ending lag are above average. Due to the sheer size of this move's hitbox, it's a great anti-air attack. If someone hits the Mandragora before it explodes, though, it simply will be destroyed and deal no damage at all, since the plant has abysmal priority. There can only be one of these man-roots at a time.
This move will add 2 DP to Soma's counter and be available for him as Dark Lord.

Down Smash

Alura Une


Soma drops a little seed onto the floor that causes an Alura Une, a female plant demon, to grow out of the ground. It has about the same size as Donkey Kong (the leaves aren't part of her hurtbox) and can only be summoned on solid ground - using it on dropthrough platforms will simply make the seed drop through it. This attack does not count as projectile or trap or anything else. Alura Une has 15-30 HP (depending on how long Soma charged). She will constantly shoot white, sharp roses towards the nearest enemy. These roses do 5% damage and no knockback, and they move as fast as Falco's laser as well as in a straight line. Soma can be hit by them, too, so watch out. When an opponent or item touches the ground near her (about Jigglypuff's width), she summons twines to catch them and hold them where they are for 2 seconds. Items will simply be destroyed by her. Alura Une can stay out for 20 seconds before she simply disappears. After Alura Une has been destroyed or disappeared, Soma has to wait another 20 seconds before he can summon another one. There can only be one Alura Une at a time.
This move will add 4 DP to Soma's counter and is available as Dark Lord. In the Dark Lord version, there's a few aesthetic changes, such as the girl having black hair, throwing bloodred roses and the green becoming more brownish.


Neutral Air

Erynis
Soma summons the spirit of an angel. The female angel appears behind him and closes her arms and wings around Soma for a short moment, then disappears, making Soma glow white for 3 seconds. The move deals no damage or knockback, but absorbs one single hitbox, no matter how weak or strong it is. This means that Erynis is very easily defeated by a multi-hit move. It also doesn't prevent from getting grabbed. The startup and ending lag to this move is above average. A great defensive move to use. He can use the move multiple times, but the effect doesn't stack. The effect also won't be taken over into his bat form.
This move will be not only rendered useless if Soma became the Dark Lord, but instead of the female angel, a black demon appears and poisons Soma. He then glows purple and recieves 2% damage for every second of these 3, but gains no protection.

Forward Air

Killer Clown
Soma tosses a card forward. It flies quickly in a straight line and about 1.5 Battlefield platforms before disappearing. If someone is hit by it, they flinch and recieve 3% damage. The hitbox is very tiny, and the card makes a very identifiable sound. Now, this move is particularly interesting because it is a projectile, but pierces through shields and reflectors. That also includes Soma's Neutral Aerial. If the move hits a counter, invincibility frames or a hitbox, it will be blocked or destroyed, and it has abysmal priority. However, this move is great for pressure and repositioning with Soma due to its speed and piercing ability. There can only be one card out at a time.
It will add 3 DP to Soma's counter, and be rendered useless if he becomes the Dark Lord.

Back Air

Guillotiner

(Click the picture for a better view)


Soma sweeps an arm backward and summons a Guillotiner in his back with little startup lag. The demon appears about 1 second after he summoned it, and first is open. The top part is about Ganondorf's height above the bottom part which is placed about where Soma's waist line was when he summoned the creature. It will stay like this for about 0.5 seconds and then quickly the two parts move towards each other and snap together. This happens insanely quick. If someone gets caught in this move, they will recieve 13% damage and can be KOed at about 170%. Soma can move once the summon has been called, and there can only be one out. The Guillotiner has very high priority, and counts as normal disjointed hitbox.
It will add 3 DP to Soma's counter, and is available if he becomes Dracula.

Up Air

Disc Armor
Soma gets out a bladed discus and tosses it upward. It's on a string, like a yoyo, so it will come back down once it reaches it peak, which is about Jigglypuff's height right above Soma. The discus has the size of the bigger wheel of Wario's bike. If someone gets hit by the attack, they recieve 10% damage with knockback that KOs at about 190%. The move has below average starting and ending lag. However, there's one special situation. If someone gets hit by the disc when it returns back to Soma, they will be meteor-smashed downwards!
This move will be rendered useless when Dark Lord mode is reached.

Down Air

Amalaric Sniper


Soma summons an Amalaric Sniper - portrayed above - right at his foot. The fallen angel faces into the same direction as Soma and aims diagonally down - exact 45°. He draws his bow and releases it after a second, shooting an arrow right diagonally downwards at the same angle. If someone is hit, they will recieve 10% damage and get stunned for a short moment similarily to Falco's laser. The summon itself has little startup and ending lag. The arrow moves at a similar speed as Link's arrows, and can be easily knocked away. This move is great for edgeguarding and gimping opponents that are recovering low, as well as strategic setups.
Amalaric Sniper will become unavailable if Soma becomes the Dark Lord.


Soma's grab is very simple - he reaches forward with his arm. The grab speed is a bit above average and his range is okay, as well. His dash grab is not too laggy if whiffed, but you should still watch out.
Soma cannot use throws if he becomes the Dark Lord. If he presses the Grab-button, he will simply shield.

Pummel

Abaddon
Soma summons a small swarm of insects attacking the victim, dealing 2% each hit. The pummel has the speed of Fox's.

Forward Throw

Succubus
Soma glows in a reddish color and then apparently bites the throwee (humanoids will be bitten in the neck) to suck their blood. They recieve 4% damage, and Soma heals 2%. Then, the victim drops down onto the floor similarily to Snake's Down Throw while Soma sweeps his mouth with his sleeve.
This throw adds 3 DP to Soma's counter.

Back Throw

Great Armor
Soma summons a big armor equipped with a sword. It will always stand in the background with its front to the screen. Soma lets go of the victim, while the armor rises up its sword, and then smacks it right into the opposite direction Soma is facing, dealing 8% damage. The range is okay, it's a good throw to get the enemy offstage, but will only KO at 210%.

Up Throw

Rycuda
Soma tosses the throwee up and raises a hand, shooting out a bolt of lightning right homing into the victim. They recieve 5% damage and are stunned in mid-air similarily to Zero Suit Samus' Down Smash. A perfect throw for setting up aerial combos.
It adds 1 DP to Soma's counter.

Down Throw

Catoblepas
Soma breathes in deeply and then exhales, his breath becoming a grey cloud. This will petrify the throwee, and otherwise deal no damage or knockback, leaving the statue at the some position they were grabbed at. The petrified victim is able to button mash to free themselves sooner. Otherwise, it works just like Yoshi's Egg Lay, so Soma can still deal damage to the victim. If the Down Throw is used above a pit, the victim will be placed right at the edge of the platform.
It adds 2 DP to Soma's counter.


Death


Congrats, you got the Final Smash! For 20 seconds, Soma will become the grim reaper, Death himself. During the whole 20 seconds, small sickles - Pokeball size - will randomly spawn and move towards the closest enemy. They travel in a straight line and about as quick as Luigi's fireball. There usually are around 15-20 sickles at once on the screen, and each deals 5% damage and flinches when an enemy gets hit. A sickle disappears if it hits an obstacle or flies offscreen. Soma hovers in the background of the stage. He can do 2 attacks in this form. Pressing the attack button will have him swoop onto the battlefield and to the nearest enemy and try to slash them, dealing 20% damage and KOing at 150%. Pressing the special button will have him stop in his positing and fling his scythe into the foreground of the battlefield. The player then gains control of the weapon and can move it around freely - it controls similarily to Pikachu's Volt Tackle, so it isn't that easy to manage. Getting hit by the lone scythe deals 25% damage and KOs at 110%. If the player presses the special button again, the scythe disappears immediately in a cloud of smoke and reappears in Soma's hand.
After the 20 seconds are over, Soma returns to the place he used the Final Smash at. If Soma uses this Final Smash with DPs on his counter, they will be erased. Should Soma be in Dark Lord state, he will revert to his original state.


Up
Soma places his right hand at the position of where his heart is, and looks to the side, flailing his hair during the movement.

Side
Soma drops a plate of curry onto the floor. It cannot be picked up or consumed, it's just for show.

Down
A chair out of nowhere appears, on which Soma sits. He stays comfy for a short moment and then gets back up.


Soma's playstyle is pretty obvious and characteristic. His game resolves around his ton of projectiles and delayed moves, as well as avoiding becoming the Dark Lord - usually a very unfavorable position, except maybe on the last stock. Soma zones extremely well with Katana and Spear Stab, as well as Mandragora and Killerclown. He also is able to put his opponent into different locations easily thanks to Rycuda, Persephone and comparable moves.

Soma lacks a reliable kill move. Katana is very risky since it's extremely punishable, especially since Soma has to get into the space of his opponent to land it, something he would prefer to avoid. Therefore, he has to try to pressure the opponent offstage with his genuine summon game. Alura Une, Guillotiner, Amalaric Sniper, all those moves attack only after Soma has moved. They are hard to land directly, but they can push the opponent to change their location, thus leading into a position to be hit by Soma's more direct attacks.

Racking damage is comparably easy with Soma. He is in complete control of the stage and probably even set up combos in his projectile game. He outcamps pretty much every character in the game and can use this to his own advantage. Furthermore, his defensive game is genuine. Erynis, Mandragora, Persephone, Katana and Puppet Master all provide Soma with possibilities to defend himself or escape out of an unfavorable position. Due to this, Soma is pretty much a fortress of projectiles and delayed hitboxes who's defense has to be penetrated before he can be hit. Since he has to watch out for his Darkness Points and not becoming Dracula, this will sneak in little windows for the opponent to sneak in a hit or two when he cleanses himself with Mina's Talisman. His poor close-range game and dependance on the Neutral Special make Soma a character with an extreme learning curve - he has to balance all of these facts while keeping up his projectile and summon game.

Soma's recovery is not really bad, but very tricky and strategic. Bat Company is an extremely risky move to use, since it makes Soma highly vulnerable to gimping and edge guarding. He can use Puppet Master, as another mean of recovery.

Soma's throw game is rather good, but for way different reasons than just the throwing. He can use throws to regenerate a bit of health with Succubus or get himself into a better position with Rycuda and Catoblepas. His Back Throw is the only real throw in Soma's arsenal, and a good way to get an opponent offstage.

Overall, Soma is a strong opponent to face, but he has some big weaknesses that the opponent possibly can exploit once they are aware of the capabilities of Soma and the matchup in general.


Entrance
Several lightning bolts flail around just above the position Soma will come out. He appears, arms and legs stretched out with his chest pressed upward - almost like he was hanging from a rope tied to his chest, and glowing blue. He then drops down.

Victory Poses

Up
A orange pulsing orb is seen floating. Soma, obviously wounded, approaches it from the side and grabs it. The orb disappears and coats Soma in a glowing light. After the light disappears, Soma is all well again.

Side
Soma does a similar pose as in his entrance. A glowing orb spirals around him and right into his chest. The color of the orb is randomly chosen as Red, Blue, Yellow or Grey.

Down
Soma gets out Mina's Talisman and examines it, then clenches his fist around it and presses it to his chest, closing his eyes and thinking about Mina.

Dark Lord
If Soma wins in his Dark Lord state, the victory pose is always the same. Coated in a deep red light, glowing and holding a chalice, Soma floats in mid-air, legs crossed like he would sit on a chair. He laughs demonically.

Loss
Soma simply claps for the victor(s) of the battle.


Series Icon

The reverse-crucifix and devil wings; a Castlevania standard.


Codec Converation
Snake: Colonel, this guy looks familiar... Is it Alucard?
Colonel: No, Snake. This is Soma Cruz, and he inherits Dracula's soul. This allows him to gain the souls of his defeated enemies and use them as his own weapons.
Snake: So... he could have some power I inherit when should he defeat me?
Colonel: That is correct. However, he has to keep out. Since he carries Dracula's soul, he is vulnerable to the dark powers. Only a talisman given to him by the priestess Mina Hakuba protects him from the darkness and cleanses him from evil.
Snake: Interesting... so I suppose he has to take a break now and then to make sure he doesn't get overflown by darkness. What if it does happen?
Colonel: Then Soma become the dark lord, Dracula himself. His powers will increase, although he will lose access to some of them.
Snake: Gotta watch out then...


Kirby Hat
Kirby gains long, white hair and a little white coat. Since the Neutral Special is of no use for Kirby, he gets Soma's Side Special, Puppet Master.

Credits Song for Single Player
Castlevania: Dawn of Sorrow - Pitch Black Intrusion

If you press the Special button before the credits roll, you will get this song instead:
Koumajou Densetsu - Opening
 

n88

Smash Lord
Joined
Oct 10, 2008
Messages
1,547
Holy ****!

Do you people realize that by posting all these movesets immediately, you're hurting the reception of your set, and the set of everyone else on the page?

Itachi - I don't know much about the character, but I nevertheless enjoyed reading the moveset. My only complaints are that the playstyle section could be a bit bigger (Which you acknowledge), and that Itachi has an F-Smash, a F-Air, a F-Throw, but a Side Tilt and a Side Special. This is very minor, but it's a little strange (To me, at least).


Yae - You've created a very workable set here, but it's a bit too generic. Just coming up with a few more creative attacks would be good. Also, the set seems to have two D-Tilts. On the up-hand, I absolutely love the pseudo-DOJO entry.

Haven't had a chance to read Rival Trainer or Nightmare yet. I'll have something to say if I get a chance.

Also, I'd like to say that I'm currently workiing on three movesets at once, so I probably won't be done with them until MYM7 at this rate, thanks to school.

EDIT: @#$%&*!#%^*&^*@!!!
Another one?
Oh well, it's nice to see Onishiba back. I'll try to comment on this after I get through Rival Trainer and Nightmare.
 

Wizzerd

Smash Ace
Joined
Feb 24, 2009
Messages
929
Soma Cruz: We missed you! I can't say that I know that much about the character, as I haven't played any of Soma's Castlevanias. This is a shame really, as it's obviously the kind of moveset that's incredibly true to character while still fitting into Smash cleanly and not being a direct port.

The mechanic is handled pretty well, and you don't forget about it in the moves themselves, as you always mention if moves are available as Dracula while adding a just-right amount of moves that help to handle his DP. Still, I don't absolutely love it because it doesn't add that much to his playstyle. I still think it adds to the moveset, but I'm not in love with it.

The first thing I notice about this set... the image headers, the little pictures, the set looks amazing aesthetically. It perfectly fits the character (as far as I know), it looks good and it isn't distracting. The little images on some of the moves are always the right size and help to visualize the moves.

The moves are never "ZOMG awesome," but you never go crazy with originality like I did with Tingle, and most of them are interesting enough. The reason I say most is the throws, which aren't so original. They aren't utterly generic, but they still could be better. Maybe it's sacrificing originality for playstyle?...

...But there isn't much playstyle. This is my main criticism of the set. He's really just a typical damage racker who can't really KO. The defensive capabilities and summons mix it up somewhat, but I still don't really think it's particularly original.

All in all, I genuinely enjoyed this set. It's definitely one of those sets that could fit into Smash while blowing all other movesets out of the water. Please stick around, because we <3 u (well, I do).
 
Joined
Oct 9, 2008
Messages
8,905
Location
Vinyl Scratch's Party Bungalo
NNID
Budget_Player
All right... from a guy who has never played halo any more than casual multiplayer with some friends, here comes...

Master Chief


Master Chief is the main character and protagonist in the immensely popular (and overrated >.>) Halo series. And now, he decides to join the brawl. Mostly because he's bored and wants to stomp some heads in. His normal stance has him standing with a plasma sword in one hand with an assault rifle strapped to his back. Due to his massive insistence on ranged attacks, his playstyle is very different from anyone else. There is exactly one other character who has a true projectile that is tied to a smash, tilt, or aerial attack, and his are far less interesting; MC's actually go forwards.

When I refer to random numbers in parentheses after describing an action, they're frame counts. Degrees are on a scale where 0 is straight in front of the character, 90 straight above, etc.

Stats

Run Speed: 5/10. While it isn't easy to move incredibly fast in a suit of armor, Master Chief approximately matches Samus's run speed and can move pretty well across the stage.

Walk Speed: 8/10. There is never a spare moment for dawdling, so for this reason MC has learned to move fast, even when he doesn't run.

Weight: 8/10. MC is a big dude in a suit of power armor. He weighs in pretty heavily, akin to snake or Ganon.

Melee Power: 6/10. A competent close-range fighter, MC can take it up with a lot of foes.

Ranged Power: 4/10. Powerful attacks, but hard to hit with and somewhat laggy.

Attack Speed: 5/10. MC has a nice combination of fast poking attacks and slow power moves.

Size: 8/10. MC is one of the tallest characters.

Fall Speed: 7/10. Heavy armor is heavy.

Aerial Acceleration: 4/10. Jumping is pretty cool, but it doesn't let you fly well without rockets on your ***.

Aerial Movement: 3/10. Very slow. You can tell that chief doesn't like the air as much he might if he was in a spaceship or something.

Jump height (first jump): 5/10. Above average, with a booster.

Jump height (second jump): 6/10. A strong second jump due to a small jet pack.

Jump height (SH): 7/10. MC has a high shorthop. Finesse is not his thing.

Range: 8/10. Plasma Sword is cool.

Shield: 6/10. MC has a relatively good shield.

Roll: 8/10. An excellent and very distancing roll. Not that much invulnerability, but it gets you a good distance.

Sidestep Dodge: 4/10. Getting shot at all the time increases your reflexes. Right? Right? Nope, MC's sidestep dodge is pretty bad.

Airdodge: 3/10. Oh dear. MC is a sitting duck in the air, isn't he...

Moveset
Standard Attacks

Jab 1: Master chief jabs forward with his offhand. Low range, does 2 damage, will combo into Jab 2 but not much else; MC has a pretty lousy jab cancel game. 5 frames startup, 20 frames end if not canceled into Jab 2 (which will start on the 8th frame after Jab 1 if inputted).

Jab 2: Master chief takes a step, then slashes forwards and down with his plasma sword. It has a crazy range (comparable to tipper marth fsmash), but is very punishable. It deals 11 damage and has very solid knockback (about on par with snake jab 3) at a 45 degree angle. Startup is about 16 frames, endlag is about 40 frames (1-20: stands in place in a similar pose to the one samus takes after a beam sword fsmash; 20-40: straightens up). The knockback, however, is strong enough that only the fastest characters can punish it on hit, and then only at low procentages. It will kill pretty well, and at times you may find yourself relying on MC's jab to kill.


Forwards Tilt: Master Chief pistol-whips you. With his offhand, he pulls the Assault Rifle out of the holster on his back and smashes it down. The hitbox is his whole arm and the weapon itself, and it has very good range. At about 16 frames of startup, this move is not particularly fast, but it does 16 damage and trips the opponent (I would say knocks them down but yeah, it's the slip animation). The endlag is short. I cannot give an exact number right now because I'm missing what I need (trip frame data), but it would be [Frames in Trip animation before you can roll/get up attack+6-startup from this attack]. Essentially that means that you have a 10-frame advantage regardless of what happens when you hit your opponent with this attack. This makes it invaluable for chasing. Read your opponent correctly and you can really hurt them.


Up Tilt: MC fires his gun into the air straight above him. He pulls the gun out of the holster (9 frames) aims it up (3 frames), and fires about 6 rounds off in a very narrow cone (6 frames, during which the hitboxes extend one by one). This will reach incredibly high above him (from the ground floor to the top of the roof of the house on luigi's mansion) but cannot hit an opponent who is on level ground with MC. The shots are fired so that depending how close to directly above master cheif the opponent is, the more of it will hit the opponent (if they're to high, the cone will be spread out to the point that not more than one or two bullets will connect). Each bullet will deal between 3 and 4 damage for a maximum of 21 damage if done directly above him vertically. The bullets have moderate vertical knockback. The more you hit with, the better it is. It will, on average, KO around 130% if done while the opponent is directly above you. Cooldown lag is 10 frames where he puts the gun back in his holster. This attack will really mess with anyone who is above you on a platform and utterly destroy aircamping. It has transcendent (laser) priority.


Down Tilt: MC swipes at the ground in front of him with his sword. 9 frames of startup lag, hits on frames 10-13, 8 frames of cooldown. This is one of MC's fastest ground attacks; hell, one of his fastest overall. It has a pretty good range, a disjointed hitbox (obviously; it's a friggin' sword), and if you space it correctly, it is safe on block against anyone who's best punisher falls short of Wolf's Fsmash in speed and range. It deals 9 damage and hits the opponent up and towards you at a 110-degree angle; they whiff their DI and you can combo Dtilt to utilt. It's really simple to DI but if they do it wrong, they will eat a lot of bullets. The move will kill upwards of 200% but is still incredibly useful in other ways. It is also very nice for poking shields.


Smash Attacks

Forward Smash: Master Chief pulls out his MG slowly (30 frames), aims (charge) and fires off a full clip (frames 31-41 on uncharged, tack on X+4 frames for charge duration, where X is the number of frames he was charging). During the time he's firing, he has super armor. He then reloads (42 to 77, see firing frames). This attack is obscenely powerful. It will reach exactly from one end of final destination to the other. It traps the opponent in a string of hits, pushing them forwards the entire time (like Samus's final smash, but with a lot less push time) releasing at the end of the clip with powerful knockback (70% angle, will kill mario fresh from the center of final destination at about 80%). For each frame the opponent is caught in the move, it does 3 damage fresh; if you hit him with all of it, that's 30 damage and a very likely kill. Because the knockback gets calculated on the last hit; if you catch them with all of it you can act as if they had 27 more % than when they started for killing. So in fact, this will kill more accurately around 50 or 60%. Unlike most "normal" smashes with high lag, if your opponent is not close to you you can fire off this baby just to try to bait them. The hitbox is about as high as MC himself, so it's not the best idea against characters with high mobility,


Up Smash: The Impaler. Master chief crouches (1-8), swings the sword from in front of him upwards (9-14) and then jumps up about the height of a shorthop with the sword above him (15-19, the hitbox is from 17-19). Then he comes down on one of his knees and his offhand and straightens up (20-43). The first hitbox deals 3 damage and will usually set up for the second hitbox, although you can SDI out. The second hitbox deals 16 damage uncharged, and knocks back at a 90 degree angle. If your opponent doesn't DI, they usually set themselves up for an utilt followup unless they get knocked too high. It will KO off the top of FD at about 110%.


Down Smash: Master Chief crouches down (1-18) and lays a frag grenade on the ground. (19-26). Then he straightens up. (27-39). This grenade acts just like snake's grenades as soon as the attack finishes (frame 40); it can be picked up, attacked, thrown, and explodes when it comes into contact with a hitbox or after 4 seconds. The main difference is that when it explodes, it deals 18 damage and KOs around 100%. It's predictable (it starts flashing right before it explodes), but very, very good at pressuring people (it does high shield damage as well). And when it lands, it knocks back at a random angle between 70 and 110. Powerful attack.


Aerials
Neutral Air: Master chief pulls out his MG with his offhand (1-9, autocancels) and slices down on both sides (Sword in front of him, MG behind him in the air). The hitboxes here are pretty weird. they both extend from frames 9-13, but the gun hitbox has a considerably lower range. What's more, the sword hitbox knocks at a 40 degree angle up and away (dealing 10 damage and KO'ing around 160), while the gun is a very powerful meteor smash (knockback on par with Ness's Dair) which sends the opponent straight down and deals 12 damage. Then he puts the gun back (13-29). Landing at any point after frame 9 will result in 26 frames of landing lag. A slow, but powerful attack that, if spaced correctly can lead to some very nice offstage gimps.


Forwards Air: Master Chief slices across the Z-axis in front of him with his sword (Pit does the same thing in his fair) (5 frames startup, hits on frame 6, 14 cooldown, 19 landing). This move has solid range, does 13 damage, and will KO around 140 at a 23 degree angle.


Up Air: Master Cheif raises his sword above his head (1-10, 20 frames landing lag) and holds it there (11-46, 32 frames landing lag), then slices down with the sword to the front of himself (47-49, 8 landing). Hitbox 1 is above him from frames 11-12; hitbox two is above him from frames 13-44. A sex kick, it will knock up on most hitboxes... Hitbox one deals 16 damage and will KO off the top around 120% on a grounded character (90 degree angle). Hitbox two deals 10 damage, will KO off the top around 190%, but has very low KBG; it looks strong but won't get that much stronger. Hitbox three is out from frames 47-49 and will knock opponents back at a 300-degree angle (weak spike, comparable to diddy kong's down air).


Back Air: Chief pulls out his SMG (1-14, 13 frames ground cancel) and fires off 3 rounds (15-21, 18 frames ground cancel), afterwards returning it to the sheath on his back (22-29, autocancel). For info on how the bullets work, see up tilt. Hitting the opponent with the gun as it comes out (frames 9-14) will hit the opponent slightly forwards, guaranteeing a hit with the three bullets.


Down Air: Chief raises his hands above his head (1-23, 16 frames landing lag), then slams them down between his legs (24), recoiling them (25-63, landing lag: 30 frames). The hitbox is out for one frame, and is another strong meteor smash. It deals 15 damage and will hit a little harder than the gun hitbox on his nair. It autocancels on the ground on frames 1-9, and 25 (yep, right after the hitbox! Get frame perfect timing and this aerial is lagless). Not ideal for hunting offstage, but still decent-the autocancel hitbox can lead to very, very dangerous combos.


Specials
Neutral Special: Machine Gun Fire. When you press B, Master chief pulls out the machine gun (19 frames). On release, he puts it back into the holster, reloading in the process (29 frames). By holding B, Master Chief fires off a run of shots, in a very straight line, which you can aim slightly up and down by angling it (see also: fire breath). The bullets come out 1 per frame, last the distance of final destination, deal 1 damage each, and have low forwards knockback. Not as low as things such as firebreath or lasers, but actual knockback. As in, you could potentially kill with it at obscenely high procents. Each bullet deals 1 damage, and a full clip is 45 shots. If you don't SDI out (very possible; as said, they have knockback), you will take a very large amount of damage, similar to Bullet Seed. At around 160%, the knockback on the individual bullets becomes so large that with proper DI, you will never take more than 3 or 4 hits before coming out. In any case, if you don't follow correctly, the payoff on this move will be low. If you use the entire clip of 45 shots, then Master Chief pauses and reloads... very slowly (78 frames!). This is a long reload time and is ridiculously punishable. By comparison-Ganon's utilt startup is 84 frames. All in all, this attack is incredibly potent overall. Keep in mind that while you do it, you can't move or jump, but if you are already in the air, you can DI.


Side Special: Assassination Thrust. Master Chief pauses (1-12) Dashes forwards (frames 13-28), dives forward with the sword out (frames 29-37) and goes into a roll, landing gracefully on his feet with his arms outstretched and then reverting to the normal stance on miss or on hit with the second hitbox (38-60). The first part of the move goes over a short range (width of lylat patrol platform), the second part goes about 1.5x that distance, and the third part goes about 75% of that distance. From frames 13-20, the property of the move changes. If you hit your opponent with the very start of the dash, then they get pulled into a throw animation (it does not actually grab, so it can be blocked) where Master Chief slams the sword through them and then up, dealing 20 damage with high knockback (65 degree angle, kills off the side/top around 90%). When this happens, the ending animation does not happen and instead he reverts to normal after the animation fades. If you miss with the beginning, the hitbox disappears for 8 frames, then if the opponent is hit with the sword from frames 29-37, they take 11% with moderate knockback (no kill potential; kills around 280%) at a 30 degree angle. This attack will put you into specialfall-the aerial animation is exactly the same (he runs on air, yes).


Down Special: Plasma Grenade. Master Chief pauses (1-4) pulls out (5-10) removes the safety on (10-11) and chucks (12) a plasma grenade (same arc and look as snake's hard (forwards) grenade toss), then straightens up (12-20). If it hits your opponent while you're throwing it, it will stick to your opponent (much like a gooey bomb), and much like a gooey bomb can be transferred the same way. Other than that, it acts like the frag grenade from dsmash. You can only have one plasma grenade out at once. This attack will put you into specialfall.


Up Special: Gravlift. MC puts down a grav lift under him (both grounded and aerial) (1-23), then catapults up, sword first (24-30). Then, after a short float at top height, he begins to fall. Specialfall landing lag takes 24 frames. The attack gets about as much height as G&W's upB but very little horizontal momentum (see also: dolphin slash). Frames 25-29 have a very, very powerful hitbox on the sword which deals 23 damage and will KO around 75% on most characters off the top. The attack is telegraphed and laggy, and easily punishable-**** up the punishing, and you eat a fistful of ****. Not exactly effective as a KO move either, because of the long startup and very punishable endlag. You go into specialfall from this attack.


Throws
(I'm not going to bother with the frame data here; that's just ****ing tedious)

Pummel: 23 frames, 2 damage - MC whacks the opponent over the head with the hilt of the sword

Fthrow: Master chief kicks the opponent in the gut. 9%, KOs around 230%, knocks up and away at a 72 degree angle. Hard to follow up from.

Uthrow: Utilt clone; MC throws the opponent up and then does a weakened utilt; depending on DI this will do between 4 and 16 damage. KOs around... never. Fixed knockback, no follow-ups though.

Bthrow: Master chief throws them over his shoulder. 12%, will KO off the side around 150%. No follow-ups. 40-degree angle.

Dthrow: MC throws the opponent to the ground. Never kills. Can be teched with good timing; if your opponent doesn't tech, they bounce up enough that you can hit them with dtilt, sometimes (rarely, at high %s) ftilt. Deals 8%.


Misc. Attacks
Dash Attack: MC swipes forwards with his plasma sword (similar to the animation from TL's dash attack, but with a bigger sword). 7 frames startup, attack is out from 8-9, 10-36 is ending lag as he goes out of the run. This move is pretty effective for DACUS due to its high momentum and decent startup. It does 9% fresh and knocks the opponent down and behind Chief. Make sense? If you perform this on an aerial opponent, they will be knocked down to the ground a good distance behind you, with the bounce animation. It will KO a grounded opponent around 260%.

Ledge Attack <100: Master chief swipes with his sword while getting up. 8%, low knockback.

Ledge Attack >100: Master Chief swipes both legs over the side. 6%, low knockback, long endlag.

Get up Attack: Master Chief swipes behind him, then in front of him while getting up with the sword.


Taunts:

Up Taunt: Master Chief fires off a few rounds into the air.

Side Taunt: Master Chief aims from side to side, like fox's victory pose

Down Taunt: Master Chief holds his plasma sword up to catch light.
 

Red Arremer

Smash Legend
Joined
Nov 27, 2005
Messages
11,437
Location
Vienna
Soma Cruz: We missed you! I can't say that I know that much about the character, as I haven't played any of Soma's Castlevanias. This is a shame really, as it's obviously the kind of moveset that's incredibly true to character while still fitting into Smash cleanly and not being a direct port.
That's horrible, get the games now, they're great. :3

The mechanic is handled pretty well, and you don't forget about it in the moves themselves, as you always mention if moves are available as Dracula while adding a just-right amount of moves that help to handle his DP. Still, I don't absolutely love it because it doesn't add that much to his playstyle. I still think it adds to the moveset, but I'm not in love with it.
I wanted to include his ties with the Dark Lord-stuff he has in his games without making it the Final Smash, so I went through this way.

The first thing I notice about this set... the image headers, the little pictures, the set looks amazing aesthetically. It perfectly fits the character (as far as I know), it looks good and it isn't distracting. The little images on some of the moves are always the right size and help to visualize the moves.
Thanks. The headers are old, though... people who know my Castlevania sets from MYM4 should remember them.

The moves are never "ZOMG awesome," but you never go crazy with originality like I did with Tingle, and most of them are interesting enough. The reason I say most is the throws, which aren't so original. They aren't utterly generic, but they still could be better. Maybe it's sacrificing originality for playstyle?...
I'm horrible with making crazy moves. I simply can't do that. My creativity has limits, especially with moves that give me HUGE trouble. In short, the throws.

...But there isn't much playstyle. This is my main criticism of the set. He's really just a typical damage racker who can't really KO. The defensive capabilities and summons mix it up somewhat, but I still don't really think it's particularly original.
I haven't followed MYM6 at all. *shrug* I made this moveset because I love the games and recently replayed Dawn of Sorrow. I made this moveset cause I wanted to make a moveset for Soma. That's basically all... I don't aim to win this contest or even make it into the top contenders... I already won together with H_R, I don't have anything else to gain.
Thus, I don't try hard... I just let it flow. I think the playstyle fits to the character and that it's good enough for my personal "accomplishment" to take place.

All in all, I genuinely enjoyed this set. It's definitely one of those sets that could fit into Smash while blowing all other movesets out of the water. Please stick around, because we <3 u (well, I do).
Thanks. Maybe I will... One or two sets or so. I dunno. We'll see.
 

T-major

Smash Champion
Joined
Oct 19, 2006
Messages
2,167
Location
Windsor, Ontario, Canada
Hey, this thing is still going on! :D Gee, I've been gone too long. I was only around for the first one O__O

I love stuff like this, so I'll make a set... at some point.
 

Hyper_Ridley

Smash Champion
Joined
Dec 21, 2007
Messages
2,299
Location
Hippo Island
Soma Cruz

ZOMG Spadefox Onishiba posted a set! OMG OMG OMG OMG OMG OMG

*calms down*

Alright, so first things first: Move originality. The Dark Lord mechanic sounds intruiging, though I wish it did more than just disable move inputs and power up other moves. The individual moves were all good stuff for the most part. Mostly simple but clever additions. MOSTLY. My main gripes are with the (you know this was coming) random effects that just seem tacked onto some moves for the sake of being the same as in the game, but that's typical HR anti-randomness :3.

Onto playstyle. So he's a projectile spammer and a trap/summons character. While I have to give you major props (Rool: ZOMG props!) for writing that lengthy playstyle section, I have to say that it wasn't exactly the most flowing playstyle in the world. His summons are mostly typical projectiles and trap type stuf with a cool asthetic attached, with the exception of the epic DSmash. His FTilt is basically completley contradictory to his entire playstyle since it bring enemies in close, and while you claim that he has projectile "combos" he seems to have more combo set-ups with his close range game through his FTilt and DThrow. Add in his Down Special and Nair for more close combat defenses...yeesh. You sure this is a ranged fortress?

And now I get to mention something that I really can't believe I'm talking to a MYM veteran about: Detail. I cannot fathom how the DSmash of all things fails to state lag time for summoning it considering how it basically is so freaking insane otherwise, having the ability to pressure with projectiles, block other attacks, stun with the vines, and it's still available in Dark Lord form. I mean, really, lag on this move is pretty much a make or brake feature depending on how you want it to fit into his playstyle. There are other moves that need lag too but it's not as offensive. Conversly, the FSmash and Fair are a bit redundant with their descriptions as you state things that would be expected to happen, such as the Fair being destoryed if it hits invincability frames (Liek no wai!). And...I'll stop right there, you get the picture.

Despite all that negativitey, I still don't think this is a bad set perse. It's a certain charm to it, and it's still got oodles of move creativity which I love. It was nice to see you show your face if only for a moment, but at the same time your "break" from MYM is apparent.

Ending on a humerous note: This moveset is countered by the set named after its author. :bee:
 

Red Arremer

Smash Legend
Joined
Nov 27, 2005
Messages
11,437
Location
Vienna
Alright, so first things first: Move originality. The Dark Lord mechanic sounds intruiging, though I wish it did more than just disable move inputs and power up other moves. The individual moves were all good stuff for the most part. Mostly simple but clever additions. MOSTLY. My main gripes are with the (you know this was coming) random effects that just seem tacked onto some moves for the sake of being the same as in the game, but that's typical HR anti-randomness :3.
And you know that I want them to be random.

Onto playstyle. So he's a projectile spammer and a trap/summons character.
Wrong. All of his summons outside of the DSmash are counted as disjointed hitboxes or projectiles. He's NO trap character.

His FTilt is basically completley contradictory to his entire playstyle since it bring enemies in close, and while you claim that he has projectile "combos" he seems to have more combo set-ups with his close range game through his FTilt and DThrow.
FTilt is more meant to be a move defending against projectile spamming rather than an offensive attack.

Add in his Down Special and Nair for more close combat defenses...yeesh. You sure this is a ranged fortress?
Yes.

And now I get to mention something that I really can't believe I'm talking to a MYM veteran about: Detail.
As I already told you personally and said in my earlier post - I don't really care about the whole deal anymore. There might be a few things I missed, but I tried to be as detailed as possible.

I cannot fathom how the DSmash of all things fails to state lag time for summoning it considering how it basically is so freaking insane otherwise, having the ability to pressure with projectiles, block other attacks, stun with the vines, and it's still available in Dark Lord form. I mean, really, lag on this move is pretty much a make or brake feature depending on how you want it to fit into his playstyle.
Guess this is one of the things I missed.

There are other moves that need lag too but it's not as offensive.
Like?

Conversly, the FSmash and Fair are a bit redundant with their descriptions as you state things that would be expected to happen, such as the Fair being destoryed if it hits invincability frames (Liek no wai!). And...I'll stop right there, you get the picture.
Considering that FAir is piercing through shields and reflectors, I thought it would be better to say that invincibility frames aren't affected by it.

Despite all that negativitey, I still don't think this is a bad set perse. It's a certain charm to it, and it's still got oodles of move creativity which I love. It was nice to see you show your face if only for a moment, but at the same time your "break" from MYM is apparent.
Yay.
 

MarthTrinity

Smash Lord
Joined
Aug 9, 2007
Messages
1,954
Location
The Cosmos Beneath Rosalina's Skirt
Sorry Spade, somebody posted a Soma Cruz set already.

http://www.smashboards.com/showpost.php?p=2717472&postcount=1


Soma Cruz

All joking aside, when I saw that Spadefox was posting another moveset in MYM I was honestly taken a bit aback considering I never thought I'd see the day again...my interest was increased further when H_R said that I in particular with like the character choice (although he refused to tell me who it was). So needless to say, when I saw it was Soma I was pleasently surprised considering he's one of my favorite game characters and my favorite Castlevania character behind Shanoa.

Enough blabbering, let's take a looksie. First off, we have a special mechanic that, once activated, can't be deactivated...so Soma just kinda gets detroyed. I find it a tad weird that he can't become a bat while in Dark Lord form but eh, okay.

The Neutral B only removing the DP makes it a little bit dull; maybe if he could harness that in the form of some light based attack to counteract the darkness. Puppet Master and Bat Company are perfectly in character and I really -LOVE- Puppet Master. Manticore is a tad weird to have as a Down Special just because of how unimportant it is in game; something like Zephyr, Paranoia or Balore could've potentially be used for creative Down Specials.

Onto the normal moves...zomg Persephone is an anti-trap move! =O But yeah, those tilts are all in character, I like Aguni and Persephone...Katana is kind of ho-hum but Mandragora and Alura Une are both nice. The Neutral air looks like an idea I saw before but I can't remember what set for the life of me o.o...forward's a tad dull but the back air and down air I like.

The throws are all okay, nothing really jumps out and wows me really there but they're by no means bad. The Final Smash however kind of strikes me as out of character since Soma never becomes Death. . .but I suppose it's better than "Generic Super Form #14" attack.

The organization on the set as a whole is good, the headers are reused but not bad. I wish you had sprites for all of the moves instead of just some, not having them for the throws is a tad weird but eh. Also, you skipped out on some of the cooler powers (such as the ones I mentioned as potential down specials) Gergoth, etc.

Overall, it's not a bad set at all, it's got some good ideas and some I really like (Puppet Master :3), but it also has some dry moves such as the up air and the throws but I suppose that's excusable considering your absence from the thread. Anyway, I hope you decide to stick around and make sets every once in a while, even if it's just for fun.
 

Red Arremer

Smash Legend
Joined
Nov 27, 2005
Messages
11,437
Location
Vienna
Enough blabbering, let's take a looksie. First off, we have a special mechanic that, once activated, can't be deactivated...so Soma just kinda gets detroyed. I find it a tad weird that he can't become a bat while in Dark Lord form but eh, okay.
I wanted to make Dark Lord absolutely unfavourable. Considering that you practically lose the game when you get the bad endings with Soma becoming Dracula in the games, I thought it was appropiate.

The Neutral B only removing the DP makes it a little bit dull; maybe if he could harness that in the form of some light based attack to counteract the darkness. Puppet Master and Bat Company are perfectly in character and I really -LOVE- Puppet Master. Manticore is a tad weird to have as a Down Special just because of how unimportant it is in game; something like Zephyr, Paranoia or Balore could've potentially be used for creative Down Specials.
I was thinking of doing that, but I didn't want to overpower the Neutral B. And I thought of adding Paranoia as Down B instead of Manticore, but I honestly didn't know how. I didn't think much about Zephyr or Balore... in retrospect, you might be correct on that one, yea.

Onto the normal moves...zomg Persephone is an anti-trap move! =O But yeah, those tilts are all in character, I like Aguni and Persephone...Katana is kind of ho-hum but Mandragora and Alura Une are both nice. The Neutral air looks like an idea I saw before but I can't remember what set for the life of me o.o...forward's a tad dull but the back air and down air I like.
I think it's not too uncommon of an idea to have a guardian angel hug the character and protect them. I know that Erynis works differently in the game (as an actual attack), and I first wanted to make it like it works in the game, but then I thought of the defense mechanism.

The throws are all okay, nothing really jumps out and wows me really there but they're by no means bad. The Final Smash however kind of strikes me as out of character since Soma never becomes Death. . .but I suppose it's better than "Generic Super Form #14" attack.
Throws and Final Smash are my weakpoints. For Death... I first wanted to give him Barbariccia or Iron Golem, but didn't think that it was epic enough. Then I wanted to give him Menace, but I didn't want to write a hugeass description about how Menace looks like. So I chose Death. Since the Death soul actually does summon the small sickles, the transformation wasn't too much of a stretch.

The organization on the set as a whole is good, the headers are reused but not bad. I wish you had sprites for all of the moves instead of just some, not having them for the throws is a tad weird but eh. Also, you skipped out on some of the cooler powers (such as the ones I mentioned as potential down specials) Gergoth, etc.
I could've added one for the Back Throw, but otherwise, I think it wouldn't have made much of a difference, especially considering that the move looks different than the enemy sprite. I also don't think that there's much vision needed to imagine a thunderbolt or a character being petrified. :p

Overall, it's not a bad set at all, it's got some good ideas and some I really like (Puppet Master :3), but it also has some dry moves such as the up air and the throws but I suppose that's excusable considering your absence from the thread. Anyway, I hope you decide to stick around and make sets every once in a while, even if it's just for fun.
Yay.
 

Neo Exdeath

Smash Ace
Joined
Sep 11, 2009
Messages
795
Location
Strawberry Fields
Um... hello. I've been lurking for a while here (since MYM4, actually) and I've always wanted to make movesets. So, hello, and I hope that I make great movesets. I haven't read Soma yet, but I will soon. So, until then, good day to you all.
 

SkylerOcon

Tiny Dancer
Joined
Mar 21, 2008
Messages
5,216
Location
ATX
Soma Cruz

Ah, Spade. It’s been a while, eh? Well I’m sure you know that… and now we definitely know. I have to say, I was rather underwhelmed by Soma. The neutral special? Obligatory mechanic move, with tons of lag (but if it had less lag it would be broken!). Your side special is completely and utterly useless – I’m quite sure that the opponent will be able to figure out where you reappear much before you even disappear in the first place! If I was playing it against Soma, I would LOVE that move because it would pretty much mean a free FSmash to the face.

Your up special make no sense. Lets take a look at Pit’s up special – Whaddaya know! That lasts four seconds as well! Guess it’s just broken with the whole totally NOT tacked on damage/gimp buffs to your opponent put on. The Down Special is good, and I have no problems with it.

The neutral combo seems to be a decent spacer, and the dash attack is such a pathetically useless move that I have no clue why anybody would ever use it. 8% with pathetic knockback that might send me into helpless? No thanks, I’m good.

So wait – not only does the forward tilt lock me in place for two seconds, I’m also going to take half damage from projectiles AND my only reward is stun equivalent to that of Samus’ Down Smash without damage? That’s a really, really useless move, to be honest. The Up tilt is pretty good. The down tilt doesn’t seem to be particularly good at putting me in a bad position – unless being in the air counts as that. Jumping over the flame isn’t that big of a deal ;_; The freezing effect feels like a tacked-on afterthought for a shameless attempt at originality.

The forward smash is incredi-bad because the moment any opponent see it’s start-up animation, they’ll just shield and wait for their chance to punish you on the giant end lag. That really does make this move painfully useless… And the up smash - Where are the charged percentages? The explosion feels pretty much like a gimped version of Snake’s grenade, with more damage (and, awkwardly, with less knockback). And how might you suggest characters without projectiles go about attacking Alura Une? They can’t run up an attack it without being caught up in the vines.

The neutral aerial is cool, and is a nice high-risk, high-reward move, due to the lag. The forward aerial is also a good move. The back air is pretty cool, but the up air is pretty lacking. How far does the disk travel? That’s a pretty important stat that you have left out. The down air is a pretty useful move, and I like it a lot actually. Good job on that.

The throws are pretty alright. There’s some stuff I like, some stuff I don’t like. However most of it is minor, and for the sake of keeping this short, I won’t go into detail on stuff that doesn’t really matter. Though, they’re definitely a nice solid part of the set.

Soma’s playstyle doesn’t really have the flow that we look for now – this really shows your age as an MYM-er. Soma feels like an MYM4 set, to be completely honest, and the playstyle feels more like a half-***** attempt at a playstyle, to be honest. You’ve got some bits and pieces of a playstyle there, but it doesn’t all come together… just, a bit of it comes together.

Soma’s alright. You’re obviously rusty at moveset making, and you obviously haven’t been following MYM6. That’s cool though – it’s clear you had fun with the set. That’s all that matters.
 

JOE!

Smash Hero
Joined
Oct 5, 2008
Messages
8,075
Location
Dedham, MA
Edit 2 on RT:

Button!
[URL="http://www.smashboards.com/showpost.php?p=8353476&postcount=1193"]'s extras[/URL]

Also fixed some stuff on chik...

now for a comment:
@mastuh cheef

Nice one Cadet, but you seem to be having the opposite problems of the last person I commented on :p

You have a good understanding of how moves work and all that, but you forgot 2 things in the stats:

1) snake is much heavier than Ganon, being that he is a superheavyweight (3rd heaviest actually), while Ganon is the Heaviest non-big (:bowser2:, :dedede:, :dk2:, :charizard:) or broken (:snake:) character, and 6th heaviest

2) how tall is he? he's not the tallest...so not Ganon or Boozer height, DK height?


After that minor issue, the thing holding your set back is lack of Aesthetics.

It has little flow as you read it, and gets boring pretty quickly seeing as its all the same text style, just different sizes for headers, and the descriptions are all clumps...

breaking up the descriptions a bit instead of having balls of text would help tremendously, as would possibly centering the titles, and adding some color or font changes, sprucing up the set by making it more eye-catching.


Even a covenant smashing super-soldier can afford to look nice :bee:
 

Junahu

Smash Ace
Joined
Nov 15, 2005
Messages
899
Location
Shropshire Slasher
Soma Cruz: Word around the chat is that, while not a bad set by any stretch of the imagination, Soma feels disjointed and is not exciting to read. You've already made it clear that you didn't make this to impress anyone, so there's no point in anyone complaining about it. But it's still irritating to be subconciously repulsed by the writing style and the lack of connection between individual moves.

Side Special has a lot of unspoken potential for hit-and-run (throw the puppet, attack and be whisked away during the end lag. Or throw the puppet behind a foe, attack, then appear behind them and attack again)

I know you wanted becoming Dracula to be a punishment, but there's no reason for Neutral B not to expend DP on some form of attack. Accumulating DP should not, in itself, be a bad thing. Of course, when it gets too high, then Cruz should certainly be punished. But there should be some sort of incentive to collecting DP, to keep the 'turning into dracula' mechanic from being a simple black vs white situation. (I haven't played the game, but I make the assumption that Cruz has at least some form of benefit from having Dracula's soul, which causes a conflict between 'becoming dracula' and 'losing his power')
 

Red Arremer

Smash Legend
Joined
Nov 27, 2005
Messages
11,437
Location
Vienna
Soma Cruz: Word around the chat is that, while not a bad set by any stretch of the imagination, Soma feels disjointed and is not exciting to read. You've already made it clear that you didn't make this to impress anyone, so there's no point in anyone complaining about it. But it's still irritating to be subconciously repulsed by the writing style and the lack of connection between individual moves.
I never was great with making crazy connections or linking moves together. And my first language isn't English, so I have legit johns here.

Side Special has a lot of unspoken potential for hit-and-run (throw the puppet, attack and be whisked away during the end lag. Or throw the puppet behind a foe, attack, then appear behind them and attack again)
Yes, that was my intention with this move.

(I haven't played the game, but I make the assumption that Cruz has at least some form of benefit from having Dracula's soul, which causes a conflict between 'becoming dracula' and 'losing his power')
Soma has the benefit of getting the Soul ability of collecting the enemies' powers. However, becoming Dracula is basically a "Game Over" in the games. You get a bad ending with Soma becoming Dracula and essentially being out to destroy the world. Which is not something you would like to have (except you want to watch all endings. :p).
 

SixrchBattosai

Banned via Warnings
Joined
Aug 31, 2009
Messages
39
Location
With my boyfriend...who's moving ;A;
Sixrch Battosai


Playstyle

Sixrch is a very interesting character. He plays like a heavyweight, but is, in fact, a middle-weight. It probably has something to do with his weapon: A spiked club. >_> He also commands rose magic. Some of his abilities include turning the petals into sharp projectiles and increasing the size of the thorns protruding from his skin. He’s a character that’s playable from long range, due to the lag of his standard moves, all of which involve his weapon. That’s right; no physical attacks. His club is the main reason for that as well, being that the weight of it is almost his own. He tends to shy away from physical moves either way, mainly because dirtying his own hands makes it harder to hold his weapon. He's a basic character that is hard to use sometimes due to his contradictory fighting style. His playstyle revolves even more so around his use of rose magic. This also makes him an all-range character, combined with his club's length and his mechanic.


Gimmicks/Mechanics
(because apparently, it’s mandatory)

Thorny Skin—Sixrch obviously has sharp rose thorns coming from his skin. This prevents any character from getting too close to him, mainly because physical attacks against him are double-edged swords. Sixrch takes the regular damage, but the attacker receives 2% recoil. Also, if a character is grabbed, there is no actual “Pummel” attack. His thorns are already hurting the opponent. Lastly, this mechanic breaks all combos. Talk about a c-c-c-combo breaker.

Attack Throws—Sixrch combines two attacks together to create a series of attacks that require no button pushing. Yes, I took this term from Soul Calibur, seeing as I had no other ideas for names.

Statistics

Size: 6/10
Weight without club: 6/10 With club: 9/10
Club Attack Speed: 3/10 Petal/Thorn Attack Speed: 9/10
Running speed: 6/10
Traction: 8/10
Jump 1: 4/10
Jump 2: 5/10
Aerial Movement: 3/10
Crouch: 5/10
Wall Jump: Yes
Wall Cling: Yes
Glide: No


Standard Attacks​

Single Press Standard: Sixrch swings his club in a forward half-arc, knocking the opponent back quite a bit, and causing 2 to 3%, both depending on if the sweet spot hits. A simple attack, really; although if guarded against or blocked, it leaves Sixrch a sitting duck. It has a pretty laggy ending and beginning.

Combination Standard: Sixrch extends his free arm and opens his free hand and summons a small burst of rose petals. He can repeat this part of the combo up to 4 times, dealing 2% each hit (each set of petals counts as one hit), and when added up, amounts to about 8%, if all hits connect. This happens most of the time, seeing as each hit deals little to no knockback, with little lag. Also, if the petals miss, they either float away in the wind or just sit on the stage. They don’t cause damage; it’s just a pretty aesthetic.

Side Tilt Standard: Sixrch moves his arm as if to make the combination standard, but fires the petals either diagonally upwards or downwards depending on which way Sixrch is standing, although it makes no difference if you’re hit. The move is pretty standard for a tilt, dealing 2 or 3 percent. It’s a very quick move that’s hard to dodge. Also, it can be used for an attack throw.

Side Tilt Attack Throw: The character thrown by the swing is hit by five 1% bursts of petals as they fall, then Sixrch smashes the club onto the character as they hit the ground, dealing 15% damage. This, as well as the Up Smash Attack Throw, needs to be timed perfectly for them to connect. Otherwise, Sixrch is left open for serious punishment.

Side Smash Standard: Sixrch swings his club like a baseball bat, with a lot of starting lag, due to the weight, but this move creates very large knockback with about 18% damage. It’s pretty much high risk, high reward. It’s also a visually appealing move as well, creating a red tinge on both the opponent and the weapon.

Up Tilt Standard: Sixrch swings the club over his head, basically, but there’s a catch: The hitbox is ONLY available at the beginning of the attack, and if a character is unfortunate enough to be caught in this attack, they are sent flying perfectly vertically. This allows for the Side Tilt Standard or Up Smash Standard to be turned into an “Attack Throw.”

Up Smash Standard: Sixrch swings the club similarly to the Up Tilt Standard, except that this attach has a hitbox available throughout the swing. Any character hit receives medium knockback and 9%. It's a fairly laggy move at the end, as Sixrch has to drag the club back to his side.

Up Smash Attack Throw: Sixrch catches the opponent on the club and swings them away. This part deals no damage, but if the character hits another opponent, they are both dealt 12% and heavy knockback. This is somewhat laggy at the end, and doesn’t always connect. This, as well as the Side Tilt Attack Throw, needs to be timed perfectly to connect. Otherwise, Sixrch is left wide open for a beating.

Down Smash: Sixrch creates a small ring of thorns around his feet and commands them to rip through the ground away from him. If an opponent is hit, they receive about 6 or 7% with minimal knockback. The move has some starting and ending lag, but if you play Sixrch correctly, the ending lag shouldn’t be a problem. It’s a pretty basic standard move.

Specials​

Special: Thorn Defense—Sixrch curls up a bit, still standing, and quickly extends the thorns on his arms, legs, and back, causing medium knockback, 8 or 9%, and poison damage to any affected opponents. It’s a very fast move that’s extremely hard to avoid. Also, to show that a character has been hit, a weak purple tinge appears on the affected characters. The poison lasts for about 10 seconds and is irremovable during that time frame. Also, Sixrch prepares the thorns, his body glows a dark forest green. This is a strictly short range move. Even though the Thorn Skin mechanic deals damage to an attacking opponent, it’s best to just get in, use it, and get out.

Side Special: Petal Barrage—Sixrch fires a continues spray of rose petals from his palm, each hit to an opponent dealing 3%, and the attack lasts for about 5 bursts, adding up to 15%, provided all of the hits connect. It’s not very laggy in the beginning or end, as are most of his petal attacks. It’s one of Sixrch’s attacks that CAN be used mid-range, but is best short range. If you’re a short range player, this is a staple move for you to use.

Up Special: Petal Fountain—Sixrch extends his free arm above his head and opens his palm and shoots out a large explosion of poison-edged petals. The way to differentiate these petals from the rest is another weak purple tinge. If any opponent comes into contact with any petal, they receive poison damage that lasts 20 seconds. In addition to this, Sixrch can pick up the petals to heal him of 2% each petal. This is an “any-range” attack, as the petals can be moved around by walking into them. But beware, this attack also affects teammates.

Down Special: Thorn Storm—Sixrch repeats the opening animation to the Basic Special, but instead, the thorns fly out of his skin and at opponents. If an opponent is hit, they receive low knockback, 5%, and poison damage for as long as the thorn is embedded in them. This poison damage, however, is removable. If a player continually moves around, the thorn eventually falls out. This is when the Thorn Skin mechanic deactivates. You can reactivate it by gathering the thorns before they disappear. If they disappear before you collect them, the Thorn Skin mechanic is deactivated until you lose a stock. This is not a good move to use casually during survival mode. Lastly, unless you are playing as Sixrch, you cannot pick up the thorns as they will cause irremovable poison damage for 10 seconds.

Aerial Attacks​

Basic Aerial: Sixrch moves his free arm around his chest as he quickly spins, opens his free hand, and fires a burst of rose petals. Any affected character receives 6 or 7% and minimal knockback. It's a bit laggy at the end and beginning. It's a boringly simple attack, but visually appealing, as the rose petals slowly fall to the ground. Again, it's simply a pretty little motion. No damage or effects.

Forward Aerial: Sixrch jabs the front of the club forward, dealing 7 or 8% with heavy downward knockback which leads into an Attack Throw. It's a basic attack with minimal lag. If it misses, however, there's more lag and an ending animation. He seemingly slips forward in the air and goes into his helpless state. He also has a surprised/scared expression on his face.

Backward Aerial: Sixrch shoves the butt of the club behind him, dealing about 6 or 7% with minimal knockback. Also, being that the butt of the club is a rose, the character that is hit has a weak red tinge if the hit connects and a few petals fall from the rose, but quickly regrow.

Up Aerial: Sixrch holds his free hand above his head and shoots a few bursts of petals into the sky as he falls, dealing 3% each hit, amounting to 9% total if all hits connect. However, this is hard to do as it requires precise timing. Again, as with all petal attacks, the petals slowly fall to the ground.

Downward Aerial: Sixrch positions his club below him with the top pointed downward and starts falling. Any character hit either standing up, crouching, or in the air receives 8% and weak horizontal knockback. However, if a character is downed, they receive 10% instead. Lastly, if a character is hit by the forward aerial and then this attack, this move becomes an attack throw.

Downward Aerial Attack Throw: The opponent is caught by the club and hits the ground when the club does, dealing 12% damage, and is smashed into the ground, resulting in high knockback. The beginning is very laggy and makes this attack very high-risk/high-reward.


Grab and Throws

Grab: Sixrch grabs forward with his free hand and holds the opponent close, resulting in 2% damage every half second the opponent is held.

Forward Throw: Sixrch puts his free hand between him and the opponent, facing the opponent, and fires a powerful burst of petals, throwing them quite a bit with 10%. As with all petal attacks, a red tinge on the opponents body and the petals fall to the ground.

Upward Throw: Sixrch pushes the opponent off of him a bit and catches them on his club, and throws them upward. This part deals no damage, but if the opponent hits another opponent, they are both dealt 7% and the second opponent flies somewhat far.

Backward Throw: Sixrch repeats the beginning animation of the Upward Throw, but instead throws them over his head and behind him. As with the Upward Throw, if the opponent hits another opponent, they are both dealt 7% and the same knockback.

Downward Throw: Sixrch pushes the opponent onto the ground and fires continual bursts of petals at them, each burst dealing 2% and the total amounting to around 16%. Being that that the hits are relatively weak, this throw has very little knockback, giving an opportunity for chain grabbing.

Final Smash
Rose Demolition
Sixrch's eyes become totally rose-colored as he readies his Final Smash. Sixrch then runs to the center of the stage and rises into the air. He summons large waves of rose petals to slice the stage. The roses start to move quickly around the stage in a weak funnel. At this stage in the Final Smash, it is easy to dodge. Although, if you DO get caught, you're basically through. Soon, the funnel becomes stronger and more powerful. The waves start dealing more and more damage. Then, Sixrch's club is thrown about by the funnel of rose petals. It starts spinning violently and hits all characters caught in the funnel. As each character caught in the Final Smash is hit by the club, they fly out of the funnel and off-screen. After all characters caught in the attack are defeated, Sixrch slowly lowers to the ground, the funnel weakens and stops, and his club lands in front of him. He picks it up and the Final Smash ends.


Taunts
Upward Taunt: Sixrch bangs his club on the ground a couple times.
Side Taunt: Sixrch opens his palm and assembles a rose out of petals then blows at it and the petals float away on the wind.
Downward Taunt: Sixrch sits down on the ground, lays his club on the ground next to him, and starts playing with some petals.


Extras
(because these seem to be mandatory, too.)​
Entrance: Sixrch enters through a shower of rose petals, dragging his club behind him.
Victory Poses:
1. Sixrch holds a rose in his hand, looks at it, and smiles.
2. Sixrch looks at his club and scowls.
3. Sixrch isn't on screen, but a single rose lays on the ground where Sixrch should be standing.
Loss Pose: Sixrch claps wistfully in the background, and his thorns seem to be larger than normal.

Emblem:


Author's Notes
This moveset didn't take very long. It took less than a day, actually. Please, review this moveset and tell me if I left anything out and what it was. I'll be sure to add it in ASAP. Thanks in advance!
 

Meorksies

Smash Cadet
Joined
Dec 14, 2007
Messages
74
Location
Wherever you aren't.
I don't mean to take any notice away from movesets, but I wanted to say I'm really interested in this. I have started a few moveset ideas, though only a couple of them are very... creative, and only finished one, and one of the less creative ones I have. But before I even think about posting any sets, a couple of questions.

1: How do you put pictures in a post? This may be an odd place to ask, but this is the one thing I'm really interested in that I would feel the need to do so with.

2: Is it considered a bad thing if not all moves have names? Mostly thinking of tilts and air attacks and such. I will of course have names for all specials and the FS.

Answers and any encouragement to actually post, despite my stating my movesets aren't that great, is appreciated.
 
D

Deleted member

Guest
I don't mean to take any notice away from movesets, but I wanted to say I'm really interested in this. I have started a few moveset ideas, though only a couple of them are very... creative, and only finished one, and one of the less creative ones I have. But before I even think about posting any sets, a couple of questions.

1: How do you put pictures in a post? This may be an odd place to ask, but this is the one thing I'm really interested in that I would feel the need to do so with.

2: Is it considered a bad thing if not all moves have names? Mostly thinking of tilts and air attacks and such. I will of course have names for all specials and the FS.

Answers and any encouragement to actually post, despite my stating my movesets aren't that great, is appreciated.
Welcome to MYM!

1. To put images in a post, put the URL inside the code [IMG*][/IMG] minus the *.
2. It's not taboo, but it's frowned upon. Any generic name for the attack you can come up with would suffice.

I hope your stay is a long and enjoyable one. :chuckle:
 

JOE!

Smash Hero
Joined
Oct 5, 2008
Messages
8,075
Location
Dedham, MA
@Sixrch Battosai

1st things 1st, do you have trouble reading this? or how about this?

The colors on alot of your sections mesh badly with the background...making it difficult for me to read at times...


On the aesthetics note: Your sections arent really well defined. Things like "forward throw:texttextfiller" are kindof hard to spot due to how they mix into the description of the move. Seperating them from the description may be a good idea.


Now that we're done with that, lets move on to the actual set:

you club moves do WAY too little damage. Look at say, DK for example. He has moves that mimick the Club's range, with half the lag....but do like 2-4 x the damage!

A move with that kinda lag and KB should not be doing 2-3%...

the combo is ok though.

Tilts are ok, but you are missing a Dtilt, and what exactly are these tilt attack throws? How would one pull them off? do you have to press grab directly after the move?


Usmash does too little damage for it's lag. where are the charge times/damages?

Down smash doesnt say the range...


he has no recovery move!
other than that, the speicals are all cool, if not only slightly different from each other...


...you gave him falco's chaingrab, but better?


overall, this set needs some work, the attacks are kinda...odd, he cant recover, and it is hard to read :dizzy:
 

SixrchBattosai

Banned via Warnings
Joined
Aug 31, 2009
Messages
39
Location
With my boyfriend...who's moving ;A;
@Sixrch Battosai

1st things 1st, do you have trouble reading this? or how about this?

Maybe change your monitor's setting. I can read it perfectly fine.

The colors on alot of your sections mesh badly with the background...making it difficult for me to read at times...

Again, try changing your monitor's settings.


On the aesthetics note: Your sections arent really well defined. Things like "forward throw:texttextfiller" are kindof hard to spot due to how they mix into the description of the move. Seperating them from the description may be a good idea.

Those have been fixed.

Now that we're done with that, lets move on to the actual set:

you club moves do WAY too little damage. Look at say, DK for example. He has moves that mimick the Club's range, with half the lag....but do like 2-4 x the damage!

A move with that kinda lag and KB should not be doing 2-3%...

the combo is ok though.

Tilts are ok, but you are missing a Dtilt, and what exactly are these tilt attack throws? How would one pull them off? do you have to press grab directly after the move?


Usmash does too little damage for it's lag. where are the charge times/damages?

Down smash doesnt say the range...

Fixed that.

he has no recovery move!

I have no clue of what a character with a large, metal, spiked club and control of rose petals could do for recovery. Do you?

other than that, the speicals are all cool, if not only slightly different from each other...


...you gave him falco's chaingrab, but better?


overall, this set needs some work, the attacks are kinda...odd, he cant recover, and it is hard to read :dizzy:
Thank you, and my answers are in red! ^_^
 

KingK.Rool

Smash Lord
Joined
Nov 26, 2005
Messages
1,810
Um... hello. I've been lurking for a while here (since MYM4, actually) and I've always wanted to make movesets. So, hello, and I hope that I make great movesets. I haven't read Soma yet, but I will soon. So, until then, good day to you all.
Welcome to MYM! It's always nice to see someone who lurks for a while before posting, I think.

I don't mean to take any notice away from movesets, but I wanted to say I'm really interested in this. I have started a few moveset ideas, though only a couple of them are very... creative, and only finished one, and one of the less creative ones I have. But before I even think about posting any sets, a couple of questions.

1: How do you put pictures in a post? This may be an odd place to ask, but this is the one thing I'm really interested in that I would feel the need to do so with.

2: Is it considered a bad thing if not all moves have names? Mostly thinking of tilts and air attacks and such. I will of course have names for all specials and the FS.

Answers and any encouragement to actually post, despite my stating my movesets aren't that great, is appreciated.
And a second newcomer in two pages! It's just as nice to see someone asking questions before tossing together their first moveset. I wouldn't worry too much about our quality standards; everybody starts somewhere, of course, and then improves from there.

Thank you, and my answers are in red! ^_^
He's totally right about the colors. I don't know what your monitor settings could possibly be, but for everybody else it's a huge eyesore to see a moveset that's just a lazy kaleidoscope. ESPECIALLY when the colors are hard to read. I'd try adding some BBCode and making a standard color scheme; I'd direct you to some examples, but you of all people should know about this by now.

And as for a recovery, why not just make some sort of tether involving his club extending and sprouting thorns temporarily? Tie both of his main gimmicks together and whatnot. It's not amazing, but it's something; every character, unless it's supposed to specifically be a weakness, needs a recovery.
 

Neo Exdeath

Smash Ace
Joined
Sep 11, 2009
Messages
795
Location
Strawberry Fields
@ K. Rool: Thank you for noticing me! I'm up to the tilts of a moveset for one of my favorite pokemon, Togekiss. I know all about Pokemon Syndrome too, and I've mostly avoided it. By the way, how does one make those buttons in your sigs?
 

KingK.Rool

Smash Lord
Joined
Nov 26, 2005
Messages
1,810
Really? Impressive. I'll be anticipating your first set, then! :bee:

And here's the tutorial for making a button or icon or whatever they're called:

http://www.smashboards.com/showpost.php?p=3153725&postcount=61

It's pretty simple with any program, really, and doesn't take too long. That's the tricky way to make them.

Then there's the very very long way, which is asking me for them. Just ask BKupa how long he's been waiting. >_>
 

SixrchBattosai

Banned via Warnings
Joined
Aug 31, 2009
Messages
39
Location
With my boyfriend...who's moving ;A;
Samax - The Murderous Solitude

♈Contents♈
Aries: Contents
Taurus: Background
Gemini: Element
Cancer: Specials
Leo: Standards
Virgo: Smashes
Libra: Tilts
Scorpio: Aerials
Sagittarius: Situationals
Capricorn: Final Smash
Aquarius: Extras
Piscies: Playstyle

♉Background♉
Masa was almost an adult, around 18, when he became a Nobody. Knowing that his name meant "true sand," he became fascinated with deserts, beaches, and basically anything else that was related to sand. He decided to travel to Agrabah and see the desert it held. He packed everything necessary for travel across a desert: food, tent, light-colored clothing to resist the sun's heat, heavy night-wear and lots of water. When he arrived, he was set upon by shadow creatures with bright yellow eyes, long antennae, and sharp claws. He ran as fast as he could to escape them, but tired out after what had seemed like only minutes. As he looked around, he realized that the creatures had disappeared. He breathed a sigh of relief and drank some water. As he regained his strength, he began to walk through the desert again. Soon, it became night and Masa set up his tent and looked up at the night sky. The constellations were so visible out in the desert. He decided to record them in a notebook that he'd brought. He did and soon went to sleep. Suddenly, however, a much larger creature burst out of the sand before him. It had six arms, two of which held curved blades, a snake's head, and was 20 times Masa's own size. He ran, but to no avail. The creature bound and landed before Masa and sliced him with a single blade. However, Masa was still alive. He'd assumed that the creature had missed, but he suddenly coughed up blood and fell to his hands and knees. A pink, glowing, heart-shaped gem fell out of his chest. It melted into the sand, disappeared and Masa lost consciousness. Masa regained his senses in front of a gate of a large, old, dilapidated mansion as a woman with pure yellow hair that seemed to sprout antennea and deep, blue eyes, full of malice, walked up to him and gave him his new name; but not just a new name, a new meaning.

♊Element♊
Once again, I melded two elements to create a new one. This time, I mixed Wind, Xaldin's element, and Earth, Lexaeus' element. It seems like this will be a Gaara rip-off. Trust me, it won't. Instead of just using his powers over sand to attack, he just uses it to strengthen his otherwise weak or short-range attacks and to recover. The specific ways he does this will be explained in the moveset. If it's confusing at all, please say something in your comments about it.

♋Specials♋
♊NeutralSpecial♉OpeningPitch♊
Samax puts a ball of sand into his hand and poses like a pitcher. If you hold the B Button, the ball will be thrown faster, will be larger, and will do more damage altogether. If the button isn't held, the minimum damage is 4% and minimal knockback. But when held, the maximum damage is 12% with better than medium knockback. Like I mentioned in the "Element" section, his attacks are normally weak and the sand makes them them stronger.

♊UpwardsSpecial♉SandDune♊
Samax creates a mound of sand under him and jumps off of it. It is similar to Sonic's Upward Special, except this one can be done up to 3 times. The reason for the number of jumps is because it doesn't have much recovery distance. As Samax's main recovery move, it needs to have some vertical movement.

Final Smash -Kurt Zisa


Samax has the Smash Ball and it's getting really hot! That's right. You're in the desert. The entire stage turns into a pit of sand caged by energy. At first, it seems as if nothing else will happen, but instead, after 5 seconds of fighting, the heartless who stole Masa's heart jumps out of an enormous sandstorm in the background. However, his arms are handcuffed by Nobody thorns. That's when Samax says, "Take care of them, my pet," and jumps out of the caged area to watch the slaughter. Kurt Zisa's hands are unhand-cuffed and he slashes with one blade. Any character caught in the slash in instantly KO'd, but in an interesting way. The camera pans to view the whole caged area from a birds'-eye view as KZ throws the character up, jumps after them, and brings them down with both blades. Instead of showing the character's being KO'd, the camera zooms in on Samax with an evil and maniacal grin on his face as each character's KO scream is heard. As they scream, Samax's eyes get wider, his pupils dilate, and his grin widens. Then, the caged arena becomes the stage again as Samax is standing on the head of the now hand-cuffed Kurt Zisa. "You've done well, my pet," Samax says as he jumps off. When he lands, the fighting continues. As an added threat, during the Final Smash, any character not hit by KZ is deal 1% every other second. Multiply this by the 14 seconds the Final Smash is active and you get 7% done to the non-KO'd characters.
 

kitsuneko345

Smash Ace
Joined
Dec 20, 2007
Messages
562
Location
*sending Sundance lots of apple pies on Pi Day, as
But For Now...

Ron the Death Eater


***

(--------Background--------)
http://www.youtube.com/watch?v=5J2KwbarSeA

Ronald Weasley was the best friend of all time to the tilte character of the Harry Potter series. Although he used to be a clever joker like his brothers Fred and George, the young wizard disappeared and became completely absorbed in the Dark Arts becuase pf Draco Malfoy's sudden change to being a protaganist, leaving Hogwarts School of Witchcraft and Wizardry. During this time, he underwent many extreme and evil magical transformations, as well as as working for Voldemort as a Death Eater. After Voldemort resurfaced, Ron went along with his new "friends" (also Death Eaters) while creating an alternate plan to take over the Wizarding world by becoming Voldemort's successor. Indeed, Ron became so widely feared that most are scared to speak his name, referring to him merely as 'He-Who-Must-Have-No-Names' or 'You-Know-Him'. The Death Eater's plans caused one historic war and huge numbers of casualties, before he was finally defeated at the hands of Harry Potter's, Herimonie Granger's, and Draco Malfoy's Dauther Ebony Dark'ness Dementia Raven Way (not to be confused with Enoby Dark'ness Dementia Raven Way).

Click the moveset headers for some experience-uplifting music from the HP movies.

(--------Statistics--------)


Projectile Distance »»» 10
Traction »»» 10
Aerial DI »»» 9.5
Range »»» 9
Size »»» 8
Power »»» 9
Priority »»» 7
Comboability »»» 5.5
Recovery »»» 6
Second Jump »»» 6
Attack Speed »»» 4
Weight »»» 4
First Jump »»» 3
Fall Speed »»» 2
Dashing Speed »»» 1.5
Crouch »»» .5
Walking Speed »»» .5

Alright, an interesting new set of stats. Ron's power stat is (although it is becoming cliche to say this) deceiving. He can KO easily with his vast magical abilities, but he's not a power-focused character. Ron uses his Chestnut wand to maximum potential, giving several attacks great range to combo foes from. Holy hell, a magic-user who isn't completely focused on close combat! In addition, the Death Eater sports a floaty aerial style that can assist him at close range. However, Ron has one of, if not the slowest movement speed in the game. His deathly figure is also insanely easy to combo; while this wouldn't be a huge problem, Ron is quite light for a character his size, meaning he can't stand up to these combos that threaten him so much. You'll have to keep your foes at bay with ranged combos to emerge victorious.

(--------Ability - Deathly Hover--------)


Like most evil overlords, Ron lacks the commonplace ability to wall jump/cling, crawl, glide, or tether to the stage. However, he does have a unique take on the ability to hover. After a jump, hold the Jump input to begin floating in midair. While floating, you can use aerials, or glide around for a recovery. Ron isn't restricted to just horizontal movement, like Peach. He can direct the Control Stick in any direction to move that way, at 3/4 Peach's hovering speed. However, Ron can only float for three seconds before falling helplessly; also, if he is hit or touches the ground, he stops automatically. After hovering, Voldemort must touch the ground before hovering again. This new technique is best used for short-hopping aerials (seeing as how Voldemort has bad landing lag) or recovering in times of need.

(--------Moveset--------)
http://www.youtube.com/watch?v=Zgy4n14a8uE

Neutral Special - Cruciatus Curse
One of the three Unforgivable Curses, the Cruciatus Curse causes mind-blowing pain, simply put. Here, Voldemort aims his wand forward, muttering the incantation 'Crucio!'. Voldemort's wand emits a red beam of light across the screen. The spell has the same range and priority of R.O.B.'s fully charged laser; however, the beam is about half as wide. Voldemort has little startup lag, but a moderate amount ending (he's watching the result). Unlike R.O.B.'s laser, the curse doesn't pass through foes or obstacles. You can generally pull this move out easily, but it can only be done once every ten seconds; Voldemort wants to build the pain at a moderate pace to torture the foe.

A foe hit by this curse falls to the ground, writhing; the hapless victim takes fire damage, built up over the course of 1.5 second. You can't KO foes with this move, due to there being no knockback. However, hit a foe offstage, and they'll enter a footstool effect for the time they'd normally thrash onstage. The Cruciatus Curse is a prominent damage-builder in Voldemort's vast arsenal. It is quite effective at hitting from a range, and Voldemort can use other attacks on the thrashing foe to combo them. The main downside is that Voldemort can be punished after casting the spell; this sometimes limits him to using it as a surprise combo-starter.
[ 10% ]

Side Special - Imperius Curse
Another of the three Unforgivable Curses; this one gives the caster full control over the victim. Voldemort rapidly aims his wand again; however, a Soccer Ball-sized orb of blue light is cast from the wand this time, rather than a beam. Voldemort stands in place, manipulating his spell. You can direct the orb around like Din's Fire. While it only moves at the speed of the sh*tty Melee Din's Fire, the orb is amazingly maneuverable (like Lucas' PK Thunder). Release the input and Ron will utter the incantation 'Imperio!', detonating the orb with low lag on both ends. He can cast the orb around for three seconds, before it explodes automatically.

Foes hit by the orb's Kirby-sized explosion take no damage, but get a vacant look in their eyes. You now have complete control over their actions. If Ron KOs a foe via manipulated victim, he scoring the KO for himself. Although he is dangerously vulnerable while both casting the spell and controlling the foe, attacks your controlled foe uses cannot hurt the Death Eater. The victim can button-mash out of their controlled state; it takes twice as long as escaping a grab. This means you'll have a tough time self-destructing your victim until they have high damage. Even if your foe is damaged, stick to a simpler KO move. Even without multiple foes, though, Ron can still direct foes into stage hazards. Just don't render yourself defenseless for too long.
[ 0% ]

Down Special - Horcrux
Horcruxes are items containing a portion of a wizard's soul, so that even if the wizard's main body is destroyed, their small portion of soul would keep them alive. To split the soul in the first place, however, murder must be committed by the wizard. As such, this move has no effect unless Ron has KOed at least one foe. If he has, Ron pulls out one of his various Horcrux artifacts from the series (including a broken Wand, a small owl, some tape, a lighter, a watch, and a necklace) and begins channeling Dark magic into it. Ron takes as long as Jigglypuff's Rest to channel a portion of his soul into the object; if he is interrupted, the effect is null.

Even if Ron can complete the spell, nothing is noticeable at first, as he stows the object in his cloak. However, the next time Ron gets KOed, his Horcrux saves him; the KO won't count against him. The Death Eater merely respawns with an evil laugh, having used up the Horcrux. It is quite difficult to create a successful Horcrux due to its lag. However, if you can pull it off, Ron can be a lot more reckless. Even though he has a light weight, you don't have to play nearly as defensively when your KO won't affect you. For best results, create your Horcrux while your foe is soaring away in a Star KO, then continue playing defensively to conserve the freedom allowed by your split soul. Even if you have KOed multiple foes, though, only one Horcrux can exist at a time, unlike in the books.
[ 0% ]

Up Special - Dark Apparition
Apparition is a basic form of magical transportation; picture a location, yearn to occupy said location, step forward and poof, you're there! Ron uses his own form of this 'teleporting' as his recovery. Ron instantly begins concentrating, folding his arms as he falls at his normal speed. During this time, a thin train of smoke emerges from his head and extends upwards; for three seconds, you can control this smoke to form a path of your own. It moves at the speed of Ness' PK Thunder, but has the maneuverability of Lucas'. Don't let it touch anything or overlap with itself, or Ron will enter a freefall!

After three seconds, or when you release the input, Ron immediately vanishes in place. A split second later, Ron rematerializes at the trail's end, in a smoky flash of sorts. This deals slight damage and low knockback that can't KO. The flash is close-ranged, with low priority; it only affects foes who touch Ron right as he reappears. You should never use this move to damage, though. Foes can cripple Ron's recovery by either hitting him while he's concentrating (which makes him have to start his trail over), or by hitting his trail; this breaks the trail where the foe touched it, causing the break to be the place where Ron reappears. Use the trail's versatility to get around foes, or merely hover to safety instead. Fortunately, the Death Eater can sweetspot edges with both of these.
[ 8-9% ]

(--------Basic Attacks--------)


Basic Combo - Disarm
Ron sweeps his wand arm in an arc in front of him, letting out a slight grunt. This has the exact same properties as Ganondorf's basic combo, except that Ron has slightly less range. To make up for this, he deals slightly more electric damage and knockback. Pretty nice as a GTFO move. There is a secondary use to the move as well; if a foe is carrying an item while standing within two character lengths of Ron during this move, they drop the item to the ground in front of them. In addition, they are unable to pick the item back up for three seconds. This can combo well into an F-Tilt, or from a D-Tilt; Ron can also just swipe the item for his own use.
[ 6-7% ]

Dash Attack - Smoke on the Wind
Ron quickly condenses his body into a Bowser-sized smoky orb (Death Eaters do this in the films to snipe at foes); you now have five seconds to control him around on the stage. Ron can maneuver himself around wherever he wants, but he can't go offstage, turn around, or rise above the height of Ganondorf. While in this form, Ron's maximum speed increases up to that of Dedede's dash. Even if you don't use it to attack, you can still move around faster for approaches with this move.

If Ron's smoky form overlaps with a foe, the victim starts taking damage. You can't KO with this, but if you overlap with the foe for three seconds, Ron automatically grabs them. Foes can easily DI out of this, though; it becomes easier to DI out over time as well, so this isn't exactly easy to do. Ron has very low priority in this form; one hit turns him back to normal. There is moderate ending lag here, but Ron can press a shield input to turn back early, if it is more convenient for him. Don't abuse this as a damage-racker, but don't overlook it either.
[ 5-6% per second ]

(--------Tilts--------)


Forward Tilt - Fiendfyre

Ron holds his wand to his mouth, breathing a ball of fire in front of him. As he releases the flame, it melds itself into a hissing fiery snake, slithering forward in the air. The fiery snake is about as long and thick as the Rope Snake; it travels three Stage Builder blocks' distance at Mario's dashing speed before fizzing out. Ron has below average startup lag on both ends of this move. The snake has moderate priority; foes who touch it take up to three fiery hits. The first two trap foes (although DI is possible), while the last deals moderate knockback that KOs at 145%. This tilt is a great ranged combo move for Ron, especially during a Cruciatus Curse. You can also KO with it in a pinch. Only one snake can be out at a time.
[ 3-12% ]

Down Tilt - Cruel Trick
Ron points his wand at the ground in front of him, a bit like Lucas' D-Smash, and fires an orange spell. The thin beam hits at close range, but due to it going down from Ron's height, it has more range than you'd think. Ron has the lag of DK's D-Tilt with each use of this. The beam has moderate priority, being the same thickness as the one form his Neutral Special. Foes who touch it take damage and trip in place. A second use of the move on the tripped foe yields below average knockback that KOs at 185%. A pretty handy set-up move for F-Tilt or F-Smash.
[ 6-7% ]

Oh yes, and you can cast this on items to give them the temporary properties of a banana peel. The properties last for two trips, whether it be from throwing the item or stepping over it. There is no limit to how many times you can cast the jinx on it, however, meaning you can make the item slippery until it vanishes. The item deals the same amount of damage as usual when thrown, but all knockback is replaced by tripping. If you cast this on a banana peel, you'll slip twice in a row upon contact with it. Trippy!
[ Varies ]

Up Tilt - Dark Mark


Ron points his wand straight up, firing out his personal emblem, the Dark Mark. This symbol is cast over homes where the Death Eaters have been, and usually, where they have murdered. Ron has the same lag as Snake's U-Smash; the Mark is shot up as high as a moderately-charged mortar, floating at the launch's apex. The Mark has moderate priority, and is the size of Kirby. Ron can only have one Mark out at a time, but he can disperse his own Mark to reposition a new one. Foes who hit the Mark take decent damage, as well as knockback that KOs at 150%; however, these stats slowly lower as the mark fades and vanishes over the course of five seconds. A nice move to coax foes off platforms above Ron.
[ 5-11% ]

(--------Smashes--------)


Forward Smash - Detonation of Fury


While charging, Ron makes a Bowser-sized barrier of energy in front of him. Upon release, however, nothing happens. This Smash is a charge-and-save move, like Giant Punch; there is no lag on either end here. Your charge time only determines damage, not knockback. When you press the input again, Ron spreads his arms to detonate the energy, letting out a mirthless yell. The Bowser-sized explosion deals great damage and above average knockback that KOs at 125%. Ron has below average startup lag, with an above average amount ending, when detonating energy. The blast always has high priority; stay away and wait to punish Ron.

You want more power with the attack now? While charging, Ron can absorb energy from all projectiles in his barrier. Now, when you release it, you'll get extra knockback, depending on how many projectiles you've absorbed. The other properties of the Smash stay the same. Your projectile-powered knockback can range from high with one or two projectiles, to unholy with five (the maximum). This can KO foes at 110-50%; now, that's power! Ron still has to be cautious of how easily foes can punish him. However, the ability to charge and use this Smash separately allows Ron to charge in front of projectile spammers like Fox, Falco, or R.O.B., then punish them at an opportune moment. Ron's wand glows blue when he has energy stored.
[ 23-29% ]

Down Smash - Infernal Cross
Ron aims his wand at the ground in front of him as he charges. Upon release, he rapidly slashes a diagonal line of purple fire at his feet. A split second later, he slashes another line of fire, creating an 'X'. He has little lag on either end, but the whole move lasts about a second; Ron is far from unpunishable, despite the crosses' great priority. The final 'X' is about the size of Kirby; it vanishes after completion. Foes who hit the first line take decent damage and a set knockback that is barely below average.

Now, no foe with half a brain would hit the next line, due to the fact that they're distanced a bit from Ron. They wouldn't...except that the first line reverses their controls for five seconds. Meaning new players or those who forgot this property will likely run right back into the second line when trying to DI away. You have to DI into the line to escape. Those unfortunate enough to hit the second line take better damage, as well as knockback ranging from above average to borderline insane. This can KO them at 120-85%; this is a great KO move, but you'll need practice to land it on experienced players.
[ 7-12% first line, 14-20% second line ]

Up Smash - Mental Sparks
While charging, Ron strikes a thoughtful, meditative pose. However, upon release, he yells, jabbing his wand into the air to release a flurry of sparks. This Smash shares many similarities with Zelda's U-Smash. The sparks fly above Ron in nearly the exact same way. Ron has a bit more vertical range with his sparks, in addition to dealing more damage and knockback per each light hit. However, Ron has below average startup lag, with a moderate amount ending, that is missing from the Zelda version. His sparks have moderate priority, so they can be used as a nice anti-air move.

A more interesting difference is that foes who touch the sparks are hit by a random variety of elements present in Brawl (e.g. fire, ice, electric, darkness). These don't affect the outcome, but are cool to watch anyways. The last hit deals average to high vertical knockback that can KO at 155-115%. Foes who touch the final spark at full charge take another interesting effect; the next time they land on solid ground, they enter a shield-break effect for 1.5 second. This may seem impossible to pull off, but Ron has ways of tweaking this effect with some other moves. Otherwise, Ron can jab through platforms fairly well with this Smash, as long as he is careful not to be punished from the sides.
[ 2-26% ]

(--------Aerials--------)


Neutral Air - Orbit of Smoke
Ron snaps his fingers, causing a smoky spiral to appear around his body, at a below average range. Although you can tap the input to keep the spiral out for half a second, holding the input keeps it there for as long as you want. There is little startup or ending lag at first, but if you land mid-move or hold the spiral more than a 1.5 second, the ending lag is above average. Ron has rather mediocre priority no matter what, so take care not to become a target.

Ron's spiral pulls foes and items toward him with a tiny vacuum effect; there's little to no pull, but it extends infinitely if you're on the same ground level. Once foes get within striking range, the pull strengthens to that of Dedede's Inhale. Foes who are pulled into the swirling spiral take no damage at first, but when you release the input, they are knocked away. This deals fair damage and average knockback that can KO at 150%. Foes are hit in the direction they were facing in the spiral. Multiple foes can be pulled in. Although foes can mash out with grab difficulty, Ron can Spiralcide at high damage levels.
[ 11-12% ]

Ron can also pull in up to three items; when an item is pulled in, it enters Ron's robe as the spiral continues. By pressing the throw input, Ron can now use or throw the item(s) he's collected, in the order he collected them. This gives him a great defense against Banana Peels and the like; normal projectiles he can't grab are merely dispersed by the spiral. You'll be using this aerial rather often, so practice its various uses.
[ Varies ]

Forward Air - Serpentine Gaze
With moderate startup lag, Ron's eyes flash a dangerous red color. This creates a low priority sparkle a short set distance from his eyes. This hitbox is very small, but you must hit with it from the get-go to land the following move. Foes who touch the sparkle enter a footstool jumped effect for a second and a half. They also take a bit of damage, but if you score a KO with this, it'll be from a gimp, not from blasting them past a boundary. Ron has bad ending and landing lag, so think carefully before you use this. On the bright side, it's a great edge-guarding tool; it also combos into Ron's D-Air.
[ 5-6% ]

Back Air - Cremation
Ron extends a hand backwards, not even bothering to turn around, creating a ball of fire slightly larger than Kirby. This has rather high priority, so you can create a wall of protection behind Ron with this. However, he has below average startup lag, with an above average amount ending and landing; don't go spamming this, or you'll pay the price. Foes who touch the fireball get pulled in, taking five rapid hits. The first four trap foes, while the fifth deals above average knockback that can KO at 130%. If a foe takes the final hit below the ball, they are spiked. Opponents in the ball can DI out, but Ron can DI backwards during this move to keep them in. Pretty handy damage-building and KO move, but not one that can be abused in the least.
[ 4 - 21% ]

Up Air - Yew Bolt
Ron aims his wand up and shoots out a bolt of energy. The energy is slightly longer than Pikachu's Thunder Jolt, but Ron has moderate startup lag, with a bit ending; like Bowser's U-Air, spacing and timing are key to landing this safely. The bolt has rather high priority, so it can defend Ron from above, although it leaves him open from the sides. Foes who touch the bolt take good damage and moderate vertical knockback that KOs at 145%.

Also, for ten seconds, they are surrounded by an electric aura. During this time, Ron can land the final hit of his U-Smash to put them in a shield-break effect...without charging it up the whole way, like normal. If you aren't using this as a situational KO move, this should be incentive enough to look for an opening to try and land it. If you land multiple U-Airs somehow, the effect's timers can overlap.
[ 13-14% ]

Down Air - State of Suspension
Ron snaps his fingers, causing a sparkle of energy to appear a short distance below his feet, with moderate startup lag. Like F-Air, this move has a small hitbox that foes must hit as it appears for the move to work. The fact that it has low priority doesn't help. Ron also has bad ending and landing lag to work around, so be extremely choosy about when you use this aerial; it's his most punishable one, by far. Foes who hit the sparkle are dangled upside down below Ron, moving parallel to him in the air below him wherever he goes.

From here, Ron can either press the move input again to detonate the sparkle area on the foe; this deals great damage and high vertical knockback that can KO at 120%. He can also land on top of the foe to give them lesser damage, but put them in their downed position, ready for a combo. Finally, Ron can suicide with his foe beneath him; because the foe is under him, Ron never dies first. All these options have their uses, but the foe can button-mash out with twice the difficult of a grab; make your choice fast! So many options, so little time.
[ 16-17% explosion, 6-7% landing on foe ]

(--------Grabs and Throws--------)


Grab - Dark Summon
Ron casts a thin red horizontal beam of magic in front of him. His beam has the range of ZSS's grab, but this is actually usable. The magic comes out and back in with virtually no lag; Ron can hold it out as long as he wants, but if he holds it more than one second, the ending lag becomes average. Now, the nearly non-existent lag plus the great range would make this a little overpowered, right? Merely getting hit by this grab won't bring you to Ron.

The beam drags you into his hands, it being a Summoning Charm. It takes about a second for a foe at the tip of the beam to be pulled to Ron; during this time, they can DI out with moderate ease. Ron holds his victim in a force-like choke-hold with his wand. Used as a surprise tactic, this grab can be quite effective; you'll hit the foe towards the beginning of the beam and pull them to Ron nearly automatically. Ron's throws are all rather damaging as well. A high-risk, high-reward grab with a fun twist. Oh, and from a dash, Ron merely stops his momentum before firing out his beam; this doesn't add lag to him at all.

If an item is in Ron's beam, it is automatically pulled to him, rather than dragged over like a character. Ron suffers almost no lag from this whole process; it can be helpful to snare items that are just out of his pick-up range.

Forward Grab - Rodent Assistance
Ron also has another little tool he can use as a grab. By tilting the Control Stick forward as he grabs, Ron sends out his pet rat
Peter Petigrew/
Scabbers to track down his foes. Ron has below average lag on both ends of this grab, from a standstill or a dash (which he merely stops for). Scabbers has 5 HP that can be lowered to KO her. He is Olimar's length, but very low to the ground; it'll take a D-Tilt to knock him out in most cases. He moves at Dedede's dashing speed, disappearing if he runs into a wall or reaches an edge.


If a foe comes into contact with Scabbers while not attacking him, she'll wrap around the foe's neck, pinning them to the ground laglessly. He can still be KOed during this time (although not by Ron, as he wouldn't hurt his own
pet/sex slave
); if Ron walks into him, however, he'll hold the foe in his own grab, as Scabbers vanishes with a squeak. Foes can button-mash out, but with double grab difficulty. Ron can obviously only have Scabbers out in one place at once, and if he is KOed, he must wait ten seconds before using him again. While this can't really replace his normal grab, it can still assist Ron at longer-ranges.

Scabbers can grab one item she comes across in her mouth, scowering back to her master to deliver it at normal speed. Once she has an item, Scabbers won't grab foes; she can still be KOed during this time as well. However, she'll at least get the item closer to Ron; she laglessly hands the item to Ron before vanishing, if she reaches him.

Grab Attack - Torturous Finger
Ron extends a finger and presses it to the foe's forehead. While this may not seem painful, Ron's finger apparently burns the foe with a fire effect. This has moderate speed, but you'll only want to use it once or twice; you won't want to risk your victim escaping before you can use one of your better throws.
[ 2-3% ]

Forward/Back Throw - Smoky Ambush
Ron releases his foe in place, dealing minuscule damage with no knockback, as he vanishes. This leaves the foe on the ground where Ron stood, in their downed position. The foe and Ron have a second to choose what to do now. Ron can do nothing, or tap left or right on the Control Stick, while the victim can use a get-up attack or roll in either direction.

If Ron and the foe choose the same direction (as in, they tap/roll left), Ron will reappear in a smoky blast over the foe. This unfortunate victim takes great damage and above average knockback that can KO at 135%. Even if the foe uses a get-up attack, the blast will outprioritize it. However, if Ron chooses the wrong direction, he'll reappear laggily; the victim can punish him easily now. Ron should try to match his foe's direction to land this, while the foe should postpone their movement to the last second to keep Ron guessing. After a second, though, Ron reappears automatically; you can't wait too long to choose. Also, once either character has selected a direction, they can't change it. These throws are gambles, but they can be great KO moves if pulled off properly.
[ 15-16% ]

Down Throw - Possession
Ron seemingly disappears, while the foe falls into their downed position. No damage is dealt yet, so it would seem nothing is wrong...except that the foe has black rings over their eyes; Ron is possessing them. The foe can button-mash to exorcise Ron, but he can tap A to put the hurt on them. He can use this pummel-of-sorts up to five times during one possession; they are fairly fast and able to build up great damage.

However, Ron takes the damage he deals here; contact with the victim's whole soul damages his split one. Because of this, you absolutely cannot spam the great damage; if Ron is a stock ahead or has a Horcrux, though, go for it. Ron can shield to exit early; if he exits or is exorcised, he pops out where he stood. The foe is still downed at his feet, though; you can combo them directly after possession, seeing as there's no knockback.
[ 5% per pummel ]

Up Throw - Mental Spiral
Ron looks as if concentrating, using his telekinesis to spin the foe around him in a spiral. Once they reach his head, he blasts them upwards, dealing electric damage with knockback that can KO at 165%. There's nothing too special about this throw; Ron can use it to KO opponents on stages with low ceiling blast lines. The spinning foe can also hit outside foes for light set damage and knockback, providing a low priority wall of defense for Ron. Finally, if the spinning victim has the electric aura from U-Air, this throw resets its timer. As consecutive U-Airs can be annoying to land, this is reason enough to use the throw, if the other benefits aren't sufficient.
[ 8-9% throw, 4-5% spinning foe ]

(--------Situationals--------)


Get-Up Attack - Cyclone of Wrath
Ron gets up with a yell, snapping his fingers to create a dusty three-ring shockwave around him. The first and outermost ring extends a Stage Builder block's distance on either side of Ron. He has low startup lag, with a below average amount ending. Ron's waves of anger last for a split second around him, providing him with a moderate priority barrier of defense. Each waves deals light damage to foes, while the outermost ring deals a below average set knockback that can't KO. A fairly helpful get-up attack that is used for Ron's downed, flipped, and tripped attacks.
[ 3-4% per wave ]

YOU HAPPY NOW, JUNAHU? I DEFIED SMASH REALISM HERE TO APPEASE YOU!

Ledge Attack - Worship the Lord
Ron casually glides onto the ledge, aiming his wand at foes. Opponents who stand within a Stage Builder block of Ron below his height enter a 'bowing' pose of sorts, for one second. The niceties of battle must be observed, correct? The area of effect has below average priority; Ron holds it out for a split second before being controllable again. The area of effect covers Ron's body, but his upper half can be hit with projectiles; it's not entirely foolproof.

Bowing foes can be damaged, but they take no knockback from attacks; it's essentially Melee's Headbutt, but with a bigger target on the victim's body, seeing as they're not halfway buried. The bowing foe can button-mash to regain control, but it's a bit harder to do than with a grab. Ron has a decent bit of ending lag that can be punished should his opponent space from him properly. Still, the minuscule startup period allows for Ron to use this as a surprise damage-building tactic.
[ 4-5% ]

Ledge Attack (Over 100%) - Soul Sacrifice
Ron has a scary ledge attack with over 100%, although it can work against or for him. When Ron uses this move, he turns into the smoky form from his Dash Attack, with the lag typical to these attacks. In smoke form, Ron glides across the entire stage at Mario's dashing speed. He has moderate priority as he does so. Any foes who touch him get snared in his smoke and pulled along with him. Ron can pick up items at well, absorbing them in his robe; if he cancels this move, he can use the items in the order he picked them up.

As soon as Ron reaches an edge, he plummets down at an unholy speed; if you're caught as he does so offstage, you're dead. Fortunately, you can button-mash out with grab difficulty; Ron will have to do the same if he wants to cancel the move. Foes who are slammed off an edge onto a lower area of the stage take great damage and vertical knockback that can KO at 115%. Caught foes also take a bit of damage per second. This is extremely risky to use in any case, and should never be used as anything but a last-ditch suicide.
[ 2-3% per second, 14-15% stage slam ]

(--------Final Smash--------)


Final Smash - Killing Curse
Ron laughs evilly in an echoing voice, as the screen blacks out in a smoky manner. His opponents are seen in a graveyard, while Ron's laughter continues. The screen pans to show five tombstones, lined up in a row, each with a button input over it. Each foe has ten seconds to press a button input to hide behind the tombstone; multiple foes can hide behind the same tombstone, but this is not advised. After ten seconds, Ron appears; if a foe hasn't chosen by then, they stand defenselessly in front of the middle tombstone.

The button inputs appear once again for Ron. By pressing the input over a certain tombstone, Ron will cast the notorious Killing Curse on it, screaming out its incantation, 'Avada Kedavra!'. We don't need to elaborate on it does, correct? This third Unforgivable Curse destroys the tombstone in a vast beam of green light, instantly KOing the foe behind it. Ron has three curses to fire out during this Final Smash; he must use all them in fifteen seconds, or the Final Smash will end early. Ron has no way of knowing which tombstone each foe chose (unless they are ******** enough to not choose in time), but his opponents have no way to block the deadly curse. This is quite a luck-based Final Smash. After all spells are used up or all foes are KOed (only one KO per foe), the screen blacks out and the battle starts up again.

(--------Overall Playstyle--------)

One of the first things you'll notice about Ron is that he has ranged attacks that he is actually good at using, unlike, say, Link. Many of his attacks hit from a range, travel to a range eventually, or blast foes far back enough that they can be hit by more long-ranged attacks. Got all that? Now let's elaborate. A possible long-ranged combo may include using your Neutral Special to down the foe, F-Tilt to build more damage, then Side Special to manipulate them closer to you. From there, blast them back and repeat, with a few new moves mixed in to throw off your foe. Generally, Ron's KO moves need to be pulled off closer to a foe, but he has no real problem with this. He just can't revolve his playstyle around strong moves and such.

At close range, Ron becomes more aerial-focused; his grounded close-range moves are either too slow to use regularly, or mere combo set-ups. He is quite floaty and maneuverable up there, and several of his aerials are not half bad. Some take great precision or accuracy to land, and some can have horrendous consequences should you fail, but you can still build some damage up in times of need. Ron is exceptional also against campers, whether they be projectile-spammers (e.g. Falco) or item-abusers (e.g. Diddy Kong). Ron can absorb projectiles with F-Smash to strengthen the attack. He can also snare normal items with means like N-Air and F-Grab, and screw with them using D-Tilt and Basic Combo. Ron can hold his own against many of the best characters using these abilities, along with his ranged magic.

The final element you'll want to add to your playstyle is Down Special. While you'll have trouble setting up a Horcrux in a fierce battle, doing so after Star KOing a foe is doable. It takes practice to pull off, but having a Horcrux in play helps Ron overcome his downfalls...temporarily, at least. Overall, Ron excels at quite a few different elements of the game, but he has a couple of downfalls that prevents him from being stellar. By building damage from a variety of ranges, then ambushing your opponent with a powerful attack, Ron can prove to be a great character to use, but a challenging one to learn.

(--------Playing Against--------)

Ready to hear about those downfalls? Alright, so Ron is a tall character with decent width from his robes. With his mix of combo and KO moves, he must be another Kupa heavyweight combo villain, right? Ron can indeed be comboed like crazy, but he's far from a heavyweight. Even though he's big, Ron's frame isn't bulky or anything, so his weight is quite light. If a foe gets to him, they can absolutely **** him and KO him with ease; he's not a heavyweight who can stand up to said combos at all.

From close range, Ron will be pressuring to damage you in the air, then knock you back to land some ranged moves. Play smart, dodge these attempts, and keep comboing him. Ron can be gimped with relative ease; you can just touch the trail of his Up Special to cut its range short. He can try hovering back, but he has little defense from this. If you let your guard down, Ron can blast you back and keep on comboing. He absolutely cannot flee from you himself, though; his movement is among the worst in the game. Keeping close enough to pressure him, but including a touch of defense, is the easiest way to bring down the Death Eater.

(--------Match-Ups--------)

Vs. Meta Knight - 45/55: Meta Knight's Favor
Ron and Meta Knight have a variety of options to take down the other character. First of all, Ron actually has options to outprioritize that cursed Whorenado; some of these include Neutral Special, Side Special, and F-Smash. Ron can also KO Meta Knight with little trouble, due to his light weight. However, let Meta Knight get close to Ron, and he's done for. Meta Knight can simply F-Air Ron off the edge, N-Air him to force him to recover, then use his endless jumps to gimp Ron. It'll be hard for Ron to set up a Horcrux to prevent this, seeing how Meta Knight has great speed. The Death Eater can actually fare well against Meta Knight, but the broken Smash God just has more options to win, thus taking this match-up.

Vs. Snake - 65/35: Ron's Favor
Ron has no trouble using his ranged spells on Snake to build up damage. In addition, Ron can pull in and use grenades. However, they still explode after three seconds, damaging Ron if he's holding them; toss them back quickly. All of Snake's projectiles can power up Ron's F-Smash, giving the Death Eater an easy KO option against Snake. Of course, if Snake gets in close to Ron, a few broken disjointed tilts can score him easy KOs. Because Ron will actually have to watch Snake from a range, he'll have trouble making a Horcrux. Still, Ron should take advantage of Snake's less-than-amazing speed to prevent this from happening.

Vs. King Dedede - 30/70: King Dedede's Favor
Ron obviously has trouble against Dedede, due to his size. He doesn't have nearly as bad of a match-up against the penguin king as, say DK, but Dedede's chain-grab and infinite can give the Death Eater hell if he gets grabbed. Fortunately, out of the characters who fall victim to this poor match-up, Ron fares the best, due to his superior range. Dedede takes a while to get close to Ron; couple that with his large size, and the Death Eater can build some damage on Dedede before he gets close. Also, because nothing of Dedede's besides minions can hit you from a range, Ron can sometimes create a Horcrux as a safety net should he get grabbed. Of course, when he does get close, Ron should definitely take to the air to avoid that massive grab range. Even from there, the B-Air of doom can spell him an early end. Dedede wins this match-up, but it's not impossible for Ron to pull off a surprise victory from time to time.

Vs. Diddy Kong - 90/10: Ron's Favor
Item-reliant characters fare poorly against Ron? No character proves this better than Diddy and his bananas. Ron can break through Diddy's low-priority defenses with his own priority from a range. It doesn't take much to KO Diddy at all, and bananas can power up Ron's F-Smash even more...but why waste such a valuable weapon there? Ron has no problem stealing bananas with several moves, being able to use them for his own means. Plus, with D-Tilt, Ron can cause Diddy's bananas to slip the young Kong twice in a row. Diddy can combo Ron reasonably well at close range, but Ron has so many more options here, earning him an easy win. He won't even need to bother with Horcruxes here.

Vs. R.O.B. - 50/50: Draw
R.O.B.'s projectiles have nothing on Ron; the Death Eater can absorb lasers and gyros with F-Smash, or pull in gyros harmlessly to toss back at R.O.B for nice damage. Although these are easy for Ron to steal, they can prevent him from making a Horcrux in most cases. Ron has little trouble building damage on R.O.B. from a range, although if R.O.B. closes the distance, his aerial capabilities outclass those of Ron. R.O.B.'s KO options, such as F-Smash and D-Smash, are much more freely usable than those of Ron. Once R.O.B. gets Ron offstage, the robotic operating buddy can interrupt the Death Eater's recovery with ease. D-Air Ron for a spike, then hover on up to the ledge and laugh. Ron and R.O.B. have fairly even abilities to screw over the other character in this match-up.

Vs. Bowser - 40/60: Bowser's Favor
Bowser's huge size makes him a prime target for Ron's ranged moves; indeed, the Death Eater can curse the Koopa King fairly easily, but Bowser's F-Tilt and F-Air can beat most of Ron's ranged attacks. Once the two characters get within close range of each other, Bowser's stronger moves have the upper hand over Ron's light weight. The Bowser player's main focus should be to prevent Ron from making a Horcrux; if Bowser's KO on Ron doesn't count, the damage he's taken from a range can cost him the match. Also, every second Fire Breath comes into contact with the energy from Ron's F-Smash, one projectile's power is added to it. Fortunately, Bowser can angle the fire up and over the barrier, at Ron's head, knocking him out of the F-Smash charge into the main stream for some nice damage. Fire Breath can also shorten Ron's Up Special considerably, if aimed correctly. Finally, Bowsercide can all too easily be used on Ron while he's making a trail for Up Special. Ron needs to build Bowser's damage up from a range to win; it will take some work, but it can be done.

Vs. Yoshi - 45/55: Yoshi's Favor
Yoshi's fairly large size can accumulate damage rather quickly from a range against Ron. His one ranged tool against this? Up Special. It gives Yoshi a decent way to retaliate against Ron's magic, while eliminating his chances to create Horcruxes, all in a few clean shots. Although Ron can absorb it with F-Smash, Yoshi can angle it over the energy to keep on pegging the Death Eater. Yoshi's D-Air at close range can give Ron some trouble, but other than that, Ron's priority is better than Yoshi's in nearly every way. If it weren't for those eggs, Yoshi would have another bad match-up on his hands. Either character can come out on top in this match-up, but Yoshi's versatile projectile gives him the upper hand in most cases.

THERE YA GO, SUNDANCE!

Vs. Link - 70/30: Ron's Favor
That's right, Ron's not afraid to have a decent match-up against one of the worst characters in the game. Ron can absorb arrows and bombs (he can steal bombs as well), while giving Link a hard time with magic of his own. Sometimes, Link's shield can block him from an attack or two, but as good ol' Sakurai said on the DOJO, you can't rely on this. Link's disjointed sword can break through a few attacks, but he lacks quick moves to do so, leaving him open in the process. At close range, Ron can just take to the air and dominate Link even more. He won't need a Horcrux here, due to faring so well here. Link can KO Ron at times, but this is far from enough to earn him a consistent win in this match-up.

Vs. Bear Hugger - 50/50: Draw
Bear Hugger can force Ron to approach by going into his defensive stance. Ron can easily make a Horcrux from a range here, but in doing so, you give Bear Hugger plenty of time to sticky up his gloves. Using catch-and-release, Ron's damage can be built up with ease; because Bear Hugger has an abundance of KO moves, the Death Eater's light weight is a problem. However, if you get him offstage, Ron is near-guaranteed a KO. Just hurl him off with N-Air and grab the ledge. If Bear Hugger gets in a few KOs before his own damage is too high, he'll have this match in the bag; Ron can still combo and gimp the Canadian with little effort as well, evening up the two.

Vs. King Hippo - 55/45: Ron's Favor
King Hippo's super armor renders Ron's long-ranged attacks useless. Now, the match is a matter of who can start the damage-building first. This requires a whole lot of patience, making it easier said than done. Hippo has little trouble KOing Ron after building his damage, while Ron can merely wait for an opening, then combo Hippo into next week. While Ron isn't exceptional at close-ranged combos, Hippo's hitstun gives him much more freedom to do so. Both characters fare fairly well against each other in this regard; if Ron scores a KO, however, he can make a Horcrux, due to Hippo's lack of ranged attacks. This gives the Death Eater a slight upper hand in this match-up; if Hippo can prevent this and keep comboing Ron, the tubby boxer can vanquish the Death Eater with ease.

Vs. Onishiba - 25/75: Onishiba's Favor
You've got to be kidding. A good match-up against Onishiba?! Well, if the demon wolf can use F-Tilt, he can take away a great part of Ron's projectile arsenal. This includes Neutral Special, Side Special, F-Tilt, U-Tilt, and F-Grab. Neutral Special can also take away Ron's mini-mechanic of Horcruxes, even though Ron has little trouble making them against Onishiba. While Ron's approaching options are much better than Onishiba's, that d*mn F-Tilt is all Onishiba needs to shut down Ron. While the Death Eater can still build some damage in the air, all he can do with those besides gimp is space for a lucky B-Air/U-Air KO. Onishiba's status effects give him one more boost over Ron in this match-up.

Vs. Bleak - 80/20: Ron's Favor
All Ron needs is F-Smash to nullify Bleak's projectiles and therefore most of his game. Bleak can build damage on Ron fine and all, but this won't win him the match. In addition, Ron can do the same to Bleak, but nearly always have a powered-up KO option to unleash on the poor snowman. Both characters can KO with aerials; Bleak can do so slightly more easily, but when you have Ron's F-Smash, why bother even going up there? The only thing Bleak has going for him is defense against Horcruxes, which Ron won't even need in the first place, due to him being so dominant already.

Vs. Black Knight - 50/50: Draw
Black Knight fares well against campers, and can combo like crazy, huh? Is this the end for Ron? Not so much. If Ron can get BK into the air, he can rack up quite a lot of damage, even though he's not exceptional up there. The ebon-clad fiend's weight makes him troublesome to KO, but his crappy ledge game makes him a prime target for Ron; the Death Eater merely has to glide out at use F-Air. Still, BK can easily KO Ron's light weight, even though his Smashes aren't too versatile. In addition, it's near impossible for Ron to make Horcruxes, due to BK's warping abilities. This match-up usually boils down very quickly, ending in the favor of the character who used their advantages the best.

Vs. Bubbleman.EXE - 70/30: Ron's Favor
Bubbleman is all about camping and comboing? That makes two characters in this match-up! Ron can fare well against Bubbleman from a range; his priority beats Bubbleman's with ease, although making a Horcrux is a pain in the arse, due to Bubbleman's bubbles staying out after he's KOed. F-Smash is a pretty big hitbox to get bubbles off you, but Ron won't really need to get close to Bubbleman to damage him. When you have to move in for the KO, Ron's options are much better than Bubbleman's. If Bubbleman can get Ron offstage, he can give Ron trouble, considering the Death Eater's light weight. A competent Ron should rarely be out there, though. Ron reigns dominant in this match-up most of the time.

(--------Extras--------)

***


Les Prix de Crepes
(The Crepes Awards for short)​

The: Definite article, as opposed to "a".
Crepes: plural for of crepe, a tasty french pancake usually folded with some fruit for a nutritious breakfast.
Awards: plural form of Award, an alternative way of saying prize.

The Crepes Awards: a small contest in conjunction with the the Marshmallow awards in MYM 4 and the Strudel Awards in MYM 5. In this, people who happen to come upon this post will find a question by me that will need to be answered via VMing to me. The first on to answer correctly shall receive a Crepe, a useless yet tasty award in MYM. So lets get started, shall we...

START HERE:

For every contest that I participated in expect for MYM 4, I had a certain pattern that is slightly known by the community involving my second movesets. What is that pattern?

TIM BURTON'S EDIT: Although Kholdstare didn't answer correctly, he techically didn't get it wrong. The full answer would be a second generation (this is what Khold forgot) flying type pokemon.

Now for the next question: Who directed The Nightmare Before Christmas and what are two other stop-motion animated pictures the he directed?

EDIT: Despite what most people think (which apparently includes Kholdstare), Tim Burton didn't direct The Nightmare Before Christmas, but rather it was Henry Selick, whom TWILTHERO correctly guessed right. TWILTY also answered correctly his other stop motion movies James and the Giant Peach and Coraline, and he could have also guessed Monkeybone despite it being live action as well.

WE'RE JUMPING ONTO WHITE EDIT! AAAAAAAAAAAAAAAAAAAAAAAAAAAAAAH!: What was the line "We're Jumping Onto White Base! AAAAAAAAAAAAAAAAAAAAAAAAAAAAAAH!"'s original line in Japanese? Just ignore it please.

POST EDIT 2.9: If you had seen HR's recent reviews, you might notice the number of each title is different. Believe it or not, there is a relationship between the moveset reviewed and the number. What is that relationship?

THE FIFTH EDIT: KingK.Rool suddenly came out of nowhere to answer correctly that the numbers used by HR's review are the post that the moveset was on. For example, this post (#29) would be "Log Entry 2.9 - The Crepe Awards" in HR's Eyes.

Next Question: At around 4:50 PST, somebody created the thread "BAIR's that Suck". Who is the thread creator?

THE SIXTH EDIT: Khold, who happened to miss the question beforehand, rush forward to take the lead with the correct answer. JOE! (who made Spiderman in MYM 5) started the thread "BAIR's that suck". Let's hope this meme can last forever.

Next question: Put these people in order: hyperhopper, Blue the Blur, sethpenguin, --WAMY-- (expects no one to answer this correctly)

JUST ANOTHER EDIT: As Agidius was ready to type his response, Clowned ninja'd him and caught everyone else by surprise with 4 (!) different answers (blame it on my vague descriptions). The correct order (--WAMY--, hyperhopper, sethpenguin, Blue the Blur) was his first response, while everything else (reverse chronological, alphabetical, and reverse alphabetical) was just for showboating.

FINAL EDIT VIII: "Wake from your sleep, my children/ Your childhood years are gone/ Wake from your sleep, Fated Children/ Your slumber is over" is part of what song?

TIEBREAKER EDIT: Because both Agidius and Clownbot have answered correctly around the same time period, they will participate in a tiebreaker. The answer to this question by the way was "Liberi Fatali" from Final Fantasy 8.

Now to the Tie breaker: somewhere in this post I made a "spoiler" for one of the answers. What does that spoiler say? (Note: this is what it looks like) <--- Highlight here.

EDIT: Since both feel that the other deserved it more, they both get crepes to respect their answers. OK? NO More Changes!

DISNEYEDIT: So on August 15 I went to Disneyland Anaheim of all places with a friend I haven't met for three years. So what was the fireworks show called?

EDIT: Agi finally answered with no further interruptions. Fantasmic (!) was the fireworks show I was watching, although I can also accept "Magical: An Exploding Celebration In The Sky".

XKIT: What comic is unsuitable for children, adults, and liberal-arts majors?

Hm? EDIT: K. Rool Strikes again with the answer XKCD, with contains strong language, unusual humor, and advanced mathematics.

Next question: I noticed that the Strudel awards have suddenly disappeared (actually it's been two months). The questions is what was the post number for the Strudel awards and where can it be found?

REDIT: TWILT came up to the stand with what appeared to be a controversial answer (number 7399 of MYM 4). However, Agidius did make a Strudel award there so the answer counts. My fault in not getting all of the information for this question. (I must suck as a host)

It still begs he question of where the other strudel awards is. I'll give you a hint that it's in MYM 5, but good luck trying to find it.

EDIT: And TWILT has taken the lead with the answer 188. The only way to have known that now ws to find Agi's link up space to MYM 5.

EDIT: Whoa you actually found it? Well then... VM me with the post link then! Hurry!

EDIT: Khold was kind and patient enough to search for the Crepes... Now I should move it for even more mindgames? You know what? I'll just VM everyone where the Crepes moved.

Results so far:

TWILTHERO: 3
Kholdstare: 3
Clownbot: 2
agidius: 2
KingK.Rool: 1

(--------Basic Animations--------)

Standard Pose:
Ron stands calmly, holding his wand at his side; he's ready for this slaughter fest!

Idle Pose:
Ron c*cks his head to one side, as if pondering a question, then regains his normal composure.

Walking:
Ron takes very slow, yet intimidating and deliberate steps towards his opponent.

Running:
Ron merely speeds up the above pose. Whoop dee doo.

Dashing:
Ron looks a bit like Zelda trying to run, except slower. He holds his wand up at his side now, ready to strike.

Jump #1:
Ron pushes down slightly, boosting him a small distant off the ground with some force-esque magic.

Jump #2:
Ron strikes a concentrating pose, shutting his eyes and lifting himself higher via telekinesis.

Crouching:
Ron barely hunches over, as if performing a mock-bow to his opponent.

Ledge-Hanging:
Ron points a finger at the edge, holding on with magic, despite not even touching the ledge.

Swimming:
Ron resurfaces angrily, and uses telekinesis to move slowly forward. His robes become bogged down quickly, only allowing the Death Eater to swim for a short time.

Forward/Backward Roll:
Ron extends a hand, pushing himself magically in the direction he wishes to roll, leaving behind a bit of smoke.

Spot Dodge/Air Dodge:
Ron simply vanishes in place for a brief period, reappearing after the dodge, similarly to Mewtwo.

Shield:
Ron raises his wand slightly, creating a black shield charm around him. The charm has the same properties as the normal bubble shield.

Tripped:
Ron merely stumbles a bit, not actually tripping, but entering an unstable pose.

Dizzy:
Ron puts two fingers to his temples, looking disoriented.

Sleeping:
Ron merely shuts his eyes in place, folding his arms and entering a deep, meditative sleep.

Other:
Ron never actually touches items; he casts them around in a force-like manner from his wand.

(--------Extra Animations--------)

Up Taunt - Deathly Rotation
Ron spins around a few times, using his telekinesis, chuckling subtly to himself. Sound familiar?

Side Taunt - Dark Command
Ron yells at your character, "Don't you turn your back on me! I want you to look at me when I kill you!"

Down Taunt - Fool's Errand
Ron quietly tells his opponent, "You are a fool to challenge me...and you will lose...everything."

Entrance - Out of Smoke
Ron Apparates onto the stage in a smoky manner, chuckling as he appears.

Victory Pose #1 - Dark Distaste
Ron looks to the side of the screen, folding his arms, commenting that the foes are, "So...weak..."

Victory Pose #2 - Serpentine Meal
All of the losers lie dead, as Ron faces them, stroking Scabbers, who is on top of his left shoulder. In an emotionless voice, Ron tells his snake, "Dinner, Scabbers...", for the rat to scour to the floor and at the corpses. The screen blacks out afterwards.

Victory Pose #3 - Death Eater Pride
Ron cackles as he fires the Dark Mark into the sky above his head. He holds the pose with his wand up after firing his emblem.

Victory Theme - Darkness Falling
Ron uses an ominous clip from the main Harry Potter theme as his victory fanfare.

Loss Pose - Lost in Limbo
Ron is shown as a writhing, flayed, naked baby, rather than himself. After the final portion of his soul was destroyed, this was the form he became trapped in for eternity, in a limbo between the worlds of mortals and souls.

(--------Kirby Hat--------)

Kirby gets a pale-tint to his face/body, gaining a copy of Ron's yew wand as well. Gaining the Cruiciatus Curse as his Neutral Special sure helps Kirby out from a range. Plus, hearing him screech the incantation in his high voice is always a plus, eh?

(--------Alternate Colors--------)

  • Normal
  • Red robes (Red Team)
  • Green and silver robes (Green Team, Slytherin colors)
  • Blue robes (Blue Team)
  • Golden robes
  • White robes

(--------Codec Conversation--------)

-Press Select-

Snake: Colonel, there's a pale-faced snake-man here...I get the sense that he's a murderous madman.
Colonel: Watch out, Snake! That's R...er, He-Who-Must-Have-No-Names. Killing Muggles such as yourself is little more than sport for him.
Snake: Muggles? What the hell kind of disease is that?
Colonel: It's a term for a non-magical human, and Ro...You-Know-Him is determined to slaughter every last one of them. He's definitely got the magical talent to do so.
Snake: Magic? Pah...so he's going to put on a light show for me?
Colonel: Be very careful, Snake. Ron's *cough* knowledge of Dark magic surpasses that of any wizard alive, by far. He kills mercilessly and indiscriminately.
Snake: Whatever. I don't doubt my ammo's ability to penetrate snake-head's "magic".

-End Transmission-

(--------Other--------)

Icon - Famed Scar
Ron shares the Harry Potter series lightning bolt. Fitting, seeing as he saw that scar and knew of its meaning.

Wiimote Sound - Dark Laughter
Ron squeaks in a high-pitched casual manner.

Crowd Chant - Fearful Support
Due to the crowd being afraid to speak Ron's name, they merely cheer and clap loudly.

Unlocked By:
  • Play 717 Brawls
  • KO 10 foes with a Ray Gun
  • Clear Classic and All-Star with Roy
Unlock Message: "The True Dark Lord has risen. Ron the Death Eater has joined the Brawl, ready to create an atmosphere of chaos and confusion with his murderous magic."
 

Katapultar

Smash Lord
Joined
Nov 24, 2008
Messages
1,284
Location
Australia
[size=+2]SixrchBattoshi[/size]

One thing that I think would be cool could be that say, maybe you gave us information about a storyline for Sixrch, but importantly, his personality. Anyway...

Sixrch Battoshi looks like an interesting set, the details aren't all over the place or anything.
The Up-Special could involve Sixrch using petals to lift himself up or something. I don't really get the attack throw mechanic either. Finally, perhaps you could detail some of the specials such as range, size and so on, especially for the specials so we can see how they are different from one another.

It's awesome that there's an OC, and when you make more OCs, they should relate to Sixrch or something like that, give them a storyline.
 

Neo Exdeath

Smash Ace
Joined
Sep 11, 2009
Messages
795
Location
Strawberry Fields

"You leave me no choice. I'll simply defeat you here!"​

-Dusknoir-

~Background

Pokemon #477


Dusknoir, if you haven't guessed yet, is a Pokemon, introduced in the games Pokemon Diamond and Pearl.This pokemon is best described as being the Grim Reaper among Pokemon. In fact, the item you need to use to evolve it from Dusclops is called the Reaper Cloth. Dusknoir was a
major antagonist
in the game Pokemon Mystery Dungeon 2,
as he attempted to stop the flow of time while living in the desolate past and masquerading as a noble explorer in the present
and he had a gang of Sabeleyes to boot. Who knows? Maybe you'll see stuff from that game in this set, too......

Some music you may enjoy while reading this set:
http://www.youtube.com/watch?v=V5EsxqCBhig
http://www.youtube.com/watch?v=hnbEtq3Y_bg&feature=related
http://www.youtube.com/watch?v=K5tbqOre4tU


-Stats-
Attack Power: :dk2:
Attack Speed: :mario:
Movement Speed: :dk2:
Size: :marth:
Weight: :gw:
Priority: :mario2:
Range: :dk2:
First Jump: :diddy:
Second Jump: :falco:
Recovery: :marth:
Other things: He can glide. See Down Air for info.

~~~~~~~((((((The Actual Moveset))))))~~~~~~


Neutral Special~~~~Shadow Flare


At the beginning of this move, Dusknoir pauses for a second. From the mouth on Dusknoir's stomach, a purple flame comes out, as shown in the animation above. This takes about 1 second. The flame is about as big as a Stage Builder block, does 10%, and travels 3 stage builder blocks forward before landing.

But wait! That's not all! As you can see in the above animation, the floor turns purple where his flame landed. This attribute carries on into Smash. For 6 seconds after the flame lands, the stage-builder block area where it landed turns purple and anyone who steps on it takes 2% and turns around as if they were hit by Mario's Cape. This has no ending lag.

Up Special~~~~Dimensional Gate

Dusknoir sweeps his/her/its/potato's hands in front of his/her/its/potato's face. This takes about 2 seconds. Once this is finished, a dark, portal type thing appears in the background behind Dusknoir and somewhere off-stage (if you are on-stage when you use this) or on-stage (if you are on-stage when you use this)

So what's the point of this move, Neo? Well, that's simple, really, if you press the up button while you're next to a door, you enter the door like you would a door in the Subspace Emissary. You then reappear at-who knew?-the other door, after about 2 seconds. Unfortunately, keep in mind your enemy can also take advantage of the doors.

Down Special~~~~Shadow Firewall


Dusknoir opens the mouth on his stomach again, the inside of it glowing purple. Then, a purple fire comes out of it, orbiting Dusknoir. This takes 0.5 seconds. The fires are each as big as a Pokeball.

Well, what's the purpose of this one, Neo? Simple, really. This move is to help him protect against lower moves, as the flames orbit Dusknoir at about his waist's height, about as tall as Kirby. When a flame touches anyone who touches into Dusknoir, it dissipates and does 11% to the enemy, with knockback that kills Mario at 200% You can have 6 flames orbiting you at a time.

Side Special~~~~Sableye Summon


Dusknoir snaps his fingers and..... Oh? What's this? He's summoned one of his Sableyes to fight alongside him! This takes .5 of a second. Sableyes are about as big as Kirby and are controlled by a LVL 5 CPU. You can only have 1 Sableye out on the field at a time. They each have 15 stamina. If you do nor deplete that in 10 seconds, the Sableye vanishes anyways, and Dusknoir has to wait 20 seconds before summoning another one. They travel and attack as fast as MK. They have two attacks.

The first one is a slash that does 4%. They do this when not commanded. This does some moderate hitstun to the enemy, with the hitbox being Sableye's claws (about the size of a Pokeball)

The second one is to turn invisible. They only do this when commanded to, which is simply pressing the B button when you're right next to them. This attack primarily serves for mindgames.

~~~~~~STANDARDS~~~~~

Neutral Attack~~~Shadow Punch

What do you think happens? Dusknoir PAWNCH, that's what happens. Dusknoir pulls back one of his massive hands, his fist glowing black, and punches upwards. This does 9% and about 1/3 of the lag the Warlock Punch, and the hitbox is about the size of Kirby. This can kill Mario at 200%

Dash Attack~~~Shadow Sneak

What's up with this guy and shadows? Anyways, for this move, when you press this button input, Dusknoir suddenly vanishes in a puff of smoke. Then, when you press this button input again, Dusknoir re-appears, approximately 3 stage builder blocks from where he vanished. This does 11% and the hitbox is Dusknoir's entire body. This kills Mario at 140%

~~~~~~~~TILTS~~~~~~~


Up Tilt~~~Evil Eye

No, this move does not refer to the Super Moderator of the same name. Dusknoir's single eye glows a dark purple during the start-up animation of this move. Then, two seconds after the beginning animation, two purple explosions, about as big as Kirby, go off in front of him. Both explosions do about 11% This kills Mario at 120%

But wait! There's more! If you move the control stick while Dusknoir's eye is glowing purple, you can choose the direction the explosions go. This move has no ending lag.

Side Tilt~~~Watchful Eye

During the start-up animation of this move, Dusknoir's single eye glows a dark purple during the start-up animation of this move. Then, two seconds after the beginning animation, two purple explosions, about as big as Kirby, go off in front of him. Both explosions heal 11%

Wait..... heal? Are you insane, Neo? Well, actually, no. First off all, this, combined with Dusknoir's ability to create a free recovery, makes him a god in team. This also can heal his Sableyes. But the main purpose is for the epic mindgames. The enemy will be forced to decide whether they think it is this move or Evil Eye.

But wait! There's more! If you move the control stick while Dusknoir's eye is glowing purple, you can change the direction the explosions go. This move has no ending lag.

Down Tilt~~~Will O Wisp

Dusknoir opens his mouth on his stomach, it glowing red this time. Then, a second, a red fireball, very similar to the MOTHER boys' PK Thunder attack, is released from it. This is controllable, like PK Thunder, and when it touches an opponent, it does 6% to it and some hitstun.

So, how is this different from PK Thunder? That's simple. When it touches an opponent, it burns them, dealing 2% per second for 12 seconds. This has no effect on water-based enemies (think Squirtle, Poliwrath, Bubble Man) and twice damage to ice based (think Kholdstare, Bleak, Abomasnow) and grass based (Ivysaur, Leafeon, etc.) This has about 1 second of ending lag.

~~~~~~~~SMASHES~~~~~~~~

Up Smash~~~Crunch

Dusknoir opens the mouth of his stomach wide open, as the charge up-animation. This move takes about 1 second to fully charge up, and it does 12% and bad knockback at low charge and on high charge, 23% and knockback that kills Mario at 110%. The range is about as big as Mario's Fsmash, and it has about as much priority as it.

If you press B when you are charging, though, Dusknoir pretty much does the equivalent to Wario's Neutral Special and a pummel, which poisons the opponent (think Lip's Stick). Unfortunately, this is easy to DI out of. The pummel does 2 damage.

Side Smash~~~Dark Beam


As shown in the above (poor quality, sorry about that) GIF, Dusknoir pulls his hand back, this taking 1 second for the most charge. Then, Dusknoir thrusts his arm forward, black orbs of energy coming out of them, as shown in the above GIF. The amount of orbs depended on your charge, with 1 ball at no charge and 12 at full charge. Each ball is as big as an unexploded Smart Bomb, and each does 2%, does FLUDD-like knockback, and has about as much priority as Snake's missiles. This makes a great GTFO move, if you haven't figured it out yet.


Down Smash~~~Oblivion Laser

As shown in the above GIF (boy,do I love GIFs?) Dusknoir opens the mouth on the stomach, with black energy gathering around his mouth. When the move charge ends, Dusknoir exclaims, "Take THIS!". This takes about 2 seconds to charge fully, and does 30% and massive knockback that can kill Mario at about 80% when fully charged with massive ending lag. When uncharged, this does 15%, with knockback that can kill Mario at 150%, and moderate ending lag. As you can clearly see, this is Dusknoir's main killing move.

However, this move has an Achilles heel. If someone with higher priority moves attacks it (this move has as much priority as Snake's grenades), or reflects it, gets reflected back at Dusknoir, doing equal damage to him. Of course, Dusknoir can attack it back, reflecting it to his enemy once again.

~~~~~~~~~~GRAB+THROWS~~~~~~~~~

Grab~~~Lunge

Dusknoir lunges forward, with the mouth on his belly open. If this hits an enemy, it grabs the enemy using the mouth on his belly, not unlike his D-Smash. Come on, you guys know how a grab works.

Pummel~~~Shake

Dusknoir suddenly picks up the opponent and starts shaking them. This does approximately 1% per second for 4 seconds. Additionally, if the enemy breaks out of the grab early and Dusknoir has done this move on them, there is a 10% chance that they will be confused, which means their controls we be reversed for the next 5 seconds.

Up Throw~~~Shadow Explosion

Again with the shadows? Anyways, for this move, Dusknoir throws the opponent straight up in the air, which does 5%. Then, he claps his hands, which creates an dark explosion right below your hapless enemy, which does 11% and knockback that kills Mario on Final Destination at 120%. Keep in mind that the opponent can DI out of the explosion, though.

Forward Throw~~~Imprison

Dusknoir simply throws his opponent down. What? That's it? Well, actually,your opponent can still attack, but not move, as they have been hit by Imprison. Rather effective, isn't it? Best when used with one of the burned floors from the Neutral Special, or a Sableye. This effect lasts 2 seconds, and Dusknoir can only do this once per 10 seconds.

Back Throw~~~Disable

This guy has about as much status effects as moves that start with "Shadow", am I right? Anyways, for, this move, Dusknoir simply throws his opponent behind him, doing 2%. The status effect, howe
ver, is that the opponent will find that for the next 30 seconds, the last move that they did before they were hit by this can not be used for 30 seconds.

Down Throw~~~Void Throw

Sounds threatening, doesn't it? Anyways, during this move, Dusknoir opens a portal, not unlike his Up Special, and throws his enemy in. The enemy reappears anywhere on stage that is not 2 stage builder blocks from the blast line, so they won't immediately kill themselves. This move does 5%


~~~~~~~~~~~AERIALS~~~~~~~~~~~

Neutral Air~~~Payback

Dusknoir suddenly turns blue for 2 seconds. During these two seconds, Dusknoir can not attack. Then, suddenly, Dusknoir release a wave of black light. The damage, you see, is twice the damage the opponent dealt to Dusknoir while he was glowing blue. This has arange of about 3 stage builder blocks around Dusknoir. This has about as much priority as a shield breaker. This has absolutely no ending lag whatsoever.

Up Aerial~~~Sucker Punch

Dusknoir punches upwards for this move. This is a punch that has a hitbox about the size of Kirby, and does 14%. This has great priority, with no ending lag. This can kill Mario at 120%

Now, before you cry, "GENERIC!", this move has a catch. You can only land this move if the opponent is attacking. This means that if Dusknoir wants to land this fantastic move, he has to be wary.

Down Air~~~Flight Of the Reaper

Dusknoir curls himself down into a ball. The, after pausing for 0.5 of a second, he plunges down, dive-bombing himself. Dusknoir's whole, curled-up body, the size of Kirby, is a hitbox during this move, and it does 14% with mediocre priority. This is a full-fledged Stall-then-Fall, with one exception.

If you press Up on the control stick while Dusknoir is going down, he will start gliding, hence the name of the move. This makes a pretty useful move once you consider the exploitablity of his Up-Special.

Forward Air~~~Invisibility

Dusknoir laughs, rather evilly, and suddenly disappears into thin air. In reality,this is pretty much a portable Cloaking Device, only that Dusknoir is completely invisible during this move. This lasts about 10 seconds, and it can be used once per 20 seconds. Other than that, go wild! You're invisible, man!

Additionally, if an opponent grabs Dusknoir during this move,or vice versa, the opponent will turn invisible also. This makes Dusknoir even more potentially deadly in teams.

Back Air~~~Night Shade

lol the BAir sucks.

This is a rather...... interesting move. A wave of shadow comes out from Dusknoir's sides. This wave is about three stage builder blocks long, with mediocre priority. The whole wave is the hitbox here.

The damage and knockback, however, are a different story. The damage that this move does is 1/3 of the damage Dusknoir currently has. The knockback is determined by how much damage the move does:


  1. The move does 1%-10%---Poor knockback; kills Mario at 170%
  2. The move does 11%-20%---Middle-of-the-road knockback; kills Mario at 150%
  3. The move does 21%-30---Good knockback; kills Mario at 120%
  4. The move does 31+%----Amazing knock; kills Mario at 90%

~~~~~~~~~~~~FINAL SMASH~PLANET'S PARALYSIS~~~~~~~~~~~~


Dusknoir laughs like only an antagonist can, saying, "Yes! The planet's paralysis has finally came!". Then, a bright flash of light, and everyone besides Dusknoir is frozen in place. The stage looks darker, gloomier, with stones broken, plants wilted, etc. Now, for the next 10 seconds, you are free to do whatever you want. Go nuts!


~~~~~~PLAYSTYLE~~~~~~

First thing you'll notice about Dusknoir is his sheer amount of stage control. Seriously, his stage control is the whole reason he's not underpowered with his bad mix of stats. Also,you may have noticed that he has two different playstyles, really; aerial and ground. Therefore, this section will be split into two parts.


~~~~AERIAL~~~~
First of all, Invisibility is your best friend here. Use it. It is practically the glue of Dusknoir's aerial game, as it allows him to plant his schemes. You should be wary when you cannot use it.

Okay, so you've cast Invisibility on yourself. Good. Now, GLIDE LIKE THE WINDS! No, really. Gliding is makes aerial mobility so much easier, especially when you're invisible.

Now, there are two options you can do. One is to purposely get hit, and attempt to survive until 120% or higher. Now, once you do that, you can unleash Night Shade, devastating the opponents. While you are doing that, when you are building up your damage, you can also unleash Payback. Of course, it's much easier when your invisible to start Payback, as the can't see your glow.

Your second option is to unleash Sucker Punch and Flight of the Reaper constantly. Of course, Sucker Punch becomes more useful when you're invisible. There's not as much as I can say for this than the first option.

~~~~GROUND~~~~
First of all, what you'll want to do groundwise is set up Firewall. This can be tricky, as Firewall takes a while to completely set up. So what should you do? That's simple. Dthrow the enemy or send a Sableye to distract them.

Next, use Dimensional Gate. You'll want to, so you won't get messed up if you get gimped. Again, use a Sableye to distract your opponent when you are doing this.

Now, it's time for damage racking. Dthrow+Neutral Special+Up Tilt is a really good option. Dash Attack becomes 5 times more useful when you are invisible.

Then there's the mindgamed. Healing with Watchful Eye is a good one, as it might make your opponent think you're friendly. Invisibility plus Shadow Sneak is even better.

Finally, there's the killing moves. While Crunch can be violate, the best choice is Fthrow+ Dsmash. Be wary, though, as the enemy may reflect the attack back.

~~~~~~PLAYING AGAINST~~~~~~

~~~~AERIAL~~~~
First of all, be wary when Dusknoir is invisible. For all you know, he could be using Payback. Sucker Punch also is pretty strong to, and its potential is improved when Dusknoir is invisible. It would be best not attack when he's invisible.

When the invisibility wears off, though, then unleash your best attacks. When Dusknoir is visible, the only thing that's much of a threat is Flight of the Reaper.


~~~~~GROUND~~~~~
First of all, Invisibility is not as potent onstage as it is offstage. The only thing you have to worry about is Shadow Sneak on ground with invisibility. But Dusknoir has a whole new slew of threats onstage.

You'll want to destroy Firewall as soon as you can, especially if you are a small character. Use long ranged attacks when you are fighting against Dusknoir.

Then there's the stage control. Watch out for burned floors, and never, ever, get grabbed at a high percentage, as it probably means he's gonna Fthrow-->Dsmash. That's bad. Also, never walk in to Evil Eye; sure, it might be Watchful Eye, but more often than not, it's Evil Eye.

Basically, the best way to beat Dusknoir is to stay away and hit him with long-ranged moves. Do this and you will succeed.

~~~~~~~MATCHUPS~~~~~~~


Vs. MK; 60-40, Dusknoir's favor

Dusknoir is one of MK's worst nightmares: he is defensive with close-up offense, and Firewall pretty much shuts down most non-aerial offense. And then there's Dusknoir's aerial game. So what can MK do? First, the wh0renado is even more potent with Dusknoir, as it can shred through all of Dusknoir's firewall without blinking. Second, MK can murder Dusknoir aerially when he's not invisible. Those are MK's two biggest hopes for survival in this matchup.

Vs Snake; 20-80, Snake's favor

Dusknoir hates Snake about as much as GaW hates MK. Snake's unbelievably broken tilts laugh at Firewall. Then there's Snake's arsenal of projectiles, which pretty much shuts down the stage control. The only thing that Dusknoir can hope to do is make an aerial approach, but then there's the Nikita to worry about. Counterpick against this guy.

Vs DDD; 50-50

Right away, the chaingrab is rendered useless in this match-up, as he's as light as Game and Watch. However, DDD is a rather long-ranged character. Due to Firewall, his minions are rendered useless. Swallowing Dusknoir also gets rid of his Firewall and Sableyes. The easiest way for Dusknoir to kill the fat penguin king from Dreamland is to make an aerial approach, as he doesn't have any real good anti-air attacks like Snake. This could go either way.

Vs Pikachu; 40-60, Pika's favor

Pika is fast, small, and agile; everything that Dusknoir hates. Pika can ignore Dusknoir's Firewall with his Neutral Special, and his aerial game is something to fear. There's also Thunder, to annoy Dusknoir aerially. Evil Eye and Shadow Sneak can potentially annoy Pika; the same is true with Sucker Punch. Overall, this is a bit of a challenging matchup; not as challenging as Snake, but still quite challenging.
 

MasterWarlord

Smash Champion
Joined
Aug 24, 2008
Messages
2,911
MR. SANDMAN


ZZZ BACKGROUNDZZZ

Mr. Sandman is an opposing boxer from the Punch Out series, and is generally always among the highest ranks. He’s the well deserved champion in the Wii game, being absolutely undefeated (He’s even shown beating all other known boxers in a montage), and the third last opponent in the original on the NES (And is far more difficult to take down then Macho Man, who comes after him). While not ranked highly or particularly difficult in Super Punch Out, he, Macho Man, and Bald Bull are the three champions of the three main circuits, the game giving the trio some respect.

As for personality, Sandman likes to “put his enemies to sleep” by TKOing them. It’s not that deeply a part of his character and he simply uses is as a brand of insults, probably to go with the name he picked out for boxing. Whether or not you find these insults intimidating, his sheer strength and speed are something to truly be feared in the ring.

ZZZ STATSZZZ

Power »»» 9
Size »»» 9
Traction »»» 8
Falling Speed »»» 7.5
Weight »»» 7.5
Priority »»» 7
Range »»» 6.5
Recovery »»» 6
Movement »»» 4.5
Aerial Movement »»» 3.5
Attack Speed »»» 3
Jumps »»» 2.5

Not much to say, really. Sandman’s a pretty average heavyweight in every aspect, and there’s no obligatory “deceiving” categories. His stats for the most part mirror those of Ganondorf. The only stat that’s somewhat surprising is recovery, Sandman being the only boxer with a respectable recovery who doesn’t resort to the ever dreaded props. The main thing that prevents Sandman from falling to Ganon’s fate is that he can actually rack damage despite his low attack speed.

ZZZ SPECIALSZZZ

Side Special – Knuckle Sandwich


Sandman reels his arm back and says “Night night” in a mocking tone for lag on the level of Mario’s fsmash (No end lag though), then punches forward with the reach of Bowser’s ftilt. You can angle it much like Bowser’s ftilt, but it’s much more exaggerated, meaning you can hit higher up and lower down and it’s easier to do so. If you just hit a random spot on the foe with the move, it just does a “meh” 12% and knockback that kills at 175%.

If you hit the foe in the face (Or Kirby’s entire body), though, they’ll be stunned, cartoonish tweeter birds flying around their head. This won’t deal any knockback to them, but stuns them for .75 seconds. This still won’t be enough time to pull off some of your laggier moves on them, but for 4 seconds, any hitstun done to the foe will stack.. Even if they get out of the hitstun, the birds will continue circling their head until the 4 seconds are up, though the idea is to never let them out of the hitstun and combo them. You obviously cannot refresh the effect by hitting the foe with another Knuckle Sandwich, this move being pointless to use again until the 2.5 seconds are up.
[12%]

Down Special – Blink of an Eye
Sandman winks with no lag on either end, but a awkward .55 second duration, a start-up animation of his in the Title Defense fight in the Wii Punch Out. After the blink is done, you can input any move for Sandman to instantly perform it and entirely ignore the start-up lag of the move. This can allow you to land some of your laggier moves on a stunned foe without stacking additional hitstun on them, so what’s the point of even bothering to stack the hitstun in the first place?

Well, this move is high risk high reward. If Sandman is hit as he winks, the game treats it as if his shield was broken and tweeters birds start circling his head – he gets his own stacking hitstun effect stuck on himself for 3 seconds, allowing him to be comboed right back. While it is pretty nasty, you can use this to bait foes in to a powerful move, so long as you pull it off before they knock you out of the wink. . .Definitely a gamble.
[0%]

Neutral Special – Dream Rotation
Sandman starts rotating his fists around with no start lag, his start-up animation for all of his attacks in the classic Punch Outs. While Sandman is doing this, his fists are a disjointed Kirby sized hitbox in front of him that absorb projectiles and deal 7% with “meh” set knockback. You can come out of the move by pressing B again and the maximum you can hold it for is 5 seconds, but you have very awkward lag as the momentum in Sandman’s rotating arms slowly stops, making this far too punishable to use.

However; you can exit this stance with any move you see fit by inputting it once you’ve rotated your fists for half a second longer then the start up lag of the attack you want to use. You’ll ignore the start-lag of the move when performing it, much like down special (Otherwise it’d be pretty pointless). This makes you less vulnerable as you prepare for your next attack and makes you far more difficult to predict, as the foe has no idea what you’ll come out of the stance with. This can be used as a semi-decent defense against projectiles as well, but considering Sandman can’t hold this stance forever and will eventually have –some- point of vulnerability, he’s much better off trying to close the distance between him and his foe rather then trying to tank.
[7%]

Up Special – Dreamland Express


On the ground, Sandman steps into the background with .25 second starting lag and says a long exaggerated “Dreamlaaaaand. . .”. If you hold B a bit longer, he’ll mock the foe and say “boo.” casually, up to two times based on how long you hold it. The minimum you can hold this phase out is a second, and you can hold it up to 2.5 seconds.

After you’re done taunting, Sandman comes back onto the battlefield and does three uppercuts, alternating the arm he uses each time. These uppercuts are incredibly fast and Sandman has superarmor as he does them, each only taking .15 seconds, yet do 17% and vertical knockback that kills at 95% and cover a range the size of Bowser. The ending lag is pretty short to boot, .25 more seconds, meaning there’s only .50 seconds where you’re actually vulnerable in the entire lengthy attack. Of course, it’s still extremely hard to hit with the thing due to the start-up, but there’s little risk involved, seeing this move is difficult to punish. You can try to scare foes into dodging early by holding out the initial phase a bit longer with a “boo”, but the best course of action against the attack is to just wait the thing out and expose the brief ending lag/projectile spam Sandman to damage him while he has only superarmor (not invulnerability) doing the uppercuts.

In the air, Sandman cuts the crap and goes straight to the uppercuts, though he has some start-up anyway, .55 seconds or so. Each uppercut makes Sandman go up as high as one of Luigi’s uses of up B, and considering how utterly ungimpable it is his recovery’s actually pretty respectable. Of course, you’ll wanna avoid being above Sandman in the air thanks to this move, but it’s pretty easy to fastfall through Sandman and air dodge then just punish him as he’s up in the air a decent ways and forced into freefall, the aerial version being much more punishable.
[17%]

ZZZSTANDARDSZZZ

Standard Attack – Fake Out


This is identical in start-up animation (And pretty much all other properties) to Knuckle Sandwich, but Sandman doesn’t say anything during it, meaning the start-up is only that of Bowser’s ftilt. This can only be angled as much as said move and has no bonus for hitting foes in the head, but considering how reliant Sandman is on hitting with a Knuckle Sandwich it’s easy to fake foes out and get some free hits with this. Another strategy, the inverse, is to abuse this faster attack rather then neutral B to make it easier to feed your foe a Knuckle Sandwich when the time comes.
[12%]

Dashing Attack – Leaping Punch
Sandman leaps 1.5 Ganondorfs into the air with no start lag, then does an animation like Mario’s fair as he comes back down, landing a Battlefield platform ahead of where he was initially. The punch is just as laggy as Mario’s fair (With slightly better range/priority due to Sandman’s size) and does 13% with .70 seconds of hitstun and knockback that kills at 85%. Sandman’s legs are also a hitbox as he lands back on the ground, dealing 10% and 1.3 seconds of hitstun, forcing foes into their lying down states, spiking them first if they’re in the air. This move has a pretty bad .80 second ending lag, but if you do land it you can possibly follow it up with another attack due to the hitstun.

This is an approach, but it’s far from ideal. The only notable part about it is that it can leap over a projectile or wall then come back down to crush the foe, but this only really works on foes with laggy projectiles, such as Dedede, and even THEN you have to predict it in advance if you expect to hit with this, though the payoff is large. Approaching is Sandman’s biggest problem.
[13% aerial punch, 10% slam]

ZZZ TILTSZZZ

Forward Tilt – Spinner Thrust
Sandman sweeps his arms forward with range slightly less then Bowser’s ftilt and .40 seconds of lag, .20 second ending lag and average priority. If he hits somebody with the move, they take 5% but don’t take any real knockback but instead spin around rapidly for the next second. No, they don’t into a cartoonish blur, they’re simply unable to move and rapidly “turn” back and forth. They’re still perfectly capable of attacking, but it’s pretty easy to hit the wrong way. Of course, they can just use a move like a dsmash to hit to both sides, but this forces them to go toe to toe with your priority with these moves. They start spinning more slowly as the duration goes down, making it nice and easy to feed them a Knuckle Sandwich as they’re forced to face you (You can’t get the stacking hitstun effect if they have their back to you – you have to hit their face, not just their head).
[5%]

Up Tilt - Uppercut
Nothing notable here, this is taken directly in animation from one of the uppercuts in the Dreamland express. It’s as fast as Bowser’s ftilt and has a good priority hitbox the size of Bowser. That said, it’s rather weak, only doing 7% and vertical knockback that KOs at 250%. If it were more powerful though, it wouldn’t be such a great combo piece. This has .60 seconds of hitstun on it, and launches the foe weakly into the air, you easily able to pull them back down and continue comboing them.
[7%]

Down Tilt – Wake Up Call


Sandman brings up his arms and lays his head on them like a pillow, then closes his head and snores twice, imitating the foe who’s (hopefully) snoozing in dreamland, then laughs. This has a very laggy 1.40 second start-up, but afterwards Sandman immediately punches downwards, aiming to hit foes lying on the ground. If this does indeed hit a grounded foe, it does only “meh” set knockback but a absolutely ridiculous 32%. Otherwise, this just does 6%, being nothing more then a taunt. The only way you’ll pull this off is knocking a foe down and stacking a bunch of hitstun on them, but it makes for an excellent closer to a combo for maximum damage output.
[6%][32% on lying down foes]

ZZZ SMASHESZZZ

Forward Smash – Stonewall
Sandman does an animation like Wario’s fsmash (But less jerky and with actual average start lag)but his arm actually covers entirely in front of him and is the only hitbox on the move, giving it better range, though only decent priority (No superarmor here). Despite Sandman being so much bulkier then Wario, the more is surprisingly weaker, doing 13-19%, .25-.50 seconds of hitstun, and knockback that kills at 200-175%.

What makes this able to compete at least somewhat with Wario’s fsmash is that if a foe dashes into Sandman’s arm as he holds it out, they’ll ram against it and fall over backwards onto their backs with a full second of hitstun and 20%. This can make foes think twice about approaching Sandman, it being all too easy otherwise.
[13-19% normally, 20% on foes who ram against arm]

Up Smash – Ground Pound


Mr Sandman turns to face the screen and reaches his arm into the air as you charge, then upon release says “stand still” for .50 seconds, then lags for another awkward .50 seconds before finally smacking downward (No end lag). His hand is a high priority hitbox all the while as he swings downward, and it spikes foes down onto the ground (Where they’ll automatically go into their laying down states) with .45-.80 seconds of hitstun and 19-26%. This move doesn’t actually reach down onto the ground, meaning you can’t chain this move into itself, but it’s a great set-up for other moves, especially if it has the benefit of some other moves coming first to increase the hitstun, and it does plenty of damage in it’s own right.
[19-26%]

Down Smash – Earth Shaker
Sandman turns to face the screen and hunches over slightly as he charges the smash, then upon release he goes into the background, gaining brief invulnerability frames, then leaps forward. His arms are on either side of him as leaps forward, crashing down onto the battlefield as he swings them in downwards arms from over his head. Hitting with either arm, which are high priority hitboxes the size of Marth, does 10-15%, .40-.60 seconds of hitstun and knockback that kills at 210-180%. While this may not sound that appealing considering the lag (Horrendous end lag and the start lag is still on par with Ganon’s fsmash to boot), it’s possible to hit with both arms on wide foes – or more importantly ones that are laying down on the ground.

Of course, foes who aren’t absolutely gigantic (Anyone besides D3, Bowser, and DK) can just stay in-between your two arms to avoid both hitboxes entirely and give you some pretty nasty punishment.. .But you have the ability to make your arms swing down together right in front of you by hitting B during the charging phase. This has double the knockback of hitting with a single arm, but still the same damage and hitstun.
[10-15%]

ZZZ AERIALSZZZ

Neutral Aerial - Catch
Sand man leans back slightly (Not far enough to be in the background) and splits his arms apart, then swings his fists together to catch the foe. This has the lag of Mario’s fsmash, average range, low priority, and deals 8%. Now, what’s awkward is that rather then doing knockback, the foe is just let out of the move, though they can’t immediately resist due to .45 seconds of hitstun. This stops all momentum the victim has, meaning you can catch a foe to prevent them from being knocked out of your combo and bring them back down to earth with little problem, seeing the low lag of this attack. This also has potential to save allies from being KOd in doubles.
[8%]

Forward Aerial – Double Header
With .35 second starting lag Sandman smacks upwards with average range and priority, doing 8% and weak set knockback but a good full second of hitstun. Sandman then proceeds to follow up the last punch a good .60 seconds later with a downward punch with the same hand (Same range/priority), dealing 10% and downward average set knockback and .45 seconds of hitstun. If the foe lands on the ground during the hitstun, they’ll lie on it. When lag is taken into account, this gets you a big netgain of 1.05 seconds of hitstun if the foe is hit by a Knuckle Sandwich and forces the foe to go to dreamland on the floor to boot, but this attack is highly punishable. Sandman goes through both punches regardless of whether he hits with either.
[8% first hit, 10% second hit]

Back Aerial – Roundhouse Smack
Sandman extends out a arm behind his head in a wind-up like motion, then spins around to face the opposite direction, his arm being a decent priority hitbox all the while, his arm stretching out about Luigi’s height away from him as he spins it around. This has the start-up of Mario’s fair, but the actual attack happens pretty damn fast with little end lag. This causes Sandman to be facing the opposite way at the end. This deals 12%, a great 1.5 seconds of hitstun and spikes foes with decent power. If used on a grounded foe, it simply makes them go into their lying down state rather then giving them vertical knockback, making it a great hitstun builder once you’ve hit the foe with a knuckle sandwich.
[12%]

Up Aerial – Take Down
Sandman reaches above himself with both arms with slightly less lag then Bowser’s uair and 1.5X the range. If he comes into contact with anyone, he grabs them with the usual grab priority. Sandman doesn’t do anything from here as he holds onto the foe’s feet (Or Rob’s base), just causing the foe’s fall speed to double until they hit Sandman off with a dair. If they’re stunned, it’s obviously a good bit easier to suicide with them, and if they are indeed stunned you’ll have control over the DI of where you go rather then the foe. Yes, it’s a suicide grab. How is this bad? He has plenty of punches already.
[0%]

Down Aerial – Dreamland Skyrocketer
Sandman flips so that he goes upside down in mid-air, stalling in the air, then plummets downwards like a rock with a single fist outstretched Luigi’s height below him with good priority that does 18%. It’s the usual stall then fall, and offstage it’s a suicide, so this is far from a useful spiking tool. Unlike similar dairs, Sandman gets no superarmor here, and the spike is pitifully weak, meaning you can’t even gimp with it. The attack has a good bit of lag on either end to boot, meaning there’s only one situation where it’s useful: grounded foes. Despite being a weak spike, the spiking power of most dairs seems to of been shifted over to the upward knockback on grounded foes, this killing as early as 70%. If you’ve stacked a bunch of hitstun and grounded your foe, then you’ll either want to finish them with this for the KO or a dtilt to damage them further if their percent is still too low.
[18%]

ZZZ THROWSZZZ

Grab – Arm Swing
Sandman reels back, leaning back and stretching his arms out far behind himself, then suddenly swings his whole body forward, thrusting his arms forward to grab foes. This is ridiculously laggy, twice as long as the average tether grab, but it’s range is even better then said tethers. That said, it’s still borderline unusable. . .If not for your ability to take down the ridiculous lag in the blink of an eye. In combination with blinking, this is one of the best grabs in the game.
[0%]

Pummel – Bash
Sandman smacks the foe over the head. It’s very laggy, taking an entire second to do, but deals 5%, and if the foe has the stacking hitstun effect it will leave them stunned for the remainder of the duration. That said, after hitting the foe with a Knuckle Sandwich you have to take the time to grab them, bash them, then throw them, after which time the stacking hitstun effect will of almost expired. It guarantees you at least one more hit, if nothing else.
[5%]

Forward Throw - Shove
Sandman shoves the foes away from him, separating them just far away enough to still be in range for a Knuckle Sandwich, dealing no damage. He then proceeds to beat them over the head to do 7% and stun them for the exact amount of time the start-up lag of Knuckle Sandwich is. Very convenient set-up, no? In theory, this could be used for an infinite chain-grab if you renewed the stun as it expired then grabbed the foe again, but you can’t renew the stacking hitstun for .75 seconds after it expires. This is Sandman’s fastest throw – use it if you want to take advantage of the hitstun from your pummel ASAP.
[7%]

Back Throw – Show Boating
Sandman smacks the foe away behind himself with a casual punch that does 2%, and non existent set knockback, then performs his down taunt (Generic laughter). The taunt causes Sandman to heal 18%, regardless of whether he completes it or not, but the foe is free to cancel out the healing with an attack. That said, if Sandman stacks some hitstun on the foe then performs the throw, he’ll be able to heal uninterrupted.

The foe isn’t entirely unable to resist even in this situation, though. If the foe taunts after Sandman taunts, they’ll get the healing effect instead, but of course Sandman has the ability to interrupt it, unlike the foe, so it’s a win-win situation (They’ll still get the healing from the taunt regardless of whether they finish it though). If Sandman taunts after the foe taunts, then the healing will go back to him, and so on, but at that point it’s anybody’s game. Notably, if you do go into a big showboating contest against each other, each taunt increases the amount of healing that will be gained by 5%, so eventually the stakes can get pretty high as for who gets the last laugh. The maximum amount of laughs the game will permit is 9, and that means that if you keep going on forever Sandman will eventually come out on top. This throw has no healing effects if used on a teammate.
[2%]

Up Throw – Flight to Dreamland
Sandman throws the foe up into the air for 8%, half a second of hitstun, and knockback that kills at 180%. He proceeds to leap upward to follow it up with a upward punch that deals another 8% and half second of hitstun, and knockback that kills as early as 60%. Great throw all around, right? Well, foes will be knocked too high for Sandman to follow up at around 40%, meaning the great KO potential of the second punch can never be utilized, save maybe in a FFA. This is a good damage racker and hitstun stacker at low percents and little else, though it’s Sandman’s only throw that’s capable of KOing under any circumstances.
[8% first hit, 8% second hit]

Down Throw - Grind
Sandman turns to face the screen as he holds the foe, then smacks his fists together, crushing the victim in-between them. He laughs as he proceeds to grind his gloves around to cause further pain to the foe. This deals a decent 11% and leaves the foe lying on the ground with half a second of hitstun. Another nice set-up, and it still does a decent bit of damage of it’s own. It’s laggy, but who cares about that?
[11%]

ZZZ FINAL SMASH – PUNCH OUT!!ZZZ

Sandman yells out “Come on!” and does a motion similar to Captain Falcon’s taunt, but not so flamboyantly. If anybody is within a Battlefield Platform in front of Sandman when he performs this move, they’ll be locked into the final smash, otherwise it ends right there.

If you hit with the initial hitbox, the camera pans behind the enemy and the gameplay goes into a typical arcade boxer format. You can both press A and aim either high, low, or in the middle to punch that point of your enemy’s body. Foes deal 2% per hit and 4% per headshot, while Sandman does double damage due to the battle not being in his field of expertise. You can both press B to block any of the three points of your body, as well as move right and left ever so slightly to do a brief dodge.

However; Sandman has an option that his foe can’t do – a deadly right and left hook that you input like you would a fsmash/bsmash. This deals 20% and knockback on par with Bowser’s fsmash, ending the final smash early. These two deadly hooks out prioritize all enemy punches and can’t be blocked, and must be dodged by moving in the opposite direction Sandman punches. Of course, these can be hard to hit with due to the lag, so you can fake them by inputting a ftilt/btilt to do the startup animation but not actually the punch, then punish the foe for their dodge.

. . .Doesn’t this sound ever so familiar? Well, Sandman does have one option over the Turkish boxer in that he can press Z to wink. This functions just like in his down special in that it destroys the lag of his next punch, but if the foe punches him in the face as he does it, he’ll take double damage from it.

If you don’t smack the foe out of the final smash early with a hook, the final smash lasts 10 seconds (Slightly lesser then Bull’s version due to his unique winking ability).
[Variable damage]

ZZZ PLAYSTYLEZZZ
Unlike most heavyweights of his size, Sandman plays very offensively. He’s like Ganondorf in that he has pretty much no viable defensive options, but unlike that bottom tier amateur, Sandman can actually put on the pain. If not for his stacking hitstun ability, he’d probably be on Ganon’s level due to his slowness, but with it he can rack up absurd amounts of damage and even set up to easily land a KO move to boot. Once you’ve fed your foe a Knuckle Sandwich, the sky’s the limit.

Of course, if landing them was easy, everybody would main Sandman. What determines how good you are with Sandman is how often you can get the Knuckle Sandwiches in. First off, you have to approach. Far from an easy feat. Sandman is extremely vulnerable to being camped just like his fellow big black man. Dashing Attack is a possible option, but considering you have so few options it’s pretty predictable. To use it, you’ll have to beat the foe to the punch and predict a laggy projectile. Aside from that, you’ll probably just have to take some hits as you close the distance with the foe.

Once you get up to them, you have a decent few options to make landing that Knuckle Sandwich easier. Fake them out with a neutral A to get in free damage and abuse it so they don’t expect the Knuckle Sandwich when it comes, start doing a Dream Rotation and rotate your arms around far longer then you need to so they expect a different attack, grab them in the Blink of an Eye (Down B) and follow up with an fthrow, lock them in place and force the foe to face you with an ftilt. . .Sandman has plenty of options for getting in his crucial move, especially if you posses some creativity with mindgames.

Okay, so now you’ve hit. You can possibly get up to a good 50% (!!!) or so via Knuckle Sandwich if you’ve got your combos down, and you’ve got plenty of freedom for how you want to perform them. Sandman’s got no limit of options for how to rack damage. I could detail the combos, but is it really that necessary? Stack up as much hitstun and damage as possible, make the foe lie down and slumber off in dreamland, then end it with the meat of the damage with a dtilt or dsmash, based on how much time you have left before the foe snaps out of the stun.

This –does- sound pretty scary for Sandman’s opponents, but Sandman will be taking so much damage before he actually gets in his combo fest in from his typical heavyweight problems that he’ll be merely catching up to the foe in damage percent rather then pulling ahead. Anyway, once the foe’s percent is in KO range, your options become a good deal more varied. While the ideal move to land is still Knuckle Sandwich so you can get all the more damage and finish with a KO move, Dreamland Express and dsmash (With your arms together rather then separated) are perfectly viable options. Try to throw some of these moves in when you come out of your Dream Rotation to trip foes up some. It adds largely to your mindgame potential. It’s only natural that a heavyweight like Sandman would have a easier time finishing the job. Just don’t get any thoughts about using Sandman’s spiking aerials to actually gimp rather then as combo pieces – despite his decent up special, his piss poor second jump, fall speed, and aerial movement means he can’t venture far away from the stage before being forced to recover.

So, assuming you’ve KOd your foe, Sandman can attempt to try to attempt to prolong his destruction. His recovery’s not terrible and nigh impossible to gimp, and if he does manage to get in yet another Knuckle Sandwich he can end it with some showboating to get in some free healing. Sandman will want to play semi-defensively when he’s closed the distance between his foe at this point by keeping up his Dream Rotation, then simply exiting the stance with moves that bat away the foe the easiest rather then aiming for a sandwich. If he can get one in anyway, more power to him, of course. The ideal way to go down would be to drag the foe down with you to your doom via uair, and if you’re close to the edge with far too much damage to recover and have just landed a Knuckle Sandwich, go for it.

ZZZ MATCH-UPSZZZ

VS. Kirby – 70/30, Sandman’s favor
While one might think Kirby would be annoying to hit with a Knuckle Sandwich due to his small stature, the fact that he’s all head means his entire body is a sweetspot for the move. Kirby also has little to gain from devouring Sandman, as Kirby has no moves that are laggy enough to warrant preparing for them via Dream Rotation, and his range when rotating his arms around is laughable.

Aside from that, Sandman is absolutely relived that Kirby has no worthwhile projectiles, as it allows him to approach far easier. What’s more, Kirby’s up B somewhat laggy to boot, so if Sandman predicts it, he can smush Kirby with a dash attack. Kirby’s other attacks are all very close range and require him to be close up to Sandman, right in his playing field. Of course, despite all this, Kirby is still far faster and can rack up Sandman’s percentage just as fast as the heavyweight champion, but Sandman won’t be falling behind in damage percentage in the slightest, able to keep up with him easily due to Kirby wanting to come to him just as bad as visa versa. Kirby’s off-stage game is near useless due to Sandman’s ungimpability and Sandman can KO far better to boot, giving him the match up by a decent margin.

VS. Meta Knight – 35/65, Meta Knight’s favor
Alright, so most everything from the Kirby match-up applies here, but rather then giving Sandman an easy time approaching via Final Cutter, Meta Knight will be doing all the approaching via Mach Tornado, and he’ll be racking up Sandman’s damage far faster for obvious reasons. Sandman isn’t completely helpless against it, a good few of his attacks hitting through it, but they’re pretty laggy. What’s more notable is his dream rotation hits through it due to his disjointed properties, allowing him to hit Meta Knight out of the Tornado then punish him. Seeing Meta Knight will nearly constantly be dashing towards Sandman, throwing in an fsmash once or twice certainly won’t hurt, just don’t abuse it.

While Meta Knight’s dsmash won’t KO until pretty high percents, it’s incredibly easy to land, unlike Sandman’s options, and Meta Knight is far more then capable of getting the damage needed for it to KO. Sandman is forced to play defensively here and capitalize on the few Knuckle Sandwiches he lands considering Meta Knight will constantly be approaching him, but if he just constantly keeps up a dream rotation Meta Knight can just casually roll behind him and dsmash/tornado or abuse the superarmor of Shuttle Loop. Sandman puts up a respectable resistance, but Meta Knight’s advantage is obvious, as always.

VS. Wario – 25/75, Wario’s favor
Wario has no projectiles but a high priority approach, but much like Meta Knight Sandman can easily eat through it with his high priority and Dream Rotation. While one would think Wario approaching would be a good thing, Wario can just short hop an fair to poke you then retreat backwards with his godly aerial movement to get far out of the range of anything you can do. Wario won’t rack up the damage nearly as quickly as Meta Knight (Who can?), but he makes up for it in that with his wonky aerial momentum he can weave in and out much more easily to avoid your attacks. You’ll have a harder time getting in your hits on Wario, which lead to his inevitable lead in the damage percentage. In addition, Wario’s fsmash is just as easy to land as Meta Knight’s dsmash but all the more powerful, so Wario will ultimately take you out just as fast as Meta Knight but with hardly even taking a scratch. Nasty stuff.

VS. King Dedede – 40/60, Dedede’s favor
Sandman can be chain grabbed. Who can’t these days? If you keep a dream rotation in front of you, Dedede will just get hit as he tries to grab you and you’ll be able to punish it with a Knuckle Sandwich or any other move of your choice. On the other hand, Dedede can use Waddle Dees and abuse the range and speed of ftilt to force an approach, which Sandman HATES. While you could leap over the Waddle Dees, Dedede will likely predict your prediction, considering his Waddle Dees aren’t –that- laggy. In addition, while Sandman does put up a good defense from being grabbed, he –will- get grabbed eventually which will cause his percentage to skyrocket. It’s not hopeless, once Sandman gets in close quarters with Dedede he’s easier to land Knuckle Sandwiches on then most. Dedede also lacks a good deal of the power heavyweights are known for, though you won’t KO him any sooner then he will you due to his godly recovery, so that’s rather a moot point.

VS. Peach – 20/80, Peach’s favor
Peach can float up out of the range of where Knuckle Sandwich needs to sweetspot and rain down on Sandman with a flurry of dairs to make life hell for Sandman. In addition, she can also camp with her vegetables, and mixing together camping with floating dairs provides for a beastly damage racking mechanism that provides Sandman with little chance to retialiate. Of course, Peach will have to get in close to KO and she’s not particularly good at it either, meaning Sandman –does- have a chance to catch up eventually. Considering how massive of a comeback he’ll have to make, though, it’s far from likely.

VS. Zelda – 70/30, Sandman’s favor
Zelda can camp and even move the projectile up so Sandman can’t leap over it, but in all honesty that’s all she can really do that Sandman has to fear. While her awkward disjointed magical priority out prioritzes most of what Sandman can do, don’t let her looks fool you. She’s a power character. Once you get up close, Zelda’s pretty easy to beat to a pulp, and you’ll easily pull forward in the damage racking. She has some KO potential, but you obviously completely outclass her in that regard. She’s really not left with that many options outside down B, but that gives you a free Knuckle Sandwich and is another match-up entirely.

VS. Pokemon Trainer – 65/35, Sandman’s favor
Squirtle is basically Wario without power, meaning that’s a bad match-up but at least gives Sandman –some- chance for resistance seeing Squirtle’s pitifully weak, especially with stamina taken into account, so it’s relatively equal. Ivysaur’s a nasty match-up seeing he can camp (Not well, but Sandman fares terribly against it in any form) and get up as much as a combo-fest from Knuckle Sandwich by catching Sandman in Bullet Seed, and he –can- KO to boot. Charizard’s the only one which is a good match up for Sandman, as he’s pretty much just Sandman minus the comboing when you boil it all down.

So a equal match up, a bad match up, and a good match up. 50/50, right? Well, it would be, it not for the stamina. Stamina makes Squirtle pitifully weak and Charizard a power character without power, making Ivysaur the only threat. In addition, if the trainer ever even THINKS of switching (Probably to Ivysaur), that's a free Knuckle Sandwich for you right there. You should be overjoyed to see the trainer switching.

VS. Little Mac – 70/30, Sandman’s favor
Despite being a slow behemoth, Sandman will refuse to give Mac any time to get stars. He’ll negate the start-lag of his moves in the Blink of an Eye and his Dream Rotation to ensure that any moves of his that he fires out actually hit, and in general most of his more notable moves that he won’t be using during his combo spree aren’t very punishable. This causes Mac to die off pretty fast and have a very difficult time KOing. The one thing Mac has going for him against the champ is that he has Doc in his corner, who will give Mac a decent substitute for projectiles – traps. This makes Sandman’s life much more difficult in that he’s forced to approach Mac, allowing him to easily land blows as Sandman carefully goes around Mac’s traps. Mac can damage rack as well as Sandman can, but the fact that Mac dies far more easily gives Sandman the match up.

VS. Von Kaiser – 55/45, Sandman’s favor
Sandman can rack up Kaiser’s damage with ease, seeing both are melee fighters, but Sandman relies on it much more, being unable to fight anywhere else. Kaiser is without a doubt faster then Sandman and can give him some trouble, particularly with his ridiculous bthrow, and he can use it regardless of his percentage, so he can ultimately damage rack too, just not as well. When it comes time for the KO, both have painfully telegraphed KO options, but Sandman can hide what he’s going to do by disguising the start-up of one of these moves in the Blink of an Eye or with a Dream Rotation, allowing him to have a much easier time landing it.

That said, Kaiser’s neutral special is the best KO option out of what the two have, so this is far from heavily biased towards Sandman. At higher percents, Kaiser also doesn’t mind being given some space, as he can just sit back and heal while Sandman’s forced into approaching – easy pickings for Kaiser. Just make sure you don’t use your dtilt to fall down as Kaiser, seeing how many of Sandman’s moves take advantage of foes snoozing in dreamland down on the ground.

VS. King Hippo – 35/65, Hippo’s favor
Ah, the battle of the combo heavyweights. The main thing Hippo has going for him is his super-armor. Hippo can just soak up Sandman’s Knuckle Sandwiches, then proceed to own him up with his own combos. While this may sound a bit extreme, if Sandman can’t land any of these, he’s pretty well screwed, so if Hippo can just abuse the super-armor –just- long enough Sandman can do little to challenge the king. That said, Hippo is a good deal more predictable then Sandman due to Sandman’s ability to hide what move he’s about to perform, so if Sandman just waits for his chance he can punish him. The thing is that the fight’s entirely on Hippo’s terms. You have to predict his attack –and- prepare a move via down B/neutral B, then hit him with it during the end lag. Not an easy feat. This phase is only more blatantly biased for Hippo by the fact that Sandman is such great combo food.

However; all hope is not lost when Sandman’s percentage racks up far faster then Hippo’s. Sandman will have a better hope of trying to mount a comeback once his percentage goes up a bit so Hippo’s moveset will become much slower and like that of a typical heavyweight, causing him to be much more punishable. Once their percents are equal, again, Sandman’s much more unpredictable, but Hippo’s superarmor even things out. What rigs this for Hippo is that once Sandman’s percentage is up he has a long window of time where he can KO Sandman while Sandman is simply struggling to catch up in damage percentage to finally even things out.

VS. Bear Hugger – 50/50
Sandman’s good priority won’t matter at all against Bear Hugger’s arsenal of grabs. Bear Hugger finds it far from difficult to find time to get his gloves nice and sticky in this match-up, and once they’re up he can pretty much wall anything whatsoever with his defensive stance to get Sandman into his grasp. Bear Hugger and Sandman are similar in that they just need to land one move to get a bunch of comboing/chain grabbing damage out of it, but Bear Hugger has ten thousand different grabs he can use while Sandman’s forced to land a Knuckle Sandwich, making him far more predictable. On the other hand Bear Hugger won’t get as much damage out of his grabs considering his sticky gloves won’t be entirely fresh by the time he actually grabs Sandman, so the damage racking phase evens out somewhat, but it’s still definitely more biased for Bear Hugger. While both are equally capable of KOing, Sandman doesn’t need as much damage to KO though due to Bear Hugger’s recovery being so terrible, meaning everything ultimately evens out.

VS. Bald Bull – 65/35, Sandman’s favor
Bull can force an approach, but that’s exactly what Sandman wants to do. What’s the point? Bull has to work to get a viable KO option throughout the whole fight while building up his rage alongside Sandman’s damage, but Sandman has no such problems and can damage rack better easier to boot. That said, once Bull has built up the rage for the bull charge, it undoubtedly beats out anything Sandman has, but Sandman has tons of chances to land a KO move while it all comes down to one attack for Bull. A highlight for Bull is that Sandman can’t gimp to save his life, meaning that his incredibly gimpable recovery isn’t an issue, but Sandman can’t be gimped either. Sandman can compete somewhat with Bull’s durability due to his much better recovery, though Bull still definitively wins that contest. While most of the issues here are rather debatable, Sandman’s superior damage racking gives him the match up.

VS. Klump and Krusha – 60/40, Klump and Krusha’s favor
Klump and Krusha can camp with their neutral special but this is awkwardly laggy and predictable, enough so that Sandman can actually approach the duo pretty well with his dashing leap attack. Once he’s up close, he’ll mainly want to aim for longer ranged attacks that can go through Krusha to hit Klump should the duo their back to him. Both the Kremlings and Sandman will have difficulty getting in any hits due to how slow they are. Sandman being less predictable is a big help, but Klump has the better defense through making use of Krusha as a human shield and the duo have excellent range with moves like dsmash and their grab-game. Klump can also set up Krusha as a trap via Down B or similair moves and camp with his neutral B to give Sandman a much more difficult time approaching.

The battle is for the most part on Kremling terms, though the sheer slowness of the Kremlings makes them have slight problems KOing while Sandman does so with ease. That said, one of the Kremlings’ weaknesses in their recovery is rather a moot point due to Sandman’s inability to gimp, and Klump is pretty free to separate from Krusha as he pleases seeing Sandman really can’t pressure worth a damn to prevent him from reuniting with the big lard.

VS. Raven – 50/50
Raven mixes together two categories that Sandman hates – camping and traps. Raven can easily fight at a range and force Sandman to approach, making life hell for him. Despite Raven not being that slow, Sandman’s leap is surprisingly useful here in that it can jump over walls while still moving forward and attacking all at once, but it’s unlikely to actually hit her. Raven can just keep hiding behind her walls and setting up shadow bugs for Sandman to deal with once he finally gets there, then go flee to the other side of the wall while he’s busy dealing with all the crap to further rack damage on him. Sandman will have his hands full to lay a finger on Raven. Your best bet here is to destroy Raven’s walls rather then focusing on her and only go for her as she brings up new ones.

Eventually, Raven will have to stop hiding and come out to fight the black giant to finish him off, which gives Sandman a potential chance to catch up in damage racking, considering Raven fails at KOing outside rather impractical methods like trapping you in a book. After you get the damage up on Raven you can resume trying to KO her right back with your superior KO options, but considering Raven has a much longer window where she’s allowed to try to go for the kill, it evens out.

ZZZEXTRAS ZZZ


Up Taunt – Bed-Time Snack
Sandman points forward. “I’m gonna eat –you- for a bed-time snack.”

Side Taunt – Giant’s Laughter
Sandman puts his hands on his lips and laughs heartily, looking up to the sky. His laughing animation from the Wii game.

Down Taunt – Squatting Laughter
Sandman crouches down and turns to face the screen, laughing “Oh ho ho oh ho ho!”, much like everybody else’s win animation in Mike Tyson’ Punch Out.

Entrance – Dramatic Entrance
Sandman enters slowly and casually from the background, taking long strides and holding up his head high and mighty. He’s the champ, he demands some respect.

Win Pose 1 – Bloody Fists
Sandman turns back to the losers and points to the lowest placing one. “Tell your face to leave my fists alone.”

Win Pose 2 - Championship
Sandman faces the screen, wearing the world circuit championship belt. “This title’s mine. You ain’t never gonna take it.”

Win Pose 3 - Untouchable
The referee is seen alongside Sandman and tries to lift up his arm to declare him the victor, but is unable to move Sandman’s impressive bulk. He tries pushing against him, but just makes a fool of himself as he nearly falls over. Sandman lifts up his arm casually for the referee to be lifted up into the air and let out a few disgruntled cries as Sandman laughs. Sandman’s Title Defense win animation.

Loss Pose - Vengeance
Sandman’s definitely not one who takes losses easily or in good sportsmanship, considering he has to keep winning in order to keep up his perfect record and defend his title. Alongside Sandman there’s a brick wall with a poster of the winner displayed, and Sandman proceeds to rapidly smack into it.
 

SkylerOcon

Tiny Dancer
Joined
Mar 21, 2008
Messages
5,216
Location
ATX
So basically you're saying the exact opposite of everything everyone else said before you and throw in some almost insulting sounding stuff trying to make me feel horrible.
Okay. Fission mailed. Yours, that is.
Take a step into the chat. Just yesterday after you posted the set, everybody was talking about how badly it was getting sugarcoated.

Sorry for giving you an opinion that differed from everybody elses (haha). Didn't mean to sound offensive either - I think it's more that you wanted to take offense to my comment, than anything.

@Sandman: He shall be commented soon :evil:
 

Katapultar

Smash Lord
Joined
Nov 24, 2008
Messages
1,284
Location
Australia
[size=+2]Sandman[/size]

It's too bad that the Moveset repost up the top of the page ruined a chance for a front page. That was just an utter waste of time, and well, it plagues the page and possibly confuses newcomers. Anyway, onto the set. Something about how you explain the moves is annoying, seemingly not getting to the pont, and sometimes you state priority in different areas, say like, lag importantly. I think that boxer guy dus his game on doing lots of hitstun. Not a bad idea. If I can grasp the whole thing, Sandman doesn't have any defensive options necesarily, nor great approaches, but relies on his lag cutting and his knuckle sandwich.
I would have to say you did a good job implementing the Specials to why they work with Sandman, though I think the Up-Special is too good of a recovery, even if it has start-up lag, you say it's hard to gimp, though I suppose that Sandman won't be able to reach horizontally very well.

By doing all these punch out sets, makes me wonder if you will keep doing the other mentioned sets in your sig.
 

32º Centigrade

Smash Rookie
Joined
Sep 12, 2009
Messages
14
First Moveset, First Post. Yay.


~SLAKING~


Background Info:
"SLAKING spends all day lying down and lolling about. It eats grass growing within its reach. If it eats all the grass it can reach, this POKéMON reluctantly moves to another spot. Wherever SLAKING live, rings of over a yard in diameter appear in grassy fields. They are made by the POKéMON as it eats all the grass within reach while lying prone on the ground. Hordes of SLAKING gather around trees when fruits come into season. They wait around patiently for ripened fruits to fall out of the trees. It is the world's most slothful POKéMON. However, it can exert horrifying power by releasing pent-up energy all at once."

Overview:
As you could probably gather from the PokéDex data, Slaking is a lazy, slothful being. Naturally, this translates into his Smash playstyle. He boats a fair amount of strong attacks. Slaking is horrible at approaching his enemies, so he pretty much relies on his opponents coming to him. You might assume, "Oh, well all I need is a spammy Projectile Character to counter him." Well, keep reading.


~STATS~

Size: 7/10 Slaking stands over six and a half feet, but hunched over, is as tall as Samus.

Weight: 8/10 Slaking rivals Boozer for weight.

Power: 7/10 Slaking has some powerful attacks, but is pretty weak for a heavyweight.

Walk Speed: 3/10 Slaking's lazy. Do you expect him to walk any faster?

Run Speed: 5/10 Slaking has "meh" dashing.

Ariel Mobility (as a whole): 2/10 His first jump puts him his height of the ground. Not that good. His second jump gets him Kirby's height up in the air. Even worse. Slaking's fall speed is on par with Link, his horizontal movement is as bad as a Super Mushroom, and his recovery sucks.

Range: 8/10 Slaking's long arms cover himself all around.

Attack Speed: 7/10 Slaking's attacks range from near-instantaneous to Falcon Punch slow. On average, pretty good speed.

Priority: 3/10 Slaking's moveset is mostly joint hitboxes, save a few attacks.

Comboability: 10/10 WOAH! Slaking is a comboing machine!


~SPECIALS~

Neutral Special
Slack Off
Slaking reclines into the postition in the image above. This takes about half of a second. In this state Slaking is . . . completely invincible!? Not super-armour, invulnerability. He essentially becomes a wall that absorbs all attacks and does not take damage or knock-back. This is how Slaking draws his opponents into his whirlwind of combos. The only things that can affect him are push effects and grabs. You can cancel this state by pressing B again, and it will take another half of a second for him to get up. However, if he has stayed in this state for 5 or more seconds, he will groan and reluctantly get up much slower. This takes one second.

What keeps you from abusing this attack, creating totally inescapeable combos, and overall being unstoppable? Every 10 seconds, Slaking's laziness will overcome him, and he will be forced into this state for 5 seconds, after which you can cancel out. In this automatic slack off, however, you don't have your invincibility. You will then be a sitting duck, open to your foe's attacks. This doesn't happen in the air, but you can't avoid this by stalling in the air. When you land, you'll immediately go into the auto-slack.

You can avoid this curse by manually slacking off. When the 10 second interval for the auto-slack goes off and you're already in the slacking position, the effect is negated. Slaking will scratch his belly once the interval has been passed. Afterward, you can get up and enjoy your 15 seconds of attacking.


[0% + Invincibility]


Side Special
Crush Claw
Slaking performs a large underhand swipe with both hands that reaches Mario's height horizontally in front of him, and leaps forward one stage builder block. Slash marks - like that of Charizard's in his neutral combo, but larger - appear on his sausage-like fingers. The attack comes out as fast as Fireball. The pseudo-slash does 10% and knock-back equivalent to Snake's third Jab hit.

Seems like a pretty simple special, huh? Well, the slash marks are actually disjointed, and have high priority. This can easily cancel out sword-based attacks, but his attack is cancelled out, too. It's also a good combo finisher, as it comes out fairly quick and can be used in the air.


[10%]


Up Special
Pursuit
Slaking instantly turns into a black blur and swiftly darts 2 stage builder blocks upward. Then, he free-falls. I told you it was a terrible recovery.

As the jump finishes, he does a quick front flip in the air. This spin does 6% and pretty decent horizontal knock-back. You're not done yet though. By pressing B more, he'll keep following his victim, doing more almost-teleports directly to them. The following attacks occur:

>Attack 1: The spin mentioned earlier. 6%​


>Attack 2: A large right hook. 1%, more horizontal knock-back.​


>Attack 3: A large left hook. 1%, even more horizontal knock-back.​


>Attack 4: A back flip which ties into an upwards kick. 1%, upwards knock-back.​


>Attack 5: A backhand swipe which turns Slaking around. 1%, backwards knock-back.​


>Attack 6: A meteor-smash that looks similar to Diddy Kong's down air. 2%, very powerful meteor-smash.​
This can be a potential counter to edge-guarders and gimpers. You can also cancel the barrage of attacks at any time by not pressing B after an attack. Slaking will stop his assault and gains a chance to use his crappy recovery again. A good idea would be to use Pursuit on someone "Wall-Of-Pain"ing you, and performing the combo up to the back hand swipe. You'll miss the meteor-smash, but you will have gained a greater horizontal distance, and you could have another chance to use Pursuit again.

You might be tempted to abuse that powerful meteor-smash, but consider that you would have to hit someone directly above you, and then you would travel quite a distance forward, and then, if you are able to land the meteor-smash in open air, you most likely won't be able to recover, seeing as the whole combo puts you in a helpless fall, and then you would get KO'd, too. Still, it might be worth it for a guaranteed KO.


[6-12%]


Down Special
Mach Punch
Slaking reels back and swings his arm in a circle, similar to that one win pose of Mario's. After two seconds, he instantly jumps forward 3/4 of Battlefield, instantly, in an uppercut position, with half a second of end lag. While speeding forward he runs his fist along the floor to strike any downed foes. Contact with his fist deals 12% and great horizontal knock-back that kills at 120%, while contact with his body does 6% and minor upwards knock-back.

This can be used to aid his horrible recovery, as his momentum carries him forward after the dash at Jigglypuff's air speed. It also doesn't put him in free-fall, so follow up with pursuit. Just use it where the start-up can't punish you, and be careful not to slide under the stage.


[6%, 12%]


~STANDARDS & SITUATIONALS~

Neutral A
Uproar
Slaking beats his chest similar to DK's up taunt but more violent, roaring all the while. Each swing of his arm does 2%, or would, if not for stale-moves. The first swing gives off forwards knock-back, while every other swing gives off backwards knock-back, drawing the foe back in, only to be hit back out.

This attack always does at least four hits, but you can continue the attack by tapping A. However, you can control how fast you beat your chest by tapping A fast or slow. If you tap slow, they're less likely to escape, but you may fall victim to auto-slack. If you tap fast, they'll escape easier, but you won't be punished.

The attack will always end in backwards knock-back, so you can use a follow-up attack.


[Variable%, 2% every hit]


Dash Attack
Double-Edge
From his dash, he lunges his shoulder forward, doing 11% and knock-back equal to Captain Falcon's Forward Smash. He lands hard on his shoulder and winces in pain, taking 5%. The attack comes out as fast as Ike's dash attack, and , in total, takes 2 seconds to do.

[11%, 5% to Slaking]


Ledge Attack
Lariat
Slaking instantly leaps from the ledge, as fast as DK's ledge attack, and spins in place. It's like Spinning Kong, but Slaking holds his arms in a stiff "T" shape. He spins for one second, and the whole attack has sex kick properties, every frame doing 6% with good GTFO knock-back.

[6%]


Ledge Attack (Over 100%)
Thunder Clap
Slaking struggles to get up and over the ledge, but when he does, he quickly lifts and slams his hand on the ground in front of him, creating a shockwave that spreads out 2 Kirbies in front of him.

His palm deals 10% and knock-back equal to the second hit of Snake's infamous Forward Tilt. The shockwave is disjointed and deals 5% with upward knock-back like DK's Down Special.


[10%, 5%]


Downed Attack
Mega Kick
Slaking, from either laying on his back or his face, will quickly extend his feet. Contact with his feet will trip his foe and deal 2%. He then flips onto his feet; the flip will deal 6% and knock-back according to how he flipped. If he was on his back, he does a back flip and his foe goes behind him. If he was lying on his face, he does a front flip and his foe goes in front of him. Both instances give good GTFO knock-back.

[8%]


Tripped Attack
Body Slam
From sitting on his rump, Slaking jumps in the air and slams his buttocks on the ground, creating a shockwave that spreads out 2 Kirbies from both his sides. Same knock-back and damage as the shockwave in his Ledge Attack. Then he bounces up in the air and lands on his feet.

[5%]


Slack Off Attack
Double Slap
From his reclining pose, swipes his arm forward for pathetic range, his middle finger just barely reaching his toes. This does 6% and GTFO knock-back. Then, he swipes his arm behind his head for great range, about a Battlefield platform behind him. Same damage and knock-back as the first swipe. The whole attack lasts one second.

One possible way to exploit the range of the second swipe is to turn around in the beginning of a match and then use Slack Off. If someone tries to approach you, you can swat them away to buy some time to get up. The downside to the second swipe is the start-up.


[6%]


~TILTS~


Forward Tilt
Double Kick
Slaking plants his knuckles on the ground and, through the space made by his arms, swings like a pendulum and kicks in front of him. As fast as Mario's Forward Tilt, as powerful as Bower's second Jab, does 8%. Good for finishing combos.

[8%]


Up Tilt
Slam
Slaking holds his palm behind him for half a second. Then, he swings him arm in an arc overhead. Think DK's Up Tilt, backwards. Contact with his hand does 9% and diagonal upwards knock-back. Fairly fast attack.

The real attack from this move is the sweetspot, or at least what I'm calling a sweetspot. If you hit your foe as Slaking slides his hand out in the start of the attack, they take 2% and fly right above Slaking's head. When he does the overhand swipe, they get hit to right in front of you and take 2%. As his fist comes down, it drags the foe down and does 8%. On contact with the floor, it puts them in the downed position. Slaking has no end lag; follow up with Down Tilt!


[9%, 12% sweetspotted]


Down Tilt
Flip
Slaking holds both his palms open on the floor in font of him. Then he lifts his hands in an arc going over his head, but the hit boxes are only in front of him. Contact deals 8% and knock-back equal to Mario's forward tilt. Another fast tilt.

Again, this has a special "sweetspot". If the foe is in their downed position, Slaking picks them up and throws them one stage builder block above him. It does the same damage, but once the foe reaches the apex of their flight they go into a footstooled effect. Follow up with another attack.


[8%]


~SMASHES~


Forward Smash
Mega Punch
Slaking clenches both his fists together and spins 360º, his fists doing a small arc overhead before coming down on unfortunate foes. The attack, no matter where the enemy is hit from, does 16%. The knock-back depends on where the enemy was hit.

If they are hit by your fists as they are going up (Slaking turned around), they are sent up like in DK's down smash. If they are hit by the overhead arc above Slaking, they are hit as if by DK's forward smash. If they are hit by the fits coming down in from of him, they are hit with a powerful meteor-smash, which, if they are on the ground, sends them high in the air, high enough to kill at 120%.

This attack is as fast as Jigglypuff's forward smash.


[16%]


Up Smash
Stomp
Slaking stands up straight, an impressive 6'7", and reaches his arm overhead. Should he grab someone, he'll throw them beneath him, jump in the air, and stomp them hard for 15% and 45º knock-back with not much power. Mostly used for finishing combos because of its great range and grab properties.

[15%]


Down Smash
Double Team
In a process that takes one second, Slaking faces the screen, (or away from it) leans into the background (or foreground) and slams his palms into the foreground (or background). Similar to DK's forward smash, but in the foreground or back ground. Does 15%, great horizontal knock-back, kills at 100%.

Also, just to prevent confusion, it's called Double Team because he uses both his arms. I was running out of attack names . . .


[15%]


~AERIALS~


Neutral Aerial
Double Kick(again?)
Slaking extends his limbs outward covering a Battlefield platform in front of him and behind him. It looks vaguely like this:

[ -]
=0=

Contact with him does 8% and more GTFO knock-back, great for finishing combos or getting that pesky aerial character off you.


[8%]


Forward Aerial
Strength
Slaking brings his arms downward in an "X" like manner. 10%, comes out as fast as Captain Falcon's back air, knock-back equal to Bowser's forward air.

If he hits someone hanging onto a ledge (if they're vulnerable, that is) or hanging by a tether, he'll grab them and throw them below him, while propelling himself upward one stage builder block. This can help out his recovery against a bad edge-guarder.


[10%]


Back Aerial
Focus Punch
slaking swings his sword and a dark wave is sent

But seriously, the back air sucks.

Slaking reels his arm back, then swings it behind himself. 11%, same knock-back as Captain Falcon's back air, as quick as Bowser's up air.


[11%]


Up Aerial
Slap
Slaking holds his arm above his head, like in his Up Smash. He holds it out for two seconds, so this is a pretty laggy move. If he lands, he also suffers bad landing lag.

If he comes in contact with someone, he'll perform a swipe downwards. This is not a grab like his Up Smash, it is blockable. The swipe is a weak spike that forces the opponent below you. This can possibly be followed up by a down air. He faces no landing lag after performing the attack.


[9%]


Down Aerial
Bounce
Slaking tucks himself into a ball, then, in a pose similar to Wario's neutral air, bulges his stomach out for 8% and little knock-back. There are only a few frames of the attack.

If he lands while his stomach bulges out, he'll bounce back up a stage builder block in the air. Use this to stall in the air for whatever reason. Not recommended, though.


[8%]


~GRABS~


Grab
Slaking reaches one of his lanky arms forward. Great range, about as good as Rope Snake. Great range comes with a price, however; Slaking's grab has bad ending lag.


Pummel
Crunch
As his massive palm smothers the victim's face, Slaking suddenly squeezes tightly, creating bone crunching sounds. 2%, fairly slow for a pummel.

[2%]


Forward Throw
Seismic Toss
Slaking spins his arm 360º and releases his opponent, tossing them forward a great distance. This has power similar to Ness's forward throw, and they're thrown straight forward, becoming a pseudo-projectile. This does 12% and kills at 90%!

[12%]


Back Throw
Foot Throw
In a pose similar to his forward tilt, Slaking grabs the foe with his feet and tosses them behind him for 11%. The knock-back is a semi-spike with the power of Sheik's, meant to force the foe onto the floor. It could be used to send them off the stage pretty effectively.

[11%]


Up Throw
Toss
Slaking effortlessly tosses the enemy 2 stage builder blocks above his height in front of him, like his down tilt. This does 9%. From here you could probably follow up with his Up Air, then a Down Air, followed by a bounce off the ground, then a Neutral Air. Wow, a 34% combo!

[9%]


Down Throw
Rest
Slaking fluffs the opponent twice, as if they were a pillow, each fluff doing 1%. He then lays on them for 6% and activates Slack Off. While he is laying on them they take 2% every second and must button mash out. Once they escape, they roll forward, which is further behind Slaking,

[8% + 2% every second]


~FINAL SMASH~


Devolve:
Slaking glows a bright light and becomes his preevolution, Vigoroth! Oh, snap!

Vigoroth is controllable for 15 seconds. His attacks are faster, more lagless on both sides, and disjointed, thanks to his claws. He runs faster, has great aerial prowess now and, oh yeah, did I mention he's invincible?

The only thing I would not recommend doing is going too far off stage. His recovery hasn't been helped at all, so Pursuit is still going to be a thorn in your side.

Speaking of Specials, his
Neutral Special has been changed to Roar. He waits half a second before letting out a roar that stuns opponents within a Smart Bomb's explosion of him. Let 'em have it!


~Now that the required stuff is done, I'm gonna get some sleep. Playstyle, Match-Ups, Extras, and Possible Combos to come soon. Please post comments and Constructive Criticism.~
 

SixrchBattosai

Banned via Warnings
Joined
Aug 31, 2009
Messages
39
Location
With my boyfriend...who's moving ;A;
Ok, for those interested in how the "Attack Throw" Mechanic works, here it is:

When a player uses either the Upward Tilt or the Forward Aerial, the player can insert certain other attacks to create a sequence of attacks. Take the Upward Tilt; you can insert the Up SMASH immediately after, and Sixrch catches the opponent on the head of the club and swings them around once and forward. If you use the Forward Aerial, you insert the Downward Aerial immediately after to, again, catch the opponent on the head of the club, but this time, plummet to the ground and smash the opponent into the ground.

Edit: Thank you, Kholdstare. Any other comments? Or has everything already been said?

Edit2: Wait. Kholdstare complimenting me? FFFFF--*inplodes*
 

JOE!

Smash Hero
Joined
Oct 5, 2008
Messages
8,075
Location
Dedham, MA
Ok, for those interested in how the "Attack Throw" Mechanic works, here it is:

When a player uses either the Upward Tilt or the Forward Aerial, the player can insert certain other attacks to create a sequence of attacks. Take the Upward Tilt; you can insert the Up SMASH immediately after, and Sixrch catches the opponent on the head of the club and swings them around once and forward. If you use the Forward Aerial, you insert the Downward Aerial immediately after to, again, catch the opponent on the head of the club, but this time, plummet to the ground and smash the opponent into the ground.
so, a special combo move essentially?
 
Status
Not open for further replies.
Top Bottom