
S2
Smash Lord
KEEPING IT CLASSY - A ZELDA GUIDE
What this is: A guide to playing as ZELDA
What this isn't: A Sheik guide.
In this guide you'll find
1.) In depth analysis of all of Zelda's moves, their advantages/disadvantages, etc.
2.) Advanced strategies
3.) Character matchups
If you wish to leave feedback then just post it in the thread or PM me. Don't point out basic gameplay mechanics, as this is a Zelda specific guide. There are already SWF guides explaining basic terminology and universal game mechanics, so use the search function for those. The only universal aspects that will be mentioned are advanced techs, specifically how they apply to Zelda.
Welcome to Keeping it Classy, a guide to teach the basics of Zelda to beginners as well as advanced tactics for those who want to improve their Zelda to a competitive (tournament) level of play. Zelda has been massively buffed in Brawl, but any Melee Zelda main can tell you that some of the basics from that game still apply. With a little bit of strategy, Zelda can become a force to be reckoned with. Since Sheik is essentially her own character, this guide isn't going to go into playing her.
Contents
I.) Overview
II.) Ground A-moves (Standard Attacks)
III.) Air attacks
IV.) B moves (Special Attacks)
V.) General strategies
VI.) Character Matchups
VII.) Contributions
I.) Overview
Zelda in Brawl, much like her Melee counterpart, is a character that generally lacks approaches. Her air game is mixed (very strong attacks and weak ones) and her running speed is very slow. Unlike Melee, Brawl's Zelda can camp and force opponents to come to her. This is mostly due to improvements to Din's fire and Nayru's love. Playing Zelda can often feel very polarized, either your doing tons of damage to an opponent or you're being beaten like a ragdoll. This guide will show you Zelda's stronger attributes, so hopefully you can spend more of your time doing the damage.
II.) Ground A-moves
Zelda's ground game is very strong, but only if you're paying a lot of attention. Like Marth, spacing plays a key role in whether your attacks succeed for fail. Every single one of Zelda's smashes is devestating, but their hitboxes are very specific. Her tilts are powerful as well, although more situational and harder to use. You'll have to master them if you plan on playing tournament play though. If her A-moves have any weakness, its that they are a little on the slow side. But Nayru's love and her d-smash can work to protect her from opponents who are too close in.
Smashes
F-smash
Zelda makes a magic ball in front of her hands. This move has very high priority while doing good damage and decent knockback. The key to using this move correctly, is making sure opponents get hit as far away from you as possible. The actual attack goes in front of Zelda, so use this to your advantage. Also, it lasts a long time, meaning that if an opponent dodges but with the timing a split second off, you can often hit them with the later end of the smash.
*This move, like the Up-Smash can be DI-ed out of. Good players will DI well. Always keep that in mind.
Application: This is going to be one of your key moves, but only if your spacing correctly. The F-smash can be used to block incoming opponents from either the ground or an aerial angle that is not directly above. Keep in mind that if an opponent is too close, they may get hit by the first couple hits (only the last one sends them flying) and DI behind you, leaving you open. So don't use this as a defense if an opponent is already close to you. Keep in mind where an opponent is going to land/roll/run into and use this to keep them from approaching you without getting punished.
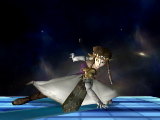
D-Smash:

Zelda does a spin kick. This is one of her fastest moves and it does decent damage and knockback. It hits on both sides.
Applications: This is a very good move. It can KO and even at low percents it'll knock opponents far away enough that they can't counter attack. You're going to want to use this move when an opponent is getting too close or you need a very quick attack (I recommend using the c-stick). Unlike her f-smash, this move has relatively little lag before, so you can d-smash over and over in succession if the situation calls for it (but don't be predictable). If you miss an attack and an opponent rushes in to punish you, oftentimes you can d-smash very quickly to protect yourself.
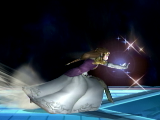
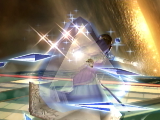
Up-Smash
Probably Zelda's greatest A-move. She makes circles with her hand above her. This move is fast and has insane priority. The knockback is huge and it'll keep your opponents above you. The actual attack is above Zelda and it seems to suck players in slightly.
*Like the F-smash this can be DI-ed out of.
Applications: Very few attacks outprioritize this, so abuse it anytime an opponent gets above you. Keep in mind that you can up-smash out of a run, so chasing a falling opponent can pay off big. This move is a KOer, so keep that in mind as well. Also, on stages with platforms, this move will often go through them. A good example is on Battlefield, where Zelda can stand below the side platforms and up-smash. She's not vulnerable at all, but the attack goes above Zelda and will hit anyone standing on the platform above her.
Neutral, Tilts, Running, and Grabs
Neutral A
Similar to the F-smash but with less startup and end lag (less powerful). Zelda makes a ball of energy in front of her.
Application: Not the greatest move on its own, the neutral is good for mindgames. It is similar to the F-smash and that's a good thing. The move itself is not that powerful, but you can substitute it where you'd normally F-smash. The advantage is that the beginning ending lag is quicker, but it has a similar hitbox (although it doesn't go quite as far). You can use this move as a fake out before doing something else. Use in the same situations you would an F-smash, as it'll leave you open if your opponent is too close, above you, or close enough to roll/DI out of it and towards you.
F-Tilt
A powerful punch, it hits in front of Zelda.
Applications: Situational and very powerful. If your playing a defensive Zelda, this is a good attack to use once in a while to throw an opponent off (since the timing/range is slightly different than the F-smash, neutral-A, or d-tilt). Like the neutral-A, you don't want to spam these. The advantage of using this move is that it can be followed up with an aerial, running-A, or running up-smash depending on the situation (that's your opponents damage plus the way they DI). Actually, depending on percentages you can do some powerful second hits off of the F-tilt
U-Tilt

Zelda strokes her arm upward.
Applications: This move is super powerful and a good KOer. However, given how good Zelda's up smash is, this move is a little less important. That doesn't mean you shouldn't use it. For one, it lasts shorter than the up-smash, but is nearly as powerful. The downside is that you don't get that ultra high priority attack ABOVE the actual character, so you're a little more vulnerable. Keep in mind, if you've used your up-smash a few times already and its knockback has decayed (Stale-move negation), you can use this for Kos. Also, unlike the Up-smash your opponent can't DI out of this.
D-Tilt
Zelda does a little kick.
Application: The d-tilt seems lame at first, but trust me its not. You can juggle many characters with this move, so landing it can equal a lot of damage. Plus you can often (depending on opponent DI) hit the opponent with another tilt or smash when you think they are going to get out of the juggle. Be careful though about the spacing as some characters can grab her out of repeated D-tilts or escape rather easily. You can also use this for long range pokes and shield stabbing.
Running A
Zelda does a running attack.
Application: Powerful. Like any running attack, only use it if you think your going to hit. Because your very open to a shield grab if this is blocked. This is a decent move to throw out if you've played very defensive and your opponent isn't suspecting it. Since Zelda's throw startup can be slow, this makes a good substitute if your opponent is open and not immediately next to you... but there is not quite enough time for you to get a throw in.
Throws
Applications: All of Zelda's throws are decent, none of them are exceptional KOer's. I won't list them individually. What you should know is that Zelda's throw startup is not that fast. The upside is that the length of the throw isn't half bad. Don't go around throwing unless you're opponent is shielding a lot close to you, or you're getting a guaranteed shield grab (key word guaranteed here, she can't shield grab fast attacks because her throw animation is slow). If your throwing an opponent above you, use either the up or down throws based on percentages, its possible to combo off a bad DI.
III.) Air attacks
OVERVIEW - Zelda's air game is mixed. Things are either very powerful or very weak. Some of the moves require sweet-spots, so missing with them will leave you open.
Neutral Air:
Zelda does a magic attack around her.
Application: It's not very strong, but it is fast and hits on both sides. Use this if your in the air and you need a fast attack when you aren't going to be sweetspotting other aerials. Generally you aren't going to be aggressive with this move. But its handy if you need a fast attack, since her other aerials are slow. It doesn't have the highest priority though.
F-Air / B-air
These moves are so similar that I'm listing them together. Zelda does a kick sideways. It has a sweet spot.
Evidently the knockback isn't exactly the same, with approximately a 5% KO difference (B-air more powerful). Given the nature that these both have to be sweetspoted, this has very little impact on a real match.
Applications: This is a move that requires a lot of playtime in order to master. The kick has a sweetspot (the best way to describe it is to hit with the heal, not the very edge of foot, the heel). Obviously you'll know if you hit it or not due to the knockback. If you sweetspot you can KO a non-DIing opponent at about 65-70%, if you miss it they will barely flinch.
Unfortunately, its hard to teach when to use this move. Due to DI and the fact that its harder to combo into this in Brawl than in Melee (That's my opinion, it might change). My best advice is to not f-air/b-air unless you're pretty sure it'll sweetspot. Because if you mess up a good opponent will counterattack you during the lag afterwards.
But it'll take a lot of experience playing Zelda to know when you can sweetspot safely and be able to spot those situations quickly. If anyone knows any Brawl combos that are guaranteed sweetspot opportunities, PM me about it and I'll list them (you'll get credit next to it).
Potential Situations to land the F-air/B-air
-When hanging onto the side of the stage, its possible to drop and then jump onto the stage and to an F-air sweetspot. For players not familiar with that, while hanging press down to let go of the edge. Immediately jump and F-air. This takes some timing, but if you do it right Zelda will doing an F-Air onto the stage that often sweetspot. Just be careful, like all tactics this can be dodged and countered if your opponent suspects it (probably meaning your doing it too often). So use good mindgames.
-After you do a ledgewarp/steal its possible to b-air for a hit that will usually kill by knocking them on the underside of the stage. This is an advanced Zelda strat that isn't for beginners. See Farore Wind's section for more info on what this is.
Up-Air:
Zelda makes an explosion above her.
Applications: Big time KO move. And the actual hit is above you, so you're somewhat safe while doing it. Keep in mind though that you have to time this move, mis-timing it leaves you open. Also watch for falling opponents, as they can airdodge (which lasts longer than the move, but your move has lag afterwards. Don't have a lot of upwards momentum when you use this on a falling opponent, as they'll airdodge through you. You can also use this underneath higher platforms (like the middle platform on Battlefield) you KO or harass safely.
D-Air:
Zelda kicks down.
Applications: It's a spike. One that will suck if your sourspotting it or using it to attack a grounded opponent. But it does have a sweetspot, which results in a very powerful spike.
Use this really only for spiking. The problem is that many up-attacks out-prioritize this. So its not safe in nearly any situation to come down on an opponent doing this move.
If you're feeling like showing off you could actually use it for spiking, but remember that its situational. It does look awesome when it hits.
The D-air cannot sweetspot if an opponent is on the ground. Basically that means don't ever attack a grounded opponent with it, as its very weak without the sweespot.
The move is actually very good for spiking as the sweetspot is basically a guranteed spike (very powerful and they go down fast). So use it when you feel confident you have a spiking opportunity. Probably best used when the opponent is coming from underneath the stage and their recovery possibilities leave them open to spiking.
IV.) B-Moves (Special Attacks)
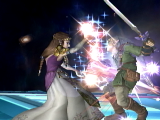
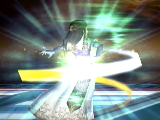
Nayru's Love (Neutral B)
Zelda surrounds herself in crystals.
Applications: This move is good for several reasons. It's purpose is a reflector, but its got much more depth than that.
1.) It's a reflector. Does exactly what its supposed to, reflects projectiles. Unlike Fox, Wolf, or Pit; you can't hold this out. The time it lasts is set. So have good timing.
2.) Deals damage and has practically no startup lag. Nayru's and the d-smash are Zelda's two quickest attacks. The move does have ending lag though (more than the d-smash). If you hit your opponent though, the knockback is enough at any percent that you won't be left open. Awesome to use if an opponent gets too close. Just make sure you aren't abusing this or missing, becuase you can be punished if you miss it.
3.) It'll knock an opponent in the direction Zelda's facing. This is important to know. If your facing away from an opponent towards the edge and you hit with this move, it'll knock them off the edge. This use this to force an opponent towards whatever side of you that you want them.
4.) It has invincibility frames at the start
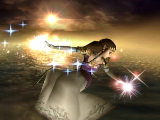
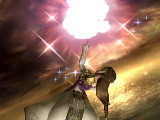
Din's Fire (Forward B)
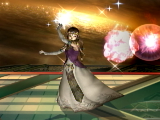
Zelda channels a fire ball. This was garbage in Melee, in Brawl its one of the best projectiles in the game.
Applications: This move is godly. Deals good damage and it can KO an opponent that is too close to the top. Keep in mind that the hitbox is bigger than the actual animation.
Also, if you get hit while using Din's then you will lose control of it and it will travel its maximum range and explode (max range OR if it hits a solid object/ground). If your already starting the explosion and you get hit, the explosion will occur regardless. Keep these things in mind, as you can direct a Din's diagonally towards the ground and have it explode close to you if the enemy hits you out of it (because it'll hit its max possible range and explode if it touches ground).
And since it gain strength as it channels, the damage/knockback increases the longer you channel it (so at max range it'll hit max strength). Its powerful regardless of when you explode it, so don't think you have to hit it at max range to be effective.
Situations to use Din's Fire
-To force an opponent to come to you. This is a great harassing move, just don't use it if your opponent is too close because there is lag at the end of the move.
-To chase an opponent you just knocked away.
-Spacing. To move Zelda forwards or backwards while harassing or attacking with Din's to chase an opponent, since you'll maintain a horizental trajectory if you use it in the air.
-Trading hits with certain other projectile characters, since Din's basically does more damage than most other projectiles and has the knockback to let you get another Din's going before they can startup another projectile. Don't trade hits stupidly with things like Samus' charge shot. I shouldn't have to explain why.
I can't stress enough to get good with this move. Even if your opponents are air-dodging it every time. As long as its safe, use it. But be careful abusing this in certain matchups.
-Advanced Din's Spamming-
It's true, not all Din's spammers are made equal. Here's some tips that will take your Din's from scrub to pro. None are all that hard, so there's no excuse not to incorporate them into your game.
1.) The Zig Zag.
More of a mindgame thing, but keep in mind that Din's can zig-zag. Press up and down respectively. This is nice because it's less obvious to an opponent where your sending the projectile. Watch platform stages as Din's will explode if it runs into a platform.
This might come in handy as well against Ness/Lucas/G&W since this makes it harder for them to predict when your going to do a false Din's (purposely exploding the Din's away from them if you're sure they are going to absorb).
2.) Spacing via Din's in the air.
How you jump while doing an air Din's will move you in a given direction. This is nice for spacing yourself if your chasing an opponent or trying to play keepaway.
Naturally, just using Din's in the air will cause you to go forward slowly. But the move is influenced by your prior momentum, so use that knowledge to move around while spamming.
-Jumping forward + Din's will give you forward momentum.
-Jumping backward + Din's will give you slight backwards momentum.
-Jumping one direction and using Din's the opposite direction will slow/stop most of your momentum.
Wavebouncing can also be done to get momentum.
-If you jump one direction and turn after casting Din's, you will bounce the opposite direction and Din's that way. This is actually rather tricky. What it consists of is casting Din's facing one way, but immediatly hitting the control stick the opposite direction. Even though you initially cast the Din's one way, Zelda will turn and do it the other direction with a big bounce in the opposite direction.
Its also possible to do the inverse.
Where Zelda shoots the Din 1 way and bounces backwards away from the Din's. This can be done easiest by
-shorthopping back and Din'ing forward immediately, Zelda will get a little bounce back.
There are ways to increase this effect (so you can do it when running or already in the air).
You can
-B-stick (not recommended). Set controller options so the c-stick is special and while jumping forward press the opposite direction on the c-stick. This is really cool, but not worth losing your fast smash attacks by giving up the c-stick just for this function.
-Pressing forward on the control stick, the B button, and back on the c-stick all at the same time. This is hard and requires you to shift your hand position. Its not recommend it. You can get around it by changing R to special. That's up to you though, whether you feel this particular wavebounce is worth changing your controls over.
It might also be possible simply via speedy back and forth on the control stick. I'll update if that is true, but either way, its very very hard to do.
Since your spacing with Zelda is vastly important, use this to manipulate minor spacing and keep yourself in an advantageous spacing.
3.) Front/back exploding
If your fighting a good opponent, its not simply about exploding Din's on your opponent, but where you hit the explosion. This works especially well against large opponent (DDD/ROB//etc) because of their size.
When exploding a Din's, learn the timing to explode it in front of an opponent or behind and opponent as far as you can, while having the edge of the Din's still hit them.
There is an interesting mindgame you can do with this.
Take for instance, DDD is simply spot-dodging your Din's over and over. If your exploding your Din's at max range in front/back of him so the very edge hits him, the timing for his downdodge is actually different for each one (as opposed to it always being the same if your always exploding it in the middle of him). If he's expecting you to explode it in front of him and spot dodge, you can actually hold the Din's and hit him as he comes out of the spotdodge if you explode it behind him and get a hit with the max edge of Din's hitbox.
Of course, no opponent stays still. They can spotdodge, airdodge moving in any direction, roll, or block (although Din's eats shields somewhat quick, so your opponent is either going to advance on you or start dodging).
The airdodging (usually its towards you) is the biggest problem, but if you have good mindgames and can predict an opponent, you can really get the most out of Din's.
This will work on chasing an opponent who offstage in a fall trying to airdodge Din's by applying the explosion to above/below them, depending on their size. This tricky because first you have to account for their falling speed, then keep in mind that hitting at the top/bottom of their body is going to have bizarre timing because they are already a moving target. To be honest, this is pretty avoidable, since your opponent has a ton of options at their disposal (fastfall, double jump, left/right influecing their fall). But I figured it was worth mentioning.
The point is that if your simply exploding Din's you can do much more by paying attention to when you explode it. Mess up your opponents timing by varying your timing on the explosion.
4.) Ending Din's trajectory by ramming it into the ground.
While it might be true that you can end Din's at will, if you get hit Din's will continue on its trajectory and explode when it hits its maximum range.
However, if Din's hits the ground, a platform, or any solid object it will simply explode.
This is important because attacking with Din's at a proper downward trajectory towards your opponent means that it'll still explode on them, regardless of if you get hit.
This is going to come in handy really in 2 main situations
-When your opponent is projectile spamming you and it's apparent that your going to be hit by their projectile before your in range to manually cause the Din's to explode, so you set it at a trajectory that'll hit the ground where they are standing.
-When the opponent is somewhat close and while you still thought it was still barely safe to throw out a Din's, this will allow you to trade hits just in case your opponent does hit you with an attack with range.
Post script - This isn't an excuse to use Din's when it isn't safe to do so.
Farore's Wind (Up B)-
Zelda Teleports
Farore's really could use its own guide. Lucky for you, the talented Luthien has created a guide exclusively on Farore's Wind and it can be found here. It is much more in depth than the short few paragraphs I'm going to talk about it:
http://smashboards.com/showthread.php?t=155351
Applications: This is another move that's going to take some practice. Everytime you use it off the stage, your opponent is going to try and predict if your going for the edge or not (so he can edgehog). If you land on the stage, you'll have some ending lag that leaves you quite open, so sweetspot that edge unless you're pretty sure you can land on the stage safely. In Brawl, Zelda does damage and knockback the slight second before she appears. You can hit an opponent with this every once and a while if the situation presents itself. Just be careful, if someone suspects your going to try and Farore them, they can block and counter. The next paragraph is seperated because its important and most players don't know this.
**Farore's Wind travels in 16 Directions**
That's correct, 16 and not 8. Don't be fooled because the GC controller's analog stick only has 8 notches on it. If you're a new Zelda player and you find that you're using Farore's Wind only to die, its probably because your pushing the stick slightly off the direction your want. The benefit though, is that if your good with Farore's you options are very open, since most opponents don't expect a teleport that's not in one of the eight standard directions.
Also, Farore's can be used for onstage mindgames and simply moving your character. Be careful though, as a botched teleport can get you killed. If your up in the air and the opponent is below you and trying to juggle, sometimes you can teleport straight down to reach the ground before them depending on the situation. Keep that in mind, especially in platform stages where a unintuitive teleport to another part of the stage could save you from a KO.
There is a also a cool little technique that Luthien explains in his guide called ledgewarping/ledgestealing. I'll warn you now, ADVANCED PLAYERS ONLY. This is done by teleporting from the stage to the edge. Zelda won't grab the edge, but instead will appear next to it with her 2nd jump available to her. The best part is that you can attack out of it. Lots of potential, but you fall to your death if you mess up the spacing. The fact that Farore's goes in so many directions means you really need to practice where you can do this.
V.) General Strategies
This is really the heart of the guide. And the part that will probably change the most as players give feedback and people get more skilled at Brawl. It's not done, so tell me what you want me to work on next.
It's one thing to analyze Zelda's individual properties, but you're going to need to put it all together to play her decently. Many Zelda players will start off mostly using her Smash attack and then incorporating her tilts, f/b-air, and other more situational moves as they get better. I'd recommend that if your not a tournament level player, learning Zelda against an opponent either at equal skill or slightly worse than you. That's simply so you can log in some time using her in real combat and getting an eye for when each attack is appropriate.
New players might find themselves left open to a good opponent all the time because they are using her tilts and smashes incorrectly. Because of the nature of many of her attacks (usually hitting slightly off her body), a minor difference in spacing between you and your opponent is really all it takes to leave yourself wide open.
For the most part, I'm going to keep this guide general (not character specific). If there is demand for a match-up list then it might be added later. But Brawl is so early in its lifecycle that the accuracy of such a list could change. Unlike Melee, people don't fully have Brawl down to a science quite yet. Even if the general level of play is getting higher much faster with this game.
Harassing:
With Din's fire being massively buffed this time around, Zelda can harass heavily in a way she could not do in Melee. If your against an opponent who does not have projectiles, use Din's fire anytime an opponent is too far away to hit you. Even if the opponent dodges it everytime, it keeps pressure on them.
When you're using Din's you also don't have to stay in 1 place. Learn to jump back and forth using Din's, this way you can be controlling your spacing while harassing.
Keep your eyes open for when an opponent attempts to advance on you so that you can explode Din's where an opponent will be if he either runs at your or attempts to roll forward. If an opponent tries to come at you from the air with an air-dodge, hit them with an attack after Din's or retreat. Just make sure that you are far away enough that you can block/attack/roll before an opponent is close enough to hit you. This can be tricky against faster characters like Sonic or Toon Link, so know what they're running speeds are. Try and keep an opponent from getting closer to you than the hitbox in front of Zelda when she does her F-smash.
If your against a character who does have projectiles, you need to be a little smarter about using Din's fire. Since Din's does 10-15 damage (damage goes down if you overuse it) it can be worth trading projectile hits in some scenarios. If you release Din's on an opponent but are hit before Zelda finishes her animation, it will still go off.
Against other characters like Falco it doesn't make a lot of sense to harass with Din's because his lasers travel faster than it and will stun Zelda. In this scenario start using Nayru's love smartly until the opponent either stops projectile spamming or begins to advance on you.
Against certain projectile characters your going to need to use some good mindgames. If an opponent feels that every projectile they shoot gets reflected, they may stop (temporarily usually). Sometimes you can still harass characters like Falco with Din's under specific conditions. Be careful about when you use either Din's or Nayru's though, because an opponent may try and punish you for mistiming them or being too close.
An important thing to remember is that in most situations Zelda does not need to play aggressive unless you want to. Since she generally lack good approaches, make them come to you. Be aggressive when an opponent doesn't expect it or when a safe opportunity presents itself.
More often than not, your opponent will be aggressive because the game will either reach a standstill (with certain projectile character matchups) or they will be afraid of taking damage due to Din's fire.
Another good Din's strategy is to explode the fireball right in front of you. This works against approaching characters with reflectors because its risky for them to reflector right in front of you (but not close enough to hit you). Be careful though, if you miss the Dins or the opponent is too close they can punish you during the lag afterwards.
And remember, Din's fire is treated like a true projectile. That means it can be reflected (nullifies the attack) and absorbed (by Ness, Lucas, or G&W's bucket).
DON'T ABUSE DIN'S AGAINST NESS/LUCAS. It will heal them. Use it sparingly. If you spam against them it'll hurt you more than help. So only use Din's in situations where they won't use absorb because they'll get punished if they do (certain recovery situations, or if they are too close to you).
And if G&W catches 3 of your Din's it'll do about 60% (that's the maximum) and KO you instantly (unless your on a level where you can wall tech, but that probably won't happen too often).
Defending Yourself from a grounded opponent:
Before I mention anything about defense, keep in mind that some of Zelda's attacks are multi-hit and its possible to DI out of them in certain situations. Since the last hit is the one that sends them flying, poor spacing on a successful hit can still leave you open. A good example is a mis-spaced F-smash. If you hit an opponent who is too close with this move, they can DI towards Zelda and escape the move - leaving you wide open. Keep that in mind when picking your attacks.
The lack of wavedashing in Brawl benefits Zelda since her wavedash in Melee was mediocre and opponents no longer be able to use this to get close to her. A stupid opponent will roll towards you, but as players get better we'll probably see less of that.
If an opponent gets too close:
First thing to know is what to do if an opponent does get too close to you or behind you. Zelda has 2 attacks that are very fast and hit on both sides. Those are her D-smash and Nayru's love. Each has distinct characteristics, so they aren't quite interchangable. Both have little startup time, but their similarity ends there.
D-Smash: The advantage to this move is the low lag at the end of the move. It's also a potential KO move that does a lot of knockback, which is something Nayru's is not. This move hits on both sides, but Zelda hits in front of her and then behind. Not both sides at the same time. The move is fast, but keep that in mind when timing it. The hits are also done at the ground, so it won't protect you if your opponent jumps.
Nayru's Love: The advantage is that it'll protect Zelda's whole body on both sides instantly. It also knocks an opponent in whatever direction you're facing. So you can force an opponent attacking behind you in front of you. It also lasts quite a while, so your timing can be a bit less precise. The cons are that this will not KO an opponent (although the knockback is enough to keep you safe from a counter hit at most percentages) and it has ending lag. If you miss with a d-smash you might have time to follow it up with something else. But missing Nayru's will leave you open.
Keep in mind that neither attack makes you invulnerable. Their purpose is to hit an opponent before they get the hit on you because these are faster than many attacks, but they won't stop every attack in their place.
Defending Against An Approaching Opponent:
I'm going to spend a big chunk of this talking about opponents approaching from directly in front of you or in the air at an angle that is more towards the front than the top. Zelda is very protected from the sky if your properly using your up-tilt and up-smash. Being attacked from the front is a little more tricky.
Zelda has a number of options defending herself from ground opponents. The F-smash and D-smash the most powerful, but you'll also want to use her neutral-A, F-tilt, and D-tilt depending on the situation. So learn the range and lag differences between them, as they are all useful in certain situations. Using her tilts is ultimately much more trick than her smashes, but if you only use her smashes then a good opponent will probably outsmart you eventually.
If an opponent is still far from you, but advancing you have a choice between a number of attacks that hit in front of Zelda. Those being your F-smash, F-tilt, Neutral-A, and D-tilt. The F-smash is the most powerful and has the longest range, but its laggier on startup and finish and can leave you open if an opponent gets too close before the attack or if they land right outside its hitbox. Your Neutral-A is a similar move, but it's quicker to start and end. The knockback on the neutral is pretty low, but its a lot safer and can be followed with a different attack. Your F-tilt is laggy, so I'd use it a little more sparingly. That being said, it knocks an opponent above you, which is good for a small combo depnding on how your opponent DIs.
The D-tilt is also an awesome little move. It's fairly quick and has a surprisingly long range (the hitbox goes to the very tip of her toe). You can hit opponents repeatedly with this over and over if they DI wrong at certain percents, but be aware that its possible to break out of this combo depending on the percent/character/range away from Zelda. You can also shield stab with this.
What really makes these four moves very useful (5 moves since you'll be using the d-smash a lot too in conjuction because opponents are going to get close to you and the d-smash actually has fairly good range - like the d-tilt it hits up to the very tip of the toe)... again, what makes these moves useful is how you use them together.
A good player can spot if your simply abusing your smashes. But because the timing and hitboxes of all these moves are similar, but slightly different, using a variety of them can really throw an opponent off.
What is hard to teach is when to use which one. I'd suggest going into training mode and seeing how far each move reaches and exactly how fast it is. In a real match you'll need a good sense of Zelda's spacing and very fast reflexes. Simply throwing attacks out is going to get you killed quickly.
Know what hits where, what can be DI-ed out of (and which ways your opponents tend to DI), and the lag on each of these moves
VI.) Character Matchups
General:
Matchup Chart
Update: Zelda is officially mid-tier. This is as stated by the latest SBR tier list.
First things first, here is a list of Zelda's matchup guide. This might change as the metagame grows. This is a matchup specific for Zelda. Also keep in mind that these are generally regarded as true. There will always be players who excell in certain matchups. Meaning, if you someone claims that G&W's are easy for him as Zelda, well that's great. He's still a terrible matchup for her.
**These matchups are based on the topic in the SWF tactical forum matchup topic. Meaning that these matchups are based on input from all players, not just Zelda users. The original topic can be found here http://smashboards.com/showthread.php?t=157979 **
Zelda's current matchups from best to worst by category (characters in categories not listed in any specific order)
Big Advantage Against:
None
Slight Advantage Against:
Bowser
Falcon
Charizard
Falco
Fox
Ganondorf
Jiggypuff
DDD
Kirby
Link
Luigi
Peach
Pikachu
ROB
Samus
Sheik
Sonic
Toon Link
Wario
Wolf
Yoshi
Neutral Matchups:
Diddy Kong
Donkey Kong
Ice Climbers
Ike
Ivysaur
Lucario
Metaknight
Ness
Pit
Snake
Squirtle
Zero Suit Samus
Bad Matchups:
G&W
Lucas
Marth
Chart changes since last update have been:
-Ike: Now considered a neutral matchup. There is disagreement here. Ikes and Zelda players have been disagreeing on this. I'd take this matchup's placement lightly though. As right now whether it's an advantage or not is probably being shaped by the loudest players giving their opinion. Not necessarily the best.
-Squirtle: Now considered a neutral matchup.
Potential Changes based on current Input by Zelda players
-Metaknight (currently neutral): is often considered a bad matchup. Primarily due to several factors. His speed makes spacing hard. His moves are high priority. His d-smash is just as quick (if not faster) than Zelda's d-smash. His aerial game has priority most of the time (unless its a up-air or a sweetspot). Tornado is a pain. Din's does not always outrpioritize it because priority with Din's/Tornado are both based on players factors like time charged. Though he is listed as a neutral matchup, you ought to treat him as a bad matchup. Zelda really has no real advantages in this fight.
-Snake (Currently neutral): There are arguments whether Zelda has an advantage against him. I'm inclined to disagree, based on the high priority and disjointed hitbox of his tilts. Zelda doesn't have the high spacing advantage she thinks she does. Obviously she still retains a decent ability to thwart his projectile game. And she can edgeguard him like no other. It probably is a neutral matchup at most levels of play, but treat the highest level of Snake players as a bad matchup.
-Wario (currently an advantage against): Recently it was found that Zelda could combo into a lightning kick from a grab on Wario. That is, if she grabs him and lets him break free, he's completely open. She has a few other options as well. Wario is already considered to be at Zelda advantage. How much this technique will impact is unknown, but if Zelda's do get good at abusing it... maybe it'll turn into a 'big advantage' matchup. Wouldn't hold my breath though.
Other Things to Keep in Mind about the Matchup
-Zelda seems to have a lot of slight advantage fights. Keep in mind just how slight they are. If you fight an equal level player you're still going to have to work hard. Just keep in mind that Zelda isn't a combo character. It's not like you can combo these guys for a free win. You still have to work hard for each hit, but at least Zelda has a few advantages specifically against these guys (like gimping recoveries, outspacing, etc).
-Zelda does not have a free win against heavies. This is a huge misconception and a reason why sometimes people seem split on whether Zelda really has an advantage against certain characters like DDD/Ike/ROB, etc. The fact is, she does have an advantage. But Zelda's light weight can make these matchups hard if you are making dumb mistakes. The problem against heavy characters is outlined in the following points
1.) Zelda usually needs at least 50% more damage to KO a heavy than they need to KO her.
2.) Small mistakes ruin Zelda. You can accidently get Smashed by a heavy and die before 100%. Certain players will abuse this, hoping you'll make a mistake.
3.) If you hit with a KO attack (at KO percentage) and the heavy doesn't die, your in trouble due to knockback (stale move) reduction.
The third point is especially relevant to DDD/ROB. Who basically will make it back on most stages if not KOed. Try different KO moves, but still, this is a pain. Keep in mind you can transfoirm into Sheik and then back in order to refresh the knockback reduction (if you do this, start the transform as soon as you hit your opponent and you know they are going to end up at the screens edge but not KOed. Otherwise you're probably not safe. Keep in mind you might have to sacrifice an edgeguard in order to pull this off).
Here are some general tips. As a Zelda player, your best matchup will always be against a slow character who has no projectile. Unfortunately, 90% of the competition you'll face are fast characters with projectiles. Go figure. Zelda's game is hurt primarily by several things.
1.) Projectiles that force her to stop camping (yes she has a reflector but sometimes reflected shots won't make it all the way back before disappearing, that won't make your opponent stop).
2.) Characters who outrange her attacks by poking behind the hitbox (which is usually off of Zelda's body).
3.) Combo characters who can keep her in the air
4.) Anyone with the ability to absorb projectile (Ness/Lucas/G&W)
*I'll add more to this list as times goes on, but I'm starting with some of Zelda's hardest matchups and moving towards the easier ones. I'm putting up Ness next, since I've been playing a lot against a good Ness player.
Character Specific Guides/Strats
Mr. Game & Watch
Mr. Game & Watch
Overview: Awful matchup for Zelda. His bucket keeps you from Din's spamming and he's hard to approach. If you know what your doing he's still tough, but he's beatable.
Approaching G&W is generally a problem, but even though you can't Din's him that doesn't mean you can't simply wait for him to attack first. His projectile sucks, so chances are he's not going to use it (but he runs the risk of getting hit with Din's).
Since he's got the bucket absorb, lets talk about Din's first. You should still use Din's fire, but don't spam it. G&W can't use his bucket safely in all situations. Specifically, most G&W's won't bucket if you're too close to them.
If you haven't already learned to approach with Din's in the air then do so. Short hop and Din's forward to move closer to your enemy. Explode the Din's on him while landing right outside the opponent's range (so he can't shield grab you or hit you with another relevant attack).
This tactic is going to give G&W's trouble, because they aren't going to bucket if they think they are going to be hit afterwards. So keep track of close range Din's opportunities. But don't be predictable about it.
G&W is going to absorb any long range Din's you throw at him, so don't. But keep using it in close range situations that don't leave you open. Also, keep in mind that a G&W player will bucket more or less depending on how much he's seeing you use Din's. If your opponent figures out in which situations your going to Din's, he's going to bucket. So use Din's wisely.
Another different strat is to simply ignore the bucket all together and Din's the hell out of G&W. This is risky and I'd be careful, because if he's good at using the bucket your probably toast (it's a 1 hit KO with 3 Din's in it). If you do find yourself against a fully charged bucket... Din's G&W every chance you get and be ready to dodge at the drop of a hat. Just be careful using any laggy moves as he's probably waiting to nail you after you do something that leaves you open.
One last thing on Din's. If you're using it and don't want to risk a full bucket... then simply stop using Din's once G&W gets 2 absorbtions. G&W players are counting on your fear of using Din's to give them an advantage, so find a fine line between abusing the move and still showing that a G&W won't scare you away from your usual tactics.
Moving onto G&W's attacks.
Watch out for his b-air. The attack comes off of his body and hits multiple times (doing good knockback even if he hits you with just the end of it). There are 2 very big problems with this move. The first is that its hard to shield grab. That's if he's in range, since the attack doesn't stop immediately when he hits the ground. Also, a smart G&W can hit your shield but land outside your grab range. This move is also faster and higher priority than Zelda's F-smash (because this is a long range air attack that goes off of G&W's body, so it'll go through your attack and hit you before your attack hits him). So be careful about that.
Since your F-air has such long lag at the end, a G&W can counter it with b-airs if he times them correctly. So then what should you do? Use tilts and the neutral A. Remember how you're neutral works like a shorter ranged f-smash, well its much faster too. Zelda's F-tilt is also basically a smash attack as well. The F-tilt can also be directed in 3 directions, learn how to direct it upwards and downwards. So if the F-smash isn't working then don't use it. Zelda's tilts are amazing and they'll be a lifesaver.
A quick note on shield grabbing against G&W. Be very careful. G&W can d-smash very quickly out of many of his aerials and that move will kill you at moderately high percents. A missed shield grab will usually get you d-smashed and oftentimes KOed. So be cautious about approaching or shield grabbing G&W after he lands an aerial.
Some tips on G&W's d-smash. It has faster startup than your f-smash, so if he's in close don't bother using the F-smash if he's too close to you. You're D-smash will only work if you hit him very early in the attack. Otherwise, if you're attacks hit each other they will cancel each other out. Interestingly, if a G&W D-smashes next to you and you Up-smash, a part of his body will hit the up-smash and he'll get hit by it (but usually only a few hits, but he's getting knocked away and you're taking no damage). Keep that in mind. But be careful, like any situation up-smashing close to an opponent is risky if you miss.
G&W's F-air looks like his B-air, but this one isn't that scary. It only does 1 hit, so if you block it you can retaliate. Don't expect to see this that often, as most G&W's will b-air instead.
Also, G&W's up-air seems scary because it sends you up (he blows air up). The air doesn't do damage. So don't get too freaked about it. Airdodge as you come down, if G&W tries to up-air you too early all it'll do is send you up with no damage.
Another thing to watch out for is his d-air (the key). Now in most situations your up smash is going to out-prioritize this (although sometimes it doesn't, need to do further analysis as to when that happens). What makes that attack tricky is that it shoots G&W down very quickly. You're going to see G&W's do this because oftentimes they can use the vertical acceleration to hit you before you can start you up-smash. Also, don't bother using your up-tilt unless your a godly at timing it. It's very hard to time this against G&W's key and it may not even outproritize the hit (I've yet to time it correctly). Remember that G&W can do that d-smash quickly out of the key, so don't assume he's open after hitting the ground. And if he keys into your well timed Up-air, he's toast. But that's hard to time.
If he's abusing his d-air be careful that your up-smash doesn't stale-move decay. That sucks and the only way to undo the decay is to land other attacks or die (decay resets if you lose a stock).
G&W's other smashes are less of a problem but still powerful. The F-smash has decent range, but the speed and range of it shouldn't scare you too much (just don't jump into it). The Up-smash can be powerful as well, but with any matchup you never want to come down on an opponent from above them.
One last thing. G&W's d-tilt (manhole cover) has excellent range and good priority. Use your d-tilt and other range attacks, but don't try to get in a poke war with him. He'll win against your d-tilt and you want to be careful about using your f-smash (because he can very quickly do a turning jump into a b-air).
SUMMARY:
-Watch out for his D-smash and him doing it out of aerials.
-Use Din's wisely
-Be careful of his b-air and using your f-smash if he's going to use this move.
-Watch for his d-tilt pokes
-Be careful of the d-air (key)
NESS
Ness
Not only does Ness give Zelda a hard time naturally due to his moveset, but in Brawl he got a buff. It's a hard matchup for new players. In reality, the matchup is 50/50. Although if you play carelessly, he can KO you at relatively low percents... so play smart.
*Note that this is a guide to fighting NESS. Not Lucas. Although some of the Special move section probably applies since they have similar B moves. Lucas has a different standard moveset. Don't use this as a Lucas guide.
Aside from him approaches and ability to KO Zelda at a low percent, Ness can absorb Din's fire to heal himself. Which means you're going to be facing a dangerous opponent and you won't be able to projectile spam. On one hand, Ness doesn't build up a super attack from Din's like Mr. G&W does... but still, you don't want to find that you've healed him.
Since Din's role is so pivotal to Zelda's game, it'll be covered first.
When the round starts you are pretty much free to spam Din's... at least until you get 1 hit. In fact, remember to Din's spam everytime Ness has a new life. It may only be 10-15 damage, but everything counts.
Once Ness has damage to be healed, you need to be a little smarter about it. You can still use Din's, just don't spam it. First of all, short-hop Din's still work at closer range. Remember though to time it so that you don't land too close to get shield grabbed. The idea is that Ness will probably not risk an absorbtion if you're too close by. If Ness is on the ground you can also try and Din him as he gets up, providing you time the explosion so that it goes off as he becomes vulnerable but before he can start he absorb.
Also keep in mind when to use Din's while Ness is recovering. If you chase him with Din's while he is too high in the air, he's always going to absorb. What you can do is Din him when he's too low (meaning under the stage line) to airdodge. A good Ness isn't going to mess his PK thunder, so you might as well score so extra damage by knocking him up with a Din's.
**This needs to be tested**
Evidently Din's can ruin Ness' recovery but it's difficult. Din's will explode or stop other projectiles, which means you can stop PK thunder before Ness can use it. If Ness is in the air and starts a PK thunder, explode Din's far enough above him so that it hits the PK thunder and destroys it. Ness will fall straight down. Its difficult just to hit the thunder and not Ness (otherwise he'll get sent up), but its something to practice.
A few other notes on Ness' recovery. If Ness recovers onto the stage (not the edge) keep in mind that he can now DI his fall left and right. Something to keep in mind as this makes grabbing him hard. Also, since its basically an instant KO when Ness PK thunders himself into you, you might find opponents who try and do it on purpose. If you are on the ground simply block. Unless your shield is really low, it wont' break it. Too counter simply shield grab. Unless Ness is very close to you, he will always end up in front of you (although the attack looks deceiving, it appears he'll go through you but at most ranges he won't). That's because your shield stops most of his momentum. But keep in mind, if he's very very close to you when he launches himself he may still end up behind you.
One tactic to be careful of that I've seen a few Ness players do is to chase Zelda with the PK thunder projectile while she's in the air. Be careful how you dodge or Farore's back down to the ground. I met a Ness player that would PK thunder as you got closer to the stage hoping for you to dodge it, because he planned on looping the PK thunder and shooting himself into you as you came out of the dodge. This isn't something your going to encounter very often. But he started doing it after he got an idea of how I was going to dodge. But keep that in mind if your avoiding PK thunder chases from below. You need to be safely dodging the projectile and the Ness rocket.
PK cross shouldn't be giving you any trouble. Dodge it. Every now and then a Ness might use it to throw you off. It's slow and leaves him open (unless your in the air). If your too far to counter, dodge or Farore's to safety.
PK fire can be tricky if your opponent is good with it. Obviously you can Nayru's to send it back it him, but because the projectile doesn't go very far you need to be rather close to him. Be careful that you don't Nayru's stupidly when he doesn't throw a PK fire only to get punished. If you do get hit with a PK fire then you have a couple of options.
-You can get hit again (not recommended)
-You can try to DI out of it before he hits you with something else. Try not to DI towards his attack.
-You can Nayru's. This attack is fast and can hit him if he isn't directly next to you when he lands the PK fire. Oftentimes by the time he makes it to you, you'll be able to start the Nayru's before he can hit you. Watch out though, if you do this once or twice the Ness will probably catch on. If you get PK fired and then Naryu's at the earliest possible point... a Ness can jump above you and hit you with a d-air.
If PK fire is really a big problem (it shouldn't be though) you can always counterpick Yoshi's Island. The ground slants so he can't PK Fire up it in many parts, since the projectile has a downward trajectory. Basically that'll gimp his PK fire.
Before his standard moves get discussed, its important to understand how deadly his throw is. Ness' back throw will kill you at about 100%. It is a massive KO move that'll kill Zelda because she's light. Plus, Ness has a pretty quick throw. Always watch out for throws when you reach about 80%. The only advise is to not do anything that'll get you shield grabbed. Other than that, use the Melee IC tip - “Don't get thrown”.
Ness' up and down smashes aren't all that powerful. More powerful than Melee, but they aren't full blown KO moves. Plus you out range them. But they do cover his whole body... so just don't jump into them. His F-smash is powerful, so watch out about it. You're F-smash probably outranges it slightly, watch out about not getting hit by it. All in all, avoid Ness' smashes... but they aren't anything too special. None of them are going to gimp Zelda's game anymore than any other character's smashes.
His up-tilt and f-tilt are pretty standard. You shouldn't be coming down on a Ness in the first place for the up-tilt and you outrange his f-tilt.
The d-tilt can be more problematic. Its very much like Zelda's d-tilt, except slightly quicker. Watch out if he's spamming it. Because it'll rack up damage quickly.
Also remember that if Ness is running at you, his running attack hits in front of him. It'll outpriortize your running A (if he sees your coming in for an approach) and probably a few other of your attacks.
What are more problematic are Ness' aerials.
The F-air appears in front of him, so many Ness' will jump in at a forward angle that can be hard to counter. Be careful about your f-smash hitbox, as this move is very fast and because it appears in front of Ness he can often jump in and hit you when you go for an F-smash. Watch your spacing when he starts abusing this.
The B-air can be problematic as well because of its sweetspot... which is pretty easy to hit. It packs a bit of punch, so don't get hit by it at high percents. Unlike the F-smash though, the attack is his body. So you can nail him with any attack that comes off Zelda's body if your spacing is correct. Otherwise block or dodge.
The D-air is a spike. Be careful of that. You're up-air/up-smash/up-tilt outprioritize this.
Up-Air is pretty powerful. Airdodge it. You shouldn't be coming down on any as Zelda anyways. The N-air isn't going to be too much of a threat either.
There is probably more that can be said about Ness, so feel free to tell me if you know of any tactic they are abusing. He's a tricky little character and a bad matchup.
Summary:
-Use Din's only in specific situations or risk healing him.
-Watch out for moves that hit in front of him. Most of them are very fast.
-Don't get grabbed. Backthrow kills at very low percents
-Learn how to hurt his recovery, safely.
VII.) Contributions
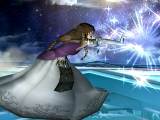
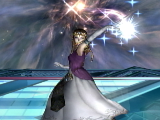
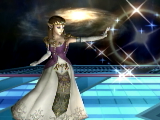
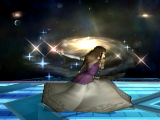
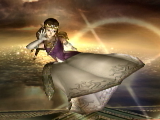
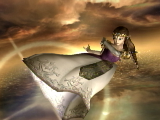
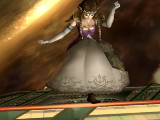
Pictures provided by Koopakoot, so thank him for providing these and making the guide visually more appealing.
The last section is where I'm recognizing others who've posted things to put in the guide.
Luthien - Numerous tips and properties about Nayru's and Farore's
FinalKai - The recovering F-air info as well as info on the D-air
Iris - Dair info.
Sniperworm - G&W bucket percentage info
")