Qinopio
Smash Journeyman
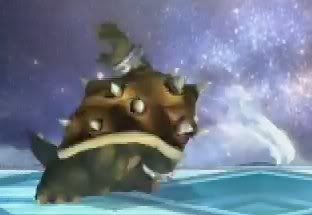
It is worth noting that you can cancel the landing lag on an aerial Whirling Fortress by holding backwards on the Control Stick.

Welcome to Smashboards, the world's largest Super Smash Brothers community! Over 250,000 Smash Bros. fans from around the world have come to discuss these great games in over 19 million posts!
You are currently viewing our boards as a visitor. Click here to sign up right now and start on your path in the Smash community!
Here's how fast it is: I miss all the time with it because I'm still thinking it's as slow as it was in meleeBrawl's uair is absolutely insane, it's the move I kill with more than any other, I find it far easier to hit with too.

Ftilt stops Arrows and Razor Leaf just fine, while giving you enough forward movement that the opponent will think twice before just throwing out razor leaf x 10 on you.About Bowser vs. Projectiles:
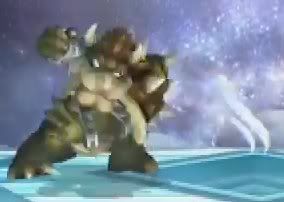
-Bowser's neutral air can reflect some projectiles. I haven't tested this extensively since I don't have a wii or the game but I know it reflects Pit's arrows.
-While on the ground the whirling fortress can be used in conjunction with walking/dashing forward as a technique to close ground on an opponent that is shooting projectiles at you. The whirling fortress can cancel out some projectiles, quickly resetting bowser to do something else if used on the ground. If you move forward in between canceling projectiles with the WF, you can decrease the distance between you and your opponent while remaining unharmed and saving your shield power. (once again, havent tested thoroughly but I've used it successfully against Pit shooting arrows at me)
You would not believe the number of times I've hit MasterC's IVy with ftilts because he just kept spamming razor leaf at me, it's great because it hits him before you get in grab range too.Here's how fast it is: I miss all the time with it because I'm still thinking it's as slow as it was in melee
Ftilt stops Arrows and Razor Leaf just fine, while giving you enough forward movement that the opponent will think twice before just throwing out razor leaf x 10 on you.
I don't know about other projectiles, but for me Ftitlt, Jab, Nair, and Flame Breath all stop the projectiles I encounter on a daily basis (E.G. Samus Missiles, Pit Arrows, Razor Leaf). I have yet to find something of Bowser's that stops Wolf's lasers though...
And the fire breath is too good in Brawl. Very nice for racking up 40-50%+ damage on an opponent, if you line it up right and adjust according to the opponent's movements.
Since the guide specifically says edits will be added for this but it doesn't have it, I'd just like to bump this quote for why Bowsercides sometimes lead to sudden death or not.Its a controller port issue. 1p > 2p > 3p> 4p . So Bowser mainers should jump pn the first port asap. Gayness too... this is truly bad game development/programming.

 Unfortunately I dont have the organizational skills or the mental quickness to do it. Any tips on creating guides?
Don't blame other characters. Blame the ones who are making tier lists.A Magnificient Bowser guide it is! Still, its a shame that there aren't many Bowser players in the world, and I blame those popular characters especially Marth, Ike, and those 3 space animals.
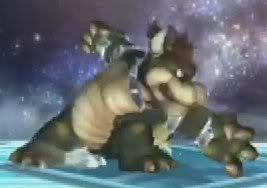
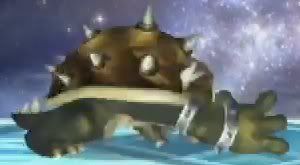
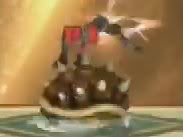
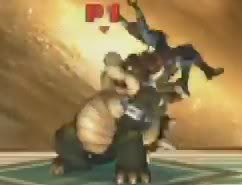
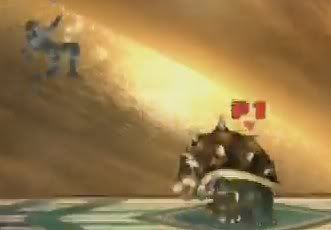
Nice guide! I love playing Bowser.Up Aerial/Uair
Bowser swings his arm rapidly over his head, striking ferociously
 .
.1. www.youtube.comno videos?
 Bowser King
I find that UpB with Bowser tends to take away any close game DK can have (dtilt, jab, grab) but those are good things for DK yes. Bowser also has the jabs and grabs. In the air, Bowser is better close up but that won't happen often in the match up.copied from AiB
first off, on the dk thing, dk actually does do well on the inside, jabs to either grabs or dtilts works wonders, they have high priority, and set up for deadly moves
on the bowser part. more grabs, the grab release is big, and on characters who aren't really affected by it like zamus, dk, wolf, and fox, bowser still has a very good tech chase game with his dthrow. chasing them with firebreath is very useful since, if they shield it, it's pretty much guaranteed to hit, firebreath if they do a get up attack, or if they roll away (jumping fire). dsmash can also punish rolls towards you
more jabs, it's pretty much better than ftilt for almost everything
more dtilt, the thing kills very early, especially characters with crap recovery like ike and ganon
have your cake and eat it too - shielding cancels to upb on frame one, you can shield and upb, you don't have to decide on which to use
fsmash moar - i'm dead serious, great against people who rely on running attacks. if they approach, and you know its gonna barely reach you, and leave them open (falcos running attack is a great example) fsmash, the drawback will dodge most moves, makes landing it quite easy, eats dash-grabs too
also, dsmash is great for eating rolls, and sideb/dsmash oos are both useful
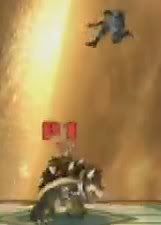
you should mention that uair has almost no lag, you can double jump and do two uairs and a fair before you hit the ground, most people don't expect it.
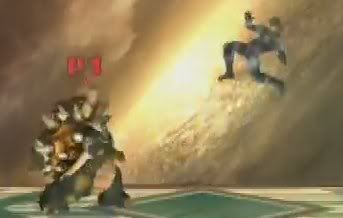
and if they're coming in level with the stage, fair works great. bowsers got a strong gimp game, don't be afraid to go for gimps
moar upb - you can never go wrong with upb
Is yours cute in Barlw too? I never got to see his cutzinessBowser is so cute
While some folks appreciate the cute and cuddly, I find myself with a different perspective. Turtles smell, they carry disease, and occasionally breath fire.Is yours cute in Barlw too? I never got to see his cutziness
Yeah I just kind of through this together. I plan to sort it into catagories or whatever eventually.The guide has a lot of effort simply through the word count, but it isn't all that well categorized. You have very broad sections where i'd have to cover a lot of ground to read up on a specific technique.
A section on Diminishing Returns would be helpful (for just about any character guide out there, really). For instance, Firebreath, regardless for how long it is channeled, only triggers DR once if hit hits an opponent during a single channel. Even if you only do 1% damage, that 1% just refreshed all your other moves one increment from a safe range.
Great effort!


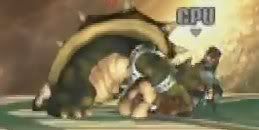

As you can see, Bowser can Grab Release the whole cast with some sort of attack or another.I did alot of testing and came up with many grab release's for Bowser, I in no way, copied grab release stuff from other threads, that being said. I'm still adding data, but I have alot of info right now. Characters like Metaknight and Olimar cannot ground escape from Bowser's grabs, they can only jump escape his grabs, however, if Bowser is grab jabbing the opponent and they try to escape as they're getting hit by jabs then they will ground escape from his grab. This applies for ALL characters.
Jump Grab Release: When a character breaks out of a grab jumping.
Ground Grab Release: When a character breaks out of a grab on the ground.
Allisbrawl
[Jump Grab Release]
* means a character can only jump escape.
Bowser
Grab release chaingrab
Grab release dash attack
Grab release overb
Captain Falcon
Grab release chaingrab
Grab release dash attack
Grab release fair going offstage.
Charizard
Grab release chaingrab
Grab release dash attack
Grab release fair
Diddy Kong
Grab release chaingrab
Grab release dash attack
Grab release fair
Donkey Kong
Grab release chaingrab
Grab release dash attack
Grab release overb
Grab release fair
Falco
Grab release chaingrab
Grab release dash attack
Grab release overb
Grab release fair going offstage
Fox
nothing
Ganondorf
Grab release chaingrab
Grab release dash attack
Grab release overb
Grab release fair
Grab release upb
Ice Climbers *
Grab release overb
Grab release fair
Ike
Grab release chaingrab
Grab release dash attack
Grab release overb
Grab release fair
Ivysaur *
Grab release overb
Grab release fair
Jigglypuff *
Grab release upair
Grab release fair
Grab release bair
Grab release upb
King Dedede
Grab release chaingrab
Grab release fair
Kirby *
Grab release fair
Link
Grab release chaingrab
Grab release overb
Lucario
Nothing
Lucas *
Grab release chaingrab
Grab release dash attack
Grab release fair
Grab release upb
Luigi *
Grab release overb
Grab release fair
Mario *
Grab release overb
Grab release fair
Marth
Grab release fair
Metaknight *
Grab release chaingrab
Grab release dash attack
Grab release fair
Grab release upb
Mr. Game&Watch *
Grab release overb
Grab release fair
Ness *
Grab release overb
Grab release fair
Olimar *
Grab release fair
Peach
Grab release fair
Pikachu *
Grab release chaingrab
Grab release dash attack
Grab release fair
Pit
Grab release fair
R.O.B
Grab release fair
Samus
Grab release fair
Sheik
Grab release chaingrab
Grab release fair offstage
Snake
Grab release chaingrab
Grab release dash attack
Grab release fair
Sonic
Grab release chaingrab
Grab release dash attack
Grab release fair
Squirtle *
Grab release chaingrab
Grab release dash attack
Grab release overb
Grab release fair
Grab release upb
Toon Link *
Grab release fair
Wario *
Grab release infinite chaingrab
Grab release forwardsmash
Grab release upsmash
Grab release downsmash
Grab release overb
Grab release upb
Grab release dash attack
Grab release fair
Grab release bair
Grab release nair
Grab release dair
Grab release forwardtilt
Grab release uptilt
Grab release jab
Wolf
nothing
Yoshi *
Grab release fair
Zamus
Grab release fair going offstage
Zelda
Grab release fair
[Ground Grab Release]
** means the character has to mash out as your grabbing jabbing them in order to ground release
Bowser
Grab release regrab
Grab release overb
Grab release ftilt
Grab release dtilt
Grab release jab
Captain Falcon
Grab release regrab
Grab release overb
Grab release ftilt
Charizard
Grab release regrab
Grab release upb
Grab release overb
Grab release downb
Grab release utilt
Grab release ftilt
Grab release dtilt
Grab release jab
Diddy Kong
Grab release regrab
Grab release overb
Grab release ftilt
Grab release jab
Donkey Kong
Nothing
Falco
Grab release regrab
Grab release overb
Grab release downb
Grab release ftilt
Grab release dtilt
Grab release jab
fox
Grab release regrab
Grab release overb
Grab release downb
Grab release ftilt
Grab release dtilt
Grab release jab
Ganondorf
Grab release regrab
Grab release overb
Grab release downb
Grab release ftilt
Grab release dtilt
Grab release jab
Ice Climbers**
Grab release regrab
Grab release overb
Grab release downb
Grab release ftilt
Grab release dtilt
Grab release jab
Ike
Grab release regrab
Grab release overb
Grab release ftilt
Ivysaur**
Grab release regrab
Grab release upb
Grab release overb
Grab release downb
Grab release utilt
Grab release ftilt
Grab release dtilt
Grab release jab
Jigglypuff**
Grab release regrab
Grab release overb
Grab release ftilt
Grab release jab
King Dedede
Grab release regrab
Grab release overb
Grab release ftilt
Grab release jab
Kirby**
Grab release regrab
Grab release overb
Grab release ftilt
Grab release jab
Link
Grab release regrab
Grab release overb
Grab release downb
Grab release ftilt
Grab release dtilt
Grab release jab
Lucario
Grab release regrab
Grab release overb
Grab release ftilt
Grab release dtilt
Grab release jab
Lucas**
Grab release regrab
Grab release dash attack
Grab release upb
Grab release overb
Grab release downb
Grab release ftilt
Grab release dtilt
Grab release jab
Luigi**
Grab release regrab
Grab release overb
Grab release ftilt
Grab release jab
Mario**
Grab release regrab
Grab release overb
Grab release ftilt
Grab release dtilt
Grab release jab
Marth
Grab release regrab
Grab release overb
Grab release ftilt
Grab release jab
Metaknight**
Grab release regrab
Grab release overb
Grab release ftilt
Grab release dtilt
Grab release jab
Mr. Game&Watch**
Grab release regrab
Grab release overb
Grab release ftilt
Grab release jab
Ness**
Grab release regrab
Grab release dash attack
Grab release upb
Grab release overb
Grab release downb
Grab release ftilt
Grab release dtilt
Grab release jab
Olimar**
Grab release regrab
Grab release overb
Grab release ftilt
Grab release dtilt
Grab release jab
Peach
Grab release regrab
Grab release overb
Grab release ftilt
Grab release jab
Pikachu**
Grab release regrab
Grab release overb
Grab release ftilt
Grab release jab
Pit
Grab release regrab
Grab release overb
Grab release ftilt
R.O.B
Grab release regrab
Grab release overb
Grab release downb
Grab release ftilt
Grab release dtilt
Grab release jab
Samus
Grab release regrab
Grab release overb
Grab release downb
Grab release ftilt
Grab release jab
Sheik
Grab release regrab
Grab release overb
Grab release downb
Grab release ftilt
Grab release dtilt
Grab release jab
Snake
Grab release regrab
Grab release overb
Grab release downb
Grab release ftilt
Grab release jab
Sonic
Grab release regrab
Grab release overb
Grab release downb
Grab release ftilt
Grab release jab
Squirtle**
Grab release regrab
Grab release overb
Grab release downb
Grab release ftilt
Grab release jab
Toon Link**
Grab release regrab
Grab release overb
Grab release downb
Grab release ftilt
Grab release dtilt
Grab release jab
Wario**
Grab release regrab
Grab release upb
Grab release overb
Grab release downb
Grab release uptilt
Grab release ftilt
Grab release dtilt
Grab release jab
Wolf
Grab release regrab
Grab release overb
Grab release downb
Grab release ftilt
Grab release dtilt
Grab release jab
Yoshi**
Grab release regrab
Zamus
Grab release regrab
Grab release overb
Grab release ftilt
Grab release jab
Zelda
Grab release regrab
Grab release overb
Grab release ftilt
Grab release jab
")