
I. The Purpose of This Guide
I.a. Terminology
II. Starter Stages
II.a. Battlefield (last discussed on 9/15/09)
II.b. Lylat Cruise
II.c. Smashville (last discussed on 9/21/09)
II.d. Yoshi's Island (last discussed on 9/24/09)
II.e. Pokémon Stadium [Brawl]
III. Starter/Counter-Pick Stages
III.a. Final Destination (last discussed on 9/18/09)
III.b. Castle Siege(re-discussion ended 10/14/10)
III.c. Halberd (last discussed on 10/24/09)
III.d. Delfino Plaza [CURRENTLY DISCUSSING 10/17/10]
IV. Counter-Pick Stages
IV.a. Brinstar
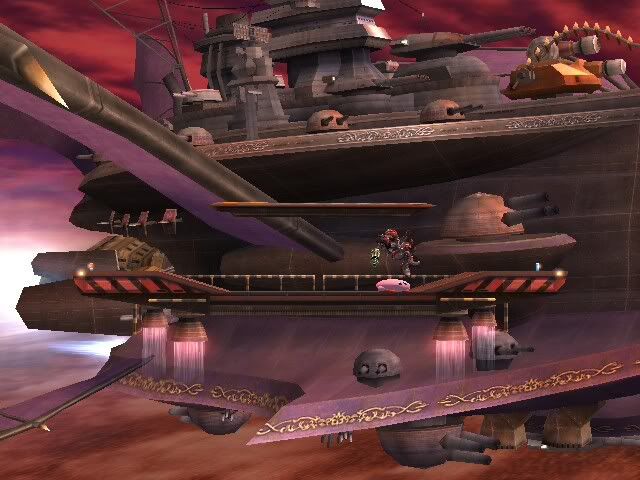
IV.b. Frigate Orpheon
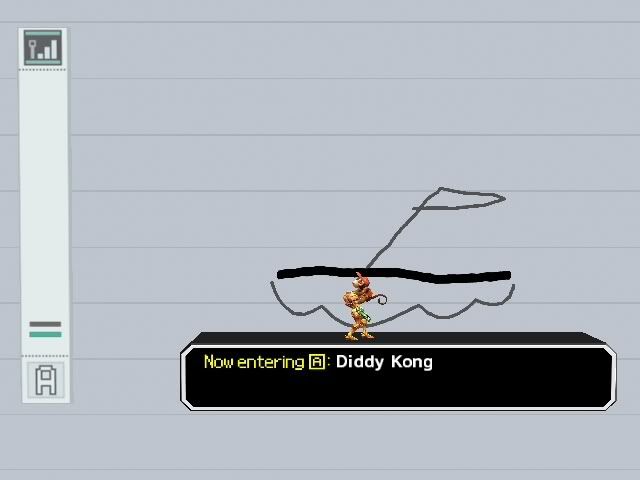
IV.c. Jungle Japes
IV.d. Pictochat
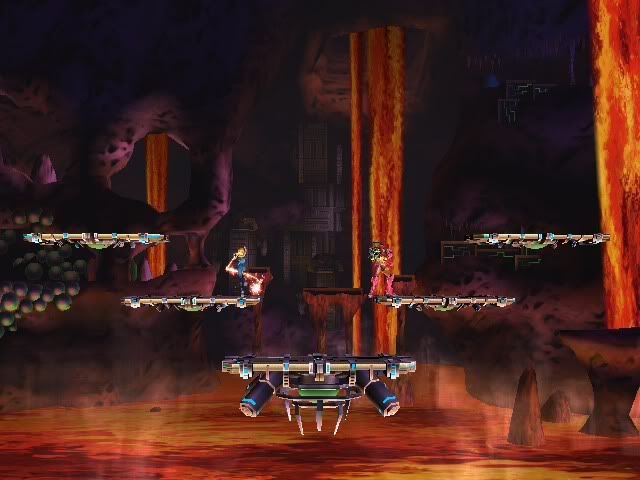
IV.e. Norfair
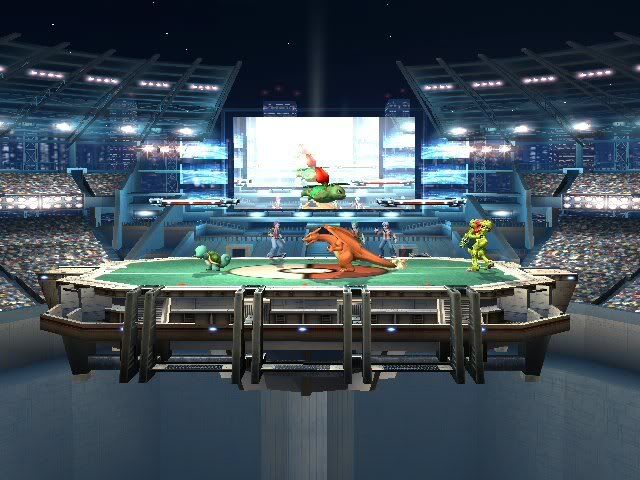
IV.f. Pokémon Stadium 2
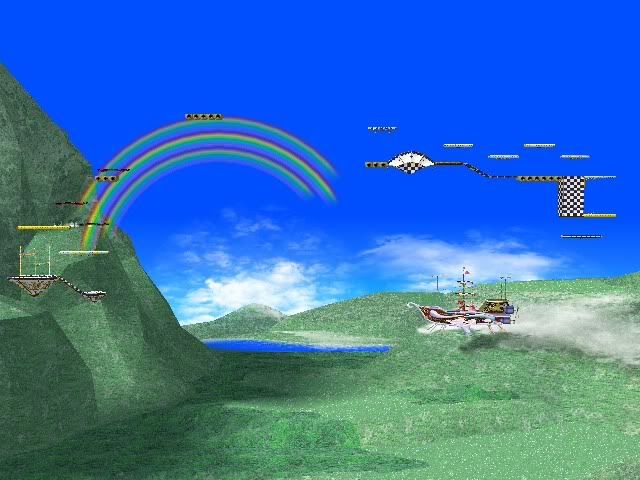
IV.g. Rainbow Cruise
V. Counter-Pick/Banned Stages
V.a. Distant Planet
V.b. Green Greens
V.c. Luigi's Mansion
V.d. Port Town Aero Dive
V.e. Yoshi's Island (Melee)
V.f. Pirate Ship
VI. Banned Stages
VI.a. 75m
VI.b. Big Blue
VI.c. Bridge of Eldin
VI.d. Corneria
VI.e. Flat Zone 2
VI.f. Green Hill Zone
VI.g. Hanenbow
VI.h. Hyrule Temple
VI.i. Mario Bros.
VI.j. Mario Circuit
VI.k. Mushroomy Kingdom I
VI.l. Mushroomy Kingdom II
VI.m. New Pork City
VI.n. Onett
VI.o. Rumble Falls
VI.p. Shadow Moses Island
VI.q. Skyworld
VI.r. Spear Pillar
VI.s. The Summit
VI.t. Wario Ware
I. The Purpose of This Guide
The purpose of this guide was created to help all Samus players, both mainers and those who use her as an alternative character, to learn about every stage in Super Smash Bros. Brawl. It is also intended to help create level-specific tactics, which will hopefully help the player understand each stage better. Feel free to post what you think will benefit you as a Samus player. If you know of any tricks or glitches that will be useful, please share them.
I.a. Terminology
Starter (S): These stages can only be used at the beginning of the first match. Counter-Pick stages are not allowed to be used at this time.
Starter/Counter-Pick (S/C): The more the 7-9 Starter Stagelists catch on, the more common it is to find these stages as Starters. However, 5 starter stagelists still use these as counterpicks.
Counter-Pick (C): These stages can only be used during the second and third match (fourth and fifth in best three-out-of-five), though starter stages may also be used. It cannot be used as a starter stage, however.
Counter-Pick/Banned (C/B): These stages are still permissible by tournament standards.
Banned (B): These kinds of stages are not allowed by tournament standards.
Below are the stages, and the numbers coming after the name of each stage are the votes. From left to right, it represents Starter, Counter-Pick, and Banned. The one with the most votes determines if the stage is a starter, starter/counter-pick, counter-pick, counter-pick/banned, or banned, though other votes also determine where each stage is placed by tournament standards. For more information, go here.
The easiest way to navigate to the stage discussion you are curious about is to use your browser's find function and type in the roman numeral+letter combo.
II. Starter Stages
II.a.
Kill Percentages on Mario:
Fully refreshed d-tilt:
Top platform with no DI = 96%
Middle platform with no DI = 110%
Bottom stage no DI = 124%
Fully refreshed fully charged Charge Shot:
Top platform with no DI = 105%
Middle platform with no DI = 89%
Bottom stage edge no DI = 80%
Bottom stage middle no DI = 109%
Fully refreshed f-smash:
Top platform with no DI = 118%
Middle platform with no DI = 101%
Bottom stage edge no DI = 92%
Bottom stage middle no DI = 123%
(Add 25% to incorporate DI/SDI+Momentum Canceling)
Thanks goes to RaigothDagon for the compilation of data.
Tips and Tricks:
Yoshi: Because of Yoshi's lack of OoS options, Samus's projectile game, her z-air and her aerial options, Yoshi encounters serious problems on Samus's arguably best stage.
Pit: Tackle on Pit's weaknesses. Hindering his arrow game can help more than you think. Not to mention you can gimp Pit below BF with z-air.
Falco: Although the match-up is severely against Samus's favor, any way to lessen Falco's laser spam helps you. Shield dash, use platforms and z-air your way towards him. A Falco playing to win won't approach you. Samus will have to do the dirty work.
Who should Samus avoid on this stage:
Marth: His sword beats your cannon in the air. End of story. Take him to a stage where you can use your projectiles without giving him a different, drastic advantage.
Snake: Snake can utilize his mines and C4s and u-tilt can go through the platform. Samus can easily outspam Snake on a multitude of stages, including this one. It's not necessary, however, to give him advantages to mitigate this particular weakness.
G&W: His aerial game *****. And the worst case scenario involves him d-throwing you on a platform. If you're going to CP a G&W, think less of Samus's advantages and more of G&W's advantages over her.
II.b.
Tips and Tricks:
Who should Samus take on this stage:
Spacies
Falco is debatable here due to stage assisted pewpew storm, but I would definitely take Wolf or Fox here, if for no better reason than that the stage will Lylat them so much harder than it will Lylat you. Take advantage of that!
Anyone who strikes Battlefield
Seriously. It's a great Battlefield replacement if you're uncomfortable with some of the crazier stages available to you.
Who should Samus avoid on this stage:
Dedede
There's just not enough stage to keep Dedede away from you here--occasionally the stage will tilt and then half your arsenal is obsolete, which doesn't help. His utilt covers all the platforms as well, which makes them less safe than, say, smashville or battlefield.
Bananas
Seriously. If they're on the platform they trip you during utilt. What kind of crap is that!
II.c.
Kill Percentages on Mario:
Fully refreshed dtilt:
No DI involved = 124%
AWP = 153%
Fully refreshed fully charged CS:
N/A
Fully refreshed fsmash:
N/A
Thanks goes to RaigothDagon for the compilation of data.
Tips and Tricks:
Who should Samus take on this stage:
Marth: Unlike Battlefield and Final Destination, Smashville gives you an opportunity to use a platform for aerial options and camping without giving Marth a huge advantage. As for offering Marth an alternative recovery option, hogging the edge and good reads will turn his option into profit for you.
Ike: Again, similar reasons for taking Marth to this stage. Smashville is the jack of all trades out of all the neutrals, providing just enough room to meet all kinds of styles. And Ike (and most characters without a projectile game) make it advantageous to fight on this stage.
ICs: The moving platform gives you an out from the chain grabbing, allowing you to pressure with your long-range game and forcing IC's to approach. When in fact they do approach, that single platform gives Samus a plethora of options to respond with. Center your game around it (not on it, around it): it is by far the best zone you can place yourself in the match-up. If the platform is moving away from you and ICs are approaching, planking provides an brief and effective stall option until better positioning is available. The lips of the edges scream z-air/f-air and even u-air abuse. Just be careful to space yourself away from a shield grab.
Who should Samus avoid on this stage:
PT: After much consideration (along with some friendlies,) I've concluded that Smashville is not a good stage to fight PT. Although we have an advantageous match-up against the majority (about 60-40 against Charizard and Ivysaur,) the transformation lag cancel Smashville's moving platform provides somewhat nullifies this advantage. I also considered the following counter-argument: Won't over-usage of Squirtle essentially have disastrous effects because of stamina? Therefore, through friendlies, I specifically played where after a minute of very conservative play, I would return to fighting Squirtle normally with the slight advantage of stamina on my side.
This fails to consider a good PT being able to use Ivysaur and Charizard legitimately against Samus, even if it's an unfavorable match-up against Samus. And their ability to use Ivysaur and Charizard effectively will strengthen their usage of Squirtle. If this sounds confusing, please look here for stamina info.
II.d.
Kill Percentages on Mario:
N/A
Tips and Tricks:
Who should Samus take on this stage:
Sonic: This stage forces the match-up into very linear gameplay. Subtract all of Samus's projectiles and Sonic's mind games and you've got Sonic approaching with Samus countering: the platform hinders both characters and makes them play at such core fundamentals. At the same time, it's not as if projectiles were going to help you as much on this stage anyway. So don't use them: charge shot yes. Missiles? No. Z-air? A Samus approaching Sonic with z-air does not work. A Samus punishing a failed Sonic approach with z-air does.
Stay under the platform and control the center. From the center, jumping from spin dash gives Sonic little follow-up options if Samus shields/dodges (because of the platform). Learn all of Samus's OoS options. Spin dash can be punished by OoS Up+B. Be wary of dash/pivot grabs... be sure to use your own. Sonic being on the platform automatically calls for platform pokers: u-tilt/u-smash/u-air/f-air/up+b. All of which can be used OoS. In other words, Yoshi's Island is like a box. You're inside and Sonic has to approach. Once you've got him above your box, you win. Occasionally, you can risk going above your box as bait, just to get him onto the platform. Emphasize your ground game and platform game, less on z-air, and all of a sudden Sonic becomes easier to read, and therefore, manage.
If Sonic gets an u-throw in, bomb your way to the ledge and reset yourself. Being above Sonic at all means failure. And speaking of bombs, they can be surprisingly useful because of the dips and angles of the entire stage. (Don't overuse though.) And when you've finally knocked him off stage, use shy guys to refresh and charge up. The power of attrition (successful f-smash/d-tilt/charge shot landings and conservative gameplay otherwise) wins you the match.
Who should Samus avoid on this stage:
You don't take anyone else here. Enforce stage striking and ban this stage.
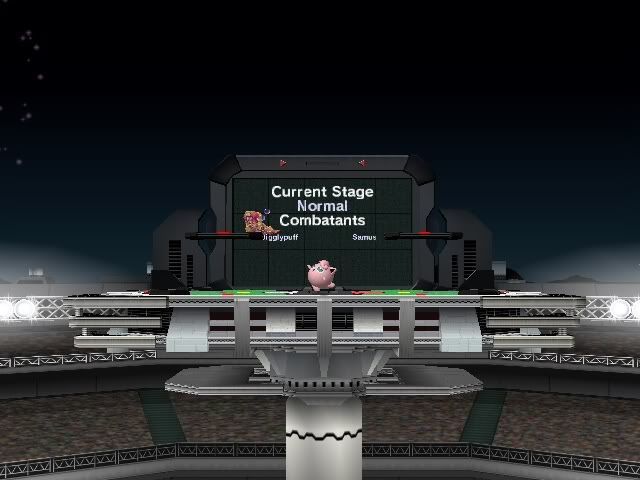
II.e.
III. Starter/Counter-Pick Stages
III.a
Kill Percentages on Mario:
Tips and Tricks:
Who should Samus take on this stage:
ALL TALL CHARACTERS: Marth, Ike, Snake, DK, Lucario, you name it. (D3 is an exception.) Any character that can be securely hit by a super missile cancel, (no matter how early you cancel it from a short hop) you should take to this stage. Samus's projectile game is unmatched by almost all of the cast (seriously, only Olimar can outright beat our spam.) Therefore, missile canceling approaches are relatively effective in racking up damage.
Who should Samus avoid on this stage:
ALL SPACE ANIMALS: Captain Falcon, while commonly associated with the others, does not count here. Fox has no problems getting through Samus's spam, let alone having his own laser camping and phantasm. His Hyphen Smash has huge range, and his speed will make your life hell. Concerning the others, Falco's CG options, laser camp and phantasm, and Wolf's reflector (with invincibility frames) and annoying blaster... yeah, Final Destination would be the dumbest choice to take these characters. Your tournament should be enforcing stage striking, therefore, this should never come up as an option unless they're counterpicking you.
Diddy: While personally, I don't have excessive difficulty with Diddys on FD, it nonetheless should be mentioned that there are better stages to face Diddy on. Nana locks to d-smash can rack up damage early, along with Diddy's normal close range options (d-tilt and throws) beating most of Samus's OoS options make the match-up difficult here. If you find yourself against a Diddy, keep your distance and be sure to trade off z-air with bananas so Diddy loses the chance to follow-up.
III.b.
Kill Percentages on Mario:
N/A
[collapse="Previous Tips and Tricks"]Tips and Tricks:
Tips and Tricks:
-Credit to Ismar
Who should Samus take on this stage:
Snake
Shorter blastzones on the first stage give us an easier time killing him, and the platforms give us room to breathe/zone/escape with SA. The second stage gives you enough room to run away and hinders his projectiles in the same way it does yours. Stage 3 is all FD-y
Who should Samus avoid on this stage:
Wario
Come on. He's fully capable at beating us in the range we're given in Stage 1(nair and bite), and he's gonna be everywhere except fighting you stage 2. Plus if he wants to fight you, he has statue-extended hitboxes everywhere. We can air release him on Stage 3 (from the dais near the left ledge), and possibly zone him better, but it's not worth throwing away 2/3rds of a counterpick.
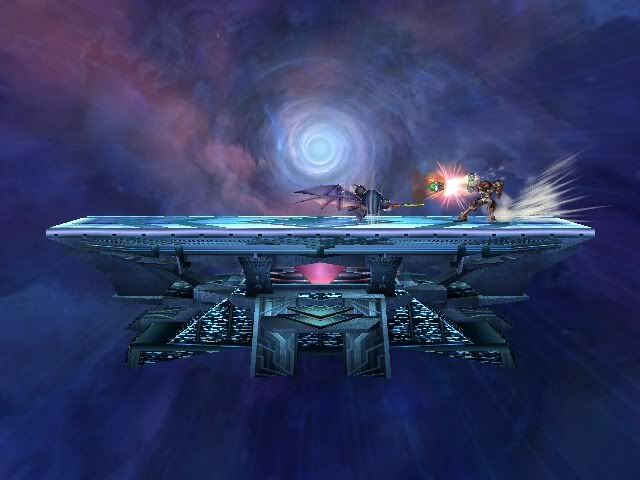
III.c.
Kill Percentages on Mario:
Who should Samus take on this stage:
??:
Who should Samus avoid on this stage:
??:
III.d.
IV. Counter-Pick Stages
IV.a.
IV.b.
IV.c.
IV.d.
IV.e.
IV.f.
IV.g.
V. Counter-Pick/Banned Stages
V.a.
V.b.
V.c.
V.d.
V.e.
V.f.
VI. Banned Stages
VI.a.
VI.b.
VI.c.
VI.d.
VI.e.
VI.f.
VI.g.
VI.h.
VI.i.
VI.j.
VI.k.
VI.l.
VI.m.
VI.n.
VI.o.
VI.p.
VI.q.
VI.r.
VI.s.
VI.t.
I.a. Terminology
II. Starter Stages
II.a. Battlefield (last discussed on 9/15/09)
II.b. Lylat Cruise
II.c. Smashville (last discussed on 9/21/09)
II.d. Yoshi's Island (last discussed on 9/24/09)
II.e. Pokémon Stadium [Brawl]
III. Starter/Counter-Pick Stages
III.a. Final Destination (last discussed on 9/18/09)
III.b. Castle Siege(re-discussion ended 10/14/10)
III.c. Halberd (last discussed on 10/24/09)
III.d. Delfino Plaza [CURRENTLY DISCUSSING 10/17/10]
IV. Counter-Pick Stages
IV.a. Brinstar
IV.b. Frigate Orpheon
IV.c. Jungle Japes
IV.d. Pictochat
IV.e. Norfair
IV.f. Pokémon Stadium 2
IV.g. Rainbow Cruise
V. Counter-Pick/Banned Stages
V.a. Distant Planet
V.b. Green Greens
V.c. Luigi's Mansion
V.d. Port Town Aero Dive
V.e. Yoshi's Island (Melee)
V.f. Pirate Ship
VI. Banned Stages
VI.a. 75m
VI.b. Big Blue
VI.c. Bridge of Eldin
VI.d. Corneria
VI.e. Flat Zone 2
VI.f. Green Hill Zone
VI.g. Hanenbow
VI.h. Hyrule Temple
VI.i. Mario Bros.
VI.j. Mario Circuit
VI.k. Mushroomy Kingdom I
VI.l. Mushroomy Kingdom II
VI.m. New Pork City
VI.n. Onett
VI.o. Rumble Falls
VI.p. Shadow Moses Island
VI.q. Skyworld
VI.r. Spear Pillar
VI.s. The Summit
VI.t. Wario Ware
I. The Purpose of This Guide
The purpose of this guide was created to help all Samus players, both mainers and those who use her as an alternative character, to learn about every stage in Super Smash Bros. Brawl. It is also intended to help create level-specific tactics, which will hopefully help the player understand each stage better. Feel free to post what you think will benefit you as a Samus player. If you know of any tricks or glitches that will be useful, please share them.
I.a. Terminology
Starter (S): These stages can only be used at the beginning of the first match. Counter-Pick stages are not allowed to be used at this time.
Starter/Counter-Pick (S/C): The more the 7-9 Starter Stagelists catch on, the more common it is to find these stages as Starters. However, 5 starter stagelists still use these as counterpicks.
Counter-Pick (C): These stages can only be used during the second and third match (fourth and fifth in best three-out-of-five), though starter stages may also be used. It cannot be used as a starter stage, however.
Counter-Pick/Banned (C/B): These stages are still permissible by tournament standards.
Banned (B): These kinds of stages are not allowed by tournament standards.
Below are the stages, and the numbers coming after the name of each stage are the votes. From left to right, it represents Starter, Counter-Pick, and Banned. The one with the most votes determines if the stage is a starter, starter/counter-pick, counter-pick, counter-pick/banned, or banned, though other votes also determine where each stage is placed by tournament standards. For more information, go here.
The easiest way to navigate to the stage discussion you are curious about is to use your browser's find function and type in the roman numeral+letter combo.
II. Starter Stages
II.a.
Battlefield
Kill Percentages on Mario:
Fully refreshed d-tilt:
Top platform with no DI = 96%
Middle platform with no DI = 110%
Bottom stage no DI = 124%
Fully refreshed fully charged Charge Shot:
Top platform with no DI = 105%
Middle platform with no DI = 89%
Bottom stage edge no DI = 80%
Bottom stage middle no DI = 109%
Fully refreshed f-smash:
Top platform with no DI = 118%
Middle platform with no DI = 101%
Bottom stage edge no DI = 92%
Bottom stage middle no DI = 123%
(Add 25% to incorporate DI/SDI+Momentum Canceling)
Thanks goes to RaigothDagon for the compilation of data.
Tips and Tricks:
Who should Samus take on this stage:On this stage, Samus excels with her aerial attacks. Her Screw Attack may also be used safely and more liberally, since the passable platforms minimize the duration of the unmovable state that Samus ends up in after using the Screw Attack.
The two lower passable platforms help Samus start off the match by getting it a free hit with z-air. Sometimes it will work, sometimes it won't, depending on whether or not the opponent is aware of this strategy. These platforms are also useful against characters with projectiles that are fired in a horizontally, e.g., Needle Storm and/or Thunder Jolt, though it's not always the case, such as Falco's Blaster. Projectiles that alter in trajectory like Pit's Palutena's Arrow or R.O.B.'s Robo Laser can be difficult to avoid as well. The way these platforms benefit you is dependent entirely on what projectiles your opponent possesses.
Now, it is generally not a good idea to be on any of the three platforms, since the opponent can attack from below. The way you use these platforms should be used wisely. They have their uses sometimes, but it's not the best place to be.
Of the two lower platforms, Samus' Homing Missiles can be affected by them, depending on where you're located. The Homing Missiles may end up hitting the platforms when that was not what you were trying to do. This really only happens if you are in the center and you're short hopping toward the end of the stage while firing a Homing Missile at your opponent who might be at the edge or off the stage.
Yoshi: Because of Yoshi's lack of OoS options, Samus's projectile game, her z-air and her aerial options, Yoshi encounters serious problems on Samus's arguably best stage.
Pit: Tackle on Pit's weaknesses. Hindering his arrow game can help more than you think. Not to mention you can gimp Pit below BF with z-air.
Falco: Although the match-up is severely against Samus's favor, any way to lessen Falco's laser spam helps you. Shield dash, use platforms and z-air your way towards him. A Falco playing to win won't approach you. Samus will have to do the dirty work.
Who should Samus avoid on this stage:
Marth: His sword beats your cannon in the air. End of story. Take him to a stage where you can use your projectiles without giving him a different, drastic advantage.
Snake: Snake can utilize his mines and C4s and u-tilt can go through the platform. Samus can easily outspam Snake on a multitude of stages, including this one. It's not necessary, however, to give him advantages to mitigate this particular weakness.
G&W: His aerial game *****. And the worst case scenario involves him d-throwing you on a platform. If you're going to CP a G&W, think less of Samus's advantages and more of G&W's advantages over her.
II.b.
Lylat Cruise
Tips and Tricks:
-Credit goes to ThrowbackLylat is amazing for samus. Get on the low side & zair your opponent silly. Abuse utilt, fair & uair while they are on platforms. Uair/fair from under the stage are great.
My personal fave counterpick, there's nothing bad about this stage for samus.
The only character I wouldn't take it against is falco, cos his low-side laser spam is far more brutal than samus' zair spam.
-Credit to Th3 ComposerOk, so a little bit of my thoughts on Lylat Cruise.
1. With a battlefield-esque platform layout, Lylat makes Screw Attack safer.
*I actually think SAing under platforms is great not necessarily because it can end the lag faster but also because you can use them to trick your opponent and land safely. If you SA and land on the platform but you haven't knocked them far enough way you can be punished, but if you fall through the platform and they land on it then you're still safe
2. All three platforms have the benifit of being in utilt range (and usmash if you're into that). It can knock off shielding opponents too, which leads to other various set-ups.
3. The ledges--most characters hate how the ship tilts because it can ruin their attempts to recover, but being able to recover with tether makes that mostly irrelevant. Of course, if you have to recover low, screw attack isn't a bad upB move in terms of getting Lylat'd. I believe there's also a reset lip under the inside of the wings, so there's a chance that if you UpB wrong, you can get your UpB back.
4. The tilting has already sort of been addressed. It's worth noting that homing missiles are useful against characters who aren't tiny little pricks regardless of the direction of the tilt, and that Wario can be grab released (to utilt I think) when you have him grabbed towards the downward slope.
A big con of the platform height is that, if diddy has a banana on a platform and you try to utilt, the banana will trip you. It's obnoxious and stupid and I wouldn't recommend taking Diddy there just because of that fact (granted that's a pretty personal preference thing). You are also susceptible to a lot of other character's utilt/usmash shenanigans while you're on a platform, so be careful.
-Credit to IYM!Lylat has 3 platforms than give samus a strong advantage in several aspects: while approaching, she can use those platforms to get to new points to shoot her missiles and use Zair; it makes screw attack safer by giving us a way to cut back on vulnerability time; they allow us a better use of our Uair, Nair, Fair, Utilt and, in a few situations, Usmash. Another thing about the stage is its mobility--the ship always swings, and that can give us some advantages and problems sometimes. IMO that situations gives samus more problems than advantages, especially with our edgeguarding game.
For example, the technique than i has siad before, (samus grab the edge and after she fall to make a Up B to get the edge again) is useful for mind games, and to avoid attacks (samus is too good in the air, so our opponent will be afraid for go attack us, because we can gimp him).
and the other technique that Throwback said before (samus on the ledge after she fall, do a second jump, shoot a missile and grab the ledge again) can be really dangerous to use because the stage is always swinging, and makes it possible to do a screw attack and get stuck under the stage.
Like you said before Cherry 64, this stage depends of the abilities and play style of the person, because this stage is a double-edged sword
Who should Samus take on this stage:
Spacies
Falco is debatable here due to stage assisted pewpew storm, but I would definitely take Wolf or Fox here, if for no better reason than that the stage will Lylat them so much harder than it will Lylat you. Take advantage of that!
Anyone who strikes Battlefield
Seriously. It's a great Battlefield replacement if you're uncomfortable with some of the crazier stages available to you.
Who should Samus avoid on this stage:
Dedede
There's just not enough stage to keep Dedede away from you here--occasionally the stage will tilt and then half your arsenal is obsolete, which doesn't help. His utilt covers all the platforms as well, which makes them less safe than, say, smashville or battlefield.
Bananas
Seriously. If they're on the platform they trip you during utilt. What kind of crap is that!
II.c.
Smashville
Kill Percentages on Mario:
Fully refreshed dtilt:
No DI involved = 124%
AWP = 153%
Fully refreshed fully charged CS:
N/A
Fully refreshed fsmash:
N/A
Thanks goes to RaigothDagon for the compilation of data.
Tips and Tricks:
Credit goes to Hive.Its not battlefield but in terms of strenghts it can be just as good for a samus as final destination depending on what aspects of her game you want to amplify with the cp for a starter.
First off the Ledges- Are basically my favorite thing about this level ^^ they are just the right size and curve for a lot of her staple moves from here. For one it allows you to get a lot of distance with her ledgehopped fair, and zair, which will allow you to punish further onto the stage, unlike, say yoshi's, where her ledgehop zair is hindered and her ledgehop fair only has a little range. Since the platform is moving it allows you a free fulljump to safety if you are getting into trouble (and are stuck in a situation you want to avoid, say snake's mortar), from which you can charge your beam, spam from the platform (when you are moving forward the missiles will be closer together!), fall through and zair or missile anyone on the stage, or if you are above the opponent fall ff uair to screw attack. All the usual fulljump combos apply, though i don't think you can drop and walljump off the side for double homing missiles before hitting the ledge again like you can in bf though. I'm also pretty sure that if the platform is above you on the ledge you can ledgehop to screw attack as well if the opponent is hugging the ledge so that if you miss you will land more safely on the platform, but its not something I use much.
My favorite part of the ledges though is the little bit of inwards curve on them. This allows you to zair through the stage super easy, and if the opponent is closer in you can uair them through the stage and gain relatively risk free damage. The zairing through the stage is also a very good thing for characters with flamethrower edgeguards like charizard, who will use it over the ledge and you'd usually be forced to stall before you are able to do anything (drop screw attack up to ledge again, or drop tether stalls if you are trying to force a movement), and for characters like DDD. Why is this a good thing against DDD? Everyone knows that playing a close range battle against DDD is a lose tactic. What you can do is spam that fatty until he forces an approach. Instead of doing anything risky though to try to gain space again you can let yourself be forced off the level and onto the ledge (rather than play close range). From here you can ledgehop back and punish with projectiles or different aerials depending (his cg will punish less too since you are at the edge of the level and his cg runs out)... but many times the DDD will stand a little bit back and try to spam/wait for you to come up. The zair through the level forces him to go back even more though or else you can gain cheap damage that way. From samus' aerials, zair thru the stage, and ledgehop zair, DDD is basically forced back, giving samus back her space again. This obviously doesnt stop DDD from ****** samus in this matchup. And it IS pretty **** boring. But it is a good tactic to use in this matchup (and one of the only ones lol).
The Moving Platform
Besides being able to perform all her usual low platform moves from this there are a few new trixies ^^
-You can fulljump Spams from here (and be moving at the same time!) kwl!
-Not only that but while you are fulljump say homing missile you can have yourself land on the edge of the platfom and cancel/drop off shooting another homing/super missile or zair.
-If the opponent is off the ledge you can even take this one step further even- You can fulljump two homing missiles drop off the ledge homing missile and then drop off the stage homing missile. Its basically a quadruple missile lol but hard to time ^^
-Fast falling uair through the platform (or fair) is a very good idea, it basically gives a more moving hitbox to the uair which will chain into screw attack.
-If the opponent is on the platforom and moving towards you you can do the moving usmash to punish him from underneath (or bc I don't use this often) the platform is setup just right to provide an easy shorthop to zair hit.
Spacing
Ok, smashville isn't a final destination, but I mean come on it does have pretty good horizontal length and room for offledge game comparitively ^^
BALLOOOOON! :o
Technically it refreshes a move once.... lol which makes it even more pointless when I zair it
I don't care even if you are in the middle of gameplay! Whatever you do hit the balloon before the enemy does, it is the entire key to the matchup, and you'll look like ten times more ****** doing it! I promise!
Afterwards, it pops. HOW KWL IS THAT???!! Trust me and test it out yourself. It definitely pops.
Credit goes to KillerJawz.-The moving platform is actually a really mixed bag of pros and cons to our camping/spamming game, this is mainly due to the fact that the position of the opponent or yourself will be constantly changing, so predicting when to uair and zair a character approaching the platform or yourself on this stage is VITAL to get used to. It is also good to note that its harder for homing missles to hit due to the platform moving. When the platform moves away, its like a smaller FD without the super gimp lips <.<, when the platform is near you, its like a weird BF. It really depends on personal preference, if you like moving platforms, stay here, if you hate them, go BF, either way, the platform, when running off of it, you are able to platform missle cancel, and if its near the edge, you can pull off TWO missles in a very short space of time, its so useful for gimping, I've got countless gimp kills from it. Samus can make it UNDER smashville with her bombs and recovery, so if your in a tight spot and the opponent cannot gimp well without taking such a large risk (Link, Ganon) going under the stage isn't a bad choice, but please use it as a last resort, there is no reason why you should be under THAT much pressure.
Credit goes to RaigothDagon.Along the lines of what Jawz was saying about using bomb jumping to reach the other end of the stage, I was playing around with that yesterday, and if you save your midair jump, you can get straight to the bottom middle, and decide which edge to take from there.
Who should Samus take on this stage:
Marth: Unlike Battlefield and Final Destination, Smashville gives you an opportunity to use a platform for aerial options and camping without giving Marth a huge advantage. As for offering Marth an alternative recovery option, hogging the edge and good reads will turn his option into profit for you.
Ike: Again, similar reasons for taking Marth to this stage. Smashville is the jack of all trades out of all the neutrals, providing just enough room to meet all kinds of styles. And Ike (and most characters without a projectile game) make it advantageous to fight on this stage.
ICs: The moving platform gives you an out from the chain grabbing, allowing you to pressure with your long-range game and forcing IC's to approach. When in fact they do approach, that single platform gives Samus a plethora of options to respond with. Center your game around it (not on it, around it): it is by far the best zone you can place yourself in the match-up. If the platform is moving away from you and ICs are approaching, planking provides an brief and effective stall option until better positioning is available. The lips of the edges scream z-air/f-air and even u-air abuse. Just be careful to space yourself away from a shield grab.
Who should Samus avoid on this stage:
Credit goes to Hive.Snake: He will plant c4s on the moving platform basically giving him a moving c4. T.T pretty scary! He can also drop nades there too or throw them and try to get them to explode above you for damage and to force an approach.
Credit goes to KillerJawz.Pikachu: Now, you may be thinking, "Thunder is cut off before it reaches him due to the platform and his jolts are ruined by it", this is true, but QAC will ABUSE you on this stage, the platform gives him so much coverage of the stage its scary, and gimping him is actually not that easy, he can be VERY versatile. Pikachu kos far earlier then we do, hes quite small so he can crawl under super missles and pull off some nasty stuff on us, just dont take him here.
Jigglypuff: This is very debateable, but imo its not a good place to take her. She can use the platform very nicely and with her beautiful horizontal recovery, she can easily just stall until we are forced to return to the stage, she is very versatile and can avoid most of our projectiles with ease (Pound has godly priority). Take her somewhere else <.<.
PT: After much consideration (along with some friendlies,) I've concluded that Smashville is not a good stage to fight PT. Although we have an advantageous match-up against the majority (about 60-40 against Charizard and Ivysaur,) the transformation lag cancel Smashville's moving platform provides somewhat nullifies this advantage. I also considered the following counter-argument: Won't over-usage of Squirtle essentially have disastrous effects because of stamina? Therefore, through friendlies, I specifically played where after a minute of very conservative play, I would return to fighting Squirtle normally with the slight advantage of stamina on my side.
This fails to consider a good PT being able to use Ivysaur and Charizard legitimately against Samus, even if it's an unfavorable match-up against Samus. And their ability to use Ivysaur and Charizard effectively will strengthen their usage of Squirtle. If this sounds confusing, please look here for stamina info.
II.d.
Yoshi's Island
Kill Percentages on Mario:
N/A
Tips and Tricks:
Credit goes to Onishiba.Yoshi's Island is awesome. Walljump ftw.
However, the stage is not very good for Samus, in my opinion. The tilting platform and the flyguys are all able to interrupt projectiles. The oddly shaped main platform kinda hurts the utility of some moves, mainly DSmash and DTilt. It's not as bad as on Halberd, though. ZAir is pretty kickass on this stage (where isn't it? Haw), and interestingly enough the USmash, which can reach right through the platforms and not that easily punished. Also, bombs onto the top of the platform are not as bad either. Since the space between main area and platform is very small, characters with explosive or big projectiles (Gordos) can be very annoying here. If you are on the platform, be careful of up-angled moves that might reach through the platform, such as Sheik's, Zelda's or Bowser's USmashes or Meta Knight's or Peach's UTilt. And of course the stuff that reaches through it anyway (I'm looking at YOU, Zero Suit Samus and Snake). Also, the ghosts can break up your offstage game and help the opponent recover.
Generally, try to avoid characters with great aerial movement or aerial attacks here.
Who should Samus take on this stage:
Sonic: This stage forces the match-up into very linear gameplay. Subtract all of Samus's projectiles and Sonic's mind games and you've got Sonic approaching with Samus countering: the platform hinders both characters and makes them play at such core fundamentals. At the same time, it's not as if projectiles were going to help you as much on this stage anyway. So don't use them: charge shot yes. Missiles? No. Z-air? A Samus approaching Sonic with z-air does not work. A Samus punishing a failed Sonic approach with z-air does.
Stay under the platform and control the center. From the center, jumping from spin dash gives Sonic little follow-up options if Samus shields/dodges (because of the platform). Learn all of Samus's OoS options. Spin dash can be punished by OoS Up+B. Be wary of dash/pivot grabs... be sure to use your own. Sonic being on the platform automatically calls for platform pokers: u-tilt/u-smash/u-air/f-air/up+b. All of which can be used OoS. In other words, Yoshi's Island is like a box. You're inside and Sonic has to approach. Once you've got him above your box, you win. Occasionally, you can risk going above your box as bait, just to get him onto the platform. Emphasize your ground game and platform game, less on z-air, and all of a sudden Sonic becomes easier to read, and therefore, manage.
If Sonic gets an u-throw in, bomb your way to the ledge and reset yourself. Being above Sonic at all means failure. And speaking of bombs, they can be surprisingly useful because of the dips and angles of the entire stage. (Don't overuse though.) And when you've finally knocked him off stage, use shy guys to refresh and charge up. The power of attrition (successful f-smash/d-tilt/charge shot landings and conservative gameplay otherwise) wins you the match.
Who should Samus avoid on this stage:
You don't take anyone else here. Enforce stage striking and ban this stage.
II.e.
Pokémon Stadium 1 [Melee]
III. Starter/Counter-Pick Stages
III.a
Final Destination
Kill Percentages on Mario:
Thanks goes to RaigothDagon for the compilation of data.Before looking at the numbers, realize that fsmash involved the base of the gun of Samus and was untilted. Also, where AWP is listed from here on, know that this means anything within power to keep from dying.
Fully refreshed dtilt:
No DI involved = 124%
AWP = 153%
Fully refreshed fully charged CS:
At the edge no DI = 79%
At the edge AWP = 118%
Middle stage no DI = 115%
Fully refreshed fsmash:
At the edge no DI = 92%
At the edge AWP = 128%
Middle stage no DI = 127%
For an instance of AWP, when hit by CS my results include using SDI twice, DI correctly, uair to cancel momentum and fastfalling and moving towards the stage to stay alive.
Tips and Tricks:
Credit goes to SMASH GIGAS.This is probably my favorite stage for the most part. Final Destination is long so Samus can easily Missile / Zair spam from a distance, given if that's your opponent's weakspot. Though your opponent can obviously do the same, so be careful who you choose to fight here.
I find this place an opportunity to bounce between sniping and CQC. You can convince your opponent that you're a strictly long-range combatant at the beginning, then switch to some blend of melee / distance, or however you play best to throw in a surprise in your playstyle. This is all dependent on how you play, but since Samus' hand-to-hand combat is quite lacking, it's probably best to keep your opponent at as much distance possible. Another option, since the stage has a good distance as opposed to Battlefield / Smashville, you can get a headstart charging your beam. That is, unless you're fighting someone like Fox....
Under the ledge is a flat wall, so you could use this by walljumping off of it and possibly landing a Bair on your opponent if he's waiting on the ledge. This is very risky as you can get stage-spiked. Another trick if your opponent is further away from the ledge is to walljump, then fire a Super Missile across the floor, followed by grappling the ledge to recover. [This is merely to show off, there are better options.] Like missiling onto the stage, or ledge hop--> Homing Missile--> ledge grab, if you feel like camping. I don't think a Charged Beam would reach over the ledge after a walljump....
Who should Samus take on this stage:
Credit goes to KillerJawz.ROB: Now, this matchup is even for us, and if you like camping/spamming, you will LOVE FD with R.O.B on it. Due to both characters having projectiles, this game will be full of camping, but I believe we slightly edge him out with our zair and missles on this stage, since he's a large target, its like having a nice dessert when we keep him off the stage (with zair) due to him being unable to airdodge.
Yoshi: I have PLENTY of experience fighting Yoshi's and I can safely say this is a nice stage for you if you know the matchup well. Zair any incoming eggs and himself, he can't do much against it. Keep up your missles and force him to approach, going to the edge is a nice option, we can actually occasionally (I've done this to Yoshi's every time and its always worked, but others disagree) use a homing missle from the ledge while Yoshi is recovering to weaken the armor on his jump, proceed to dair and it should send him pummeling downwards.
ALL TALL CHARACTERS: Marth, Ike, Snake, DK, Lucario, you name it. (D3 is an exception.) Any character that can be securely hit by a super missile cancel, (no matter how early you cancel it from a short hop) you should take to this stage. Samus's projectile game is unmatched by almost all of the cast (seriously, only Olimar can outright beat our spam.) Therefore, missile canceling approaches are relatively effective in racking up damage.
Who should Samus avoid on this stage:
Credit goes to KillerJawz.D3: Chaining of the grabs, infinites, bair, waddles and utilt, all of them give Samus MAJOR trouble and with no real objects/platforms in the way of D3, he can just waddle the spam, and grab, and since FD is just a flat long stage, even if infinites are banned, CGs will work just as nicely. For lord sake why have you not picked a different character for this?
ALL SPACE ANIMALS: Captain Falcon, while commonly associated with the others, does not count here. Fox has no problems getting through Samus's spam, let alone having his own laser camping and phantasm. His Hyphen Smash has huge range, and his speed will make your life hell. Concerning the others, Falco's CG options, laser camp and phantasm, and Wolf's reflector (with invincibility frames) and annoying blaster... yeah, Final Destination would be the dumbest choice to take these characters. Your tournament should be enforcing stage striking, therefore, this should never come up as an option unless they're counterpicking you.
Diddy: While personally, I don't have excessive difficulty with Diddys on FD, it nonetheless should be mentioned that there are better stages to face Diddy on. Nana locks to d-smash can rack up damage early, along with Diddy's normal close range options (d-tilt and throws) beating most of Samus's OoS options make the match-up difficult here. If you find yourself against a Diddy, keep your distance and be sure to trade off z-air with bananas so Diddy loses the chance to follow-up.
III.b.
Castle Siege
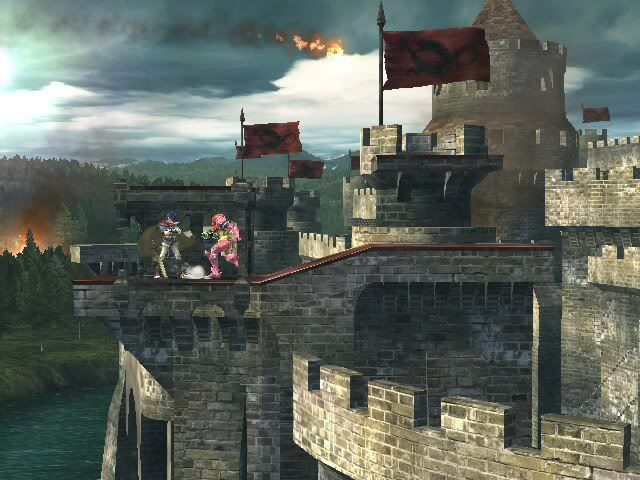
Kill Percentages on Mario:
N/A
[collapse="Previous Tips and Tricks"]Tips and Tricks:
Credit goes to Borozan.Castle Siege is an odd stage for all characters, as obviously it changes three times. With this in mind, the Beginning stage, the Castle in Siege, is like a Battlefield, only a bit shorter on each end. The second stage is almost like a Luigi's Mansion with no outside air to dair in, which is a downer for Samus. Finally, the last stage is like a moving Final Destination, which is actually a pretty nice place for Samus to be. Overall, 2 out of the 3 stages go to Samus' advantage in my opinion, but if you get trapped with an Ike on the 2nd stage, things get nasty. He is pretty good at getting you out of there to the side, fast. He can kill you at really low percentages, and so can other characters with burly attacks, such as DK's clap. Be cautious in the middle stage for sure, but you can use your zair to your advantage, get them near one of the ends at the bottom area, and shoot a homing missle, a zair, then a charged shot.
As for the other stages of Castle Siege, just do as you would in Battlefield/Final Destination.
Oh, and inbetween stages, you don't really have much time, and not really much space, so spam zair and missle cancels.
Credit goes to IsmaR.The 1st stage is more like a slanted FD with platforms(lips gimp more easily, higher ceiling than BF(I think)), and the 3rd one like a tilting BF without platforms. Basically the same things, but meh. I do better on BF than I do on FD, which kind of explains why I do worse in the 1st stage, but better on the 3rd.
The 2nd stage is a bit iffy. The walk-off sides obviously screw you over if you are playing anyone with a chaingrab, or anyone with decently good B/F-throws. Even crappy throws will kill if you get too close to them. The platforms make it easier to evade things, and work well with Scew Attack, U-air and the like. The statues pretty much **** up your long range/projectile game until you can destroy them. But, they can be useful to you as well, particularly for refreshing moves with SH N-air and U-air. They'll also interfere with certain characters' moves(Link's D-air, Ike's Side B, etc.), along with other projectile-happy characters. Depends on how you use it, but it's got its mix of good and bad. The character you are fighting decides if it is worse or better for you, IMO.
Overall, the stage is good for players who can evade and manipulate their environment well, bad for people who rely on camping/spacing too much.
Credit goes to Onishiba.[/collapse]Castle Siege is a really odd counterpick that can benefit every character somehow, but somehow also put them at a disadvantage.
For Samus, clearly, that is the second part of the stage. But, I'll get to that in a second.
Stage Part 1:
This is actually not too bad. You have the slope, so keep out for that when using your projectiles, it screwed me over some time already.
The platforms are nice for Screw Attacks or UAirs, and can prove very useful. It's basically a little bit adapted Battlefield. It has a high ceiling, but the side-blastzones are a bit closer, so it might be useful. Getting a KO here can be tricky, if you kill someone here' it probably going to be on the second run-through, unless you're lucky. Not too bad, but not insanely great either.
Stage Transition:
This thing is probably one of the most underrated parts of that stage ever, lol. The transition can be used for quick KOs with ZAir chains or Charge Shot. Be careful, though, as those are walkoffs.
Stage Part 2:
Now... this is horrible for Samus. First of all, this thing is HUGE. The statues block your projectile game by a big margin, so you should stay in the upper half of the stage. Be careful, as there's a whole bunch of walkoffs, so don't let a Dedede grab you here.
If you are good at staying and defending a position, I'd suggest staying in the center of the stage, on top of a statue. This is probably the worst section for Samus. The ceiling is even higher than in the first part, although this section has the closest side-blastzones on this stage.
Stage Part 3:
Now, this section is one single platform that's tilting. Watch out, as it's not completely even - there's a small step that lets the left side of it be a little higher. Just something to keep in mind - not that it's a big problem.
I forgot how high the ceiling is on this one, I think it was the lowest in the stage; but the side blastzones are the farthest away. This section is great for camping and ZAiring. Otherwise, the tilting can screw a bit with your recovery, so be careful.
In general, this is probably the most uneventful part of the stage.
Tips and Tricks:
-Credit to IYM!CS is a weird stage, 3 in 1, so we must take differents tactics for each phase.
Phase 1: is a small stage, so we will not have many problems getting a KO and is perfect for kill with our Zair, the platforms give us new angles for shot our projectiles and is importan mix the missiles ( homing and super ). In the same way than Lylat, the platform help us to make less the helpesfalling state after a screw attack, and help us to make a better use of our Uair an Utilt. BuT the platforms also can help to the opponent to get safe of our homing missiles, so keep this in mind.
Phase 2: the 2 statues give us problems with our spam, so the only thing than we can do is take a deffencive tactic, is important use right our close range combat, at least to evade the attacks for the opponent, i know the problems of the Samus's melee combat, but would not a bad idea know 2 or 3 things, at least the enough to get away our opponent and start a Zair spam.
the Zair is the Key here if we want make space between us and our opponent. If is possible you can destroy a statue, but i recomend destroy only one, in case we need change our strategies.
a good thing here are the platforms, we can do good aerial combos with those.
Like: jump (under the platform) > Fair > land in the platform> Jab cancel > Dtilt> jump Uair> Zair., for example.
Phase 3: this is like FD with a little bump near the middle, and, like Lylat, this stage is in constant swing . just start to do the all samus mains here can do better : spam missiles and Zair, and dont forget the CS,, missiles are very good in flat stages, the opponent dont have plataforms to get close to us, so spam ftw here
Stage 1/Top of the castle
Uneven terrain/main stage gives us the slight advantage and disadvantage depending on the situation. Being on the left side obviously opens up many options, while fighting a character with long ranged attacks will put us as a disadvantage being on the right. Z-air, U-air, U-tilt/F-tilt angled up, Up B and Missiles of course all appreciate the cover provided by the low platforms, and even bombs could be used slightly less crapily than usual. The edges are both walls, so Samus has an easy time stalling out with Wall Jumping(you can even do that Spiderman Bomb thing if your opponent is dumb enough to wait for you/too scared to approach. The ledges can trap you ala FD lip if you aren't careful, however. Overall this is my favorite part of the stage, the ceiling is odd that we get utterly screwed, not too low and not so high we can't KO with D-air/Smash. During the transitions to and from the other stages, you can abuse the temporary floor to sneak in a few more hits than normal, or even a KO if you're smart enough(hold them where there is no floor when transitioning from stage 3-1, get them near the edge so you can Z-air them off the walk off during stage 1-2, and so on). There is more to this stage, but I'll try to leave at least something that other people can contribute. :d
Stage 2/Castle hall w/statues
Yes, the dreaded statues that eat projectiles. For obvious reasons, this is the least liked part of the stage for many, but I've grown fond of it recently. While it is true the statues hamper our spam game, I find the not-situational advantages/disadvantages to add up to a neutral or even in Samus' favor phase of the battle, not counting certain characters(coughDee3ZeldaMario/PTwaterguncough). For starters, the disadvantages don't just hurt Samus(and don't hurt her the most, in fact). Unless your name is Zelda, your projectiles are at the mercy in the middle of the stage as well(this especially helps me in the Snake MU, as they'll have to rely on C4's as their only projectile while we still have Z-airand bombs to a non-existent extent). The statues have actually helped me more than hurt me. For instance, several of Samus never-used moves could be used to destroy them and/or refresh move. Helps that U-smash is a multi-hit move. But this brings up my next point. Samus' moves last longer when hitting the statues, which more than likely can assist in catching foes with the lingering hitboxes(again, helps in multi-hit moves or just moves that cover a decent amount of space, like D-air/U-tilt/N-air/D-smash, and even Z-air), and this'll do wonders against any characters/opponents who rely heavily on spot/air-dodging. Lastly, the biggest advantage, I think, is how well Samus can maneuver here. Up B lands perfectly on the higher platform, you can use bombs to stall around high up on the stage, and against characters who rely on projectiles, you can keep away and Charge a shot while they approach either fearlessly(mindgames to the max) or reluctantly(though your mileage may vary). Then there is, of course, the constant fear of the Grapple Beam(yes either on ground or in the air) pressuring them to the edge, or a lucky grab leading to a B/F-throw KO. Overall, I'd say this stage is good or bad depending on who you fight here rather than it just being automatically bad for Samus. Keep moving, play aggressively not just defensively, and use the stage to your advantage.
Stage 3/The underground/Hell
So as mentioned above, this is considered the only good one for Samus. The tilts really help her edge game, as she has a much easier time recovering than most from under the lip. Z-air anybody under it and unless they are MK/R.O.B.(even then they are in danger) and they are screwed. The side boundaries aren't very wide either, so this somewhat compensates for the higher than average ceiling, also making it next to ideal for surviving as well as KOing. Get 'em with a tippered Z-air or a Charge Shot near the edge and they'll die, or have trouble getting back to the stage. On the stage itself, the tilting can also be helpful occasionally. When falling, for example, sometimes the stage will tilt enough to let you dodge their attacks by stalling with bombs, air-dodging > Z-airing them back(or semi-fully charged Charge Shot if it's handy), and the tilting helps similarly to stage 1 in terms of projectiles. Careful so that the protrusions/higher side doesn't eat your projectiles, though. Lastly, being the higher side gives your attacks a bit more range if you use them right. D-air towards the lower side, F-tilts angled either up or down, and retreating D-airs all get ab it boosted. All of this is situational, though, and similar to stage 2, the effectiveness of the stage can vary depending on character/player.
Overall/Overall
Stage is good for Samus, but she'll lose to characters who can abuse it betteror if they're just betterobv. You have to keep an open mind and not rely on things you are used to if you are CP'd here, but it'd do you a lot of good to learn the stage for going there on your own choice, IMO. The stage has the traits to be good for Samus, but that is on paper. Just like to make Samus work, you'll have to work to actually make the stage work. If you are very versatile, or your opponent is not, then this stage will keep you/them on their toes. Tis all in your opinion in the end.
-Credit to Ismar
Who should Samus take on this stage:
Snake
Shorter blastzones on the first stage give us an easier time killing him, and the platforms give us room to breathe/zone/escape with SA. The second stage gives you enough room to run away and hinders his projectiles in the same way it does yours. Stage 3 is all FD-y
Who should Samus avoid on this stage:
Wario
Come on. He's fully capable at beating us in the range we're given in Stage 1(nair and bite), and he's gonna be everywhere except fighting you stage 2. Plus if he wants to fight you, he has statue-extended hitboxes everywhere. We can air release him on Stage 3 (from the dais near the left ledge), and possibly zone him better, but it's not worth throwing away 2/3rds of a counterpick.
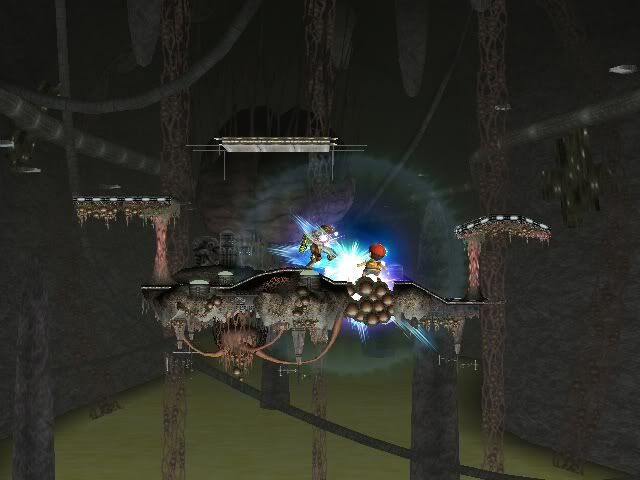
III.c.
Halberd
Kill Percentages on Mario:
Tips and Tricks:Please check here.
Credit goes to Dryn.This stage begins at the Halberd's hangar. In the beginning of the match, you can charge up your Charge Shot, but cancel it by shielding before the floor opens. If you don't cancel it, you will have wasted time charging up your Charge Shot, and your opponent might be coming your direction already. So be sure to cancel it before the floor below you opens. You may also decide to fire a Super Missile at the beginning just to try and get a free hit. Once the floor below you has opened, the platform that you will be standing on will lift off shortly thereafter. Make sure you are on the platform, because if you aren't, and then floor flys up, you risk losing a stock.
Once the platform is up in the air, you and your opponent will be likely working in close-combat. The stage is small during this time, after all. The best spot to be on this stage is in the center, since there is an intrusion in the center. It allows Samus to perform her z-air easier. She may also use her u-tilt, u-smash, or u-air if her opponent is standing on the passable platform. If forced to one of the sides, using the edge will be one of the best places for Samus to attack from. She can grab onto the edge and use her fully charged Charge Shot, Homing Missiles, f-air, u-air, or even z-air, since these will all pass through from under the stage. This can make it difficult for certain characters to attack Samus directly. Watch out for potential spikes.
There is a part where you will see the flying platform coming by the docking bay. This part will allow you to have a bit more space to fight on. When you see yourself nearing the docking bay, you may drop and stall with your Bombs, since by the time the flying platform comes to land, you will have land below you. From there, you can charge up your Charge Shot if it's not charged already. You can also try to get in a few hits, since your opponent will be above you and will have no way of hitting you unless he or she comes down there with you or until the flying platform lands. Look out for attacks with explosive properties if your opponent has any, such as Bombs, Grenades, or a C4.
During your time on the docking bay, there are three hazards that may occur. These are:
1. The beam cannon.
2. The cannon ball.
3. The mechanical claw.
The beam cannon follows one of the players on the stage, and once it targets on, it will fire a beam. If the beam cannon is aiming at you, you can use it and get close to your opponent and hope it will fire out when your opponent is nearby. This is also useful if your opponent is off the stage and attempting to grab onto the edge of the stage. Watch out, though, because your opponent might try to use it to his advantage by gettng you caught in the beam. If caught in the beam, smash DI out of it to insure survival. Failure to do so will mean you take unnecessary damage and most likely a KO.
The cannon ball isn't as threatening, since it doesn't aim at you or your opponent. Sometimes it will fire in the middle, or one the left or right. It can be avoided by simply running in a direction away from it. It may also be air-dodged. It is possible to throw your opponent into the blast radius, but it is risky to do so.
The mechanical claw is like the beam cannon, except it does not show any sign of who it is going to hit. It starts up by moving around for a bit, and when it's about to launch, it pauses for a brief moment. After that, it strikes. This can be avoided by spot-dodging, air-dodging, or rolling, which is what you and your opponent might do, since neither of you will be aware of who it is after until it strikes forward. All three of these hazards are capable of KO'ing, so be sure to pay attention to the hazards when necessary.
Credit goes to KillerJawz.Okay off the bat im going to say this, DONT TAKE SMALL CHARACTERS HERE. Honestly its horrible to see them duck under our spam with that ditch in the floating stage, so yeah, take note of that. We are able to ZAIR UNDER THE STAGE when it floats, so this is very useful if your under pressure, just be sure that you are in a position where a through stage spike is not possible. The platform above is VERY helpful against larger characters, they have a tough time getting off of it when we get them up there. Proceed to **** them with uairs and utilts.
On the 2nd part of the stage (the flat bit) there can either be a platform or no platform, if there isnt a platform, this is FD with a cannon/claw/lazer, if there is no platform its kind of like SmashVille. On this part of the stage, larger characters are at our mercy, spam on this stage works beautifully. Super Missles can be used for the most extreme camping since Wario dittos :O.
Who should Samus take on this stage:
??:
Who should Samus avoid on this stage:
??:
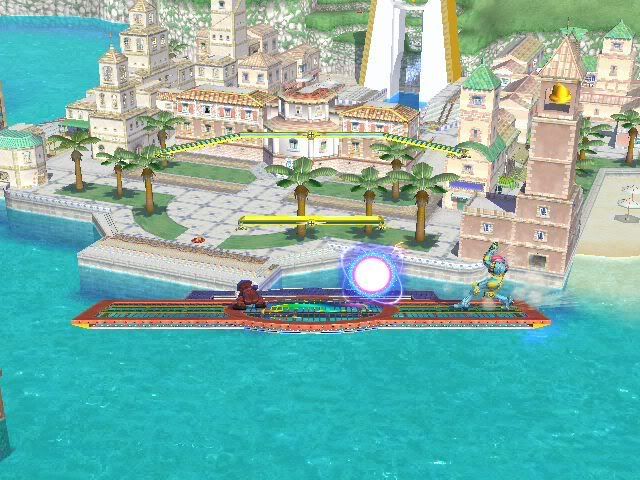
III.d.
Delfino Plaza
IV. Counter-Pick Stages
IV.a.
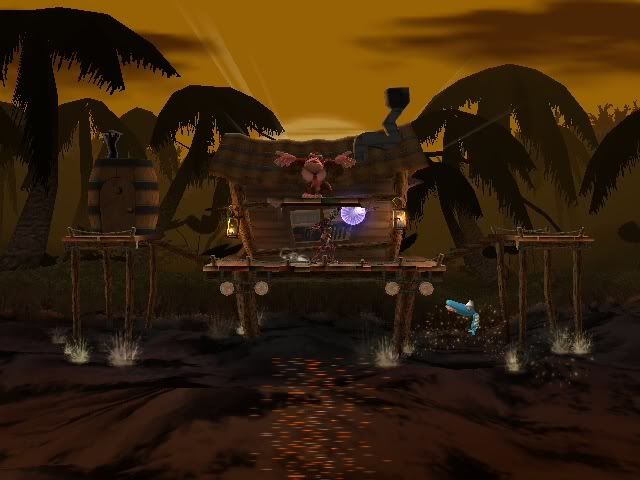
Brinstar
IV.b.
Frigate Orpheon
IV.c.
Jungle Japes
IV.d.
Pictochat
IV.e.
Norfair
IV.f.
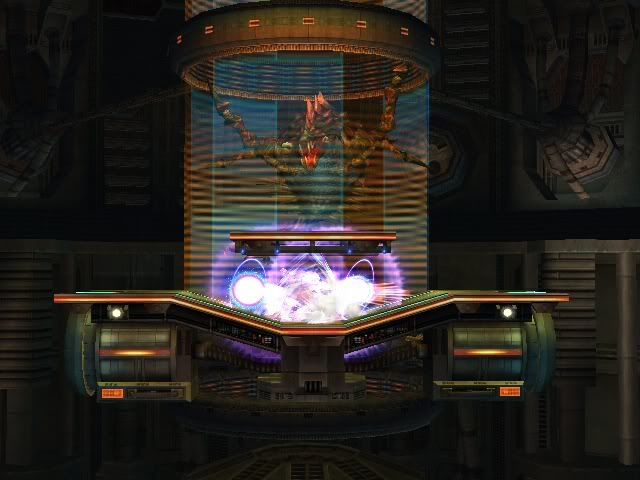
Pokémon Stadium 2 [Brawl]
IV.g.
Rainbow Cruise
V. Counter-Pick/Banned Stages
V.a.
Distant Planet
[Image Coming Soon!]
[Image Coming Soon!]
V.b.
Green Greens
[Image Coming Soon!]
[Image Coming Soon!]
V.c.
Luigi's Mansion
[Image Coming Soon!]
[Image Coming Soon!]
V.d.
Port Town Aero Dive
[Image Coming Soon!]
[Image Coming Soon!]
V.e.
Yoshi's Island (Melee)
[Image Coming Soon!]
[Image Coming Soon!]
V.f.
Pirate Ship
[Image Coming Soon!]
[Image Coming Soon!]
VI. Banned Stages
VI.a.
75m

VI.b.
Big Blue

VI.c.
Bridge of Eldin

VI.d.
Corneria

VI.e.
Flat Zone 2

VI.f.
Green Hill Zone

VI.g.
Hanenbow

VI.h.
Hyrule Temple

VI.i.
Mario Bros.

VI.j.
Mario Circuit

VI.k.
Mushroom Kingdom I

VI.l.
Mushroomy Kingdom II
VI.m.
New Pork City

VI.n.
Onett

VI.o.
Rumble Falls

VI.p.
Shadow Moses Island

VI.q.
Skyworld

VI.r.
Spear Pillar

VI.s.
The Summit

VI.t.
Wario Ware

")