• Welcome to Smashboards, the world's largest Super Smash Brothers community! Over 250,000 Smash Bros. fans from around the world have come to discuss these great games in over 19 million posts!

    You are currently viewing our boards as a visitor. Click here to sign up right now and start on your path in the Smash community!

Make Your Move 8: -TOP 50 POSTED-

Crewx

Smash Rookie
Joined
Oct 9, 2010
Messages
21
@Crewx
You should go for whichever Pokemon you like best. Or, if you're really feeling courageous, you can try a random number generator to pick one. (Although that would likely make your choice harder to stick with)
I've decided to go with my favorite pokemon, Typhlosion.
 

gcubedude

Smash Apprentice
Joined
Aug 15, 2009
Messages
83
I've decided to go with my favorite pokemon, Typhlosion.
Lookin' forward to this :)

A question to anyone who knows this: When will this contest come to an end? Has an exact date been decided? I'm working on a moveset, and idk whether to finish it and put it into this contest, or just wait for the next one.
 

flyinfilipino

Smash Master
Joined
Sep 11, 2007
Messages
4,319
Location
North Carolina
What?!


It's Mr. Mime time!

* Introduction *

Mr. Mime, the famed miming master of the Pokemon world, has decided to bring his act to Super Smash Bros.! He uses his psychic abilities to create invisible walls and objects to confuse his opponents. But will anyone understand him?!

* Stats *

Size * Medium
Mr. Mime is just about as tall as Luigi.

Weight * Light
Mr. Mime is a bit on the light side, comparable to Peach.

Walk Speed * Average
Mr. Mime plods along merrily.

Dash Speed * High
Mr. Mime can book it when he needs to. His running speed is on par with Pikachu.

Jump * Above Average
Mr. Mime displays great jumping prowess.

Fall Speed * Average
Nothing too out of the ordinary here.

Air Speed * Above Average
Mr. Mime moves well in midair.

Traction * Average
Just your average mime.

Mr. Mime cannot wall jump, wall cling, crawl, or glide.

* Special Moves *

Neutral B * Barrier

It's Mr. Mime's signature move, of course! What good mime can't conjure up a nice invisible wall? Mr. Mime nearly instantaneously conjures an unseen barrier by waving his hands around in front of him. This barrier is the same height as Mr. Mime and reflects any sort of projectile perfectly. He'll keep up this barrier for as long as you hold B, and you can even jump, walk and run while doing this!

There's one more thing Mr. Mime can do with this barrier, and this is done in midair. If Mr. Mime is midair, you can continuously mash B instead of just holding it in order to enable him to walk and run in midair! Mr. Mime will stop wherever he his and be able to stand as if there was a drop-through platform under him. Similarly to the Golden Hammer, you can move the Control Stick back and forth while mashing B to walk or run in midair. Use this to recover from long horizontal distances!

Up B * Invisible Ladder

Just as it sounds, Mr. Mime conjures up an invisible ladder that only he can climb up and down freely! Mr. Mime starts at the bottom of the ladder, which is 2 Stage Builder Blocks high. It lasts for 8 seconds, and Mr. Mime can climb up and down as he pleases, jumping off in any direction. He won't enter freefall state if the ladder disappears while he's on it. Also, unlike normal Brawl ladders, Mr. Mime's side faces the screen as he climbs this invisible ladder. He can only be attacked from behind while climbing. Why's that? The invisible ladder also doubles as a solid barrier! Use it off-stage to deny your opponents the chance to recover! Keep in mind that you can only have one invisible ladder on-screen at a time.

Side B * Unidentified Flying Object

Mr. Mime draws his hand back as if getting ready to throw an invisible Frisbee, then quickly lets it fly straight ahead! Who knows what it actually is that he's throwing; it's invisible! The projectile fires at the same speed and rate as Wolf's Blaster shot, but has infinite range. It does 5% damage and flinching knockback on contact. Your opponent won't know what hit them!

Down B * Mysterious Wall

When you input this move, Mr. Mime quickly waves his hands around, differently from the way he does with Barrier, as they glow with a colored aura for a brief moment. The colored aura starts red, but cycles through blue, yellow, and red again with each input of Down B. What does this mean? After Mr. Mime waves his hands with a red aura, he becomes surrounded by an invisible forcefield that completely blocks Jab Combos, Tilts, and Dash Attacks! When Mr. Mime waves his hands with a blue aura, the invisible forcefield completely blocks Smash Attacks! Finally, when Mr. Mime waves his hands with a yellow aura, he becomes completely immune to grabs (including attack grabs)! This forcefield is constantly on until Mr. Mime is KOed, but only one type can be active at a time. Switch between Mysterious Walls often to confound your opponent!

* Standard Attacks *

Jab Combo * Doubleslap

Is someone heckling you during your act? Slap them around with your broad hands! Mr. Mime delivers two quick slaps; the first does 3% damage and flinching knockback, and the second does 3% damage with low knockback. Basic Damage Racking 101!

Forward Tilt * Obstacle

Utilizing a common pantomime act, Mr. Mime exerts some effort as he appears to push a large object forward. This invisible object is a little larger than Mr. Mime's height and about a Stage Builder Block wide. Anything that comes into contact with this object as Mr. Mime gives it a push takes 8% damage with medium knockback.

Up Tilt * Clown Trick

What's a good act without juggling? Mr. Mime starts rapidly juggling three invisible balls over his head while turning and facing the screen. You can hold Up on the Control Stick and keeping pressing A to keep juggling. Each ball deals 3% damage and weak vertical knockback on contact and reaches a bit above Mr. Mime's head, so naturally, this move is good for juggling.

Down Tilt * Clean Sweep

Is the fight getting a little dirty? Mr. Mime takes care of it with his trusty invisible broom! He mimes a rhythmic sweeping motion that continues with each press of A while holding Down. The hitbox for the move is around Mr. Mime's feet and causes foes that he hits to trip and take 6% damage.

Dash Attack * Cruisin'

When the stress of the battle starts to take its toll on you, take a nice relaxing bike ride! When you press A while running, Mr. Mime seems to mount an invisible bicycle and starts pedaling! He'll keep going at his running speed until he runs into something or you press A again. If you happen to run into a foe with your bike, they'll take 10% damage and above average knockback. Of course, it's not good to crash on a bike, so there's a bit of end lag if you do hit someone. This can be nullified by pressing A just as you collide with your foe. It is an invisible bike, after all!

* Smash Attacks *

Forward Smash * En Garde

As you charge this move, Mr. Mime enters a preparatory stance, as if he's about to thrust an invisible sword straight at the foe. When you release this move, he'll quickly stab forward twice with an invisible sword with the range of Marth's Forward Smash, with the first hit doing 7% damage and no knockback, and the second hit doing 8% damage and high horizontal knockback. After that, there's a brief period of end lag, but at any point during this, you can tap A one more time to have Mr. Mime give a final thrust! This last hit does 9% damage and very high horizontal knockback. A normal shield can't take all three hits without breaking, though the last hit is a bit slower than the first two.

Up Smash * Overcast

Mr. Mime holds an invisible object with both hands as he charges this move. When you release it, he moves one hand upward quickly: he's opening an invisible umbrella! The umbrella is as wide as one Stage Builder Block and reaches a bit above Mr. Mime's head. Anything that comes into contact with it as it opens up takes 12% damage and high vertical knockback. The umbrella also temporarily functions as a barrier to any attacks from above, so anything that falls from the sky will bounce or slide off of the umbrella while it lasts, which is about a second.

Down Smash * Caution

Mr. Mime turns to face the screen and puts his hands behind his back while looking up in an innocent manner. What's he up to? When you release this move, he takes a large sliding step in the direction opposite the way he was facing when you used the move as a large invisible object crashes to the ground where he was standing! When it hits the ground, it makes a sound like a crashing piano. The object drops like a rock from about two Stage Builder Blocks above Mr. Mime's head, and its size and strength depend on how long you charge the move. At no charge, the object is as big as Stone Kirby and does 14% damage and above average diagonal knockback on contact. At maximum charge, the object is the size of a Stage Builder Block does 24% damage and high knockback on contact.

* Aerial Attacks *

Neutral Aerial * Momentum

Mr. Mime assumes a sitting stance with his legs stretched out in front of him, his hands gripping invisible ropes. He stalls in midair and rears back a bit, then quickly swings forward to kick foes. Whee! The kick does 8% damage and medium knockback. The animation is a little strange, and might throw off a foe's timing while trying to avoid it.

Forward Aerial * Stroke

Mr. Mime positions his body horizontally, belly-down, and starts rapidly throwing his arms forward as if swimming in invisible water! He stops falling while using this move and actually moves forward about a platform length while throwing his arms out four times. Each stroke of his arm does 4% damage and low knockback, except for the last hit which does medium knockback.

Back Aerial * Axis

Mr. Mime pauses in midair and seems to grip an invisible pole in front of him. In a swift and fluid motion, he suddenly swings around it and delivers a kick to foes behind him! This move is his fastest aerial and does 9% damage and above average knockback.

Up Aerial * Trampoline

Mr. Mime crouches as if he's going to make a midair jump, then does a soaring leap while tumbling head-over-heels! He reaches a height of 2 Stage Builder Blocks, and anything that comes into contact with his spinning body while he jumps takes 9% damage and medium vertical knockback. You can't keep using this move to jump infinitely though, because Mr. Mime has to come down to his original height, and he's quite vulnerable while falling. You are able to move left and right a bit during the entire jump, however.

Down Aerial * Floor It

Mr. Mime stands in midair...and that's it! He's created a solid invisible platform under him that only he can stand on that lasts for 5 seconds. From there, you can do whatever you want; Tilts, Smash Attacks, Specials, all in midair. And there's always the obvious gimping that's possible when you decide to create a platform over a recovering foe. Keep in mind that like Up Special, you can only have one of these on-screen at a time.

* Grab/Throws *

Grab * Reelin' It In

As if holding an invisible fishing rod, Mr. Mime casts out a line to try to snag foes. This has the same start lag, but a slightly longer reach than Samus's Grapple Beam.

Pummel * Talk to the Hand

A standard pummel; Mr. Mime slaps his reeled-in foe at a moderate pace with his broad hands for 2% damage for each hit.

Throw * Boxed In

Mr. Mime doesn't have a standard throw; instead, the focus of his grab is to try to trap the foe in an invisible box! When you input a direction (other than down), Mr. Mime will release the foe, and at the same time conjure an invisible wall in that direction relative to the foe's location. For example, tapping forward will create a wall directly behind the foe. Tapping back will create a wall between Mr. Mime and the foe, and tapping up will create one directly above the foe. Your opponent is unable to move past the barriers (they can't even roll through them). It's up to you to predict where your opponent will try to move (or try to attack you!) and tap in that direction before they can do it, essentially tapping all three directions and trapping them in a box with no escape! The completed box is big enough to fit Bowser snugly. Once you succeed in trapping them, your foe is boxed in for 10 whole seconds, during which you can do whatever you want to them! They won't be able to attack you through the walls, but you can attack them as much as you want with any of your attacks!

Opponents that can teleport, like Zelda or Sheik, are able to escape the box. Party poopers!

Final Smash * Mime Time

Mr. Mime has grown tired of getting strange looks from people and Pokemon alike for manipulating his invisible objects. How would the rest of the world feel if their objects were invisible? With the power of the Smash Ball, Mr. Mime is able to find out! When you activate his Final Smash, the camera will zoom in real close on Mr. Mime as he uses his hands to cover the screen. When he uncovers the screen, a ghastly sight awaits everyone! There's nothing! Everything's gone! Everything's invisible, actually, except for the background of the stage and Mr. Mime. Nothing is visible, not the stage, not any other characters, not even visual effects from attacks. Even the little cursors above your heads vanish for a while. On stages where there's a bottom blast zone, this could be very dangerous, as your foes might have no idea where they are. Mr. Mime isn't worried about falling to his doom, however, due to his many ways of staying suspended in midair. Maybe you could launch attacks all over the place and force people to move around so that they might fall off. They won't know they're falling until it's too late! Everything stays invisible for 20 seconds.

* Playstyle *

The name of Mr. Mime's game is to screw around with your opponent, confusing them with a variety of tactics, including invisible barriers, invisible hitboxes, and outright immunity to some of their attacks. All the while, you'll want to be racking up damage while they don't know what's hitting them, then go for the KO. Mr. Mime is quite defensive (as he should be; mimes get a bad rep), but his tricks can give him the upper hand.

Mr. Mime is able to counter a variety of foes with some of the moves in his arsenal. Barrier, his Neutral B, is a no-brainer against projectile-happy foes. You can reflect their shots right back at them and remain unharmed with little effort. Mysterious Wall is a very useful tool depending on your opponent. If your foe is grab-happy, throw up that particular variety to totally shut them down. If you find your foe Tilts a lot, you have a way to render those useless. If you're facing someone that likes to utilize Smashes often, turn on the anti-Smash wall. Set it and forget it! Mr. Mime is light and easily knocked out, so having a permanent safeguard against certain types of attacks is a blessing. You can even switch back and forth between Mysterious Walls if your opponent gets smart. That'll totally confuse them, especially if they don't remember which one is currently active!

As far as damage racking goes, Mr. Mime's attacks are for the most part rather quick (and so is he). Doubleslap is quick damage, as are the majority of his Tilts. Throw out Unidentified Flying Object every once and a while too; your opponent won't see it coming, so they'll usually have a hard time dodging it and avoiding damage. Mr. Mime's Aerial Attacks are also pretty effective, as their awkward animations might catch some people off-guard. In fact, all of the invisible hitboxes might do that. Mr. Mime's Smash Attacks are all rather strong and you'll be relying on them to send your foes flying when they've racked up enough damage. Use the one that best suits your current situation.

Mr. Mime's grab is very handy if you can pull it off. It's basically leaves your foe helpless for 10 seconds while you pound on them. Well, they can still shield, but Forward Smash might take care of that. In order to succeed in trapping them, you need to have quick fingers and prediction skills, and it'll pay off. It's pretty high-risk, high-reward.

Mr. Mime's off-stage game is very good. As far as recovery goes, he shouldn't have a very hard time. Barrier comes through once again as a means of recovering from basically any horizontal distance. From there, you can use Up B to climb to safety, or even Up Aerial as a last resort. Down Aerial is also an option, giving you a solid platform to jump off of. In addition, some of these moves double as invaluable gimping tools. You can use both Up Special and Down Aerial next to a ledge off-stage to block your opponents' recoveries. They won't even see them, so they'll have a hard time manuevering around them!

In summary, Mr. Mime can be pretty frustrating to fight against if you don't pay close attention. Use all of your tricks to confuse your foe while hiding behind your various walls. Keep that big grin on your face, and show them what mimes are made of!

* Extras *

Up Taunt * Mr. Mime faces the screen and waves his hands on all sides of him. Apparently he's trapped himself in a box. Silly mime!

Side Taunt * Mr. Mime raises an arm to his head and seems to struggle against a very strong wind as he gets pushed backwards while walking.

Down Taunt * Mr. Mime sits down in an invisible chair, crosses his legs, and puts a hand up to his chin in deep thought.

Victory Pose 1 * Mr. Mime happily runs back and forth across the screen, apparently while conjuring a large invisible wall.

Victory Pose 2 * Mr. Mime seems to climb up an invisible winner's podium and pumps his fists in victory.

Victory Pose 3 * Mr. Mime enters and starts an invisible car, gives a thumbs up, then drives off into the distance.

Loss Pose * Mr. Mime claps loudly and happily for the winner.

Character Entrance * Mr. Mime opens an invisible door and steps through it to enter the battle.

Costumes * Mr. Mime comes in his Default colors, or tinted Pink, Blue, Yellow, Green, or Black/White.

Kirby Hat * Kirby gets Mr. Mime's rad blue hair and white skin, and the ability to conjure Barriers! Let the fun begin!


MarthTrinity

Smash Lord
Joined
Aug 9, 2007
Messages
1,954
Location
The Cosmos Beneath Rosalina's Skirt
Mr. Mime

Well isn't this an interesting surprise! Wasn't expecting a FF set anytime soon so when you -DID- announce you were going to post one, I was very interested as to who it would be for...needless to say I wasn't expecting Mr. Mime although it fits nicely in place with your previous Jynx set. As for the set itself, well, you certainly did one thing very nicely (well more than one thing obviously but this one stands out the most); you certainly gave it a feel of making a set for the overall "theme" of the character. While I'm normally against making sets for concepts instead of characters, in the case of Pokemon, they really don't have much character beyond their general appearance; as you may remember I did the same thing with Tauros, he was essentially a moveset for a cow. I also did the same thing with Strike Man who was more or less a moveset for baseball. So yes, making a moveset for a mime and working it into a well known mime works very well in this situation and it by default feels very in character for a character with no real character, ya dig? ;P

So what else do I like here? Well I'm really digging that Down Special as it has the awesome potential of forcing a character to play differently than they may normally do. For example, how would a grab based character play without the ability to grab Mr. Mime? What else would he or she have to resort to in that situation? Really makes you think outside the box and potentially acts as a major playstyle shutdown to some characters.

I also really like the fact that Mr. Mime can more or less bend the rules of the game by making his own (albeit invisible) platforms and walls to mess around with (although I do see JOE's point about Mime maybe being -TOO- good at his gimping game). As for the overall playstyle you have here, you have exactly how I'd imagine Mr. Mime to play. Mimes are irritating, what with always making invisible stuff and all that...so it makes sense that Mr. Mime revolves around confusing his foes with all the invisible crap he makes as well as his invisible hitboxes. Plus he'd be hella easy to actually make in game considering half his attacks seem to have invisible results !

Overall, Mr. Mime is a pretty fun read for sure and probably, at least in my opinion, one of your stronger entries. I didn't even get to touch on the grab game but I also found that pretty unique and suiting as well. Very nice work here FF!

:122:

Also, mimes get every bit of hatred they deserve. They're like more desperate clowns...and clowns are scary enough as is.
 

Crewx

Smash Rookie
Joined
Oct 9, 2010
Messages
21


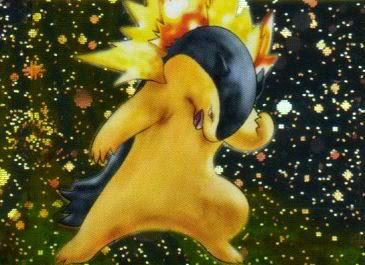
Typhlosion-

Known as the Volcano Pokemon, and not for its appearance, but for its explosive nature. Typhlosion, unlike its previous incarnations Quilava and Cyndaquil, has a quick temper and, when its angered, anything that touches it's soft fur will instantly go up in flames. Some say it can hide itself in shimmering flames, moving surprisingly quick on it's four legs, it can quickly shift from four to two. And, lastly, it can generate great flames and Eruptions from the vents on it's back, only adding to its explosive and violent nature.


Size: Slightly smaller than Charizard.
Weight: Rides the line between heavyweight and middleweight.
Walk: Hes fast, he walks on his two legs at about the speed of Squirtle.
Run: He drops to all fours to run surprisingly fast, rivaling the speed of Falco.
First Jump: Fair, a little better than Ike.
Second Jump: Fair, a little less height, if not the same as his first.
Priority: Low, having no weapons to strike out with.
Traction: Good, he clings to the ground with his claws as he runs.
Fall Speed: Falls at a moderate rate.
Aerial Movement: Average

Special Attributes- Typhlosion, being very hot and firey, can inflict his target with a Burn status. Burns deal damage over 5 seconds, 1% per second. After they take all the damage, for the next 10 seconds, their attacks have reduced knockback. All of Typhlosion's attacks that use Fire have a 10% chance to inflict a burn, and enemies have a 5% chance of taking a burn by attacking him.


Standard Attacks​

Jab- Scratch

Typhlosion quickly reaches forward and scratches with his claws. Deals about 3% damage.

Second Jab- Cut

Typhlosion cuts the target with quick succession from his Scratch. Both hits strike with 0the speed of Charizard's first two slashes. This stroke deals about 4% damage.

Upward Tilt- Crunch


Typhlosion bites the area directly above him, projecting his body upward like a spike. Deals about 10% damage and sends targets directly upward.

Side Tilt- Headbutt

Typhlosion rears back and headbutts forward in a broad motion, expelling flames from his back as he does. Deals about 7% damage.

Downward Tilt- Bite


Typhlosion, down on all fours, bolts forward and back, biting the target with blazing speed. Deals about 6% damage.

Dash Attack- Double Edge


Typhlosion jumps and corkscrews, expelling flame as he does. Deals about 9% if he hits with his body, however, a sweetspot will only deal 7%, because he hits with his head rather than the flames.

Prone Attack- Struggle


Typhlosion rolls onto his side and curls up. Then, he struggles back and forth, rolling in a circle before jumping to his feet. Deals about 5% damage.

Recovery Attack(Below 100%)- Reversal


Typhlosion jumps up onto the stage while spinning around, dealing 4% damage to anyone within range.

Recovery Attack(Above 100%)- Lesser Reversal

Typhlosion climbs onto the stage, then spins to backhand the target. Deals 3% damage.

Special Attacks​

Neutral Special- Devastate


A fire attack to suit Typhlosion's violent nature. Hold the B button to charge up this attack, then shield or evade to store the charge. A full charge is shown by Typhlosion emiting flames from his back. When released, it makes an explosion of flame around Typhlosion in all directions. When fully charged, it can reach as far as two character lengths! It deals about 8% damage when not charged, but up to 16% when fully. In addition, this attack burns so hot, it will burn away any item the enemy is currently holding. Even a Smash Ball will always be forced out.

Side Special- Flame Wheel

I'm sure quite a bit have been waiting for Typhlosion's signature attack. Typhlosion jumps into the air, right below the height where Bowser jumps for Bowser Bomb, and spins, expelling angry flames from his back in the process. Does the same in the air, making it an effective recovery move. Using this attack will always release Typhlosion from being encased in Ice and prevent damage from any Ice attack throughout. This attack will deal about 17% damage and has a 20% rather than 10% chance of Burning.


Upward Special- Purgatory


Typhlosion curls into a ball and then flies upward in a fireball of destruction. A physical attack, rather than a special attack like in the games, this attack will always inflict a severe burn upon impact(The knockback reduction will remain for an additional 3 seconds). Sends him as far as Falco's Fire Bird, but has no recharge time, and sends foes flying if it hits, deaing around 11% damage.

Downward Special- Nitro Charge

While a think Typhlosion would be a Pokemon Trainer's pokemon in a game, this move is still good. Typhlosion clentches it's fist and growls, increasing his power. Its usable three times. Each time, Typhlosion's walking and running speed will increase. When used three times, the next Flame Wheel, Purgatory, or Double Edge will have 5% more damage and a bit more knockback. Using any of these attacks will reset Nitro Charge.

Smash Attacks

Side Smash- Thunder Punch

Yes, a fire Pokemon can learn Thunder Punch. This attack deals massive damage, shocking the target before sending them flying, but has a lengthly start time, taking time to rear back with time similar to Charizard's side smash. After such, he punches with a devastating right hook. Deals 16% uncharged, 22% charged.

Upward Smash- Overheat


Typhlosion makes an explosion of flames from his back. Takes a brief time to launch, but only strikes above him. Deals about 10% damage uncharged, 16% charged.

Downward Smash- Flame Wheel


Typhlosion uses his signature attack again, spinning on his side while propelling his spin with flames out of his back. Deals about 10% damage to targets on both sides uncharged, 20% charged.

Aerial Attacks

Neutral Aerial- Flame Wheel

Again? Sheesh. Typhlosion does a spin and expels flames from his back. Deals about 10% damage to targets in a circle around him.

Downward Aerial- Strength


Typhlosion curls slightly, then sweeps the area below him with the broad lower part of his body, with the power to knock away boulders. Spikes the target downward with about 10% damage.

Backward Aerial- Fire Punch

Typhlosion punches behind him. Deals about 11% damage and deals fire damage, which means a possible Burn.

Forward Aerial- Flamethrower

The only time he actually shoots flames from his mouth, he expels flames from his mouth in front of him, deals about 9% damage in all, but has quite a bit of knockback. The tip of the embers can strike for about 3% damage with no knockback if the target is just out of range.

Upward Aerial- Fire Fang

Normal Typhlosion can't learn this! But this is no normal Typhlosion, eh? He bites upward, dealing 10% damage as fire damage.

Grabs

Grab- Defense Curl

Typhlosion curls around his target, growling at them.

Pummel- Slash


Typhlosion slashes at the target for about 2% damage. Fit one of these in before a real throw.

Forward Throw- Leer


Typhlosion throws the target on their feet forward, before staring at them with frightening eyes. Deals no damage, but stuns the target for 2 seconds, letting good time for an attack.

Backward Throw- Smokescreen


Typhlosion releases the target behind him, and breaths smoke at them. Deals about 7% damage and pushes the target back.

Upward Throw- Overheat


Typhlosion places the target on his back as he stands on all fours, and then explodes flames from his back, sending the target upward. Deals about 10% damage.

Downward Throw- Gyro Ball


Typhlosion lays the target on the ground before rolling into them. Sends targets forward with about 6% damage.

FINAL SMASH

Eruption-

Typhlosion roars and bolts to the lower center of the stage, then giant flames erupt from his back. The smaller the stage, the more lethal. Every target caught in the flames remain there until the attack is through. Lava rocks also form in the flames, and if they hit an enemy, they are sent flying. Typhlosion ends the attack with a burning spirit and 3 full Nitro Charges.


Taunts

All his taunts look more menacing with a fully charged Devastate.

Upward Taunt-
Typhlosion releases smoke from the vents on his back.

Side Taunt- Typhlosion gets on all fours and faces in whatever direction he is and his eyes flash, akin to Leer.

Downward Taunt- Typhlosion faces the screen on all fours and roars.

Snake Codec-

Snake: Ottacon. I think I'm facing a Pokemon. He looks pretty angry, and hes emitting fire by just standing there!
Ottacon: That must be a Typhlosion! Its a Volcano Pokemon. It can shoot flames out of it's back by rubbing it's fur together to generate heat, and then it's fur catches, but doesn't burn.
Snake: It fights with explosions? I think I like this one. Wheres a Poke Ball when I need one.
Ottacon: Good luck, its so violent and short tempered, even a veteran trainer would have trouble taming it.
Snake: That makes it and I even more alike.

Playstyle-

The ultimate playstyle of Typhlosion is to overpower your enemy with multiple burns and sears, then sending them away with a powerful Flame Wheel or Thunder Punch. A classic Pokemon routine, weaken them, and capture them... Err, finish them off, rather. His burns and other fire attacks are perfect for dwindling the enemies health, and it'll be hard to defend themselves with all their items burned away by Devastate, their hopes for a Final Smash taken away when it's seared out of them. Thats the other aspect of Typhlosion: Intimidation.


flyinfilipino

Smash Master
Joined
Sep 11, 2007
Messages
4,319
Location
North Carolina
@Typhlosion: He may be the least-appreciated Fire starter, but I still love him!

(This is the second time I'm gonna type this comment, since my computer froze in the middle of the last one.)

I think this is the first set of yours I'm going to comment on, Crewx. Typhlosion's moveset feels very natural and in-Smash, and your move descriptions are clear and your writing style isn't painful to read. So kudos! You could probably use a bit more detail regarding attack speed and ranges, though. Also, don't be afraid to think outside the box when thinking up moves, though. I know there's not much to work with for Typhlosion, since all he really does is set things on fire.

It would've been nice to see his Burn mechanic fleshed out a bit more or made more prevalent in the moveset, because as of now it feels just kind of tacked on to some attacks. Speaking of Burn, the chances of recieving one from attacks or attacking Typhlosion should be higher; right now they seem kind of insignificant. It could've been cool to see Typhlosion's physical moves do more damage when they hit a Burned opponent. It's that kind of thing that adds a bit of "flair" to movesets.

Just a couple more nitpicks: Nitro Charge is a little dull as just a weak boosting move (it also makes reference to an unknown Double-Edge attack). I question the use of Thunderpunch as a Forward Smash for a Fire Pokemon; I'm sure there's a more relevant move out there for Typhlosion. Typhlosion's grab starts out unique with him surrounding the foe, but then doesn't pick up from there; I think you could've worked in a Burn or two between that and some of his throws.

Overall though, Typhlosion's a good effort. I hope I didn't sound too harsh or anything. You can only improve from here, and I look forward to what you bring to the table next! :bee:


Mr. Mime

Well isn't this an interesting surprise! Wasn't expecting a FF set anytime soon so when you -DID- announce you were going to post one, I was very interested as to who it would be for...needless to say I wasn't expecting Mr. Mime although it fits nicely in place with your previous Jynx set. As for the set itself, well, you certainly did one thing very nicely (well more than one thing obviously but this one stands out the most); you certainly gave it a feel of making a set for the overall "theme" of the character. While I'm normally against making sets for concepts instead of characters, in the case of Pokemon, they really don't have much character beyond their general appearance; as you may remember I did the same thing with Tauros, he was essentially a moveset for a cow. I also did the same thing with Strike Man who was more or less a moveset for baseball. So yes, making a moveset for a mime and working it into a well known mime works very well in this situation and it by default feels very in character for a character with no real character, ya dig? ;P

So what else do I like here? Well I'm really digging that Down Special as it has the awesome potential of forcing a character to play differently than they may normally do. For example, how would a grab based character play without the ability to grab Mr. Mime? What else would he or she have to resort to in that situation? Really makes you think outside the box and potentially acts as a major playstyle shutdown to some characters.

I also really like the fact that Mr. Mime can more or less bend the rules of the game by making his own (albeit invisible) platforms and walls to mess around with (although I do see JOE's point about Mime maybe being -TOO- good at his gimping game). As for the overall playstyle you have here, you have exactly how I'd imagine Mr. Mime to play. Mimes are irritating, what with always making invisible stuff and all that...so it makes sense that Mr. Mime revolves around confusing his foes with all the invisible crap he makes as well as his invisible hitboxes. Plus he'd be hella easy to actually make in game considering half his attacks seem to have invisible results !

Overall, Mr. Mime is a pretty fun read for sure and probably, at least in my opinion, one of your stronger entries. I didn't even get to touch on the grab game but I also found that pretty unique and suiting as well. Very nice work here FF!

:122:

Also, mimes get every bit of hatred they deserve. They're like more desperate clowns...and clowns are scary enough as is.
And thanks for the comment, MT! I dig! :bee:
 

Rychu

Thane of Smashville
Joined
Jul 5, 2010
Messages
817
3DS FC
1908-0105-4965
...You Do realize we've dot 99 sets right now.
1 more
 

Crewx

Smash Rookie
Joined
Oct 9, 2010
Messages
21
I did have other ideas for Typhlosion... After I wrote it x)

Double Edge is the name for his Dash Attack btw. Nitro Charge is kinda a filler move for me since I really think it would be a Pokemon Change to a Totodile.

But thanks for the comments! I'll keep a lot of it in mind.
 

Plorf

Smash Apprentice
Joined
Jan 28, 2009
Messages
124
Location
Silver Spring, MD
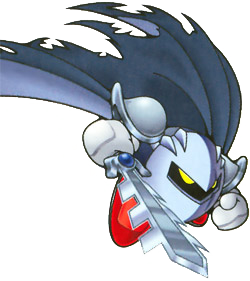
// Dark Meta Knight \\


click for playlist

// Information \\

Description ~ ? ? ?
{
So far only appearing in a single game, Dark Meta Knight was created by the power of the Mirror World, and was made in the likeness of Meta Knight himself. When Meta Knight found that the Mirror World was in danger, the mirror created a copy of his dark side, and Dark Meta Knight came to be. In Radish Ruins, Dark MK disguises himself as Meta Knight and is called "? ? ?" during the Boss battle.

Dark Meta Knight bears a great resemblance to Meta Knight. The main difference between the two is their coloration. While Meta Knight's design is somewhat vibrant, Dark Meta Knight is grey and dark (perhaps in reference to his original design). Dark Meta Knight also possesses a very different mindset, having almost no sense of honor or chivalry.

In Brawl, Dark Meta Knight doesn't actually appear on the character roster as most characters do. Instead, similar to Zero Suit Samus, he can be selected by holding the L or R button (Z on Wii remote) when picking Meta Knight on the character select screen. However, as an homage to Kirby and the Amazing Mirror, tapping the down taunt button briefly (as if performing Snake's Codec easter egg) as Meta Knight will transform him into Dark MK mid-battle (not that you'd want to, honestly). This process takes a few moments as the game loads the new moveset and Meta Knight changes colors from blue to grey.

Dark Meta Knight has very similar stats to the regular Meta Knight, but a few things are different. For one, Dark MK has a slightly faster air speed and falling speed, and generally slower and more hard-hitting attacks. He also has different animations for almost everything, including running, jumping, gliding, and dodging. Dark MK also has no voice acting, being almost completely silent in-game. Although Dark Meta Knight's handling is quite familiar, he plays pretty differently than regular Meta Knight.
}

// Special Attacks \\

Neutral Special ~ Mach Tornado {Damage: 4% per hit}

{While still called Mach Tornado, this move differs considerably from Meta Knight's neutral B. Drawing back his sword, Dark Meta Knight charges up a sphere of blue energy on the tip of his blade behind him, this being a move of the hold-to-charge variety. You can hold the charge indefinitely, but it finishes charging after a little under three seconds. Upon release, Dark Meta Knight launches a whirling pillar of yellow and purple energy that moves forward on the ground at a decent pace.

Depending on how much you held B beforehand, this can either be a Ganondorf-sized pillar that moves forward at a steady pace or a towering vortex as high as Pikachu's Thunder cloud, damaging everything in its path with multiple hits that carry upward. The tornado will fall diagonally to the ground if summoned in midair, and will dissipate at the lip of the stage or if it hits a wall (if not sooner, it's on a timer for several seconds). This move can KO at higher %s at the top blast zone, but is easily dodgeable. Shielding foes, however, will be pushed by the tornado and must roll dodge to get past the whirlwind. This move is not very spammable.
}

Side Special ~ Sword Beam {Damage: 5%, 8% on sweetspot (only if dodging)}

{With a similar animation to the neutral B, Dark Meta Knight draws back his sword and swings it in front of himself, sending an arc of purple-grey energy briskly forward. There's a sweetspot in the middle of this projectile, in the form of a more spherical-shaped energy, which deals extra knockback. The energy wave can be slightly angled up or down before it launches, but always disappears a Fox laser's distance away. This move has a very important twist, however, in that it only affects foes who are shielding or dodging. Shielding foes have it easier-- they'll sustain damage to their shield, and will be pushed far away, but will otherwise be untouched by this move. Dodging enemies, however, will take regular damage and knockback, making this move useful on overly jumpy foes but not very much so otherwise. Unlike the previous projectile, this one can be used liberally in a short timespan.
}

Up Special ~ Mirror Flip {Damage: 9%}

{Dark Meta Knight appears to become two-dimensional, gleaming with a mirror-like sheen. After a momentary pause, he turns sideways and promptly disappears, reappearing simultaneously one platform away, in whatever direction you pointed the stick. This move can be used twice before touching the ground, allowing for very unpredictable movement, but the second use of this move without touching land will put Dark MK into a helpless state. Dark Meta Knight becomes a weak hitbox where he reappears, but this move is otherwise non-offensive. There's more starting lag than ending lag, but you still can't really spam teleports.
}

Down Special ~ Dark Absorb {Damage: Variable}

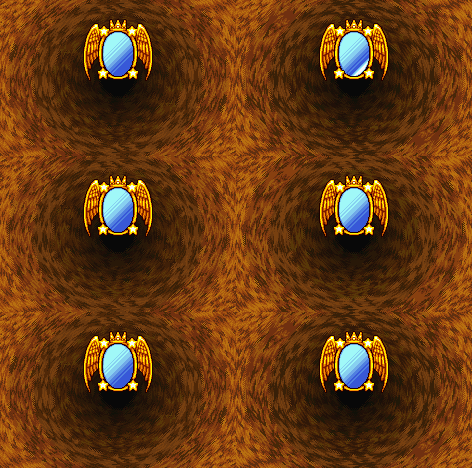
{Dark Meta Knight holds up his blade in a parry stance, blocking any attack from in front of him and absorbing its energy. Dark MK can hold this stance indefinitely, though he may take some damage and experience end lag after a particularly powerful blow. After this move is released, your attacks will have up to a 50% boost in damage and knockback for up to six seconds (non-stacking), as well as the ability to reflect projectiles with sword attacks to varying degrees of intensity. During these six seconds, Dark Meta Knight will have an afterimage that trails behind him (almost mirror-like...), as well as a somewhat glowing sword that shines brighter the more energy is absorbed. When he reflects a projectile, his sword will flash once to notify the players. By the way, that deal with the afterimage isn't just cosmetic; Dark MK's dodge animation is a mirror teleport, but the afterimage runs to where you reappear after the dodge, giving away your position. Play wisely.

Exactly the timing and percentages of the stat boost is an unnecessary detail, but I'll try and break down the mechanics of it. Basically, depending on how much damage you've blocked, your buff will gain intensity first, followed by a gain in buff time. That means that you'll reach your maximum buff strength before the maximum buff time, so if you've only absorbed so much damage, the buff will be at the minimum time and low power. If you've absorbed a bit more than that, you'll max out on the possible damage bonus, and now your only gain is in boost time. Reflection characteristics are proportional to the damage buff: projectiles hit by sword attacks will be deflected at a faster velocity (but not power!) based on the damage buff, maxing out at the same rate and increasing in time at the same rate. Hope that wasn't too confusing.
}

// Standard Attacks \\

Neutral Attack ~ Infinite Slash {Damage: 1%-2% (each slash)}
{This is a fairly standard one-two-infinite combo, with Dark Meta Knight performing a left slash, then a right slash, then a flurry of barely visible sword swipes that cover the area one lying Wario in front of him, trapping foes for continuous damage racking. The horizontal range on this is more than most other neutral combos, but the vertical hitbox is low to the ground and there is a spot of end lag if you want to stop slashing.
}

Forward Tilt ~ Sword Lunge {Damage: 9% (normal), 13% (sweetspot)}

{With little warning, Dark Meta Knight thrusts his sword forward and keeps it there for a moment, for moderate knockback that scales poorly at higher %s. There's a sweetspot at the tip of the blade when Dark MK first pulls out his sword that has extra knockback and damage, but afterwards the sword is a hitbox that deals set damage and knockback. This move has great range, but if you want to score a KO then learning to space the sweetspot is important.
}

Up Tilt ~ Skyblock {Damage: 10%}
{Dark Meta Knight raises his blade above his head, in an upward parry stance. After a moderate pause, the swordsman will automatically perform an overhead slash that covers a 180° angle above his head, with high knockback that scales poorly at high %s. This attack has only average damage, but this move is a makeshift counter-- Dark MK's blade will block any attack from above during the starting lag, ensuring that you'll land the hit. This move can become a very powerful counter to down-facing aerials, but its substandard startup time and unremarkable damage make it not worthwhile otherwise.
}

Down Tilt ~ Shadow Blade {Damage: 8%}
{This guy's crouching stance is pretty much exactly like regular Meta Knight's, so from that pose, Dark MK thrusts his blade into the ground (or a mirror, really), and at the same time the other end of the sword pierces out of the ground, about a character width away. This is a decent diagonal launcher, and is a great setup for aerial combos, having consistent knockback and predictable traits-- however the awkward spacing of the attack means that you'll need to distance yourself from enemies a little. This move comes out surprisingly fast, but can't be spammed the same way regular MK's DTilt can.
}

Dash Attack ~ Drill Rush {Damage: 1% (x7 hits), 3% (final hit)}

{As the name suggests, this attack is very much like Meta Knight's Side+B, with a few differences. It's not controllable, firstly, and it transpires much faster, meaning that it will get more hits in a shorter time. This move can also carry Dark MK off ledges, unusual for a dashing attack, making this a good choice for aggressive playstyles. Some cooldown on this makes it best to use while rushing towards enemies.
}

// Aerial Attacks \\

Neutral Aerial ~ Whirl {Damage: 12% (first hit), 7% (second hit), 5% (third hit)}
{Similarly to Meta Knight's NAir, Dark MK takes a moment to perform a quick aerial spin with his sword outstretched, only this move has a horizontal hitbox rather than a round one. It's just about as powerful as Meta Knight's move of the same input, though, and has some nice range on each side to boot. Bit of a twist (haha!) on this move though, basically it boosts Dark MK up in the air a little when he uses it, making it a boon for horizontal recovery as well as a good choice in aerial combos. This is accompanied by a small whirlwind effect. Small note: Although the attack has multiple hits, you'll never land all three on the same enemy.
}

Forward Aerial ~ Quick Strike {Damage: 10%}
{With no warning (obviously), Dark Meta Knight slashes forward with one hand, this being a bit of an overhead slash (think covering a 35° angle in front of and slightly above the dark knight himself.) There's a very slight lingering hitbox as well, so Dark MK here will briefly hold the sword out after he swipes. As you'd expect, this is nice and fast combo move, but the angle of the hitbox makes it best to approach from slightly below the enemy, while you're jumping at them. How are you going to keep the enemy in the air, though...?
}

Back Aerial ~ Reflex {Damage: 7% (normal), 11% (sweetspot)}
{Dark Meta Knight turns around and extends his blade in one fluid motion, this turning him around entirely in the process. This attack hits behind and slightly below Dark MK, and as such the direction of launch is a rather evil diagonal downwards angle-- only if the tip of the sword hits, though. It's not a very strong attack otherwise, and has low hitstun, not to mention a spot of ending lag. If you can manage it, though, the direction of knockback is pretty awesome, so use this near the lip of a stage for a killer edgeguard.
}

Up Aerial ~ Sword Spin {Damage: 2% (x5 hits)}
{Dark Meta Knight throws his blade above his head, and for some reason it hovers in place and spins for a moment, dealing out multiple hits before knocking away foes in a vague upward direction. Oh, and when I said it hovers in place? I meant it. The sword will actually spin for a moment in a static location before returning to Dark MK, leaving him briefly helpless (well, not entirely, you can still dodge, glide, recover, grab, or perform a weak kick) until either the move ends, he lands, or is hit by an attack. This is useful for distancing yourself from the action, but can be risky to use. There's minor lag on either end.
}

Down Aerial ~ Star Dive {Damage: 9% (sword), 6% (stars)}

{Basically, Dark Meta Knight plunges downward with his sword (keeping some momentum), before striking the ground and emitting a shiny star on either side of him (somewhat like Dedede's Up Special), this being a stall-then-fall style move. While it's not as powerful compared to, say, Toon Link's move of the same input, and doesn't have the spiking ability, it does come out a little faster, and can be canceled by jumping or dodging, allowing for rapid changes in vertical spacing as well as mindgame potential. The landing is somewhat punishable, though.
}

Z Air ~ Roll {Damage: 8% (roll), 9% (glide attack)}
{In lieu of a move like Shuttle Loop that initiates a glide, Dark Meta Knight has a ZAir input that, pretty straightforwardly, has him perform an aileron roll (that is to say, spin) that deals damage and transitions smoothly into a standard glide. His glide attack is a stab downward with his sword, which is a meteor smash.
}

// Smash Attacks \\

Forward Smash ~ Darkslash {Uncharged Damage: 14%, Charged Damage: 19%}

{After drawing back his sword, Dark Meta Knight unleashes a mighty arcing forward swing, covering a pretty nice horizontal range. The parallels to regular MK's forward smash are obvious, and in fact the move behaves very similarly. However, this attack trades off some damage for a large hitbox (just as in the image above), as well as the priority to destroy most projectiles outright (unless you have a dark energy buff, in which case you will reflect them). As an extra bonus for advanced players, the startup animation for this move is very similar to both your Neutral and Forwaard Specials, allowing you to mix things up a little.
}

Up Smash ~ Energy Thrust {Uncharged Damage: 15%, Charged Damage: 22%}

{Dark Meta Knight crouches as his sword glows, before thrusting the energy-infused blade with great upwards force. That can KO quite handily on its own, but that same motion also creates an air column extending roughly above and around Dark MK himself. This is basically a clearly visible wind blast that pushes foes out and away (dealing no damage, but a windy sort of set knockback) from the glowing sword's ridiculous hitbox... which is a bad thing, right? Well, it depends on how you look at it. You may in fact be wise to keep foes away from you... Anyhow, this is a fairly slow move not quite in the same family as Ivysaur or Lucas's USmash, but powerful nonetheless.
}

Down Smash ~ Blade Rift {Uncharged Damage: 12%, Charged Damage: 16%}

{Dark MK plunges his blade into the ground, and evidently into the mirror dimension, as two identical copies of his sword come straight up from the ground on either side of him dealing some nice upward knockback. The move comes out pretty quickly, and since the vertical blades are some distance from Dark MK's actual body, this is a safe move to use at range. Dark Meta Knight remains somewhat vulnerable if he misses, though, for that same reason-- spacing is key. This move is a good pick for reflecting projectiles, provided you have the buff active.
}

// Grab and Throws \\

Grab Attack ~ Cutthroat {Damage: 3%}
Dark Meta Knight holds opponents just like normal Meta Knight, except his pummel is a shady-looking slice with his sword. All the stats are the same, though.
}

Forward Throw ~ Mirror Portal {Damage: 9%}

{{Dark Meta Knight summons an ornate mirror in front of the helpless foe, then launches them forward with his sword... after which they disappear into the mirror?! Huh? Before you can blink, a second mirror appears some ways behind Dark MK, from which the character is sent sailing above the dark knight's head. The move ends here, so if you're fast enough and your foe's % is low, you can pull a fast one on them in midair. You can also send projectiles through the mirror in the instant before it vanishes, allowing for even more options.
}

Back Throw ~ Bank Shot {Damage: 10%}

{Dark Meta Knight summons an ornate mirror in front of the helpless foe, then launches them forward with his sword. Sound familiar? Well, don't get too comfortable. This time, the mirror simply reflects their trajectory and promptly sends them flying in the opposite direction. If you're quick, though, you can send a Mach Tornado or Sword Beam bouncing after them before the mirror disappears. This throw is better for KOs than the FThrow, but is harder to follow up from.
}

Up Throw ~ Dark Descent {Damage: 12%}
{Dark Meta Knight leaps high into the air (upper blast zone) holding the enemy, then plummets downward with his sword at an alarmingly fast rate. When he lands, you have just enough time to see he has impaled his foe, before he picks up his blade. Naturally, this move ends with the other character lying prone-- but Dark MK ends having just barely bounced into the air, open for options.
}

Down Throw ~ Shatter {Damage: 1% (each shard) (11% max)}
{Dark Meta Knight seems to freeze in place... Wha...? Without warning, he shatters violently into an array of reflective shards, launching the held opponent forcefully upwards. The mirror fragments seem to move in slow motion briefly, before coalescing back to form Dark MK once more. Throughout this, you can influence the direction of explosion/reintegration and thus slightly change the direction of knockback and where you re-form after the throw's over. Also, it doesn't really behave like one, but this throw technically has multiple hits.
}

// Final Smash \\

Final Smash ~ Dimension Mirror

{Dark Meta Knight has destroyed the Smash Ball! Upon activation, the sky grows dim and a whirling maelstrom of darkness forms behind the stage. In the center of the madness is a large and ornate winged mirror, that flashes with an evil face... what could it be? Why is it here? You don’t have time to ponder such questions, as Dark MK, glowing with power, slashes any opponent standing directly in front of him so hard they split into four different-colored versions of themselves! Before they have a chance to do anything, though, all four of them (more if you slashed more than one character) are sucked into the ominous mirror in the background, and lose a stock as they are banished the the Mirror World! As you can imagine, this is a very powerful technique, but you have to be pretty close to land it.}

// Playstyle \\

Playstyle ~ ? ? ?
{
Dark Meta Knight is an interesting character to pick in Brawl. Right off the bat, you can start the match as the infamous Meta Knight, and no one will bat an eyelid. Of course, at any time, if you have a quick thumb, you can reveal your true form (Dark MK). That party trick gets old fast, though; you're going to need some pretty tricky tricks to scrape by-- something Dark Meta Knight has no shortage of.

His fast movement speed, coupled with higher falling/air speed than regular MK as well as teleporting dodges, make his motion unpredictable. This is helped by a teleporting recovery, glide functionality, and a counter-style move. Dark MK has plenty of moves that are pretty fast to come out, like his decidedly less evil counterpart, but on the whole has only slightly above-average attack speed. As a player, you also have access to two very useful projectiles: one is a great ranged option (your towering Mach Tornado) that can put a lot of pressure on your foes and forces them to run or roll towards you. The other is a deceptive wisp of energy whose sole purpose is to trick your enemy-- it shares startup animations with the NSpec and the FSmash., and doesn't affect anyone who isn't trying to avoid it.

Your Down Special is not your average counter. Instead of being punished immediately via knockback, your foe will instead have to contend with much more powerful attacks as well as most of their projectiles coming right back at them. They'll have to seriously consider whether or not to attack you, and whether or not to dodge your projectiles (thanks to your FSpec). This indecision gives Dark MK valuable time to land some of his slower, more KO friendly moves, like his FSmash and USmash... outside of those, bar certain throws and aerials, you sorely lack finishers at reasonable %s. Not that you have a hard time racking up damage though; there are multi-hit attacks abound (like your dash attack and neutral combo) as well as moves that string naturally into combos (DTilt is a launcher, FAir and NAir can chain easily, your throws are easy to follow up from).

Played right, Dark Meta Knight is an interesting alternative to our notorious, blue-caped friend. You may even find you prefer Dark MK's power, or perhaps the the feeling of outsmarting foes with your unpredictable attack pattern. Either way you slice it, you are rewarded for playing intelligently and using mindgames to defeat your enemies, moreso than your average character. You'll also benefit from keeping your distance (thanks to tippers and projectiles) and moving constantly (with glides and teleports). That's all for now, so... good luck being evil and stuff
}

// Boss Battle \\

Phase 1 ~ Dark Mind

{
Dark Mind first appears fading from black against an ominous, blue-swirling background. After that intro, he mostly flies around the arena, constantly teleporting, with two damage-dealing and reflective mirrors orbiting around him. Dark Mind also fires stars in various formations. The stars in-game can be inhaled by Kirby for different abilities, but in Smash, they just have elemental properties: Fire (red), Freeze (blue), Electric (violet), or a random status effect (green).

When it seems you've defeated Dark Mind, he shatters into pieces and your character is teleported to a small segment of the SSE, where you can earn back some health items and defeat a couple of enemies. Once you go back through the mirror portal though, Dark Mind appears in a new arena (with a theme from the last rest area you visited) with some new tricks as well. This process of "killing" him and being sent to a new area repeats three times over, each phase becoming more erratic as he gains new attacks, such as firing stars in corners which later on home onto the player character, or dropping a dangerous bomb that will destroy the screen (and you!) unless you damage it enough first. If you keep at it, Dark Mind eventually falls, but it's not over yet...
}

Phase 2 ~ Evil Eye

{
You find yourself in an empty plain under a sky of incandescent orange clouds. A single blazing eye appears at a distance from the middle of the screen, pulsing threateningly... It suddenly grows to take up almost half the battlefield! This is Dark Mind's second, more powerful form. This form will fly around the arena, sometimes sweeping horizontally across the screen to fire a huge laser either continuously or in bursts. He can also quickly weave his twin mirrors around in complex patterns while moving himself, sometimes while rushing across the bottom of the screen upside-down. If a mirror is attacked enough, it will shatter into damaging shards before disappearing and regenerating. Dark Mind will also send mirrors to various locations on-screen and shoot a laser at one of them, which will then reflect the beam to the other mirrors-- this is naturally tough to dodge.

Another ability involves summoning a group of minor SSE enemies that may drop useful items upon death. Occasionally, the screen might even be flipped vertically in order to confuse the player. During the fight, you might also find yourself walking into "invisible" doors that flip your position on the screen. Dark Mind's weak spot are is the very center of the eye (if it's open), so his attacking hitbox is always bigger than his hurtbox-- sucks for you. This form and the next form also lack health bars, so you'll have to play it by ear for this. Once you whittle down the giant eye's health enough though, Dark Mind shrinks and takes to the skies, with you in hot pursuit on a Warp Star...
}

Phase 3 ~ Desperation

{
At this point, Dark Mind is reduced to a Bowser-sized fireball flying through space, as the player character(s) engage in a top-down scrolling shooting gallery. You chase the fiery eye up into the clouds, firing stars at him and him at you as fast as you can pull the trigger-- it's not easy to die, but if you don't destroy the eye after a certain amount of time during the intense battle, Dark Mind will escape into exosphere and out into space, and you have lost the battle. If you succeed, the eye violently explodes over several seconds and you fly off into the sunset.}

// Extras \\

Stage ~ Dimension Mirror

{
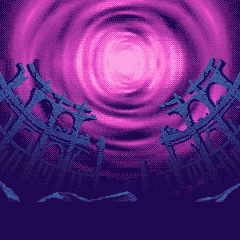
This stage is the location in which you fight Dark Meta Knight in Kirby & The Amazing Mirror, just before you go on to face the final boss. It's a fairly simple stage, taking place in a worn-down stone coliseum on an island floating in the midst of a swirling vortex of energy. The mainland is a lot like the Battlefield's main land mass, but instead of there being three platforms arranged in a pyramid, there are only two floating platforms, one on each side, suspended above and a little over the ledge on each side. This orientation makes the Dimension Mirror a very competitive arena that can sometimes offer some interesting gameplay due to the ability to safely drop down onto recovering opponents. Because of the relative ease of edgeguarding on this stage, staying towards the middle is crucial for victory.}

Entrance Animation ~ Mirror World

{
An ornate winged mirror appear in the background, and out swoops the masked man himself-- Dark Meta Knight.}

Kirby Hat ~ Mach Tornado
{
Kirby dons a slightly darker mask complete with a scar on the left-hand side, glowing yellow eyes, and cute little bat wings. He also gains the ability to use Mach Tornado, a powerful technique.}

Palette Swaps ~ Spray Paints
ORIGINAL
BLOOD RED
MEAN GREEN
META BLUE
DARK KNIGHT
WHITE DEATH

Up Taunt ~ Mysterious Cape

{
Dark Meta Knight holds his cape in front of him... mysteriously...}

Side Taunt ~ Engarde

{
The dark knight beckons enemies to come forth and face him.}

Down Taunt ~ Shine
{
Dark MK takes on a 2D appearance as he flashes with a mirror-like sheen.}

Up Victory Pose ~ Phase Out
{
Dark Meta Knight leaps in the air and turns sideways, promptly vanishing out of sight.}

Side Victory Pose ~ Swordplay
{
Dark MK spins his sword a few times in a moment of show-offery, before sheathing it.}

Down Victory Pose ~ Dark Knight
{
Dark Meta Knight swoops onto the screen on menacing dark wings, like a certain caped crusader...}

Loss Pose ~ Flee
{
Dark Meta Knight's faceplate is cut in half, revealing a familiar face... the mystery figure quickly teleports away, as seen below.}


Plorf

Smash Apprentice
Joined
Jan 28, 2009
Messages
124
Location
Silver Spring, MD
DEATHTANZ MANTISK

click for playlist

INFORMATION

Deathtanz Mantisk is a Reploid, a sentient robot with the ability to think and make decisions. He's a boss in Mega Man Zero 3, where he was sent to a residential area to capture the two Baby Elves, living computer programs that contain great power. Deathtanz is one of the Eight Gentle Judges of Neo Arcadia, a court of Reploids that enforced the law of Earth's largest city. Apparently, he did not like unnecessary killing, saying the dullness of his sickles was a sign of peace, but after the evil Dr. Weil modified him, he cared for nothing but killing.

Mantisk attacks by throwing his sickles so that they spin around the arena, using quick slashes, throwing one of his arms as a boomerang of sorts, and shooting down rocks from the ceiling with a cannon on his rear. In the boss fight, he is rather agile and quick, so that makes for a good skill-set in Brawl. To get an idea of what fighting him is like, click here. For a complete spritesheet, click here.

STATISTICS

SIZE \ 9/10
Deathtanz Mantisk is a bit awkward. He's not terribly big or bulky, but he's very gangly. Thankfully, he doesn't have a wide idle stance, though it is quite tall. His crouch is low and wide.

WEIGHT \ 5/10
This sort of advanced reploid is made of a very light, strong material-- which is perfectly useless in Smash.

POWER \ 2/10
Virtually all of his moves are lacking in terms of knockback, but boy can he put on the damage.

GROUND SPEED \ 7/10
He's actually not overly fast while running, due to having a cumbersome shape.

AIR SPEED \ 10/10
In the air, however, he shines, stalking down prey from leaping above.

FALLING SPEED \ 9/10
Very fast falling speed; Deathtanz is not the floaty type at all.

ATTACK SPEED \ 9/10
Basically, think Meta Knight. This guy is the master of reaction, being very dangerous close up. He's not perfect, though...

RANGE \ 10/10
Really? He has projectiles too? That seems unfair. Decent physical range, too.

PRIORITY \ 10/10
Ugh, you've got to be kidding me. You're making Meta Knight, Plorf, I swear.

FIRST JUMP \ 7/10
While not Falco, Mantisk can really jump, as well as wall-cling and wall-jump.

SECOND JUMP \ 10/10
Like Yoshi, and so many MYM characters, Deathtanz has a unique midair jump. Instead of a single hop, the reaper uses the structure on his rear to propel himself through the air, ascending at a decent rate, the whole thing being very similar to R.O.B.'s jets, even with similar distance.

The energy used for this, though, does not recharge on the ground but rather recharges over time, so while that does make him able to stay in the air for as long as the floatiest characters out there, it makes him prone to accidents in that he won't have enough fuel to gain height should he be knocked off the edge. Unfortunately, this is his only recovery, so try not to misuse it.


CROUCH \ 8/10
With an awkward insect-like stance that's very wide, Deathtanz manages to go as low as Meta Knight despite being so much taller.

RECOVERY \ 6/10
With a wall-cling and a good recovery distance, it seems great. It's a bit gimpable, though.

SPECIAL ATTACKS

NEUTRAL SPECIAL \ SICKLE RUNNER
So, we first get into the skill-set with a projectile. Pressing B causes Deathtanz to hold up one of his arms and flick it forward, launching one of his scythes forward with low lag-- this is an aimable projectile. This blade spins so quickly that it looks like a circle, and moves very quickly as well: a bit slower than Sonic's dash. It deals multi-hit damage of about 10% a second, but it travels through an enemy much too quickly to get all the hits in. The normal trajectory of this attack is straight forward, a bit above the ground, high enough so that Kirby can barely crouch underneath-- but as I said before, you can aim it in any direction. As a side note, the sickle will roll along flat surfaces, if you fire it at a wall or floor. It then travels across the entire stage like a Hothead.

Now, let that sink in for a second. This guy is throwing his arms at you, essentially, so Deathtanz actually does lose a physical part of him as he throws these: that means that, while you can throw two of these at once, you lose your blades for standard attacks, making getting the scythes back a priority. If you ran your sickle runner along the stage, it's as simple as standing on the ground when one rolls back to recollect it, but if you fire it off-stage it's not so simple. Mr. Mantisk has one way of getting his sickles back to him, and that's through his DSpec. Yeah, it has another use too, sue me. In any case, this attack is very useful, and if you'll be patient I'll explain things a little better.

NOTE: If you try to use this move without any sickles attached to you, Mantisk will simply perform a powerful thrusting attack with both his arms, with dull tips. This is of course fast all-around, does 7% and actually rather decent knockback, better than most tilts. Can be a surprise stage-spike.

SIDE SPECIAL \ REAPER
Another limb-breaking attack, Deathtanz Mantisk rapidly pulls his arm back and tosses it straight forward, this time high enough to go over a lot of crouches. The scythe arm is folded up when he tosses it, so it's actually a fairly small hitbox, moving at a decent speed and dealing 6% with tiny knockback. This arm of his is rather sly: it goes forward for as long as you hold B.

The instant you let go, however, it springs the trap: the sickle unfurls and speeds backwards towards Mantisk, the sharp side facing him. Now, the blade does 10% and carries the foe directly into the hands of the executioner, with astonishing speed. Yes, so the idea is that your foe will shield the initial attack, but you, the crafty mantis, will trigger the stealth hitbox and perform some other deadly move. Tricky, that.

NOTE: Without any sickles, this move is obviously very different. Deathtanz will lean back and jump forward, his bladed feet extended. This will always do 7% damage, but knockback is variable on his momentum. Without any speed going, Mantisk can hardly even budge foes, whereas if he's in the middle of a pursuit, he can actually knock them off the edge, but this still isn't good enough to be a replacement for the sickled move, with mediocre knockback under best conditions.

UP SPECIAL \ ROCK BREAKER
This is Deathtanz Mantisk's slowest move by far. He begins by crouching low to the ground, folding up his blades and sticking his tail end into the air. After the total startup time of Dedede's FSmash, he fires the cannon. Exactly three shots, in a triple-burst of red energy, the shots travel infinitely straight up, though they can be aimed in the beginning lag. On their own, they're extremely fast and deal 6% apiece, though their nature makes it nigh-impossible to get hit by just one. The knockback for the lasers is superb-- it's around the level of Wolf's forward smash.

An interesting side-effect of the death beams, though, is that they don't travel infinitely off-screen. As soon as they hit a blast zone, a loud explosion is heard, and a huge rock falls from the ceiling/wall. It's about Bowser's size, but it's a perfect rectangle, taller than it is wide. The rock falls fairly fast, and deals knockback upward a bit like Toon Link's DAir. It does do about 20% on contact, though, so really try to avoid this. Anyway, this rock has exactly as much HP as a column on Shadow Moses Island, only Mantisk has special interaction with it. Apart from his inherent wall-cling ability, various moves of his slice up the rock and send pieces flying at enemies, making this move the very center of his KO game.

NOTE: In the air, this move is a bit faster, at the cost of some power. The shots now do 4% each, and knockback is more like Kirby's forward smash. On the plus side, this now can be aimed in any direction, as opposed to just roughly upward.

DOWN SPECIAL \ CROSS-COUNTER
Mantisk crosses his scythes in front of him as he faces the screen, in a timeframe similar to Marth's Counter, without any momentum stall. If anything hits him during the counter period, two things happen. Firstly, the enemy attacking experiences unusually large ending lag from some invisible strike from the mantis as well as a large shield push effect-- unless there was a projectile involved.

Secondly, Deathtanz is immediately free to do anything, with literally no lag afterward. Now is the moment to show your speed and precision, perhaps even getting a combo going. Of course, you don't take any damage from this, and if you're hit with a projectile while countering, it will be reflected squarely back where it came from. As I mentioned previously, using this move when missing one or both scythes causes whatever's missing to fly back from the edge of the screen, as if magnetized. Cool.

NOTE: Without his blades, Mantisk is a lot less threatening. He can still adequately block hits, but when it boils down to counterattacking, he's out of luck: the enemy is not stunned whatsoever, so precision and timing are important to get the upper hand. Projectiles also aren't reflected, merely deflected.

STANDARD ATTACKS

NEUTRAL ATTACK \ RAPID SLASH
This robot's blades are extremely sharp, and extremely maneuverable: he can do some crazy things with them. That pointless intro aside, this move is actually pretty simple. Mantisk faces the screen as his scythes move so quickly that it's impossible to tell what directions they are going in. Now, anything that comes near him is knocked aside for 6% and low knockback, at least if they're not near him initially. This also shreds physical projectiles, but that's beside the point.

Moving on, should anyone be right on top of Deathtanz when he does this, and I mean right smack close to him, they'll be sucked in as Mantisk holds A and continues a tremendously difficult to escape combo. This'll do about 7% a second, which is plenty enough for the opponent to want to stay away. Now, due to the properties of this move, it's actually pretty great against rushers, but that's not all. When you confront a giant boulder with this, Deathtanz wastes no time, ripping through the stone in a mere couple of seconds. The shards of it then fly forward irregularly, a bit like G&W's frying pan. There's very similar damage, also, but I'm not sure exactly how much. Oh, and the boulder pieces fly a good deal faster than sausage. As a note, Mantisk sticks out both his arms in each direction when he doesn't have any sickles left, a motion which is a tiny bit slow, but deals 5% and okay knockback.


FORWARD TILT \ PULL
Mantisk is based off of a real-world mantis, an insect which uses its claws to snatch in prey. Similarly, the reaper-bot extends his forearms and his blades, this having a range of about a Dedede's width (the blades are vertical). He then swiftly pulls the scythes back in almost as quickly as they came out, dragging any hapless foe into his arms. There's no grab hitbox involved, but instead a single hitbox that deals 7% and knockback directly towards Deathtanz.

Now, first of all, this move should be used with some degree of caution. Since the enemy is now right on top of you, you have to react -instantly-, otherwise someone might get the jump on you. Of course, attack speed isn't exactly a problem for you: a simple grab ought to do the trick, I'd think. Also, without any scythes available, Deathtanz gives a quick boot with his bladed foot, dealing about 4% and knockback that's not terrible. When you try this on your stone block, you'll take out a piece of the middle, leaving the top half to lean forward and fall over. This only does 2% and pathetic knockback on the ground, but when the piece falls over the edge, you've got yourself a lethal falling projectile that gains power as it falls.


UPWARD TILT \ PIERCE
Here begins Mantisk's excellent anti-edge game. If he sees someone recovering right near the ledge, this is the perfect move. Deathtanz raises both his scythes in the air, then stabs them downward in front of him. As you may imagine, this has awful horizontal range, but apart from being able to hit people edge-hanging, it also does 7% and a nice little meteor smash. The move has a bit of end lag, also, but used correctly your foe will be worrying about recovery while you recuperate.

Now, I didn't tell you before, but when Mantisk uses moves with only one scythe, they are still usually the same move, but due to the lack of an arm, they are noticeably weaker than normal: this move, for example, will only do 4% with weakish downwards knockback. If you hit your stone with this, you'll sort of chop it in half vertically, with the far side flying out for a few feet, doing 7% and get-away knockback. The fallen chunks of rock remain on the stage for about 20 seconds (this goes for all chunks), getting in the way of people's feet and forcing them to jump or roll through them.


DOWNWARD TILT \ LOW BLOW
One of Deathtanz's more subdued moves, this has him use the dull side of his sickle to sweep precariously close to the ground. While being fast, it's also reliable: it has a 100% chance of tripping the opponent, and does 5%. The range is also good, like a Dedede DTilt. Now's as good a time as any to mention that Mantisk has a crawl, which is low enough to duck under Fox and Falco's blasters. Stick it to 'em.

Without any blades to hit with, Mantisk performs the same move, but with much less range and only 3%. It also won't trip opponents, merely knock them away about a foot. Should you try and use this move on a stone brick, it'll chip away at the very bottom of it, sending small pieces skimming on the floor. This is also an auto-trip with 5% damage, though it won't trip if the rock flies off the edge.


DASH ATTACK \ TAKEDOWN
While bolting forward, Deathtanz takes a large leap, keeping his momentum going. Instead of a normal looking jump, though, the Reploid jumps feet first-- right into the enemy. Should this connect, the foe will encounter a grab hitbox as Mantisk pins them to the ground at the end of the jump. Upon landing, this deals 7% and leaves the enemy in a downed position. Should be useful if you want to tech-chase, but this move has another good use.

This is an dash attack that will go off the edge if you're near one, so that means you'll take people down with you in the air. This is both a good and bad thing. On one hand, you've got your staple suicide KO. On the other hand, it may leave Deathtanz unlikely to recover if you want to cancel by pressing jump. And oddly, if you do this, the enemy doesn't get spiked but rather gets knocked up as well. Try and abuse this move now, folks! On another note, when this collides with a rock, it will tip over entirely, pitfalling enemies in front of it for 10%. Useful, actually.

SMASH ATTACKS

FORWARD SMASH \ STRIKE

Just like a real mantis, Deathtanz can launch a powerful attack in a split second, keeping enemies on their toes. Here, without any sort of telltale startup animation, the reploid slashes with one of his scythes so that the blade clotheslines the unlucky foe: this has Marth FSmash range. Now, contrary to what I said, this is not a power move, but it is good enough to knock foes a short distance away, so that you can set up a new approach with minimal ending lag. Uncharged, this move does about 12%, whereas if it's fully charged it'll do 21%.

However, Mantisk has a trick up his sleeve. First off, he can hold his charge indefinitely, though he won't be able to move still. More importantly, though, shielding cancels the charge, so if your foe tries to punish your charging, you can perform a roll or spotdodge to either ambush them from behind, get further away, or straight-up counter with a grab or a DSpec. Another interesting property is that if you use the FSmash again immediately after shielding (or dodging), it will have the same charge as you last had it before shielding-- so you can still hit people with a charged Smash even if you had to defend yourself first. By the by, without scythes this is a simple move that involves Mantisk thrusting an arm forward rather like a weaker Samus FSmash, for 8-16% and mediocre knockback.

One final comment, sorry. Mantisk can actually roll behind his rock, being the only character able to do so. Using the FSmash, you can blast the rock into pieces in one blow, launching all the pieces less than a platform away, but with enough knockback to be a solid kill move with 9% per fragment. It also looks nifty.


UPWARD SMASH \ PLASMA PULSE
With his odd little laser-thorax, Deathtanz crouches down low and aims his beam weapon similarly to the Up Special. After a short delay, about a Meta Knight FSmash length, the reploid unleashes a burst of bright reddish energy that ranges nearly an entire Lucas USmash up and around him.

This is a little less powerful than Meta Knight's smash, but its disjointed hitbox and good damage make this worthwhile. Indeed, this does about 16% uncharged and a whole 28% when fully charged, with only medium ending lag. However, all the discharged plasma does stick around in the form of a gas, acting as an after-effect hitbox not unlike Lucas's. This'll cause about 3% and a heavy flinch, basically discouraging approach for a little while. Unlike Lucas's move, though, Deathtanz is able to move around just before the cloud of plasma dissipates, allowing some sneaky combo options.

And on another side note, the actual blast radius is much smaller than the visual, which is rather gigantic and can flash in front of the screen a bit, obscuring view. Using this with DACUS only makes the move more lethal. When used right next to a rock, the plasma somewhat blasts the rock, sending it sliding in one direction for a platform with 14% and fairly good knockback. Not to mention it MOVES YOUR ROCK-- but still damages it.


DOWNWARD SMASH \ RING BOOMERANG
In an unusual feat for a DSmash, Mantisk hops up as he throws a spinning horizontal sickle below him, the boomerang circling his feet before he touches the ground. This has excellent range and can clear out an entire platform's radius with largely horizontal knockback. The damage is not too shabby either, at 12% uncharged and 24% fully charged. There's only mediocre knockback for a Smash-- better than Ivysaur's, mind you, but still pretty bad-- but there are some other tricks you can pull off with this.

First off, since the mantis jumps while performing this attack, doing it right after a dash will carry some momentum and make Mantisk himself a weak non-damaging hitbox. The spinning blade beneath him, though, will always home back in automatically, so if they shield or dodge the initial barge, enemies will get snagged by a scythe at their feet. Secondly, if you tap A again while in the air, Deathtanz will actually throw out another sickle, this one traveling slightly higher. Since the timing for this double-attack is not strict, you can surprise enemies with the timing of the second blade.

All in all, this move contributes to a nice, versatile get-away move that probably won't score you a KO-- though it may lead to an edgehog. Without scythes, this is a double jump-kick that hits on both sides, deals mediocre knockback, and 8-15%. Also, with a stone nearby, the low-hovering blades cause the rock to chip off at the bottom and collapse over itself, having very short range but 16% and decent enough knockback.

AERIAL ATTACKS

NEUTRAL AERIAL \ SPIN KILLER
Being based on a praying mantis, Deathtanz uses fairly high-accuracy moves rather than broad-sweeping ones. However, the mantis robot accommodates; spinning once horizontally with his blades close in. This is an extremely fast move, about on par with Meta Knight's NAir, but with noticeably less knockback. This spin does about 10%, nothing too exciting, but it has very high hitstun, on par with a Lightning Kick. So high, in fact, that there's enough time to barely edge in a fast move before the opponent is knocked away.

Obviously there's a lot of combo potential here, especially considering that your second jump is a combo fiend's best friend. Follow this up with pretty much any aerial, or even a Sickle Runner or Rock Breaker cannon! This move without scythes is a lowly sex kick, that does about 6%, but it gets stronger as it's left out, rather than weaker! This is due to Mantisks's bladed foot. When used on a boulder, this move splits it perfectly horizontally and sends the upper part off a ways for 11% and as much knockback as Meta Knight's NAir.


FORWARD AERIAL \ PRECISION STRIKE
Probably the most boring move in this moveset, Mantisk delivers a simple slash forward, much like Marth's FAir. Like that move, this attack has very nice range, but lacks a tipper knockback bonus. The attack does 10% and low knockback, and is quite spammable. There are no special effects or anything like that, but there is an advanced technique regarding this move. Right during the ending lag, if you nab the timing right, you can turn Deathtanz around without having to abuse B-reversal or anything like that. Performed correctly, you can unleash a wall of FAirs in both directions, if you so decide. Without any sickles, this move is a faster/weaker clone of Mario's FAir, being an ineffective meteor smash for the most part, also doing 8% in the process. When used on a stone, this acts as a minor cut, chipping it away piece by piece, each one flying forward a short way and dealing 6% and minuscule knockback.

BACKWARD AERIAL \ SURPRISE!

Deathtanz Mantisk, if you couldn't tell so far, is pretty much a cheater in the air. This attack stops all his horizontal momentum, first of all, and has a bit of starting lag. After that, though, he strikes a weird pose with his blade sticking out, looking like the above image. This works somewhat like a sex kick, because the duration is longer than average, but it's only really effective as a strategically timed attack.

Anyhow, the move, if it hits the shiny sweetspot, is a decent KO move that deals 12% damage and moderate knockback. Any time after the initial button press, though, it just does 4% and a flinch effect. The real meat of the move, though, happens if you land while the hitbox is out. When that happens (the hitbox still remains if you land, so this is in fact an anti-ground move as well), Deathtanz can now cancel the attack into any move, at all. Against your rock, this is similar to the FSmash, shattering the rock utterly. This particular cut, though, causes the stone to break more cleanly, with only one piece that flies out, doing 12% and nice knockback. This move turns into a backwards kick (think DK's BAir) without scythes, doing 7% and combo-style knockback.


UPWARD AERIAL \ SCISSOR KICK

In a motion looking like every other Brawl character's UAir, Deathtanz leans back with his feet following in a flipping motion. However, instead of performing a 360° turn, he stops with his feet facing up, upside down. After a slight pause, he then slices both his feet straight down in front of him, violently. It all happens very quickly though. Anyhow, on the first initial flip, your feet are a hitbox that deal 6% and slightly upwards set knockback; nothing spectacular. However, on the strong downwards kick, your feet are a two-hit hitbox, the first hit doing 5% and the second dealing 6% and a subtly angled meteor smash. This attack has great range on the upstart, but the meteor smash has mediocre range. This does not combo into itself.

This attack is actually quite useful, especially when following up edgeguards and other offstage shenanigans. The timing is tricky to get around-- if you hit someone with the initial flip, there go your chances of spiking, so you'll have to combo it into something else. When you do use it in the right situation, though, the risk is worth it and you may even get a KO. Against a rock, the flip kick simply damages it, but the spike breaks the rock in half, each half flying downwards with 7% and fairly good knockback away from it.


DOWNWARD AERIAL \ VAULT
Mantisk crouches in midair and swipes his blades down and back, as if he's vaulting over something. Of course, that's exactly what he's doing-- if this hits an enemy, they take 9% and decent backwards knockback, as Deathtanz is propelled slightly forward. There's nothing really more to this move; he simple jabs backwards underneath him with his sickles. That doesn't make it any less useful; when you think about your other aerial options, this ties in perfectly. When used on a rock, it'll chip off the top and make it fly back for 6% and somewhat irritating hitstun/flinch.

GRAB AND THROWS

GRAB \ ENSNARE
In an entirely expected turn of events, the mantis reploid has a pretty sweet grab game. Deathtanz quickly stabs his blades so that anything directly in front of him is captured, like a real mantis. This grab is among the fastest in the game, with decent range. More unexpectedly, Mantisk also has an aerial grab that functions exactly like a normal grab, though he can't hold enemies as long and the throws are different. By grabbing a rock, he can actually pick it up and carry it like a heavy item.

PUMMEL \ SLIT
Deathtanz holds his victim with his blades practically at their throat, so naturally each tap of A painfully tightens his grip for 2% a slice, being in most senses an average pummel.

FORWARD THROW \ BACKSTAB
Following the trend of throws in which the opponent is deceived into thinking they escaped the grab, Mantisk lets his opponent free. If timed right, they will think they've been let go and will begin a counterattack. However, exactly .7 seconds after they "escape", the mantis brutally tosses a sickle at the enemy, utterly impaling them and sending them flying for 15% and rather good knockback. Nimble foes may shield or dodge this, though the latter is recommended as this eats through shields like butter. Also, if Deathtanz misses, he will have to use his Down Special to retrieve his lost blade, so be cautious.

In the air, he skips the whole trickery aspect and instead gets straight to throwing them-- he throws enemies exactly as he would his scythe, and they take 7% and low knockback-- the move still looks cool, though.


BACKWARD THROW \ DOUBLE TEAM
This move requires both scythes to work properly. Mantisk turns around with the foe in his arms and throws both his blades behind him, the enemy player still between them. The sickles hover in the air for a moment as Mantisk leaps up, lightning-fast, and digs a bladed heel into the foe while simultaneously reattaching his blades-- this sends them diagonally down, bouncing off the floor. This throw does 9% and is not the best combo starter, but it can be used to send people off the edge behind you. In the air, the move is the same, except with only 7% and less knockback. I will note that, interestingly, this throw ends with Deathtanz in the air no matter where it's used, so use that to your advantage.

UPWARD THROW \ SKYBLADE
Mantisk throws his enemy straight up, then immediately begins his assault: he throws both his scythes directly at the enemy, one at a time-- each one doing 4%. The blades magnetize back to you at this point, but for all purposes the throw is over. Since it's over so quickly, though, that gives you a chance to use a Rock Breaker, or any aerial, or perhaps even a charged USmash. In the air, this throw is pretty much the same.

DOWNWARD THROW \ EXCRUCIATE
In one fluid motion, Deathtanz slides the opponent to the tip of his blade, then stabs them into the floor-- stepping on their neck in the process. This does 8% straight up, but the mantis is not done yet. From here on you have two options. You can press jump to end the throw early and be in the air, or you could press shield to cancel yourself right out and roll/dodge. Or, you could press A/B to continue the throw. If you choose this, Mantisk turns around and uses his energy array to face the enemy and shock them repeatedly-- several hits for another 6%. That's some killer damage right there. It's also a lot of time, if you're in a free-for-all. In the air, this only does the initial 8%, and ends with the opponent right next to you, slightly stunned.

FINALE

FINAL SMASH \ 1,000 SLASH

When you beat Deathtanz Mantisk in Mega Man Zero 3, Zero gains an EX Skill called the "1,000 Slash", which is a rapid close range attack. You never see Mantisk use it in the game, so the reploid takes it literally when he slices open a Smash Ball. If he's very close to an enemy and presses B, the camera will zoom in as he does a cool shadowy animation, and he will take seven seconds to slash them 1,000 times for 1,000% damage. At the end of this period, he'll take a brief pause, which is cue for you to press a direction-- this direction is the direction in which the foe will be knocked away. This EX Skill can hit multiple people at once and it a one-hit KO under any circumstances.

PLAYSTYLE

Deathtanz Mantisk is fairly specialized, but is not limited to having to play a certain way, rather like many Brawl characters. The main idea behind his character is that he's fast and unpredictable. He has plenty of moves, like the Side Special or FSmash, that force the enemy to guess what Deathtanz is planning next. It's also this idea that makes the mantis so annoying to fight-- many of his attacks lead into another, so if you don't react in time, Mantisk is going to take advantage of that and combo you into infinity.

Building damage is no problem. You've got your fairly risky Neutral Attack, for starters, but there's also FTilt and pretty much any of your other standards, some that start combos and some that perpetuate them. Throws are also particularly deadly. The choices are all there--what's not quite as obvious is how to kill. Now, I probably undersold the KO potential that Mantisk really has, but it can be tough for more than one reason. The main hurdle you have to get over with in terms of KO is shooting the rock down in the first place-- you pretty much need your rock to KO at a respectable percent, and if you can't blast it from the ceiling, you're screwed. Of course, your laser is plenty strong enough to kill, but chances are foes will avoid that. There's no way they can avoid the aftermath of your rock falling if you fire your beam in the first place, though.

Deathtanz excels at close range, but he's plenty lethal at a distance, unfortunately for those facing him. The Sickle Runner is the classic speedy projectile, with a twist. It doesn't serve a huge purpose if you use it as you would a normal projectile; Deathtanz too offensive for that. However, as soon as you've gotten to running the scythe around the stage, or having it boomerang back to you, you start getting really scary, really fast. Combined with all your other mindgame specials and relentless air game, Mantisk can hit a foe anywhere he chooses. Your Side Special and Up Special are also valuable projectiles with varied purposes, both being quite obvious if you've read them.

When it boils down to things, Deathtanz Mantisk plays a little bit like Meta Knight in terms of sheer tenacity: following the character around the stage, peppering them with attacks. However, the addition of a good ranged game, mindgames, throws, and a gimpable recovery, you've blended in some unmistakable elements of this character. Playing as this reploid demands strict timing, great reflexes, craftiness, and above all, a mastery of how to kill.


EXTRAS

ALTERNATE COLORS \ SPECTRUM
FOREST \ DEFAULT
BLOOD \ RED TEAM
ABYSS \ BLUE TEAM
ONYX \ BLACK
PLATINUM \ WHITE
ACTIVE CAMOUFLAGE \ CHANGES HUE

UP TAUNT \ PREPARE
Deathtanz strikes a basic battle stance, with his blades ready to strike, like a mantis.

SIDE TAUNT \ CUTTHROAT
In a threatening motion, Mantisk slides his blades across each other, creating a grating noise.

DOWN TAUNT \ DEATH GLARE
The name speaks for itself; Deathtanz gives a mean stare, which actually follows the nearest opponent. Creepy.

UP VICTORY POSE \ TRIUMPH
Mantisk jumps in and slashes twice and then stands in his idle pose from Mega Man Zero 3, with his scythes out.

SIDE VICTORY POSE \ SPIRAL

In another animation from Zero 3, Deathtanz takes on a weird aura and twirls his blades so quickly that a neat purplish portal shape appears.

DOWN VICTORY POSE \ TRANSFORM

Before the Eight Gentle Judges were transformed by Dr. Weil, they were a nice looking group of golden-white humanoids. Deathtanz here transforms himself back info his lanky original form.

LOSS POSE \ DEFEATED
Deathtanz Mantisk stands with his head down, blades compacted, silent still.

STAGE \ OLD RESIDENTIAL

The image pretty much speaks for itself. This is a non-gimmick stage, it is as it looks. The pillars with the gaps in between them support a crafty, offensive style of play very well, also supporting wall cling and all of those fancy things. The upper KO boundary is higher than it looks, though, and it extends higher than in the picture. The structure at the upper left is also moved up.

ENTRANCE ANIMATION \ BATTLE MODE
Deathtanz is already on the stage before the countdown begins, in his humanoid form. He spends the three seconds morphing into his combat form.

KIRBY HAT \ ROBOT SUIT
Kirby dons a green, high tech suit that includes both a pair of little mantis eyes poking out on his head and miniature, but deadly scythes. Kirby can now use a simplified version of Sickle Runner-- it has no boomerang effect and only deals 7% a second. However, since Kirby's sickles regenerate, he can use this move much more frequently than Deathtanz.


flyinfilipino

Smash Master
Joined
Sep 11, 2007
Messages
4,319
Location
North Carolina
Thanks for the Mr. Mime comment, Plorf!

@Deathtanz: I had to stare at his picture for a while to figure out where his head was.

He seems like a cool character; a blade master with an unexpected interaction with a rock. And it's a pretty cool interaction with a rock. With his flying sickles everywhere, I reckon Deathtanz would look pretty cool to play as. All of his specials are pretty neat, although Down Special is a little dull (but useful!). The rest of his Standards are pretty nice, with nice little additions here and there to make 'em cool. And his rock-slicing shenanigans keep things interesting.

Overall, an cool moveset for a robot-mantis-assasssin guy! :bee:
 

MarthTrinity

Smash Lord
Joined
Aug 9, 2007
Messages
1,954
Location
The Cosmos Beneath Rosalina's Skirt
Death Mantis

Yes I know his name is DEATHTANZ MANTISK but in all honesty, that name is really freakin' stupid. However, being the fair person that I am...I will read and comment DEATHTANZ MANTISK with no bias. If I managed that with Nero, I'm pretty sure I can do it here.

So. . .right off the bat I can say that the moveset is certainly more unique and flowing than Kingdra. So no, everything is not Water Gun. Now I'm not really sure what it was (maybe the notes sections) but the moveset felt a tad bit...cluttered to me. The move descriptions even on the more simple moves (fair for example) tend to drag on for a while as well. That being said, the layout and organization is suiting and the use of the in-game sprites is certainly helpful for imagining the moves better.

And now...I actually think I know what's making it feel cluttered. It feels like the moveset is trying to do way much, at least in the specials. The counter Down Special also acting as a way to get your arms back seems a bit tacked on...however it -WOULD- be pretty cool if the arms were actually active hitboxes upon returning too. That way they'd act as sort of a controllable boomerang-esque projectile of sorts. Although I suppose that -IS- what the Side Special's for so that's hardly a big complaint or anything.

Actually, my only real complaint here is that you have all these moves to use without your arms. . .but why would you ever want to? With his arms, he's a Meta Knight-esque priority demon with fast, powerful attacks (damage wise at least). Considering you say he can use his counter without losing momentum, what's to keep him from using it in midair and regaining his arms everytime he loses them? So basically, he comes off as pretty overpowered more or less.

But yeah. I always seem to come across as more negative than I should be for comments (which is kind of OoC for me but...eh). Overall, DEATHTANZ MANTISK was a pretty good read with some creative ideas here. It's certainly better than Solar Man and Kingdra to say the least (chew)
 

Hyper_Ridley

Smash Champion
Joined
Dec 21, 2007
Messages
2,299
Location
Hippo Island


MASTER SKARMLORD


This is a Skarmory, a 2nd generation Pokemon. However, this isn’t just any Skarmory, this is MasterWarlord’s Skarmory that he keeps on his sandstorm-based team in Pokemon Online. Warlord has found a set-up so insane that he’s basically single-handedly proven that Skarmory deserves his own tier above Ubers. Forget Wobbufett, Kyogre, Garchomp, and Mewtwo. If you don’t devote a move-slot on every single one of your Pokémon to specifically defeat Skarmlord, it’s GG.

STATS

Ground Movement: lol, move? He arrogantly struts about at Ganon’s speed. Ain’t nothing’s gonna break Skarmlord’s stride.

Traction: Perfect. If he ever does need to switch-out, he’ll guarantee have the counter to the thing you sent in to counter the thing he sent in to counter your Skarm counter.

Jump: Skarmlord has 5 epic-height jumps, and in fact, he has the same moveset in both the ground and air.

Fall-speed: floatier than Jigglypuff. Can’t let those inferior Pokemon have advantages over Skarmlord, can we? Now bow before almighty God.

Air Control: Double Wario’s. Nuff said

Size: Around Marth’s size. It’s big for a Skarmory, but this IS MasterWarlord’s Pokemon we’re talking about here.

Weight: About Wario’s, which is actually bul- I mean, heavy. Skarmlord also has the Sturdy ability which prevents him from being KO’d if he was struck by an attack at O%. It also prevents all instant-kills, so pummel KOs are like using poison-type moves against him.

SPECIALS​

Side Special: Stealth Rock
With no animation or lag whatsoever, Skarmlord creates a field of sharp, floating rocks, covering an area the size of Bowser. He can only have one of these on the field, but since there’s no way to tell he performed this move whatsoever, you’ll never know where that area is until you hit it. Contact deals 50% while KOing at 300%. However, if the opponent uses electric, fire, Ice, wind, or bug-based attacks, they take 999%.

Down Special: Spikes
Skarmlord spreads his wings as a flurry of his sharp feathers fly out, covering the entire platform he’s on. The spikes last for 30 seconds, and deal 9% with flinching knockback. This makes it impossible for your opponent to use their ground moveset on stages like Final Destination. The animation for the move lasts .5 seconds, but even if Skarmlord is damaged the feathers will fly out of him while he’s taking knockback.

Neutral Special: Whirlwind
Skarmlord flaps his wings, creating a tornado the size of Meta Knight’s infamous Neutral Special in front of himself. This goes on for .4 seconds after moderate startup lag, but it has a grab hitbox. If anything is caught in the wind after its normal duration is up, the tornado will shrink to constrict the opponent as you move them around with the control stick, having 3x the difficulty of a grab to escape. Catch an opponent, then drag them through all of your spikes and stealth rocks.

Up Special: Roost
Skarmlord appears in the center of the stage with no animation and only taking 1 frame to do so. This also fully heals him in the process. What, you though it would be possible to OUTSPEED Skarmlord and KO him with a move he’s weak to? (hehe) Even if you hit him with a move that KOs at 0%, Sturdy would kick in and he recovers anyways…

A MOVES

Neutral A: Taunt
Skarmlord lets out a hearty laugh, which causes the opponent to become enraged. They can no longer perform shielding or dodges for the next 10 seconds. Speaking of Skarmlord’s laugh, it is incredibly deep and evil sounding. This isn’t a reference to heavyweight make antagonists, it’s just that it’s Warlord’s Skarmory.

Side A: Double Team
Skarmlord performs his spot/air-dodge animation, but it lasts for an additional .5 seconds after it’s supposed to end, giving him dodge invincibility while still being able to attack. Even if you do have an anti-dodge move, he’ll just roost it away. No, there is no reason to use his regular spot/air-dodge over this. In fact, this IS his dodge move!

Up A: Sandstorm
Skarmlord spreads its wings as a Tyranitar descends to the stage on a pillar of heavenly light. It takes a full second for T-Tar to land but he’s invincible the entire time. After landing, he performs his roaring animation from the 3d Pokemon games, causing a sandstorm to envelop the screen. The opponent now takes 3% every .3 seconds for the next…oh wait, this is Tyranitar, the sandstorm doesn’t end. Olololololol. Once you summon it, the only reason to use the move again is against character with weather-based moves, such as Jumpluff and Ludicolo.

Down A: Stall then Stall Some More
Skarmlord spreads his wings and hovers in midair as long as you hold A. When you release A, he crashes down with the power of Bowser’s Down Special, but you go back to holding A for him to start hovering again.

FINAL SMASH – SKARMCHANS​

A Chansey appears in front of Skarmlord. Yeah, you can forget about Skarmbliss, seeing as Chansey has a new item called pre-evo stone that makes it BETTER than its evolution. Chansey will automatically take damage for Skarmlord until it reaches 999%. However, that only applies to special moves. Hitting Chansey with any normal attack or grab causes her to EXPLODE, KOing everyone of the screen…except Skarmlord. (h)

PLAYSTYLE


MATCHUPS

Skarmlord vs Something with Suction Cups, a priority fire-type special move, and 256 special attack:
Skarmlord wins. Period
 

flyinfilipino

Smash Master
Joined
Sep 11, 2007
Messages
4,319
Location
North Carolina
@Master Skarmlord: I really like that Taunt move; I'm not sure if that's been done before (though it probably has). Sandstorm is epic. Good job! :bee:
 

MarthTrinity

Smash Lord
Joined
Aug 9, 2007
Messages
1,954
Location
The Cosmos Beneath Rosalina's Skirt
Oh, howdy peeps! Just thought I'd make a HUGE OFFICIAL ANNOUNCEMENT HERE!

The set making period for MYM8 will be -ENDING-at midnight on October 31st; keep in mind that this is pacific time; as a reminder, I'll make a post when the contest is over! So. . .SPOOKY HALLOWEEN CLOSING :3

So basically, once Halloween is over, so is MYM8! Get your sets in for the final rush people!
 

Crewx

Smash Rookie
Joined
Oct 9, 2010
Messages
21
So how often does this run? Because I have plenty more ideas in mind, ones that a lot won't expect.
 

darth meanie

Smash Journeyman
Joined
Jun 6, 2008
Messages
452
Hey guys, I might be able to come back and be active pretty soon. I've had a nightmarish hive of awful awful midterms lately, but it's gonna clear up pretty quickly.
 

n88

Smash Lord
Joined
Oct 10, 2008
Messages
1,547
So how often does this run? Because I have plenty more ideas in mind, ones that a lot won't expect.

Basically, there's just a few weeks in which advertisements and voting go on and the Top 50 is compiled, followed by cooldown/a chance to get something prepped for next contest. And then we're right back at it. You should probably expect MYM9 to kick off near the end of November.

@DM

=O
 

Crewx

Smash Rookie
Joined
Oct 9, 2010
Messages
21
Basically, there's just a few weeks in which advertisements and voting go on and the Top 50 is compiled, followed by cooldown/a chance to get something prepped for next contest. And then we're right back at it. You should probably expect MYM9 to kick off near the end of November.
Awesome, thanks for the notice. Honestly, I didn't know it was a contest till after I made General Scales. I was making em for fun x)
 

Junahu

Smash Ace
Joined
Nov 15, 2005
Messages
899
Location
Shropshire Slasher
DEATHTANZ MANTISK: does suffer from being a bit 'busy' to read, though it's easy to see that this flaw is only in the writing. The set itself is streamlined enough and would play remarkably well. You did a good job of using simple attacks to build a reasonably energetic moveset.
But
I felt the block interactions weren't as organic as they could have been, and the writing could stand to be improved, or at least condensed.
I also find the colour green to be my least favourite colour of all
 

Chris Lionheart

Smash Champion
Joined
Apr 6, 2008
Messages
2,076
Location
Make Your Move
Urgot


Video​

http://www.youtube.com/watch?v=1bQtJZW1x08

Watch this to see Urgot's basic abilities, animations, and voice in action.

Story

There are warriors who become great for their strength, cunning, or skill with arms. Others simply refuse to die. Urgot, once a great soldier of Noxus, may constitute a case in support of the latter. Prone to diving headlong into enemy battle lines, Urgot sewed chaos throughout the enemy ranks, often sustaining grievous injuries in the process. When his body was unable to weather further abuse, the crippled Urgot was delegated the position of High Executioner of Noxus. By this time, his hands had been ruined and he could barely walk. Scythe-like grafts affixed to his maimed limbs served to carry out his bloody work.

Urgot finally met his end at what should have been his finest hour. Because of his military background, he often accompanied detachments into foreign territory to carry out judgment. After ambushing an enemy force, Jarvan IV, Crown Prince of Demacia, fell into the clutches of Urgot's division. Too far from Noxus to risk transporting their prize for ransom, Urgot prepared to dispose of their captive. At the final moment, however, the Dauntless Vanguard, led by Garen, the Might of Demacia, intervened, and Urgot was cut in two by the zealous warrior as he scrambled to free his Prince. In recognition of his service, the executioner's remains were remanded to the Bleak Academy for reanimation. A lifetime of abuse, however, had left his body in a catastrophic state; proving problematic to the necromancers' craft. Professor Stanwick Pididly, the prevailing scholar of Zaun, offered a solution. Within Pididly�s laboratories, a nightmarish new body was forged for Urgot. Now as much machine as man, Urgot arrived at the League of Legends in search of the man who ended his life; necromantic energies coursing through his metal veins.

"We can rebuild him. We have the techmaturgy." --Professor Stanwick Pididly

Stats

Size- Enormous
The same as Bowser in all dimensions.

Weight- Heavy
Urgot also weighs roughly the same as Bowser or Ganondorf.

Movement Speed- Poor
Urgot is one of the slowest characters in the game.

First Jump – Poor
Practically a shorthop.

Second Jump- Great
Urgot’s mechanical body allows him a Yoshi-esque second jump.

Falling Speed- Very fast
What falls faster than fat and metal? Urgot.

Crawl- No

Glide- No

Wall Kick- No

Wall Cling- Yes (5 seconds)
Urgot clings to walls like a spider.


Specials

Neutral B – Noxian Corrosive Charge
Press and hold B for Urgot to create an aiming reticule, much like Snake’s Final Smash. This reticule cannot exceed 1/3 of Final Destination’s length from his body, Urgot moving in the aimed direction if you attempt to extend it further. Release B to fire a corrosive grenade. Foes struck by this grenade are afflicted with a poison that deals 1% per second to them over 5 seconds. In addition, any Acid Hunter missiles Urgot fires will auto-seek the nearest afflicted target.

Side B – Acid Hunter
Urgot fires a scythe-shaped missile in the target direction (left, right, diagonal), which collides with the first target it hits. The missile has a range of 1/4th of Final Destination by default and moves rather slowly, but if any foes are afflicted with Noxian Corrosive Charge, the missile flies very quickly, seeks the target regardless of range, and cannot be avoided (but can be shielded/reflected). Deals 5% damage. Low start lag, but some considerable end lag.

Down B – Terror Capacitor
Urgot charges up his capacitor to gain a shield, blocking 5…10…15% damage (based on charge length) and causing his Acid Hunter, Neutral Aerial, and Neutral A to slow target’s movement and attack speeds by 5…10…15% per hit (max 5 stacks). The shield has a max duration of 10 seconds, and the slow has a max duration of 3 seconds, unless refreshed with more applications.

Up B – Hyper-Kinetic Position Reverser
Urgot charges up his hyper-kinetic position reverser, switching places with the nearest foe. This takes 1 second to perform. In addition, Urgot gains superarmor for a couple seconds after swapping. Max range of 1/4th of Final Destination.

Normals

Neutral A – Energy Round
Urgot fires a single, semi-spammable burst of energy from his gun arm, dealing a mere 1% damage with no knockback. Well, so much for that move. Still… it’s one of Urgot’s only sources of damage-racking and works well with his Down Special, so why not?

Dash Attack – Spinning Spider
Urgot bends his spider legs, stretching the outward to deal damage as he spins. Does up to 8 hits of 1% each, with a nice sized, good priority hitbox. A bit of start lag, with no end lag. The end lag will be nasty, however, if the attack is whiffed.

Tilts

Side Tilt – Slice
Urgot slashes his scythe arm forwards. Pathetic reach (the foe literally has to be right next to Urgot), but decent speed. Deals 6% damage.

Up Tilt – Spider Kick
Urgot backs up on his hind-legs and kicks upwards with his front legs, dealing 5% damage with serious upwards knockback (Kos starting at 80% on lightweight characters) to struck foes. Low lag but rather mediocre reach.

Down Tilt – Belly Bump
Urgot shifts forward, pushing foes directly in front of him away. If you thought the side tilt had bad reach, this one is even more unimpressive. They have to actually TOUCH Urgot to be hit by this, but the knockback is great, being comparable to a bumper. The starting lag is fairly low too, but the ending lag is a slight nuisance.

Smashes

Side Smash – Great Scythe
Urgot extends his scythe arm to a great reach and slashes forwards. This move has considerable starting lag, but deals a nice 7…10…12% damage and good forwards knockback that kills as low as 70%. The ending lag is quite low. Reach and priority are good.

Up Smash – Poison Field
Urgot performs a motion much like (armored) Samus’s Up Tilt, leaving a poison huge poison cloud that deals slight upwards knockback with 3% damage initially. The trail lingers for a few seconds, staying in place. It deals a painful 6…8…10% per second to foes caught in it.

Down Smash – Explosion
Urgot aims his gun arm downwards and fires a series of missiles, creating an explosion that rises upwards, dealing 10% and knocking struck foes up in the air for great upwards knockback (killing “squishies” as low as 65%). The trick is that, after the explosion starts to rise, Urgot can push the hitbox around with his attacks, as he “charges” the move. The barrage automatically ends after 5 seconds.

Aerials

Neutral Aerial – Bullet Spread
Urgot fires a series of weak short-distance energy shells as he spins around, hitting opponents in all directions for repeated hits of 1% damage with no knockback. Lag is very low, as this move can be spammed much like his Neutral A.

Forward Aerial – Hook
Urgot clamps his spider legs forwards, snaring struck foes in his grasp. He then immediately throws them downwards. This is a pretty standard meteor and deals 7% damage. Starting lag is pretty high, and the reach is average at best.

Backward Aerial – Backslash
Urgot slashes behind him with his scythe arm with force. This pathetic-reach scythe attack deals great knockback and 7% damage. A typical finisher that can be painfully difficult to land.

Upward Aerial – Energy Turret
Urgot shoots a burst of energy shells, dealing very rapid hits of 1% each. This deals up to 15% damage within a period of a second, though there is no knockback. This does not protect Urgot from aerial attacks, but it is a nice harass and damage racker, albeit the starting lag is fairly high. This attack will continue if Urgot touches the ground while firing, so short-hopped Uairs can be a great source of damage.

Downward Aerial – Belly Flop
Urgot lays down midair and shifts all weight to his massive… well… weight. This causes him to fall even faster (he could literally fall from the upwards KO line to the stage in a second), dealing 5…20% damage to struck foes depending on the distance he fell. He drags struck foes with him, either Urgotciding or pinning them to the ground for a couple seconds. It is semi-easy to suicide with this move, though you can end it early if you haven’t struck a foe.

Grabs

Grab – Noxian Hook
Urgot extends his scythe arm a great distance, even revealing a long chain hidden inside his arm. This is a “channeled grab.” The longer you hold the grab button, the further the grab reaches until it collides with something. Unfortunately, it takes longer for Urgot to “reel them in” (laughing maniacally) as the chain grows, which can potentially make ending lag HUGE. This grab can be used aerially, and works as a tether recovery.

Grab Attack – Shock
Urgot releases pure energy into his scythe-arm (and chain), dealing spammable hits of 1%.

Forward Throw – Mechanical Strength
Whirling the chain (and his caught foe) around him several times, Urgot throws them forward for knockback that increases with the size of his chain. A max length chain could deal enough knockback to finish a “squishy” at 50%, but will deal NO damage. With no chain at all, Urgot deals an impressive 20% damage, with very light knockback.

Back Throw - Catch of the Day
Urgot pulls on his chain, reeling the caught foe back to him instantly. They take 3% damage and are stunned in front of him for a second, especially vunerable to his Down Tilt.

Up Throw – Hangman’s Noose
Urgot drags the chained foe over his head, hanging them in midair. For a few seconds (or until they break out), he can freely attack them and use them as a platform.

Down Throw – URGOT SMASH
Urgot slams the chained foe into the ground, dealing a nice 7% damage and decent upwards knockback (killing “squishies” as low as 100%).

Final Smash

Hyper-Kinetic Position Manipulator

For 10 seconds, Urgot charges his hyper kinetic position reverser to such a power level that he can freely control the position of anyone on the map. An aiming reticule allows Urgot to specify the locations. Press B to send all foes to that location. Press A to send yourself to that location. This power is within limits- Urgot cannot aim the reticule below the stage-line.

Taunts

Up Taunt – Fear
Urgot says “Fear, NO! I am the mind killer!”

Side Taunt – Demise
Urgot says “There’s no coming back from your demise.”

Down Taunt – Laugh
Urgot laughs maniacally, with a rasping caugh afterwards.

Victory Pose – You Can’t Beat Me
“You can’t beat me, so join me. I NEED a good pair of legs.”

Playstyle​

Urgot’s moves are seemingly random and unconnected, however they have a surprising amount of synergy. Urgot is definable as a “tanky ranged dps.” In other words, he specializes in dealing damage from a distance with the help of his specials, neutral A, Nair, Uair, and Grab. He is very lackluster in close-ranged combat, as many of his moves are either laggy or have hilariously poor reach. This is naturally how an enemy counters Urgot (though Reflectors generally spell his doom as well. Never pick Urgot against Fox, Falco, Wolf, or Pit.)

Urgot effectively has 5 bread-and-butter moves:
Down Special- Used to flee with its slow, absorb damage, keep them in range of your projectiles, or increase enemy lag.
Neutral Special- Used in conjunction with Side Special to provide most of your damage.
Side Special- Your bread and butter damage dealer. Nothing else to say.
Neutral A- A low-lag source of repeatable damage.
Neutral Aerial- Effectively the same as A.

This isn’t to say that Urgot doesn’t have a plethora of short combos available. Back throw works very well with Down Tilt as a potential killing combo. Up Special can be used in countless ways, including recovering, combo setups, or causing a foe to fall off the stage.


Alt Outfits


The original design for Urgot that was unused.


Urgot's Butcher outfit. Manatee is 50% off!


Giant Enemy Grabgot!


Author's Comments

Does this set look rushed? Well it is. I finished it within 3 hours of starting it, seeing as how tomorrow is the deadline. Hopefully, it'll still be good.


Happy Halloween, Everyone!​
 

Hyper_Ridley

Smash Champion
Joined
Dec 21, 2007
Messages
2,299
Location
Hippo Island
Urgot's not bad at all for a 3-hour effort. It harks back to the days of late MYM3 with its really simple but detailed moves, giving him some retro appeal, and he even has some legitamate playstyle. I think some of his close-range moves need super-armor or something to go along with his tank theme and prevent him from being destroyed once the opponent gets past his projectiles, and he could use a general damage buff, but I don't think balance was a big priority for a set like this anyways. If nothing else, I can definitely see this set as "Brawl feasible", but it's got enough zaniness to meet my tastes. Nice seeing another set from you Chris.
 

KingK.Rool

Smash Lord
Joined
Nov 26, 2005
Messages
1,810
Here is the second revision of the definitive roster, an MYM staple launched in MYM 6. Once a contest we revisit it, shifting sets in and out to reflect changing stances and make room for the newest sets of note. This by no means obsoletes the last two lists; nine sets have been taken out in this latest revision, but those nine are quite worth revisiting and remembering in their own rights. So difficult was this last revision that we considered upping the roster to an even 50.

Basically, if you're a newcomer, this is where you start. You read all 35 sets listed here and you're more or less caught up, or can at least throw around big set names with the best of them. Along the way, you'll get a great sampling of the very best MYM has to offer.


THE MOVESETS OF MYM
A CANONICAL COLLECTION OF NOTABLE SETS


-- MYM 1.0 --


Furret :: Fawriel :: 34th
MYM 1 was marked by a very relaxed atmosphere; there was little to no sense of competition. Fawriel, however, stood out from the crowd with his simple, readable, fun movesets, like this one; Furret's gimmick is its tiny hurtbox, hidden under a mass of fur. Fawriel was also, of course, MYM's founder, and formulated the Infinite Sakurai Theorem. He left MYM in the hands of another and has hardly visited it since.​


~~ MYM 2.0 ~~


Aqua Teen Hunger Force :: El Duderino :: 2nd
MYM 2 was much like the first MYM, except that it was the first one that started to have what you'd call "regulars". Its champion set was Paper Mario, but that set is largely forgettable and won on the basis of character bias; this creative set for an obscure group of characters placed second. Note the great improvement this set is over Furret, especially in terms of detail. El Duderino himself, a landmark moveset-maker of his time, disappeared soon after the end of MYM 2.0.​


(( MYM 3.0 ))


Dracula :: Chief Mendez :: 1st
Dracula is probably the most famous and influential moveset in the history of MYM. It was a giant leap forward for its creator, Mendez, who was already becoming a legend based off of his intelligent posting, creative movesets, and brilliant set organization. Dracula's creativity was unsurpassed at the time he was posted. He singlehandedly caused the rest of MYM to take heed and step up their games, and marked the point that "just for fun" became a real contest. Dracula himself is still a shining beacon of simplicity and visual appeal, and exemplifies Mendez's goal: to make interesting, character-oriented sets for realistic implementation into Brawl.​

Cervantes :: MasterWarlord :: 2nd
Warlord, like Mendez, was a rising star, one who seemed bound and determined to turn MYM into a competitive forum for serious discussion of movesets. He replied to Dracula with a string of Soul Calibur movesets that oozed creativity and were heavy on special mechanics, on detail, and on extras. The last - and most refined - of these was Cervantes. He was immediately raised up on a pedestal, right next to Dracula, and seemed the obvious runner-up.​

Gecko Moria :: KoJ :: 23rd
Gecko Moria was entered into the wrong contest; in the madcap shuffle of MYM 3.0, a set with deep playstyle was forgotten no less quickly than an underdetailed five-minute work. KoJ, an exemplary MYMer who had been working away at his inordinately creative movesets since pre-Draculan times, delivered his chef d'oeuvre when he created a moveset which relied on manipulation of its own shadow, a detachable, manipulable hitbox. His style jarred against Mendez's more implementation-oriented sets, but lately the works of KoJ have been rediscovered and recognized as the masterpieces they are. KoJ himself vanished altogether toward the end of MYM 3.0, leaving two half-finished sets behind him.​

The Headless Horseman :[color="#99999"]:[/COLOR] KingK.Rool [color="#99999"]:[/COLOR]: 3rd
The Headless Horseman was the last moveset posted in MYM 3.0, and was posted on the last day, Halloween. This publicity move made the moveset's reception all the greater, and it placed 3rd on the back of its organization, creativity, and intriguing mechanic. K.Rool, who had entered MYM on the same day as Warlord but more quietly and humbly, had taken inspiration from Mendez and Warlord, and emphasized readability and unique playstyle in his later MYM 3.0 movesets.​


«« MYM 4 »»


Chef Kawasaki :: KingK.Rool :: 1st
Kawasaki placed first in MYM 4 on the basis of a massive hype campaign. He also featured a unique, interactive mechanic, light, approachable organization, and nary a generic attack to be found. In recent times, some MYMers look back at him less than fondly, citing his plethora of prop attacks and gimmicky focus, but he stood out then and now as a more digestable moveset in an overdetailed period.​

Mr Shine and Mr Bright :: SirKibble :: 3rd
Kibble had been an MYMing stalwart since MYM 2.0, but it wasn't until MYM 4 that he stepped up his game and proved that he was one of the best. He quickly became one of the most popular and acclaimed moveset makers, as, quite apart from his great creativity and easy reading style, he had always been one of the most likable regulars. The idea of him making excellent sets like this - a two-in-one character with a unique switch mechanism and his trademark 0-damage tilts - was very appealing to the average MYMer.​

Mach Rider [color="#black"]:[/COLOR][color="#darkgrey"]:[/COLOR] Chief Mendez [color="#darkgrey"]:[/COLOR][color="#black"]:[/COLOR] 7th
Mendez was ever present, now as an authority figure, and he soon came out with this uber-creative moveset. Sadly, his brilliant organization is no longer all there; the moveset has fallen into disrepair since Mendez's departure. The breathtaking mechanic, however, implementing the character's motorcycle directly into his moveset, is still there and just as compelling as ever. The set was well-liked but not beloved; Mendez's star had begun to fade as the rest of MYM started to catch up, and he was regarded more as an eccentric mentor than an involved member of MYM. Today, however, the set is considered critically underrated and MasterWarlord would be the first to proclaim it the best set ever made.​

Jafar :: KingK.Rool :: 21st
After Kawasaki, Jafar received the most praise of K.Rool's MYM 4 movesets, and unlike the former, he has aged excellently; in retrospect, he was the very first self-aware "trap character", a well-established archetype in later contests, taking the can of worms Dracula had popped open and focusing on it. His organizational layout would become the standard template for many movesets to come, including many of MasterWarlord's later works. He is now viewed as the pinnacle of K.Rool's MYM 4 achievement.​

Super Star Helpers :: SirKibble :: 9th

Along with Shine and Bright, this was Kibble's other major offering to his favorite series. This mighty four-character moveset had been in the works for a good two months, and its arrival did not disappoint, as it proved to have four entirely fascinating characters, each with styles that would be utterly unique, from the bomb-heavy Poppy Bro to the grab-obsessed Bugsy. This was the set that first cemented Kibble as a great moveset maker, although it wouldn't place as highly as Shine and Bright.​

Black Doom :: Hyper_Ridley :: 8th
Another rising presence in the MYM world, Hyper_Ridley turned in a batch of excellent movesets in MYM 3.0 but couldn't really get noticed until a more competitive MYM 4. Black Doom was his opus, an eclectic character based around making your own playstyle through a set of ingenious attacks that did things nobody else had ever thought of. The number of interactions HR had hidden between the lines was unparalleled - unthought of - at the time, and is a trademark that continued in his later sets.​

Deoxys :: Chief Mendez :: 13th
By the end of MYM 4, Mendez had begun to lose interest in Make Your Move. This set, posted around the halfway mark, was one he had been prodded into posting, as he had never been completely satisfied with it; however, its organization, friendly level of detail, and simplistic but interesting concepts made for an easy, inviting read, and for a little while, he received an echo of the attention that had been lavished on him in MYM 3.0. Mendez's departure is still remembered as one of the greatest losses MYM has suffered; his friendly, intelligent demeanour and air of easy authority have never quite been matched since.​


[[ MYM 5 ]]


Acid Seaforce :: Hyper_Ridley and Spadefox :: 1st
The ultimate joint set between two of the closest friends in MYM, Acid Seaforce has it all, quite simply; a beautiful do-it-yourself playstyle, individual moves that ooze uniqueness, a charming organization, perfect balance, and a writing style that simply begged to be read. It ended up narrowly winning the whole contest. It was only one of HR's numerous and indelible contributions to MYM 5, but Spadefox - a long-standing veteran who came into his own in MYM 4 - left not long after it, after a string of nasty arguments that resulted in him simply throwing up his arms and walking away.​

Ryuk :: MasterWarlord :: 5th
MasterWarlord spent most of MYM 4 creating enormously detailed movesets with off-the-charts creativity in each and every move - he was disparagingly dubbed one of the "Big 3," along with SirKibble and KingK.Rool, when the three of them claimed seven spots in the top ten between them. When the contest turned, he entered a number of ultimately forgettable movesets in early MYM 5, and eventually came out with this beast, whose unique concept and truth to the source material is almost unparallelled. This moveset embodied a rapidly emerging trend in movesets; the focus on an overall feel, a flow to the character's attacks, over the creativity of individual attacks. This "playstyle movement" would permanently change the way movesets were made and evaluated, and rather like the detail movement of late MYM 3.0 and MYM 4, was spearheaded by Warlord.​

Arthas :: Chris Lionheart :: 11th
After a tumultuous relationship with MYM that involved getting appointed and later booted from the authority figures, Chris, an MYM 2 veteran, redeemed himself with a moveset that took everyone by surprise. Arthas was the first dedicated "summons" character, and his mechanic was so simple - but so interesting - that Arthas rode the wave all the way to the Top 50, much later. The fact that he didn't quite make Top 10 is an injustice that can only be explained by how early he was posted and continues to confound the authorities of the time, all of whom were diehard supporters of the set. Chris would make several other excellent MYM 5 movesets, and handily regain his spot among the authorities - for one contest, before being shunted out once again and seeing his activity in MYM dwindle away altogether.​

Lemmy Koopa :: Hyper_Ridley :: 12th
HR's most popular moveset of the contest after Acid Seaforce, this trap-based character revolves around turning the stage into a circus sideshow, and a real nightmare for any foe. His creativity and significance can't be overstated; he was one of the movesets that prodded forth the playstyle movement (see Ryuk). As usual, HR emphasizes attack interactions and a singular - but never too linear - way to play.​

Miracle Matter :: KingK.Rool :: 4th
After his win in MYM 4, K.Rool almost rendered Kawasaki obsolete with several lauded, increasingly playstyle-oriented movesets, the most popular of which was Miracle Matter, who had an easily imagined (if difficultly put into use) mechanic that involved the use of all his forms, just as in the eponymous boss battle. Each form - including a fireball, an ice cube, and a rock - has an unusual and creative playstyle.​

Cutesy Beau :: Junahu :: 6th
Junahu gave one of his finest outings since his celebrated MYM 3.0 debut - Donna - and proved that he wasn't going anywhere any time soon when he surprised everyone with this OC. All agree that she has wonderful organization - a hallmark of Junahu's work - but after that, opinions are divided. Cutesy has attracted a devoted cult following based on her flowing playstyle, unique conception, and choice to emphasize a smooth implementation into Smash over complex standards. Definitely worth a read, if only to see what side you stand on, as this controversial set remains one of the most interesting examples of what MYM is capable of and, indeed, encapsulates the values of MYM 5 - the emphasis on the whole over individual components.​


|| MYM 6 ||


The Count :: MasterWarlord :: 1st
Hunting that elusive win with increasing fervor, Warlord finally struck gold when he posted The Count, a monster of a two-in-one moveset with notably atrocious grammar that somehow adds to its distinctive personality. Recycling all of his past trademarks and making them coalesce into what was hailed as the Ultimate Warlord Set, this villainous heavyweight won MYM 6 with a surprising - and, some have whispered since, unwarranted - ease after the multiple ties of the previous contest.​

Zant :: KingK.Rool :[color="#darkorchid"]:[/COLOR] 2nd
KingK.Rool posted universally acclaimed movesets throughout MYM 5, but tended toward controversy in MYM 6 with the seven consecutively-posted Eeveelutions, the deliberately generic King Hippo, and the bizarre pseudo-joke set TAC. When he finally stopped playing head games and created a long-awaited moveset with heavy creativity and a layered playstyle, it quickly became a fixture in super vote lists and an instant frontrunner.​

Sloth :: MasterWarlord :: 5th
With Sloth, Warlord showed just how much he intended to push playstyle. Almost every attack in Sloth's moveset is specifically meant to interact with at least one other attack, making a brilliant jigsaw puzzle and a stimulating thought experience. Individual move creativity had finally been cast aside in favor of the bigger picture, and Warlord pushed MYM forcefully into a whole new age of playstyle and detail. Sloth remained a frontrunner, right up there with The Count, until the end of the contest, and is now widely regarded as Warlord's best work of the contest.​

Negative Man :: MarthTrinity :: 10th
MarthTrinity had been a contest fixture since MYM 2, but had become most well-known for placing 25th every contest without failure. A genial, friendly MYMer, it seemed only a matter of time before he broke through; in this case, it was with Negative Man, a silly and deliberately underpowered - but perfectly valid - set for a minor Mother boss, focusing around his self-demeaning personality and brandishing an ingenious writing style. Like MT's weekly recaps, Negative Man was written in the dead of night. The little set that could ended up placing in the Top 10, a surprise and delight to all, and MT was ushered into the leadership and eventually given the coveted crown of thread leader in MYM 8.​

Dingodile :: MasterWarlord :: 4th
While Warlord was to post more highly lauded movesets - such as a remake of his MYM 5 Gluttony - it is this humble-looking moveset that endures, for its surprisingly deep playstyle, an early example of a character who plays differently against different foes and of a defensive character who cannot succumb to pressure. His charming organization (credited to agidius), tidy writing style, and abundant personality make him one of the greater movesets from his legendary creator, and he placed highly without much in the way of hype.​

Joe Calzaghe :: Junahu :: 32nd
Junahu's MYM 6 showing has become the stuff of legend: every one of his six sets placed within the top 35, with the maligned Joe coming in last. MYM 6 was speckled with sets from the Punch Out movement, simplistic boxer movesets made in response to an overwhelming reliance on traps, props, and mechanics; the message was well taken and MYM 7 would see a more even spread of tactics - but the Punch Out sets themselves were largely forgotten. Toward the movement's end, it was Junahu who chose to distill it to its essence by making a boxer set with some knowledge of what it was talking about and precise truth to the nature of the sport. In the process, he produced one of his best sets ever, one largely passed over because it lacked the flashy organizational flourishes of his more polished work.​

George A. Romero :: KingK.Rool :: 3rd
Opting for a nostalgic approach, K.Rool finally connected his love of movies with movesets by posting his tribute to the zombie subgenre on Halloween eve, the anniversary of the celebrated Headless Horseman. Written in the same way, with throwback but considerably more appealing organization, Romero wormed his way into the hearts of many MYMers at the very last second and placed third without receiving any comments. At the time, it was the way he turned a Brawl into a zombie survival odyssey that brought him attention. Today, he is most remembered for showcasing the music-in-headers trend that agidius kindled midway through MYM 6 - Romero's soundtrack is a Greatest Hits of horror movie music.​


{{ MYM 7 }}


Doppelori :: Junahu :: 1st
With MasterWarlord, KingK.Rool, and Hyper_Ridley all having won an MYM in the past, it was Junahu who stepped up to bat midway through MYM 7. As sets grew increasingly refined and distinguishing between good and better became more difficult, Junahu nonetheless created a set that stood head and shoulders above the crowd; Doppelori forces Final Smashes into practical, item-less games and crafts a unique game around this ability as a drawback. Ever one to push the enveloppe, Junahu dominated MYM 7 with his highly adaptable, meticulously crafted movesets, and Doppelori is his crowning glory.​

Subaru Nakajima :: darth meanie [color="#darkslateblue"]:[/COLOR]: 6th
Although he achieved mixed success with Magnezone, Nanoha Takamachi, and BubbleMan.EXE, it's with Subaru that DM cemented himself as one of the greatest working MYMers. Heralded as one of the first truly aggressive character not to center around combos, Subaru's inertia-based playstyle, a spiritual successor to Mach Rider, made her a huge early contender in MYM 7 and, without a doubt, the point at which meanie, who slipped into the contest without much fanfare in MYM 5, started a long streak of top-notch movesets.​

Cairne Bloodhoof :: MasterWarlord :: 7th
Just as his sets - growing looser and less constricting - provoked more controversy than unanimous acclaim, the omnipresent Warlord produced Cairne, a new frontrunner for a new contest. Pinwheeling around forcing the opponent into a hole and focusing on a slow-motion, grappling-based sort of combat, Cairne exemplified the less linear, more complex playstyles MYM 7 became known for.​

Super Macho Man :: Hyper_Ridley :: 5th
The Punch Out movement was over, its point made. Hyper_Ridley, however, arriving late to the party, created one of the movement's masterpieces when he geared Super Macho Man around shattering the opponent's shield. This simple - and entirely unique - concept was precisely what the movement had been about, and perfectly reflects HR's pragmatic approach to setmaking.​

Dr Strangelove :: Wizzerd :: 4th
When Wizzerd, a prominent MYMer-turned-leader popular for his lightning-quick commenting, finally produced a set that could comfortably be called a frontrunner, the results were deafening. Blending a nuclear-bomb countdown strategy with intricate trap comboing, Strangelove harnessed a unique playstyle based on fear and paranoia; more than any of the rather popular sets Wizzerd had made since he joined in MYM 4, Strangelove pleased everybody at once. Recently, his balance has been called into question, but the set - the last Wiz made before going into a contests-long slump from which he never recovered - still works on the basis of its innovative ideas.​

The Spy :: MasterWarlord :: 12th
Midway through MYM 7, MasterWarlord opened a can of worms; he began making highly experimental, edgy sets that pushed the boundaries of what belonged in Smash farther than they'd ever been pushed before. His tendancy to emphasize creativity over implementation came to its breaking point as he designed this, a set quite literally made for a nonexistent "Capture the Flag" mode in a fictional future Smash game. The set inspired a storm of controversy and shook the foundations of MYM as Warlord flatly declared that Brawl was a terrible game that did nothing but impose limitations and that we'd all be better off ignoring its constraints. The in-Smash/un-Smash rift would lead to mass disillusionment on the part of numerous MYMers and some thunderous in-thread and in-chat debates. Spy, meanwhile, was deemed an eligible entry and placed highly, a set of sheer, unfettered imagination.​

Team Rocket Grunt :: KingK.Rool :: 2nd
KingK.Rool produced an odd mix of presentation experiments and serious entries throughout MYM 7, but it was with this, ostensibly his last set, that he once again gained the public eye; Grunt was a massive implementation of a three-in-one Pokemon character that revolved around highly interconnected move interactions and the ability to have more than one Pokemon on the stage at a time. K.Rool, meanwhile, disagreed with Warlord's new theories on MYM and debated them at length, believing that more value lay in risky - but feasible - implementation and successful characterization than sheer creativity. By the end of a setless MYM 8, losing sight of movesets as objective experiences that could be properly ranked or rated and foreseeing the contest's inevitable end, KingK.Rool faded out of MYM.​


.. MYM 8 ..


Mr Potato Head :: BKupa666 :: ??
BKupa, a perpetually underrated MYMer who had been working away at his highly creative - some have said Warlordian - movesets since early MYM 3.0, has never placed in the top 10, despite any number of popular, clever sets. When he remade Andy's Toys, a quartet of sets originally posted as his frontrunner in MYM 3.0, it became clear that at least one of them would place highly; most agree that it will be Mr Potato Head, an ingenious set geared around setting his own spare body parts around the stage as constant hitboxes. As usual, Kupa's strength is the ability to extract an entirely singular playstyle from source material of questionable potential.​

Dark Bowser :: MasterWarlord :: 1st
Make Your Move 8, after six months, produced barely sixty pages of activity - about a week's effort for MYM 4 - and almost no true "frontrunners," with overall set quality evolving to the point where distinguishing between good and better had become a fool's errand. The one set that had been both commented and liked by more than a couple of people, Dark Bowser represented a MasterWarlord with a cooler head. Although he included a "boss moveset" designed for three-vs-one matches, he designed Dark Bowser as a traditional character based around capturing the opponent in a cage and effectively torturing them. Warlord's commenting dwindled over the course of MYM 8 along with everybody else's and some of his own sets were forced to wait days for a comment, but Dark Bowser, at least, stirred an echo of the activity MYM had once been known for.​
 
D

Deleted member

Guest
Urgot
Okay, this is a rather short comment, but I think it's kinda fitting...for a rather short moveset (though that's not a bad thing at all). Overall, considering you managed to pull this off in 3 hours and you haven't made a set in a while, he's a really good effort from you. There are a lot of cool moves I like, such as the grab, neutral special/side special and more. The set flows into a cool playstyle and not to mention the set was very easy to read.

Like HR said, a couple of damage boosts could be applied here and there (a killing forward smash that only does 12% damage?) There are also a lot of times where you don't make moves sound particularly useful (the tilts come to mind...). Overall though, it's a cool set, and it's great to have you back Chris.

EDIT: (clap) Rool. I wasn't even aiming for the first page. xD
 

Plorf

Smash Apprentice
Joined
Jan 28, 2009
Messages
124
Location
Silver Spring, MD
VAN POOKIN


playlist

Miniboss

Description ~ Pumpkin Tank (VAN Pookin is the mid-boss of Shade Man's stage in Mega Man 7. It's an odd mini-boss, consisting of three nesting pumpkin shells, the innermost one being the only one with any personality. The pumpkin tank attacks by flying around the room and shooting green pellets at Mega Man in different patterns. Depending on how the blue bomber defeats it, Pookin crashes through different parts of the wall, changing the path he takes through the rest of the stage. For a spritesheet, click here. For a video detailing Shade Man's stage, click here, though it's a long video.

In Brawl, VAN Pookin is a unique character in a lot of ways. The pumpkin is a super-heavyweight, being over twice as heavy as Bowser. It's also twice as big as the Koopa king. It also has a very good recovery, about as good as Jigglypuff's, thanks to a nifty jump system that has you hold down Jump to gain altitude, rather than tap the button. The tank hovers everywhere, never touching the ground except when downed. Another strange trait is that Pookin is completely solid, meaning nobody can pass through it, though some characters can crawl underneath. Lastly, and this is important, VAN Pookin has no dodges of any kind, and can't turn around by dashing or via any other means. Instead, rolling is what makes the tank turn around, and shielding has it close up momentarily with a Yoshi-like unpokeable shield. That means you can shield and turn in the air, as well.

Pookin's main mechanic, though, is that it has three pumpkin heads in three different layers: the first layer takes .5x of all damage and experiences no hitstun whatsoever. The second layer head takes normal damage, and the innermost head takes 1.5x of all damage as well as increased hitstun. When fully sealed, VAN Pookin has one weak point: if you attack its eyes (an annoyingly small hitbox), Pookin will take normal damage/hitstun from the attack.
)

Special Attacks

Up Special ~ Open (In a very simple motion, Pookin opens its shell one level with no lag whatsoever, the pumpkin starting out with its shell closed. Naturally, this move can only be used twice in a row, since any more times and there would be no more layers to open. This move, combined with the down special, are by far the most important moves in the moveset. You'll see as you read on.)

Down Special ~ Close (Once you've opened up your inner pumpkin heads and have become vulnerable, what's to let you seal back up? This move. 'Nuff said.)

Neutral Special ~ Green Goo (Taken directly from the miniboss fight, this move has VAN Pookin spew out small green pellets in rapid succession, all around itself. The trajectory of each shot is is random, and the small globs deal no damage and no hitstun to speak of. However, each shot sticks to the enemy for a few seconds, slowing them down ever so slightly. This is important. The attack continues as long as you hold B, but the amount of shots spat out per second varies on how much Pookin is open. Fully sealed, only a few blobs fly out of the sides of the tank each second, but the next level in the firepower is noticeably higher. When the innermost head is revealed, this move is actually rather scary, since there are so many pellets being sprayed everywhere around Pookin. This move scares away most approaches, but can easily be followed up with offensively.)

Side Special ~ Pumpkin Bomb (Taking a note from the Green Goblin (or the Hobgoblin if you're so inclined), VAN Pookin spits out a large bomb (Wario size) that looks suspiciously like the pumpkin tank itself. Anyhow, these bombs don't explode on contact with just anything; they only blow up if they touch an enemy. How convenient. Anyhow, bombs can be aimed slightly using the control stick, but they always follow a slight arc and deal 9% damage. The knockback is variable on each head: light knockback on the outer layer, strong knockback on the inner head. As you can plainly see, the small pumpkin on the middle is the center of the action, but tends to have a harder time pulling of its stronger attacks.)

Standard Attacks

Neutral Attack ~ Evil Eye (If you watched the Shade Man video or have played his stage, you'll know that VAN Pookin likes to flash its eyes a lot. The tank puts that skill to good use: a tap of A flashes Pookin's eyes momentarily, briefly stunning anyone in front of them within a platform. The stun power increases the more Pookin is opened up: fully extended, there are six pairs of eyes flashing at once, making the attack truly frightening.)

Forward Tilt ~ Slimeball (Another attack pulled straight from MM7, this one has Pookin spit balls of goo, rapid-fire. They're quite identical to the ones in the neutral special, the only difference being these are fired in a line as if from a machine gun. Slimeballs are fully aimable as you hold down A, but will only fire in a generally forward direction. Plus, they eat through shields like mad. While this doesn't do damage, the movement-slowing effect from each one is more than enough to make this attack, combined with all the other green-goo style attacks, a force to be reckoned with.)

Up Tilt ~ Spirit Spin (As is the case with most Mega Man bosses, Pookin is not without physical contact moves. This one is useful, though. VAN Pookin simply spins as long as you hold down A (boy, there sure are a lot of these kinds of move), its body serving as a multi-hit hitbox that deals 7% a second in easily escapable damage. Standard fare. What's not so obvious is that, along with an increased bodily hitbox when expanded, there's a slight wind effect on the floor beside Pookin, due to its jets working extra hard for this move. The effect is amplified for each level opened.)

Down Tilt ~ Falling Gourd (This one's really simple: VAN Pookin turns off its thrusters, falling to the ground. Of course, that's quite an impact, and anyone underneath will get pitfalled for 10%. There's a minor shake effect that stuns anyone on the ground next to the pumpkin tank as well. This attack has minor starting lag and rather hefty end lag, but it can be worth it, as it's also a semi-spike near edges.)

Dash Attack ~ In Flames (You may have noticed that VAN Pookin looks an awful lot like a Jack-O-Lantern. Pookin goes back to its roots in this dash attack, utterly engulfing its pumpkin form in flames while still in motion. These flames take on an eerie tint, being purplish, but otherwise deal 8% and light knockback that can combo well. This move is more useful than you'd think; when Pookin is open, it's slower while dashing, and can use all the protection it can get. When closed, Pookin can use this as a tool to make it even more of a tank. There's a bit of lag on either end of the attack, though.)

Smash Attacks

Forward Smash ~ Candy Corn Cannon (You'll have to put yourself in the mindset that Pookin is nothing more than a Halloween-themed futuristic tank. As a sealed pumpkin, VAN Pookin opens its mouth as quite a few candy corns form inside the mouth, looking like sharp teeth. More and more appear as you charge, and at full charge, the move sends out 20 candy corns in a general forward path, though each one has a slightly different, ever changing trajectory. Each one deals small explosive knockback and 2% damage, so the attack is obviously more potent with charge.

With the outer shell open, Pookin's inner mouth opens up, and with charge, up to 10 large candy corns form as teeth inside. These each do 3% and moderate knockback, so again, full charge is the best iteration. When all your shells are open, the pumpkin tank's true head appears, charging up a single missile. When you release the charge, this giant candy corn will fly out as a homing missile that does 9-18% and decent to great knockback. This move has moderate ending lag.
)

Up Smash ~ Wraith Mortar (See that green stem on Pookin's head? It's not there for show. With a bit of starting lag, the stem's top grinds and opens up in a technologic fashion, before firing a gigantic glob of superheated green go. Since it's so hot, it's basically like green-tinted plasma, and it goes more or less straight up, with a slight forward or backward angle depending on if you aim it (Remember: since it's still green goo, it'll have a slowdown effect, this one being quite poten). The mortar will always deal 13% and decent knockback, but how far it travels upward before falling is determined at charge. Upward range varies from one platform to nearly offscreen. This attack is one of the few that is in a way better to use while shielded, but since it's mainly used as an indirect attack, it's more defensive than anything.)

Down Smash ~ Flame Mixer (There are four high-powered jet engines surrounding Pookin's underside. Each is quite powerful. When you use this move, VAN Pookin spins around while angling the jets more horizontally, sending scorching flames out a few character lengths around him. The flame deals a single hit of 7% in fire damage and very low knockback, effectively comboing into itself. Uncharged, you'll only get two hits in (one full spin), but at full charge, Pookin spins four times.

This attack has amazing range and low lag, but has very little kill potential. However, if someone's trying to take advantage of your towering stack of heads, this'll show 'em not to mess with you at close range.
)

Aerial Attacks

Neutral Aerial ~ Flashbang (I don't think I stressed enough how much VAN Pookin flashes its eyes. It does it, like, all the time, even not as an attack. As such it can be confusing to tell when a move like this starts. Pookin turns once, the physical contact doing 6% and weak knockback, but it flashes its eyes while performing the spin. If you've read the Neutral Attack, you know what this does: stun the enemy in place for a moment, paralyzed. Pookin has a fantastic air game, and the "bang" part of this move becomes quite clear when you see the pumpkin tank's explosive options.)

Forward Aerial ~ Air Bomber (This one's another simple move. Fully sealed, Pookin opens its mouth to drop a miniature pumpkin bomb that deals weak knockback and 4%, the bomb traveling in a small arc. In fact, each head's own pumpkin bomb does the same damage, because that's not the draw of using this when completely opened up. The previous level's bombs will still be fired if you're open, so you can theoretically fire three small bombs at once, each right next to another bomb. The move is also fairly quick to execute.

What does this mean? Well, it obviously means you can rain bombs on enemies from your high-altitude perch, one, two, or even three at a time. That's a load of damage you can dish out at once.
)

Back Aerial ~ Three Stage Rocket (This move is the same for all three levels of shield. Pookin launches a large HOMING candy corn that deals a base of 8% and good knockback. However, if you use this move again while the missile is still out, the orange part at the bottom of the candy corn will detach, leaving a smaller and more maneuverable missile with the same damage potential. Pressing BAir once more has the yellow midsection drop off, with only the powerful white tip to fly around. This is an extremely hard to dodge move, due to the adjustable motion of the homing missile, so it can be combined with other moves to form an offense.)

Up Aerial ~ Spiked Stem (Pookin transforms its stem again, using the outer parts to form a very sharp triangular point that comes out quite suddenly. This sharpened point deals a nice 9% with fairly low knockback-- but if you look closely, it's actually injecting green go directly into the enemy! The move has some ending lag, but it slows your enemies down CONSIDERABLY. Use this both offensively and defensively.)

Down Aerial ~ Overflow (VAN Pookin produces a lot of green go to fuel all its various attacks. For this move, Pookin overproduces so much that slime starts oozing out of the cracks between its shells! This slime does no damage, but remains on the stage for several seconds, acting as a ground obstacle. The more layers you have open, the more slime is produced, until what you have looks like a fountain of slime pouring down as long as you hold A. Since there's no actual knockback or damage, it's hard to use this effectively, but if you fly overhead while dropping goo on everyone, foes will be hard pressed to reach you.)

Grab and Throws

Grab ~ Clamp (Like Shellder, VAN Pookin slams two halves of its shell together to snare enemies. Unlike Shellder, Pookin is gigantic, so enemies won't be able to move a muscle while grabbed. Anyhow, this grab lasts longer depending on how many layers slowly grinds the enemy for 3% a pop.)

Forward Throw ~ Consume (Throws have different outcomes based on Pookin's shells. Sealed up, the pumpkin robot gulps the opponent up, churns them around for a moment, then coughs them back up, covered in green slime. This does 6% damage and obviously is great for slowdown. One layer in, the same thing happens, only the purple pumpkin head launches foes further, and with less slime. The final and smallest head will spit the unlucky enemy far away with no slime, then fire a beam of concentrated slime at them in midair. This is he only variation with decent KO potential.)

Back Throw ~ Swap (VAN Pookin was probably built originally as a robot that would be more amusing than dangerous, so the tank comically swallows a foe, churns them around a bit, then ejects them out the rear of the pumpkin. This deals 8% and low set knockback. However, the foe will find that, when they stand up, they will have an entirely different costume on! That's right, this move changes the foe's appearance. There's a small chance that, whenever you use this move, the character gets a Mega Man costume, Shade Man costume, or even a giant pumpkin suit. This also affects Kirby hats.)

Up Throw ~ Ejection (Using the port at the top of the green stem, Pookin again consumes the enemy, churns them up, then launches them up at mach speed, this being slightly aimable. This has huge KO potential, but I say potential because green slime also weighs people down. That's right, the slower and more covered foes are with green goo, the heavier they are and the faster they fall. This can be a blessing or a curse.)

Down Throw ~ Toasty (Pookin opens its jaws one last time, and pops the foe underneath its massive pumpkin chassis. It proceeds to absolutely demolish the enemy, slamming on them once for 8% and using its jets to further burn them for 7% more. This throw ends with Pookin slightly in the air due to using its rockets, and the foe in a prone position.)


Final Smash

Final Smash ~ Trick or Treat (This one's annoying. VAN Pookin emits an evil laugh as the screen grows dark, the full moon comes out, etc. The pumpkin tank then opens up and disperses candy of all sorts across the entire stage, no matter how big it is. Candy heals much more than normal food, averaging about 10% per piece, with a slight speed boost due to so much sugar. However, if Pookin presses B and then another direction instantly, he does the same move-- with a trick. All of the candy is still edible, only they will explode as soon as they are eaten, dealing 20% and great knockback like a Bob-Omb.

VAN Pookin can take advantage of this: the tank can eat candy normally, and when it consumes the explosive candy, it only takes 5% and no knockback-- and since the explosion is internal, nobody can hide it better than Pookin, with three layers of explosion-dampening armor. While this still harms VAN Pookin, the real trick is on your enemies.
)

Playstyle

Playstyle ~ Impenetrable Fortress (There's not much to playing as VAN Pookin, in theory. Your most important tools are your Up and Down specials, as they'll decide how you play. When you're sealed up, your're in defensive mode, and you have options to reflect that, such as the Neutral Attack, Up Smash, and Forward Special. However, you'll find you have much more offensive options when you're more vulnerable, such as your green goo and plethora of moves that are amplified when open.

The balance between offense and defense is also key: Do you try and tank it out and scrape out a KO eventually, through a slowdown? Or do you go commando and fire projectiles indiscriminately, blowing the enemy away but leaving yourself open? That's a choice you can make and break in a flash, thanks to your two most important specials.

In the air, you're great, with every move having a use. Flashbang is a pure combo starter, which can go wel with the FAir-- an offense so great it's more like a defense. The BAir is also fantastic in terms of combo, giving you a homing missile that can work with a Candy Corn Cannon or just in combination with other shutdown moves. The Up and Down aerials serve as a way to spread your green, goopy influence, which is devastating to your opponents and key to your KO game.

Most of the time you'll be trying to do things through ranged combat, but since the pumpkin tank is SOOO tough, you can try your hand at close range combat. The grab and throw game is the first obvious answer, but you also have things like the DSmash and Utilt, and especially the DTilt, that can pin people down or get them far away for a projectile kill.

VAN Pookin is at heart a defensive player, and obviously a tank. The beauty of it, though, is that if you rush enough and pressure the foe enough, your offense can act as the defense you're always striving for, and you'll land a KO in no time. After all, you are playing as the Pumpkin King. Eehahahahahaaaa.
)

Extras

Up Taunt ~ Evil Laughter (You know how Vincent Price laughs in "Thriller"? Yeah.)

Side Taunt ~ Haunted Carousel (VAN Pookin spins his segments in different directions, blinking different colors. Slowly and eerily.)

Down Taunt ~ Jack-O'-Lantern (Pookin's interior crackles with a dim candle light. Quaint.)

Up Victory Pose ~ Disjointed Laugh (A spooky sounding cackle is heard offscreen, and Pookin floats in and hovers in the middle of the screen.)

Side Victory Pose ~ Creepy Carnival (Music-box sounds play as Pookin sluggishly turns and shines different colors. The screen is tinted a dark color.)

Down Victory Pose ~ Will-O-Wisp (The pumpkin tank rushes on screen, covered in blue flame, then releases it in the shape of a rushing horrifying face, directly into the camera.)

Loss Pose ~ Tearing Down Walls (Pookin is heavily damaged and starts blowing up, ramming all of the characters offscreen before crashing through a wall near the camera and blowing up.)

Kirby Hat ~ Green Goo (Kirby takes an extra-long time to inhale VAN Pookin, but it's worth it when he gains working pumpkin armor and the ability to use Green Goo.)

Entrance Animation ~ This Is Halloween (VAN Pookin flies in very quickly from offscreen, firing candy corn missiles and pumpkin bombs left and right. By the time it reaches the ground, the stage is a battlefield of colorful dust and smoke. It's go time.)


n88

Smash Lord
Joined
Oct 10, 2008
Messages
1,547

FIREBAR
Probably everyone reading this is familiar with the Firebar, a basic Mario enemy. Although it's so incredibly simple and inanimate that there are probably very few of you who even knew it was called a Firebar, and considered it more of an obstacle than an actual enemy. If you're unfamiliar with it, then, well. . . it's a group of fireballs that form a line (or bar) that rotates around a block, getting in Mario's way and just being a nuisance in general. And of course, it's decided to join the Brawl.​


STAT
Size|1


Yes. That is Firebar's only relevant statistic. That number doesn't encompass the whole fiery section, of course, as that can vary a bit. That just refers to the block that the fire uses as a base. Now you're probably thinking that Weight should matter, too, but you are quite incorrect. Firebar is not KO'd in the normal fashion. Instead, opponents have to get through its defenses and pick up the block at the center as they would an item, then throw it off the stage. Easier said than done.

Firebar always spawns directly in the center of the stage, and cannot move at all without someone picking it up and throwing it. Firebar always has a group of fireballs circling around it clockwise at roughly Zelda's dash speed. Fireballs can move right through the stage and other obstacles undeterred. Firebar starts with four fireballs, but that number can increase. (We'll get to that later) Each fireball is slightly smaller than the main block itself. Colliding with a fireball will deal 8% damage and mediocre knockback (kills around 250%) in a line at about a 30 degree angle from the direction Firebar points in.​

SPECIALS
Neutral Special|Extend
The fireball at the end of the Firebar glows brightly, and suddenly, a new fireball pops into existence at the end of the chain. Like Wario Waft, this move gets stronger over time, becoming more powerful the longer it's not in use. Using it immediately after you pick up a new fireball yields nothing but a little piffle and some lag, whereas a patient player can increase their yield of fireballs hugely. It takes five seconds after each use to regain the ability to make a new fireball, but after just thirty seconds, it's possible to add a whopping eight fireballs to your total.

Forward Special|Shift
With each tap of the Forward Special, the line of fireballs shifts one fireball-length directly across the block from its previous direction. This is nearly lagless, and provides additional protection (Fireballs on both sides means the block is harder to get to) at the expense of range.

Down Special|Flop
Firebar's block trembles slightly and falls on its side, towards the background. This has moderate endlag, a rarity for Firebar. It's only effect is that Firebar's fireballs now spin from the background into the foreground and back. This makes it more difficult for foes to make ground approaches, but makes aerial approaches nigh impossible to avoid, seeing as how Firebar can be picked up and lifted over the head of foes standing on top of his block.

Up Special|Overdrive
Firebar spins at double speed for a period equivalent to the time this move was charged (theoretically infinite). Sadly, this double speed is immediately followed by a time in which Firebar moves at half-speed, for 2/3 of the time the attack was charged. Great for quick bursts of speed on defense, but you may not want to charge it for too long.

STANDARDS
Jab|Freeze
Firebar halts its rotation completely for as long as the button is held. If you're in the middle of an Overdrive (or its wind-down) then the timer doesn't count down while this is in effect.

Forward Tilt|Focus Burn
The three fireballs closest to the edge of Firebar's radius (If you've got fireballs on two sides, then this will affect three fireballs on each side) burn slightly brighter than is usual, and a small flame begins to tral behind them in their path. Anyone who collides with this flame will take 7% damage, actually light on fire. The effects are pretty much the same as a Superspicy Curry! Except the person who gets hit doesn't get to dole out damage, and actually take rapid hits totalling up to 4% a second. And they don't get to breath fire. And this generally isn't considered a good thing. It lasts for a full five seconds, though, which is certainly worth the barely existant lag.

Up Tilt|Fireball Fling
The fireball at the end of Firebar's chain glows orange and flies off in the direction Firebar points, travelling at Sheik's dash speed until it crosses a blast zone and dealing 9% damage along the way. Fun for gimping! Almost no lag!


Down Tilt|Reverse!Reverse!
Firebar slows down gradually for as long as the button is held. Once the button is released, the fireballs come to a complete stop, then spin back in the opposite direction from the way they were travelling, at 1.5x normal speed for the same length of time that the button was held, after which they revert to their normal speed, but keep going in their new direction. Low endlag, and variable startlag.

SMASHES
Forward Smash|Cooldown
All of Firebar's fireballs dwindle to half their normal size and turn blue, and dole out half of normal damage and knockback. This lasts for 2-6 seconds, depending on charge time. Speaking of which, while this attack is charging, the fireballs double in size and deal double damage/knockback to boot. Charge time maxes out at 7 seconds.

Up Smash|Fire Juggle
Suddenly, and without warning, (Well, some warning. Firebar does glow yellow while charging smashes, like other fighters) both halves of Firebar's chain of fireballs flies up and over the top of Firebar in an arc, to swap places. You can even trap foes inbetween the two, like a giant fiery pair of scissors. This is less impressive if you haven't got fireballs on both sides. Low startlag, high endlag.

Down Smash|Set the World on Fire
Or at least part of the stage. With the input of a Down Smash, all parts of the stage that Firebar's fireballs are in contact with light on fire, creating flames ~1 Pichu tall that deal 10% damage and set upward knockback. Fires last 3-9 seconds depending on charge time. This is Firebar's slowest move, full of lagginess.

FINAL SMASH
SUPER FIREBAR SPIN FAST! After using its Final Smash, Firebar, over the course of three seconds, speeds up to a blinding rate of 3x his usual speed, making approaches all but impossible, and maintains aid speed for five seconds before slowing back down to normal.​


PLAYSTYLE
Very defensive. Probably because Firebar can't move. Foes are going to want to strike early in the match, because with the addition of more fireballs, Firebar just gains more and more momentum, and becomes more difficult to stop. Firebar can move quite unpredictably to throw off opponents who attempt to approach. And remember that Firebar is always in motion, so even if someone picks him up, there's always the chance that he can hit them quickly and be dropped. Firebar is short on KO methods, and mostly disposes of foes by building up a huge string of fire and hounding them off the blast zone with it.​


Disclaimer: This isn't really meant to be taken seriously. I just made it a) To see if I could and b) because I thought (correctly) that I could do it in an hour.​
 
D

Deleted member

Guest
This is my first post in the thread for a... long time. It seems a foregone conclusion now, but I'll be retiring the Smady Ratings and Sundae Summary until MYM9 – where they will make a return. The story on the recent inactivity simply boils down to a lack of motivation; what with my re-instatement into leadership, I've been given a second wind in trying to catch up, but to go back and rate as well as comment everything I missed is simply not possible. I will be reading them all [perhaps not as in-depth as I normally would, again in the interest of time], though, so as with my audio reviews back in the day, just give me a buzz if you want me to comment a particular set, and I'll add it to this next bunch – obviously telling the requester when I do. Now it's way too late to do that, I'm afraid.

This is simply a lot of comments I had been working on for a long time, over several months. It's not that impressive, yet I felt obliged to post it seeing as we're coming onto the end of this contest. I know, for example, Nate has been waiting for this Haunter comment for a while... these comments obviously lack any sort of rating attachment.

[collapse=Lots and lots of STUFF]And my biggest break from commenting was here since Make Your Move 7 – oh joy, non-sarcastically in fact, as I have the pleasure of giving my take on Dionysus, surely one of Kupa’s best movesets in his long and envious career. It’s not so much that this moveset does anything particularly new, but that it captivates with a few golden nuggets and runs away with it by nailing them down with a perfectly simple playstyle.

As always, got to get onto the things completely unrelated to the moveset; that’s how I roll, in fact. So Dionysus is an ancient Greek God, like how Hades [though a complete spit in the face to the mythological Hades] was inspired through similar literature. Obviously, the comparison is hedgy at best; with the greatest comparison I can draw being that poor Odysseus a year-or-so ago. Drawing upon such a unique base is hardly unaccustomed to you, after Zinger, Stanley, Bleak and those two Donkey Kong cartoon characters in that joint with Warlord, but it only becomes more impressive over time that you’re able to find these figurative goldmines of a resource. There’s just no one else I can see this moveset working for other than this obscure character, while working perfectly fine in Smash – which is far more difficult to produce than write about.

Your writing style and organisation are perhaps the worse side of the penny in regard to your steadfastness – it’s never to the levels of total depravity, but there are several sections that lost me in terms of following what’s being expressed. Mostly, this is surrounding the areas in which you talk about manipulating the vineyard; its current status and interactions relevant to this, how it affects characters already caught by it, how it is itself affected. Notably, I found myself, several times, confused over how a move worked. I suppose I could complain about the organisation more, if not for the otherwise adequate and well-descript writing style of yours, always with the intriguing and insightful quips that nurses interest while reading, at the same time bestowing factoids upon the reader; perhaps you’re simply running away with this splendid idea?

Speaking of ideas, the way you’ve really simplified down several of your old mechanic ideas into something more intuitive and perfectly fitting for this character is downright impressive. The grab and health-reliant mechanics from Hades are back, slotting in rather nicely here – the grab because of its extending, the health thing being the grapes. You use them in a refreshing way, though, by linking in with that great vineyard mechanic. It almost makes him too much of a monster – the opponent can never escape, permanently being forced to approach by both the grapes and that sinister throw which has to be one of the most powerful I’ve ever seen, without being hilariously overpowered. What’s a little disappointing is that you use other moves like the up smash to similarly break smash conventions, lessening the impact of the grab.

That’s generally where I would say I dislike this moveset – in that its playstyle doesn’t really come off as anything particularly suited to Dionysus, despite the effort you went to in order to produce a capable moveset for such an anonymity. He forces a constant approach – at close range his tilts are all simply to stall or stun, while the smashes are generally pretty random; inputs like with the healing grapes, while an interesting take on an old idea, seem a little unimaginative here, while the gas seems to serve the same purpose as all his tilts and a few of the airs similarly seem unsuited. Very few of these move tie into anything but the vineyard, relying entirely on the set up of this move.

The lack of detail on how to set up is also rather unnerving, with the required three seconds seemingly relying on the player’s ability to hold off enemy attacks with moves suited for when you already have it up. The fact you have to do this in every match also occurs to me as somewhat of a grind, eventually leading to Dionysus becoming a tired character where few techniques to use his vineyard aren’t already well-known by every John and scrub, making half the challenge of playing him simply setting up. You don’t deny this in the moveset, or specifically the playstyle, but many of the tilts and airs really wouldn’t work well as a stall, with the required three seconds.

Despite my criticisms, I still feel it’s a very strong moveset. The way it works as a team moveset is similar to Nurse Joy, in drastically changing the main aim of the playstyle, while keeping intact the general message or flow of the moveset is again very remarkable. Many of the more situational moves become more useful with three other players on the field, though the set-up part in all of this is still a little hard to get by, as Dionysus is a complete anchor to any character not suited to protecting him. Really, though, it’s an interesting concept to combine a heavy set-up and reward character like this with any kind of approach-orientated or other sorts of set-up characters. Not to wander off-point, but I felt the match-ups were decent, while I did find the lack of doubles match-ups disturbing. Overall, an awesome effort and solely lacking the Zinger playstyle in being your best ever, but it does have numerous flaws.

Onto Dunsparce, which is suffice to say not Koppa Kirby’s best in the slightest. From the get-go, you make the mistake of mapping very simple actions to inputs like the ‘taunt’ button, which could simply be accomplished by moving the analogue stick. This may seem nit-picky, but there’s so much superfluity throughout the set, it becomes a bore to read. That, and the blatant Pokémon influence in the form of Pokémon syndrome – rather than being inspired by an idea for a playstyle, or the character itself, liberties are taken in simply stealing moves and giving them any kind of attack properties whatsoever. It comes across as laziness.

Firstly, it is practically missing an up smash, with a very generic shared input. Likewise with the down and back air, which is a pairing I had never thought I’d see. It creates a Kat-like air of humour when reading the set, along with some of the equally bizarre figures like, ‘0.14 seconds,’ or, ‘0.03 seconds’ – at which point, the move is more-or-less instantaneous, right? Similarly, the odd numbers attached to many of the damage percents – ranging anywhere below ten, mainly ignoring that this kind of damage isn’t really worth differentiating to such a dramatic degree. The writing style is just super anal, but I’ll get back onto that later. Foremost here, there are big, obvious flaws that make it a challenge to even take Dunsparce seriously which could easily have been averted.

The big problem here is that there’s no conceited effort in trying to connect any of Dunsparce’s moves together, in any way that either emphasizes the personality of the character or how he plays in Pokémon. Sure, you take plenty of the moves he can theoretically perform, but you don’t do it with prejudice. In the end, this means that most moves end up feeling very disjointed, to the point that there is almost a theme of disjointedness. Where there are interesting ideas, such as with the slow dart or string shot, it’s not capitalised on and the moveset suffers for it.

As is the natures of a quickly-produced moveset, many traits of the project seem more than a little rushed; the language used seems to always go off on insignificant tangents of detail, there are mechanics thrown into moves that are more complimentary as literary filler than anything to do with the playstyle and that section is also somewhat lacking. This is due to the way you list out the moves and their interactions, leaving little in the way of a general summary, other than Dunsparce being a ‘non-defensive, peppering approaching’ character, which is, sadly, not very well illustrated throughout much of the rest of the moveset.

Really, I’m looking at my word count right now and just figuring out if this is long enough to substantiate Dunsparce over my shorter comments, but there’s little to say here because of the air of absence surrounding many attributes of the production. In all, it just isn’t a satisfying moveset and you take many a step backward from Burst Man… but obviously, it was a rushed moveset and you ‘saved’ one of the weeks from being completely dead. Alas, of what we have learned here: absolutely nothing.

Krystal and Knuckles share so many common faults, niggles and generally fit so well together, it may as well be a multi-set project, especially considering they were posted so closely together and by a user I doubt we’ll see again. For a newcomer, the moves aren’t too bad – you’re missing some inputs, others are criminally under-detailed and there’s a blatant lack of thought put into anything to do with, like, playing as the character, but that’s what all newcomer movesets accomplish. If the user who created these is actually still in Make Your Move in any way and reading this comment, simply don’t be discouraged at how your movesets compare to all the rest, because it’s not a fair comparison.

[Admittedly, this is hardly a comment, but I’m not rating either of these due to the author being a newcomer and so many people have touched on them, it seems like I would be entirely repeating what others have said. There’s little else to comment on other than, yes, these are newcomer movesets and have blatant flaws that should be addressed.]

So after a terrible comment there, time to actually write one for the by now well-received Colonel Sanders; it’s a great newcomer moveset – and that’s all I’ll say about that, hopefully. I’ve already said enough about a person’s history or newness in past commentary in this very block, so it seems clinically hazardous to any reader of this big ole wall to then throw more and more of that in here. Without further ado, my thoughts on the Colonel are as follows.

The egg, chicken and drumstick mechanic is pretty interesting. The interactions between the egg – it being useable as a projectile, being crushable and causing tripping – are well thought out; make sense from both a lateral and thematic sense with Sanders. Similarly with the chicken, creating your own producer of the eggs is fairly interesting and makes perfect sense: difficult to express, but I feel this was really well-written in terms of detailing what a chicken actually does, but later on you start being a little too lenient with no damage percents or knockback. The drumsticks part, along with the ten-piece bucket, is where things start not quite going to plan, but it’s still solid. It seems like Sanders has a healing scheme similar to Dionysus’, but it’s not really described enough to really let us know (Junahu must love this moveset).

The writing style deserves its own part in this commentary, truly. There’s something to be said about your modest way of expressing attributes through the five-star rating system – possibly the wisest system one can choose for ratings, indeed – but at the same time, you miss out on key details like specific percents in which one can hope to knock out opponents and how much damage a move does or the time taken to do it. This would all be solved if, like Junahu, you simply expressed as some point a kind of ‘key’ to this map of attributes, so one-star would actually mean something. Otherwise, it’s all self-referential and thus rather alien to most of us. I can’t really fault you for it, though, considering it’s a unique take on things and there are several bigger nagging feelings I have about the moveset’s general lack of professionalism. Read: first paragraph for that one.

If I have any real problem with the moveset, it’s those rather generic inputs. Not to say they aren’t fitting for the Colonel, but there’s not an ounce of flow between any of them – he randomly pokes with his cane, throws a bucket, etcetera, etcetera and it doesn’t really fit in with his pretty distinctive mechanic, either, which is a shame. Perhaps there is a common purpose in certain groups of move, as you illustrate in the surprisingly decent playstyle section, that link together to form some kind of cognitive pattern which help Colonel Sanders out, but these are isolated events. There’s no ‘greater idea,’ as Rool would put it, which brings this nation together. To re-emphasize, I still love that every move is in-character, particularly the rather imaginative ‘grease’ moves, such as the ledge attack.

Likewise, there are some rather random factors like his walk, his run and his ledge grab which don’t really add anything to the playstyle, but add a heck of a lot to the moveset itself. It’s very interesting that a newcomer would consider these really obscure details, but I feel they really do make a set unique – if only the moves actually went together well, this moveset would actually be really good for what it is. You talk about him having limitless potential in his playstyle, but he really just has some very laggy specials and otherwise there’s little to differentiate him, from a technical standpoint. My basic advice to you would be to keep an idea of the bigger picture while making movesets in the future.

So, we have our second Katapultar set of the contest – I was almost disappointed it wasn’t Freddy, as I thought there was going to be an epic sequel to the infamous Jason Voorhees. This was a tough read, in all honesty. I have no idea who the character is, now or when I began reading the moveset, but let’s just call Sarisa random loli protagonist, hm?

With Sarisa, I did like the emphasis on play mechanics you focused on a lot with the tilts, the up throw and generally throughout, you make a big commitment to a good kind of magic syndrome. Being that the term is used usually as a pejorative along with ‘generic,’ you substantiate the individual inputs enough, alongside your constant analysis, that we see the positives of this dedication. Obviously, as with any syndrome, there are downsides too – a lot of inputs just come off as “the ice attack,” “the thunder attack” and “the fire attack” input, while perhaps they have some merit in terms of playstyle, it’s difficult to see past the lame moniker.

By the ‘good side’ of the syndrome, I mean that you’re able to create even remotely interesting inputs that don’t rely on the series canon at all, but then this becomes a slight when there is little reference to the source material whatsoever besides the move names. Only in the extras do we see it – and I’ll get to those later. Still, while I praise you for no lack of imagination in conjuring up these moves, the method is pretty much hated by everyone in the contest. Perhaps I could have at least forgave this on the basis of the character being obscure, unknown and probably lacking much of a presence in her game of origin, but then again, you are the fun and educational guy – surely that would also involve teaching us all about Phantasy Star, no? This moveset really seems similar to my old Vivi set, which had entirely similar magic inputs, but it’s an old-fashioned approach in Make Your Move 8, when that moveset was already aging in Make Your Move 3.

In terms of the playstyle itself, it comes across as strange that Sarisa has to use a stairway to chaingrab as her primary example, even going so far as creating a staircase to chaingrab off of. This was actually so mindboggling to me, I’ve been questioning whether it’s really there, but it is – what the significance of all of this is to Sarisa the character, I don’t know, but conjuring up objects to chain grab off of is a new idea in a rather forced, contrived manner. As with the self-buff and lots of the properties you give the moves, it seems like you have a loose grip on the actual metagame of Brawl, but you use your knowledge sparingly here to create somewhat of a stage manipulation character. That she would almost break the fourth-wall to chain grab is really odd.

The way you summarise playstyle for each section is intriguing as an approach, but I feel it fails at summing up the entire moveset. There’s almost a chronological styling to these, whereby only this section of moves is covered and you have to connect these summaries up to get any sense of how the overall playstyle works. Though this is more of a writing problem, there is some disconnect between the different sections here, almost working against each other in trying to achieve different goals – healing mechanics, chain grabs, status effects… these would be hard to piece together if you had a ginormous written article for a set. So trying to connect the dots as an average reader is going to be difficult.

In terms of writing and organisation, it’s a bit of a mish-mash. You have a very casual writing style, which a lot of the time doesn’t delve deep enough into the subject to portray what you’re talking about very well. This is obvious in any move where there are less than two lines of text, usually denoting the move is either completely useless or a throwaway input. When you telegraph your own writing like this, you need to re-strategize. At times your organisation can be endearing, what with the colourised symbols in the tilts and change of format to a plain white font with the summaries for each section, but whoever told you giant purple font in italics is a good choice needs to be shot. Similarly, simply changing the colours of the bright blue, green and pink fonts would have been greatly appreciated by my retinas.

The extras are just… insane. You have three boss fights here, all of which not under-detailed – to a degree. Most descriptions are kind of dull ‘blast’ type moves, with little thought put into seriously how the boss will play unique to other bosses. After Dark Bowser, it should be pretty easy to make something substantial as a boss moveset, but none of the three really come across as anything spectacular. Taking my critic hat off for a moment, though, I can appreciate the enormous amounts of effort put into all the extras here, which is sadly rare now – but it’s also an area that needs improvements.

In comparison to Jason, this entire project is actually a lot less impressive, though much better technically. What Jason did have was memorable badness, whereby the unforgettable stage, underpowered statistics and eponymous up tilt or smash [I forget which] made it shine when compared to pieces of trash that I would rate at a similar technical level. You’re not hitting the basement anymore in terms of quality, but you lose a lot of the fun, educational features of Voorhees in the process, which is what’s truly invaluable. I can attest this mostly to you strapping the moveset proper down with stuff meant to make it more Brawl-friendly, which you really shouldn’t bother with unless you’re some kind of professional Smash player or forum obsessive. In all, still a lot better than Jason, academically.

Between this and the last, there has been a long interval of not writing [again]. I am deeply sorry for being so late with many of these comments – they feel more than a little impotent now. However, it is for sets like Gengar, the first of user Wrk, that I continue in this endeavour. The moveset isn't the greatest by any means, but I'm always happy to give insight to blossoming authors. I would say, even now, the user is evolving, despite the rather harsh climate in Make Your Move 8. It all began here, funnily enough.

The organisation of Gengar is where we first see the type of person who is behind the page; it's to the point, but bold in giving the visual cues needed to waft through a rather unexpectedly complex mechanic that handles in a vein similar to that of Raiden or Protoman; blue and red moves that branch on an input. The idea of falling into the stage and becoming a running shadow is almost brilliant: I had hoped you'd be more specific on the interactions themselves; the aforementioned heavily-referenced the changes and the nature of the drop-off makes one question the brevity to which you put forth here. It would seem that halfway through production, you ran out of ideas. Coupled with the lack of description, it leaves the set feeling half-baked.

You could probably sum up this next paragraph with the term 'Pokemon syndrome,' so please move on if you're well-versed in the lingo. There's simply a lack of response to such criticism for this genre of sets here, which is kind of unavoidable given you likely don't [or didn't] know such tropes even existed. Of course, Pokemon movesets are some of the most visited – there are so many loops to jump through, clichés to overcome that it's difficult for a newcomer to not fall flat on their face reception-wise. One of the often worst offending attributes is the Pokemon syndrome – here manfesting in a lot of the better inputs, but at the same time, sucking up most of the best ones as well. This lets for a bad first impression where most moves seem like they're either simply interpretations of Pokemon moves in Smash or just very general attacks based on the ghost theme...

What doesn't help is the way you wrote the playstyle. Not to appear all negative in this respect – you write in a sophomore fashion, knowing your limits and capabilities, identifying that you can only really make the set, then analyse it for a post playstyle. What makes the best sets is a train of thought that is present throughout production, leaving the analysis to others. Perhaps it is that your first role in the contest was unusually as a person leaving [decent] commentary, but this set comes off as more of a self-analysis than a well-thought piece of setting (yes, I just used that word). This allows for some clever specifics like the dash, and you to go a bit crazier with some creative parts of very particular inputs, but there's not much of a flowchart here except for what could theoretically be found by players. In that way, it seems like a lesser-forced Sakurai set.

And yet again, I have to remind myself this is a newcomer set, but it's incredibly old now and obviously quite outdated, so this is not indicative of your current abilities. On its own, this set really doesn't stand up well, obviously – it's better than Childre, though, in keeping a light-headed approach to the whole thing without going totally overboard. What it wrong is that you actually missed out on some of the crazier, detailed descriptions that would have made this set a lot more fun – branching moves, Gengar's jester-like personality and even some move interactions that straight connected moves together would have been appreciated. For what it's worth, it's still a mighty good newcomer moveset.

Déjà vu, déjà vu – this time, at the end of the moveset we see some early damage control in Haunter! Honestly, I don’t see the point in this current trend of talking down your own movesets prior to feedback. As with Ken Masters, there are plenty of redeeming features about Haunter and it’s actually one of the better one-day Pokémon sets.

First of all, I’ll just address the state of the thing as a one-day project, as this is likely to crop up in many other areas – there’s a certain air about some aspects like the throws that seem rushed, in that you make connections with other moves, but as King K. Rool said, there are many weak links that drag down the whole thing from being what you blatantly intended with the foreground to background shifting. The merit in the speed of creating a piece like this is great, yet there were obvious hits to the end quality here – so much so, any Make Your Move user could easily spot them. Smaller problems such as spelling mistakes, an off reference or two and writing oddities also make the text less than perfect – what’s really the more painful issue is that there’s a lack of an overall playstyle.

That may seem like a very harsh criticism in today’s Make Your Move, but I don’t mean it in the typical sense of the phrase – rather, where Haunter needs playstyle is where he lacks it. There are rather odd move interactions focused solely on moving your opponent into the background, which feel unnatural – such as blowing them into it. While similarly, Kamek had certain moves which acted in unique ways to coordinate his greater methods, those never felt as tertiary as Haunter’s. It’s not a thread common throughout the set; we see Haunter is perfectly capable of very interesting ways to interact with other characters in the background and why this benefits him as opposed to anyone else, with moves that remind me, in fact, of Espeon from last Summer, which make some of the puddles, illusions and plays on the foe familiar for this reader, but don’t quite reach that level of tenaciousness.

I think my main problem with the moveset is actually the foreground or background plane stuff, which while rather subtly referencing the myths of a ‘ghostly presence’ or ‘another plane,’ come off as a little too enforcing on the person you’re doing this to. Sure, it’s an interesting and new idea, but it’s one that interrupts the flow of every character and Haunter almost has to rely on this mechanic, completely striking through a lot of strategies for other characters. It’s hard to criticise a concept that readily challenges so many paradigms such as this, but I honestly would have just preferred moves that allowed Haunter to move through the background or merely interact with it alone – when you start ‘throwing’ opponents in there, things start to become a little muddled. In terms of themes, it’s like you’re stating that Haunter isn’t special in being a traveller through this ghostly plane, but that other characters are just less adept at it – an odd comparison for a ghost and what could be, say, Pikachu.

In terms of the playstyle, it’s mainly just getting your foe into the background then using a large range of move interactions or sly ruses to fool them again, but while many of these appropriate uses of tomfoolery, these interactions are generally far more interesting as individual inputs than when put together with others. Similarly to Ken’s copied ‘objection’ move, a lot of what Haunter does isn’t just suitable for him and would likely aid any given playstyle, not really culminating in anything that pushes beyond the basic traits of Haunter being a “sneaky, evasive” Pokémon – as Kupa put it, or “his game [being] one of hiding and running, of status conditions, and of terribly annoying projectiles and jabs,” as Rool put it. This wouldn’t have been such a loss, I feel like you attempted something more than that here, though.

As with Pokey, you capture certain elements rather perfectly: Haunter is a ghost; he plays with his ‘food’ and enjoys using obnoxious moves created to trick the enemy. A problem crops up again here that didn’t in Kamek – some very strange concepts mixed into the absolute mainstream of the playstyle, like Pokey’s body separation [apparently in an iteration of his] that make the moveset seem off thematically. There’s nothing as good of an example as that with Haunter, but it doesn’t seem quite what one would expect from a Haunter moveset. For a one-day Pokémon moveset, it’s mostly forgivable, but pales in comparison to your Kamek and struggles against Pokey in terms of quality. Perhaps it’s just that my expectations of you are much higher now, thus this comment will come off as far more negative than what I wrote for, say, Dark Samus or Pokey. Rest assured, I will continue to judge you using these untouchable, mountainous expectations, even if you continuously fail to reach them from here on out.[/collapse]

With that out of the way, lets comment on some recent sets!

Sazandora is unfortunately where Marth Trinity chose for me to start off from – I was not a fan of this moveset... in a combination of fifth-gen Pokémon obsession and my disdain for your previous dragon-type joint project with Joe, Salamence, I came into this with relatively middling expectations. What makes it most painful is that I really am at a loss for words when I criticise your sets to this degree; there's some good, but that I feel that when there are overwhelmingly bad elements to the creation, it's difficult – I can't exactly chastise you for inexperience.

The style is one of low detail and a playstyle largely apparent in context to how the moveset was written, rather than the other way around. Most inputs have little cognisance; they don't appear to be in mind of the entirety of the thing, leaving the playstyle to try and wrap it all up. But similarly to trying to re-assemble that priceless family heirloom with sticky glue, all the pieces don't quite fit perfectly together. Perhaps this style is one that, unbeknownst to me, actually can take deep care in the flow of a set in linking together moves without the need for regular reminding through the text, but it just bugs me that you, of all people, are still writing up very short and rather meaningless inputs that can only ever generally add to a general playstyle.

I think it's this vague trait of your prose that really irritates me, and it's because it lends credence to a very fast output of movesets which, while suited for Pokémon one-day sets, makes no attempt to tell the reader: yes, this isn't me going my all, but rather me making a quickie because I want to. It's all about efficiency; low word count, high on specifics in terms of knockback, priority and damage, but never helping the reader in connecting to other moves or inputs. I would have loved to come to the playstyle section and find I was wrong – that you had taken all of this to hand, alas, I was disappointed to find no evidence of that.

I would split near all of the moves into two categories: creative moves and filler, the former being the specials, the latter most of the inputs. What is there of the creative moves is interesting; the interactions evoked in the surf and draco meteor moves invite a level of interest what with their lavish effects on the stage or diversion from source, but they are somewhat out-of-place. No one can blame you for that; the games aren't even out in America yet and you had little to work with, but come on, draco meteor as a rush move? Sazandora the three-headed dragon curls up into a ball and summons walls of water? Really? It all seems outlandish and almost silly. And I was also more than a tinge confused by the wording in the neutral special, which seemed to tell of how Sazandora's default move is defined below each input... but it isn't. You make distinctions about projectile, ground-based and priority-head moves, but never go on to further elaborate on these finer points, so leaving us all guessing as to what's going on.

I had very much the same problems with Salamence. There's just this air of either nonchalantness or flat-out uncaring attitude toward a lot of the inputs where you don't go out on a limb in defining any themes or giving the character any kind of personality. Again, I leave the experience with as little idea as to what Sazandora is besides a dragon who apparently is fat and has three heads... which could easily be the Hydra monster from Disney's Hercules. I'll stick by Axel Gear being great, because you were able to define the persona aired along the lines of that YouTube video of the fight with him, almost perfectly, without copying-and-pasting – which is why I forgave the obfuscating stage-bar move. You err on the recycling of an idea that complicates Smash for no reason; surf conjures up its own stage hazard.

It is an itch for a commenter like myself to even produce a long comment on such a set, as it invites a brush-over with a shorter spiel like, “great work HR,” or, “I really liked the [painfully intrusive] surf attack.” However, with any remotely in-depth inspection, this kind of work is going to fall apart. I mainly blame the failure of this set on your lack of motivation: this due to the Pokémon, who, maybe like Salamence, lacks that special touch that we sense from something like Hariyama's grab game – or that you're really becoming uninterested in Make Your Move after your 'retirement.' Either way, I think a move away from Pokémon would be good for you and I look forward to psycho-analysing you in the future!


:cool:

What is essentially a newcomer set appears next in the form of a moveset for the unfortunately-concluded character of General Scales from StarFox Adventures. Crewx, the creator of this one, was before probably gushing over potential of Spyro the Dragon, particularly as a new author who would need a good amount of inspiration to attempt this unique form of writing. An intelligent pick there, so when I saw the connection, it was baffling to say the least. He doesn't even get a boss fight; you'd have to invent much of his fighting style and almost interpret his entire personality according to your own text. This is way too challenging for a newcomer.

To start with, I enjoyed the introduction of the set. You are quite adept at setting a mildly sinister tone with that line, “Perhaps now Fox will.” It's funny how you've used this glitch video to give a sense of the character and I like how you reach out to the reader through encouraging the watching of General Scale's end in his respective game. It's little touches like this that are your strength; even going up to the statistics here, the references to “Dinosaur legs” and 'all that armour' are charming, if ineffective due to your not-exactly-perfect grammar and punctuation.

The 'attribute' where he replaces his own weapon with those he picks up is a neat concept, but one which deserves more attention than a note. Here we can identify the first weakness in your writing – lack of detail. You don't tell us how each weapon works, instead going the route of making this somewhat of an Easter egg for the player. The idea that one character can rely on items to a large degree is one persisted by some of the best authors in this contest; the moveset that won the previous contest had developed one such mechanic. This is really the difference between newcomers and veterans of the contest, and something you will need to improve upon to progress.

To drive through the same point, for much of the standards, consisting of the jab through the get-up attack, we don't really see much of that original personality you built up to with Scales, nor the recognition of him as a presence, that you were so quick to bring forth with the introductory paragraphs. The key here is the lack of explanatory text; it barely jumps from the length of the statistic descriptions, and again, this is the mark of more experienced Make Your Move authors. To move on, you will need to give a greater sense than simply telling the reader that Scales, “cuts backwards.” You don't need to reach the highest pedestal possible any time soon; this is simply a bar to set for yourself.

Onto the specials and things pick up quite a bit. I liked the motions surrounding the fire breath of the neutral special – you go out of your way to create a unique usage of the rather eponymous fire-breathing speciality, which is a sign that you do, as I had thought earlier, know more than the average forum visitor here how to make a moveset. Perhaps you learnt from the commentary on Spyro? I can't tell, as I haven't read the set or its commentary [though maybe I should]. Anyway, the rest of the specials are a mixed bag; I like the conveyance of dominance and blood lust with the up special, and it operates as somewhat of a cliché in also being a suicide recovery. It is a little strange when it's his primary form of recovery, though and you don't make big waves about you realising it's a suicide when it clearly is. The down special is another example of a lack of detail, yet I did like Scales' line of dialogue once the device busts.

Summing up the rest of the set up to the final smash, it's all very similar to the standards. You go the route of making Scales more of a ferocious, beast-like character, rather than a civilised and sinister villain; avoiding making connections to the specials, which is characterised by someone of inexperience. Still, by filling out the inputs with relevant moves and making an effort in giving General Scales some form of personality, you are a head above most of your age in this contest. The final smash is of course a wild excursion compared to the rest of the set, in which Scales seems to take on a God-like personage and spout his native tongue rather outlandishly while summoning some good old meteorites.

The extras are as well filled with similar references to the dino-lingo, lots of extravagant gestures unlike much of what we see in the set. Really, translating this kind of thing over to the rest of the set would be a good start, as well as developing an overall idea that defines your movesets; playstyle, or flow, that links them together in creating a character who can be tested scientifically to follow some sort of logic pattern. In all, it's not a set I would vote for, but it was better than expected and I certainly really hope you get to read this comment, or at least continue making sets in this contest, because you do show some potential here. It has been a couple of weeks, so I expect you've left us.

:cool:

Like Ken Masters, Twilt ends up talking down Nero before he's even started... it's honestly not deserved, as the set has plenty of good points. It's showy, flashy and all about dazzling the reader, but that is so appropriate for a Devil May Cry moveset. This clashes with the idea of a subtle concept, though, as much of what Nero does is unnecessary – one can pontificate on easy solutions, when figuring out these difficult aspects of gameplay. Indeed, as was the way with Ken, your crutch is crushing as many mechanics together without editing. However, what is salvageable is decent; it just lacks the polish of something like Edgeworth.

First, the good about the set. I do love the incorporation of the devil trigger, the revving of Nero's sword and little things like including the final 'attack' of the game on the final boss in the final smash; it's obvious you know your Devil May Cry 4, using this knowledge to represent the character accurately. This ties in with by far the best part of the set: the presentation... you have oodles of character just oozing off of the page what with all the images leaked into the background, some dynamic what with the artistic nature of the glowing arm on the monotone frame. The off-remark quotes, the very... Nero font [it's half Lionheart-style misogyny with the bold italics, half classy with the thickness of the headers] and touches like the GIF just put the fly-o-meter through the roof, making this set Genuinely Popping.

The grab game is an original take on a simple concept, though perhaps the error is in its simplicity. As said, the real dumb-bell mark downs come from the lack of polish, so when you make such a brass move as this grab – with all its 'I like to grab from anywhere in the air and throw you in the air' in-your-face nature – one immediately questions if it is, indeed, at all necessary. There was probably an easier way to do that than making it so easy to chain grab people; you don't put nearly enough restrictions on it when there's so much potential for brokenness. In this way, it's hard to take you seriously when you seriously suggest just letting Nero grab people mid-air and fling them around like a ragdoll, as cool as that is.

So, is Nero all bark and no bite? Well, we have other mechanics, which are indeed very, very flashy, but they don't add all that much to the playstyle. The stuff about the 'bars' is mildly confusing – especially when you talk about summoning the bars in the special as if they're an item, and you pull a big writing no-no of mine by leaving the reader hanging on key details. Telling the reader to “find out” on a huge playstyle element has been the making of sets before, like Nurse Joy, but there are points at the beginning of the moveset where you've left several mechanics unchecked and simply ask for the reader to... wait a moment. The build-up for these is usually unwarranted. Though you certainly don't do anything criminal like Solar Man's sun mechanic, it's still kind of annoying to read.

I know, mostly this has been about presentation, writing style and the fashion of the set rather than the actual moveset. As said, it's a good portrayal of Nero. I like the amount of different slashes that have a very visual kind of writing style to them, indicative of your imaginings. It's, yeah, a lot of generic attacks, but you at least beef them up with the mechanics when they become too much. That's also a double-edged sword, though, as you do fall on that crutch sometimes, using mechanics as a pressure valve to say, “well, that's boring... but what if it does this?” I would greatly have preferred if you had just done the cool thing to begin with, as the set becomes convoluted with so many of these things.

To conclude, the playstyle itself also is kind of a little... eh. Due to splitting dividends between the devil trigger, revving up the red queen and the grab game involving your arm, it all comes off as a bit messy. What's fun in the set is appreciating each individual move's delicate appreciation of Dante as a swordsman, and in putting together a rather fun set that doesn't try to be too hard to understand in a vague sense, but just beneath the surface, gets complicated quickly. For the future, just stick to one or two of these concepts and develop them fully. I'd still say Edgeworth is by far your best this contest, though this is as good as Ken Masters in the fun-fun and just as enjoyable, really. Sets like this are far from a bad thing.

:cool:

This is one set I really wish I had commented on earlier, considering both its creator and just how good it is. This is one of the most fun experiences I've had reading a set in a long time... you really pull out all the stops in creating an authentic mime compendium of hilarity-ensuing actions for the 'mon to use. The extremely plain-to-see concept is reminiscent of Lucy in creating an invisible maze for your opponent to climb through, forcing them to learn your own animations in order to figure out what you've created.

What I like best about this approach is that it invites offensiveness. Not only with how non-threatening and silly Mr. Mime looks while performing many of these actions, but in the way that you appear to be completely defenceless while building a fortress of sorts to defend yourself. Being fairly simple, the foundation for a mime fits well for beginners, being able to link a notable reaction to the object created – which was my big problem with Lucy, so it's actually far better here, in my view. My big grievance with invisibility has indeed always been that it's counter-intuitive and that you were able to reprimand this is impressive; very good character choice.

I suppose what I've been known to like about sets like this most is that the playstyle almost writes itself; by the creation of invisible hitboxes, you can pretty much mindgame your opponent and they have no idea what you're doing... saying that, this wouldn't be sustained until high-level play. This is obviously where the set kind of recedes in on itself, as it would seem plain as day to a professional player, or anyone adept with the character, exactly how the objects will fall and, more specifically, their hitboxes. Here is where you'd have to get more wily and attempt to fool them with your whole arsenal of moves.

The real test of the set, in that way, is what capabilities Mime carries over when it comes to high-level play what isn't simply mindgames through the invisible hitboxes and falling imaginary items. He has that interesting move that disallows certain types of moves, for example, always making him immune to a certain type of thing like grabs or smashes or what-have-you... that's rather interesting, as it does let him nullify a kind of approach: obvious results being, he can manipulate the opponent to fight like he wants them to, making him an exceptionally versatile character. Along with that barrier, projectile fiends like Solar Man are really screwed coming up against Mr. Mime.

Moreover, the fun stuff is just awesome. You have Mr. Mime dropping invisible pianos on people, boxing people in with his throws, riding an invisible bicycle and so on... the jocularity is incredible. This is a character who I imagine people would pick up solely for his hilarious comprised of humiliating mimery, which is pretty shameful to be a victim to. The final smash is yet another slap in the face of your opponent; it reminds me of Von Kaiser's in his “taking out” of his own anger on the enemy through a bizarre magical medium. This is one of the few times I really took a deeper look into the extras and didn't just skim them, because they were worthwhile and, yeah, really, really funny. Loved Mr. Mime getting in an invisible car and driving off in the victory poses.

Other comments did talk about balance a bit. The automatic veto of different moves maybe was a possible omission when Mr. Mime has a very deep gimping game and is able to recover infinitely horizontally. However, you didn't block aerial attacks, so he can't render himself invulnerable in the air or anything broken like that. In that way, it seems like a considered approach. Indeed, the writing style and presentation are clear enough of such a pure drive to create a consolidated and engrossing experience for the reader: I can tell you had a good time writing this, which translates into a witty, interesting piece of text.

So in terms of how I would rate it if I were doing that, it would be a high one. I'm not sure if I'd rate it as highly as Hariyama and Octillery because it has some awkwardness with the walking in mid-air and sometimes dips into purely mindgaming opponents not as much as I would have liked, instead relying on the use of moves more pertaining to the invisible hitboxes and mime stuff. It's not like that makes it a bad set – on the contrary, it's my new favourite of yours. I can only hope we see more of you in MYM9!

:cool:

Typlosion is much in the same vein as General Scales, so I'll make this a footnote to that comment rather than anything quite so analytical; no point in repeating myself. You make some improvements here – you're start to grow into the idea of connecting moves together with that down special that works with moves like the flame wheel, as well as incorporating more of the character's own uniqueness into the set. You actually have a playstyle now! Yes, it's actually fairly decent for someone so new... just very simple and not polished at all, because a lot of these moves don't really fit together in any constructive way conducive to a playstyle. However! I do believe you have a lot of potential and Typhlosion was a big improvement over Scales, especially considering how short an interval it was between them. Keep 'em coming in MYM9!

:awesome:

I'm going to make the next few just as brief – time's running out for this contest and I'm not going to finish these before tomorrow at this rate.

:awesome:

Deathtanz is much in the same vein as your previous sets for playstyle; spam projectiles, create pressure, make bullet hell for Smash. It's a little silly that even after all the time you've had since Kingdra, you're still making playstyles like this – I can't score you down for resilience, I suppose. You have improved your way of barely describing moves, but ironically go way too far in detailing everything. It's a positive change in all – find midground somewhere between your last two efforts and you should be well on your way to having a great writing style. Organisation is actually pretty great.Nya. Not a big fan of this set, yet it does hit the parameters I set for MegaMan X – complicated, over accessorised and obscure.

:cool:

Urgot is something I've been waiting for: a set by Chris Lionheart. Yes, it has been many months since we saw the last of this MYMer, and I for one am really joyous to see such a classic character and good friend return to us, for however long he chooses to stay. Always room for Chris, indeed. Anyways, the set itself is reminiscent of Haar in that I was involved in the selection of the character and some sort of bet was made pertaining to the amount of time spent on creating the set. As a result, it's not Chris' best work. On the other hand, having taken a look at the character's video beforehand and gandering at the interaction between the specials, one can easily detect potential that was not completely wasted. There are some rather smart ideas surrounding the up special, but as with everything else, it isn't as developed as it could be. Presentation and writing style-wise, it's actually a fairly easy, painless read. I can see that, with more time, you still have it in you to make something special, so please do!

And all those posted today... shall be commented tomorrow. As the saying goes; never, late better than.
 

Hyper_Ridley

Smash Champion
Joined
Dec 21, 2007
Messages
2,299
Location
Hippo Island
Firebar is a pretty clever set for something that I doubt is even alive. Personally, I think he should have had a move where he turns himself into a pair of legs to try walking back to the center of the stage or something. That way you could have even given him aerial attacks and stuff for more lulz, but whatever.

I know who VAN Pookin is, so I'll try to give him a full read soon.
 

MarthTrinity

Smash Lord
Joined
Aug 9, 2007
Messages
1,954
Location
The Cosmos Beneath Rosalina's Skirt
Watch The Video. Scroll Slowly.

http://www.youtube.com/watch?v=1mbo5vHy8dw


Now that you've watched the video, you will die in seven days.


Sadako

Sadako is the spirit of a young girl murdered by her father...or perhaps she's something more than that...something evil...regardless...Sadako is best known for the "Ring" tape...it is said that once a person watches the tape, they will die in seven days. Of course...many believe this just to be a story told to scare children...others...others are braver...or more foolish...

But...Sadako's tape is true. You will die...fortunately...it has a loophole to it...if one shows the tape to another...before they die that is...the curse will spare them and move onto the next person causing an endless cycle...many, many people have seen this tape...some have survived by passing it on...some...haven't been so lucky...you may even know someone who has seen it...just hope you're not on their list...

However...it may be too late for that...you see...a very famous man once saw the tape. Well aware of what it was...the man tried to show the tape to others...but they caught wind of his tricks and refused to watch it. Desperate...the man thought of one last resort...

The man was saved, having passed the video onto thousands of unsuspecting men, women and children...that man's name...was Masahiro Sakurai.

Sadako's curse is very much alive...and you've all been playing into it this whole time...Sadako joins the Brawl, whether you like it or not...

Your only hope...is to continue...the ring...


The Ring Starts...​

Sadako will only appear to the most dedicated of Smash players...but no one is safe from the curse...if you've so much as touched Brawl, you're...well...let's not get into that...

Essentially...if you haven't seen the video yet...you're safe...for now. Sadako's tape appears seemingly at random to Smash players...but there are several things that have been rumored to trigger it...

-Playing All-Star 44 times.
-Playing on a certain stage 444 times.
-Dealing 44,444% damage total.
-Getting 44 of a certain sticker.
Getting 4 pratfalls with each character.

The list goes on and on. Some of these methods have been proven to..."summon"...the video right away...sometimes it works, sometimes it doesn't...there could be even more methods, nobody's entirely sure...at least...nobody alive...

You will know when it happens though...the moment Sadako is...unlocked...the screen will flicker before going to static...as if your TV were acting up...maybe it is...who knows? Regardless, a second later...the match will come back. You'll be playing the same character you were before...on the same stage...with the same options and opponent...but...for whatever reason...your character will appear vaguely...blurry.

This is your last warning. Turn the game off now. If you do...you might just survive...if you choose not to listen...well...it's no fault of my own.

The next time you start up the Wii and select Brawl, you'll notice that you're not watching the typical Brawl intro...no...you're watching the video posted up top. At this point...the rumors say that your Wil will be "unstoppable." It'll act as if it's frozen; you won't even hear the disc spinning...pressing menu on the Wiimote will do nothing. This is your absolute last chance. Pull the plug. Throw your Wii across the room if you must just DON'T WATCH THE VIDEO.

If you're still watching...may God have mercy on your soul. Brawl will start up as normal...you'll be able to play any mode, any character you wish...but there are a few changes...


The Changes...

You will most likely notice these changes immediately...and if you're foolish to have watched this far...you'll see quite clearly that they are to keep track of your life...your remaining days.

First and foremost...the Random button has been...replaced...for lack of a better word. Instead of saying Random, the button will simply be a blur. Secondly, the character who you were playing as when you "unlocked" Sadako will have their head entirely blurred out when you play as them, as if they had some strange graphical glitch. This will be present on all photos, replays and even Stickers and Trophies of said character.

This character is you.

While obviously not you exactly...this character represents you. As the days pass by, drawing ever closer to the seventh day...deadline...you will notice the roster slimming out. On the seventh day...at least before your death...only two characters will remain. The character who was blurred...and Sadako herself.

Of course...if you manage to see this it means that you'll die playing a game...not a very good way to go out...

Finally...you will notice a new video in the "Replay" option. This "replay" will be Sadako's video. This is your one chance for survival. Send this replay to someone else or you will die.

Sadako...

Believe it or not...there are actually some people who have gone out of their way to unlock and play as Sadako. As strange as it sounds...Sadako actually has a 100% complete moveset for Smash...seemingly put in place by Sakurai as a means of...stopping the ring. It apparently has worked...at least on a few people...a few dedicated players who tried learning how to master Sadako. Needless to say...those players became consumed by their own desire for fame in the community...after all, who wouldn't want to be first to master a character who half of the players have probably never seen?

According to those who have played as her...Sadako is very comparable to Zelda...at least size wise. Her walk is quite slow...but it lowers her to the ground greatly, making her Kirby height as she walks...her dash...if you can call it that...is quite abnormal; instead of dashing, she seems to glitch out of the game before reappearing a Battlefield platform forward. She's apparently quite light too...floaty in the air but with surprising, erratic speed. There have also been rumors that Sadako never trips...

Even though Sadako can apparently be..."beaten"...the game will never show her being KO'd. The moment she touches a blast zone, the TV will change to static once more. Moments later, the screen will turn back, showing Sadako standing in the middle of the stage. Whether this is a visual or...something else...has yet to be confirmed...

As another strange note, players have reported that all of the music in the game turns off automatically...replaced instead simply by this. On every stage...menus included...


The "Moveset"...

Sadako is reported to be one of the most detailed and unique characters included in Brawl...no doubt that it's a method that Sakurai tried to stop the ring. Players have reported that Sadako is always dripping water...after all, she was supposed to have been murdered and hidden in a well. As such...Sadako leaves large puddles of water behind. When tested, it apparently just made other characters slip when they stepped on it. Apparently however...it plays a crucial part when it comes to playing Sadako effectively...

The following is a direct copy/paste of the entirety of Sadako's "moveset" as discovered by an Austrian Smash player. He apparently spent six days straight playing as Sadako in an attempt to master her...just as day seven was approaching...he panicked, sent the replay to a friend and became paranoid of everyone. He was apparently allowed into the Brawl Backroom for his indepth move analysis of the mysterious character...but he was never quite the same after the whole ordeal. He eventually shut out all his friends and kept to himself...worried that the curse may one day come back to him...


The Report...​


__________________________________________________
Hey guys, so I know a lot of you have heard the rumors that there's a super secret character in Brawl. Well I know you probably won't believe me but...I've managed to unlock her. I'm starting to think that she was meant to stay locked though; when I unlocked her, my game went all glitchy and now Meta Knight is all blurry. I'd love to post some videos but, for whatever reason, my capture card won't work properly and all my replays got deleted/glitched. I'll try and find a work around for this but until I do, I'll just give you the details of her moves.

EDIT: I managed to find a picture of her online...or at least a character that looks like her. Found a name to match too. I'll post them below ^_^ Anyone know what game she's from?

SADAKO


STATS
So she's kind of hard to describe really but...she's about the size of Zelda standing up, but when she starts walking, she walks like a spider or somethin' and gets really low to the ground, it's kind of weird. She's pretty slow normally but her dash makes her like...teleport forward, like a Dimensional Cape kinda. In the air, she's pretty floaty...like...she makes Luigi look like he's in Melee...but she's also pretty fast too...it's a weird mix.

SPECIAL FEATURE
I didn't really know what else to call it but like...she has some really weird extra thing to her. So, she's always dripping, right? So as she drips water on the stage, it starts to pool up. This just makes people slip normally...but it's got some pretty cool interactions with some of her other moves! I noticed that the puddles of water disappeared after about ten seconds or so and only form if she's standing on the spot...but they form pretty fast...like...two seconds and bam, puddle.

SPECIALS

Down Special - Reality Portal

(Before I begin, I just wanna say that none of these moves actually have names; I'm just giving them names as I go along ^_^; )

So when you press Down Special, it doesn't really seem to do much at first. There's no animation or anything and it doesn't do damage...so it takes a bit of figuring out how to use it properly. Basically, what you do with this is use it when Sadako (gonna call her that from now on since that's what it says online ^_^) is standing on one of her puddles. When you do, she seems to sink into it. You can then use the control pad/stick to select another puddle and press the Standard button. Sadako will then come out of that portal near instantly! As another thing, you can also press the Special button and her hand will shoot out of the puddle. It doesn't have a whole lot of range to it, but if it hits, it'll put the opponent into the animation where their shield is broken. One important thing I found out is that the puddle Sadako will pop out of ripples slightly when it's selected; that way you always know where you'll come out!

Sadako is also able to grab opponents while in the puddles by pressing the grab button(s). If she grabs another character, she pulls them into the puddle where their damage rapidly rises (up 14%) before they're tossed out.

Neutral Special - ???

I couldn't figure out a use for this one really but it creeped me out when I was playing; I guess they forgot the proper animation or something. Whenever I'd press the Special button with no direction, this weird image would pop up on screen with some timer. The image was of this weird glowing ring and the timer was like. . .5:10:51. The image would stick around for a second or two before vanishing. I set the game to a fight against a stationary CPU but even after five minutes passed, nothing happened. I guess this is just some glitched up move or something...

Up Special - ???

Another really glitched up move! WTF? This one's even more creepy and, surprisingly, even more glitchy than the Neutral Special! When I did the input for Up Special, the game just froze and an extreme close-up of someone's eye appeared. It wouldn't let me restart the game or anything, Wiimote wouldn't even turn of the Wii/let me go to the menu. I hate to physically unplug the Wii! What kind of game design is that? On the plus side, the graphics for it were top notch, looked totally realistic. I assume it used the sensors in the Wiimote as the eye followed it everywhere. Would've been kind of cool if it weren't so creepy!

Side Special - Dimension Rift

This one actually worked! And it was pretty cool too! Basically Sadako holds out her hand and teleports forward, kind of like Fox's Side Special. If she connects, the opponent bounces around like they were repeatedly bouncing off walls or something before falling to the ground. They take a pretty solid 9% damage but no knockback unfortunately. What makes it especially cool (and I just found this out!) is that you can actually use it out of the Down Special! So if you're in a puddle, you can make Sadako suddenly burst out with this move! It's pretty awesome to see!

EDIT: WTF? So I was playing against a CPU Ike and testing this move out, seeing what it could combo into/combo out of...I turn the Wii on today to continue testing and for whatever reason, Ike's not on my CSS! This Sadako character is glitched as hell...or maybe it's the disc...?

STANDARDS

Neutral Combo - Static

Sorry I'm late with the updates, couldn't sleep at all last night. Finally got back to testing Sadako this morning though and I've realized just how broken she is. It's like they didn't even bother testing her! Her Neutral Combo just makes her invincible! What kind of cheapness is that?! I'm starting to really worry that this character is screwing with my Wii though; the more I play her, the louder the Wii gets...it's like it can't process it all or something...

Dash Attack - Nothing

They really, really got lazy with this, I swear! She doesn't even have a dash attack! Pressing A while dashing just makes her use her Neutral Combo!

As something of a side note...I keep opening this file only having to delete a ton of stuff that I swear I didn't write...it's really starting to get on my nerves. My Wii refuses to load Brawl sometimes, and when it does, half the character select is missing. Sadako's still there fortunately so I can keep testing her out...but it's really getting on my nerves. That and the people on SmashBoards are really starting to get to me; I tell them not to bug me but...whatever, doesn't matter. I'll just keep working on this movelist and just take a break from the people there.
After that short rant, the "movelist" stopped....or at least has been edited since then. The rest is just unintelligible gibberish. except for the last few lines which still remain intact...

I found what she was talking about...replay...had to send replay...didn't care. She was coming. Only a matter of time. Replay had to be sent. The timer...that was it. She was watching me...always watching me...probably still is...broke disc...burnt it too...eyes everywhere...watching...me...
The Death...

Even with all the rumors and stories floating around...nobody seems to be 100% sure as to how watching the video kills you...some claim it's just insanity...that the viewer drives theirself insane...to the point that they just end their life. Others say however...that Sadako herself kills you...death by fear.

Many have tried to avoid the fate of passing on the video...whether it be because they don't want anyone else to fall victim to it...or because nobody they know is foolish enough to watch it. No matter the reason...nobody who has watched the video without passing it on has survived past seven days...Every. Single. Person has suffered the same fate...all found dead with a look of pure horror...

There was one person who managed to "record" their death after unlocking Brawl's...special...character...

Eyes everywhere...always watching...never safe...pass on video...or die...fear of death...fear of unknown...fear of those eyes...those always watching eyes...pass the tape on....die...only...options...tel-..?!​
Despite recording it, the camera died shortly before the man did...his last word before death sounding like "television." A popular belief is that Sadako comes through your television to kill you...but that's simply silly...even without a TV...she'll kill you regardless

Nowhere is safe.


Now...before you go and panic...worrying that your Brawl disc may end up killing you...remember just one...small...thing...


You have already watched the video...in seven days you will die.


Seven days.
 

Rychu

Thane of Smashville
Joined
Jul 5, 2010
Messages
817
3DS FC
1908-0105-4965
SADAKO

That scared the living **** outta me.
I mean it.
That was good MT.
The set wasn't half bad either
I really liked the whole mood of it, its just brooding, creepy, and honestly made me almost **** myself.
Weird, yes, but cool as hell.
If I had the link, i'd say it called for a sexy party.
 

gcubedude

Smash Apprentice
Joined
Aug 15, 2009
Messages
83
Ok, I'm just going to say that Sadako seriously freaked me out. Mostly cuz I have an imagination where I can easily picture something that I'm reading, so I was able to imagine what it'd be like if i used her Up Special on the big screen TV I have. It wouldn't have scared me so much if u didn't put that picture of the eye at the bottom of the moveset! that, and the way you spaced everything, so it was like someone narrating it, with perfectly placed pauses in their speech. I'd say it was a good read, but it wasn't for me; I'm still a little freaked out (Can you tell I don't watch many horror films?)

In all honesty, though, it was very well designed. It also showed me where "Seven Days" came from.
 

flyinfilipino

Smash Master
Joined
Sep 11, 2007
Messages
4,319
Location
North Carolina
Just thought I'd comment on Sadako...great read...it was very well-written, you're really good at keeping your writing style fresh, MT...very creative and effective entry....

:bee:...
 

darth meanie

Smash Journeyman
Joined
Jun 6, 2008
Messages
452
Glad to see the last day of MYM is going strong. Haven't read them yet, but they all look scrumptious so far.
 
Top Bottom