• Welcome to Smashboards, the world's largest Super Smash Brothers community! Over 250,000 Smash Bros. fans from around the world have come to discuss these great games in over 19 million posts!

    You are currently viewing our boards as a visitor. Click here to sign up right now and start on your path in the Smash community!

Make Your Move 8: -TOP 50 POSTED-

Hyper_Ridley

Smash Champion
Joined
Dec 21, 2007
Messages
2,300
Location
Hippo Island
http://chiefmendez.wordpress.com/

Trust me, if you have an idea for a moveset of something remotley well known, it's probably been done at some point, so there's no need to worry about it.


And since poor Exeggutor isn't getting any comments, I'll say that I like how he makes control reversing into an actual viable tactic instead of just a gimmick, though I'm not a huge fan of confusion due to the random factor, since it's possible the input changes to one I'm a millisecond from performing. I haven't read the whole set though, but I thought it would be nice to at least acknowledge the set.
 

Katapultar

Smash Lord
Joined
Nov 24, 2008
Messages
1,284
Location
Australia
I've seen you on the chat, Pokedex. I'll be one to extend a welcome from this society. If you're going to make Pokemon movesets, I'd kinda suggest looking towards a Pokedex description for playstyle inspiration and such. Works for me.

It's true that Executor hasn't gotten any comments. I'd be one to think that he would have gotten a good deal of them by now. But no matter. Anyway, I see you've got yourself something with Executor which is a good deal not too in-character for him. I'd kinda think that you could use another fellow like Kadabra or Mismagius, although Executor is fine too. You're not one to worry about in-characterness. Except for Lunge.

I don't know what to say about Executor. Im just one to acknowledge it (so I can post Dio next page).

Though I am impressed that you managed to get Executor out along with Mr. Bean in 1 week. I have to thank you; that pushed me to MAKE a moveset. And made on I have, and will hopefully post it. MUST CATCH UP WITH MOVESET QUANTITY!!!
 

Junahu

Smash Ace
Joined
Nov 15, 2005
Messages
899
Location
Shropshire Slasher
Eggman-cutor of borg:
I find it a little wierd how people embraced the random factor in the Item Tree, but when you do it, there's this awkard pause where noone comments on it.
Still, the fact you implemented it makes me rather happy. :bee:

Exeggutor deftly shows the psychological effects of randomness. It's something the opponent cannot possibly prepare for, they have to be able to rethink their whole gameplan, every couple of seconds. So while the effect itself has little impact within the game, its effect on the actual person playing is immensely crippling. From the looks of it, it seems you've struck a good balance between transcending the rules of the game, while symultaneously staying within their boundries. I really like this kind of psychological approach that challenges the player themselves and plays on their fears (and any people making a Gengar moveset in the future could learn quite a lot from Exeggutor... hint, hint)
Of course, you do realise this is one of those characters where players will find him really strong as a CPU opponent, then fall over themselves while trying to play as him themselves (especially against other CPUs, who can simply choose to ignore scrambled controls)

Anyway.. yum yum nitcpick time..

I don't like how Leaf Storm eventually stops working entirely, as it seems like the kind of move that would work well as a Wario-waft style charging attack. "Limited ammo per stock" is not something I would enjoy playing with.

I remember that grab game. Surprised you didn't squeeze in a Silver or Mewtwo joke in there. :bee:

I'd say that the 10 second duration of Egg Bomb is a little much, and the ability to extend it to up to 25 seconds even more so. I think it would work more to Exeggutor's advantage, if it lasted a random length of time between 2 and 5 seconds. That would remove the need for the two regular attacks that steal its effect.
I was also surprised that you didn't follow up much on the tripping aspect of the egg bombs. Then again, standard tripping traps are kind of annoying when most of the time they would have a more useful effect by making that part of the stage "slippery terrain".
 

Katapultar

Smash Lord
Joined
Nov 24, 2008
Messages
1,284
Location
Australia
Hey look, it's that guy!


1 Day JOJO SET!! = Dio Brando!


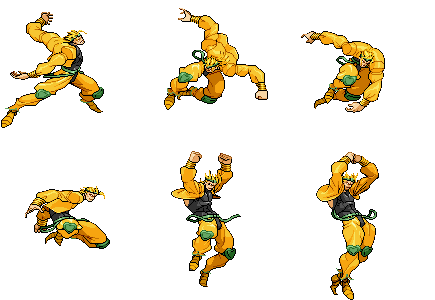
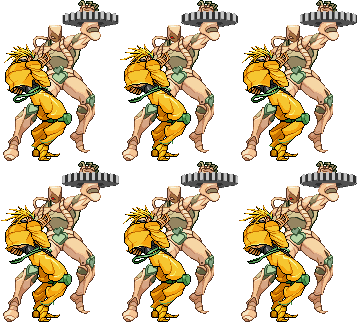
Dio Brando is A big bad from the Jojo's Bizzare Adventure anime/manga series, and is pretty much made of WIN. Internet memes were made because of him, paticuarlly ZA WARUDO, which means The World (I learnt that from Khold's Anon set by the way). Because of that, I decided to read the manga, AND, make a moveset for him. Don't know why nobody else has done that yet. If you want more information on this epic character and his backstory, look on his wikia page, which is linked in the image of him.

Onto Smash status, Dio Brando is a vampire. In JJBA, that means super strength, super speed, and regeneration in exchange for the need for blood and death from sunlight. This, combined with his muscular body, makes him a natural heavyweight. Pretty much all of his stats are good, very good. Dio basically has Falco's jumps, Captain Falcon's speed, and Ganon's endurance. Though he IS a vampire. It's like, the big thing nowdays.

Grab - Thirst for Blood
Dio's a vampire, so uhhhh, yeah, he'd naturally need blood.

Once he grabs a foe, Dio starts sucking blood from them at the rate of Lucario's pummel, healing him at the same time. Yup, no KO method, and no vampire conversions. While Dio CAN do that, he doesn't do it here. Well, not quite yet. . .

That isn't all Dio does here. Tilting the control stick allows for Dio to hold his foe in the chosen direction. This way, they act like a shield for Dio, and can be grabbed by other people. . .

If you "Smash" the control stick, Dio will effortlessly throw his victim for 11% KOing at 250%. Note that you can throw them in ANY direction, not just the 4.

Dio's grab is fairly simple. The healing makes up for him not having a natural recovery. Wait. . . didn't somebody else already do that?

Specials

Down Special - Animated Leftovers
Dio bends down and places his hands on the ground for a moment. A 'crack' remains in the ground where he used the attack, it being 1.5 SBB wide.

Nothing funny happens until the foe (or their minion) steps on the crack, even if they happened to had sidestepped over it. Once they do, a Vampire Zombie pops out of the ground with a "WRYYYYYYYYYYYYYYYYYYYYYY!!!!!" Seems Dio was here beforehand using his vampire powers to animate corpses. Hey, an evil guy like Dio needs minions in order to take over the world, right?

http://www.onemanga.com/Jojo's_Bizarre_Adventure/25/005/

The Zombie is no pushover. It will instantly seek out the nearest foe, having 1/2 the mobility of Dio (who's is VERY, VERY good by the way, so the Zombie's is fairly good) with a dash and 2 jumps. Once it's in range, the Zombie will perform a slow grab with the same results as Dio's Pummel. The only difference is that a Zombie's pummel is 2X more difficult to escape due to their sheer vampire determination.

The Zombie does not have HP. To kill it, foes must traditionally knock it back, it having the weight of Mario, with a invisible damage percentage. This seems difficult added with the Zombie's speed, but keep in mind the stupidity of these guys. You can even lure them offstage to their deaths. Other than the abyss, any light-based attack will kill a Zombie instantly (not fire, mind you).

Dio is capable of grabbing a Zombie and using it as a shield, but more importantly, it can be bloodsucked. Mind you, Zombies don't provide fresh blood, so this only works IF they have taken the blood of a foe, which Dio can add to his own health through his pummels. Talk about a blood bank!

By the way, Dio can have as many Zombies out as he likes. Only 1 'crack' can be out at a time though, but any number of Zombies can come out of a hole. A cooldown of 3 seconds is required before another Zombie can come out after the first. It all depends on wether foes trigger the crack, which Dio will most likely make them do.

Forgot to mention one last thing. There's a 1/5 chance that a Zombie will bring with them a Virgin Woman, barely alive that it didn't get to eat. The woman is basically a sitting duck that Dio can grab and bloodsuck for 20% worth. If your loyal Zombie is kind enough to bring Dio an offering, he shall accept it. Foes cannot attack virgin women, as it's against the morals of 80% of them. Good chance they'll be distracted by the Zombie anyway so they won't attack Dio.

Up Special - Stone Mask

http://www.onemanga.com/Jojo's_Bizarre_Adventure/1/33/

What's this, Dio has the Stone Mask!? Regardless of how he obtained it at this point, this mask is a dangerous one. It is capable of permanenty changing the one who wears it into a vampire, as it did to Dio (although he wanted it to happen). The Stone Mask usually requies the blood of somebody other than the wearer, but we'll skip that and say that Dio used his own blood for the sake of the get-to-go.

When Dio pulls the mask out, it acts as a throwing item that does 5%. If the foe picks it up, they have the option to wear it using A. You know what happens here. Spikes come out of the mask and impale themselves into the foe's brain. This, takes 1 second, and the foe is invincible at the time. In doing so, they have unlocked unknowningly evil potential in the brain, and have become a VAMPIRE!!

So what now? With their new vampire skills, the foe has 2X the power, jump, speed, can walk up walls, and regenerate health at 1% a second. They can also suck blood by attacking, healing them 1/2 the damage they did with the attack, which works on Virgins brought by Zombies (this is done with the hands in JJBA, but any attack will work in Brawl). Foes can suck Dio's blood due to the fact that it's fresh from being changed by the mask, and not by another vampire (I presume). Oh, I also forgot that any minions killed by the foe as a vampire will return as a Zombie on their side. This works on Dio's minions, them rising back from the ground where knocked back to serve the foe, AGAINST Dio. Dio cannot re-convert his Zombies, though it's easy enough for him to kill them.

Wait, the foe gets all that awesome power? Don't worry, Dio is not without benefit from the foe's transformation. Vampire foes will suffer stun (entering helples beforehand if in the air) if they don't drink blood for about 6 seconds due to blood being absolutely essential for vampires. To solve this, foes will need to try and suck blood from Dio or the Virgins that Zombies bring. Foes cannot suck blood from Zombies.

Something else also happens while the foe is vampire: from now on, if a Zombie is summoned by Dio or the foe, they will bring a Virgin Woman with them 100% of the time. Vampire foes will generally have the advantage in getting to the Virgin first with the minion trigger, although Dio doesn't have to worry too much about this despite needing the blood as well.

If the foe does not want to put on the mask, Dio can force them to. Grabbing them while the Stone Mask is nearby will have Dio force the mask onto his foe. If this is too hard, Dio can throw the mask at a Zombie, who will put the mask onto the foe for him when they pummel a foe. Hmmm, kind of breaks the point of "willingly", doesn't it?

Note that the Stone Mask will still be around even after changing a foe, and requires 30 seconds to pass if it's thrown offstage or eaten. Foes will return to normal upon being KOed.

Side Special - The World

With a cry of "ZA WARUDO!!!", Dio summons his Stand, The World to his side.

When active, The World will stay in the place where he was summoned, even if Dio moves. He also has Super-Amour, but can still be grabbed, though not thrown.

Having The World out is not ALL good, however. If he is attacked in any way by the enemy, Dio will take all the damage and knockback of the attack. This damage Dio takes cannot be healed by any means, except through being KOed. Seeing as how The World HAS Super Amour, Dio is at his foe's mercy if they are allowed to attack The World. Sooo, the best thing would be to dispel The World, right? Well, that's not so easy either. Dio needs 1.5 seconds, ON GROUND, to do this by using a Backwards Special input.

Dio using a Forward Special input while The World is out will cause The World to start charging. Dio is free to attack while The World is doing this, but cannot dispel The World, having to wait til the charge is done. The World will flash once the charge is complete: 1 - 3 seconds is all you need. Once done, use the input again, and The World will stop time within a certain area:


The area frozen is dependant on charging: from anything next to The World to a Smart Bomb area. Dio is immune to this effect, so he's free to beat up his helpless foe. Basically, anyone other than Dio that enters the affected area is frozen on the spot, although foes still take knockback when they're frozen. Zombies are frozen in time as well, but they will still spawn from cracks if the foe is standing on one while they are frozen. The regeneration of 1% per second for vampire foes also stops, though that's more common sense.

Which brings us to exactly how much time everything is frozen for. It all, depends on how much blood Dio has drained, regardless of wether it healed him or not - the reason why you cannot just use it at the start of the game. This is basically a mini-mechanic, Dio flashing red if he's drained blood at all: 1-50%, the more he's drained, the quicker the flash. The World can freeze time for 0.3-5 seconds.

This move is pretty much the reason why Dio should turn his foe into a vampire. Not only does it provide Dio with free Virgins every time a Zombie is summoned, but the foe is forced to take the blood of said Virgin or Dio, which in turn either Dio or his Zombie can take that blood from the foe! Note that once Dio does succed in stopping time with the foe in it, he can get to KOing.

Neutral Special - Knife Throwing
Dio readies a bunch of knives (1-25%), all the more imposing Sheik's Neutral Special. The difference between the two is that Dio's knives are spread forward in contrast to Sheik's style. The attack doesn't have a lot of range, 1/2 FD, but the bigger hitboxes added with the spread-style of Dio knives offer him some good frontal protection.

If used in the air, Dio will halt his fall before throwing the knives in a arc. Used like this, the knives will not stop travelling until they hit something. In some cases, this is the better version of the attack, but that's not to say the ground version is entirely useless.

This is basically Dio's damage-racking tool, doubling up as a decent projectile shield. You see, while it's true that summoning a bunch of Zombies IS one of Dio's aims, he has to damage rack his foe a little for some of his moves to actually be effective, mostly his standards. Of course, after he's turned the foe into a vampire, they will regenerate their damage at a extreme rate. The only other time you'll want to use this attack is when you've stopped time: stack a whole bunch of knives at the foe's position, and then let them loose once the time stop effect ends. In general, this attack provides Dio with a good deal of control. If he can't damage rack without his minions, the battle can be difficult for him.


Ok now, it's time for a bit of playstyle summary! Now, Dio basically wants to use his Down Special and very much focus on it. Of course, he'll want his foe to step on the crack so he can actually summon a Zombie. Though we won't get into that yet. Anyway, once you have a Zombie out, you can start pressuring the foe with your masses. If you're lucky, the Zombie will leave a virgin behind for Dio to consume, getting his max blood mini-mechanic up to 1/3. Otherwise he can equip them with the Stone Mask to turn his foe into a vampire. Once the foe becomes vampire, they'll have no choice but to attack Dio if they don't want to suffer stun. Then again, the foe can always kill Dio's minions and covert them to their side - as well as take the blood of the free Virgin that comes with it. This may seem bad for Dio, but there's one thing to consider out of this: Zombies on the foe's side can trigger Dio's trap. This basically means that you get a free Zombie if the foe kills one of yours as a vampire.
.
Don't forget that Dio can stop time once he's recieved enough blood from either his foe or a Virgin. He can use his minions to stall his foe while The World charges, all the more reason to have your foe walk over your 'crack'. Zombies are quite bothersome to deal with, and keep coming back if foes don't consistently knock them away. Dio can start to stack up knives and actually going for a KO once his foe is trapped in time.

You may have noticed that vampire foes will probably always be at 0% due to their regeneration AND blood draining abilities. Don't worry about it. Once you stop time, the battle will easily turn to your favour, regardless of the foe's damage percentage - with knife spamming.

We can see that Dio is basically a pressure character in some sense, though this really only applies on land. From here, we're going to see how Dio starts getting his foe to trigger his Zombie trap, as well as finish them off once they try to attack Dio as a vampire - and Dio has stopped time.

Standards

Stanadard - Teleport in Disguise

Dio pretty much does the above; he teleports from A to B, except in a much quicker animation. He is actually stopping time using his Stand, The World, rather than actually teleporting, so he has time to do other 'things'. Foes in Dio's 'way' when he 'teleports' 3/4 FD backwards take 2%. This is basically an escape technique which you can use after you've planted a D-Special trap in the right place. Be careful of the ending lag though.

Dash Attack - Second Burial
While dashing, Dio raises a hand before smashing it down with great force, enough to do 14% that pit-falls unlucky foes, doing so right at the ledge of the stage if the foe is offstage. During this time, Dio is free to place a 'crack' at his foe's position so he gets a free Zombie. It's as laggy as DDD's Dash, but worthwhile.

Speaking of the 'burial' part of the name, Dio can use this attack on a Zombie to bury them. Zombies buried in this way are done so in a 'secondary crack', which is triggered in the same way as Dio's Down Special. If Dio buries one of the foe's Zombies, he himself has to step on the hole to trigger the minion's awakening. This attack has many purposes and such - if you need to relocate your hole in order to have your foe's Zombie give you more minions, use this attack.

F-tilt - KaSMASH!
Dio holds his arm back before gutting his opponent with a mighty stab of his arm. This does 16% that knocks the opponent straight back, KOing at 190%. Since the knockback is horizontal, it's quite possible for damaged enemies to trigger Dio's D-Special trap and have Zombies on their trail, IF the foe's damage percentage is high enough, say, from using Dio's Neutral beforehand.

U-tilt - Dio Breaker
Dio performs a powerful uppercut that does 11% KOing upwards at 170%. It's generally a bit of an anti-air move for foes who would dare jump over your hole. It also serves as a minor interaction with Zombies, having Dio push the minion up into the air 4 SBB. It doesn't really help much due to the Zombie's persistent nature, though, it is quite good if you want to send one up towards a foe and bring them back down. This is only possible with Dio's F-Smash since Zombies will jump anyway to reach their target.

D-tilt - Da Power
Dio quickly punches into the ground downwards, doing 11% KOing upwards at 140% to any foe hit. The move serves as a weak D-Special interaction, allowing for Dio to expand his 'crack' 2SBB on both sides of him so foes have a better chance at touching it.


Alright now, with his Standards, Dio's getting somewhere with his game. These are designed to have Dio get his foe into his 'crack', since you can basically start spawning more Zombies if you turn the foe into a vampire. It also depends on HOW you do it. Racking up a little damage with Dio's knives and then using his F-tilt to knock the foe into a crack can be very effective.

Smashes

F-Smash - Liquid Eye Shot

A vampire technique of Dio's has him add pressure to the liquid of his eyeballs to the point where they fire a powerful shot that looks like a laser.

With it's range, this attack is generally quite powerful, doing 12-20% KOing at 100-80%. But it's not just for KOing either. With it's horizontal reach, it can hit multiple Zombies. Doing so prevents the Zombie from moving unless knocked back by a powerful attack from the foe. Despite this, Zombies can still grab foes if they get in their range. It's a fair price to pay for such a strong attack, and immobile Zombies can be somewhat threatening since projectiles can't deal with them.

D-Smash - Artery Squirt
Dio slashes himself in the artery, causing a great deal of blood to spray out forward in a jet-like fashion. This blood splatters 1SBB to 1/2FD based on charge, doing 10-20% but no knockback to all foes whom are hit by it.

Once it hits the floor, the blood stays there. No, it doesn't cause tripping, but it does provide vampire foes with Dio's blood to feast on: they'll be healed 5% per second for standing on it, choosing to either soak up the blood with their hands or lick the floor. For obvious reasons, Dio cannot be healed from his own blood.

This attack also serves as a interaction between Zombies if Dio manages to directly strike a Zombie with his blood. Any Zombie covered in Dio's blood have their speed cut in 1/2, but lose the 'invisible damage percentage', making them even more difficult to kill. Advantages come for spraying any kind of Zombie with Dio's blood, be it his own or the foe's. Covering your own minions will turn them into tanks, while covering the foes allows for Dio to do something special: you know how Dio's Down Special trap has a 3 second cooldown within summoning a Zombie? That gets negated if you set up another one right after a Zombie is summoned through the trap. The point is, have a slow enemy Zombie step on Dio's trap, and then have Dio set up another one near that Zombie, who will be too slow to stop Dio. You'll get a free Zombie by doing this. Pretty cool, huh?

U-Smash - Illusion of Time
If The World is present after charging, Dio will immediately swap places with him. The only thing that charging does is determine the ending lag, a C-sticking will leave Dio rather vulnerable while full charge will let Dio move immediately. Although you'll mostly be using this move after you've stopped time with The World, so lag won't really be a issue. Using this move when a foe is near Dio is a surefire way to set-up time freezing to KO your foe. Although it's kind of a filler move.

Or not. Let's be a bit more creative here. What if you don't want to swap places with The World? Ok then Dio will swap places with. . . a Zombie! Or. . . how about a Virgin Woman!?

This works in the same way as swapping with The World, except it only works on a Zombie or Virgin who is either closest to the furtherest foe away, OR, is being attacked. It doesn't work on Zombies who are blood sucking the foe. Instead of swapping places, Dio actually comes out from the designated body, ripping it to pieces instantly. Scary. If you charged the attack to full, Dio could grab the foe right out of this if he's near them. In general, this attack isn't a escape technique, but rather, an approaching technique. Although you can't use it when The World is stopping time. Use your LAZER then.

One MORE thing. If Dio throws the Stone Mask at either a Zombie or a Virgin who was ripped to pieces, they'll return as a Zombie on his side. This can't be done by the foe, rather, they just have to attack the corpse with a strong downwards attack to re-convert them. Fun is fun. Generally these corpses act as minion banks afterwards. Rip through a Virgin and you'll have yourself a free minion. Just don't let your foe get at them!


Dio's Smashes. Here we have a few more interactions. Like his F-Smash, which is not only a powerful KOing projectile, but also a way for Dio to freeze his Zombies in place, which pretty much forces most foes to jump over them in order to reach Dio, or kill them. Dio should use this on foes when time has stopped, as it serves as a way to render foe's Zombies immobile.

And of course, Dio's D-Smash is quite a powerful Zombie interacting tool - when you see the possibilities. Either make more minions or power your own up.

The final section of the set are the Aerials, as you can see. These basically give Dio the ability to deal with foes who would prefer to jump over Dio's 'crack' and his minions. They also house his KO moves, which kill at around the same percentage as Dio's F-Smash.

Aerials

N-air - Dio Down
Dio attempts to do a mid-air grab. If he catches a Zombie, it'll work like his usual Pummel (although it's unlikely to be useful). Grabbing a foe will have Dio use his Pummel on them in midair, basically bloodsuck them. On the other hand, the foe can also attack him at the same time - which means they get to suck Dio's blood as well. Interestingly enough, the grab will not end if both players attack each other, it being a matter of button mashing. If one player, or both, is not attacking the other, they can escape the grab, but it is 2.5X more difficult. Once the grab is finished, both players regain their jumps per usual the rules - IF they were attacked.

A good way to use this is to have Dio grab aerial approaching foes, even better if you're directly above a crack. It's also good as means of suicide kills, though you'll only ever want to do this during the last stock, as Dio should not risk losing all his Zombies and having to start over. Dio CAN potentially use this against foes to gain blood and health, though it's not the best tactic.

F-air - Vampire Crush
Dio reaches downwards as if to grab something with his mighty hand. IF he gets a Zombie with this move, he'll smash their skull, destroying them in the process. Doing that has Dio repeat the same process, gaining a little forward momentum. This cycle repeats itself, Dio becoming faster and gaining more momentum the more Zombies he is allowed to kill.

If Dio is allowed to use this attack against a foe, he'll throw them down for 10% KOing at 200%. For every Zombie he killed in a row, the power doubles, acting as a mighty KO tool after killing at least 2 Zombies.

One would initially think lowly of this attack due to the difficulty of the situation required for it to work. Of course, in a situation where time has stopped, or/and the foe is having their blood sucked by a Zombie, this is quite easy. You just have to be careful of how many Zombies you choose to waste away - you should always have at least one afterwards.

B-air - Awesome Laser
Dio turns around and fires a laser that's akin to his F-Smash. It does 3% with no knockback to foes, but causes Zombies to explode, doing 33% with hitstun to anyone caught nearby. Seeing exploding vampires is pro, but killing foes in that explosion is even more pro. The laser has a bit of set-up, but Zombies should help you hold the foe. The point of the move is to use it when time has stopped to continue racking up damage. You'll have to sacrafice a minion, but it's worth it for that KO.

U-air - Da Kick Da
Dio does a pose or sorts before unleashing a mighty kick upwards, doing 18% KOing at 150%. It's pwnage allows for a useful killing move, or as a anti-air attack against foes trying to get over Dio's Down Special trap. There's a good chance you'll be using this a decent ways.

D-air - Foot of a Ruler
Dio stomps a single foot down, doing 14% with set KB 2SBB to those it. It also has. . . GASP. . . another Zombie interaction. No, it doesn't kill them, Dio already has enough of those moves. This move does something a bit different:

The manga page isn't pretty. You were warned:
http://www.onemanga.com/Jojo's_Bizarre_Adventure/22/009/

The moment Dio plants his foot on a Zombie, scapels start protuding out of it's body! What potential does this have, you ask? Well now, it gives the Zombie a little more versatility. You see, the nature of a vampire in JJBA allows them to do creative things with their body. This is one such thing:

nor is this:
http://www.onemanga.com/Jojo's_Bizarre_Adventure/22/011/

The Zombie can do just that. It lets out a cry of "WRYYYYYYYYYYYYYYYYYYYY!!!!!" before throwing knives akin to that of Dio's fully charged Side Special. This can only be used once, but is pretty darn useful. Did I mention that Dio footstools off the Zombie? If you wanted to, you could have Dio AND his Zombie double-team on the foe with Neutral Special. Otherwise it's easy enough to attack the foe anyway with another move.


Ok, time for a bit of a overall style section. Dio Brando can basically be summed up as a pressure/trap character who is far more of a ground character than a aerial one.

Such is common sense that you'll want to use your Down Special to place a crack on the ground, preferably in the middle of the stage. Of course, no potent foe will step on Dio's trap so foolishly. This is why you have to use your Neutral Special knives to damage rack. Use Standards such as your Dash and F-tilt to force your trap onto the foe.

What's that, you think you can just damage rack with Dio's Neutral, and then KO the foe without going through the Zombie business? Note quite. You see, while Dio's stats are good, he doesn't have the neccesary tools to give him space without a Zombie. Dio's F-Smash is very slow and predictable, and his KO Standards are kind of hard to hit on their own. Also, Dio's KO aerials are either hard to hit with or need a Zombie to KO. Besides, it's much better to have a Zombie out when the foe's KOed, as it makes killing a lot quicker.

It's when Dio even has 1 Zombie out when he becomes deadly. In most cases, it's difficut enough for the foe to get rid of one. Dio can do many things when his foe is distracted, such as throw the Stone Mask over to his Zombie to convert the foe.

In the case of being distracted by a Zombie, it's not a good idea for foes to go over and attack Dio instead of the Zombie. Dio could potentially grab his foe, pummel them, hold them forward using his 'throw' and then have a Zombie come and take that foe out of Dio's hands for a pummel. Chaingrab much? No, Dio cannot grab a foe who has been pummeled by a VZ or been released shortly after. That would make Dio a game-breaking character. If the foe does not want to fight a Zombie, they, should not step on Dio's trap

Once the foe becomes a vampire, the fun really begins. Superpowered foes are FORCED to kill Zombies and covert them to their side, as well as attack Virgins and Dio for blood. Dio needs not to worry about being outnumbered by his own minions, as the mechanics of his trap allows for him to usually have 1 Zombie out along with the foe's. Besides, a good deal of Dio's attacks actually destroy Zombies.

Don't forget that Dio needs blood not only for healing, but also for his World mechanic. Of course, you could KO without it, ZA WARUDO is just cool. It's especially powerful in being used during a Zombie war, as the foe can potentially be distracted by both the need for blood, and attacking The World. Stopping time is basically a essential due to vampire foe's regeneration skills.

Afterwards, KOs are generally recieved through Dio's Aerials. You won't have to start over again afterwards unless the foe KOs you - you've got yourself a good deal of Vamprie Zombies to work for you. Such is the way of Dio Brando; a man who will do anything for power, and will use minions to kill his enemies.


Final Smash - Roller Death Da
Being the internet celebrity he is, Dio's going to put on a show! To start off, he yells out "ZA WARUDO!!!!!" at the top of his lungs, which brings The World out to stop ALL of time. If The World was out when Dio got the Smash Ball, he vanishes anyway and re-appears.

At this point, all of time is stopped for a good 7 seconds. During this time, Dio can run up to a random foe and finish them off with his bizzare, yet uberly cool finishing move:


MUDA
MUDA
MUDA
MUDA
MUDA
MUDA
MUDA
MUDA
MUDA
MUDA
MUDA
MUDA
MUDA
MUDA
MUDA
MUDA
MUDA
MUDA
MUDA
MUDA
MUDA
MUDA
MUDA
MUDA
MUDA
MUDA
MUDA
MUDA
MUDA
MUDA
MUDA
MUDA
MUDA
MUDA
MUDA
MUDA
MUDA
MUDA

He then yells out "WRYYYYYYYYYYYYYYYYYYYYYY!!!!!", as the foe takes 999% KOing at 80%. The Final Smash automatically ends after that.

Wait, is the Final Smash really that broken? Errr, no. If you want to stop Dio from actually stopping time, you must hit him before he finishes saying ZA WARUDO. Easier said than done with his tricks and techniques.


And now for my overall thoughts. Hmmm, let's see. This has been the fastest I've ever pumped out a set aside from a few non-quality intended ones. Probably only because I reckon Dio is a pretty cool guy, though I don't know the series too well. To be honest, I don't think I have portrayed the character very well to some extent. Note that the Time-Stopping wasn't meant to be the core concept of Dio's game; more so his Vampire Zombies and ability to change foes into Vampires. I would usually makes extras but I decided not to because I didn't know the charcter too well.

I'd reckon this is fairly decent set, which I did have a good deal of fun making with all the Zombie Vampire interactions. I tried not to rush it, and checked spelling at least a few times over. Im at least glad I DID get a set out.

Oh, and this set wouldn't have been possible if I had never read Smady's Ryuji (or whoever the guy is from MYM4) set. That way I found out about Fightersgeneration website. Many thanks goes to Smady, even if he was indirectly involved in this set's creation. Also thanks to Khold, becauase I found out what ZA WARUDO meant from his set.

EDIT: I realized after some thinking that I kind of justified Dio's character in making him a summon character. In JJBA, Dio Brando has a lot of minions both in Part 1 and 3. Dio Brando can fight himself, as he has a good amount of attacking moves on his own in the set, but he prefers to let his minions do the dirty work. Anyway, Dio's interactions with his minions is justified because in JJBA Dio Brando is very manipulative. One time in the series, one of his servants attempted to shoot him from behind. Now you'd think that Dio would kill him for that. But instead, he uses ZA WARUDO to 'teleport' behind the servant, which shocked him into loyalty. The ability to control others is probably Dio Brando's deadliest trait.

One thing about Dio turning his foe into a vampire; in the series he sucks victim's blood out and replaces it with a special fluid in his body to use their body as his puppet. I didn't have him do that because 1: the Stone Mask is more FUN. 2: While the Stone Mask does increase a being's evil (in that they get a urge to suck blood), it allows them to keep their will unlike Dio's usual method of turning victims into vampires. Though Dio did once force the Stone Mask onto a man's face in the series, he only did that because he thought the mask was a torture device. Im my opinion, Dio turning his foe into a vampire is justified in his character in that he's trying to control them. The enemy still has some fight in them, but is limited as they have to suck blood to feed their vampire urges or they'll get stunned. Dio is trying to take control of his foe and use his charisma to overcome them. Also, the foe being able to take control of Dio's minions is basically a shout-out to the fact that in JJBA, the protagonists will usually always acquire a new ally from a former foe. This happened once with 2 of Dio's minions, though they were being mind controlled.


Im editing extras in because everything's better with extras regardless of what you think.

Poses

Opening
Dio's opening is bizarre. In a 1v1 match, he'll appear in front of his opponent, but oddly enough, the 3 second countdown will not play as usual with time having stopped. When the match begins, Dio 'teleports' to his starting position. If there are more players, Dio merely starts at his usual point, scoffing at the other players.

U-taunt
Dio starts to laugh manically while leaning backwards more so than usual. He does this for a while so it is rather punishable.

F-taunt
Dio points forward, saying "Weakling!". He does this over and over if you hold the button. You can mock the foe by doing this.

D-taunt
Dio raises a bloody hand as he looks at it. He then licks it while grinning evilly.

Victory 1
Dio faces his enemies while proclaiming, "There's a limit to what you can achieve as a human.". This is the same thing he said to his old enemy Jonathan Joestar way before he became a vampire.

Victory 2
Dio takes his usual charismatic pose while convincing his foes to join his side. "I've heard of you. There's no need to be afraid. We all want to be secure. Your loyalty to me will allow you peace. Otherwise you oppose me."

Victory 3
Dio is slouching on a throne surrounded by minions. He then proclaims "Im the only one fit to rule the world."

Loss Pose
While Dio is charismatic most of the time, he'll get angry when losing. He won't accept a loss if it means there's somebody stronger than him. It's all serious business in the JJBA Universe.

Animations

Standing/Idle


Walk


Run


Jump

Dio bends before leaping up with his arms raised in the same manner as the above animation.

2nd Jump
Dio looks below him as he holds his arms below himself slightly as is he was trying to launch himself using the air.

Crouch

Dio enters this awkward stance. It doesn't help for ducking projectiles but it gives Dio some good launch resistance.

Roll


Dodge

Dio enters the stance above as The World temporarily appears next to him. Dio is actually stopping time for his spotdodge, because he can.

Shield
the area around Dio inverts in color. Otherwise a normal shield.

Stun
Dio's is a bit graphic; he holds his hands to his head in irritation. He uses so much force that blood starts squirting out of his head. Afterwards he's left with a pretty bad wound, but it regenerates back anyway.

Sleep
Dio must unfortunately sleep like all the others. He simply stands.

Boss Battle - Shadow Dio

Because bosses are just AWESOME.


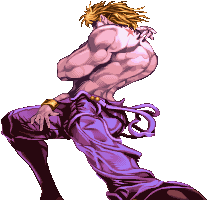
Wow, as if Dio Brando wasn't already enough! Yeah, but it's more awesome if we include Dio Brando's shadow form. I don't really know too much about this form, but this is basically Dio without his Stand, which can be used in the JJBA Fighting Game. In my opinion Shadow Dio takes Dio Brando's awesomeness and cranks it up to the extremes.

Wow, as if Dio Brando wasn't already enough! Yeah, but it's more awesome if we include Dio Brando's shadow form. I don't really know too much about this form, but this is basically Dio without his Stand, which can be used in the JJBA Fighting Game. This also could be Dio Brando when he's inside his mansion.

I Won't make up any kind of story to go with things. Feel free to use this in your Story Mode or modify it if you want to.

HP: 400
Play as: Jotaro Kujo,
Stock: 7
Music: Shadow Dio's Theme

You fight Shadow Dio in a typical walk-off stage. The fight takes place in his mansion, which you can visualize in any way you like. Eh, this is just an idea for now.


)))
 

MasterWarlord

Smash Champion
Joined
Aug 24, 2008
Messages
2,911
It's true that Dio Brando hasn't gotten any comments. I'd be one to think that he would have gotten a good deal of them by now. But no matter. Anyway, I see you've got yourself something with Dio Brando which is a good deal not too in-character for him. I'd kinda think that you could use another fellow like Banette or Hunter J, although Dio Brando is fine too. You're not one to worry about in-characterness. Except for Shedinja.

I don't know what to say about Dio brando. Im just one to acknowledge it (so Khold can post Torterra next page).
 

Wizzerd

Smash Ace
Joined
Feb 24, 2009
Messages
929
In case you all didn't catch me in the chat, I'm back from being gone. I feel very guilty just leaving Dio Brando there without a comment, but I need to catch up sooner or later and it's easier if I do it sooner.

Arcanine

Many of Arcanine's problems can be traced back to the fact that he was originally meant to be supported by five other teammates. That being said, there are still some problems even ignoring those. First, you still could work on presentation. There are quite a few typos despite you using Word, and the red and orange color scheme badly needs some color codes. At least size up the move headers. Your writing is on the rise, but there are still a couple of stinkers, including some run-ons, the most egregious of which is "Arcanine is mostly based around a simple concept: make the stage an inescapable hell of fire hitboxes, the heart of which you force the foe into as you hit and run constantly, keeping them in with flinch damage, then getting up Flash Fire and going for the KO with Flame Wheel, as Sunny Day is impractical to actually attempt to KO with, especially since Arcanine likes his foes on the ground at his level (If you can KO with it, though, Ill lol).".

It would also be nice for you to remove the references to Arcanine's teammates, which are somewhat disorienting even if it's explained by him originally being part of a multi-set. It's pretty odd for you to not spell out move names, as n88 said, and it's also odd for you to revert from capitalizing the second letter (UTilt, FSmash) to not (Nair, Dair). That, and why are there no directional throws - already a bad thing - and then there's for whatever reason a Down Throw?

The playstyle, despite being somewhat trappish, is fairly solid. I'm not sure why ExtremeSpeed is a special - why not give his regular dash all those cool properties? - and I wish he had a way around the typical setup phase, but it still works, and I shouldn't be complaining about it, as it's the highlight.

Ultimately, while I wouldn't say I outright liked Arcanine, I couldn't hate it either, and it's certainly significant as a point of progress from you, especially in terms of grammar and writing style.​

Dionysus

Dionysus is certainly rather odd. What happens to Dionysus's inputs while a vineyard isn't up is something I'm worried about, but it's been covered already, so I'll leave it at that. Anyway, while it's good of you to use one recurring prop in the pots, I found it odd that the vineyard forces the entire cast to have a prop in the goblet and drink wine, which could be either OoC or impossible without limbs. Could you really see someone like Jigglypuff walking in, pulling out a goblet and getting drunk?
I'm aware the same criticism could be made of Strangelove's Up Smash.
That, and why is that the wine from the grapes heals the foe, and the grapes in the pummel don't?

Also, I believe the word MW was looking for in his comment was "trap". It's a unique trap in that it has to be activated manually and covers every trap move, but it is a trap. Of course, it doesn't matter if it's done uniquely, which it is... I just wanted to note that >.> 30 stamina is really low, though, and it doesn't sound particularly difficult to hit the vineyard while it's growing. That being said, once he does get it up he has that frightening chaingrab agi mentioned...

But that's all mainly nitpicks, and I did enjoy Dionysus, if not quite as much as Zinger and Stanley. What I liked most about it was the whole baiting aspect with the wine, though as with Ninetales, if Dionysus really benefits more from the stunning than the foe benefits from the healing, they wouldn't really be so tempted. Overall, nice job Kupa, it's a worthy read despite my criticisms.​

Dunsparce

What an odd set. I'll start with the positive. Like agi said, it's true to character for Dunsparce to be dependant on luck due to Serene Grace, though Togekiss outclasses him in every way competitively on that count. On another note, he actually has a pretty massive movepool counter to what MT said - Ice Beam, Thunderbolt, Flamethrower, Water Pulse, Shadow Ball, etc - but seeing as so much of his movepool isn't fitting to him it's forgivable.

Now onto the negative... which is unfortunately rather expansive, so I'll try to be quick with it. You're getting better with numbers, but there are still a couple of things that are off - namely String Shot. I don't really get the point of a stunner that can last for five seconds when it's escapable in less than two seconds (thirteen presses, less factoring in the elapsed time, of A isn't difficult, try it yourself). The Frustration / Double-Edge thing isn't very good either - catharsis only really works when it's spread across the entire moveset a la Scarmiglione, or else it's rather pointless as the extra damage outweighs the power, especially on a lightweight. The pummel does more damage than any other pummel while (I believe) being faster than any other pummel. Limited-use moves (Down Throw) are always very disorienting (Where'd my move go?) and I don't get how a non-damaging move (Up Aerial) can have moderate priority, or priority at all, for that matter.

The playstyle is interesting, like Sandshrew but with actual (If very limited) offensive options, and the writeup's better than Burst Man's. The problem is that Dunsparce seems underpowered and has those mirrored inputs and unneccessary Pokenames as MW and MT stated respectively, giving Burst Man the edge over him. That being said, it is a two-day Pokeset, and from what I can gather it was the only set the week it was posted, so thank you.​

I hit mental block at Nihongo-ookami's (man was that tedious to type) sets, which I'll get around to soon enough, hopefully.
 

flyinfilipino

Smash Master
Joined
Sep 11, 2007
Messages
4,319
Location
North Carolina
First of all, Hi Wiz! :bee:

@Dio Brando:

These are designed to have Dio get his foe into his 'crack'
O_o

Anyway, Dio Brando seems like a pretty weird guy. He makes Virgins, for crying out loud. I think the whole vampires-outta-the-crack idea is pretty cool, along with the potential zombie war that might occur between between Dio and his foe. Just some nitpicks; you don't really state the range or lag of F-Smash (though you mention that it's slow and predictable under playstyle). Also, I'm not a huge fan of the situational aerials. Overall, though, it's a pretty elaborate set, and a fun read (even though all the references went over my head). Very good for a one-day set. Keep up the good work, Kat! :bee:
 

MYM'r

Smash Cadet
Joined
May 16, 2010
Messages
27
The Bonded Brothers, Paris and London Traves

Paris and London Traves, the Bonded Brothers, have joined the Brawl!


Background
Paris and London Traves are Identical Twins who were forcibly sewn together to make Conjoined Twins. London is the one on the right and Paris is the one on the right. They both have white hair and wear gray sweatpants. Their tragic story starts with their 15th birthday. They had a great day at their school, Prepwood Academy, in Yorkshire, England. They took the scenic route home and unfortunately, were both hit by a car. They were rushed to Yorkshire Infirmary Center for medical attention in an ambulance. Dr. Delacroix, a literal insane scientist, was their presiding surgeon. He sewed the two boys together and took them to his underground, "utopia" for his experiments. By utopia, i mean an insanity ward turned prison for freaks. Here is where the twins met Oiler, a large mutated toad, and Shuffle, a peppy teen who changes with the music. These are just two of the many the doctor has "modified." As Paris and London usually need help doing the simplest of tasks, Oiler and Shuffle help them out in Brawl!

Special Mechanic
There isn't one! LOL XD XC XB XA


Moveset

Stats
Size - 6/10
They are rather tall and skinny due to their metabolisms.

Weight - 4/10
Paris and London are rather frail and thin. They don't have much weight.

Power - 5/10
They have average power. Nothing special here.

Ground Speed - 4/10
As they are not used to having a body like this, they don't have much ground mobility.

Attack Speed - 7/10
They excell here. It's a good thing too. They would get mauled if not for this.

Traction - 8/10
Paris and London have extemely good foot traction, as they are cautious when walking.

Jumps - 7/10
Paris and London are good with thinking on their feet, so naturally they have good jumps.

Falling Speed - 3/10
Due to thier weight, they aren't free fallers.

Priority - 7/10
To compensate their average power, the twins like to make their attacks hit.

Range - 6/10
They have long arms so, they have good range plus they have a few projectiles.

Special Moves
Standard Special Move - Phantom Limb Syndrome
What? What the h**l does that mean? Well, if you must know, the twins make a Samus-like pose and a transparent arm shoots out of London's arm and starts crawling along the ground. This arm travels at Samus's Charge Shot's speed and is an tall and long as Marth's arm. When it finds an opponent, it will latch on like a Pikmin, dealing 2% every second it is latched on. The arm has a Stamina of 20HP so, it can be difficult to knock off. If it the arm finds an item, it will grab it and instantly fly back to Paris and London, giving them that item. It will grab any item, even negative ones such as a Poison Mushroom. London and Paris can move around during the searching period.

Side Special Move - Needle and Thread
London and Paris have a needle and thread? You'd think they wouldn't want to have anything to do with them. They shoot it out like Shiek shoots her Chain and it deals 5%. It can be twirled just like Shiek's. Twirling it has an added effect, however. If two items are in the range of its the thread's twirl and they have endured three twirls, the two items will be sewn togther. These two items now have a combined effect. I'll let you, the player, decide which items are good with what. I will give an example: Freezie + Hothead = IcyFire. It travels like a Hothead but looks like a Freezie stuck to a Hothead it has both effects. When it touches someone, it will shock them and then, it will freeze them in a block of ice. This can also be used to tether recover.

Up Special Move - Oiler Bullet Tank
Finally, Oiler gets some action. (You pervs! Not like that) If used on the ground, Oiler will jump out of the background and put the twins on his back. He will then say, "Finally!" The player gets to control Oiler now. He wears a gangster jacket on with a neck ruffle on it. He is as large as Bowser and can only use one Special Move. He has a dash attack and a standard combo. He has only one taunt as well. He moves as fast as Bowser to and he has Samus's jump height. Oiler is red and has yellow eyes. He is basically a huge toad.


Oiler's Attacks

Special Move - Oiler Bullet Bomb
Oiler spews a bullet of oil and laughs. The twins laugh too. The oil does 7% and stops the opponent in their tracks. This stick effect lasts 3 seconds. This gives Oiler plenty of time to get to the opponent.

Standard Combo - Toad Knife Cut
Oiler slaps once with his left flipper then with his right flipper. He then pulls out a a small dagger and slices in front of him. Each slap does 3% and the knife does 5% for a total of 11%.

Dash Attack - Toad Slam
Oiler body slams forward, crushing anyone in front of him. The body slam does 7%.

Taunt - Oiler stands straight up and says, "See ya. Wouldn't want to be ya", causing the twins to fall off. This will end the ground version of Oiler Bullet Tank.

Note: Oiler only lasts 10 seconds so make him worth while.

But in the air, well, thats a different story. Oiler will appear and grab the twins. Oiler is a toad so he can jump like one. He mimics DeDeDe and rockets upwards, with direction still controlled by stick. When he lands, anyone under him will take 10%. However, unlike DeDeDe, he will grab a ledge with his sticky flippers if not landing on the stage. He dissapears after the aerial version of this move.

Down Special Move - Shuffle Sonic
Shuffle appears in from the background and says, "Need a hand?" This will allow you to play as Shuffle. Shuffle is about a .5 head taller than Paris and London. He wears headphones and green tinted goggles. He also has brown hair and wears a purple hoodie and a pair of Jeans. He gains powers based on the music he is listening to. Paris and London will follow behind him and they cannot be hurt during this period but Shuffle can. Shuffle runs at ZSS's speed and is as large as her too. He has one Special, one standard combo, one dash and one taunt just like Oiler.

Shuffle's Attacks

Special Move - Shuffle Sound
Shuffle touches the random button on his headphones and he pulls out a random musical instrument to fit a genre. musical notes or waves come out of the instrument. Properties of the notes or waves depend on the genre Shuffle got:

General: He starts clapping in rhythm and small grey notes shoot out with each clap. These notes fly at a Purple Pikmin's speed and do 3% This is easily spammable, much like G&W's Chef. The faster the rhythm of the stage, the faster the notes will come out.

Techno: He will pull out a set of Turn Tables and start spinning them. Each time the player presses the Special Button, he will mix the discs. Each mix lets out a music note. This note is yellow and acts much like Pikachu's Spark, traveling at the speed of it. The hit with this will deal 2%.

Blues: He'll pull out a harmonica and hum it in a slum fashion. Every second, a note is released. These notes are blue and fall very slow to the ground. These notes will land on the ground. If stepped on, the opponent who stepped on it will trip. Does no damage but is useful for setting up traps.

Rock: He pulls out a guitar and when he strums, red sound waves come out. To strum, one needs to press the Special Button. These waves do 5% and they only effect a Stage Builde Block radius around Shuffle.

Classical: He pulls out a Chello and starts playing it. Anyone caught in 2 SBB of Shuffle will fall asleep for 3 seconds. These notes are green and they do no damage.

Rap: He puts his hand to his mouth and starts beatboxing like a pro. Each time he beatboxes (press the Special Button) a note flys out really fast and deals 5%. These notes are brown.

Country: He pulls out an acoustic guitar and starts strumming. Every time he strums (press the Special Button) an orange wave comes out. This wave does 5%.

Jazz: He pulls out a Saxophone and starts blowing. Hold the Special Button to keep him blowing. When he blows, he creates a reverse vaccum effect, pushing opponents away from him. Shuffle can walk around while using this genre. Purple notes come out of his Sax.

Pop: He puts on a mic and starts dancing like a popstar. His moves can hit people and the player must hold the Special Button to keep the dancing going. Each dance hit does 4%.

Standard Combo - Sound Wave
Shuffle pulls out a Microphone with stand and starts singing loudly. A wave is released from this in front of him. This wave travels 2 SBBs and is green. The player can hold the Attack Button to keep the singing going. For each second an opponent is in the wave, they take 2%.

Dash Attack - Drop Kick
Shuffle will kick forward doing 8% to the opponent and 4% to himself when he falls on the ground.

Taunt - He says, "I'm out!" He dissapears and control goes back to London and Paris.

Standard Attacks
Standard Combo - Hidden Needle
London punches then, Paris punches. Then, London stabs the opponent with a needle. Each punch does 2% and the stab does 5%.

Dash Attack - Twin Spin
London and Paris spin, hitting multiple times. Each slap does 3% and they slap 6 times.

Tilts
Forward Tilt - Twin Punch
Paris and London both punch forward at the same time. Each punch does 4%

Up Tilt - Twin Uppercut
Both twins uppercut in front of them. Each uppercut does 5%

Down Tilt - Twin Slam
London and Paris, both slam their fists on the ground damaging anyone caught between them and the ground. Each fist does 5%. Can Meteor Smash if aimed on ledge.

Smashes
Forward Smash - Pentagram Blast
The Pentagrams on their chests both glow red during the charging time. When unleashed, the twins both fire a magic blast from their chests. This blast is made of energy and is red. It deals 12% to who ever it hits. It travels at an Aura Sphere's Speed.

Up Smash - Toad Slash
Oiler appears and rears up his knife. When the charging time is over, he will slash upwards, hitting anyone in his range. This deals 13%.

Down Smash - Head Banger
Shuffle appears with his Rock guitar and gets ready to strum it, while charging. Once charging is done, he will smash the Guitar over the opponent's head. This does 14% and can Meteor Smash.

Aerials
Neutral Aerial - Left Kick
London kicks forward. This does 3%.

Back Aerial - Right Kick
Paris kicks backwards. This does 3%.

Forward Aerial - Twin Kick
Both, Paris and London, kick in front of them. This does 6%.

Up Aerial - Twin Fist
They both punch upwards. This does 6%.

Down Aerial - Twin Foot
They both kick below them and Meteor Smash anyone beneath them. Does 6%.

Throws
Grab - Phantom Limb Syndrome Part II
They make the same pose as their Standard Special but shoot a hand 3 SBB in front of them. It does not go on the ground it flys through the air at Charge Shot Speed. When it gets someone, it brings them back to Paris and London.

Pummel - Hand Crush
London squeezes his hand and the Phantom Hand squeezes the opponent. Does 1%.

Forward Throw - Hand Toss
Paris points as the Phantom Hand toss the opponent forward. Does 8%.

Back Throw - Hand Slam
London closes his fist and the Phantom Hand slams the opponent behind Paris and London. Does 10%.

Up Throw - Hand Jab
The Phantom Hand toss the foe upwards a little and Paris jabs his hand into the opponent's back. Does 7%.

Down Throw - Pentagram Pummel
The Phantom Hand holds the opponent while Paris and London shoot a magic blast each. Does 10%.

The Final Smash

Triple Threat!

Oiler and Shuffle appear and Paris and London and them hop into the background. They all shoot there own attacks at random. The twins shoot magic blasts, 1 per second, that do 10%. Oiler shoots Oil Bullets, 1 per second, that do 15%. Shuffle plays his Rock Guitar and shoots Green Notes, one per second, that do 10%. The targeting is on a random opponent. This lasts 10 seconds.

Extra's! Finally!
Taunts
Taunt 1 - "We're aren't freaks!" They both say.
Taunt 2 - They both look at their Conjoined body and get encouraged to fight.
Taunt 3 - "We have each other. That's all that matters!" They say.

Victory Poses
Pose 1 - "Two Heads are always better than one!" They say while holding their fists up triumphantly.
Pose 2 - Oiler and Shuffle appear and lift the twins up. All Cheering.
Pose 3 - The twins make their Pentagrams glow red and look down with their sea green stares.

I made some adjustments they are minor so if you'll look again, please do!

OC's. I finally got a moveset done.
 

MarthTrinity

Smash Lord
Joined
Aug 9, 2007
Messages
1,954
Location
The Cosmos Beneath Rosalina's Skirt
Paris and London

Newcomer set, awesome. And it's an OC character, more awesome. Okay so....they're conjoined twins, nifty. Alrighty, first off good for you in making your first set an OC, that's a gutsy risk especially since they're characters we don't know. That is however also a downfall; for example, Oiler and Shuffle are presented as (somewhat) key parts of the set.....yet we really have no idea what they look like. Had this been say a normal character, we'd be able to look them up. It's not a big complaint really but it's nice to have pictures for all characters in an OC set. (Disregard this to an extent; you somewhat flesh them out later).

Onto the set itself...the Side Special is admittedly a pretty kickass idea. It's actually the idea I mentioned previously in the thread that HR thought up for an item based set. As awesome as it is though, it seems just kind of tacked in there with no real connection to the rest of set. The Neutral Special seems a tad odd too the way it's worded. They make a Samus-like pose...as in how Samus charges her charge shot? Or her idle pose? Or what? A transparent arm shoots out of where? Do I want to know? D:

And now we're too Oiler. No idea what any of that Naruto terminology means so that doesn't help -ME- personally but maybe others understand (dern kids with yer ninjas and your beliving it). Oiler and Shuffle don't seem to add a whole lot to the set as a whole but they're so appreciated variety so it's not like it's too bad especially since the normal attacks are fairly standard

But still, it's a good first effort. Most of the things I pointed out were simply detail based (adding explainations, clarifying, adding stuff suck as knockback etc) and can be fixed quite easily with time. It's great to see a newcomer, especially one who's into OC characters. Hope I didn't come across as too negative, sorry if I did =(

EDIT: Also, I have a hard time kind of picturing the characters as they seem to have contrasting personalities. In the intro, they seem to just be kids who got run over by a car. Later, their taunts seem to not really fit if you know what I mean. In one they're frowning at their body but they seem to be find in the other. In one of the win poses everyone's happy and smiling...in the next they're looking evil with glowing pentagrams. Are they good? Are they evil? Are they unhappy with thier combined body? It's hard to get a grip on it really. I only bring this up as they seem to be a cool character(s?) and understanding why an OC is the way they are is part of the moveset IMO if only because we have no way of knowing what they're like without your help.
:028:
 

MYM'r

Smash Cadet
Joined
May 16, 2010
Messages
27
I made the adjustments forgetting the pics (because I don't have any) and the knockback. I did clarify everything else I believe

EDIT I'll have pics sometime in the next few days so i hope thats all right
 

Hyper_Ridley

Smash Champion
Joined
Dec 21, 2007
Messages
2,300
Location
Hippo Island
Dio Brando

WHY has this set barely recieved any comments?

I can't comment on how in-character or not it is, but the set has some great concepts behind it and you do a great job of developing them. Turning civillians into zombies reminds me of Romero, my favorite Rool set, and it's still tons of fun here. Unlike Romero, rather than overwhelming the opponent with undead minions, Dio regularly kills off his own zombies in order to buff his attacks.

Turning the enemy into a vampire was a very original concept, and I liked how it leads to both sides competing for the same minions and resources. This was also a massive improvement from Jason's machette in that there's enough reasons for the opponent to WANT to take the mask, and if they don't Dio can force it onto them so he can access more of his gameplay.

Dio is your best set IMO.

Paris and London

Respetable first effort. The item sowing is epic and I like how there are several alternate mini-movesets to play around with. I wish the needles were used a but more throughout the set than just 1 special and the jab, it's one of the things that make the character stand-out. As awesome as the item combination move is, it's a shame he has no way of making items of his own, as right now the coolest part of the set is unusable if items are turned off.
 

Wizzerd

Smash Ace
Joined
Feb 24, 2009
Messages
929
Krystal

A newcomer! Awesome! This isn't an awful way to start MYMing, but I have some criticisms to make. First, I'm going to second agidius in saying that you could stand to present Krystal a little better. From what I can gather it was originally all one color, but a kaleidescopic color scheme isn't much better. Swalot is a good example of a liked set with simple organization, which you could try out. Also, while the "digest" organization at the end of each move doesn't shove all of the properties in it, which is nice, it would be easier if you were more consistent about just what went into it.

The meat of it is decently interesting, if mainly because of the mana mechanic and "timed hits". You're a little vague in terms of detailing, though, like agidius and Hyper_Ridley said. The UAir is a good example of this - is it like Ike's NAir or Dedede's UAir (parallel or perpendicular to the background)?

And you could define your playstyles a little better too. I couldn't really pick up on anything as I read it, but HR seems to have noticed something. It would make it easier on all of us if you included a writeup on how exactly you intended for her to play.

That being said, Krystal isn't a bad set for a newcomer by any means, so I hope you stick around! =)​

Knuckles

In retrospect I probably should have commented Knuckles with Krystal, but bah. Most of the same complaints apply to Knuckles as to Krystal, but it isn't all centered, there's more detail and the playstyle seems a little more obvious (Still needs a writeup though (wary)). Just refer back to the previous comment for my thoughts, but it is an improvement over Krystal, so good job on that.​

Colonel Sanders

Great character choice xD

I honestly expected a joke set seeing that this was a set for Colonel Sanders, but I was surprised to see that it isn't a bad newcomer set. The highlight is undoubtedly the specials - the chicken mini-mechanic is very interesting, and I especially liked how the chickens create eggs of their own, which adds to the farm feel of it. That being said, I thought you wasted inputs a little. Creating and cooking a chicken really shouldn't be that complicated of a process, let alone one spread across five inputs. Granted, three of the inputs are invented, but then you go on to make the Cane Sword as an input which doesn't seem to add that much. That, and I'm not sure how in-character it is for Sanders to randomly pull out a sword, unless I'm missing something... Also, it was a little odd that the drumsticks could only be eaten by Sanders, though he'd need some more buffs to make up for it, which leads into my next criticism...

Sanders, or at least the chicken system, is pretty underpowered. As n88_2004, agidius and KingK.Rool said, several seconds to heal 5% is pretty ridiculous, especially considering that it's pretty difficult to get an egg to hatch into a chicken to begin with.

Like KingK.Rool, I also found that the standards could stand to be more playstyle-relevant. I'm also not sure about the star system simply because I'm not exactly sure how much speed, damage, knockback or hitstun x amount of stars constitutes, mostly damage - you could use some percentages in there. I also found it odd that it was dropped for the grab / throws.

Also, detail. I went over the star system already, but I'm sort of confused on the specials. You tell us a bunch of things the chickens do but with not enough detail. For example, you say that they can be killed by a single strong hit, and I'm not sure exactly how strong you mean. There's also the slowed fall speed, the egg-laying, the movement and the pecking, which you just introduce without explaining. If you're going to include these properties at all, at least go into how they work. Overall, though, Sanders really isn't half bad and an overall fun read, despite my critique, so I hope you can stick around.​

This is... a pretty miniscule amount of comments and I probably have time for more, plus I'm yet again leaving Dio Brando up there, but I hit mental block at Sarisa. x_X Next time!
 

MYM'r

Smash Cadet
Joined
May 16, 2010
Messages
27
Paris and London

Respetable first effort. The item sowing is epic and I like how there are several alternate mini-movesets to play around with. I wish the needles were used a but more throughout the set than just 1 special and the jab, it's one of the things that make the character stand-out. As awesome as the item combination move is, it's a shame he has no way of making items of his own, as right now the coolest part of the set is unusable if items are turned off.
Thanks for the review. Another Set is coming so keep the old peepers peeled. I hope to have it done tonight
 

MarthTrinity

Smash Lord
Joined
Aug 9, 2007
Messages
1,954
Location
The Cosmos Beneath Rosalina's Skirt
Sarisa

So I apologize first off for not commenting your first set...but Sarisa is fairly fresh in my mind whereas I've only given a skim to Dio so far. Buuuuuuut...I figured you'd appreciate a comment on at least one of your sets (especially since Sarisa hardly got noticed at all).

Now first of all, I like the whole concept of a chaingrab based character who actually changes their stats in order to chaingrab better. The Side Special gives her a good thing to chaingrab against but it's not really seeming that useful outside of that really. Self Buff seems kinda eh considering it can't be used to cancel out Debuff and vice versa.

The tilts..well, they kinda throw off the whole playstyle of the set really. It takes Sarisa's nifty chaingrab game and throws it in the trash. Why should I bother chaingrabbing them when I can deal a ton of damage with her powerful, spammable and useful tilts? Same goes for a few of the aerials; uair does 37% total.

Regardless of whether or not you use her insanely powerful tilts/aerials or her chaingrab game, you still seem to only have Smashes to KO or maaaaaaaybe gimp them. So basically...in my eyes the concept is pretty awesome. It's a chaingrab based character with a nifty grab game and a nifty way to set it all in motion. The problem however is she has too many options for racking up damage and not enough for KO'ing. Sure she has her chaingrab game but you have plenty of ways to build up damage outside of the chaingrab and not enough ways to capitalize on the lots of damage you'll rack up.

So yeah, I like the core concepts here but if the tilts were focused more on KO'ing or something than damage building, it's put a much bigger highlight on the great core concept of the set.

But from what I've read, Dio seems to have some pretty awesome ideas too so I'm sure that one'll be better, not that Sarisa's bad or anything though.

Sunday Recap Related Edit
Episode 46 of the Recap is RIGHT HERE. Click it, read it, love it, take it out to dinner, confess your true feelings to it, marry it, realize it's holding you back, divorce it, leave it, awkwardly see it in the grocery store a month or so later and look away as you're forced to awkwardly walk past it.......I'll stop now.
:029:
 

JOE!

Smash Hero
Joined
Oct 5, 2008
Messages
8,075
Location
Dedham, MA
So...

gonna announce now that i will be putting off some of my other projects for the moment to work on a huge one:

An attempt at making a "6 man team" Trainer set actually *gasp* work!


MYM'r

Smash Cadet
Joined
May 16, 2010
Messages
27
Glameow

Glameow, the Feme Fatale Feline, has joined the Brawl!


Background
Glameow is the 432nd Pokemon in the National Dex. It was introduced in Pokemon Pearl as a version exclusive and cannot be caught in its partner games, Pokemon Diamond and Pokemon Platinum. The Catty Pokemon, it claws when displeased and purs when affectionate. Its fickleness is popular among some. With its sharp glare, it puts foes into a mild hypnotic state. It is a very fickle Pokemon. It hides its spiteful tendencies of hooking its claws into the nose of its Trainer if it isn't fed. When its happy, Glameow demonstrates beautiful movements of its tail, like a dancing ribbon. Its two abilities are Limber and Own Tempo. These abilities are transferred to Brawl.

Special Mechanic - Limber/Own Tempo
Limber is a Pokemon ability which eliminates paralysis. In Brawl, this means that Glameow cannot be paralyzed by Pikachu's Shock or any of ZSS's Stunner attacks. Characters of MYM with Paralysis attacks beware!
Own Tempo is another Pokemon ability which eliminates confusion. In Brawl, this means that Glameow has no dizzy state. She cannot be put into dizzy state. Just try it, see what happens. *game crashes*

Actual Moveset
SBB = Stage Builder Block
Stats
Size - 3/10
Glameow, being cat sized, is only as tall as Pikachu.

Weight - 3/10
Being a cat, she can't have much weight.

Power - 4/10
With her tiny stature, she doesn't have much power behind those paws.

Ground Speed - 7/10
Size = Speed. 3 + 7 = 10. You see what I'm getting at here.

Attack Speed - 6/10
Glameow can hit at an above average speed. No more math!

Traction - 7/10
She uses the pads on her feet to keep her balance.

Jumps - 7/10
Glameow does have good jumping muscle strength.

Falling Speed - 3/10
Due to her weight, she is a floater.

Prioirty - 5/10
She has pretty average priority, nothing special here.

Range - 5/10
Glameow also has average range.


Special Moves

Standard Special Move - Swift

Glameow raises her tail over her head and shoots gold stars from her tail. These gold stars work like tracking missles. Glameow fires 3 stars. In a 4 person Brawl, the stars will each seek out a foe and cannot miss. If the person dodges, the star will keep flying and circle around to hit.
5% for Star
Low Knockback
Low Priority
No Effect
Flys infinite SBB (until hit)

Side Special Move - Shadow Claw

Glameow starts saying, "Glaaaaaaa" while charging. It starts out as a purple-outlined black dark transparent aura around Glameow's claw but then when fully charged it changes to this:

A completely black aura around her entire leg. If B is let go during the any part of the charging period, she will lunge forward and scratch the opponent in her grasp 5 times. After the scracthes, Glameow shoots the opponent forward.
2% for each scratch (Chrg Lvl 1), 4% for each scratch (Chrg Lvl 2)
Mid Knockback
Mid Priority
Darkness Effect
Extends 2 SBB in front of her.

Up Special Move - Shock Wave

Glameow twists its tail up and then lets it go, letting out a star, 2 SBB wide all round her and she rises. The star stays in place where she sprang. Like most Up Specials, it can be angled. Star sticks around for 3 seconds
4% for each second in star
No Knockback
NA Priority (if caught in it you're trapped)
Electric Effect
Rises 3 SBB

Down Special Move - Hypnosis

Glameow stares forward for 1 second and anyone 2 SBB in front of her and facing her, will fall asleep. This slumber lasts 2 seconds.
No damage
No Knockback
No Priority
Sleep Effect
Extends 2 SBB


Standard Attacks

Standard Combo - Cat Scratch Fever!
Glameow scratches for as long as the player holds A
2% for each scratch
Low Knockback
Low Priority
No Effect
Extends .5 SBB

Dash Attack - Pounce
Glameow jumps forward slam anyone who tries to get in her way.
4% for lunge
Mid Knockback
Mid Priority
No Effect
Extends 1 SBB

Tilts

Forward Tilt - Sucker Punch
Glameow swings forward with her paw. If hit, Glameow will meow and look devious.
5% for punch
Low Knockback
Mid Priority
Darkness Effect
Extends 1 SBB

Up Tilt - Feint Attack
Glameow collaspes and a dark spirit version comes out and scratches above her. It then, snickers and goes back into Glameow's body. Glameow gets back up after this.
6% for scratch
Mid Knockback
Low Priority
Darkness Effect
Extends 1 SBB above

Down Tilt - Body Slam

Glameow falls forward and slams someone in front of her.
7% for Slam
Meteor Knockback
Mid Priority
No Effect
Extends .5 SBB in front of her

Smash Attacks


Forward Smash - Assist
Glameow's paw, during the charging, glows white and when unleashed, she sticks her paw out and the glowing paw lets out one of the following:


Mud Shot - Glameow releases 3 mud bullets from her hand that are affected by gravity and fly for 2 SBB before ploping on the ground.
6% for each shot
Low Knockback
High Priority
Splash Effect
Flys 2 SBB


Magical Leaf - Glameow shoots three glowing leaves that fly at fast speeds. These leaves are not affected and fly until hitting an opponent.
5% for each leaf
Low Knockback
Mid Priority
No Effect
Flys infinite SBB (until hit)


Psycho Cut - Glameow slices forward with her paw while it glows with psychic energy.
10% for cut
High Knockback
High Priority
No Effect
Extends 1 SBB in front of her


Waterfall - Glameow's eyes glow and she sticks her paw above her, it still glowing. Then, a flow of water is formed above her head and curves down blasting anybody in front of her.

10% for Water Blast
Meteor Knockback
High Priority
Splash Effect
Extends 1 SBB in front of her


Psywave - A blue tentacle grows from Glameow's paw and Glameow, slams the tenetacle in front of her. Causes Dizzy State.
10% for Tentacle Slam
Meteor Knockback (on ledge), High Knockback on ground
High Priority
Dizzy Effect
Extends 2 SBB in front of her

Up Smash - Fake Out

Glameow, while charging, rears back with her tail above her head. When done, Glameow will lunge forward and if hit, she will launch the victim up 3 SBB, setting up for a good combo.
8% for lunge, 0% for lift
NA Knockback (launches the opponent up)
Mid Priority
No Effect
Extends 1 SBB in front of her

Down Smash - Iron Tail

During charging, Glameow's tail shines like metal and at the end changes to pure white. When done charging, Glameow will flip and slam her tail in front of her.
12% for slam
Meteor Knockback
High Priority
No Effect
Extends 1 SBB in front of her


Aerials

Neutral Aerial - Scratch

Glameow scratches in front of her. Pretty simple.
4% for scratch
Low Knockback
Low Priority
No Effect
Extends 1 SBB in front of her

Forward Aerial - Cut

Glameow slashes forward with her ejected claws.
5% for cut
Mid Knockback
Low Priority
No Effect
Extends 2 SBB in front of her

Back Aerial - Knock Off

Glameow shakes her tail behind her leaving miniature black electric bolts. Any item the foe was holding gets knocked off.
6% for Tail
Low Knockback
Mid Priority
Item Drop Effect
Extends .5 SBB behind her

Up Aerial - Quick Attack

Glameow shoots upwards and tackles an opponent. Good for recovery.
5% for tackle
Mid Knockback
Low Priority
No Effect
Extends 1 SBB above her

Down Aerial - Shadow Ball

Glameow shoots a ball of dark energy below her. It travels until hitting someone.
7% for Shadow Ball hit
Meteor Knockback
Mid Priority
Darkness Effect
Flys infinite SBB (until hit)


Throws

Grab - Advanced Shadow Claw
Glameow shoots a fully charged shadow claw out like a rope still attached to her paw. When it grabs someone, it brings the foe back to Glameow. Can be used for Tether Recovery
No damage
No knockback
Mid Priority
Darkness Effect
Extends 2 SBB

Pummel - Bite

Glameow bites the foe in her Shadow Claw.
1% for bite
No Knockback
NA Priority
Darkness Effect
Throw Victim is affected

Forward Throw - Fury Swipes

Glameow grows her claws and swipes at the opponent, launching them forward
8% for Swipe
Mid Knockback
NA Priority
No Effect
Throw Victim is affected

Back Throw - Dig

Glameow digs, leaving the opponent confused. She then, shoots from behind the opponent, out of the ground, launching them forward.
10% for Dig hit
High Knockback
NA Priority
No Effect
Throw Victim is affected

Up Throw - Thunderbolt

Glameow toss the opponent up and then, shoots them with a bolt of lightning from its tail.
12% for lightning
High Knockback
NA Priority
Electric Effect
Throw Victim is affected

Down Throw - Frustration
Glameow gets a bulging nerve and slams the victim three times on the ground.
5% for each slam
High Knockback
NA Priority
No Effect
Throw Victim is affected


Final Smash!
Attract

Oh no! Glameow has the Smash Ball, but she's a cat. What is she going to do with it? Love us to death? Yes, yes, she is. She sends a wave of yellow hearts that affect everywhere on the stage. The enemies are now infatuated with love for Glameow. The opponents will not be able to attack Glameow and will move in random directions. This is Glameow's chance to pull off a powerful throw, rack up damage or just taunt the foes with well, taunts. Have your fun with her.


Extra's! Finally!

Taunts
Taunt 1 - Glameow purrs and licks herself.
Taunt 2 - Glameow makes a little spark orb in her tail.
Taunt 3 - Glameow makes her paw glow in shadow energy.

Winning Poses
Pose 1 - Glameow jumps and cheers while smiling
Pose 2 - Glameow bounces up and down on her tail.
Pose 3 - Glameow makes a Shock Wave star and looks dazzled.

Losing Pose - Glameow lays down like she is sad and frowns.
 

Kholdstare

Nightmare Weaver
Joined
Oct 10, 2008
Messages
1,441
Glameow is an interesting character choice. While you have overcome some problems newcomers face (detail and organization), you stumble on the main problem that plagues Pokesets: Pokemon Syndrome. This means inserting the Pokemon's Pokemon moveset to Smash rather than giving her attacks of her oww. A majority of these moves are OOC for Glameow to actually preform (Shockwave, Magical Leaf, Psycho Cut, to name a few). The abilities especially are just her Pokemon abilities copypasta'd into Smash (plus they're broken as hell). Instead, why not focus on what we know about Glameow:

It claws if displeased and purrs when affectionate. Its fickleness is very popular among some.

With its sharp glare, it puts foes in a mild hypnotic state. It is a very fickle Pokémon.

It hides its spiteful tendency of hooking its claws into the nose of its Trainer if it isn't fed.

When it's happy, Glameow demonstrates beautiful movements of its tail, like a dancing ribbon.


For instance, a moveset focusing on Hypnosis or Attract, which are perfectly in character, would be great, interesting, and far better than what you have here.

I hope this comment helps you and you take it as constructive criticism. I would really like to see you improve over this because what you do have shows lots of potential for you to go places in MYM.
 

Kholdstare

Nightmare Weaver
Joined
Oct 10, 2008
Messages
1,441
Sorry I failed Again
No, don't take it like that D:

Literally the only thing holding you back is the Pokemon syndrome. You have plenty of creativity, detail, and organization in the rest of the set. If you make more sets of this quality, then I'm sure everyone will love them. I'd love Glameow if it played to her actual character. It's a great effort by a newcomer, and a lot better than many newcomer sets.

Take for instance, our very own leader darth meanie. His Magmortar set (which was his first set) had exactly the same problems, but look at him now! He's a MYMing pro! I'm sure you can improve like he did, easily.
 

MYM'r

Smash Cadet
Joined
May 16, 2010
Messages
27
Well thanks for saying that but Idk I like to go by movesets I go by breed moves and TM and HM moves and every move they can possibly learn and thats how I do it I chose Attract because when I use it in actual Pokemon battles it allow me to win. And plus it is the last move in her level up set so I think it the strongest thats my side of it. and I based her primarily off of Zoey's Glameow from the show
 

Moogi

Smash Apprentice
Joined
Oct 24, 2009
Messages
189
Location
Canada
I spent a lot of time finding a character who hasn't been done before. Soo, double-checking... has anyone done Pulseman? Not that anyone would've done him, but I wanted to find a unique idea (you don't need to know exactly who he is, even I'll have difficulties due to the fact he was only in one game on the Japanese Genesis/Mega Drive imported to the VC, and I still need to finish the game.)

Waitaminute... he was created by the same company who makes Pokemon.........at least one of them.
 
D

Deleted member

Guest
Yes, Pulseman has not been done yet. Generally, policy on that is we encourage as many movesets as possible, with little recognition of who 'did' whom first as a character. It's really more about the set itself rather than the character.
 

MarthTrinity

Smash Lord
Joined
Aug 9, 2007
Messages
1,954
Location
The Cosmos Beneath Rosalina's Skirt
I lol at your funnyness MT
D'awwwwwwww<3
Moi? Funny? Naaaah....

Sorry I failed Again
Like Khold said, don't get discouraged...Nobody's first sets are perfect and any comments you get on them are purely ways you could improve, not attacks against you or anything. Nobody here wants to shoot down a newcomer the moment they walk in the door, they only care to help. In fact, we love having newcomers join up and stay interested! =)

You've got a good start here and your seem to have the spirit of making sets so I highly encourage you to keep at it (as you seem to be judging by your list of plans).

I spent a lot of time finding a character who hasn't been done before. Soo, double-checking... has anyone done Pulseman? Not that anyone would've done him, but I wanted to find a unique idea (you don't need to know exactly who he is, even I'll have difficulties due to the fact he was only in one game on the Japanese Genesis/Mega Drive imported to the VC, and I still need to finish the game.)
As Smady put quite well, no one has done Pluseman (heck, I've never even heard of him but I question if he's as awesome as VECTORMAN :bee:) but you're more than welcome to make him or any other character regardless of whether or not they've been done.


And off topic of quotes; Moveset Graveyard #6 featuring lots of Warlordian goodness! Enjoy!
:030:
 

MYM'r

Smash Cadet
Joined
May 16, 2010
Messages
27
Thanks to all of you for the encouragement I have another moveset in the works so watch for me
 

MarthTrinity

Smash Lord
Joined
Aug 9, 2007
Messages
1,954
Location
The Cosmos Beneath Rosalina's Skirt
Octillery

Well I'd first off like to apologize for waiting so long to comment this moveset JOE! And then like to apologize for my somewhat brief comment. I had a much larger comment typed up and ready to post, clicked Submit Reply and...502 Bad Gateway.

So in a very brief summary of my Octillery comment; I enjoyed it quite a lot. It takes a concept similar to my own used in Cradily and refines it.......you're basically making a moveset for a character who is a turret. In Octillery's case however, he's far, far more mobile than Cradily and I find the whole "him sticking to partners to become a mobile turret" an awesome concept. The only real gripe I had with it is the Down Special which essentially seems like a workaround for him potentially being outcamped.....that and it's basically all of Strike Man condensed into one move.

That tiny nitpick aside though, it's a great set, easily your best. Better than Spartan, Forretress and Salamence by a wide margin.

Will add another comment or two to this post.........just don't want to lose more comments to the bad gateway X_x
:031:
 

Moogi

Smash Apprentice
Joined
Oct 24, 2009
Messages
189
Location
Canada
Just to stay active, I'll comment on Glameow whatever sets I feel like commenting on later. It's 2 AM and I'm not in the mood right now >.<

What's worse is the fact I have to download a decent text editor because all the Mac gets at the beginning is a white square for typing text. :p
 

MarthTrinity

Smash Lord
Joined
Aug 9, 2007
Messages
1,954
Location
The Cosmos Beneath Rosalina's Skirt
Glameow

I pretty much echo what Khold had to say. It's a good start really and nowhere near a terrible set, it just falls into the Pokemon Syndrome category. Khold explained that one pretty well; moves that don't fit a Pokemon's "character", regardless of whether or not they can learn them or not is usually considered Pokemon Syndrome and is typically something you'd want to avoid.

Most of the attacks in the forward Smash would be considered this. I wouldn't really expect a classy cat like Glameow to start spraying mud at the foe.

But of course, it is your set, your concepts. Since you based it directly on a Pokemon in the anime, I won't pick at moves like Swift. Keep it up dood, you're doin good!

Dio Brando

WRYYYYYYYYYYYYYYYYYY!

Now that that's out of my system...Dio's pretty darn good Kat and, I'll say this right here and now, he's my favorite set of yours, I totally agree with HR on that one. So basically you took a similar concept to Jason's of offering (not forcing) changes upon the opponent that not only benefit them but hinder them as well. It's a concept that was pretty neat in Jason but more or less......well, we all know how that one turned out.

Here however, the opponent actually -DOES- get some pretty nifty benefits from taking the "bait" if you will. When they do take the bait, it becomes a bit of a tug-o-war if you will over the minions what with them constantly being killed/brought back by the other side. It's a cool concept for sure.

Then you have ZA WARUDO-...ahem, The World, who uses his awesome time stopping abilities to freeze the foe allowing you to rack up damage. This however comes with its own bit of strategy; if you summon The World, you essentially double your hurtboxes as the foe can attack him to damage you. This adds another layer of strategy in the whole defending The World until he can achieve his goal of stopping time. While this is nifty for sure, it would've been nice to see some more attacks that involved The World. For example, in the JJBA arcade game, Dio can summon The World to follow him about and do his own attacks and such. While this means you can deal more damage and all that, you're essentially two overlapping hurtboxes meaning double damage. It would've been pretty cool if more stuff had to do with The World so that the choice between going solo or using your Stand was a bit harder to make and more situational.

But that's just a nitpick; Dio's your best set fo' sho' and I genuinely enjoyed reading it. It also, as I said in the Recap, motivated me to actually look into JJBA. The arcade game is totally kickass; thank God for CPS-3 emulators <3
:032:
 

MYM'r

Smash Cadet
Joined
May 16, 2010
Messages
27
Okay MT, I have to stop u at F Smash because it is Assist. Its a move that randomly copies another move from the users party. All of Zoey's Pokemon know at least one of the moves and Glameow is known for one of the 4 Pokemon to learn Assist Thats my say in it
 

Moogi

Smash Apprentice
Joined
Oct 24, 2009
Messages
189
Location
Canada
Glameow

There isn't much else to say from what already was said. Glameow is a good beginner set, but now there's Pokemon Syndrome to worry about. Out of curiosity I checked Bulbapedia to see what moves Glameow can learn and can't learn.


Standard Special- Yes, but as a tutor move.
Side Special- Yes, not really a suiting move for Glameow but I'll let it slide
Up Special- Yes, but now she has tan electric move...
Down Special- Yes, but I find it a little overpowered. 2 SBB seems like a lot....

Standard Combo- Despite the name difference, yes.
Dash Attack- No, which makes sense if we're talking about a bratty Glameow

Forward Tilt- Yes, but once again, doesn't really fit Glameow
Up Tilt- I suppose you're talking about Faint Attack? At least, that's what Bulbapedia calls it. If so, then yes.
Down Tilt- No, which makes sense as well.

Forward Smash- Yes, but I find it a bit iffy, reason being what MT said.
Up Smash- Well, it's actually Glameow's starting move. I suppose we can let it slide, but does it only ever send opponents upward 3 SBB?
Down Smash- Yes, and I don't find too much of a problem with it

Neutral Aerial- Yes, extremely obvious for Glameow
Forward Aerial- Yes, makes sense, but almost the same as the Neutral Aerial
Backward Aerial- Yes, probably a suitable move for Glameow
Up Aerial- Yes, but not only is it one of the moves where Glameow must have been bred by a certain Pokemon, it would be a little bit like Pikachu's Up Special
Down Aerial- Yes, whether people think it fits is up to them, I myself am not so sure.

Grab- Acceptable, I guess
Pummel- Yes, it works, but she can only learn if she was bred by a certain Pokemon, same as the Up Aerial. Then again, it works for a cat Pokemon.
Forward Throw- Yes, works well for Glameow.
Backward Throw- Yes, but I wouldn't see this Glameow digging into the stage.
Up Throw- Yes, but I'm not so sure, as we already have/had 2 Electric Pokemon in Smash, so I don't see why we need a Mon who can use plenty of Electric attacks. (Then again, she's a pure normal type Pokemon)
Down Throw- Yes, semi-suitable for Glameow, but for some people maybe not.

Final Smash- Attract works well as a Glameow attack, and I don't have much to say here.


Don't take any of this as insults, because you do have potential as a moveset maker. Just accept what people have to say and use their advice. Just keep in mind for your next Poke set on what their personality's like, what moves they can use, and so on. (Now if you excuse me, I've got a set to work on)
 

Hyper_Ridley

Smash Champion
Joined
Dec 21, 2007
Messages
2,300
Location
Hippo Island
So since I have so much free time over my summer break, I decided to take a looksie of some of my old, unfinshed sets...and in this case, finish one! Yea, poor Helios actually was only missing around 4 moves and a playstyle section before he was forgotten, and since what was finished was lookin' pretty cool to me, I decided to give him his well-deserved time in the spotlight and complete part 2 of the Leviathan Guardians! Though to complete the set I'd have to make an Omega Ridley set from scratch...

Please keep in mind this set is basically 2 MYMs old, so don't expect it to be some amazing top 50 shoe-in. Having said that, enjoy!


THE SECOND LEVIATHAN GUARDIAN

HELIOS​


Helios was once a robot caretaker on a Chozo sky-station floating about in the atmosphere of the planet Elysia. One day the Chozo left, but the robots living there forged an alliance with the Galactic Federation. The federation would use the station for research, and the robots would have a continued reason for existence by maintaining the site. However, once a Phazon Leviathan crashed into the surface of Elysia, all the robots were corrupted and became violent, and the station was abandoned. Eventually the Space Pirates found it and used it as a temporary base…

Helios himself was charged with protecting the core of the Leviathan thanks to his ability to control bat-like machines known as swarmbots. Helios is also implied to be the leader of all the robots living on the sky-station as there are computer logs generally believed to have been written by him. Based on these logs, Helios is depicted as being a noble and trustworthy being before phazon corrupted him. Samus acquires the Phazon Missile upon defeating Helios, which allows her to fire ridiculously powerful missiles of doom that would be broken if not for taking up half of an energy tank to fire.

In Brawl, Helios has well-rounded set of core stats. He’s about 1.3x the same size as Jigglypuff and average in weight. His ground movement speed is average and he has slightly below average traction since he floats. All of his jumps are average and he is fairly floaty with good air control. He has 2 midair jumps.

Music:
Helios Fight Theme
Metroid Prime 3: Steamlord
Metroid Prime 3: Ghor Battle
Metroid Prime 3: Skytown

COMMANDING SWARMBOTS​

Ah yes, Swarmbots, Helio’s minions that he needs for most of his offensive and defensive maneuvers. Helios has brought a whopping 100 swarmbots with him into Brawl, split up into 20 groups of 5 that, well, swarm all around him rather closely, with most going into the foreground and background to obscure Helios’ position. Each group is about the size of a purple Pikmin so you can imagine how small each individual unit must be. Each swarmbot group will be destroyed in a single hit, and they adjust their positions so that there is always swarmbots in Helios’ position in the z-axis to take hits for their leader. When there are less groups around than needed to completely cover Helios, they will default to his front.

While this strange “shield” is all well and good, what’s more important is how Helios can command his swarmbots for attacks. All swarmbot attacks are either performed while “attached” to Helios or by having them “detach” from him to perform their own attack where it was initiated. All attacks have a certain number of swarmbot groups that they “require”. However, Helios can perform any of his swarmbot attacks with as few as 1 group, making the requirement simply mean the maximum amount of groups it can take when possible. Like with Olimar, using attacks with no swarmbos available results in Helios performing the animation with no hitbox (so don’t do it!). To make things even easier for the player to manage their swarmbots, there are 2 counters atop his HUD that represent how many swarmbot groups he has attached to him, and how many there are on the stage in total. Helios can replenish lost swarmbots with his down-special.

When swarmbot groups detach from Helios, sometimes they will return to him on their own after completing an attack, but other times Helios will need to manually call them back with his neutral special (see that move below for more details). Whenever swarmbots attack, the group(s) has a glow to indicate how much damage they can resist; blue are immune to anything below 15 damage, green die with 10 or more, and red are killed by anything. So without further ado, let’s get to some swarmin’!

SPECIALS

Down Special > Swarmbot Factory
Helios crosses all four of his arms across his front as phazon energy begins to build up in the center of the stage. Helios is vulnerable for .4 seconds during this move, but when he is controllable again the phazon continues to build up for another 4 seconds.

Once the phazon is finished merging, a metallic structure sprouts up in the background, as large as DK. Every 2 seconds, 3 swarmbot groups will exit the top of the structure and fly over to Helios at the speed of Captain Falcon’s dash, assuming Helios doesn’t have 20 already. Of course, it would be pretty lame if Helios just had to input for this move once and never have to use it again for the rest of the match, so there’s a red knob on the center of the structure that is in the fighting plane but can be passed through. This knob has 35 HP, and when it’s gone the entire thing falls apart, with Helios having to wait another 20 seconds before he can make a new one. Helios and his swarmbots cannot damage his own factory. In matches with multiple Helios, the other players’ factories will spread out next to each other. These factories will naturally compete with the same space that Arthas and Roller Coaster Tycoon use for their own structures, making those matchups all the more intense.

Neutral Special > Rendezvous
A red energy pulse emits from Helios that takes up an area slightly larger than his body. There is virtually no startup or end lag to this, and the pulse lasts for about .6 seconds (Helios can move around while the pulse is being emitted). Helios is essentially calling back his swarmbots in their own robotic language, and his swarmbots are EXTREMLEY responsive to the signal. All detached swarmbots on the stage will instantly head for Helios at the speed of Captain Falcon’s dash, even canceling out of attacks to return to their leader unless otherwise stated. This move is extremely versatile and is one that you should learn ASAP. The only limiting factor with its usage is that you can only send out a new signal when the old one disappears.

Side Special > Waypoints (Detached)
When you input for the move, a small white cursor appears directly in front of Helios with next to no lag. You can move this cursor around with the control stick. Pressing the attack button to set a red-colored cursor at the position of the main one. You can place up to 10 of these that link in succession, and you can press the shield button to remove the last marker you placed. Press the jump button to cancel the move while saving the waypoints you’ve set up.

When you press the special move button in the preparation phase, Helios waves all four of his arms as a swarmbot group attached to him begins to fly single file to each point in succession at the speed of Sonic’s walk as they take on red status, and you can rapidly tap the button to keep sending groups on patrol. When they get to the last waypoint they will loop back to the first one in a perpetual cycle. Contact with a group deals 2% and flinching knockback, so if you get snagged by the first one in a long line expect to eat up a ton of damage without proper DI. This move has potentially epic levels of stage control, but remember that if you send all of your swarmbots out with this move, Helios is nearly defenseless until you call them back!

Up Special > Personal Transport (Detached)
This move uses up to 4 groups. Helios points his 2 bottom arms downwards as 4 green groups all spread out underneath him in a horizontal line. The groups will remain there for 3 seconds before returning to Helios. During this time, enemies who come in contact with them take 6% and small set vertical knockback. Helios can however, use the groups as an edgeless platform by way of magnetic pulses, assisting in recovery or to use as a temporary retreat from aggressive opponents. There is below average startup and end lag to setting-up the formation.

STANDARDS

Jab > Blade Pincers
This is one of Helios’ few attacks that he uses directly instead of with swarmbots. The front of his sphere-like body opens up to reveal two blade-like appendages concealed within. Helios begins to snip his blades together horizontally like a pair of grass-clippers, going at the rate of 5 snips per second for as long as you hold the attack button. They are the length of Meta Knight’s sword. Each snip deals 2% damage and flinching knockback, being easier than average to DI away. This move has below average startup and end lag and the blades are disjointed, making this a decent tool to defend Helios when he has no swarmbots nearby, or to pin them down when a swarmbot attack is about to strike.

Forward Tilt > Lance Thrust (Attached)
This attack uses up to 7 swarmbot groups for maximum effect. First, 3 blue groups will gather around his hand to form a “grip”. Then, 3 green groups will extend from his hand in single file to create the lance’s body, with a final red group at the very end to be the “tip”. Helios and the swarmbots mimic the startup animation of Marth’s neutral special as they thrust forwards their pseudo-lance, having average startup lag but the range of Olimar’s Up-B with 4 Purple Pikmin straight forwards. If an enemy hits the “tip” of the lance, they take 14% and horizontal knockback that KOs at 120%. Hitting the “blunt body” deals 10% with diagonal knockback that KOs at 160%. Hitting the “grip” at Helio’s hand deals 8% with knockback that KOs at 160%. Besides the damage sweet-spot, spacing is important for this move because if a swarmbot group is destroyed in the attack, all of the other groups that extended further along the lance will leave the attack and return to Helios in their default state. So basically the lance breaks, lulz. This attack has below average end lag.

Down Tilt > Spinning Whips (Attached)
This move uses up to 8 swarmbot groups. 4 groups will go to each of Helios’ bottom arms, 1 red group directly attached to his hand, 2 blue groups extending along the ground from that, and a final green group at the end. The attack tries to evenly spread the groups used for each side. Once the groups form up with below average startup lag, Helios begins to spin in place like a top, the swarmbots hitting low to the ground. The attack lasts for .5 seconds, with the green group dealing 10% with vertical knockback that KOs at 150%, the blue groups dealing 6% with vertical knockback that KOs at 200%, and the red group dealing 13% with vertical knockback that KOs at 80%. This has below average end lag. Like with the FTilt, destroying a group will cancel out the attack for the ones that extend from it.

Up Tilt > Whirling Devil (Attached)
This attack uses up to 10 swarmbot groups. Helios holds up his 2 top arms and starts to spin around like a top. As he does this, 2 blue groups appear just above his arms and start to swirl around. You can keep pressing the attack button to add up to 4 more pairs of swarmbot groups to the attack that will stack on top of each other. If you only have 1 group attached to Helios and you try to add another (or just to start this attack), then it will simply go by itself to the attack. There is .55 seconds of startup lag to this attack so you can add the groups that you want but Helios has super-armor during the startup time.

So finally, the actual attack begins. As you may have guessed, Helios and his swarmbots spinning around causes a tornado to extend from Helios’ hands to the top of the swarmbot column, staying within the swarmbots’ boundaries. This tornado sucks up enemies who are within once Kirby’s size away from it, and then the enemy is pulled towards the top, taking 1% from every swarmbot group they pass on the way (maximum of 10% if the enemy is sucked into the bottom of a full-size tornado of 10 groups). It is impossible to DI out of the tornado once stuck, and when an enemy reaches the top they are held just above it for the remaining duration of the attack (2 seconds total) before being launched with vertical knockback that KOs at 200%. The move has below average end lag

While the attack is going on, Helios can move left or right with the control stick at the speed of his regular walk. He’ll pull caught enemies along with him, so you can drag enemies into detached swarmbot groups for an effective combo attack. Destroying swarmbot groups that make up this attack will naturally shrink the tornado.

Dash Attack > Bowling Ball (Attached)

This attack uses up to 10 swarmbot groups. Helios curls up his limbs to somehow become even more of a ball than he already was as 10 green groups all gather around him to form a nice, compact sphere of death. This “ball” will roll forwards until Helios goes off the edge of the platform he is on or he smacks into a wall. Helios rolls at the speed of Wario’s dash and a collision with this formation deals 11% with horizontal knockback that KOs at 140%. There is below average startup lag to the attack, with below average end lag if Helios rolls of a platform to end it or average end lag if he collides into a wall. Destroying swarmbots that make up this attack will put holes into the ball, allowing you to strike Helios through his minion defenses.

SMASHES

Forward Smash > Hyper Missile
If Samus gets to use this weapon after killing Helios then it’s only fair that Helios gets to use it himself! Helios’ front opens up (no blades this time, sorry) as some phazon energy starts to build up in his core. After charging, a disjointed burst of phazon energy emits from his core, covering an area the size of Kirby in front of him and dealing 12% (22% charged) and KOing at 150% (120% charged). Below average startup and end lag. Don’t worry about your swarmbots, they can’t be harmed by this.

Hey! I thought there was supposed to be a missile in this attack! Well, after you completely charge, Helios doesn’t automatically release the attack. Instead, he begins to flash red as he starts up a second loop of charging! You have to complete this entire loop to reap the benefit, otherwise he uses the “normal” fully charged attack. If you go the distance, you’re in for a treat. Helios launches a blue missile of phazon that travels as fast as Pit’s arrows until it hits something. If an enemy is caught in its path, they are “rewarded” with 40% and knockback that KOs as low as 30%! Did I mention that this missile has priority so high it may as well be disjointed? When you have to charge for 2 full seconds to use an attack, it had better be God-like!

DSmash > Hammer Time! (Attached)
This attack uses up to14 groups. Helios raises his top two arms as 2 blue groups form a “handle” and 6 blue groups bundle together to form a “head” of a hammer-like formation. As you charge, more blue groups will be added to the handle, increasing its length. If you’ve done the math, up to 4 more groups can be added to the handle’s length, increasing it significantly. After charging, Helios smashes the hammer onto the ground before him. The hammer’s head deals an impressive 14% with horizontal knockback that KOs at 90% regardless of charge, and the handle deals 7% and flinching knockback. There is average startup lag and below average end lag to the move. Destroying groups that make up the handle will cause the entire formation to fall apart and cancel, but destroying groups that make up the head will just put “dents” into it while the attack continues.

USmash > Front Lines (Detached)
This attack uses up to 3 groups. Helios crosses his two top arms as the groups involved gather in front of him. As you “charge”, a small cursor appears directly in front of Helios that you can move around with the control stick, and you can charge for as long as you’d like. When you release the charge, the swarmbots will zoom over to that location as fast as Captain Falcon’s dash and start to slowly rotate clockwise around the marked location, taking on a blue status as they do so. The cursor can mark other detached swarmbot groups so that the ones in this move will actually rotate around that group, following it if need be. Contact with the rotating swarmbots deals 7% with set knockback as far as 1/3 of battlefield, and the groups involved will keep up this defensive formation until they are destroyed or called back to Helios. There is low startup and end lag to this move.

AERIALS

Netural Aerial > Razor Discus (Attached)

Here’s a move that can potentially use up all 20 of your swarmbot groups. Helios faces the screen and floats in place as blue groups start to form a rotating circular formation around him, the circle expanding outwards as more groups join in. If you get to 16 groups, then the next 4 will be red groups that orbit closely around Helios. There is surprisingly below average startup lag to set-up this formation.

Once, the formation is, well, formed, you may move it around with the control stick at a below average speed in any direction. The formation lasts for 4 seconds. Contact with the blue groups deals 12% with knockback in the direction the group was heading that KOs at 160%. While you might think that the huge size of the circle with 16 groups makes this an amazingly spammable move, there is no hitbox in between the circle’s edge where the groups are and Helios, so enemies can just stay close to Helios the entire time and be safe from harm. While Helios has super-armor for the duration of the attack, destroying the red groups orbiting him will instantly cause the formation to cancel as Helios takes 4% with high hitstun (somehow he was using those red groups to maintain the larger circle). Destroying blue groups will shrink the formation, and if there are fewer than 8 groups in the circle, the red groups cancel out of the attack. This takes away the danger of Helios getting stunned from the red groups’ destruction but of course the range on the attack is decreased more than half from its maximum size.

Forward Aerial > Artillery (Detached)
This attack only uses 1 group. What a bargain! Helios points forwards for low lag as our brave little swarmbot group remains where Helios was when the attack was input. The group remains stationary with red status as white energy begins to form inside it and expand. After 6 full seconds a white orb of energy will have formed that is the size of the group, which is when the swarmbots fire the orb at a high speed at the nearest foe. The orb has deals 9% with flinching knockback. After the orb is fired the swarmbot groups remains where it is and begins to charge up a new shot. While this attack may appear undesirable due to the weak defense of the formation and their slow firing rate, remember that Helios is welcome to use his aerial mobility to set these up off the stage as well as use other swarmbots to defend them.

Back Aerial > Patrol Guard (Detached)
Another move that only requires 1 group. Helios points behind himself as a group takes on green status and begins to fly back and forth the distance of 1 Battlefield platform. It travels at a decent speed and contact with it deals 6% and knockback that KOs at 210%. Low startup and end lag.

Up Aerial > Rocket Launch (Detached)
This move uses up to 7 Swarmbot groups. First, Helios gathers energy before boosting upwards the height of 3 Ganondofs at a high speed. His entire body has decent priority and deals 13% with flinching knockback. There is average startup lag and low end lag to this. While he does this, 7 swarmbot groups will be left floating where Helios initiated the attack, taking on a green status. 1.5 seconds after Helios does his attack, these swarmbot groups will perform the same upwards boost in single-file, each group dealing 5% with flinching knockback to anything in their path. Once the swarmbots finish their attack, they will fly back over to Helios. Helios can also use his neutral special to call them back before they attack.

Down Aerial > Sword Beam (Attached)
This attack only needs 2 groups at maximum. Helios swings one arm downwards as 2 green groups bunch together directly in front of their leader and form a red beam of energy that extends as far as twice Luigi’s height. It fires straight ahead but the groups quickly rotate around Helios going to his underside first, the beam rotating as well. The beam deals 10% and knockback in the direction it is facing that KOs at 155%. Below average, startup lag, average end lag. If only 1 group is used in the attack, the beam is half as long.

THROWS

Grab Animation > Humanoid Form (Attached)

This can potentially use up all 20 of Helios’ swarmbot groups. Helios rises upwards as far as 5 swarmbot groups would stack on top of each other. As he does this, 5 groups extend from each of his arms to form “arms” and “legs”. These do not spread evenly; rather, Helios first forms his left leg, then the right leg, then the left and right arms. The groups closest to his actual hands are red, while all others are blue. This all happens surprisingly quickly, taking about .5 seconds to assume this form.

Helios is immobile in this form. For each limb you have at least one group for, you will have access to a new throw, and the pummel comes free of charge! Destroying the red groups directly attached to Helios will destroy that limb, naturally. Besides removing that throw from his arsenal, if both of Helios’ “legs” are destroyed, he will fall to the ground as the formation cancels and he takes 9% upon hitting the ground. Otherwise, Helios can remain in this form until you perform his pummel, and his actual body is invincible while this formation is active. Keeping with the theme of grabs, all of these “throw” attacks will ignore shields.

Pummel > Exit Stance
Helios cancels the formation and the swarmbots involved will return to swarming around him as he is controllable again after .2 seconds. Simple but efficient at what it does.

Down Throw (Left Leg) > Furious Stomp
Helios’ lifts up the formation’s left leg and stomps it back onto the platform. This has average startup lag and deals 15% with spiking knockback to anything it hits with below average end lag. If Helios’ has enough groups for the leg to reach to the ground, it will cause a small earthquake effect like DK’s Down-Special, affecting an area the length of Luigi’s height to both sides of his foot and dealing 6% with set vertical knockback upwards the height of Mario.

Back Throw (Right leg) > Windup Punt
Helios pulls back the formation’s right leg before swiftly kicking it forwards. There is above average startup lag to the move, and you can hold back on the control stick to charge up the punt for up to 1 full second. The punt deals 12% with horizontal knockback KOing at 140% with no charge, and a full charge yields 24% with knockback KOing at 90%. When you factor in the move’s insane range if you get a full leg of 5 groups, this is a scary move indeed. Still, besides the startup lag there is also average end lag as the leg retracts, so it should be used conservatively.

Forward Throw (Left Arm) > Phazon Paunch!
Just like the name says, Helios reels back the formation’s left arm before performing a powerful thrusting punch. It deals a whopping 28% with knockback that KOs at 70%. Of course, the move has above average startup and end lag, but when you consider its range potential, power, and its shield-ignoring property, this can be an utterly vicious KO move. Just don’t miss!

Up Throw (Right Arm) > Energy Lob
Helios lifts up the formation’s right arm as an energy ball 3x the size of Kirby forms in its “hand”. It takes a full second for the energy ball to form, and then he hurls it at the nearest enemy. It travels at a slow speed but deals a respectable 12% with knockback that KOs that 140%. There is average end lag to launching the sphere.

FINAL SMASH - THE SWARM​

Helios rolls around in midair as a large shriek is emmited from within his chassis, invincible the entire time. The fight continues normally for 6 seconds, but then the skies darken as an entire planet's worth of swarmbots flies in to the battlefield, covering the entire screen with the minimum amount of visiblity required to see what's going on. This swarm lasts for 10 seconds, with a non-flinching hit of 1% dealt every .2 seconds that is undodgebale but can be shielded. Helios also has effectively infinte swarmbots to use for attacks during this time while retaining a perpetually self-repairing sheild, making him next to invincible. Finally, the shrieks of so many swarmbots can really instill fear in your opponents (or annoyance depending on who you play).

While you can spam Fair and Bair to all heck during the final smash, once the FS ends any dettached swarmbots on the field, except those in play before the final smash began, will leave with the rest. Helios will also have his "available" swarmbot counter restored to 20.

PLAYSTYLE

Helios’ strength lies in his ability to play both a melee-oriented and stage-control-based strategy and mix them up as he pleases. His swarmbots are the critical element in his technique, using them both for attacks and a passive shield. Unfortunately, since he can only have a limited amount of swarmbots on the stage at once he isn’t able to play at 100% with all of their uses at once, so it’s important to decide how much of your forces you wish to commit to different tasks in order to emerge victorious.

Let’s start with utilizing Helios’ melee attacks. Helios has amazing melee range with nearly all of his non-projectile attacks, notably his FTilt, DTilt, and DSmash. If you can space them correctly you’ll also find these move pack quite a punch, though they’re not without their weakness to offset such range and power, particularly in the speed department. However, even if your opponent tries to punish you, if you have swarmbots remaining in standby mode they’ll protect you from harm, making these attacks surprisingly safe as long as you have the resources. Utilt makes a good approaching and anti-air tool, and Dash Attack is an interesting “approach” tool against an opponent on the edge of the stage as well as a defensive mobility device. If Helios is in the air, Nair and Dair are good options thanks to covering an area all around Helios, and Uair can work as a melee attack for the first part. Overall, melee Helios wants to play a primarily defensive game of poking with ranged attacks and punishing your opponent whenever they improperly space themselves for even more damage.

In contrast to the ground-based melee strategy, Helios wants to stick to the air when utilizing his stage control gameplan. Fair and Bair are the centerpieces to this style. They both cost just 1 swarmboth group are lagless to set-up, so when combined with Helios great air mobility can quickly have the stage covered in a cloud of mechanical bats firing projectiles and ramming into foes. You’ll want to place 1 or 2 Fair groups in remote locations so they won’t be near your opponent, then protect them with DSmash satellites to ensure their safety. With 2 protected Fair groups, you’re left with 12 groups to use in other ways, such as overwhelming your opponent with Bair groups fluttering everywhere. To make life even more miserable, be sure to mark out a confusing path with Waypoints and have groups follow that so your enemy can’t keep track of which areas of the stage will become unsafe at any given moment. Uair doubles as a stage-control device due to the groups left behind, and while it costs 7 groups to use you get these groups back when the trap has been sprung, making it a good investment. Use jab when low on attached swarmbots to keep opponents out of your face. Stage controlling Helios plays a game of keep away, using his aerial speed to stay out of reach while his swarmbots pick apart the enemy as they try to catch him.

Now, the cream of the crop of Helios players, those who can combine the 2 styles! This requires a mastery of budgeting your swarmbot forces; use too much for stage control and your melee attacks lose some of their impact. However, with a few swarmbots left to their own devices, your melee attacks become a lot scarier. Helios can now take an offensive approach to the fight by using his minions to cover the lag of his attacks and giving the opponent less options for dodging them. He can still go back to his defensive tactics any time he likes, so this offensive boost enables Helios to be very flexible in how he fights, able to change his tactics to adapt to his opponent. Regardless, remember that if you choose this strategy, you won’t be as effective at either “pure” strategy, and in some cases you’ll find it a better commitment to stick to either melee or stage-control and leave it at that. Luckily Helios can easily switch from stage-control to melee combat by calling his swarmbots back to him.

Helios’ has 2 routes to take for a KO; his “grab game” or his FSmash. While landing a move that essentially takes 2 seconds to charge sounds impossible, landing an FSmash is easier than you might think. If you can trap an enemy in place with your swarmbots (Waypoints is great for this) you have a good shot of pulling off an Fsmash thanks to its range and projectile speed. Helios’ humanoid formation is good if you’ve got an opponent cornered but aren’t so close that they’ll break your limbs. Granted, both KO strategies require more set-up than a standard fighter, but the set-ups are flexible enough to be reliable. Helios himself has good survivability thanks to his swarmbot shield, 2 midair jumps, and Personal Transport.

Despite his complexity and depth, Helios is actually rather accessible for casual players. It’s possible to use Helios’ attacks without having to memorize a required minimum of swarmbots for something to happen, with the exception of his grab. While the swarmbot mechanic and sweetspots of his moves add nuance to them, they are still easy enough to figure out and his shield makes even his slowest moves slightly spammable. Getting more Swarmbots is as simple as pressing down+B, and being able to call back detached swarmbots prevents players from being frustrated from lack of melee attacks. The ease of starting to play Helios, combined with his flexible yet unique playstyle, ensures that he would see a healthy amount of pro players who each bring their own strategies to the table, giving him a constantly evolving metagame of fun.
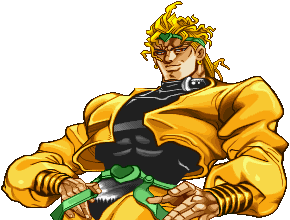
lol end of page
 

flyinfilipino

Smash Master
Joined
Sep 11, 2007
Messages
4,319
Location
North Carolina
Hey, a set by Hyper_Ridley! Wait a minute...(wary) I can't believe I just did that

Before I read Helios, I just want to know: how far from the Ghor boss fight is the Helios fight? My brother and I are sort of playing through MP3 (borrowed from a friend), and I think beating Ghor was one of the last things he did in the game (or going through Bryyo Ice or something). I think I'd be able to appreciate your moveset more after actually going through that part in the game. :bee:
 

JOE!

Smash Hero
Joined
Oct 5, 2008
Messages
8,075
Location
Dedham, MA
as you may have noticed, i am sporting my new "tech" version of the MYM avvy, hit me up if you want one
 

cutter

Smash Champion
Joined
Jun 4, 2008
Messages
2,316
Location
Getting drilled by AWPers
Check your VMs when you get the chance JOE! ;)

I'm working on pounding out two movesets in the future, one of which is nearing completion. I can guarantee that these characters haven't even been touched with a ten-foot pole. Stay tuned!
 

Monkey D. AWESOME

Smash Apprentice
Joined
Feb 28, 2010
Messages
143
Location
Coming to terms with having two people in my mind
CHUCK NORRIS'S EVIL COUSIN DIO BRANDO

Now, I don't know a lot about JJBA. I only watched the fight between Jotaro and Dio, and know about Dio's awesome memes. But shouldn't Dio be using his Stand more? I mean, aren't Stands a big part of the series?

All that aside, Dio is my favorite set of yours. The zombie interactions are cool, and I like all of the things Dio can do with them. Stopping the zombies in place, sucking their blood, giving them one of his specials, and my favorite, making them explode. It's hard to get more awesome than exploding vampire zombies. :p

Other than that, turning your opponents into vampires is pretty creative. It sounds like a dumb idea to make them faster and stronger at first. But by doing that, Dio's forcing them to attack his zombie army head-on so the opponent can suck their blood.

So, like I said, Dio's your best set, Kat. One more thing: EPIC FINAL SMASH!! :)
 

MasterWarlord

Smash Champion
Joined
Aug 24, 2008
Messages
2,911
HELIOS

Helios has 2 styles that he can switch between with ease, so it’s natural that flow isn’t that blatant, but I’d like to think I could find some more flow in the 2 individual styles – mainly the melee style, as by itself it basically amounts to a standard issue heavyweight (Albeit with a surprisingly cool priority system). The melee style is made a lot more relevant when combined with the stage control, though, so I’m more willing to forgive it, and the stage control you’ve got going is some pretty cool stuff. Aside from being able to freely combine or switch between his 2 styles, the stage control leaves a lot of room open for creativity. In particular, I can see placing swarmbots defensively around the Swarmbot Factory and just in general complimenting the general defensive style of his melee attacks – not to say that what you suggested in the playstyle summary isn’t perfectly good too, because it is. This is pretty much an ideal set to symbolize versatality positively in my mind. The only part that truly feels out of place is the grab-game, which while epic all by itself, seems too detached from everything else.
 
Top Bottom