• Welcome to Smashboards, the world's largest Super Smash Brothers community! Over 250,000 Smash Bros. fans from around the world have come to discuss these great games in over 19 million posts!

    You are currently viewing our boards as a visitor. Click here to sign up right now and start on your path in the Smash community!

Make Your Move 6 - Nothing Gold can Stay

Status
Not open for further replies.

Chris Lionheart

Smash Champion
Joined
Apr 6, 2008
Messages
2,076
Location
Make Your Move


Origin

Fire Emblem: Path of Radiance
Fire Emblem: Radiant Dawn

Path of Radiance

The Black Knight serves as a major antagonist in both Fire Emblem games he appears in. Despite being Ike's greatest rival, he is not the final boss of either game, rather appearing as a very late-game boss in both games, each time initiating a duel with Ike.

The Black Knight first appears to order Petrine to return to base, but his role becomes much more serious soon afterwards. In fact, before the next level even starts, The Black Knight gains his role as Ike's mortal enemy when he slays Ike's father right before the young mercenary's eyes and nearly kills Ike as well. The Knight is later revealed to be invunerable to all attacks not from weapons blessed by the goddess, Ashera. The only weapons capable of hurting him due to this are his own sword Alondite, and its twin, Ragnell, which the he gave to Ike in order to witness Ike's full strength.

The Black Knight was defeated by Ike at Fort Pinell, which collasped immediately following the battle, but the ebon-clad man's body was nowhere to be found.

Radiant Dawn

The Black Knight, long thought to be dead, appears out of nowhere to save Micaiah and then liberate Daein from Begnion's oppressive rule. The Knight appears several more times in the game in order to aid Micaiah's forces.

The Black Knight makes his final appearance in the Tower of Ashera, where he holds a final duel against Ike. Ike defeats him and the dark-armored general finally meets his end.

Spoilers

The Black Knight was a student of Ike's father. The true reason behind him murdering Ike's father was that he wanted to surpass his master. Upon learning that Greil cut the tendons in his sword hand, the Black Knight was relieved that his master was not truly so pathetically weak and turned his gaze towards Ike, who was also taught by Greil, to be his path to surpassing his master.

The Black Knight is a servant and friend of Sephiran, a prominent Begnion senator. This is why he stays his hand when Sephiran appears to rescue Ranulf from him.

The source of his incredible attack speed (despite wearing heavy armor) and strength is his part-Laguz blood. It is not known what type of Laguz his ancestor was, but that does not change the fact that he is a branded.

And now for the big one.... The Black Knight's true identity is... Zelgius


Height - Tall
The BK is about a head (his helmet) taller than Ganondorf.

Width - Wide
The BK is about the width of Ganondorf in Brawl.

Weight - Like A Stone
The BK is twice as heavy as Ganondorf!

Walking Speed - Abysmal
Despite being able to attack quickly, the BK can't walk very quickly. In fact, he walks twice as slow as Brawl's Ganondorf. His approach must suck, right?

Dash Speed - Slightly Less Abysmal
Even while dashing, the BK moves at a pathetic speed... only very slightly faster than his walking speed. Geez... how will this guy defeat anyone with a projectile?

First Jump - Abysmal
The BK can only jump half of an average jump.

Second Jump - Abysmal
No better than the first.

Falling Speed - Very Fast
Pk-ow: Smash isn't realistic. Everything falls at the same speed.
Spadefox: Glad to know that feathers and iron fall at the same speed.

Let's just say the BK isn't the feathers in this... he falls about the same speed as Ganondorf.

Traction - Perfect
Due to how slow he moves, it is impossible for the BK to trip except through outside means, such as Diddy's banannas, and turns very easily. This doesn't help his mobility much though.

Dodges - Excellent
The BK has surprisingly amazing reflexes despite all that heavy armor. This gives him some of the game's best dodges.

Crouch - Yes
The BK has a crouch on par with that of Ganondorf and with an even better "teabagging" noise! (Warlord: YES!)

Crawl - No
You try crawling in that armor.

Wall Jump - No
Again.

Wall Cling - No
... Again...

Glide - No
ROFLMFAO!


Standing Pose

The Black Knight stands tall and intimidating- almost motionless. His sword his carried in his right arm, which is at his side.

Idle Pose

The Black Knight randomly taps his sword on the ground or lifts it up to his shoulder and rests it there briefly. He looks bored at the pitiful fight going on.

Walk Pose

The Black Knight walks forward very slowly. He has a very intimidating air about him.

Dash Pose

The Black Knight's sword now drags on the ground behind him as he takes larger steps. He is still very slow and intimidating.

Jump Poses

Same as Ganondorf.

Shield

The Black Knight plants his sword into the ground and a shield of red energy, being exactly the same as a typical bubble shield appears.

Sidestep

The Black Knight veers slightly to the side and makes an effortless parry. Extremely fast dodge.

Roll

The Black Knight vanishes into thin air (warp powder?) and reappears in the direction he rolled. Unlike other uses of warp powder, he takes no damage and the dodge is about identical in effectiveness to Mewtwo's roll.

Airdodge

The Black Knight veers to the side quickly and effortlessly. Very fast dodge.


Neutral Special - Warp Powder

When you press the input, the Black Knight pulls out a bag of warp powder. At no charge, only a little dust is in it, only allowing the BK to teleport a short distance (a Battlefield Platform). However, if you charge the move, he will proceed to add more warp powder to the satchel at a rate of about 1/4th of a bag every half second. Every 1/4th of a bag of powder = 1/4th of Final Destination travelled. The charge of this move can be stored. Upon release of the B button (without cancel), the BK will vanish into thin air for a duration of 1/4th of a second, suffering no lag, during which time you can control the direction he warps (with forwards being the default on the ground and upwards being the default in the air.) No ending lag. The BK takes 1...9% damage (+2% per 1/4th bag) due to the powder draining his strength. Does not leave the Black Knight helpless.

This is the main reason why the Black Knight does not epicly fail at getting around the stage, despite his lack of movement. Through use of this move, the BK can approach, escape, set up surprise attacks, etc., but at a cost to him. Most importantly, perhaps, this serves as his main recovery.

{1...9% self damage}

Side Special - Alondite Wave

The BK swings his sword downwards using one hand, releasing a shockwave of pure light. This wave travels slightly faster than Link's boomerang over the distance of 1/4th of Final Destination before dissipating. It goes right through everything, even solid objects, such as characters and obstacles, dealing 7% to anything that is damageable and continuing along it's path. The move can be aimed diagonally as well, in a manner similar to Link's boomerangs. Medium lag on both ends. Note that this projectile is priority neutral, as everything goes right through it without affecting it.

This is the Black Knight's main projectile. It is very useful should the Black Knight need to camp or force an approach.

{7%}

Up Special - Warp Bomb

The Black Knight pulls out a satchel of warp powder and throws it in a manner much like Yoshi's Up Special, having the same lag and throwing distances and arcs. Upon hitting something (character, item, projectile, trap, and any obstacle that isn't a part of the stage), the struck object vanishes for 1/4th of a second. At the end of this duration, whichever direction the BK player's control stick is pressed in is the direction the foe will warp, (the warped distance is about 2 Battlefield Platforms, as long as there is space to be warped to). The struck object takes 5% damage (if applicable), due to the object draining the user's strength, but this does not refresh recoveries due to the damage not coming from any apparent outside force. Also, if the bag is struck, it will burst, releasing warp powder everywhere within a BF platform's radius and having the warp effect on anything in that reach. Note that if no direction is chosen for the foe to warp, they will reappear where they were.

This move functions as a gimping and spacing tool, as well as a secondary projectile and an anti-projectile. It can even counter traps.

{5%}

Down Special - Warp Counter

The BK pulls out a bag of warp powder upon pressing the button input. This is a counter-type move with frames much like those of Ike's counter. If struck during the counter frames of this move, the BK will warp behind the inflicter of the damage (works on both attacks and projectiles) and place his sword by their head, causing them to freeze in terror. This allows the Black Knight to use a free attack on them, as the foe cannot escape until they are attacked by the BK (having super armor against everything but the BK's attack) or until a second has passed. The BK takes the damage, but not the knockback, of the attack that struck him, as well as an additional 7% from the warp powder.

This is the Black Knight's secondary means of approach. This move alone makes the BK an anti-camping god when used properly. It can also be used to help set up finishers. Just don't overdo it, as that 7% self damage per use tends to be painful.

{7% self harm}


A - Slash

The BK slashes diagonally downwards from his right to his left. Deals 3% and flinching with some slight hitstun. Great reach. Good disjointed priority. A bit slow to start up but no ending lag.

Useless by itself, but it comboes into two more hits.

{3%}

A , A - Reverse Slash

The BK reverses his slash from the ending of the first one, slashing diagonally upwards from left to right. Deals 3% and low upwards knockback (kills starting at 300%) with some slight hitstun. Great reach. Good disjointed priority. Low beginning lag with no ending lag.

Unlike the first hit, this attack actually has some speed. Being a followup doesn't help it very much, however. Combo into the third hit if you are confident that the foe will not escape and punish you.

{3%}

A, A, A - Critical

From where the BK left off on the second slash, he holds his sword before his face briefly and then lets out a powerful attack, swinging his sword from behind him (sword touching the floor) to above and in front of him in one wide arc. Deals 8% and good upwards knockback (kills starting at 110%). Has a medium start up and a above average end lag. Great reach. Good disjointed priority.

The finisher to the BK's A combo is actually one of his best finishers should he manage to land it. It also makes his combo finally deal some decent damage, but it can be easy for the foe to escape.

{8%}

Dash Attack - Tear

The BK uses a quick burst of energy to run at an actually normal pace for about half of a BF platform. At the end of this, the BK uses the momentum to stab forwards, dealing 4% and good hitstun. If this attack connects, he will follow up by performing a move comparable to Roy's Up B (only going upwards half the distance), dealing 4%, and finishing the combo by using a downwards falling slash much like the second half of Ike's Aether for another 4% and low horizontal knockback (kills starting at 250%). Interestingly, the last hit can spike if the foe is off the edge (which would require precise placement). This move has low beginning lag, a considerable duration (about 3/4 second) and low ending lag. Great reach. Good disjointed priority. You can affect the area where he uses the final part of the attack somewhat by using the control stick before he uses the falling slash, even allowing you to use the attack backwards, though, oddly, the character(s) that have been comboed by the first two attacks will still be caught in the third hit.

This is a good alternative to the BK's A combo. It deals only 2% less than a full A combo, comboes into other moves more readily, can spike under the right conditions, and is quicker to start up. It is very easy to punish if whiffed, however.

{4%, 4%, 4%}


Side Tilt - Checked-Hand

The BK "checks his hand" as he swings his sword downwards, making for a non-lethal blow. Deals 4% and a weak set knockback (half of a BF platform). Low beginning lag and ending lag. Good reach, comparable to that of the last hit of Ike's A combo. Good disjointed priority. Deals a fair amount of hitstun.

This can be seen as a much more suitable damage racker than his A combo and, like the Dash Attack, comboes readily into other moves. This is a useful lead into the Dash Attack, in fact. The move is also a much more viable followup from the second hit of his A combo than the third hit of his A under most circumstances.

{4%}

Up Tilt - Blade Raise

The BK lifts his blade above his head in a similar manner to Ike's Up Tilt, though more slowly, having medium beginning lag as he does so. He keeps the blade above his head for about 1/3 of a second. The blade creates an extremely high priority defense towards attacks that strike the BK from above, also dealing 6% and a weak set upwards knockback (about 1/3rd of a BF platform) with good hitstun. This move has low ending lag. Pathetic vertical reach due the sword's positioning. The attack can be cancelled early if need be. An interesting property of the attack is that you can angle it left and right, making him hold the sword diagonally. While this shrinks the protective hitbox some, it allows you to change the direction of knockback.

The main use of this move is for defense against airborne foes and/or attacks that would strike the BK from above but the move also has a reasonable use as a combo tool. One example of a simple combo from this move would be to angle it in the direction you are facing and cancel the attack as soon as the foe is struck. Follow up with a Side Special aimed upwards (it will go diagonally upwards). If timed right, this combo can do a nice 13% if the foe has not used DI to prevent it. Another option would be to use the BK's up special before hitting them with the Side Special.

{6%}

Down Tilt - Hamstring

The BK performs a quick diagonally downwards slash in the direction he is facing, clearly aiming to cut the foe's leg. This attack has low lag on both ends. Deals a mere 3% (guess that attack didn't have much force to it), but causes the foe to trip. Rather average reach, as only the angle drastically lowers the hitbox of the sword. Good disjointed priority.

Like the BK's other tilts, this move serves as a great combo starter, though this one is also useful as a lead into moves such as the BK's Side Smash, which are slow but powerful. An example of an effective combo starting with the Down Tilt is Down Tilt -> A -> A , A -> Side Tilt -> Dash Attack.

{3%}


Side Smash - Luna

The BK holds Alondite with both hands and swings it upwards sort of like a golf club, forming a blue crescent moon in front of him. This move has 2 hits: 1) The slash itself. Deals 7% and very high hitstun with great reach and good disjointed priority. 2) The crescent deals 5...15% with great upwards knockback (KOs starting at 100%). Great reach. Has the same priority as Lucario's aura. The crescent lingers for about 1/4th of a second after being completed. Note that foes struck by the slash will also be struck by the crescent immediately afterwards, but foes can come into contact with the crescent while it lingers without having to be hit by the slash. This move has fairly high lag on both ends.

This move should be pretty straight-forward. It is a powerful finishing move that provides good frontal defense.

{7% , 5...15%}

Up Smash - Eviscerate

The Black Knight turns to face the camera and unleashes a very powerful downwards slash from above his head to the ground. The force of this slash is truly amazing, dealing a massive 20...29% damage and high upwards knockback (kills starting at 80%). It also creates a spread of shattered rocks similar to those of Charizard's Side Special (in fact, having roughly the same size) that strikes foes in the foreground for 12...21% damage and great upwards knockback (kills starting at 110%). This move has medium beginning lag and very high ending lag (as the BK must unlodge his sword from the ground). The upwards reach of the attack is great (roughly the same as Ike's Up Smash), but the hitbox is unfortunately thin, having no horizontal slash at all, the only width being created by the sword. Good disjointed priority.

The use of this attack is usually as a KO move, though it can be used as a combo ender (a good lead into this attack would be the Up Tilt), though this is situational. If whiffed, the foe will have a perfect opportunity to punish the BK... and this attack is very easy to whiff with that thin hitbox it has.

{20...29%} {12...21%}

Down Smash - "Here, use this blade."

While the Black Knight charges this move, his hand is on a secondary sheathe and he says "Here, use this blade" (blade being said when the charge is complete). Upon release of A, he will throw this secondary sword, which looks like a more generic steel version of Ragnell/Alondite, presumably a third (non-canonical) sister sword to the aforementioned blades. The thrown sword outprioritizes all projectiles and travels 1 BF platform ... 1/2 of Battlefield at a very fast speed and deals 9...18% and medium...good upwards knockback (kills starting at 150...125%) to foes who are struck by it. When the sword comes into contact with the ground (or a platform), it will become stuck just like Link's Dair. The BK or a foe can pull the sword out of the ground and use it as a weapon. This sword will act much like a slow-but powerful version of the energy sword, dealing 3% more than the Energy Sword but having a good bit more ending lag on its attacks. The sword will also increase the weight and reduce the movement speed of its wielder by 25% each due to it's sheer weight. This move has high beginning lag and low ending lag. Only one of these swords can be on the field at one time, the move only throwing out a generic sword that is just like an Energy Sword but shorter in reach when the larger blade is already in existence. The primary sword deals 7% damage when used as a throwing projectile. The secondary swords deal 5% when used as a throwing projectile.

This move may seem useless as a projectile initially, but the fact that it produces a weapon that greatly increases the Black Knight's already massive weight is quite tempting, though not necessary until he gets to high percentages. Until then, this move is best used as a throwing projectile, as the thrown sword deals some pretty nice damage.

{9...18%}


Neutral Aerial - Blink

The Black Knight uses a very small amount of warp powder to disappear briefly (during which time he has invinceability) and then reappear in the exact spot he was before. The lag and disappearance frames of this move are roughly identical to those of Mewtwo's airdodge by default, but by holding A, the Black Knight can remain in his disappearing state for a cost of an additional 1% self damage per second with a maximum of 3 seconds duration. When he reappears, the Black Knight will immediately launch a swift sword slash in one direction, dealing 6% and medium knockback in that direction. To control the direction of the slash, use the control stick during the disappearance frames, with forwards being the default. The attack has great reach, good (disjointed) priority, and deals no hitstun. The BK takes 1% damage from Warp Powder.

The ultimate in defensive aerials. Use this if you need to dodge an attack and immediately punish a foe or just for simple mindgames. The combo potential of this move is low, considering it deals decent knockback and can be predictable when not used to punish foes.

{6%} {1...4% self harm}

Forward Aerial - Shove

The Black Knight performs a shoulder bash a bit like Wario's Forward Smash in animation (except much less cartoonish and more effortless). Struck foes take 10% damage and are meteored downwards in a horizontal arc. This attack has medium beginning lag and high ending lag. Mediocre reach. Medium priority.

A useful move for spiking purposes. Can potentially be used to knock the foe to the ground in preperation for a combo, as the end lag auto-cancels on the ground.

{10%}

Back Aerial - Fatal Strike

The BK turns around, using the momentum to lead into a powerful finishing slash for low beginning lag. While this attack does have the great reach of the BK's sword, it behaves much like the Knee of Justice or Zelda's Fair in that it is really weak unless sweetspotted. The sweetspot of the attack, like that of the Knee of Justice, is pretty bad, only coming out in the first frames of the slash (though reaching all the way down) and only being at the base of the BK's sword. Sweetspotted (evident by flashing red lightning at the point of connection), the slash will deal a massive 15% and great horizontal knockback (kills starting at 85%). Unsweetspotted, the slash deals a mere 3% and a low set knockback. Medium ending lag. Good (disjointed) priority.

This move is a great finisher when sweespotted and a respectable end to a combo. Perhaps one of the best comboes for this purpose is Up Special -> RAR Bair.

{15% sweetspotted, 3% unsweetspotted}

Up Aerial - Spinning Blade

The Black Knight throws Alondite up in the air for low beginning lag. The blessed sword travels upwards about 3 BF platform's distance before falling back down. Normally, the sword just flies/falls straight, dealing 6% damage and decent upwards knockback (kills starting at 145%), but, if attacked, the sword will start spinning just like a flipper for rapid hits of 1% (with the speed of the spinning being based on the power of the attack that hit it). The spinning hits draw foes inside of the sword's hitbox and are very hard to DI out of, seeing as they actually deal some nice hitstun. Should the foe be unable to escape, they will be drawn back to the BK. This move has low ending lag. Duration is about 3/4 of a second.

If the foe can be tricked into attacking the blade, they will be caught in its spinning. This is great for drawing foes closer to the Black Knight (amazing for starting comboes), especially if the foe had high damage already. This can be a great lead into almost any combo, though combines naturally well with the BK's Up Smash.

{6% no spin, rapid hits of 1% spin}

Down Aerial - With An Iron Foot

The Black Knight does a stomp much like that of Ganondorf's Dair (even having the same lag, priority, and hitstun), but using only his right foot. The force of this attack actually has a pretty opposite knockback to that of Ganondorf's. If used on aerial foes, they will suffer good upwards knockback (kills starting at 120%) and take 12%. If used on grounded foes, the foe will be stuck to the ground under the weight of the BK's heavy boot, taking 5% damage and putting them in a grab of sorts. From this point, the BK can hold down A to squeeze said foe under his foot for 2% per second or "throw" them by pressing the control stick left or right, causing the BK to kick them just hard enough to make the foe slide across the floor at a slow speed. The grab version of this attack has almost unnoticeably low ending lag and can be escaped just like a normal grab.

The vs. aerial version of this attack has very low comboing potential but is more powerful as a standalone (and it can be used to score KOs), but the vs. ground version of the attack can actually lead into comboes quite nicely, and is thus the more recommended version of the attack. It leads nicely into many ground attacks, especially the Dash Attack and Side Special.

{12% vs. air; 5% + 2%x vs. ground}


Ledge Attack - Heavy Fist

The BK jumps up from the ledge and unleashes a powerful punch that deals 11% and great forwards knockback (kills starting at 100%). Medium beginning lag and fairly high ending lag. Good reach. Good priority.

What can really be said about a situational move? I suppose that if you manage to land it, it is a suitable killing move, but if whiffed, you can be punished with ease.

{11%}

Tripped Attack - Heavy Blade

The BK gets up slowly and unleashes a mighty 360 degree sword swing, hitting in all directions for 13% and high upwards knockback (kills starting at 70%). Great reach. Good (disjointed) priority. High beginning lag and fairly high ending lag.

What a powerful move this is! Too bad it's so slow. On the few occassions that an outside source of tripping does make the BK trip, he'll sure be feeling it with the high lag of this attack.

{13%}

Rising Attack - Leap

The BK leaps to his feet while using the weight of his mighty arms to swing from the sides upwards, ending in a powerful double elbow. The "sourspot" of the attack deals 8% and decent upwards knockback (kills starting at 135%). The sweetspot of the attack (the ending elbow) deals 12% and great upwards knockback (kills starting at 90%). This move has low beginning lag and medium ending lag. Medium reach. Good priority.

The BK's rising attack is actually fast in contrast to his other situationals but is still a good killing move when sweetspotted.

{8% unsweetspotted, 12% sweetspotted}


Grab - Iron Grip

The Black Knight grabs the foe with his left hand and brings them close to him, seemingly looking like an embrace. This grab has average grab stats.

Grab Attack - Iron Fist

The Black Knight swiftly punches the foe in the gun for 1%. This is a fast pummel, having low lag on both ends.

{1%}

Forward Throw - Iron Knee

The Black Knight slams his knee into the foe, dealing 6% and great forwards knockback (kills starting at 97%). Medium lag on both ends.

The BK's best killing throw when not by the edge.

{6%}

Backward Throw - Iron Gauntlet

The Black Knight tosses the foe backwards with his left arm, following up with a mighty elbow slam with his right arm. Deals 8% and good backwards knockback (kills starting at 110%). Medium lag on both ends.

Ties with the Up Throw for the BK's most well-rounded throw.

{8%}

Up Throw - Iron Foot

The Black Knight unleashes a mighty upwards kick, dealing 7% and good upwards knockback (kills starting at 103%). Medium lag on both ends.

Ties with the Back Throw for the BK's most well-rounded throw.

{7%}

Down Throw - Go Join Gawain

The Black Knight stabs the grabbed foe through their chest, the blade clearly seen protruding through their backsides. The foe takes 10% damage and, after about 1 second, falls off the sword and starts staggering backwards, falling down after 1 second. This throw has high beginning lag and medium ending lag.

While this cannot chain grab, as the foe is invinceable while staggering, this is the best throw the BK has for comboes, as the foe is vunerable to attack after falling down. Interestingly enough, the foe can humorously commit suicide if they fall off the edge.

{10%}


Eclipse

http://www.youtube.com/watch?v=qrmuATvklKA

The most overkill move in Fire Emblem history!

The Black Knight walks from where he is all the way to the edge of whatever he is standing on. When he reaches a foe, said foe will be caught in his ultimate attack. The Black Knight will point his sword at the foe tauntingly and then slash the foe 5 times, dealing 10% with each slash. The last slash deals great knockback (kills at 100%) that completely removes the foe's weight. This works by treating Jigglypuff as if she had 0 weight and thus all character's take the same knockback as Jigglypuff.

As a special easter egg, an FE life bar displaying 50 health points for the foe will appear and drain to 50 to 0 when the last hit connects.

{10% + 10% + 10% + 10% + 10%}


Up Taunt - Full Strength

The Black Knight offers the sword from his Down Smash while saying "I'ld like to see you at your full strength."

Side Taunt - Preparational Stance

The Black Knight performs the sword slash + point that he uses to signal the start of his Final Smash (Eclipse).

Down Taunt - A Real Challenge

The Black Knight says "Now, offer me a real challenge" while his cape blows in the wind, as in Ike's taunts.

All Victory Poses - Is That All There Is?

Theme - Against the Black Knight

The Black Knight stands intimidating under the moon light saying "Is that... all there is... no challenge... no resistance?"

Using the taunt directions changes what the foes do during the results screen.

Up - All foes start bowing down to the Black Knight.
Side - The foes all cower in fear.
Down - The foes lie on the ground motionless. Look's like they've joined Gawain in the afterlife.

Loss Pose

A speech bubble appears over the Black Knight's head saying "You've grown stronger... I... commend you," as the BK weakly claps.


Pros

Heaviest character in the game.
Attacks are often quick.
Great reach on most attacks.
Good priority on most attacks.
Good at damage racking and comboing.
No lack of killing moves.
Powerful recovery with warp powder.
Warp Powder allows the Black Knight to approach.
Ultimate anti-camper.
Cannot trip on his own.
Multiple useful projectiles.
Can gimp
Has multiple ways of spiking.

Cons

Large target.
Extremely reliant on Warp Powder. He cannot approach, recover, or fight campers without it.
Warp Powder moves (except Up Special) cause the Black Knight self harm.
Slow movement speed.
Bad jumps.
Fast faller, hurting recovery and air game and making him even more susceptible to comboes.
Bad edge game.
Moves that cause the BK to trip are especially effective against him, given his horribly slow tripped attack.


The Black Knight Lives - Play As

The Black Knight is a very odd case among heavyweight characters- he is exceptional at comboing.

A list of his comboes includes:

A -> A,A -> A,A,A
A -> A,A -> Side Tilt -> Dash Attack = 22%
Down Tilt -> A -> A,A -> Side Tilt -> Dash Attack -> Side Special = 32%
Up Tilt -> Up Special -> Up Smash = 31%
Up Tilt -> Side Special = 13%
Up Tilt -> Up Special -> Side Special = 18%
Down Throw -> Dash Attack = 22%
Down Throw -> Side Special = 17%
Down Throw -> Dash Attack -> Side Special = 29%
Up Aerial -> Up Smash = 20% + 1%x (variable depending on number of hits).
Down Aerial -> Dash Attack = 5% + 12% + 2%x (depending upon duration of Down Aerial "grab").
Up Special -> RAR Bair = 8/18% (unsweetspotted/sweetspotted)

The Black Knight may possess many more comboes than even that list holds. It all depends on the inventiveness and talent of the Black Knight player. One particular instance of combo innovation would be the inclusion of warping to bring the Black Knight to the foe to extend his combo or proper use of the Up Special to position the foe just right for another hit of the combo.

Of course, there is more to our ebon-clad fiend than comboing.

The Black Knight is really really slow and has terrible jumps. This means that approaching would be a living Hell for him, right? Not necessarily. The Black Knight can use his Neutral Special (which is also his primary means of recovery) to warp across the stage or even warp right to a foe who strikes him with projectiles via the use of his Down Special. The use of these tools is limited, however, as the BK takes damage with every use of warp powder. Use these specials only when it is necessary.

The BK has a terrible edge game. His falling speed, bad recovery (without warp powder), and punishable ledge attack mean that aggressive gimping can prove to be a deadly mistake on his part. But fear not... the Black Knight's Up Special isn't just for positioning foes for a combo. It's also a wonderful gimping tool as it moves the foe a considerable distance without refreshing recoveries!

The BK's killing moves are usually very conditional. His Forward Smash is slow to start. His Up Smash is hard to hit and painful if whiffed. His Bair has to sweetspot to kill. All of his spikes/meteors are fairly conditional (though that is to be expected of a spike or meteor). The only unconditional killing moves he actually has are his throws (only one of his throws really comboes well). BK players have a variety of approaches for killing. They can use their reliable throws. Alternatively, they can attempt to land any of their situational KO's, though comboes are the only reliable ways to do so really. Up Special -> RAR Bair is one example of a killing combo when used correctly. Up Aerial or Up Tilt -> Up Smash is another example. Of course, gimping via Up Special shouldn't be ruled out as a way to score early KOs.

The Black Knight's air game is nothing short of bad, considering the fact that his jumps are poor, his falling speed is too fast, and his heavy weight usually prevents him from being knocked high into the air until high percentages anyway. So why even use his aerials? The answer is simple really. His aerials all complement his ground game perfectly.. think of them as an extension of his ground game. His Fair comboes well into moves like the Dash Attack and can be used to spike or space. His Bair is an effective RAR should you learn to land it reliably. His Nair is a great move for punishing foes and for self defense. His Uair is a great form of anti-air and comboes nicely into his Up Smash. His Dair comboes nicely into his ground game when used against grounded foes (especially into Dash Attack and Side Special).

Black Knight players will find themselves truly blessed when they master this character, a heavyweight with a potentially godly approach, recovery, and anti-camp game, great combo potential, and an array of KO options. That Victory Pose of his shall embarass many a foe.

Against the Black Knight - Play Against

Playing against an experienced Black Knight player can be a very difficult task. He is great at comboing up close and can counter campers with ease. So what does this leave you with to fight him?

One important thing to note is that the Black Knight has a terrible air game and a worse edge game. For this reason, an opponent of the Black Knight should attempt to aerial combo and juggle him. He is incredibly susceptible to comboes, epitomising heavy weight, fast falling speed, and large size.

The Black Knight is very susceptible to traps. With a terrible movement speed and bad jumps, his only means of getting past traps is usually to warp, which hurts him anyway.

The Black Knight responds very badly to sources of tripping. Use moves that can cause tripping, especially Diddy's bannanas and the Black Knight will find himself weakened dramatically.

Black Knight Vs. Ike - 80/20 Black Knight's Favor

Did you really think you could defeat the Black Knight? You are a fool, son of Gawain. The Black Knight's comboing abilities far, far, exceed those of Ike's. Ike also completely lacks projectiles giving him little choice but close combat, while the Black Knight does hold the distinct advantage of projectiles. The match isn't completely hopeless on Ike's part, however. Ike's counter can be used to stop comboes before they ever happen. Ike also possesses superior movement and air game. If Ike can force the BK into the air, the BK will have a difficult time escaping the punishment.

Black Knight Vs. King Dedede - 0/100 Chain Grab's Favor

It goes without saying that someone epitomising large size, heavy weight, bad movement, and fast falling speed will have an impossible time against Dedede's chain.

Black Knight Vs. Metaknight- 50/50

Here we have a surprisingly even matchup. The Black Knight and Metaknight are both very effective in the combo department and can rack damage on each other with ease. The Mach Tornado will give the Black Knight Hell, but the Black Knight is actually not completely helpless, as warping and projectile spam will allow him to combat this intimidating foe. Metaknight has an advantage in the air, but the Black Knight is almost uncontested on the ground.

The Black Knight Vs. Diddy Kong - 20/80 Diddy's favor

Diddy is far from reliant on camping to pull a victory and both are competent comboers. Diddy's real advantage comes from his bannanas. The Black Knight will either be pinned due to bad mobility, forced to hurt himself with warp powder, or be falling on his *** due to bannanas if the pesky peels are set up properly. Enjoy one hilarious match, you cheeky ape.


So... here it is... a moveset for my leadership representation and current avatar. The Black Knight may or may not be an amazing moveset by MYM standards. I care not. It is my way of "paving my own way" in this contest. No longer will I bind myself by trivial, excessive, and unrealistic creativity. I'm supposed to be making move sets for Smash..... not an imaginary game where characters are unable to perform basic attacks that everyone should be able to do. Am I saying that I am dooming myself to Sakurai-level genericism? Hell no. I am merely finding a point between these- a great medium that combines practicality with reasonable creativity and uniqueness. Take this as you wish. Spit on this set for its lack of ungodly creativity or praise this set for its practicality... I care not if I win or lose, because, frankly, MYM is no longer my highest priority. It's a fun side-venture and that is all it should be.

I would like to thank Smash Daddy for providing the visual images for this set.
 

Hyper_Ridley

Smash Champion
Joined
Dec 21, 2007
Messages
2,299
Location
Hippo Island
So, I get the first comment on Black Knight? Yay! The original version was one of the sets I remember reading back when I lurked in MYM2. I remember him being really underpowered since he was a slower Ike...But that's okay, cause this one is not underpowered and is in fact a totally awesome moveset!

So, anways, let's talk about...CREATIVITY! Yeah, I don't get the point of that mini-rant at the end, cause this set still has tons of cool stuff in it that instantly make it too good for Brawl, lol. Warp Powder was just awesome in general. Warp Black Knight around, warp enemeis around, perform melee-airdodges with the Nair (gasp!) Then we have stuff like his Uair's counter-projectile mixture, Dair's own-self contained grab mechanic...yeah, like I said, anybody who whines about this set being boring and uncreative needs to shoot themselves in the foot. Of course, there were a FEW basic if not outright bland moves...

but those can be excused for fitting into his EPIC playstyle! While the basic concept of a comboing heavyweight has become a bit of a cliche *glares at Kupa*, you pull it off better than any other set before it so I'm forced to love it. Just, wow...he can barely budge an inch and yet he's capable of comboing like no tommorow due to his surprisingly high attack speed, cancelable attacks (there's another move I love, UTilt), and his warp powder for even more clever combos. In most fighting games, it seems like there's always only one superior combo to everything else, but with the Black Knight's nuances on his attacks and warp-powder mechanics, combos would be based more on player innovation and have different benefits depending on how you chose to end a combo. This is what I was trying to accomplish with Black Doom, and you finally realized my dream playstyle.

Balance-wise, I saw no major problems. Having a super powerful lingering hitbox with the FSmash was a bit iffy, but not a deal-breaker by any means. He's a god at comboing and approaching with great weight, but he eats combos like no tommorow and won't recover easily as well. So he's bascially balanced like King Hippo but without any super-armor to scew it up! :bee:

So, yeah, as if you couldn't already tell by now, I love this moveset! It combines plenty of creative attacks with a superb playstyle and great balance. It's clear that a lot of thought went into this set, and it definitley paid off. This is THE set I want to see programmed into a game, and easily a top contender in my eyes along with Sloth.

Kinda fitting in a way. One of the sets that helped got me into MYM turns out to be one of my all-time favorite sets down the road. <3
 

darth meanie

Smash Journeyman
Joined
Jun 6, 2008
Messages
452
The Black Night Is a very good looking set, first off. The Warp Powder is a very interesting recovery move, but I question why you chose two different measurements for the distance traveled, it makes it a little difficult to imagine. The Warp Bomb is a very nice move, by the way, and Warp Counter is nice as well, although I'd think with lag and self-damage you don't need to include the damage from the hit too.

The jab combo is fairly nice, and the way it fits with the dash is pretty cool. The tilts are all nice, nothing particularly note-worthy and nothing bad to them. The first two Smashes are pretty sweet, and nicely implemented, but the Down Smash is absolutely ridiculous. Throwing an energy sword that increases the weight of whoever picks it up? Just... too out there, its rather jarring with the rest of the set in mind.

Nair reminds me of my Daroach set, but actually good this time. Fair is okay, but the fact that there is no landing lag on a shoulder slam that has a lot of ending lag in midair is kind of odd. The Bair is Ice-cold, as is the Dair, but the Uair is just a little odd, in that it requires being attacked to activate; that feels unnecessary. With the exception of the Dthrow the throws are uninspired, but I've never been one to expect brilliant throws, even though with Warp Powder and his sword I'd think you could have done at least a little better.


Overall, I'd say he's a little broken. Those combos you listed are absolutely devastating, and he's heavy as hell; not to mention that Warp Powder is a pretty good recovery. He's a good looking set, and there's nothing bad with him but a few nitpicks, but from playstyle, to creativity, he just doesn't jump out to me. Not a bad set by any means though. He's a comboing heavyweight, and we've seen a few of those this MYM already. He'd implement well though, and he seems rather true to character (except that DSmash...) Make no mistake that I got a very good impression from this set, I liked it.

After reading the Author's Comments, it seems that you mostly hit your goal. I think you still could have made him more creative while still functioning in Brawl, but hey, as you said, this isn't your highest priority, and that's probably a good thing.
 

Katapultar

Smash Lord
Joined
Nov 24, 2008
Messages
1,284
Location
Australia
You need not to criticize yourself for not having creativity. The moves worked well, having a purpose, as well as being nice and easy to read. He has an interesting playstyle and can teleport foes around, kind of like my next set... The only thing I kind of nitpick is the fact that having all the stats and stuff in red kind of makes it hard to read, meh. I saw little to no problems with this set, and I think you did much better than you thought, as making generic attacks over random creative attacks is sure better.
 

Junahu

Smash Ace
Joined
Nov 15, 2005
Messages
899
Location
Shropshire Slasher
The Black Knight This is a humungous leap foreward for you. A wonderful, fitting depiction of the one character I'd never thought could work in brawl. I enjoyed reading this, to the same extent I enjoyed reading Raiden in MYM5 (which was, needless to say, very enjoyable)

The various warping moves, as everyone before me has said, are simply incredible.
I would, however, ask whether the Black Knight needs all three warping specials. The Neutral Special could be written out of the equation if he was capable of hitting himself with his Warp bombs (giving him a little PK thunder style twist to his recovery).

D-Smash smacks to me of the wierd FE problem of weapon weight only factoring in when the character is actually holding it (instead of the more logical conclusion that weapons encumber you even you have them sheathed). Though that may have been the whole point of you including it
 

Red Arremer

Smash Legend
Joined
Nov 27, 2005
Messages
11,437
Location
Vienna
I'm making a moveset. It will throw you off your chairs, as it will be epic. Just noting that. *leaves to get back to the SBR and character boards*
 

Wizzerd

Smash Ace
Joined
Feb 24, 2009
Messages
929
It's Onishiba/Spadefox! :O

In other news, I found The Black Knight to be an excellent set. As HR said, the comboing heaviweight deal is somewhat overused, but not by you and you've pulled it off quite well, so I don't mind really. Of course there are some bland moves in there, most notably the dtilt (every dtilt in existence rolled into one), but it's a necessary originality-for-playstyle sacrifice, and there are plenty of unique moves without being props/traps/absolutely insane. And of course it's a great playstyle, he's like a heaviweight pretending to be a lightweight (I'm planning to do the inverse in my planned Tamagon set).

Is it better than Thrall? I don't know, but it certainly competes.
 

SixrchBattosai

Banned via Warnings
Joined
Aug 31, 2009
Messages
39
Location
With my boyfriend...who's moving ;A;
Hello. What do I do to introduce myself here? I found this place through a link in n88_2004's signature. I asked him about it and he told me. I'm interested in making movesets for my numerous Original Characters. If someone would like to give me some pointers on making good movesets, I'd appreciate it greatly! Thanks in advance!
 

Hyper_Ridley

Smash Champion
Joined
Dec 21, 2007
Messages
2,299
Location
Hippo Island
Hello. What do I do to introduce myself here? I found this place through a link in n88_2004's signature. I asked him about it and he told me. I'm interested in making movesets for my numerous Original Characters. If someone would like to give me some pointers on making good movesets, I'd appreciate it greatly! Thanks in advance!
Welcome to MYM! It's always great to see a new face. Especially when it's another OC maker. :3

Anyways, the best adive I can give you is too take a glance at some of the other sets in the thread made by some of the well-known MYMers. There's a link in the OP to the Canvas with a full list of movesets in the thread, as well as links to other stuff to help you get started. Some sets I would personally reccomend are Sloth, Bleak, and The Black Knight (the page we're on lol) Beyond that, feel free to ask us when you're stuck on a move or something.

I look fowards to seeing your first set. =D
 

JOE!

Smash Hero
Joined
Oct 5, 2008
Messages
8,075
Location
Dedham, MA
ok guys, Imma get cracking down on finishing my latest moveset, hopefully getting it done by this weekend at the latest. Ive been neglecting it for too long :urg:

(shameless plug for hype is shameless...)


SixrchBattosai

Banned via Warnings
Joined
Aug 31, 2009
Messages
39
Location
With my boyfriend...who's moving ;A;
Welcome to MYM! It's always great to see a new face. Especially when it's another OC maker. :3

Anyways, the best adive I can give you is too take a glance at some of the other sets in the thread made by some of the well-known MYMers. There's a link in the OP to the Canvas with a full list of movesets in the thread, as well as links to other stuff to help you get started. Some sets I would personally reccomend are Sloth, Bleak, and The Black Knight (the page we're on lol) Beyond that, feel free to ask us when you're stuck on a move or something.

I look fowards to seeing your first set. =D
Thank you, Hyper_Ridley. I already have a few moveset ideas. But there is a complication. I am in my school's upcoming play "The Good Woman of Setzuan," and I am at school from 8 am to 6 pm. I may not get my movesets done very quickly, so everyone will have to be a bit patient with me, I'm afraid. Sorry if I inconvenience anyone because of this. Even so, I will work my hardest to complete a moveset by the end of September.

This is a work in progress for the image of my first moveset.


I would appreciate any comments, constructive criticism, or compliments. Thank you in advance.
 

half_silver28

Smash Ace
Joined
Apr 25, 2008
Messages
862
Location
MYM, Ohio
The Black Knight: The first thing that caught me about TBK is that his warp power immediately sets him apart from all other "combo heavyweights". It affords him the ability to approach opponents directly, whereas most heavyweights have to depend on projectiles or other moves to distract them before they can approach. He can also mess up the foe's spacing (or try to gimp) with his up special. Another difference is the fact that TBK actually emphasizes the "combo" part. Most of his attacks are meant to either start a combo or to finish it (or KO). I love how both of those aspects come together to create an awesome playstyle. While he does have some bland attacks, they're forgivable for fitting into the playstyle, and they do have the effect of making TBK actually seem feasible for brawl. Of course, he has some flat-out awesome attacks as well, like the dash attack, forward smash, nair & uair.

Of course, The Black Knight is not without its flaws. My biggest complaint has to be the down smash, which seems to blatantly stick out from the rest of the set. I get that it can increase TBK's weight when he gets to high percents, but why would any foe give you the chance to pick it up? With the high start lag of the move & TBK pitiful movement, it would be too easy for them to pick it up & simply throw it away. Besides that, I have to say that some of the throws (apart from being the blandest moves in the set, minus down throw) have some pretty brutal KO percents. I think you should make those KO a little later, instead of being TBK's most reliable KO methods. I like the whole idea of comboing into up smash or using spacing techniques to sweetspot bair instead of just throwing them <.<.

Overall, I feel like I overuse "overall" this is a great set that I think easily overtakes Thrall for your best in MYM6 (I was already planning on voting Thrall, btw). Awesome job representing your leadership title with The Black Knight!
 

kirbywizard

Smash Hero
Joined
Jan 4, 2009
Messages
6,713
Location
Napa, California . . . .Grapes For Miles
3DS FC
0989-1847-5768
Not as robotic as Ghor but. . .


Mr.2 Bon Kurie


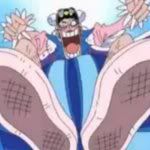
Mr.2 Bon Kurie is an extremely tall Okama from the manga/anime One Piece. He is covered in a large amount of makeup, and usually has very large grin. He at first worked for a criminal organization and the reason he was given the name Mr.2 Bon Kurie is because he is around the second strongest out of 13 agents. He has a very flamboyant attitude, and he values friendship alot seeing that he sacrificed himself twice for his friends. His main fighting style is Okama Kenpo which seems to be a mixture of Ballet and Karate. His outfit seems to be based off a swan like theme.
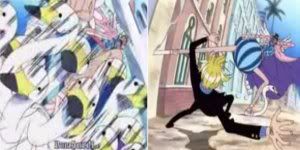
Fighting Scenes
Part 1
Part 2

Music
Oh Come My Way
I Feel Pretty

Stats

Size: 8/10
He is a very tall man that even rivals Ganondorf's height. Good thing he is faster then Ganon

Weight: 5/10
He trains every single day there's no way he would let himself go

Walk Speed:7/10
Around the walk speed of Luigi, but just a little bit faster

Running: 9/10
Faster then Captain Falcon, but not as fast as Sonic

Traction: 7/10
Above average a little better then Marth's

Power: 6/10
He really isn't a power house, but his long legs should help you rack up damage

Attack Speed: 6/10
A ballerina must be swift on his feet

Range: 8/10
Just a bit better then Marth's but some of his attacks extends by far.

First Jump: 8/10
A little higher then Luigi's first jump

Second Jump: 6/10
He loses some of his flash, and it only goes as high as Mario's second jump

Ariel Movement: 7/10
Graceful in the air, like a swan above the water

Fall Speed: 3/10
Even slower then Luigi's

Recovery: 8/10
Around as good as Luigi's

Landing Lag: 1/10
Almost nothing

Swimming 0/10
Thanks to eating a devil fruit he sinks like a rock

Animations

Entrance
Mr.2 enters from the background dancing

Standing
Mr.2 stand on his tip toe, and begins to spin around in place. After a while he spins quickly enough to levitate just above the ground.

Walking

Running
Mr.2 begins to spin quickly towards any direction.

First Jump
Mr.2 jumps with his only foot that is touching the ground as his cape blows against the wind

Second Jump
Mr.2 pushes with his second leg as he spins in the air

Roll Dodge
Mr.2 spins towards the right as he spins a little bit into the background.

Sleeping
Mr.2 closes his eyes and falls face first into the ground, his cape looks like a blanket

Cross Dresser Specials

Neutral Specials: Mascara Boomerang


Bon Kurei peels off the mascara below his eyes, and flings them forward. The mascara is actually a concealed weapon cleverly disguised as simple make up. It will travel just slightly farther then Toon Link's boomerang, and then return back to Bon Kurei's face. At times it may be hard to spot, similar to Shieks needles, so it can act as a clever trap against careless opponents. To clarify there are two small pieces of mascara. The mascara can be angled to a much better degree then Toon Link's boomerang, and travels faster. It only deals out 4% damage for each mascara, and can easily be shielded. Sadly it has almost no priority, so the majority of attacks will go right through it. However when the mascara is returning to Bon Kurei, and if an opponent makes contact with it. The opponent will take 5% damage for each mascara, and flinch. This is one of Bon Kurei's few projectile, and can be used to open up situations for combos. Use wisely, and don't overuse it; you'll run out of mascara. :mad:

Side Special: Shabby Swan Ball Dance


Bon Kurei's swans appear drunk for some reason as soon as this attack is activated. Bon Kurei takes a stance, and then follows with a fury strike of kicks, and punches. Now similar Marth's side special you must time both the control stick and you B button correctly to be able to unleash different attacks. Now Bon Kurei will count to three in French to signify when to press the control stick, and B Button. There are four possible attacks, and only three possible inputs during this attack. Each one has high priority, but then again they could all just be dodged, or shielded.

B Button + Up= Bon Kurei does a quick upper cut kick that launches the opponent away (8% damage)
B Button + Down= Bon Kurei does a quick spin while his leg sticks out just a bit to trip his opponent. It causes the opponent to trip, but it has such a small hitbox it only works up close. (4%damage)
B Button + Forward Side= Bon Kurei does a punch that has very little knock back (6% damage)
B Button + Back Side= Bon Kurei does a small hop back while standing on one toe, and then he quickly spins with his leg sticking out. His leg deals Medium knock back that KO's at 180% damage. It can also cause weak shields to break ( Deals 10%)

Now obviously used correctly it can set up for some nasty combos, and for great pressure game. It can easily be shielded by the opponent, and a smart player will learn how to mix up the combinations to confuse the opponent. It can be canceled by pressing the L button.


Up Special: Moonlight Sky
Bony Kurei begins to spin quickly in the exact same place. By tapping the B button the attack will last a little longer, but not by much. This move has no start up lag, but has great end lag on the ground. If the opponent makes contact with Bon Kurei then they will receive medium knock back, and 9% damage. It sounds horrible on the ground but if used in the air, it makes for a fantastic recovery. Bon Kurei spins at a much faster pace in the air, and can freely move in the air while spinning. He has high priority while in the air spinning, and deals consecutive hits 4% damage. The opponent is dragged in similar to Metaknight's tornado and then are knocked back at the end of the attack in which Bon Kurei strikes a pose. Bon Kurei can use this attack in the air for a total of 1.5 seconds, but he can be easily spiked from above. The main areas of weakness are on top, the only area that has almost no priority. The sides have high priority like stated earlier.

Down Special: Mane Mane Memory


Bon Kurei has the power of the Mane Mane Fruit which allows him to turn into anyone he touches. This allows Mr.2 to gain some of the strengths and weaknesses of the person he copies. But there are limitations, one being he can only copy the body, and won't get any of the opponent's weapons like swords. Mr.2 can only copy human, and human like bodies, and won't be able to get his opponent's abilities like fire hands, or floating, and such. Here is a small vid of his power in action

O_o

Now before Mr.2 can copy the opponent in the battle, he must at first make physical contact with him. Once he manages to do so he he can freely change into the opponent for the rest of the stock, and back to his regular form. When Mr.2 changes into his opponent he has access to all of his opponent's attacks (minus the down special). He basically changes into an almost exact clone of his opponent. . . .almost. He has no access to attacks that involve weapons because he doesn't get to copy his opponent's weapons, only the body. Mr.2 also has no access to moves that involve element based attacks like Mario's fireballs, Din Fire, and Bowser's fire. If mr.2 attempts to use an attack that he can't do then he will revert to his regular form and attack with the attack he tried to do. Example Mr.2 changed into Marth, Mr.2 tries to do ftilt that involves Marth's sword, Mr.2 Changes back and attacks with his ftilt.

Mr.2 however can not change into non-human opponents ( DK, and Diddy being the only exception), and opponent's covered or made of mostly armor ( Ghor, Samus). He can't turn into Kirby, D3, or any other very non-human characters.

This move has no start up or end lag. Now this move can be very useful, or almost useless. It depends who you are fighting. Like if your fighting DK, you have access to all of his strong attack, but like if your fighting Marth ( a character that has all sword base attacks) this move is useless. As a bonus Mr.2 is still wearing his regular clothes when he changes to other characters. Imagine Marth in Mr.2's outfit @__@ beautiful.

Okama standards, And A Dashing Dash Attack.

Standard A: Kiss
A Kiss
Mr.2 blows a kiss that takes the form of a little heart that floats across the stage. It travels as fast as a walking waddle dee :mad: If the heart makes contact with the opponent then it makes them act as if they have broken their shields. It has unmatched priority, and by unmatched I mean it has none .This little heart is pretty small, so you'll most likely not have this connect to often. Mr.2 has almost no start up lag, or end lag. Only one heart is allowed on the stage at a time.

Dash Attack: Okama Dash
Thanks to Mr.2's strong legs, he can quickly dash very large distances in a short amount of time. mr.2 only taps the ground a few times then pushes with his legs, and takes a quick leap forward. This leap is the length of one whole battlefield platform, and deals out 8% damage. Almost no start up, or end lag, but does suffer with some awkward priority placement. Only Mr.2's leg has priority ( very high) while the rest of his body has none.

O Come My Way Tilts

Ftilt: Pardon My Oh Come My Way Knuckle
Mr.2 attacks with a quick punch with his fist. This is one of the few non-kick moves he uses in his entire fighting style. It only does 8% damage, but deals out high,knock back, that kills at 180% damage. Nothing flashy about it, but then again he works out his kicks more then his punches. Thanks to this it has very low priority compared to some of his other attack.

Dtitlt: Summer Breeze
Mr.2 does a quick spin in place while he sticks his leg out just above the ground. The kick causes the opponent to trip, and take 6% damage with somewhat average priority compared to most tilt attacks. This move has no start up lag, and if the B button is pressed then it will automatically go into the Up B special with no start up lag what so ever. By pressing the A button it will automatically go into the down smash ( uncharged) with hardly any end lag. This move can open up for easy damage, or an early KO. But the hitbox is somewhat small, so really only works if the opponent is close.

Uptilt: Swan Arabesque
Mr.2 attacks with a high kick that reaches towards the sky. This move has great range, and the main hitbox here is his leg. If the opponent only makes contact with his leg, then they only take 9% damage with low knockback. But if they are hit by the tip of the foot then they take 14% damage with medium knockback that KO's at 160%. Mr.2's leg has high priority during this attack, but it finishes so quickly you may not even need that priority.

Air Attacks: Graceful Swan

Dair: Tip Toe Kick


Mr.2 spins just enough to hit the opponent with both of his legs dealing two weak consecutive kicks that only deal 3% damage each. If both of these kicks connect he will attack with one last kick that will launch the opponent flying dealing 10% damage. The last kick has high knockback that can KO opponents at 130% damage. It may be hard at times to connect the last kick when your opponent shields, but as long as you don't overuse this move you can easily save it for a surprise KO. this move has about average priority (first two kicks), so it shouldn't be used in the air while you have characters like Luigi all up in your face.

UpAir:Bombardier Arabesque (Prima Mode)
Mr.2 puts the swans on his legs which have metal at the tip of the beaks. The swans give him extra range that even beats Marth's sword, and the tips of the beak damage the opponent as if he were shot by a bullet. It only takes Mr.2 .5 seconds to put on the swans before he attacks. When wearing the swans he has a little bit more end lag at the end of his attacks. For this attack, after putting on the swans, Mr.2 kicks towards the area in front of him. If the opponent is only hit by Mr.2 legs, or the swan's neck then they only take 10% damage with knockback that only KO's at 150% damage. But if the opponent is hit by the Swan's Beak then they take 18% damage, and can be KO at 130% damage. This move suffers with just a bit of start up lag, but it has a large amount of end lag ( .20 seconds). The swans have super armor, and can not be stopped, however Mr.2 body has below average priority ( minus the legs that have high priority0

Fair: Memoir Of The Winter Sky
Mr.2 does about three quick somersaults in the air, and descends just a little bit before delivering a strong kick with his swan. Thanks to the momentum of the somersaults this increases the amount of force the kick does. If the opponent is hit by the Swan's neck, or Mr.2's leg then they take only 9% damage. But if they are hit by the swan's beak then they take 12% damage, and are usually KO at 120% damage. This move is Mr.2's strongest Ariel but may be hard to land when fighting air moblie characters thanks to the .5 seconds of lag he has putting on the swans. The swan has super armor, but like his Up Air, his body is vulnerable.

Bair: Ohikae Na Fouetté
Mr.2 does a quick backward somersault, and does a whip like kick at his opponent. It launches the opponent down, so it can act as an easy spike that deals out 12% damage. His legs have average priority, so this attack can easily be stopped by air opponents like Luigi. .But sadly this is the only Ariel that actually has a lot of knockback in it that it causes Mr.2 to spin around out of control, and then free fall. That only happens if he misses the kick, but as long as the kick makes contact that won't happen.

NairAround The World
Mr.2 spins around 1,000 times in the air in only .20 seconds. This move deals out 9% damage, and decreases momentum. The spins have below average priority, and knockback so a good deal of attacks can stop this spinning frenzy. However if the A button is quickly mashed then Mr.2 will continue to spin into his Up B special. This move can help trying to make a safe window to use your recovery when someone is trying to spike you.

O Pardon My Okama Smashes

Forward Smash: Bombardier (Prima Mode)


Mr.2 rapidly kicks up close with a fury of Swan kicks, but for some reason they don't do any damage or knockback. As the long as the A button is held, he will continues to kick like this, but once the A button is released he will kick with one sole Swan kick. This last kick is even stronger then a Pistol, and deals out 16% damage, and KO's at 100% damage. But if the tip of the Swan's beak hits then it deals 22% damage, and KO's at 85% damage. The first fury of kicks are to fool the opponent, or keep him from guessing when to dodge. It takes Mr.2 only .20 second to put on the swans. The swan kick can not be stopped, but Mr.2 can still get knocked out of the attack if his body is damaged. .Note if an opponent tries to shield this their shield can easily shatter if it's not fully charged. This move has average lag mostly because Mr.2 has to bring back that swan before he can't do anything else.

Down Smash: Memoir Of That Summer Day
Mr.2's strongest spinning attack which has him spin a total of 320,000 times in only about .50 seconds fully charged. Mr.2 spins very quickly in place, and when released has him spin forward ( or backwards if you point the control stick the opposite direction) at the length of two stage blocks. Mr.2 uses the momentum of the spins to release a strong kick that deals out 15-18% damage. This can KO easily at 90% damage, but it can easily be seen ( A tall man spinning in place, you have to be blind to miss that), so it can be shielded very well by opponents. This move has average priority as he spins towards you, but the last kick cannot be stopped


Up Smash: Death Wink
An advance level newkamam kenpo ( which is considered a new stronger version of Okama Kenpo) that is a move shown by Emporia Ivankov the king/queen of the Okama. This move is a projectile like attack that just has Mr.2 winks his eye while looking, the wink releases a large amount of power that damages the foe from affair. It was first shown being used on Mr.2 himself. The hit box stretchers only about one stage block above him. This move can be charged fro up to .5 seconds and deals any were from 10-12% damage. KO's at 120% damage. The hitbox is pretty small seeing it's only right above Mr.2, and not to mention mr.2 is very vulnerable, and can easily be knocked out of this.

Grabs and Throws

Grab: Come Closer
Mr.2 spins once while having his right arm reach out for the opponent. Simple, and graceful at the same time.

Pummel: O Pardon My ***** Slaps
Mr.2 begins to slap the opponent across the face with his left arm. Each slap does 2% damage.

Forward Throw: Un Deux Trois ( One Two Three in French)
Mr.2 takes one step back,and says Un. The opponent also takes one step back trying to copy Mr.2. Mr.2 then takes one step forward on his tip toe, and says Deux. The opponent tries to step on his tip toe as well. Mr.2 says trois, and the spins in place to deliver a quick kick that deals 10% damage. This move will make sure your opponent learns how to dance like a man.

Back Throw: Spin With Me
Mr.2 grabs the opponent with both of his hands, and then begins to spin a total of 10,000 times in only a second. Mr.2 then quickly lets go of the opponent while spinning sending them in towards the right or left ( Can be controlled by control stick). It does a total of 8% damage, and KO's at 150% damage. Guess only Mr.2 can take so much momentum.

Down Throw: Death Winks
Mr.2 slams the opponent down with an downward kick, and then stand on him. The kick only does 2% damage, but Mr.2 proceeds to do a total of two Death winks at the opponent. Dealing 6% damage each wink. He quickly kicks the opponent away towards the side he was facing. This throw has very little knockback, but sure looks funny seeing your opponent getting damaged by winks.

Up Throw: Flying Swan
Mr.2 throws the opponent upwards, then jumps up and dealing a Tip Toe kick to the opponent that sends the opponent flying downwards towards the right. This move deals 8% damage, and can act as a spike if near the edge.

Final Smash: Last Dance

Last Dance

It is an instant KO​

Play Style
Mane Mane Fruit: Ok this is the first thing you want to look at. Now with the Mane Mane fruit you can easily change matches into epic dittos, or you can horrible mess up. An example would be if you are fighting Luigi. You would have access to his high priority Air attacks, and somewhat killable smash attacks. If you have no knowledge on how to use Luigi then you shouldn't turn into him. Stick to copying characters you know how to use, and how to play against. Don't be afraid to use a few attacks like DK's Neutral Special, or Luigi's Forward smash. They can easily act as quick trump cards against your opponent.

Your projectiles are like little mini trump cards of doom. Your mascara is a quick, small, and useful projectile. It isn't the best far range projectile, and actually works a lot better when your opponent is up close attacking you. It is fast, and small, so your opponent may not even notice it coming back from behind if you distract him long enough. You want to get the Mascara to hit when it is coming back towards your opponent. Once it connects it will cause the opponent to flinch allowing you to sneak in some attacks. At low damages you can sneak in a full side special, or heck a smash if you want. Now another projectile you want to remember you have is your little cute hearts. It acts more as an obstacle then an actual projectile as it slowly makes it's way across the stage. When you launch it try get your opponent to run into it, or hit him towards it. Pressure him into the heart, and KO his *** with a well spaced down smash.

Spacing is a key aspect, and is even alot more important then spacing with Marth. The majority of your attacks can deal out alot more damage, and a few can even KO sooner just by having the very tip of Mr.2's attack making contact. Some are alot more tricky to tip with then others, and your main why to nail them is to pressure your opponent into a tight spot. Get a projectile in, or trap them near the edge. Do what ever it takes to trap them into a well spaced smash.

The swans just add little bit more start up lag on some of his attacks, and increase the end lag. However try to make contact with only the beak, so you can deal out more damage, and even sooner KO's. They are a little bit harder to hit with, and may leave you open if misplaced. Always try to save the swans as a surprise, and never over use.

Trickster is what you may get off this playstyle Pressure your opponent, and trick him into some easy set ups. Distract them with your rather weird attacks, and always try to stay random. Once you become predictable I will guarantee you will notice it will become alot harder to get in those tippers.


Playing Against

Well if you have projectiles spam as much as you want, and try to keep him away. Mr.2 is a much bigger threat up close then he is far away. He can approach without much trouble but try to stack up as much damage as possible before he gets to you. Once Mr.2 finally manages to get up close then do not rush in and attack. Mr.2 has many tricks up his sleeves that make offensive approaches risky. Pay as much attention to his attack style, and try to find some sort of pattern to exploit. Try to pay attention on your spacing, you may catch yourself getting hit by a tipped forward smash. Mr.2 will try to trick you into many traps, and rack up that damage on you. Your best option is to launch in the air. His fall speed will make it hard for him to land, but remember that he has a good amount of range with his attacks. You want to play it save in this match. Try to pick stages with obstacles to keep his projectiles at bay.

Taunts 1
Mr.2 Blows a kiss towards the opponent, and winks at him as well

Taunt 2
Mr.2 begins to spin at a rapid pace, and will begin to slowly rise into the air. If held long enough mr.2 might KO himself by spinning of screen

Taunt 3
mr.2 pulls out a boombox, and begins to play his theme song Okama Way that will begin to play for a whole minute.

Victory Pose 1
Mr.2 does a random Mane Mane Memory change into a random character in brawl, that or into Nami. He then gives out a big laugh while spinning

Victory Pose 2
Mr.2 begins to apply some make up while spinning in place. This really does explain why his make up looks so bad

Victory Pose 3
For some reason mr.2 seems to not be on the screen, the person that got second place all of a suddens turns out to be mr.2 in disguise. Wait what happened to the second place winner?

Loser Pose


Snake Conversation

Snake: hey Ling whats up with this wack job?
Ling: That is Mr.2 a man skilled in martial arts, and ate the Mane Mane fruit
Snake: What does the fruit do
Ling: It let's him change into anyone he touches Snake
Snake:. . . . . .
Ling: What's wrong Snake?
Snake: That guy just changed into me. . . .am I really that sexy
Ling:. . . . . .yes


darth meanie

Smash Journeyman
Joined
Jun 6, 2008
Messages
452
Mr. 2 Bon Kurie was an interesting set for a ...interesting character. I'd have to say though that it was fairly weak overall. You really, really need to review your writing, there are basic spelling and grammatical mistakes, and it doesn't flow very well. Your organization, while somewhat improved, is still messy; having Smashes at the end and Specials first when the Specials aren't essential to the set or playstyle makes it weird to read. Also, I would suggest cleaning up your stats section; its long and the explanations are poorly written, and removing extra fluff from your headers.

On the subject of the actual set, he's rather bland, mostly attacking by spinning and kicking, and there isn't really anything creative or special to it; you also mention several times how fast he spins per second, but that really doesn't matter, especially when details like lag and knockback need to be mentioned, they aren't always. I also seriously question putting priority in a little box after the attack, usually that's used for special mechanics or damage, which also brings me to the fact that the priority of his attacks is rather random; you'd expect his legs to have consistent priority, and they have impossibly high priority seeing as they are jointed hitbox attacks.

Prima Mode seems unnecessary entirely, he has a whopping three attacks that use it, and you don't even mention the lag of putting the swans on or off. Again, I don't think I can stress enough how much you need to improve your move descriptions; its very choppy, doesn't flow, and seems unorganized.

Fix these issues for your next set, and I assure you it will be a lot better, but as it is, this was fairly weak.
 

Jimnymebob

Smash Champion
Joined
Sep 26, 2008
Messages
2,020
NNID
Jimnymebob
A few months back I promised a set of mine; Mushroom, would have a really visual layout. However, being impatient I'm not willing to spend 30 mins on Photoshop doing each little part of the layout. This means that if I get some throws done I could have him posted tonight, or tomorrow. If I get round to making the funky layout I'll edit the original, but for the time being simple BBCode is fine.

Also, I still have no chat access, so I'll wait 'til the set above mine gets some more comments before posting mine. I gave it a skim, and whilst it's good, a lot of moves seem generic, but it seems faithful to the character. I had that problem with Ripper Roo. However, as darth meanie said, the whole Prima mechanic seems slightly unescessary, seeing as it only affects a handdul of moves. It's a good set, and the layout is fine, but it was slightly generic. I also disagree with meanie, specials are fine first, but smashes should be before aerials in my opinion, but hey- it's a matter of choice.

Hang on- his f-air deals 120% damage and has high priority?! Hopefully that's a typo- or you may need to tone him down.

Final edit: seems like the new Internet Channel lets you in Xat Chats. However you can't change your name, so if someone with a name like Smoochy Honey comes on then it's probably me XD.
 

Katapultar

Smash Lord
Joined
Nov 24, 2008
Messages
1,284
Location
Australia
Man, I was hoping to get my next set in on this page. Oh well, I'll wait till next page if I can...
I've watched some of One Piece anime and have seen this guy in action a bit...
Ok, here are my comments. I was looking at the stats, and umm, they look a bit overpowered. At first glance, you should weaken him a bit in power levels.
The Neutral Special is shown weirdly: "Bon Kurei peels off the mascara below his eyes, and flings them forward. The mascara is actually a concealed weapon cleverly disguised as simple make up. It will travel just slightly farther then Toon Link's boomerang, and then return back to Bon Kurei's face." and "The opponent will take 5%damage for each mascara, and flinch." There is a confusion in numbering here. You are pronouncing that there is 1 mascara, but there are 2 I believe from reading this.
Ummm, a lot of the attacks seemed a bit random with no strategy...

I'll sum up problems with this set rather than saying all the attacks...
Despite having a playstyle, attacks are random and don't really work with each other (It's AOK to have generic moves but make sure they fit into the playstyle).
Certain details are lacking or perhaps out of order in the set. Sometimes kill percentages are mentioned, at others, not. This applies to priority as well.
Spelling mistakes (A nitpick on my behalf, can't be bothered going through all of them)
Sorry to say this, but I haven't looked through the WHOLE set. Here's my tip:
Create a certain order for details of a move to be represented. For example, state animation, lag, attack range, details regarding priority, damage and knockback, end lag (If not mentioned in the beginning) and any extra details. If you gave yourself an order, then it would be one step to making a better set. I used the order of details as stated before in my Gorea set to organise it, just to let you know. The codec was funny though...

Oh, and take out (Prima Mode) for those 3 attacks. And the FS is a bit silly...

@SixrchBattosai: That design for the OC looks quite impressive. You don't need to worry about not getting a set done in a month. It actually doesn't take that long to make a good set, providing you have a basic outline of how that character could work. Also don't worry about "keeping everyone waiting". People make a teaser for their next set, and then they don't get it done in a longshot (Kind of like Mr. Mime set that was shown in MYM5 by Clownbot), though nobody really cares. Oh yeah. One final thing. If you are making more than one OC, I could suggest possibly creating a Story Mode consisting of your original ideas. Chris Lionheart did it for his Lionheart sets and made his 2 SMs, I think it would be awesome if you did the same as well, though that depends if you feel you wanted to do that at all. If you wanted to make a Story Mode, then Playing God is inspirational, however, I also think Armageddon is also good becasue it has a plot to instantly work with at the start to help.

And that's my suggestion for the OC maker...
 

kirbywizard

Smash Hero
Joined
Jan 4, 2009
Messages
6,713
Location
Napa, California . . . .Grapes For Miles
3DS FC
0989-1847-5768
Mr. 2 Bon Kurie was an interesting set for a ...interesting character. I'd have to say though that it was fairly weak overall. You really, really need to review your writing, there are basic spelling and grammatical mistakes, and it doesn't flow very well. Your organization, while somewhat improved, is still messy; having Smashes at the end and Specials first when the Specials aren't essential to the set or playstyle makes it weird to read. Also, I would suggest cleaning up your stats section; its long and the explanations are poorly written, and removing extra fluff from your headers.

On the subject of the actual set, he's rather bland, mostly attacking by spinning and kicking, and there isn't really anything creative or special to it; you also mention several times how fast he spins per second, but that really doesn't matter, especially when details like lag and knockback need to be mentioned, they aren't always. I also seriously question putting priority in a little box after the attack, usually that's used for special mechanics or damage, which also brings me to the fact that the priority of his attacks is rather random; you'd expect his legs to have consistent priority, and they have impossibly high priority seeing as they are jointed hitbox attacks.

Prima Mode seems unnecessary entirely, he has a whopping three attacks that use it, and you don't even mention the lag of putting the swans on or off. Again, I don't think I can stress enough how much you need to improve your move descriptions; its very choppy, doesn't flow, and seems unorganized.

Fix these issues for your next set, and I assure you it will be a lot better, but as it is, this was fairly weak.
Thanks for reading it, and I have to say I didn't try as hard as I did with Ghor. It was more for fun,. and because I just like Mr.2. I probably edit this entire set after I get more input from others. More input= better editing of moveset. Thanks for you look at the set, and I will edit it soon.


edit: I fixed some errors, and put in more detail on almost all of his attacks, and stats. Also took at that Prima Mode, because I really did not need it.
 

Katapultar

Smash Lord
Joined
Nov 24, 2008
Messages
1,284
Location
Australia
(((SUZU)))

(((BIO)))
Suzu is a secondary character in an anime/manga series called Bobobo-bobo-bobo. The series parodies many other anime and manga series, but in particular, one called Fist of the North Star. Suzu is the assistant of Bobobo's rival, Gunkan (English name: Captain Battleship). She has psychokinetic powers; though the only known forms of this is teleportation, paralysis, pyrokinesis (Note this power comes from the RPG Bobobo game, though Suzu did destroy a Hair Hunt base on her own in the anime/manga offscreen, implying even further that these powers do exist). Suzu has helped Bobobo's team on certain occasions, being portrayed as a very nice girl despite the first impression in the series that made her look like a cold being. Suzu appears in the end credits of the Bobobo anime, in most versions of the anime, English and Japanese alike, possibly implying that she was going to have more roles on the show...

Suzu does appear in this video, though it is only end credits. I could not get any episodes due to Toei Animation taking Bobobo off Youtube for copyright reasons:
www.youtube.com/watch?v=SHcOW3NyYwY

(((OVERVIEW)))
Suzu is a different addition to the line-up than other characters. All her moves have a set knockback in which they can kill, in other words, the foe's damage percentage does not matter at all. Suzu has a lot of stage control and mindgame methods to work with, as well as the only real KO option she has: Gimping. Due to the nature of her moves and style, the match-ups with Suzu can be very different. Suzu has moves that can hit the foe anywhere on the stage, holding a lot of pressure based attacks.

Situationals are not mentioned, rather they are generic, doing hitstun to prevent them from potentially killing.

(((STATS)))

Size: 5/10
Weight: 3/10
Ground Speed: 5/10
Traction: 5/10
Aerial Movement: 5/10
Jumps: 5/10
Priority: 1/10

Overall, the stats are pretty much average as well as the unmentioned ones. Suzu is an average character, I see. The priority is rather uneeded due to most of Suzu's attacks being blasts, though there are VERY FEW exceptions. The blasts do say infinite priority throughout the set, though this merely means that they are the same as normal blasts due to not really having priority.

----------------------------------------------------------------------------------------------------------------------------
(((SPECIALS)))

Neutral Special: Pyrokinesis:
Suzu will raise her hands into the air for half a second, halving falling momentum if used in the air. If the animation is complete, nothing will happen until 3 seconds have passed, during that time the nearest opponent to Suzu will glow white briefly for a sudden moment of forewarning. The character who glowed white will suddenly be engulfed in a explosion as large as a blast box's, having infinite priority, doing 13% to that character and anyone hit in the blast radius (including you) for set knockback 3 Stage Builder Blocks.The knockback can actually be predetermined by tapping the control stick in any direction during the start-up lag, so you can basically choose where your foe gets knocked back. Default will cause the foe to be knocked straight up. The only catch is that you cannot use this attack for 3 seconds after you have used it (Starting from the blast occuring), limiting spamming cases.

This move should without a doubt be called the main attack in Suzu's moveset. It gimps, pokes, mindgames, yeah. Should be abused, but not to the extent where you recklessly use it every time you can.

(13%)

Side Special: Paralyze:
Suzu raises both of her hands in an open palm facing forward while flashing yellow briefly, and the word "Paralyze" can be heard. If an opponent is at the most 1/2 the width of Final Destination in front of Suzu at this time, then they will instantly be held in place in a grab hitbox, virtually paralyzed and not able to break free through button mashing. Suzu must stay in her position to keep the opponent paralyzed, not being able to move herself. The opponent will stay paralyzed for up to 5 seconds before they will escape the paralysis as if they escaped a grab, or you can simply press the B button to release the enemy early. No matter wether you paralyze a enemy or not, Suzu will always suffer the same end lag. The start and end lag of this attack are exactly identical to Lucario's Force Palm.

At first glance, a staller, though this is another big move for either forcing your foe into your Neutral Special or just forcing your foe in place. Expect this attack to be very useful due to it's high grab range and being hard to punish.

(0%)

Up Special: Teleport:
Suzu will close her eyes and will have both of her arms in a cross position for very brief lag. After this, a red cursor the size of a pokeball will appear above Suzu's head. You will now be in control of the cursor, it being able to move at Mario's dashing speed with perfect turning, able to go through walls. You must be holding the B button to keep the cursor in effect, and while it is out, your falling momentum in the air will be halved. If the cursor manages to touch Suzu herself, an item, enemy (or ally), trap, or summon with the red dot, the object will be given a red shade to lock on the object, there being no limit to the number of objects that can be in effect of the dot. If nothing has come underthe effect of the cursor, then this attack ends with almost no lag upon release of the B button.

Though if something did come into effect from the cursor, then upon release of the B button, the words "Teleport" can be heard as Suzu opens her eyes for quick start-up lag. During the start-up lag, you can aim the control stick in any direction to designate a certain path (Default goes upwards). All affected objects will now teleport in the chosen direction with the range of 1.3 Mewtwo's teleport, no character suffering end lag after being teleported. Once a object is teleported, the red shade will begone from the object. You will enter helpless state if you teleport yourself into the air, though the foe will not have their jumps anewed due to taking no damage in the first place. If you did not teleport yourself, then the attack will end with almost no lag.

Additionally, if you tapped the B button instead of holding it, Suzu will immediately go into the second part of the attack as stated above, though she will only teleport herself to the desired direction, allowing for a easier recovery. You can also tap A in any part of the start-up lag, so that Suzu will not teleport herself acting kind of like a bluff, suffering very small end lag.

Not only this being your recovery move, but a very good gimping and spacing move. While it is very predictible and a simple spotdodge can save a foe from being teleported to a place they don't want to go. This is dead vital in most cases for laying a kill on the foe.

(0%)

Down Special: A Raw Coelacanth:
Suzu will pull out a coelacanth from her yellow jacket somehow for start-up lag equal to DDD's F-tilt. Suzu will just stare at the coelacanth continuously unless you tap the B button, which will cause Suzu to bite the fish, which can be continuously be done for every B tap. You can also press down on the control stick to put the fish away when you are not tapping the B button for very short ending lag.

Now, for every 5 times you tap B, a piece of the coelacanth will fly from Suzu at an angle randomly varying from 60 to 120 degrees, the size of a food item, travelling 1 Stage Builder Block at Mario's dashing speed. If a piece of the coelacanth comes into contact with the foe, then they will AUTOMATICALLY eat the piece (Air dodging if neccesary in the air), healing them 3%. For every 25 times you press the B button, you will heal 5%. Tapping the B button 100 times will cause Suzu to devour the coelacanth, healing an extra 10% (Overall 30% for 100 taps), though Suzu will instantly suffer being stunned as if your shield broke. Finally, you will not be able to use this attack for 20 seconds when you recover from the stun. (Note that the button tapping counts even if you cancel the move and use it again)

An attack that, if you are a very good button masher, can prove somewhat effective healing effect. Only suggestible using little by little at a time, and as a healing method against foes who have moves that when their damage percentage is higher, such as Lucario, Bald Bull. It can also be used as a lure, which is quite important for Suzu to have.

(0%), Heals Foe 2% and you 5-10%

(((STANDARDS AND TILTS)))

Standard: NOTABADMOVE:
Suzu will raise her hand as she performs an overhead swipe, having fast-average start-up lag. This creates a blast right in front of Suzu the size of a bomb-omb blast. A foe who gets hit by this infinite priority blast takes 4% with strange set knockback causing the foe to be knocked behind Suzu so they are 1 Stage Builder Block behind Suzu. In addition to the knockback, there is a large amount of set hitstun to accompany the move. After the explosion, there is barely any end lag.

Actually one of Suzu's more simple attacks. It seems outright bland and is slightly predictable from the start-up lag, though a successful hit can potentially lead into a combo, such as using your Neutral Special. The lag otherwise doesn't make it a favourable approach or keep away move.

(6%)

Dash Attack: Too Slow:
Suzu will stop all forward momentum, looking confused. This takes 1 second worth of start-up lag, and if the opponent who last damaged or was damaged by Suzu does not appear in her line of sight within the duration of the animation, the effect of this attack begins: The designated foe will now have vanished from their position, and will instantly appear behind Suzu. Upon this happening, Suzu will have a shocked expression on her face deviod of pupils, yelling out "I've been found out!". The foe will be wearing a chef's hat and an apron for some reason while massaging Suzu's shoulders, who is eying the foe suspiciouslly. The massage lasts for 3 seconds, and afterwards, the enemy will instantly backstab Suzu (The attack is not one of their own, but characters will do different things, such as MK slashing or Pikachu electrocuting). The backstab is unaviodable for Suzu, taking 11% diagonally that kills her at 100%. The opponent suffers very little lag after the backstab.

This may seem like a stupid attack only serving for forcing a foe to come closer to you, but Suzu is rewarded with a 1.1 decrease in the lag of all her attacks (Start and End), thanks to the shoulder massage. This attack can be repeated 5 times, and for every time you do, the damage taken from the enemy's backstab for this attack decreases by 2% as well as the knockback by a very small amount. These bonuses will reset if you lose a stock. By the time you have done this attack 5 times, the lag of all of Suzu's attacks will be halved. You will not be able to use this attack after you have gained all the bonuses.

This is a great move for forcing your opponent to come closer or set them up in a certain location, the obvious trick would be to look away from your opponent and then use this dash. If your going to use this dash, use it early, because you do not, the opponent will be able to abuse the damage you take and potentially KO you if your damage percentage is high enough.

(0%), 11% to self

F-tilt: Broken Star Blast:
Suzu begins to form her arms in a cross-like shape, creating 3 small stars (Think Tabuu's exploding stars when he points). This has some fairly average start-up lag to it, and the stars will be 1 Mario width away from each other and from Suzu. The stars will explode near instantaneously, each having a bomb-omb blast range, having infinite priority, and do 3% with set knockback straight forward 2 Stage Builder Blocks. The ending lag is near non existent.

A different version of the attack will occur if you held the control stick forward while inputting the tilt command. Upon the stars appearing, instead of them exploding, as long as you hold the control stick forward, you will be able to guide the stars like with Zelda's Din's Fire. The 3 stars will move forward at Gannondorf's running speed to a maximum distance of 3/4 Final Destination. It is possible to angle the stars diagonally, but only to a maximum of 60 or 120 degrees. Either by the stars reaching their max distance or by releasing the control stick forward, the stars will explode normally, along with the normal ending lag.

Finally, while you have control over the stars by holding the control stick forward, you can tap A as much as you want. Tapping the A button at all will cause the, once released, stars to delay their explosion for 1 second for each time you tapped the A button. The blast will instantly occur on the spot it was left at once the time limit expires. You can move around normally even when a blast has been delayed and the end lag has finished as usual, but be aware that the blast can hurt you as well as your foes. There is no limit to the amount of blasts that you can set up and delay.

This attack is not only spammable, but outranges even DDD's F-tilt. One of the most versatile and useful attacks in Suzu's set, being able to be used for an approach, a time bomb that would make your foe afraid to venture upon certain areas, and best of all gimping.

(3%) per blast

U-tilt: Lock ON:
Suzu will close her arms, muttering "Su", as a red ring (Similar to Tabbu's Off Wave) enamates from Suzu's body. The start-up lag is very quick, the ring travelling at Sonic's dash speed up to a maximum smart bomb blast diameter and will go through walls. Suzu is vulnerable when the red ring is active, but has no ending lag once it vanishes.

If any object is hit by the ring (including allies), they will have the same red shade from the Up-Special, but no damage, knockback or hitstun. The red shade does not go away unless the affected object (A foe) is KOed. This effectively means that you can teleport an object without having to use the cursor from the U-Special. Remember when you could bluff the teleportation by tapping A during the shortened version? Well, when you do that, the object will teleport in the direction you want, but Suzu will not, making for a good gimping tool without having to teleport yourself.

It is possible to stack another red shade on the foe, which allows you to mark an object twice, making their shade purple. Though to do this, you must red shade an object 3 times more when it is already red shaded to simply prevent a quick broken gimp. Note that this cannot be done with the U-Special.

Potentially a great move that you should try to prepare over the course of the match. If you can wait, then try to get the purple shade on the foe. It's not easy as foes can spotdodge the rings or use the time to launch a powerful blow on you, but if it works, it might be an instant kill for you.

(0%)

D-tilt: Dark Veil:
Suzu will perform a similar start-up animation to the F-tilt, having quick start-up lag. Afterwards, Suzu will instantly teleport, reappearing in the exact same spot suffering very minor lag. However, by holding the control stick right or left, you can teleport up to 2 Stage Builder Blocks to your right or left, stopping at the edge of a stage. Though the real beauty of this attack is that once you re-appear, black smoke that is 1.5 Gannondorf height tall and 1.5 Bowser's width will completely obscure Suzu. The smoke lasts for 4 seconds, and anything in the smoke will have
it's sound effects blocked, meaning that you can stay in the smoke so your opponent can't predict what you are going to do. You cannot have more than one smoke veil out and another one cannot be created by this attack for 8 seconds after the 1st one clears.

This is one of the attacks you will want to spam as much as you can because of the smoke's sound canceling effect, making it your big mind-game move to stop foes from predicting your attacks. Works very, very nicely in Suzu's game, causing mass panic. Nice.

(0%)

(((SMASHES)))

F-Smash: Chaos Field:
Suzu clenches both fists, closing her eyes, muttering "Su" for a quick start-up lag before charging. After charging, Suzu will open her eyes as she holds her hands out for a slightly laggy animation. The attack will simply end there, doing nothing until 1 second passes, which a bomb-omb blast sized explosion will occur in a completely random area of the stage that is ground level, but it will never hit an area where Suzu or any of her allies (team battles) are, let alone hurt them. Any foe getting hit by the infinite priority blast will take 5% with set knockback in a straight line 3 Stage Builder Blocks, always knocking back the foe away from the nearest edge so this attack can NEVER kill. Only 1 blast is made by C sticking, but fully charged, 10 blasts will be made over a peroid of 10 seconds.

This attack will never kill and is useless against foes who are in the air, but it's a great way to cause chaos on the stage easily since the area the blasts appear in is random, but they will never be able to get aerial foes. Works very well with your D-tilt.

(5%) per blast

U-Smash: Heat Seeker:
Suzu clenches both fists and closes her eyes for a before charge lag that is a bit laggy. The Smash attack can be charged for up to 3 seconds. After charging, Suzu will open both of her eyes as she raises her hands into the air, almost laglessly. Anything damageable, except for yourself and allies will be englufed in an explosion the size of Snake's C4 explosion, having infinite priority, doing 4% with set knockback 1.5 Stage Builder Blocks upwards (If you or a ally are in the blast range though, it can still hurt you). The range the object has to be in to have a blast created from them depends on the charge,
from 2 Stage Builder Blocks diameter around Suzu to the whole stage. Suzu will suffer ending lag equal to DDD's F-Smash ending lag afterwards. Note that it is possible for more than 1 blast to be created, and there can be no limit to how many there are, all being created at the exact same time.

This is another great poking tool Suzu has to use, though it's obvious that her Neutral Special is much more effective since you have to charge this attack. This attack should be used in FFAs or against trap characters, but only if you have enough time to execute the attack.

(4%) per blast

D-Smash: Gum Trap:
Before charging, Suzu will look down in disgust, though the lag from this is almost non existent. As you charge, blue chewing gum will strangely materialise over Suzu, starting from her feet until it reaches her neck. There is a different effect based on when you release the charge:

0-49% charged:
The gum will have only covered Suzu's feet. You are free to control Suzu as you wish, but you cannot move forward or backwards, jump, crouch, grab or dodge in any way. Additionally you'll have super-amour to all attacks that do 5% or less. Fire attacks will automatically destroy the gum if they hit Suzu, or if you take a total of 20% in the gum. The only way to break free early is to your U-Smash, which will see the gum as a hitbox, though you will do damage to yourself.

50-99% charged:
The gum will have reached Suzu's knee height. The same rules will apply as before, except that you have super-amour to all attacks that do 15% or less. The gum can be destroyed if you take a total of 35% in the gum, as well as fire based attacks or U-Smash for self damage.

100% charged:
The gum will have reached Suzu's waist, though she is still able to move her arms and her head. The same rules will apply as before, but Suzu will have super amour in this state. The gum can be destroyed with the same conditions as usual, or by accumalating 40% on Suzu in the gum.

This is a good defensive tool for Suzu if you need to play more defensively. If the foe cannot damage you quickly enough, they can easily get close enough to you when one of your blast attacks would home in on them. This attack is quite useless the enemy has fire-based attacks.

(0%)

(((AERIALS)))

N-air: Dollman:
From black smoke, Dollman will appear on Suzu's left shoulder (He's REALLY small, the size of a baked bean and looks like one). For Dollman to appear and the smoke to clear takes a small amount of lag. Once the attack is executed, Dollman will stay on Suzu's shoulder for an unlimited amount of time, making quiet cackling noises. Dollman has 1HP, pretty much dying from 1 attack. His real purpose is actually being an target: If Suzu uses her Neutral Special or U-Smash, then they both will target Dollman. The problem is, not only will the blasts damage you, but they will also kill Dollman as well. If Dollman dies, then you cannot respawn him for 9 seconds. You can use this as an additional recovery if you need to however, but I'd strongly suggest not relying on it unless you happen to have good timing...

Dollman also serves another purpose. Should a foe touch Suzu at all (Much harder than it sounds because none of Suzu's attacks cause direct contact with her body, and being attacked will kill Dollman), then Dollman will act like a gooey bomb and cling onto them. The foe cannot kill him with their own attacks unless it is a self-damaging one like Link's Bombs. And yes, Dollman will act like a target for Suzu's Neutral Special and U-Smash, though something special will happen during a moment the foe would be hit by 1 of the 2 attacks while having Dollman on them: Not only will the attack do double damage to the foe (Not terribly neccesary), but they will be knocked back to 4 Stage Builder Blocks in the normal direction for both the Neutral Special and U-Smash, though Dollman dies even if the foe dodges the attack. It is possible in reverse for the foe to touch Suzu with any part of their body to make Dollman return to Suzu.

An interesting aspect to Suzu's game, you can choose to use this as a recovery or as an extra gimping tool, making star KOs actually possible. If you do manage to get Dollman on your foe, then it can be used as a neat lure to force the opponent off the edge...

(0%)

F-air: Machine Gun:
Suzu will have her hands in a position as if she was holding a gun, as a machine gun materialises in Suzu's hands. The lag is quick-average, and once the machine gun forms, Suzu is free to move around while the gun is in her hands. Anything that is 2 Stage Builder Blocks in front of Suzu in a 40 to 140 degree angle will cause Suzu to fire 3 red shots out of the gun, the size of that of Wolf's Blaster's, travelling at Gannondorf's walk up to 2 Stage Builder Blocks at the object. The shots have very low priority, and do 4% with set average hitstun. After firing the 3 shots, the gun vanishes.

If the gun does not target anything, Suzu will hold it for 2 seconds while waiting for a target before vanishing. Note that you cannot summon another gun while you have 1 out.

This is quite a useful aerial for Suzu to use, it's fast and provides some nice defence from the front. Good for aiding your gimping, though otherwise it is just good for some quick weak defence.

(4%) per shot

B-air: Kinetic II:
Suzu will close her eyes in midair while clenching both fists for fair start-up lag. This lasts for half a second, and Suzu will come out of the animation for almost no end lag. However, upon special circumstances being Suzu is behind a specific object (Max distance: 3 Stage Builder Blocks) in the animation, something will happen:

A foe being damaged by one of Suzu's blast attacks:
Instead of the foe being knocked back, they will take some very strong set hitstun/flinching. One of the moves that is good for comboing if you need to combo into something better such as your F-tilt, Neutral Special. Nothing great.

Suzu's dormant F-tilt blast:
Suzu will immediately teleport in the position where the dormant F-tilt blast was, and the F-tilt blast will be in the place Suzu was. Neat for tricking a foe.

An active F-Smash (Suzu must use this behind where she activated the F-Smash):
Instead of the blasts occuring during each second, Suzu will teleport to the places the blasts would have occured during each second. Suzu does suffer the consequence of taking 2% every teleport though. A good idea would be to use many F-tilts and set them dormant for this whole time.

Overall this attack isn't too bad, it has 3 options, though using this attack is fairly predicitable to an extent, but being able grasp some extra options is ok. Most of them are merely mindgame extras.

(0%)

U-air: Unrealistic Flight:
Suzu will tilt her head upwards, having very small start-up lag. She will keep her head in the same position for a sudden moment before returning her head back to it's normal position for almost no end lag. The attack will work when a foe is right above Suzu when she is looking up, at the most, 3 Gannondorfs tall in viewing range. Suzu will instantly have a shocked look on her face devoid of pupils while yelling out "GYAAAAA!!", causing the foe to fall as if they had been footstooled by a footstool jump. The end lag takes slightly longer when you use the actual attack.

While the attack may seem random, it's perfect for interupting foes aerial movement, but more importantly, you should be using it to prevent a foe from potentially spot-dodging one of your blasts or teleporting attacks. Think of it as your aerial version of the Side Special...

(0%)

D-air: Frustrating, no less:
Suzu puts on an angered face while thinking "Something's making me really frustrated." This takes 1 second to complete, some of the dialogue occuring after the finished animation, the attack working even if you hit the ground. During this 1 second of animation and for an additional 2 seconds afterwards for every blast based attack (Neutral Special, Standard, F-tilt, F-Smash, U-Smash) that has been spotdodged successfully by any foe throughout the match, the direction a foe is knocked back by a blast is reversed, except for the Neutral Special, which will damage you instead of homing into foes. When you do use this attack, the amount of times a foe spotdodged your blasts is treated as 0 to prevent this effect from stacking.

Certainally not a bad move, best shorthopped with the D-tilt. This attack is quite hard to pull off, though it does punish your foe for dodging your blasts. There is also no warning as to when the effect ends, and virtually makes your Neutral B damage you. This attack is very much best used with your U-Smash to turn it into a spike, or better off your F-Smash, which will blast the foe away from the edge. Nothing you can spam or rely on, but it's a good option for when you want to make some blasts more lethal.

(0%)

(((GRAB: PARALYZE VER.2)))
Suzu will perform the animation similar to the Side Special, having the same properties such as lag, except that this verison only reaches out 1 Stage Builder Block rather than 1/2 of Final Destination. Once an opponent is paralyzed, they can escape the grab normally unlike the Side Special. This is a much worse version of the Side Special, unless you have a blast(s) from the F-tilt or Neutral Special lying in wait. Then you can input any 4 directions like a normal throw while holding the foe. The foe will take 4% from a quick bomb-omb blast sized blast, but no matter how many F-tilt blasts or you have, this can only ever accumulate to up to 4 blasts to prevent a OHKO. The foe then will be knocked back in the direction that you chose, 1 Stage Builder Block for each blast. This will use up the blasts that lie in wait when you do use the throw.

A good mindgame with your Side Special, though it may be hard to reach the foe due to the short range. This is one way that Suzu can easily KO a foe, especially one that is trying to recover, though the timing is difficult to pull off becuase of the lag, but well worth it for sure. Obviously good with your D-tilt...

(4%) per blast

(((FINAL SMASH: END CREDITS)))
A pink stage suddenly rises from the top of the screen to the stage's height, being in the background. Suzu will get onto the platform, and will start to sing and dance according to this:
www.youtube.com/watch?v=eP9pIJlclzk
She will be on the stage for around 10 seconds, being invincible while in the background, though your F-tilt, F-Smash and Neutral Specials will still work even when you are not on the actual stage. After the 10 seconds, Suzu will have healed all her damage from the singing and dancing as she gets back on the stage to fight. Say What?

(0%)

----------------------------------------------------------------------------------------------------------------------------

(((PLAYING AS)))
Playing as Suzu can be a different experience. Well first off, we KNOW that her attacks do not kill on their own and have set knockback. Newcomers may find Suzu hard to learn due to her strange knockback. You know that Suzu can poke from a distance, mindgame and gimp. Anyway...

For a basic strategy, a Suzu player should always play right at the edge and spamming away with your range attacks, luring the fish with the worm and then catching it. Yeah, Suzu's game can almost be described as fishing (Kinda ironic huh).

CHOOSING THE BAIT:
At the start of a battle, a Suzu player should use either their Neutral Special or D-tilt, preferably the D-tilt to instantly set the battle up for mindgames. A great defensive option, from here on, you can use your D-Smash to gain amour, Neutral Special or F-Smash to launch a surprise attack, you name it. During this time, make sure that you make use of your U-tilt to set up a potential gimp, and F-tilts to scare your foe or beef up your grab/throw. Should you succed in getting your fish up close up to you, here's the next part...

CATCHING THE FISH:
When your foe does decide to get up close, you can potentially set up a Side Special on your foe, strike with a Neutral Special to send the foe off the edge. You are truly at your best when the foe is off the edge, because you can spam all your Specials and your F-tilt to play keep aways.

Ok, so maybe your foe is a projectile spammer, and they stubbornly refuse to move, say the foe is Snake, and their projectile can kill you. You may want to actualy get close to the foe. You have your Neutral Special, Side Special, F-Smash, F-air to help you, but your F-tilt is your only approach move, but it's not awfully fast and it's predicitable. I wouldn't reccomend this, though it can help you greatly when it comes to forcing the foe off the edge. You'd better off be setting F-tilt bombs, those are quite juicy, forcing your foe to stay away from certain areas. Why, even a F-tilt in the middle of the stage can scare the hell out of foes. If you were to use this strategy though, using your dash attack will get the job done quicker, as your F-tilt isn't the quickest move in your set, though your Dash Attack makes it more spammable. You get the point, a well timed F-tilt allows great stage control, to beef up your grab, and to push foes away (To the edge of the stage). You might as well call this strategy Star Blast offense or something...

Overall Suzu can be seen as a pressure character, a major pressure character. You would want to pick Suzu if you want to have an easier time against heavyweights, attack from any part of the stage and be able to score kills at the start of the game potentially.

(((PLAYING AGAINST)))
For all she has, Suzu certainally has her weaknesses. Firstly, she is a lightweight. Secondly, she has no quick attacks for when a foe gets right up to her, her attacking options not being very versatile. Thirdly, her moves never kill unless she gets the foe to the edge and gimps them like there's no tommorow. Lastly, she is a horrible damage racker at that, so certain characters can use that to their advantage. Know that dodging is your best friend in this match, you just can't fight Suzu without it.

That being said, a Suzu player will always start a match by either using her Neutral Special or D-tilt. Great, the pressure is on you now, but no need to worry. Your first priority should be to stay the hell away from the edge of the stage and stay in the middle. From there, Suzu will try to stay at the edge, forcing you to come by otherworldly means. Projectile users, great, start chipping away at Suzu, she has no means of defending herself from projectiles since her attacks can't out-prioritize them. For those without projectiles, this may get a bit tricky. Suzu will force you to come to the edge so you can be fire bait. I'd suggest approaching from the air rather than the ground, as this gives you protection against many of her attacks and stops the risk of a Side Special. Suzu has a c****y aerial game that can't combo or defend her quickly, so if you can approach Suzu with an aerial, then do so. Finally, never forget that Suzu needs breaks in between the use of her D-tilt and Neutral Special. This is when Suzu is at her most vulnerable if she cannot use either of them, as you can get in her face without worrying about her using either, best if you are in the air. Know that the battle at hand is quite unpredicitable.

(((MATCH-UPS)))

VS Gorea (85:15): Gorea:
Gorea gives you a hell of a lot of trouble because of it's ability to absorb your Neutral Special and spam projectiles on it own against you. Gorea also has a superior grab game in terms of speed, and has a lot of fun spamming it's F-air on you. Basically Gorea is sitting on the fineline between too close and too far from Suzu, being able to pressure you with it's goldly grab and the afformentioned F-air (Cool move I tell you). You can break Gorea's Ice Barriers and gimp it with relative ease due to it's somewhat bad recovery, though Gorea WILL give you projectile and grab hell.

NOTE: Gorea will gain Psychic projectile from Suzu using it's Neutral Special.

VS Meruki Master (70-30): Suzu:
Meruki Master relies on his schoolgirls to do significant damage, and guess what? You can use your F-Smash and U-Smashes to damage them all at once. Though unfortunately for you, your attacks directly don't do enough damage to take out the schoolgirls in 1 shot...
Since MM requires an extent of close range combat, AND his Meruki Meter, hey, you can play differently... just burn that Meruki Meter down, as Suzu's wide hitting blasts will keep hitting the Master. Well, you could just gimp MM as well. MM does not fare very well in the fight...

VS Pennywise (40-60): Pennywise:
Pennywise is one of those characters who relies on getting in close range to effectively, but Pennywise is a tougher case due to his traps. He can effectively use a leech or a corpse to bait out your Neutral Special so he can set up more traps. Leeches and Corpses are HELL for Suzu, because she is a horrible damage racker, meaning Pennywise can spam his leeches to rack up loads of damage. Suzu would want to be using her 2 blast smashes throughout this match without a doubt, though Pennywise can still set his traps up. It goes without saying that Suzu somewhat has a disadvantage against trap characters like Pennywise. That clown's D-taunt suits perfectly for this match, how fitting...


Against the Black Knight (85-15): Suzu:
This is a rather interesting match-up. BK is able to teleport you around the stage as well as you being able to.Though BK is though one of the characters who suffers from Suzu: their weight does not save them, they fall quickly, and have weak recovery for Suzu to GIMP. BK can save himself with careful spot-dodging and cunning teleport combos, but he's pretty much dog meat in this match virtually due to Suzu having plenty more mobility than he does, and just about all of his heavyweight traits are going against him in this match.

VS those Punch-Out!!! Sets (100-0): Suzu:
Hey, Psychic Beats Fighting...
Though this is fairly realistic to an extent, those guys don't have projectiles, they have bad recoveries, King Hippo's Super Amour doesn't save him from Suzu's U-Special. Heh, Bald Bull can play defensively all he likes, but no... you.. will... die...

(((ANIMATIONS)))
Standing:
Suzu will stand while sporting a serious face.
Walking:
Suzu moves slowly forward while swaying her arms backwards and forwards reguarly.
Running:
Suzu increases the pace.

Dashing:
Suzu moves with a regular fist puming movement.
1st jump:
Suzu bends her legs and hops into the air.
2nd jump:
Suzu jumps again in mid-air while performing a spin like Wario does in mid-air.
Roll Dodge:
Suzu will sidestep to her new position.

Aerial Dodge:
Suzu will perform a spin in mid-air to the background rather than abusing her teleportation.
Spotdodge:
Suzu quickly leans into the background and back.
Sleeping:
Suzu collapses on the floor with her arms spread, sleeping.
Stunned:
Suzu holds her head while stumbling backwards and forwards.


(((EXTRAS)))

Up Taunt: Shocked:
Suzu will have a shocked look on her face devoid of pupils while yelling out "GYYYYAAAAHH!". A short taunt that's good for when your opponent does something stupid.

Side Taunt: A Fatal Flaw:
Suzu will have a smile on her face that is cunning, taunting "Stupid, you've gone into here. This taunt is quite lengthy so use sparingly. Suzu seems to be quite battle serious now to point out the opponent's flaw, this isn't really like her unless she really HAS to kill someone.

Down Taunt: Uneccesary Aid:
Suzu will bend down, somewhat wrapping a bandage around her right arm, for some reason...
The taunt is fairly average in length, and the bandage does nothing at all, but it stays on your arm for an ok visual effect... if you want it...

Victory Pose 1: Some Fun Finally:
Suzu will sing and dance according to the 3rd Japanese Bobobo end credits...

Victory Pose 2: Unaware:
Suzu walks from the right side of the screen while looking around, saying "Well, did I miss out on anything exciting?" seemingly unaware of what went on. The female heroine of Bobobo, Beauty will come out from the other side to greet Suzu, as if she is about to hug her, saying "Suzu! You're ok!". Beauty and Suzu will both walk off the screen results.

Victory Pose 3: Mercy: (Works only if one of the losers was a villain)
Suzu will step forward while holding the body of a villain from the losers. If the villain can talk, they will ask "Why did you spare me?" (Note that dialogue may change based on the villain), to which Suzu will respond "I was taught that nobody gets left behind". Suzu will then gently place the villain's body on the floor next to her.

Lose Pose: .....
Suzu doesn't look too happy losing to a stronger foe, she stands clapping while posing a serious face.
Pressing the L or R button will cause Suzu to teleport off the screen results...

Opening: Teleportation:
Suzu teleports to the battlefield. Enough said.
 

Junahu

Smash Ace
Joined
Nov 15, 2005
Messages
899
Location
Shropshire Slasher
Mr 2: Having not been exposed to One Piece before reading this, I must say that the character himself intrigues me greatly. There's a lot of potential there, a fighting style that revolves around confusing the opponent, signature moves at every turn and killer swan booties.
Your moveset however, misses much of the point of Mr 2. Though you did manage to effortlessly translate the weaknesses of his individual moves (such as; the limits of Mane Mane Memory, Bombadier having end lag due to his having to retract his extended leg, etc), the playstyle as a whole just feels unfocused. Constantly comparing Mr.2 to Marth was also incredibly misleading as comparing the two is like comparing apples to oranges.
Actually, the only real problem with the set is your writing style. The exact usage and utility of Mr.2's attacks could have done with more attention. There were also a number of moments where I had to reread a section, in order to figure out what it was that you were trying to say.

Suzu: Suzu's specials are the shining moment of this moveset. For one, you made a genuinely exciting move out of Teleportation, and anyone can tell you how boring teleport recoveries generally are. Pyrokinesis and Paralyze work well with eachother and with the rest of the moveset. And all together, these three specials carve out a fun playstyle that messes with the opponent's head almost as much as Gwen.
The problems start with the Down-special, and persist for the rest of the moveset. You put too much effort into transplanting individual instances of the anime into the attacks. I shouldn't have to explain why, but random moves like the dash attack, simply tear apart the general flow of the moveset.

Actually, I don't think Suzu would have that big an advantage against BK. Since the knockback Suzu deals is fixed, there's no longer any reason for him not to spam the warp powder and other self damaging moves constantly. And he still has a vicious projectile that'll help force Suzu to approach.
But whatever, she'd have a good matchup against Dingodile, and that's awesome in itself.

how odd... I've seen that picture being used for a moveset before, but I can't find any record of a Suzu moveset in an earlier MYM
 

half_silver28

Smash Ace
Joined
Apr 25, 2008
Messages
862
Location
MYM, Ohio
& here I thought I'd be the first person to comment on this set...

Review: Suzu by Katapultar

Alright, so I remember this set appearing back in MYM5, but it seems to be much different this time around. I haven’t seen Bobobo at all, but it seems like a rather interesting show. Let’s get to the review, anyway…

Creativity/Trueness to Character:
I’ll just say right off the bat that I won’t be able to judge trueness to character for this set at all, since I haven’t seen the show. She’s a telepath, so I can only assume that all her magical attacks are fitting for her. That being said, Suzu doesn’t possess a single attack that I can label as bland. In fact, there are some attacks I find really cool, like the forward special, and forward and down tilts. I really like the obscuring effect of the down tilt; it’s not something I’ve seen often in MYM (usually a move like this involves simple invisibility), and it fits in with Suzu’s style well. However, there are some moves that move beyond creative to just plain random. The main culprits of this are the down special, dash attack, uair, and down smash, although the down smash and uair get exceptions due to fitting into Suzu’s playstyle so well. Granted, Bobobo seems like a somewhat random show, so that randomness just may be fitting. And seeing as how I made Excel in MYM5, who rivals Suzu in terms of randomness, I’d be really hypocritical for me to criticize you any further for that. On the whole though, Suzu definitely doesn’t lack creativity.

Playstyle:
Suzu has quite an interesting playstyle that I don’t think I’ve seen in MYM before. She focuses on pressuring the opponent with long range moves, most of which are not projectiles in the traditional sense. Mindgames are also a strong part of Suzu’s style, with moves like the up special, down tilt, forward smash, forward tilt and bair helping immensely with this. She also has the unique effects of the forward special, down smash, dair and grab to support her pressure playstyle. The down smash I especially like for being able to keep Suzu from being knocked out of her attacks. She also has a big focus on gimping, which her up special seems to be built for. She has to up tilt to aid in this as well. The neutral and up aerials can be good gimp options in their own right.

Looking at the “playing as” section, Suzu seems like the type of character that can potential do a lot of damage by spamming long range moves, although ironically, she is vulnerable to spammable projectiles herself. In that case, she has to try and approach, even though she has a bit of trouble doing that with mostly long range attacks. Additionally, whenever the foe decides to approach, Suzu has to predict it and either use her side special or one of her ranged moves to stop it, or have a down smash set up so they can’t knock her out of her attacks immediately. Suzu is almost screwed at close range, barely having any options at that range. As for the matchups, they seem fairly accurate, although I can’t speak for the first two due to not having read those sets… <.<. & the "punch-out" matchup seems just too weird for me; I see how boxers like Bull and Kaiser would be at a huge disadvantage, but not someone like Hippo who has near constant super armor. & it's certainly not 100/0 in Suzu's favor; the boxers must have at least SOME chance to win.

Overall, I rather like this playstyle; I find it really interesting and it seems like it would be a lot of fun to use Suzu in Brawl. A few moves I still see as a bit random (dash attack) or just don’t contribute much to the playstyle (down special), but those are just fairly minor issues in the long run.

Writing Style/Detail:
This, unfortunately, is where this set starts to break down. While your writing style is good for the most part, there are quite a few instances where your move descriptions are much more wordy than they have to be. The neutral aerial, up special, forward tilt in particular are big culprits of this. For example, here’s the first part of the neutral aerial:

“From black smoke, Dollman will appear on Suzu's left shoulder (He's REALLY small, the size of a baked bean and looks like one). For Dollman to appear and the smoke to clear takes a small amount of lag. Once the attack is executed, Dollman will stay on Suzu's shoulder for an unlimited amount of time, making quiet cackling noises. Dollman has 1HP, pretty much dying from 1 attack. His real purpose is actually being an target: If Suzu uses her Neutral Special or U-Smash, then they both will target Dollman. The problem is, not only will the blasts damage you, but they will also kill Dollman as well. If Dollman dies, then you cannot respawn him for 9 seconds. You can use this as an additional recovery if you need to however, but I'd strongly suggest not relying on it unless you happen to have good timing...”

Now this is a fairly long description for something that could be described much more easily. Here’s how I would recommend writing it:

“From black smoke, Dollman will appear on Suzu's left shoulder (He's REALLY small, the size of a baked bean and looks like one) with a small amount of lag. Dollman will stay on Suzu's shoulder for an unlimited amount of time, making quiet cackling noises. Dollman has 1 HP, dying immediately upon being attacked. Dollman serves as an extra target for some of Suzu’s moves: her Neutral Special or U-Smash will target him. The problem is, that the blasts damage you, as well as kill Dollman. Once Dollman dies, he cannot be respawned for 9 seconds. You can use this as an additional recovery if you need to, but I'd strongly suggest not relying on it unless you happen to have good timing...”

Condensing your descriptions will definitely help you in the long run, and make your sets much more readable. This issue plays into detail as well, although this set isn’t really overdetailed (with the exception of the 3 moves mentioned above). In fact, you pretty much tell me every detail that I would need to know. You’ve done a good job with detail overall.

Balance:
Suzu probably leans towards being underpowered; she has trouble approaching and dealing with projectiles, which puts her in the same category as heavyweights, strangely enough. She also has trouble dealing damage too (actually, I might even recommend buffing the percents of some of her blast-related moves). Her best matchups seem to be with slow to average speed characters that lack a spammable projectile, who Suzu can pressure with her long range moves and easily get away from when they decide to approach. Suzu has VERY bad matchups against foes who are quick and have a spammable projectile, like Fox or Toon Link. Suzu doesn’t seem to do well against foe who can get close to her quickly, with her best hope being to catch them with her side special or dash attack before they can get in close. This makes Suzu a character of extremes: having great matchups on one side of the spectrum, and having terrible ones on the other. Anyway, I’m just kind of rambling on in this section; balance isn’t a huge issue for Suzu. She’s pretty much saved from being bottom tier because of her mindgame potential and the great mobility her up special gives her.

Organization:
You’ve been using this type of organization for a while now, and it still works quite well. I can see everything that I need to see without squinting or having my eyes melt due to bad color choices. Although I think that it’s a bit unnecessary to include damage percents in the move description AND at the end of it. I don’t really have much else to say here.

Obligatory Closing Comments:
Overall, this was a pretty fun set to read. Suzu has a lot of really creative attacks and a really awesome playstyle. However, issues with overdetail bogged this set down, as did a few moves that were random as hell and didn’t really fit in with the playstyle. If you would just work on changing your writing style a bit, then I’m confident that you could create a truly great set. :)

*insert catchphrase here*
 

KingK.Rool

Smash Lord
Joined
Nov 26, 2005
Messages
1,810
You'll forgive the brevity of my comments, I'm sure, since I've got plenty of movesets to catch up on.

Start with Protoman.EXE. I seem to remember SonicBoom making a set for this dude back in... early MYM 4, was it (funny that you have an attack called Sonic Boom in the set proper)? But that set was impossible to read, and nobody can say that for this one. I admit that it's a bit disappointing that you used more or less the same format that you did for Darkrai; I don't think the bolded font works quite as well thematically here.

The main problem I have with this set is the writing style. This is basically a Sakurai Movement moveset, and with so many simplistic attacks, the descriptions feels jarringly long and winding. I do believe your sentences are simply too long; too many commas, too many incomplete sentences trying to get as much information across in as little space as possible. The irony, of course, is that this results in the moveset feeling overdetailed, if anything.

Reading a moveset like this, though, makes me all the more fond of trying to scale back creativity and keeping to in-character and simple but interesting attacks. It's a lovely, natural moveset that's a lot of fun to envisage and read through, despite the way it's written (I just love how MYM is becoming more and more like an English class).

On more minor notes, I don't like Specials being nestled in the middle of the moveset and I certainly don't like the character himself. That's just my bias against anything but the classic Megaman games talking, though.


And that was quite a bit longer than I expected it to be. On to Hornet Man, a moveset I've been anticipating. agi is fast becoming one of my favorite moveset makers; his playstyle-focused style is something I'm very fond of, even if he's more faithful to his central gimmick than I've ever been. Khee'bler is, of course, a set I love more and more the more I think on it, so suffice to say I had high hopes for yet another Robot Master in the vein of the excellent Bubble Man.

To start off ambiguously, it feels like a more exaggerated Khee'bler in that the descriptions are SO brief that they're confusing at times. Other parts seem rushed and incorrect, like his Jab being capable of cutting down his Flower Garden; first you say it can't be attacked, then you contradict yourself, very odd indeed. This is a complex moveset, it needs quite a bit of description, much of which just isn't there.

When was the last time I mentioned how much I love the music-in-the-headers of your movesets? Your choices are always SO good, and this coming from someone who tends to skip the music if possible. It really adds to the mood and feel quite excellently, and anyone who eschews it is really missing out on a major part of the moveset (just as you probably missed out on the wonderful music of Wario: Master of Disguise :mad:).

But as to my actual reaction? Yeah, I really, really like it. The way you describe him as a farmer is quite apt; his hornets are so much more than simple summons, and his flowers and beehives are much more than just plain traps. There are so many levels and sublevels to his playstyle, I question whether even you understand them all. It's really quite mindboggling, especially when things that would be a HUGE part of how to play him, like hornets warring with each other, are explained away airily in one sentence. It's mind-boggling.

Let me tell you, though, this moveset really reminds me of Cutesy in several ways. It mostly deals with the manipulation of a simple item, and many of its standards are generic except for their interaction with that item, be it petals or hornets. It's pretty bold of you to make attacks like that FAir, but it's definitely a decision that pays off in the grand scheme to things.

There's a lot to say about this moveset and I could probably go on for a few more paragraphs, but let's just leave it at that, since I have more movesets waiting. It's another moveset I really appreciated and, even though its ideas are not quite as revolutionary as Khee'bler, I get the feeling that it, too, will improve upon reflection.

Next is something that I'll have to gloss over a bit, I'm afraid, because it's three movesets that just have to be viewed together, even moreso than the Eeveelutions. One at a time, though, and first up is Hitmonlee. There are things I love about this set, and things I don't like nearly as much. It's got that Frfian creativity that always seems to come out of nowhere; these characters are all pretty generic fighters, and you've squeezed every ounce out of them along the way.

Well, let's start with a general comment for all three: I love the organization. It's basically the same throughout, but with such small but fitting changes as to make them all separate and distinct. Very well done, kickkickkickkick.

Hitmonlee himself? I'll tell you, I like Close Combat a LOT; I note that you phrase it as practically a one-hit KO, removing any real balance qualms. I also really, really enjoy the tripping motif carried throughout the moveset; Hitmonlee needs to make them slip up once to land the brutal finisher. The whole thing feels very fitting for the kicker of the bunch, as does juggling the foe repeatedly with acrobatic moves. There was a time when Hitmonlee was a favorite among Pokemon as a theoretical addition to Smash, and I can see the appeal more than ever when looking at this moveset.

But there are also things I dislike, and the most blatant of them is that Up Special. You seem to have tried to avoid the incredibly obvious Hi Jump Kick for recovery and instead did some sort of crazy twister thing that feels so out of character it boggles the mind. It's the main impediment to my enjoyment of the set, although there are several more, including your tendancy to tack on random effects to attacks like Zen Headbutt - it reeks of Pokemon Syndrome.

But enough about Hitmonlee! With an very clever transition when discussing team playstyle, we move on to Hitmonchan. I'll be honest, I have always preferred the punching evolution, and tend to pick him, even though, as we all know, he's the weaker of the two. That's not true when it comes to the movesets, though, because Hitmonchan is pretty brilliant, and I like him quite a bit more than Hitmonlee.

His playstyle has so much thought put into it. Putting the foe a platform away, in conjunction with his Elemental Punches and his zipping around the stage via Side Tilt and his simple but cool Jab... it all slots together wonderfully, I'm very fond of it. He's also much less creative-for-the-sake-of-creativity, and that's always a good thing; Hitmonchan lets his playstyle, defensive and cautious but with the potential for a great burst of strength, speak for him, and it definitely does that.

It's an even more impressive achievement considering the influx of punching movesets this contest, from Von Kaiser to Joe Cazzaghbaggawhateverhe'scalledle and onwards; hardly any of your ideas have been touched on, or at least implemented so effectively, in the past. There are some minor issues - even more than Hitmonlee, there are slight problems with description here and there, and especially on that bewildering but probably awesome Down Special - but on the whole, I love it. Well done, Frf.

I'd like to leave it at that and move on to The Black Knight, but I also have to discuss Hitmontop, don't I? Now, you'll forgive me for being for being apprehensive, since the general consensus is that Hitmontop is the worst of the three. I'm afraid it's somewhat true, because it's painfully clear that you struggled with this one; in the mirrored aerials, the lack of throws, and the occasional sand-based attack. I find the latter the most egregious offense, actually, but it's all pretty blatant and somewhat painful.

This is a shame, because I really want to love Hitmontop. He's got an awesome concept behind him, and just imagining him whirling around the screen repeatedly bumping the foe like a Beyblade or something makes me grin. There's a solid playstyle there somewhere, and an interesting character on the whole, as evidenced by the intriguing playstyle section. It's just that you seem to have run out of steam halfway through. :(

And that Neutral Special basically feels like it could have just as easily been a mechanic; it's the kind of Special-that-could-be-folded-into-the-character-proper that Junahu always complains about.

Looking at all three together, though, I have nothing but admiration for the full project, and enjoyed it greatly. It's certainly easier to digest than my seven sets, and they compliment one another very nicely. Now I understand why Junahu and Plorf would so like to vote for the Eeveelutions as one moveset - I'd certainly like to do the same for these.

And good god, is this post getting long... but I'm not done yet. Next is The Black Knight, the most critically acclaimed of all the movesets I'm commenting on here. quite a few MYMers agree that it's your best yet. I find that hard to believe, considering how much I adore Arthas, but better than Thrall, I could see. And then I read it.

Well, let's start at the organization, which is a great step up. Your previous stock organization was appealing in some cases and less so in others, but it was starting to get a bit stale after seeing, what, ten movesets in it? This is more of the accepted template I used for Kawasaki, but it looks very crisp and neat; good font choices and very nice headers from Daddy.

I have surprisingly little to say about this moveset. It IS good, very good; that cannot be denied. The use of Warp Powder lends him a uniqueness that one wouldn't expect from a heavyweight sword-wielder, but that shouldn't suggest that his regular attacks are uninteresting; they all fit into the playstyle like a good jigsaw puzzle, and nothing is particularly out-of-place. Unlike most people (glare), I don't think there are too many heavyweight combo characters (King Hippo, Black Knight... Wart and Pennywise, most agree, fail at this), so this is a welcome addition to our well-rounded MYM roster.

I will say that the throws stand out in the moveset; it's almost like you lost inspiration for them. Nothing wrong with keeping the throws, a good functional button input, simple, but these are not only short, they're pretty generic.

Don't get me wrong, though: it is DEFINITELY your best set since Arthas (although I am very fond of Gwen...), and certainly reminds us all of why you're a Major Villain.

And now kirbywizard will have to forgive me, because it's getting to be a bit much for me and I need to comment on poor Suzu, so I'm going to skip the flamboyant Mr. 2 for now.

Well, your biggest problem, Katapultar, and one I didn't notice earlier (having passed on Gorea) is the way you phrase things. Suzu is difficult to interpret. Not only that, she is blatantly overdetailed, and here I thought that was a thing of the past. I put so much time and effort into convincing everyone to bring detail levels lower, and here comes Suzu, with all the heft of a late MYM 3 set (but considerably more creativity)!

The reason that Suzu has too much detail is twofold. Firstly, the way you phrase things. Sentences feel short and stilted and don't really flow together very well; it's like the opposite of darth_meanie's problem in ProtoMan, which is interesting, since I mini-reviewed that set about an hour and a half ago (why is this taking so long? WHY IS THIS HAPPENING TO ME??? *cries*). But the other reason is because Suzu is overflowing with excessive creativity. The Specials are just that; more than special enough, so I can forgive the length and how complex they are (except the Coelaconth eating is just a messed-up attack). Most of the rest of the moveset just piles on effect after effect, until the mind boggles at trying to decipher how she'd play, even though you explain it at the end.... sort of.

Maybe it's just because I'm exhausted now from all these sets in quick succession, but I can't make heads or tails of her odd set-knockback playstyle. I think it's probably incredibly cool, but it's just too hard to decipher buried beneath long, awkward descriptions and innumerable creative details.

There. Caught up, or mostly, anyway. I'm going to go pass out now.
 

Junahu

Smash Ace
Joined
Nov 15, 2005
Messages
899
Location
Shropshire Slasher
Congratulations Rool, you've redeemed yourself with that nice long comment-post. I can now find it in my black shallow heart to forgive you, and finally give you a King Hippo comment:

HA HA HA!
HA HA HA!

hey, remember the days when I was the only one who noticed when you did something cool looking with your organisation? Looks like everyone is in on that game now. Too bad, it makes it that much harder to wing my way through a comment nowadays..
But King K Hippo is still one nice looking moveset. The attack/matchup headers are particularly good, and it brings to mind the Punchout Matchup screen.
I'm a little put off on how you used the Punch Out Wii art, when the set itself so clearly relies on the NES title for its look and feel. This happens a lot with nostalgia sets in MYM, and it still irritates me when I see it happen.

I can never shake the feeling that King Hippo is a slow attacker, despite how many times you tell us otherwise. Maybe it has something to do with the witty writing style you use, that over-emphasises his clumsy lumberous movements. Or maybe it's that, to everyone else, King Hippo just sounds like a slow attacker (it doesn't help that he's one of the slowest attackers in Punch Out anyway).
I don't know how to feel about Hippo's combo centric playstyle. While it sounds great for a boxer, it a bit weird for a Hippo.
His decaying super armor didn't make sense at first, but gradually became acceptable when I remembered how he actually fought in Punch Out.

D-throw is as literally out of character as a move can get. Am I to believe that when his pants fall down, he is LESS weak? Let's just stop and actually THINK about this. In the games, when his pants fall down, that's the key opening Mac needs to go to town on Hippo. How is it, that when it happens in Brawl he gets Super Armor?

Anyway, it's a Rool set. And just like all Rool sets, it's wittily written, charming and clever with big heaping teaspoons of ingenuity mixed in. But it's also a boxing set. And just like all boxing sets, it involves lots of punching, bad recoveries and magical matchups with little Mac that always happen to be in his favour (credit to you, it actually makes sense for King Hipp)
 

Agi

Smash Lord
Joined
Jul 27, 2008
Messages
1,120
Location
SE Washington
On to Hornet Man, a moveset I've been anticipating. agi is fast becoming one of my favorite moveset makers; his playstyle-focused style is something I'm very fond of, even if he's more faithful to his central gimmick than I've ever been. Khee'bler is, of course, a set I love more and more the more I think on it, so suffice to say I had high hopes for yet another Robot Master in the vein of the excellent Bubble Man.
High praise indeed, Rool.... I'll take it. (h)

To start off ambiguously, it feels like a more exaggerated Khee'bler in that the descriptions are SO brief that they're confusing at times. Other parts seem rushed and incorrect, like his Jab being capable of cutting down his Flower Garden; first you say it can't be attacked, then you contradict yourself, very odd indeed. This is a complex moveset, it needs quite a bit of description, much of which just isn't there.
Yeah, I've been shooting a bit more for brevity recently. Generally, though, I stop when I feel there's really nothing more to say... oh, but the Jab was an exception, not a contradiction. It was just a way to correct an error in placing the garden, or to remove it if you don't feel the need for more health. I probably should have specified that, however... I can see how it could have been taken the wrong way. I'll edit it in for HR's benefit.

When was the last time I mentioned how much I love the music-in-the-headers of your movesets? Your choices are always SO good, and this coming from someone who tends to skip the music if possible. It really adds to the mood and feel quite excellently, and anyone who eschews it is really missing out on a major part of the moveset (just as you probably missed out on the wonderful music of Wario: Master of Disguise :mad:).
I'm simply appalled the music-in-headers hasn't caught on yet. Glad someone notices it.

But as to my actual reaction? Yeah, I really, really like it. The way you describe him as a farmer is quite apt; his hornets are so much more than simple summons, and his flowers and beehives are much more than just plain traps. There are so many levels and sublevels to his playstyle, I question whether even you understand them all. It's really quite mindboggling, especially when things that would be a HUGE part of how to play him, like hornets warring with each other, are explained away airily in one sentence. It's mind-boggling.
Good point, there are probably interactions in there I'd never dream of.

...

Man, I want to play as him now. XD

Let me tell you, though, this moveset really reminds me of Cutesy in several ways. It mostly deals with the manipulation of a simple item, and many of its standards are generic except for their interaction with that item, be it petals or hornets. It's pretty bold of you to make attacks like that FAir, but it's definitely a decision that pays off in the grand scheme to things.
I never finished reading Cutesy... but from what I gathered, she was ridiculously complex. Hornet Man is pretty simple, comparatively.... maybe that's just because I wrote him. :p

There's a lot to say about this moveset and I could probably go on for a few more paragraphs, but let's just leave it at that, since I have more movesets waiting. It's another moveset I really appreciated and, even though its ideas are not quite as revolutionary as Khee'bler, I get the feeling that it, too, will improve upon reflection.
:bee:
 

kirbywizard

Smash Hero
Joined
Jan 4, 2009
Messages
6,713
Location
Napa, California . . . .Grapes For Miles
3DS FC
0989-1847-5768
Suzu: I remember watching the anime, and I kinda remember this characters ( I should read the manga). Well anyway back to the set.

From watching the anime this moveset isn't random enough :mad: (kidding). It captures the character well, but I think I remember her being a little bit well more surprised when things happened. She feels kinda stiff, but then again I haven't seen this show in like two years.


I have not seen a moveset like this period. The gimping was taken to a new level, but even with teh crazy gimping she looks really underpowered. At least give her more damage for the attacks that actually do some to begin with.

I had some trouble reading the set, mostly because some parts felt a little bit longer then they needed to be. My head almost wandered off in the middle of reading the moveset.

Very creative, and fun. . . . Sorry for the late comment :(
 

darth meanie

Smash Journeyman
Joined
Jun 6, 2008
Messages
452
Start with Protoman.EXE. I seem to remember SonicBoom making a set for this dude back in... early MYM 4, was it (funny that you have an attack called Sonic Boom in the set proper)? But that set was impossible to read, and nobody can say that for this one. I admit that it's a bit disappointing that you used more or less the same format that you did for Darkrai; I don't think the bolded font works quite as well thematically here.

The main problem I have with this set is the writing style. This is basically a Sakurai Movement moveset, and with so many simplistic attacks, the descriptions feels jarringly long and winding. I do believe your sentences are simply too long; too many commas, too many incomplete sentences trying to get as much information across in as little space as possible. The irony, of course, is that this results in the moveset feeling overdetailed, if anything.

Reading a moveset like this, though, makes me all the more fond of trying to scale back creativity and keeping to in-character and simple but interesting attacks. It's a lovely, natural moveset that's a lot of fun to envisage and read through, despite the way it's written (I just love how MYM is becoming more and more like an English class).

On more minor notes, I don't like Specials being nestled in the middle of the moveset and I certainly don't like the character himself. That's just my bias against anything but the classic Megaman games talking, though.
Well, thanks for the commentary. ProtoMan.EXE was a step back from the crazy mechanics of Abomasnow, Magnezone, and Darkrai, and an attempt to focus on playstyle and mindgames through simple, creative attacks. It was an experiment and practice in that regard, and I feel in that at least I was a success.

I understand your complaints about writing style; I've always been one for concise language, an overemphasis as you noted. Though I can't be sure until I post it, I feel that my latest set solves this main issue. As for Specials in the center, its a point of opinion, but I tend to put them after Smashes if they're not that important to the set, but I'll keep that in mind.
 

SixrchBattosai

Banned via Warnings
Joined
Aug 31, 2009
Messages
39
Location
With my boyfriend...who's moving ;A;
I finally got around to reading the two movesets on this page.

Mr.2: "AUGH!" was my exact response when I saw the picture. Honestly, he makes me feel uncomfortable. I didn't expect such a detailed and...visual moveset. The use of pictures was a...nice touch.
And by nice, I mean extremely creepy.

Suzu: Knowing the history of the show, I expected a fairly goofy and ridiculous set. You proved me wrong. Also, Suzu wasn't the character I expected anyone to make from that series.
Let alone anyone from the series in general.
 

darth meanie

Smash Journeyman
Joined
Jun 6, 2008
Messages
452
BUBBLEMAN.EXE​


BubbleMan.EXE is a villain from MegaMan Battle Network 3, and is loosely based on the Bubble Man from Mega Man 2. BubbleMan.EXE is insane, insecure, and above all, cowardly, hiding behind his minions and obstacles for the majority of his scenario to try to weaken MegaMan.EXE. Unlike Bubble Man, who is repeatedly lambasted as one of the easiest bosses in the Mega Man series, BubbleMan.EXE was a viciously difficult boss and incredibly annoying to fight, spamming the battlefield with traps and bubbles behind an excellent defense.

In Brawl, BubbleMan.EXE uses as many cheap tactics as possible to win, camping, comboing, trapping, and even occasionally gimping, making him easily the most annoying opponent to fight in the entire game. Try not to break your controller...

Also, Music:


Boss Battle Theme - Battle Network 3
Bubble Man - Mega Man 2
Hero - Battle Network 6


STATS


  • Movement Speed: Awkward
  • Aerial Mobility: Rather Good
  • Size: Wide but Light
  • Power: Fairly Weak
  • Priority: Pitiful
  • Lag: Pretty Slow
  • Recovery: Absolutely Ridiculous
  • Comboability: Uttterly Incredible


Wow, those stats are just the slightest bit lopsided, eh? BubbleMan.EXE has a strange playstyle allowing him to combo rather easily, even without speed or priority. He has good jumps, a slightly below average fallspeed, and incredible recovery, making his offstage game rather frightening, but he has low traction and speed on the ground, and is twice as likely as any other character to trip. He's in no way an aerial character though, interesting...


SPECIALS


Neutral Special: Bubble Wrap

No, not the packaging material. BubbleMan.EXE quickly summons a protective bubble around him, with no starting lag and practically no ending lag. BubbleMan.EXE is protected from all harm for eight seconds, and can float at his falling speed in any direction. If the bubble takes any damage whatsoever though, it pops, pushing enemies away, but also putting BubbleMan.EXE into fallspecial.

However, two and a half seconds later it will completely regenerate, with its lifespan completely recovered to the full eight seconds. This makes BubbleMan.EXE nearly impossible to gimp, as he can always recover as long as he's a decent distance above the stage. Even great gimpers like Mario and Meta Knight will more likely get themselves killed gimping him than they will gimp him themselves.

BubbleMan.EXE can also use this move as a little defensive barrier on the ground while he goes about his business of cowardly camping behind his bubbles. BubbleMan.EXE can attack as normal while on the ground, but jumping puts him back into his recovery.


Down Special: Bubble Fountain

BubbleMan.EXE points to the ground in front of him, and in an instant a small black hole appears where he pointed. This otherwise inconspicuous pothole is a Bubble Fountain, and it produces bubbles the size of Jigglypuff at a rate of three every two seconds. The bubbles home in on foes at Luigi's run speed, but have pitifully poor priority. If a bubble touches someone though, it wraps around them, trapping them. The bubble pops quickly, but without good DI enemies can sometimes become trapped in a chain of bubbles.

A Bubble Fountain cannot be destroyed, moved, stopped, or interacted with in any meaningful way by the opponent; when it isn't producing bubbles its a normal part of the stage. The Bubble Fountain produces bubbles constantly, even when BubbleMan.EXE is between stocks, and only disappears if BubbleMan.EXE is permanently KO'd or BubbleMan.EXE creates a new one. Also, BubbleMan.EXE is unaffected by the bubbles, and his attacks don't burst them, so feel free to go nuts in that regard.

[3%]


Up Special: Crab Toss

With a good bit of starting lag, BubbleMan.EXE tosses a strange pink crab two battlefield platforms away. The crab hits the ground and immediately scuttles forward at Mario's run speed, snapping its pincers, a decent priority hitbox. If it touches someone, it deals a good bit of damage and pushes them about a platform away, further if they are at higher damage levels. A good spacing move, it only has a little ending lag, so toss away.
[6%]


Side Special: Bubble Shooter

BubbleMan.EXE swings a strange bazooka over from his shoulder, and lines up a shot, aiming it by tilting the control stick. When fired, a strange bullet shoots out very quickly with high priority. On impact, it explodes into a bubble, doing some damage and hitstun, but it doesn't trap the opponent. This move will not KO, even at Sudden Death.

If BubbleMan.EXE fires this move into one of his bubbles though, it will explode into a Bubble Spread, an explosion slightly smaller than a Smart Bomb. Any bubbles caught by the burst will also explode, starting a chain reaction, but the hits don't stack. A Bubble Spread will quickly eat up BubbleMan.EXE's supply of bubbly doom, but does a good bit of damage and knockback that KO's at 140%. If BubbleMan.EXE shoots an enemy trapped in a bubble, the damage and Knockback go even higher, KO'ing at only 120%.

Remember that while using the Bubble Spread will destroy all of your bubbles, it will also activate any traps inside them, so keep that in mind as well.

[4%, 9% Spread, 13% v Bubble]


STANDARDS


Jab Attack: Foamy Spray

Twitching slightly, BubbleMan.EXE opens his mouth only to vomit a torrent of water. The disgusting liquid covers the ground at the rate of Mario's run, causing any enemy running or dashing through it to trip. The attack only causes damage to enemies right in front of BubbleMan.EXE though, and has a good bit of lag, so it isn't abusable.
[3%]


Dash Attack: Fish Out of Water

BubbleMan.EXE runs forward, but loses his balance in the middle of his dash, the klutz. Waving his arms wildly, he takes two short hops forwards, then falls face first into the ground in his tripped state. His arms can hit opponents twice and do a little forward knockback, and his face does good knockback that KO's at 140%. This move has no starting lag, but a very long duration, making it risky to use, but interestingly has no ending lag, comboing straight into his tripped attack.
[3% Arms, 7% Face]


Tripped Attack: Big Crybaby

As this move is part of a combo, and easily accessible from BubbleMan.EXE's dash attack, it has been placed here. BubbleMan.EXE begins sobbing hysterically, pounding his fists against the ground in a childish tantrum. It's hard to tell through his tears, but he just might be saying, "Curse you, Sakurai!"

BubbleMan.EXE can get a good bit of damage out of this move, his fists don't do much knockback and come down quickly, getting two or three hits against most opponents. This move can be held out for as long as the A button is held, but when released, BubbleMan.EXE pulls himself up slowly, dusting himself off, ripe for payback. You can however cancel the ending lag with a roll dodge, making it a little more complex to predict what you will do.

[3%]


TILTS


Forward Tilt: Needle Fish

This move is one of BubbleMan.EXE's trapping moves. If BubbleMan.EXE is facing his Bubble Fountain from within one stagebuilder block, he holds his hands out and forms a bubble, which flashes slightly before floating on. The bubble shows no outward signs of being tampered with at all, but if it touches an enemy or is attacked, a small fish the size of the fan item bursts out. It hovers for a moment, then shoots towards whoever attacked it at Captain Falcon's dash speed, its sharp nose dealing good damage and knockback that KO's at 140%.

The fish is a projectile, with slightly above average priority, making it possible, but difficult, to override. The fish also is immune to damage while its hovering, and can only be countered once it shoots out. This move has a lot of ending lag, and can't be used to increase the rate of bubble production; the bubble produced replacing the one next created.

If BubbleMan.EXE isn't near his Bubble Fountain though, he'll simply pull out the fish, holding it by the tail. It flops in his hand, and he slaps any enemy near him for some damage. This has a good bit of starting lag, but by tapping the A button after using this move, BubbleMan.EXE can follow it up immediately with another slap, and another. They hit a little like a fan, but even without DI most opponents will escape within three or four hits.

[8% from bubble, 3% slapped]


Up Tilt: Anchors Aweigh

Another trapping move, this move has identical lag and animation as Needle Fish, making it utterly impossible to tell which one BubbleMan.EXE used. When this trap activates, a giant anchor pops out of the bubble, and drops straight down. How did that... never mind.

The anchor drops very fast, and knocks anything that touches it away doing a little knockback and damage. If it impacts an enemy on the ground though, the damage and knockback shoot up, the enemy flying up, KO'ing at 110%. While in a bubble, it behaves slightly differently, floating slightly above the opponent, and bursting automatically if it lines up above them.

If BubbleMan.EXE doesn't have access to his Bubble Fountain though, he instead lifts the anchor over his head. BubbleMan.EXE isn't nearly strong enough to hold it up though, and drops it in front of him, stubbing his toe. BubbleMan.EXE grabs his foot and hops around, crying, before finally shaking it off. The anchor does some damage and knockback that KO's at 150% when dropped, and BubbleMan.EXE's body is a hitbox when he stubs his toe, barely doing any damage though. Used in this form, the attack has massive lag and duration; combined with low priority it is inadvisable to use it, but pretty hilarious.

[6% dropped, 11% on impact, 4% jumping]


Down Tilt: Aqua Whirl

BubbleMan.EXE takes a single step forward, thrusts his right arm out, and spins it in small, tight circles. After a bit of lag. a whirlwind of water the size of Luigi then kicks up in front of him, and spins away at Mario's run speed. It travels for about two and a half seconds before fading, but if it touches someone they are dragged into it and carried back for a second, vulnerable to bubbles and traps.

A good spacing move that can give BubbleMan.EXE some breathing room, and a very safe option if he isn't near his Bubble Fountain, at least in comparison to some of his other moves.

[6%]


SMASHES


Forward Smash: Harpoon Bazooka


You haven't seen the last of BubbleMan.EXE's cannon. Like the Bubble Shooter, BubbleMan.EXE pulls his weapon out, lines up a shot, but then begins to stuff harpoons down the barrel as he charges. When released, he fires from one to five spears at the enemy, each one doing decent knockback and chaining into the next.

BubbleMan.EXE's signature finishing move, the harpoons are fairly high priority and can KO at 160% with only one harpoon, and at 100% with all five. Fully charging this move takes time, but with bubbles and traps, it shouldn't be too hard to line up a good shot and fire all your harpoons.

[5%, 1-5 hits]


Down Smash: Coral Mine

This is BubbleMan.EXE's final trapping move, so pay attention. This move has no charging animation whatsoever, appearing entirely to be BubbleMan.EXE's idling animation until released, making it still impossible for your opponent to know one hundred percent what your trap is. When the bubble is attacked or gets within a stagebuilder block of the opponent, it activates, a bomb made of coral exploding in a radius of about twice the size of Bowser. The bomb can KO from 145%-105%, depending on charge.

If BubbleMan.EXE doesn't have his Fountain near, he pulls out the bomb and panics, kicking it away and cowering. Because of this it has a lot of ending lag, and the bomb is unprimed, doing considerably less damage and knockback, KOing only around 180%.

[14-21% primed, 7-14% unprimed]


Up Smash: Waterline

BubbleMan.EXE crouches down to charge this move, and then slowly raises his hands above his head, taking a lot of lag. If BubbleMan.EXE is within two battlefield platforms of any water source though, be it the bottom of the stage, the water in Delfino Plaza, or the Bubble Fountain, it shoots out a massive jet of water in the direction BubbleMan.EXE is facing, doing damage and pushing any enemies considerably back. This move can also be used to gimp, but the lag and angle makes it fairly difficult, and smart enemies can ride the water up before it goes back down.

If there's no water nearby though, BubbleMan.EXE's cheeks inflate. This can't be good. BubbleMan.EXE vomits up a veritable fire hose of water upwards, in a miniaturized effect of the regular attack. As you may expect, the ending lag rises considerably when used this way.

[9-14% summoned, 7-11% spat]


AERIALS


Neutral Aerial: Burst Your Bubble

BubbleMan.EXE stretches his arms legs, and head out in a star pattern, saying "Pop!" A sex kick move with little stating lag, its priority, damage, and knockback are all mediocre. If BubbleMan.EXE performs this move in his Bubble Wrap though, the bubble pops, increasing priority, range, and damage, and adding a push effect. BubbleMan.EXE does not enter fallspecial, but can't use his Bubble Wrap again until he hits terra firma.
[4%, 7% in bubble]


Forward Aerial: Bubble Raspberry

BubbleMan.EXE leans way in forward and sticks his tongue out at his opponent, blowing raspberries and bubbles at him. The stream of bubbles is low priority, but reaches out fairly far, and can catch opponents in a flurry of small hits, pushing them to the edge of the stream. BubbleMan.EXE can't shorthop this move though, as it has a good bit of ending lag, and absolutely horrid landing lag.
[Variable, usually 3-12%]


Back Aerial: Backstroke

BubbleMan.EXE leans back and pantomimes the swimming technique, actually moving backwards fairly quickly. His arms swing out three times, each time with slight upwards knockback. There's a good bit of lag, but each hit chains into the next, and it can combo into his Uair. It also gives him a little extra aerial mobility, not that he particularly needs it.
[4%, up to three hits]


Up Aerial: Scuba Squirt

BubbleMan.EXE looks up and shoots a stream of water from his scuba gear like Kirby does when underwater, pushing enemies up. It does little damage, only doing the max damage when the opponent is right on top of him, but the push effect makes it practically impossible to nail BubbleMan.EXE with a dair, and adds even more difficulties to a gimper's day. Very little lag, especiallly for BubbleMan.EXE.
[2-6%]


Down Aerial: Geyser

Pulling out a small bomb, BubbleMan.EXE drops it from midair down. If it hits an opponent on the way, it bounces off not doing much of anything and disappears. If it hits the ground, it explodes into a burst of water the size of Gardevoir's field, doing a little damage and pushing enemies away.

If it falls offstage though, something entirely different happens. In about half a second steam starts to rise from where it fell, and a second later a massive Geyser shoots out, the size of Snorlax, reaching up about three Ganondorfs above the stage. This form of the move does good damage and can KO at around 150%.

BubbleMan.EXE can also use this move to aid his recovery if he is to lose his BubbleWrap, throwing himself up back into the air and out of fallspecial, although he still takes damage. Even better, if this move falls into Bubble Fountain, it has the same effect as it would if it landed offstage.

[2% on hit, 6% on ground, 11% Geyser]


THROWS


Grab and Pummel: Waterboard

With his stubby arms and short stature, BubbleMan.EXE isn't winning any grabbing contests, that's for sure. His pummel is fairly decent though, he holds his opponent down, and vomits water over their head, doing 2% damage a second. Ewww...


Forward Throw: Shove and Slam

BubbleMan.EXE pushes the enemy away from him, then slams his shoulder hard against them. It has pitiful knockback though, and BubbleMan.EXE bounces off; landing about two battlefield platforms back. At least it gives him a bit of spacing...
[6%]


Down Throw: Belly Flop

BubbleMan.EXE throws his opponent on the ground, then attempts a body slam on top of them. Unfortunately, he's so lightweight and bubbly that instead of slamming them down, he bounces off. BubbleMan.EXE lands about a battlefield platform ahead in his tripped position, but his opponent is in his downed position. Its anyone's game here...
[8%]


Back Throw: Hose 'em Down

BubbleMan.EXE whirls around facing the other direction, and points his bazooka at his opponents face for one last hurrah. "Blub you!" he shouts before letting a jet of water shoot out, pushing them far back. It barely does any damage, but gives him a lot of spacing, at can give BubbleMan.EXE a chance to gimp the opponent if he's near the edge.
[3%]


Up Throw: Living in a Bubble

BubbleMan.EXE tosses his opponent lightly into the air, and holds his arms out wide, forming a bubble around them. They float upwards very quickly, but take very little damage. The enemy is stuck for about two seconds though, and is a sitting duck for your bubbles to start racking up damage.
[3%]


SUPER ATTACK


Super Attack: Bubble Parade

BubbleMan.EXE raises his hands, and the field fills with bubbles, and I mean fills with them. As in, you can't take two steps without running into half a dozen bubbles. The bubbles all automatically pop in eight seconds, but good luck lasting that long!


PLAYSTYLE


Playing As: The Art of Cowardice


Hopefully BubbleMan.EXE's playstyle is abundantly clear, even without this section. Get up a Bubble Fountain, camp, combo, KO. Its not as simple as it sounds though. You can't just sit there and spam your traps all day. Traps may get more damage in a single hit, but you need your regular bubbles to restrain your enemies too, so make sure you get a nice mix of empty and trapped bubbles. When you're not trapping a bubble, you should be trying to control your opponent's movement; crab toss forces the opponent to get into the air or give up approaching, and risk getting bubbled.

And combos, oh do you have combos. When you do eventually catch your opponent in a bubble, you've got a few ways to let it play out. Sometimes your bubbles are in a nice distribution and you can just let them play out like normal, maybe charging up a Harpoon Bazooka or preparing to finish the bursts with a Bubble Spread. However, its just as legitimate to jump right in there with a Bubble Raspberry, or chain a Backstroke into a Scuba Squirt. You can also just use the time to lay some more traps, its all good.

Eventually though, you will get separated from your Bubble Fountain. Relax, it happens. Your Needle Fish is a surprisingly decent damage builder without a bubble around, and Aqua Whirl can help buy you some time. Against melee enemies, you may just want to hide in your swarm of bubbles and head back to safety.

With Bubble Wrap, you've probably got the best offstage game out there. Hide offstage if you need to and toss a few crabs and shoot some bubbles at your enemies; its cheap as hell but nobody with half a brain wants to go up against you that far from the stage. If you've got an opponent with you, Burst Your Bubble is a surprisingly good gimper, assuming you're close enough to the edge to use it, and Bubble Raspberry can trap an opponent temporarily while you both plummet until only you can head back up. And for goodness' sake, don't forget to turn on your Bubble Wrap when you're on stage, that shield can save your butt!

BubbleMan.EXE can't KO too easily, and his priority is fairly weak, so don't forget what your character values above all else: cowardice. Hide, camp, and wait it out, you'll kill them eventually, if they don't kill themselves in frustration.

BubbleMan.EXE is a cowardly character, but you can play him however you want. Constantly camp, or head out when its safe. Your palette of potential combos is practically limitless, so have a blast. Or better, have a bubble.


Playing Against: That Mother BLUBer

Alright, so your opponent chose BubbleMan.EXE. Take a deep breath, you'll be fine. Choose the stage, and wait for the match to start. When the announcer hits two, punch the douchebag who picked him in the face, if his reflexes are slow enough, you can make him self-destruct before he attains consciousness.

If you're too slow though, you're gonna have to do this the hard way. BubbleMan.EXE isn't actually that threatening of an opponent as much as he is just an annoying one. He's fairly laggy, and unless he traps you in one of his bubbles, he can't rack damage either. Plus, his priority stinks as a whole.

The first order of business is how you'll handle the Bubble Fountain. If you've got a ranged attack, especially a spammable one, now is one helluva time to use it. If you don't, use the biggest hitbox moves you can, and wipe them out quickly, you do not want those things piling up on you.

Second, you need to separate him from the Bubble Fountain. Together, they are invincible, but apart, they're both rather manageable. Use your best approaches and try to push him away; he'll likely have his fountain set up near the edge, so try to knock him to the center of the stage, although that's easier said than done.

When fighting BubbleMan.EXE, remember three things above all: Never touch a bubble, unless you feel like losing control for a while as your damage meter climbs; Never go off stage if you can; and never, ever take the pressure off. He can't handle it, so don't let up.


MATCH-UPS


VS Meta Knight: 75:25 Meta Knight's Favor

As you may expect, the king of pressure soundly trumps the king of camping. Meta Knight may not have a projectile, but Mach Tornado is one fantastic substitute, even shielding him from Coral Mine explosions. Meta Knight is disadvantaged in that even he has trouble gimping BubbleMan.EXE, but he really doesn't need to; BubbleMan.EXE is too slow to really do anything to him without his bubbles, and Meta Knight can dispose of them rather quickly. BubbleMan.EXE can try to camp offstage with his ranged specials, but even then Meta Knight would punish him eventually. This really is no contest.


VS Snake: 60:40 BubbleMan.EXE's Favor

Snake on the other hand has a lot of trouble with our bubbly friend. Grenades take too long to explode to be a very effective anti bubble technique, and his aerials, while frightening in range, won't save him from Coral Mines or an Anchor. In the air, BubbleMan.EXE's Bubble Shield has him beat, and even his great recovery won't save him from a well-aimed Backstroke. Snake is also fairly comboable, and his C4 and Mines won't be much good against a character who camps as well as BubbleMan.EXE.

Its in no way a staged fight though, that dash cancelled Up Smash of his breaks right through BubbleMan.EXE's defenses, and nothing makes BubbleMan.EXE angrier than a mine right in his favorite spot by his Bubble Fountain. Aqua Whirl can mess up his approach good though, making this a competition of how well Snake can pressure BubbleMan.EXE


VS King Dedede: 50:50 Split

The King has plenty of ways to deal with BubbleMan.EXE. His Waddle Dees make great living sacrfices for the bubbles, and his aerials have more than enough range to clear them out. That chaingrab is as brutal as ever, and he's pretty hard to KO too.

Dedede's also a pretty massive target though, and with his fallspeed, size, and lag, once BubbleMan.EXE gets him in a combo, he's gonna stay in there for a while. Also, Dedede's air game, even his epic Bair are nothing against Bubble Wrap, and not even all five of his jumps can help him if he's caught far off stage, what with his vertical recovery and BubbleMan.EXE's ability to push opponents off stage with his Backstroke and Bubble Raspberry. It all comes down to a surprisingly even match. Be wary.


VS Falco: 60:40 Falco's Favor

When it comes to spammable projectiles, Falco's on the top of the list. Falco Phantasm lets him get across to BubbleMan.EXE pretty easily, and that chaingrab hits BubbleMan.EXE as hard as the rest of the cast.

If it wasn't for just how easily BubbleMan.EXE can gimp Falco offstage with the push from his Bubble Wrap, this would be a landslide, but BubbleMan.EXE absolutely dominates Falco offstage, his Dair useless against Scuba Squirt and Fire Bird getting stalled out fairly easily by the passive effect of Bubble Wrap's pop. BubbleMan.EXE is going to have a hard time getting him over there though, so its still his advantage.


VS The Black Knight: 60:40 BubbleMan.EXE's Favor

So, its light combo character vs heavy combo character, eh? The Black Knight's got a great approach through Warp Powder, no doubt, and he can combo BubbleMan.EXE just as easily as BubbleMan.EXE can combo him, but the match isn't quite in his favor. The Black Knight is, in the end, the biggest target in the game, and his aerials in the end just aren't enough to cut it against the endless parade of bubbles. Throw in his terrible edge game against BubbleMan.EXE's great one, and he's gonna have some trouble. He's heavy enough though that it'll be hard to get him over there, and his faster attacks and great priority will give BubbleMan.EXE hell while he can, making this in no way a one-sided fight. No way.


VS Hornet Man: 100:0 Hornet Man's Favor

Bubble Man's weakness is not the Metal Blade. It's the Hornet Chaser. Seriously, passive enemies that act fairly autonomously? Great, there goes your Bubble Fountain and your Bubble Wrap. Splash BubbleMan.EXE with honey, and he's a sitting duck. You've got no chance of taking out his bees with your pitiful damage either, much less his hives. Seriously, no character as entirely shuts down BubbleMan.EXE's play as much as he does. He attacks faster than you, has higher priority than you, there's basically nothing you can do. With his ability to heal too, don't be surprised if the match ends with him at 0%.


VS ProtoMan.EXE: 65:35 ProtoMan.EXE's Favor

NetNavi vs NetNavi, eh? ProtoMan.EXE's got the StepSword, and can cut right through your defense, and his Sonic Boom does quite a number to your bubbles. His defense is fantastic, with the energy arcs from his swords and his Proto Shield protecting him. It's not all bad, his air game isn't to great, and once you can force him into a bad position you can rack up the damage or ravish him offstage, but otherwise, he's controlling this match, aight?
 

UserShadow7989

Smash Journeyman
Joined
Aug 13, 2007
Messages
315
Ah, nerts. Not once, but thrice I'm beaten to the new page. Oh well, Akira needs more fine tuning anyways.

Anyways, let's get constructive for a minute. Bubbleman is another great set from DarthMeanie. Despite being a trap character, he goes about it in a fairly creative way and it's perfectly in-character for him to be one, so no complaints. The attacks are all creative, but still flow into a cohesive playstyle; a very good balance and something you seem to excell at.

Unfortunately, that's not all that's consistant about your sets and it's the one flaw that's holding you back- writing style. While you usually include the needed details, sometimes you leave out important footnotes and what you do remember is presented in an overly wordy manor. For example, let's examine the Side Special:

BubbleMan.EXE swings a strange[how is it strange? Is the fact it's strange a needed detail?] bazooka over from his shoulder, and lines up a shot, aiming it by tilting the control stick[run on sentence]. When fired, [does it fire automaticly after X seconds, or do you press a button to fire?] a strange [see above] bullet shoots out very quickly [can you give us an idea of how fast?] with high priority. On impact, it explodes into a bubble, doing some damage and hitstun, but it doesn't trap the opponent. This move will not KO, even at Sudden Death.

If BubbleMan.EXE fires this move into one of his bubbles though, ['though' is not needed] it will explode into a Bubble Spread, an explosion slightly smaller than a Smart Bomb. Any bubbles caught by the burst will also explode, starting a chain reaction, but the hits don't stack. A Bubble Spread will quickly eat up BubbleMan.EXE's supply of bubbly doom, but does a good bit[plenty, a lot, or the actual damage amount will suffice] of damage and knockback that KO's at 140%. If BubbleMan.EXE shoots an enemy trapped in a bubble, the damage and Knockback go even higher, KO'ing at only 120%. [just say "Enemies trapped inside bubbles recieve (damage)% and knockback that KOs at 120% instead"]

Remember that while using the Bubble Spread will destroy all of your bubbles, it will also activate any traps inside them, so keep that in mind as well[redundant, cut either the first part or the last].
Can be written as:

Bubbleman.exe swings a bazooka over his shoulder. The player can aim the bazooka by using the control stick, and fire by pressing the B button again. A small bullet is launched from the weapon, moving at the speed of [insert character]'s [insert projectile/run]. The bullet has very high priority, and explodes into a bubble on contact. Does 4% damage and long hitstun, but no knockback. The bubble does not trap foes like one from a Bubble Fountain.

If the bullet hits one of Bubbleman.exe's bubbles, that bubble explodes with a blast radius slightly smaller then a Smart Bomb's. Any bubbles caught in the explosion (called a 'Bubble Spread') also explode, creating a chain reaction. The Bubble Spread does 9% damage and knockback that KOs at 140%. Multiple explosions do not stack. Opponents trapped in an exploding bubble recieve 13% damage and are KOed at 120% instead.

While a Bubble Spread eats up Bubbleman's supply of bubbles, remember that any traps inside an exploding bubble instantly activates.
In short:
1. Cut details that aren't needed and/or don't tell the reader anything.
2. Use the smallest amount of words needed to convey something. If the word can be cut, cut it.
3. If it needs 3 or more commas, it's probably a run on sentence. Cut it into two smaller ones.
4. When done with a sentence/paragraph, reread it and ask yourself "Is there a way to make it easier to read/understand?"
5. Break any of the above rules if following them would make you sound like a caveman.

{Note: I learned all this from an article on http://www.Sirlin.net, a website on design.}
This is the only problem I can spot in Bubbleman (though maybe someone who can review worth a crud will be more helpful) and I feel that other then readability, Bubbleman.exe is a set worthy of praise. Congrats on pumping out these sets as fast as you are, by the way.
 

darth meanie

Smash Journeyman
Joined
Jun 6, 2008
Messages
452
Gah, and I thought that I had finally fixed that problem. Thanks for the input at least, at the clearer criticism on my greatest weakness. I'm working on it, I'm working on it.
 

Hyper_Ridley

Smash Champion
Joined
Dec 21, 2007
Messages
2,299
Location
Hippo Island
So, Bubbleman.EXE. I still fondly remember Agi's moveset for the classic Bubbleman, so naturally I'm gonna have high expectations for a spirtual "remake" of him.

Right from the get-go, your stats had me curious. A character who is slow and has poor priority and good jumps, but he's more of a combo-based character than an aerial character? Just how the hell do you expect me to believe tha-

Ohhhhh, so he's got a bunch of literal traps to keep enemies pinned down so he can just keep attacking with bubble after bubble after bubble....you took a tried and ture archetype of bubbles that trap enemies and ran with it, creating a large amount of diverse, interesting attacks. Turning a sex-kick Nair into a memborable attack is quite an accomplishment.

The playstye was a nice take on trap characters and combo characters as well. Rather than just run around the screen planting traps and hopnig your enemy runs into them, Bubbleman wants to activle send the traps after the enemy so he can combo. You even managed to make tripped attacks play a useful role in the playstyle, kudos to you. Like Black Knight, this was a combo-based character that had combos with more substance than "lol press A then FTilt then UAir!"

Overall, this is definitley your best set so far, and I think it even tops Agi's MYM5 Bubbleman. It had a lot of creative attacks and a well-made playstyle that took two contradictory archetypes and spliced them together. Just work on your writing style (which I still don't find as terrible as everyone else) and this could be a very strong contender in the contest. Gee, I've been finding a lot of great movesets in recent memory haven't I? Lol, I guess this just goes to show how much we're all improving. :bee:
 

Wizzerd

Smash Ace
Joined
Feb 24, 2009
Messages
929
Bubble, bubble... isn't it fitting that I'm almost done with Bubbles now? Anyway, Bubbleman.EXE is an excellent set by any standard. Making a comboer with low movement and speed must be a difficult thing to do, but you pulled it off very well. As HR said, this is an excellent twist on the standard trap character. Good job here. However, my main gripe is the way you organize things. Your writing style falls under this, but it isn't my main point. What I'm saying is that there's some awkward organization in there. Simple stats/10 are much easier to interpret than prose. Yeah, these are minor nitpicks though, and this is a well-done 'set, I comment you on it.
 

MasterWarlord

Smash Champion
Joined
Aug 24, 2008
Messages
2,911


BACKGROUND

Roller Coaster Tycoon is a series of RTS games on the PC in which you design theme parks. While the game had specific objectives for you to meet, who cares about some obligatory computer “park rating”? It clearly has no taste and is very robotic. No, Roller Coaster Tycoon plays like a sandbox game in that the majority of your enjoyment will be in just messing around with the thing and making the parks exactly how you want them.

. . .But how can one make a moveset for a game? Well, the visual representation of “Roller Coaster Tycoon” is a generic businessman. That said, the character slot “Roller Coaster Tycoon” could still be much better described as a implementation of the game itself into Smash rather then the guy who makes the parks.

OPENING YOUR PARK

Roller Coaster Tycoon is an absolutely blatant trap character and extremely “unsmash”, though anything less would fail to do the character justice. If you are SkylerOcon (No fun or smiling permitted), please stop reading this moveset now.

Every single one of his button inputs alters the stage in some way, without exception. While the tycoon has no lag whatsoever in using one of his button inputs to have his mechanic start building a ride (Who pops into existence just to do so), the mechanic can only work on constructing one ride at a time. If you order a construction accidentally, just press the button input again to cancel it. The Tycoon can only have one of any single type of ride at a time.

Seeing there would barely be any stage left to walk on if the tycoon built his park on the playing field, he instead builds his rides in the background. Each ride has an entrance and exit, roughly Bowser’s size. If a foe steps in front of the entrance, they’ll be forced to go onto the ride, the effects varying based on what ride they went onto. Once the ride’s over, they’ll come back out the exit. For shops and stalls, the foe simply has to step in front of it to activate its’ effects and goes back into the foreground afterwards, being immune to the shop for a few seconds. The Tycoon can also enter his own attractions (Mainly to abuse the invulnerability frames), though he’s not forced to, having to press up in front of the entrances/shops to enter them like doors in the SSE.

Now then, running your park isn’t all fun and games. Thanks to the lovely economic situation we’re now in thanks to our commander in chief, you’re going to have to make a living off of this theme park you’re creating. It costs money to build each and every addition to your park. You can get more money by forcing your enemies to go on your rides and buy your merchandise, as well as other matters elaborated on later. You start with $750, and it’s displayed next to your percentage. When the Tycoon dies, all of this is reset and all his rides instantly vanish.

Your most obvious way of killing your foe will be to blow your rides up while the foe is on them. To do so, simply press the button input of the ride you want to incinerate. This deals 18% and upward knockback that kills at 200%. . .Yeah, it’s gonna be a good while before they die this way if you just randomly blow up everything they board. While you can blow up your shops and stalls, foes will instantly leap back and not be caught in the explosion if they’re using one, so the only purpose of blowing them up is to relocate them.

Oh, and one last thing before we dive into the main moveset. You can’t honestly picture somebody like Ganondorf riding a merry-go-round, can you? No, you can only force characters to go on rides they’d actually enjoy going on. Every characters has a level of preferred intensity they look for in rides. If the characters prefers high intensity rides (Such as the earlier example of Ganon), they’ll refuse to go on your cute little rides for racking damage/stalling. If they’re too scared of the big rides though (Peach), you’ll have an annoying time KOing them due to them refusing to go on your roller coasters and some of your thrill rides.

Before this turns into another Cutesy, let’s begin with the main moveset, shall we?

STATS

Priority »»» 10
Range »»» 10
Attack Speed »»» 10
Recovery »»» 7.5
Size »»» 6
Falling Speed »»» 5.5
Aerial Movement »»» 5.5
Weight »»» 5
Traction »»» 5
Movement »»» 5
Jumps »»» 5
Power »»» 2

The most deceiving things about these stats is the attack speed. The Tycoon has literally no means of direct attack, and he can only –begin- the construction of his buildings instantly, it still takes time for them to actually be built. The range/priority comes from all the infinite priority disjointed hitboxes and the massive stage control the Tycoon has – he has no melee range or good jointed priority to speak of. Aside from that, the stats are pretty average and boring, being the norm for a generic human, though the low power can be alarming.

SPECIALS – PARK ESSENTIALS

Neutral Special – Park Entrance


This takes a mere 2 seconds for your mechanic to build and is absolutely free, popping into existence almost instantly. This is basically just a small arch, not taking up any more space then the standard ride entrance. This is the only “ride” foes cannot enter, but this is still without a doubt the first thing you’ll want to build.

Every 10 seconds, a generic citizen will enter through the park entrance, a guest to your park. These guests are your primary source of income, as they have to pay the same amount of money to go on the rides as your rivals do. They vary in size from Ness to Marth, coming in many varieties. These random varieties determine the amount of HP and the types of rides the guests will prefer. While random elements might be a turn-off, you won’t get guests that prefer types of rides you haven’t built yet, so it’s not that big an issue. And yes, your guests are actually attackable – unlike your rides which are safe in the background, you’ll have to actively protect your guests from enemy fire.

If you enter your park entrance, you can stay inside for up to 3 seconds (Press A to come out early) to hide from your foes, though you’ll have plenty of lag going in and out of it. While inside, you can tilt the control stick up and down to make a green number appear and make it go up and down. By default, it’s set to 20, and it goes up and down pretty fast. This number is how much money you’re charging everybody to go on your rides, save your shops and stalls which charge half the number.

Guests/enemies will always go on rides if they encounter them regardless of price if the ride’s in their intensity range, but if somebody doesn’t have enough money to pay for a ride, they won’t be forced to ride it, meaning there’s little you can do to harm foes if you just empty them of all their cash instantly. While you can just put free admission on the rides, you’ll obviously run out of cash fast that way. All foes start with $300, their money also being displayed alongside their percentage, while guests have a mere $100.

As an Easter egg, the banner above the arch displays the name of your Brawl tag followed by “Park” (I.E. “DFM Park” with a DFM tag). If you don’t have a tag, it simply says “Tycoon Park”.
[$0]

Side Special – Hire Staff


This move has two variants based off whether you input it as a forward or back special, though they both hire staff. Inputting the move as a forward special hires a security guard with below average lag, who are needless to say far more useful here then in Roller Coaster Tycoon. They’re roughly Marth’s size, have 25 stamina, and walk about slowly at Ganon’s walking speed. They’ll patrol back and forth on the platform they’re summoned on, swinging their nightsticks to deal 10% and average knockback with decent range/average lag.

By inputting a forward special when next to a security guard, you can set the security guard’s patrol zone by dragging around a cursor (Which moves incredibly fast). Move the cursor around to get to the start of the patrol zone, then hold A and drag to the end of how far you want the zone to be. You still can’t make the guard leave the platform he was summoned on, but considering they’re so slow there’s little reason to. If anything, you’ll want to just hit A once casually to tell the security guard to stay put, particularly in front of a ride exit so a foe gets hit by the guard the moment they come out the exit (Though they still have time to dodge, there’s nearly no lag coming out of a ride).


By inputting a backward special, you can hire a mechanic, who will happily wave before going into the background and vanishing, not seeming to do anything. However; this allows you to build two buildings at once, one per mechanic.

You can have up to three security guards and three mechanics, having one mechanic at the start of a match who works for free. Your other employees cost money though, $10 per second per mechanic and $5 per second per security guard. Needless to say, this can add up pretty fast, and you’ll be hard pressed to actually make use of all your employees at all times anyway, so try to flood your park with employees.
[$5 per second] [$10 per second]

Up Special - Supports


This move has no function if used on the ground, but if used in the air one of your mechanics will start building supports from the ground up to the point where you used the move. This can be used off the stage, the mechanic working up from the bottom of the screen to get to the point you used the move. This takes 3 seconds and costs $35 for every Ganondorf high the mechanics have to build, and the minimum you can build up is double good old Ganon’s height. While the mechanic builds the supports in the background, on the top of the supports will be a drop-through platform that reaches out from the background onto the playing field which can be stood on normally, being 1.5X as long as a Battlefield platform.

You can build as many supports as you want, unlike your other constructions, and in addition the mechanics will build around your other rides when creating the supports, meaning they don’t take up space. On the contrary, your supports are the main thing that allows you to be tourney viable, as it allows you to create more space to build stuff on those tiny tourney legal stages. Yes, I am fully aware this is a terrible recovery, if it can even be called that, that’s still to come.
[Variable $]

Down Special – Roller Coaster


Now then, this is the first true ride of the moveset in one sense in that foes can actually enter it and it has a normal entrance and exit, but it’s much more versatile then most in that you manually construct it rather then your mechanics doing everything for you. When you first input this move, the tycoon steps into the background, becoming invulnerable. You can stay here for a maximum of 5 seconds and go into this quickly, but there’s terrible lag coming out of it. While in the background, you can press shield to change your track piece type, A to place the piece, and B to go back onto the battlefield early. This does not function in the air. The type of roller coaster you make changes to match the stage – steel coasters for urban stages, wooden for medieval/jungle ones, log flumes/water slides for stages like Delfino Plaza, etc.

Station Platforms
Regular Track Pieces​
U-Turns​


The five track pieces available to you are station platforms, regular track pieces, u-turns, the entrance, and the exit. Station platforms aren’t anything special, but you can’t place the entrance and exit on regular track pieces. Regular track pieces can be rotated, meaning you can make them climb up into the air or go down for a dramatic plunge. Each piece aside from the entrance and exit costs $15, and all pieces outside the entrance/exit are roughly half a Battlefield platform in size.

Now, before your roller coaster can truly function, you have to loop it back around to connect to the opposite end of the station platform. You’re perfectly allowed to have the roller coaster go off a blast zone on it’s way back – it’s pretty much the only way Tycoon will be scoring any KOs. . .But this is very expensive to make and will require you to step back into the background countless times, primairily due to you having to bring the track back around into a loop before the ride’s finished. But that’s what your other rides are for! Use them to occupy your foe so you can build your ultimate death trap in peace.

You can’t blow up roller coasters like your other rides, but there’s no limit to how many you can make, meaning you can possibly make a secondary roller coaster that simply goes on forever to occupy your foe while you continue to expand your park. Due to all the freedom you’re given with roller coasters, they’re easily your most versatile ride. For the majority of the ride, foes won’t take damage, but when going downwards they take 5% a second.
[Variable $]

GRAB

Grab – The Claw


In Roller Coaster Tycoon, you could casually pick up your guests and employees with a claw like device, then place them anywhere you wish, so long as it was in your park boundaries. This naturally allowed for plenty of sadistic manipulation of guests such as drowning them and what-not, and this carries over to Smash quite well.

Upon pressing Z, a claw (Roughly Marth’s size) appears double Ganondorf’s height above the tycoon with below average lag, and you can they move it about at Ganon’s dashing speed in any direction for as long as you desire, although if the tycoon gets hit the claw will disappear. Pressing Z causes the claw to vanish early with below average lag, while pressing A causes the claw to open up it’s pinchers and try to grab someone with average lag and reach. If you do grab someone, you’ll deal 1% to them every other second and can still move the claw around at will, then release the victim with the A button. Foes must button mash out like a grab like normal. This can be used for KOs once you’ve got some damage up, mainly gimp ones, but more importantly you can use the claw to drop your foes off in front of the entrance to a ride. The claw is also an excellent shield, absorbing any and all attacks.

The claw is fully capable of grabbing your guests and security guards in addition to foes, making it all the easier to manipulate your park as you see fit. Place your guests in front of the rides you need them to go on and move your security guards to new locations rather then hiring new ones. As if the almighty claw couldn’t grab enough already, it can also grab the tycoon himself, serving as his primary means of recovery.

While you can obviously use this in the air due to it being a recovery, you can also use the claw when inside one of your buildings or are doing anything else whatsoever. This allows you to still put up an offense while cowering away and hiding, and also allows you to constantly be doing something or other for the betterment of your park by moving your guests out of harm’s way.
[$0]

STANDARDS AND TILTS – SHOPS AND STALLS

Standard Attack – Cash Machine


This and all the other shops/stalls are Ganondorf’s height and 1.5X Bowser’s width, cost $75, and are built in 8 seconds. The function of this particular stall is another move that is absolutely vital for the Tycoon – foes and guests who go up to it will take advantage of the ATMs to instantly restore all their cash to their max, enabling them to continue going on rides. Obviously, this doesn’t cost them anything. You –WILL- have to get your foe to eventually come to one of these at some point or other, so plan on it.

This button input has a secondary function, you only blowing up the cash machine if you’re standing in front of it. If used elsewhere, the tycoon runs his finger across his neck and says “You’re fired!”. If used in the middle of nowhere, you’ll fire one of your extra mechanics (You can’t fire your main one), and if used in front of a security guard you’ll fire him. If you run out of cash, all your extra employees instantly quit without needing to be fired.
[$75]

Dashing Attack – Souvenir Stall


Foes who go up to this shop can purchase either a balloon or a umbrella. Both cost the same amount and the parasol’s the default, but you can switch it to the balloon by pressing B as your character steps up to the stand. If items are turned on, you can purchase a random normal item with shield also.

The foe actually gets to make use of the item they purchase. The umbrella functions identically to the parasol in Melee, but the balloon doesn’t function as a battering item and simply gives you a float. Unlike the parasol’s “float” this not only slows your momentum but causes you to even rise at the rate you’d normally fall with the umbrella – but the balloon can be popped with any attack, making recovery with it dangerous.

The main reason you’ll be building this is to buy the items yourself – primarily the umbrella. While the recovery bonus is quite welcome, you’ll be wanting it because it will give you some actual attacks with its' battering weapon properties. While they’re still pitifully weak and low in number, raising your total of GTFO moves from anything other then zero is always nice. If your foe has a terrible recovery, an umbrella/balloon might sound like a dream to them. If that’s the case, blow the stall up after you get your umbrella immediately.
[$75]

Side Tilt – Food Stand


There are many types of food stands available in Roller Coaster Tycoon and they appear at random when you use this move, but they all function identically, so the extra types are just Easter eggs. Now then, guests and foes will eventually get hungry from all the time they spend in your park and want some food, a thought bubble of the food item your stall produces appearing above their head. The guest/foe will refuse to go on any rides until their hunger has been satisfied. Upon picking up a food item, the guest will stand in place and eat to restore 2% per second for 4 seconds, though foes can move around while eating and have super-armor while doing so. It takes roughly 2.5 minutes for somebody to get hungry, and this timer carries over stocks.
[$75]


People can also get thirsty, and inputting this move as a btilt builds a soda stall (No variations, this is by far the most common means of drinks in the games) rather then a food stand. This functions much the same way, with everybody simply having separate invisible counters for thirst as well as hunger. The thirst of the people builds faster then their hunger, taking only 2 minutes.

If you intend to abuse the healing and superarmor by going to get food/drinks yourself, you’ll be disappointed to know that the tycoon has extra ending lag when finishing off a food item to prevent him from just re-entering the stall to get more superarmor. Bah.
[$75]

Up Tilt – Bathroom


Rather then getting a thought bubble, foes will start doing frantic little dances when left to stand in place when they need to take a piss and will lose the ability to walk (And thus their ftilts). The counter for going to the bathroom is pretty high, 4.5 minutes, but every soda the foe drinks makes the foe have to go to the bathroom 1.5 minutes sooner. Unfortunately, you don’t get any profit off of this (What do you mean I can’t tax people on bathroom breaks?!?), so this is far from high priority on your list of things to build.

All of these various needs (hunger/thirst/bathroom) for the people cannot stack, the other two counters pausing when one of the counters hits zero. Considering guests will tend to still eat/drink when not at max hunger/thirst, try placing your soda stall and bathroom close together, as the guests will probably have a good deal too many unnecessary sodas. . .
[$75]

Down Tilt – First Aid Room


Upon entering this stall, foes get healed for 15% over 5 seconds. Sure, it makes you a quick buck, but this isn’t one of the obligatory needs you have to fill to satisfy your customers, so what’s the point, really? Well, much like the souvenier stall, you’ll be wanting to go into this stall yourself to get some free healing. Unlike your guests, you can leave it early with a casual press of A. The first aid room can only treat somebody once every 15 seconds, preventing the entire match from being a king of the hill over the place.

What you’ll want to do is to assign a security guard to stand in front of the first aid room to block foes from getting in. Even if they do knock the guard away (They –do- take knockback) and get inside, the guard will come back to his spot before they leave the first aid room and smack them with his nightstick on their way out to limit the healing, as there’s more ending lag coming out of this place then your other attractions.
[$75]

SMASHES – THRILL RIDES

Forward Smash – Motion Simulator


This is a rather small ride, being only as large as a shop/stall, though it costs a good $150. Once the foe goes inside of the thing, it starts rocking about every which way violently, dealing 17% damage total over the 2.5 second duration. While the ride is pretty fast and has little notable about it otherwise, if you fully charge it the foe will be dizzy and sway to the right or left a Battlefield platform’s distance upon coming out. While the foe will have super armor as they do-so, meaning they can’t just be grabbed and they won’t walk off edges, you can get free extra damage and time to yourself by setting up rides on either side of the Motion Simulator so the foe automatically is forced into another ride. Due to being unable to build more then one of the same ride, you unfortunately can’t just set up mass motion simulators for an infinite (Or close enough to one).
[$150]

Up Smash – Extreme Scream


The longer you charge, the higher your mechanic will build up the extreme scream (Also known as the Whoa Belly), though it’s always only double Bowser’s width. Minimum charge makes it go up 2.5X Ganondorf’s height and costs a mere $80, while a maxxed charge doubles both cost and size. If you build some supports then build a tall Extreme Scream on top of it, it makes for an easy KO move, but even without all that set up it’s still the best ride to blow up to go for a KO on the foe when they reach the top of the ride, thanks to the vertical knockback of ride explosions. Foes take anywhere from 12-28% while on the ride over time based on how long their ride on it is. While this ride is near useless uncharged, it’s not hard to find some time to charge it, considering how good you are at stalling. . .
[$80-160]

Down Smash – Swinging Ship


While this ride isn’t absolutely enormous, the actual ship part of the ride being around the width of a Battlefield platform and Mario’s height, it requires 1.5X the distance of a Battlefield platform on either side of it due to the arc the swinging ship goes in. This costs a rather meaty $200 regardless of charge. Charging increases the duration of how long the ship will swing to and fro and thus also the damage, anywhere from 2.5-5 seconds and 14-26% damage.

While this move isn’t that notable in damage output, this ride isn’t entirely in the background. It’s much like the statues in Castle Siege in that you can walk through them normally, but it absorbs projectiles. It still can’t be destroyed like the other rides, but the swinging ship is a hitbox to foes not on the ride when it’s swinging about. Aside from being great for FFAs, this means that you can board the ship yourself to set into motion, or simply send a guest to ride it in order to do so. This makes a great centerpiece to your park to give foes a consistent obstacle they’ll have to go around and to render projectiles obsolete.
[$200]

AERIALS – GENTLE RIDES

A small note before we go into the aerials is that mechanics will build up supports to the point of where you used the move before constructing the actual ride that button input is assigned to. If you want to build one of these five “aerial rides” on the ground, just shorthop and use the button input, as if you do so the mechanics will just build the ride directly under your location (You have to be the minimum distance into the air to build supports – double Ganondorf’s height - for them to insist on building them rather then building the ride below you.).

Neutral Aerial – Merry Go-Round


This ride costs $100 with a 10 second build time, and is Ganon’s height/2.5X Bowser’s width. This ride is pretty simple and only deals 1% per second to foes that are on it, but the duration of this ride is –very- long – 7.5 seconds. This will be one of the first rides you’ll want to build so you can send your foe off to humiliate themselves on the merry go round (A shame so many people refuse to go on it) while you expand your park, it serving little other purpose.
[$100]

Forward Aerial – Bumper Cars


This ride takes 12 seconds to be built, costs $120, and is Ganon’s height/3X Bowser’s width. People stay in the bumper cars for a mere 2.5 seconds due to having no partner and take no damage from this move otherwise, but for every additional guest that goes onto this ride (There’s no limit to when people can board it or how many there can be), the duration will be doubled for each guest, and people inside will take 3% per second as they bash together with the other bumper cars. Seeing this damages guests and potentially puts them in danger, you’ll be wanting to steer guests away from this ride, possibly building it off the main stage to prevent them from entering it entirely, and only bring them over to use as “ammo” to damage/stall foes with when they board the bumper cars.

The tycoon can also go onto the bumper cars himself, though the only reason he’d want to do that would be so the foe actually takes damage and stays on longer if they’re currently on solo. While you won’t be able to do much while inside here, your foe will be occupied and your rides under construction will continue to be built. The tycoon will also take the same damage as anyone else, though, so be careful. If two players (Namely you and the foe) are on at the same time, they’ll go into a button mashing contest, the winner dealing more damage/taking less based on how much more they mash.
[$120]

Back Aerial – Haunted House


This ride is double Ganondorf’s height and Bowser’s Width, costs $150, and takes 12 seconds to build. Inside, foes take a somewhat “ho-hum” 12% and are trapped inside for a decent 4 seconds, but the real highlight of this move is that once foes come out of it they’ll be somewhat spooked. This has no effect on gameplay outside a new idle animation for 10 seconds, but during these 10 seconds foes will be willing to ride low intensity level rides. That said, the haunted house is still a rather low intensity level ride, so the higher ups like Ganondorf will refuse to go on this and thus still will refuse to humiliate themselves on the Merry-Go-Round, but that fat fart Bowser is another story. . .
[$150]

Up Aerial – Ferris Wheel


This ride takes up an abnormal amount of space – 2.5X Ganondorf’s height and a Battlefield platform’s width, making this an absolute beast of a ride in size. In addition, it costs $180, fairly steep for a ride of this price, and takes a lengthy 16 seconds to be constructed. So what does this thing do? It’s a clone of the Merry-Go-Round, 7% over 7.5 seconds, rather unattractive when the Merry-Go-Round is so much more space and cost efficient.

However, this ride can be an excellent combo starter. . .Build it below another ride, then once the foe reaches the top of the arc, blow them up so they go through the drop through platform and land in front of the entrance to another ride. While this can work with any ride, the Ferris wheel’s height makes this easier to do, and the fact that the foe gets rotated around a good deal means that the placing of the ride above the ferris wheel doesn’t have to be precise – just wait for the foe to rotate to be below it, then send them sky high with an explosion.
[$180]

Down Aerial - Slide


While this ride is only 1.5X Bowser’s width, it’s double Ganondorf’s height. It’s fairly run of the mill in build speed/pricing, 14 seconds and $140. Now then, this breaks the rule established with the other aerial rides in that your men won’t build up supports to it in the normal fashion. While you’ll be hard pressed to notice the difference at first, the platform on the top of the supports will be entirely in the background, meaning this is your only ride you can build with nothing whatsoever under it.

Now that we’ve established that, the area where you first press this button input will be where the entrance to the ride is built, but the entrance is located at the top of the ride. There’s an actual platform as wide as the entrance you can stand on in front of it, but the exit is at the bottom of the ride, double Ganondorf’s height below, with nothing under it. Naturally, you’ll be wanting to place your slide in such a way to either gimp foes or to drop them into a gigantic cluster of rides. The actual ride is over in a mere 2 seconds and deals only 5%, this ride requiring strategic placing to be useful.
[$140]

FINAL SMASH – GO KARTS


Upon activating the final smash, the camera zooms in on the Tycoon as he rubs his hands together greedily, then pans back out as he steps into the background. From here, you can make a Go Kart track in an identical fashion to your roller coasters, but you have 8 seconds to do so and it’s absolutely free. Once the time’s up or you’re done, all guests will start heading directly for the go karts, ignoring all other rides. You have to get the foe to come to the go karts before the 8 karts are filled up, or else the final smash is essentially wasted, as once everybody does three laps around the track, it vanishes and the final smash is wasted, outside some free profit from your guests.

If you –do- get your opponent to go on the go karts, it starts up in 8 seconds, not waiting for a full load. The foe must button mash to get ahead of the race, as for every enemy racer that beats them they’ll take 30% damage. You can board the go karts yourself to add to the chaos and give your enemies another opponent to beat, though you’d be better off building more rides anyway. Of course, you can always just make the track loop off the edge so it KOs the foe, but with only 8 seconds to do so this is easier said then done, and if you haven’t finished a loop before your 8 seconds are up the final smash is entirely wasted.
[$0]

PLAYSTYLE
Like any good blatant trap character, the Tycoon must first set up before he can do much of anything. He has a much harder time doing this then most trap characters in that he has no direct attacks whatsoever. That said, there’s little foes can do to stop you to from constructing buildings seeing there’s no lag for you to order your mechanics to get to work and they can’t be attacked, but you’ll be taking tons of punishment while they’re being built none-the-less. To minimize this, you’ll be wanting to use your claw and security guards to the best of your ability, and best of all set up a souvenir stall and equip yourself with an umbrella in order to be able to actually defend yourself. Don’t worry about your foe picking one up, they have better options then to use such a pathetic weapon.

Once you actually have a few buildings up, making more instantly becomes much, much easier. Use a merry-go-round to eliminate foes from the picture, or just simply go on the ride yourself to hide as your rides continue being built. You can use your claw to defend yourself on the way out and pester your foe/save guests all the while. Swinging ships also give you an actually large hitbox to work with, far bigger then a mere ride entrance. Build one ASAP.

Another thing to look into is making a chain of rides for maximum stall time. Make a Motion Simulator in the middle of a Merry-Go-Round and a Ferris Wheel, your two longest running rides. Place a Slide above the Ferris Wheel, then when the Motion Simulator forces the foe into the Ferris Wheel blow it up to send the foe up into the slide. Have two nice little stalls on either side of the Ferris Wheel foes can DI into once they come out of the Slide, as well as a security guard and your claw ready where the Ferris Wheel once was once they come down from the Slide. Leave no space free from your onslaught of traps. The possibilities are endless.

While this is all going on, you’ll be wanting to build a coaster as your primary KO move. While you could go with an Extreme Scream, a coaster generally will take less room and you can manipulate the track to go around your other rides. Of course, this is more expensive and time consuming, but this can possibly net you an additional KO once the foe respawns due to it not requiring you to rack the foe’s damage.

The main thing that prevents Tycoon from being garbage tier is his ability to 3 stock foes. While he can build up his park time and time again with each and every stock, this is easier said then done. That said, the Tycoon is more capable of this then most trap characters, as he can abuse invincibility frames by running and hiding in his rides, particularly by healing in his first aid room. It’s not even necessary to guard the place with a security guard – if you have a roller coaster the foe’s percentage won’t matter anyway. In addition, the Tycoon’s up special allows him to make as much space as he wants to build his park with regardless of how small the main stage is. Before long, you’ll be troubled to freaking recognize the base stage at all.

That said, one thing preventing your complete and utter dominance once you have a fully functioning park are the needs of your foe, their cash/hunger/thirst/bladder. You’ll be wanting to satisfy these needs before they come into play, as if you can manipulate your foe to go into them with your other rides, particularly a Motion Simulator with stalls on either side, it’s far easier to meet the needs. If the foe becomes immune to all but one ride, though, prepare to be in for hell. Money is more only a problem early game, so you don’t have to worry about that as much. Just go make everything free in your park entrance. Your park should already be big enough by this point for you to go without additional income for a bit – just don’t grow too fond of your Security Guards.

Of course, Tycoon hates moving stages, but the legal ones, Delfino Plaza and Halberd, his rides will stay in tact so long as he doesn’t build the rides so far off that the main platform doesn’t pick them up, and if that’s not enough space for him he can always build up supports to make additional platforms. The Tycoon also absolutely LOVES Smashville (The most neutral stage in the game) – that gigantic moving platform can make your rides much more of a threat and opens up a whole new layer of strategies.

MATCH UPS

VS. Wario: 25/75, Wario’s favor
Wario’s waft power replaces the normal bathroom need, meaning he’ll have to use it a good deal sooner. While this might sound good for the tycoon, Wario can still use this as an actual attack, and if he actually uses a fully charged waft in the bathroom he’ll blow it up, wafting out through the top of it. No joke. This means you’ll constantly have to replace your bathrooms against Wario, though that’s not a big issue, seeing they’re so cheap.

Wario’s excellent aerial mobility allows him to move around the ride entrances much better then other characters, and that goddamn bike of his allows him to pass ride entrances without going into them. Thankfully, the claw and security guards outprioritze the bike, meaning it doesn’t give him the match up. That said, Wario is pretty much the jack of all trades, and seeing how good he is at avoiding your rides in general and the little bathroom easter egg to boot, he’s a great counter for the Tycoon.

VS. Mr. Game & Watch: 60/40, Tycoon’s favor
Sure, the Tycoon will be pressured to all hell at the start of a match, but G&W and other speedy characters can’t gimp the Tycoon nearly as well as he’d like for an easy KO. While if the Tycoon just uses the claw, he’ll be rather gimpable, if he floats back to the stage with an umbrella he can defend himself from being gimped with the claw (So long as he sets his momentum to go forward before he takes out the claw, he won’t need to control his main body). One of Game & Watch’s primary advantages, his disjointed hitboxes, also means little to nothing in this match-up. While G&W will indeed rack up the Tycoon’s percentage before he gets much set up, the Tycoon can stall his demise with his great recovery. While G&W’s aerial DI and small size help him out here like Wario, he can’t avoid the rides nearly as well as the fat lard due to his lack of a bike, and he also can’t KO and is easily KOable by the Extreme Scream.

VS. Ganondorf: 65/35, Tycoon’s favor
Ah, so it’s the guy we keep talking about when we mention intensity levels. It’s true, stalling Ganondorf at the start of a match can prove to be a major problem due to his immunity to all the gentle rides save the Bumper Cars, which aren’t all that great for stalling anyway. Your best bet is to line up a bunch of shops and stalls so there’s a whole bunch of wide hitboxes lined up together. This will also eliminate the problem of having to stave off Ganon’s needs later on.

One of Ganondorf’s favorite moves, his side special, can prove rather problematic to use. Considering all the space he needs around him to do it, much less if he wants to follow it up with a dair, it’s pretty likely he’ll bump into a ride entrance or stall somewhere along the way. Of course, Ganondorf can still use this to suicide with the Tycoon off the stage and instantly destroy all his rides. He WILL go for it when he knocks you off with his absurd power. Predict it and grab him with the claw before he gets to you.

VS. Bowser: 20/80, Bowser’s favor
While one would think Bowser would have problems racking damage, when he’s faced with absolutely no retaliation it’s not nearly as difficult as one would think. Of course, the Tycoon can still dodge just fine, but the fact remains that Bowser will get up a good 30% on the Tycoon before he gets up a single ride. This enables him to have full control over the momentum when he grabs you with Side B, which enables him to get an easy suicide KO and is far from difficult to hit with. Considering this destroys all the Tycoon’s rides in the process, the win’s pretty much in the big for the Koopa King. The fact that he’s immune to all gentle rides save the bumper cars and haunted house (Unlike Ganondorf, thankfully) also isn’t helping matters, giving him all the more time to suicide KO you before you can stall him and pick up some momentum.

VS. Peach: 60/40, Tycoon’s favor
While Ganondorf and Bowser being immune to gentle rides might be a nuisance, it’s just that. Nothing to be worried about, especially when the Haunted House comes into play. Wussy people like Peach on the other hand prove to be much more of a problem, as there’s no inverse of the Haunted House to force people to go on thrill rides/roller coasters, and you absolutely NEED these rides in order to properly function. All Peach is vulnerable to is the Motion Simulator, meaning your best KO option would probably be blowing up a Ferris Wheel when she gets to the top of its’ arc. This will require absurd amounts of damage. . .While this might sound bad for the Tycoon, if he gets that well set up to go for a KO, he’s pretty well off anyway. Peach can’t KO or damage rack as well as Game & Watch, meaning this match out actually comes out relatively even. Neither combatant’s going to die any time soon. . .Which is exactly what the Tycoon wants. For the match to drag out as long as possible.

VS. Von Kaiser: 75/25, Tycoon’s favor
The Tycoon feels no drive at all to raise Kaiser’s percentage, as the primary reason he’ll be having him board rides is to stall for time and to make a quick buck. This means Kaiser’s higher percentage moves become much more difficult to use, though the fact Kaiser can raise his percentage himself with his neutral special complicates things. On the other hand, the Tycoon can send Kaiser off to the First Aid Room when he gets him in the clutches of the claw to send his percentage back down. Kaiser has significant problems finishing off the Tycoon, making it all too easy for the Tycoon to build up momentum. At least Kaiser can get some vengeance on the kiddies who beat him up when they come into the park, right?

VS. Soda Popinski: 60/40, Tycoon’s favor
If Popinski goes up to a soda stall, the game will act as if he used his neutral B to slurp down a soda normally. Forcing Popinski to drink all six of his bottles to make his recovery terrible and force him into an eventual crash is an excellent. While Popinski can abuse all of his power he’ll gain from all the soda before he crashes, the Tycoon can just run and hide like a pansy and in general stalls very well, making this obsolete. That said, the Tycoon can’t exploit one of Popinski’s main weaknesses, the punishability in his ending lag. . .Because he has nothing whatsoever to punish the guy with. The fact Popinski refuses to humiliate himself on a Merry-Go-Round or even go in a Haunted House to be sppoked can also prove annoying. It’s a close match up and Popinski can quite possibly stop the Tycoon from getting set up at all, but if the Tycoon picks up any momentum at all things can become hell for the Russian soda addicted boxer.

VS. Espeon: 90/10 Tycoon’s favor
Espeon’s sixth sense proves utterly useless here – the animations for all of his building attacks look identical. Of course, Espeon can try to guess what the Tycoon would want to build without his six sense and if you’re familiar with the character it’s far from impossible, but the Tycoon can just as well intentionally throw you off. The most Espeon can predict is the fact that the Tycoon is using an aerial and he can then proceed to use one of his moves specifically made for countering them. The Tycoon can easily casually short hop a nair at the start of the match to get in the only building he really will want early game anyway, though, a Merry-Go-Round, long before Espeon can get a sixth sense on him. If Tycoon wants more aerial buildings in the late game, it shouldn’t prove much a problem, as he’ll have enough set up to easily protect him during that brief moment anyway, or he could even stall off the duration of the Sixth Sense. While Espeon can heal himself with his tilts with nearly no resistance, the Tycoon doesn’t really give a damn about Espeon’s percentage anyway, as Roller Coasters require no damage to KO. Tycoon is THE Espeon counter.

VS. Leafeon: 20/80 Leafeon’s favor
Two trap characters being pit against each other generally always results in which character does better once their traps are all set up, seeing they’ll generally leave each other undisturbed. This is particulary true against the Tycoon, as due to the Tycoon’s buildings being made in the background they’re out of the way, meaning the other trap character can set up their traps on the main stage. Considering the Tycoon can make all the more room for traps to be planted, Tycoon is THE trap characters you’ll want if you’re aiming to make a stage completely unrecognizable by coating it with traps.

The main clincher is that not all characters are as extreme as the Tycoon in that they still have regular attacks to pressure the Tycoon with while Tycoon can’t do anything back, meaning he does rather poorly against his fellow less exaggerated trap characters. Still, Tycoon’s insanely low lag keeps him from being unviable against them, but Leafeon in particular is a rather special case in that his traps have an infinite duration and stick around even if he’s KOd. This means that once both of you are set-up to your heart’s content, Leafeon only has to KO you once while you have to 3 stock Leafeon to end his reign of terror.

VS. Arthas: 10/90 Arthas’ favor
Arthas breaks the mold of most trap characters in that his traps are in the background, meaning you’ll have to compete for space considerably. However, Arthas has no control over where his acolytes create buildings, while you have complete control over where your buildings are produced. This means you can use up all the space in the background hastily to prevent Arthas from getting that far into the Undead tech tree. On the other hand, you won’t be able to get up many of your own buildings due to having to compete for space with Arthas, meaning you’ll have to pick which buildings you build carefully. While Arthas has a full moveset, his Acolytes taking care of the traps, the fact he’s so slow means he’s not much more to worry about then any other opposing trap character.

The Tycoon will generally get the first kill and get somewhat set-up, but he’ll be far from ideally set-up. Due to the lack of space to create buildings, the Tycoon will be hard pressed to satisfy Arthas’ needs on the second stock, considering he’ll of used up the space with the regular rides needed to occupy him on the first stock. This will give Arthas more then the chance he needs to KO the Tycoon back, and considering Arthas’ buildings aren’t destroyed when he loses a stock when the Tycoon’s are, the Tycoon will soon be left with nowhere to build while Arthas will easily build up a deadly undead army. Even his weaker units will prove useful in the early game as they kill off the Tycoon’s guests, limiting his profit.

VS. Dingodile: 10/90 Dingodile’s favor
Dingodile is the ultimate trap character counter what with his ability to bring down his crystals without a second thought, being a trap character that requires no set-up. While the Tycoon can begin building stuff with little to no problem due to his low lag, Dingodile can use his attacks aimed at the background to quickly destroyed them. The stamina of the buildings when attacked in this way varies, but if you time a nice nair on a building just as it starts being made, you can destroy it before it’s stamina goes up while still draining Tycoon of the money it would’ve cost to build it. Hell, Dingodile has no need to hide behind his crystals what with Tycoon’s lack of direct attacks. He can just pressure Tycoon to all hell and blow up anything he attempts to build.

That said, Dingodile’s crystals are still useful tools if the Tycoon does manage to get set up, as they can block off the entrances to the Tycoon’s precious rides, and there’s little the Tycoon can do about it. A well placed Swinging Ship can shatter the crystals if you go to board it, but Dingodile doesn’t need all his crystals, just a few to block off your ride entrances. This is a fun match-up for Dingodile in that it’s a change of pace for him and that he actually gets to go out on the offensive rather then camping behind his crystals like a pansy.

VS. Spadefox: 0/100, Spadefox’s favor
Upon pressing neutral B, Spadefox summons your mechanic in front of him, strangles him, then tosses his corpse away without a second thought. This has nearly no lag, and there’s absolutely nothing you can do once your mechanic is dead outside your claw, Security Guards, and taunts. This makes Dedede’s infinites look fair. You can’t even stop him from doing it, considering you have no attacks whatsoever. You’re the exact kind of character Spadefox was designed to counter.

Try and get a souveneir stall up before Spadefox kills your mechanic so you can at least put up –some- form of resistance with an umbrella. If you do somehow kill Spade, you’ll get another instance where you can get up another ride or two. Go for a park entrance and a swinging ship or a first aid room. If you choose the first aid room, go set the admission to a ridiculously high price so Spadefox can’t afford to enter while you can abuse it. When you combine this healing with your good recovery (With both the umbrella and claw), you’ll have some excellent survivability going for you. While resistance is possible in this match up, this is even more broken then an infinite, seeing Spadefox doesn’t even have to connect with a grab – just one casual press of B. Winning here is as realistic as winning with Nolimar. All you can really do is delay your inevitable demise.

EXTRAS

Up Taunt - Stock Market Punch


The Tycoon does an upercut, but his arm is all squiggled up in the shape of a line graph and it extends. It knocks the enemy back in the direction you're punching with low set knockback and 1%.

Side Taunt - MONEY PAUNNNNCH
The Tycoon throws a giant punch and if it hits a bunch of coins spill out of the opponent (like Mario's Up B). It's pretty much a copy of Captain Falcon's Falcon punch. It takes a long time for the punch to execute, and has some ending lag. If it does hit, it inflicts 1% and average set knockback. Instead of fire being emitted it's a bunch of jewelry. He yells "Money Paunnnnch!" as he does the taunt.

Down Taunt – Money up the Wazoo
The Tycoon throws money all around like it's no big deal. What? He's rich.

Entrance – 5 Star Entrance
The Tycoon has his private helicopter bring him down to the stage. Some people who resemble hotel staff from a 5 star resort carry him out on his chair like a king.

Win Pose 1 - Entertainers
The Tycoon simply stands in a confident pose with his arms folded, but all the losers are replaced with entertainers, one in a elephant suit, another in a tiger suit, and a third in a panda suit. They all clap happily for the Tycoon.

Win Pose 2 - Handyman
The last place loser looks utterly sick, then pukes and resumes their normal loss animation. The Tycoon motions off screen for a handyman to come in and start cleaning it up, then stares at the puke in disgust, facepalming. If the character in question is incapable of puking (R.O.B.), then this animation will be not be used.

Win Pose 3 – Sunglasses Stall
The Tycoon goes into the background and picks up a pair of shades from a stall, then grins as his poses for the camera, his shades and teeth letting out a stereotypical shine.

Loss Pose - Clap
The Tycoon claps with his suitcase, opening it and closing it.

Stage – Forest Frontiers

For the basic layout of this stage, picture three copies of Battlefield placed side by side in a forest-ish setting. No, it’s not a walk-off stage, still having as much space as Battlefield on either side of the stage. However, it’s not just a big open forest for you to build a theme park on – there’s already a theme park built on this stage that is hostile to all players. In the center of the stage is the entrance to the park generating guests, and 6/9 of the platforms have a ride on them from Tycoon’s moveset. There’s one of each of the stalls placed on the ground of the stage besides a souvenir stall, and there are already 5 guests going about the park upon your loading the stage. The last touch to make the park function is a single regenerating security guard patrolling the main stage.

This stage is a mixed bag to play on as the Tycoon himself in that you have to compete for business with the existing park. While you have much more space then normal on this stage, a good chunk of it’s already taken up by the neutral rides, so it sort of cancels out. On the plus side, the Tycoon can hide in the less harmful hostile rides while his first few are being built, meaning he’s never without a place to cower in fear. Needless to say, the way to unlock the Tycoon and this stage is a late-game event match on this stage against the Tycoon where he owns all the rides.
 

KingK.Rool

Smash Lord
Joined
Nov 26, 2005
Messages
1,810
Naming taunts? What's up with that?

Those match-ups are really lopsided, they'd be boring to play.

You should have a picture at the beginning of the moveset.

Stage feels pointless. Extras are pointless.

I miss cheap_josh... (cry2)

Cool set.

EDIT FOR SRS BUSINESS:

Jesus Christ, Roller Coaster Tycoon is insane. It's probably the most insane moveset I've ever read, because it's so utterly unSmash. Seriously, Junahu is going to have a field day with this, and Ocon? Don't get me started. I mean, I don't even know where to begin. The specials alone boggle the mind and break the character in half instantly, although I'm not sure whether they make him broken or Falconbroken.

Here's the kicker: this moveset is going to be incredibly popular. I can just sense that HR is going to seize upon it as one of his favorites ever, and I doubt he'll be the only one. This moveset is just pure, concentrated originality, and that's going to be clear to everyone who reads it, so it WILL place highly, of that I'm sure (unless something goes terribly wrong). Knowing that, I feel no guilt in giving you negative commentary.

I don't even know where to start. The most obvious indicator of this moveset's insanity is that it doesn't even deal in such trivialities as DAMAGE and KNOCKBACK; it deals in money, a unit the moveset itself specifically invents, and totally centers the game around. Playing against Roller Coaster Tycoon would quite simply be a losing battle for absolutely everyone, because he basically plucks your character out of Smash and drops him into his own game. It's like Mario morphing every stage into Mushroom Kingdom. It's like Game and Watch turning every level into Flat Zone. It's crazier than that. It's mind-boggling.

I mean, basically you've taken all the mechanics of Roller Coaster Tycoon and thrust them forcibly into Brawl. One of the most blatant examples is with those security guards, who you set to patrol in EXACTLY the same way that you do in his game. It's appalling, it's brilliant, and it's totally unrealistic. And building your roller coaster manually? Absurd! But... it's so cool! You can actually build it however you want, and make it go off the blast zones? Awesome! But... it's so ridiculous!

The real warning sirens should go off as soon as one realizes that RCT (abreviated henceforth for brevity's sake) has no ways to directly hit the foe. He's basically not even playing the same game; certainly not playing a fighter. This... is the EMBODIMENT of why MYM is not Brawl and could never be Brawl. RCT is not a Brawler. He's a bandit, a vandal sneaking into the game and hacking its very structure to its core. But he's not like MM9:MM, oh no. Where that one was an innocent wanderer who stumbled into the wrong game and was shown firmly out, RCT knows perfectly well that he's not wanted. He's planned and schemed for this, and theoretically he could fit in. You're a sick, evil man, Warlord.

And hell, FOOD COUNTERS? You actually make the foe get hungry after a few seconds? That's so ludicrous, it's genius... or maybe the other way around. I can't believe you put stuff like that in here.

Okay, let's see... constructive complaints... uh.... how does he get double Ganondorf's height into the air (at minimum) if his jump is a paltry 1? What else, what else.... uh, it seems kind of pointless to have so much control over building your roller coaster if it doesn't actually DO anything to have it twist and turn.... maybe make U-Turns causes the foe some brief disorientation after they get off, depending on how many you have? Uh, security guards should have more stamina, because otherwise I think you're pretty damn unlikely to actually get any structure built before the foe starts beating on you, and you with no GTFO moves, as you'd put it. On the flip side, he's broken once he gets going, so it all cancels out, I guess. This is typical of a trap character, one could say, but never to THIS extent. This is profane.

And what does he do on moving stages? Break down and weep, I suppose. And you say everything he builds goes away once he's KO'd? And he has no real recovery? Wow man, this is underpowered. He'll never even manage to start up, since the foe can just bash him away and then gimp him - or even just stand there and watch him plummet without any outside interference. Serves him right for sneaking into a game that doesn't want him.

But MYM is a game that wants him, unfortunately, and I fully expect to see RCT-the-profane in our Top 5 when all is said and done. Hell, it's hard for even me to resist the urge to love him, so what does that mean for MYMers like wyvern?
 

darth meanie

Smash Journeyman
Joined
Jun 6, 2008
Messages
452
Well, whaddya know, RollerCoaster Tycoon is up. First, let me wave good bye to any more attention BubbleMan.EXE might have gotten. Good-bye...


With that out of the way, wow. You really did a very impressive job of implementing the grandaddy of business simulator games into Brawl. The system is incredibly complex and entirely unsmashlike, but that was basically the entire goal of this set. I can't imagine a better way to implement him, and you did a fantastic job. The background dragging idea is an entirely kickass way to make it at least somewhere near the realm of feasibility and balance, so good job there.


Starting with the specials, I question your choice of the funds system on the theme park entrance. Wouldn't it make more sense for each individual ride to have a set price; setting it all to one level is weird, and there isn't any real encouragement as far as you showed to alter prices. The Side Special was very nice, and the Up Special makes perfect sense, and the Down Special is just sweet. Handbuilding your rollercoasters? YES!

For tilts, you made a good choice by making it the stalls and various items, and the games with the First Aid Room and such are sweet. The Smashes are all good move choices, but the aerials are a tad disappointing; how is it not an instant gimp if I build the slide entrance right on the edge, and why are the Merry-Go-Round and the Ferris Wheel mirrored? The Bumper Cars had so many effects that I couldn't keep track of them all too.

Also, why is the grab last? I'd put it right after the specials, personally, since it completely changes the entire moveset's flow. The Final Smash also seems a little lackluster; GO KARTS are his ultimate attack? Why does he only get eight seconds, why not be able to go in and save that Smash for later, like the rest of his set?


Match-ups, as K Rool, said, are rather one-sided, and the lack of any sort of appendix explaining who rides what rides makes them feel a little manufactured. In the end, though, I absolutely have to commend you for having the balls to drop such an amazing, ambitious, insane set; like Sloth demanded playstyle, Tycoon wrecks feasability, so congratulations on a great read.
 
Status
Not open for further replies.
Top Bottom