• Welcome to Smashboards, the world's largest Super Smash Brothers community! Over 250,000 Smash Bros. fans from around the world have come to discuss these great games in over 19 million posts!

    You are currently viewing our boards as a visitor. Click here to sign up right now and start on your path in the Smash community!

Make Your Move 5

Status
Not open for further replies.
D

Deleted member

Guest
<He's known as L's true Successor! Near joins the Brawl!>
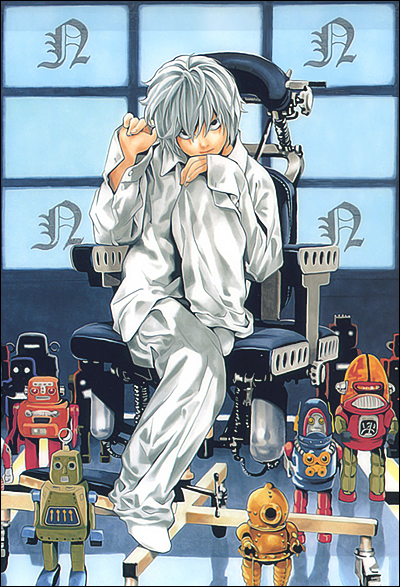
"If you can't solve the puzzle, you're nothing, but a loser.>"


SPOILER WARNING: Those who have not yet seen the ending to Death Note should not read on.

Near (ニア, Nia), whose real name is Nate River (ネイト・リバー, Neito Ribā), is the younger of L's two successors raised in Watari's orphanage for gifted children (Wammy's House). Near is 155 centimeters tall (5' 0"), weighs 88 pounds and his blood type is B. Near is the more level-headed, calmly assessing the situation, while the other, Mello, is more emotional and quick to act. Much like L, Near shows various odd behaviors during his normal life. He is usually seen hunched over than sitting, and he also constantly plays with various toys which he uses in his theories. He shows a great respect for L, basing much of how he solves crime on L's methods, even to the point where he only takes cases that he is interested with rather than trying to pursue justice. Much like L, Near uses the Old English "N" to represent himself. He is voiced by Noriko Hidaka in the Japanese anime.

About 5 years after L's death, he works for the United States under the SPK (Secret Provision for Kira) team that is established to investigate Kira. He soon manages to deduce that Light, posing as L, is actually Kira. After finding that Mikami is Light's proxy and Mello kidnaps Takada, Near is able to switch Mikami's Death Note with a fake one, allowing him to set up a final confrontation that leaves Light exposed. Ryuk kills Light soon after. Near claims that neither of he nor Mello could surpass L alone, but together have done so by inadvertently working together. Near soon takes on L's name, and keeps on the surviving members of the SPK as his subordinates.

In the one-shot taking place after the series, Near is shown as the new L. He summons the police force to fight against a new Kira. The new Kira had gained a Death Note which belonged to a Shinigami named Meadra (Midora in Viz's translation of Death Note: How To Read 13), who had received another Death Note from the Shinigami King by giving him 13 apples which she had taken from the human world. The new Kira had the quality of murdering only elderly people to "relieve their pain". When Near's SPK subordinates ask him why he isn't taking any action, he replies saying that he is trying to think what the previous L would do. He finally comes to a conclusion that the prevailing Kira was just a murderer without a purpose. He finally announces that he isn't interested in the case on national television, he also says that the reason for his backing out is that the current Kira is not the real Kira. This results in C-Kira committing suicide. Throughout the 40-page manga chapter, the identity of the new Kira isn't revealed. It is also revealed that Rester and Lidner continue to work with Near.

Attack: 5
Running speed: 5
Jumps: 6
Falling speed: 4
Walk: 5
Range: 6.5
Weight: 2.5
Height: 6
Attack speed: 6.5
Wall jump: No
Wall cling: No
Glide: no

Standard Special — Near's lie

Near will start currilling his hair and tell his a opponent a lie. The lie will be, "[Insert character that's important to the character Near is fighting] died of a heart attack." If this manages to hit the opponent, the opponent will be shocked for about 3 seconds, being in grief of what happened to there love one. After the 3 seconds is over however, the opponent will shake it off, and realize that Near was lying. For this move to hit, Near must say this DIRECTLY in front of his opponent and for Near to say the entire sentence, it will take him 2 seconds. Therefore, if the opponent is above or below Near, it will not have any effect still. Also, the opponent must be in a 2 small stage builder block range for this move to work. Also, once Near has said this sentence to the opponent, Near's Lie will not work again as the opponent will not believe in Near. Near must wait for about 20-30 seconds again for this move to have any effect on his opponent. Otherwise, if you continously spam in this move in the opponent's face, it will cause you to wait even LONGER.

Side Special — Rester and Gevanni
Near will quickly point forward to the opponent and shout either, "Rester! Go take him down!" or "Gevanni! Follow him!" Out of nowhere by Near's side, Rester or Gevanni will start running forward, chasing after the opponent, moving at the running pace of Mario's speed. The person that Near chooses to send forward will have Rester and Gevanni continously switch places everytime they are sent forward. Only one of them is aloud out to the battlefield one at a time. Plus, if they fail to find, or reach the opponent in 5 seconds, they disappear. Also, there is a chance that if the opponent attacks either Rester or Gevanni with a nice knockback move (or 3 ok knockback moves at once), they will be sent flying off the stage, and Near won't be able to use one of them for 30 seconds, whoever was sent flying. Anyway, here is what they can do:

If Rester was the one chosen, and if he manages to get to capture the opponent in his reach, he will bring out his....handcuffs! That's right, if Rester was successful of reaching his opponent, he will use his handcuff's to bind the opponent's hands together, and from now on, whatever attacks that involve using the opponents hand will not be able to work for 20 seconds, after the handcuffs disappear. However, Rester needs about 2-3 seconds to actually handcuff his opponent's hands together. Opponents can move and get away from Rester, without struggle at all. Using Rester is not easy.

If Gevanni was the one chosen, and if he manages to capture the opponent in his reach, he will take a personal belonging of the opponent, replace it with a fake belonging (but looks exactly alike) and bring it back to Near. It will be the weapon that the opponent uses the most (if it's someone like Mario, it will be there gloves, and if it's a pokemon, it will be some momentum there trainer gave them.) Near will reveal that the weapon they are using is a fake, and reveals to the opponent that he has the real weapon by showing it off. Near will then throw it to the middle of the stage for the opponent to reclaim. While the opponent is using the fake weapon/belonging, there attacks will do pathetic knockback, and only do 1% damage each for 20 seconds if they wait, or they reclaim their original weapon from the middle of the stage.

Down Special — Finish the puzzle

OMGZ. REALLY COMPLICATED MECHANIC AHEAD!

Near will take out a jig-saw puzzle and place it on the ground. He will then start to put pieces on to the puzzle board, trying to complete it, going in a fast motion and continues doing so until you stop Near by pressing the down B button again, forcing him to stop.

Now, what Near will create with his puzzle thingy maggigy depends on how long Near keeps on the trying to complete the puzzle. As soon as you press the downward's B button to stop Near from keep on using the puzzle, he will use whatever he has. The puzzle will form a sort of item that will help Near fight, defend, and use against his opponent. When you release the downward's B button, Near will show to the opponent what he has done to his puzzle board. He will then slowly take out his complete puzzle piece out (takes about a whole second really), and will start using it. Obviously, the beginning of this move (even if you don't do the puzzle for long) is really laggy. The item is usally worth it though. However, Near's hands might get a bit shakey, and break the puzzle if Near keeps on moving around and around. Staying in one spot is the best way for Near not to break his puzzle piece. Also, if Near is hit hard enough, he will drop it like a regular item. You have better use what ever item Near has created fast. Anyway, Near's item are as followed:

Completed puzzle: 1 Second
Near....has only finished one piece of the puzzle. That's right...only one mesely piece. Near can throw it like a pokeball, and if it makes contact with the opponent, it will only do a mesely 2% damage, with only a flinch of a knockback. Obviously, this puzzle piece is near useless, but...it can be used to GIMP people at REALLY high percentages....lol.

Completed puzzle: 2 seconds
Near has completed...about 5 pieces of the jig-saw puzzle now. It can now be use as a held weapon, like a bat, or laser saber. However, this puzzle weapon is really weak, and fragile. One hit with this thing, and it breaks into pieces. Not only that, it barely does any damage (only slightly stronger than a fan...like 2% extra). It moves at the same speed as a laser saber however. So yeah....it is like REALLY WEAK.

Completed puzzle: 3-4 seconds
Near has successfully manage to complete half of the puzzle! Now, if Near carries this around him, the next attack that the opponent does will be cut in half in both damage, and knockback wise. This is useful if Near is on the verge of being Koed. SERIOUSLY.

Completed puzzle: 5 seconds
Near has completed a more dense, and solid version of the held weapon, back in 2-3 seconds of the completed puzzle. It will last more longer, with 3-5 hits of the weapon to be destroyed. It also is more powerful this time (about 4% stronger than a fan weapon.) Also, this now more able to GIMP opponents better now!

Completed puzzle: 6 seconds
Near has fully completed his puzzle. Near has 2 options with his completed puzzle. One is that if he holds it in front of him (really, just stand still with it), and whatever attacks that hit Near, it will do no damage or knockback whatsoever. This will cause the puzzle to break however after being hit 3 times. The second option is that if Near throws his puzzle to his opponent, the opponent will auto-matically catch it, and look at it, staring at the pretty picture for 3 seconds, before tossing it away. It will serve as Near's chance to attack.

Upwards Special — Building of the lego staircase

Near will start stacking up lego blocks (if he's in the air, he does it in the air lol), and it will start forming a staircase sort of form. After he is done making the staircase, he will then start climbing on it, evaluating him upwards, and uses it as his form of recovery. How far he can recover is depending on how much you charge this move. If you just simply press the Upwards B button, with no charge at all, Near will only be able to travel upwards 1.5 small stage builder blocks. If Near charges it fully for 3 seconds however, it can reach as far as 5 small stage builder blocks. Near just stays suspended in midair if he charges this move in the air. This recovery is risky, so be careful.
Standard A — Money toss

In the series, Near uses money to escape from a lot of angry Kira supporters.

In Smash Bros., Near throws a handful of cash forward to the opponent. If it reaches the opponent in a 1 small stage builder block range, it deals off about 6% damage. There is hardly any beginning lag, but ends with an average amount of lag. There is something else that happens too. Since there is a lot of money spread around them, the greedy opponent tries to take it all for themselves, being distracted for 2 seconds, giving Near a chance to run away or to use this opportunity to attack.

Side Tilt — Toy Soldier

Near will pull out a toy soldier, and will start winding up it's key on it's back. He will then put the toy soldier on the ground, and with it winded up, it will move forward on it's own, marching forward. If the toy soldier touches the opponent, it will, not only deal off 8% damage, but push the opponent forward everytime it's touches it's frontal view, with little knockback. The toy soldier marches at a slow walking pace, and goes about as far as 4 small stage builder blocks. Near does have above average beginning lag for him to pull the toy out, and wind it up, but doesn't really have any ending lag. Near can only wind up 3 toy soldiers at once, so wait for them to disappear or they fall off the stage (after it stupidly decides to march off the stage) before using this move again, because otherwise, you're just wasting your time using this move.

Down Tilt — Toy ball bounce

Near will pull out a toy ball from his pocket. He will then bounce it on the ground, sending it upwards about 1 small stage builder block above Near, dealing off about 11% damage with ok knockback if it hits, and Near catches it! This move has some above average beginning lag, but hardly any ending lag. While the ball is out of Near's hands, he will have super armor frames there. This move is good to attack opponents above Near, without going directly to them.

Up tilt — Airplane toy

Near will bring out his toy airplane, and, acting like a child at heart he is, will start running forward about 1.5 small stage builder blocks, while motioning the airplane upwards above him, seeming to wanting it to take off and fly away. The range reaches about 1/4th of a small stage builder block above Near's head, and not to mention the dashing, giving this move so range. The speed of this move has barely any beginning lag at all, but when he stops in his tracks at the end of the tilt, he will suffer above average lag at the end. If Near hits with the airplane above him (which is, BTW, the hitbox of this move), it will deal off about 10% damage with just a bit below ok knockback.

Dash Attack — Spring toys away
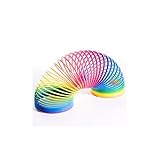
Near will throw 3 toy springs forward in front of him, travelling at average speed, and if it hits an opponent, it will multiple hit the opponent about 3-4 times, dealing off about 3-4% damage each. The springs spring forward about 3 small stage builder blocks forward, before disappearing. The speed for this move is that Near does take some time to get the springs out in the first place (only about half a second though), and Near ends with average amount of ending lag. Man....i use to love this toy, so use this move wisely, as if opponents manage to attack the springs, they will cut in half, and Near will not be able to use this move until after 10 seconds.

Forward Smash — Puppetry

Near will bring out his little puppet collection, and put a puppet version of the opponent to on his finger. If you just release the forward smash the first time, he will just point his 2 fingers with the puppets on it forward, and he needs to touch the opponent for the forward smash's full effect. His fingers reach only what's right in front of him, barely having any range at all, but the speed for this part of the forward smash is great, with barely any lag at both ends.

After Near has managed to touch his opponents with the puppet fingers the first time, if decides to perform his forward smash the second time, Near will start motioning his fingers, managing to control what happens to his opponent. The opponent cannot do anything while Near has the opponent under puppet control. Near must be in a 2 small stage builder block range for this to work, and the fact he needs to touch the opponent with his fingers the first time around. Plus, they both need to be on the ground for this to work and on the same level. Left uncharged, Near can only hold his opponent in place for 2 short second, and fully charged, about 3 seconds. After Near is done with his forward smash, he will not be able to use it again for 15 seconds.

While Near has his opponent under his puppet control, he isn't really controlling his opponent. Instead, he can hurt the opponent by attacking his puppet depending on what button you press.

A button: Near will stab his finger puppet with a needle that he has. This will cause the opponent to suffer about 7-8% damage every single time. This takes Near a full second to do, so you must damage rack as much as you can before the opponent escapes.

B button: Near will squish his puppet of the opponent with his fingers, looking like he's squeezing the life out of them. This will automatically end the forward smash under Near's control, and will cause the opponent to suffer good knockback. Use this with the needle stabbing from the A button effect forward smash, and you'll get some good KOing and damage racking results.

Down Smash — Build, build and collaspe!

Near starts to stack up lego block by lego block on top of each other, that will cause Near to make a huge lego tower, almost as tall as him if this move is uncharged, and taller than Near fully charged. The tall lego blocks will protect Near from enemy attacks, as they require about 3 hits (5 hits if the move is fully charged) to take down. That's some good defense, but however, Near may only have 1 tall lego tower out at once, So no spamming this move. The beginning lag is really bag, being it being a whole second and a half, and the ending lag is just average. After 5 seconds, the tall lego tower will disappear. So this is pretty much only a defensive move....

Not really. If Near pushes his tall lego forward (by just simply pushing forward control stick really), it will collaspe in the forward direction, and break to bits. It will collaspe about 2 small stage builder blocks forward in front of Near, and deal off about 14% damage with nice knockback uncharged, and 17% damage with good knockback fully charged. That's a lot of damage isn't it? Of course, the towers take about a whole second to actually collaspe, so it's a hard to hit move.

Up Smash — Remote control airplane

Near will bring out an airplane and throw it to the skies straight upwards. Then Near will bring out a remote control, and start controlling the airplane. If the airplane manages to touch the opponent with it's frontal part, it will deal off around 13% damage with ok knockback uncharged, and 16% damage with nice knockback fully charged. You can control the airplane for a short amount of time only; 2 seconds uncharged, and 3-4 seconds fully charged. This move does have above average amount of lag at the beginning for Near to pull out the airplane in the first place, and barely any lag at the end. Near can control the airplane like how Wario controls his motorcycle with the steering, except that the airplane is in the air, and you can move it up and down as well. It doesn't really move very fast, as it only travels a bit slower than Lucario's neutral special. Remember that only the frontal part of the airplane will cause damage. This can be hard to hit with.

Neutral aerial — Airplane Zoom

Near will bring out his airplane once again, only this time, Near will throw it around him, and then the airplane will fly around Near’s body once, attacking any opponents near Near (no pun intended) and then…disappear! The range covers all around Near (besides up and down), barely extending at all, with just average lag at the beginning, and hardly at the end. This attack deals off about 11% damage with ok knockback. This is just an okay move for attacking around Near's body, without getting TOO close.

Forward aerial — Toy flashing robot

Near will bring out his toy robot, and put it in front of him. He will then turn it’s switch on its back on, and will cause it’s eyes to flash up, and the light will shoot forward, not damaging the opponent, but blinding the opponent by causing the opponent to flinch for about 1 seconds. The range reaches about 2 small stage builder blocks forward, with having the beginning of Captain Falcon’s forward smash, and there is barely any lag at the beginning. This move is good for distractions, and perfect to get ready for Near's next attack.

Backwards aerial — Toy Yo-yo

Near will bring out a toy Yo-yo, and swing it behind him, the Yo-yo extending backwards, and coming back to Near's hand. The range that the Yo-yo can reach up to is about 1.5 small stage builder blocks. The speed it has is barely any lag at the beginning, but there is above average ending lag. The damage that the Yo-yo can deal off is about 12% damage, with little knockback. It's basically just a good damaging move, with good range.

Upwards aerial — Superman fly

Near will motion his superhero action figure upwards, depicting that Near wants his toy action figure to fly. Basically, it's just a slow small swipe upwards in the horizontally with his action figure. The damage it can cause is around 6% damage, with little knockback. There is hardly any lag at all for both ends. It's range is pretty bad, as it just reaches what is directly above Near. Yeah....this is probably Near's most generic attack....you know, besides grabs.

Downwards aerial — Water gun blast

Near will bring out his toy watergun, and he'll point it downwards, and shoot in the downwards direction with water. Only the water is the hitbox, and it's just a thin line of water. The damage it can deal off is around 7-8% damage with little knockback. It reaches all the way down the stage, so no real need to worry about range. There is hardly any lag at the beginning, but ends with an average amount of lag.


Beat Down — Action figure bash

Near will simply bash away at the opponent with his action figure toy, dealing off about 2% damage for each hit. It goes about the same speed as always for any other beat down move.

Forwards Throw — Watergun blast

Near will throw his opponent forward, and will bring out his water gun. He will then shoot a blast of water at the opponent, and...they're soaking wet. They suffer about 7% damage, with little knockback.

Backwards Throw — Watergun backwards

You remember Near's forward throw? Well yeah, he does the exact same thing...just backwards.

Downwards Throw — Surround house

Near will start stacking up a tower of puzzles all around his opponent. This move will not cause any damage, but will trap the opponent inside a puzzle box, to prevent the opponent from moving at all.

Upwards throw — Near's point

Near will throw his opponent upwards, and points at the opponent with a glare. This causes the opponent to suffer a 2 second lag, with 5% damage. Lol....this is not a KO move. Near looks kind of evil in this move.


Surpassing L

Near has grabbed the smash ball! With the smash ball, Near will shout out, "Together we can surpass L! Together we can stand with L!" After that, Mello comes out of nowhere, right next to Near, riding his motorcycle. He will then act on his own, work together with Near, and you get to control Near again. There are 3 things he can do:

1 is that he'll shoot his gun bullets at the opponent. This will cause 8-9% damage and nice knockback for each bullet, and there are a lot of them (Mello will shoot about 10 of them in 3 seconds.) He will do this move commonly. Mello points his gun forward as a signal for the opponent to run in 1-2 seconds, so this move can be avoidable. The range for the bullets reach as far as 8 small stage builder blocks. That's a lot obviously. Of course, this is probably Mello's worse move. Use this with Near's attacking for easy damage racking. His other move is....

Mello will set a bomb somewhere like Solid Snake's, only this time he sets it up totally randomly on his own, with nothing more than a small "click" for an indication. Mello will then press a bomb switch from his side, exploding a selected spot, with the range covering about half of battlefield. The damage this can cause is 20-25% damage with great knockback. Of course, right before this move happens, there is major start up lag, so opponents know when to move.

The final thing that Mello can do is use his motorcycle to capture the opponent. He will capture the opponent by looking like he's going to run over the opponent, but really, he quickly grabs them, and drags the opponent to his seat behind him. The opponent can't do anything at all. Mello will bring the opponent to Near's side. Mello will then kick the opponent off, dealing off 9% damage, and let Near do the rest of the work.

This final smash lasts for about 20 seconds.

EXTRAS!!!!

Taunts
Up Taunt: Near will start currling his hair, looking a bit worried what this match has in store for him.
Side Taunt: "Things are getting interesting now."
Down Taunt:"It's pleasure to meet you sir. I'm Near."

Victory Pose
Victory Pose 1: Near will toss aside an uncompleted puzzle, and say, "If you can't solve the puzzle, you're nothing, but a loser."
Victory Pose 2: Near will point forward at the screen and say, "It's over. You've lost the game."
Victory pose 3: Near lets out a smirk and says, "Don't make me repeat the same thing many times."
Victory against Light and Ryuk: Near will start squishing a Kira labelled puppet and say, "You're just a murderer....Light Yagami."
Victory against L: Near will look surprised for a while in his life and say, "I did it....i surpassed my mentor L."

Snake Codec
Snake: Colonal? Are you there? I'm facing some boy with white hair.
Colonal: That's Near Snake. He's known as L's successor.
Snake: ....L?
Colonal: L is the world's greatest detective Snake. When he died, Near had taken his place.

---Connection jam---

Near: Ah....Hello there Snake. Let's see....call me N!
Snake: What the? How did you get in to this line?
Near: I'm a brilliant young man Snake. Anyway...i think it's time to take you down. L's true successor against the great Solid Snake. Who will win?
Snake: That's going to be me.
 

The Trophy Master

Smash Journeyman
Joined
Dec 27, 2008
Messages
272
Location
*Sends Sundance an orange elephant on Chirstmas, a
Here are 4 other mini reviews from me :

Revolver Ocelot : Just from a skim, I knew it was great. Now, it's all read. First, well done, you have one of the most detailed newcomer moveset, I hope you'll do other ones. You have HUGE Extras, which is for me, a big +. Happy to see what you based off. When I first saw your moveset, I thought it was Kits, a well known MYM-er, even if he doesn't have this avy anymore. My only complaints are : 1. Try to use some colors, and BBCode especially for titles and headers, not for the entire moveset, as your moveset is all bold. 2. You could use a little bit more detail in each move. Overall, really good.

Megaman.EXE : The presentation is font already got me into the moveset, into reading it. Percantage stats are nice, well done! One thing I haddifficulty with was to sometimes find the different moves. You could use more animation informations for your moves. Happy you got Extras but, couldn't have you found two different taunts for up and down? Overall, it's really good. Oh, almost forgot the Bubbleman Conversations, awesome. Is it still possible to send you requests for that?

Airman : The first thing I looked at was, the stats, as they're the first feature on the moveset. :p The presentation is really classic, and perfect. Each move has more details than it must, a lot. They're easy to understand and not too unique, which is fun. You could have put a bit more details on your FS, which many people should. The Playstyle informs a lot on how to play, which also is perfect. Awesome recolors BTW! Extras are short and okay. Can't wait for CS Kirby! Good job Agi!
The Goos : The mechanic seems understandable and simple to me, which is good. I don't know why, The Goos make me think of Worms, from the Worms Series. Each move is unique, but okay at the same time, but they could still use more details, I'm sure you can. The Extras aren't too short or too long, and it's perfect. Even if it doesn't have as much details as let's say, Revolver Ocelot, that's the kind of newcomer moveset I like. Good job Wizzerd! Can't wait to see your next moveset!

Birdon will be ready today, tomorrow, or Monday. :bee:
 

Agi

Smash Lord
Joined
Jul 27, 2008
Messages
1,120
Location
SE Washington
@ Airman: I don't think I've commented on him yet. Wonderful work, agi. I'd love to review him, but Spade's already claimed him. :ohwell: Nevertheless, one of my favorites so far and I love all the little extras you put into it. Although I've never played Megaman, I can get a perfect feel for the character just by reading your set. Excellent job!
1: I specifically asked Spade to review it before I put any work into the set. =P
2: Thanks for the commentary! This was by far the most fun I've had writing a set, and I'm glad it showed.

Here are 4 other mini reviews from me :

Airman : The first thing I looked at was, the stats, as they're the first feature on the moveset. :p The presentation is really classic, and perfect. Each move has more details than it must, a lot. They're easy to understand and not too unique, which is fun. You could have put a bit more details on your FS, which many people should. The Playstyle informs a lot on how to play, which also is perfect. Awesome recolors BTW! Extras are short and okay. Can't wait for CS Kirby! Good job Agi!
Less detail? NOO! (I tried to cut down on excessive words AFTER writing it... and couldn't bring myself to throw anything out. :ohwell:)
But, thanks anyway.
 

Darkslash

Smash Master
Joined
Feb 1, 2008
Messages
4,076
Location
Strangereal Equestria


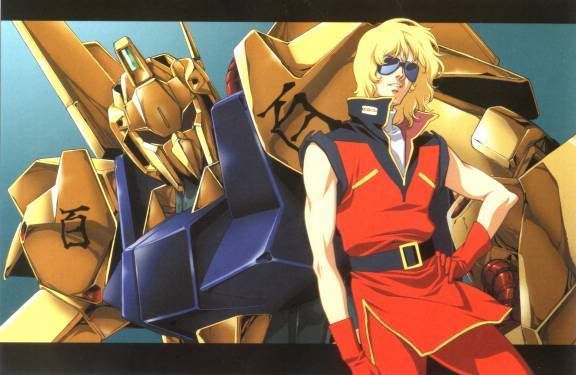
MSN-00100 Hyaku Shiki (Type 100 in Japanese) Quattro Bajeena Reporting!


Back story

This Mobile Suit was one of the original designs of the MSZ-006 Zeta Gundam. Unfortunately the Hyaku Skiki design did not let it transform into the infamous Wave Rider mode. It was redesigned and became the mobile suit MSN-00100 Hyaku Shiki. Anti Beam Coating or ABC for short, was first applied on this mobile suit. The Hyaku Shiki had armor that was colored gold. This gold armor was the result of the ABC coating and giving the finger to the Earth Federation brutal enforcers, the Titans, the finger. The Hyaku Shiki is piloted by Lieutenant Quattro Bajeena.

Mobile Suit Performance

Power
Ranged: 7/10
Most of the Hyaku Shiki’s weapons are explosive based.
Melee: 6/10
His only Melee weapons are 2 beam sabers

Movement
Walking speed: 4/10
As I said mobile suits are slow, but this is Quattro and he goes 3 times as fast.
Dashing Speed: 8/10
The Hyaku Shiki had speed in mind. Plus it has 4 rocket thrusters.

Thrusters
Jump 1: 3/10
Barely a hop
Jump 2: 7/10
Uses thrusters to go the length of 2 jumps done by other characters.

Mobile suit Dimensions
Height with Tail Binders: 2.14 meters
Antenna Height: 1.92 meters
Head Height: 1.85 meters
Weight: 8/10

Mobile Suit Attack capability
Attack Speed
Ranged: 6/10
Melee: 8/10

Hyaku Shiki is capable of flight.
Cannot cling to walls due to possible damage to Tail Binders
Weight makes the Hyaku Shiki incapable of wall climbing

ATTACKS

Special Attacks

Neutral Special
Beam Rifle
Having better performance from the RX-78-2’s beam rifle, the Hyaku Shiki’s beam rifle is faster and slightly more powerful. Due to its faster properties, it cannot be charged. After 8 shots it has to be reloaded, which takes 4 seconds of uninterrupted time.

Damage: 6%

Side Special
Thrown Beam Saber
Quattro throws his beam saber at the enemy. Quattro pulls it back the beam saber with the finger cord installed on the Hyaku Shiki’s finger.

Damage: 5% per hit
Theoretical Max damage: 10%

Down Special
Double Clay Bazooka
Activating the down special causes Quattro to pull out two Clay Bazooka’s. The Clay Bazooka fire’s different rounds at random.

Clay Shot: A sticky substance. Opponents get “stuck” into the ground.
Damage: 1%

Explosive shells: Main stray Bazooka ammo. Most common round used in this attack.
Damage: 12%

High Explosive Rounds: The second most common round. High knock back.
Damage: 20%

Scatter Shot Rounds: The most powerful and some what rare round. The result of the round is an unavoidable wall of hot lead.
Damage: 24%

Basic Attacks

Basic Attack #1
Quattro takes out 1 beam saber. He then proceeds to slash up and down, throw the beam saber in the air and backhand(holds it upside down) stabs the opponent.

Total damage: 16%
Up Slash; 5%
Down Slash: 5%
Back Hand Stab: 6%

Basic Attack #2
Quattro takes out his beam saber. He then slashes twice and ends with a jump slash.

Total Damage 17%
Slash 1: 5%
Slash 2: 5%
Jump Slash: 7%

Basic Attack #3

Quattro takes out his two beam sabers. He then slashes right to left, left to right, and then undoes the cross on the opponent.

Total Damage 20%
Slash 1: 5%
Slash 2: 5%
Cross Slash: 10%

Tilts

Forward Tilt.
Vulcan head bash
Quattro charges with Vulcans firing. He then pushes them away with a head butt.

Damage: 5%

Up Tilt
Clay Bazooka snipe.
Quattro takes out one Clay Bazooka. He then fires it at a 45 Degree angle. Only fires an Explosive round.

Damage: 6%

Down Tilt
Spinning Down kick
Quattro Rams the opponents head with a spinning kick from the Hyaku Shiki.

Damage: 6%

Back Tilt
Bazooka Dodge
The Hyaku Shiki maneuvers around an opponent. Quattro then fires a HE Round from his Bazooka. High knock back from unexpected attack. Also hard to land.

Damage 10%

Smashes

Forward Smash
Bazooka Barrage
Quattro prepares a multi round shot from his Bazooka. Due to the Clay Bazooka having 8 rounds, it takes 8 seconds to fully charge this attack. The result is devastating and worth it.

Clay Rounds: This move may become the most underrated due to it doing a max 8% damage, but smart players will take it to its advantage. Every second charging the weapon after it’s fully charged adds 2 to that number. So it becomes 4, 6, 8,10,12,14 etc.
The opponent also cannot move even when hit many times.

Damage per round: 1%
Total Damage: 8%
Minimum time stuck: 1 second
Maximum Time stuck: Unknown

Explosive Rounds: This round is an enforcer. Usually blasting the foe off the stage. Unlike other smashes this round doesn’t send the opponent flying off the stage.

Damage per round: 6%
Damage fully charge: 48%

High Explosive Rounds: This round is for a typical smasher. This one acts like a classic Smash, blasting the foe off the stage.

Damage per round: 10%
Damage fully charge: 80%

Scatter Shot Rounds:The second most devastating weapon in Quattro’s arsenal. This round has low knock back but its maximum damage is terrifying.

Damage per round: 12%
Max Damage: 96%
holy hell you’ll be seeing a lot of gold from that.

Down Smash
A Trip to the Stars
Hyaku Shiki trips the opponent. He then rams them into the ground and then kicks them into the stars. It’s also hard to get out of this combo as any team mate attacking Quattro will hit the guy Quattro is already beating up. The only way to get out of this one is that a team mate unleashes a barrage of projectiles.
Damage: 30%

Up Smash
Orbital Re-Entry
Hyaku Shiki performs a flip kick. The opponent is sent flying up into the sky. On the way back down, Hyaku Shiki automatically spin kicks the opponent again for the killing blow.
Deadly when it hits, but easy to avoid.

Grabs and Throws

Grab Animation
Hyaku Shiki uses his left hand to grab. It has a medium reach.

Grab Attack
The Hyaku Skiki fires 1 second of Vulcan into the opponent, for every press.

Up Throw
Flip Blaster
Quattro throws the enemy into the air. The Hyaku Shiki then flips backwards and takes out the beam rifle. Quattro fires 2 rounds at the enemy.

Damage per beam: 6%


Down Throw
Disaster Blaster
With Hyaku Shiki’s foot he pins the opponent down. He then fires 3 shots of his Beam rifle into them or when he runs out of ammo. He then kicks them away.

Damage per Beam: 6%
Kick Damage: 3%

Forward Throw
CBC (Close Beam Combat)
Quattro picks up the opponent and proceeds to shoo them in the face with his Beam rifle. He then kicks them away. Like other beam rifle attacks, if it runs out of ammo, he just kicks them.

Damage per Beam: 6%
Kick Damage: 3%

Aerials

Up Aerial
Wing Binder stabilizer.
The Hyaku Shiki uses its jets and wing Binder to stabilize in the air. The Hyaku Shiki stabilizes with the use of the vernier thrusters located in its shoulder and legs. Any in the way gets kicked with the right leg. Has more damage due to thrust.

Damage: 5%

Forward Aerial
Wing Binder Flip

Hyaku Shiki uses the vernier thrusters to perform a downward kick. Not as powerful as the other kicks as the kick is going in the opposite direction of the thrusters.

Damage: 3%

Back Aerial
Wing Binder Kick

The Hyaku Shiki uses the vernier thrusters to turn 180 Degrees. Quattro then uses the foot thrusters to push away. The foot thrusters do fire based damage.

Damage: 3% per second

Down Aerial
Jet Thrusted

Quattro uses his foot thrusters to deal damage. Even though this is a down aerial, the thrusters cause him to fly up.

Damage: 3% per second

Final Smash

Mega Bazooka Launcher
The Hyaku Shiki just grabbed a Smash Ball. He then zooms up into space. Where he went you have no clue, but you better find Cover. Why? Because the Hyaku Shiki just got a hold of the Mega Bazooka Launcher. The Mega Bazooka fires a beam no wider than the Hyaku Shiki, but one touch of this thing is an instant K.O. It last for 10 seconds, so on a huge maps like Eldin it’s not very effective.

EXTRAS

Colors

Defeat: Blue Chest armor
Red: Red Chest Armor with tinted Red Gold Armor
Green: Green Chest armor
White: Completely Gold Armor
Dark: Black Chest Armor


Taunts
Using the same Comm system found on the RX-78-2

Up Taunt
“Skillz”
Quattro yells out on the Comm system “Character Capabilities don’t result the outcome of battle! Skills do, and it seems you don’t have any!”

Side Taunt
Spinning Green
The Hyaku Shiki takes out its two beam sabers and spins its hands. After its done it re sheaths them if it’s not in Melee mode.

Down Taunt
“I r not Char”
Quattro messages with the Comm. saying “Heh, you’re almost as bad as countless grunts that put up a fight” While doing this the Hyaku Shiki perform a laughing pose.

Entrance animation

The Hyaku Shiki falls from the sky with the Ballute System on. Before Hyaku Shiki lands, it detaches the Ballute system and it flies away. Quattro then is heard saying “Well let’s get this started”

Victory and Defeat poses

Victory Pose #1
Quattro takes off his helmet and puts on his sunglasses. The Hyaku Shiki is in the background.

Victory Pose #2
Quattro salute’s the player(s). He then goes on the Hyaku Shiki and flies away.

Victory Pose #3
Quattro takes off his helmet and has a smirk on his face. He then says “Hmph, common was that a fight at all?”

Defeat Pose
The Hyaku Shiki is seen ruined in the background. On the floor where Quattro should be is his Helmet.

Snake Codec

Snake: Huh? WHAT THE!?!?
Otacon: Snake what’s the matter? A gold Mobile suit!
Snake: That bright gold color is making me sick.
Quattro: Heh, seems like you spotted me.
Snake: How did you get this channel?
Quattro: Heh, it was a piece of cake.
Otacon: Snake, the Hyaku Shiki is covered in a special type of Armor called Anti Beam Coating or ABC. This coating enables it to have some damage resistance. Also beware for its clay bazooka, the sticky substance it fires can stick to you for hours.
Snake: Well this seems like a challenge. But can you fight?
Quattro: You know your not the only war hero here Snake.

Shield
Since Hyaku Shiki doesn’t carry a shield, so instead shield button fires dummies. It carries up to 15 dummies a stock, so use them wisely.
[/COLOR]

Not a Good move set. Laugh at my rushjob
 
D

Deleted member

Guest
Catching up on movesets...

# King K. Rool by MasterWarlord
Really detailed, as I expected, and I enjoyed reading it thoroughly. I prefer Tiny & Cortex over this because it seems almost like treaded ground after that other DK moveset you co-wrote [Klump & Krusha?], but it's still really awesome and it will do well to stay in the running right until the end of the contest. I find it somewhat ironic that you have a crown toss and Bowser simularities after all I've heard you say about K. Rool / Brawl. :chuckle:

# Golbez by Spadefox
I stand by my old comment on you having similar problems to me, but I feel you may just have inspired me to try again with how you handled this guy. The moves come off as a little generic - they make up for it in creativity, and it's as close as you'll get to such an adaptation. It's not like the character has that much material to use. Good job, especially on getting the Dark Dragon in there.

# Edward Elric by TWILTHERO
Your use of sprites is improving and I admire you for using a method of such orthopedic imagery. It makes life easier for all of us. I'll refrain from reading this one fully until after watching FMA, I think.

# Waluigi by Mythic02
You need to use better organisation before anyone here takes you seriously. Use different colours, use pictures, use links, etc. You need to work on the relativity as well, it seems like some of the moves are completely random. Fox has a Waluigi moveset coming up - look out for it for some pointers.

# Disaster by dancingfrogman
Lol wtf? I have no idea where this character came from. Not as good as the Lionheart OCs; not bad, per se, but your later moveset is of another level of quality.

# Arthur by BKupa666
I found this one pretty hilarious and I've been looking forward to it since you announced it, me having posted that 'Massive, Throbbing Hit' video originally [right?]. I'm disappointed but unsurprised you delved into other poops - it's a fun set, but it's nowhere near as good as AoStH Robotnik. I don't think it belongs up there with The King or Robotnik: it comes down to how well you know Arthur in comparison to how well Fox knows The King and DFM knows AoStH... yours seems less dedicated due to all the mediocre poop references. I'm sure you know what I mean - Fox even played the CD-i games! Still, funniest moveset so far and it should be for a while, but it's as likely to get a vote from me as an OC. :lol:

# Revolver Ocelot by UserShadow7989
MYM3-4 quality set for a new guy, colour me impressed. You just need to brush up on some BB Code - especially things like colour and headings - and you're set to tango with the best of us. I quite like the moveset regardless, you have some quirky ideas with the use of even things like Ocelot's cape. I'd have never thought of that.

On a side note, please give me feedback on my Raiden when I post it. It should be out within the next couple of days. :)

# Ratchet and Clank by Hyper_Ridley
I love me some R&C, but somehow this one comes off as... severely under-detailed? Come on, HR, it's Ratchet and Clank! You can do better. It seems rushed. With such a rich tapestry, you should have many more extras, plus more detailed and better labeled moves all around.

# Megaman.EXE by SkylerOcon
Awesome yet eye-popping presentation which makes it hard for me to read it. Like my Yamazaki, really. The use of pop-up boxes and the font are really cool, but it's a freaking massive wall of text to me with the square text, little use of images, etc.

# RX-78-2 by Darkslash
Needs less giant pictures and more text. The colours are also really annoying - or maybe I'm jumping onto white base too quickly on this one. :D

# Shellder by KingK.Rool

Some really innovative ideas using the shell that put the design behind Squirtle to shame. I hope you return to your old, characterised presentations after this. It's not like you need it with such an interesting character already, without even its brilliant playstyle section. Barely can walk - stays in shell - great in air? Genius. This is like a taster for the really good stuff, right? I know some Kawasaki epicness is coming up, with the fan fare and all when you post said epicness. PM me when it happens.

# The Goos by Wizzerd
So very interesting. Typical niche puzzler / collector / Lemmings inspirational with the context, but I find the idea of building stuff and using it to attack people baffling. Continue smoking the weed.

# Fatman by MasterWarlord
One of my favourite MYM5 sets so far, simply because it replicates the boss fight so much just with the neutral and side special. Really awesome ideas that make me think of this KoJ guy, I think we lost a good guy. The cypher and grabs are weird, as someone else said... aside from that, everything fits well and I like the set.

# TWILTHERO by … well… TWILTHERO
Self-inserts are lame, but that first image cracked me up. Here's a cookie.

# Ema by kitsuneko345
I find it hard to imagine any Ace Attorney character in battle, even after Mendez's numerous moveset creations [both now and back then], which couples with your bad presentation (sorry) to make the moveset a hard one to really 'get'. The moves are all well-thought out and such, but I feel you're wasting your time on all these characters from the same franchise which has little to do with fighting. I appreciate your dedication and talent, though - I couldn't make an AA set half as good.

# Airman by agidius

Fun and well-presented moveset. The sparing use of images works well and each move fits, I like the inclusion of the torque. Not much else to say, besides, Airman will not die!

# Battalion Army by dancingfrogman
This is much better than Disaster. The use of the different units is exemplary on your part and works seemingly very well, you keep it from being broken or underpowered. You've given me some ideas for a future moveset too. Good work.

# Ridley by drag0nscythe
Is this even complete? Looks alright for a beginner, I guess.

# Near by TWILTHERO
Like with your Misa, I don't think Death Note fits well into Smash with this character. His moves seem too constrictive and scripted. With you, it's like you have the decent sprited ones and the comparably terrible Death Note ones. Stick to the former!

# Type 100 by Darkslash
Detail, images and headers. What, did this moveset take you a couple of minutes? Look at other movesets for examples.

And that took forever. Raiden soon-ish, hopefully by Monday.
 

Chris Lionheart

Smash Champion
Joined
Apr 6, 2008
Messages
2,076
Location
Make Your Move
Some fine movesets have been posted since I last commented.

And speaking of great movesets, I just finished my first one.

Expect it to be posted either later tonight or tomorrow.
 

Tanookie

Smash Journeyman
Joined
Nov 17, 2008
Messages
436
Location
*sends Sundance a leather harness on Dragon Apprec
I feel so sheltered...I hardly recognize any of the characters posted so far. Except for K.Rool and Shellder, of course. And I still fail to see how people like DFM and TWILT have posted two movesets already and still have tons more to come. It makes me afraid of the 20-odd movesets Baloo wants to post...

I expect mine will be up to snuff. I'm having really good feelings about Hypno. He has no special mechanic, but I enjoy all of his moves so far immensely. Plus Mia only has her Extras left. Get excited, you guys!
 

Baloo

Smash Ace
Joined
Nov 14, 2008
Messages
781
I feel so sheltered...I hardly recognize any of the characters posted so far. Except for K.Rool and Shellder, of course. And I still fail to see how people like DFM and TWILT have posted two movesets already and still have tons more to come. It makes me afraid of the 20-odd movesets Baloo wants to post...

I expect mine will be up to snuff. I'm having really good feelings about Hypno. He has no special mechanic, but I enjoy all of his moves so far immensely. Plus Mia only has her Extras left. Get excited, you guys!
Yuo wrong me! It's only 19. :p

Near looks great, Type 100 is ish. 100 reeeeaaaaly needs better organization.

♥ @ Airman moveset.
 

Hyper_Ridley

Smash Champion
Joined
Dec 21, 2007
Messages
2,297
Location
Hippo Island
# Ratchet and Clank by Hyper_Ridley
I love me some R&C, but somehow this one comes off as... severely under-detailed? Come on, HR, it's Ratchet and Clank! You can do better. It seems rushed. With such a rich tapestry, you should have many more extras, plus more detailed and better labeled moves all around.
First, short descriptions are not the same as underdetailed. Black Doom was praised for his conciseness in MYM4.

Second, and this applies to anybody else that wasn't fond of my move set...it wasn't meant to be a serous contender to begin with. I was just annoyed that this series was never given a move set in MYM, so I took it upon myself to make one. This was originally a canned MYM4 move set, which is probably why some of the moves seemed rush, because they were made pre-MYM4. Any moves I made after revisiting it were given proper attention to make them work in today's environment.

Bass and Treble are my REAL first entry in Make Your Move 5, and they should exhibit everything you guys have come to expect from me. So, there.
 
D

Deleted member

Guest
First, short descriptions are not the same as underdetailed. Black Doom was praised for his conciseness in MYM4.
I believe they were too short, but coming to the main point...

Second, and this applies to anybody else that wasn't fond of my move set...it wasn't meant to be a serous contender to begin with. I was just annoyed that this series was never given a move set in MYM, so I took it upon myself to make one. This was originally a canned MYM4 move set, which is probably why some of the moves seemed rush, because they were made pre-MYM4. Any moves I made after revisiting it were given proper attention to make them work in today's environment.

Bass and Treble are my REAL first entry in Make Your Move 5, and they should exhibit everything you guys have come to expect from me. So, there.
I love Ratchet & Clank too, thus why I was excited to see not only a moveset, but by a respected and decent creator. I don't see the point in posting it if it was only to fill a spot for the series, the couple have so much potential that you should have used - as a respected member. It really seems like a missed opportunity and you probably won't come back to it from what I've read.

I look forward to your 'real' moveset, then. I know your standards are better than what I just mentioned.
 

Wizzerd

Smash Ace
Joined
Feb 24, 2009
Messages
929
# The Goos by Wizzerd
So very interesting. Typical niche puzzler / collector / Lemmings inspirational with the context, but I find the idea of building stuff and using it to attack people baffling. Continue smoking the weed.
I don't do drugs! :O That was the developers of World of Goo.
Seriously, in one level, you have to grind up "ugly goos" into mush so that the one "beauty goo" could be implanted into a girl-shaped generator's forehead.
But thanks for the thoughts.

Anyway, I'll be posting some sort of moveset from the Mario RPGs sometime in the next week.
 

Hyper_Ridley

Smash Champion
Joined
Dec 21, 2007
Messages
2,297
Location
Hippo Island
I love Ratchet & Clank too, thus why I was excited to see not only a moveset, but by a respected and decent creator. I don't see the point in posting it if it was only to fill a spot for the series, the couple have so much potential that you should have used - as a respected member. It really seems like a missed opportunity and you probably won't come back to it from what I've read.
Because I had fun making this move set? Seriously, I <3 my Captain Quark AT.

I mean, isn't what this thing is all about? Having fun making move sets? Besides, like I said, any moves I made when finishing it for MYM5 had genuine thought put into them, so it wasn't like I was just making it to "fill in a spot", as you say.
 

Heartz♥

Smash Legend
Joined
May 18, 2008
Messages
10,443
Location
Virginia
I feel so sheltered...I hardly recognize any of the characters posted so far. Except for K.Rool and Shellder, of course. And I still fail to see how people like DFM and TWILT have posted two movesets already and still have tons more to come. It makes me afraid of the 20-odd movesets Baloo wants to post...

I expect mine will be up to snuff. I'm having really good feelings about Hypno. He has no special mechanic, but I enjoy all of his moves so far immensely. Plus Mia only has her Extras left. Get excited, you guys!
I'm really looking forward to Mia. I wouldnt have thought to make a Golden Sun toon.
 

SkylerOcon

Tiny Dancer
Joined
Mar 21, 2008
Messages
5,216
Location
ATX
@SD: You already know this from the chat, but it's pretty ridiculous that you're judging a set based off of the looks. It's not impossible to read, though it's admittedly not as user-friendly as most either (though still not that bad...). Actually judge it off of the set instead of being so superficial.
 

Chris Lionheart

Smash Champion
Joined
Apr 6, 2008
Messages
2,076
Location
Make Your Move
I didn't want to submit this moveset until late in the contest, but it has a major role in my MYM5 SM and I wanted it to be secret.

My Secret Set revealed.

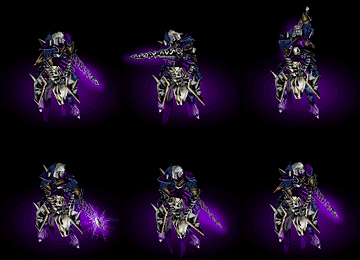
The hero turned villain. The Palidan turned Death Knight. General of the Scourge.

Arthas


"This kingdom shall fall, and from the ashes shall arise a new order that will shake the very foundations of the world!"
~Arthas


Scales Reference:

I often refer to stats as such:

Very Low/Very Slow- Barely anything at all... in knockback this would be little more than a flinch, for example. Less than 1-2/10.

Low/Slow- This would put the stat well-below average. This would be like a 2-3/10.

Below Average- The stat isn't bad... but it isn't average either. It would be like a 3-4/10.

Average/Medium/Decent- This stat is perfectly balanced. Basically, 5/10.

Above Average- The stat isn't particularly good, but its above the norm. 6/10

Good- This stat is considerably above average. 7/10.

Great- This stat is as the name suggests... really above average. 8/10.

High/Fast- This stat is almost as good as it gets. 9/10.

Very High/Very Fast- This stat is about as close to as good as it gets as possible. 9-10/10.

Legend of Frostmourne: The Tale of Arthas

(May contain spoilers to the plot of Warcraft 3.)

Arthas was the prince of the human kingdom. He worked under Uther, the greatest of the Palidans, in hopes of one day being a mighty champion of light and a great king. When news of a horrible plague that turned the living into the undead reached the kingdom, Arthas and Uther lead an army to investigate the source of the plague and purge it. Over the course of his journey, Arthas would show himself to possess very dark qualities for a hero, resulting in the downfall of his kingdom. Arthas now wields the Frostmourne, the unholy rune blade that steals the soul of its victims... and its wielder. The former Palidan is now a Death Knight, a general of the undead Scourge and one of the most trusted servants of the Lich King.

In addition, this is from the Warcraft Battle.net site:

"Death Knights were once virtuous defenders of Humanity. However, once the Paladin ranks were disbanded by the failing Alliance, many of these holy warriors traveled to the quarantined lands to ease the suffering of those left within the plague-ridden colonies. Though the Paladins were immune to disease of any kind, they were persecuted by the general populace who believed that they had been infected by the foul plague. A small band of Paladins, embittered by society's cruelty, traveled north to find the plague's source. These renegade Paladins succumbed to bitter hatred over the course of their grueling quest. When they finally reached Ner'zhul's icy fortress in Northrend they had become dark and brooding. The Lich King offered them untold power in exchange for their services and loyalty. The weary, vengeful warriors accepted his dark pact, and although they retained their humanity, their twisted souls were bound to his evil will for all time. Bestowed with black, vampiric Runeblades and shadowy steeds, Death Knights serve as the Scourge's mightiest generals."

Pros:

Fast character.
Heavyweight.
No lack of killing moves.
Dash Attack is very effective.
Great reach.
Building and unit systems allow Arthas to be very powerful in long matches.
Has 2 ways to Arthaside.
Immune to tripping.
Can glide.

Cons:

Large target.
Few fast attacks.
Many attacks are quite predictable.
Not effective in short matches.
Reliant on corspses and minions.
Cannot grab the ledge.

Mehs:

Random Recovery
Random Final Smash

Command the Scourge: Play As

Arthas is heavily reliant on his building and unit systems to win the match. Unfortunately, he starts the match with absolutely nothing. A predictable character on his own, Arthas cannot rely on solo combat.

Early Match:
Your first priority is to find a safe spot to summon your Acolytes. The spell has a 1 second cast, and is thus easily interruptible.

Once summoned, the Acolytes will get right to work. They are fragile units, however. They lack the ability to defend themselves and only have 30 hp. They require your protection. To ensure their safety, you must know how to play your cards right. Your Neutral Special is the most valuable tool in ensuring the Acolytes survive. Even uncharged, you can ensure that the Acolyte survives another attack. Fair spam can also help keep your Acolytes alive. Your Up Smash is great for healing the Acolytes when they are clumped together while also providing some attack. You may also wish to summon additional Acolytes (keep in mind that only 3 can be on the stage at a given time), as when the one currently building dies, he can be quickly replaced. Believe it or not, Death Pact can actually be a tool to increase the efficiency of the Acolytes. Despite choosing a random target, this move can be used to replace a highly damaged Acolyte with a new one. As a bonus, you even get a Shade, which is often even better than a free corspe. When an Acolyte dies, it provides you with a corspe or a Shade. You may want to use Death and Decay to protect the area and scare the opponents away from your other Acolytes temporarily.

Remember that you are not the enemies' primary target, but should they decide to put pressure on you, you do have ways of defending yourself. By using moves such as your Down Smash or Nair, you can provide some valuable some-defense. Your Dash Attack is also a decent all around move for both defensive spacing and offensive assaults. You can even use your Dash Attack in mid-air! Remember, the early-game is when you will be spending your mana like hell!

Late Game:
If you have played your cards right, chances are you will have an army established. If you don't... you better resume your early game tactics (though you are probably screwed anyway).

While defending your units is still important to some extent, it is not nearly as vital as it was in the early game. Most of the units that you will be trying to keep alive are exceedingly valuable ones, such as the mighty Frost Wyrm, the Necromancer, and the Crypt Fiend. Don't even bother healing Banshees... they are built to die.

Now that you have your army, you are free to go on the offensive. Throw everything you have at the opponent to keep them busy. F-Tilt helps provide one more thing to distract the opponent while Nair can ensure that they outright avoid you. You may actually be using Death Coil offensively rather than defensively at this point! If you have a well-established army in the late game, you pretty much have it made.

To Save Humanity: Play Against

In contrast to Arthas's mostly defensive playstyle, his opponent is basically forced to play offensive the entire match.

Early Game:
At this point of the game, Arthas is forced to play defensively if he wants to succeed later on. You, on the other hand, are pretty much forced to go on the offensive. While it is tempting to take advantage of Arthas's early-game weakness and kill him, keep in mind that while you do so, he has Acolyte(s) building an army to kill you! At the same time... you don't want to let him safely defend them. You must play smart, dividing pressure between direct assaults on Arthas and attacking the Acolyte(s) to keep Arthas to occupied to protect his Acolyte(s).

One strategy is to use powerful attacks, murdering his Acolyte's before he can heal them. In MMO terms, this is a "spike kill". A Bowser F-Smash is great for this purpose. Another idea is to use wide-reaching attacks that damage all of the Acolytes at once, such as DK's Ground Pound, Bowser/Charizard's Fire Breath, and many attacks that hit both sides.

Arthas himself is really not hard to defeat. He cannot combo well and his attacks are often predictable. Right now, he is desperate just to keep his Acolyte(s) alive. When you see him casting a spell, you should attempt to interrupt it with a projectile or jab.

Late Game:

Hopefully by this point, Arthas still doesn't have an army. If he does, however, Arthas now becomes your primary target.

Most of the undead units, especially Frost Wyrms and Abominations aren't even worth attacking. Some units, such as Necromancers, Banshees, and Crypt Fiends are very annoying or even devastating for you. Fortunately the former two are also fragile. Kill them quickly.

Ironically, by attacking Arthas directly at this point, you actually help wear down his army. By forcing him into using Death Pact to recover, you cost him valuable units. Perhaps, if you are lucky enough, he may even end up sacrificing that durable Frost Wyrm.

Basically, at this late point of the match, if he has an army, you must make a "mad dash" to kill him and end the fight before you are decimated!

Skills of the Scourge: Mechanics

Building-
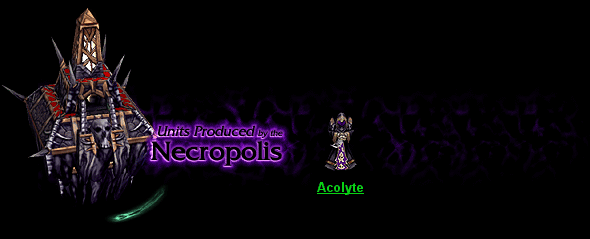
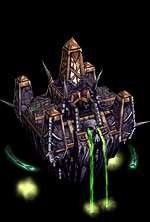
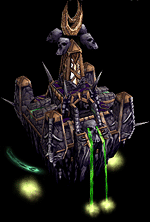
The staple of any RTS (Real-Time Strategy) game. Arthas relies on a building system, meaning he will be quite underpowered at the beginning of the match, but can progress into a very impressive character. The building system is mostly automatic. You must summon Acolyte's with his Neutral B. These servants of the Lich King then automatically start summoning buildings in the background. Further explanation of this mechanic will come later.
Unit Production-
Buildings produce random units (from a list of units that differs for each type of building). These units auto-attack foes at regular intervals. Properly maintaining, sacrificing, and utilizing these units is crucial to playing as Arthas. Further explanation of this mechanic will come later.
Mana-
Arthas possesses 250 mana. It shows up as a blue number above his Character Potrait in battle. This is used for certain moves, including the vital ability to summon Acolytes. Wise usage of mana is crucial to playing as Arthas. Mana regenerates at a rate of 1% per second, in other words, 2.5 mana per second +0.1 per second each time Arthas "levels up". In addition, Arthas can reap souls, gaining 5 mana upon the death of an undead unit and 10 upon the death of any player, excluding himself. He doesn't have to kill the target to gain this benefit. After being KO'd, Arthas's mana completely regenerates. Another benefit to killing foes is that is causes Arthas to "gain experience." He gains 10 more maximum mana with each foe he successfully KO's. His mana maximum is reset to 250 when he is KO'd.

Strength of the Death Knight: Stats

Size- Large
Arthas is a big target. While vertically, he is not quite as tall as Bowser, rather being about that of Ganondorf, he is very wide due to being a mounted unit.

Weight- Very Heavy
A knight in armor with a heavy sword riding an undead horse.. he is going to be heavy. His weight compares to that of Bowser, perhaps being a bit lighter.

Trotting Speed- Slow
Arthas's horse doesn't move very fast when it is just trotting. Its pretty below-average.

Galloping Speed- Fast to Very Fast
When Arthas's horse gets going, it is one of the fastest characters. It would probably be about the speed of, or a bit slower, than Metaknight.

Attack Speed- Slow
Arthas's attacks tend to be polarized, having great lag at one end but low lag on the other.

Attack Power- Great
Fear the power of Frostmourne! Arthas's attacks really pack a pawnch.

Direct Melee Attack Reach- Great
Arthas's sword is huge. His melee attacks compare to that of Ike.

Priority- Great
A lot of Arthas's moves have great priority.

Hitstun- Very Low to Low
Arthas and his undead allies barely have any hitstun, but there is atleast some.

First Jump- Great Vertical, Medium Horizontal
Arthas's steed springs off of its hind legs. Its really going to jump high. Short hopping is very difficult.

Second Jump- No Vertical, Great to High Horizontal
Arthas's death horse gallops on air for 2-3 seconds as you gain the ability to control it. As it moves at Galloping Speed, you can cross a lot of horizontal distance in this time. Oddly, you can even use your Dash Attack in midair during this.

Falling Speed- Fast
Though not the fastest faller, Arthas's heavy weight gives him a considerably above average falling speed. He certainly doesn't have the most respectable air game.

Recovery- Variable
Arthas's recovery is largely reliant on the prescense of Undead Units and its duration is variable based on the health of these units.

Final Smash- Variable
The effective of Arthas's Final Smash is random.

Traction- Great
Arthas horse can't trip and it turns very easily. He has absolutely amazing traction!

Dodges- Poor
Simply put, someone of Arthas's size who is mounted on a horse can't dodge very well.

Crouch- None
A horse doesn't crouch easily.

Crawl- None

Wall Cling- None

Wall Jump- None

Glide- 2 seconds
Surprisingly, Arthas can glide, but only during his second jump. Hold the jump button and Arthas's horse will continue galloping for an additional 2 seconds. This, of course, puts Arthas is helpless, but its a considerable alternative to a traditional recovery.

Living Dead: Animations:

Entry Pose- Arthas warps in similar to an FE character's warp powder, creating a dark circle on the ground. His sword is raised above his head as it is the souce.

Idle Pose- Arthas's horse turns its face towards the screen and Arthas turns his head towards the direction the horse was facing, occassionally looking the opposite way. You can see the icy breath of the dead steed.

Trotting (Walk)- Arthas's horse steps at a leasurely pace as Arthas looks straight ahead.

Gallop (Run)- Arthas's horse gallops as Arthas holds the reigns with his right hand. The Frostmourne, which is always wielded in the left hand cannot be seen, as it is hidden behind the horse.

First Jump- Arthas's horse springs up using its hind legs... if you've seen just about any movie with horses, you know what I'm talking about.

Second Jump- Arthas's horse floats in its current elevation, allowing you to gallop freely for 2 seconds. Great horizontal distance. You can use your dash attack during this.

Skills of the Scourge: Specials

Neutral B- Death Coil

A staple of the Death Knight in both Warcraft and Smash. Press and Hold the B button. The nearest undead unit (other than Arthas himself) will be surrounded with a dark purple aura. Use the Control Stick to change the undead unit or character you want to target. Targeting works in a cycle from this point on, and you can go back to the last target by pressing the control stick left. Pressing it right chooses the next target. Release B once you have found the unit you wish to target.That target will then briefly be surrounded by a brillaint dark-purple flash. If that unit was an undead unit, including enemy Arthas's and summoned undead, that unit is healed for health based on charging (10% for 0 seconds, 20% for 2 seconds, 30% for 3 seconds). If the target was a non-undead, it takes damage (but no knockback) based on charging (10% for 0 seconds, 15% for 2 seconds, 20% for 3 seconds). This move consumes 1 point of Arthas's mana for each point of damage dealt or healed. The range of the move is unlimited. This move has a casting (beginning) lag of 1 second after your target has been selected. The ending lag is actually very brief.
*The most obvious use of this move is to maintain your undead army.

Side B- Death and Decay

Similarly to the Neutral Special, when you hold this move, you can choose the target. This time, however, the targets are the corspes (or Shades) provided by your dead undead allies or by graveyards (or those of opposing Arthas's). A dark green ritual circle under the target corspe denotes which one is your currect target. The nearest corspe or Shade is the first target. Move the Control Stick to the left to pick the previous target and to the right to pick the next target. Release B when you have your target. Arthas will point his sword at the target corspe and a green disease cloud will appear around the corspe. The disease cloud reaches 3 stage builder blocks radius (in other words, 3 stage builder blocks in any direction.) Foes in its area of effect start caughing (works like flinching) and take 10% of their current damage percentage per second (minimum of 1% per second). The disease cloud lasts for 10 seconds. This move has a cast time (beginning lag) of 1 second. This move costs Arthas 20 mana to use.
*The uses of this move include edge-guarding, as the caughing foe cannot grab the ledge, and simple damage or area defending.
*The targeted corspe or Shade will disappear after the duration is over.
*I recommend targeting Shades, as this creates a mobile damaging aura.


Up B- Death Pact

Unlike the previous two specials, this move chooses a random target. Any of Arthas's allied summoned undead can be sacrificed. Arthas will point his sword in the direction of the sacrificed unit. That unit will be blown up, and cartoonish bones will fall from its current position downwards (if it was in the air), stopping when they hit the ground or fall off the stage. Arthas's horse will grow skeletal wings for a duration equal to 1 second, rounded up, for every 10 health that undead unit had (an undead unit with 11 health, for example, would net Arthas 2 seconds). Basically, you better pray that the sacrificed unit had enough health for you to recover. Oddly, even if you hit the ground, the wings will not disappear until the duration is over. You will move on the ground like normal in this situation, but if you jump, you continue to fly. The flight netted by this move is similar to that of Pit's Up Special, with some exceptions. You can attack during this without any penalty. This does not leave Arthas helpless when it runs out, but keep in mind that each use comes at the cost of one of your valuable undead units. This spell has a 1/2 second cast time (beginning lag) but low ending lag. This move costs Arthas 10 mana to use.
*The corspe produced by the sacrificed unit can be exploited using Death and Decay (side special) or other corspe-exploiting moves.
*If the sacrificed unit happened to be an Acolyte, a Shade is created. It is explained later on in the moveset.

Down Special- Summon Acolyte

Arthas's most important skill, period. Arthas stabs the ground with his sword, creating a ritual circle of gold. This summons an Acolyte, a human cultist loyal to the Lich King. These acolytes immediately get to work summoning buildings in the background. Buildings can summon undead units at regular intervals or produce other effects. Each building has its own completion time. Buildings will be further explained in the later buildings section of this moveset. An Acolyte has 30 health and is incapable of attacking foes. This move has a 1 second cast time (beginning lag) but low ending lag. It costs Arthas 30 mana to use this move.
*When an Acolyte is killed normally, it creates a corspe just like other undead. If it is sacrificed with Death Pact, however, it creates a Shade.
*Only one Acolyte can summon the same building at one time. There are advantages to having multiple Acolytes on the field at the same time, however. If the building Acolyte dies, another is soon able to replace it. In addition, when 2 or more buildings are available at the same time, they can all be built at the same time by different Acolytes.
*Only 3 Acolytes can be on the field at any given time.


Dead Grounds: Ground Attacks

Neutral A- Simple Slash

Ah, the obligatory auto-attack of the unit turned into a neutral A. Arthas's steed faces the screen, just like his Idle Pose (and shown in the animation). He simply slashes down with Frostmourne in the direction his horse was originally facing. This move is quick to come out, having fairly low beginning lag, but its ending lag is considerable, roughly 1/3 to 1/2 of a second. In other words, it can be punished pretty easily. Great hitbox reach. Medium priority. Low hitstun. Deals 9% damage and good knockback.
*An interesting feature of this move is that after being used, Arthas remains in the "idle position shown in the animation. This actually does have some benefit, as it further reduces the beginning lag of any subsequent uses of the move (yes you can repeatedly use the move in this position), as all he has to do is slash down. The ending lag of the attacks is still normal, though. This benefit can also be obtained through Arthas's true idle pose. Some possible mindgame potential, but thats debateable.
*In addition, while using this move, or in this position for that matter, one of Arthas's weaknesses, his large horizontal length, is considerably lessened.


Dash Attack- Hit and Run
Arthas's steed gallops the distance of Wolf's Forward Smash in the direction you are running. Arthas slashes, creating a purple fire mark from the starting point to the ending point. His horse then quickly turns around and leaps back to Arthas's original position plus the distance of Wolf's Forward Smash. One of Arthas's few fast moves, having low lag on both ends. Superb reach, as the hitbox is from the original location + the distance of Wolf's F-Smash in the dash direction + the reach of the sword in that direction. Low priority and low hitstun. Deals 5% damage and decent knockback.
*This is one of Arthas's most useful attacks by far. Aside from being one of his few fast moves, this is also far reaching, deals decent damage, and is great for spacing away from the foe. Possesses some mindgame potential.
*It is worth noting that at the end of this move, Arthas will be facing the direction opposite of his original dashing direction.


Blade of the Lich King: Tilts

Side Tilt- Locust Swarm

Arthas raises his sword into the air and then points it forward. A swarm of locusts flies from the upper corner of the screen in the direction opposite of the direction Arthas is facing. They fly very slowly, going diagonally downwards in the direction Arthas was facing when he used the move until reaching the elevation of the stage (or any platform, obstacle, etc. that Arthas was standing on when he used the move). They then fly horizontally until leaving the stage. This move sports high beginning lag but low ending lag. Obviously, this move has an amazing reach, being a projectile. The locust's work in an interesting way. There are approximately 20 locusts. The swarm reaches approximately 3 stage builder blocks in length and 1 stage builder block in height.Each one is capable of dealing 1% damage by biting foes unfortunate enough to come into contact with the swarm. Any locust that has "eaten its fill" returns to Arthas, healing Arthas for 1% health when they reach him.
*This move is very indirect and very predictable. However its use as a projectile and as a way of keeping your foe's mind occupied is obvious. It's hard to actually hit with this move, and you risk being punished. That potential maximum 20% healing can really help, but don't count on it.

Up Tilt- Rider's Fury
Arthas's horse stands up on its hind-legs. It flails its front legs in the air in front of it, dealing 6 rapid hits of 2% (with low knockback on the first 2 hits and decent knockback on the third) each to foe's in front of Arthas. While this happens, Arthas swings Frostmourne above his head 3 times, dealing 2 hits of 4% damage and low knockback and a third hit of 5% and good knockback. This move is quick to start, having low beginning lag, however it has nearly half a second of duration and some considerable ending lag. This move has high vertical reach and decent forwards reach. Great priority on Arthas's slashes but low priority on the horse kicks. Medium hitstun from both the sword and the horse.
*While this move is obviously great for defending against assaults from above, it must be used wisely because of it being very punishable.
*Arthas can easily be knocked out of this move by hitting him from the front, due to the low priority on this end, or even more preferably, from behind as he is completely vulnerable from this end.


Down Tilt- Impale

Arthas points Frostmourne at the ground. Immediately, spines burst from the ground. They cover an area 3 stage builder blocks in the direction Arthas is facing. This move sports fairly high beginning lag and low ending lag. Grab priority. No hitstun. Deals 6% damage and causes the foe to be caught in the spines for 1 second.
*The uses of this move should be obvious. It deals decent damage and leaves the foe vulnerable to a fast move, such as your dash attack. Also good for halting approaches.

Might of the Scourge: Smash Attacks

Side Smash- Necrotic Traversal

Arthas and his steed are surrounded in a dark purple aura. They instantly teleport to the nearest corpse. When this happens, the corspe explodes, releasing a putrid green "death nova". The nova reaches 3 stage builder blocks in all directions. Low beginning lag and high ending lag. Great priority. Low hitstun. Deals 10...15% damage and high knockback (in the direction of the part of the circular explosion they are struck by) to struck foes. This costs Arthas 10 mana.
*While not dependable, this move can prove useful in a pinch. It can be used to space away from foes, or just outright escape them. It can also be used as an unexpected attack.
*Arthas has Super Armor while surrounded by the dark purple aura.
*Keep in mind that the used corspe disappears afterwards.


Up Smash- Well Of Blood

Arthas's stabs the ground with Frostmourne (this is the charging position). The ground glows red (including during charge time) and suddenly a geyser of "red water" bursts from the ground. It reaches 5 stage builder blocks upwards (keep in mind some of that distance is Arthas's body.) The width of the fountain is 1 stage builder block. This move sports high beginning lag and a long duration (nearly 2 seconds), but surprisingly low ending lag. Deals 10% and great upwards knockback to foes struck by it. What is the use of this move, you ask? Undead units, excluding Arthas, are healed for 10...15% (based on charging) for each second they are inside the Well of Blood.
*This move is a decent way to protect Arthas from aerial assaults for an extended duration.
*The primary use of this move is a source of healing for your undead units that doesn't waste your mana.


Down Smash- Jagged Bones

Arthas holds his sword in front of his face and it grows very brightly (this is the charging position). Sharp bones (spines to be exact) burst from the bodies of Arthas and his mount. Very high beginning lag and very low ending lag. The spines have a good reach all around Arthas and his mount. High priority. Low hitstun. For 2...4 seconds, the armor of bones remains on the Death Knight and his fell mount. This grants him Super Armor. In addition, foes who come into contact with the bones take 6% damage and flinch. This costs Arthas 20 mana to use.
*Unlike most Smashes, this is used for defensive purposes. It can be used as an extra source of damage, but its primary use is the Super Armor and "armor of priority" that it temporarily provides Arthas with.

Flight of the Scourge: Aerials

Neutral Aerial- Carrion Swarm

A horde of skeletal bats fly out of Arthas's cape. They then patrols around him for 5 seconds. If a foe gets within 3 stage builder blocks distance of Arthas, the undead bats fly towards the foe at an average projectile speed. When a bat reaches a foe, they latch on to it, biting them repeatedly for 1% damage per second. They act just like Pikmin in this matter. There are a total of 18 bats, but only 6 may latch onto a foe. The entire swarm flies around the target foe. What is the point of this? The bats swarmed around that foe then use him as their new "orbit." If another foe gets near that foe, the bats not latched to the first target fly to a second target (with 6 bats per target, there is a maximum of 3 targets). The bats can not be gotten rid of like Pikmin, but they dissapear after the 5 seconds are over. This move has low beginning lag and high ending lag. No hitstun, flinching, or knockback is dealt by the bats. This costs Arthas 10 mana to use.
*The bats are an excellent method of projectile defense, as they neutralize the projectile... unfortunately the bat struck by the projectile dies. Melee attacks outright miss the bats, so they are not an effective form of melee defense.
*This attack is a great source of fierce multi-target damage, though it is fairly predictable and not to difficult to counter.
*This move can be easily punished, as even though they risk being swarmed, a foe can attack you during the high ending lag of the move.


Forward Aerial- Vampiric Blade

The fire around Arthas's sword briefly flashes red as he slashes horizontally. This slash deals 5% damage and decent knockback to the foe. This health is stolen... but you are not the recipient. Instead, all undead minions (friend and foe) are healed for 5%. This move has fairly high beginning lag and low ending lag. Great horizontal reach in front of Arthas. Great priority. Low hitstun.
*This move's primary use is, of course, to heal your minions without burning mana.

Back Aerial- Flare
Arthas looks behind him and points Frostmourne in that direction. The dark purple flames around it surge, creating a scorching burst that reaches 2 stage builder blocks behind Arthas's horse. Fairly high beginning lag and fairly low ending lag. Great priority. Low hitstun. Deals 10% and good horizontal knockback in the direction behind Arthas.
*This attack is really straight-forward. It's main use is a long-reaching attack for protecting Arthas from assaults from behind.

Up Aerial- Pilgrimmage to Heaven
Arthas's steed catches on dark-purple fire and starts galloping diagonally upwards. It travels all the way to the top of the screen. Foe's who run into Arthas or his horse take no damage, but are taken with him. Arthas and any caught foes leave the stage and lose a stock. Low beginning lag and a variable duration. Arthas has Super Armor over the entire duration of this move... so he is going to die. If Arthas is under the stage, he will hit the stage and become helpless, falling to "Hell."
*This move can be used to Arthaside.

Down Aerial- Fetid Ground

Arthas's horse starts galloping diagonally downwards in the direction Arthas is facing. He will grab foes who come into contact with him. When/if Arthas touches the ground, he will stab the stage. The entire stage (or platform) that he struck will have the appearance of decaying and turning green for 1 second. He will throw any foes that he grabbed on the way down onto the foul earth. Foes struck by the fetid ground take 10% and high vertical knockback. Arthas has Super Armor on the way down. This move has low beginning lag, medium lag on the ground stab, and fairly high ending lag. Low hitstun.
*This move is quite easy to dodge, considering that dodging it is often as simple as jumping.
*This can result in a SD if used incorrectly.
*If Arthas suicides, any foes grabbed by him are taken as well. This creates an alternate Arthaside.


Situationals:

Rising Attack- N/A
Arthas can not Trip.

Ledge Attack- N/A
Due to being a horseman, Arthas can not grab the ledge.

The Lich King's Grasp: Grabs and Throws

Grab- Grasp From The Grave
Arthas has the game's most unique and situational grab, but potentially one of the most rewarding. When you press the Grab Button, Arthas points his sword forward and all corspses on the field reach up their bony arms and grab the legs of any foe who comes into contact with them. It then gets up and looks right into the foe's eyes. The speed of the grab is average, although Arthas himself has little lag. If the grab is successful, Arthas turns the skeleton into his puppet. Arthas is completely vulnerable during a successful grab until you throw the enemy.
*This grab is potentially very effective, as it is very difficult to predict and can't be punished by the target very easily.
*The downside is that you must have a corspe right next to or under your target for the grab to work.


Grab Attack- Feast of the Dead
The skeleton who grabbed the foe starts biting them. All other corspses on the field become animated and converge on the helpless foe. They all start biting him, each doing 1% per second. They can be thrown off like Pikmin, freeing the victim from the grab. Arthas can use a throw at any time during this.

Forward Throw- CHARGE!
Arthas's horse charges at the grabbed foe. He sticks the Frostmourne out in front of him. When the foe is struck by the sword, they take 10% and great horizontal knockback. Arthas laughs after impaling the foe, causing high ending lag.

Back Throw- Bone Slap
The skeleton that grabbed the ***** slaps them with great force, knocking them in the direction behind the skeleton. Deals 6% and good knockback in that direction. Very fast throw.

Up Throw- Scourge Combo
The skeleton that grabbed the foe kicks them upwards with great force. It then leaps up to them and kicks them repeatedly in an animation similar to Falcon's Up Aerial. Deals 5% and fairly low knockback. This can result in a chaingrab at percentages under 30%.

Down Throw- TOMBSTONE
The skeleton that grabbed the foe performs the famous move of the Undertaker, turning the foe upside down and slamming them into the ground. They actual go into the stage, and a grave forms where they are, with the words R.I.P. and the character's name written on it. This deals 6% damage and traps the foe. The foe can escape through rapid controller inputs. Doing so can allow them to escape in 1-2 seconds.

Wrath of Arthas: Final Smash
Animate Dead-

Arthas raises Frostmourne into the air and yells "Rise, my minions!" Six randomly chosen undead units, each with an equal chance of being chosen, are created. These units have the normal health bars for their type.
*This stacks with the natural 6 minion limit. Until these minions are killed, you control 12.
*Acolytes, Shades, and Corspses are not summoned by this Final Smash.

Crucial Mechanics:

Buildings of the Scourge:

Notes-
Buildings are created in a set order by the Acolytes, which are created by Arthas's Down Special. The order they are listed here is the order they are created.
Buildings are created in the background, and thus cannot be damaged. Once created, it remains a part of the stage until the match ends. On a side-scrolling stage, the building permanently stays in that part of the stage, re-entering the match when the stage returns to that point.
Buildings scale to the size of the stage, and will thus be larger on a larger stage.
Two buildings cannot overlap in the background.
Buildings must also obey the tech tree. Not only must they be built in order, but the proper stage of the Necropolis must exist for other buildings to be built.
The only time buildings are vulnerable is the time betwen Arthas being KO'd and Arthas returning to the stage. Each building has a health bar and can be attacked during this time frame.
If the Necropolis/Halls of the Dead/Black Citadel is destroyed, all buildings that have been built so far still remain functioning, but it must be rebuilt and re-upgraded to build new buildings.


Building One- Necropolis

The Necropolis is the most important building of the undead, as it is the first in the tech tree (no other building can be created without its existance.) It allows you to build the Graveyard and the Crypt. In Warcraft, this building produces Acolytes, but that doesn't occur in Smash. Rather, this building serves little initial function but to start the tech tree. This building takes 20 seconds to complete. This building has a 50% health bar.
After 2 minutes and 20 seconds, this building is upgraded to a Halls of the Dead.

This building allows additional parts of the tech tree to be built. Without it, you cannot construct a Slaughterhouse or Temple of the ****ed. It shoots a projectile once every 3 seconds that deals 3% and flinching if it hits a foe. This building has a 75% health bar.
After another 2 minutes and 20 seconds, this building is upgraded to a Black Citadel.

This building allows the last part of the tech tree to be built, the Boneyard, home of the mighty Frost Wyrms. It shoots a projectile once every 3 seconds that deals 5% and flinching if it hits a foe. This building has a 100% health bar.

Building Two- Crypt

The Crypt is your first unit-producing building. It can only produce the Ghoul initially. Once the Graveyard has been made, it can produce the Crypt Fiend. Once the Graveyard and the Halls of the dead are on the field, it can produce the Gargoyle. It produces one unit every 20 seconds. This building takes 10 seconds to build and requires a Necropolis to build. This building has a 50% health bar.

Building Three- Graveyard

The Graveyard is a crucial building as it not only adds new parts to the tech tree, but it also produces corspses. One corspe is produced every 10 seconds. This building takes 10 seconds to build. It has a life bar of 50% health. Without this building, you cannot produce the Slaughterhouse or the Temple of the ****ed.

Building Four- Slaughterhouse

This building cannot be produced without the Graveyard and the Halls of the Dead. It produces Meat Wagons initially. Once the Black Citadel has been built, it can produce Abominations. It produces one unit every 30 seconds. This building takes 10 seconds to build and has a 60% health bar.

Building Five- Temple of the ****ed

This building cannot be produced without the Graveyard and the Halls of the Dead. It produces Necromancers initially. Once the Black Citadel has been built, it can produce Banshees. It produces one unit every 30 seconds. This building takes 10 seconds to build and has a 60% health bar.

Building Six- Boneyard

This building cannot be produced without the Black Citadel. This building produces the mightyest of all undead units... the Frost Wyrm! It takes one minute to produce a Frost Wyrm. This building takes 10 seconds to build and has a 70% health bar.

The Army of the Scourge: Undead Units

Undead units are a valuable ability for Arthas. They aid in melee damage, provide projectiles, or even produce buildings, other undead units, or other effects.
Each undead unit has its own health bar.
An undead unit is produced by a building at a rate and interval stated in the buildings section.
There can only be 6 Undead Units on the field at any given time (though Acolytes, Skeletals, and Corspses are exempt from this rule.)
If 6 Undead units are on the field and a building is ready to produce another unit, that unit will wait until there is a spot open. If there are multiple ready units, the "highest priority" unit will be the first one picked (a Frost Wyrm has the highest priority, for example).
Undead units auto-target foes randomly. Projectile based undead fire the projectile right at the foe. Melee undead units wait until their target hits the ground and then attack them.
Undead units do not take knockback from attacks.


Corspe-
A simple skeleton created when an Undead unit dies. Once every 10 seconds, one of these is produced by the Graveyard. It is used to produce Skeleton Warriors and Skeleton Mages. Some of Arthas's moves are also reliant on corpses. It is exempt from the 6 undead units rule.

Acolyte-

The Acolyte is the most crucial undead unit. It is summoned by Arthas's Down B. An Acolyte has 30 hp and cannot attack. It is responsible for building unit-producing buildings. Only one Acolyte can build the same building at one time, but if multiple buildings are available to be built at the same time (ex. The Crypt and the Graveyard are in the same part of the tech tree), both buildings can be constructed at once. It is exempt from the 6 Undead Units rule, but only 3 Acolyte's can be on the field at one time.

Shade-

The Shade can only be created by sacrificing an Acolyte with Arthas's Up Special. A Shade is invinceable. It is a mobile corspe that works very well with moves such as Death and Decay. It is destroyed when you exploit it. An Acolyte can also see invisible enemies, making Cloaking Devices useless. This unit is exempt from the 6 undead units rule.

Ghoul-

A Ghoul is the most basic attack unit of the undead. It attacks at intervals of once every half second, dealing 3% damage and decent knockback with every strike. A Ghoul has 30 hp. It is produced by the Crypt. The production rate of the Ghoul is 100% when it is the only unit available, 80% when the Crypt Fiend is available, and 60% when the Crypt Fiend and the Gargoyle are available. All units produced by the Crypt have the lowest unit priority.

Crypt Fiend-

The Crypt Fiend is an undead anti-air unit. It attacks at intervals of once every second by spitting out a web that reaches the distance of half of Final Destination. This web deals 3% damage and causes any airborne foes to be spiked downwards. In addition, the web traps foes for about 1/4th of a second. A Crypt Fiend has 40 hp. It is produced by the Crypt when a Graveyard is on the field. It's production rate is 20%. All units produced by the Crypt have the lowest unit priority.

Gargoyle-

The Gargoyle is the primary aerial combatant of the undead. It attacks at intervals of once every 1/2 second. If the attacked foe was in melee reach of it, the attack is a claw swipe that deals 5% and good knockback. Its natural instinct is to shoot a wind-blade that travels 1/3 of Final Destination and deals 4% and decent knockback. A Gargoyle has 40 hp. It is produced by the Crypt when a Graveyard and a Halls of the Dead are on the field. It's production rate is 20%. All units produced by the Crypt have the lowest unit priority.

Meat Wagon-

The Meat Wagon is the siege weapon of the Undead. It is a real glass canon, packing quite a punch but being defensively weak. It's projectile, which is shot once a second, travels the distance of Final Destination and deals 7% damage and good knockback. It has 30 hp. It is produced by the Slaughterhouse. It's production rate is 100% when it is the only unit available and 50% when the Abomination is available. This is a medium priority unit.

Abomination-

The Abomination is the heavy melee unit of the Scourge. It is powerful, but slow. Its axe attacks, which are used at intervals of once every second, deal 8% and great knockback. It has 60 hp. It is produced by the Slaughterhouse when a Black Citadel is in existence. It's production rate is 50%. This is a medium priority unit.

Necromancer-

The Necromancer is the primary spellcaster of the Scourge. It is valuable, but has weak defenses. Its projectile attack is used once every half second, reaches half the distance of Final Destination, and deals 3% and low knockback. It can turn a corspe into 2 Undead Units (1 Skeleton Warrior and 1 Skeleton Mage.) One Necromancer can only control 1 pair of Skeletons at a time. It has 25 hp. It has a 100% production rate when it is the only unit available, and an 80% production rate when Banshees are available. Only 1 Necromancer can be on the field at a time. This is a high priority unit.

Skeleton Warrior-

A Skeleton Warrior is a weak undead unit produced out of a corspe by a Necromancer. It attacks every half-second, dealing 3% damage and low knockback. It has 20 hp. It ignores the 6 Undead unit rule.

Skeletal Mage-

A Skeletal Mage is a weak undead unit produced out of a corspe by a Necromancer. It attacks every half-second, firing a projectile that deals 3% damage and flinching. It has 15 hp. It ignores the 6 Undead unit rule.

Banshee-

A Banshee is the secondary spell-caster of the Scourge. It is a very weak, but devastating member of the Undead. It fires a large projectile once every 1.25 seconds that travels half of Final Destination and deals 5% damage and flinching. This projectile gives the opponent a 33% chance to auto-miss with attacks for 3 seconds. In addition, when a foe gets within 5 stage builder blocks of a Banshee, it will attempt to fly towards them and possess them, causing them to perform random actions for 3 seconds. The Banshee is destroyed after the possession ends. A Banshee has a mere 10 hp. It is produced by The Temple of the ****ed when the Black Citadel is in existence. It has a 20% production rate. This is a high priority unit.

Frost Wyrm-

The Frost Wyrm is the most powerful unit of the Undead. It is a powerful flying unit. Once every second, it spits out an icy blue fireball that is the size of a stage builder block and travels the distance of Final Destination. It moves at an average projectile speed. Foes struck by this projectile take 7% damage and good knockback. It has 70% hp. It is produced by the Boneyard and has a 100% production rate. Only 1 Frost Wyrm can be on the field at a time. This is the highest priority undead unit.

Taunts:
Arthas's taunts command his Undead Units. Arthas will use a quote said in the game either by him or by a generic Death Knight.
Up Taunt- Target
"Frostmourne hungers." After using this taunt, the next foe you attack will be targeted by all allied undead.
Side Taunt- As You Will
"Ride… or die!" After using this taunt, all undead allies go back to their normal AI. Used to cancel the Up Taunt or Down Taunt commands.
Down Taunt- Defend
"The Lich King has given me true power." All allied undead units lend Arthas their power, gathering around him to defend him.

Lose Pose
Arthas and two undead ghouls scowl in disgust. They turn around and disappear into the darkness.

Victory Poses:
Up- "You will know endless torment!"
Arthas's sword burns bright as he looks down on the losers. He says "You will know endless torment!"

Side- "Ah, at last!"
Arthas sheathes Frostmourne and says "Ah, at last! Victory is mine!"

Down- "I will be twice as king my father ever was."
Arthas plants Frostmourne into the ground and an army of undead rise out of the ground. Arthas says "I will be twice as king my father ever was."

Extras:

Character Portrait:


Game Insignia:


Assist Trophy:
Kel'Thuzad-


Kel'Thuzad is a powerful Lich and the most reliable ally of Arthas. When summoned from the Assist Trophy, he warps in the same way as Arthas, but surrounded by ice.

The Lich is invinceable and, like Arthas, he has mana (300 mana in the Lich's case). The Lich leaves after running out of Mana.

He uses the following moves:

Frost Nova-

The air around one random foe starts to freeze and turn blue. One second later, an explosion of freezing magic hits that foe (the foe can sidestep or shield it), dealing 10% and great knockback. If the foe is struck, its explosive reach widens to a large 3 stage builder blocks all around. This second nova doesn't hurt the original target, but other foes caught in it take 20% and high knockback. This costs the lich 100 mana.

Frost Armor-

The Lich picks a random allied target, including Arthas, player controlled allies, and undead units. He casts a spell on them and they become surrounded in an icy aura. This gives that unit +3 armor (reducing all damage against that unit by 3%, with a minimum dealt damage of 1%) and causes all units that attack the protected unit to move and attack at half speed for 3 seconds. The Frost Armor lasts 5 seconds. This costs the Lich 30 mana.

Death and Decay-

This creates the same effect as Arthas's version of the move. Unlike Arthas, Kel'Thuzad targets an enemy with the move, surrounding them in the vile disease cloud. The disease cloud follows the foe, striking them and all other foes who get in its hitbox for 3% damage and flinching per second. The cloud disappears after 10 seconds. Strangely, it damages foes through shields, but does not stop them from shielding. This costs the Lich 150 mana.

Boss- Tichondrius, The Dread Lord


This lieutenant of the Burning Legion dares to call himself the Lich King's master!? HE SHALL KNOW ENDLESS TORMENT!

Difficulty- Medium High to High

Hp- Normal Boss Hp

Size- About double that of Ganondorf

Mobile- Yes (can move around like a human character, but cannot jump).

Knockback- Can not be knocked back.

Moves:

Dual Swipe-

Tichondrius claws at you twice using the exact timing and animation shown here. Each slash deals 5...15% and medium...great knockback. The damage dealt by these slashes heals Tichondrius.

Carrion Swarm-

A horde of skeletal bats is summoned by Tichondrius. They then patrol around him for 5 seconds. If a foe gets within 5 stage builder blocks distance of Tichondrius, the undead bats fly towards the foe at an average projectile speed. When a bat reaches a foe, they latch on to it, biting them repeatedly for 1...3% damage per second. They act just like Pikmin in this matter. There are a total of 18 bats, but only 6 may latch onto a foe. The entire swarm flies around the target foe. What is the point of this? The bats swarmed around that foe then use him as their new "orbit." If another foe gets near that foe, the bats not latched to the first target fly to a second target (with 6 bats per target, there is a maximum of 3 targets). The bats can not be gotten rid of like Pikmin, but they dissapear after the 5 seconds are over. This move has low beginning lag and high ending lag. No hitstun, flinching, or knockback is dealt by the bats.
*Do NOT go near Tichondrius when he uses this.

Sleep-

Tichondrius throws a red energy ball at you. If it hits you, you're character takes 10...25% damage and is forced into a deep sleep for 3...7 seconds. Definitely an attack you would want to avoid. The projectile is the size of a large stage builder block and moves at an average projectile speed. It travels until it leaves the stage or hits something. The move is predictable enough to be avoided simply by jumping over the projectile or side-stepping it.

Inferno-


Tichondrius calls down an Infernal from the sky. If you are struck by it when it lands or as it falls, you take 20...40% damage and great...very high diagonal knockback. If you were on the ground, when it lands and within half of Final Destination distance from it, you are stunned for 1...3 seconds. The Infernal has 30...60 health and attacks your character with melee strikes, dealing 5...15% damage and medium...great knockback with each hit.
 
D

Deleted member

Guest
I'm going to be quick because there's a REALLY frickin' good Warcraft 3 moveset above me which is begging for my attention.

Because I had fun making this move set? Seriously, I <3 my Captain Quark AT.

I mean, isn't what this thing is all about? Having fun making move sets? Besides, like I said, any moves I made when finishing it for MYM5 had genuine thought put into them, so it wasn't like I was just making it to "fill in a spot", as you say.
It's just that, it could substantiate a really epic moveset and I don't think the main characters of the series should be reduced to a 'joke'. Captain Quark himself would be suitable for that, but remember that you limit the options of others when you create a moveset of a character. It's all conjecture on my part, as we may never have had a person try to make a moveset for R&C besides you, let alone in MYM5 / 6. Sorry if I was rude.

I don't do drugs! :O That was the developers of World of Goo.
Seriously, in one level, you have to grind up "ugly goos" into mush so that the one "beauty goo" could be implanted into a girl-shaped generator's forehead.
But thanks for the thoughts.
Haha, sounds great. I remember reading up on that game somewhere, or maybe it won an award. Good luck in your future MYM endeavours.

@SD: You already know this from the chat, but it's pretty ridiculous that you're judging a set based off of the looks. It's not impossible to read, though it's admittedly not as user-friendly as most either (though still not that bad...). Actually judge it off of the set instead of being so superficial.
Just clean up the presentation and it's golden, Ocon. I like the moveset - it's the presentation that's bad and it sticks out like a sore thumb because it contrasts with the good content therein. It seriously ***** the eyes!

Now to read Chris' WC3 masterpiece [hopefully]. :psycho:
 
D

Deleted member

Guest
I need to come back to the building mechanism to get my head fully around it, but the moveset is an all around accomplishment and a big step for you, Chris. This is much better than anything you made in MYM4.

For a RTS game character (and a **** fine game / character at that), I wouldn't have thought you could do it justice, but you effectively have used every spell I can recall, every unit, a couple of the characters as an assist trophy and boss: I can't see how it doesn't represent quite perfectly. Awesome job, Chris - best in the thread so far if I can fully get my head around the treevolution mechanic. :lol:
 

Wizzerd

Smash Ace
Joined
Feb 24, 2009
Messages
929
Haha, sounds great. I remember reading up on that game somewhere, or maybe it won an award. Good luck in your future MYM endeavours.
Well, let's see. World of Goo won:
Best Independent Game on Spike TV Video Game Awards
Best Wii Puzzle Game on IGN
Best PC Puzzle Game on IGN
Best Artistic Design on IGN
Best New Intellectual Property on IGN
Most Innovative Design on IGN
Game of the Year on IGN
Best Game No One Ever Played on GameSpot
You really should buy it. It's such an awesome game. :bee:

Anyway, I've decided on a Mario RPG series character for my next moveset. Who (or rather, what) I'm making the moveset for is a bit out there, but I promise you it'll be great.
 

Jimnymebob

Smash Champion
Joined
Sep 26, 2008
Messages
2,020
NNID
Jimnymebob
I have mixed feelings about Arthas- part of me loves him, and part of me thinks he may end up sharing a similar fate to MM9:Mega Man.

The moveset is quality, and whilst not one of your best by a significant amount, it features some good moves, and was a fun read. However, the special mechanic is a bit out there, if you get what I mean.

I don't understand it fully, but I did like it a lot- it's just not really Smash like. Being truthful, I believe the Crucial Mechanic distracts attention from a great moveset, and while it represents the games well, I just couldn't see him fitting in the game. It seems as if you have to fight in Smash Bros. whilst playing with a "spin-off" Warcraft system in mind.

'Twas a great set though, and I may appreciate it more when I'm more awake. Well done :bee:.
 

The Trophy Master

Smash Journeyman
Joined
Dec 27, 2008
Messages
272
Location
*Sends Sundance an orange elephant on Chirstmas, a
My MYM5 Story Mode : All Around The Worlds - Prologue Released!

On a side note, I must agree with Jimny. The moveset is awesome, and one of the best of the thread so far. I love it! And it's great you used many moves of the game but, the Undead mechanic + the Building mechanic does a too much non-Smash moveset. It wouldn't fit so well. But still, great job Lionheart!
 

princesspeachluver13

Banned via Warnings
Joined
Nov 13, 2007
Messages
617
Location
Yep. I had it coming. Stupid apathy.
*attempts to catch up on moveset reviews*

Well, Near was an interesting and fun read! I'll type his review tomorrow. I have homework to do right now.

WoW's Arthas was also an interesting set. It was fun, but not in the same way as Near. It was a dark kind of fun.

I'm making a blog to put my reviews now, but it won't be finished until tomorrow. Stupid teacher giving stupid homework...
 

Darkslash

Smash Master
Joined
Feb 1, 2008
Messages
4,076
Location
Strangereal Equestria
# Type 100 by Darkslash
Detail, images and headers. What, did this moveset take you a couple of minutes? Look at other movesets for examples.
Nah 2 hours. Zeta Gundam Mobile suits will be filler and better done later..maybe. Nu Gundam and Sazabi will be my real entries.

So really Hyaku Shiki was a pile of poop. Not my best effort. Nu will be MUCH better. So don't kill me :<
 

Twilight-Emblem

Smash Apprentice
Joined
Nov 28, 2008
Messages
114
Location
Alabama
THE TWILIGHT REALM
Twilight-Emblem's Link-up Space

Bowser's Minions (Pretty much any Mario game ever) {WIP}


Yugi Moto (Yu-Gi-Oh: The Abridged Series) {WIP}


FMAn (MYM Chat) {WIP}

If anyone more artistically inclined than me would like to draw FMAn, PM me please.


Tom Nook (Animal Crossing) {WIP}


Aryll (Legend of Zelda: Wind Waker) {WIP}


X-Naut (Paper Mario: The Thousand Year Door) {WIP}


Primid (Super Smash Bros. Brawl) {WIP}


Dr. Shrunk (Animal Crossing: Wild World) {WIP}


Dry Bones (Again, most Mario games) {WIP}


Dummy (Car Commercials and such) {WIP}


CREDITS:
Spadefox: All the current buttons save for FMAn and Dr. Shrunk
Mewtwo guy on chat: For the idea for FMAn
 

MasterWarlord

Smash Champion
Joined
Aug 24, 2008
Messages
2,911
Arthas is. . .Dare I say it. My favorite freaking moveset yet. Good god this thing's amazing.

The incorporation of the actual army playing such a huge role in the set while still working made me orgasm. I thought at most you would have him animate skeletons. And you actually gave him his horse! I never would've thought of that. Far more unique and interesting. As a matter of fact, this whole moveset is so insanely true to character, so vividly detailed and has so many original moves that I don't know how you could've been the same author as the guy who made your MYM 4 stuff.

Read Arthas. NOW.
 

Heartz♥

Smash Legend
Joined
May 18, 2008
Messages
10,443
Location
Virginia
Arthas is. . .Dare I say it. My favorite freaking moveset yet. Good god this thing's amazing.

The incorporation of the actual army playing such a huge role in the set while still working made me orgasm. I thought at most you would have him animate skeletons. And you actually gave him his horse! I never would've thought of that. Far more unique and interesting. As a matter of fact, this whole moveset is so insanely true to character, so vividly detailed and has so many original moves that I don't know how you could've been the same author as the guy who made your MYM 4 stuff.

Read Arthas. NOW.
You did Lust? I sooo envy you lol
 

KingK.Rool

Smash Lord
Joined
Nov 26, 2005
Messages
1,810
# Shellder by KingK.Rool[/B]
Some really innovative ideas using the shell that put the design behind Squirtle to shame. I hope you return to your old, characterised presentations after this. It's not like you need it with such an interesting character already, without even its brilliant playstyle section. Barely can walk - stays in shell - great in air? Genius. This is like a taster for the really good stuff, right? I know some Kawasaki epicness is coming up, with the fan fare and all when you post said epicness. PM me when it happens.
I most definitely DON'T have a secret moveset going. Not a chance *shifty eyes*

Glad you enjoyed it, Dad. Also, you're awesome for commenting on everything. Your comment were pretty dang hilarious, at that.

I expect mine will be up to snuff. I'm having really good feelings about Hypno. He has no special mechanic, but I enjoy all of his moves so far immensely. Plus Mia only has her Extras left. Get excited, you guys!
Honestly, I was considering Hypno back in MYM 4, it just never panned out. If that moveset is HALF as good as your MYM 4 stuff, with that dude's potential, it's gonna be insane. Really looking forward to it. :bee:

I have not yet read Arthas, but I agree that it looks downright epic. More comment come later, as always. I can't believe I've actually commented on everything so far, minus the most recent sets. So proud of myself!
 

SkylerOcon

Tiny Dancer
Joined
Mar 21, 2008
Messages
5,216
Location
ATX
http://skylerocon.wordpress.com/

I have a review place now. Seriously you guys come here. Going there instead of the Abyss gives you many benefits that you won't get anywhere else such as:

1) You get 10 Ocon points (redeemable absolutely nowhere except in my heart...)
2) Me >>>>>>>>> that strange MasterWarlord fellow. Who does he think he is anyway? :mad:
3) Each review is lovingly hand-crafted and formatted by asian slave children myself.

So yes. Just be sure to mind my only rule that I will only allow 5 requests in the que at one time.
 

MasterWarlord

Smash Champion
Joined
Aug 24, 2008
Messages
2,911
“Can I eat him now?”​


Gluttony is an antagonist in the Full Metal Alchemist anime and manga. This moveset is based off his anime incarnation, though there’s little difference between the two. Gluttony is one of seven homonculis, each being named after one of the seven deadly sins. Homonculis are failed attempts at bringing humans back to life, and Gluttony seems to of been the homonculis to go the most wrong out of any, as he has essentially been left as a mindless beast. With what little intelligence Gluttony does posses, Lust treats him as a pet. Gluttony technically is the one to defeat the main villain of the series.

Never Ending Hunger


When Gluttony first comes into battle, he’s not nearly as hungry as displayed here, but slowly his hunger will build, indicated by his drooling more and slowly starting to let out a grimace. At his maximum level of hunger, Gluttony will have an insane grimace and be drooling in mass eerily in the picture. To fill his hunger, Gluttony must use his moves where he bites into the enemy or tastes them with his tongue. The more Gluttony eats and tastes, the more hungry he becomes. Give a wolf a taste and they’ll come back for more. . .The higher Gluttony’s hunger, the faster his movement speed and the better his jumps become as he more hungrily chases the enemy. Some of Gluttony’s moves also make use of his current hunger level or how much he’s devoured in various ways, some depleting his hunger as a penalty while others make use of what Gluttony has devoured more literally. If Gluttony goes for a while without a taste, 15 seconds, his hunger will start to decrease at the rate of 2% per second, so make sure you never give up on your relentless attempts to feed. Laugh and grow fat!

Stats:

Size: 8/10 Gluttony is as wide as Bowser and Dedede, but his height is slightly shorter then Marth’s. Only fitting that a glutton would be short and stout, though his width still makes him prime combo food.
Weight: 8.5/10 Gluttony is a fat lummix, it’s natural he’d be heavy. Gluttony would probably fall somewhere into the top 5 heaviest characters in Brawl.
Walking Speed: 2/10 Bad, even for a heavyweight. Still, it can potentially be decent with maxxed hunger as it doubles.
Running Speed: 2/10 Same case as the walking speed, but with maxxed hunger this stat QUADRUPLES. Gluttony wants nothing coming between him and his dinner when he’s hungry.
Traction: 8/10 Due to Gluttony moving so slowly, he has good traction, and as his hunger goes up this actually becomes worse as Gluttony thinks less about keeping his footing. At maxxed hunger, this stat is only a 2/10.
Power: 7/10 Gluttony is easily a typical heavy hitter in this department. While the damage percentages dished out from his moves can easily compete with the likes of Bowser, Ganondorf, and Dedede, his knockback generally isn’t as insanely high as the others, and when it is the move is nearly impossible to hit with or requires charging. While certainly better off KOing in a regular manner then most of the cast, he can’t compete with the other heavy hitters.
Attack Speed: 3.5/10 Gluttony has plenty of slow moves, but he also has his share of moves which are actually posible to connect with which you’ll be using nearly exclusively until you need to finish your enemy. However, unlike the likes of Bowser and Ganondorf, Gluttony has disablers via stunning/tripping his enemies and can make some of his KO moves fast enough to actually connect should he build up his hunger.
Range: 6.5/10 Gluttony has above average range, but nothing too spectacular. Gluttony has no traditional projectiles which can be used in a practical situation.
Priority: 7.5/10 Once again, it’d be awkward if a heavy hitter’s moves didn’t our prioritize a regular fighter’s moves. Gluttony can out prioritize most of the cast save those who specialize in the department. Gluttony for the most part is on par with the rest of the heavy hitters as far as priority goes, but he has a few disjointed hitboxes and a move with infinite priority that help boost the ranking up slightly.
First Jump: 3/10 Nothing notable here, standard heavyweight jump, but this stat can potentially up to triple if Gluttony has the right motivation.
Second Jump: 3/10 This jump can only double in potent-ness, as no matter how motivated you are you can’t do much in the air.
Recovery: 7/10 Gluttony’s recovery is amazing for a heavyweight, though not on the unholy level of Dedede. He has a multitude of options for how he wants to get back to the stage. Gluttony is far superior at horizontal recovery, but his up special offers him average vertical recovery as well, a good bit above average if Gluttony is hungry enough.
Fall Speed: 8/10 Gluttony’s typical heavyweight fall speed doesn’t do him any favors, although he can use his uair to slow his descent considerably.
Crouch: 2/10 Gluttony gets a tiny bit shorter, but does nothing to reduce his enormous width, making the crouch useless.
Hover: No.
Crawl: No.
Wall Jump: No.
Wall Cling: No.
Gliding: No.

Basic Actions/Animations:

Standard pose: Gluttony stands with his arms at his sides up straight, his fists clenched.
Idle pose: Gluttony occasionally scratches his rear end or picks his nose.
Walking: Gluttony drags his arms along the ground behind him.
Running: Gluttony stops dragging his arms, picking them up. If Gluttony is above 49% hunger, he’ll extend out his arms in front of him, walking like a zombie.
Dashing: Gluttony pumps his arms to make a run for his meal.
Crouching: Gluttony sits on his rump, his legs out in front of him and propping himself up with his arms behind himself.
Jump 1: Gluttony leaps up awkwardly suddenly, making the jump somewhat intimidating when he’s drooling from hunger.
Jump 2: Gluttony tucks in his arms and legs and does a spin as he rises, then releases his arms and legs. Should Gluttony be over 49% hunger, he’ll flail furiously for the jump animation.
Shield: Gluttony puts his hands on his head and looks down to the ground, tightly shutting his eyes as the standard bubble shield forms.
Sidestep: Gluttony faces the camera and nearly loses his balance, leaning into the background accidentally as one of his feet flies up into the air. Gluttony then forces himself to lean forward back into the foreground. Slightly longer then the average sidestep.
Rolling: Gluttony curls into a ball by putting his limbs to his side and tucking in his head, becoming a ball of fat as he literally rolls into the background in the desired direction.
Air Dodge: Standard leaning into the background.
Sleeping: Gluttony gets a thought bubble showing a random food item as he sits and sleeps, getting a typical anime snot bubble.
Dizzy: Gluttony staggers back and forth, actually moving forwards and backwards very slightly, not just as a part of the animation as he’s dizzy. Gluttony moves a character distance back, double forward, double back and it keeps repeating until he snaps out of it. Gluttony cannot walk off edges in this fashion, he will simply run in place.

Special Attacks:​

B – Tasting Defeat:


Gluttony opens his mouth wide and sticks his tongue out, going “Ahhhh” in his awkward high pitched voice as if he were posing for a doctor. Gluttony has an exceptionally long tongue that sticks out the range of half a Battlefield platform, being disjointed. Gluttony will hold the tongue out for as long as you hold B just like Wario’s neutral B, although unlike it there’s no limit to how long you can keep his tongue stretched out. This has around double the lag on both ends as Wario’s neutral B, but has more range and priority. The lag can potentially be reduced down to the level of Wario’s neutral B if you have maximum hunger, it becoming faster the hungrier you are to make an amazing multi purpose move. If you hit an enemy with your tongue, you have one of two options.

If you press B after getting someone into the hitbox, Gluttony will give them a big lick like a dog, doing 5% and giving you half a second to hit them while they’re stunned and increasing Gluttony’s hunger by 5%. This is good to set up for a KO, but it’s nearly as hard to hit with as one of your KO moves until the lag is decreased from a high hunger level. If you press A, Gluttony will lick them all over rapidly and randomly, and you’ll gain 1% hunger for every 3 presses of any button while he does this, and they’ll take 1% damage for every 5 presses of any button. Foes must button mash themselves to get out of this like they would a grab.

But that’s still not all! Like Wario’s neutral B, this move can also eat items (Gluttony grabs the item with his tongue and brings it back inside himself, and he still can’t eat Smash Balls.), and explosive items deal no damage at all to Gluttony upon devouring them due to his ability to literally eat anything. Unlike Wario’s neutral B, Gluttony can use this move to devour projectiles (Just letting them fly into his mouth, not interrupting his stance). Every item Gluttony eats increases his hunger by 5% while every projectile does so by 3%.

Still like Wario’s neutral B, this counts as a grab and can be used to Gluttoncide if used in the air, albeit it’s harder due to the lag unless your attack speed is raised from hunger. In any case, you probably won’t want to Gluttoncide until you’re at higher percentages which is when your hunger will be highest anyway, so this is still a good option and more viable then Wariocide due to the range of the move.


B Side – Puking in Disgust: This is a projectile move, but what projectile comes out depends on one of many different principles. If you’ve eaten an item via your neutral B, Gluttony will puke out the item in the direction he’s facing, it going at the speed as if he power threw it. The next highest priority is him puking out any projectiles he’s devoured via the neutral B (And only it can devour projectiles). He launches out all the projectiles at once with identical properties to how the owner of the projectile would, meaning if you, say, absorbed 5 seconds of Fox’s blaster with the neutral B, you’d puke it out all at once for excellent damage. There’s a limit to how many projectiles Gluttony can remember, but the cap is around, say, enough lasers from Fox to do 50% back to him or two Gordos (Yes, he can even eat those) and a Waddle Dee. Store up as many projectiles as you can that your enemy foolishly launches at you then punish them with their own projectiles at an opportune moment due to the move’s low starting lag (Though it has above average end lag). Gluttony is an idiotic character to camp against for reasons like Game & Watch.

Well, this move is utterly useless with items off final destination against characters with no projectiles, right? Your enemies wish. Gluttony will puke out liquid of all the nasty stuff he’s devoured like one typically would when they puke. This costs Gluttony 5% of his hunger, but it functions (With a more gross animation and slightly more laggy) like a fully charged version of Mario’s down B, meaning it can be used to gimp your foes.


B Up – Saved by the Skin of your Teeth: Gluttony lunges up diagonally forward into the air, his tongue out of his mouth and flailing about in the wind as he has his mouth wide open. With no hunger, this only takes Gluttony 75% as far as the Firefox, but with maxxed hunger Gluttony launches as his target to chomp down on more feral-like, covering 1.5X the distance of the Firefox, you leaping farther the more hungry you are.

Once Gluttony has traveled his full distance, he’ll chomp down his mouth. This can be used to tether recover, and while it is a melee range tether the size of Gluttony’s head is exaggerated to make the tether worth potentially using. More interestingly, if you’re able to touch the stage but not get up to the ledge, you can latch Gluttony’s jaws on to a part of the stage and wall cling for a moment, then release to regain your second jump and up special, albeit you’re only able to do this once before touching solid ground without going into your helpless state.

If you chomp down on an enemy, Gluttony will plummet straight to the ground with them for a Gluttoncide, meaning edge-hoggers should beware. If you land on solid ground after capturing someone in your meaty jaws with this move, they’ll take 10% and set average knockback. While the move has high priority, this isn’t recommended as a way to assault enemies unless you’re Gluttonciding, as the startup stalls like Firefox and there’s horrendous ending lag for the move assuming you don’t hit anyone, as well as terrible landing lag. Still, if you have a shot for this, it’s a decent idea, as chomping on someone with this increases your hunger by 5%.


B Down – Drooling Anticipation: Gluttony stands in place and lets out a creepy grimace, drooling in mass through his teeth. The drool will fall through Gluttony’s teeth to the ground, slowly forming a little puddle of drool. It takes a full second with no charge for Gluttony to finish making a puddle, but you can cancel out of the move at will. The drool puddle, as you may have guessed, causes tripping to any who walk over it save Gluttony himself, and lasts 30 seconds. Gluttony can only have one puddle out at a time, but it lasts for a considerable time. This increases Gluttony’s hunger by 1%, meaning it should be spammed to avoid going too long without a move to increase Gluttony’s hunger which would make him start to lose his appetite. The drool puddle is very useful seeing there’s nothing enemies can do about it unlike Diddy’s down special. Try to play around your drool puddle and force your enemies to come to you to trip into it. Seeing how foolish your enemy would have to be to try to camp you thanks to your side special, your enemy has little choice but to come to you.

Basic Attacks:

Neutral A Combo – Sticking your Tongue out: Gluttony stabs his tongue out for the first hit like his neutral special, doing 4-5% with a flinch on contact and small set knockback to pull them right in front of Gluttony, having the same range with below average start up lag. We next skip right to the infinite instead of the usual second hit; mashing A causes Gluttony to spin his tongue around rapidly in front of him (It having around half the range of the initial part, but if you hit with that you’ll hit with this), doing 5 hits per second of 1% each. The first hit of the combo increases Gluttony’s hunger by 2% while every 4 hits from the infinite increases his hunger by another 1%. This is a welcome damage racker to your arsenal as it has low lag on both ends of both parts when you start/end them.

Forward Tilt – Ground Pound: Gluttony raises his fists above his head then slams them down in front of him to give the move average start up lag, this part of the move having above average range and priority and doing 5-6% tiny set knockback. Gluttony’s pounding of the ground causes some rubble to rise up in front of him instantly, hitting anyone he hit with the ground pound, doing 5 hits of 1% and flinching in under a second. At this time you can press A to do a second part of the attack in a manner like Snake’s ftilt. The second part of the move has Gluttony chomp forward the same range with below average start up lag and doing 8-9% for the finisher with average knockback, hitting anybody hit by the previous two hits. However, if nobody was hit by the rubble and you perform the second part of the ftilt, Gluttony will devour the rubble as it flies up, increasing his hunger by 3%. If you don’t hit with the first part of the attack, this move begs to be punished, but if all the hits connect it can deal up to 20%. Think of this as Snake’s ftilt (Which brokenly deals 20% also), but not ridiculously fast or a good KO move.

Up Tilt – Gone with the Wind: Gluttony turns to face the camera and brings up one of his hands. If you press right on the control stick after this button input, it’ll be his left, and visa versa, albeit it appears the opposite due to Gluttony facing the camera so right is still right essentially. If you don’t hit right or left, it’s random. Gluttony will then suck on the pointer finger of the hand he raised, increasing his hunger by 2% due to liking the taste of even his own flesh apparently. Gluttony then sticks the pointer finger up above his head into the air to feel the direction of the wind, causing a small hitbox on his pointer finger that does 6-7% and below average upward knockback, though this is far from the attack’s main attraction. Some wind will actually blow by above Gluttony as Gluttony tries to feel which way it’s going. If Gluttony raised his right hand, a gust of wind will come from the right and blow to the left (Visa versa with his other hand), it being a stream as tall as Ganondorf and three times as wide as Bowser. Contact with this stream of wind will push you in the direction the wind is going with high knockback but no damage like Mario’s FLUDD. This can be used to send high recovering foes back out, but this is rare, so the move has few practical uses.

Down Tilt – Eat Dirt!: Gluttony extends his arms out to both sides then pounds them down to either side an average range and above average priority. The pound does tiny set knockback towards Gluttony and 5-6% damage. The move has a second hit to it upon another press of A, just like his ftilt. For the second hit Gluttony runs his fingers through the dirt from their current position, pulling them towards himself, dragging any foes caught by the first hit towards him quickly with 4 hits for 1% each. Gluttony then puts both fingers with the dirt on the tips in his mouth to try out the taste of it, doing a sweeping motion with his arms as he puts the fingers in with horrible priority and range that only covers foes directly next to him from being brought in by the finger dragging. This last hit does only 2-3% and tiny set knockback, but covers Gluttony as he recovers from the ending lag as he eats the dirt. Devouring the dirt increases Gluttony’s hunger by 5%. This move can do up to 15% total but is outclassed by the ftilt for the most part, although this does a better job of increasing Gluttony’s hunger.

Dashing Attack – Human Surfboard: Gluttony reaches his hands out in front of him as he runs. This counts as a grab, and if he grabs anyone he’ll throw them under himself for 4% damage. He’ll then jump up land on the foe, standing on top of them for another hefty 8% damage. Gluttony will then slide forward on the foe while standing on top of them, having been running while doing the entire attack, going the distance of a battlefield platform. While sliding on a top of a foe, it’s possible to go off stage. If you hit anyone else while “surfing” on the main victim, they take 7% damage and below average knockback. This has high priority and isn’t that laggy to start, but if you fail to grab anyone with Gluttony will still go through the entire motions of the attack, landing on his rump when he tries to jump on the foe he was supposed to catch, giving the move notable ending lag.

Smash Attacks:

Forward Smash – Butterflies Flying in your Stomach: A butterfly comes out from the background and flies up above Gluttony, him looking up at it as his tongue falls out of his mouth. As you “charge” the smash attack the butterfly flies away for Gluttony to start chasing after it. Gluttony runs at his normal running speed after the bug and transverses half of Battlefield chasing after the butterfly should you fully “charge” the smash attack. When you release the “charge”, Glutttony will jump up and chomp to devour the butterfly, his mouth being a hitbox as it chomps down. There’s average start up for lag for the move as he jumps up to devour the butterfly, nothing terrible, but as he lands on the ground he has above average ending lag as he has above average ending lag as Gluttony looks down into his stomach, hearing buzzing. The hitbox is exaggerated as Gluttony’s head enlarges as he chomps the butterfly down to give the move decent range (Covering directly above Gluttony, above him to his sides, and if you’re RIGHT NEXT TO HIM on the ground it’ll also connect), and it has good priority as well. Regardless of how long you charge, the move does 21-22% with above average upward knockback. Charging the move has decent mind-games for when you release the attack. Devouring the bug increases your hunger by 3%, and should you hit someone with the chomp that’s another 3%. If you’re at max hunger level, Gluttony will travel twice as far twice as fast in the charging animation, him going faster and farther the hungrier he is. The starting lag for the jump up to devour the butterfly is also reduced up to potentially half of it’s start up lag, making this a mean KO move with high hunger.

Up Smash - Barf Up: Gluttony holds his stomach in pain and groans as you charge the smash attack, then faces his head downwards and barfs a stream of barf as wide as himself. He barfs so much that the force of the barf propells him upwards, letting out a stream of the stuff. This takes 20% hunger, and Gluttony will continue barfing until he’s up double Ganondorf’s height, giving the move good range. Contact with the barf (Which is disjointed) or Gluttony does 20-21% damage and above average upward knockback while the move does 26-27% damage with high upward knockback fully charged. This move has little start up, but puts Gluttony into his helpless state at the end, him being up in the air, making him vulnerable. This does nothing if Gluttony isn’t hungry and thus hasn’t eaten anything yet, him having nothing to barf up. If Gluttony has some hunger but not 20%, he simply won’t be propelled up as high, finishing barfing earlier. If Gluttony, say, had 10% hunger, he’d only go up half as high before the move ended.

Down Smash – Rocky Road: Gluttony looks at the ground and licks his lips for the charging animation, then upon releasing the charge he starts devouring the ground due to being so hungry. This lasts for 2 seconds, Gluttony gaining 10% hunger from the mass garbage he’s eating. Every half a second two rock chunks the size of Kirby will be shoved away from Gluttony as he devours into the ground flying up to his height then landing half a Battlefield platform’s distance away. Contact with any of the rock chunks does 9-10% with slightly below average knockback (14-15% with average knockback fully charged), and they’re disjointed. Gluttony is unprotected from above and short characters can walk up to Gluttony’s side as the rock chunk will fly over them to punish Gluttony during this. This should rarely be used as an attack, instead being a good tool to use to build your hunger. If you’re up against a wall or your foe is a huge target who would have trouble getting around this, this could be good to potentially use, but against quick foes never use this as an attack, as this gives your enemy an actual chance to briefly camp.

Aerial Attacks:

Neutral Aerial – Breath of Death: Gluttony turns to face the screen and opens his mouth wide as a toxic gas comes out of his mouth and surrounds him. Gluttony does this for a full second, there being no hitbox during this time and him easily able to be punished. However; after Gluttony finishes breathing out the bad breath it will stick around for 5 seconds, and coming up to it will cause foes on the ground to become stunned for a second while foes in the air will go into their helpless states. You still have to get right up next to a foe for this to work, though, as the range of the breath surround the glutton barely goes out at all from his body. If you’re more hungry, though, it can potentially get up to double his size if the hunger is maxxed, the range of the breath becoming larger the hungrier you are. This move will be interrupted if Gluttony lands on the ground before it’s completed, so it takes some time to use two jumps then the nair to make the barrier. The only practical time to do this is when your foe is knocked off stage, then as they come back to the platform leap out with your newly formed barrier of bad breath to gimp them.

Forward Aerial – Ball of Fat: Gluttony brings his arms and legs up against himself and ducks his head to make himself into a big living ball of fat. If you have any momentum when you start the move, Gluttony will start rolling in that direction based off the momentum, DI not effecting Gluttony for this move. Should Gluttony hit the ground, he’ll continue rolling until he comes into contact with something, gaining more speed as he rolls, there being no limit to how fast he can go. Gluttony starts at the speed of Ganondorf’s run and doubles his speed every second he rolls, tripling it every second if he has maxxed hunger, more hunger meaning more acceleration. Contact with Gluttony at any time does amazing knockback and 27-28% damage, making this a prime KO move even without hunger to support you. Still, the move has above average start up lag and the move will never end until you come into contact with an enemy, an item, or a wall, meaning you could very well roll off the edge with it should you miss your enemy. If nothing else, your entire body is a hitbox with infinite priority during the attack to make you a deadly force while rolling, but in the event you don’t hit anyone you’re in for a nasty surprise as the move has bad ending lag upon bumping into something if it’s not an enemy, Gluttony rubbing his head and getting up slowly, begging to be punished. This is mainly only useful on large stages where you can build momentum but also contain walls to stop you, such as Hyrule Temple. A very situational move.

Back Aerial – Waft Away: Think of this move as an aerial horizontal Wario Waft. Gluttony lets out an eerily high pitched chuckle as he farts, the force of it propelling him forward. Gluttony travels 3 Battlefield platforms horizontally over a second. Gluttony’s body is a hitbox during this time, and another hitbox for the move is a character distance to either side of Gluttony when he ignites the move just like the Wario Waft. This has little starting lag or ending lag, making this a great move to gimp foes with or recover horizontally, although it’ll leave you helpless. Contact with any of the hitboxes does 22-23% damage with above average knockback away from the hitbox the foe came in contact with. This uses up 20% of Gluttony’s hunger, and should Gluttony have less the knockback/damage/distance Gluttony travels will be reduced (If he has, say, 10% hunger, all the statistics are halfed). If you have no hunger at all, Gluttony will let out a cute little poot like Wario. This is best used to recover and more awkward to use for gimping then the Wario Waft, but certainly still can be used to gimp given the right situation.

Up Aerial – Tongue Propeller: Gluttony sticks out his tongue above himself and rapidly spins it about to slow his descent. The start up for the tongue to come out is below average, and Gluttony will spin his tongue around for one full second once it’s out, creating a hitbox above himself that’s around as wide as Bowser. There’s a whopping 15 hits that are done during this aerial, all of them merely causing flinching and 1% save the last one which does 2% and below average upward knockback for a total of 16%. This is a good damage racker, and every 5 hits you hit with your tongue increases your hunger by 1% for 3% total if you hit with all of them. This can also be used as a decent horizontal recovery assuming you don’t want to waste the hunger for a bair. How? Gluttony has increased horizontal DI capabilities while hovering with his tongue, and his falling speed is reduced to Jigglypuff’s. This won’t give you as much distance as the bair, but also doesn’t cost you 20% of your hunger. If your hunger is maxxed, you’ll fall 25% slower then even Jigglypuff, but still not be able to go as far as the bair. The hungrier you are, the slower you’ll fall as Gluttony more hastily spins his tongue around.

Down Aerial – Glutton Droppings: Gluttony turns to face the screen like in his nair, but instead of letting out bad breath he does a pose like Captain Falcon’s up taunt as he forces some “droppings” out his rear end (Should you turn the camera to view his backside for whatever reason, he’s somehow pooping through his pants, the backside briefly turning crusty brown as he does the move.). Three disjointed balls of crap the size of Kirby will come out from underneath Gluttony, and the move takes away 20% of Gluttony’s hunger. They fall at the speed of Fox using DI down, meaning extremely quickly, and contact with any of the droppings does 12% and a weak meteor smash downwards. Still, considering there’s three of these things and they’re all projectiles, this is an easy way to spike your enemy. This has average starting lag and brief ending lag.

Grab and Throws:​

Grab – Glutton’s Embrace:


Gluttony brings his arms out behind him to prepare for the grab, giving it awkwardly long start up for a grab (The longest in the game easily), then sweeps both arms in front of him to give the grab massive range, slightly greater then Dedede’s. Ending lag is thankfully below average, as it’s enough to work around the starting lag. Once Gluttony has grabbed someone, he holds them against himself as he faces the camera, opening his mouth up wide as he puts the victim’s head inside, ready to chomp down at any moment.

Pummel – Flesh Craving: Gluttony starts drooling as he holds the victim’s head in his mouth, all too eager to devour them. This deals 1% to the victim and increases Gluttony’s hunger by 1%, and is highly spammable, as fast as Lucario’s pummel.

Forward Throw – Devour: Gluttony’s head enlarges, his mouth in particular, as he stuffs the entire victim down his gullet head-first. Gluttony will then appear bloated like Dedede when he inhales someone, and can walk around and jump a single time with the same speed/height Dedede can when he inhales someone, respectively. This is three times as hard to escape as Dedede’s neutral B as far as button mashing is concerned, but Gluttony can’t spit them out on will like Dedede. Gluttony can move to a more advantageous position or Glutton-cide while his foe is inside him, and either way the foe takes 2% per second while inside him and Gluttony’s hunger goes up by 2%.

Back Throw – Fake Out: Gluttony brings his head back so that the victim’s head isn’t in his mouth, then chomps down to make the victim think he bit their head off. Gluttony releases the victim for them to fall to the ground and faint, stunned, Gluttony laughing maniacally. The foe lies on the ground, stunned for a second. Their position limits how you can attack them, but hey, it’s still a free hit. The most serious and fearless of characters such as Ganondorf, Snake, and Samus are immune to this move, it having no effect.

Up Throw – High Tastes: Gluttony sticks his tongue out of his mouth and slithers it around the foe’s head randomly, tasting them, then says “Yick!” and retracts his tongue, apparently not liking the taste of the victim. Having very high standards, Gluttony grabs the victim’s head by a firm grip in his teeth, then flings them upwards for excellent upward knockback for a throw and another 11-12% damage, rejecting the meal. This is the only one of Gluttony’s throws that does actual knockback and is a good KO move to add to Gluttony’s arsenal, albeit it’s bad to use in free for alls due to some lag at the beginning when Gluttony tastes the foe.

Down Throw – Meat Shield: Gluttony stabs back a bit into the background out of harm’s way as he holds his meat out in front of him to use as a shield. This is meant to be used in a free for all or the victim to be hit by a stage hazard, and is useless with no items final destination. Gluttony will hold the victim for 2 seconds before they break free, or until the current hitbox hitting the victim vanishes so it's safe for him to come out, so Gluttony won’t come out halfway through the Halberd’s laser fire and such. In a one on one match this could possibly be used to stall seeing it gives you 2 seconds. With maxxed hunger, the amount you can hold the victim for before they escape doubles, you able to hold them longer the hungrier you are.

Situational Attacks:

Rising Attack (Either Side) – Overgrown Baby: Gluttony groans as he gets up into a sitting position, facing the camera and sucking his thumb. Gluttony seems to get a taste for his own thumb during this, increasing his hunger by 2%, but forces himself to take it out. Barely below average lag on both ends, does no damage. This leaves Gluttony in his crouched position (Which is sitting), ready to perform a quick dtilt to defend himself.

Ledge Sweep (Under 100%) – Belly Flop: Gluttony holds onto the ledge with both arms and gains some momentum, swinging back and forth, giving the move average starting lag. Gluttony then swings himself onto the platform, his body being a hitbox with high priority that does 8% with below average knockback. Gluttony has average ending lag as he gets up, making this more punishable then most ledge attacks and the starting lag making it predictable. Avoid this. The starting lag is slightly decreased if you have more hunger.

Ledge Sweep (Over 100%) – Shoulder Charge: Gluttony quickly comes up from the ledge with impressive speed, then does a shoulder charge forward. This has super armor and Gluttony runs at his running the speed the length of a Battlefield platform. Contact with Gluttony does 11-12% with average knockback. However, after that impressive display, the move has above average ending lag bordering on horrible ending lag, Gluttony having used all his remaining energy to do all that. The ending lag can potentially be halved if you’re hungry enough.

Tripped Attack – Loogie Flick: Gluttony picks his nose as he gets up from off his rump to give the most slightly below average starting lag, then flicks it forward. The snot is disjointed and the size of a franklin badge, doing 3% and a VERY brief flinch upon contact with anyone. It goes forward the length of a battlefield platform before falling to the ground and vanishing.

Final Smash – Philosopher’s Stone:

Upon pressing B, the Philosopher’s stone (The generic artifact of power of the series, ahuge red stone) appears in front of Gluttony, and you must mash A like a madman for Gluttony to start devouring it. It takes 100 button presses for Gluttony to finish devouring it, but you don’t have to devour the whole thing. However; the Philosopher’s Stone only lasts 15 seconds, and if you’re hit by any attack save a non energy based projectile, you’ll be knocked away from the stone. Coming into contact with the stone will have you go into devouring mode again, but the best idea is to save this for when a small amount of foes are around. You recover 1% damage for every 2 button presses while devouring the stone, so this will heal 50% if you devour the whole thing.

If you do 50 or more button presses but not all 100 before the stone vanishes, Gluttony’s mind will be completely wiped by the power of the stone, the only thing left being the desire to feed. This maxes your hunger for the next 30 seconds. While this is useful, it’s not terribly hard to max your hunger on your own or keep it there once you have, and you’re still perfectly vulnerable. Considering this doesn’t even last forever, you’ll much prefer the other final smash available to you if you do all 100 button presses to fully devour the philosopher’s stone. Still, this is a fine consolation prize if your enemies are too relentless on keeping you from eating the stone.

If you fully devour the stone, you’ll turn into a massive monstrosity.


Video of the beast in action (Spoilers and blood)

Quite a handsome fellow, isn’t he? You can’t really tell exactly what he is due to the angle, so essentially picture a big blob of fat with four tentacles. You’re around a quarter shorter then Giga Bowser in this form, but twice as wide. You can walk through Gluttony with no problem whatsoever thankfully considering how much space he takes, him functioning like a boss in this regard. Gluttony is unable to move in this form, and always faces the camera. This means that having the philosopher’s stone appear out of the way to eat it in peace has a penalty in that you won’t be able to eat your foes as easily once you’ve transformed. The best strategy would probably be to knock a foe away or stun them, then iniate the final smash a bit away from the center of the stage to get a little away from them and button mash like a monkey on crack.

You are completely invulnerable, and this final smash also lasts 30 seconds, which is quite long for a final smash. Still, unlike other transformations, it’s actually quite possible to prevent this final smash from happening at all. On the other hand, it heals 50% damage off of Gluttony. The impact of the final smash really depends on if Gluttony picks a smart time to use it when he’ll be undisturbed in eating the stone. Timing is everything.

Here’s your moveset as the monster:


A – Tentacle Sweep: Gluttony sweeps the two pairs of tentacles on either side of himself inwards against himself, causing any foes who are overlapping with Gluttony to be pushing towards him with set knockback and 8-9% damage. The tentacle pairs overlap for this attack, making two hitboxes rather then four. If you press A again after this attack, Gluttony will lash his tentacles away for a two part neutral A combo. Anybody within the range of Gluttony or a Battlefield platform away from him will be hit by this, but it’s decently easy to dodge if you wern’t hit by the first part of the attack. Contact with the tentacles does 12-13% with above average knockback.

A Side - Tentacle Pound: The two tentacles on the side of Gluttony you pressed (So if you do this input the left, his tentacles on his left side and visa versa) pound down, doing 14-15% damage with above average knockback. The tentacles reach out three battlefield platforms away from Gluttony, but slam down rather laggily. Still, this isn’t the easiest to dodge as the tentacles don’t overlap, meaning you’ll have to do two quick dodges in succession as they both slam down. Both tentacles are hitboxes, and you’ll likely be hit by the second tentacle on that side after if you’re hit by the first.

A Up – Tentacle Clap: Gluttony claps all four of his tentacles above his head, meeting each pair of two up above himself. The tentacles reach three battlefield platforms above Gluttony, and each pair of two tentacles on either side of Gluttony overlap to make only 2 hitboxes as the tentacle pairs clap. Contact with the tentacles at any time during the move does 18-19% with huge upward knockback.

A Down – Rollover: Gluttony rolls back and forth, being a gigantic mass of fat, making his body a hitbox that does 18-19% with above average knockback, bordering on huge. This is easy to see coming with long startup, but the hitbox stays out for a very long time, meaning you can’t dodge this attack normally and must get away from Gluttony’s body to avoid it.

B – Roar: Gluttony’s main head lets out a massive roar, stunning anybody within a battlefield platform distance of the massive beast and doing 7% damage, pushing foes a character distance away from Gluttony so they can be better exposed to the tentacles. The cooldown for this attack is shorter then the stun time, meaning you can spam this to get foes into a prime position for the tentacles to hit them.

B Side - Tentacle Chase: The two tentacles on the side of Gluttony you pressed (So if you do this input the left, his tentacles on his left side and visa versa) start chasing after your foe like snakes. You can control where the tentacles go, guiding them with the control stick. There’s no limit to how far out they can stretch, but they move in a rather wavy pattern, so you have to be careful to make easy turns or else the tentacles will get tangled within each other, causing you to have bad lag as the tentacles reel in, you having to wait until they’re back before performing another attack. If you grab someone with the mouth of either of the tentacles (It counts as a grab), you can mash A to do 1% per press, which is a lot faster then it sounds. The other tentacle will come over and chomp them after you damage them with the first tentacle for a brief second, chomping them for 20% and huge knockback. This is the main way you’ll chase after foes on huge stages.

B Up – Tentacle Stilts: Gluttony puts all four tentacles underneath himself to use as legs, using them to push himself up. Gluttony can then change his location to a more central spot to better dispose of his enemies, but he moves very slowly in this move, the speed of Ganondorf’s walk, his tentacles having trouble holding up his enormous mass of fat. Gluttony can execute a single jump that’s very laggy as the tentacles force themselves to push up Gluttony’s fat, but goes up 1.5X Falco’s jump (The best first jump in the game). To get out of this, press A or B to make Gluttony’s tentacles give out, causing him to crash down to the ground and doing 25-26% damage with unholy knockback with his main body being a hitbox. This is very laggy and has a lot of down time before you can do another move, so this is rather stupid to use as an actual attack when they are easier KO methods available to you. You’ll probably use up half the time you have with the final smash getting to a good central spot if you went into hiding to eat the Philosopher’s Stone, but this could be a decent option to use if you’re just slightly away from the perfect spot to plant yourself.

B Down – Drooling Anticipation: Gluttony’s main head starts drooling in mass, creating a stream of drool that travels across the ground. The part of the stream to the left of Gluttony will go to the left and visa versa. Coming in contact with the ground while the fast streams of drool are going will have you whisked off the screen with the rushing disgusting waters as if you landed on the track of the Big Blue stage. You can keep drooling for as long as you like to keep up the stream by holding/mashing B, the stream stopping when you stop drooling. This can be avoided by going onto a platform, and is mainly only useful on stages with large portions of flat ground such as Bridge of Eldin.

Overall Play Style – Playing with your Food:

Gluttony doesn’t really leap out and make an all new playstyle. At his core, Gluttony is a standard heavy hitter character, even if his moves have a bit awkward of hitboxes. How does Gluttony stick out then? Gluttony is an actual heavyweight who can hold his own. He can actually deal with all the weaknesses the typical heavyweight has. Getting camped to hell? Eat those projectiles and send them back at them. There’s nothing you can’t devour. Since your enemy can’t camp you, you don’t have to worry about approaching. That’s the enemy’s problem. What’s this about heavyweights having terrible recoveries? Hardly. Gluttony has an exceptional recovery. Having trouble actually getting your powerful moves you and your fellow heavy hitters are so infamous for? You actually have ways of getting those quick little buggers to stand still by tripping them with your down special or stunning them with your bthrow/neutral B.

On the whole, Gluttony plays rather defensively. He can’t camp, but he’ll want to stay away from the enemy so he can eat up any projectiles they foolishly give to him, as well as strategically place a puddle of drool for enemies to trip over so Gluttony can get them with a bigger hit. At earlier percentages, Gluttony should try to build up his hunger and avoid hitting with his more powerful attacks. If Gluttony has enough hunger, his powerful attacks can easily connect. Building up your hunger should be at least if not more high priority for you then damaging your foe, as the sheer power of your KO moves when sped up can easily finish a foe at a low damage percentage. Also keep in mind that your hunger will stick around when your enemy comes back with their next stock while the enemy’s damage percentage will of vanished. Gluttony can go on killing sprees of sorts, as if he gets the first kill the match can dramatically shift in his favor as he already has some hunger stored up for the next stock. If he’s hungry enough, it doesn’t matter how damaged he is. He WILL come back to that stage after being knocked off. If he’s so damaged that he’d be knocked off screen from a single hit, Gluttony can try to take his foe down with him via neutral B or his dthrow. Gluttony can be a huge pain to take down if you don’t finish him off fast. Whoever gets the first KO may very well determine the entire flow of the battle.

A good Gluttony player will control the flow of battle and will always be doing something useful. You’ve tripped your foe? Get an extra 5% on them with your neutral B and stunning them before you smack them away, and while they’re knocked away from you to give you some breathing room use your dsmash to build your hunger as quickly as possible. Gluttony may not be King Dedede, but he’d still regularly be seen as tournies, being around the level of DK and Wario. Playing as Gluttony is a test of patience as you wait for your foes to approach you instead of visa versa. Gluttony’s worst match ups would be against those who beat out his melee range such as Marth, while his best match ups would be against those who heavily rely on camping.

Laugh and grow fat!


Taunts:

Up Taunt – Gluttony’s Lust: Gluttony raises his arms up to the sky and angrily yells out “WHERE’S MY LUST?!?”.

Side Taunt – Snotty Glutton: Gluttony picks his nose, then looks for a place to wipe it off. Gluttony shrugs, seeing no good place to do so, and eats it. This increases Gluttony's hunger by 1%, but Gluttony obviously has better options for this.

Down Taunt – Belly Drum: Gluttony plays a random tune on his belly by pounding on it. The tunes are all very short and include such randomness as the first few notes of the Super Mario Bros. theme or the Legend of Zelda item jingle.

Entrance – Bloodhound: A steak appears where Gluttony is supposed to spawn, and Gluttony comes in from the background on all fours like a dog, sniffing with his nose to the ground. Upon getting up to the steak, he hastily devours it and goes into his standard stance.

Results Screen Poses:

Win 1 – Survival of the Fattest: The second and third place characters of the fight are looking for the fourth place character instead of clapping, scratching their heads. Gluttony then casually walks across the screen and burps out a signature item of the character before going off screen (Mario’s hat, Link’s cap, etc.) again. Gluttony always devours the lowest placing character if there are less then four, and there is simply nobody looking for the loser if there was only one person for Gluttony to eat.

Win 2 – I wonder what’s for dinner. . .: Gluttony looks between the losers, scratching his head as if deep in what limited thought he possesses. He then starts looking at one of the losers at random in drools, then devours them in the same fashion as his dthrow. The other losers stop clapping, turn to Gluttony, then flee in horror.

Win 3 – Served on a Silver Platter: The last place loser comes in with a massive turkey on a silver platter, kneeling before Gluttony to serve it to him. Gluttony knocks the turkey and platter away with a sweep of his arm and instead devours the one serving him. What good is a meal if it’s not fresh?

Win Pose with Lust – Mistress’ Pet: Gluttony turns to the losers and drools, then looks up at Lust and says “Can I eat them?” for Lust to smirk and reply “Be my guest.”. Gluttony laughs maniacally and tackles the two clapping losers, a dust cloud forming to obscure Gluttony devouring the characters as chomping sounds are heard while Lust watches.

Loss – Squashing Bugs: The butterfly from Gluttony’s fsmash appears and it flies about in front of Gluttony. Gluttony tries to squash it by clapping his hands together as it flies about, indirectly applauding his opponnent. The speed Gluttony does this is very fast to make it look more like clapping.

Victory Theme: Eat it (Weird Al Yankovich) (No, I didn’t make this video, but it’s lol worthy)

Kirby Hat - Pink Glutton: Kirby gets the stripes going across Gluttony’s arm and back, gets the glutton’s nose, as well his creepy pupil-less eyes. Kirby gets Gluttony’s neutral special, tasting defeat, and Kirby’s tongue gets the symbol of the homonculis tattooed like Gluttony’s tongue with the Kirby copy. You’ll mainly want to use the stunner version of the move here, as the other version’s main feature is increasing hunger, which Kirby can’t use.

Alternate Colors:

Black outfit, red stripe (Standard)
Red outfit, black stripe (Red Team)
Dark blue outfit, green stripe (Blue Team)
Dark green outfit, teal stripe (Green Team)
Gray outfit, black stripe
Yellow outfit, brown stripe


Snake Codec Conversation:

Snake: Woah. . .that’s one fat man. . .
Otacon: Fatman. . .? I thought Raiden took him out back at the Plant years ago. . .How did he survive?!?
Snake: (Sigh) It’s not that Fatman. . .It’s just some really fat guy. He’s eating everything in sight.
Otacon: Oh. . .Well that’s a relief.
Snake: I wouldn’t say that. . .That guy is eating through metal. What have you got on him?
Otacon: Let me look this up a second. . .I think it’s Gluttony.
Snake: Well obviously what he’s doing is gluttony. . .
Otacon: No, Snake, that’s his name. . .
Snake: Well, do you have anything useful to tell me about him?!?
Otacon: Just try to finish him off fast before he gets a big appetite. . .If you don’t take him out fast, he’ll be a pain to take down.
Snake: . . .He’s been staring at me while drooling the entire time. . .
Otacon: Yeah. . .Calling me probably wasn’t the best idea. . .
Snake: Thanks for the help!

-End Transmission-

Assist Trophy - Winry:


Winry, childhood friend and mechanic of the Elric brothers, emerges from the assist trophy. She throws wrenches in an arc similar to the Hammer Bro. assist trophy for similar damage and knockback, though if anybody comes close to her she’ll beat them over the head with the wrench to deal a solid 20% and large knockback.

If the summoner of the assist trophy is Ed, Al, or a robotic character such as Rob or a robot master, they can go over to Winry for her to stop attacking and start tuning them up. She heals Alphonse and the robotic characters at a rate of about 5% per second. For Edward, she heals the health of his automail blade rather then him directly. Winry lasts roughly 20 seconds.


*** Stage – Lab 5: ***


The entire stage looks rather metallic, and there are mass red bubbling cauldrons in the background. Several prisoners can also be seen being held captive behind bars. No objects in the actual arena besides a transmutation circle at the center, and the stage is around the length of Final Destination. There are walls on the sides of the stage, but the ceiling is too high up, you still able to get star KOs. If you stay against the wall for long, spikes will come out before retracting back into the wall, doing 10% and average knockback. This prevents infinite chain grabbing. This stage is essentially just a less broken version of Shadow Moses at heart. . .

But what fun would that be? There are a few various events that can randomly happen on the stage.

Sometimes an explosion will occur in the background next to the prisoner's cell, busting it open and freeing them. The prisoners will then hastily run out from the background onto the stage and then off the foreground, coming up against the cameras before getting out of vision, causing mass blocking of the view. As they overlap with the stage, they do 15% and above average knockback if you don’t do a dodge.


The guardian of the lab, Slicer, will also occasionally come out onto the battlefield to join the fray. He’s a sturdy suit of armor that functions as an even slower even more powerful version of Ike. While he can’t use items, he’s insanely heavy, like as heavy as Bowser with a metal box, thus he can’t be KOd by conventional means. However, once he takes 30 stamina worth of damage, his helmet will be knocked off. Slicer’s little brother will still continue to control the suit of armor and fight on, but after taking another 30 stamina worth of damage will crumble to dust. However; once his helmet is knocked off, it can be used as a throwing item, and Slicer can put it back on to reset his stamina back to the full 60, so be careful. While Slicer is powerful, he’s so insanely slow that he’ll only really affect anything in a FFA where he can actually hit something.


The –other- guardian of the lab, Barry the Chopper, will also occasionally come out onto the battlefield. He’ll leap in from the background doing a downward slash for 20% and spiking downwards, then his blades will get stuck in the ground, leaving him vulnerable. He’ll then go into the background again before coming out again in another random period 10-15 seconds later. Barry has 40 stamina you must take out before the living suit of armor will crumble to pieces.

The stage hazard who has the most notable effect on the battle is Tucker. He’ll follow a player’s horizontal position while in the background for 5 seconds, then grab them. Tucker cannot jump, so this is the easiest way to avoid him. If he –does- grab you, however, he’ll pull you over to the transmutation circle and cause a massive explosion double the size of Bowser for 30% and huge knockback, creating a cheap knock off of the philosopher’s stone. Tucker will take it and run off into the background with it. You can escape Tucker’s grab quite easily by button mashing, but at high percentages it becomes hard to escape. Still, it’s not terribly hard to just avoid him in the first place.


*** SSE Role: ***

Before the level where you run away from the Pig King Statue as Lucas, PIKACHU and POKEMON TRAINER are seen together, Pikachu mounted on the trainer’s shoulder. They’re walking through a forest together. A Metapod falls down from the trees and wiggles back and forth. The trainer takes out his Pokedex to inspect the Metapod to see if it’s worth catching, then rolls his eyes and sends out Charizard to dispose of it with a fire blast for some quick experience points. The screen fades out then slowly fades back in for the Pokemon Trainer to look tired. He looks at his pokedex again, it showing data on Jigglypuff with a blinking mark over the trainer’s location, this apparently being where they’re located. The Pokemon Trainer lets Pikachu look at the pokedex and points at Jigglypuff’s picture for the electric rodent to nod and let out a “Pika!”. You play through a level as the two characters and rather then subspace enemies there are various wild bug Pokemon for the enemies. You have access to Ivysaur and Charizard alongside Squirtle.

At the end of this level, the trainer comes up into a clearing to see GLUTTONY chasing JIGGLYPUFF around in circles. Gluttony is drooling in mass, going very fast, Jigglypuff barely able to keep fleeing. Pikachu’s cheeks crackle with electricity upon seeing this and the trainer sends Ivysaur out into battle. You play as the trainer, Pikachu, and Jigglypuff all against Gluttony. Gluttony has maxxed hunger for the entire duration of the battle to keep the three on one from being a cake walk.

Upon defeating Gluttony, he’s turned into a trophy. Jigglypuff angrily goes up with his her marker and doodles over Gluttony’s face, then happily goes up to the trainer and nods in thanks. Before any pleasantries can be exchanged, though, LUST comes into the clearing with an army of subspace creatures. Lust extends out a finger to touch the base of Gluttony’s trophy to revive him, then motions out her other arm to have the army attack. Gluttony leads the charge as the trainer and his pokemon have intimidated looks on their faces. The trainer lets out Charizard and hops on top of him along with Pikachu and Jigglypuff, flying up and away from the army. However, Lust extends out her fingers and wraps them around Charizard, bringing him down to the ground. The trainer, Pikachu, and Jigglypuff hop off Charizard and run frantically as Gluttony drools over Charizard’s tail, putting out the flame on it and turning him into a trophy, Lust and the subspace army still on their tail. Lust extends out her fingers to stab Pikachu and Jigglypuff as she chases them, turning them into trophies which her minions catch. Lust goes to stab the trainer, but he nimbly dodges. Lust still manages to snag Ivysaur’s pokeball, however. The trainer comes up to a cliff, cornered. He turns around to look at Lust, then reluctantly jumps off. Thankfully he lands in a pool of water. Lust looks over the cliff to see if the trainer is still alive to see nothing, then goes to leave. The camera zooms into the water to reveal the trainer holding onto Squirtle tightly under the water, then going up for air the moment Lust leaves. The trainer and Squirtle head in the opposite direction of Gluttony and Lust hastily, the trainer being seen next when he encounters Lucas.

After the first level with Pokemon Trainer and Lucas, we are shown Lust, Gluttony and their subspace forces hauling along the trophies of Charizard, Jigglypuff, and Pikachu. One of the primids is carrying Ivysaur’s pokeball. The pokeball. Suddenly, Ivysaur’s pokeball starts wiggling around violently, and Ivysaur escapes from the pokeball. He uses vine whip to touch the trophy bases of Charizard and Jigglypuff. Charizard snorts at Gluttony and smacks his fists together, ready to fight, but Ivysaur carries him away by wrapping his vines around Charizard, carrying him away, this not being a fight they can win. Jigglypuff runs off along with them, but gives a regretful look back at Pikachu’s trophy. . .Lust gives a dismissive motion to Gluttony and some of her forces to go after them while the rest of them continue on their way. You play as Jigglypuff, Ivysaur, and Charizard for a level, the former two not having the trainer around with his annoying voice to bug you. Enemies will constantly come at you from the rear in this level, so you’re encouraged to keep moving.

At the end of the level, you’re shown a cutscene of Charizard leaping off over a cliff as Jigglypuff and Ivysaur hop onto his back and ride on him. Due to Lust not being with the group chasing them, she can’t bring Charizard down like before. However, this is far from over. Gluttony laughs maniacally and takes out a trophy gun and starts firing it rapidly at Charizard, who does graceful aerial maneuvers to dodge. After a while, Charizard gets too far away, much to Gluttony’s dismay, him going back to head to Lust and putting away the trophy gun. He hastily runs back to Lust at a frantic pace and points out in the direction they escaped for Lust to facepalm and motion her troops to come along with her. Lust sees how far off the Pokemon are over the water and sighs. . .How will they chase after them now? Suddenly, WOLF comes up in his Wolfen and gives a thumb up to Lust, motioning her to come over for a ride. Lust looks at the disturbing lack of space in the tiny one man plane and raises an eyebrow for Wolf to spread apart his legs and motion to his lap, smirking. . .He wants Lust to sit his lap?!? Lust grits her teeth and extends out her fingers to get a grip around Wolf’s neck, choking him briefly before releasing him. Lust hops on top of Wolf’s ship, Gluttony following her lead (Carrying Pikachu’s trophy), then she motions off to Charizard. Wolf sighs and flies in the direction they went, them being long off camera by now. The camera zooms in to a deserted island in the general direction Charizard flew off to, it more likely then not being where he landed. Lust and Gluttony hop off the ship, and Lust takes Pikachu’s trophy from Gluttony. Lust hands the trophy to Wolf and points to the subspace bomb factory in the sky for Wolf to nod, taking the trophy and flying off towards it. Gluttony and Lust proceed to go further into this uncharted island. . .

We’re shown a cutscene inside a base of some sort, with ROY MUSTANG at a desk, filling out mountains of paper work. After watching this for a brief bit, King Bradley, comes into Mustang’s office for Mustang to hastily get up and salute him. . .Such a suck up. Anything to one day become the fuhrer. . .Bradley gives a dismissive motion for Mustang to go at ease, then the king takes out a photo of Ganondorf and Bowser to show to Mustang. Bradley runs his finger across his neck, then throws the picture into the trash can. Mustang nods to the king for him to leave, Mustang sinking back into his chair and sighing. How is he supposed to get to them, much less capture them, with such little warning? Mustang sighs. . .He presses a button nearby for SAMUS and SNAKE to come into the room. Mustang brings up a pictures of the subspace bomb factory and the Halberd on his computer and points to it for the two of them to nod and head out after taking some papers for mission briefings and what not. Next, EDWARD and ALPHONSE come into the room. The camera shows Mustang’s point of view from behind the paperwork, only able to see Al due to Ed being so short. Mustang gets a thought bubble with Ed and a “?” for Ed to jump up above the paper work and throw a little tantrum, causing the paper work to fly everywhere. Alphonse laughs while Mustang facepalms. . .Mustang just brings up a picture on his computer of the island Charizard, Ivysaur, and Jigglypuff went off to with a photo of Wrath next to it. Ed gets out of his tantrum for it to just start up once more upon seeing the little gremlin Homunculi. Mustang drums his fingers and points outside to a boat for Al to nod, dragging his brother out with him. . .We cut to Bradley who is seen secretly watching Ed and Al leave Mustang’s office. He shakes his head and paces back to his quarters, where SLOTH, his secretary, is waiting for him. Bradley motions off to the boat for Sloth to smirk and nod, turning into a mass of water as she goes out through a vent. . .

Another cutscene opens up showing Ed and Al aboard the boat, it sailing off for the island. Ed looks rather bored as he slumps up against the wall while Al looks out to see. Everything seems to be going smoothly. . .Until a crash on the ship occurs. Ed and Al go out to look at what caused it for it to be a bunch of pathetic pirates in a poorly made old fashioned ship. TOON LINK stands at the helm of this ship, leading the raid against them. Perhaps he’s short on Rupees? Perhaps he thought the ship was one of Ganon’s? Who knows. They put up a plank and start running up onto the much more modern ship Ed and Al are on, but Al casually blocks the way, them getting knocked overboard as they try to pass his massive armor. Ed runs to go down onto the small pirate ship, Al close behind. Some army men from the modern ship go to help the Elric brothers, but the scrawny plank collapses under Alphonse’s large weight, preventing them from coming along. You play a level on Toon Link’s ship (Which is enlarged so as to be a level), various toon pirates being the enemies.

After this level, Toon Link is seen running up to Ed to slash him across the face, but Ed casually transmutes a wooden spike up out of the ship to send Toon Link flying back. Toon Link prepares to run at Ed again, but he is flung away by the ever annoying launcher from the Pirate Ship stage, flying off and landing on Ed and Al’s ship. Toon Link lands deep within the ship to find that it’s sinking and the men panicking to try to prevent it from doing so. A level starts up where you play as the vastly superior Link clone, getting out of the ship before it sinks, there being a time limit. The enemies are various military soldiers in the FMA style.

After getting out of the ship, Toon Link finds the source that’s causing the ship to sink to be Sloth, as she turns one of her arms into water and shoves it down a man’s throat to drown him. She turns to Toon Link and chuckles, petting him like a child. Toon Link, disgusted with this, takes a slash at her, but Sloth picks him up with one of her watery arms and flings him overboard. Ed and Al watch from the puny pirate ship, unable to get back up onto their main ship. Al tries to steer the pathetic ship into the main ship to attack it, but this just causes it to crash due to it already being damaged. It sinks into the sea. Sloth chuckles and jumps into the water, turning her body fully into liquid and rocketing off towards the island at amazing speeds. We then get a shot of Ed, Al, and Toon Link sinking close together, watching Sloth swim off. Al goes to shake Toon Link’s hand, but Ed and Toon Link just swim off, not trying to go for any pleasantries. Al shakes his head, then a underwater level starts, you playing as all three characters. The enemies are various Water Pokemon and aquatic Mario/Kirby/Zelda/DK enemies. Underwater, you have infinite mid air jumps, but your attacks are slightly slower.

Before continuing with Ed and Al, we cut back to the base with Mustang and Bradley. Bradley is seen in his room, pacing back and forth. . .Suddenly, an image comes up on his computer screen showing Wario coming in through the sewers with an army of subspace forces. Bradley clenches his fist and chuckles. . .Finally he can ditch his little cover up here and move on to further greatness with Master Hand. He nods to Wario, then quickly cuts the screen as Hughes comes in. Hughes raises an eyebrow, but Bradley hastily does a dismissive motion to Hughes. Hughes gets a thought bubble of Sloth, pointing to her empty seat, for Bradley to shrug and glare at Hughes angrily. Hughes reluctantly leaves. . .Bradley sighs. He can’t keep Hughes around any longer. He presses a button on his desk for ENVY to come in through an alternate entrance. Bradley runs his finger across his neck for Envy to nod and chuckle. . .He turns into a female officer and heads out into the hallway after Hughes. Envy takes out a gun and points it at Hughes. We’re shown a mug shot of Hughes as he turns around, then the camera instantly blacks out as a gun shot is heard. The camera comes back in to reveal that a certain box has been watching this entire incident. . .Looks like Snake didn’t leave for the Halberd just yet. He waits for Envy to leave, then hastily gets rid of his cover and runs for Mustang’s office. Upon getting there, he finds Mustang already fighting against a bunch of subspace forces, Wario commanding them. Snake takes out a grenade, then you play as him and Mustang in a standard SSE enemy battle. Wario is seen in the background commanding them, regularly using his taunts on you.

Upon defeating the enemies, Wario’s jaw drops. His army has ALREADY been defeated?!? Guess the troops he plowed down along the way already took down a sizable amount of them. Mustang snaps his fingers to cause Wario’s buttocks to light on fire, and he hastily runs around the corner to flee. Snake and Mustang go to chase him, but when they get around the bend Wario is on his motorcycle, fleeing quickly. Snake takes out his rocket launcher and Mustang prepares a powerful attack, but before anything further can happen, Bradley steps out from his office, no longer in his military uniform, blocking their way. He takes off his eye patch to show the symbol of the Homunculi, revealing himself as Pride. Master Hand would never accept it if Wario didn’t make it out alive. Pride draws his sword and slashes forward at the shocked Mustang for a boss battle to start.

Boss: Pride


Play as: Roy Mustang, Snake

Attacks at 100%

Ultimate Eye-
Pride reaches up and places his hand on his forehead. Anyone who attacks Pride while he’s in this stance has their attack blocked and countered with a swift kick. Pride’s counter-attack deals 1.2 times the damage and knockback the attack would’ve dealt. Look for the obvious tell and this attack is easy enough to prevent.

Piercing Thrust- Pride lunges forward a fair distance (two battlefield platforms forward) and thrusts his sword outward. This attack is incredibly fast and can easily catch you off guard. Fortunately the thrust is high enough that it can be ducked under. Either duck this or spot dodge it. Deals 14% and medium knockback.

Casual Slice- Pride casually walks forward whilst swinging his sword from left to right. A fairly predictable attack considering he move so slowly but if he does it near you it can wrack up some damage quickly as it’s possible to get locked in the attack. 6% and very low knockback.

Attacks at 50%

Psycho Crusher-
A very close range attack, Pride thrusts his arms out and grabs the opponent by the throat. He then lifts them off the ground and begins to squeeze. Wriggling the control stick is the only way to break free of this attack and if the control stick is NOT wriggled, the player will lose a stock instantly. The player will take continuous damage until they break free of Pride’s grasp, receiving 2% every second and a half that passes.

Raging Inferno- The arena you’re fighting in slowly becomes engulfed in flames; as the battle rages on, the flames grow larger. The flames deal the same amount of damage and knockback as the flames on the Pictochat stage so it’s best to try and wrap up the fight quickly.

Attacks at 25%

Body Reform-
Pride’s body begins to quake slightly as his wounds begin to heal. It takes him a total of 4 seconds to heal and if the move is successful, he’ll recover his health up to the 50% mark. If attacked at all during the process of this attack, Pride will stagger backwards and be vulnerable to attack

Attacks at 10%

Neck Breaker- A variant of the Psycho Crusher attack; instead of slowly crushing the player, Pride crushes the character’s neck instantly costing them a stock. Fortunately this attack is slightly slower than its other form due to Pride being worn down.

Attacks at 5%

End of the Line-
Pride rushes forward as quickly as in his Piercing Thrust attack. If he grabs an opponent, he tosses them into the air and impales them on his sword. He then tosses the opponent’s limp body away and laughs. This attack is rather fast, covers the entire arena length and instantly kills any opponent he grabs. Fortunately, it can be jumped over and, once leapt over, leaves Pride in a vulnerable state where you can easily reduce his HP to zero.

After defeating Pride, Mustang triumphantly stands over him. Looks like his long campaign to become the fuhrer has finally payed off. However; Mustang’s brief moment is cut off when Snake motions to the corpse of Hughes. Mustang clenches his fist and lets out an angry cry, then motions for Snake to leave, him not being seen again until he normally is on the Halberd.

The next cutscene shows Ed, Toon Link, and Al washing up on the island the Elrics were assigned to go to, albeit at another spot on it. Alphonse hastily gets up and starts getting the water off him, thankful that none got on his blood seal. Ed does a quick transmutation on Al to remove the rust his armor acquired and gives his brother a thumbs up for Al to nod in thanks. Al gets a thought bubble showing Wrath, the reason they were supposed to come here in the first place, and points to it for Ed to nod to him. Meanwhile, Toon Link has already run off, long gone, the Elric Brothers scurrying off after him to catch up. You place another level as the two alchemists, the enemies being more various Wild Pokemon due to this island being uninhabited. The Pokemon are considerably stronger than the bug ones from the forest level with Pikachu and the Trainer.

Before continuing the new sub section with the FullMetal Alchemist characters, you play the first Zero Suit Samus/Pikachu level early. However, in the cutscene where Zero Suit Samus normally finds Pikachu being forced to power a machine, Samus spies into the room rather then barging in. We see Wolf placing Pikachu’s trophy into the machine, then reviving the rodent and slamming the door to the machine shut. Wolf chuckles as Pikachu is tortured as a power source for the camera to cut to Samus’ face, letting out a slight gasp. She comes into the room and primes her pistol for Wolf to just let out a chuckle and gets into his feral fighting stance. You brawl Wolf as ZSS. Upon defeating him, Samus frees Pikachu from the machine and then mass Robs come into the room to attack Samus as normal, but they also revive Wolf from his trophy status. Wolf gives Samus a smack to the face, then backflips out over the Robs and out the exit of the room, the door closing behind him. Samus scowls as she gets into a fighting pose alongside Pikachu, and the level plays normally.

The next cutscene opens with Charizard landing on the island and looking around. Ivysaur motions forward with his vines and the other characters follow. Another level in the same design as the last one with Ed, Al, and Toon Link takes place with Ivysaur, Charizard, and Jigglypuff.

At the end of this level, Toon Link, Ed and Al are seen walking by, the Pokemon watching from some foliage. Jigglypuff sees Al in his huge armor and hides behind Charizard. Charizard gets angered by this and roars at the warrior who caused Jigglypuff to cower in fear, coming out into view, Ivysaur hastily coming out alongside him. Jigglypuff stays in hiding while Ed is slightly taken aback by the dragon. Ed goes up to attack, but Al holds him back, not fond of hurting animals. Ed and Al are left with no choice, however, when Toon Link simply leaps out and slashes Charizard across the face, a battle starting up. You play as Ed, Al, and Toon Link against the two PT Pokemon and Jigglypuff.

After the battle, Toon Link, Ed and Al continue on their way, Al shaking his head at the beasts turned into trophies. After they’re gone, Jigglypuff comes out and revives Charizard and Ivysaur. Charizard goes to go after the alchemists, but Jigglypuff and Ivysaur hold him back. Charizard sighs and allows Ivysaur and Jigglypuff to mount on his back once again, flying off into the distance off the island. The camera cuts back to Ed, Al and Toon Link walking through the island, and they suddenly hear some childish laughing. They turn to the laughing, but nobody’s there. They run off after it. . .The camera shows a mug-shot of Wrath, who is in hiding. You play another level as Ed, Al and Toon Link that loops around in mass in a maze like fashion, you having to catch Wrath. You’ll rarely if ever actually see him on camera, and if you do he’ll probably be exiting the door of the room you come into. The only way to catch him is to corner him into a “room” without an exit besides the way he came in.

The next cutscene shows Ed grabbing WRATH as he tries to flee, but Wrath suddenly smacks him away with impressive force. This pisses Ed of and he starts fighting Wrath, Alphonse sighing as he reluctantly goes to help his brother. After a bit of this, Sloth reveals herself, leaping out in front of Wrath and taking a hit for him, Wrath excitedly yelling out “Mommy!” at the sight of her. Ed raises an eyebrow at this, but Sloth just lets out a smirk and turns her arm into water, swinging it forward at him. You have three characters (And thus three stocks) against Sloth and Wrath, but they’re both out at once, ganging up on you.

Wrath and Sloth fall to the ground, turned into trophies. Al looks down at the trophy of Sloth regretfully. . .She looks so much like their own mother. Al reaches down to touch the base of the trophy, but Ed smacks his hand away. There’s no way that monster could be their mother! Suddenly, Gluttony and Lust come out into view with a sizable amount of subspace forces surrounding the clearing Sloth was just fought in. Lust extends out a finger to revive Sloth and Wrath, touching their trophy bases, and the army proceed to attack the Elric brothers from all angles alongside the three Homunculi. Toon Link and the Elric brothers put up a decent fight, but ultimately get turned into trophies. Wolf comes down in his Wolfen, back from having delivered Pikachu to the Subspace Bomb Factory. Wrath, Gluttony and Lust hop on top of the small ship, Gluttony and Wrath carrying the trophies of Ed, Al, and Toon Link, but when Sloth goes to get in Wolf motions down to his lap again, making room for her. . .He doesn’t know when to quit. Sloth turns her arm into a watery substance and smacks him, then gets on top of the Wolfen alongside Wrath. Wolf scowls and flies off for the Subspace Bomb Factory.

Before anything else happens, we’re shown a brief cutscene of Charizard flying with Ivysaur and Jigglypuff. He suddenly gets swarmed by those bird enemies that can be picked up as weapons when they impale their beaks into the ground and is forced to do some barrel rolls to avoid them. . .However, this causes Ivysaur and Jigglypuff to fall off the beast’s back, falling down into the ruins and turning into trophies. Ivysaur and Charizard aren’t seen again until they normally are in the SSE, and Jigglypuff is found alongside Ivysaur.

The cutscene where Kirby runs off and leaves the princess he saved from Petey and Piranha and Bowser turns her into a trophy, then makes a shadow version of her plays out a good deal differently. Instead of Kirby simply running off, Envy appears and smacks him away, causing him to fly off into the distance where he’s not seen until his next cutscene. The princess sees this and goes to run frantically, but Bowser appears and grabs the princess from behind. Bowser throws the princess to the ground and gets in the pose from his dthrow, but Envy comes up in front of Bowser, shaking his head and wagging his finger. Master Hand would never accept this! Bowser sighs and simply smacks the princess unconscious, turning her into a trophy. Envy then transforms into the princess and lets out a chuckle at Bowser, who gives him a thumbs up. Bowser gets into his Koopa Klown Car to take the princess’ trophy to the Halberd and the cutscene ends.

In the next cutscene, Envy then attacks the heroes as the princess normally did due to being in her form, the cutscenes looking the same with the exception of Envy not having the shadow energies radiating off him like the shadow princess. The battle against the princess is also made somewhat harder, as after defeating Envy while he’s in the form of the princess you’ll have to battle him as his true self, him having two stocks.

After defeating Envy, he’s turned into a trophy, but still in the form of the princess so the cutscene remains unchanged. After Mario’s/Link’s misunderstanding, Dedede whisks by in his trophy cart and picks up Envy’s trophy, thinking he’s the real princess. Kirby then comes by and frees the trophies of the character who lost the previous battle along with Envy, also thinking he’s the princess. Mario/Link help Envy up depending on which princess he is. The characters who battled against Envy and know his true identity glare at him, but he just smiles and laughs, hiding behind Mario/Link. Mario and Pit/Link and Yoshi see that the hero is far from willing to let them attack Envy, and just head off in the opposite direction. Kirby heads off after Dedede, motioning Envy to follow, and he hastily heads off after him. The princess’ lover sighs and chases after him, while Pit/Yoshi follow the hero with little thought. You play as Envy in the form of the princess in the levels where you chase after Dedede now as opposed to Link and Yoshi/Mario and Pit.

After playing the first of the two cave levels with Mario/Link’s party, there’s an interruption as we cut back to Mustang, who is located outside the Subspace Bomb Factory with his men, prepared to launch an attack. Mustang motions his forces to move in, snapping his fingers to hasten them up, but this accidentally causes a flame to materalize and burn off a random soldier’s hair, him running around frantically. Mustang facepalms and puts the fire out, then the men run inside. Mustang takes a different route then his men inside, preferring to go it alone, hence there are no soldiers to help you in the level. You play a fairly standard subspace bomb factory level with Mustang, but in the background you can sometimes see your men helping you out.

After this level, Mustang is seen entering the room the Ancient Minister is found in when he reveals his identity. His men are already inside of here fighting off the Robs, but there are far too many, them quickly subdueing and KOing Mustang’s army. Mustang snaps his fingers to burn off the Ancient Minister’s robes to attempt to reveal his identity, but the AM hastily runs out of sight before we can see anything of him. Mustang goes to run after him, but all the doors slam shut and a hologram of Ganondorf appears and laughs as several Darknuts come into the room through Ganon’s dark portals. You play a battle as Mustang against them, then another brief cutscene plays where yet more Darknuts come out and overwhelm Mustang.

In the cutscene where Mario’s/Link’s party chase after Bowser, he is carrying Luigi’s trophy as he flees rather then that of the princess. However, Mario’s/Link’s party catch up to Bowser before he gets away. Kirby goes to smack Bowser with his hammer, but all of a sudden Envy reveals his true colors as he does a swift kick at Kirby to knock him away from Bowser. The princess’ lover stares at Envy in shock for him to smack him across the face, then turn into his true form. Bowser hops off the cliff and Envy runs after him to follow, and they both leave in the Koopa Klown Kar together, heading off to the Halberd. Mario/Link’s party isn’t seen again until their final level where they battle against mass subspace enemies, them reuniting with Link and Yoshi/Mario and Pit which lengthens that cutscene slightly.


Before the Snake/Meta Knight/Lucario level, we are shown Envy and Bowser in the room with the princesses in the cages, Bowser carrying Luigi’s trophy. Envy transforms into Mario, and Bowser nods at him. Bowser proceeds to go out of sight as Envy opens the cages of Peach and Zelda, reviving them. They look excited to see Mario. . .But not so much when he attacks them. You play as Envy again, though with Mario’s moveset rather than his own, you still not getting to unlock him yet.

After assaulting the princesses, the battle is seen raging on rather than the princesses being turned into trophies in the cutscenes, although it’s not really shown as much of a battle, as Envy is owning the princesses considerably. Bowser creeps out behind Luigi’s trophy and touches it from the back, then quickly goes back into hiding before Luigi notices him. Luigi stares in horror at his brother attacking the princesses. He goes up to Envy and frantically talks in gibberish, but Envy knocks him down with an fsmash. Luigi is angered at his brother. . .What the heck is he doing? Now is finally his time to take the spotlight! You play as Luigi in a battle against Mario/Envy.

The battle is still going between the “Mario Bros”, you getting a decently cool fight scene for Luigi’s vengeance that I won’t bother to detail. However; before either brother can finish the other, Bowser intervenes and leaps out, smacking Envy down with an fair and turning him into a trophy. Bowser extends out a hand to Luigi. . .Luigi looks very reluctant to shake, hesitating in mass. In the background behind Luigi we see a primid come over and revive Envy, who turns back into his own form briefly before turning into Peach (Albeit now looking dark and evil, in her Shadow Queen form from Paper Mario 2). The primid presses a button to close a door to block off the real Peach and Zelda, getting them out of Luigi’s sight. This all happens very quickly, Luigi being completely unaware. Envy comes over to Bowser’s side and gives Luigi a kiss on the nose which of course gets Luigi to shake Bowser’s hand (After the shock of the kiss, of course.). Bowser gives a hearty evil laugh and the cutscene ends. . .Luigi has been successfully manipulated.

Snake/Meta Knight/Lucario’s level now happens as normal, but instead of finding the princesses at the end, they bump into Envy, Luigi, and Bowser. Luigi is in his Mr. L costume, Envy finishing the costume up by putting on his mask for him as they arrive. Bowser motions Luigi and Envy out to attack, and you fight the pair of them, Envy still in Peach’s form.

After Luigi and Envy are turned into trophies, Bowser takes out a trophy gun and starts firing at Meta Knight’s party in mass. They are forced to flee the area, and Bowser goes over to revive Luigi and Envy’s trophies. They’re still in the general room where Peach and Zelda were normally fought. . .And Luigi finally realizes he hasn’t seen anything of Zelda since the Mario incident, getting a thought bubble of her. He points up to the thought bubble and speaks gibberish to Bowser for him to hastily pull Envy over, who is still in Peach’s form. Luigi shakes his head and points up to the thought bubble of Zelda again for Bowser to slash the thought bubble into pieces. Luigi does his down taunt, but Envy goes over and kisses him on the nose again, which causes Luigi to stop thinking of the other woman. Bowser and Envy go to leave, Bowser motioning Luigi to come along, but he holds up his finger as if to say “Just a sec”. . .Bowser shrugs and leaves with Envy, Luigi waiting for them to leave. . .He goes over to the controls of the room and opens up the door out of curiosity to find Zelda and the real Peach. Was he just faking his allegiance to Bowser all along? Who knows. He motions for the princesses to come along with him, and you play the normal level you do with the princess pair where you escape the Halberd, only now with Luigi as an additional character.

The remainder of the Halberd plays out as normal, only now with Luigi added in the Duon boss fight. In the cutscene when Duon is revealed though, Bowser and Envy (Envy back in his normal form) are seen watching in disgust due to Luigi (Yes, he’s playable for that boss) being alongside the others. Upon being defeated, both are shocked, and they hastily hop off in Bowser’s clown car.

After this, we get another entirely new section, where we see Bowser and Envy riding in the Koopa Klown Kar. The Klown Kar goes to land down on the ground in a secluded area a good ways off from where the rest of the action is taking place. Bowser and Envy gets out of the transportation vehicle, then Bowser snaps his fingers to cause a portion of the ground to open up to reveal a mechanical base inside. Bowser and Envy hop inside, then it starts closing back behind them as if nothing happened. Here we see SONIC look at the base closing back up, and he hastily runs inside just before it closes with his insane speed. Bowser and Envy turn around and see Sonic for Bowser to let out a loud roar, summoning subspace creatures to attack Sonic. Bowser and Envy flee, not having time to waste, then you play a level in this underground base as Sonic.

After the level, we see GREED being held in a cell. He looks bored as all hell, but suddenly Bowser and Envy come up to his cell. Greed grits his teeth, pissed at seeing the ones holding him here, but Envy gives a dismissive motion and chuckles. Envy unlocks the cell and enters it, extending out a hand to help Greed up. Greed smacks Envy's hand away, but Bowser comes in behind Envy and takes out a bag of cash. Greed's eyes turn into dollar signs as he happily takes the bag of cash. Envy extends his hand out to Greed to shake. . .But Greed realizes the fatal error of Bowser and Envy. He hastily runs out of the cell while Bowser and Envy are still in it, then slams the cell shut before they can leave, locking them in. Bowser glares at Envy angrily for trusting Greed for him to just shrug. Greed runs off hastily, chuckling. Some subspace enemies come to the prison door to let out Bowser and Envy, Bowser motionining off to where Greed went and letting out an angry roar. You play another level in this base as Greed.

Greed keeps heading for the exit, ignoring all the enemies that attack him along the way, them not phasing him in the slightest. He's the ultimate shield, remember? Greed sees Sonic getting beat up by a considerable amount of Subspace foes. Greed lets out a reluctant sigh, but then goes over to the Hedgehog's aid, coming down on the enemies with a powerful drop kick. Greed extends out his hand to Sonic and shakes it, then they proceed along together through the base. The two of them see a way out of the base, but it's closing, and fast. Sonic makes it out easily, but it becomes clear that Greed isn't going to make it. Sonic sees this and reluctantly goes back into the base to help Greed, who just got attacked by another swarm of enemies. You play a battle level as Sonic and Greed. After defeating the enemies, a brief cutscene shows Greed smashing down the door, then the pair leave.

Before the level where DK, Diddy, Captain Falcon, and Olimar invade the subspace bomb factory, we’re shown a cutscene of, Lust, Sloth, Wolf, Gluttony, and Wrath (The later two whom are carrying the trophies of Ed, Al, and Toon Link) entering it, meeting up with the Ancient Minister. The Ancient Minister salutes his superiors for Sloth to give a dismissive motion to the Ancient Minister, allowing him to be at ease. In the background, Wolf can be seen turning around and leaving, going back into his Wolfen, being rather annoyed. He doesn’t particularly like being reduced to a delivery boy. . .Lust points to the Elric brothers for the Ancient Minister to nod and motion for them to come along with him. He opens up a secret room where a massive transmutation circle is ready along with tons of Robs moving about mess chemicals. Mustang is also seen here, along with several of his men, right in the middle of the Transmutation circle. Lust pats the Ancient Minister on the head for him to look down at the ground regretfully. . .Lust does a dismissive motion to Gluttony for him to let down the three trophies with a breath of relief. Lust and Sloth revive the trophies of the two Elric Brothers, and Lust points towards the Transmutation Circle with a thought bubble of the Philosopher’s Stone. . .She wants him to transmute Mustang and his men into it. Ed goes to lash out at her, but Sloth wraps her watery arms around him to hold him back. Lust chuckles and points to Al, who is being held by Gluttony. Lust snaps her fingers for Gluttony to take a bite out of Al, him letting out a cry of pain. Ed frantically tries to get out from Sloth’s grasp, but to no avail. Wrath comes up in front of Ed while he’s being held, sticking his tounge out at him and taunting him, infuriating him all the more. Lust points at the transmutation circle once again for Ed to reluctantly gets on his knees and prepare to do the transmutation. . .The Ancient Minister, unable to bare watching this slaughter, hastily leaves the room, going back out to the main room, closing off the doors inside. The DK/Diddy/Captain Falcon/Olimar level now plays as normal.


In the cutscene where the Ancient Minister normally reveals his identity as ROB, everything for the most part goes the same way, but Ganondorf simply forces the Robs to blow themselves up rather then set off subspace bombs. After the Ancient Minister reveals his identity and joins forces with the characters, rather then fleeing out, he hastily opens up the door where Ed and Al are being held and motions the characters down to attack. There are all the more Subspace forces inside of here, but they easily manage to free Mustang, Ed, and Al, and they also revive Toon Link’s trophy. Lust, Sloth, and Gluttony hastily go to flee the factory, heading back out into the main room. Sloth takes out a remote control and presses it for the Robs to start taking out the subspace bombs, and they escape, a door closing behind them and blocking the characters from chasing them. You play the normal escape level here, only now with the additional characters of Toon Link, Ed, Al, and Mustang. You also go on to use these characters in the fight against Meta Ridley.

Wolf’s been busy getting his *** kicked the entire SSE and being made fun of. . .He’s had enough taking orders. He’s doing things his way. Before the Great Invasion cutscene, we see Wolf flying off towards the Halberd where everyone is preparing for battle, Fox getting his arwing. As Fox and Falco get up in their arwings to fly alongside the Halberd, Wolf’s Wolfen crashes into Fox’s arwing and causes them to both crash. Both pilots hastily eject from their Arwings before they hit the ground and clash against each other in mid-air, and a standard Brawl occurs. . .And you play as Wolf. Yeah, you’re actually getting to play the villain in this SSE for the first time, outside of Envy copying people. After defeating Fox, Wolf gloats over Fox for a brief moment, having had his 15 minutes of fame, before Falco and a hoard of other characters arrive. Wolf reluctantly gets into his Wolfen and flies off into the distance as the other characters get up and revive Fox, who angrily shakes his fist at Wolf as he flees. The great invasion cutscene now occurs as normal, although the cutscene before it is edited slightly to show Greed and Sonic joining the rest of the cast at the Halberd, having fled the prison base.


In the Great Invasion, the Ganon Cannon is quite crowded with villains. Ganondorf, Bowser, Wolf, Lust, Gluttony, Sloth, Wrath, and Envy are all seen on board, standing together. Aside from that, no changes to the scene take place. However; in the cutscene where Bowser normally betrays Ganondorf, all the Homunculi take out trophy guns rather then Ganondorf, aiming them at the Nintendo villains. The Nintendo villains perform their various sidesteps, then you play as them against the Homunculi in a 3 on 5 battle. Only one foe from each side it out at a time, but they have one more man then you, keeping this far from easy, and besides, the highest ranking of your characters is in D tier!

After defeating the Homunculi, the Nintendo villains all do victorious taunts. Bowser and Wolf continue to walk forward, but then Ganondorf takes out a trophy gun and fires it at Bowser as normal. Unlike the normal cutscene though, Bowser dodges the shot and gets into a battle with Ganondorf. Wolf takes Ganondorf’s trophy gun and aims at the two fighting, wanting all the credit from Master Hand for himself, but Ganondorf smacks the gun out of Wolf’s grip and it falls off into the abyss. You now choose one character out of Bowser, Ganondorf, and Wolf for a three way Brawl. The losers get turned into trophies at the hands of the winner, and the winner goes to go before Master Hand then get defeated by Tabuu.


In the cutscene where Dedede normally squares off against Bowser, he’ll find the winner of the Nintendo villain brawl and fight them instead of it always being Bowser. Later on, the winner will be seen whaling on the trophies of the two losers like how Bowser whaled on Ganondorf.

Everything continues as normal, but you also have to hunt down the trophies of Sonic, Greed, Wolf, Jigglypuff, Toon Link, Ed, Al, and Mustang. If you find Ed and Al’s trophies, a cutscene will play in which Ed and Al stand before the four trophies of the five Homunculi. Ed goes past them without a second thought, but Al stares down at Sloth’s trophy again, unable to shake off the thought that she’s so similar to their mother. Alphonse slowly reaches down to revive her once more, Ed running up to stop him, but ultimately being too late. Sloth gets revived, then hastily turns her arms into water and extends them to revive Wrath, Envy, Gluttony, and Lust, touching their trophy bases. All five Homunculi quickly run up the stairs to the Great Maze, ignoring the Elric Brothers. Ed facepalms at Al while he just shrugs, then it continues as normal, them being added to the Great Maze party and finally being unlocked.


A few small sections are added to the Great Maze. The forest where Pokemon Trainer was introduced is added, containing the shadow versions of Gluttony, Lust and Jigglypuff, and PT and Pikachu’s shadow versions are also moved here. Wolf is moved back to Pikachu’s old spot due to him not showing up at any place in particular. Another new section is an underwater one with parts of Ed’s ship and Toon Link’s ship where the shadow versions of Ed, Al, Toon Link, Wrath, and Sloth are found. Yet another additional section is made for the prison base introduced towards the end of the SSE where the shadow versions of Greed and Sonic are found. A final additional section is Mustang’s base, contaning the shadow versions of only Mustang, Envy, and Pride (The boss).
 

Hyper_Ridley

Smash Champion
Joined
Dec 21, 2007
Messages
2,297
Location
Hippo Island
Gluttony was a fun read Warlord!

The hunger mechanic provided for some humerous attacks, like the Up and Down smashes. The Specials all made me lol for various reasons. I also see that the FMA move sets have a shared set of extras.
 

Tanookie

Smash Journeyman
Joined
Nov 17, 2008
Messages
436
Location
*sends Sundance a leather harness on Dragon Apprec
Well, ****.

That is one enormous moveset...I'm sure if Gluttony himself ate it, he'd laugh and grow fat too... *Is bad at making jokes*

Seriously, though. Gah. That's a moveset right there. Yeesh...

Excuse me while I drain the blood from my eyes.

(No, but seriously, it was amazing.)
 
D

Deleted member

Guest
Anyway, I've decided on a Mario RPG series character for my next moveset. Who (or rather, what) I'm making the moveset for is a bit out there, but I promise you it'll be great.
That settles it - I'll consider World of Goo once I start buying Wii games again... but who knows when that will be? :laugh:

Your next submission should be interesting if you see it as 'out there', with how OUT THERE the Goo moveset is. :psycho:

Nah 2 hours. Zeta Gundam Mobile suits will be filler and better done later..maybe. Nu Gundam and Sazabi will be my real entries.

So really Hyaku Shiki was a pile of poop. Not my best effort. Nu will be MUCH better. So don't kill me :<
I'm sorry if I was a little harsh, your movesets just need some work to improve them. Mainly, you need to write more about each move and also preview it before you post it to test out new layouts. As it stands, both your sets are pretty messy.

Don't give up! Remember that we're always in the chatroom [or rather, in the afternoon for Americans] if you need assistance.

Gluttony: Indeed hella fun and really gross - his winning poses are hilarious. The 'hunger' mechanic really fits well with the character and is your own work, which I find impressive. Your pursuit of balance was successful in that regard! Thanks for no spoilers by the way, I just couldn't resist given how cool this character is.

MT's story mode and it has the Umbrella logo embedded! Colour me interested.

Will read later.
 

Akiak

Smash Ace
Joined
Jul 28, 2007
Messages
820
Location
In my secret laboratory.
@Gluttony

Awesome! The hunger mechanic is genius and the Neutral B and Forwards B are too much fun. The other moves, while not as fun as the specials, are also really fun to read and make for a very interesting character. This deserves a super vote, if 6 movesets don't surpass it in the future.
 

Red Arremer

Smash Legend
Joined
Nov 27, 2005
Messages
11,437
Location
Vienna
Wow... just wow... I'll be really really honest, Chris... I never thought you could improve from MYM4. But this right here... is amazing. Definitely the best moveset so far. Easily one of the best movesets this contest ever could spawn. And it definitely overshadows MW's wall of text.

The sheer beauty of this set is almost blinding... how you incorporated the RTS-parts of WarCraft... it's just wow... I can't put into words how much I am astonished.

This deserves a super vote, if 6 movesets don't surpass it in the future.
GOD I HATE IF PEOPLE SAY THAT. Stop doing it. PERIOD. It's annoying. ESPECIALLY THIS EARLY IN THE CONTEST.
 

dancingfrogman

Smash Ace
Joined
Jan 3, 2008
Messages
862
Location
United Kingdom, Birmingham
Switch FC
3133 8842 3910
That B-air smells!!!

but for seriousness, while I knew some moves and the mechanic before hand already due to previewing it in the chat. While I know nothing about FMA, knowing warlord, it fits to the character well, and the mechanic is well implemented! Kudos!

I have skimmed through that set of yours Chris (sorry), but it looks your best yet, a majour improvement from MYM4!

EDIT: So it has a similar style to Battalion Army with the fact of having units follow you and you can produce them etc. I can gather that you'll be campy at the start of battles, and more offensive later on. This reminds me of the Chao set I did in MYM3 (with the growing stronger mechanic with time). This is my favourite of your sets Liony, and I'm looking forward to your other works now!

Why do I have to make so complicated mechanics, Chao and Undead Hero had simple mechanics that fit well to character greatly! Hopefully Chaos 0 has a mechanic that people would understand, hopefully. Keep in mind everyone, simplicty is the BEST MECHANIC!

BAH, too many good sets, I wonder if anyone will remember Battalion Army or Disaster at the voting times. Chaos 0 hopefully will get recognised if it's posted in what I call the "Moveset Drought". (Will haz moves from the 5 beginning Chaos forms in Sonic Adventure, and some moves from Sonic Battle)

PS: I'm thinking of giving Chaos 0 some crawl moves (in the puddle), so he'll have 2 mechanics X.X

I do too much!

I agree with Spade: PEOPLE, MYM5 HAS ONLY BEEN UP FOR 3 DAYS, MOST LIKELY, BETTER SETS WILL BE POSTED!
 

The Trophy Master

Smash Journeyman
Joined
Dec 27, 2008
Messages
272
Location
*Sends Sundance an orange elephant on Chirstmas, a
GLuttony is awesome Warlord, your best work in your 3 posted yet, I think. Arthas is Chris' best, and maybe the best of the contest so far.

@Frogman : Everybody shall remember, Batallion Army, the 10000 words long wall of text.

Awesome presentation on your SM, MT!

Why didn't anybody comment on mah Story Mode yet? ( On the thread please :) , to avoid spam )

EDIT : For my SM, look in my sig, my link-up space, the link is there.
 
Status
Not open for further replies.
Top Bottom