BridgesWithTurtles
Smash Champion
One Day set coming in, beware.

Wraps things up!

The Bug-type Pokémon #617, Accelgor, is the evolved form of Shelmet. Once a meak and wholly defensive mollusk-like creature, Shelmet loses its heavy shell upon evolution, spurred by being traded for a Karrablast. While Karrablast steals poor Shelmet's carapace to become the armored and knightly Escavalier, Shelmet benefits from this theft by trading its sedentary lifestyle for blazing, ninja-like speed as Accelgor. Few Pokémon manage to reach the mach speeds that this ironically swift snail attains, and it uses this to its advantage to overwhelm its opponents with overwhelmingly quick ninja-like movements. Since it has lost its shell, it wraps itself in numerous layers of a thin membrane to keep itself hydrated. Accelgor brings its gastropodular ninjutsu to the Smash Bros. arena, because nothing says 'hype' in MYM like yet another ninja moveset.
While Accelgor can have one of three different abilities, in its Smash Bros. appearance, the Sticky Hold ability is most directly featured. Thanks to Sticky Hold, Accelgor cannot be forced to drop an item. Unlike other characters, who are prone to drop held items from time to time while taking knockback, Accelgor will never lose hold of any item in its grip. As to be expected, it moves with quick, dynamic, ninja-like motions. Due to its lack of legs, it forcefully launches itself from a standing position to “fly” across the ground for its dash animation. Unlike fellow ninja Pokémon Greninja, Accelgor doesn't vanish while dodging, but it has a very fluid and swift dodge roll nonetheless. Like other ninja-like fighters, it is capable of performing the wall jump and wall cling techniques.

Size – 4
Weight – 2
Ground Speed – 9
Traction – 10
Air Speed - 9
Fall Speed - 8
Jump – 8
At 2'7'' in canon, Accelgor is rather diminutive for a fully-evolved Pokémon. Nonetheless, it is slightly scaled up for Smash, as with most Pokémon combatants, and is close to Villager in model size. It has most of the benefits bestowed upon characters of its type: small frame, great speed, excellent traction, and a decent fall speed. While not quite as quick to reach back down as Greninja, it sits comfortably near Mega Man in regard to gravity. Combined with an excellent jump height (a full first and second jump easily getting it to the highest platforms in Skyloft) and equally quick ground and air speeds, Accelgor can move to and fro with ease, able to be exactly wherever it needs to be as the player wills. In fact, stacked up against the canon roster, Accelgor is the second fastest character, ahead of Captain Falcon but slightly behind Sonic.
Accelgor's major disadvantage is its characteristic light weight, sharing a tier with Mr. Game & Watch and ultimately being very poor at surviving powerful blows. Coupled with this problem is Accelgor's smaller than average shield, making it a hassle at times to survive into the higher percentages.

Neutral Special – Spikes
Spikes is a move that Accelgor can learn through breeding, and due to the great utility of the move, this Pokémon is quite often seen using it. In the Pokémon series, Spikes functions as a move that lays – you guessed it – barbed spikes (which resemble caltrops) on the ground, providing a trap that injures opponents that fall onto them. The move works much the same way in Smash Bros. With a press of the button, Accelgor pulls a single jack-like spike, about the size of a Freezie, out from hammerspace, and tosses it forward with both arms straight. The animation for this action is about as long as Pac-Man's fruit throw, and like Pac-Man's fruit, the spike functions as an item, and it lands about 1/3 of Battlefield's length away from Accelgor. The move can be charged exactly in the same way as Sheik's needles, allowing Accelgor to toss more spikes at once, up to 5 total. When tossing multiple spikes, Accelgor will throw them in a cluster, so they will all fly in roughly the same direction, but land at different locations in front of Accelgor, though their max range is still 1/3 of Battlefield's length. Spikes deal 8% damage when tossed at an opponent, and 4% damage every time they are touched once resting upon the ground. In any case, contact with a spike is quite painful for Accelgor's opponents, and notably, they suffer higher than average flinch frames.
Accelgor can also be hurt by its own spikes, so you'll want to be careful when attempting to pick them up. As they are items, individual spikes can be picked up and thrown again, and this is a tactic Accelgor can make excellent use of due to their high hitstun. Enemies may also grab spikes, but are easily prone to dropping them when attacked, risking further injuring contact with the dangerous traps. Luckily for Accelgor, Sticky Hold ensures that it will never drop one of its spikes, keeping it safe and secure to pick them up and carry them without risk of suffering unnecessary damage. There can be up to 5 spikes per Accelgor on the map, and unlike other items, retossing a spike doesn't dispose of it, but simply relocates it. Spikes will disappear after 20 seconds.
Side Special – Membrane Chain
Expertly uncoiling some of its protective membrane from its arm, Accelgor performs a very quick-to-start attack in which it flicks its arms and casts out a long strand of membrane. The rope-like material travels straight for half of Battlefield's length, lingering at its maximum length for a few frames before immediately snapping back to Accelgor. The sticky membrane attaches itself to any opponent or item it contacts, functioning as a command grab, and as soon as it does so, Accelgor is left vulnerable to other opponents until it makes another input. Yes, Accelgor uses its membrane as a chain dart. “Get over here!”, indeed.
In a less gory take on Scorpion's infamous spear technique, if the control stick is flicked inward, Accelgor will give a forceful tug and pull its target toward itself, briefly flinching opponents but dealing no damage. This leaves both combatants in immediate proximity of one another, with Accelgor at a slight frame advantage. If the control stick is flicked outward, Accelgor reels itself in, rocketing itself into the target and sending it flying. Against opponents, this causes a heavy impact that deals 13% damage and moderate knockback killing outwards at 160%. For extra damage, activating this move while holding a spike will cause it to attach to the end of the whip, impaling enemies when it makes contact and dealing 9% damage, though this removes the attack's command grab properties. Quick to start and quick to end, this attack can be disorienting for opponents and can set Accelgor up for any number of combo options, or at least net the Bug-type an item from afar. A useful technique for closing distances or punishing rolls, the Membrane Chain is a move best used smartly, as despite activating quickly, failing to connect with this move leaves Accelgor quite vulnerable.
Down Special – Bug Buzz
Accelgor's go-to power attack in the Pokémon metagame, Bug Buzz is an interesting special move. Simply pressing the input will cause Accelgor to stir, but fail to deliver any sort of attack. Holding the input causes the attack to fully go through, and the move can be held indefinitely thereafter. Accelgor emits visible, green soundwaves in a circular pattern around its body in several thin rings, creating a roughly Bowser-sized field around itself. While Accelgor's entire body is covered, this is actually quite short-ranged. Enemies near Accelgor take 8% damage and are pushed outward from the point of contact, making Bug Buzz a good “get off me” option, despite its slow startup. While the input can be held indefinitely, the soundwaves begin to shrink until 5 seconds of usage brings them to their minimum range, just enough to fit around Accelgor's frame, leaving the sibilating snail vulnerable.
Bug Buzz's key utility comes from its unique properties in completely ignoring shields. The move makes no contact to shields. It does not damage shields at all, and simply ignores them as if they are not present, hitting shielding opponents for full damage and knockback. Punishing rolls with ease, Bug Buzz helps ease some of the pressure off of Accelgor when locked in close-quarters or when dealing with opponents who enjoy shielding a lot. Of course, they might be conditioned to do so in order to block all of those spikes laying around.
Up Special – Double Team
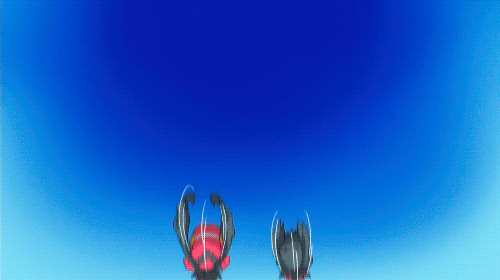
Accelgor creates two illusory copies of itself as all three Accelgor instantly boost in their own direction. One Accelgor will travel straight upward, the other at a 45° incline forward, and the last straight forward. Travelling at the speed of Wario's Corkscrew for the distance of Falco's Fire Bird, all three Accelgor follow identical paths save for their trajectories. Accelgor doesn't get the most distance from this recovery, however. At the end of the move, Accelgor will not be placed into special fall, but it will have no jumps remaining.
But which Accelgor is the real one? As with many recoveries, a second input can be made to decide which direction you will travel in. The real Accelgor will always be the one travelling in the direction the player chooses to go, while the other two will be illusions. These illusions can be attacked and will disappear when hit, but they deal no damage to opponents, simply passing through them. All three Accelgor, however, have an accompanying windbox that slightly pushes opponents. You'll want to mix up your direction every now and then to keep your opponents guessing, as the move is fast enough to usually only allow time for one Accelgor to be “gimped”.

Forward Smash – U-turn
Crouching and tensing its body while charging this smash, Accelgor bolts forward head-first, launching itself like a rocket for a distance of one Battlefield platform and bashing opponents it collides with using its helmet-like cranium. If Accelgor contacts an opponent, item, or surface midflight, it rebounds and returns to its previous position. This attack will even rebound if met with a shield, keeping Accelgor safe from being shield punished, though it can be interrupted mid-attack (it has light armor). This Fsmash deals 12-18% damage to opponents and decent knockback, killing vertically around 170% with some charge to it. Somewhat weak for a smash attack, it exemplifies Accelgor's preference for speed and mobility over raw power.
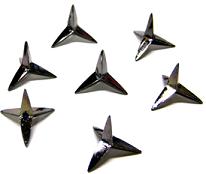
Up Smash – Swift Scatter
 Looking upward, Accelgor coolly but forcefully swipes one arm in an arc overhead, releasing a scattered ray of gleaming stars of various sizes seemingly composed of pure light. The stars, sharp as razors, extend in an arc above Accelgor, spreading out as they reach ¾ of Accelgor's own height. A disjointed, multihit attack, it has the potential to deal 15-23% if all hits connect. Due to its range and speed, it's a great antiair, and can hit opponents on low platforms above Accelgor as well. The move has some cooldown, however, and doesn't hit to Accelgor's sides, so a whiff can spell trouble.
Unlike most Down Smashes, the attack hits inward rather than to either side of Accelgor, so quick punishes on rollers can be a bit trickier than normal. However, luring an opponent to attack, only to disappear and hit back has its own rewards, including an instant aerial set-up which can potentially be followed up on, and shielding opponents will have trouble blocking a hit from two Accelgor at once. This move is not a counter, however, so while it starts quickly, it can be interrupted. Attacking either of the “clone” Accelgor will cause it to dissipate instantly, but has no effect beyond that.

Jab – Acid Spray
Accelgor's odd-looking, puckered lips allow it to eject poison from its mouth, and that's exactly how they're put to use in its standard jab attack. A three-step jab, this attack consists of a quick palm strike with one hand, followed by an identical hit with the other hand, and finally, a spray of acid from Accelgor's mouth. If the jab is inputted with singular presses, the final hit will be an insulting spit of acid toward the opponent's face, which has high hitstun but no real knockback. The strikes in this three-part series of attacks deal 2%, 2%, and 4% damage, respectively, making for a modestly powerful jab, albeit one with no real knockback potential. If the input it held, Accelgor's final hit will become a rapid jab, whereby it continually spits acid from its mouth, dealing moderate hitstun accompanied by 1% damage per hit. Notably, this acid is corrosive enough to break down barriers, and withers shields away like a knife through butter. Shielding opponents beware! It's much easier to punish Accelgor by avoiding his jab and retaliating than by shielding.
Get Up Attack – Struggle Bug
Red with anger, Accelgor quickly rises to its standing position, striking on either side of itself with its arms, and dealing 5% damage with some knockback. Past 100%, the flustered bug performs a rapid handstand kicking maneuver that hits on either side of itself for 7% and higher knockback.
Ledge Attack – Deceptive Blow
Accelgor rolls onto the stage, quickly turning around and sweeping low with its tail/foot, popping the opponent inches into the air, or tripping them occasionally (4%). Past 100%, the Pokémon rolls onto the stage again, this time hitting forcefully with an extended palm, striking the opponent in the back (8%). Unlike other ledge attacks, Accelgor's work best when the foe is behind it rather than in front of it, connecting correctly against opponents who get too close to the ledge, rather than those who respect Accelgor's space. Place a spike a short distance from the ledge, perhaps, to see how your opponent behaves.
Dash Attack – Flying Foot
 As Accelgor is technically airborne while dashing, it performs a “dash” attack by flipping itself around so that its singular, gastropod “foot” is facing forward while boosting a short distance. Holding itself this way causes it to deliver a flying kick to anyone it runs into, dealing mild diagonal knockback and 6% damage. There's a bit of endlag after this move ends, as Accelgor lands on its side, halting its momentum. The move comes out quickly but it still rather telegraphed, so it's not the best move to throw around often, and is best reserved for hard reads or when you know it will hit.
Down Tilt – Snail Slide
Leaning bent backward, low to the ground almost to the point of laying on its back, Accelgor slides forward a short distance, generally comparable to Mega Man's down tilt. Sliding into an opponent pops them weakly into the air and behind Accelgor, allowing the ninja to make a risky but sneaky escape from close combat. This weaker attack deals just 5% damage, but can be useful as a mobility option, especially in escape situations, as previously mentioned.
Forward Tilt – Swift Shot
Accelgor expertly swipes its arm backhanded from its chest as if throwing kunai, instead sending out a collection of small, weak stars of light a short distance in front of itself. Extending ¾ of a Battlefield platform in front of Accelgor, this mid-range projectile attack is relatively fast to come out, so it can be a decent surprise attack from time to time. Knockback is nearly nonexistant, but it can weakly whittle down shields and harass opponents, flinching them and buying Accelgor enough time to either retreat or move in; the maximum damage output is 10%.
Up Tilt – Dual Whip
Accelgor looked upward and raises both arms to whip with extended membranous whips from each limb. A two-hit attack with four hitboxes, Accelgor whips upward for the first strike (4%), then crosses its arms to whip them into a knot for a second hit (5%). The first hit is a weak flincher that usually links well into the second, which launches upward, and is a weak kill option for finishing off stubborn survivors around 200%. The whips themselves give the attack quite some range for a normal tilt attack, reaching just below the top Battlefield platform.

Neutral Aerial – Snail Spiral
Accelgor presses its hands together and closes its eyes in concentration as it horizontally spins twice, in a manner similar to Marth's Nair. The scarf around Accelgor's neck extends slightly, whipping opponents who get too close. With horizontal range slightly outclassing Marth's Nair, it's Accelgor's go-to “get off me” option in the air, smacking opponents for mild knockback comparable to Villager's Nair and 8% damage. The second spin has a different hitbox at the end of the animation that sourspots for negligible knockback and 5% damage, so a little precision is required to make the most of the move. Landing lag is mild, but not ignorable.
Up Aerial – Ninja Flip
Displaying expert acrobatic skill, Accelgor performs an aerial backflip, hitting with its foot and dealing 7% with low diagonal knockback. The animation is your archetypical flip kick up aerial, similar to Mario or Pac-Man, but with a bit of tokusatsu flair as Accelgor raises its arms over its head, striking a pose. The entire animation is incredibly quick, easily able to fit two into a shorthop. The attack also has low landing lag, making it quite a spammable technique. Its low knockback is offset by its ability to chain together into itself multiple times, though some accuracy is required due to its short range.
Forward Aerial – Swift Slice
Accelgor quickly chops downward with one arm. This crafty ninja strike comes in two flavors to mix things up against your opponents. A light input will cause Accelgor to send out a short-range disjointed series of small, flinching hitboxes in the form of tiny Swift stars. The range is slightly longer than that of Mega Man's Fair, and the move is a great harassment option out of a shorthop, especially while retreating. When all hits connect, you can expect to deal 11% damage. A “smashed” input, on the other hand, replaces the stream of stardust with one single, large Swift star, which Accelgor grips and slices with like a blade. This deals a more solid, meaty hit of an impressive 14%, as well as knockback reminiscent of Sheik's Fair, but with a more downward trajectory. This version of the move has paltry range, unfortunately, and comes out and ends so quickly that precise timing is needed to avoid whiffing and getting punished. Both versions of this move have moderate landing lag, but Accelgor's fall and jump speed still allow it to throw these out alongside shorthops rather quickly.
Downward Aerial – Thousand Strikes
Accelgor rapidly jabs below itself, alternating arms. These lightning fast punches trap opponents, in the same vein of Dairs as Yoshi and Peach. Delivering blows so fast that only motion blurs can be seen at normal game speed, Accelgor gives its opponent up to 16% damage. If the final hit lands, the opponent is lightly meteor smashed (if aerial) or put into prone (if standing), allowing for some interesting scenarios to unfold. If Accelgor fails to deal the finishing blow, the opponent suffers only mild flinching and is put at a frame advantage, leaving Accelgor vulnerable to counterattack. Out of all of Accelgor's aerials, this attack has the highest landing lag, but it's not exactly bad in that regard.
Backward Aerial – Spiral Kick
Accelgor positions itself so that it's horizontal in the air while spinning, delivering a multihit spin kick to foes behind itself. Similar in animation to Greninja's or Sheik's Up Aerials, only in a sideways position, the attack links together many small hits before releasing the opponent outward. Enemies take a maximum of 10% from this attack. The total knockback is rather weak, so it's not a great off-stage finisher, but if positioned correctly, multiple instances of this move can gimp opponents. Quite fast to execute, Accelgor can throw this move out while approaching, jumping, retreating, or just about whenever it wants, but beware the landing lag on this attack, which is the second highest of Accelgor's aerials.

Grab
In a short-ranged grab, Accelgor grabs with a lightning-fast, motion-blurred extension of one arm, like a warrior in training attempting to catch a fly in midflight. Staring coldly at the opponent with that odd expression it has, it delivers a painful upward jab to the abdomen with its other arm. A mid-speed grab attack, it deals 2% per hit, so it's usually a better option to just toss the opponent before they break out of your grip.
...Or it would be, except for Sticky Hold. Accelgor's iron-tight grip is not limited to simply the items that it grabs; it applies to its opponents as well. Players grabbed by Accelgor will find it 1.5x harder than normal to break out of its grasp, which allows the Pokémon to fit in an extra grab attack or two to rack up some more damage before disposing of its captive.
Down Throw – Swift Execution
Accelgor forcefully tosses the opponent to the ground, hops over the opponent's prone body, and tosses a rapid volley of small Swift stars at them, each hit dealing flinch frames and 1% damage, for a total of 10% overall. Accelgor lands on the other side of the opponent. The opponent is left in prone after this throw ends, forcing them to make a decision in how they will respond.
Back Throw – Water Shuriken
Showing up Greninja at its own game, Accelgor makes use of the Water Shuriken technique that it can also learn. With a backward swing of the arm, Accelgor tosses the opponent 75° into the air behind itself (5% damage). Without even looking back, it tosses a single, small Water Shuriken at the opponent (4% damage), and this can actually be aimed slightly within the range of about 15 degrees, allowing a smart reader to lay the pain on an opponent who tries to DI out of hitstun at low percents. If the shuriken connects, which it usually will unless another opponent attacks the target or Accelgor is interrupted, the target is actually lightly bounced back toward Accelgor, usually ending up in the air a few feet above the Pokémon. Hint: Try to get a follow-up off of this, obviously.
Forward Throw – Pressure Point
Accelgor rapidly jabs at its opponent at different points on their body, attacking their nervous system to briefly stun them. Opponents are left paralyzed in a manner identical to Zero Suit's stun gun or Pac-Man's bell, and will be stunned longer the more damage they've accumulated. While paralyzed, opponents cannot be regrabbed. This “throw” deals 8% damage with no knockback to speak of.
Up Throw – Whiplash
Using motion blur to near-instantly wrap the opponent in a coat of its membrane, Accelgor tosses the opponent upward while they're tied to a leash. Accelgor always tosses the opponent the same distance of 1.5 Batlefield platforms, but unlike other throws, the player can input a secondary direction on the joystick to have Accelgor throw them at any angle between 45° and 135°. At the extent of the throw, Accelgor yanks back on the membranous leash, causing the foe to slam back into the ground beside it, instantly tearing their own membrane coat apart and bouncing them off of the ground, possibly for a follow-up. Opponents can be tossed through a jump-through platform, but when yanked back, will be slammed into the platform instead of returning to Accelgor, allowing the player to get a little tricky with how they use this move. The opponent is dealt 10% damage. Overall, the entire process for this attack is about 80 frames.

Double Team Split Strike

Accelgor employs two different Pokémon techniques for its Final Smash. To activate the attack, the opponent(s) must be within a short distance of Accelgor, who will cast out a glowing pulse of light to ensnare the foe(s). Once the opponent is locked into place, Accelgor glows, using the move Guard Split to average its own defenses with that of its victim(s). Since Accelgor's defenses are so low, the enemy becomes lightweight. Then, the camera zooms in on Accelgor, whose eye glints, and then immediately splits into 6 of itself using Double Team. The illusory copies then begin dashing at the trapped enemies one at a time, slicing through them with ninja-like strikes that deal 10% damage each, for 50% total. The original Accelgor delivers the final blow, dealing 20% damage, with a concentrated strike from a single arm, sending the opponent(s) flying off-stage, and likely to their doom.

Now that we've gone over each individual move, we can discuss some of the more advanced applications of those moves.
One of Accelgor's moveset cornerstones are its spikes, which, like any item, can be played around with in a number of ways. Instead of just picking them up and repeatedly throwing them at your opponent, try Z-dropping them. Most characters with item-based moves, like Link, Peach, and Mega Man, make usage of Z-dropping to great effect. Z-dropping a spike is not only a very fast and unexpected move out of a shorthop, footstool, or shield jump, but the great hit stun it provides opens up a gateway for any number of follow-ups, leading into combos or even a repeating cycle of footstools and Z-drops.
Accelgor's Membrane Chain is a great utility move for snaring opponents from afar, but did you know that it can be platform canceled? Short-hop into or drop through a platform while this move comes out to cancel it early. This allows Accelgor to cast its thread quickly without suffering from the consequence of high cooldown should it miss. Accelgor can act out of a platform-canceled Membrane Chain almost instantly, making the move far less commital. However, the full length of the membrane won't come out when the move is canceled, so keep that in mind.
Accelgor can perform a Spike-Canceled Up Throw using careful positioning. Aiming an opponent into a spike resting on a platform is a great way to build some damage, and if the platform is nearby, you can even follow-up on the hitstun, because an opponent tossed into a spike is instantly freed from the membrane cloak. This breaks the thread as well, canceling Accelgor's Uthrow animation entirely. This move will be canceled whether the opponent hits a spike on their way outward or inward, allowing this somewhat lengthy throw to be sped up considerably. While you won't get the 10% damage from the throw and will have to settle for 5% from a spike, the high flinch effect provided by spikes can allow you to follow up for potentially even more damaging blows.
One of Accelgor's best kill moves, despite being a weak Smash overall, is its Fsmash, U-turn, which, while relatively safe, also has the dishonor of being one of its most telegraphed moves. Like Diddy Kong's infamous glide tossed banana into Fsmash finish, however, Accelgor can mitigate this somewhat. Glide-tossing a spike has enough reliable stun to almost guarantee that your Fsmash will go off successfully, so keep that in mind if you find yourself fruitlessly fishing for kills.
Accelgor is pretty good at keeping strings going. Some makeshift combos include:


Where do we begin to break down Accelgor? As a ninja, it's a master of trickery and deception. The key objective is to keep pressure on the opponent and ensure that they keep second-guessing themselves, always forcing them to worry about stepping out of line, making the wrong move, or attacking at the wrong time. Accelgor relies on blazing speed and perfect maneuverability to completely overwhelm its opponents. A well-honed Accelgor player should be able to make full use of speed and control to be anywhere on-screen that they need to be at the drop of a hat. Accelgor has no shortage of ways to approach, chase, or retreat, with an excellent short hop aerial game, evasive maneuvers such as Down Tilt and even Up Special to fool it its foes into hopelessly chasing it around the map. Even DI'ing opponents have Accelgor's sheer speed to fear, as the shinobi snail has plenty of ways to maneuver around a foe trying to escape its strings of attacks. Accelgor's raw pressure, when applied correctly, makes it very difficult for even skilled players to stay on their toes and think ahead to avoid eating a series of hits.
Accelgor is designed to shut down many of the overcentralizing strengths of Smash 4's powerful shields and grab punishes. Accelgor's Spikes afford great stage control, at the cost of making the arena a bit more dangerous and difficult to navigate for Accelgor as well. The great flinching capabilities of spikes make navigating the stage a feared task for most players, as a single slip-up could lead to dangerous capitalization on the part of Accelgor. Moves such as Ftilt, Jab, Fair, and Usmash bully opponents who don't respect Accelgor's space, pressuring them near spikes and giving them scant room to breathe. Such moves, Spikes included, will also condition foes into throwing out their shields often to avoid taking avoidable damage, only to be punished with a grab or hard read. As a stealthy infiltrator, Accelgor thrives on reading shields and rolls, and has a clear disrespect for shields. While its Dsmash has trouble covering its side, Bug Buzz punishes rollers like no one's business, completely ignoring shields, and Fsmash allows Accelgor to keep up the pressure without fear of being shield-grabbed. Opponents who pick up on these tricks may learn to stop shielding and instead approach Accelgor with short-hopped aerials, dash attacks, or pivoted ground attacks, to which Accelgor may respond with a coy Dsmash to catch them off guard yet again, or respond by jumping out of shield with a Z-dropped spike, never letting the opponent become securely confident in any of their options. Spikes are Accelgor's key tool, and its best close-quarters options are enabled through the use of them as a holdable item, always a reliable tactic thanks to Sticky Hold. Contrarily, without a spike, many of Accelgor's low-knockback, short-ranged close combat options are punishable and weak, which gives it the disadvantage at taking on stronger characters at close-range, specifically struggling with the likes of Mario, Captain Falcon, and Link.
Accelgor generally excels at bringing its opponent nearer to it, or bringing itself nearer to its opponent. While it can close distances and even create space well, it struggles with launching and finishing opponents. Many of its attacks that send opponents away, such as Membrane Chain, Up Throw, and Back Throw, are just as capable of bringing them back closer to Accelgor. Many attacks of this type are designed to put the enemy wherever Accelgor wants them. From that point, it's as simple as navigating Accelgor to that position for a follow-up. Dair and Down Throw force the opponent into positions where they must choose a way to get up, often leaving them little place to go with spikes lying around. They'll often be forced to take the hit from a spike, or simply use their get-up attack, and a smart Accelgor will know how limited these options are and punish accordingly. Membrane Chain is another cornerstone in Accelgor's playstyle, being a lengthy command grab that, like many of Accelgor's other moves, punishes shielders and makes a mockery of the very concept of shielding. Accelgor can approach or retreat while throwing out Membrane Chain when it's platform canceled, but must understand its length in order to not leave itself vulnerable under normal circumstances. Up close, the mid-ranged attack is liable to whiff, guaranteeing the opponent a punish, and from too far a distance, Accelgor is left open for a rushdown; like Bug Buzz, the Membrane Chain will often require a hard read to land and avoid being punished. Membrane Chain is an excellent way to increase the application of Accelgor's spikes, as it can tip the chain with the barbed weapon and open up longer-ranged hitstun options, all without ditching the item in question, as it would with a throw. Membrane Chain can also bring spikes straight to Accelgor's hands, allowing it to pick up its treasured items without having to get too close to risk taking damage from them. A hard read to snag opponents with this versatile special move can reset a combo chain on a fleeing opponent or even secure a kill, as the outward input on this move leads to one of Accelgor's strongest kill options.
While Accelgor has great strengths and a toolshed of options for mixups and general scenarios, it's not without weaknesses. As a fighter of extremes – extreme speed, extreme pressure, extremely light weight – it has both hard strengths and hard weaknesses. Its light weight keeps it from surviving for very long if it finds itself hit by a strong enough move, a major problem for a character with an easily outranged and outprioritized Dair. Because it tends to die early, Accelgor isn't very effective at taking advantage of rage, which can be frustrating for the little bug that already struggles to KO. If you play your cards right, you can net your earliest kills through actions such as getting a Dair meteor smash (best in conjunction with a footstool) or by stage-spiking with Bair. Returning to the stage can sometimes be difficult, especially when knocked at a low trajectory. Accelgor will often be sent flying far, and while its jumps are excellent, it falls quickly, and doesn't have the longest-ranging recovery move out there. Luckily, it can augment this somewhat thanks to its ability to wall-jump.
Accelgor is determined to demonstrate its well-honed ninja techniques in the Smash Bros. arena. A mix-up magician with a great combo, punish, and anti-defensive game, Accelgor forces opponents to adapt to a playstyle that most Smash 4 characters are uncomfortable with. As the millionth ninja character in MYM, you basically know the drill by now. Overwhelm your enemies with disorienting speed and keep them under your constant control. Never let your target out of your sights until the deed is done. Prospective Smashers looking to play as Accelgor, come out of your shells and show everyone what it means to be insane in the membrane.

Taunts
Results Screen
Battle Entrance – Accelgor drops down from a classic-style trade cable, as featured during Pokémon trades.
Boxing Ring Title – Mach-Speed Mollusk
Kirby Hat – Kirby receives a hat that resembles Accelgor's motocross-like helmet, and gains the ability to use Spikes in the same manner as Accelgor.
Trophies
[DS: Pokémon Black and Pokémon White (3/2011)]
[DS: Pokémon Black 2 and Pokémon White 2 (10/12)]
[DS: Pokémon Black and Pokémon White (3/2011)]
[DS: Pokémon Black 2 and Pokémon White 2 (10/12)]
Wraps things up!
The Bug-type Pokémon #617, Accelgor, is the evolved form of Shelmet. Once a meak and wholly defensive mollusk-like creature, Shelmet loses its heavy shell upon evolution, spurred by being traded for a Karrablast. While Karrablast steals poor Shelmet's carapace to become the armored and knightly Escavalier, Shelmet benefits from this theft by trading its sedentary lifestyle for blazing, ninja-like speed as Accelgor. Few Pokémon manage to reach the mach speeds that this ironically swift snail attains, and it uses this to its advantage to overwhelm its opponents with overwhelmingly quick ninja-like movements. Since it has lost its shell, it wraps itself in numerous layers of a thin membrane to keep itself hydrated. Accelgor brings its gastropodular ninjutsu to the Smash Bros. arena, because nothing says 'hype' in MYM like yet another ninja moveset.
While Accelgor can have one of three different abilities, in its Smash Bros. appearance, the Sticky Hold ability is most directly featured. Thanks to Sticky Hold, Accelgor cannot be forced to drop an item. Unlike other characters, who are prone to drop held items from time to time while taking knockback, Accelgor will never lose hold of any item in its grip. As to be expected, it moves with quick, dynamic, ninja-like motions. Due to its lack of legs, it forcefully launches itself from a standing position to “fly” across the ground for its dash animation. Unlike fellow ninja Pokémon Greninja, Accelgor doesn't vanish while dodging, but it has a very fluid and swift dodge roll nonetheless. Like other ninja-like fighters, it is capable of performing the wall jump and wall cling techniques.
Size – 4
Weight – 2
Ground Speed – 9
Traction – 10
Air Speed - 9
Fall Speed - 8
Jump – 8
At 2'7'' in canon, Accelgor is rather diminutive for a fully-evolved Pokémon. Nonetheless, it is slightly scaled up for Smash, as with most Pokémon combatants, and is close to Villager in model size. It has most of the benefits bestowed upon characters of its type: small frame, great speed, excellent traction, and a decent fall speed. While not quite as quick to reach back down as Greninja, it sits comfortably near Mega Man in regard to gravity. Combined with an excellent jump height (a full first and second jump easily getting it to the highest platforms in Skyloft) and equally quick ground and air speeds, Accelgor can move to and fro with ease, able to be exactly wherever it needs to be as the player wills. In fact, stacked up against the canon roster, Accelgor is the second fastest character, ahead of Captain Falcon but slightly behind Sonic.
Accelgor's major disadvantage is its characteristic light weight, sharing a tier with Mr. Game & Watch and ultimately being very poor at surviving powerful blows. Coupled with this problem is Accelgor's smaller than average shield, making it a hassle at times to survive into the higher percentages.
Neutral Special – Spikes
Accelgor can also be hurt by its own spikes, so you'll want to be careful when attempting to pick them up. As they are items, individual spikes can be picked up and thrown again, and this is a tactic Accelgor can make excellent use of due to their high hitstun. Enemies may also grab spikes, but are easily prone to dropping them when attacked, risking further injuring contact with the dangerous traps. Luckily for Accelgor, Sticky Hold ensures that it will never drop one of its spikes, keeping it safe and secure to pick them up and carry them without risk of suffering unnecessary damage. There can be up to 5 spikes per Accelgor on the map, and unlike other items, retossing a spike doesn't dispose of it, but simply relocates it. Spikes will disappear after 20 seconds.
- (Alt. Neutral Special 1 – Snagging Spikes)
- (Alt. Neutral Special 2 – Toxic Spikes)
Side Special – Membrane Chain
Expertly uncoiling some of its protective membrane from its arm, Accelgor performs a very quick-to-start attack in which it flicks its arms and casts out a long strand of membrane. The rope-like material travels straight for half of Battlefield's length, lingering at its maximum length for a few frames before immediately snapping back to Accelgor. The sticky membrane attaches itself to any opponent or item it contacts, functioning as a command grab, and as soon as it does so, Accelgor is left vulnerable to other opponents until it makes another input. Yes, Accelgor uses its membrane as a chain dart. “Get over here!”, indeed.
In a less gory take on Scorpion's infamous spear technique, if the control stick is flicked inward, Accelgor will give a forceful tug and pull its target toward itself, briefly flinching opponents but dealing no damage. This leaves both combatants in immediate proximity of one another, with Accelgor at a slight frame advantage. If the control stick is flicked outward, Accelgor reels itself in, rocketing itself into the target and sending it flying. Against opponents, this causes a heavy impact that deals 13% damage and moderate knockback killing outwards at 160%. For extra damage, activating this move while holding a spike will cause it to attach to the end of the whip, impaling enemies when it makes contact and dealing 9% damage, though this removes the attack's command grab properties. Quick to start and quick to end, this attack can be disorienting for opponents and can set Accelgor up for any number of combo options, or at least net the Bug-type an item from afar. A useful technique for closing distances or punishing rolls, the Membrane Chain is a move best used smartly, as despite activating quickly, failing to connect with this move leaves Accelgor quite vulnerable.
- (Alt. Side Special 1 – Whip Wrap)
- (Alt. Side Special 2 – Scarf Snatch)
Down Special – Bug Buzz
Accelgor's go-to power attack in the Pokémon metagame, Bug Buzz is an interesting special move. Simply pressing the input will cause Accelgor to stir, but fail to deliver any sort of attack. Holding the input causes the attack to fully go through, and the move can be held indefinitely thereafter. Accelgor emits visible, green soundwaves in a circular pattern around its body in several thin rings, creating a roughly Bowser-sized field around itself. While Accelgor's entire body is covered, this is actually quite short-ranged. Enemies near Accelgor take 8% damage and are pushed outward from the point of contact, making Bug Buzz a good “get off me” option, despite its slow startup. While the input can be held indefinitely, the soundwaves begin to shrink until 5 seconds of usage brings them to their minimum range, just enough to fit around Accelgor's frame, leaving the sibilating snail vulnerable.
Bug Buzz's key utility comes from its unique properties in completely ignoring shields. The move makes no contact to shields. It does not damage shields at all, and simply ignores them as if they are not present, hitting shielding opponents for full damage and knockback. Punishing rolls with ease, Bug Buzz helps ease some of the pressure off of Accelgor when locked in close-quarters or when dealing with opponents who enjoy shielding a lot. Of course, they might be conditioned to do so in order to block all of those spikes laying around.
- (Alt. Down Special 1 – Big Buzz)
- (Alt. Down Special 2 – Slug Buzz)
Up Special – Double Team
Accelgor creates two illusory copies of itself as all three Accelgor instantly boost in their own direction. One Accelgor will travel straight upward, the other at a 45° incline forward, and the last straight forward. Travelling at the speed of Wario's Corkscrew for the distance of Falco's Fire Bird, all three Accelgor follow identical paths save for their trajectories. Accelgor doesn't get the most distance from this recovery, however. At the end of the move, Accelgor will not be placed into special fall, but it will have no jumps remaining.
But which Accelgor is the real one? As with many recoveries, a second input can be made to decide which direction you will travel in. The real Accelgor will always be the one travelling in the direction the player chooses to go, while the other two will be illusions. These illusions can be attacked and will disappear when hit, but they deal no damage to opponents, simply passing through them. All three Accelgor, however, have an accompanying windbox that slightly pushes opponents. You'll want to mix up your direction every now and then to keep your opponents guessing, as the move is fast enough to usually only allow time for one Accelgor to be “gimped”.
- (Alt. Up Special 1 – Agility)
- (Alt. Up Special 2 – Feint)
Forward Smash – U-turn
Crouching and tensing its body while charging this smash, Accelgor bolts forward head-first, launching itself like a rocket for a distance of one Battlefield platform and bashing opponents it collides with using its helmet-like cranium. If Accelgor contacts an opponent, item, or surface midflight, it rebounds and returns to its previous position. This attack will even rebound if met with a shield, keeping Accelgor safe from being shield punished, though it can be interrupted mid-attack (it has light armor). This Fsmash deals 12-18% damage to opponents and decent knockback, killing vertically around 170% with some charge to it. Somewhat weak for a smash attack, it exemplifies Accelgor's preference for speed and mobility over raw power.
Up Smash – Swift Scatter
Down Smash – Double Team Strike
Extremely quickly, Accelgor disappears in-place, two afterimages appearing to either side of where it was standing, facing one another. The two Accelgor simultaneously strike inward toward each other with both arms, hands touching at the tips. Anyone caught between the two Accelgor is struck for 14-21% damage and popped upward with low knockback growth. The two Accelgor linger in place for 3 frames before the “true” Accelgor reappears in-place.Unlike most Down Smashes, the attack hits inward rather than to either side of Accelgor, so quick punishes on rollers can be a bit trickier than normal. However, luring an opponent to attack, only to disappear and hit back has its own rewards, including an instant aerial set-up which can potentially be followed up on, and shielding opponents will have trouble blocking a hit from two Accelgor at once. This move is not a counter, however, so while it starts quickly, it can be interrupted. Attacking either of the “clone” Accelgor will cause it to dissipate instantly, but has no effect beyond that.
Jab – Acid Spray
Accelgor's odd-looking, puckered lips allow it to eject poison from its mouth, and that's exactly how they're put to use in its standard jab attack. A three-step jab, this attack consists of a quick palm strike with one hand, followed by an identical hit with the other hand, and finally, a spray of acid from Accelgor's mouth. If the jab is inputted with singular presses, the final hit will be an insulting spit of acid toward the opponent's face, which has high hitstun but no real knockback. The strikes in this three-part series of attacks deal 2%, 2%, and 4% damage, respectively, making for a modestly powerful jab, albeit one with no real knockback potential. If the input it held, Accelgor's final hit will become a rapid jab, whereby it continually spits acid from its mouth, dealing moderate hitstun accompanied by 1% damage per hit. Notably, this acid is corrosive enough to break down barriers, and withers shields away like a knife through butter. Shielding opponents beware! It's much easier to punish Accelgor by avoiding his jab and retaliating than by shielding.
Get Up Attack – Struggle Bug
Red with anger, Accelgor quickly rises to its standing position, striking on either side of itself with its arms, and dealing 5% damage with some knockback. Past 100%, the flustered bug performs a rapid handstand kicking maneuver that hits on either side of itself for 7% and higher knockback.
Ledge Attack – Deceptive Blow
Accelgor rolls onto the stage, quickly turning around and sweeping low with its tail/foot, popping the opponent inches into the air, or tripping them occasionally (4%). Past 100%, the Pokémon rolls onto the stage again, this time hitting forcefully with an extended palm, striking the opponent in the back (8%). Unlike other ledge attacks, Accelgor's work best when the foe is behind it rather than in front of it, connecting correctly against opponents who get too close to the ledge, rather than those who respect Accelgor's space. Place a spike a short distance from the ledge, perhaps, to see how your opponent behaves.
Dash Attack – Flying Foot
Down Tilt – Snail Slide
Leaning bent backward, low to the ground almost to the point of laying on its back, Accelgor slides forward a short distance, generally comparable to Mega Man's down tilt. Sliding into an opponent pops them weakly into the air and behind Accelgor, allowing the ninja to make a risky but sneaky escape from close combat. This weaker attack deals just 5% damage, but can be useful as a mobility option, especially in escape situations, as previously mentioned.
Forward Tilt – Swift Shot
Accelgor expertly swipes its arm backhanded from its chest as if throwing kunai, instead sending out a collection of small, weak stars of light a short distance in front of itself. Extending ¾ of a Battlefield platform in front of Accelgor, this mid-range projectile attack is relatively fast to come out, so it can be a decent surprise attack from time to time. Knockback is nearly nonexistant, but it can weakly whittle down shields and harass opponents, flinching them and buying Accelgor enough time to either retreat or move in; the maximum damage output is 10%.
Up Tilt – Dual Whip
Accelgor looked upward and raises both arms to whip with extended membranous whips from each limb. A two-hit attack with four hitboxes, Accelgor whips upward for the first strike (4%), then crosses its arms to whip them into a knot for a second hit (5%). The first hit is a weak flincher that usually links well into the second, which launches upward, and is a weak kill option for finishing off stubborn survivors around 200%. The whips themselves give the attack quite some range for a normal tilt attack, reaching just below the top Battlefield platform.
Neutral Aerial – Snail Spiral
Accelgor presses its hands together and closes its eyes in concentration as it horizontally spins twice, in a manner similar to Marth's Nair. The scarf around Accelgor's neck extends slightly, whipping opponents who get too close. With horizontal range slightly outclassing Marth's Nair, it's Accelgor's go-to “get off me” option in the air, smacking opponents for mild knockback comparable to Villager's Nair and 8% damage. The second spin has a different hitbox at the end of the animation that sourspots for negligible knockback and 5% damage, so a little precision is required to make the most of the move. Landing lag is mild, but not ignorable.
Up Aerial – Ninja Flip
Displaying expert acrobatic skill, Accelgor performs an aerial backflip, hitting with its foot and dealing 7% with low diagonal knockback. The animation is your archetypical flip kick up aerial, similar to Mario or Pac-Man, but with a bit of tokusatsu flair as Accelgor raises its arms over its head, striking a pose. The entire animation is incredibly quick, easily able to fit two into a shorthop. The attack also has low landing lag, making it quite a spammable technique. Its low knockback is offset by its ability to chain together into itself multiple times, though some accuracy is required due to its short range.
Forward Aerial – Swift Slice
Accelgor quickly chops downward with one arm. This crafty ninja strike comes in two flavors to mix things up against your opponents. A light input will cause Accelgor to send out a short-range disjointed series of small, flinching hitboxes in the form of tiny Swift stars. The range is slightly longer than that of Mega Man's Fair, and the move is a great harassment option out of a shorthop, especially while retreating. When all hits connect, you can expect to deal 11% damage. A “smashed” input, on the other hand, replaces the stream of stardust with one single, large Swift star, which Accelgor grips and slices with like a blade. This deals a more solid, meaty hit of an impressive 14%, as well as knockback reminiscent of Sheik's Fair, but with a more downward trajectory. This version of the move has paltry range, unfortunately, and comes out and ends so quickly that precise timing is needed to avoid whiffing and getting punished. Both versions of this move have moderate landing lag, but Accelgor's fall and jump speed still allow it to throw these out alongside shorthops rather quickly.
Downward Aerial – Thousand Strikes
Accelgor rapidly jabs below itself, alternating arms. These lightning fast punches trap opponents, in the same vein of Dairs as Yoshi and Peach. Delivering blows so fast that only motion blurs can be seen at normal game speed, Accelgor gives its opponent up to 16% damage. If the final hit lands, the opponent is lightly meteor smashed (if aerial) or put into prone (if standing), allowing for some interesting scenarios to unfold. If Accelgor fails to deal the finishing blow, the opponent suffers only mild flinching and is put at a frame advantage, leaving Accelgor vulnerable to counterattack. Out of all of Accelgor's aerials, this attack has the highest landing lag, but it's not exactly bad in that regard.
Backward Aerial – Spiral Kick
Accelgor positions itself so that it's horizontal in the air while spinning, delivering a multihit spin kick to foes behind itself. Similar in animation to Greninja's or Sheik's Up Aerials, only in a sideways position, the attack links together many small hits before releasing the opponent outward. Enemies take a maximum of 10% from this attack. The total knockback is rather weak, so it's not a great off-stage finisher, but if positioned correctly, multiple instances of this move can gimp opponents. Quite fast to execute, Accelgor can throw this move out while approaching, jumping, retreating, or just about whenever it wants, but beware the landing lag on this attack, which is the second highest of Accelgor's aerials.
Grab
In a short-ranged grab, Accelgor grabs with a lightning-fast, motion-blurred extension of one arm, like a warrior in training attempting to catch a fly in midflight. Staring coldly at the opponent with that odd expression it has, it delivers a painful upward jab to the abdomen with its other arm. A mid-speed grab attack, it deals 2% per hit, so it's usually a better option to just toss the opponent before they break out of your grip.
...Or it would be, except for Sticky Hold. Accelgor's iron-tight grip is not limited to simply the items that it grabs; it applies to its opponents as well. Players grabbed by Accelgor will find it 1.5x harder than normal to break out of its grasp, which allows the Pokémon to fit in an extra grab attack or two to rack up some more damage before disposing of its captive.
Down Throw – Swift Execution
Accelgor forcefully tosses the opponent to the ground, hops over the opponent's prone body, and tosses a rapid volley of small Swift stars at them, each hit dealing flinch frames and 1% damage, for a total of 10% overall. Accelgor lands on the other side of the opponent. The opponent is left in prone after this throw ends, forcing them to make a decision in how they will respond.
Back Throw – Water Shuriken
Showing up Greninja at its own game, Accelgor makes use of the Water Shuriken technique that it can also learn. With a backward swing of the arm, Accelgor tosses the opponent 75° into the air behind itself (5% damage). Without even looking back, it tosses a single, small Water Shuriken at the opponent (4% damage), and this can actually be aimed slightly within the range of about 15 degrees, allowing a smart reader to lay the pain on an opponent who tries to DI out of hitstun at low percents. If the shuriken connects, which it usually will unless another opponent attacks the target or Accelgor is interrupted, the target is actually lightly bounced back toward Accelgor, usually ending up in the air a few feet above the Pokémon. Hint: Try to get a follow-up off of this, obviously.
Forward Throw – Pressure Point
Accelgor rapidly jabs at its opponent at different points on their body, attacking their nervous system to briefly stun them. Opponents are left paralyzed in a manner identical to Zero Suit's stun gun or Pac-Man's bell, and will be stunned longer the more damage they've accumulated. While paralyzed, opponents cannot be regrabbed. This “throw” deals 8% damage with no knockback to speak of.
Up Throw – Whiplash
Using motion blur to near-instantly wrap the opponent in a coat of its membrane, Accelgor tosses the opponent upward while they're tied to a leash. Accelgor always tosses the opponent the same distance of 1.5 Batlefield platforms, but unlike other throws, the player can input a secondary direction on the joystick to have Accelgor throw them at any angle between 45° and 135°. At the extent of the throw, Accelgor yanks back on the membranous leash, causing the foe to slam back into the ground beside it, instantly tearing their own membrane coat apart and bouncing them off of the ground, possibly for a follow-up. Opponents can be tossed through a jump-through platform, but when yanked back, will be slammed into the platform instead of returning to Accelgor, allowing the player to get a little tricky with how they use this move. The opponent is dealt 10% damage. Overall, the entire process for this attack is about 80 frames.
Double Team Split Strike
Accelgor employs two different Pokémon techniques for its Final Smash. To activate the attack, the opponent(s) must be within a short distance of Accelgor, who will cast out a glowing pulse of light to ensnare the foe(s). Once the opponent is locked into place, Accelgor glows, using the move Guard Split to average its own defenses with that of its victim(s). Since Accelgor's defenses are so low, the enemy becomes lightweight. Then, the camera zooms in on Accelgor, whose eye glints, and then immediately splits into 6 of itself using Double Team. The illusory copies then begin dashing at the trapped enemies one at a time, slicing through them with ninja-like strikes that deal 10% damage each, for 50% total. The original Accelgor delivers the final blow, dealing 20% damage, with a concentrated strike from a single arm, sending the opponent(s) flying off-stage, and likely to their doom.
Now that we've gone over each individual move, we can discuss some of the more advanced applications of those moves.
One of Accelgor's moveset cornerstones are its spikes, which, like any item, can be played around with in a number of ways. Instead of just picking them up and repeatedly throwing them at your opponent, try Z-dropping them. Most characters with item-based moves, like Link, Peach, and Mega Man, make usage of Z-dropping to great effect. Z-dropping a spike is not only a very fast and unexpected move out of a shorthop, footstool, or shield jump, but the great hit stun it provides opens up a gateway for any number of follow-ups, leading into combos or even a repeating cycle of footstools and Z-drops.
Accelgor's Membrane Chain is a great utility move for snaring opponents from afar, but did you know that it can be platform canceled? Short-hop into or drop through a platform while this move comes out to cancel it early. This allows Accelgor to cast its thread quickly without suffering from the consequence of high cooldown should it miss. Accelgor can act out of a platform-canceled Membrane Chain almost instantly, making the move far less commital. However, the full length of the membrane won't come out when the move is canceled, so keep that in mind.
Accelgor can perform a Spike-Canceled Up Throw using careful positioning. Aiming an opponent into a spike resting on a platform is a great way to build some damage, and if the platform is nearby, you can even follow-up on the hitstun, because an opponent tossed into a spike is instantly freed from the membrane cloak. This breaks the thread as well, canceling Accelgor's Uthrow animation entirely. This move will be canceled whether the opponent hits a spike on their way outward or inward, allowing this somewhat lengthy throw to be sped up considerably. While you won't get the 10% damage from the throw and will have to settle for 5% from a spike, the high flinch effect provided by spikes can allow you to follow up for potentially even more damaging blows.
One of Accelgor's best kill moves, despite being a weak Smash overall, is its Fsmash, U-turn, which, while relatively safe, also has the dishonor of being one of its most telegraphed moves. Like Diddy Kong's infamous glide tossed banana into Fsmash finish, however, Accelgor can mitigate this somewhat. Glide-tossing a spike has enough reliable stun to almost guarantee that your Fsmash will go off successfully, so keep that in mind if you find yourself fruitlessly fishing for kills.
Accelgor is pretty good at keeping strings going. Some makeshift combos include:
- Bthrow (land shuriken) → Utilt → jump → Uair, Uair, Uair, etc.
- Uthrow (direct into spike) → short shop Fair → Dtilt → (at lower percents) approaching Bair
- Short hop Nair (land) → Dtilt → pivot Membrane Chain
Where do we begin to break down Accelgor? As a ninja, it's a master of trickery and deception. The key objective is to keep pressure on the opponent and ensure that they keep second-guessing themselves, always forcing them to worry about stepping out of line, making the wrong move, or attacking at the wrong time. Accelgor relies on blazing speed and perfect maneuverability to completely overwhelm its opponents. A well-honed Accelgor player should be able to make full use of speed and control to be anywhere on-screen that they need to be at the drop of a hat. Accelgor has no shortage of ways to approach, chase, or retreat, with an excellent short hop aerial game, evasive maneuvers such as Down Tilt and even Up Special to fool it its foes into hopelessly chasing it around the map. Even DI'ing opponents have Accelgor's sheer speed to fear, as the shinobi snail has plenty of ways to maneuver around a foe trying to escape its strings of attacks. Accelgor's raw pressure, when applied correctly, makes it very difficult for even skilled players to stay on their toes and think ahead to avoid eating a series of hits.
Accelgor is designed to shut down many of the overcentralizing strengths of Smash 4's powerful shields and grab punishes. Accelgor's Spikes afford great stage control, at the cost of making the arena a bit more dangerous and difficult to navigate for Accelgor as well. The great flinching capabilities of spikes make navigating the stage a feared task for most players, as a single slip-up could lead to dangerous capitalization on the part of Accelgor. Moves such as Ftilt, Jab, Fair, and Usmash bully opponents who don't respect Accelgor's space, pressuring them near spikes and giving them scant room to breathe. Such moves, Spikes included, will also condition foes into throwing out their shields often to avoid taking avoidable damage, only to be punished with a grab or hard read. As a stealthy infiltrator, Accelgor thrives on reading shields and rolls, and has a clear disrespect for shields. While its Dsmash has trouble covering its side, Bug Buzz punishes rollers like no one's business, completely ignoring shields, and Fsmash allows Accelgor to keep up the pressure without fear of being shield-grabbed. Opponents who pick up on these tricks may learn to stop shielding and instead approach Accelgor with short-hopped aerials, dash attacks, or pivoted ground attacks, to which Accelgor may respond with a coy Dsmash to catch them off guard yet again, or respond by jumping out of shield with a Z-dropped spike, never letting the opponent become securely confident in any of their options. Spikes are Accelgor's key tool, and its best close-quarters options are enabled through the use of them as a holdable item, always a reliable tactic thanks to Sticky Hold. Contrarily, without a spike, many of Accelgor's low-knockback, short-ranged close combat options are punishable and weak, which gives it the disadvantage at taking on stronger characters at close-range, specifically struggling with the likes of Mario, Captain Falcon, and Link.
Accelgor generally excels at bringing its opponent nearer to it, or bringing itself nearer to its opponent. While it can close distances and even create space well, it struggles with launching and finishing opponents. Many of its attacks that send opponents away, such as Membrane Chain, Up Throw, and Back Throw, are just as capable of bringing them back closer to Accelgor. Many attacks of this type are designed to put the enemy wherever Accelgor wants them. From that point, it's as simple as navigating Accelgor to that position for a follow-up. Dair and Down Throw force the opponent into positions where they must choose a way to get up, often leaving them little place to go with spikes lying around. They'll often be forced to take the hit from a spike, or simply use their get-up attack, and a smart Accelgor will know how limited these options are and punish accordingly. Membrane Chain is another cornerstone in Accelgor's playstyle, being a lengthy command grab that, like many of Accelgor's other moves, punishes shielders and makes a mockery of the very concept of shielding. Accelgor can approach or retreat while throwing out Membrane Chain when it's platform canceled, but must understand its length in order to not leave itself vulnerable under normal circumstances. Up close, the mid-ranged attack is liable to whiff, guaranteeing the opponent a punish, and from too far a distance, Accelgor is left open for a rushdown; like Bug Buzz, the Membrane Chain will often require a hard read to land and avoid being punished. Membrane Chain is an excellent way to increase the application of Accelgor's spikes, as it can tip the chain with the barbed weapon and open up longer-ranged hitstun options, all without ditching the item in question, as it would with a throw. Membrane Chain can also bring spikes straight to Accelgor's hands, allowing it to pick up its treasured items without having to get too close to risk taking damage from them. A hard read to snag opponents with this versatile special move can reset a combo chain on a fleeing opponent or even secure a kill, as the outward input on this move leads to one of Accelgor's strongest kill options.
While Accelgor has great strengths and a toolshed of options for mixups and general scenarios, it's not without weaknesses. As a fighter of extremes – extreme speed, extreme pressure, extremely light weight – it has both hard strengths and hard weaknesses. Its light weight keeps it from surviving for very long if it finds itself hit by a strong enough move, a major problem for a character with an easily outranged and outprioritized Dair. Because it tends to die early, Accelgor isn't very effective at taking advantage of rage, which can be frustrating for the little bug that already struggles to KO. If you play your cards right, you can net your earliest kills through actions such as getting a Dair meteor smash (best in conjunction with a footstool) or by stage-spiking with Bair. Returning to the stage can sometimes be difficult, especially when knocked at a low trajectory. Accelgor will often be sent flying far, and while its jumps are excellent, it falls quickly, and doesn't have the longest-ranging recovery move out there. Luckily, it can augment this somewhat thanks to its ability to wall-jump.
Accelgor is determined to demonstrate its well-honed ninja techniques in the Smash Bros. arena. A mix-up magician with a great combo, punish, and anti-defensive game, Accelgor forces opponents to adapt to a playstyle that most Smash 4 characters are uncomfortable with. As the millionth ninja character in MYM, you basically know the drill by now. Overwhelm your enemies with disorienting speed and keep them under your constant control. Never let your target out of your sights until the deed is done. Prospective Smashers looking to play as Accelgor, come out of your shells and show everyone what it means to be insane in the membrane.
Taunts
- Up Taunt – Accelgor utters its own name as it performs a backflip, lands on its “foot”, and strikes a pose with one arm raised.
- Side Taunt – Closing its eyes and holding its hands together, Accelgor creates illusory copies of itself by rapidly shifting back and forth.
- Down Taunt – Accelgor sternly glares forward while brandishing an extension of membrane at its side, hitting the ground with a cracking whip sound.
Results Screen
- Victory 1 – Accelgor rapidly tosses gleaming Swift stars in various directions, then dynamically crosses its arms while facing the camera as the announcer calls its name.
- Victory 2 – Accelgor simply stands still as an unmoving rock, eyes scowling at the camera as its scarf flows dynamically.
- Victory 3 – Accelgor, in a blur, rushes on-screen and stops dead-center. With its arms crossed, it turns its head slightly, saying “Accel...Gor!” as it insultingly spits a drop of acid at the ground.
- Loss – Rather than clap, as most characters do, Accelgor stands, motionless, with its back toward the camera, head slightly turned to view the victor out of the corner of its eye with spite.
Battle Entrance – Accelgor drops down from a classic-style trade cable, as featured during Pokémon trades.
Boxing Ring Title – Mach-Speed Mollusk
Kirby Hat – Kirby receives a hat that resembles Accelgor's motocross-like helmet, and gains the ability to use Spikes in the same manner as Accelgor.
Trophies
- Accelgor
[DS: Pokémon Black and Pokémon White (3/2011)]
[DS: Pokémon Black 2 and Pokémon White 2 (10/12)]
- Accelgor (alt.)
[DS: Pokémon Black and Pokémon White (3/2011)]
[DS: Pokémon Black 2 and Pokémon White 2 (10/12)]
- Double Team Split Strike
Last edited:

")