• Welcome to Smashboards, the world's largest Super Smash Brothers community! Over 250,000 Smash Bros. fans from around the world have come to discuss these great games in over 19 million posts!

    You are currently viewing our boards as a visitor. Click here to sign up right now and start on your path in the Smash community!

Make Your Move 16: MYM 17 Starting June 1st

Reiga

He sold diddy for a switch
Joined
Dec 8, 2014
Messages
1,256
Location
White Noise
3DS FC
1461-7646-7368
NOOOOOOOOOO Captain Toad was the character I was working on :c :teeth:

But anyway, I'll read your moveset to see what similarities and differences it had with the one in my mind. I don't know if I'll have the time to comment right now and I'm going to be busy for a few days, but I'll try to post a comment for this Sunday at worst!
Ironically I was also planning on doing a regular Toad moveset (the Up-Special was basically the same thing as Munomario's for capn Toad)

Now I feel bummed out and don't want to do a Toad moveset anymore.:c
 
Last edited:

ShinyRegice

Smash Lord
Joined
Jul 27, 2014
Messages
1,631
Location
France
In order to imagine my Captain Toad moveset I have done research about Super Mario 3D World and Captain Toad: Treasure Tracker as I don't have these games and am not really interested in getting them either, so there are some things in your moveset I didn't imagine.

Looks like you went straight by giving to Captain Toad no jumping abilities whatsoever... what I gave him was the inability to jump until he throws away a few items from his backpack. Throwing items from the backpack would lighten him, making him able to jump (but not very high anyway), as well as making him run and walk faster, but also making him easier to KO, weaker for a few of his attacks inducing his backpack used as a blunt weapon, and finally unable to use some standard attacks which use these items (for example, my Captain Toad's dash attack used the Super Pickax, but if he already thrown it, then he would be unable to use it). In my moveset, Captain Toad chosen the item to throw with the neutral special move like Shulk does in Smash 4, and he could eventually recover them with an additional option provided by the neutral B once some time. These items were: Super Gem, Green Star, Super Pickax and potted Piranha Plant, used respectively for up smash + up aerial, forward smash + forward aerial, dash attack + down aerial, and down smash + back aerial.

Otherwise:
- Your Captain Toad's neutral special uses basically the same concept as my jab combo lol
- I also imagined a Minecart side special, but without the Turnips.
- Up special is... somewhat of what I imagined. I had no idea of what to give to Captain Toad as an up special while being inspired from SM3DW or CTTT so I instead gave him the Propeller Mushroom from New Super Mario Bros. Wii. Your up special was exactly the same as mine in the concept but as it is inspired from SM3DW it looks less out-of-character.
- I was fully aware of the importance of Turnips in CTTT but I purposely didn't use them in my Captain Toad moveset as they're already used by Peach. Looks like it wasn't a problem for you.
- The Spinwheel was in my Captain Toad's moveset as his down special. It had for effect to move the stage's blast lines in order to kill opponents earlier than usual. Yes I know, super gimmicky, but I thought it was the best way to represent its original effect in CTTT, which consists of moving portions of a stage.
- As grappling hook's artwork comes from The Legend of Zelda, The Wind Waker, it looks like it doesn't appear in SM3DW, and neither it does in CTTT. But honestly it makes perfect sense and matches perfectly Captain Toad's characterization as an explorer, especially given that it's a tether recovery and thus improves his ability to recover, making up for the lack of midair jump.
- My Final Smash involved the Starshroom as well, but I saw it more of a "piloting" Final Smash similar to Landmaster, in the sense that you could accelerate in order to inflict damage and knockback to any opponent entering in contact with it.

And for criticism:
- I'd lower Captain Toad ground speed. Yes I know Toads are fast but his backpack would prevent him to run fast, isn't it?
- I don't like the down special. Like, at all. In fact, I despise randomness in character movesets, it conceptually sucks imo: first, it's a cheap way to add more contents in a character's moveset and waste it by preventing you to manually choose it; second, it severely hurts the gameplay at a serious level (with items off and a neutral stage). To be honest, I lost all interest in competitive Pokémon because I was tired of the sheer randomness involved in the core gameplay, and it's also the reason why Mr. Game & Watch is by far my least favourite character to fight in SSB. If you want to represent the different things Captain Toad can pluck in CTTT I'd personally rather split them between custom variations.

Otherwise I don't have much criticism to do. This moveset seems to be fitting for Captain Toad. Looks like you tried to be kinda more faithful with your Captain Toad moveset that how I did, by preventing him to jump whatsoever and giving him turnips and random plucks. Mine was more of a resource manager concept, which obviously doesn't come from the original game but was the result of taking something from it and adapting it for a unique mechanic in Smash, much like how the puppeteer concept was used to put Lumas in Rosalina's moveset.

Oh, and as a bonus, here's my Palutena's Guidance I imagined for Captain Toad, feel free to use it as a base for your own guidance if you want:

Pit: Hey look, it's a Toad!
Palutena: And not just any Toad. It's Captain Toad, the leader of the Toad Brigade.
Pit: The leader of the Toads? But... I thought it was Peach...
Viridi: Guess you're referring to her Toad bodyguard, isn't it? Not everyone needs to follow the same leader you know.
Palutena: Exactly, Viridi is right. Captain Toad is the leader of the Toad Brigade, a group of four Toads: him, Blue Toad, Yellow Toad and Green Toad. They make an appearance in his Final Smash, inside his starship, named the Starshroom.
Pit: He has his own starship? Wow! He must like to explore galaxies!
Viridi: And knowing how much greedy he is, he must like to loot ton of natural resources from every planet he visits!
Palutena: Anyway, Captain Toad's heavy backpack prevents him to jump, but watch for the items he will throw at you in order to lighten himself.
 
Last edited:

Katapultar

Smash Lord
Joined
Nov 24, 2008
Messages
1,284
Location
Australia
Cool, a Palutena's Guidance conversation (nice conversation, by the way). I had planned on putting up an article on the Bunker/Plaza site with links to the characters' pictures from Uprising, in case anyone wanted to use them to make Palutena's Guidance conversations and enhance them a little. That being said, the images were roughly 250x, so you'd need to put the conversation in a collapse tag lest the images stand out too much.
 

Munomario777

Smash Master
Joined
Nov 18, 2014
Messages
3,253
Location
Charleston, South Carolina
3DS FC
0387-9596-4480
Switch FC
SW-8229-3157-8114
In order to imagine my Captain Toad moveset I have done research about Super Mario 3D World and Captain Toad: Treasure Tracker as I don't have these games and am not really interested in getting them either, so there are some things in your moveset I didn't imagine.
Thanks for the feedback! :) I would definitely recommend picking up those games; they're great fun.
Looks like you went straight by giving to Captain Toad no jumping abilities whatsoever... what I gave him was the inability to jump until he throws away a few items from his backpack. Throwing items from the backpack would lighten him, making him able to jump (but not very high anyway), as well as making him run and walk faster, but also making him easier to KO, weaker for a few of his attacks inducing his backpack used as a blunt weapon, and finally unable to use some standard attacks which use these items (for example, my Captain Toad's dash attack used the Super Pickax, but if he already thrown it, then he would be unable to use it). In my moveset, Captain Toad chosen the item to throw with the neutral special move like Shulk does in Smash 4, and he could eventually recover them with an additional option provided by the neutral B once some time. These items were: Super Gem, Green Star, Super Pickax and potted Piranha Plant, used respectively for up smash + up aerial, forward smash + forward aerial, dash attack + down aerial, and down smash + back aerial.
I like the concept, but I'm not so sure about the implementation. The selection of items seems a tad awkward, and I'm not sure if disabling attacks would be the best way to go here.
Otherwise:
- Your Captain Toad's neutral special uses basically the same concept as my jab combo lol
- I also imagined a Minecart side special, but without the Turnips.
- Up special is... somewhat of what I imagined. I had no idea of what to give to Captain Toad as an up special while being inspired from SM3DW or CTTT so I instead gave him the Propeller Mushroom from New Super Mario Bros. Wii. Your up special was exactly the same as mine in the concept but as it is inspired from SM3DW it looks less out-of-character.
- I was fully aware of the importance of Turnips in CTTT but I purposely didn't use them in my Captain Toad moveset as they're already used by Peach. Looks like it wasn't a problem for you.
- The Spinwheel was in my Captain Toad's moveset as his down special. It had for effect to move the stage's blast lines in order to kill opponents earlier than usual. Yes I know, super gimmicky, but I thought it was the best way to represent its original effect in CTTT, which consists of moving portions of a stage.
- As grappling hook's artwork comes from The Legend of Zelda, The Wind Waker, it looks like it doesn't appear in SM3DW, and neither it does in CTTT. But honestly it makes perfect sense and matches perfectly Captain Toad's characterization as an explorer, especially given that it's a tether recovery and thus improves his ability to recover, making up for the lack of midair jump.
- My Final Smash involved the Starshroom as well, but I saw it more of a "piloting" Final Smash similar to Landmaster, in the sense that you could accelerate in order to inflict damage and knockback to any opponent entering in contact with it.
- Yay coincidences! :p
- I think the Turnips were a good way to be faithful to the game and give him a good mixup option.
- While Captain Toad doesn't actually use the Propeller Box in the game, it's from the same game, so close enough. :p
- I considered the similarities to Peach, but I think this is different enough with the way I implemented it.
- I think a better way of implementing that sort of Spinwheel functionality would be to perhaps have it move parts of the stage rather than the blast zones. It's more faithful to the original, and less like that Devil assist trophy nobody likes. :p
- The grappling hook is one of the few things that isn't from the original, but I felt it was somewhat necessary for reasons you listed.
- The Starshroom in my set is a piloting Final Smash, but with a cannon for good measure. :p
And for criticism:
- I'd lower Captain Toad ground speed. Yes I know Toads are fast but his backpack would prevent him to run fast, isn't it?
- I don't like the down special. Like, at all. In fact, I despise randomness in character movesets, it conceptually sucks imo: first, it's a cheap way to add more contents in a character's moveset and waste it by preventing you to manually choose it; second, it severely hurts the gameplay at a serious level (with items off and a neutral stage). To be honest, I lost all interest in competitive Pokémon because I was tired of the sheer randomness involved in the core gameplay, and it's also the reason why Mr. Game & Watch is by far my least favourite character to fight in SSB. If you want to represent the different things Captain Toad can pluck in CTTT I'd personally rather split them between custom variations.
- Toads are rather strong, and lifting heavy things never really seems to slow them down; this is shown in 3D World where he can run at full Toad speed even with the backpack IIRC.
- I think it's fine if it's not overused, and it can provide a nice risk versus reward element. It's only one move, and the rewards aren't usually that consequential (the Pickaxe only appears 5% of the time). Plus, it sort of references Treasure Tracker in that you don't know what a sprout will contain. That said, customs could change the random element; I'll probably add them tomorrow.
Otherwise I don't have much criticism to do. This moveset seems to be fitting for Captain Toad. Looks like you tried to be kinda more faithful with your Captain Toad moveset that how I did, by preventing him to jump whatsoever and giving him turnips and random plucks. Mine was more of a resource manager concept, which obviously doesn't come from the original game but was the result of taking something from it and adapting it for a unique mechanic in Smash, much like how the puppeteer concept was used to put Lumas in Rosalina's moveset.
Thanks! As I said earlier, I like the idea of resource management, but I think the execution could use some work.
Oh, and as a bonus, here's my Palutena's Guidance I imagined for Captain Toad, feel free to use it as a base for your own guidance if you want:

Pit: Hey look, it's a Toad!
Palutena: And not just any Toad. It's Captain Toad, the leader of the Toad Brigade.
Pit: The leader of the Toads? But... I thought it was Peach...
Viridi: Guess you're referring to her Toad bodyguard, isn't it? Not everyone needs to follow the same leader you know.
Palutena: Exactly, Viridi is right. Captain Toad is the leader of the Toad Brigade, a group of four Toads: him, Blue Toad, Yellow Toad and Green Toad. They make an appearance in his Final Smash, inside his starship, named the Starshroom.
Pit: He has his own starship? Wow! He must like to explore galaxies!
Viridi: And knowing how much greedy he is, he must like to loot ton of natural resources from every planet he visits!
Palutena: Anyway, Captain Toad's heavy backpack prevents him to jump, but watch for the items he will throw at you in order to lighten himself.
Interesting. I don't plan to write Guidances for my sets (mainly because I haven't actually played Uprising), but yours is pretty well written. Thanks again for the feedback! :)
 

Reiga

He sold diddy for a switch
Joined
Dec 8, 2014
Messages
1,256
Location
White Noise
3DS FC
1461-7646-7368
Time for a R-R-Reigareview!
*cue awesome music of your choice*

That Guy From Minecraft

So Munomario, I noticed that you are making these movesets really quickly, that isn't bad per say, but I noticed that because of that the description and such of moves has been very simple and barebones, leaving us with some headscratching moments.
To start, for the Side-Special you keep it pretty vague facts like if Steve can hop off the pig or even stop the pig on it's tracks, facts like these may be simple to some but may also change the moveset quite a bit, in this case if Steve can jump off the pig it can be pretty good for horizontal recovery.
Another thing that I think can be explained more is the potion of poison, you say the poison lasts for x seconds, but what does it do? I mean does it do damage? (if so, how?) It's not like there is a poison effect in Smash Bros, the closest thing is being flowered.
The Up-Special looks pretty OP in my eyes, 3 battlefield platforms seems a lot for a character with 2 other good methods of recovery (the blocks and the pig) and I think can be toned down a bit; in Smash Wario's Up Special's recovery is pretty bad but because he already has the Wario Bike and the Wario Waft that can be justified.


As for movesets by me, don't worry, I'm making a moveset; a hint for what it is? Well, it's for an anime character, but it's not a shonen adventure character or a magical girl.
Wait, thats like 3 hints.
 

9Blades

Smash Ace
Joined
Sep 8, 2014
Messages
577
Location
Tuscaloosa, AL
NNID
Venusboshi04
3DS FC
4210-4504-3290
SAILOR MOON
Smashing evil by moonlight
ThunderousGlisteningElephant.gif


(This took literally all day to come up with. Probably not the best out there)​
Weight: 75/120
Size: 6/10
Ground Speed: 5/10
Jump Height: 6/10
Air Speed: 7/10
Fall Speed: 3/10

Alts: Alternate costumes are the other Sailors =P

:GCA:Standards:GCA:

A: Moon Stick - Simply hits someone with the Moon Stick. 1-2%

Jab combo: Bishoujo Senshi Sailor Moon combo - The same move she does in the BSSM series. 3% on the first hit, 5% on the second, and 6% on the third, 14% in total.
d4b6db130ac10e0432d4d530d077ab6e.gif


Up-Tilt: Upward Moon - Waves the Moon Stick in the air, making sparkles and stuff. Does 7%

Side-Tilt: Side Moon - Same as Up-Tilt but to the side. 7%

Down Tilt: Sweeping kick - A swift kick spin on the ground, similar to Falcon's D-Smash. 3% on the right, 7% on the left.


:GCN:Aerials:GCA:
N-air: A spin with the Moon Stick, works like Marth's n-air. 10%

B-air: The Kick of Love and Justice - Its like the falcon knee, 17% if sweetspotted, 9% otherwise.

D-air: A basic stomp that has spiking capabilities.

F-air: A quick forward kick. Useful for gimping. 6%

:GCB:Specials:GCB:
Standard Special: Mars Fire Ignite - Chargeable. Launches a bullet of fire that travels the speed of a Super-Scope shot. Hits for 18% damage fully charged.

Side Special: Moon Tiara Action/Moon Croissant of Love and Justice - Sailor Moon throws out the tiara that functions like a boomerang but does not come back. (More like the Cutter ability from Kirby games) Does 10% but has a lot of startup and cool down time.

Up Special: Mercury Water Repent - On the ground, makes two splashes of water to the side, in the air, one blast of water that gives an aerial boost. 10% on ground, 5% in air.

Down Special: Jupiter Thunder - Chargable like Robin's Thunder. Fully charged is a single thunderbolt like Pikachu.
6-15% depending on charge.

:GCZ: Grabs :GCZ:
Grab+A: Hit with the Moon Stick multiple times. 1-2% each.

Down Throw: Simply throws them to the ground. 5%

Up Throw: Tosses upwards for possible follow-ups. 3%

Back Throw: Throws backwards and hits with a kick. 6%

Forward Throw: Whacks with the Moon Stick to propel forward. 5%


smash-ball.gif
Final Smash
smash-ball.gif

After breaking the Smash Ball, Moon summons the rest of the Sailor Scouts and fires a giant beam of love and justice from all of them. (Basically Megaman all over again) Hits for 35% and severe knockback.
 

Slavic

Ask not the sparrow how the eagle soars
Joined
Jun 5, 2013
Messages
763
Location
taco bell, probablyn't
GENJO SANZO
“MY NAME IS GENJO! SAITEN GENJO SANZO HOUSHI!”


Genjo Sanzo, also known as Xuanzang or Hsuan-Tsang, was a first century Buddhist monk and scholar from China. Throughout his life, Sanzo traveled across China looking for sacred Buddhist books, and soon became interested in sacred scrolls from India. Sanzo then made a seventeen-year travel overland to India to find these scrolls, writing the novel Great Tang Records on the Western Regions. Later, a novel fictionalized his exploits, known as Journey to the West. Twenty centuries later, Sanzo’s DNA was stolen among other historical figures and the monk was resurrected to serve the villainous Ikkyu as part of his I-jin army. Sanzo was given the mythical Ruyi Bang staff, an infinitely extending rod capable of producing fire, the ability to breathe fire himself, and boots that provide Sanzo with the ability to fly on a cloud. Sanzo meets and subsequently squares off with Yomiko while the heroine is on a mission in India, where Sanzo is more than a match for the agent. Sanzo is overconfident through the fight, acting as if he is a god, and the effect is enhanced by the villagers who bow down to him, believing him to be a god as well. However, Yomiko’s partner, Nancy, creates a diversion which gives Yomiko the opportunity to defeat the monk. Ultimately Sanzo completes his goal, stealing Yomiko’s book, before he is impaled by his boss, Ikkyu. Sanzo is a powerful character more than capable of combat using his staff expertise and burning attacks.

FLAVOR
Up Taunt - Sanzo holds his staff in both hands, horizontally in front of his body. The staff then extends outwards, at a rate of one Stage Builder Block per .4 seconds. This reaches a cap length of four Stage Builder Blocks for the entire length of the staff. This taunt, and the Down Taunt, is functional, and the length of the staff influences many of Sanzo’s attacks, as explained later.
Side Taunt - Sanzo points his staff behind himself in a standoffish pose. His boots begin to steam a bit and he lifts his head, breathing a puff of flame, before returning to battle.
Down Taunt - Sanzo sticks his staff in the ground in front of him and presses his hands together, gathering qi. The staff shrinks at a rate of a Stage Builder Block per .4 second, same as the extending taunt. This reduction won’t shrink the staff past its original size, which is roughly two Stage Builder Blocks in length. While the animation is different than the Up Taunt, the start-up lag is the same, and very small. If Sanzo is interrupted while reducing his staff, it does not cancel the taunt. This taunt, as well as the Up Taunt, last as long as the input is held.

Entrance - Sanzo flies down on a cloud with his arms crossed. The cloud sputters a bit and Sanzo leaps down, prepping himself for battle.
Kirby Hat - Kirby gains Sanzo’s headpiece and Yulong's fire.
Victory Pose A - Sanzo stands perfectly still with his staff in the ground, praying. As his qi increases, visible energy pulses out from the monk.
Victory Pose B - Sanzo spins his staff around impressively several times and performs an athletic leap. Upon landing, he assumes a pose similar to his Side Taunt.
Victory Pose C - Sanzo soars around on his cloud with his staff held behind him. The monk lands and breathes a burst of flame, punctuated with a resounding ‘Pitiful fools!’
Losing Pose - Sanzo stands perfectly straight with a serious expression and his staff held up in the crook of his elbow. Sanzo claps with a look of despise on his face.
Victory Theme - 3:39-3:45 of Suite For An I-Jin
Character Theme - Run Silent, Run Deep
Home Stage - Submerged Fortress


Palette Swaps
01 - Original Colors
02 - Colors of a Catholic Cardinal
03 - These colors
04 (Alt.) - Sanzo without his headress
05 (Alt.) - Colors of Jean-Henri Fabre
06 (Alt.) - Colors of Ikkyu

Animations
Neutral - Sanzo stands tall and proud, wielding his staff at his side. The staff is held at a diagonal, and the staff extends outward and upward from behind Sanzo.
Idle - Sanzo taps his foot on the ground and a small puff of steam appears. Sanzo looks down approvingly and continues the fight.
Walk - Sanzo takes deliberate, visually powerful steps forward, carrying his staff horizontally at his side.
Run - Sanzo takes large steps as he runs forward, holding his staff over his shoulder while he does so.
Dash - Sanzo flies forward across the ground on a cloud of steam, and he carries his staff tilted behind himself.
Jump - Sanzo takes one foot in the air and slams it on the ground, propelling himself upwards with his first jump.
Double Jump - Sanzo creates a puff of steam under his feet, which propels him further upward for his second jump.
Wall Cling - Sanzo grips the wall with his unarmed hand and both his feet. Sanzo looks away from the wall upward at an angle.
Wall Jump - Sanzo releases his grip on the wall and pushes himself off the wall with both legs.
Roll - Sanzo’s boots create a burst of steam that launches him to the side as the monk turns to face the screen.
Spot Dodge - Sanzo taps his staff on the ground and leans towards the background, putting himself out of danger.
Aerial Dodge - Sanzo grabs his staff and spins his body around the staff, taking him out of the plane of battle and into either the foreground or the background, depending on which direction he’s facing.
Sleeping - Sanzo slumps down on one knee with his head down, gripping his staff for support. Similar to Marth’s sleeping pose.
Crouch - Sanzo kneels down and touches the ground with the fingertips on his free hand, while he supports himself using his staff.


STATS
Strong enough to be mistaken for a god, Sanzo is a powerful, intimidating man. He is tall, though he doesn’t carry as much weight as other characters his height. Sanzo’s real strength comes from his agility, which allows him to traverse the battlefield with ease. Sanzo’s stats are almost uniformly above average, already making the monk a threat in battle. His stats shine especially in the air, where he can stay for a while to fight foes. Sanzo also has, at his disposal, the ability to wall cling and wall jump, which does even more to aid his aerial game.

What separates Sanzo even further is his mythical Ruyi Bang staff, which doesn’t infinitely expand in Smash Bros, but through his taunts Sanzo can control the length. As the staff grows, it gets a wider range and deals more damage, but the cost is slower attacks with the staff and greater lag on staff attacks. For each Stage Builder Block in length past two, Sanzo gains .2 seconds of startup and ending lag for staff based attacks (this is combined, so .1 seconds of startup, .1 of ending lag). Sanzo’s staff based attacks also deal 1.2 times as much damage for each Stage Builder Block added. This means, with Sanzo’s cap of a four Stage Builder Blocks, he can add two units to his staff, which gives him twice his original range, 1.4 times as much damage, and .4 seconds of starting and ending lag. This means motivation for finding a happy medium for the staff length, deciding when rewards outweigh the penalty.

Weight - 6
Height - 8
Jump Height - 6
Double Jump Height - 7
Air Speed - 7
Fall Speed - 4
Walk Speed - 3
Dash Speed - 8
Traction - 7

MOVES
*Moves with a O==( )==O are considered staff moves affected by the length of the staff as described in the taunts section.

SPECIALS
Neutral Special - Yulong’s Fire (~8-15%)
Sanzo leans his head back with a sour expression on his face. He stabs his staff into the ground for support as his cheeks puff outward during the charge animation for this attack. The attack can be charged for up to three seconds, though not stored. What exactly is this attack Sanzo charges? None other than the dragon Yulong’s mighty fire! If uncharged, Sanzo opens his mouth and a burst of red-hot flames erupts out of him. This fire is aimed downward at the ground directly in front of Sanzo, similar to Bowser or Charizard’s Special. However, the fire takes form not in a stream but a powerful flare which dissipates quickly. When charged, Sanzo releases an even mightier explosion of flame which scorches the ground in front of Sanzo for the distance of two Stage Builder Blocks. While the range and damage are increased with charging, the mythical nature of Yulong’s Fire means it does not linger, and being energy based it has nonexistent killing potential. It is a good way, however, for Sanzo to rack up damage from a decent range, and can pressure opponents away from himself.

Custom 1 - Yulong's Heat Wave (~9%)
Sanzo leans backwards and inhales, similar to the regular variant of this move. However, there is no charge available for this attack. Instead, Sanzo leans forward and expels a long stream of fire that travels straight in front of himself. This stream licks at opponents and deals damage, though not as much as his charged normal Neutral. However, the fire can be sustained, though the range, and damage, decreases the longer it is held. This attack is useful for racking up damage on opponents, but it lacks the kind of momentum the original move has.

Custom 2 - Yulong's Fireball (~8-12%)
Sanzo steps forward on one foot and inhales as he charges this attack. Sanzo then opens his mouth and launches a ball of fire, which travels quickly the distance of three Stage Builder Blocks. The longer Sanzo charges this attack, the larger the fireball gets, and unlike the other two variants of this move, the fireball has capable knockback. The knockback also increases with charge, and a fully charged fireball can KO at 150%. This move also has a storable charge, allowing Sanzo to carry it with him until he can effectively use it. This move is functionally the same as Samus' Charge Shot.

Side Special - Ruyi Bang Vortex (~0%)
One of Sanzo’s signature moves in Read or Die, the monk takes his Ruyi Band staff and holds it in front of him with one hand. Sanzo then spins the staff in front of him at high speeds, turning the weapon into a blur. Sanzo will spin the staff expertly as long as the input is held, and will put his staff down when released. The spinning of the staff destroys all non-energy projectiles that attempt to strike Sanzo, including cannons, arrows, boomerangs, and other similar moves. While this seems like a watered down shield, the move has a second function as well. Sanzo can press attack inputs while he spins the staff, and, depending on the length of the staff, will cause Sanzo’s next attack to do extra damage. If Sanzo has not extended the length of his staff, the move does 1.8 times damage, and loses .2 times multiplier for each additional Stage Builder Block has been added. This move also has a quasi-charge store, and if Sanzo moves while using the Vortex, he cancels the move but continues to spin his staff, which allows him to carry the boost to opponents should they be (as they likely are) staying away from the Vortex in use. This stored spinning motion only affects one move after Sanzo cancels the attack. This move is a good way to punish foes who try to camp out Sanzo with projectiles, as he can turn the projectile into momentum.

Custom 1 - Ruyi Bang Counter O==(?%)==O
Sanzo holds his staff diagonally in front of his body for half a second. An opponent's attack that hits the staff activates the counter, and Sanzo springs forward. The monk sweeps the staff across the ground, causing any opponents hit by the staff to trip and fall to the ground, though they take no damage from this portion of the move. Once the opponent is on the ground, Sanzo thrusts the staff underneath them and flings them into the air, reflecting how much damage Sanzo would have taken from the attack. This move has KO potential, but varies depending on how much damage it deals.

Custom 2 - Ruyi Bang Reflect (0%)
Sanzo grips his staff in both hands in front of himself. He then spins the staff blindingly fast, faster even than the original variant of this move. This creates what appears to be a single surface in front of himself. Projectiles that make contact with the spinning staff are reflected backwards. This attack also shares the damage bonus of the original variant.

Up Special - Wilcox Cloud (0%)
Sanzo crosses his arms, staff in one hand, and a cloud of steam appears around his feet. The boots Sanzo wears were designed by steam engineer Steven Wilcox, or rather his evil I-Jin clone. He lifts slightly up before returning to a battle position, the same dynamic pose as when he is dashing. The cloud gives Sanzo the ability to fly around freely, and Sanzo has very good speed using the cloud. This makes for an amazing recovery for the monk, and is a true testament to his combat and aerial prowess. On the downside, the cloud has poor traction, and causes Sanzon to ‘slide’ through the air when he stops moving, similar to stealing a Lakitu’s cloud in Mario games. If Sanzo lands on the ground, he reverses the startup animation, crossing his arms as the cloud gives out from under him. The cloud will also disappear after three seconds automatically, sputtering out from under the monk, leaving him to fall.

Custom 1 - Wilcox Storm (~9%)
Sanzo's boots lift the monk upwards, on a cloud similar to the default variation of this move. However, once airborne, the cloud darkens and becomes electric, damaging any opponent it touches and knocking them away. However, the cloud moves much slower as consequence, and is harder to use for recovery.

Custom 2 - Wilcox Whirlwind O==(~11%)==O
Sanzo holds his staff horizontally in front of himself as his boots start to activate. The boots create a steam jet that push the monk upwards through the air. While flying upwards, Sanzo rotates around in circles, damaging opponents and launching them away from himself. Sanzo travels three Stage Builder Blocks straight upwards before his boots give out, leaving Sanzo to fall. This attack can KO around 170%.

Down Special - Ruyi Bang Vault O==(~13%)==O
Sanzo faces forward with his legs in a braced position. He grips his staff with both hands, pointing it in front of him. Sanzo then takes a step forward and pushes the end of his staff into the ground. His boots create a burst of steam under him after this, and it boosts him upwards, using the staff to pole vault. While traveling through the arc, Sanzo holds his leg out, kicking any opponents who get in the monk’s way. This deals a good chunk of damage and throws opponents in the direction of the leaping Sanzo. Opponents who are pinched between the ground and the end of Sanzo’s kick receive an exceptional amount of knockback, enough to KO at 120%. The distance Sanzo travels with the kick, and the speed at which he travels, are dependent on the length of his staff. At a full six Stage Builder Block length staff, Sanzo will travel the forward distance of six Stage Builder Blocks (the first chunk of the staff is for Sanzo to hold, so only the remaining three blocks of distance are used for the attack). However, the increased staff length also means that Sanzo travels much slower through the air, which can leave him susceptible to opposing attacks. Additionally, if Sanzo misjudges the distance he travels, it is possible for him to vault off the entire side of the stage to his death. This move is especially useful for a quick, surprising rush on the opponent, and makes Sanzo all the more lethal.

Custom 1 - Ruyi Bang Drop Kick O==(~11%)==O
Sanzo goes through the same motions as the standard variation of this move, driving his staff into the ground and performing a flying kick, knocking opponents around and dealing damage the same as the normal version. However, once the staff is standing straight upright, Sanzo slides down the staff using his hand, his leg still extended in a kick. Opponents struck by his foot are meteor smashed, and if an opponent is pinned between Sanzo's foot and the ground, they are launched outwards.

Custom 2 - Ruyi Bang Joust O==(~13%)==O
Sanzo's boots create a cloud under himself, which lifts the monk slightly off the ground. He then points his staff ahead of himself like a lance as the cloud rushes forward, moving Sanzo two Stage Builder Blocks forward. Opponents struck by the staff take damage and a bit of knockback, but they are pushed back several times, allowing multiple hits. This move starts KOing around 180%.

STANDARD MOVES
Jab - Wukong Warrior O==(~3-11%)==O
Sanzo jabs his staff forward in front of him, striking an opponent bluntly and square in the gut, which deals a rough 2% damage. Sanzo then flips staff around in one hand and jams the opponent with the reverse end of the staff, hitting for another 3%. Sanzo then stabs downward towards the ground in front of him with the staff, which damages opponents for another 3%. The combo ends with Sanzo flicking the staff upwards, dealing another 3% and launching opponents upwards. While the combo is fairly weak damage-wise, Sanzo can KO opponents at 130% with the last hit.

Forward Tilt - Wujing Whirl O==(~7-14%)==O
Sanzo grips his staff tightly in one hand, and creates a figure eight formation with the two ends of the staff. The motion of the staff is slow and predictable, and the ends of the formation are exaggerated with jabs from the staff. The tips of the staff have a hitbox during the attack, and getting hit by either side can deal up to 7% per hit, and there are two opportunities to hit the opponent. The first hit doesn’t do a lot of knockback, but opponents struck by the second hit can be KO’d at 130%+.

Up Tilt - Wukong’s Whirlpool O==(~4-12%)==O
Sanzo lifts his staff in both hands above his head, horizontally extending on either side of him. The monk then spins the staff around in several quick circles. Opponents who are struck by the staff get pulled towards the center of the attack and take multiple hits, about 4% damage per hit. The attack lasts a little over half a second, and afterwards opponents caught in the attack are dropped. This attack has little knockback, and opponents only get KO’d at up to 200%+.

Down Tilt - Bajie Flip O==(~10%)==O
Sanzo grabs his staff and steps backwards with one leg, pointing the weapon at the ground in front of himself. Sanzo then jabs the staff into the ground before him, which damages opponents with a bit of stun. Sanzo then brings the staff upwards, which launches opponents who were struck upwards into the air, and can KO at 140%.

Dash - Soaring Rod Strike O==(~8%)==O
Sanzo flies forward on his cloud with his staff in hand. Sanzo lifts his feet up, and the propelling steam allows him to brake in midair. While braking, Sanzo stabs his staff forward, which damages foes and throws them backwards. Opponents struck by the staff can be KO’d at 150%+.

Ledge Attack - Nyoibo Lift (~5%)
Sanzo grips the ledge with his free hand and stabs his staff into the stable ground. Sanzo’s boots activate and lift him upwards as Sanzo grips the staff with both hands. This causes Sanzo to fly around the staff in a pivot-like manor, kicking opponents who are in front of the monk. This move has little knockback, KOing at upwards 210% damage.

Ledge Attack (100%+) - Nyoibo Rescue O==(2%)==O
Sanzo grips the ledge with his free hand and stabs his staff into the stable ground. Sanzo then pulls himself up and, after standing up, pulls his staff back out. Sanzo then weakly swings the staff once in front of himself. Killing potential of this move is nonexistent, though there is enough flinch to give Sanzo a brief respite.

SMASH MOVES
Forward Smash - Yulong’s Hurricane O==(~10-17%)==O
Sanzo grabs his staff in one hand and twists it around behind himself. When held, the staff is horizontally aligned, spreading out to Sanzo’s left and right. The end of the staff also lights on fire as a hidden mechanism pops out. Once released, Sanzo swings the staff out from behind him and grabs the weapon with both hands. The pole swings in a wide arc in front of the monk before it reaches the end of the attack. This move, in addition to dealing good damage with a fire element, has excellent killing potential, and from a full charge can KO at as low as 90%.

Up Smash - Monkey’s Kick O==(~11-18%)==O
Sanzo drives his staff into the ground as he charges this attack. Once released, Sanzo uses his weapon as a brace to lift himself upwards. Sanzo flips around and kicks upwards as he rises. Opponents struck by the move take damage and are launched almost straight up. While this attack does more damage than Sanzo’s Forward Smash, and has a better range, the knockback is slightly less, and on average KO’s around 120%.

Down Smash - Sweeping Staff of the Monk O==(~13-20%)==O
Sanzo holds his staff to the side of himself and proceeds to spin it around in rapid circles in the foreground. Once released, Sanzo makes a dramatic motion and leans back, thrusting the staff into the ground in front of him, as though it were a lance. Like the other staff moves, the actual hitbox for the staff is dictated by the length of the staff. Opponents who are hit take damage, but are not knocked back far, and this move starts to KO opponents at around 150%.

AERIAL MOVES
Neutral Aerial - Flight of Yulong (~8%)
Sanzo leans back while falling and inhales for a split second. After that, Sanzo releases a burst of flame from his mouth. Unlike his Neutral Special, the fire takes form of an explosion centralized in front of Sanzo’s face, instead of angled downward. Opponents struck by this suffer as though hit by a weak explosion before being knocked back. This move is capable of KOing around 180%.

Forward Aerial - Wukong Rising (~7%)
Sanzo holds his staff idly at his side. Sanzo then takes a pose as though kneeling in midair, similar to Captain Falcon’s Forward Aerial. The monk’s boots then create a burst of steam, which propels Sanzo forward the distance of a Stage Builder Block, and slightly upwards. Opponents struck by Sanzo’s knee take damage and are knocked backwards quite a bit, and Sanzo is able to KO foes from 140% onward.

Up Aerial - Wujing Whirling Whip O==(~10%)==O
Sanzo lifts his staff above his head with both hands. The monk traces a single figure eight in the air above his head, and opponents struck by this are pulled to the center of the staff, taking a bit of damage from either end of the weapon. After twirling his staff, Sanzo suddenly flicks his staff upwards, smacking opponents with the long end of his staff. Opponents are launched upwards by this attack, KO'd at 150%+.

Back Aerial - Cirrus Step (~11%)
Sanzo carries his staff idly by as he falls backwards slightly. Once the monk’s boots are in front of him, the steam activates and creates a cloud. The boots launch Sanzo backwards at high speed, a Stage Builder Block’s worth, and opponents who are caught in Sanzo’s path are slammed and knocked backwards. This attack can KO at 140%, and is easily Sanzo’s best Aerial, though the ending lag leaves Sanzo very vulnerable should he miss the opponent.

Down Aerial - Monkey’s Rocket O==(~8%)==O
Sanzo grips his staff with both hands and swings it downward (no damage in this part of this attack).Once the staff is pointing straight down, Sanzo flips himself so he is also upside down, pointing at the ground. At this point, Sanzo’s boots activate, launching himself downwards and driving his staff downward. Opponents struck by the staff are meteor smashed downwards as they take damage. Sanzo won’t quit the course of the attack, unless he is struck, until he hits ground or an opponent, which can lend itself to many self-destructs.

GRABS

Grab - Ruyi Bang Pierce O==(~2%)==O
Sanzo braces himself and spreads his legs as he pulls his staff backwards. Sanzo then thrusts his weapon forward at high speed straight in front of himself. When an opponent is struck, the staff pierces through the opponent, snagging them. The staff then retracts at high speed, pulling opponents inwards.

Pummel - Ruyi Bang Wring (~3%)
Sanzo grabs his staff with both hands while it is embedded in the opponent. Sanzo then rotates the staff between his two palms, causing it to spin inside of the opponent, weakly damaging them.

Forward Throw - Face to Face with the Mighty Yulong (~15%)
Sanzo yanks his staff backwards and pulls the opponent even closer to the monk. He then inhales and opens his mouth, breathing a great burst of flame into the opponent’s face. Afterwards, Sanzo pulls his staff out of the opponent, allowing them to fall to the ground. This attack deals no knockback, but does a good chunk of damage.

Up Throw - The Flying Monkey O==(~11%)==O
Sanzo grips the staff and quickly yanks it out of the opponent, causing them to teeter over. Sanzo then jabs the staff into the prone opponent, scooping them on top of the staff, and flicks the staff upwards. The opponent is sent flying upward as the staff travels through the air, and is able to KO at 120%.

Back Throw - Bajie’s Flip O==(~12%)==O
Sanzo holds onto his staff and braces himself against the ground. Sanzo then pulls the staff upwards in an arc over his head. Once the opponent is above him, Sanzo rotates himself around and slams the opponent into the ground. Sanzo pulls his staff from the opponent as they hit the ground, causing them to bounce up. This attack can KO around 120%.

Down Throw - Yulong’s Steam Bath (~15%)
Sanzo pins the opponent into the ground with his staff and activates his boots. The steam propels Sanzo upwards a short distance, before they let out. Sanzo then drops down onto the opponent, driving both his boots and his staff into them, damaging them. Opponents are launched horizontally a distance, and can be KO’d at 150%.

FINAL SMASH
Four Disciples

Sanzo hurls his staff into the ground beside him and presses his palms together, entering prayer and channeling qi. While he does that, Sanzo’s four disciples from Journey to the West appear on screen; The monkey Yukong, the pig Bajie, the ogre Wujing, and the dragon Yulong. The disciples fight for Sanzo as he completes his prayer. Sanzo is invincible during this time, and his disciples disappear after ten seconds, forcing Sanzo to resume fighting. The four disciples, and their abilities, are explained below.

Sun Yukong, The Monkey
Sun Yukong was the first of Sanzo’s disciples, and as such will not travel far from his master. Yukong is also equipped with the Riyu Bang Staff, and goes in a frenzy should an opponent be in the vicinity of his master. Yukong’s moves are a series of fast, furious swipes with his staff, high in both damage and knock back, racking up with rapid hits of around 10% each, and a strong hit from Yukong can KO opponents at 100%, meaning being near Sanzo is a poor idea during this attack.

Zhu Bajie, The Pig
Zhu Bajie was Sanzo’s second disciple, but unlike Yukong, Bajie is both gluttonous and cowardly. When summoned, Bajie will run from the other fighters as best he can. However, if cornered, Bajie will strike at opponents with his rake, dealing some weak damage with little knockback. Bajie will also hunt down any food on the stage, and will actually actively attack opponents to get to it. If attacked, Bajie will occasionally drop food, though Bajie cannot actually be defeated.

Sha Wujing, The River Ogre
Sha Wujing was Sanzo’s third disciple in Journey to the West, and was also known as the Sand Briar. Wujing is a fighter at heart, and his serious attitude contrasts to the lighthearted Yukong and Bajie. When summoned, Wujing will chase down opponents, though he does so slowly. Wujing slams opponents with his polearm bluntly, which deals up to 15% per hit, though there is little knockback from his attacks.

Yulong, the Dragon
Yulong was Sanzo’s fourth disciple, and was also the third son of the Dragon King of the West Sea. Rescued from a death sentence by Sanzo, Yulong takes the shape of Sanzo’s white horse throughout most of Journey to the West. When summoned, Yulong soars across the screen several times, leaving streams of flame behind himself. The fire disappears after a second, but opponents struck by Yulong are sent flying forward, though only receive around 8% damage. Yulong has the best killing potential out of all the disciples.

PLAYSTYLE
Sanzo is the definitive risk vs. reward fighter. Sanzo’s staff extending mechanic allows him to hit harder and farther, but at risk of more lag and slower attacks. Sanzo’s moveset is full of fast rush and approach moves, giving the monk excellent momentum, but many of his best attacks, like the Riyu Bang Vault and his aerials, leave him wide open for counterattacks, or lend themselves to easy self-destructs. However, Sanzo is effective at defending himself as well, using his amazing melee range and close range pressure moves to force opponents away, and his Riyu Bang Vortex can turn opponent's projectiles into momentum. Once opponents are in the air, Sanzo can truly go berserk, using his powerful aerials to take opponents out, and his low gravity and high air speed allow him to constantly chase opponents. Those fighting Sanzo need to play defensively but smart, timing their dodges and waiting for Sanzo to take a risk to hit. Once Sanzo is struck and his momentum is lost, he has a hard time defending himself as many of his attacks have a fair amount of lag about them, especially if the staff’s length is increased. Sanzo, in a nutshell, is a mid-ranged character based around brutal, risky attacks that have big payoffs.

TROPHIES
Fighter Trophy
(The trophy depicts Sanzo wielding his staff with both hands, pointing the weapon forward)
Genjo Sanzo was a monk in the 1st century who traveled across Asia, searching for valuable books. In Read or Die, Sanzo's DNA was stolen and used to create an evil clone of him, called an I-Jin. Equipped with mystic weapons from his novel, Sanzo fought Agent Paper and Miss Deep to obtain Beethoven's Immortal Beloved. In Smash Bros., Sanzo comes packing his magic staff, flaming breath, and steam-producing boots, and he is ready to rumble!
>Read or Die (2002)

Alt. Trophy
(3DS - The trophy depicts Sanzo without his regalia as he spins his staff around in the Riyu Bang Vortex)
(WiiU - The trophy depicts Sanzo with his Cardinal colors, performing his Down Taunt while his staff glows)
Time for a staff meeting! With Sanzo's staff, his Riyu Bang Vortex can destroy projectile that fly toward the monk. On top of that, the move powers up Sanzo's next hit, and he can even spin his staff while moving. The staff can also shrink and grow, through Sanzo's taunts, allowing him to hit farther and harder. Watch out though: Sanzo's attacks take more time to hit when his staff grows.
>Read or Die (2002)

Final Smash Trophy
(The trophy depicts Sanzo sitting on the ground reading a scroll with his four disciples around him)
When Sanzo breaks the Smash Ball, he uses the ultimate power to reflect in prayer. Don't think this makes him vulnerable, though, as Sanzo becomes invincible while praying. Sanzo's four disciples come to fight for him instead. Those close to Sanzo have the most to fear, as the monkey Yukong will fiercely defend his master. However, chasing Bajie, the pig, can result in free food for thrill-seeking fighters.

PALUTENA'S GUIDANCE
Pit - Whoa!! This guy’s staff is insane!
Palutena - That’s Genjo Sanzo, Pit. He was a monk who traveled the land thousands of years ago.
Pit - And he’s still alive?
Viridi - No, dummy, he’s a clone! An evil one at that.
Palutena - Indeed. That staff may sting when it hits you, but watch out, Sanzo can create a cloud that grants him the power of flight.
Pit - You know what might help? If a certain goddess could grant me the power of flight as well?
Palutena - Sorry, Pit, no intervening!
Viridi - Besides, this is more entertaining!

---
I figured that I should take a shot at the Palutena's Guidance, it seems pretty important for fleshing out a character in my opinion. And I always enjoyed writing for Snake's Codec in my movesets, so this is a good alternative. I think I'm missing a bit of that Uprising wit, though. Also, I'm going to go play Uprising now because writing that put me in the mood for it.
 
Last edited:

Slavic

Ask not the sparrow how the eagle soars
Joined
Jun 5, 2013
Messages
763
Location
taco bell, probablyn't
We’ve built up quite a few movesets in the past few days, so I guess it’s time for another rousing edition of…

SLAVIC’S SMASHING STATEMENTS!

STEVE
Oh, this brings back memories of sophomore year, spending dozens and dozens of hours mining… and crafting… and- well, you get the picture. Minecraft was (and might still be) a pretty fun game. And glossing over your moveset for Steve, he seems like a pretty fun character! Steve plays off as a very referential character, falling in with the likes of Mr. Game & Watch and Villager, which I think makes sense for a game like Minecraft which focuses on what freedom and creativity rather than Steve himself. Throughout the moveset, there are plenty of Minecraft items, and the whole set seems rather derived from the game (A good thing!) I love the idea of the inventory, and I think it’s well balanced so it’s not confusing but still is helpful to Steve’s playstyle. In the Specials, I like the Mining attack, and I like the idea of pulling out chunks of the stage. Just to throw out an idea, perhaps instead of random blocks the player would pull up blocks that correlate to the stage? I like the idea of the Pig as a Wario Bike-type move as well, though the animation might be slightly awkward, since it is an animal and not a bike Steve pulls out. If you were at all concerned about that, I would recommend maybe having Steve break open a pig egg to spawn his vehicle. In the Standards, I like the use of different tools for the tilts, which I think adds a good amount of variety to Steve. I also think that the Diamond armor makes for a nifty Final Smash.

Now for some criticisms and general questions. I know you list the damage on mining and placing blocks as 0%, but I feel like both those actions are ‘violent’ enough to warrant damage. You already use swinging his pickaxe as an attack, so maybe Steve can use the damage so opponents don’t pester him while he digs. As for placing blocks, I imagine it similar to the Villager’s bowling ball drop, and I could see it knocking opponents away, though maybe I’m just misinterpreting the description. I already mentioned the possibility of mining specific blocks from specific surfaces, but I don’t think there is an issue with having the blocks be random, it captures the unpredictability of Minecraft well. Another nitpicky thing, is there a way to shuffle blocks and items in your inventory, or are you stuck with the order you collect them in? I’m glad you took Reiga’s advice with the Pig, it makes more sense now. Reiga touched on the TNT Cannon briefly, but I personally don’t like it as an attack. Compared to the rest of Steve’s moveset, it seems really out of the ordinary; I can’t think of a time where I actually wanted to blow *myself* up, even with a cannon. I don’t have any recommendations on what to replace it with, but it just sticks out to me. The Standards of this set seem fairly barebones. For some of the moves, especially the tilts, this makes sense, because the motions are intuitive and easy to visualize. Others, though, aren’t as easy to visualize. For instance, how exactly does Steve charge the Beacon? When Steve uses the Flint and Steel, is the ring horizontal or vertical around himself? I can easily picture both, but they would have very different hitboxes and usage than each other. The last odd attack to visualize is Steve’s back throw. I like the usage of Redstone, but how fast does he set this all up, and does the open just stand there while he does so. How does the opponent get knocked behind Steve from that? As a last note, I think you may have utilized a few too many items in the moveset, and the references seem just a bit cluttered for me. I know something I was hoping for was tool-based Smashes that upgrade from Wood to Stone to Steel depending on charge, or something along those lines. That’s just me, though. All in all, I like Steve as a character, and I would honestly play him as is. There’s just a few points I would try to tidy up and fix, and work on some of the visualization.

Also, if you’re still looking for a good victory theme, I would suggest 0:35 through 0:43 of the Sweden Theme. I think it captures both the soundtrack and the essence of the game.

CAPTAIN TOAD
Goodness, I still need to get this game, it seems pretty fun! I’m so glad Captain Toad became an actually important character after Galaxy. Glancing over the set, it looks like he plays similar to Steve, using a bunch of references to his game. I’m glad to see, however, that he seems more formative a character, which is good because Captain Toad actually has a canonical personality and identity, which is well embraced in the moveset. Off the bat, there is excellent dedication to the game, keeping Toad grounded (more about that later). The Headlamp attack is pretty nifty (and similar to the moveset I’m working on now ;D), and it’s good to see more of that paralyzing action in moves. It especially works for Toad, who can’t jump, which allows him to chase down opponents. The Minecart is another good move for Captain Toad (can it go aerial?), and I think it makes for a better move than. for instance, Steve’s Pig. Should someone just be glancing through the moveset, they might think the Propeller Box is absurdly good, but I think it works for Captain Toad, who desperately needs the vertical boost. The Pluck move, contrary to other opinions, I actually love the random aspect of the attack. The items all seem good to me, although I’m concerned the Super Pickaxe might be a bit too powerful. For the Jab, I’m assuming these coins don’t heal Toad like his Pluck attack? I think the tilts are all fitting for Captain Toad, and I love the Smashes, I think they’re quirky and fun. The aerials seem fine, for what they’re worth, although Captain Toad could probably stand to have stronger aerials, given how rarely he’s in the air. The grappling hook is a good reference for any adventurer, and I think helps define Captain Toad as a fighter. Bonus points for the Super Mario Bros. 2 gif, also!

While I complimented your dedication to the source material, I would be concerned about Captain Toad’s inability to jump as a gimmick, as it’s not made up for in the moveset. I’m not talking about he has no recovery, but there’s nothing that balances out the negative part as playing him. “Which character should I play, Steve?” “I know, Captain Toad! He can’t jump!” Not the best advertisement for a character. I would suggest finding some motivation to play Captain Toad, something that gives him an edge over opponents. As a general criticism, some of the moves, particularly the up throw, are hard to imagine, and I would recommend (as I always do) fleshing out some of the moves to give them substance. Otherwise, I think Captain Toad is one of your better sets, and I think it’s a fun little niche set (until everyone else releases one, goodness.)

SAILOR MOON
Sailor Moon is a set that has potential, since I know there’s a lot of source material, but it just needs some TLC to get better. If this is your first moveset, then welcome! If not, still welcome! I’m going to throw out a few general suggestions on how to improve this (and other) movesets, though I might be wrong on all of this, since I’ve only made five myself (almost six). First off, formatting. I like the images you put in, but often it seems they overshadow the text they go with. I would recommend changing text size throughout the whole set, it helps make it pop out at people. In the beginning of a set, you should include a brief description of the character for people not familiar with the fighter. For instance, I’ve heard of Sailor Moon, but I really don’t know anything about her. What are her goals, what does her moon stick do, who are these other Sailors? Answering questions like these can help develop characters so outsiders can better understand who they are reading about, and help make them more invested (nothing drives this home better than doing movesets for obscure characters, I think I’m the only person in the world familiar with Read or Die.) The stats themselves look good, but I would recommend adding a section in stats describing how Sailor Moon plays, to give an idea if she’s good in the air or ground, and what you intend to make her playstyle revolve around. To be blunt, the moves need some serious work. It takes a lot of practice to translate how you imagine a move to look into enough words to put that image into your reader’s head. Similar to the character description, asking yourself questions about how the moves work and look like and writing out the answers bulks up the moveset. For instance, how long does Jupiter Thunder take to charge? How far does Mars Fire Ignite travel? Are there any special properties to Moon Tiara Action, because it has a lot of lag for a semi-strong incomplete boomerang. As a minor thing, putting Specials in between aerials and grabs is rather odd; traditionally, they are put before or after the standards, depending on who you talk to. The set in general seems to be constricted to what already exists in Smash Bros., Make Your Move is a chance to push the envelope and create a unique character! Given what you have, it will take a lot of work to fix up, but this set has potential, so don’t lose hope on it! Heaven knows I would never show off my first set (it was not on Make Your Move by a longshot). I hope I was helpful with my criticism!
 

Munomario777

Smash Master
Joined
Nov 18, 2014
Messages
3,253
Location
Charleston, South Carolina
3DS FC
0387-9596-4480
Switch FC
SW-8229-3157-8114
We’ve built up quite a few movesets in the past few days, so I guess it’s time for another rousing edition of…

SLAVIC’S SMASHING STATEMENTS!

STEVE
Oh, this brings back memories of sophomore year, spending dozens and dozens of hours mining… and crafting… and- well, you get the picture. Minecraft was (and might still be) a pretty fun game. And glossing over your moveset for Steve, he seems like a pretty fun character! Steve plays off as a very referential character, falling in with the likes of Mr. Game & Watch and Villager, which I think makes sense for a game like Minecraft which focuses on what freedom and creativity rather than Steve himself. Throughout the moveset, there are plenty of Minecraft items, and the whole set seems rather derived from the game (A good thing!) I love the idea of the inventory, and I think it’s well balanced so it’s not confusing but still is helpful to Steve’s playstyle. In the Specials, I like the Mining attack, and I like the idea of pulling out chunks of the stage. Just to throw out an idea, perhaps instead of random blocks the player would pull up blocks that correlate to the stage? I like the idea of the Pig as a Wario Bike-type move as well, though the animation might be slightly awkward, since it is an animal and not a bike Steve pulls out. If you were at all concerned about that, I would recommend maybe having Steve break open a pig egg to spawn his vehicle. In the Standards, I like the use of different tools for the tilts, which I think adds a good amount of variety to Steve. I also think that the Diamond armor makes for a nifty Final Smash.
Thanks for the feedback! :)
  • Emmet: Ah, LEGO Movie. That movie was amazing.
  • Memories: Yeah. Minecraft is so open-ended; it's my favorite game of all time, as I said in the set introduction.
  • Opening: Thanks! Since Minecraft has so much content and possibilities in it, I aimed to include as much as possible into Steve's moveset.
  • Inventory: Obviously, the whole Inventory wouldn't fit in that small of a space, so I trimmed it down a bit while still keeping the essence of the mechanic in Minecraft.
  • Mining: The attack doesn't actually leave a permanent hole in the stage; it's more like the Turnips in that Steve pulls out a random item and then covers the hole back up. I like the idea of blocks correlating to the stage, but that would leave some blocks unused (not many stages have diamond flooring, for example). That said, I could definitely see that as a custom move or something along those lines.
  • Pig: I like the idea of using the Spawn Egg; I might have to implement that when I go back through the moveset.
  • Standards: I think using the axe, hoe, etc. for the standards was the best choice, since they are the most "basic" tools in the original game.
  • Final Smash: The Final Smash was sort of designed to encapsulate the upgrading aspect of Minecraft (advancing from wood to diamond tools and such).
Now for some criticisms and general questions. I know you list the damage on mining and placing blocks as 0%, but I feel like both those actions are ‘violent’ enough to warrant damage. You already use swinging his pickaxe as an attack, so maybe Steve can use the damage so opponents don’t pester him while he digs. As for placing blocks, I imagine it similar to the Villager’s bowling ball drop, and I could see it knocking opponents away, though maybe I’m just misinterpreting the description. I already mentioned the possibility of mining specific blocks from specific surfaces, but I don’t think there is an issue with having the blocks be random, it captures the unpredictability of Minecraft well. Another nitpicky thing, is there a way to shuffle blocks and items in your inventory, or are you stuck with the order you collect them in? I’m glad you took Reiga’s advice with the Pig, it makes more sense now. Reiga touched on the TNT Cannon briefly, but I personally don’t like it as an attack. Compared to the rest of Steve’s moveset, it seems really out of the ordinary; I can’t think of a time where I actually wanted to blow *myself* up, even with a cannon. I don’t have any recommendations on what to replace it with, but it just sticks out to me. The Standards of this set seem fairly barebones. For some of the moves, especially the tilts, this makes sense, because the motions are intuitive and easy to visualize. Others, though, aren’t as easy to visualize. For instance, how exactly does Steve charge the Beacon? When Steve uses the Flint and Steel, is the ring horizontal or vertical around himself? I can easily picture both, but they would have very different hitboxes and usage than each other. The last odd attack to visualize is Steve’s back throw. I like the usage of Redstone, but how fast does he set this all up, and does the open just stand there while he does so. How does the opponent get knocked behind Steve from that? As a last note, I think you may have utilized a few too many items in the moveset, and the references seem just a bit cluttered for me. I know something I was hoping for was tool-based Smashes that upgrade from Wood to Stone to Steel depending on charge, or something along those lines. That’s just me, though. All in all, I like Steve as a character, and I would honestly play him as is. There’s just a few points I would try to tidy up and fix, and work on some of the visualization.

Also, if you’re still looking for a good victory theme, I would suggest 0:35 through 0:43 of the Sweden Theme. I think it captures both the soundtrack and the essence of the game.
  • Mining: The swing isn't really that pronounced the way I'm imagining it (it's mainly aimed down at the ground, since he's mining and all). That said, I could probably add a small hitbox for if opponents do get in the way.
  • Place: Actually, Sand and Gravel are the only blocks that fall when placed; the other ones float in midair, which can aid recovery if a block is placed in midair below Steve. This references the physics (or lack thereof) of Minecraft.
  • Shuffling: Yes; you just use the Neutral Special and Down Special alternately (you can stand on top of a Placed block and use the Down Special to pick it up again). This changes the order of the Inventory.
  • TNT Cannon: TNT cannons are a relatively common creation in Minecraft, but they will, of course, harm the player unless they're in Creative Mode. This usually results in death in the actual game, but I toned it down a bit for Smash. It also helps nerf his recovery a bit, since he can create up to three floating platforms below him Cloud Mario-style.
  • Beacon: He sort of places it and puts both hands on it. This is different from its function in the actual game, so I'll clarify this when I edit the set.
  • Flint and Steel: It's a vertical ring (so that it will hit opponents at all angles). I'll clarify this as well.
  • Back Throw: The circuit is something like this:
  • 2015-02-18_16.37.16.png
  • The Zombie represents Steve (should be facing to the right), and the Skeleton represents the opponent. Steve flicks the lever, and the piston extends, sending the opponent flying. It takes about a second to set up. Of course, I'll add this image to the set.
  • Too Many Items: I think it's fine, given how many items Villager and the like use. It gives a nice identity to each move (the flint and steel attack, the hoe attack, the beacon attack, etc.).
Thanks again for the feedback! :) I'll go through either today or tomorrow and edit the set accordingly.

EDIT: Set updated! Check it out and see what you think. :)
CAPTAIN TOAD
Goodness, I still need to get this game, it seems pretty fun! I’m so glad Captain Toad became an actually important character after Galaxy. Glancing over the set, it looks like he plays similar to Steve, using a bunch of references to his game. I’m glad to see, however, that he seems more formative a character, which is good because Captain Toad actually has a canonical personality and identity, which is well embraced in the moveset. Off the bat, there is excellent dedication to the game, keeping Toad grounded (more about that later). The Headlamp attack is pretty nifty (and similar to the moveset I’m working on now ;D), and it’s good to see more of that paralyzing action in moves. It especially works for Toad, who can’t jump, which allows him to chase down opponents. The Minecart is another good move for Captain Toad (can it go aerial?), and I think it makes for a better move than. for instance, Steve’s Pig. Should someone just be glancing through the moveset, they might think the Propeller Box is absurdly good, but I think it works for Captain Toad, who desperately needs the vertical boost. The Pluck move, contrary to other opinions, I actually love the random aspect of the attack. The items all seem good to me, although I’m concerned the Super Pickaxe might be a bit too powerful. For the Jab, I’m assuming these coins don’t heal Toad like his Pluck attack? I think the tilts are all fitting for Captain Toad, and I love the Smashes, I think they’re quirky and fun. The aerials seem fine, for what they’re worth, although Captain Toad could probably stand to have stronger aerials, given how rarely he’s in the air. The grappling hook is a good reference for any adventurer, and I think helps define Captain Toad as a fighter. Bonus points for the Super Mario Bros. 2 gif, also!
Thanks for the feedback! :)
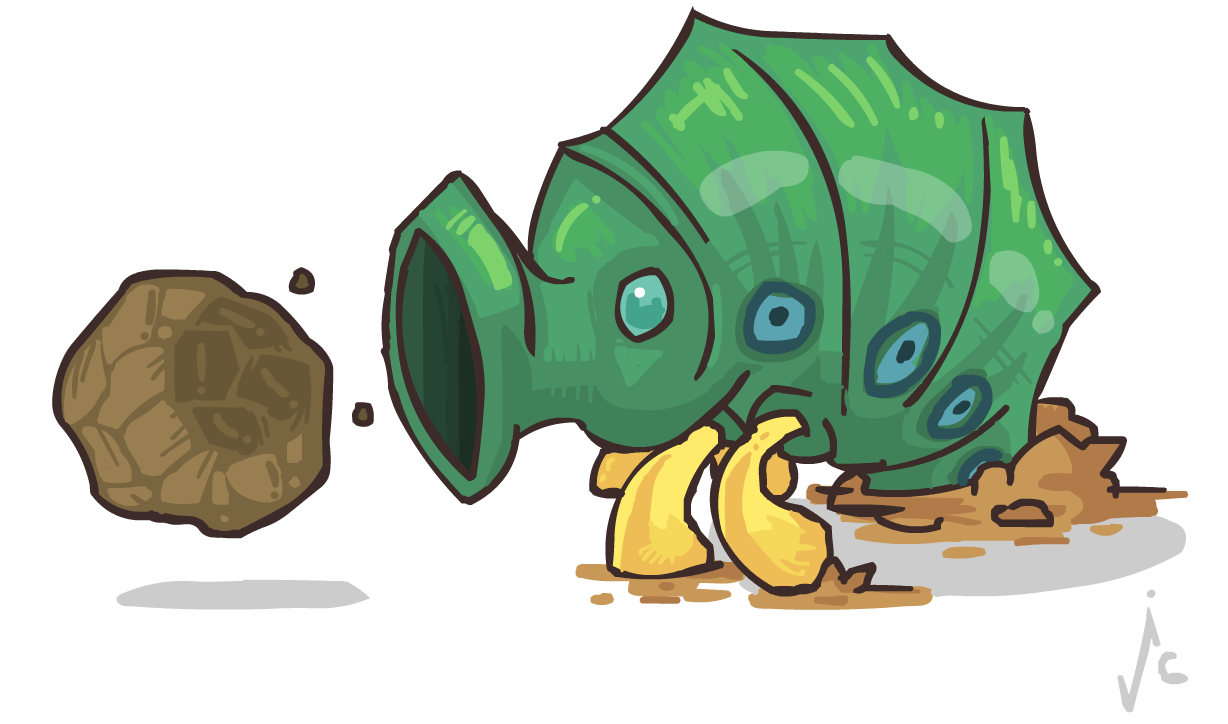
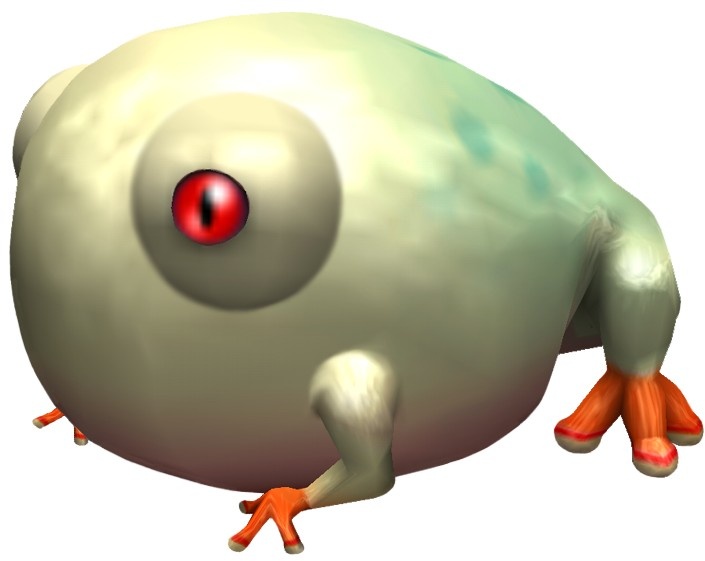
  • Weird Frog Thing: Um... okay. Moving on.
  • Treasure Tracker: It's a ton of fun. I'd totally recommend it.
  • Intro: Thanks! I aimed to use as many things from the source game as possible. This was a bit difficult given the simple core gameplay of Treasure Tracker, but I think I did a decent job at pulling it off.
  • Headlamp: Yeah, the headlamp attack is really good for follow-ups, like Zero Suit's Paralyzer.
  • Minecart: If you mean jump off the ground, then no, it can't. It can, however, be used in midair, and it can go off ledges.
  • Propeller Box: Yeah, a character with no double jump really needs something like this. Almost like a reverse Yoshi situation, now that I think about it.
  • Pluck: It's a risk-versus-reward move, and I think it worked out well. The Pickaxe only has a one in twenty chance of appearing, so I think it's balanced enough.
  • Aerials: Good point; I think I'll buff up some of the aerials when I go through the set again.
  • Grappling Hook: Even though it wasn't in Treasure Tracker, I felt it fit the theme of his character and the set as a whole, and is somewhat of a necessity given his lack of a double jump (plus, it can be used after the Propeller Box, since it doesn't leave him in helpless).
  • SMB2 Gif: "Hey guys, where are you going? Come back! :("
While I complimented your dedication to the source material, I would be concerned about Captain Toad’s inability to jump as a gimmick, as it’s not made up for in the moveset. I’m not talking about he has no recovery, but there’s nothing that balances out the negative part as playing him. “Which character should I play, Steve?” “I know, Captain Toad! He can’t jump!” Not the best advertisement for a character. I would suggest finding some motivation to play Captain Toad, something that gives him an edge over opponents. As a general criticism, some of the moves, particularly the up throw, are hard to imagine, and I would recommend (as I always do) fleshing out some of the moves to give them substance. Otherwise, I think Captain Toad is one of your better sets, and I think it’s a fun little niche set (until everyone else releases one, goodness.)
  • Lack of Jump: Good point. I think beefing up the aerials would help remedy that, as well as giving him a better ground game.
  • Hard to Imagine: True. I'll go back through and give some of the moves more in-depth descriptions.
Thanks again for the feedback! :) I'll go through either today or tomorrow and edit the set accordingly.

EDIT: Set updated! Check it out and see what you think. :)
 
Last edited:

Katapultar

Smash Lord
Joined
Nov 24, 2008
Messages
1,284
Location
Australia
Great comments so far, everyone! Us old folk need to work harder (or more like work at all) to catch up!

Also, I knew about Read or Die beforehand, mostly because of Yomiko starring in a Japanese exclusive crossover game featuring other characters like those from Sgt. Frog and Slayers. I've only watched the first 12 episodes of the R.O.D TV anime and am reluctant to watch the OVA on Youtube because there is no dub option. Yes, I prefer dub if the option exists.

Also, @ Munomario: the weird frog thing is Keroro from Sgt. Frog (or Keroro Gunsou in Japan), a little green alien frog who wants to take over earth. I made a moveset for him and his crew back in MYM12 (2012), and he's considered the second most underpowered moveset of all time.

I approve of the image.

And with that, Genjo Sanzo, who hasn't been commented yet, deserves a comment:

[collapse=Genjo Sanzo]I like how you've made yourself synonymous with the obscure Read or Die series by making 2 sets for it when nobody else has. Genjo's staff mechanic reminds me of a similar mechanic used in a Kyoko Sakura set made back in MYM11 (2011), but that used a Special to handle the weapon extension and the set's author isn't fond of its execution, whereas here you use the taunts and it frees up space for the rest of the moveset. Going into specific numbers for the staff mechanic is pretty bold of you, but I get the feeling that you underestimate exactly how wide a (small) Stage Builder Block is: this article here on the Plaza perfectly shows just how long a SBB is and is a great reference for how far some attacks reach, meaning Genjo's staff, which can range from 2-6 SBBs in length, can reach pretty darn far! I don't know about Smash 4, but Brawl Final Destination is approximately 8 SBBs long, and Battlefield platforms are about 2 SBBs long, I believe. It's good to know this reach stuff for the future, and really it's easily fixed with a bit of editing; I would probably make the max distance of the staff about 1.4 Battlefield platforms wide, perhaps, which is not obscenely far but still further than virtually any melee attack. Since I don't think you intended to give the staff such good reach, I'm going to assume that its actual range is a lot more down-to-earth.

Also, you could perhaps make the extension/retraction of the staff much quicker, maybe 0.4 seconds each time? I wouldn't want to spend that long just to get the staff's length to a level I want when I'll have to use it to beat up the opponent.

I feel it makes sense for Genjo to play offensively given his character and stats, and I like his Down Special as an offensive option that utilizes his extended staff, but I can't help but imagine him as being an equally good defensive character given his potentially good range and moves like the Neutral and Side Special. Genjo would excel at walling off opponents with his high-ranged attacks, partly to space himself for the extra lag on his extended attacks, but he's perfectly capable of rushing at opponents and finishing them off with his close-ranged N-air, F-air and B-air once he's launched them. It's very clever of you to give Genjo an actual reason to ram into enemies with his momentum-inducing Specials, but it does feel weird that he is out-ranged in horizontal air combat when attack range is supposed to be his forte. The set can be a bit strange in this sense, but it doesn't outright contradict given Genjo doesn't have any proper projectiles and thus he is essentially a mid-ranged fighter who -can- go for a kill up-close.

Genjo's execution is a tad questionable at times, and he doesn't feel like overly exciting or anything, but he's certainly interesting in his own way. He is a step forward, at the very least, and cements your interest in the Read or Die series. I wonder who you'll make a moveset for next?

Also, the Final Smash is pretty darn cool; it takes from the original source material and is very well presented - a definite highlight of the set!
 
Last edited:

Slavic

Ask not the sparrow how the eagle soars
Joined
Jun 5, 2013
Messages
763
Location
taco bell, probablyn't
Also, I knew about Read or Die beforehand, mostly because of Yomiko starring in a Japanese exclusive crossover game featuring other characters like those from Sgt. Frog and Slayers. I've only watched the first 12 episodes of the R.O.D TV anime and am reluctant to watch the OVA on Youtube because there is no dub option. Yes, I prefer dub if the option exists.
I totally support the dubs, I feel you. I actually have been unable to find the dub online anywhere, so I ended up buying it off of eBay for like 18 bucks, and the DVD also includes historical biographies on all the historic characters. Useful for my research! I was actually unaware there was any game with her in it (it would be Japan only), I have to play it sometime, somehow.

I like how you've made yourself synonymous with the obscure Read or Die series by making 2 sets for it when nobody else has. Genjo's staff mechanic reminds me of a similar mechanic used in a Kyoko Sakura set made back in MYM11 (2011), but that used a Special to handle the weapon extension and the set's author isn't fond of its execution, whereas here you use the taunts and it frees up space for the rest of the moveset. Going into specific numbers for the staff mechanic is pretty bold of you, but I get the feeling that you underestimate exactly how wide a (small) Stage Builder Block is: this article here on the Plaza perfectly shows just how long a SBB is and is a great reference for how far some attacks reach, meaning Genjo's staff, which can range from 2-6 SBBs in length, can reach pretty darn far! I don't know about Smash 4, but Brawl Final Destination is approximately 8 SBBs long, and Battlefield platforms are about 2 SBBs long, I believe. It's good to know this reach stuff for the future, and really it's easily fixed with a bit of editing; I would probably make the max distance of the staff about 1.4 Battlefield platforms wide, perhaps, which is not obscenely far but still further than virtually any melee attack. Since I don't think you intended to give the staff such good reach, I'm going to assume that its actual range is a lot more down-to-earth.

Also, you could perhaps make the extension/retraction of the staff much quicker, maybe 0.4 seconds each time? I wouldn't want to spend that long just to get the staff's length to a level I want when I'll have to use it to beat up the opponent.

I feel it makes sense for Genjo to play offensively given his character and stats, and I like his Down Special as an offensive option that utilizes his extended staff, but I can't help but imagine him as being an equally good defensive character given his potentially good range and moves like the Neutral and Side Special. Genjo would excel at walling off opponents with his high-ranged attacks, partly to space himself for the extra lag on his extended attacks, but he's perfectly capable of rushing at opponents and finishing them off with his close-ranged N-air, F-air and B-air once he's launched them. It's very clever of you to give Genjo an actual reason to ram into enemies with his momentum-inducing Specials, but it does feel weird that he is out-ranged in horizontal air combat when attack range is supposed to be his forte. The set can be a bit strange in this sense, but it doesn't outright contradict given Genjo doesn't have any proper projectiles and thus he is essentially a mid-ranged fighter who -can- go for a kill up-close.

Genjo's execution is a tad questionable at times, and he doesn't feel like overly exciting or anything, but he's certainly interesting in his own way. He is a step forward, at the very least, and cements your interest in the Read or Die series. I wonder who you'll make a moveset for next?

Also, the Final Smash is pretty darn cool; it takes from the original source material and is very well presented - a definite highlight of the set!
I went through and made some changes to his staff. I actually have seen that article before, but what I took from it was people typically make their ranges too small, so I tried to avoid that. I changed his Up Aerial to make better use of his staff's range as well, to help with that, and added a few things I was missing (I can never remember to add those customs, jeez!) Thanks for the comments as always, Kat! Very helpful. Also, the Final Smash was the one of the most fun parts of this moveset to write. Originally I was just using the disciples' names for the attacks, but I was stumped for a Final Smash and I thought it would be a fun reference!

@ Munomario777 Munomario777 I went through your sets again and they're looking pretty swift, I have a better job imagining how Steve moves and what not, which was the biggest problem I was having. I didn't see much difference with Captain Toad, did I miss something by any chance?
 
Last edited:

Munomario777

Smash Master
Joined
Nov 18, 2014
Messages
3,253
Location
Charleston, South Carolina
3DS FC
0387-9596-4480
Switch FC
SW-8229-3157-8114
@ Munomario777 Munomario777 I went through your sets again and they're looking pretty swift, I have a better job imagining how Steve moves and what not, which was the biggest problem I was having. I didn't see much difference with Captain Toad, did I miss something by any chance?

Thanks! For Captain Toad, I mostly just added a few details and buffed his attacks a bit to make up for the lack of jumping.
 

Slavic

Ask not the sparrow how the eagle soars
Joined
Jun 5, 2013
Messages
763
Location
taco bell, probablyn't
Thanks! For Captain Toad, I mostly just added a few details and buffed his attacks a bit to make up for the lack of jumping.
I figured that's what it was, but I had nothing to compare it to. I just wanted to make sure I didn't skip any major new mechanics or anything.
 

Waver

Smash Cadet
Joined
Jan 5, 2012
Messages
71
Location
In your cookie jar...
NNID
WaverJR
3DS FC
2964-8605-0439
Switch FC
SW-1450-5084-6730
It's time for some Luigification! :D
VERSION 2.0.2


Now, I know what you're thinking: "Toon Link is already in the game!" I know, I know. This moveset is a theoretical revamped version of this clone character. Also, please note that this set is based solely on Link from The Legend of Zelda: The Wind Waker (and, by extension, its HD remake). Phantom Hourglass, Spirit Tracks, and the other "toon" games are not being referenced here. Also, this moveset is designed for Smash 4, and certain moves are based on Toon Link's existing moveset from Smash 4. With that said, let's dive right into this set!

STATS
The stats are the same as Toon Link's in Brawl/Smash 4 (if there are differences here between the two games, please let me know), which are:
Weight: 92
Size: 3
Ground Speed: 6
Air Speed: 6
Fall Speed: 4
Naturally, attack power and the like vary with each move, and will thus be explained in the attack section.

UNIQUE MECHANICS
First up in the unique mechanics department, we have the Magic Meter!

This green bar is placed above the percentage meter and character portrait, similar in positioning to Little Mac's KO Meter. The Meter is divided into eight segments, and certain attacks will use up one or more segments when used. If there is not sufficient Magic left, said attack will fail to perform (this happens in a different way with each move, which will be explained as each move is introduced). Also, if an attack uses, say, two segments and there is only one segment left, the attack will still fail, unlike Robin's Tomes. The Meter refills one segment every five seconds, unless there is a magic-consuming attack in use, during which the five-second refill timer will pause (so if there is one second until a recharge, but the player uses a Magic attack, the Meter will refill one second after the attack is done). Of course, this is different from Robin's Tome/Levin Sword usage in that the remaining amount is visible, it recharges over time even if it's not depleted, and all of the applicable moves draw from the same bar.

Secondly, since it's not tied to a move per se, we have the Mirror Shield!

This is somewhat similar to Link's Shield (and, by extension, Toon Link's Shield in Brawl/Smash 4), but it has three key differences. First off, the shield is only active while Toon Link is crouching, rather than standing or crouching. Second, it can reflect projectiles that collide with the shield (but only the shield, of course, not Toon Link's whole model) for 1.4x the original damage. However, the third difference is that reflecting projectiles consumes one segment of the Magic Meter! This means that, on a full Meter, the Mirror Shield can reflect eight projectiles without recharging or using Magic in another way. If there is no Magic left, the Mirror Shield will change in appearance from the Mirror Shield to the standard Hero's Shield (this is the Shield that Toon Link currently uses in Smash 4):

This Shield will still block projectiles, but it will not reflect them. Like all Magic-consuming moves, if Toon Link is blocking with either Shield (even the standard Hero's Shield), the Magic Meter will pause its refilling process.

SPECIALS
Now let's move onto Toon Link's special moves.

Standard Special: Magic Bow
Uses Magic: Yes; 0-4 segments depending on charge
Damage: 3~15% depending on charge

I know what you're thinking: "I thought you were making Toon Link different! Why does he have the same Standard Special?" Well, he does and he doesn't. He does still use the same Bow, but he doesn't use the same Arrows...

Introducing the Fire, Ice, and Light Arrows! Switching between the Arrows (Standard, Fire, Ice, and Light) depends on how long the move is charged. The charge time is about the same as Robin's Thunder (along with the transitions to Elthunder, Arcthunder, and Thoron), and the order is Standard, Fire, Ice, and then Light Arrows. The Standard Arrow does 3% and very low knockback. It travels the length you'd expect if you charged the existing Smash move for that long. It has no special effects. The Fire Arrow does 7% damage and medium knockback, and has a fire effect. It will also leave a flame on the ground where the arrow lands, doing 1% and no real knockback (only flinching) per hit while on the ground. It travels the length you would expect the existing Hero's Bow in Smash 4 to travel at this charge time. This Arrow also consumes one segment (one eighth) of Magic per use. The Ice Arrow does 10% damage and great knockback (KOing at around 110%), and has a freezing effect on opponents who are at 30% or higher. The notes above about travel distance apply here as well, and this Arrow consumes two segments (one fourth) of Magic per use. Finally, the Light Arrow does 15% damage and amazing knockback (KOing at around 90%), and travels as quickly as Robin's Thoron. Also like Thoron, this Arrow travels in a straight line, unaffected by gravity, and can travel indefinitely (only disappearing at the edge of the screen). Toon Link can cancel at any time during charging by shielding, rolling, air dodging, spot dodging, or getting hit by attacks (used to conserve Magic), but this will not store the charge. This attack can also be aimed from straight down to in front to straight up by tapping up and down on the Control Stick. Use this move for zoning, as well as setting up traps with the Fire and Ice Arrows and potential long-range KOs with the Light Arrow.
Custom 1: Skyward Bow
Uses Magic: Yes, 1~4 segments depending on charge
Damage: 3~15% depending on charge
This custom is fairly basic. The gravity on the arrows is reversed (so they fall up, rather than down), but this costs one more segment of Magic per arrow. This means that the Standard Arrow costs one segment rather than zero, the Fire Arrow costs two rather than one, and the Ice Arrow costs three rather than two. As the Light Arrow is unaffected by gravity, it and its magic cost of four are unaffected. This move can also not be aimed. This is a great anti-air move, with potential to gimp certain recoveries and approaches.
Custom 2: Homing Bow
Uses Magic: Yes, 0~4 segments depending on charge
Damage: 1~10% depending on charge
This custom is mainly for those who aren't very skilled at aiming. All four Arrow variants will home in on opponents, like Samus's regular Missile. However, these Arrows are much slower than normal, and the damage is reduced (Standard does 1%, Fire does 4%, Ice does 7%, and Light does 10%), along with the knockback. Use this for zoning, but if you're good at aiming, use the default or the other custom.

Side Special: Boomerang
Uses Magic: No
Damage: 3~8%

Yeah, yeah. I know it's the same basic weapon again. Don't worry, it gets more interesting after this. Anyway, this move functions similarly to Toon Link's current Side Special (along with its 8% going out and 3% coming back in), but there are some key differences. First off, the angle at which the Boomerang can be thrown is greatly increased all the way to straight up and straight down! To angle this move effectively, use a similar input to aiming Mega Man's Metal Blade. Anyway, the other difference is that the Boomerang can now carry items back to Toon Link, similar to Olimar's Pikmin! It also has a 50% chance of stealing items from opponents it hits and carrying them back to Toon Link. Use this for zoning, keeping opponents at bay, and item retrieval.
Custom 1: Flaming Boomerang
Uses Magic: Yes, 1 segment per use
Damage: 7~12%
This custom sets Toon Link's Boomerang on fire, dealing 4% of extra damage per hit as opposed to the normal Boomerang. However, this comes at a cost of one segment of Magic per use, and if there is no more Magic left, the Boomerang will appear charred and not leave Toon Link's hand (it will deal 1% damage if the charred boomerang collides with an opponent, however). In addition, this Boomerang will not carry items back, due to the fact that it's sort of on fire. If this Boomerang is out, the Magic Meter refill timer will pause. This move is best used for zoning and damage racking.
Custom 2: Clingy Boomerang
Uses Magic: Yes, 1 segment per use
Damage: 0%
This Boomerang variant is very interesting. Instead of just stealing items, thanks to the Wind Waker, this one will also grab opponents it collides with and carry them back to Toon Link for combos! However, Toon Link is vulnerable and can't move for a second due to him using the Wind Waker. Despite this, there is still enough time to get an attack in on the return trip! This can be broken out of similarly to a grab, but higher percentage means it's harder to break out of. This won't start a regular grab when it returns, so it's best to strike the opponent while they're caught in the Boomerang. The range of this Boomerang is also much shorter than the original. Of course, the nature of this move means that it won't deal any direct damage, so the player must be skilled to use this to its full potential. The Magic recharge timer is paused while the Boomerang is out. This Boomerang is good for closing gaps between you and the opponent.

Up Special: Deku Leaf
Uses Magic: Yes, 1~8 segments depending on how long the move is used
Damage: 0%

Now we're talking! This brand-new Up Special is a multipurpose item depending on how, where, and when you use it. In the air, this functions as Toon Link's main recovery option. Toon Link holds onto both ends of the leaf with one hand, and in the other, he uses the Wind Waker to create a gust of wind upwards to propel himself upwards (this consumes 1 segment of Magic), the gust of wind having a windbox to push opponents upwards. He then puts away the Wind Waker and grabs onto the Leaf with both hands like a parachute, and glides through the air (in a similar fashion to Peach's Umbrella). This consumes 1 segment of Magic per second while gliding. The landing indicator from Wind Waker HD on the Wii U appears on the ground underneath Toon Link while he is gliding. If there is no Magic, the leaf will wilt, and Toon Link will fall into a helpless state. If Toon Link attempts to use the move in midair without any Magic, he will hold the Leaf and the Wind Waker as usual, but only the gust of wind upwards will result. Toon Link can cancel the glide at any time, but he will be put into helpless; while in this state, he can hold the Leaf out again similar to Peach's Umbrella, but cannot create another gust of wind upwards. If used on the ground, Toon Link will use the Deku Leaf as a giant fan to create a horizontal gust of wind to push opponents away at the cost of one segment of Magic. If there is no Magic, the leaf will wilt and no gust of wind will appear. Like all Magic-consuming moves, the Magic Meter's refill timer will pause while Toon Link is using this move. This move is good for recovery while in the air and edgeguarding while on the ground.
Custom 1: Deku Poison Ivy
Uses Magic: Yes, twice the regular move's values
Damage: 4%
This custom special exchanges Toon Link's Deku Leaf for a leaf of poison ivy. If opponents touch this poisonous plant, they will be knocked back a bit and take 4% damage. However, this comes at a cost of consuming twice as much Magic as normal (2 segments for the initial gust upward, 2 per second gliding, and 2 for the horizontal gust on the ground). The damage will create the same effect as a hit from Olimar's White Pikmin. This move is good for a safer recovery option due to the damaging leaf.
Custom 2: Rising Deku Leaf
Uses Magic: Yes, 2 segments per second gliding and 1 segment when blowing on the ground
Damage: 0%
This custom move changes the gliding aspect of the Deku Leaf drastically. Instead of rising upward and gliding down, Toon Link continuously uses the Wind Waker while gliding for an upward arc. However, this means that the gliding costs twice as much Magic as normal, since both the Wind Waker and the Deku Leaf are in use. The ground version is changed from a horizontal wind gust to a diagonally upwards wind gust, but the Magic usage for this is unaffected. This leaf is good for low recoveries, as well as guarding against high ones.

Down Special: Iron Boots
Uses Magic: No
Damage: 16%

A combination of Kirby's Stone move and Shulk's Shield Monado Art, this move is a fresh new addition to Toon Link's moveset. When used, Toon Link puts on the Iron Boots. This makes him slower and heavier, resulting in inability to jump, much faster falling speed, slower walking speed, inability to dash, inability to shield/roll/spot dodge/air dodge, inability to throw (he can still grab/pummel though), and much greater start and end lag on attacks. However, this is made up for by an extreme weight gain, making Toon Link weigh as much as Shulk's Shield Art and thus reducing knockback taken greatly; weaker attacks won't even make him flinch! Also, if Toon Link falls on an opponent (either by using it in the air or falling off a ledge) with these shoes on, it will deal 16% damage and Stone-level knockback. Toon Link can toggle back out of the Boots at any time by just using the Down Special again. Use this move for approaching from high up, as well as surviving at high percentages.
Custom 1: Hover Boots
Uses Magic: Yes, 1 segment per second while floating
Damage: 0%
This custom move has Toon Link don the Hover Boots from the Zelda series. This pair of shoes lets him hover like Peach can (aerial attacks and all), with a cost of one segment of Magic per second while hovering. These shoes also result in increased jump height, but the lower weight results in increased knockback from attacks Toon Link is hit with. If there is no Magic left, the shoes will not allow Toon Link to hover, but the other functions will work fine. Of course, the Magic Meter refilling will be frozen while hovering. Use this for aerial battles, as well as using aerials close to the ground.
Custom 2: Pegasus Boots
Uses Magic: Yes, 1 segment per second while dashing
Damage: 5%
This custom special utilizes the Pegasus Boots from multiple games in the Zelda series. These shoes increase Toon Link's air and ground speeds, as well as turning his dash into an attack, dealing 5% and good knockback. However, this consumes one segment of Magic per second while dashing. The increased air speed can aid horizontal recovery, especially since the Pegasus Boots give Toon Link a midair dash (with attack and all). If there is no Magic left, the dash will not damage opponents, and the midair dash will not work. Of course, the Magic Meter refilling will be frozen while dashing. Use this for approaching from long distances, as well as for horizontal recovery.

With the Specials done, now let's move onto the rest of the moveset.

GROUND ATTACKS
Jab:
Sword Swipe*
Uses Magic: No
Damage: 3%, 2%, and then 4%

Toon Link swipes his sword two times, and then jabs with it on the third hit. Good for racking up a bit of damage.

Side Tilt: Telescope Bat**
Uses Magic: No
Damage: 9%

Toon Link swings the telescope his little sister Aryll gave him for his birthday in an overhead arc to damage opponents. Has a decent range, and can be used for attacking at medium range.

Up Tilt: Enemy Weapon Poke
Uses Magic: No
Damage: 3~7% depending on weapon pulled out

This attack has Toon Link pull out a weapon used by the enemies in Wind Waker and poke opponents above him using them. There are three different weapons, pulled out in the following order. The Machete (left image) has the shortest range, but has the least lag. The Boko Stick (middle image) deals the least damage, but has the longest range. The Moblin Spear has the most lag, but deals the most damage. Depending on which weapon is pulled out, this is good for attacking quickly, anti-air purposes, or damage racking.

Down Tilt: Low Sweep*
Uses Magic: No
Damage: 7%
A low sweep using the sword, with a chance of tripping.

Dash Attack: Shield Bash
Uses Magic: Yes, 1 segment per reflected projectile
Damage: 7% (or 1.4x the reflected projectile)

This basic attack has Toon Link hold out his Shield and bash opponents with it for 7% of damage. If there is Magic left, the Mirror Shield can reflect projectiles during this attack for one segment of Magic per reflected projectile (it costs no Magic if there is no projectile to reflect). If there is no Magic left, the Hero's Shield can still block projectiles as normal. This attack is good for reflecting projectiles while on the move.

Edge Attack: Shield Swipe
Uses Magic: No
Damage: 6%

Toon Link swipes his Shield along the ground, with a chance of tripping opponents. The Mirror Shield can't reflect projectiles with this attack, since it is facing the ground. This is good for catching opponents off guard while on the ledge.

SMASH ATTACKS

Side Smash:
Skull Hammer
Uses Magic: No
Damage: 7~27% depending on charge

Found in the Forsaken Fortress, the Skull Hammer is a powerful weapon with a long charge-up time. The start lag is about one second (plus the charge time of the smash attack), and the end lag is significant as well. This is made up for, however, by huge damage, range, and knockback (similar to that of King Dedede's Forward Smash). This is one of Toon Link's best KO moves, as would be expected by a smash attack.

Down Smash: Spin Attack
Uses Magic: No
Damage: 10 hits, with 1~3.5% damage per hit for 10~35% depending on charge

Don't worry, Toon Link's old Up Special isn't completely gone. It's been remapped to the Down Smash, with some minor modifications. First off, due to it being a Smash attack, the aerial version is gone. The ground version, however, has a shorter charge time for higher damage potential than the original. It has the same quick startup as the original, but has a bit of end lag when Toon Link strikes his pose. This is one of Toon Link's best damage racking moves, but leaves him vulnerable due to the long spinning animation (like Shulk's Down Smash) and is lacking in the knockback department. If Toon Link has Magic left, this attack becomes the Great Spin Attack, increasing the attack's range. It won't consume Magic, however, and the timer won't pause. This is a great damage racking attack, as well as a quick option to escape some tricky situations.

Up Smash: Bomb Throw
Uses Magic: No
Damage: 10~19% depending on charge

Similarly to the Spin Attack, this is a remapping of a Special move to a Smash attack. In this attack, Toon Link throws a Bomb directly above him, which then explodes upon contact with a surface or an opponent (think Snake's Mortar). The move has great knockback, KOing at around 80% when fully charged. Use this for vertical follow-ups.

AERIAL ATTACKS

Neutral Aerial: Bomb
Uses Magic: No
Damage: 7%

This attack uses the same Bombs from the Up Smash, but in a different way. Toon Link explodes a bomb on himself, creating an explosion around him that damages opponents for 7% and has knockback comparable to Toon Link's current Down Special. It has moderate start and end lag, as well. This is good for close-up aerial battles.

Up Aerial: Hookshot
Uses Magic: No
Damage: 5%

Toon Link fires his Hookshot straight upwards, with range similar to that of Toon Link's current aerial Hookshot (not the ledge-grabbing kind, just the damaging kind). It has knockback comparable to that of the current Hookshot as well, but vertical. The lag is also identical to the current one. However, this Hookshot can also grab items, similarly to the Boomerang, and can grab ledges similarly to Brawl Zamus's Up Special. In addition, only the hook has a hitbox, not the chain. Good for aerial vertical follow-ups.

Down Aerial: Wind Waker Breeze
Uses Magic: Yes, 1 segment per use
Damage: 0~1%

This attack has Toon Link use the Wind Waker baton to create a gust of wind downwards. While it won't deal any damage, it does have a downward windbox that can serve as a weak meteor smash-type attack. It will also propel Toon Link upwards a tiny bit, which can potentially aid recovery. If there is no Magic left, the Wind Waker still has a tiny hitbox for 1% and a small flinching effect. Good for recovery and edgeguarding/gimping.

Forward Aerial: Side Swipe*
Uses Magic: No
Damage: 13%

Toon Link swipes his sword in front of him in a horizontal arc to damage opponents. Good for close-up aerial combat.

Back Aerial: Reverse Side Swipe*
Uses Magic: No
Damage: 11%

Basically the same thing as his Forward Aerial, but faster and less damaging.

GRAB GAME

Grab: Grappling Hook
Uses Magic: No
Damage: 5% (aerial version)

Instead of the Hookshot, Toon Link uses the Grappling Hook to grab opponents. It functions identically, and also replaces his air grab.

Pummel: Wallet/Bomb Bag Smack
Uses Magic: No
Damage: 1%

Toon Link's pummel has him taking out either his Adult Wallet upgrade or his Big Bomb Bag upgrade (randomly chosen) and smack the opponent's face with it. Not much else to say, really.

Up Throw: Power Bracelet
Uses Magic: No
Damage: 10%

This throw has Toon Link pick up the opponent with the power of the Power Bracelet and throw them upwards, resulting in heavy knockback that can KO at around 100% and 10% of damage.

Forward Throw: Skull Hammer Smash
Uses Magic: No
Damage: 15%

Toon Link whips out his Skull Hammer (the same one used in his Forward Smash) and flattens the opponent with it. Does heavy damage, but barely any knockback.

Down Throw: All-Purpose Bait
Uses Magic: No
Damage: 5~15%

Now, you might be thinking, "How will bait hurt anyone? Is it poisonous?" It probably is poisonous, but that's not what Toon Link has in mind. Instead, he sprinkles it all over his opponent's body, which will randomly summon one of three animal types:

The Rats attack in a swarm, and will deal 15% combined, but barely any knockback. The Seagulls attack in a flock, and carry the opponent upwards into the air before slamming back down. This deals 10% and moderate knockback. Finally, Link the Pig (in Wind Waker, it shares the same name as your file and thus your character, so I'll call him Link the Pig) belly slams onto the opponent, dealing only 5% but with amazing vertical knockback.

Back Throw: Wind Waker Whoosh
Uses Magic: Yes, 1 segment per use
Damage: 5%

Toon Link creates a whirlwind around the opponent using the Wind Waker, and then swirls it around, tossing the opponent behind him. Like Link the Pig, this attack only deals 5%, but deals incredible backwards knockback. If there is no Magic left, Toon Link just smacks the opponent with the Wind Waker for the same damage, but pitiful knockback.

MISCELLANEOUS

Final Smash:
Wind Waker
Uses Magic: No, but refills the Magic Meter after the attack is finished
Damage: Varies with each song

With this attack, Toon Link unleashes the full power of the Wind Waker baton! When used, Toon Link holds out the Wind Waker, ready to play a song. A UI pops up, with four directions each with a different icon for a song. When a direction is pressed, that song will be played (only one song per Smash Ball). Here are the four different songs:
Up (Wind's Requiem):
This song changes the direction of the wind. When played, Toon Link goes back into regular combat, but can change the wind direction by pressing the directional pad (or whatever you use for taunts) in any of the eight directions (taunts are disabled during the attack). Up will reduce gravity (for easy vertical KOs), sideways will push opponents to either side (for easy horizontal KOs), down will push opponents downwards (for easy meteor smashes and gimped recovery), and the diagonals are in between. The gusts do not affect Toon Link, only his opponents.
Right (Song of Passing):
In the original Wind Waker, this song would change day to night and vise versa. In Smash, however, it does the reverse, slowing down (practically freezing) everyone but Toon Link's opponents for about 15 seconds. Damage won't actually be dealt by Toon Link per se during this, but at the end of the song's effect, all of the damage and knockback dealt during that time will be added up for one huge strike!
Down (Ballad of Gales):
This song creates a huge tornado in the center of the stage to launch opponents into the air! The launching scales with percentage, KOing at around 50% or so. It also sucks opponents in at a large range, but only lasts for about 5 seconds.
Left (Command Melody):
The Command Melody has Toon Link take control of a random opponent (or the only opponent in a 1v1 scenario) for about ten seconds. During this time, Toon Link is invincible. The duration can be reduced by mashing buttons, like you would if you were grabbed.

Up Taunt:
Toon Link plays the Wind Waker identically to how he does in Smash 4.
Side Taunt:
Toon Link releases a Fairy from a Bottle, which flies around him. This will refill half of his Magic Meter, but leaves Toon Link wide open.
Down Taunt:
Toon Link takes a picture of himself with his Picto Box, and his face has a random expression.

Victory Pose 1:
Toon Link catching the pig like he does in Smash 4.
Victory Pose 2:
Toon Link playing the Wind Waker like he does in Smash 4.
Victory Pose 3:
Toon Link going through the "item get" animation with a Tingle Bottle.

Victory Music:
A remixed, more upbeat version of 0:15 to 0:20 in this video.

Miscellaneous:
- If a long enough combo is reached, sword strikes will gain the musical note sound effect they have in Wind Waker.
- Toon Link has the cel shaders he has in Wind Waker.
- Pictures taken with the Picto Box, his Down Taunt, can be saved to the photo gallery.

PLAYSTYLE
Toon Link has elements from many different fighters, as well as a few entirely new concepts he brings to the table. He has the resource management of Robin, the item variety of Villager, a reflector, Olimar's item retrieval, and more. Edgeguarding is a breeze (:L) with the Deku Leaf and its blast of wind to push opponents away. Toon Link's projectile game is also rather strong, with the variety in Arrows and his reworked Boomerang. The Boomerang is also good for keeping opponents at bay while waiting for the Magic Meter to refill. The Iron Boots help out when Toon Link is at high percentages, and the Skull Hammer can help KO when opponents are damaged. The Hookshot is good for vertical chasing, and Toon Link's recovery is great thanks to the Deku Leaf and his Down Aerial. The Wind Waker makes for a great Final Smash, which can be adapted to fit any situation. His greatest weaknesses are his lack of weight, lag on many of his moves, and his limited Magic Meter. Overall, Toon Link is set for battle with these new upgrades, but also gets some downgrades to balance it out. As always, feedback is welcome! :)

*This attack is the same as Toon Link's current attack in Smash 4.
**This attack is a reskinned version of Toon Link's current attack in Smash 4.​
If he had this moveset in Smash 4, then I'd be happy with his return! :D Seriously, 10/10. The Final Smash was a similar idea I had too. Great moveset. :)
 

Munomario777

Smash Master
Joined
Nov 18, 2014
Messages
3,253
Location
Charleston, South Carolina
3DS FC
0387-9596-4480
Switch FC
SW-8229-3157-8114


If he had this moveset in Smash 4, then I'd be happy with his return! :D Seriously, 10/10. The Final Smash was a similar idea I had too. Great moveset. :)
Thanks! :) I aimed to incorporate as many unique elements, items, weapons, etc. from Wind Waker as I could to give him a nice variety rather than the majority of the attacks being sword swipes like he currently has in Smash, and I think I did a pretty decent job. :)
 

Munomario777

Smash Master
Joined
Nov 18, 2014
Messages
3,253
Location
Charleston, South Carolina
3DS FC
0387-9596-4480
Switch FC
SW-8229-3157-8114
NEW MYM 17 HUB!!!

Ah, what the heck.

Munomario's Make Your Move Hub!


Updated with each new moveset! I also post about new movesets over on my profile page; check either here or there for new movesets! :)

NEWS
Revamp Project Started!
I'm going through all of my movesets and shaking them up, adding details, tweaks, changing some things up, and more! Click here for details.
Wonder-Red Revamped!
Wonder-Red, the first moveset in the Revamp Project, has been updated! Descriptions are extended, images are added, formatting is improved, and other tweaks are made.
Omochao Revamped!
Omochao, the second moveset in the Revamp Project, has been updated! The change is very subtle, so see if you can spot it!
Added the tags [sortofajokemoveset] and [/sortofajokemoveset]
Baymax Revamped!
Baymax, the third moveset in the Revamp Project, has been updated! Descriptions are extended, some moves are changed, formatting is improved, and other tweaks are made.
Inkling Revamped!
Inkling, the fourth moveset in the Revamp Project, has been updated! Descriptions are extended, many moves (including the Tilts, Dash Attack, Up Smash, Down Smash, Neutral Aerial, Up Aerial, Forward Aerial, Back Aerial, Back Throw, and more) are changed, images are added, formatting is improved, and other tweaks are made.
Dood Revamped!
Dood, the fifth moveset in the Revamp Project, has been updated! Descriptions are extended, moves (including the Jab, Smashes, Neutral Aerial, Forward Aerial, and Back Throw) are changed, the grab system is changed, and other tweaks are made.
Boom Sonic Doesn't Need to be Revamped!
I'm never changing Boom Sonic.
Captain Toad Revamped!
Captain Toad, the seventh moveset in the Revamp Project, has been updated! Descriptions are extended, aerials are buffed, he has a new Up Aerial, and other tweaks are made.
Robotnik Revamped!
Robotnik, the eighth moveset in the Revamp Project, has been updated! Descriptions are extended, Side Special has a new aerial version, Down Tilt, Forward Throw, and Back Aerial are changed, and other tweaks are made.
Daisy Revamped!
Daisy, the ninth moveset in the Revamp Project, has been updated! Descriptions are extended, Forward and Back Aerials are changed, she has an air grab, and other tweaks are made.
Toon Link 2.0 Revamped!
Toon Link 2.0, the tenth moveset in the Revamp Project, has been updated! Descriptions are extended, Magic usage for some moves has been tweaked, Side Custom 1 is changed, sword attacks now fire a beam, and other tweaks are made.
Steve Revamped!
Steve, the eleventh moveset in the Revamp Project, has been updated! Descriptions are extended, the Inventory is more incorporated into the moveset, the Dash Attack has some new properties, and other tweaks are made.
Sonic Heroes Revamped!
Sonic Heroes, the twelfth and final moveset in the Revamp Project, has been updated! It's pretty much a whole new moveset, so go check it out!
Revamp Project Finished!
Yay, it's finished! All twelve movesets added to, changed, and in some cases rebuilt from the ground up! Check them out sometime! :)
 
Last edited:

Katapultar

Smash Lord
Joined
Nov 24, 2008
Messages
1,284
Location
Australia
Actually, they're default fonts in the Pixlr editor (basically a free online alternative to Photoshop). I don't think there's a way to change fonts here, is there?
You can use BBCoding through the "A" boxes above where you write your message, which lets you alter the size, color or font of your text like this in order to make the headers stand out and overall make your set much more presentable.
 

Munomario777

Smash Master
Joined
Nov 18, 2014
Messages
3,253
Location
Charleston, South Carolina
3DS FC
0387-9596-4480
Switch FC
SW-8229-3157-8114
You can use BBCoding through the "A" boxes above where you write your message, which lets you alter the size, color or font of your text like this in order to make the headers stand out and overall make your set much more presentable.
Thanks for the tip! Unfortunately, it doesn't look like any of the fonts I used are on the list... :ohwell:
 

Katapultar

Smash Lord
Joined
Nov 24, 2008
Messages
1,284
Location
Australia
SWF used to list more fonts, but they don't anymore for some reason. That being said, other fonts -will- still work on SWF, such as those listed on MS Paint. Other fonts work too, but I'm not sure to which extent.

This article I wrote long ago should hopefully help in case you want to use fonts other than those listed on SWF.
 

Munomario777

Smash Master
Joined
Nov 18, 2014
Messages
3,253
Location
Charleston, South Carolina
3DS FC
0387-9596-4480
Switch FC
SW-8229-3157-8114
SWF used to list more fonts, but they don't anymore for some reason. That being said, other fonts -will- still work on SWF, such as those listed on MS Paint. Other fonts work too, but I'm not sure to which extent.

This article I wrote long ago should hopefully help in case you want to use fonts other than those listed on SWF.
Thanks! Would you happen to know where I could find the codes for the MS Paint fonts?
 

Katapultar

Smash Lord
Joined
Nov 24, 2008
Messages
1,284
Location
Australia


Tamaki is the heroine of the anime Bamboo Blade and a kendo prodigy of immense skill, being strong enough to take down experienced adults without breaking a sweat - largely due to being born into a kendo family and learning the sport at the age of 4. She is quiet and reserved outside of kendo, but she possesses a strong sense of justice due to being a massive closet tokatsu anime fan, believing that she cannot lose due to being "righteous". Her style of kendo is an aggressive mix of speed and power, mostly speed, so most of her matches end before the opponent realizes what hit them. Tamaki has yet to know true defeat and does not believe that losing would be beneficial, but there's always someone out there who's better than you...


Similar to Little Mac and his boxing, Tamaki fights using kendo. Kendo is a sport based around discipline and involves two competitors attempting to strike one another using shinai, makeshift swords designed to omit the fatalities that would come with practicing with real swords. Practitioners (kendoka) don kendo armor and are required to connect with an opponent's head (men), forearm (kote), the side of their armor (do) or throat (tsuki) using the upper-third of their shinai in order to score a point (ippon), all while using proper footwork and shouting the name of the part they intend to strike. Points can also be scored if an opponent steps out of the ring or makes 2 mistakes, but these are less common means of scoring. A round ends when a player scores and is best out of 3.

Only hits from the upper-third of Tamaki's shinai count as proper hits; connecting elsewhere will trigger a sourspot that deals 1-3% and hitstun bordering on frame-neutral or a frame disadvantage depending on the strength of the attack, all while accompanied by a dull hitting sound. One can easily tell where the sweetspot on the shinai is since it glows white and leaves a slash trail from that specific part of the weapon, but that's only fair since hitting with that sweetspot is absolutely essential to Tamaki's victory.


Height: 149cm
Weight: 5
Ground Speed: 8
Jump: 2
Air Speed: 2
Fall Speed: 9
Traction: 11


Tamaki possesses stereotypical "sports" stats, being slower than Little Mac (3rd fastest in Smash 4) but heavier due to wearing kendo armor. Her traction is unparalleled due to the footwork involved in kendo, which is to say that she can stop and turn around very quickly. She also has fantastic walking and running speed, which is great for approaching quickly and safely.


Neutral Special - Kiai
The kiai is a battle cry used to intimidate, boost spirit and command attention in self-defense situations, marked by a fierce shout from Tamaki that distorts the area around her and causes a red aura to emanate from her body. A shockwave of sound is released from Tamaki, spanning 1.4 platforms and dealing 5%, brief stun and a platform of pushback to anyone struck by it. The shockwave destroys projectiles and delivers massive damage against shields, but it fares better when the foe doesn't shield as it will automatically put their shield down to 1HP and delay its recovery for an additional 3 seconds. Kiai is a frighteningly fast move that breaks the opponent's defense and allows Tamaki to go crazy on the offense, but once used it won't reach full power again for 20 seconds, causing no hitstun and much less shield damage among other things should it be used prematurely. Kiai's charging time is slowed down slightly if Tamaki's shield is not at full health, and is worsened greatly if her shield is about to break.

Side Special - Slider
Tamaki steps back by 1 SBB in the blink of an eye. This might seem unremarkable for a Special, but it is much quicker than a roll and an excellent spacer, especially since you can use it while dashing. If you hold B even slightly afterwards, Tamaki will immediately rush 2 platforms forward and hit the opponent with a swift strike to their side the moment they register at the range of her sweetspot, dealing 14% and pretty good mostly-horizontal knockback that starts KO'ing at around 135%. The rush itself is frighteningly fast, but the attack is extremely punishable against shields since Tamaki will continue to slide forward a bit even after connecting, leading her to get grabbed even if the foe didn't powershield. On the other hand, it's dangerous for foes to shield if they were Kiai'd, and if they put up their shield in anticipation of the rush then you might be able to fake them out and nail them with a Kiai.

If you use this attack in midair, Tamaki will skip the step back and simply perform the rush, but she'll only travel half as far. It won't put Tamaki into helpless, but it makes for a poor recovery if opponents get in her way and the end lag bogs her down quite a bit.

Up Special - Rising Thrust
This is obviously not a real kendo move, as Tamaki leaps into the air while thrusting her shinai on a high angle, covering a relatively short distance before entering helpless. Foes caught in the attack are dragged up for multiple hits that accumulate 8-14% before being ejected for average knockback, but you can press B again to initiate a second attack where Tamaki holds out her shinai and falls at high speeds, dragging the foe down for an extra 6% before strongly launching them from the exact point she started the recovery. This attack has virtually no lag and is designed to intercept airborne foes, covering more distance and dealing more damage if started on ground.

Down Special - Gedan-no-Kamae
This is a stance in which the kendoka lowers their shinai to knee-length in order to counter attacks from a safe distance, something Tamaki does to a T in this move. If Tamaki OR a short area above her shinai are struck, she'll -immediately- retaliate with a wrist strike that simply deals 10% and fair radial knockback that KOs at 170%, fast enough that foes won't know what hit em' upon being countered. This is not an especially strong counter since kendoka don't really use their opponent's power against them, unlike with counter-punches in boxing, but it does have a neat positive: Tamaki will breathe deeply at the end of the counter, which restores her shield by 50% its max amount, refreshes her stale moves and even takes of 5 seconds for the time necessary to recharge a Kiai. This is especially good because opponents will likely attack in order to defend themselves when their shield is weakened, allowing Tamaki to spam Kiai if she is able to pull off a lot of counters - especially if you frequently counter projectiles.

If you hold B during the counter, Tamaki will rush forward a platform's distance at high speeds and cut through opponents in her way while damaging them. This is great for further punishing projectiles since Tamaki experiences invincibility and recovers crazy fast if she performed it on the ground, possibly even pushing foes in front of her for a follow-up attack depending on how close she was and if their percentage was relatively low. Finally, if Tamaki countered an item that connected with her shinai, she'll perform a Maki Waza by hooking her shinai with the item to turn it upside-down, flinging the item behind her on a high angle as though it were smash-thrown. This is a less common means of scoring a point in a kendo match, and rather situational in Smash.


Jab - Oji-Waza
Tamaki steps back and raises her shinai close to her in a defensive maneuver, dealing 5% and light set knockback no matter where she hits. Her follow-up attack involves a flurry of horizontal swings that deal 6% and decent knockback on a 60 degree angle should one connect, which automatically ends the attack given you only need to land one strike in kendo and that wailing on the opponent would be dishonorable. The first hit always knocks foes towards the sweetspot and guarantees a hit from the second attack, but Tamaki can delay the second attack to give the foe a chance to respond with their shield or elsewhat, in which case she won't stop attacking and can deliver some decent shield damage while pushing the foe back. This is one of Tamaki's few defensive moves should she find herself cornered, and one of rare attacks she can use against an enemy close to her.

Should Tamaki's first attack clash with an opponent, she'll push them back a fair distance without being pushed back herself, the distance greater if the opponent's shield was weakened. This does not work against attacks that deal 14% or more.

Dash Attack - Step In
Tamaki slides 1 platform forward while quickly swinging her shinai 3 times: twice to the side followed by a swing on a slight upwards angle. The first hit is strongest at 11% and good knockback on a 50 degree angle that KOs at 140%, the second hit deals a lesser 8% that KOs at 165% while the final hit only deals 6% and relatively low knockback, but keeps foes fairly close to Tamaki even at higher percentages. Similar to the Jab, this attack is unique in that Tamaki will automatically end the attack if she connects with any of the hits, making this a safe and fantastic means of establishing the spacing necessary for Tamaki's sweetspot against shielding opponents. Better yet, if you connect with the first or second hit several times, the opponent might forget that there's more to the attack and let their guard down!

F-tilt - Do-bu
This is a strike which aims for the side of an opponent's kendo armor. Here, Tamaki will step forward and swing her shinai sideways before stepping back into neutral position, a swift yet forceful strike which deals 10% and knockback that pushes foes back along the ground at lower percentages, or mostly-horizontal knockback at higher percentages that will KO at 150%. This is Tamaki's bread-and-butter move for hitting foes in the range of her sweetspot, and is especially deadly just because it's so fast - not to mention it has enough reach to prevent foes with subpar grab speed or range from retaliating out of a shield. The only downsides to the attack other than the sourspot is that it does not cover a lot of area around Tamaki and cannot be angled unlike other F-tilts, making it slightly predictable and possible for some characters to crouch against.

U-tilt - Men-bu
This is an overhead strike that aims for the top or side of an opponent's headgear, a swing that covers Tamaki from diagonally upwards behind her all the way down in front of her. The attack deals 9-13% and steady knockback on an angle 45 degrees higher than where the victim was struck that KOs at 185-136% depending on whether you struck early or later, but regardless it's a good move for intercepting opponents due to covering a lot of area. The attack can be easy to dodge from the front due to hitting behind Tamaki first, but it can serve as a neat little surprise attack over the F-tilt and can be acted out of very quickly due to hitting at the end of the attack's duration.

D-tilt - Sweep
Tamaki's crouch is a squat that sees her spread her legs out, the starting position competitors assume before a kendo match. Like many combat-based sports, hitting below the belt is illegal in kendo, but Tamaki has little choice here: she stabs her shinai along the ground to deal 6% and tripping pushback that turns into proning diagonal downwards knockback at higher percentages, capable of KO'ing at 200%. The attack actually lingers for a bit, and because Tamaki stabs her shinai it can effectively hit opponents close to her and is great for stopping their ground advances, especially since you can shield poke opponents with a weakened shield. At mid-percentages, it is possible to put opponents in a downed position where rolling towards you will put them in range of your sweetspot, whereas rolling away will put some distance between the two of you.


F-Smash - Tsuki-bu
The tsuki-bu is a throat strike that only high-level kendoka are allowed to perform since it risks neck injury to an opponent if performed incorrectly. It is utilized by Tamaki whenever she really wants to defeat an opponent (usually because they're morally corrupt), but she's only allowed to use it against older men with kendo experience. Those hit by this move are usually sent flying and are knocked down on their back.

Tsuki-bu has Tamaki step forward and thrust her shinai towards the throat, curving it up slightly as she does. The attack comes out fast and delivers 15-22% plus great knockback that can KO offstage opponents at rather low percentages, but it delivers minimal shield damage and leaves Tamaki open if blocked, made worse by the fact that she moves forward slightly during the rush. It doesn't help that this attack is much weaker (6-9%) if you don't connect with the sweetspot near the end, making it predictable but all the more deadly if you catch an enemy off-guard with it.

U-Smash -
Tamaki simply performs a throat strike up on a high angle and steps back roughly 0.3 SBBs in order to space herself properly for the strike, delivering 13-19% and good mostly-upwards knockback that KOs between 115-88% or mere flinching if you connect too closely. This is fast as hell, and Tamaki actually keeps her shinai out for a slight moment to deliver 7-12% and light knockback that KOs at 200-160% against any opponent who lands on the sweetspot, which is good for catching opponents off-guard since the main hitbox is very easy to see coming given the specific positioning required to hit with it. You might be able to intercept an opponent with this move if they were jumping towards Tamaki for an aerial approach, given many of her more spammable moves like the Dash Attack and F-tilt have a blind spot diagonally above her.

D-Smash -
Tamaki lowers a knee and turns halfway towards the screen with her shinai tilted away slightly. This is then followed by Tamaki turning around and stepping in that direction to sweep the floor with her shinai for 12-16% that KOs at 150-120%, before she turns back around and swings her shinai back up for a swing to the side for 15-20% that KOs between 110-80%, stepping back to space herself as she does. This attack is a bit awkward to use in the sense of crowd control given the general precision required to hit with the sweetspot, but it's fast nonetheless and serves 2 main purposes: first, the back hit can catch opponents who roll around Tamaki if her spacing was good, but second she'll have moved back far enough that by the time she lands that second attack the sweetspot will actually connect at the area right in front of where she was previously standing. In other words, you can use this to flat-out punish opponents who approach too carelessly, but be aware that you need space behind you in order to accomplish this.


N-air -
Tamaki swings her shinai sideways on a shallow angle using one hand. The sourspot deals no hitstun, but otherwise it delivers 4% and an inch of pushback. The attack is fast enough to wall off opponents and potentially combo into itself, helping Tamaki maintain the distance necessary to utilize her ground game or follow into an Up Special. Being a sports set, Tamaki doesn't fight well in midair, but unlike Little Mac she has enough reach to ward off opponents who try to assault her.

F-air -
Tamaki throws herself out and attempts a far-reaching throat strike, dealing 10% and surprisingly good knockback that can KO at around 150%. The hitbox lingers for a bit and deals 6% with lesser knockback to those who come in contact, which can provide -some- coverage, but Tamaki does suffer some landing lag unlike with the N-air. This can be used as a surprise attack to score KOs, but it can also combo from the N-air since it reaches slightly further and can hit opponents pushed out of said attack's reach.

B-air -
Tamaki swings her shinai behind her and holds it there for a moment before forcefully swinging it all the way, dragging opponents for 4 hits of 2% before swatting them away for some rather low knockback on a low angle (KOs past 225%). This can be used to pressure opponents slightly for what it's worth, especially if they shield, and it even turns Tamaki around at the end so it helps with her ground transition. You might be able to drag an airborne opponent and transition into your ground game, but doing so will leave Tamaki with her back exposed due to having the attack canceled early.

U-air -
Left with little choice, Tamaki thrusts her shinai diagonally upwards and swings it over behind her in a broad motion, dealing 7% and below-average mostly-horizontal knockback that can KO as early as 138%. This keeps opponents horizontal to Tamaki where she prefers them, and motion of the attack even pushes her back about a character distance and increases her backwards momentum for an instant, making for a good midair spacer that can prevent retaliation if Tamaki misses.

D-air -
Tamaki swings her shinai sideways beneath her, dealing 6% and decent knockback that pops enemies up on a 30 degree angle. This comes out fast, but has a bit of end lag and is susceptible to being shielded against. If you pull it off successfully, you might be able to intercept opponents as they come down on you.


Tsuba-Zeriai

Tsuba-Zeriai occurs when 2 shinai get too close to one another, and requires the kendoka to knock away their opponent's shinai so they can follow-up with a counterattack. It is similar to a clinch in boxing, only it's not designed to take a breather.

Tamaki simply holds her shinai upright close to her and pushes it forward, which somehow locks opponents in place for a grab. This is a fast grab, but it has low range, mostly serving as a way to deal with opponents who get too close to you.

Pummel -
Tamaki pushes the opponent back slightly, dealing 0.8% for the sake of dealing damage. The pushback is a tad more effective against opponents with greater damage, but not overly so.

F-throw -
Tamaki steps forward and pushes the opponent back 1.2 platforms in a powerful burst of speed while simultaneously letting out a fierce battle cry. Afterwards, the opponent is shunted back on a low angle for 5% and knockback that starts out weak, but scales steadily to KO at around 135%. Tamaki's kiai lowers an opponent's shield by 20% and delays its regeneration by 3-7 seconds based on their percentage (capping out at 100%), which is good for punishing opponents with a shield weakened by the Neutral Special or if you manage to pull off this throw multiple times at lower percentages. If you can carry your opponent to the ledge, you might be able to finish them off with a killer edgeguard at surprisingly low percentages, especially with the F-Smash.

B-throw -
Tamaki pushes the opponent to the opposite side of her and strikes them with a hasty throat strike, delivering 13%, impact stall (0.5 seconds of hitlag) and great knockback that can KO at 115%. This throw offers the most damage, knockback and KO potential of all Tamaki's throws, being a basic good reversal throw for if the enemy had you cornered. It is also good if you want a breather, and the throw's duration can be used to stall slightly to help recharge the Kiai.

U-throw -
Tamaki brings her shinai back and swings it back up in a full-circle to smack the opponent up on a high angle for 7% and knockback that scales poorly. The knockback always keeps enemies close at reasonable percentages, which is good because Tamaki can't really pursue in midair. This can easily follow into an U-Smash.

D-throw -
Tamaki knocks the opponent straight down with an overhead strike for 10%. If the opponent rolls back, they'll give Tamaki enough range for her sweetspot, but if they use a get-up attack they risk being countered by her Down Special.


Tamaki is a speed-based character who keeps opponents on their toes with lightning-fast attacks and unparalleled traction. She is not very powerful for a sports-based character given a human girl can only get so far by hitting people with a reinforced stick, but she is plenty good at pushing enemies back without huge knockback and can keep them at bay with her good reach. Better yet, she can instantly cripple an enemy shield with her Kiai in order to crush their defenses, leaving them with little choice but to either stay away or fight back until their shield starts regenerating. If opponents stay away, Tamaki can try and intercept them, but if opponents fight back then Tamaki can attempt a counter against them that might be easier to time if their actions are made more predictable out of desperation. If opponents shield out of natural reflex or because they forgot their shield was weakened and have it broken as a result, then that's a free F-Smash for Tamaki right there - and possibly a KO if she had the enemy cornered!

Tamaki can be rather demanding to play as given she -needs- to hit with the sweetspot of her weapon, which makes for arguably her biggest weakness because it makes her more predictable if she can only really hit from a specific distance. This is why Tamaki has speed and shield-crushing abilities in the first place, because they allow her to keep enemies on their toes and prevent them from easily blocking attacks they would normally see coming. They also allow Tamaki to work at a fast pace, which is absolutely necessary because of how helpless she becomes when opponents get close to her...or worse yet, is launched into the air or knocked off the stage, in which case she is practically doomed. Tamaki also dislikes being cornered, as it ruins the spacing for her Side Special, U-Smash and D-Smash to some extent while obviously putting her in grave danger of being KO'ed easily - Tamaki would rather be the one cornering opponents rather than being cornered.

Of course, it's not like Tamaki always has to position herself for the sweetspot of her shinai; she can still fight back against enemies close to her with a Jab, Grab or well-timed counter, and she can rush in from a distance using the Side Special, Dash Attack or even a Grab if she's feeling lucky. The Side Special back-step, in particular, is one of the most important moves in Tamaki's arsenal not just because it gives her some quick, basic spacing, but also because it can be used from a dash for a fake-out while simultaneously keeping opponents on guard for the potential follow-up rush attack, which can also be used to force an opponent to stay guarded and throw off their timing in order to hit with something else. Just that one move makes Tamaki a lot more unpredictable than she would be without it.

If you're looking for a kill-or-be-killed fighter who can end matches with speed, reach and a powerful defense-crushing move, then Tamaki just might be the character for you...if you can put up with all her anime artwork, that is.


Hero of Justice
Breaking open the Smash Ball, Tamaki is filled with the power to fight evil! A red light flashes around her, replacing her kendo outfit with a super sentai costume while her shinai is replaced with a real sword. This makes Tamaki's attacks 1.1x stronger and grants her a significantly improved air game with new, stronger aerials, but best of all it applies the sweetspot of Tamaki's attacks to the entirety of the sword, all for a good 15 seconds.

While transformed, Tamaki's Neutral Special is replaced with a powerful finisher: a telegraphed rush that covers 4 platforms worth of ground. Should Tamaki mow through an opponent, they'll be stunned in place and appear to explode in a manner reminiscent to a villain being destroyed in a tokatsu show, after which they go flying back for 30% and powerful knockback capable of KO'ing at 65%. Using this attack instantly ends the transformation.
 

FrozenRoy

Smash Lord
Joined
Apr 26, 2007
Messages
1,268
Location
Las Vegas, Nevada
Switch FC
SW-1325-2408-7513
On the subject of color coding, what I often do to get my colors is I take a picture of the character, sample prominent colors from them and run them through this color calculator in order to get a code: If you ever have RGB but not color code (You can mess with RGB in something as simple as paint), this will let you convert it. Sometimes the differences are small but other times it can add a personal touch.

EDIT: It can also be used to get codes for MS Paint fonts if that wasn't clear.
 
Last edited:

Munomario777

Smash Master
Joined
Nov 18, 2014
Messages
3,253
Location
Charleston, South Carolina
3DS FC
0387-9596-4480
Switch FC
SW-8229-3157-8114
On the subject of color coding, what I often do to get my colors is I take a picture of the character, sample prominent colors from them and run them through this color calculator in order to get a code: If you ever have RGB but not color code (You can mess with RGB in something as simple as paint), this will let you convert it. Sometimes the differences are small but other times it can add a personal touch.

EDIT: It can also be used to get codes for MS Paint fonts if that wasn't clear.
Nice! How would one get the MS Paint codes?

Also, unrelated question: what exactly makes a "joke" moveset?
 

Katapultar

Smash Lord
Joined
Nov 24, 2008
Messages
1,284
Location
Australia
A joke moveset is a set that doesn't take itself seriously, and is usually designed to poke fun at a certain character, series or subject matter. These sets are easy to distinguish by their tone and silly moves that are sometimes deliberately underpowered or overpowered, not meant to be balanced like a serious set. Joke movesets used to be barred from set lists, but that's not the case anymore; recent examples include Royal Sticker Bowser, Usami and Cartoon Donkey Kong. Negative Man from MYM6 might be one of the more famous "joke sets" in that he had a remote sense of playstyle at the time and actually placed -10th- at the time. He's something of a serious joke set that is deliberately underpowered but has some sort of gimmick to help him fight back and play "properly", so in that sense he's a different type of "jokeset". Mike Dawson of MYM13 is another example of this kind of set.

Unlike regular sets, a joke set succeeds when it makes people laugh, or actually does well in the case of the "serious" sets. Also, sets that try to be serious and epically fail can become jokes among the community, some sets taking more time than others to become such. Dr. Strangelove is probably the most famous example at the moment, but there are plenty of other sets that are mocked for fun.
 

Munomario777

Smash Master
Joined
Nov 18, 2014
Messages
3,253
Location
Charleston, South Carolina
3DS FC
0387-9596-4480
Switch FC
SW-8229-3157-8114
A joke moveset is a set that doesn't take itself seriously, and is usually designed to poke fun at a certain character, series or subject matter. These sets are easy to distinguish by their tone and silly moves that are sometimes deliberately underpowered or overpowered, not meant to be balanced like a serious set. Joke movesets used to be barred from set lists, but that's not the case anymore; recent examples include Royal Sticker Bowser, Usami and Cartoon Donkey Kong. Negative Man from MYM6 might be one of the more famous "joke sets" in that he had a remote sense of playstyle at the time and actually placed -10th- at the time. He's something of a serious joke set that is deliberately underpowered but has some sort of gimmick to help him fight back and play "properly", so in that sense he's a different type of "jokeset". Mike Dawson of MYM13 is another example of this kind of set.

Unlike regular sets, a joke set succeeds when it makes people laugh, or actually does well in the case of the "serious" sets. Also, sets that try to be serious and epically fail can become jokes among the community, some sets taking more time than others to become such. Dr. Strangelove is probably the most famous example at the moment, but there are plenty of other sets that are mocked for fun.
Okay, thanks. I have what I think to be a pretty good joke moveset concept ready to write, but first I'm going to finish the moveset that I'm currently working on.
 

Munomario777

Smash Master
Joined
Nov 18, 2014
Messages
3,253
Location
Charleston, South Carolina
3DS FC
0387-9596-4480
Switch FC
SW-8229-3157-8114
UNDER CONSTRUCTION


DOCTOR IVO "EGGMAN" ROBOTNIK
Boasting an IQ of 300, hundreds upon hundreds of robotic inventions, and a truly amazing mustache, Dr. Robotnik is the eternal rival to Sonic the Hedgehog for twenty-four years and counting. He's come close to defeating Sonic countless times, but his plans have always been foiled, whether it be via a fake Chaos Emerald or his grand prize just being an old carpet. Nevertheless, Robotnik is still an incredibly persistent and formidable for Sonic, and he’s ready to take him and everyone else on in the world of Smash! As always, this moveset is custom made for Smash 4 for balance purposes and such. With the introductions out of the way, let’s dive right into this set!

STATS

Weight: Bowser
Size: Bowser
Ground Speed: Bowser Jr.
Jump Height: Bowser Jr.
Air Speed: Jigglypuff
Fall Speed: Jigglypuff
Stance: Eggman rides in his Egg Mobile for the whole match, similarly to Bowser Jr. and his Junior Clown Car:


Also similar to Bowser Jr., the Egg Mobile takes 0.88x the usual damage, whereas those that hit Robotnik himself will deal 1.15x damage. Robotnik's standing animation has the Egg Mobile hover above the ground, the running animation has him pilot the Egg Mobile forward at top speed, and the crouch has Robotnik duck into his Egg Mobile as it falls to the ground. While prone, Robotnik hangs out of the Egg Mobile a bit. Additionally, the Egg Mobile can hover like Peach can, aerial attacks and all, but this also allows him to perform Specials while hovering.


SPECIALS

Neutral Special: Wrecking Ball
Damage: 15%


The Egg Mobile releases the wrecking ball from the first boss of the original Sonic the Hedgehog and swings it. If used in the air, it does a pendulum-style swing to both sides before retracting (about two seconds total). Robotnik can also use any aerial attack during this, making for some interesting mix-ups. If used on the ground, the Egg Mobile does a front flip motion, causing the wrecking ball to swing in an arc from behind to above to in front of the Egg Mobile before retracting (about two seconds total), similar to this boss's pinch attack from Sonic 4. The grounded version cannot be combined with another attack. Whether grounded or airborne, this attack has great knockback, KOing at around 120%, but is quite laggy, and only the wrecking ball has a hitbox, not the chain.

Side Special: Drill Tank
Damage: 3~7%


The Egg Mobile turns into a large car with a drill on the front from Emerald Hill Zone in Sonic 2. The Egg Mobile moves more slowly than normal (about Ganondorf's dash speed) and can't jump, but the drill can damage opponents for 3% and hits multiple times, leading to a high net damage output. Additionally, only the core Egg Mobile takes damage. It takes a little bit of time to start and end the attack.

...

You thought that was it, didn't you? Well, that was only the grounded version! In the air, the Egg Mobile will instead sprout helicopter blades on the top, while the Drill Tank appears directly below on the ground (if there is no ground, it will not appear). The Drill Tank will follow the Egg Mobile's movements along the ground (unless there is a wall or something in the way). The blades half the Egg Mobile's falling speed while active, and Robotnik can still perform any other attack during this. Plus, they'll deal 1% of damage and minor knockback to opponents who come in contact with the blades. Rather than dealing repeated damage like the grounded version, the Drill Tank will point its drill upwards, deal 7% of damage, and knock the opponent up into Egg Mobile. This makes it a great aerial combo starter. If the Egg Mobile touches the Drill Tank, then the grounded version of the attack will begin. If it touches the ground instead, the move will end, the Drill Tank will disappear (if it hasn't already), and the propellers will retract. This is also good for recovery, thanks to the propellers. However, it can only be used once per midair session, and Robotnik can be knocked out of the propeller state by an attack (and this won't replenish it either).


Up Special: Flying Mobile
Damage: 5%


The Egg Mobile gains seven spinning fake Egg Mobiles from Metropolis Zone around it and rises up into the air about two Battlefield platforms, retaining full horizontal movement. The fakes will damage opponents for 5% and moderate knockback as well as destroying projectiles, but this will cause the fake to disappear; plus, Robotnik is still vulnerable. This doesn't leave Robotnik in helpless, but he can't use the attack again without touching the ground.


Down Special: Badniks
Damage: varies


This attack summons one of Robotnik's Badniks (robot battle minions) from the bottom hatch in the Egg Mobile in a specific order (READ: not random). Each one has two unique functions, depending on whether the button is pressed or held, and the summoning order is as follows:

Motobug (the ladybug one) will trot along slowly, ramming into opponents that come into its line of sight to deal 8% of damage and moderate knockback. If the button is held, it revs up and dashes forward at Sonic's dash speed until it hits either a wall or a blast zone, ramming into opponents for 17% of damage and good diagonal knockback, KOing at around 130%. Has 15 HP, and disappears after ten seconds.

Buzz Bomber (the blue wasp one) flies up one Battlefield platform into the air and fires small yellow energy projectiles, 3 at a time. Each one deals 4% of damage and moderate knockback. The Buzz Bomber aims at opponents, but the projectiles don't home in. If the button is held, it will fly beside Robotnik, charge up its attack. and shoot a Charge Shot-esque energy ball forward at Sonic's dash speed to deal 15% of damage and KO opponents at around 120%. Disappears after ten seconds, after it uses the charge attack, or after its 13 HP are depleted.

Crabmeat (the crab one) scuddles slowly side to side, firing slow-moving bombs from its claws in an arc. These explode either on contact with a surface or an opponent, dealing 10% of damage and decent knockback, KOing at around 150%. If the button is held, it will charge up its claw cannons and shoot two large bombs to either side, dealing 15% of damage and KOing at around 120%.Disappears after ten seconds, after using its charge attack, or after its 20 HP are depleted.

Spiny (the one that's flat on the bottom with the angry eyes) is launched forwards in an arc and can stick to walls or ceilings, and stays in place, firing small, slow projectiles in an arc. These deal 20% of damage and KO at around 130%. If the button is held, it stays beside Robotnik, charges up, and shoots a beam of energy up to the top of the screen, dealing 20% of damage and KOing at around 100%. Disappears after ten seconds, after using its charge attack, or after its 15 HP are depleted.

Orbinaut (the green ball with four yellow spiky balls surrounding it) serves as a shield for Robotnik; instead of deploying apart from the Egg Mobile, the four spiky balls start circling it to protect from attacks similarly to Mega Man's Leaf Shield. If an opponent touches the spiky balls, they are dealt 4% and moderate knockback and that ball disappears. If the button is held, they are launched forward as a projectile and have the same effects. Disappears after ten seconds or after all four orbs are hit.

Finally, Egg Robo (the one that looks like Robotnik) flies around the map at high speeds, shooting laser blasts at opponents to deal 10% of damage and moderate knockback. If the button is held, it charges up one powerful blast for a couple of seconds and fires it. This is aimed at opponents, and it deals 25% of damage and great knockback, KOing at around 120%. Disappears after ten seconds, after using its charge attack, or its 20 HP are depleted.

If a Badnik is already in play, Robotnik cannot use the move again until that Badnik disappears.

STANDARD ATTACKS

Jab: Not-So-Big Arm
Damage: 3%, 3%


Inspired by the final boss of Sonic 3, Big Arm (shown above), the Egg Mobile leabns forwards and grows two relatively small arms with fists on the ends to punch forward for a rather standard jab combo (spiked canopy not included).

Forward Tilt: Catcher Mobile
Damage: 3% per hit, 5 hits, total of 15%


The Egg Mobile grows the electric catcher from the Casino Night Zone boss and leans back about 45 degrees, so that the catcher faces forward. This is a multi-hit attack, catching opponents to deal 15% damage and good knockback, KOing at around 140%. The electricity is also a disjointed hitbox (it can't clash with other attacks), so it's good for safely attacking.

Up Tilt: Drill Mobile
Damage: 2% per hit, 8 hits, total of 16%


A large drill from the Marble Garden Zone boss emerges from the Egg Mobile to attack opponents above and behind Robotnik. The attack is a bit laggy (due to taking out and putting away that giant drill), but it has a good damage output and good knockback, KOing at around 130%.

Down Tilt: Freezer Mobile
Damage: 5%


The Egg Mobile's bottom half grows spikes. While this might seem simple at first, this attack is anything but! Suddenly, a long shaft causes the main body of the Egg Mobile to rise up from the spiky bottom (which is now on the ground), at a height similar to that shown above. Then, freezing cold fluids come out of the sides of the spiked platform and the shaft, so any fighters near Robotnik will be hit with 5% of damage and a freezing effect. Sweet! Normally, Robotnik will return to the ground at the end of this move, but if the jump button is held, he will enter his "floating" state at that height, and the bottom part of the Egg Mobile will come up to him. This is crucial to Robotnik's playstyle, since it's one of his safest methods to get in the air (where he always wants to be).

Dash Attack: Ram-botnik
Damage: 5%

The Egg Mobile speeds up for a second, rams into the opponent, and slows down. This deals moderate knockback at a diagonal angle and damage, and it is very quick, making it a nice combo starter.

Edge Attack: Spike Mobile
Damage: 3%


The Egg Mobile sprouts a single spike from Sonic 1's Spring Yard Zone and hits with it as Robotnik gets back up from the ledge, doing a low sweeping motion along the ground. Has a rather small hitbox and doesn't deal very much damage or knockback, but is very quick.

SMASH ATTACKS


Side Smash: Flame Mobile
Damage: 8~15%


The Egg Mobile sprouts two flamethrowers from the boss in Angel Island Zone from Sonic 3, which fire forward with a bigger flame depending on the charge (the maximum size being about one Battlefield platform). This attack KOs at around 110% at full charge, and can be angled up and down.

Down Smash: Tonkachi Mobile
Damage: 5% per hit, 1~4 hits depending on charge, 5~20% total


The Egg Mobile stands still during the charging period, and two small totem poles rise on either side from Sonic 2's Aquatic Ruin Zone boss. These act as solid walls to block projectiles, fighters, and such, and the tops can be stood on. Depending on the charge, more and more layers rise out of the ground. At maximum charge, the pillars are about two Robotniks tall. When the charge is released, the faces (which are facing inwards) will fire arrows that deal 5% per layer, and all of them will hit into the next, starting at the bottom (the bottom one fires and sends the opponent slightly upwards, then the next one up fires and does the same, then the next one, etc.). It won't KO opponents very soon, but since Robotnik can move around while the arrows are firing, he can chase the opponent upwards to start an aerial combo! The totem poles will crumble and disappear after either 15 seconds or when Robotnik uses the move again, allowing Robotnik himself to get on top of them to perform some standard attacks while he's a bit higher up. However, opponents can destroy these pillars by depleting their 50 HP.

Up Smash: Water Mobile
Damage: 5~13% depending on charge


The Egg Mobile rises upwards, connects to the ground via a tube, and gains a water tank on top, in reference to Chemical Plant Zone's boss in Sonic 2. Mega Mack (a dangerous purple fluid) then flows through the tube into the tank during the charging period, and when the charge is released, the fluid is fired upwards out of the tank to deal damage and push opponents upwards to KO at around 90% at full charge. However, this is only effective against airborne opponents since the tank is so high up, so it's rather tricky to hit with. This can be worked around, though, since the Down Smash happens to put opponents at the perfect height for this! Since the Down Smash allows Robotnik to retain mobility as soon as the first arrow is fired, he should have enough time to perform this attack, making for a devastating combo that is centric to Robotnik's KO game.

AERIAL ATTACKS

Neutral Aerial: Egg Shock
Damage: 7%

The Egg Mobile overloads with electricity, and the outer surface emits electric sparks as a result. These can damage opponents, dealing 7% of damage and moderate knockback. However, the sparks don't cover Robotnik himself, so the weak spot on top is still exposed.

Up Aerial: Drill Mobile II
Damage: 2% per hit, 5 hits, total of 10%


Robotnik faces the screen as two drills facing upwards from the Mystic Cave Zone boss grow from the sides of the Egg Mobile, which act as two separate multi-hit hitboxes. This attack has a bit of lag at the start and end, but KOs at around 130%.

Down Aerial: Mine Mobile
Damage: 3~12%


The Egg Mobile fires a spiky mine from Star Light Zone downwards that explodes about two Egg Mobiles downward from where it was fired. However, it won't explode on impact, so in order to get the explosion sweet spot (which deals 12% damage and a powerful meteor smash) and not the sour spot of the non-exploding mine (which deals 3% damage and barely any knockback), the spacing must be very precise. This can be performed easily on grounded opponents by using the grounded jump and then gliding, but to take advantage of the meteor smash, some skill is required.

Forward Aerial: Turret Mobile
Damage: 10%


The turret from the submarine boss in Sonic 2's Hill Top Zone covers the canopy on the Egg Mobile for a second, covering up Robotnik's weak spot. The turret then fires a stream of flames forward about one and a half Egg Mobiles to deal 10% damage and good knockback, KOing at around 120%. The turret then retracts and the weak spot is revealed. The attack is rather laggy due to the turret extending and retracting.

Back Aerial: Fireball Mobile
Damage: 5%


The Egg Mobile leans forward ninety degrees (so that the bottom is facing backwards) and a small cannon emits from the bottom. Immediately after this quick start-up, a fireball emits from this cannon, shooting backwards about two Battlefield platforms. The fireball deals 5% of damage and minor knockback to opponents, making it seem rather weak. However, this can be spammed very quickly by repeatedly pressing the button, bypassing the usual start and end lag. This makes it an effective, ranged damage racker, especially when used together with the hovering mechanic.
GRAB GAME
Grab: Claw Mobile
Damage: 0%


A large claw that was originally used to steal the Master Emerald extends from the Egg Mobile, as Robotnik leans backwards so that the claw reaches forward. If an opponent is grabbed successfully, they are held underneath the Egg Mobile.

Pummel: Tighten Mobile
Damage: 1%

The claw tightens for the pummel to deal 1% of damage.

Up Throw: Screw Mobile
Damage: 10%


The Egg Mobile places the opponent on the ground, paralyzes them with electricity, flies upwards, and sprouts a propeller from Sonic 3's Hydrocity Zone underneath. While the opponent is lying on the ground, the propeller spins and a stream of water flies upward from the ground toward the propeller, carrying the opponent up with it. When the opponent hits the propeller, it deals 10% of damage and a powerful meteor smash with a bounce strong enough to KO at 120%. This will not send opponents down to the bottom blast line if used on the edge of the stage; the bounce will still occur. When the throw ends, the Egg Mobile will still be at that height.

Forward Throw: Carry Mobile
Damage: 0%

Robotnik regains full movement (but not any attacks/specials/etc.) and carries the opponent around underneath. Pressing the attack button will cause Robotnik to perform a forward version of the Back Throw, even in the air! This can lead to some early KOs by going far off of the ledge with an opponent in tow, but since more power is going to mobility than the claw, this is twice as easy to break out of.
Down Throw: Graviton Mobile
Damage: 5~13%


The Egg Mobile drops the opponent on the ground, paralyzes them with electricity, flies upwards, and transforms into Carnival Night Zone's Graviton Mobile boss. While the opponent is on the ground, the Egg Mobile emits two electric walls to either side of them and a large metal ball drops from the Egg Mobile onto the opponent. Deals heavy damage and moderate knockback, but other fighters can't be hit by the ball; the electric walls will deal 5% of damage and moderate knockback to prevent them from coming underneath Robotnik. When the throw ends, the Egg Mobile will still be at that height.

Back Throw: Spin Mobile
Damage: 9%

The Egg Mobile spins rapidly in a front flip motion with the opponent still grabbed, and lets go while spinning. This launches the opponent backward to KO at around 110%. Other fighters who touch the spinning Egg Mobile or opponent are damaged for 9% of damage and moderate knockback. This has a bit of end lag, since Robotnik gets a bit dizzy afterwards.

MISCELLANEOUS

Final Smash: Death Egg Robot
Damage: varies


The Egg Mobile flies up beyond the top of the screen, and down comes the invincible Death Egg Robot! This completely changes the moveset; pressing the jump button activates the infinite rocket boosters, walking is slower, and the Special and Standard attack buttons become one in the same. The attacks are as follows:

Neutral: Arm Missile
One of the two fists fires from the Robot as a missile, dealing 20% damage, homing into opponents, and KOing at about 60%. After it hits the ground or an opponent, it comes back to the mech at high speed to damage opponents for the same damage and knockback. The move cannot be moved if both fists are absent. During the attack, Robotnik says "Get a load of this!" If the move is used twice in quick succession, it will sound like he's saying "Get a load of-- get a load of this!"

Side: Torso Copter
The Death Egg Robot spins at the waist joint at rapid speeds, with the arms dealing 30% damage and KOing at around 50%. A bit hard to hit with since the arms are so high up, and if the fists are gone from the Neutral attack, the range is decreased. During the attack, Robotnik says "Time for a change of pace!"

Up: Kamikaze
The Death Egg Robot flies up off of the top of the screen and a targeting reticle appears on the ground, showing where the mech will land. This can be moved to control the descent. After the attack button is pressed or five seconds pass, the Death Egg Robot crashes into the ground where the reticle is. The mech then explodes for 50% damage and KOs at only 10%, revealing the regular Egg Mobile inside. This will end the Final Smash. During the attack, Robotnik says "All systems, full power!"

Down: Stomp
The Death Egg Robot jumps up a bit and does a ground pound, burying opponents with its feet as well as dealing 40% of damage. If used in the air, the leap forward will be skipped. During the attack, Robotnik says "I will flatten you!"
The transformation ends after 20 seconds have passed or after the Up attack is used.

Up Taunt:
Robotnik twists one side of his mustache, and then lets go of it to let it pop back into place.
Side Taunt:
A trombone pops out of the Egg Mobile and Robotnik plays it, which creates a windbox and music notes coming out of the cone.
Down Taunt:
Robotnik opens a panel, takes out a wrench, and seems to repair something underneath said panel before getting shocked, skeleton visible and all.

Victory Pose 1:
Robotnik laughs maniacally and then coughs, saying "Ouch! I think I gloated so hard I pulled a muscle!"
Victory Pose 2:
Robotnik kicks his robot minion Cubot in the head. His voice chip then gets messed up, and he proceeds to say stereotypical cowboy things in a stereotypical cowboy voice. Orbot then says "On the bright side, he's much more exotic now." while Robotnik sighs and facepalms.
Victory Pose 3:
Robotnik flies in on the Egg Mobile at top speed and stops on a dime, causing him to fly out, land on his rear end, get a headache, and rub his head and sigh accordingly.

Victory Music:
The first three seconds of this.

Miscellaneous:
- When getting star KOd, Robotnik says "OH, SHUT UUUUUP!!!" in reference to the ending cutscene of Sonic Colors (where hi own amusement park PA talks about safety while he's getting sucked into a black hole).
- One of his KO phrases is "No way! I can't believe this!"

PLAYSTYLE

Robotnik is a rather varied character as far as attacks go, since the Egg Mobile's whole arsenal is on display here, but he has a theme that permeates his entire moveset, and that theme is aerial prowess and keeping his distance, especially with his weak spot on top. The hovering gives him some great ways to accomplish this, especially with the ability to use Specials. The Neutral Special is great for playing keep-away, since it has an excellent range and is useful for air-to-ground or vice-versa. Up Special provides a shield to discourage opponents from approaching and is decent for recovery, but it shouldn't be used straight away for recovery. The optimal recovery is double jump, hover, Side Special to slow your descent, and then Up Special. The recovery is rather gimpable, however, due to the Side Special, double jump, and hover not refreshing upon being hit. Down Special can create traps via the Badniks to aid zoning, and they all have potential to be used creatively to set up combos. The Egg Mobile has a lot of multi-hit attacks and lasting hitboxes, what with all of the drills, shockers, and fireballs, and this can be used for effectively racking up damage. One of Robotnik's best tilts, however, is the Down Tilt, which is great for safely entering the air while throwing out a hitbox to occupy opponents, and the freezing can set up even more combos! The Down Aerial is good for air-to-ground, but requires precise spacing; it can also be used for meteor smashes if the spacing is just right! The Death Egg Robot is an extremely powerful Final Smash, able to both tank through powerful attacks and deliver some of the heaviest blows in the game itself. Overall, Robotnik's biggest weaknesses are the lag on many attacks, the weak spot on top, and his gimpable recovery. That said, Robotnik, with his Egg Mobile, his multitude of weapons and his army of Badniks is still more than ready to take on the world of Smash Brothers! As always, feedback is appreciated, and I hope you enjoyed the set! :)

Like what you see? See some more over at my Make Your Move Hub! :D
 
Last edited:

Munomario777

Smash Master
Joined
Nov 18, 2014
Messages
3,253
Location
Charleston, South Carolina
3DS FC
0387-9596-4480
Switch FC
SW-8229-3157-8114
[jokemoveset]

BOOM SONIC

Sonic has done some awesome things over the years, like defeating armies of robots, slaying more god monsters than you can shake a chili dog at, and going faster than a speeding bullet. Sonic Boom says "screw that" and makes an entirely NEW Sonic in an alternate universe, who does things such as pressing buttons, swinging across small gaps, and defeating some snake dude with mechanical arms who clearly doesn't actually want to kill Sonic considering he lets him platform for half an hour to get his crystals. So I thought the best thing to do would be to make a moveset for this Sonic. As always, this set is built for Smash 4 for balance issues and stuffs. With that said, let's dash leisurely jog into this moveset!

STATS

Weight: Jigglypuff (look how skinny that guy is!)
Size: Taller than Sonic (he's much lankier)
Ground Speed: Ganondorf (have you played Rise of Lyric?)
Jump Height: Sonic
Air Speed: Luigi (Seriously, Sonic is so slow in the Wii U game)
Fall Speed: Jigglypuff


SPECIALS

Neutral Special: Enerbeam
Damage: 7%

Boom Sonic whips out his metal bracelet thing that emits laser grapples fashioned from a laser trap and cracks it like a whip to damage opponents. The whip is 10 Boom Sonics long (he's skinny, so it doesn't actually reach that far). KOs at around 100%, and can be used as a tether recovery.

Side Special: Boost Pad!
Damage: 0%


A boost pad appears below Boom Sonic and he dashes forward at Sonic's dash speed. He can't stop without hitting a wall or until he reaches 10 boost pads in length, so this can easily lead to flying off of the edge! Boom Sonic can jump during this, but he won't be able to slow down! The boost pad never disappears, and opponents can hit it too! Combined with the fact that there is no lag on the move and you can use it while already dashing, it can be pretty annoying for opponents to traverse! When Sonic goes on his boost pad, he says one of the following quotes:

"Boost pad!"
"Built for speed!"
"It's like this road was built for me!"
"Boost pad!"
"Can't slow Sonic down!"
"Boost pad!"
"Boost pad!"

Up Special: Bounce Pad!
Damage: 0%


A bounce pad appears below Sonic and he goes flying up in the air about three Battlefield platforms. Like the boost pads, the bounce pads don't disappear, and others can bounce on them. Like in Sonic Boom, sometimes it will go in a direction that it doesn't look like it will go (for instance, one facing up could send you anywhere from diagonally up to straight down!). Sonic also says one of the following quotes:

"Bounce pad!"
"Can't slow Sonic down!"
"Even without wings, I can still fly!"
"Bounce pad!"
"Bounce pad!"

Down Special: Rev the Engine!

Damage: 10~15%

This move has three purposes. If used on the ground, Sonic will perform the Spin Dash, which deals 10% of damage and sends Sonic forward about a Battlefield platform. This is very spammable, since you can use it right after the previous Spin Dash ends. Additionally, the grounded version can create a ramp if up is pressed after the Spin Dash. If used in the air with a target in range, Sonic performs the Homing Attack, dealing 15% of damage. Like Sonic's Neutral Special in Smash 4, but faster and even less accurate (as if that was even possible). Finally, if used in the air with no target, Sonic performs the Stomp, which sends him downward at high speeds in ball form to deal 15% of damage and a powerful meteor smash. If Sonic hits the ground with the Stomp, he will automatically perform the Spin Dash. All three of these will trigger the following quotes:

"Time to rev the engine!"
"Can't slow Sonic down!"
"Built for speed!"
"This is what speed looks like!"

STANDARDS

Sonic does a bunch of lackluster punches and kicks like he does in Boom. Moving on.


SMASHES


Side Smash: Amy
Damage: 10~20% depending on charge

Amy pops in out of nowhere a couple of feet above the ground like the partners do all the time in Sonic Boom. She then swings her hammer in an overhead swing to bury opponents and deal damage.


Down Smash: Knuckles
Damage: 10~20% depending on charge

Knuckles pops in and digs into the ground for the charging period. After the charge is done, Knuckles pops out of the ground for an uppercut that launches vertically and KOs at around 100% at full charge.


Up Smash: Tails
Damage: 10~20% depending on charge

Tails pops in and throws two to five mini bombs up into the air depending on the charge. Won't KO opponents, but has a powerful stun effect.


AERIALS


Sonic does a bunch of lackluster stomps and spin attacks like he does in Boom. Moving on.


GRAB GAME


Grab: Enerbeam
Damage: 0%

Sonic uses the Enerbeam to pull opponents towards him. He doesn't actually grab hold of them, instead bringing them right in front of him to follow up for an attack. Functions as a tether recovery, but doesn't harm opponents in midair.


MISCELLANEOUS


Final Smash: Glitch
Damage: 0%

Sonic glitches out of the 2D plane and has full 3D movement. This makes him invulnerable to attacks since he can stand behind opponents, but he can still attack them. Runs out after a full minute.


Up Taunt:

Sonic pops out and pops back in (like Tails, Amy, and Knuckles do in his Smashes).

Side Taunt:

Sonic leisurely jogs in place and says "This is what speed looks like!"

Down Taunt:

Sonic just stands there because the taunt animation didn't load.


Victory Pose:


The calming flute melody that plays while the airship is attacking in Rise of Lyric.


Miscellaneous:

- Shadow, Amy, Knuckles, and Tails are the alternate costumes, but they still say Sonic's lines because the voice actors didn't want to be associated with Sonic Boom anymore.


PLAYSTYLE

KEY: -> = Boost Pad
->->-><-<-<-
Win.


[/jokemoveset]

Like what you see? See some more over at my Make Your Move Hub! :D
 
Last edited:

Slavic

Ask not the sparrow how the eagle soars
Joined
Jun 5, 2013
Messages
763
Location
taco bell, probablyn't
You know what time it is?

SLAVIC’S SMASHING STATEMENTS!

TAMAKI KAWAZOE
I was wondering when we would be blessed with another Kat set. This one is a lot more approachable than some of your others (refer to page one), but despite being shorter retains a lot of charm and detail. Love kendo, and I love the idea for a kendo set! It’s a nice change from all the swordsmen (and women) who all boil down to slashes and stabs. I actually went through and watched the first episode of Bamboo Sword after reading this set, which looks pretty good from what I’ve seen. I’m also impressed that it actually follows how kendo works and armors the main characters, anime girls are woefully unarmored. Onto the actual meat of the set, the mechanic with the proper part of the shinai is pretty nifty, and is true to the kendo spirit. I don’t feel the sourspot function is too much of an issue to play around, either, especially considering how well the moveset supports the mechanic. Normally I don’t think talking about the size of a character’s weapon is important, since it rarely makes too much of a difference, but there are exceptions (Like Genjo) and I think Tamaki is one of those exceptions. Since she only does full damage with a third of the shinai, it would be nice to know where that hitbox is in relation to Tamaki. You do mention that the sweetspot glows, but I would still like to know how far out she hits.

I enjoy all the Specials thoroughly, and they all feel true to the character (even if jumping’s not a part of kendo). The Kiai is obviously useful for pressuring foes with shields, and I enjoy that many of of the moves interact with it as well. However, I might move the order of the Specials so that the Gedan-no-Kamae is explained with the Kiai fresh in the reader’s mind. That’s just me, though. I like the trueness of the counter to swordplay, however there is some ambiguity in how the second portion of the attack happens. Does rushing forward precede the counter, does it replace it, or does it happen after the counter? I’m not fully understanding how that works, and the Maki Waza has me scratching my head as well. Slider and Rising Thrust also seem fairly generic for Tamaki, but I don’t think it hurts the set any. After the intuitiveness of Kiai and Gedan-no-Kamae, it leaves me wanting more from the moves. However, they do their job well and fit within the moveset.

The standards are well described, and are easy to visualize, and the tilts all feel very true to Kendo. I was concerned that the attacks would seem weak when considering you can only hit with the shinai’s sweetspot, but they feel actually strong enough to choose Tamaki, especially the amazing smashes. Combined with the fact that opponents likely have a heavily damaged shield, I get a good sense for how dangerous Tamaki is on the ground. I feel like her threatening fighting style ends on the ground, however, as her aerial attacks are vastly inferior to her grounded. I get the feeling, though, as this is intentional to enforce Tamaki to fight on the ground, and even her Rising Thrust is better when used while grounded. With the grabs, I’m overjoyed you didn’t have her just grabbing the opponent with her hand and slashing at them. The forward throw is innovative, too, helping to deplete the shield, and I think its necessary since Tamaki has so much trouble with up-close combat.

This set is nice and simple, and has the charm and sporty feel of characters like Little Mac. Tamaki plays exactly how a character who has been trained in Kendo since she was four would be expected to, down to her weakness in the air. Among criticisms, some clarification on the range of Tamaki’s shinai and a less confusing description of her counter would be what I ask for.

DR. ROBOTNIK
A Dr. Robotnik moveset with no robots?? Let’s see what we have here. You compare the Egg Mobile to Bowser Jr.’s Junior Clown Car, and this set seems very similar to Bowser Jr., with dozens of attachments to the Mobile. However, I think this set makes more sense than it did for Bowser Jr., as it’s true to how Robotnik fights and you utilize actual content from the Sonic games. I like the idea of the pendulum-thing as Robotnik’s main Special, it is instantly recognizable and an iconic move of the Eggman. However, I think there might be a better way to handle it while grounded than flipping the Egg Mobile upside-down. It’s weird to imagine and is likely weird in practice too. Perhaps he could launch the wrecking ball outwards in front of himself, with the ability to manipulate how it moves. The Drill Tank and Flying Mobile feel very true to Robotnik, but I feel like the Freezer Mobile seems rather odd. First off, Robotnik strikes me as a brute force kind of guy, not the freeze foes type, and its not very recognizable as a Robitnik move, unlike the other Specials you included. You also say how opponents can stand on the platform that is lowered, but nothing beyond that. Are opponents damaged by being retracted into the Egg Mobile? Are they protected from the attack by standing on the platform? The move isn’t clear, and I think there might be better choices for his last Special.

Your tilts feel very underdeveloped, but it’s not as bad as it could be. I still get a good idea on what they all do and how they work, even without playing all the Sonic game, so the move descriptions do their job well enough. Luckily, you expanded the descriptions in the rest of his moveset, and I like the aerials and smashes well enough, even if they are fairly simple. This set, when all things considered, isn’t bad at all, but it doesn’t seem very ambitious, and so it feels like a very vanilla set. If you wanted to add something to the set, perhaps you could add robots that Robotnik could control or, at the very least, summon, which I feel is central to the character of Robotnik. It’s not that this set is bad, but it doesn’t stand out. At least, it doesn’t stand out as much as your next set...

SONIC BOOM
This set. This is the set I’ve been waiting from you. The set does an exemplary job of demonstrating a new age character who honestly has a good shot at Smash Bros. DLC. I’m not sure I actually want Sonic Boom as DLC now, because I doubt Nintendo is capable of encapsulating the brilliant vision of your Sonic Boom. I was concerned when I started this moveset, as the Enerbeam seems a little absurd. I mean, giving a character like Sonic a tether recovery may break the game a little, but I think it can be overlooked in light of the rest of the moveset. I like the risk-and-reward aspect of the boost pad, and the fact it is accessible to opponents as well can keep the player in a suspense of what to do. I think this compliments the Bounce Pad, which has a degree of unpredictability that can help deter opponents from following Sonic Boom. I love that the Spin Dash is faster than regular Sonic and without the lag, it helps differentiate Sonic Boom from his blue blur brother. After the Specials, we come to the Standards, which I actually have a problem with. Your descriptions for the Standards are extremely wordy, and are a struggle to get through. It’s not essential to explain every frame of an attack with a paragraph, but it’s nice to see the effort nonetheless! Sonic Boom’s Final Smash actually introduces a fairly intuitive concept for Smash Bros, with three dimensions of motion, and it would have been nice to see it come in more in the moveset maybe. However, all in all, I think this is one of the best sets this contest, and I expect this level of expertise from you with all your sets from now on!
 
Last edited:

Munomario777

Smash Master
Joined
Nov 18, 2014
Messages
3,253
Location
Charleston, South Carolina
3DS FC
0387-9596-4480
Switch FC
SW-8229-3157-8114
DR. ROBOTNIK
A Dr. Robotnik moveset with no robots?? Let’s see what we have here. You compare the Egg Mobile to Bowser Jr.’s Junior Clown Car, and this set seems very similar to Bowser Jr., with dozens of attachments to the Mobile. However, I think this set makes more sense than it did for Bowser Jr., as it’s true to how Robotnik fights and you utilize actual content from the Sonic games. I like the idea of the pendulum-thing as Robotnik’s main Special, it is instantly recognizable and an iconic move of the Eggman. However, I think there might be a better way to handle it while grounded than flipping the Egg Mobile upside-down. It’s weird to imagine and is likely weird in practice too. Perhaps he could launch the wrecking ball outwards in front of himself, with the ability to manipulate how it moves. The Drill Tank and Flying Mobile feel very true to Robotnik, but I feel like the Freezer Mobile seems rather odd. First off, Robotnik strikes me as a brute force kind of guy, not the freeze foes type, and its not very recognizable as a Robitnik move, unlike the other Specials you included. You also say how opponents can stand on the platform that is lowered, but nothing beyond that. Are opponents damaged by being retracted into the Egg Mobile? Are they protected from the attack by standing on the platform? The move isn’t clear, and I think there might be better choices for his last Special.
Thanks for the feedback! :)
  • Robots: Eh, robot, flying hovercraft with a bunch of gizmos, close enough. Plus, there's the Final Smash.
  • Egg Mobile: Yeah, I aimed to use as many of the boss concepts from Sonic as I could and make them fit as well as I could.
  • Neutral Special: I think the first boss was a good way to kick off the set, and I think it works rather well. That said, I'll definitely go back and see if there are any better ways to handle the grounded version.
  • Down Special: Well, the freezing does deal a decent amount of damage, and it allows him to follow up with said brute force. I think it's fine if it's not extremely recognizable, as long as it functions well and is still faithful to the original. The icy blast emits from the pole as well (as I said in the set), so no, the platform won't protect opponents. That said, I'll go through and clarify things some more, or perhaps change the Down Special if I can find a suitable replacement.
Your tilts feel very underdeveloped, but it’s not as bad as it could be. I still get a good idea on what they all do and how they work, even without playing all the Sonic game, so the move descriptions do their job well enough. Luckily, you expanded the descriptions in the rest of his moveset, and I like the aerials and smashes well enough, even if they are fairly simple. This set, when all things considered, isn’t bad at all, but it doesn’t seem very ambitious, and so it feels like a very vanilla set. If you wanted to add something to the set, perhaps you could add robots that Robotnik could control or, at the very least, summon, which I feel is central to the character of Robotnik. It’s not that this set is bad, but it doesn’t stand out. At least, it doesn’t stand out as much as your next set...
  • Tilts: When it comes to writing, I'm more of a short-and-sweet type rather than long-and-detailed. It's faster to write so I can make movesets more efficiently, and it makes sets easier to read than if each move was a wall of text.
  • Smashes/Aerials: I really had fun capturing the essences of all these different boss fights and incorporating them into the moveset, and the Smashes are a great example of this. The Forward Smash is fairly basic, but the Up and Down Smashes are more complex, with specialized purposes and uses.
  • Robots: Perhaps the Badniks could be the new Down Special (but then again it might feel too similar to the Mechakoopa if they're just summoned... perhaps I could incorporate them somewhere else).
Thanks again for the feedback! :) I'll go through the moveset again and see what I can do to clarify some things and revamp some other things.

EDIT: Moveset updated! Check it out and see what you think. :)
SONIC BOOM
This set. This is the set I’ve been waiting from you. The set does an exemplary job of demonstrating a new age character who honestly has a good shot at Smash Bros. DLC. I’m not sure I actually want Sonic Boom as DLC now, because I doubt Nintendo is capable of encapsulating the brilliant vision of your Sonic Boom. I was concerned when I started this moveset, as the Enerbeam seems a little absurd. I mean, giving a character like Sonic a tether recovery may break the game a little, but I think it can be overlooked in light of the rest of the moveset. I like the risk-and-reward aspect of the boost pad, and the fact it is accessible to opponents as well can keep the player in a suspense of what to do. I think this compliments the Bounce Pad, which has a degree of unpredictability that can help deter opponents from following Sonic Boom. I love that the Spin Dash is faster than regular Sonic and without the lag, it helps differentiate Sonic Boom from his blue blur brother. After the Specials, we come to the Standards, which I actually have a problem with. Your descriptions for the Standards are extremely wordy, and are a struggle to get through. It’s not essential to explain every frame of an attack with a paragraph, but it’s nice to see the effort nonetheless! Sonic Boom’s Final Smash actually introduces a fairly intuitive concept for Smash Bros, with three dimensions of motion, and it would have been nice to see it come in more in the moveset maybe. However, all in all, I think this is one of the best sets this contest, and I expect this level of expertise from you with all your sets from now on!
That face... :eek:
I know right, I should totally be a DLC designer.
It's really a completely different Sonic with a completely different play style, so I don't think it would break the game too much.
The Pads can really screw with opponents in so many different ways. It's like Tails in Sonic 2 Debug Mode, it's amazing.
The Spin Dash isn't actually faster than :4sonic:, not even close. Did you play the Wii U game? :p
Okay, okay, I won't go on about the standards that much next time. Sheesh. :rolleyes:
[serious]I really would like to see a Smash-type game in 3D, that would be pretty neat. The blast zones might be tricky to implement though... :ohwell:[/serious]
Oh believe me, I will deliver. ;)
 
Last edited:

Chase

Smash Ace
Joined
Dec 21, 2013
Messages
529
CANDY KONG

Candy Kong was first introduced in the 1994 game for the SNES, Donkey Kong Country. She has since made other supporting appearances in the Donkey Kong series, such as selling instruments in Donkey Kong 64, and running the Challenge mode of Donkey Kong Barrel Blast, aptly titled "Candy's Challenges". The apple of Donkey Kong's eye has made several appearances throughout the Donkey Kong series, each one has provided more material for a moveset than people give her credit for. Candy is a character who is full of surprises, and this is shown with her moveset.

STATS
  • WEIGHT: 104 (Same as Captain Falcon)
  • SIZE: Ganondorf's height
  • GROUND SPEED: Diddy Kong
  • AIR SPEED: Marth
  • FALL SPEED: Ike
SPECIALS
  • Standard Special – Soundwave Smackdown – Candy Kong plays one of the five instruments she sells in Donkey Kong 64, being bongos (for Donkey Kong), a guitar (for Diddy Kong), a trombone (for Lanky Kong), a saxophone (for Tiny Kong), or a triangle (for Chunky Kong). Each instrument creates a different sized soundwave around Candy, with the trombone creating the largest wave but being the weakest, but the triangle’s wave is the most powerful despite being the smallest. The instrument played is decided at random, with a 20% chance of each. (Damage being 11% for bongos, 13% for guitar, 8% for trombone, 10% for saxophone, and 20% for triangle)
  • Side Special – Flirt – Candy Kong blows a kiss at opponents, traveling about halfway the length of Final Destination in a straight line. If the kiss touches an opponent, they become dazed and Candy can run over and deliver a devastating attack. (Damage: 1% but dazes opponents it hits)
  • Up Special – Barrel Blast – Inspired by her role in Donkey Kong Barrel Blast, Candy Kong uses a pair of rocket bongos to fly high into the air. Candy can travel quite high with this attack, but the special button must be pressed over and over again with a consistent beat in order to get her higher, otherwise she will fall helplessly. Opponents can be damaged by the fire produced every time Candy beats the drums, but the hitbox is only on the underside requiring precision similar to that of R.O.B.'s dair. (Damage: 10%)
  • Down Special – Save Barrel – Candy's first appearance in the Donkey Kong franchise was running the save point in the first Donkey Kong Country. Now reflected in her moveset, Candy Kong spawns a Save Barrel (one of which she housed at her checkpoint, although this one can be broken unlike the one she had), which she promptly jumps in and out of. The Save Barrel remains on the stage until Candy Kong presses the button again, teleporting to where the barrel is. This attack works from anywhere on the stage, but it takes considerable setup as opponents can easily destroy the barrel by dealing 30% damage to it. This is Candy's most effective tool, both at recovering and surprising opponents. It disappears after a single use, but can be summoned again rather easily. (Damage: None).
STANDARDS
  • Standard Attack - Candy punches twice before slapping an opponent. Is not an infinite. (Damage: 4%, 4%, 6%)
  • Side Tilt - Candy punches, with a range longer than her standard. (Damage: 6%)
  • Up Tilt - Candy pops her hand above her and snaps. (Damage: 7%)
  • Down Tilt - Candy kicks forwards before landing in a split and jumping back up. (Damage: 4%)
  • Dash Attack - Candy swings her posterior forwards, hitting opponents. (Damage: 8%)
  • Edge Attack - Candy slaps one of her hands onto the stage and uses it to pull herself up (Damage: 2%)
  • Getup Attack - Candy does a breakdancing spin and jumps up.
SMASH ATTACKS
  • Side Smash - Candy uses her headphones from DK64 like a whip and throws it forwards. The range depends on how long Candy charges the attack. (Damage: 10% uncharged, 20% charged)
  • Up Smash - Candy sticks her pointer finger in the air with a musical chord that sounds like "Fame" sounding out if it hits. (Damage: 9% uncharged, 23% charged)
  • Down Smash - Candy crouches and flips her hair one time in each direction. (Damage: 11% uncharged, 19% charged)
AERIALS
  • NAir - Candy straightens out of her body to ram into other opponents with her head. (Damage: 7%)
  • FAir - Candy flips her hair forwards. (Damage: 10%)
  • BAir - Candy juts her butt out behind her, slamming into opponents. (Damage: 12%)
  • UAir - Candy shoves a bongo drum upwards, sending opponents above her flying. (Damage: 10%)
  • DAir - Candy claps her hands below her. Does a lot of damage but not much knockback. (Damage: 16%)
GRABS
  • Grab - Candy uses the wire from her walkman for a tether grab. It travels about the length of Lucas' Rope Snake.
  • Pummel - Candy slaps the opponents, though not as hard as her Standard. (Damage: 1% with each hit)
  • FThrow - Candy kisses the opponent on the cheek, before promptly shoving her foot into them, sending them flying forwards. (Damage: 8%)
  • BThrow - Candy spins the opponent around like a baton and throws them off at a vertical diagonal. A lot of startup lag but a lot of knockback. (Damage: 10%)
  • UThrow - Candy holds the opponent above her before whacking them with her walkman. (Damage: 9%)
  • DThrow - Candy throws the opponent to the floor before jumping onto their back, sending both Candy and her opponent into the air. (Damage: 12%)
FINAL SMASH
Final Smash – Circle Kiss – Candy is well known for seemingly being a flirt in games like Donkey Kong 64, where she flirted with K. Rool during the Final Battle to allow Funky Kong to deliver the finishing blow. Candy's flirtiness itself is now the weapon, as she can daze opponents on the ground and in air with their lovestruckness. Candy jumps up into the air and blows kisses in a 360° radius. Any opponent hit by the kisses is thrown to the ground and wake up dazed. Any opponents who are off the stage better try and avoid those kisses, because otherwise they are sent falling to their doom. (Damage: None on ground, 15% each hit in air, dazes on both air and ground)

PLAYSTYLE, STRENGTHS, AND WEAKNESSES
Candy's playstyle depends heavily on her ability to setup for certain circumstances. As mentioned earlier, she can teleport to her Save Barrel at any time as long as it's present, as this makes baiting a prime tactic for Candy. Whether putting an opponent in a position where it would be either impossible to recover or very difficult to do so is one of the best ways to the use Save Barrel, especially at higher percentages. Candy can also surprise opponents using the barrel, as she can teleport to the Barrel even when in hitstun, being able to disrupt a combo and maybe leaving an opponent like Jigglypuff, who could be about to finish her with a Rest, in an awkward predicament with not enough time to react before Candy delivers a powerful blow such as an Up Smash or a Down Throw. Candy does best against opponents whose powerful attacks and finishers have a lot of endlag, so she can take advantage of this with what I like to call a "BBS" - A Barrel Bait-n-Switch. Set up a barrel, get Candy in a position where it seems like an opponent could easily finish her off, teleport again, use endlag of opponent's failed finisher to either grab or charge up a Smash Attack, and send the opponent flying. The BBS isn't Candy's only strategy with the barrel however. Candy can also use the barrel to lead opponents with a lot of aerial control to an area that not even they could recover from, such as under stages like Battlefield and Final Destination, which we will refer to as an "Air Trap". Watch out, Wario! Not even you could recover from that! The BBS is Candy's best way of dealing with fighters who aren't in the air very often like Little Mac.

So what are Candy's weaknesses? Well, a Candy's biggest foe is a character who is capable of dealing large amounts of damage in very short increments of time. Characters such as Bowser and Ganondorf are very difficult for Candy to deal with because they can make quick work of destroying her barrels, requiring her to place her barrels very precisely in these matchups. If Candy wants to stop them, she'll have to use the barrel as soon as the opponent begins to break it, causing it to disappear from the stage and allowing for a potential BBS, but not allowing for more complex set-ups without having to take severe risk. Speaking of "short increments of time", that's another one of Candy's enemies; time. The quicker Candy can get rid of an opponent, the better, as once everything Candy done is processed by another human player, you are in for a rough time because they will be on your barrels like a hawk. If you make quick work of them, they won't have time to process how you are utilizing the barrels for strategies like the BBS or Air Trap.

Candy's most glaring moveset weakness is the precise timing her recovery requires without a barrel present. If you are fighting powerhouse characters like Bowser and Ganondorf, you will often rely on Barrel Blast to get back on stage, and this can very difficult to pull off without a lot of practice. The best way to prepare for matchups like Bowser and Ganondorf is to simply practice recovering using the Barrel Blast, and getting a precise beat. If you are good at moves like Marth's Dancing Blade, you shouldn't have much of a problem getting this down, but it is still recommended you practice.

TAUNTS AND MISCELLANEOUS
  • Side Taunt - Candy winks at the player.
  • Up Taunt - Candy twirls in a circle with a song playing from her walkman.
  • Down Taunt - Candy spawns a barrel, which she leans on and extends her hand to do a "come over here" motion.
  • Victory Animation - Candy leans on a Save Barrel and winks at the camera.
  • Victory Theme - https://www.youtube.com/watch?v=f4gdtHyaP_g (Saxophone Remix of DK Victory Theme)
  • Alternate Costumes - Her appearance in DKC, Her appearance in DK64, A new design based on her appearance in the cartoon.
 
Last edited:

Katapultar

Smash Lord
Joined
Nov 24, 2008
Messages
1,284
Location
Australia
[collapse=Dr. Jr]I didn't know Bowser Jr took 2% less from his car and 2% more if hit head-on. Interesting...

I'm happy to say that Robotnik shows some signs of improvement from you, mostly because his basic moves are a tad more detailed than usual and some even contribute to his playstyle such as his throws which place him up in the air where he wants to be. You've even done a pretty good job of emulating Robotnik's fighting style from his classic boss fights by making him a fighter who wants to bombard opponents from above and keep them out of reach.

The Down Special stands out as a really cool idea, not only the platform that's not broken but also the fact that the move boosts Robotnik up into the air like I imagined it would going into the move. That being said, I do think the move could have done with a lot more detail, like how long the pole is and whether Robotnik can move and attack while keeping the platform out (probably not). Also, it could be cool if the platform was actually a hitbox upon extending and retracting, damaging enemies if they get caught between the platform and the underside of the Egg Mobile when it returns...maybe knock them sideways so you can assault them or something. The Side Special could also do with some detail too, and doesn't seem to add much to the set as is.

Your playstyle sections seem to describe your character from a "varied" standpoint, which is not bad, but I do think you could perhaps work on establishing the character's goal in a match and how they're generally supposed to be played. For example, Robotnik is clearly established as a floaty aerial fighter who prefers hovering above grounded opponents, which -is- mentioned in your playstyle but you mostly talk about the Specials and Final Smash (you might be the only MYM'er whose mentioned a Final Smash in their playstyle section). Perhaps you could mention how the Specials work in with Robotnik's overall goal? By having a good grasp on your character's goal, but not being -too- invested in it to make them redundant, you might be able to make more fleshed-out standard attacks and Specials in your future sets. It's mostly a case of detailing some use to your attacks after you've finished describing them (one sentence is usually good enough), though, because I actually felt that you did a good job of having Eggman's aerials capitalize on his strengths, from the D-air balls that hit below from a distance, the keep-away N-air and Side Aerials that attack from a distance and can be used to block off midair opponents - just that you might want to make readers aware of some of these traits your moves have. Reading some veteran sets might give you a good idea of ways in which you can detail the use of your moves so that your readers will have a full understanding of your sets, but really I'm starting to ramble on here.

For all I've said, Robotnik is your best set so far, likely because it seems you spent more time on him than your other sets. Good job so far![/collapse]

[collapse=Boomshakalaka]If this guy were in Smash, I think his set would be something like this. I love how terrible his stats are! And man, those boost pads would be really annoying to fight against - you could set them up like crazy and everyone will go flying off the stage to their doom, because there's no stable ground to fight on! Great job omitting the boring standard attacks too, because those would have been a bigger waste of time to read than playing the game itself. And wow, that's one crazy Final Smash, but I don't think it would make Sonic immune to Dr. Strangelove's doomsday device since that can even hit characters who haven't loaded yet.

On a serious note, the Down Taunt and Alt Costumes were genuinely funny. Using Sonic as a unit of measurement can be a bit confusing since I immediately assumed that you were using his height rather than his width, but that issue clarifies itself right away. Fun stuff![/collapse]


TAMAKI KAWAZOE
Thanks for the comment!

I personally don't think mentioning the specific length of a character's weapon is that big of a deal, but you do make a good point given fighters' swords all reach different lengths. I don't know the exact length of a shinai in comparison to say, Marth's sword, but I always had that weapon in mind when visualizing the weapon. That being said, Tamaki is a bit shorter and is a girl, so it would probably be more realistic if her shinai was a hit shorter. This would mean that she can be outranged by some bigger characters, but she does have speed and doesn't have a lot of trouble closing the gap.

The vagueness on the counter was probably my fault due to going off on a different tangent in a new paragraph, but the rush is essentially an additional action you can take while still performing the counter normally, meaning both occur at the same time. Finally, I like to keep the Specials in a specific order in my sets and work the move descriptions around them, but it usually works out since the Neutral Special or Down Special are almost always the most important attack in the set. With that, I hope I clarified matters for you and am glad you liked the set!

Also, continuing on the semi-unrelated subject of Read or Die while I have the chance to squeeze it in a thread-relevant post, the crossover game Yomiko starred in was called Heroes Phantasia (or Heroes Fantasia), a game on the PSP starring main characters from 10 different anime series.
 

Munomario777

Smash Master
Joined
Nov 18, 2014
Messages
3,253
Location
Charleston, South Carolina
3DS FC
0387-9596-4480
Switch FC
SW-8229-3157-8114
I didn't know Bowser Jr took 2% less from his car and 2% more if hit head-on. Interesting...

I'm happy to say that Robotnik shows some signs of improvement from you, mostly because his basic moves are a tad more detailed than usual and some even contribute to his playstyle such as his throws which place him up in the air where he wants to be. You've even done a pretty good job of emulating Robotnik's fighting style from his classic boss fights by making him a fighter who wants to bombard opponents from above and keep them out of reach.
Thanks for the feedback! :)
  • Bowser Jr.: I think that's what it is, anyway. I heard that an attack that normally deals 10% deals 8% and 12%, so I made a guesstimate based on that. However, checking the Smash Wiki shows that "[a]ttacks that strike the Clown Car will deal 0.88x damage, whereas those that hit Bowser Jr. himself will deal 1.15x damage." I'll probably go back through and fix that.
  • Detailed: Thanks! I aimed to be as faithful to the boss fights as possible and squeeze as much as I could into the moveset, while still making it somewhat comprehensible. :p The Egg Mobile is rarely on the ground in the games, so he's a very aerial-based fighter in Smash.
The Down Special stands out as a really cool idea, not only the platform that's not broken but also the fact that the move boosts Robotnik up into the air like I imagined it would going into the move. That being said, I do think the move could have done with a lot more detail, like how long the pole is and whether Robotnik can move and attack while keeping the platform out (probably not). Also, it could be cool if the platform was actually a hitbox upon extending and retracting, damaging enemies if they get caught between the platform and the underside of the Egg Mobile when it returns...maybe knock them sideways so you can assault them or something. The Side Special could also do with some detail too, and doesn't seem to add much to the set as is.
  • Down Special: Actually, due to feedback, I've since changed the Down Special to an attack that summons Badniks (Robotnik's robotic minions). Give it a look and see what you think. That said, I might incorporate the original Down Special into another attack.
  • Side Special: It's a good damage-racking, tank-type move, and I think the description along with the image provided is enough detail.
Your playstyle sections seem to describe your character from a "varied" standpoint, which is not bad, but I do think you could perhaps work on establishing the character's goal in a match and how they're generally supposed to be played. For example, Robotnik is clearly established as a floaty aerial fighter who prefers hovering above grounded opponents, which -is- mentioned in your playstyle but you mostly talk about the Specials and Final Smash (you might be the only MYM'er whose mentioned a Final Smash in their playstyle section). Perhaps you could mention how the Specials work in with Robotnik's overall goal? By having a good grasp on your character's goal, but not being -too- invested in it to make them redundant, you might be able to make more fleshed-out standard attacks and Specials in your future sets. It's mostly a case of detailing some use to your attacks after you've finished describing them (one sentence is usually good enough), though, because I actually felt that you did a good job of having Eggman's aerials capitalize on his strengths, from the D-air balls that hit below from a distance, the keep-away N-air and Side Aerials that attack from a distance and can be used to block off midair opponents - just that you might want to make readers aware of some of these traits your moves have. Reading some veteran sets might give you a good idea of ways in which you can detail the use of your moves so that your readers will have a full understanding of your sets, but really I'm starting to ramble on here.
  • Playstyle: Very true. In the future, I'll aim to make the playstyles more coherent throughout the movesets.
For all I've said, Robotnik is your best set so far, likely because it seems you spent more time on him than your other sets. Good job so far!
Thanks! :) He's definitely one of the better sets I've made IMO, and I'm quite proud of it. That said, I'll go back through the set either today or tomorrow and tweak some things. Thanks again for the feedback! :)

EDIT: Moveset updated! Check it out and see what you think! :)
If this guy were in Smash, I think his set would be something like this. I love how terrible his stats are! And man, those boost pads would be really annoying to fight against - you could set them up like crazy and everyone will go flying off the stage to their doom, because there's no stable ground to fight on! Great job omitting the boring standard attacks too, because those would have been a bigger waste of time to read than playing the game itself. And wow, that's one crazy Final Smash, but I don't think it would make Sonic immune to Dr. Strangelove's doomsday device since that can even hit characters who haven't loaded yet.
Thanks for the feedback! :)
  • SonIke: Ah, moveset swapping... always an amazing watch. :p
  • Stats: Since Sonic is so slow in Boom, he's slow in Smash. :) He pretty much needs power-ups to go fast in the Wii U game, after all (whether it be a boost pad, a boost ring, an enerbeam rail, or the hyrdodashing rings).
  • Boost Pad: I aimed to make Boom Sonic as joke moveset-y as possible to really drive the point home, and I think between the loading fails, the brokenness of the set, and the overall bashing of Boom throughout (which I haven't played, by the way, but I've seen multiple playthroughs to get a feel for the game), I think I succeeded. :p
  • Standards: Is that even possible? :L
  • Final Smash: True. Not even glitchyness can avoid being hit by the doomsday device... apparently.
On a serious note, the Down Taunt and Alt Costumes were genuinely funny. Using Sonic as a unit of measurement can be a bit confusing since I immediately assumed that you were using his height rather than his width, but that issue clarifies itself right away. Fun stuff!
  • Down Taunt/Alts: I think these two aspects really captured Boom's failure, both within the game and critically, and I love it.
  • Measurement: Yeah, I made it clear by referencing how skinny he is, while still making it humorous.
Thanks again for the feedback! :) Of course, I won't be editing this gem anytime soon.
 
Last edited:

Slavic

Ask not the sparrow how the eagle soars
Joined
Jun 5, 2013
Messages
763
Location
taco bell, probablyn't
  • Down Special: Actually, due to feedback, I've since changed the Down Special to an attack that summons Badniks (Robotnik's robotic minions). Give it a look and see what you think. That said, I might incorporate the original Down Special into another attack.
To clarify on my comment, I do think the Down Special is a cool move, especially with the lifting on the ground, but I just think that there are more pivotal components to Eggman than his ice move, and the Specials, in my eyes at least, should be key parts of the character.

Looking at your new Down Special, I think it is more in character for Robotnik, and I like that there are different robots with different effects. I was surprised to see Sonic Boom Metal Sonic, but it definitely works with him, especially since he'll only ever appear for longer fights, most likely. Now real quick, does the order reset upon death or only cycles around after Metal Sonic is summoned?
 
Last edited:
Joined
Jul 7, 2014
Messages
583
Location
New South Wales, Australia
NNID
AwesomeCauliflwr
3DS FC
0576-6167-0092
Louie


Louie is a young employee of the Hocotate delivery company Hocotate freight. He loves food and he enjoys cooking the various wildlife he finds on PNF - 404. He has a strange connection with bug’s as seen in pikmin 2 and a small part of 3. Louie is the closest thing the pikmin series has to a bad guy right now despite being one of the main protagonists.

Stats​

WEIGHT: 48 - 50 (Identical to Olimar’s weight
SIZE: A bit taller than olimar​
  • GROUND SPEED: A bit slower than olimar
  • AIR SPEED: Olimar
  • FALL SPEED: Olimar
Specials

Neutral B - Armoured Cannon Larvae - An Armoured Cannon Larvae burrows up from the ground. The rock can travel ¾ of the way of Final Destination and it goes slowly. When it gets to the end of it’s run it explodes in a small rock explosion. Pieces of rock can be on the ground and used as items. (15% damage for the main rock and 5% for explosion and pieces)


Up b - Bumbling Snitch Bug: A Bumbling snitchbug swoops Louie out of the sky. The bug can fly in whatever direction you please for a short while. If you press B again while you are flying, the snitch bug will throw you downwards just like in pikmin. if it hits someone it is a devastating move and if it hits anyone while they are in the air it is an instant KO. If he uses it above ground and doesn’t hit anyone louie will be buried. This move is very risky but it is his best move. (30% damage for the plummet)


Down b - Careening Dirigibug: Louie summons a Careening Dirigibug to place a bomb rock it will stay there like a trap.Small hits (jab or tilt) will set it off to explode in a short time but large hits (smash attack) will blow it up instantly. There can only be one bomb rock at a time and they can harm Louie. (18% damage with high knockback)


Side b - Anode Beetles: A unique move that will summon an anode beetle to walk around. He can press it again to summon another one and an electrical current will pass through them. The beetles can be knocked around easily and with a fairly strong attack can be blasted of the stage but it can be hard to get to them when they are electrocuted though. The electricity does small damage and can paralyse. (4% damage each time you walk into the current.)

Standards

Jab - Identical to Olimar’s. Not as good of a choice as Olimars due to Louie being more powerful up close. (3%, 4% damage)

Up Tilt - Louie swipes above his head with a frying pan. Good for starting combos. (6% damage)

Down Tilt - Louie opens a microwave and fire comes out of it to burn the opponent (7% with a fire element)

Side Tilt - Louie stabs with a knife and fork similar to diddy’s side tilt. Low knockback. (9% damage)

Dash Attack - A dweevil picks him up for a second then drops him. The dweevil then runs off to the side of the screen. Diagonal knockback. (9% damage)


Aerials
Neutral Air - A swarm of scornets fly around louie hurting anyone that goes near him. (2% damage every scornet hit with minimal knockback)

Pretend the Maestro in the middle is Louie

Back Air - Louie holds a Male sheargrub behind him to bite three 3 times (4% per hit)

Forward Air - Louie hits in an arc in front of him with a soup ladle. Soup drops come out of it for effect. this can be downwards or sideways knock back depending on where you hit it. (9% damage)

Up Air - Louie holds onto a flying shearwig and it bites above him one time. This is one of Louie's best kill moves and sends them vertically. (12% damage)

Down Air - Louie rides a wollywog that plummets down. Can bury for a short time (7% damage)

Smash Attacks
Up smash - A skutter chuck is summoned by Louie and it throws a rock up. The move has very good vertical range and the rock can go about as high as palutena’s up Smash but it isn’t very damaging. Diagonal knockback. ( 15% fully charged, 10% no charge)

Down Smash -Louie summons two purple sheargrubs to come out of the ground either side of him and bite throwing the enemy sideways. (10% unchaged 16% full charge)

Side Smash - Louie summons a Joustmite to comes out and Jab people with its proboscis. One of louies best moves (20% fully charged, 15% no charge)


Final smash - Titan Dweevil: Louie Summons the Titan Dweevil and goes in the background of the stage. There is four stages to the attack and you can direct the attacks like Zero suit Samus’ but with more control. Each stage lasts for 5 seconds.

Stage 1: Flare Cannon - You are able to shoot fire all over the stage. The fires will continue burning on the characters and do gradual damage

Stage 2: Shock Therapist - Control the weapon to paralyse foes and do damage to them. The currents can pass through characters to other characters.

Stage 3: Monster Pump - Control this weapon and shoot water around the stage to push people off like Mario’s FLUDD.

Stage 4: Comedy Bomb - Shoot poisonous gas to make flowers grow on their other characters heads.

This doesn’t have much KO potential other than the water but it can dish out A LOT of damage.

Grab, pummel and throws
Grab - He uses an arachnode to shoot and web and grapple them in.

Pummel - The Arachnode squeezes the enemy. (3% per squeeze)

Forward throw - The Arachnode shoots the enemy out as they are attached to the web. (8% damage)

Back Throw - Louie turns around quickly and shoots the opponent away just like forward throw (10% damage)

Down Throw - The Arachnode aims down covering the opponent in webs then they get launched. This can combo into a foward air or at high percentages an up air.(11% damage)

Non Atacks
Taunt 1 - Spectralids fly around louie while he looks at them with a plain expression.

Taunt 2 - Louie pokes out his eyes and looks at the screen

Taunt 3 - An Iridescent Flint Beetle runs across and trips Louie over

Entrance Animation: Same as Olimar's but the ship crashes just to show Louie's incompetence

Victory animation:


Victory theme - The unsuccessful end of day theme form Pikmin 2

Boxing Ring Alias - King of Bugs

Playstyle
Louie will have a trapped base moveset. He wil play extremely different to Olimar due to them having very different personalities and they will be high contrasts to each other for some variety for pikmin representation in smash. Louie will have a trapped base glass cannon moveset. His moves are powerful but he is light and slow. Louie won't be a big combo user but he can have a couple. His Up B is an interesting move and it is very risky with high pay off.​
 
Last edited:

Viriquin

Smash Rookie
Joined
Dec 7, 2014
Messages
15
NNID
HarlequinBlue
3DS FC
5413-1007-0170
Planning my debut soon, expect sloppy work~
 
Top Bottom