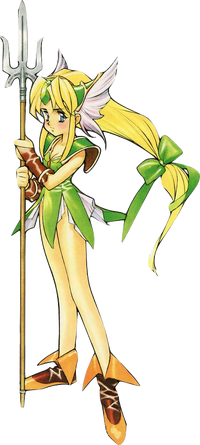
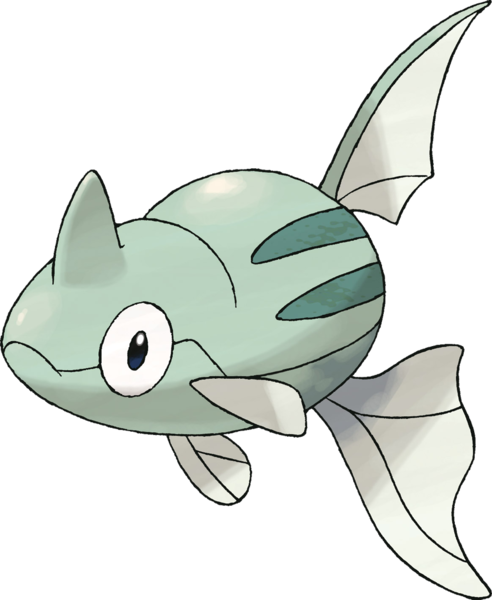
• Welcome to Smashboards, the world's largest Super Smash Brothers community! Over 250,000 Smash Bros. fans from around the world have come to discuss these great games in over 19 million posts!

    You are currently viewing our boards as a visitor. Click here to sign up right now and start on your path in the Smash community!

Make Your Move 14 - This is Snake, I'm done here

Fire Emblemier

The Crests are to Blame
Joined
Apr 4, 2013
Messages
3,909
Location
United States
Switch FC
SW-2862-0450-4332
Lethe
About
Lethe is an unit in Fire Emblem: Path of Radiance, and Fire Emblem: Radiant Dawn. What makes her so special in the games is she is a Laguz unit. Laguz are the characters that can transform in to animals in the game, including Cat, Hawk, Dragon and etc, Her being a cat laguz. She is the first cat laguz you get in both games. Lethe's personallity is quite different compared to some other characters of the games. She has a sharp tongue, but still cares for her comrades with her honor for her duty. She is also one of the few characters in Path of Radiance who can have an A-support with the main character, Ike. Now let's get on to the move-set.
Statistics
Lethe is a light weight character, whose special moves and Smashes involve her cat form. She is a speedy character, the same height as marth, in human form, same height as Pikachu in Cat forme. Lethe is the character you would want to be if you prefer speed over power. Lethe is an above average aerial character, but is mostly meant for the ground. With that, as her, you want to avoid as much attacks as possible while dealing as much damage to KO. Don't under estimate her though, she may not seem strong, but she can, actually, lift even some of the heaviest of people. In Cat form she is extremely heavy, that when in it, she has somewhat of a super armor, don't worry though, she is not in this for long periods of times, sometimes even extremely short. Lethe's specials will continue to have that, speedy, avoiding attacks feel. Lethe can also chain attacks quite easily, and is even faster than Marth. With her being like this, I expect her tier to be just below MK's. A pro-player can easily master her, while new players, might take a while to master her.
Specials-
In her specials she will mostly use her cat form
Down Special-Counter move: Like most FE characters there's a counter move. Lethe will quickly change in Cat form if attacked she will counter, about 16% hit. Lethe's counter is fast and can easily lead into another attack.
Neutral Special-Stun: She will fiercely stare into the opponent's eyes and stuns him/her for about 5 seconds. This move can be great in a variety of ways, including chain grabing or getting a chance to KO the opponent. I expect this to be staple to most conpetitive players.
Up Special-Final Leap: Lethe will jump, tackling in the air and will be in a helpless state, till she meets the ground, Recommended as recovery. With that if this mive is done on the ground, it can easily attack opponents through platforms. about 12% hit
Side Special-Pounce: Lethe Charges at opponent at fast speeds, in Cat form. Think Fox's Side Special. This attack would also make a good recovery or a fast way of getting around the stage. about 14% hit
Final Smash:
Roar-Lethe will transform into her cat form, roar, which will stun all enemies, she then does a frenzie attack, attacking all enemies in contact. Lethe will also be invincible, allowing to take out characters who weren't affected with ease. Think of it as a more face-paced luigi FS. Each hit will also cause a whooping 35% damage.


Smash, Airs and Tilts
Tilts in human form, Smashes in Cat.

AAA combo- Lethe will jab with her left fist than right and then headbutt. The headbutt causes the most knockback and damage, hit-1: 5%,hit-2: 9%, hit-3: 14%

Side tilt- Lethe claws the opponent, about 10% hit

Down tilt- Lethe does a split kicking on both sides of her, about 9% hit

Up tilt- Lethe Claws over her head, about 8% hit

Dash- Lethe charges at opponent in human form, about 10% hit

Smashes

Side Smash- transforms quickly and Bites opponent, has strong knocback and damage. about 20% hit


Down Smash- transforms quickly and does a quick spin hitting opponents on either side of her, has strong knocback and damage. about 17% hit

Up Smash- transforms quickly and tail whips above, has strong knocback and damage. about 18% hit


Forward air- Lethe quickly claws at opponent in human form, about 10% hit


Back air- Lethe claws while turning around, about 12% hit

Up air- Lethe quickly flips while kicking, about 7% per hit

Down air- Lethe repeatedly kicks below, think of Lucas' or Meta Knight's down air, about 5% per hit


Grabs
pummel- When lethe grabs the opponent and attacks she claws the opponent, causing about 6% damage, will let go after 5 or so hits

Forward throw- Lethe will transform into a cat while holding the opponent, quickly tackles lauching the enemy, does about 5% damage

Backwards throw- Lethe will toss the opponent behind her, transform and kick, sending the opponent away. does about 6%

Down throw- Lethe will send opponent face planted to ground, quickly transforms and jumps on back causing about 15% damage all together, from both hits, face plant and jump. This is Lethe's best grab by being able to chain quickly after it

Up throw- Lethe will toss the opponent up in the air, transforms and quickly flips sending the opponent to the sky, does about 11% damage.


Taunts-
Up Taunt- Lethe gets in a battle ready pose and says "When I fight, it's with claws out."
Side Taunt- Lethe transforms into Cat form and hisses
Down Taunt- Lethe does the pose in the 1st picture of the post

Tell me if I'm missing anything for this, anyways, what do you think of my first Make-your-Move Move-set.
 

JOE!

Smash Hero
Joined
Oct 5, 2008
Messages
8,075
Location
Dedham, MA
It looks like a cool start, but I recommend fleshing it out a bit.

For example, look at say Croagunk on page 1 as an example of how the moves are usually explained with relevance to the big picture.
 

FrozenRoy

Smash Lord
Joined
Apr 26, 2007
Messages
1,260
Location
Las Vegas, Nevada
Switch FC
SW-1325-2408-7513
Electric-Type Gym Leader

Okay, he's not REALLY a Gym Leader...

Neutral Special is extremely broken. You say he'll want to call back Vlad, but there isn't any reason too, even if they can slaughter zombies: Volknerr himself should be able to destroy an opponent equipped with this due to getting laggy smashes and the fact that, to me, it seems like his smashes would hit anyone they are embedded into...and even if not, F-Smash is insane for dragging someone off the screen and gimping them by using it again. Especially since Volknerr can recall Vlad before the opponent dies, so he does not even lose Vlad.

Oh, right, and he can Back Throw to make this even worse. And replacing basically an entire moveset with sword slashes is a bad idea in general.

Aside from that, the moveset doesn't seem to really have much playstyle to it, as zombies are just summoned and then...well, to me, it feels like even the basic stuff doesn't flow all that well. The idea of zombies is okay, but I can think of so many better ways to take advantage of them, especially with a character like this who feels like they have a lot of potential behind them. Up Special feels really awkward. And a lot of the moves don't really work into anything, just being moves, which you can get away with if you have a strong playstyle...which this doesn't. So between not having good playstyle or flow, the brokenness and general annoyance from stuff like moveset tweaking, along with the ocassional oddity make it, for me anyway, a very unenjoyable read that did not have many redeeming qualities. I'll take Shadow's flaws any day.

Genderbent Merlin

I wouldn't say Merlina's concept is bad, combining pressure with laggy moves to create a sort of mishmash offensive and yet, with elements like the Black Knight, defensive-ish playstyle. Unfortunately, I feel the moveset suffers from some massive issues. The Down Aerial, for example: 4 seconds is a pretty absurd amount of time to freeze someone! Yeah, she needs setup and whatnot, but moves like that simply are not the way to do it. They aren't really interesting and such easy stun without a check or balance begs to be abused in unintended ways that undermine the playstyle. Plus, there are a lot of more interesting ways to work set-up and other such things into a playstyle, I feel.

I also felt some of the moves were quite odd: Dash Attack, for example. It feels weird, to me, that Merlina is just plain summoning part of the Black Knight for what amounts to a simple dash attack, this big flashy animation for something very simple. I also greatly dislike the Down Tilt: Counters on tilts are already odd, but this is a very strong counter with absurd KO potential, which is more than a little broken and is not very fun for the playstyle. I also feel like the Queen's appearance on Smashes feels Sweet Weird and Hella Awkward. Also, grab games without full throws. : (

This moveset did have some good points, however. I liked the Black Knight in the Specials, that seemed cool, and the Jab was pretty neat as well. NSpec is also pretty neat. And the writing here is pretty amusing, so it isn't a total drag to read and has minor highlights. But...yeah, overall, I don't like it much at all.
 

Katapultar

Smash Lord
Joined
Nov 24, 2008
Messages
1,251
Location
Australia
[collapse=Merlina]Froy's comment inspired me to comment this set, because I wanted to voice my opinion on the set that made me watch through the cut-scenes of its source material. I actually think the set has some very good atmosphere in the way the Black Knight is used from the game, and even some interesting creative liberties like the frog-hexing and sword-in-the-stone that weren't actually in the game but reference the King Arthur legend in a way. Even the outlandish animations like the Dash Attack and D-air's sit well with me. It reminds me of why I still hold a lot of respect for Adachi even now.

I'd say you could easily swap the D-tilt and Down Special inputs since the latter doesn't seem to do anything in the air anyway, while at the same time making the counter look less awkward. You could have the frog transformation be a way to stall time or hit enemies easily (whereby they return back to normal), just give them two decent jumps and the ability to grab the ledge so it's not game-breaking (though I do find the idea of having to herd enemies to the ledge just to kick them off interesting, it's not the base concept and you could easily say, intercept a recovery with a hitbox for the win). The frog could easily have good depth if the victim is restricted to a weak shield, dodge and generally not being able to attack, all while getting past your static hitboxes like Black Knight, current Down Special, Neutral Special and all that jazz. It could even flow well with Merlina wanting space because she doesn't have a teleport or any way to move across the stage quickly despite being a slow wizard - just froggify enemies and you can walk away from them or whatever, or if you set a trap or two to disrupt them beforehand. D-air not stoning enemies off-stage is obviously quite forced too, whereas the easiest way to ensure enemies do not just fall to their deaths would be to just make it a throw, if you had a set. Some of the aerials being skimmed in the first place like F-air and U-air would imply it'd be pretty easy, and an interesting way to finish the set.

Overall, Merlina definitely has a lot of potential, though it can be hard to see when your intentions aren't always clear, what with having moves that embody a novel concept and some that are filler-ish (or at least aren't explained as how they could be interesting), a bit unbalanced and not having a playstyle section (which isn't a big deal, but makes it hard to tell whether the entry is serious or not). I do like the set a little, but it just needs that slight push to get on a votelist that I foresee will be tightly packed from the sheer number of cool entries that have already this contest.

Finally, I just realized that the "quotes" are apart of the lyrics of "With Me", linked at the start of the set.
 

Fire Emblemier

The Crests are to Blame
Joined
Apr 4, 2013
Messages
3,909
Location
United States
Switch FC
SW-2862-0450-4332
It looks like a cool start, but I recommend fleshing it out a bit.

For example, look at say Croagunk on page 1 as an example of how the moves are usually explained with relevance to the big picture.
I'll make it more detailed, it might take me a little while, as I must think of what I think would work, without her seeming broken or useless.
The only thing you need for the set to be a complete set is a grab game featuring a pummel and 4 throws.
I put them in I was going to add them, but it took me a little bit to get my thoughts through.
 

JOE!

Smash Hero
Joined
Oct 5, 2008
Messages
8,075
Location
Dedham, MA
One question I have that is a biggie:

How does her transformation work? Does she just randomly transform mid-move, then back again?
 

peeup

Smash Lord
Joined
Sep 3, 2007
Messages
1,618
Location
Hartford/Mass
Little Nemo


Little Nemo (Little Nemo: Adventures in Slumberland) is a little boy with a very large imagination. One night when Nemo falls asleep, he gets summoned to be the playmate of the princess of Slumberland. When tragedy befalls Nemo’s new friends, its up to him to wield the king’s magical scepter and save the day!

The Team:


Nemo is not alone in his quest to vanquish evil. In Smash, he is joined by his best friend, Icarus the flying squirrel. Also joining him are a team of five goblins Boomps: Oompe, Oompa, Oompo, Oompy, and Oomp. The whole gang rides along with Nemo on his bed for the most part, though they are also utilized in some of Nemo’s attacks.

The Stats:

Nemo is, physically, an interesting character. He and his friends ride along on his bed, making his hurtbox rather large and awkward - it’s nearly twice as long as it is tall. The bed stands a little bit higher than Kirby, and it is nearly as long as a battlefield platform. The bed is quite nimble, and as such it has a very quick running speed, clocking in at just slower than Captain Falcon. Those wooden legs don't slide so much, so shield grabs are nice and easy, but wavedashing (if it exists) is a feeble attempt. The bed is much more at home in the air, as most magical beds are, and so his horizontal aerial speed is even quicker, giving aerial acrobats like Wario a run for their money. Being a magical bed, it is rather floaty, making Nemo very difficult to combo, but also fairly easy to kill vertically. It should be noted that, due to the legs of the bed being pretty short as is, Nemo’s crouch does very little for him.

Nemo’s weight is a tricky story. With so many passengers on his bed, he’s actually quite heavy for such an agile character, weighing in at around King Dedede’s weight (112). However, over the course of battle, Nemo may find that some of his friends have left his bed (this will be explained). He has 6 passengers total (not including himself), and each passenger makes up 6 units of weight. That means that with an empty bed, Nemo only weighs 76, less than Kirby. Managing your weight is a crucial aspect maintaining Nemo’s survivability!

The Moveset:
Special Moves


Down Special: Boomp

Meet the Boomps: Oompy, Oompa, Oomp, Oompe, and Oompo! This is the Boomp team in order of size, smallest to largest. Note that the size of the Boomp doesn't matter for this attack, this order is just to simplify things.

So what does this attack do? Starting from the beginning of the Boomp order, this attack will place one of your Boomps onto the battlefield at your location. If used on the ground, the Boomp will go directly in front of you. If used in the air, the Boomp will appear directly below you, and will hover there in the air unaffected by gravity.

But why would you want to get rid of a Boomp? If an enemy runs into a deployed Boomp, or if they are otherwise knocked into a Boomp, the Boomp will smack them, knocking them up and away a fixed distance, and also dealing 7% of damage. The knockback of a Boomp is pretty poor, a little longer than a battlefield platform, so they shouldn't be used to kill. However, setting up Boomp traps is a great way to start or extend a combo. Thwack a foe into a Boomp, the Boomp thwacks them up at an angle, and you jump up and thwack 'em again! Boomps can also be placed maniacally near a ledge, bringing almost certain doom to an off stage enemy. Be ready to edgegaurd, though, because if a foe Up-Specials into a Boomp and you aren't there to take advantage, that foe just took a meager 7% with a now refreshed Up-Special and a more advantageous recovery position.

If you really want to get a direct kill with a Boomp, it is wise to utilize Kloomps. What are Kloomps? If you deploy 2 or more Boomps close enough so that they would be touching, they will merge into a Boomp Kloomp (About 45 seconds into this video). Kloomps deal 7% of damage per Boomp. The knockback, however, does not scale as nicely. 3 Boomps will result in double the knockback, and 5 Boomps will result in triple the knockback.

When you want your Boomps back, press Down-Special again after all 5 Boomps have been deployed. They will all spring back into your bed, helping to weigh you down once again.

Side Special: Icarus

Nemo's best friend, Icarus, is always ready to help out his pal. Hitting the Side-Special will cause Icarus to shoot out in a horizontal line in the direction fired. If Icarus hits an opponent, he will latch onto that fighter for 6 seconds, dealing 1% of damage per second. Also, with a squirrel biting and gnawing on their head, the foe will be slowed by 50%. This only applies to ground speed, though. Aerial speed and the lag on attacks are not effected. After this 6 seconds, Icarus will fly back to Nemo's side to help keep his friend from floating away.

If poor Icarus does not hit an opponent, he will continue to fly horizontally, though any walls or obstacles, until he flies offscreen. You will then have to wait for 6 seconds before Icarus returns, swooping in from the top of the screen to come back to Nemo's bed.

Neutral Special: Incantation

Nemo’s magical scepter isn’t just for looks. It’s actually an extremely powerful weapon used to fight against the nightmares! To make the scepter more powerful, Nemo can recite a magical incantation that causes a beam to grow out of the tip of the scepter. At its longest, the beam is a full battlefield platform and a half long!

In the heat of battle, it is very difficult for Nemo to focus enough on his cheat sheet, and as such it takes a very long time for him to recite the full incantation, a whopping 20 seconds. Lucky for Nemo, though, he has his friends around to help him out. His friends will help keep the bed steady, keep an eye on the fight, hold the cheat sheet open, etc. Because of this, each passenger you have will speed up the process by 2 seconds. This means that, with a full bed, Nemo can get his beam to full length in just 8 seconds! (re: that's what she said) Once the Special button is released, Nemo's beam will cease extending, and he will need to take a brief moment to get back into fighting form. It takes a fully charged beam 20 seconds to revert to normal length, meaning you must capitalize on your extended range when you have the chance. The beam grows the longer you charge the incantation, so don't fret if you don't get the whole thing out at once; it will maintain a partial charge and decrease at the normal pace.

Up Special: Magical Bed

All of Nemo's friends aren't riding on his bed... One of his friends is the bed itself! The bed does not want any harm to fall Nemo's way, and so in a pinch it will exert some extra energy to try to save the day. The bed catches a magical thermal, propelling itself instantly upwards, a little bit less than Snake's full recovery, and then continuing to glide down with remarkable agility. For all intents and purposes, this is a glide. However, Nemo does not possess a glide attack. Also, Nemo can not normally glide.

The glide can only be achieved by using this move. Utilizing the Magical Bed attack on the ground will not initiate a glude, it will simply quickly lift Nemo. Afterwards, Nemo is free to do what he pleases. This makes it a good move for chasing aerial opponents.
Normal Moves
Dash Attack: Swoop
During the bed's brilliant dash, it will perform a short ramming attack, following it up with a quick reverse, putting some sizable space between you and the foe. The retreat does not do any damage, but it makes this move very safe, giving you some space and making it difficult to be shield grabbed. It is also very quick on both startup and cooldown. It only deals 4%, though.
Jab: Simple Swipe
Nothing fancy here. Just one quick swing of the scepter for 4%. A very quick attack, good for getting people out of your face. Unfortunately, if Nemo's scepter is uncharged, it will hardly even extend beyond the edge of the bed. This makes it a great option if you have some charge, but a horrible option if not as you will be a sitting duck.
Forward Tilt: Poke
Nemo leans forward in his bed and pokes the scepter forwards for 6%. Because he leans forward, this attack has a notably better uncharged range than the jab. When the scepter is all the way charged, however, is when this attack truly shines. With nearly two battlefield platforms worth of range, this attack is sure to annoy the heck out of any frontal assailants. A quick speed also allows this move to be used repeatedly, creating a strong wall between you and your enemy.
Up Tilt: Upward Sweep
Nemo wards off aerial attackers by sweeping his scepter above his head for 13%. The range on this move is not really limited by the boundaries of the bed, and it comes out quickly, making it a great counter to an airborne attack. Also with its huge damage for a tilt, this move in tandem with Icarus can very effectively eliminate both a ground and an air approach from the disgruntled foe. Use it wisely, though, as the weight of the scepter makes holding it above Nemo's head difficult to recover from, giving this attack an awkwardly high amount of ending lag.
Down Tilt: Bed Kick
Nemo's been doing an awful lot of work lately. Let's move the spotlight back to his friends, specifically, the bed. The bed does a quick little kick with one leg, dealing only 3% but guaranteeing a trip. Use this time to either land a hard blow, or put some space between you and the enemy!

Smash Attacks
Up Smash: Victory!
In a celebration of his conquest over his foes, Nemo thrusts his scepter into the air with both hands. The powerful force of the thrust is nothing to scoff at, able to deal 11-17% with quick speed. Unfortunately, the ending lag on this move is downright frightful, and it is only effective against enemies directly above you.
Forward Smash: Hero Slash
As this move charges, the bed does a little squat, getting ready to pounce. Upon activation, the bed does a small jump, and as it lands, Nemo swings the scepter in front of him with huge force, dealing 15-20% with very strong knockback. Sharing a similar range with Nemo's jab, it really is not worth attempting this move if you don't have close to full charge. Slow and strong, this move is best used when the enemy is slowed by Icarus. Otherwise, it could easily result in a big whiff and an even bigger counterattack!
Down Smash: Tantrum
For this attack, the bed goes belly out and starts flailing its legs to and fro. The legs swing for multiple hits, 5 to be exact. Each hit deals 2%. A final 8th hit will deal between 4-6%. At low percents, this move is fantastic to start combos as it pops the foe up with not much knockback. Outside of that, though, this move is not terribly useful, having very low range.
Aerial Attacks
Up Air: Wiggle
In the same fashion as his up smash and tilt, Nemo waves his scepter above his head. However, in the air, it is hard to balance, and so this attack is more of a waver than a strike. The scepter moves around a little bit, causing 4 hits of 2% with the final hit sending foes out. A useful move if the enemy is above you, but only with added range from the incantation. Without that extra range, this move will likely be out prioritized.
Forward Air: Slash
Nemo slashes horizontally in front of him for a pretty quick attack, dealing 9%. This is Nemo's bread and butter aerial attack. It comes out quick, it does nice damage, it can combo into itself, it can be used twice in a short hop. The only downside is that it needs the incantation range to be fully effective.
Down Air: Friend Slam
One... Two... Three! All of Nemo's friends jump up, then crash down hard on the bed, sending it plummeting back to earth. This is a stall-then-fall attack, dealing more damage the more weight Nemo has. It deals a flat 6% without any friends on board, with an extra 3% of damage per friend, giving the move a potential for massive damage. Extra friends to not increase knockback, but that isn't a huge problem as the knockback in this move is enough to kill at decent percentages. In fact, given the quick speed of this attack, it is probably Nemo's most reliable kill move. Just make sure you hit the enemy; if you don't you'll have a lot of landing lag that will leave you way open!
Back Air: Donkey Kick
Okay. All of the bed's physical attacks so far have been lackluster. This is where the old frame really shines. A quick, strong donkey kick from the bed's rear legs will deal a solid 10% to anyone behind Nemo. While this move won't be KOing anyone for a while, it is hugely useful for taking advantage of an off guard opponent thanks to its blazing fast speed.
Neutral Air: Scepter Spin
Nemo quickly spins his scepter around in a circle, dealing a quick 7% all around Nemo. However, this move really, really needs the extra incantation range to be helpful at all. Without a nearly full beam, it will hardly extend past the rear end of the bed at all. It is quick, but foes that were directly next to you will when you hit them with it will laugh as the tiny hitstun allows them to punish you as you finish making your swing all the way around.
Grab Game
Grab: Scoop
Nemo scoops forward with his scepter. Use this grab liberally; it has awesome range if you are all charged up, and a whiffed grab does not result in much lag. If the grab lands, Nemo will scoop the oppopnent over the bed as if they are on a fishing line.
Pummel: Teamwork
I guess teamwork is one word for it! For each pummel, Nemo and all of his on-board friends get a swing at the foe for 1% each, dealing a potential 7% per pummel! With an average pummel speed, this can easily rack up some huge damage.
Back Throw: More Teamwork
Nemo hoists the foe just behind him, dealing 4%. As the foe flies behind the bed, each on-board friend will smack the airborne enemy for an extra 3% each, giving a potential for 22%. After that, though, you won't be able to follow it up very well, and this throw certainly won't kill.
Forward Throw: Fling
Nemo flicks the captive foe forward, dealing only 6% but having deceptive knockback, killing at later percentages.
Up Throw: Toss
Nemo tosses the enemy directly upward for 7%. At low percentages, this can be followed up with a jump and an aerial. Even at mid percentages, it can be followed up with a grounded Up-Special and an aerial, making this a useful throw for starting combos.
Down Throw: Curbstomp
Wow. That bed has issues. Nemo drops the enemy and the bed stomps on it, shooting the enemy up at a 45 degree angle and dealing 10%. This throw does fixed knockback, too far away for Nemo to follow it up. However, the fixed knockback and angle make this throw useful for setting up Boomp combos. Place this throw wisely and you could end up with a nice trap.
Final Smash: Nightmares
Ohhhhh boy. Looks like Nemo got the Smash Ball. Using the power of the Smash Ball, his scepter, and his curiosity, Nemo accidentally unlocks the door to Nightmare Land, allowing Nightmares to swarm the stage, criss crossing about a la Latios/Latias. The amount of spawned Nightmares relates to the level of charge of Nemo's scepter, meaning you need to make sure you're all charged up when the Smash Ball rears its head!
Extras
Up Taunt
Nemo and his crew start high fiving. If there are no passengers in the bed, Nemo will look around once or twice, then sigh.
Side Taunt
Nemo sticks out his tongue and puts his hands beside his head in the classic neener neener pose.
Down Taunt
Nemo looks at his scepter and tries to remember part of the incantation. Pajama rama? Banana barama kazama wama?
Emblem
A Bed with the covers strewn about.
Kirby Hat
Kirby gets a shock of brown, messy hair. Because Nemo's neutral special doesn't exactly translate to Kirby, he will instead get the ability to drop a Boomp. However, Kirby will instead drop a Waddle Dee that acts the same way. He only gets one Waddle Dee, though.
Stage Entrance
Nemo gets air dropped down from a dirigible, and his bed swoops in from offscreen to catch him just in time.
Victory Pose
Nemo and the others share high fives and excited cheers, similar to his up taunt. However, there is a small chance (about 1 in 40) that Nemo will wake up in his bed and look around, only to see that nobody is there, not even his opponents. Nemo will shrug and say, "I guess it was just a dream..." Icarus will then climb up from under the covers, holding the scepter.
Play Style
Nemo is an extremely difficult character to use due to the extent to which his moves and characteristics are dynamic. He has adjustable range, adjustable weight, adjustable combo potential, and adjustable stage control. The first key to playing Nemo is to learning how to manage your team. You can choose to play Nemo as a light stage menace by dropping Boomps all over the place to make the fight a nightmare for the enemy. Landing a hit with Icarus will greatly help this, but it is important to shoot wisely. Whiffing with Icarus means you will be without an extra set of hands for various attacks and lowered weight for nothing. If you can place Boomps everywhere you want to, though, being a featherweight is hardly a concern. With a huge array of landmines scattered across the stage, enemies won't be able to get in enough hits on you to make the lack of survivability an issue. Utilize Nemo's agility to set up the stage how it would best suit your matchup, be it trapping the ground or eliminating the air. Every character has a weakness, find it and exploit it by not allowing the enemy to use the space that they want!
On the other hand, you could choose to play Nemo as more of a pokey heavy weight. With the full team on board, Nemo is among the heaviest characters in the game, and with an awesome recovery, he can survive a whole lot. Also, with a full bed, you can charge up your scepter much, much faster than you could otherwise. Use this to abuse your absurd range to get in a grab, use your absurd pummel, and throw em back for some more absurd damage. Of course, you sacrifice a lot of stage control if you choose to keep your team with you at all times, but the upside to that is very enticing. Huge range coupled with huge power coupled with huge weight is nothing to scoff at. Keep your friends close to lay on the damage!
Of course, it would probably be wise to play a middle ground of sorts. Only a few Boomps are necessary to set up a nice buffer zone between you and your opponent, or at least to create a difficult terrain for them to traverse. Using the remaining Boomps, as well as Icarus, it won't take terribly long to get a good length scepter beam. Obviously using this method will make you a jack of all trades, master of none type of character. Middling weight, middling range, middling stage presence. Luckily, though, you always have the option of tilting towards either extreme. Read the matchup well so you can accurately decide which style of play would suit you better, and adapt your way to victory!
As a general rule of thumb, it would be a good idea to utilize the first seconds of a match, as well as invincibility from respawning, to charge up your scepter a bit. With a full team, you can get a hefty portion of your range up in not a huge amount of time, so playing a little game of keepaway isn't a terrible idea, especially considering Nemo's good speed. Once you have some initial charge to work with, then you can really play with the rest of the game how you personally want to. Want to be a light combo master? Want to be a heavy longranged powerhouse? Want to be a dynamic character able to react to most situations? Make sure you get the match started on the right foot so you have the time to decide what to do and give yourself the time to execute it, and you have the match in the bag!
With all these advantages, Nemo would seem like a horrendously overpowered character. And while it is true that Nemo has options for most circumstances and that he is capable of being ridiculously strong and hard to touch, he also suffers from multiple weaknesses. Nemo is a highly strategic character. Everything about his statistics are in a constant state of flux. This gives him a very steep learning curve, allowing for only the most dedicated Nemo players to unlock his full potential. Also, with so much to keep track of during a match, it could be very easy to misjudge your weight and die from an attack that you assumed could be easily shrugged off. Such a mistake can be avoided with proper knowledge and very good attention to detail, but even the most seasoned players have lapses in judgement. Keep a good management over Nemo's team so that you can mitigate Nemo's high risk nature and emphasize his potential high reward!
Another glaring flaw in Nemo's heavy reliance on his neutral special. Without several teammates helping him out, it takes a painfully long time to charge up his beam. Conceivably, Nemo could set up an army of Boomps and play keepaway charging up his scepter at spare moments. However, the scepter length decreases over time, and against a savvy opponent, these occasional breaks to charge might not be enough. On the other hand, if you keep all your team with you so that you can always be at full charge, you lose out on a huge amount of stage presence. Either way, though, it isn't a terribly difficult task for the enemy to run away from you for enough time for your beam to decay. Then, when you stop to recharge, the enemy can just as quickly take advantage of your downtime and give you a nasty punish. Keep your scepter charged and keep your wits about you so that you can maximize Nemo's globally above average stats!
Nemo is a complex character to play. Few other characters in Smash or MYM require such attention to so many different details. However, for somebody who has a solid grasp of everything that Nemo has to offer, he can be a huge threat. Given time and space early on in a match to get things rolling, Nemo can build up some serious momentum that will prove remarkably threatening to any enemy trying to get a hit in against a foe with more range than any other character, fighting on a stage that is essentially fighting them back. Play to your strengths, allow your friends to cover your weaknesses, and unleash the massive power that Little Nemo has to offer!
 

ForwardArrow

Smash Ace
Joined
Aug 17, 2011
Messages
502
Spiderman
This set has been garnering a lot of attention, and thus far all of it seems to be very positive. I can certainly see why the excitement surrounding this set exists. For one the organization and extras are stellar, I usually don’t like to bring those things up but in this set I do feel they are good enough to actually have some bearing on the set’s quality. That wouldn’t matter if the set itself did not have good points, which it certainly does, with it managing to bring Spiderman’s comic book style to life almost masterfully, making full use of his web slinging, ensnaring, and web grappling for a very mobile playstyle that feels quite fun to play as. It helps that some moves, for example the Neutral and Forward Aerials, actually take a lot of this stuff into account and become much more interesting in the context of it, and you provide some options with his follow ups with his Neutral Special webbing to make it a lot more interesting to use. The Spidey Senses really help bring the set together, both flowing nicely into his highly mobile style and being one of the more interesting counters I’ve seen in a long time. This is as close to a definitive Spiderman set as we’ll ever get and for that reason I can fully understand why some people love it as much as they do.

Now as for my lack of enthusiasm on the set, which mind you, I still like, I think it comes down to 2 things. For one, I feel the set loses a lot of both the fun factor in terms of actually playing it, and a fair amount of playstyle depth, when playing on Final Destination. Sure he still functions fine from a playability standpoint, but the fact that Spiderman gets a lot worse on a very commonly played stage is a point against him. Second of all… I guess blame it on me craving every move does something fancy, but a lot of inputs in the set feel just like they’re there, not actually doing anything unique or fun in the context of Spiderman’s other moves. Sure, there are some inputs that actually are good in that aspect, but just as many are just… there, filling up space and not really holding my interest, or feeling like they’d be any more interesting on Spiderman than any other character. Admittedly, that’s all personal perspective, but I have trouble feeling the same sort of enthusiasm over this set that a lot of other people are.

Gyarados
Obviously due to the nature of the set’s movement and projectiles, it’s pretty bloody unique from the start and at least from where I’m standing, not in a bad way. The moves succeed in making the character feel powerful and yet at the same time beatable due to the absolutely massive amount of baggage he carries around and his ability to still take full stun if his head is hit. It’s not like his head’s small either. The miniature playground around the tornados and the like flows very well and allows for both an aggressive and deep playstyle considering how well he can keep fighting as he sets up. Where Gyarados suffers is, I feel, is from an aesthetic standpoint. Sure, making slopes out of his back for waterfalls and tornados to travel along is interesting, but it’s absolutely bizarre to envision him spitting a waterfall into his back and then flipping it around in the arch of his back. Aside from that, I’m not sure if I am really okay with the Down Smash, which sure flows into the rest of his game and isn’t easy to pull off, but having an attack cover nearly the entire stage and just be undodgeable and probably ruinous on shields that covers nearly the entire stage is just something the foe can’t possibly respond too when it actually works. For this reason GyaraDOESN’T end up as one of my favorites this contest, but GyaraDOES end up an overall solid set.
 

Katapultar

Smash Lord
Joined
Nov 24, 2008
Messages
1,251
Location
Australia
[collapse=Little Nemo]I was rather surprised with how far you took this set, enough so to easily consider it to be by far your best ever. The fact that you're playing as a bed makes the set interesting right off the bat, and it's even more interesting when his stats are actually -good- but is only offset by being a massive character (seriously, we've had sets for cars, rocks and whales but we've never had a set for a bed!). I really like the Down Special in that it's appealing from a lot of perspectives, being interesting as an attack but also for the character - at first I kinda wished the Boomps weren't invincible, but then I realized it made perfect sense since they come from a children's show and as such you wouldn't want to burden the player with the worry that their companions might die. The simple use of the Boomps is also well-done in that their use feels Disney-like, what with the potential of being able to smack the enemy around even down to their lack of (initial) killing potential. There's some excellent form and characterization throughout the whole set, from the Icarus' use in the Side Special, and even the climactic-ish teamwork of the Down Special. D-air is a personal favorite animation of mine, it's really awesome.

Execution-wise, you've got some decent stuff and actually pretty self-aware of what's going on. The Neutral Special almost made me cringe at the aspect of having to charge an attack for 8-20 seconds until you mentioned that charging halfway or so was still effective - what's nice is that these affected moves aren't even broken due to having some end lag on them, and really interesting when you take into account the fact that Nemo is struggling to get his scepter beyond his already massive hitbox. The playstyle pretty much speaks for itself in that you ward enemies off the ground with Boomps and Icarus before beating them around with your air game, taking advantage of the transcendent priority of your huge-ranged weapon via being in the air to gain an overwhelming advantage - that is actually pretty good.

If I'm going to level any complaints against, they're veeeery slight - I think it's slightly out-of-character for Nemo to summon the enemies he's trying to destroy for his Final Smash, whereas you'd think he'd have something much better in the form of his scepter or Boomp friends. You also need to get a new picture for Nemo, and I don't know what Disney thing or what not he comes from. That aside, excellent work.
 

Katapultar

Smash Lord
Joined
Nov 24, 2008
Messages
1,251
Location
Australia
I edited my move-set, how does it look now?

It gives a clearer indication as your intentions with the set, which is good. Perhaps it could use a bit more detail and tweaking, especially with the Neutral Special which I daresay seems like an important move for Lithe - for reference, 5 seconds is the entire duration of Jigglypuff's Rest! I imagine the move being similar to Mewtwo's Disable from melee in how telegraphed it is, the fact that enemies need to be facing you for it to work and how long they're stunned for (in this case, it would probably make more sense for them to be locked in a state of escapeable hitstun, so it can also work in the air). If you give the move some range, say half of Battlefield, it could prove an interesting tool for Lithe to get in on opponents with her speed what with a lack of projectiles, or chain-grab as you mentioned. It could even flow into the counter if enemies are pressured to hit you as soon as they exit the stun.

You bring up an interesting idea of Lithe being heavier in cat form, though it feels more like a random gimmick in that it somewhat takes away from the feel of her being a light-weight. Extra move detail is always good too, say its direction of knockback, lag and generally when you'd want to use it. There's a fair bit more to a simple A attack than you'd think when writing one down and analyzing its uses. For that, I'd actually somewhat recommend looking up guides on existing Brawl characters and how they work.
 

peeup

Smash Lord
Joined
Sep 3, 2007
Messages
1,618
Location
Hartford/Mass
Well howdy ho thanks for the sick review Katapultar. Your complaint about the final smash is shared by me as well. There really isn't anything from the source material that would be a good final smash, save for a large beam attack used by Nemo fully reciting the incantation, but that would be reeeeaaaaaally hard to have be interesting at all. Also I'm now noticing that I neglected to include this line (or something like it) to the final smash text, and I don't quite know why...

Now the land of nightmares is no place for Nemo or his friends, and so they take refuge under the protection of the bed's covers and successfully avoid the invasion.

I'll actually add that to the post when I go back and include some fun extras and such. As for the Nemo picture... dude, google images is really bumming me out. There are NO good pictures. Nothing at all, I swear. Which is a huge pain because I feel like the character is much harder to visualize without an actual picture, and I doubt many people have seen the movie.
 

Rychu

Thane of Smashville
Joined
Jul 5, 2010
Messages
810
3DS FC
1908-0105-4965
TIME FOR KETCHUP

Superior Geto Remake
You capture the essence of Bad Girl very well in this moveset. I'm sure by now you're at least mildly aware that I'm quite the fanatic of the No More Heroes franchise, and I love it when movesets are made for characters in the series. Berserk is a good way to portray her, though personally, had i remade this character myself, I would have focused a lot on suicide KOs, but that's my own personal take on the character.

The Gimps (I just can't see the fight without the Gimps, man) are handled well, I like that you treat them as nothing more than meat shields and weapons. I also really like the side special: I've always thought of Bad Girl as a tank (though a very fragile tank) and this move gets that across really well. The use of fire is cool, too.

Outside of good characterization and good ideas, the rest of the set...well, it doesn't fall apart, but it fails to follow up on those ideas. What's presented sounds fun as hell to play, really, but I do feel more could have been done with the character. More focus on playing with the foe's head perhaps? An even more reckless playstyle, maybe? I'm doing a lot of speculating here really, but what you have is a good step up and certainly a set that I can appreciate.

Halloweezing 2: Weezerection
The thing I love about Koffing most is that shi.t eating grin it always has on it's face. It knows exactly what it's doing...

Koffing takes the idea of that passive gas and runs with it until it can't run anymore, then it gets selfdestructed another couple hundred feet. It's so tightly wound and bursting with ideas that there's very little room for negativity. Passive offense is always tricky to pull off, but you've done it beautifully here. The all the little interactions and the ways of spreading the gas around the stage make for a lot of fun stuff. I'm definitely a fan.

DORK FAILZ
No move names, 0/10 would not bang.
 

JOE!

Smash Hero
Joined
Oct 5, 2008
Messages
8,075
Location
Dedham, MA
We had fun with event matches, now lets get the ball rolling with another...


POKE
BALL
MINI:
Create a Pokeball Pokemon item that does not currently exist. For added bonus, make it interactable with the person who threw it!​
 

Katapultar

Smash Lord
Joined
Nov 24, 2008
Messages
1,251
Location
Australia
Well howdy ho thanks for the sick review Katapultar. Your complaint about the final smash is shared by me as well. There really isn't anything from the source material that would be a good final smash, save for a large beam attack used by Nemo fully reciting the incantation, but that would be reeeeaaaaaally hard to have be interesting at all. Also I'm now noticing that I neglected to include this line (or something like it) to the final smash text, and I don't quite know why...

Now the land of nightmares is no place for Nemo or his friends, and so they take refuge under the protection of the bed's covers and successfully avoid the invasion.

I'll actually add that to the post when I go back and include some fun extras and such. As for the Nemo picture... dude, google images is really bumming me out. There are NO good pictures. Nothing at all, I swear. Which is a huge pain because I feel like the character is much harder to visualize without an actual picture, and I doubt many people have seen the movie.

I see. I don't see why the huge beam wouldn't be interesting as a Final Smash, since they don't have to have relevance to the moveset. As for your picture problem, I totally understand where you're coming from with that. But congrats on getting a picture.
 

BridgesWithTurtles

Smash Champion
Joined
Apr 18, 2013
Messages
2,172
Location
The long road to nowhere
3DS FC
3523-2059-7939
Pokéball Mini: Galvantula

Galvantula is a combination Bug/Electric-type Pokemon introduced in Generation V. An arachnid with the power of electricity, Galvantula is a speedy little bug with a high special-attack stat. It's also pretty popular, even though Ariados is cooler.

When spawned from a Pokéball, Galvantula's behavior mimics that of a real-life tarantula. The pocket monster stands in the background of the stage, just outside of the plane of battle. Its fiber-like hairs twitching from time to time, it immediately sets out to find the perfect spot to create its nest. Galvantula will wander about the stage, climbing up and down walls, and back and forth across floors and ceilings, but will never enact any action until a fighter gets too close. As an instinctive reaction, if a fighter gets within two or attacks within three character spaces of the Pokémon, Galvantula will release its signature move: Electroweb. Crafting an electrified spiderweb beneath itself, it leaves a large, sticky trap 1 and 1/4 Battlefield platforms in width on the surface it was standing on.
Like this, but bigger.
This yellow-tinted net has a unique frame that has an adhesive property. Characters that step on, land upon, or pass over the web are stuck to it, and suffer a taser-like electric shock so long as they are trapped, which deals gradual damage of 2% in one second intervals. Electroweb is even more threatening to those who run over it: the stickiness and elasticity of the web create a lethal combination. As a player runs over the trap, their feet stick to its surface, but they continue to run (while taking damage), stretching the web with them, until its resistance snaps them backward. The faster the character runs, the less they have to worry about, as if they're running fast enough (only Sonic, Captain Falcon, or someone wearing a Bunny Hood have this privilege), they'll be flung backward so far that they will be ripped from the net and released (though they may be launched so far that recovery could be a problem). Meanwhile, slower characters who run over the web are in extra trouble, as the web pulls them backward without releasing them, gluing them to their backs and leaving them greatly vulnerable and making it difficult to escape.

Players caught in Electroweb can rapidly flick the joystick to make an early escape, but their struggling will make them take 4% damage per second at a cost. While multiple characters can be stuck in Galvantula's web at once, it does not effect the player who summoned the Pokémon, and as soon as someone breaks free, the web is destroyed (it can also be destroyed with fire attacks). Galvantula itself stays on-screen for twenty seconds, and if its web is destroyed while it occupies the stage, it immediately repairs it. The web continues to stick around after Galvantula disappears, until it is destroyed.

Galvantula reacts in a special way to Spider-Man, if summoned by him. All of the web-slinging hero's web-based moves are of great interest to the spider Pokémon, which follows the attacks. Rather than constructing its own web (though it will still do so under the same criteria), Galvantula appropriates Spidey's for its own. Galvantula will simply chase after standard silk-shooting moves such as Spidey's Neutral Special. However, moves that actually craft webs, such as Back Throw, Side Special, and Up Special, will cause the Pokemon to follow the attack and then occupy it, giving the hitboxes its own electrified treatment to make it feel at home. This can be used to create interesting scenarios. For example, Galvantula will glomp onto an opponent stuck to a wall from Spidey's Back Throw, electrocuting them for 6% damage. It will scurry along Spider-Man's Side and Up Specials, giving the entire length of the web lines electrical properties that deal 2% damage and slight stun upon impact, moving itself along the hitbox, which allows Spidey to control where the arachnid positions itself. Spidey also benefits from Galvantula's web, which he is immune to. Rather than sticking to it, Spidey can use it to jump off of like an elastic trampoline, greatly boosting his jump height (if it's on the ground). A ceiling-placed Electroweb bounces Spidey downward, and webs plastered to walls give him a boosted wall-jump of sorts. By using his web-shooting moves to direct Galvantula's position, he can smartly choose where he wishes the pocket monster to lay down its own web, by directing it into a crowd or shooing it away from an opponent until the time is right.
 

darth meanie

Smash Journeyman
Joined
Jun 6, 2008
Messages
452
Remoraid
Remoraid is an oddity of a Pokemon. When released from a Poke Ball, it behaves identically to Goldeen. It flails around on the ground uselessly, doing absolutely nothing to anybody. What makes Remoraid special though, is that the user can pick Remoraid up, as if the Pokemon were an item! The user wields Remoraid like a pistol, holding it outwards like so.​

Attacks
Mash A: BubbleBeam
Remoraid fires a stream of bubbles the size of an assist trophy that travel forward slowly. Touching the bubbles pushes the player struck along with them, dealing 2% damage a second.
Hold A: Aurora Beam
Remoraid fires a wide rainbow beam out half a battlefield platform in front of him, after a little start up. Being in the field freezes opponents briefly and deals 3% damage a second.
Tap A: Psybeam
Remoraid fires a powerful, quick blast of rings from his mouth, that deals 6% damage and has the stun of an uncharged paralyzer attack from ZSS.
 

Katapultar

Smash Lord
Joined
Nov 24, 2008
Messages
1,251
Location
Australia
POKEMON WITH NO SET POTENTIAL


Masquerain hovers where it was summoned for a good 15 seconds. It is largely useless and only serves to comfort players with a perky cry of its name upon being summoned, followed by a faint fluttering noise for the rest of its lifespan, but if a weak minion, Assist Trophy, stage hazard or Pokemon looks at it they'll become too intimidated to do anything. This kind of sucks because you'll never know when it'll be summoned and whether it'll be useful for the situation anyway: you can intimidate stuff like Torchic, Gulpin, Jill and Waddle Dees alright, but it won't work on stronger stuff like Venasaur or a Rifle Demon. Still better than Goldeen, I suppose.
 

TheKalmarKing

Smash Apprentice
Joined
Mar 7, 2013
Messages
162
Drifblim


When he appears from his Pokéball, Drifblim starts floating toward an opponent. Once he reaches his target, he grabs him/her/it and start flying upward, hoping to kill the opponent by taking him past the blast zone. The opponent can escape at the normal grab difficulty; beware though, Drifblim is a tough stalker and he won't stop until he either killed somebody or reached his time limit, which is about 10 seconds. Being a hot air balloon, he can quickly rise through the sky but will floatily descend to the ground if his target escapes him. Fortunately, his user can just knock an opponent back into him. Drifblim won't do any damage while holding an opponent but he's sure annoying enough like that, his grab having absolute priority. So yeah, if he's coming your way, run away!

If his master comes near him and grabs him, Drifblim will allow him to float through the stage easily, keeping it's former properties while being heavier (The weight gain is based on the user). When you're carried by Drifblim, you can use your ground attacks in the air, giving characters like Bad Girl and Jinbe their much needed air game. They'll feel right at home in Drifblim's arms, spitting beer over the stage or collecting water while floating safely away from the opponent. Aerial based characters like Zoboomafoo and Spiderman though... Well they don't gain that much of an advantage but it's still nifty to drift around the stage while kicking butt.

Of course, given his unique characteristics, Drifblim got some unique weaknesses: attacks will knock him away easily, smashes and the like being especially devastating when he holds somebody in his arms. Also, fire attacks will suddenly make him rise through the air, giving him a burst of hot air. When caught in a wind attack, he will start hopelessly drifting around the stage, and will go back to his routine once the wind stops. Those weaknesses can easily be used against his master, but a skilled Drifblim user can use those against the opponent while he's carried by the hot-air balloon Pokémon...

And of course, it's user can easily let Drifblim go by shielding, letting him go back to his stalking routine.
 

ForwardArrow

Smash Ace
Joined
Aug 17, 2011
Messages
502
Little Nemo
This is the first set you’ve ever made with an actual awareness of playstyle, and the ideas here aren’t bad at all. You have a minion to serve as a distraction and 5 serving as traps, plus a weapon that becomes much easier to power up when they’re all on board and variable weight, and you basically have to manage your resources between them. I actually kind of like how the Boomps work, since you can either make a giant more powerful minion or attempt combos by spacing them further away from each other and abusing your obscene range once you get your sword charged. Meanwhile, you can use them as defense while you charge your sword in exchange for having to charge for longer to get a result, creating a rather interesting balancing act.

Admittedly, I wish there was all a little more substance to this given most of his attacks are just a sword stab in X direction, though you impress me a bit by actually making them aware of the character’s body shape and mechanics beyond just a mere mention in the earlier moves. The bed attacks serve as an okay defense for when his sword is non-existent too but they don’t contribute to the set otherwise, and I really wish maybe they could help a little more with that obscene charge time Nemo needs for the full power blade. As a last note, I know it’s just percentages but the grab, pummel, and teamwork throws feel like they are so good you would do nothing but spam them once you get your set up maxed out and strike me as awkwardly powerful even before then, given he has a pummel that deals 7% a pop and a throw that deals 22%. Don’t let it worry you too much though, this is undoubtedly your best set by far and if you stick around I can easily see you achieving much greater heights than this.

Sho Minamimoto
Now I’ve been meaning to comment this set for a bit, because I’ve told you for a while that I thought you would never make a set I would be willing to SV. I think maybe me being so harsh in that regard got through to you, because this set is absolutely fantastic and it’s going to take a hell of a lot of work for ANYONE to top this as my favorite in the entire contest.

There are a lot of reasons why, to start off the basis gives him a very unique pressure tool in the i Flare, a risky one to utilize given how long Sho has to wait to pull it off where the foe can act on their own accord, but one that makes fighting against Sho’s minions a great deal more intense as they frantically try to get to the mastermind himself. The minions themselves though, I feel are the real reason this set shines so much. All of them have a very interesting flare to them and feel both interesting to fight against and to utilize, and work well into the minion manipulation Sho has later in the set in his throws and tilts, which are all great in their own right, being both creative and yet fitting very practically into Sho’s playstyle by giving him both a lot of control and yet plenty of ways for the foe to interact.

This all, especially in the Smashes, ends up giving Sho an extremely extensive playground around his minions and stage construction that never once feels entirely unfair to foes or too derivative of another set. Frankly, I’m kind of surprised we haven’t ever seen tethers used this effectively to handle minions before, nor the concept of allowing foes to steal minions, and for that matter giving Sho the ability to fight back against them. I had little hope for that concept when you first mentioned it to me but in all honesty I think that ends up being one of the most interesting parts of Sho’s playstyle. On top of that, I can tell you really enjoy this character with all those references to his actions and eccentric attitude in game, along with the various mathematical jokes to make reading the set a very easy and enjoyable experience. The most I can really level against the set is there is the occasional filler move in the aerials, as well as the Jab, but even those moves are at least practical and become more interesting in the rest of his set. One again, congradulations Froy, you have really outdone yourself.
 

Fire Emblemier

The Crests are to Blame
Joined
Apr 4, 2013
Messages
3,909
Location
United States
Switch FC
SW-2862-0450-4332
MAGIKARP
Magikarp works like Goldeen, just flops and stuff, but is way awesome-er. First off, you can beat it up, let the people who didn't get it mock it and beat it. Yet, when it is beat up a little to much it goes berserk and starts glowing. It soon evolves into....​
Gyarados
Gyarados is a behemoth when it comes to the Smash Bros. Pokemon. Gyarados can move all around the stage. quickly. It shoots a combination of Hyper Beams and Dragon Rages. Gyarados will have no problem KOing foes, and will destroy anything in it's path, except the stage.​
 

God Robert's Cousin

Smash Hero
Joined
May 20, 2013
Messages
5,300
Location
Dustbowl
NNID
RepaignPalsims
3DS FC
4339-2483-2603
Boldore

Simply enough, Boldore, upon being released from the Pokéball, starts setting up Stealth Rock. Those of you who have used Charizard's Side Special in Brawl Minus will understand exactly how it works. Boldore sends out floating stones randomly within a set radius around it, around 6 to 7 of them within the same circumference as Brawl's Battlefield. These stones then rotate as they float in place. Even after Boldore disappears, the stealth rocks continue to stay where they are. When an opponent hits one of the stealth rocks, they get knocked slightly upwards and take damage. Because of this, Boldore becomes a nice partner for characters that like to use throws and aerial moves for combos. When you have two or more Boldores setting up stealth rock at once... Well... :troll:
 

BridgesWithTurtles

Smash Champion
Joined
Apr 18, 2013
Messages
2,172
Location
The long road to nowhere
3DS FC
3523-2059-7939
Pokéball Mini: Go Go Gadget Gogoat!


Gogoat is a new Pokemon set to appear in Pokemon X and Y. A Grass-type seemingly based on the concept of a goat crossed with a motorcycle, it is specifically designed to be ridden, the first Pokemon the player is capable of using as personal land transportation in the series. But wait, riding a Pokemon? Isn't that a frightening prospect? Couldn't one hurt themselves? While there are risks inherent in the activity, this motivational video should convince you of the safety and enjoyment to be found in taking Gogoat for a go.

When Gogoat pops out of a Pokeball, the docile, domesticated creature patiently stands still, occasionally gnawing at the ground in search of grass, and waiting for a brave soul to take hold of its handle-horns and rev it up for a good ride. By pressing the attack/item grab button near Gogoat, the player will hop onto the Pokémon, and (if they have arms) grasp onto its horns with both hands. Only the player who summoned Gogoat is able to interact with it, but other players can attack it, and if it suffers 40% damage, it disappears, so get to it quickly! Once safely situated atop Gogoat and all hands, feet, and arms are securely inside the vehicle, the player is introduced to a new control scheme. The player can control Gogoat's movement just as they would their own, with a light tap of the joystick causing it to walk, and a double-tap causing it to dash, the animation of which has Gogoat's legs taking on a cartoony wheel-shape. Gogoat has the dashing speed of Sonic, making it an excellent way to get around, and its traction is smooth as butter, due to the fact that it is a goat, an animal which makes a living out of mocking physics.

Gravity? What's that?
Also while riding Gogoat, players can jump, but only once. This jump is altered by the rider's weight, reaching a maximum of six character spaces with airbags like ChuChus and a minimum of one with fatties like Gruesome Twosome. Players can jump off of Gogoat (by holding up on the joystick while pressing the jump button), however, even in the air, giving them an extra chance at claiming air height, although losing Gogoat in the process. While Gogoat can be reclaimed, if it is abandoned over a pit, well, even its physics-defying goatness won't save it. Also, Gogoat adds another 2 units to a character's weight.​
By pressing the attack button while standing still, Gogoat headbutts with its horns: a relatively quick but short-ranged move that deals 10% damage and tells the opponent not to screw with the Grass-type's Barley-rider. Pressing the attack button while dashing sees Gogoat hold its head down for as long as the button is pressed, deploying Horn Leech. This move deals 18% damage and saps 9% of that damage to replenish Gogoat's 40-HP of health. As opponents are undoubtedly going to try and kill off Gogoat while the player rides it, landing Horn Leech is key to keeping the Pokémon alive. Gogoat can be kept active indefinitely as long as its HP isn't fully depleted. However, if the player jumps off of the Pokemon at any point after 15 seconds from the moment it spawned, it instantly disappears. Likewise, it will do the same if left alone for the first 15 seconds after spawning.​
 

Rychu

Thane of Smashville
Joined
Jul 5, 2010
Messages
810
3DS FC
1908-0105-4965
Dork Failz
What I remember of the original set is approximately nothing, so I'm coming into this with a fresh mind. Before we even get into this, I think that we should begin to make stages designed specifically for Boss fights, because even this "small" boss is really huge. Obviously this anecdote has nothing to do with my actual opinion on the set, I'm just delaying the comment with it and this following explanation to annoy you. Yes, YOU, FA. Move name hating prick.

Anyway, ooh, lookie, a soul-rip mechanic! I like the way that it's handled here, and I'm already formulating teams to work against it. A tank character would be needed as a sort of artificial lamb, along with a healer and maybe another tank to deal lots of damage to Falz. That's basically my favoritr aspect of boss sets. I like the voodoo doll mechanic at work here too, but that's probably more of me just liking voodoo dool type deals in games in general.

Aside from maybe some balance issues that are present with pretty much every boss set, I can't find too many issues with Falz. So, I liked it. Probably would have liked it more with move names, though.

Spoodermin
Spider-man is a technically brilliant moveset with every possibility thought out and addressed, even if it's indirect. The working of Spider-man's Web Swing and Spidey-sense, two very important parts of how the character fights, which were absent in the other Spider-man set, is great. The focus on slick, fast aerial combat works for Spidey well, as does the great web-based grab game. Obviously, it's a beauty to look at, too. Who cares if not every move has a flashy effect? I think you two have stumbled upon what may very well be the perfect Spider-man set.

Shoe Mini Nintendo
The use of minions and summons in this set is absolutely brilliant, give yourself a pat on the back for it. Level Flare is also great on it. As is all the stuff to do with the garbage pile. And don't get me started in the grab game! And also-

Let's just say I pretty much love every single word typed in this set, that it's basically going to be a high Supervote (my SVS are going to have a lot of Froy...) and that you should be proud of having created this. K? K.
 

JOE!

Smash Hero
Joined
Oct 5, 2008
Messages
8,075
Location
Dedham, MA
Third time's the charm they say, and hopefully this should be more in vein with the 1st CMini.. so yeah!​
Week 1 is simple enough, I want each of you to create the specials for:
Post your 4 specials (and probably stats if you want) in order to start the Mini!​
 

TheKalmarKing

Smash Apprentice
Joined
Mar 7, 2013
Messages
162
Little Nemo

I like how sending the Boomps on the stage modify the sats of the bed, allowing it to be either a light-weight or a heavy-weight (Even though the player will want to stay a light-weight due to the Boomps being really good traps). Also while the N-Spec sounds good, I don't think it would practical, even with the little charge quirks. It IS an important part of Nemo's gameplay though, increasing his range and all that. Other than that I can't say anything new, Kat covered it well enough...
 

BridgesWithTurtles

Smash Champion
Joined
Apr 18, 2013
Messages
2,172
Location
The long road to nowhere
3DS FC
3523-2059-7939
Little Nemo - Right off the bat, I just need to point out that while I have no idea what kind of acid-trip piece of animation these characters come from, I truly appreciate that you were passionate enough about this apparently obscure work to make a moveset for them. As someone who has great enthusiasm for animation history, I'm really glad to see more animated character movesets that don't come from an action anime or Disney flick.

I like the very concept of the character(s) as well, controlling a piece of furniture is a rather interesting idea, and unlike a vehicle set, the bed's size and magical properties don't limit it to a wildly unconventional playstyle. It's unique, but it's not un-Smash, and not really that complex. Anyone who could play as Mario or Link could play as Nemo without much trouble. It's a pretty nifty "cargo" set that've probably been done in MYM before, but I've yet to come across one.

As for the gameplay itself, I like the special moves, as they all have their concrete uses and they interact with the rest of Nemo's moves well enough. I do feel like a 6-second recovery time is a bit long for Icarus, even if the move is pretty useful. A lot of the aerials, smashes, and tilts feel like repeats of one another, but they all have their uses and I'm sure it's in-character, so I have little to complain about. Don't take any criticism I may have too seriously; most of my less-than-enthusiastic comments are more personal curiosity than outright criticism. Anyway, as Forward Arrow said, the grabs and pummel seem pretty OP and detract a bit from Nemo's other moves. As another plus, I like the resource management with the bed's weight. However, I went into the set expecting more moves to make use of the bed's passenger count, but Down Air and pummel are really the only ones that do. I suppose the main intention is to keep the Boomps on the field to act as hazards, but it still would've been nice to see them more involved in direct attacks. Once again though, this is probably just in-character, so there's really not too much weight behind my point. All in all, it's a pretty cool set. Short, sweet, and to the point as well, so kudos for that.
 

Koric

Smash Apprentice
Joined
Feb 10, 2006
Messages
84
Location
Aiken SC
The Amazoness Riesz

Riesz is one of the six main characters from Seiken Densetsu 3, one of the main Secret of Mana series. She resides at the wind kingdom of Laurent as the princess as well as the captain of the Amazon army. On the battleground, her abilities with the Spear know no equal to human and monster alike. Out of the 6 main characters, she is the most polite and understanding. Even in dire situation should it be having a kingdom taken over, having a king killed and brother kidnapped, or faced with an almost impossible battle, she will always face them with a clear mind...most of the time.​

Basic stats -

Walk - 7
Run - 6
Jump - 6
Double jump - 4
Fall - 7
Traction - 4
Quick fall - 9
Weight - 4.8
Air movement speed - 3
Riesz is only a few inches smaller than ZZS, however she wields a much taller Spear. While the Spear has several good points such as its long range, almost all of her spear attacks have a hit box radius that is small that it only covering its blade requiring you to make a precise hit from a non-point blank position. Despite her body frame, she can take a sufficient amount of damage before she would fall in battle. Also, her jump speed is faster than the average character…by comparison, it’s just slower than fox’s standard jump.

Special attacks

N special - Whirlwind Spear

Riesz assumes an unique position as she beings to spin her spear. The speed that she spins her spear so fast that she can bring her foes in front of her even closer to her and blows away anyone who is behind her as long they are apart within 3 stage builder blocks around her by distance and can blow or push opponents if they are not currently not as high from a height of 4 stage builder blocks. If they are very close behind her, they will sure to be cut by her spear before they would make an attack.

At any time, she can either execute the attack by releasing the special button allowing her to perform a strong thrust attack or cancel the attack by pressing the shield button while holding the special button. Keep in mind that the attack does the same damage and knockback regardless of how long it’s held. In any case, the attack tends to do 13%-16% damage regardless of distance and may kill the opponent at 121% when executed normally and is at the position of the spearhead. Any other position would kill at 153% and without the hit stun. It also does 3% damage if there are way too close behind her when spinning.


Side special - Amazon strike

Riesz lunges back and dash forward with her spear extended forward allowing her to go up to 6 stage builder blocks forward with such speed (more distance if her running speed is higher). However this move has a rather long startup, but it has a very good recovery allowing her to attack almost instantly after her attack miss the opponent. When she overlaps the opponent within half a stage builder block from her starting position, she won’t dash forward, but will deliver a second vertical strike that launch the opponent upward.

When used in the air, it defines gravity so she can cover the same distance in the air during the execution making it good as a recovery move as well. If there a ledge within 45 degrees in front of her before her execution, she will instead aim for the ledge with 3X the speed. She will ignore the target that in her way even if they are at point blank range. After using the Amazon strike in the air and not hit a ledge, she will be in a helpless state.


Up special - Tornado

She spins her spear fiercely building the wind around here. She then jumps 6 stage builder blocks high with her spear striking anyone who were to be above her doing 13% damage launching them upward which could kill as early as 88%. As she jumps, she releases a wind burst that will push anyone within 4 stage builder blocks away from her. It will not going to push anyone if they are too far above or below her. This attack has a very long start up time of 1.1 seconds with a decent recovery time (when done it the air, she has only 3 frames of startup animation)

After this attack is executed and reaches her max height in the air, she quickly spins her spear above her almost instantly and slowly descends to the ground at a speed similar of Peach’s parasol. When this attack is active, it has the opposite effect than that on the ground. As long anyone within 2 stage builder blocks from her will be pushed away from her making it hard to land an attack against Riesz. As long the special button is held, she will fall at that slow speed until the releases the B button. She won’t be in a helpless state, but she can’t use it again until she lands on the ground.


Down special – totem stance

She place the head of her spear to the ground and baSpear it straight upwards. She then quickly jumps on top of the handle and baSpear herself on top of it. From there she waits for the right time to follow up in multiple ways or you can just press the down special command again to return to her normal stance.

Because of her long spear, she is able to stand over 1.6 of a stage builder block in height. This can allow her to avoid attacks and projectile as long it can’t reach her in height. Anyone overlapping her spear will take damage and launched upward slightly with high priority. From her totem stance she can execute multiple attacks. From a standard attack, she flips forward executing an aerial kick that can spike the opponent. By pressing the shield button and tilt the control stick as if you doing a rolling dodge will have her hop on that direction along with her spear on that same totem position. She can’t do this for too long, or she will stumble causing her to drop her totem as well as suffer a very long recovery time.

She can execute almost any of her special while in the stance, but they will come out in a different way.

From totem to Amazon strike – She lifts her spear, but she defines gravity while doing so allowing her to attack 1.6 builder blocks above the ground. She can’t use the dragon tooth spear this way. She won’t be in her helpless state and will have her double jump as well when used this way.


From totem to Tornado – She jumps only twice as high with this method. However, the wind effect is more greater and there is little to no startup delay.

Standard attacks


A attack – close strike

She tilts her spear to its wooden side and bashes the opponent with it as she knocks the opponent with a low set knockback but with good priority. She then follows with a straight side kick if the A button is pressed again. The first hit box comes out in 4 frames and the second comes 7 frames afterwards. Each hit does 2% damage with her side kick capable of killing at 187% to an average weighted character.


Tilt forward – Crescent slash

She takes a position with her left side of her body facing her enemy. She then step forward to execute a downward vertical slash to the opponent as she moves forward about 7/10 of a stage builder block in the process. It has less reach and knockback than her usual attacks, but the damage is slightly higher contrast to her smash attacks. It does 18%-21% damage in general and has a good priority but it takes slightly longer for her attack to come out unlike compare to her other non-smash attacks.


Tilt up – standing split kick

Riesz leans forward with her left leg tilted straight upward striking anyone who is behind her and above. The attack has a good attack recovery and startup but it only can hit if the enemy is 6/10 of a stage builder block above her or if they are 2/10 of a stage builder block behind her at the start. It can do 7%-13% damage in general and would kill at 180%. It has a low growth knockback so it could be used to chain attacks.


Tilt down – Ankle sweep

As she crouches to the ground and swipe her spear downward just slightly so that it can surely hit regardless of height. Disregarding its animation startup, this attack range reaches almost a full stage builder block as it does 6%-9% damage capable of killing at 158%. If the opponent weight is average, it could trip them at 15%-22% (trip percentage depends on weight). If the opponent is in the air, this attack will spike them downward with no change in knockback power.


Dash attack – Rising strike

Upon execution, she will halt her running speed to the point that she ends up sliding forward depending on her traction. During that moment, she slightly jumps with an upward vertical strike of her spear. On hit it does 13% damage capable of knocking the opponent upward capable of killing at 154%. As an Amazon, she would slide half a stage builder block upon execution.


Smash forward – Spear charge

She takes a step back about 7/10 of a stage builder block from her position and focus her power. She then executes a fierce spear thrust directly forward with her spear extending more than a stage builder block in distance. On impact it can do 12%-14% damage uncharged capable of killing at 122%. On charge it does 21%-23% capable of killing at 103%.


Smash down – Quad spin

She wedges her spear to the ground and begins and holds on to the middle pole of the Spear. She then leaps forward with great movement that will cause her to spin around her spear to a total of 4 complete spins fast from the handler to the spear head. On each spin she extends her right leg into a kicking position striking anyone who is in her way during this attack.

Her first spin does 12%-16% capable of killing at 117% with moderate priority and range. With each spin dealing less knockback and damage by 15% of its original damage as it goes on.


Smash up – Lunar flip

She crouches down and executes a backflip that hits twice while moving back by a small stage builder block.
Her right leg hits the opponent first doing the most damage of 14% with little to no knockback. This hit box only appears in front of her within half a stage builder block. Her left leg connects 2 frames after the first doing 1%-5% damage capable of launching the opponent upward as it can killing at 112% depending on how much decay is affected by the move. This hit box remains in effect until she lands on both legs implying that she can also hit anyone behind her as well. If that happens, the opponent will be launched direction behind her.

Aerial Attacks
Aerial neutral – jump kick

Riesz extends her right leg to the position of a fighting based jump kick. Its hit box duration lasts for 16 frames and surrounds her entire lower body boosting good priority and recovery frames on both landing and animation. It does 3%-5% damage and provide little knockback.


Air forward – Spear thrust

Riesz extends her Spear to pierce her foes in front of her in a downward 45 degree angle. The hit box only appears on her spear head, but it lasts the same as her jump kick except the priority and it doesn’t do as much knockback unless the first hit box frame of this attack hits. Otherwise it would kill at 126% as it does 8% to 10% damage in general. This is one of her longest range attack and can be good at keeping her opponents at bay while using a short jump…but try not to abuse it.


Air back – talon kick

Riesz executes a split side kick similar to that of a gymnast covering at least 8/10 of a stage builder block as well as 2/10 of a stage builder block in front of her. This move has good priority and can be used for spacing when used effectively and the attack animation lasts for 12 frames. Though it has a good recovery time, it recovers slowly when colliding to the ground before the attack is done. It can kill at 143% and usually does 8%-14% damage. After the first hit box frame, the knockback of this attack is decreased by half.


Air down – double kick

Riesz attempts to kick downward twice with high and low knockback respectfully. Though it has little range and priority and slow on startup, it has multiple purposes depending on the situation.

The first hit is where this move shines if it were to be successful on hit. On the first hit and if it lands at a certain position, it will be treated as footstool. If it doesn’t hit its mark, it would do 3% damage with little to no knockback. The second sends the opponent forward capable of killing at 148% in average. The impact from a successful hit will slightly boost her in the air for at least one stage builder block in height. If the opponent has been stepped on before the second kick, they will sure to be spiked downward with efficient results.


Air up – flip kick

She performs an aerial somersault kick covering the area above her with moderate power and with very little growth knockback. Don’t rely on killing with this, but with its good landing recovery upon landing and fast attack recovery, you might want to use it to keep the chain going. It usually does 7%-11% damage with good priority.


Throw Techs

Grab attack - elbow smash

She can deal a decent about of damage with a direct attack to the face of her enemy doing 2% damage with moderate speed. Compare to the majority of the Smash bros cast, her attack does not harm anyone around her during its execution.

Throw forward – amazon kick

Riesz pushes the opponent slightly forward and attacks with a strong kick to the upper body to launch them moderately far. It does 3% damage capable of killing at 122% in average if the attack is fresh. If she hits anyone else other than the thrown opponent, they will be launched at the same force as the opponent.


Throw down – pedestal stab

Riesz turns to the left side of her opponent and strikes them down midway with the handler part of her spear. When her opponent is down with their face to the ground, she stabs the grounded opponent with her spear doing 14% damage. She then takes out her spear and kicks her opponent in the face launching the opponent forward doing 4% additional damage in the process.


Throw back – Piercing throw

Riesz kicks the opponent slightly pushing the opponent to her idea distance. She then thrust her spear forward skewing the opponent for 9% damage, but does not completely go through. She then chucks her opponent behind her releasing her opponent while doing 10% damage. Combined, the total damage can do 15%-19% damage and can kill around 174%. You can also try to catch multiple opponents to throw at the same time, but it not advisable on a 2vs2.


Throw up – kangaroo throw


She grabs her opponent and roll to the ground with her back is to the ground. She then fiercely launches her opponent upward using both of her legs for a precise distance averaging around 9 stage builder blocks for a weight 5 character. This throw launches the opponent for a set amount as it does 12% damage. This could be useful for getting the opponent in the air at full health.


Others
The following details the class changing mechanics and its specializations.
[collapse=Class based details and specials]
Class based details and specials
As that of the abilities of a main character after reaching a certain level, she has the ability to change her current class resulting in a change in her special moves and current stats. When a minute and a half of playtime has elapsed, a projecting light with a fairy will appear around her. When that happens, she is able to class change. When executing and holding a special attack, pressing the attack or jump button will transform her to the next class with changed stats and different armor. The Attack button during a class change will change her into her next dark class while the jump button will change her to her next light class. There is no turning back to her neutral class unless by choice during respawn. While she on her spawn pedestal, pressing any taunt button will lower her class to her previous form (She can’t degrade from a final class to her Amazon class). Eventually after a total of 3 minutes and 30 seconds of game play, a fairy will surround her again if she was in a Valkyrie or Rune Maiden class allowing her to change again into her final class. The class change timer will still be active even if she die (Like Wario's Wrath charge), but it will reset if you choose to downgrade a class during respawning.

After a class change, you will clearly notice a change in Riesz movement in general. Basically her stats has change to better suit her new special moves and mechanics. Stats changes in red indicate a negetive stats change in contrast to her Amazon class. It also indicate what moves was lost from the previous class. As for stats changes in blue indicate a positive change in comparison to her Amazon class. It also indicate what moves was replaced from her previous class.


Valkyrie

Run - 1
Walk - 1
Weight - 1.2
Moves lost from Amazon - Whirlwind spear - Amazon strike
Jump + 0.5

Double jump + 1
move gained - booster - Vacuum surge spear

This class is the light class after her Amazon class. She gains the ability to cast the Vacuum spear special projectile and can buff herself to better situate herself in battle. Even though she can jump much higher in general, she is slightly lighter to KO and can move slightly slower on the ground.

N special - Booster
She executes a stats affecting attack to herself that does no damage, but can change her stats for 4 seconds. On her light-dark class. On execution she will begin chanting a spell that will last for 1.50 seconds. After the required time has passed, she will execute the attack depending on the direction of the controller stick making her chant out a buff spell. At any time, she can cancel a spell by pressing a shield button. After executing a buff, she can’t use the same buff for 9 seconds. She can’t use the same or different buff until the previous one expires.

Attack up (right)– allows her damage to increase by 30%.
Protect up (down)– allows her damage and resistance to increase 40%.
Speed up (left) – Increase her run, walk, and air movement speed by 3.
Mind up (up) – increase her standard hit box radius slightly.


Side special – Vacuum surge spear
Riesz spins her spear above her body and strikes forward with the spear still spinning gathering the wind from around it. This causes her to fires an air blade from her spear that can cut almost anything. The blade travels up to 9 stage builder blocks in distance overall. At first it travels very fast, but it gets slower until it stops for about a half second before it vanishes. Like fox’s blaster, it can’t be blocked by another attack or projectile.


In the air when this move is used, it will fire on the direction opposite of the user jumping or falling. During a jump, the vacuum surge wave will go forward as it goes downward in about 20 degrees. While falling, it will go forward as it goes upward in the same amount of degrees.


Rune Maiden

Air Movement + 1
Jump - .5
Double jump – 1
Moves lost from Amazon - Whirlwind Spear - Tornado
Traction + 2
Run + 2
Walk + 1
Weight + 1.2
Moves Gain - debuff - Flying Heaven Spear


Class changing to a dark class from her Amazon class will change her to a Rune Maiden. She becomes more of a combat fighter with slightly better stats, the ability to use a lengthy recovery move and several debuff techniques. The only negative is that her jump is shortened.


N special - debuff
She uses a stats affecting attack to her enemies in a form of a projectile that appears briefly one stage builder block in front of her doing no damage on connection, but does launch the opponent a small distance. Like her Whirlwind Spear, she can hold the attack as long as she want to, but it won't change the attack. On hit, this effect can change certain stats for 6 seconds in total. If by of some reason this attack hits more than one enemy, the stats effect will only affect the person who is closest to Riesz. If the target is your teammate, they will not be affected by a debuff. On any direction of the controller stick she will chant out a buff spell depending on the direction.


Attack down (right) – lowers the targets attack damage by 25%.
Protect down (down)– lowers the target damage resistance and knockback resistance by 20%.

Speed down (left)– reduce their run, walk, and air movement speed by 15%.

Mind down (up)– decrease their size of their attack hitbox radius by 15% during the duration.


Up special – flying heaven spear
She jumps very high covering a total of 8 stage builder blocks both in distance and height. This attack startup up isn’t affect by gravity so it can be used as a recovery move. At any time during her long jump, she can press any attack button to execute a falling spear attack aiming to the area below her. Or if you insist, press the shield button to cancel her jump…just know that you have no double jump from this. When falling, her body has super armor until impact with the ground and can instantly grab a ledge when she is near one when overlapping it.


As she falls, she can do 14% damage at most if anyone were to be caught as she falls. The grounded opponent will be launched upward with much force that would kill them at 115% in average. If it strikes an opponent in the air, it will launch them downward instead.


Vanadis

Run – 1.5
Walk – 1.5
Weight – 3
Air movement speed - 1
Moves lost - Totem stance
Traction - 2
Jump + 1
Double jump + 1.5
Moves gained - Light Ball Spear
Moves upgrade - Booster plus


Class changing to a light class after Valkyrie will change her to a Vanadis class. On this class she can add additional boost on her buffs to further change the flow the battle and have access to the Light Ball spear projectile to add to her projectile spacing game. This however takes a toll compare to her Amazon class in terms of basic stats. She is better suited on a 1vs1 battle with an opponent who doesn’t have a very good zoning game and/or against characters whose speed is average to slow.

Booster plus
In addition to a successful booster buff, she can apply additoinal effects to the type of buff she is currently using. Remember that the time it takes to use a different or same buff is greatly longer than that of the Valkyrie class.

Attack up (right)– Also increase her knockback by 20%)
Protect up (down)– Also Increase her weight by 4 and give her super armor on her smash attacks startup animations.
Speed up (left) – Decrease the frame rate of all of her non-special/non-smash attacks by 30%.
Mind up (up) – Change the hit box on her non-special and non-smash attacks for to top priority (AKA Metaknight tornado priority)


Down special – Light Ball spear

Riesz creates a second spear with electrical energy. As soon she creates it, she throws it straight up till its off-screen. She can throw up to 3 spears at once. When she launched 3 off screen, the move is locked until the earliest is releases.

Once she executes a Light Ball spear when in the air, the longest lasting spear will fall on the same spot where it was fired. Actually, she can execute this move in the air at any time either if she taken damage, in the air, or during a different air attack. It can stay up offscreen for up to 45 seconds until it fall back down automatically. As it falls, the spear will fall with lightning speed as it penetrates anything solid or not, so it will go through any stage, platform, or stage mechanics. On collision with her enemies if they were to be on its path, they will be stun for a brief .6 seconds before they are launched upward slightly. The damage usually deals about 8%-12% in general. Be warned, that this is her only attack of which she can damage herself, so be aware on the spots you fire your attacks before releasing them.


It might take some practice, but she can air grab her falling light ball spear with precise timing. When grabbed successfully, she will wield her electric-light spear as if it was a javelin. It now counts as a throwing item that can be dropped when hit. When thrown, it travel well as if it was a light throwing item and on collision with any solid ground or character will result in small light elemental explosion that does 16% damage capable of killing at 121% in average.


Star Lancer

Weight – 1.2
Run - .5
Walk - .5
Moves lost from Valkyrie - totem stance
Double Jump + .5
(Attack frame rate + 10%)
Moves gained - Shooting star


Class changing to a dark class after Valkyrie will change her to a Star Lancer class. On this class she can better support herself on the battlefield with faster attacks. She can buff multiple allies around her as well as her ability to use the Falling Heaven spear counter. Her weight is the same as that of her Valkyrie form and the only negative and positives stats in contrast of her first class are barely noticeable. This final class is more suited for a 2vs2 situation.

Booster (all)
she can use this attack for herself and her teammates within a radius of 6 stage builder blocks. There is no change for the duration and cooldown for her buffs.

Down Special – Shooting Star
Riesz takes a defensive position as she waits for an incoming attack. When she intercepts an enemy’s attack, she will crouches and kick directly upward attempting to lift the enemy upward with a disjointed hitbox (not as bad as Snake's up tilt). Upon a successful hit, two shadows of herself and aligns themselves by standing at both side of the opponent respectfully. Her original self will jump sky high to the air while the two clones near the opponent on each side (if there a ceiling above her, she will jump to the point of the ceiling and cling to the wall until her clones made their attack). Afterwards, the clones leap with their spears aimed forward striking through the foe while they crossed each other at such speeds to rival the speed of sound knocking the opponent further upward (they will always hit even if they were to somehow recover from Riesz kick). Finally the original falls from above to strike the opponent below spiking the opponent in the process. The clones then return to her original body. This attack cannot be stopped when activated properly and it cannot hit anyone else under any circumstances.


The entire shooting star spear counter attack can only be activated if her upward kicks connect. In total it can do 26% damage in average but it can only spike the enemy. Unless you want it to kill, you best try to counter the enemy direct attack away from the arena. Be wary though, it has a long recovery animation if it didn't intercept an attack.


Dragon Master

Traction + 1
Weight + 1
Moves Upgraded - Debuff plus
Moves Upgrade - Amazon strike to Dragon Tooth Spear


Class changing to a light class after her Rune Maiden form will allow her to become a Dragon Master. Out of all of her final forms, she retains most of her original stats from her Amazon form. The only difference is that her traction and weight is slightly better than her original form. Also she has the ability to add additional debuffs along with the standard to further weaken your opponent’s stats and gameplay. This class is more versatile on any situation compare to all of her final classes.


Debuff plus
On addition to her debuffs she has before, she can add additional stats defects to her enemies on a successful hit.

Attack down (right) – Also decrease their knockback power of the enemy
Protect down (down)– Can also reduce the opponent’s max shield power by half and inflict half damage to power shielded opponents
Speed down (left)– Also increase all of their attack frames by 10%
Mind down (up)– Change the priority on all of the opponent’s attacks to fail on collision against any of her or any ally attack hitboxes.


Amazon Strike upgrade to Dragon Tooth spear
By holding the special button long enough, she dashes forward with the spear as her body surrounds itself of the shape of a fire dragon as it chews anyone that comes in its way. This attack is similar to Sonic's spin dash except it has a very large hit box due to her spear having the head of a fire dragon. When executed, she doesn’t stop when the opponent is one stage builder from her unlike the Amazon strike. If the controller is tilted when she reaches a ledge on a solid floor or platform, she can turn around so that she can continue going to that desired direction. She can also turn at anytime, but she will have a long traction before she turns around to strike again. She can also jump from her attack her to move in air with great movement speed. After 2 seconds when this attack is executed, this attack will end. Keep in mind that though her Amazon strike has a moderate startup and quick recovery, her Dragon tooth spear has a quick startup and long recovery. To tell if she can use this, her spear will be brimming with fire. When this happen, she is free to use it the next time she uses the Amazon strike. Her Dragon tooth spear will recharge every 11 seconds.


Fernir knight

Traction + 4
Jump – 2
Double jump – 3.5
(Attacking frame rate – 10%)
Moves lost from Rune Maiden - totem stance
Weight + 3
Jump speed + 1
Run + 3
Walk + 4
Air Movement + 2
Fall speed + 2
Moves gained - Hundred Flower Dance
Moves upgrade - debuff (all)


Class changing to her dark form after her Rune Maiden will allow her to become a Fenrir knight. This form makes full use of her abilities providing her good weight as well as great movement both in ground and air movement. Her debuff spell mechanic has changed so that it can now spread in a radius of 2 stage builder blocks from her body allowing her to hit multiple opponents. The big negative is that her jump height in general is very small making her chances to recovery difficult compare to her other classes and her frame rate on her attacks are slightly slower than any of her class. This class is more for a Free for All situation.

debuff (all)
the radius of her attack increases that it can reach her enemies in a radius of 5 stage builder blocks and can affect multiple opponents. The startup animation is similar to her Light classes. She will start chanting until she is finished and release the attack hitting and affecting anyone within its radius.


Down Special – Hundred Flower Dance
First she focus her aura till she surrounds in a wind like aura. Then, she slightly jumps forward and attempts to grab her opponent before she lands as four shadows of herself follows as an extra visual effect. The time from her startup animation to her grab hit box is longer than a falcon punch startup animation by frame rate. If it somehow connect, she beings to accelerate around the opponent on four sides striking the opponent with her spear at each 25 times in the course of 0.7 of a second (the grab will be inescapable if connect). The direction of the controller pad will determine where the 101th hit will execute and where the opponent will be launched. Each hit will do 0.10% with the final hit will do 18% damage to the opponent capable of killing the opponent at 69.7% in any launched direction making it her most damaging non final smash attack.


When the attack is done in the air however, she will skip the long startup animation and proceed to jump forward (defying gravity) as she fall rapidly downward to the ground almost instant with her hand dispels a wolf like claw as a visual effect. As she falls, her grab animation will activate as she falls and when she lands. Her attack recovery is fast to begin with as its around 6 frames anyway. If she grabs her opponent in the air and/or as she lands this way however, she will only hit 4 times doing 1% damage each before her final hit connects doing 5% additional damage capable of killing at 127% in average regardless on the direction the controller stick is tilted at the end. This version is like a mix between both the air version of Bowser bomb and Ganondorf's flame choke, so it can be used to add to her spacing game. It could be also use for a suicide attack, but it’s not recommended. Be wary that she can be knocked out form her throw when done this way.
It most likely better to use this attack in the air.


Final smash - Legendary summons
Using a large amount of magical power she has within her, she will summon a creature to the battlefield to do her bidding. The type of monster varies depending on her final class. If the special button is pressed, but isn’t at her final class, She will class change to a random class of the next level until she reach a final class when she can use a summon. (this will not affect her class change counter.) After the summoning, she reverts back to her amazon class. With her class change counter set to 1 minute.


(Vanadis) – Freya
Riesz summons a whirlwind in front of her expanding 2 stage builder blocks in an attempt to trap as many enemies as she can. If it missed the enemy, the whirlwind won’t start resulting in a failed attack. If successful the whirlwind will form and spin the enemy around triggering a climatic attack similar to Captain Falcon’s final smash half a second later.

~ The Whirlwind takes them to a flower field on the middle of a mountain top. It gently places the enemies on the ground only to be greeted by Riesz who is standing at least 50 yards away from them. After a small welcoming gesture, she then summons the legendary goddess to the garden. This heavily armored Valkyrie whom is 3 times the size of Riesz appears with her iron chariot pulled by her three furious felines who looks like oversized jaguars, Riesz valiantly jumps on the middle jaguar and gives the command to Freya to charge towards the enemies. The camera switch to the enemy perspective to see Freya coming closer to them until the moment before the Jaguar driven chariot tramples them. On that moment, the camera fades and the field switch back to the actual arena ending the climatic ~

Afterwards, Riesz jumps at the end and the enemies whom struck by Freya attack will become small for 8 seconds. This summon tend to do 18% damage capable of killing at 83%.


(Star Lancer) – Marduk
Riesz summons the legendary sun god to the arena. He flies from the background from a star that would signal a star KO in a red like flame. When he fully visible, his physical form is viewed showing he has gold like armor with 2 sets of wings. From the background, he fires a corona orb on the field. From that orb, three beams of light appear firing nonstop and slowly rotate clockwise around the corona orb. Each time a character is hit by the beam, it does 4% damage each time with moderate knockback capable of killing at 102%. Each hit of light will disable the opponent to the point that they will be dazed as if their shield was broken. (The stun time is no more than a second) The corona orb however will slowly chase down one of her enemies while the beams of light rotate around it. The orb alone does 32% damage capable of killing at 78% so try not to get hit by it. After 10 seconds, Marduk will end his attack and ascend from the arena.

(Dragon Master) - Jormungand
Riesz summons the legendary Serpent from the depths into the fray. It arrives from the bottom of the arena causing a slight earthquake in its wake. His body far exceeds the length of Final destination with his pale green skin reek of an unknown poison to mankind. When its long body is completely emerged from the ground, Riesz jumps into the back of this monster as it begins his destruction on the arena. It flies around the battlefield poising anyone who touches its body (as if they can avoid them to begin with). When poisoned, they will take 1% damage per second until 20 seconds has passed. To top it off, he can fire a green acidic flame that travels as far as the length of battlefield. On hit, it can do 16% damage while poisoning the enemy while launching the opponent far capable of killing at 82%.

If you familiar with how “The Legend of Zelda: Ocarina of Time” boss Volvagia behaves in the air, you might imagine how Jormungand moves.

(Fernir Knight) – Lamia Naga

From out of nowhere, Riesz summons the legendary demon to the field. From the forbidden seal, Lamia Naga rises from the darkness of the void to the presence of her caster. Her appearance shows a giant dark cobra like woman with hair as long that it reaches her waist. Her upper half shows a human part showing that she has six mobile arms; four of her upper arms are equipped with Scimitars each wielded professionally. Her normal arms clings together to cast a dark magic spell that can drag her opponents to her position. One the enemy is trapped in her vortex, there is no way out. Before she finishes her spell, she swings her scimitars downward striking anyone who is in her range doing 47% capable of killing almost instantly. Only with a handicap or equipped with a weight changing transforming item would allow you to survive this unholy attack. After her scimitar attack, she finishes her vortex attack and slitters back inside the void from where she came. Riesz then closes the seal


returning everything to normal.


Fairy’s Rune
Only in her Amazon class if the fairy remain with her for four minutes of gameplay without changing class during the entire match, the fairy will rapidly fly around Riesz with a beaming blue arua around it before vanishing. As a result, a second hitbox will appear after any successful execution from any of her attacks. The second blue hitbox will appear within 3 frames after the primary attack main hit box appeared fully visible to the players sights covering twice the size of the attack hitbox in a blue aura. The blue aura can do the same damage as that of the original attack plus a 15% extra knockback and +.20% damage bonus on all attacks. All of these effects will remain on Riesz for 2 minutes...however....

If Riesz were to be hit hard or taken too much damage during the effect, the blue aura will be knocked off from here into a form of a blue stone. At that point, anyone can grab it as if it was a transformation item and will reap the benefits for the remainder of its 2 minute duration, that is if its knocked out of them. The fairy rune effect does not count down unless its grabbed by someone. Also, only until the fairy rune effect is completely gone, the class change countdown will begin anew.

For example – take this animated demo for Ike’s Forward smash with visible hit box.

[URL='http://i33.tinypic.com/zy648x.jpg%5b/IMG']http://i33.tinypic.com/zy648x.jpg[/IMG[/URL]]

Suppose Ike picks up a rune dropped from an enemy Riesz player and decided to execute a charged forward smash attack. From the effect, the damage output will change 31%-33% to 37.2%-39.6%. During the effect the bonus from the fairy rune, the a blue hit box would appear visible 3 frames following the main hit box covering twice its size. You already saw his hit box upon execution…now imagine it twice as big.
[/collapse]
 

Junahu

Smash Ace
Joined
Nov 15, 2005
Messages
899
Location
Shropshire Slasher
Pokeball mini entry​


Cleffa

This diminuitive muffin of a pokemon is just thrilled to be outta that darn Pokeball. It skips gaily back and forth, marvelling at the next-gen graphix of SuperSmashBros4. It doesn't appear to do anything, and it vanishes after about 10 seconds.

Of course, if you knew ANYTHING about Smash Bros, you might recall there was another Baby Pokemon, Bonsly, and that you could throw him at people. Compared to that lug of a rock type, Cleffa is so small and light, that you could pick her up and run around as if you were holding a capsule.

Throwing Cleffa into an opponent causes her to bounce off, deal 3% damage, and one of the following random effects;

  • Charm: The opponent begins sweating hearts somehow, signifying that their attack strength (damage, hitstun, knockback) has been cut in half for the next 5 seconds.
  • Sing: The opponent falls asleep on the spot, or falls helplessly to the ground if they were airborne at the time.
  • Magical Leaf: A stream of leaves orbits around the opponent for the next 3 seconds. At one random point during that time, they will converge on the foe, causing them to flinch.
  • Sweet Kiss: The opponent's left and right movement is reversed for the next 4 seconds (i.e. if they push left, they'll run right, and vice versa). Small chicks orbit the foe's head to signify this "confused" status
  • Encore: A question-mark hovers ominously, overlayed on the foe's body. If the opponent attempts to use any attack during the next 5 seconds, they will end up using the last attack they successfully used instead (from before they were hit with this status)
  • Tickle: The opponent erupts with uncontrollable laughter. For the next 6 seconds, attempting to move left or right when on the ground will cause the foe to roll in that direction instead.
  • Pound: The opponent takes standard knockback, as if struck by a thrown (non exploding) capsule.
  • Splash: Nothing happens, the foe doesn't even flinch.
  • Present: A random food item drops out of Cleffa, landing at the foe's feet.
Cleffa shares Mr.Saturn's bounciness, and can also be tossed multiple times, which means an enterprising player could stack multiple effects on the foe, or two fighters may end up tossing the same Cleffa back and forth. The statuses are applied even if the foe shields the thrown Cleffa
 

darth meanie

Smash Journeyman
Joined
Jun 6, 2008
Messages
452
Lies, Junahu. Munchlax is a baby pokemon too, and my attempts at throwing it were less than satisfactory.
 

Junahu

Smash Ace
Joined
Nov 15, 2005
Messages
899
Location
Shropshire Slasher
Curses! Foiled again!
Though hot damn I'd love to be able to throw Munchlax at opponents in order to have him eat the item they're holding.
 

Kholdstare

Nightmare Weaver
Joined
Oct 10, 2008
Messages
1,439
tl;dr: Good things will happen if you throw babies, according to Junahu.
 

Conren

Smash Apprentice
Joined
Feb 17, 2009
Messages
90
Location
Boston
NNID
Conren1
3DS FC
5086-4445-8944
VESPIQUEN

The evolved form of a female combee. Vespiquen is the leader of a hive of combee, and protects said hive from intruders along with her army combee. Vespiquen has been known to reward outsiders that kindly protect her hive. She has a skirt-like group of honeycomb cells around her abdomen which serves as a hive for baby combee. This hive-skirt may or may not be part of her body.

Pokemon

ATTRIBUTES

4/10 Dash Speed
3/10 Air Speed
1/10 Fall Speed
7/10 Jump
2/10 Air Jump
8/10 Traction
5/10 Weight

Vespiquen is exactly the same height as Lucario. She has three midair jumps, and as such, her back air jump turns her around. Vespiquen also has the ability to hover which is identical to Peach's floating ability.

Some of Vespiquen's attacks inflict poison. When an opponent is poisoned, they receive one damage per second until the poison clears. Poison lasts for 1 second for every 2% the poison move deals, so it essentially increases the poison move's damage by 1.5x. The poison timer cannot be extended, but it can be replaced if the new timer is longer than the current timer.

Notable Animations

Walking - Without proper legs, Vespiquen opts to hover slightly off the ground while buzzing her wings mildly fast.

Dashing - Vespiquen flies a bit off ground Mewtwo-style.

Crouching - Vespiquen bends at the waist, which is not much of a crouch.

Jumping - With any jump, Vespiquen buzzes her wings several times. She doesn't do any fancy acrobatics with her air jumps.

Sleeping - Vespiquen practically sleeps standing up, her wide hive-skirt easily supporting her.

Hovering - Vespiquen's wings buzz very fast while her abdomen sways like a bell.


SPECIALS

Neutral Special - Combee Gather

[collapse="Combee"]

[/collapse]

Vespiquen starts the match with two combee already at her side. Each one about 1/4 of her height.

However, by using Neutral Special, Vespiquen focuses a little bit and emits pheromones to call forth another combee. The pheromones are completely invisible, so it almost seems like a form of telepathy. The single combee appears from the background and zips right to Vespiquen's side. Vespiquen can have up to six combee at her command. Most of Vespiquen's moves are different with the presence of combee.

When idle, combee fly lazily around Vespiquen. Although they gravitate towards her front which makes for a good defense against projectiles. When Vespiquen dashes, the combee have a tendency to trail behind her, even though they're generally faster.Each combee has 10 stamina, and when KO'd will fly away with three sad faces. A KO'd combee has a small chance of dropping a honeycomb, which can be eaten for 2% recovery. If Vespiquen is KO'd, the combee will stay around for her next stock, but will fly away if it was her last stock.

A summoned Combee has a 1 in 7 chance of having a red spot on it's center forehead. Which does nothing but look pretty. If Vespiquen falls asleep, the combee will interlock into a wall and sleep as well. Possibly unaware that her sleep is a status effect.

As a side note, combee aerial attacks can generally clang with ground attacks. For those interested in priority rules.

Damage of moves that use combee will be listed in the format: Vespiquen Damage% / Combee Damage%

Side Special - Attack Order
7% / 4%

With a commanding stance, Vespiquen points forward. The first combee in line then puts on a determined look and hustles straight towards the nearest opponent, prioritizing ones that are in front of Vespiquen. The combee then delivers a little bug bite that does 4% damage and a little bit of knockback. After a short pause, it returns back to Vespiquen.

The move can be angled when fired, causing the combee to instead fly in a curved path towards it's target. If the move is instead smashed, the combee will fly at a faster speed, but without the ability to be angled. If the combee covers the length of Final Destination before hitting an opponent, it'll automatically come back. Vespiquen can fire off combee pretty quickly, creating a small swarm of attacking combee if she so chooses. However, it is pretty easy for an opponent to knock combee off their flight path with any old attack. As is the case with any of the combee based attacks.

If there are no combee to command, Vespiquen will instead bite forward with her mandibles and do 7% damage and slightly more knockback than a combee bite. The grounded version simply has Vespiquen leaning forward to bite, while the midair version has her extend with her whole body, giving it more range. The bite's only special property is that it can be used to eat food items, which totally interacts with the honeycombs that combee can leave.

Down Special - Patrol Order

Vespiquen looks at her combee and points down, then one of the combee will stay, flying back and forth in a small space the width of Vespiquen's hive-skirt. If an opponent comes near it, the lone combee will emit a sweet scent, which takes the form of a pink cloud, then will zip back to Vespiquen. The sweet scent distracts the opponent for a short moment. While distracted, the opponent can't use any actions except button mash to snap out of it earlier. Taking knockback will remove the status effect. When used on an aerial opponent, they will strangely freeze in midair.

Duration(in frames) = 20 + 0.5 per point of damage - 5 per button mash

Or, About 1/3 of a second at 0% damage, to over a full second if the victim is at 100% damage, if no buttons are mashed.

Vespiquen can use her ranged moves to capitalize on a distracted opponent, or one that's using caution to deal with patrolling combee.

Vespiquen can pick up a patrolling combee by standing on the same spot and using Down Special again. If there are already six combee on the stage, she can also use Neutral Special to call a patrolling combee back to her. If the stage scrolls it past a blast zone, the patrolling combee will automatically head back to Vespiquen.

If there are no combee available for the move, Vespiquen will use her own sweet scent, which has the same effect. Although not as useful since it's possible for an opponent to snap out of distraction just as Vespiquen finishes the move.

Up Special - Defend Order

Vespiquen does a special upwards jump that's about the same height as her ground jump. Then all the non-patrolling combee come to her and orbit her in different directions, creating a combee sphere. During this time, Vespiquen gains free flight for 2 1/2 seconds, which feels a lot longer than expected. Also, special moves won't be usable and the combee that are part of the sphere can't participate in attacks.

As the name suggests, this move has a defensive feature. If Vespiquen gets hit during Defend Order, for every 300 "mph" of knocback, rounded down, that Vespiquen would have recieved, one of the combee carrying her will get knocked off, properly reducing her flight speed as well. At low damage, Defend Order can negate knockback all together. Even at high damage, Defend Order can significantly reduce knockback and allow Vespiquen to survive, on average, 30% more damage.

Defend Order does not leave Vespiquen helpless and does not consume her remaining jumps or hover. If Vespiquen takes knockback during the starting animation of Defend Order, she will regain the use of this move. Otherwise, Vespiquen can only use Defend Order once before landing. Defend Order can be cancelled by just touching the ground.


STANDARD ATTACKS

Neutral Attack
6%

Vespiquen does a furious cut with one arm, then does a follow-up cut with her other arm. Each hit does 3% damage, with the second one having some knockback. The two hit combo can be chained indefinitely, but there is a slight pause after the second hit.

Forward Tilt
14%
KO: 140%

Vespiquen places her hands on her head gem as it glows white, then she leans forward, arms extended back, and shoots a powerful blast of small hexagonal-shaped gems of light at a 45 degree angle downwards. The blast deals 14% damage if all hits connect and is Vespiquen's best combeeless KO move. Despite it's appearance, the blast acts more like a melee attack, like Snake's forward smash.

Rather slow, but it's useful on a distracted opponent.

Down Tilt
7% / 2%

Vespiquen looks diagonally towards the ground. Then, in a train like formation, the combee attack by diving straight down, then curving forward right before hitting ground level, then stopping when they complete an curved "L" path. Of course, this is easier to show than to explain, so...

[collapse="Down Tilt"]

[/collapse]

The attack does 2% damage per combee, and flinching knockback. That second part of the move, where the combee are moving forward, has a 10% chance of tripping the opponent each time a combee hits. Which is about a 47% chance of tripping if all six combee hit.

This move has a special feature, if the move is inputted while there are any combee in the middle of Forward Special (or the short pause after Forward Special), those combee will perform the move, instead of the idle combee. Many moves will have this feature, which will here on be referred to as ordered attacks.

If there are no combee to command, Vespiquen will simply use her claws to stab at the opponent's legs and deal 7% damage. This move has an extended stun, being the shocking sting of a bee after all, and does average knockback. This move inflicts poison.

Up Tilt
8% / 3%

An ordered attack. Vespiquen looks diagonally up, then the combee, starting at ground level, smoothly move up-forward before arcing backwards to Vespiquen's head. The path taken kind of looks like a large apostrophe. Does 3% damage per combee. The knockback of this move makes it useful as a launcher, with which Vespiquen can follow-up with her air game. Alternating between this and down tilt can create a rotating combee wall of doom.

Without combee, it's basically the same as Vespiquen's down tilt, except she stabs straight up, causing vertical knockback and doing 8% damage. Again, it inflicts poison.

Dash Attack
10%
KO: 190%

Vespiquen rushes forward with both arms extended. When she hits, the move does 10% with pretty good knockback, but has a laggy end lag where she falls first before getting up. Can be used as a surprise desperation move in Vespiquen's otherwise slow paced game.


SMASH ATTACKS

Forward Smash
6% - 8.4% / 4% - 5.6%
KO: 130% - 120%

While charging, Vespiquen rears her arms back and all non-patrolling combee come to gather in front of her. When the button is released, Vespiquen gestures by pointing both arms and her abdomen forward, then the combee fly outward like a shotgun blast, reaching out 1 full SBB, and a spread height of 1.5 Vespiquen's height. Each combee does 4% - 5.6% damage, depending on the charge. The gesture itself does 6% - 8.4% damage. The attack is pretty laggy, but Can do a lot of damage and is Vespiquen's best KO move if enough combee hit. Which is easier to do at point blank range, or on a large target. The KO value represents the move when all hits connect.

Down Smash
11% - 15.4% / 3%
KO: 190% - 180% / N/A

Vespiquen goes into a stance where she crosses her arms in front of her. As the move is charged, each idle combee goes into a small rotating circle formation at Vespiquen's center, then expand outwardly (they're actually spiraling away from Vespiquen) until the formation reaches 1.5x Vespiquen's height in diameter, although they'll still rotate for the duration of the charge. When rotating, a combee does 3% damage to any target it happens to ram into, and knockback that knocks the foe towards Vespiquen. When the move is released, or the charge ends, Vespiquen spins once with both arms extended, doing 11% damage and decent knockback at each side of her.

Due to the way the combee move, and the knockback they do, this is a good way to get around an attacker's move and then counterattack immediately.

If there are no combee for Vespiquen to command, she'll be able to focus more on the attack, doing 11% - 15% damage, depending on the charge.

Up Smash
10% - 14%
KO: 170% - 160%

An ordered attack. While charging, the combee move in circles, creating an hourglass shaped whirlwind that moves towards Vespiquen. The whirlwind formation itself doesn't do any damage, but each combee creates a vacuum effect that overlap with each other. With six combee, the vacuum effect can be very strong. Upon releasing the button, Vespiquen does an uppercut that does 10% - 14% damage and is a weak but usable KO move. This can leave Vespiquen vulnerable to an attack, unless the opponent is pulled through a patrolling combee.


AIR ATTACKS

Neutral Air
16% / 3%

Vespiquen buzzes her wings quickly creating soundwaves, which look like colorful circles-lines, from her wings that grow outwardly up to her height in diameter. She creates 8 soundwaves that each do 2% damage, and flinching knockback. If any of the soundwaves reach combee, those combee will do their own version of the attack, creating 3 soundwaves that move outwardly at a diameter of twice combee's width and do 1% damage each.

When paired with Vespiquen's hover ability, this move is useful for retreating, and somewhat useful for approach as well. The soundwaves don't move with Vespiquen, so hovering in one direction can create a doppler effect.

Since the soundwaves don't quite cover Vespiquen, she is vulnerable to attacks from below. The landing animation of this move has Vespiquen pausing as she creates the rest of the soundwaves.

Forward Air
9% / 3%

An ordered attack. The combee move forward in a wave path for a moderate distance. This wave motion makes it difficult to attack the combee, as well as give the combee extra chances to hit an opponent everytime a combee goes in an upwards motion. Does 3% damage per combee and a little knockback that goes in the same direction that combee is moving. Landing lag is almost non-existing but does interrupt the combee attack. This move has the most subtle gesture from Vespiquen, making it a surprise attack, especially when used after turning around with a back air jump.

Without combee, Vespiquen does a simple up-to-down slash that does 9% damage and average knockback. Landing lag is pretty low, and the move can kill at very high percentages.

Down Air
11% / 4%

Another ordered attack. Vespiquen looks down, moving her hive-skirt away from her line of sight, then the combee split up into two groups and move downwards in a double-helix path. Does 4% damage per combee. Landing lag is a bit longer than her other "look-to-attack" moves. This is a good air to ground move that can be used against juggling attempts. When combined with a fast-fall, this is a good way to shield Vespiquen while some the combee go around attacks.

With no combee, Vespiquen will instead curl-up, then do a stomp that does 11% damage, but has low knockback scaling. The landing lag is somewhat long.

Up Air
8% / 3%
KO: 210% / N/A

One more ordered attack. The combee go up, then move in a clockwise arc, before curving forward. Useful to get combee over an attack and hit the attacker. Does 3% damage per combee and very low knockback.

Without combee, Vespiquen crosses her arms above her head then slashes with them outwardly, which actually has good coverage. Does 8% damage. Landing lag is pretty short.

Back Air
10% / 4%
KO: 190% / N/A

Guess what? Another ordered attack. Vespiquen looks over her shoulder, then the combee go down backwards, and move in a figure-eight path before returning back to where they started. Does 4% damage per combee. As can be guessed by the path, this can be used repeatedly before landing, covering Vespiqune in a sort of shield.

Without Combee, Vespiquen attacks with her abdomen, doing one horizontal spin. Does 10% damage. Landing lag is quite severe, as she falls flat before getting up.


GRAB ATTACKS

Grab

A simple grab where Vespiquen extends her arm to grasp the foe. If there are any idle combee, one combee will dart a bit forward to grab the foe and bring them into Vespiquen's grasp.

When used in the air, Vespiquen sends out a single combee forward to the same distance as a hookshot. Does 2% damage and minor knockback but has no landing lag. Useful for spacing purposes, or if you don't want to send out all combee at once for an aerial attack. This grab air is unique in that it requires at least one combee to use, and doesn't tether.

Pummel
4%

Vespiquen stabs the opponent with her free hand, creating a purple effect and doing 4% damage. A slow but very damaging pummel that also inflicts poison.

Forward Throw
3%
KO: 120%*

Vespiquen holds the foe by the shoulders, then they both become engulfed in purple flames. The two then move in an arc path forward for 2/3 SBBs, then fall straight down. If they hit the ground, the foe is dealt 3% damage and minor knockback. If they don't hit the ground then it can become a suicide KO. However, the move can be escaped even during the throw, which will interrupt both character's animations. The opponent must be at around 120% damage for it to be a succussful KO.

Down Throw
1% / 2%

Vespiquen lets go of the opponent, the move itself doing 1% damage, then the combee one by one dive-bomb the opponent, each one doing 2% damage and a bit of upwards knockback. Each combee comboes the foe into the next one, making this a good launching move.

Up Throw
10%
KO: 150%

The combee all lift the opponent above Vespiquen and hold them there for a second. During this time, the opponent can still attempt to escape, with 1/3 the normal grab timer for every combee holding him, minus the time already spent in Vespiquen's clutches. Whether or not the opponent escapes in time, Vespiquen shoots a blast from her forehead gem straight up. The blast does 12% damage and a good amount of knockback, making it her best killing throw. Or, only killing throw for that matter. If there are no combee to hold the opponent in place, Vespiquen will still perform the attack, and most likely miss.

Back Throw
3% / 1%

Vespiquen throws the opponent backwards doing 3% damage. If there are idle combee, they will rush the opponent, pestering them while they do an animation similar to a victim under Bowser's down throw. During this time, the victim is still considered tobe in "grabbed" status. One by one, each combee bites the opponent for 1% damage, and no stun or knocback, before flying back to Vespiquen. The extended length of the throw gives Vespiquen a chance to reposition herself. However, the move is brief enough that it can't be used as a cheap off-stage KO. Due to the no stun, this can't be used as a chain grab on a competent opponent.


BEAM SWORD ATTACKS

Neutral Swing

A normal sword swing. It's a bit slower than her normal jab, but the extra range is a great improvement.

Tilt Swing

In one quick motion, Vespiquen rears her sword back, then leans forward with a down-to-up slash. With this move, Vespiquen trades KO power for better speed and range.

Dash Swing

Vespiquen continues dashing while she thrust her sword forward with both hands. This move has a similar ending animation to her normal dash attack.

Smash Swing

Vespiquen holds the sword over her head with both hands while the move charges. Upon release, she does a strong down slash. The combee still attack as they do during her normal forward smash. The extra range of the sword makes it easier for Vespiquen to contribute knockback to the move. Even without combee, Vespiquen still gains a fairly fast and viable KO move.


FINAL SMASH

Assault Order

Vespiquen has the smash ball! Even though it's very like one of the combee gave the final hit. Vespiquen hovers into the air, spreads her arms outward, then gives an unnerving high pitched call. Then, from off the side of the screen, a fast moving object with a golden aura races across the stage. Upon closer examination, it's a combee! And it has three furious faces! The combee does 7% damage and really good knocback for a combee. A bit underwhelming for a final smash. But no sooner than the combee leaves before another one appears of the side of the screen. Then another, then a few more, then the stage gets swarmed by randomly placed combee rushing across the stage.


PLAYSTYLE

The first thing that needs to be mentioned, is that ordered attacks can be chained together. Consequently, this means that she can create interesting comboes, even from a remote distance. Or at the very least, pester her foe with repeated hits of combee fury. There are a few catches though. Firstly, Vespiquen's best combo moves are her aerial attacks, and landing, even briefly, will disrupt a chain of ordered attacks. So Vespiquen must use her aerial maneuvers in between attack inputs in order to extend her comboes. She can also use her air attacks during her hover to great effect. Secondly, good aim is very crucial, as a single well placed attack by an opponent can spell doom for your trail of combee since they'll, one by one, plant face first into the attack. But managing a clean hit can earn several hits on your foe, even six if your foe is at low damage.

However, despite her high damage output, Vespiquen has trouble earning a kill. Her earliest KO moves, forward tilt and forward smash, are laggy and punishable. Fortunately, she has Patrol Order at her disposal which, with good timing, can help her land a finishing blow. As the opponent's damage goes up, and combee start hitting fewer times per attack, it becomes more useful to lay down patrolling combee. If one is patient enough to get the foe to very high damages, Vespiquen will gain some difficult to avoid killers like up smash and down smash. Which is a good thing that with her combee to defend her, Vespiquen can be a frustratingly hard opponent to kill. Although Vespiquen may at first seem good at keeping a foe off stage with her remote comboes, the feeble knockback from combee might actually help the opponent more than hurt them.


EXTRAS

On-Screen Appearance

Vespiquen flies into the stage with two combe, then hovers a bit while the two combee do a little dance at each side of her.

Up Taunt

Vespiquen hovers a bit off the ground, then baby combee fly out of her hive-skirt to play with her. They then immediately return.

Side Taunt

Vespiquen does a queenly pose while the combee gather in front of her like an audience. The captivated combee then give pleased looks before returning to their idle stance.

Down Taunt

Looking bored, Vespiquen examines the claws in one hand as they rub together. Then she flicks her claws, causing a sharpened sound effect, before ending the taunt. May enrage the opponent.

[collapse="Kirby Hat"]
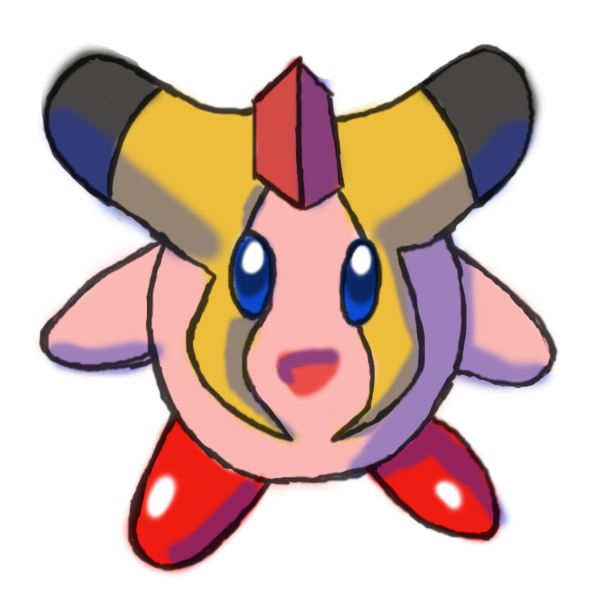
[/collapse]


[collapse="Super Special Extra"]
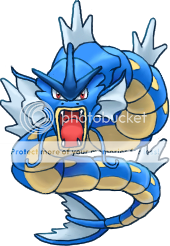
COMBEE

A pokemon that lives in a great hive of other combee and is greatly loyal to it's queen. When three baby combee mature, they fuse together into the pokemon you see here. Then it goes into an egg to be born again. At least that's what the game mechanics seem to indicate. Combee that have a red spot on it's center forehead are female, and can evolve into a Vespiquen.

Pokemon

ATTRIBUTES

6/10 Dash Speed
7/10 Air Speed
1/10 Fall Speed
5/10 Jump
2/10 Air Jump
1/10 Traction
1/10 Weight

Combee is really a bonus character. To play as Combee, one must first select Vespiquen, then click on one of the combee in her portrait. You have your choice between the female and male combee. This post will assume you selected the male one. Combee will use all the same moves he does in Vespiquen's moveset, just with slightly different properties. However, with the playable character curse of falling during his aerial move endlag, so Combee can't stall infinitely with his air attacks.

Combee has five midair jumps, and as such, his back air jump turns him around. Combee can also hover, just like Vespiquen.

Attack descriptions that are the same from Vespiquen's set will be grayed out for reference.

Notable Animations:

Standing, Walking, Dashing - Combee constantly stays air born just a little off the ground while buzzing his wings during these animations.

Crouching - Combee stops buzzing his wings and drops to the ground.

Jumping - With any jump, Combee buzzes his wings several times. He doesn't do any fancy acrobatics with his air jumps.

Ledge Grab - Combee bites onto the ledge.

Hovering - Combee's wings buzz very fast while he shuffles his body left and right.


SPECIALS

Neutral Special - Gust

In an uncharacteristically avian way, Combee flaps his wings forward and creates a small whirlwind. The whirlwind moves forward in a random angle for the distance of a battlefield platform. The whirlwind can push an opponent about twice as hard as when a character gets pushed when overlapping with another character, and really has no business being a special move. Combee can shoot whirlwinds quickly, and can maybe use them to KO an opponent who would have otherwise just barely reached the ledge.

Side Special - Bug Bite
4%

Combee puts on a determined look and hustles straight towards the nearest opponent, prioritizing ones that are in front of him. Combee then delivers a little bug bite that does 4% damage and a little bit of knockback. The bite will also cause a random food item to pop out of the opponent, and will heal Combee as soon it it touches him. Although the opponent has a good shot at eating the item first.

The move can be angled when used, causing Combee to instead fly in a curved path towards his target. If the move is instead smashed, Combee will fly at a faster speed, but without the ability to be angled. If Combee covers the length of Final Destination before hitting an opponent, he will automatically stop. The move can also be cancelled with an aerial attack, or by pressing shield.

Down Special - Sweet Scent

Combee emits a pink cloud. The sweet scent distracts the opponent for a short moment. While distracted, the opponent can't use any actions except button mash to snap out of it earlier. Taking knockback will remove the status effect. When used on an aerial opponent, they will strangely freeze in midair.

Duration(in frames) = 20 + 0.5 per point of damage - 5 per button mash

Or, About 1/3 of a second at 0% damage, to over a full second if the victim is at 100% damage, if no buttons are mashed.

Has the same strategic value as Jigglypuff's up special, except it doesn't immobilize the target long enough to do much.

Up Special - Combee Flight
2% per hit

Combee gains free flight for 2 1/2 seconds and moves as fast as his air speed. During this time, Combee will aggressively bite any opponent within biting range for 2% damage every second, and do flinching knocback. Knockback of attacks that hit Combee will be reduced by 300 "mph", which admittedly makes it good for tanking through Falco's lasers... until Combee actually takes some good damage.

Fly does not leave Combee helpless and does not consume his remaining jumps or hover. If Combee takes knockback during the starting animation of Fly, he will regain the use of this move. Otherwise, Combee can only use Fly once before landing. Fly can be cancelled by using an aerial or just touching the ground.


STANDARD ATTACKS

Neutral Attack
4%

Combee bites three times in different directions. With each bite, Combee moves a little bit in that direction before rearing back for his next bite. First two bites do 1% damage each, and the last bite does 2% damage and weak knockback.

Forward Tilt
6%

Combee jumps forward while spinning with wings outstretched, doing three hits of 2% damage. Hits on both sides of Combee, which is wasted unless for some reason the opponent decides that Combee is enough of a threat to roll past him.

Down Tilt
3%

Combee attacks by diving straight down, then curving forward right before hitting ground level, then stopping when they complete an curved "L" path. Of course, this is easier to show than to explain, and I won't show it.

Anyways, the attack does 3% damage and flinching knockback. That second part of the move, where Combee is moving forward, has a meager 10% chance of tripping the opponent. It's just too bad that Combee's acrobatic maneuvers are poor at attacking a prone opponent.

Up Tilt
3%

Combee, starting at ground level, smoothly moves up-forward before arcing backwards a little bit. The path taken kind of looks like a large apostrophe. Does 3% damage. The knockback of this move makes it useful as a launcher. It leaves Combee airborn as well, which allows him to follow-up with his air game. However, it is a bit of a curse since Combee won't be able to shield after whiffing.

Dash Attack
4%

Combee somehow trips in mid-air, and tumbles forward doing a solid hit of 4% damage. Can be used as a surprise laughter inducing attack.


SMASH ATTACKS

Forward Smash
7% - 9.8%

Combee rams forward for 7% - 9.8% damage, and ok knockback. This move has extreme angling properties, and can be angled anywhere up to 45 degrees away from straight forward. One of Combee's few KO moves.

Down Smash
4%

As the move is charged, Combee moves in a small circle path at 2x his height above ground, then expands outwardly (he's actually spiraling away from the center) into a path reaching 6x Combee's height in diameter, although Combee will still rotate for the duration of the charge. When rotating, Combee does 3% damage to any target it happens to ram into, and knockback that knocks the foe towards the center of the circle path. Once the charge is let go, Combee does a drill ram towards the direction he was going for 4% damage and OK knockback.

Up Smash
5% - 7%

While charging, Combee moves in a ground-aligned circle, creating an hourglass shaped whirlwind around him. The whirlwind itself doesn't do any damage but pulls foes in. Upon releasing the button, Combee does an upwards ram that does 5% - 7% damage and is a weak and not usable KO move. Very risky move to use with practically no upside..


AIR ATTACKS

Neutral Air
3%

Combee buzzes his wings quickly creating 3 soundwaves that move outwardly at a diameter of twice combee's width and do 1% damage each.When paired with Combee's hover ability, this move is mildly useful for retreating. The landing animation of this move has Combee pausing as he creates the rest of the soundwaves.

Forward Air
4%

Combee moves forward in a wave path for a moderate distance. This wave motion makes it difficult to attack Combee, as well as give Combee extra chances to hit an opponent every time Combee goes in an upwards motion. Does 4% damage and a little knockback that goes in the same direction that Combee is moving.

Down Air
4%

Combee moves downwards in a single-helix path. Does 4% damage. This is a good air to ground move that can be used against juggling attempts.

Up Air
4%

Combee goes up, then moves in a clockwise arc, before curving forward. Useful to get Combee over an attack and hit the attacker. Does 4% damage and very low knockback.

Back Air
5%

Combee goes down backwards, and move in a figure-eight path before returning back to where he started. Does 5%. As can be guessed by the path, this can be used repeatedly before landing. Useful for telling other combee where to find food.

GRAB ATTACKS

Grab

Combee will dart a bit forward to a clawshot distance and grab the foe with a bite, somehow holding the foe that way.

Pummel

Combee emits one soundwave, doing 1% damage. Fairly fast.

Forward Throw
5%

Combee lets go, rears back, then rams the opponent for 5% damage and might actually be able to KO at high damages.

Down Throw
2%

Combee lets go of the opponent, then goes straight up before dive-bombing the opponent, doing 2% damage and a bit of upwards knockback.

Up Throw
1%

Combee lifts the opponent into the air and holds them there for a second before letting them go for 1% damage. Leaves Combee in the air.

Back Throw
2%

Combee pesters the opponent while they do an animation similar to a victim under Bowser's down throw. Combee bites the opponent for 2% damage, and no stun or knocback before retreating 1 SBB away.


FINAL SMASH

Endeaver

Combee has somehow gotten a smash ball. With a gold aura surrounding him, Combee dashes straight forward, stopping as soon as he hits any target. Such an underwhelming attack... but wait what? Combee does as much damage as he currently has! And the attack even does more knockback the higher the target's weight is!


PLAYSTYLE

So, you've decided to pick up Combee? Maybe you're trying to develop a metagame for an unorthodox character. Maybe you just want to play around and are not worried about winning. Or maybe you're just going for a handicap match. Actually, that last one may be the best reason as it is where Combee truly shines. With his acrobatic maneuvers, Combee can get around the defenses of his opponents as grab items very easily. His ability to stay in the air for a long time can keep a foe from getting back on stage, as long as the foe doesn't know what they're doing. Ultimately, how good Combee does will depend on how bad his opponent does.

Oh, and he might actually be a tiny bit better in team matches.

EXTRAS

On-Screen Appearance

Combee flies onto the stage and does a bee dance.

Up Taunt

Combee does a continuous loop-de-loop as long as the input is held.

Side Taunt

Combee looks to the background, then to the foreground, then it does it's call.

Down Taunt

Combee flies in a circle, much like his up smash, then stops, gets dizzy eyes, then snaps out of it to end the taunt.
[/collapse]


Change List:

-Dash Speed 1 -> 4 (Makes more sense with the animation)
-All base damages are now whole numbers.
-Brand new Forward Throw
-Added Super Special Extra
[new] -Added a mini poison mechanic.

Up Special:
-Uses consistent animation and speed.
-Can be used without combee.
-Combee no longer bite.
-Can no longer end early with an aerial.
 

Agi

Smash Lord
Joined
Jul 27, 2008
Messages
1,120
Location
SE Washington
Vespiquen

Or wait, I hear it's trendy now to change the name of the set, making it more difficult for the reader to pick out exactly what you're talking about

Quen Elizabee III

That better? Don't judge me, I'm new to this. Anyway, this being the first set I've read in a good while, I'm pleased to say that I actually enjoyed it! Sending a swarm of semi-sentient servants to do your dirty work is a concept that, yes, has been played with before, but it's by and large the best way to handle a Vespiquen.
One thing I appreciated about the set, early on, was the good amount of life and personality you put into the animations - in both senses. Full animations for attacks are rare in MYM sets, particularly custom ones. Tiny frowns on the Combee as they fly away, having failed their queen, and Vespiquen's royal persistence to remain standing even while asleep - these are very tiny things, but they add a lot to the set's charm. ...which is why I was disappointed when the voice petered out somewhere around the aerials, to be replaced with a dry (but still perfectly functional) tone.
Something of a confession to make, actually, which lead to me appreciating the set all the more in the end - I had entirely forgotten what was meant by "ordered attacks" until the reminder at the beginning of the playstyle section, thinking it was just a slick little thing on the down tilt and the down tilt specifically. I then had to ask a few questions, visually, such as how practical staying in the air to input all these commands to her swarm actually is, and approximately how ridiculous it would look. But really, it works pretty well, as Vespiquen is, ultimately, orchestrating a complicated dance of sorts, with simple pokes and points. Perhaps not QUITE how "real" bees do it, but a nice connection.
I WAS left wishing that Attack Order gave the user a bit more control over the swarm which was sent out. That is to say, it's simply stated that she can fire them out rapidly... I might've had the "lead" Combee stay in place for a brief moment if the input was being mashed repeatedly, allowing you to group a few together, but that's a minor quibble. Other such minor quibbles include the deterioration of proper spelling towards the very end of the set, and maybe how incredibly out of place beam sword animations felt, especially before the final smash. Oh and also I think you misused the term "doppler effect" (referring to sound dilation from an object passing by an observer) here, but it got the gist across.
Edit: Haha nope I was TOTALLY WRONG and that was an acceptable use of "Doppler effect" and this is an excellent animation of it
I'll let the other folks go ahead and comment on how "playstyle this, playstyle that," but suffice it to say that I like the core concept, and the voice and move animations greatly added to the set's overall feel. I only wish said feel was consistent.
Probably coming up with another comment or two in the next couple hours owing to a couple factors, the "probably" coming from how inconsistent I am about such things
 

Conren

Smash Apprentice
Joined
Feb 17, 2009
Messages
90
Location
Boston
NNID
Conren1
3DS FC
5086-4445-8944
^ Whoops. I completely forgot to run spell check.
 

FrozenRoy

Smash Lord
Joined
Apr 26, 2007
Messages
1,260
Location
Las Vegas, Nevada
Switch FC
SW-1325-2408-7513
Eater of Vespi

To tell the truth, I'm really afraid of bees and wasps and the like. They just make me REALLY uncomfortable. But this is one queen bee I can get behind.

The Olimaresque feel of this set is simply exquisite, building off the base idea in more innovative and flowing ways than said Olimar, but never losing touch with the intuitative feel of the plucky little captain. I especially love what you did with the Specials: Attack Order is a great way of both translating the attack and giving Vespiquen a nice playstyle piece, Patrol Order makes the most out of a Pokemon with an extremely limited skillset in Combee and Defend Order is an interesting and unique recovery option that uses Yoshi-esque armor, which is surprisingly underdone. Managing your Combee eternally remains a key part of the playstyle due to both how central they are to every part of the moveset and yet how fragile each Combee is. In a way, this reminds me of a set of mine, Alice Margatroid.

The tilts are all okay, and Down Tilt's animation is quite amazing, but I personally really liked the Smashes: U-Smash really takes advantage of the ability to order, D-Smash takes good note of Ness-esque charge damage and F_Smash is just plain fun. But a move I really like from this moveset is the Neutral Aerial, which greatly rewards proper Combee placement by letting you spam out hitboxes, but at the same time offers great risk due to needing to spread your vulnearable Combee around via things like ATtack Order.

In short, despite some move's dryness, Vespiquen's stinging playstyle working towards a long KO is quite worthy of a look and I feel that, so far, it is actually one of the better movesets this contest. Good work, Conren!

Safety Valve

Anything more than 2 is too much.

The most problematic thing I find about this set is that it feels like it has an odd dichotomy of vehicle mechanics and how the set plays with the TNT. It feels like something that would want to naturally start and stop even with the ability to do things on the move, but that totally murders your ability to move and the playstyle you seem to be going for. It all feels kind of scattershot in that regard: I feel this would have been done much better if it was not a vehicular set.

I also didn't really like the concrete or the ramps in this moveset: The way the ramps are introduced as being made feels horribly strange and the concrete feels like it was better used in a set such as, say, Ant HIll Mob. The concrete platforms do admittedly feel a bit cool with how he can use them with his anti-grav...but with how he is needing to move a lot to get his great movement speed it again feels awkward in the context of vehicular mechanics. There's also the fact it feels like some numbers in general are a bit out of whack, like taking so long to slow down at full speed, the length of some moves or the absurd strength of the missile. I also find the "stuff popping under the stage" awkward here: it doesn't feel as fitting as older sets we've had with that.

Still, this does have some good ideas, like the anti-grav and the TNT in general. But I just don't feel they can get over the stuff I do not like and other inputs that just feel...meh. On the other hand, it's not something I'd say I hate either, so...well, yeah, that's about it, something I just kinda vaguely dislike and have a lot of issues with.
 

BridgesWithTurtles

Smash Champion
Joined
Apr 18, 2013
Messages
2,172
Location
The long road to nowhere
3DS FC
3523-2059-7939
My opinion of Vespiquen is largely mixed, but I do have more good to say than bad. The Pokémon is very much in-character, for one thing, which is important. I like the way the Combee work, and this set goes far in demonstrating just how many different ways minion-using sets can function. The command moves seem to share a universal taste for oddly-shaped, disjointed hitboxes, which is praise-worthingly creative and refreshing to see. The way they combo into each other is pretty cool, and makes the character seem rather entertaining to play as. The way that Patrol Order works is pretty neat, and makes Vespiquen have a sort of stage presence befitting of an all-reaching monarch. I also like how each move notes its damage output before its description, rather than inside of it. More praise for your animation as well, which really does help illustrate the way that Vespiquen's animations work.

I do have a few dislikes. For one, the writing style, which kind of makes it difficult to follow at times. But not usually, so it's not much of a problem. Vespiquen's moves without Combee are also pretty bland, but it makes sense, and I'm certainly not all that gung-ho about sets using in-Smash elements at times, especially if it makes sense. If anything, Vespiquen's stale standards give the player all the more reason to use the more interesting Combee moves, if their benefits weren't already incentive enough.

Not much else I have to say. It's pretty good, in my eyes. It could be a tad more interesting, but eh, what do I know? I'd play the character if I could, so it's definitely something I'd say is commendable.
 
Top Bottom