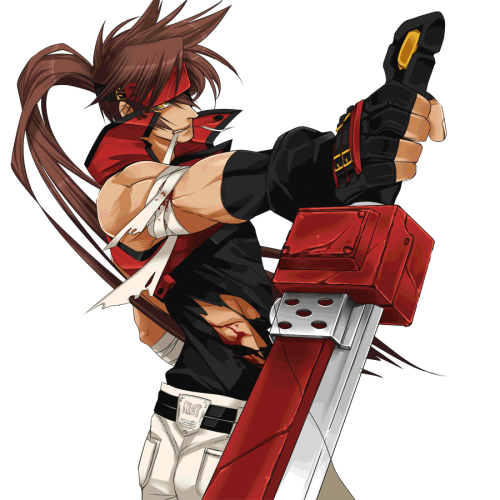
• Welcome to Smashboards, the world's largest Super Smash Brothers community! Over 250,000 Smash Bros. fans from around the world have come to discuss these great games in over 19 million posts!

    You are currently viewing our boards as a visitor. Click here to sign up right now and start on your path in the Smash community!

Make Your Move 14 - This is Snake, I'm done here

TheKalmarKing

Smash Apprentice
Joined
Mar 7, 2013
Messages
162
Much thanks! Now to start my gruelling mental workout. . .
You know, writing in white would be a little bit easier for my eyes. x)

Also yeah I've been very inactive lately, shame on me, but I'm really busy and MYM isn't my priority. (My priorities being finishing my sh*tload of work and solving my personal problems) But I'm still thinking about my set and I hope to release it before mid-July at worst. Stay tuned!
 

Kamiko

Smash Ace
Joined
Jun 13, 2013
Messages
976
Location
Wandering the Gerudo wastes
Wha...? That makes two people now who're having problems with my font color, even though I've seen worse around here. Is bad contrast a common monitor problem? I can see it just fine on mine.

Either way, I'm making much better progress on my moveset than I thought I would. But I don't even know where to start with writing the thing out.
 

Lemonwater

Smash Ace
Joined
Jan 9, 2009
Messages
664
Sol Badguy

Background
Sol is the main character in Guilty Gear and is Ky Kiske's rival. At first glance, he is an aloof, anti-hero bounty hunter, whose apparent laziness and gruffness belies his terrifying fighting ability, and the amazing genius and emotional depths beneath that brash exterior. Sullen and unrefined, Sol only speaks to others when absolutely necessary. This is reflected in everything he does, and his fighting moves, while rough and unpolished, are executed with absolute precision. He also tends to be impatient and rude towards those who wish to interact with him. Overall, Sol is not a friendly man, but he is not an inherently evil one either. He is a person who prefers to convey his intent with his actions. And while he cynically mocks those who speak of justice, he has exhibited a sense of righteousness that motivates him to prevent anything that might potentially threaten the world. His exact history is unclear, but it is known for certain that Sol's real name is Frederick, who not only was one of the lead scientists of the Gear Project, but is also the Prototype Gear. His headband is actually a Gear-suppression device which prevents him from giving into his Gear nature and losing his rationality, at the cost of suppressing most of his power. The headband also conceals the red brand on his forehead, the telltale mark that would expose him as a Gear. Sol's weapon of choice is the Fireseal (Fuuenken), a uniquely designed sword with a rectangular blade, the blunt part which seems to have an exhaust/engine-like device that spews forth flames. The weapon itself is capable of generating high-power flames, which he can use to augment both his physical and sword attacks. He often fashions this fire into ground-bound projectiles. He always wields his sword with a reverse grip, using his legs and arms as much as his weapon during combat.

Stats
Height/size: Slightly shorter than Ike
Weight: Snake
Falling speed: Ganon
Dash Speed: Marth
Walk Speed: DK
Crouch: He kneels on one knee but he keeps his head pretty high, though he does lower it a little bit. He doesn't lose too much height.
Shield Pose: Sol holds out his sword in front of him with one hand and the other hand is on his hip.
Down Pose: Sol lies on his back with one knee bent OR he lies completely flat on the ground facedown.
Dodges/Rolls: For dodges, Sol pivots his body so that it is facing the camera completely, bends his knees, and lowers his sword arm. For rolls, he tumbles once along the ground quickly, directly onto his feet, without using his hands.
Jumps: His first jump is short, about the same as Link's. His second jump is about the same as Marth's.

Overview: Heavy character with fairly fast falling speed. Despite him having a sword, he wields it in a reverse grip so it doesn't give him crazy range on most of the sword attacks.

Taunts and Character Appearances
Selected - Sol opens his arms and leans back, sort of like Ganon's spinning taunt but his feet stay on the ground.
Begin Match - Sol stands up from a sitting position casually on the battlefield with his arms crossed, as if he arrived early and was waiting for everyone else. He does a quick energy burst, sending flames out from his body, which quickly dissipate before he cracks his neck and assumes his ready stance.
Victory - Sol throws the Fireseal downward forcefully, causing it to stick itself into the ground. Then, he turns so that his back is facing the camera and does a strong thumbs-down pose that can be seen from behind him. His other hand is on his waist.
Defeated - Sol kneels on the ground and throws his arms up in frustration.
T1 - Sol does the same thing as his selected animation.
T2 - Sol says "what's wrong?" in a mocking way, with his arms crossed.
T3 - Sol uses his free hand to help him crack his neck left and right.
Neutral stance - Sol holds the Fireseal at his side in a relaxed way as his other hand is on his hip. He stands straight up with his feet slightly apart.


Grab
Sol reaches out with his free hand and clutches upward in front of him. Sort of like Ganon's grab. His grab has similar range as well. He holds his opponent with his free hand and his other hand with the sword remains at his side. He stands straight while doing this.

Pummel: Forehead Smash
5% damage
A slow but strong pummeling move. Sol smashes his forehead against his opponent's dealing damage.

U-Throw: Rising Slash
8% damage
Sol tosses the opponent very slightly upward and delivers a quick rising slash with the Fireseal, sending his foe upward in a slightly diagonal trajectory. Weak launching power.

D-Throw: Wild Throw
12% damage
Similar to C. Falcon's forward throw. Sol forcefully throws the opponent downward so that they bounce off the ground. Has a slightly more angled trajectory than his u-throw, as well as much more launching power.

F-Throw: Head Bang
10% damage
Sol does a similar movement as his pummel, but brings his head much further back before smashing it forward, sending his opponent in a diagonal trajectory. There is a brief red energy burst at the point of contact between his forehead and his opponent for cosmetic purposes. Possesses strong launching power for a throw, though it isn't as powerful as his back throw.

B-Throw: Overhanded Fling
10% damage
Sol turns around, widens his stance, and throws his opponent forcefully with one arm. Sends the opponent in a diagonal trajectory. Has strong launching power for a throw.


Getup/Ledge Attacks/Recoveries
Standard ledge attack: Sol does a quick horizontal slash with the Fireseal once he raises his body high enough. 7% damage.
High Damage ledge attack: The same as the standard, only Sol takes more time to raise himself up. 7% damage.
Standard ledge climb: Sol pulls himself up with one hand with his sword at the ready.
Standard getup attack: Sol pushes himself up with his free hand and does an upward slash with his sword that also reaches behind him due to its broad arc. Hits in front of Sol first. 6% damage.
High damage getup attack: Sol pushes himself up with both hands but is slower to get up than the above move. He does a red, fiery energy burst that hits all around him. 6% damage.
Teching off surfaces: Sol absorbs the impact with his free hand and his legs, popping himself quickly back into a ready position.


Specials
B (hold B button down): Gunflame
3-5% damage per hit randomly, hits up to 4 times with the last flame dealing weak knockback
Sol leans forward and widens his stance, lowering himself slightly as he sticks Fireseal into the ground, perpendicular to the ground. Flames erupt from the Fireseal in several small, spiked waves that travel forward. The flames juggle the enemy into the following flame. Only the last flame spike sends enemies flying, though it is pretty weak. Damage is dealt per wave at random, so an opponent caught by all 4 hits can take 12% to 20% damage, depending on your luck. The flames are about 3/4th the height of Sol and linger slightly. Has ending lag slightly slower than that of PK Fire. It has about 20% more range than Samus's grounded grab.

B (tap and release B quickly): Gunflame Feint
9% damage
Sol does the same movement as Gunflame but doesn't release any flames. Has virtually no ending lag. This attack does no knockback and the damage is dealt when the Fireseal strikes the opponent during the stick-into-ground animation. Deals heavy hitstun, causing foes to stagger if it connects. Sol does a quick laugh if this move lands.

Forward-B (tap and release B quickly): Bandit Revolver
6% or 8% damage
Sol hops forward, then flips through the air, kicking in large, rapid downward circles while flying forward. He can complete 3 turns in the air above smooth ground. This move also hits behind Sol, but for less damage. This move auto-cancels if he touches the ground during the kicking cycles. Has weak launching power but it is possible to catch opponents in all 3 hits if they are against a wall, dealing a hefty chunk of 24% damage. Otherwise, foes are usually only hit once before being sent too far away. All three kick 'cycles' have the same launching power. Due to the distance traveled, it can be used to aid in recovery. He can up-B after this attack, though he cannot use down-B (Grand Viper) out of this move in the air.

Forward-B (hold B button down): Bandit Bringer
16% damage
Sol hops forward further and higher than Bandit Revolver's initial hop, then charges his free hand with red energy to deliver a powerful shockwave-punch in a diagonal direction in the air. Due to the height and distance of the leap and the angle of the attack, it will miss enemies that are directly in front of Sol when he begins using this move. This move requires some spacing. Slower to hit than Bandit Revolver, but it has incredible launching power and sends opponents in an almost-horizontal angle forward. Sol has super armor during the delivery of the punch. This can also be used to aid in recovery due to the super armor and increased jump distance, but the greater ending lag after this move makes it riskier, though he can still up-B after this move. However, he cannot use down-B (Grand Viper) out of this move in the air.

Down-B: Grand Viper
2% per charging flame hit, 8% Fireseal uppercut damage
You may repeatedly mash B during this move while Sol is charging forward to deliver more hits and travel further. Sol crouches low, leans forward, and slides forward, trailing fire. Enemies that he strikes are juggled into the hit that comes after that strike. Without mashing B, Sol will strike 3 times with the charge before ending the attack with an uppercut with his sword's pommel, sending the opponent straight up with weak-moderate knockback. Mashing B can increase the hits to 6 before the uppercut but will increase the ending lag considerably after the uppercut. Similar concept to Falcon Kick, but this is done at a much slower rate and Sol follows the ground during this move. This move will autocancel if Sol starts it on the ground and ends up going off a platform, though it can continue for its entire duration if Sol initiates the attack in the air. Can be used to aid in recovery due to the distance, though mashing B repeatedly for this is not recommended due to the increased ending lag and Sol's falling speed. He may up-B after either version of Grand Viper, but cannot use either of the Bandit specials.

Up-B: Volcanic Viper
12%-16% damage
Sol does a flaming uppercut with some upward range. It carries him through the air. His body is parallel to the ground during this move and the uppercut has vertical and horizontal range. You may hold down the B button to get double the range out of this move. The longer the distance traveled with this move, the greater its launching power and damage when it connects. Strike airborne foes at the highest point of your upward flight for the greatest effect. It doesn't have very much vertical travel distance without holding B, about the same range as one of his short hops. It has similar trajectory and trajectory control as Marth's Dolphin Slash if B is held for a long time, though the range is shorter and it doesn't travel as quickly. Using Volcanic Viper doesn't make you enter a helpless state if it is initiated on the ground.

Ground Attacks
Dash attack: Speedy Steel Slug
8% damage
Sol punches powerfully with his Fireseal arm during the charge. This is a fast dash attack although it has limited range. It has decent launching power due to it having the full weight of the heavy Fireseal behind it, and is able to KO most enemies standing at mid-stage at around 150%. It sends foes that are struck flying forward, so you can score some kills off the side with this move.

AA: Pommel Strike + Speed Cut
3% damage, 6% damage.
Sol does a quick forward poke with the Fireseal's pommel from his hip. Very fast jab. He follows up with a quick horizontal slash from his sword. The slash has moderate launching power (for a jab).

Forward-A: Setting Sun
5%, 7% damage
Sol brings one foot forward and leans forward a lot, bringing his sword down from above in a broad arc in front of him. The sword can hit twice if the opponent is within range from early in the move. Has decent launch on the second hit (first hit merely sets up for second). Looks similar to Marth's forward smash but is done slower during the swing animation with the sword held in reverse grip. It also has less range but has high priority.

Down-A: Snakebite
8% damage
Sol sticks out his un-bent leg and quickly strikes the opponent with a straight leg thrust to the knee/lower leg. It may cause tripping and is a fast move. Has minimal knockback but good range.

Up-A: Rising Sun
11% damage
Sol slashes upward in a broad arc with his sword. Has good power and can kill most enemies at 120%. It has some horizontal range in front of Sol as well, but not much. Has slight start-up lag but almost no ending lag.

Forward Smash: Tyrant Rave v. Beta
3%, 20%-27% damage
Sol does an weak, swift uppercut with his free hand with a small orb of flame energy. It has weak set knockback and sets up the opponent for the following hit, a powerful forward punch heavily-charged with flame energy (think Falcon Punch) with the Fireseal-wielding arm. Has considerable ending lag. The second hit possesses powerful launching ability and kills most enemies uncharged at about 80%. Deals large amounts of shield damage on the second hit. Sol is stoic (super armored) during the giant flaming punch.

Up Smash: Sun God's Wrath
14%-20% damage
Very similar to his up-A, but Sol charges the Fireseal with flames for the Rising Sun. Deals very high vertical knockback. It's slower to start up than his up-A, but it has very limited ending lag as well.

Down Smash: Desert Dervish
10%-15% arm strike, 12%-17% leg strike
Sol crouches and does a low sweep with one leg forward while simultaneously turning the upper half of his body back to deliver a backfist with his Fireseal's pommel. The arm strike does more knockback but the leg strike does more damage. Pretty fast smash attack that hits both sides of Sol at once, with limited ending lag. Both strikes have moderate diagonal knockback, but the pommel strike launches further. The kick is lower than the backfist and has more range.

Aerials
A: Tuck Tail and....Fight?
9%-13% sword, 7%-10% body/legs damage
Sol brings his legs forward and tucks his sword between his legs so that it is sticking down below him. This move lasts about 2 seconds. It does more damage and launches further the earlier it hits enemies. The sword deals more damage than the rest of Sol's body but the knockback is the same. Has decent launching power if it strikes as soon as it comes out, but it has low knockback otherwise. Needs very little time to start up. Autocancels if Sol lands before the move is over.

Up-A: Solar Eclipse
11% damage
The ONLY move where Sol uses a regular forehand grip on his sword. He coats the Fireseal in flames and swings the sword up above him, forward to back. Has moderate launching power. Combos well at early percents, fairly fast but also ends fast.

Forward-A: Fafnir
11%-15% damage front hit, 7%-9% damage back hit
Sol charges Fireseal with flame and swings it horizontally in a big arc. The frontal strike is much stronger than its follow-through that hits behind him. It also has more range than the strike behind him. Similar start-up time as Ike's forward aerial. The forward hit has good launching power. The second hit has low launching power. Tipping with either move will deal lower damage with much weak knockback, as the very tip is flame with no sword backing it up. The hit behind him spikes enemies.

Back-A: Sidewinder
12%-17% damage
Sol charges Fireseal with flame and swings it behind him. Very similar to Ike's back aerial, though it has less range. It possesses very high power and is a fast attack. The tip deals much less damage and knockback, since it is just flames with no sword backing it up.

Down-A: Feed the Hellhounds
10% damage
Sol twists his body nimbly in the air to deliver a fiery slash in an arc below him. Similar to Marth's down aerial. This move has relatively weak launch. However, it will send opponents downward no matter how it lands. Has about half the ending lag of Marth's down aerial.
 

BridgesWithTurtles

Smash Champion
Joined
Apr 18, 2013
Messages
2,172
Location
The long road to nowhere
3DS FC
3523-2059-7939
Smash 4 Hype Mini!
In the Animal Crossing franchise, fruits are important items that grow in groups of three on fruit trees. Players each have their own "native fruit" which grows in their town exclusively, until different types of fruit are obtained from other locations - usually, another player's town - and planted. As of Animal Crossing: New Leaf, there are many different types of fruit, but the basic five, along with the misfit but veteran coconut, all pictured above, would be the only types to appear in Smash Bros.
In Animal Crossing, all fruit are created equal. In Smash Bros, that is mostly true. While they are worth more their weight in bells than in nutrition in the Animal Crossing world, they serve to be eaten in Smash. When the odd peach or pear spawns on-screen, interacting with it causes the character to eat the fruit. Like the normal "food" item, fruits restore health, at a set 15% for all varieties save the coconut, which chips off 30%. Of course, the hard-shelled health-restorer is the most rare of the lot. The coconut is also unique in that it can be held and thrown as a projectile; players must correctly tech to grab the fruit instead of eating it, by making use of an air catch or simply picking it up with their dash attack. After grabbing a coconut, it can be thrown to deal knockback comparable to a hammer head and 30% damage.
The Villager has special uses for fruit and a couple of unique ways to interact with it. By using his pocketing move, Villager can store a fruit and save it for later, as with other items. This can be used to heal oneself more reliably; if too vulnerable to eat a fruit where it spawns, the player can simply snatch it up to drop and then use at a more opportune time. Swiping a coconut at a low percent and hanging onto it until later is a smart idea. Villager can even pocket thrown coconuts to use as an instant projectile when needed.
More impactful is the Villager's ability to plant fruit trees. By using his tree-planting move while standing over a fruit, he will bury it in the ground, and when watered, a fruit tree grows, offering three of whatever fruit it was grown from. When the tree is attacked or chopped down, the fruit fall to the ground, providing the players with three health recovery items at once. Three of the normal fruit increases their damage healing from a mere 15% to a helpful 45%, putting them on par with a single coconut plus another fruit. Three coconuts, which spawn from a unique palm tree, provide 90% health recovery, making them almost as beneficial as a heart container! If fruit are knocked from a tree but the tree remains active, they will grow back after 25 seconds, so keeping a tree alive is a great way for Villager to keep his own health in check. An apple a day keeps the doctor away, but six apples a stock removes all need for a doc.
 

JOE!

Smash Hero
Joined
Oct 5, 2008
Messages
8,075
Location
Dedham, MA
I had hoped for more entries, but 3 for the 3rd attempt will work!​

  • First up is CONREN with a set of 7 specials thanks in part to Down B's ability to split the duo, a nice touch given how heavy it was played with in Banjo-Tooie. I also like how pack-Whack is a special that can utilize the awesome double jump glitch to recover! The eggs only having a chance of fire/ice and not the other variants is a tad off-putting tho.​
  • KATAPULTAR posts right after with a conventional 4 specials. I like how Beak Buster is a special here, and how the egg types are handled and Wonder Wing are handled. However, if there is one complaint it's how the inputs for N and Side Spec seem like they should be swapped, especially with Side B making the move be performed the opposite direction?​
  • Finally, JUNAHU brings a whopping 11 specials to the Bear and Bird! Working off the flight mechanic from the games, BK have several nuances to their specials based on being either simply airborne or gliding to add some nice depth to them and every input seems done with care. However, it may prove to do a tad too much with how the specials are altered via gliding or airborne to make other inputs a bit tougher to configure.​
With all this said and done, it's now time for the main challenge of the mini:
Remember this infamous feature? This time around it is actually implemented, just amongst the contestants!​
Simply put, each section of this CM is going to SWAP whoever is working on the set for each part. Meaning that the standards of Banjo-Kazooie...​
  • CONREN makes Standards for KATAPULTAR'S Specials.
  • KATAPULTAR makes Standards for JUNAHU'S Specials.
  • JUNAHU makes Standards for CONREN'S Specials.

As an added catch, you are to also flesh out the specials you have been given to work with some and make 1 minor change. Hopefully this will give the three of you some insight into how each MYMer works, oh and have fun!​
 

Katapultar

Smash Lord
Joined
Nov 24, 2008
Messages
1,251
Location
Australia
[collapse=Junahu's Specials]

Banjo and Kazooie are the glorious (though somewhat troubled) original IP of Rareware. They starred in a good game once upon a time, along with a sequel that people insist was also good, a gameboy advance game which no one remembers, and an xbox-360 game that involved cars.

And yet that one shining title was so good that, to this day, Banjo & Kazooie remain iconic characters synonymous with Rareware at their very best.


In the Smash Bros of Superness, Banjo & Kazooie feel quite at home being a heavier, bigger Mario (statwise), with more aerial action to boot. Banjo jostles along at a syrupy pace and provides most of the muscle, while his backpacked companion Kazooie is abused for her acrobatic skills. As the image shows, Kazooie pops her head and wings out from inside the backback whenever she's needed. If her legs are required, they come out from the bottom of the backpack.
Banjo handles the pair's first jump, which is fairly good, and Kazooie flaps her wings for the remaining jumps. Only the second of those jumps gains any height, with the others (all 4 of them) being used to slow their fall. The duo is mechanically one character, so there wont be any weirdness like splitting them up. However, because Kazooie is a pretty fragile bird, the duo take 0.4x extra knockback if she is ever struck directly. This is a problem, as many attacks involve kazooie poking out of the backpack, rendering her an easier target to strike

Up Special: Flight
Kazooie wishes to fly free like a Breegull should, and if she has to drag Banjo up with her, so be it. She rockets, beak first, 3 stagebuilder units upward, before levelling off into a glide. If an opponent gets in her way during her ascent, they take 10% damage, and knockback that is halfway between the knockback of Mario's Up Special and Luigi's (sweetspotted).

Glide Up Special:
If this input is used while Banjo and Kazooie are already in a glide, they perform a shuttleloop, much like Metaknight's Up Special. Kazooie's variant boasts stronger knockback, a longer sweetspot, and the ability to angle the analogue stick in order to mirror the whole move either horizontally (so they perform the shuttleloop facing the opposite direction), or vertically (so they perform a downward loop). Banjo & Kazooie enter free-fall after performing their shuttleloop.

Side Special: Talon Trot
Banjo rolls forward onto his back as Kazooie emerges from the backback to support his weight. Carrying the blubbery bear, Kazooie can use those spindly legs of hers to dash around at a speed rivalling even a certain blue hedgehog. This will last until the player releases the B button. During the Talon Trot, Kazooie is free to peform a single jump (on par with Banjo's), crouch during a dash in order to slide forth on her stomach, and even use any regular attack. Doing so quickly ends the Talon Trot however, as it is Banjo who's responsible for the heavy hitting, so he needs to be in control in order to attack. At least the transition adds little in the way of extra lag for those attacks, and if you keep holding the B button down, then they'll hop right back into the Talon Trot after Banjo's attack is done.

Air Side Special: Wall Trot
The bear takes his backpack in paw and swings it ahead of himself, dealing 5% damage and light knockback. At the end of the swing, Kazooie's legs pop out from the bag and begin scratching furiously in front of the duo. These wild kicks deal 3% individually, for a total of 15% damage. And those kicks have some serious range to them, especially considering that the backpack swing was already disjointed to begin with.

However, a bunch of light hits isn't really the point of using Talon Trot in mid-air. If those legs of Kazooie's meet a wall, or even just an unlucky opponent, Kazzoie's kicking gains traction on that solid object. This causes her to essentially run vertically up that wall (or up over the foe's face) for the breifest of moments, before having to return to the backpack. Any momentum gained from running up a wall, is carried over to Banjo when the attack ends, launching him skyward.

Basically, you attack a wall with this Special, and it will catapult you upwards, without using up your recovery.

Glide Side Special: Beak Bomb
Pausing in mid-glide for a moment, Kazooie shoots forward like a missle (dragging Banjo along too, of course) for up to 4 stagebuilder units, or until she hits something. This attack can be angled up to 45 degrees up or down using the analogue stick. In addition, using Beak Buster will not cause Banjo and Kazooie to fall helplessly afterwards, but it will take them out of their glide. You may hold the B button to increase the delay before Kazooie launches into the Beak Buster, which also helps if you need to aim more precisely.

Colliding with a foe deals 16% damage and some nasty KOing knockback in the direction Kazooie was travelling. However, Kazooie herself suffers half of this in the form of recoil damage/knockback.

Neutral Special: Egg Launcher
Banjo crouches down with his paws over his eyes as Kazooie's head emerges from the backpack like a tank turret. While you hold the B button, Kazooie will fire an egg twice per second. I know.. shocking stuff, Kazooie vomits eggs. This is the kind of stuff you just have to accept.
These eggs, by the way, slowly arc forward until they hit an opponent or the ground, upon which they will eggsplode. Eggs do not cause the enemy to so much as flinch, and each deals a poultry 2% damage (1% if the foe was grazed by the eggsplosion). You can freely angle Kazooie's head, by tilting up or down on the analogue stick, in order to lob eggs in different trajectories (up to 85 degrees upwards). This allows the fowl to take a few cheeky shots in a variety of situations. Incidentally, Kazooie will remember what angle she fired her last egg at, assuming that position again the next time you start this Special. You can also mash the B button in order to fire eggs at an even more potent pace, but you lose the ability to change your firing angle whilst mashing. If you're curious, the maximum range from which you can successfully lob an egg and hit the mark, is 1.3x the distance Mario's fireball travels. And, at most, an egg can reach 1.4x ganondorf's height into the air. [I could probably save you the hassle of imagining those distances by measuring them in terms of Stagebuilder Units instead, but I don't wanna.]

Air Neutral Special: Egg Payload
With the bear leaning backwards ever so slightly, Kazooie's rear end pops out of the bottom of the backpack and sharts a single green egg directly downwards. This egg is a bit bigger than the usual sort, and it falls as fast as any small dropped item would. The egg is also kinda bouncy, so when it hits something it will bounce straight back into the air, 3/4 the height it fell. Upon hitting something a second time, the egg simply shatters. The egg deals 8% damage and decent hitstun when it hits an opponent. If the same egg hits the same foe twice, it deals an extra 2% damage and double the hitstun.

Glide Neutral Special: Egg Bomb
Banjo grasps Kazooie's extended neck and then yanks on it, forcing Kazooie to cough out an egg. This (red) egg quickly flies straight in the direction you were currently gliding in, exploding after travelling 2.3 stagebuilder units. Egg Bombs are somewhat stronger than Kazooie's rapid firing variant, and thus deal a healthier 6% damage and mid-light knockback away from the explosion. Of course, you can only fire the one egg, so make it count.

Using this Special will force kazooie to come out of her glide, but only 0.7 seconds after the move ends, so you have a little time to change your trajectory, or use another gliding attack.

Down Special: Wonderwing
Ta-ta-ta-tataaaaa!


Kazooie covers her bear friend in a magnificent glowing shield formed with her wings. She can only cover the front sadly, but for the 1.1 seconds this special lasts, Kazooie's shield will be impregnable from the front. Attacks will clank off of Wonderwing, Projectiles and traps evaporate before its might, even grabs won't work. Wonderwing also functions as a solid wall, pushing foes away with 10% damage and decent backwards knockback.


Of course, the best thing about Wonderwing was always that you could move around with it active, and you can definitely do the same here in Smash Bros. You cannot jump very high (you get one tiny hop), nor turn around, nor even walk backwards. But being able to move at all is certainly better than being an immobile patsy.

Air Down Special: Wonderwing
While attempting the same move in mid-air, Banjo and Kazooie end up tumbling forwards, the duo falling to the ground with Kazooie's invincible wings pointed downwards. If they land before the move can end, those wings slam into the floor, launching nearby foes away with surprisingly severe knockback and 13% damage.

Even if Kazooie is so high up that she won't land during Wonderwing, you can still use this to block attempts to juggle you, or even drag foes downward using her solid wings.

Glide Down Special: Beak Buster
Hey! Did someone order a Stall-then-fall? No? Well too bad! The bear and bird plummet to the ground, with Kazooie leading the charge by launching herself downward. Functionally, this is the same move as the Beak Bomb, only angled straight down (and without the 4 stagebuilder unit maximum range). You can even delay the attack by holding B, just like with Beak Bomb.

Playstyle
Defeat Gruntilda and her silly magic spells. Smack her stupid head with a Beak Bomb from across the stage, or push her lardy self off a cliff with a Wonderwing. Also, shoot her with eggs. That's the weakness of all Banjo bosses.
...

Huh? A Smash Bros Playstyle? Sorry, I got nuthin'.[/collapse]
Banjo and Kazooie Standard Attacks

Side Special Change (Talon Trot)

You no longer have to hold the input to maintain Talon Trot (you now re-use the input to exit the state), and Kazooie's dashing speed is reduced to match the more realistic speed of a certain brown fox. The former case is (a lot) more important, as it not only makes it easier to input attacks but also lets Kazooie use Specials while carrying Banjo! Firing eggs should be obvious enough, whereas the other two Specials can be canceled into with no additional lag. Another interesting thing about Talon Trotting is that if you try jumping out of it and then performing a glide not only will it come out a lot faster but you also get to keep whatever momentum you had beforehand to get a headstart. This is especially handy given Kazooie gets a ton of aerial momentum out of a Talon Trot jump and can turn around once in mid-air as she does, so feel free to jump offstage and turn around to swoop on your unsuspecting foe.


Jab:Bear Swipes
Banjo gives the foe a taste of his claws, swiping at them like a pansy. As you mash that A button, Banjo moves forward a teensy bit at a time while dealing 1% and some actual decent flinching knockback, though you do have to put up with some pretty terrible range. The move would suck if you weren't able to combo it into any Kazooie-based move, because she's not already contributing the meat of the set for the lazy bear.

Dash Attack:Bear Roller
Banjo curls up into a fetal position and rolls forward, uttering a cry that vaguely sounds like "a-hoog!" as he does. Banjo covers a SBB as he rolls, and if he hits someone he'll deal 5% and some okay knockback, but also flips off of them just like he does in-game. How far Banjo flips off depends on the distance you had left to cover with the roll, and it leaves you in the air to follow up with any crap you like afterwards. That's not bad, because if you're real close to your opponent you can just use this move to retreat whereas further away it can help Banjo roll over certain projectiles and start into an aerial combo. Wall Trot almost always works out the move, even if the foe's at a fairly high percentage.

It should be obvious enough that Banjo's roll for this move was taken from the first game, not the second. If that was the case, he'd make a sound that'd sound like "Hot-daaah!" while rolling for a fair bit longer both time and distance-wise.

F-tilt:Cuckoo
Another classic move, Kazooie pops out of Banjo's backpack and pecks forward, which she can repeat up to 3 times in a row. Each peck delivers a nice 7% and nice knockback on a low angle that can kill at decent percentages. It comes out decently fast but has a little end lag, though what's interesting is the good range of the attack and how if Kazooie connects with a target without extending all the way she'll retract her beak earlier and go through less end lag. If the enemy's particularly close to you, this can combo multiple times at lower percentages, but even from a distance it makes for a fine finisher. Kazooie makes a sound like "Ga-ga-geh!" with each peck.

U-tilt:Chip
Kazooie stretches her body up as high as she can and takes a nip before retreating into the depths of the bear's smelly pack. This deals 4% and juggling knockback that won't KO for a while, and isn't the fastest move to come out, but it has absolutely fantastic range which even beats out stuff like Link and Marth's D-airs. It even shares withdrawal properties of the F-tilt and can combo into itself, though having such range simply means it's good for spacing, if you want to kill with the Up Special. If you're in a FFA, one interesting thing to do is cancel a Jab into this move to deal with a foe above you, surprising them so you can change your target on demand what with how easy it is for the duo to adapt to the ground or the air.

The sound-byte for this move has Kazooie yell "arp!" as she nips, which players might recognize from the last level of the original game with those birds that bite at you when you get too close to the holes in the trees. That was always a funny sound, and this move pays tribute to it.

D-tilt:Generic Tripping Attack
Kazooie pokes out and pecks across the floor, having worse range than the F-tilt but coming as quickly as you'd expect a D-tilt to. Having your legs pecked by a rascally bird nets you 3% and puts you into prone (no tripping in SSB4, remember?), and if you're pecked again due to not getting up immediately you'll slide back across the ground. Compared to the F-tilt which has power behind it, you'll want this move for always giving you time to set-up Wonder Wing (yes, it has a decent chunk of starting lag behind it, but what do you expect from a move that makes you invincible for one second and is spammable without cost?) since it contributes to Banjo's ground-control game in the case where Eggs aren't enough. Just make sure the foe doesn't roll behind you, but if they do that you can just B-air them in the face.
 

JOE!

Smash Hero
Joined
Oct 5, 2008
Messages
8,075
Location
Dedham, MA
Hmm, just saying: it may help to put the previous section above this current one in
tags or such?
 

BridgesWithTurtles

Smash Champion
Joined
Apr 18, 2013
Messages
2,172
Location
The long road to nowhere
3DS FC
3523-2059-7939
In which I address the fact that Pinsir could use some more comments.

Oh boy, I'm still not entirely sure what to say about Pinsir. What I can say right off the bat is that I wouldn't play as him. That means absolutely nothing when discussing whatever bad points the set may have. Rather, it has a lot more to say about its good points, as Pinsir is the kind of character that I could never master. Due to its plethora of extra inputs and commands, as well as the innumerable possibilities concerning move linkage, Pinsir would just be way too overwhelming for me to play, and that's why it's so good. There's nothing really un-Smash about it; rather, it takes the concept of alternative move commands seen in examples like Dancing Blade, and amps it up to eleven. Pinsir's playstyle is of course high-risk and high-reward, and manages to be demanding without being complex; that's where its beauty lays.

Pinsir's comfort zone is of course always having the option to have something between his pincers, and the use of the Strength boulder to provide him with both a hurtbox and hitbox even when opponents aren't available or the best choice is truly creative and genius, creating a spackle that patches up any possible holes the set could have sported. Using the boulder as a secondary hitbox to augment already powerful attacks (to say nothing of Focus Energy's boosts) is pretty genius and a likable concept. The aptly-named "Pain Train" lives up to its hype. The standards and specials all work well into one another, almost blurring the distinction between the two categories. Despite the unorthodox controls that the moveset features, Pinsir doesn't even seem out of place when one takes into account the fact that Smash Bros, as far as gamepllay is concerned, is a Kirby game at its core, and we've seen similar throw-heavy movesets in that series as well, such as with the Throw ability and Bugzzy.

As is customary of my comments, I don't really have anything bad to say, but Pinsir's real quality will come to light when I see how he matches up against his rival. : )
 

FrozenRoy

Smash Lord
Joined
Apr 26, 2007
Messages
1,260
Location
Las Vegas, Nevada
Switch FC
SW-1325-2408-7513
Junahu, I just want to say I have been toying with the idea of a TAC Remix-esque set using Shadow Rise. I appluad your remixing of TAC. I'l need to read it to see if it is any good. I wonder if the social experiment part I had in mind would work...
 

JOE!

Smash Hero
Joined
Oct 5, 2008
Messages
8,075
Location
Dedham, MA
For anyone who's interested, a fun MYM mini-game of sorts has arisen on The Whiteboard....


FrozenRoy

Smash Lord
Joined
Apr 26, 2007
Messages
1,260
Location
Las Vegas, Nevada
Switch FC
SW-1325-2408-7513
TAC

It needs no introduction. It needs no reason. It merely is...TAC.

"In the distant future, when all MYM6 sets are considered absolute garbage, only TAC will remain relevant. The master of deception indeed…"

This was once said by the remix maker himself, Junahu, and while it does not hold entirely true today (There is still the ocassional relevant MYM6 set!), it perfectly encapsulates WHY I am so excited to see this set: Will TAC still spark the same debates as before? Has opinion shifted on it...and if so, is it positive and negative? What will people who had never seen the original TAC think? The entire mental exercise is astounding to imagine!

The organization in this set is pretty great: The repeated and mirrored inputs are a necessity for the concept that I can forgive (Kind of like how it is forgivable for a Mario set to have his classic punch-punch-kick, even if it is taken from Mario's Brawl set), but the introduction itself is great, the match-up section is nicely done, and there are bits like TAC stealing the extras.

The concept for TAC is so simple, so elegant: Every move, or in this case ALMOST every move, steals a move from the foe, creating a true mirror mismatch, as TAC must play the thinker's game to build up his moveset, and utilize his unique statistical abilities to his advantage and deal with the foe having any positive mechanics...or punish them for having negative ones! It is all quite a charming little ditt from the past. This is combined with the Side Special, Up Special and Down Special: 3 non-thieving moves to help differentiate TAC. While I enjoy the Side Special (It gives him a legit move to use outside stealing!) and the Up Special is okay, I hate the Down Special: it feels very useless and anti-TAC. TAC having to carefully consider each stole move is part of the feel of the moveset, and it feels VERY easy to just pluck away attacks...plus, to me, the attack feels very anti-TAC, and does not flow. I would have much prefered this to be the original TAC's invisibility: it fit TAC well and really should have been there.

I also highly dislike a change from the original to this: TAC not keeping his stolen attacks across stocks. It simply makes him unplayable, due to the fact he is inevitably going to take damage while stealing the foe's attacks...and while the foe does not have to build up after dying, TAC now does. If TAC dies before the opponent, he is pretty screwed. It is simply a poor change. Some other changes, like the ability to give a decent attack (SSpec), are welcomed...as is the ability to charge each theft, giving TAC some great depth. Still, the DSpec and stock change bug me greatly...

This is minor, but you know what I was was in here? TAC vs. Rool's TAC. We have TAC vs. TAC after all...why not have Rool's TAC steal TAC's place for one? :3 Also, I hate how TAC is effectively banned from competitive play: I don't agree that would happen. D3 makes Brawl characters unplayable and he is allowed. Other forces have entirely centralized metagames before. TAC is fine.

The changes are a bit bothersome in some places, but TAC still holds up in this day and age for me, if not amazingly so. The thought experiment remains provoking: The responses will probably interest me: The set remains solid...if iffy in spots, especially the stock change. I hope to see many responses to this set soon.

And, indeed, I would say...TAC remains relevant.
 

Junahu

Smash Ace
Joined
Nov 15, 2005
Messages
899
Location
Shropshire Slasher
TAC...

...The concept for TAC is so simple, so elegant: Every move, or in this case ALMOST every move, steals a move from the foe, creating a true mirror mismatch, as TAC must play the thinker's game to build up his moveset, and utilize his unique statistical abilities to his advantage and deal with the foe having any positive mechanics...or punish them for having negative ones! It is all quite a charming little ditt from the past.
Thank you for the prompt commentary

It's difficult for me to address your issues with the moveset without branding myself a hypocrite. I have to maintain that this TAC is not the better TAC, merely one that takes a few more steps to ground itself. That said, I think I can try to bring across my reasoning behind the various elements you disliked.

I hate the Down Special: it feels very useless and anti-TAC. TAC having to carefully consider each stole move is part of the feel of the moveset, and it feels VERY easy to just pluck away attacks...plus, to me, the attack feels very anti-TAC, and does not flow. I would have much prefered this to be the original TAC's invisibility: it fit TAC well and really should have been there.
I'm going to have to admonish you for using the word "flow" without clarification. It's a buzzword that pretty much has no meaning on its own. MYM's sense of flow is typically driven by the reading of the set, rather than its actual capacity to complement itself.

Locking the TAC player into every decision he ever makes is completely fine for the original moveset, which focused hard on 1v1 matchups and had a strong mirror match message to convey. In my version however, such a decision would forbid TAC from experimentation and reinvention, two massively important elements of an engaging FreeForAll. It's slightly unfair to ask the player to permanently marry into every attack he steals, especially since accidents can happen in a chaotic Brawl.
I insist that the Down Special is fundamentally important to this interpretation of TAC, as it is a tool that facilitates and fuels his changing outlook on the match around him. And that is the angle I chose to give focus on with this version of TAC.
"Anti-TAC" is a somewhat bizarre accusation too. If you meant that it goes against the ideal depicted by the original moveset, then yes it is somewhat Anti-TAC. But TAC as a helper has always been capable of ejecting an ability that doesn't suit him.

And, my final defense on the matter: this attack is also important because of the references it makes to other movesets. Two sets in particular, both strongly connected to TAC.


I also highly dislike a change from the original to this: TAC not keeping his stolen attacks across stocks. It simply makes him unplayable, due to the fact he is inevitably going to take damage while stealing the foe's attacks...and while the foe does not have to build up after dying, TAC now does. If TAC dies before the opponent, he is pretty screwed. It is simply a poor change.
It seems as though your complaints against the moveset stem from your assertation that TAC should only ever steal his moves once, becoming a static/complete moveset thereafter.
The actual building up of TAC's repertoire is the most interesting part of how TAC plays. Decisions on which attacks to steal first, how to mitigate the foe's advantage, etc. I wanted this TAC to be able to experience this more than once in a match.

Losing his gained moves after a lost stock does not immediately make TAC unplayable. Even while you're stealing attacks, you're still dealing a decent wad of damage into the bargain, along with staling the opponent's attacks, so it is not simply wasted set-up time. The threat of losing your moveset encourages more conservative play out of TAC, which further helps delineate the difference between TAC and his opponent.
It also lets him throw out his moveset when it's not working and try a new arrangement in a FFA match. In addition, it acts as a balancing factor in a FFA where one of the foes has already been eliminated; by forcing TAC to reassemble a moveset using less targets if he is KO'd.
And I think I have to stress this point; TAC does not need to steal every single attack in order to stand against the foe and win. In fact, if you actually try that, you'll end up losing TAC's speed advantage.
 

FrozenRoy

Smash Lord
Joined
Apr 26, 2007
Messages
1,260
Location
Las Vegas, Nevada
Switch FC
SW-1325-2408-7513
I meant Anti-TAC as it felt antithetical to TAC's concepts, not to TAC the helper: Either way though, I feel Down Special was a weak move for removing the moves anyway, and that something better could have been achieved. If the move had been better, I could forgive the idea of removing moves stolen and such on and so forth.

Flow simply referred to the fact that it did not feel like it meshed well into how the rest of the moveset played: As a move to remove the moves, it did not feel that great, and I feel like the descision to be able to remove moves at all is debatable on if it is good or bad.

(Also, while not related, I just forgot to add it in the comment: I really disliked the dash attack pitfall).

I am glad you enjoyed my prompt comment. :)
 

darth meanie

Smash Journeyman
Joined
Jun 6, 2008
Messages
452
Well done Junahu. TAC is always an underrated set, one that even I've underrated for some time. There is an incredible amount of depth here and you've barely scratched the surface of the depth he has. In fact, I'd say TAC is an exemplary character in describing how the metagame and positioning works and would be an incredible learning tool for players even to understand how to okay the game at a higher level. Interpereting either set as a mere ditto function or restat of another character is a grave mistake.

Smash, like all fighting games, is a game of POSITIONING. Where you are and where the opponent is is by far the most important element in deciding matches and the most important thing to control. If the opponent has a powerful down aerial to steal then, for example, it becomes a huge challenge as both players attempt to get or prevent the other from stealing / using it, both trying to get above the other. TAC makes the subtle game of control obvious and challenging in every match up. Do you go for the rewarding option or the likely option? How do you tske advantage of the hitstun? I'm honestly disappointed most of the matchups focused more on mechanical. interactions than juicy skirmishes over how the opponent would try to predict and deny TAC. I also debate your claim that TAC is unplayable competitively. He is certainly very good, but as far as Brawl itself goes, or any smash game, no match up clearly benefits him or hurts him. Ice climbers certainly have an advantage but hardly an insurmountable one, even Olimar can have Pikmin Pluck stolen. I suppose some MYM characters yes can't be played with TAC, but if that was the measure for competitiveness then every set would be unplayable on account of being destroyed or destroying some other character.

Having him not use the three specials and lose all moves after stocks was a good move. It sets him apart as a character of his own instead of a ditto machine and keeps the interesting decisions at the forefront, with a few new ones to make as well.

tl;dr TAC is way more brilliant than it first appears, love you Jun.


EDIT: Kirby match-up where? Inhale a stolen inhale, or steal an inhaled steal?
 

JOE!

Smash Hero
Joined
Oct 5, 2008
Messages
8,075
Location
Dedham, MA

Welcome, welcome one and all to the community discussion board where we pit our creations against one another to see who comes out on top!

Every couple of days I (or if anybody has suggestions) will post a handful of Match-Ups between MYM Sets of the current contest and as a community we discuss which we think will come out on top. Hell, we might even bring up some sets from previous contests for fun!

When each MU has a consensus, the results will be posted in the Plaza in a formal report, and in the end if we have a clear "top tier" set we can give it's creator a cookie. A delicious, MK-encrusted cookie.

Without further adieu, here's the first batch:


MINAMI IWASAKI vs SHADOW THE HEDGEHOG

CROAGUNK vs MACE WINDU

CHU CHUS vs ANT HILL MOB

VESPIQUEN vs PINSIR


Ready...

Set...

Discuss!​
 

Katapultar

Smash Lord
Joined
Nov 24, 2008
Messages
1,251
Location
Australia
VS


Minami and Shadow might appear to be cut from the same cloth as far as being mid-ranged fighters with reliable close-up and long-ranged moves, but when it comes to comparing them it's the Ultimate Lifeform who comes out on top. First off, Shadow is actually faster than Minami and has his fair share of kicking moves, especially one in his Dash Attack. Where things really get nightmarish for Minami, though, is the dreaded Chaos Control: having a ball slowed in mid-flight is absolutely terrible for Minami since it makes them easy fodder for Shadow to catch. Although Chaos Control does take some time to set-up on Shadow's part and can inconvenience his projectiles in terms of spammability, if he's willing to set one up every so often they can wreck Minami, since even if Shadow just dodges a ball it'll be slowed and she'll be delayed in getting it back. Chaos Spears are also a big issue for Minami: projectiles are usually a non-issue for Minami since she can toss her balls over them, but Chaos Spears move so slowly and do enough damage that only a dodgeball or strong soccer kick would be able to break through them, as the other weaker balls will just bounce back to her. To be fair, Minami can just keep bouncing a ball back and forth to continually wipe away a whole slew of Chaos Spears, but it will lose momentum quickly and potentially fall into Shadow's hands.

So yeah, Shadow has everything, from high speed, static hitboxes, spammable projectiles and a horrifically overpowered stage control method in the form of Chaos Control that ***** Minami's projectiles. It's pretty much impossible for Minami to ever fight back against Shadow if he's sheltered himself inside a Chaos Control zone, so the only thing she can really do is wait for the zone to dissipate and attempt to disrupt him as soon as he tries to start it up again. Of course, Shadow can get around the stage stupidly easily and start up zones whenever he likes, since he's faster than Minami let alone nearly every character in the game. Still, we can't very well deny that Minami has unpredictability on her side; her main hope for winning the match will be to stay on the outer perimeter of the Chaos Control zone and possibly bait Shadow via tossing a ball or two up into the sky. Shadow can't very well camp in his Chaos Control zone in the air, and THANKFULLY his U-air isn't a flip kick, though it can be used to drag Minami into a Chaos Control zone if timed right.

Shadow wins this match-up due to being able to snipe at Minami's main strength which she needs to win matches while being able to outclass her stat-wise at the same time. I guess a mere schoolgirl wouldn't stand a chance against the Ultimate Lifeform, and he IS good at basketball.


15-85 Shadow's favor
 

BridgesWithTurtles

Smash Champion
Joined
Apr 18, 2013
Messages
2,172
Location
The long road to nowhere
3DS FC
3523-2059-7939
Vespiquen: The cold-blooded monarch who conquers swaths of territory with her anthophilic army of Combee...​

Pinsir: The giant stag beetle with a penchant for crushing and tearing with its massive barbed horns.​

WHO​
IS​
DEADLIEST?​

Using twenty-first century science, we'll see what happens when the two warriors go toe-to-toe. No rules, no safety, no mercy. It's a duel to the death, to decide who is...

THE DEADLIEST WARRIOR​

Statistics

For the statistics comparison, we'll be pitting Vespiquen's floaty frame against Pinsir's hefty, grounded approach.

Both fighters are on the slow side, Vespiquen incredibly so. Her paltry dash speed is offset by her extremely poor air jumps, which make her an easy target when left open. Pinsir is also rather slow, but faster than Vespiquen on all accounts. Vespiquen also has a very low fall speed, which makes her a susceptible target for Pinsir's catalogue of anti-air attacks; on the other hand, Pinsir's high gravity makes him a natural whipping boy for Vespiquen's combos. Finally, Pinsir boasts just a bit more weight than Vespiquen, meaning that he will last longer in most conditions. This is crucially important, as a smart Pinsir only improves with momentum. Vespiquen will have to outlast her opponent and wear Pinsir down to get an edge in this sense, which is a difficult task with her lower speed and weight.

Vespiquen's low gravity provides her with an advantage in that Pinsir's ground-to-air chases out of its down throws become more difficult to connect, limiting the Pokemon's options. However, due to Pinsir's massive movepool, this is not a major problem for it.

While both insects are comparable in statistics, Pinsir begins the match with a slight edge due to greater weight and speed, and Vespiquen takes a negative mark for her poor gravity, which provides for more hindrances than advantages.

Edge: Pinsir

Attacks

Vespiquen's long-range swarm of Combee will be pitted against Pinsir's close-quarters throwing techniques to decide which insect warrior's attacks are more lethal.

Vespiquen will want to have her Combee stock in a healthy count for this fight, as her physical attacks are outranged by the majority of Pinsir's techniques. By attacking from long-range and properly zoning, Vespiquen can create a headache for Pinsir by giving the stag little options due to its entirely physical movepool. Even when conjuring a boulder with Strength, Pinsir has little in the way of outright forcing Vespiquen to play to its game. Vespiquen's Combee clash with ground attacks, which does manage to cut a noticeable hole in Pinsir's options, but the armor on its horns make even whiffed attacks from the beetle difficult to punish, effectively creating a stalemate between the two combatants. While Pinsir's horns don't outprioritize Combee, there's also little punishment for throwing out attacks that absorb hits like a sponge. Due to the psuedo-shield properties granted from shattering boulders, Pinsir can effectively negate most Combee-related attacks. With a full party of 6 Combee, Vespiquen can hope to best Pinsir through higher damage output, but thanks to Focus Energy, Pinsir is capable of tearing through many of Vespiquen's techniques. With Focus Energy at Level 3, Pinsir's heavy armor far outperforms Vespiquen's pseudo-defensive Combee hitboxes.

Pinsir can have a field day with the aerially-focused Vespiquen, as she has little protection beneath her. Her Nair provides next to no coverage beneath her, and her Dair, while an effective air-to-ground approach, forces her to play aggressively against foes below her, which is exactly what Pinsir wants. The stag can easily take advantage of Vespiquen's vulnerability from below with his attacks such as his highly effective Uair and powerful Usmash.

Pinsir's throws can put Vespiquen into uncompromising positions; namely, aerial throws are able to phase through her Combee-provided armor and beat out her sole way of defending herself in the air. Due to the slow speed of her flight, Vespiquen is susceptible to being grabbed, as all Pinsir has to do is fast-fall off the stage and use Seismic Toss. Provided that Vespiquen is unable to dodge, her efficient recovery becomes instantly nullified, and Pinsir is able to meteor launch his opponent.

In the situations that may arise where Vespiquen is able to avoid Pinsir's attacks, she is put into her best position. The end lag on Pinsir's throws make him an open target for a combo string from the bee queen, allowing her to possibly keep up with the beetle's larger average damage output. The downtime Pinsir suffers after Focus Energy wears off is also a key time for Vespiquen to capitalize on rare moments of Pinsir's vulnerability.

Despite Vespiquen's strong combos which can easily tear apart Pinsir on an off day, Pinsir has much more with which to engage Vespiquen's attacks head-on. While both bugs seem to have an offensive stalemate, Vespiquen leaves herself vulnerable on a more consistent basis than Pinsir, which makes the weak link in her defense her own undoing against Pinsir's monstrous offense.

Edge: Pinsir

Playstyle

When comparing strategies, we'll be looking at the sentry-using stage control deployed by Vespiquen, in relation to the full-on offensive game that makes Pinsir so terrifying, aptly dubbed "The Pain Train".

Vespiquen has two possible strategies in her fight against Pinsir: outlast the beetle and capitalize on its mishaps, or engage it in an attempt to pressure it and KO it as early as possible; Vespiquen does not want a closely-tied battle to drag out, as her lighter weight increases her risk of being KO'd as time passes. While Pinsir can snag a meteor kill off-stage, its generally lacking off-stage game gives Vespiquen the advantage. By applying enough pressure and scoring enough combos early-on, Vespiquen can use her disjointed attacks while hovering to batter Pinsir back to a distance it can't recover from; on the downside, Combees' knockback would often be too weak to successfully beat back the brawny beetle. On a walk-off stage, however, the possibilities are diminished greatly.

As a rule, Pinsir is comfortable with getting its opponent off of the stage, but does not do well when it itself is too far from solid ground. Vespiquen can attempt to stall out Pinsir by hovering a risky distance away from the stage and pestering Pinsir with longer-ranged moves such as Attack Order. As Pinsir solely wants to focus on the offensive, forcing it to play defensively may be Vespiquen's smartest decision. Vespiquen has trouble scoring kills from afar, however, making an all-out defensive strategy nearly impossible. At some point, Vespiquen must go in for a kill move, which would require a vulnerable Pinsir, which in turn is where Patrol Order and Sweet Scent come in handy. Of course, Vespiquen would need to occupy the stage to properly deploy her Combee for any sort of set-up.

While Pinsir may have difficulty in forcing Vespiquen to play to its game, Vespiquen suffers the problem of having to limit itself in order to successfully outdo Pinsir. It is better at forcing Pinsir to play a certain way, but with all of the stag's movepool options, it doesn't mind all that much. Meanwhile, Vespiquen must limit itself to ensure it can keep a lead over Pinsir. In the end, however, Vespiquen's focus on defense is what can save her from Pinsir's offense, and Pinsir's defense may be his undoing against Vespiquen's offense.

Edge: Vespiquen

Winner: Pinsir​


Pinsir wins this matchup because the few things it has to worry about (defensive vulnerability, nonexistant range game) are nowhere near as handicapping as Vespiquen's worries (poor aerial approach, demanding combos, lack of kill moves, floatiness and low weight). While Vespiquen is designed to be a predominantly defensive character, Pinsir's sheer offense is too much for Vespiquen to handle. The bee Pokémon has to take her time in scoring a kill, while Pinsir has little trouble ripping holes in an opponent's stock count. Even when Vespiquen shuts down some of Pinsir's options, it has enough fuel to keep the Pain Train running relatively smoothly. The Pain Train doesn't prove exceptionally effective on Vespiquen, but Vespiquen's approaching and combo-initiating options are zilch when Pinsir doesn't leave itself open. In order to deal damage to Pinsir, Vespiquen has to initiate an attack string from afar, limiting her own options while allowing Pinsir to play relatively safely and beat back projectile attacks, simply stalling out Vespiquen's own stall. At the end of the day, Vespiquen has to go in for a kill, which is precisely what Pinsir wants her to do. As long as he can outmaneuver the slower combatant, he can gain an edge with his brute physical force and score a kill much more easily. Vespiquen's defenses simply aren't strong enough to withstand Pinsir's offenses. Her options are more limited, due to her unconventional, logistics-focused playstyle, while Pinsir's backlog of throws ensure that it always has an upper hand in the amount of options it has. With a simple but versatile movepool at its disposal, the Pain Train-conducting Pinsir has the tools necessary to declare itself the Deadliest Warrior.

35% / 65%​
 

Rychu

Thane of Smashville
Joined
Jul 5, 2010
Messages
810
3DS FC
1908-0105-4965
The Ant-Hill Mob, the toughest selection of racing gangsters this side of Grand Theft Auto.​
The ChuChus: lovable space mice in search of peace from dreaded Kappu Kappus.​
Using 21st century science, we're going to be looking at their strengths, skills, stats, and playstyles so see what will happen when these two unlikely foes go toe to toe. No rules, no limit, no mercy.​
WHO
IS
DEADLIEST?
Statistics
You've got two completely different characters here: one of the heaviest and largest, and one of the absolute lightest and smallest.
Size : 28/0.5
Weight : 15(changable)/1
Ground Movement : 4-10/9
Jump : 0/8
Aerial Speed : 4/8
Falling Speed : 10/4
Traction : 0.5/10
From a purely statistical standpoint, this is a very one-sided match-up. Ant-hill Mob may have the disadvantage of being huge and combo-fodder for attacks, but they also have 15 times the weight of the small ChuChus, along with being able to reach up and above the same speed as the quick little mice. Now, the ChuChus CAN take advantage of this large size by positioning themselves on top of the limo and attack the drivers inside. with a large number of followers able to fit on top of the car. However, as we are just comparing stats, it's clear who has the advantage.
Advantage: Ant-Hill Mob
Individual Attacks
Both brawlers play the positioning game with their specials, the ChuChus with fast-paced ChuChu creation and luring into the rocket, and the Ant-Hill Mob with a slower and more methodical placing of gangsters.The placing of the ChuChu's rocket and mousehole are extremely important in this match-up, perhaps having to deal with a rather braindead placement in order to acquire large amounts of ChuChus in a short amount of time. Stages wth higher platforms do well for ChuChus, though if on a completely flat stage then the very edge, away from where dropped off gangster will be is ideal. There will be a lot of replacement rockets and mouse holes this match. Kappu Kappus can help by being able to stop the large car in it's tracks and launch it into the air, while their recovery move is surprisingly good, far better than that of the Mob. With their multitude of directional tiles, the Pilot is actually very good at stopping the car, or at least delaying it, having to play a lot more campy than he normally would. Of course, keeping some following ChuChus is necessary here, though if the pilot can hold it's position for long enough it can be quite devastating with it's smashes. Even the grab game is great at taking care of dropped off gangsters!​
Conversely, once the Ant-Hill Mob is set up, there isn't much in the way of stopping them from decimating the small nice, especially due to their small weight. If the mob breaks through the defenses, say hello to cement or any one of their attacks that will destroy the ChuChus is their place. Since the Ant-Hill Mob doesn't even need too much in the way of set-up against the ChuChus, simply ramming their way into them or building enough speed and turning to tip over will do the trick in at least knocking off the Pilot. If the Pilot is ever knocked offstage, it's goodbye to the metch=up.​
Advantage: Ant-Hill Mob
Playstyle
Simply put, the ChuChus cannot play as they normally would in this match-up. for how easily the Ant-Hil mob can kill or otherwise hinder the follower's progression. This is unfortunately a very one-sided match-up even in terms of playstyle, and it's very clear who the winner is from the get-go.​
Advantage: Ant-Hill Mob
The Winner:
 

Rychu

Thane of Smashville
Joined
Jul 5, 2010
Messages
810
3DS FC
1908-0105-4965
well yeah, ramming back and forth on a 0.5 weight character is pretty much gonna win you it
 

Slavic

Ask not the sparrow how the eagle soars
Joined
Jun 5, 2013
Messages
757
Location
taco bell, probablyn't
-- Pictures Looked Better With White Background :C -​

Croagunk, a fearsome fighting frog with a poisonous prowess.


Mace Windu, a master Jedi with utter control over the Force.

Using 21st century science, we're going to be looking at their strengths, skills, stats, and playstyles so see what will happen when these two unlikely foes go toe to toe. No rules, no limit, no mercy.

WHO
IS
DEADLIEST?


Statistics


Size : 7 / 2​
Weight : 4 / 3​
Ground Movement : 9 / 7​
Jump : 8 / 8 (Crouch)​
Aerial Speed : 5 / 6
Falling Speed : 3 / 5
Traction : 9 / 9

Statistically, the match is fairly spread out. Windu is superior when it comes to his height, and he is barely sturdier than Croagunk. On top of that, Windu easily outspeeds the little frog, ranking as one of the fastest characters out there. Croagunk's speed is nothing to laugh at, though, still maintaining well above average. Croagunk wins in the air, with a deal more mobility in the air, as well as being able to return to the stage faster than the Jedi Master. The two of them tie when it comes to their jumping skills, if Croagunk utilizes his crouch-jump ability, and they are both at the top of the tier when it comes to their traction, meaning the battle is going to be a very fast-paced and evenly matched. However, Windu beats Croagunk in more categories, even if it's just by a little.

Upper Hand: Mace Windu

Individual Attacks

Croagunk is a beautiful mixture of stacked damage and close combat, with a couple of moves to keep the opponent guessing. Croagunk's main feature, his poisoning attacks, are going to put the pressure on Windu, preventing him from overusing his Down Special to buff himself. The Jedi doesn't appreciate the added extra damage, chipping away from him and leaving him vulnerable to a powerful killing move from Croagunk. Revenge is a brilliant move against Windu's aggressive fighting style, giving the amphibious fighter a useful counter to send Mace flying after stacked damage. Faint Attack gives Croagunk a quick approach move against Windu's Force Tear and Force Push, sneaking up on him during the animation and adding on more damage. Sucker Punch and Fake Out gives our froggy friend a way to surprise Windu and make him think more before attacking. Venoshock is possibly Croagunk's most useful move in this fight, punishing Windu for staying on the offensive. Croagunk's F-Throw, combined with Vacuum Wave, can mess with Windu's mind, but Drain Punch is a much better use of Croagunk's grabs, allowing him to use the Jedi's willingness to take a few blows to heal himself. Several of Croagunk's moves are going to ensure Windu isn't going to be using his shield very much, if at all, throughout the match.

Windu, on the other hand, is going to rely on an all out onslaught using his strong moves, as well as having ranged moves that Croagunk can't stand up to. Force Tear is hindered in its use due to Croagunk's Faint Attack, but from a greater distance can cripple Croagunk and keep him at bay. Force Push can quickly end Croagunk's combos, pushing him farther away and giving Windu room to pull off some of his more ranged attacks. Unfortunately, using his Force Enhancement is too risky for Windu, thanks to constant stacking of poison damage, as he would quickly skyrocket into Croagunk's KO range. Windu's best moves are quite possibly his grabs, allowing him to fight off Croagunk from any range. Shatterpoint is also quite useful in the match, not only preventing Croagunk from shielding himself but also effectively shuts down Croagunk's Revenge, making short range combat a little safer for him. Windu's Forward Tilt can throw Croagunk off his game, and is a fantastic counter against Fake-Out, completely breaking the frog's mind game tactics. Outside of that, Windu's attacks are all aggressive and powerful, and can throw the lightweight quite easily and KO early on in the match.

While both competitors are competent combatants, Croagunk's moves are far more effective against Windu than the other way around, shutting off a lot of Windu's more competitive moves, and forcing him to go on an all out offensive. Shatterpoint and Tempered Aggression do serve Windu well, allowing him to put down several of the frog's move potential as well, but in the end, Croagunk's moves are simply better when it comes to the overall effect and flow.

Upper Hand: Croagunk

Playstyle

When it comes to playstyle, Croagunk can't pack the sheer power that Windu brings to the field, instead wanting to wait it out by poisoning the Jedi and keeping him close at all times to keep the damage high until he can pull off a Revenge or Venoshock and knock him off the stage. While Croagunk would prefer not to be hit at all, he would much rather take Windu on close range where he can fight back, and give him the opportunity to heal himself back with Drain Punch. Whenever Croagunk finds himself too far away and subjected to Windu's grabs, he has the ability to use his Faint Attack and Fake-Out to rapidly approach Windu and fight him back again. Alternatively, Croagunk can try to use Vacuum Wave to pull Windu closer to him, though this leaves him open to powerful blows from his opponent, so an approach is much preferred.

Windu's buff he gets from Force Enhancement isn't feasible in this match, as he's going to suffer enough passive damage from Croagunk's up-in-your-face poison approach. However, Windu does have the advantage of both speed and range, meaning he can space himself away and keep Croagunk away from him. Done successfully, Windu CAN afford the Enhancement, meaning Croagunk would have to deal with a powerful beatdown from a distance, with little way to prevent it. However, Croagunk is only a pace slower than Windu, meaning it can be difficult to get away from Croagunk. Shatterpoint can decimate Croagunk's killing potential, eliminating Revenge's countering abilities, and Tempered Aggression shuts down the mystery between Fake-Out and a roll. Outside of his grabs, specials, and a handful of normals, Windu is subjected heavily to Croagunk's style, making the match more difficult for the Jedi Master.

Upper Hand: Croagunk

Winner:
Croagunk

While the match is full of intensity and action, Croagunk's ability to poison and stay right up with Mace Windu make him a powerful foe, thanks to the removal of one of Windu's Specials. Croagunk's attacks flow better into a combo, even if they don't pack as much of a punch as Windu's, they leave him wide open for a Venoshock. The whole match is going to be very sparse with shields, as both brawlers absolutely destroy shields. Windu does get his ranged grabs and specials, but thanks to Croagunk's effective approach moves, keeping the frog at a distance is quite a chore, especially without the buff. In the end of the day, Croagunk's poison pressure is just too much for Mace Windu, and the winner is clear cut.
 

Davidreamcatcha

Smash Ace
Joined
Feb 9, 2011
Messages
629
You should probably update the OP. Joe's name still links to Kupa's profile and he does not have a theme to match the other leaders.
 

JOE!

Smash Hero
Joined
Oct 5, 2008
Messages
8,075
Location
Dedham, MA
Did somebody repost a Charade set under a random kirby enemy? :troll:
anywho...​
ROUND 1 RESULTS:
MINAMI IWASAKI vs SHADOW THE HEDGEHOG
CROAGUNK vs MACE WINDU
CHU CHUS vs ANT HILL MOB
VESPIQUEN vs PINSIR

ROUND 2:
MEGUMI KITANIJI vs SHO MINAMIMOTO
SPIDER-MAN vs SPIDER
STARFORCE MEGA MAN vs BLAZIKEN
ULTRON vs DARK FALZ
Ready...​
Set...​
Discuss!​
 

Katapultar

Smash Lord
Joined
Nov 24, 2008
Messages
1,251
Location
Australia


VS


It's the ultimate battle against MYM14's two most evil entities....or at least for now, until Desperado arrive. When it comes to breaking balance, who goes above and beyond and gives the other villain a run for their money? I'm sure you're all wanting to know that, so let's delve in and find out...

Both bosses weight the same amount, but when it comes to stat superiority it's not hard to tell that Ultron has the advantage. Sure, Falz can fly, but he's pretty frickin huge and really has no other advantages. Ultron has 10% Super Amour, a unique type of grab resistance and minions that enter the battle automatically. This immediately puts Dark Falz at a disadvantage since his base concept relies on being able to grab enemies to rip their soul out, which happens to be very effective against one opponent...well, maybe not so much against Ultron what with his Super Amour and weight matching Falz's, but I digress.

Falz will mainly be wanting to pick at Ultron's damage percentage, not only so it's at the 35% marker where he can start grabbing but also in the case where his robotic rival will die first should a voodoo doll effect occur. This isn't too hard because A: Falzy has a lot of projectiles, B: Ultron's first minion won't arrive until 4.5 seconds have passed and C: The Dark God can fly off-stage to get some distance for himself. As far as projectiles that deal more than 10% are concerned, a Chaos Sorcerer's foie fireball will make a dent, though Ultron will have to be far away for that to work. That's a bit slow though, whereas the Nspec laser is more spammable and D-Smash creates a lot of hitboxes that can break through the amour (at the cost of Ultron being able to send them back); there's not too much else for Falz that doesn't rely on getting up-close or corrupting Ultron's soulless soul. That being said, the Dash Attack actually makes for a good approach on Falz's part due its good range and high damage output.

On Ultron's end, he'll be forced to somewhat wait it out until his first minion arrive (or just spam D-Spec en masse), which if he's lucky will fall on Falz and damage him since he's pretty big. Encephalo Ray might seem rather useless since Falz isn't allied with anyone, but it's absolutely crippling if he has even one Chaos Sorcerer out: Falz is huge, has a lot of attacking range and laggy moves, so if he gets hit by the ray even once he won't ever want to risk summoning a minion lest he be screwed over - just make him use the F-Smash and hit him during charge to get even more stun. Ultron will have to supervise his drones so they don't stupidly use some random jab or something, making them use a D-air/D-Smash synch combo or something to get the most damage out of Falz's period of inactivity.

You'd think that Falz would have more to work with by taking Ultron's drones into account, but no, they just make things waaaaaaaaay worse for him. You see, unlike fighting 3 regular opponents at once, stealing a drone's soul doesn't accomplish anything since Ultron doesn't care about them dying - heck, that just makes matters -worse- for Falz since Drones will detonate over time and put him into a deathly state of stun that Ultron can exploit or even get a free Encephalo Ray out of. Ultron is perfectly fine with hiding behind one of his drones to stay safe from Falz's long-ranged grab, mainly spamming his F-Smash to keep pestering Falz if he thinks he can get away with grabbing a drone. Well, it'd be foolish for Falz to try and grab a drone anyway, but he can at least use his F-tilt and N-air to bash at them if they get too close...heck, N-air is actually good because it heals Falz, but unfortunately it's an aerial and you'd have to be pretty low on the ground to hit with it.

Something I've yet to address is the energy barrier Ultron can create by shielding when there's a drone near him...note this destroys all -energy- projectiles that come into contact with it, and all of Dark Falz's many projectiles are energy. It also stops grabbing and shielding and dodging, all of which are veeeeeery painful for Falz. It's easy enough for Ultron to put a drone in front of him, activate the shield and them beam spam through it, which is enough to bring the pain to Falz - those projectiles are supposed to give Falz the tools he needs to make up for being 3 characters, along with his minions, which you can practically lock-down with the ray. Oh, and if Falz SOMEHOW manages to steal Ultron's soul, then guess what? He can just use a move that deals 10% or less and be completely unaffected by it. Examples of these include the Encephalo Ray, Jab, F-tilt and Pummel/B/U-throw. Dear god.

What wrecks Dark Falz are a few trivial matters: the Super Amour that makes half his moves obsolete against Ultron (but not drones), the electric coating that damages him for trying to pull off a grab when he's finally able to do so, the Encephalo Ray and finally the drones that can swarm over him like a regular 3-man team. Heck, it can get even worse than that since there's no actual limit for how many drones can be out. Although both bosses have minions, one having a greater reliance on there being 3 enemy players compared to one who somewhat plays like a normal character wrote the entire match...or you could just say that boss resistances make everything.

And with that, the definite winner is:


BridgesWithTurtles

Smash Champion
Joined
Apr 18, 2013
Messages
2,172
Location
The long road to nowhere
3DS FC
3523-2059-7939
VS
Here we have Spiderman engaging in a creepy-crawly confrontation with Spider, and while both combatants enjoy their fair share of web-slinging, we have a stark contrast in that one prefers the air while the other will do everything he can to stay grounded. In a bit of irony, Spiderman finds himself yet again in conflict with a mechanically-altered scientist.​
Right off the bat, both fighters have go-to strategies. Spider, who'll want to play defensively in order to avoid Spiderman's combos, can apply his projectiles, particularly Arachnid's Leg and Electro-Beam, to keep Spiderman at bay and ruin his field day up in the air. Once enough damage has been dealt, a simple hit from one his powerful explosive attacks can send Spiderman flying. Getting in close is difficult for Spider, however, who not only wants to attack from afar, but also works best in doing so in this match-up. Meanwhile, Spiderman can bring Spider right to him with his Web Zip.​
Spiderman, on the other hand, will want to stay in the air where Spider is afraid to travel and where he himself remains relatively safe. Bringing Spider close with Web Zip and then getting the bug into the air is Spiderman's claim to victory, as Spider is nearly helpless when out of his element.​
Spider wants to avoid aerial combat at all costs, which can provide for quite a problem against Spiderman. Moves like Spiderman's Up Smash are nifty for getting Spider into the air, after which the poor mutant is fair game for all of Spiderman's aerial follow-ups. Spider Sting and Spidey-Pault can greatly disorient Spider and prove great at frustrating the unlucky bug while also dealing damage. Leaping Strike and Bat Bomber are Spider's sole saving graces in the air, and Bat Bomber's utility is significantly reduced by the fact that Spider will hardly ever be above Spiderman, except in the case of being launched. The flamethrower variant of Arachnid's Leg is Spider's best bet at countering an approaching Spiderman, punishing the superhero for short-hopping or web-zipping into close-quarters. Granted enough hit-stun is delivered, Spider has the chance to deliver a powerful follow-up, such as Front Leg Spike.​
Spider's mines and trap doors are instantly nullified by Spiderman's aerial game and maneuverability, which poses a problem for him; on the other hand, however, Spiderman has little way to rid the stage of such hazards, though he'd rather stay in the air anyway. Spider also loses his unreliable but powerful Drag Off kill option, due to Spiderman's exceptional recovery. Likewise, Spiderman loses his equivalent option, though it's less of a detriment for the superhero.​
With such knowledge, we can claim that the winner is...​
Oh, wait...​
There we go.​
In short, Spiderman is at the advantage because he's more comfortable touching the ground than Spider is entering the air, and his aerial domination proves more useful in pressuring his opponent than Spider's ground camping does. Spiderman forces Spider to play excessively defensively as the arachnid's combos just aren't up-to-speed enough for him to play aggressively, while Spiderman laughs in the face of danger and has little to no restriction over what he can do. Any hindrances are minor setbacks at most. That being said, Spider still has the killing potential to take some of Spidey's stocks, and he clearly beats the superhero in power, making the match-up a bit closer than it may seem.​
60% - 40%
 

JOE!

Smash Hero
Joined
Oct 5, 2008
Messages
8,075
Location
Dedham, MA
Nothing for these two? Come on guys!

MEGUMI KITANIJI vs SHO MINAMIMOTO
STARFORCE MEGA MAN vs BLAZIKEN
 
Top Bottom