Tirk you're a jerk.
=-=-=-=-=-=-=-=-=-=-=-=-=
Hudda hudda hudda hrrmp hrmp hrrrrmp hudda phoo fudda mmp phrrr hmmph! Hurr hudda hudda hrmm hudda prmm fmmph! Frr hudda hudda mrr hudda hudda!
Translation: Hello sir, madam, child, or any hatted gentlemanne perusing this moveset at the current time! I am the Pyro, of Team Fortress the Second Famme! Prepare to be dazzled by my fires of damnation!
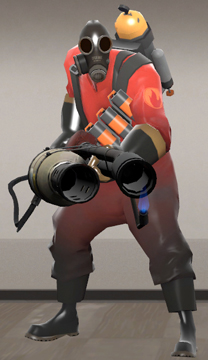
Sorry for that, as I felt it was necessary for an introduction for the Pyro. So the Pyro is one of many classes from the tactical team-based shooter Team Fortress 2, currently one of the most popular online games on the PC in the recent five years it’s been released. The Pyro is heavily featured on advertisements of Team Fortress 2, although some people might disagree, and one of the more enigmatic characters of the game- nobody knows if he is a man or woman or even human. We do know that it loves to set things on fire and in SSBB, Pyro will be doing what he loves most and does best.
While I won’t delve too much into how Pyro plays in SSBB but needless to say, he’ll play a lot like he does in TF2 in that his main focus will be to set as much of the environment as he can on fire. Sure, the opponent can be caught in the crossfire (No pun intended), but FIIIIIIIREEEEEEE. Okay, seriously, fire is what drives Pyro. Not much else to say other than Pyro will be more heavily armed than he appears in the above picture. Although there are a few things I should say about the Pyro that make him differ from everyone else in the game.
First of all, Pyro is immune to stun from fire-based attacks, including any opposing Pyro’s afterburn. This doesn’t mean he’s immune to explosions- fire based attacks such as Ike’s Eruption and Flame Crates can still damage Pyro due to explosive damage, although there is a lack of flame effects on struck Pyros. He won’t even be interrupted by fire attacks during his move animations. Secondly, several of his attacks cause an unusual mechanic referred to as “afterburn”, but we’ll get to that one we’re there. Lastly, a handful of the Pyro’s attacks run on ammo, something that the Pyro can only regain if he uses a certain special move or dies. You have 200 ammo for your flamethrower, 16 flares shared between your Flare Gun and Detonator, and 6 shots for your shotgun per life. Your ammo count is visible next to your percentage.
=-=-=-=-=-=-=-=-=-=-=
STATS AND OTHER COOL STUFF (On a 1-5 ranking basis)
=-=-=-=-=-=-=-=-=-=-=
Ground Speed: 3 (Pyro has middling speed in Team Fortress 2, so it’s only fair that he has middling speed in SSBB. Besides, if the Pyro were any faster, it’d make his job a lot easier. And the last thing we need is an easy way to W+M1 in Brawl.)
Aerial Speed: 2 (Pyro isn’t the most ideal aerial fighter in TF2, although he still has some tricks up his sleeve in Brawl for whenever he’s in the air. His recovery move is also incredible to an extent.)
Aerial Control: 1 (Without outside influence, Pyro has little control over where he travels in the air. He’s not the strongest character in the air in TF2 and in an effort to translate Pyro as accurately as possible; he’s poor in the air here.)
Power: 4 (A lot of Pyro’s power comes from close range, but when he is close, he deals a LOT of damage even in short increments. Combined with his afterburn and Backburner damage, it can get rather ridiculous.)
Attack Speed: 5 (Considering the biggest threat Pyro makes is afterburn damage, which is damage dealt over a small period of time, Pyro can still rack up quite a bit of damage to his opponent even when he’s across the other side of the screen in a short period of time.)
Jump Skills: 2 (The only real thing saving Pyro from 1 material is his recovery being so damn good at lower percentages. His jumps are slightly better than that of Bowser’s.)
Weight: 3 (Pyro has the third most natural health in TF2, tied with Demoman and less than Soldier and Heavy. As such, it only makes sense to have Pyro have middling weight, weighing about as much as Mario.)
Height: 4 (Pyro is human… or humanoid. Either way, he’s about as large as Captain Falcon.)
=-=-=-=-=-=-=-=-=-=-=
Repeat after me: “Mumumumum I’M DEAD!”
=-=-=-=-=-=-=-=-=-=-=
B (Airblast): Pyro looses a compressed blast of air from his flamethrower, taking away 20 ammo from his total ammo count (50 if you’re using the Backburner). If the flamethrower of choice has less than 20 ammo, Pyro’s flamethrower releases a puff of smoke from its mouth. However, if you do have enough ammo for an airblast, you have a highly versatile tool at your disposal. Whenever you tap B on the ground or in the air, Pyro fires a compressed blast of air that pushes opponent’s a distance disproportional to the victim’s weight, reflects non-laser/bullet projectiles, and moves items, mines, or bombs around the battlefield. Even better, the airblast reaches to about three Mario-lengths and ignores reflecting/absorbing specials as well as the Mother Badge; the airblast will actually push them forward and into the air. It’s great for a multitude of situations that benefit Pyro greatly.
It can be argued that… Okay, it’s no secret that Pyro has a very bad long-range game. With the airblast, Pyro can properly deal with most threats that come his way, be it a pesky yet quick close-range fighter or a ranger that deals heavily in projectile attacks. You don’t even need it for that- assuming you have your foe on fire, you can instantly stop your foe’s midair momentum to follow up with a quick Axetinguisher. The gimping potential is even greater since the pushback is similar to Kyogre’s Hydro Pump and Mario’s FLUDD. In other words, it absolutely destroys characters that are floaty in midair or have a floaty recovery move. However, Pyro’s airblast won’t work all the time- it’s ineffective against prone foes, enemies in their final smash animations, and Kirby in stone form. Otherwise, almost everything is fair game for Pyro’s airblast shenanigans.
B^ (Detonator): This move has different properties depending on whether Pyro is grounded or airborne. On the ground, Pyro shoots a small flare in the direction he is facing. It has a bit of a downward arc to it after a second of travel, although the Cracker Bomb-sized projectile can span the entirety of Final Destination in less than half a second. Pyro uses up one flare from his 16 flares per life. Once Pyro fires the flare, he briefly stands still and during this phase, the player can tap the B button to detonate the flare. Anyone caught in the flare during the detonation period is dealt 7% damage and suffers afterburn damage. Pyro takes a full second to reload before he’ll do anything else. Fortunately, you can still move around while he reloads so you’re not totally open for punishment. The flare can also damage and flinch the Pyro, which leads to the airborne version.
When Pyro uses this in the air, he aims it downward, shoots out a flare, and automatically pops himself further into the air. He takes less time to reload the detonator than he does on the ground, about half a second. The best part is that Pyro can do this as many times as he pleases, as each jump sends him as far as Shiek’s Vanish, and each brief period of floatiness gives Pyro enough time to perform a subsequent flare jump due to a full reload. You can even damage anyone underneath you for similar damage to the ground version. However, with each flare jump you perform, you take 3% damage, so this recovery move can be very pricey if you really need to make it back to the stage and your recovery is restricted by how many flares you have. The recovery is also strictly vertical, with the only horizontal recovery involving normal directional influence. You’re also forced to use up one of your flares to use a recovery attack from an ammo count shared with the Flare Gun. Despite these flaws, the Detonator provides Pyro with one of the best recovery moves in the game.
BV (Resupply Cabinet): A large resupply cabinet pops into the background next to Pyro, as the slightly surprised mercenary turns to it. During this period, Pyro resupplies his flamethrower, flares, and shotgun and is forced to switch to a new flamethrower that always cycles between Flamethrower->Backburner->Degreaser->Flamethrower. You’re able to choose your flamethrower at the character select screen as well. The time it takes to resupply and gain a new flamethrower is on the heftier side and should be saved while your opponent is far away or doomed to death. Once Pyro is finished with taking out his new toy, the cabinet suddenly digs back into the ground with Pyro’s previous weapon being refilled by an unknown person.
Each flamethrower has differences that clearly set them apart in terms of playstyle, power, and ammo consumption:
The vanilla Flamethrower uses 20 ammo for an airblast, causes the normal 4% damage per tenth of a second over time when foes are exposed to the open flame, and provide the regular 4% damage bonus for each second of afterburn. It’s a very reliable weapon and provides a good starting point for any new Pyro player while also giving expert Pyro players a "best of both worlds" weapon.
The Backburner uses 50 ammo per airblast and can drain all of your ammo quickly if you aren’t careful with your airblast usage. However, the Backburner not only deals an extra 2% damage while your foes are exposed to fire, but deals twice as much damage if you’re flaming anyone from behind, potentially giving the Backburner the highest DPS in the game. Foes also take the same afterburn damage as the Flamethrower. The Backburner is for the traditional ambushing Pyro- while not as helpful in one-on-one matches, the pure damage output can make up for it.
The Degreaser is more similar to the Flamethrower than anything else; 20 ammo for an airblast and 4% damage over the same time to enemies exposed by the open flame. However, the afterburn damage is much weaker, with foes only taking 1% damage for each second of afterburn. On the bright side, the ending lag of your airblast moves become nonexistent and your smash attacks gain an immense beginning lag speed bonus. The Degreaser is very helpful for setting your opponents up for a smash attack or a finishing move, since the decrease in lags give you the opportunity for easy combos. However, the damage output on the Degreaser is less than that of the Flamethrower and Backburner.
B> (Flare Gun): Pyro fires a flare gun from his hip before taking a second to reload it and holster the flare gun. The Flare Gun and the Detonator are fairly similar, so I’ll get similarities out of the way first. The projectile fired is similar to the one the Detonator fires, each projectile flies at the same speed, and both flares are the same size. You can also move around during the reload animation, which take the exact same time. Hell, even the damage and afterburn given are the same. While the beginning lag is shorter for the Flare Gun, you cannot detonate the flare in midair and must make direct contact with the foe in order to deal damage. However, there’s one big advantage to the Flare Gun over the Detonator.
Whenever you manage to hit a burning opponent while they are on fire with a flare, they take 25% damage and a bit more knockback than usual, as well as reset the afterburn timer. This advantage alone puts the Flare Gun ahead of the Detonator in terms of damage, especially combined with the Degreaser; once you set your opponent on fire, you can quickly fire off a flare to cause some big damage in a short amount of time. Keep in mind that whenever using the flare gun, one should always keep a steady aim to make up for the slight curve of the flare’s flight path. There’s a gaping flaw in using the Flare Gun, however; for each flare you fire, you draw upon the 16 flares you have for both the Flare Gun and the Detonator. This means that every time you use the Flare Gun, you’re potentially hurting your ability to recover. Regardless, the Flare Gun is one of the most powerful projectiles in the game under the right circumstances and even then, it’s incredibly useful.
FINAL SMAAASH (Shrshri Nrr Hrrdrr): Pyro mutters a corrupted version of “Satsui No Hadou”, which translates to Murderous Intent. Pyro surrounds himself with a field of flame that traps anyone caught within this burning field until the final smash ends or if Pyro knocks them out with an attack first. During the final smash, Pyro is constantly enveloped by this fiery field, has glowing red/blue eyes depending on what team you’re on, and has infinite ammo for all his weapons, even if the ammo count was at zero. Although Pyro will return to his original ammo count once the final smash ends. Speaking of duration, the entirety of Shrshri Nrr Hrrdrr lasts for ten seconds, so Pyro players should make the most of this. The flame field deals a little over 3% damage per quarter of a second, so this can rack up to a huge amount of damage if they’re caught early.
One the ten seconds are up, Pyro pulls his arms and legs in as the fire surrounding him briefly expands for five frames, then pulls anything caught closer to Pyro. This process takes a whopping three seconds, during which Pyro is levitating above the ground and stationary. Once Pyro summons all the flames toward him, he releases a burst of fire, causing anyone unfortunate enough to be drawn in to be killed instantly, assuming they’re in an open space. Otherwise, they take an extra 20% damage on top of however much they took in the final smash. I’ll be honest, this final smash is a little overpowered in retrospect but then again, final smashes are usually supposed to be overpowered.
=-=-=-=-=-=-=-=-=-=-=
You look like death warmed over…
=-=-=-=-=-=-=-=-=-=-=
A (Axe Swing): Pyro performs a left swing with his fire axe to slice the opponent’s midsection. The first of three is the quickest in starting lag, as it takes less than a quarter of a second to attack. And for being the weakest hit in the combo, it still deals quite a bit of damage (4%). However, the range is small, reaching only to about one Mario-length, and the ending lag is horrendous- it takes a little under a second for Pyro to recover from a single swing of his axe. As such, it’s actually better for Pyro to continue his combo than to end it there simply because the opponent has so much time to take advantage of the Axe Swing’s ending lag. Outside of that, it’s a great first strike in a neutral attack combo; use it on slower opponents to beat out many of their attacks.
A, A (Shotgun Bump): As Pyro’s axe comes around, he jabs his shotgun with the opposite hand into the opponent’s stomach, hardly giving them enough time to recover from the axe swing. It covers more ground than the Axe Swing, reaching to about one and a half Mario-lengths and dealing the same damage (4%) but with increased knockback. Not enough to put them out of range for Meet the Pyro, although it can kill at… like, 350%. Anyway, the ending lag for the Shotgun Bump is considerably quicker than Axe Swing so if you miss with the Shotgun Bump, you’re slightly safer. Except if your opponent dodged the Axe Swing anyway, he’ll know what to expect and avoid the second hit. So make sure you land the Axe Swing first before you go into the Shotgun Bump, although you could take foes by surprise if they expect you to end the combo with the sluggish Axe Swing.
A,A,A (Meet the Pyro): As Pyro’s shotgun remains at his opponent’s stomach level, the flame-obsessed mercenary pulls the trigger, blasting his unfortunate foe away a good distance with some potentially nasty damage (5-20%). This uses up one of his six buckshots. Naturally, the blast itself isn’t really a melee attack so much as a projectile. Regardless, MTP should be treated as such due to the damage restriction on the blast; the buckshots fired by the shotgun scatter in a wide radius so if your opponent is outside of close range, expect to deal only about 10% max. Otherwise, it’s a decent finisher to a three-part combo that racks on a lot of damage at the ideal range. However, the ending lag is terrible, as the Pyro takes a full second to pump the shotgun’s gauge
A> (Shotgun Strike): Pyro lifts his shotgun to head level, aims slightly upwards, and fires once, taking a small step back to dampen the recoil. This uses up one of the shotgun’s six available buckshots and if empty, all you’ll hear is a measly clicking sound. Since the angle at which you fire the shotgun aims slightly upward, you may wonder why this registers as a forward tilt attack. Well let’s say you’ve lit someone on fire and now they’re running away. Now let’s assume they jump. Well, since you’ve already got a panicked enemy that doesn’t know what he’s doing, he’ll be easy prey for a follow-up shotgun blast that will damage him for at least 10% damage. However, Pyro players should keep this move’s usage in situations such as the aforementioned theoretical. From medium to long range, the move deals severely less damage due to the buckshot spread and won’t even stun your opponent, much less deal damage over 5%. Still, the Shotgun Blast is helpful for adding salt to the burning wound against retreating enemies. However, Pyro takes the time to pump the gauge, which takes a full second to perform if you want to repeatedly use shotgun moves in sequence. While this would normally leave you open, you can move around during the pump so Pyro isn’t totally helpless.
A^ (Ground-To-Airblast): Pyro quickly aims his flamethrower upwards and releases a compressed blast of air. While this airblast has a cone-like hitbox that only affects airborne foes above Pyro, it’s still very helpful against foes with fastfall attacks, as it practically stops them in their tracks and prematurely ends their attack. Like every other airblast move, it costs 20 ammo from the vanilla Flamethrower and Degreaser and 50 ammo from the Backburner. Fun fact; this can also help boost items, projectiles, and even teammates upwards and like every other airblast, can reflect projectiles or thrown items. It’s not even affected by reflecting specials or the Mother Badge, just like the other airblast attacks.
AV (Shotgun Blast): Pyro aims his shotgun toward the ground and fires once, using up one of his buckshots in the process. Much like the Shotgun Strike, the Blast version aims at a specific angle- this time, downwards. Also like the Shotgun Strike, the Blast version causes Pyro to pump the gauge in an animation that lasts for one second, during which Pyro cannot attack but can still move around to avoid punishment. Unlike the Shotgun Strike, however, the Shotgun Blast aims toward the ground. While you can use this on nearby downed enemies for the most damage possible, you’ll find it hard to ever use this item outside of that scenario. The range is limited and the pellets disappear once they hit the ground. However, when the opponent is off-stage and actively recovering, this is when the Strike shines. While it deals no stun to far-off enemies, it can perform some gruesome damage (up to 20%) and knockback to anyone up close. As such, characters with normally excellent recovery such as Wario and Pit are suddenly suspect to a very lethal gimping move. However, due to the Blast’s limitations, there’s one kind of recovery that actually beats it out for the most part: tethering. Yes, due to the opponent hanging from the stage, Pyro can’t quite shoot them due to being directly below Pyro. The mercenary can still shoot at opponents hanging on a ledge and knock them far away when close, however.
Dash A (Flamethrower): This dash move is unique in that while Pyro maintains his dash motion, an active hitbox remains directly in front of him. As he runs, Pyro activates his flamethrower of choice, streaming a steady line of fire three Mario-lengths in front of him. He can arc the flames as far up and down as possible and can even perform a u-turn, with Pyro maintaining his fiery blaze during the reversal. Opponents caught in the stream continuously take 4% damage for every tenth of a second they remain in the fire, with the damage increased to 6% by the Backburner. While the fire deals no knockback, it’s still Pyro’s most damaging move and it should be the focus of every Pyro player to land this attack as often as possible. And with Pyro’s decent dash speed and the ability to aim where you spew fire, it’s not too difficult. Even if the opponent escapes the jet of flame, however, they’ll be suspect to a mechanic called afterburn.
Afterburn is what gives Pyro’s damage his 4 rating. Once the opponent is no longer exposed to direct flame, he will suffer additional damage per half a second for three seconds, with damage ranging from flamethrower to flamethrower. For the vanilla Flamethrower and the Backburner, the opponent suffers 3% damage over each half a second while the Degreaser only deals one percentage of damage over each half a second. There is a limitation on this attack to prevent it from becoming too powerful; for each half a second your flamethrower is active, you lose one point of ammo. While this may not seem like a lot, you’ve also got your airblasts to take into account, as they are as equally important to another aspect of Pyro’s gameplay as fire and afterburn. It’s important to conserve your ammo because the only ways to refill your ammo count are to change your flamethrower entirely with
=-=-=-=-=-=-=-=-=-=-=
Nobody’s gonna miss YOU, you mutant!
=-=-=-=-=-=-=-=-=-=-=
Fsmash (Axetinguisher): With a quick spin technique, Pyro instantly swaps out his fire axe for the Axetinguisher mounted on the right side of his back, performing two spinning side swings that arc upward, covering a decent amount of range due to Pyro stepping forward during the first spin. The smash on its own is rather poor- the beginning lag is good, although the damage is pitiful at 5%, and the knockback doesn’t keep the opponent close enough to continue the pain. Not only that, but Pyro requires three-fourths of a second to switch his Axetinguisher out for his fire axe. Despite these flaws, there is a reason this move is proclaimed as Pyro’s number one kill move while on the ground.
If the Pyro strikes a flaming enemy with the Axetinguisher, the attack receives a tremendous damage bonus from 5% to 20%. This is due to the thermite lined along the barbs of the Axetinguisher- as such the burning sensation is increased greatly. The flaming enemy also receives increased knockback, transforming this move from a pitiful pummel into a certified killing move. And given the decent 120 degree radius each swing covers, it’s great for getting at any enemy you may just have set aflame. The Degreaser’s attack speed bonus also gives Pyro a very good tactic dubbed, “Puff and Sting”. In TF2, this involved setting the foe on fire and quickly switching to the Axetinguisher to instant kill most classes. In Smash, it increases the power of the Axetinguisher exponentially.
Usmash (Backscratcher): Pyro briefly drops both his weapons to the ground as he reaches for a large garden rake propped vertically on his back, then slams it into the ground in front of him. The backscratcher covers an insane amount of range, SIX Mario-distances, or half of the entire Battlefield stage. The Backscratcher causes 14% damage, good knockback, and several projectiles to vanish. The best thing about the backscratcher is the range; other than covering six horizontal spaces, it keeps this hitbox during the vertical swing. As such, it works as a great anti-air repellant for aerially inclined foes.
There’s a glaring flaw with this move that should not be overlooked; the beginning and ending lags. While the beginning lag isn’t too bad at a noticeable three-fourths of a second, this is also supplemented with super armor during the brief frames between the charging portion and before Pyro swings the back scratcher. The ending lag, however, is terrible at a sluggish second and a half. Please make sure you don’t miss with this weapon or your opponent won’t make such a foolish mistake during the recovery period.
Dsmash (Powerjack): Pyro stands sideways, facing (away) from the screen, as both his weapons are dropped to the ground in favor for a large metal automobile jack. Pyro rears the weapon up like a golf club then swings it in the direction he was facing. It’s your typical down smash, with an unusual 250 degree radius covering the left and right of Pyro as well as some of his bottom hitbox. The damage is good at 15% and the knockback is, while the weakest of his smash attacks, on the stronger side. In fact, Powerjack can help you keep your opponent close without keeping them too out of range. There’s a good bonus for this attack, however; every time you kill someone with the Powerjack, you heal 30% of your health. While this may seem like a random buff to give Powerjack some use, it’s actually due to the electrical energy inside the automobile jack that are powered by the energy coming out of a character’s death explosion. However, this is due to the risks involved with using the Powerjack.
First, you actually gain a temporary damage increase when Pyro is in active animations while using the Powerjack, due to the same electric energy powering the Powerjack. Further stimulation beyond Pyro’s grip causes a temporary malfunction that shocks the Pyro. This means that during the beginning/ending lags as well as the attack itself, Pyro is open to taking 5% extra damage from any counterattack that connects. What’s worse is that the beginning and ending lags are fairly hefty, at half a second and three fourths of one, respectively. As such, it’s good to use this move for when you suspect your opponent of making a sudden move on you and even then, if they bait you into it, you’ll be eating a lot of damage in a short amount of time.
=-=-=-=-=-=-=-=-=-=-=
Sorry to put out your campfire, boy.
=-=-=-=-=-=-=-=-=-=-=
Nair (Flame Wheel): Pyro puts his flamethrower between his legs and spins around in the air, all while firing his flamethrower throughout his spin. Anyone hit by this takes 8% damage, are stunned, and given afterburn. Since Pyro spins around during Flame Wheel, he covers all possible openings that would otherwise give his opponents the chance to punish. Although the Flame Wheel does take some time to prepare with a half-a-second beginning lag, the reach of the wheel is as large as an airborne Donkey Kong and the ending lag is very short. This is probably Pyro’s best aerial attacking move, as the rest of them are either non-damaging but very useful or strict in terms of utility. As such, Pyro’s aerial capabilities aren’t impressive to begin with, so if you insist on approaching from the air, Flame Wheel is your go-to move. While using this move, you use up 10 of your flamethrower ammo, unless you land before the aerial animation finishes. In that case, you can short hop this attack for great effect.
Fair (Great Divide): Pyro raises his axe high into the air and performs a strong downward chop with the range of Donkey’s Clap. Unfortunately, the Great Divide has just as much starting lag as the Klap and slightly more ending lag. Luckily, the damage on the chop is impressive (15%) and it covers a large portion of the space in front of Pyro; it can even spike airborne foes if the axe head portion strikes. Despite that, the knockback outside of the spiking capabilities leave much to be desired, meaning the Great Divide is helpful for making sure recovering foes don’t. Otherwise, it’s a fairly unsafe move if your enemy manages to block or evade it.
Bair (Blind Fire): Pyro looks over his left shoulder briefly before propping his shotgun onto said shoulder and fires a buckshot, pumping the gauge with his shoulder before spinning it back into place. Like every other shotgun move, Blind Fire uses up one of your six buckshots. The recoil of the shotgun causes Pyro to spin once before the mercenary steadies himself into his aerial combat stance. The shotgun pellets, like the ground-based ones, spread out and deal damage proportional to how close the enemy is to you. As such, the spread has a slight downward angle to grant a better coverage for any pursuing foes, and damage can range from a measly 4% to a whopping 25%. With proper timing, you can dash, short hop, and use Blind Fire to keep anyone from chasing you scared stiff. Do not use this move wantonly, however- the recovery is poor, taking a total of one second to recover, and the beginning lag isn’t much better at half a second. So be sure that your Blind Fire lands or you’ll be sorry.
Uair (Airblast-To-Air): Pyro aims his flamethrower upwards and releases an airblast, costing 20 ammo for Flamethrower/Degreaser and 50 for Backburner. The direction of the airblast happens to put Pyro into a fastfalling state similar to that of Sonic’s Dair, although he still has what minimal control he has over his aerial movement. Pyro can use this move to cause your airborne foes no shortage of trouble, as it can prevent them from moving in at opportune moments from the air. It can also give Pyro a quick escape if he’s moving into a shoddy situation while in the air, providing an easy way to get back to the ground. Like with the grounded versions, Pyro can reflect projectiles and items away from him as well as opponents, only this time, he can reflect them upwards. With some smart play, this can cause all sorts of trouble for your opponents; redirecting projectiles, enemies, even items to deal indirect damage to your opponent. And don’t worry about anyone absorbing the airblast; reflectors and absorber specials get pushed into the air, and the Mother Bade is useless.
Dair (Airblast-To-Ground): Pyro sets up his flamethrower, cocking both of his feet onto the sides like a pogo stick, and pulls the trigger, releasing an airblast that not only sends anything below him spiraling downward but slightly pushes Pyro further into the air. Like every other airblast move, each airblast costs 20 ammo from Flamethrower/Degreaser and 50 ammo from Backburner. Although the recovery between each airblast is three-fourths of a second, you can still use this to recovery from a far side of the screen at the cost of your ammo. Think of it as a Luigi Missile with a use limit, movement/reflecting capabilities, and slightly quicker recovery. However, the ATG blast is more helpful in the air than others because of how it can ruin the opponent’s anti-air strategies; it not only pushes Pyro a bit further into the air but it blows back whatever items are thrown upward and even pushes enemies to the side. Like the anti-air version, you can go through reflecting and absorbing specials while pushing them around and can go through the Mother Badge.
=-=-=-=-=-=-=-=-=-=-=
Go to Hell, and tell the Devil I’m coming for him next!
=-=-=-=-=-=-=-=-=-=-=
Pummel (Claw of Fate): Pyro raises his right hand and fires a claw-like contraption strapped to his right arm. The claw is connected by a sturdy rope that can stretch out to a maximum of five Mario-distances, giving this grab a very long range in comparison to several other grabs. The Claw also has a very long recovery, capping at a full second for Pyro to withdraw the claw. You can also use this as a tether recovery for good results if you’re against an unattentive foe, although those are diamonds in the rough. As soon as the claw makes contact with a foe or item, Pyro pulls them so that they’re adjacent to the Pyro and open for a throw or in the case of an item, for use. The claw can also strike airborne and escaping foes so you can continue inflicting pain on your victims. While the opponent is in your grasp, Pyro can slightly twist the claw a bit to scratch deeper into the opponent’s chest/head, causing 3% damage.
Fthrow (Homewrecker): Pyro roughly pulls the claw out of the opponent, causing them to stagger forward a little, before Pyro reaches for a hammer propped sideways on his waist and smacks the opponent across the screen. The move deals 7% on normal opponents and provides decent knockback- not too far as to force Pyro into a new chase but not so close that it’s easy to follow up. However, if your opponent of choice happens to be storing a charge move or has a wearable item equipped such as the Mother Badge, the hammer briefly sparkles before dealing negating the charge or destroying the item. This is the quickest and most reliable throw at Pyro’s disposal, capping at a total of one full second for total completion. Additionally, since Pyro swings his Homewrecker like a baseball bat, any foes behind Pyro are liable to suffer as much damage as Pyro’s intended victim. Some of you might be wondering why the Homewrecker gets rid of wearable items and chargeable special moves; well, that will be explained in Maul.
Bthrow (Maul): Pyro moves around so he’s behind the opponent, tugging at the claw’s rope to stumble the victim as Pyro pulls out a large metal maul and swings it in a manner similar to the Homewrecker. Much like the Homewrecker, whatever charge or equippable item the opponent may have is negated or destroyed. This is because the Homewrecker and Maul are weapons with heavy mass and their recommended point of impact is usually soft. In layman’s terms, try getting hit in the head by a hammer/maul and see if you can keep anything intact. While the Maul is identical to the Homewrecker in terms of damage and knockback, the ending lag takes a tiny bit more time to finish than the Homewrecker, although the Maul sends Pyro’s enemy in the opposite direction. As such, the Homewrecker/Maul is great for characters that depend on charge moves such as Donkey Kong and for getting rid of pesky wearable items. For power, it’s rather meager, but for utility and option denial, these hammers shine brightly.
Uthrow (Postal Pummeler): Pyro pulls the claw out of the opponent, letting them clutch at their pained chest for half a second as Pyro swings upward, clashing with their chin with a mailbox. The opponent ends up in a fixed spiral falling state as Pyro crouches down to check on the broken-off yet rumbling mailbox. As he does, the mailbox shoots several burning letters upward and toward the opponent, dealing 2% each over five seconds. Pyro steps away while chuckling, letting the opponent peppered with letters. This move happens to deal much more damage to a burning target due to the flaming letters adding more burn pains to the target as well as cutting into the opponent’s skin and letting fire get into the wounds. As such, the boost is increased from 2% each 6% each. Foes can be caught in the crossfire of letters and suffer the same amount of damage as the victim, although the victim will remain in a spiraling descent animation until they hit the ground or a letter, while the interloper has no restrictions. The letters also don’t come back down, meaning once they’re shot upward, there’s no stopping them except with a body. Postal Pummeler is very helpful for adding on damage to a fleeing burning opponent as well as providing Pyro for a helpful vertical killing move.
Dthrow (Sharpened Volcano Fragment): Pyro drops both his weapons before summoning a molten, fiery battle axe out of thin air, swinging it to trip the opponent onto their side before slamming the broad end of the axe onto their body. The battleaxe dissipates from the Pyro’s hands as he picks up his fire axe and shotgun while his opponent lay prone. This causes a low amount of damage (13%), but on the bright side, you also set the opponent on fire (if they weren’t already) and keep them close to you at the same time. If you’re using this merely to rack up damage, it’s fine if you’re planning on using the afterburn qualities of the dthrow but otherwise, stick to your other throws for pure damage. It’s important to know that if your opponent is already on fire before performing this move, the afterburn time isn’t reset and your opponent takes significantly less damage (5%). The biggest flaw in this move is the time it takes to fully come out- while setting folks on fire and keeping them in range is helpful, the Sharpened Volcano Fragment requires a huge two and a half seconds to complete, meaning that the Pyro should be careful he’s either the only one upright or the only man around.
=-=-=-=-=-=-=-=-=-=-=
You cannot burn me! I DO NOT HAVE TIME TO COMBUST!
=-=-=-=-=-=-=-=-=-=-=
Gameplay: After all of that, it’s easy to identify Pyro as a strange category of rush-down. His flamethrower can cause a huge amount of damage once he reaches his prey and he can still lay down the hurt from afar using his shotgun and flares. Even better, he can negate enemy projectiles or reflectors to put them into an even more vulnerable state with airblasts and his specialized smash attacks/throws help him in many situations. To call Pyro versatile would be an understatement; he’s got some sort of answer against every match-up and has the offensive power to keep up and the defensive power to keep away. . Also like the game he’s from, Pyro thrives off the chaos created by battle- an ambushing Pyro can be the deadliest opponent on the battlefield. Even in a one-on-one match it’s hard to deal with a persistent Pyro.
Unfortunately, this versatility is limited in ammo count- Pyro is only as powerful as his ammo count. Without it, he relies on smash attacks and throws that, while certainly helpful, don’t nearly deal as much damage nor apply as much pressure as his proper weapons. As such, a wise opponent that can force Pyro into squandering or wasting his ammo can turn the tide of the match in their favor. Opponents who use the opportunity to rush down Pyro when he’s out are even more of a problem, as the Pyro has no quick “get off me” move to deny them of their advantage. As such, a big part of Pyro's game is to conserve your ammo while you can, using your flamethrower to deal the highest possible damage in the shortest amount of time while limiting your airblast use. Even the Detonator can put Pyro at greater risk than the moment he was flung off the stage.
While Pyro is certainly a master of close-range death, he is also victim to it via his flaws. Just like in the game he’s from, Pyro’s objective is to chase after his foes and set them on fire, whether it’s via his Sharpened Volcano Fragment, Flare Gun, Detonator, or Flamethrower. But once he/she is lit aflame, there is no telling what Pyro can do. Just make sure your ammo count remains stable or you’ll end up regretting it later.
Costumes: There are two “skins” for Pyro- RED and BLU- similar to WarioWare Wario and Classic Wario. The differences are minute, however- RED Team has a red fire retardant suit and BLU Team has a blue fire retardant suit. As such, the true differentiation is what they are wearing as a hat.
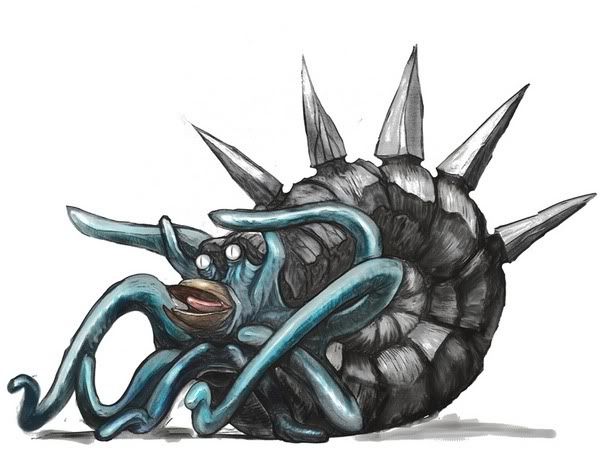
Hatless Pyro (Original), Madame Dixie (Red Team), Foster’s Façade with Stockbroker’s Scarf (Blue Team), Triboniophorus Tyrannus (Green Team), Handyman’s Handle with Sight for Sore Eyes (Wut Team), Connoisseur’s Cap with Whiskered Gentleman (Fancy Chef Team), and Pyromancer’s Mask (Skull Team)
These, however, are simply customized sets made for Team Battle or Free for All Battles. You can outfit your Pyro however you like and even get more Pyro-specific hats during gameplay! They’re rare, however- more rare than CDs!
Taunt 1: Pyro lifts his currently loaded flamethrower above his head while laughing in triumph, before getting back into his combat stance.
Taunt 2: Pyro’s weapons appear to… float… (It's a reference to an old glitch in TF2 where if you switch weapons and taunt at the same time, you'll perform a more hilarious version of the taunt.) while he brings both his hands back, palms together, with flames enveloping the inside of his hands. He then performs a Hadoken motion with a small ball of flame reaching out in front of him. Pyro then takes hold of his weapons and gets back into combat stance. If the flame ball connects, anyone nearby is knocked away for 500% damage and given afterburn. While this may seem overpowered at first, keep in mind that the hitbox is incredibly tiny- they have to be DIRECTLY next to him- and the entire taunt takes a little over a second and a half to come out.
Taunt 3: Pyro swings his fire axe around so he’s holding it like a guitar and pretends to play a few riffs on his axe, even humming the tunes. After a riveting final rip, he flips his fire axe back into place.
Victory 1: Pyro alternates between making these two poses with his back to the screen:
http://www.youtube.com/watch?v=_UqEmaKOsqk
Victory 2: Pyro starts laughing at his opponent’s misfortune in a looped animation like so:
http://www.youtube.com/watch?v=l5x_s_N2BUM
Victory 3: Pyro’s weapons appear to be missing. Shortly before he can do anything, a Spycrab walks across the stage, with a bewildered Pyro staring at it. While he’s distracted, an actual Spy tries to backstab Pyro but as the former comes out of cloak, Pyro quickly snaps a hand forward to grasp the Spy’s throat. The Pyro, however, continues to watch the Spycrab even as it’s off-screen.
Victory Theme: http://www.youtube.com/watch?v=3853FW88kHQ
Series Logo: The Control Point symbol
Loss: Pyro’s hands are at her waist as she taps her foot impatiently, leaning a little to the left. For reference, he’s the first one in the video:
http://www.youtube.com/watch?v=F9HcJWnZXMw
Entrance: An unspecified teleporter appears where the Pyro starts. After half a second of preparation, Pyro pops out of the teleporter wielding the weapon he chose at the start of the match. The teleporter exit is shortly destroyed by the off-screen Engineer who created it.
Kirby Hat: Kirby’s entire body becomes Pyro’s helmet, complete with rubbery arms and legs. The puffball even pulls out a miniature flamethrower to use a no-cost airblast.
SSE Role: Little does the player know, RED and BLU have been fighting over the resources of the floating island ever since the defeat of Tabuu. Should the player return to the Subspace Bomb factory, instead of going through the level, he/she encounters a RED/BLU Pyro patrolling the premises for spies and intruders. Beat him and you gain the Pyro.
Unlock Method: Fight 131 Brawls, unlock him in SSE, or land 150 fire-based attacks. The count will only register if you see the fire effects on the opponent.
=-=-=-=-=-=-=-=-=-=-=
!!!SNAKE CODEX!!!
=-=-=-=-=-=-=-=-=-=-=
C: Snake, how’s your mission going?
S: I’m all right. I’m just having some trouble with this incendiary weapons expert. Do you have any info, Colonel?
C: None whatsoever. She seems to only be called, “The Pyro.”
S: “She”? I swear to God I think it’s a he.
C: We’ll… agree to disagree. At any rate, The Pyro has multiple weapons at her disposal and can use them all effectively. Just watch out when she gets close, or she’ll REALLY turn the heat up and finish you off.
S: We… we need to work on calling The Pyro a “he”, Colonel.
=-=-=-=-=-=-=-=-=-=-=
MYMINI TIME
Wait, what’s that? Nope! We’re not done here quite yet!
What are these? They are Partner Capsules! These come from some of the later Mario Parties but the partners themselves are from Mario Party 3! These babies only appear during Coin Battles and act as Assist Trophies/Poke Balls, only instead of damaging the opponent or creating weird effects, they’ll go after your opponent’s coins! Sure, they’ll offer some additional benefits such as damage and whatnot but they’ll help you get coins too. Note that the Piranha Plant is one of many and is there for decoration. You won’t be able to see what’s inside the capsule until you open it. There are a total of eight possible partners you can summon from the capsule:
Boo, once summoned, will slowly move around the stage at the pace of Ganondorf. Once he sees a nearby opponent, Boo will make a beeline for said opponent and latch onto him. Once the ghost does, Boo slowly drains the coins from his victim until the victim either loses all of their coins or until the victim attacks whoever summoned Boo, causing the ghost to lose his grip on the victim and continue wandering. Even though Boo sounds like a terrible partner, he has limitless movement in that he can float to any point on the stage and can even go THROUGH it. Otherwise, Boo will aimlessly wander the stage and pursue opponents for a maximum of ten seconds until the ghost disappears. Boo cannot be attacked directly; all attacks will go right through him.
Chain Chomp acts as a strange yet very effective partner for whoever summons him. Once Chain Chomp comes out of the capsule, the very spot that the player summoned him is where Chain Chomp’s stake is. Chain Chomp is tied to the stake and is limited in where he can move. However, the beauty is in the “chain” of his name; if the summoner manages to nab a capsule in the right place, Chain Chomp can possibly attack anyone on the stage. For example, if you summon Chain Chomp in the middle of Final Destination, he can reach out and chomp anyone close to the stage. If he’s in the middle of the main Battlefield platform, he can attack anyone anywhere. Yep, Chain Chomp dashes through soft platforms at someone up to SIX Mario-lengths in a 360-degree radius, knocks them away a good distance, knocks out several coins, and deals 15% of damage to their health. He’ll remain on the field for ten seconds before disappearing. You can try and attack Chain Chomp at close range but all you’ll be met with is a loud clank and no damage done.

Mr. Blizzard is a snowman that stays in the spot where he was summoned. Instead of directly assaulting the summoner’s enemies, Mr. Blizzard instead pelts at them from afar using snowballs. Each snowball deals 7% damage, knocks out a handful of coins, and tracks where the enemy moves, failing to hit them only when they’re behind cover. Mr. Blizzard throws out snowballs every half a second, meaning that the opponent will need to be on their toes if they wish to survive this snowstorm. While Mr. Blizzard on his own isn’t too powerful, the summoner can use Mr. Blizzard as covering fire to advance on the opponent if they have more coins or retreat if they’re winning. Unlike several other partners, Mr. Blizzard can be attacked and taken out early. Otherwise, he’ll last for fifteen seconds before melting, creating a puddle that any of your enemies can trip on. The puddle lasts for an extra three seconds before evaporating.
Snifit looks like a Shy Guy- well, Fly Guy- but he isn’t. Instead of walking around being awesome, Snifit hovers around the stage being slightly less awesome but still awesome. This partner hovers around the stage looking for bad guys to shoot pellets at. He shoots small, Bob-Omb shaped pellets that deal minor damage (5%), travel at Hothead’s speed, and knock away few coins. On his own, he’s rather weak, but he’s a great annoyer since he’ll actively seek out enemies unlike Boo and has great movement unlike Chain Chomp. And since he flies, he’ll always try to be out of the foe’s reach, although he can still be attacked and defeated prematurely. Snifit will sometimes swoop down at a distracted foe and steal a large amount of coins, after which the partner will fly back to his summoner and directly deliver the payload. This only increases how annoying Snifit can be, although he won’t do this as often in one-on-one matches. Snifit will last for twenty full seconds before disappearing, making him the longest-lasting partner a capsule can spare.

Piranha Plant, once summoned, digs itself into the ground with its mouth open, waiting for anyone to cross over the ravenous plant. Think of it as a Pitfall trap except with increased range and a visual reminder of where the Piranha Plant is. Piranha Plant still has a big difference from a Pitfall: you can put the Piranha Plant on a pass-through platform with the same effect, unlike Pitfalls. However, Piranha Plants won't go through platforms either. Should anyone be unfortunate enough to be above the Piranha Plant, he'll trap the summoner's enemy in his mouth, dealing continuous damage (At least 6% and up to 24%). Piranha Plants will only go as high up as two Ganondorfs-worth of height. This entire partner may seem unrelated to coin battle; however, once the opponent escapes/is spat out of the Piranha Plant's mouth, the plant will also spit out an amount of coins proportional to the damage done to his victim. However, the plant has some brains; it'll spit the victim in one direction and the coins in the opposite. So a crafty summoner or enemy can take advantage of this trick by remaining on one side of the stage when the Piranha Plant spits out the opponent. However, on Team Battles, one enemy teammate can beat on the Piranha Plant to release his trapped teammate prematurely. Unlike other partners, however, Piranha Plants will remain on the field until they are triggered by an opponent. After a single trapping, it disappears.

Thwomp is an angry block with gravity issues. Once summoned, Thwomp will slowly but surely ascend into the sky, out of view from every fighter on the battlefield. Once it's in no-man's land (IE the zone where you don't die but you take damage over time), it will lie in wait for anyone to comer underneath it. There's no way the opponent can interrupt the rise or fall of Thwomp, although he will only ever go straight up into the air and will not drop on an opponent if there's a layer between them such as a passable platform. However, if anyone is unfortunate enough to unwittingly stray beneath a floating Thwomp, the block falls at an incredibly fast pace equal to a Bowser Bomb. If it hits an airborne foe, they are spiked and dealt 15% damage. If it hits a grounded foe, they suffer tremendous horizontal knockback with 20%. They also lose a large amount of coins. After his rapid descent to ground, Thwomp disappears, still with an angry look on his face. Like Piranha Plant, Thwomp will only disappear if someone strays beneath him.

Whomp is a dumb-looking lug that's really tall. I mean five Ganondorfs high tall. Better yet, it's got the highest health of any attackable partner- it has 100% stamina and can still take a beating. Whomps walk around at an incredibly sluggish pace, only speeding up to Ganondorf's walk speed when they spot an opponent. Once they reach an enemy, they leap a short distance into the air and fall forward to crush anyone in front of them. This deals 20% damage, causes coins to go flying everywhere, spikes airborne foes, and causes a pitfall effect to grounded ones. The range on this move is incredible, ranging up to seven full Mario-lengths. However, the recovery is just as bad, taking a full three seconds for Whomp to pick himself up off the ground. He takes a lot of punishment and packs quite a punch, especially against an unwary adversary. Even better is the Whomp's ability to temporarily incapacitate an enemy while his coins go flying for someone else to pick up. A single Whomp will last for fifteen seconds or until the stamina runs out.

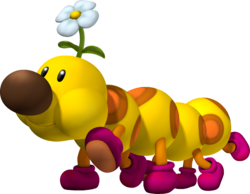
Wiggler is the rarest partner to get, and rightfully so. Once summoned, Wiggler simply waves to the players and waddles along the stage at Wolf's walking speed in a circle similar to Hotheads, even clinging to walls and ceilings to get by. However, if Wiggler is attacked or jumped on once, even by the player who summoned him, Wiggler gets very angry. So angry that he starts targeting players, even the one who summoned him. Wiggler starts charging into players for 15% damage and even grabs onto their coins, taking the currency along for the ride. Wiggler can be beaten for real by jumping or attacking its head twice- afterwards, the entire worm disappears and all the money it nabbed is dropped. Wiggler also gains a big speed boost, going as fast as Sonic's dash during his rage mode. Wiggler will disappear after fifteen seconds of screen-time or if the head is beaten.
 More seriously, I'd rate this as not bad, but not exactly good either. Sakurai's "balancing" is rather entertaining and an interesting idea to build a set around, but the end result isn't entirely stunning. First off, the smoke bomb clouds... well, you can see through them quite easily in Brawl, which makes the move more or less pointless. Some of the other moves are generic, and don't really add much to the play style (the ban hammer and the wiimote, for instance). The play style itself is more or less generic gimping, setting up traps and tilting the stage so the opponent has to constantly recover into them. That is, there's not really anything NEW the set does. Don't get me wrong, I don't hate the set, it just didn't really feel like anything special to me.
