• Welcome to Smashboards, the world's largest Super Smash Brothers community! Over 250,000 Smash Bros. fans from around the world have come to discuss these great games in over 19 million posts!

    You are currently viewing our boards as a visitor. Click here to sign up right now and start on your path in the Smash community!

Make Your Move 16: MYM 17 Starting June 1st

Slavic

Ask not the sparrow how the eagle soars
Joined
Jun 5, 2013
Messages
757
Location
taco bell, probablyn't
With one month left to go, it's time to bring out the one, the only...


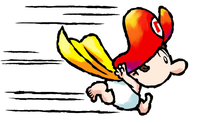
Who says only royalty and magicians can join Smash? Even the humblest of combatants can bring it with the best of them!


“I been takin’ me some combat lessons! I gots a lot to learn, but I’m gettin’ better.”


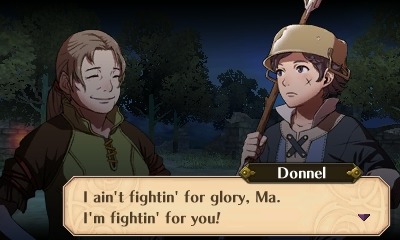
Donnel Tinhead hails from the Ylisse countryside, his only appearance in the series so far being in Fire Emblem Awakening for the 3DS. Donnel is an optional recruit, joining Chrom and company should his village be saved and Donnel level up during the battle. Donnel joins as a unique class, the villager class, and is characterized by very low stats outside of his incredibly high luck. While Donnel can be a pain to raise, he is rewarding with incredible stat growths boosted by his signature Aptitude ability. This little hick farmer boy’s mission, Sickle to Sword, is in reference to Chrom’s impromptu lesson on combat, teaching him how to turn farm training into battle skills a la the Karate Kid. Despite his American West accent, Donnel can secure a spot on any team, not just for battle but to pass his coveted Aptitude ability onto any of his children. He is not motivated by money or glory, but instead to make his ma proud, and be able to return to the farm with his chest all puffy. His makeshift spear is as homely as the dented pot he wears on his head, and as such he uses his spear exclusively for attacks. Smash, get ready, because the real villager is coming to fight!

Entrance - A glowing seal appears on the ground, similar to the other Fire Emblem characters. Donnel appears with his spear pointed in front of himself, ready for battle. However, the pot on his head slips down, covering his face and causing Donnel to stumble a bit. He lifts his pot back up and lifts his spear with one hand, returning to his battle set.
U-Taunt - Donnel pulls his pot over his eyes as if tipping a hat. Donnel says solemnly ‘I’ll win for you, ma...’. Donnel pulls the pot back up and lifts his spear, ready to fight for ma!
S-Taunt - Donnel places the base of his spear against the ground and puts his free hand on his hip. Grinning, Donnel says aloud ‘If my folks could see me now!’
D-Taunt - Donnel throws his spear into the ground and crosses his arms. A gust of wind blows his tunic around. Donnel closes his eyes and lowers his head, stating ‘I fight for my ma.’ He’s seen someone do this before...
Kirby Hat - Kirby gains Donnel’s signature tin pot to wear on his head, complete with curly black locks of hair, and gains his Rally move.
Victory Pose A - Donnel is seen on his back, pot over his eyes with his hands behind his head. After such a hard day of work and fighting, all the village boy really wants is a bit of rest. The napping Donnel snores every now and again.
Victory Pose B - Donnel is seen with a hoe in his hand as he tills the ground, determinedly starting a farm on the results screen. How quaint! While doing this, a big fat pig walks behind him, oinking, turning up the ground, and generally being your standard livestock.
Victory Pose C - Donnel lifts his spear up in the air and leaps a bit, crying out ‘Alright! I did it for you, ma!’. Upon landing, Donnel sticks the end of his spear in the ground and grins until the screen fades away.
Victory Pose X (Team Battle with Lucina or Female Robin) - Donnel is seen overjoyed, having used his winnings to retire from fighting and marry his wife (Lucina or Robin). The two of them are seen huddled together, holding a baby in a blanket. The baby’s face is not shown.
Losing Pose - Donnel stands with his spear in the crook of his elbow, looking politely happy. Donnel claps his hands until the screen fades out.
Victory Theme - Smash Bros. Fire Emblem Victory Theme
Character Theme - Fire Emblem: Awakening Theme
Home Stage - Ylissan Border Town

Palette Swaps
01 - Original Colors
02 - Colors of Amelia (FE8)
03 - Colors of Ross (FE8)
04 - Colors of Ewan (FE8)
05 - Colors of an NPC Unit
Alt - Amelia (FE8)

Look down at the stats below. See much good? No? Donnel’s a simple farmhand who’s never had to fight a day in his life, what did you expect? Yes, Donnel’s a glass cannon without the glass, but living in the rural reaches of Ylisse makes you adaptable, and Donnel’s stats become actually respectable through his Aptitude ability (explained next). The biggest issue for Donnel is his low weight, one of a few stats which does not increase with level, and so even a level six Donnel has to be careful with what he gets hit by. His stats at max are listed in parentheses, which shows that some TLC and strategy with Donnel can turn him into a top-tier powerhouse!

Weight - 4 (4)
Height - 5 (5)
Jump Height - 5 (10)
Double Jump Height - 4 (8)
Air Speed - 4 (4)
Fall Speed - 5 (5)
Walk Speed - 5 (8.5)
Dash Speed - 5 (8.5)
Traction - 5 (5)

Donnel is quite clearly a scrawny, easy to knock around character who doesn’t bring a lot of damage to the table, and it may be a struggle to get damage in before being KO’d. However, Donnel brings his defining feature from Fire Emblem Awakening on board, his signature Aptitude skill! In Fire Emblem, Aptitude raises the chances for all of Donnel’s stats to raise after leveling up and allows Donnel to quickly grow from a fragile villager to an extremely powerful unit. In Smash Bros., Aptitude allows Donnel to rise from his flimsy fighting to a much more powerful one through experience. Experience is the damage Donnel does to the opponent with his non-Special moves, and after a certain amount of damage dealt (or after KOing an opponent) Donnel proceeds to the next level. The level he is currently on is displayed by his damage counter, and Each level provides a bigger bonus to Donnel, meaning as the fight goes on he becomes more and more lethal, changing from a scrawny weakling to a Smash powerhouse! This sounds too good to be true! However, should Donnel himself be KO’d, he is dropped a level, mitigating his bonus. Additionally, with how weak Donnel starts out, it takes an advanced player to use him effectively, lest he be knocked clear off the stage. Less skilled, or more cautious, players can utilize Aptitude by playing Defensively with a hit-and-run style, dealing damage but focusing on staying alive until his boosts kick in. More ambitious players can rush the opponent, quickly racking up damage and hoping to avoid potentially killing attacks all the while. This method works better on larger characters with more predictable moves, as Donnel can dodge out of the way to continue his assault. Should Donnel reach Level 6, he can be quite scary, as seen in the chart below. One of the few things that Donnel doesn’t improve is his ability to take hits. With an under average four in weight, and his weight not increasing with level ups, he can be knocked out just as easy at level 6 as he can at level 1.


Neutral Special - Rally (0%)
Donnel faces the body to the camera and plants his spear in the ground. With his free hand, the farmer creates a fist by his side. This is a semi-charge state, as the move doesn’t finish unless an input is entered while his fist is clenched. Should no input be pressed within half a second, Donnel hangs his head slightly with a disappointed ‘Aww...’. However, pressing any non-special input while in this state will cause Donnel to throw his fist in the air with a resounding ‘Alright!’, followed by an enthusiastic phrase. Depending on the input pressed, Donnel receives a temporary buff. This particular buff cannot be used again for twenty seconds, and Donnel can only rally one stat at a time. Donnel also cannot add another buff for five seconds. The buffs are described below. At Level 6, Donnel is unable to use Rally, though he will still perform the motion if the input is pressed.

(Standard Input) Rally Strength - Donnel shouts out “I feel stronger already!” For seven seconds, all of Donnel’s spear moves deal increased damage and knockback, an additional 15% given for both. Rally Strength is useful in the very beginning, when Donnel struggles to deal damage, but becomes less important as the match goes on.

(Shield Input) Rally Defense - Donnel shouts out “I feel invincible!” For the next seven seconds, Donnel only takes 85% of the damage he normally would for all attacks. However, he will still take all the knockback he normally would. This is useful when Donnel is still at low damage percentages, as it allows him to keep himself healthy early in his stock, which is useful for him to deal damage to level up.

(Down Input) Rally Resistance - Donnel shouts out “Can’t stop me now!” For the following seven seconds, Donnel takes 50% of the knockback he normally would from attacks, though the damage and other effects from attacks are not affected. This is, without a doubt, Donnel’s most useful Rally for him, as it mitigates (if only temporarily) his biggest weakness, which can mean the difference between gaining a level or losing one.

(Left/Right Input) Rally Movement - Donnel throws his hand in the air and shouts “Just try and keep up with me!” For the next seven seconds, Donnel’s ground and air movement speed is increased by 15%. This is a generally useful buff, rather than having a specific addition, as Donnel will always want to move faster.

(Up Input) Rally Speed - Donnel cheers out “I feel light as a feather!” For seven seconds following, Donnel’s jump and double jump are increased by 15%. This is an especially useful buff when Donnel has higher damage and is being knocked around farther, as it aids in his recovery to the stage.

(Taunt Input) Rally Luck - Donnel shouts “This little piggy’s learned some new tricks!” For the next seven seconds, Donnel’s attacks deals 1.07 times as much damage and knockback, Donnel moves 1.07 times as fast and jumps 1.07 times as high, and he takes only 93% of the damage and knockback he would be hit with. While these buffs are weaker, this is Donnel’s best option at higher levels, as they allow him to safely boost everything without having to cover a particular weakness.

Neutral Special Custom 1 - Support (0%)
Donnel plants his spear into the ground by his side and brings his hand to his mouth, cupping it like a megaphone. Donnel cries out “Need some help here!” Similar to the Rally move, pressing an input will determine a buff Donnel receives. However, instead of simply obtaining a boost, a character corresponding to the input is summoned from Fire Emblem Awakening to give support to Donnel. For the moments following, the character will provide a supporting conversation. During this conversation, Donnel is able to move and fight normally, although his supporting character can be attacked during this time. Each character can take 15% damage before they are defeated, and if they are beaten before their conversation ends, Donnel does not receive his buff. Each conversation takes about a second or two to complete, and so it may be wise for Donnel to guard the summoned character rather than departing and continuing to fight. Good Donnel players can force opponents to combat them instead, pressuring them away from his partner. Once the partner has disappeared, another cannot be summoned for ten seconds. The summoned support characters and their effects are described below.

(Standard Input) Vaike - Vaike appears behind Donnel and lifts his axe in the air. With a powerful vigor, he shouts out ‘advice’ to Donnel, “Alright, farmboy! Show ‘em what old teach taught you! Give ‘em the Vaike way!’ Vaike then disappears from the stage, giving a buff to Donnel in the form of increased attack damage and knockback, both by a factor of 1.3 times. This effect lasts for four seconds before disappearing.

(Shield Input) Kellam - Kellam appears behind Donnel and smiles gently. He places his own spear on the ground in front of himself and throws out advice quietly. “ Donnel… just make sure you hold your ground, okay? Don’t let people push you around…” Kellam then disappears. Donnel takes .7 times the normal damage he would during this phase, which lasts for four seconds before ending.

(Down Input) Sully - Sully appears behind Donnel, unmounted but wielding her lance still. Placing the lance over her shoulder, she closes her eyes and gives a quick salute with her free hand. “Hey, kid, don’t feel bad. Sometime you’ll be tough as me, I promise!” After her disappearance, Donnel loses all knockback from opponent’s attacks for four seconds. However, this is not true super armor, as he can still suffer from flinching.

(Left/Right Input) Panne - Panne appears in her human form behind Donnel, striking an athletic pose. She calls out to Donnel with her advice: “Young one, I am a survivor because I ran fast. I suggest you do the same.” With her solemn message, the taguel disappears. Donnel has his speed increased by 30% for the following four seconds.

(Up Input) Sumia - Sumia appears behind Donnel, unmounted similar to Sully’s appearance. She lifts her hands to her mouth, cupping them like a megaphone. She shouts out to Donnel with a friendly tone: “Falling down can hurt, but take it from a Pegasus Knight! Being in the air is the best feeling!” For the next four seconds, after Sumia’s disappearance, Donnel’s jump and double jump height is increased by 30%.

(Taunt Input) Virion - Virion appears behind Donnel with his bow in his hand. Virion bows at the waist a little bit and holds his hands up, lecturing Donnel on how he succeeds. “My fine boy, the best way to win a fight is simply by being the best at everything!” The aristocratic archer then vanishes, leaving Donnel with a four second long buff. This buff causes Donnel to deal more damage and knockback at 1.15 times the normal amount. Donnel also will take only .85 times the damage he normally would, and the knockback from attacks he takes is halved. Donnel’s speed and jumps are also increased by 15%.


Neutral Special Custom 2 - Forge (0%)
Donnel takes a knee and places his spear on the ground. He then takes out a small hammer, pounding the spearhead of his weapon. This process takes two seconds to finish, and afterwards Donnel stands back up, his weapon new and shinier. When this custom is selected, Donnel’s spearhead starts blue, representing the Copper Lance from Awakening. Forging Donnel’s spear will change it from Copper to Iron to Steel to Silver in that order. Each forging of the weapon increases the power of Donnel’s spear-based attacks by a factor of 1.2 times each, stacking so that Donnel’s silver spear deals 1.6 times as much damage than normal. Should Donnel be KO’d, however, his spear is reset back to bronze, forcing him to reforge the weapon if he wants to use it properly. Donnel gains no super-armor or resistance while he forges his weapon, and he cannot cancel the move once he has started, meaning if he is careless opponents will punish him for it.


Side Special - Reeking Box (5%)
Donnel pulls out a small, black box, which appears to be made of wood. After he pulls it out, he holds it as if it were a regular throwing item, allowing him to fight while holding it. This item is a Reeking Box, a tool in Fire Emblem Awakening used for summoning the demon-like Risen to the map. When this Reeking Box is thrown, it will damage opponents struck by it for 5% and a little bit of hitstun. This is not the main function of the Reeking Box, of course, as when it is thrown and it hits the ground, a purple aromatic cloud is emitted from it. After about half a second, a randomly selected Risen appears at the site of of the box. After the box has been activated, both Donnel and the opponents are capable of picking it up and throwing it again, until the Risen has appeared. The Risen will actively attack the nearest player, including Donnel, and they essentially act as a CPU player with a difficulty of 5. The Risen have set health, which varies from unit to unit, and most of them can also be defeated by knocking them off stage. Only one Risen can be on the stage at any one time, and another Reeking Box cannot be used until seven seconds after the last Risen has been defeated. Why should Donnel want to summon the Risen? In addition to the Risen attacking opponents, should Donnel himself defeat a Risen it is considered a KO, and as such levels Donnel up upon defeating them. The different Risen, their health, and their behavior and abilities are described below. The number in the parentheses is the health each unit has.


Fighter Risen (25%)
These Risen are the most common to appear, showing up 50% of the time a Reeking Box is used. The Risen move somewhat slowly, and will chase down the nearest player. If the Risen reaches an opponent, it takes his axe and swings it in a downward arc. Anyone struck by the axe takes 9% damage and horizontal knockback, which can KO characters at as low as 135%. Should this Risen be knocked off the stage (difficult as it has a bit of bulk behind it), it will attempt to reach the stage, leaping up using its axe similar to Marth’s Dolphin Slash. Fighters hit by this attack take 9% damage but diagonal knockback, and can be KO’d at 125%+.


Archer Risen (15%)
This Risen takes form as an archer with a longbow, and appears 25% of the time a Reeking Box is used. Unlike the Fighter Risen, the Archer Risen avoids opponents, keeping its distance and firing arrows at any character in front of himself. These arrows damage the fighter for 10% each hit, though there is very little knockback. Should the Archer be knocked off stage, it will attempt to return with its jumps, but has no special recovery to get there. The Archer Risen is also rather light, allowing it to be knocked back with great ease.


Knight Risen (30%)
The Knight Risen is the bulkiest of the Risen, and appears 12.5% of the time. This heavily armored Risen comes wielding with a lance which he will stab in front of himself. Fighters hit by the lance take no knockback but take 12% damage as they are pierced by the spear. While this Risen will walk towards characters, it has no jump and a slow movement speed, meaning it will rather use the range of its lance to attack its target from a distance. Due to the heavy armor it wears, this Risen takes virtually no knockback from attacks.


Swordmaster Risen (15%)
The most lethal of the Risen, the Swordmaster variant appears 12.5% of the time. This Risen carries a longsword and will ruthlessly chase down the closest fighter. The swordmaster can either thrust its blade forward, which deals 15% but little knockback, or swing its sword in an upward arc, which only deals 10% damage but with diagonal knockback that can KO at 130%. Should this Risen be knocked off the stage, it will perform a diagonal attack similar to Ike’s Aether move, which deals 12% damage and can KO at 120%. While this Risen can be a scary appearance, its low health and weight turns it into quite the glass cannon.

Side Special Custom 1 - Sacred Box (5%)
Donnel pulls out a small green box, similar to the Reeking Box from the normal variant of this move. Similarly, Donnel can hold the box until he wants to use it, and will act with similar properties as the Reeking Box. However, upon hitting the ground the Sacred Box will instead release a small cloud of fog. After about half a second, a random monster appears from Fire Emblem: Sacred Stones from the fog. Unlike the Risen, these monsters will only attack opponents, actively chasing them down to deal damage. Donnel can still defeat the monsters, should he like, but defeating them will not give Donnel a level, unlike the Reeking Box. Also similar to the Reeking Box, the Sacred Box has a cooldown of seven seconds before it can be used again. Unlike the Risen, the monsters take no knockback from attacks and can only be killed by depleting their health. The monsters that can be summoned are listed below, along with their descriptions.


These monsters take the form as floating eyeballs, and are the most common monsters, appearing 50% of the time. The Mogall is somewhat weak, but will levitate and follow the nearest opponent, though at a distance to avoid being hit. The Mogall shoots blue beams of energy out of its pupil, and these beams deal 10% damage each time they hit, with little knockback. While not overly threatening, the Mogall can be annoying if left unattended.
Gargoyle (25%)
A winged stone monster, the gargoyle is equipped with a lance and will appear 25% of the time a Sacred Box is used. The gargoyle will pursue the closest opponent and attempt to stab them with its lance, which will do 12% and little knockback, similar to the Knight Arisen. However, the gargoyle is extremely mobile, which can be annoying for opponents.
Tarvos (25%)
Tarvos is a large centaur who wields a massive axe and appears from a Sacred Box 12.5% of the time it’s used. The centaur gallops towards the nearest opponent with great speed, though it will not jump anywhere. The centaur attacks by swinging its large axe with one hand downward in a 90 degree arc in front of itself. The axe deals 15% damage to all opponents who are hit, and the opponents are launched outward and can be KO’d at 120% and above.
Bael (15%)
This spider-like monster appears 12.5% of the time a Sacred Box is used. The Bael crawls along the platform it was summoned on at a high speed, and will crawl along walls and ceilings to reach opponents as well. Should the Bael encounter an enemy, it can perform two attacks. The first one involves stabbing forward with its front four legs, which deals 10% damage to opponents and excellent knockback, able to KO at 130%. The second attack has Bael lunge forward with its fangs. This does a measly 5% damage should it hit, but opponents hit by it are ‘poisoned’, enveloped in a dark cloud as if hit by an attack from Ganondorf. The opponent then takes 5% damage per second for three seconds, after which they are cured.


Side Special Custom 2 - Rift Door (0%)
Donnel pulls out a small blue circle, divided into two halves with the appearance of a door. Donnel instantly throws the blue circle in front of himself onto the ground two Battlefield platforms in front of himself. This circle does no damage to opponents, and can’t be stopped on its way to the ground. Once the circle has landed on the ground, the two halves of it swing open like doors, and a bright light extends out of the door ‘frame’. A weapon, one of the legendary weapons from Fire Emblem, rises out of the circle, similar to how the Golden Hammer appears. Once the item has fully appeared, the door disappears and another cannot be placed until ten seconds after the last item spawned has disappeared. The summoned weapon can be used by any character who picks it up, not just Donnel, so he must be careful not to arm the opponent with a good weapon. The weapons are described below, and each one has an equal chance of appearing.

Reinfleche - This legendary bow fires lightning fast arrows that deal 7% damage to opponents they hit. Additionally, these arrows produce a windbox behind themselves, which push opponents away who evade being struck. The bow can fire ten arrows before it is fully used up.

Regal Blade - This legendary blade is incredibly heavy due to its massive size, and is a struggle to attack with. Using the sword causes the wielder to swing it two handed horizontally in front of them. Opponents who do end up being struck by the blade take 15% damage and a good chunk of knockback, able to KO opponents at 120%.

Rex Hasta - A legendary lance, the Rex Hasta allows its wielder to lunge forward and strike from a good distance away. The lance deals 13% damage to opponents and has an additional sweetspot at the very tip of the lance. Opponents struck by this sweetspot are frozen for a moment thanks to an ice effect on the lance.

Luce - A legendary piece of light magic, Luce takes form as a staff. When a character uses the staff, they point it forward and a bright sphere appears at the tip of the staff. The sphere grows for about half a second as it charges. Opponents who touch the charging orb take 4% damage per hit, and are hit three times a second. Once the orb has finished charging, the wielder points the staff in the air and a brilliant aura surrounds it. This aura has a radius of one Battlefield Platform and, in addition to dealing 13% damage to opponents who are struck, push opponents backwards with a windbox. The staff can only be used once before it loses use.


Up Special - Javelin (11%)
When used on the ground, Donnel pulls out a javelin with his free hand, as seen in its Awakening appearance. Donnel lunges forward with one foot and pulls the javelin back, preparing his throw. During this state, by pressing the up and down inputs, Donnel will move the javelin up and down, preparing the trajectory of the javelin anywhere in a 45 degree arc from the starting position of the javelin. Once the move is released, Donnel leans forward and hurls the javelin forward, causing it to soar through the air. Opponents struck by the javelin take 11% damage and are knocked away weakly. Instead of the attack ending, however, the javelin will continue until it hits a platform or wall, or it flies off screen. This allows the javelin to damage multiple opponents with one input, though the javelin is unaffected by Donnel’s buffs. This move, when grounded, is useful for Donnel at lower levels, as it allows him to rack up damage to line up a KO. Naturally, this move is also useful for hitting opponents who are more distant.

In the air, Donnel leaps upwards at an angle, holding a javelin in one hand above himself. This jump takes Donnel upward two Battlefield Platforms high, but only half a Stage Builder Block horizontally. The height of this move is unaffected by any of Donnel’s buffs. Opponents who are hit are launched upwards, KOing around 170%, and take 11% damage. Once Donnel reaches the peak of his jump, he pulls his javelin-wielding arm back past his head. He then throws the javelin downwards at a nearly 45 degree angle, after which the javelin will act like it had been thrown from the ground. Donnel then enters his special fall.

Up Special Custom 1 - Short Spear (8%)
This custom replaces Donnel’s javelin with a short spear. This short spear, in addition to being visually different, will travel farther than a javelin due to its lighter weight. This allows Donnel to strike from an even farther distance with this move, though the spear does less damage than the javelin, losing 3% of the potential damage this input can do. Additionally, when Donnel uses the short spear in the air, he travels an extra Battlefield platform upwards, increasing the recovery abilities of Donnel. Like with the javelin, the short spear will pass through foes it hits, and is unaffected by any of Donnel’s buffs.


Up Special Custom 2 - Glass Lance (15%)
Another custom to replace Donnel’s javelin, this gives Donnel the powerful, but fragile, glass lance. This lance is larger than either the javelin or short spear, and so it naturally takes slightly more time to take out, aim and throw. The javelin also travels less distance due to its unwieldy weight. However, the increased size and sharpness causes the lance to deal more damage, 15%, and will travel much faster through the air. This lance will KO at 150% and above. When used in the air, Donnel’s recovery isn’t affected, still traveling two Battlefield Platforms upwards. However, when thrown from the air, the lance deals 18% damage to opponents and will KO at 130% with a good deal of horizontal knockback. However, this lance, due to being glass, is fragile, and will break upon hitting an opponent, taking away the multiple hits the javelin and short spear have. This move is not affected by Donnel’s buffs.


Down Special - Vulnerary (21%)
Donnel reaches into his tunic and pulls out a clear glass bottle with a blue fluid inside. Donnel struggles with the cap for a moment before it pops off and falls to the ground. Donnel then lifts the bottle to his mouth and tilts it. Bottoms up! The bottle takes a whole second and a half for Donnel to drink fully, and should the move go uninterrupted, will heal him for 21% of his damage. However, this move doesn’t heal Donnel’s health all at once; every half a second, Donnel will recover 7% of his health as he takes three gulps from the vulnerary. Once Donnel has finished drinking the vulnerary, he throws the bottle aside and returns to his battle stance. This move has a cooldown of ten seconds, whether or not the move was completed, and Donnel can be punished for attempting to use one haphazardly. If Donnel uses this move and performs a dodge or roll, he will cancel the attack but keep the vulnerary in his hand, allowing him to use the vulnerary at any point without the starting animation. He can cancel at any point while drinking the vulnerary, too, allowing him to heal a bit and store the rest for later. This move is crucial for Donnel’s survival at all levels, thanks to his low weight which allows him to be KO’d early on. However, careless use of the vulnerary is highly punishable, so it is best used sparingly.

Down Special Custom 1 - Elixir (0%)
Donnel pulls out a glass bottle, similar to his vulnerary, but inside there is an red-orange fluid instead of a blue one. The starting animation for the elixir is the same as the vulnerary, and after Donnel has successfully removed the cap he begins to drink the elixir. Instead of healing Donnel, drinking an elixir will end the cooldown on his neutral and side special moves, allowing him to use them as soon as the elixir has been finished. The elixir takes .7 seconds to drink, and only works if the move is finished, unlike the vulnerary. The elixir cannot be stored by canceling either, although it is possible to cancel out of the move. The elixir also has a ten second cooldown time, which is not reduced by using an elixir, of course. This option is useful for players who utilize Donnel’s buffing moves a lot, as it allows more uses of said buffs.


Down Special Custom 2 - Holy Water (7%)
Donnel pulls out an elaborate glass bottle from his tunic and pops the cork off. Once the bottle is opened, Donnel hurls the bottle forward, underhanded, about half a Battlefield Platform in front of himself. Opponents struck by the bottle take 5% damage and a bit of hitstun. Once the bottle hits an opponent or surface, it breaks open which creates a small burst of pure holy water. This water does 7% damage to any opponent it touches, and will create a small puddle of water on the ground. This puddle won’t damage opponents, but it will greatly lower their traction. The puddle disappears after five seconds, after which Donnel must wait five more seconds to use another holy water. The big use of this move is the bonus it has on the Risen and monsters that Donnel can spawn, as the holy water will do double damage (14%) on them or any undead / dark characters (Like Ganondorf). Additionally, Donnel’s summoned enemies will take damage from stepping in the puddle, also at 14%. This is useful for players who enjoy using Donnel’s summons to level up.


Jab - Punctuate (2%, 1%, 1%)
Donnel lowers his body and rams forward, shoulder first. This charge doesn’t travel any distance, but will deal 2% damage to opponents who are struck and stun them momentarily. This allows Donnel to set the opponent up for the following parts of the jab. The second hit of the jab causes Donnel to lift his knee with force in front of himself, bringing it into the gut of any opponent in front of him. This deals 1% damage and more hitstun, which leads into the last stage of Donnel’s jab combo. After the tackle and knee attack, Donnel grabs his spear with both hands and leans back. Donnel thrusts his spear forward in front of himself, dealing 1% damage with a bit of knockback. If pressed again, Donnel pulls his spear back and lunges it forward once more, with the same effect. This part of the jab is an infinite flurry of stabs. At level one, Donnel has exceptionally large amounts of lag for being a jab, and it can be difficult to hit opponents without fully telegraphing his moves. As Donnel’s level increases, however, the jab is much scarier for damage racking, especially thanks to the extended range of the spear.

Forward Tilt - Shishke-Breaker (8%)
Donnel, having no formal training, learned his moves from his teammates and, undoubtedly, by studying his competition. This leads Donnel to examine the fighting styles of Marth, and the villager attempts to perform the prince’s Shield Breaker. Donnel grabs his spear and places one foot forward, thrusting his weapon straight ahead. Opponents struck by the spear take 8% damage and take some horizontal knockback, which begins to KO at 190%. Like many of Donnel’s moves, at lower levels this move takes a bit of time to hit, but it can become lethal at higher levels, KOing at 95% when Donnel’s level is capped. While visually similar to Marth’s Shield Breaker, this move does not have any special impact on shields whatsoever.

Up Tilt - From Pitchfork to Spear (9%)
Donnel relies heavily on his farm experience for many of his moves, treating his spear like various farm equipment. When Donnel uses this move, he grabs his spear with both hands and points it upwards, wielding it more similar to a pitchfork than a spear. Donnel shoves his spear straight upwards, holding it upright in the air for a moment before pulling the spear back. Opponents who are struck by the spear take 9% damage and vertical knockback, which KOs at 160%. Of course, this move gains use through experience, and at level 6 deals 18% damage and KOs at 80%.

Down Tilt - Shoveling Strike (6%)
Donnel grabs his spear with both hands and thrusts it towards the ground in front of him. Opponents on the ground who are struck by the spear take 6% damage and are also ‘tripped’, being knocked prone. If an opponent is airborne (such as off of a ledge), they are weakly meteor smashed when struck, still taking 6% damage. Donnel can choose to use this opportunity to hit the opponent with a stronger attack, such as a smash move, or to run away and give himself a buff. Should the input be pressed immediately after Donnel stabs the ground, he will take the spear and lift it up, as if it were a shovel being used to dig a hole. Opponents who are hit by the upward spear also take 6% damage, and take vertical knockback that is capable of KOing at 180%. This move is useful for disrupting opponents, which opens frames of opportunity for Donnel at low levels who needs all the time he can get.

Dash - Wild Hog Tackle (10%)
As Donnel dashes forward, he holds his spear away from himself. Donnel then turns around slightly and aims his shoulder in the direction he is running. Donnel then jumps forward shoulder first, traveling almost a whole Battlefield Platform of distance before landing and returning to battle. Opponents struck by this move take 10% damage and good knockback, capable of KOing at 145%. While this move seems simple, it is extremely important for Donnel at low levels, as it is unaffected by Aptitude and actually allows Donnel to score many of his early game KOs thanks to its comparatively high knockback and damage.


Forward Smash - Critical Hit (10%)
Taken from Lord Ephraim’s critical hit animation from Fire Emblem: Sacred Stones, this is one of Donnel’s best moves. When used, Donnel leans forward and holds his spear in one hand behind himself. While charging the move, Donnel spins the spear around in fast circles until the input is released or the move reaches full charge, after which Donnel stabs the spear forward like a lance. Opponents who are struck by this move take 10-15% damage depending on charge, and are knocked at a backwards angle. At max charge, level one, this move begins to KO at 160%, which may not seem like great numbers for a smash move, but at level six this move is capable of doing 30% damage and KO at 80%. This makes this move one of Donnel’s better late game moves.

Up Smash - Figure Eight Strike (6%, 9%)
Donnel grabs his spear with both hands and points the dull end of the spear upwards. This is the charging animation for the attack, and when released Donnel flips the spear so the spearhead is facing outwards. Donnel then creates a figure eight shape in the air above himself using the spear. Opponents struck by the figure eight take 6% damage and negligible knockback, regardless of the charge of the attack. Once the figure eight formation of the attack is finished, Donnel thrusts his lance straight upwards, dealing between 9% damage and 14% damage, as well as vertical knockback capable of KOing at 170%. This smash move is more useful at lower levels, interestingly enough, as the long lasting hitbox and somewhat wide range ensures more hits with the move.

Down Smash - The Churning Sea of War (4%)
Donnel takes his spear in both hands, pointing it at the ground as if it was the handle of a butter churn. Donnel lifts the spear up away from the ground as he charges this attack. Once released, Donnel vigorously stabs the spear into the ground, again, in a butter churning motion. Opponents struck by the move take 4% damage per hit regardless of charge and a little hitstun. Donnel will stab downward between four and eight times, depending on charge, allowing it to theoretically deal 32% damage at level one. However, opponents are pushed out of the move to prevent this, and most opponents will take between 8% and 12% damage. However, this move is useful for pressuring opponents away from himself, as he can hit multiple opponents for fairly good damage, especially at higher levels.


Neutral Aerial - Can’t Handle This (6%)
Donnel grabs his spear with both hands and holds it horizontally in front of him, so that the ends of the spear are aligned with the Z axis. Donnel then shoves the handle of the spear in front of himself in a simple motion. Should this move connect with an opponent, the opponent will take 6% damage and be pushed backwards away from Donnel. Additionally, Donnel will also be pushed backwards away from the opponent, creating a decent gap between Donnel and the opponent. This has a few uses; for one, Donnel can space himself against melee fighters and hit them with his decently ranged spear. Donnel can also use this move should he need to get away from aerial combatants and their combos. This move is also rather quick at all levels, which can help keep a level one Donnel alive and rack up some safe damage.

Forward Aerial - Polearm Power Poke (9%)
Donnel holds his spear with both hands towards the back end of the weapon. Donnel then thrusts the spear forward, which pushes Donnel backwards a short bit. Opponents who are struck by the head of the spear take 9% damage and diagonal knockback. This move is capable of KOing opponents at 155% at level 1, but has some startup lag, like his other moves, and even more ending lag should this attack miss an opponent. One of the main uses of this move is to space opponents from Donnel, similar to his neutral aerial, as opponents are pushed to the end of the spear while Donnel is pushed away from the spearhead. This move is also an excellent follow up to the neutral aerial, as the extra distance between Donnel and the opponent can mitigate the lag he has to deal with at low levels.

Up Aerial - Use Your Head (6%, 10%)
Donnel grabs his spear with both hands, pointed downward similar to his Down Smash. Donnel pushes his spear downward a bit, using it to lift himself upwards relatively fast, turning his helmeted head into a hit box. Opponents who are struck by Donnel’s pot take 10% damage at all levels, and are knocked upwards a bit, which only starts to KO at 165%. However, what makes this move special is the second hitbox of the attack, the downward facing head of the spear. It is a small, non-moving hitbox, but should an opponent be hit by it they take 6% damage and are meteor smashed down. This twin hitbox aerial has several potential uses, which helps make this one of Donnel’s best aerials early on.

Back Aerial - Ride ‘em Cowboy! (9%)
Donnel grabs his spear with one hand and slides it between his legs, the spearhead facing behind himself. Donnel lifts his other hand in the air, shouting ‘Yee-haw!’ Donnel then kicks off the air, moving himself forward a third of a Battlefield Platform forwards. Opponents who are struck by the spearhead take 9% damage and are weakly meteor smashed, not enough to make this move typically lethal. However, at higher levels, in addition to dealing more damage this meteor smash is stronger, and, combined with the forward movement the attack provides, allows Donnel to effectively edge guard. This move is also, like most of his aerials, is good for spacing himself away from opponents.

Down Aerial - Sweep the Competition (4%)
Donnel takes his spear with both hands and points it downwards, similar to the Up Aerial and Down Smash, as Donnel turns to face the camera. Donnel then swings the spear to the left, then to the right, and back to the left before the attack ends, as if sweeping a floor with a broom. Opponents struck by the side of the spear take 4% damage per hit and are pushed in the direction of the spear. Opponents who are struck by the tip of the spear, however, are weakly meteor smashed and take the 4% damage. Donnel can slightly alter his movement during this attack left or right, allowing him to chase opponents down or escape from them. This move is another good move for both damage racking and creating space between Donnel and the opponent, two things that Donnel needs at low levels.


Grab - Farmer’s Hold (0%)
Donnel allows his spear to slide into the crook of his elbow. Donnel lunges forward with both his arms outstretched. Should Donnel make contact with an opponent, he wraps his arms around them and lifts them up off the ground, like a farmer catching a wild animal, or a wrestler preparing a move. Should Donnel miss an opponent with this grab, he has a bit of ending lag that makes spamming this move punishable. All of Donnel’s throws and his pummel are unaffected by Aptitude, and are useful for lower level Donnel because of it.

Pummel - Wring Out (3%)
Donnel flexes his arms, forcing his arms to tighten. This crushes the opponent, who takes 3% damage each time they are crushed. This pummel is a bit slower than some others, which prevents rapid usage of it, but the good damage at all levels makes this a good move for helping to level up Donnel.

Forward Throw - Timber! (11%)
Donnel holds the opponent in his grapple and allows himself to fall forward. The opponent then hits the ground, taking 11% damage, but are still in Donnel’s grapple. Donnel then lands on the opponent, launching them diagonally and is capable of KOing at 155%. Should Donnel press the backwards input before landing, however, he will brace himself and lift him and the opponent back up into Donnel’s grab once more. This allows Donnel to make the most of his grab and throws, and opponents who find themselves grabbed by Donnel should do their best to struggle no matter what due to his ability to return to the grab. The grab’s escape rate is not reset if Donnel chooses to do this; however, since the opponent takes damage from the throw, it does take a bit longer to escape from the grab.

Up Throw - Hay Bale Hurl (10%)
Donnel lets the opponent out of his grip and quickly grabs their hands. Donnel then begins to spin the opponent around in a circle, visually similar to Mario’s back and forward throw. During this spinning animation, the opponent takes 10% damage. If left alone, Donnel hurls the opponent up into the air above him, which is capable of KOing the opponent at 140% and above. If Donnel presses down before hurling the opponent, however, he performs his throw cancel and grapples the opponent once more. This is Donnel’s best KO throw, however, so it is less in his interest to cancel this throw.

Back Throw - Skullcracker (14%)
Donnel holds the opponent tight and lifts them up higher. Donnel then bends over backwards in a single sudden movement, bringing the opponent’s head into the ground. The opponent then takes 14% damage, and are left prone for a moment, rather than taking any knockback. By pressing forward, of course, this throw can also be canceled back into Donnel’s grab. Due to the high damage output and lack of knockback, this throw is the best one to cancel out of into another throw, as it doesn’t add much to KOing opponents, but can help aid a second throw in KOing the foe.

Down Throw - Back Breaker Rebound (10%)
Donnel lifts the opponent up horizontally, aligning them with the Z axis. Donnel takes a step out and kneels before dropping the opponent onto his knee, ‘breaking’ their back. The opponent takes 10% damage and, for a split second, the opponent remains on Donnel’s knee. However, the opponent’s back snaps back, and the motion of this causes them to fly upwards at high speed. This move begins to KO at 155%, and can be useful for ending or starting a throw combo, as it can, like the other throws, be canceled by pressing up to put the opponent back in the hold.


Pair Up, AKA Babysitting
Donnel breaks open the Smash Ball and holds his hand to his mouth. ‘Need some help here!’ Donnel yells, and out of the nowhere Chrom, lord of being banished to Final Smashes, appears in front of Donnel. Chrom gives calming words to the farm boy, saying ‘You don’t need to worry about a thing.’ Chrom moves slightly faster and jumps slightly higher than Donnel, meaning he will always be ahead of Donnel. Chrom acts like a bodyguard to Donnel, doing his best to prevent Donnel from actually engaging in combat. Donnel himself receives no buff in this state, and can take damage if the opponent can get past Chrom, but Donnel does lose access to his specials. Chrom himself is invincible, and will attack with his Falchion every time Donnel attacks. Should Chrom hit an opponent with his sword, they will take 15% damage and high knockback, able to KO starting at 120%. Additionally, should an opponent’s attack come close to Donnel, Chrom will hold his sword and attempt to counter the opponent. This counter deals 25% damage and will KO at 100%, punishing anyone who tries to hurt Donnel. After eight seconds, Chrom sticks his sword in the ground and tells Donnel ‘Sorry, Donnel, I have to go get married,’ after which the lord disappears and leaves Donnel to fight on his own.

PLAYSTYLE
(Forgot to make a header...)
Donnel’s playstyle is easy to visualize but hard to pull off; keep Donnel alive and safe until he reaches higher levels, and then reak havoc on the opponents. Donnel’s moveset has multiple ways to support this playstyle, from buffing himself to leveling off of the Arisen to the spacing moves that keep Donnel away from opponents. Early on, Donnel should rely on his dash attack and throws to deal damage reliably; these moves start off good compared to the rest of Donnel’s moveset, but are not affected by Aptitude buffs and so lose their use later on. Donnel should not rely on heavy offensive, however, as his grab and dash attack are both punishable, and at early levels many of his attacks leave him open to counterattacks. Until Donnel levels up, he should play defensive and evasive, trying to keep himself healthy long enough to get the strength he needs to fight back. Rally Defense and Resistance are both important to utilize for keeping Donnel alive, and his Vulnerary allows him to recover should he find himself in trouble. His aerials, while not particularly good for aerials, are excellent for pushing opponents away from himself. Once Donnel reaches higher levels, his Rally becomes less useful, and his dash attack loses usage. Rather, Donnel should use his smash moves which can reach incredibly powerful levels at high levels. It is still important for Donnel to keep himself healthy and safe even at max level, and so his Vulnerary will see much use throughout the match. Donnel can’t take hits well no matter what his level, so don’t let the power go to your head. Characters with projectiles make a good counter for Donnel, whose only defense from long distance attacks is his Javelin attack. Additionally, heavier characters and high priority moves can make things difficult for Donnel, as even when he gets stronger he can be overpowered and sent flying. Donnel is a difficult character to use and master, but those who know how to play him are rewarded an incredibly strong character.

Pit - Is… is he wearing a pot on his head?
Palutena - Yes, Pit, that’s the villager Donnel. He comes from a small farming village in the country of Ylisse.
Pit - He’s a farmer? He doesn’t look like a threat…
Viridi - Hey! Farming is a respectable profession! To be so in touch with nature… the muscular build of the farmer type…
Palutena - ...Anyways, Pit, he may be weak now, but he’s a quick learner, so don’t give him a chance to get stronger.
Pit - Beat him fast. Got it.
Viridi - And Pit, try not to hurt his face, pretty please?


Fighter Trophy
Donnel
(The trophy shows Donnel leaning on his spear nonchalantly with one hand on his hip, grin on his face)
Donnel is a young farmboy from a small village in Ylisse, where he spent his life working in his family’s fields. However, one fateful night bandits came to his village and raided the place, killing his father. Chrom and his shepherds showed up in the nick of time, and Donnel joined their forces. While Donnel starts out weak, having no combat experience, given enough time and experience, he becomes an incredibly good fighter.
2012 - Fire Emblem: Awakening (3DS)

Fighter Trophy (Alt.)
Donnel
(On the 3DS, the trophy shows Donnel with Ross’s colors holding a reeking box in his hand. On the Wii U, the trophy shows Donnel’s Amelia alternate costume performing the Rally animation)
One of Donnel’s trickiest moves his his Reeking Box. This item will summon a zombie-like Arisen to the stage who will attack any nearby characters, including Donnel! Donnel’s Rally attack is incredibly useful for the farmer, as it allows him to temporarily boost one of his stats.
2012 - Fire Emblem: Awakening (3DS)
Final Smash Trophy
Pair Up, AKA Babysitting
(The trophy shows Chrom standing in front of Donnel, with his sword prepared to counter)
Since Donnel has no previous combat experience, he takes a lot of work to fit in with Chrom’s shepherds. As such, Donnel is often paired with a strong character, like Chrom or Frederick, who keep the villager alive until he is strong enough to fight. In this Final Smash, Chrom will do his best to separate Donnel from any opponents with ferocity.


Stage - Ylissan Border Town
This stage takes place in Donnel’s home village, a small farm town near the border of Ylisse. However, bandits attacked the town and razed it, as shown in this stage. The fighters fight around a burning building on a farm, with an extra tree to fight upon. A local family stands in the background, with a worried look about them, and on the left a group of bandits sits on the edge of the stage. Players who get too close to the bandits are attacked by swords and axes, taking 8% damage and being knocked back towards the stage. This stage is relatively simple outside of the bandits. (The bandits and family are models, not sprites.)

Assist Trophy - Lissa
Chrom’s sister and a cleric, Lissa is the first healer the player gets in Fire Emblem: Awakening. When Lissa is summoned to the stage, she stands in place and holds her staff in the air. From the staff an aura emanates, which has multiple simultaneous effects. The aura has a radius of a Battlefield Platform, and the summoner and their allies in the aura are healed 20%. Any opponents on the ground are put to sleep for a second, and any opponents in the aura are warped outside the range of the staff. This aura lasts for two seconds before it dissipates, after which Lissa giggles and disappears.
---​
Spent a decent chunk of time on this moveset, I hope it was worth it. I got pretty inspired with the specials, but I think my effort was misplaced, and I don't think the playstyle is as good or fun as Clawgrip's was. Regardless, it was fun to make, and I think it's a step in the right direction.
 

Tocaraca2

Smash Ace
Joined
Feb 22, 2015
Messages
557
Location
Wokingham
and saying yourself that the Up B and Side B are very similar. You then proceed to say they're different, without any real explanation as to why other than you saying so.
I said that the Side B hits 5 times while the Up B hits 7 times, and the Side B is laggier than the Up B.
He also does the most damage on the hilt, and I explained with some of the moves how they will do different things to foes depending on which part of the sword you hit them with.
There is stuff used from the old Roy because some things are already fine in the game. I modified the jab so it's not identical to Dancing Blade, and remember, this is my first set in MYM. It's also a moveset for a character already in the game, so his playstyle shouldn't really changed.
I'll try and make it slighty more unique when I create my Lucina moveset.
 

Munomario777

Smash Master
Joined
Nov 18, 2014
Messages
3,253
Location
Charleston, South Carolina
3DS FC
0387-9596-4480
Switch FC
SW-8229-3157-8114
Nope. Can't say i have. Don't even know what the abbreviation stands for lool.
It stands for "Make Your Move". This is a thread where anyone can design a moveset for a Smash character, no matter how unlikely they are to actually be in the game. It's all for fun, of course, but there's also voting at the end of each thread (which is April 10th for this particular contest). Constructive criticism and reviews of sets are always welcome, even if you aren't an author yourself, and anyone is free to write a set! Of course, the OP is the best place to go for details.
 

Munomario777

Smash Master
Joined
Nov 18, 2014
Messages
3,253
Location
Charleston, South Carolina
3DS FC
0387-9596-4480
Switch FC
SW-8229-3157-8114
Well, with less than a month left in the competition, I thought I'd take this time to spruce up some of my old movesets! For that reason, I'm proud to announce...
Munomario's Make Your Move Revamp Project!
Whew, that's a mouthful.
So, between now and the end of the competition (April 10th), I'll be going through each of my twelve movesets to add detail, fix some things up, add ideas that come to me, and just improve the sets overall. I don't have a fixed schedule for this, of course, but I do plan to go from my most recent moveset (Wonder-Red) to my first ever moveset (Sonic Heroes). I'll be posting updates in various places, so you can check for updates here, here, or here. (Lol you totally just opened this post in another tab :awesome:)

COMPLETED REVAMPS
Wonder-Red
Omochao
Baymax
Inkling
Dood
Boom Sonic (no plans to revamp)
Captain Toad
Robotnik
Daisy
Toon Link 2.0
Steve
Sonic Heroes

THE REVAMP PROJECT IS FINISHED! :D
 
Last edited:

ChaosKiwi

Smash Apprentice
Joined
Feb 1, 2014
Messages
104
NNID
ChaosKiwi
Oi, updated my rankings last night, for those interested. Step up yer game, kiddos, I gave more 2/10s than I wanted. Mama Kiwi is disappointed. To find the rankings, go to the first page and Ctrl+F Rankiwi

Also, expect a set soon.
 

Reiga

He sold diddy for a switch
Joined
Dec 8, 2014
Messages
1,256
Location
White Noise
3DS FC
1461-7646-7368
Yoshi 2.0 (Yoshi and Baby Mario)

Everyone loves Yoshi in Smash Bros, right? (Ok, not everyone). I thought I'd make a fun little moveset of Yoshi based on the original Yoshi's Island, alongside baby Mario! This moveset takes many inspirations from Yoshi's Island and I hope you have fun reading this set!

Flavor
Entrance: A random Yoshi of a different color from the one you are playing runs next to your Yoshi and throws Baby Mario to the back of your Yoshi, similar to what happens when you complete a level in Yoshi's Island.
Up-Taunt: Baby Mario starts crying and having a tantrum, with Yoshi putting his finger in front of his mouth and doing a "Shh!" motion
Side-Taunts: Baby Mario waves to the screen doing some generic baby sound.
Down-Taunt: Yoshi does the animation in Yoshi's Island for when he loses a life, where he spins around in one foot with his hands in the air and then falls over on the ground.
Kirby Hat: Same as in SSB4
Victory 1: An animation similar to Yoshi's entrance happens where Yoshi passes Baby Mario to another Yoshi with a different color.
Victory 2: A Toadie tries grabbing onto Baby Mario, Yoshi then throws an egg to the Toadie, making the Toadie run away.
Victory 3: Yoshi gulps a purple Shy Guy, then doing a peace sign with a full mouth
Losing Pose: Baby Mario throws a tantrum and starts crying. Yoshi has his fingers where his ears would be.
Victory Theme: Same as in SSB4
Boxing Ring Alias: Toddler and Dino, The Greatest Duo!
Alternate Costumes: Alongside Yoshi changing colors, Baby Mario is swapped out completely for another Mario character, it doesn't affect gameplay though. Here is a list of Yoshi colors and there corresponding baby:
-Green Yoshi: Baby Mario
-Light Blue Yoshi: Baby Luigi
-Pink Yoshi: Baby Peach
-Yellow Yoshi: Baby Bowser
-Dark Blue Yoshi: Baby Wario
-Brown Yoshi: Baby DK
-Purple Yoshi: Baby Daisy
-Black Yoshi: Baby Rosalina

Stats:
Size: 7/10
Weight: 80/120 (This version of Yoshi is actually lighter)
Ground-Speed: 5/10 (Baby Mario weighs Yoshi down.)
Air Speed: 9/10 (Air speed is still good, even if a bit less than usual)
Fall Speed: 6/10 (He falls a bit faster thanks to Baby Mario)
Crawl: No
Wall-Jump: No
Flutter Jump: Yes, though it works diffirently from SSB4, now you don't recieve as much height from it but you can use it various times during a jump, making for a great recovery method.
Yoshi maintains his unique Shield.
In a matter unlike Bowser Jr., Yoshi recieves 1.3x more damage if Baby Mario or any other baby is damaged.

Mechanic: Egg Line
So, I made this moveset mostly because of this neat mechanic, which takes great inspiration from Yoshi's Island. In Yoshi's Island Yoshi could gulp enemies and lay eggs to aid him in combat; Yoshi could lay up to 6 eggs before he couldn't lay any more. What does this translate into Smash? When uses an attack that traps an opponent in an egg they will stay immobile and unable to do damage, but after they escape they leave behind a cracked Yoshi Egg. If Yoshi passes by an egg it will follow Yoshi in a line alongside up to 5 other eggs (so the total is 6). These eggs can be used in a variety of moves from Yoshi.
If a cracked Yoshi Egg is not collected by Yoshi it can be attacked by adversaries and be destroyed after recieving 15% damage.

Specials

Neutral-Special: Tongue

Yoshi's signature attack, where he launches his tongue forward trying to gulp anything in his way plays very similarly to Smash 4, but has it's fair share of diferences.
If an enemie is gulped by Yoshi they will suffer 10% damage and be trapped in a Yoshi Egg, forced to button-mash to break free easier. As been said before in the mechanic, after an enemy breaks free from an egg, the broken egg-shell stays in place and can be grabbed to add to Yoshi's egg line, if Yoshi already has 6 eggs the Yoshi Egg breaks after an enemies is free and leaves nothing behind.
If Yoshi gulps up an item, Yoshi will lay an egg that automatically joins Yoshi's egg line. (this timethe egg doesn't have a crack, though it doesn't affect gameplay)
Just like in Yoshi's Island Yoshi can aim his tongue upwards by quickly moving the circle pad upwards in the first frames of the move.
As a bonus, Yoshi cannot eat certain unedible items (Uniras, Explosive Crates) and gains more than just normal eggs from Metal Boxes and Heavy Items (Crates, Barrels and even a Wario Bike). If Yoshi eats a heavy item, he will lose all eggs and gain a Mega Eggdozer. If Yoshi eats a Metal Box he will lose all eggs and gain a Metal Eggdozer. What the hay is an Eggdozer you politely ask? Well, we'll go indept about them in our next move...

Up-Special: Egg Toss


Just like in Smash 4, Yoshi's Up Special is his second most well known move, tossing Yoshi Eggs! A move that without eggs cannot be executed, but with eggs causes Yoshi to hold a Yoshi Egg with one hand and have a reticle 4 Yoshi's distant from Yoshi appear and move around in a half-circle motion in front of Yoshi, with it's extremes being under and above Yoshi. During the moment the reticle is out Yoshi can move around sideways, jump and even press the grab button to make the reticle stop moving and stay in the spot. Yoshi can also press the Shield button to cancel the Egg throw. When the B button is pressed Yoshi will throw the Yoshi Egg in the direction the reticle was facing.
The attack wastes eggs, while the original does not, but to compensate the egg travels way faster and does 7% damage on contact with good knockback.
If the egg hits a wall it will deflect with it's color changed to a glowing yellow (if an enemies is hit by it, they will recieve 9% damage with the same knockback as a regular egg.), if a glowing yellow egg hits a wall again it will turn glowing red and do 11 % damage to who is hit by it and do great knockback. If a glowing red egg hits a wall it will break.
If Yoshi has the hulking Mega Eggdozer, a giant egg twice the size of Yoshi, he can't flutter jump and has his weight increase from 80/120 to 100/120 and has his speed decreased. If a Mega Eggdozer is thrown it moves way slower than a normal egg but does 13% damage with good knockback.
If Yoshi has a Metal Eggdozer, his weight goes from 80/120 to 110/120 and has an extremely slow ground and aerial speed, along with the innability to flutter jump and ignoring the psysics of water and immedietly sinking when on water. If Yoshi throws the gargantuan egg it will move slower than a Mega Eggdozer but does 16% damage with great knockback.
An Eggdozer dissappears after 5 seconds without use.

Side-Special: Egg Roll
Yoshi curls up his arms and legs and Baby Mario has a suprised expression as an egg forms around him and Baby Mario, Yoshi can then charge up his Egg Roll for more power and velocity. The move does uncharged 4% damage, the same as SSB4's Egg Roll. While fully charged it can do 10% damage and has increased knockback. Unlike the original move the Egg Roll doesn't make Yoshi fall directly downwards when used in the air, but instead makes Yoshi move horizontally through the air, making for a great recovery move. If the egg hits a wall Yoshi enters a helpless state, so watch out!
If an Egg Roll is charged halfway through with an egg on Yoshi's Egg Line, the egg covering Yoshi will go from the normal color to a glowing yellow and will do more damage than the usual half-charged Egg Roll (just so you know a normal mid-charge Egg Roll does about 6~7% damage, while a Yellow Egg one does 8~9%). The egg's knockback stays the same as it's normal counterpart. An egg is wasted doing this move
If an Egg Roll is charged completely and Yoshi has 2 Yoshi Eggs, the Egg will go from a glowing yellow to a flashing red. When Yoshi releases the charge Yoshi will move at the same speed, but rolls for a shorter period of time, if it hits an enemy it will do 11~13% damage with good knockback.

Down-Special: Watermelon Roulette

Yoshi plucks out of the ground a Super Watermelon and immedietly gobbles it up. The first time Yoshi uses his Down-Special, he'll get a Green Super Watermelon, the second time Yoshi executes the attack he grabs a Red Super Watermelon, and the third time Yoshi grabs a Watermelon it'll be a Blue Super Watermelon, with the folowing Watermelon being the Green one and all after go in the same order.
Now, what does a "Super Watermelon" do anyways? It'll fill Yoshi's mouth with the watermelon and make him unable to use attacks with his tongue, like his Neutral B. In place of Yoshi's Neutral B Yoshi shoots a diferent projectile depending on the Watermelon, which we will get to in a bit.
Green Super Watermelons make Yoshi's Neutral B become a rapid fire shot of 5 watermelon seeds that can be used up to 3 times and ends automatically after third one is shot, making Yoshi eat the Watermelon. The watermelon seeds travel 1 and a half Battlefield platforms and do only 4~5% damage with not a lot of knockback, but don't have a lot of lag and can be rapid-fired.
Red Super Watermelons make Yoshi's Neutral B become a move where Yoshi shoots a thin streak of fire from his mouth. The move can be used 3 times before Yoshi automatically gulps the watermelon. The fire shots go a Battlefield platform apart from Yoshi and do 7~8% damage and have good knockback alongside a Fire effect, the move does however have major startup lag and can be easily punished because of it.
Blue Super Watermelons have effects similar to the Red ones, but obviously instead of fire Yoshi shoots a thin streak of ice from his mouth. The ice only travels 1/2 a Battlefield platform and do 6~7% damage with an ice effect and can be used up to 3 times before Yoshi eats the watermelon.
If a Super Watermelon is in Yoshi's mouth for 8 seconds Yoshi will automatically eat it. Adicionally, if Yoshi peforms his Down B while still with a watermelon in his mouth he will spit it out (which does no damage).

Basic Attacks

Jab: Punch Punch... Egg?
Yoshi does a punch with his right arm and then follows up with another punch, this time from his left arm. Each punch does 3~4% damage and have very miniscule knockback. At this point Yoshi normally ends the combo, but with an egg in his Egg Line Yoshi can follow up the combo by grabbing an egg with both hands and then tossing it forward, the throw is light so the egg only goes about the size of Yoshi himself (standing) and doesn't break when an enemy is not in the way. The egg does 6% damage with decent knockback.
Just like the Villager's flowerpot, Yoshi's egg can also fall off ledges, which can be a way to edge-guard opponents trying to recover.

Side-Tilt: Dino Bash

Concept art of Mario riding a creature similar to Yoshi, this was years before Super Mario World.

Yoshi moves his head back a bit then quickly moves his heads downwards, similar to the picture above, damaging anyone hit while it is being lowered for 7~8% damage and does extra damage (9% damage) if an opponent is hit by the lower part of Yoshi's head. The move is quite quick and doesn't have a lot of lag and has good range.

Down-Tilt: Baby Punch!
From Yoshi's crouch position Baby Mario/other baby character will lean forward and then do a punch with his/her right hand. The move has poor range but has a quick execution, overall good knockback and does 6% damage, which ain't shabby for a Down Tilt.

Up-Tilt: Dino Headbutt
Yoshi will do a short hop with his arms to his sides while at the same time quickly moving his head forward and doing an upwards headbutt. The move has good range and does 6% damage with decent knockback. The move is a great way to start a juggle.

Dash Attack: Yoshi Roll
From his dashing motion Yoshi curls up his arms, legs and head similar to an armadillo as Baby Mario stands on top of Yoshi, constantly sprinting forward and making Yoshi roll forward similar to one of the Kongs riding on top of DK in Donkey Kong Country Tropical Freeze. The attack does 7% damage but has a great dose of Startup Lag and may make Yoshi very vulnerable. Yoshi's velocity also amps up when rolling, so this may actually be an effective way of moving if used correctly.

Forward-Smash: Huffin Puffin

Yoshi throwsin the same animation as him throwing an egg forward a Huffin Puffin chick (it's about the same size as a Yoshi Egg). The Huffin Puffin moves forward 1/4 of Battlefield before dissapearing and, just like in the upcoming Yoshi's Wooly World, create thin cloud platforms wherever it passes by, which can be walked by Yoshi and adversaries/team mates. The cloud platforms dissapear after 10 seconds and can be destroyed by opponents like Skyworld platforms (10% damage will destroy the platforms). They're can only be 1 platformon screen, as when Yoshi throws Huffin Puffin when they're is already a platform it will not create a platform. The attack does 13% damage uncharged and 20% damage fully charged. Uncharged, Huffin Puffin can KO at 170% damage and fully charged it can KO at 150%.

Down-Smash: Starman Tulip


Yoshi plucks from the ground a Tulip from Yoshi's Island and holds it upside-down with both hands. The tulip then release many Starman (shown below the Tulip) to damage opponents. Uncharged the Tulip will only release 2 Starmen, each going to each side of Yoshi and hopping 2 times before dissappering and doing 12% damage to opponents, being capable of KOing at 170%.
Fully Charged the Tulip launches 3 Starmen on each side of Yoshi that do 19% damage to opponents and can KO at 140%

Up-Smash: Winged Cloud

A Winged Cloud flies in from the background and sways side-to-side above Yoshi, hitting enemies in it's way. The cloud starts in the middle and then goes forward, then back, then forward again before going back in the background. It moves forward/back about the same distance as Yoshi himself (standing up). The Winged Cloud does 14% damage uncharged and 21% fully charged, with a chance of KOing being at 160% uncharged and 145% fully charged.
If Yoshi does the move with an egg in his Egg Line the move will act differently. The Winged Cloud flies above above Yoshi from the foreground during charging and on release Yoshi throws an egg upwards (using the same animation as Yoshi throwing a Yoshi Egg directly upwards in his Egg Toss move), making the Winged Cloud poof away and make a small multi-colored explosion that uncharged is smaller, does 15% damage and can KO at 155% damage. Fully charged the explosion will be bigger and do 22% damage, with the probability of KOing being around 135%. Yoshi loses one egg from his Egg Line when executing this move.

Aerials

Neutral-Aerial
Yoshi faces the camera and then curls up his arms and legs and then does a midair curled up cartwheel and then quickly recurls doing a pose similar to the end of the Dr./Luigi Tornado. Just like such move, Yoshi's arms and legs all function as hitboxes that do 5~7% damage, with not a lot of knockback.
A great weakpoint in this move is the startup, as it can take a while to Yoshi to do the pose. However, when Yoshi curls up with an egg in his Egg Line an egg forms when he curls up, making Yoshi recieve no damage from attacks. The egg then breaks for Yoshi to do his pose, but the egg parts also do the same damage as Yoshi's arms and legs, giving the move way more range. How nifty!

Down-Aerial: Yoshi Bomb
You'd think we'd forget the Yoshi Bomb? The Yoshi Bomb is one of Yoshi's main moves so it still needs to be in this moveset! So, how does it work? Works almost the same. Yoshi does a sitting pose and falls to the ground. The Stars from the original do not appear, so Yoshi needs to be really precise in hitting opponents. Yoshi does however fall faster but also has greater ending lag. Does 12% damage but sweetspot directly below Yoshi, doing 15% damage.

Side-Aerial: Forward Flutter
Yoshi puts his feet forward in a sitting position and start moving them quickly, causing an effect similar to Yoshi's Down-Aerial from SSB4. The move will do a continous 2% damage 2 times and do 6% in the last kick, which has good knockback. Similar to R.O.B.'s Back-Aerial, Yoshi's Forward Aerial pushes him, though it pushes him backwards, it can be used as a recovery move, but since it doesn't cover a lot of distance isn't as reliable as moves like the Egg Roll.

Back-Aerial: Baby Kick!
Baby Mario (or any other baby character) faces the direction opposite of Yoshi and does a kick with both legs, with Yoshi turning his head and having a suprised expresion as the toddler attacks opponents. The move has very little range but has excellent knockback and does about 6~7% damage. It is used best to end aerial-combos and can be seen as an important move in Yoshi's arsenal due to his great aerial mobility.

Up-Aerial: Baby Headbutt
Yoshi lowers his head and ascends his torso upwards, almost being upside down. The Baby then stands on top of Yoshi's saddle and quickly moves his head forward, making an upwards headbutt. The attack does 4~5% damage and solid knockback and can be a great mid-combo move.

Grab:
Just like in Brawl Yoshi traps opponents in his mouth, pretty straight forward.


Oh, did I forget to mention that this is a Tether recovery? Indeed, in the first time in Smash history Yoshi can use his sticky tongue to grab onto ledges! Yoshi's tongue doesn't have a lot of reach, but since he can't get a boost from his Up-Special and he has less air mobility this should help our green dino!

Pummel: Our little dino chews on the opponent, same deal as in SSB4. (Does 2% damage.)

Up-Throw: Yoshi spits out the opponent to the ground and then holds them as if they where an egg. Yoshi then backs off a bit and then throws the opponent diagonally upwards, using the same animation as Yoshi throwing an egg in his Egg Toss. (does 7% damage to opponents.)

Back-Throw: Yoshi eats the opponent and then lays an egg. When the egg touches the ground the opponent flies off to the direction behind Yoshi. Opponents that are in the egg can try to escape out of it, during normal gameplay they still can't escape the egg before they are tossed away, but if they are falling they still can try getting out in time. This is to ensure Yoshi can't eat an enemie next to the ledge and drop them below for a cheap KO. (Opponents launched off the egg recieve 6% damage.)
The egg will just like Neutral-B eggs later have a crack and automatically enters Yoshi's Egg Line.

Down-Throw: Yoshi spits the opponent into a tulip that blooms out of the ground besides him, which will damage the opponent 3 times, each doing 2% damage and then goes upside-down and spits the opponent out to the ground.

Forward-Throw: Yoshi spits the opponent out backwards and then has the baby throw forward using both hands. The move suprisingly does a lot of horizontal distance and does 7% damage.

Final Smash: Superstar Baby

The baby in Yoshi's back suddenly finds a Superstar and holds it upwards, similar to somebody holding a Special Flag. The baby and Yoshi suddenly glow white and reappear, with the baby standing up with a cape and being followed in his own Egg Line an egg the size and color of your Yoshi! The baby has speeds the same as Captain Falcon, Superarmor and can glide by holding the jump button when in midair, which will make him use his cape as a parachute and slow his descent.
The baby also has a basic set of moves:

A Move: Windup Punch
For all moves that use A the baby will do a straight punch with his right hand (that in Smash-fashion suddenly enlarges when the move is used). The move can be charged to do more damage similar to a smash attack. The uncharged punch does 15% damage and medium knockback, but the fully-charged punch does 30% damage with great knockback, being able to KO at only 100%.

Neutral and Down-Special: Yoshi Toss!
Baby Mario throws Yoshi inside his egg directly forward using only one hand. Yoshi's egg will do 20% damage with great knockback. Even after hitting an enemy Yoshi's egg is still the same as before and doesn't break.

Side or Up-Special: Super-Hero Flight!
For his Side-B Baby Mario extends his arms forward and does a jumping sprints, then flies forward using his cape! Baby Mario can fly indefinetly, but can stop after pressing B again.
For the Up-B, Baby Mario does a pose of a super-hero flying and then suddenly flies upwards, after moving 1 and a 1/2 Battlefield platforms upwards Baby Mario automatically starts his glide.
If an opponent is hit by Baby Mario flying they will recieve 10% damage with good knockback.

~~~

General Playstyle
Yoshi is a character with a mix of all, good ground speed and very good aerial speeds, which make him a momentum-based character that can change the battle's pace at any time and easily going from ground game to aerial game and vice-versa, alongiside going from offensive play to defensive play quite easily. Yoshi also has great combo capability both in the ground and the air, but especially the air. Yoshi's Up-Tilt gives him good range and the damage input sufficient to start a juggle, which can be followed up by an Up-Aerial and finished off by a Back or Front Aerial.
Defensively Yoshi is also great, he has a unique shield that while roll wise isn't very good, can be jumped out of easily. In the air, his Neutral-Aerial with an egg can also be an effective substitute to an Air-Dodge, as in the end of the move when Yoshi's released he can damage and punish opponents.
Edge-guarding wise Yoshi has various moves to pick from, his Egg Toss might feel clunky as he needs to aim from a reticle, but it can help him a lot while edge guarding, as it can be angled, moves quickly and does good damage. Another edge-guarding option would be the Super Watermelon, especially the Blue one, as it can freeze opponents at higher percentages. His Forward-Aerial is also a good option, it both does great and continuous damage but also propels Yoshi backwards, ensuring that Yoshi himself can return to the edge.

[END OF MOVESET]


You can tell from my number of posts I had in my last MYM (100) and my current (304) that I have been slouching out a lot :p
Hoped you liked the moveset though, constructive criticism is always appreciated!
 
Last edited:

MasterWarlord

Smash Champion
Joined
Aug 24, 2008
Messages
2,902
Location
Not wasting countless hours on a 10 man community
JUNAHUISM

The grandmatriarchs have always been quite a solid set despite the difficult production cycle they've had, and this contest (and your reputation) would’ve definitely benefited from it being released earlier on in its life. The price the set pays for this is aerials and a grab-game made significantly later, and there is a small amount of awkwardness in terms of redundant animations doing new and unique interactions. The new moves don’t interfere with how the set plays, though, and while I would expect more from a giant blob’s grab, the aerials got off pretty well considering the character.

The core of the set has been and will continue to be appealing to me. A giant super heavyweight who’s attacks drop food items for the foe to heal themselves, increasing their durability to be on par with themselves. Of course the moveset goes out of its way to prevent the foe from doing this and uses the food item cookies as a very valuable resource, with the manipulation of it proving to be highly enjoyable. Stealing cookies the foe has already eaten is brilliant, and it doesn’t feel imbalanced because foes still need them to compete with the character’s durability and because of how the character’s size cripples it so much.

The set has some issues with numbers – and I don’t care that it’s triple the size and weight of a standard character. The issue is more that you don’t express complete awareness of the character’s size at times. You love sweetspots on moves, but this seems like a terrible character to give them to in multiple moves when it’s so slow and you haven’t given them proper spacing moves. On the other hand, the dair sounds like it’d be better than you give it credit for, as with the character’s width it’d be hard to not plop down on top of somebody. These are rather trivial “complaints”, but I think the character should’ve had the set-up more directly integrated into its gameplay. While you have given the character some decent defensive options, it basically amounts to just tanking hits while generating set-up. The prism takes too many resources and time, and even once summoned foes have 5 seconds to deplete its mere 25 HP. That said, this has been a general weakness in your movesets, and it is not as pronounced as in some of your other works here beyond the prism.

The moveset is certainly not one that’s going to be forgotten any time soon, and for everything that’s a bit wonky the moveset seems to do a decent job counterbalancing it (Mostly with weight/size strengths/weaknesses). The last moveset I remember that used food item consumption as a core mechanic so heavily was Willy Wonka, and I imagine that even Katapultar will agree that Grandmatriarchs won’t be topped at what it’s trying to do any time soon.

STILL BETTER THAN LUCINA

Donnel’s appeal largely lies in the characterization, with the various moves that imitate farm work despite him not using farm tools. It’s a pretty admirable effort and is about as good as you can do with such a simplistic character. The issue I have with the set is the moves work into a much more general toolset approach than a specific playstyle. If you put anywhere near as much effort into the custom specials as you do the meat of the moves throughout the set, you might really have something here. The emphasis on custom specials just provide more generic versatility, though, most obviously in the multitude of ways he has to buff himself. Specific buffs don’t feel like they’re played off of in any meaningful way.

I thought at first that the set would be extremely straightforward with the experience in a rather boring way, but I am a big fan of the Down Special introducing “minions” that double as enemies to kill for experience, it’s probably the best concept in the set. What I think is a missed opportunity, however, is to use this as a basis to give purpose to some of the other moves in the set. Imagine moves that would typically be designed for free for all matches, but in 1v1 would be used to kill enemy players and your own summons simultaneously. It would go with the set’s very basic feel too, and you could potentially even have some basic interaction with the attacks of the summons/countering them. The set is a good effort and learning experience for you, but it’s not in a style I personally enjoy that much.

OVERCOMPETENT COMIC RELIEF

Sokka is a set that’s trying to pass blander moves with an emphasis on characterization of how much of a butt monkey the character is, which largely seems like the correct approach to go with him. The problem, aside from it being bland as you’d expect from the character choice, basically amounts to him being too powerful. I know I am sometimes criticized for this myself, but you now have a long history with bad numbers, “Rychu”, and it seems like you just don’t have that good of a grasp on the general Smash Bros engine. Your numbers and the random pitfall dsmash have rather bizzarely turned Sokka into a heavyweight bruiser archetype. On one of his throws, he punts the foe “just a few battlefield platforms” for what is supposed to be a very weak looking move. I apologize for not having more feedback than this, but I feel this is more constructive than harping on the moveset for being bland or “unfocused”.

MARTHTRINITY

FA’s comment on Zhu Li pretty much said everything that I could (Other than that such an underdetailed transformation seen in the Up Special should just be deleted), and I feel like I have more to say about Hol Horse. Hol Horse has a lot of legitimately entertaining moves, and while it regularly borders on joke set territory is still one of my favorite sets of yours. The J. Geil moves you do feel legitimately organic (Bar the joke one where he comes out of his eyes), and the dashing attack could probably pass as a special if the set was more serious. I think the grab-game was particularly well done, and the homing bullets are a nice and interesting part of the set that would’ve been nice to see expanded. While the set does get a bit too jokey at points, the set captures Hol Horse’s character quite well, with hilarious animations like the bthrow. The set’s obviously unfocused and too much of a joke to take seriously at points, but this was definitely a good experience for you.

INTENTIONALLY ANNOYING SET

Omochao is the kind of character you’d expect for a jokeset, but you attempt to make a serious set out of this one, Munomario. There’s nothing wrong with that, but the first couple of the moves in the set more belong in a jokeset, quite honestly. Having such powerful mind control over the foe’s inputs is very scary – mind control of any form is something that you have to very careful with in terms of both balance and stopping the foe from playing the game in a very unfun experience. It also provides a level of breaking the foe’s characterization, something we’ve cracked down on over the years, as characters wouldn’t do things simply because Omochao tells them to. Banning inputs is also generally a big no-no – even if you don’t ban recoveries (which you do), many sets heavily rely on certain moves and banning them largely destroys their playstyles. Omochao can ban foes from recovering for 30 seconds, easily killing them off-stage.

Omochao is given superpowers beyond just mind control in the set. The Side Special, amongst other moves in the set, gives him super strength, enabling the tiny guy to carry the heaviest of characters around. The move is also very powerful in tandem with banning the recovery of foes, enabling him to carry foes several platforms off the stage. Stealing moves from other characters in your series can be one thing if the characters are remotely similar, but giving Omochao so many of Sonic’s moves, even his signature spindash, is a pretty heavy mistake on a characterization level. I know you’ve done much better than this, Munomario, but I thought this set deserved some spotlight so you hopefully learn to not carry over some of the mistakes in this set to your future works.
 
Last edited:

Munomario777

Smash Master
Joined
Nov 18, 2014
Messages
3,253
Location
Charleston, South Carolina
3DS FC
0387-9596-4480
Switch FC
SW-8229-3157-8114
Commenting time! I don't have much to add to what @ MasterWarlord MasterWarlord just said, so I'll just be tackling one moveset today, that moveset being Yoshi 2.0!

Hmm, a revised version of a green cartoony character? Sounds familiar... :)

First off, what I like about the set. The Egg Line mechanic is a nice addition to Yoshi's character, and is a great way to call back to the original Yoshi's Island games while adding a bit of depth to the character's playstyle. The opponent-holding Egg hatching into an Egg Line Egg feels a bit odd, though, and I feel it could use some more clarification. The Neutral Special has a nice new purpose due to this mechanic though. I like how the Up Special is easier to aim, with a clear reticle showing you exactly where you're aiming. The Eggs gaining power as they bounce also adds quite a bit of depth to the attack, since bouncing an Egg off of the ground to hit an airborne target will deal more damage. The Egg Roll's charging makes sense, and could possibly make it useful for recovery. The Down Special is interesting, and adds a bit of variety to Yoshi's moves while temporarily sacrificing his tongue attacks. Speaking of the tongue attacks, I love that his tongue can be used as a tether recovery! There's really no excuse for Yoshi not to have this in Smash after Galaxy 2, lol. The standards are nice enough, if not a bit underdeveloped. The Egg in the jab combo is an interesting idea, and I can appreciate the Babies actually helping out for a change. Speaking of, I found the flavor in this set nice, with the different Babies, the losing pose, and the entrance animation standing out.

That said, this set certainly isn't without its faults. There are some minor things here and there, such as the watermelons coming out of nowhere (perhaps plucking them from the ground?), the Up Special's lack of momentum limiting Yoshi's recovery options when in his games he's very mobile in the air (perhaps edit the Flutter Jump to be more faithful to the original games?), and such. I also think a neat thing to add to the Forward Smash might be a platform trail like they make in Woolly World, which would make the attack stand out a bit more than just another boomeranging projectile. However, as I hinted at earlier, the biggest problem that I feel permeates the set is a lack of detail and clarification. There were some descriptions that I found unclear throughout the set, such as:
  • Side Special (What happens to Baby Mario? Does he ride on top? Is he in the egg too? Can it be used in midair more effectively than the current version?)
  • Forward Aerial (How many hits does it have, and how much total damage does it deal as a result?)
  • Jab (Can the Egg go off the ledge if used next to it, for edgeguarding?)
  • Up Special (What trajectories can the Egg be thrown at? Can it be thrown downwards, upwards, behind Yoshi, etc.?)
  • Also, most attacks could use some extra beef to their descriptions; @ Slavic Slavic made a great guide to this a while back.
Overall, I like the set and its concepts, and it adds/fixes some things I wish Yoshi in the actual Smash games had, but the execution is lacking in some areas and the set desperately needs clarification and detail. Keep up the good work! :)
 

Reiga

He sold diddy for a switch
Joined
Dec 8, 2014
Messages
1,256
Location
White Noise
3DS FC
1461-7646-7368
Commenting time! I don't have much to add to what @ MasterWarlord MasterWarlord just said, so I'll just be tackling one moveset today, that moveset being Yoshi 2.0!

Hmm, a revised version of a green cartoony character? Sounds familiar... :)

First off, what I like about the set. The Egg Line mechanic is a nice addition to Yoshi's character, and is a great way to call back to the original Yoshi's Island games while adding a bit of depth to the character's playstyle. The opponent-holding Egg hatching into an Egg Line Egg feels a bit odd, though, and I feel it could use some more clarification. The Neutral Special has a nice new purpose due to this mechanic though. I like how the Up Special is easier to aim, with a clear reticle showing you exactly where you're aiming. The Eggs gaining power as they bounce also adds quite a bit of depth to the attack, since bouncing an Egg off of the ground to hit an airborne target will deal more damage. The Egg Roll's charging makes sense, and could possibly make it useful for recovery. The Down Special is interesting, and adds a bit of variety to Yoshi's moves while temporarily sacrificing his tongue attacks. Speaking of the tongue attacks, I love that his tongue can be used as a tether recovery! There's really no excuse for Yoshi not to have this in Smash after Galaxy 2, lol. The standards are nice enough, if not a bit underdeveloped. The Egg in the jab combo is an interesting idea, and I can appreciate the Babies actually helping out for a change. Speaking of, I found the flavor in this set nice, with the different Babies, the losing pose, and the entrance animation standing out.

That said, this set certainly isn't without its faults. There are some minor things here and there, such as the watermelons coming out of nowhere (perhaps plucking them from the ground?), the Up Special's lack of momentum limiting Yoshi's recovery options when in his games he's very mobile in the air (perhaps edit the Flutter Jump to be more faithful to the original games?), and such. I also think a neat thing to add to the Forward Smash might be a platform trail like they make in Woolly World, which would make the attack stand out a bit more than just another boomeranging projectile. However, as I hinted at earlier, the biggest problem that I feel permeates the set is a lack of detail and clarification. There were some descriptions that I found unclear throughout the set, such as:
  • Side Special (What happens to Baby Mario? Does he ride on top? Is he in the egg too? Can it be used in midair more effectively than the current version?)
  • Forward Aerial (How many hits does it have, and how much total damage does it deal as a result?)
  • Jab (Can the Egg go off the ledge if used next to it, for edgeguarding?)
  • Up Special (What trajectories can the Egg be thrown at? Can it be thrown downwards, upwards, behind Yoshi, etc.?)
  • Also, most attacks could use some extra beef to their descriptions; @ Slavic Slavic made a great guide to this a while back.
Overall, I like the set and its concepts, and it adds/fixes some things I wish Yoshi in the actual Smash games had, but the execution is lacking in some areas and the set desperately needs clarification and detail. Keep up the good work! :)
Neutral Special: Humm, i'll try making a way that makes sense for the egg to joing the Egg Line
Down-Special: I guess it would be better than just getting it out of nowhere lol
Up-Special: I thought of making his Up-Special not elevating him but making Yoshi have unorthadox recovery methods (Tether and Forward-Aerial), though I guess I should make the Flutter Jump more faithful to the games (Don't really know how to do that though, maybe have it act as a third jump?).
Forward-Smash: Never seen a lot of gameplay from Wooly World, but that idea does seem interesting.
Side Special: Good point, didn't think about that.
Forward Aerial: Didn't notice I didn't say it.
Up-Special: I said that the reticle moves in a half-circle motion, so I guess with only a bit more explanation it can be more understandable
Attack Beef: Yeah, I'll work on that.

So, yeah, thanks for the comment! Hopefully I'll fix some errors in the moveset and be more clear, thanks for everything! :)
 

Munomario777

Smash Master
Joined
Nov 18, 2014
Messages
3,253
Location
Charleston, South Carolina
3DS FC
0387-9596-4480
Switch FC
SW-8229-3157-8114
Neutral Special: Humm, i'll try making a way that makes sense for the egg to joing the Egg Line
Down-Special: I guess it would be better than just getting it out of nowhere lol
Up-Special: I thought of making his Up-Special not elevating him but making Yoshi have unorthadox recovery methods (Tether and Forward-Aerial), though I guess I should make the Flutter Jump more faithful to the games (Don't really know how to do that though, maybe have it act as a third jump?).
Forward-Smash: Never seen a lot of gameplay from Wooly World, but that idea does seem interesting.
Side Special: Good point, didn't think about that.
Forward Aerial: Didn't notice I didn't say it.
Up-Special: I said that the reticle moves in a half-circle motion, so I guess with only a bit more explanation it can be more understandable
Attack Beef: Yeah, I'll work on that.

So, yeah, thanks for the comment! Hopefully I'll fix some errors in the moveset and be more clear, thanks for everything! :)
No problem! :) The idea I had for the flutter jump was make it not go as high, but give him multiple uses of it in midair, like in the actual Yoshi's Island game. It would still be tied to the jump input, of course. This would help for when he's gimped, which happens quite easily since his flutter jump isn't restored when he's hit.
 

Tocaraca2

Smash Ace
Joined
Feb 22, 2015
Messages
557
Location
Wokingham
I must say this Yoshi moveset of yours seems pretty good! The only thing I would add is Yoshi's Flutter Jump being restored after Yoshi being attacked. And also, does his Egg Roll still render him helpless if he rolls off the edge then cancels out the egg roll.
 

Reiga

He sold diddy for a switch
Joined
Dec 8, 2014
Messages
1,256
Location
White Noise
3DS FC
1461-7646-7368
Ok, made some changes to the Yoshi moveset taking note comments from Munomario and Tocaraca.
 

Tocaraca2

Smash Ace
Joined
Feb 22, 2015
Messages
557
Location
Wokingham
Wait, so on April 10th this thread will end and MYM17 will be created?
I'll continue my moveset creating there. :)
 

n88

Smash Lord
Joined
Oct 10, 2008
Messages
1,527
Wait, so on April 10th this thread will end and MYM17 will be created?
I'll continue my moveset creating there. :)
There will be a gap between the two; we always take a couple weeks to sort out voting on the Top 50 (the actual contest bit), and then there's usually a week or two intermission before kicking off the next one.
 

Tocaraca2

Smash Ace
Joined
Feb 22, 2015
Messages
557
Location
Wokingham
Warning Received
There will be a gap between the two; we always take a couple weeks to sort out voting on the Top 50 (the actual contest bit), and then there's usually a week or two intermission before kicking off the next one.
So how does the voting system work? I'm worried that my moveset won't be in any of the top 50 because no one will vote for it as the best. Shouldn't people vote for which ones are highest in there own top 10 list?

Ok, made some changes to the Yoshi moveset taking note comments from Munomario and Tocaraca.
Oi, you stole my Egg Roll recovery idea! My idea to make Yoshi's recovery better that I was going to share one day was taken by your moveset! Just so you know, I was going to make it so Yoshi had a supply of eggs but they were invisible, and they helped in recovery by all giving the same amount of vertical distance, and you start with 3 and gain 1 every time you use Neutral Special until you have 6. I was also going to make it so his Flutter Jump was restored after being attacks. Also that both his grab and his Neutral Special were tether recoveries. And that his Egg Roll would make him sort of bounce in the air, acting as a third jump and not putting him into helpless.
 
Last edited by a moderator:

n88

Smash Lord
Joined
Oct 10, 2008
Messages
1,527
So how does the voting system work? I'm worried that my moveset won't be in any of the top 50 because no one will vote for it as the best. Shouldn't people vote for which ones are highest in there own top 10 list?
We're at 109 movesets and counting, so less than half will make the top 50; there's no shame in not making it, especially with your debut moveset. Generally speaking, MYM's a pretty laid-back competition. We're mostly in it for the actual moveset-making bit, not the Top 50. And of course, you (and anyone else) are always welcome to talk/post about your own favorite movesets.

As for a more detailed explanation of the voting process, this is pulled from the OP:

The voting week is where you send in your votes to the vote gurus (FowardArrow and FrozenRoy), and then collectively everyone's votes form the Top Fifty - the fifty sets which gained the most votes in all. Everyone gets 36 votes altogether, which are broken up into three different kinds of votes. 6 of them are Super Votes, 15 are Regular Votes and 15 are Weak Votes. Super Votes are worth more than Regular Votes are worth more than Weak Votes. To be exact, Super votes are worth 9 points, Regular Votes are worth 5 points and Weak Votes are worth 2 points. You're not required to use all your votes, so if you only like 30 sets, you only have to vote 30. The point being, you rank the sets you like on your vote list, giving preference to your absolute favorites.
 

ChaosKiwi

Smash Apprentice
Joined
Feb 1, 2014
Messages
104
NNID
ChaosKiwi
There is a man, a man of such capability, such mystery, such raw power that he is completely unmatched. A man so incredible that lesser men (and women) quiver at the mere mention of his name. A carrying such weight, such respect, such fear that none dare speak it, and even when they do, only in hushed tones of reverence. That name... the name of the man above all others... the most incredible name of all time... that name is....


J
"Emissary of the Black Sun"


This well dressed, mustachioed man may appear unassuming, but his average looks are a facade, hiding an unimaginable power. Hailing from the series Bobobo-bo Bo-bobo, J wields the deadly Fist of the Black Sun, allowing him to summon dark flames with untold destructive capabilities. He even has enough energy to continuously power an entire city with all by himself! However, everyone who meets J comes away from it with only one thing on their mind...

...Is he an onion, or garlic?


HIS STATS

Size- 8
Weight- 6
Jumps- 8
Ground Speed- 8
Air Speed- 7
Fall Speed- 7
Traction- 8
Intrigue-
Off the Charts


HIS SPECIALS

Up Special- The Sleepless Black Sun

J holds his open hands above his head, creating a Black Sun directly above him, slightly larger than Kirby. It has 20 HP, but deals burn damage on contact, 5% per touch. This acts as a sort of defense, and recovery.

When J does this move again while a Black Sun is already out, he will flicker slightly. Should an attack come into contact in this window, he will chuckle, disappearing from sight. It seems he had been a projection of the Black Sun the whole time! After the false J disappears, the real deal will immediately appear under the Black Sun.

If the Black Sun is destroyed, then J must wait ten whole seconds before recreating it. Additionally, he must wait five seconds before using the hologram trick again. If J does the move while already under the Black Sun, he'll bolster its defenses, restoring 5% to it. However, this only works if the Black Sun has taken damage already, and will not boost its health higher than the 20 HP maximum, and J has to wait 5 seconds before restoring its heath again.

The Black Sun's effects don't end there, however. It affects several of J's other techniques, detailed in the individual moves' descriptions.

Neutral Special- Electra of Sadness

J summons a dual conflagration of ebony flame, one orb of fire in each hand, before releasing them. The orbs expand into pillars of dark fire, about as tall and as wide as J himself. The flames travel slowly, but cover a good distance, not dissipating until they reach one and a half full sized stage builder blocks away from their points of origin.

When an enemy comes into contact with one of the pillars, they are engulfed in the dark purple blaze. They are still able to move and fight as normal, but their bodies will be wreathed in the fire of the Black Sun for three seconds, with each second dealing them 5%.

Should the move be used directly under the Black Sun, the pillars will move to their end positions and, instead of dissipating, remain in place. They will stay ablaze until somebody walks through them, acting as a sort of deterrent from attacking the Black Sun. Once somebody walks through them, they disappear. When used in this way, their damage is boosted to 8% per second.

Side Special- Black Flame Teleportation

J thrusts his forward facing hand, holding a small flickering of black flame in his palm. When he does so, a near invisible hitbox travels forward from his hand, the only visual indicator being a dark purple spark in the middle. The invisible portion of the hitbox has the size of a Battlefield Platform. It travels three and half Battelfield platforms before disappearing. It travels slightly faster than J's dash speed.

When the player releases the input for the attack, J will clench his fist, choking out the flame he once held. As he does, the purple spark will expand to engulf the entire invisible hitbox in Black Sun flames. At the same time, another flame appears.

The second flame will always appear the same distance from the Black Sun, that distance being equal to the distance between the first flame and J. So, if J is three Battlefield platforms from the first flame, that's how far away the second flame will appear from the Black Sun. And, based on the angling of the stick, the flame will appear in different directions, either to the left or to the right of the Black Sun, but not above or below. A second flame cannot overlap with J, and will instead appear directly in front of him.

Should any enemies, projectiles or items be engulfed in the first flame, they will teleport into the second flame, without any actions they were performing and maintaining their momentum. Should there be no Black Sun, however, they will teleport to exactly halfway between J and the first flame.

Down Special- Wandering Night Fortissimo
J fires an orb of black flame from his open palm, which travels in a straight line through the air with a speed similar to that of a fully charged Super Scope shot. The orb is slightly larger than one of Mario's Fireballs, and is fired with such force that it physically pushes J back, perhaps even off a ledge if used improperly. On contact, the ball deals 6% fire damage, and can travel 2/3 the length of Battlefield before evaporating. It doesn't do much knockback, however.

If used in the air, J instead fires the ball straight down. It travels two Battlefield platforms instead of the full distance of the grounded version, but moves at the same speed and does the same damage. The force of the blast, however, is enough to push J up one BF platform, making it an alternate form of recovery. However, he can only use it once in the air, and has to land before he can do it again.

Should the orb travel through or directly under the Black Sun, even if it's very far below it, it gets a power boost, becoming larger and dealing twice as much damage (12%).


HIS STANDARDS

Jab- Fist of the Black Sun
J's most physical move, perhaps. By engulfing his fist in the fiery black passion of his shinken, he can power up his punch to superhuman levels, dealing 8% with his mere jab. However, it is remarkably slow for a jab, only coming out half as fast as any other.

Up Tilt- Baranda of Despair
Galeria of Despair is a strong uppercut, black fire spewing from his fist to reach up farther than the reach of J's actual arm. This does 10% and knocks foes up. A very simple attack, all things considered.

Down Tilt- Forever Blue

J strikes the pose in the image, two blasts of flame appearing, one one each side of the man. They are each about the side of his head, and each deal 7% burn damage on contact. Short range, low knockback, but high enough hitstun that it leaves foes open.

Side Tilt- Luxuria Nighttime
Luxuria Nighttime takes the form of J pointing forward and snapping his fingers, a blast of black fire appearing immediately in front of his index finger. This fire is, again, around the size of his head, but quickly extends downwards to the floor before evaporating, meaning enemies cannot simply duck under it. Luxuria Nighttime deals 5% and trips foes.

Dash Attack- Walkway of Disgrace
Walkway of Disgrace is J's dash attack, as you can read above unless you're illiterate or something. It's a simple plow-forward type of move, as he bathes himself in the flames of the Black Sun to become a walking inferno, dealing 12% fire damage on contact. This attack knocks foes in the same direction J is walking, so its good for herding enemies away from the Black Sun, if you like.


HIS SMASHES

Up Smash- Factoria of Youth

J spreads his arms, and a thick pillar of black flame engulfs the area around him, while J himself is unaffected. The pillar is 2/3 a Battlefield platform thick, and two and a half tall. It deals 17% when uncharged, and 24% when fully charged. An excellent anti-air move.

The real meat, however, is this move's effect on the Black Sun. When used below it, it pushes the sun up, perhaps moving it out of reach of an enemy or raising the point to which J teleports.

Side Smash- The Humilation of Vanessa

The Humilation of Vanessa appears when J backflips, causing a flurry of flower petal-like infernos to appear behind him (the direction the stick is pointed). The attack extends a full stage builder block forward, and hits an area as tall as J himself. It deals between 15% and 20% based on charge level, and functions similarly to Factoria of Youth: It pushes the Black Sun away from J upon contact with it. One SBB distance.

Down Smash- Sin-Colored Catharsis

J swipes his arms downwards, one on each side, releasing thin ribbons of black fire from his fingertips. These ribbons, normally, reach only immediately to his sides, and deal between 15% and 21% damage, depending on the amount of charge the player puts into the smash.

When used directly under the light of the Black Sun, however, it becomes more... Potent, shall we say. J instead swipes up, spewing the flames directly toward the Black Sun. Encircling the star of darkness, the streams of fire form a sort of second, protective layer around the thing. This layer has 5 HP, effectively boosting the Black Sun's HP to 30. However, while the second layer is active, J cannot use this smash again, at least until the layer is destroyed. Additionally, he cannot heal the Black Sun while the second layer protects it, and for ten seconds after the layer is destroyed.


HIS AERIALS

Neutral- Destiny Syndrome

Striking the pose seen in the image above, J creates a vortex of black flame around himself. For as long as the player holds the input, the vortex expands, up to one Battlefield platfrom in diameter. When it comes into contact with an enemy, they take 8% fire damage.

However, J continues to move through the air, leaving the vortex behind, expanding, again, as long as the button is held.

Forward- Galleria of Voracity
J thrusts forward his palm, and a second palm, made of black flames, flies from it. The projectile travels one Battlefield Platform reversing direction and being returned to J's body like a boomerang. A simple move, all things considered. It deals 7%.

Down- ...J Kick? I guess? Names are hard.
J does the ever popular kick-downward-and-spike your foes technique. Deals 5% and spikes. If used directly above the Black Sun, it could lead to an interesting opposite-juggling type thing, a cycle of kicking them into it, it hitting them back up and dealing more damage, and you kicking them back into it. However, since there is a slight angle to this kick, it wouldn't be able to go for more than, say, five hits.

Back- Diana's Eternity
The Emissary of the Black Sun turns, placing his palms opposite eachother and creating a small, black orb in between them. He crushes it in his hands, then releases the energy, creating a small explosion behind him that does very high knockback, but abysmal damage, only dealing 3% to enemies. However, the high knockback is enough to KO at 70%, to make up for its near melee range, slowness, and damage output. Diana would be proud, wherever she is. And, uh, whoever she is.

Up- Painful Memories of Boy's Springtime Love
J strikes one of his heroic, action figure type poses out there, creating behind him two fiery wings of passion... and also fire. Blackish purplish fire, specifically. The wings unfold and strike upwards, with good range. However, it only hits diagonally upwards to the left and right, leaving J open for attack from above. It does deal a nice 12% and launch foes, though. So make sure you time it right!


HIS GRAB GAME

Grab- The Black Sun's Orbit
J flicks his hand towards himself, pulling in any enemies within arm's reach as if he had physically grabbed them. However, that's not all. When J and the enemy are both grounded, within a straight line of eachother, and withing one SBB of the Black Sun, this grab's range is extended, allowing him to pull foes to him who are otherwise far out of reach.

Pummel- Pummel of Putrifications
A simple pummel. A punch to the face. 4%.

Up Throw- Delicate Sunshine
J throws his foe upwards, following after them with a hefty ball of black fire, which spikes them downwards. A simple throw, deals 16%.

Down Throw- Ruination of Amore
J stomps his foe into the ground, firing a stream of black flame into their face. This leaves the foe prone, and deals 14%. Another simple throw.

Forward Throw- Lights of the Long Forgotten Kingdoms
J takes the enemy in his hands, and fills them with as much black fire as possible. This isn't so much a throw, as a faster, angrier pummel. It deals 6% per second, for as long as the player holds the button. However, the foe can break free of this the same as they would a regular grab, and doing so leaves J in a state of shock, stunning him. Don't use this without thinking ahead!

Back Throw- Southern Constellation Gilgamesh
In order to remind the enemy that they are inferior to the Black Sun's might, J throws them in whichever direction is the exact opposite of the direction of the Black Sun. If there is no Black Sun present, he throws them straight behind him. The foe, from the sheer disgrace, takes 15%.


HIS FINAL SMASH
SUPER FIST OF THE BLACK SUN: APOCALYPSES OF CHILDREN LONG PAST

J creates another Black Sun. This one, huge, and just above the upper blast zone of the stage. Slowly, it descends, revealing itself to be 4/5 as wide as Battlefield. It travels through platforms, and on contact with enemies deals 20% and enough knockback to KO at 60%.​
 

jaketheknight

Smash Apprentice
Joined
Feb 4, 2015
Messages
94
Location
San Diego
NNID
jaketheknight
3DS FC
4854-6438-8016
Foreword: My first moveset, yay! I was originally doing Scrooge McDuck, but I found that fact that he only has a two offensive moves in the Ducktales game a bit difficult to work with. So I changed focus, found a new objective, and decided on a game I really enjoy. Because it's my first set, I'm not great at finding specific damages, stats, and knockback's for the kit, so I'm drawing a lot of comparisons to other character stats, which I've seen is ok in MYM so far. So without further ado...
The Boy and His Blob

The titular characters of WayForward's 2009 Wii adventure-puzzler game A Boy and his Blob, which is a remake of the 1989 NES game A Boy and His Blob: Trouble in Blobonia. After an intergalactic emperor threatens on his home, Blobonia, the Blob flies off to Earth in search of assistance. He crash lands near the home of The Boy, who aids in the Blob's quest to dethrone the evil emperor. Normally a shapeless mass, The Blob changes into all sorts of handy tools to assist in their quest when fed flavors of jelly beans by his human companion. While not a well known game, A Boy and his Blob features a heart-touching story of friendship and teamwork, and is told through one of the most beautiful artistic stylings found on the Wii, being widely acclaimed for it's art design. In Smash, these two act as two seperate entities, with Boy relying on Blob to fight, and Blob relying on Boy to traverse. When together, these two use their ingenuity and Blob's appetite for jelly beans to take down any foe.

STATS
(I'm not familiar with stat values, so I'll draw comparisons to other characters)
Boy
Weight - Ness
Height - Ness
Jump Height - Ness's first jump
Double Jump Height - Mario's second jump
Number of Jumps - 2
Air Speed - Toon Link
Fall Speed - Ness
Walk Speed - Villager
Dash Speed - Villager
Traction - Ness


Emotes
Entrance: Blob crashes onto the stage from his corner of the screen
U-Taunt - Boy spills his bag of jelly beans and hurriedly picks them up while Blob hungrily attempts to get some.
S-Taunt - Boy uses his signature hug button on Blob. In other words, they hug!

D-Taunt - Boy eats one of his mints and tosses Blob a random jellybean, causing him to transform to a random form before reverting back.
Kirby Hat - If Boy is absorbed, he gains Boy's backpack.
Victory Pose A - Boy stand center stage and Blob hops over to him, Boy pats him on the head like you would with a pet.
Victory Pose B - Boy and Blob stand center stage and hug.
Victory Pose C - Boy gives Blob a Root Beer jelly bean, turning Blob into a Rocket. Boy hops on and flies away. They occasionally fly past in the background.
Victory Theme - 0:00 to 0:08 in this video with an added horn flourish form 0:07 to 0:08
Character Theme - This song


Blob
Blob behaves similarly to Luma, in that he is a separate entity with an individual percentage, which is listed below Boy's at about half the font size of Boy's percentage. When Blob is with Boy, he will act like Luma, attacking when Boy attacks, and following Boy. Blob weighs as much as Kirby, and will keep pace with Boy and jump with him while accompanying Boy. When not accompanying Boy, Blob will behave like Luma behaves, but still be open to receive jelly beans from Boy. He will rejoin Boy if hit by a Ketchup Bean or if he comes within close proximity to Boy. If Blob is KO'd, Boy will be without Blob and have his combat efficiency severely reduced. Blob will respawn after 15 seconds, or when Boy respawn.
Jelly Beans

Boy is capable of pulling out a variety of jelly beans from his backpack to toss to his amorphous friend with a maximum of 3 jelly beans on the playing field at a time. With the exception of his Up Special, all the jelly beans that come from his specials act like throwing items similar to Megaman's blades; where he throws them on special input, but can pick them up afterwards. They are about as small as Sheik's Vortex Bomb, and must be thrown to Blob to make the special take effect. If they aren't eaten they will stick around for a second, where they can be picked up or thrown by Boy or another fighter. If Boy is holding a jelly bean and accompanied by Blob, pressing the Special button causes Boy to simply hand the bean to Blob, simplifying the jelly bean process, and giving Boy an advantage for successfully managing when he does and doesn't have Blob.
Specials
Neutral Special- Coconut Jelly Bean/Ketchup Jelly Bean
Coconut: While accompanied by Blob, Boy pulls a Coconut flavored jelly bean from his pack. When Blob eats the bean, he morphs himself into a coconut that is then held by Boy as an item. Boy can press the Standard Attack input to throw Blob like a regular item. He can also press a Special input (except UpB) to roll Blob on the ground like bowling ball until he hits an enemy or reaches the end of the platform he was rolled on. If hit by a Blob that was thrown, enemies will be dealt 10% damage, and medium knockback. If hit by Bowling Blob, the enemy will be dealt 5% damage and tripped.

Ketchup: When not accompanied by Blob, Boy pulls a Ketchup flavored jelly bean from backpack. A staple of Boy's jelly bean collection, the ketchup causes Blob to Catch Up. After eating the bean, Blob will make his way back to Boy's side, moving slightly faster than a returning Luma, and being able to make great leaps to get back to his friend. Blob can be hit by an enemy on his way back, but he'll get back up and try returning again, but after being knocked over a second time, he will remain stationary. Anyone caught in Blob's path while returning will be dealt 7% damage and light knockback, and Blob will steal any item being held by the first opponent he hits on his way back, and give it to Boy.


Down Special- Orange Jelly Bean/Cola Jelly Bean
Orange: While accompanied by Blob, Boy produces an Orange jelly bean from his pack. When given to Blob, Blob will turn into a Vitablaster! The Vitablaster is a firearm used by Boy that fires vitamins, which do similar knockback and damage to Dr. Mario's Megavitamins. Boy holds Blob like the Firework Cannon from Brawl, and aim and fire it in the same way. The Vitablaster will fire 4 vitamins before Blob reverts to his regular form, or until he is given another jellybean via a special input.
Cola: When not accompanied by Blob, Boy pulls out a Cola flavored jelly bean, which causes Blob to turn into a bubble. When in bubble form, Blob will act similarly to a Bumper item when an enemy runs into him. If he receives 25% damage in bubble form, he will revert to Blob form, or revert after 7 seconds, or after being hit by another jelly bean type.


Side Special- Root Beer Jelly Bean
Boy produces a Root Beer flavored bean, which causes Blob to turn into a rocket. Blob imitates a Lloyd Rocket when flying through the air, and deals 20% damage and moderate knockback to enemies, and Boy can ride on Rocket Blob. When it hits an enemy, Rocket Blob does not explode, but rather hits them and bounces back, returning to his natural form when he hits the ground or enters freefall.
Up Special- Grape/Vanilla/Licorice/Tangerine Jelly Bean
When Boy uses his Up Special, Blob will return as fast as possible to Boy, and Boy will be put into a state similar to Ness during PK Thunder for 3 seconds. If Blob makes it to Boy, Boy will pull a random recovery Jelly Bean from his pack , and give it to Blob. Blob will then transform into one of four recovery transformations of varying degree's of usefulness.

Grape: Blob turns into a balloon, and allows Boy to slowly ascend in a fashion similar to ROB's Roboburner.
Vanilla: Blob turns into an Umbrella and does a copy of Peach's recovery, with 3/4 times the height., but allowing Boy to grab edges he isn't facing.
Licorice: Blob turns into a Ladder that will remain in the air for 6 seconds or until he is hit by another bean, it is 1.5 Battlefield Platforms tall.
Tangerine: Blob turns into a Trampoline and acts similarly to Megaman's Rush Coil, but gives Boy a jump with 3/4 times the height Rush gives to Megaman. He may be a shapeshifting alien, but he's no robot dog.
Once Boy recovers safely, Blob will make a great leap to get back to Boy.

Attacks
Some of these moves don't appear in any BHB game, I'm making it up as I go along
Most attacks that rely on Blob can only be performed if Boy is in possession of Blob. If seperated, Blob will simply do basic attacks in the direction he is facing.
Standards
Jab: A simple 3 hit punch-punch-kick combo from Boy followed by an infinite spinning kick by Blob, similar to breakdancing as he stretches his form to simulate rudimentary legs. The infinite is ended by a swing of Boy's backpack, dealing 7% damage and moderate knockback, killing at 165%. The 3 hit combo does 2%-2%-4% with light knockback and the infinite does 1% per kick with knockback similar to Falco's infinite.
S-Tilt: Boy swings Blob in a baseball bat form after very quickly feeding him a caramel corn flavored jelly bean. Deals 9% damage and moderate knockback, killing at 180%
D-Tilt: Using a Punch jelly bean, Blob turns into a hole in the ground, quickly sealing up, dealing 8% damage and moderate vertical knockback, killing at 190%
Up-Tilt: Boy turns Blob into a spear with the spearmint jelly bean and thrusts him upward. Deals 7% damage and respectable knockback vertically, killing at 185%
Aerials
Neutral: Blob morphs into a Bubble around Boy for .25 seconds. If an enemy comes into contact with Bubble Blob, they are dealt 9% damage and light knockback
Forward: Blob morphs into a blowtorch and Boy swings him in a forward arc of similar size to Samus' FAir, but with a single hit box, rather than Samus' bursts. Deals 8% damage and moderate knockback
Back: Blob turns into a Spear with the help of a Spearmint jelly bean, Boy quickly stabs him backward in 3 quick pokes. The first two deal 4% and light knockback and the third deals 6% and moderate knockback.
Down: Taking a page from G&W's book, Boy gives Blob a Lime jellybean and Blob morphs into a Key. Boy then uses the very same move with similar damage and knockback model.

Grabs
Grab: Blob wraps himself around the victim at Boy's command
Pummel: Constricts, does 3% damage
Back Throw: Blob rolls backward and violently ejects the grabbed enemy, dealing 11% and killing a 135%
Down Throw: Blob let's go of his victim, Boy hold them in place, and Blob jumps up and turns into an anvil with the help of a Banana jelly bean. Deals 7% damage, and similar knockback to ROB's DThrow.
Forward Throw: Blob morphs into a cannon after being tossed a jelly bean, and launches the victim after a small delay. Deal 16% damage and high knockback, killing at 115%. Incredibly reliable kill move
Up Throw: Blob morphs into a Jack with the help of an Apple jellybean and launches the victim upwards. Deals 10% damage and kills at 125%

Smashes
Side Smash: Blowtorch
Blob morphs into a blowtorch with the help of a cinnamon jellybean. Boy grabs him and unleashes a stream of fire about half the length of Mii Gunner's FSmash. Deals 9% damage uncharged and kills uncharged at 110% and fully charge at 80% Has a chance of applying a burning effect to enemies, causing them to take 6% damage over 2 seconds after being hit. Has a 15% chance of burning uncharged, and a 35% chance fully charged.
Down Smash: Doppelganger
Blob morphs into an identical copy of Boy after getting a mystery flavored jelly bean. If united, Boy and Blob get back to back and perform a sweeping kick on both sides. Deals 8% damage uncharged, and can kill uncharged at 135% and charged at 80%%. When either version of Boy is hit, the damage has a 50/50 chance of either going to Boy's damage, or Blob's. the damage will always be distributed due to chance, despite if you see which side Blob went to; Doppelgangers are tricky like that!
Up Smash: Cannonball!
Taking a page from Snake's book, Boy uses Blob's cannon form to launch a cannonball up in the air dependent on how long Boy charges it. It's trajectory and launch height is almost identical in every way to Snake's mortar, but the cannon ball does not explode, and acts like a smaller version of Villager's bowling ball. It is 3/4 the size of Villager's bowling ball, and deals 13% uncharged and kills at 120% uncharged and 80% charged.
Final Smash: Robot Suit

Boy toss Blob a glowing jellybean, which Blob quickly scarfs down. Blob gets a slightly worried look on his face before morphing into a mech suit for Boy to drive. The suit is about the size of Giga Mac and can run at approximately the same speed. The suit makes boy invincible for 8 seconds and gives him a rudimentary fighting set to dish out damage with. Upon activating up special in the mech suit, he will use recovery similar to ROB's Roboburner for as long as needed, never being sent into free fall.
Mech Suit Moveset
Standard: A two hit punching combo that deals 15% per hit and can kill at 115%
Side Smash: Blob raises both arms above his head and swings both down in a large arc to whatever side he's facing. Does 30% damage at any charge and kills at 70%
Up Smash: Claps both arms above his head in a manner similar to Donkey Kong. Same damage model as FSmash
Down Smash: Smashes both sides of him similar to Bowser Jr.'s DSmash, Same damage model as FSmash

Any Air: Extends all appendages and spins similar to Diddy's NAir. Does 13% damage, light knockback.


EDIT: Added aerials, stupid me.
 
Last edited:

Slavic

Ask not the sparrow how the eagle soars
Joined
Jun 5, 2013
Messages
757
Location
taco bell, probablyn't
Commencing terrible gimmicky Pokeset.


CASTFORM
Here to rain on your parade!

Number 351 in the Pokedex, this small, pale Pokemon was artificially created by scientists to help research the weather. After rescuing the researchers being held captive by Team Aqua / Magma in the Weather Institute, the player of Ruby, Sapphire, and their remakes receive Castform as a thank you token. Castform’s signature ability is to transform with the weather, having four different forms with different types each. Because of the artificial scientific nature of Castform, many of its moves are TM moves which are also manmade, and the Pokemon’s playstyle focuses on changing the weather and setting the stage up.

FLAVOR
Entrance - A Pokeball is thrown onto the stage and Castform appears from it in a burst of light.
Up Taunt - Castform does an aerial flip before shaking its body around with a joyful expression on its face.
Side Taunt - Castform spins around in the air as a small whirlwind forms around the Pokemon.
Down Taunt - Castform turns towards the camera, smiling, and proceeds to wink at the screen before returning to battle.
Kirby Hat - Kirby gains Castform’s wispy head thing.
Victory Pose A - Castform appears from behind dense cloud cover before doing several quick flips.
Victory Pose B - Castform floats around the screen happily, creating several rainbows as it does so.
Victory Pose C - Castform spins around happily in the air repeatedly, creating several small whirlwinds that fly off the screen.
Losing Pose - Castform drifts slowly around, looking at the ground sadly.
Victory Theme - Smash Bros. Pokemon Victory Theme
Character Theme - Fortree City
Home Stage - Weather Institute

STATS
According to the Pokedex, Castform is a third of a meter in size and weighs less than two pounds. This means the Weather Pokemon makes Jigglypuff look like a fat Italian plumber by comparison, and Castform wants to avoid being hit at all costs. Outside of Castform’s ludicrously low physical stats, Castform has a good spread with great speed and aerial capabilities. Castform actually floats above the ground, bouncing through the air close to the ground. Castform has bad traction though, as once the Pokemon stops moving, it will float a bit forward still.

Height - 1
Weight - .5
Walk Speed - 6
Dash Speed - 7
Jump - 8
Double Jump - 9
Air Speed - 8
Fall Speed - 2
Traction - 3

SPECIALS
NEUTRAL SPECIAL - CLOUD NINE
Castform pauses for a moment and a white cloud begins to form under its feet. After about a third of a second, a white and fluffy cloud the size of Kirby fully forms under Castform. Castform and Castform alone is able to stand on top of these clouds, and only the Castform who summoned the cloud can interact with it. The cloud rises slowly straight into the air, ending up one Battlefield Platform above where it was summoned. Standing on a cloud, Castform will stop falling and is treated like it is standing on a platform, and is actually the only time Castform actually stands on solid ground. Castform can also move the cloud, at Mario’s dash speed, in any direction. In addition to being able to stand on top of the cloud, Castform can enter itself in the cloud by jumping into it from below or dropping through the top.

When inside the cloud, Castform has several altered properties. The Pokemon’s form changes depending on the cloud, explained later on in the move, and Castform is safe from taking knockback while inside the cloud, aiding its extremely low weight. Inside a cloud, Castform can still move the cloud, but significantly slower, at the speed of Ganondorf’s dash. Many of Castform’s attacks also change effect depending on the cloud, and Castform is considered in the air while inside a cloud, limiting usable moves to aerials. The cloud will disappear after it has been on screen for fifteen seconds and the timer is not stopped while Castform is riding or inside of a cloud. Additionally, clouds that take enough damage, 15%, will also disappear, which will leave Castform in a helpless state. This prevents Castform from camping inside of a cloud the entire match. Should Castform be on top or inside of a cloud and attempt to use this move, the cloud will take a second to change form, depending on the additional input.


Cloud Nine (No Input)
The default cloud that appears when Castform uses the move, this cloud has no special properties. Should Castform enter this cloud, his form does not change, and opponents have no interactions with this cloud outside of being able to destroy it. This cloud is useful for providing Castform with quick cover, and while it may not appear to be spectacular, placing these clouds of the stage not only has a defensive use for Castform but an offensive and strategic one as well, as many of Castform’s attacks can interact with his clouds without needing to be inside of them.


Sunny Day (Up Input)
This cloud, oddly named Sunny Day, is a cloud with beams of light piercing outward an extremely short distance. An unknown heat source, perhaps an artificial sun, is located in the center of the cloud and radiates outwards. In addition to turning many of Castform’s attacks into fire-based ones, should Castform land on or enter the Sunny Day cloud it will enter its Sunlight Form. This is simply a cosmetic change, having no impact on stats. The Sunny Day cloud also becomes a hazard to opponents, and any who touch it are burned by the intense heat, taking 8% damage and being knocked away from the cloud. However, any attack outprioritizes the burning effect, allowing the clouds to be destroyed.


Rain Dance (Side Input)
When changed to this form, the cloud darkens and becomes a storm cloud. A combination of rain and lightning, this is perhaps Castform’s most useful cloud. Similar to the Sunny Day cloud, this version changes Castform into its Rain Form. Many of Castform’s attacks become water or electricity based in this form, but again there is no statistical difference when in this form. Electricity crackles along the exterior of the cloud, and opponents who touch the cloud take 5% damage and are stunned for a moment. Again, attacks of any kind have higher priority than the cloud, allowing opponents to destroy the cloud without taking damage.


Hail (Down Input)
When this input is entered while Castform is on or in a cloud, the cloud changes from white to an extremely pale blue, and miniscule ice crystals form on the outside of the cloud. Castform changes to its Hail Form, and, as would be expected by this point, many of Castform’s attacks become ice-based. The cloud itself becomes yet another hazard, and opponents who come in contact with the cloud take 3% damage and are frozen for a split second.

As an added note on the use of the clouds, Castform retains mobility with the special clouds, and could in theory chase opponents down and simply deal hazard damage to them. However, Castform does not appreciate chasing opponents down due to its incredibly low weight, and while entering the cloud protects the Pokemon from knockback, it removes its speed entirely, preventing any kind of safe chase game. Naturally, these clouds are excellent to use for protection, as Castform is light and fast enough to jump from cloud to cloud.

SIDE SPECIAL - WEATHER BALL
Castform opens its mouth and gains an angry expression as a white, globular orb begins to appear in front of the Pokemon. This ball takes roughly half a second to fully form, after which it is about the same size as Castform itself. Castform then launches the ball forward, as it travels at Ganondorf’s dash speed through the air. This ball will travel forward two Battlefield Platforms in distance in a low arc that peaks at three quarters of a Battlefield Platform in height. Opponents struck by this orb take a bit of hitstun and 7% damage, making this a rather lackluster projectile. This is, however, only the attack without weather or forms taken into account.

In his Sunny Form, the Weather Ball that Castform produces becomes red instead of white, and gains fiery properties. This Weather Ball still does 7% damage when it hits opponents, but opponents who are struck by the orb are ‘Burned’, a persistent fire effect that takes the form as if the opponent is being burned by an attack. This effect deals 7% more damage over the course of two seconds, in the form of seven separate flinching hits. Afterwards, the flames on the opponent disappear. The fiery Weather Ball does little knockback, instead focusing on the persistent burning effect.

In Rain Form, Casform creates a Weather Ball of oscillating water. This water has an electric current inside of it, and does not give a special effect after hitting an opponent. Instead, the Rain Weather Ball will deal 14% damage when it makes contact with an opponent all at once, with a good chunk of diagonal knockback that KOs starting at 165%. However, when this Weather Ball does hit an opponent, obstacle, or other solid object, it breaks apart into several splashes of electrified water. Opponents struck by these splashes take 5% damage and a little hitstun.

Hail Form Castform creates not a liquid ball but instead a sphere of solid ice. This chunk of ice travels in the same trajectory as the water and fire ball, but upon hitting an opponent it deals 14% damage and excellent knockback, due to being solid instead of liquid. This ball of ice shatters after damaging the opponent and can KO at 115% and above. However, this Weather Ball has no bonus effect or extra damage, becoming a much simpler projectile.

Weather adds even more versatility to Weather Ball. Should a Weather Ball pass through one of Castform’s clouds, the sphere will change the the corresponding property of that cloud. For instance, should a Fire Weather Ball pass through a Hail Cloud, the Weather Ball will become solid ice and continue its path. Naturally, this means that Castform’s Weather Ball does not damage its clouds, and this is true with all of Castform’s attacks. This allows more interactions between the clouds and Castform’s moves. Weather Ball itself is a good goto move, with different situational uses. Additionally, Weather Ball’s versatility allows Castform to have an excellent move in nearly every instance, providing motivation to leave clouds across the stage.

UP SPECIAL - TAILWIND
A powerful wind blows in from under Castform, boosting the Pokemon up the distance of two Battlefield Platforms at the speed of Lucario’s Extremespeed. This is an excellent recovery move for Castform, and has incredible horizontal prowess, allowing Castform to be boosted fully sidewise. Additionally, any opponents near Castform are carried by the wind in the same direction. The only downside to Tailwind is the fact that neither the wind nor Castform itself deal damage, and carrying opponents with Castform allows them to attack Castform after recovering. After this move ends, Castform is made helpless, assuming the Pokemon did not land on a platform or one of its clouds. Should Tailwind take Castform into the bottom of one of its clouds, the Pokemon will automatically enter the cloud and Tailwind will cancel. This move is also useful for dragging opponents towards one of Castform’s elemental clouds, which can help damage opponents. While it seems like a basic recovery, like with Castform’s other moves Tailwind gets more interesting when its clouds are involved.

When Castform is on top of one of its clouds, Tailwind will create a gust of intense wind behind the cloud. This causes the cloud to move forward suddenly, at Marth’s dash speed, the distance of one Battlefield Platform. In this usage, Tailwind can only push Castform and the cloud horizontally, but is useful should Castform be on top of one of its special clouds, as this move can function like a tackle with elemental properties. When pushed by Tailwind, the clouds no longer have bottom priority, and can’t be stopped by a single attack. Should an attack hit the cloud that would deal 15% damage to the cloud or more, the attack is reversed, the cloud is destroyed, and Castform also takes the damage and knockback. Nifty as that is, Tailwind takes another effect should Castform actually be inside of one of its clouds.

When the move is used in this scenario, wind appears from underneath the cloud, pushing it up at Mario’s dash speed. Tailwind will then move the cloud in any direction inputted, making it more controlled, but much slower, than when Castform is on top of the cloud. This Tailwind will last two seconds before petering out. As mentioned before, its difficult to chase opponents with the hazardous clouds, but proper usage of Tailwind allows good players to pursue their foes. Whether Castform is on top of a cloud or inside a cloud, the end of the move has two seconds of cooldown that prevent spamming of the move. This prevents Castform from being able to endlessly chase opponents with constant hazards for risk of being punished. While this move is relatively simple in practice, it plays brilliantly into the set, allowing Castform to both defend itself and pressure opponents, and acts as an excellent recovery, of course.

DOWN SPECIAL - FORECAST
Castform floats in place and begins to spin rapidly. As Castform becomes a blur, a large transparent tornado appears around the Pokemon as it uses Whirlwind. This tornado is a column of wind one Battlefield Platform in diameter, and reaches up three Battlefield Platforms. This twister deals no damage, although opponents who touch the spinning Castform take 4% damage and are knocked away. The main function of the Whirlwind is to move objects and opponents around. The vortex lasts for approximately two seconds and any and all objects, opponents, and projectiles in the range are rotated around the Whirlwind. The moved entities are slowly pulled towards the center of the Whirlwind, though objects near the edge of the range will likely not reach the center. Objects close to or at the center are spun around in circles, which can result in opponents being struck by weapons, items, or even Castform’s clouds. Opponents can resist the Whirlwind with a moderate amount of effort, but the main function of this attack is to bring Castform’s clouds closer to itself, which helps set the field up for battle. After using this move, Castform has about half a second of ending lag as the spinning winds down. While this move can be useful, it isn’t particularly powerful or competitive as is. Of course, this move is affected by Castform’s clouds.

When on or inside a Sunny Day Cloud, this move becomes Harsh Sunlight. Directly underneath the cloud a beam of yellow light the width of the cloud appears, traveling downward until the beam hits a platform. This beam burns opponents with intense heat, dealing 5% nonflinching damage per second the opponent is under the beam. Only one cloud can produce Harsh Sunlight at a time, and the effect lasts for ten seconds. Once the effect dissipates, there is a cooldown period of five seconds before another instance of Harsh Sunlight can occur.

On a Rain Dance Cloud, a different effect occurs, naturally. Whether you can believe it or not, the cloud suddenly creates… rain! This downpour deals no damage to opponents, but makes the ground directly under the cloud slippery, creating the chance for opponents to slip. Additionally, opponents’ jumps are nerfed by the heavy rain, which only allows them to jump half their normal jump height while under the cloud. Electrical attacks that strike the downpour are amplified, traveling up to the cloud and down through the ground, electrocuting everyone in contact with the rain, including Castform, making this move a gamble, given Castform’s own electric attacks. Similar to the Harsh Sunlight, the rain will only last ten seconds before disappearing, and also has a five second cooldown.

Should Castform use Forecast on a Hail Cloud, lo and behold it begins to hail! The hail continues down until it hits a platform, as with the Harsh Sunlight and the Rain, and will last just as long with the same cooldown. The hail, similar to the Harsh Sunlight, deals passive damage, but deals 2% flinching damage per second. This makes the cloud an annoying nuisance which allows Castform to follow up with a Smash Attack for an uninterrupted KO.

Probably the most straightforward of Castform’s Specials, there are a few more properties that Forecast provides. Certain Standards are amplified by Castform sitting underneath the weather from the clouds, giving reason for Castform to leave the comfort of the clouds for ground combat. Additionally, Castform’s Form changes whenever it goes into a new weather, showed by a rapid pixelation and unpixelation. Weather Ball will also change to whatever corresponding element it passes through on its path. Castform can either use the clouds to passively pass effects off, leaving the cloud behind, or alternatively Castform can chase opponents down with the weather, burning them with sunlight or pelting them with hail.

STANDARDS
JAB - GUST
Castform floats in place and drifts around a bit in the same general vicinity. Meanwhile, small gusts of sharp wind surround Castform, visually similar to a white version of Robin’s jab. These gusts of wind deal 2% damage per hit and are infinite, appearing as long as the input is pressed. On the ground, this is a simple jab, but when used while Castform is standing on the ground, the jab gains new properties. Wisps of the clouds are pulled into the jab thanks to the gusts of wind, which not only amplifies the damage from 2% to 3% damage per hit, but each cloud gains a subtle effect of either fire, electricity, or ice respectively. These effects don’t cause any immediate effects, but any objects or abilities affected by those elements (like the Blast Box) are activated.

FORWARD TILT - ICE SHARD
A small sliver of ice appears in the air in front of Castform. A moment later, the ice takes the form of an arrowhead and is launched forward. The shard’s trajectory can be altered in a roughly 30 degree angle in front of Castform and travels forward one Battlefield Platform. Opponents who are struck by the shard take 8% damage and some light knockback, KOing around 185%.
If used under Harsh Sunlight, the shard is unable to become as large, and as such deals less damage and knockback, dealing only 5% damage. However, the decreased size allows the shard to move much quicker, at the speed of Sheik’s needles. This also allows Castform to create more shards in a set amount of time, due to their smaller size.
When used in hail, on the contrary, the shard becomes reinforced thanks to the presence of colder temperatures and ice. The shard’s larger size allows it to deal 13% damage and KO opponents at 140% and higher. As a cost for the higher mass, though, the shard moves slower, and less can be produced in a set amount of time.

UP TILT - DROUGHT
Castform rotates in the air once and a red beam of light appears in front of Castform, in a column directly in front of the Pokemon. This column travels from the ground up to about twice Castform’s height off the ground, and lasts for about half a second. Opponents struck by the pyre take 11% damage of burning damage and take a chunk of hitstun instead of knockback.
When used in Harsh Sunlight, the column of light grows larger, reaching up almost a Battlefield Platform above the ground without any extra starting or ending lag. The column also does increased damage, 15%, and actually deals knockback vertical knockback. This move, under Harsh Sunlight, is capable of KOing at 130%.

Under rain, however, the move is vastly different. The column’s size is retained from the original, but the damage is lowered to 7% to opponents struck. This may seem bad, but the benefit of using this move in the rain is the production of steam from the heat boiling the raindrops. This steam expands the hitbox of the move, essentially doubling the width of the column. Opponents struck by the steam take 7% damage and hitstun, and allows for a greater range at the expense of damage.

DOWN TILT - SPARK
A small yellow spark appears in front of Castform’s face, coursing with electricity. This spark takes about half a second to charge, growing to an electric orb the size of a Bobomb. Once the sphere has fully formed, Castform gives a slight nod and the spark flies to the ground directly in front of Castform. While the move has poor range compared to the rest of Castform’s moves, it packs a punch, dealing 14% damage and beginning to KO at 125%, making it an excellent KO move for the Pokemon.
When the spark makes contact with rain, as explained in the Forecast move, the entire drizzle becomes electrified. The electrification starts at the point of contact and quickly radiates outward, turning the whole column of rain into an electric conductor. Every character in the electric rain, including Castform itself, take 14% damage and are stunned slightly. The rain is only electric for a moment before the rain returns to normal. In order for Castform to properly utilize the electric rain, it requires precise usage of the move, as too far will miss the rain and too close results in self-induced damage. The electric rain has no knockback.

DASH ATTACK - TWISTER
While floating forward at a high speed, Castform begins to spin rapidly. Castform will continue to move forward almost a Battlefield Platform as a very small tornado appears around the Pokemon. Opponents struck by the rotating Castform take weak combo damage, 4%, and are pushed backwards slightly. This is the boring part of the attack, though, and once again Castform’s weather comes into play here. Unlike Forecast, this dashing tornado will not attract objects or characters, but it will pull rain, hail, or sunlight (don’t worry about it) into the vortex, not only tripling the damage to 12% but adding a sweetspot at the very end of the move that provides various effects. When an opponent is sweetspotted at the end of the attack, the sunlit tornado will do a good chunk of knockback, able to KO at 120%. When the vortex has pulled in rain, the sweetspot will cause opponents to slip and fall, allowing Castform to potentially charge a Smash Attack to KO them. With hail pulled into the tornado, sweetspotted opponents will be momentarily frozen in a chunk of ice, giving Castform some free time to work with. In the event that Castform passes through multiple weathers during the course of this attack, only the last weather is counted for the effect.

SMASHES
FORWARD SMASH - WATER PULSE
Castform opens its mouth for the charging animation of this attack, and a deep blue light appears in the Pokemon’s maw. After the move has been charged, Castform fires a single watery blue ring in front of itself, the size of Mr. Saturn. The pulse travels in front of Castform anywhere between half a Battlefield Platform to two Battlefield Platforms, dependant on charge. The ring gets larger as the attack moves farther, reaching the size of Mario at max charge. In addition to a larger hitbox, the attack deals more damage when its larger, starting at Castform’s mouth dealing 12% damage to the peak size, where it does 18% damage. Left alone, the water pulse will deal moderate knockback to opponents, KOing between 175% and 150%, depending on charge. You know the drill by this point.

If Castform starts this move currently under Rain, the charge time is diminished significantly, allowing it to launch the pulse much faster. To be more specific, the charge time is decreased to 70% of the original charge time. Outside of that, the pulse has no special effect or bonus in the rain.


Should the Water Pulse pass through a Sunny Day Cloud or Harsh Sunlight, it will evaporate from the heat. This creates a ring of steam which, in addition to dealing 8% more damage at all charges, has a wider, less constricted hitbox, which makes it easier to hit opponents. As a consequence, however, the steam ring will deal zero knockback to opponents, and lacks even hitstun, dealing solely damage in exchange for more damage and wider range.


Passing through Hail or a Hail Cloud will, of course, freeze the ring into a solid ring of ice. The new solid property of the move prevents the ring from growing any larger, fixing the damage at whatever it was before entering the Hail. The ring also becomes affected by gravity, and its trajectory will begin to sink after freezing over. The positive of freezing the ring? A great increase of knockback, thanks to the solid nature of ice, and the knockback is affected by charge instead of distance, unlike the damage. In fact, at maximum charge, this move is capable of KOing at as low as 110%.


Should the frozen ring pass through Harsh Sunlight or a Sunny Day Cloud, it will thaw out and return to the watery pulse. The inverse is true should a steam ring pass through Hail or a Hail Cloud. During the charge up for this attack, the Up and Down directional inputs can be used to slightly adjust the vertical trajectory of the pulse, allowing some versatility with the move.

UP SMASH - ENERGY BALL
Castform rotates in the air and faces upwards at a 60 degree angle and opens its mouth. A small orange orb appears and begins to grow for the charging portion of this attack. Once the move is released, Castform fires the photosynthetic ball in the direction the Pokemon is facing. Like with the Forward Smash, and the Down Smash below, this move can be aimed slightly during the charge phase, which can help Castform accurately hit foes. The orb travels upwards between half a Battlefield Platform and two Battlefield Platforms in an arc depending on charge before returning downwards. Opponents who are hit by the ball take 11% damage at no charge to 16% at full charge. This move has greater KO potential than the Forward Smash, however, and at full charge can KO at 135%.

Similar to the Forward Smash, using this move while under Harsh Sunlight will cause the charge time to be decreased by 30%, and no other buff is provided for the move.


Should the energy ball pass through Rain Dance Cloud, the ball will become electrified, coursing with lightning. Should opponents be hit by this electrified Energy Ball, they will take increased damage, up to 22% at full charge, but the ball loses all knockback as a result. The bonus to this, besides the damage, is that opponents hit by this ball are stunned, as if struck by Zero Suit Samus’ Paralyzer. This allows Castform to follow up with a different KO move or set up more clouds.


Passing through Hail or a Hail Cloud will instantly freeze the energy ball into a solid state. The increased weight disrupts the trajectory of the projectile, causing it to drop straight downward. Additionally, the frozen energy ball has increased knockback, capable of KOing at percentages as low as 115%.


This is one of the better forms of any of Castform’s Smashes, but takes planning and setup to properly use for KOs. As with the Forward Smash, should the energy ball pass through multiple weathers in its trajectory it retains the effect of the last one traveled through.

DOWN SMASH - ICE BEAM
Castform looks down towards the ground at a shallow angle and opens its mouth as a light blue light starts to form. Once the move is charged, Castform launches a thin beam of frozen ice at the ground in front of itself, making contact with the area half a Battlefield platform away from the Pokemon. The beam moves out from Castform at Mario’s dash speed. The range of the move is fixed, and will travel until it hits a surface/opponent or has traveled one and a half Battlefield Platforms. This range comes into play should Castform be firing the beam off of one of its clouds or aiming the beam, similar to the other Smash moves with the directional inputs. The beam can be fired anywhere in a 60 degree angle in front of Castform. Depending on charge, the beam of ice will deal between 14% and 18% damage upon hitting opponents, and deals a chunk of knockback that can KO as low as 145% damage.

As would be expected from all of Castform’s Smashes, using this move under Hail will cut the charge time for the move to 70%. Once again, this is the only bonus for using the move under the Hail.


Should the move pass through Harsh Sunlight or a Sunny Day Cloud, or be used under the Sunlight, the beam of ice is superheated, becoming Scald! This boiling hot stream of water deals more damage than the regular ice beam, ranging between 18% and 24% damage. The move deals no knockback, however, but it does push opponents backwards which can be useful for spacing.


Passing through Rain or a Rain Cloud will cause electricity to strike the ice beam. This creates the legendary boltbeam combination! Opponents who are struck by the boltbeam take between 14% to 18%, the same as the regular ice beam. However, opponents who are struck by the electrified ice receive a ‘Paralyzed’ effect, similar to many of Castform’s other electric moves. After the paralyzed effect, the opponent is launched backwards, which will KO opponents at 160% damage.


AERIALS
NEUTRAL AERIAL - AIR LOCK
Castform gains an angry expression on its face as its mouth opens. Around Castform a shimmering sphere of air appears, which can be pressed repeatedly like a jab. This will slow Castform’s descent a fair amount, enough to potentially stall opponents in the air. However, this feature isn’t terribly useful for Castform whose strong suit is recovery and staying in the air already. Opponents who touch this air sphere are whipped by wind, which stuns them a slight bit and dishes out a measly 2% damage per hit. Inside one of Castform’s standard clouds, the jab will cause the cloud to expand and oscillate, which expands the hitbox but still does 2% damage.

Sunny Form Castform will perform a different attack, producing Ember. As the input is tapped repeatedly, a small ball of fire will orbit Castform like an electron around an atom. Opponents who are struck by this ember take 4% damage and a bit of hitstun, after which the wisp of flame disappears. When this move is used while Castform is inside of a Sunny Day Cloud, the beams of sunlight from the cloud shoot out further, increasing the hitbox of the cloud and singeing opponents for 5% damage per hit.


In its Rain Form, using this move will cause Castform to use Water Sport. Three drops of water leap off of Castform, creating three separate hitboxes around the Pokemon. Opponents struck by these water droplets take 3% damage and are pushed away from Castform. When this move is used inside of Castform’s Rain Dance Clouds, lightning will intensify from the cloud, creating a thin aura which extends the electric hitbox of the cloud outward with each press of the move. This aura is identical to the hazard hitbox of the Rain Cloud, but extended. This means this move has the same super-low priority, preventing Castform from camping in an impenetrable cloud.


In Castform’s Hail Form, this move causes a large, elaborate snowflake to appear around the Pokemon. This move has six hitboxes, one for each point of the snowflake, but only these six tips will damage opponents. The snowflake inflicts 4% damage when it hits an opponent and knocks them backwards a short bit. Using the move inside of a Hail Cloud has a similar effect to the Sunny Day Cloud and the Rain Dance Cloud, causing an expanded hitbox of frozen gas.


DIRECTIONAL AERIAL - SECRET POWER
Unlike most fighters, Castform has one directional aerial attack that can be aimed in multiple directions. This is made possible by Castform’s incredible aerial prowess which allows it to turn around in midair. In addition, this aerial is extremely important with regards to cloud control and protecting the Pokemon. For the sake of clarity, the move description is treated if the forward input is pressed. Castform does a forward flip in the air and a small rainbow arc appears in the air in front (or behind) the Pokemon. This rainbow appears from the top of the arc and travels downward, the peak of the rainbow facing away from the Pokemon. Opponents struck by the rainbow take 8% damage and are knocked backwards, this move beginning to KO at 175% damage and above. Should the rainbow hit one of Castform’s clouds, the cloud will revert to a vanilla, non-elemental cloud, as if it had first been formed. When this move is used inside of a regular cloud, the rainbow changes properties. The rainbow forms from the cloud outward, reaching forward like an arm. The damage and knockback for the attack is the same, but the range is increased significantly. Should there be a nearby cloud, within a Battlefield Platform’s distance, the rainbow will automatically lock onto the cloud, bridging the two which not only neutralizes the second cloud but creates a lingering hitbox. The rainbow will stay around for three seconds after the move is used, linking the two clouds, and Castform can fight like normal while the rainbow remains. This has the same properties of the other rainbows, dealing the same damage and knockback.

In Castform’s Sunny Form, the Pokemon creates a small solar beam. This manifests in the form of a thin beam of yellow light surrounded by orange orbs of energy. The beam travels forward a fourth of a Battlefield Platform and deals 11% damage upon hitting an opponent with much less knockback than the rainbow. Similar to the default form of this attack, clouds struck by the solar beam will light up and become Sunny Day Clouds. When actually used inside a Sunny Day Cloud the beam’s length is extended, reaching almost a Battlefield Platform ahead. The thin strand of light will slightly home in on opponents, but will lock onto other clouds with great ease. Like with the rainbows, two clouds connected by the solar beam will both become Sunny Day Clouds, and the bridging hitbox will last three seconds before disappearing.


Rain Form Castform will use Thunderbolt, which takes form as a thin stream of lightning that flicks in front of the Pokemon. The electric bolt will zap opponents for 11% damage with a Paralyzing effect, similar to many of Castform’s other electric moves. Clouds hit by the thunderbolt are turned to Rain Dance Clouds, as with the other variants, and the lightning gains new properties when Castform is inside one of the aforementioned clouds. Left alone, the lighting will shoot out the same distance as the non-clouded Castform. However, nearby opponents, objects, and clouds will attract the lightning, causing it to jump over into them, which deals the same damage as before and will turn clouds into Rain Dance Clouds. If clouds become connected through lightning, the lightning will stay for three seconds.


Using this move in Castform’s Hail Form will cause the Pokemon to use the move Icy Wind. The wind is symbolized by extremely thin, pale blue lines with crystals drifting along the current. The gust travels forward in a straight line almost half a Battlefield Platform, striking opponents and dishing out 11% damage that freezes opponents for a moment. As to be expected by this point, this icy wind will freeze clouds, turning them into Hail Clouds. Of course, inside a cloud this move functions slightly differently. The width of the wind is increased, which makes it easier for Castform to hit opponents or clouds. However, the wind has zero homing ability, only blowing in the direction inputted.


This move could be construed as lacking the flexibility of four different directional aerial moves, but it is actually designed for making Castform much more usable as it allows it to change any cloud in any direction. This clearly helps the Pokemon control the stage better, and is extremely versatile when added with the clouds. Clouds connected by the move can be moved through the air, which allows Castform to drag the ‘weather tether’, dragging rainbows and thunderbolts to the opponent.

GRAB GAME
GRAB - MIST
Castform’s expression becomes angry as it opens its mouth and shakes in the air. In front of Castform a spiral of grey fog appears from the ground, which ensnares opponents it wraps around. This has a bit of range to it, but as a result the grab animation is laggy. When Castform pummels the opponent, the mist around them suddenly compresses, dealing 2% damage. Unlike the grab itself, the pummel is quick and can be used in rapid succession. Should multiple throws be used in succession, the effects listed below do not stack, simply replacing the old effect with the new one. Despite having a good grab range with excellent throw effects, Castform’s Grab is a risky move, as the long animation is easily punishable which can quickly spell the end for the extremely light-weight Pokemon.

FORWARD THROW - SMOG
The mist surrounding the opponent takes a deep purple color, becoming a noxious smog. The opponent takes 10% damage from this poisonous gas and are covered in a purple color. After this, the smog dissipates, dropping the opponent prone to the ground. The opponent is now poisoned for five seconds, causing them to take 2% damage per second from the toxic substance. This ultimately inflicts 20% damage to the opponent after it is all said and done, making this an excellent move for racking damage, given how hard it is for Castform to KO the opponent.

UP THROW - FAIRY WIND
The mist surrounding the opponent becomes a cotton-candy pink, and pink glitter courses through the cloud. The opponent takes 10% damage from this move and, as with the Forward Throw, they are left prone on the ground. Afterwards, the opponent is surrounded with pink sparkles for three seconds, which have an anti-gravitational effect on the foe. This means the opponent’s weight is lowered by a scale of one (dropped point in the Weight stat) or the equivalent. Additionally, the foe’s fall speed is greatly reduced. This is another useful throw for KOs given the low knockback most of Castform’s moves deal.

BACKWARDS THROW - SILVER WIND
The mist surrounding the opponent turns a shimmering silver, as small points of light dance through it. The opponent takes 10% damage as the mist dissipates and are knocked prone. The effect of this move is opposite that of the Up Throw; opponents are affected as if a strong gravity is acting upon them over the course of three seconds. This increases their weight and weakens their jump quite a bit. Yet another move excellent for KOing opponents, because despite making it difficult to launch the opponent, their recovery becomes greatly nerfed.

DOWN THROW - SMOKESCREEN
The mist around the opponent takes on a pitch black color, becoming a thick obtrusive smoke. the opponent takes 10% damage and, of course, is knocked prone upon the smoke vanishing. However, the opponent is now covered with this dark color, turning them into a silhouette for a total of five seconds. The opponent has a greatly increased tripping rate, which can mess with momentum and help Castform set up the stage.

FINAL SMASH
DEFOG, HEAT WAVE, HURRICANE, BLIZZARD
Castform faces the screen and floats in place, now invincible. The move Castform uses depends on its current form, but all moves last two seconds before ending. Should Castform be in its normal form, it will then use Defog, which creates a powerful windbox that emanates out from the Pokemon in all directions, which is good for throwing opponents off the stage. As a more interesting effect, however, this will cause all of Castform’s clouds to drift outward, which makes them much more difficult to avoid and allowing the hazards to damage opponents.

In Castform’s Sunny Form this move becomes Heat Wave. This causes four streams of intense heat to be produced from the Pokemon, traveling out until they hit a platform. These pillars of flame deal 5% damage per hit, with enough hitstun to lock opponents into the move. The move actually hits five times a second, so opponents who take the full brunt of the move are dealt 50% damage. After the move ends, opponents struck by it are launched with enough force to KO at as low as 70%.


In its Rain Form, Castform will use Hurricane. This creates a vertical column of rain and lightning around Castform, the width of about one Battlefield Platform. Opponents who touch this column, which reaches up to the top of the screen, are battered and thrown around the vortex. Opponents who are pulled into the hurricane take 40% damage and are launched out of the storm, KOing at 50% damage.


In Hail Form, Castform will instead use Blizzard, which creates an icy aura around the Pokemon. This aura has a diameter of two Battlefield Platforms and will hit opponents in the area repeatedly, whipping them with bitter ice and wind that deals 70% damage if the opponent is hit for the entire move. The blizzard has no knockback, however.


PLAYSTYLE
Two most important things for Castform: Make clouds and don’t get hit. While Castform can fight decently well on its own (not really), the clouds it can make, manipulate, position, and interact with are pivotal to its wellbeing. Simply creating clouds gives Castform a hiding place, which is important since they protect Castform from knockback temporarily, which is of great importance for the tiny Pokemon. Having a variety of cloud types not only keeps opponents out of the air for fear of hazards, but adds to the versatility of Castform’s movesets. While novice players may find it difficult to work with the clouds, experienced players can utilize the various weather effects on the moves, especially the Smashes, to their advantage.

Hail Clouds are the most important to have, as moves that pass through Hail typically have increased knockback, which is good for a fighter with low killing ability. Sunlight adds a lot of damage to moves, which can be good for early game, and placing Rain near a ledge can gimp opponents’ recovery severely, which can non-traditionally help Castform KO. Weather Ball and its Smashes are the Pokemon’s most important attacks, as they will do the most knockback consistently, especially given Castform’s laggy grab has no actual throwing involved. Should Castform manage to get a hold on the opponent, the Up Throw is, without a doubt, the best throw to utilize, lowering the opponent’s weight and making them easier to launch. Castform’s biggest fears are heavyweight low flinch characters, especially those like Ike, Dedede, and Bowser, all of which have moves which can destroy several clouds at once. Projectile based characters are of much less issue for the Pokemon, as few projectiles pack enough power to launch Castform very far, which allows it to set up clouds at its own desire. For players who like a somewhat campy glass cannon, cannons never came as glass as Castform.
 
Last edited:

ForwardArrow

Smash Ace
Joined
Aug 17, 2011
Messages
502
J
This is probably the first time you've made a set where I think it could easily be argued its better than Borth-Majar, as not only does it take itself seriously, but at least in the specials manages to be kind of interesting. I'm not even sure if it was intended but I like the idea of simply being able to teleport the projectile he summons around to some weird coordinates around the Black Sun, and moreso the general "hologram" tricks and basic interactions that can be performed with the thing. Its never revolutionary, but its nice to see it remain something you reference throughout the whole set, even a little in the aerials and grab game. Obviously, there's still a ton of filler and in the grand scheme of things, I think you could've done more with it, the Down Smash particularly feeling rather egregious in that it just gives a small amount of extra HP to the Black Sun, I'd have liked something a little more than that especially when making a Black Sun in the first place is not even that hard, even if its position is rather important. Also, I kind of wish there was something else to teleport in the set aside from just one fireball and the Up Smash should probably have its own interaction and let the FSmash move it upwards by angling it, but that's just me saying the next steps as this is a pretty clear improvement for you.

Yoshi Remix
I think the addition of the egg line to Yoshi's normal set is a pretty clever one, even if it is a bit weird how they're acquired(Yoshi just has to use cracked eggs that the opponent escaped from, but I guess that's just a consequence of being in Smash), and the uses for them, while basic, are at least a decent interpretation of this new mechanic you've give him. There are definently a few downgrades from Smash Yoshi, which is bad as its honestly one of the worst movesets in the actual game, like the Back Throw which is just absurd from an animation standpoint and the watermelons feel thoroughly unnecessary to me, as if anything it limits Yoshi's moveset to have one of them in his mouth. That being said, its a pretty interesting set to see from you especially with so few other sets under your belt, I like that you're experimenting around with stuff like cloud platforms on Smashes too, its a bit weird but Smashes can certainly be used to do more creative things and you at least try to give it some justification.

Donnel
I know a fair bit about Fire Emblem and making sets for generic melee units in those games is really rough, as is making sets based around level up mechanics, which tend to be rather stifling because of how linear they make the playstyle. At the very least the basic buffs given in Neutral Special and, far moreso, the Reeking Box summons make the process of trying to reach a higher level much more interesting. I sort of wish those sorts of things were more relevant later in the set, as while you do a good job on the animations and making the attacks feel well designed as far as basic Smash Brothers attacks go, at times I wish the effects at higher levels were a bit more varied, not just for variety's sake but I think it'd make evolving more rewarding than just the same attack with more damage and knockback. I can't fault you too hard for the set's faults when the character has so little potential and leveling up is a lot less interesting than a temporary super mode, though there should've been more mention of the Risen in the standards.

Castform
I've complained about these two things in chat already, but I should restate them here for posterity's sake. Your decision to never use the enter key makes some of the moves hard to read, probably the worst case being Up Special because at least the other ones are broken up with different colored text. This is made up for somewhat by your writing being very easy to read, so its not as bad as it could be, but a screen filling block of white text is hard to get through suffice to say. Aside from that, the directional aerial is actually a pretty good move, if anything one of my favorites in the set for being a really unique use of the clouds beyond just changing the properties of the moves... but why couldn't it just be a Forward Aerial you angle up and down? That'd be enough to cover basically every kind of bridge you'd reasonably want barring straight up and down ones, and having 3 other aerial inputs in place of that is far more versatility anyway.

I actually enjoy the weather stuff in the set quite a bit, it creates a lot of fun projectile/camper play with some admittedly redundant options, but most moves still manage to feel unique enough in their interactions with the weather to all feel justified existing. I do feel sometimes the payoffs you come up with are a little dry, and occasionally even maybe overly stun heavy in the case of the fire version of Weather Ball, but still good. The problem comes with the fact that the set is pretty broken. Castform can fly around in a cloud for 30 full seconds with a decent amount of ways to hit the foes he's camping from above, and if that wasn't enough just hopping from one cloud to another can let him infinitely stall. The opponents can destroy the clouds when he comes in close enough to hit them sure, but the fact that he can stall forever is enough to be bad in and of itself, let alone when he is equipped with as much long range stuff as he has. Still, I will say that unlike Clawgrip there's more of an attempt to interact and flow on inputs outside the Specials and Smashes, the Jab sticking out as a very clever move well outside those input sections, and even the grab game which, while I personally didn't like it, it made any attempt to be relevant or interesting. If the set had a full aerial game and the stalling bit was fixed this would easily be my favorite of yours(especially if the remaining aerials were good), but as is I can't overlook those aspects.
 

Squid bee

Smash Rookie
Joined
Mar 19, 2015
Messages
6
Location
Westerville, Ohio
Squid girl moveset

“I’m the emissary of the sea!”


Squid girl, from the anime named “squid girl” came to the surface (because of the pollution) to conquer man-kind! The problem is, she knows almost nothing about the earth’s culture. Plus, she isn’t really accomplishing anything. -_- Lets see what her moveset would be!

FLAVOR

Entrance: An egg appears and she pops out.

Up taunt: She grabs an umbrella squid unite 1 and spins a can on it. This allows enemies to take 3% damage and fly up a tiny bit, and team mates will do a screw attack.


Side taunt: A mosquito flies next to her. She tries to crush it by clapping in the air but fails.

Down taunt: She spins while spitting ink around herself.

Kirby hat: Kirby gains her hat and 8 tentacles.

Victory pose A: She nibbles on a lobster.

Victory pose B: She runs in a circle, with a scared expression, while being chased by Sanae who has hearts for eyes.

Victory pose C: She holds her umbrella over her shoulder like princess peach while making a peace symbol

Losing pose: She looks away angerly while her two front tentacles are clapping.

Home stage: The lemon beach house

Stats

Height: Peach

Weight: 4

Jump height: 6

Double jump height: 4

Fall speed: 4

Walk speed: 5

Run speed: 7

Traction: 5


Specials


Neutral B
She spits some ink that both damages AND lowers traction. Can be charged up for more damage and less traction

(6%)


Side B
She spits ink onto her umbrella and spins it. It lowers more traction and has more range, but it does hardly any damage.

(3%)

Down B
She puts her tentacles into the ground and sand tentacles attacks a few feet in front of her.

(6%)

Up B
She jumps far up and then floats down by spitting ink downwards.


Standards


Neutral A
She slaps forwards with 2 of her tentacles.

(4%)

Up A
She smacks opponents up with her hat’s fins

(7%)

Up smash
She smacks opponents up using her front tentacles while simultaneously spitting ink upwards, lowering opponents traction.

(Up to 15%)

Side A
She smacks forward with her umbrella.

(6%)

Side Smash
She Does a tornado spin using her umbrella and ink.

(Up to 17%)

Down A
She spits an ink puddle which lowers traction ONLY when walking on the puddle. The puddle effects squid girl as well.


Down smash
She smashes down using her front tentacles creating 2 puddles and doing damage. (obviously)

(Up to 17%)

Grab

Grab
She grabs an opponent with two tentacles with a large range.


Pummel
She smacks opponents with her hat fins

(3%)

Forward throw
She Throws the opponent forward using her tentacles.

(13%)

Backwards throw
She does a spin throw like almost everyone else.

(17%)

Up throw
She shoots her opponent upwards by using her umbrella.

(11%)

Down throw
She smashes the opponent to the ground and flies up a bit.

(15%)

Aerial

Neutral air
She smacks with her front tentacles

(13%)

Up air
She swats above herself with her umbrella.

(12%)

Down air
She flies strait down (upside down) with her tentacles aimed downwards.

(15%)

Side air
She spits ink forward like a water gun

(12%)


FINAL SMASH!!!!!!!!!
She grabs the 3 closest opponents and crushes them with her tentacles, equaling up to 75% of damage, and spits so much ink at them that even Bowser would be incredibly slippery. Then they are thrown and if they survive they will be slipping everywhere.

She will also be making this face:


Palutena’s advice

Pit: Who is this girl? And what's up with her hair and hat?

Palutena: That’s Sq-

Squid girl: I’m Squid girl! emissary of the sea! And you can bet your beak I will beat you!

Pit: Riiiiiight....

Viridi: Just warning you, she can spit ink at you and make you slip all over the place!

Pit: And why does she have an umbrella?

Squid girl: This is Squid unit 1! He is pretty powerful.

Palutena: Just try to avoid her ink and you should be fine.
 
Last edited:

Squid bee

Smash Rookie
Joined
Mar 19, 2015
Messages
6
Location
Westerville, Ohio
Edit:
the move set up there just got the final smash added. I don't know how I forgot to add it, but whatever. Problem sleuth move set coming up next! :b::kirby:
 
Last edited:

Tocaraca2

Smash Ace
Joined
Feb 22, 2015
Messages
557
Location
Wokingham
Squid girl moveset

“I’m the emissary of the sea!”


Squid girl, from the anime named “squid girl” came to the surface (because of the pollution) to conquer man-kind! The problem is, she knows almost nothing about the earth’s culture. Plus, she isn’t really accomplishing anything. -_- Lets see what her moveset would be!

FLAVOR

Entrance: An egg appears and she pops out.

Up taunt: She grabs an umbrella squid unite 1 and spins a can on it. This allows enemies to take 3 points of damage and fly up a tiny bit, and team mates will do a screw attack.


Side taunt: A mosquito flies next to her. She tries to crush it by clapping in the air but fails.

Down taunt: She spins while spitting ink around herself.

Kirby hat: Kirby gains her hat and 8 tentacles.

Victory pose A: She nibbles on a lobster.

Victory pose B: She runs in a circle, with a scared expression, while being chased by Sanae who has hearts for eyes.

Victory pose C: She holds her umbrella over her shoulder like princess peach while making a peace symbol

Losing pose: She looks away angerly while her two front tentacles are clapping.

Home stage: The lemon beach house

Stats

Height: Peach

Weight: 4

Jump height: 6

Double jump height: 4

Fall speed: 4

Walk speed: 5

Run speed: 7

Traction: 5


Specials


Neutral B

She spits some ink that both damages AND lowers traction. Can be charged up for more damage and less traction


Side B

She spits ink onto her umbrella and spins it. It lowers more traction and has more range, but it does hardly any damage.


Down B

She puts her tentacles into the ground and sand thingys attacks a few feet in front of her.


Up B

She jumps far up and then floats down by spitting ink downwards.


Standards


Neutral A

She slaps forwards with 2 of her tentacles.


Neutral smash

She slaps forward with all of her tentacles.


Up A

She smacks opponents up with her hat’s fins


Up smash

She smacks opponents up using her front tentacles while simultaneously spitting ink upwards, lowering opponents traction.


Side A

She smacks forward with her umbrella.


Side Smash

She Does a tornado spin using her umbrella and ink.


Down A

She spits an ink puddle which lowers traction ONLY when walking on the puddle. The puddle effects squid girl as well.


Down smash

She smashes down using her front tentacles creating 2 puddles and doing damage. (obviously)

Grab

Grab

She grabs an opponent with two tentacles with a large range.


Grab attack

She smacks opponents with her hat fins

FINAL SMASH!!!!!!!!!
She grabs the 3 closest opponents and crushes them with her tentacles, equaling up to 75% of damage, and squirts so much ink at them that even Bowser would be incredibly slippery. Then they are thrown and if they survive they will be slipping everywhere.

She will also be making this face:


Palutena’s advice

Pit: Who is this girl? And what's up with her hair and hat?

Palutena: That’s Sq-

Squid girl: I’m Squid girl! emissary of the sea! And you can bet your beak I will beat you!

Pit: Riiiiiight....

Viridi: Just warning you, she can squirt ink at you and make you slip all over the place!

Pit: And why does she have an umbrella?

Squid girl: This is Squid unit 1! He is pretty powerful.

Palutena: Just try to avoid her ink and you should be fine.
Look pretty cool, I like the way you did Palutena's Guidance for it.
But there's no such thing as a Neutral Smash...
 

n88

Smash Lord
Joined
Oct 10, 2008
Messages
1,527
I'm having a bit of a hard time with Roy in that he reads a bit more like a tweaked version of what we've already got in PM and Melee (I had similar things to say about Muno's Toon Link 2.0, I know, but I think the same point stands here), with some moves even acknowledging that they're just slightly remixed versions of Roy's attacks. And indeed, when talking about the set, you admit that you didn't want to stray too far from what was already in place. You do a good job getting into the nitty-gritty of the set and giving us some numbers to work with, but I'm not sure what it all really adds up to. With your next moveset, I'd love to see you spend a bit more time talking about how it plays as a whole; here, your Playstyle section just kind of nods at Melee/PM Roy, but doesn't talk about how your new moves would change him up.

I'm really digging some of the little touches early on in J's set that build up the character's mystique a little. It's a minor theme touch, but the intro, stats, and headers do a lot for setting the tone. Top-notch presentation work there. J has a strong centerpiece in the Black Sun, and you do get some good mileage out of it with mostly pretty simple attacks. It's a fun set for sure, but I have to say that it left me wanting a little more; J really could have benefited from a playstyle section, methinks. The set just never quite dug into its concepts as much as I wanted it to, in either the technical/gameplay sense or on the creativity and writing side of things. But I agree with FA that this is your standout moveset (probably: there are still a few I need to go back and check out, busy as you've been); you're clearly having fun with it, and that translates to a good reading experience.

The Boy and His Blob really hits the Specials out of the park; I'm liking the way you play with the concepts of separating the two and changing up Blob's forms. The set loses a little momentum after the Specials; the rest of the set isn't that fleshed out, and there are some points I'm unclear on. Can Blob grab while separated? You say Blob just hits out with generic attacks when he's absent for a move that requires him, but what does Boy do when that happens? Also basic swipes? Nothing? The rest of the moveset doesn't impress me as much as those first few attacks did, though there's some fun to be had in the attack animations. Still, this is quite the debut! I'm eager to see where you go from here.

Castform turned out to be a bit of a slog at points. I don't think I've ever said this before, but it might be more readable with a smaller font (the colors aren't really helping either). Anyhow, the actual moveset here isn't too shabby. Managing your different kinds of weather gives Castform some interesting possibilities, but I'm not sure clouds can be created and manipulated easily enough for him to achieve anything like that picture you've got in the playstyle section (unless of course he's going up against another camper, in which case maybe he's got a shot at that). And I think that's really my main concern with the set; it feels to me that there's a bit too much attention paid to manipulating and managing the weather's effect on your attacks, but Castform doesn't have the tools to really take advantage of that. There are also some strange inputs here and there; does the Up Special really need to change so much with Castform's position? Still, I shouldn't harp on the set too much; you're doing some fun stuff here, and I like where your writing is headed.

Welcome to MYM, Squid bee! Squid Girl feels like she's missing some key details. None of her moves mention damage, and some of them are really vague; what are these "sand thingys" that the Down Special mentions? The reference might make sense to people who are familiar with the source material, but it's a bit of a head-scratcher to me. You also haven't got any aerials or throws. I like your spirit, but you could stand to beef up your descriptions a bit. Don't be afraid to really get into what makes Squid Girl (or your next fighter of choice!) tick, as a moveset.
 
Last edited:

jaketheknight

Smash Apprentice
Joined
Feb 4, 2015
Messages
94
Location
San Diego
NNID
jaketheknight
3DS FC
4854-6438-8016
Yay, feedback! I'll get to fixing up the weak parts of the set when I can access a desktop. On a side note, I read about some sort of MYM chat every once in a while, is that somewhere on this site? I feel like some early screening for my sets might really help.
edit: Grr, my progress on my next moveset got deleted! Reminder to always make backups. :c
 
Last edited:

Tocaraca2

Smash Ace
Joined
Feb 22, 2015
Messages
557
Location
Wokingham
I'm having a bit of a hard time with Roy in that he reads a bit more like a tweaked version of what we've already got in PM and Melee (I had similar things to say about Muno's Toon Link 2.0, I know, but I think the same point stands here), with some moves even acknowledging that they're just slightly remixed versions of Roy's attacks. And indeed, when talking about the set, you admit that you didn't want to stray too far from what was already in place. You do a good job getting into the nitty-gritty of the set and giving us some numbers to work with, but I'm not sure what it all really adds up to. With your next moveset, I'd love to see you spend a bit more time talking about how it plays as a whole; here, your Playstyle section just kind of nods at Melee/PM Roy, but doesn't talk about how your new moves would change him up.
The thing is I don't really know how it plays as a whole. I gave you some combos and I also thought I said that he should play pretty similar to Roy in Project M?
Anyway, my next moveset will be on Lucina, and as none of her moves are unique, I have a better chance of being able to come up with more unique stuff.
 

Slavic

Ask not the sparrow how the eagle soars
Joined
Jun 5, 2013
Messages
757
Location
taco bell, probablyn't
edit: Grr, my progress on my next moveset got deleted! Reminder to always make backups. :c
I recommend using Google Drive if possible. It's totally free, has a huge amount of storage, carries your work through the cloud to any device, and saves every edit you make automatically. It's where I keep all of my work, MYM related or not.
 

jaketheknight

Smash Apprentice
Joined
Feb 4, 2015
Messages
94
Location
San Diego
NNID
jaketheknight
3DS FC
4854-6438-8016
I recommend using Google Drive if possible. It's totally free, has a huge amount of storage, carries your work through the cloud to any device, and saves every edit you make automatically. It's where I keep all of my work, MYM related or not.
If I do all the formatting work (font size, justify, bold/italics, etc.) in Google Drive, does it carry over when I copy/paste it over to the Smashboards editor, or should I do the formatting in the SB editor?
 

Slavic

Ask not the sparrow how the eagle soars
Joined
Jun 5, 2013
Messages
757
Location
taco bell, probablyn't
If I do all the formatting work (font size, justify, bold/italics, etc.) in Google Drive, does it carry over when I copy/paste it over to the Smashboards editor, or should I do the formatting in the SB editor?
I've tried to do the editing in Drive, but there are issues when carrying over, so I do all the editing on the forum. It's a little more work that way, but it's a useful tool if you don't mind spending the extra time for it.
 

Squid bee

Smash Rookie
Joined
Mar 19, 2015
Messages
6
Location
Westerville, Ohio
Look pretty cool, I like the way you did Palutena's Guidance for it.
But there's no such thing as a Neutral Smash...
Fixed that.

Welcome to MYM, Squid bee! Squid Girl feels like she's missing some key details. None of her moves mention damage, and some of them are really vague; what are these "sand thingys" that the Down Special mentions? The reference might make sense to people who are familiar with the source material, but it's a bit of a head-scratcher to me. You also haven't got any aerials or throws. I like your spirit, but you could stand to beef up your descriptions a bit. Don't be afraid to really get into what makes Squid Girl (or your next fighter of choice!) tick, as a moveset.
Changed the description of down B.
Added damage, throws and aerials.
 
Last edited:

Tocaraca2

Smash Ace
Joined
Feb 22, 2015
Messages
557
Location
Wokingham
Fixed that.


Changed the description of down B.
Added damage, throws and aerials.
This set was extremely easy to read. Thank you for a relaxing set.
Though maybe slightly more detail? And preferably a better template design. Having standard attacks and smash attacks in the same category is a bit strange, and having the Up Smash before the Forward Smash.

And BTW guys, what does the Z in Z-air stand for? Because one of my future movesets I am planning to have an air-grab with.
 

FrozenRoy

Smash Lord
Joined
Apr 26, 2007
Messages
1,260
Location
Las Vegas, Nevada
Switch FC
SW-1325-2408-7513
If I do all the formatting work (font size, justify, bold/italics, etc.) in Google Drive, does it carry over when I copy/paste it over to the Smashboards editor, or should I do the formatting in the SB editor?
As opposed to Slavic, I recommend using Notepad or Wordpad to work on movesets. You won't lose stuff as long as you save frequently, you can type out your coding in Notepad to have it be there and to copy + paste for previewing it to yourself or posting and it is nice to have it backed up to your computer (You can also then C+P to back it up on Google Drive).
 
Top Bottom