Father Cornello is the starting antagonist of Full Metal Alchemist, getting nothing but the first episode to himself in the main series. While he technically works under the homunculi, he is largely an episodic character to generically start off the series with some action. Cornello uses alchemy, but passes it off as power from god to gain loyal acolytes, with the eventual goal of world domination. He is the sole voice of god due to his ability to perform these “miracles”.
Cornello started off as a non fighter in the manga/2003 anime, but has gained more and more abilities throughout various adaptions. Aside from the Brotherhood series giving him an actual fight, he is given several unique attacks in the FMA Warcraft 3 map where he’s a playable character, alongside other such beloved and memorable characters as Fu, Zampano, and Dolcetto.
STATISTICS
Traction: 10
Size: 8
Aerial Control: 7.5
Falling Speed: 5
Aerial Speed: 5
Weight: 4.5
Ground Movement: 1.5
Jumps: 1
Cornello’s a heavyweight without the weight in statistics. While he should realistically be heavier, his poor weight is used to represent his physical incompetence and frailty as an old man.
Cornello has a “rebound” meter below his portrait comparable to Little Mac’s. Whenever Cornello uses a move that uses alchemy (The majority of them), the meter will fill up a certain amount based off the attack. Every second, the meter will tick down by 1/18th, so he has to be somewhat spammy with his attacks in order to fill up the meter. When the meter completely fills, Cornello will enter his rebound form, gaining invulnerability for the 3/4ths of a second duration of the transformation.
Weight: 20
Size: 20
Traction: 10
Jumps: 10
Falling Speed: 10
Ground Movement: 6
Aerial Speed: 5
Aerial Control: 2
Turning into this form grants Cornello superarmor to attacks that deal 7% or less, and grants him 0.2 seconds of complete stun immunity after getting grab released or thrown. Cornello will stay in this form for 9 seconds before shifting back to his previous state. While Cornello will get a free invulnerable transformation back to normal, he will take 40% over the period of time he remains in the Rebound form. When he turns back, Cornello will go through a half second of lag, .3 seconds of which he is vulnerable for.
PRIEST SPECIALS
UP SPECIAL – MIRACLE
Cornello raises his hands above his head and looks to heaven as he gains an aura of red lightning around himself. This will cause him to begin healing at a rate of 3% per third of a second. While this would make him somewhat scary to leave around, this fills up Cornello’s rebound meter faster than absolutely anything else – 1/8th of the way per every 3% damage healed. The Rebound form’s self damage will of course outdamage the otherwise very good healing from this attack, with Cornello getting a net loss of 16%. Of course, if you just want to get into Rebound as fast as possible, this has the bonus of healing some of the damage. If used in the air, this will slow Cornello’s falling speed by a decent margin.
Cornello does not have a recovery on his Specials in his base form, making him even more frail. The rebound form has a very powerful recovery, though, meaning foes largely have to gimp you if they expect to recover. Granted, if you have to build up your meter from nothing in order to recover, you’ll have to be knocked fairly high in order to not drop off the bottom while transforming. Specifically because of how Cornello’s recovery works, he’ll always want to balance his Rebound meter at a fairly high position in order to recover.
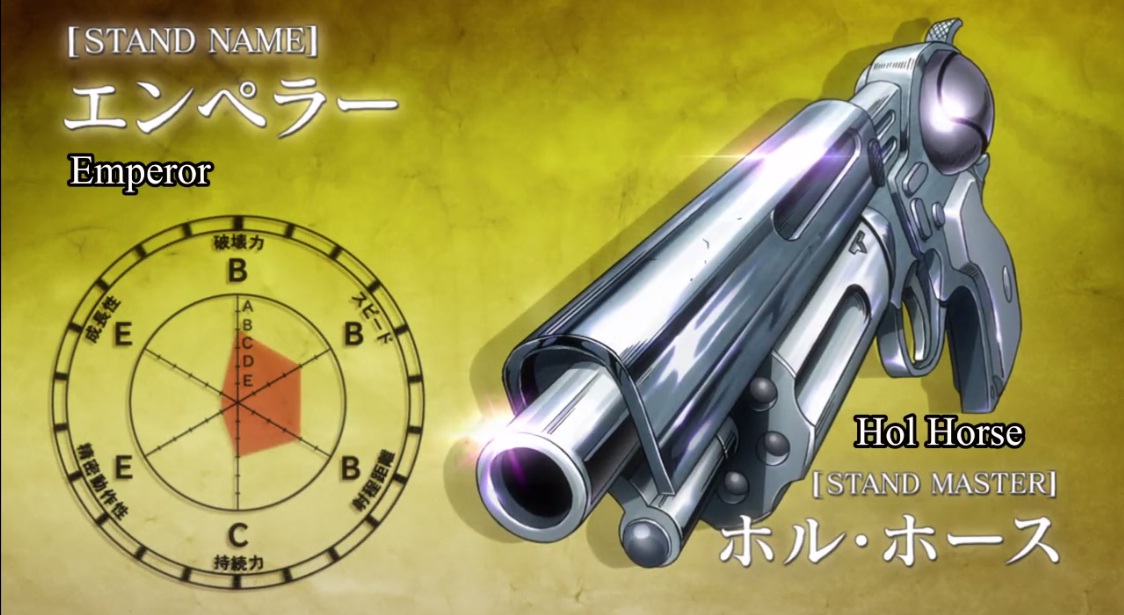
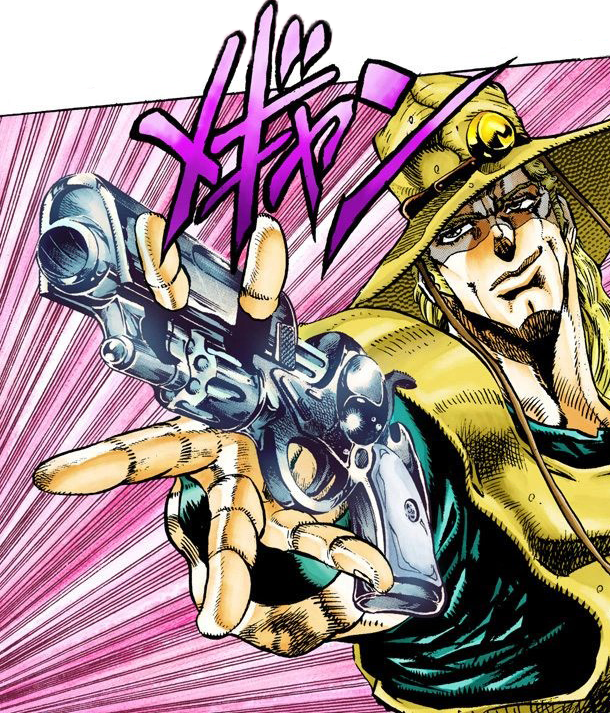
NEUTRAL SPECIAL – MACHINE GUN
Cornello transmutes his cane into a machine gun and fires at will, laughing maniacally at random intervals if he holds out the move long enough. As he continues to spam the move, he simply transmutes more ammunition into the gun barrel. Cornello has full control over where he aims the move, having the full range of Final Destination! The bullets are the same size as Sheik’s needles and go just as fast, with each one dealing 0.5% with no stun. Cornello fires 36 bullets a second, working as a very powerful damage racker – imagine if Fox could freely aim his Neutral Special and you’ve got a comparable move.
The big problem with the move is there is strangely a very long amount of ending lag to leave the stance. If you just exit the stance as a foe comes up to you, you’ll be taking something on par with a Bowser fsmash as your punishment. As such, the move is largely reserved for attacking foes at very long range, most reliably those who are knocked off the stage for free damage.
The move fills Cornello’s rebound meter at a rate of 1/16th for every third of a second he stays in this stance. The move can be used as an amazing transition into rebound if you can force a foe to approach you, then bypass the move’s ending lag with the foe already at point blank range. This is a pretty big gamble based off whether you think the foe can punish you in time or not, as if it’s too painfully obvious you’ll transform the foe will likely just wait out your gunfire until you do.
DOWN SPECIAL – ALCHEMIC ABOMINATION
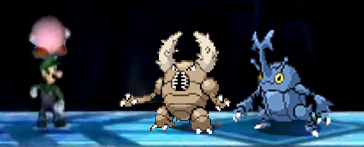
Cornello summons a chimera in front of himself – a lion fused with some other unidentifiable creature through alchemy, apparently making it stronger than a regular lion somehow. The chimera is about as tall as Luigi, but is as wide as a crouching Snake without counting the tail, which extends out for double the chimera’s width. Attacking the tail deals damage to the chimera, but not knockback or stun. The chimera is as heavy as Mario at 50% and is vulnerable to hitstun and grabs, but will simply keel over and die on the spot if its 30 HP is depleted. This has an awkward .4 seconds of lag to summon and doesn’t affect the rebound meter, but if Cornello is interrupted during the move the chimera will still be summoned anyway, possibly punishing his attacker.
The chimeras patrol the stage at Ganondorf’s walking speed, but will pursue foes at his dashing speed if they come within 0.75 platforms and will pursue them until they get 1.6 platforms away. Their basic melee attack is a quick bite that deals 8% and knockback that kills at 165%, but has noticable ending lag to punish them. The bite will heal the chimeras of 5%, adding slightly to their survivability. If a foe is a platform’s range away from the chimera and they’re on the chase, they will perform a swift pounce on top of them that deals 14% and knocks grounded foes into prone, dealing knockback that KOs at 200% to aerial foes and those already in some kind of stun state. The chimera will follow up with the bite instantly if the foe was put into prone, though foes have enough time to do an immediate action to avoid it – though this will make them more predictable.
SIDE SPECIAL – CHAIN LIGHTNING
Cornello fires a burst of red lightning out of the end of his cane. After the move’s brief startup, the range is 2 platforms long and the lightning instantly travels this distance like realistic lightning. it initially seems rather useless compared to the Up Special, as it simply heals the target of 5% (Including foes, though foes will take a flinch from it). However, the target will then begin to take damage over time at a rate of 2.5% per second, taking double the damage they were healed.
When the lightning hits a target or any form of terrain, it will bounce off of it at an angle comparable to Rob’s laser. Every target that is hit will take 3% more “healing” than the last one, and bouncing off the ground will still power up the move in this way. Cornello can angle the initial firing of the lightning, and can have a lot of fun with this move with no set-up on stages with platforms. Note that shielding the move will still power it up, enabling you to still use shielding foes as a target to bounce off of or rejecting the lightning from yourself if you don’t want to take the damage.
This gives the chimeras some more relevance, enabling them to act as “bumpers” and to power up the move. While the actual lightning jumps are instant, there is a very brief pause between the bounces between each individual target, so if you intend to save the foe for last for a big hit you’ll have to apply some pressure after shooting out the red beam. Aside from simply damage racking the foe with damage over time, chimeras will often like the nature of this brief healing, potentially expanding a short lifespan. The pounce attack chimeras use can also offer some more angles to bounce the lightning off of.
While firing the lightning fills up his meter by 1/12th, it will fill up far more if he hits himself with it. If he is the second target (The minimum, since he can’t target himself outright), his meter will fill up by 1/6th. For each target later he was in the Chain Lightning, the meter will fill up by an additional 1/6th. If Cornello enters rebound while taking damage from this move, any further damage he would take from it will be erased, meaning if he turns into it outright he’ll simply get the healing only. Every character can only be hit by this once per use and the lightning will expire once it travels the maximum distance, so Cornello can’t just bounce it off of a foe infinitely at point blank. Shielding the attack does not count as “being hit” by it.
PRIEST SMASHES
FORWARD SMASH – SPIKE IMPALE
A spike shoots out of the ground in front of Cornello at a 45 degree angle. Cornello can angle the move up or down to change this angle to 20 or 60 degrees to alter the slant of it. With no charge, the spike barely juts out of the ground at all, only around two thirds of Kirby’s height. At full charge, the spike is as long as a platform. If the move is charged at least a quarter of the way, the spike will be solid terrain, providing an interesting surface to bounce off of with Chain Lightning. Regardless of charge, the move deals 20% and knockback that kills at 130% as it comes out.
The spikes have 5-35 HP, though you can’t attack the tip which remains a hitbox that deals 5% and weak knockback. The uncharged version of this move is very fast to compensate for the horrible range, and the small status of the spike actually makes it nearly impossible to destroy from the front, potentially making it more “durable” in some situations.
While chimeras can jump to traverse stages with these spikes fine, they actually will sit and wait on top of spikes created with this move when created, getting ready to pounce on anything that comes into range. The move fills up 1/16th of Cornello’s meter, up to 1/8th if fully charged.
DOWN SMASH – HOMING SPIKE
Cornello creates a spike underneath the nearest foe’s current position, shooting straight up. The spike deals 16% and knockback that kills at 150%, and the size, HP, rebound meter filling, and solid status of the spikes increases in an identical manner to the fsmash. This is significantly laggier than the fsmash, even uncharged, given the range of the move. If the foe is off the stage or under it, the spikes will come out of the ledge or under the stage, respectively. While the spikes are solid, they will just become the new ledge if you create them in such a way to “block it”. If you create a spike on the ledge during a time where a foe is on it and they have ledge invulnerability, this won’t hit through it, but will cause them to get pushed back to the “new” ledge created by the spike.
This adds an obvious new option to your camping, and while it obviously can’t hit foes directly off-stage can be an interesting thing to use as the foe comes back to the stage. Even if they can easily recover high to avoid the ledge, they should ideally have run out of jumps so they be impaled upon landing.
UP SMASH – CHIMERA COMMAND
Cornello summons another chimera, but as it is summoned it immediately performs the pounce attack. Uncharged, the pounce is the same as the generic one chimeras will voluntarily perform, dealing 14% and knockback that KOs at 200% while traveling a platform through the air. This is largely used for the attacking portion of the move, as if you use this exclusively to summon the chimera you’ll find that the chimera only has 5 HP until they complete the ending lag of the pounce, after which they become a regular minion. Interrupting the move as the chimera is quickly summoned will result in it immediately dying, unlike the regular version of the summoning on Down Special. That said, the appeal of killing the chimera during the ending lag of his attack can potentially make you personally less vulnerable. If this is used next to a chimera already created, they will keep their durability in-tact for the leap and stand alongside you for the charging, and the move will start up instantly.
Charging the move will increase the distance of the pounce to a mighty leap, potentially traveling the entire distance of Battlefield at full charge and dealing up to 22% and knockback that KOs at 145%. Cornello can also slightly angle the chimera’s leap by about 15 degrees in either direction, also helping give him some good surfaces to bounce his Side Special off of. While using this to camp is stupidly impractical, this is decent at melee range to use the chimera as a meat shield. The low durability also won’t matter much if you send the chimera on a suicide mission to an off-stage opponent.
REBOUND SPECIALS
UP SPECIAL – LEAP OF FAITH
In the air, this is the standard heavyweight recovery you’d expect for Cornello in his rebound form. It’s Dedede’s recovery with heavy buffs, going up 1.5x as high with double the power. Cornello is invulnerable as he ascends rather than having superarmor, and on the way down he has superarmor against attacks that deal less than 20%. Instead of the stars that pop out under Dedede, bits of rubble pop out to either side of him when he lands, dealing 6% and knockback that KOs at 200%. This is a very safe recovery, which is well deserved considering what he has to go through in order to use it.
If used on the ground, Cornello will jump even higher due to having something to actually kick off of. Cornello will jump up a set distance comparably to Kirby’s suplex throws, specifically jumping up into the “magnifying glass” in the top blast zone above him assuming there’s nothing solid in the way. Cornello will jump up incredibly fast at Sonic’s dashing speed, becoming a weak hitbox that deals 7% and knockback that KOs at 250%, again with superarmor to attacks that deal less than 20%. Once he reaches the magnifying glass, the player can control his horizontal movement to move him up to 2 platforms in either direction over .35 seconds before he comes crashing down. As he comes down, he deals 25% and a spike 1.3x stronger than Ganon’s dair, along with making the rubble on either side of him like the aerial version of the move.
While the grounded version of the move isn’t very useful to Rebound Cornello, it can propel Priest Cornello to impossible heights that he could never reach before if Rebound Cornello jumps up there as he transforms back. If you’re not in immediate combat with the foe, this is one of your priorities before shifting back in order to prevent punishment when turning back.
SIDE SPECIAL – SHOULDER CHARGE
Cornello does a shoulder charge forwards, providing an alternative recovery for horizontal movement. He tramples forwards through the air at Captain Falcon’s dashing speed, dealing 19% and knockback that KOs at 125% to anyone who gets in his way. The mad dash can be stopped early at any time, and the earlier it is stopped the shorter the ending lag is. If Cornello just taps the input, he’ll do a shoulder charge motion in place, quite similar to Brawl Wario’s fsmash in appearance and lag. If he charges two platforms or more, the ending lag will cap out at a full second.
Cornello’s horribly mutated arm in Rebound Form is largely a result of his transmutations on his gun, as various gun parts can be seen sticking out of it. The last move you use to enter Cornello’s rebound form will have a visible impact on his arm – lightning/healing will cause it to crackle with red electricity, a gun move will just have a couple more gunbarrels on his arm, and a spike, of course, will have the spike jutting out of his arm. They apply various bonuses to this move in addition to the primary hitbox.
Lightning will cause the move to apply a version of the Side Special that heals the foe for 12% before damaging them for 4% per second for 5 seconds. If you hit the foe with a Side Special in Priest Form while they already have this effect, it will boost the power of the Side Special as if you bounced it off of 3 targets by hitting the foe.
Having some extra machine guns will cause them to spurt out a few bullets for you to aid your charge – you’ll fire 5 bullets a second and each will deal 1% and flinch the foe, making it much easier to hit with your charge.
Having a spike jut out of your arm requires the spike to be at least as tall as Mario in order to do anything. If it is, the spike specifically becomes a grab hitbox that you can impale the foe onto during the move, still dealing 19%. Cornello can still do whatever he wants with a foe impaled on his arm, though they will obviously be instantly released if Cornello shifts back to regular size.
NEUTRAL SPECIAL – STRENGTH OF GOD
Cornello goes to rip a Bowser sized boulder out of the ground with his “normal” arm with about .4 seconds of lag, having superarmor to attacks that deal less than 20% for the duration. If he’s interrupted during the later .2 seconds, the boulder will still get spawned, but he won’t generate a hitbox. After ripping it out, Cornello will bowl the boulder forwards along the ground, causing it to go at Wolf’s dashing speed and deal 17% and knockback that KOs at 140% as it goes. The boulder is solid, but given Cornello can’t throw it through the air it’s not especially scary as an on-stage gimp. The boulder will travel forwards 2.5 platforms on a flat surface, getting weaker as it goes before it slows to a stop. Cornello can much more quickly just pick up the boulder to throw it again, and foes can destroy it by depleting its 40 HP. The boulder will go faster/slower if it’s going down/up slopes, and will increase in power accordingly. The boulder caps out at 28% and knockback that KOs at 80% with 1.2x Captain Falcon’s dashing speed. Cornello –can- potentially launch a boulder into the air by rolling it off of an angled spike from fsmash, launching it into the air by using the spike as a ramp. Of course, this is pretty predictable for gimping.
If Cornello is standing in front of a spike, he will rip it out of the ground very casually with .15 seconds of lag. Cornello can carry the spike around while using his moveset normally, while inputting Neutral Special will cause Cornello to stab in the desired angle with it, dealing 10% and knockback that KOs at 170% for an extremely good “poke” with a full length spike. If he holds down the input for .4 seconds and then releases it, he’ll throw the spike like a spear 3 platforms in the desired direction, dealing 8% and knockback that KOs at 200%. If either of these spike attacks hit a grounded foe, they will get impaled, taking an additional 5% and having to escape at grab difficulty. So long as Cornello throws the end of the spike at the ground, it will end up impaled in the ground, enabling him to reangle spikes as he wishes and enabling him to make a spike ramp for a boulder on demand. Cornello can pick up spikes that have impaled foes on them before adding more creatures to the shish kebab, or just throw it off stage. Cornello can also rip out a spike growing from his mutated arm by using this move in the air.
The boulders can have spikes generated on them by Priest Cornello given they’re solid, and the spikes can be used to help “defend” the boulder for when Rebound Cornello comes back. If Rebound Cornello attempts to pick one of these up, he’ll pick the boulder up by the largest spike, assuming there’s a spike at least as tall as Mario available to use. Attempting to use it as a weapon will cause him to smash it in front of himself like a club with minimal lag. This will cause the boulder to be an immediate hitbox that deals 20% and knockback that KOs at 115% as it hits the ground, then pop off the spike Cornello was using and roll forwards along the ground normally. Afterwards, Cornello will still be holding the spike in his hand.
DOWN SPECIAL – ASHES TO ASHES, DUST TO DUST
Cornello scoops out a portion of the ground in front of himself in the form of gravel, not actually terraforming the stage with this move, before throwing it all forwards a relatively short distance of a platform. The debris deals many multiple hits as it goes forwards, dealing roughly 14 hits of 1% and set pushing knockback over the course of the attack.
If the debris comes in contact with a slope (which he can make with his rebound dsmash), it will slide to the bottom and collect there. Cornello throws about 1.5x Bowser’s size in debris with each use of the move, and it doesn’t go away after being created. Rather than being solid, characters can walk through it with three fourths of their regular dashing speed. If it’s piled up so high that a character is in an aerial state when wading through it, their falling speed will increase by 1.5x while inside of it. The debris can take knockback from attacks, as heavy as Jigglypuff at 80%, but it won’t hurt anybody when attacked in this way. If the knockback doesn’t knock it out of a pit and it lands on a slope, it will slide back down into it.
If Priest Cornello attempts to heal with his Up Special when his rebound meter is two thirds of the way charged, he will absorb a Bowser’s worth of the debris around him, heal 20%, then instantly enter rebound form. If Cornello enters rebound in this way, his mutated arm will have even more gravel around it when he enters that form. This will cause Cornello to shed some of his arm to create a Kirby’s worth of gravel when he hits foes with moves like Side Special that make use of mutated effects on his arm.
If Priest Cornello uses his fsmash or dsmash to create a spike in a pit with gravel in it and he is not in the pit himself, he will instead use his alchemy to fill in the gaps in the ground, terraforming the hole in the ground shut into solid ground, how it was before he terraformed it. Any foes inside will be pitfalled at the top of the ground and take 20%. This is fairly laggy and will need a pretty deep pit filled with debris in order for you to be able to pull it off. This also fills up a third of Cornello’s rebound meter, so if he enters rebound in this way he won’t be able to capitalize on the foe being pitfalled at all. This will give Cornello a “bulkier” arm if it’s the last use of alchemy that makes him enter rebound, identical to the previous paragraph.
REBOUND SMASHES
DOWN SMASH – STOMP OF JUDGEMENT
Rebound Cornello does a large stomp forwards, dealing 20-30% and knockback that KOs at 130-95%. While it’s not the fastest attack, it has superarmor and anti-grab armor specifically on Cornello’s stomping leg, making it easier for him to get the attack’s secondary benefit. Each use of this move makes an indent the height of Mario-Snake and the width of Bowser. The sides of the indent slope down into the pit – you won’t “fall” into this and enter an aerial state at any point, you’re largely just creating slopes with this move. On paper thin platforms/drop throughs, this will bend them. There isn’t really much that needs to be said about the implications of such a move – it’s incredibly beneficial to your boulders, and provides lots of new angles to generate spikes and use your chain lightning. Cornello will run down slopes 1.3x faster with his Side Special. Characters will slide down slopes at Mario’s dashing speed when in prone, making foes who get knocked into prone by a chimera’s pounce more predictable.
For all of the great possibilities this has and how quick it is to use, just keep in mind you don’t want to waste too much of your precious 9 rebound seconds that you take 40% for entering on set-up.
FORWARD SMASH – REPENT
Cornello gets on his hands and knees for the charging animation, furiously gritting his teeth, before smashing his head into the ground. While the move has some very noticeable startup, Cornello has both anti-grab armor and superarmor against attacks that deal 19% or less while in the charging stance and during the move’s start-up. This is extremely powerful on hit, dealing 29-40% and knockback that kills at 90-60% at a 45 degree downward angle, making it incredible to kill foes at the ledge. If the foe hits the ground due to the knockback, they will take a miniature pitfall effect, with their feet getting pitfalled rather than their entire lower torso. They will still take knockback in this state from the move, sliding along the ground, obviously getting freed from the effect if they slide off stage.
Having impaled feet bans the foe from moving or jumping. The foe will not take knockback during this effect (Other than the initial sliding from being hit by the fsmash) unless the knockback would send them at least 3 platforms, in which case the knockback will free them from the ground. After taking the initial hitstun of the attack, foes may attempt to escape this effect at grab difficulty. If a foe uses a leg based attack, the starting lag will be increased by 1.3x, but will cause them to escape the status effect early if they succeed. Using this move again on a foe already smashed into the ground will deal vertical knockback that KOs at 75-40%.
If the foe travels 2.5 platforms or more due to the knockback of this attack along the ground, the pitfalling will be more severe and they will use their regular pitfall animation, unable to attack. This is still only half as difficult to escape as a regular pitfall. If the foe travels an additional 1.5 platforms beyond the first 2.5, they will become completely buried in the ground, with nothing but a pile of dirt to indicate where their character is, with them having to escape at regular pitfall difficulty. Completely buried foes cannot be hit by most attacks, but if Cornello terraforms down with a dsmash stomp he will see them half pitfalled in the ground and be able to attack them normally. Cornello can also stab a spike into the ground and pick the foe out of the ground, impaling them on it.
While the described pitfalling effects are incredibly powerful, few to no stages are long enough to make practical use of this, and the massive power of the attack can work against you by knocking a foe too far away or even off the stage, nullifying the burying effects. This is where you can thank the downward portion of the knockback, though, as foes will stop sliding if they reach the bottom of a pit due to the knockback’s angle. While using this at the bottom of a pit will probably just get you punished as foes will only be pitfalled up to their feet and can still punish you, using it at the top or further away from a slope can let you roll down a boulder or toss a spike down on the foe to impale them before they escape. Because of this, Rebound Cornello actually prefers to be out of a pit most of the time, while Priest Cornello will seek refuge within it at high percentages due to it being harder to KO him and being able to better protect himself with spikes.
UP SMASH – GOD’S PROTECTION
Cornello raises his mutated arm above his head during the “charging” of the smash, causing it to become solid and invulnerable. Like the Side Special, mutations can happen in this move based off the type of alchemy move Cornello used to enter the Rebound Form. If he has extra guns, a few shots will fire out of his arm to juggle the foe lightly in the air above his arm, dealing 8 hits of 1% and flinching. If he has red lightning from Up/Side Special, it will actually crackle a bit above his arm, dealing 10 hits of 1% and flinching while sucking foes in. The reason the lightning isn’t simply better than the gunfire is because there is no hitbox up against Cornello’s arm, meaning while it will suck foes in it won’t hurt those who intentionally come to stand there. A spike, of course, will impale foes and deal 10% to them if it was at least Mario’s height. Having extra debris absorbed into Cornello’s arm will cause any attacks that hit Cornello’s invulnerable arm to cause him to shed an amount of gravel from his arm comparable to the power of the attack – a Bowser’s worth at max and a Kirby’s worth at minimum.
As soon as the charge is released, Cornello moves his arm out of the way, causing anyone standing on it to fall as he goes to do a tremendous headbutt above himself, with the veins in his head visibly pulsating as he does so. The headbutt deals 26-38% and knockback that KOs at 120-75% for an extremely powerful move. This is actually quite quick, too, almost as quick as Dedede’s utilt, the only difficulty being Cornello is so tall it’s rather hard to hit with his balding head. The idea of the move is to catch a foe, interrupt their attack by trigger landing lag supplemented by a mutation bonus on your arm, then hit them with the headbutt when they’re sitting ducks. Of course, the first half of the move is optional and you can just skip straight to the headbutt if you wish.
Note that if Cornello throws a spike into the air, he can catch it with this move in order to impale it into his arm, potentially skewering a foe on it. It can be a nasty surprise to grab a foe with it who thinks they’re safe in the air by producing artificial ground.
PRIEST AERIALS
NEUTRAL AERIAL – DIVINE SHIELD
Cornello performs some alchemy with his cane in order to produce a large amount of red lightning, crackling around himself in a ball shape as a “shield”. This lasts for about half a second, stopping immediately if the brief landing lag is triggered. The shield deals 6% and knockback that KOs at 250% on hit, rather unimpressive for how long and awkward the hitbox is. If Cornello exchanges blows with another aerial with this attack (Due to aerials having no priority system), the foe will take a small amount of extra damage and knockback in addition to the move’s natural power, one quarter that of their own attack. The foe will take their extra damage over time, at a rate of 2% per second. If Cornello hits somebody taking this damage with Chain Lightning, the damage will be “cured” from them and added to the power of the lightning. If Divine Shield is up when Cornello gets hit by Chain Lightning, it will bounce off of him without him absorbing it, and it will count as if it had bounced off of two surfaces, getting a small boost from the Divine Shield.
This move by default fills up an eighth of Cornello’s rebound meter, but if he clashes with another attack it will fill up an additional amount. For each 4% the enemy’s attack did, the meter will fill up by an additional one fifth. With the various Chain Lightning interactions, it’s possible to get a very powerful beam that can get you to Rebound form fast.
FORWARD AERIAL – SHOTGUN BLAST
Cornello transmutes his cane into a shotgun and fires a close range shot in front of himself, dealing 17% and knockback that KOs at 200%. This starts up very quickly making it a very appealing move regardless of long ending lag. The base knockback on the move is very good despite poor knockback growth, making it an excellent way to get Priest Cornello some space or more offensively to knock the foe off-stage to start a damage racking session.
Said long ending lag consists of Cornello taking the kickback of the gun backwards, propelling himself backwards roughly half a platform’s distance. His back is a weak hitbox that deals 3% and knockback that KOs at 500%. This gives Cornello some form of recovery without having to make use of his rebound form, with the hitbox on his back largely functioning as recovery self defense. It may not seem like much, but Cornello can use the move infinite times in the air.
Using the shotgun fills up one eighth of Cornello’s rebound meter, and that can obviously bypass the ending lag. Having the shotgun transmuted into Cornello’s arm when he uses his Rebound Side Special will enable him to shoot the shotgun by pressing the A button, generating the fair’s shotgun hitbox in front of him while slowing down his movement by a third for 0.2 seconds due to the shotgun kickback in order to potentially catch foes off guard. When the shotgun is used with the rebound usmash, no hitbox occurs unless the foe specifically steps onto the shotgun jutting out of Cornello’s arm, at which point it will fire. The shotgun is located on the far side of his arm, enabling him to catch a foe attempting to DI away from where he intends to headbutt.
BACK AERIAL – CANE DRAG
Cornello extends out his cane behind himself and attempts to hook people with the cane’s crook before raking them in to himself, dealing 7 hits of 1% and set dragging knockback. This is a very spammable attack and one of Cornello’s fastest, and it’s an interesting option to spam when it doesn’t raise your rebound meter. At a glance, you would think this move would be terrible defensively due to bringing foes up to Cornello in point blank range. However, if Cornello uses his DI to go towards the foe as he brings them to him, he can go past them and end with them in front of him, in perfect range for his shotgun fair which can create the space you need. This helps a lot just on the stage, but also helps significantly with defense against gimping. Even if the foe dodges the shotgun blast, they’ll be out of your way and you’ll be able to recover back to the stage in safety.
The followup to the bair is so obvious that foes will quickly learn to expect it and will often just instinctively dodge after you get in position for the second move. This can actually be a decent excuse to try to perform set-up in the foe’s face by summoning a chimera if you predict a dodge against an especially aggressive enemy. This is made more practical when you take into account that even if the foe hits you, the chimera will still get summoned. If the foe tries to outspeed your fair with their quickest poke, you can attempt to counter it with the nair.
UP AERIAL – TOWER OF BABEL
Cornello looks above himself and grins as he shifts his cane around to hold it upside down, then starts to extend the bottom of the cane out rapidly. The cane extends out extremely quickly a massive distance, potentially going up 2.15 platforms over .3 seconds if you hold down the button the whole time. The cane isn’t exactly a powerful blunt object by itself, though – the force of the attack comes from the speed at which it’s extending, meaning that it’s more powerful the further it has extended out. Using the move at point blank range is very weak, dealing 3% and knockback that KOs at 270%. At the top of the cane, the power caps out at an impressive 19% and knockback that KOs at 140%.
Keep in mind that only the top of the cane is a hitbox, though, making this awkwardly specific to hit with. The move’s ending lag increases the further you extend out the cane, going for half as long as you extended it out. Cornello will automatically stop extending it if he hits somebody. This fills Cornello’s Rebound Meter by anywhere from 1/16th to 1/7th based off how far he extends the cane, and if it’s the move that makes him enter his transformation will give him extra debris on his arm.
It is very difficult to get the full potential out of this move and it will often go ignored for new Cornello players, but having a pit greatly helps this attack. Rather than getting the foe higher into the air, you can simply get lower down, making the move an excellent way to poke at foes approaching into said pit. Another useful scenario for the move is to punish foes who recover high, who are terrified of your dsmash spike punishing them as they attempt to reach the ledge.
DOWN AERIAL – FALL FROM GRACE
Cornello extends his cane below himself as he transmutes a small spike out the end of it. He goes into a vertical position in mid-air as he goes into a quick stall then fall, headfirst. This move does a fairly unimpressive 11% and downwards knockback that would never kill if it weren’t for the fact it was downwards, enabling it to gimp on rare occasions. If Cornello actually hits someone, he’ll bounce off of them lighly, and after falling the distance of 2 platforms Cornello will automatically exit the stall then fall, making this less suicidal than most. This can actually see some use on-stage despite the horrible landing lag if you have a pit created by Rebound Cornello, as well if Cornello is very high in the air from Rebound Cornello’s Up Special.
This move fills a tenth of Cornello’s rebound meter. If it happens to be the move that triggers the Rebound transformation, it will generate a Mario sized spike out of Cornello’s arm like with the fsmash and dsmash. More interestingly, Cornello will actually transform as he uses the move. This means Cornello will not gain any invulnerability as he transforms, but the hitbox will stay out as Priest Cornello transitions from using his dair into Rebound Cornello’s dair. The cane will get absorbed into Rebound Cornello’s arm, punching downwards. The mutated arm will form very quickly to create the hitbox of the rebound version, with the rest of the body following along over the usual duration of .75 seconds. See the rebound dair for more details.
REBOUND AERIALS
DOWN AERIAL – GOD’S RIGHT HAND
Cornello goes vertical in mid-air and punches downwards with his mutated arm as he descends in an extremely quick stall then fall. Cornello’s fist deals 25% and a spike 1.4x as strong as Ganondorf’s, and his arm is superarmored against attacks that deal 19% or less. The landing lag of this is quite bad, as you’d expect. For a brief moment, Cornello stands upside-down, supported by his arm, before falling over into prone. You can choose which direction Cornello falls over in if he’s not on a slope where gravity dictates which way he must fall, and he will gain complete superarmor and anti-grab armor as he falls. Falling over deals 20% and knockback that kills at 100%. While being on a slope makes you a bit more predictable due to having to fall in one direction, you’ll slide down the slope while in prone to potentially make yourself less vulnerable.
If Cornello has a shotgun in his arm, it will fire in the opposite direction of the one Cornello falls in, generating the usual shotgun hitbox, while causing him to fall over much faster. If Cornello has red lightning, it will crackle and deal 10 hits of 1% and flinching around his arm when Cornello triggers the move’s landing lag, making it take longer but better defending him. If he has extra debris around his arm, a significant amount of it will fall off, a Bowser’s worth, not actually protecting Cornello at all but producing a very large amount of it. The debris gives Cornello further incentive to land in a slope, as it will cause all of to tumble down to the bottom of the pit. If he has a machine gun, it will fire several bullets as he descends during the stall then fall all the way to the ground, dealing 8 hits of 1% and flinching per second to try to stun them for Cornello’s fist to hit them.
If Cornello has a spike on his arm, it will specifically get fired out of his arm towards the ground, tip first, being as powerful of a hitbox as it is when thrown normally and potentially impaling foes who are on the ground. The spike will get impaled into the ground upside down with the flat side pointing up, but assuming Cornello is allowed to finish the move he will smack down the spike with his fist, driving it completely into the ground. Anybody who was impaled by the spike will get pitfalled inside of the stage while taking 29%, though the move’s ending lag means Cornello will rarely be able to exploit their stun. This is more of a way to get the most bang for your buck damage wise than anything else, in case their percentage is still low. In addition, even if no foe was on a spike, this can function as a way to “conserve” your spike so the foe can’t destroy it, enabling you to dig it up later with Rebound Down Special/Down Smash. Cornello will also fall over as soon as he finishes driving the spike into the ground, meaning his hurtbox will be a bit higher into the air during his vulnerable period.
NEUTRAL AERIAL – BALL UP
Cornello curls up into a ball and spins, dealing 12% and knockback that KOs at 170%. This is actually a fairly weak move by Rebound Cornello’s standards, but the appeal of the move is it grants complete superarmor for the duration. The starting and ending lag is quite brief, with the superarmored duration providing the majority of any “lag”. Should Cornello need one in Rebound form due to his size, this is a very good panic button.
While the move’s landing lag is normally bad, if Cornello makes contact with a slope the move will continue as he rolls down it. This provides him with a fully superarmored approach, enabling him to put this move to more offensive use. While spammable projectiles are typically far too weak to be a concern for Rebound Cornello’s health, enemies can use them to stall Cornello’s time in rebound form. Good approaches like this move and the Side Special are needed, as Cornello has no time for such childish games. The Side Special is the better move if you actually intend to hit the foe with the attack, while this grounded version of the nair functions better for clearing space.
FORWARD AERIAL – KICK OFF
Cornello tucks in his legs before shooting them out in front of himself at a 75 degree angle to do a fierce kick at foes with both his legs. The stomp deals 18% and knockback that would kill at 140% if at a more regular angle, but it’s more comparable to a spike when it goes down at the same 75 degree angle as the kick. The move is about as laggy as Ganondorf’s down aerial, and looks a bit similar to it. While the move is aimed downwards in addition to forwards, most enemies are so short in comparison to Rebound Cornello the move’s aim is doing you more of a favor if anything.
If the landing lag is triggered during the stomp (Not when Cornello tucks in his legs), Cornello will kick off the ground, propelling him at the same angle backwards into the air a platform with almost no lag at all. Despite having no bonus superarmor, the move is a surprisingly safe one to use against grounded opponents. Cornello tucking in his legs at the beginning will remove the portion of his hurtbox that grounded foes could reach, and should foes dodge he’ll kick off the ground back into the air by the time they come out of said dodge.
The move has some interesting applications on slopes. Obviously you can just keep your back to a slope to avoid hitting the ground, but kicking off the slope can allow you to propel yourself at different angles, with spikes providing even more variety. You can potentially punish people for rolling by kicking off one side of the slope to the other, then rolling down on top of them with the nair, all while staying fairly safe and not over committing yourself.
BACK AERIAL – ELBOW DROP
Cornello extends out his arm behind himself as he turns to look behind himself before attempting an elbow drop on the foe with his regular arm. Most of this move’s rather large lag is in the start-up, though Cornello’s upper torso gains superarmor against attacks that deal 12% or less after the first 10 frames of the move until the hitbox comes out. On contact with Cornello’s elbow, the foe is powerfully spiked, taking 23% and a spike 1.5x as strong as Ganon’s dair straight down.
While the move normally has very little ending lag, the landing lag on the move is quite extensive. Triggering the landing lag during the starting lag will speed up the move and cause the hitbox to spawn as Cornello elbow drops the ground, though Cornello will be suffering lag longer than the starting lag while on the ground.
While both versions of the move have obvious weaknesses, using this move next to a ledge or slope can make it more threatening as you don’t have to immediately commit to one or the other. If using it next to a slope, you can DI away from the slope towards the hole in the middle to keep it going if you predict a dodge. If using the move next to the ledge, you can do something far simpler – cancel the move by grabbing the ledge. If Cornello hits the ledge during the starting lag/hitbox animation, he’ll slam his elbow against it as he grabs it with his fist, spiking anybody on it without ledge invulnerability. This technique can be an excellent transition from Priest Cornello’s edgeguarding game – the priest knock the foe off the stage and transform while they make their way back to not allow the foe any free set-up time, then Rebound Cornello can attempt to wreck the foe who’s likely most of the way back by that point with his bair on the ledge.
UP AERIAL – GRIND TO DUST
Cornello turns to face the fore/background as he raises his hands above his head. His regular arm gets ready to catch the mutated one as it winds up the punch, then it smacks into Cornello’s open hand with great force. This performs yet another spike, dealing 12% and a spike on par with Rob’s dair. While Cornello has his usmash as an excellent defense against enemies approaching him from above, his uair allows him to knock foes back down into his comfort zone if he wants to take the extra risk for a more offensive approach with potential follow-ups. Cornello is very aware of how large he is in this form, and is intelligent enough to aim most of his attacks towards the ground to hit the pipsqueak SSB4 newcomers.
The move has a large amount of freeze frames when Cornello hits a foe with this move, “stunning” both him and his enemy in place. Rather than for dramatic effect, this is done so that an effect from Cornello’s mutated arm may be applied to the foe after hitting them. The machine gun simply adds an additional 9% as a few bullets are shot out of Cornello’s palm at the foe during the frames.
The red lightning will apply itself to the foe, leaving Cornello’s arm as it shocks the foe squished between his hands, but treating the foe as if they had been hit by Priest Cornello’s side special after it’s already bounced off two entities. If Cornello is going to downshift back to his regular state soon, there’s little better use he can make of it than this.
If he has extra debris in his arm, then a Wario’s worth of debris will get knocked off of his hand that will fall down after the foe as they take their knockback, briefly becoming a hitbox that deals 8% and knockback that KOs at 190% on the way down as an obstacle before losing its hitbox status. The debris gives Cornello some pressure on the foe to assist in his follow-up.
If a spike is growing out of Cornello’s arm, the foe will knock the spike off of the arm due to how forcefully their body is shooting downwards from the primary attack. Based off the size of the spike, the foe will take an additional 2-6%. If the spike was at least as tall as the foe was wide, then only a portion as large as the foe’s body will be taken off of his arm. The foe will enter prone on top of this spike, and if the spike hits a slope it will slide down it to the bottom at a fairly brisk pace. If the spike/foe is very small, it’s possible they’ll be able to destroy it on the way down with a get-up attack. Perhaps most impressive is the move’s potential off-stage, as the foe will have to get up from prone before they can attempt to recover. Of course, the foe will be granted the use of their first jump due to having ground to jump off of, but it’s a very respectable trade. If the spike is at least as wide as Mario, Cornello will be able to kick off of it with his fair, enabling him to quickly come back after the foe if he misses his gimp attempt.
The shotgun will attempt to shoot the foe as they get knocked down and fly past Cornello’s arm, just as powerful as it usually is dealing 17% and knockback that KOs at 200%. The shotgun generally fires too quickly before the foe is sent down to it, meaning that Cornello will generally want the foe at a high percentage. Fall speeds and weight factor into the equation of how fast the foe will reach this point – one thing Cornello can do to have some control over this is to perform the move inside of a pit of gravel, which will greatly increase the foe’s falling speed. Inside of a pit, the foe also won’t get knocked as far away by the high knockback when they hit the side of a slope, allowing Cornello to better pursue them.
PRIEST GRAB-GAME
GRAB – CHOSEN EMISSARY
Cornello extends out a hand for one of the best physical grab ranges by Brawl standards, but with awkward lag attached comparable to Falco’s grab. Upon successfully grabbing the enemy, Cornello restrains the foe by putting a hand on their shoulder.
Cornello can grab chimeras, allowing him to perform transmutations on them with his throws. If a foe is within range of the grab, Cornello will of course ignore any chimeras, so you don’t have to worry about them getting in your way.
PUMMEL - TRANSMUTE
Cornello’s hand pulsates with red electricity, dealing 0.5% per pummel in a spammable pummel on par with Lucario’s. Each pummel fills Cornello’s meter by 1/20th, serving as a way to potentially transform while having the foe already grabbed. The grab escape difficulty increases to 1.5x during the time Cornello is transforming, though even with this buff foes will generally always escape before you reach your second form. This is still helpful against foes who benefit from set-up time, though, as you can prevent them from making use of that time while you transform.
Used on a chimera, this will heal it by 0.5% with each use of the pummel while filling up your meter at a slower rate, 1/25th per pummel. Normally when transforming with the pummel, you will just gain lightning as your arm mutation. If you have given the chimera some kind of transmutation with your throws and then transform, though, Cornello will absorb the chimera into his arm and gain all mutations they have on his arm. If the effects of the transmutations would contradict each other in moves such as the Rebound Down Aerial, only the effects that can stack together will happen. While having all of the Rebound effects on a move such as the Up Smash may sound very powerful, keep in mind the chimera is quite easy to kill as you just waste time giving it transmutations with throws, this will kill that minion, and you’re only gaining these effects for 9 seconds anyway.
FORWARD THROW – EXECUTE
Cornello stabs the foe with his cane, knocking them into prone, then steps on their torso as he transmutes his cane into a shotgun. He then shoves the shotgun into the foe’s face before firing, dealing 11% and with knockback that kills at 250%, but very high base knockback. While the knockback will most of the time appear to be horizontal, it is actually at a 45 degree downward angle which can knock foes into slopes, and, more importantly, score kills when used at the edge. While this requires very high percentages to kill outright, it is Cornello’s single best move for beginning an on-stage gimping session. Cornello’s ability to make spikes come out under/the side of the stage if the foe is next to them can actually be useful in this scenario.
Cornello knocking the foe into prone at the start of the move may at first appear aesthetic, as the following shotgun blast will knock the foe out of prone immediately. If you knock the foe into prone on a slope, though, Cornello will slide on top of the foe briefly before firing. This enables Cornello to get into a pit while firing the foe out of it, serving as a superb reset into a defensive position. Be aware this powerful new attack gives a lot of ending lag, so you’ll have to cover for the Chimera during its downtime. The move fills up 1/10th of Cornello’s rebound meter.
If this is used on a chimera, Cornello will transmute a shotgun barrel into the mouth of the lion. When the lion bites the foe, they will fire the shotgun, dealing 17% and knockback that KOs at 200% like in the fair. The kickback of the gun blast will knock the lion back a platform’s distance. Aside from a generic buff to the lion’s attack, this can help lions recover when suicidally chasing foes off-stage, as foes will inevitably attempt to bait them for easy kills in this way.
BACK THROW – SMITE
Cornello channels yet more red lightning into the foe before sending an elongated blast of lightning to knock the foe behind him to deal 5%. This does a minimum knockback of a platform, after which point the foe will take knockback that KOs at 190%. Beyond the initial 5%, the foe will continue to crackle with red lightning for 10 seconds, during which time they will take 1.4% per second. If the foe hits another character or minion while they have this status effect, though, it will instead be passed on to that character. If Cornello can keep away and evade being hit for all that time, though, he’s looking at a damage output of 19% for pulling off this throw.
While this only fills up a mere 1/12th of Cornello’s rebound meter by itself, if Cornello hits the foe with Chain Lightning their damage will simply get added to the beam’s power and they will lose the ability to pass it around by hitting people. Not only does the foe have to go out of their way to hit Cornello, but they have to evade Chain Lightning on the way. While they can quite easily pass it off to a Chimera, this will grant Cornello the ability to easily “collect” the power of the lightning by hitting his minion with the Chain Lightning. Obviously using this throw on a chimera directly will just apply the effect to the chimera immediately, with the end goal of getting the chimera to land an attack on the foe to spread the lightning.
Not only does the foe have to watch out for Chain Lightning as they come to pass the lightning to Cornello, but Cornello’s nair can block the passing of the lightning to some degree. If a foe with this status effect hits Cornello, they will not pass the effect to Cornello but will instead have a quarter of the damage of their attack added to the length of their effect. Adding in the regular 1/4th of damage a foe instantly takes from attacking Cornello in his nair, and they’ll eventually be taking half the damage of their attack in total.
UP THROW – SOLIDIFY
Cornello transmutes a geyser of sand 1.2x Ganon’s height up underneath the opponent to propel them into the air. This deal 13 hits of 1% and pushing knockback into the air, with the last hit dealing vertical knockback that kills at 260%. While the knockback is weak, the sand geyser will push the foe up 1.3 platforms before they even take said knockback. Cornello’s rebound meter will fill up by 1/8th for performing this attack.
As the foe rides the sand geyser, some of the sand will stick to their body and start to harden into stone, encasing small portions of their body. This will give the foe the effect of traveling in debris from the Rebound Down Special, decreasing their dash speed by 1/4th and increasing their fall speed by 1.5x. This can stack if the foe is standing in actual debris. Foes can knock off the debris by attacking it like a leeching Pikmin, with the debris having 10 HP. It will take the knockback of the foe’s attack as they knock it off and become a small amount of regular debris after that point. If you used the move in a pit and foes attempt to remove their debris immediately, it will more than likely roll down into said pit as a nice small bonus.
If used on a chimera, they will have to have the debris knocked off of their bodies. Aside from creating debris, this serves as a small buff of 10 HP to the chimera, as they will not take damage from attacks that knock it off of them. The debris will be primarily located on the chimera’s torso and will function as a drop-through platform. If a foe comes to gank you off-stage and a chimera is chasing them like the suicidal idiot it is, you can potentially make use of the chimera to recover. Even better is that you can produce spikes on the chimera’s back. When a chimera is leaping at the foe, possibly through your usmash command, you can use the dsmash to make the spike come out from underneath the chimera’s belly to stab at the foe. Be aware if you make spikes underneath the chimera, though, that they will break off when it hits the ground (They can still be picked up by Rebound Cornello later).
DOWN THROW – BED OF SPIKES
Cornello produces 5 minimum charge spikes as powerful as the fsmash/dsmash in front of himself, then slams the foe down into them, dealing 10% and knockback at a slanted primarily vertical angle that kills at 200%. The 5 spikes will stick around as a weak trap afterwards like regular uncharged spikes, dealing 5% and weak knockback.
This throw can be looked at as a “free set-up” throw, but just 5 uncharged spikes by themselves don’t have all that much use. If Cornello uses an fsmash/dsmash where an existing spike that isn’t fully charged, though, it will extend out from the spike that’s already produced. Not only does this significantly decrease the lag, the resulting spike will be better protected by the small spikes surrounding it, largely forcing foes to get rid of them first to get rid of the spike that actually matters, during which time you can attempt a dsmash to extend those spikes. The move fills up a tenth of Cornello’s meter, and if this move triggers Cornello’s transformation he will have a fully charged spike growing out of his arm, combining the 5 smaller spikes into one.
If this is used on a chimera, the spikes will come out of the chimera’s stomach and impale into the ground, rooting the Chimera to that point. This turns the Chimera into a trap rather than a minion, preventing it from killing itself or taking knockback. It can also stay to be in a more reliable position for set-ups/as a Chain Lightning bumper, as well as keep it “safe” if you’re trying to dump multiple transmutation throws into it. The lion’s pounce attack will still be just as powerful, but will just be a swat of the chimera’s front claws in place. Performing a usmash command on a chimera affected by this will have Cornello release the chimera from the spikes with no additional lag. The 5 small spikes can also be unearthed at a later time by Rebound Cornello.
REBOUND GRAB-GAME
GRAB – IRON GRIP
Cornello goes to grab the foe with both his hands. The grab is Dedede’s with 1.2x the range, making it as fantastic as you’d expect. This is only with Cornello’s standing grab, though, as his dashing grab is much laggier, meaning you’ll largely be using the standing one exclusively. While the standing grab is still great, it’s a bit of an issue in making Cornello predictable when he only has 9 seconds to use it.
PUMMEL – CRUSH
Cornello squeezes the foe in a laggy pummel dealing 4%. Despite the power, the lag makes the pummel rather inefficient compared to that of a normal character’s. However, each pummel increases the grab escape difficulty by 1.15x, potentially allowing Cornello to keep a foe restrained if he’s about to deform into his regular form if the foe’s at a high percentage. Of course, the foe can still escape the grab during the time where Cornello changes back.
FORWARD THROW – CAST OUT
Cornello encloses his hands around the foe, obscuring their character model as he shakes them inside of his hands like a pair of dice. He then opens up his hands to let the foe tumble forwards, dealing 9% and strangely weak knockback that KOs at 250%. Foes will briefly enter their reeling animation as if they were footstooled, leaving them vulnerable. Cornello is able to capitalize on this extremely well, as this throw is quite fast, even by the standards of a regular character. Aside from using this as a set-up throw, this makes the throw quite useful when time is such a valuable resource for Rebound Cornello.
Cornello’s height means when he releases foes, they won’t immediately go and tumble along the ground with downward angled knockback, starting in the air. Outside of very low percentages, though, foes will hit the ground so quickly that Cornello won’t be able to make use of the footstooled effect. Sending them into a pit from the outside will keep them ripe for punishment for long percentages to come, though. The move can even set-up for the kill, beginning a gimping session at the edge.
UP THROW – ASCENSION
Cornello restrains the foe in such a way to perform a suplex on them before leaping high, high into the air at a speed a fair bit slower than his grounded Up Special. He goes up into the Smash Bros “magnifying glass” at the top blast zone like Kirby’s throw before coming back down to the ground, dealing the foe a minimum of 10% and knockback that KOs at 190%. The more distance Cornello had to travel to reach the top blast zone with this move, the more powerful the move becomes. Each Ganondorf traveled increases the power of the move by 4% and makes the move’s knockback to KO 10% sooner. Cornello will fall through drop through platforms on the way down.
This will be Cornello’s strongest throw in raw power if used in a pit, but starting the move on lower ground causes the move to take longer. While lag on throws is not normally a concern in 1v1, it means Cornello will have to aggressively grab at the foe early on in the transformation, and in a pit no less, if he wants to pull off the move with the full potential. While the knockback buff is nice, you’re mainly in this throw for the damage, as being lower when the foe actually takes their knockback somewhat negates the knockback boost anyway.
DOWN THROW – BURIAL
Cornello throws the foe to the ground, dealing 4%, leaps up and stomps on them with both feet, dealing 6%, then does it again for another 6%. This throw creates a Ganondorf deep “pit” as if Cornello had used his Rebound dsmash on the location of the throw, and will leave the foe at the bottom of that pit in the prone position. Due to foes sliding down the sides of a pit while in prone, it makes foes rather easy to tech chase if they attempt to roll up from the position, with Cornello’s primary techchasing moves being the nair and fair. The nair will enable Cornello to ignore get-up attacks with his superarmor and quickly roll to either direction the foe rolled, getting beaten out by the foe just standing up from prone immediately.
Aside from providing offensive pressure, which the move is great at, the move is very key because it enables Cornello to set-up while still attacking the foe. While this is something any character with set-up would love, Cornello screams for a move of this kind with his very strict 9 second schedule.
BACK THROW – OPEN ARMS
Cornello holds the foe in one hand before extending out both of his arms and spinning in place. After building up some momentum by spinning for some lag, he releases the foe as the arm holding them goes behind where he was originally facing, sending them flying with 12% and knockback that KOs at 130%. This is Cornello’s direct kill throw, and will deal 20% and knockback that kills at 110% to outside foes in a FFA.
Cornello’s height enables this move to become very convenient for him. While the knockback foes take is horizontal, they’re elevated to Cornello’s shoulder height before they take it. Cornello’s pits often won’t be that deep, meaning they’ll be lower than Cornello’s shoulder height. This lets you knock a foe directly out of a pit with a KO move without having to resort to something like vertical knockback, which will be penalized by the foe being lower down in the stage due to being in a pit. In the event you have a pit that’s so deep Cornello can’t throw the foe out of it with this move, you’d want to be using the uthrow anyway.
PRIEST STANDARDS
JAB – QUAKE
Cornello taps his cane on the ground, causing the ground a platform’s distance in front of himself to lightly shake. This is not forceful earthshaking that knocks people into the air – it simply slows the movement of enemies by a quarter while dealing 9 hits of 1% per second. This doesn’t flinch enemies, but every fourth hit will always cause enemies to trip as a small ripple goes through the ground. Each of the 9 hits per second fills Cornello’s rebound meter by 1/60th.
Simply using this on foes approaching you will cause anybody with half a brain to jump, or simply roll past the ripple as it shows up. This move has very little lag, though, with the portions of the move that aren’t the tripping essentially functioning as the move’s “lag”. Using this on a foe not impeded in any way can be used to try to bait some kind of punishable action.
Where the move truly shines is on opponents that are coming out of the air. You can “charge” the move in advance to trip them the moment they touch the ground, getting foes who recovered high ready for punishment. This will also wrap around edges to hit the ledge. The damage will still hit foes with ledge invulnerability, while the ripple will deal light downwards knockback to hit foes off the ledge if it connects.
DASHING ATTACK – RUN AND GUN
Cornello stops using his cane as a walking stick in his dash, lifting it up and transmuting it into a shotgun as he turns behind himself. The move deals 11%, with the usual knockback that KOs at 200% with high base knockback. Even should the move miss, it’s useful for running away considering it propels Cornello forwards a little under Bowser’s width. Cornello’s body deals 3% and knockback that kills at 400%, just so you don’t look like an idiot when the foe rolls in front of you with the move. This is a keep dashing dash attack, enabling Cornello to fire behind himself at will when fleeing from enemies. Cornello’s dash will be slowed briefly as he transmutes his shotgun back into a cane to prevent the move from being a faster method of transportation than just dashing normally.
The frail Cornello will fall onto his stomach when this move is used on a slope due to the force of the kickback. This can actually assist Cornello by enabling him to “dive” back into a defensive position pit, as sliding down a slope is faster than his rather crippled dash speed. The move also fills 1/8th of the Rebound meter, meaning if Cornello transforms because of this move he can potentially slide down a hill to “chase” a foe while transforming.
FORWARD TILT – HAND OF GOD
A hand of earth rises from the ground in front of Cornello. It arcs forwards as the “arm” behind the hand extends with it before coming back down to smash into the ground in an “arch” shape, hitting foes about a Wario width in front of where Cornello was standing. The hand is a hitbox throughout, dealing 6% and knockback that KOs at 275% in the direction the palm of the hand was facing. The hand and arm crumble to dust after the move is completed.
Cornello can hold down the A button to enable the arm to extend upwards further before completing the arch. At maximum, this will cause the hand to reach 1.5x Ganon’s height into the air and hit 1.2 platforms away from Cornello. This is impressive in how fast it is, but of course leaves a gaping blindspot on the ground for the move. The higher the hand was before it started to come down, the more powerful the move becomes as it does so, dealing up to 14% and a spike on par with Rob’s dair. Cornello gains anywhere from 1/16th to 1/9th of Rebound meter, gaining it progressively as the move “charges”.
The arc of this move provides useful for a multitude of purposes. It’s great at hitting enemies approaching downwards into a pit when you’re lower down, hitting foes jumping over a pit or even just a spike to reach you, and of course serves as an excellent punisher at the edge, especially on enemies recovering high.
UP TILT – SAND GEYSER
Cornello taps his cane on the ground, then .4 seconds later a geyser of sand 1.2x Ganondorf’s height erupts at that position. The sand geyser deals 13 hits of 1% and flinching as it pushes foes to the top of itself, with the last dealing vertical knockback that KOs at 260%. Cornello is free to move after the move’s very brief lag, waiting for the geyser to show up. If he taps the ground with his cane in the same position before the geyser shows up, it will double the height the geyser goes up and add an additional 5 hits. Foes will go up the taller sand geyser more quickly so they can’t just DI out. While the knockback is terrible, it can be enough to eventually kill enemies when they’re taking it at the top of multiple sand geysers. The move boosts the rebound meter by 1/16th.
While Cornello can only stack 2 sand geysers in the same position with this move alone, he still has enough time to grab a foe. If Cornello performs his uthrow when a sand geyser is about to erupt, the uthrow and utilt(s) will combine their power as if the uthrow was a “bonus” utilt. The uthrow will also cause additional portions of the foe to solidify. Each extra sand geyser will slow the foe’s movement by an extra 1/6th, while their falling speed will be increased by an additional 1.2x. Each extra portion of debris hardened on the foe’s body requires them to knock it off with an additional attack, creating another portion of debris to boot.
The utilt takes much too long to start-up to use as an offensive measure in most cases, and actively attempting to get the utilt/uthrow combo is laughably predictable. It functions as a great defensive measure, though. If a foe is approaching and about to reach you, you can use the utilt and step behind it to use it as a barrier. Even if the foe will get past the geyser before it erupts, you now have a big juicy reward to grab them at that position as they inevitably come past it. You can stack both utilts in the same position if you’re feeling overconfident, but placing two geysers slightly away from each other foes to approach you from will give you significantly more leeway in where you land the grab. Note that the geysers will erupt directly upwards regardless of whether or not they’re on a slope.
If a spike is buried underground for any reason (Caving in the ground with rubble, driving it in with rebound dair, etc), using the utilt or uthrow will cause the spike to get shot up out of the ground. The tip is just as powerful as always, and it will hit anybody hit by the geyser. The geyser will also cause the spike to flip over as it reaches the top, causing the spike’s tip to still be a hitbox as it comes back down. Larger spikes will retain their solid status during all of this, so even if the foe isn’t hit it will prevent foes from immediately rolling past the sand geyser, getting caught in it as their roll gets stopped short. Rather than just “running”, this version of the move largely will just have Cornello wanting to dance back and forth where the eruption happens to bait enemies.
DOWN TILT – QUICKSAND
Cornello causes the ground a Wario’s width in front of himself to start sinking for a very brief period over .4 seconds before making the ground solid again. Any foes hit by this attack will take 8 hits of 1% and flinching over the course of it before getting their feet stuck in the ground. Foes can still attack/dodge/etc from this position, but not move or jump until they either escape at grab difficulty or use a leg based attack with 1.3x the starting lag. Taking knockback from this position that would knock them back a platform or more will also release the foe. Using the move on a foe already caught in this effect will deal them knockback that KOs at 220%.
The most obvious follow-up to this attack is an fsmash or dsmash, as even if the foe dodges the primary hitbox they will automatically be hit by the spike tip’s passive hitbox afterwards, while also granting you a free spike in the process. The move fills 1/6th of Cornello’s Rebound meter, and if he hits a foe and transforms it’s ideal since they’ll be delayed from running away from him while he hulks out.
The move will cause spikes in the area of effect to sink into the ground Mario’s height. Larger spikes will still keep their HP despite looking like shorter spikes, and this actually makes them more obnoxious to destroy as foes have to aim multiple attacks at the ground. You can also bring spikes completely underground for you to use with either your utilt or Rebound Cornello. The move is particularly nice to use against a foe on the opposite side of a spike as yourself, as the spike should ideally block some of their attacks as you use the dtilt before functioning as ammo in a utilt followup. When the foe’s locked in place, it also becomes much more feasible to perform the utilt/uthrow combo.
REBOUND STANDARDS
JAB – STREGNTHEN FAITH
If the button is simply tapped, Cornello will punch forwards with his mutated arm, quickly dealing 9% and knockback that KOs at 160% in a very reliable spacer. If Cornello mashes or holds down the A button, he will flex his mutated arm for the duration, powering up the punch to come. Cornello can charge the punch for up to a second. At max charge, the punch deals 19% and knockback that KOs at 90%.
Based off what Cornello has on his mutated arm, different effects can happen if the move is charged. The shotgun is the simplest, with it firing as the punch goes off in the opposite direction in order to make the force of Cornello’s punch more forceful and have 1.3x the power. This slightly increases the ending lag, but the shotgun will not fire if the move is uncharged.
With rubble on his arm, it will fall off it as he charges, creating falling hitboxes below his arm in front of himself that deal 12 hits of 1% and flinching over the charge’s duration, stunning foes for the punch. If Cornello releases the jab and punches as the rubble is falling, he will instead knock some of it forwards 2.5 platforms as a small stream of projectiles.
A spike on Cornello’s arm will get shot up out of his bicep during the charging, skewering enemies as if it were thrown. You need larger charge to shoot larger spikes out of your arm, requiring full charge for a fully charged spike. The spike will skewer enemies like when picked up and thrown, but will go much faster (In exchange for more lag and having to go straight up). When a foe is approaching you from the front in the air, this gives you responses for if they both jump towards you directly or over your head entirely. Charging the move can also function as a decent fake out as you fire off the move early in order to avoid shooting your spike.
If Cornello flexes with machine guns attached, the pressure put on them will cause them to explode if the move is fully charged, dealing 23% and knockback that KOs at 70%, while dealing Cornello a minimal 5% in recoil penalty. The hitbox will be Cornello’s entire arm as he releases the punch and will linger for quite some time. If you only partially charge the punch, the guns won’t instantly “cool down”, only doing so completely after 3 full seconds. This enables Cornello to somewhat “store” his charge, and makes slightly charged spams of the jab a lot more scary for the foe and gives you some degree of leverage by charging the attack. This obviously uses up the guns, but if you work up the charge gradually and use it as a threat it will last most of your transformation time anyway.
If Cornello has lightning in his arm, he will jut out his palm instead of punching forwards with a fist. This decreases the physical power of the attack by 1/6th. While charging, Cornello’s flexing arm deals 4 hits of 1% and flinchig throughout to slightly cover himself, then Cornello channels channels the lightning into his hand upon releasing the jab. This will cause the lightning to shoot out of his palm at a 45 degree angle towards the ground. The power of the beam is the same as the one that he used/absorbed in order to enter Rebound form, requiring a minimum of half charge to fire off, and increasing the power of it by up to 1.3x at full charge. This will cause Cornello to lose the lightning in his arm unless he manages to reflect it back to hit himself, and this becomes significantly easier for Rebound Cornello due to his size. Foes will actively seek to shield this attack at times in order to make it bounce off of them into the air harmlessly.
DASHING ATTACK - RAM
Cornello kicks off the ground to propel himself forwards, attempting to headbutt his opponent. Cornello will travel the distance of 1.3 platforms along the ground before falling into prone at the speed of Captain Falcon’s dash. His head deals a powerful 17% and knockback that KOs at 100%, and on hit Cornello will fall on the ground into prone early. This move has very little lag, with the penalty being forced into prone. This is certainly much better than ending lag, though. Cornello is very wide when he lays on his stomach, so unless he attempted to hit a foe at point blank he will likely be able to hit that enemy with a prone attack if they dodged the headbutt. If you want to hit foes farther back, you can use the move on a slope and slide back to them as you use the prone attack. Also note that Cornello will continue sliding while reverting his transformation, so this can help you to continue to control your movement.
If Cornello ends the move in the air, he doesn’t enter prone and basically doesn’t experience lag with the move. This makes the move a very scary ones for foes attempting to travel over the top of your pit, and can also just be used for outright transportation. The move can also of course provide an excellent transition into your off-stage game.
FORWARD TILT - PRAYER
Cornello claps his hands together in front of himself, attempting to crush his enemies. Contact with his hands deals 11% and knockback that KOs at 135%, with fairly high base knockback. This is one of Cornello’s best attacks in terms of the speed/power ratio, functioning as one of his most mindless and spammable spacers with his giant body providing it excellent range. Unlike Bowser’s ftilt, Cornello’s hands don’t have to magically enlarge.
If Cornello claps his hands on a spike, he will shatter it, causing the remains of it to fall out of his hands in the form of rubble. The rubble deals 4-12 hits of 1% and flinching as it falls based off the size of the destroyed spike. While weak, the ending lag of this move is short enough to follow up on foes getting hit by the rubble. The solid nature of the spikes before they are broken can also serve to catch rolling foes – if they roll into the spike and dodge the clap with it, they’ll get caught by the rubble.
UP TILT - PURGE
Cornello raises his arm behind his head before punching the ground in front of himself, dealing 12% and knockback that KOs at 140% at a 30 degree angle downwards. This creates a hitbox that spawns immediately above and in front of Cornello with nearly no lag whatsoever before it smacks down in front of him. The speed is still acceptable to hit grounded opponents, though the move is merely average against them rather than something exceptional. While the move doesn’t hit directly above Cornello, he’s so tall that you can generally bat enemies out of the air with this attack as they attempt to reach that point. The move of course also works well on opponents on a slope above you or those recovering high.
When Cornello’s fist hits the ground, a platform sized earthshaking hitbox will show up in front of himself comparable to the Priest’s jab. It lasts a second and deals 9 hits of 1% with no flinching, with the fourth hit tripping enemies. Just this alone isn’t nearly enough reason to use the attack, but it’s possible to knock foes into this with the punch at lower percentages. At higher percentages, this can still be accomplished by hitting enemies at a higher position on a slope than yourself. You can also get a small amount of mileage out of this by hitting a foe downwards off the stage with the punch, forcing them to take a small bit of bonus damage on the ledge when they come back.
DOWN TILT - DRAG
Cornello reaches out his hands in front of himself, then drags his hands back to himself as digging his fingers into the ground a bit. This deals 10 hits of 1% and weak set knockback back towards Cornello. The move will “wrap” around slopes rather than Cornello just dragging his hands through open air. The move is primarily to catch enemies attempting to just flee Rebound Cornello to stall out his timer, as it’s quite a fast attack. Even if foes don’t just run for the entire duration, running for the last couple of seconds can be a viable tactic. The move’s ability to “wrap around slopes” also applies to edges, enabling Cornello to easily hit foes attempting to plank his Rebound timer.
If Cornello wraps his hands around a boulder, he’ll bring it in to himself as you’d expect, taking a bit more lag. As he brings in the boulder, it will be a hitbox that deals 8% and knockback that KOs at 200%. If the boulder is in a slope, it will take longer for Cornello to bring it to himself and it will not be a hitbox, but Cornello can release the boulder at any time with another press of A. This makes the boulder a fair bit less predictable.
PLAYSTYLE SUMMARY
Cornello’s transformation is unique in that it can be seen as something of a “power-up”, despite having a complete moveset to call its own. Despite being such a boon, mindlessly transforming into it whenever possible is obviously a terrible idea when so much self damage is given to him. There are many moves and situations throughout his massive toolset that serve as good transitions, such as camping with moves that build up the meter and transforming as they reach you or transforming as you knock them off the ledge. Early on in the match, Cornello will probably just want to transform once primarily for set-up purposes – a dsmash or dthrow is mandatory, and a boulder or pile of rubble are nice bonuses. While Cornello can score kills fine as the priest, he will be relying on the Rebound transformation more and more as the match progresses regardless. The extra damage will matter less when Cornello’s damage is already high, and he will want to stay in the form primarily for the weight and recovery it provides, essentially making him invincible.
The many defensive moves available to the priest can allow him get set-up as you’d expect from a typical character of this archetype. While that’s nice and he will use them for that purpose to a degree early on in the match, most of his set-up is designed to work fairly well in the face of combat. The spikes are the most obvious example, but foes can’t even interrupt the summoning of Cornello’s chimeras. Beyond just set-up, though, Cornello needs his massive arsenal of defensive moves in order to survive at the stupidly high percentages that he’s going to reach. If foes want to kill Cornello in his Rebound form, they’ll have to take him to ridiculous percentages, at least 200%. Cornello needs to be able to survive long enough when he reverts back to the Priest to regain Rebound status, as well as be comfortable enough to actually do anything when he does. While Cornello’s Chain Lightning won’t have much of anything to bounce off of at low percentages when a normal character would actually want healing, late in the match there should be countless targets to extensively heal him and fill the Rebound meter. While the priest doesn’t particularly care whether he’s at 180% or 200%, it can actually be enough to enable the Rebound form to survive. With these insanely high percentages, the priest will want to be in the pit just to make himself harder to kill, let alone the new opportunities it provides for his attacks. Going out of his way to survive for as long as possible also means he will inevitably get some great set-up towards the end of his stock, worth going for since everything he does reverts to normal on his death.
Cornello’s favorite place for the foe to be when he goes on the offensive actually isn’t in a pit, but off the stage. The priest enjoys the foe being there for his opportunities to damage rack directly with the Machine Gun or give easy surfaces to bounce off his Chain Lightning to power it up, then punishing them horribly whether they come to the ledge or recover high with his multitude of options. The priest doesn’t expect to kill when he knocks his opponent off the stage, he just intends to impede them for as long as possible. This is also the most obvious opportunity for Cornello to perform set-up with absolutely no risk. One of the most popular forms of “set-up” is to transform into Rebound form. The Rebound form still loves to see the foe off the stage, but it has much more evil intent as it directly gimps foes or, in the least, horribly punishes them as they land back on the stage.
PRIEST FINAL SMASH - CRUSADE
Cornello summons five of his followers with comparable size to himself. They weigh as much as Captain Falcon and have 50 HP. Their attacks consist of Priest Cornello’s Machine Gun and his shotgun fair, though they’re able to use the shotgun on both the ground and in the air. This provides plenty of projectile clutter and huge fodder for you to bounce Chain Lightning off of, with the Final Smash lasting for 10 seconds.
If Cornello enters Rebound form while his minions are out on the stage, though, he will absorb the guns of any minions within a platform of him into his arm. This will give him access to the shotgun and machine gun at the same time, and increase the amount of hitboxes produced by 1.5x for each pair of guns he absorbs. All of Cornello’s minions will flee the stage and kill themselves upon his transformation.
REBOUND FINAL SMASH – GODHOOD
Cornello attempts to perform further transmutation while already in his rebound state. This increases his size and weight by an additional 1.5x, and causes his entire body to mutate into a black mess of alchemy like his arm. Cornello’s entire body is now solid, and every 2 seconds, a mutation will come out of Cornello’s body at the position nearest to the foe. If the foe is right up against him, a shotgun will jut out of his body and shoot the foe as powerfully as his fair. If the foe is within the distance of a max charged spike, one will jut out at the foe. If the foe is further away than that, a machine gun will sprout from Cornello’s body and fire in the foe’s direction for one second. After 9 seconds of this, Cornello will revert to his priest form.


")