• Welcome to Smashboards, the world's largest Super Smash Brothers community! Over 250,000 Smash Bros. fans from around the world have come to discuss these great games in over 19 million posts!

    You are currently viewing our boards as a visitor. Click here to sign up right now and start on your path in the Smash community!

Make Your Move 12: Now with accurate title! MYM12 is closed! MYM 13 is Open!

Katapultar

Smash Lord
Joined
Nov 24, 2008
Messages
1,284
Location
Australia
Incomplete Set #3


Egghead


Egghead is an American Davian character from the old 1960s Batman show. He strives to be an eggcellent villain and even has some henchmen, but is outshadowed by those other American people and even video game characters like Billy Hatcher and Dr. Eggman. The only place this guy ended up was down the river, or maybe not because he magically got a set thanks to Dave.

This video shows one all they need to know about this eggciting character. And maybe this too.


Size: 8
Weight: 8
Ground Speed: 4
Jump: 4
Aerial Speed: 4
Fall Speed: 6
Traction: 2

Egghead would be pretty easy to crack up, were it not for the fact that he has 2 thugs following him around in the background! He's a multiminion character because it's a Dave character, and said minions have the same stats as him. I REALLY don't need to show you what the thugs look like when they're in the video.​


Specials


Neutral Special - Dave's Eggs
Egghead gets his minions to place cardboard boxes where they are (usually behind him), one per minion every half a second. The cardboard boxes are small enough that 6 will easily make up the height of a regular character as the thugs make a new stack behind that one afterwards. Thugs are vulnerable to being knocked offstage while they're stacking cardboard boxes, but Egghead can move around while they're stacking (to distract his foe like a good villain) and the boxes can block incoming attacks...well, sort of. Cardboard boxes aren't exactly the most durable material - not only can players pick them and and throw em around, but they can also be knocked down with realistic physics by virtually any attack that does knockback, or even by running into them. If the boxes fall atop somebody they take 5% and enter prone, while thugs are knocked down by them stupidly and struggle to push them away in front of them, a process that takes at least 2 seconds against one stack and leaves the thugs unusable and vulnerable to attack.

Oh, and no guessing what's inside a single cardboard box. Eggs, four dozen eggs (that's 48 of em!). Thankfully Egghead was actually -smart- enough to have the boxes sealed before the fight, but any player holding a box can rip the tape open to break it apart as it falls to the ground. From there, the eggs sit there clustered, items that players can pick up and eat to heal 1% (a very, very slow healing method given the eggs have to be picked up and then eaten) or thrown to -inflict- 1% with flinching as it splatters on that player, covering them in surprisingly harmless yolk that does little but hurt their clothes. If an egg hits the floor however, it'll create a mess that decreases traction and increases tripping rates for the 2 seconds it lasts for (it's incredibly small, but), giving characters a chance to trip if they try to attack atop it. If a box that has been knocked around or thrown is opened, the eggs inside will totally be scrambled, resulting in a huge mess (a platform width) that slightly pushes anyone back as the yolk stays there, lasting for a good 15 seconds before leaving.

If both minions are dead Egghead will use this move himself, though it's obviously a lot less effective.​

Side Special - Dave's Toss
Egghead points forward, telling his minions to throw eggs! If there's a foe ahead of the minion and they perform an attack, the minion will throw eggs at them, simple as that, interrupting their attack in a similar concept to wonderful Willy Wonka.


One minion will jump up in front of Egghead, with 12 eggs, and begin throwing them at the same rate Olimar would throw his Pikmin until he runs out or Egghead tells him to stop - tilting the control stick will conveniently change the arc in which the thug throws the eggs. Oddly enough, tapping and smashing the control stick will designate one of the two minion so you can have them throw eggs in different places or only make on of them do so, and minions are indeed stupid enough to throw eggs behind another if you're stupid enough to tell them to do that (or stupid enough to get in their way) - at the very least you can get over this by having the backrow minion throw their eggs in an arc over the one in front of them. If a minion is attacked/grabbed while they still have eggs, those eggs will fall to the floor to create a mess 0.6 SBBs wide that lasts for 3.5 seconds, something that can put foes off-guard and potentially trip them if they try to throw the minions. And needless to say, if there's a cardboard box within a Platform of a minion when they run out of eggs they'll run up to the box (taking the top one if it's in a stack), open it and take 12 eggs from it before running back to their position. It's laggy and the eggs don't cause flinching to foes, but Egghead can move while they're being thrown, so all's fair.​

Up Special - Dave's Chicken
Egghead takes out a bunch o chicken and lets them carry him upwards! Think a more hilarious version of Cypher, only the 4 chicken used for the recovery flutter down to the stage after use. Go chickens, go and take out the foe for your beloved master! Eh, what, they're just walking around the stage like...chickens!? Wow, those guys are useless, and here I thought you'd get something good out of the fact that you can have a ton of em out.​

Down Special - Dave's Eggsploder
Egghead takes out a remote of what could possibly be his greatest invention: The Eggsploder! This is a weak throwing item, and when the input is used again Egghead will laugh and press the button, but, nothing seems to happen...did this plan flop on him yet again? Wait, no, something's happening...all the eggs onstage just eggsploded! All farmers and housewives, bow down in fear for the great Egghead, lest all your precious eggs get splattered across the area for a big mess you have to clean! Eggsplosions are actually surprisingly strong, but not as strong as the one seen in Silly Billy's set: they're relatively small, but deal 3% that KOs at 300% of which becomes 0.08X stronger for every egg involved. Needless to say, while the damage output from one involving four dozen eggs won't be that good (you have thrown eggs for that, remember?), the knocknback is good enough to kill at 100%, a surprisingly competent way to kill foes at the cost of losing all your eggs...but did I mention that said eggs make their splatter after exploding anyway? Nice huh?

There's at least -some- time before the eggs explode, and when they they'll begin to rattle: minions throwing eggs will know better and toss them all ahead at once as they explode in mid-air, while those attending to cardboard boxes will run back into the background...needless to say, minions who can't escape due to eggceptional circumstances like being crushed by a box will be met with rather unfortunate implications. Try to avoid that if you can, you need all the help you can get, you sucky super-villain.​


Standards

Standard - Dave's Doorknocking
Egghead seems to think that flailing his arms ahead of him like a sissy is an effective tactic for deterring foes. Well it is, acting like the fan item but with more ending lag that punishes Egghead, capable of keeping foes trapped for up to 2 seconds.​

Dash Attack - KFC Slider
Egghead gets down and dives across the ground, yelling "wootwootwootwootwoot!!" over and over like an American cartoon character lying on their sides and running around in circles in a manner that's apparently supposed to be hilarious. Egghead also kicks his feet like a little kiddie paddling in a swimming pool, too, as he travels a SBB's distance. Foes hit by Egghead's front trip and are knocked behind him with 7% that KOs at 190% if they're somehow hit by his legs. If Egghead ran across egg he'll be slid by it for distance that doesn't count towards his total distance and resets it, letting him go across the entire stage if he wishes while stupidly killing himself if he runs into a blast zone. Despite being incredibly stupid, this attack has a number of uses. If Egghead slides into a cardboard box, the others stacked atop of it will fall behind and can hit foes or even splatter eggs and stuff, and this also allows Egghead to slide underneath his minions to safely attack foes while they're throwing eggs at them. It's also Egghead's best way to travel across the stage, if that's even believable.

Also, if minions are somehow sent sliding across egg AKA trip they'll fall with their hands outstretched and deal 4% with weak horizontal knockback to any foe they hit, capable of tripping them at low percentages.​

D-tilt - Kinder Surprise
Egghead​

Smashes


F-Smash - Green Eggs and Ham

U-Smash - Egg Bomb
What are you doing Egghead, egg bombs are too good for you! But eh, I'm preeeeetty sure you guys all remember how we had EGGS as capsules in Melee, and how they could explode? Yeah, took Egghead here a while to import those over to Brawl. The egg's quality of such is 1/3 to the same as said egg and as such packing quite a punch if it hits, but if Egghead is an egghead and holds it for any longer than 3 seconds it'll suddenly go BOOM by itself! Dat bad.​

D-Smash - Egg-Head
Egghead takes out a massive egg and holds it behind him in an exaggerated manner, ready to swing over an unlucky foe's head. They gotta be even more incompetent than Egghead here to get hit by this laggy attack, and if that does happen they'll take 9-12% and be forced to suck on a giant egg (or at least the yolk inside it) that usually covers their head. The egg can be shaken off with 1.25-3X grab difficulty, and while the foe can still use their attacks I'd advise against moving or attacking at all when your controls are randomly scrambled until the egg is shaken off. It's pretty hilarious to throw eggs at a struggling foe to humiliate them, that's for sure.

Also, if you've been egged on enough to wanna put an egg over one of your minions' head, say when they're throwing eggs, they won't be able to see where they are! I guess they can still throw eggs normally, but if they're hit by a foe they'll run around like a headless chicken.​

Aerials

N-air - The Chicken Dance
Egghead faces the screen and starts cooing and flapping his arms like a chicken! This somehow magically slows his descent and deals some weak hits while being quick - it's good, because it allows Egghead to pester the hell outta foes and trap them with the move's hits before they hit him back. If you use this while there are chickens out however, they'll get angry that Egghead is imitating them and start attacking him! So much for using this out of the recovery...​

F-air - Egg Crusade
Egghead lies on his stomach and holds his arms out like a super cool swimmer, but only manages to deal 3% with flinching before stupidly obeying the laws of gravity, plummeting to the ground headfirst and dealing himself 5% with bad landing lag, splattering any eggs from any cardboard boxes he lands on in what will be an absolutely huge pile. On the other hand however, if a foe is just as stupid as Egghead enough to be beneath him when he falls they'll take 10% that KOs at 160%. I almost think he shouldn't be able to do that, but he hurts himself in the process so it's okay. Plus he has a big head, so it makes sense.

This move is completely revolutionized when Egghead is holding an egg. You see, Egghead will be inspired to show the foe how awesome eggs are, and this will cause him to fly forward a Platform's distance...before falling stupidly. Egghead will indeed show the awesomeness of eggs to any foe he hits on his flight path, dealing 5% with okay horizontal knockback to both parties. Eggs don't respect Egghead, man. This is actually a nice kamikaze approach method that can knock Egghead a safe distance where his minions await after hitting a foe, and it even works if a foe ahead of Egghead is holding an egg.​

B-air - Egg Ya On
Egghead does a stupid pose behind him, as if awaiting a thrown footbool. Egghead can go in and out of this as often as he likes, and it acts like an aerial taunt that leaves a blind spot behind Egghead....but what's this, it has a super cool interaction with things! It would seem obvious enough to use this with your back behind a cardboard box, which will cause Egghead to smack it on the other side of him! Apparently the force is so great it causes 12% with comical knockback similar to being hit by a thrown Fan, and tears the cardboard box open as the eggs all fly out in random arcs 4 SBBs ahead of Egghead if lands a successful hit, making one hell of a mess as they land (foes won't take much damage due to the knockback being upwards unless their damage was low, however). And suddenly this attack isn't so bad after all. Also, if there are any minions behind Egghead in his line of sight holding an item or are in front of a cardboard box they'll throw it at Egghead, which he'll catch...before swinging the latter in front of him anyway. If you're a jerk and/or really want to get all the eggs out quickly, place a minion in front of you before smacking them with the cardboard box!​

U-air - Egg Beater
Egghead puts that huge noggin of his to good use by smacking the area above him with his head. At least it's not a flipkick or drag ya down move. This just might be Egghead's ultimate weapon, or at least his most conventional move, because he deals a surprisingly competent 13% with upwards knockback that KOs at 145%, and remember the foe will be in the air so it'll KO earlier than that, even. Oh, but what's this, Egghead hurt his poor head in the process! He takes 20% from the impact, holding his head in pain as he falls to the ground in a manner that'd make one think he was footstooled. Egghead kinda values people on the ground, so if they try to take to the air to cheat out of the eggs on the floor or jump over other stuff you can beat them over the head with your egg beater!​

D-air - Get Down Man
Egghead points down to the ground in a non-hitbox that deals no damage, yelling "The floor is lava!" "Egg em boys!" in the same voice Dave likes. Minions stop whatever they were doing and rush to that point, beating up anyone in their way with a telegraphed punch that deals $13 and upwards knockback that KOs at 200%. It's useful offstage, among other things like basic re-positioning since minions don't move when Egghead is in the air.​


Grab

Egghead actually tries to be competent for once by holding his foe's hand out and shaking it as if striking a deal with them. Hilariously enough, this can be used on chickens, and also minions I guess, which won't stop what they're in the middle of doing.​

Pummel - Gotcha Buddy!
Egghead punches the foe in the face for 2%, while still shaking their hand. The animation is pretty darn hilarious, actually, but serves no real purpose on chickens unless you like to be a bully. Used on minions however, you take control of them as they have all of Egghead's moveset minus his Specials and Smashes, and Egghead will do whatever they were doing. Pressing B returns control to Egghead and makes the minion go back to whatever they were doing.​

F-throw - Join the Eggman Empire!
Egghead asks the foe to become his lackey as the option to do so becomes available to them by pressing A or refuse with B. If the foe chooses to join Egghead, he'll think they're not being serious before asking them again over a period of 2 seconds, just like in the Nintendo games where you're given a "choice" to join the villains but it keeps looping over and over until you say no, but here it serves a legitimate stalling purpose that'll absolutely NEVER WORK. If the foe refuses, Egghead punches that foe away for 8% and set knockback before getting his minions to focus their egg-throwing on that specific foe, and if they run out of eggs they'll take out a crate and open it for more eggs to use. This lasts until they're given another command.

If this is used on a chicken that hasn't been angry at Egghead, it'll actually join Egghead and start pecking at the nearest foe, because wow, Egghead actually takes chickens more seriously than what I hope is his living, breathing, talking and very competent foe he's trying to take down. Low blow man, low blow. No wonder you suck.

If used on a minion, Egghead gets him to run over and use it on the nearest foe/chicken, and if the latter refuse he'll throw eggs at them.​

D-throw - Try One
Egghead gives the foe whatever item he's holding. He can given items to his minions while they're throwing eggs this way, and if he gives them an egg he'll give them permission to eat and heal their health, a nice way to pay back from all those times you were hitting them for fun. Commanding a minion or having their damage at 0% rids their cravings.​


Dave got me to start a set because he wants everyone in MYM to do a set for a character voiced by Vincent Price. Decided to do my take on multi-minion, though you can't really do all that much with eggs, and I didn't want to associate myself with such a character from such a franchise (can you see a trend as to certain sets I'm not completing?). That, and I felt some of the ideas could be put onto any character, something I have to be careful of when there are many non-superpowered characters out there I'd like to make sets for. I did get pretty close to completing it, and while Dave decided to take it off my hands, I haven't heard anything from it since, so yeah.
 

MasterWarlord

Smash Champion
Joined
Aug 24, 2008
Messages
2,911
CLAW MACHINE​


As an arbitrary Pixar related extra, the Claw Machine from Toy Story 1 enters Smash Bros as a stage. The Stage is as wide as 1.25x Final Destination’s platform with walls on either side, which cannot be broken unlike the Shadow Moses walls. The top blast zone is average height, and is the only way to score KOs under normal circumstances. However, if you attack the glass with enough damage to destroy the walls on Shadow Moses you can shatter them and create side blast zones – not walk offs, mind you, as you have to recover to make your way back into the machine, the amount of off-stage being comparable to a standard stage like Battlefield. The glass repairs itself in a time again comparable to Shadow Moses.

The ground of the stage is made up of Little Green Men, the alien toys inside the claw machine. Only the upper half of a human sized character (Marth) can be seen outside of them, while short characters cannot be seen at all. Any attack that hits the LGMs will cause them to go flying, though this does not affect the amount of LGMs in the bottom of the stage. The LGMs deal a third of the knockback they took to players they hit, the LGMs being as light as Jigglypuff, though no stun or damage at all thanks to their soft squishy bodies.

Every 50-75 seconds, the claw will come downwards at one of the players inside the claw machine at random. The claw moves to get over somebody’s horizontal position first, moving at Jigglypuff’s dash speed, before plunging downwards at Meta Knight’s dash speed. The claw can grab LGMs, and no matter what it grabs will go back upwards at the same speed off the top blast zone. If somebody gets grabbed, they must escape at normal grab difficulty to avoid getting pulled off the top. Dodging the claw can sometimes prove difficult, so if you want to ensure your safety you can just knock some LGMs upwards at the claw.
 

n88

Smash Lord
Joined
Oct 10, 2008
Messages
1,547
. . .One evil guardian stands alone against the forces of all that is good and holy​


Unjustly robbed of a boss moveset. . .


. . .This dark sentinel is now ready to make the foe pay​


IN SPADES. . .


HE'S BACK FOR THE ATTACK


Here's the original if you want to brush up​


ProfPeanut

Smash Ace
Joined
Oct 1, 2008
Messages
727
MYMini#5-wait, another Kung Fu Panda mini?!

MYmini #9: The Moveset Graveyard Rummage Sale

“In honor of M.Trinity’s Moveset Graveyard, it’s time to dust off all your old moveset ideas that you couldn’t quite get off the ground. This week, just post a moveset consisting of 4 Special attacks. That is all; just 4 specials. No need for regular attacks, or grabs, or even a final smash. Let’s just focus on the part of the moveset that actually matters eh?”
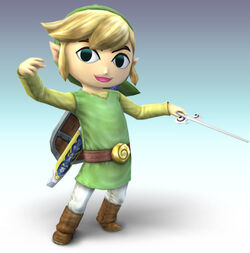

1647445770812.png

Lord Shen


Lord Shen is an albino peacock of noble birth, and the major antagonist of Kung Fu Panda 2. A long time ago, it was prophesized that his growing ambitions and research into explosive destruction would be stopped by a warrior of black and white. In an attempt to change his fate, he led a purge against the pandas, but was then driven out of the city of his heritage by his own parents. Fueled by both his hunger for power and his inability to let go of the past, he invented a weapon of destructive prowess that could overcome any warrior, and used it take back Gongmen city by force. His plans then extended to the subjugation of all China, until a certain legendary warrior stood against him…

Size: 7

Weight: 2
Ground Speed: 8
Air Speed: 6
Traction: 9
Jump Height: 6
Fall Speed: 3


Neutral Special - Royal Lord's Fan

Shen normally moves about with his long tail closed in a trail behind him. With this move, Shen quickly spins around clockwise and buffets the area in front of him with his tail, spread out so as to let the hitbox linger more. The move is very quick in its execution, with a hitbox similar to Ike's Forward Tilt if it reached half a length further, but has a bit of ending lag as Shen faces forward once more with his tail back in its neutral position. Foes struck by this [10% total] will usually be flinched while it lasts, but getting struck by the entire attack will knock those foes into prone. Prone foes hit by this will only be pushed back, so Shen should make use of his other attacks when they're down.

Better yet, Shen can input this during the starting or ending lag of any of his attacks in order to feint them and strike back at foes with his tail. He can't interrupt his attacks when the hitboxes of those moves are active, but otherwise this makes a graceful method for keeping foes on their feet, or perhaps forcing them to jump above it instead.

In the air, Shen will sweep a round Ganondorf-tall-radius area around him with his fanned out tail, spinning counterclockwise if he's facing left. Again, think a wider-reaching version of Ike's Neutral Air. It will only flinch and push downwards and, and the landing lag isn't very good, but it otherwise covers a greater area than the grounded version. Of course, simply use this in good conjunction with his aerials to keep pressing the foe into a position more advantageous for Shen.


Side Special - Bladed Feathers


Shen near-instantly throws out five feather-shaped knives at high speed straight at the closest foe he's facing, though he can angle this by fifteen degrees from that direction. An immediate lock-on for such an attack may sound unfair, but it won't always be to Shen's liking, as you'll see later. Unlike Shiek's knives, they're large enough to be visible, and they fan out by a tiny bit, covering a ten degree cone. Each flinches [5%] foes for quite some time, but they'll disappear if they cross five stagebuilder blocks. Of course foes won't bleed; the mess might stain Shen's robes.

Shen empties his ready-to-throw knives out with this attack, but he readies a single one every four-fifth seconds should he be lacking. Using this input again will have him throw out as many as is available, emptying his arsenal once more. Of course, between maintaining close combat while letting the knives stack up again and throwing one or two out at regular intervals, Shen's allowed to decide when to make the foe think fast at his leisure.


Up Special - Fowl's Flight


Shen leaps back into the air, rising two Ganondorfs up and one Bowser back. The initial leap produces a quick wind effect that'll blow back anyone in front of Shen when he jumps; during the leap itself, any foes he might leap into will be foots tooled as he rises further from the extra boost. At the end of the leap, Shen will enter his glide (yes, he has one, fools) unless B is pressed, wherein he'll instead use his Side Special at the peak of the jump before descending as normal.


Down Special - Parting Gift


Shen pulls out a small flare from his robe, igniting it with his metal talons before tossing it forward similar to Snake's grenades. He can angle the toss similarly too, except that pressing down will have him slide it across the floor up to two stagebuilder blocks. Shen can use this input over an existing flare to toss it again (relighting them automatically), and he can have up to two of these out at a time.

The moment it's lit, it'll produce a noticeable sparkling light that flinches anyone hit [1%] if they aren't Shen, and will continue to burn up like that unless a wind or water effect puts it out. Shen himself can use either his tail or his Up Special to quickly snuff out the flare, wherein it'll simply remain there onstage, able to be picked up by anyone and thrown like an item. The flares can be reignited with fire or an incredibly fast flick of metal, though the latter method doesn't work if they're picked up; in Shen's case, he can use his knives, another flare, or the various claw attacks in his normal inputs. Now if only foes would move close enough to unlit flares for Shen's knives to spark them...

The moment there's a lit flare onscreen, including when Shen first ignites it, a Chinese-styled targeting icon will appear in the center of the stage. It's similar to the one used by the Halberd, and moves at the same speed too, but it instead chases after the closest flare. The moment a sparkling flare enters the center of the icon-BOOM!


Of course Shen would never fight fair; it's enough that he's in this brawl without his wolf guards to back him up. Instead, he has a minion-manned cannon aimed straight at the stage, waiting for him to light a flare such that the cannon can aim and fire straight at it. The resulting explosion has twice the range of an Electrode's explosion, and all the potency too; it's a surefire KO method [25%] for anyone at perhaps 40%. If no flares are lit, the icon will fade out, but it will remain in place until a flare is relit. It will also move onto a second flare if there is one, though Shen can always throw one close to it to change its direction. Given this, Shen can freely opt between defeating foes with the rest of his attacks, forcing foes to dodge two potential explosive targets at once, or lighting flares just as the foe steps on them with the cannon already aimed straight at them.


1647445870620.png


"Shame, really. It was going to be quite the moveset, if only there were the time to complete it. Plenty of pressuring attacks, moves that became more effective the more knives I held, a dangerous grab game, countermoves, lance and claw strikes - all a deadly graceful arsenal to mock foes while they preoccupy themselves with not getting blasted to oblivion. And of course a chance to get back at that accursed panda. Then again, you lot couldn't possibly appreciate anything that didn't use props or charges, now could you?

{{"Not in this time period, certainly. But in the future?..." - Time-travelling recruiter}}
 
Last edited:

ForwardArrow

Smash Ace
Joined
Aug 17, 2011
Messages
503
Well, this set was mildly painful to reread.

Bomber 3 vs 1 Boss

Statistical Changes

*First of all, Bomber has aerials now, believe it or not. A directional aerial, but aerials none-the-less.

*Bomber's walk and run speeds are doubled to 4/10 and 8/10 respectively, making him a bit more capable of actually approaching foes.

*Bomber can now Jump, though not amazingly well. Why the hell he wasn't able too in the original moveset is beyond me. In-character? He had a FAN on his bloody JAB

*He also has decent aerial control, as opposed to being literally unable to control himself in the air.

*The explosion is significantly buffed. It's now absolutely huge, 1.5x the size of a Smart Bomb blast, dealing 20% and knockback that KOs at 80% on the outer edge and 50% with nearly an instant KO towards the center. The blast still lasts for the same time period though.

*He also has a grab, since KK randomly thinks having Handy pop out of nowhere is okay there's no reason a stupid HAND can't GRAB.

Moveset Changes

*The Neutral Special takes less than .1 seconds to execute, turning it from just an ineffecitve way to stop your self destructs into a legitimate mindgame, on some levels.

*The Side Special only takes half a second to execute, and he is free to change how he flies by pressing another direction, allowing him to pursue foes into the air or if they, you know, jump over him.

*Instead of having 3 Factories total, you just have 3 per stock. They also have 230 HP each, considering, you know, they have to be able to sort of survive 3 foes wailing on them at once. Also the random hitbox when the factory springs up deals double damage and knockback, if you really think you can actually hit with it.

*The Up Special has been completely changed, due to him being able to, you know, jump. Now instead it has the Factory produce some smoke, and create another shiny new Bomber. This one will just march forward stupidly at it's walk speed, but the explosion is just as powerful as ever. You can have up to 4 Bombers out in total. On top of that, this is only if you smash Up Special. If you tilt it, Bomber will switch control to the nearest other Bomber while the one you just were controlling continues whatever it was doing until it blows up, flies off a blast zone, or the attack ends. Maybe you want to set up a chain reaction to kill all your foes at once.

*The fan on the jab (:glare:) pulls in foes at twice the distance, though with the same speed. There's a fair bit less lag on either end, and the fan can now be angled.

*The Dash Attack deals 12% and knockback that KOs at 130% now in the standard variation. If you use it during a dash, it doesn't do anything different, though remember Bomber's explosion is stronger now.

*The Forward Tilt has a somewhat larger drill now, and deals 3% per hit that is actually pretty hard to DI out off. Sides from that, you can input this attack in the midst of drilling a foe to launch this as a projectile, travelling Battlefield's width at Mario's dash speed.

*The Down Tilt instead shuts off his capacity to explode with 1.2 seconds of super armor on afterwards as opposed to high priority (where the hell did KK even get that idea). Pressing this while you are already incapable of exploding will instead allow Bomber to explode again.

*The stupid hand in the Up Tilt (don't ask me, this isn't my set) will now swing upwards in an uppercut that goes up twice Ganondorf's height and deals 18% and upwards knockback that KOs at 100%. And, you know, it can set off another Bomber flying above you.

*Since we combined the Forward Smash and Forward Tilt, Bomber has a new Forward Smash. Bomber charges forwards a third Battlefield's length at Sonic's dash speed, dealing 15% and knockback that KOs at 100% all the while. This has average start lag and end lag, and can also be angled up or down. Angling it up will have Bomber launch up diagonally into the air, where as angling it down will have him bury himself in the ground instead, where he can't do anything unless you use the Neutral Special to pop out or the Down Smash to explode.

*Bomber's Down Smash gives him super armor instead of high priority. Again KK, that doesn't even make sense.

*The Up Smash has Handy, instead of tossing Bomber up, carry him around with free flight at Mario's dash speed. Handy can carry Bomber as long as you want, and if you switch control to another Bomber you can have the hand just hold Bomber in place in mid air, perfect for setting up chain reactions. You can gently release Bomber in the air by pressing A, or press A and any direction to have Handy toss Bomber in the chosen direction, and deal 12% and knockback that KOs at 150% on contact.

*The Neutral Aerial remains unchanged, aside from the parachute deploying near instantly.

*His other aerials just have him launch his drill bit in the chosen direction, dealing the same damage as before with his Forward Tilt. Not very exciting, but what do you want me to do, honestly?

*Bomber's grab has Handy show up and grab forwards, having incredible range and speed on the grab that even Dedede would envy. For his pummel, he squeezes the foe for 3% at a rather rapid rate.

His Forward Throw has him toss the foe forwards with 13% and strictly horizontal knockback that KOs at 120%. The Back Throw has Handy drop the foe onto the ground and do a hand drill in a similar manner to Master Hand, dealing 8 hits of 2% and the final hit dealing upwards knockback that KOs at 140%. The Up Throw has Handy carry the foe upwards at Mario's dash speed until they break out of the grab. The Down Throw has Handy slam the foe into the ground, dealing them 15% and pitfalling them. If there's a Bomber underground where Handy pitfalls the foe, the embedded Bomber will explode, probably killing the foe you threw at the ground, the other Bomber, and anyone else nearby.
 

Davidreamcatcha

Smash Ace
Joined
Feb 9, 2011
Messages
629
Fits MYMini#12

CUSTOMER SERVICE


Customer Service is a major character from the Kirby series, most important the anime, though he has made an appearance in Kirby Mass Attack. He is seen throughout the series acting as a representative of Nightmare, speaking only through a large monitor affixed to the wall of King Dedede's castle. His role is to provide monsters to King Dedede, something he does for a large fee. However, he has also been known to help Dedede come up with evil plots to destroy Kirby - largely as an advertisement for these monsters.

Customer Service appears as a gameplay mechanic in the world of Smash. Should he be turned on in the items menu, he will randomly appear at least once in the match, in the form of a giant hologram of his face and torso popping up in the background. Once he appears, he immediately attempts to start selling help to the players - an icon of a random assist trophy, pokemon, fiend, minion, enemy, boss - any sort of NPC that can be summoned will appear next to the hologram. He will immediatly ask "How much will you ask?". If no one presses up taunt after 3 seconds, he will grimace and change the icon to that of another summon. If he goes through this five times, he will simply disappear.

Wait, is this bidding? Well, duh, Dedede isn't the only one buying "monsters" any more! By pressing the up taunt, a character will raise their hand as a number 10 appears over them. This means that the character will take 10% if the bidding is successful. Other players can use this to increase it by another 10% if they choose. After 5 seconds pass and no one has raised the number, Customer Service will proclaim "Sold!" as he disappears. The requested summon appears next to the player after this, they will be loyal to them, unless the bought summon was a fiend or boss. What's more, the summon will have doubled stamina and last for double the normal duration. Nightmare Enterprises only provides the best!

This is somewhat changed in coin matches. The conditions are still the same, however, players will bid coins rather than their own health.
 

webcoroma

Smash Rookie
Joined
Feb 28, 2012
Messages
21
Location
San Jose, CA, USA, Earth.
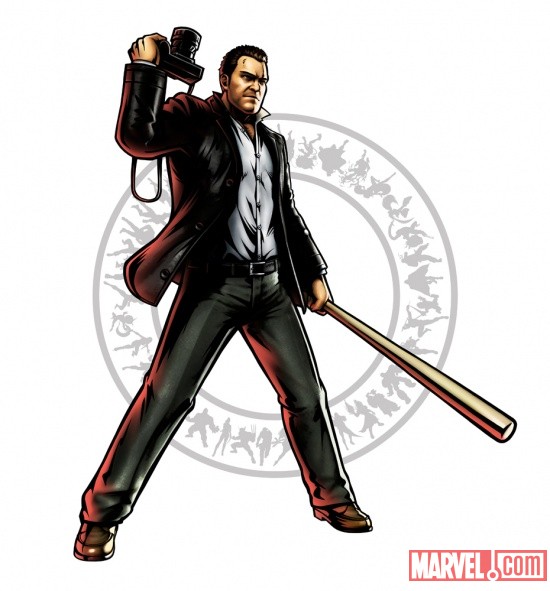
"Frank West" the camera attack that stuns enemies for 20 seconds; even 2 seconds would be rather lengthy at that! The throws also inflict more damage than virtually any other move in the set when in reality they're only supposed to inflict 7-13% at average, so it'd seem to me that perhaps your interpretation on them and just how powerful a move is supposed to be is quite different than normal. Perhaps a visit to the Smash Wiki would do some good in regards to the averages of how much a character's attacks are supposed to do? Mind you, I have no idea as to what kind of experience you have with playing Brawl, but if you want to keep on making sets then by all means keep going, and the fellows will be there to support to you in that case. You'll also need to post a picture on your next set, because although I tried to indirectly state that your set had a picture and could be put on the list, that didn't happen.]

I'm sorry about the seconds thing, I have zero concept of time. And my copy of brawl-and Wii- stopped working so I was going by my crap memory. With the picture, I just didn't see the "insert picture" icon thingy. Yeah, I'm a bit thick. Thank you for the comments and advice!
 
D

Deleted member

Guest
MYmini #9: The Moveset Graveyard Rummage Sale


KingTAC
MYmini #5 - Big Easy Catchup

~Neutral special: Moveset gourmet~

KingTAC... stops all animations! He's deep in thought, his bag even fills up! Keep that opponent close by - lets say, a battlefield platform in range, and your bag of stolen thoughts will keep on getting bigger! How big? That isn't for me to say. This is a mere indicator of how full up on idea your KingTAC is getting, though. Trying to do this move without an opponent in range? Bad luck - nothing happens. Once your bag is full up on that good old thought gas, it'll start flashing, of course! Try and use this move again when that happens! I dare you. What you'll get is a bunch of... well... a big mess, like a bunch of tumbleweeds dancing in front of you, man. Think Game & Watch's full bucket, but packing a bigger punch! This isn't the intended purpose of an embiggened bag - simply there to keep the opponent off your tail.

~Side special: Follow my example~

A white hand comes out of KingTAC! and nothing of note happens. Not even hitstun.

However! If you touch an opponent, your side special changes - and you have lots of reach to do that from a safe range to boot. The change is entirely dependant on what their last move performed was. KingTAC will change animation to suit whatever the need of the borrowed move is, rather than copying its presentation: it's about how you do, not what you do, after all. Imagine all kinds of funny ways that KingTAC can replicate MYM's most overly-creative movesets!

That's not all, though. Hit an opponent while they're using a move? It's taken. Better KingTAC has it than anyone else! Want it back? You gotta hit him while he's using the move, prove you're better than him! Like that's even possible.

~Up special: Cruel intent~

KingTAC disappears in a quick flash! he re-appears somewhere off in the distance, three Ganondorfs, but he's now free-falling. It would seem our once innocent hero as flown too close to the Sun! Pick any direction with your choices of controls, keep up the mindgames!
*KingTAC can drop his bag by holding down the grab input for an extended period. Do this while teleporting to send your bag to the chosen location, but keep KingTAC where he is. Why? We'll find out soon enough...
*Perform this on your bags to break them yourself.


~Down special: Seal of approval~

Take out your bag - hold it below you - then stamp it rigorously with your stamp of approval. This bag is finished! If you hadn't dropped your bag by now, you're compelled to now! A bag that isn't completely full up will be destroyed by nary a weak attack - this causes the King woe, in the form of hitstun! You can always pick up your non-complete bags - don't let all that spiritual philosophy go to waste!

Hit a full bag? Prepare to face the consequences! A full copy of the entire stage and what was going on will play from KingTAC's perspective - arguably, the most important one - copying hitboxes and all, but none of them hurt you! The opponent will bare the brunt of his faults, how dare he try to attack the mighty KingTAC! Perspective is important here - the hitboxes will appear in the context of where you were when you took mental note of them, ignoring the layout of the stage. How to get around this with an opponent being in range... you can copy your own replays, allowing you to keep on rehashing what has already happened! Commenting on commenting? Yes, you've seen through my [brilliant] ruse.

~Final smash: Yoshi~
 

Junahu

Smash Ace
Joined
Nov 15, 2005
Messages
899
Location
Shropshire Slasher
MYmini #7: Oh Canada, watchu gonna do with it?


Oppressor Vs Oppressed
This Brawl Mode is a third team-up option during multiplayer. Compared to Free-For-All, where it's every man for himself, and Team-Brawl, where players are placed into static teams for the duration of the match, Opressor Vs Oppressed is a bit more fluid, constantly changing to match the chaotic politics of the match at hand.
(Oppressor Vs Oppressed will be referred to as OvO)
The match begins with no functional difference between it and a regular Free-For-All, just go attack and KO and whatever. As blows land and winners and losers become more clear-cut, players begin glowing with newly assigned Team-colours. Three outcomes are likely from this;

  • 2v2: If players are naturally forming alliances on their own, then the match morphs into a 2v2.
  • 2v1v1: If two of the players are failing to play nice with one another, they'll end up on seperate teams. This outcome is more likely if the two uncooperative players are otherwise winning.
  • 3v1: If one player is completely dominating the match, then everyone will gang up against them.
Team Attack remains switched on in all three of these outcomes, and team arrangements can be reassigned by the game throughout the match (the match could even revert back to a FFA). Basically, the game continually assigns teams based on who actually needs the extra help. A crafty player might play 'wounded dog' in order to force other players onto his team.

While the match ultimately ends in the same way a normal match would (Stock or Time, depending on which are selected), the winner(s) are determined via points. Even in a Stock match, it doesn't matter if you survive or not, just so long as you accrue the most points.
KO opposing player: +1 point
KO opposing player who is on their last stock: +2 points
KO allied player: 0 points
Self Destruct: -1 point

There is, however, one exception to this arrangement: Coin matches. In OvO Coin Matches, coins obviously dictate the winner. However, when collecting coins in OvO, everyone on your current team receives 1/2 of the coins that you got (i.e. you collect 100 coins, you receive 100, and your teammates receive 50)
 

Davidreamcatcha

Smash Ace
Joined
Feb 9, 2011
Messages
629
Big Easy Catchup (MYMX Edition)

[11th Mar-17th Mar]
Jun is just such a hippo that he can post his mini on Sunday. And have it counted. And there's nothing you can do about it.
 

Junahu

Smash Ace
Joined
Nov 15, 2005
Messages
899
Location
Shropshire Slasher
I'm such a hippo because I do things other people do. How deadful!

MYmini Week #6
Limited Step Remicks


[18th Mar-24th Mar]
What nonsense is this? We’ve been invaded by Brawl Movesets from an alternate dimension! While almost identical to our own Brawl movesets, these ones have exactly 2 attacks that are different. Which moves have been altered, and what to?
 

Davidreamcatcha

Smash Ace
Joined
Feb 9, 2011
Messages
629
Just because other people do it doesn't make it right. It ended earlier. There is no reason to have it counted.
 

ForwardArrow

Smash Ace
Joined
Aug 17, 2011
Messages
503
There is in fact a set in this post

Elsa Maria
Elsa Maria is a witch, one of the bizarre monsters which serve as antagonists in the Madoka series. Elsa herself showed up for a single fight scene later in the series, in which she is killed by a crazed Sayaka. Elsa herself is a bizarre, religious sort of figure, worshiping the red star shaped object you see in the picture. She prays for all humanity and hopes that she can assimilate them into her barrier.


Traction 10
Weight 8
Size 6
Aerial Speed 4
Fall Speed 3
Recovery 1
Ground Speed 0.5


Elsa is rather heavy for her size, which is actually rather small, being barely taller than Marth but slightly wider. Her movement is incredibly slow and plodding as she inches her tentacles along the ground at barely above Ganondorf's walk speed on a dash, and her movement on a walk is almost non-existent. In the air, Elsa still has terrible jumping prowess and moves around rather slowly, but she actually falls rather gently, in an unearthly sort of manner. Indeed, Elsa is not a being that seems like it belongs in this world.


One of the strange properties of witches is their tendancy to warp the world around them with their mere existence. Upon spawning on the stage, the world appears normal, but Elsa's presense will slowly alter the world. As her tentacles touch the stage, that part will turn darker and more devoid of life, and passing through the air the background fades and grays until all you can see are some strange white and gray lattices. As the world changes, opponent's inside the modified stage are only visible in black and white, with just their eyes and their almost shadow like figures visible against the background. The change is rather gradual, and tends to occur naturally over the course of a match with Elsa.

Also note that once parts of the stage start looking like the screenshot shown above, nearby parts of the stage will slowly change to look the same way. While this aesthetic stuff is all nice and such, this actually will play a role later on in the set of making Elsa far more unpredictable as she can hide her hitboxes far more easily...


There are more direct implications to the barrier engulfing the world as well. Inside her barrier, the monsters shown above, her minions, will spawn at a rate of 1 every 10 seconds for each 3 stage builder block sized patch of the stage converted (not including the air). They appear in fixed locations based on the stage, in the closest one to Elsa as possible. Their worm like bodies stand about twice Ganondorf's height while being incredibly thin, with a head about half the size of Kirby. They are fairly frail with 20 stamina and taking double damage if their body is attacked as opposed to their head, although every 5th one spawned will be twice as tall and have 50 stamina.

The minions are fairly mindless and needlessly aggressive, just lunging their heads at foes in an attempt to bite them. The bites deal 5% and low knockback that's not going to KO until like 550% or something obscene like that. The larger ones actually hit pretty hard though, dealing 14% and knockback that KOs at 170%. The one good thing is that they can attack through walls, and they won't send any more of their bodies through the walls than necessary, meaning foes can only hit their far less frail heads. They exist solely to serve, as nothing but mere nuisances to any practiced magical girl, or Brawl opponent in this case.


Neutral Special

Elsa extends out a tentacle above and below her, stretching 5 battlefield platforms in both directions and passing through the stage as though it wasn't even there. The tentacles then rotate clockwise around her, dealing 8% and average upwards knockback on contact. This is probably the best attack for creating a large area of barrier, and in addition it gives the opponent something they have to dodge on a rather frequent basis. They circle rather slowly though, once every 4 seconds. The tentacles take about half a second to bring out, though.

Another thing, though, is that Elsa can send out more tentacles with another press of the button, up to a maximum of 10 out at once. This gives the opponent a lot more to dodge and shield, and you can customize the timing for different situations. The other thing about the tentacles is they actually can be damaged, and the damage is done directly to Elsa. Not to mention they can only take 25% each before disintegrating and needing 15 seconds to regenerate. When Elsa takes knockback, all of your tentacles will be uprooted and return to you, although this doesn't actually destroy them.

Obviously, you're going to need them for the other inputs as well, so you need to find a balance for what amount of tentacles doing what task works best for the situation. Lastly, if you only have one tentacle left for use when using this input, it will still function, you'll just have one tentacle come out the top.


Side Special

Elsa Maria lashes forwards with a single tentacle, dealing 8% and minor knockback with fairly low start-up lag. This attack can be charged, and reaches forward 2.5 times Bowser's length. Charging will increase the number of tentacles cast forward to a maximum of 4 tentacles, dealing 20% and knockback that KOs at 85% with all 4, though that takes 2 and a half seconds to fully charge.

That's not all there is too this attack however. Afterwards, the tentacles will start to dissolve, forming a pitch black mist that covers an area between a half Ganondorf tall and 3 Bowser's wide at minimum charge and two Ganondorfs tall and 5 Bowser's wide at maximum charge. While you lose access to the tentacles used to create this, opponents cannot see you or your tentacles inside the mist, and you can create as many patches as you wish. Obvious mindgame potential abounds, which makes some of your laggier attacks easier to hit with, but the foe can still see themselves perfectly fine. That said, minions are not visible inside the mist, and if they aren't near enough to a foe to bother chasing them they will take to a patch of mist if possible.

That said, remember how the foes become largely just shadowlike figures in a fully fledged barrier? Yeah, if the barrier is fully formed, they can't even see themselves inside the mist. You can completely confuse them as to their current location and what sort of obstructions they need to escape, and with all of Elsa's ways to space and beat around the foe, that can be quite terrifying. Just keep in mind it puts a limit on what you are able to do with your other tentacles.


Up Special

Elsa creates sends out two of her tentacles down into the ground, which boosts her up high into the air, about twice Ganondorf's height. The tentacles here serve as solid walls, having the same stamina as normal. Elsa can use her ground attacks as normal from her new-found perch, though if both tentacles below her are destroyed she falls to the ground in helpless. Not very exciting on it's own, but given that Elsa can create almost maze-like tentacle configurations, it gives you a whole new bunch of options for how to use them. This will also lift up any tentacles you have out 2 stage builder blocks up, though if they are embedded into the ground the ends will stay embedded, though rest of the tentacle will be lifted up. I may as well mention, this is the exact same thing that happens when you jump.

This move is also fairly different when used in the air. Elsa will instead send out a single tentacle, which you can direct with the control stick. If it hits a foe, it will stab into them dealing 12% and knockback that KOs at 165%. That said, more interesting results will occur if Elsa embeds it into the stage, which will have the tentacle bury into and grip into the stage. From here, Elsa will unnaturally hold in place, able to use her ground attacks in the air. The problem is again that if the tentacle is destroyed Elsa goes into helpless, and the tentacle functions like a solid platform so opponents can walk on it. It also can only hold out for 8 seconds before it disintegrates and Elsa goes into helpless. Using Up Special again will have the tentacle pull Elsa to that part of the stage with half a second of lag, her tentacles staying in whatever positions they were in but moving with her, though embedded tentacles are actually uprooted by this action and retract back.

The last thing of note is if you grip the underside of the stage with this, Elsa will instead just be pulled up to the bottom, still attached and on the same timer. You can press Up B one more time to teleport through the stage, however, to a point directly above where she was at the time.


Down Special

The most recent tentacle Elsa has produced glows and expands slightly. The tentacle is dispersed into a mist from the Side Special, it will begin to solidify. From here, you have a fair few options. Pressing A will cause that tentacle to retract, allowing you to dedicate it to a different purpose. This obviously makes the move crucial to Elsa, allowing her to switch how she has her tentacles arranged on the fly. That said, retracting tentacles isn't entirely unpunishable, taking 0.2 seconds. You can switch which tentacle you have selected by pressing left or right (more recently created by pressing left, less recently by pressing right). Pressing up will select the current tentacle in and allow you to select an additional one from here, allowing you to select additional tentacles at once. Pressing down cancel out of the move without doing anything.

There is one more option with this move, and that's pressing B. Instead of retracting the selected tentacle, it will cause it to sprout spines all over it's mass for the next 2 seconds. These spines deal 8% and knockback that KOs too late for it to really matter to any foe who comes into contact with them. However, if an opponent takes knockback into said spikes, they will bounce off taking twice as much damage and knockback in the opposite direction. The spines don't have very good priority, so the foe can still attack the tentacle, though it does make things more difficult. Using this on a tentacle in the Side Special mist will just cause the mist to deal a passive 3% per second. Unfortunately, you can only have one spined tentacle at a time, selecting more will only choose the current tentacle. This also has a bit of lag in transforming the tentacle.


Jab

Simply pressing Jab has Elsa extend out a tentacle a short distance in front of her, dealing no damage or knockback but pushing foes away slightly. From this stance, Elsa can perform a couple of close range attacks by pointing the control stick up, down, or forwards. Pressing up has her whip the tentacle upwards, dealing 3% and light upwards knockback. Pressing forward has her jab it forwards for 4% and shoving the foe lightly away. Down has her whip at the ground, tripping the foe and dealing 2%. All of these movements are actually pretty laggy, and have terrible priority that is incredibly easy to break through, so the foe will probably just be able to rip through your tentacles with no trouble. That said, this is pretty much your only straight up melee option in your set, so you have to take what you get. You can leave this stance by pressing Down Special.

Actually, no your only melee move is not that terrible. Pressing A again with a tentacle out like this will have Elsa cast out another tentacle, up to a maximum of 3. You can then have the three tentacles all perform attacks separately, by inputting one direction after another while the others go through their lag. This makes you a touch more competant at close range, at the very least preoccupying the foe until your minions can close in on them and chase them away.


Dash Attack

Elsa shoots out two tentacles about Bowser's length in front of her, dealing 12% and knockback that KOs at 150%. After that she swings them off to the side and retracts them. This attack is fairly slow, but at least works as a functional GTFO move. Then again, Elsa really isn't supposed to be dashing on a regular basis, considering how horrible her movement is it's pretty much a waste of time.

Forward Tilt
Elsa Maria shoots a single tentacle forwards, which travels forwards 2 Bowser lengths before landing implanting the tip into the ground. The tentacle comes out at about Elsa's head height, deals 6% and flinching knockback on context, and will linger as a solid wall until you retract it. Moving away from it will drag it through the ground, dealing rapid flinching hits of 1% that are fairly easy to DI out of if the tip comes into contact with the foe. You can also angle this move up and down. Angling it up will actually cause it to launch up in arc that reaches a maximum of twice Elsa's height before coming down to the ground. Angling it down will move or less have the tentacle move directly along the floor before embedding itself into the ground. Note that if a foe gets trapped in a gap between tentacles that is smaller than they are, they'll pop out from there and take 5%.

Another note is that if you press A during the start up lag of the attack, you can increase the range of the attack by half a Bowser length at the cost of slightly more lag. This allows for a large number more ways to set up your tentacle walls all over the stage. You can possibly even make a deadly maze out of these things, if you are so clever, especially in combination with some attacks to come.


Up Tilt

Elsa Maria launches two tentacles upwards, spaced about Bowser's width apart. The tentacles deal 5% and low upwards knockback, and can be directed around with the control stick. They travel at Mario's dash speed and can move a maximum of 5 Bowser lengths, though they stop upon hitting the stage. Like the tentacles from the Forward Tilt and Up Special, these are entirely solid and stand static after use.

Down Tilt
Upon inputting the attack, nothing in particular appears to happen... but don't let that fool you. Half a second later, small debris will fly out of the ground below the opponent before a tentacle will shoot up to stab them for 13% and knockback that KOs at 140%. Elsa is free to use other attacks in the mean time, but after the tentacle launches out, it doesn't retract, giving opponent's a brief period to possibly destroy it should you miss... not to mention the attack is massively predictable, given that the opponent can easily see the debris before dodging it.

Or at least, it's easily predictable without the barrier around. If the stage has a fully fledged barrier underneath it, the debris don't appear, with only a slight sparkle a split second before the attack as an indicator anymore, making it very difficult to predict. Aside from that, if you use this when hooked onto the stage with the Up Special, Elsa just shoots a single tentacle down below her twice Ganondorf's height dealing 11% and a strong spike, as well as serving as a solid wall. Useful for intercepting recovering opponents, and it also functions as an additional support if you are holding yourself up with the on stage version of the Up Special.


Forward Smash

Elsa sends another tentacle through the ground, this time directed forwards. It travels through the ground 2-5 Bowser lengths, based on charge, before coming out and circling around in a loop towards Elsa. The loop is 1.5x the height of Ganondorf and as wide as it is high. This deals 10%-16% and knockback that KOs at 250%-150% to anyone who comes into contact with the tentacle at the time it comes out. Afterwards, it lingers as a solid object as usual. This attack also has a follow-up, if you use Forward Smash immediately after the initial attack, Elsa will drive the tentacle through the center of the loop, dealing 27%-40% and knockback on par with Ike's Forward Smash. Unfortunately, despite this follow-up actually being moderately quick, it suffers from some major end lag as Elsa retracts the end of the tentacle back into it's normal position and will not actually ever knock out the foe until obscene percents due to the solid nature of the loop.

This attack can also be angled to double the size of the loop by angling it up or decreasing it by a third by angling it down. In addition, if you input the smash in the opposite direction you are facing, it will loop in the opposite direction when it comes out of the ground. Lastly, if used in the air tethered to the stage, the tentacle will instead wrap around the tentacle you have attached to the stage as opposed to going underground. This adds a layer of protection to that tentacle, the Forward Smash tentacle must be destroyed before you can attack the Up Special tentacle. That said, if you pull yourself to the stage the Forward Smash tentacle automatically gets retracted. With regards to setting up confusing barriers for your opponent, this greatly increases your options, not to mention creating a nice little box to pummel your opponent in.


Up Smash
In a similar manner to the Down Special, the most recently created tentacle of Elsa's begins to glow a dark shade and pulsate at points. You also select in the same way as the Down Smash. The tentacle you selected will then shake and produce large spikes out of itself, spaced a Bowser width apart and half Ganondorf's height-1.5 times Ganondorf's height. The spikes only come out of the top half of the tentacle, which if the tentacle is sideways is the direction Elsa is facing when using the move. These spikes are solid as usual, last as long as the tentacle stays out or until they take 15% each, and deal 15%-23% and knockback that KOs at 140%-85% coming out. The only downside is that the attack is extremely laggy to start, and likewise with the tentacle if the spikes take damage so does Elsa. Obviously this is a wonderful way to impede the foe's movement further, but at the same time it takes a fair bit of time to use and means your damage meter is going to skyrocket even further than normal.

There are a couple cases with this attack I figured should be mentioned. Namely, when used on a tentacle comprising a mist, it will instead cause the mist to begin to swirl a bit and pull foes towards the center at a rather slow rate. Obviously, Elsa can take advantage of the fact that they are trapped like this, namely by setting up tentacles around them or sicking minions on them or whatever. Elsa thrives on when characters are movement impaired. And if used on a rotating tentacle, the spikes will serve as constant hitboxes that deal the same damage and knockback as they did when they came out as long as they are extended.


Down Smash

Elsa entwines 5 tentacles together, before launching them forwards as a giant tree like tentacle. The tentacle is three times the length of Bowser and at the end branches out into several branches that cover an area the size of Giga Bowser, with some spaces about large enough for someone stand inside. Getting hit by this as it comes out deals 33%-45% and knockback that KOs at 35%-0%. The move is certainly obscenely powerful, but it won't hit opponents standing on the ground unless they are standing where the branches shoot out. This move also takes a whopping 2.5 seconds to pull out, making it extremely impractical to hit with, especially considering the amount of tentacles involved, but there are ways to pull it off, particularly if you hide that you are using it with the Side Special.

Aside from that, the tentacles stay out, serving as effectively a giant barrier with 100 stamina, the tentacles all taking damage together. Retracting one will retract all of them, and honestly having them out is rather impractical for the most part aside from it serving as the hardest barricade to break through in your entire moveset, though if they are underneath it, the whole thing hardly matters, not to mention the amount of tentacles this uses up... That said, it can serve as an amazing KO move and there is plenty of opportunity to capitalize on a foe rolling between the branches.


Neutral Aerial
Elsa shoots wraps one of her tentacles around the front of her. This takes a relatively short period of time, though the button can be held down longer to have the tentacle wrap around Elsa's back as well. Contact with Elsa as this wraps around her deals 6% and weak set knockback. As usual, it sticks around after the attack is over, serving as a shield around Elsa. You can cover it in spikes as well to make yourself a hitbox as you fly through the air, or use the Up Smash as a straight up melee attack now.

Forward Aerial

Elsa stabs forwards with a single tentacle, flying out Bowser's length and dealing 13% and knockback that KOs at 160%. This comes out with decent speed, but unfortunately has rather bad end lag as Elsa retracts the tentacle. So no, this doesn't just create a nice little wall for you, but truth be told you aren't particularly about setting up in the air.

Back Aerial

Elsa Maria shoots out 3 tentacles from the side she appears to be facing(remember, her attacks come out of her back), wrapping them around an area the width of Bowser and the height of Ganondorf. There's a hitbox at the edge that deals 10% and knockback that KOs at 150%, but they are also a hitbox in the background and foreground as they wrap around that deals the same damage and knockback. Here, the tentacles will stay out as usual, but this is a rather inefficient method of defense, truth be told. After all, you are using 3 tentacles when you could just use one, and since the foe probably will hit all 3 of them at once it's just incredibly inefficient. That said, it creates a cage for a foe trapped inside the 3 tentacles that they aren't allowed to dodge inside due to the tentacles walling off the background and foreground.

So obviously, this creates a nice little cage scenario where the foe has to destroy the tentacles, but you can of course cover them in spikes with the Down Special as well as protect yourself with the Neutral Aerial. Better yet, let your minions join on the fun, lashing out at the foe while they struggle to smash their way out. Unfortunately, you don't really have any attacks that can hit a foe trapped behind you besides the Neutral Special, but trust me, they have enough to worry about as is without the ability to dodge.


Up Aerial
Elsa sends two tentacles out from both sides of her in a similar manner to the Up Tilt, though you can't steer them. Elsa will shoot them upwards 1.5 Ganondorf heights, them serving as solid walls and dealing 8% and weak knockback on the way up. Afterwards, the tentacles will tie together, grabbing the foe and swinging them downwards, tossing them to the ground in for an average strength spike and 12%.

Down Aerial

Elsa Maria shudders for half a second as four of her tentacles entwine together, before they are launched downwards as a single massive black tentacle dealing 24% and a ridiculously strong spike that puts Ganondorf's Dair to shame. On top of that, it has infinite range, only stopping when it hits the ground or a bottom blast zone, and afterwards the large tentacle will fly apart into several smaller tentacles, swinging off to the side and dealing rapid hits that add up to 16%. before retracting. While this attack seems very powerful and not as relevant to the playstyle as one might like, it's limited by it's huge duration, during which opponents can punish if you use it at the wrong time. That, and it's probably best that the opponent isn't standing next to you when you land on the ground, and this attack does a wonderful job at keeping them away.


Grab Game

Elsa Maria stretched out a single tentacle, travelling forwards at Fox's dash speed and being completely controlled by the control stick. If this collides with a foe, it will wrap around them, from which point Elsa gets to utilize her grab game. If you hit a minion with this, Elsa will wrap the tentacle around the minion, holding it in place until you retract that tentacle or it is destroyed. Perhaps you might want to use this to grab some large minions, form some tentacle defenses around them, and stock up on them to maul the foe once you accumulate a large enough amount.

Once you grab a foe, you don't have throws like a normal character, rather being able to drag and swing them around by pressing any direction. Pressing forwards will have Elsa push them away from her still grabbed as they attempt to break free, moving at Ganondorf's dash speed. Backwards will have them pulled towards Elsa at the same speed. If you slam them up against a wall this way, they'll take 4%. If that wall happened to have spikes, they'll take the 8% and be released from the grab as well, taking the knockback. The tentacle cannot go through walls while holding the foe, sadly.

Pressing up will have Elsa swing the tentacle clockwise, and down will have her swing it counterclockwise. The swing still moves at Ganondorf's dash speed, and when it hits a wall it deals the foe 3% for each battlefield platform they were swung from. Obviously, this has ridiculous potential to gimp when Elsa is hanging from the stage with her Up Special.

Lastly, pressing A will have Elsa release the foe she had grabbed and retract the tentacle. While this is far from noteworthy if you were just dragging or pushing them, if you release them from the swing they take knockback that KOs at 200% minus 20% for each Battlefield platform swung in the direction the tentacle was currently swinging in. If you use this as you slam them into a wall they'll take knockback in the opposite direction of the wall. You can also swing them into a spiked tentacle, which boosts the KO potential of this attack through the roof.

Yes, yes feel free to take snapshots.

Final Smash
Elsa will launch out a tentacle at each foe at Sonic's dash speed, being fairly easy to dodge but only if they aren't preoccupied with other tasks, such as dodging mass minion/tentacle blows in a closed space. Any tentacle that successfully reaches a foe will attempt to grab them, and if it succeeds Elsa will send out 4 other tentacles for each foe, ignoring her cap. The tentacles will then grab them and snap their limbs and body parts into uncomfortable positions, the foe letting out loud screams as it happens, and totaling up to 40% for each caught victim. Elsa then drops them where they were grabbed, them going into helpless if they were in the air, possibly for a gimp. Once they land, they'll be unable to attack for 6 seconds as they recover from their injuries.

So you want to play Elsa Maria, yes? Well, she is a bit hard to just pick up and just start mashing buttons with, though I suppose that will get you somewhere since you'll probably create a bunch of walls that you have no idea what to do with, and maybe even get some minions going. But if you really want to figure her out, you are going to have to learn how to place your tentacles strategically, creating prison after prison and mazes for your opponent to crawl through, all the while converting the stage to your barrier and slowly amassing an army of followers.

So, it should be fairly obvious now that you can make a lot of little boxes for your opponent, and I'm not going to bother you with how you make those, it should be fairly obvious in the moves themselves. The main thing I figure would be worth clarifying is how you create the barrier. While your other tentacle attacks can slowly create patches of it, the best method of generating barrier is probably through your Neutral Special, which especially with a large number of tentacles going will rapidly create a huge segment of barrier for Elsa to utilize.

While the benefits of the barrier seems small at first, it does give you access to more than you might think. An attack that hits the opponent at any time which they can no longer predict very well, for one, is something Elsa quite appreciates as it forces the foes to frantically dodge, shield, and roll inside her various prisons. Aside from that, it also obscures the opponent's position inside your fog, which is immensely useful. The opponent won't be able to tell what the heck is going on as you can reposition them wherever throughout the cloud, perhaps through your grab game, or by generating spikes on the various tentacles you no doubt have them trapped between.

And obviously, the minions are also worth discussing. You don't have any inputs that give you direct control over them, and they are rather stupid on the surface and frail... but you are going to start amassing them in large quantities. A simple distraction is really all you need to start setting up directly around the opponent again, restricting their movement as you pummel them with the Neutral Special or your grab. On top of that, since they attack through your walls, they serve as a wonderful way to damage foes you already have locked down, giving them far too much to deal with at once. And, I may as well mention that your opponent is going to eventually put a lot of your tentacles out of commission, at which point you are going to have to rely on them for any sort of defense. Perhaps it's best to save up on them as they spawn...

Aside from that, I may as well mention the aerial game, which doesn't seem like anything notable at first glance. Really, Elsa just needs a way of getting space in the air, seeing as when she lands she doesn't want the foe to be right next to her. So ideally, you'll want to use stuff like the Up, Forward, and Down Aerials to make for a safer landing or Up Special perching. The Nair gives you defense as due to the nature of your tentacles you'll probably be at an obscene percent, and if you do have your fair share of minions or active tentacles going for a Back Aerial can really pay off in building huge damage on foes, with the minions and tentacles constantly battering on them in a closed space. Maybe dodging it is a safer idea, after all.

I shouldn't have to tell you about Elsa's lockdown, reasource management, and aversion to close range. On a whole though, you are certainly a very defensive character, but not one who isn't at the same time trying to eliminate the foe, by grabbing them and battering them around or caging them in place. Against other super defensive characters, Elsa can even grab them out of their little set up and drag them into hers, creating a bit of an uphill battle for the other defensive character. She may have only been a minor antagonist who was taken down with ease, but don't let that fool you. Let your guard down against her, and she'll tear you into ribbons.


Vs. Sayaka: 60-40 Sayaka's favor

The main thing going for Sayaka in this match-up is her constant ability to approach Elsa, with her having various movement attacks that actually do some rather impressive damage. Elsa is not really given much time to set up on Sayaka, and once she gets in close Elsa is completely outclassed. You probably won't even get time to set up your barrier.

That said, Elsa has a fair few ways of turning the match-up in her favor, but they rely on certain things to go right. You mostly need to get in a lucky hit and manage to box her in properly, which is a fair bit easier if you get her inside an obscuring fog. Those things aren't exactly hard for her to get around, but the Up Smash and Down Smashes will help you a little with that, at least. But if you can preoccupy her, get in some minion spam and wail on her with tentacles, her inevitable close range decimation of you will at least cause her to go into Berserk mode... which if you can survive, is probably going to swing the match in your favor, especially with your barrier actually going and some walls to pin her up against. It's a bit of an ugly prospect, but if things go right for you the whole fight could turn in the exact opposite direction it did in the show as poor Sayaka falls into despair.

Vs. Cyrus: 55-45 Elsa Maria's favor
Cyrus going into ball form is obviously absolutely devastating for you. It gives him such an easy way to overwhelm your defenses, as he ricochets off the walls and tears through your minions before eventually reaching you. There's no real way in your set to stop him, and he can decimate all your hard work with relative ease. That said, it does take him a lot of time to turn into ball form, which means you have plenty of chance to interrupt him with all of your long range attacks. This should, at the very least, keep him preoccupied... up until the point he gets enough bullet hell going that you can't really reach him anymore, and he does go into ball mode.

That said, Elsa can kill Cyrus before then, what with his fairly gimpable(for you) recovery and his lack of any real options beyond pelting your tentacles with projectiles, which isn't even especially effective considering they deal rather low damage. Cursed blocks mean absolutely nothing due to the nature of Elsa and her hitboxes, and the Size/Shield curses are hardly important to begin with. It's a fairly tough match-up for Cyrus, as Elsa has plenty of options to overwhelm him at first, especially if she manages to grab him and pull him into a prison... but all that goes out the window if Cyrus goes into ball form, making the match-up fairly close.


Vs. Baron K Roolenstein: 65-35 Elsa Maria's favor
The main problem for Baron in this match-up really comes down to him having a lot of options... none of which are actually particularly offensive. Sure, the electric barrier can lock off zones for Elsa to place tentacles, but Elsa's grab can casually remove an electric barrier set up anywhere... or better yet, she can slam Baron against his own barrier repeatedly. Not to mention his projectiles and melee options aren't particularly good at dealing with Elsa's tentacles, considering they are meant to knock foes into a barrier, and her tentacles don't actually take knockback.

It's not all hopeless for Baron though, largely due to the fact that he can fly around freely, and Elsa doesn't really have a ton of options against him approaching her from above. Unfortunately, this doesn't mean Baron is going to actually be able to set up the barrier like he wants on her, since she can still just slam him against it if he tries... it's just kind of an ugly match-up for Baron, though if he does manage to get an ideal electric barrier set-up that Elsa has trouble grabbing, he can at the very least turn the match-up around.


Vs. Zasalamel: 80-20 Zasalamel's favor

Elsa's woes in this match-up largely come from the fact that Zass can't really be locked down. Like, at all. The Up Special makes him hilariously good at traversing through your tentacles, invalidating a lot of your defenses. On top of that, he doesn't even have to get in close, since he can just use the Neutral Special to abuse you with the scythe, and with how laggy your grab is you basically have no real options as Zass just drags you around and destroys you. Hell, he might legitamately get a huge cog set-up to deal with you, not like that's entirely necessary considering he can demolish you just fine without ever even making a cog. Truth be told... you don't have a lot of good options in this match-up. Your methods of interrupting people's games don't really work on Zass, and the best thing you can do is just perch off stage with the Up Special and hope for a cheap gimp or 3.
 
Last edited:

majora_787

Smash Hero
Joined
Jun 23, 2007
Messages
6,122
Location
Texas
* * * Terezi Pyrope * * *​

The Seer of Mind​


Terezi Pyrope is a character from the story Homestuck within the webcomic MS Paint Adventures. erezi is alternatingly civil, flirty, manipulative, derisive and outright sociopathic in her interactions. She is almost always grinning and in many panels it appears as though she is cackling madly. As could be discerned from a character based off the Libra(or who has Libra based off of them in-comic), she is heavily into delivering justice and wishes to become a "legislacerator"... with assumed emphasis on lacerator. After an accident, Terezi has been left blind. However, as a result of being raised by a blind alien dragon (essentially), she is able to see through smell and taste. Her weapon, her cane, is somewhat complicated and has been shown to be able to split into segments as a bludgeoning weapon, hold a larger single concealed blade, and two smaller concealed blades. She also brings her Dragonsprite, a game abstraction made out of the corpse of her Dragon parent, into the fray for aerial support.


Because of being blind, Terezi will start a match with some things working against her. Her attacks will be weaker in knockback and will not reach quite as far. Her grab will be easier to escape. She will trip slightly more often in situations where that is a possibility. The ending lag of her attacks is a quarter second longer. She has to be closer to the ledge to grab ahold of it when recovering. Her shield is weaker, and her dodges have fewer invincibility frames. She drops items more easily when hit, and sometimes just drops them on accident. This all sounds like a bad deal, doesn't it? Well, yes. But the thing is, Terezi has a large number of tricks up her sleeve for getting around these issues. For example, when she manages to lick her opponents, these problems will lessen gradually. The more times she hits her opponents with tongue attacks, the less they will affect Terezi's performance. After 5 successful attacks, Terezi will no longer be debuffed with her problems. After 7 successful hits, she will actually be BUFFED with longer invincibility frames when rolling, a slightly stronger grab, and the ability to use her cane as a tether recovery with Z.


* * * STATS * * *​


WEIGHT: 3
SIZE: 6
GROUND SPEED: 8
AIR SPEED: 8
FALL SPEED: 7

Terezi is a pretty fast character! Her agility is important early in the match when her goal is to get a grasp on her opponents by licking them. This will remove her blindness ailment from play and lead to a whole new ball game. Her stats don't change depending on how debuffed she is.


* * * SPECIAL MOVES * * *​


Neutral B: M1ND R34D1NG​
Terezi closes her eyes as a Mind emblem appears around her feet, covering half a battlefield platform in all directions around her. If the B button is pressed, this circle will remain up for a half second and Terezi will autododge any attack that hits her in that time. If the button is held for a full second, it will linger around Terezi for ten seconds. The first thing that hurts her afterwards, she will be immune to while the shield is up. For example, if she puts up the shield and is hit with a fire attack, Terezi will be fireproof for ten seconds. If she puts up the shield and gets caught in one of her nooses, she will not be able to be trapped in them.

Side B: CO1N FL1P​
Terezi pulls a coin from her pocket and flips it. "Heads you stay, Tails you go." If an opponent is within a battlefield platform of this happening, a symbol will appear over their head of the coin alternating between heads and tails. Despite the fact that it is a coin flip, it will always land on tails. After this, if the opponent turns their back on Terezi, she will teleport to their location and impale them with her cane for 16% damage.

Up B: W1NGS OF JUST1C3​
Terezi procures a pair of red wings with yellow flame decals. She puts the wings on, and after doing so, can jump a total of five times and air dodge twice in the air without being unable to jump or going into prone. If the pack sustains too much damage (about 25%), it will detonate and do 30% damage to anyone in the blast; including Terezi. Pressing up and B again will cause Terezi to remove the pack and be able to throw it like an item. The item can be picked up and worn by opponents and teammates. The wings give the same benefits to everyone, but if they are worn for longer than six seconds straight they will detonate regardless of who is wearing them, assuming Terezi is not the one wearing them.

Down B: PUN1SHM3NT​
Terezi grabs a length of rope and a stuffed scalemate. If she is standing on a ledge or on a pass-through platform, she will lynch the scalemate on a length of rope that will dangle down about 1.2 times Ganondorf's height. The ropes impede movement in that if they are contacted they have to be swung from, and cannot be avoided. Large congregations of scalemate lynchings can cause opponents to get completely tangled in ropes. A number of things can also happen with this. The scalemates block the ability to drop down from the rope. However, the scalemates can be removed from the nooses by anyone if they grab the base of the ropes with Z. The scalemate can be thrown like an item for 1% damage. They can also be throne back into nooses that are not occupied. However, empty nooses can entangle opponents in a damaging grab. If the upper third of their body contacts the very bottom of the noose, they will be stuck in it, and will take 3% per second if they attempt to pull out of it or escape it. They can still attack while stuck in the grab. If the noose is hanging off a ledge and does not have solid ground under it and an opponent gets trapped in it, then they will take 18% damage and fall out of the noose. The ropes can be cut and the nooses destroyed by attacks that involve fire, blades, arrows, lasers, bullets, explosives, claws, fangs, or other sharp/fiery/corrosive things. Attacks involving things like electricity, water, ice, hands, feet, and heads will not accomplish this.


* * * STANDARD ATTACKS * * *​


A:​
Terezi shoves the opponent for 2% damage. If she is holding an item, she will forcefully give the item to the opponent. If the opponent is holding an item, they will drop the item.

Dash Attack:​
Terezi dashes into her opponent with a length of rope. If she hits an opponent, she will go through them and keep running, and the opponent will be put in a noose for no damage.

Up Tilt:​
Terezi licks the opponent with a surprising hitbox that is larger than it looks, reaching a quarter of a battlefield platform. This move counts as a lick and knocks the opponent upwards for 3% damage.

Side Tilt:​
Terezi swings her cane forward for no damage, and then shoves the opponent, who will stumble backwards for 6% damage.

Down Tilt:​
Terezi plants her cane in the ground and procures another in a low slash for 4% damage. Any ropes that touch the grounded cane will attach to it and restrain whoever is trapped in it.


* * * SMASH ATTACKS * * *​

Terezi's smash attacks all share a common oddity in which they can use each others' startup animations. When Terezi charges a smash attack, she is able to charge it indefinitely, but her attacks do not gain power or knockback. When charging a smash attack, if you press the control stick in a different direction, Terezi will use the startup of the smash attack you chose and will then use the smash attack you intended to use to begin with. All three animations last about a half second.

Forward Startup: Terezi prepares an overhead swing.
Up Startup: Terezi prepares to stab her cane upwards.
Down Startup: Terezi makes a movement as if she is about to slash horizontally at the opponent's ankles.


Forward Smash:​
After the startup animation, she quickly then stabs her cane forward into the opponent, sending them flying back low to the ground for 16% damage.

Up Smash:​
After the startup animation, Terezi swiftly draws dual blades from her cane and cross-slashes them overhead for 18% damage and decent upward knockback.

Down Smash:​
After the startup animation, Terezi ducks down quickly and does a sort of breakdance kick, hitting opponents on both sides of her for 12% damage and moderate knockback.


* * * AERIAL ATTACKS * * *​


Up Aerial:​
Dragonsprite appears next to Terezi and grabs onto her, pulling her upwards in a flying upward tackle of sourts. If it collides with opponents, it knocks them out to the side for 10%.

Forward Aerial:​
Terezi does a sort of lunge forward, and if she hits an opponent she will lick them. The lunge does 8% damage, and the lick does 1%.

Back Aerial:​
Dragonsprite appears next to Terezi and breathes a small stream of fire over her shoulder a short distance, dealing 9% damage.

Down Aerial:​
Terezi procures a noose and attempts to tether downwards with it. If she hits an opponent, they will be lynched in the same way as they would be from her Back Throw. However, Terezi will hold onto the rope. If Terezi has her wings on, she will hold the rope and can jump once to deal an automatic 20% lynch damage to the opponent.

Neutral Aerial:​
Terezi procures a scalemate if she is not already holding an item. If she is, she will drop it in favor of procuring a scalemate. She can make one scalemate for every empty noose on the stage. If there are no empty nooses, she will have a lynched scalemate. If the rope touches a pass-through platform or a ledge, the scalemate will be planted there as a normal lynched scalemate. The lynched scalemate, if not attached to anything, can be picked up and thrown by opponents.


* * * GRAB GAME * * *​


GRAB​
Terezi extends her cane in segments, which wraps around the opponent and holds them in place.

PUMMEL​
Terezi tugs on the cane, tightening it and dealing 2% damage.

Up Throw:​
Terezi throws her opponent upwards, and her cane disappears. She places a pile of scalemates under the opponent, and when they land on the pile they get scattered away, revealing that they landed on the upward-pointing blade of Terezi's cane for 12% damage.

Forward Throw:​
Terezi sticks her tongue out and gives her opponent a big lick, dealing 6% damage. They are then stunned for about a second

Back Throw:​
Terezi ties a noose around their opponent's neck and throws them back over her shoulder. The rope will follow behind the opponent and attatch to the first ledge or pass-through platform the rope contacts. The rope cannot be broken until it has attatched itself to something else, unless it is burnt up in fire or an explosion.

Down Throw:​
Terezi pulls the opponent close as a large sun appears in the background behind the stage. Terezi forces the opponent to stare up into the sun, dealing 10% damage over about 1.5 seconds. She then releases them and they drop to the floor, with their controls slightly less responsive for about three seconds.


Final smash: TH3 L4ST G4T3​
Terezi procures a rocket pack next to her and offers it to opponents. She will be invincible until the opponent either attacks her or grabs the rocket pack. If they attack Terezi, she will disappear, and the rocket pack will explode like a smart bomb in the opponent's face for 30 damage. If they grab the rocket pack, Terezi will begin moving again, and the opponent will rocket up in the air, able to fly freely like Diddy Kong. They will only be able to use their aerials like this, until they either take too much damage (35%), or fly into a gate. Gates will appear all over the stage in random places while the opponent flies around. If the opponent touches a gate, the screen will begin shaking as Typheus appears on the side of the stage. Terezi will laugh and disappear at the coming of the beast, who will inhale heavily to swallow the opponents. It is impossible to escape the pull of this attack unless you have a wall between you and Typheus, and fighting it will only deal more damage at 4% per second. This applies to all opponents. When eaten by Typheus, he then spits the opponents out in a burst of oil for 20% damage and massive knockback that has a good chance of KO'ing foes with more than 40% damage.


* * * OVERVIEW * * *


Coming Soon(er or later)
 

Davidreamcatcha

Smash Ace
Joined
Feb 9, 2011
Messages
629
Hippo.

Disney Rumble

The Elegant Captain Hook

J CAPTAIN HOOK J

VERSION 2

"Good form, Mr. Smee? BLAST GOOD FORM!"

***

--- AN ELEGANT MAN...

Captain Hook is amongst one of Disney's greatest villains - possibly the most well-known. In the "Peter Pan (1951)", Captain Hook and his crew of throat-slitting pirates stay afloat in a ship docked just outside of Neverland. He refuses to leave Neverland until either he or Peter Pan are blasted out of it...forever. Hook desires revenge against the boy for feeding his right hand to a crocodile. This croc has constantly antagonized Hook since his hand was eaten, pursuing him to wherever he may go...

--- AN ELEGANT BEARING...

Idle Stance
Captain Hook has his sword sheathed at his side, he faces the foe with a large scowl. On occasion, he unsheathes his sword and toys with it for a moment.

Walk
Captain Hook's walk is a fairly dignified one - he takes large steps across the ground, not changing his posture, as he unsheaths his sword and keeps it pointed at the foe.

Run
Captain Hook is done toying, you scurvy brat! Hook dashes towards the foe, leaning as far forward as he can go, hands and sword at his side.

Crouch
Hook crouches down on his knees, sticking his leg out slightly, that sneaky crook...

Dizzy
Hook stumbles about, shaking his hook at the foe.

Sleep
Hook falls asleep, sleeping against his hook as though it were a pillow.

--- AN ELEGANT FORM...


TRACTION - 9
HEIGHT - 8
WEIGHT - 7.5
POWER- 5
FALL SPEED- 5
JUMP- 5
POWER - 5
RUN- 5
RANGE- 4


***

--- ELEGANT SPECIALS...

Special - Clash
Captain Hook keeps his sword pointed downwards before he swings it at an upwards angle with some quick start lag and bad end lag. He doesn’t swing directly above himself, instead pointing it slightly upward, making it somewhat incompetent as anti-air. Should he hit the foe with this, he will stab a vital part of their body, dealing about 5%. More importantly, this causes their attack speed and movement speed to be reduced for 7 seconds, hindering their approach and their defense. While their movement is only simply reduced, attack speed is far more hindered.

However, this also has a special option if Hook clashes with a foe holding an normal item. Should he do this, Hook will clash his sword against it, before removing it with his sword. He then hurls the item behind him, crying “Go get it!” This deals no damage, of course, and leaves Hook vulnerable. However, it can also spread out the foe from any precious items that they may be using against Hook.

Forward - Pistol
Hook makes a motion as though he is holding a pistol. A pistol is drawn into his hands before Hook fires a bullet forward with quick start time! The bullet travels the full distance of Final Destination before disappearing, dealing 4% and some good knockback that kills at much higher percentages (120% or so.) However, this does have some end lag as Hook blows the smoke emitting from the barrel of the gun, meaning you will have to be careful with your aim. This also means you can't spam it as fast as the space animals, even Wolf. You can hold this in to aim your shot before you fire it, though Hook will automatically fire after 4.5 seconds.

If Hook fires at an enemy projectile, the bullet and the projectile will clash harmlessly, disarming both.

Down - With Love, From Wendy
Hook holds out his hands for an an obnoxiously large present to be drawn in. He fiddles around with it until you press the input again. A large "20" hangs above the present when it is first drawn in, though for every second it stays out, 3 numbers are removed from the count. When you press something, Hook will tuck it away.

Now, when you press it again after having been tucked away, Hook will pull out the present and hold it in front of himself as though he were handing it over in a mock gesture. He holds it out for .50 seconds before putting it away. If a foe comes in contact with the present, they will confusedly take it and put it into their own hammerspace - Looney Tunes style.

Now, whoever is holding the present at the end of this (either Hook or the foe) will have a speech bubble appear above their head, with the number that Hook selected at the beginning appearing inside of it and counting down. At the end of this countdown? The present will explode, being an undodgeable attack that deals 15% and high vertical knockback. Of course, the foe or Hook can transfer the speech bubble to one another by simply running into one another - much like a gooey bomb. If Hook hits the foe with his neutral special while they have a present, however, he can throw the present backwards - a last ditch option, perhaps?

In addition, Hook can press downwards while he is fiddling with the present to place it on the ground - here, it will not be triggered unless someone walks into this, deactivates it with a trap or projectile or the countdown is up. The present will deal 8% and explosive knockback. However, Hook is vulnerable to his own presents. Hook can only have 3 presents on the stage at a time (including the one being carried), so he can't make the stage into a neverending screen of hitboxes.

Up - Rope
A rope is drawn into Captain Hook's hand extremely quickly, to the point where it looks like it appears from hammerspace. Hooks holds the rope in such a way that it forms a large circle, allowing Hook to catch opponents. After this, Hook automatically tosses it out 4 battlefield platforms. However, Hook can hold the input to angle it if he doesn't wish for it to be thrown on a horizontal line. If Hook hits the stage, he will be pulled towards it in an obvious tether.

Now, if any foes are hit by the rope, they will be dragged to Hook's current spot. Should they reach Hook, they will be grabbed by him directly. However, they will not reach Hook if they are hit by a present trap or regrabbed by Smee, now will they? Of note: If they were shielding when they were grabbed, they will remain shielding as they are dragged, meaning their shield can break from hitting a present trap or whatever.

Speaking of these two, Hook can grab presents not to throw them, but as soon as the rope hits them, Hook will toss them in his direction. This requires a large amount of skill to work with, but if done right, you can potentially hit foes attempting to close distance between you and them. You can also grab Smee to bring him closer, and he still retains the ability to grab people...that, and he can always transfer the present if he's carrying and he touches the foe. Grabbing weapons on the ground should also be obvious, as you can toss them towards yourself and inevitably, away from the foe.

While you have the foe grabbed, you can move around at half of Hook's normal walk speed, the foe clinging on. The uses for this should be obvious, of course, drag yourself into a present trap with the foe in tow, or simply drag them to Smee for some beatdown. You can also drag them away from weapons they would use to fight ol' Hook back...


--- AN ELEGANT OFFENSIVE...

A - Hook's Hook
Hook uses the blunt end of his hook to strike! He pushes his arm forward, hitting foes with the blunt end to deal 2% damage and some stun. Hook can hold the input in to delay the attack, and can even outright cancel it during the delay by pressing any input. The primary use of this is to fake foes out or forcing them to perform some sort of defensive manuever.

Dash - Swatting Hook
Hook stops dead in his tracks, before he performs a backhand motion, slashing them with the back of his hook to deal damage, This deals 3% damage and pushes the foe a battlefield platform backwards rather than dealing knockback - allowing Hook to space if needed. This will push foes backwards even if they are shielding, which means that they can hit presents or be grabbed from behind by Smee.


--- ELEGANT TILTS...

Forward - Let's Have At It!
Hook holds his sword in front of him for a brief moment before he draws it back with some pathetic end lag. If Hook's sword is struck during this time, Hook will reach out of his hook to grab the foe who struck him, before pushing the sword at them. This causes the foe to take 6% and roll backwards. While this of course adds yet another redundant spacer to Hook's library, this gives him a counter - something that allows him to remain remotely competent while the foe has broken his space.

Up - I'll Give You A Splash!
Hook raises his hook upwards, holding it above his head as an effective anti-air. After some small time after holding the hook above his head, he claws it downwards, dealing 5% and knocking foes hit into a prone state. Should foes get hit by the hook, they will get caught on it as Hook tosses them downwards into a prone state and dealing 5%, obviously your easiest way of knocking foes off the ground. Your most obvious follow-up, of course, is to use a ground hitting move.

Down - Cheat? Not I!
Hook, in his crouched stance, decides to sweep his leg out in front of him! This deals about 4% damage and causes them to enter a tripped stance, they trip in the direction you choose during the starting lag. Hook's primary goal here is to get away and set up space, though it also has a purpose of forcing the foe into your presents quite easily. Hook can also trip the foe while they're shielding if they don't move away, as their feet are not covered by the shield.

--- ELEGANT SMASHES...

Forward - Leap of Hook
Hook uses his hook to strike! He leaps 2 battlefield platforms forward while shoving his arm into the background. His arm is in the background, but the end of his hook curves into the main plane, hitting foes in their backs. This has good range, as you might imagine, and deals 5-9% and good knockback to those hit. This is one of Hook's greater close combat moves for a good reason - he can poke against a foe's back rather than their main body. In addition, the strike will hit any dodging or shielding foes, or anything that might be in the background.

By pressing the control stick backwards during the startup time, you can leap backwards instead of forwards, making this a decent retreat option as well.

Up - Sword Thrust
Hook draws his sword back during the charging phase: you're able to angle it either forwards, downwards or upwards. When you release the charge, he has a very brief period of start lag before he thrusts the sword a battlefield platform forward, keeping it out for half a second before drawing it back with some end lag. Hitting the enemy at close range does 4-9% damage with very little knockback, however, when the tip of the sword hits, the damage increases to 10-18% with heavy knockback. This has a bit of ending lag, and can be easily punished if Hook misses or it doesn't connect. Usually, this is the attack you'll want to use when Smee has the foe grabbed.

Down - Smee
Captain Hook lets out a cry of "SMEEEE!", causing Smee to be drawn in by his side and immediately run towards the foe. Smee dashes towards the foe at a decent speed, around that of Fox's, and is actively smart enough to jump past obstacles/enemy hitboxes/presents. However, he will be erased if he takes 8-20% (based on charge) as he is rushing towards the foe. Should Smee catch up with the foe, he will reach out in a grab motion. If Smee connects, he will hold the foe in place as he keeps them grabbed from behind, the foe having to escape with average grab difficulty. The most obvious purposes of this, of course, are for Hook to get away and set up or KO the foe while they're in Smee's grasp. Smee stands still for a moment after the foe escapes, but will chase after them soon after.

Smee can be given presents like Hook and the foe, and will transfer his presents to whoever he grabs or even touches...


--- ELEGANT AERIALS...

Neutral - Rough Shoves
Hook turns to face the screen as he extends both arms to full length, pushing them outwards. Anyone who comes into contact with his arms during this time will be sent backwards and take 6% damage. Aside from obvious damage racking opportunities, this also has a decent use in free for alls, as both foes will be looking to transfer their presents to you...hot potato!

Forward - Sword Slashes
Hook pulls out his sword and performs a multitude of slashes in front of himself, almost looking like a blur! This deals 5 flinching hits of 2% to any foe caught in your sword swings. You can move during this, meaning you can DI away from or towards the foe while you swing the sword. Should any projectile come into the path of Hook's sword during this time, it will be nullified by the disjointed hits. This, combined with the relatively low lag time from shorthopping, makes this one of your best pressure moves.

Back - Cowardly Smelt
Captain Hook smirks as he hops backwards about 1.5 Battlefield Platforms before falling again. This deals 8% and decent knockback to those he actual hits. While this serves as a good spacer, this also works as a decent recovery should he have his back to the stage - of course, the fact that this moves him less and less everytime he uses this in one session and the endlag keeps this from being an infinite recovery.

Up - Gotcha!
Hook stabs his sword directly above himself, keeping it out for about half a second before he draws it back. Getting hit by the sides of the sword deal about 4%. If you get caught on the tip of the sword, Hook will catch you with it, before he drags you downwards in one of those terrible drag down uairs. The extremely long reach of the sword makes it good for attack foes that think they can fly...fly away like a coward!

Down - Spinner
Hook does a brief spinning motion in place, hoping to catch someone. Should the foe actually come in contact with his hand or hook during this time, Hook will grasp onto them before falling downwards. Hook and the foe can button mash while in this, as Hook and the foe constantly fight over who ends up on the top and who ends up at the bottom. Whoever ends up at the bottom, obviously, will die first in a suicide KO. Whoever is on the bottom, should they fall onto the stage, will take 8% and be pitfalled. Obvious damage racking opportunity for the cowardly Hook, yes? You can also take them straight down into presents if you so choose....

--- ELEGANT THROWS...

Grab - Hooky
Hook swings out his hand towards the ground, hoping to catch his foe with it. This has some rather decent range. If it hits the foe, he catches them and holds them by their shirt while shaking his hook at them in an attempt to be intimidating. The most important thing to note is that this can pluck foes out from prone, if he wishes. His pummel is a generic knee that deals 3%.

Up Throw - Bleed Out
Captain Hook scratches his hook across the enemy's face, causing a scar to appear as they start bleeding. Hook lets them go a short distance in front of himself shortly after this. For the next 10 seconds, the foe takes 1% damage per second and flinches for one second every 2 seconds, leaving them highly vulnerable. The effect here can't be stacked, but still, it's wise that you spotdodge as you're about to flinch - which will negate the flinching and stop the bleeding for a second. Oh wait...Hook can just abuse you with his forward smash. Such is the life of a pirate.

Forward Throw - Drag around
Hook loosens his grip a bit as he holds the foe, he is now able to move about while dragging the foe behind himself - they can still button mash out of this. At any time, he can press the standard input to toss them forward for 5% and decent knockback, this is one of his only throws that actually throws the foe - there is, of course, the obvious perk of moving around with them behind you, positioning and whatnot.

Back Throw - CLANK!
Hook carelessly smacks the foe on the head with his hook, making a rather noticeable "CLANK!" The foe falls to the ground with a stupid expression on their face, taking 5% and laying in prone in front of Captain Hook. Hook can of course follow this up with moves such as fsmash if they attempt to roll, but can also space away, especially if he might be KOed by a getup attack.

Down Throw - Stomp
Captain Hook throws the foe to the ground before he stomps on them, rubbing his foot around a few times before kicking them forward, sliding them 1.5 BFPs across the ground. This deals multiple hits of 5% and a final hit of 3%. This is obviously your optimal spacing move, as you can space them straight into a present without worries of them avoiding your attacks. Spacing them into Smee for a regrab also works wonders.

--- AN ELEGANT FINAL SMASH...

Final Smash - Tick Tock the Croc


With a ticking noise starting, the crocodile enters from the place where Captain Hook spawned - causing Captain Hook to let out a yell as he begins quivering. Hook's animations take on a more frightened tone as he now moves around the battlefield at Falcon's dash speed. This persistent Crocodile is constantly crawling after Hook at Mario's dashing speed and jumps surprisingly high, enough to reach any platform that is in his path. If the Crocodile comes in contact with a foe in his path, he will deliver a bite to them that deals 30% with incredibly high knockback - this has the effect of near-instantly KOing Hook. If Hook is tossed off the main platform, the Crocodile will stand by the edge, waiting for him - he'll stop at nothing for a bite, it seems.

Hook's main goal here is to lure the croc into his foes, in order to prevent his own demise. Various things such as dragging them around or locking their escape routes with presents helps here - and he can have the foe worry about the croc and their holding a present at the same time, creating a bit of stress for them. This lasts until Hook is KOed or until 30 seconds pass.

--- AN ELEGANT PLAYSTYLE...

Captain Hook intrigues you? Well, let's just start this off by being blunt - Hook is a coward. He may pass himself off as a swordsman, but he's really just a cowardly smelt who would prefer not to be fighting the foe at all. Is he good at fighting? Well, yes - but he needs to be in his comfort zone first. Let's put him there, shall we?

His main way of accomplishing this? Presents. Presents presents presents. These explosive little treats are your best way of getting the foe downright uncomfortable - set a countdown and give the foe as they're charging one of their little attacks - they'll find themselves awkwardly accepting it, Looney Tunes style. Once they have it, you'll find yourself playing an awkward game of hot potato with your opponent and Smee, repositoning the present with uspec, nspec and the like. Of course, hindering the foe with nspec and uthrow are always options in your quest to make the playing field uneven. You can, of course, run away from the foe as you drop presents and pelt at them with your sspec, destroying their every attempt at reaching with you with moves that space yourself and moves that directly space them.

On that note, one of your more direct ways of hindering the foe is to apply your nspec to them - hindering their attack speed makes Hook's meleeing style works it far more to their advantage. Caging them in to an arena with presents also works wonders here - if they just attempt to leave, you can shoot a present to set it off as they jump away or just shoot them. Limit your foes' comfort zone, counter their now-predictable moves, it's all such a wondrous trial, no? If the foe attempts to dodge your attacks, you can always hit them your forward smash - and can easily either force them to dodge or flinch with your uthrow. Speaking of which, your throws are an incredibly helpful asset - all amongst your best spacing tools. You can, of course, also suicide bomb while you have them grabbed.

In a FFA match with Hook, things get far more chaotic as he sends the foes playing hot potato and spaces them about. It is in these matches where Hook enjoys making alliances - he spaces them into the foes' attacks, he can keep two people with presents from reaching him with his nair, he can even give a present to his ally and force them to suicide bomb. Hook has all the tools needed to hinder a good offense and a good defense, he just needs to work them to his advantage.

***

--- AN ELEGANT PERSONALITY...

Up Taunt
Hook takes an extravagant bow, removing his hat.

Forward Taunt
Captain Hook points his hook straight at the foe, shaking it as he cries “BLAST YOU!”

Down Taunt
Hook repeats "tick, tock..." to himself about 3 times as he looks around, almost cautiously.

Victory Pose 1
Captain Hook holds out his hand, causing a double cigar holder to be drawn into it. He takes a quick smoke before it is erased.

Victory Pose 2
Hook smirks at the screen, before turning to the foes and announcing "So ends worthy opponents!"

Victory Pose 3
Smee and Hook are both onscreen, and they both share a round of laughter at the foe's loss.

Losing Pose
Hook can't clap with his hook, instead, he simply shakes his head about his loss and occasionally shakes his hook at the winner.

--- AN ELEGANT TALE...

Symbol
Hook has his own symbol: his hook.

Entrance
Hook is simply standing at the starting point with his eyes closed, before he opens his eyes and smirks at the foe, proclaiming "give up now!" as he gets into a stance.

Wiimote
“You wouldn’t dare fight old Hook man to man!”

Music
Captain Hook’s theme is, in fact, The Elegant Captain Hook.

***

...Captain Hook never breaks a promise.
 

Davidreamcatcha

Smash Ace
Joined
Feb 9, 2011
Messages
629
MYMini #0

You bet yer lily white livers I'm the Flying Dutchman...

I'm gonna let you in on a little secret...

The Flying Dutchman


The Flying Dutchman is a ghastly green ghost who appears as a recurring character in the popular show, Spongebob Squarepants. The Dutchman was once a feared pirate who ravaged the Seven Seas, being one of the most famous pirates of them all. When he died, he went down with his ship, falling into the water by the Bikini Atoll, an island famous for being a location for radiation tests. His body was never recovered by human beings, instead being found by fish living in the town of Bikini Bottom, his body was being used as a window display. In the afterlife, his spirit haunts the town of Bikini Bottom as his body was never put to rest. After being dead for more then 5000 years, he's adjusted to his job of scaring people quite well.

The Dutchman's powers have expanded upon becoming a ghost; he has gained masterful manipulation over fire to the point of being able to use it underwater, has been shown in some appearances to be able to fires lasers from his eyes, control over a hellish portal known as "The Fly of Despair" and the ability to fire beams of energy from his mouth. These powers have allowed him to become the gatekeeper of Davy Jone's Locker, the underwater equivalent of Hell. The Dutchman often escorts what he calls "Bad Undersea Folk" to Davy Jone's lockers, them kicking and screaming all the while. Click the picture to start the playlist and let us get rolling...


Statistics

Size: 9
Aerial Movement: 8
Traction: 7
Jumps: 7
Recovery: 6
Weight: 5
Movement: 2
Falling Speed: 2
Float: 2x as long as Peach's, and The Dutchman is able to use his smashes as he floats.


Standard Pose
The Dutchman has both arms in front of himself, hands curled up. His mouth forms a ghostly smirk as he waits for his foe's next move.

Idle Pose
The Dutchman leans his head forward, letting out a yell of "Arr!"

Walking:
Practically identical to his standard pose, nothing to see here, folks.

Running:
Same, only hunching over even more.

Dashing:
The Dutchman leans forward, hovering above the ground as he moves forward as though he were a fish, his ghostly tail moving back and forth behind him.

Jump #1:
The Dutchman swipes under himself, hoping to propel himself into the air.

Jump #2:
Placing both arms in front of him, the Dutchman jumps upwards.

Crouching:
The Dutchman hunches forward, placing his ghostly tail on the ground. He doesn't crouch much, though, making him a rather huge target regardless.

Swimming:
Not used to swimming in his ghostly form, The Dutchman has a slow swim as he bodystrokes.

Spot Dodge:
The Dutchman instantly disappears for his spotdodge. When he reappears, he leans his head forward and lets out a cry of "Boo!" All of the Dutchman's dodges outside his air dodge are laggy, giving him a much needed weakness.

Air Dodge:
The Flying Dutchman seamless turns into a thin green mist, swooping into the background before going back into the foreground.

Tripped:
When the Flying Dutchman trips, he falls from his hovering position and lands facefirst in the dirt, taking longer than most characters to get back up.

Dizzy:
Grasping his forehead, the Flying Dutchman wobbles back and forth, occasionally swiping his hands out as if to counterattack his foe while he's dizzy.

Eating:
Taking a second to equip a sock on his tail, the Flying Dutchman leans down and eats whatever he's been presented with.

Sleeping:
The Flying Dutchman leans his head back and begins taking a ghostly nap, snoring all the while. Between his snores, he can be heard mumbling "I'm the Flying Dutchman..." over and over.


Specials

Down Special: The Fly of Despair


If you're not familiar with the show, here's a handy dandy link to help you imagine this move.

Now, I'm sure something has immediately sprung to your mind upon seeing this, if you're Warlord: It's something akin to "OH NOEZ, A GENERIC PORTAL RECOVERY! I'M ON THE FIRST INPUT AND IT'S ALREADY RUINED FOREVER!" for the rest of you, it's "lolol he opens a fly. i get it.", the first indeed used to be true: But I wouldn't say it's generic anymore. While there is in fact a portal, it's far less generic then the standard portal recovery. Far less generic.

As soon as the input is pressed, the Dutchman reaches forward in a grablike motion, with an expression on his face that seems to be that of regret. After he reaches his hand one Kirby–distance outwards, he grabs the air, as he generates an Olimar-sized Zipper in his hand. In a smooth motion, he pulls downwards on the Zipper, creating what appears to be a vagina-shaped hole that constantly floats 1 Kirby off of the ground. The hole itself is slightly taller then Ganon, actually, 1 head taller then the Gerudo King. It takes about .50 seconds for the Dutchman to create one of these portals, and he has about .5 seconds of ending lag coming out of it. For now, The Fly of Despair does nothing, that is, until you create a second one. When the Dutchman creates a second one, both of the portals begin to swirl, the insides of them turning a deep orange color. It seems like they finally lead somewhere! If the foe gets knocked into one of these portals, they will cling to the sides of it, desperately attempting to break free from it's grasp. Those unfortunate souls remain there for 5 seconds before being shot out of the second portal, dealing 8% with decent horizontal knockback. Once they're shot out, they get a brief 3 seconds of invincibility and immunity to grabs, represented by a green portal on their HUD, next to their stocks.

Multiple foes are allowed in the portal, in fact, this is encouraged: every foe in the portal adds 3% to everyone's damage when they are knocked out, in addition to 5 more seconds being added to the window of time foes can stay there, giving you plenty of time to gather up all the foes. To clarify here, since I doubt I'll get the chance to later: If, say, Mario were to be forced into the first Portal and Luigi were to be forced into the second Portal, Luigi will be teleported to the first portal and will be shot from it if you don't act quick enough. The Flying Dutchman's projectiles can be shot through either of his portals, them moving immediately out of the second one. Getting back to the move itself, the main thing about your portal is that The Dutchman himself can venture into it, being transported to the other one with a delay of .25 seconds.

...That is, unless, at least one foe are gathered up inside. If the Dutchman enters either of his portals with all of his foes inside, the stage blacks out for a second, before clearing to reveal...


OH JEEZ, WHAT THE HELL IS THAT

Indeed, once you are inside the Fly of Despair, abandon all hopes. Everyone will find themselves on this new hellish stage, the length of which is about the size of two Battlefields. The only blast zones present are the one at the top and the one at the bottom; if the foe is sent into the left blast zone, they will reappear from the right and vice versa. I wouldn't be so quick to call it a stage, however, as there is no ground here. That's right: For the next 15 seconds, everyone will be doing nothing but free-falling in this hellish landscape, so hellish that the mere sight of it would make Giygas himself cringe. The height of the stage is 6 Ganons tall, the stage is constantly scrolling downwards here at a speed akin to the road on Big Blue, meaning that if you get frozen here you're pretty much going to die a horrible, painful death off of the top blast zone. Everyone can still use any sort of tactic they would normally be able to use in midair. If you go into helplessness, for example, you might as well be screaming "KILL ME" right then and there because if The Dutchman gets to you, you're absolute history. If that's not enough for you, the Flying Dutchman is given such a thrill knowing that he's about to kill his foes that he all of his aerials now boost him upwards in mid-air and come out faster, akin to Wario-Man. In addition, it is impossible for the Dutchman to enter helpless state inside of his Fly. After 15 seconds of this, everyone of the Dutchman's foes will be shot out of the portal that they didn't enter, the Dutchman flying out shortly after that. KOed foes will not spawn in the Fly of Despair, and neither will items, instead, all the foes you KOed will reappear shortly after you exit. If only one person is left floating in the Fly of Despair, all the others having been KOed, they are let out immediately. Obviously, the Dutchman can't use his down special inside the Fly, and your portals are destroyed once you die. A way the Dutchman can destroy his portals will be revealed later on, but for now, let's continue.

With multiple foes in the match, the screen will divide either horizontally/vertically (can be changed in options) upon you entering the Fly. One screen will show the physical realm while the other will show the inside of the Fly. Dutchman's fire trap and minions will continue to linger in the outside world regardless of Dutchman's being in the Fly.

By the way, credit to Warlord for the very brief one sentence concept of this move, without him, The Fly would have remained nothing more then a generic portal recovery.


Neutral Special: Ablaze With Fear

The Dutchman leans forward from his hunched-over stance, now levitating Kirby's height off of the ground in this position. Plugging up one of his nostrils, The Dutchman proceeds to close one of his eyes as though he were aiming for something. After striking this pose, a cone of toxic green fire as tall as Ganon erupts from the Dutchman's uncovered nostril. The fire covers an area of two Bowsers and has an excellent multi-hit property, containing foes within them in a manner that's almost identical to PK Fire, if not better. The multiple hits your fire trap deals to the foe totals up to about 2% per second, if they are unfortunate to be stuck within them. This move has about .15 seconds of starting lag and .15 coming out of it, but if you're an at-all competent Dutchman player you should have your foes trapped within the fire trap when it ends. The actual move itself lasts for about .25 seconds, but the input here can be held for as long the Dutchman player wishes. That's not to say that The Flying Dutchman player should rely heavily on this, as it is easily DI'd after a period of time.

When used in the air, once the Dutchman stops holding this input, the fire drifts down from the Dutchman's nose, at about Snake's falling speed. It retains the same attack properties as it did before, so getting a drop on the foe with this and subjecting them to the multiple hits of the flame as it drifts downwards is an excellent idea, as there is potential it can drag them downwards to the bottom blast zone for a KO. This is easier said then done though, but at the very least it'll hold the foe in place while The Dutchman plots his evil schemes. The fire will keep moving until it either hits the ground or disappears off the lower blast zone.

After the Dutchman exits the move, the fire on the ground remains exactly where it was fired at. The cone shape diminishes into a more pillar-like shape; it has the same size, area of effect and damage-dealing properties as it did before. The Flying Dutchman is obviously immune to his own fire trap and only one of these fire traps may exist for each Dutchman on the field. If you use your Neutral Special in the air, the flames that fall onto the ground will create this trap as well. The trap itself lasts for 6 seconds, but the Dutchman has several moves the "feed the flame", refreshing the time it lasts.

If the Dutchman uses this after he's created a fire trap, the Dutchman will begin to grow a bright green, far brighter then he was before. During this time, moving the control stick upwards will have The Dutchman raise his arms, causing his fire trap's height to spike upwards, adding a Bowser to the height of the trap. Pointing it downwards will cause him to point at the ground, giving the trap more distance, adding two Bowsers to each side of the Fire Trap. The Dutchman enters these states with about .15 seconds of lag, and is immobile while he is able to manipulate his trap in this way. Pressing any button besides A will cause the Dutchman to exit this move and perform the attack you pressed. If you press A, the Flying Dutchman's current fire trap sinks into the ground as he leans forward, shuts one eye and clasps his nostril, beginning the first part of his Neutral Special again. Surprisingly, your fire trap doesn't disappear after your death.


Side Special: Haunting Memories

When the Dutchman presses the input, the ground Wario's distance in front of him begins to rumble as dirt starts to rise. The Dutchman cackles to himself, as he generates a Bowser-sized mass of green smoke to cover the activity happening underneath the ground. This takes a decent amount of time, 1.20 seconds, but the Dutchman is completely immune to knockback during this time, while still being vulnerable to damage. Once this time has passed, the Dutchman points one arm forward, causing the smokescreen to move 3 SBBs forward at Captain Falcon's dash speed before disappearing. This smokescreen has the added benefit of pushing foes along with it, making it the perfect tool to push foes into your fire trap, or perhaps pushing them from your fire trap into your Fly?

Once he's pushed the smokescreen, it is revealed exactly what was underneath it: a skeletal fish in a pirate hat, wielding a sword. This is what remains of the souls who were condemned to Davy Jone's lockers, a mindless skeleton that now serves the Dutchman as a pirate on his crew. The fish is about as tall as Ganondorf and floats forward at the Gerudo's dashing speed as well. The skeleton floats 1 Kirby off the ground where it was summoned, due to being cursed by the Dutchman. Due to a lack of motivation, the skeleton will simply float idle until a foe is within a close enough range. If the foe is at least 3 Bowsers away from the skeleton, it will move towards them in it's un-motivated float. As it floats, it swings it's sword a Wario distance forward at a rate of 2 swings per second. Each swing of the sword deals 5% damage and low knockback, each swing is a freeze frame, which makes it extremely effective against those shielding types. Once the skeletal fish is a Kirby away from someone, it will reach forward and grab those pesky foes with it's bones (see those 4 bones in the pic?). Once they're grabbed, it constricts them, holding them in place and dealing 3% damage per second. The foe can escape this with 2x more difficult then the normal grab, with no other way to. Of note: If the foe was shielding at this time, they will keep shielding, the bones dealing extremely good damage to the shield instead of the foe.

One of the most detrimental things about these skeletal minions is that they are not immune to your fire, being contained by it and taking damage much like your foe does. Each skeletal fish has about 13% stamina and all are resistant to knockback. Four of them can be on the field at the time, and the Dutchman only has these 4 members of his crew. But who says you want them on the field? Your skeletons can enter the Fly of Despair without The Dutchman and company, while you cannot summon more skeletons to make up for the lost numbers, this can be rather effective if you want to overwhelm the foe. It's not like your skeletons would ever want to enter the Fly, what with how unmotivated they are, so you'll just have to find a way to force them.


Up Special: Smoky Materialism

The Dutchman stalls if he is in the air, laughing as his body materializes into a toxic green smoke. Pressing the shield/dodge input at anytime will cancel this, allowing you an opportunity to fake foes out. This animation is about .30 seconds long, once it is complete, the Dutchman disappears as a thick green smoke is left where the Dutchman was. You now control the smoke, it moving at the speed of Mario's dash for the next 2 seconds. The Dutchman is immune to knockback and hitstun in his smoky state, he is still, however, able to take forms of damage during this. As the smoke swoops through the air, it leaves behind a trail, which will come in handy later on. After this move is complete, the Dutchman falls into helplessness if he is not inside of his Fly during that time. Immune to helplessness there, remember? Your smoke trail remains even after you exit this state. While the obvious purpose of the smoke trail at a glance would be to obscure your various traps, you can still make out everything the smoke trail covers making that somewhat useless. The smoke trail, however, does have a unique purpose that I'll get to.

If you press the up special input a second time, The Flying Dutchman will snap his fingers before transitioning to his smoky state. Once the Dutchman snaps his fingers, the smoke trail you left behind? The trail turns solid - however, it is only solid for Dutchman, other foes are able to pass through it. The Dutchman's projectiles can make a hole through the solid smoke, giving it a decent use as a sort of wall you can snipe your opponents through, or a platform to snipe foes from. The trail has about 15% stamina, and can't be destroyed by the Dutchman's traps or minions. Only one solid trail may exist per the Dutchman, as the next time he turns a smoke trail solid, the current one will disappear.

When the Dutchman uses this inside his Fly, the smoke trail is unaffected by it's scrolling, meaning that he'll be able to use it as a platform inside of his Fly without it automatically flying off of it. In addition, it will be solid for - everyone.


Grab-Game

Grab - Soul Steal

The Dutchman scoops his hand downwards, before swiping it upwards, hoping to grab characters by their collar/article of clothing. Due to the hand scooping, The Dutchman can grab downed foes more easily then foes standing in front of him. The range of this grab is below average, and is comparable to Wario's in terms of speed/lag.

As soon as The Dutchman grabs a victim, he thrusts his now-translucent hand straight into the grabbed foe's chest. For the next half second, The Dutchman moves his arm about in the foe's chest, searching for something. At last, The Dutchman smirks as the foe closes their eyes and goes lifeless, as The Dutchman pulls out a glowing, pokeball-sized orb from the foe's chest and tosses it a set distance of 3 Bowsers forward. This orb represents the foe's soul, being white or black depending on their alignment to good or evil. The Dutchman immediately tosses the foe to the ground after this, dealing 3% damage to the victim, forcing them to use a getup attack afterwards, or fall downwards if he grabs them in the air.

The foe's soul now remains on field, calmly (or erratically, if it's black, but it's cosmetic) above the ground. The soul is about as heavy as Kirby, and it takes knockback almost like that of a normal character, but will only travel about 2 Bowsers at most with each attack, halting upon reaching it's destination. The foe is at a disadvantage without their soul, as while their soul is separate from their body at this point, the foe will take 2x more knockback without their soul inside of them, so they'll want to get it back as soon as possible. If the foe manages to overlap the soul, it will fly back into them and reunite the body and soul in an animation with lag of about 1.25 seconds, during which they are invulnerable to knockback, before they resume attacking (or falling into helplessness if in the air).

Not only do the foes get lighter without their soul, if the soul flies off the blast zone, the foe will fall to the ground and die in a laggy animation that removes a stock. While the obvious idea here would to knock it off the blast zones, the Dutchman's aerial prowess is thanks to the Fly, as outside his Fly his airgame is certainly not the best. Floating to it and attacking it with smashes would be the ideal option, but when you eventually fall, your half-decent recovery isn't going to be your friend. If the soul enters your Fly of Despair, the foe turns a sickly green color. After five seconds, the foe will fall to the ground and lose a stock. The only way the foe can recover their soul at this point is to enter the Fly, if they are blasted out, they will be blasted out with the soul inside of them. If the Dutchman sends them to the stage, they will perform the reuniting animation before freefalling, giving the Dutchman some time to set up platforms or use his F-Air. The Dutchman cannot use this grab while the Soul is floating about the stage. Once the soul reunites with the foe, The Dutchman cannot use this attack again for another 20 seconds.


Aerials

Neutral Aerial: Eye Blaster


The Flying Dutchman leans forward, his right eye glowing as he shuts the other eye. Suddenly, he fires a beam the size of a Battlefield Platform from his open eye! The beam is, at first, fired at a downwards angle from the Dutchman, as seen in the picture above. It's fired over the course of a second, however, so the Dutchman can angle this as he pleases, and can float about to move during this time. The beam has a containing effect, dealing 2% for every .25 seconds a foe is being affected by it. The primary use for this beam? To close the gap. As Dutchman can float during the move and angle the beam, it makes an excellent option to bring yourself closer to your escaping foes. Inside your Fly, the Dutchman gains special properties for the movement of this move, he can float in any direction during this, not just left or right like his usual float. The move, like most others, has halved start and end lag, and the end lag here is almost completely nonexistant. This means that The Dutchman will be able to follow this up almost immediately...

Forward Aerial: Ghostly Wail


Glaring, The Dutchman extends his neck forward. Closing his eyes, the Dutchman lets out a dark howl, mocking that of a wolf. The start-up lag here is nothing to be proud of, and it is the only aerial of yours that keeps all of it's lag and momentum while inside your Fly of Despair, gaining no buffs. While the Dutchman is howling, a small hitbox appears from his mouth. The size of the hitbox is pitiful, usually only affecting those directly next to The Dutchman's head. The hitbox stays out for a short time, and the Dutchman strikes a triumphant pose immediately after performing this maneuver, giving this some end lag. Thanks to this end lag, the Dutchman is incredibly vulnerable to a counter attack from foes.

What does this move do to make it at all worth using, then? If the foe is unfortunate enough to get affected by this pitiful hitbox, they are stunned in place for 3 seconds, terrified by the Dutchman's howling. Outside of your Fly, this can make a decent keep-away move so you can get some traps set up. Once in your Fly, however, this becomes your best kill move. Thanks to the Fly constantly scrolling downwards, if you land this near the top blast zone, this is your best killer. Your other aerials can juggle the foe upwards, and the increased momentum can help you space yourself properly.


Back Aerial: The MacNeil Spin


The Flying Dutchman faces the screen with an un-nerving grin, arms to his sides. Suddenly, his head starts spinning 360 degrees! Huh, guess that the Dutchman's learned some tricks from other demons. The Dutchman's head is a hitbox that spins around 3 times over the course of a second, each time his head spins, 4% is dealt to those who come into contact with it. This has decent knockback as well and is an incredibly difficult move for your foe to DI out of, even at high percentages. Despite this, the landing lag here is absolutely attrocious. When in your Fly, this move sends The Dutchman up one Kirby, making this one of your best options for juggling.

If you press B while using this move, however, it's use changes entirely. As the Dutchman spins his head, he spews out flames from his mouth, forming an effective shield all around his head due to his spinning. Due to his head spinning, the Dutchman is able to hit foes lurking in the background or dodging. The Dutchman can hold the input to keep holding out the flames as long as he wants, but they begin to diminish after 2 seconds of continuous use, being reduced from Kirby-size flames to Pokeball-sized flames. If a foe is unfortunate enough to stumble into the flames, they will be given 3% damage and be lit aflame. When lit aflame, the foe enters a footstooled state and takes 2% per second, if they hit the ground, they will write around, continuing to take damage. The foe must button mash to stop the flames, being slightly harder to escape from then the typical grab. The foe suffers .25 seconds of lag cooling themselves off from this, making them vulnerable to the Dutchman's various tricks. The main purpose here is to disable foes inside the Fly, especially those who benefit from the environment more than the Dutchman does.


Down Aerial: Toxic Drool


The Flying Dutchman's facial expression turns into the one seen in the picture above, a bit of drool slipping from his lips. Quite horrifying, ain't it? Fortunately, the Dutchman's expression doesn't stay like this for very long as he changes back the instant a drop of neon green drool escapes his lips. This whole animation isn't as pitifully laggy as it sounds, actually coming out at a decent speed. So, what's the point of this move, then? His drool, of course! The drool from his lips goes downwards at a fast speed, from the top of Final Destination's blast zone, it reaches the lower blast zone in about 5.5 seconds. The drool is about the size of Pikmin, but with a slightly different shape then Olimar's little minions. If the drool comes in contact with the foe, they are coated with the drool for about 10 seconds. If they were in the air at this time, they're footstooled very lightly. If the drool lands on the stage, it coats an area as wide as Bowser with drool. When the Dutchman uses this inside his Fly, he is boosted 2 Bowsers upwards. He can't juggle his foes with this, but it can help him to setup a hit with this.

That's it? Isn't it blatantly OOC for someone as intimidating as the Flying flippin' Dutchman to attack someone with his own saliva? There has to be a big benefit involved there, and there is. You see, if you press the input again as the drool falls, the Dutchman will snap his fingers, causing the drool to explode into a cloud of acid! The initial explosion is an extremely high priority hitbox the size of Kirby that deals 10% damage and high knockback, being a decent killer for the Dutchman if his foe is low enough. You cannot detonate drool that has landed on a player or the stage. A translucent green smoke cloud is present where the explosion went off, lasting for the next 15 seconds.

This is one of your best ways to space your skeletons about, as the smoke cloud and players coated in drool will attract your ghost minions to the smoke/coated player at the rate of Ganondorf's walk. Obviously, they will attack players if they get close enough. The skeletons can float off-stage to get to off-stage clouds. I almost forgot to mention: This acid will snuff out your flames if it comes in contact with it, so be careful where you use this.


Up Aerial: Dragging You Down

The Dutchman raises both of his arms above himself, with a deranged smirk on his face. Inside your Fly of Despair, the execution is almost instant, and it boosts him two Bowsers upwards. The arms here are a hitbox, and the Dutchman keeps them out for .25 seconds before lowering them. If a foe comes into contact with the arms, The Dutchman lets out a laugh as he pulls them into a mid-air grab! Unlike most mid-air grabs, neither The Dutchman or his victim stop in mid-air, instead continuing to fall. But considering The Fly is infinite falling, this doesn't unmotivate The Dutchman in the slightest. By pressing A, The Dutchman will activate his regular grab, The Soul Steal. By moving the control stick about, however, The Dutchman will enter his float, being able to float about with his foe. This midair grab is about 1.5x as hard to escape from then The Dutchman's normal grab.

Standards

Jab: Flamethrower


The Dutchman strikes the pose seen in the picture above, widening his eyes a bit to add extra intimidation to the whole thing. Shortly after this, a Kirby-sized flame bursts from the Dutchman's mouth! The fire from the Dutchman's mouth is aimed at a downwards angle, making it good for hitting foes directly in front of you. The fire deals 2% damage per second, and has a hitbox similar to Bowser's Fire Breath. By default, it stays out for a very short time before disappearing, but the Dutchman can hold the A Button to keep this move out for as long as he wants. If the flames from the Dutchman's mouth meet the fire from his fire trap, the time on his fire trap will be refreshed.

Forward Tilt: The Power Within


The Dutchman brings his eyes to his forehead, closing his eyes as though he were concentrating on something. Suddenly, his glowing eyes shoot open! Without leaving this position the Dutchman fires two glowing beams from his eyes, the beams constantly intertwining with eachother. The two beams together are as tall as Wario and move forward 6 SBBs in front of the Dutchman at Falcon's dashing speed. If any foes are caught within the beams' grasp, they're dealt 8 light, flinching hits of 1% damage. In addition, they will be pushed along with the beam for the entire duration of the move, making this perfect for getting the foe into the areas you want them to. Of note is the fact that if any members of your pirate crew are caught in the beams' grasp, they will be dragged along for the ride as well.

Up Tilt: Winds of the Caspian Sea

With a sneer, The Dutchman pulls his arms out in front of him, palms facing up, before he quickly retracts them upwards! The range on this isn't very big, but if it successfully hits a foe they take about 3% damage and little knockback, but there isn't much point. The Dutchman holds this upward pose for .80 seconds, during which, a wind is created from his hands! The wind extends the entire range of Battlefield in front of him, and is not visible to anyone. Foes who get caught in this wind are sucked in with twice of the force of King Dedede's inhale, but foes can attempt to outrun this. If one of your minions gets caught in the wind, they will be sucked towards the Dutchman with no resistance. Once one of his fish or the foe are within 2 SBBs of the Dutchman, he lowers his arms with no end lag, causing the wind hitbox to disappear. The closeness of your foe allows you to follow this up with one of your moves, such as your Neutral Special or your Down Tilt if they're a minion. Alternatively, who is to say you can't just head by one of your Flys and use this? Projectiles go through the Fly after all...

Down Tilt: In for a Shock

The Dutchman hunches over slightly with his fingers extended. In this position, he starts erratically moving his fingers up and down, as electricity pulses through his fingers! The stream of electricity from his fingers heads about a Bowser in front of him, and is as tall as Pikachu. By default, he performs this move for about .50 seconds before withdrawing with some end lag, but he can hold this to keep it out as long as he wants. The electricity deals about 2% per second to foes who are caught within it, but it's very easy to DI out of this compared to, say, your Fire Trap. It does hold them for some small time though, which you could use to hold them in place while a skeleton minion is in range, allowing them to reach the foe without any sort of difficult. If your a skeleton minion is the one being hit by the electricity, however, he will be healed 2% per second! If your minion needs some quick healing and your foe needs some damage added (and you don't want to set a fire trap up), one of your best possible strategies is to use this while your minion has the foe within it's skeletal grasp.

Dash Attack: Hypnotizing Momentum

The Dutchman grinds to a halt, and raises his arms into the air, after a small delay, a translucent green bubble is raised around the Dutchman's body for half a second, before The Dutchman lowers it back down to add some end lag to this move. The bubble is the size of the Dutchman's standard bubble shield, essentially taking up a small space around him. He can still be hit out of this by projectiles during this state, or even direct attacks if the foe is quick enough, but more often then not, the foe will end up being hit by this. The Dutchman can hold the A Button to keep using this move, and can move about at his normal dashing speed while doing so, but cannot jump as he does so. After 3 seconds of holding this, The Dutchman will bring the bubble down with double the end lag.

What does this do, then? Foes who come into contact with the bubble will stand still, there eyes glowing green. They will now follow the Dutchman wherever he goes for the next 3 seconds, the Dutchman being unable to use any moves during this time to prevent abuse of his Fly. The Dutchman can use this next to his pirate fish to force them to follow him, giving him an actual way to command them about. Using this next to the foe's soul works too, it moving around with the Dutchman for the next 3 seconds.


Smashes

Up Smash: Psychic Possesion

During the charging phase of this move, The Dutchman places both of his hands to the side of his head as he closes his eyes. This takes about 2 seconds to fully charge, when the charging is complete, the Dutchman's eyes burst open, glowing a bright green color. A toxic green bubble slightly smaller from Kirby emerges from The Dutchman's skull. You are in control of the bubble for now, The Dutchman has to press the shield input or take damage to be taken control of again. The bubble takes no damage, and can float in all directions with no repercussions. The speed the bubble floats at depends on the charge time, from Mario's Dash at minimum charge to Sonic's at the maximum. What exactly does this bubble do? Well, once the bubble overlaps with something (Traps, Foes), it shimmers brightly. If the bubble successfully stays overlapped for another .15 seconds, the bubble possesses whatever it came in contact with! The effects of this will be listed below.

Your Fire Trap: Using the control stick, the Dutchman move his fire left or right. Depending on your charge time, this varies from Bowser's dashing speed or Captain Falcon's dashing speed. Obviously, this is the main tool the Dutchman will be using from this, as you can manipulate your foe right into your Fly when you're good and ready.

Your Fly: Yes, the Flying Dutchman can manipulate his Fly. While you have control of your Fly, you can angle it up and down as though it were a Cracker Launcher. Pressing A while in control of your Fly causes it to start sucking air in, at the rate of Dedede's inhale. Pressing B causes it to explode, dealing 15% and good knockback to anyone inside of it. This is impossible to KO with at low percentages, so it's best to use this against foes who keep avoiding you inside the Fly or those who have better aerial capabilities.

The Foe's Soul: Once the Dutchman grabs the foe's soul, it's nearly game over for the foe. Their soul becomes a sickly green once the Dutchman gets a hold of it, and The Dutchman can manipulate it from Bowser's dash speed to Fox's dash in any direction, depending on the charge time. However, The Dutchman can only move the soul about for 3 seconds, so hopes of getting this off the blast zone are near worthless.

The Foe: If the Dutchman is able to gain control of the foe, he can move them, them having to button mash to escape. This is easier to escape from then a grab, though, being 2x as easier. This shouldn't be a focus, but it could be good as a last resort.

Forward Smash: QUIET!


The Flying Dutchman looks rather pissed off during the charging of this move, his face turns slightly red and steam blows out of his face, almost like a tea pot. The Dutchman can angle his head here to determine where he will make his move. Once the charging is complete, The Dutchman opens his mouth wide for some small start-up lag, before releasing a Bowser-sized blue beam from it, yelling this move as he does so. The beam is about 3 Battlefield Platforms long, and is fired from the Dutchman's mouth for .30 seconds. The Dutchman can alter the angle of the beam while firing if he is quick enough.

What does the beam do, then? It deals 8% - 18% depending on the charge time, and has a pushing effect similar to that of Samus's final smash, making it an excellent option for pushing your foes into your flames or your Fly. In addition, if it is shot at the ground, it creates a small dirt trap. Foes who walk over this dirt trap are pitfalled for 3 seconds, before they can escape from it and the trap disappears. Dutchman can only have one of these pitfall traps on stage at a time. While it's not likely to be used as a killer, especially not when firing it at grounded foes, it still remains a good move.


Down Smash: Scare of All Scares


The Dutchman throws his head back during the charging phase of this move, as his head slowly grows larger and larger. Without any sort of charge, The Dutchman's head remains the same size while at maximum charge, the Dutchman's head is about 3x larger. This takes 2 seconds to fully charge, if the Dutchman himself is hit during the charging portion of this move, an extra .10 seconds is added to the Dutchman's end lag for every .50 seconds he charged this for. When the charge is completed, the Dutchman suddenly strikes his head forward in a swift motion, dealing 7-18% damage depending on the charge time and good horizontal knockback. Once he strikes his head forward, The Dutchman immediately lets out a horrifying scream of "BOOOOOO!" over the next second, in an attempt to terrify his foe.

During his bloodcurdling scream, a wind hitbox emerges from the ghostly pirate's head. The hitbox here is about the size of Ganondorf, and at minimum charge, reaches two Bowsers away from the Dutchman. At full charge, the hitbox is five Bowsers long. The wind from The Dutchman's head will push foes away with 3x the force of Dedede's inhale, likely pushing the foe into your flames in the process. The Dutchman can angle his head over the course of this second to adjust the wind's trajectory.

Speaking of your flame trap, the wind hitbox will affect that as well. Due to the lack of resistance from your trap, it'll move farther then your foes will. At minimum charge, it moves away from The Dutchman at Mario's dashing speed, while at maximum, it will move at Sonic's dashing speed.


Final Smash

The Perfume Department: Upon activating the Final Smash, the camera zooms in on The Flying Dutchman, who shrugs and pulls out a fork and knife. As he does so, he says "I've been thinkin': this fightin' thing? Doesn't really work out for me, so I decided I'm just gonna eat ya." He smirks, placing a sock over his tail. "Time for dinner."

The camera zooms back out to the foe, the Dutchman becomes an AI at this point in the match as he gains a new walking animation: leaning forward and flying with fork and knife in hand. He'll attempt to fly towards you at his regular dashing speed for the next 4 seconds, but there's no use outrunning the Dutchman, as after those 4 seconds are up, he'll instantly teleport towards you and eat you for an instant KO. Overpowered, much? Well, as soon as the camera zooms back out, a mysterious green door appears 4 SBBs to the left of the foe, a large arrow pointing towards it. The door can be entered like a Subspace Emissary Door, walking in will lead to a cutscene. If multiple foes are present, they must either enter/die for the cutscene to start.

In the cutscene, the character is seen running from the Dutchman in what seems to be...a perfume department? Yes, for some reason, the door leads to a perfume department. As the foe runs away from the Dutchman, they are sprayed with various perfumes as the camera slows down and zooms on them dramatically as generic department store music plays in the background. This lasts for about 10 seconds, upon which the foe, covered in perfume, will find another glowing green door. They enter it, as the foe reappears where he was, the Dutchman does not exit the door for another 3 seconds, so you could easily attempt revenge on him. All foes who were dead or eaten by the Dutchman will respawn during this time. Everyone who entered the Perfume Department now has 50% damage added to their percentage meter and takes accumulative damage of 1% for the next ten seconds, still being covered with some perfume. It's a choice between taking 60% damage or being KOed immediately, but it's not like they have a choice; If you're a decent Dutchman, you should have your foe trapped in your flames before they get to the door...

Smash Balls do not spawn in the Fly, but if you are to use your Smash Ball inside your Fly, the door will not spawn, making the foe's death even quicker.


BOSS SET


In comparison to the likes of the Dirty Bubble and Man Ray, the Dutchman is a villain who can be considered an actual threat – if anybody should get a boss set from Spongebob, it’s him. Considering you’re probably not even reading this if you haven’t read the main moveset, I’ll cut the obligatory introduction and get to the actual changes the Dutchman has in 3v1.

* The Dutchman’s weight is brought up to a 30/10.
* The Dutchman can be grabbed but this deals no hitstun to him.
* Hitstun only has 85% of its normal proficiency, with hitstun dealt during previous hitstun not stacking. The Dutchman can be stunned by multi-hit moves, but using it on him four or more times in five seconds will result in him becoming completely immune to hitstun for 2 seconds. Moves that deal flinching also do not work until he reaches 90%.
* The Dutchman doesn't take knockback from moves with set knockback under 100%, and only a quarter of it at 200%. This doubles in effectiveness every 100%.
* Status effects such as being prone, pitfalled or frozen do not work. The Dutchman can swim 5x as long as other characters.
* KO mechanics require twice as many units [Units on various pummel KOs like the Count's for example] before they work. Negative status effects last half as long.
* The Dutchman escapes grabs twice as quickly.
* The Dutchman’s float now lasts twice as long, making it 4x as long as Peach’s in total, helping to make up for his weight only being 30/10 instead of the usual boss 40/10. The Dutchman also gains the ability to use his grab during his float.
* If the Dutchman enters the fly when a foe is inside it, other foes only have 2 seconds to enter the fly to join the match inside. If they fail, the Brawl transitions inside the fly anyway, with those stuck outside of it simply having to wait until the Dutchman and any characters inside the fly come back out before they can do anything.
* The Dutchman’s fire trap now lasts 30 seconds – he doesn’t have the time to babysit it in a boss match-up. If the Dutchman directs his fire into the fly, then it will indeed still be there if you ever actually enter the fly, albeit the counter will still keep ticking down.
* The Dutchman has presumably threatened his minions with even worse fates if they don’t obey him, because they actively pursue foes now. If a foe is inside the fly, they’ll head directly for the fly instead. You can also summon as many as you want, they’re immune to your fire, and have doubled stamina.
* The Dutchman moves at Captain Falcon’s dash speed during his Up Special and the solid smoke is now constantly solid as it would be in the Fly and has 50 stamina - enabling the Dutchman to easily contain individual foes in small prisons to keep them from getting to the fly/avoiding the fly. The Dutchman is able to go through his smoke at will, but can still stand on it.
* Souls can now be destroyed directly if they take 50 damage. While allies of the foe who’s soul you’ve ripped out can help them out by knocking the soul back towards their comrade, they’ll be damaging the soul in the process, and the damage will not be healed if the Dutchman rips out the foe’s soul again.
* The Dutchman is blown back by the force of the howl from his fair 2 Ganondorfs, enabling him to easily defend himself, is able to angle the move in any diagonally forward direction, and the hitbox on the move lingers significantly. The hitbox is perfectly capable of going through solid objects, making it a great way to further stun a character trapped inside a box of Up Special Smoke.
* The Dutchman’s bair gains a suction effect the size of Bowser around his head twice as powerful as Pikachu’s dsmash, making the move impossible to DI out of. The Dutchman can cancel the move into itself laglessly up to 3 times, though if he attempts it a fourth or beyond he’ll get dizzy. This turns the move into an excellent tool to drag foes to/away from the fly, as well as obviously enhancing the gimping potential.
* The drool from the Dutchman’s dair causes any characters who get it dropped on them to have their falling speed doubled and take 1% poison damage per second, lasting 10 seconds. When the drool is on the ground, it forms a generic tripping trap, also lasting 10 seconds. The Dutchman is still perfectly capable of blowing up the drool at any time with a second input of dair, regardless of its position, meaning if somebody trips they will inevitably be hit by the explosion.
* When the Dutchman has somebody grabbed with his uair, he is able to phase them through solid smoke from his Up Special, meaning he doesn’t have to create the smoke cage around the foe.
* The Dutchman is able to move during his jab.
* For the Dutchman’s ftilt, he shoots the ends of the lasers immediately out to the end of their normal trajectory before slowly bringing them back to him, causing it to turn from a move to push foes away into one where you reel foes in, giving the move less redundancy with his other pushing moves.
* The Dutchman can laglessly change the suction from his utilt to either bring foes in or push them away, and can hold the move for up to 5 seconds if he so wishes. Obviously changing the direction of the wind rapidly can cause the foe to accidentally DI/dash in the direction they weren’t intending to go, and if they were dashing this can easily cause them to trip on dair drool.
* The dtilt is now far less laggy and stuns foes for a full 1.5 seconds, making it a quick and easy way to deal with one foe before proceeding to the next.
* The Dutchman’s dash enables him to fully control the character he hypnotized for the 3 second duration, the Dutchman phasing out and becoming invulnerable for these 3 seconds.
* The bubble that traps foes in the Dutchman’s usmash is now capable of picking up momentum as it moves along to potentially go at Sonic’s dashing speed. If the bubble is going fast enough and has something inside it, it turns into a hitbox against outside foes – nevermind how the weapon you’re using against the other foes is probably their own ally. If you use the momentum to slam the bubble into the ground, you will damage the character inside the bubble with said momentum.
* While the Dutchman’s hitbox on his dsmash is the same size, there is no pushing effect. Instead, anybody who comes into contact with the hitbox will become horrified and become incapable of standing still or walking, forced to either constantly dash or go into the air. This makes foes far easier to herd around the stage into your various traps, and the dashing aspect in particular makes it easy to catch them on dair drool. The amount of time they spend horrified varies on charge, anywhere from 8-20 seconds.


Match-Ups

Soon enough.​

Extras

UP TAUNT - PIRATE LAUGH
The Flying Dutchman throws his head back and laughs a hearty pirate laugh, his hair blowing back in the wind.

SIDE TAUNT - TIME'S UP
The Dutchman points to the foe menacingly, stating "[CHARACTER NAME HERE], your time has come!" If he is facing more then one foe, he will speak to the closet one.

DOWN TAUNT - FORMAL INTRODUCTION
The Dutchman points to himself, a demented smirk on his face. He speaks to the foe, stating "You bet your lily white livers I'm the Flying Dutchman!" The next time this is used, his speech changes. Now, he states "I'll let you in on a little secret...I'm going to steal your soul!"

ENTRANCE - THUNDERING APPEARANCE
Green smoke swells up on part of the stage, thunder strikes down onto the smoke, causing The Dutchman to form from the smoke as he laughs manically. As he does so, an excerpt of the song that always plays when he appears, begins.

VICTORY POSE #1 - HORRIFYING INNUENDOS
The Flying Dutchman eyes the losers as they clap, before unzipping The Fly of Despair next to them. He grabs the last place loser and tosses them into the Fly, before unzipping it. Looking at the horrified losers, The Dutchman folds his arms and asks "Would anyone else like a ride on the Fly of Despair?"

VICTORY POSE #2 - WATCH ME BE "KNOT"-Y
With a smirk, the Dutchman turns towards the losers and proclaims "I've won the undersea knot-tying competition for the last 3,000 YEARS!". He then proceeds to show off his fancy knot-making skills to the foes.

VICTORY POSE #3 - THE WELCOME WAGON
The Flying Dutchman is nowhere to be seen, with the losers looking around confused. Suddenly, The Dutchman bursts from the ground behind them and lets out a screech of "BOO!" Frightened, the losers run off the right side of the screen, only to reappear on the left! They look around confused as The Dutchman crosses his arms triumphantly, stating "Welcome back!" They then run off the right side again, this cycle repeating until you exit the results screen.

VICTORY POSE AGAINST SPONGEBOB - THINKING STRAIGHT
The Flying Dutchman grabs the bright-colored Sponge, letting out a yell of "Next stop, Davy Jone's locker!" He laughs, while Spongebob screams as the two disappear into green smoke. If you stay on the results screen long enough, The Dutchman reappears with Spongebob, tossing him on the ground with a cry of "Take him back!" before he disappears again.

VICTORY POSE AGAINST THE APPETIZER - DELICIOUS
The Dutchman turns towards the Appetizer, licking his lips as he extracts a fork and knife. "It be time for dinner, ya delicious lookin' sack a meat!" He then chases the Appetizer, who slides away from him with a horrified expression.

VICTORY POSE AGAINST MANRAY AND THE DIRTY BUBBLE - SECOND-RATE VILLAINS
Manray and the Dirty Bubble are shown bickering to each other about their loss in the background. The Dutchman gets annoyed with this after a few seconds, turning to them, he lets out a cry of "QUIET!" and blasts them with his FSmash beam. The two are scorched and become quiet, as The Dutchman grins triumphantly.

VICTORY THEME - SWASHBUCKLER
The Dutchman wouldn't be represented well by any of the victory themes of the rest of the Spongebob cast, so he instead gets his own, the last few seconds of Malleus Mallificarum.

LOSS POSS - ANNOYANCE
The Dutchman claps slowly and sarcastically, occasionally grumbling and crossing his arms.

ICON - UNHEALTHY LIVING SPACE
The Dutchman shares the main Spongebob icon with the rest of the cast, a pineapple.

Interactions

M. Trinity's Down Taunt
"Unzipping a giant fly? Huh; guess you have to compensate for the small one somehow." (Pose 2)

Little Mac's Down Special
"Looks like it's Halloween, Mac, baby! KO that pirate before he trick-or-treats all the chocolate away; I need to get some for myself!"

Doc Scratch's Bowls

Bowl will be Filled With: Spongebob's Hands
Casual Stealing Animation: Dutchman takes one of Spongebob's hands and eats it as though it were corn on the cob.
Vigorous Stealing Animation: Dutchman mimics Spongebob in the above picture: he takes handsfuls and scarfs them down.

Snake's Codec

Snake: Otacon, who's this freak dressed like a pirate?
Otacon: That's the Flying Dutchman you're fighting, Snake.
Snake: Flying Dutchman? Like the famous pirate ship?
Otacon: This is the man for whom the ship was named. He died long ago, and now haunts the seven seas, gaining a range of powers to do so.
Snake: What's that thing he's pulling down, it looks like some sort of portal...
Otacon: Snake, step away from it! The Dutchman's Fly of Despair may not seem all that intimidating, but it leads to a hellish dimension!
Snake: I bet it's hell under his other Fly, too.
Otacon: Ugh, Snake...​

I'm going to steal your souls!
 

MasterWarlord

Smash Champion
Joined
Aug 24, 2008
Messages
2,911
SAMUS REMICKS​

Down B - Authorization: Samus punches some crap into her arm to communicate with Adam to ask for authorization. During this time, Samus can input any move to request the authorization of that specific move. There is a 50% chance of the authorization being successful, giving Samus the ability to use the move you picked - Samus cannot use any moves before they become authorized outside this one and her Neutral B. At all. This move takes one second to input.

Neutral B - Traumatized: Samus recoils in fear as parts of her power suit start phasing away slowly (It's not an actual suit, it's only held up by mental concentration dontcha know). After 2 seconds of this, her suit will phase away completely, leaving the player to use Zamus. However; Adam will come onto the stage to defend Zamus, prompting Zamus to give a thumbs down while giving him a stupid look.

Adam uses Samus' Melee Moveset with double the power and speed as a level 9 AI Partner. He will have as many stocks as Samus did when she summoned him. Samus cannot summon him again due to being stuck with her Zero Suit moveset for the rest of the match. If Adam is alive when Samus "wins", then Adam will win the match on the results screen, while Samus will be in her default loss pose cheering him on like the woman she so obviously is. Note that Samus cannot harm Adam, even with Team Attack on.

Adam's face cannot be seen due to him constantly wearing his helmet. If you hack through his visor, you will find Sakamoto's face.
 
D

Deleted member

Guest
Annndd...here's the week 4 mini results!

Week 4: Improbable Boss Time:
1) Po by ProfPeanut (7 votes)
1) Voldo by MasterWarlord (7 votes)
2) Biospark by SirKibble (3 votes)
3) Deformed Blonde by Katapulter (1 vote)


Congrats to the winners!
 

Hyper_Ridley

Smash Champion
Joined
Dec 21, 2007
Messages
2,299
Location
Hippo Island
only other competitive entry for this mini

GANONDORF

B: DARK SPHERE
Ganondorf raises a single fist into the air as it crackles with electricity, then hurls forwards a sphere of lightning that is half the size of Kirby. It travels slightly faster than Ganon's dash until it hits something, dealing 12% and a paralyzer effects. Hitting the sphere with any attack will reflect it in the direction of the attack's knockback, and a move that deals no knockback will cause it to hover in place for up to 5 seconds before it dissipates. This has above average startup lag and moderate end lag.

Down B: SWORD OF SAGES
Ganondorf performs his DTaunt, only after examining his sword, he grimaces as he KEEPS IT DRAWN! (aghast)! This gives him his beam sword moveset only the attacks deal an extra 1.5%, and if he throws it, it explodes in a shower of darkness energy as it returns to him, dealing 11% and KOing at 100%. Ganondorf may only have one sword in play at a time, which is still a vast improvement over his 0 swords in our universe's Brawl
 

Kholdstare

Nightmare Weaver
Joined
Oct 10, 2008
Messages
1,441
AU Solid Snake

Side Special // Non-Lethal Force
Snake's modified Side Special removes some firepower in exchange for a different style of takedown. He takes out a modified Beretta 92F handgun, fitted with a surpressor and tranquilizer rounds. Each shot is the equivalent of a single needle from Sheik, although these needles slow down the foe by 10% for three seconds. Each consecutive shot stacks the slowdown but refreshes the timer. The effect stops if the foe is totally immobile (10 darts), and is reset after three seconds. The tranquilizer effects movement speed and increases frames of lag on both ends of attacks, dodges, and rolls (three frames per dart).​

Neutral Aerial // CQC
Brawl Snake's Neutral Aerial is one of the main problems with his air game. Let's fix that! Snake takes out his CQC knife and slashes rapidly around him with it four times. The first slash has fairly good start-up, and the NAir has little start up and landing lag, making it useful and easy to land all four slashes on a grounded opponent, and the fourth slash has very high horizontal knockback should it be landed. Best performed soon after a double jump, but all four slashes can come out in a full single jump. One of his moves that can prevent juggling if predicted well. Better against airborne and large characters, since it's nearly impossible to DI out of. Does 28% if all slashes connect.​
 

Katapultar

Smash Lord
Joined
Nov 24, 2008
Messages
1,284
Location
Australia
[size=+5]MR. GAME AND WATCH[/size]


DOWN SPECIAL - SHADOW BUGS

Mr. Game and Watch takes out a black knife and cuts himself to release his shadow bugs, which is contradictory to his nature considering he shouldn't even be aware of them and that he has no concept of good and evil. This does 5% to Gamey every time you use it, but when you do a random Subspace minion appears to fight alongside with you at Hard level difficulty. lol.


F-AIR - BLACK HOLE GLITCH

Mr. Game and Watch takes out a bucket instead of a brick, which spills black oil that works like fully charged FLUDD as a cheap gimper, but has no effect on moving characters. It has better range overall but. What's special about this however, is that the oil will contaminate the stage in a wholly un-brawl manner that puts a hole in it leading to the abyss below. Aside from allowing you to get deep kills on Mr.Game and Watch's freaking home stage, it also allows you to jump in and leap back out in order to spam the hell outta your awesome B-air - it also helps that the created hole has ledges to allow planking, but only one can be made at a time, and it is 2 SBBs wide. It can also corrode ledges, which is awesome. This is generally a move that most G&W players in the 8884934th dimension use every time they start a Brawl, and it makes Watchey better than Meta Knight.
 

Katapultar

Smash Lord
Joined
Nov 24, 2008
Messages
1,284
Location
Australia
[COLLAPSE="Nate's Angel"]This set comes across to me as one you put more character love into than usual given the surprisingly generic nature of the character, lovely yet fitting headers and just what appears to be an overall more complete feel that I can't quite put into words. The bouts of characterization you make the effort to fit in do impress me, such as that of Angel's sense of honor regarding his swords and his ummm....somber nature, the latter of which I wouldn't have known or even had been able to pick up on at all had it not been for those simple yet working extras.

One thing about the set is, while I know you've never been one for complex playstyle sections and that's more than fair enough, there are quite a few bits and pieces in the sets that are a wee bit difficult to keep up on, especially with all the differences the gameface presents to the set. They don't seem to be all that touched upon in the playstyle section either, though it's probably fair to say it's up to the readers to figure that out themselves, even if it doesn't seem to be all that easy. I might be getting a bit too negative here for this comment's own good, but really, the whole point on what I believed to be under-elaboration is no big deal that shouldn't bog you down all too much.

For what Angel manages to do, he's quite likable in my eyes, and for all the comparisons people were making with him to that of past sets, this set ended reminding me of Party Pete with the special triggering of the gameface but moreso my Yutaka set in how Angel manages to do a lot with what little he's given and has some interesting simplistic attacks...speaking of which, those event matches were pretty win yet intense in my eyes, and humorously enough, although it seems they were designed for the mini, they'll stay on the set forever and people will see them whenever they look at the set. And as a final note, I loled at the extras; not only the punchline of the victory poses but also the F-taunt which taught me what climax meant in that regard, thanks to a little help from the wiki...let's just say that I'll never look at the word "climax" the same way again...:reverse:[/COLLAPSE]


[COLLAPSE="Frank West"]At this point I don't believe anyone else has touched upon this set of yours aside from Waver, to which you're probably dying for some comments, or at least some kind of advice I can give to you, even if its taken from the re-cap. Your simplistic use of moves is quite fine, though there is a rather major case of balance here, such as the camera attack that stuns enemies for 20 seconds; even 2 seconds would be rather lengthy at that! The throws also inflict more damage than virtually any other move in the set when in reality they're only supposed to inflict 7-13% at average, so it'd seem to me that perhaps your interpretation on them and just how powerful a move is supposed to be is quite different than normal. Perhaps a visit to the Smash Wiki would do some good in regards to the averages of how much a character's attacks are supposed to do? Mind you, I have no idea as to what kind of experience you have with playing Brawl, but if you want to keep on making sets then by all means keep going, and the fellows will be there to support to you in that case. You'll also need to post a picture on your next set, because although I tried to indirectly state that your set had a picture and could be put on the list, that didn't happen.[/COLLAPSE]


[COLLAPSE="Doc Scratch"]Definitely a very, very fun set (which is kind of surprising considering your writing style is not the most emotive), and one that could have perhaps done with a comment from me earlier than later...he's the only set you've made in the contest however, and for some random reason this theme always comes into mind whenever he's mentioned. Being the kind of person who likes set fanservice and has no experience with the series that Scratchy comes from, I'm probably one of the few people who actually enjoyed the D-throw (as it showed me a fun little piece of his character that all the more demonstrates just how god-like the fellow is if the reality-warping wasn't enough) and do not mind the broom attacks which contrast with the god moves. There's also the surprisingly fitting organisation and fun Easter Egg, and I can see that you do like the good fellow quite a bit given what I've heard from you in the chat.

It's also funny how much Doc Scratch resembles my first two sets of the contest given the reality-warping and mirrored Standard/N-air gimmicks; I like to imagine Fibrizo and Doc Scratch as being partners in crime of sorts just for fun.

And just wondering, when are you going to add Lord English's moveset? Probably guessing that you're waiting for an update from the Homestruck comic if anything. [/COLLAPSE]


[COLLAPSE="Vergil"]A joint-set between a fanboy and a feasibility enthusiast? My my. It's easy enough for me to say that this set succeeds at doing both, but I feel TWILT's presence to be the strongest here with all the GIFs and of course the obligatory TWILT special mechanic orby thing that's probably supposed to be a tribute to the DMC games or something, with the moves themselves mixing between the UMVC3 and DMC. In any case, the set feels quite clean and easy to read, and isn't tacky in any way or form, not even with the orbs that are essentially supposed to balance Vergil as a character. While Vergil's game is very basic, it's not like there'd be any way around it without not paying close tribute to what he does in his other games, which you (TWILT) seem to try and capture in most of your sets, though that's your style; there's nothing wrong with invoking cliches when you just want to make a moveset for a character you really like. And really, the more I think about it, the more I can say I'm rather impressed with what you've managed to crop up: a clean set that pays tribute to both Vergil's main games both image and moveset wise. This is pretty good for your comeback, (even with help from HR) which is good considering the fanatic nature of your sets that are almost always done for main characters, and I'm sure a good deal of us will enjoy what you'll do next. [/COLLAPSE]


[COLLAPSE="Terezi Pyrope"]This moveset seems all too reminiscent too Karkat...I'm not too sure whether that's because of your overly simplistic style or the somewhat uninviting atmosphere of the series to those who aren't familiar with it due to all the crazy under-elaborated concepts floating about. Oddly enough, Doc Scratch's set was the only one I didn't have any problems with, but I guess it's not something that can be helped all that much. Onto the set I suppose.

Even regarding the set's nature, there are a few things about it that intrigue me. The first is your interpretation of blindness into a fighting game (thinking of Lily from Katawa Shoujo right now), and while I don't question why Terezi's sense are heightened just by licking enemies I do kind of question the logic behind the implementation of it affecting her overall composure in the world rather than giving her buffs against the one enemy she licked...what if licking the enemy had an effect of allowing certain attacks to auto-target the enemy? The way you have them is fine I suppose, which brings me to my second point, and that involves the ropes; I do not believe such a concept has been done before, but seems rather difficult to imagine - that or I simply don't understand some of the words to a degree where it is hard to imagine them, by no means a fault of yours.

I do kind of feel like nitpicking the concept of moves being mentioned in other moves before they're introduced such as the Down Special on the Neutral Special, and B-throw on the D-air, which kind of means you have to go and read a move that hasn't been introduced yet. Perhaps overall, the set is simple, perhaps a bit too much for its own good at times...I also feel that maybe the set doesn't have enough fanservice in terms of explaining the many concepts behind the nature of the character and the series, especially regarding what appears to be a random dragon for some of the aerials in my eyes. Getting another set from you is most certainly nice though, and it's great to see you trying to pursue a bit of a career in making sets for a certain franchise you like, something I'm ready to encourage anytime.

Also, it seems that Terezi Pyrope is made for Melee and not Brawl, jokingly enough, because characters don't enter helpless when they air dodge in Brawl! Just telling you so you know in the future. :)[/COLLAPSE]


[COLLAPSE="Captain Hook's New Moveset thingy"]Judging from what I've seen from you, and what others think of Captain Hook, it'd seem to me that you like him a lot as a character and want others to like him just as much, though I guess that'd make sense considering the Extras and all. The changes definitely give the set a better and more in-smash feel of sorts, and you seem to have taken in the advice you got last time from the other peeps...your brand of Davidness is still on the set in some places though, but that doesn't necessarily detract all THAT much, and if you're not all too willing to go into massive depth about the moves and their functions together like myself the set ends up being fairly fun in terms of displaying Hook......I still remember that Boss from Peter Pan's moveset...[/COLLAPSE]
 

Junahu

Smash Ace
Joined
Nov 15, 2005
Messages
899
Location
Shropshire Slasher
MYmini entry


Toon Link

Somewhere, in a musty cubical cell of some sort, the decision was made to further differentiate Toon Link from Link, by encouraging the former to be more spacially aware of his projectiles, and more capable of following them up (because that's kinda his thing already... ignoring Diddy and Snake, who are much better at this stuff). This decision was quickly shelved in favour of being lazy, because we all know that Brawl was completely made by just one lazy person, all on his own.

Down B: Bombchu
Very similar to Toon-Link's existing Down B. Our cartoonish hero takes a Bombchu (a mechanical mouse bomb) from his pocket, and holds it. You can throw it in any direction, carry it around with you, drop it with Z... all stuff you could do with a regular bomb. The differences then, are fourfold;

  • There is more lag taking a Bombchu out, and it has a slightly shorter fuse
  • There is a 1 second delay between when a Bombchu hits an opponent, and when it explodes. You'll know when it's primed to explode, because it stops dead in its tracks and emits a cute little "Eek!"
  • The explosion a Bombchu causes is very odd. It's shaped like a mouse's head, and knocks foes opposite the direction it was travelling in (i.e. it knocks foes toward Toon Link)
  • It does not explode on contact with a wall, ceiling or floor. Instead, the mousey explosive scurries across the stage, following the curvature of the ground/walls etc, just like a Hothead item. It travels at Toon-Link's walking speed
Neutral B: Fire And Ice Arrows

Again very similar to the move it replaces. Tink nocks an ordinary arrow in his bow, then lets it fly when you release B. If you hold B, not only will the arrow fly farther, but it soon glow red with the crimson embers of fire. Fire it now, for a Fire Arrow, which deals double the normal damage, but has almost nil knockback growth, like a lot of other fire based attacks in Brawl. If this arrow hits the floor (or a wall), the fiery hitbox remains potent for a brief few seconds before burning out
Keep holding B however, and the fire arrow will chill into an Ice Arrow instead. Fire this baby, and you'll see it cruise through the air at a super slow speed. You can actually run ahead and knock the foe into this arrow, it's just that slow. On contact with the foe, it deals its damage as you'd expect, and there is a chance that it'll also freeze the foe (much like many other Ice based attacks in Brawl)
Hold B past this point, and the arrow will cycle between Fire and Ice once more, giving Toon Link another chance to fire his preferred arrow.

But, keep charging and... Light arrow! After what must have felt like forever, Toon Link's arrow shines with the brilliant power to banish evil. When you finally decide to fire this holy arrow, it fwips across the entire stage at a fantastic speed, penetrating anything in its path, even solid ground.
On contact with a foe, the arrow deals triple the normal damage, and swallows them in a blinding light. When it vanishes, so has the foe! But instead of killing the foe, the Light Arrow simply teleports them directly to Toon Link's position, after a short delay.
Naturally, because of the charge time you need to get a light arrow, coupled with the projectile's straight forward nature, you won't be seeing this attack on the competitive circuit.

Side B: Hero's Boomerang
Identical to the existing attack, but with exactly one difference. When it collides with a damageable target (such as a foe, a summon, a crate, a bombchu etc), it rebounds off of it, heading directly towards the nearest next target it can damage.
It can do this up to 3 times, but still retains its boomeranging properties. So after travelling so far in one direction without hitting anything, it curls back, but not towards Toon Link, but towards the area where it last hit something. Tink will have to go stand at that exact spot if he wants to catch the Boomerang on its return trip.


Up B: Whirlwind Slash
For the fourth time in as many moves; "This attack is almost identical to Brawl's own version"
Toon Link spins around and around with his sword outstretched, and this propels him up through the air, like a rotor blade or somethin'. Unlike Link's Up B, which can be charged up, Toon Link's can be extended by rapidly pressing B during it. If you don't, Toon Link won't spin for very long at all, and his recovery will be suitably crippled.
When used on the ground, Toon Link can move left or right while spinning, by continually mashing the B button. Waaaahahaaaaa!
Problematically, the longer you extend the attack by mashing B, the longer Toon Link will suffer from the end lag (in the air, the length of time before Toon Link can control his descent is extended). Go too long, and poor Link will be outright dazed!
However, if you don't tap B at all, dooming Toon Link's recovery to regular Link levels of fail, Tink won't fall helplessly after the attack. This still robs him of any additional jumps he had, but allows him to attack while he falls. If used on the ground, then Toon Link suffers very little end lag at all, and can quickly bring up his shield to avoid punishment.


majora_787

Smash Hero
Joined
Jun 23, 2007
Messages
6,122
Location
Texas
This moveset seems all too reminiscent too Karkat...I'm not too sure whether that's because of your overly simplistic style or the somewhat uninviting atmosphere of the series to those who aren't familiar with it due to all the crazy under-elaborated concepts floating about. Oddly enough, Doc Scratch's set was the only one I didn't have any problems with, but I guess it's not something that can be helped all that much. Onto the set I suppose.

Even regarding the set's nature, there are a few things about it that intrigue me. The first is your interpretation of blindness into a fighting game (thinking of Lily from Katawa Shoujo right now), and while I don't question why Terezi's sense are heightened just by licking enemies I do kind of question the logic behind the implementation of it affecting her overall composure in the world rather than giving her buffs against the one enemy she licked...what if licking the enemy had an effect of allowing certain attacks to auto-target the enemy? The way you have them is fine I suppose, which brings me to my second point, and that involves the ropes; I do not believe such a concept has been done before, but seems rather difficult to imagine - that or I simply don't understand some of the words to a degree where it is hard to imagine them, by no means a fault of yours.

I do kind of feel like nitpicking the concept of moves being mentioned in other moves before they're introduced such as the Down Special on the Neutral Special, and B-throw on the D-air, which kind of means you have to go and read a move that hasn't been introduced yet. Perhaps overall, the set is simple, perhaps a bit too much for its own good at times...I also feel that maybe the set doesn't have enough fanservice in terms of explaining the many concepts behind the nature of the character and the series, especially regarding what appears to be a random dragon for some of the aerials in my eyes. Getting another set from you is most certainly nice though, and it's great to see you trying to pursue a bit of a career in making sets for a certain franchise you like, something I'm ready to encourage anytime.

Also, it seems that Terezi Pyrope is made for Melee and not Brawl, jokingly enough, because characters don't enter helpless when they air dodge in Brawl! Just telling you so you know in the future. :)
1. Terezi is weird. In the series, she is able to see better when she licks things. It's how it works, and if it doesn't make sense to you here it wouldn't make sense to you in the characterization either. It's one of those things.

2. It was awkward to write because I wrote it in a way that branched off in different directions. So yeah, stuff with less explanation at the beginning was written after late stuff with more explanation. I know it's inconvenient. Sorry. :p

3. I could explain a few concepts, but I think Dragonsprite is probably the only reference I could explain without getting into a lot of underlying plot which would bog the set down.

4. Yep.
 

ForwardArrow

Smash Ace
Joined
Aug 17, 2011
Messages
503
Poison Ivy
I'll have you know I was far from a fan of Batman, but to my surprise you really came through with this set. The prone abuse here is really fun, it clicked with me a lot more than most prone abuse stuff. I particularly like the grab, which allows you to roll them on to a bed of thorns, as well as stun them a bit so the flowers can fire their projectiles at them. The flower game isn't quite as interesting, but at least you added the healing element for some added depth, not to mention I do appreciate Poison Ivy's methods of pseudo stalling in conjunction with the projectiles and poison, though on some level I feel it would probably make her less fun to play against on the nature of removing some opponent interaction... I suppose it's fitting though. At the very least, the tethering goes with all aspects of her gameplay.

I actually don't have a lot to complain about, aside from the flowers, poison, and prone abuse not combining in much beyond the stalling aspects. Really, you have a grasp on how to make a perfectly good set, now you may want to try for something a bit more ambitious. And as I mentioned with Zasalamel, pure prone abuse isn't really my thing, it's not particularly interactive or fun. Don't confuse this with me not liking the set though, this is a perfectly fine offering and certainly something that I think I'll have on my vote list come the end of the contest

Kirika Ueno

Another day, another Katapultar set... though this one isn't as delightfully zany as Agiri or Fibrizo. That said, this isn't necessarily a bad thing, it reduces the amount of tackiness and balance problems in the set. They still exist mind you, but they are pretty tame... and the core playstyle here is something quite awesome. The regeneration makes her able to pretty much berserk the foe... up until her timer ticks down and she has to be in a safe position or die. Couple that with some percentage manipulation and modular range moves, not to mention various suicidal and tethering strategies, you have quite a lot of depth here despite you're toned down move creativity. Some of the moves are awkwardly worded and rather bland, but they work just fine in the service of the playstyle. Now if you can just get something this refined with your more wacky and bombastic moves... well, you may have yourself a frontrunner. Hell, I already like the vast majority of your sets this contest, Kirika included. Regardless of it being quite possibly the worst character choice in MYM history.
 

LegendofLink

Smash Apprentice
Joined
Feb 17, 2008
Messages
164
Location
Pennsylvania
Tropius
As FA said, this set is really fun to imagine. The interactions are all rather intuitive, and are all relatively in character (being able to sprout trees like that is a little suspect, but the cool factor of the idea lets it slide in my book). Making the extreme charge time on Solar Beam relevant with the healing factor added is an amazing way to design the move. Where the set has problems, though, is in the disconnect between the three focused of the set. You have the trees and their physics interactions, the whirlwinds and their seeds/leaves, and the solar beam. Solar beam does work well with the other two as a KO method to the leave's damage capabilities, and the trees fuel the beam, but the trees and the wind don't really do anything for each other. Sure, the wind can blow the fruit around, but given the directionality of the wind, it's far more likely to bring the fruit to the foe than to you. In fact, the tree interaction really isn't that useful outside of the fruit, as the snapback from the trees is rather predictable thanks to your one easy way to set it up. That aside, though, it's pretty cool to see a heavyweight sandbox character like this, and the tongue-in-cheek writing was a treat as well. Keep it up.


X-Naut
I've got to echo Junahu in saying that the effort you put into this set is commendable. The animations are all extremely well done (and you even included hitbox highlights that differentiate between different degrees of power! That's just amazing!), and were great to look at. It really does help bring a sense of cohesiveness and design to the set, regardless of how simple it is in concept. A few of the specials are a little wonky, though. I'm not a fan of the random effects on the potions. If there was a way to choose them, or see ahead of time which one was going to be thrown it would allow the player to plan around that instead of simply throwing one and hoping for the best. The down special is a bit out of place, too, being a purely defensive attack in a rather aggressive set. Apart from that, there isn't much else to fault the set on. I would love to see more from you with those cool animations, but don't be afraid to branch out and be more creative even with the more basic attacks.


Poison Ivy
I really like the tether focus here. Normally these kind of things are used on a single move and don't end up being too relevant to the overall playstyle. Here, though, you actually have tow separate tethers that can both be active at once. Combine that with your projectile spewing plants, alluring odors, and poison to and there really is quite a lot you can do with them. A few of the moves are rather awkward to imagine, though, like the dash attack, forward smash, and up tilt. In addition, the grab game is rather awkward. rolling around with the foe is rather useless most of the time, and the hypnotism is either useless or overpowered depending on the situation, and generally unfun to play against in the first place, especially when you have so many forced grab escapes you can stack on top of them as it is (vine grab->normal grab->mind control->roll them on to spikes + whatever stun they take from plants shooting at them in the meantime = they're probably breaking their controller from mashing buttons so much). Overall, the general design is great and creative, but it falls apart in a few places thanks to some strange attacks.
 

Katapultar

Smash Lord
Joined
Nov 24, 2008
Messages
1,284
Location
Australia
1. Terezi is weird. In the series, she is able to see better when she licks things. It's how it works, and if it doesn't make sense to you here it wouldn't make sense to you in the characterization either. It's one of those things.

2. It was awkward to write because I wrote it in a way that branched off in different directions. So yeah, stuff with less explanation at the beginning was written after late stuff with more explanation. I know it's inconvenient. Sorry. :p

3. I could explain a few concepts, but I think Dragonsprite is probably the only reference I could explain without getting into a lot of underlying plot which would bog the set down.

4. Yep.
I see. It was the fault of the original creators, and not yours. My condolences. In any case, I guess the concepts aren't all that much troubling, as they mostly serve as an invitation to the series if not explained, which is one positive that comes with the approach.


Kirika Ueno

Another day, another Katapultar set... though this one isn't as delightfully zany as Agiri or Fibrizo. That said, this isn't necessarily a bad thing, it reduces the amount of tackiness and balance problems in the set. They still exist mind you, but they are pretty tame... and the core playstyle here is something quite awesome. The regeneration makes her able to pretty much berserk the foe... up until her timer ticks down and she has to be in a safe position or die. Couple that with some percentage manipulation and modular range moves, not to mention various suicidal and tethering strategies, you have quite a lot of depth here despite you're toned down move creativity. Some of the moves are awkwardly worded and rather bland, but they work just fine in the service of the playstyle. Now if you can just get something this refined with your more wacky and bombastic moves... well, you may have yourself a frontrunner. Hell, I already like the vast majority of your sets this contest, Kirika included. Regardless of it being quite possibly the worst character choice in MYM history.
I honestly have no idea why you think the character choice is terrible...at all. That doesn't really matter I suppose, but I'm quite surprised that something I didn't really put all that much thought into would get this much praise, both from you and LegendofLink. Essentially speaking, the fact that I was even able to make this set in the first place makes me think that I could keep going at the same pace, but I really don't want to get into a habit of it...on the other hand, the contest is rather lacking at this point. I did indeed try to go for a simplistic tone in that only the Specials and possibly Smashes and Grabs are special, while the tilts and aerials are normal moves, and simply try to make one raw concept, which I'd like to possibly try and focus on in the future if that's what you meant about refinery. It's great to know that Kirika didn't suck after all though, so...maybe I should go out and repeat the same process? I'll see about that.


Also, Nate totally posted a new set, and has 6. I'd better get cracking.
 

darth meanie

Smash Journeyman
Joined
Jun 6, 2008
Messages
452
A MYMini From Meanie!

Luigi


Neutral Special: Thunderballs

Luigi's fireballs function mostly the same, but fire slightly slower than their already extremely slow speed. However, they last over three times as long on screen, letting them reach much further. They also now have THUNDER properties as well, stunning any opponent struck by them for half a second.

Down Special: Poltergust

Mario isn't the only guy with a backpack now! Charge up the Poltergust identically to the FLUDD by holding it down. It glints when fully charged. Tap it again to create a powerful vacuum force to pull opponents from all the way across the stage in. The area of effect is huge, and opponents who are sucked closer to the Poltergust are trapped by a tether of energy and take 10% damage a second. When it releases the opponent they drop in a helpless state. It takes six seconds to fully charge the Poltergust, which lasts up to 3 seconds.

The Poltergust also can suck up items and projectiles, like Luigi's Thunderballs. Even minions can be swallowed. Suck them up and shoot them back at enemies by pressing Down Special again!

Mario


Down Special: F.L.U.D.D.

When Mario is in the air, his F.L.U.D.D. switches into jetpack mode. He is propelled up into the air as water drains from his backpack and pushes foes beneath him. Fully charged, he rises the height of Ike's Aether and pushes opponents an equal distance, although it is possible to DI out of.

Neutral Aerial: Foot Stomp

Mario stomps down in midair, dealing 6% damage and somewhat below average downward knockback. In addition, this attack has the properties of a footstool, propelling Mario further up while knocking opponents further downward and leaving them in a state where they are temporarily unable to act. Against opponents on the ground, they are knocked slightly into the air, allowing for a combo.
 

webcoroma

Smash Rookie
Joined
Feb 28, 2012
Messages
21
Location
San Jose, CA, USA, Earth.
Let's try this again...


He’s covered wars, ya know. Frank West joins the brawl!

Frank West is a freelance photographer and photojournalist. Frank is not a handsome man. He's not even particularly good looking. He's a big guy, with a lantern jaw and a no-nonsense attitude, and all he's interested in is the biggest scoop of his career. He is a relatively well-known freelance journalist who has covered many world events, wars, and other big stories. Lately, however, his career has begun to fizzle out. Looking for the next big scoop, he stumbles on to some strange events happening in the small town of Willamette Colorado.


Size: About the size of Captain Falcon.
Weight: Little bit heaver then Captain Falcon.
Walk Speed: Above Average.
Dash Speed: Fast.
Jump: Above Average.
Fall Speed: Above Average.
Air Speed: Average.
Traction: Normal.
Crawl: Yes.
Glide: No.
Wall jump: No.
Wall cling: No.
Idle animation: Frank will stretch out his back and groan a little bit.
A: Frank throws a left punch. (4%)
AA: Frank throws a right punch. (5%)
AAA: Frank does a karate chop. (6%)

Forward Strong Attack: Frank does a front kick. (8%)
Up Strong Attack: Frank swings a lead pipe (10%)
Down Strong Attack: Frank does a foot sweep. (5%, Trips)

Forward Smash Attack: Frank swings a baseball bat. ( 10% uncharged 25% mid knock back charged)
Up Smash Attack: Frank swings a 2X4 ( 10% uncharged 23% mid knock back charged)
Down Smash Attack: Frank swings a golf club. ( 10% uncharged 24% low knock back charged)

Dash Attack: Frank runs by and swings a knife. (5%)

Nair: Frank does the jump kick (13%)
Bair: Frank swings a Cash Register. (14% When the cash register hits a target, it emits a "cha-ching" noise.)
Fair: Frank swings a Acoustic Guitar (12%)
Uair: Frank swings a Frying Pan. (10%)
Dair: Frank does the Knee Drop (20% Frank goes straight down to the ground.)

Grab: Frank wraps a Croupier Stick around a opponent's neck and pulls them to him.
Pummel: Frank knees his opponent's chest. (3%)
Backward Throw: Frank does a Sulpex. (18% mid knock back)
Forward Throw: Frank does a Great Swing. (15% mid knock back)
Down Throw: Frank preforms the Face Crusher (10% no knock back)
Up Throw: Frank throw his opponent in the air and shoots them with a shotgun. (19% can be interrupted.)

Neutral Special: Frank takes a picture. (No damage, Stuns the foe for 1.5 seconds. can’t spam)
Side Special: Frank throws a random item. (damage is between flinching and 50%)
Up Special: Frank pulls out a zombie on a rope and throws the zombie up to grab something. (no damage. Very silly though.)
Down Special: Frank pulls out a Juice (The things you get from the blenders) In least likely to get: Randomizer (Gives Frank stomach pains and makes him puke. Throws up three times. Moves up the ranks everytime a different Juice is used) Energizer (Frank cannot be injured) Pain Killer (Frank receives half physical damage) Untouchable (Frank cannot be grabbed by opponents but can still suffer damage from their attacks) and Quick Step (Frank is able run at three times his normal speed. However, actions such as attacking and jumping are not affected.) (all Juices last for 3 seconds)


Final Smash: Frank vanishes and a horde of zombies swarm the stage. Lasts about 20 seconds. ( About ten zombies per opponent. 30 max. Zombies do 10% damage.)

Victory Pose 1: Frank dusts off his hands and says: Well, I guess play time is over.
Victory Pose 2: Frank imitates a zombie.
Victory Pose 3: Frank runs from zombies.
Lose Pose: Frank takes pictures of the winners.

Taunt 1: Frank makes a comment about one of his opponents. (9/10 times it’s snark)
Taunt 2: Frank takes a quick pic of his opponent/s.
Taunt 3: Frank drinks some OJ. (does not heal)

Wiimote sound: Frank saying “Fantastic!”

Character Entrance: Frank leaves from a vent.

Series Symbol: It’s a camera.
 

ForwardArrow

Smash Ace
Joined
Aug 17, 2011
Messages
503
I figured I'd let you know it's not exactly encouraged to repost sets. I don't personally have a problem with it, but you might want to avoid doing that in the future. Maybe you should link back to it or something.

...anyway, I just figured I'd say that Frank here could do with some lag times, at least. I don't mean like frames or anything, but just say whether attacks are fast or slow or whatever. And... is that Up Special a tether in a similar manner to Ivysaur's Up Special? You don't really specify, and if not that would give the move an additional purpose. If you do that though, please don't repost the set again, rather just give a link or if we're not done the page yet, just mention it.
 
D

Deleted member

Guest
User Rankings Week #4, #5

Welcome to the User Rankings! Every Monday, I'll be compiling the entire of the last week's activity in the thread and showing off, just who is the most active member? The point of this exercise is to recognise the most dedicated among us – those make your movers who are currently pushing the boundaries, as well as highlighting all movesets made by them.

To get on this list, you need to have made a moveset in this or a previous Make Your Move, as well as having posted in the Make Your Move 11 thread. The cut-off point for tallying is 3:59PM on Sunday EST, 5:59PM PMT or 11:59PM GMT; other removals or changes are at my own discretion. The breakdown of points is as follows:
30 points for a Moveset
5 points for a Comment
4 points for a Secondary Submission
2 points for a Secondary Submission Comment
1 point for a Regular Post
+Regular Posts do not stack
+Secondary Submissions are MYminis, Joke Movesets and other miscellaneous submissions
First, I'll explain how this User Ranking even fits. This is for the last two weeks, but only goes up until the end of Sunday. Sorry about the delay - super busy on my end. And activity was hardly an event the past fortnight.

In all, not an awful couple of weeks, but far from enthusiastic. We had plenty of mini entries and some commenting, so it wasn't all bad. For one thing, Kat got a set out in the form of Kirika, as well as some comments, minis and so on, pulling ahead in the overalls. Second was long-time patron of the User Rankings, Smashbot, posting his usual storm of commentary the last two weeks that he's now known for. In third, FA put out a set - Elsa Maria - and some big commenting, plus minis. Nothing exciting, but be sure to check out their sets, and lets try to get things going if we can, eh guys?

Overall User Rankings


Points: 54, Movesets: Agiri, Fibrizo, Yutaka, Kirika

Points: 40, Movesets: The Coachman

Points: 39, Movesets: Doc Scratch, Elsa Maria

Points: 35, Movesets: Gardevoir, Tropius

Points: 34, Movesets: Angel

Points: 34, Movesets: MMX6 Box Art, X-Naut

Points: 33, Movesets: The Necromancer, Zasalamel

Points: 31, Movesets: Vergil

Points: 30, Movesets: Poison Ivy

Points: 30, Movesets: Karkat, Terezi

Points: 16, Movesets: Dry Bones, Kirby Enemy Team

Points: 10, Movesets: Trine

Points: 10, Movesets: Captain Hook

Points: 5

Points: 4

Points: 4, Movesets: Amps, Chantique, Kang, Angel

Points: 2
 

Waver

Smash Cadet
Joined
Jan 5, 2012
Messages
71
Location
In your cookie jar...
NNID
WaverJR
3DS FC
2964-8605-0439
Switch FC
SW-1450-5084-6730
Another question

Is it okay to make bosses, items, and stages? If so, is there a certain way to set them up as far as writing it?
 

SirKibble

Smash Champion
Joined
May 2, 2008
Messages
2,400
MYmini

K I R B Y


Disclaimer: This mini is small and doesn't change very much at all. I'm very satisfied with Brawl's Kirby, but have grievances about the following two moves being sorely needed in his moveset.


Down Tilt Slide
Not so different from Kirby's current Down Tilt, but he holds the leg out as he slides forward about half a Battlefield platform's length. You know it; it's done with the same input in virtually every sidescrolling Kirby game. Offensive properties remain the same as the current Down Tilt.

Neutral Aerial Air Shot
Kirby releases a round, white puff of air from his mouth, about half his own size, which shoots forward half a Battlefield platform's length very quickly. The air shot deals 8% damage and weak knockback. Kirby suffers a little end lag after using this move, though it's very quick on the startup.
 

The Warrior of Many Faces

Smash Apprentice
Joined
Mar 22, 2012
Messages
101
Location
Everywhere and nowhere, as location is meaningless
A Minor Lurker Reveals Himself

I figured I should introduce myself before I critiqued or posted a set, so here I am! I can't say I've been lurking here for long, but I have trawled through a number of the sets from previous years, so I hope I at least have an inkling of an idea of what you expect from a moveset.

Now, if there's some rule (or just a very very strong preference) against newbies posting sets, let me know please, so that I don't clog the thread with an unauthorized set.

I'd say that's about it for now. I'll probably be critiquing for the first week or so (note that my opinion as a newbie may not be as useful as anyone else's, though), and then moving on to making a moveset. I actually have a couple possibilities in mind, including one that I'm honestly surprised hasn't made it here yet, so stay tuned!
 

darth meanie

Smash Journeyman
Joined
Jun 6, 2008
Messages
452
Oh no, not at all. In general, we're happy for any sort of activity, be it comments, movesets, minis, or anything. Experiment and have fun. We're not that serious here.
 

SirKibble

Smash Champion
Joined
May 2, 2008
Messages
2,400
Edit: Wait, how do you link?
You can get the URL to a particular post by clicking the little number in the upper-right corner of the post box (for example, this post is #239).

If you want a link to the post that includes the rest of the thread (but automatically scrolls to where the post is on the page), do the above, then from the individual post you get, click the thread name at the top. Hopefully that makes sense; if not, just say so and I (or someone else) will explain it with pictures instead.

Is it okay to make bosses, items, and stages? If so, is there a certain way to set them up as far as writing it?
There's no rule against it, though to be honest with you, people probably won't pay much attention to them. You're welcome to do it if you want, though!

I figured I should introduce myself before I critiqued or posted a set, so here I am! I can't say I've been lurking here for long, but I have trawled through a number of the sets from previous years, so I hope I at least have an inkling of an idea of what you expect from a moveset.

Now, if there's some rule (or just a very very strong preference) against newbies posting sets, let me know please, so that I don't clog the thread with an unauthorized set.

I'd say that's about it for now. I'll probably be critiquing for the first week or so (note that my opinion as a newbie may not be as useful as anyone else's, though), and then moving on to making a moveset. I actually have a couple possibilities in mind, including one that I'm honestly surprised hasn't made it here yet, so stay tuned!
First of all, welcome to SWF and MYM! We're happy to have you. Looking forward to what sets you come up with, and don't worry about your comments/critique not being helpful. People generally just like hearing what you thought of their movesets, and what's more, lots of commenting is a great way to figure out the kind of things to put in your own movesets!
 

The Warrior of Many Faces

Smash Apprentice
Joined
Mar 22, 2012
Messages
101
Location
Everywhere and nowhere, as location is meaningless
Oh no, not at all. In general, we're happy for any sort of activity, be it comments, movesets, minis, or anything. Experiment and have fun. We're not that serious here.
Shiny. :D

don't worry about your comments/critique not being helpful. People generally just like hearing what you thought of their movesets, and what's more, lots of commenting is a great way to figure out the kind of things to put in your own movesets!
So basically it's not expertise that matters so much as an honest opinion? Sweet; I can do honest opinions with the best of them. Speaking of which, I should go type some up. XD
 
Top Bottom