• Welcome to Smashboards, the world's largest Super Smash Brothers community! Over 250,000 Smash Bros. fans from around the world have come to discuss these great games in over 19 million posts!

    You are currently viewing our boards as a visitor. Click here to sign up right now and start on your path in the Smash community!

Guide To Re-Spray Painting your controllers for melee(Updated 4/3/07)

DP's Mario

Smash Ace
Joined
Feb 15, 2007
Messages
660
Location
Columbus, GA
I need a "Mario Official" controller. Something like red on the top half, blue on the bottom with everything else white. So American....:chuckle:
 

Xsyven

And how!
BRoomer
Joined
Oct 14, 2002
Messages
14,070
Location
Las Vegas
All primered up and ready to go! All I have to do now is go to Home Depot and choose what color of spraypaint I want...

I don't care if I mess up. I'm using the shell of an old broken controller. So if I mess up, I still have the shell of my brand new controller.
 

Xsyven

And how!
BRoomer
Joined
Oct 14, 2002
Messages
14,070
Location
Las Vegas
Okay, got my first coat of paint on!


It's a very nice choice of color, if I would say so myself. I don't know why I abandoned my other favorite colors.


Update: Never let them dry outside on a windy day, under a tree, and near a garden. Self explanatory? I think so.
 

Xsyven

And how!
BRoomer
Joined
Oct 14, 2002
Messages
14,070
Location
Las Vegas
It's actually a bright, citrusy Key Lime color. The cloudy day and crappy 1.3 Megapixel camera-phone made it seem a bit darker, though.
 

Xsyven

And how!
BRoomer
Joined
Oct 14, 2002
Messages
14,070
Location
Las Vegas
Woo for double posting!

So check it out. Here's a basket full of various console controllers. Guess which one I painted.


And here it is compared to three other colors of controllers:


The spice controller was in my friend's car, so that's too bad. But this picture is way high contrast for some reason. It's not as bright as it appears in this picture.

My biggest piece of advice for those of you who are hopping onto this controller-painting bandwagon slower than I did, would be to seriously wait for 24 hours before using. I waited 12, and though it's dry to the touch, it still rippled after playing Melee with it.. like, you can tell where my hand was rubbing constantly, and the paint around where my finger was sort of rippled up. I also wrapped the wire around the middle, and I guess I did it too tight. The wire dented the paint. So seriosly. WAIT 24 HOURS.
 

DynamicDuo

Smash Lord
Joined
Jun 22, 2006
Messages
1,731
Location
Gotham City
If i had to chose color, i would want yellow with the buttons golden and my dpad and joystick white and cstick in black.
 

ooolllyyy

Smash Rookie
Joined
Nov 1, 2006
Messages
1
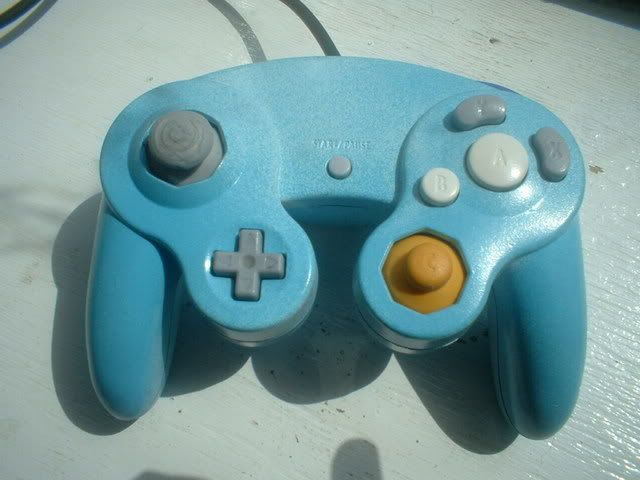
Never posted on here before but i saw this great guide and decided to give it a go. I think it went pretty well for a first attempt, did the controller shell and A + B buttons.


I went for an 'ice effect'.

Does anyone know what to use to paint little patterns or pictures on it, like to replace the GC logo (looks a bit empty there)?
 

Luck-NYC/NJ

Smash Lord
Joined
May 25, 2006
Messages
1,745
Location
BergenField, Bergen County(North East Jersey)
yea im about to do this and i was wondering if someone could give me better step by step directions. im a little confused about a few terms used. Like how many coats are needed, how much time each coat needs to dry, Sanding? does tht mean just rubbing the paint completely off? when to sand and how to make sure the controller comes out smooth.
 

Bailey

Smash Hero
Joined
Feb 9, 2006
Messages
5,057
Location
Rockland County,NY
I started mine a half an hour ago just put on the first coat I am having it half red and white like the left side on the front is red then the other side is white then vice versa on the back to give it a checkered apparence but this is my test one my main one is gonna be an italian flag lol I will edit with pix later,
 

vericz

Smash Champion
Joined
Nov 3, 2005
Messages
2,307
Location
Kissimmee (Central Florida)
I'm Going to try and add some LED lights into a gamecube controller but i don't know where I can get power from the circuit board to do it. Does anyone have any high quality pictures of the board (front/back) that I can send to a friend so he can help me out??
THanks
 

JesiahTEG

Smash Master
Joined
Jan 30, 2007
Messages
4,126
Location
Rochester, NY
Is there a better way to clear coat or a different kind of clear coating paint that we can use that won't wear off or start to show fingerprints other than using krylon plastic spray paint.
 

Luck-NYC/NJ

Smash Lord
Joined
May 25, 2006
Messages
1,745
Location
BergenField, Bergen County(North East Jersey)
yea im about to do this and i was wondering if someone could give me better step by step directions. im a little confused about a few terms used. Like how many coats are needed, how much time each coat needs to dry, Sanding? does tht mean just rubbing the paint completely off? when to sand and how to make sure the controller comes out smooth.
uh no-ones gonna answer that right? yea i hate wen i make posts with detailed question. and the thread starter doesnt even answer it.

SOME PLEASE ANSWER MY QUESTION

thank you -_-
 

2_Percent

Smash Ace
Joined
Dec 20, 2005
Messages
600
Location
Seoul, SK
with my controllers i don't even sand the controller. to me it was best not to because of the shape of the controller it's hard to get a good smooth sanding all around.
so i used instead something called an adhesion promoter. that gives the paint something better to stick to.

as for how many coats. it all depends on how much it takes to get a good color coating on it. i feel that long as the original color of the controller doesn't show through, then you should be fine. but the first coat should definitely be a light coat. you don't want runs of paint on your controller. so use a nice light coat with no runs first..let it dry a bit then start your next coat which can be heavier, but be careful of runs.

the most important thing i think is your clearcoat. i've played on my controller for probably a year now and i still haven't worn through it. you just need a good quality clearcoat and 2-3 coats of it. first coat of course being light, then waiting a bit before you put on a heavier coat.

i hope that helps you out.
 

Pyr0

Smash Ace
Joined
Sep 1, 2006
Messages
918
Location
Plucking Pikmin
Im doing a cardboard cut-out of this image:


Im going to spray over it where the gamecube logo was...
Just a small quick spray, to give it that graffitii effect.

The top half will be black with the Boo in the top, the lower half will be white.
Perhaps i will paint all the butons white.
 

Luck-NYC/NJ

Smash Lord
Joined
May 25, 2006
Messages
1,745
Location
BergenField, Bergen County(North East Jersey)
with my controllers i don't even sand the controller. to me it was best not to because of the shape of the controller it's hard to get a good smooth sanding all around.
so i used instead something called an adhesion promoter. that gives the paint something better to stick to.

as for how many coats. it all depends on how much it takes to get a good color coating on it. i feel that long as the original color of the controller doesn't show through, then you should be fine. but the first coat should definitely be a light coat. you don't want runs of paint on your controller. so use a nice light coat with no runs first..let it dry a bit then start your next coat which can be heavier, but be careful of runs.

the most important thing i think is your clearcoat. i've played on my controller for probably a year now and i still haven't worn through it. you just need a good quality clearcoat and 2-3 coats of it. first coat of course being light, then waiting a bit before you put on a heavier coat.

i hope that helps you out.
yea that helps a litte. now when you said use a light coat i asume u mean not use that much paint. and then the heavy coat i spray the controller alot. then i just spray the clear coat on and im done?

my second question is the Adhesion promoter. where can i get this and does it do the same job as the sandpaper. What job does it do and when do i apply it during the process.
 

2_Percent

Smash Ace
Joined
Dec 20, 2005
Messages
600
Location
Seoul, SK
for the light coat yea, don't expect to cover the whole controller yet with the color. just be patient with it otherwise it'll look like crap with drips and stuff. then on your next coats you can start putting more paint on but still watching for drips/runs.
you want to wait a while for that color coat to dry before you put the clear coat on. i give mine an hour or so. then i put clear coat on and leave that over night.

i use adhesion promoter. it's something i found at a store like advanced auto. it's just a clear primer basically. you can use normal primer if you want also. like with auto car painting..primer gives the paint something to stick to. and since some of the paints i use are only for use onto something that's primered, i used that. some paints can stick directly to plastics, but the ones i use don't. primer is applied first before everything else.
 

Luck-NYC/NJ

Smash Lord
Joined
May 25, 2006
Messages
1,745
Location
BergenField, Bergen County(North East Jersey)
ok thank you that explains alot more then the first page.

one more thing... >8)

im gonna reguritate the steps back to you and please tell me if im right or just write out the steps.

1.Sand original paint off
2. spray primer (leave it for a day)
3. spray first light coat (let dry for about an hour)
4. Spray spray second coat (heavier let dry for same amount of time)
5. spray final coat (let dry)
6. Spray clear coat finish for smoothness?
 

2_Percent

Smash Ace
Joined
Dec 20, 2005
Messages
600
Location
Seoul, SK
to me you don't even need to sand. i don't. just make sure you clean your controller is all.
primer would only need like 10 minutes to dry. something like that.
after you spray your light coat, you can wait like 5 mins or something..since it's only a light coat. then do a better coat after and probably let that sit about 20 mins also, you don't want it to dry but just be 'tacky'.
once you have got the color coat all on like you want, then you let it sit like an 1-2 hrs.
then finally clear coat it the same way. you want the clear coat on to make it mostly to protect the paint from wearing and also it just looks better.
 

MDZ

Smash Journeyman
Joined
Jun 6, 2006
Messages
395
Location
Armstrong B.C Canada. It's in the Okanagan, so if

Boom!

This is what my controller will look like (on the front) in a couple of days. I currently only have the white/green spray done without the Eggs on yet. I'll be making the stencils for it soon :p

The back is going to be the green color with a shot of Yoshi's face in the middle round-ish part that stands out. It might be pretty hard, so I may just put an egg there. We'll see how it goes :p

Sorry for the horrible drawing :p It's never been my specialty.
:yoshi:
 

Bailey

Smash Hero
Joined
Feb 9, 2006
Messages
5,057
Location
Rockland County,NY
Ok bump and will edit soon with pix of what I got so far.
This is right after I took it apart there was the thing in front of the triggers that is why there are two screw drivers


The two screw drivers themself


Front taped and ready (the paint I used doesn't need a primer


Back so far


Front so far


Pythag

BRoomer
BRoomer
Joined
May 7, 2007
Messages
2,627
Location
Flux
well this whole thing is cool, but I have one question.
if you were holding a controller that had been cosmetically modded (with a clear coat of paint as a finisher)
would it feel the same as a regular un modded controller?
I'd like to do this, but at the risk of it not feeling nice...ehhhh.
 

2_Percent

Smash Ace
Joined
Dec 20, 2005
Messages
600
Location
Seoul, SK
it won't feel the same. the controller unpainted still has that texture of the plastic.
when you paint it, it won't be there anymore and instead smooth.
 

Seison

Smash Journeyman
Joined
Mar 19, 2007
Messages
220
I posted these picks in anther thread earlier today for another reason, but i might as well add them to this compendium of modded controllers too. if anyone still looks at this thread feel free to comment. its a pretty basic design and I didn't really want to mess with the buttons.


the priming phase

more primer

now the color (after letting each coat dry completely


and finally, the finished product.
 

vericz

Smash Champion
Joined
Nov 3, 2005
Messages
2,307
Location
Kissimmee (Central Florida)
Nice controller, came out smooth. I did mine today but i skipped the primer and it still came out good, used paint for plastics. I don't think I will paint the button since it might affect my gameplay, I only did the D-pad and start button.

Did you use clear coat when you finished?? I did.
 

NyTeStRiDeR

Smash Apprentice
Joined
Jan 16, 2005
Messages
87
Location
[S].[F].
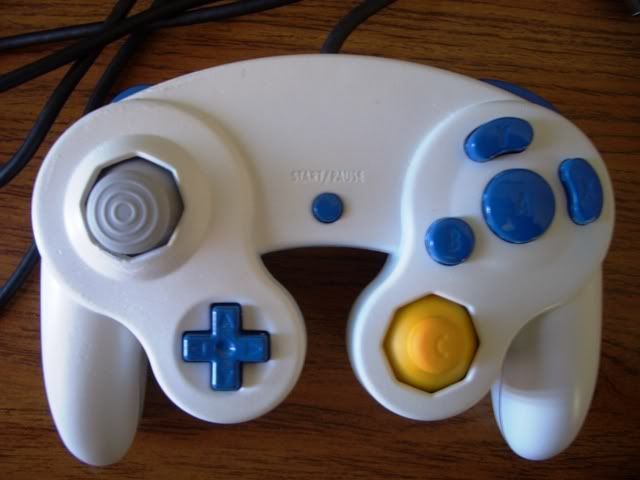
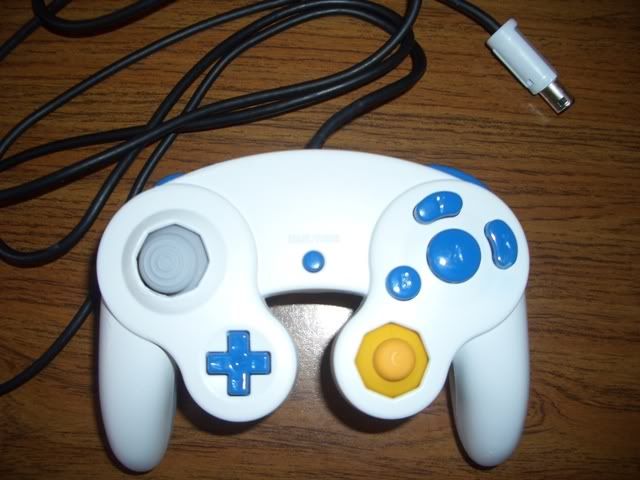
the buttons don't really effect my gameplay except for the x button for short hopping. The triggers tend to not release as quickly which effects my wavedashing and sometimes makes me roll when i do an l-canceled aerial or shield. These errors do not happen often. Its mostly the result of the paints making the buttons/triggers thicker which rubs against the casing. The x button won't be a problem because when ur playing with it the sides of the buttons tend to scratch off a little so it will loosen gradually. I mostly use the R trigger which scrapes a lot but im pretty sure the problem will the triggers will go away also. i probably only put around 4-5 hours of playtime on it since i painted it. I used krylon paint. i didnt clear coat the buttons cuz i didnt feel lyke waiting a week to use it because if you use it too soon even after the clear coat dries, you can leave finger prints on it
 

vericz

Smash Champion
Joined
Nov 3, 2005
Messages
2,307
Location
Kissimmee (Central Florida)
Ok, I might not paint the buttons then. I knew it made them thicker but i don't want to risk buttons sticking and staying down while i play. I may just do the D-pad and start button. Thanks
 

NyTeStRiDeR

Smash Apprentice
Joined
Jan 16, 2005
Messages
87
Location
[S].[F].
Only the triggers stick down (quite rarely though). For A B Y and X i think its okay to paint, but u might need to press the x or y whichever you use for shing harder but it loosens gradually just like breaking in a new controller. Right now im juss scraping off some of the paint on the controller so the triggers can slide up and down smoother. I'm fine with scraping if off because as long as the triggers are in the controller i can't see the parts where i scraped off paint. Havent tried the triggers out yet to see if it is smooth enough but i will when im finished.

update: after scraping off some of the paint, i no longer have the problem witht the triggers. they are looser since i scraped some paint off and it looks just the same. the triggers pretty much feel the same as before i painted them.
 

vericz

Smash Champion
Joined
Nov 3, 2005
Messages
2,307
Location
Kissimmee (Central Florida)
I put in a painted A button I had and it felt kind of stiff. I took a piece of sandpaper, rolled it up and sanded the inside where the buttons sit to take off the excess paint on the inside and allow more room for the button. It worked out nice and the button feels fine. I will sand off the paint from the trigger slots if I do decide to paint the triggers.

Thanks again
 

Seison

Smash Journeyman
Joined
Mar 19, 2007
Messages
220
Nice controller, came out smooth. I did mine today but i skipped the primer and it still came out good, used paint for plastics. I don't think I will paint the button since it might affect my gameplay, I only did the D-pad and start button.

Did you use clear coat when you finished?? I did.
I didn't use clearcoat on it nope. I did that months ago though, and I just took the pic of the finished product yesterday, and it still shines :p

@ nytestrider, very hott controller. I'm loving the white and blue theme. looks crisp.
 

RoyTheFlamboyant

Smash Journeyman
Joined
Jun 25, 2007
Messages
292
Location
Concord, NC
I have a shell painted, but lost my 1.8 mm screwdriver, so I can't get it back together. Yeey, I'm dumb. xD

Anyway, I hand-painted the Smash symbol and my tag on it with acrylics, hope to get some pictures up soon for you to see and tell me how much it sucks or doesn't. *thumbs up*

Also, I think I had a legitimate question, but I forgot it, so I'll ask it if I remember next time I post.


NyTeStRiDeR, sweet controller! It's so smooth-looking, glad you got the triggers fixed up!
 
Top Bottom