• Welcome to Smashboards, the world's largest Super Smash Brothers community! Over 250,000 Smash Bros. fans from around the world have come to discuss these great games in over 19 million posts!

    You are currently viewing our boards as a visitor. Click here to sign up right now and start on your path in the Smash community!

Post movesets for your most wanted characters

Speed Weed

Smash Master
Joined
May 16, 2020
Messages
3,586
Location
Portugal
Switch FC
SW-1814-1029-3514
so! i figured it'd be a fun idea to make a thread where you (yes, you) can post movesets for any character you want. this is different from make your move btw. this is simply a for-fun thread where you can share the movesets you made for your most wanted characters.

i'll start by posting a moveset i made for edward falcon from power stone and posted in the newcomer thread:
so! yesterday, i mentioned making a moveset for edward falcon from power stone. and well, here it is! by the end of this, i hope you too will be interested in the prospect of the power stone series in smash.

also for just this one post i'm dropping the all lowercase letters schtick
Alright, since I still can't figure out how to upload images, please refer to this video for reference and for better visualizing his moves.
First of all, a crash course: Who is Edward Falcon?
Edward Falcon is the protagonist of Power Stone, a 3D arena fighter released by Capcom for the arcades and the Dreamcast, and its sequel. An aviator/boxer in the anime, Edward hails from the totally-not-a-certain-real-world-location land of Londo, and his main goal is to find the legendary Power Stones. Since his appearance in his own (dead) series, he's shown up here and there, namely as a small cameo in Capcom VS SNK 2, a card in Ultimate Marvel VS Capcom 3's Heroes and Heralds mode, and, most surprisingly of them all, a DLC costume in Dead Rising 3 of all things (Not even I was aware of this last one before researching all his cameos!)

OK. Now we cover the basics, or rather, the overall theming of his moveset. So, Edward himself is just punchy-kicky man, admittedly. BUT, there's two things in particular that make him EXPLODE in moveset potential: his super form and items. The super form we'll get to later, but items are, well, items in his original game. When added to his moveset, they basically make him an arsenal of cartoony weapons. And trust me, i had to leave out a TON in this moveset. For reference, Power Stone 2 had OVER 100 ITEMS. Yeah, this moveset doesn't cover all of his potential, but tbf it'd be impossible to stuff all that in one moveset, so i just went with the ones i felt flew better in the context of Smash.

Now before we get to the main event, I'd like to mention his smash attacks, as they also use items. Of course, stuff like his jab combo, tilts and grabs would all just be run-of-the-mill brawling.
Forward Smash: Edward swings a pipe forward.
Up Smash: Edward pulls out a sword (oh boy) and slashes upwards.
Down Smash: Edward pulls out a giant hammer and SLAMS it on the ground.

Alright, it's Special time:
Neutral Special: Machine Gun: Yes, a literal mother****ing machine gun. Starting off on the right foot, ain't we? Well, it's a big cartoony machine gun, to be more specific. When using it, Edward stays in place, and you can let it last for as long as you want by simply holding the B button.
Side Special: Crate Kick: Edward kicks one of a selection of stage objects from the first game forward. So not just crates: barrels, chairs, tables, vases, benches, trash cans...Great for ruining attempts at recovery.
Up Special: I honestly don't know what to name this one: Edward does a simple jump. It's got decent height. HOWEVER, if Edward makes contact with an opponent during it, he will grab them midair and slam them down. It's like a non-tether, shorter-ranged version of Byleth's up-B. This is an actual move of his from the first game, and i wanted to incorporate it into his moveset in some way.
Down Special: Item Shop: Now here's where things get interesting. So, a new feature in Power Stone 2 was the item shop. It brought a whole load of new items with it, as I mentioned before. So, with this, instead of going for just one, I decided to have a 4-in-1 and give Edward a not-as-nearly-as-gimmicky version of Command Select. So, when using it, a menu gets pulled up, and from it you can choose to use one of 4 weapons:
Soccer Ball: This was Edward's special unique item of sorts in the game. He kicks a soccer ball, and it works more or less like the Soccer Ball item we already have, minus the flames.
Bazooka: Edward shoots a few shots, does decent damage, not much else to be said here other than it's a goddamn bazooka.
Flame Rod (i think that's what it was called): Edward pulls out said rod and shoots 3 fire orbs at the opponent.
Fire Bottle: Edward throws the bottle at the opponent, engulfing them in flames. There we have it boys, our first Smash fighter to wield an actual molotov.


Now, we got a real shake-up coming: his Power Stone meter. It consists of three little Power Stone icons, and when Edward does a certain amount of damage, one of the icons fills up and so on until he becomes his super form. This pretty much gives him a whole second moveset. Keep in mind that I'm not naming most of the specials this time cause as of this writing I don't remember the names.
Neutral Special (Super Form): Edward shoots a single missile.
Side Special (Super Form): Edward dashes knee-first into the opponent. I'm taking away the original ability to perform this move multiple times at once as to not run the risk of having another Bayo on our hands.
Up Special (Super Form): Power Hurricane: Edward performs a flaming uppercut.
Down Special (Super Form): Edward fires 5 small homing missiles at the opponent. Not a lot of knockback.
And now, the big one:
Final Smash for both forms: Red Whirlwind (named after his canon moniker ala Red Baron): Edward turns into his super form (or stays in it, it depends), kicks the opponent into the air and fires an absolute BARRAGE of missiles. It's like Snake's Final Smash on steroids.
i sincerely hope y'all take the time to read this, this took me a lot of time and i think it came out great. and if this convinced you on his potential, you can stop by the edward falcon support thread! afaik it hasn't been added to the directory yet so you'll have to look for it
 

RetrogamerMax

Smash Legend
Joined
Sep 3, 2018
Messages
12,221
Location
Houston, Texas
NNID
RetrogamerMax2
Goemon:

Specials:

Side Special Chainpipe: Goemon pulls out his Chainpipe and shoots it out to attack the other player or grab them. It would be similar to Link's Hookshot and it could grab the ledge of the stage as well too like the Hookshot and Simon's wrip.

Down Special Super Saiyan Goemon or Super Goemon: Goemon's hair turns golden like a super saiyan's from DBZ and he gains quite a boost of attack power for like 5 or 10 seconds. Afterwards, it will take a whole minute for Goemon to perform the move again.

Special Ryo: Goemon throws a Ryo coin at the other player. Pressing B Goemon throws a normal Ryo coin but holding B will charge it up and set the Ryo coin on fire for a more explosive attack.

Up Special Cloud Boost: In the Goemon games when you die when you're playing co-op, you can be brought back by the other player if you have more lives. Goemon or whoever else you would be playing would pop out of nowhere on a cloud like their spirit has been rising from the dead. Goemon would fly up in the cloud in Smash like in his games.

All Smash Attacks Goldenpipe: Goemon swings his Goldenpipe at the direction of your choosing.

Final Smash Impact: A giant Power Ranger type robot called Impact comes out to help Goemon and shoots a mouth laser at all other players on stage that get's hit by it. Here is a taste of what Impact could do in the games:


Mamboo07

Smash Hero
Joined
Mar 23, 2019
Messages
9,375
Location
Oztralia
I remember doing a moveset for The Shake King.
Shake King's Moveset
JAB/TILTS
Jab
A three part attack, a right hook, followed by a left jab, and finished with an overhead slam into the ground with both arms stretched forward.

U-Tilt
An awkward hop while facing the screen.

S-Tilt
Lightly winds back, and throws a far-reaching punch.

D-Tilt
Raises his foot and slams it on the ground creating a small shock wave in front of him.

SMASH ATTACKS

Side Smash
Steps back and moves his arm behind himself while an after-effect of red appears behind him. After a moment, he steps forward and punches so hard.

Up Smash
Awkwardly attempts to punch upwards.

Down Smash
Reels back, and while facing the screen slams a fist into the ground directly in front of him, creating two "shock wave" projectiles.

Dash Attack
Comically trips, and holds his arms straight above him, when he lands, he face plants and his fists crash down in front of him.

AERIALS
Neutral
A body splash, similar to Dedede's one.

Up
Sticks his arms out to his sides, and claps directly upwards.

Down
Spins himself so he's facing straight downwards, before throwing a punch in that direction.

Forward
A slightly awkward punch forward.

Backward
Removes his helmet, and swipes behind himself with it before putting it back on.

GRAB/THROWS
Grab
Outstretches both his arms and tries to snag an opponent.

Dash
Lunges forwards with his arms out.

Pummel
Shakes the opponent so hilariously fast that they become a banana-shaped blur.

Up
Slams the opponent on the ground before throwing them in the air.

Down
Throws the opponent on the ground as body slams them wrestler style.

Forward
Winds back with opponent in hand, and throws said opponent.

Backward
Grabs the opponent by the legs and swings them around at ridiculous speed before sending them flying.

Floor Attack
Shake King gets up and dropkicks the opponent.

Edge Attack
Shake King climbs up and punches the opponent forwards.

BLOCKS/DODGES
Standing
Holds up his arms in front of himself.

Side Roll
Shake King slides backwards dodging the opponents attack.

Downward
Shake King steps aside swishing his cape around.

Aerial Dodge
Something similar to K. Rool's air dodge.

SPECIALS
Neutral
Electric Punches

Shake King tightens his fists as his hands start crackling and glowing with electricity.
Holding B much more all the way will have Shake King start punching the opponent very fast and rapidly at high speed in a flurry of lightning and fists.

Side
Helmet Rush
Shake King ducks down and glows blue as he charges across the stage with his helmet pointing forwards as he tramples opponents.
(Running into a wall results in him getting stuck.)


Up
Leaping Pound
Shake King glows blue as he jumps into the air and floats a while before crashing down sending opponents sky-high.


Down
Earthshaker
Shake King raises his fists into the air and slams them into the ground so hard causing a shock-wave that trips opponents or stuns them.
(Based on Wario's earthquake punch from Shake It!)


FINAL SMASH
Wrath of the Shake King
Shake King smiles evilly as he charges forwards ramming into the opponent leading to a cut-scene of the opponent landing on the Shakedown Schooner as Shake King is seen charging at high speed roaring in anger and fury towards said opponent as he grabs them and crashes through many walls brutally punching him/her at high speed before the two go crashing outside the back as Shake King uppercuts the opponent before throwing him/her into the upper troposphere as he glows blue before firing a massive laser at them ending in a gigantic explosion, the opponent is launched into the Blast Zone thus ending said FS.

TAUNTS
1. Shake King points forwards and does a neck-slice gesture laughing evilly.

2. Shake King glows with electricity crackling across his skin.

3. Shake King rears back while giving out a battle cry before slamming both fists into the ground.

ALT COSTUMES
(Shake King's alt costumes are based on different Wario characters except for the last.)
1. Default
2. Wario
3. Captain Syrup
4. Genie
5. Rudy the Clown
6. Black Jewel
7. Count Cannoli
8. A pirate outfit
(Something like Kaptain K. Rool)

VICTORY POSES
-Shake King grabs the 4th wall and smiles evilly as several cracks appear.

-Shake King is seen laughing manically with the other bosses from Shake It.

-When the game transitions to the victory screen, the screen is abnormally darkened.
After a moment, two glowing blood red glints appear out of nowhere before the screen brightens to show Shake King on his throne.

Losing Pose: Shake King slowly claps his hands with blood red glowing eyes.

OTHER ANIMATIONS
Walking
Shake King stomps towards the opponent menacingly.

Running
Wario's wheel-of-feet from Shake It when entering a Max Fastosity Dasherator.

Running into Wall
Falls on his back and gets up while grumbling.

Crouch
Something similar to Wario's crouch from Wario Land series.

Crawl?
Has no crawl.

Dizzy
Crazy Wario's stumbling from Wario Land 3.

Swimming
Does a breaststroke while swimming.

Drowning
Flails his arms and feet anime style trying to stay afloat.

Sleeping
Face plants on the ground snoring, after a while he gets up.

Jumping
Does his own version of Wario's jumps.

Edge Hanging
Hangs on the edge by one hand trying to pull himself up.

Edge Balancing
Flails around hilariously trying to balance himself.

Chilli Curry
Flails around while on fire.
(Reference to Flaming Wario.)

Home-Run Bat Swing
Holds said bat with one arm before swinging it.

Hit by Joker's Side Special
Has an annoyed expression on his face glancing towards the screen.

Stamina Battle Defeat
Falls on his back and glows white before exploding.
(Reference to his defeat animation back in the final battle from Shake It.)

Star KO
Screams out in a deep voice.

Screen KO
Splats on the screen with his face squished against said screen having a hilarious expression.

(One little detail is that when Shake King is damaged or attacked, he assumes many anime expressions.)

KIRBY HAT
Kirby gains Shake King's big beard, and his eyebrows with helmet.

BOXING RING TITLE
"The Marauding Pirate"
 

Perkilator

Smash Legend
Joined
Apr 8, 2018
Messages
10,441
Location
The perpetual trash fire known as Planet Earth(tm)
Dig Dug
Intro: Dig Dug drills from underneath the ground and pops out.

Stance/Idle 1: His idle animation from Namco X Capcom, as Taizo Hori.

Idle 2: Dig Dug rests his shoulder on his drill.

Idle 3: Dig Dug holds up his drill like a gatling gun.


Notable Palette Swaps:
-Dig Dug arcade cabinet design (default)
-Taizo Hori (Blue; his skin color becomes that of his Mr. Driller design, and he even has his goatee)
-Susumu Hori (Pink)
-Anna Hottenmeyer (Yellow)
-Ataru Hori (Black)
-Dr. Z (White; like his Taizo alt, his goatee is present)
-Pooka (Red)
-Fygar (Green)

Walk: Dig Dug walks with his jackhammer mounted on his back.

Jog: Dig Dug extends his legs while walking.

Dash: Dig Dug runs just like his run animation from Dig Dug.

Damage: Dig Dug's lose animation.

Jump: Dig Dug lifts his drill up as he jumps with both legs.

Crouch: Dig Dug sets his jackhammer on the ground, ready to drill into the ground.


Weapon of Choice: Dig Dug mainly fights with both a jackhammer and a pump.

Normal Attacks
Jab: Dig Dug swings forward twice (7%, small knockback), and then drills the target continuously (2-5%, small knockback)
Forward+A: Dig Dug fires three shots from his Ray Gun (6%, small knockback)
Down+A: Dig Dug drills out one rock at a time (7%, small knockback)
Up+A: Dig Dug pumps out some air above him (9%, OK knockback)

Aerial Attacks
Air+A: Dig Dug spins with his pump around him (8%, OK knockback)
Air Forward+A: Dig Dug drills forwards (9%, OK knockback)
Air Back + A: Dig Dug drills behind himself (12%, OK knockback)
Air Up+A: Dig Dug holds either a Pooka's eyes or a Fygar's scary face above him (11%, OK knockback)
Air Down+A: Dig Dug dives downward and drills into the ground (16% with a meteor effect, OK knockback)

Dash Attack: Dig Dug drills on the ground, riding his jackhammer (5%, small knockback)
Edge Attack: Dig Dug turns into blue eyes and pops up onto the stage (7%, small knockback)
Get-Up Attack: Dig Dug's pump blows out some air around him, lifting him back up (4%, small knockback)

Smash Moves
Forward+A: Dig Dug holds a Fygar out, and it breathes fire (19%, medium knockback)
Up+A: Dig Dug drills upwards (21%, medium knockback)
Down+A: Dig Dug drills on the ground, erupting pillars of fire around him (22%, medium knockback)

Grab Game
Grab: Dig Dug grabs the target with his pump.
Pummel: Dig Dug pumps air onto the target (1%)
Forwards+Throw: Dig Dug's pump blows the target diagonally forward (13%, OK knockback)
Down+Throw: Dig Dug drills the target and buries them into the ground (18%)
Back+Throw: The pump flails around and shoots out the target (11%, OK knockback)
Up+Throw: Dig Dug's pump blows the target upward.

Special Moves
B : Pump Inflation
(don't laugh); Dig Dug injects his pump into the target in front of him, growing the target but reducing their weight (10%, OK knockback). This also applies to a teammate.
B + Forwards : Ray Gun Beam; Dig Dug fires a long laser beam out in front of him (15%, OK knockback), which can hit multiple opponents and deal good shield damage.
B + Up : Pooka Balloon; Dig Dug pumps up a Pooka above himself, and multiple rapid presses of B can send him higher. However, pressing B too much in succession pops the Pooka (8%, OK knockback)
B + Down : Drill Dig; by holding B, Dig Dug drills into the ground for 3 seconds. When B is released before then, he'll sometimes dig out an item. When the time is up, he pulls out a rock that he can throw at opponents for a meteor effect (20%, medium knockback). However, if Dig Dug holds it for 5 seconds, he will be buried (13%)

Final Smash: Fault Line; Dig Dug drills a huge area in front of him, and a light bursts out (11%). Any opponents caught are taken into a cutscene where Dig Dug drills into a fault and the piece of land the fighters are on sinks into the water (59%, devastating knockback).

Gimmick: Dig Dug's Neutral B varies not only with size, but also weight, despite only being able to grow a fighter.

-When the target is tiny, their weight and size will return to normal.
-When an opponent is already Giant in advance, only their weight will be reduced.

Taunts
1: Dig Dug mimics his pose from the title screen of the original Dig Dug.
2: Dig Dug mimics his pose from Namco × Capcom.
1+2: Dig Dug's jackhammer drills by itself for a bit.

Winposes
1: Dig Dug puffs up a Pooka, but it blows up and he lands on his butt.
2: Dig Dug sets up the Player 1 victory sign from Dig Dug Arrangement.
3: Dig Dug floats about on a piece of land, stranded in the ocean.

Applause: A normal applause, sometimes interrupted by Dig Dug's jackhammer.

Icon: A Pooka's eyes

Boxing Ring Title: The Underground Underdog

Star K.O.: The death sound from Dig Dug.

Victory Music: The Dig Dug victory jingle.

Kirby Hat: Dig Dug's helmet and cyan visor.
 
Last edited:

Megadoomer

Moderator
Moderator
Writing Team
Joined
Jun 28, 2013
Messages
10,254
Switch FC
SW-0351-1523-9047
I'm already prepared for this - I made a moveset for Dante after beating Devil May Cry 3 and starting Devil May Cry 4 a few years ago.

His default appearance is based on Devil May Cry 4, though he’ll have a Devil May Cry 3 alternate costume. Dante’s outfit seems to change slightly each game, but as those two are generally considered to be the best of the series, that’s what I’m going with.


Palette swaps for the DMC4 outfit will be based on Trish (blonde hair, black clothes), Nero (hair stays white, dark blue jacket), and his alternate costume from the special edition. Palette swaps for the DMC3 outfit will be based on Lady (white clothes, black hair), Vergil (light blue coat, dark pants), and Sparda.


The series’ logo would be the silhouette of Trish from the logo of the first game, and the stage would be the second phase of the Mundus battle. There’s any number of stages that I could go with (the main hall of the castle on Mallet Island from DMC1, the roof of the Temen-ni-gru from Devil May Cry 3), but given that this already involves floating platforms and is plot-important, I figured it would be a good fit for a Smash stage.


The way that I’m picturing it, there would be five stone platforms suspended in or over a pit of magma. Three would make up the “ground”, with a small gap between them, and two would float there, thin enough to jump through. Mundus would be looming in the background, shooting out orbs to bombard the stage with lasers, and occasionally shooting lasers out of his forehead (which would do more damage if they hit, but have a targeting reticule appear on the ground to make it more obvious when he’s about to fire). The platforms could be destroyed by Mundus’s attacks after a few hits from him, but only a maximum of two would be broken at any given time, to prevent the stage from being impossible to navigate.


His entrance would be driving in on a motorcycle… which promptly crashes and explodes. The smoke quickly fades to show him dusting himself off, somehow unharmed. Idle animations would be putting his fists on his hips and smirking, or crossing his arms in front of his chest and slowly falling asleep. His main weapons would be Rebellion (his sword), and Ebony and Ivory (his two pistols).


References for the some of the moves can be found here: https://www.youtube.com/watch?v=VJ74nEoYYCY and here: https://youtu.be/zL7IYAeD0Ik?t=82


A --> AA --> AAA: Rebellion Combo II – the series of five attacks that you get when you pause briefly between the first and second hits in the DMC games.


Forward A: Million Stab. Dante stabs rapidly, which lasts a bit longer if you mash the A button (though the stabs gradually knock the opponent back to keep it from being spammed)


Up A: Dante rapidly shoots upwards.


Down A: Dante spins around with his sword outstretched.


Forward Smash: Prop Shredder. Dante spins his sword around in front of him like a propeller. Based on his basic Swordmaster action.


Up Smash: Launcher. Dante swings his sword upwards, launching whoever’s hit by it into the air. Based on his back attack with Rebellion.


Down Smash: Twosome Time. Dante fires his pistols on either side of him, though the bullets are larger red energy blasts since he charged them up (and to make so that they’re visible and have knockback). Based on his basic Gunslinger action.


Neutral Air: Aerial Rave. Dante swings his sword three times in midair. Based on his aerial Swordmaster action from Devil May Cry 3.


Forward Air: Aerial Combo. Dante kicks twice. Based on his forward air attack in Devil May Cry 2.


Back Air: Dante does a spin kick to hit behind him.


Up Air: Dante slashes upwards.


Down Air: Rain Storm. Dante spins around in midair, shooting his guns straight down. Based on his Gunslinger mid-air action.


Dash Attack: Million Stab Finisher. The stab at the end of a Million Stab combo, which knocks enemies back.


Wake Up Attack: Crazy Dance. Dante spins around, kicking any enemy in the vicinity.


Climb Up Attack: Dante swings his sword as he gets to his feet.


Grab: a standard grab.


Pummel: pistol-whipping the opponent.


Forward Throw: Jackpot. Dante lets them go and shoots both of his pistols once, which emit a large flash of energy. Based on the move that finished Mundus.


Back Throw: Sword Pierce. With his sword stabbed into his opponent, Dante tosses the sword behind him. The sword flies back to him almost immediately (while the victim keeps going), and Dante reflexively catches it. Based on the Swordmaster move from DMC3.


Up Throw: Bullet Juggle. Based on a common combo in the DMC series, Dante tosses his opponent into the air and shoots them several times to suspend them there for a moment.


Down Throw: Wild Stomp. Dante shoots at his downed opponent point-blank. Based on a Gunslinger move where you approach downed opponents and fire.


Up Taunt: Dante shrugs his shoulders, saying “Hey, what’s up?” His taunt from DMC4 when you have a B-rank.


Side Taunt: Dante crouches down a bit, gesturing for his opponent to come at him with both hands. “Come on!” His basic taunt from the DMC games.


Down Taunt: Dante crouches down low, grinning while resting an arm on his knee. “Showdown!” His S-rank taunt from DMC4.


B: Drive. Holding his sword behind him, Dante charges up energy and shoots it out as a beam. Can be charged, though it takes a while.


B Forward: Stinger. He dashes forward, sword-first, to stab the opponent. This works in the air as well; it gets him good distance, but the main problem is that he doesn’t stop at ledges, so you can’t just spam it.


B Up: High Time. Dante leaps up into the air, swinging his sword upwards. If you hit B after using it, he uses Helm Breaker, which launches him and whoever is hit by him straight down. Similar to Cloud’s Climhazzard.


B Down: Counter. After all, what kind of a new character would Dante be if he didn’t have a counter move for one of his specials?


…Just kidding. Instead, his B down would be Style Change. This lets him switch to weapons from his other games, giving him several different fighting styles to choose from. When switching styles, he strikes some of the poses that he does when changing styles in Devil May Cry 4.


~~~~~~~~~~~~~~~~~~~~~~~~~~~~~~~~~~~~~~~~~~~~~~~~~~~~~~~~~~~~~~~~~~~~~~~~~~~~~~~~~~


Pressing B Down while he’s using Rebellion, Ebony, and Ivory switches him to a DMC3 style of fighting, giving him Beowulf (spiky gauntlets and boots) and Artemis (a bow that fires large magic projectiles). Beowulf’s attacks are faster than Rebellion, but they have shorter range and do less damage. Meanwhile, Artemis is the opposite – the attacks do more damage than what Ebony and Ivory do, but those attacks are slower, and can be seen (which makes avoiding them easier)


A --> AA --> AAA: a left-right punch combo followed by a rapid series of kicks.


Forward A: Kick 13. Based on Ifrit’s move of the same name in DMC1, Dante performs a roundhouse kick.


Up A: Upwards Kick. The finishing move of Beowulf’s Combo 1 (where you just mash buttons).


Down A: Axe Kick. The finishing move of Beowulf’s Combo 2 (where you pause after the second hit).


Forward Smash: Straight. A straight, but powerful, punch that can be charged.


Up Smash: Beast Uppercut. Dante launches his enemies into the air with an uppercut.


Down Smash: Shock! Based on Gilgamesh’s attack from DMC4, Dante slams his fist into the ground to create a shockwave.


Neutral Air: The Hammer. A double-fisted haymaker that slams enemies toward the ground.


Forward Air: Dante charges forward a bit, punching.


Back Air: Dante spins, kicking behind him.


Up Air: Dante flips in the air, kicking upwards.


Down Air: Killer Bee. Dante dives down feet-first at his opponent, similar to Bayonetta’s downward After Burner Kick. (though not as effective due to being a normal move)


Dash Attack: Dante leaps forward, punching at the ground.


Wake Up Attack: as he gets to his feet, Dante pounds the ground on either side of him.


Climb Up Attack: as Dante climbs up the ledge, he does a spin kick.


Grab: a standard grab.


Pummel: Dante punches his grabbed foe in the gut.


Forward Throw: This is Sparda! Dante boots his opponent in the stomach, knocking them away.


Back Throw: Dante slams his opponent into the ground behind him.


Up Throw: Tornado. Dante knocks the enemy into the sky, leaping up after them and kicking hundreds of times at lightning speeds.


Down Throw: Acid Rain. Dante fires Artemis into the air, and several arrows fall down, pinning the enemy to the ground for a moment before dissolving.


Up Taunt: Dante raises a finger in the air, saying “This party’s gettin’ crazy!” From the opening cinematic of Devil May Cry 3.


Side Taunt: Dante punches the air before thumbing his nose, as a homage to Bruce Lee (and a reference to his taunt before the Cerberus fight)


Down Taunt: Dante pulls out Nevan (an electric guitar) and plays a few chords on it.


B: Charge Shot. Dante pulls out Artemis, and as long as you hold the button, the end of it glows purple, growing larger the longer it’s held. Once released, it fires one, two, or three homing projectiles, depending on how long it has been held for. The projectiles move in a straight line towards the nearest enemy.


B Forward: Volcano. Dante slams the ground with his fists to create an eruption of magma from the ground.


B Up: Divine Dragon. Dante gives a spinning uppercut, knocking his opponent into the air.


B Down: Style Change to a DMC4-based fighting style.


~~~~~~~~~~~~~~~~~~~~~~~~~~~~~~~~~~~~~~~~~~~~~~~~~~~~~~~~~~~~~~~~~~~~~~~~~~~~~~~


The DMC4 style is his most unorthodox, giving him Lucifer (a backpack with blades on it) and Pandora (a suitcase that transforms into different weapons). This is more of a trap-based style of gameplay, as the blades generated by Lucifer’s attacks will stay there, though after six have been placed, the first one disappears to be replaced by the one that was just summoned. Dante can detonate these using one of his specials, and they are spawned whether they hit an enemy (at which point, they will attach to them) or not (where they will stay hovering in midair).


A --> AA --> AAA: Dante spins around three times, stabbing with the swords of Lucifer. One sword appears per stab.


Forward A: Pin-Up. Dante throws out three swords, positioning them in front of him.


Up A: The finishing blow of Lucifer Combo 3. Dante stabs upwards, leaving two red swords behind.


Down A: Dante puts the shuriken form of Pandora on the ground and stands on top of it, spinning like a top.


Forward Smash: Dante spins around faster and faster as the attack is charge, and once it’s done, he stabs rapidly, leaving behind up to four red swords.


Up Smash: Revenge. Dante fires a laser cannon straight into the air.


Down Smash: Climax. The blades of Lucifer are positioned around Dante (how many depends on how long the attack was charged, though it’s a maximum of three on each side), and the ones that appeared or were moved are detonated upon release.


Neutral Air: Shredder. Dante holds out the shuriken form of Pandora, which spins around like a saw.


Forward Air: Dante stabs one of the red swords forward, leaving it suspended in midair or in whoever it hits.


Back Air: the arms of Lucifer stab behind Dante.


Up Air: Splash. Dante flips in the air, scattering four Lucifer blades around him – two on either side.


Down Air: Dante points Pandora’s gatling gun down and fires. This gives him a bit of a boost in the air, letting him hover for a moment or two.


Dash Attack: Dante spins around with Lucifer’s arms extended, leaving a red blade on either side of him.


Wake Up Attack: the “arms” on Lucifer’s back stab on either side of Dante.


Climb Up Attack: Dante is pulled up by the arms of Lucifer, flipping and landing with an axe kick.


Grab: a standard grab.


Pummel: Dante stabs his opponents with the arms of the Lucifer backpack, though the red blades aren’t active.


Forward Throw: Omen. Dante opens up Pandora, and the flash of light launches the opponent away from him.


Back Throw: Epidemic. Dante turns around and shoots his opponent with Pandora’s bowgun form, knocking them back.


Up Throw: Jealousy. Dante throws the victim into the air, and pulls out the gatling gun form of Pandora, which he fires at the opponent.


Down Throw: Hatred. Dante pins his opponent with his foot, pulls out the bazooka form of Pandora, and fires at point-blank range. Surprisingly, he isn’t hurt by this.


Up Taunt: Dante waves his hand above his head, saying “Get out of here” dismissively before turning around and putting his hands on his hips. Used if you die in a boss battle against him in DMC4.


Side Taunt: Dante laughs and points at the opponent, swaggering a bit. An S-rank taunt from Devil May Cry 4.


Down Taunt: Dante bows mockingly, holding an arm out. “Shall we dance?” A taunt from the tutorial of DMC4.


B: Satisfied? - Dante throws out a rose, causing all of the active swords from Lucifer to detonate. The rose does one percent of damage if it hits the enemy and launches the enemy downwards, though it doesn’t go very far. It acts like Dudley’s taunt in Street Fighter 3.


B Forward: Grief – Pandora turns into a shuriken-like weapon, which Dante throws. If it hits an enemy, it spins around them, trapping them in place and gradually damaging them


B Up: Argument – Pandora transforms into a UFO-type object – two rings (one horizontal and vertical) with a chair in the centre that Dante sits in, and a bunch of missile launchers on the outside of the rings. Dante can fly around in this (which is slow-moving, but lasts a while), or he can press the button again to fire all of the missiles at once (after which, the vehicle disappears). Once its time runs out, the missiles will fire automatically.


B Down: Style Change back to Rebellion, Ebony, and Ivory


~~~~~~~~~~~~~~~~~~~~~~~~~~~~~~~~~~~~~~~~~~~~~~~~~~~~~~~~~~~~~~~~~~~~~~~~~~~~~~~~~~~~


For his Final Smash, Dante would have Devil Trigger. His Style automatically returns to Rebellion and the pistols, no matter which one he is using at the time, but his attacks are faster and stronger, and his weapons have been upgraded. Rebellion is now the Sword of Sparda, and Ebony and Ivory are now Luce and Ombra, the weapons of his father. It’s a general upgrade of his base form, and a magic meter appears above his life bar to show how much time he can spend in this form.


In addition to the speed and power upgrades, the Sword of Sparda has a longer range and greater knockback than Rebellion, and the bullets of Luce and Ombra are surrounded by electricity and cause opponents to flinch. His health also regenerates slightly (maybe 10% in total) when this is active.


Activating Devil Trigger creates an aura around Dante for a moment that knocks opponents back, dealing damage. Once the magic meter runs out, he returns to whatever style he was using before he activated the final smash.


~~~~~~~~~~~~~~~~~~~~~~~~~~~~~~~~~~~~~~~~~~~~~~~~~~~~~~~~~~~~~~~~~~~~~~


For Dante’s victory poses, one would be his pose from Marvel vs. Capcom 3. He pulls out both guns, spins them around, and points them at the camera as it zooms in on his face.


Another victory pose would be shrugging his shoulders, similar to one of his taunts. The last one would be Dante balancing his sword on his shoulders, like the cover art for Devil May Cry 3. Each pose has several one-liners that he says during them. Much like the Kid Icarus and Star Fox characters, he and Bayonetta would have a unique line if they beat the other one.


Dante: That was more like an anti-climax.


Bayonetta: I was hoping you’d last longer.


If he loses, his back will be to the camera, though he’ll be slowly clapping. His victory music would be a snippet from the title theme from the first game.

I probably should update it for Devil May Cry 5 - not sure if I'd give him a moveset with Dr. Faust (the hat) and Cavaliere (the motorcycle/buzzsaws), or make a moveset that incorporates his styles rather than focusing on weapon switching. Also, he'd have a different final smash - Judgement from DMC5.
 
Last edited:

RetrogamerMax

Smash Legend
Joined
Sep 3, 2018
Messages
12,221
Location
Houston, Texas
NNID
RetrogamerMax2
I'm already prepared for this - I made a moveset for Dante after beating Devil May Cry 3 and starting Devil May Cry 4 a few years ago.

His default appearance is based on Devil May Cry 4, though he’ll have a Devil May Cry 3 alternate costume. Dante’s outfit seems to change slightly each game, but as those two are generally considered to be the best of the series, that’s what I’m going with.


Palette swaps for the DMC4 outfit will be based on Trish (blonde hair, black clothes), Nero (hair stays white, dark blue jacket), and his alternate costume from the special edition. Palette swaps for the DMC3 outfit will be based on Lady (white clothes, black hair), Vergil (light blue coat, dark pants), and Sparda.


The series’ logo would be the silhouette of Trish from the logo of the first game, and the stage would be the second phase of the Mundus battle. There’s any number of stages that I could go with (the main hall of the castle on Mallet Island from DMC1, the roof of the Temen-ni-gru from Devil May Cry 3), but given that this already involves floating platforms and is plot-important, I figured it would be a good fit for a Smash stage.


The way that I’m picturing it, there would be five stone platforms suspended in or over a pit of magma. Three would make up the “ground”, with a small gap between them, and two would float there, thin enough to jump through. Mundus would be looming in the background, shooting out orbs to bombard the stage with lasers, and occasionally shooting lasers out of his forehead (which would do more damage if they hit, but have a targeting reticule appear on the ground to make it more obvious when he’s about to fire). The platforms could be destroyed by Mundus’s attacks after a few hits from him, but only a maximum of two would be broken at any given time, to prevent the stage from being impossible to navigate.


His entrance would be driving in on a motorcycle… which promptly crashes and explodes. The smoke quickly fades to show him dusting himself off, somehow unharmed. Idle animations would be putting his fists on his hips and smirking, or crossing his arms in front of his chest and slowly falling asleep. His main weapons would be Rebellion (his sword), and Ebony and Ivory (his two pistols).


References for the some of the moves can be found here: https://www.youtube.com/watch?v=VJ74nEoYYCY and here: https://youtu.be/zL7IYAeD0Ik?t=82


A --> AA --> AAA: Rebellion Combo II – the series of five attacks that you get when you pause briefly between the first and second hits in the DMC games.


Forward A: Million Stab. Dante stabs rapidly, which lasts a bit longer if you mash the A button (though the stabs gradually knock the opponent back to keep it from being spammed)


Up A: Dante rapidly shoots upwards.


Down A: Dante spins around with his sword outstretched.


Forward Smash: Prop Shredder. Dante spins his sword around in front of him like a propeller. Based on his basic Swordmaster action.


Up Smash: Launcher. Dante swings his sword upwards, launching whoever’s hit by it into the air. Based on his back attack with Rebellion.


Down Smash: Twosome Time. Dante fires his pistols on either side of him, though the bullets are larger red energy blasts since he charged them up (and to make so that they’re visible and have knockback). Based on his basic Gunslinger action.


Neutral Air: Aerial Rave. Dante swings his sword three times in midair. Based on his aerial Swordmaster action from Devil May Cry 3.


Forward Air: Aerial Combo. Dante kicks twice. Based on his forward air attack in Devil May Cry 2.


Back Air: Dante does a spin kick to hit behind him.


Up Air: Dante slashes upwards.


Down Air: Rain Storm. Dante spins around in midair, shooting his guns straight down. Based on his Gunslinger mid-air action.


Dash Attack: Million Stab Finisher. The stab at the end of a Million Stab combo, which knocks enemies back.


Wake Up Attack: Crazy Dance. Dante spins around, kicking any enemy in the vicinity.


Climb Up Attack: Dante swings his sword as he gets to his feet.


Grab: a standard grab.


Pummel: pistol-whipping the opponent.


Forward Throw: Jackpot. Dante lets them go and shoots both of his pistols once, which emit a large flash of energy. Based on the move that finished Mundus.


Back Throw: Sword Pierce. With his sword stabbed into his opponent, Dante tosses the sword behind him. The sword flies back to him almost immediately (while the victim keeps going), and Dante reflexively catches it. Based on the Swordmaster move from DMC3.


Up Throw: Bullet Juggle. Based on a common combo in the DMC series, Dante tosses his opponent into the air and shoots them several times to suspend them there for a moment.


Down Throw: Wild Stomp. Dante shoots at his downed opponent point-blank. Based on a Gunslinger move where you approach downed opponents and fire.


Up Taunt: Dante shrugs his shoulders, saying “Hey, what’s up?” His taunt from DMC4 when you have a B-rank.


Side Taunt: Dante crouches down a bit, gesturing for his opponent to come at him with both hands. “Come on!” His basic taunt from the DMC games.


Down Taunt: Dante crouches down low, grinning while resting an arm on his knee. “Showdown!” His S-rank taunt from DMC4.


B: Drive. Holding his sword behind him, Dante charges up energy and shoots it out as a beam. Can be charged, though it takes a while.


B Forward: Stinger. He dashes forward, sword-first, to stab the opponent. This works in the air as well; it gets him good distance, but the main problem is that he doesn’t stop at ledges, so you can’t just spam it.


B Up: High Time. Dante leaps up into the air, swinging his sword upwards. If you hit B after using it, he uses Helm Breaker, which launches him and whoever is hit by him straight down. Similar to Cloud’s Climhazzard.


B Down: Counter. After all, what kind of a new character would Dante be if he didn’t have a counter move for one of his specials?


…Just kidding. Instead, his B down would be Style Change. This lets him switch to weapons from his other games, giving him several different fighting styles to choose from. When switching styles, he strikes some of the poses that he does when changing styles in Devil May Cry 4.


~~~~~~~~~~~~~~~~~~~~~~~~~~~~~~~~~~~~~~~~~~~~~~~~~~~~~~~~~~~~~~~~~~~~~~~~~~~~~~~~~~


Pressing B Down while he’s using Rebellion, Ebony, and Ivory switches him to a DMC3 style of fighting, giving him Beowulf (spiky gauntlets and boots) and Artemis (a bow that fires large magic projectiles). Beowulf’s attacks are faster than Rebellion, but they have shorter range and do less damage. Meanwhile, Artemis is the opposite – the attacks do more damage than what Ebony and Ivory do, but those attacks are slower, and can be seen (which makes avoiding them easier)


A --> AA --> AAA: a left-right punch combo followed by a rapid series of kicks.


Forward A: Kick 13. Based on Ifrit’s move of the same name in DMC1, Dante performs a roundhouse kick.


Up A: Upwards Kick. The finishing move of Beowulf’s Combo 1 (where you just mash buttons).


Down A: Axe Kick. The finishing move of Beowulf’s Combo 2 (where you pause after the second hit).


Forward Smash: Straight. A straight, but powerful, punch that can be charged.


Up Smash: Beast Uppercut. Dante launches his enemies into the air with an uppercut.


Down Smash: Shock! Based on Gilgamesh’s attack from DMC4, Dante slams his fist into the ground to create a shockwave.


Neutral Air: The Hammer. A double-fisted haymaker that slams enemies toward the ground.


Forward Air: Dante charges forward a bit, punching.


Back Air: Dante spins, kicking behind him.


Up Air: Dante flips in the air, kicking upwards.


Down Air: Killer Bee. Dante dives down feet-first at his opponent, similar to Bayonetta’s downward After Burner Kick. (though not as effective due to being a normal move)


Dash Attack: Dante leaps forward, punching at the ground.


Wake Up Attack: as he gets to his feet, Dante pounds the ground on either side of him.


Climb Up Attack: as Dante climbs up the ledge, he does a spin kick.


Grab: a standard grab.


Pummel: Dante punches his grabbed foe in the gut.


Forward Throw: This is Sparda! Dante boots his opponent in the stomach, knocking them away.


Back Throw: Dante slams his opponent into the ground behind him.


Up Throw: Tornado. Dante knocks the enemy into the sky, leaping up after them and kicking hundreds of times at lightning speeds.


Down Throw: Acid Rain. Dante fires Artemis into the air, and several arrows fall down, pinning the enemy to the ground for a moment before dissolving.


Up Taunt: Dante raises a finger in the air, saying “This party’s gettin’ crazy!” From the opening cinematic of Devil May Cry 3.


Side Taunt: Dante punches the air before thumbing his nose, as a homage to Bruce Lee (and a reference to his taunt before the Cerberus fight)


Down Taunt: Dante pulls out Nevan (an electric guitar) and plays a few chords on it.


B: Charge Shot. Dante pulls out Artemis, and as long as you hold the button, the end of it glows purple, growing larger the longer it’s held. Once released, it fires one, two, or three homing projectiles, depending on how long it has been held for. The projectiles move in a straight line towards the nearest enemy.


B Forward: Volcano. Dante slams the ground with his fists to create an eruption of magma from the ground.


B Up: Divine Dragon. Dante gives a spinning uppercut, knocking his opponent into the air.


B Down: Style Change to a DMC4-based fighting style.


~~~~~~~~~~~~~~~~~~~~~~~~~~~~~~~~~~~~~~~~~~~~~~~~~~~~~~~~~~~~~~~~~~~~~~~~~~~~~~~


The DMC4 style is his most unorthodox, giving him Lucifer (a backpack with blades on it) and Pandora (a suitcase that transforms into different weapons). This is more of a trap-based style of gameplay, as the blades generated by Lucifer’s attacks will stay there, though after six have been placed, the first one disappears to be replaced by the one that was just summoned. Dante can detonate these using one of his specials, and they are spawned whether they hit an enemy (at which point, they will attach to them) or not (where they will stay hovering in midair).


A --> AA --> AAA: Dante spins around three times, stabbing with the swords of Lucifer. One sword appears per stab.


Forward A: Pin-Up. Dante throws out three swords, positioning them in front of him.


Up A: The finishing blow of Lucifer Combo 3. Dante stabs upwards, leaving two red swords behind.


Down A: Dante puts the shuriken form of Pandora on the ground and stands on top of it, spinning like a top.


Forward Smash: Dante spins around faster and faster as the attack is charge, and once it’s done, he stabs rapidly, leaving behind up to four red swords.


Up Smash: Revenge. Dante fires a laser cannon straight into the air.


Down Smash: Climax. The blades of Lucifer are positioned around Dante (how many depends on how long the attack was charged, though it’s a maximum of three on each side), and the ones that appeared or were moved are detonated upon release.


Neutral Air: Shredder. Dante holds out the shuriken form of Pandora, which spins around like a saw.


Forward Air: Dante stabs one of the red swords forward, leaving it suspended in midair or in whoever it hits.


Back Air: the arms of Lucifer stab behind Dante.


Up Air: Splash. Dante flips in the air, scattering four Lucifer blades around him – two on either side.


Down Air: Dante points Pandora’s gatling gun down and fires. This gives him a bit of a boost in the air, letting him hover for a moment or two.


Dash Attack: Dante spins around with Lucifer’s arms extended, leaving a red blade on either side of him.


Wake Up Attack: the “arms” on Lucifer’s back stab on either side of Dante.


Climb Up Attack: Dante is pulled up by the arms of Lucifer, flipping and landing with an axe kick.


Grab: a standard grab.


Pummel: Dante stabs his opponents with the arms of the Lucifer backpack, though the red blades aren’t active.


Forward Throw: Omen. Dante opens up Pandora, and the flash of light launches the opponent away from him.


Back Throw: Epidemic. Dante turns around and shoots his opponent with Pandora’s bowgun form, knocking them back.


Up Throw: Jealousy. Dante throws the victim into the air, and pulls out the gatling gun form of Pandora, which he fires at the opponent.


Down Throw: Hatred. Dante pins his opponent with his foot, pulls out the bazooka form of Pandora, and fires at point-blank range. Surprisingly, he isn’t hurt by this.


Up Taunt: Dante waves his hand above his head, saying “Get out of here” dismissively before turning around and putting his hands on his hips. Used if you die in a boss battle against him in DMC4.


Side Taunt: Dante laughs and points at the opponent, swaggering a bit. An S-rank taunt from Devil May Cry 4.


Down Taunt: Dante bows mockingly, holding an arm out. “Shall we dance?” A taunt from the tutorial of DMC4.


B: Satisfied? - Dante throws out a rose, causing all of the active swords from Lucifer to detonate. The rose does one percent of damage if it hits the enemy and launches the enemy downwards, though it doesn’t go very far. It acts like Dudley’s taunt in Street Fighter 3.


B Forward: Grief – Pandora turns into a shuriken-like weapon, which Dante throws. If it hits an enemy, it spins around them, trapping them in place and gradually damaging them


B Up: Argument – Pandora transforms into a UFO-type object – two rings (one horizontal and vertical) with a chair in the centre that Dante sits in, and a bunch of missile launchers on the outside of the rings. Dante can fly around in this (which is slow-moving, but lasts a while), or he can press the button again to fire all of the missiles at once (after which, the vehicle disappears). Once its time runs out, the missiles will fire automatically.


B Down: Style Change back to Rebellion, Ebony, and Ivory


~~~~~~~~~~~~~~~~~~~~~~~~~~~~~~~~~~~~~~~~~~~~~~~~~~~~~~~~~~~~~~~~~~~~~~~~~~~~~~~~~~~~


For his Final Smash, Dante would have Devil Trigger. His Style automatically returns to Rebellion and the pistols, no matter which one he is using at the time, but his attacks are faster and stronger, and his weapons have been upgraded. Rebellion is now the Sword of Sparda, and Ebony and Ivory are now Luce and Ombra, the weapons of his father. It’s a general upgrade of his base form, and a magic meter appears above his life bar to show how much time he can spend in this form.


In addition to the speed and power upgrades, the Sword of Sparda has a longer range and greater knockback than Rebellion, and the bullets of Luce and Ombra are surrounded by electricity and cause opponents to flinch. His health also regenerates slightly (maybe 10% in total) when this is active.


Activating Devil Trigger creates an aura around Dante for a moment that knocks opponents back, dealing damage. Once the magic meter runs out, he returns to whatever style he was using before he activated the final smash.


~~~~~~~~~~~~~~~~~~~~~~~~~~~~~~~~~~~~~~~~~~~~~~~~~~~~~~~~~~~~~~~~~~~~~~


For Dante’s victory poses, one would be his pose from Marvel vs. Capcom 3. He pulls out both guns, spins them around, and points them at the camera as it zooms in on his face.


Another victory pose would be shrugging his shoulders, similar to one of his taunts. The last one would be Dante balancing his sword on his shoulders, like the cover art for Devil May Cry 3. Each pose has several one-liners that he says during them. Much like the Kid Icarus and Star Fox characters, he and Bayonetta would have a unique line if they beat the other one.


Dante: That was more like an anti-climax.


Bayonetta: I was hoping you’d last longer.


If he loses, his back will be to the camera, though he’ll be slowly clapping. His victory music would be a snippet from the title theme from the first game.

I probably should update it for Devil May Cry 5 - not sure if I'd give him a moveset with Dr. Faust (the hat) and Cavaliere (the motorcycle/buzzsaws), or make a moveset that incorporates his styles rather than focusing on weapon switching. Also, he'd have a different final smash - Judgement from DMC5.
You know I never paid close attention to your signature until just now. I notice half of your wants here have a good chance of happening and hopefully they get in. I'm rooting for Geno and Elma as well.
 

Perkilator

Smash Legend
Joined
Apr 8, 2018
Messages
10,441
Location
The perpetual trash fire known as Planet Earth(tm)
Ryota Hayami

Intro: Ryota rides his jet ski hanging from the back and lets go.

Stance/Idle 1: Ryota stands around with his arms folded.

Idle 2: Ryota slightly adjusts his gloves.

Idle 3: Ryota jumps in place three times.


Notable Palette Swaps:
-Ryota Hayami (default)
-Wave Race 64 outfit 1 (green/blue)
-Wave Race 64 outfit 2 (red/yellow)
-Dave Mariner (green)
-Ayumi Stewart (pink)
-Ricky Winterborn (cyan)
-Wave Race GB front cover (red/blue)
-Rob Haywood (blue/white)

Walk: Ryota walks with his arms still folded.

Jog: A normal human jog.

Dash: Ryota skids along the ground as waves come out, as if he were riding his jet ski.

Damage: Ryota falls over like he's fallen off his jet ski.

Jump: Ryota jumps up like he's jumping off a jet ski (similar to Shulk).

Crouch: Ryota squats down like he's holding onto his jet ski.


Weapon of Choice: Ryota attacks with water-based kicks, but sometimes pulls out his jet ski for specials.

Normal Attacks
Jab: Ryota jabs twice (5%, small knockback) and then kicks the target (4%, OK knockback)
Forward+A: Ryota does a roundhouse kick with a splash of water (8%, OK knockback)
Down+A: Ryota splashes some water with his foot (9%, OK knockback)
Up+A: Ryota kicks upwards (11%, OK knockback)

Aerial Attacks
Air+A: Ryota kicks in a 360 (9%, OK knockback)
Air Forward+A: Ryota kicks forward with his right leg (10%, OK knockback)
Air Back + A: Ryota kicks behind himself with both legs (13%, OK knockback)
Air Up+A: Ryota kicks upwards with his left leg (8%, small knockback)
Air Down+A: Ryota slides downwards, kicking with both feet (14% with a meteor effect, OK knockback)

Dash Attack: Ryota stops and creates a huge splash of water (13%, OK knockback)
Edge Attack: Ryota hops back up like he's getting onto his jet ski (8%, OK knockback)
Get-Up Attack: Ryota jumps forward and kicks with both feet (7%, small knockback)

Smash Attacks
Forward+A: Ryota kicks forward in place with his right leg (19%, medium knockback)
Up+A: Ryota jumps upwards and drill kicks with water all around him (13%, OK knockback), while upside down (22%, medium knockback)
Down+A: Ryota sweeps kicks with both legs (23%, medium knockback) with water around him (12%, OK knockback)

Grab Game
Grab: Ryota grabs the target with his left hand.
Pummel: Ryota jumps up slightly and headbutts the target (2%)
Forwards+Throw: Ryota splashes the target with a wave that pushes them forward (14%, OK knockback)
Down+Throw: A wave drops down and meteor Smashes the target (20%, OK knockback)
Back+Throw: Ryota shoulder throws the target onto the ground (13%, OK knockback)
Up+Throw: Ryota throws the target upwards (7%) and then attacks with a water uppercut using his right fist (9%, OK knockback)


Special Moves
B : Wave Kick
; with water bubbling at his foot, Ryota charges up a jumping roundhouse kick that sends him a great distance at full charge, similar to Terry's Crack Shoot (12% at normal charge, OK knockback; 17% at full charge, OK knockback)
B + Forwards : Jet Ski; Ryota jumps onto his jet ski charging forward (6%, small knockback) and can accelerate by holding the B button. He can dismount by moving and pressing the shield button.
B + Up : Buoy; Ryota propels himself forward using a speed boost buoy; his distance is slightly longer when he rides his jet ski. A yellow buoy appears whenever he faces left, and a red buoy appears whenever he faces right.
B + Down : Jet Ski Spin; Ryota spins in place (13%, OK knockback) and splashes water in an area around him (8%, small knockback)

Final Smash: Wave Race; Ryota charges forward with his jet ski (11%) and opponents caught up in it are taken into a cutscene where Ryota races with the other Wave Race characters (all using their Blue Storm designs), finishing in 1sr place (57%, devastating knockback)

Gimmick: Like Wario, Ryota can freely mount and dismount his jet ski (it can even be picked up and eaten). However, UNlike Wario, the jet ski can't be destroyed by attacking it over and over.


Taunts
1: Ryota snickers while turning his body the other direction.
2: Ryota stretches out both his legs while slightly squatting.
1+2: Ryota leans to his right and stretches out his left arm.


Winposes
1: Ryota stands on his jet ski, raising both his arms in joy (taken from Wave Race 64).
2: Ryota jumps to the front of his jet ski and backflips back onto the seat (taken from Wave Race: Blue Storm).
3: Ryota spins around once before stopping his jet ski and raising his left hand in joy.

Applause: Ryota kicks the ground with his hands to his hips.

Icon: The logo from Wave Race: Blue Storm

Boxing Ring Title: The Wave Rider

Star K.O.: "Uuuuuaaaaaaggggh….!"

Victory Music:

Kirby Hat: Ryota's hair
 

Megadoomer

Moderator
Moderator
Writing Team
Joined
Jun 28, 2013
Messages
10,254
Switch FC
SW-0351-1523-9047
I made a moveset for Geno, and I updated my moveset for Dante under the assumption that, much like Bayonetta, he'd be limited to his basic weapons. (plus, it was a reason to include Style Switching, which was conspicuously absent from my previous moveset)

Geno:


Geno Reaches for the Stars!

Palette swaps based on Mario (red cape/hat, brown hair, blue symbol on hat), Mallow (white cape/hat, pink hair, light blue symbol on hat), Bowser (green cape/hat), and Peach (pink cape/hat, yellow hair, silver symbol on hat), along with three of his capes from Mario RPG – the Fuzzy Cape, Fire Cape, and Stars Cape.

For a stage, most people would probably say Forest Maze since that’s where Geno’s introduced, but I’m going with Bowser’s Castle. Not only is it the cover and title screen of the game, and the shot of Exor embedded into the roof of the castle is a striking image, but seriously, how do we not have a Bowser’s Castle stage yet? That’s just baffling. Maybe it could have multiple areas like Garreg Mach Monastery (the roof with Exor clearly visible, the chandeliers where you fight Bowser and Boomer, a bridge suspended over lava…), or areas inspired by Bowser’s various castles throughout the Mario series.

For Geno’s entrance, it’s similar to his first appearance in Mario RPG – a Geno doll is sitting on the ground, and a star flies over it and possesses it, causing it to inexplicably triple in size in the process.

-------------------------------------------------------------------------------------------------------

Since Geno has five special moves and five weapons in the original game, I might have to make stuff up.

A --> AA --> AAA: Geno uses Finger Shot with his left and right arms before lifting up his arm to fire the more powerful Hand Cannon from his elbow.

Forward A: Star Gun – Geno shoots stars at his opponents, which are faster and more powerful than the Finger Shot, but don’t go as far.

Up A: Geno fires the Hand Gun into the air.

Down A: Geno does a slide kick – not all of my moves are going to be original.

Forward Smash: Rocket Punch! Charge the attack to make it go farther

Up Smash: Geno Blast – it acts similarly to Palutena’s up-Smash, though the beam starts above him and goes down. The more you charge it, the higher the beam’s starting point

Down Smash: Double Punch – pointing his hands at the ground, Geno does a rocket punch with both fists, which loop in a tight circle before returning to his wrists.

Neutral Air: borrowing a weapon from Mallow, Geno clangs two cymbals together, creating a shockwave around himself.

Forward Air: Star Rain – Geno borrows a move from Mallow by throwing out a star that launches diagonally downwards, bouncing if it hits the ground. However, since he hasn’t mastered it (somewhat ironically), it’s much smaller than Mallow’s version, being only a little shorter than Geno himself.

Back Air: Double Punch – Geno shoots both of his fists behind himself, though his body doesn’t change direction.

Up Air: Geno tosses a small version of the orange ball from Geno Flash into the air, which explodes, showering four red triangles similar to the fire plant enemies in Super Mario World. However, these only go to the height that Geno was at when he used the move.

Down Air: Geno tries lifting the Ultra Hammer, but the weight is too much for him, and it plummets to the ground, carrying him along with it.

Dash Attack: jumping up a bit as he runs/floats (not sure which would suit him better), Geno headbutts the opponent before skidding to a stop on the ground.

Wake-Up Attack: a star spins around Geno as he gets up, knocking enemies away

Climb Attack: Geno fires pellets from his fingers before pulling himself up

---------------------------------------------------------------------------------------------------------

Grab: Geno has a tether grab… sort of. His hands launch out, grabbing the opponent and pulling them back to him. Unlike other tether grabs, this does not act as a tether recovery, since there’s nothing to pull his body back to his hands.

Pummel: Geno headbutts the grabbed opponent.

Forward Throw: Hurly Gloves – taking a page out of Bowser’s book, Geno lifts the opponent over his head and tosses them straight forward.

Back Throw: Geno’s top half spins around (though his bottom half remains in place) before tossing the opponent in the opposite direction, similar to his forward throw.

Up Throw: Geno uppercuts the opponent, mixing it with a rocket punch to take the opponent higher.

Down Throw: jumping up a bit, Geno fires the Star Gun at a downed opponent.

----------------------------------------------------------------------------------------------------------

For his Up Taunt, Geno takes off his hat, pulls out a Honey Syrup, and uses it, causing the same visual effect from the game. It has no practical use, but it works as an explanation for how he can keep using his specials.

For his Side Taunt, he goes limp as the star floats out of his body, circles around it, and goes back in.

For his Down Taunt, he face-faults, which is a common reaction to foolishness in Mario RPG.

----------------------------------------------------------------------------------------------------------------

The main gimmick for his specials, much like the game that he originates from, is timed hits. Pressing the B button at a certain time causes an extra effect, and usually does more damage or makes the special more effective in some way.

B: Geno Beam – I feel like I had to have this one. If you press B, it fires a quick beam similar to Fox’s, but it does less damage and like Fox’s, it doesn’t cause flinching or knockback. If you hold B, red stars will appear above Geno’s icon on the bottom of the screen. Let go when the third one appears, and Geno will fire the Geno Beam at the size that it is in the game, giving it much more range, power, and knockback. If you hold B for too long, the beam fires on its own as the small, weak version, so knowing when to let go is crucial.

Up B: Geno Flash – turning into a cannon, Geno points the mouth of the cannon straight down and fires. The recoil launches him upwards, leaving a glowing orange ball behind that explodes. If you press B at the peak of the jump, the explosion is much larger, gaining a face like in Mario RPG (I’m assuming that’s possible from a coding standpoint – I don’t know what’s practical)

Side B: you’d think that it would be Geno Whirl, but actually, it’s something that I’m calling Playtime. Floating off the ground a little bit, Geno dashes forward, ramming into his opponent. I wanted to give him some horizontal recovery. Normally, Geno stops shortly after he makes contact (or automatically, after a certain distance), but if you press B right as Geno hits an opponent, a giant ghostly Gaz appears, holding on to Geno, and Geno moves much farther than normal, regardless of whether or not anyone else is in the way. (he just smashes through them) I included this as a reference to Geno’s first appearance, where Gaz runs into Mario with enough force to knock him into a wall.

Down B: Geno Boost – red arrows move up Geno’s body as smoke billows around him, temporarily boosting his attack. If you press B right as the animation is about to end, it boosts his defense as well. However, the animation takes a bit of time, he doesn’t get any kind of a boost if he’s attacked while using it, and there’s a bit of a cooldown – trying to overuse it causes him to raise his hands over his head while nothing happens.

For Geno’s Final Smash, Mallow appears and uses Shocker – I had to include him somewhere! If it misses, Mallow has a surprised reaction and disappears. If it hits, it transitions into a cutscene where characters are transported to the roof of Bowser’s Keep. While the opponents are stunned by the lightning bolt, Geno throws out three Geno Whirls. The animation slows down before they hit, before suddenly returning to normal speed as they cut through the opponent in a flash. 9999 appears over the heads of opponents caught in it, and in the background, Exor is slashed in half diagonally, sliding apart anime-style. (if you’re on Bowser’s Keep in that part of the stage, Exor inexplicably repairs himself – I just figured it would be a cool shot, and a nice reference to how effective the move is on Exor) If the opponent’s at 100% damage or more, they’re KO’d. Once the game transitions back to gameplay, Geno and Mallow face the camera and do their victory poses before Mallow disappears. I figure this could be used for Geno’s classic mode ending, with Mario, Peach, and Bowser taunting while the two of them strike this pose.

--------------------------------------------------------------------------------------------------------------------

For his victory poses, one would be his win pose from Mario RPG, where he faces the camera and nods. Another references the ending of Mario RPG, where the seven stars surround him and he vanishes into a beam of light, returning to Star Road. His third has a scarecrow wearing blue sitting there, before Mallow dumps an Able Juice on it, causing it to turn back to Geno. Geno looks shocked, while Mallow laughs. His victory theme, of course, would be the victory theme from Mario RPG.

Dante: (warning: mid-game spoilers for Devil May Cry 5)


Super Smash Bros. Ultimate (featuring Dante from the Devil May Cry series)

Palette swaps based on Vergil (dark blue jacket), Trish (black jacket, yellow shirt underneath, blond hair), Lady (black hair, white jacket, white undershirt, dark green pants), Nero (lighter blue jacket than Vergil's, red shirt), V (all black outfit, black hair), Nico (brown jacket, white undershirt, blue pants), and Sparda (purple jacket, red shirt).

The series' logo would be the hilt of Rebellion - while the sword won't make an appearance in Dante's moveset, it's got a pretty distinct look. As an alternative, like I said last time, Trish's silhouette from DMC 1 could be used.

For a stage, I'm torn. Third party characters tend to get stages that are either recurring locations or early on in the games in question. Dante's shop, Devil May Cry, seems to be the most commonly recurring location, but it's a bit cramped, along with being an interior location. Then again, given Dante's luck, it could be a stage with destructible walls, spilling out onto the street to give fighters more room and make it so they could be KO'd off the sides as well as the top. On the other hand, from what I recall, stages with destructible elements tend to reset themselves eventually, which might result in that stage not being fun from a gameplay perspective.

Another idea is Urizen's throne room, where Urizen lounges about and launches attacks at the stage. Perhaps Nero could show up from time to time in order to attack Urizen, drawing his attention away from the fighters. (if hazards are turned off, either Urizen's not there, he's just sitting there and watching, or Nero's fighting him the whole time - not sure which would be better)

I'm still sticking with Dante's entrance being him driving in on a motorcycle. While the Cavaliere would work better given the DMC5 theme, that raises the question of why he's not using it, and my previous intro was funnier, so he drives in on Lady's motorcycle, which explodes when it hits the ground, leaving him holding the handlebars before he tosses them to the side. Idle animations would be him putting his fists on his hips and smirking, or slowly falling asleep, like in the DMC games (I think those were his idle animations in 4?).

------------------------------------------------------------------------------------------------------------------

Dante's almost entirely going to be using Devil Sword Dante, Ebony, and Ivory. Smash hasn't exactly shied away from spoilers (Sheik being used as a transformation for Zelda in Melee, about three years after Ocarina of Time came out, is one of the tamer examples), and Devil Sword Dante offers more to work with than its predecessors. I'll also be including some moves from Balrog, though since they're going to be punches and kicks, he doesn't necessarily need Balrog equipped to use them - they'll just be used as visual references.

Descriptions of the moves that I'll be referencing are in the links above, though I might add video references later on. For a general overview, here's video clips of Ebony and Ivory's attacks, Devil Sword Dante's attacks, and Balrog's attacks, though I might add specific time-stamps to the moves in question later. Without further ado, here is Dante's moveset!

A --> AA --> AAA: Devil Sword Dante combo B - two basic swings followed by Million Stab, with a finisher to launch foes away from Dante.

Forward A: Four Handed - four red energy blades slash in front of Dante; they don't have much knockback, and are mainly used to build up damage

Up A: Prop - Dante spins his sword in front of him in a circular motion, catching opponents in a multi-hit attack that launches them upwards slightly

Down A: the third hit of Devil Sword Dante combo A - a low sweeping horizontal slash

Forward Smash: Dance Macabre Finisher - Dante winds up like he's about to hit a baseball before sending the opponent flying

Up Smash: Launcher - Dante swings his sword upwards, knocking his opponents into the air

Down Smash: Twosome Time - Dante fires his guns on either side of him. The bullets are laced with demonic energy, which gets larger the more that the move is charged, though the bullets don't go very far. (they go slightly farther the more it's charged)

Neutral Air: Aerial Rave - Dante swings his sword four times to keep his opponent airborne, with the fourth hit knocking them away from him

Forward Air: Feather Combo - a three hit combo that ends with Dante punching his opponent downwards

Back Air: Switch Kick - Dante does a roundhouse kick that hits behind him

Up Air: Updraft - Dante does a backflip, kicking upwards to knock his opponent higher into the air

Down Air: Rainstorm - Dante spins around, shooting Ebony and Ivory downwards at the ground. It's the attack that Joker stole from him.

Dash Attack: Stingers - not to be confused with Stinger - this is the Devil Sword Dante attack where red swords appear in front of Dante, spiraling like a drill. For the sake of Smash, they'll stick close to him, acting as a sort of barrier as he dashes

Wake Up Attack: Break Spiral - Dante does a break dance, spinning around to trip up his opponent

Climb Attack: the first hit of Balrog's kick combo, a sweeping kick

-----------------------------------------------------------------------------------------------------------------------

Grab: a standard one-handed grab

Pummel: pistol whipping the opponent

Forward Throw: Jackpot - Dante lets go of the opponent and energy charges in his guns before they shoot out a red and yellow beam to knock the opponent away - the move that he finished off Mundus with

Back Throw: Drive - previously his neutral special, it's now demoted to a throw. Dante turns around and charges his sword, holding it behind him in a reverse grip before swinging it forward. A red crescent beam of energy launches from the sword, carrying the opponent with it.

Up Throw: Bullet Juggle - Dante tosses his opponent into the air before shooting them with Ebony and Ivory to keep them suspended there for a bit

Down Throw: Wild Stomp - Dante stomps on his downed opponent before firing rapidly at them with Ebony and Ivory, kicking them away at the end

------------------------------------------------------------------------------------------------------------------------

All taunts are referenced from here.

Up Taunt: "Huh, this should make things easier." Dante steps forward, swinging Devil Sword Dante. (it doesn't do any damage) The sword disappears at the end of each swing before reappearing in his hand. He holds it up to examine it and says the line in question.

Side Taunt: "Not slacking, are ya?" Dante shrugs his shoulders, looking disappointed.

Down Taunt: "Come on, you can do it! Over here!" Dante crouches over, claps, and beckons, as though he's calling a dog.

Dante also has an air taunt, because of course he does. Pressing any taunt button in the air causes him to toss out a rose, which deals 1% damage if it hits and can be used to gimp an opponent's recovery. For the sake of balance, this can only be used once until he lands.

If you hold down any taunt button while on the ground, Dante goes into an extended taunt which needs to be seen to be believed. The game doesn't have a style gauge or Red Orbs, so it has no practical function, but it would be pretty impressive to see the full animation. Maybe the red orbs that fall from the sky around Dante could deal some damage.

------------------------------------------------------------------------------------------------------------------------

Now we get to the specials, which is where it gets complicated. I'll save his Neutral B for last, since that requires the most explanation.

Up B: High Time/Helm Splitter - Dante swings upwards like his up smash, except this time, he launches himself into the air with his opponent. Pressing B again causes Dante to swing his sword, plummeting towards the ground. It's similar to Cloud's up B move.

Side B: Stinger - DAH! Dante dashes forward, stabbing his sword and covering a lot of ground, though it's very unsafe on shield

Down B: Style Switch - Dante changes which style he's using, striking the related pose from DMC4 and 5 as he does so. You can hold B to select the style, like Shulk's Monado arts, or you can tap it to cycle through them. Yes, this can be spammed, so either the individual poses or the button mashing variants can effectively be taunts online. The Style that you're using is indicated near Dante's stock icon, and the set-up is similar to DMC5 - T (Trickster) on top, G (Gunslinger) and S (Swordmaster) on the sides, and R (Royal Guard) on the bottom, with a circle around it to show how much the gauge has built up.

B: Style Button - using it depends on which style you have equipped. Dante defaults to Trickster, since that's the easiest of the Styles to use in my experience.

-Trickster: Dash/Sky Star - Dante disappears, dashing forward - the direction can be influenced slightly by using up or down while Dante's vanished. If you're holding B and you touch an opponent, Dante uses Mustang, jumping off of his opponent and gaining another use of Sky Star.

-Swordmaster: Round Trips - spinning red energy swords are launched forward as a projectile. If held down, this becomes Swords Formation, where Dante summons red energy swords around himself. The functionality of these changes based on which style you have equipped.

a) Chaser - in Swordmaster form, the energy swords follow up Dante's A attacks that use swords
b) Interceptor - in Gunslinger form, swords home in on the nearest opponent that's in front of Dante, though they don't do much damage or go very far
c) Reactor - you get an extra Trick use (so if you're knocked off stage while this is active, you can use Sky Star twice)
d) Escort - the swords will tank up to two hits, and each hit they tank fills up the Royal Guard gauge

If you use Swords Formation, the letter S is darkened, and you can't use it again until it refills. It will only start refilling once the summoned swords have disappeared.

-Gunslinger: Honeycomb Fire - Dante fires both guns rapidly in front of himself, which has a range comparable to Bayonetta's neutral special. The B button can be held to charge the move, which gives it greater knockback and more damage.

-Royal Guard: Block/Royal Block - Dante flashes red at the start of the block animation to indicate the timing for Royal Block, which is fairly tight. Dante gets into a guarding stance for a moment, though there's a decent amount of endlag to keep it from being spammed. While in this stance (which he only holds for a short time), it acts similarly to Joker's Rebels' Guard, making Dante take less damage (though he can be grabbed out of it) and filling the Royal Guard gauge by a notch. If you successfully pull off Royal Block, Dante takes even less damage and the gauge fills up faster, though blocking with Royal Guard is the only way to fill up that gauge - it doesn't fill up by attacking, and it doesn't increase over time. If you hold B, this becomes Release, where Dante empties the gauge to release a fast but (if the gauge is high enough) powerful blow. Using this while the gauge is full turns it into Royal Release, where he dashes forward slightly and punches while surrounded by red energy, dealing significantly more damage. (though it takes a lot of work to get to that point)

For his Final Smash, Dante uses Judgement. Stabbing himself with Devil Sword Dante (or maybe having it merge with his body if the animation of stabbing himself in the chest is a bit excessive), Dante turns into his Sin Devil Trigger form, delivering a series of rapid slashes before ending with an explosion that engulfs him, turning back to normal in the aftermath. Words don't do it justice, but it instantly KO's any opponent who's unfortunate enough to get caught in it and be over 100% damage at the end.

-----------------------------------------------------------------------------------------------------------------------

For his victory poses, one would be the same as in Marvel vs. Capcom 3, while another would be his victory pose from the Bloody Palace mode in DMC5. For the third, there are several options that I'm torn between (something from his Shakespearean moment in DMC4, tossing a rose at the screen), but I'll go with my gut and having him chowing down on some pizza.

I'll stick with a snippet from the DMC1 title theme for his victory music, though the theme for beating Bloody Palace with Dante could work as well.

As a side note, since I didn't think to include them before, Kirby's hats for the two would be wearing Geno's hat and a wig that looks like Dante's hair. (maybe a bit of stubble, since it would make for a funny contrast on Kirby)

If Kirby copies Geno, he gets the Geno Beam, though since I'm not sure how well Kirby's stubby arms would work as gun arms, he fires it from his mouth like when he uses Bowser Junior's copied ability.

If Kirby copies Dante, he'd use Round Trips - I know that Swordmaster isn't Dante's default style, but the idea of Kirby with Trickster just seems broken. (Kirby with upwards of two horizontal teleports and possibly an extra jump on top of what he already has? Not sure if that's as bad as Kirby with Shulk's Monado Jump, but I don't want to risk it)
 
Last edited:

Perkilator

Smash Legend
Joined
Apr 8, 2018
Messages
10,441
Location
The perpetual trash fire known as Planet Earth(tm)
Sakura Shinguji
Intro: Cherry blossom petals blow around Sakura as she performs her signature pre-battle pose.

Stance/Idle 1: Her idle animation from the Project X Zone series.
Idle 2: Sakura slightly pushes back her hair.
Idle 3: Sakura takes out her blade for a second, then sheathes it again.


Notable Palette Swaps:
-Her pink kimono (default)
-Iris and Jean Paul (green/brown)
-Gemini Sunrise (red/brown)
-Maria Tachibana (dark blue)
-Combat outfit (alternate costume)
-Sumire’s combat outfit (purple)
-Kanna’s combat outfit (red)
-Ogami’s combat clothes (white)


Walk: Sakura walks gracefully.

Dash: Sakura sprints with her sword in hand.

Damage: Sakura covers her face with her right hand.

Jump: Sakura jumps as if she’s falling down a chute.

Crouch: Sakura sits upright with both knees on the ground.


Weapon of Choice: Reiken-Arataka, Sakura’s katana handed down to her, with which she can slice single water droplets with ease. She’s a master of the Hokushin Itto Ryu sword technique.


Normal Attacks
Jab: Sakura performs three standard jabs to the middle, and then the left and right (8%, small knockback)
Forward+A: Sakura slashes down in front of her (7%, small knockback; 10% at the tip, OK knockback)
Down+A: Sakura sweep kicks below a target’s legs, tripping them (6%, small knockback)
Up+A: Sakura swipes her katana above herself to the left (8%, small knockback)


Aerial Attacks
Air+A: Sakura slices around herself, similar to Ike’s N-Air (11%, OK knockback)
Air Forward+A: Sakura slices downward (11% with a meteor effect, OK knockback)
Air Back + A: Sakura turns around as she slices backward (14%, OK knockback)
Air Up+A: Sakura spins a mop above herself (13%, OK knockback)
Air Down+A: Sakura swings a mop downwards (16% with a meteor effect, OK knockback)


Dash Attack: Sakura speeds past the target as she slashes them (12%, OK knockback). If the target is above 100%, there is a chance they’ll be K.O.’d instantly.
Edge Attack: Sakura gets back up and slashes straight down (7%, small knockback)
Get-Up Attack: Sakura quickly sweep kicks the floor (5%, small knockback)


Smash Attacks
Forward+A: Sakura steps forward and slashes with her sword in flames (22%, medium knockback)
Up+A: Sakura jumps up and slashes twice in rapid succession (18%, OK knockback)
Down+A: Sakura slashes several cherry blossom petals around her in half (15%, OK knockback), which then swirl around her (9%, medium knockback)


Grab Game
Grab: Sakura grabs the target with both hands.
Pummel: Sakura slaps the target with her right hand (1%)
Forwards+Throw: Sakura pushes the target forward (12%, OK knockback)
Down+Throw: Sakura jumps over the target and trips them without dealing any damage.
Back+Throw: Sakura strafes around the target and slashes them (13%, OK knockback)
Up+Throw: Sakura spins once and launches the target diagonally upwards (8%, medium knockback)


Special Moves
B : Ouka Hoshin
; Sakura sends out a large pink blade projectile. It goes about the same length as Cloud’s Blade Beam, but is much faster and can hit multiple opponents at once (7% per hit, OK knockback). It also has priority over other projectiles, but getting hit by one causes it to slow down and disappear after hitting anything else (6%, small knockback)
B + Forwards : Hyakka Ryoran; Sakura dashes forward a short distance, surrounded in flame (14%, OK knockback); you can tilt the control stick in the opposite direction for a second dash (9%, OK knockback)
B + Up : Rising Sakura; Sakura floats high up in a wind of cherry blossom petals, and can do anything after before she hits the ground again. Pressing Up and B again has Sakura slice upward as she jumps upward and forward a small distance (11%, OK knockback)
B + Down : Clean Up; Sakura takes out a mop and sweeps the floor, which pushes nearby opponents away (13%, OK-medium knockback). Tilting the control stick to the left or right after initiating the attack moves Sakura in that direction, but the power and knockback decrease after a while.

Final Smash: Koubu Strike; Sakura speeds forward and slashes the target(s) (11%). The targets are then taken into a cutscene where Sakura gets into her Koubu and performs an extremely powerful Ouka Hoshin (59%, devastating knockback)


Gimmick: At certain moments, Sakura can have her attacks do 3% more damage and have slightly more knockback for 5 seconds (getting hit causes her to lose this buff). Here is when she gets this:

-From a well-timed attack
-From a Perfect Shield
-When the crowd starts cheering her name


Taunts
1: Sakura bows towards the camera.
2: Sakura performs her signature pre-battle pose.
1+2: Sakura brushes her kimono.


Winposes
1: Sakura performs her victory pose from her very first battle in the first game.
2: Sakura pushes back her hair as cherry blossom petals blow in the wind.
3: Sakura mimics her pose from the first frame of the first game’s opening.


Applause: Sakura claps quickly and happily.

Icon: One of the flowers on Sakura’s kimono.

Boxing Ring Title: Imperial Floral Hero

Star K.O.: “Oooogamiii…!”

Victory Music: https://youtu.be/Vr14LlDeLDo

Kirby Hat: Sakura’s hair and katana.
 
Last edited:

Edelgard von Hresvelg

Smash Rookie
Joined
Jun 20, 2020
Messages
21
Edelgard von Hresvelg (Fire Emblem Three Houses)

If she did join Smash, I envision her as a sort of semi-clone of Byleth, in the sense that they share some moves. Kinda like what Isabelle is to Villager or something. Of course, she would have two alts--one for pre-time skip wielding a killer axe, and one for post-time skip wielding Amyr. The killer axe might have to be sized up slightly to better match the proportions of Amyr. She has different idle stances depending on which alt is is, but is only holding the axe by default.
Neutral Special - Fire/Bolganone
Showcasing Edelgard's aptitude for magic, she fires a medium range projectile that flies straight ahead. Like Byleth's Failnaught, if you hold the button longer she begins casting Bolganone instead, which explodes a medium distance in front of her. Alternatively, the second spell could be Luna or Hades.
Side Special - Lightning Axe
The animation of this move is similar to Byleth's Areadbhar, or one of the axe crit animations in TH. She holds her axe with both hands and rushes forward, cutting upwards with an electric effect and high priority. In some ways it's pretty similar to Dark Pit's Electroshock Arm.
Up Special - Helm Splitter
While this move takes its name from a combat art, the animation is actually like one of the axe crit animations in TH, where the user jumps and then spins before slamming down with the axe. In that sense, it is very similar to Chrom's Soaring Slash, and Edelgard has super armor at the beginning of the move.
Down Special - Armored Strike
Edelgard normally can't learn this combat art, but who cares. She pulls out a large shield and makes a heavy overhead swing with the axe. In essence it functions like Byleth's Amyr special, granting her super armor before bringing the axe down.
Final Smash - Raging Storm
Considering how legendary this move is, it kind of has to be her final smash. However, an alternate idea is a gambit attack, where armored knights trample your enemy. Hubert might show up too, shouting "Marvel at our strategy!" or something.

One of her victory animations HAS to be her spinning her axe while saying "Now you know your limits!" The rest of her standard attacks utilize her axe in various ways. Of course her down smash and down aerial are the same as Byleth's. Also, when playing on the Garreg Mach stage, Edelgard is obviously absent from the background (and replaced by Hubert).
 

Megadoomer

Moderator
Moderator
Writing Team
Joined
Jun 28, 2013
Messages
10,254
Switch FC
SW-0351-1523-9047
Rounding out my top three most wanted with a moveset for Doomguy.


Doomguy Rips and Tears!

Doomguy would have four palette swaps based on his Doom Eternal design, and four based on his classic suit from Doom Eternal. Doom Eternal’s already been kind enough to give me obvious palette swaps for the classic costume – the regular green outfit, and the indigo, bronze, and red outfits that you got for buying the newest releases of Doom 1-3. For his Doom Eternal costume, aside from the default appearance, he could have Astro (white armour with a red visor), Phobos (gold and black armour with a dark grey visor), and Crimson (red armour with a dark grey visor).

For the series’ logo, I’d go with the Mark of the Slayer. While the UAC logo is more commonplace throughout the whole Doom series, it would seem really weird to represent Doomguy using the logo of the company that he has every reason to absolutely hate.

For a stage idea, one idea that I have is a mix of old and new – the first room of E1M1 from the original Doom, but done in the style of Doom (2016) and/or Doom Eternal. It could be called Phobos Base, it would be a walk-off, and recognizable demons from the Doom games (Imps, Pinkies, Cacodemons) could wander in to harass the players. Defeating them could cause them to vanish in a flash of Argent Energy (or explode comically), dropping a item if those happen to be turned on. (to give the player a reason, from a gameplay perspective, to kill the demons)

For his intro, a black and blue portal opens up and Doomguy steps through the portal before it vanishes, like the portal system in Doom Eternal. For his idle animations, Doomguy cracks his neck, examines his gun, or hops up and down impatiently, clearly not comfortable with standing still.

------------------------------------------------------------------------------------

While Joker’s Gun special seems to indicate that realistic-looking firearms might not be an issue any more, I’m willing to provide an alternative for some of them. The weapons of the most recent Doom games are decidedly more science fiction based in nature, with the shotguns being the big exception. If that winds up being a problem, the Super Shotgun’s Meathook in Doom Eternal can be upgraded to light opponents on fire, so perhaps the shotguns could shoot out bursts of flame that act the same way as shotgun shells in Smash if they need to make them seem less realistic. I feel like they could get away with Doomguy’s weapons, considering that Joker (and Kirby) can use a realistic-looking pistol (I’ve played Persona 5, so I’m aware that it’s a toy/model gun that works in the Metaverse because enemies think it’s a real gun, but that’s never stated in Smash if I recall correctly), but I figured I’d offer an alternative just to be on the safe side.

A-->AA-->AAA: Doomguy throws out a right hook and a left hook, followed by a big kick to send them flying. All of Doomguy’s melee attacks are based on Glory Kills.

Forward A: Doomguy fires his Super Shotgun straight ahead; this can also be used while walking.

Up A: pulling out the Chaingun, Doomguy fires it straight upwards into the air. Probably not the safest use of a gun, but who’s going to tell him to stop? The individual bullets do little knockback or damage, but the damage adds up.

Down A: Doomguy shoots at knee-level with the pistol from Doom 2016, which has more hit stun than usual if it connects to simulate weakening an enemy for a Glory Kill

Forward Smash: Doomguy pulls out the Ballista and charges it up. Firing sends out a red energy blade, and the more that it’s charged, the larger it is, and it will travel a larger distance.

Up Smash: Doomguy holds up the Crucible, and Argent energy crackles around it. The Crucible activates once the button is released, dealing more damage the longer you charge it.

Down Smash: Doomguy revs the chainsaw to charge it up, and he spins around while keeping the chainsaw low to the ground.

Neutral Air: Doomguy uses the Plasma Rifle and activates its Heat Blast

Forward Air: Doomguy pulls out the Heavy Cannon and fires a single shot using the Precision Bolt. This does more damage than his other aerials, but it requires incredibly precise timing.

Back Air: the Equipment Launcher rotates, and the Flame Belcher is fired behind Doomguy’s back.

Up Air: Doomguy shoots the Plasma Rifle straight up in the air. It’s not likely to KO enemies, but it’s a good way to build up damage.

Down Air: Doomguy fires a rocket launcher straight down. If he’s close enough to the ground, the explosion can keep him airborne for longer, referencing Quake’s rocket jump.

Dash Attack: Doomguy knees the opponent with a similar animation to Captain Falcon’s Knee attack.

Wake-Up Attack: propping himself up, Doomguy kicks out on one side while firing the Super Shotgun with the other – both do the same amount of damage.

Climb Attack: Doomguy swipes with his Doomblade before leaping back onto the stage.

------------------------------------------------------------------------------------

Grab: Doomguy grabs the opponent by the neck (or the top of their head if it’s someone like Kirby – I don’t think grab animations change depending on who’s grabbed)

Pummel: he punches them in the stomach with his free hand

Forward Throw: Doomguy punches the grabbed enemy in the face really hard, with enough force to send them flying.

Back Throw: turning around, Doomguy kicks the enemy’s leg before booting them away, similar to one of the Glory Kills that he can use on Imps in the 2016 game.

Up Throw: Doomguy sweep kicks the enemy, knocking them into the air before punching them with enough force that they hit the ground and bounce upwards.

Down Throw: Doomguy slams the opponent to the ground before stomping on them.

------------------------------------------------------------------------------------

Up Taunt: putting his guns wherever he puts them, Doomguy cracks his knuckles before using his hands to crack his neck.

Side Taunt: Doomguy pulls out a toy version of himself, adjusts the arm, and fist-bumps it

Down Taunt: Daisy (Doomguy’s pet bunny) hops around Doomguy’s feet while he watches calmly.

------------------------------------------------------------------------------------

B: Rocket Launcher – Doomguy pulls out his rocket launcher and fires three rockets in quick succession. A targeting reticule appears in front of Doomguy, and if the opponent happens to be inside the reticule or in between it and Doomguy, the rockets will home in for a short distance

Up B: Meathook – switching to the Super Shotgun from Doom Eternal, Doomguy launches the Meathook, dragging him towards whatever opponent or ledge it latches on to. You can press B at any point to fire the shotgun, though this will stop the recovery.

Side B: Dash – the only non-offensive part of Doomguy’s arsenal, this move is for either closing the distance between Doomguy and his opponent, or getting away from them if he needs to. There’s a brief period of invincibility in the middle of the dash, and it goes farther than a dodge roll, though the invincibility doesn’t last as long. Doomguy can do this twice before it needs to recharge, either on the ground or in the air.

Down B: Doomguy fires an Ice Bomb from his shoulder cannon, immobilizing anyone caught in the blast radius, though it doesn’t deal much damage. This gives Doomguy the opportunity to get some good hits in, or to put some distance between him and his opponent. Like in Doom Eternal, it takes some time to recharge after being used.

Final Smash: it’s the BFG 9000. I mean, come on – there’s no way that it could be anything else. Pulling out the BFG, Doomguy fires it straight ahead. Tendrils of energy come from the giant green ball, dragging enemies in and dealing damage. Once the ball gets far enough away from Doomguy, it explodes, automatically killing any enemy with 100% damage or more. Simple, straightforward, and involving unnecessary amounts of overkill – pretty much what you’d expect from Doomguy’s final smash.

------------------------------------------------------------------------------------

For one victory pose, he grabs the camera, looking at it before punching it away. For his second victory pose, I feel like I have to include this one – it’s perfect. For his third one, the camera pans up a pile of Imps and Zombies to show Doomguy standing on top of the pile, firing down at them like he does on the cover art of the original game.

His victory theme could be a snippet from At Doom’s Gate, specifically the 2016 remix. When Kirby copies him, he gets Doomguy’s modern helmet, and he can use the Rocket Launcher. It works the same way as Doomguy’s, though the targeting reticule is lower to the ground since Kirby’s shorter.
 

MrElectroG64

Smash Journeyman
Joined
Jun 26, 2014
Messages
459
Location
PNF-404
Awesome! Finally my kinda thread! I'll definitely be using this as my dumping ground for movesets in the future (as well as now lol), so I'll go ahead and drop the link to my Flickr where I post all of them already for documentation's sake: https://www.flickr.com/photos/184893183@N07/with/48921399417/

In addition, I've just finished one of my latest movesets today, so I might as well post it here too:

Louie (King of Bugs 2) Moveset.jpg


Some of the text is understandably too hard to read here, so I suggest you go on over to my Flickr profile where it's a bit clearer and easier to read! And yes, this is indeed my FOURTH moveset for Louie lol. One can never have too many!

Also I understand that this one is a bit more messy compared to my others. I hadn't quite planned out where to put the text as well as some of my others. I may be a bit rusty on the drawn moveset side of things, lol.
 
Last edited:

DanganZilla5

Smash Champion
Writing Team
Joined
Mar 5, 2019
Messages
2,369
Moveset for Crypto (Destroy All Humans).

Crypto's Moveset
Crypto has obtained over 15 weapons throughout his games (25 including the saucer weapons). He has his trusty Zap-O-Matic which shoots electricity that frys anything. The Disintegrator Ray shoots hot balls of plasma that disintegrates humans in seconds and can blow up vehicles quickly. The Ion Detonator is a grenade thrower that shoots a red plasmic ball that explodes with a wide radius, disintegrating humans and blowing up vehicles. Crypto also has his iconic Anal Probe that shoots a probe into people's butts which goes up to the head, exploding it and revealing a brain that Crypto can obtain. Yeah, with this one I can't see Sakurai being able to implement it due to its disgusting nature.

Thankfully, Crypto has plenty other weapons. The aforementioned ones appear in all the games, but wait! There's more! Crypto has the Disclocator Ray which shoots purple discs that latch onto objects and makes them fly all over the place in various random patterns. The Superball shoots rainbow balls that attach to objects and makes them bounce all over the place, dealing damage with every bounce. Crypto also has a gun that can shoot a probe of another Furon, Gastro. He is a separate entity who has a rapid fire gun and explosives. And the list goes on.....

As for Crypto's play style, he would be a glass cannon. He is a long-ranged fighter that relies on his guns to get the job done. He also has psychokinesis (PK) powers that he can use to lift and throw objects and people, magnetize objects together, and he can even temporarily stop time. In Destroy All Humans, Crypto is a bit fragile. He has a shield to protect him, though it can't handle a lot of bullets and one shot from a tank can almost completely drain his shield. In Smash Bros, Crypto would have to avoid close combat with his opponents and out-range them to survive. He has a lot of range and fire power, but he can die easily. His ground speed is average, but he has a jetpack which gives him a lot of air time and mobility, which gives him an advantage when it comes to air combat. It's also important to note that Crypto does get damaged from his own weapons, most notably from the Ion Detonator if he gets close to the blast radius.

Now onto his moveset:

Dash Attack - Headbutt assisted by jetpack.

Jab - Zap-O-Matic fires a medium-ranged stream of electricity that stuns and damages opponents, then stops after a couple seconds. Requires a brief recharge period.

Side Tilt - Crypto uses PK to push back the opponent. The opponent has to be in close proximity for this to activate.

Down Tilt - Crypto uses the Superball to fire a rainbow ball that bounces across the stage for a good while. If it hits an enemy, that character will be latched onto it and they will be bounced once. They will take damage upon the one bounce. Crypto can attack the enemy while they are latched onto the Superball projectile, but his attack will result in the projectile letting go of the character. Only two Superball projectiles be can active at the same time.

Up Tilt - Crypto points the Disintegrator Ray upwards and shoots pellets of hot plasma.

Neutral Air - Same as Jab

Forward Air - Points Disintegrator Ray forwards and fires pellets that have medium range distance.

Back Air - Same as Side Tilt

Down Air - Fires a lure that once it drops onto the floor, it will summon the Burrow Beast which comes out of the ground beneath the lure and bites anyone close to the lure. It will then retrieve into the ground with the lure. The lure itself does a tiny bit of damage if it hits someone during its fall. Crypto can also get bitten if he's too close. The lure can be picked up during its fall and then thrown. The beast will only appear when the lure touches the ground.

Up Air - Fires Zap-O-Matic upwards with medium distance.

Side Smash - Crypto uses his magnetic PK to lift up matter from the ground and bind it into a ball that he throws. The longer you charge, the more matter that goes into the ball, making it bigger and more devastating.

Down Smash - Crypto creates a small anti-gravity field around him that affects everyone except him. Allowing him to follow up with a powerful attack. The longer you charge, the longer the anti-gravity effect will last.

Up Smash - Points the Ion Detonator upwards and shoots a ball of plasma that explodes. The longer that you charge, the higher the ball will go. If the ball doesn't touch anything, it will drop down to the ground and explode, damaging anyone including Crypto.

Neutral Special - Ion Detonator will fire a ball of plasma in an arch. The ball explodes after 10 seconds or when the player presses the B Button again. It can be picked up and thrown. The explosion can hurt Crypto as well. The button can be held down to have the ball go further.

Side Special - Crypto uses the Ball Lightning to fire a ball of lightning that stays in the air for 5 seconds. It will do chip damage to everyone (except Crypto) who goes near it. Only one ball can be active at a time.

Down Special - Crypto uses the Meteor Strike gun to summon a very small meteor several feet in front of him. The gun requires a moment to aim and activate, but the meteor does a ton of damage.

Up Special - Crypto uses his jetpack to boost himself upward. It's similar to R.O.B's recovery in terms of mobility and distance, but it's a little faster.

Final Smash - Crypto gets into his flying saucer and uses the Quantum Deconstructor, which fires a thermonuclear cloud that has a huge blast radius and does massive damage.

Side Taunt - Pulls out the Anal Probe and spins it around like a pistol.

Up Taunt - Crypto uses telekinesis to lift himself up.

Down Taunt - Crypto pulls out the Black Hole Gun and gestures to the opponent to approach him.


[spoiller]
 

RouffWestie

Smash Lord
Joined
Oct 27, 2013
Messages
1,207
Location
Georgia
Had the sudden urge to do a moveset for Amy Rose... don't know why, I've only ever considered Shadow, Tails, and Eggman whenever I seriously think of who I'd prefer for a Sonic rep.
Standard combo - She uses a 3-punch combo wearing boxing gloves. It’s the same combo she uses in Sonic Battle.

Side tilt - Uses her hammer bonk a fighter on the head. Press it 3 times to hit in succession, like with Meta Knight’s side tilt. It’s the same combo she uses in Sonic the Fighters.
Up tilt - With her boxing gloves on, she punches overhead from her left, then from her right. Generally, the opponent gets knocked from left to right to left, allowing you to juggle them fairly easily.
Down tilt - Quickly kicks in front of her like Mario, Luigi, etc.

Dash attack - Performs the Girl Bomber from Sonic Battle.

Neutral Air - Does a normal nair kick like Mario, Luigi, etc.
Forward Air - Performs the Girl Dunk from Sonic Battle. It meteor-spikes if timed correctly.
Back Air - A multi-hit attack where she spins her hammer behind her like a propeller.
Up Air - Swings her hammer upward with a lot of strength. This can be used as a reliable kill move. It's similar to one of her air moves in Sonic Advance 3.
Down Air - Spins around with her hammer out while falling straight down. It’s the same as her Stop ‘n’ Slam from Sonic Advance 2 and 3.

Side Smash - Leaps forward, slamming her hammer down with a lot of strength. The hitbox extends past the hammer itself due to a minor shockwave caused by the impact, giving it more range than it appears to have. It’s similar to the Hop Hammer from Sonic the Fighters.
Up Smash - Performs the Girl Swing from Sonic Battle.
Down Smash - Swings her hammer in a full circle low to the ground. It’s similar to Girl Crush from Sonic Battle, but noticeably closer to the ground.

Pummel - With her boxing gloves on, delivers a gut punch to the opponent.

Forward Throw - Performs a similar maneuver to the Elbow Dash from Sonic Advance 3, main difference being that she’ll rebound off her opponent.
Back Throw - Jumps onto the other fighter’s head and leaps off them, knocking them backwards in the process. It’s the same the Vaulting Horse from Sonic the Fighters.
Up Throw - Grabs the other fighter with both hands, then jumps while tossing them overhead.
Down Throw - Pushes the other fighter down then faceplants into the ground, knocking them away as she slides into them. It’s similar to the Head Slide from Sonic Advance 2 and 3.

Neutral Special - Hammer Slam
Amy slams the Piko Piko Hammer down in front of her. It’s a bit slower than most attacks, but also powerful. It can bury an opponent if timed correctly.
If used in midair, she’ll perform the Jump Attack - a somersault with her hammer out. It’s significantly faster, but also weaker.
If you hold the B button, then perform a dash dance, and Amy will use the Spin Hammer Attack. She’ll continue to spin as long as B is held. You can adjust your positioning while spinning. At first, the hits are weak and keep any contacted opponents close to her. After a while, she spins at double-speed. Though it’s harder to move, each hit is now very powerful and has great knockback. However, if you spin too much, Amy will become dizzy, leaving her open to attack. The moves are based on her abilities in Sonic Adventure.

Side Special - Pink Typhoon
Amy spins around with her hammer out, spawning a tornado that travels directly forward. It halts any opponent who touches it and deals multi-hit damage before tossing them into the air. The tornado has a hitbox that’s more horizontal than it is vertical, making it best avoided with jumps. The move comes out slow, but the tornado itself travels quick enough that it’s a decent projectile option. This was her Shot-ability in Sonic Battle.

Down Special - Gift
Amy drops an explosive disguised as a present in front of her. It detonates as soon as anything touches it. Alternatively, she can place another one on the stage somewhere else, causing the previous one to explode automatically. The gift has a very lenient time frame wherein it can sit before self-destructing. This was her Trap-ability in Sonic Battle.

Up Special - Hammer Jump
Amy lifts herself into the air by slamming the Piko Piko Hammer onto the ground. The distance she goes can be very short or very high. If she hits any solid ground, she goes high. If she hits nothing but air, it’s short. To make the most out of the ability in midair, you need to hit an item or another opponent. Generally, your best bet is to use Gift, then quickly follow up with a Hammer Jump. If an opponent is chasing you offstage, try hitting them to recover instead. If struck in midair with correct timing, they’ll be meteor-spiked. This is based on one of her abilities in Sonic Advenure.

FINAL SMASH - Flower Festival
Big and Cream appear and they use their Team Blast ability from Sonic Heroes. It’s a cutscene-type Final Smash, so it works just like the others of the same variety.
 

V.E.G.A

Smash Rookie
Joined
Jul 12, 2020
Messages
2
Aiai rolls back


Description: aiai is protagonist of the super monkey ball series a physics party platforms first released by Sega in 2001. His most recent game is super monkey ball banana blitz h d which released on switch about three months ago. He loves bananas and his family and has the ability to roll in a hamster ball like sphere called an monkey ball. The reason to put him in is his recentish game and as a new Sega rep. His playstyle would be switchable modes between using his normal body and rolling in his monkey ball. Which brings me too.
[/note:his moveset will be split into two parts monkey mode and ball mode. Monkey mode is more mobile in general and doesn't do much damage. Ball mode is faster with low fraction super armor good damage and buffs his recovery but jump is worth a th it can't grab opponents of ledge.
Monkey mode moves:
:GCA::punches with boxing gloves
:GCR::GCA::a slap
:GCU::GCA::Swings a banana upwards
:GCD::GCA::a low punch
:GCCR::slams a hammer
:GCCU::a uppercut
:GCCD::spins around
:GCA:(while running)cartwheels
:GCA:(while on ledege):a kick
:GCA:(while down):a punch
:GCA:(air):twirls
:GCR::GCA:(air):a drop kick
:GCL::GCA:(air):a backwards dropkick
:GCU::GCA:(air):a front flip headbutt
:GCD::GCA:(air):a stomp
:GCZ::grabs with two hands
:GCZ::GCA::a headbutt
:GCZ::GCR::a punch
:GCZ::GCL::Like pikachus
:GCZ::GCU::a spinning suplex
:GCZ::GCD::elbow
Ball mode moveset:
:GCA::Two lunges then spins vertically into infinite jab
:GCR::GCA::a lunge
:GCU::GCA::jumps up
:GCD::GCA::jumps and slams down
:GCCR::runs head first into wall in opposite direction bouncing off
:GCCU::jumps of one have of seesaw causing one side too spring up
:GCCD::jumps up and comes crashing down causing a shockwave
:GCA:(while running):Like Monkey mode but with a larger hitbox
:GCA:(air): spins vertically
:GCR::GCA:(air): pops a side off reverts him to monkey mode
:GCL::GCA:(air): pops a side off backwards reverts him to monkey mode
:GCD::GCA:(air): pops a side off down reverts him to monkey mode
:GCB:: A large bunch but in ball mode attaches his ball to his fist
:GCR::GCB:: Kicks a ball forwards in ball mode rushes forwards
:GCU::GCB:: Flies upwards dioagnolly using his ball as wings in ball mode it goes higher
:GCD::GCB:: Switches mode
:GCB::causes a bunch of monkey balls come from both sides ramming into opponents]
Alts: he would have two alts and color swaps. His two alts would be his classic designed and meemee
Stage: monkey island would a pretty flat stage like final destination but would be a giant seesaw tilting with characters weight.
[
Baby: support spirit:starman: effect: lightweight 1 slot
Gongon: support spirit:starman::starman: effect: physical attack up 1 slot
Yanyan: support spirit:starman::starman: effect: jump height up 1 slot
Dr. Badboon: support spirit:starman::starman::starman: effect: giant 2 slots]
that ends this first character let me give you a hint of the next one.
The devious pokemon
 

A Bowl Of Cereal

Smash Cadet
Joined
Jun 16, 2019
Messages
32
Location
USA Michigan
Switch FC
5100-4725-9235
Hai I made a complete move set for Black Mage and New character Design when I was like 14 posted it much later here: https://www.destructoid.com/--552675.phtml

I'll just leave images on the design below but skip to Special Moves to get to the actual Move set the stuff before is details on why I designed him the way I did and some other stuff like Elemental status effects or how certain elements work if their energy or physical. Poses for the directional attacks are there as well. My support thread for more details is here: https://smashboards.com/threads/black-mage-for-smash.506369/#post-24035298

Front:

Back:

Wand:
 

Perkilator

Smash Legend
Joined
Apr 8, 2018
Messages
10,441
Location
The perpetual trash fire known as Planet Earth(tm)
Chosen Undead
Intro: Chosen Undead gets up after sitting next to a bonfire, which then dissipates.
Stance/Idle 1: His stance from the Dark Souls games.
Idle 2: Chosen Undead gives a proper bow.
Idle 3: Chosen Undead points forward.


Notable Palette Swaps: The Chosen Undead variations from all 3 Dark Souls games.
-Chosen Undead (navy blue; default)
-Siegmeyer of Catarina (black/gold)
-Bearer of the Curse (turquoise/white)
-Solaire of Astora (green)
-Ashen One (red)
-Dragonslayer Ornstein (yellow)
-Black Knight (black)
-Silver Knight (gray)


Walk: His walk from the games. Uses no Stamina.
Dash: His dash from the games. Uses a little Stamina.
Damage: His damage animation from the games.
Jump: His jump from the games. Uses no Stamina.
Crouch: Chosen Undead feigns the Prostration gesture.


Weapon of Choice: Chosen Undead mainly uses a sword, but also has magic attacks in his arsenal.

Normal Attacks
Jab: A slow 3-hit slash combo (9%, OK knockback; uses a little Stamina)
Forward+A: Chosen Undead thrusts forward (8%, small knockback; uses a little Stamina)
Down+A: Chosen Undead slightly stabs downward (6%, small knockback; uses a little Stamina)
Up+A: A 90 degree backwards upper slash (11%, OK knockback; uses some Stamina)

Aerial Attacks
Air+A: Chosen Undead casts three fireballs around himself (11%, OK knockback; uses a little Stamina)
Air Forward+A: Chosen Undead swings two swords to the left (14%, OK knockback; uses some Stamina)
Air Back + A: Chosen Undead stabs the target with two swords (12%, OK knockback; uses some Stamina)
Air Up+A: Chosen Undead raises his shield up (9%, OK knockback; uses some Stamina)
Air Down+A: Chosen Undead swings both his swords downward, one at a time (6%-7% each, OK knockback; uses a little Stamina)

Dash Attack: Chosen Undead charges with a shield bash (12%, OK knockback; uses a little Stamina)
Edge Attack: Chosen Undead leaps off the edge and slashes down (8%, small knockback; uses some Stamina)
Get-Up Attack: A bonfire flame erupts around Chosen Undead and lifts him back up (7%, small knockback)

Smash Attacks
Forward+A: Soul Greatsword; Chosen Undead summons a sword made of souls and slashes to the left (23%, medium knockback; ⅓ of your Stamina)
Up+A: Great Combustion; Chosen Undead blows up a fireball above his head (19%, medium knockback; uses ¼ of your Stamina)
Down+A: Lightning Stake; Chosen Undead takes a bolt of lightning and slams it on the ground, which creates a moderate AOE shockwave (26%, medium knockback; uses ⅖ of your Stamina)

Grab Game
Grab: Chosen Undead grabs the target with his right hand, shield in the left.
Pummel: Chosen Undead bashes the target with his shield (2%-3%)
Forwards+Throw: Chosen Undead tosses the target and bashes them with his shield (11%, OK knockback; uses a little Stamina)
Down+Throw: Chosen Undead stomps on the target (7%, small knockback; uses a little Stamina)
Back+Throw: Chosen Undead tosses the target behind himself, not even looking at them (4%, small knockback; uses no Stamina)
Up+Throw: Chosen Undead casts pyromancy that launches the target like a cannon (13%, OK knockback; uses a little Stamina)


Special Moves
B : Homing Soulmass
; Chosen Undead summons five magic orbs around his head, which can damage opponents upon contact (2% each, small knockback; uses nearly ½ of your Stamina). Pressing B a second time (or waiting a few seconds) causes the orbs to home in on any opponents in range (5% each, small knockback; uses nearly ½ your Stamina)
B + Forwards : Lightning Spear; Chosen Undead summons a bolt of lighting and throws it (exactly as the name implies) like a spear (24%, medium knockback; uses ½ your Stamina). It can be subtly aimed in the direction the control stick is tilted.
B + Up : Homeward Bone; Chosen Undead is surrounded by mist below him, and he is instantly warped back to the stage with no Stamina lost. However, not only is the exact spot mostly random, but he can be interrupted during the startup.
B + Down : Estus Flask; Chosen Undead takes one drink of an Estus Flask, which heals 55% damage. However, there are only 5 uses, so don’t get greedy.

Final Smash: Link the Flame; Chosen Undead casts Soul Stream, a beam that goes a long distance (12%). Any fighters hit are taken into a cutscene where the Chosen Undead lights the last bonfire and surrounds the area with fire (56%, devastating knockback)

Gimmick: Stamina Gauge; Chosen Undead has a Stamina Gauge above his HUD (along with 5 Estus Flask uses next to the Gauge on the left). Each attack he does (even quick ones) use up Stamina. It refills automatically after each move, but the amount depends on the move itself.


Taunts
1: Chosen Undead praises the sun.
2: Chosen Undead performs the Shrug gesture.
1+2: Chosen Undead looks skyward as he facepalms, then faces the ground as he shakes his head.


Winposes
1: Chosen Undead performs the “Well! What is it?” gesture.
2: Chosen Undead praises the sun (again).
3: Chosen Undead takes a rest at a bonfire.

Applause: Chosen Undead performs the Prostration gesture.

Icon: The sword in the bonfire.

Boxing Ring Title: Thou Who Are Undead

Star K.O.: “You Died” appears above Chosen Undead’s HUD (and on-screen of Chosen Undead loses a Spirit Battle; likewise, “Victory Achieved” appears when you win a Spirit Battle).

Victory Music: A remix of the bonfire theme

Kirby Hat: Chosen Undead’s DS1 helmet

Scorbunny
Intro: Scorbunny pops out of a Premier Ball.
Stance/Idle 1: Its idle animation from Sword and Shield.
Idle 2: Scorbunny wipes its nose.
Idle 3: Scorbunny briefly looks up to the sky while hopping.


Notable Palette Swaps:
-Scorbunny (default)
-Shiny Scorbunny (yellow)
-Bunnelby (gray)
-Buneary (brown)
-Grookey (green)
-Sobble (blue)
-Zacian (light blue)
-Zamazenta (red)

Walk: Scorbunny lightly hops along the ground.
Dash: Scorbunny dashes very quickly.
Damage: Scorbunny covers its nose.
Jump: Scorbunny jumps high up with both feet, and jumps slightly less high on the second jump.
Crouch: Scorbunny squats as if to block a goal.


Weapon of Choice: Scorbunny, despite its small size, mainly fends for itself with kicks.

Normal Attacks

Jab: Double Kick; Scorbunny kicks twice with each foot (6%, small knockback)
Forward+A: Headbutt; Scorbunny softly headbutts the target (5%, small knockback)
Down+A: Low Kick; Scorbunny does a slight slide kick (6%, small knockback)
Up+A: Swift; Scorbunny attacks with its ears, shielded by stars (7%, small knockback)

Aerial Attacks
Air+A: Heat Wave; Scorbunny spins around as fire swirls around it (9%, OK knockback)
Air Forward+A: Blaze Kick; Scorbunny kicks downward with fire around its foot (11%, OK knockback)
Air Back + A: Acrobatics; Scorbunny flips backward and kicks the target four time (12%, OK knockback)
Air Up+A: U-Turn; Scorbunny does a backflip kick above itself (10%, OK knockback)
Air Down+A: Mega Kick; Scorbunny does a powerful, two-foot kick straight downwards (14% with a meteor effect, OK knockback)

Dash Attack: Overheat; Scorbunny flicks its feet on the ground (9%, OK knockback), which leaves tiny trails of fire along it (1%, continual damage)
Edge Attack: Tackle; Scorbunny headbutts the target as it hops back up (6%, OK knockback)
Get-Up Attack: Work Up; Scorbunny hops up and a small ring of fire bursts around it (7%, small knockback)

Smash Attacks
Forward+A: Ember; Scorbunny prepares a sneeze, and sneezes out a big ember (17%, OK knockback)
Up+A: Iron Head; Scorbunny hops up and performs a strong headbutt that grants a split second of invincibility (18%, OK knockback)
Down+A: Low Sweep; Scorbunny sweeps the floor in a 360 with both its feet (16%, OK knockback)

Grab Game
Grab: Scorbunny glomps the target.
Pummel: Scorbunny nibbles the target (1%)
Forwards+Throw: Scorbunny kicks the opponent forward (8%, OK knockback)
Down+Throw: Body Slam; Scorbunny jumps up and slams downward onto the target (12%, OK knockback)
Back+Throw: Reversal; Scorbunny leaps over the opponent and kicks them behind itself before hopping back onto the ground (11%, OK knockback)
Up+Throw: Super Fang; Scorbunny clenches the target with its teeth and spits them upwards (11%, OK knockback)


Special Moves
B : Pyro Ball
; Scorbunny kicks up a rock and shoots it like a soccer ball. Pressing B once has Scorbunny kick it up twice and shoot it a moderate distance (11%, OK knockback). Holding B has Scorbunny kick it up four times and shoot it a long distance (19%, medium knockback)
B + Forwards : Assurance; Scorbunny leaps forward to tackle the target, and kicks them straight forward like a soccer ball (15%, OK knockback). It can also be used to save allies.
B + Up : Hi Jump Kick; Scorbunny leaps extremely high with a leaping kick (7%, small knockback), and does a flaming downward kick (16%, medium knockback). It hurts its head (4% recoil) and enters free fall should it hit a ceiling.
B + Down : Bounce; Scorbunny leaps down to form a fireball around itself. Three leaps forms a small fireball (3% per hit, small knockback); two after forms a medium fireball (6% per hit, small knockback); and one more after forms a large fireball (9%, OK knockback). The height of Scorbunny's bounce also changes with each consecutive leap.

Final Smash: Dynamax; Scorbunny grows to a humungous size and wreaks havoc. You can walk left or right with the control stick, jump with the hump buttons to stomp and bury enemies (12%), and kick embers into them with the attack buttons (20%, medium knockback)

Gimmick: N/A


Taunts
1: Scorbunny looks down and tilts its head left and right, with its ears folded.
2: Scorbunny mischievously snickers.
1+2: Scorbunny tries to make an angry face, but ends up looking like it’s pouting.


Winposes
1: Scorbunny runs around constantly, leaving celebratory trails of fire.
2: Scorbunny hops down and puts its hands on its hips.
3: Scorbunny constantly hops up and down with joy,

Applause: Scorbunny makes a pouty face.

Icon: Pokémon series icon

Boxing Ring Title: The Fired-Up Rabbit

Star K.O.: “Baannniiii….!”

Victory Music: https://youtu.be/m9_ozzyG3uo

Kirby Hat: Scorbunny’s ears
 

whitesnake

Smash Apprentice
Joined
Aug 18, 2019
Messages
124
Dig Dug
Intro: Dig Dug drills from underneath the ground and pops out.

Stance/Idle 1: His idle animation from Namco X Capcom, as Taizo Hori.

Idle 2: Dig Dug rests his shoulder on his drill.

Idle 3: Dig Dug holds up his drill like a gatling gun.


Notable Palette Swaps:
-Dig Dug arcade cabinet design (default)
-Taizo Hori (Blue; his skin color becomes that of his Mr. Driller design, and he even has his goatee)
-Susumu Hori (Pink)
-Anna Hottenmeyer (Yellow)
-Ataru Hori (Black)
-Dr. Z (White; like his Taizo alt, his goatee is present)
-Pooka (Red)
-Fygar (Green)

Walk: Dig Dug walks with his jackhammer mounted on his back.

Jog: Dig Dug extends his legs while walking.

Dash: Dig Dug runs just like his run animation from Dig Dug.

Damage: Dig Dug's lose animation.

Jump: Dig Dug lifts his drill up as he jumps with both legs.

Crouch: Dig Dug sets his jackhammer on the ground, ready to drill into the ground.


Weapon of Choice: Dig Dug mainly fights with both a jackhammer and a pump.

Normal Attacks
Jab: Dig Dug swings forward twice (7%, small knockback), and then drills the target continuously (2-5%, small knockback)
Forward+A: Dig Dug fires three shots from his Ray Gun (6%, small knockback)
Down+A: Dig Dug drills out one rock at a time (7%, small knockback)
Up+A: Dig Dug pumps out some air above him (9%, OK knockback)

Aerial Attacks
Air+A: Dig Dug spins with his pump around him (8%, OK knockback)
Air Forward+A: Dig Dug drills forwards (9%, OK knockback)
Air Back + A: Dig Dug drills behind himself (12%, OK knockback)
Air Up+A: Dig Dug holds either a Pooka's eyes or a Fygar's scary face above him (11%, OK knockback)
Air Down+A: Dig Dug dives downward and drills into the ground (16% with a meteor effect, OK knockback)

Dash Attack: Dig Dug drills on the ground, riding his jackhammer (5%, small knockback)
Edge Attack: Dig Dug turns into blue eyes and pops up onto the stage (7%, small knockback)
Get-Up Attack: Dig Dug's pump blows out some air around him, lifting him back up (4%, small knockback)

Smash Moves
Forward+A: Dig Dug holds a Fygar out, and it breathes fire (19%, medium knockback)
Up+A: Dig Dug drills upwards (21%, medium knockback)
Down+A: Dig Dug drills on the ground, erupting pillars of fire around him (22%, medium knockback)

Grab Game
Grab: Dig Dug grabs the target with his pump.
Pummel: Dig Dug pumps air onto the target (1%)
Forwards+Throw: Dig Dug's pump blows the target diagonally forward (13%, OK knockback)
Down+Throw: Dig Dug drills the target and buries them into the ground (18%)
Back+Throw: The pump flails around and shoots out the target (11%, OK knockback)
Up+Throw: Dig Dug's pump blows the target upward.

Special Moves
B : Pump Inflation
(don't laugh); Dig Dug injects his pump into the target in front of him, growing the target but reducing their weight (10%, OK knockback). This also applies to a teammate.
B + Forwards : Ray Gun Beam; Dig Dug fires a long laser beam out in front of him (15%, OK knockback), which can hit multiple opponents and deal good shield damage.
B + Up : Pooka Balloon; Dig Dug pumps up a Pooka above himself, and multiple rapid presses of B can send him higher. However, pressing B too much in succession pops the Pooka (8%, OK knockback)
B + Down : Drill Dig; by holding B, Dig Dug drills into the ground for 3 seconds. When B is released before then, he'll sometimes dig out an item. When the time is up, he pulls out a rock that he can throw at opponents for a meteor effect (20%, medium knockback). However, if Dig Dug holds it for 5 seconds, he will be buried (13%)

Final Smash: Fault Line; Dig Dug drills a huge area in front of him, and a light bursts out (11%). Any opponents caught are taken into a cutscene where Dig Dug drills into a fault and the piece of land the fighters are on sinks into the water (59%, devastating knockback).

Gimmick: Dig Dug's Neutral B varies not only with size, but also weight, despite only being able to grow a fighter.

-When the target is tiny, their weight and size will return to normal.
-When an opponent is already Giant in advance, only their weight will be reduced.

Taunts
1: Dig Dug mimics his pose from the title screen of the original Dig Dug.
2: Dig Dug mimics his pose from Namco × Capcom.
1+2: Dig Dug's jackhammer drills by itself for a bit.

Winposes
1: Dig Dug puffs up a Pooka, but it blows up and he lands on his butt.
2: Dig Dug sets up the Player 1 victory sign from Dig Dug Arrangement.
3: Dig Dug floats about on a piece of land, stranded in the ocean.

Applause: A normal applause, sometimes interrupted by Dig Dug's jackhammer.

Icon: A Pooka's eyes

Boxing Ring Title: The Underground Underdog

Star K.O.: The death sound from Dig Dug.

Victory Music: The Dig Dug victory jingle.

Kirby Hat: Dig Dug's helmet and cyan visor.
really creative specials!!
 

Perkilator

Smash Legend
Joined
Apr 8, 2018
Messages
10,441
Location
The perpetual trash fire known as Planet Earth(tm)
Frank West
Intro: Frank pushes a zombie off of him, and kicks it into the background.
In 1v1 battles, he sometimes takes a picture of the opponent (usually with female characters).

Stance/Idle 1: His idle stance from UMvC3.
Idle 2: Frank adjusts his camera’s focus.
Idle 3: Frank looks down at his watch and shakes his head.

Notable Palette Swaps:
-Default (black)
-UMvC3 color 2 (purple/black)
-UMvC3 color 4 (brown)
-Chuck Greene (yellow)
-Nick Ramos (blue/red)
-UMvC3 color 6 (gray/pink)
-X costume (alternate costume A)
-Protoman Costume (alternate costume B)

Walk: His walk from UMvC3.
Dash: Frank’s dash in his victory animation from UMvC3.
Damage: His damage animation from UMvC3.
Jump: His jump from UMvC3.
Crouch: His crouch from UMvC3.

Weapon of Choice: Basically, anything he can get his hands on. You’ll see in a second.

Normal Attacks
Jab: Frank hits the target with a plunger once (3%, small knockback), and the proceeds with a flurry (2%-4% each hit, small knockback)
Forward+A: Frank punches the target in the stomach (6%, small knockback)
Down+A: Frank swings a fire axe straight down (11% with a meteor effect, OK knockback)
Up+A: Frank does a roundhouse kick (7%, small knockback)

Aerial Attacks
Air+A: Frank swings the bat all around him (9%, OK knockback)
Air Forward+A: Frank does a drop kick (13%, OK knockback)
Air Back + A: Frank swings the bat behind himself (11%, OK knockback)
Air Up+A: Frank holds a 5-hit chainsaw above himself (16%, OK knockback)
Air Down+A: Frank swings a golf club straight down (14% with a meteor effect, OK knockback)

Dash Attack: Frank pushes a shopping cart in front of him as he dashes forward (12%, OK knockback)
Edge Attack: Frank swings a fire axe down as he gets back up (11%, OK knockback)
Get-Up Attack: Frank kicks upward with both legs (9%, OK knockback)

Smash Attacks
Forward+A: Frank swings a baseball bat with great force (21%, OK knockback)
Up+A: Frank swings a golf club upwards (21%, OK knockback). This can reflect projectiles upward at a slight angle.
Down+A: Frank whirs a chainsaw on the ground; this scores up to five hits simultaneously (25%, medium knockback)

Grab Game
Grab: Frank puts a Servbot head on the opponent’s head. If the head isn’t the adequate size, he simply grabs them with both hands.
Pummel: Frank knees the opponent (1%-2%)
Forwards+Throw: Frank pushes back the opponent by kicking them (9%, OK knockback)
Down+Throw: Frank performs a face crusher (12%, OK knockback)
Back+Throw: Frank performs a judo throw (11%, OK knockback)
Up+Throw: Frank swings the opponent, then tosses them far up (11%, OK knockback)

Special Moves
B : Snapshot;
Frank takes a picture of his surroundings (5%, small knockback). Has a chance to briefly stun opponents up close and raises PP based on how many items of interest are in range (up to 10 at a time; 1 PP per object is gained).
B + Forwards : Zombie Attack; Frank pushes a zombie forward. The zombie lurks for a few seconds, biting any opponent in its range (3%-8% at a time), which then poisons the opponent and deals continuous damage.
B + Up : Wall Kick; Frank jumps straight up and bounces forward, kicking any nearby opponents (14%, OK knockback)
B + Down : Combo Weapons; Frank squats down for a couple seconds and modifies his chainsaw and baseball bat. They then become the Paddlesaw and Spiked Bat, respectively, which have their damage increased by 5%. In addition, Frank’s down Smash now has him swing the dual Paddlesaw along the ground in a 360 spin (15% from each saw, OK knockback). Similar to Robin's Tomes and Levin Sword, the Combo Weapons share a durability meter.

Final Smash: Dead Rising Charge; Frank takes out a Servbot head and slaps it on the opponent’s head (11%). The opponent is then taken into a cutscene where Frank charges them into a field of zombies (33%), throws them high up, and takes a picture with a nearby zombie as the opponent crashes down (19%, devastating knockback). Frank gains 500PP from the “Smashing” rank, instantly maxing him out.

Gimmick: Prestige Points; Frank gets these by taking snapshots of items of interest in front of him (fighters, Assist Trophies, Poké Ball summons and items). The more items in his range (up to 10 can be in range at a time), the more PP he gains. The level he reaches determines his stats.

Lv. 1: Default stats
Lv. 2 (50PP): Attacks do 3% more damage
Lv. 3 (100PP): Defense and PP rates are doubled
Lv. 4 (200PP): Movement speed is doubled
Lv. 5 (300PP): Frank is harder to launch, and his camera flashes (now with a longer range) can stun for 5 seconds

All of these buffs combine with each level. The level reverts back to Lv. 1 when Frank suffers a KO.


Taunts
1: “I’ve covered wars, you know.” Frank raises his right hand and sticks out his index finger.
2: Frank chugs down a water gallon, and then shouts “Tastes great!”
1+2: “Smile!” Frank takes a picture of himself.


Winposes
1: Frank loosely mimics his artwork from Tatsunoko vs. Capcom.
2: Frank’s victory animation from Ultimate Marvel vs. Capcom 3.
3: Frank screams towards the sky on his knees.


Applause: Frank takes pictures of the winner.
Icon: The zombie in the Dead Rising logo.
Boxing Ring Title: He’s covered wars, you know.
Star K.O.: Frank’s scream from the end of Dead Rising.
Victory Music: "What was solved?"
Kirby Hat: Frank’s hair and camera.
 
Last edited:

Gengar84

Smash Hero
Joined
Dec 9, 2009
Messages
5,372
Sarah Kerrigan
"I am the Swarm. Armies will be shattered. Worlds will burn. Now at last, on this world, vengeance shall be mine. For I am the Queen of Blades."

Zerg logo 2.png
Sarah Kerrigan (Norse Chowder) small.jpg
Zerg logo 2.png

Artist: Norse Chowder

Introduction
Starcraft is a science fiction real time franchise developed by Blizzard Entertainment. While the series is mostly known for being a PC game, the original game did release on the Nintendo 64 as Starcraft 64 in 2000. The franchise received a sequel in 2010 which spawned several expansions. It remains one of the most popular and influential games in its genre to this day.

Who is Sarah Kerrigan?
Prior to her infestation, Sarah Kerrigan began as a psychic terran soldier known as a ghost operative. During a mission, Kerrigan was abandoned by her superior, Arcturus Mengsk, when things began to look bad and was left to die. Instead, Kerrigan became infested by an alien insectoid race known as the Zerg and became one of them. In time, Kerrigan rose to become the leader of the entire Zerg race and swore revenge on the one who betrayed her.

Why should Kerrigan get in Smash?
Kerrigan is an iconic character that would offer a lot to a game like Smash Bros. For one, she is both a female and a villain, two things which Smash is still lacking. Even though Blizzard now has Overwatch and Diablo on Nintendo consoles, Starcraft was the first of their major series to be on a Nintendo system with Starcraft 64. Finally, I believe Sarah Kerrigan is the best character to represent the RTS genre due to her ability to control the Zerg. RTS games are all about resource management and creating an army of units to crush the opponent's base. This is something I think Kerrigan can utilize in Smash. Starcraft also really meshes well with the Metroid universe and would make for some really cool interactions if there is any kind of story mode in this game.

Potential Moveset

Special Traits / Other:
Kerrigan would be the first true summoner character in Smash. All of her special attacks other than Psionic Shift summon various Zerg units to aid her in battle. In order to balance this, I decided to incorporate an element of resource management similar to her home series.

Vespian Gas - As the battle goes on, Kerrigan builds up resources that she can spend to use all of her special attacks minus Psionic Shift (which doesn’t cost anything since it is her recovery move). Being a simple attack, Zergling Rush attack uses the least amount of gas while the Hydralisk/Defiler/Mutalisk uses the most.
Weak Attacks:
A Combo – Chain Reaction
Kerrigan attacks with a flow of electricity. Like Megaman’s A combo, this is a projectile attack and deals no knockback. In multiplayer, the electricity can flow to other nearby enemies if they are close enough.

Forward Tilt – Kinetic Blast
A small short range explosion from her hand

Up Tilt – Razor Swarm
Kerrigan sends out several mini shockwaves diagonally upwards

Down Tilt
A low claw swipe

Running A
A running double claw swipe
Smash Attacks:
Forward Smash – Leaping Strike
Kerrigan lunges forward and stabs the opponent with her wings

Up Smash
Kerrigan thrusts her wings upward and stabs above her

Down Smash – Impaling Blades
Kerrigan slams the ground causing spikes to rise from the ground on both sides
Specials:
Neutral B – Hydralisk /Defiler / Mutalisk
Similar to Dedede’s original side B that summoned Waddle Dees, Kerrigan summons one of a variety of Zerg units that wander along the battlefield and attack opponents. The hydralisk is the most basic of these. They travel along the ground and attack any opponent nearby. The defiler doesn’t actively attack but instead inflicts various status effects on anyone that gets too close with a cloud of poisonous gas. Finally, the mutalisk flies through the air and attacks any airborne opponents in its range.

Forward B (Grounded) – Zergling Rush
Kerrigan summons a pair of Zerglings to rise from the ground and charge forward for a bit before diving back into the ground.

Forward B (Aerial) – Scourge
If performed in the air, Kerrigan hatches a pair of Scourge who fly forward and explode into any opponent they touch.

Up B – Psionic Shift
Kerrigan surrounds herself in energy then dashes in the chosen direction, damaging anyone she touches

Down B - Lurker
Similar to Snake’s mine attack, Kerrigan summons a Lurker to burrow in the ground right next to her. Anyone who walks over this location is attacked with a rising spike attack for a short while. Like the Hydralisk, only one Lurker can be summoned at a time.
Grabs:
Grab
Kerrigan impales the opponent with her wings

Pummel
Kerrigan grabs the opponent’s face and shocks it with energy

Forward Throw
Kerrigan kicks her opponent forward

Back Throw
A simple toss backward

Up Throw
Kerrigan throws her opponent upwards followed by a quick lightning attack

Down Throw
Kerrigan slams her opponent into the ground
Aerial Attacks:
Neutral A
Kerrigan surrounds herself with electric energy and attacks around her, much like Mewtwo

Forward A
A forward claw swipe

Back A
A backward thrust kick

Up A
A somersault kick

Down A – Quantum Ray
Shoots a beam of energy diagonally downward
Final Smash: Apocalypse
Kerrigan surrounds herself in a radius of energy. Any opponent that comes within range is struck by an explosion which triggers a cinematic cutscene. This scene mimics the final few seconds of the Betrayal on Kerrigan scene. After landing the initial strike, the opponent is transported to a ruined planet where he or she is surrounded by zergs on all sides. As they reach the target, the screen turns to black. It then returns to the normal battle screen and the opponent takes massive damage and knockback.

Cutscenes

Betrayal on Kerrigan
Kerrigan vs Megnsk

Finally, Blizzard has always had some of my favorite characters in all of gaming and I feel like they have a lot to offer Smash Bros. Out of all the speculation, I almost never hear anyone clamoring for a Blizzard character, and when they do, it is usually Tracer from Overwatch. I hope I've demonstrated how much a character like Kerrigan can add to the game. At the very least, I'm interested in hearing any sort of discussion about people's thoughts on her or anyone from Starcraft or Warcraft.
 
Last edited:

Perkilator

Smash Legend
Joined
Apr 8, 2018
Messages
10,441
Location
The perpetual trash fire known as Planet Earth(tm)
Alm
Intro: Alm uses a green Warp circle with red smoke

Stance/Idle 1: His idle stance from Shadows of Valentia.
Idle 2: Alm’s talking artwork from Shadows of Valentia as a Fighter.
Idle 3: Alm’s talking artwork from Shadows of Valentia as a Hero.


Notable Palette Swaps:
-Fighter (default)
-Celica (white/red)
-Tobin (brown)
-Gray (green)
-Mycen (yellow)
-Berkut (black)
-Rudolf (red)
-Gaiden design (alternate costume)

Walk: His walk from Shadows of Valentia.
Dash: His run from Shadows of Valentia.
Damage: His damage animation from Shadows of Valentia.
Jump: Similar to Shulk’s jump.
Crouch: Alm rests his sword on the ground facing down.


Weapon of Choice: The Royal Sword, which Alm receives after defeating Desaix in his fortress, unsure of its purpose. He carries it in his left hand.

Normal Attacks
Jab: Alm slashes twice (5%, small knockback). When his shield’s out, he bashes the target with it (6%, small knockback)
Forward+A: Alm stabs the target with his sword (8%, small knockback)
Down+A: Alm kicks the ground with his right foot (4%, small knockback)
Up+A: Alm raises his sword upward and stabs any target above him (7%, small knockback)

Aerial Attacks
Air+A: Alm swings his sword in a 360 as blue flames surround him (11%, OK knockback)
Air Forward+A: Alm swings his sword in an upward arc (8%, small knockback)
Air Back + A: Alm dangles a lantern behind himself (9%, OK knockback)
Air Up+A: Alm stabs straight upwards (11%, OK knockback)
Air Down+A: Alm fires an arrow diagonally downward (7%, OK knockback)

Dash Attack: Alm hops and slashes down (12%, OK knockback)
Edge Attack: Alm backflips upwards and slashes down (13%, OK knockback)
Get-Up Attack: Alm hops up and does a quick spin slash on both sides of himself (6-7%, small knockback)

Smash Attacks
Forward+A: Sunder; Alm swings his sword straight down in a powerful slash (19%, medium knockback)
Up+A: Tigerstance; Alm thrusts his sword straight up; similar to Marth, but more aggressive and without a tipper (22%, medium knockback)
Down+A: Flamberge; Alm slashes downward twice, dealing fire damage (11%-14% per hit, OK knockback)

Grab Game
Grab: Alm grabs the opponent with his right hand, regardless of whether or not he has his Shield.
Pummel: Alm knees the opponent (2%-3%)
Forwards+Throw: Alm stabs the opponent (11%, OK knockback)
Down+Throw: Alm attacks the opponent with his sword’s handle (9%, small knockback)
Back+Throw: Alm pushes the opponent behind himself, then kicks them (12%, OK knockback)
Up+Throw: Alm kicks the opponent upward twice (14%, OK knockback)

Special Moves
B : Curved Shot / Heavy Draw

  • With the shield out, Alm can angle his bow and arrow in a 70o angle as he charges his shot (15%, OK knockback)
  • With the shield put away, pressing B has Alm fire a somewhat slow shot that can’t be angled (13%, OK knockback; .2% recoil). When B is held, Alm fires a much quicker and more powerful shot that can break a shield (19%, medium knockback; 1.4% recoil)
B + Forwards : Shove / Double Lion
  • With the shield out, Alm pushes a gust of wind forward on the ground that pushes opponents away and deals no damage. In the air, this moves Alm forward a fair distance.
  • With the shield put away, Alm does two arc slashes with each press of B (8% per slash, OK knockback; 1.8% recoil)
B + Up : Crosswise Cut / Deicide
  • With the shield out, Alm jabs upward once, about the height of Ike’s Aether (12%, OK knockback), and can do a 360 spin slash to either the left or right (9%, OK knockback)
  • With the shield put away, Alm jumps slightly higher, and then slams down on the ground at the apex of the jump as flames erupt in front of him (22%, medium knockback; 2.6% recoil)
B + Down : Defensive / Windsweep
  • With the shield out, Alm halves the damage taken from physical attacks for one hit. He can also reflect projectiles.
  • With the shield put away, Alm charges his sword for a powerful, two-handed upward slash that uses the wind to push opponents away (29%, far knockback; 3.7% recoil)

Final Smash: Scendscale; “This is how it’s done!” A symbol glows on Alm’s left hand, as he slashes downward with a powered-up Royal Sword that extends to a huge blue sword-like beam (39%, devastating knockback). It can hit multiple opponents at once.

Gimmick: Shield; Alm can put his shield away or take it out by holding the Shield button and pressing B. His specials change depending on whether or not the shield is out, but putting it away causes his other specials to cause recoil damage.


Taunts
1: “All right.” Alm loosely mimics his animation for before his Double Lion.
2: “You can’t touch me!” Alm points his sword straight forward.
1+2: “Here’s what I can really do!” Alm mimics the pose he makes before unleashing Scendscale.


Winposes
1: “I’ll never yield!” Alm’s Fighter victory animation from Echoes, added with the tossing of his shield.
2: “This is my strength” Alm’s Hero victory animation from Echoes.
3: “See what you get?” Alm’s Hero victory animation from Echoes after defeating enemies with a Bow.

Applause: Alm claps.

Icon: The Fire Emblem series icon

Boxing Ring Title: Hero from Ram Village

K.O. Scream: “Gah!” “No…”

Star K.O.: “Not when we were so clooooose…!”

Victory Music: https://youtu.be/o0l6BSZURKE

Kirby Hat: Alm’s hair and headband.
 

Perkilator

Smash Legend
Joined
Apr 8, 2018
Messages
10,441
Location
The perpetual trash fire known as Planet Earth(tm)
Adol Christin
Intro: Adol regains consciousness, and gets into battle position.

Stance/Idle 1: Adol moves left and right in a 90’s anime-style movement, holding his sword two-handed.
Idle 2: Adol briefly strokes his sword with his left hand.
Idle 3: Adol wipes his head with his left hand.


Notable Palette Swaps:
  • Classic Adol (default)
  • Dogi (blue/green)
  • Feena (cyan/white)
  • Rhea (blue/red)
  • Lilia (cyan/brown)
  • Dark Fact (yellow/purple)
  • Geis (green/black)
  • Estelle Bright (brown/orange)

Walk: Adol treads carefully.
Dash: Adol dashes forward with his sword in one hand.
Damage: Adol leans backwards. When he’s not being hit, he glows red when the Bump System kicks in.
Jump: Adol jumps once in his two-handed position, then takes one of his hands off when double-jumping.
Crouch: Adol crouches like


Weapon of Choice: Adol carries a Longsword, which ties into the Bump System.

Normal Attacks
Jab: Adol swipes left and right constantly (2%-3% each, small knockback)
Forward+A: Adol jabs his longsword (5%, small knockback)
Down+A: Adol does an uppercut swipe (6%, small knockback)
Up+A: Adol does a backward slash above himself (5%, small knockback)

Aerial Attacks
Air+A: Adol does a full 360 slash around himself (9%, OK knockback)
Air Forward+A: Adol does a crescent slash (8%, OK knockback)
Air Back + A: Adol does a backward crescent slash (9%, OK knockback)
Air Up+A: Adol does an upward arc slash (7%, small knockback)
Air Down+A: Adol does a downward crescent slash (10% with a meteor effect, OK knockback)

Dash Attack: Adol does a dashing slash (7%, OK knockback)
Edge Attack: Adol thrusts his sword as he climbs back up (4%, small knockback)
Get-Up Attack: Adol swings left and right (5%, small knockback(

Smash Attacks
Forward+A: Adol stabs the enemy with his sword (22%, medium knockback); this can be slightly angled.
Up+A: Adol swings in an upward arc twice (21%, medium knockback)
Down+A: Adol swings his sword diagonally downwards (18%, medium knockback)

Grab Game
Grab: Adol grabs the opponent with one of his hands.
Pummel: Adol knees the opponent (1%)
Forwards+Throw: Adol does a slash that looks like it’s scooping up the opponent (9%, OK knockback)
Down+Throw: Adol spins ounce and swings his sword downward (11%, OK knockback)
Back+Throw: Adol turns around and kicks the opponent (6%, small knockback)
Up+Throw: Adol throws the opponent above himself (3%) then stabs them (9%, OK knockback)

Special Moves
B : Ignis Bracelet
; Adol shoots fireballs by pressing and holding B (6% each, small knockback). Repeated uses weaken the attack over time.
  • If B is tapped, Adol shoots one fireball.
  • If B is held for 1.5 seconds, Adol shoots two fireballs.
  • If B is held for 3 seconds, Adol shoots three fireballs.
B + Forwards : Terra Bracelet; Adol thrusts his sword and charges forward.
  • If B is tapped, Adol charges forward and goes a long distance (14%, OK knockback; 6% recoil)
  • If B is held, Adol performs a powerful thrust that goes slightly less distance (31%, far knockback; 13% recoil), leaving him to recharge for 2 seconds.
B + Up : Wing; Adol flies extremely high with a Wing, only able to move straight upward.
B + Down : Livart Slash; Adol does a two-handed 360 slash where wind blows out of his sword (20%, far knockback; 5% recoil)

Final Smash: Books of Ys; Adol charges forward in a beam of light (10%). Opponents are then taken into a cutscene where all six Books of Ys gather around Adol, and he charges into the opponent (20%) and the lights of the Books all form spires that do the same (4% each) (56% total, devastating knockback)

Gimmick: Bump System; if Adol attacks opponents when really close to them, he will take slight recoil damage (.1%-.5%); hence why he has a Longsword, because it can help to attack opponents without getting too close. The Bump System only kicks in when the opponent isn’t shielding.


Taunts
1: Adol briefly sticks out his left index and middle fingers while holding his sword in his right hand.
2: Adol mimics his pose from Ys I & II Chronicles.
1+2: Adol raises his sword and lets out a war cry.


Winposes
1: The Books of Ys all float around Adol.
2: The camera zooms around Adol, who then does a slash with his sword taken directly out of the scabbard.
3: Adol raises his sword and lets out a war cry as light shines down on him.

Applause: Adol simply claps.

Icon: The Ys series logo (which is a stylized Ys)

Boxing Ring Title: The Journeyman of Legend

Star K.O.: Adol lets out a cheesy 90’s scream.

Victory Music: https://youtu.be/wlO7XeVtFhg

Kirby Hat: Adol’s hair
 

Janx_uwu

Smash Champion
Writing Team
Joined
May 17, 2020
Messages
2,957
Location
Faraway Avalon


Shadow The Hedgehog


(Smash reveal intro appears)
The shot opens on Sonic The Hedgehog's shoe-which is unbuckled. He kneels down and begins to fix it up. The camera zooms out to reveal that this is a Mario Kart race track-and next to Sonic are some of the fastest characters in Ultimate (most of them, anyways), getting warmed up. Doc Louis is coaching Little Mac, and Pokemon Trainer is doing the same for Charizard. Wario is making adjustments to his bike and simultaneously eating ungodly amounts of garlic. Captain Falcon is stretching his legs, Hero is opening his commands menu and has his cursor set on Acceleratle, Banjo and Kazooie are both running in place, Mario is adding gas to his kart, Bowser is lifting Bowser Jr as a weight (who is pretending to be an airplane), and Zelda is transforming into Sheik.
Many characters from Smash's current roster are standing on the sides and cheering the racers on. Lakitu is being ref. He blows into a whistle, which means it's sixty seconds until go time. Everyone in the race steps up to the checkered squares. Sonic bumps fists with Captain Falcon, and Mario and Wario exchange looks that could kill-but when Bowser roars at them both, everyone in the stadium cowers in fear. Little Mac chugs a water bottle and throws it behind him, where Doc catches it. Squirtle and Ivysaur stand behind Charizard, smiling and clapping for him. Lakitu flies to the front and above the racers, and holds up his starting lights.
3…
Sonic and many others bend down. The sound of leather squeaking against the paved ground can be heard.
2…
Mario and Wario's vehicles begin to rev for the instant speed boost. Charizard flaps his wings, and Hero gets ready to choose his spell.
1…
Banjo and Kazooie swap out for the Talon Trot. Bowser has smoke coming out of his mouth, and Sheik charges up her needles.
GO!!!
Everyone runs off at once-except for Wario, who didn't time his engine right and spun out. He starts behind everyone else.
Squirtle and Ivysaur are covered in dust. They cough. Then, Toad hops up from the top seat and hits the floor (the racers are long gone by now). Everyone stares at him, wondering why-until he curiously picks up a piece of black hair or fur. "What is this?" he asks no one in particular.
Sonic and Hero are neck and neck. "You might be fast…" says Sonic, "But how's your Magic Points, Eleven?"
Eleven/Hero looks down-it reads 5, and is whittling down every second. Hero panics and tries swinging his sword at Sonic. Sonic dodges, and Hero's Magic fades away as he falls to the ground. He looks up, not only to see Sonic far ahead but the other racers close behind him. Hero gets up, finds two Slimes in the grass next to the road, and begins to partake in a turn-based battle with them to farm more Magic. But after one turn each, someone or something-a black blur-zooms by and takes out the Slimes in one fell swoop. Hero is bewildered, but after looking around, picks up the MP and begins running with Accelerate again.
Mario and Wario are close behind Captain Falcon, who is right next to Sonic. Mario runs into an item box, and gets three green shells and smirks. He throws one at Wario, who gets hit and spins out. With him out of the picture, Mario tosses the other two at Sonic and Captain Falcon-who dodge them gracefully. Mario's starting to get angry now, so he reaches into his pocket and pulls out a Mushroom-but then a black blur swoops by and takes it.
Mario looks surprised. Then he looks back in his rearview mirror and sees that the racers behind them are either super far behind or are knocked out cold. Mario says "Stop!" to Captain Falcon and Sonic, who look back, see the damage, and obey. Mario stops as well, and hops out of his vehicle. The trio ball their fists and get ready for a fight-when all of a sudden, with a flash of green, they become stunned. Then, a black blur, and now it's just Mario and Sonic. They go back to back and start circling, trying to find out who the wrongdoer is. Sonic senses something, sighs (like Samus did in the Ridley trailer) and hops over Mario before doing a flip and kicking the perpetrator right over the head. Whoever it is looks dazed-but soon they aren't there anymore, and with one more blur Mario is gone as well, going out with a very Mario-y yell.
"Hey, shads, didn't you get the memo? You're not invited!" Sonic says.
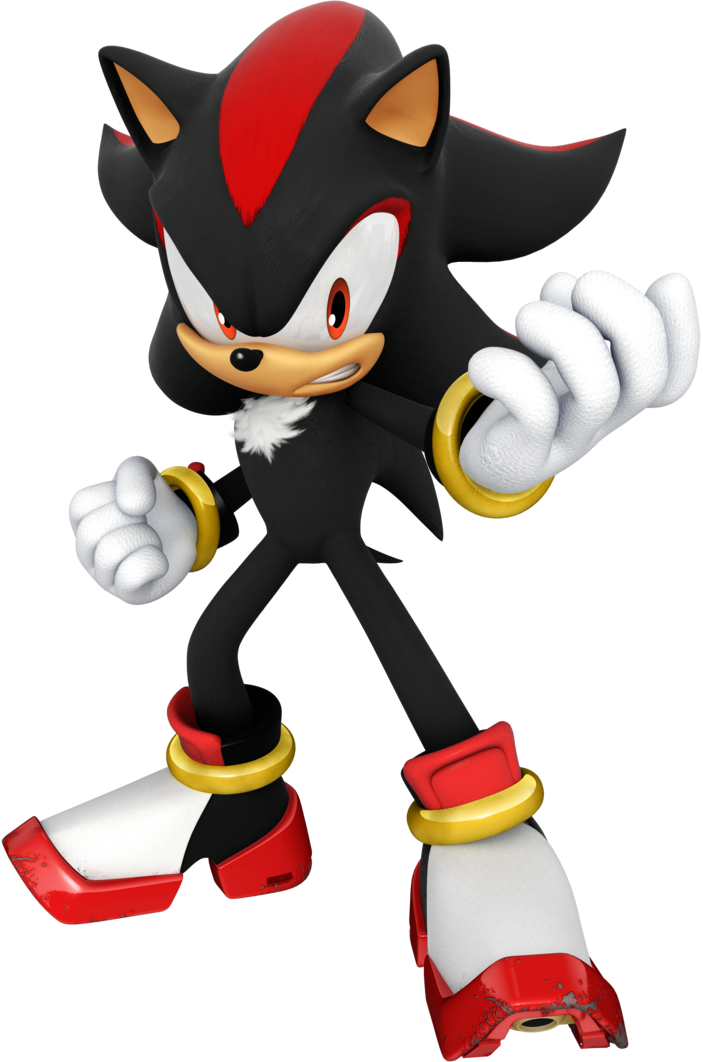
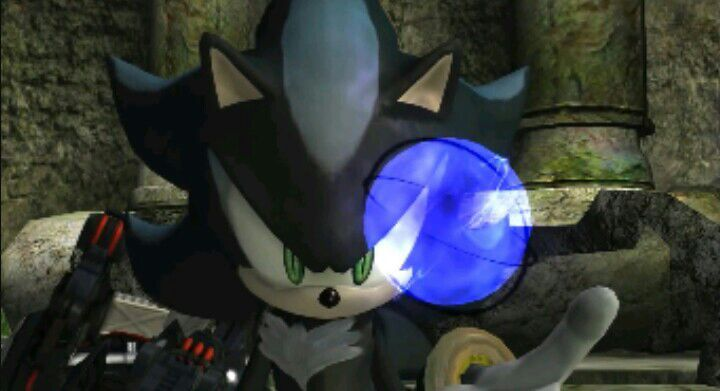
"Maybe not. I took this from a tall purple man-he looked too silly to be in Smash." Says the mysterious voice, who we now see the dark outline of, in front of Sonic. He's holding a SMash invitation. "But the way I see it," he says as he clenches his fist, "this is a way for strong beings all over the world to prove just how strong they are. And I consider myself to be...Ultimate, wouldn't you say, you so-called 'fastest thing alive'?" We now see Shadow in all his glory.
SHADOW
Unleashes the Chaos!!
We get some gameplay footage of him. Before the trailer ends, we see Sonic and Shadow, racing neck to neck for the finish line that's in sight, the other racers close behind, just recovering from being knocked out. It looks like it'll be a tie or very close-and then, at the last second, Hero jumps over the pair of them and crosses the finish line! Sonic and Shadow come to a halt, confused. They look away from each other, annoyed, finally agreeing on something-a rare sight indeed.


Shadow was created as the Ultimate Life Form by Gerald Robotnik 50 years ago, aboard the Space Colony Ark. Gerald wanted to create an invincible being that could heal and help the people of Earth. Aboard the Ark, Shadow felt fond of Gerald's granddaughter, Maria. They were best friends-that is, until the government raided the ship, stole some of Gerald's experiments, and murdered Maria. Gerald was thrown into a blind rage, losing sight of his well-meaning goals, and wiped Shadow's memories, making him think he had to avenge Maria's death by murdering the human population.
50 years later, and Gerald's grandson Ivo takes Shadow out of the ice he's been contained in, using him to fulfill his vision of destroying Earth.
Over time, Shadow regained his memories, and when he remembered the true promise Maria made him keep-to give those on Earth a chance-he teamed up with his rival Sonic to save the planet and prevent the Space Colony from crashing into it.
Shadow has a special connection with the Chaos Energy that hails from the Chaos Emeralds-the lifeblood of the world that possess unlimited power. His connection with them is so powerful, in fact, that over time he has learned to do certain Chaos techniques without the use of an Emerald. He truly is the Ultimate Life Form, and ever since the events of Sonic Adventure 2, he has remained an ally to Sonic and his friends, ready to stop the evil Doctor in his tracks whenever possible, in Maria's name. He is not a good guy, nor is he a bad guy-he does what he thinks is most right and lives by his own way.

Shadow's fighting style relies on brutal hand-to-hand combat, utilizing a variety of roundhouse kicks, punches and jabs. He's just as fast as Sonic and shares nearly all the same attacks as Sonic He also possesses many Chaos techniques, which use Chaos Energy to enhance his abilities or give him entirely new ones. He's no stranger to firearms either, and though he's not the friendliest of people, he'll accept help from his allies if he thinks he needs it. He also has his Air Shoes, which let him hover in the air and strengthen his foot attacks. Finally, he possesses inhibitor rings on his wrists and ankles, which limit his abilities-and if he takes them off, he becomes a near unstoppable force. And his most powerful ability, when he assembles all seven Chaos Emeralds, he becomes Super Shadow, and is truly a force to be reckoned with.

Tagline

Shadow Unleashes The Chaos!!


Stats

Shadow's height, weight, ground speed, and rolls/dodges/techs are all equal to Sonic's, due to them having equal agility, speed, weight and height in the games. Jumps are a bit higher than Sonic's, due to his Air Shoes (it should also be noted Shadow does not go into a ball like Sonic during his jump which allows him to use said Air Shoes).
Shadow has two special characteristics: hovering and Chaos Boost. Hovering is very similar to the hover Peach and Daisy have-he can do it thanks to his Air Shoes (I might say Air Shoes a lot in this doc :p). Just like Paisy, he can do attacks, move left and right, and hover cancel. He even has a move he can only use during a hover, his Chaos Attack neutral air.


Special Moves


Neutral B: Chaos Spear
In the games, Shadow uses the power of a Chaos Emerald to attack his opponents with various Chaos powers, and one of them is Chaos Spear-several electric spears that hone in on the opponent and pursue at high speeds. In Ultimate, Shadow snaps his fingers with one hand and holds the Chaos Emerald in his other hand (The costume he's using decides the color of said Emerald, with one referencing the fake Chaos Emerald from Sonic Adventure 2 and the others being the actual Emeralds). Right as he snaps, a Chaos Spear appears above his head. After a few frames, the Spear (8%) launches itself at the opponent. When hit, the opponent is stunned for a short time before they are knocked back. This means Shadow can follow up the Spear with a fast attack, granted that he is close enough to his opponent. If he is too far away to follow up, he can still press the button a second and third time to use more Spears (4%). These Spears will always hit the opponent and damage them but do zero knockback. It takes 10 frames for the first Spear to launch and 8 frames for the other two to launch if activated.


Side B: Boost
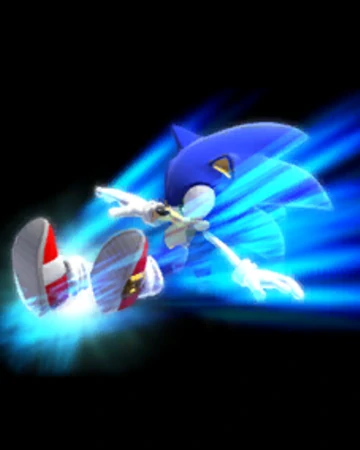
This is a move more closely associated with Sonic, but as Sonic Forces proves, Shadow also has this power. When activated, it has a frame 18 startup, and afterwards Shadow boosts forward, knocking away any opponents in his path with high speeds. He is invincible at this time. The move has high knockback, but it does have a few downsides. When it hits a shield, Shadow stops in his tracks and has 30 frames of endlag, not doing too much damage to the shield. Like Wonderwing he can be grabbed out of his Boost. And if Shadow doesn't hit anything during the attack, he'll likely fall offstage and have to recover.


Up B: Chaos Control
Shadow's signature move since 2001's Sonic Adventure 2, Shadow teleports away and reappears somewhere else. In Ultimate, this move is functionally identical to Metwo's teleport-but it has one key difference. When activated next to an opponent, Shadow kicks the opponent in the direction indicated by the player's control stick. When Shadow reappears, he will kick the opponent again in the direction indicated by the player's control stick. After this Shadow can act again in the air but he cannot use Chaos Control again. The reason for the way this move works is this cutscene from Sonic Forces. Shadow also does a similar thing in this cutscene from Shadow The Hedgehog, and this scene from the Sonic Boom television show. Also, when it is angled down it is a spike, and Shadow uses his two hands to smash them down, sort of like Mii Brawler and Diddy Kong (you can see this in action in the above clips). It has a pretty miserable startup for a teleport move, meaning you can't use it as a reliable OOS option against most moves (Frame 11).


Down B: Chaos Counter

This move is inspired by this scene from Sonic The Hedgehog (2006). Works very similarly to Greninja's counter. Shadow holds up a Chaos Emerald, and if he is attacked, time stops thanks to Chaos Control, and Shadow flies forward and kicks his opponent into the direction they were attacking him from. For example, if Mario hit Shadow during Chaos Counter's active frames with a forward aerial or back aerial from the left side of Shadow, Shadow will fly behind Mario and hit him to the left. If Mario hits Shadow from the top, Shadow will teleport above Mario and send him down with a forceful Sonic Eagle (more on that later), spiking him. If Mario hits Shadow from below, Shadow teleports below Mario and uppercuts him. This is a very strong counter move, and is great for punishing your opponents for trying to edgeguard you. Has the same frame data as Greninja's counter because of their similarities.


Standard Attacks


Jab
A jab, leading into a kick, that leads into another kick that sends the opponent straight up, and afterwards Shadow flies up to their level and summons Chaos Energy spheres to his hands, hitting the opponent away in a rather powerful jab. This is one of Shadow's ground attacks from Sonic Battle. It cannot combo into anything and has no rapid jab variant, however it does kill at ledge after 85% on most characters. (18%)


Forward Tilt

Shadow pulls his fist back and backhands the opponent with another Chaos Energy sphere-yet another reference to one of his Sonic Battle moves. It's a move with considerable knockback that can kill as early as 90% at the ledge on most characters. It comes out on frame 17. (15%)


Down Tilt: Fire Somersault
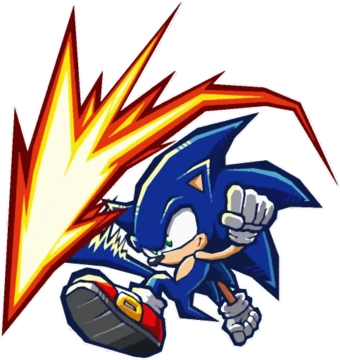
A move Sonic and Shadow use in Sonic Adventure 2. It's a move that instantly spins you forward at a slow speed, breaking metal crates and destroying enemies. In Ultimate, it's a slow move that slides Shadow forward, a little faster than Joker's down tilt for comparison. However it is a very good kill move. (Pretend the image is of Shadow and not Sonic, couldn't find an image for him). It comes out very fast (frame 8) and has considerable endlag. (20%)


Up Tilt
Shadow does a flip kick, utilizing his Air Shoes to create a fiery blaze around him, damaging anyone caught in the blast and hitting them up in the air for combos. This move does not directly reference anything. It is visually similar to Min Min's up tilt. (8%)

Dash Attack: Slide
The move from the Boost Sonic games, it lets you slide under obstacles and attack enemies all while maintaining your speed. In Ultimate, Shadow slides low on the ground, attacking opponents and staying low to avoid high or mid hitting attacks. Functionally the same as Cloud's down tilt, or Joker's, for comparison. (Shadow performs this move in Forces, sorry I couldn't find a screenshot of him doing it). He hits the opponent straight up for a follow up attack until about 60%, when it doesn't combo anymore. (7%)


Grab Game


Grab

Since Silver will likely never make a playable appearance in Smash, I decided to make him part of Shadow's moveset (he's my favorite character so I may be slightly biased). When pressing the grab button, Silver teleports from out of nowhere in front of Shadow (though he has no hurtbox) and grabs the opponent with his psychokinesis (it's an ability that lets him pick up living and nonliving objects with his mind). When pummeling, Silver clenches his fist, damaging the opponent. (Pictured below is the Silver fight from Sonic 06).


Back Throw

Silver tosses the opponent behind him, and following up with a pistol, Shadow fires a round into the opponent, which they could dodge at certain percentages. It's incredibly strong, both in knockback and in percent, but only if the opponent gets hit by the bullet. (5% and weak knockback with no bullet, 15% and kill knockback with bullet)


Forward Throw

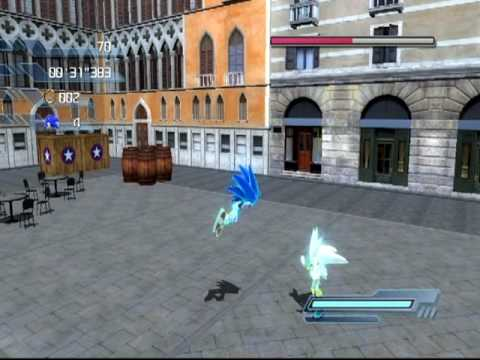
Silver steps out of the way, and Shadow dashes through and Boosts right into the opponent, knocking them far bac (this does not have anything to do with his side b).. It is a kill throw that does considerable damage as well. (Pictured below is the rival fight from Sonic Generations). (14.5%)


Up Throw

Silver does an uppercut into the opponent, letting Shadow follow up. Can be combo'd off of until 50% when the opponent is too far away. (10%)


Down Throw

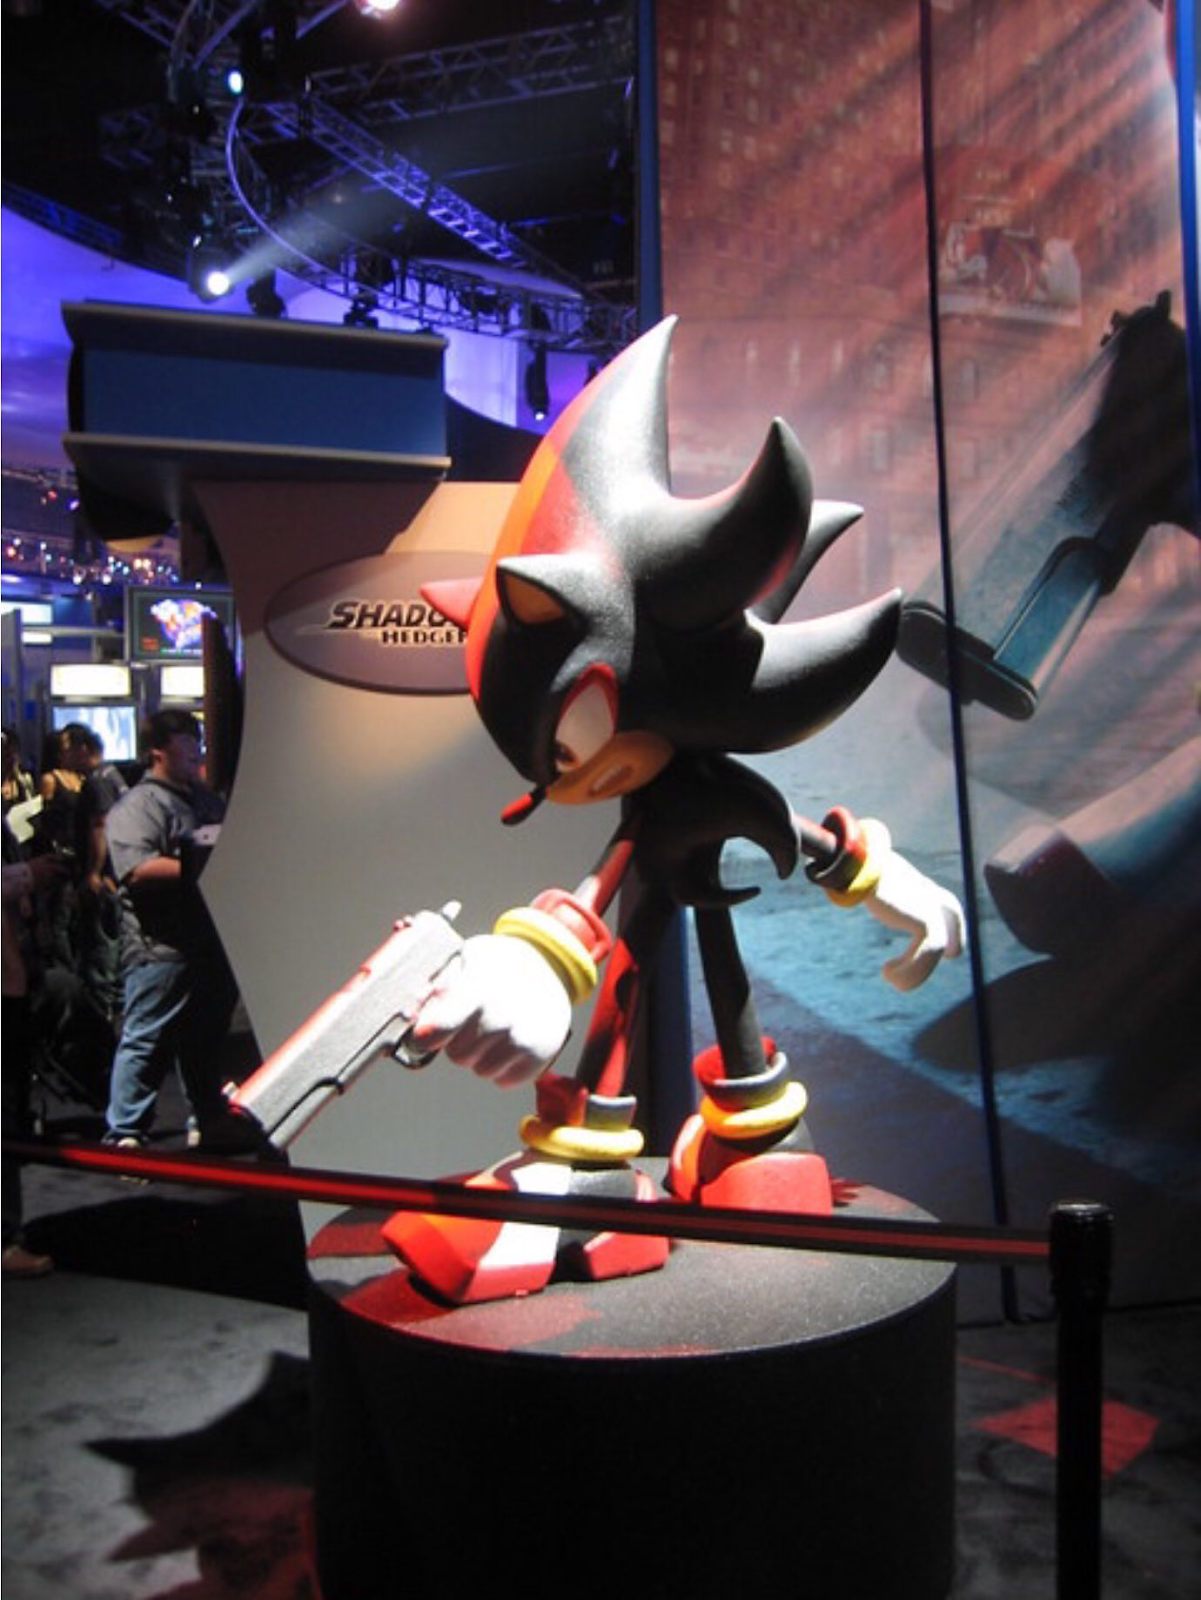
Silver steps out of the way for Shadow, and Shadow places his Air Shoe onto the opponent with force, and shoots them with his pistol. In fact, it very closely represents this statue from Sega's E3 2005 to promote their then-upcoming release Shadow The Hedgehog (pictured below). They are sent at a good angle for combos granted that they are at low percent. (19%)


Smash Attacks


Forward Smash

Shadow snaps his fingers and a rift of Chaos Energy appears in front of him-another one of his Sonic Battle moves. It's the quickest of his smashes albeit the weakest. (16%, worst knockback of the smashes but still a kill move)


Up Smash: Black Tornado
In Sonic Heroes, the Black Tornado has Shadow spin in his ball form in the air for a bit, greatly damaging flying opponents and armored ones as well. In Ultimate, it accomplishes a similar thing: Shadow creates a Black Tornado above him and sends his opponent straight up if they're caught in the multi-hit attack. (18%, good knockback)


Down Smash: Spin Kick
In Sonic 2006, Shadow's Spin Kick lets him pull in enemies while also damaging them in a breakdance-like sweep. In Ultimate, it functions similarly. When charging, there's a windbox that pulls in nearby opponents, and the longer you charge, the stronger the windbox and power of the kick becomes-when released, the windbox stops Shadow performs the kick. It's his slowest smash attack, a little bit slower than up smash. It can break shields! (21%, most knockback of his smashes)


Aerial Attacks


Forward Air: Sonic Eagle

Shadow flips midair and brings his Air Shoe down onto the opponent, leaving with it a fiery trail like his up tilt. The fiery trail is easier to hit with and doesn't spike, while the shoe and leg do spike but are harder to hit with. This attack references the Sonic Eagle attack from Sonic Battle-Shadow cannot perform the attack in Battle, but he did later on in Sonic The Hedgehog's IDW comic issue #31 against Metal Sonic, in a move that looks strikingly similar. Couldn't find an image of the panel unfortunately. (19%)


Down Air

The stomp move from the Boost games. Can break shields the same as Yoshi's down b. Has high knockback and is pretty fast as well. (19%)


Neutral Air: Spin Attack/Chaos Attack

In Sonic 06, after performing a homing attack with Shadow, pressing the A button multiple times will have Shadow attack the target with various punches and kicks. In Ultimate, it works a little differently. When in the air normally, Shadow will spin around in his ball form, identically to Sonic's nair. (12/ 8/5% depending on hitbox). However, if you utilize Shadow's hover ability (more on that at the end when I discuss his special mechanics), you can do the Chaos Attack for as long as you hold down the A button or until your hover runs out. When you let go of A Shadow will deliver a finishing blow. This move is very good for racking up considerable damage. (22% if you get every blow, which is difficult but doable).


Back Air

Exactly the same as Sonic's but with a fiery effect and slightly larger hitbox thanks to said fire. (14%)


Up Air
Similarly to Min Min, Shadow's up air is a faster, stronger, aerial version of his up tilt. It too has a fiery trail that slightly extends the hitbox. (14%)
Final Smash
Shadow assembles the seven Chaos Emeralds and unlocks his most powerful form, Super Shadow. Super Shadow rushes forward after the slowdown and hits the opponent into a cutscene (if he doesn't, there's a good chance he'll fall to the side blast zone). In the cutscene, Super Shadow flies to the ruined streets of Westopolis, where he throws the opponent onto the ground. He delivers several strong punches before grabbing them and throwing them up. He teleports up to them, grabs them by the chest, holds a Chaos Emerald, and yells, "Chaos...BLAST!!" A huge dome of Chaos Energy surrounds Shadow, decimating the nearby city and laying waste to your opponent. If they're above 100% after the Final Smash they poof as a cloud of smoke.
Taunts
Up Taunt: Shadow juggles the Chaos Emerald, like he does in his first Hero Story cutscene from Sonic Adventure 2.
Side taunt: Shadow points at his opponent and says "You're too slow!" in a much more aggressive tone than Sonic in Brawl.
Down taunt: Shadow crosses his arms and lets out a "You're weak." (This is what he says to Infinite multiple times in Sonic Forces).
Winning animations
Winning animation 1: Shadow performs his winning animation from Sonic Adventure 2, saying, "Here we go!" If he is fighting against Sonic, he'll instead say, "You're not even good enough to be my fake!"
Winning animation 2: "You'll never understand the power of CHAOS CONTROL!" Shadow says, holding up a gleaming emerald. After the splash screen, he disappears.
Winning animation 3: Shadow stands next to a results screen that is inspired by various results screens from Sonic games. He looks it up and down as it totals up Rings, Time, and Score (Time will actually be counted with the match but won't affect the ranking. Playing on Golden Plains also increases your Ring Count proportionately to your number of coins collected.) Shadow sees himself get an S rank just as the splash screen appears. He crosses his arms and smiles at the screen. "Ultimate victory!" He says.
Losing animation: Shadow scratches his forehead and frowns, in deep thought.

Misc.
His getup attacks feature kicks.

His rolling animation has him sliding backwards on his Air Shoes.

When dying in Stamina mode, he says, "Maria…" This is to reference his death line from that game. He also says it when being spiked, to reference the end of Sonic Adventure 2.


Alternate costumes:
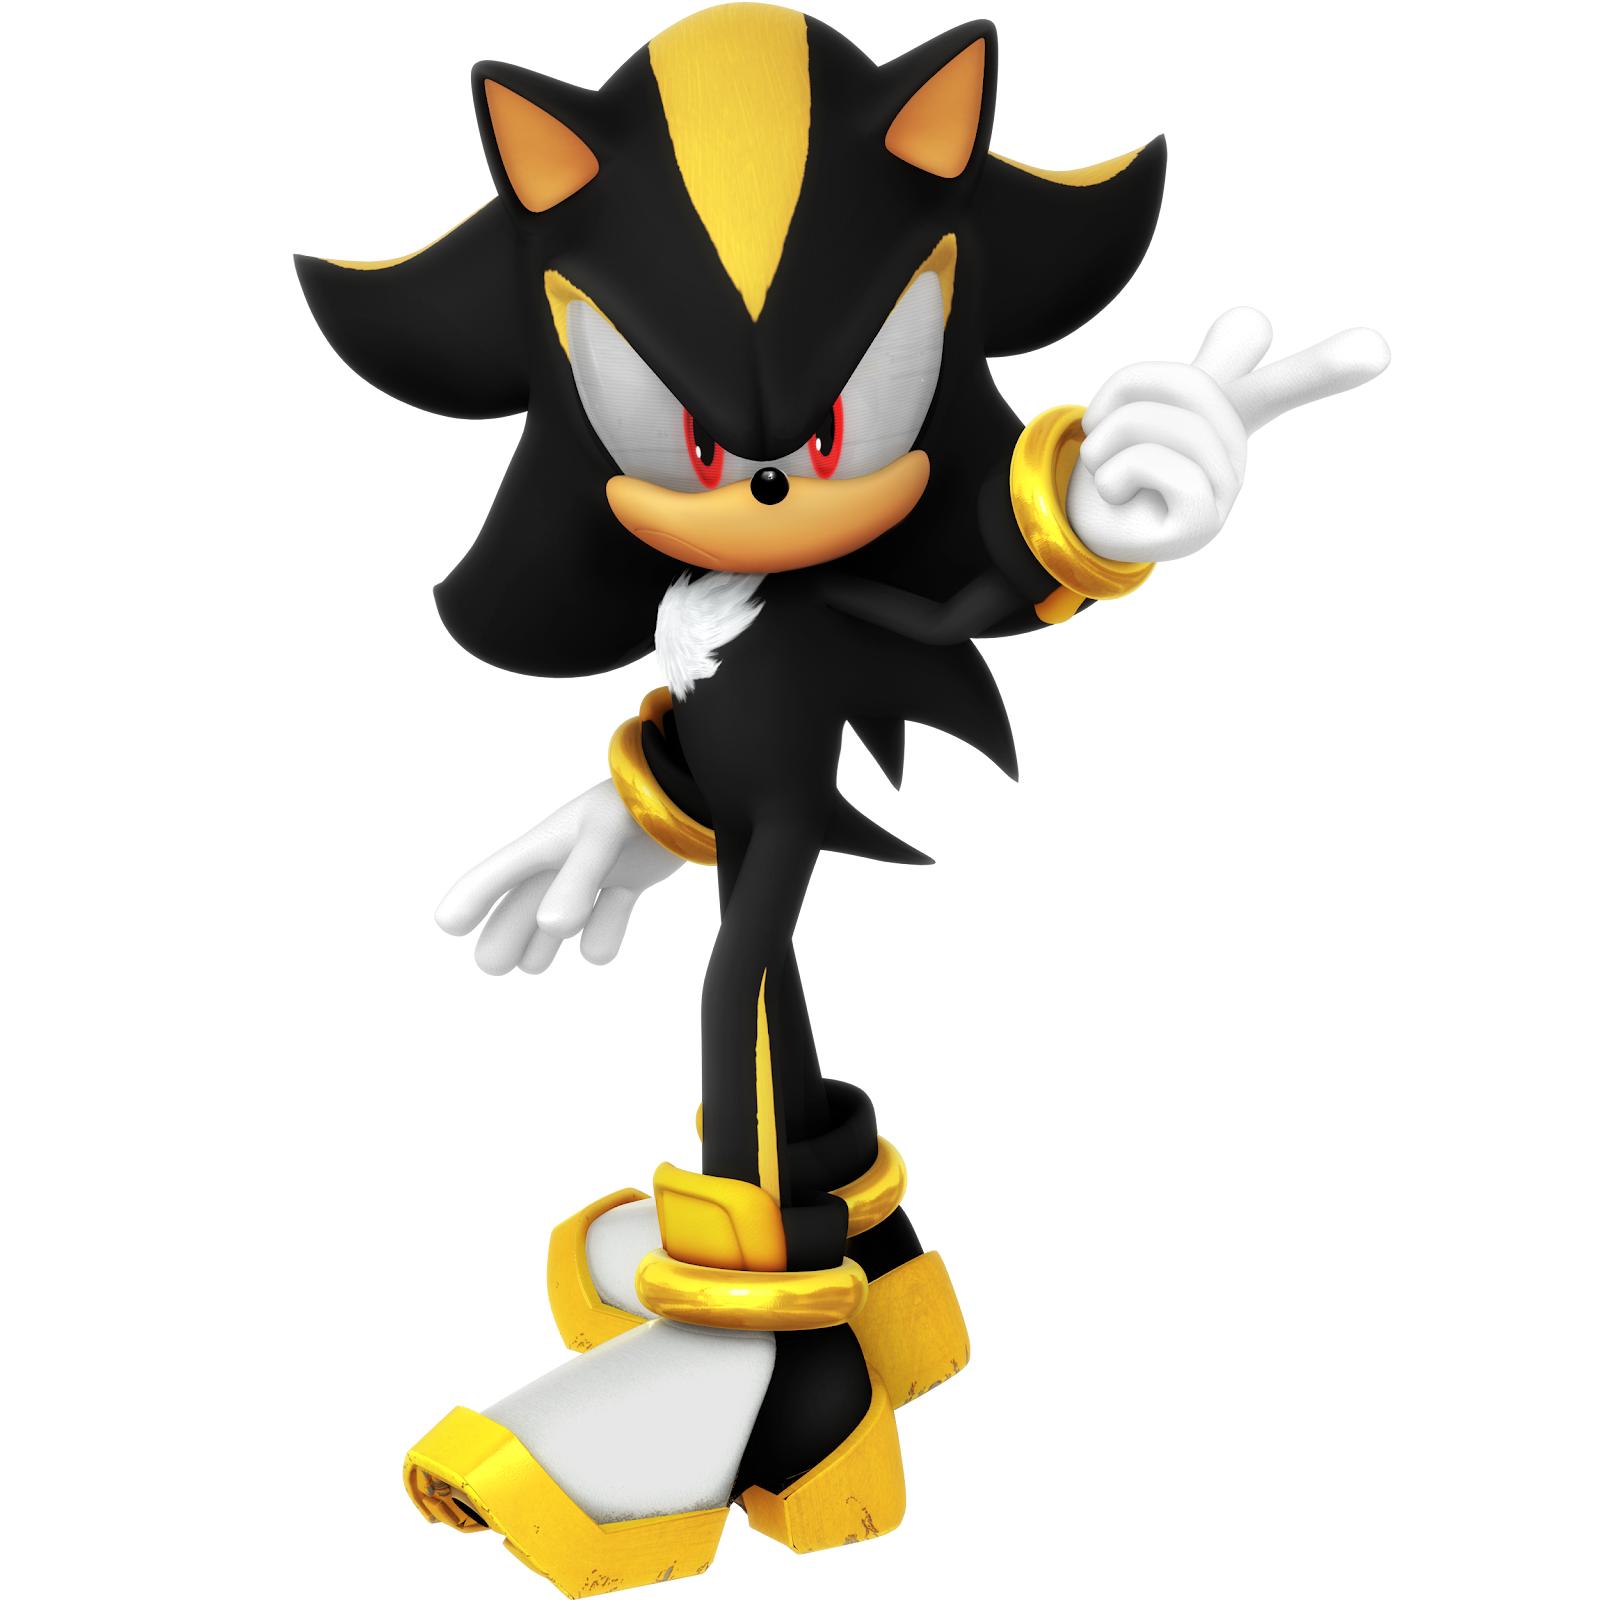
Color 1: Shadow's default color. Uses a green Emerald for attacks (this is the one he is most commonly seen with).

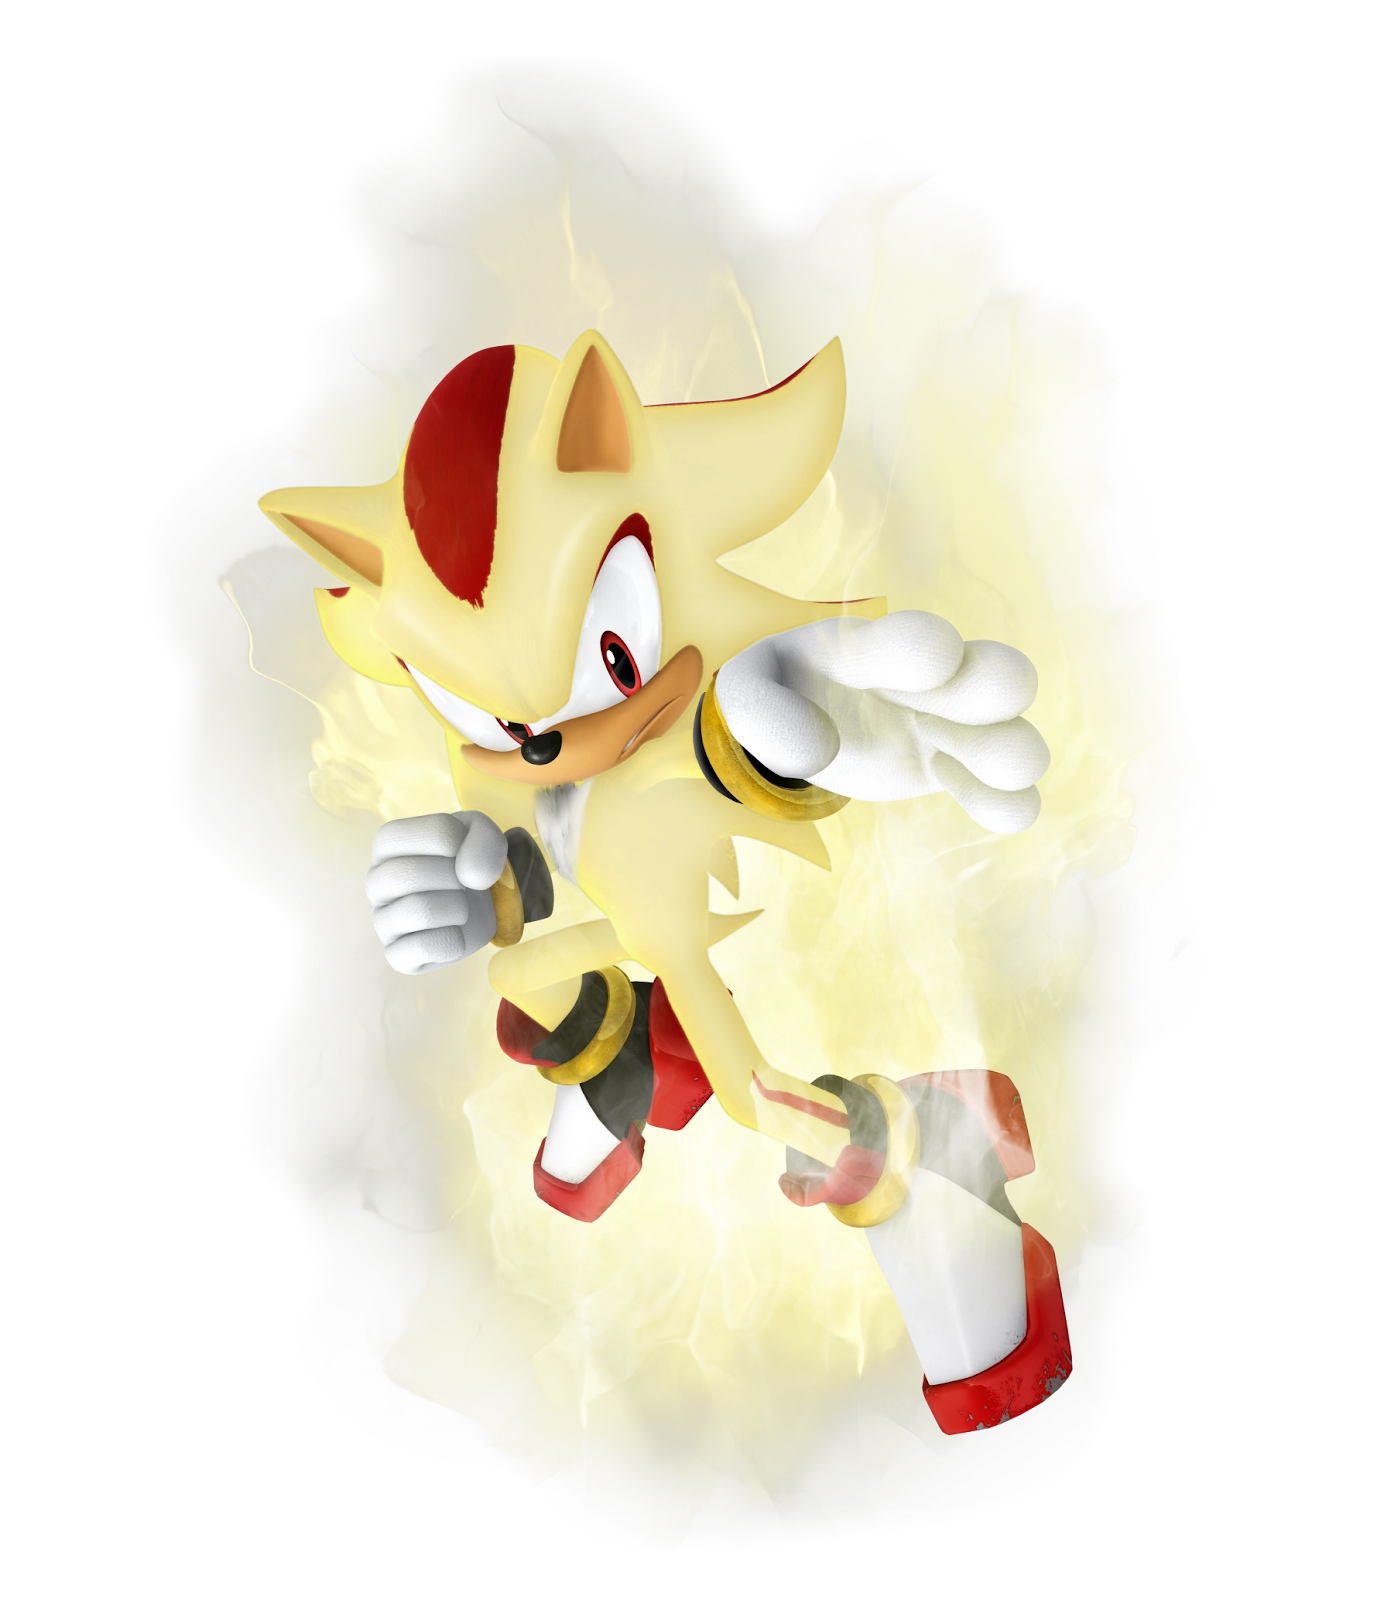
Color 2: Super Shadow. Not as bright as Super Shadow and doesn't have a glow effect either. Uses a clear Emerald for attacks.

Color 3: Mephelis, the antagonist from the game Sonic 06. Uses a purple Emerald for attacks (this is one Mephelis is often associated with given his color scheme when crystalized, and it's the last Emerald he obtains before killing Sonic).

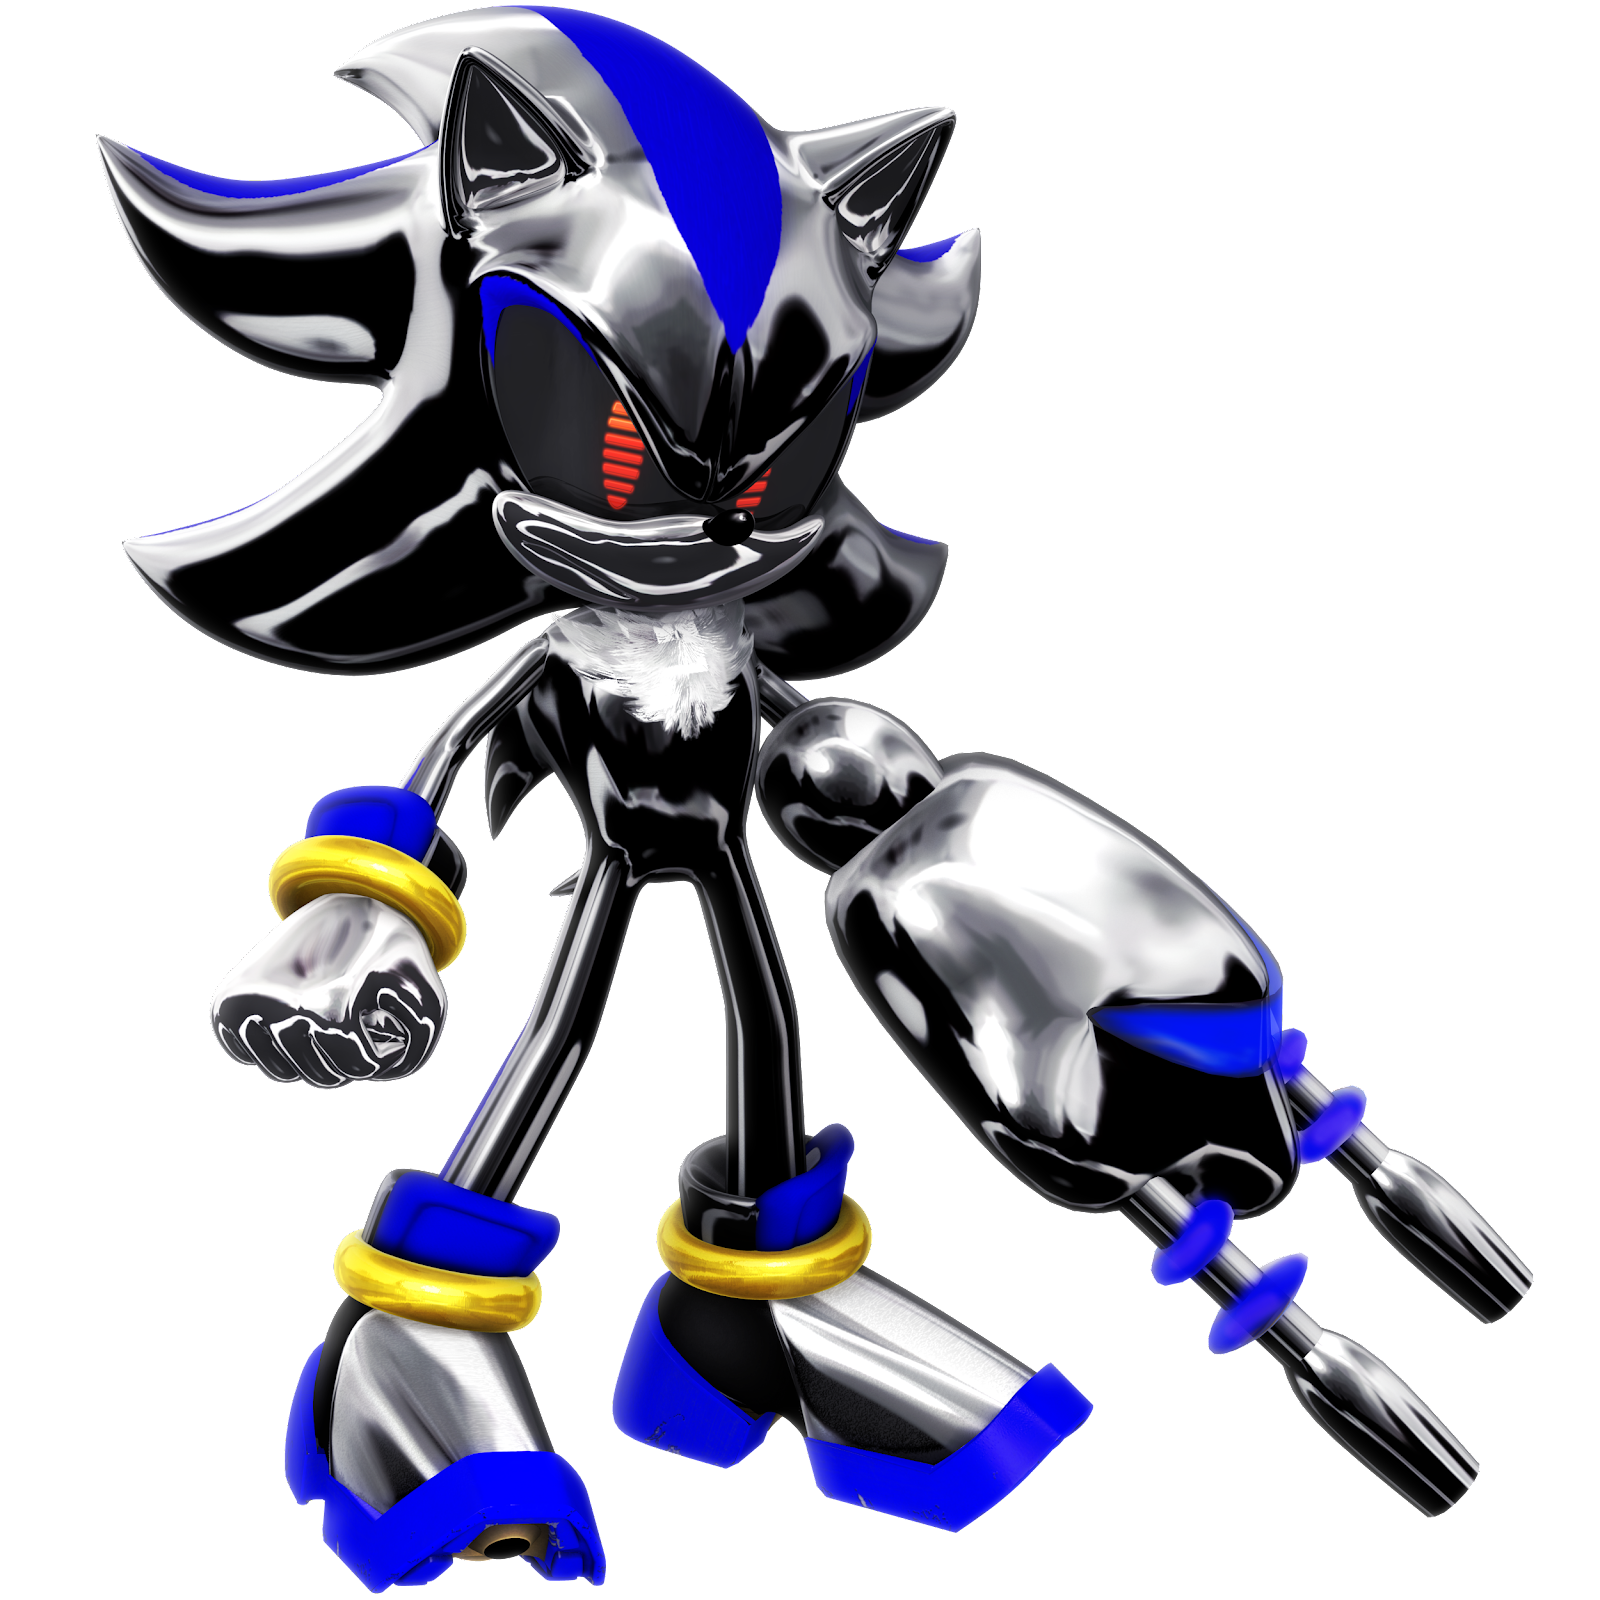
Color 4: Shadow android. A robotic version of Shadow from Shadow The Hedgehog. Uses a yellow Emerald for attacks. (Render by Nibroc-Rock)

Color 5: Sir Lancelot, Shadow's alternate dimension self from the world of King Arthur. Uses a red Chaos Emerald.

Color 6: A blue Shadow android. Uses a blue Chaos Emerald. (Thanks to Nibroc-Rock once again)

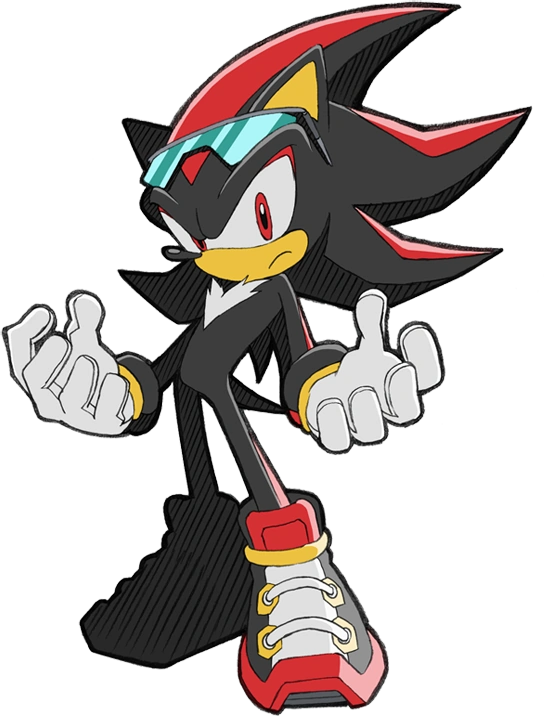
Color 7: Shadow's redesign from the Sonic Boom era. Uses a fake Chaos Emerald.

Color 8: Shadow wears his Sonic Riders gear. Uses a cyan Chaos Emerald.

Stage: Radical Highway
The first Shadow stage from Sonic Adventure 2. This part of Radical Highway in Ultimate is on the bridge segment near the middle. It's basically a plane of flat land with some overturned cars that can be destroyed. There are often G.U.N. robots that will fly in occasionally, and defeating one will net you a Chaos Drive, and depending on the color of said Drive it can upgrade a certain stat (Purple=jump height and air speed, green=running speed, red=power, and yellow=defense). This is from Sonic Adventure 2's Chao Garden where you collect Drives in action stages and feed them to Chao in the Chao garden,, and the only one I changed the function of was yellow, since yellow in that game improves swimming, and Radical Highway has no water.
Classic Mode: I Am The Ultimate Life Form!!
Shadow fights characters who are canonically the strongest on the roster. This includes characters like Palutena, Bayonetta, Kirby, Sonic, Rosalina, Zelda, Mewtwo, and Meta Knight. Ends in a fight against Rathalos, with Sonic as an ally and Final Smash Meters turned on.
Spirits
Maria-****
Gerald Robotnik-**
Biolizard-* (can enhance into Final Lizard-**)
Black Doom-***
Mephiles-* (can enhance into Solaris-**)
Shadow Android-*
Doom's Eye-*
Songs
Radical Highway
Throw it all away
Final Chase
White Jungle
Westopolis
I Am...All Of Me
All Hail Shadow
This Machine
Metal Harbor
Final Rush
Solaris Boss Phase 2
Shadow Rival Fight (Sonic Generations)
Virtual Reality (Supporting Me Remix)
Wave Ocean (The inlet)
Radical Train (The Chase)
Crisis City (Sonic Generations Act 2 remix)


Playstyle


Chaotic Glass Cannon
Shadow's moveset is simple yet brutal, and the same goes for his combos. However, he has the Boost and the Chaos Spear to play passive if needed, but not to the degree that Sonic has, as it's pretty easy to dodge the Spears if that's all Shadow is throwing out. His playstyle will revolve around getting as much damage as quickly as possible, because he's as light as Sonic and therefore a glass cannon. I was even considering giving him a Chaos Boost, that would damage him over time and make him stronger as a result, but I figured that would make him too strong. Overall he's a character where you want to get in, and if you can't maintain your advantage state, get out. His main problem will come from his lightness and his lack of "get off me" moves. He can also be unwieldy at times due to his high speed and weight. He can't cancel his fast burst option like Sonic can, so you have to be careful with your approaches. His endlag from moves is also not great, since his only safe aerials come from utilizing hovering (except for bair, which is always safe if spaced). Overall Shadow is the kind of character that can get pushed around all stock but still gain the upper hand if you read where the opponent will be or bait it, and then attack accordingly. Moves like his up b and down smash are great for punishing because of their early kill potential and semi-big hitboxes.

This was my first moveset and I'm very thankful if you've made it all the way here! I have to admit I've been messing around with the idea of making a Shadow set since back in May, but never really organized my thoughts until now. I appreciate all kinds of feedback, praise and criticisms, so I can use those to make a better set next time.
 

Perkilator

Smash Legend
Joined
Apr 8, 2018
Messages
10,441
Location
The perpetual trash fire known as Planet Earth(tm)
Scizor
Intro: Scizor pops out of a Poké Ball

Stance/Idle 1: Scizor stands upright, occasionally clacking its pincers
Idle 2: Scizor does an X-pose with its pincers
Idle 3: Scizor stretches out and flaps its wings

Notable Palette Swaps:
  • Scizor (default)
  • Shiny Scizor (yellow-green)
  • Scyther (green)
  • Manga Scizor (grey/black)
  • Golisopod (light grey/purple)
  • Pinsir (brown/white)
  • Vikavolt (blue/yellow)
  • Slowking (pink/grey)

Walk: Scizor floats along the ground almost motionlessly
Dash: Scizor dashes as it flutters
Damage: Scizor will turn its head, barely fazed
Jump: Scizor jumps with its wings the second time, barely leaving the ground
Crouch: Scizor puts one of its pincers on the ground


Weapon of Choice: Scizor’s learnset as of Gen 8


Normal Attacks
Jab: Scizor slices twice (4%) then keeps slicing rapidly (1%-2%, small knockback)
Forward+A: Scizor attacks with a pincer as it flutters along (3%, small knockback)
Down+A: Scizor kicks lightly along the ground (4%, small knockback)
Up+A: Scizor slashes in an upward 45o arc (6%, small knockback)

Aerial Attacks
Air+A: Scizor swiftly spins around and slashes four times (8%, small knockback)
Air Forward+A: Scizor slashes downward (7%, small knockback)
Air Back + A: Steel WIng; Scizor flashes it wings behind itself (8%, OK knockback)
Air Up+A: Double Hit; Scizor slashes upwards twice (9%, OK knockback)
Air Down+A: Scizor falls downward, putting its legs together like a sword (11% with a meteor effect, OK knockback)

Dash Attack: Fury Swipes; Scizor rapidly slices the opponent five times with its pincers (10%, OK knockback)
Edge Attack: Wing Attack: Scizor rams the opponent with its wings as it climbs back up (6%, small knockback)
Get-Up Attack: U-Turn; Scizor hops back up with a backflip kick (7%, small knockback)

Smash Attacks
Forward+A: Bug Bite; Scizor violently snaps one of its pincers (22%, medium knockback)
Up+A: Fury Cutter; Scizor slashes upwards with both pincers (21%, medium knockback)
Down+A: Bug Buzz; Scizor emits a loud buzzing from its wings, creating a downward shockwave (19% with a meteor effect, medium knockback)

Grab Game
Grab: Scizor grabs the opponent with one of its pincers
Pummel: Scizor squeezes the opponent with one of its pincers (2%)
Forwards+Throw: False Swipe; Scizor throws the opponent with its pincer (9%, OK knockback)
Down+Throw: Take Down; Scizor slams the opponent on the ground with both of its pincers (13%, OK knockback)
Back+Throw: Reversal; Scizor throws the opponent behind itself (10%, OK knockback)
Up+Throw: Iron Head; Scizor tosses the opponent up, then headbutts them (15%, OK knockback)


Special Moves
B : Bullet Punch
; Scizor rapidly punches the opponent when B is held (4%-5%), finishing with a powerful punch when B is let go of (10%, OK knockback); the attack weakens the longer B is held down
B + Forwards : X-Scissor; Scizor flashes forward and slashes the shape of an X, which can hit up to four opponents at once (15%, OK knockback)
B + Up : Aerial Ace; with help from the wind, Scizor slashes with both pincers and is launched high upward (14%, OK knockback)
B + Down : Swords Dance; Scizor summons two clanging swords behind itself, then slashes with both pincers (15% each, OK knockback)

Final Smash: Mega X-Scissor; Scizor Mega Evolves into Mega Scizor, slashing furiously (20%) and finishing with an X-Scissor that covers nearly the entire stage (38%, devastating knockback)

Gimmick: N/A


Taunts
1: Scizor does an X-pose
2: Scizor puts its pincers next to its face, making it look like it has three heads
1+2: Scizor shuts each of its pincers


Winposes
1: Mega Scizor performs a Bullet Punch
2: Scizor hurls up a rock and breaks it
3: Scizor, floating a bit, comes down and raises one of its pincers in the air

Applause: Scizor folds its arms and disappointedly flaps its wings
Icon: The Pokémon series icon
Boxing Ring Title: The Unfazed Slicer
Star K.O.: Scizor lets out a harsh noise from its wings
Victory Music: https://youtu.be/m9_ozzyG3uo
Kirby Hat: Scizor’s wings
 
Last edited:

BowserKing

Smash Lord
Joined
Feb 16, 2019
Messages
1,826
Location
winnipeg
Entrence: Lugia flies towards the battleground, before landing

Idol Animations: It rears it’s wings up a bit
It rears it’s neck, while looking around

Lugia cannot Crawl, but it can wall jump

Lugia has four jumps, and it’s weight is 129. It can run at 2.6.

Moveset:
Jabs: Neutral Jab: Pecks it’s beak, does 5% damage
Up Jab: Rams it’s head, does 6% damage
Side Jab: Rams it’s neck, does 7% damage
Down Jab: Peck’s it’s beak downwards, does 5% damage

Aerials:
Neutral Aerial: Slams it’s hand, does 7% damage
Up Aerial: Strikes it’s wing upwards, does 7% damage
Side Aerial: Uses a Small Wind Gust: does 10% damage
Down Aerial: Stomps on the opponent, works as a meteor smash, does 12% damage

Grab: uses it’s large hand to grab opponents
Pummel: Pecks opponents with it’s beak, does 1.5% damage each
Forward Throw: Launches an opponent forward, does 10% damage
Side Throw: Slams it’s hands before head butting the opponent, does 12% damage
Up Throw: Flies up a bit, before ramming the opponent, does 7.5% damage
Down Throw: Grabss it’s opponent with it’s feet before delivering a slam to the ground, it also gives the burry effect, does 13% damage

Rush Attack: Strikes it’s hands, does 14% damage
Ledge Attack: Delivers a backwards kick, does 10% damage
Downed Attack: Slams it’s neck, does 8% damage

Smash Attacks
Up Smash: Slams it’s hands upwards, similar to Donkey Kong’s Up Smash, does 28% damage
Side Smash: Claps it’s hands, similar to Donkey Kong’s Side Smash, does 28% damage
Down Smash: Slams it’s tail around, does 20% damage

Special Attacks
Neutral Special: Aeroblast. Lugia’s signature move. It fires it’s aeroblast. The amount of damage depends on how long you press the button. The maximum amount of damage is 35% damage, while the minimum is 7% damage
Side Special: Wind Gusts. Lugia flaps it’s hands, causing wind to strike opponents. It also pushes items away from opponents. Does 20% damage
Up Special: Dragon Rush. Lugia rams the opponent with this ability. Does 26% damage
Down Special: Extrasensory. Lugia uses this ability, delivering surprising amount of damage. Does 35% damage
Final Smash: Hurricane Attack. Lugia rams the opponent, before cutting to the sea, where Lugia unleashes a hurricane, delivering a lot of damage. Does 61% damage.

Taunts:
Up Taunt: Preforms a Wing Pose
Side Taunt: Flies around a bit
Down Taunt: Rears up to show it’s height

Alternate Costumes
1: Default
2: Shadow Lugia
3: Red, based off Ho-Oh
4: Purple, based off Lunala
5: Blue, based off Cramorant
6: Yellow, based off Zapados
7: Brown, based off Noctowl
8: Shiny Lugia

Victory Pose
1. Flies around, before posing it’s hands
2. Rears it’s neck, before creating a wind gust
3. Finishes a Dragon Rush, before slamming it’s hand
Losing Pose: Claps normally
Victory Theme: a Remix of vs Lugia

Icon: Pokeball
Kirby Hat: Lugia Head
Boxing Ring Title: The Legendary Deep Sea Guardian
 

Megadoomer

Moderator
Moderator
Writing Team
Joined
Jun 28, 2013
Messages
10,254
Switch FC
SW-0351-1523-9047
I've written up twelve movesets since then, which are linked in my signature. In case I change my signature at some point, I'll post two of them here and include links to the rest.

The two that I'm going to post are Ryu Hayabusa and Impa - while they aren't necessarily my most wanted characters, they (along with Geno and Dante) are my predictions for the remaining spots in the Fighters Pass.


Ryu Hayabusa Infiltrates Smash!

Ryu Hayabusa would have two costumes – his modern black bodysuit (which would be his default) and his blue ninja garb from the NES games. For his bodysuit, the palette swaps could be based on the outfits for Kasumi (blue with white highlights), Ayane (purple with dark blue highlights), and Momiji (white with red highlights) – I chose those three because they’re also playable in the Ninja Gaiden games. His NES-era outfit could have more traditional Smash palette swaps with red and green outfits; the red outfit could do double duty by referencing his father Jo, from the intro to the original NES game. The last palette swap would be light purple, to reference his sprites in the NES game.

For a series logo, I’m going to go with a falcon head, which is in Ninja Gaiden 3’s upgrade menu where it’s used for Ryu’s unlockable costumes. I could use a shuriken, but I’m not sure if that would be too generic. (then again, Mega Man used a gear, so being generic might not be an issue) From what I’ve seen, Ryu’s associated with both dragons and falcons, so a series logo could go any number of ways, but the falcon is a symbol used in NG3’s menus to represent Ryu (other characters have different symbols for their unlockable costumes, like a flower for Kasumi), so that’s what I’ll pick.

For a stage, I’m not overly familiar with the environments of Ninja Gaiden, given my inexperience with the series. One place that comes to mind, however, is Hayabusa Village. A traditional Japanese village seems very different from what we’ve gotten in Smash so far in terms of stages, with the sloped hills and wooden houses making for some unusual fighting terrain. If the stage has hazards (most of the DLC stages don’t, but Mementos had the trains), I could see falcons flying in to smack fighters out of the air, or members of the Black Spider Ninja clan showing up to attack the village and the fighters. If they’re limited to being background elements, maybe the Black Spider Ninjas could still show up, only to have Ayane fighting them off in the background.

Ryu starts out already on the stage, invisible (though it’s Predator-style invisibility, so he can faintly be seen) before fully appearing and drawing his sword. For his idle animations, Ryu looks at his sword or spins it around in a dramatic flourish.

------------------------------------------------------------------------------------

This is largely going to be based on Ninja Gaiden 3: Razor’s Edge, as that’s the main game that I’ve played. I’m not sure how different it is from the other games in the series in terms of combat, and I haven’t played a Dead or Alive game, so I’m not sure how Ryu fights there (I wound up looking up his throws when I got to that section, but I figured I should stick to one type of fighting style for the sake of consistency and simplicity). I’m using Ryu’s sword moves from Razor’s Edge as a reference, so I’ll include the commands from the original where they apply.

A-->AA-->AAA: Slant/Crescent/Lotus Slash. Ryu uses his basic light-light-light sword combo – a downwards swing, followed by a vertical swing, followed by a heavier downwards swing.

Forward A: Violent Wind/Gale. Ryu swings the sword twice horizontally, shouting on the second swing. (light attack while moving)

Up A: Ryu kicks his opponents into the air, based on one of his finishing moves on dismembered opponents.

Down A: Ryu uses a sliding kick, based on his slide dodge.

Forward Smash: Annihilating Demon. Ryu lunges forward, swinging the sword diagonally like when he charges a heavy attack.

Up Smash: Scarlet Dragon. Ryu swings his sword upwards, which works as a launcher attack. (light-hold heavy) At max charge, Ryu will leap up after the opponent (Azure Dragon; light-tap heavy)

Down Smash: Dragon Ring Slash. Ryu spins around, slashing his sword horizontally at head level, chest level, and finishing at his opponent’s feet if the attack is fully charged. (heavy-heavy-heavy) If it’s not charged, he’ll only use the foot attack, while if it’s partially charged, he’ll aim at the chest and feet. The blow to the head does more damage, but the blow to the feet is what sends the enemy flying.

Neutral Air: Ryu flips in midair while slashing with his sword, like his upgraded midair attack from the NES game.

Forward Air: Ryu swings his sword forward, like his regular air attack from the NES game.

Back Air: Falling Falcon. Ryu turns around, swinging his sword downwards. (running jump light attack)

Up Air: Flip Kick. Ryu flips to kick above himself; based on the flip that he does at the end of an upwards wall run.

Down Air: Helmet Splitter. Ryu stabs straight downwards, impaling whoever’s below him (air heavy attack)

Dash Attack: Piercing Wind. Ryu stabs forwards as he skids along the ground. (running heavy)

Wake-Up Attack: Crouching Crane. Ryu spins around with his sword outstretched, knocking enemies away from him. (360 motion + heavy)

Climb Attack: Ryu leaps back on stage, stabbing his sword in front of him. (this is based on what happens to whatever unfortunate enemy is standing by a ledge when you’re climbing up the wall beneath him)

------------------------------------------------------------------------------------

Grab: Ryu grabs the opponent with one hand, keeping the other on his sword.

Pummel: Ryu knees the opponent.

Forward Throw: Guillotine Throw. Ryu jumps over his opponent, grabbing them by the head before flipping to throw them a great distance.

Back Throw: Ryu stabs his sword into the enemy before flinging them behind him; based on one of his finishing moves on dismembered opponents. (along with some of the Steel on Bone attacks)

Up Throw: Izuna Drop. I feel like it has to be this. Grabbing the opponent, Ryu leaps into the air, spinning around like a drill before flipping around, falling back down, and slamming them into the ground head-first.

Down Throw: Ryu throws the opponent to the ground before disappearing in a puff of smoke. He appears above the opponent, and lands on top of them with his arms crossed as his scarf billows dramatically. I looked into his throws in Dead or Alive while trying to come up with his down throw; DOA has a much larger amount of throws than I expected, but it’s based loosely on this team throw.

------------------------------------------------------------------------------------

Up Taunt: sheathing his sword, Ryu clasps his hands together with his index fingers held up in a stock ninja pose before drawing his sword again.

Side Taunt: Ryu holds out his arm, and a falcon lands on it before flying off.

Down Taunt: Ryu places a fist on the ground, meditating. In Razor’s Edge, this gains him health, though it does nothing in Smash.

------------------------------------------------------------------------------------

B: Shuriken. A staple tool for a ninja, though this move can be charged. If it’s tapped, Ryu throws out an ordinary throwing star; it’s quick, making it easy to catch an opponent off-guard from a distance, but it barely does any damage. Holding down the button until Ryu has a faint purple aura (which doesn’t take long) and releasing it causes Ryu to throw a windmill shuriken, which is much larger, more damaging, and returns to Ryu like a boomerang. Much like in the NES game, Ryu can jump over it to make it go back and forth, though it’s tricky to do this multiple times in a row. Holding the button longer, until Ryu gains a red and orange aura, and releasing causes Ryu to throw out flames, which are much faster than the shurikens, more damaging, and can travel a longer distance before they disappear.

Up B: Wind Blades/Falcon Dive. Concentrating, Ryu glows blue before creating a tornado around himself, which launches him upwards and damages nearby enemies. Once he reaches the peak of his jump, he transitions into a Falcon Dive to launch himself forwards. He glides through the air, though he has no control over the speed of his glide, making his movement fairly predictable and leaving him open to attack. The glide can be cancelled by dodging in midair or pressing B – pressing B will cause Ryu to dash forward slightly, and if he makes contact with an opponent, he uses a command grab where he stands on the opponent’s shoulders before leaping off of them, spiking whoever he hits and getting some more horizontal distance. However, canceling it with either of these methods will put Ryu into a helpless state afterwards.

Side B: Bow. Taking a bow off of his back, Ryu fires an arrow at his opponent. If the B button is held, the angle that Ryu fires at can be changed by moving the control stick, making it effective at keeping the enemy from returning to the stage. However, it has a relatively lengthy cooldown after firing compared to the Shuriken.

Down B: Fire Wheel. Three fire balls spin around Ryu, similar to Mega Man’s Leaf Shield. Unlike Leaf Shield, this doesn’t block projectiles; however, it does much more damage than the Leaf Shield to enemies that come near Ryu. If an enemy touches a fireball, the fireball disappears, and Ryu can move while it's active. Pressing down B again while the Fire Wheel is active causes Ryu to use Art of the Inferno, which causes the fireballs to merge into a larger fireball above Ryu’s head before being flung to the ground in front of Ryu. Upon landing, or getting far enough from Ryu, they create a large explosion. The wheel will disappear after a while.

Final Smash: Art of the True Inferno. Ryu chants as fire gathers around his hands, before drawing his arms back. As he thrusts his arms forwards, a flaming serpentine dragon flies out of the flames, spinning around the stage before stopping to roar and flying straight into the air.

------------------------------------------------------------------------------------

For one victory pose, a straw dummy is sitting on the victory screen before Ryu slashes its side with a kunai, leaving him crouched on the ground near the camera with his kunai held out. In another victory pose, Ryu and a ninja wearing gray leap at each other, slashing before they hit the ground. The gray ninja collapses as Ryu stands up straight, in a reference to the original game’s opening cutscene. For a third victory screen, he stands with his back to the camera, before he glances over his shoulder as the camera zooms in on his face. This is partially based on the ending to the original arcade game, but I thought the concept would look cool.

For a victory theme, a remix of the Act Start jingle from the NES game seems like it would fit.

If Kirby absorbs Ryu, he gains Ryu’s modern mask and scarf. He also gets Ryu’s shuriken special, along with the charged variants.


Impa Sneaks Through the Shadows!

Some of Impa’s palette swaps will be basic, changing the light gray parts of her outfit to red, light blue, or green, while changing some of the secondary colours to mesh better with those palettes. One palette changes her outfit to have the same colour scheme as the Ancient Armour, while another changes her colour scheme to resemble the one used by Ocarina of Time’s Impa. One changes her outfit to brown, which was worn by Impa in the instruction manual of the first Legend of Zelda, while her last palette swap has her wearing orange and black, resembling the outfit of the Yiga clan.

For a stage, I assume it would be set in Breath of the Wild’s Hyrule. While Kakariko Village might have the closest association with Impa, I’m not sure how visually distinct it would be. Maybe a stage on top of one of the Divine Beasts could work? Vah Rudania (specifically, its back) could provide a different setting from the other Zelda stages while also referencing Kakariko Village's connection to Death Mountain in Ocarina of Time.

Impa arrives on stage by appearing in a puff of smoke with tags bursting out of it, like her dodge animation in Hyrule Warriors: Age of Calamity. For idle animations, she stretches her arms over her head and looks behind her (her idle animation in Age of Calamity), or she looks behind herself for threats while holding her sword closer to her body.

------------------------------------------------------------------------------------

This moveset is largely based on her Hyrule Warriors: Age of Calamity moveset, though some generic attacks or moves from other incarnations of Impa (mainly Hyrule Warriors) were used to fill in the gaps.

A-->AA-->AAA: horizontal slash, horizontal slash while spinning, and stab with the kodachi. The stab has fairly good launching power.

Forward A: Impa steps forward, swinging the kodachi down vertically

Up A: standing on her hands, Impa kicks upwards at an angle where she’d hit human-sized opponents on the chin.

Down A: while crouching, Impa swings the kodachi horizontally.

Forward Smash: Impa leaps into the air, spinning vertically before bringing the kodachi down with great force. (based on her Hyrule Warriors basic combo)

Up Smash: Impa uses the Sheikah Slate to create an ice block in front of her, which knocks the opponent into the air.

Down Smash: Impa does a spinning sweep kick.

Neutral Air: Impa does a vertical-spinning flip kick

Forward Air: Impa spins forward, slashing with her kodachi like her air light attack in Age of Calamity

Back Air: Impa turns around to stab behind herself with a kunai.

Up Air: Impa tosses a bomb from the Sheikah Slate into the air, which explodes.

Down Air: Impa stabs downwards like her air heavy attack in Age of Calamity, plummeting straight down.

Dash Attack: Impa disappears before reappearing a few feet ahead of where she was, swinging with a wide horizontal slash (her fifth light attack in Age of Calamity)

Wake-Up Attack: Impa spins around on the ground, holding her leg and kodachi out to knock opponents away.

Climb Attack: Impa flips onto the stage, using an axe kick (straight down) as she lands.

------------------------------------------------------------------------------------

Grab: Impa grabs the opponent with her free hand.

Pummel: Impa smacks the opponent in the gut with the hilt of her kodachi

Forward Throw: spinning horizontally as she slides forward, Impa swings the kodachi upwards with enough force to send the opponent flying.

Back Throw: Impa disappears in a cloud of smoke, reappearing in the air on the other side of the opponent as she drop-kicks them away.

Up Throw: Impa releases the opponent as four paper seals appear on the ground beneath them. The seals create a tornado that launches the opponent into the air.

Down Throw: Impa throws the opponent to the ground, hops off of them, and tosses exploding kunai to launch them away from her.

------------------------------------------------------------------------------------

Up Taunt: Impa summons a frog beneath her, which licks its lips before vanishing in a puff of smoke.

Side Taunt: Impa adjusts her hat so it’s on her head, strikes a stock ninja pose, and puts the hat back where it was.

Down Taunt: Impa crouches down, trying to pet the Egg Guardian, but it ignores her and walks by her.

------------------------------------------------------------------------------------

B: Symbol Tag/Absorb. Much like her main mechanic in Age of Calamity, pressing B will have Impa place a tag on her opponent. The tag will stick to the opponent like Snake’s C4, and one of three blue symbols will appear above their head. Pressing B while a tag is active causes Impa to stab forward as a blue aura appears around her, absorbing the tag if she hits them. (the blue symbol over their head disappears, along with the tag, and a blue symbol above Impa’s health lights up) When a symbol lights up, Impa gains a clone, with a maximum of three out at a time. The clones can’t be attacked, but they only stay out for a limited time. (if their time is almost up, the blue symbol that represents them above Impa’s health will start flashing)

Clones will imitate Impa’s basic attacks, and perform unique actions for her specials. They can’t grab, though – they temporarily vanish when Impa tries to grab. If Impa has clones active when she uses Symbol Tag, they’ll rush forward if it connects, knocking the opponent away from her. If she has clones active when she uses Absorb, the clones will explode around the opponent, reforming afterwards.

Up B: Glider. Based on Impa’s YX attack, Impa will jump into the air and throw exploding kunai at the ground (or the space below her). Afterwards, she will pull out a Sheikah-themed glider and float forward slowly. If she has clones active, they will float forward and drop exploding kunai at regular intervals, to clear a space for her to land. The glide can be cancelled out of by attacking or jumping.

Side B: Sheikah Rush. Impa vanishes, dashing forward while invisible. If she connects, she (and her clones, if they’re present) will rapidly slash the opponent before she reappears. (based on Impa's YYX attack in Age of Calamity)

Down B: Sheikah Laser. A blue Sheikah symbol appears over Impa, firing a laser on either side of her. If the clones are active, they hover in the air around the symbol, firing more lasers to increase the attack’s range and damage. (based on Impa's YYYX attack in Age of Calamity)

Final Smash: Fruits of Research. Impa’s clones rush forward and place a stack of blue explosive barrels in front of her, and anyone caught in the explosion is launched into a cutscene. The opponents land in a barren Hyrule field, where Impa and her clones have surrounded the enemies. They attack from all angles, vanishing as a targeting reticle appears in the center of the group. The camera pans over to show Robbie and Purah posing as a Guardian head that they're standing on fires a laser at the opponents. The opponents are blasted into the air, ending the cutscene and sending them flying.

------------------------------------------------------------------------------------

For her first victory pose, Impa’s kodachi is stabbed into the ground. She kicks it into the air, where the camera follows it as it spins wildly before landing in the sheath. Impa, who’s visible when it lands, turns to the camera and smiles. (this is based on her sword victory pose in Hyrule Warriors) For her second victory pose, she is kneeling on the ground with her eyes closed meditatively before she swings her sword, getting to her feet. (this is based on her intro in Hyrule Warriors) For her third victory pose, she is watching the sky absent-mindedly, humming Zelda’s Lullaby to herself before looking at the camera shocked, as if realizing that someone’s there.

Her victory theme is the standard Zelda victory theme. If Kirby absorbs her, he gains her straw hat and the Symbol Tag/Absorb ability. If Kirby absorbs the symbols, it creates clones of Kirby, and they imitate all of his moves aside from Symbol Tag/Absorb. (where they act like Impa’s do) Much like Impa’s clones, they can’t grab.

As for the rest...


Perkilator

Smash Legend
Joined
Apr 8, 2018
Messages
10,441
Location
The perpetual trash fire known as Planet Earth(tm)
Sora
Intro: Sora appears from a save point and gets into his fighting stance.

Stance/Idle 1: Sora holds his Keyblade near his right hip and looks around.
Idle 2: Sora rests his Keyblade on his right shoulder for a few seconds.
Idle 3: Sora bares his teeth in the direction he's facing.

Notable Palette Swaps:
  • KH3 outfit (default)
  • KH2 outfit (alternate costume)
  • Riku (KH3 black)
  • Roxas (KH2 white/red)
  • Kairi (KH3 pink)
  • Limit Form
  • Donald (KH3 blue)
  • Goofy (KH2 green)

Walk: His walk from the games.
Dash: His run from the games.
Damage: His damage animation from the games.
Jump: High Jump and Doubleflight.
Crouch: Crouches with his Keyblade's end on the ground, holding it.

Normal Attacks
A,A,A: Slapshot; Sora slashes twice, then follows up with an uppercut (14%, OK knockback)
Forward+A: Speed Slash; Sora slashes twice (4% each hit, small knockback), and then does a quick dual slash (13%, OK knockback)
Down+A: Sliding Dash; Sora performs a slide across the ground, slightly faster than that of Cloud (12%, OK knockback)
Up+A: Upper Slash; Sora swings his Keyblade upwards with both hands (10%, OK knockback)

Aerial Attacks
Air+A: Magnet Burst; Sora briefly surrounds himself with an array of magnetic orbs (13%, OK knockback). Pressing A again, if necessary, sends these orbs flying out (11%, medium knockback)
Air Forward+A: Aerial Finish; Sora slashes forward three times (9%, small knockback), and then finishes with a strong slash (8%, OK knockback)
Air Back + A: Aerial Sweep; Sora slashes behind himself three times (11%, OK knockback)
Air Up+A: Hurricane Blast; Sora vertically swings around four times with his Keyblade (14%, OK knockback)
Air Down+A: Diving Strike; Sora dives down and strikes the ground with his Keyblade (15%, OK knockback)

Dash Attack: Prism Windmill; Sora spins Keyblade in front of him, protected by a shield of light (15%, OK knockback)
Edge Attack: Magic Flash; Sora lifts himself up and uses a flash of light that affects the area around him (11%, OK knockback)
Get-up Attack: Vicinity Break; Sora sweeps the floor with his Keyblade in a 360 spin (9%, OK knockback)

Smash Attacks
Forward+A: Strike Raid; Sora throws his Keyblade forward as it spins (15%, OK knockback)
Up+A: Ripple Drive; Sora swings upwards and summons a barrier of light with rectangular patterns (21%, medium knockback)
Down+A: Explosion; three orbs of light surround Sora as he thrusts his Keyblade down to the ground (22%, medium knockback)

Grab Game
Grab: Sora casts Magnet and binds the opponent
Pummel: Sora crunches the opponent with Magnet (2.1%)
Forwards+Throw: Quick Blitz; Sora thrusts his Keyblade on the ground in a downward arc (14%, OK knockback)
Down+Throw: Fail-Safe; Sora spins once before tossing the opponent on the ground (13%, OK knockback)
Back+Throw: Merge; Sora spins around backwards before hurling the opponent in that direction (11%, OK knockback)
Up+Throw: Lunge n' Launch; Sora pushes the opponent forward and slashes upwards (13%, OK knockback)

Special Moves
B : Magic Selection
; Sora can select a magic spell from his list. Once a spell is selected, it will stay on that spell until another is selected, which can be done on the fly.
  • Firaga: Sora summons two rings of fire that encircle him (17%, OK knockback)
  • Blizzaga: Sora shoots three snowflakes that have a chance of freezing the opponent (10%, OK knockback); using this in the air has Sora shoot them diagonally downward
  • Thundaga: Sora summons a spark from his Keyblade that forms a dome (15%, OK knockback)
  • Aeroga: Sora surrounds himself in a windy barrier that halves damage taken and reflects projectiles; the spell lasts for 18 seconds
  • Curaga: Sora heals up to 150% taken damage; this spell can only be used once per stock and can also heal nearby allies by 1/3
B + Forwards : Sonic Blade; Sora thrusts forward four times, with consecutive button presses (6% each hit, small knockback)
B + Up : Airstep; Sora travels in the pointed direction at the speed of light after releasing the button (holding it slows him down for six seconds).
B + Down : Ars Arcanum; Sora charges up and unleashes a flurry of thirteen slashes (2.5% each hit, OK knockback)

Final Smash: Ultimate Union Ragnarok; Sora attempts to unleash Ultimate Form (Final Form in his KH2 outfit), and catches any opponents he successfully hits (8%). The trapped opponents are taken into a cutscene as Sora slashes them with hundreds of swords (32%), and finishes off with Union Ragnarok, with the Lux symbol showing as he fires it (16%) (56% total, far knockback).

Gimmick: Situation Commands; after pulling off successful combos, three arrows appear by Sora's HUD, one by one. Once a combo is successful with all three arrows, a command appears above Sora's icon, and pressing B will activate one of four Grand Magic spells, which are obtained by using one spell consistently, and that spell will appear for a set amount of time.
  • Firaza has Sora summon a giant fireball that can travel offscreen when it doesn't hit any opponents (25%, medium knockback)
  • Blizzaza has Sora fire a giant icicle that freezes the first opponent it hits, and sends all others flying (25%, medium knockback)
  • Thundaza has Sora rain down a pillar of electricity and combo any opponents above him (25%, medium knockback)
  • Aeroza has Sora summons a tornado that circles him, sending opponents flying (30%, far knockback)
Whenever you use a Grand Magic tier of a spell, that spell enters a 15 second cool down period.

Lock-On: By shielding and pressing B, Sora can lock on to foes to better aim his magic. The yellow variant that appears on random foes is there when Sora doesn’t lock on, and the blue variant for when Sora DOES lock on is there as well.


Taunts
1: Sora wipes his nose and smiles.
2: "Yeah!" Sora raises his Keyblade high in the air.
1+2: Sora performs Break Time, where he spins around for a bit and says "ta-da!" as he puts his right hand on his hip and puts up his left hand.

Winposes
1: "That's the power of the Keyblade!" Sora's victory animation from KH1, whenever he wins a tournament in Olympus Coliseum.
2: Sora spins his Keyblade and sticks it firmly in the ground, smiling (based on one of his renders based on KH1 artwork of him).
3: Sora opens a treasure chest as he does in the games, and a Meow Wow comes out to cuddle-tackle him.

Icon: The heart in KH series logo.
Boxing Ring Title: The Key to Many Hearts
Victory Music: Sora’s theme
Kirby Hat: Sora's hair and necklace.
 
Last edited:
D

Deleted member

Guest
I recently found this really cool moveset video for Pauline which almost matches with my view of how she could play in Smash:


BowserKing

Smash Lord
Joined
Feb 16, 2019
Messages
1,826
Location
winnipeg
Note: the moves I will show are either different from Bowser, or are possible moves that Bowser could have in the sequel

Entrence: Dark Bowser emerges from the shadows

Neutral Special: Blue Fire. Similar to Bowser’s Neutral Special, but is coloured blue. Does the same damage as well

Side Special: Boulder Launch. Dark Bowser grabs a Boulder and throws it at the opponent, doing 28% damage. Said boulder breaks into smaller boulders, which can be used as projectile weapons, doing 5% damage. But those boulders disappear after 10 seconds.
Up Special: Shell Ball. (Note, Bowser would have this ability in my Bowser moveset upgrade). Dark Bowser turns into a ball and rams opponents, doing 30% damage. Also has great recovery.
Final Smash: Rage Caged. A cage is summoned, trapping the opponent, and the Dark Bowser charges a huge energy attack and then he unleashes it at the opponent, doing 54% damage.

Taunts: Uses Bowser’s taunts he currently has. (Bowser in my moveset upgrade has new Taunts and can talk)


Victory Posses
1. He fires his breath at the screen, before rising his fist
2. Rolls in the scene before emerging and roaring
3. Creates a storm and then he growls in a smug tone
Clap: Claps with a frown on his face
If Bowser defeats him, Bowser would say “I’m the true ruler of the Mushroom Kingdom”

Costumes
1. Default
2. King Wart Costume
3. Smithy Costume
4. King Olly Costume
5. Dimentio Costume
6. Fawful Costume
7. T.Rex Costume
8. Shake King Costume

Kirby Hat: His head
Boxing Ring Title: Doppleganger of Evil
Victory Theme: Same as Bowser
 

Perkilator

Smash Legend
Joined
Apr 8, 2018
Messages
10,441
Location
The perpetual trash fire known as Planet Earth(tm)
Adol Christin
Intro: Adol regains consciousness, and gets into battle position.

Stance/Idle 1: Adol moves left and right in a 90’s anime-style movement, holding his sword two-handed.
Idle 2: Adol briefly strokes his sword with his left hand.
Idle 3: Adol wipes his head with his left hand.


Notable Palette Swaps:
  • Classic Adol (default)
  • Dogi (blue/green)
  • Feena (cyan/white)
  • Rhea (blue/red)
  • Lilia (cyan/brown)
  • Dark Fact (yellow/purple)
  • Geis (green/black)
  • Estelle Bright (brown/orange)

Walk: Adol treads carefully.
Dash: Adol dashes forward with his sword in one hand.
Damage: Adol leans backwards. When he’s not being hit, he glows red when the Bump System kicks in.
Jump: Adol jumps once in his two-handed position, then takes one of his hands off when double-jumping.
Crouch: Adol crouches like


Weapon of Choice: Adol carries a Longsword, which ties into the Bump System.

Normal Attacks
Jab: Adol swipes left and right constantly (2%-3% each, small knockback)
Forward+A: Adol jabs his longsword (5%, small knockback)
Down+A: Adol does an uppercut swipe (6%, small knockback)
Up+A: Adol does a backward slash above himself (5%, small knockback)

Aerial Attacks
Air+A: Adol does a full 360 slash around himself (9%, OK knockback)
Air Forward+A: Adol does a crescent slash (8%, OK knockback)
Air Back + A: Adol does a backward crescent slash (9%, OK knockback)
Air Up+A: Adol does an upward arc slash (7%, small knockback)
Air Down+A: Adol does a downward crescent slash (10% with a meteor effect, OK knockback)

Dash Attack: Adol does a dashing slash (7%, OK knockback)
Edge Attack: Adol thrusts his sword as he climbs back up (4%, small knockback)
Get-Up Attack: Adol swings left and right (5%, small knockback(

Smash Attacks
Forward+A: Adol stabs the enemy with his sword (22%, medium knockback); this can be slightly angled.
Up+A: Adol swings in an upward arc twice (21%, medium knockback)
Down+A: Adol swings his sword diagonally downwards (18%, medium knockback)

Grab Game
Grab: Adol grabs the opponent with one of his hands.
Pummel: Adol knees the opponent (1%)
Forwards+Throw: Adol does a slash that looks like it’s scooping up the opponent (9%, OK knockback)
Down+Throw: Adol spins ounce and swings his sword downward (11%, OK knockback)
Back+Throw: Adol turns around and kicks the opponent (6%, small knockback)
Up+Throw: Adol throws the opponent above himself (3%) then stabs them (9%, OK knockback)

Special Moves
B : Ignis Bracelet
; Adol shoots fireballs by pressing and holding B (6% each, small knockback). Repeated uses weaken the attack over time.
  • If B is tapped, Adol shoots one fireball.
  • If B is held for 1.5 seconds, Adol shoots two fireballs.
  • If B is held for 3 seconds, Adol shoots three fireballs.
B + Forwards : Terra Bracelet; Adol thrusts his sword and charges forward.
  • If B is tapped, Adol charges forward and goes a long distance (14%, OK knockback; 6% recoil)
  • If B is held, Adol performs a powerful thrust that goes slightly less distance (31%, far knockback; 13% recoil), leaving him to recharge for 2 seconds.
B + Up : Wing; Adol flies extremely high with a Wing, only able to move straight upward.
B + Down : Livart Slash; Adol does a two-handed 360 slash where wind blows out of his sword (20%, far knockback; 5% recoil)

Final Smash: Books of Ys; Adol charges forward in a beam of light (10%). Opponents are then taken into a cutscene where all six Books of Ys gather around Adol, and he charges into the opponent (20%) and the lights of the Books all form spires that do the same (4% each) (56% total, devastating knockback)

Gimmick: Bump System; if Adol attacks opponents when really close to them, he will take slight recoil damage (.1%-.5%); hence why he has a Longsword, because it can help to attack opponents without getting too close. The Bump System only kicks in when the opponent isn’t shielding.


Taunts
1: Adol briefly sticks out his left index and middle fingers while holding his sword in his right hand.
2: Adol mimics his pose from Ys I & II Chronicles.
1+2: Adol raises his sword and lets out a war cry.


Winposes
1: The Books of Ys all float around Adol.
2: The camera zooms around Adol, who then does a slash with his sword taken directly out of the scabbard.
3: Adol raises his sword and lets out a war cry as light shines down on him.

Applause: Adol simply claps.

Icon: The Ys series logo (which is a stylized Ys)

Boxing Ring Title: The Journeyman of Legend

Star K.O.: Adol lets out a cheesy 90’s scream.

Victory Music: https://youtu.be/wlO7XeVtFhg

Kirby Hat: Adol’s hair
Oh, also; I created a Classic Mode route for him as well. Here's the thread for making your own if you like.
 

Perkilator

Smash Legend
Joined
Apr 8, 2018
Messages
10,441
Location
The perpetual trash fire known as Planet Earth(tm)
Ayumi Tachibana
Intro: Ayumi runs onto the stage and catches her breath

Stance/Idle 1: Ayumi stands with her briefcase in hand.
Idle 2: Ayumi nervously looks over her shoulder
Idle 3: Ayumi brushes her left leg

Notable Palette Swaps:
  • Ayumi Tachibana (default)
  • Diskun (orange/yellow)
  • Takamaru (red/white)
  • Tamagon (green/yellow)
  • Sukapon (pink)
  • Seliph (blue)
  • Civilian Ayumi (alternate costume)
  • FDC protagonist (alt. blue)


Walk: Ayumi walks slowly and nervously
Dash: Ayumi runs delicately while keeping her suitcase in one hand
Damage: Ayumi puts a hand to her mouth, gasping in shock
Jump: Ayumi jumps somewhat low both times.
Crouch: Ayumi looks down, observing the ground

Weapon of Choice: While not necessarily “weapons”, Ayumi defends herself using her suitcase, flashlight, umbrella and magnifying glass


Normal Attacks
Jab: Ayumi slaps the opponent twice (4%)
Forward+A: Ayumi weakly kicks the opponent (3%)
Down+A: Ayumi briefly kicks along the ground (4%)
Up+A: Ayumi does an upward backhand slap (5%)

Aerial Attacks
Air+A: Ayumi swings her suit case in a full circle (7%)
Air Forward+A: Ayumi briefly flickers her flashlight (7%)
Air Back + A: Ayumi swings her suitcase backwards (9%)
Air Up+A: Ayumi briefly opens then retracts her umbrella (8%)
Air Down+A: Ayumi kicks opponents below her (6%)

Dash Attack: Ayumi trips on the ground (5%)
Edge Attack: Ayumi slams her suitcase onto the ground (6%)
Get-Up Attack: Ayumi turns on her flashlight and gets up (5%)

Smash Attacks
Forward+A: Ayumi swings her suitcase with force (17%)
Up+A: Ayumi opens her umbrella (18%)
Down+A: Ayumi shines a burning light along the ground (15%)

Grab Game
Grab: Ayumi grabs the opponent with her open hand
Pummel: Ayumi backhands the opponent with her suit case (2%)
Forwards+Throw: Ayumi pushes the opponent (8%)
Down+Throw: Ayumi pushes the opponent to the ground (8%)
Back+Throw: Ayumi runs past the opponent as she pushes them by (7%)
Up+Throw: Ayumi uppercuts the opponent with her suitcase (10%)

Special Moves
B : Flashlight
; Ayumi shines her flashlight in a medium area (10%), briefly stunning opponents in range
B + Forwards : Solar Rays; Ayumi uses her magnifying glass to create a ray of sun (8%). The attack’s power is increased by 7% damage for a single hit when used on stages that take place in the daytime.
B + Up : Umbrella; Ayumi nervously opens her umbrella and floats in a single direction without stopping, only slowing down when the control stick is tilted in the opposite direction
B + Down : Inspect; Ayumi inspects the ground with her magnifying glass; there’s a 50/50 chance of Ayumi picking up an item
Final Smash: Case Closed; Ayumi glares at up to 3 opponents. Any caught in her vision are taken into a cutscene emulating FDC on the Famicom, where Ayumi declares the opponent(s) the perpetrator(s). The attack is increased by 5% if the opponent(s) is holding an item.

Gimmick: N/A


Taunts
1: Ayumi gasps in shock
2: Ayumi looks over both of her shoulder
1+2: Ayumi struggles to lift her suitcase

Winposes
1: Ayumi slowly walks towards the camera
2: Ayumi, her back turned to the camera, looks at it and, startled, gasps in shock
3: Ayumi turns on a flashlight and points it towards her name on the victory screen

Applause: Ayumi quietly claps

Icon: A magnifying glass

Boxing Ring Title: Schoolgirl Detective

Star K.O.: Ayumi pushes down on her skirt and screams for her life
Victory Music: https://youtu.be/9h7FyuIRC4A
Kirby Hat: Ayumi’s hair
 
Last edited:

Perkilator

Smash Legend
Joined
Apr 8, 2018
Messages
10,441
Location
The perpetual trash fire known as Planet Earth(tm)
Snivy
Intro: Snivy pops out of a Poké Ball

Stance/Idle 1: Its idle animation from Poképark 2
Idle 2: Its idle animation from Pokémon Black and White
Idle 3: Its idle animation from Pokémon Black 2 and White 2

Notable Palette Swaps:
  • Snivy (default)
  • Shiny Snivy (blue)
  • Serperior (green/white)
  • Tepig (orange/black)
  • Oshawott (cyan/white)
  • Reshiram (white/blue)
  • Zekrom (black/red)
  • Victini (orange)

Walk: Snivy sashays
Dash: Snivy’s run animation from Poképark 2
Damage: Snivy looks away in an annoyed manner while covering its face
Jump: Snivy jumps at a moderate height, then uses Leaf Tornado to jump twice
Crouch: Snivy crouches on both its legs and hands

Weapon of Choice: Snivy is a Pokémon, so it of course uses Pokémon moves. This incarnation is loosely based on the Snivy in Poképark 2; both in moveset and personality.

Normal Attacks

Jab: Snivy rapidly smacks the opponent with its vines (1%-2%), then finishes with a jab (4%, small knockback)
Forward+A: Headbutt; Snivy headbutts the opponents (5%, small knockback)
Down+A: Photosynthesis; Snivy relaxes in the sun, emitting energy (7%, small knockback)
Up+A: Cut; Snivy jabs one of its vines upward (5%, small knockback)

Aerial Attacks
Air+A: Razor Leaf; Snivy twirls and blows a gust of leaves around itself (8%, OK knockback)
Air Forward+A: Tail Whip; Snivy does a flip turn attacking with its tail (9%, OK knockback)
Air Back + A: Tail Whip; Snivy raises its tail backwards (6%, OK knockback)
Air Up+A: Snivy spins looking up, attacking with its nose (8%, OK knockback)
Air Down+A: Slam; Snivy nosedives towards the ground (11% with a meteor effect, OK knockback)

Dash Attack: Tackle; Snivy tackles the opponent (8%, OK knockback)
Edge Attack: Return; Snivy tackles the opponent after using its vines to climb back up (9%, OK knockback)
Get-Up Attack: Leer; Snivy glares at nearby opponents, causing them to slip as it gets back up (5%, small knockback)

Smash Attacks
Forward+A: Leaf Blade; Snivy fiercely attacks with both vines (17%, OK knockback)
Up+A: Iron Tail; Snivy does a backflip while using its vines to support itself (19%, medium knockback)
Down+A: Frustration; Snivy slams both vines on the ground on both sides of it (18%, OK knockback)

Grab Game
Grab: Wrap; Snivy grabs the opponent with its vines
Pummel: Wring Out; Snivy squeezes the opponent with its vines
Forwards+Throw: Mean Look; Snivy lets go of the opponent and stuns them by glaring at them (5%)
Down+Throw: Snivy buries the opponent by slamming it into the ground (9%)
Back+Throw: Snivy tosses the opponent behind itself (7%, small knockback)
Up+Throw: Snivy tosses the opponent into the air (7%, small knockback)


Special Moves
B : Magical Leaf
; Snivy summons twelve leaves that home in on nearby opponents (1%-2% each hit, small knockback). It can store these leaves for use whenever.
B + Forwards : Grass Knot; Snivy grabs its tail with its vines and rolls around in a wheel shape (8%, OK knockback)
B + Up : Leaf Tornado; Snivy spins around on its head, rising way up in a gust of leaves (15%, OK knockback). It can also use it on the ground to quickly move left or right (8%, OK knockback).
B + Down : Leech Seed; Snivy tosses three seeds out onto the battlefield (5%, small knockback). Any that hits an opponent inflicts the flower effect.

Final Smash: Leaf Storm; Snivy flies around and spins rapidly in a giant tornado of leaves (50%, devastating knockback)

Gimmick: N/A


Taunts
1: Snivy confusedly scratches its head with one of its vines
2: Snivy smugly raises its head and smiles
1+2: Snivy folds its arms and looks away from the camera

Winposes
1: Snivy puts an arm out and raises its head
2: Snivy folds its arms and smugly smiles as its vines raise it in the air
3: Snivy gleefully twirls around in a gust of leaves
Applause: Snivy claps with its vines while folding its arms

Icon: The Pokémon series icon
Boxing Ring Title: The Rambunctious Princess
Star K.O.: “Snivyyyyy….!”
Victory Music: https://youtu.be/m9_ozzyG3uo
Kirby Hat: His Leaf hat from Return to Dream Land
 

Perkilator

Smash Legend
Joined
Apr 8, 2018
Messages
10,441
Location
The perpetual trash fire known as Planet Earth(tm)
(Sorry to force this into life support)

Dr. Eggman
Basis: https://twitter.com/TKOWL_Art/status/1354599286172954629?s=20

Intro: Eggman floats down on his Egg Mobile

Stance/Idle 1: The Egg Mobile floats close to the ground
Idle 2: Eggman chuckles
Idle 3: Eggman twirls his mustache

Notable Palette Swaps:
  • Default: Dr. Eggman
  • Color 2: Maria Robotnik (blue)
  • Color 3: Snively (green)
  • Color 4: Professor Gerald (white)
  • Color 5: Eggman Nega (black)
  • Color 6: Pajamas (pink)
  • Color 7: Classic Eggman (alt 1)
  • Color 8: Eggrobo (alt 2)
Walk: The Egg Mobile floats along the ground
Dash: The Egg Mobile floats along the ground while the jets fire
Damage: His damage animation from the Classic games
Jump: The Egg Mobile’s Walker legs spring out, and the jet propels Eggman slightly for the second jump
Crouch: Eggman rests the Egg Mobile on the ground

Normal Attacks
Jab: Eggman flurries with robotic claws from the Egg Mobile (2%-3%), then finishes with an uppercut (6%, small knockback)
Forward+A: Eggman attacks with one of the bumpers from the EGG-HVC-001 (6%, small knockback)
Down+A: Eggman sends out a boxing glove attached to a spring that sends opponents far (9%, OK knockback)
Up+A: Eggman attacks using the pointy tail from the second submarine boss of Oil Ocean (9%, OK knockback)

Aerial Attacks
Air+A: Eggman attacks using the flippers from the final boss of Sonic CD (3% each hit, OK knockback)
Air Forward+A: Eggman fires a shot from his energy gun (7%, small knockback)
Air Back + A: Eggman drops some blue toxic water from the back of his Egg Mobile (10%, OK knockback)
Air Up+A: Eggman attacks by clamping the two claws from the Casino Night Zone boss (11%, OK knockback)
Air Down+A: Eggman drops down with a spike at the bottom of the Egg Mobile (8% with a meteor effect, OK knockback)

Dash Attack: Eggman dashes forward with the Egg Walker’s legs
Edge Attack: Eggman shoots an energy laser (7%, small knockback) and gets back up after hanging on the edge with the Egg Mobile’s robot claws
Get-Up Attack: Eggman briefly summons an Electric Shield (5%, small knockback)

Smash Attacks
Forward+A: Eggman slams the ground with a giant hammer (25%, medium knockback)
Up+A: Eggman attacks by raising a drill from Marble Garden above himself (22%, medium knockback)
Down+A: Eggman fires two fireballs from the bottom of his Egg Mobile (15% each hit, OK knockback)

Grab Game
Grab: Eggman uses Big Arms to grab the opponent
Pummel: Eggman slowly squeezes the opponent (5%)
Forwards+Throw: Eggman tosses the opponent forward (9%, OK knockback)
Down+Throw: Eggman hovers up a bit and buries the opponent with a full-force ground slam (15%)
Back+Throw: Eggman throws the opponent behind himself (12%, OK knockback)
Up+Throw: Eggman uses the Phantom Ruby to warp the opponent to above himself (8%, small knockback)

Special Moves
B : Egg Mobile-H
; “Take this!” Eggman unleashes a wrecking ball and slams it forward after a brief spin (22% with a meteor effect, medium knockback). By tilting the control stick in the opposite direction, Eggman can do a backflip and attack opponents behind him.
B + Forwards : Egg Mobile-D; Eggman rushes forward in a drill car (15%, OK knockback). The drill itself cancels out the Drill item, and can be released by pressing B again.
B + Up : Phantom Ruby; Eggman uses the powers of the Phantom Ruby to warp in the direction the control stick is tilted; this attacks fighters in a large area (5%, OK knockback) and can either shrink opponents, reverse controls, or inflict the Flower status.
B + Down : Laser from M.E.; “Get ready to be schooled!” Using the powers of the Master Emerald, Eggman fires a huge one-hit laser that goes offscreen (35%, far knockback). This attack has a 7-second cooldown between uses.

Final Smash: Death Egg Robot; “Get a load of this!” Using the powers of the Phantom Ruby, Eggman summons the Death Egg Robot. Both of its arms can be controlled with either control stick, and pressing B has Eggman fire both of them towards the screen (30%, far knockback); if opponents are at 70% or higher, they will suffer a screen K.O.

Gimmick: N/A


Taunts
1: “Yosh…” Eggman pets his Egg Mobile
2: “Time for a change of pace!” Eggman gets out of the Egg Mobile for a sec to do a “Well! What is it?” gesture
1+2: “Ohohoho!” Eggman puts his hand on his chest as he laughs

Winposes
1: “Now you know why I am the best!” Eggman mimics the bad ending from Sonic the Hedgehog
1a: “Try again, Sonic!” (Vs. Sonic)
2: “The more, the merrier!” The camera pans up from a capsule containing Flickies and moves up to Eggman, with Orbot and Cubot appearing briefly
3: “Yes, yes, yes!” Eggman’s victory animation from Sonic Adventure 2

Applause: Eggman mimics the good ending from Sonic the Hedgehog
Icon: The Sonic series icon
Boxing Ring Title: The Man with the Master Plan
Star K.O.: “You’ll regret thiiiis…!” “I hate that hedgehoooog…!”
Victory Music: E.G.G.M.A.N.
Kirby Hat: Eggman’s glasses and mustache
 

FazDude

Smash Master
Joined
Jan 26, 2021
Messages
3,067
Location
Wherever good books are sold.
I hate to jump on this nine months after the last post, but I wanted to share a moveset for the closest thing I have to a most wanted character; Waluigi. Wait, no, come back!

This is my first moveset on Smashboards, so I hope you enjoy!
First off, Waluigi would be able to crawl. Also, his roll is actually him moonwalking, something we see him do in a lot of games.
Normal Attacks:
  • Jab: Waluigi throws two hooks before throwing a stylish straight kick.
  • Dash Attack: Waluigi springs forwards, only to land on the ground and slide forwards a short distance.
    • This can be seen as an attempt at a soccer goalie's lunge, referencing the Super Mario Strikers games, a reference to Waluigi's trophy animation in Mario Power Tennis, or Waluigi's attempt at performing the infamous Luigi Missile in defiance of his rival. All three could work well for the character.
  • Forward Tilt: Waluigi jabs two of his fingers out in an attempt to poke his opponent in the eyes. Not only can this be seen as a cheap knockoff of Luigi's Forward Smash, but it's fitting for Waluigi.
  • Up Tilt: Waluigi throws a high kick, referencing one he used against Bowser in Mario Party 3.
  • Down Tilt: Waluigi performs a stomp, not too dissimilar from the one he currently uses as an Assist Trophy. Just like King K. Rool's down tilt, it can bury opponents.
  • Forward Smash: Waluigi charges up before swinging a tennis racket forwards. While not particularly powerful, it can reflect projectiles just like Ness' F-Smash.
  • Up Smash: Luigi does a headbutt for his Up Smash, so Waluigi attempts to do so as well. However, his Up Smash has him strike his head upwards while spinning around, kind of like Wario's U-Smash from Brawl.
  • Down Smash: Waluigi performs a breakdance kick, similar to a lot of characters' Down Smashes. This move simply represents Waluigi's love of dance.
Aerial Attacks:
  • Neutral Air: Waluigi sticks his leg out as he swings it around wildly, somewhat referencing the Whirluigi Power Shot from Mario Power Tennis.
  • Forward Air: Waluigi thrusts his leg out while posing for the camera, referencing a trick he pulls off in the Mario Kart games.
  • Back Air: Waluigi throws a nasty roundhouse kick behind himself.
  • Up Air: Waluigi holds up his arms so his silhouette resembles his iconic Γ shape. The tip of the shape is a sweetspot.
  • Down Air: Waluigi performs the Drop Rocket from Super Mario Strikers, descending diagonally in a corkscrew motion. This move can spike opponents during its first few frames.
Grab / Throws:
  • Grab: Waluigi simply grabs his opponent with one hand.
  • Pummel: Waluigi knocks on the opponent's head.
  • Forward Throw: Waluigi lobs the opponent forwards with his tennis racket.
  • Back Throw: Waluigi tosses his opponent behind him before giving them a kick in the rear.
  • Up Throw: Waluigi tosses his opponent into the air before uppercutting them, as if he were hitting a Dice Block from Mario Party.
  • Down Throw: Waluigi tosses his foe to the floor before whacking them with a golf club.
Specials:
Waluigi's specials are where things get REALLY wacky.
  • Netural Special: Serve / Liar Ball
    • If you simply press the special button, Waluigi tosses a tennis ball into the air. While the ball is airborne, hitting any button will cause Waluigi to swing his racket, being able to serve the ball in different arcs depending on your timing. The closer the ball is to the center of the racket, the more speed and power the ball will gain. After serving it, the ball becomes capable of damaging opponents and bouncing off most surfaces, only despawning once it goes off-stage, Waluigi gets KO'd, or after some time.
    • If you hold the button, the move changes into the Liar Ball, inspired by Waluigi's Star Skill from Mario Superstar Baseball. While Waluigi serving this special ball works in the same way as the normal ball, it will not bounce at all. Instead, upon contact with anything, the ball suddenly expands into a poisonous cloud, similar to Piranha Plant's Side Special.
    • If you use the Neutral Special while either ball is out, Waluigi performs a faster, but much weaker version of his F-Smash, perfect for returning served balls.
  • Side Special: Swimming Return
    • Waluigi performs five breaststrokes in the air, being able to turn in any 90 degree angle inbetween strokes. In essence, it's a weaker, slower version of Sora's Sonic Blade without the lock-on functionality. However, Waluigi can also cancel the move at any time between strokes with an aerial or jump, giving him some mix-up potential.
    • This move is inspired by Waluigi's Defensive Power Shot in Mario Power Tennis.
  • Up Special: Whirluigi
    • Waluigi performs his Offensive Power Shot from Mario Power Tennis, tucking his leg behind his back and spinning. While spinning, he can ascend upwards in a curved trajectory before entering freefall. While it isn't the best recovery option, it can hit the opponent multiple times. In addition, it can also reflect projectiles as a nod to the move's original purpose.
  • Down Special: Dice Block
    • Waluigi, being the cheater that he is, attempts to rig the odds in his favor with the help of a Dice Block from Mario Party. After a short wind-up, he hits the block above his head, after which a number between 1 and 10 will appear, determining the outcome of the move much like Mr. Game & Watch's Judge. However, there is a short cooldown inbetween hitting the block and being able to use it again.
      • 1 - Waluigi is put into a dizzy state.
      • 2 - Waluigi is made tiny, as if he were hit by a Poison Mushroom.
      • 3 - Nothing happens at all.
      • 4 - Waluigi has recoil damage applied to him.
      • 5 - Waluigi gains a Timer effect, slowing him down.
      • 6 - Waluigi gains a Green Shell.
      • 7 - Waluigi gains a Blue Shell.
      • 8 - Waluigi turns giant, as if he recieved a Super Mushroom.
      • 9 - Waluigi's mobility is increased for a short period.
      • 10 - Waluigi becomes invincible.
  • Final Smash: Zone Speed
    • Waluigi creates a purple field of energy around himself, slowing opponents who get caught in it to a crawl. Once this is done, he begins lobbing tennis balls into the field at a rapid pace, racking up damage. Eventually, he takes out a Bob-Omb and lobs it in, causing it to explode and launch the trapped opponents as the field vanishes.
    • This move is inspired by the Zone Speed mechanic from Mario Tennis Aces.
Animations / Cosmetics
  • Alts.
  • Stage Intro
    • Waluigi rides in on the Standard Kart from the Mario Kart games, paralleling Wario's entrance animation.
  • Idle Animations
    • Waluigi twirls his moustache.
    • Waluigi points forwards, beckoning the opponent.
  • Taunts
    • Up: Waluigi cackles.
    • Side: Waluigi pulls out a rose before throwing it forwards. This move can deal miniscule non-flinching damage.
    • Down: Waluigi performs the crotch chop from Mario Strikers Charged (vulgar, yes, but iconic to his character) while spouting a random line which either praises himself or mocking his opponents.
  • Victory Animations
    • Waluigi tosses a rose into the air before spinning around and posing, catching the rose in his mouth. This is a mixture of his eagle animation from Mario Golf: World Tour and his first-place animation from Super Mario Party and Mario Party Superstars.
    • Waluigi points and laughs at the camera, being a parallel to one of Wario's victory animations.
    • Waluigi moonwalks into view before performing a pose.
    • I also have a fourth victory idea, but it's REALLY wacky, perhaps even too much.
      • The animation begins with the series icon of another fighter appearing, but when we see the victory screen locale itself, no one is there. Suddenly, Waluigi pops out from below the camera, shouting "TOO BAD, WALUIGI TIME!" as the series icon quickly corrects itself to his own and his victory theme kicks in.
    • As for a victory theme... I can't really decide. Best thing I can think of is an excerpt of Waluigi Pinball (which Super Smash Flash 2 does quite well).
  • Misc. Animations
    • Waluigi's roll would be a moonwalk.
    • Waluigi's airdodge would be a quick breaststroke, another reference to the Swimming Return.
    • Waluigi's losing animation would have him slowly clap for the winner, a peeved expression on his face.
 
Last edited:

Perkilator

Smash Legend
Joined
Apr 8, 2018
Messages
10,441
Location
The perpetual trash fire known as Planet Earth(tm)
Phoenix Wright
Intro: Nick's intro from UMvC3

Stance/Idle 1: Nick’s idle animation from UMvC3
Idle 2: Nick puts a finger up to his chin
Idle 3: Nick puts his hands on his hips in a determined fashion

Notable Palette Swaps:
  1. Age 35 (default)
  2. Maya Fey (purple)
  3. Miles Edgeworth (red)
  4. Apollo Justice (red/white)
  5. Godot (green/tan)
  6. Athena Cykes (yellow)
  7. Ryunosuke Naruhodo (black)
  8. PaPa costume (alt.)
Walk: His walk from UMvC3
Dash: Phoenix dashes like he's late for a case
Damage: His damage animation from UMvC3
Jump: His jump from UMvC3
Crouch: His crouch from UMvC3

Normal Attacks
Jab: Nick pulls out a stack of papers (1%), skims through them (1-2%), and then slaps the opponent with it (4%, small knockback)
Forward+A: Nick points his finger forward as an illusion of it appears (4%, small knockback)
Down+A: Nick trips and accidentally kicks the opponent twice (6%, small knockback)
Up+A: Nick points his finger diagonally upward as an illusion of it appears (4%, small)

Aerial Attacks
Air+A: Nick throws a cup of hot coffee in the air (8%, small knockback)
Air Forward+A: Nick points his finger forward as an illusion of it appears (7%, small knockback)
Air Back + A: Nick swiftly turns around and guards himself (5%, small knockback)
Air Up+A: Nick drops several pieces of paper that go flying in the air (8%, small knockback)
Air Down+A: Nick points his finger diagonally downward as an illusion of it appears (7%, small knockback)

Dash Attack: Nick stops in his tracks as a huge cloud of dust appears in front of him (9%, OK knockback)
Edge Attack: Nick sneezes as he gets back up (5%, small knockback)
Get-Up Attack: Nick shouts "I got it!" as a "!" appears (6%, small knockback)

Smash Attacks
Forward+A: Nick shouts "Objection!" as the iconic speech bubble appears (13%, OK knockback). When fully charged, the speech bubble is bigger (22%, medium knockback)
Up+A: Nick tosses several pieces of paper into the air (2%, small knockback), which then inflict several paper cuts (17%, OK knockback)
Down+A: A giant gavel appears above Nick and buries him (5% recoil) while a shockwave appears around it (17%, OK knockback)

Grab Game
Grab: Nick grabs the opponent and looks at them curiously
Pummel: Nick shouts "Hold it!" and points at the opponent (2%)
Forwards+Throw: Maya appears and tackles the opponent (11%, OK knockback)
Down+Throw: Nick turns around and unknowingly knocks the opponent down (4%, small knockback)
Back+Throw: A dog appears and bumps into the opponent (8%, OK knockback)
Up+Throw: Maya appears and tosses the opponent into the air (7%, small knockback)

Special Moves
B : Mood Matrix
; Nick uses a different special move based around the four moods on display. Each mood has a 15-second cooldown.
  • Happiness emits a healing field that heals both Nick and any opponents in its vicinity
  • Anger causes Nick to charge a huge explosion that hurts both him and any opponents in the vicinity (20% to Nick; 35% to opponents, medium knockback); only Nick is prevented from launching
  • Sadness emits an aura that increases Nick's speed and attack, but decreases his defense
  • Surprise makes a scary-face burst that stuns opponents in the vicinity as well as causes Nick to crumple over
B + Forwards : Bracelet; Nick tosses a bracelet that paralyzes any single opponent it touches (7%, small knockback)
B + Up : Stepladder (Ladder?); Nick climbs a ladder and jumps from the top of it. When used on the ground, it can be destroyed by other fighters, causing Nick to fall off. When used in the air, it falls and destroys itself upon hitting any fighters under it (8%, small knockback)
B + Down : Magatama; Nick traps up to 5 opponents in the vicinity using Psyche Locks, and destroys them a second later (14% each, OK knockback). If there are no opponents in the vicinity, Nick takes 15% in recoil damage.

Final Smash: Ace Attorney; as Nick points his finger forward, a streak of light resembling it beams forward and traps a single opponent (5%). The opponent is then taken into a cutscene where Nick accuses them of committing a crime, which is based on his Lv. 3 Hyper Combo from UMvC3 (45%, far knockback). This instantly K.O.'s any fighter above 100%.

Gimmick: N/A

Taunts
1: "I spy...a contradiction." Nick's taunt from UMvC3
2: “Sure you’re not forgetting something?” Nick looks down and finds a random piece of evidence
1+2: “The defense is ready to present!” Nick points forward

Winposes
1: Nick's victory pose from UMvC3
2: The camera points towards Nick, who points at it in turn
3: Nick and Maya point in opposite directions

Applause: Nick sweats profusely
Icon: The glimmer in the AA logo
Boxing Ring Title: The Ace Attorney
Star K.O.: “WHY DID I AGREE TO THIIIIIS…?!”
Victory Music: https://youtu.be/SPOFjeHS_hc
Kirby Hat: Nick's hair; Kirby also has his regular forward Smash replaced with an Objection
 
Top Bottom