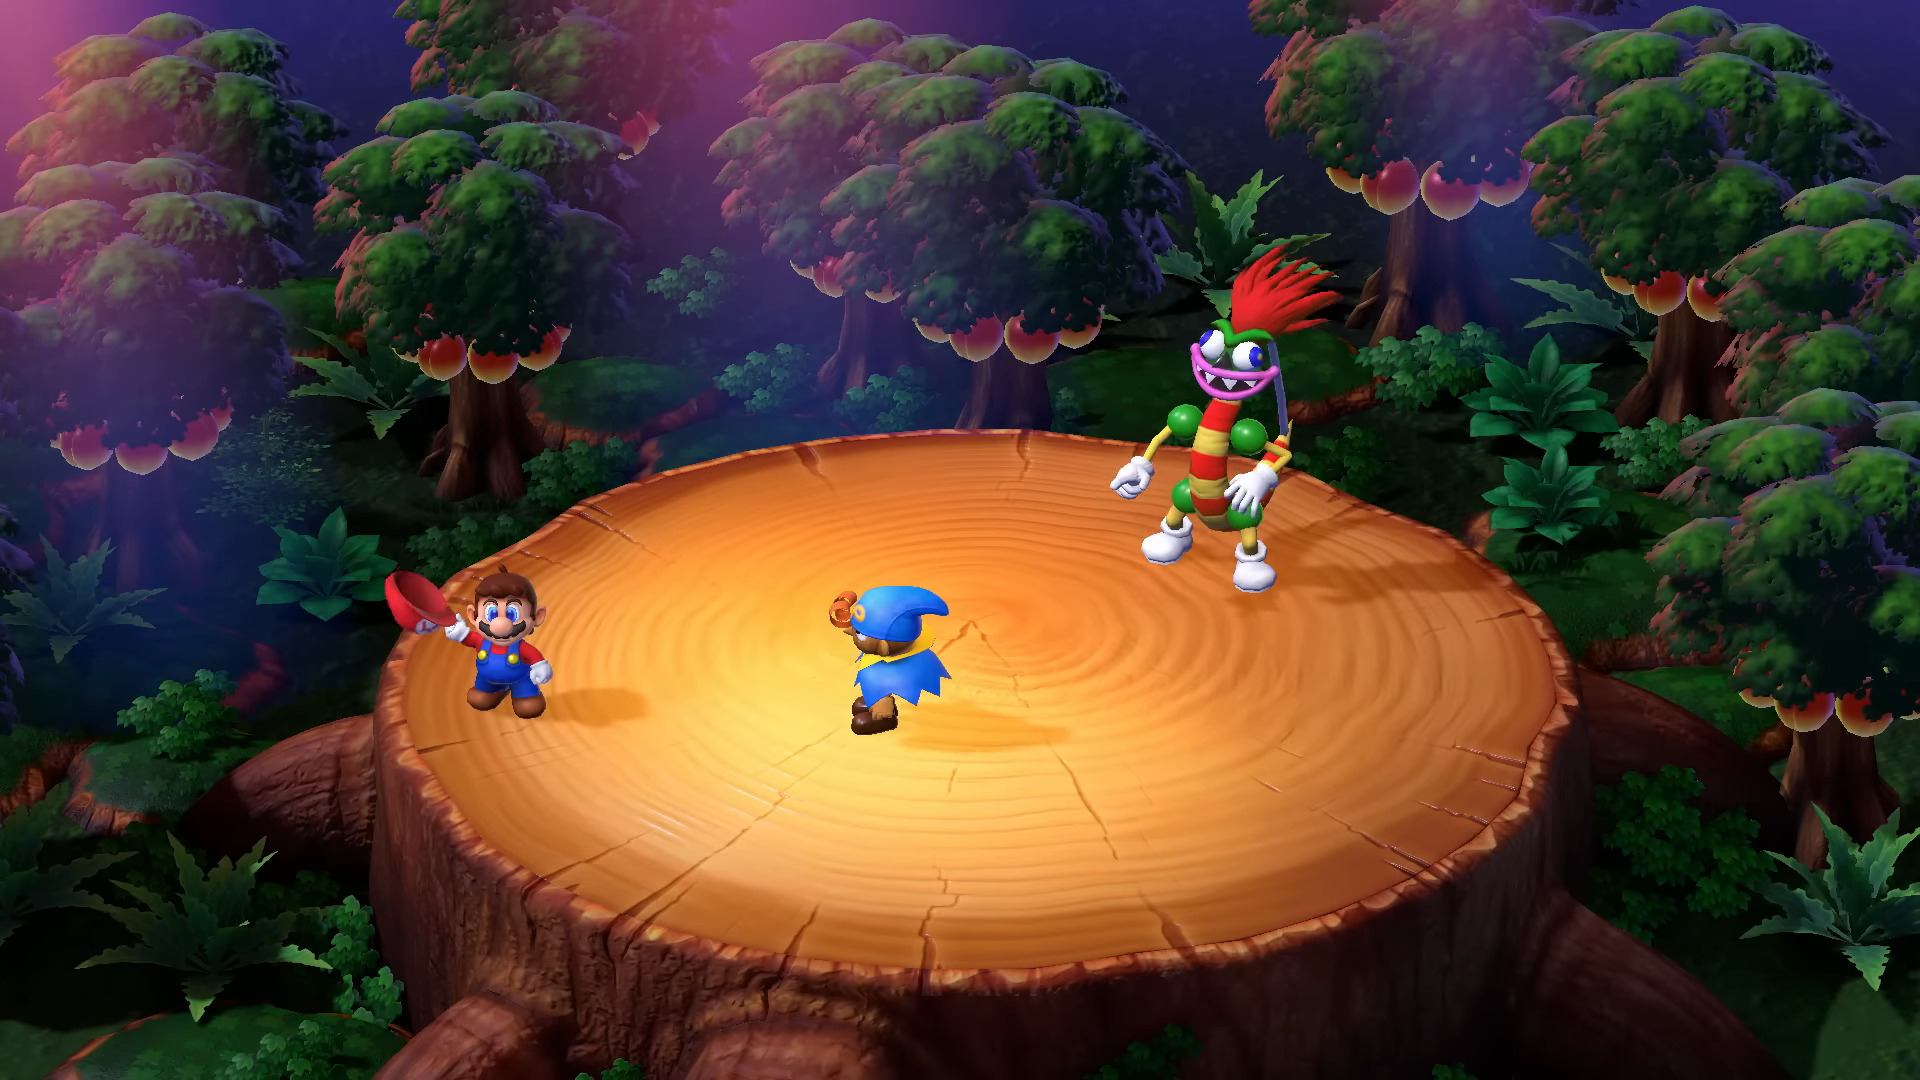
He's the King of the Koopas.... with a twist
Name:
Paper Bowser
Quality Picture:
http://shrines.rpgclassics.com/n64/paperma...ies/bowser2.gif
Origin:
Paper Mario (N64)
Date of Origin:
August 11, 2000
Home Stage:
Mushroomy Kingdom
Taunts:
Taunt ^: Paper Bowser pumps his fists in the air and chortles "gwhahaha"
Taunt v: Paper Bowser begins biting the air ferociously, just like the 'real' Bowser.
Taunt < or >: Paper Bowser folds his arms, looks away, and then snorts derisively.
Entrance:
A small book emblazoned with a star design, opens up, and Paper Bowser leaps out, ready to do some fightin'
Kirby Hat:
Kirby becomes entirely flat, along with wearing the standard Bowser hat
Stats:
Offense: 3/10
Defense: 6/10
Projectile: 4/10
Weight: 3/10
Speed: 4/10
Recovery: 5/10
Throwing Ability: 6/10
Final Smash: 7/10
Special Moves
Standard Special: "Breathe Fire!" (3%,3%,3% etc)
Breath out a stream of molten hatred in the form of burning embers.
No self respecting King can call himself such without the ability to project flames from his mouth.
The great King of the Koopas, squats down, mouth agape and begins breathing a conical stream of cartoon fire. Paper Bowser really puts in his all into it this time; the flames never die down, and they do a stellar job of repelling foes to a more manageable distance. To put it bluntly, "Paper" Bowser blows (fire) better than the real thing!
But, and there always is a but, Paper Bowser has a terrible secret... he's made of PAPER!
If you try to hold the flames out for longer than 0.5 seconds, Paper Bowser's inflammable curse comes to haunt him. Do you smell something burning? It's you! You're on fire! Run! Roll! Put out the flames before they reduce you to cinders! Ok, maybe that was an exaggeration, you won't die from being on fire, but you do take a monstrous 5% damage every second until you douse it somehow. Water is a good idea, but that comes with its own problems, so stick to rolling.
Still, there are a couple of benefits to catching alight. For one, Paper Bowser will now deal flinching contact damage to the foe, multiple hits that can be tricky to get out of if Bowser correctly predicts the foe's movements. These flames also provide a rudementary shield against some of the weaker projectiles, swatting them out of existance before they can become a problem. Among the various things it can stop, are Fox's, Falco's, Wolf's and Rob's laserbeams (The intense heat acts as a form of light distortion that breaks apart the high density frequencies of the lasers) Peach's Turnips too, and the wooden Boomerangs that Link/Toon Link throw.
The other advantage of burning alive, is that Paper Bowser billows out copious amounts of smoke as he fries. The smoke is acrid and black, obfuscating anything inside the clammy ash from view. It's hard to see things in smoke, it seems, and if you leave Paper Bowser burning a while, it'll become hard to see... well.. anything. Not only does the smoke expand, but Paper produces more of it, the longer it burns. Even once you put out the fire, Paper Bowser will continue to smolder for a short time, keeping the smoke nice and thick for him to hide in.
Paper Bowser (on fire) produces enough smoke to comfortably hide behind, in 2 seconds, and enough to cover the entirety of New Pork City in 10 seconds. And speaking of 10 seconds, that's how long the smoke lasts before is disperses enough for the foe to see where you are. If you think of it that way, 10% damage up front to hide yourself for 10 seconds is a pretty sweet deal. But don't you dare abuse it, Bowser is supposed to be big and mean! Only hide in smoke so the foe won't know where you'll spring from.
Upward Special: "Fortress Spin!" (1%)
Ducking into his pointed shell, Bowser spins around and around like a whirling fortress. Decent horizontal recovery really.
If you're a true Bowser, you need to spin around in your shell. It's the law. You've got a little bit more vertical lift as Paper Bowser, owing to your threadbare weight. You can even rise up when using this on the ground, by mashing B a bunch. Awesome.
Sadly though, Paper Bowser is a piece of paper. He's completely flat, so spinning around is much like spinning a floppy coin, it looks silly and it doesn't hurt. It is hard to hit Paper Bowser as he spins though, most of the move has the properties of a dodge.
So what happens if you hit the foe? Well, imagine your favourite silent comedian getting caught in a revolving door. They spin around and around, unable to escape, before getting flung unceremoniously away with weak, and static, horizontal knockback.
But, just like in comedy, when Bowser finally stops spinning, the foe is left on the wrong side of the "revolving door". Now they're in the background, as if in a permenant state of spot-dodging. While not particularly inconvenienced, foes in the background cannot attack anything in the foreground, and vice versa. In order to return to the fight proper, the foe needs to perform a spotdodge or airdodge, and that's when Paper Bowser can capitalise on their moment of weakness!
And what better way to annoy the foe than to use Fortress Spin again to throw them right back into the background? Combined with smoke from his Breath Fire attack, Paper Bowser can really throw the foe offguard, making them question whether they can attack, or whether they need to spotdodge first.
But what about foes who would rather spend the entire match lounging in the background? Not a problem, Fortress Spin works even against a brother in the back, bringing them into the foreground yet again.
In fact, Fortress Spin works on just about anything smaller than him, including projectiles, summons and traps that aren't rooted to the floor. This makes the background like a second plane to fight on, especially in 2v2 when you can use Fortress Spin and a teammate to booby trap the background and discourage the enemy from spotdodging. Or send your Ally into the background so they can circle around the enemy and attack from the rear.
Bowser? Using strategy!? What an insane idea!
Downward Special: "Bowser Pound!" (3%)
Assuming a freefall stance by protruding his rear underneath him, Paper Bowser falls, intending to squash something.
Yet another staple of his great flabiness, the Bowser ground pound predates Mario's cheap immitation. This move has been his literal downfall on more than one occasion. Be thankful you workshy plumbers!
But, in yet another horribly expected twist of fate, Paper Bowser lacks the... stage presence of the real Bowser. What should have been an earth shattering plummet, is a very floaty, awkward looking drift downwards. Bonk the foe on the head with this, and they'll suffer only minor damage and a bit of a flinch. Paper Bowser on the other hand will bounce back up, even higher than his regular jumps. This move is embarrassing to say the least. A true disgrace to his lardship.
Also, because Paper Bowser is locked into this move until he hits the ground, if you attempt to turn around, Bowser will fold in half, as if he were trying to flip, but unable to do so. This is more than a visual quirk however, as folding Paper Bowser in half can trap foes currently overlapping with him. If he does succeed, Paper Bowser will roll himself up around the foe, constricting them completely. It doesn't hurt (unless Paper Bowser is on fire) but the rolled up tube of turtle can waddle around with the trapped foe, even suiciding off-stage if he so chooses. Like most suicide KOs, the trick is to build up enough damage on the foe so that they won't escape.
If Paper "Tube" Bowser is lucky enough to trip while walking, he'll land on his side and roll right off the edge of the stage, expediting the process of suiciding greatly.
This additional use may be all well and good, but what of the actual Bowser Pound? Well, if you successfully land without hitting anyone (or dieing horribly), Paper Bowser will scrunch up under his own weight, like accordian bellows. You know what one of those looks like right? Not only does this reduce his height by two thirds, but it also makes him wide enough to be in both the background and foreground symultaneously. As you may expect, any attack performed in this form will hit both playing fields at once and thoroughly trounce spotdodges. The obvious cost is that anything you put in the background via Fortress Spin can now hit Paper Bowser. His reduced vertical presence also renders him vulnerable to aerial approaches.
To fix Paper Bowser's comical shape, simply jump. This will spring Bowser much higher into the air than his usual jumps. Such a tall jump can be prove rather disasterous, but if you wait until the foe knocks you offstage before expending your "spring jump", you'll find it extremely useful.
Foreward Special: "Claw of the Koopa!" (5%)
With as much momentum as he can gather, Bowser slashes forth with paperthin claws. KSSSHHHIINNG!
Notice the pattern? You're not the only one. Bowser actually looks a bit incredulous as he slashes. And for good reason, he's just a sheet of paper. What's he going to do, give the enemy a papercut?
Yes, actually. This feeble clawing really will give the foe a little papercut. Papercuts in general are quite painful, and for brawlers, any stinging pain can come back to haunt them at the worst of times.
More specifically, if the foe suffers a papercut, there will be a 25% chance of them stuttering whenever they change animation, wasting a whole frame in lag. "Changing animation" could be anything from skidding to a halt from a dash, the very start of a jump before the foe leaves the ground, the transition between being launched and entering a "tumbling" state, landing during an aerial attack, attempting to shield. Even a lot of the attacks themselves are split up into multiple animations. There are literally 100s of chances for that 1 frame of lag to crop up. Even IDLING COMPLETELY STILL has 3 or 4 seperate animation transitions.
Papercuts are represented by a hairline fracture on that player's character portrait, and heal themselves up after 20 seconds.
That's assuming you hit the foe of course. If you flubb it, Paper Bowser will follow through on his momentum and tear his other arm off. Don't worry, he'll grow a new one in 12 seconds (and yes, limb regeneration in amphibians is a real thing).
Of bigger concern is the torn arm left on the ground. It's technically an item now, so it can be picked up and thrown by anyone(though paper does not travel very far when thrown, naturally). Fire attacks can also be used to ignite the rogue appendage, turning it into a trap, or projectile, of sorts. Basically, touching a flaming arm is like the contact damage from touching a flaming Bowser, and if you think about it, that makes perfect sense. Sadly, an arm will burn up completely after 10 seconds.
This may sound all awesome and stuff, but Paper Bowser is, after all, made of paper, and is therefore not immune to his own flaming traps. Don't touch the arm after it catches alight, and Paper Bowser will be just fine. Of course, if you're already on fire, then go ahead and ignore that advice
Final Smash:
With a Final Smash in hand, Bowser summons the book he came out of in his Entrance animation. He then frantically claws through the pages, presumably looking for something specific. If Paper Bowser is struck during this brief moment of weakness, the Final Smash ends there and then. If not, he will reach into the book and pull out the legendary Star Rod somehow!
With rod in hand (it behaves much like the battering item; "Star Rod"), not only does Paper Bowser grow to double his normal size, but he is also literally invincible, ignoring attacks as if they weren't even there. So long as he doesn't drop, throw or otherwise lose the Star Rod, he can maintain his state of invulnerability for as long as he wishes. Unfortunately, even though attacks do not phase him, they can still randomly cause Paper Bowser to drop the Star Rod. He will also drop the Rod when tripping, which tends to happen a little more frequently during the Final Smash for some reason.
The Star Rod warps away the moment Bowser drops it, signaling the end of the Final Smash
Brief Info on Character:
In the storybook world of Paper Mario, Paper Bowser is bumbling, immature... and dangerous. He will not flinch away from using a dirty trick to win, even ambushing his enemies after a grueling fight.
He relies greatly on the combined help of his minions, and especially his main lackey Kammy Koopa, to get anything done. But he also has the sense of mind to notice when things won't go according to plan.
Beyond that, this is Bowser. Business as usual; kidnap the Princess and defeat Super Mario, blah blah blah.
Works:
Paper Mario (N64)
Paper Mario 2: The Thousand Year Door (Gamecube)
Super Paper Mario (Wii)
Submitter:
Junahu
Name:
Kudgel
Quality Picture:
Brief Info on Character:
Kudgel is a gray extremely muscular Kremling from Donkey Kong Country 2, who wields a gigantic club as large as he is. He is the only Kremling boss in any of the Country games besides K. Rool, though the fact he didn’t show up in the gameboy remake of the game Donkey Kong Land 2 and that he’s basically a recolor of Klubba makes him rather obscure. Unlike Klubba, Kudgel is an actual boss, though, who leaps around the arena causing earthquakes as he lands to stun the Kongs. Kudgel is one of the few Kremlings to get a unique voice that makes him sound more intimidating, though the fact it sounds more like roars makes one question Kudgel’s intelligence. . .
Origin:
Donkey Kong Country 2: Diddy’s Kong Quest
Date of Origin:
November 20th, 1995
Home Stage:
Kudgel’s Kontest
Taunts:
Taunt ^: Kudgel beats his chest and roars.
Taunt v: Kudgel turns to face the screen and flexes his muscles, snarling.
Taunt < or >: Kudgel points forward, presumably at the foe, then brings his finger menacingly across his throat while letting out a sound as if he was slitting his own throat.
Entrance: Kudgel leaps up from the bottom blast zone and up a bit higher than his spawning position, then lands down with a thunderous crash.
Kirby Hat:
Kirby gains a gray crocodile hat similar to the one he gets when he eats Yoshi. Unlike similar hats, this hat goes over Kirby’s eyes, making him look a fair bit more menacing.
STATS
Offense: 5/10
Defense: 8.5/10
Projectile: 0/10
Weight: 10/10
Speed: 3/10
Recovery: 7.75/10
Throwing Ability: 8/10
Final Smash: 9.5/10
Special Moves
Standard Special – TNT Barrel: (24%)
Kudgel leaps up Ganon’s height before falling back down to the ground – hopefully you didn’t use this off-stage. His body deals a mere 8% as he falls back down. Once he lands on the ground, a TNT barrel falls from the top blast zone before landing a bit in front of Kudgel. If it hits anyone on the way down, it explodes in an explosion the size of Bowser, dealing 24% and massive knockback. Kudgel isn’t stuck doing the jump on this move for long, but the TNT barrel takes a long time to come down. Kudgel can only have one barrel out at a time.
Once the TNT barrel is down, Klubba or the foe can pick it up like a normal barrel. If it hits anyone or anything as it rolls, it’ll explode. This is perfectly capable of hurting Kudgel just as the Kongs used it against him in his boss fight, though Kudgel has ways of minimizing this with his other specials.
There’s a 20% chance that a Red Kremling will pop their head and arms out through the top of the barrel and their feet through the bottom once the TNT barrel lands on the ground – these are called Klobbers. Klobbers will run after the nearest enemy to try to suicide bomb them and can’t be picked up like a regular barrel. While foes can jump on the head of a Klobber to force them back into the barrel for 10 seconds, if they try to pick up the barrel the Klobber will immediately come back out and prevent them from doing so.
Side Special - Impale: (12%)
Kudgel swings his massive club forwards, which is so large that it’s twice as wide as he is. Anybody he hits with this will get impaled on Kudgel’s club, taking 2% per second, and must button mash out of it like a grab. Kudgel can still move around normally during this time, though he can’t hit the foe directly. If he uses any move involving his club, the foe will get shot forward, taking 12% and decent knockback. Flung foes also deal 12% and decent knockback to any other foes they hit in mid-flight.
If Kudgel hits any enemy projectiles with his club, they will get impaled on it, and when Kudgel swings his club forward again the projectiles will go flying forwards with their original strength and power. This doesn’t work for energy based projectiles that logically can’t be impaled such as Fox’s blaster, but this move blocks such projectiles. This move is also a good defense should foes use your own TNT barrel against you.
Up Special – Earthshaker: (16%)
Kudgel leaps a bit less high than Dedede does for his recovery, then falls back downwards towards the earth with full control over his aerial influence as he does and being able to grab ledges, unlike Dedede. He does 16% and spiking knockback as he falls.
When Kudgel lands on the ground, a earthquake effect happens on the platform he’s on, stunning any foes for 1.65 seconds and dealing 16% to them. The end lag combined with Kudgel leaping up into the air prevents you from infiniting foes with this move. Needless to say it’s rather hard to hit with.
More importantly, any TNT Barrels on the ground will get shot up into the air when Kudgel uses this move, exploding on contact with any foes. After you throw a barrel at the foe/A Klobber inside it runs at them using this move can make it significantly harder to dodge. Kudgel has some control over his falling speed when he comes down, so despite the lag this move is less predictable than you’d think. Besides, if they get out of the air to avoid the barrel, they’ll just be hit by the earthquake. This move also enables you to fling a foe you’ve impaled on your club, then launch a TNT barrel in their path to explode on them if you can space both the foe and the barrel far enough away from each other so you have time to complete this move.
Down Special – Cudgel: (15%)
Kudgel turns to face the screen and smacks his club downwards at the ground. Anybody hit by this attack becomes pitfalled, similar to DK’s Side Special, and takes 15%. This is rather slow and hard to hit with, but if a foe is impaled on your club from your Side Special this move will function normally on them.
While you can’t stun a foe with your Up Special who’s pitfalled or pitfall a foe who’s stunned with your Down Special, the damage of the moves will still work and won’t bring the foe out of the stun/pitfall, giving you some good ways of racking damage. When you’re ready to finish them off, use a TNT barrel or one of your many other KO moves. If you only have time enough for one or the other, place your TNT Barrel close to the foe so when you land from your Up Special the TNT barrel is launched up and immediately goes to hit the foe.
Final Smash – Earth Shatter: (50%)
Kudgel leaps up into the air and off the top blast zone very quickly before coming back down to the earth even more quickly, causing anybody on the stage to take 50% and be stunned for 3 seconds. Anybody who hits Kudgel on the way down also takes 50% and gets spiked into the stage, where they’ll then be hit by the earthquake effect. More importantly, this causes the entire stage to shatter into pieces, leaving no ground whatsoever to stand on. Kudgel leaps back up into the air to avoid falling to his death and goes back up off the top blast zone, staying up there for 5.5-7 seconds before the stage re-forms and Kudgel lands back onto the stage.
The vast majority of the cast can’t stay in the air this long, and thus the only thing they can do to attempt to survive this is to grab onto Kudgel’s legs as he leaps off the top blast zone. To do this, they simply have to make contact with Kudgel as he goes upwards the second time, after which they’ll grab onto his legs automatically. Of course, Kudgel has full control over his aerial influence during this so he can’t be casually grabbed, and even if they do manage to grab onto Kudgel (Done by pressing any button) they best let go before he lands back on the stage or else take 50% and 3 seconds of stun. This may sound easy to do, but the fact there’s a bit of a random factor to the timer makes it harder to predict and Kudgel comes down –very- quickly.
Works:
Donkey Kong Country 2: Diddy’s Kong Quest (SNES)
Donkey Kong Country 2: Diddy’s Kong Quest (GBA)
Submitter:
MasterWarlord
MAJOR BURROWS
Major Burrows is one of Bowser’s minions, and the leader of the Monty Moles. He guards a power star in the Gusty Garden Galaxy, and attacks a star rabbit before Mario puts a stop to his military career. Later on, he challenges Mario to a rematch under the power of the Daredevil Comet, but Mario once again defeats him.
Origin: Super Mario Galaxy
Date of Origin: 2007
Home Stage: Gusty Garden Galaxy
Works:
Super Mario Galaxy (2007, Wii)
Super Mario Galaxy 2 (2010, Wii)
Taunt ^: Burrows holds his stomach and lets out a hearty laugh. Typical fat evil antagonist.
Taunt v: Burrows claws at the ground, sending some dirt into the air.
Taunt < or >: Major Burrows salutes. Can be fun to use in team-battles, or with Bowser in Brawl Machinima.
Entrance: Major Burrows pops out of the ground half-way, looks around, then jumps out completely.
Kirby Hat: Kirby acquires Major Burrows’ spiked helmet, and also has a few whiskers growing out of his cheeks.
Offense: 8/10
Defense: 5/10
Projectile: 5/10
Weight: 8/10
Speed: 2/10
Recovery: 4/10
Throwing Ability: 9/10
Final Smash: 7/10
Neutral Special: Belly Flop (13%)
Burrows reaches out with both arms in attempt to grab an opponent. This starts up near-instantly and has decent range, but it has punishable end lag. If he catches someone, he holds them in a bear-hug as he jumps into the air and turns so he’s directly above his opponent. He then let’s go as the opponent drops to the ground…right before Burrows’ fat stomach lands right on top of them. This deals 13% and Burrows bounces off his belly back into a standing position a few feet away, but the opponent is left lying down. Burrows can move a moment before the opponent, allowing him to attempt to counter his opponent’s wake-up with more attacks.
Side Special: Tunnel Strike (9-12%)
Burrows dives straight into the ground beneath him, with only his helmet exposed. This has somewhat high starting lag to it so don’t try it when you’re opponent’s pressuring you. On the other hand, anyone in Burrows’ way as he dives takes 12% and receive a pitfall/spiking effect. If he dives into a drop-through platform, he will fall through it and continue falling until he hits a solid platform to dig into. You can move him around while underground, and since digging is Burrows’ natural element, he moves much faster than usual, at a 7/10 speed. Anyone who comes into contact with his spiky helmet takes 9% and are launched vertically, star KO’d at 150%.
Burrows can stay underground for 3 seconds before he has to surface for air. Alternatively, you can come out of the ground early by pressing the Special-Move button. Burrows doesn’t experience much end lag when resurfacing, making this a very safe way of approaching or retreating. Another neat trick with this move is that if you input for it while dashing, Burrows will dive forwards about a character length instead of straight down, increasing the chances of catching someone with the initial hit. One great use for this is to punish opponents who try to roll away after a Belly Flop; if you land both hits, you deal high damage if not a KO, but if you miss you’re still underground to either continue offense or retreat and recuperate.
Up Special: Cloud Tunneling (12%)
Burrows forgets how gravity works as he starts to dig upwards into the air, going up 5x his height at an OK speed. He can be directed slowly left and right while doing so. Anybody who comes into contact with his arms as he digs takes 12% and spiking knockback. This move starts up instantly but like most up-specials Burrows goes into freefall after he finished digging through the sky.
Down Special: Monty Mole Minion (5%)
This move has him whistling through his fingers…er, claws, as a Monty Mole pops out of the ground right behind Burrows and salutes. The whistling animation is a long as Olimar’s whistle. Up to 3 Mont Moles can be summoned at a time. After being summoned, the Monty Moles will scurry about the stage at a 6/10 speed, dealing 5% and tripping opponents. They will walk of platforms that have ground underneath, but if not they will turn around. Monty Moles are about the same size as Mario. Sadly, Monty Moles die from any attack, but that doesn’t change how helpful they can be. Since they trip opponents and you time to summon one after a Belly Flop, if the opponent isn’t careful they might themselves knocked back down very quickly, making them vulnerable to a Tunnel Strike.
Final Smash: Rage Mode (0%)
Major Burrows stomps the ground as his fur and helmet turn red and his eyes turn orange with RAGE, just like in his boss fight! He stays in this mode for 13 seconds. He now moves twice as fast in the ground and air, and all attacks deals slightly more knockback. His special moves are also buffed.
After grabbing an opponent with Belly Flop, Burrows throws them high into the air before gaining the strength to jump high enough to meet them in mid-air. He then swats them back to the ground, dealing 10%, before falling onto his enemy as a flaming comet, dealing an additional 17% and KOing at 60%. When performing his Tunnel Strike move, he doesn’t go in all the way. Instead, his upper half sticks out as he viciously claws at the ground to propel himself forwards. He has super armor while digging and contact with his body deals 15% while KOing horizontally at 75%. Burrows now rises twice as high during his up-special, and he rises twice as fast. Monty Moles summoned during the final smash will also be red and angry, moving twice as fast and dealing 10% instead of 5.
Submitter: Hyper_Ridley
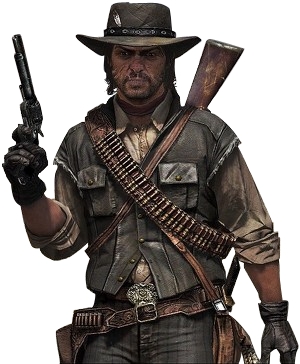
John Marston
John Marston is the main player character and protagonist of the game Red Dead Redemption. A former outlaw, John is forced to jump into action once again when his family is taken from him by the government (who he is then forced to work for if he wants to see his wife and son again). Forced to round up his former posse, John sets off across the dying west in hopes of redeeming himself for his past crimes and reuniting with his family once again.
Origin: Red Dead Redemption (PS3/360)
Date of Origin: 2010
Home Stage: N/A
Works:
Red Dead Redemption (2010, PS3/360)
Taunt ^: John removes his hat and shakes it out in an attempt to dust it off. After a moment he puts his hat back on and fixes it with both hands.
Taunt v: John lets out a whistle and glances about as if trying to pinpoint where his horse will come from (no horse'll be comin' though. . .)
Taunt < or >: John reaches up and tilts his hat. He'll then say "Watch yourself, friend." or "Go on! Git!"
Entrance: John is on the stage, mounted on a horse. The horse will rear back and kick into the air as John jumps off. The horse will then run off screen.
Kirby Hat: Kirby will get a beard and a cowboy hat. Yeehaw!
Offense: 6/10
Defense: 5/10
Projectile: 9/10
Weight: 6/10
Speed: 5/10
Recovery: 4/10
Throwing Ability: 6/10
Final Smash: 7/10
Neutral Special: Six-Shooter (2%)
John unholsters his trusty six-shooter and takes aim. If you simply tap the button, John will fire a single shot forward that deals 2% damage and flinching knockback (like Falco's laser). But if you -HOLD- the button, an aiming reticle will appear on screen. This aiming reticle moves at Fox's dash speed and can be aimmed anywhere, lasting as long as you hold the button. If you overlap an opponent with this reticle, one red X will appear on them for each half-second they're overlapped (six X's maximum). Once you release the button, John will instantly fire one shot per X on the foe, aimmed directly at the foe! These bullets travel pretty fast (about the speed of Sheik's needles) so while you can air dodge them, it'll take practice. Also, since it -IS- a six-shooter, firing six shots (whether it be at one time or over several minutes) will cause John to stop and reload his gun, leaving him vulnerable for about Falcon Punch lag.
Side Special: Lasso (1%)
John grabs his lasso and twirls it overhead for a moment before casting it forward. If the lasso connects, the opponent will be caught and will tumble over to the ground (opponent's should also keep in mind that this is a grab and can't be shielded). John now has two options here for what he can do with the lasso'd foe. His first option is that he can walk away from them. While this may sound silly, it causes John to actually drag the foe behind him where they'll take 1% damage per half second they're pulled along. The other option however is far more fun; hog-tie! Approaching the foe will cause John to say, "Sorry, friend!" as he hog-ties the opponent! Once hog-tied, John can pick up the opponent as if they were a heavy item (like a barrel) and toss them off stage! Or he could, of course, just wail on 'em while they're all tied up! If you happen to get lasso'd, you can break free from the lasso at normal grab difficulty. . .but if you're hog-tied, it becomes much harder to escape! Wriggle the control stick and jam on the buttons if you're hog-tied and picked up!
This also acts as John's only recovery option; acting as a basic tether off-stage.
Up Special: Fire Bottle (5%)
John pulls out a molotov cocktail and hurls it forward, arching it much like one of Yoshi's Eggs. If the fire bottle hits a foe in mid-air, it'll burst, dealing 5% damage and some decent upward knockback. If it happens to -MISS- an opponent however, it'll shatter on the ground; lighting the stage on fire in that spot. The fire is about the size of Kirby, so it's pretty noticeable once it's splashed down. Treading in the fire will ignite your character, dealing 2% per second you're standing in it. This also affects John however so don't just go throwing fire bottles everywhere. . .
Also keep in mind that you can drag a lasso'd opponent through the fire. . .or perhaps place a hog-tied opponent on the flames for some major damage.
Down Special: Dynamite (14%)
John's most powerful Special but also one of his most predictable and easily countered...if you're using it randomly that is. John pulls out a stick of dynamite and lights the fuse, similar to Snake's grenades. If the command is simply tapped, John will roll the dynamite along the ground. If held however, John will hang out to the stick of dynamite; capable of moving and jumping at his normal stats. The dynamite has a whopping 2.5 second fuse and, once thrown, can be picked up and thrown by John or his opponents. This of course means you'll have to be clever about chucking dynamite around, otherwise you might end up with it right back in your face! Upon exploding, the dynamite creates a Bowser sized blast that will deal high knockback and 14% damage.
Final Smash: Dead Eye (0%)
Upon shattering the Smash Orb, John will glow with great intensity! Pressing the button causes John to exclaim, "I warned you, friend!" before the entire screen goes a sepia (like those old photos) color. This is the Dead Eye; John's signature "bullet-time" mode from RDR. In this mode, everyone's speed, both movement and attacking, is halved...except for John! The bullets from his six-shooter now deal 4% per shot making it an ideal option for damage building during the Dead Eye period. You can also use this time to build up some damage with fire bottles, or even hog-tie a slowed foe and hurl them to their doom! Unfortunately, all good things must come to an end; after 11 seconds, John's Final Smash will wear off. . .
Submitter: MarthTrinity
Name:
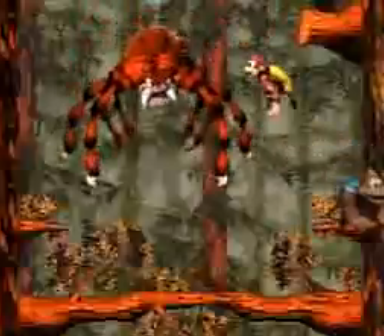
Squitter
Quality Picture:
Brief Info on Character:
Squitter is an overgrown spider with eight shoes for each of his eight spider legs. He was an Animal Buddy in Donkey Kong Country 2 and 3, and helped the kongs by creating web “platforms” which he could then proceed to use as solid ground. There was no limit to the amount of web platforms he could have out, enable Squitter to transverse both great vertical and horizontal distances, putting Rattly and Winky who specialized in jumping out of a job.
Origin:
Donkey Kong Country 2: Diddy’s Kong Quest
Date of Origin:
November 20th, 1995
Home Stage:
Web Woods
Taunts:
Taunt ^: Squitter laughs a spider-esque laugh, covering his mouth with two of his legs while smacking the ground from how hard he’s laughing. He more looks like he’s cracking up from a joke or someone’s sheer stupidity than an evil laugh.
Taunt v: Squitter spins around in a circle, smiling at the camera turning the time he turns to face it.
Taunt < or >: Squitter shoots out some webbing in front of himself onto the ground that reads “DK”, then picks it up with some of his legs and shows it to the camera before stowing the webbing away.
Entrance: A crate with Squitter’s silhouette shows up where Squitter is supposed to and shakes violently before exploding to reveal Squitter.
Kirby Hat:
Rather than gaining a typical Yoshi-esque hat of Squitter’s head, 8 spider legs with Squitter’s signature shoes come out of a furry orange hat on Kirby’s head.
STATS
Offense: 2/10
Defense: 9/10
Projectile: 8/10
Weight: 10/10
Speed: 6/10
Recovery: 10/10
Throwing Ability: 7/10
Final Smash: 9/10
Special Moves
Standard Special – Web Platform: (8%)
Squitter shoots out some webbing that travels as slowly as Luigi’s Fireball in any direction you so choose (forward by default), but goes two thirds the distance of Final Destination. Contact with the webbing deals 8% and flinching. If you press Neutral B again before the projectile vanishes, the webbing will unfold out into a platform as wide as Squitter that can be stood on by both Squitter and foes. These platforms last for 20 seconds, and Squitter can have up to 3 out at a time. Squitter cannot make more than 3 platforms without going back to touch solid ground, so he unfortunately can’t stay off-stage forever. Never the less, he can stay off-stage for quite some time with a web platform perch spamming the regular version of this move to camp foes.
Side Special – Web Wall: (2%, 2%, 2%, etc)
Squitter forms a wall of webbing in front of himself as tall as Ganondorf. Anybody who comes into contact with the wall while dashing or gets knocked into it by an attack will get caught in it and have to escape with grab difficulty, which will destroy the wall in the process. Every half a second the foe is caught in the web they take 2%. Squitter can have up to 3 web walls set up at any time and they each last 45 seconds. Any projectiles fired at these webs will get caught in them and deal their damage to anybody who gets caught in the web later on. The Web Walls can be destroyed by foes and they only have a paltry 25 stamina, but if Squitter fires a projectile from his Neutral Special at the wall this will heal it for 10 stamina. Energy based projectiles like Fox’s blaster can’t get caught in the web, but the web is immune to such projectiles, absorbing them.
Up Special – Web Tether: (3-15%)
Squitter shoots a long string of webbing in any direction other than down, aiming it upwards by default. This is your standard tether recovery, though it’s faster than most and has good range. Either way, Squitter has his Web Platforms for recovery anyway. Contact with the string of webbing deals 3% and flinching.
If the string of webbing makes contact with either a Web Platform or a Web Wall, Squitter will swing forward as if he were Spider-Man, holding onto the string of webbing as he does so. Based off his momentum as he swings, Squitter can deal anywhere from 5% and tiny knockback to 15% and decent knockback that can actually KO at higher percentages. In addition, Squitter can use any of his aerials, his Neutral Special, and his air dodge as he swings about. Squitter doesn’t automatically let go while swinging and you can input left and right for him to continue swinging about using the Web Platform/Wall as an anchor. He can let go by pressing Up Special again, only to potentially immediately fire up another string of webbing at a different web platform/wall to continue swinging about the stage.
The amount this move bolsters Squitter’s aerial combat is undeniable, but a particular aerial you’ll want to take a look at is his neutral aerial. This involves Squitter turning to face the camera and extending out his legs as he goes into the background for a brief air-dodge, then attempting to grab the foe with his legs as he comes back onto the playing field. If he lands with the foe on the ground before they escape the grab, the foe takes a simple 8%. . .None too impressive. However, if you grab a foe while swinging around and then swing into a Web Wall, the foe will get ensnared in the webbing!
Down Special – Cocoon: (2%, 2%, 2%, etc)
Squitter walks around in a circle five times quickly, shooting out acid as he does so. He goes into the foreground and background slightly as he does this, preventing him from being too vulnerable during the attack’s slightly long duration. If a foe is inside of the Bowser sized circle Squitter is walking around, they’ll start getting covered in webbing. For every time Squitter walks around the circle, foes get one “layer” of webbing applied to them. Each layer slows the movement speed of foes by 20%, while the final layer covers the foe entirely in a cocoon where they must escape with grab difficulty, taking 2% per half second they’re trapped. Luckily for the foe, they’re stuck down to the stage where they were wrapped into a cocoon so they can’t be KO’d. . .Or can they?
It’s near impossible to get a foe covered in webbing if they’re not already stuck to a Web Wall, but getting just a couple layers of webbing on the foe can also be highly beneficial, as each layer of webbing increases the grab escape difficulty from a Web Wall by 20%.
In order to take advantage of a foe trapped in a cocoon, you can grab them then use your forward throw or back throw on them, which has Squitter hastily unwrap the foe from their webbing and use it spin them forwards/backwards a set distance, with them unable to do anything until they’re done spinning. This can be a great finishing KO method if you get a foe entirely wrapped up in a cocoon, and even if you can can’t you can provide extra layers of webbing with your pummel.
Final Smash – Web Weave: (?%)
Squitter starts shooting out web en mass and moving around at incredible speeds as he covers the entire stage in webbing. From here, Squitter turns his back to the camera as he proceeds to start climbing around the web, you able to control him as he climbs about in any direction freely at Meta Knight’s dashing speed. Inputting B has him fire his standard projectile in any direction dealing 8%, but you can’t turn it into a platform and instead can have as many of the projectiles on-screen as you want. Inputting A has Squitter smack the webbing that he is currently on, causing it to go into the background before bouncing back onto the stage and becoming a grab hitbox (Assuming Squitter moved away), causing anybody who comes into contact with it to get stuck there for a normal grab’s duration, taking 2% per half second as usual. Inputting Z has Squitter extend out his legs and try to grab anybody overlapping with him (Easiest to do after somebody gets stuck to the web). If he grabs anyone successfully, he can carry them around until they escape the grab, or press Z to release them early, preferably off the stage to their death while Squitter casually climbs back to safety. Squitter is invulnerable during the Final Smash and it lasts for 20 seconds.
Works:
Donkey Kong Country 2: Diddy’s Kong Quest (SNES)
Donkey Kong Country 3: Dixie Kong’s Trouble (SNES)
Submitter:
MasterWarlord
Name: Magmortar
Quality Picture:
http://archives.bulbagarden.net/media/uplo...67Magmortar.png
Origin: Pokemon Diamond and Pearl
Home Stage: Pokemon Stadium 2
Taunts:
Taunt ^ - Magmortar leaps into the air slightly, burning with flame
Taunt > - Magmortar points a cannon forward and eggs the foe on
Taunt v - Magmortar stomps the ground twice, breathing loudly
Entrance: A waterfall of fire streams from above, and Magmortar emerges from it
Kirby Hat: Kirby gains flaming red hair, and grows cannons when using his Neutral Special
Stats:
Offense: 3/10
Defense: 9/10
Projectile: 9/10
Weight: 4/10
Speed: 3/10
Recovery: 8/10
Throwing Ability: 5/10
Final Smash: 4/10
Neutral Special - Fire Blast (6%-12%)
Magmortar fires a giant fireball from his cannons. This attack can be charged up and aimed before firing by holding down the B button, similar to Pit's arrows. Tilting the control stick can change the arc at which the Fire Blast is fired.
The Fire Blast explodes in a fireball the size of Kirby, dealing damage based on how charged it was when it was fired.
Side Special - Lava Plume (3%-6%)
Magmortar holds his cannons forward, and hot lava pours out of his cannons. This pushes foes like Mario's F.L.U.D.D. and also deals damage to foes.
If Magmortar's lava touches the stage though, it remains as a pool of lava for ten seconds. Opponents must jump over the lava, because if they walk on it, they take 6% damage and leap into the air, like Mario does in Super Mario 64.
This is also great for Magmortar's Fire Blasts, as he can fire them into the air where they're more difficult to avoid, and force opponents into the air if they want to approach him.
Up Special - Fire Jets (5%)
Magmortar's cannons flare with jet fire, and he flies in whatever direction the control stick is pointed. Bad guys in the path of his fire are pushed away by the flame, and take damage.
Magmortar can fly around in bursts, just like ROB. While he's not normally fast, he can jet around for short bursts like this, but he must wait for it to recharge to do it again, otherwise he'll run out of flame to reach the stage again with.
Down Special - Earth Power (2%, 12%)
Magmortar fires a blast of energy into the ground, and a giant pillar of stone shoots out of the ground. This pillar has about 25 stamina, and can be used for all sorts of things. Magmortar can use them as shields to fire Fire Blasts from behind, or to hit enemies into with attacks. He can also put them on the ledge, forcing foes to grab the top of the pillar in order to recover and make it harder to get back to the stage.
If Magmortar uses Earth Power while standing on lava though, it'll become a giant pillar of lava, that shoots up and scorches any enemies near it, dealing 12% damage and a whole bunch of knockback. It's also a great anti-air move for enemies who are approaching from the air, which they have to if you have lava on the ground.
Final Smash - Magma Storm (20%)
Magmortar creates a giant ring of lava with his fire powers, which begins to spin around the stage. For every pool of lava on the ground when he uses this attack, another wheel of lava is created.
These wheels of lava spin around and knock enemies back towards the stage, dealing huge damage and knockback. With two or more rings, and some lava on the ground, you can bounce opponents into the lava and back into the stage, and then back into another ring of lava and get absolutely insane damage. It takes proper set up to use well though, otherwise the enemy can easily avoid the attack.
Vergil
Vergil is the main antagonist of the game Devil May Cry 3. He's the twin brother of the main character of the series, Dante. Unlike Dante, who's laid back, cocky, and non serious, Vergil is more of a calm, cool, and serious character. He uses a sword katana known as Yamato, and he's able to perform quick and fierce slashes with it.
Works: Devil May Cry 3 (Playstation 2)
Origin: Devil May Cry 3
Date of Origin: February 17, 2005
Home Stage: Temen-ni-gru tower
Taunt ^: Vergil says, "Where is your motivation?!"
Taunt v: Vergil brushes his hair upwards, smugly.
Taunt < or >: Vergil puts his hand on his read Katana, ready to strike.
Entrance: He jumps out from the skies.
Kirby Hat: Kirby know has Vergil's hair, and katana, and he looks a lot more serious now.
Offense: 7/10
Defense: 5/10
Projectile: 4/10
Weight: 5/10
Speed: 9/10
Recovery: 8/10
Throwing Ability: 6/10
Final Smash: 7/10
Standard Special: Summoned Swords
Vergil whips up blue magically generated swords, which fly forward a very fast speed. The range is around 3 stage builder blocks, and hitting opponents with this will deal off 5-6% damage per sword, and every 5th sword will cause the opponent to stumble back a stage builder block (all others do no knockback, not even flinching). Vergil can summon swords at around 2 per second, making this move very useful. The main drawback is that these swords hardly drain shields.
If you hold down B for a second and half, Vergil can summon a circle of swords around him, following him like a shield. Now, there are 8 swords in all, and each coming into contact will deal off 2-3% damage, with flinching knockback. The sword that hits the opponent will immediately disappear however, so use it wisely. If the sword touches any projectile, it'll take the hit for Vergil. If you press B again while the summoned swords surround Vergil, they'll disappear, and immediately will lock onto the nearest opponent within 3 stage builder blocks. They then become projectiles like the ordinary Summoned Swords, except damage and knockback wise. (5-6% x ? or 2-3% x 8 )
Side Special: Judgement Cut
Vergil sheathes his sword, saying, "This may be fun," before a dark blue orb (the size of Bowser, let's say) appears in front of him a quarter of final destination forward, and it'll continously move forward at a slow speed, as long as Vergil is still holding B. Letting go of B will cause the orb to pop, and a bunch of slashes will appear in the orbs place. Any opponent within those slashes will suffer from potentially 10 hits, each dealing off 1-2% damage, with the last slash KOing at 130% damage. Has lag comparable to Link's arrows. A very useful range move. (1-2% x 10 )
Up Special: Dark Slayer
Not an attacking move, but still pretty useful. Vergil immediately teleports to the nearest opponent within half the length of Final Destination. If there is no one within that length, Vergil immediately reappears on the same spot. There is very little lag at both ends. Alternatively, if you press a direction immediately after Vergil disappears, he can move straight in that direction. In the air, it's the same thing.(0%)
Down Special: Sword Spin
Vergil will start spinning his sword like crazy in front of him. Now, any physical attacks that hit Vergil will immediately be cancelled, and the opponent will stumble backwards a stage builder block with 5% damage. Any physical projectiles will be stopped, and Vergil will send them right back. This move can't do anything against energized projectiles however. This move has a 1 second duration, before Vergil suffers half a second of ending lag. A pretty useful move if the opponent keeps on blocking the neutral special or something. (5%)
Final Smash: Devil Trigger
Vergil lets out a, "You will not forget this devil's power...You are unworthy as my opponent." He will then transform into a demonic state, which will grant him superarmor, regenerative health at 2% per second, and his power is 1.5x the ordinary amount. Here's a pic:
http://media.giantbomb.com/uploads/0/7094/...dmc06_super.jpg
Final smash lasts 20 seconds. (0%)
Edit 1: Added an extra feature to summoned swords, and made the down special do damage. Thanks HR!
Submitter: TWILTHERO
TWILT's note: I've been wanting to make a set for this guy, but haven't gotten the ideas down for him. Anyway, hope you can enjoy this set. Oh and MT, just because I posted this set doesn't mean you still can't make that joint with me. (d)
Name:
Shotzo
Quality Picture:
Brief Info on Character:
Shotzo is an immobile, and usually indestructible cannon that hails from the Kirby Universe. As mentioned before, he usually cannot be killed. Although he is usually immobile, there have been Shotzo cannons clever enough to move through the air with the help of parasols. There has also been a vulnerable model of Shotzo with wheels installed on them, although that model is scarce. Some Shotzos will aim their barrel at Kirby, and some will just stay bolted at one angle, and fire volleys of three cannonballs on a timer. Now, this powerful war machine is joining the Brawl!
Origin:
Kirby’s Dreamland
Date of Origin:
August 1, 1992
Home Stage:
Mecheye
Taunts:
Taunt ^: Shotzo fires two blanks into the air.
Taunt v: Shotzo spins its barrel around a couple times.
Taunt < or >: Shotzo unleashes a fiery explosion around itself, which deals little damage, like one of Luigi’s taunts. 2%-3%
Kirby Hat:
Kirby turns a metallic black color, and gains a Cannon’s barrel where his mouth is supposed to be.
STATS
Offense: 1
Defense: 8
Projectile: 7
Weight: 10(Footstools deal 12+ damage)
Speed: 1 (Actually, he’s immobile)
Recovery: 10
Throwing Ability: 6
Final Smash: 7
SPECIAL MOVES
Neutral Special – Fire! (6%-8%)
Before we begin describing the move itself, I want to make something clear: SHOTZO IS IMMOBILE. The input you would normally use to move now serves as aiming for this move. Shotzo can aim in 8 directions; left, lower left, down, lower right, right, upper right, up, and upper left. Now onto the move itself.
In a slightly laggy way, Shotzo will fire a cannonball out of its barrel. It’s only about a third of the size of Kirby, but due to the way it spins as it sails through the air makes its hitbox almost as large as the puffball itself. Speaking of Kirby, the cannonball sails through the air at the same speed as his run. Holding down the special attack button will cause Shotzo to lock in on that angle for firing cannonballs, and fire 3 cannonballs with barely a pause in between, pausing for 2 seconds, then repeating the cycle. The cannonballs vanish after making contact with their target, and deal light knockback, but good hitstun.
Side Special – Stockpile Ammunition (0%/8%-11%)
Shotzo will unload itself with a quickness, stocking all the cannonballs it had in the ground underneath it. Ordinarily, this move would not do much at all if it was an ordinary platform. Under ordinary circumstances, it would create a land mine that would explode if any character but Shotzo stepped above it, with medium knockback and a mild radius. However, there is an important move reaction that will be detailed in the Down Special.
Up Special - Parasol Flight (2%-5%)
With very medium lag, a parasol will open up on top of Shotzo, and proceed to lift him up in the air Kirby’s height. This, my friends, is his silver lining. Now, this immobile character can finally deal some damage. In the air, Shotzo suddenly gains control of his movement(moving at a speed not too different from Snake’s Cypher), and can move in all directions freely. Those who aren’t attacking and touch him will take damage with light knockback. However, he cannot attack in this phase, which is unfortunate. Hitting the standard attack button will cause the parasol to release and float off into the sky. The down special and the neutral special CAN be used in the air. When Shotzo touches ground again, the parasol will automatically detatch.
Down Special – Star Block (0%/15%-32%)
This attack is only effective in the air. With surprisingly little lag, Shotzo will spawn a Star Block(About the size of a Stage Builder Block) directly underneath him. This Star Block will serve as Shotzo’s little out of reach sniping position. From here, he can plan to destroy! Anyway, the parasol will detach after creation, leaving Shotzo to do whatever he pleases on his new platform. There can be any amount of Star Blocks up on the screen at once. The blocks themselves will cripple from any attack. If a block is made on top of someone, it will eject the person to either side of the block.
If Shotzo chooses to stockpile ammunition in a Star Block, the real fun begins. The Star Block becomes a deadly Bomb Block. Same size and everything. However, if someone attacks a Bomb Block, it unleashes a string of explosions around the size of Kirby(By that I mean each short explosion is the size as Kirby), which proceed to drill in a direction determined by outside factors, dealing medium to heavy damage with medium knockback and hitstun. The explosions will move up if most of the stage is above the Bomb Block, or they will move downward if the majority of the stage is below them. They’ll move at about the speed of Kirby’s walk.
The major thing with these Star Blocks is that the chain of explosions will actually BORE THROUGH THE STAGE. The explosion chains will actually create holes in the stage that opponents can fall through and be KO’d. Meaning that these Bomb Blocks are extremely valuable, and setting them up is a must. After around 20 seconds, the holes in the stage will patch back up, forcing anyone within their confines up to the surface with a hefty 23% damage.
Final Smash – Combo Assist (13%-17%/10%-12%)
Shotzo’s final smash calls in an assist. The Arm from Combo Cannon! For those who don’t know the about Combo Cannon’s Arm, I’ll some it up. During the boss fight with the Cannon, the arm would either drop bombs on the player, or pick them up and smash them into the ground. In this Final Smash, the Arm will descend from the heavens every 3 seconds, and do either of these things. The arm is long and spindly, and has 30% HP, as the arm is out until it is destroyed or a new arm is brought in via Final Smash.
The arm’s two attacks are both in, and which one it will do is randomized. The bomb dropping attack drops a bomb only slightly larger than one of Link’s bombs, and explodes 1.5 times as big. The resulting explosion deals medium knockback and hitstun, as well as the first of the two percentages shown. The slamming into the ground attack has the arm grabbing the opponent from where they stand, and then smashing them in the ground after a brief raise into the air. The resulting collision dealing major knockback, and the second of the two percentages.
Works:
Kirby’s Dreamland (Gameboy; 1992)
Kirby: Nightmare in Dreamland (Gameboy Advance; 2002)
Kirby Canvas Curse (Nintendo DS; 2005)
Submitter:
Koopakirby
Name:
Haunter
Quality Picture:
Brief Info on Character:
Haunter is one of the original 151 Pokemon
, appearing as number 93 in the Pokedex. Otherwise known as the Gas Pokemon, Haunter's Ghost/Poison nature makes him quite mischievous and deadly.
Origin:
Pokemon Red and Green
Date of Origin:
February 27, 1996
Home Stage:
Lavender Town
Taunts:
Taunt ^: Haunter cackles menacingly.
Taunt v: Haunter fades in and out, without ever disapppearing completely. While cackling menacingly.
Taunt < or >: Haunter licks his chops. And cackles menacingly.
Entrance: Haunter appears on the stage in a cloud of purple smoke.
Kirby Hat:
Kirby gains what looks like half of Haunter's body as a hat, including everything from Haunter's upper jaw on upward. Rather erie, as it looks like there's a Haunter chewing on Kirby. And because the hat seems to be winking at you sometimes. Oh, and the hat gives Kirby the ability to use Haunter's Standard Special attack, Night Shade.
Stats:
Offense: 7/10
Defense: 4/10
Projectile: 0/10
Weight: 1/10
Speed: 7/10
Recovery: 8/10
Throwing Ability: 7/10
Final Smash: 6/10
Special Moves
Standard Special: Night Shade (0%)
For this attack, Haunter quickly darts into the background, which is almost completely lagless. And then. . . well, that's it. Haunter can spend up to seven seconds in the background before he's automatically forced out, but he can duck out at any time by tapping the Special button again, which is also nearly lagless. (although Haunter suffers a good deal of lag when forced out) While in the background, Haunter can move about and attack normally, but opponents cannot hit him unless they have attacks that reach into the background, and he can attack foes who visit the background for their dodges. While in the background, Haunter's dodges will be reversed in that they'll send him into the foreground (where he could be hit by opponents).
Side Special: Hypnosis (0%)
Haunter's eyes begin to glow brightly, and he raises his hands as he moves forward in a very confrontational way. Any foe who is within a two Stage Builder Block range in front of Haunter is forced into a dizzy state when this happens, and is unable to move for a full second. During this time, the Haunter player can use any of his standard attacks on the foe (although those hits aren't guaranteed), or press the Special button for Haunter's gaze to intensify further, causing the opponent to step into the background.
Foes unlucky enough to be forced into the background will remain in the background after the attack is over. Being in the background won't actually affect their movement or ability to attack. Rather, the purposes for which they use the foreground and the background are merely swapped, much like when Haunter moves into the background with his Standard Special, so foes can still move around and attack exactly as they normally would, but in a different plane. This puts foes largely at Haunter's mercy, as Haunter can move in and out of the background almost laglessly whenever he wishes, and foes can only exit the background by spot- or air-dodging, which deposit them in the foreground, but are very laggy about it, and allow Haunter to punish the foe with just about anything he wants. Haunter can chuck foes into the background, then mirror their movement in the foreground and occasionally jumping into the background to attack. This creates a lot of pressure on the opponent to escape, and can lead to a lot of mistakes that Haunter can punish.
Up Special: Destiny Bond (3%)
Haunter halts his movement for a moment, and then his hands fly forward in any direction, indicated by a tap of the analog (a 45 degree upward angle by default), travelling a length of 1.5 Ganondorf-heights at Captain Falcon's dash speed before stopping and returning to Haunter. If they make contact with a fighter, they'll latch on to the opponent's shoulders (or shoulder equivalent) and deal 3% damage and flinching knockback. And then just stay there. While the hands are attached, Haunter can press Up Special at any time to instantly teleport to the location of the foe (although this will cause the hands to release and return to Haunter), or, by holding the Grab input and inputting any direction, use a throw on the opponent to end the move and recall his hands. This isn't a particularly fast move, so you're going to have to be smart to land it.
Down Special: Dark Pulse (0%)
Haunter cackles maniacally as a ring of blackness shoots out from his body and covers an area of roughly 2/3 of a SmartBomb radius. This orb is completely black, and it is completely impossible to see anything inside. Haunter can only have two of these zones on teh stage at any one time, and this move is somewhat laggy, so creating them isn't easy, but the invisibility benefits Haunter much more than it does other foes. This is because it is not immediately obvious whether a fighter is in the background or the foreground, unless you have been keeping track, or pause and look at your fighter closely. Haunter can knock foes into the background inside a blacked-out area, or swap himself back and forth, and odds are that no-one will be the wiser. Haunter can also use his Dark Pulse as a place to launch his other attacks from, such as Destiny Bond.
Final Smash: Nightmare (20%+)
The camera zooms in on Haunter as he unleashes an extremely menacing cackle and rushes forward at about 1.5x Sonic's dash speed as foes are stunned and unable to move. As soon as Haunter strikes a foe, he vanishes, and they fall asleep, only to twitch and spasm in the throes of the evil vision Haunter is giving to them. The foe is completely helpless during the attack, and must escape at 6x normal grab difficulty. They are dealt 4% damage a second, and it is completely impossible for them to escape before five seconds, so you've got a guaranteed 20% damage dealt, plus potentially, much much more.
Works:
Pokemon Red and Green (GameBoy)
Pokemon Stadium (Nintendo64)
Pokemon HeartGold/SoulSilver (NintendoDS)
Submitter:
Mycroft
Egg Mech
Works:
Sonic the Hedgehog 2 (Genesis)
Sonic the Hedgehog 4 (WiiWare/PSN/XBLA)
Origin: Sonic the Hedgehog 2 (Genesis)
Release Date of Origin: November 20th 1992
Brief Info on Boss: The Egg Mech, also known as the Giant Mech, is the final boss of both Sonic the Hedgehog 2 and Sonic the Hedgehog 4. It is considered one of Dr. Eggman's most powerful creations and is piloted by the mad doctor himself. In Sonic the Hedgehog 2, Sonic was forced to fight this massive machine without the use of Rings, making the boss incredibly difficult. To add to the difficulty, Sonic could only attack the mech's cockpit when he wasn't at risk of jumping into the razor sharp claws on the mech's arms. The boss returns in Sonic the Hedgehog 4 where the fight has a few new attacks (and the added help of Rings).
Health:
Easy: 800%
Normal: 1000%
Hard: 1200%
Very Hard: 1400%
Intense: 1700%
Details of Boss Movement: The Egg Mech moves at a rather slow speed for the most part, either walking menacingly towards or away from the player character at about the speed of Porky's normal walk. However, once his health gets to about half health, he'll occassionally bound across the stage in one giant leap. This isn't so much an attack, but if you're under the mech when it lands, you'll be pitfalled and take 12% damage. Note that, because this is a large walkoff stage you fight the Egg Mech on, he'll never leap off the stage or anything like that. You'll also have plenty of room to leap over the Egg Mech if worst comes to worst (as there's no ceiling).
Attack #1: Rocket Punch (Easy-Intense)
The Egg Mech pauses in place and extends both arms out before it. A moment later, the two fists will rocket off his arms in the general direction of your character at Captain Falcon's dash speed. This deals considerable upward knockback and a damaging 15%; fortunately, Egg Mech can't use this attack again for at least a second and a half for his arms to return. On higher difficulties, the fists will be shot off almost instantly and reattach with far less lag. As the mech takes more damage, it will try and mix things up by firing the fists at different angles instead of side-by-side. Because of this, it's very possible to be hit by both fists after being knocked up by the first.
Attack #2: Burst Tackle (Easy-Intense)
Eggman exclaims from inside the mech, "All systems, full power!!" as the thrust on the back of the mech fires up. About a second later, Egg Mech will rocket across the stage at incredible speed! This move CANNOT be shielded/side-step dodged or even air dodged. The only surefire way to avoid this attack is to leap over the Egg Mech as it rockets towards you. If this move connects, it'll almost surely be an insta-KO as it deals insane horizontal knockback. Fortunately, once the Egg Mech has dashed past you, it takes a few seconds for Eggman to sort out the controls leaving him totally vulnerable to a beating. At higher difficulties, the Egg Mech will skid to a halt after it passes you then turn around and dash again. It will do this up to three times.
Attack #3: Atomic Collider (Normal-Intense)
Eggman lets out a hearty laugh before crying out, "Get a load of this!" The Egg Mech will then rocket upwards off stage. A small target will appear on your character, following them everywhere. Slowly, the target will grow larger and larger. After about five seconds, the target will freeze where you are (or were) and the Egg Mech will come rocketing downward! If you're hit by the falling Egg Mech, you'll be spiked downward and take 20%. If the Egg Mech lands on you, you'll be pitfalled and will take 25%. If you manage to dodge however. . .you'll still have to jump the shockwaves created by the impact; they travel out to both sides and will deal 10% and tripping.
Once Egg Mech has taken a lot of damage, this attack will actually break chunks out of the arena!! If you're caught under the Egg Mech when it falls, it will almost certainly be an instant stock loss as you'll be pushed through the stage!
Attack #4: Shock Generator (Easy-Intense)
Despite appearing on all difficulties, this move will only occur once the Egg Mech is at half health. Eggman will appear to be shocked and yell, "What?! This can't be happening!" as the Egg Mech starts to spark and coursing with electricity. Touching the Egg Mech with any physical attacks will deal 5% and light knockback, meaning that only projectiles will be able to harm the mech without harming the user. Every 15 seconds this electricity will turn on and off; finish him off while he's not electrically charged! On higher difficulties, the Egg Mech will use these attacks in conjunction with his other attacks. His Rocket Punch and Burst Tackle will leave electrical trails behind him that will damage you much like PK Thunder's tail. Fortunately these trails don't last long. . .
Attack #5: Egg Oblivion (Very Hard-Intense)
Eggman's last ditch effort attack, the Egg Mech will only use this attack once its health has dropped to zero. Upon reaching zero health, the Egg Mech will begin to smoke and many small explosions will blow pieces off of it. Eggman however. . .will laugh?! In one last attack, the Egg Mech will leap a short distance into the air and collide with the stage, self-destructing in the process. This explosion will instantly destroy the -ENTIRETY- of the stage, KO'ing any characters in the process. Obviously if you have some Stock left, this isn't a huge deal. . .but in Boss Battles or if you're at only one Stock left?
Despite seeming incredibly powerful, this attack is insanely easy to counter. Simply attack the Egg Mech once before he touches the ground. Any attack will do so ideally. . .use a fast one. Hitting the Egg Mech in mid-air will cause it to explode (dealing no damage to you) and will end the boss fight!
Submitter: MarthTrinity
Name:
King Gohnad (Armored Monster with Crippling Weakpoint)
Quality Picture:
http://www.indiegames.com/blog/gallery/tlp.../tlprince2w.png
As a boss from an Indie game, the only available images of King Gohnad, are screenshots
Works/Origin:
Legend of Princess
Release Date of Origin:
January 24 2009
Brief Info on Boss:
King Gohnad is a massive dungeon dwelling behemoth who attacks our main hero; Bind. As a giant horned beetle creature, King Gohnad can breath/spit fire, regurgitate animated skulls, summon bats, tunnel underground, and send shockwaves across the floor. He's also almost impervious to damage, thanks to his tough armored exoskeleton.
But, like all bosses, Gohnad has a crippling weakpoint; the gelatinous orb inside his mouth.
Health:
(King Gohnad takes quadruple damage from attacks hitting his weakpoint. There's also another way to defeat him, without exhausting his massive health. But of course, if you ever want to get his Trophy, you'll have to deplete his health anyway)
Easy: 1400HP
Medium: 2400HP
Hard: 4000HP
Very Hard: 6500HP
Intense: 10000HP
Details of Boss Movement:
The fight takes place on a long open platform, with edges either side to fall off of. There is also a low ceiling across the stage, making it nearly impossible to jump over King Gohnad. If the player strays too far from the boss, he will walk towards the player, until they are back in his range. He will also take a single step forwards, every 3 seconds that go by without the player attacking him. To avoid him simply running you off the stage, the player will need to attack him periodically. Occasionally (during certain boss attacks) King Gohnad will open his mouth, revealing his squishy weakpoint within. If enough damage is dealt to the weakpoint, before he closes his mouth again (12% on easy, which is 48% when you factor in the 4x damage multiplier for hitting his weakpoint), King Gohnad will collapse on the ground, leaving his weakpoint open for further beating. While stunned, every hit forces King Gohnad to retreat, the distance he steps back varies with the strength of the attack that hit him. If the player manages to get him to retreat off the edge of the stage, he will fall to his death, ending the Boss fight, regardless of how much health he had left at the time.
Attack #1:
King Gohnad rears up, before slamming down, sending a tremendous shockwave across the entire surface of the stage. This tall shockwave, along with dealing severe damage, repels the player a long distance, bringing them much closer to their edge of the stage. The further away from Gohnad the shockwave travels, the lower and weaker it becomes. While it may be tempting to retreat to a safer position when this attack is unleashed, so you can just hop over the shockwave, this gives Gohnad the opportunity to gain ground on you, and push you closer to the edge of the stage.
Attack #2:
King Gohnad opens his mouth, revealing his tempting weakness and coaxing the player in. Surprise! The weakpoint launches out towards the player and smacks them away! The sheer distance this attack can hit from, makes it difficult to avoid without retreating, but a well timed spot dodge is all you need. If you're skilled enough, you can hit the weakpoint with a strong enough attack to stun it, while it's shooting towards you
Attack #3:
King Gohnad buries himself underground, dissappearing from sight. For the next 3 seconds, somewhere on the stage there will be King Gohnad's weakpoint, poking out of the soil. If the player deals any damage to it, it will retreat, and King Gohnad will reemerge from the exact point he initially dug in from. If the player fails to reach the weakpoint in time, King Gohnad will reemerge there. If at that point, King Gohnad is closer to the edge than the player, he will bulrush to the very center of the stage, knocking any player in his path flying.
Attack #4:
King Gohnad opens his mouth, and spews a toxic haze in front of him. While easy enough to avoid, if you want to hit his weakpoint, the player will have to brave the fumes in order to get close enough. The gas deals severe poison type damage over time, worsening in effect the closer to King Gohnad the player approaches.
Attack #5:
King Gohnad rears up and opens his mouth, dribbling flames from his jaw in anticipation of his next attack. After a short pause, King Gohnad launches three balls of fire from his mouth simultaneously, though in various random arcs. If any ball hits, the player will be ignited, taking constant damage for a time and being forced to continually dash around. King Gohnad typically follows this attack up with Attack #1
Submitter:
Junahu
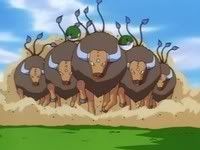
Pokémon Name: Tauros
Pokémon Number: #128
Generation: 1st Generation
Appearance Rate: Uncommon
Pokémon Attack: Tackle
Attack Style: Physical
Attack Description: When summoned from a Pokeball, Tauros will let out a loud moo and charge directly across the stage. Contact with this Tauros will deal 15% damage and moderate upward knockback. Approximately three seconds after the first Tauros runs off stage, a whole hoard of Tauros will stampede across. This hoard of Tauros acts much like Piplup, sweeping opponents off the stage if they're caught in the rush (and dealing 3% per half-second they're caught in the herd). This attack is much easier to avoid on stages with higher platforms, but on stages like Final Destination, you'll have to time your jumps carefully so as not to get swept away. If the Tauros or the group of Tauros reach a wall, they'll glance about confused for a while before vanishing in a puff of white smoke.
Information on Pokémon: Tauros is the Wild Bull Pokemon, a rare Normal-type who, in the original games, only appeared hidden very well in the Safari Zone. Tauros are well known for being highly aggressive and violently headbutting/tackling potential threats. Tauros is notable for being one of the few non-legendary 1st Gen Pokemon to not recieve a pre-evolution or an evolution and remains that way even into 5th Gen (despite their being a bull who looks rather similar to him there).
Submitter: MarthTrinity
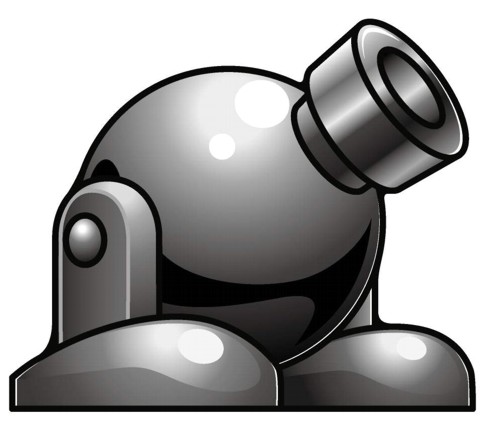
Name: Bully
Quality Picture:
Works: Super Mario 64 (Nintendo 64)
Super Mario 64 DS (Nintendo DS)
Origin: Super Mario 64
Release Date of Origin: June 23, 1996 (Japan), September 29, 1996 (American)
Brief Info on Enemy:
Bullies are black, spherical creatures that live in hot, harsh environments, such as Lethal Lava Land. There are a subspecies that live in the frozen tundra, but that is unrelated. These creatures tend to have a harsh temper, and deal with their aggression by trying to push Mario off cliffs and into scalding hot lava. Bullies, however, cannot cope with the fiery hot substance as well as Mario can, and are easily defeated if pushed into the lava themselves. They are thought to serve Big Bully, a larger Bully, and one with a larger temper. In the latest Mario releases, they seem to have been replaced with Topmen.
Health: 100% (Easy)
120% (Medium)
150% (Hard)
200% (Very Hard)
225% (Intense)
Mode of Travel: Aimless wandering around a platform, never leaving the platform.
Attack Method:
Bullies will do a short hop if they see a player character in front of them, and will then charge forward, dealing about 2-9% damage depending on the difficulty level, along with large knockback.
NOTE: BULLIES HAVE GARGANTUAN HP. IT IS ADVISED TO SNEAK UP ON ONE AND ATTEMPT TO HIT IT OFF ITS PLATFORM AND INTO A HAZARD RATHER THAN ATTACK IT DIRECTLY.
Submitter: Koopakirby
Name: San Luis River
Location: Mexico
Origin: Red Dead Redemption (PS3/360)
Date of Origin: May 18th 2010
Works: Red Dead Redemption (PS3/360, 2010)
Home Stage of: John Marston
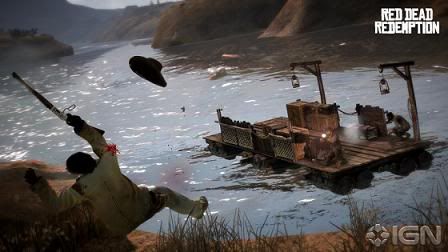
Brief Info on Stage: The San Luis River is the setting of the "We Shall Be Together In Paradise" mission in Red Dead Redemption. Located on the boarder of America and Mexico, John Marston and his companion Irish rafted down the river in order to enter Mexico. Along the way, they were attacked numerous times by hostiles who attacked the two with a hail of gunfire and dynamite. John managed to successfully defend the rafter however and the two made it safely to Mexico.
Layout of the Stage: The layout of the stage is fairly basic. It's a long raft that vaguely resembers the one in the SSE level with Fox and Diddy (except slightly larger). To the far right of the raft is a stack of crates that can be climbed on (but not moved). This stage also makes considerable use of swimming! Despite the fact that you're on a raging river, the water is not instant death. . .however. . .the raft is constantly moving to the left of the screen. If you happen to get hit by the raft, you'll instantly be spiked downwards. The left and right blast zones are fairly far from the raft however which gives you excellent swimming opportunities. This stage, much like Battlefield, has a constantly changing time of day/night.
Hazard 1: Dynamite
Sometimes during the Brawl, you'll see some men run up to the shore in the background. These men will begin hurling sticks of dynamite at the players in an attempt to blow them off the raft! If the dynamite makes direct contact with a player, it'll explode instantly, dealing 14% and high knockback. If it misses however, it'll land on the raft where it can be picked up and thrown either at opponents or off the boat. These men will obviously stop throwing dynamite once they've scrolled off screen.
Hazard 2: Oil Lamps
On both sides of the raft there are two oil lamps hanging on hooks. These lamps can be knocked loose with most attacks and, when they fall, will shatter on the ground and burst into flames. These flames will burn characters for about 2% for as long as they stand in it...and what's worse, the flames will actually stick to you, dealing constant damage! So how do you put out flames? Rolling is one but. . .don't forget you're fighting on a river. Oh and also keep in mind that, since this stage has passing time...destroying the lamps will obviously make it darker and harder to see the action at night!
Hazard 3: Gunners
Much like the dynamite men, sometimes men with rifles will be seen on shore! These guys will take steady aim at one of the characters (a crosshair will appear over them) and attempt to blast them off the raft! Fortunately, the crosshairs are pretty slow and easy to dodge...but they will deal about 10% and good knockback if the hit! Like the dynamite men, they'll vanish when the stage scrolls past them.
Submitter: MarthTrinity
Name: Arich’s Ambush
Location: Kremwood Forest
Origin: Donkey Kong Country 3: Dixie Kong’s Double Trouble (SNES)
Date of Origin: November 19th, 1996
Works: Donkey Kong Country 3: Dixie Kong’s Double Trouble (SNES), Donkey Kong Country 3: Dixie Kong’s Double Trouble (GBA)
Home Stage of: Squitter
Brief Info on Stage: Arich’s Ambush is the home of Arich, a gigantic spider boss. In order to defeat Arich, players would have to jump on the branches on the sides of the arena then jump up onto Arich as he came down to attack the player, then pick up the barrel off his back and launch it at him. While Arich never recurred outside remakes of the game, another similar spider boss showed up later in Donkey Kong 64 as a mini-boss in Fungi Forest.
Layout of the Stage: This stage only has a top blast zone similar to Shadow Moses Island, with the trees on either side of the arena blocking the arena in. If the walls take enough damage they’ll be knocked down like the walls on Shadow Moses and create side blast zones, and while they have more health they take damage from having foes knocked into them. This prevents Dedede from having an infinite chain-grab against the walls and other similiar abuse. On the other hand, projectiles do nothing to the tree walls. The tree walls do not stay down when destroyed, eventually regenerating after 30 seconds. Arich hangs at the top of the stage from a string of webbing as a background object most of the time, but he has several attacks that make up the hazards of the stage.
Hazard 1: Webbing Pellets
Arich shoots down 3 pellets made of webbing from his mouth that deal a mere 5% and flinching and travel around at Mario’s dashing speed, but ricochet off the walls and don’t vanish after hitting victims. They’ll ricochet around for quite some time before finally going back off the top blast zone from whence they came unless you destroy the walls.
Hazard 2: Arich’s Ambush
Arich drops down into the arena, his whole body a very large hitbox that does 15% and some decent knockback. This is a fairly common attack, but very telegraphed and Arich stays down only briefly before goes back up to his idle position, no longer being a hitbox.
Hazard 3: Web Weave
This is very rare – Arich weaves a web covering the top blast zone, causing anybody who comes in contact with it to get stuck against it and have to escape from it at grab difficulty, taking 2% per half-second they’re caught in the web. This prevents any KOs from being made off the top blast zone, and forces you to take down the tree walls to either side of the arena. As an easter egg, Squitter, the character whom this stage belongs to, can use his Up Special on the webbing as if it was one of his Web Platforms to swing around. In any case, eventually the webbing gives in after 20 seconds and it falls down to the floor. If you get hit by it as it falls you’ll be trapped in webbing for the usual grab difficulty and taking 2% per half second, but it’s easy to air-dodge as it falls down.
Hazard 4: Devour
Arich only uses this attack if somebody gets caught in the webbing he makes blocking off the top blast zone. He’ll go over to them and spin them up into a cocoon of webbing before devouring them for an instant KO no matter their percentage. This takes roughly 2 seconds for Arich to complete, but if they have a high enough percentage it’ll be too hard to escape in time, meaning KOs are still technically possible with the webbing blocking the top blast zone even if you don’t destroy one of the tree walls.
Submitter: MasterWarlord
Name: Gangplank Galleon
Location: Krocodile Isle
Origin: Donkey Kong Country
Date of Origin: November 24th, 1994
Works:
Donkey Kong Country (SNES)
Donkey Kong Country 2: Diddy’s Kong Quest (SNES)
Donkey Kong Land 2: Diddy’s Kong Quest (Gameboy)
Home Stage of: King K. Rool
Brief Info on Stage: Gangplank Galleon is one of the main means of transportation for King K. Rool and his Kremlings, and he used it in the first Donkey Kong Country game to travel across the seas and invade DK Island. After news of the Kremlings being defeated on DK Island reached K. Rool’s ears (Or lack thereof), he boarded the Gangplank Galleon and set sail to put Donkey Kong on his place, which resulted in the final boss battle of the game. K. Rool was of course defeated, though later on he managed to kidnap DK in the sequel to the game. In this sequel, Diddy and Dixie stow away on the Gangplank Galleon to chase the Kremlings back to their homeland, and as such the Gangplank Galleon is the first world of the game.
Layout of the Stage: The stage takes place at the front of the where the steering wheel is located, with the Krow’s Nest towering far up above the Top Blast Zone. The steering wheel of the ship is located on the right, with a Final Destination’s worth of room separating it from the Krow’s nest on the left, which acts as a wall. The Krow’s Nest blocks the left and prevents any kills that way, but there is a blast zone off to the right (The water isn’t on-screen due to the ship’s massive size) and top. The top blast zone for the stage is very high-up, meaning most KOs will be off the blast zone to the right.
Hazard 1: Kruncha
A massive bulky blue Kremling with a Pirate Bandana comes in from the background and proceeds to patrol the stage left and right a bit slower than Ganondorf’s dashing speed. Contact with him does only 10% and average knockback, but if you attack him he turns red and moves twice as fast and becomes twice as powerful briefly – no attacks are capable of killing him, it seems. . .
Hazard 2: Krow’s Nest
This only happens when somebody attacks the Krow’s Nest or is knocked into it by an attack (Preventing chain-grabs on the wall) – which angers Krow, the gigantic bird who reigns in said Krow’s Nest. Krow comes down from his nest holding a gigantic egg the size of Bowser, flapping up next to the top blast zone. He proceeds to follow whoever attacked/knocked a person into the Krow’s Nest’s horizontal position before dropping down a gigantic egg onto them that deals 20% and large knockback. While the egg has a slow falling speed, it bounces around a bit after landing, during which it still deals 10% and average knockback. If it hasn’t been destroyed by coming into contact with someone, the egg can be picked up as a heavy throwing item like Bonsly once it stops bouncing, shattering on impact. Throwing this at Krunchas is the only way to kill them, unless you have items on and throw a barrel at them. Krow will only come down from the arena once every 30 seconds at most if you just poke the nest occasionally, but if you attack the nest repeatedly (Probably chain-grabbing somebody against it), he will come down as soon as 15 seconds after he last did.
Hazard 3: Steering Wheel
It should be noted that the Gangplank Galleon is actually sailing along during the fight, but it’s just a background detail. . .Unless you go over and attack the steering wheel, causing it to go off course and potentially bump into various rocks and such, causing the stage to tilt about slightly and cause a slight earthshaking effect on the ground that does 8% and weak upward knockback. Waves also occasionally come up from the right towards the left, pushing characters towards it similar to FLUDD but a decent bit more powerful. Attacking the wheel again only has a 20% chance to set it straight again rather than just setting it off on a different chaotic course. If you want the ship to stay on course, then don’t bother killing the Krunchas, as if the ship goes off-course they will rush over to the wheel at their maximum dashing speed (Still with regular power though) and grab a-hold of the wheel to set it back on course over 2 seconds.
Hazard 4: Kreepy Krow
If you somehow can manage to hit Krow when he comes out at the top blast zone, much less deal 50 damage to him, you can kill him. The most feasible way of doing this is to throw one of his eggs back up at him, as they have tremendous range when thrown. Regardless of his health this will finish him, but good luck keeping an egg around long enough to throw it up at him. After you kill him, Krow will fall off into the sea in the background, seemingly dead. . .But 3-5 minutes later, Krow will come back from his watery grave as a ghost. While he will still pursue people who dare to disturb the Krow’s Nest normally, every 30-45 seconds he’ll specifically go to attack the player who killed him regardless of whether or not they attacked the Krow’s Nest.
Submitter: MasterWarlord

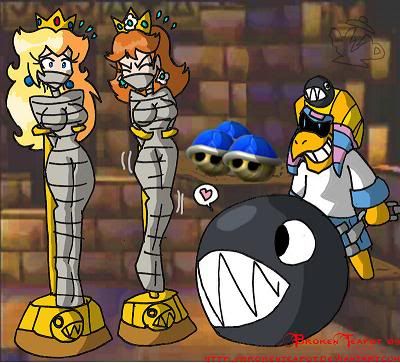
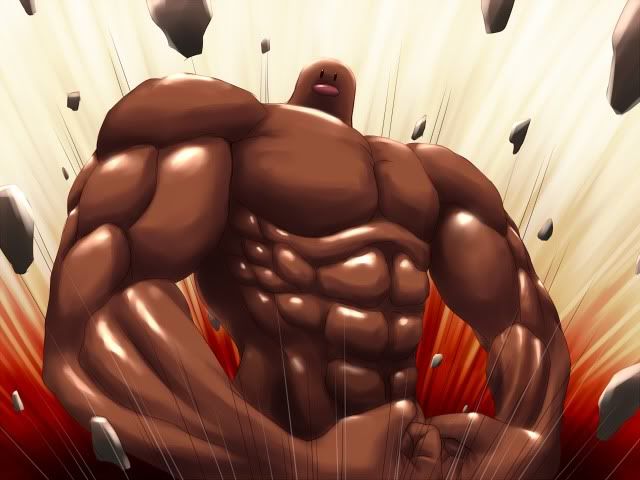
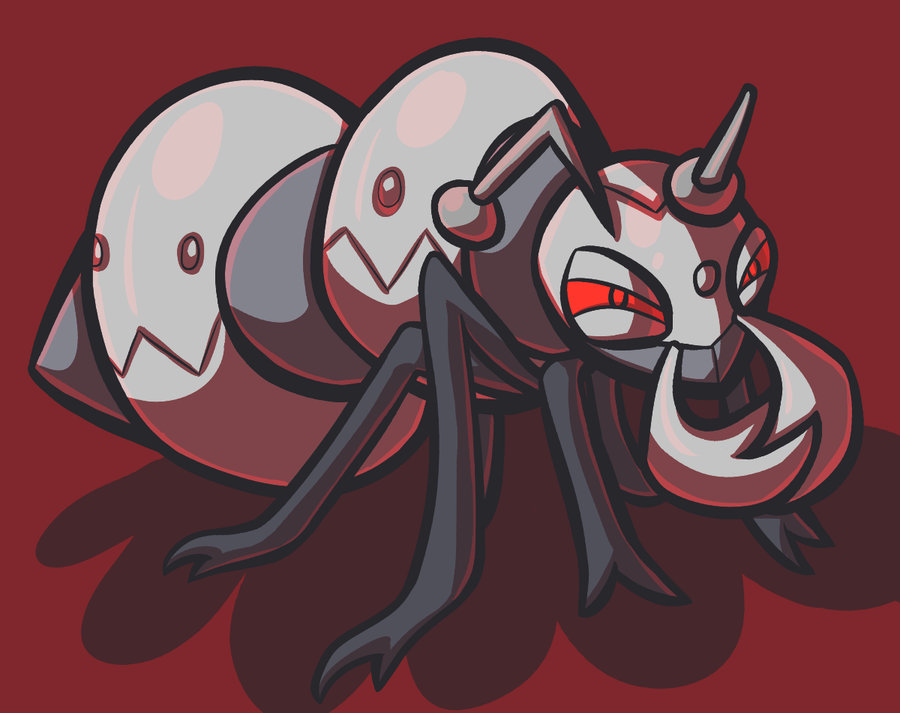


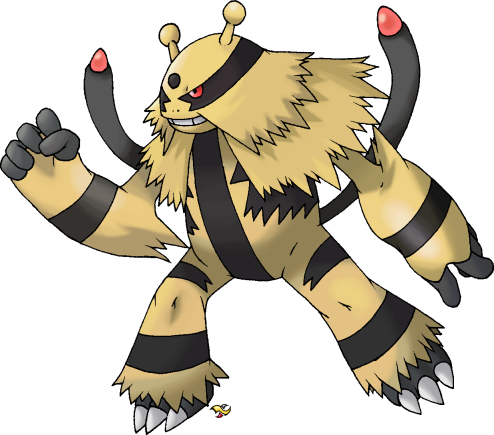
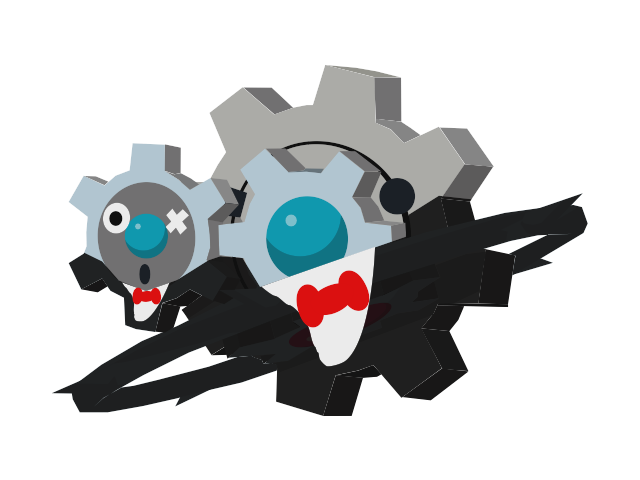

.jpg)
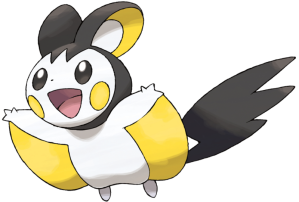

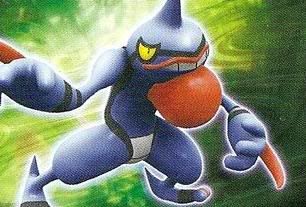


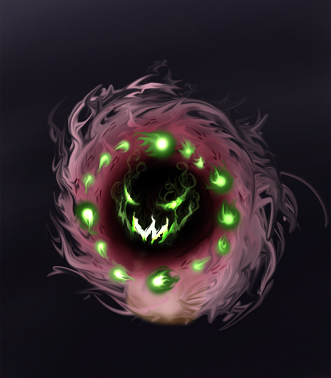
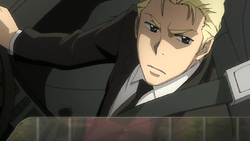


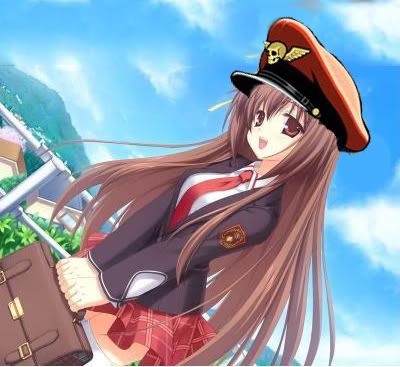


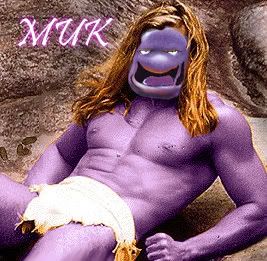


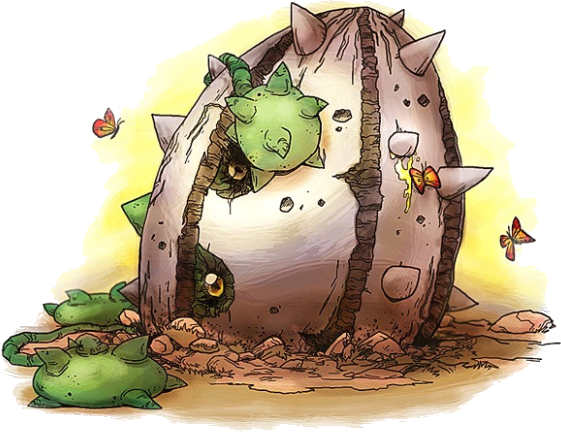


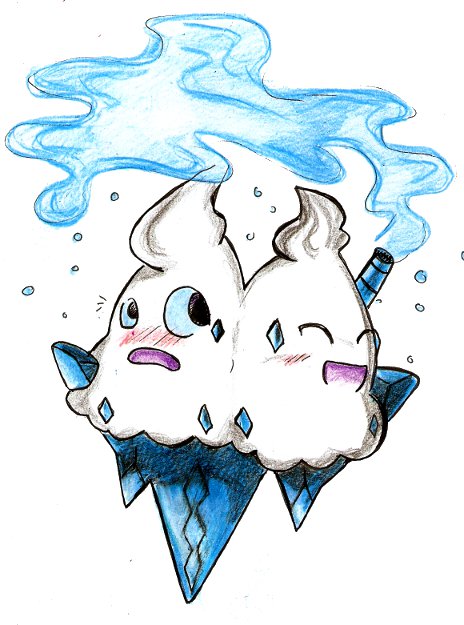


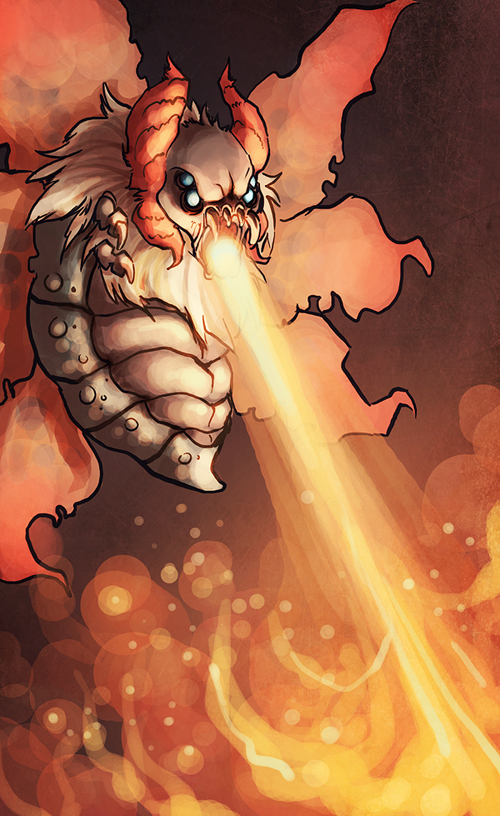


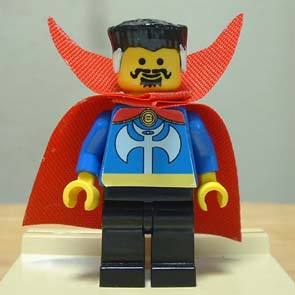


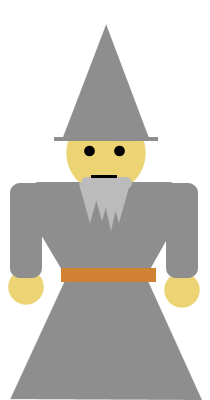

")