• Welcome to Smashboards, the world's largest Super Smash Brothers community! Over 250,000 Smash Bros. fans from around the world have come to discuss these great games in over 19 million posts!

    You are currently viewing our boards as a visitor. Click here to sign up right now and start on your path in the Smash community!

Make Your Move X - Congratulations winners! MYMXI start date OCTOBER 10TH!

Status
Not open for further replies.

ProfPeanut

Smash Ace
Joined
Oct 1, 2008
Messages
727


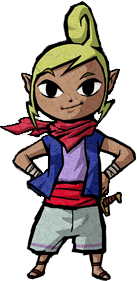
Tetra is a young pirate captain who shows up in Wind Waker and ends up helping resolve that chapter of the Legend of Zelda saga. She’s also Zelda’s reincarnation and a wielder of the Triforce of Wisdom, but don’t expect any down special transformation move here; after a life of piracy on the Great Sea, Tetra finds her own methods of fighting good enough. Headstrong, crafty, and possessing a trademark wink of awesome, she brings a blend of straightforward trickiness to the battlefield, knife and wits in tow. Tetra has joined the Brawl!

Statistics

Size: 3
Weight: 5
Ground Speed: 7
Air Speed: 7
Traction: 5
Jump Height: 8
Fall Speed: 3
Wall Jump
Crawling


Tetra’s pretty quick on her feet, though not as fast as Zelda’s other counterpart. Couple this with her jumps, which can both reach as high as one-and-a-half Ganondorfs, and she’s got the ability to both add or close space between herself and other characters without even using her specials. Then again, being light and somewhat floaty has its disadvantages of being easy to knock out, so she'll need that kind of mobility.


Specials

Neutral Special: Pirate Cannon
Tetra pulls out a circular Party Ball-sized cannon, already loaded, from the ground. Huh, there's another object secretly littered all over the stage. She can't use this move in the air, or if she has another cannon set up. Tetra has super armor during the one second it takes to prepare the cannon, after which she's free to move about on her own while the cannon fires away. They do have fuses. Cannonballs travel in an arc curving downwards.

Without additional input, the cannon will fire a shot as slow as a thrown Bonsly at 45 degrees. But a charge can be set by holding down B during the start-up lag; it'll also remember what angle the analog stick is tilting towards. Once Tetra's done preparing it, the cannon will bob up and down as it further charges the shot so that the cannon ball flies faster and farther, taking as long as four seconds before snapping to its set angle and laying siege. At maximum charge, the cannonball rockets out as fast as an arrow!

The cannonballs themselves (10%-30%) have some ridiculous knockback scaling, KOing from 160% to 80%. They’ll plow through projectiles, but explode upon contact with any solid platform or character, creating a big wall of cel-shaded smoke (1%) that’ll make anyone not directly hit by the cannonball flinch slightly. Tetra and any other character can hide in the smoke to pull off whatever move, as it lasts three seconds before dissipating. The cannons themselves only disappear after the cannonball explodes or leaves the screen (though they aren’t affected by the upper blast line).

Oh, and one last (very important) thing: Tetra does not have immunity from any cannon shots. So don’t be stupid with the charges, or she’ll know just who to blame for those suicide deaths.


Side Special: Grappling Hook
In 0.4 seconds, Tetra brings out that handy hook-on-a-rope from Wind Waker. Toon Link’s happy with his hookshot anyway, so he won’t mind. This is obviously a tether recovery, but it doesn't snap to ledges easily, making aim a valuable skill.

Tetra will then throw the grappling hook forward, covering a distance of two Bowsers in a few frames. Holding down B for up to two seconds will make Tetra swing the hook around until release, wherein it will travel faster and fly up to four Bowsers instead. The hook will latch onto any opponent or object it connects with; if it doesn’t, it’ll drop upon reaching its limit while Tetra frowns at your lousy timing. Then she’ll have to spend one to two seconds reeling it back.

If it latches onto an opponent (4%), shielded or not, Tetra will then tug the rope which will fling the opponent to the spot right in front of her. The hook will then be released, and Tetra will have a few frames to grab or attack as the opponent lands. Yet a foe heavier than Tetra with his feet on the ground isn’t as easy for our pirate to reel in. In fact, she’ll instead tug the rope, then combine the tension with a leap to send herself flying at the opponent. The foe still can’t do anything until she lands in front of him while releasing the hook.

If the grappling hook instead catches an item, a character holding an item, or a physical projectile (such as rockets and *ahem* cannonballs) Tetra will tug the hook back immediately, bringing the item towards her (or stealing it from whoever held it!). This action still takes up a few frames of time, during which holding down B gives another option. That'll make Tetra spin the item around herself twice (which takes 0.25 seconds) once it arrives before throwing the item back at high speed!

If not, Tetra will hold onto the item once it comes to her, discarding any item she may have been previously holding. Remember, though, explosive projectiles are better for blowing characters up than for holding on to.


Up Special: Catapult
A catapult pops out right where Tetra is, similar to the one on Pirate Ship. What do you mean, it's not safe? Pirates do this all the time.

After a tiny duration, Tetra will be launched from the catapult in an arc. She’s actually propelled from the momentum of the catapult, which can sustain her for one and a half seconds until she reaches the highest point of the arc: three Bowsers further and three Ganondorfs higher from her original position. Her body’s tilted to whatever direction she’s flying to while the momentum is active, reverting to a normal falling stance afterwards. Also, she can attack and dodge right after leaving the catapult. Helpless? Not Tetra.

There are two additional settings that will change the aim of the catapult. Tilt up before Tetra's launched, and she'll fly four Ganondorfs high but only one Bowser forward. Tilt forward, and she’ll go four Bowsers ahead, but only one Ganondorf high.

The catapult will stay onscreen for three seconds before disappearing, during which Tetra can’t pull out another one. Any other character who walks into a catapult will be launched to the same angle that Tetra was, except that they’re flung reeling until they reach the peak of the arc. In the air, the catapult will tumble down like Sonic’s spring, but is still capable of launching other characters, and no one probably wants to be flung to the stage wall while recovering.


Down Special: Fool’s Bait
Tetra prepares a powerful horizontal strike with her blade. Except that she really won’t. Huh.

For the duration of this move (0.5 seconds), Tetra will look exactly as if she were charging up her forward smash. There are three tricks that happen in this stance:

1. If an attack from an opponent close enough to Tetra connects, Tetra will dodge and roll behind that character, then deliver a blow at their back with the knife hilt. This will stun the character for a duration based on the addition of two factors: the damage that would have been dealt (ranging from half a second for a quick jab to two whole seconds for a fully charged smash attack) and the opponent’s percentage.

2. If an opponent dodges to a position behind her (whether sidestepping or rolling), Tetra will turn around the moment they become vulnerable and deliver a powerful slash (24%) capable of KOing at 100%.

3. If a projectile comes Tetra’s way, she’ll flip directly up into the air dodging any attacks before being able to move again; the projectile isn’t stopped.

Using this special in the air will make her imitate her back aerial instead, which turns Tetra around. Only the first trick works here, wherein a melee attack will be deflected and returned by a meteor smash (5%).

Of course, if nothing comes Tetra’s way, she’ll spend one more half second pretending to charge her forward smash, then straighten up with a disappointed look. In the air, she’ll just glance behind her shoulder with a frown instead of attacking.


Ground Attacks

Neutral A: Knife Slash
Tetra does a left-downwards swipe (2%) with her knife. Naturally, hitting A two more times makes this move more effective, in which case Tetra will follow it up with a rightwards swipe (3%) and end with a downwards stab (4%) into the area in front of her. This is one of Tetra’s few close-quarters moves, good for quick damage and having an actual direct attack.

Dash Attack: Off Ship
Tetra leaps straight forward, moving faster than her dash speed. If she hits someone, that someone's going to get kicked back (8%) horizontally while Tetra lands one Bowser length away, which makes this a great attack for dealing fast damage while maintaining distance. If she doesn't hit someone, she'll just dodge-roll as she lands one BFP away before resuming a neutral stance - unless she ends up leaping or rolling off the stage. Better recover before Tetra loses a stock then.

Forward Tilt: Blade Swinging
Tetra swings the grappling hook in a horizontal leftward arc, which would be an odd move if it weren't for the fact that the hook is holding onto Tetra's knife. The knife-hook strikes an area one SBB away (12%), knocking opponents another SBB back. The rope will flinch anyone it hits (1%), but it's pretty ineffectual, and the end lag is punishable, so this move is better against those who are far enough for this disjointed attack to hit.

Up Tilt: Over-Head
Tetra readies her knife behind her, then makes a wide slash forward (9%), the knife's arc sweeping the area above and in front of her. It covers quite some space in a disjointed hitbox, and deals decent enough knockback to lay some pressure off of you, yet the start-up lag and end lag are less than ideal. Nonetheless, Tetra has few other options for keeping opponents away when they get close.

Down Tilt: Trip Up
Tetra, lying on the ground, makes a quick stab (4%) in front of her. The move is quick and has a small range, but it'll trip anyone who gets hit by it. Tetra can dodge some moves and attack at the same time with this, but a simple short hop from anyone dodges this move in return.

Ledge Attack: Cast Off
Tetra hangs onto ledges with one hand, leaving the other free. With this attack, Tetra will hoist herself up quickly, then throw out a grappling hook. It only goes as far as two SBB, but if it hits an opponent, that foe will be pulled and flung off-stage while Tetra safely rolls away from the ledge. If the hook doesn't connect, Tetra will just pull it back while climbing onto the edge of the platform. By 100%+ damage, she’ll settle for leftward slash (3%) at the area near the ledge as she pulls herself up.


Aerials

Neutral Air: Pirate Spin
Tetra spins twice horizontally with her knife outstretched (7%, 9%), dealing little enough knockback with the first spin so as to knock them off with the second one. The hitbox is a line perpendicular to Tetra’s body, meaning that using this move while Tetra’s flung from the catapult will tilt the hitbox accordingly. Alone, it’s a good close-combat air move with short landing lag, but combined with her up special, Tetra can fly over foes while smacking their hurtboxes.

Forward Air: Two Ways
Tetra does an initial upwards slash with her knife (8%), which knocks foes back slightly. Then she throws the knife down, which is now attached to the grappling hook again. It arcs downwards (6%) and does much more knockback; while this disjointed attack covers a large area in front of Tetra, the move itself has terrible landing lag, making it better for spacing when Tetra’s higher up in the air.

Back Air: Rear Guard
Tetra turns the other way and delivers a straight-upwards strike (9%) with her knife. While the knockback is decent, and the landing lag is small, the start-up lag takes 0.5 seconds and Tetra will end up with her back turned to any foes who may have been in front of her. Alternating this move with her down special can bluff opponents from or into attacking, or just cause headaches.

Up Air: Unfurl the Sails
Tetra flings the grappling hook straight upwards, which will reach a range of one Ganondorf before being pulled back quickly. There's no knife attached this time, so anyone it hits (5%) will be caught by the hook, but it won’t serve as a tether recovery. Tetra will then pull that character downwards, effectively spiking them. The landing lag isn't pleasant, so aim well.

Down Air: Hoist the Sails
In an opposite variation of the previous aerial, Tetra throws the grappling hook straight below her instead, with the same range and lousy landing lag. Any character caught by the hook (5%) will be thrown skywards for quite a distance, though Tetra herself will be flung downwards as a result. Tetra will land pretty quickly instead if she lands on the ground this way, however.


Throwdown

Grab: Plunder
Tetra grabs at whoever is in front of her with her hand. This makes her grab like any other - well, if every other grab stole things like Franklin Badges and Screw Balls from the victim, and put them onto Tetra. As for a pummel, whacking them with the knife hilt (2%) is good enough for her; she's not planning on holding them there...


Forward Throw: Overboard
Tetra holds the foe down as she pulls out the…cannon? Is she…yes, it looks like Tetra loads the foe into the cannon before firing it straight at the ground (10%). The opponent rebounds out diagonally while a wall of smoke with the same properties as a cannonball explosion obscures the area Tetra stood in, except that she won’t take damage from it. It takes Tetra a whole second to pull this move off as well, but she won’t have super armor this time, and she can’t use this if she’s already got a cannon set up somewhere. As to why Tetra doesn’t use this with her neutral special instead, I’m guessing characters just aren’t reliably aerodynamic. Just ask Toon Link.

Back Throw: Keelhaul
Tetra flings the foe right behind her, then strikes with her knife (12%), sending the foe flying and skidding at the floor. The set knockback of this move will make the opponent land one BFP away in a knocked-down state before skidding. This throw sends foes the furthest, so it's better for when Tetra wants an opponent as far away as possible. Then again, if there isn't a floor...well, the foe won't be helpless for that long anyway.

Up Throw: To The Mast
Tetra takes a moment’s breath before throwing the opponent (5%) straight above her. The foe will be flung as high as two Samus before descending, reeling upwards in that time period. Meanwhile, Tetra’s free to dash off once the opponent’s airborne. Preferably away from the cannonball explosion.

Down Throw: Marooned
Tetra does a short hop before kicking the foe (9%) with both her feet. She leaps back 1 SBB while the foe is left lying knocked down on the same spot; by the time Tetra lands, the opponent will be able to dodge any grappling hook she throws out, ruling out chaingrabs. The strange thing about this throw, however, is that Tetra gains invincibility frames during the move. This lets her put someone else in the line of fire while she escapes from an incoming opponent – or cannonball.


Smashes

Forward Smash: Fool’s Fate
Tetra, hunching a bit, begins to charge a horizontal slash with her blade from her left. When released, she’ll suddenly roll forward, dodging all attacks, then perform a powerful slash once she’s back on her feet, the arc of which hits everyone in front of her (12%-20%). and behind her (12%-20%). Of course, that roll traveled some distance; two SBBs’ worth of distance, actually. The forward slash deals really impressive knockback that kills from 120%-70%. The back slash on the other hand has a set knockback that will fling them right behind where Tetra stood just moments ago. This smash attack is no direct way of KOing foes, but alternating this with her down special is sure to leave opponents crying.


Down Smash: Clear the Deck
Tetra seems to perform the same charging action, but now it looks like she’s going to hit the ground instead. She’s also standing straight up and slightly twisting her body. Upon release, Tetra throws the knife at the ground – except that it’s actually connected to the grappling hook, which Tetra’s got a hold on. She makes an initial spin with the knife-hook, sweeping the area immediately around her (5%-10%), then extends the rope enough on the second spin to hit anyone one Bowser length away (8%-14%) before pulling the knife back. The initial spin has a set knockback that will put opponents in the range of the knife of the second spin, which launches opponents horizontally and KOs at 170%-120%. The rope still deals negligible damage by itself (1%), and the whole move can be dodged by a short hop.


Up Smash: Clear the Skies
Tetra performs the exact same charging animation as her down smash. But this time, on release, Tetra does a jump that would dodge Ike’s dash attack while performing a fast horizontal slash behind herself (4%-8%) and in front of herself (4%-8%) while before delivering a vertical slash below herself (10%-16%). The hitboxes, which form a T shape, are as disjointed as her up tilt. The first two strikes spike the opponent, sending them directly downwards.; unfortunately, they can be dodged simply be ducking. The last strike knocks opponents straight upwards, KOing at 110%-60%, but it's pretty much impossible to land unless the foe's right below Tetra. The move ends as Tetra lands on the ground again.

Much like Tetra’s down special and forward smash/back aerial, her up smash and down smash have the same charging animation, but they also have the same start-up lag and possess disjointed hitboxes. Anyone who’s close by when Tetra prepares either smash can only either guess correctly or move outta there.


Final Smash: Blades of Wisdom

This is the part where you expect to see a pirate ship come into the background/foreground and barrage the stage. In reality, though, Tetra’s crew isn’t very good at sailing to distant arenas without the help of their captain, making this option out of the question. Hey, you already read this far knowing there isn't any "transform into Toon Zelda" move. But here's where being a descendant of a magical royal bloodline can be useful to Tetra for once!

Tetra’s knife starts glowing brightly as she flips it in the air. After catching it, she does a slash that would OHKO anyone right in front of her; from the strike, the three Triforce triangles shoot outwards in a cone, spinning horizontally and flying at the same speed as Cresselia’s crescent attack. Remember the Cymuls, those floating metal orbs from SSE with the rotating death blades? Stretch it to two BFPs, and you’ve got the Triforce triangle in this Final Smash. They behave like Toon Link’s Boomerang; after traveling 3/4s of Battlefield’s length, they’ll fly back to Tetra and spin past her until they reach their range limit and come back again. Since Tetra’s free to move around, she can make the triangles curve straight into the opponents, who’ll get caught in a 1%-per-0.1-second hitbox until they’re separated from the triangle by the stage or until the Final Smash ends. Once the triangles cross past Tetra for the fourth time, they’ll slow down until they reach end of their range limit, then disappear in a bright flash (20%), which will KO anyone easily. Of course, with three flying hitboxes whirling at your whim, it shouldn’t be too hard to catch opponents by that time.


Playstyle

Tetra's moveset is admittedly more down-to-earth and simpler than some of the other ones in this contest. It's a mish-mash of attacks with different roles that are much more efficient and dangerous when used in tandem with each other. A landed Grappling Hook can lead to a quick jab combo or grab, a down throw can be followed up by a dash-attack, being launched from a Catapult makes aerials more potent, a forward smash follows a successful forward tilt, a back throw into a pit leads to a gimping falling catapult, a down tilt can set up for a down smash, stunning a foe provides an opportunity for a sweetspotted up smash. And that's all without regarding your cannon that's laying waste to the stage.

Tetra will need to make the damage rise before trying anything risky for a KO, but landing attacks won’t be too hard in the early parts. Her Grappling Hook and Catapult coupled with her good mobility make her approach game ridiculous. Fling yourself in, dash-attack, grapple them, or smoke them out with a cannonball; they’ll end up with a knife at their necks any way. As the match continues, your opponent will find himself unable to get rid of you as long as you can keep the pressure up.

Tetra's Pirate Cannon is a valuable asset, and there's not much harm in setting it up whenever you're able to. It can cover the area above you simply by bobbing, making any foe wary of where and when it will shoot; remember, only you know those details. You can dissuade foes from staying on the ground or hanging in the air with a few shots, then throw a curveball to surprise them. Set it at high charges so the shot can speed across the stage or so it can fly high up just to come down again. Low charges give you more immediate range and assured covering smoke. The knockback is very attractive, but your opponents can and will spot-dodge any shots if they’re quick enough. That’s where your throws and positioning attacks can shine, holding them in place or keeping them out of the actual safe zone as a cannonball crashes down. You can also stand between your foe and the cannon for a bit of false security before sidestepping or using you down special past the flying cannonball.

Tetra may have only two sets of moves that look alike, but that’s enough ways to make someone lose a stock. Exploit those spot decisions players make, and hopefully you'll punish them for choosing wrongly. Using Fool's Bait after flinging yourself at the opponent with the Catapult is good fun, but so is landing the sweetspot of your forward smash on someone who flash stepped away. Your up/down smash can make your immediate area a dangerous place for your foes, who'd probably rather not guess.

Never forget the risks, though. Do something wrong, and you end up setting Tetra up for a hit instead, and much worse. Getting spot-dodged on the Grappling Hook, using your forward smash while they roll behind you, or missing with your up aerial in a short hop give your foes time to space themselves or press their own attack. Don’t forget your opponents are also free to grab and chuck you at your own cannonball if you’re not careful. You have the ability to flee when you need to get away yourself, and just tapping B when setting up Pirate Cannon will make it shoot immediately at anyone who thinks they can KO you when you're done.


Extras

Entrance
An upwards puff of grey cel-shaded smoke explodes onstage. Tetra appears, winks, then pulls her knife out of the scabbard.

Taunting
- Tetra sighs with her hands on her hips, expressing a mixture of "All in a day's work." and "Was that it? Boy, that was easy."
- She pulls out the Pirate Charm (this thing), tosses it up and catches it before putting it back.
- Trademark wink + sound that plays during trademark wink. Because no one can match Tetra's wink.

Alternative Costumes
- Blue vest, purple shirt, red scarf and sash (default)
- Red vest, yellow shirt, orange scarf and sash.
- Light green vest, brown shirt, dark green scarf and sash.
- Light blue vest, white shirt, dark blue scarf and sash.
- White vest, grey shirt, black scarf and sash

Victory
- Tetra tosses her knife, then rolls to where it lands before catching it. She then stands up in a relaxed pose, free hand on hip
- She does a mock version of Link's victory pose, doing two feint slices then giggling as she sheathes her knife.
- Crossing her arms, Tetra winks at the screen. Stand tall, Tetra, stand tall.


ForwardArrow

Smash Ace
Joined
Aug 17, 2011
Messages
503
I bet you didn't think this was even remotely possible.

Wailord


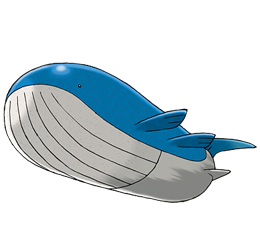
Wailord is a Pokemon from the third generation Pokemon games. It was a water type that evolves from Wailmer. It also happens to be the largest pokemon in the history of the franchise, being even bigger than Steelix by a considerable margin. It also has no way to walk on land. So of course we're trying to implement it into Smash Bros.


Stats:

Size: 50
Weight: 12
Fall Speed: 10
Movement in Water: 6
Aerial Movement: 1

Wailord can not walk. Seriously, how would you expect that thing to walk. In other news, he is basically the size of Final Destination, and if he spaws on a stage that size of smaller he will be partially hanging off the edge and will be leaving a little bit of room for the foe. Also, while you are heavy, you're not nearly as heavy as you might think, and you can still be KOed at around 160%. In addition, you are very fast falling and move rather slowly through the air. Your opponents can stand on top of you as they would a platform. In the bizarre situation you're opponent would try to dig through or plant mine/traps/whatever inside Wailord though, it's not gonna work, so don't try.

Wailord's shield is also a little weird. It's the largest shield in the game, but it only covers his head. However, you can move it around anywhere on his body with the control stick, to protect the rest of yourself. It only moves at Ganondorf's dash speed though, so it may not get there in time. You also cannot be grabbed and take half normal hitstun from attacks, a saving grace for you considering your massive size.

~~~~~~~~~~~~~~~~~~~Specials~~~


Neutral Special: Water Spout

Wailord pauses for a second before firing a blast of water out of his blowhole as long as you hold this imput. This deals no damage but ungodly knockback that KOs at 20%. The good news is that this doesn't have a lot of lag, so it wouldn't be that hard to hit with. Except the hitbox is right over your blowhole, which no sane opponent would ever stand on knowing you can do this. You can hold this out for up to 6 seconds, and no more for reasons that will probably explain themselves later.

So, is there an actual point to this move other than a really situational attack? Of course there is, don't you know anything about MYM? You see, as Wailord uses this, the stage floods at a rate of about 1 Ganondorf height per second. This water is not at all like the water on Delfino, in that it basically means while you're in it you can fly. This means if you flood up to the stage, you can actually move. Wailord moves at about Lucario's dash speed in water, actually making him decently mobile. Unfortunately, the opponent can swim around in the water just like you can. Fortunately, if the opponent spends more than 6 seconds underwater, they drown and instantly lose a stock. In addition, you can also rotate underwater, pointing your head/tail/blowhole wherever you please.

This is all well and good, but there's no way Wailord is surviving if he just holds down Water Spout all day. In addition, the opponent can still gimp you if you flood the entire stage, making this move rather dangerous, but very rewarding if you can pull it off. Also, the water disappears at a rate of half Kirby's height per second.


Side Special: Bubble

Wailord opens his mouth, releasing a rather large cloud of bubbles in front of him. If you imputted this move in the opposite direction, he instead has the bubbles blow all over his face and on the front of his body. The bubbles deal 1% and a flinch each, and 25 are produced with this attack. Each bubble is about half the size of Kirby. These will stick around for 3 seconds and soak up an attack when hit, giving you some protection while you attempt to flood the stage to your liking.

If this move is used underwater, the bubbles will last indefinently until they are popped, and will slowly float towards the top of the water. This turns it into a move much more usable on the offensive.


Up Special: Capsize
Wailord rotates over on his back, dealing opponents no damage but medium fixed upwards knockback. While Wailord is on his back, he is upside down, which basically does nothing other than prevent you from using a few attacks. However, it can be used to knock off foes trying to attack you.

There is one far more important use for this move however. If you use Water Spout while Wailord is on his back, the water will be fired at the ground. This floods the stage at the same rate, but instead of creating a high power knockback hitbox it instead pushes Wailord up into the air at the rate of Jigglypuff's dash, and creates a tide of water off the edges of the stage at the speed of Captain Falcon's dash. This allows Wailord to move in some form or fashion, as well as frustrate grounded foes by pushing them away. It can also be used to spike foes with extreme prejudice off stage if you so desire.


Down Special: Rest
With almost no lag, Wailord goes to sleep, regaining 6% per second. You can press this imput again to wake up with what is unfortunately a ton of lag. This can help aid your survivability, but only if you can make sure you'll live through it. Maybe you could use it underneath the stage with bubble clouds protecting you. That'd be nice.


~~~~~~~~~~~~~~~~~~~Standards~~~

Jab: Roll
Wailord rolls back and forth, dealing rapid hits of 1% to anyone standing on top of him or right in front of his face. This has literally no priority what-so-ever so you're opponent can just attack you through it really easily, but it is a decent GTFO move.

Forward Tilt: Ram
Wailord, mustering up all of his strength and courage, jumps forwards a very short distance, dealing 13% and knockback that KOs at 160%. This has a fair bit of lag on both ends and transports you forwards about Kirby's length. Yay.

Up Tilt: Arch
Once again, Wailord musters all of his might and springs his back upwards, dealing foes standing on top of it 9% and knockback that KOs at 150%. This has a fair bit of lag on the start up, but Wailord has super armor during that time so you should be okay. This is your most effective way of dealing with foes standing on your back.


Down Tilt: Tail Smack

Wailord smacks up and down with his tail, dealing 2 hits of 6% and 7% respectively. This doesn't actually have much lag, but most likely you're opponent is not going to be behind you, so you won't get to use this unless they try to attack you from the back. In which case this is your only option, though it's a solid one.

~~~~~~~~~~~~~~~~~~~Aerials~~~

Wailord really isn't exactly an air person. He prefers to be underwater, where he can use his smashes. As such, Wailord can only use one move in the air other than his specials. Can you guess what that is?

Any Aerial:

Wailord stalls for a second, before falling down out of the air at insane speeds. If he collides with a foe, they take 20% and are spiked with incredible force. If he lands on a foe with this, they take a whopping 25% and are crushed underneath Wailord. If they spotdodge however, they will instead crawl up onto Wailord during the end lag. From here, they can crawl extremely slowly(think half Charizard's walk speed), taking 5% per second all the while. You can use this time to flood the stage with your Neutral Special. Unfortunately, this attack has huge ending lag if you miss, which hopefully you won't.

In addition, this attack has an additional effect when used above water. When Wailord crashes into the water, it creates waves on both sides of him twice Ganondorf's height. These move at Sheik's dash speed towards your opponents, dealing them 16% and high upwards knockback if they hit an opponent. It also will prevent Wailord from suiciding if somehow you aren't touching the stage with this attack.


~~~~~~~~~~~~~~~~~~~Smashes~~~

Wailord can only use his Smash Attacks while underwater, where he can also use his tilts and specials.


Forward Smash: Breach

Wailord begins moving at Captain Falcon's dash speed in the direction you are currently facing, dealing 18%-26% and knockback that KOs at 100%-55%. He will do this until he has moved one of this body lengths, or approximately the length of Final Destination. If he happens to reach the surface, Wailord will lunge out his entire body length, ending up in the air. This also creates a wave Ganon's height that deals 11% and a brief stun. From here, you can probably guess what to next.


Up Smash: Breath Deep
Wailord creates a vortex over his blowhole the size of Bowser-Giga Bowser depending on charge. Any opponent swimming near that hole will be pulled on top of it for 1-3 seconds. From here, this allows you to go directly into a Water Spout and very likely a KO. You can also KO a foe by putting your head past the blast zone while they are trapped there, as you can move while using this attack. This really doesn't have much lag on either end.


Down Smash: Water Pulse

Wailord fires a large ring of energy from his mouth which deals 16%-24% and knockback that KOs at 120%-65%. This has surprisingly little lag and moves at the speed of Wolf's laser. This is a surprisingly spammable projectile, and is one of the many reasons you have to flood the stage. Unfortunately, the attack does nothing once it leaves the water, so your going to want to use if you either flood the entire stage or are trying to keep the opponent out of your domain.


~~~~~~~~~~~~~~~~~~~Grab Game~~~


Grab: Belly of the Whale

Wailord opens his mouth for half a second. If an opponent comes in contact with his mouth at any point during this time, Wailord will swallow them. At this point, they are stuck inside Wailord, so he can just go ahead and flood the stage without the foe interfering. In addition, if you use your A combo during this time, the foe is dealt rapid hits of 2%. The foe can escape with slightly above grab difficulty. The other thing here though is that the foe can attack while inside your stomach. You can take half damage and no knockback, but it is a nuisance.


FINAL SMASH
TICKLE
Wailord has obtained the Smash Ball. Oh god what's he going to do. Well, he rubs the opponent with his head, causing them to laugh hysterically as long as he keeps rubbing them. This lasts for a total of 5 seconds, during which you can Water Spout or whatever. But you'll notice as the Final Smash goes on, the foe starts to choke and turn blue. At the end their eyes go bloodshot and they fall over and lose a stock.

Yeah that's right, they just died from lack of oxygen.
:urg:


~~~~~~~~~~~~~~~~~~~Playstyle~~~

Wailord is a really weird character, if you haven't noticed. He can't jump or walk and is often bigger than the stage he gets placed on. So how does such an awkward character survive in Smash Bros? Well, first of all you're going to want to use Bubble to pester the foe and give yourself a little shield. It's not much, but it can help protect you. Along the way use your tilts when necessary to keep the foe away, and use the rest of the time to flood the stage.

Once the stage is flooded up to the edge, now is your chance. You can now swim off, create bubble clouds underwater, and pester the foe with your Smashes. They basically have to swim after you or you'll just heal all their hard work, which is exactly what Wailord wants. Once the foes down with you, you can then rotate towards them and Water Spout them off an edge, even pulling them towards him with your Up Smash. Be careful though, because your insane size actually makes you extremely easy to gimp if the foe ever successfully manages to approach you.

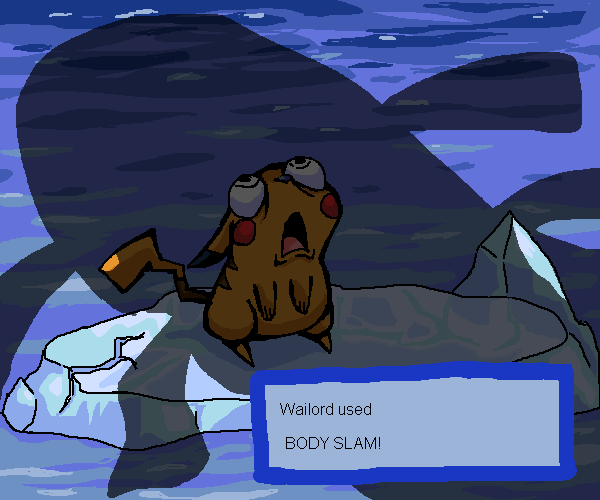
By the way, if you want you can flood the entire stage if your feeling agressive, which lets you camp the foe with Water Pulse and makes them somewhat easier to gimp. On the other hand, this strategy is high risk-high reward as the opponent can gimp you just as easily. Also, the process of flooding the stage becomes much easier if you can land a Body Slam on the foe, as you can very easily flood the stage while they try to climb out. You can do the same thing with a grab, but be warned it will build A LOT of damage on you.
 

BKupa666

Barnacled Boss
Moderator
Joined
Aug 12, 2008
Messages
7,788
Location
Toxic Tower
Just to clarify on that end date, the contest will close on the end of the 10th, meaning the cutoff point is midnight, 9/11. I was alerted that the OP was slightly confusing on this matter, so here I am, clarifying for everyone looking to get in those last-minute sets. Keep up the excellent work, everyone!
 

flyinfilipino

Smash Master
Joined
Sep 11, 2007
Messages
4,319
Location
North Carolina
@Tetra

Hi ProfPeanut (that name sounds familiar...), and welcome to MYM! It seems this is your first MYM-related post, and your first moveset. Good to have another talented newcomer join the ranks!

And here we have a set for Tetra. I only ever played Wind Waker, so everything from that game is all I know about the character. I don't remember her having a knife in Wind Waker, unless I'm mistaken, but it seems to be a suitable pirate weapon. Her Pirate Cannon is a nice handy tool for long-range damage, and is just about the most pirate-y thing you could give her. The Capapult is also a nice touch, and the Grappling Hook stays faithful to the game and is also cool. The majority of her other attacks are knife slashes, but you made some of them kind of sneaky, so I guess that's pretty pirate-like too. Tetra would fit right into an actual Smash Bros. game. You acknowledge yourself that most of her moves aren't extravagant, but you seemed to be very aware of the way you wanted to portray Tetra in her moveset.

You have a nice, clear writing style that adequately describes each attack pretty clearly. Your tone is also nice, and I like the little bits of humor thrown around in there. I also approve of your presentation; simple and effective. If I have one criticism, it's to avoid using seconds as a unit of time for attacks; they're actually pretty long and probably not what you're really going for.

So yeah, great first moveset, ProfPeanut. In the future, don't hesitate to think up some interesting moves for standards in addition to special moves. Now, I don't blame you in the case of Tetra; I don't think she had much potential without going into Zelda territory, but you squeezed as much pirate charm (see what I did there) out of her as you could in her attacks. Good work, and we hope to see more from you in he future! :bee:

Wailord to come
 

majora_787

Smash Hero
Joined
Jun 23, 2007
Messages
6,122
Location
Texas
ANOTHER MYM almost done.

Time really flies when you're making movesets... =\

I actually probably won't participate much in the voting, because most of the sets I've read were not from THIS contest, they were from older contests for research. So I've got no real legit votes this time off the top of my head.
 

mentholcase

Smash Cadet
Joined
Sep 2, 2011
Messages
56
Location
Northern California
just curiosity getting the best of me over here... what was the most number of new designers in a single mym ?

and how many is this one currently pushing ?
 

Hyper_Ridley

Smash Champion
Joined
Dec 21, 2007
Messages
2,299
Location
Hippo Island
I'm gonna say 3 or 4 had the most newcomers, they each have by far the most activity to begin; while no other MYM has even made it to 200 pages, 3 and 4 both have OVER 700 PAGES. Yeah, it was awesome.
 

half_silver28

Smash Ace
Joined
Apr 25, 2008
Messages
862
Location
MYM, Ohio
This might be my last set ever. . .it's been good :)

Are you not scared of me...?


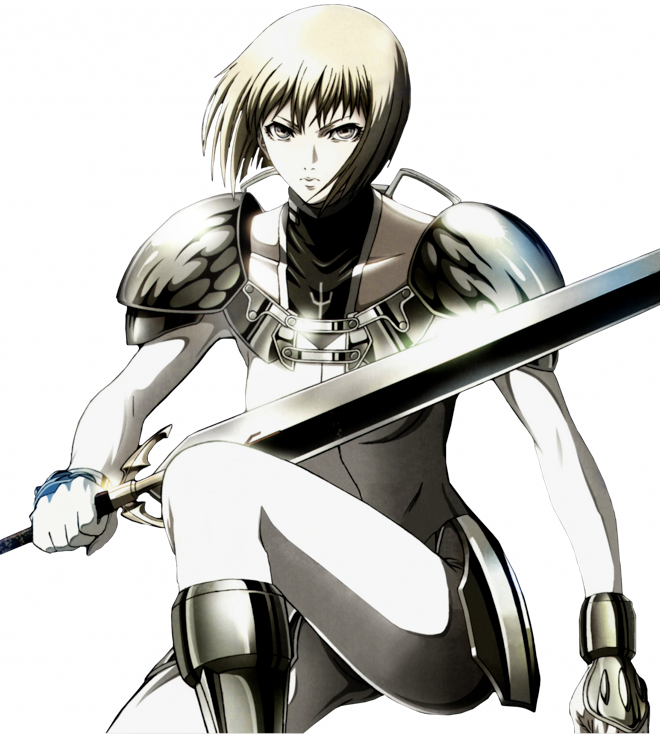
Claymore's sexy yet volatile swordswoman, Clare joins the Brawl!


Playlist


Background


There's no need to tell you the name. . .for you'll forget soon enough.


Clare is the main protagonist from the 2007 anime series Claymore. She is a member of an unnamed organization that fights Yoma (big-ass monsters that can talk and disguise themselves as humans). In order to do this, they combine the flesh of Yomas with humans (willingly or unwillingly) to create half-Yoma fighters called "Claymore", and send them out on missions to kill Yoma in towns and other locations. The created warriors are ranked 1st through 47th according to their power and potential. Claymores can willingly tap into the Yoma power or "Yoki" inside themselves to increase their power or speed, heal themselves, or gain other special powers. But if they push themselves beyond their limits (using more than 80% of their powers for most) Claymores will lose control of their powers, and eventually "awaken", transforming into Yoma themselves. This is the reason that Claymores are exclusively female: males tend to lose control and awaken very quickly when they gain Yoma powers. Both the Claymore name and the descriptive term of "Silver-Eyed Witches" were given to the half-Yoma warriors by humans: they do not have a proper name in reality.

As you may have guessed, Clare is one of these Claymores, but she is a unique case. Instead of being combined with the flesh of a Yoma, she was combined with that of another Claymore: Teresa. Thus she is only one-fourth Yoma. Her normal level of power is below that of other warriors and her Yoki is unstable, which leads the organization to give her the lowest rank of 47th. However, Clare ended up becoming one of the few Claymores to regain control of her powers after going over her limits. The process of nearly awakening permanently raised her base power level, and allows her to exceed her limits for short periods of time without losing control. Clare's impulsive and iron-willed nature makes this a problem. While she can take down very powerful opponents, her tendency to overdo it leads her to almost fully awaken in many instances. This set will put this power in the hands of the player: will you keep your Yoma powers in check? Or will you release all of Clare's powers to overwhelm the foe?

Abridged Background for Rool

Clare is a part Yoma (monster) swordswoman who can tap into her inherent Yoma power (Yoki) to increase her power, but she will lose control of her powers if they're used for too long. She can even "awaken" and become a Yoma herself if she doesn't fight the transformation. Therefore players should use her (Yoki) sparingly or in short bursts, or just give in to the urge to awaken and try to overwhelm the foe.

Stats
Clare is as tall as Marth and weighs as much as Luigi. She dashes as fast as Pit by default, and has Lucario's jump power. Her aerial movement and fall speed match Ike and Zero Suit Samus' respectively. She can also wall jump and wall cling. Note that her stats will routinely change depending on how much Yoki she uses.

Specials

Down Special: Yoma Power / Awakening


The conflict between our human mind and our Yoma mind takes place during every battle.


The whole deal with Clare's Yoki is contained within one vitally-important special. Clare is surrounded by a light-blue aura when down special is input, and begins to power up her body. You can visibly see her arms and legs becoming larger and more muscular (not quite Chris Redfield through). Her face also takes on a more beastly appearance: her teeth become sharp and her eyes glow yellow (her eyes are yellow when she uses any Yoki at all, silver normally). Depending on how long Clare powers up, she receives moderate buffs to her damage and dash speed, and gets slight buffs to attack speed. Clare can power up for 5 seconds before she is forced to stop, but she can power up fully within 1 second if the player mashes B during the move. If Clare does manage to max out her Yoki, both her arms and legs fully awaken: her monstrous gray arms burst from her sleeves and her legs below the knee take on a sleek silver hue and become incredibly thin. At this point, her attack power exceeds that of Ike and her speed matches Fox's. A few of her moves actually become weaker as a result, but others receive more specific buffs that I'll mention in the moves themselves.

However, Clare can't keep this up forever. About 15 seconds after entering her fully awakened state, Clare will suddenly kneel down in apparent pain. She's fighting the intense urge to awaken at this point: Clare becomes unable to attack or jump, and the only things she can do are move around at Jigglypuff's run speed and roll dodge. But she will be allowed to use her jumps and up special to get back to the stage if she enters this state in midair. This state lasts for a whole 7 seconds by default, but Clare can lower this time to 3 seconds if she continues to kneel and concentrate on holding her power back.


I need to have more power. . .I need. . .more. . .more!


But what if you DON'T want to hold that power back? In that case, hitting down special and mashing B for 2 seconds will make Clare let out a huge surge of light-blue energy that pushes foes back like the Fludd, and ultimately enter a near fully-awakened state. Her general attack power becomes comparable to Bowser, but she doesn't lose anything in the way of attack speed, making her a truly frightening offensive beast. Her weight also increases to just above Samus', but her fall speed also increases to match Link's. Her speed actually drops slightly to Marth-level, but her traction drops like a rock to be barely better than Luigi's. Thus nearly-awakened Clare can have a tough time keeping up with foes, and her increased size, weight and fall speed make her vulnerable to being comboed and/or gimped. This state also changes Clare's moveset to reflect her new abilities: a list of changes is below. Oh and did I mention that this state is permanent? Think before you just go full power to beat your foe into the ground. Clare goes back to 0% Yoki after she fights off awakening.

Unless noted otherwise, all of Clare's moves retain the same buffs they have when both her arms and legs are fully powered up/awakened. Also, might want to wait until you read the whole set before you read these. . .yeah.

The neutral special and down specials become unusable. The neutral special is replaced by a move where all the tentacle thingys of Clare's back shift to cover the area behind and slightly above Clare and begin to vibrate. Any foe who touches them takes 11% and average knockback: they can be hit multiple times if they are right behind Clare when this starts up. Essentially prevents foes from rolling behind Clare. The tentacles vibrate for 7 seconds, and the move has a 5 second cooldown. Her tentacles join in with Clare's sword for the side special, stabbing the air around and in front of her. So Clare cannot be approached while using side special, and the damage is doubled if she brings the foe close to her to be hit by the tentacles in addition to the sword strikes. Smash side special has only 3 seconds of cooldown. Up special does not keep the range buffs on the dash.

Her arms stretch a bit during the first two hits of the neutral combo, increasing the range and doing damage equal to 150% of the base. The dash attack deals decent stun and increased shield damage. The up tilt is replaced completely with a move where all of the tentacles stand straight up, each reaching half a battlefield platform away from her. Contact with one deals 13% and average knockback, the attack having high end lag. Shielding foes can be hit with multiple tentacles, really wearing their shield down. Down smash only requires 25% charge for Clare to throw the sword its maximum distance. Clare spins around twice with her tentacles bunched up and facing outwards for neutral air, dealing 14% damage and knockback KOing at 160%. The move has slightly better range than a non-buffed nair. Clare points all her tentacles straight up for up air, having the same range as a non-buffed up smash and impaling foes. She then throws them down, being a spike with the same power uair would normally have. She uses her tentacles to grab instead of her arms, tripling the range.

Clare loses her wall cling but gains a glide. However this glide isn't much faster than Charizard's. Clare stabs in front of her with her tentacles for a glide attack, dealing 13% and knockback KOing at 140%. She can also use up special out of the glide, but the range is halved. For the final smash, Raki comes out instead of the other Claymores and. . .hugs Clare. Clare says "Raki. . ." in the deep monster voice her transformation gave her. She then erupts in the familiar blue aura. 3 seconds later, she is reverted to her normal form. Raki then disappears into the background. This is the only way she can come back from this state.

If you'd rather not risk it all, hitting up or down on the control stick while powering up with cause Clare to only power up her arms or legs respectively. Powering up her arms separately will raise the power and speed of Clare's sword-based attacks (read, most of her attacks). If she fully awakens her arms, she will get the buffs/attack changes on sword-based moves, but her dash speed decreases a bit to match Mario's, and her aerial movement drops a bit too. Her fall speed also increases to Ness-level. Basically this makes Clare an offensive beast with some mobility issues, but can tear up foes at close range.

Powering up Clare's legs buffs the speed and power of her leg based attacks, increases her dash speed and buffs her aerial movement a little. When her legs awaken, her dash speed shoots up to match Captain Falcon, her aerial movement is buffed to Wolf-level, and her jump power increases to match Falco's. In a way she becomes more aggressive now: she doesn't have pure power but she can dominate foes in the air and gimp them once she gets them offstage. The choice between powering up arms or legs depends on what aspect of Clare's game the player wants to focus on. Clare will have to fight off awakening as normal after 15 seconds, but that period only lasts half as long as usual.

Neutral Special: Flow of Yoki


You have the scent of Yoma about you. . .


This is one of Clare's most vital techniques, one that allows her to fight powerful foes much more easily. Clare appears to do nothing when B is first hit, but in reality she is focusing in on the foe's attacks, trying to get a read on them. Clare uses this power-sensing technique in her series to read the yoki flow of powerful Yoma, and dodge their attacks accordingly. While most of her foes in smash don't utilize yoki, she can still read them and dodge their attacks. In this state Clare will automatically dodge any attack that does more than 5% damage or is aura-based (Aura Sphere, Mario fireball, etc). Clare can walk and run (but not dash) while she uses this move, and has one jump.

So she can approach foes while using this, but they have no way of telling whether or not Clare is using this. So they will likely either run away or try to hit Clare with something she can't insta-dodge: attacks that do 5% or less, non-magical items like bombs or missiles and grabs. Clare can use this for defense or to make her approach safer, and she can even fake using this move by walking or running for an approach. With good reactions, a player can dodge with this and instantly cancel the move and counterattack. Hitting Clare with any attack forces her out of the move and deals an extra bit of stun. This move lasts for 3 seconds, and does have above average start lag. Clare can also stop the move early by hitting the shield button (this won't cause her to actually shield unless the button is held), or she can cancel it into a roll. Either way, there is a cooldown period of 5 seconds during which Clare can't use this again.

There is one catch to this otherwise useful ability: Clare can only use this to its fullest when she is using none of her Yoki, since she has to decrease her own power to concentrate on another's. If she is even the smallest bit powered up, she will experience above average end lag after 3 seconds of use, forcing her to end it early if she wants to use her ability effectively. If she powers up to half of her full potential, this move will last only 2 seconds. This move is near useless when her arms awaken, lasting for only .7 seconds. Unless timed perfectly, Clare will be left vulnerable even if she dodges something. When Clare's legs are fully awakened, this lasts 1.25 seconds. As mentioned in the down special, a near-fully awakened Clare cannot use this move at all.

Side Special: Quick Sword / Windcutter
Clare learned this move from another Claymore, but can use it pretty effectively in her own right. Clare starts slashing and stabbing the air in front of her at an incredible speed, creating blades of air that fill up a Bowser-sized area before her. The blades trap foes that touch them for multiple hits, dealing 8-10 hits of 1% per second. This can be shielded and even perfect shielded, but normal shields will be severely depleted and it'd take superhuman reflexes to perfect shield the whole thing. They can DI out within a second if they only get caught by the outermost blades though. Clare can keep this up for 3 seconds before stopping: she has a 5 second cooldown where she can't use this again.

This move requires Clare to use about 10% of her Yoki: she will automatically power up before using this if she isn't using any Yoki, adding to the move's average start lag. Clare can keep this up for 4 seconds with fully awakened arms with no cooldown, but using it twice within a 8 second period will make Clare start to struggle with awakening a few seconds earlier. And attempting to shield 4 seconds of it will break just about any shield.

During those 3 seconds, Clare can walk back and forth to move the area she hits with the attack, and she can also move her arm in a direction by double tapping the control stick in that direction. Clare can hit right in front of her by pulling her arm back or move it forward to put the hitbox half a platform in front of her. Moving her arm up. . .makes it hit at a 45 degree angle upwards, and moving her arm down points it towards the ground at a 45 degree angle. Angling it down halves the height of the hitbox, but it makes it nearly impossible for foes to escape it. This move is best used for predicting a roll, recovery or jump, or just about anything. Clare can even trap helpless prone or tripped foes in it with a well-timed downward angled attack. Once a foe is caught, Clare can move foes closer to her or further away by moving her arm, but be aware that foes can escape if they DI in the oppose direction you pull them in. If Clare angles the move down after she has a foe caught, they'll be left in the tripped position when they are released.

Using side special with a smash input results in a completely different attack: Windcutter. With above average lag, Clare fires off a huge blade of wind with a horizontal sword swing. This giant blade travels forward at Mario's dash speed and is large enough that it hits into the background: foes can't dodge or roll past it. But it does travel almost Pikachu's height off the ground, so most characters can duck under it. Contact with the blade doesn't do knockback, it pushes characters forward half of battlefield before dropping them to the ground in the tripped position, dealing 10% damage in the process. This can push foes off the stage too: they'll be weakly spiked if the attack dissipates offstage. Shielding foes still get pushed the full distance, but don't fall at the end unless they get pushed offstage. Like Quick Sword, Clare can angle this at a 45 degree angle up or down. A downward angled one will only carry foes half as far but will leave them in prone. An upward angled one typically carries foes high enough that they can recover before hitting the ground, but it can potentially force foes off the top blast zone for a KO. This move has 4 seconds of cooldown.

With awakened arms, this deals 15% damage and travels a tiny bit faster. It also drops foes into prone instead of tripped, and foes who are dropped from high above will end up in tripped instead of being able to recover. This move's great for gimping or setting up for a gimp, or for completely screwing a foe's approach. Clare can also follow the Sonic Boom Windcutter and try to guess the foe's reaction depending on whether the move hits or not. A particularly evil player can hit characters like Snake when they're trying to recover and just push them to the blast zone.

Up Special: Mirage
Clare quickly strikes a counter stance not unlike Marth's, though it only lasts half as long. If anyone attacks Clare during this stance, she will quickly dash behind the attacker at lightning speed, ready to counter-attack with the move of her choice. There is significant end lag of course, so she'll get hit if she mistimes this. Clare can also press a direction on the control stick immediately after the up special input to dash half of battlefield in the chosen direction instead of doing the counter. This can be helpful for faking foes out, not to mention giving Clare a much-needed recovery move. Any foe Clare hits during the dash will be footstooled, but not damaged. This move has a 3 second cooldown, but Clare can use it multiple times in the same air trip otherwise. The cooldown makes this mostly useless for anything besides screwing around though.

With powered-up legs, the dash portion of the move has its range increased by 50%, the cooldown decreases to 2 seconds, and the end lag decreases a bit. If B is tapped twice while inputting the move, Clare will stop after traveling half of battlefield. Additionally, foes hit by the dash take 3% damage and get weakly spiked downwards instead of footstooled. Her improved recovery lets her go further in gimp attempts, and potentially follow a recovering foe to get in more hits. Even on the ground, Clare can predict a roll or dodge and get in the opponent's face with a dash.

Standards

Neutral A Combo: Silver Slayer
Clare attacks with two quick vertical sword slices, and finishes with a more laggy stab attack. The first two attacks do 2-3% each, while the stab does 6% and average knockback. Clare can cancel either of the first two attacks into another standard or smash, always keeping her foes wondering what she'll do. Aside from generically buffing speed and power, Clare can increase the range of the stab with awakened arms by holding A. This causes her Yoma-like arm to stretch half a battlefield platform forward over .5 seconds. Even Clare's neutral combo can trip up foes with the right timing and manipulation of the range.

Dash Attack: Heel Turn Swing
While continuing to dash, Clare swings her sword horizontally in front of her, but with the broad side facing outwards. This deals 5% damage and turns foes around, just like Mario's cape. A dashing Clare might seem more vulnerable to foes since she couldn't be using her neutral special, but this move can make them become very predictable upon a hit. Most foes will try to either dodge or turn around for a counter-attack upon being flipped around, and Clare can seriously punish both actions.

Forward Tilt: Ophelia's Rage
With average lag, Clare swings her sword horizontally in front of her, making a half-circle around her body. While Clare does put some power behind it, it has surprisingly little range for a disjointed move. It deals 11% damage and medium knockback that KOs at 160%. But what makes this move actually interesting is that it hits into the background behind her, and thus will hit foes who are attempting to roll behind her at the time. Foes hit while dodging will be knocked directly upwards with low knockback: Clare can start a combo with this at low percents. Along with the up tilt, this is the main move that makes foes think twice about dodging past Clare, and to encourage them to fight her head on. With powered up arms, Clare can stretch her arm to slightly increase the range of this move by holding A, but this will also move the portion of the background she hits forward, so foes who dodge past her may not get hit. It's still a decent way to keep foes from dodging though. Shielding foes are pushed back a fair amount.

Up Tilt: Reverse Blade


Try to keep up. . .


Clare briefly holds her sword behind her horizontally, before swinging it up and in an arc above her head. This has pretty good range, and deals 10% damage and low upwards knockback, comboing at low percents. Now this hits foes that are behind Clare as well as above: it lightly impales them and drags them above her, where they take the same knockback and damage. The tail end of the attack hits foes who are standing right in front of Clare (it'll miss shorter characters through). This part of the move weakly spikes foes downwards, putting them into prone, and causes them to bounce off the ground a bit before going into rest.

This move works well with the forward tilt: the ftilt hits foes who are dodging past Clare, and this move hits foes right after they actually DO get past her. This one can be dodged and shielded just fine, but doing either of those might just get foes grabbed in the end. The last part that bounces foes onto the ground might be hard to connect with, but it puts foes into perfect position for Clare to use one of her prone state-abusing moves. This move's average end lag might screw that up a bit, but that becomes less of an issue with the speed buff from powered-up arms. This move has some nice knockback growth when Clare's arms are awakened too: it does low knockback at low percents but eventually deals upward knockback that KOs at 135%

Down Tilt: Dragging Slash
From Clare's low crouch, she crouches down even lower and sweeps her sword around her body in a circle. This deals 10% damage and trips foes. More noteworthy is what this does to foes in prone or tripped. This essentially resets them: it hits them without taking them out of said state. Clare can really abuse them with this if she knocked them down with up tilt first, but this move has a weakness in its low priority: it clashes with low-hitting get-up attacks. That said, the threat of this move will encourage foes to roll backwards instead of getting up on the spot, giving Clare a great opportunity to predict it with a well-spaced side special or down smash. This can double as a defensive move or pseudo-counter too, since Clare gets so low when she attacks.

Smashes

Forward Smash: Undine's Force
Clare unleashes a powerful and laggy vertical sword strike - it deals 15-24% and knockback that KOs at 120%, and does significant shield damage. The force of the attack is such that it pushes any foe within half a battlefield platform of Clare back one Bowser length. This serves as Clare's primary KO move when using part of/none of her Yoki. It's a bit laggy, but easy to land if you can make foes hesitant to use their dodges with ftilt and side special and such. The pushing wind force is mostly there to frustrate approaching foes into a careless attack rush or space them. If you catch them in an attack with the push, they'll be vulnerable to a smash side special or down smash. With awakened arms, the attack itself will pitfall foes. Of course that'll likely lead to Clare blowing them. . . . . away with a dsmash or another fsmash.

Up Smash: Skyward Sword
Clare thrusts her sword straight above her in a replication of Marth's up smash (but a bit more laggy). This is a grab hitbox that impales foes and deals 12-19% damage. At this point, Clare can slam them down to the ground in front of her or behind her, doing 5-6% more damage, by pressing that direction on the control stick. If nothing is input within a second, she automatically slams them down in front of her. Slamming them in front of her forces them into the ground head-first - this makes them bounce off the ground up to Clare's chest level before falling down into prone. This makes it easy for Clare to add more damage with another attack: most notably this is a good setup for side special. Slamming them behind Clare will turn her around and put the foe right into prone, but with some stun so she can abuse them with dtilt and such (no she can't spam it enough to infinite them, only like 2-3 hits). This attack as a whole has high end lag.

With powered-up arms, the range of this move increases by 30% as Clare automatically stretches her arms up a bit. The slam part of the attack also deals more stun, giving Clare more time to abuse their vulnerable state. Either way this can pick off foes who try to attack from the air: where Clare's most vulnerable with awakened arms/ in her awakened state.

Down Smash: Flying Blade
Clare holds her sword behind her back horizontally, griping the handle tightly with one hand. After a bit of lag, Clare just THROWS THE SWORD LIKE A BOOMERANG. The speed, power and range of the sword depend on how long the move is charged. If the move is c-sticked Clare doesn't even throw the sword, she just weakly swings it horizontally in front of her for 3% and flinching. At half charge she throws it a battlefield platform forward at the speed of Toon Link's boomerang, dealing 15% and knockback that KOs at 155%. At full charge it travels 3/4ths of Final Destination at Falcon's dash speed, dealing 30% and high knockback that KOs at 100% - a truly frightening move considering its a projectile. Clare can angle this 45 degrees upwards too, making it a devastating anti-air projectile. The power with which Clare throws the sword depends on how much Yoma she is using: She will start powering up subtly (without the aura) when she charges this move, starting at 10% and powering her arms up to 90% power at full charge (almost awakening them). Unlike the side special, Clare keeps her current yoki level after the move. This move has above average start lag (excluding charging) and high end lag.

Clare won't have to charge the move as long if her arms are halfway powered up or more, but even at 90% power she'll have to charge at least halfway to get full power. Clare is unable to use most of her attacks without her sword, but the weapon does defy gravity and act like a boomerang: flying backwards half the distance it was thrown (Clare automatically catches it if it passes her) before dropping to the ground. If it ultimately goes off the stage, Clare will automatically regain her sword after 7 seconds. Other Characters can pick up the sword, but those who are not physically strong or have telekinesis to hold items (Pikachu, Zelda, etc.) will be slowed to a walk as they drag it and won't be able to throw it far. Only the strongest characters like DK will be able to actually use it against Clare (like a beam sword). But Clare takes her sword back if she grabs and pummels them.

The sword deals massive shield damage and good shield-push and can't be sidestepped: it's simply to big for foes to avoid it with one sidestep. It can be rolled past though, so alert foes can avoid it and get to Clare when she's most vulnerable. But Clare can easily activate neutral special or just fake it and counter with up special. Alternately, Clare can follow the sword after she throws it and grab a foe who rolls towards her or assault a blocking foe. Keep in mind that this move can be perfect shielded, but the sword hits twice, so it'll take two perfect shields to block it. Even if they do block or dodge the first time, Clare can really force them into a slipup if she keeps them busy until the sword flies back. If she throws the sword as a foe is rolling backwards from prone or tripped, it'll likely hit them or at least eat into their shield. With awakened arms, Clare always throws the sword the full length and speed. It is the damage and knockback that the charging affects, 18-35% with knockback that KOs at 90% at full charge. This is pretty much Clare's primary KO with with awakened arms or in her near-fully awakened state.

Aerials

Neutral Aerial: Tornado Slash
Clare hold her sword out horizontally and spins around 3 times. This is pretty much your basic spinning nair, it deals 9% damage and moderate knockback: the fact that it hits on both sides gives it use as basic gtfo and a gimper. When Clare's arms are awakened, she quickly extends her arms a full Bowser length from her body before attacking, giving this move a range of almost a full battlefield platform! She also spins a bit quicker, now dealing 16% and good knockback that KOs at 140%. This makes for a monstrous gimper that'll likely be Clare's most-used aerial offstage. Clare's arms are a separate hitbox from the sword, dealing 9% and flinching. The ending and landing lag for the move becomes pretty bad though, so this is a risky move to use short-hopped.

Forward Aerial: Demon Roundhouse
With the tiniest bit of lag, Clare unleashes a harsh roundhouse kick with some good range. This deals 10% and knockback KOing at 155%, a decent gimper that works well short-hopped. This is one of the few moves Clare has at her disposal when her sword is missing, so it's useful for pressuring along with the down smash or getting foes away from the sword on the ground. With awakened legs, it loses a bit of lag and gains a lot of power: it now deals 14% and KOs at 130%. Combined with the aerial buffs she gets from awakened legs and the up special, Clare can land this multiple times or she can counter and bounce recovering foes off the stage for a KO. This combined with the bair and uair are what make Clare a gimping beast with awakened legs.

Back Aerial: Silver Shield
Clare holds her sword vertically behind her in an attempt to block. If a foe hits her from behind during this time, she'll push the sword forward to push them 1/4ths of a battlefield platform back, and she'll turn around to face them. Clare gets in perfect position for a counter-attack with nair or (if they're close enough) a fair. This loses some lag with awakened arms, making it all the more effective for leading to a powered-up nair.

Up Aerial: Holy Knives
For this move Clare uses. . .a weapon other than a sword. Clare quickly pulls two long knives out of her boot and stabs above her head with them. This deals 8% and impales foes on them (a grab hitbox). If she catches a foe, she'll fling them under her and kick them downwards for a spike, KOing at 140%. With awakened arms the range of the attack increases a bit, but the major buffs come with awakened legs. The kick portion of the move now KOs at 90%, becoming a fearsome move that will make foes think twice about getting above Clare. It's not the most useful anti-air with its shorter range though, and foes won't be impaled if they attack the knives. But holding A lets Clare keep the knives out for up to 2 seconds, discouraging anyone from attacking from above.

Down Aerial: Bloody Dive
Clare holds her sword out in front of her horizontally, and immediately plummets to the ground in a stall-then-fall move. This deals 15% damage and drags any aerial foes under Clare to the ground (or offscreen for a suicide KO that kills the foe first). Regardless of whether the foe was airborne or grounded, they get knocked into prone upon reaching the ground. Clare can also hit foes who are already in tripped or prone with this move: it deals a full second of stun to them as they cry out in pain and fall back into prone (if they were in tripped before, they go into prone now). This move also ignores get-up attacks, so you can interrupt them with this too. If you want more time to abuse your opponent's state and add more damage, this would be the move to land. The stun this move deals increases with awakened arms, making it even more deadly. Dair to Fsmash to Dsmash is a brutal combo indeed.

Grabs & Throws

Grab and Pummel
Clare's grab is fairly unspectacular: she grabs with average range and speed. For her pummel though, she stabs them with one of her knives for 3% in a very laggy attack. Each knife that Clare stabs them with stays embedded in the foe after they are released. Each embedded knife decreases the victim's speed and jump power by 12% and deals 1% damage every other second. They can remove the knives by mashing Z while standing still, taking about .7 seconds to remove one. Until then though, they'll be especially pressed to escape Clare's attacks when she goes on the offensive. Clare has another grab-based weapon in the form of a. . .

Grab Counter
This is not a traditional grab counter by any means: Clare will always be grabbed as normal. But after 1 second passes with Clare in their grasp, she can react to their inputs. If Z is pressed right as the foe attempts to pummel her, she'll quickly punch them for 1% before they can hit her. This doesn't free her but it does waste the opponent's time. And when the foe tries to throw Clare, she can hit Z + the opposite direction of the throw the foe input to reverse the situation by flipping out of their throw or something. When all's said and done, Clare will have the foe in her own grab instead! Grabs will likely be a large part of the foe's game if they're paranoid about neutral special: use this to Clare's advantage. But if Clare has 50% or more damage than her foe, it'll be two seconds before she can counter. It'll take 3 seconds if she has 100% more and so on.

Forward Throw: Helen's Gambit
Clare quickly elbows her victim in the gut, and then kicks them away. This deals 11% damage in all, and sends the foe sliding along the ground for 3/4ths of a battlefield platform in a hilarious fashion (halfway fallen over). If they happen to slide off the edge, they'll retain their moment as they fly off, but will be able to recover after a moment. With awakened legs, this deals 16% damage total and makes them slide half of Battlefield forward. Either way this is a great way to start a gimping attempt, even more so if you grab them near the edge.

Back Throw: Violent Slam
Clare brutally impales the foe on her sword and slams them into the ground behind her, turning around in the process. This deals 12% damage and puts them into prone. But this is a somewhat laggy throw that doesn't add any time to the grab: foes can break out of this throw. But even so they're still impaled on the sword. Foes can tech the actual slam to get up from prone quickly, or they can time a roll with the slam to get away safely. If there is no ground for Clare to slam them onto, she spikes them down towards the bottom blast zone, KOing at 170%. This can set up a gimp attempt if the spacing's right. With awakened arms, this pitfalls the victim, but only for as long as they would have stayed in the grab following the throw. Clare will have a good chance to KO them at 100+ percent. If she puts the foe offstage, the spike now KOs at 130%. Even if the foe recovers, this might end up putting them right back offstage if you predict a roll from the ledge.

Down Throw: Soul Release
Clare simply releases the foe and takes a stance similar to her counter stance, giving them the opportunity to attack her. This is a quick throw that can take foes by surprise and trick them into attacking if they were button mashing. But their attack will just flat out hit Clare: the heck is the point of this? Well Clare can use her actual up special counter or use neutral special during this, so the foe's attack will miss or she'll counter it. The foe won't be able to move away for the duration of this throw (half a second), so she'll have a decent chance to catch an attack. They can grab her if they're expecting a dthrow, but she still has that grab counter. . . Both Clare and the foe regain control at the same time, so she'll also have a good chance to predict either an attack or a roll and punish. If they don't actually move or attack right away, a regrab is possible.

Up Throw: Witch's Kick
Clare does a handstand and kicks the foe above her, almost identically to Sheik's up throw. This deals 7% and low knockback, and it doesn't stun them for long either. It's possible for the foe to counter-attack almost immediately after this, but that'll be expected at low percents. Up smash or up tilt can hit them out of most attacks, and an up special counter can beat powerful spikes. With awakened legs Clare executes the attack much quicker and deals good stun at higher percents. Going from this into an up tilt can be an easy KO method with both arms and legs awakened.

Final Smash: Those Who Rend Asunder


Don't forget that there are people who want you to live. . .


Clare can't always handle all her battles herself. . .she calls on her fellow Claymores after she gets the smash ball! Out of nowhere, 3 other Claymore jump onto the stage: Helen, Deneve and Miria. The three of them immediately start attacking with what is essentially Clare's moveset minus neutral and side special, and the counter portion of up special. They all have 50% health each, with a Claymore retreating into the background when their health is depleted. With one exception, none of them will ever awaken their limbs. That exception is Helen, who will awaken and revert her arms many times to replicate the moves Clare can use with awakened arms, but she can stretch more than twice as far as Clare can. Deneve carries two swords, and her power reflects that. If she is left alone while having been damaged, she will kneel down and have that blue aura surround her. After 2 and a half seconds she gets back up, being 100% healed of her wounds. You have to really concentrate on her if you want her KOed. Miria though, is much tougher to bring down: she is #6 in the organization after all. She has access to Clare's full up special, and will automatically use it to counter any attack that lands. So basically the only way to damage her is to have two characters attack at once.

After 12 seconds, a female voice will be audible in the background saying "18. . .19. . ." and going on until "21. . ." Half a second after this, one unlucky foe will be attacked by Jean. She had been hiding in the background and preparing her "Drill Sword" technique, which involves her twisting her stretchy sword arm around itself 21 times and then lunging at the foe with the sword spinning like a drill. Jean basically just flies out of the background and immediately strikes at the foe with her Giga Drill Breaker, requiring a precise roll or well-timed dashing to dodge it. It deals 40% damage and KOs at 80% upon a hit. The FS ends after Jean attacks, and all the Claymores sans Clare retreat.

Playing as Clare: Completing the Job​
So what is it that we've got with Clare? She's got a strong defensive game thanks to her neutral special's ability to dodge attacks, her up special counter and move that focus on cutting off specific attacks and taking advantage of the foe's hesitation, punishing their every mistake instead of just rushing them down. The neutral special can really put foes on edge when Clare can even pretend to use it and still approach safely. If they go for a predictable multi-hit jab to hit her out of it when she's faking it, she can easily counter and put them in a bad situation. If they try to roll away from her attacks, the side special and down smash serve as devastating counter-reactions. She can even follow a dsmash or smash side special as they push foes and continue the assault on or offstage. Make sure the neutral special and/or up special aren't in cooldown just in case you can't keep foes busy for your thrown sword from dsmash to come back. Not to mention how Clare can move foes around with side special and put them in position for another attack (assuming they don't predict the direction and DI out). Foes will come to avoid rolling behind Clare, with the threat of ftilt or utilt hitting them despite the roll. Both can pop the foe up and lead into other moves like up smash or neutral combo.

Speaking of up smash, it's one of Clare's many moves that put foes into prone or tripped. Clare shines when it comes to predicting and punishing foes who are in those states: a well-spaced side special can hit them after a roll, and a smash side special or dsmash can even hit them during it. Clare can counter or dodge a get-up attack and assault them, or she can even use a down air to stun them for more fun with prone abuse. The down tilt is a nice tool for said prone abuse, not to mention how it works as a pesudo-counter since she gets so low during it. Clare can push foes to the edge with fsmash, smash side special and forward throw, and she can gimp once they're offstage too. Neutral air hits around her decently and forward air just kicks them away, and the bair can put her in position to hit with one of those. The up air doesn't have that much range, but foes will think twice about being above her when she ends up spiking them for the KO. She can also get some suicide KOs with dair. The up throw leads into more attacks, the back throw leads to more tasty prone abuse. The down throw can trick them into attacking Clare, who may or may not be countering. . . Clare can really discourage foes from dodging with a multitude of attacks that hit through them, which is really good when she's got stuff like side special and fsmash that eat up shields, and of course her KO moves: fsmash and dsmash.

When Clare starts powering up with Yoki, things get more complicated. She'll generally want to be using a decent amount at all times, if not fully awakening her arms and legs. She can add a good amount of speed and power to her game even without awakening her limbs, and buff the dsmash into a frighteningly quick KO move. But her options truly start to open up when she awakens her arms and/or legs. Awakening her arms not only increases her strength tenfold, but it also gives her the ability to selectively buff the range of her attacks, keeping foes guessing as to how and when they can to defend themselves. While she can get them off the edge and KO quicker, she isn't as proficient at gimping when only her arms are awakened. However, a buffed neutral air set up by a bair can devastate a recovering foe. Some of her more powerful moves like fsmash pitfall foes, which may not KO directly, but directly sets up a KO nonetheless.

When her legs awaken, Clare has a much easier time getting into position to punish a foe's mistakes with her speed and can really pressure them with her tilts. She can follow smash side special and dsmash and easily continue to attack foes, and eventually push them off the edge with throws or one of said moves. Clare can then move across the air like lightning and take advantage of her buffed forward air and up air to gimp her foe. It basically comes down to which you prefer: power or speed and gimping power? Or maybe you prefer both. . .while Clare isn't at her full speed with both limbs awakened, she is still very powerful and has all her buffed gimping tools at her disposal. All 3 options retain her strong mindgame abilities, as well as her specialization in predicting and punishing and abusing the prone state. Especially if you awaken both her limbs, you need to be prepared for Clare to fight off completely awakening after 15 seconds. So you'll definitely want to get the KO before that happens. . .

Or do you even want to fight it? While Clare doesn't COMPLETELY awaken, quite a few things change if she gives into her Yoma power. Her power now makes Bowser wet himself, though her speed isn't AS good. Her old neutral special is gone, but she now has delicious tentacles and a glide. Her range is even better now thanks to the tentacles, and she can defend herself well (especially in free-for-alls) with her new attacks. Her new neutral special makes it IMPOSSIBLE to roll behind her, forcing foes to take her head on. The new up tilt can protect her from any direction, and the improved side special protects her and has the potential to do terrifying damage to nearby foes. Yet many of these new attacks have a long duration along with cooldown, giving foes time to set up an offensive when she misses. Her weight and size make her a large target for combos. While she can glide and has a strong air game, her fall speed limits her potential, and she becomes an easy gimp target if her own gimp attempt fails. The easy solution is to just not go for gimps: try to pitfall the foe or trick them with a dash attack or counter, then KO them with brute force. Going into this state right away in FFAs or using it when you have a lead could prove to be effective once you've frustrated the foe with successful mindgaming.

Clare can use her offense to the fullest (near-fully awakened), her defense to the fullest (not fully-powered), her speed to the fullest (awakened legs) or combine her offense and defense (awakened arms). All four methods play differently, but also play the same at the same time. Regardless of what path you choose, your prediction skills had better be sharpened before you play Clare.

Taunts and Victory Poses

Up Taunt:


Side Taunt:


Down Taunt:


Victory Pose 1:


2:


3:


Victory Theme:

I'll add taunts and all that jazz no one reads after the deadline and get disqualified for it (HIPPO).
 

ForwardArrow

Smash Ace
Joined
Aug 17, 2011
Messages
503
Clare

But if you're gone, whose gonna do the MYM Winners thing? I love that stuff.

Well, Clare is a weird sort of set. I'm not sure what to make of it, really. I mean there is sort of a playstyle in there, but it seems mostly to be versatility. I mean there is the punishing/tripping stuff, but I consider punishing more to be more of a support to the regular playstyle personally. So yeah, I guess you could say she doesn't really have a playstyle of note. What makes it worse is that really there aren't any moves that are actually interesting in here, so it comes off as bland and playstyle-less. I don't know, maybe I'm missing something since I did read the set kind of fast, but I don't see anything here that I like. Sorry Silver.

Tetra and Dixie Kong may come later when I feel like it.
 

JOE!

Smash Hero
Joined
Oct 5, 2008
Messages
8,075
Location
Dedham, MA
Not really due to there actually not being too much you could do with it over 16-23 inputs, and/or lack of a real "rep" for the series to make.
 

wolfgang92

Smash Rookie
Joined
Sep 9, 2011
Messages
22
Location
Sky Valley, NC
Not really due to there actually not being too much you could do with it over 16-23 inputs, and/or lack of a real "rep" for the series to make.
Thanks I'm make Black Ops soldier then since Mw2 isn't out yet. I don't have to get it aproved by the mods to post it right?
 

ForwardArrow

Smash Ace
Joined
Aug 17, 2011
Messages
503
Thanks I'm make Black Ops soldier then since Mw2 isn't out yet. I don't have to get it aproved by the mods to post it right?
If there's extreme gore in the pictures, I'd advise against it. Other than that, why WOULD it have to be approved by mods.
 

JOE!

Smash Hero
Joined
Oct 5, 2008
Messages
8,075
Location
Dedham, MA
Thanks I'm make Black Ops soldier then since Mw2 isn't out yet. I don't have to get it aproved by the mods to post it right?
Dont need mod approval, just make sure you have enough stuff to fill out all the inputs, which would be a bit odd honestly without constant weapon-swapping or a frankengun
 

Davidreamcatcha

Smash Ace
Joined
Feb 9, 2011
Messages
629
Twilight Sparkle


Stats

Traction: 10
Jumps: 8
Aerial Movement: 6
Falling Speed: 5
Ground Movement: 4
Size: 3
Weight: 3


Specials

Down Special: Forcefield

For the startup lag, Twilight flips through her book for a magic spell. Once the mild startup lag is complete, she projects a purple forcefield around herself. The forcefield is the size of half a Smart Bomb Explosion, and is see-through, meaning Twilight has no obscuring game like you'd imagine. Anyone coming in contact with the forcefield, including Twilight, takes 3% damage and is bounced to where they were at 3 times the speed they came into at. The forcefield lasts for 8 seconds on it's own, but anyone can destroy it with projectiles and disjointed moves, it having 10% stamina. Once the forcefield is broken, anyone inside of it has their shield broken. Twilight can have 4 of these out at a time.

By holding the down special, Twilight will laglessly bring all of her forcefields down, before reraising them by releasing the input. It takes .50 seconds for them all to reappear, however.


Up Special: Teleport

Twilight, after a small period of starting lag, teleports three Battlefield Platforms in any direction. After performing this, Twilight descends into helplessness, and has a fair bit of end lag if she used this on the ground. Yes, is a fairly generic recovery, but what else could you imagine for her?

Tapping any input before she reappears leads into an interesting twist: Twilight reappears in one of her forcefields. By default, the forcefield Twilight reappeared in will be the first one she made, though she can tap the input several times in the middle of her teleporting to change the one she reappears in. She suffers 2 seconds of end lag once she reappears. While this may sound overpowered even if the horrid end lag, Twilight's extremely low weight and slow movement in general, as well as how easy it is to pressure the forcefields (unless you have no projectiles, a Rarity in MYM), makes up for it.


Side Special: Flame Spell

Twilight swipes her book in front of her with low startup lag, dealing 5% and decent knockback to anyone hit by it. More importantly, as soon as she pulls the book away, a purple ember the size of her book appears where she swiped it. The ember floats towards the top of the screen at Dedede's dash speed, though Twilight can stop it at any point by pressing the input again. The ember does not pass through Twilight's forcefield, her having to lower it if she wants to send it through the top.

Coming into contact with the ember deals 8% damage and decent knockback, not too shabby. While the damage it deals is somewhat on the low side, Twilight's low startup lag allows her to create a multitude of embers to litter the screen, making this an excellent zoner to move the foes into areas she wants them. Each ember disappears 6 seconds after being placed.


Neutral Special: Energy Blast

Twilight lowers her head, her horn glowing purple all the while. As she prepares, she can walk and angle the move identically to a Cracker Launcher. Twilight can charge this move as well, attacking once you release the input. .10 seconds after startup/charging, a purple energy ball flies out from her horn, traveling forward at Ganon's dash speed. The minimum size is that of a pokeball, while maximum (3 seconds of charging) is the size of Electrode.

Despite the relatively low speed at the start, the energy ball actually builds up momentum, causing it to increase speed the more it travels. An uncharged energy ball deals 4% at default speed, while a fully charged energy ball deals 8% at default speed. Every time it builds up speed, the damage it deals increases by 1%, eventually reaching to a maximum of Sonic's dash speed. At this speed, an uncharged projectile will deal 13% and great knockback and a charged one will deal 20% and great knockback. It takes awhile to build up, though, roughly ten seconds of moving. It's not like you have any way to build it up...

Or do you? The energy balls will turn around when coming into contact with Twilight's forcefields, rather then damaging them. This allows her to create a deadly area of zoning, in order to control her foe's movements and force them closer to your forcefields. Despite this, Twilight herself can be hit by the energy balls, meaning she'll want to evade them as well.


Standards

Jab: Protective Shield

Twilight brings up a Bowser-sized purple shield with low start lag, projecting it around herself. The shield spins around the immobile Twilight for .60 seconds before disappearing, giving Twilight some mild end lag and a cooldown of a second before she can use her jab again. Foes who come in contact with the shield take 3% damage and good knockback, but it can be broken through with disjointed attacks. On the other hand, the shield will reflect all projectiles that try to hit Twilight during this time, making it a very good resort if the foe ends up bringing you into one of your own projectile zones.

Forward Tilt: Book Bash


Twilight, with very little start lag, swipes her book in front of her using telekinesis. She is able to angle the book akin to Bowser's ftilt during the brief startup. The book itself deals 3% damage and knocks the foe away from Twilight in strictly horizontal knockback. Primary use of this is to juggle foes against your forcefield; whether they're inside of it or outside of it. This move stales over time though and eventually starts doing barely any knockback, so be cautious of that when you're bouncing your foe against it.

Up Tilt: Launcher

Twilight closes her eyes as her horn glows purple, holding this pose for .30 with a quick startup time. If a foe steps is within a Battlefield Platform away from Twilight's horn at this time, they are levitated into the air. Twilight can move the control stick in any direction to launch them away for 10% and knockback strictly vertical or horizontal, depending on the direction. If a projectile or Twilight's forcefield is in front of her, she can choose to launch it. The forcefield travels towards its' destination at Falcon's dash speed, bouncing foes on the outside and inside all the while. This is one of Twilight's primary KO methods, as she can trap a foe inside her forcefield, ensure they'll stay in with enough racked damage and send them forward for a KO. Sending it upward to bounce foes approaching from the air is possible as well, but a much less practical strategy unless combined with your grab-game.

Down Tilt: Stopper

Twilight begins her up tilt animation, having the same startup, end lag and times as she does normally. If a foe comes within range, they are automatically frozen in place for a second, being immune to the stopping effects until she starts it again, but stalling is impossible due to slow end lag. More importantly, this causes all of your projectiles on stage to stop moving, only starting movement again upon a second press of the input.

Dash Attack: Teleportation

Twilight blinks out of existence after .10 seconds of end lag, teleporting 1.5 Battlefield Platforms forward instantly, but having another .10 seconds of end lag after reappearing. By holding the the input before Twilight teleports, Twilight will continue teleporting beyond one Battlefield Platform, moving at Mario's dash speed across the stage, she will pass through anything during this time, giving her the ability to evade her projectiles. Twilight reappears once the A and B buttons are simultaneously held, upon reaching the stage edge or being hit out of teleporting by the foe.

As she is teleporting, she can use all of her attacks on the move. This allows Twilight some sneaky tactics such as littering the stage with forcefields and fire, as well as possibly juuggling foes across the stage. Her primary use is to get around her horrid movement speed, however. While this may sound atrociously broken, her typical movement speed is Ganon-level and her weight is very light, making up for it.


Smashes

Up Smash: Healing Magic

Twilight begins flipping her book forward during charging time, looking for a particular spell. Once charging is complete, her horn glows purple over the course of .15 seconds. The horn generates a ball of Bowser-sized purple energy around Twilight, healing her and anyone within the energy 8-16% damage. Even without charging, this is still a laggy special and opponents can interrupt you during startup/charging for the book to heal them, so proceed with cautious. The energy remains around her for a second, healing any allies who come near her. Of note, if used against your forcefield, it refreshes the time it lasts for as well as healing damage done to it. This also refreshes holes made by your fsmash beams. One of your primary uses of this should be to bait the foe, as they'll likely want to reap your healing.

Forward Smash: Book Beam

During the charging phase, Twilight closes her eyes as her book levitates in front of her, glowing purple. She can angle the book around her, having far more versatility in the firing angle than the likes of the Cracker Launcher. Once the (long) charge is complete, Twilight turns her head as the book opens and a purple beam the size of Mario fires out from the book. The length of the beam depends on the charging time, ranging from 2 Battlefield Platforms to 5. The beam delivers multiple hits of 5% per second, and pushes foes along to the end of the trail before delivering good knockback. Twilight has a bit of end lag on the end of this, for all of the good things it does.

If Twilight fires the beam from inside her forcefield, she'll find it's the only one of her projectiles that go through the forcefield rather than bouncing off. In fact, it makes a hole the height of the beam in the forcefield Twiight shot the beam through. Used right and this can lead to a place to fire your energy balls and fire spells more. Speaking of which, if the beam touches your energy balls or spells, they will begin glowing purple. After a second of glowing, the projectiles that were hit by the beam move towards the side blast zones, in the direction the beam would push them to. They travel at Falcon's dash speed horizontally, and will continue moving until going offscreen or having Twilight's dtilt used against them. While it's better than the utilt for a coordinated attack, it won't push your forcefield and is slower to boot.


Down Smash: Book Control

During the charging portion of this move, Twilight causes her book to rapidly spin around her, her horn glowing purple. After the move is charged, Twilight holds this pose, gaining control of her book. The book has unlimited free flight thanks to Twilight's magic, moving around at Captain Falcon's dash speed. Anyone coming in contact with the book takes 5-8% damage and good knockback, but that's not the main point of this move. By pressing the Specials Button, the book begins to suck things near it. The book's suction has a range of 3 Battlefield Platforms, forcing foes to travel towards it at Mario's dash speed.

While this is good for spacing, more importantly, the book can suck in projectiles as well, yours or the foes. The book can suck 3-6 projectiles depending on the charge time. Twilight can release these projectiles by using her ftilt, which causes projectiles to fly out every use in addition to the regular hit. The projectiles retain the same properties they had when they were sucked in, so your projectiles retain momentum and what not. Hitting the book at any time causes it to return to Twilight, and hitting Twilight with any move while she is controlling the book causes it to return as well. She can also force it to return by pressing any input outside special input.


Grab-Game

Grab - Telekinesis

Twilight closes her eyes as her horn begins glowing purple, a ball of Bowser-sized purple energy appears from it. From here, Twilight can move the energy in any direction at Fox's dash speed for 4 seconds before it disappears and Twilight exits the grab. The startup lag is relatively small here, but the end lag if she misses can really hurt Twilight.

Whenever the energy comes in contact with a foe, they will float one Kirby in the air and enter their "grab" state, Twilight being able to throw them from this position. The grab is slightly easier to escape than a normal grab, but Twilight can grab offstage foes.


Pummel - Teleport

Twilight blinks out of existence for .20 seconds, before reappearing. When she reappears, the foe appears next to her, still grabbed. They take 1% from this.

If Twilight holds the input, she and the foe reappear in one of her forcefields if she has one. She can spam pummel to move from forcefield to forcefield, if she so desires.


Up Throw - Grasp Tighten

Twilight concentrates, as she strengthens her hold around the foe, making it 2x as hard for them to escape. Twilight exits the grab, being able to move and attack at will at this point. This gives her some time to run around and set up, as well as heal herself.

The foe must escape from the energy like a normal grab, continuing to float if they were in midair. Twilight is unable to use her grab-game until 3 seconds after the foe escapes.


Forward Throw - Psychic Swap

Concentrating her energy, Twilight and the foe both disappear for .10 seconds, before they reappear in each other's spots, the foe exiting the grab. While this may sound simplistic, Twilight has several uses for this, including sending foes straight into her field of projectiles or trapping them in a forcefield so she can shatter it, or gain some setup time. On that note, it's also great in friendly fire team matches: get a high damage foe out of danger and replace them with yourself before retreating.

Down Throw - Psychic Suplex

In this move, Twilight concentrates as raises her head upwards, her foe flying 3 SBBs vertically, dealing 5-15% to any foes in the way depending on their weight, though this is only really useful in team matches. After holding them up for .20 seconds, Twilight throws her head down as the foe flies into the ground, taking 10% and strictly vertical knockback...if they hit it, of course. This is obviously one of Twilight's best killers, as your foes may be offstage from an fsmash or a moved forcefield, or what have you. Suplex them down for a cheap kill.

Aerials

Neutral Aerial: Magnetic Force

Twilight begins emitting a purple wave of energy from her, as big as Bowser and as thin as Tabbu's off-waves. The waves increase a Bowser in size every .50 seconds Twilight holds the input down. What this does is attract foes within range to you at Fox's dash speed, them being able to attack you as you move. This also automatically forces all of the projectiles on stage to you. This is a great KO method if you're in the air with the foe, as well as a way to bunch projectiles into one specific spot, the projectiiles will stop moving once you stop holding the button. This has low start lag and low end lag, with the end lag being slightly slower. However, the landing lag is quite terrible compared to most aerials, so this is primarily an aerial move. Use this to catch foes offguard.

Forward Aerial: Book Spin

Twilight levitates her book and begins to spin it around herself, it traveling around her at Mario's dash speed. This has a small hitbox, however, being largely limited to foes directly next to Twilight. It deals 8% and good knockback to foes foolish enough to step next to it, however. More importantly, the book functions as a barrier, shielding her from attacks that hit it. Use for approaching or something (HIPPO).

Up Aerial: Aerial Launch

Twilight's horn glows purple, as it often does, as a purple bubble appears around Twilight. The bubble is around the size of Bowser, and covers her completely, but she can be hit out of it easily. This has low starting lag, but the end lag is bad, meaning Twilight can be easily punished. If anything touches the bubble, they will float in place as Twilight and the foe stall in mid-air. Twilight can hurl her foe in any direction at this point, dealing 10% damage and good knockback to them. More notably, she can also redirect any projectiles coming her way, meaning this combined with naerial is one of her sneakier techniques. She can also redirect her forcefield, whether or not it's been affected by her ftilt.

Back Aerial: Flank Kick

Twilight, with semi-decent startup, pushes her back legs into a backwards kick. This deals 7% damage and good knockback to anyone affected by the kick, while this may seem simplistic, Twilight ends this with little lag. This allows her to create a small wall-of-pain to attack opponents attempting to dissuade her as she is approaching, or those attempting to approach her as she does some setup, it functioning as a spacer in this instance.

Down Aerial: Stall and Fall

Twilight pauses for a brief period before plunging downwards in a stall-and-fall motion. Anyone hit by Twilights body will experience a weak gimp, decent but almost impossible to KO someone with, and be dealt 6% damage. If Twilight lands this, she will be bounced 3 SBBs upwards with little end lag.

You must be thinking, "Gee, this guy's run out of ideas. He just used a stall-and-fall and meaningless gimp in the same move!" Not quite: This has actual relevance to the rest of the set. Just get a foe right above your forcefield and let it rip: The bounce you get from landing this will be enough to keep your foe sandwiched between you and your forcefield long enough for you to inflict some damage. While the foe easily DI away, they have the threat of embers and projectile zones constantly around them, making it more likely for them to counter attack. This by itself is too weak to gimp unless the foe is at a high damage percentage, unfortunately for Twilight.


Final Smash

Twilight glows purple, gaining an overload of magic. Everything on the stage is automatically grabbed by a ball of purple energy from her grab. Twilight has 3 seconds to choose a direction, once she does, the foe, projectiles, traps and whatnot gets flung in the direction she chose, with excellent distance. No way the foe will be dodging this.


Extras

Up Taunt: Disinterested

Twilight levitates her book in front of her, beginning to study in the middle of the battle. You must really be boring her.

Side Taunt: Horse Puns! Haha!

Twilight glares at the foe, letting out a cry of "Stop horsing around!"

Down Taunt: Adorable1

Twilight chuckles to herself, before letting out a little squeak.

Victory Pose 1: Book-Worm

Twilight flips through her book, talking to the losers as she does so. She states "Perhaps you'd like to borrow my copy of Practical Pugilism: A Beginner's Guide to Fisticuffs?" before teleporting away.

Victory Pose 2: Excited Victory

Twilight ecstatically hops across the screen, letting out cries of "Yesyesyeesyesyesyesyesyesyesyesyes!" until you leave the results screen.

Victory Pose 3: Disgruntled

Twilight looks back and forth, stating "Where's Spike? I need to take down a letter for the Princess."
 

MarthTrinity

Smash Lord
Joined
Aug 9, 2007
Messages
1,954
Location
The Cosmos Beneath Rosalina's Skirt
Smash Bros. needs to be about 20% cooler...


Rainbow Dash

For those of you who may not be educated on the matter, Rainbow Dash is a young pegasus pony from the My Little Pony series (with this version in particular being from Friendship is Magic). Rainbow Dash is one of the main characters of said series as well as one of the most popular ponies out of all of the MLP characters. Rainbow Dash is typically a bit of a show off when it comes to her accomplishments and flying abilities and is quite competitive because of this. Despite this, Rainbow Dash's element is loyalty as she is fiercely loyal to her friends. Finally, Rainbow Dash's cutie mark is that of a rainbow colored lightning bolt.

Stats

Jumps: 10
Aerial Movement: 10
Traction: 9
Ground Movement: 8
Size: 3
Weight: 2
Falling Speed: 1

I really hope you didn't expect anything less from this perfectionist pony! Rainbow Dash excels in nearly all aspects; she's fast (on sky and land), she has exceptional traction, her jumps are obviously really good (she's a pegasus for crying out loud) and her floaty nature lets her stay in the air with incredible ease. She's not exactly a huge target either...being about Ivysaur's size. Rainbow Dash's main weakness lies in her incredibly low weight however making her rather easy to smash away...if only her recovery weren't so godlike. Rainbow Dash has -FIVE- jumps (the two standard ones and three Meta Knight-esque ones) and a glide.


Super Speed Strut


One of Rainbow Dash's trademark abilities, the Super Speed Strut is an interesting one as well as one that greatly increases the pony's arsenal of moves. Essentially, when Rainbow Dash touches the ground...she continues flying at her normal speed but pantomimes as if she were running on the ground. What this means is, Rainbow Dash can use any of her aerials out of an "airdash" except for her Down Aerial (as pressing down on the control stick/pad will cause Rainbow Dash to drop to the ground and dash normally).

This not only makes you faster (as Rainbow Dash's airspeed is greater than her groundspeed) but it allows her to use most of her aerial game while retaining tremendous speed. Also worth mentioning is the fact that Rainbow Dash can use her Specials, Down Smash and grab out out of Super Speed Strut allowing for insane mixups and pressure. Smallest .gif I could find.


Special Attacks

Neutral Special: Cloudy Days

Rainbow Dash's job is to keep the skies of Ponyville cloud free. Of course...Smash isn't Ponyville so anything goes here! With a tap of the Special button, Rainbow Dash will fly at an blindingly fast speed off the nearest blast zone and return almost instantly with a cloud in her possession. These clouds aren't much bigger than Rainbow Dash herself and will appear directly below the pony after she uses this attack making this a handy recovery option.

The thing is however, these clouds are...well...just clouds. Anyone heavier than Rainbow Dash cannot stand on these clouds and will immediately fall through the bottom of them. In fact, even Rainbow Dash will cause the clouds she stands on to sink slowly downward (so as to prevent her from camping in the sky forever) This provides Rainbow Dash with a personalized recovery and her own personal "hiding spot" when things get too hectic. Do note however that only five clouds can be in existence at one time (and they'll only last for fifteen seconds each and Rainbow Dash can only "make" two clouds in the air before touching solid ground).

So, you must be wondering what these clouds do aside from aid in Rainbow Dash's recovery. If Rainbow Dash jumps and lands on a cloud, a burst of rain will come pouring out of the cloud dealing multiple hits of 1% damage that lasts for two seconds. Needless to say, one could use these clouds to make an annoying wall of death for recovering opponents or, better yet, use them to keep your foes well below your cloud perch. As a note, Rainbow Dash does not regain her jumps (outside her first jump) until she touches solid ground, so you can't just camp the skies forever with this.

If this move is used out of the Super Speed Strut, Rainbow Dash will hop a slight way into the air before she flies off screen to grab a cloud. Once she returns with it, Rainbow Dash will drop it where she used the move and continue her with her momentum.


Down Special: Rainblow Dry

Another of Rainbow Dash's signature techniques; Rainbow Dash begins rapidly flying in a tight circle, forming a large rainbow colored tornado as she does so. This tornado is roughly the width of Bowser and stands roughly a Ganondorf and a half high. Like Meta's Mach Tornado, Rainbow Dash can increase the speed and duration of the Rainblow Dry by tapping the Special button. Overall, this move does some solid damage (many weak hits of 2% each) and tends to suction the foe into all of the hits...although the priority is nowhere near as powerful as Mach Tornado and provides no horizontal/vertical movement to compensate for the increased range of this attack.

This move also acts as Rainbow Dash's primary way of getting rid of her own clouds. If the Rainblow Dry tornado comes in contact with a cloud, said cloud will be pulled apart and scattered in the area it was. Once scattered, a cloud will become a Bowser-sized smokescreen of sorts that will obscure the visibility of anyone or anything behind it. While this unfortunately makes it so that Rainbow Dash can't stand upon this cloud or create damaging rain from it, these smokescreen clouds do not count towards Rainbow Dash's total of five clouds allowing her to block off parts of the stage visibly with these and offensively with her rain clouds.

If used out of Super Speed Strut, Rainbow Dash continues forward as she uses the Rainblow Dry covering a great distance without stopping. This allows Rainbow Dash to cover a great amount of ground with her sweeping tornado of doom as well as drag captured enemies towards the edge of the stage and scatter any clouds in the way.

Side Special: Sonic Rainboom

The Sonic Rainboom is Rainbow Dash's ultimate ability in which she actually breaks the sound barrier by flying at such an incredible speed that both a sonic boom and a rainbow are created at the same time. Needless to say this attack is quite potent...if used properly. Upon inputting the command for this attack, Rainbow Dash will pause in place momentarily before a giant rainbow ring appears around Rainbow Dash .75 seconds later. This ring is approximately a Ganondorf high over Rainbow Dash and about Marth's width (coming directly from Rainbow Dash's center). If anyone touches this ring, they'll take 16% and high knockback. Likewise, anyone behind Rainbow Dash as the Sonic Rainboom forms will be blown backwards a good distance but will take no damage.

Of course, that's just the initial effect. After using the Sonic Rainboom, Rainbow Dash will rocket forward with her front hoofs extended at a speed slightly greater than Sonic. Anyone who is in the charging pony's way as she rockets forward will take 18% and high knockback. Needless to say however, this makes Rainbow Dash a nightmare to control properly...but it does put her into an instant Super Speed Strut. Rainbow Dash can cancel this Sonic Rainboom powered Super Speed Strut by tapping down on the control stick/pad; make sure you do this before you accidentally rocket off the stage.

Like the Rainblow Dry, the Sonic Rainboom also has an effect on her Neutral Special clouds. If Rainbow Dash dashes through a cloud (scattered or not), the cloud will be pulled on with such force that rain will actually fly out of the cloud sideways! This makes it possible to create a very deadly wall of horizontal rain to launch at foes -OR- to chip away at their shields if they're trying to guard against the charging pony. Either way, horizontal rain from normal clouds is more concentrated and deals 2% per hit directly to the right of the cloud...whereas scattered clouds deal 1% per hit and cover a much wider area.

If used out of Super Speed Strut however, Rainbow Dash has very, very little start up lag to this attack (as opposed to the Falcon Punch level she has from a stationary position) and can easily use it to chase down foes or continue her momentum. Regardless of how it's used, Sonic Rainbow is a particularly dangerous move in all situations...sometimes to you as well!

Up Special: Fantastic Filly Flash
For Rainbow Dash's recovery Up Special (not that she really needs help in the recovery department...), Rainbow Dash shoots upwards the distance of Marth's Up special recovery before diving downwards in a nosedive and leveling off into a glide. All in all, this gives you exceptional vertical recovery during the initial part but only half as much due to the nosedive afterwards. IE: If the closer you are to the stage when using this, the easier it is to recover from below the stage. Any opponent who makes contact with Rainbow Dash as she darts upwards receives 8% damage and low-medium knockback while any opponent that is hit by Rainbow Dash as she nosedives takes 10% and medium downward knockback. Needless to say no damage is dealt from her glide...

Now...why does Rainbow Dash need this impressive recovery when she already has five pretty damn good jumps -AND- a glide? Well...Rainbow Dash is pretty floaty, remember that? This makes her pretty easy to swat away even if she does have an amazing recovery. With her Up Special however...and with some help from her Neutral Special...Rainbow Dash is near untouchable. If Rainbow Dash touches one of her clouds during the uprising or nosedive parts of Fantastic Filly Flash, Rainbow Dash will extract some of the rain from the cloud, causing an awesome rainbow aura to surround Rainbow Dash once she exits. What this aura does is give Rainbow Dash super armor for one hit. This makes Rainbow Dash -INSANELY- difficult to deal with off stage if you don't have a high knockback, multi-hitting attack.

If used out of Super Speed Strut, Rainbow Dash's entire upwards movement will be incredibly quick and much shorter than if used in the air. This allows Rainbow Dash to dart up quickly, make contact with her super armor giving clouds and continue ahead with great speed. Obviously this makes it much easier to be more aggressive with Rainbow Dash as you'll have super armor to aid in your assault.


Aerial Attacks

Neutral Aerial: Rainbow Loop


As a note before beginning, most of Rainbow Dash's aerials are perfect for positioning the pony during your Super Speed Strut, playing a constant game of hit and run while keeping your opponent guessing. This isn't to say however that her aerials are useless normally, quite the opposite actually...

When one inputs Rainbow Dash's Neutral Aerial, the pony will perform a quick loop-de-loop much like Meta's Shuttle Loop but without the absolutely ridiculous priority to it. Needless to say, this move is pretty damn fast and will deal 12% and medium horizontal knockback to anyone hit during any part of the loop. Like Shuttle Loop, if used normally, Rainbow Dash can glide out of this move which allows for some decent vertical height gain as well as a way to chase after enemies you knocked away with the loop.

If Rainbow Dash holds the standard button while in the loop and passes through a cloud, she'll grab onto the cloud and hold it until you release the button. Very useful for picking up and repositioning clouds as you fly along to set up for your Side Special or Up Special recovery.

Finally, if Rainbow Dash uses this move out of Super Speed Strut, the loop will be much tighter and even faster than normal. A very quick and handy aerial best used for knocking foes away from you as you dash along. Make sure you keep in mind this move's cloud-moving capabilities when you use it, especially during a Super Speed Strut (as you can release the cloud anywhere you please so long as you keep the button held and only release it where you want the cloud to be).

Forward Aerial: Filly Footstool
Darting forward with a surprising burst of speed, Rainbow Dash will, if she makes contact with a foe, immediately slam all four hooves down on the foe, dealing 12% damage and some forceful downward knockback for a footstool. Much like Captain Falcon's Side Special, this keeps Rainbow Dash's forward momentum as it bounces off the foe allowing for yet another recovery/gimping option for Rainbow Dash's arsenal. Considering the attack has roughly the range of Captain Falcon's Side Special as well, this move is incredibly useful...especially since you won't instantly go into a freefall if you miss with it!

Rainbow Dash can also interact directly with her Neutral Special clouds via this attack and will automatically footstool jump off them if she makes contact. This allows Rainbow Dash to hop from cloud to cloud activating them and causing mass torrential downpours at once. Probably one of the easiest ways to gimp off foe stages is to chain clouds together with this move.

If used out of Super Speed Strut, this move is more or less the same as in the air except for the fact that it puts the opponent into a prone state instead of dealing knockback. This is one of Rainbow Dash's better tools for simply powering through opponents in her way while keeping her charging ahead.

Up Aerial: Rainbow Rise

Like the awesome pony she is, Rainbow Dash flutters in place ever so briefly before pointing herself 45 degrees diagonally upward. Her right hoof extended before her, Rainbow Dash then darts diagonally upwards one full Battlefield platform, acting as a high priority hitbox during the entire dash and dealing 12% damage and light knockback that'll knock the foe roughly where Dash's Up Aerial peaks regardless of damage percentages. Despite the seemingly laggy sounding start-up of this move, it's comparable in start-up to Fox's Side Special...but the animation for the attack is nowhere near as instant as that one.

Out of a Super Speed Strut, this move causes Rainbow Dash to rise up in the air diagonally while still moving forward. For those of you who have played the Vs. Series games, this is comparable to Morrigan's standard dash. This, unfortunately, takes you out of Super Speed Strut due to you rising off the ground...but it's technically the only way to use your down aerial out of a dash which can prove to be quite useful. This can really put you into an advantageous situation above your foe if used properly.

Regardless of the way you use this move, Rainbow Dash can, like in her Neutral Aerial, grab and hang onto clouds by holding the standard button while using this attack. This allows you to grab placed clouds and hoist them above opponents so Rainbow Dash can rain on foes from above. If the Rainbow Dash player releases the cloud as they reach the end of this move's range, she'll instantly drop onto the cloud, catching any opponents she hit with Rainbow Rise as well as any below her with the falling rain.

Back Aerial: Filly Kick
An incredibly basic move...when used normally...pressing this input while in the air will cause Rainbow Dash to do a simple mule kick directly behind her. This has pretty good range (that rivals the range on Marth's Back Aerial) and will deal a very solid 12% and medium knockback. It's a fairly ho-hum aerial when used normally that's mostly good for swatting opponents away.

Used out of Super Speed Strut however...Rainbow Dash will, while dashing forward, spin around and mule kick directly behind her (IE: directly before where she was running). The main benefit of this attack however is that it not only spins you around to face the other way while attacking your opponent...it also fully reverses your momentum and sends you charging off in the other direction! Probably more reliable than simply stopping and turning, if you want to keep your dashing momentum, learn to love this aerial!

Down Aerial: Rainbow Flash
Rainbow Dash's one aerial that cannot be used out of Super Speed Strut (unless you used an Up Aerial beforehand), this is also one of Rainbow Dash's more unpredictable aerial attacks. When the input is pressed, Rainbow Dash will instantly and erratically shoot diagonally (to the right) downward, then diagonally left, then diagonally right once more, a rainbow trail following her as she does so. Essentially, she's dashing in the form of her cutie mark, a lightning bolt.

This all comes out at roughly the speed of Pikachu's Quick Attack Up Special and will deal 13% and medium horizontal knockback to anyone who is struck by this attack. This attack (given enough room) moves her approximately a Ganondorf and a half downward in a very brief amount of time. Surprisingly, there's not a whole lot of landing lag to this move...so even though it covers quite a bit distance wise, feel free to use it close to the ground as well. Good not only for hasty escapes but for aggressive assaults as well.


Grab Game

Grab: Pony Ride
Rainbow Dash has what is hands down one of the most useful grabs in the game. Why is this? She can grab out of Super Speed Strut, duh! Normally when grabbing, Rainbow Dash will lower her head and attempt to buck the opponent onto her back. This has pretty pitiful range really, rivaling Ganondorf's terrible grab range. As a dash grab, the range of this increases...but only because you're dashing. Out of a Super Speed Strut however...you're a constantly moving grab hitbox making this particularly dangerous and effective, even if you miss! Anyway, if Rainbow Dash "grabs" a foe, she'll buck the opponent onto her back and ride around with them (unless this was done from a standstill) Rainbow Dash will automatically run at this point, allowing you to throw in any direction. Characters on Rainbow Dash's back will throw their arms in the air, realizing the magic of friendship. Yes, especially Ganondorf.

Pummel: Bumpy Trails
Pressing the Standard Button while the opponent is grabbed will cause Rainbow Dash to jump a slight ways, jolting the opponent upward and dealing a very slight 2%. Not terribly powerful but pretty spammable making it very useful to use while you prolong your grab.

Forward Throw: Bucking Pony
Arching forward, Rainbow Dash tosses her opponent off her back causing them to fly forward a slight ways. If used from a standstill, this throw is quite bland and will deal a moderate 5% damage and set knockback about a Bowser width before her. Of course, if used with momentum...Rainbow Dash does the same thing! Shocking, no? That said, Rainbow Dash doesn't stop running after she uses this throw meaning that you can pretty much hitconfirm this into any number of Rainbow Dash's aerials (Forward, Neutral or Back will get best results).

Up Throw: Featherweight
Rainbow Dash's main weakness is the simple fact that she's light. Very light. Wouldn't it be nice if your opponent was also as light as you? Well you can with this throw! Tapping up on the control pad/stick will cause Rainbow Dash to buck the opponent upwards a short ways before she starts rapidly spinning around the foe, much like in the Rainblow Dry, obscuring them in a rainbow blur. This deals a fairly weak 4% damage and deals fairly weak upward knockback.

More importantly though, it coats the foe in a in a layer of fluffy clouds! As Jumpluff has taught us, being covered in fluffy stuff makes you considerably lighter! This reduces the foe's weight by about 25% and makes Rainbow Dash 20% cooler as well. This effect lasts for ten seconds and -CAN- be stacked twice, reducing the foe's weight by 50%. On lighter opponents, this may even make them light enough to stand on Rainbow Dash's clouds! Of course, if they're standing on the clouds and their weight increases again...they may just fall right through! Needless to say this also makes them a fair bit floatier in the air...

Down Throw: Pony Dive
Another fairly basic throw but one that serves as a fairly powerful ace in the hole move. Upon pressing down, Rainbow Dash leaps up in the air before flipping forward and smashing the foe into the ground beneath her. She's only a light little pony so it doesn't do a whole lot of damage, 4% and putting the opponent in a prone state is all you'll normally get out of the foe here. If used with momentum however...Rainbow Dash can use this as a powerful suicide ko! Once Rainbow Dash is over the edge of the stage and uses this, she'll plummet downward with the foe beneath her! This obviously won't work on foes with very low percentages...but if you're quite high up there on damage you may as well try and save your pride and take the foe with you, no? One prime use for this move is simply as a threat. With the ability to grab you and suicide ko you in one fluent motion, opponents will want to avoid the edges and thus play into where ever Rainbow Dash may want them to be.

Back Throw: Buck Off
A rather peculiar throw that does something Rainbow Dash rarely wants to do...stop! Slamming on the breaks (not literally obviously...), the opponent jolts forward before Rainbow Dash rears back onto her rear hooves and tosses the opponent backwards off her back. This is Rainbow Dash's most powerful throw, dealing 10% damage and moderate backward damage and it keeps Rainbow Dash facing in the direction she was headed in. This allows you to start dashing forward once you've tossed your opponent off...perhaps to gather up your clouds or simply to get some breathing room...

Smash Attacks

Down Smash: Rainbow Crash
Finally, the last move that can directly be used out of a Super Speed Strut! Rainbow Dash's Down Smash is a little bit unorthodox compared to most characters' but in actuality, it's incredibly flexible and can be used in a multitude of situations. Pressing and charging this input will cause Rainbow Dash to arch forward like in the image seen below. If used out of a Super Speed Strut, Rainbow Dash will begin flapping her wings rapidly to keep her moving forward while she does so (although she'll automatically come to a stop after traveling a Battlefield platform length regardless). Releasing this Smash will cause Rainbow Dash to simply shake it off and mutter "Aww man..."

But...if Rainbow Dash is hit while using this move, yep, you guessed it; a counter! When struck, Rainbow Dash will laugh in the foe's face, hop over their attack, grab them by the head (or body if they're Jigglypuff or something) and dash forward half a Battlefield platform before releasing them and hopping down onto their head. Having their face forcibly meet the ground via the aid of Rainbow Dash's hooves will deal 13-20% damage depending on the charge...but the pain's not quite done yet!

Yes, after Rainbow Dash bounces off their head she jumps backwards a short ways as the foe, from force of the impact, bounces off the ground. At this time, Rainbow Dash can follow through with an attack of her choice due to being at such close range to the helpless opponent. Maybe a Down Special would be of good use as a follow up? Or maybe one of her other Smashes...hmm...


Side Smash: Rainbow Arc
A very basic Smash Attack, especially compared to her Down Smash. For this move, Rainbow Dash jumps upward the height of Jigglypuff and bounds forward twice, jumping in an "m" shape. All in all, this causes Rainbow Dash to travel forward an entire Battlefield platform, acting as a moderate priority hitbox that deals 11-18% depending on the charge. It's not the strongest Smash Attack around but it makes up for it with crazy range, speed and mobility.

This Smash Attack, surprisingly, does no real knockback until Rainbow Dash reaches the end of her second arc however. Until that point, the opponent will take no additional damage but will essentially just be stuck with you until they take moderate knockback at the end of the move. This makes the Smash incredibly useful for shuffling your foe closer to the edge of the stage so that you can set up an easy gimp or simply to move them beneath a slew of clouds or something.

As one final note, providing she hasn't struck an opponent yet, Rainbow Dash can cancel this move during the peak of either rainbow by pressing and holding the jump button to enter a glide!


Up Smash: Double Rainbow
All the way across the sky, yeah, yeaaaaaaaaaaaaaaaaaah! So intense. Anyway, this move is fairly simple if just done normally...If charged and released, Rainbow Dash will simply jump upwards into the air Ganndorf's height, do a brief spin and fall back down, a rainbow appearing where she did her spin. Anyone who touches Rainbow Dash either when she jumps up or when she's spinning will take 10-20% damage and light horizontal knockback while anyone who touches the Jigglypuff-sized rainbow itself will take 12-22% damage and moderate-high knockback. This Rainbow only lasts for a scant few moments so it's not like it's some reliable trap or anything of the sort. Once Rainbow Dash reaches the ground again, it will vanish within a few seconds sadly...

So where does the name come in? Well, if Rainbow Dash happens to leap upward into a cloud while using this move, she'll cast forward droplets of rain as she spins! This creates another rainbow identical to the first one Battlefield platform away from you. To make matters even scarier for your opponent, the rainbows will actually be connected to one another via an overhead arc! Touching ANY part of this rainbow death will deal the same damage/knockback as touching the rainbow under normal circumstances! This move can cover a a massive amount of space for a brief time, effectively acting as an extremely powerful anti-air and one of Rainbow Dash's best ko methods outside of gimping. Also keep in mind that one can obscure the rainbows and their arc behind scattered clouds...


Standard Attacks

Dash Attack/Glide Attack: Full Rainbow
Yes, Rainbow Dash has a shared Dash/Glide Attack...but it's very useful when it comes to controlling space. As Rainbow Dash glides or dashes, one can press the standard button to cause Rainbow Dash to dart forward a short ways,dealing 8% damage and upward knockback. Nothing too impressive really but if one holds the standard button during this, Rainbow Dash leaves a long rainbow trail behind her! Anyone who touches this rainbow trail will take 2% damage and slight downward knockback...considering that the trail doesn't vanish for a whopping eight seconds and that it can reach a maximum length of Final Destination...this can be particularly damaging to foes who can't tangle with the pegasus pony in her area of expertise.

As one can tell, this move has a multitude of uses, the least of which being for assuring easy gimp ko's. With a wall of rainbow in their face, opponents may find it very difficult to make it back on stage. Alternatively, Rainbow Dash can keep the foe in the air by blocking the length of the stage with a rainbow trail, forcing them to stay where you excel.

Two more things to note on this move. One, Rainbow Dash cannot be harmed by her own rainbow trails; this isn't a game of Snake or something. And two, this move can only be used out of a normal dash or a normal glide, pressing the standard button during a Super Speed Strut will use your Neutral Aerial instead.


Jab: Brohoof
Rainbow Dash extends her right hoof outwards to hit the opponent. If this connects, it deals a simple 2% damage and very, very slight flinch. Alright, next move!

Wait...you mean she's trying to brohoof the opponent? Well why didn't you say so! Rainbow Dash's jab is incredibly fast. Most other jabs are also fairly fast. Who wins? Well, you do of course! You see, if an opponent tries to hit you with a jab...and you jab first...Rainbow Dash will brohoof the opponent, leaving them in a brief state of confusion as they glance around! This sets them up perfectly for any move of your choice, so choose wisely and get 'em! This move works against all jabs and side tilts and even some down/up tilts that hit more towards the middle! As a random note, if you successfully brohoof, Rainbow Dash will say, "Aww, yeah!"

Side Tilt: Poking Fun
Rainbow Dash is a bit of at trickster and quite the fan of practical jokes, much like Pinkie Pie. When this input is pressed, Rainbow Dash will make a silly face, much like the one pictured below. If the opponent happens to be within a Bowser width of Rainbow Dash and facing in her direction (much like Mewtwo's disable), they won't be able to help but crack a smile. Or get annoyed if they're one of those nasty heavyweight types. Either way, this doesn't do any damage...directly...but for the next eight seconds, the opponent will either, in their state of good mood or their annoyed mood, find it impossible to dodge! It seems they're either so amused or so irritated by Rainbow Dash that they can't think straight...or something like that.

Either way, an opponent around Rainbow Dash who can't air dodge her aerials or spotdodge her Super Speed Strut grab game is in for a lot of trouble. Do remember that, even though you can't use this move out of Super Speed Strut...there's nothing saying you can't cancel out of a SSS by tapping down and then using your Side Tilt right in their face when they're not expecting it!


Up Tilt: Flutter Up
No, Rainbow Dash is -NOT- becoming Fluttershy! That'd just be silly! For this move, Rainbow Dash starts really working her wings and rises up a Mario height within a brief amount of time. Making contact with Rainbow Dash during this move deals a weak 5% damage and pops the opponent upwards slightly. You -CAN- however use this move under a cloud or a scattered cloud to either blow it upwards with the air generated by her wings. If you use this Up Tilt on a scattered cloud, it'll spread out to a larger area...but it'll be easier to see through it...this is of course helpful if you manage to get lost in your own clouds but don't want to 100% expose yourself yet.

Down Tilt: Hoof Swipe
Rainbow Dash simply takes a swing at the opponent's legs. This attack does 4% damage and typically trips the foe...or at least knocks them back a slight ways. This also happens to hit enemies who are on the ground allowing you to use this move to follow up pretty much any move with this one. It's a fairly no-thrills move...but it certainly has its uses in Rainbow Dash's arsenal.


Playstyle

20% Cooler In Ten Seconds Flat

Rainbow Dash admittedly has a little bit of everything...but that doesn't mean she has some sort of unfocused "versatility" playstyle, far from it in fact. First of all, let's discuss damage racking. Rainbow Dash rules the skies here with her hit and run aerial attacks. Thanks to Super Speed Strut, Rainbow Dash can dart in, deal a nasty chunk of damage to a foe and dart off! All of her aerials are rather suited for damage racking, as is her Down Special. Another huge goldmine for damage lies in Rainbow Dash's clouds. These things can EASILY rack up massive amounts of damage on foes if you use them properly. Position your clouds where your opponent likes to hang out so you can rain on his or her parade from above! If your opponent thinks they have the speed to outrun Rainbow Dash, set up an obscuring smokescreen of scattered clouds to keep them out in the open at risk of being hit by an unseen Rainbow Dash...that and, being right in the middle of a potential deathstorm if Rainbow Dash Sonic Rainboom's through said clouds you're hiding in...

While not entirely combo focused like some other characters, Rainbow Dash has her fair share of links and short combos that she can catch her opponents with. Forward Throw is easily linked into many of Rainbow Dash's aerials from a Super Speed Strut and both her Down Smash and Neutral Combo can lead to a free move of your choice if used properly, Down Smash counter especially can lead into some pretty crazy things. Also don't forget that your Down Tilt makes it all the easier to add up more damage on a grounded opponent in a hurry! Rainbow Dash's "combos" are far more about reacting to specific situations (such as distance and stun) and picking a move suiting that situation than linking together the same moves over and over. That said...Side Smash is yet another move that can easily link into other moves and be linked into by other moves.

Another strategy for Rainbow Dash is controlling space. You see, Rainbow Dash isn't terribly strong...so her main way to win is to limit your opponent. While she does have some traditional ko moves (Up Smash and Side Special being the most obvious), Rainbow Dash can have a much easier time getting ko's if she focuses on other aspects. By obscuring the stage in scattered clouds, Rainbow Dash limits off the battlefield to where she wants it to be. Furthermore, Rainbow Dash's forward throw, down throw and back throw are all useful tools for positioning a foe or repositioning yourself. So what about that up throw? Well, that one's incredibly useful too! Making your opponent lighter makes them easier to ko for sure...but they'll also be very floaty in the air! Combine this with the Side Tilt's inability for the foe to air dodge -AND- with Rainbow Dash's aerial game and you've got a very sad battle going on for the non-Dash player. Of course though, what is potentially the biggest controlling move you have is your Glide/Dash attack. With this move, you're very, very capable of cutting off entire sections of the stage by forcing it to be a pesky hazard to your opponent by setting up damaging Rainbow Trails as you run and dash along.

As mentioned before, actual ko's are certainly possible with Rainbow Dash. As has been proven, Rainbow Dash doesn't have many problems actually adding up the damage...but her kill methods are less than varied. Sonic Rainboom will sadly become fairly predictable...unless you're using it out of Super Speed Strut. Up Smash may actually be your best bet when it comes to knockouts seeing as it can cover a good deal of area and easily catch your foe off guard with the second rainbow. Speaking of damage, Rainbow Dash probably will be taking it, even with her incredible speed. This however opens the potential for a suicide ko. Rainbow Dash -HATES- losing...so it's only suiting she'd take out the person who might win! Her main option for this is your Down Throw out of a Super Speed Strut...but pretty much any grab combined with Super Speed Strut will do the job.

Which raises an interesting point...Super Speed Strut is useful beyond useful. You -MUST- learn this ability as soon as possible inside and out if you plan on using this pony well. Landing back on the stage at a fast-ish forward angle will activate this very important ability..but knowing when to use it and when to cancel it is also a valuable skill. From the SSS, Rainbow Dash has access to all aerials sans down aerial but she can also use her powerful Down Smash counter to stop overly aggressive foes from swatting her away. However...even without the Down Smash, they wouldn't be able to touch Rainbow Dash if she's using Up Special in combination with her clouds! Giving Rainbow Dash super armor is a scary, scary thing indeed. The little pony only needs to take one hit before she's taking you out from close range, so stay on guard! The fact that she can use this so quickly out of her SSS should come as a nightmare to her foes!

When it comes to momentum, Rainbow Dash is near unmatched. Her impressive speed in combination with Super Speed Strut can be absolutely overwhelming for some opponents...but each one of her aerials takes movement to another level. Forward Aerial can forcibly overtake the foe, Back Aerial can pull a completely 180 degree turn for hasty escapes or hit and run assaults. Up Aerial and Down Aerial can be used to get higher in the air and zip straight down respectively and your Neutral Aerial is great for getting foes away from you or repositioning your clouds.

If the Rainbow Dash player, for whatever reason, wants to play defensively...even then does she have a few options. While she is primarily offense focused, Rainbow Dash can easily hide within her smokescreen of clouds while perched above on top one of her solid clouds, periodically raining down death from being the obscuring white fluff. While she can't stay away forever, Rainbow Dash can sure as hell try seeing she has so many mobility options. The biggest flaw in any Rainbow Dash "keepaway" game is that she doesn't have much to fight back with. Up Smash and her clouds are the closest things to a projectile she has...and that'll get predictable after so long. It's possible to play her this way but it's not exactly practical.

So all in all, Rainbow Dash is an aggressive character through and through. She plays fast and she plays constantly on the move, soaring about with incredible ease. She may not be the strongest pony around...but she's certainly got the tools in her arsenal to take on anyone or any situation!


Final Smash

The Wonderbolts

Omigosh, omigosh, omigosh, omigosh, omigosh! It's The Wonderbolts! If Rainbow Dash manages to grab the Smash Ball (which isn't too hard considering her impressive aerial game!), she'll glow...rainbow colored, like anyone else who grabbed a Smash Ball. With a tap of the Special button however, The Wonderbolts come into play to help Rainbow Dash out! Three of The Wonderbolts will appear for this Final Smash, Spitfire, Soarin' and that third Wonderbolt. Yay for them. At this time, Rainbow Dash will be simply standing there, too shocked to react to the fact that her biggest heroes are right in front of her...and helping her out not less! For the entire 12 second duration of this Final Smash, Rainbow Dash stands in place, repeatedly saying "Omigosh."

So what do The Wonderbolts do? Well, they act much like Latias and Latios in Brawl; aka they dart across the screen repeatedly and very rapidly. Considering there's three ponies darting across the stage at once (and for 12 whole bloody seconds!) this Final Smash can be incredibly difficult to dodge! Getting hit by a Wonderbolt deals 9% damage and moderate knockback...so you're likely to get bounced between the Wonderbolts as they swarm the stage.

To make matters worse...or better if you're Rainbow Dash...any clouds on the stage will react to The Wonderbolts' dashing as if Rainbow Dash had just used the Sonic Rainboom. This means that anytime a Wonderbolt dashes through a cloud...a damaging burst of rain will come with them in the direction they dashed! With a bunch of clouds on stage, scattered or otherwise, this Final Smash can be absolute hell for the opponent to dodge! Of course, this requires you set up before hand...as you can't produce anymore clouds without activating your Final Smash!

After 12 seconds are up, The Wonderbolts will fan out and fly directly at the screen. Rainbow Dash will then shake her head and realize she missed out on her big moment. Poor Rainbow Dash...there's always next time!


Extras

Taunt 1: Cutesy Face
Standing on her rear hooves, Rainbow Dash puts her front hooves to her cheeks and makes a mocking duck face.


Taunt 2: Laugh Riot
Rainbow Dash must find your performance rather hilariously bad as she starts laughing hysterically, falling over in the process. This is one of the longest taunts in the game...so only use it when you really have a lead or really wanna enrage your opponent!

Taunt 3: Wacky Antics
Rainbow Dash simply sticks out her tongue and waggles her head from side to side. This taunt can actually be held as long as you want simply by keeping the input held.


Win Pose 1: Victory...As Expected
You expected anything less than triumph for Rainbow Dash? The victorious pony shakes her front hooves similar to how Brawl's own great ape does when he wins. It's a little less clunky when Rainbow Dash does it though...


Win Pose 2: Fanpony
Rainbow Dash won! Gasp! I wonder if that would impress The Wonderbolts! Either way, Rainbow Dash has a bit of a fangirl moment imagining the praise she'll get from this victory...repeating the words "Omigosh" until you leave the victory screen.

Win Pose 3: Showoff
Dashing quickly past the victory screen three times, Rainbow Dash stops, turns to face the camera and then exclaims "Best day ever!" while hoofpumping. She then flies off once more leaving a rainbow trail behind her.


Lose Pose: Soar Loser
Haha, get the pun? Because she soars instead of sore lo-yeah, you get it. Anyway, Rainbow Dash doesn't clap for her opponent. Instead, she simply crosses her hooves and pouts while floating in mid-air, muttering "I hate losing..." under her breath.

Win Pose Against Applejack: Mocking Impersonation
Taking up the strange pose you see in the image below, Rainbow Dash says "Howdy y'all, I'm Applejack!" while attempting Applejack's southern drawl. Needless to say, Applejack doesn't look that amused...


Win Pose Against Fluttershy: Cheering Practice
Rainbow Dash is seen standing next to Fluttershy who is apparently being taught how to cheer properly. Meekly, Fluttershy lets out a quiet "Yay" prompting Rainbow Dash to facehoof and reply "You're gonna cheer for me like that?! Louder!" The exchange of "Yays" and "Louders" goes on for a bit before Rainbow Dash shouts "LOUDER!" causing Fluttershy to take a deep breath before saying..."Yay...". Rainbow Dash then flops over onto her back which prompts Fluttershy to question, "Too loud...?"


Alternate Colors


Kholdstare

Nightmare Weaver
Joined
Oct 10, 2008
Messages
1,441
Applejack


Applejack is an earth pony and one of the main characters of the series. She lives and works at Sweet Apple Acres farm with her grandmother Granny Smith, brother Big Macintosh, and sister Apple Bloom. Applejack is reliable and hard-working, although headstrong about doing things on her own. She tackles the annual apple harvest all by herself while her brother Big Macintosh recovers from an injury in Applebuck Season, while simultaneously helping out all of her friends with an assortment of tasks. She is more ill-tempered than the rest of her friends, with the possible exception of Rainbow Dash, who once ironically put it, "Sometimes, she's sour apples". Though she is careful to keep it under control, it can get the better of her sometimes and it often makes a bad situation worse.

As an earth pony, Applejack is well-known for her athletic abilities, shown to be both strong and dexterous. When she and Dash hold an Iron Pony competition in Fall Weather Friends, their various athletic feats draw a sizable crowd. She is also very skilled with the lasso, demonstrating her ropework in Boast Busters, Look Before You Sleep, and Fall Weather Friends. She is described by Pinkie Pie as being "one of the best bakers ever" in Applebuck Season, though this may be hyperbole. Even so, she seems to be able to make several different kinds of foods and desserts using apples as the main ingredient, and sets up a concession stand in The Best Night Ever. She is very business-minded, using the Grand Galloping Gala as an excuse to set up a the aforementioned concession stand and use the money to benefit her family.

Her skills at "applebucking", harvesting apple trees by kicking them with her hind legs, are shown to be superb; even when extraordinarily sleep-deprived, she is usually capable of knocking off the apples of an entire tree with one kick while leaving the tree apparently intact, whereas the Appleloosans can only knock off several apples per kick in Over a Barrel.

Specials


Down Special --- Apple Cart
Applejack does exactly what happens in the picture- she opens up shop on the stage! This move serves primarily as an ammo dispenser for some of Applejack's moves, so it is undoubtedly useful. The cart disappears after Applejack loses a stock, and it can be passed through (it doesn't act as a wall or anything).

In conjunction with her Neutral Special, Applejack has a random chance of obtaining one of the following items from her cart. The foe can also try to get one out, but they'll more than likely just get apples. They are:

Item | If Eaten | If Thrown
Apple | Heals 2% | 5% Damage
Apple Juice | Heals 3% | 3% Damage
Caramel Apple | Heals 5% | 5% Damage + -1/10 Speed
Apple Sauce | Heals 6% | 6% Damage + -3/10 Traction
Apple Fritter | Heals 7% | 7% Damage
Cinnamon Apple | Heals 8% | 8% Damage
Apple Cake | Heals 9% | 9% Damage
Apple Pie | Heals 10% | 10% Damage + .2 sec Hitstun
Applejack (alcohol) | Heals 11% | Heals 11%, makes foes drunk (they have severely reduced traction and reaction time)

Neutral Special --- Take Out
Applejack pulls out an apple from hammerspace and holds it in her mouth, like a throwing item. This is what happens if you use this normally. If used by an apple cart, she will instead pull out one of her baked treats! This has little lag. To eat an apple or treat, simply throw it on the ground and pick it up like a regular food item. To throw it, do a tilt attack in the direction you want while holding it. Foes can catch it by grabbing it. To balance this out, you have to wait four seconds before pulling out another treat from the cart. Apples have no restrictions.

Forward Special --- Apple Dash
Applejack bows her head forward and charges like a bull, covering about as much as Fox's side special. This does high knockback and 18%, but has noticeable lag which means it's easy to spot dodge... how are you supposed to land it, then?

Up Special --- Rope Tether
Applejack pulls out a lasso, and swings it at the edge of the stage with her mouth. This is pretty much an exact clone of Zero Suit Samus's Up Special- or is it? If you use this within a Battlefield platform's distance of an item, even if the foe is holding it, Applejack will lasso it and yank it to her, stealing it from the foe's hand! How to use this effectively, however...

Standards

Jab --- Bite
Applejack, well, bites. She chomps down on whatever is on front of her. This does 8% (she has some mighty fine chompers) and okay knockback. This also makes sense since she can eat food items with her jab like everyone else.

Forward Tilt --- Applebuck
Applejack does her signature attack, the applebuck. This does 10% and good knockback, and has pretty good range too. She can also kick an item she has in her mouth to turn it into a deadly projectile with this. That's pretty much all there is to it- it's not a fancy complicated attack like the rest of the folk have.

Up Tilt --- Kick Up
Applejack kicks upward like a rodeo horse, dealing 9% and good knockback. In that way, this is pretty much a vertical applebuck. Doing this with an item in mouth will make her kick it upwards too, launching it a fair distance.

Down Tilt --- Stomp
Applejack stomps down firmly, kicking up a bit of dust. This does 8% and okay knockback. If you use this with an item, she will crush it firmly... what a waste! It will turn it to a gooey mush that affects foes traction like her applesauce. In fact, if you crush an apple it will turn into applesauce... funny. The only exception to this is apple juice and apple cider, which don't affect traction at all if crushed.

Dash Attack --- Tackle
Applejack leaps up and tries to tackle the foe, if they're there. If they are, she does 12% and great knockback. If she doesn't, she falls flat on her belly... with a good amount of end lag. A high-risk, high-reward attack.

Smashes

Forward Smash --- Headbutt
Applejack bows her head down and headbutts forward, dealing 14-25% damage and great knockback. This is pretty quick uncharged, so you can nudge foes towards your apple cart so you can pummel them with confections.

Up Smash --- Yeehaw
Applejack rears up like a startled horse, except grinning, and flails her front legs while yelling the move's name. This does 12-22% and okay knockback, so it's not the best smash ever. It -can- ground foes above her, if they are close enough, however.

Down Smash --- Rope Show
Applejack does the trick above, dealing multiple hits that can deal up to 15%-27%. This is easy to juggle the foe with, as it knocks them -into- Applejack, and is pretty quick. It's also fun to look at. Wheee....

Aerials

Neutral Aerial --- Spinning a Yarn
Applejack spins her rope around her in a circle, dealing 7% and okay knockback to any poor soul who happens to get whipped by her. This is perhaps her quickest aerial.

Forward Aerial --- Karate Chop
Applejack does a KARATE CHOP in front of her, dealing 9% and great knockback. One of her most damaging aerials.

Backward Aerial --- Aerialbuck
Applejack does an applebuck... BUT IN THE AIR! GASP! This does 9% and good knockback, but yeah, it's not fancy. Hey, at least you don't have to read through long-winded text blocks...

Up Aerial --- Random Flipkick
Yes, even Applejack has one now! She does a random flipkick, of course, dealing 8% and goodish knockback. Easy to juggle with.

Down Aerial --- Pony Tail
See, that was a pun. Kind of. Applejack slams the foe with her tail, dealing 9% and great downwards spiking knockback. It also has impressive range... for an aerial, at any rate.

Grab

Grab --- Hog-Tied Up
Applejack is one of those simple grab-with-no-throws folks that Khold hates. Irony abound! Applejack simply ties the foe up beyond movement or attack, and leaves them sitting there. She can move them with her attacks (specifically Forward Special and Smash) if she wants, and she can stuff food into their mouth to heal them. Yet, the more baked treats, they eat, the fatter they get... after eating 50% health recovered worth of treats, they will be too fat to move. Regular old apples don't do this, though, and in fact they kind of help! An apple a day keeps the doctor away. The more apples the foe eats, the healthier they get. So this is bait for foe's to eat apples instead of your treats... although you can shove treats into their mouth anyway when they go for the apples.

Final Smash

Final Smash --- Harvest Time
Suddenly, there are apple trees... apple trees EVERYWHERE. Applejack will go into a proud frenzy and try to harvest all of them by applebucking all the trees, running back and forth. Foes will be assaulted by falling apples, leaves, and even Applejack herself, taking anywhere from 30-60% damage. After fifteen seconds, Applejack gets exhausted, and collapses. She then looks at the screen and laughs maniacally while it zooms in on her. Then the image disperses, and the game returns to normal- and Applejack wakes up, startled. It was just a dream!


Davidreamcatcha

Smash Ace
Joined
Feb 9, 2011
Messages
629
Pinkie Pie
Playlist

"Surprise! Hi. I'm Pinkie Pie and I threw this party just for you. Were you surprised, were you, were you? Huh huh huh?"

...

"That's silly. What kind of welcome party would this be if it were quiet? I mean, duh, bo-ring. You see, I saw you when you first got here, remember? You were all, hello, and I was all, 'gasp!', remember? You see I never saw you before, and if I never saw you before that means you're new, 'cause I know every pony, and I mean every pony in Ponyville, and if you're new, then it meant you haven't met anyone yet, and if you haven't met anyone yet, you must not have any friends, and if you don't have any friends then you must be lonely, and that made me so sad, and I had an idea, and that's why I went 'gasp!', I'll just throw a great big ginormous super-duper spectacular welcome party and invite everyone in Ponyville. See? And now you have lots and lots of friends!"


Statistics

Aerial Movement: 8
Traction: 8
Jumps: 6
Ground Movement: 5
Falling Speed: 5
Weight: 4
Size: 3

Specials

Neutral Special: Continuous Momentum


This move looks almost exactly like the picture above, except the movement of Pinkie's feet spreads out a bit more, making the erratic movement of her feet even more erratic.

When Neutral Special is tapped, Pinkie Pie...begins running backwards, with no lag on either end. With Pinkie Pie's genre saviness and constant lack of awareness of physics, isn't it obvious that she would perform something mind boggling in the fight? Whenever Pinkie uses this move, she begins running backwards at her normal Dash Speed, facing the same direction she was facing when she executed the move. Pinkie is still able to use her entire library of attacks during her movement, but is unable to use this in the air. Jumping causes Pinkie to cancel out of this move, and transfers her to her regular air state.

If Pinkie presses the input again while she is dashing backwards, she will begin doing something surprisingly normal for her...dashing forward, being able to switch back and forth using the input. This entire move is lagless, meaning Pinkie Pie can activate this during one of her moves or as she's dashing towards the foe and easily start moving backwards without a hitch if danger strikes, before moving forward again to prepare a counterattack. Be advised, however, if Pinkie Pie uses this four times or more in one Continuous Momentum, she will immediately have a 60% chance of tripping, this increasing by 10% the next time she uses it. Pinkie cannot normally trip while in Continuous Momentum, but if she abuses this, she will. Tripping out of Continuous Momentum lasts 4x as long for Pinkie Pie, so be advised.

This has a notable property in that Pinkie Pie can pass through all foes while in this state, being slightly in the foreground. This would be all well and good in terms of dodging if her feet were not a hitbox. Her feet are a containing hitbox, dealing multiple flinching hits of 2% per second in a hitbox extremely comparable to Yoshi's down aerial. with her feet dealing damage in a constant hitbox similar to it. If the foe overlaps with Pinkie while she is moving, or she starts using this special while above them, they are likely to getting dragged along by her feet as she moves, with the move being difficult to DI out of. Surprisingly, it is easier to DI out of this move at a high percentage compared to a low percentage. Pinkie will cancel out of this move when she takes 7% or more, and she can deactivate by jumping or shielding. Also note that if Pinkie performs a suicide KO on the foe with this, she will always die first in every scenario.


Side Special: Pinkie Hop

Pinkie quickly leaps off the ground, stopping her movement if she is in the middle of Continuous Momentum (but resuming at the end of the end lag, as well as being able to change the direction of the Continuous Momentum as she hops). Pinkie leaps about 1.5 Ganon's upwards, making this able to go over most characters in the game. She can manipulate the direction she moves in with increased aerial movement, moving backwards or forwards. If she lands on someone, they will take 10% and be stunned for a moment, before Pinkie footstools off them, regaining her jumps. If Pinkie Pie uses this in the air, she goes into helplessness after the initial hop unless she lands on someone. Each hop lasts about .50 seconds.


One of Pinkie Pie's favorite strategies is to use it while hopping forward. With this, Pinkie can chain Pinkie Hops together to form an unpredictable and evasive movement strategy, allowing her to dodge most enemies and their attacks with ease. Pinkie is able to easily follow this up with much of her attack library, such as a backwards NSpec if she manages to jump over the foe.


Up Special: Balloons

When the up special input is pressed, Pinkie Pie takes out a Kirby-sized balloon before tying it to herself and flying upwards with starting lag equal to Mario's up special. Whoo, look at her go!

The balloon causes Pinkie Pie to fly 5 Ganons upwards at Mario's dash speed with the ability to control herself and attack, before she slowly starts drifting downwards at Ganon's walk speed. One of the most notable traits about the balloon is that it acts as a small platform which characters can stand on, meaning she can carry foes upwards the top blast zone with this. However, the balloon only has 15% stamina and sends Pinkie into helplessness when popped, meaning that it's an incredibly risky technique and a risky recovery.

After she travels this distance, she slowly starts drifting downwards at Ganon's fall speed, still able to attack and control her movement. If Pinkie Pie somehow lands on the ground without the balloon being gimped, she'll still have the balloon tied to her back. The balloon gives Pinkie Pie a float, slightly higher jumps and higher air maneuverability. Pinkie cannot tie another balloon to herself while she has a balloon equipped, her up special now just sends her into the default recovery unless the balloon pops.


Down Special: Gummy


Pinkie Pie lifts her tail up a bit with a cry of "Come on, Gummy!" This causes her pet alligator, Gummy to come out of it and land on the ground behind her. This motion takes about .30 seconds to perform with .10 seconds of end lag. Gummy himself is around the width of Pikachu and slighty shorter then a pokeball. As soon as he appears, he immediately starts dashing towards the foe at Captain Falcon's dash speed, running back to Pinkie with the same speed if hit by an attack dealing 10% or more, he will also run back to Pinkie if he stays out in the air for more then 5 seconds, jumping from any height to reach her. Once Gummy is within a battlefield platform of the foe, he will jump onto them and begin biting them, dealing no damage as he is a toothless alligator. However, every .50 seconds Gummy is on them, they gain .10 seconds of ending lag added to all of their attacks for five seconds after Gummy leaves them, meaning they must be quick to knock him off. To knock Gummy off, the foe must be still for .50 seconds, allowing them to knock Gummy to the ground, which causes Gummy to run back to Pinkie. Fairly generic minion, right?

Pressing the down special when Gummy is already out causes Pinkie to stop what she's doing at the moment (unless she's in the middle of Continuous Momentum, which she will continue). Gummy leaps 3 Ganons into the air, head upward, as you can control him using Aerial DI similar to Wario. Once he reaches the apex of his jump, he falls back down to the ground at Jiggly's falling speed. All during the jump, you can press the Jab Input to have Gummy perform a headbutt, dealing 10% damage and good vertical knockback as well as pressing the Special Input to make him bite the foe and clamp onto them normally.


Standards

Jab: Rubber Chicken


Pinkie swiftly reveals a rubber chicken from hammerspace and begins happily swinging it up and down if you hold the button down, as well as just tapping A traditionally. This isn't nearly as bad in the startup lag area as you would believe, only taking .10 seconds for Pinkie to start up. For the first hit, Pinkie swipes the chicken downwards, dealing 4% and giving the foe a bit of hitstun, so they'll be immediately hit by the second part of your jab. In the second part, Pinkie swings the chicken upwards, dealing 8% damage and high vertical knockback. While this may sound like filler, Pinkie's second hit sends the foe into the air, where she is at the prime state of her game.

Forward Tilt: NoiseMaker

Happily extracting a blue noisemaker from hammerspace, Pinkie brings it up to her lips and blows into it, making the noisemaker 1.5x as long as a Battlefield Platform, with the height of it being around the same distance as well. Pinkie keeps the noisemaker out for .50 seconds, before it recoils, but she can hold it out by holding jab. Every .50 seconds Pinkie holds the noisemaker out, however, she suffers another .10 seconds of end lag due to having to catch her breath from blowing into it so much.

The Noisemaker is, ironically, pretty solid, as anyone (or Gummy) who stands on it will find that it's essentially a platform that you can't pass through. It deals about 3% damage to anyone who is hit by it, as well as being pushed back to the end of the noisemaker. Those who are standing on it or are at the end of it will be brought back to Pinkie when it recoils, leaving this as a spacer to help bring foes into Continuous Momentum.

Speaking of which, if Pinkie uses this during Continuous Momentum, she will stop in place before resuming her movement once she goes through the end lag. Luckily for her, though, she can press nspec to change the direction she moves while she blows into it, making it mindgame central.


Up Tilt: Surprise Tube

Pinkie reaches for something in the magical land of hammerspace, pulling out a tube full of snacks. Quickly pulling out the tube at an upwards angle, the gesture's narrow hitbox deals 2% damage and slight upwards knockback. This has a follow-up, however. Pinkie has rigged the tube with a spring so it will shoot out confetti, causing an explosion of confetti to occur .20 seconds after she pulls the tube out. The explosion of confetti is a Bowser-sized hitbox that deals 6% damage, spreading 10 pieces of confetti all over the area of the hitbox and knocking enemies away from Pinkie. There is a cooldown of 3 seconds after Pinkie exits the end to prevent this being spammed.

Ever been to a party and find some leftover confetti on your clothes later on? That's the real reason Pinkie uses this: any pieces of confetti the opponent touches stick to them, causing them to move slightly slower, the effect obviously increasing the more pieces of confetti you have on them, them losing all mobility if all 10 pieces of confetti miraculously land on them (the foe cannot have any more pieces stuck to them). The foe must stay idle to brush the confetti off, knocking off 5 pieces of confetti every .30 seconds they stay idle.

The pieces of confetti that don't connect with the foe drift to the ground shortly after, creating a cosmetic effect that will disappear if attacked on the foe. This remains cosmetic provided you don't use Continuous Momentum on them. If Pinkie uses Continuous Momentum over top the confetti on the ground, it gets caught up in her legs, staying with her while she uses the attack. Each piece of confetti adds 1% damage to her feet as she moves, allowing her to damage rack more effectively. Every piece of confetti she has drops back on the ground once she cancels out to use an attack such as Pinkie Hop, also landing back on the ground if she jumps away from it.


Down Tilt: Hot Sauce

Reaching for a bottle of hot sauce, Pinkie swings it at her foe! The startup lag here is about .40 seconds long, and Pinkie Pie keeps the bottle out for another .50 seconds if she misses, so your primary use here is hitting foes in the middle of Continuous Momentum. If Pinkie hits the foe, they take 8% and get covered in hot sauce, if she taps the input as she swings it, she pours the hot sauce onto the ground.

If Pinkie is not using Continuous Momentum and pours the hot sauce, it is the width of Bowser on the ground, wheras if she is in the middle of Continuous Momentum, she will spill the contents as she moves, covering her tracks. The trail of hot sauce lasts for about 10 seconds, during which Pinkie cannot use her dtilt again, in addition to a 5 second cooldown after the hot sauce disappears.

Anyone covered in or standing on the hot sauce enters their Super Spicy Curry Animation and take 3% every second due the scalding condiment, in addition to having more of a likely chance of tripping. This includes Pinkie as well, despite the damage not knocking them out of Continuous Momentum. Beware, everyone has something to fear from the hot sauce! Well, everyone except for Gummy, who slides across it at Sonic's dash speed should he come across it.

If Pinkie runs over this during Continuous Momentum, she starts to slip, causing an extra 1% damage per second due to the even more frantic movement of her feet. Combined with the damage from the hot sauce being applied to both Pinkie and the foe, this can be a dangerous damage builder.


Dash Attack: Pratfalling Pinkie

Pinkie Pie jumps into the air, arms spread as she prepares to tackle the foe, her body a constant hitbox that deals 4% and low knockback. She travels forward about a Battlefield Platform during her time in the air. This air travel would be all well and good if she didn't fall forward and land on her face immediately after traveling the platform, skidding forward as she eats dirt. While skidding, Pinkie deals no damage or knockback to foes if she is not in her Neutral Special. Instead, if a foe is within a Battlefield of Pinkie Pie while she is skidding, they laugh at her misfortune, leaving them vulnerable for 2 seconds. Pinkie Pie has .70 seconds of ending lag on this move as she gets up, so she's extremely vulnerable if this misses, and must be extremely quick to follow up on the opponent's helplessness.

Smashes

Up Smash: Cupcakes

As Pinkie charges this move, she hums a tune to herself as she extracts a cupcake from hammerspace, admiring it and licking her lips. When charging is complete, she lets out a cry of "Cupcakes, Cupcakes, Cupcakes!", tossing it into the air, opening her mouth to catch it. The distance the pokeball-sized cupcake travels depends on charge time, it moving the height of Mario's up special to Sonic's at max. If the Cupcake hits anyone during its' travel, the hotness deals 12% damage and good knockback to them before it falls downwards at the speed of the Ice Climber's stall and fall.

If the cupcake lands on Pinkie Pie, which likely won't happen if you're in the middle of Continuous Momentum, she'll eagerly devour it in a motion taking a second. This heals her for 8% no matter the charge time, with Pinkie eagerly licking her lips afterwards. If the cupcake lands on the ground, it splatters, forming a trap the width of Ganon. If foes stand on this trap, it causes frosting to stick to their feet, it creating frosting spots wherever they walk for the next 3 seconds. The cupcake lasts for 5-9 seconds depending on charge, getting stuck on the foe's foot refreshes the timer. The individual frosting spots last for about 3 seconds each.

What exactly does this do? While it's stuck to their feet, their traction becomes quite terrible, as well as attracting an unwanted party guest: Gummy. Gummy loves cupcakes, automatically dashing for the sole cupcake on the ground at double his normal dash speed. If foes have the cupcake stuck on them, Gummy will pursue them at this increased speed, having to take 15% damage before he runs away. He still bites them at the normal rate, mind you.


Forward Smash: Pin the Tail on the Pony


During the charging phase, Pinkie extracts a paper tail with a nail stuck through it as she bounces excitedly, ready to play her favorite party game! Once charging is complete, Pinkie Pie swipes the paper tail a short distance forward, not being the most graceful of pinners, Pinkie clumsily spins as she does so. If this connects, the foe takes 10-15% damage and high knockback, as well as getting the paper tail stuck to the place where the sun don't shine. This move is incredibly laggy as Pinkie tries to regain her balance after it ends, putting the end lag on par with Dedede's fsmash, making it risky to try and land.

While having a paper tail is humiliating to those heavyweight male antagonists you'll probably be fighting against, it also messes them up, being as inexperienced with a tail as they are. For the next 7 seconds, if the foe attempts to use an aerial attack, the tail will flap into their face as they angrily knock it aside, causing their aerials to come out 1/4 as slow. Use this to mess air-inclined fighters up!


Down Smash: Tail Slap

During the charging phase, Pinkie leans over on the ground in anticipation. Finally, she's going to do something physical! After she finishes charging, she spins, sweeping her tail across the ground in front of her. Her tail covers a Bowser's distance in front of her, but has an extremely low hitbox, likely only hitting ground foes. Foes hit by Pinkie herself as she spins take 10-15% and decent knockback while those hit by her tail take 15-20% damage and good vertical knockback. The hitbox stays out only for about .30 seconds and she faces some bad end lag at the end of the move, so this is really a hit or miss against certain foes.

If Pinkie Pie swipes her tail over any of the traps she has set up (cupcakes, hot sauce), she coats her tail, causing them to disappear off the ground and onto her tail. For the trap's duration, whenever Pinkie hits the foe with her tail, they are inflicted with the status effect the tail has. She can also swipe her tail at Gummy in addition to her traps. This causes him to stay on her tail until she presses the down special, which makes him come off.


Grab-Game

Grab - The Mane Event

Pinkie Pie lunges her neck forward before chasing her tail for a whole second, stopping her movement if in Continuous Momentum (and continuing movement if she grabs or begins ending lag), If anyone gets within a Mario of Pinkie Pie during this time, she'll clasp onto them with her mouth, tugging at their clothing. This has relatively quick startup, on par with Dedede's grab but Pinkie's grab range is nowhere near as godly as Dedede's, instead being mostly contained to enemies directly next to Pinkie Pie. The ending lag if she misses and the second duration are also things to keep in mind. Despite the bad lag time, Pinkie can grab the foe in mid-air to make up for this.

Like all of Pinkie's other moves, this can be used straight out of Continuous Momentum, with Pinkie still moving while performing the attack. This makes the initial grab not as terribly inconvenient, considering Pinkie will stop chasing her tail the second she grabs onto a foe. This makes it one of the best ways for Pinkie to control the foe DIing out of it, and is one of the best ways to keep the enemy locked in place or even KO them. Pinkie's feet continue to cause damage to the foe during this, meaning it's quite difficult for them to escape.


Pummel - Joy Buzzer

Pinkie Pie holds out her hoof to the foe, signaling friendship. The foe reluctantly returns the gesture, only to find that Pinkie Pie's equipped her hoof with a joy buzzer! Pinkie Pie shocks the foe, giggling with glee all the while. This deals 4% damage to the foe, and is highly spammable. Once the foe is released, they begin to have muscle spasms due to the voltage traveling through their body. For the next five seconds, opponents will have 1 muscle spasm for each pummel Pinkie performed, shown by their skeleton being outlined and sparks flying off their body in classic SSB64 fashion for .20 seconds. This stops whatever they're doing at the time, whether it be attacking or being in the middle of lag or what have you. While this sounds easily abusable, pummeling the foe five times in one grab will cause the joy buzzer to explode in Pinkie's face as she takes high knockback and 20% damage, before it returns to normal.

Back Throw - Pony Tail (Not Cotton Tails)

Pinkie grabs the foe by her teeth and tosses them above her. As they are going through the air, she strikes this pose, with the same TailSpinning. The foe ends up being caught by her tail, taking 3% and light flinching hits every second. Pinkie's tail spins for 4 seconds before it bucks upwards, tossing foes caught by the initial hits vertically into the air, higher depending on their damage percentage. If Pinkie has something caught in her tail (hot sauce, Gummy, cupcakes), it will spin around in the tail as well. When Pinkie's tail bucks upwards, anything on the tail is launched 2 Bowsers upwards before falling back down to the ground at Kirby's down special speed. This not only gets rid of any status effects Pinkie had on her tail, it refreshes the time on anything tossed off her tail. Furthermore, tossing Gummy upwards with this can be a perfect time to take control...

Down Throw - Whistle
Pinkie whistles for Gummy. This causes him to run out from where it currently is, whether it be across the stage or on top of Pinkie. Gummy headbutts the foe for 10% damage once he reaches them, as well as starting to bite. Whoppee.

Up Throw - Ride 'em, Cowpony!

Pinkie Pie grabs the foe with her mouth, before flipping them onto her backside. If Pinkie has a balloon tied to her, she flips them onto there instead of her back, allowing her to use her up special for a star KO or jump upwards. While on Pinkie's back or the balloon, they enter a new grab-state, having to button mash out with 1.5x the difficulty of an average grab. If you used your pummel enough, this really shouldn't be a problem. Pinkie can press A to buck the foes off her for 8% damage and decent knockback.

While the foes are riding Pinkie, she automatically dashes forward in Continuous Momentum, and can angle her backside with the control stick. Angling causes the foe to move to her tail or her head, depending on the direction she moved it. If on her tail, they can be biten by a waiting Gummy or get inflicted with status effects from her down special, while being on her head allows Pinkie to prepare a KO by bucking them off.


Forward Throw - You'll Float Too!

Using a free hand, Pinkie grabs a balloon and ties it to the foe. Pinkie Pie takes a second to do so while her foe is at low damage, during which they can smack her away. If they're at 50% damage or more, Pinkie will tie it on with no struggle from her foe.

Once a balloon is tied on, they cause the foe to immediately move upwards in a manner identical to Pinkie Pie's up special, the balloons functioning in the same way. If the foe decides to cut the balloons with their generic flipkick up aerial or any moves like that, they'll be sent down into helplessness, what with the balloon being popped and all. Pinkie Pie can pop the foe's balloon, but that does not mean that she wants to, what will all her moves being low hitters. Though, if she gets into the air, she can pop the balloon with her side special instantly.

Once the foe lands back on the ground, they'll find that the balloon has brought a few changes. Their air speed is now significantly floatier and slower, leaving them combo fodder if someone in the match has picked one of those blasted MYM6 heavyweight comboers. Their weight is reduced by 2 statistics and their Up Special is replaced with Pinkie Pie's own USpec, and they gain a float that's even shorter than Peach's. If Pinkie Pie has decided to fight one of those DBZ characters in an attempt to prove that Cartoons are vastly superior to Anime, their float will be replaced by the one Pinkie granted them. If Pinkie Pie manages to tie multiple balloons onto the foe, these effects will stack.

Gummy acts notably different while the foe has a balloon, if he lunges towards the foe while they have one on, he will automatically jump on the balloon and start biting it. Despite being toothless, if Gummy is able to chew on the balloon(s) for 1.5 seconds, he will pop it, sending the foe into helplessness as Gummy runs back to Pinkie.


Aerials

Neutral Aerial: Hiccups

My, it would seem Pinkie has the hiccups! In this move, Pinkie Pie hiccups, with a very small amount of start or end lag. The hiccup has a very short hitbox, dealing 3% to any foe a Kirby away from Pinkie's mouth. But the prime use of Pinkie's nair is mobility, as while she hiccups, she can influence her direction, moving a Kirby height in any direction she chooses with insane aerial DI, on level with Wario. While this may allow for an infinite recovery, if Pinkie hiccups 5 times, she will begin coughing as she plummets towards the ground. The coughing lasts for 4 seconds, making her a sitting duck as she falls. Once she finishes coughing, she cannot hiccup again until she lands on the ground, refreshing her hiccups.

Forward Aerial: Streamer

Extracting a streamer from hammerspace, Pinkie holds it in front of her for .10 seconds before she flings it forward! During the startup lag, Pinkie can angle the streamer in a manner identical to Bowser's ftilt to change the trajectory she slings it out. The pink-colored streamer is about the 1.5x the length of a Battlefield Platform, and the same size as it as well.

Pinkie holds the Streamer out for .25 seconds, before pulling it back for .10 seconds. While holding it or pulling it back, she can perform any of her other aerials at the cost of suffering horrendous end lag if she lands on the ground while holding the streamer. Any foe caught on the end of the streamer will get caught on the end of it, and dragged to Pinkie once she pulls it back. Pinkie can also pull the foe by their own balloons as well, if need be. This can be an excellent way to drag fast-falling foes back up into the air where you want them, and also serves as a spacer if they get far away.


Up Aerial: Bite

Pinkie looks upwards, before delivering a sharp bite to anyone above her. This has a short range, usually affecting people only near Pinkie's mouth. The bite itself deals 5% damage and great knockback to anyone within this range at the time, making it a half-decent GTFO move if she needs it.

More importantly however, if Pinkie bites while she has a balloon, she'll hold the string in her mouth, being unable to attack while she holds it. From here, Pinkie can tap A to headbutt the balloon, causing it to float out of her grasp and move up to the top blast zone at Fox's dash speed, the balloon up floating to the top blast zone at Fox's dash speed, causing anyone underneath her to stand on top of it, and potentially end up being star KOed if they aren't able to get off it in time, which can be made easier if they're being affected by your joy buzzer and various other party supplies Pinkie has attained.

By pressing a different direction, Pinkie will swing the balloon by the string, it extending about a battlefield platform. If it connects to someone, the balloon will drag them back to Pinkie as she ties the balloon on to them, causing them to use Pinkie's up special as she makes them do in her fthrow, the effects of the balloon increase by 1.5x if they already have a balloon on them.

The primary use of this is to tie your own balloon onto the foe if they've been rude party guests and knocked their own balloon off. If they haven't knocked their own off, why not give them more balloons as well? It's a party; they can take all they like!


Back Aerial: Power of Laughter

Pinkie represents the power of laughter, or indomitable positivity even in the face of your greatest fears. While airborne, Pinkie Pie, after a period of decent lag, begins laughing for a whole second. Pinkie is able to control her movement during this time, but is unable to attack. While she laughs, Pinkie forms a hitbox 2x as large as Bowser around herself. If the foe enters the area of this hitbox and are not dodging/in the background, they gain a grimace on their face and attempts to strike Pinkie to shut her up. Not planning a counterattack, Pinkie takes the hit, taking 10% damage and good knockback from the foe's strike. While this may sound useless to Pinkie Pie unless the foe has an ally in team matches, the real fun begins if she has a balloon tied to the foe. If Pinkie Pie is able to navigate herself close enough to the balloon using moves such as her nair, this can cause them to knock out their own balloon, sending them to their likely doom. Since Pinkie herself is hit when they attack her, this is best used as a last effort if Gummy is unable to get to them.

Down Aerial: Breath of Fresh Air

Pinkie begins breathing in for .20 seconds or for up to five seconds if you decided to hold the A Button. Pinkie will release her breath after this time is up, moving her foe away with a breath. Pinkie's breath stays out for .30 seconds, pushing foes within a battlefield platform of her away with twice the force of Dedede's inhale. She can angle her breath as she pushes foes away, allowing her to move them towards the side or top blast zone. As you might expect, the wind affects the balloons far more then just regular fighters, pushing them away with 2x force. Pinkie will likely end up blowing her breath towards the balloons rather than the foes. Of note, if Pinkie uses this as she is bringing the foe towards her with her fair, the wind overrides the streamer, dragging the foe away with Pinkie attached. This creates even more opportunities for killing.

Final Smash


Parasprites GIGASKHAN COMES OUT AS PINKIE RUNS OFFSCREEN. They attack with H9K level AI for 12 seconds, before Pinkie comes back out in a one mand band uniform and herds them across the screen with superarmor. The Parasprites GIGASKHAN becomes a solid hitbox that pushes foes, as they run after Pinkie. Once it reaches the ledge, they fly away, pushing foes along with them.

Extras

UP TAUNT - WHAT I THINK OF PTA
Need I say more?

SIDE TAUNT - YAWN
Read the title.

DOWN TAUNT - ECSTATICALLY HOPPING IN PLACE
Read the title.

ENTRANCE - FLUNG IN
With a cry of "Whee!", Pinkie Pie is flung in from the side blast zone by an unseen force, performing her side special across the dirt. Pinkie Pie gets up and happily exclaims "It's time for a party!"

VICTORY POSE #1 - TIME OF HER LIFE

This. Back and forth across the screen. Forever.

VICTORY POSE #2 - PARTY TIME
Pinkie Pie lets out a cry of "It's time for a party!" and begins dancing a jig on her hind legs as confetti and balloons fall from the sky.

VICTORY POSE #3 - CAKE BAKING
Pinkie is shown baking a cake, before she tosses it up into the air and opens her mouth wide so the whole thing lands in her mouth. A second afterwards, she burps before pardoning herself with a giggle.

VICTORY POSE AGAINST RAINBOW DASH - CUPCAKES!
Rainbow Dash angrily grumbles to herself, distraught about her loss. Pinkie Pie turns to her with a cheesy grin, pulling out a tray of cupcakes and stating "Aw, it's okay, Rainbow Dash. Have a cupcake!" Rainbow facehooves and mutters to herself "This is more humiliating than the time I lost to Applejack..."

VICTORY POSE AGAINST FLUTTERSHY - CHIN UP
Pinkie Pie stands by Fluttershy, who seems rather depressed. Pinkie pats her on the back with a reassuring "It's okay, Fluttershy, cheer up!" She continues patting her back until you leave the results screen.

VICTORY POSE AGAINST APPLEJACK - EATING APPLES
Applejack smiles and claps for Pinkie from the background, as Pinkie sits in the foreground and helps herself to a basket of apples. After a whole minute, Pinkie dramatically eats the last apple before looking to the screen with a cry of "Juicy!" Naturally, the only reason you'd stay this long is to see "Juicy!" coincide with Dingodile's loss pose. Just sayin'.

VICTORY POSE AGAINST TWILIGHT SPARKLE - CLEANUP DUTY
The screen has a slightly darker tint as Pinkie Pie dances the same jig in her second victory pose. Losers outside Twilight Sparkle are fast asleep in the background. Twilight herself is walking about in the background, cleaning up various party supplies with unicorn magic. After 30 seconds, she falls to the ground, asleep. Not Pinkie, however, she has a lot of energy.

VICTORY POSE AGAINST RARITY - CONFETTI LEAVES A MARK
Pinkie Pie performs one of her normal victory poses as Rarity is cleaning off some of Pinkie's up tilt confetti off herself, letting out a cry of "Ugh! How will I ever show my face again with this stuck to me!" Quit your whining, Rarity...

VICTORY POSE AGAINST PINKIE PIE DOUBLE - THE MIRROR NEVER LIES
The two Pinkie Pies seem overly fascinated by each other, as the two face each other and mimic each other's movements and gestures as though it were a mirror. Kaptain Skurvy would be proud...

LOSS POSE AGAINST MOST - EASILY EXCITED


Pinkie excitedly claps in the background, occasionally stopping to say "We'll have to throw a party for you!" before resuming her clapping.

LOSS POSE AGAINST HMAS - DEFLATABLE HAIR


Pinkie's hair slowly expands, before releasing air with a sound effect similar to a whoppee cushion as it deflates. Pinkie looks down at the ground sadly, slowly clapping and occasionally wiping her eyes with one hoof.

ICON - CUTIE MARK
As most ponies do, Pinkie has her own individual icon in the form of her unique cutie mark: three balloons floating together.


>me when Warlord ranks this 1 star because character choice before ranting about it in the xat
 

Kholdstare

Nightmare Weaver
Joined
Oct 10, 2008
Messages
1,441
Rarity


Rarity is a unicorn who lives in Ponyville, the older sister of Sweetie Belle, and one of the main characters of the show. She works as both a fashion designer and seamstress in her Carousel Boutique.

Rarity has a passion for design and considers herself an artist, with other ponies' looks as her medium. Her dream is to design for Princess Celestia one day and marry "the stallion of her dreams", which was initially Celestia's nephew, Prince Blueblood. She has a tendency to give her friends spontaneous makeovers and clothing tips if their appearance does not meet her (very high) standards (Twilight is a frequent victim of this). However, this does not mean that she is shallow or superficial; she truly cares about each one of her clients and tries her best to create designs which will bring out the inner beauty of her friends.

That is not to say that Rarity does not deal with her outer beauty as well. In Boast Busters, her attempt to show up Trixie is spoiled when the unicorn ruins her hair, causing her to run away. In Look Before You Sleep, she panics while trying to avoid getting muddy or having her mane soaked in the rain. This causes some conflict with her friend Applejack, who is not bothered about getting muddy or wet. In Dragonshy, she wears a scarf on the way to the dragon's lair, wondering if she should carry a tiara to match. In Green Isn't Your Color, she is shown indulging in full spa treatments. In The Best Night Ever, it is revealed that Rarity actually wears eyelash extensions.

Rarity takes great pride in her work and will do whatever it takes to make sure a dress is perfect for the customer, no matter how long it takes. In Suited For Success, she takes it a step further when her friends do not seem satisfied with the first wave of dresses she made for them. She stresses herself into making a new set as perfect as they want it, going as far as following all their instructions instead of her own instincts. She is unhappy with the results, even though her friends are the opposite. Because of the love of her career, she can be emotionally distraught when it is threatened in some shape or form. When her "perfect" gowns are devastatingly rebuked by a visiting fashion critic and she is being laughed at, she locks herself in her room, lamenting the fear of her career being ruined. In another example, in Swarm of the Century, she forgets the parasprite crisis around Ponyville when she realizes some of the hungry swarm are in her shop eating all of her clothes, causing her to panic and rush over.

Specials

Neutral Special ~ Fashion Show!
Rarity uses her magic to shine a spotlight on the foe, darkening the rest of the screen. The spotlight is like the one on Shadow Moses Island, and the foe in it will react in one of two ways:

  • They could pose for the spotlight, filled with pride, taking one second to flash a sexy pose. Afterwards they gain a 1.25x boost in power and resistence in knockback for three seconds, due to their pride, but a single attack will knock their pride off, making them fall on their butt, stunned for one second.
  • Or, they could act surprised, embarrased that the spotlight is on them, and freeze in place for one second out of fear and embarrassment. For three seconds after, they have a 25% chance of their attacks failing and trip twice as often.

So which one of these will the foe do? Well, it depends on their appearance. You see, Rarity loves to give makeovers, and what better place to do it than in the... unfashionable battlefield of Smash? For female foes, they are proud thinking they look prettier than Rarity. For males, they become embarrassed at being dolled up in girls' clothes... For those that are neither, this effect has a 50% chance of being either. Yet, I have yet to tell you the drawback to this. The foe has to have a complete makeover done- that means at least one of every single one of Rarity's attacks had to be preformed on the foe, bar her specials, dash attack, neutral aerial, and pummel. After that is done, you can use it. If you try before this, Rarity will mutter, "Tsk, it's not ready yet! Needs more [insert attack effect here]!"

Side Special ~ Pony Charm
Rarity strikes a pose, looking beautiful as always. If the foe happens to be looking her way, they will lose focus for a moment, stopping whatever action they were doing. They also forget how to shield or dodge for two seconds. This gives Rarity a chance to apply an attack to the foe without them blocking it. This doesn't work if you use it consecutively.

Up Special ~ Get Out the Way
Rarity suddenly does an attack reminiscent of Peach's forward special, bumping her flank forward. If she hits a foe, she will deal 12% and great knockback, remarking "Move, bitch." This has the power to KO at 150%, so this is actually Rarity's sole KO move. It's pretty fast, too.

If used in the air, Rarity will do a different move entirely - she magics in butterfly wings onto her back, and gains a Pit-esque flight recovery. Fairly simple and boring, though.

Down Special ~ In Search of Diamonds
Rarity will use a gem-finding spell to search for gems hidden in the stage ground. Gems will glow brightly while you are holding this in, and they are randomly scattered across the stage. If she finds a gem, she will call the pony cast's baby dragon friend Spike from out of nowhere and he will start to dig in that spot, pluck up a gem, and hand it to Rarity. Gems are throwing items that deal 7-8%. Pressing Down Special when he tries to hand it to you will make Rarity let Spike keep the gem. Spike will be overjoyed and stick around for Rarity. If Rarity is ever hit by the foe, he will attempt to attack the foe - he has a claw attack that deals 9% and good knockback, and a fire attack that deals 12% and great knockback. However, if Spike himself takes 20% damage, the poor little guy will be KO'd for 30 seconds. Also, did you know he has a crush on Rarity?


Standards

Jab ~ Foundation
Rarity applies a layer of foundation, also known as base makeup, on the foe, dealing 4%. Pretty much a given for anything, including covering up wrinkles. Let your youthful beauty shine, even in the heat of battle!

Forward Tilt ~ Eye Shadow
Rarity applies dark blue or light blue eye shadow on the foe, bringing out their soul residing deep within their eyes... it also deals 3% damage.

Up Tilt ~ Mascara
Rarity applies some mascara as well, bringing out the foes eyelashes, full and dark. If they don't have eyelashes, well now they do. Problem, officer? This deals 2%

Down Tilt ~ Lipstick
Rarity applies deep red lipstick on the foe, giving them wet delicious smooching lips. Pucker up, precious. This does 8% for some reason.

Dash Attack ~ Makeup Cloud
Rarity trips, much to her dismay, and releases a cloud of makeup powder, covering any bystanders in it and dealing 5% to them. This has quite a large hitbox, so it's moderately useful.

Smashes

Forward Smash ~ Hair Style
Rarity takes out her scissors and brush and gives the foe a whole new hairstyle, and magically growing hair where there wasn't. The charge determines the length and complexity- low charge provides a short, simple style while a longer charge makes the hair style itself longer and more girly and fancy. It deals 12-22%.

Up Smash ~ Hair Accessories
All styles need an accessory to complement it! From bows to clips, this smash can provide an essential accessory. It also deals 13-23%... yeah...

Down Smash ~ Hair Color
And of course, unique styles call for unique colors! While a simple low smash will provide standard colors, taking time to charge this invests Rarity to try out bolder colors- greens, blues, and purples. The dye has a damaging effect on the foe, however, and deals 12-22%...

Aerials

Neutral Aerial ~ Spinny Spin Spin
Showing a rare bout of physical assault, Rarity spins like a helicopter blade while blowing a raspberry. This may not be as much of an attack as a... childish fit? At any rate, it deals 10% and okay knockback.

Forward Aerial ~ Bracelets
Rarity puts some gold bracelets on the foe, weighing them down by 0.5 points. This affects fall speed and weight. Quite useful, if you get enough on them.

Backward Aerial ~ Rings
Rarity slips a ring onto any appendage she can find... keep laughing, boys, because you won't be when you have a tight ring around your johnson. At least you'd be popular with the ladies with a diamond-studded member. At any rate these weigh the foe down by 0.5 points.

Up Aerial ~ Earrings
Rarity pierces the foe's ears, dealing 7%, and inserts some large earrings into them. They look quite different, although some like extra large hoops are quite fashionable. They weigh the foe down, again, by 0.5 points.

Down Aerial ~ Necklace
Rarity hangs a necklace on the foe, gold with a large bedazzling jewel hanging from it. It weighs the foe down by 1 point.

Grab Game

Grab ~ Stay Still!
Rarity grabs the foe with her pony magic, holding them in mid-air with levitation.

Pummel ~ Locked in Lace
Rarity ties the foe up with lacy ribbon, keeping them in place so she can do her fashion magic on them, although the tightness damages foes for 5%. Fun!

Forward Throw ~ Blouse
Rarity puts the foe in a fashionable blouse, with sequins and pretty gems. Sparkly. The scissors she uses to make adjustments to the blouse deal 8%.

Backward Throw ~ Skirt
To match the blouse, you always have to have a skirt to complement it! Rarity slips a wavy skirt onto the foe, with it being about knee-length. No, she is not going to make it short. We can leave some things to the imagination. This also deals 8%.

Up Throw ~ Headwear
Fashioning a tiara, dixie hat, or some other form of girly yet fashionable headwear, Rarity stuffs it on the foe's head, dealing 7% damage. Robin Walker would be proud.

Down Throw ~ Shoes!
Of course, you HAVE to have shoes! In particular, high-heels. Rarity forces the foe into some heels, dealing 9% and slowing them down tremendously. Good luck trying to walk in these, Ganondorf....

Final Smash

Final Smash ~ Art of the Dress?

Something brash, perhaps quite fetching
Hook and eye, couldn't you just simply die?
Making sure it fits forelock and crest
Don't forget the magic in the dress
Even though it rides high on the flank
Rainbow won't look like a tank
I'm stitching Rainbow's dress

Piece by piece, snip by snip
Croup, dock, haunch, shoulders, hip
Thread by thread, primmed and pressed
Yard by yard, never stressed
And that's the Art of the Dress!

Rarity hums the song and proceeds to create the perfect dress for her foe... one that perfectly matches their personality. For instance, for Peach she will sew a beautiful dress with peach and flower designs. And for Ganondorf, she creates a fierce purple dress resembling a storm of darkness. While this may be the perfect dress for the foe, they will undoubtedly not like it... which makes Rarity mad. So she instead puts them on a table and sews them up in a straightjacket. The straightjacket lasts for ten seconds, ten seconds during which the foe can only move at a snail's pace and not attack at all. Wail on them during this time!


Junahu

Smash Ace
Joined
Nov 15, 2005
Messages
899
Location
Shropshire Slasher
Gotcha!


PRINCESS CELESTIA
[Cosplay Extra]
[A "cosplay" is basically a moveset consisting only of 4 specials. A fictional item in Brawl called the Cosplay Item, when picked up, replaces the player's specials with a set of specials from a randomly chosen Cosplay Moveset. It's like a Kirby Transformation, except it replaces all your specials, and any character can use a Cosplay]

This gallant Equestrian is the beloved ruler of all Ponydom, though she doesn't seem to enjoy ANY aspect of being a Princess.
She frequently ignores problems that affect all of Equestria, in favor of allowing her heir, Twilight Sparkle to solve them for her. And on some occasions, she even creates problems deliberately. But of course, her quirky, hands off method of ruling, is all to help her subjects learn valuable life lessons. She's a troll, but a benevolent one, if such a thing even exists.
Neutral Special: Magic is Magic
Celestia fires a short beam of sparkling magic from her horn. It's nothing too special, it flies forwards, can be reflected, and fizzles out after travelling 1/2 of Final Destination.
If the beam hits home, the foe is encapsulated in a mysterious ether. Through no will of their own, they are levitated a short distance off the ground, completely disabling their ability to move (They may still use aerials and aerial specials).
The foe is trapped like this for a good second and a half, at least, though they will break out early if you hit them with any other attack.


Up Special: Incoming!
From out of nowhere, Celestia leaps up into the air, 4 stagebuilder units up in fact. This is a pretty graceful (read: slow) jump, and Celestia uses her deus ex magica to super armor herself.
After peaking, Celestia comes crashing back down, her weighty presence stomping down and KOing foes from 110% onwards. Perhaps it would be easier just to say that this move is exactly like King Dedede's Up-Special.
There is one vital difference however, in that if you hold B down as she reaches the peak of her leap, she will use her wings to stall in midair, flapping away until you release B. While 'hovering' like this, her royal hayness (lol, get it?) Celestia can move left or
right.

Down Special: Grand Galloping Gala
Our regal horsey emits a radiant... um... radiance of sparkling goodness while you hold B. Anyone standing near her, heals 4% health per second. Celestia herself heals a mere 3%. There is sigificant start and end lag, meaning that if you mess up, your foe can easily come in for some free healing.
Then again, if you're in a Free-For-All, your enemies will be falling over one another to stand in (and protect) your radiant healing.

Side Special: Tea Time Trick
With a fey wave of her hoof, Celestia summons a tea table in front of her, replete with tea cup and tea pot. She leaves it there, tempting foes in with the promise of delicious tea.
Sadly for them, this table is magical. When a foe strays near, they will find themselves pouring a cup of tea, and then just leaving it there on the table. If the foe swings around a second time, they just end up pouring in a little more tea.
If Celestia herself comes by however, she sips the tea, recovering 5% health. If the foe left her more than one serving to drink, she still just drinks one
(though she heals 15%, from it somehow).
The only way to dispel this trap of a tea party, is to pour tea three times, not just once or twice. With three pours, the cup overflows with tea. The foe snaps out of their dellusion, and chugs the remaining tea, healing 25% damage along with dispelling the tea table trap alltogether.


MarthTrinity

Smash Lord
Joined
Aug 9, 2007
Messages
1,954
Location
The Cosmos Beneath Rosalina's Skirt
DERPY HOOVES

Derpy Hooves is the fan-given name of this adorable little pony you see above. Derpy isn't really a major character, in fact her only spoken line so far is simply "Muffins!"...despite this however, she manages to be one of the more popular ponies in the series due to her distinct features. In her first appearance in the series, Derpy was randomly drawn cockeyed. Sharp eyed fans picked up on this and she was boosted up to somewhat meme status and given the fan name, Derpy Hooves. Because of this, Derpy has frequently and officially been drawn cockeyed for most of her appearances. Judging from what little we know of her character, Derpy is rather ditzy and tends to be a bit of a klutz. Apparently, Derpy is supposed to gain a scripted role in the show's next season (where it's possibly that she will get the official name of Ditzy Doo).

But enough history, I bet everypony wants to know what Derpy does in Smash! Well, simply put, she's an Assist Trophy! When one grabs the Assist Trophy, Derpy will emerge and happily fly about the stage for a while before an angry looking moverpony shows up and places his hands on his hips. Derpy frowns and flies off the top of the screen. Uh...wow...that was kinda lame Derpy...what gives?

After about five to eight seconds after Derpy leaves the screen, random stuff start falling from the sky directly towards the opponents of the player who summoned Derpy! Four things will fall from the sky and they always fall in the same order...


Flower Pot: The flower pot is the lightest and least damaging thing that can fall on your head...but the next item will -ALWAYS- fall in the same spot as the pot...so if you get struck by the flower pot, the next thing will hit you for sure as it does a nasty bit of stun despite being rather weak. Being hit by the flowerpot deals 8% damage and no knockback.

Anvil: As mentioned before, being hit by the flower pot means you're getting hit by the anvil as well...and the anvil -REALLY- hurts! If struck by this, you'll take a 20% damage and be put into a prone state! This anvil falls at the speed of Metal Bowser...so really, if you're under it when it falls...you're gonna get squashed. Also...be careful where you roll afterwards...you might get hit by a...

Hay Cart: If you thought an anvil hurt...you've never had a hay cart dropped on your head! This hay cart is about the size of Bowser (a little bigger actually) and will deal 24% damage to anyone squished by it! To make matters worse, you'll actually end up buried in hay, having to escape from it as if you were pitfalled!

Grand Piano: Why Derpy is moving a bloody grand piano through the skies is beyond me...but either way, run like hell to avoid this baby falling on you! If it does, you're done. That's it. Game over. You remember those elevators in the Subspace Emissary? Yeah, when you got flattened by one, you lost a life. You lose a stock here too if the Battlefield platform-sized piano falls on ya!

Once the piano hits the stage Derpy will flutter down from the top of the screen, a sheepish look on her face as she looks vaguely embarrassed at the trouble she's caused. Or maybe she's just worried she's in trouble? Who knows?
 

Davidreamcatcha

Smash Ace
Joined
Feb 9, 2011
Messages
629
NIGHTMARE MOON


Up Special: Dark Form

Nightmare Moon glares, her body disappearing into mist over the course of .10 seconds, making this a fairly fast process. Once Nightmare Moon has disappeared, a thick veil of purple smoke as long as a beam sword on its' side and as tall as a pokeball take her place. This smoke can be controlled, allowing Nightmare Moon to move in any direction she chooses for the next 10 seconds.

She can pass through foes in this state, dealing no damage, but she can be knocked out of this by any attack they perform, falling into helplessness. If she falls into helplessness and lands back on the stage, she has lag equivilant to the Warlock Punch as she lands back on the ground, making this insanely punishable even with her 10 second flight time.

On the subject of the smoke itself, its' movement initially starts out at Ganon's walking speed (let's say, a speed stat of 1), but every .60 seconds she moves, she gains momentum, increasing her speed stat by one every second. The maximum speed stat is 8, at which point she will move swiftly at Falcon's dash speed. As well as her speed increase, the smoke also starts dealing damage to any foe it runs into every time she gains a speed stat. 2% for every speed stat increased, meaning that it can deal a max of 16% and good knockback everytime she runs into the foe with this.

If Nightmare Moon's speed stat is at least a 5, some notable properties begin happening to her. If she angles the path of her up special into the stage, she will begin cutting through the stage as though she were a knife. Parts of the stage she has segmented follow logic, staying in their place unless it makes no logical sense. Parts of the stage she cuts off that make no sense staying disappear in a puff of smoke (e.g. If Nightmare Moon cuts off the edge, it will disappear, as she's cut it off from every other part of the stage.), leaving nothing in their place. Nightmare Moon can use this move to segment the stage, allowing her to create holes and trenches in which to attack from. She can also cut off natural parts of the stage, such as the edge, for dark and nefarious purposes.

Once Nightmare Moon is KOed, the stage reverts back to normal, not reassembling unless Nightmare Moon uses certain other moves in her movepool.

Side Special - Shadow Bolts


A grimace on her dark face, Nightmare Moon disappears into a circle of purple smoke, out of which come her alteregos: the Shadow Bolts. Nightmare Moon used this forms to tempt Rainbow Dash into giving up her loyalty to the other ponies, in order to prevent them from finding the Elements of Harmony that would destroy her. While in these 3 bodies, Nightmare Moon gains a new set of stats...

Size: 6
Width: 9
Traction: 5
Weight: 6
Aerial Movement: 8
Jumps: 9
Fall Speed: 3
Movement: 5
Float: 3x as long as Peach's.

Nightmare Moon now controls 3 bodies at once, losing access to shielding to do so. Instead, shielding now causes her to switch between the three bodies. If one of them was attacking in the middle of being switched, they will continue their attack even while Nightmare Moon is in control of a different Shadow Bolt. Now, make no mistake, the Shadow Bolts share the same moves as Nightmare Moon herself, and they all share the same damage percentage between the three of them. However, Nightmare Moon's power is divided between the three of them, making each of them slightly weaker to make up for their exceptional stats.

Down Special - Smoke

Nightmare Moon strikes a dramatic pose, a smirk on her face. After .20 seconds, dark purple smoke, identical in appearance to her up special smoke, begins spewing out from her body. The smoke starts at the size of a smart bomb, and expands by another smart bomb every second Nightmare Moon holds this pose, Nightmare Moon has the ability to cancel out by pressing the input again with a small bit of end lag. The smoke obscures the foreground and mutes all sound within the area it takes shape. This also can obscure parts of the stage in addition to just the playing area, allowing Nightmare Moon to hide her handiwork. This works nicely into carving the stage to your liking, as you can not only obscure your work or work while obscured, you can potentially trick foes into thinking areas underneath the smoke have been carved into, while in all reality nothing has happened to them. This can work well with your Shadow Bolts as well, since you can easily space them out to create multiple smoke clouds across the stage.

The smoke's countdown timer begins ticking as soon as she exits the pose, it disappearing in 25 seconds after the time it was set. Once the smoke clears up, one thing becomes clear that should chill foes to their very core: all of the carved up parts of the stage look as they were, a rather frightening illusion. The moment anyone, including Nightmare Moon, comes in contact with a false part of the stage (walking over a part of the stage that was carved, attempting to grab a part of the stage that was an illusion), they pratfall if they were on the stage or fall into helplessness if in the air as the part they came in contact with reveals its' nature. This is frighteningly deceptive, and can help Nightmare Moon get her foes into the air, which obviously works with the rest of her set.

Neutral Special - Horn-A-Blazin

Nightmare Moon hunches forward, dashing at her normal speed with her horn pointed forward. This has very little startup lag, meaning she can enter this at will and exit with a second press of the A button. Anybody hit by her charging will take 10% and decent knockback; a price to pay for getting in her way. If Nightmare Moon dashes into any of her Shadow Bolt duplicates, they disappear. Once one Shadow Bolt is gone, the two remaining Shadow Bolts now each have 1/2 of Nightmare Moon's power, while dashing through both Shadow Bolts returns Nightmare Moon to her normal form at normal power. The near-laglessness of this move combined with your smoke can really **** foes up, not letting them know whether you've transformed back into Nightmare Moon or still have duplicates lying about inside.

By pressing the special again, Nightmare Moon hisses as she explodes in a Smart Bomb explosion sized purple explosion, dealing 20% and high knockback to herself and anyone coming in contact with it. If she is inside a smoke cloud, the hitbox expands to the size of the smoke. Naturally, this is perfect with your Shadow Bolts: send your duplicates out on suicide missions...
 

Kholdstare

Nightmare Weaver
Joined
Oct 10, 2008
Messages
1,441
Big Macintosh Assist Trophy


Big Macintosh is Applejack's older brother and a recurring secondary character in the show. He's a laid-back and calm pony who looks after the farm when Applejack can't, and advises her when she tries to work too hard. To match his laid-back appearance, he speaks calmly and slowly and never raises his voice. He seems to have a practical sort of wisdom, certainly greater than his little sister Applejack who gets angry at him for "using his fancy mathematics" on her, but tends not to share it if a simple "eeyup" will suffice.

In Brawl, Big Macintosh is quite passive. He'll toss apples in the direction of his summoner, which can be eaten for 10% damage healed. After he tosses about four apples, he'll disappear with a word of wisdom: "Eeyup."​
 

ProfPeanut

Smash Ace
Joined
Oct 1, 2008
Messages
727
And to think this whole ambitious venture would have been ruined had I posted my Princess Celestia moveset instead. Oh well, next time.

Sadly, this contest is probably now rigged because the moment Equestria Daily finds out about this, the bronies will swarm to make new accounts just to up-vote the pony movesets (And yes, I am beings serious about both details).
 

JOE!

Smash Hero
Joined
Oct 5, 2008
Messages
8,075
Location
Dedham, MA
they cannot vote unless they post a moveset, and it'd be obvious who spammed just to vote up the ponies, thus we wont count theirs
 

mentholcase

Smash Cadet
Joined
Sep 2, 2011
Messages
56
Location
Northern California
MODS ARE ASLEEP
POST PONIES
Are they banned from mym are something ?

also, hopefully this doesn't sound offensive to the pony fans, but to the ones with strong hatred to them, I'd rather have the entire fim cast in a smash game then a single mii

<goofy's signature laugh here>

oh jeez, watch someone post a mii moveset now that i've flapped my lips :glare:
 

Davidreamcatcha

Smash Ace
Joined
Feb 9, 2011
Messages
629
>mfw one of the two guys we were rushing to beat for a new page was making a pony set

Well.

Also, on the subject of EQD vote-rigging, contest ends tomorrow at midnight. As long as they don't find out before then, nothing can go wrong.
 

ProfPeanut

Smash Ace
Joined
Oct 1, 2008
Messages
727
they cannot vote unless they post a moveset, and it'd be obvious who spammed just to vote up the ponies, thus we wont count theirs
Oh, thank the Lord. Nevertheless, this stunt will probably end up on the front page of that site.
 

ForwardArrow

Smash Ace
Joined
Aug 17, 2011
Messages
503
Oh god what you done to the thread

Twilight Sparkle
I can't really say a lot about this set to be quite honest. The concept of barriers you can hide behind while camping really isn't all that original (in fact it may have been done to death). That said, I enjoyed some of the interactions with the Forcefields, even if the set isn't really particularly unique. Though I'm a little worried this set has a big problem with magic syndrome, mainly because I don't know the character. Anyway, decent work, Dutchman is much better though, and short comment is short.

Rainbow Dash
Now THIS on the other hand is a set I very much enjoy. Even if I don't like the show, I love all the personality the set shows. It feels very in character and really demonstrates who Rainbow Dash is very well. Along with that is the somewhat unique agressive aerial playstyle with the clouds and such. It feels very different from the other fast moving characters we've seen before, and generally the set is just a lot of fun. I also sort of love the way you use the clouds. The set just feels very elegant and seems like it'd be fun to play. Anyway, past my gushing I will admit it's VERY overpowered. Seriously, she's incredibly fast and not nearly weak enough to make up for it, and is unbelievably fast and darting around with almost every move, not to mention she can disable their dodges. I don't care TOO much about balance, but it's very noticeable here, and it does bother me. None-the-less, I really like this set, and I might super vote it unless someone posts a ridiculously good last minute set.

Other ponies to come later.
 

mentholcase

Smash Cadet
Joined
Sep 2, 2011
Messages
56
Location
Northern California
wtf? Ponies?

Also does I have to have playstyle section and taunts??
no, you don't have to

the link in the OP should be

http://chiefmendez.wordpress.com/mym-x-movesets/

not

http://chiefmendez.wordpress.com/movesets-2/mym8_sets/

but here's a direct quote

...please note that only movesets with all the basic moves for a character will be listed here. These are:

0. A picture of your character. This may seem weird as a requirement, but without it…

1. Four Tilt Attacks (including a neutral A button attack), one Dash Attack, and three Smash Attacks.

2. Five Aerial Attacks.

3. Four Special Moves and one Final Smash.

4. Four Throws, a grab, and a pummel.


That being said, some of the best movesets in MYM history haven’t had all of those and even some of the longest running MYMers skimp out on some of them sometimes (Count had no throws, Ekans had no down throw, etc). So basically, that’s more of a guideline; shoot for all of those, but if it seems forced or unnecessary, we’ll make an exception… Just make sure you give good reasoning for why you’re skipping out on certain moves!
 

JOE!

Smash Hero
Joined
Oct 5, 2008
Messages
8,075
Location
Dedham, MA
Taunts and stuff have become optional, but are good for character if you want to get that across

Playstyle section however is essentially mandatory as it wraps everything up of how you want your character portrayed/played
 

wolfgang92

Smash Rookie
Joined
Sep 9, 2011
Messages
22
Location
Sky Valley, NC
no, you don't have to

the link in the OP should be

http://chiefmendez.wordpress.com/mym-x-movesets/

not

http://chiefmendez.wordpress.com/movesets-2/mym8_sets/

but here's a direct quote
Taunts and stuff have become optional, but are good for character if you want to get that across

Playstyle section however is essentially mandatory as it wraps everything up of how you want your character portrayed/played
okaty thank you. Will post black ops tonight maybe I'm having hard time with this stuff.
 
Status
Not open for further replies.
Top Bottom