• Welcome to Smashboards, the world's largest Super Smash Brothers community! Over 250,000 Smash Bros. fans from around the world have come to discuss these great games in over 19 million posts!

    You are currently viewing our boards as a visitor. Click here to sign up right now and start on your path in the Smash community!

Make Your Move X - Congratulations winners! MYMXI start date OCTOBER 10TH!

Status
Not open for further replies.

Davidreamcatcha

Smash Ace
Joined
Feb 9, 2011
Messages
629
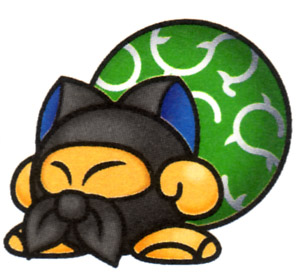
The Grinch


Please, tell me you've heard of this guy before. I'm in need of some dire reassurance that you all had childhoods. For those of you grew up watching Dragon Ball Z every Christmas, the Grinch is a character from Dr. Suess's classic Christmas Book: How the Grinch stole Christmas. In the book, the Grinch *GASP* steals Christmas away from all of the Whos of Whoville, as his heart was two sizes to small. Eventually, he warms up to the Whos and brings back all their gifts once he discovers the true meaning of Christmas. As this whole thing is Christmas-themed, the Grinch only starts appearing as a common assist trophy starting on Thanksgiving, being impossible to summon before that without cheats.

When the Grinch is summoned, he hoists an empty bag over his shoulder and begins to sneak around the stage, standing at Ike's height and moving at Wario's Run Speed. If the Grinch gets near a foe, he'll pickpocket them, stealing a glowing present. This glowing present represents a weapon/projectile from the foe's arsenal, not allowing the foe to use moves utilizing that weapon anymore (Until they press any taunt input, where they pull out an exact copy of that weapon.) In addition, he will also steal any item present on the stage. If the Grinch is attacked, he will swing the bag at the foe who attacked him, dealing 10% for each weapon/projectile/item in the bag, with an infinite amount of weapons and projectiles being able to be stored. The Grinch will steal everything he can within the 2 minutes he's present, until disappearing.

What's the point of this? Every time you summon the Grinch, he retains the same items he had, allowing him to gather a wide variety of items before Christmas. On Christmas Morning (or after, if you weren't playing on Christmas), the next time you open an assist trophy, the Grinch will appear carrying the bag of items on his shoulder. The Grinch will ignore the foes, moving to the edge of the stage, about to dump the bag off. However, he pauses as his eyes turn blue and his heart is seen growing two sizes bigger. He runs to the center of the stage and dumps all of the items, weapons and projectiles out of the bag at once before disappearing until next Thanksgiving. This can be quite a chaotic assist trophy when used right, so try to keep mental notes of what the Grinch stole each time he appeared.
 

Tanookie

Smash Journeyman
Joined
Nov 17, 2008
Messages
436
Location
*sends Sundance a leather harness on Dragon Apprec
A wild TANOOKIE appears!


STORM

Storm (born Ororo Munroe to a Kenyan priestess and a photojournalist) is a mutant with the psionic ability to control the weather, both Earthly and extraterrestrial. She can create any sort of meteorological phenomena, including rain, tornadoes, mist, lightning, tsunamis, and hurricanes. In addition, she can dissipate any weather and form clear skies, whether she formed it or not. Storm is an extremely powerful mutant in even this simple sense of her power; alien Sentinels have identified her as an Omega-level mutant, though she is not formally listed as such.

Storm’s power also has many smaller facets that are useful in many situations; she can control lightning and wind in all its forms, and has used wind as a shield to block projectiles, as propulsion for herself and others to fly at high altitudes, and can use it to control other people, in mimicry of telekinesis. In addition to all of this, Storm’s control of the atmosphere is so masterful that she can use it on such subtle levels, such as manipulating the pressure inside one’s ear to cause them intense pain. She has also demonstrated the ability to bend light using moisture in the air to render herself partially transparent, if not completely invisible.

There are many other uses Storm has for her power, and most of them will be demonstrated in this set. One fact is certain though: you do not want to get on Storm’s bad side. After all, how can you protect yourself from a rushing wave, focused lightning bolts, or even acid rain? To anger Storm is to incur the wrath of Mother Nature herself.

STATS

Size »»» 6
Weight »»» 3
Power »»» 8
Priority »»» 7.5
Range »»» 10
Attack Speed »»» 2
Traction »»» 3
Movement Speed »»» 5
Fall Speed »»» 4
Aerial Mobility »»» 7
Abilities »»» Glide

Storm is a tall, imposing woman, but she doesn’t have much girth, unfortunately (and in actuality she stands at about Link’s height and weighs about the same as Pit). Combined with her slow fall speed and overall floaty nature, Storm’s rather easy to knock around and KO. However, her power, range, and priority also make it easy for her to KO other people. Storm’s attacks are almost all ranged, and deal powerful burst damage, and she’s quite adept at dealing with more than one foe—however, almost all of her attacks are slow and laggy, cementing her position as a ranged fighter. In addition, her aerial prowess is quite good, due to her floaty nature and overall powerful aerials.

Storm only has one real “jump” to get her off the ground, but pressing the jump button while in mid-air causes her to ride a powerful wind current upwards for as long as you hold the button down, much like R.O.B.’s Booster. However, this, too, only lasts for a certain amount of time in midair. Still, the total distance you can move upwards is equal to that of two of Falco’s midair jumps, so she’s quite good at recovering long distances. If you press left or right while in this state, Storm enters a standard glide, flying forward on a cushion of air.

NATURE'S WRATH

Storm’s powers are partly controlled by her emotions—when she gets mad, lightning strikes and thunder rumbles. She has long since learned to keep this aspect of her power (and her emotions) under control. However, this aspect of Storm’s mutation just so happens to smoothly transition into Smash Brothers. Essentially, this is Storm’s special mechanic (even though I'm not sure if having special mechanics is still "in"). As Storm gains damage, various weather effects occur on the battlefield, depending on the severity of her mood. If Storm is KO’ed, everything returns to normal and the counter resets. These effects DO affect Storm, so be careful…Mother Nature pays no favors.
  • Upon gaining 20% damage, Storm grows a little annoyed, and the sky turns slightly gray; a distant sound of thunder rumbles once.
  • Once Storm is attacked to reach 40% damage, the sky darkens and a lightning bolt strikes immediately in front of her, damaging whoever is in the way for approximately 13% damage and good horizontal knockback. After this point, lightning bolts will randomly strike the stage every 20 seconds with the same properties (they will also continue to immediately strike in front of Storm when she reaches each following level of anger).
  • When Storm accumulates 65% on her damage meter, the sky is covered by dark gray clouds and thunder begins to rumble every so often. Lightning bolts continue and a light drizzle begins to fall, decreasing traction by 15%.
  • If Storm reaches 100%, thunder sounds every few seconds, and lightning strikes often in the background and on stage, with the time in between them decreasing to about 10 seconds. In addition, heavy rainfall begins, obscuring view of the stage and keeping the same traction-lowering properties, now upped to 25%. In addition, this rain causes all electric-based attacks to deal 3% more damage (including the lightning bolts created by these storms).
  • When Storm hits 120%, a strong wind begins to blow on the stage in addition to the above effects. This wind blows in one of four directions and changes randomly: wind blowing to the right makes it harder to move to the left (and vice versa). Wind blowing upward increases all characters’ jumps by 1.5 (while wind blowing down has the opposite effect).
  • If you ever manage to stay alive until gaining 160%, the winds pick up speed (so they now double/halve speed in each direction), and the rain grows even heavier to further obscure your view. The lightning bolts begin to strike every 5 seconds and begin striking closer to actual players when they land. In addition, the sky turns pitch black, and tiny localized tornadoes begin to randomly swirl around the stage, acting very much like the ones on Hyrule Castle, though they are all about the size of Ganondorf. If you ever get to this point, it’ll be just as hard for you to play as it will be for the others, so be careful!

SPECIALS

Neutral Special Cyclone
Wh0renado knockoff? I resent that! …Anyways, by pressing the B button, Storm spins around slowly, and a small streak of wind trails behind her. Useless, unless you press the B button furiously. Doing so will cause Storm to spin faster and faster, creating a tornado around her body within a second of rapid button mashing—if she’s in the air when she does this, she stops where she is and begins to fall at a very slow pace. By continuing to hammer on the B button for about two seconds, you can increase the size of the tornado until it’s about 1.5x the height of Ganondorf and can suck in enemies from almost all the way across Final Destination (this is the maximum size). It doesn’t actually suck them in, but it draws them toward you and makes running in the opposite direction harder.

If they do touch the tornado, however, then they begin to spin around in the vicious winds, spinning upwards and then being fiercely tossed out the top. For each second they spend in this vortex, they take 6%, but be warned! If Storm spins around for more than five seconds, she’ll automatically stop, the whirlwind will dissipate, and she’ll enter a dazed state, like when your shield is broken. If you stop hitting the B button before this limit, Storm will slowly stop spinning and the cyclone will continue forward at the speed of Ganondorf’s walk for about three seconds before disappearing—during this time it retains all the same properties as before. This is a very good KO move, but be sure you time it right, or else you’ll be screwed.

Side Special Chain Lightning
You’ve probably seen this attack before with several other characters, and with Storm it’s a very good way to rack damage, as well as a testament to her skills at range. Storm momentarily pulls her hand back, charging for .5 seconds before opening her palm and releasing a streak of jagged blue lightning that shoots forward horizontally, seeking the nearest opponent within the range of Battlefield. If the nearest opponent is more than 60° higher in relation to Storm, this lightning will simply seek the next closest opponent within Battlefield’s range.

If this lightning connects with an enemy, it shocks the opponent once, dealing 16% damage but no knockback. The lightning then instantaneously extends from that foe to the next nearest foe, within 3/4 of Battlefield’s range, dealing the same amount of damage—it then proceeds to seek out a third target, within 1/2 of Battlefield, instantly jumping to them and dealing more damage to that person. Storm and all the players struck by this lightning are held immobile for the entire duration of the attack (although each person is only damaged once), and once the last available target is struck, the lightning disappears instantly, but Storm takes a moment to recover. This is an excellent move for dealing with crowds, but unfortunately its lag on both ends leaves it best suited for ranged assaults.

Up Special Cloud Creation
Since Storm already has such a good enough second jump plus a glide, it would be a tad unfair—and a wee bit redundant—for her to get a recovery move too. Instead, this move causes Storm to hold her arms up, as a stormy gray storm cloud swirls into being at Mario’s height directly above her. The cloud increases in size one Stage Builder Block for every second you hold the button down, and it can grow up to three Stage Builder Blocks in length (meaning you cannot spend more than three seconds creating this cloud). The cloud remains on the stage for a maximum of three minutes, regardless of whether or not Storm is KO’ed. You can only have one of these clouds out at a time.

Contact with this cloud does nothing; Storm (and all other fighters) can use it as a platform (but that only lasts for about two seconds before she falls through—this effect renews itself ten seconds later). This cloud periodically releases thunderbolts every fifteen or so seconds; these bolts cause 13% damage with average horizontal knockback and arc towards the enemy closest to it (though the bolts cannot reach further away than 1.5 SBBs).

This may seem rather pointless for an attack, but if it’s raining onstage, or the cloud is hit by a water attack, the cloud steadily grows in size. Once the cloud reaches a maximum size of five Stage Builder Blocks across (it steadily grows at a rate of 1 SBB per fifteen seconds), it releases a torrential downpour of damaging rain, hitting any fighters beneath it for 18% damage and forcing them to the ground (excluding Storm, of course). The cloud then disappears. This cloud makes a great edgeguarding tool, and you can manipulate it around the stage; if the cloud is hit by a wind-based attack, it moves along with the wind but decreases in size proportional to the strength of the attack. This means that once wind starts blowing because of Storm’s power, the cloud will eventually be blown offstage.

Down Special Clear Skies
Storm looks to the sky and her eyes glow white, taking one second to do so. Over the course of the next second, all current weather effects fade away (including any created clouds you have), and the stage remains clear for the next 8 seconds. Obviously, this is a very laggy attack (two seconds in Smash is not an optimal speed for anything), but it’s a very helpful attack when you know that the current weather onstage has gotten a little too chaotic for your liking. Remember, all those stray lightning bolts and wind currents can hurt you too! This move can be used as often as you like, though make sure you have an opening to do so, since Storm is defenseless while she performs it.

STANDARDS

Standard Combo Shock
Storm leaps slightly into the air and points both of her hands down towards the ground, and tiny bolts of pink lightning shoot from her fingertips and arc downwards to the ground, covering one Stage Builder Block of total distance. This attack is laggy on both ends as Storm takes a moment to leap into the air, gather energy, and fall back down, but the lightning comes out instantaneously. The actual lightning is only out for a short time (about 0.8 seconds), but contact with it deals 8% damage and a stun effect similar to ZSS’s charged Paralyzer shot.

Dash Attack Conductor Spin
Storm spins around quickly while moving forward at a heightened speed (about equal to Pit’s running speed), holding her arms straight out and her feet pointed straight down at the ground. She’s actually floating slightly off the ground, if you look closely…but that doesn’t really matter. Storm moves for about half of Battlefield in this manner (you can stop it short by pressing the shield button), and contact with her during this time deals 7% damage and moves you along with her.

But that’s not really what this move’s about: as you move, three super-thin lightning bolts shoot in across the screen towards her body in a fan-shape, one after another in quick sequence. These lightning bolts deal a little hitstun but no damage; instead, when they hit Storm, she releases a small burst of electricity to those immediately next to her, each causing a rapid bursts of electricity for 3% damage. This move deals no knockback and ends with you right next to the foe, so obviously you want to use this move when the foe is close to you, so you can pull them in and deal the maximum amount of damage (which is 16% damage, but that’s a very hard thing to do unless they’re right up near you). This is a very good combo starter—possibly the only one in Storm’s repertoire.

Forward Tilt Funnels
Storm spins around while holding her leg out, taking about three-quarters of a second to do so, and a small tornado the size of Luigi swirls into being in front of her, moving forward at half the speed of Ganondorf’s run. This tornado will continue forward for four seconds or until it hits an immovable obstacle. If this funnel hits an item, it picks the item up and spins it around violently before tossing it backwards a little bit and disappearing; the item breaks once it hits the ground.

The same thing happens with an enemy; if an enemy comes into contact with the funnel, it will trap them, holding them off the ground and spinning them around in place for a second, dealing 10% damage before tossing them up with average knockback and fading away. This move is not a very good killing move; instead, use this move to hold foes in place and toss them around a little bit, keeping them disoriented. Storm can have up to two of these funnels out at one time.

Up Tilt Hailstorm
Storm’s eyes glow white and she looks to the heavens, taking about a second to do so; a wispy blue wind appears above the nearest enemy within the distance of Battlefield, blowing down onto them. This wind slows foes by 30% of their normal movement speed and decreases their jumps by the same amount; in addition, Pokéball-sized ice chunks fall onto the enemy’s head, dealing 2% and no knockback each time they connect—eight hailstones in total fall, making the total damage 16%. This wind is permanently attached to your target for the entire time it remains on the field, which is approximately five seconds. This is a useful debuff to your opponents, as well as a great source of constant damage.

Unfortunately, there’s one tiny catch. When Storm activates this move, any rain on the field turns to snow as well. Which mostly is referring to the rain caused by Storm’s mechanic, in case you couldn’t tell. The snow does nothing, but the move also summons hail chunks that are identical to the ones plaguing your opponent—these chunks of hail rain all over the field, dealing the same damage and flinching knockback. This stage-wide effect remains for about 10 seconds, and gets rid of the effects of normal rain (traction lowering and electric damage-boosting), since the rain isn’t there. This hail CAN hurt Storm, so before you use the move, you need to weigh the pros and cons of whether or not you can handle having another hazard to deal with. This is a perfect move to use before you accumulate a lot of damage, so that way the stage-wide hail doesn’t appear.

And by the way, if you use Clear Skies to clear away the hail, the opponent’s hail will disappear, but when the stage returns to normal, the stage-wide hail will be gone as well.

Down Tilt Lightning Bolt
Ah, one of Storm’s classic moves: dropping lightning bolts onto unsuspecting foes and frying them to a crisp. Satisfying, no? When you do this, Storm’s fist crackles with electricity and she crouches slightly, slamming her closed fist down towards the ground; as soon as her fist stops moving (about three quarters of a second), a blue lightning bolt shoots down from the top of the screen onto the nearest enemy within the distance of Battlefield in any direction. Contact with this lightning deals 13% damage and good side knockback, much like Pikachu’s Thunder. This lightning comes out fast, but a skilled opponent can easily dodge it. Although this move actually starts up pretty quickly, the ending’s a bit slower as Storm takes a while to stand back up.

Ooh, there’s also some cool bonuses that go along with this move: if you manage to hit a foe with this while they’re beneath a created storm cloud, the lightning cuts through the cloud and increases in size, amplifying its power and dealing 18% damage and great knockback! This is a difficult task to pull off, sure, but it’s a suitable reward, I think…

SMASHES

Forward Smash Gust
Bah, another laggy move. After charging, Storm leaps a full character length into the air and throws her hands forward, taking almost a full second to do so. A strong gust of wind shoots from her palms, extending from her location in the air all the way into the ground. Horizontally, this wind current stretches a little over half the length of Battlefield, meaning you can attack enemies from a safe distance away. If you hit an opponent with this gust, they will take great horizontal knockback and 18-24% damage, depending on how long you charged.

Unfortunately, this move will not actually throw enemies into the air until they have accumulated at least 80% damage on their meters. Otherwise, they will simply be forced to the ground and will slide backwards. Gust can also be used to move your created cloud around the stage if you later realize that you want it somewhere else. Be warned though that this, like all wind-based attacks, will decrease the cloud’s size slightly, meaning it will take longer to reach its maximum size. Finally, this wind sends items and containers flying with twice the strength/distance of being thrown; if they hit the ground after being tossed about, they break as normal. Storm holds the wind out for only three-quarters of a second, so it doesn’t last too long, and there’s above-average lag as Storm falls back to the ground.

Up Smash Static Charge
Storm holds her arms up to the sky, and two small sparks crackle into being slightly above her fists as she charges. When you’re done charging, she swings her arms down and the sparks move down and out, drawing a thin line of lightning as they do so. The longer you charge, the further out the sparks go, covering a maximum distance of four SBBs on each side of Storm. When the two sparks hit the ground, anything within the lines of lightning “drawn” by the sparks is frozen in place and is shocked multiple times by the large number of sparks inside for rapid hits of 1% damage; they can take up to 10% in this manner. This deals no knockback, and Storm is unable to move while she channels this move. This move's damage is unaffected by Storm's electric boosts—that is, the rain and her Down Smash.

Now, you may think this is a pretty useless move, but there’s a pretty cool catch. Any enemy caught in the static field is debuffed for the next 6 seconds, taking 2% more damage more damage from every attack they take, not just those from Storm! Considering Storm’s main purpose is racking up damage, this is a great, very useful move. If you use this move while it’s raining, the enemy does not take the extra damage usually granted to lightning attacks, but instead the duration of the debuff is upped to 8 seconds. If you use this smash while the enemy is already under the influence of the debuff, the duration is not renewed or increased in length.

Down Smash Superconductor
After you finish charging this move, Storm rises to a hovering position slightly above the ground, and an enormous lightning bolt shoots down from the top of the screen, hitting her and sending an intense electrical aura exploding outward for 3 SBB's in all directions. If an opponent is struck by the lightning on its way down, they take 28% damage and great horizontal knockback. This attack is slow, as the lightning bolt itself is rather large and the electricity that radiates outward from Storm takes a bit of time before fading away; the electric field deals 22% and great knockback Combined with its potent range, this makes Storm’s Down Smash one of her best KO options.

But wait, there’s more! Once the attack finishes (the whole attack, including startup and ending lag, takes about 2.5 seconds), Storm is glowing a faint blue and her fists are crackling with electricity! If you see this, Storm has 4 seconds of immunity to all electric attacks due to the immense amount of electric power coursing through her body—in addition, all of her electric-based attacks deal 1% more damage. Be warned that once you use this move, Storm is unable to use it for the next 10 seconds, meaning 6 seconds after your boost fades away. Considering this is such a powerful attack, it would only make sense that Storm needs time to recharge. Tiny sparks will shoot from Storm’s body when the move is done charging.

AERIALS

Neutral Air Pollution
Storm releases a thin brown fog for as long as you hold the A button down while in the air; it doesn’t slow her descent or anything, meaning you can effectively create a trail of this stuff all the way down to the ground. The fog remains on the field for about six seconds. Contact with this fog deals 6% and no knockback, but then deals 1% per second for the next three seconds as the opponent suffers the aftereffects of this gross mist. This fog does not affect Storm, but once six seconds have passed, the mist dissolves and floats upwards, off the top of the screen.

If it’s raining when this occurs, the rain will turn to acid rain. This rain has a sickly brownish-green color, and deals 2% per second to everyone, including Storm. The acid rain lasts 7 seconds, so before you throw away your morals to use this move and deal a hefty dose of damage to your opponents (and yourself), consider whether or not you’re willing to pay the long-term price for polluting the environment (that’s right, folks, this moveset supports the green movement!).

Forward Air Thunder Mines
Storm freezes in midair and surrounds her fists in crackling lightning; without hesitation (FINALLY A MOVE WITH NO LAG!), she tosses three spheres of lightning forward in rapid succession, each slightly larger than a Pokéball. These spheres randomly move around the field, slightly homing towards the closest opponents, but they’re not too incessant about finding a victim; they move around at .75x the speed of a Smash Ball and have the sense to move around walls and such; they can be absorbed by PSI shields, but cannot be reflected by things like Pit’s Mirror Shield or the Space Animals’ Reflectors.

Contact with one of these thunder mines causes it to detonate, wracking the opponent’s body with lightning and paralyzing them where they are as they take rapid hits of 3% damage, capping off at 12% total if they are not attacked out of it. The mines fade away after 5 seconds, and Storm can only use this move again once all the mines are gone from the field (i.e. they’ve all been used up or disappeared). These are good things to have out at all times to add to the chaos, but they’re not really a deal-breaker in terms of damage racking or KO potential.

Back Air Flash Freeze
Typical back-air sweetspot move? I think not! For this attack, Storm demonstrates her control of the atmosphere on an infinitesimally small level. Storm spins around in midair and reaches out for an opponent; if she makes contact with them, she grabs them in midair. Almost immediately after, the opponent flashes an icy blue for approximately .2 seconds—this is your cue to hit the A button again! If you time it right, then Storm releases a powerful pulse of kinetic energy throughout the opponent’s body, freezing them and sending them flying up into the air with great knockback and 15% damage.

This is a rather simple move, and the rewards seem a bit underwhelming considering that the success of this move requires depends on your perfect timing. However, this move is an aerial, and therefore if you use it after the opponent has reached a high enough damage level (usually around 130%), you’ll probably score a star KO. Also, if you use this move while it's snowing (through use of your U-Tilt) the opponent glows blue for half a second, making it easier for you to land the hit!

Up Air Dust Devil
Storm freezes where she is in midair, and is immediately surrounded by a tight cylinder of swirling wind, her eyes glowing white. This wind causes 7% and weak knockback when someone comes into contact with it—most attacks from things like swords or bats can reach through the wind, however, so you’re not invincible by any means. This vortex remains until you let go of the A button—you can hold it as long as you want, but after the first two seconds, Storm begins to sink closer to the ground with each following passing second, constantly taking 1% as time goes on (this prevents players from abusing this skill to build up adverse weather effects on the field).

The cool thing about this vortex is that any solid projectile or item that comes into contact with this wind is caught in it, swirling around Storm incessantly, boosting the damage caused by the vortex by 2% for each foreign object in the wind. When Storm releases the vortex, she holds her arms out and the items go flying out in random directions, causing the normal damage that item would cause if thrown (if there are no other objects in the dust devil, the wind simply dissipates instead).

Also, if you use this skill above a body of water or while it’s raining, Storm creates a waterspout, or a vertical column of water. Aside from looking insanely cool, this waterspout causes 12% damage upon contact and better knockback, though Storm takes constant ticks of 2% damage after two seconds in her creation. This does NOT suck up items (if there are pre-existing items in the wind before it becomes a waterspout, they are destroyed). When Storm releases a waterspout, the water falls straight to the ground, dealing 12% damage to anyone below it and forcing them to the ground.

If this attack is used over any sort of flame/lava (including Brinstar/Norfair), Storm creates a fire whirl, which is the same thing as a waterspout, but with fire. Contact with this deals 18% damage and really good knockback; however, if Storm tries to keep this going for too long (like all the others), she begins to take ticks of 4% damage. Like the waterspout, a fire whirl cannot hold items. When you release one of these, the fire expands two SBB’s in all directions before fading away, dealing 16% damage and good knockback to anyone it hits. This is a very hard feat to accomplish, so be sure to use it well!

Down Air Blitz
Stalling in midair, Storm points her arms down towards the ground, and a number of lightning bolts shoot down from the top of the screen randomly across the stage. The number of lightning bolts is dependent on how much damage Storm accumulates—this begins as one single lightning bolt, but adds one for every 25% damage you take capping out at 100% and bringing the total number of lightning bolts up to five. These lightning bolts have the same properties as those seen in Storm’s Down Tilt and her special mechanic, 13% damage and good knockback.

THROWS

Grab Final Warning
I can’t really see how you want me to make this special…Storm’s a normal human. The grab is average range, comes out relatively quick, and does no damage. There.

Pummel Lightning Pulse
Gripping the foe with both her hands, Storm begins to steadily shock the opponent for 3% every second—you can hold down the A button to keep this pummel going infinitely, but it’s a VERY easy grab to break out of, as Storm’s already weak grip is made even weaker by channeling electricity through her hands. Overall, though, a solid pummel, though one that’s pretty hard to make full use of.

Forward Throw Jetstream
Storm thrusts her hands forward, palms open, and releases a strong gust of wind that blows the enemy back with it! This wind is controllable, meaning you can essentially manipulate the opponent in whatever direction you so desire; however, the wind only lasts for three seconds, and its initial air speed (about that of Mario’s walk) is inversely proportional to the thrown foe’s weight. That is, if the foe is heavier, the wind will move more slowly, and it will pick up speed for a lighter foe. This throw does no damage; it’s entire purpose is positioning and KOs. It’s also useful for moving your cloud around.

Back Throw Thor's Hammer
Storm spins around on one leg, tossing the opponent into the air as she does so; the second the opponents falls in front of her, she releases a stream of lightning that pushes the opponent back and forces them to the ground. It’s not a very unique throw, admittedly, but since it forces the opponent to the ground and pushes them a good distance away (approximately three SBB’s), it’s a good tool for spacing. This throw deals approximately 8% damage, and also has a 20% chance to slow the opponent for 5 seconds afterward due to the lightning coursing through their body. During this time, the opponent’s movement speed is cut in half.

Up Throw Wind Geyser
Storm tosses the enemy right above her head and begins to spin around, forming a cushion of wind beneath the opponent that keep them spinning in midair right above her. Now, this wind cushion will fade away immediately unless you begin spinning the control stick in a circle. By doing this at a rapid speed, Storm begins to spin around and around in place, much like with her neutral special. However, this forms a thin, cylindrical wind vortex above her, as opposed to a funnel-shaped cyclone. The more you spin, the higher the column of wind rises, dealing ticks of 1% damage every second until it reaches about Ganondorf’s height above her, which would deal about 5% damage. When you reach this point, Storm stops spinning automatically and the foe is launched straight up a hefty distance, taking 8% more damage. You can stop spinning at any time, however, since Storm is essentially defenseless while she manipulates her opponent upward. This is a good throw (aside from the start up time), as the ending lag is average; the move can kill Mario at 120% if you raise the geyser to its maximum height before releasing it.

Down Throw Pressure
Storm forcefully tosses the opponent down on the ground, dealing 5% but no knockback. Sounds worthless, but if you mash the control stick down, Storm begins to push her palms towards the ground as the opponent writhes in pain—that’s right, Storm’s increasing the pressure around the opponent’s body to forcefully crush them! This deals consistent ticks of 1% with every smash of the control stick, so if the opponent has trouble breaking out of the throw, this throw can possibly deal a ton of damage. Be warned, though, that Storm is completely vulnerable while torturing her opponents, so be careful that you don’t get too caught up and ignore other threats.

FINAL SMASH

Final Smash Will of the Goddess
Having gained the Smash Ball, Storm taps into the deepest reaches of her power as the action freezes. Holding her arms to the sky, her eyes turn completely white and her body glows as she instantly performs one Superconductor attack and slowly begins to rise into the air, calling upon the forces of nature to shift the ferocity of the weather up to the highest possible level if it isn’t already. This may seem incredibly pointless, but after Storm comes back down to the ground, she is completely invincible and all of her attacks have almost no lag. This means it’s incredibly simple for to wreak any further havoc for the next ten seconds. Have fun!

Also, during this time, trying to use your down special (Clear Skies), instead creates a localized tsunami that starts in the background and is the length of Battlefield (with Storm serving as the center). This tsunami does take about three seconds to form and fall onto the stage, meaning it’s kind of hard to land, but if it does manage to hit an opponent, they will suffer 35% and high upwards knockback, basically guaranteeing a KO if it connects.

PLAYSTYLE

The mistress of the weather is all about damage. Building up damage is Storm’s strongest skill, and her moveset reflects this; almost every attack she has is slow, has great range, and causes insane damage, with secondary effects and debuffs that only raise her output. This means that Storm, obviously, shines at a distance, but how does one go about keeping that distance? The answer is simple: by relying on Storm’s mechanic and allowing damage to accumulate on her, the chaos slowly intensifies over the course of the battle. In Free-for-All matches, Storm especially comes into her own, since it’s incredibly difficult for an opponent to focus on both the assault coming from Storm and the very atmosphere around them.

This special mechanic is simultaneously the most useful and most difficult thing about mastering Storm; it requires no input on the part of the player, sure, but that doesn’t mean it’s smooth sailing from the moment you start a match. In fact, it’s quite the opposite; it’s more difficult than one might thing to chart a course through waters as capricious as a battle field containing Storm. Not only do you have to focus on avoiding your opponents, but you also have to deal with the weather effects: decreasing your movement speed and traction, even simple burst damage in the form of the random lightning bolts (which are as unforgiving as you would think they are). Even some of Storm’s most useful debuffs (like her U-Tilt and N-Air) affect the environment around her, giving the player a difficult dilemma as they weigh the risks and rewards of immediately setting their opponent back and subsequently dealing with their own consequences. After all, Storm knows better than anyone not to upset the balance of nature too many times; sooner or later it will turn against you.

However, that means it’s up to you to remain on your toes as you control Storm throughout any brawl. It’s not incredibly hard for her to avoid her opponents—her above-average recovery allows her to recover from most any distance, and creating a cloud offers a useful stepping stone when you need to bridge that extra-long gap between you and the stage. One possibility: try creating a cloud and then using your F-Throw. Direct your Jetstream upwards, and you can send your cloud soaring to heights only the most daring aerial fighters would dream of reaching. Obviously, it’s not too much of a problem for Storm to reach this skyward safe haven with her outstanding second jump, but remember that also means bringing your cloud down will be that much harder if you need it for another purpose later on.

But why rely solely on your cloud? After all, each of Storm’s attacks have significant punch behind them. Even her standard combo has respectable range for a basic attack—and the stun on it grants you a brief window with which to make your retreat. Throughout your battles on Storm, you should focus on keeping the enemy at bay, using electrical assaults to keep their damage percentages high and then throwing them back with powerful Gusts when they get too close for comfort. Even if they manage to weather your defenses (pun intended), Storm’s throw game is practically made for spacing (with the exception of her D-Throw, though that’s more intended for a finisher anyway). Toss them behind you and possibly slow them down, or launch them into the air with your deadly pirouette of an U-Throw. But even if you can’t get the opponent to play right into your hands, with Storm as your fighter, the sky is quite literally the limit—or maybe it's even higher.

Wild TANOOKIE fled!
 

darth meanie

Smash Journeyman
Joined
Jun 6, 2008
Messages
452
It's Comment Time!

Sure, I've got an essay due this Thursday I -should- be working on, but this is obviously more important, right? And with a new contest comes a brand new comment organization too! Now with more orange!

Spider-Man

Spider-Man is a character that I've considered before for making a set, and when I considered it I definitely struggled to figure out how to make web-slinging simple and straightforward between all the different ways he can do it. Imagine my surprise when you manage to make it simple, easy, and
still have plenty of room for creativity as a player.

The web mechanics are simple, intuitive, and remind me of my work with chain length manipulation with Rider in Make Your Move 7. This set manages to usurp my best attempts at making swinging those lines around with moves that are useful both as basic attacks and as ways to swing web around.

I also liked how you approached his mobility with the combination of attaching webs to any surface, although it feels a bit awkward to have wall-crawling as a Special instead of a mechanic like wall clinging and wall jumping.

And while I do like a lot of the standard moves, I do take issue with the number of moves that shoot web when you've already set up enough moves to spread web. Moves like the Forward Tilt, Forward Smash, and Down Smash do a great job of manipulating it without spraying more web.

There are some other, small issues with the moveset; I'm not a fan of moves like the Forward Aerial that deal more damage with higher air speed, as it begs the question of why every move doesn't do that. Being able to get in quick with a strong aerial attack from throwing yourself from a web-line should be good enough.

And while there is cool stuff in the grab-game that you have set-up, you ultimately failed to give him any actual throws, or anyway to grab an opponent without catching them in a web-line. I'd have loved to see moves where he would say reel in opponents for another throw, or even just for him to be able to grab at all without a web-line out.

That said, polish and other small issues aside this is a quality, stand-out moveset with plenty of ways to play him and a simple, effective mechanic that puts it on even footing with any other moveset in this contest. A wonderful feather in your cap and a suitable launching entry for MYMX.

Ashley

Others have certainly said it, but it bears repeating; white is a perfectly good color for normal text, having especially vibrant, dark, or deep hues for your body text, and making it monochromatic simply makes it a headache to read.

One concern I would note is that the mechanic with Red is ultimately an entirely negative mechanic; by making Ashley utterly reliant on him for a great deal of her moves, she doesn't really get any advantage to compensate for the risk of losing him.

There are certainly a few really cool ideas here; the Heavy Hex is an idea that definitely deserves exploration. I appreciate the concept of her as a stage controller, and with her magic circles and heavy hex she certainly has some good base options for that control, but they don't end up fitting into a real overall plan for her as well as you could have done it. Essentially, more of the regular moves could have fit into a general idea of how she controls the stage.

You have the makings of a good set here, and you've definitely got a flair for writing style and story-telling that I look forward to seeing you continue to make more prominent in your future movesets.

Sir Weston

So, our great leader has his first set of the contest! The mechanic definitely superficially seems similar to King Boo, but they certainly couldn't be more different. The use of the ice block as both a way to give him room to set up without giving him immunity to attacks is a nice way to approach it.

Some of the ways you used moves didn't really work for me though. There already exists a mechanic for icy floors in Brawl, we didn't need a redundant one. And the tongue-ice combination feels wholly out of place, like a bad joke in the middle of a serious set. And while I certainly like the use of ice picks in his recovery, using them to trap opponent between mini-bumpers just doesn't jive with how I imagine pickaxes actually working.

Sir Weston certainly has some nice ways of shaping opponent options to control their movement and play his defensive game, but I just wasn't overall impressed. You certainly have a lot to live up to, as the reigning victor of MYM9 and the OP of MYMX. I'm glad to see that your commenting rate so far this contest is so high though.

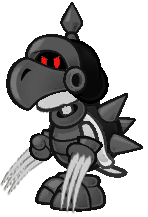
Dry Bowser

A Bowser based set? We have our MYMX winner people!

...Eyeh, I'm afraid to say that that's probably not going to happen with this set. I appreciate the simple moves and how they work together in this set, but Dry Bowser doesn't come together to do anything impressive. A character who sticks to his opponent and is hard to shake? We've had sets like that before, and Dry Bowser doesn't feel like a character really built for that archetype very well, and the playstyle ends up seeming hollow.

The grab also seems very much like a cop-out, and you admit it in the moveset yourself. It doesn't actually hit opponents through shields, and, while a cool move idea, there is nothing remotely grab-like about it except for being one of the few moves that he has that really effectively prevent opponents from running. Without a real grab though, his offensive options are stunted.

You have some nice moves, and use fire in a number of interesting ways, but ultimately, the set doesn't really hold up as well as other offerings you've made.

Enrico Pucci

Abusing and manipulating the opponent's moveset to your own advantage is a complex but interesting topic, one that I've approached twice, in VideoMan.EXE in MYM7 and less successfully in TATARI in MYM8.

I certainly like the basic concept of using command discs to force opponent actions, but once you get into stealing their moves, it becomes a little more complex. Do moves he has stolen last for the rest of the stock? How does he use his old move if he needs to?

I love the use of forcing commands like falling, exploding, or otherwise manipulating their behavior in ways that are much more fitting to character and straightforward than I did in VideoMan.EXE, but in other places he's overly complex. One of the problems that I ran into was finding that having to fill up so many moves for a move stealer and manipulator means that you can end up having so many ways to change action and behavior that it becomes more complex than you intended; Whitesnake as a mechanic seems to do little more than just make him harder to execute.

Still though, you have some cool ideas, and a fresh take spin on movesets from before your time that makes me rethink how I approached it back in the day, and that makes this set more than worth it.

Gon Freeces

Let me start with my favorite part of this moveset; the grab. The fishing rod is a unique way to add a lot more character to his throws, build up damage, and makes the grab game a lot more unique than the standard one-way mechanic of one player making all the decisions while the other just button mashes furiously.

The mechanic you've made is a simple but straightforward boosting mechanic, one that we tend to call 'everything gets better' mechanics. What moves gain advantages from building up Nen points, which don't, and what the advantages are seems a bit haphazard, which is one of the weaknesses of the set. You've definitely shown that you understand the nature of his mechanic makes him naturally stallish in his approach to playstyle, which is nice to see, and with his taunts, he has some interesting ways of using his mechanic. The animations you add in at the end also gave me a lot of insight into exactly what these modes mean for him as a character, and who he is. I can't help but ask, what manga is he from?

I don't like how his Specials eat up Nen points that he builds up. These moves are generally the core, most important moves in a playstyle, and by making them such huge eaters in his Nen point budget you've made them harder to use and less intuitive.

For future movesets, I'd recommend thinking more about how you want the tilts and aerials to fit into the playstyle; there's a stark contrast between the level of detail in the specials, smashes, and grab-game and his 'normal moves'. All should be important in contributing to his playstyle. Oh, and try not to make your next moveset almost entirely green.


... And finally 'oh crap, Tanookie posted a moveset while I was working on this' :O


Will read, but I'm getting to crunch time on my essay. Wanted to drop these off for everyone, and get to work on my OWN MyMini at some point. Happy movesetting!
 
D

Deleted member

Guest
Wow, what a blast from the past! You did post in Make Your Moves after 5, but this is your first moveset in some years. I could tell from early on that you were conflicted over what functions were now considered old-hat, especially with that wondering about if “special mechanics are still in.” Considering how long you've been out of the move-setting business, Storm's not bad – it definitely shows its age, though, what with the sparse use of bold text, the relevance given to items and team fights [in the specials no less], with lots of other little things from around 5-6 that carried over for obvious reasons. For that time, I would say this is a rather brilliant move-set, linking together the tentative weather, which is also reliant on Storm's damage percentage – while an obvious route to take, it's pulled off pretty well here, and though there is always a degree of randomness to the weather's effects, it's largely for characterisation sake. Love that.

In terms of the writing style, it is probably what makes this set a nostalgic read for people who have read your sets circa Make Your Move 5 and before that. It doesn't lose your charm of sweeping vocabulary alongside a quite flowing prose that stays somewhat casual at the same time. The bold text is, as inferred, not necessary, and you seem to have posted the aerials twice, but that's easily fixed, just kind of a funny nitpick. What's really lacking here compared to more recent submissions is that the flow of the moves is kind of basic, not very laid out, mostly up to the reader to piece together what's there. Many moves have a middling link to the weather, such as being effected by the wind and current rain status, which is interesting to consider actually playing, but too reliant on the random number generator to be competitive. This is balance-related so mostly a nitpick, but the times are usually far too long, such as the one input that stops all weather effects for fifteen seconds – it's more that time isn't really taken into account, though. Nevertheless, despite the playstyle being quite shallow, it's a fun project to read, mostly because it's almost a time capsule of that age of Make Your Move. Do I even need to say, I want to see more of what you can do? I get the impression this could be a one-time thing, but I hope I'm wrong; you have plenty still to offer to the contest, and as always, have loads of potential to get better.
 

koolerkid

Smash Rookie
Joined
Apr 18, 2011
Messages
4
I can't help but ask, what manga is he from?
Gon's from an awesome manga called Hunter X Hunter, which despite the fact that the creator goes on month-long hiatuses frequently, is an absolute must-read for Shonen fans. Think Naruto on crack, but replace the lame ninjas with awesome bounty hunters.


Thanks for the reviews and advice, everyone! I hope you like my next set as much: A little-known figure from an awesome flash animation called Super Mario Bros Z. His name...


Is Basilisx.​
 

Junahu

Smash Ace
Joined
Nov 15, 2005
Messages
899
Location
Shropshire Slasher
Snorlax's typical day consists of nothing more than eating and sleeping.

Spiderman:
I'm not typically one to appreciate the "only X move does Y effect" style of moveset flow, so I get naturally aprehensive when Spiderman is swinging the foe around like he's a member of the Wrecking Crew, or how D-Smash just becomes an ENTIRELY different move if he happens to have a webline.
I'm pretty sure that even if every A attack was a generic punch, Spiderman's Specials would ensure plenty of depth in the playstyle. And there still is a lot of depth in the enormously fun playstyle you've laid out for Spiderman. It's just that a fair few of the attacks, such as Up-tilt, are functionally unintuitive, being unique in ways that have nothing to do with the input itself.

My other complaint, is that Spiderman's weblines can't tether themselves to the top blastzone (or some arbitrary midair point above himself), which makes it exceptionally difficult to perform a classic spidey webswing. ¬_¬ Don't tell me it's physically impossible, this is Brawl dammit. Even MvC has Spidey webswing on absolutely nothing.


Characterwise, you've got Spiderman down perfectly. He bounces around his foe, coating everything in his pubescent goo and humiliating the bad guys with all manner of tricks. I would have liked to see a little more of Parker's insecurities poking through in the set, but that's just me being wierd.

As I mentioned before, Spidey's specials afford his playstyle a great degree of creativity, allowing him to tackle the foe in all manner or different ways. This is absolutely what the Spiderman character is about. So, don't think for a second that I didn't enjoy the set, because... yeah... I did.


Ashley:
Right off the bat, the first person narrative obscures the random "anything can happen" nature of the Warioware games. In Brawl, Wario himself represented the game very well by having twitchy animations, and some ludicrously random motions as attacks. And while there are a fair few similarly eccentric points in Ashley (mostly whenever Red comes into play), it isn't quite enough to come across as schizophrenic.
Personally, I find the crux to Ashely, is in the fact she's too young to really understand the consequences of.. for example, turning her teacher into a spoon. And it's that, which the first person narrative has a hard time bringing across.

Her bizarre quest to brew the greatest potion could perhaps be better represented in this set, if it was a corollary to Wario's Down-B fart. The basic idea being, that she secretly brews a potion as time passes, and throws it to the floor with Down-B. The effect of the potion would be related to how long the potion was brewed, with stronger potions taking more time. Wait too long however, and the potion becomes weak again.

I won't complain about the way the moveset was formatted, as it seems very suitable for a moveset that a young child wrote herself. And the moveset itself, beyond all the baseless complaints I levelled just moments ago, is actually pretty damn clever. I absolutely adore how you implemented Red, he comes across as being vital to Ashley, despite being constantly used as a meat shield. That speaks volumes about their quirky, abusive relationship.

Also, you included an SSE role and Codec, which makes me very happy :bee::bee::bee:
 

Nicholas1024

Smash Lord
Joined
Mar 14, 2009
Messages
1,075
Another LoL set on a character I've never heard of:
Well, there's good and bad here. First off, the idea of taking and using your opponent's moves for your advantage is brilliant, and I think it's pulled off fairly well here. Additionally, the positioning game you've got going on between Whatchamacalit and his snake is pretty nice. However, the other half of the set is fairly lackluster, as the tilts and aerials are generic, and though the grab is neat, no throws compounds the problem. Yes, I know this encourages you to take your opponent's moveset for yourself, but that feels like a cop-out, and besides, what if the opponent's good inputs coincide with yours? (Particularly if their best moves are their specials.) Still, the core idea of the moveset is sound, and I'd like to see more from you this contest.

Gon:
Alright, let's start off with the good stuff. It's rather unusual to see a newbie set with any mechanic at all, let alone one which appears as consistently through the set as yours does. Additionally, you provide several ways to manipulate that mechanic, and its effects are central to the playstyle, which you're completely aware of. The bad news is that the mechanic itself isn't too interesting, and without it, the set (except the grab game, which is unique and a great idea), is fairly generic. Still, although the mechanic itself was lackluster, it was integrated extremely well into the set, and if you combine that with a better mechanic and some more interesting individual inputs, you could easily end up with a breakout set.

Oh yeah, and Basilix is from Super MARIO Bros Z, not Super Smash Bros Z! :glare:
 

Hyper_Ridley

Smash Champion
Joined
Dec 21, 2007
Messages
2,299
Location
Hippo Island
Dry Bowser

You know you're doing something right when you get HR to come out of his lair to comment!

Dry Bowser's a character I've wanted to see a set for for a long time, and I really like what you did with him here. You've got the classic bone-toss move (why doesn't Bowser have a hammer toss in Smash Bros?) as well as nice use of his fire-breath which heavily differenciates him from his living counterpart while still letting us know it's a set for a Bowser incarnation. The ability to collapse and reform his body at will feels right at home on a super dry-bones, and I love how you made them viable both as individual moves and when used in conjunction with each other.

Playstyle-wise, you managed to make a character with a ton of ranged projectile-like moves into a close-range offensive powerhouse, so kudos to you. This is primarily achieved through that nifty dash attack, but more importantly you emphasized it through his body reforming techniques; while I feel Dry Bowser should generally be more of a defensive character seeing as the only time we fight him he's DEFENDING a death-switch, the fact that you made such stand-out abilities play a key role in his gameplay allows the set to still feel like you're playing as a powerful undead tank. He's already dead, he doesn't need to worry about guarding his life!

However, I have to say, I HATE that "grab". Random projectile on a grab input didn't work with Kaptain K.Rool, and it doesn't work here, especially when we're playing a character who's living version has had 2 different special grabs in his Smash Career. Give him more legit grab options plz.

btw, the set I'm working on has a similar concept with a projectile which goes slower when you charge it. What are the odds this becomes the cliche of MYMX?
 

Chaos Swordsman

Smash Apprentice
Joined
Sep 15, 2008
Messages
174
Location
In your closet.


Ashley:
Right off the bat, the first person narrative obscures the random "anything can happen" nature of the Warioware games. In Brawl, Wario himself represented the game very well by having twitchy animations, and some ludicrously random motions as attacks. And while there are a fair few similarly eccentric points in Ashley (mostly whenever Red comes into play), it isn't quite enough to come across as schizophrenic.
Personally, I find the crux to Ashely, is in the fact she's too young to really understand the consequences of.. for example, turning her teacher into a spoon. And it's that, which the first person narrative has a hard time bringing across.

Her bizarre quest to brew the greatest potion could perhaps be better represented in this set, if it was a corollary to Wario's Down-B fart. The basic idea being, that she secretly brews a potion as time passes, and throws it to the floor with Down-B. The effect of the potion would be related to how long the potion was brewed, with stronger potions taking more time. Wait too long however, and the potion becomes weak again.

I won't complain about the way the moveset was formatted, as it seems very suitable for a moveset that a young child wrote herself. And the moveset itself, beyond all the baseless complaints I levelled just moments ago, is actually pretty damn clever. I absolutely adore how you implemented Red, he comes across as being vital to Ashley, despite being constantly used as a meat shield. That speaks volumes about their quirky, abusive relationship.

Also, you included an SSE role and Codec, which makes me very happy :bee::bee::bee:
[/COLOR][/FONT]


Yay, another comment.

As for that last paragraph, that's pretty much what I was going for. The part about Red, I mean. Though we can say I was going for that first part, too, right?

Anyway, when I first decided on making a moveset for Ashley, I pretty much instantly thought she would be more of a support-based character than anything else, given her "occupation" and personality.

Oh, and this'll make you happier. My next two sets will also have a SSE and Codec sections.(Not including a third who will be a remake of a character already in Brawl.)

And speaking of those sets, I came to ask if any of the experts would willing to look at them before I actually posted them. They're both edited and ready to be shown, but I was hoping for a second opinion to add any improvements if necessary. And I assure you all, they're much better than Ashley's set.

Please don't tell her I said that...
 
D

Deleted member

Guest
Come to the chat if you want to find someone to preview your set - people are there most times of the day [especially if you're in an American time zone] and you're sure to be able to find help there.
 
D

Deleted member

Guest
They should be able to make you a member. Maybe try refreshing the page if it doesn't work. If it doesn't then, well, you're out of luck, I'm afraid.
 

darth meanie

Smash Journeyman
Joined
Jun 6, 2008
Messages
452
Storm

Well, it's very good to see you back with a set Tanookie. Storm is very nostalgic to read, and it's clear how your two-year hiatus has made your moveset different than the rest. It's like a time capsule back from Make Your Move 6, with the expectations and paradigms of that age with more polish. Phrases like 'are special mechanics still in' and the like are signs of just how different a setting this set was made in.

Storm definitely has the kind of copious individual move creativity and high detail that we don't see often any more, and that's a good and a bad thing at the same time. I like how you make references to team matches and items in the set, something that rarely ever gets a passing glance in most movesets these days. The mechanic and the things it does are interesting as well, I like how the thunderbolts work almost like an auto-retaliatory counter-attack. Some of the moves I feel don't work quite as well though; the aerials are certainly interesting, but they suffer from being excessively creative for their own sake rather than being really usable close-range options. As a character as naturally air-oriented as Storm, she should have most of her attacking and approaching options here. You never capitalized on her unique jumping and aerial movement in her aerials either.

Also, small funny thing I noticed was how laggy most of her inputs are, and how slow we thought moves really were back two years ago. The back aerial has a huge window for the second input that actually deals the damage, even a tenth of a second would be good enough for anyone remotely familiar with the character to always land it. That move in particular is another example of a move that has a twist for its own sake rather than really fitting into a general plan.

Which is where Storm doesn't really hold up; there certainly is a playstyle there, and a lot of ideas and interactions scattered about, but they never really fold together into a consistent battle plan, and end up having a widely spread number of ideas rather than smooth connections. The advantages concurred from Storm's rain range from fitting with a few moves to being mostly irrelevant or even just annoying. It also seems a bit strange that you stress how she's vulnerable to her own tempest; while indeed it can be triggered by emotions, I've always seen her as a much stronger character than to that easily lose control. A tranquil fury if you will.

Now, this comment may seem a bit patronizing, and I don't mean to at all. In fact, I suspect that in the end this moveset will be more memorable than some other early sets because of the approach you've taken with it; I feel that we've lost that big wow factor at some point in these past few contests, and Storm definitely knows how to present itself as a big set. It's good to see you making moves again.
 

darth meanie

Smash Journeyman
Joined
Jun 6, 2008
Messages
452
Double Post For Content

Kasumi Goto


Kasumi Goto is a master thief from Mass Effect 2, and one of the two DLC recruitable characters from the game. She's the best thief in the galaxy, not the most famous, and is capable of breaking into almost any vault in the galaxy, no matter how secure, with a little technical know-how and cleverness.

When summoned as an assist trophy, Kasumi will burst out of the glass, and then immediately activate her tactical cloak ability, disappearing into a vague shimmer. She then dashes while invisible over to the nearest enemy, and uses her omni-tool to deliver her signature Shadow Strike, punching them with an orange gauntlet to deliver 18% damage. If she strikes an opponent, they are dazed as if their shield was broken, incapacitated by the strike.

If Kasumi fails to hit an opponent, she grimaces and pulls out a flashbang grenade. She somersaults backwards and tosses it out, dealing no damage but instantly breaking shields and a full second of hitstun to other opponents. This takes about half a second and has the burst area the size of a battlefield platform.
 

UserShadow7989

Smash Journeyman
Joined
Aug 13, 2007
Messages
316
Ah, MYM 10 is here! Sorry for the late post and for ducking out last contest, I was just loaded with other things I wanted/needed to do first. Anyways, here's my new link up space, so I can find all my sets easily enough:

UserShadow7989's MYM10 Link-up Space

Completed Sets


Planned Sets

(No Button)
Mimic, the popular RPG Monster
Various RPGs

Yes, that's correct. Not a character or even specific monster from a specific game, but a monster concept found in many places! The Mimic isn't much of a fighter at first glance; weak attacks, poor mobility, and little staying power. However, the mimic has plenty of tricks up its non-existent sleeves. Baiting in opponents with items, sticking to them like glue, and even transforming into a perfect (in appearance, at least) copy of them! Compensate for weak moves by disabling or gimping opponents, or simply drop all pretenses and beat them at their own game by transforming into their exact mirror!

Previous Contests

Make Your Move 8 Link Up Space

Make Your Move 7 Link Up Space

Make Your Move 6 Link Up Space

Make Your Move 5 Link Up Space
 

Rychu

Thane of Smashville
Joined
Jul 5, 2010
Messages
817
3DS FC
1908-0105-4965
Sir Weston:star::star::star::star::star::star::star:
Our great MYMX leader casts upon us a moveset that, i'm assuming now, is Kupa's obligatory Mario Series ghost set for this contest. Let me start by saying that I really enjoyed the concept of wrapping yourself up inside a great ball of ice and just messing with your foe, as well as the fact that messing with said foe within that Ice cost's it's ability to effectivly guard you from the opponent. If all this set had was that, I'd honestly be happy with a good trap character.
This is where my real complaint with this set begins, although it's a minor complaint and I really do enjoy this set a lot, is that damn Ice Pick. It's not that it's a bad move or anything, in fact on another character it would work extremely well i'm sure, but in Weston's case it sticks out like a sore thumb. It even fits in with his playstyle, but I can't help feeling that there was some brilliant Ice-based recovery/trap that could have been that was left out. Another complaint of mine is how surprisingly competent in the air. I don't know why, but this just feels wrongt to me for some reason, and it seems as though such a land-based trap character would be as good all around as he.
Whoa, that was a lot of nitpicking. I'll sum this up by saying that despite that long complaint, I really liked this moveset.

Dry Bowser:star::star::star::star::star:
Ohey![insert un-funny Bower-related joke here]
This set...I don't really know how to feel about this set. I don't really love it, or hate it with a buring passion. This was more of a "oh that's nice" moment for me while I was reading it. While I don't particularly love the set as a whole, I do love the ideas behind the moves themselves. Like everyone else who posted a comment on this set, I absolutely adore that dashing attack, as well as that slowing projectile and the disassemble recovery. What I don't like...I don't like the grab, in all honesty. I don't like the playstyle, really, no matter how in-character it may be to have him as a reckless killing machine. Don't get me wrong, I'm gkad I took the time to read this set, it gives me some ideas of my own actually (especially that skid), but on a whole, it's kind of jumbled, feeling like a lot of really good solid set ideas that where thrown together a bit haphazardly. Like i said, I don't hate the set, far from it, but it's hardly something that will be looked on as one of you're all-time greats.
 

gcubedude

Smash Apprentice
Joined
Aug 15, 2009
Messages
83
Alright! MYMX is up! Awesomeness!

Anyway, thought I'd start off this contest with an MYmini. This is the first character who came into my head when I thought of thief.

T.A.C

When Tac appears from the AT, he immediately runs toward the closest opponent. When he gets within a horizontal Battlefield Platform of them, he'll shoot his hand, detached from his body, toward the foe. It travels a platform length, but only travels horizontally: If he needs to, he'll jump and shoot his hand in midair. His hand boomerangs back to him if it misses, still acting as a hitbox on the way back. After doing this once, he'll move to the next opponent, repeating the process as many times as there are living participants in the round. So if it's a FFA, he'll attack opponent 3 or 4 times. In a 1v1, he'll attack the foe twice, with a small break in between as he runs around randomly. After attacking so many times, he runs toward the closest edge and jumps off before using rocket jets to blast off the top blast zone (He'll travel through floors and ceilings to get there). If there's no edge, he'll simply run off stage.

So what happens if he actually hits someone with his hand? Why, he steals something, of course! If his hand connects with an opponent, he steals their most-used Special (if there's a tie, he'll steal one at random.) Once stolen, the opponent becomes unable to use that Special, or anything that uses that specific move. It remains stolen as long as Tac is still on screen, as well as 30 seconds after he leaves.

So how do you stop Tac? Well you can't attack him, as whenever an attack (other than the summoner's) comes close to Tac, he'll automatically use his "guard" from Kirby Super Stars, where he blends in with the background, only his eyes and nose visible. This has a use, as Tac will automatically retreat if 30 seconds pass and he hasn't attacked the full number of times yet. So continuous attacks will make him eventually leave, but that's the opportunity for the summoner to attack the distracted foe.
 

Junahu

Smash Ace
Joined
Nov 15, 2005
Messages
899
Location
Shropshire Slasher
Weston
You've already gotten a mixed reception on this guy, and I'm afraid my opinion isn't any kinder. Beyond the complaints DM set out (the 'my ice is special', and the fact icepicks act like bumpers of all things), you kind of fail to specify whether Weston himself can slide on ice, which is a pretty important detail, even if Weston is not supposed to ever move, ever.

Comparisons to Bowser Jr were going to happen no matter what kind of set you produced, but that doesn't mean you were supposed to play into those expectations so completely. It's astonishing how you managed to post a stage-controlling mario antagonist on day-1 with a straight face.


Still, at least the ice mechanics, are somewhat more intuitive than Bowser Jr's goop, and you did work a better playstyle into taking advantage of the foe's traction. It's a lot less confusing than the idea that you can get rid of goop by standing gormlessly in the middle of it.

And I did enjoy the ability to encase yourself in a block of ice, regardless of whether anyone else did or not. It would have been nice to be able to slide yourself across the ice when you're encased, but that's just me.
 

Chaos Swordsman

Smash Apprentice
Joined
Sep 15, 2008
Messages
174
Location
In your closet.
I see
Henshin a go-go, baby! Viewtiful Joe has joined the Brawl!


Joe was once...well, an Average Joe. He was just a casual, regular guy who loved movies, and went to them often with his girlfriend, Silvia. But one day, a giant robot actually came out of the movie screen and kidnapped Silvia, and Joe found himself in the realm of Movieland soonafter. After meeting with his favorite superhero, Captain Blue, and obtaining the V-Watch that gives him his incredible VFX powers, Joe set out to rescue his girlfriend from the evil Jadow organization, and in the process, becoming the hero of Movieland, Viewtiful Joe!

Gimmick:VFX Meter.

At the bottom of the screen, just below Joe's damage meter, will be a small guage with a pink bar. Three much smaller pockets of the gauge are in front of the main bar, locked at the beginning of the match. By unlocking these small guages, you'll be able to use more VFX power without waiting as often for it to refill itself. How do you unlock these extra guages, you ask? Simple. KILL STUFF! For each K.O Joe gets, you'll unlock another bar of VFX power. These bars stay for the rest of the match, even if Joe is K.O'd. If you completely run out of VFX power, Joe will go into his very weak civilian form for a little bit. Once the main gauge refills itself completely, though, Joe will return to his hero mode.

However, the smaller gauges can only be refilled by dealing damage to the opponent. Something interesting to note is that teching (or in Joe's case, pulling a Ukemi) actually refills the bar a little bit. At it's normal capacity, the gauge will drain completely in 7 seconds with continuous use, with an extra second added for each small gauge unlocked. When it's empty, it will take 6 seconds to refill to normal capacity. This is to keep it from being abused too much. So, now that you know all that, let's get to the actual moveset, shall we?

Viewtiful Stats

Before reading this part, know that the first numbers are referring to Joe's civilian form, while the latter numbers stand for his hero form.

Size:(5) 5/10. Joe's not fat, but he's not skinny, either. In civilian form, he has the same build as Mario. In hero form, his size moreso resembles Luigi. Don't ask why, that's just how it is.

Walk Speed:(4) 5/10. As I've said, Joe's a casual guy, so his walking speed reflects his attitude.

Run Speed:(2) 4.5/10. Oddly, Joe's not really that fast...unless he's using one of his special powers.

Aerial Movement:(1) 8/10. Joe has pathetic movement in the air in his normal form, but he becomes a force to be reckoned with when he's in costume.

Traction:(10) 10/10. That's right. Joe has perfect traction in either form to make up for his lackluster speed.

Jump:(5) 8/10. Joe's a pretty good jumper, but as you can guess, he has a severe problem in his civilian form, as he has no second jump. However, when he IS capable of a second jump, it's pretty dang good.

Viewtiful Specials

As stated before, Joe has what's called VFX, or Viewtiful Effects power, which resembles the special effects seen in movies. Let's see what he can do with it.

Neutral B:Slow-Mo.

Pressing B makes Joe clench his fist, causing everything, and I mean EVERYTHING, to slow to 1/4th of it's original speed. This includes the characters, the assist trophies, moving items and thrown items, and even the stage itself if it's a moving one. Of course, Joe is also slowed down, but unlike everyone else, he can take advantage of it. All of his normal attacks are doubled in power, gain a fire attribute for some reason, and his jab is changed, but we'll get into that later. Plus, his shield (and everyone else's, for that matter) shrinks at a much slower rate. Another odd side effect of Slow-mo is that all explosions are doubled in both radius and power. To return everything to it's normal speed, just press B again.

Side B:Mach Speed.

This time, instead of slowing everything down, Joe himself is sped up to ridiculous levels. His running speed becomes equal to that of the race cars on Big Blue, beyond even Sonic without a bunny hood. Something to note is that Joe's traction isn't lessened in the slightest, so you never have to worry about running off a ledge. Just like his Slow-Mo power, his jab is changed, but again, we'll into that later. Otherwise, all of his attacks become incredibly fast, even his smash attacks. When Joe is using this power, an animation shows across the screen that looks like the wind is blowing by very fast, which actually isn't just aesthetic, as it will blow all characters and items on screen at the same strength as Whispy Woods in whichever direction Joe is facing. There are a couple, rather severe disadvantages to using Mach Speed, however. For one thing, his fall speed becomes equal to Yoshi's ground pound, so be extremely careful not use this offstage. Also, his spot-dodge becomes so fast it would be useless to use it, and his shield will also shrink faster. Press the same input to return to normal speed. Or get hit. I recommend the former option.

Down B:Zoom In.

As the name implies, pressing the Down B input will actually cause the in game camera to zoom in on Joe and the immediate area around him at the same degree as when pressing start. During this time, Joe will flex his muscles and face the screen, grinning; and anyone caught in the zoom in when the input is pressed will be dealt very high hit-stun from witnessing his pure awesomeness, but nothing else. This will leave them vulnerable to one of Joe's Zoom In moves, but we'll into those moves later. Just like his other abilities, Joe will remain in this mode until Down B is pressed again. You can also use this move to screw with people, so there's that.

Up B:Six Machine.

Joe quickly gets in his fighter jet, the Six Machine, which actually has quite a few uses. First off, the Six Machine allows Joe to fly around for as long as he wants. Overpowered? Not in the slightest. The Six Machine actually has 50% HP, and once it's destroyed, it can't be used again for the rest of the match, so I would advise against abusing it...too much. When using the Six Machine, you have two forms of attack which can be altered by using your other abilities. The first is a small, pink laser closely resembling Wolf's, shot by pressing the B button. Only 4 of these shots can be on the screen at one time, and they travel 3/4th the length of FD.

The second attack is used by pressing A. Joe can drop two missiles at a time, which explode upon hitting...anything, really. These missiles have the same size and power as one of Snake's remote control missiles, just more cartoonish. Joe can't actually turn around with this thing, so try not to let anyone get behind you. Press Up B again to go back to normal.

Facts about Specials:All of Joe's powers can actually be combined in different ways, but this will cause the VFX gauge to go down faster. Using any two powers together will drain it twice as fast, and using all three will drain it at triple speed. Only use this when victory is in your grasp, or to escape from the jaws of defeat.

Slow-Mo+Mach Speed: the stage will still slow down, but Joe will be at normal speed, meaning he won't get any type of boosts to his attacks.

Slow-Mo+Zoom In:Obviously, Joe's zoom in attacks will become both slower and stronger.

Slow-Mo+Six Machine=Joe's lasers will grow in size the farther they go, dealing up to 8% damage. As for his missiles, their attack power and explosion radius will be doubled.

Mach Speed+Zoom In=Again, it's obvious. Joe's zoom in attacks will become ridiculously fast.

Mach Speed+Six Machine=Along with super speed, you'll be able to fire up to six lasers instead of the usual four. And your missiles will fall faster, plus their trajectory will be altered by Mach Speed's wind.

Zoom In+Six Machine=N/A.

Slow-Mo+Mach Speed+Zoom In=Use your noggin. Everything but Joe will move slowly, allowing him to hit opponents with his zoom in moves at normal speed, but, of course, this will drain the guage at triple speed.

Smashes


Joe may not be the hardest hitter in the game, but he's still got some muscle. Remember, all these attacks become more powerful in Slow-Mo, and faster with Mach Speed.

Forward Smash:Backhand Punch.


Joe holds an arm across his chest, fist clenched, then he spins and throws his fist forward, which deals 14% to 21% damage, with almost completely horizontal knockback.

Up Smash:V-Uppercut.

Joe crouches down slightly, then quickly snaps up straight and does an uppercut that has purely upward knockback, doing 13% to 20% damage.

Down Smash:Sliding Kick.

Name gives it away. Joe crouches down, then slides forward with a leg outstretched, going the distance of a SBB and dealing 12% to 18% damage with diagonal knockback.

Normal Attacks


Joe had quite a few moves in his own games, and he brought them all to Smash Bros.

Jab:Viewtiful Fury.


Remember how I said (or rather, typed) that Joe's jab changes with his different specials? Well, here's how it is. Normally, Joe's jab is a quick and, to be honest, unoriginal, three hit combo. He punches once with each fist, then lashes out with a kick, doing 3% per punch and an extra 4% with the kick. However, when in his Mach Speed mode, his jab becomes a ridiculously fast flurry of punches and kicks that deal 2% per hit; and it can rack up fast. Do NOT get caught in this. It hurts. A lot. As for Slow-Mo, his jab remains the same, but the hits gain more damage, and it gains a unique ability. If Joe punches a physical projectile, he can actually send it flying back from where it came from, but this doesn't work for energy attacks like Pit's arrows and Samus' charged shots. While using Zoom In, Joe will simply perform a triple punch with one fist that does 2% damage each.

In his civilian form, Joe can only use the regular jab. In fact, using his jab is one of the only attacking option Joe has in civilian form, and it only does 1% per punch and 2% for the kick. He can only even punch once in midair, which does 2%. Keep an eye on your VFX meter at all times.

Dash Attack:V-Kick.

Joe dashes forward and does a small flying kick that does 9% damage and decent knockback. This has very slight ending lag.

F-Tilt:Voomerang.

Joe grabs the emblem on his forehead and tosses it forward like a boomerang. It reaches the distance of a stage builder block before returning to it's owner. It's kind of laggy, so don't try to spam it. What's that? Oh, right, the damage. It does 8%.

U-Tilt:Shocking Pink.

Joe creates a white bomb with a fancy pink V on it, then tosses it up. The bomb explodes right above his head, doing 10% damage.

D-Tilt:Leg Sweep.

It does 6% damage and trips the opponent. 'Nuff said.

Get-up Attack:Breakdance Kick.

Joe spins once on his back, lashing out with kicks that deal 6% damage.

Ledge Attack (weak):Sucker Punch.

Joe quickly pulls himself up and throws a fast punch, doing 4% damage with poor knockback.

Ledge Attack:(Strong) Flippin' Joe.

Joe flips forward onto the ledge, kicking with both legs and dealing 8% with above-average knockback.

Aerials

Joe has a great (and stylish) air game. It's almost like he should have been born with wings.

Neutral Air:Air Joe. Whirling Kicks.

You're probably wondering why this has two names. Well, this move is affected by Zoom-In mode. The normal version of this move is a unique aerial, as it has Joe doing a very quick, weaker version of his normal jab, 2% for each punch, and 3% for the kick. This is, oddly enough, an air stall, but it has some ending lag, so be wary. With Zoom-In mode, Joe will turn in midair with his head pointing at the background, then he'll spin in midair and kick his legs, a hot pink circle of energy appearing around them. This deals 3 hits of 3% damage each.

Forward Air:V-Whirl.

Joe whirls around and kicks forward with both legs, one after the other, doing 3% with the first and 4% with the second.

Back Air:V-Slash.

Joe pulls the emblem off his head and slashes backwards like it's a claw. It's a practically lagless attack that deals 9%damage.

Up Air:Flip Kick. Dragon Uppercut.

The normal version of this move will have Joe flipping backwards, his feet trailing a red, spiky line of energy in front of him. This is your basic pop-up move that does 8%. When used with Zoom In, this actually becomes a (bad) recovery move should the Six Machine be destroyed. Joe will shoot up the distance of Falco's Firebird, spinning around with a pink, almost bullet-shaped corona around him. This deals up to 6 hits of 2% damage each. So, yeah, it's a better attack than it is a recovery move, though it can be angled to go diagonally left or right. Just so you know, this move will only boost Joe once, but it will become an air stall afterwards; at least until you hit the ground again.

Down Air:Red Hot Kick. V-Spike.

If you didn't see this move coming, you don't know Joe. Quite possibly Joe's most famous move, this will have him flying diagonally downwards in whatever direction he's facing at Fox's run speed, dealing 9% damage. Be careful using this move, because Joe will travel nearly half the distance of FD before he can do anything else. In Zoom mode, this becomes a spike...literally. Joe will be surrounded in a pink, V-Shaped cone and shoots straight down, also dealing 10% damage and spiking. Upon hitting the ground with this move, a small, circular wave will spread out from him at half the distance of a SBB, dealing 4% damage and below average knockback.

Grab Game

Joe doesn't have much experience throwing his enemies around, but he still does his best. Something you should know is that Slow-Mo doesn't double the damage of his throws, so don't bother trying. And if you grab someone during Mach Speed, grab escape difficulty is halved, so don't try that either. You could still use zoom in to stun them and then grab them, but that's it.

Grab:Viewtiful Grip.

Nothing fancy. Joe's grab is pretty much the same as most other characters.

Pummel:V-Headbutt.

Kudos to anyone that gets the (obscure) reference. Joe simply bashes his head into the opponent for 4% damage. Painful but slow. That emblem on his forehead is hard.

Forward Throw:Average Toss.

Joe holds the opponent over his head, dealing 2% damage thanks to his emblem, then throws them forward, dealing 7% more.

Back Throw:V-Flip.

Joe falls over backwards and kicks the opponent behind him with both feet, dealing 11% damage.

Down Throw:Elbow Drop.

Joe throws the opponent to the ground, then drops on them with his elbow, dealing 10% damage.

Up Throw:Big Air.

Joe tosses the opponent up with both arms, doing 9% damage.

Final Smash

Viewtiful Infinity:Joe performs a series of poses before finally finishing with his most famous pose (as seen at the top) with a cry of "Henshin a-go-go, baby!" Afterwards, the mouthpiece and glass visor of his helmet cover his face, and he becomes covered in a hot pink aura. For 20 seconds, Joe gains infinite VFX power, but that's nowhere near the end of it. When using Mach Speed, Joe will be trailed by four after-images of himself that do everything he does, adding more hits and damage to his attacks. Plus, he'll be outlined with a fiery armor that halves damage from physical attacks, but this armor only appears when Joe manages to land a flurry of punches on an opponent; and it will disappear after five seconds. In Slow-Mo, Joe's attacks will gain shield-breaking power, but remember, most opponents will still be faster than him. With Zoom-in mode, Joe's Zoom In attacks will simply last longer to do more damage. You may think this Final Smash is incredibly overpowered, but of course, it has a severe drawback. Once his Final Smash is over, Joe will be left in his civilian form. To make matters worse, his VFX meter won't start recharging for 3 seconds, so it will be nearly 10 seconds before Joe is in fighting shape again, which can be more than enough time for an opponent to get some revenge. Be VERY careful.

Extras

Joe wouldn't be as cool as he is if he didn't have ways to tick off his opponent.

Idle Pose:Knuckle Cracking. Joe interlaces his fingers and stretches his arms forward, cracking his knuckles.

Idle Pose 2:Viewty Sleep.Joe crosses his arms, head drooping for a bit, but he quickly snaps awake, ready for action.

Up Taunt:Viewtiful Dodge. Joe temporarily performs his jump dodge from his games in what's possibly the shortest taunt in the game. This can actually be used to dodge low hitting moves, that's just how cool he is.

Side Taunt:Who, me? Joe grins to himself and brings a hand to his forehead, then flicks his wrist through the air before returning to his normal stance.

Down Taunt:Henshin a go-go, baby! Joe does the exact same pose as the start of his Final Smash.

Symbol:His famous V symbol, of course!

Entrance:Joe appears on the stage in black and white before flickering into his normal colors. A reference to his movie-like powers.

Victory Pose 1:The camera will zoom in on Joe multiple times as he does different poses before finally settling down, then Joe will simply flex his muscles and grin.

Victory Pose 2:Joe, now in civilian form, is simply standing there with a grin on his face, eating a cheeseburger, his favorite food.

Victory Pose 3:Basically, just his down taunt.

Victory Theme:The beginning tune of Joe's theme, Joe the Hero.

Loss Pose:Joe will simply stand there in his civilian form and clap with a good natured grin on his face.

Kirby Hat:Obviously, Kirby will simply gain Joe's helmet. The little guy will get his own VFX gauge, but he can't upgrade it. Plus, Slow-Mo doesn't boost his attack power, but it still does everything else. Oh, and if Kirby runs out VFX, his helmet will temporarily change into Joe's cap.

Role in SSE:On their quest to reunite with Mario (or anyone, for that matter), Kirby and the princess come across Joe in his civilian form. Upon seeing the duo, Joe instantly becomes smitten with the princess, then he runs over to her and introduces himself, asking if she was willing to go on a date. The princess blushes while Kirby tilts his head, confused. Before she could give the teen an answer, the three spot the Halberd flying overhead, dropping Subspace bugs that quickly form into primids around them. Joe blinks in surprise as Kirby and the princess prepare to fight. The long haired woman tells Joe to run, but instead, Joe grins and holds up an arm, his V-Watch shining on his wrist. There's a flash that blinds the two, and once they can see again, they find Joe in his hero costume. Knowing this meant he could fight, the princess nods at him, and the trio face down the approaching creatures. Afterwards, Joe explains that he was searching for the Subspace's base of operation, as they had attacked him earlier. Almost reluctantly, the princess offers Joe the chance to travel with them, which he immediately takes.

Later, the three are walking along a dirt road near the coast when Kirby suddenly hears something from far off. Without warning, the puff ball dashes ahead, leaving his two friends behind. Casting a quick glance at the princess, Joe motions for her to stay where she is, then dashes after their pink companion with Mach Speed. The princess holds up a hand, trying tell him to wait, but then hears a noise behind her.

A few moments later, the two spot Dedede snatch up some trophies from the winners of an unseen battle. Before the penguin king can make off with them, the two make themselves known. Dedede watches in shock as Kirby cuts through the grabber of his commandeered vehicle, allowing Joe to quickly free the heroes from their trophy state. The four land on the ground as Dedede whirls around and drives toward them, only for the freed archer to shoot an arrow just before he flies past. There's a pause as Dedede continues driving down the road, then an exposive noise sounds from the vehicle, accompanied by a column of smoke, and the united heroes quickly give chase.

Snake's Codec


Snake:Otacon. Who's the short guy that looks like Captain Falcon?

Otacon:Watch out, Snake. *Joe uses Mach Speed.* That'sViewtifulJoetheheroofMovieland.Hehasthepowerto *Joe uses Slow-Mo.* cooooonnnnntttrrrrooooooolllllll tiiiiiiimmee...

Snake:IIIIIII seeeeeee whaaaaat yoooouuuu meeeeeaaaaan. *Time goes back to normal.* Ugh... Sheesh, that was weird. How am I supposed to beat something like that?

Otacon:You have an advantage against him, Snake. Whenever he slow's down time, your explosives will become more powerful.

Snake:And how exactly does that work?

Otacon:Do you really want to know, or do you want to get back to the fight?

Snake:Good point.


Playstyle Section

There's one thing you should always keep in mind when playing as Joe. WATCH. YOUR. VFX. GUAGE. I can't stress this enough. Joe can do plenty of damage in hero mode, but if he turns into a civilian, he's practically lost a stock, so don't go wild with Joe's VFX power, or you're pretty much screwed. Fortunately, Joe will always respawn in hero mode with his VFX gauge at regular capacity, so don't worry about that.

It's pretty easy to tell that Joe is a pure melee fighter; the kind of guy who tries to get in the opponent's face. But the thing to note is that it's best to use his VFX powers in certain ways. You'll often want to use Mach Speed for going on the offensive, and vice-versa for Slow-Mo. Zoom In mode is the more balanced of the three, so use it as such. At the beginning, you'll want to restrict your use of VFX, as you don't have a lot to spare. However, as the match goes on and you earn K.O's and, just as important, VFX, feel free to use it a bit more often.

As for the fighting itself, just try to get in the opponent's face. Joe is a close-range fighter at his core, with the exception of the Six Machine. This is punctuated by many of Joe's attacks being fast and lagless. What's that? The opponent is getting campy on you? Never fear! You have plenty options, depending on what kind of projectile they're using. You can either use Mach Speed to get up close to them fast, use Slow-Mo to punch their projectiles back at them, or just hop on the Six Machine and beat them at their own game. Just be careful if you go for that last option, you won't always have it if you get reckless.

Joe's not the only one who can take advantage of his powers, however. He also makes an excellent teammate for certain characters, most notably Snake. As stated in the Codec section, Joe's Slow-Mo power can make Snake's explosives more powerful. Of course, there are less gimmicky ways they work together. Joe is meant to rack damage while nearly all of Snake's moves can kill, which can be a deadly combination. Like Ashley, Joe is meant to be paired with characters who can kill. Heck, Joe could even be paired with Ashley herself. With her Heavy Hexes and Binding Circles combined with Joe's Slow-Mo and Mach Speed powers, they would be an incredible stage control team with excellent attack style synergy...or so I think. Who knows? Maybe I'm just completely insane.

In summation, use your VFX wisely, don't let your opponent play keep-a-way, and overall, keep a cool head.
 

half_silver28

Smash Ace
Joined
Apr 25, 2008
Messages
862
Location
MYM, Ohio
I know you want my help because I'm so good!


Yuffie Kisaragi


Yuffie Kisaragi is an optional playable character in that one game everyone has an opinion on, Final Fantasy VII. Yuffie appears randomly in wooded areas on the world map as an enemy, and once defeated, the player can convince her to join the party. She is one of the quickest characters in the game and can attack from a distance using her giant 4-sided Shuriken. She also has an affinity for theft, both in and out of battle. Yuffie has an obsession with Materia: crystals filled with magical energy that grant their holder various abilities. She makes a habit of stealing and attempting to steal Materia in order to restore glory to her hometown of Wutai after their defeat in the Wutai War. The youngest party member in the game, Yuffie is the most energetic and upbeat of the group.

....blah I'm ranting again. I know you guys don't really care about the background thing, so I'll get on with this. Yuffie is an assist trophy in Brawl, and upon being summoned immediately begins attacking others on her summoner's behalf (with a smile of course <3 ). Yuffie has 40% health, anti-grab armor and all the movement stats of Sheik. She sticks around for 20 seconds or until she loses her health, at which point she departs with a quick "Okay see ya later!" or "Ouch... :/". She has some generic punching and kicking moves that can easily chain into each other, and she also can perform a slightly laggy swipe with her shuriken that can KO around 125%. She has a random flipkick she can do in mid-air too. But those are just her boring attacks... Yuffie has a few more to set her apart.


Rising Sun
With a bit of lag, Yuffie tosses her giant shuriken at a foe in the same manner Toon Link would use his boomerang. Yuffie's weapon though is nearly twice as big as TL's boomerang, and travels 1.5 times as far before returning to her. Yes shuriken = boomerang, leave me alone (D). A direct hit by the shuriken (which can be bounced off the ground) deals 15% damage and knockback that KOs at 100%. However, it only deals 8% damage and flinching knockback on its return trip.

Greased Lightning (ground only)
Yuffie pauses very briefly and suddenly dashes one platform forward at Sonic's run speed. If she comes in contact with a foe, she stops and immediately attacks with a strong vertical shuriken slash that deals 15% damage and knockback that KOs at 110%. This does a ton of shield damage and is very difficult to dodge or power shield: the foe doesn't have very long to react to this.

Knife Throw (air only)
Yuffie quickly grabs some of the kunai knives hanging from her back and flings them at a 45 degree angle downwards. These knives deal 4-16% damage depending on the number of hits, as well as some terrific hitstun. Yuffie tends to use this while short-hopping so she can easily take advantage of the hitstun should she hit.

Flash Step
Yuffie goes all DBZ on her foes with this one. She quickly steps or jumps into the background and disappears, only to jump out directly in front of or behind a random foe. There isn't a whole lot of lag on this move, making it a good setup for Yuffie's other attacks.

Steal
Now here's where things get interesting. Yuffie attempts to grab, having pretty average range and speed. If she catches someone, she starts to "search" them for anything she can steal (looking through their pockets and such) while holding her victim awkwardly close to her in the grab. After about a second of this, Yuffie will extract a tennis ball-sized Materia crystal from them and hold it up in the air. Pleased with herself, Yuffie giggles before stashing the Materia away. But wait, what? Her foe couldn't have possibly had a Materia on them! In this case, the Materia is more of a physical representation of an attack/ability that Yuffie robbed them of. The color of the Materia she produces gives away what type of move or ability Yuffie stole:

Red - Red Materia is used for summoning in Final Fantasy VII, so naturally Yuffie robbed them of the ability to use summons or minions. This extends to include items that are produced out of hammerspace, like the Ice Climber's ice blocks.

Green - a versatile Materia, green indicates that Yuffie robbed her foe of elemental moves and the ability to inflict status effects. For physical attacks with an elemental effect, this simply removes the element from it, significantly weakening the move. Basically, Falcon Punch will lack its fire.

Yellow - Yellow Materia deals with abilities, but that role is slightly different in Brawl. Yellow indicates that Yuffie robbed them of the ability to use one random move: it could be something important or something that really isn't. They'll just have to experiment to figure out which one.

Blue - Blue Materia deals with support magic. When Yuffie steals Blue Materia, it means that she robbed them of the ability to use non-damaging moves.

Purple - Purple is essentially the wild card Materia. If Yuffie pulls out this color, it indicates that a random stat on her victim has been nerfed. This could end of halving their speed or attack, or robbing them of an ability such as gliding. If Yuffie is stealing from Link, she might simply forego the Materia and just take his shield away! And just for the record, no. Yuffie cannot take someone's sword away.

In order to get their abilities and attacks back, Yuffie's victim needs to deal 15% damage to her to make her drop the Materia. While she does have possession of the Materia, she can use it herself. Yuffie briefly produces the Materia and holds it up to activate it. Using a Red or Blue materia grants her access to the victim's corresponding abilities. Using a Green Materia infuses her shuriken with a stolen element or status effect for as long as she holds the crystal. Using a Yellow Materia grants her usage of the random move she stole. She can use her Shuriken and knives to emulate most projectiles and disjointed hitboxes, but she won't be able to use moves she is physically incapable of performing. Lastly, Purple Materia will buff the same stat on herself that was nerfed on her victim.

Once Yuffie is dealt enough damage or is defeated, she will drop the Materia she stole. The foe she stole from can go and pick it up to return to normal, but others can go pick it up as well. They will carry it around like a normal item, and can use it just like Yuffie does by hitting A. When thrown off the stage, the victim will recover their abilities after 7 seconds.


"Remember, if you piss me off... it'll cost you!!"


Limit Break
When Yuffie has 50% of her health or less, she will have access to her super moves, referred to as Limit Breaks in Final Fantasy VII. Obviously these are quite laggy, so Yuffie can easily be finished off if she misses. Here's a list of her ultimate moves:

Landscaper - Yuffie crouches down and punches into the ground with one hand. This creates a platform-long wave of earth that's as tall as Jigglypuff, which travels across the stage until it goes off the screen. Contact with the wave deals 20% damage and knockback that KOs at 100%. This is the least laggy of her Limit Breaks.

Clear Tranquil - Let me tell you, you don't want to let Yuffie use this. The ninja girl closes her eyes and takes a stance of concentration. A light blue sphere of energy then forms around her as well as her summoner or anyone allied to them. After 3 seconds, the spheres glow white, healing Yuffie and her allies by 50% damage and curing them of negative status effects. However, dealing 25% to Yuffie (who is super armored during this move) will break through the sphere and knock Yuffie out of the move.

Gauntlet - Yuffie produces a blue bomb a bit bigger than one of Link's and tosses it one and a half Bowser lengths in front of her. The bomb immediately explodes on impact into a tower of blue energy as wide as Ganondorf that reaches up to the top of the screen. This traps foes in it for multiple hits that can deal up to 40% damage. When the energy disappears after 3 seconds, it launches foes away with knockback that KOs at 110%. Yuffie is vulnerable for nearly two seconds after she throws the bomb.

Doom of the Living -
This is essentially Greased Lightning+. Yuffie dashes forward just as she does for Greased Lightning, but she attacks with 15 quick shuriken blows instead of just one. This deals a total of 42% damage, and Yuffie blows them away with a SHORYUKEN at the end that deals high knockback that KOs at 100%. This move is pretty much unblockable once Yuffie catches them in the dash, but it is a bit more laggy on the front end and has horrible end lag if she misses.

All Creation - This is truly Yuffie's Ultimate attack. Yuffie quickly takes the concentration stance she takes for Clear Tranquil, as her body is surrounded by a surge of yellow energy. Yuffie puts her hands together as a huge mass of purple energy as tall as Bowser appears in front of her. After 2 seconds the mass of energy fires forward in the form of a giant laser that reaches all the way across the screen. It travels slightly quicker than Samus' Final Smash, and though it disappears twice as fast, it deals a devastating 40% damage and knockback that KOs at 80%.


"The stars shine so bright, like glowing materia... reach up and grab one."


edit - oh sh-, Yuffie stole the new page too (hippo)
 

darth meanie

Smash Journeyman
Joined
Jun 6, 2008
Messages
452
Viewtiful Joe

I've never actually played Viewtiful Joe before, but from what I knew about the game, he certainly seemed to have potential, and it's a shame that MvC3 doesn't make as good use of the VFX as they could have.

While I don't mind the VFX mechanic at all, I don't like how if it drains he goes into civilian mode, which makes him a complete sitting duck. The way that he can have more VFX over the course of the match by scoring KOs is a bit awkward, as it makes him better in longer matches. I just think that it doesn't merit being in a moveset on its own as other characters level up and get stronger, but they don't have mechanics for that in their movesets. For the same reason, I don't like how the Six Machine can't regenerate and be lost for the entire match. It puts him in a worse situation with every stock, when a new stock should be a completely fresh chance for the character.

I do like how you use VFX for his approaching game, and there are a lot of fun ways to use and abuse it. I feel that as far as the playstyle goes, you need to link the regular moves into the playstyle further. Essentially, after the Specials, most of the moves are pretty basic attacks. While there's nothing wrong with that, you never extend it to explain how he uses those moves, in what situations they're useful, and how they fit into his overall strategy. With all of his VFX, he obviously has a lot of versatility there, it just needs to be expanded upon.

Overall though, this is better looking, better written, and more thoughtful and deliberate than Ashley was. I like it, and I think it has promise for your future sets.
 

Katapultar

Smash Lord
Joined
Nov 24, 2008
Messages
1,284
Location
Australia
Yay, time for my first set of MYMX!


Nano Shinonome and Hakase "Professor" Shinonome are main characters of Nichijou, a gag ani.............................................................................................................


WTF!? Where the hell did my set go!? Somebody stole it!


Is that MY SET Swiper's holding!? Wait one moment, I'm gonna catch that a-hole and get it back! Oh crap he just encapsulated it and threw a bunch of copies of it around the place! Sorry about that guys, I can't post my set yet until I find the right one...


To make sure this never happens to your set, call the Moveset Insurance Company and you'll get the amount of time back that you wasted working on your moveset but you have to give us one dollar every day. Or you could just waste your time reading this mini entry of which you could spend working on a FABULOUS moveset. Seriously.

If you don't know already Swiper comes from ... ... ..., a series you probably have heard of or have seen your little cousins watch on Cartoon Network, whatever. Oh crap Swiper stole the name of the series. He REALLY doesn't want us to find him. But good thing since you don't want to waste your time watching a crappy kid's show. This is just black comedy you know.

Ok let's cut to the chase. Swiper is a sneaky fellow. When he appears out of the you-know-what, he'll go after the closest thing that's not a living thing with Ike's dash speed and 2 Ganon-jumps. If he gets what he gets, he'll encapsulate it into a ball and then throw it along with other balls across the stage before laughing and saying adiós. He'll always throw 4 balls of red, blue, yellow and green across random parts of the stage cause those are the only colors kids are supposed to know about...anyway, it's up to the players to find which ball has the real object in it by throwing it on the ground like a Pokeball. If a player really wants to mess with their foe, they can chuck the balls offstage to get rid of what was stolen for good. That sneaky little swiper...

Ok I'm guessing you want to know how to stop Swiper...well that's easy! All you have to do is say "Swiper no swiping!"...........oh wait there's no Brawl function for that. THAT MEANS YOU CAN'T STOP SWIPER!!! Just kidding. There's always good o'l violence. Just hit Swiper with a move that can send one flying and byeeeeeeeeeeeeeeeeeeeeeeeeeeeee! Good riddance.
 

MarthTrinity

Smash Lord
Joined
Aug 9, 2007
Messages
1,954
Location
The Cosmos Beneath Rosalina's Skirt
That sneaky son of a. . .

Wait...wait a second! Who's that rustling through the bushes?! A black and white blur? Who is this mysterious thief?!


Oh God dammit it's the Hamburgler! Not sure how Kat didn't do this one but this sneaky hamburger thief manages to worm his way into Brawl one way or another!

When the Hamburgler is summoned from an Assist Trophy...nothing seems to happen. Weird, huh? Is the Assist Trophy a dud? Well, not exactly. At this point, massive amounts of delicious hamburgers will spawn throughout the stage, even if the Food items are turned off. These hamburgers heal typical Food health...but they also attract the Hamburgler out of his hiding! The Hamburgler will open his eyes at this point (he's disguised himself as part of the background!) and will make a mad dash for the closest pile of hamburgers! Anyone who gets in his way will take 10% damage and medium upward knockback as he dashes to his greasy treasure.

Hamburgler will then begin shoveling the hamburgers into a sack with a hamburger on it, glancing about as he does so. After about two seconds of this, Hambugler will get up, tie the sack and make a run for the nearest blast zone/edge of the stage. Hamburgler will still deal the same damage as he did before, but now you can attack him! If you attack the Hamburgler, he'll drop his hamburger sack, panic for a moment and then run away! You can then consume the hamburger sack to heal your character for a cool 60% health!

Crime doesn't pay Hamburgler, especially when the dollar menu exists...
 

MasterWarlord

Smash Champion
Joined
Aug 24, 2008
Messages
2,911
POPPLE AND ROOKIE


Popple is a thief from the Beanbean Kingdom, while Rookie is a random hefty Koopa who clearly is not Bowser with amnesia and is not someone you recognize. When the pair spawns from the assist trophy, Rookie will function as a Bowser clone 2 levels below the lowest cpu level in the match (If no cpus are present, Rookie will be level 6). Popple is significantly less threatening, opting to stay next to characters with his Pikachu level movement speed before suddenly going in to attack. When Popple attacks, he repeatedly circles the victim, dealing 10 hits of 1% and no flinching over half a second, and if he completes the attack will steal any items the foe has – this includes items that are technically absorbed, enabling him to steal a mushroom out of a giant character, for example. Popple will also pick up items lying on the floor in general, and will use any items he picks up that can be thrown himself. If Popple goes 15 seconds without finding any form of item, he will go over to Rookie who will breath fire on him to ignite him, then spin him around rapidly before throwing him at the nearest enemy player, dealing 26% and knockback that KOs at 75%.

This assist trophy may seem very powerful at a glance, considering the duo last for a very long 45 seconds assuming they don’t get killed otherwise. . .But if Rookie is hit by an attack that launches him more than 3 battlefield platforms or deals more than 19%, he’ll be cured of his amnesia and get rid of his bandana, fighting on the side of the person who cured him – though he’ll be specifically targeting Popple for the most part, who’s busy having a paltry 35 stamina. If Rookie is hit by another such attack during this time, he will regain his amnesia and put the bandana back on, granting his loyalty back to Popple and the assist trophy summoner.

WEB SWINGING MENACE

Spiderman has a lot of nifty interactions going on with swinging around various globs of web around on a web string as a sort of chain and flail, dragging foes around when he tethers web to them directly, and of course that great grab-game. It’s a significant improvement over your previous works, but the set as a whole seems a bit scattered as all of the various sets of interactions still exist in their own separate bubbles to an extent, with little holding them together. Not to say that the moveset doesn’t have much of a playstyle, but it certainly feels like all these interactions could be more focused – even giving him something obvious like a gimping focus in a way Junahu suggested would be appreciated. You’re certainly on the way though with those interactions, and the playstyle summary helps to put the moveset into somewhat of a context.

Your moves are perfectly simple and playable enough when used outside the interactions, don’t worry about that. Dunno what Junahu’s smoking there. I actually thought that was one of the better things about the set. The other main thing I wanted to address was how all over the place you seemed to be with your listing of details, tacking on important details at rather random intervals in your speech and being rather indirect. That said, how you used realistic physics with the webbing was good, lord knows we wouldn’t want an essay on how it works exactly at all times.

WITCH PEOPLE ONLY WANT IN SMASH BECAUSE THEY’RE INTO LOLI

The main focus of the set seems to be Red, which isn’t a particularly good thing when Red is so incredibly under-elaborated on. Most of the actual playstyle seems to be in the various spacing moves Ashley has, such as the transporter and the barrier, though it’s hard for it to come together when. . .1: Ashley isn’t all that powerful with Red anyway, and he is needed to perform half of her attacks at all, and 2: She doesn’t actually do much to the foe with this defensive strategy of hers with no real material to camp with, causing her playstyle to be running and hiding for no real reason. The moveset also has large amounts of filler which I obviously don’t need to point out – coping out on the filler moves over and over doesn’t help matters.

I mention this specifically because you brought it back in Viewtiful Joe – for the love of god, don’t call your mechanic a gimmick. Really doesn’t help your case.

WESKER

Weston’s ice block has a decent enough purpose in the moveset without many snazzy interactions, as it’s the main thing that lets Weston set up properly and it’s a fairly unique way of letting him do so. That said, there isn’t that much to Weston beyond elementary set-up and defense by turning the floor icy and creating pickaxe traps, with occasional prone abuse. There is some cool stuff in the set with the fsmash to move the pickaxes around and the main thing preventing the icy terrain from functioning identically to goop, Weston’s ability to bring up icy spikes out of it to give Weston a greater degree of control over said areas. When all’s said and done, though, there’s really not that much to differentiate Weston, and the fact that something as proppish as pickaxes is one of the main things Weston uses to litter the stage feels rather jarring. One of the main potential areas you had to expand on this simplistic set was the air-game, setting he’s a ghost and all, but you opted to make his air-game bad and make it rely on bringing the foe to the ground – the stereotypical heavyweight air-game.

And Junahu and DM, many other sets have had different icy terrain already, and more importantly, the icy terrain in Brawl doesn’t actually –do- much of anything, hardly enough to make it actually worth it to painstakingly turn the floor into ice in a moveset.

MYM 10 WINRAR

Dry Bowser has some decent simplistic playstyle of getting into the foe’s face with some excellent approaches with his dashing attack/projectiles to cover said approach, then sticking to the foe like glue by collapsing into nothing to evade attacks and either approaching again when they escape or just blocking it al-together with his grab. That said, while you got the part down with Dry Bowser being good at spacing, not all that much is established for what Dry Bowser actually does when he’s at close range – a rather key factor. All he really has is forcing foes off-stage before he proceeds to gimp them, which I guess qualifies as –something-, but. . .Yeah. You’ve just turned Bowser into a character with 8/10 movement speed who specializes in pressuring and is bad at KOing. That’s. . .Very, very disturbing. The majority of Bowser’s weight comes from his shell, which he has perfectly in-tact, not his meat, causing this to feel like it’s a set for a skeletal Koopaling more than a skeletal Koopa King.

DIO BRANDO BY KATAPULTAR

The positioning aspects of the moveset with Whitesnake are the more interesting parts of the moveset to me, but also the less elaborated on, as the main focus of the set is giving commands to the foe with disks and to yourself in order to steal moves. The positioning that can be done eats up more inputs than it should, most obviously with the fair and bair when a more specific movement mechanic operated by a single Special would be preferable, and when you have several intentionally bad inputs that are supposed to be overwritten it’s not a fantastic combo. The commands Pucci can give to the foe don’t seem to tie into much of anything specifically beyond generically stunning the foe for something like a grab, and the moveset as a whole relies too much on adapting to the foe to have much semblance of flow outside of relying on Whitesnake. Of course, it’s a large improvement over similar characters in that Pucci and Whitesnake –do- have an actual base of a moveset to build off of, meaning that there’s far more to playing these characters then a simple mirror match. Perhaps if there was more of a focus on how Whitesnake and Pucci can abuse stolen moves better than their original users I’d like the moveset better, but as is it just feels like somewhat of a rushed experiment.
 

MasterWarlord

Smash Champion
Joined
Aug 24, 2008
Messages
2,911
★★★★★★★★★★ - 0 Movesets - At 10 stars, I will declare this moveset the best moveset ever made. . .Not by MasterWarlord. No moveset has ever obtained this rank.
★★★★★★★★★☆ - 0 Movesets - At 9 stars, movesets are front runners among the front runners. Only Nurse Joy has obtained this rank.
★★★★★★★★☆☆ - 6 Movesets - At 8 stars, movesets are typically getting into the ranks of the elite, and will fondly be remembered for MYMs to come.
★★★★★★★☆☆☆ - 6 Movesets - At 7 stars, movesets are getting good enough to actually stand out from among the crowd and be legitimately memorable.
★★★★★★☆☆☆☆ - 14 Movesets - At 6 stars, I -do- like the movesets, though they certainly have plenty of room for improvement or their ideas aren't -that- unique.
★★★★★☆☆☆☆☆ - 19 Movesets - At 5 stars, I no longer actually like these movesets, but they aren't -bad-. The quality gap between 6, 5, and 4 stars is among the largest on the list.
★★★★☆☆☆☆☆☆ - 12 Movesets - At 4 stars and below, I specifically start DISLIKING movesets.
★★★☆☆☆☆☆☆☆ - 10 Movesets - At 3 stars are plenty of bad movesets, but they typically have some slightly redeeming quality that prevents them from going down the list further.
★★☆☆☆☆☆☆☆☆ - 18 Movesets - At 2 stars, movesets have no redeeming qualities whatsoever.
★☆☆☆☆☆☆☆☆☆ - 9 Movesets - With only 1 star, movesets not only have nothing good about them, they're completely OOC, horrifically generic, impossible to read, and do 30% and great knockback on every move.

BARON K. ROOLENSTEIN

★★★★★★★★☆☆
8/10


PENNYWISE

★★★★★★★★☆☆
8/10


MR. BANBALLOW

★★★★★★★★☆☆
8/10


GENGAR

★★★★★★★★☆☆
8/10


KABUTOPS

★★★★★★★★☆☆
8/10


FLYING DUTCHMAN

★★★★★★★★☆☆
8/10


KRILLIN

★★★★★★★☆☆☆
7/10


MR. MIME

★★★★★★★☆☆☆
7/10


GALLADE

★★★★★★★☆☆☆
7/10


HAUNTER

★★★★★★★☆☆☆
7/10


N. TROPY

★★★★★★★☆☆☆
7/10


SLOWBRO

★★★★★★★☆☆☆
7/10


HOMURA

★★★★★★☆☆☆☆
6/10


EDGAR

★★★★★★☆☆☆☆
6/10


LORD CRONAL

★★★★★★☆☆☆☆
6/10


TEFERI

★★★★★★☆☆☆☆
6/10


GARBODOR

★★★★★★☆☆☆☆
6/10


GRUNTY

★★★★★★☆☆☆☆
6/10


MALZAHAR

★★★★★★☆☆☆☆
6/10


CONCRETE MAN

★★★★★★☆☆☆☆
6/10


E.E.D. SOLDIER

★★★★★★☆☆☆☆
6/10


OMASTAR

★★★★★★☆☆☆☆
6/10


DARKMEGA.EXE

★★★★★★☆☆☆☆
6/10


GALAXY MAN

★★★★★★☆☆☆☆
6/10


MISMAGIUS

★★★★★★☆☆☆☆
6/10


WAKKA

★★★★★★☆☆☆☆
6/10


CATERPIE

★★★★★★☆☆☆☆
6/10


PORTAL MAN

★★★★★★☆☆☆☆
6/10


KLOBBER

★★★★★☆☆☆☆☆
5/10


TWILIGHT

★★★★★☆☆☆☆☆
5/10


GHOST RIDER

★★★★★☆☆☆☆☆
5/10


CHESS MAN

★★★★★☆☆☆☆☆
5/10


SPIDER MAN

★★★★★☆☆☆☆☆
5/10


PINKIE PIE

★★★★★☆☆☆☆☆
5/10


RAINBOW DASH

★★★★★☆☆☆☆☆
5/10


COLORS SONIC

★★★★★☆☆☆☆☆
5/10


COSMIC

★★★★★☆☆☆☆☆
5/10


DRY BOWSER

★★★★★☆☆☆☆☆
5/10


TEAM PEDESTAL

★★★★★☆☆☆☆☆
5/10


ENRICO PUCCI AND WHITESNAKE

★★★★★☆☆☆☆☆
5/10


GIGAN

★★★★★☆☆☆☆☆
5/10


MAFIA MAN

★★★★★☆☆☆☆☆
5/10


LINEBECK

★★★★★☆☆☆☆☆
5/10


YANMEGA

★★★★★☆☆☆☆☆
5/10


MODOK

★★★★★☆☆☆☆☆
5/10


SIR WESTON

★★★★★☆☆☆☆☆
5/10


FLUTTERSHY

★★★★★☆☆☆☆☆
5/10


SATANA

★★★★★☆☆☆☆☆
5/10


VICTINI

★★★★★☆☆☆☆☆
5/10


IRON GIANT

★★★★☆☆☆☆☆☆
4/10


BELOME

★★★★☆☆☆☆☆☆
4/10


MAN RAY AND THE DIRTY BUBBLE

★★★★☆☆☆☆☆☆
4/10


APPLEJACK

★★★★☆☆☆☆☆☆
4/10


TWO FACE

★★★★☆☆☆☆☆☆
4/10


GASTLY

★★★★☆☆☆☆☆☆
4/10


VENOM

★★★★☆☆☆☆☆☆
4/10


COMMANDER SHEPARD

★★★★☆☆☆☆☆☆
4/10


MR. FREEZE

★★★★☆☆☆☆☆☆
4/10


STORM

★★★★☆☆☆☆☆☆
4/10


AIDAN

★★★★☆☆☆☆☆☆
4/10


RANKASEN

★★★★☆☆☆☆☆☆
4/10


LEVEL 10 FIGHTER

★★★☆☆☆☆☆☆☆
3/10


CHARLOTTE

★★★☆☆☆☆☆☆☆
3/10


YORICK

★★★☆☆☆☆☆☆☆
3/10


BAD GIRL

★★★☆☆☆☆☆☆☆
3/10


PIERROT

★★★☆☆☆☆☆☆☆
3/10


GENO

★★★☆☆☆☆☆☆☆
3/10


ASHLEY

★★★☆☆☆☆☆☆☆
3/10


THOR

★★★☆☆☆☆☆☆☆
3/10


ROBO PATRICK

★★★☆☆☆☆☆☆☆
3/10


RARITY

★★★☆☆☆☆☆☆☆
3/10


ROBO LINK

★★☆☆☆☆☆☆☆☆
2/10


META RIDLEY

★★☆☆☆☆☆☆☆☆
2/10


TRACE

★★☆☆☆☆☆☆☆☆
2/10


BOBBERY

★★☆☆☆☆☆☆☆☆
2/10


GON

★★☆☆☆☆☆☆☆☆
2/10


MIKE HAGGAR

★★☆☆☆☆☆☆☆☆
2/10


GOOMBA

★★☆☆☆☆☆☆☆☆
2/10


OVER

★★☆☆☆☆☆☆☆☆
2/10


SHO

★★☆☆☆☆☆☆☆☆
2/10


MAJORA

★★☆☆☆☆☆☆☆☆
2/10


TAOKAKA

★★☆☆☆☆☆☆☆☆
2/10


DOPPELGANGER ARLE

★★☆☆☆☆☆☆☆☆
2/10


PRINCESS BUBBLEGUM

★★☆☆☆☆☆☆☆☆
2/10


ARAKUNE

★★☆☆☆☆☆☆☆☆
2/10


MARONA

★★☆☆☆☆☆☆☆☆
2/10


VIEWTIFUL JOE

★★☆☆☆☆☆☆☆☆
2/10


REDEAD

★★☆☆☆☆☆☆☆☆
2/10


ASH

★★☆☆☆☆☆☆☆☆
2/10


DITTO

★☆☆☆☆☆☆☆☆☆
1/10


SCOTT PILGRIM

★☆☆☆☆☆☆☆☆☆
1/10


DEADPOOL

★☆☆☆☆☆☆☆☆☆
1/10


GENESECT

★☆☆☆☆☆☆☆☆☆
1/10


SAM AND MAX

★☆☆☆☆☆☆☆☆☆
1/10


MEOWTH

★☆☆☆☆☆☆☆☆☆
1/10


DOOPLISS

★☆☆☆☆☆☆☆☆☆
1/10


EMIDIUS

★☆☆☆☆☆☆☆☆☆
1/10


SONIC AND TAILS

★☆☆☆☆☆☆☆☆☆
1/10
 

Junahu

Smash Ace
Joined
Nov 15, 2005
Messages
899
Location
Shropshire Slasher

Raine Sage
A simple half elf teacher in a backwater village, Raine possesses knowledge far beyond that of any of her peers. At 23 years old this fine woman is stringantly determined to unravel the mysteries of the world around her, and learn the truth about where she and her brother were raised.
Sometimes you have to be cruel to be kind, and Raine understands this better than anyone. If she spots you slacking off, she will definitely kick your ***.

Now, in Brawl, this shapely light mage will appear occasionally from Assist Trophies. Sensing blood in the air, Raine steps into the background to avoid harm, then sets about trying to end the conflict, in her own unique way.


From the moment she is safe in the background, to the moment she leaves (after 16 seconds) Raine casts a healing aura with a conical radius of 1.8 stagebuilder blocks. Anyone this close to Raine's position, heals 2% damage every second. Yay! Thanks Raine!


Naturally however, this is not all the aura does. While inside its healing range, any attacks that player performs, deals only 3/4 of their usual damage, making it rather counterproductive to camp from within the aura.

In addition, and this is actually the important part, if a player inside the aura is struck with an attack, a transclucent orb flies out of them at a random trajectory. It'll roll along the floor, before eventually coming to a stop. And you might want to chase this orb, because whoever picks it up, gets healed. The amount healed, is identical to the amount of damage that was originally dealt to the player who spawned the orb in the first place.
So, if some chump is lured into standing in Raine's healing spot, bean them in the face with a powerful attack, then scoop up the orb prize they leave behind. Just don't join them in the aura, or they could do the same to you too


Aika


"If you die on me, then I'm taking all your treasure!"

Hailing from the hit game that no one played; Skies of Arcadia, Aika is a hot blooded Sky Pirate with booty on her mind. She fights with a boomerang edged blade, and doesn't much care for anyone in a position of authority.

So, from out of the assist trophy she comes, and boy, does she ever want you to know it. Confetti sprays everywhere, Aika strikes a V for victory sign, and two cannons behind her fire a salute in her honor. None of this does anything mind you, it's just something fun to see.

She then acts much like any other "aggressive" Assist Trophy, roaming around looking for targets to slice up. She may randomly opt to hurl her boomerang at her foe, just to mix things up. Most of her attacks deal a flat 11% damage and she'll be around for at least 12 seconds before leaping off the top of the screen. She has just one jump, but it's decent enough, and Aika is not so aggressive as to jump offstage.

If she spots an item spawning in, she'll make a mad rush to pilfer the "treasure" for herself. If left to her own devices, the next 12 seconds will be an itemless borefest. So to get any of those items back, you can hit her with an attack, which has a random chance of making her drop one of her items.

If her summoner attacks her, be warned, Aika will start attacking them too. It's her treasure, not yours!


Super secret note:// Raine and Aika are both deathly afraid of water. So if they appear on a stage with ANY body of water in it, they will be rendered useless, or worse.
Raine appears cowering in a washtub. If the washtub ends up in water somehow, it will float away, with Raine screaming all the while.
Aika, instantly hugs her summoner tightly, crying that she cannot swim. The summoner is completely stuck like this, and only has the ability to move left or right with Aika in tow. If the summoner deliberately takes Aika into water, she will jump back to land and begin exclusively attacking her summoner in retaliation. She'll even ignore treasure because you were such a douche. If, on the other hand, you keep her away from water for the 12 seconds she hangs around, she'll give you a little kiss on the cheek as a sign of gratitude.

Also, if you spray either girl with a water attack, they will look horrified (and wet) before leaving early.


Junahu

Smash Ace
Joined
Nov 15, 2005
Messages
899
Location
Shropshire Slasher
MYmini week 1 is over, time to start voting

This post marks the end of week 1's MYmini, so, it's time for people to vote on their favourite entries. You can find all of this week's entries, and the voting procedure, [HERE]. Be sure to send your votes in, before the end of Sunday. You have 4 votes (3 normal votes and 1 "Macro" vote), and you should PM your votes to MarthTrinity


And here is Week 2's amazing MYmini;

MYmini Week #2 (15th-21st May)
Pig Power in the House!:

This week is brought to you by THIS delightful little rap. Our MYmini for week #2 is all about respect for our animal brothers in the hood.
What we want to see this week, is cool, creative, and most importantly,
animal themed ideas for Brawl Event Matches. You remember what events are, right? Those matches with wierd and wonderful twists to them, like having to KO a trio of Warios with the Dragoon, or keeping an egg safe as Yoshi?
But, you can think of better ideas than those, right? Remember, it doesn't have to be a straight up match between two characters to be an event. Just so long as an animal or two is involved with the proceedings, anything goes this week.
 

Rychu

Thane of Smashville
Joined
Jul 5, 2010
Messages
817
3DS FC
1908-0105-4965
This post marks the end of week 1's MYmini, so, it's time for people to vote on their favourite entries. You can find all of this week's entries, and the voting procedure, [HERE]. Be sure to send your votes in, before the end of Sunday.


And here is Week 2's amazing MYmini;

MYmini Week #2 (15th-21st May)
Pig Power in the House!:

This week is brought to you by THIS delightful little rap. Our MYmini for week #2 is all about respect for our animal brothers in the hood.
What we want to see this week, is cool, creative, and most importantly,
animal themed ideas for Brawl Event Matches. You remember what events are, right? Those matches with wierd and wonderful twists to them, like having to KO a trio of Warios with the Dragoon, or keeping an egg safe as Yoshi?
But, you can think of better ideas than those, right? Remember, it doesn't have to be a straight up match between two characters to be an event. Just so long as an animal or two is involved with the proceedings, anything goes this week.
I...I'm...filled to the brim with emotion over this week's amazing mini.
 

darth meanie

Smash Journeyman
Joined
Jun 6, 2008
Messages
452
Considering how much Pokemon stuff we already do, let's go ahead and eliminate them as an option.

It'd be too easy anyways.
 

Junahu

Smash Ace
Joined
Nov 15, 2005
Messages
899
Location
Shropshire Slasher
just to make sure: define what we can call an animal here
ah, good question.

Pokemon, we will not be counting as animals. But the majority of other fictional creatures would count... just so long as the creature itself is actually based on a real animal (So for example; a Wiggler or a Skulltula would count, but a Boo or a Deku Baba would not).
If in doubt though, it would be best to just use a real animal instead.
 

BKupa666

Barnacled Boss
Moderator
Joined
Aug 12, 2008
Messages
7,788
Location
Toxic Tower
STORM
Oooh, time to take a trip down memory lane...look at all those bolded letters! Reminds me of Hades 2.0...as does that anger-related mechanic. Coming from the guy who was accused of "tacking" it onto Hades, and who knows what devastating consequences it can have on a moveset, I applaud your bravery in doing so. However, Storm is merely more evidence to the idea that damage-based mechanics are rarely, if ever, pulled off effectively. I also find the lack of flow to be somewhat of a turn-off, although your writing style is pleasant enough to keep me enticed while reading your moves.

Oh, and my criticism of the set's flow has no impact on how intriguing the individual attacks are to browse. Having just read the Warlordian Recap and finding out this was started several MYMs ago, I hardly blame you for the faults, and am pleased to see Storm -does- have a few redeeming qualities. I hope you re-enter the MYM rotation this contest and become a regular again, instead of drifting in and out, here and there and creating one set before vanishing.
 

MarthTrinity

Smash Lord
Joined
Aug 9, 2007
Messages
1,954
Location
The Cosmos Beneath Rosalina's Skirt
Heffalumps and Woozles

For those who don't know, Heffalumps and Woozles are the nightmarish creation of Winnie the Pooh's overactive imagination. Essentially weird nightmare versions of elephants and weasels, these creatures harass poor Pooh Bear in a nightmare where they steal his precious honey and generally harass the pudgy stuffed bear. Apparently Heffalumps are actually real...but nobody cares about Pooh's Heffalump Movie so it's much easier to just base them upon the Heffalumps and Woozles song from Winnie the Pooh and the Blustery Day. Heffalumps and Woozles come in a variety of shapes, sizes and appearances, all fairly creepy in contrast to the normally innocent Pooh Bear and his friends. This song is generally considering a massive mindfuck ranking up there with Pink Elephants on Parade from the movie Dumbo.

Enough explaining though, you came here for an Event Match and that's exactly what you're going to get!

As mentioned above, the title of this Event Match is simply "Heffalumps and Woozles", pretty self-explanatory. Your playable character for this Event will be none other than agidius' Hornet Man. You're on a fairly generic stage that's about the length of the WiFi Training Room stage (although with a horrifying shifting dark blue background, think Giygas creepy).

For this Event, you're given two stock in order to KO your opponent twice. Your opponent? A pitch black version of yourself! Of course, fighting in a mirror match doesn't make the event very thrilling now does it? Well here's the catch. At the start of the match, four beehives will already be set up. These beehives can be healed like normal and cannot be attacked by you or the evil Hornet Man...fortunately, these beehives only create hornets for you and, because of how far spaced they are, they won't attack one another either!

Now...where exactly do the Heffalumps and Woozles come in? Well...if honey's what you covet, you'll find out they love it, just like the song says! Heffalumps and Woozles will, at various intervals march onto the stage and begin attacking the beehives! If these Heffalumps and Woozles manage to destroy all four beehives, you'll lose the match instantly! You can fight back against these nightmarish fiends...and your hornets will attack them automatically if they get close to the beehives so don't forget about them either! Let's get straight into what you'll be going up against...just remember, they come in ones and twozles...so you may be dealing with quite a few of these guys at once...

Pop-Gun Heffalump


These soldier-esque Heffalumps have one thing in mind and, surprisingly, it's not honey! No, these guys will actively attack -YOU-. When one appears, it'll slowly waddle over to you at the speed of Ganondorf's walk. When it gets within a Battlefield platform distance of you, these Heffalump will crouch down before firing its cork at you with surprising force! If you're struck by this, you'll take 10% damage and medium knockback! Fortunately, these guys are slow and can have only 20% stamina. Even more fortunately, they're one of the few Heffalumps and Woozles that don't outright target and damage your beehives, even if they do hit one!

Trumpet Woozle


These guys need to be taken out as soon as possible when you see one appear! When the Trumpet Woozle spawns, it'll take a few moments to convert its nose into a trumpet before it starts playing its song! Once it starts, the Trumpet Woozle will march across the stage. When the Trumpet Woozle passes a beehive while playing its nose, it will convert all of the Hornets there into aggressive hornets who will actively attack you -AND- the beehive! Once a Trumpet Woozle passes a beehive, it will stand there marching in place until the hornets destroy their own beehive. As previously mentioned, these guys should be taken out as soon as possible which, fortunately, isn't too hard seeing as they only have 15% stamina. The Trumpet Woozle will do no damage to you itself under any circumstances however.

Heffalump Vacuum


No real better way to describe these guys than saying that they're a huge pest who love to suck up honey! When a Heffalump Vacuum appears, it'll appear simply as a floating Heffalump head that will float slowly towards a beehive. Once it reaches a beehive, it will extend its nose into it and begin draining it of honey, forming a Heffalump body as it fills with honey. After two seconds of draining a beehive, the Heffalump Vacuum will begin to swell and ultimately explode! This will deal 20% damage and medium-high knockback if you're within range (which is about the size of a full charge Ike Neutral B) making it an incredibly deadly foe. These guys however are incredibly fragile and will pop with a single hit. All in all however, these guys can easily deal massive damage to your beehives if you're not paying attention (as the beehive will also be caught in the explosion as well as taking 2% per half second it's being drained). Your hornets should be able to take care of these guys...just make sure they're not being distracted by something else though!

Pop Goes The Woozle


These guys combine the fear of Woozles with the unholy Jack-In-The-Box, a toy that has tormented children for years! When a giant crate falls from the sky, be careful! These Woozles have fairly high stamina (about 35%) and can only be hurt when they pop out of their box! Now...these guys don't actually attack you directly, or your beehives for that matter. At regular intervals, this Woozle will burst from its box, sending anyone (you or the dark Hornet Man) into a shield broken state if they're within a Bowser width of the box. After they pop up, attack their head to destroy them. Or just ignore them; they can help you by stunning dark Hornet Man and are fairly predictable...they won't even touch your beehives!

HeffalumpCannon


These guys are fairly stationary and will only hurt your beehives if they get ammo...and that ammo is you! Once one of these guys appears, the Heffalump will begin inhaling! This force is equal to the wind blowing on Pictochat meaning it's not terribly hard to run from however. Be cautious though, if you do get inhaled by one, the Woozle behind it will ignite the cannon sending your rocketing forward and into your closest beehive! This will deal 25% to you as well as 25% to the beehive making it a MASSIVE hit if you get caught by this. Use hornets to take these two out as they only have a surprisingly small 15% stamina.

Heffaloon


The main aerial assault from the Heffalumps and Woozles, these guys will slowly drift down in an attempt to grab one of your beehives! If they're successful, they'll attempt to drag the beehive away off the top of the screen in an attempt to instantly destroy it! If one of these guys latches on to your beehive, go to take them out immediately. They can take some considerable damage but, oddly enough, are solid platforms! If you jump on top of one, you can stand on it as you damage it! Once its 25% Stamina is depleted, it'll drop the beehive where it was. Be careful though if you're standing on top of it when it dies; this Heffalump will spiral out of control and off the top of the screen at a rapid pace! Jump off before you're taken with it!

Wowsers. There sure are a lot of Heffalumps and Woozles to deal with here! Make sure you know what you're going up against and make sure you keep in mind your main goal here; defeat the dark Hornet Man! Protecting and healing your beehives from the Heffalump and Woozles assault is one thing, but if you don't defeat your main objective, the Event will never end!
 

lordvaati

Smash Master
Joined
Jul 7, 2006
Messages
3,148
Location
Seattle, WA
Switch FC
SW-4918-2392-4599
Since the last time I entered anything was almost 4 MYMs ago(the love or hate Masked man set), so I come now with a Brand- new set for all!


MYM: Meowth


The sinister schemer from the television series has joined the fight! His clumsiness is made up by his unpedictabilaty, so he can become a deadly hazard to all-even himself!

Trophy entry:


The Scratch Cat pokemon, all meowth have an obsession with any round objects they can find wandering around. In the TV show, a special Meowth who can talk travels with a trio of thieves from the nefarious Team rocket, causing havoc for the heroes…though usually, they end up being the ones getting beaten in the end(and then some.)”

Entry:
The Balloon Flies over the stage, and Meowth falls out of it. He the looks angrily up to the sky an then prepares for battle.

STATS
Size:4.5/10-
bluntly the same size as Pikachu.

Dashing speed: 6/10-
just above average, same speed class as Pit

Walking speed: 4.5/10-
is fairly slow, but decent overall.

Falling speed: 7/10-
around the same class as Pikachu.

Weight: 3/10-
very lightweight, just above Pikachu. Near ZZS’ weight.

Power: 4/10-
Meowth revolves around using multi-hit attacks and obstacles he makes to do the majority of his damage, though they do poor knockback overall.

1st Jump: 9.5/10-
one of the best first jumps in the game. However….

2nd Jump: 4/10-
the second one is mediocre, since Meowth peters out from the exertion of the first.


He can also perform a Wall Cling,Wall Jump, and Crawl


Basic Moves


Neutral A: Meowth throws quick jabs with his fist before finishing with a kick. 2% from punches, 3% from Kick.

F-Tilt:
Meowth hits them with his tail. 8% damage, average Knockback.

U-tilt:
Meowth does an Uppercut motion. 10% damage, very small range, but if it connects has very good knockback.

D-tilt:
Meowth crouches down and has his leg sticking out. Does 4% damage and little to no knockback, however if the opponent hits the sweetspot(the exact center of his leg), they are automatically tripped, which can allow setups.

Neutral air:
Meowth does a basic sex kick. 11% damage, average knockback.

U-air:
he does an aerial backflip and hits them with his tail. 6% damage, mediocre Knockback.

B-Air:
Meowth does an outstretched spinning back kick. 12% damage, good knockback, and changes Meowth’s position to be facing behind him.

F-Air:
he raises his arms above his head and then swiftly brings them down(Picture Felicia’s Cat spike from darkstalkers and you get the idea). 9% damage, good knockback, and is a spike if the opponent is hit by the sweetspot9the exact center of his paw).

D-air::
Meowth does a series of fast stomping motions downward up to 5 times. 2% per hit.

Grabs/Throws

Neutral grab attack.
Meowth bites the enemy. 1% per bite.

D-Throw:

Meowth slams them into the ground, and then jumps and strikes them with his rear. 1% from slam, 5% from jump.

F-throw:
While holding on, he winds up a fist and punches them away.7% damage, good knockback.

B-throw:
Meowth does a backflip holding the opponent, launching them behind him. 9% damage, average knockback.

U-throw:
Meowth pulls out a bomb to use….but it blows up in his face, launching the enemy upwards. 12% damage, good knockback, and does 2% recoil to Meowth.

Dash attack:
Meowth does a flying kick forward. 5% on contact
.


Smashes
Down Smash;
While doing a handstand, Meowth does several spin kicks rapidly up to 8 times. 1% per kick, 3% per kick fully charged, very high priority.

Up Smash:
in a riff of snake’s up Smash, Meowth pulls out a bomb and throws it up in the air. The amount of seconds held determine height.

Less than 1: very small distance.

1 second: halfway up the screen

2 seconds: top of screen

The bomb does 8% on contact with average Knockback.

….be warned though, when 3 seconds pass, the bomb wil go off in Meowth’s hands, causing a huge explosion that does severe knockback and 30% damage to anyone nearby-including meowth! This is best used if you have a life to spare and want to take out a large group at once.

F-Smash:

Arguably Mewoth’s best move(behind maybe “Pay Day”), Meowth charges up and lunges forward for a Take Down attack. When Charged fully, it has the Highest knockback of all F-smashes, But Meowth takes half the damage inflicted by the move. 8-22% damage.


Specials

B: “Pay Day”-
Meowth does the Pay Day attack…well, kind of. As anyone who watches the show knows, in order to talk, the allycat had to sacrifice the move, so he has to go with plan B. he throws gold-painted Bottlecaps(they KINDA look like coins….) in a small volley that does 1% damage and little to no knockback. He throws 8-15 “coins” per volley, and can use it in the air as well. However, it not just bottlecaps he throws- meowth will throw pretty much anything he could get his grimey hands on. When thrown, they will land on the ground and can be picked up as items that can be used in battle. The items that can appear are:

Ball of String: Meowth sure likes these things. When thrown, they do 2% damage and little knockback, and vanish after 1 use.32% chance of appearing.

Meowth statue: A gaudy looking Mini trophy of the cat appears. Does 5% damage, and can be used up to 3 times. 25% of appearance.

Pitfall Seed: When thrown, traps opponent in ground for a few seconds. 20% chance of appearance.

Magikarp: after appearing, just flops and splashes around to no damage at all… cannot be picked up. 13% of appearing.


Water Bucket: after hitting a target, it does 8% damage and vanishes after 1 use, but also leaves a pool a water. Anything that walks over it automatically trips. 5% chance of appearing.

Lucky coin: Hmm…so hesometimes does pull out real Pay day coins, and Big ones to Boot! When thrown, does 10% with great Knockback, and can be used up to 2 times. 3% chance of appearing.

Motion Sensor Bomb: Wh….where did he get this from?? Oh, whatever. When thrown, it sticks to a surface, and anyone who makes contact will suffer 25% damage with great knockback. 2% chance of appearance.


Anywhere from 1-3 of these items can appear in a Pay day attack, and Pay day cannot be used again until all these items are off the stage. the distance of the attack is abut the length of 1/8 of Final destination.


Smash B: Fury Swipes-

Meowth Lunges forward, rapidly slashing his claws in front of him from 3-6 times. 2% damage per hit, little to no knockback, but has good Priority. Can be used as a recovery. Has a moving distance equivalent to ¼ the length of Final destination.

Up B: substitute-

to make up for a lack of a good jumping move, Meowth makes a clone of himself and bounces off of it to go in a high upward motion. Meowth doesn’t enter helpless state, but can’t use any other specils until he touches the ground. Contact with the sub from the bottom as it falls can spike anyone in the air. On the stage, it stays and can be picked up and thrown. It does 10% damage with good knockback.


Down b: Dig

Meowth buries himself underground, which can allow him to dodge specific moves hitting the B button again allows him to pop out with an uppercut, that does 11% damage with good knockback to anyone hit. He can stay under ground for an unlimited amount of time, but there are 2 drawbacks: 1, every 2 seconds Meowth takes 2% damage due to a lack of air, and 2, a small lump of dirt will be on top where Meowth buries himself. If the dirt pile Is hit-by like say, a crouching attack- he will pop out of the ground automatically.


Final Smash: MEOWTH BALLOON


.......uh, wrong one.


Meowth takes out a Walkie-Talkie, and Screams “hurry up, you lazy bums!!” then his partners Jesse and James will Fly through the Background and shoot bombs that hit the stage in a randomized pattern. Every bomb does 15% damage, with great Knockback. Meowth himself is actually immune to the bambs, thankfully(for once).


Character Type: HIDDEN

How to Unlock: play the stage "N's Castle" 15 times.
Music:

Team Rocket GSC theme:
http://www.youtube.com/watch?v=ArdbL-J3Axg

Rocket Hideout:
http://www.youtube.com/watch?v=MmjrG5yK_hA&feature=related

Minor tidbits:

-if Pay Day is Used in Coin Battle, he will sometimes throw out coins. The size is always random.
-if meowth is Star KOed, he will Scream “I’m Blasting off Already???”
-If he uses the Meowth balloon Final Smash and the Pokemon Trainer is one of the opponents, He will look angrily up in the sky at it.
-Also, if the Meowth Balloon is used on Corneria,Venom, or Lylat Cruise, after the FS is done, the Balloon will be Shot down by an Arwing or a Wolfen.
-If one of his opponents is Pikachu, when the fight starts, he says, “if I win, I get to be the Mascot!”
-fight another Meowth, and he’ll say “this game ain’t big enough for two Meowths!”
-when in water, meowth will occasionally try to jump out of it automatically.


Taunts:

Down taunt: Meowth Points at the screen and says “I’d better get a raise for this!!”
Up taunt: Meowth makes a sly grin and uses Nasty Plot.
Forward Taunt: Mowth takes a strum from a guitar (Meowth’s party reference, and parody of Captain commando
.)


CODEC:
Snake: Otacon, what’s with this cat?
Otacon: careful Snake. That’s Meowth, and he is part of a trio of thieves that work for a Corrupt organization!
Snake: so, I should treat him as a threat?
Otacon: well, not really. The group he’s in is known more for their blunders than their success. They are actually like clowns, really.
Snake: so, what do you recommend to take him down, put him in a tiny car, or something?
Otacon: haha, Snake. Anyway, Meowths are known for their obsessions with collecting objects. Maybe you can use it against him?
Snake:….
Otacon: …What is it Snake?
Snake: I’m Just thinking. He’s a clumsy sarcastic know it all with an obsession with collecting junk…he sounds like Someone I know.
Otacon: oh Really? Do I know them too?
Snake: yes Otacon. You know them very well……


alternates


Suit 1: Meowth with no clothing.

suit 2: Meowth in a cooking outfit, like so


Suit 3: Meowth in a Jacket, like the one worn in "go west, Young meowth"


Suit 4: TEAM ROCKETUniform.


Overall
The major play style is to utilize Meowth’s abilty to create items for use in combat to cover his weak strength. Due to his erractic nature, he can be a double edged sword-his playstyle makes him hard to predict, but he can also probably hinder himself as much as his opponent. Overall, playing him is mostly a matter of Luck- and that’s probably His strongest quality.

Notes: there might have been something I forgot, but as far as I know, it's pretty much done. I might add some pics showing his attacks later, though, so stay tuned!
 

MarthTrinity

Smash Lord
Joined
Aug 9, 2007
Messages
1,954
Location
The Cosmos Beneath Rosalina's Skirt
MYmini 1 Results

I may not be a leader anymore but I'm still more than willing to help them out with this ;P Here's your results for MYmini #1!

1. Mulch Diggums by Kholdstare
2. The Grinch by Davidreamcatcha
3. Cheatyface by KoJ

Yuffie by half_silver28
Hamburgler by MarthTrinity
Aika by Junahu
Popple and Rookie by MasterWarlord
Kay Faraday by Getocoolaid
Pentagon Thief by Darkslash
T.A.C. by gcubedude

Rawr~<3
 
D

Deleted member

Guest
I am one week set I won't budge


Garbodor is a poison-type Pokémon originating in the fifth generation, being one of the few pure poison-type Pokémon in existence. As is tradition with these kinds of Pokemon, Garbodor uses his immensely gross bodily functions to afoul the foe, making them succumb to his disgusting odour caused by the garbage that comprises his body and fingertips that spew poison gas. Moreover, he even has an especially horrible breath that he churns out of his rather unappealing mouth, a circular hole with sharp gnashing teeth similar to a garbage disposal. In all, Garbodor is a clean-freak's nightmare.

Objectively speaking, Garbodor is hardly the most attractive design as far as the series goes - along with the infamous Baibanira and Gear line, being one of the more goofy-looking new entries in the fifth-generation. This is almost archetypical, though, as with past designs like Muk and Weezing, there was also an air of unattractiveness about the design. As is a tradition with pure poison-types, his move-pool isn't particularly expansive either - made up of mostly normal and poison-type moves. Of course, none of these traits make Garbodor less attractive as a Pokémon - quite the opposite, in fact, when it comes to making a moveset for him.​


Size: 11
Weight: 9
Ground Speed: 3
Traction: 3
Air Speed: 3
Fall Speed: 8

As you may have guessed, Garbodor isn't the most acrobatic of competitors in Smash... in fact, he's among the slowest due to his bulky size and awkward proportions, which has not been fixed by evolution like other Pokémon with a similar shape due to the random factor of picking up garbage wherever found and adding it to his mass, which is already large at six-feet. This combined with the pure width of him - being slightly bigger than Bowser in this sense - makes him a huge target for opponents. This naturally makes him a little clumsy to handle, but it is made up for somewhat by his impressive weight; listed as over 230lbs in the Pokédex. Considering how tall he is as well, this isn't quite as impressive as it seems, but it still combines to make him a rather oppressive force.

What hampers him most, though, is the combination of his high fall speed, slippery traction, bad air speed and slow ground speed, whereby he kinda stumbles along similar to the abominations in Warcraft 3. He's a naturally-ailed Pokémon - but there's no reason to pity him. He sacrifices in athletics, sure, but Garbodor's body is his greatest asset in fights, providing ample ammunition for which he can overwhelm the opponents defences, like true poison-type. Keep in mind that Garbodor's garbage bag tail and arms do not count as hurtboxes, only his head and body do.​


Neutral Special: Clear Smog

Garbodor opens his mouth and releases a near-transparent cloud of poisonous gas, stretching out a Kirby in front of him and surrounding his entire body. The smog does not clear for a further fifteen seconds, dealing constant damage of 4% a second to all who are caught within this small area directly in front of Garbodor. Upon movement, the gas will disperse slightly - being pulled for up to a Bowser in distance before thinning out too much to affect opponents.

Although it may not seem immediately obvious why this matters, opponents who stand on top of any part of Gardodor's body after he has used Clear Smog are dealt constant damage of 6% a second. The exact distance is the same as with Jigglypuff's sleep attack; a good indication of how difficult it is to make use of this by itself. This effect disperses exactly like the regular cloud, thinning out and disintegrating after fifteen seconds.

Side Special: Trash Condensor

Garbodor pulls up his left arm with the single funnel, shooting out a solid stream of ooze, similar in colour to his main body's yellow-brown. Considering this is part of his body mass, he loses a 0.5 in weight from doing it, but gains a point in his ground and air speed. After 0.4 seconds, this ooze forms somewhat of a compact pile in front of Garbodor, being the height of Mario and the width of Kirby, having rounded edges but also triangular in shape. This statue causes opponents to be pitfalled if they come into contact with it, being stuck in this pile of trash - similarly, an opponent can destroy the pile by dealing it over 15% damage in a single hit. A pile can also be interacted with by Garbodor again, if he uses his side special while in front of an already made pile - instead sucking it up and regaining his lost weight.

Down Special: Un-stitch

Leaning back slightly and letting out a sharp sound of ripping, Garbodor decides to let out some of that trash hidden in his mass - it pour out as he moves forward, leaving an increase a steady river of that yellow-brown coloured trash that makes up his body. The trash is as high as Luigi, causing all who try to travel in it to be reduced to a quarter of their normal movement and half of their normal attack speed, and stopping them from jumping, forcing them to trench their way out of the sides. If caught prone, an opponent takes twice as long to get up as normal.

Foes caught in this trap are also dealt 2% per second, which can stack with other effects. If placed on top of the pile of ooze from the side special, the garbage obscures it - as well as any other traps laid down by Garbador, making it hard to identify the traps and easier for Garbodor to pitfall enemies. After spreading the trash around for a battlefield platform in distance, the input automatically cancels and cannot be used again until the dispensed trash is retrieved manually by Garbodor [which will be described in his garb game]. As the move dispenses the trash, Garbodor loses up to 3 points off of his weight [comparable to Link], gaining up to 3 points in ground and air speed, though, as a result and looking notably thinner. If dropped in the air, trash falls at Fox's falling speed, and is automatically recovered if it falls off the blast zone.

Up Special: Explosion

While it may not seem so, this is the crème de la crème of what makes Garbodor unique, as he is indeed not limited by his own body's normal restrictions - being unhampered by its partial destruction. First off, though - this move takes place in the centre of Garbodor's meaty torso, which is most of his mass even when fully using his down special. A gaseous explosion sets off here, as Garbodor seems to tense up and clench his two arms closer to his body over a period of 1.1 seconds. This creates a smart bomb radius blast that deals 15% and high knockback that can knock out opponents starting at around 120% for Mario.

You could just combine this with your other specials and let that be that. This is actually a lot more complex - strenuously connected as is, Garbodor's head and two arms are disconnected from his main body, which now automatically has spread its full ooze as used in the down special, on either side of it. Within this ooze lies the his left, one-funnel arm in pile to his left, with his right hand - with three tubes - lying in the pile to his right. His head, on the other hand, is now how Garbodor is controlled by the player, appearing two Ganondorfs above the explosion and falling at the speed of Fox, making it relatively easy to get back to the stage.

As the head, your size is tremendously decreased to less than Jigglypuff, with your weight being around that Pokémon's as well - you cannot be grabbed in this state. Movement is now done by rolling across the stage and bouncing off of the floor as high as one-and-a-half Ganondorfs - rolling across your body will have you regain your normal body. You can only regain your arms when you have your normal body again and walk past them. Rolling across the ooze increases the size of your head, making it weigh up to as much as Ike at maximum and dealing 6% and flinching when you roll past opponents. As your head, only damage dealt to you will count toward your percentage, while your two arms are invulnerable - your body takes knockback according to what percentage damage you were at prior to the explosion.

The minor, but absolutely important detail of this transformation is that your arms can function as they normally would do in inputs. The only exception to this is your side special, which can only be performed when connected to your body normally.​


Garb: Suction

Garbodor's grab works fundamentally alongside his specials. It can work in two ways - either when used with Garbodor body connected to his one-funnel arm, or when the arm is disconnected by use of your up special. The former use simply has Garbodor reach forward with this arm after 0.3 seconds, creating a small horizontal whirlwind effect out of his arm that sucks in enemies as twice Dedede's suction up to half a battlefield platform away. If they're successfully pulled in, they are sucked inside of Garbodor's body using a temporarily larger funnel arm, being dealt 4% a second on top of any other effects and have to mash to get out.

At this point, Garbodor is free to use his any of his other moves - his down special will simply release the opponent, but into trash, while his side special automatically pitfalls them in their own blob of ooze and his neutral special leaves them with constant damage of 4% a second for the next five seconds. Though your explosion may seem like the obvious choice here, it puts both your head and the opponent scarily close together in the air, so should only be used as a guaranteed kill move. Being grabbed while Garbodor has ripped himself open with his down special will immediately release the opponent - this likely into trash, and with the opponent facing away from Garbodor: this is one of the few occasions where the Garbodor player is likely to have better traction than the opponent, so use the opportunity wisely.

As far as the lone arm goes, instead of sucking up the opponent, it is dragged toward them - travelling as fast as Sonic's run if they come within half of a platform of the arm. This also goes for the various jumble of things you've left on the stage up to this point. If it succeeds in sucking up to them, it'll remain stuck to them and pointed out of their chest until they touch Garbodor's main body again, also carrying any effects over such as potentially with your neutral special. Using the grab input while the arm is connected to your opponent like this causes suction of its own - this can pull in trash from your down special, immediately crippling your opponent's ability to jump, or it can pull in other parts of Garbodor's anatomy to be closer to your opponent. Due to its small size, your head will also roll twice as fast under the effects of suction, dealing 8% damage to the opponent if it rolls under and trips them.​


Jab Attack: Body Slam

Garbodor slams his immense weight a Kirby in distance over a period of 0.4 seconds, dealing 8% damage. This may seem oddly generic at first, but it's an important move interaction-wise - using it while your stitches are undone causes the garbage flowing out of you to jump slightly, making that part of it a Kirby higher than the rest. This can be continued as you disperse it if your opponent lets you, making it high enough to even hide Garbodor's body in. If used whilst your opponent is inside you threw your regular grab, Garbodor gobs the opponent out of his mouth, leaving them prone on the ground in front of him and potentially trapped in your ooze.

Dash Attack: Crash

This is the other main way to separate body from smaller parts of your body. Garbodor increases his speed to that of Fox's dash, running haphazardly forward for as long as you hold the input - crashing into any opponents in his way, dealing 10% damage and decent knockback, killing of Mario when he's at around 170%. As a side effect, Garbodor's head rolls off behind the opponent, as well as his hands flying off in the same direction and landing slightly behind where the head naturally would - about a platform's distance away. This enables the two arms to be synced up in terms of distance, allowing the Garbodor player to play a positioning game in which he can drag in the opponent with his grab, while using other inputs to attack the opponent with his other arm.

Forward Tilt: Lethal Injection

Stretching out his three-pronged arm and presenting the tubes at the end of its hand, Garbodor forcefully jabs forward with the three after 0.2 seconds, damaging anyone within a Kirby's distance of Garbodor by 6%. If an opponent is successfully hit by the move, they are numbed by the effects of the injection - their attack speed dropping to a fifth of its normal speed, and incrementally flinching every second as well. This lasts for another seven seconds, or until the next injection. This shouldn't be difficult with how fast the move is already.

Up Tilt: Poison Gas

For once, Garbodor uses his right arm with the three-pronged tubes, stretching it to just a Kirby in front of him, and exhaling purple, poisonous gas from all three exhausts over a period of 0.4 seconds. Any foe touching the gas is dealt constant flinching knockback, as well as 3% damage every half-a-second. This gas expands to fill a space of one Kirby in front of Garbador, at first only being as tall as Luigi and hovering slightly above-ground. For every 0.2 seconds it's out, though, the gaseous cloud moves a Link in height upward - this being the only way for an opponent to escape the gas. Eventually, it will travel above the top blastzone, disappearing. This is best used in combination with your up special for a smooth landing with your head.

Down Tilt: Toxic Spikes

Its eyes slightly more piqued than usual and tensing every so slightly at his arms, Garbodor spits toxic spikes out of his mouth over a period of 0.5 seconds, five of them nestling directly around him at random intervals. Stepping on them deals an opponent 7% damage and flinching knockback, but also attaches the spikes to them at the point of impact, also acting ooze that the opponent may be wading through. If this is the case, the attached ooze weighs them down, reducing their jumping capabilities to that of Ganondorf until ten seconds later when the effects of the Toxic Spikes are over.​


Neutral Aerial: Air Suction

As Garbodor isn't adept at using the air even when he's at his lowest possible weight, his air game is mostly for grounding the opponent while also applying directly to when he's in his headless form. As such, this input is purely a translation of his grab in the air - aimable in any direction in a 180° area directly above Garbodor. This move can be held, even after landing to enable Garbodor to suck in airborne opponents - being able to land and still use your aerials is a trait shared by all of Garbodor's specials

Forward Air: Bite

Garbodor can't actually learn this, but being that he has massive fangs I think we can make an exception here. Simply executed, Garbodor lunges forward and bites with his massive teeth, hitting opponents for 8% damage as well as flinching knockback and leaving them poisoned, being dealt constant damage of 1% for the next six seconds. If used while Garbodor's head is separate from his body, he instead attaches himself to the opponent until they deal him 20% damage. This lets you get back to the stage relatively safely, with a press of the input releasing you from your opponent.

Up Air: Noxious Gas

Garbodor's head glows an odd colour of bright pink - and his eyes a light blue - for a period of 0.7 seconds, before releasing a plume of gas that at first only takes up a Kirby in space directly around him, before expanding to half the size of an exploded smart bomb, and then disintegrating over the period of two seconds. Anyone caught in the attack is dealt constant damage of 4% per half-second they spend inside the cloud, also being constantly pushed up by the force of the attack. Combined with your Explosion, you can use this move to finish off opponents directly above you in the air who have high percentages, but weren't knocked out [likely heavyweights].

Back Air: Vacuum Arm

This input is mostly out of convenience. Used normally, Garbodor uses his one-tubed funnel arm to search inside his mouth... is it looking for cavities? Nonetheless, after 0.4 seconds, he uses his funnel arm to spread the gas from your neutral special in a semi-circle spectrum directly around Garbodor, marking that area for the next fifteen seconds as an area that will damage foes for 4% per second they're inside it, and deal them flinching knockback. If used while the arm is separate - as in, when your head is technically in the air, the arm will shoot out the gas on the ground, making for a real hell-zone wherever it turns out to be.

Down Air: Recycle

Being the last move of Garbodor's to separate his head from his body, it pulls its head off with its arms and tosses it above its body by one Ganondorf, letting the body fall downward and hit opponents for 9% and spike knockback if positioned correctly, or simply good killing power if they're below the stage. If perfomed on the stage, however, the move operates as a good way to get your opponent prone on trash, as your heavy body momentarily crushes them, they having to escape at a quarter of grab release difficulty. In this time, it is relatively easy for you to re-attach to your body, and is a great time to follow up with an Explosion if your opponent is damaged enough.


Forward Smash: Sludge Bomb

Garbodor stretches forward his three-tubed arm to his right, slightly increasing their width, before shooting three sludge bombs simultaneously, after charging for 1.1-2.1 seconds. These are muddy projectiles relatively the size and shape of a Mr. Saturn, travelling in three arcs that becoming further in distance per projectile and which explode on contact with an enemy for 7-10% damage each, along with flinching knockback. If hit, the opponent suffers the effect of having poisoning any trash they go into, causing it to deal a further 2% on top of any current damage that is dealt from within it.

Likewise, this also strengthens the ooze from your side special to withstand up to 20% from a single hit before disintegrating, if an opponent then attacks it. They won't do this on-purpose, but may mistakedly attack an ooze to get to Garbodor's body. This is obviously a great move to use in tandem with your dash attack and separated grab, as it further drags your opponent through the mud.

Down Smash: Swallow

Garbodor rears his head back violently for 0.8-1.7 seconds, before crunching down on whatever is in front of him. If it's just more if his trash or ooze, he'll simply re-absorb it into himself. If used on an enemy who is shielding, it will pierce it in one at max, or damage it for half at minimum and push them away a good platform in distance. On non-shielding foes, it bites them up and has Garbodor chew them up in his mouth - dealing 12-15% damage. Once this is done, he spits them out - them taking a comical square shape, as if compacted like trash. They stay in this form for longer depending on percentage, having to mash out - but while like this, they can be influenced like normal trash. That doesn't mean just a regular grab - if you absorb them with your grab, then release them over the side of the stage with your Un-stitch, they'll fall as fast as trash does at Fox's falling speed.

Up Smash: Gunk Shot

Looking upward with an odd intensity for the normally vacant Pokémon, Garbodor puts his two hands to his mouth for 0.9-2.0 and creates a horridly green cloud of gas that travels up at the pace of Ganondorf's run, being about the size of Jigglypuff. This cloud will deal 15-20% damage to opponents, as well as high upward knockback that would put Mario in a jam starting at 130%. This in of itself isn't to be laughed at, and can be deadly in combination with some well-timed Explosion use or otherwise.​


Final Smash: Stockpile

The screen shifts to Garbodor as the stage in the background seems to go through many day-night transitions, backing out again after three seconds. Oh no, they were right! Global warming is real! The stage is now flooded with trash as high as Giga Bowser! And only Wall-E Garbodor can save humanity!​


Garbodor is a character who suffers, but dually benefits from the clichés of heavyweights alike. His great weight and need to get close to his opponent to really do anything makes for a hard match if you play it squarely without any of his trap or goop-ish mechanics that allow him to be in several places at once. The hardest part of the match is inevitably going to be the set up... but the bright side is, all you really need to do is hit your opponent. Get them stuck in some of your side special's goop, in your trash, or grab them and you're free to do all the set up you need. As soon as your opponent's in your trash and you've got some traps up, you have them right where you want them.

Of course, this is easier said than done. Getting them in your trash is primary, but after that, you'll also want to be able to separate and disperse your arms properly too, which requires some skill. There is an easy way to mind screw your opponent - by simply separating, then avoiding picking up one arm as well as using your suction to pull it around and confuse things even more. If you really wanted to, you could just leave your arm down there and simply play Garbodor like that, but that would mean you can't combine it properly with the obscuring powers of trash.

A lot of your moves have effects attached to them: this is further to overwhelm your opponent as they become trapped in the trash, without much of an idea of why. Damage-racking is definitely the name of the game, and it shouldn't be hard to do. Once you're done damage racking, either use Explosion or go for the gimp kill with your down air or through a blast zone knock out. Of course, you can always set up from the ground with moves like your up tilt and all your aerials are pretty much designed to be used in this way also. Though it's best not to underrate a Garbodor on the ground, using landed aerials, as he can also be a real danger.

In the end, though, you basically just want to be as scatterbrain as possible, use as garbage a plan as possible that your opponent couldn't possibly logically figure out, forcing them to search for you in the trash and ensnare themselves in your traps themselves. Garbodor's traps are the definition of a hidden bear trap that keeps the hunter on-guard every moment.​


Versus Weezing: Solid Advantage

What these two poison-types have in common is their need for space on the stage to build up their respective stockpiles of ammunition. What distinguishes them is that, while Weezing can create his gas far easier than Garbodor can create his trash, most of it is simply lying around without posing much danger. On the contrary, Garbodor's trash is almost as easily set up, while also immediately zoning out Weezing, who has few ways to access that part of the stage when he has poor vertical movement - and due to the height of the trash, he can't simply hover over it. That isn't to say he doesn't have a lot of moves which can spread his gas around effectively - it's just that without access to the parts of the stage occupied by Garbodor's trash, he can't spread around enough of it to start making good use of it.

Where Weezing has the upper hand, however, is in his throw in turning Garbodor's breaking up on its head. While Garbodor will find it very easy to damage rack Weezing if he's given the chance, if the latter can ever get that throw off on Garb - forcing his separate body parts to each spread gas - they lose much of their attractiveness in moving around the stage to mindgame or trap. It really can get messy if Weezing effectively disables Explosion... though it will take some very good play on part of Weezing to make this happen, as one drop into the trash and he's susceptible to that ooze pile pitfall as well all the other nasties Garb can serve up, such as throwing him off-stage as trash, which also takes advantage of Weezing's mediocre recovery options. The only saving grace there is, Weezing doesn't need to get close to his foe to pressure them, but neither does Garbodor.

Versus Muk: Solid Disadvantage

This is your definition of a bad match-up. Muk doesn't need to approach at all, unlike Weezing who has to try to push his opponent back with flinching gas to try and expand over more space. No, Muk's perfectly happy staying where he is - and when Garbodor inevitably comes to ruin his party, Muk has an arsenal of moves like slime wave and gunk shot which are designed to make him even more of a turret. Of course, if Garbodor ever gets off his trash in a decent place, Muk is screwed - which will be the main objective of his throughout the match. The problem is that he won't just be allowed to do that free of charge.

What makes this match even more difficult is that Muk is highly resistant to any kind of vertical knocking out, which means you'll have to try and get up close anyway to get a knock out, as well as initially trying to set up where he's camping. The matter of fact is, he can out-camp you - the bugger is the ultimate disease that naturally spreads out over the entire stage, after all. Moreso than Weezing, though, if you can actually get set-up by taking advantage of Muk's general bulky, slow speed, then you're going to have an easy time in trapping him within the confides of your damage racking, due to his size and his hatred of movement in general. What makes this a solid disadvantage, though, is just how lazy Muk can be, while Garbodor is going to be desperate for a foot in the door.​
 
Status
Not open for further replies.
Top Bottom