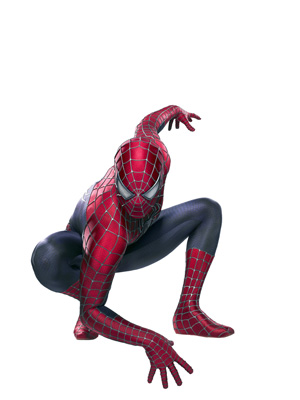
• Welcome to Smashboards, the world's largest Super Smash Brothers community! Over 250,000 Smash Bros. fans from around the world have come to discuss these great games in over 19 million posts!

    You are currently viewing our boards as a visitor. Click here to sign up right now and start on your path in the Smash community!

Make Your Move 5

Status
Not open for further replies.

JOE!

Smash Hero
Joined
Oct 5, 2008
Messages
8,075
Location
Dedham, MA


Spiderman
---

-BACKGROUND -
Bitten by a radioactive spider while going on a school field-trip, Peter Parker's DNA was infused with that of the arachnid's, gaining it's best attributes in the process. After letting a crook slide by him after stealing money from his unfair boss, he is shocked to discover the criminal kills his beloved Uncle Ben. At that moment he realizes that with the great power he has, comes great responsibility, and dawns the title of the Amazing Spiderman to protect New York from all crime.

- STATS -
Size: 6/10
Spidey isn't the prime physical specimen the other Superheroes are modelled after, he's only a teenager! He's about the same size as Zelda, with the width of Shiek (used for body length)
Weight: 4/10
As mentioned., he's kinda scrawny, but not *too* light. about the same weight as Pit

Walk: 3/10
Spidey walks at a decent pace, noting special

Run: 4/10
His run is also not too special

Traction: 9/10
Spidey has amazing traction due to his wall-clinging abilities

Power: 7/10
With his Spider-Strength, Spiderman packs quite a wallop for his size, yet only in a few moves. Most of the time he uses quicker attacks with less power to soften the bad-guys

Attack Speed: 5.5/10
Spidey is well known for his agile fighting style, of course his attacks are quick, but a few moves are laggy...

Range: 5.5/10
Spiderman's melee abilities only go as far as his feet and fists can extend, with his webs however, he can influence a huge area

Priority: 4/10 -> 8/10
Spiderman doesn't have invulnerability, so things like swords and whatnot will easily go through him his physical attckas

however, using his web-abilities give him the ultimate priority in the form of a grab...

First Jump: 10/10
Spiderman has an incredible jumping ability

Second Jump: 3.5/10
After the fist jump, Spidey loses some momentum. His second jump gives half the height as his first

Recovery: 9/10
While lacking a 3rd jump, and having a lackluster second one, Spiderman should rarely find himself in a situation where he is helpless due to his web grappling and wall clinging abilities

Fall Speed: 8/10
Spiderman falls fairly quickly

Air Speed: 7/10
Spiderman moves horizontally throught the air pretty quick, placing between Bowser and Falcon


Crouch: 8.5/10
Spiderman's crawl is near identical to snake's (hes a bit higher off the ground), but more....spider-like. His crouch sits him up a smidge higher than his crawl.

Hover: No
Crawl: Yes
Wall jump: Yes
Wall cling: Yes
Glide: No


-BASIC ACTIONS/ANIMATIONS -

Standard Pose:

Spidey stands a little slouched forward, ready to spring into action with his legs spread slightly and arms in a fighting position

Idle Pose:
Spidey crouches a little and looks left to right, arms out more

Walking:
Spidey walks forward, keeping his Standard Pose somewhat

Running:
Spidey runs forward, still crouched slightly

Dashing:
Spidey actually leaps forward a small distance (battlefield platform) very quickly before slowing to his normal run. Spidey is unique in that his dash only makes him faster during the initial movement, but Fox trotting can be dangerous as he could leap off the stage.

spiderman clears this distance in .3 seconds

essentially, spidey cannot dash like other characters, but make a quick jump, which goes into his run (he doesnt have superspeed :p)

Crouching:

Similar to this

First Jump:
Spidey crouches lightly for a moment, then springs upwards very quickly, arms down to his sides and legs together to just about Falco's height. When falling down his legs are brought up to about his chest and bent sharply, arms outstreched and slightly above him.


Second Jump:
Spidey spins mid-air and gains more height, ending in his falling animation.


Shield:
Spidey puts up a shield made of webbing in front of him and crouches slightly to fit under it. The normal bubble shield will form around him as he does so.

Spot Dodge:
Spidey swiftly crouches and leans toward the background, he is invincible during the whole animation.

Roll:
Forward: Spidey does a hop of sorts, turning in mid-air to face his opponent. there is 1 frame of lag where he can be hit as he lands.
Backward: Spidey jumps backwards swiftly. No hittable-frames.
Both rolls are a bit longer than his dash


Air Dodge:
Spiderman spins horizontally with his body extended, before returning to his "curled" fall animation


Asleep:
Spidey kneels on a knee, resting his arm on one knee and letting the other dangle, his head lowered, moving slightly

Dizzy:
Spidey stands up straight, holding his head and staggering forward and back a bit before shaking his head (arms still on) and going back to normal

---

- MOVESET -
-SPECIALS -


Neutral Special - Webshot

Spidey extends an arm and begins shooting a string of webbing in front of him, if it hits nobody, it will simply shoot out one strand for about a Battlefield Platform length. leaving spidey open as the strand comes out and after he is done shooting it.

If it does hit an opponent however, you can keep holding B to continue to encase your foe for up to 1.3seconds. Similar to Yoshi's Egg lay, your foe is trapped in a web cocoon and is highly resistant to knockback, and takes 3/4 damage. The effect lasts anywhere from .3-1.3 seconds based on button mashing and how long the web was applied.

The webbing process can be intterupted if spidey is attacked, instantley freeing the web-victim, and by button mashing during the process. This move can be dodged, leaving spidey open to attack.

Startup: .2 seconds as spidey shoots his arm out
Miss: If spidey misses, he suffers .5 seconds of lag as he shoots out a web line


Side Special - Web Blast
Seen many times within his movies, TV shows and games, Spiderman creates small balls of webbing he shoots as projectiles. The Web-Balls fire at a rate similar to falco's laser (no where near as long, about the size of a white pikmin), but do no knockback, just 3% damage per hit, there is however a 10% chance a web-ball hits the opponent's face, rendering them into a sort of dizzy state for .5 seconds before they pull the webbing off them.

Spidey crouches slightly to do this move, between his normal crouch and standing pose in height. He extends both arms and recoils them a little while they shoot alternatlivley. his legs are also spread far apart in the crouch, rendering him immobile.

The web balls are each about the size of the hook on Toon Link's hookshot, and travel as fast as luigi's fireballs, while going about as far as Zamus' stunner half-way charged

If held, the web balls will bit shot out from each hand (alternating) every .1 seconds


Up Special - Web sling

Spiderman's signature, and probabally most versatile attack.
Web Sling is Spidey's main form of recovery once knocked off the stage, being near instant, and locking onto the ledge allowing him to swing and climb to safety.
That's not all however, as with all of spidey's web manuevers.
Used from the air, Web Sling can attach to ledges, and be used again once you let go of the first string (jump), but only in one direction, and you lose your second jump. (no stalling under FD)
While attached to your web line, you can swing by pressing back and forth (yep, you can attach it to platforms above you!), climb up and down the line, and attack with A for a swinging kick.

when swinging you move at an air speed as fast as 90% of your dash speed, but slows down dramatically as you come to each apex of the swing, and loses distance that you can cover.
Doing the kick can regain some momentum and give back some swing distance.

(10% damage, med KB)

The kick is him shooting both legs forward while swinging, similar to the pump motion one has when on a swing.

It takes about .1 seconds for the hit box to come out, and lasts for about .5, with an ending lag of .3 as he brings his legs back

While grounded, the web sling acts as an extention of your normal grab, but angled diaganolly upwards, snatching persky airial foes right from the skies!

(acts as your normal grab, only towards the air.)

You can also grab people from the air, much like Diddy's sideB, and lurch yourself forward to use them as a stepping stone.
While swinging Spidey gains slight KB protection similar to Snake's UpB and Yoshi's DJ, but can be knocked off the web if he is stationary.
This move is quite handy, but comes at the price of not being able to defend yourself other than moving.

Web Sling can be angled straight up by holding Up, tapping it will go diagonal

the range of the web line is the same length as Samus's Zair, off stage it can strech a little to home in on the ledge

the line comes out in .3 seconds as spidey shoots his arm out/up and the line comes out, (.2 sec for the arm, .1 for the line)

If whiffed, spidey suffers the same lag as whiffing web-shot. If he hits nothing while off-stage, he will enter a helpless free-fall state.


Down Special - Web Zip

The web zip is a bit of an odd DownB move. The basis s that you swiftly sling a web line at your opponent (or his/her general direction) or at the ledge, and catapult yourself towards them/the stage at breakneck speed, feet first to deliver a tremendous kick.

The drawback is that it is A) easy to see coming and B) has some ending lag as spidey lands

The animation starts with spidey shooting out two stands of web (.4 sec) then drawing both arms back quickly, using the webs as a sling shot, and hurdling toward sthe opponent with his legs raised to attack (.6 seconds) before the kick hits, the opponent has a chance to dodge, leaving spidey open as he launches past them. (.4 sec as he is airborne, then lands quickly, .2 sec for each part. or just .4 sec of air time where you cant move as he is off stage)

Spiderman has higher priorety than normal with this move, able to muscle through most projectiles, and clang with some weaopn attacks

When in the air, the move can be angled downward slightly by holding Down, Tapping Down will have it go straight as normal

Like Web Sling, it can attach to platforms, and Opponents! If you snag a baddie mid air, it will provide a footstool, as well as doing some damage (5%)

Spiderman will enter a helpless free-fall state if his webs dont connect to anything.

(15% damage, very high kb, the webs shoot out the same length as his grab/link's clawshot)

-STANDARDS -


Standard Attack - Spider Combo

Spidey's AAA movem but there is a bit of a twist:
Spidey can initiate a combination jab! This is simply done by tilting the Control Stick Down or Up (or neutral) while jabbing, setting up for other moves or whatever you please.

Part 1:
A: A standard punch, swung from the arm facing the camera. 3% damage, negligable KB
.1 seconds. This begins Spiderman's assault, and has a range of .5 body lengths

Part 2:
AA: Spidey follows the punch with a swift kick done by turning himself with the punch 4% damage, minor KB. just pressing/holding A will continue the standard attack.
.2 seconds

A-DA:Tilting down while pressing/holding A will have Spiderman duck slightly, and chop at the opponent's legs with the same arm to trip them. 4% damage, trip.
.2 seconds

A-UA:Tilting Up while pressing/holding A has Spidey follow the first punch with a quick web burst to the eyes with his other hand, stunning his foe for a moment. No damage, .3 second "web-stun".
.2 seconds

Part 3:
x2 Neutral:
AAA: He finishes the combo with a small hop, where he quickly completes the spin with a big swinging kick from his other leg. 5% damage, light KB
.3 seconds

AA-DA: Spiderman finishes off from the kick by continuing to swing with the momentum he built up for a low, sweeping kick to the opponent's legs, knocking them off their feet and into the air slightly. 5% Damage, light KB (think Sonic's Dtilt but less power)
.3 seconds

AA-UA: Spiderman follows the kick through with a powerful uppercut with the arm he punched with earlier (facing camera). this option is a little slower, but does more damage, knocking the opponent up. 6% damage, light-medium KB (Upwards).
.4 seconds

Down:
A-DA-A: Spidey follows the chop with a double kick, sending both legs forward while crouched to boot the tripped opponent away. 5% damage, light KB (diaganol down, should send opponent along the floor)
.3 seconds

A-DA-DA: Spiderman grabs his downed opponent's legs and tosses them up in the air, slightly diagonally. 5% damage, light KB (60 degrees)
.3 seconds

A-DA-UA: Spiderman stands up slightly, and does a quick web-shot on his downed opponent, leaving them stuck for .4 seconds (.2 if button mashed). No damage, .2-.4 Web-trap.
.2 seconds (trap sets in on .1, leaving .1-.3 seconds to abuse the trap)

Up:
A-UA-A: Taking advantage of the stunned opponent, Spidey finishes the assault off with a strong elbow with the arm that shot the webbing. 6% damage, light-med KB (horizontal)
.4 seconds

A-UA-DA: Spiderman brings his arms back, winding up, then does a flip kick to the stunned baddie, doing a short back-flip and hitting his opponent with his heel, sending them flying!
6%, medium KB (45 degrees)
.5 seconds. this finisher does the most B, but is also the laggiest, allowing the opponent to react when they get the webbing off...if they are fast enough

A-UA-UA: Spiderman shoots two strands of webbing at his stunned foe's ankles, pulling them to their backs. 5% damage, trip
.4 seconds


Spidey slightly travels forward while doing the attack, about 1 body length

If able to pull of a full combo, you can do 8-13% damage, as well as various effects and set-ups.
The move has average priorety, about the same as Samus' jab attack, being able to power though most physical jabs, but loses out to those with added magics or weaponry.
As an added challenge to begin the combo you must hit the opponent, pressing Jab multiple times will just keep spidey doing the first punch.


Dashing Attack - Flying Kick
Spiderman launches his powerful leg forward during his dash, making for a decent kick to keep opponents at bay.

Startup: .2 seconds as spidey raises to the air

End: .2 seconds as spidey lands, the hitbox comes out during the second half of the startup, and is gone when he lands.

(10% dam, medium KB)

- TILTS -

Forward Tilt - Web-Spray
Spiderman sends forward a small, full web towards his foe, slowing them down, and making a small barrier bewteen himself and the opponent

The web creates a temporary hurt box a character length in front of spidey, and about half as tall, and will linger for .3 seconds, and be able to absorb 10% before failing

If a foe is hit with the web burst, they recieve 5% damage, and are dizzy for .3 seconds, as well as suffering minor Push-back (like mario/squirtle water attacks)

the move itself has the same animation as Webshot, but with two arms, if whiffed, the spraying of the web will take about .3 seconds, and have an ending lag of .1 seconds as he goes back to neutral, leaving .2 seconds to deal with a stunned enemy, or make a retreat

(5% dam, light push, stun)


Up Tilt - Arachno-Handle
Spiderman reaches both fists over his head, then swings them to the ground, lurching his torso forward slightly in the process to increase range.
This move is fast to activate, but the wind up and cool down have some costly lag frames.

the hitbox will be about an arms length and a half infront of spidey, and slightly above him.

The move takes about .75 seconds to activate, with . 3 seconds to wind up, .15 to swing, and another .3 to bring his arms back to neutral)

(12% dam, moderate KB, similar to Falcon/Samus's, but with his fists)


Down Tilt - Spider Sting
Spidey crouches and shoots his leg out swiftly at his opponent's ankles, tripping them and causing 4% damage.
The move is quick to activate, with hardly any lag, but it;s range is limited to just in front of spidey, as he leans back a bit to shoot out his leg, then swings it back to crouch.

this move comes out in .06 seconds (1 frame), and has an end lag (miss) of .1 seconds. the range is about a half of his body length

- SITUATIONALS -

Ledge Attack - Spider Drop
Spiderman does a handstand on the ledge, and quickly slams his feet down to the ground, back to a standing pose.
(10% dam, light KB)

Ledge Attack Over 100% - Spider Bite
Spiderman crawls up the ledge and then uses a two-legged varriant of his Dtilt to knock away the baddies who get too close
(10% dam, moderate KB)


Tripped Attack - Spidey Windmill
Naturally being down with what his NY brothas are upto, Spiderman swiftly windmill kicks around him before getting up
Hits on each side, and then when he gets up
(4% damage, minor KB)

- SMASHES -


Forward Smash - Web Glove
A move seen in the spiderman video games, spiderman encases his fist in a hard coating of webbing, to create an extra strong punch!
The smash can be charged for up to 2 seconds, and each .5 seconds, the glove gets slightly bigger (from just over his fist to x2 size)
Animation: Spidey holds one hand out slightly and winds up his other fist, coating it with web, then releases the punch in a vicious hook in front of him (arms length) before bringing the arm back and going back to standard pose

if done from c-stick (no charge), the move has a .5 second start-up of spidey bringing his fist back and covering it in web.
this is followed by hum lurching out 1.5 body lengths with his punch (.2 seconds)
finally ending with spidey bringing himself back to neutral (.3 seconds)
This move is spidey;s highest priorety physial attack, having his hand in a protective coating allows him to power though projectiles, and even some weapon attacks
(15-23% damage, very high KB)

Up Smash - Spidey Spring
Spidey hops back, and balances in a handstand, legs up in the air, but coiling up along with his arms as he charges the smash, then all at once launches upwards and slightly forward as he lands back on his feet.
The smash can be charged for 2 seconds
Animation: neglegible lag when hopping back, very fast when spidey fully extends (is airborne for a moment, and reaches as high as Dk's Usmash, but has the hitbox of Marth's, as in only his feet when they kick create a hit-box) and then he lands, crouching slightly before returning to standard pose

Start: .2 sec
When doing the srping: .2 sec
When landing from the move: .6 sec
(14-20% damage, high KB)

Down Smash - Web Snare
Spiderman creates a sticky patch of webbing on the ground to trap his enemies if they aren't careful.

This move does no damage, and is an odd trap compared to most.

Spiderman crouches and sprays a web on the ground (.5 seconds to spray, no ending lag. Size based on how long you charge, up to 2 seconds, and varying in size from 1-2 body lengths) which will then trap opponents unfortunate enough to step in it.
Opponents are free to use their moves, shield, and whatever as normal, but cannot move from that spot!

Any attempts to roll will result in a spot-dodge, and any specials or smashes that actually move you (raptor Boost, Space-Animal Side B, kirby f-smash, etc) will have the animation of it hitting a wall (or ceiling for vertical moves) where it animates, but doesnt actually "go" anywhere.

In order to break out of this move, one must either jump repeatedly (you cannot jump while trapped), use a teleport move (pika up B, Selda Up B, Dimensional cape), wait it out (the web lasts for 10 seconds) or be knocked out of the web (you take 2/3 kb while stuck)

Repeatedly pressing jump will get you out of the web anywhere from 1.5-5 seconds depending on frequency (lazily pressing jump like 3 times will result in halfing the time instead of the 1.5)

Spiderman cannot be stuck in his own web, and the bright white webbing should be a nice warning for people who enjoy pressuring spiderman to back off, or get stuck.

-AERIALS -

Neutral Aerial - Spinning Spider
Spidey spins forward once, one leg extended, and ends with the foot out for a moment.
The move has a range of about half of his leg out from his body, and ends with his leg extended that can sweetspot when the leg swings down and do 2% more damage

Jumping forward and neutrally makes the leg swing Clockwise, where as a backwards jump has spidey doing a counter-clockwise spin. It has no effect on the move, it just looks more natural.

Starting lag: .1 seconds as he starts the spin, the ove itself takes .2 seconds to animate, with another .1 seconds of ending lag

(5-7% damage, light-moderate kb)

Forward Aerial - Spidey Combo

Spiderman lets out a string of airial attacks! The more times you press F-air, the longer he attacks.

This is simply an airial version of spidey's standard AAA combo, with a few tweaks

F-A: Spidey shoots a jab forward at his opponent . 3% damage, negligable KB
.1 seconds

FAx2: Spidey follows the jab with a mid-air knee 4% damage, minor kb
.2 seconds

FAx3: Spidey continues the onslaught with a swift elbow to his opponent. 5% damage, light KB
.3 seconds

FAx4: Spidey then finishes the mid-air brawl with a powerful kick to send the baddies flying away. 6% dam, moderate KB
.4 seconds

the attacks animate essentially as described, with arms/legs switching each time. The kick is like a soccer kick, swinging forward and knocking the opponent horizontally away.

A short-hopped Fair string should only be able to make it to FAx2 due to spidey;s fall speed, allthough he does move forward about 1.2 character lengths, as well as fall a smidgeon slower.

The move is great for racking damage if you can trap your foes in the air, with little KB outside of the final kick to help it out


Back Aerial - Spider Kick
Spidey kicks behind him, slightly downwards, to send chasers away.
Spiderman looks behind him, towards the background) and shoots the leg facing the screen backward, his arms brought down slightly.
The move is essentilly lagless, taking only .1 second to animate, but only has average priorety (if hit it will be beat out by what normally beats out spidey;s attacks)

(6% damage, Medium KB)


Up Aerial - Web Umbrella
Another odd use for Spidey's webbing, he looks up and shoots a small burst of webbing to make a sort of shield above him, absorbing an attack from above.
the attack does no damage, and minor KB, but can absorb one attack, and bounce items, like wario's bike, or samus's armor pieces as if it were thrown straight down.
Be wary, the move only lasts for a few frames, and you are open to attack from all other directions, and while making the umbrella

The shield is the same size as the one created when spidey presses shield, only coverint the top of him now. The move comes out in .1 seconds, and lasts for .2, with an ending lag of .1 seconds.

The move will push you down slightly, and push away baddies in it's hurt/hitbox like his Ftilt.

The web shield will prevent an attack up to 15% damage

Down Aerial - Web Bomb
Spiderman shoots a glob of webbing down below him, covering his foes from above with a small layer of webbing, kocking them down and stunning them for . 5 seconds as they take it off.

if used on a grounded opponent, web bomb will trip them (make them fall and bounce on the ground slightly at >100%) and leave them in an animation where they get up, trying to get the webbing off for half a second, and do some damage.

If used on an air-borne opponent, the webbing will do some minor knockback, but at the same time stunning your opponent for .5 seconds as they take the webbing off, while adding .5 to their fall speed,
essentially making a psuedo-spike by making the opponent heavier, and fall faster for a moment.

Spiderman will face the screen and shoot his arms down, bringing his legs up, and to the sides slightly, shooting down a glob of webbing as big as his head for about the hit-box of Pika's down-air. (or 3/4 his height). The glob will fall at the same speed as mario (1).

start-up lag: .5 seconds as spidey turns, and brings his arms down, and creates the bomb.
ending lag: .2sec as spidey swings back to neutral air-pose, letting the bomb fall

(10% damage, moderate KB)

- THROWS -


Grab - Web lasso
Spidey Shoots a line of sticky webbing towards his foe, then reels them in. This web line goes about as far as Link's clawshot, and shoots out as fast as his Web Sling.
Quick to come out, but suffers the same lag as his Web Shot ability

Pummel - Knee
Spidey knees his grabbed opponent. 2% dam, but quick


Forward Throw - Yo-Yo
Spiderman throws his opponent diaganolly forward and upward, before reeling them in for a swift kick, sending them back yet again.
(12% damage, low KB)


Back Throw - World Wide Web
Spidey swings his opponent twice around, each time going further on the web line before being launched back off of it, with spidey facing them to take advantage.
(8% damage, moderate KB)


Up Throw - Crime Flyer
Spidey simply throws his enemy upward using his spider strength, slightly diagonally.
(3% damage, High KB)


Down Throw - Web slam
Spidey slams his opponent down and sprays web in their face, when the get back up, they are stunned for one second as they take the webbing off.
(5% damage, minor KB)


- FINAL SMASH -


Final Smash - Spider Sense
Spiderman uses his coveted Spider-Sense to quicken his reaction time! The Screen zooms in on Spidey as those classic lightning bolts surround his head and he looks around him for a moment, as the world music slows, and the color grays slightly, whith a small blur following Spiderman as he moves.
While his spider sense is activated, everyone and everything but spidey is slowed to a crawl.
This allows Spidey to manipulate the field any way he wants to for the next 10 seconds.
The slow is equivalent to 1.2 x that of a stopwatch

-EXTRAS -

- Extra Animations -

Up Taunt - Warm Up
Spidey stands straight and cracks his neck to the sides, and his knuckles by stretching his arms out, hands interlocked in front of him

Side Taunt - Breaking the fourth wall
Points to the camera, left hand on hip and says one of the following (he picks which at random)
"Is that a joystick or are you just happy to see me?"
"This is wackier than that time I fought megaman..." (MvC ref :) )
"I think you shoull'da used those codes"
"Maybe if you had bug-powers, you could have quick relfexes too" (insulting the player)


Down Taunt - Mild Mannered
Spidey stands straight and puts his inside (towards camera) hand on his hip, and rubs the back of his head with the other.
"Maybe I should've pulled my punches.."


Entrance - Dropping in
Spidey simply lowers upside down from a webline and gives a thumbsup to the camera when he lands


Win Pose 1 - Swinging in
The camera focuses up ons spidey as he swings up, does a flip, then lands in a dramatic pose, looking around

Win Pose 2 - Witty remark
Spidey is just stanind there, arms crossed
"You know, I could say something witty and annoying as usual, but I'm not one for overkill."
he shrugs near the last part, then continues standing

Win Pose 3 - Dropping down
Spidey lowers down from a string, upside down, and drops halfway, flipping to do the "web-shot" pose to the camera


Loss Pose - Clap
Spidey claps like everyone else....but upside down from a strand of web of course

- Symbol -


- Kirby Hat - SpiderKirby -


Just add the feet and arms! He will gain access to a short-range version of Web Shot

- Snake Codec Conversation -

Snake: Colonel...is that, is that Spiderman?
*static*
Snake: Colonel?
Spiderman: Hello, this is your friendly neighborhood spiderman!
Snake: What the? How did you get this channel?
Spiderman: Cell phone rang, guess you got the wrong number Rambo...Hey! Is that the box from your total Gym?
Snake: *grumbles*...wise guy huh?
Spiderman: I try.
Snake: I think I'm gonna have fun dealing with you...
Spiderman: So Chuck....did your writers come up with that or did you just rip it off the hundreds of other admiring fans of mine?
Snake: grrr....

- UNLOCK INFO. -
Spiderman is unlocked by completing classic mode on hard(or above) in under 10 minutes, showing your superhuman ability.

UNLOCK MESSAGE:
The Amazing Spiderman swings his way to the brawl

-COSTUMES-
Symbiote​
Red Team/Neutral​

Blue Team/Ben Reilly (darker red than neutral, more blue)​
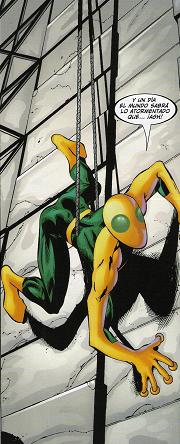
Green Team/Arachnoman​


-PLAYSTYLE-

Spiderman is a rather versitle character, having a plethora of damaging racking abilities, traps, manipulative attacks and ways to move around teh stage, there shoudl rarely be a situation spidey cannot work around if you use your abilities wisley.
That being said, Spiderman still must be cautious, as he suffers from Captain Mewtwo's disease: A combination of average priorety attacks, and a light weight on a tall(ish) frame. Luckily for him, he has so many ways to manipulate the opponents, his downfalls should be the last thing on the player's mind.

DEFENSIVE: Spiderman is a master in the art of no-get-hitsu . Using your web abilities like Web blast, Web burst, Web Umbrella and Web Snare, you can absorb damage, trap foes to make a retreat, or somply keep distance between youself as you wait for you opponent to mess up, punishing them with a grab or Web Shot for attempting to attack you.

MANIPULATIVE: Using moves like Spider Sting, Web Shot, "Up" Spider-Combo, Web Sling, and Web Bomb, you can knock your opponent around the stage, setting them up for a variety of other moves. Or, you can simply mindgame them by tripping, then doing a quick web attack to have them roll, seeing as how the web attacks look similar, and beat out most physical attacks, and punish accordingly. Or you can control the air with the web bomb, Spidey Combo and web sling; making it a risky space filled with gimps, footstools and alot of damage. The ground is your's to manipulate as well; the Web Zip makes for a nasty follow-up to a snared, or web-shot opponent...

AGGRESSIVE: Spiderman has a variety of aproach options, like Web Zip, the super-quick Spidey Kick, and his Fsmash. Couple this with his nice damage racking capabilities and follow-ups from his tilts, web attacks, grabs and aerials, you should have no problem trouncing the baddies.

GENERAL: Spiderman, as stated, can handle most situations, and has a variety of playstyles that can mix and match with each other. Even with all this great power however, one must remember his weaknesses:

  • A light weight and larger than average frame means that if hit, spidey is at teh mercy of his own reflexes, and his opponent's own onslaught.
  • His web attacks, though powerful, are horrendously punishable if missed, having no hit-boxes (or grab-box) as he sprays a web at nothing, as well as strong moves being able to muscle through his web-shielding.
  • A ranged grab means for a laggy OOS Grab...
  • Due to his epic first jump, he cannot short hop as well as one would hope, meaning he must rely on timing airials with his fast fall speed to get them in near the ground

Overall, Spiderman must be used with great responisbility to unleash his great power, for he's no superman; if you punch him he bleeds!​

~~~~~~~~~~~~~~~~~~~~~~


what do you guys think? this is my first custom moveset...thought this could be a fun one :p


NOTE: Made on wordpad....so no spell check (please PM or just say in a post if you catch something :) )
 

Jimnymebob

Smash Champion
Joined
Sep 26, 2008
Messages
2,020
NNID
Jimnymebob
That Ikkaku moveset was great.

I'm surprised by how much work you guys put into these, actually. Pretty cool. We aussies are too busy feeding our kangaroos to put time into movesets.
:laugh:- Which Mic are you?

Anyway, I just wanna say that I'm working on one more moveset, and I'm taking Warlord's advice lol.
It won't be done anytime soon (possibly not even this contest), and there's a strong chance it won't happen.

If it does, all I can say is it's for a character from a favourite game of mine;).
 

Kris121

Smash Journeyman
Joined
Nov 26, 2008
Messages
263
Location
THE INTERWEB
nice moveset joe but maybe you could make the standards a little less standard punch punch kick isn't usually the best way to go. But nice set. Happy B-day myself
 

Hyper_Ridley

Smash Champion
Joined
Dec 21, 2007
Messages
2,291
Location
Hippo Island
:laugh:- Which Mic are you?

Anyway, I just wanna say that I'm working on one more moveset, and I'm taking Warlord's advice lol.
It won't be done anytime soon (possibly not even this contest), and there's a strong chance it won't happen.

If it does, all I can say is it's for a character from a favourite game of mine;).
Yay!

I look fowards to it. ^_^


@Spiderman: Pretty cool for a newcomer move set. I liked the pictures for some of the moves, and how you incporporated his webs in more than just the specials.
 

Wizzerd

Smash Ace
Joined
Feb 24, 2009
Messages
929
Spiderman was pretty cool. The Up B was very clever. Anyway, sounds awesome, Hyper_Ridley! I actually was thinking about making a moveset for Johnny, but I decided not to... also
just Zombone, no Czar Dragon?
Maybe I'll make more SMRPG movesets. They're really fun to make. I look forward to your next moveset, Jimmymebob. I'm getting anxious for dawg food to post MYM Man...
 

JOE!

Smash Hero
Joined
Oct 5, 2008
Messages
8,075
Location
Dedham, MA
nice moveset joe but maybe you could make the standards a little less standard punch punch kick isn't usually the best way to go. But nice set. Happy B-day myself
Happy B-day (even if belated :p)

Thre probelm is, what else could Spidey do for his Jab move? I mean, thats how he fights....

(its punch-> kick -> kick btw :chuckle:)
 

☆_Mutha-Foxin GangstaKirby_☆

Banned via Warnings
Joined
Oct 15, 2008
Messages
1,672
Location
waiting for mars to hurry up with that **** blunt


Captain FABULOUS joins the brawl!​

Stats:


speed: FABULOUS!/10
strength: FABULOUS!/10
jump: FABULOUS!/10
second jump: FABULOUS!/10
wall jump GLAMOROUS RECOVERIES FTW!/10
puanch factor: FABULOUSLY INFINITY/10

A-moves:

A>AAA: Fabulous Falcon Punch to Fabulous Falcon Rapid punches! 1-50% per hit

Dash attack: Fabulously Suave Shoulder Smash 99%

Ftilt: Fabulously Gentle Pushing Falcon Kick 12%

Dtilt: Playboy Postion Slide Kick 76%

Utilt: PreSex Leg Stretch Drop 300%

Fsmash: Elegant Elbow Drop 999%

Usmash: Triple Rising Fabkick 999%

Dsmash: Fabulously Fronted Falcon Kick to Back Standing Falcon Kick 500%

nair: Fabulous Double Floating Falcon Kick 20-60%

uair: Fantastic Falcon BackFlip 43%

fair: The Ultra FabGlamInstaSweetspotted KNEE OF JUSTICE!!!
OVER 9000!!!!!! %

Dair: Mid-Air Falcon Twinkle Toes (percent unknown as this attack spikes THROUGH the stage and the percent meter rises too quickly to caculate) ???%

Bair: Falcon Reverse ***** Slap Of Questionable Sexuality 69%

B-moves:

nuetral: FALCON PUANCH! 99999999999999999999999999%

forward: Dashing FALCON PUNCH!!! 999999999999999999999999%

down: FALCON PUNCH... only with a kick instead of a punch <.< 99999999.2%

up: FALCON **** ._. falcon made me do it (its like falcons up B except with multiple YESZ! thrusts) 999%

Grabs:
Grab: a simply sexy soap opera style pull in 0%

Pummel: Repeating Ultra FabGlamNonSweetspotted KNEES OF JUSTICE!!!
9001%

Uthrow: Fabulous upward toss 30%

Fthrow: Fabulous Falcon 1-armed shove!!! 2%

Bthrow: Fabulous Falcon Back Shove to Gentle Standing Fabkick 25%
MISC.

FS: Captain Fabulous FLYING PINK PUUUUAAAANCH!!!

Captain Fabulous jumps into his bright pink Falconvertible and drives off the screen and he returns from the same side the car came from, he jumps out the wind shield in a BLAZE of Pink metero glory he shouts in a feminine voice FAAAAAAAAAAAAAABBBBBBBBBBBBBBBUUUUUUUUUUULOOOOOOOOOOOUUUUUSSSSSS FAAAAAAAAAAAAAALCCCCCCCONNN PUAAAANCH!!!!! and his entire body burst into pink flames, he the punches the air its self so hard that a pink flame falcon the size of the screen flys acrost the screen taking everyone in front of it out. all females ion the building and several surrounding buildings climax as it finishes.

taunt: show me da boobs! ( i guess hes just meterosexual -shrugs-) 45% (yup even his tuants can kill)

snake codec :

snake: otacon who is the flying fast fairy ***?

otacon: thats Captain Fabulous the cousin with questionable sexuality of Captain Falcon... hes just as fast strong and can still PUANCH! but comes with the humiliation of being beaten by a possible queer

snake: -gets Fabulously Falcon Puanched thusforth explodeing-

sleep: is always awake, waiting for you to show your moves

stun: same as Captain Falcons except he gets health from any sneak attacks from behind ._.

Kirby hat: none becuase no one can possibly suck Captain Fabulous
 

Jimnymebob

Smash Champion
Joined
Sep 26, 2008
Messages
2,020
NNID
Jimnymebob
That should win the contest.

We can have a lock now.

Spiderman's a good moveset and all, especially for a newcomer, but this.... This magnificent set just makes everyones moveset pale in comparison.
 

Jimnymebob

Smash Champion
Joined
Sep 26, 2008
Messages
2,020
NNID
Jimnymebob
That's terrible news.
You'll be missed Warlord.

Everyone's dropping like flies :(.
 

Baloo

Smash Ace
Joined
Nov 14, 2008
Messages
781
Are you guys total idiots? Dudes, read the tags. :p

Spiderman was OK, and the other one was... AMAZING!

OMG IM A MOD!
lol

EDIT: NOW I'M IN THE BACKROOM! ID LIEK 2 THANK MY MOMMY, AND MY... oh.

lolz
 

BKupa666

Barnacled Boss
Moderator
Joined
Aug 12, 2008
Messages
7,788
Location
Toxic Tower
Are you guys total idiots? Dudes, read the tags. :p

Spiderman was OK, and the other one was... AMAZING!

OMG IM A MOD!
lol
LOL I was in total shock for like ten minutes, then I saw the tag and ROFLed.

Well done MW.
 

MasterWarlord

Smash Champion
Joined
Aug 24, 2008
Messages
2,902
Location
Not wasting countless hours on a 10 man community
Guys, I'm on a library computer, away from my internet nazi parents. . .I was being 100% serious about all that. It's all true. I might be able to come visit you guys on ocassion or come back once I get out of my parent's house, but I'll probably be gone for the most part as long as Kholdstare.
 

BKupa666

Barnacled Boss
Moderator
Joined
Aug 12, 2008
Messages
7,788
Location
Toxic Tower
Guys, I'm on a library computer, away from my internet nazi parents. . .I was being 100% serious about all that. It's all true. I might be able to come visit you guys on ocassion or come back once I get out of my parent's house, but I'll probably be gone for the most part as long as Kholdstare.
Okay...I believe you now...but why did you tag April Fool's on the news?
 

Baloo

Smash Ace
Joined
Nov 14, 2008
Messages
781
Guys, I'm on a library computer, away from my internet Nazi parents. . .I was being 100% serious about all that. It's all true. I might be able to come visit you guys on occasion or come back once I get out of my parent's house, but I'll probably be gone for the most part as long as Kholdstare.
...

Really? If not, and you come back tomorrow with APRIL FOOLS! thingys, hmph. But if really...

There see always the chance that he's serious. Only time will tell.

:(
 

Hyper_Ridley

Smash Champion
Joined
Dec 21, 2007
Messages
2,291
Location
Hippo Island
Guys, I'm on a library computer, away from my internet nazi parents. . .I was being 100% serious about all that. It's all true. I might be able to come visit you guys on ocassion or come back once I get out of my parent's house, but I'll probably be gone for the most part as long as Kholdstare.
NOOOOOOOOOOOOOOOO!!!!

You're one of my best friends in MYM. This hurts. A lot.:cry:
 

JOE!

Smash Hero
Joined
Oct 5, 2008
Messages
8,075
Location
Dedham, MA
im not sure if thats a joke or not <.<


and outta curiousity....is Cpt fabulous actually eligable to win...?
 

Evilgidgit

Smash Apprentice
Joined
Oct 10, 2007
Messages
166
Location
England
I agree with Joe, I'm sure if I can believe that news, MasterWarlord. If it is true, then who's in charge of MYM5?

I love the Spider-Man moveset.
 

BKupa666

Barnacled Boss
Moderator
Joined
Aug 12, 2008
Messages
7,788
Location
Toxic Tower
I agree with Joe, I'm sure if I can believe that news, MasterWarlord. If it is true, then who's in charge of MYM5?

I love the Spider-Man moveset.
He said I'm in charge on the blog if he leaves cause we're rather similar in moveset quality.

This is what makes me doubtful about the whole thing, though, cause he isn't PMing me like crazy with the administrative rights that the Sin City leader has...:ohwell:
 

goldwyvern

Smash Ace
Joined
Nov 25, 2008
Messages
519
Location
Holy keys locked in the jet, Batman!
Um... not to break those wh 100% beleive this, but HE'S STILL ONLINE. Look at the lit up smash symbol. If the connection left he would be logged off.


...expect godzilla and my secret set within a couple weeks.

EDIT: CHECK THE CHAT! I WAS RIGHT!
 

BKupa666

Barnacled Boss
Moderator
Joined
Aug 12, 2008
Messages
7,788
Location
Toxic Tower
Um... not to break those wh 100% beleive this, but HE'S STILL ONLINE. Look at the lit up smash symbol. If the connection left he would be logged off.


...expect godzilla and my secret set within a couple weeks.

EDIT: CHECK THE CHAT! I WAS RIGHT!
Dude, speaking of the chat, the links I have are all bogus. Can someone post a new link?
 

majora_787

Smash Hero
Joined
Jun 23, 2007
Messages
6,122
Location
Texas
Hey guys, I'm temporarily dropping out of Make Your Move.

I don't have the time or patience to finish my movesets, and I'm out of further ideas anyway. I WILL finish my ideas EVENTUALLY, and if this is still up when I do, I WILL post them. But no garauntees.
 

Baloo

Smash Ace
Joined
Nov 14, 2008
Messages
781
For those who have yet to figure it out, I'm not going anywhere. This was simply an elaborate joint April Fool's Day prank by me and Spadefox.

In moveset making news, I'm finally making some progress on Illidan. He should be up before too long.
I WAZ RITE!

Oh yeah, you told me on the chat before you even posted it in the first place. :p

Concerning movesets: Ummm, don't expect that many from me. three or four, maybe.

Counting the Super star helpers (4 in 1) and Magypsies (3 in 1ish Ice climber's-esque thingy) as 1 each.
 

Tanookie

Smash Journeyman
Joined
Nov 17, 2008
Messages
436
Location
*sends Sundance a leather harness on Dragon Apprec
Okay, so...I'm leaving tomorrow to go with my chorus to New York City (we get to see In the Heights, hooray!!!), and I won't be back until Monday. I might get Internet in the hotel, but if not...well, I'll catch up on reviews when I get back. Sorry, Shake~, Sil'fer's review will have to wait a wee bit longer. :ohwell:

And so this can't possibly be seen as spam...ALRIGHT MW'S NOT LEAVING!!! (Although I totally called it.)
 

half_silver28

Smash Ace
Joined
Apr 25, 2008
Messages
862
Location
MYM, Ohio
From a world that goes unnoticed by mere humans…


Yuji Sakai and Shana join the Brawl!!!

Background
Shana and Yuji are the main characters of the anime series Shakugan no Shana. In order to truly understand this section, you should first educate yourself on the basic plot and terminology of the series here. Anyway, Shana is a Flame Haze, and as such was formerly human, but her life before becoming a Flame Haze has not been shown in the series. After spending years training with Wilhelmina Carmel and a skeletal being named Shiro, she becomes a true Flame Haze. She is bound to Alastor, the Flame of Heaven, who is one of the powerful Gods of the Crimson Realm, and takes the title of the ‘Flame-Haired Burning-Eyed Hunter’, a name that is feared by many Guze no Tomogara. She also obtains the sword Nietono no Shana, as well as an amulet, through which Alastor is able to talk with her, which she wears around her neck. She also has a strong liking for Melon Bread, thanks to Wilhelmina. Shana is extremely dedicated to her mission of protecting the balance of the world, so much so that she did not originally bear a name. She would typically be referred to by her title, or by the name of her sword, if she has to be distinguished from Flame Haze who bared her title in the past. Her view of the world is originally one of indifference, viewing Torches merely as objects, and referring to herself as ‘just a Flame Haze’. Shana also tends to be very hasty in battle and often relies on brute force to win, something even Alastor voices his concern about. Finally, in a moveset related note, Shana’s hair will almost always be fiery red in her smash brothers appearance (with heat visibly radiating from it), but her hair is black whenever she isn’t fighting, which includes during some of her and Yuji’s victory poses in this moveset. Also, her eyes are brown while not fighting, as opposed to red.

This is the point when Yuji Sakai finally comes in. He is a seemingly normal high school student, whose life is changed forever once he finds himself in the middle of a battle between Shana and a monstrous Rinne. He finds out that he is a Torch, meaning that he is technically already dead, and that he will seemingly disappear once his flame goes out. Shana then tells him the truth behind the world and the mission of Flame Haze. He readily accepts what she tells him and retains his general optimism, which comes as a surprise to Shana and Alastor. They sense that Yuji is not just a normal Torch, so Shana becomes a student at Yuji’s school in order to keep a closer eye on him. Before this, Yuji, upon hearing Shana’s reasons for lacking a name, names her Shana after her sword. While the relationship between the two is initially very rough, Shana is finally able to see Yuji as more than ‘just a Torch’ when he helps her defeat Friagne the Hunter, a powerful Guze no Tomogara. It is then that they reveal that Yuji is a Mystes who has a treasure known as the Reiji Maigo within him, which fully restores his power of existence at midnight each day. Therefore, Yuji will never disappear as long as he has a small amount of power existence left by midnight.

Throughout the series, Yuji and Shana grow much closer, with Shana increasingly relying on Yuji for moral support and sometimes even tactical advice during her battles with Guze no Tomogara. Shana is further humanized through her interactions with Yuji and other humans, and even falls in love with Yuji. Yuji requests early on that Shana train him, although it takes a while for him to show any noticeable progress. Later in the series, Yuji even learns some abilities that are normally only afforded to Flame Haze, thanks to the Reiji Maigo’s powers and training provided by Shana, Wilhelmina Carmel and Margery Daw. He also obtains the large sword Blutsauger, which he wields in battle. The abilities of both Yuji and Shana, as well as Shana’s emotional reliance on Yuji, are the core of this moveset.


Control Style
In a similar manner to the Ice climbers, you will only control Shana directly, and Yuji will be controlled by the computer. Unlike the Ice climbers, Shana and Yuji have different stats, and only some of the pair’s attacks involve Yuji. They also have separate damage meters, although you can’t see Yuji’s. Due to them having different stats, it is fairly easy to separate them. When they are separated (or if Yuji is KOed), any attack that involves Yuji changes, usually for the worse. Shana is not necessarily a bad character by herself, but many of her attacks are bland compared to how they are when she’s synced with Yuji, and she has trouble getting KOs as well. Of course, if Shana is KOed while Yuji is still on the field, he will disappear and respawn with Shana.

In the actual moveset, the names and descriptions of Shana’s attacks are written in red, while attacks that involve Yuji are in silver.


Stats

Shana
Power: 6/10
Height: 6/10
Weight: 4/10
Walk speed: 3/10
Run speed: 7.5/10
Traction: 6/10
Jump power: 9/10
(she has 5 jumps)
Drop speed: 7/10
Attack speed: 6/10
Priority: 7.5/10
Range: 7/10
Projectile: 6-10/10
Crouch: 7/10
Crawl: N/A


Shana is able to wall jump and glide using her fiery wings, which appear in a non-damaging burst of flames when she glides, uses her third jump or uses an attack that involves them)

Yuji
Power: 8/10
Height: 7/10
Weight: 5/10
Walk speed: 3/10
Run speed: 7/10
Traction: 6/10
Jump power: 5-9/10
(when synced with Shana, she grabs him when she performs her third jump)
Drop speed: 7/10
Attack speed: 5.5/10
Priority: 8/10
Range: 8/10
Projectile: 8/10
Crouch: 7/10
Crawl: N/A

Yuji has a special ability afforded to him by an Anti-Flame ring, which was originally used by Friagne the Hunter. Any fire-based attack or explosive personal projectile will not do damage or knockback to Yuji; he will automatically grab the ring, which suddenly surrounds him in a spherical gray barrier that protects him from said attacks. When he is synced with Shana, this becomes the pair’s normal shield, which turns black as it gets closer to breaking.


Special Mechanic: Intertwined Feelings
Throughout the series, Shana gradually became more dependant on Yuji as her main source of moral support, and the special mechanic these two share reflect this. If Yuji is KOed, Shana will yell ‘Yuji!’, but won’t do anything else at the moment. For the first 30 seconds that Shana is alone, she operates in the same manner that she does when she is simply separated from Yuji. After that, she starts getting fatigued as she realizes that Yuji isn’t coming back. She’ll start losing attack power over the next 30 seconds, eventually doing 2-3% less damage with all her attacks. Her normal standing pose will have her kneeling on the ground with one knee and using Nietono Shana to hold herself up. If she stands still for two seconds, you can hear say ‘Yuji…’ in a slightly depressed tone. Once 45 seconds pass, Shana will be unable to use her neutral special to power up Nietono Shana, which is a major detriment to her fighting style. So overall, Shana is a much better fighter with Yuji at her side.

Play Style
Being a double character, teamwork should be the main focus here. When Shana and Yuji are synced, they are mostly balanced, and extremely powerful. Yuji provides a lot of power, plus a very useful projectile. Most of the pairs attacks involve disjointed hitboxes, and thus can be used for spacing. You will also want to be using Shana’s neutral B move whenever you can, so that her attacks can be as powerful as they can be. While the pair’s down special has limited usage, it can be used to control the stage to an extent due to the silver flame effect. Shana’s forward tilt can also be used as type of stage control, due to its unique flame effects. However, many of their attacks are fairly laggy, so you really have to think before you attack. They also have very damaging throws, although they can’t really KO. Their only other drawback is that they are fairly light characters, but they do have a great recovery. A good Yuji and Shana player will know when to attack at a distance and control the stage, and when to get in the opponent’s face with their powerful physical attacks. Of course, you will want to keep Yuji alive as long as possible, because Shana becomes a completely different character once Yuji is gone.

As solo Shana, you will want to use her throws and aerials to keep your opponents at bay, and use her stronger attacks, such as her back aerial and forward smash, to give Shana space to use her neutral special. She’ll want to use it as much as possible, since she loses the ability to use it after 45 seconds. But hopefully, Shana will have a high damage percent anyway when Yuji dies, and thus won’t have to worry too much about losing power.


Specials​

Neutral Special: Blaze
This is Shana’s only special that remains the same, regardless of whether or not she’s synced with Yuji. Shana holds Nietono Shana (her sword) in front of her horizontally, with one hand resting on the blade itself. She closes her eyes, and the blade suddenly lights on fire! This is essentially a move that powers up Nietono Shana. Depending on how long B is held, the sword has three different levels of power (apart from it’s normal state), and they all give Nietono Shana a different appearance. Just like Samus’ Charge beam and other chargeable moves of that nature, Shana is able to retain any amount of time she spends charging, even if she doesn’t manage to hit one of her three power level initially. However, she can be forced to lose her charge time if she take a few hard hits consecutively. Speaking of power levels, here are the three levels that Shana can reach:

Level One
Shana has to charge for one second before she reaches this level. Nietono Shana’s blade turns red, which causes all her sword attacks to do fire damage (all three levels do this). This ends up adding 1-2% damage to her sword strikes.

Level Two
Shana has to charge for a total of 2 seconds to reach this level. Nietono Shana will basically keep the same form that takes while Shana is charging, that is, being on fire. This does not change the shape or size of the blade, however. Shana’s sword moves deal an extra 2-3% in fire damage at this level.

Level Three
To increase her power level to 9001 reach the third and final level, Shana must charge for a total of 4 seconds. The Nietono Shana’s blade will blaze ferociously, becoming more than twice its original size. This increases the hitboxes of all Shana’s sword strikes, which are now often able to hit opponents above or slightly behind Shana when they previously couldn’t. In addition, they now deal an extra 3-4% in fire damage.

Once Shana reaches a power level, she remains there until she charges long enough to move to the next level, or until one of several things happen. Obviously, Nietono Shana will return to its normal state if Shana loses a life. The sword will revert to its previous level if Shana takes 25% damage without hitting an opponent, or until she hits the opponent with 6 sword attacks. Finally, Nietono Shana will revert to its previous level after 20 seconds go by since it initially reached its current level. It takes careful planning to be able to keep Nietono Shana at a decent level of power. Just remember, that Shana’s attacks aren’t exactly weak to begin with, even when her sword is in its normal state. Shana suffers no start lag, but does suffer a low amount of end lag whenever she stops charging, but she will automatically stop once she reaches level three.


Forward Special: Silver Strike!/Crimson Thoughts
When Yuji and Shana are synced, this ends up being a fairly fast projectile move. Yuji opens one of his palms, and ball of silver flame about twice as big as a Mario fireball suddenly appears in it! Yuji then throws it in front of him, it being able to travel 3/4s of the main battlefield platform before it disappears. Yuji can also throw diagonally upwards or downwards if the control stick is tilted as he prepares to throw; however the fireball will disappear upon contract with the ground or a wall, leaving behind a small amount of non-damaging flames. If B is held when this attack is first activated, Yuji will open both of his palms, and a silver fireball will appear in each of them. He will then throw both of them one at a time, with half a second of separation between the first and second fireball. Each of them can be aimed in the same fashion that a single fireball can. Each fireball deals 6-7% damage and very little knockback, in addition to briefly engulfing the opponent in flames. This attack also has a special circumstance under which it can be used. If Yuji and Shana are synced and Shana is knocked down, pressing B quickly will allow Yuji to retaliate immediately by throwing a fireball. However, he will only be able to throw one under this condition. The amount of start lag Yuji suffers depends on whether he throws one or two fireballs; he suffers a medium amount of lag if he only throws one, and he’ll suffer a about a quarter second more if he throws two. This attack has a low amount of end lag regardless.

When Shana is by herself, the power of this move varies. Shana will swing Nietono Shana in front of her horizontally. When happens from there depends on which level of power her sword has currently achieved:

No Level
If Nietono Shana isn’t currently at one of the three levels, this attack functions as little more than a normal sword swipe, dealing 7-8% damage and low knockback to opponents.

Level One
At level one, this attack is a semi-decent projectile. Shana fires a short burst of flame from her sword, which is about the same size as one of Wolf’s lasers. However, it only travels half of a main battlefield platform before disappearing. It deals 6-7% fire damage and flinching knockback to opponents.

Level Two
At level two, this attack is actually kind of good. Shana fires off a burst of flame from Nietono Shana that is about the same width of ROB’s fully charged laser, and reaches across 3/4ths of a main battlefield platform. It deals 10-11% fire damage and low knockback to opponents, while also having good priority.

Level Three
At level three, this attack is really good, as you might expect. Shana fires off a large burst of flame that is about as wide as one of Lucario’s fully charged aura spheres and travels across 3/4ths of Final Destination. This attack can hit opponents up to 4 times, dealing 11-14% fire damage and medium knockback. It has great priority as well.

Regardless of Neitono Shana’s level, Shana suffers medium start lag and low end lag when using this move.


Up Special: Increasing Flames
While this move does change when Yuji and Shana are synced, the basic idea of it remains the same. Shana pauses for half a second, and suddenly sprouts fiery wings from her back! The wings are both two character lengths long, and stretch as far out as possible once they appear. Shana then has the ability to fly for one and a half seconds at about the same speed that ROB travels with its up special, after which she will quickly go into helpless state. The wings themselves deal 3-4% damage and flinching knockback to opponents who come into contact with them. In addition, Shana will be free to use her aerial moves while flying. When Yuji is present, Shana will simply grab his hand and continue flying normally, although she won’t be able to use her aerials after she grabs him. Also, it’s worth noting that Shana will grab Yuji if she manages to come into contact with him at any time he is in danger of falling to his death. That means that if Yuji is knocked off the stage at any time, Shana can save him by jumping off the stage herself, fastfalling until she is near Yuji, and using her up special. This move has medium start lag and low end lag.

Down Special: The Intricate Yuji/Fuzetsu
When Yuji and Shana are together, Yuji will be the one creating the Fuzetsu. Yuji closes his eyes and points at the ground. A gust of wind will suddenly fly out from Yuji’s feet, visibly moving his hair and stuff. A light bluish, circular insignia then appears around Yuji, which quickly expands and disappears off the sides of the screen. This signifies the casting of a Fuzetsu (it can also be called a Seal, but Fuzetsu sounds cooler). A picture of that insignia can be seen here. After that, a certain radius around Yuji takes on a reddish hue. This effect goes through all non-solid platforms, and the horizontal length that it covers depends on how long B is held (Yuji will stay in his initial pose until the actual Fuzetsu is cast). Basically, the Fuzetsu affects the area three stage builder blocks on each side of Yuji without B being held. If B is held, Yuji will suffer a bit more lag before casting the Fuzetsu, which will cover the same length of Luigi's Negative Zone. Anyone who happens to get caught in the initial casting (the reddish color effect), will be instantly frozen in place. If the victim is in the air when they’re frozen, they will fall to the ground, and end up in their tripped animation if they hit the ground. However, they fall slowly, as if they were under the effects of Shadow’s ‘Chaos Control’. This does not affect Shana or Yuji, or any of their allies in team battle. In fact, this move doesn’t affect opposing Shana and Yuji players, nor does it affect Margery Daw (by Pelikinesis) or Wilhelmina Carmel (by Sirkibble). Yuji and Shana are free to come up and attack their frozen opponents, who will take the full damage of any attack they are hit with, but will only take low knockback. After being hit, the frozen effect goes away. It is possible for an opponent to shake off the frozen effect, by mashing the A button 30 times. On another note, the red hue actually spreads out from where Yuji is standing and takes half a second to cover its total length, or a full second, in the case of a Fuzetsu that covers the whole screen. By dodging at exactly the right time, one can avoid the effects of the move. When Yuji casts Fuzetsu, a ring of silver flame that is about as tall as Luigi forms around Yuji, being four stage builder blocks away from him on each side (two if B is not held). Opponents who touch the flames take 8% fire damage and low knockback. Even though the effects of the Fuzetsu only activate upon the initial casting, the reddish hue remains on the stage for 10 seconds, and Yuji will be unable to use this move again until it disperses. As for lag, there is a medium amount of start lag for this move, and a high amount when B is held. There is a low amount of end lag. After Yuji casts Fuzetsu, he will be unable to do so again for 50 seconds.

When Shana casts Fuzetsu, it basically works in the same way, but with a few differences. Shana’s casting pose has her pointing above her head, and the circular insignia appears directly above her before it expands. It also lacks the silver flame effects, since that is not one of Shana’s abilities. However, Shana only has a low amount of start lag for her version of the Fuzetsu, due to having more experience casting them. She still has a low amount of end lag as well. So in some situations, it might actually be better to have Shana cast while she isn’t synced with Yuji. After she casts, she will be unable to cast again for 50 seconds.


Basic Attacks

Neutral A Combo: The End to Everything, The One Beginning/Sociometry
And here we have the basic attack combo. Shana attacks with two horizontal sword strikes, reaching about two stage builder blocks in front of her. While she is doing this, Yuji pulls what looks like a bookmark with Japanese writing on it out of his pocket. The bookmark suddenly glows with white light, which briefly engulfs Yuji in light as well. When the light fades, Yuji is suddenly holding an extremely large sword: Blutsauger. A full image of the sword can be found here. Yuji then swings the sword vertically in front of him, slamming it to the ground (this happens right after Shana’s two sword strikes). This hit reaches two and a half stage builder blocks in front of Yuji, due to Blutsauger’s size. The first two hits do 3% and 4% damage respectively, plus flinching knockback. Yuji’s strike with Blutsauger does 8% damage, plus medium knockback, making this move capable of getting KOs at higher damage percentages. This move has no real start lag, but has medium end lag.

When Shana is not synced with Yuji, this becomes one of her few attacks that becomes kind of boring in this situation. Shana again attacks with the two sword strikes she uses when synced with Yuji, but she does so a bit more quickly, since she doesn’t have to wait for Yuji to get out Blutsauger. Both of the sword strikes do 4% damage this time. This move still has no start lag, but has a low amount of end lag.

Dash Attack: The Early Movements of Peril/Inside the Battle
Shana suddenly stops running and quickly skids to a stop. Before she completely stops, however, she attacks with a quick horizontal sword swing. After she attacks, Yuji immediately steps in. He attacks with a punch that only has as much range as a jab from Captain Falcon. Yuji’s arm radiates with light purple energy, showing that he is channeling power of existence into his hands to make his attack more powerful. Shana’s attack deals 6% damage with flinching knockback and Yuji’s deals 7% damage and low knockback. This move has medium start lag and low end lag.

When Shana is alone, this is a rather boring attack. Shana simply uses the same attack, but without Yuji. This version does 7% damage and low knockback. It still has medium start lag and low end lag.

Forward Tilt: The Beginning of Everything
Here we have our first attack that doesn’t involve Yuji. Shana swings her sword horizontally, getting two stage builder blocks of range. Right as she starts the attack, Nietono Shana suddenly bursts into flames, making it look similar to its Level Two state from Shana’s Neutral B move. Of course, it doesn’t do this if the sword is already at Level Two or above. Opponents who get hit by Nietono Shana take 8-9% fire damage and low knockback. Also, flames from the sword drop onto the ground as she swings, which provide an additional effect for this move. The flames, which take up half a stage builder block on the ground and are one block tall, linger for one and a half seconds. Any character other than Shana or Yuji who touches the flames takes 3% fire damage and flinching knockback. This move has low start lag and low end lag.

Up Tilt: The Lit Flame
This one of Shana’s few moves that doesn’t involve the use of Nietono Shana. Shana raises her arm and points towards the sky. There is a sudden flash of yellow/white light, and a shining burst of light a little bigger than a soccer ball radiates from Shana’s finger for half a second. The hitbox of this attack reaches two stage builder blocks above Shana. Opponents can be hit up to 4 times by this move, which can do anywhere from 4-16% damage. However, it is fairly hard to hit opponents all 4 times. Since the hitbox is fairly high up, shorter characters such as Kirby or even Pikachu will not be hit even if they are standing right next to Shana. Even characters who can be hit by it while standing next to Shana will likely only take 2 hits and 8% damage. This move has medium start lag and medium end lag, making this a punishable move. It also has good priority.

Down Tilt: The Scarlet Death Struggle
Shana slams the tip of her sword to the ground. Suddenly the whole area under Shana’s feet (plus one stage builder block on each side) erupts in flames. They are about as tall as the flames created by Shana’s forward tilt, and deal 7% fire damage and low knockback. The flames remain for half a second, after which Shana will be free to move. This attack has low start lag and low end lag, and bad priority.

Smashes​

Forward Smash: Merging Powers/The Confused Flame Haze
Finally, another combined move! Shana starts out by swinging Nietono Shana vertically, letting the tip of the blade hit the ground one and a half stage builder blocks in front of her. This causes a small explosion at the spot the tip hits, about as large as the ones created by Snake’s grenades. This deals 14-20% damage and flinching knockback. However, if the opponent is standing right next to Shana when she attacks, they will only be hit by the sword swing, not the explosion. They will instead take 11-17% damage and flinching knockback. They will also have a brief chance (like a quarter second) to get away before Yuji follows up on Shana’s attack. While Shana is attacking, Yuji again brings out Blutsauger, in the same manner as in the neutral A combo. Yuji follows up Shana’s strike by swinging Blutsauger horizontally, which deals 13-19% damage and great knockback. When Yuji actually hits a foe with this, they are stunned for a brief moment before they take the actual knockback, similar to the second hit of Toon Link’s forward smash. At this moment, light-blue designs will suddenly be visible on Blutsauger’s blade, which will not be visible at any other time. This attack as a whole has low start lag and medium end lag, and both parts of it have great priority.

When Shana is alone, this move becomes a slightly tweaked version of Shana’s part of the combined attack. It looks the same, but it now deals 14-21% damage and medium knockback. It has low start lag and low end lag, and good priority.

Up Smash: A Shattering Wish
Shana slightly arches her back, and two bursts of flame suddenly shoot out from her back, from the locations where her fiery wings would usually appear. These bursts of flame reach one stage builder block on either side Shana, as well as one block above her. This can hit opponents up to 6 times, doing anywhere from 2-14% fire damage (4-22% fully charged). It also deals low upwards knockback and has no killing potential. After using this attack, Shana’s wings actually do appear on her back after the flames disperse, but this effect is only cosmetic; her wings will disappear after three seconds unless Shana uses her third jump or her up special. This move has medium start lag and low end lag, and has good priority.

Down Smash: Respective Paths/The Burning-Eyed Hunter
Shana holds Nietono Shana above her shoulder as she charges, which will light on fire if it isn’t already at Level Two or above. She then swings it downwards diagonally. Shana’s strike is very quick, and briefly leaves a large burst of flames in the air, which disappears after a quarter second. Getting hit by the sword swing deals 13-20% fire damage and medium knockback. At the same time, Yuji points an open hand towards the ground behind him (the opposite direction that Shana is attacking), and holds his wrist with his other hand. He then fires a fairly large ball of silver flames out of his hand, which hits the ground one character length in front of him and promptly explodes. This explosion is a tiny bit bigger than the one caused by Snake’s C4. It deals 14-21% damage and great knockback. This move as a whole has low start lag and medium end lag.

When Shana is alone, this move is simply a variation on her part of the attack while synced with Yuji. This version deals 15-22% damage and medium knockback, and has low start lag and medium end lag.

Aerials

Neutral Aerial: Complication, Activation, Confrontation/Tragedie
When synced with Yuji, this is a very damaging aerial. Shana starts out with two diagonal sword swipes in front of her, which get one character length of range. Each swipe causes 3-4% damage and flinching knockback. After this, Yuji clasps his hands together and attacks with a powerful two-handed slam attack. It only gets half a stage builder block of range, but it deals 7% damage and spikes the opponent downwards. Yuji’s arms slightly glow with light purple energy when he attacks, which signifies that he is channeling power of existence into his fists to power up the attack. This move has no real start lag and medium end lag. Shana’s sword attacks have decent priority and Yuji’s attack has great priority.

When Yuji is absent, this move changes completely. Shana holds Nietono Shana in front of her. A controlled line of flames suddenly comes out of the back of the blade and begins to circle around the sword. You can see a pic this attack in action here. The radius at which the line of flames circles Nietono Shana increases as it moves up the blade, eventually moving a radius of one stage builder block from the sword. This effect also goes one stage builder block beyond the length of blade, giving this move a very large hitbox in front of and under Shana. It takes a full second for the flames to reach their maximum distance from Shana, so opponents can see this attack coming. After the flames reach their maximum range, Shana is free to use another aerial, at which point the flames will disappear (the flames will automatically disappear after another second). The flames can hit multiple times; it deals 3% fire damage per hit and flinching knockback. In addition, this move can negate any non energy-based projectile that comes into contact with the flames. It also causes explosive projectiles and items to explode, which may or may not damage Shana, depending on how close to her the explosion occurs. All this makes this move more of a defensive weapon than an offensive one, which gives solo Shana a great defense against certain projectile spammers. This move has low start lag and low end lag, and decent priority.

Forward Aerial: Triangle
This is a rather cool, but strange move. Shana attacks with two forward sword strikes; first a diagonal one, then a horizontal one. After a quarter second pause, Shana attacks with another diagonal sword strike, on the opposite side of the first diagonal attack. These attacks get one character length of range. Each of these strikes leave a controlled line of flames in front of Shana along the path where the sword travels, forming a fiery triangle of sorts half a character length in front of Shana. The triangle itself causes no damage, its just there for effect. The sword attacks deal 3-4% fire damage. The first two attacks deal flinching knockback and the final one deals low knockback. The move has low start lag and low end lag, and good priority.

Back Aerial: That Which Must Be Protected
Shana holds her sword under her arm, and puts her hands together at her side. She quickly pulls them apart, revealing a slightly volatile line of flames between her palms. She then swings it behind her, the flames acting as a makeshift sword (that curves a little as she attacks with it). This only gets half a stage builder block of range, but it’s a pretty powerful move. It deals 9-10% fire damage and good knockback. This move has medium start lag and low end lag, and great priority.

Up Aerial: Awakening

Shana suddenly dashes one stage builder block upwards. She is surrounded by a flash of red energy while she does this, although the energy itself isn’t a hitbox. Shana’s body is the hitbox for this move. This attack deals 6% damage and low knockback. In addition to this, if Yuji is nearby when this move it used, Shana will grab his hand and take him along for the ride. Yuji will continue falling normally after this. This move has no real start lag and low end lag, and decent priority.

Down Aerial: Firestarter
Shana holds Nietono Shana behind her back, gripping it tightly with both hands. She then swings it downwards. When the sword is pointing directly downwards, it will briefly light on fire, then shoot a blast of fire towards the ground. This blast of fire is about the same size as the one Shana fires with her side special when Nietono Shana’s is charged to Level One (or Wolf’s laser). It travels very quickly, as quick as one of Samus’ Super Missles. When it comes in contact an opponent, it explodes, causing 8-9% fire damage and low knockback to foes. It will also explode when it hits the ground, but it will only damage opponents who are extremely close to the blast zone, which is the same size of a bob-bomb’s blast zone. It will also leave a small amount of flames on the ground where it hits, but they have no effect on battle and will disappear after two seconds. This move has medium start lag and medium end lag, and good priority.

Grabs​

Grab
Only Shana will perform the grab, not Yuji. Shana grabs with both hands, getting only an average amount of range. Her grab has no real start lag and no end lag.

Grab Attack
Shana roundhouse kicks the opponent hard in the chest, dealing 4% damage each time. However, she can only do this once per second, so getting off more than one is difficult.

Forward Throw: Violent Breathing
Shana pushes the opponent forward, seemingly letting them go. But then she suddenly darts forward and stabs them in the chest… with her hand. Yep. Surprisingly, this only deals 5% damage. Afterwards, Shana pulls her hand out of them, which deals 3% damage and causes the opponent to collapse. They are free to move after this.

Back Throw: Ex’s and Oh’s
Shana tosses Nietono Shana up into the air. It travels two and a half stage builder blocks upward until it come back down, spinning as it does so. At this point Shana jumps up and grabs the sword, turning around to face the opponent. She then holds it horizontally in front of her and lands next to the opponent, striking them with the sword and dealing 5% damage. She then swipes diagonally upwards, dealing 5% damage and low knockback. Shana ends facing the opposite direction when she finishes this move.

Up Throw: Torch Song
Shana tosses the opponent above her head, then somehow manages to balance them on the tip of Nietono Shana. Suddenly, the blade lights ablaze, and a controlled line of flames begins to circle around it. This looks almost exactly the same as what Shana does for her solo forward aerial. In this case, it only takes half a second for the flames to reach their maximum range. During this time the opponent takes four hits for a total of 8% fire damage, and the final hit deals low upwards knockback.

Down Throw: The Healing Flame
Shana closes her eyes, and the opponent is suddenly engulfed in blue flames for half a second. Once this wears off, they… HEAL 10% DAMAGE?! That’s right; this throw actually heals its victim… but there is an upside. The whole bursting into flames thing is kind of shocking for your opponents, they will start to scream once they light on fire. When the flames disappear it takes them another half second to figure out that they’ve, in fact, been healed by this move. Shana is free to move once the flames disappear, so she can get in a free attack on her confused foe if she acts quickly! However, this throw should only be used once on that particular opponent. If it is used again, the victim won’t scream when they light on fire, and will be free to move once it wears off. So you’d basically just be healing them. Although, after that particular foe dies and respawns, you will be able to make of this throw’s unique effects once again.

Final Smash​

Tenpa Jyousai
Wherever Shana is, she holds her amulet with both hands and says “Tempa Jyousai”. The amulet immediately starts glowing with yellow light, which increases to almost fully engulf Shana. It then suddenly turns into a huge ball of yellow light, which takes up half of Final Destination and is 5 stage builder blocks high. It then explodes into a huge amount of flames, shooting flames (no they’re not THAT big) that are about the same size as the flames Shana produces with her Level Three side special. They deal 15% damage and medium knockback. It also creates a huge, 8 stage builder block pillar of flames in the middle of where the ball of light was. Contact with the pillar traps the opponent and deals a total of 60% damage, but they receive no knockback when it subsides. The pillar turns into raging flames after 2 seconds, and shrinks to 3 stage builder blocks high. It continues shooting out flames in every direction for 2 seconds afterwards. Then the fire picks back up, taking up the same area that the ball of yellow light did, but being 8 stage builder blocks high. It starts shooting out PK Starstorm-sized balls of fire out randomly, which explode on impact with the ground or an opponent, causing 25% damage and great knockback to anyone they hit. After 3 seconds of this, the huge amount of fire explodes, sending the same amount of fire in each direction. While this fire can be dodged, it deals 35% damage and unholy knockback to anyone who gets hit, and it automatically breaks shields. Luckly, it only takes up that space for half a second. It also fires a pillar of flames up into the air from the same spot the first one was, only this one reaches all the way to the top of the stage and lasts 2 seconds. Contact with this pillar deals 50% damage, but not damage when it subsides. When it does subside, it reveals a huge flaming golem-like creature (sorry, best pic I could find) with a red light on top of its head (you can’t see a face). There are also a short amount of flames burning around his feet, taking up half of Final Destination. That is Alastor, the God of the Crimson Realm himself. He is as wide as Giga Bowser and as The whole point of this was to summon him into the world. Contact with Alastor or the flames at this point causes 12% damage and low knockback. After 3 seconds, Alastor lets out a huge roar, and the flames pick up again, forming a huge pillar of flames that completely engulfs Alastor and reaches all the way to the top of the stage. Contact with this pillar traps the opponent and causes a total of 70% damage and unholy knockback when it ends, practically being a guaranteed KO. After 3 seconds, the screen is suddenly engulfed in yellow light. When it subsides, Shana is seen laying on the ground, along with Yuji. Even if Yuji was dead at the time, he will reappear anyway, with the same damage percentage as Shana.

Taunts & Victory Animations​

Up Taunt: Urusai!
Shana turns towards the screen and blushes slightly, perhaps noticing that someone is watching her. She puts her hands at her sides, closes her eyes, and says: “Urusai! Urusai! Urusai!” This could nearly be considered Shana’s catchphrase, which means “Shut up! Shut up! Shut up!” in english.

Side Taunt: The Crust is the Best Part!
Shana produces some melon bread out of who knows where and happily takes a bite out of it. This being one of her favorite foods, she makes no effort to mask how much she’s enjoying it. And no, this doesn’t heal her.

Down Taunt: A Prize/Be OK
That’s right; this taunt changes depending on whether or not Yuji is alive at the moment. If he is alive, Yuji will start this taunt by saying “Shana… If I prove myself useful, will you give me a prize?” in japanese. Shana responds by saying “Shut up! Just get going!” in Japanese (yes, ‘shut up!’ is still ‘urusai!’). About a second after that, Shana can be heard saying “Baka…” under her breath. This means ‘idiot…’ in English.

If Yuji is KOed, this taunt centers around Shana’s concern for him. Shana says “Yuji… please be ok…” in Japanese. Then you can hear a deep-voiced “hm…” come from Shana’s amulet. That of course is the voice of Alastor, the God of the Crimson Realm to whom Shana is bound to.

Victory Pose One: Training Session
Shana has Neitono Shana sheathed, and her hair and eyes are black and brown respectively. She is holding a wooden sword, which she starts swinging skillfully at Yuji. The two are training, obviously. Yuji dodges a few of Shana’s blows, but Shana suddenly roundhouse kicks him in the gut, which knocks him down. This doesn’t seriously hurt Yuji though. At this, Shana bluntly says “Never let your guard down” in Japanese. She then hits Yuji on the head with the wooden sword, causing him to rub the spot for a second.

Two: A Prize 2
This Victory pose is only available when Shana’s down taunt is used at least once while Yuji is alive. Shana and Yuji are talking again, only this time Shana’s hair is still flaming red. Shana says “Yuji, you worked really hard in this battle… so… I’ll give you your prize.” Shana, blushing, walks up very close to Yuji. Yuji blushes slightly, and then tries to kiss Shana. Before he can get too close, Shana shoves a brown bag into his face. Yuji grabs the bag, and Shana says “It’s the special one. It’s good.” Then she walks off the stage. Yuji opens the bag to find… Melon bread. Again, this is all done in japanese.

Three: Alastor’s Whim
This is a rather long victory pose. Shana’s hair and eyes are respectively black and brown again. Shana and Yuji are talking. Yuji says “So Shana… what was it that you were going to tell me during the fight?” Shana blushes slightly and looks away and says “Nothing!” She then turns toward Yuji and says “Y…You should get home now.” Yuji turns and walks off the screen. Then you can hear Alastor’s voice coming from Shana’s amulet. He says: “You could have told him. I wouldn’t have stopped you. Sakai Yuji… when did he become such a significant being?” Of course, all this dialogue is in japanese.

Victory Theme
Yoake Umarekuru Shoujo ~short~ (from 1:21 to end)

Other Stuff​

Entrance
Both Shana and Yuji are already on the stage, with Shana’s hair being black and her eyes brown. Yuji says “Shana” while Shana’s hair suddenly blows behind her as if there was a strong wind and turns flaming red (her eyes turn red as well). Shana draws her sword and takes her fighting stance, answering Yuji as she does so, saying “Your plan will work” in Japanese.

Basic Stance
Shana holds Neitono Shana with both hands in a slightly hunched over stance, obviously concentrating on the current battle. Yuji stands mostly still with his left foot forward, also concentrating on the battle. As explained earlier, Shana’s standing pose changes when Yuji has been KOed for 30 seconds. Shana gets down on one knee, and uses Neitono Shana to hold herself up.

Idle Stance
Shana holds Neitono Shana with one hand and sighs slightly. Yuji briefly loses his serious facial expression and scratches the back of his head. When Shana’s basic stance changes due to Yuji being KOed for 30 seconds, her idle stance merely consists of her saying “Yuji…” in a slightly depressed tone.

Roll Dodge
Shana actually does what ‘roll dodge’ suggests; she rolls about 2 stage builder blocks in the pressed direction, taking half a second to do so. Yuji jumps back 2 stage builder blocks. Yuji actually dodges a tiny bit quicker than Shana, but its barely noticeable unless time is slowed or something like that.

Shield
As explained earlier, the shield of a synced Yuji and Shana is the gray barrier provided by Friagne’s Anti-Flame Ring, which turns black as it loses power. Solo Shana uses the normal bubble shield.

Alternate Costumes (links to photos on character’s names)
Default: Shana – dark green school uniform, black cloak Yuji – black school uniform, brown hair
Green: Shana – white and green school uniform, black cloak Yuji – dark green school uniform
Blue: Shana – white and blue school uniform, black cloak Yuji – blue t-shirt, light blue collared shirt, tan pants
Red/Special: Shana – red dress, red shoes Yuji – ‘Romeo’ costume
White: Shana – white and green school uniform, no cloak Yuji – white collared shirt, black pants
Black: Shana – black cloak, black shirt with zipper, black pants, black belt Yuji – black school uniform, black hair

Series Symbol
A white outline of a flame, like this one.

Wiimote Sound
Shana can be heard saying “Get going!” in japanese.

Kirby Hat
Kirby gains Shana’s flaming red hair when he swallows her. Instead of getting her neutral special, Kirby gets the Level One version of her side special. If Kirby swallows Yuji, he gains his brown hair and access to Shana and Yuji’s synced side special. However, Kirby can only throw one fireball at a time.

Snake Codec
Snake: Otacon, who the heck are these two? The girl has a sword and flaming red hair!
Otacon: ! Th…that’s Shana, a flame haze! And that’s Yuji Sakai with her, a mystes.
Snake: I didn’t understand a word you just sa- Whoa! That girl just tried to fry me with her sword!
Otacon: Shana’s title is “The Flame-Haired Burning-Eyed Hunter”, so obviously she has control over fire, but she usually chooses to use it to power up her sword, Nietono Shana. Shana is a rather aggressive fighter.
Snake: So what about the guy? He doesn’t look tough at all.
Otacon: Yuji actually has some limited control over power of existence, which manifests itself as silver flames. He also wields Blutsauger, a large sword that can inflict a ton of damage. Shana also tends to rely on Yuji for tactical support, so if you can take him out, it’ll be that much easier to take Shana down.
Snake: So they’re a team… and if I can take out that kid, the “Burning-Eyed Hunter” will be crippled. Got it.
Otacon: Good luck Snake.

Extras

Mizaki City Bridge

The Mizaki City bridge at dusk. Characters will actually fight on the street that runs over the bridge. Every 20 seconds or so, a car will fly by with about 2 seconds warning, so you have to be prepared to get out of the way. Occasionally, the flame haze Khamsin Nbh’w can be seen watching the fight from the foot path. Also, many of Yuji’s classmates can be seen walking along that path as well, including Kazumi Yoshida, Hayato Ike, Keisaku Satou, Eita Tanaka, and Mataka Ogata.

Music
Shana
Amusement de Personne Idiote
Bataille/Deja Vu
Peine
Reveil
Sense
Mysterieux/Serieux
Joint
Sociometry
Destruction/Poursuite
Yoake Umarekuru Shojo
Being
Blaze
Triangle
Tragedie/Lieu de la Batille Decisiv

Hishoku no Sora x2
Hishoku no Sora
Hishoku no Sora ~slow~(from 3:48 to 5:47, minus additional sounds and voices)

Assist Trophies

Sydonay

Sydonay, also known as Metamorphosis, is one of the main antagonists of the series. Anyhow, when Sydonay first appears, fighting seems to be the last thing on his mind. He's about the same size as Captain Falcon. He pretty much just stands around where he was summoned and smokes a cig (smoking in bralw?! *gasp* ). He will stand there for 10 seconds, and then disappear. However, Sydonay can be attacked like any other character; he'll fall to the ground if someone attacks him. If he is attacked, he'll quickly get back up and suddenly surrounds himself in blue energy. This transforms him into a strange looking beast with a lion's body (that has black stripes), the lower legs/feet of a chicken, the tail of a lizard or dinosaur, the wings of a bat and a brown horn on its head. You can see a pic of the creature here. He's about the same size as Giga Bowser, although Sydonay's tail makes him take up more space. Sydonay will then take to the air, and head straight for the character that caused him to transform. He's pretty fast, about as fast as ROB's up special. He basically has three potential attacks that he can do:

Raging Slash
Sydonay basically just slashes at his victim with one of his claws, having low start lag. This slash has good priority and great range, and deals 12% damage and medium knockback.

My Condolences...
Sydonay grabs in front of him with one of his claws, having low start lag. If he manages to grab someone, he'll immediately toss them away, dealing 20% damage and high knockback.

Raging Fire
Sydonay fires a blue energy blast that's as big as a fully charged aura sphere. It travels very fast, about as fast as one of Falco's lasers. Upon hitting the ground or a character, it explodes, dealing 25% damage and good knockback.

Sydonay disappears after 15 seconds when he transforms into his beast state. While he will actively go after the character who hit him initially, he can end up attacking anyone, even the person who summoned him. If Sydonay is hit by a stage hazard when in his human form, he will simply disappear. Finally, there is a 30% chance that Sydonay will say 'I suppose... becoming a beast to enjoy pleasure is tasteful as well' in japanese when he is attacked in human form.


Hecate


Hecate, the Master Throne, is another of the series' main antagonists. Hecate flies up into the air above where she is summoned (pretty much as up as she can go and still remain onscreen) and points her staff downwards. She then says 'Aster', and suddenly fires a large ball of blue energy out of her staff. It's about as big as a fully charged samus charge shot. It travels downwards as fast as a fully charged charge shot as well. After half a second, it suddenly splits into many smaller bursts of energy, which continue to rain downwards. These are about as big as fully charged ROB lasers. After another half second, these split apart as well, into a huge amount of small bursts of energy that are about as big as a Falco laser. Contact with the large ball of energy deals 25% damage and spikes the victim downwards. Hitting the medium sized bursts of energy deal 18% damage and low knockback, and hitting the small bursts cause 10% damage and low knockback. This whole attack covers an entire battlefield length.

Items

Melon Bread


Also known as Melonpan or Melon buns, Melon Bread is an inexpensive sweet bakery product popular in Japan and China. This is a favorite of Shana’s, which, contrary to its name, typically doesn’t contain melon flavor. This is a regular food item, and can appear in party balls and such. It heals 4% damage, and Shana can heal 8%, due to her liking of the food. Shana smiles and makes no attempt to hide how much she enjoys the Melon Bread, which causes her to take half a second to eat it. Enjoy!

Trophies
Shana, Yuji Sakai, Alastor, Tenpa Jyousai(FS), Kazumi Yoshida, Margery Daw, Wilhelmina Carmel, Hecate, Keisaku Satou, Eita Tanaka, Pheles, Sydonay, Friagne, Bel Peol, Sabrac, Chigusa Sakai, Hayato Ike, Khamsin Nbh’w, Reiji Maigo, Nietono Shana, Matake Ogata, Sorath and Tiriel, Blutsauger, Yukari Hirai, Rammie, Dantalion

Stickers
Shana, Shana(Alt.), Yuji Sakai, Yuji Sakai(Alt.) Alastor, Kazumi Yoshida, Margery Daw, Margery Daw(Alt.), Marchosias, Wilhelmina Carmel, Wilhelmina Carmel(Alt.), Hecate, Bal Masque, Bel Peol, Fecor, Keisaku Satou, Eita Tanaka, Pheles, Sydonay, Friagne, Sabrac, Chigusa Sakai, Hayato Ike, Khamsin Nbh’w, Reiji Maigo, Nietono Shana, Matake Ogata, Sorath and Tiriel, Blutsauger, Yukari Hirai, Rammie, Johan, East Edge, Marianne, Dantalion, Marihim, Yuri Chvojka, Kantaro Sakai, Tenmoku Ikko, The Silver, Domino

Silver Strike!
 

Red Arremer

Smash Legend
Joined
Nov 27, 2005
Messages
11,437
Location
Vienna
thankyou for the internet sir.

i hope so ._. that took me many many FABULOUS months creating his moveset


<333

@half_silver:
Wowzer that looks like a major improvement from you, man. It's almost 7 AM here, so I will read it after I've got me some sleep... but it looks dang promising!
 

BKupa666

Barnacled Boss
Moderator
Joined
Aug 12, 2008
Messages
7,788
Location
Toxic Tower
For those who have yet to figure it out, I'm not going anywhere. This was simply an elaborate joint April Fool's Day prank by me and Spadefox.

In moveset making news, I'm finally making some progress on Illidan. He should be up before too long.
You had me for a while, until I realized that you would give me moderating rights if I became the leader. Well done.
 

Evilgidgit

Smash Apprentice
Joined
Oct 10, 2007
Messages
166
Location
England
At long last, my first moveset for MYM5 is done.

Created after being promised to be made all the way back in MYM2, I give you...

The Mad Hatter

Description:
The Mad Hatter is an alternate version of the character of the same name from Alice in Wonderland, portrayed in video game American McGee's Alice, as a mad scientist. The Mad Hatter was driven insane, becoming obsessed with time and clockwork. A psychopath at the very least and a self-proclaimed genius, the Hatter begins inventing mechanical devices but most of his creations are really Wonderlanders experimented upon and turned into steampunk cyborgs. Among his victims are his old friends the March Hare and Dormouse, the Dormouse constantly drugged which makes him very tired. Ultimately, the Hatter is mechanical himself and now more machine than organic, and he intends on transforming all Wonderlanders into automatons under his control. The Hatter still likes tea though, always having a cup of tea at six o'clock sharp, regardless of what he is doing.

Statistics
Height: 5/5 - The Mad Hatter is a very tall person, likely due to his hidden mechanics (although the gear imbedded in his back gives it away). He has very long legs which gives him a higher dominance over shorter characters, making it easier for them to be kicked around.
Weight: 4/5 - Being part cyborg, the Mad Hatter is quite heavy, which effects his jumping and movement capabilities.
Jump: 2/5 - The Mad Hatter has a very weak jump, his first one the same height as Mario's first jump, his second one a bit higher.
Falling Speed: 4/5 - The Mad Hatter drops like a stone, falling quite quickly but he can recover is equal just as fast.

Movement Animations
Walking: The Mad Hatter walks with a cane, at a relatively slow pace, seemingly moving as if he has all the time in the world.
Running: The Hatter's run is more of a fast-paced walk. He no longer uses the cane but still holds, it taking great strides as he goes, with his arm moving at his sides.
Standing Movements: The Mad Hatter's standard poses involve him bringing out a pocketwatch (namely the stolen one of the White Rabbit) and inspecting it; or swinging his cane around in an anti-clockwise circle.
Sleeping: The Mad Hatter collapses onto rear and slumps forward, sleeping whilst sat up, his head moving back and forth as he snores loudly.
Stunned: The Mad Hatter wobbles about unsteadily on his feet, sparks flying from around the brim of his tall hat.
Smashed Off-Screen: If the Mad Hatter is smashed off into the background, he will spark around violently and fly off like a pencil.

Movesets
Basic Attacks & Smashes
A, A, A: Cane Strike - The Mad Hatter, brandishing his cane swipes at an enemy, striking them three times with his cane in an attack similar to slapping someone. 3% damage, low knockback.

Dash Attack: Have At Thee - The Mad Hatter runs at an opponent and lashes out at them with his cane, as if it were a sword. 4% damage, low knockback.

Side A: Prod - The Mad Hatter jabs an opponent hard in the chest with his index fingers. 3% damage, low knockback.

Up A: Clearing the Rafters - The Mad Hatter swings his cane upwards in an arch, hitting anyone in the way. 4% damage, low knockback.

Down A: Wallop - The Mad Hatter wallops an opponent with a downward strike from his cane. 5% damage, low knockback.

Forward Smash: Extended Punch - The Mad Hatter suddenly moves to punch an opponent but his arm suddenly extends out on a metal pole and punches an opponent from a distance. This is one of the Hatter's more long-ranged moves. 8% damage, medium knockback.

Up Smash: Flying Teapot - The Mad Hatter tosses a teapot into the air. The teapot flies through the air and hits the ground in three seconds, ultimately exploding and harming anyone nearby. The teapot lid will survive and can be used as a throwing item, delivering 2% damage if it hits an opponent. The exploding teapot will give 9% damage to an opponent, and medium knockback.

Down Smash: Bullet Cane - The Mad Hatter aims his cane down to the ground, arming it with both hands like a gun. He suddenly fires an explosive blast out of the cane which will hit an opponent nearby. 7% damage, low knockback.

Aerial Attacks
Aerial A: Air Swipe - The Mad Hatter swipes at an opponent with a fully-extended arm (not using a metal pipe this time). 6% damage, low knockback.

Side Aerial: Tweedle Drop

Whilst in midair, the Mad Hatter will whistle and suddenly one of his minions, namely Tweedledee or Tweedledum will appear. Upon appearing, the minion will suddenly drop to the ground, crashing down hard. Opponents may recieve damage if they either are hit directly by the falling minion or just by the impact effects, but the percentage varies depending on where they are when hit and what minion falls on them. If Tweedledum, the smallest and lightest of the minions is dropped, he will do 10% damage if he hits an opponent directly and 5% if they are hit in the impact. Tweeledee is the heavyweight of the minionsa and drops like a boulder. He'll given 14% damage if he hits an opponent directly, and 7% if he hits them partially. The third minion is an clockwork robot that is a midweight. He willl give 12% damage if he hits an opponent, and 6% damage if he only hits them partially. When the attack ends, Tweedledee (the heavyweight) will vanish, whilst Tweedledum and the robot will remain for five minutes, allowing fighters to pick them up and toss them at other opponents for an extra 5% damage. The Mad Hatter will land during the fall of the minion.

Back Aerial: Sparking Flash - The Mad Hatter will swing around to face an opponent and hits them with an electrical blast fired from his hand. This attack may stun an opponent for five seconds. 9% damage, low knockback.

Up Aerial: Gear Spin - The gear imbedded in the Mad Hatter's back spins briefly, the Hatter launching himself upward to attack an opponent with it. 7% damage, low knockback.

Down Aerial: Crashout - The Mad Hatter suddenly seems to shortcircuit and pencil dives downward to the ground. As he hits the ground, he seemingly explodes, leaving a puff of smoke and several pieces behind. However, he pops up a moment later without a scratch on him. The attack will give an opponent 9% damage, and medium knockback. The pieces left behind can be picked up and thrown, giving an opponent 4% damage and low knockback.

Grab Attacks
Grab Attack: Scientist's Grip - The Mad Hatter grabs an opponent and holds them in place with both hands. He may then bearhug the opponent, giving them 4% damage.

Forward Throw: Long Throw - The Mad Hatter will grab an opponent with one arm which extends on the metal pole, and he will then launch the opponent across the stage. The attack has long-range but gives the opponent 6% damage and low knockback.

Backward Throw: Through the Looking Glass - The Mad Hatter will toss an opponent over his shoulder, and right through a looking glass which will appear during the attack. The opponent will recieve 10% damage and medium knockback.

Up Throw: Blast Off - The Mad Hatter will toss an opponent into the air and then fire an explosive blast from his cane at them as they go flying. 9% damage, low knockback.

Down Throw: Steam Punch - The Mad Hatter throws an opponent to the ground and then delivers a double punch with his fists, extended by metal poles.

Special Attacks
B: Finger Bullet - The Mad Hatter with raise up a hand and form it in the style of a pistol. He'll suddenly withdraw it and his index finger will shoot off like a bullet. The flying bullet can be controlled via the control stick of the game controller for five seconds before it explodes. However, if the player chooses to control the bullet than the Hatter will be open for attack. The bullet attack will cause 12% damage to an opponent and medium knockback.

B Side: Flight of the Gear - The Mad Hatter will pull the metal gear from out of his back and then toss it across the stage. It will fly through the air for four seconds before returning to the Hatter. Between the attack, the Hatter will be vulnerable to attack when he is removing and inserting the gear from and into his back. 10% damage, medium knockback.

B Up: Cup of Mercury - The Mad Hatter leaps into the air, the top part of his top hat lowers away to reveal what appears to be a cannon of some sort. The Hatter then launches what appears to be a missile out of the cannon, this attack launching him back someway. The missile is in fact a teacup. As soon as it is launched, the teacup bursts into flames and crashes to the ground. Its projectile aim cannot be controlled so the attack can only be fired left or right in order to attempt some sort of aim. The attack gives an opponent 12% damage, and high knockback.

B Down: Shortcircuit - The Mad Hatter crackles with sparks and suddenly fires out a small dome-shaped electrical surge which spreads over a small radius of the battlefield. The attack can cause 9% damage, but high knockback due to the sudden blast of the attack, and may cause stunning to characters.

Final Smash: Dead Time Watch
Upon grabbing the Smash Ball, the Mad Hatter will produce a pocketwatch, namely a reworked version of the White Rabbit. The Mad Hatter tosses the pocketwatch into the air, and it transforms into a massive clockface that chimes six o'clock. During the time it takes for the clock to chime six (sixteen seconds), everything in the battle except the Mad Hatter, and weapons he uses, slows down in time. All characters move pretty slowly, allowing the Mad Hatter to easily attack enemies without much chance of recieving harm, although characters still can damage him. Also, the Hatter's attack damage to opponents is doubled. After sixteen seconds, the Final Smash ends and time speeds up to the usual speed.

Shield: The Mad Hatter surrounds himself with an electrical forcefield.

Taunts
Taunt 1: The Mad Hatter briefly brings out a cup of tea and sips from it, before hiding it again.
Taunt 2: An insane-looking child appears from behind the Mad Hatter and laughs hysterically before running out of sight behind the Hatter, the Hatter himself not even noticing the child.
Taunt 3: The Mad Hatter looks at his pocketwatch and says "This battle is running late."

Victory Poses
Victory Pose 1: The Mad Hatter stands in the middle of the screen in front of the other fighters. He has his cane placed in front of him, holding it with both hands. He smiles and turns his head to look at the defeated opponents and states "Pity, good fighters are so hard to find these days."
Victory Pose 2: The Mad Hatter swings his cane in a clockwise circle with his right hand, before placing it beside him.
Victory Pose 3: The Mad Hatter stands with his cane in front of him. A robotic teapot on spider-like legs crawls behind him across the screen. The Mad Hatter sees it and chases after it, disappearing off-screen.
Losing Pose: The Mad Hatter surges with electricity and collapses onto the ground whilst sparking.

Kirby Hat: Kirby gains the Mad Hatter's hat, a mask shaped like his face, and a gear stuck in his back.
Symbol: The Mad Hatter's symbol is the symbol for Mercury.
Wii Remote Chime: The chime is a clock striking the hour.

Snake Codec:
Snake: Otacon, whose this guy in the hat.
Otacon: That's the Mad Hatter, Snake.
Snake: You're kidding, right? From Alice in Wonderland? He looks different than the pictures.
Otacon: That's because he has been turned evil by the influence of the Queen of Hearts. He is obsessed with clockwork, time and changing people into automatons.
Snake: Sounds tough - what is the worst thing about him?
Otacon: He is part automaton himself, and has various weapons hidden in his body. Be careful, Snake.


Thanks for reading my moveset. :)
 

MagicalTervor

Smash Rookie
Joined
Mar 18, 2009
Messages
4
Location
...
Completed Movesets:

None :(


Planned Movesets:

Cloud Strife (Final Fantasy VII) ... Kinda surprised there isn't one for him yet.
 

SirKibble

Smash Champion
Joined
May 2, 2008
Messages
2,400
Silver, that moveset was awesome!! I dare say it's easily your best yet, with a perfect implementation of a cool mechanic and unique moves that comprise a really interesting playstyle! I love the change in the attacks with or without Yuji, as it really keeps the moveset interesting and would certainly keep a player conscious of themselves all the time.

And last, but not least:

SILVER STRIKE! :laugh:
 
Status
Not open for further replies.
Top Bottom