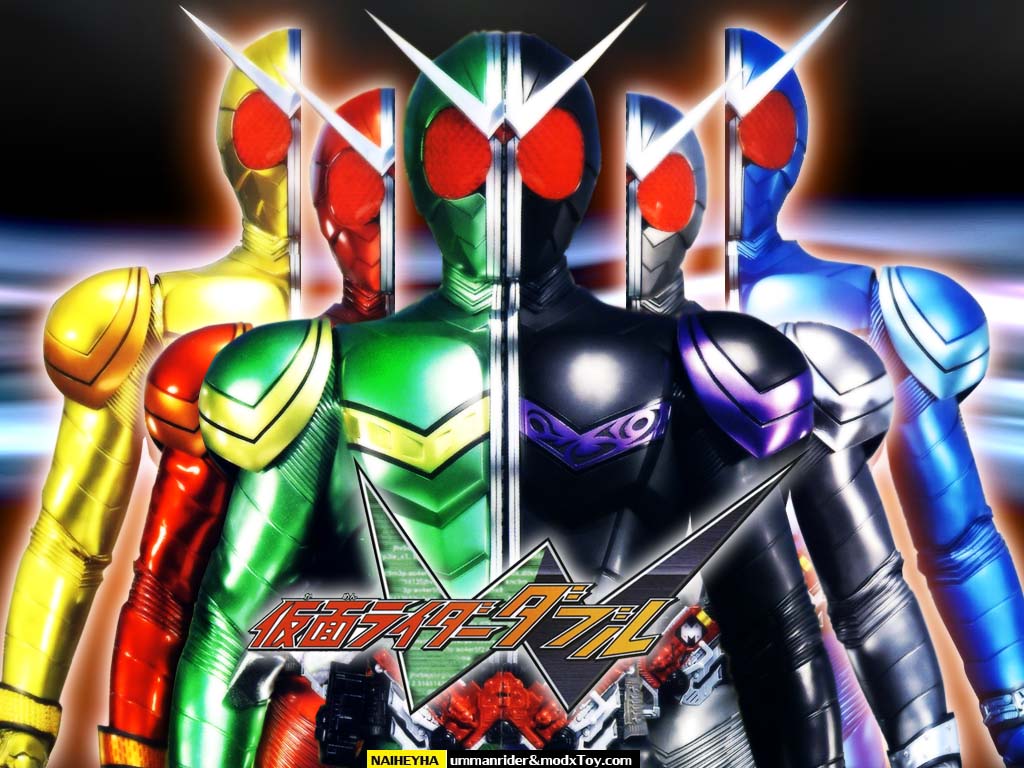
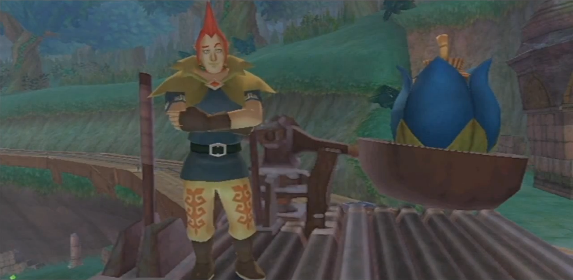
• Welcome to Smashboards, the world's largest Super Smash Brothers community! Over 250,000 Smash Bros. fans from around the world have come to discuss these great games in over 19 million posts!

    You are currently viewing our boards as a visitor. Click here to sign up right now and start on your path in the Smash community!

Make Your Move 16: MYM 17 Starting June 1st

Katapultar

Smash Lord
Joined
Nov 24, 2008
Messages
1,251
Location
Australia
[collapse=Scorpion] It's hard to say a lot about this set, given I couldn't think of any witty title other than allusions to Randy Cunningham. Scorpion is definitely one of your more simple sets, and while the dude clearly has superpowers it's even more clear that the set is staying true to its source material - especially given the first 2 Specials prevent him from acting until they're done (even if it's from the games, does hellfire really have to invoke screaming? Just that I dislike forced characterization). The Specials do a fine job at staying true to the established playstyle, but I wouldn't say it's interesting overall. The set feels very restrained due to trying to stay true to another fighting game, compared to if you went a bit more wild, as some other sets have done in the past. Such are fighting game sets though, and I'd definitely say I prefer DHD and Lore over Scorpion. Certainly not a bad effort, though.[/collapse]
 

Bionichute

Smash Champion
Joined
Jun 30, 2012
Messages
2,151
Kamen Rider Double


After an incident in a tower, involving the death of his chief, detective-in-training Shotaro Hidari and his partner Phillip, a walking encyclopedia, were granted the powers of Double Driver, a belt that allows two beings to become one powerful being using the power of Gaia Memories. The two beings who use the belt will be divided, with the mind of one becoming one half of the hero, while the half remains the original body, essentially splitting the beings into the “Body” and the “Soul”. Shotaro, being active and hardboiled, became the body, while Phillip, being incredibly smart, but also incredibly naïve, became the soul. Together, they become Kamen Rider Double, who fights the many Gaia Memory monsters that threaten their city.


Stats:

Weight: 7/10
Size: 8/10
Ground Speed: 8/10
Air Speed: 8/10
Fall Speed: 8/10
Jump: 9/10​

If you noticed, these stats match almost completely with Captain Falcon’s stats, aside from a few decreases in speed, increases in fall speed, and a noticeable increase in pure jumping prowess. This is entirely intentional. However, due to Double’s gimmick, this is only his STARTING stats. We’ll get to this in a bit.


Gaia Memories:

Gaia Memories are the main gimmick of Double, as they allow him to switch between different fighting styles and effects. Double has a total of 6 Memories, 3 body memories, and 3 soul memories. These memories are:

Joker: This memory grants Double uncanny fighting prowess, allowing him to take opponents on up close and personal.

Cyclone: This memory grants Double the power to control the wind, which can increase his range, and boosts his speed.

Metal: Armed with a pole arm, Metal Memory is the heaviest of all the memories, but it is also one of the most powerful.

Heat: This memory allows Double to control fire, and adds a burning effect to all of his attacks.

Trigger: This memory gives Double a gun. This allows him to shoot things really good.

Luna: This memory allows Double to stretch his limbs around, and alters the material of his weapons to make them more rubbery, allowing him to stretch them out.

These memories slightly alter Double’s stats, with Metal making him heavier and lowering his speed, and Trigger boosting his speed. They also completely alter his moveset, with only a total of 3 moves being used between all forms.


Shared Specials:

Neutral Special: Memory Change:

Double pulls out both of the Gaia Memories in his belt for a split second, before putting them back in. That seems… useless. Actually, this is by far Double’s most important move, as it allows him to switch between any of his Gaia Memories almost instantaneously. By holding the button, and then moving the control stick either left or right (During this period Double cannot move left or right), this will make Double pull out another Gaia Memory, which he will switch in immediately, with very little lag, allowing Double to get straight back into the action. The direction the control stick is tilted will choose which memory to swap out, left for Body, and right for Soul. The move can also be used in the air, where it acts mostly the same, but you will need to be a bit faster, but the move also gives Double a bit of extra airtime. The move will also create a burst of light that will knock opponents away, but not actually damage them. The move can also be cancelled out of into a dash by double tapping the joystick.

The memories come in a specific order:

Body: Joker > Metal > Trigger > Joker etc.

Soul: Cyclone > Heat > Luna > Cyclone etc.

Double will ALWAYS start in Joker/Cyclone form. Unless you change colors, which will allow him to either start from Metal/Heat or Trigger/Luna.


Up Special: Rider Jump:

In a similar fashion to Captain Falcon’s USpec, Double does an uppercut, launching himself into the air. Unlike the good Captain’s USpec, this move does not latch on to the opponent if it hits, instead it will just simply launch them up, but with some really good knockback, and a decent 17% damage. The move launches Double upward up about 4.5 Stage Builder blocks, which might sound amazingly good, but the move will instantly put Double into prone, meaning that, if you don’t aim the move right, you will fall right to your death.


Down Special: Rider Kick:

In a similar fashion to Captain Falcon, again, Double does a sliding kick across the ground. The only real differences are the lack of flames, and the distance the move goes for. Falcon Kick only travelled a short distance, but the Rider Kick can travel indefinitely across the ground, only stopping once the button is held down, meaning that you can fall off edges. The move also only causes 8% damage on contact… if you use it on the ground that is. If the move is used in the air, Double will do a downward kick, once again similar to Captain Falcon. However, this move is incredibly fast, almost too fast, as most kicks might end up missing opponents by a few milliseconds. But, if the move does hit, it will cause a stunning 25% damage, measuring up to the good Captain’s own trademark move.


Now, due to Double having three movesets, we’re going to take three whole posts in order to fully show this off. For right now, we’ll start with Joker.


Joker Form:

Special:

Side Special: Memory Attack:

Technically this is a move shared by all three forms of Double, but the move actually changes drastically with each form. Here, the move consists of a simple sliding punch forward, similar to the Falcon Punch, but this move actually moves a lot faster, but only does 14% damage, and slightly slides Double forward a bit. Other than that, the move acts exactly like the Falcon Punch.

Well, aside from the gimmick of course.

You see, the Gaia Memories add added effects to the moves, as read above, but they also change the moves fairly drastically. For example, the Cyclone memory, when used with this move, will create a large blast of wind from the end of Double’s punch, which will travel across the stage and, while not damaging, will knock opponents away from Double for around .65 seconds. The blast of wind is itself about half as tall as Double, and is created in a crescent shape.

If the move is used with the Heat memory, the move becomes even MORE like the Falcon Punch, as a large blast of fire will be created around Double’s fist. This actually lowers the knockback of the move, but boosts its damage to 17%, and adds a burning effect to the opponent that causes them to take around 3% damage every second for 5 seconds.

If used with the Luna memory, the move will increase its range via Double stretching his arm out forward. The punch stretches out about 1 full Stage Builder block, but it still causes the same damage, and does the same knockback.


Standards:

Jab:

This move is a simple right hook, left hook, kick combo, with a decent range to it, which hits for 12% damage. However, with memories, this move becomes a lot more interesting. With the Cyclone memory, the punches and the kick will release small balls of air, no bigger than a Pokeball. These gusts move forward at a very slow pace, and only travel about 1.5 Stage Builder blocks before disappearing, but if they hit an opponent, they will take 3% damage.

With the Heat memory, the attack becomes a lot faster than normal, and allows Double to follow up the kick with an infinite chain of kicks, similar to Kirby or Falco. Much like those moves, it will push opponents backwards if it hits them too many times. The move also leaves a burning effect on the opponent, but this time for only 3 seconds.

With the Luna memory, the move completely changes, as instead of the combo, the move changes into Double flailing his extended appendage around in front of himself, taking up most of 1 Stage Builder block. Like with Heat, this is an infinite chain, however, this move can manage to rack up a lot more damage, and a better combo if activated directly in front of the opponent. Unfortunately, each hit only causes 2% damage, and the maximum chain is around 7 hits, meaning that it only does 14% damage, and with very little knockback whatsoever.


Forward Tilt:

Double does a simple straight punch, similar to his N Special, but not as powerful, and not sliding him forward, and only does 7% damage, with decent knockback. The Cyclone version of the move creates a suction effect right before the punch activates, sucking in any opponent within .5 Stage Builder blocks of Double right into the punch.

The Heat version is much simpler, simply being a miniature version of his Heat N Special. The move does less knockback than it though, but does slightly more knockback than the other versions of this attack. It, of course, causes a burning status effect if it hits the opponent. Like the Jab, this only lasts for 3 seconds.

The Luna version simply has the punch’s range increase by about .5 Stage Builder blocks, but causing a lot less knockback than the other versions. However, if the move hits an opponent, it will drag them toward Double, setting them up for a combo.


Up Tilt:

Double does a simple uppercut, knocking opponents upward into the air a bit, and doing 8% damage. With Cyclone, the move creates a small wind about .2 Stage Builder blocks in front of Double. The wind basically has the same hitbox as the normal uppercut, but doesn’t do any damage, and knocks the opponent slightly higher into the air, allowing for aerial combos.

With Heat, the move acts mostly similar, except it causes less upward knockback, and more forward knockback, making it a somewhat better KO move. The move also causes burning, which lasts a total of 3 seconds.

With Luna, the move almost completely changes, as, instead of an uppercut, Double will do a straight upward punch, which also stretches his arm upward about 2 Stage Builder blocks before it reels back in. The move causes very little knockback, but can completely stop opponents if it hits.


Down Tilt:

Double does a complete 360 degree sweep with his leg that moves very quickly and does 7% damage. With the Cyclone memory, this spin creates a tornado around Double. If the opponent is hit by the leg sweep, they will be hit into the air, and then thrust upward by the tornado.

With the Heat memory, the leg sweep will create a circle of fire where the move was used. The fire is about as big as the hitbox of the sweep, and will causes a stream of 2% damage for as long as the opponent stands on it. Once they step out of the fire, they get burned, which only lasts for 1 second this time.

With the Luna memory, the move once again changes. Instead of a full circle, Double will only sweep in front of him. However, his leg will extend forward about .5 Stage Builder blocks and, if it hits an opponent, will stun them for a millisecond.


Dash Attack:

Double jumps up a bit into the air, and then does a leaping kick forward that causes 8% damage with okay knockback. With the Cyclone memory, Double will be boosted forward during the kick by an extra gust of wind, moving him .3 Stage Builder blocks forward.

With the Heat memory, the move becomes a simple flaming kick, but reduces the range of the kick by a bit. It causes a burning effect as well, which lasts 4 seconds.

With the Luna memory, the move gets a massive boost in distance, which has Double stretching one of his legs, leading into a massive jump, and then sticking his leg out for the kick. This increases the distance by almost one full Stage Builder block, and boosts double into the air by about half a Stage Builder block. The downside of this is that the move is likely to go right over opponents unless timed perfectly, which can also lead to self-destructs if you screw up. To make up for this, the move does an added 2% damage, and a bit of extra knockback.


Smashes:

Forward Smash:

Double tenses up a bit, and then does a strong kick forward, causing 18% at lowest charge, and 26% at highest charge. With the Cyclone memory, the kick will create an incredibly strong gust, increasing knockback, especially if the opponent is hit by the kick itself.

With the Heat memory, the kick will create a large explosion, which boosts knockback by 1.5x, and also causes a burning effect that lasts 6 seconds.

With the Luna memory, the kick will instead become a flurry of kicks, which total up to about 14% at lowest charge, or 22% at highest charge. The final kick will cause the opponent to launch away, and also cause 4% damage, no matter the charge.


Up Smash:

Double does a very strong uppercut, which has great upward knockback, and does 20% damage at lowest charge, and 38% at highest charge. With the Cyclone memory, the move creates a giant gust of wind above Double’s head, so that when an opponent is hit by the attack, they will also be blown upwards by the wind.

With the Heat memory, the move becomes similar to a Shoryuken, launching Double upward with a flaming uppercut. The move hits multiple times, adding up to the previous percentages, but it also causes a burning effect that lasts 5 seconds.

With the Luna memory, the move becomes a diagonal upward punch, reaching about 3 Stage Builder blocks diagonally. The punch launches fairly quickly, and retracts as soon as it reaches the maximum distance. Only the fist of the arm is actually a hitbox, and opponents can pass through the arm with no problems.


Down Smash:

Double slams his fist into the ground, creating an earthquake that stretches out half a Stage Builder block on either side, which causes 20% damage at lowest charge, and 29% at highest charge. With the Cyclone memory, the earthquake will create a large gust of wind on either side of Double. If the move hits the opponent, the gust of wind will cause them to be launched farther than any other version of the move.

With the Heat memory, the move will create a large blast of flames on either side of Double, which take up about .3 Stage Builder blocks of space. The flames add an added 5% damage to the move, but at the cost of knockback, as the move winds up not having much knockback when compared to the other versions, but it is still serviceable. The flames also add burning damage that lasts 5 seconds.

With the Luna memory, the move will instead have Double stretching both of his arms up into the air, before slamming them both down into the ground, approx. .3 Stage Builder blocks away from him. The move is a lot faster, but is also a bit weaker, subtracting 3% from the total damage, and not changing the knockback in any noticeable way.


Aerials:

Neutral Aerial:

Double crosses his arms, and then spins around with incredible speed, with a hitbox the size of the entirety of Double, which deals 11% damage. With the Cyclone memory, Double will become, well, a cyclone, creating a tornado effect that sucks in nearby opponents in order to deal damage to them.

With the Heat memory, Double will become a tornado of fire while spinning, giving him a slightly bigger hitbox, and also dealing burning damage that lasts 1.5 seconds.

With the Luna memory, instead of crossing his arms, Double will instead stretch them outward, making his hitbox much bigger, and increasing knockback by a bit. The downside is that the move takes awhile to start up.


Forward Aerial:

Double punches forward, and holds his fist out, leaving a lingering hitbox that stays until he touches the ground, and doing 13% damage. With the Cyclone memory, the move will have an added wind effect, making it faster, and increasing the knockback of the move.

With the Heat memory, the move becomes a flaming punch, which takes a bit longer to activate, but has better knockback, and causes burning damage for 1 second.

With the Luna memory, Double’s fist will extend at a diagonally downward direction, going about half a Stage Builder block before reeling back to Double. The move has fantastic range, but does very little knockback.


Up Aerial:

Double does an aerial uppercut, doing decent upward knockback and doing a total of 12% damage. With the Cyclone memory, the move will have Double be slightly boosted upward by a gust of wind. This can only happen once per jump, however.

With the Heat memory, the move becomes a flaming uppercut, which increases the total knockback of the move, and causes burning damage that lasts 2 seconds.

With the Luna memory, the move becomes an upward mirror of the FAir, having Double stretch his fist in an upward diagonal angle, which reaches about half a Stage Builder block, but unlike the other one, actually does slightly more knockback, but takes a bit to actually fully reach.


Back Aerial:

Double punches backwards, in an almost karate chop-esque movement, which reaches slightly behind Double, and does 14% damage. With the Cyclone memory, the punch will create a suction effect that sucks opponents right into the fist.

With the Heat memory, the punch becomes a flaming punch, which has a bit of start up lag, but increases knockback, and causes burning damage that lasts 2 seconds.

With the Luna memory, the move will have Double stretch his fist behind him, reaching about half a Stage Builder block, but doing less knockback than the other versions of this move.


Down Aerial:

Double preforms a downward double kick, similar to Ganondorf’s DAir. The difference is that the move is a lot quicker, and does 13% damage. With the Cyclone memory, the move will create a burst of wind from Double’s feet, allowing him to get a boost into the air if he uses it while close to the ground, and pushes opponents downward.

With the Heat memory, the move will create a burst of flames from Double’s feet, which will create a small patch of fire on the ground that causes 1% damage per .5 seconds, and lasts for 2 seconds. They can only be activated if the move hits the ground, however. It also causes much better knockback than the other versions, and causes burn damage that lasts 3 seconds.

With the Luna memory, the move becomes much more similar to the other aerials, having Double punch downward, and then stretch his fist downward. The fist has a lot less range than the other ones, only going .3 Stage Builder blocks instead of half. It also does a lot less knockback than the other two versions of the move.


Grab Game:

Grab:

Unlike the rest of his moves, Double’s grab does not change with each of his forms. However, his pummel and throws do, which is why this is being separated into a different move. The grab is, however, affected by the 3 memories.

The grab is just that, Double reaching out and grabbing the opponent. With the Cyclone memory, it creates a suction effect that can suck nearby opponents into his grab, giving it a bit more range.

With the Heat memory, the grab becomes a flaming grab, which, even if the opponent escapes the grab, or if Double doesn’t even hit them, will leave a 1 second burning effect on them.

With the Luna memory, the grab will have Double stretch his arm out a full Stage Builder block, increasing its range incredibly. However, the move takes a bit to get to full range, and there’s a bit of lag on its way back. Throws can only be activated once the arm has fully retracted, giving it a lot of lag.


Pummel:

Double punches the captured opponent in the face, dealing 3% damage. With the Cyclone memory, every third pummel will cause the opponent to be launched backwards via a gust of wind.

The Heat memory, of course, makes the punch a flaming punch, causing burning damage that lasts .5 seconds.

The Luna memory changes the move majorly, turning it into a rapid punch that can cause 15% damage before the opponent can escape, but decreases the amount of struggling needed to break free from Double’s grasp.


Forward Throw:

Double lets go of the opponent, and then kicks them, causing them to go flying, and take 7% damage. With the Cyclone memory, the kick will create a big burst of wind, which can cause any nearby opponents to be knocked backwards, and slightly increases the knockback of the move itself.

With the Heat memory, the move remains the same, aside from some fire effects, and a burning effect that lasts 2 seconds.

The Luna memory changes the move up a bit, as instead of a kick, it becomes a flurry of punches, before one big punch that launches the opponent away, with slightly better knockback than the other two versions.


Up Throw:

Double performs an uppercut, which launches the trapped opponent into the air, and causes 8% damage. With the Cyclone memory, the move acts very similar to the forward throw, causing nearby opponents to be launched into the air by a gust of wind.

The Heat memory is very similar, simply turning the move into a fire uppercut, and causing burn damage that lasts for 2 seconds.

The Luna memory, again, changes up the move, as Double will still start with the uppercut, but then follow up with a diagonal upward punch using his stretchy fist. The move launches the opponent in a diagonal angle, and has slightly better knockback.


Back Throw:

Double spins the opponent behind him, and then punches them, causing them to go flying, causing 8% damage. The Cyclone memory, like the other throws, will create a gust of wind that sucks opponents toward or behind Double, potentially setting up for another grab.

The Heat memory also acts the same way, simply adding fire effects to the move, and causing burning damage that lasts for 3 seconds.

The Luna memory, again, changes the throw a bit. While still having Double punch the opponent away, he will end the move with a stretching punch, which will knock the opponent a bit farther away than usual.


Down Throw:

Double elbows the opponent in the head, causing them to fall to the ground. After they fall to the ground, Double will stomp on them, causing 10% damage. The Cyclone memory will create a gust of wind, which will suck any airborne opponents to the ground. Grounded opponents will not be affected.

The Heat memory will add fire effects to the attacks, while also causing burning damage that lasts around 2 seconds.

The Luna memory changes the move up a lot. Double will instead grab the opponent with a stretched out arm, and then slam them back into the ground again. During this time, the opponent’s body will act as a weapon, hurting any other opponents who get hit by it for 4% damage.


Last edited:

Junahu

Smash Ace
Joined
Nov 15, 2005
Messages
899
Location
Shropshire Slasher
Banjo Kazooie:
Banjo Kazooie would have read so much better, had the reader known what the rest of the moveset was, before being pushed into the mini-gauntlet of 12 specials. As is, the moveset feels inside-out, and remarkably unfriendly for what it is. "Specials first" is not always the right template to use for a moveset, and it specifically feels like the wrong template to use here.

There's a pervasive failure to endear your idea to the reader. In any other moveset, you would be chomping at the bit to sell MYM on why this kind of customisation makes Banjo Kazooie a better moveset. But here, you just sort of fart out a standard playstyle blurb at the end and sort the 12 unique specials into broadly generic catagories.
Honestly, I really want the 12 specials thing to catch on. If not as an addendum for our future movesets, then at least as an alternate catagory of moveset (i.e. entries that are only specials, but have all 12 of them)

I don't believe for a second that Banjo Kazooie is a bad moveset. It's remarkably comprehensive in its references, the characterisation is inoffensive. And for all my moaning, you are diligent in giving each attack both a solid feel and a reason to exist.
It's just badly stitched together on the presentation side, which puts the moveset at something of a disadvantage.
 

darth meanie

Smash Journeyman
Joined
Jun 6, 2008
Messages
452
This gate leads to the endless halls of Pandemonium. Pandemonium is an infinite realm of pain and suffering. While you can find a good deal of loot there, all these treasures are guarded by demons and even crueler demon lords. Many a hero, confusing confidence with megalomania, has died screaming in the barrage of torment and hellfire.


Dare you proceed?
 

darth meanie

Smash Journeyman
Joined
Jun 6, 2008
Messages
452
& Lom Lobon &


Lom Lobon is one of the four Lords of Pandemonium in Dungeon Crawl, and the guardian of the Magical Rune of Zot. A wizened master of all magic, Lom Lobon lacks the wrathfulness of most other demon lords at first glance, but in fact hides a cold, impartial cruelty.

& Statistics &

Ground Speed: 3
Air Speed: 8
Size: 10
Weight: 8
Jump Height: 8
Traction: 9
Fall Speed: 1


Lom Lobon's solitary eye hides a cold impartiality as he judges and destroys those around him. A powerful aerial combatant, he is as floaty as Jigglypuff and nearly as quick in the air. In addition, instead of a traditional air dodge and spot dodges, Lom Lobon blinks, a short range directable teleport that serves in place of his recovery. He can blink about a stagebuilder unit in any direction on the ground, or half that in the air, during which he still has invincibility frames, or he can smash the blink input to teleport a greater distance, up to two battlefield platforms in length, after which he falls helpless.

Lom Lobon can also float, but unlike Peach's float he cannot move back and forth while floating. He can, however, use his smashes and standards (sans dash attack), as well as his grab-game during his float.

& Specials &

Neutral Special & Glaciate

The most powerful of Ice Magic is a cinch for a master of all spells such as Lom Lobon. A storm of ice is quickly projected out in front of him, in a cone the length of a battlefield platform, dealing rapid but weak damage to any enemy near him, with a random chance of freezing opponents completely based on damage percentage. Blocks of ice also spawn at random, like a freezie effect without any opponent actually in it, which last for ten seconds before melting away. The ice storm lasts for five seconds after the surprisingly quick casting time, allowing Lom Lobon to follow up with other moves while the storm slowly travels forward. The storm deals massive shield damage as well.

You can charge up the ice storm generated by Glaciate by repeating the attack, causing the storm to grow larger and more powerful, generating more ice chunks. The more power Lom Lobon puts into the storm though, the greater the ending lag is for the move each time he uses it.

Up Special & Tornado

Tornado as well as Glaciate has a blindingly fast start time for such a powerful spell, creating a tornado centered around Lom Lobon that stretches to the top of the screen. While in the tornado, which lasts for five seconds, Lom Lobon has free flight at the speed of Ganon's walk in any direction, allowing him to move himself and the tornado as he pleases. While the eye of the storm merely lets Lom Lobon fly as he wishes, for opponents it's not nearly as pleasant an experience.

The tornado has a powerful suction effect that has a radius of a battlefield platform, pulling opponents into a zone of rapid damage with no hitstun. Opponents caught in the tornado are slowly pulled up to the top of the screen at a rate based on their weight, fallspeed, and most of all current damage percentage, with higher damage opponents being blown up at a faster rate. Opponents can try to DI out of the top, where there's less suction effect, but run the risk of being KO'd at high percentages. Opponents can still fight back at Lom Lobon, and hitting him during the tornado will cause the spell to collapse, allowing them a means to escape. Of course, Lom Lobon is not defenseless either.

The tornado will also pick up any items from the field and smack them into opponents as they fly around the screen, including ice blocks summoned from Glaciate.

Side Special & Conjure Ball Lightning

Lom Lobon generates a sphere of pure electrical energy in front of him, which pulsates slightly before firing off in an arc in front of him, homing in a directable fashion like Ness or Lucas's PK Thunder. When the control is released, the sphere detonates in a powerful electrical blast that has a suction effect during its one second long duration. The blast deals 16% damage and powerful hitstun and knockback that kills around 120%. Beware though, the hitbox is larger than it seems, and can actually hit Lom Lobon if used at point blank. Be careful to use it at close range only when you can afford to take the hit yourself.

Down Special & Major Healing

Lom Lobon also has the single most powerful healing move in all of crawl, not that that says much. Healing is inordinately powerful, and access to it is rare indeed. Lom Lobon charges slowly for this move, healing himself about 2% damage a second as long as you hold it down. For five time as long as you charged it up though, Lom Lobon will heal himself for half the damage of all the attacks he uses from then on, absorbing the opponent's life.

& Standards &

Jab & Anti-Magic Attack

Lom Lobon stretches out a single, shriveled hand and strikes at the opponent at point blank. If he successfully hits, he deals 8% damage to his opponent, but also siphons away a little energy from them. This attack deals triple damage against shields you see, whether it hits a shield, or an opponent who's not shielding, draining nearly half the vitality from the shield in a single blow. When so many of his specials can deal powerful chip damage, you can see why this would be a big deal.

Forward Tilt & Shock

Lom Lobon quickly releases a spark of electricity which shoots straight forward, but can be angled up or down based on how you angle the control stick when you press this attack. It bounces off of any obstacle, but goes straight through enemies, and travels an impressive distance of the length of Smashville before dissipating, dealing 8% damage and moderate hitstun to any opponent touched by it. You can bounce it off of ice blocks, walls, the floor of the stage to get multiple hits in potentially, making this a very good damage racking tool when used properly.

Up Tilt & Airstrike

Lom Lobon throws a hand up, and a blade of air forms into existence, slashing from the ground up to about one and a half times his height in a forward diagonal strike, dealing 6% damage. Airstrike deals 50% more damage and knockback against aerial opponents, making it a great combo tool out of a tornado for extra damage and vertical knockback, as well as dealing all-important hitstun against opponents caught in the raging whirlwind of Tornado.

Down Tilt & Air Shock

Lom Lobon compresses his body down somewhat for his crouch, then causes a shockwave of air to explode out from the ground in front of him, knocking any opponent within a stagebuilder unit in front of him up into the air for 7% damage and set upwards knockback, which can be followed up with, but not directly comboed into, a forward aerial for high damage.

Dash Attack & Eye Rush

Lom Lobon surges forward, his body sparkling with magical energy as he charges into opponents physically, dealing 10% damage and draining 10% health from shields on hit, with decent hitstun and knockback on hit. The move has super armor on start-up, making it a surprisingly effective move.

& Aerials &

Neutral Aerial & Static Discharge

Lightning bolts arc around Lom Lobon's body, three distinct bolts like thunder jolts from Pikachu's Neutral Special. They last for one and a half seconds before dissipating, each one dealing 5% damage and moderate hitstun and knockback to enemies who get near them, arcing to that enemy. Other obstacles, such as ice blocks summoned by Glaciate can be charged too, causing the bolts to jump to them, and from there to opponent, or another opponent, or even back to Lom Lobon.

Forward Aerial & Airstrike

Lom Lobon throws a hand out and summons two blades of air that strike in an 'x'-shaped pattern in front of him, each blade dealing 6% damage, 50% more damage and knockback against aerial opponents. At the cross-point of these two blades, the attack is absolutely devastating against other enemies in the air, but this is one of the slowest aerials in the game as compensation.

Up Aerial & Pressure Wall

Lom Lobon looks straight up and generates a disc of air pressure above him, which shoots up like a short-ranged projectile, dealing 7% damage and set knockback upwards with some hitstun. It's reasonably fast to come out and difficult to avoid, and surprisingly, starts at the bottom of Lom Lobon's hurtbox, travelling up through him when it reaches the top. It's most powerful for continuing to juggle an opponent upwards in a tornado, towards the top blast zone.

Down Aerial & Cyclone

Lom Lobon spins in place rapidly, air currents sucking opponents in to take multiple flinching hits of 2% damage in from him, and can DI up or down, but the suction is too great to escape entirely. The opponent is then launched by the final hit in the direction the opponent DI'd, either upwards or downwards. They can try to go downwards to avoid getting killed off the top by a Tornado, but offstage may need to go upwards to avoid getting gimped. In a Tornado, Lom Lobon can also control whether they are launched up or down by moving up or down himself, changing which end they end up at.

Back Aerial & Chain Lightning

Lom Lobon turns around and fires a bolt of lightning behind him, which bounces to any obstacle or opponent within a battlefield platform of him. It can then continue to bounce along to another opponent, and even potentially loop back to him, dealing 9% damage and strong hitstun. The only rule to bounces is that it cannot bounce directly back from where it bounced from, and it cannot bounce to the same object from the same object twice, meaning that with several ice blocks in the air from a tornado, this can still bounce back and forth several times to build up quite a bit of damage!

& Smashes &

Forward Smash & Orb of Destruction

Lom Lobon generates a pink sphere of energy about the size of a bumper item in front of him, which charges as long as he holds the input down, up to one second. When released, it very quickly charges forth at the nearest opponent, homing in for 15-20% damage and powerful knockback, but with extensive freeze frames that make it easy to DI. There's a bit of a delay between the end of Lom Lobon's ending lag for the move and the actual firing of the sphere, allowing you to play all sorts of tricks with it, like blinking in front of it and casting Tornado to catch it in a tornado, or smashing it into an ice block to create a loud explosion of icy shrapnel for up to 32% damage against an opponent caught in the wrong position.

There's one more element to Lom Lobon's Orb of Destruction. It's a very fast projectile, but it's most effective from a distance. 15-20% is the average damage for a distance of two to two and a half battlefield platforms away, but closer the damage is weaker, maxing out around 11% damage, while further away, it can max out as high as 28% damage and even more ridiculous knockback.

Up Smash & Crystal Spear

Lom Lobon creates a spear out of pure crystal, generating it purely out of geokinesis, then throws it at a nearly completely vertical angle above him, which sails up at the speed of a full charged Snake's Up Smash without losing speed, only stopping when it reaches the top blast zone. The spear deals 17-22% damage to opponents and strong upwards knockback, but is deathly hard to aim due to its significant start-up time and unusual hitbox. Unless of course an opponent is caught in a tornado.

Down Smash & Shatter

Lom Lobon floats in place unwaveringly, and an explosion occurs just beneath and in front of him, about the size of the hitbox for Lucas's Down Smash. The stage itself shatters, spreading shrapnel around a smart bomb's radius of Lom Lobon, dealing up to 12% damage against grounded foes, and up to 6% damage to aerial foes, less the further they are from the explosionLom Lobon himself takes 6% from the shrapnel, as he is considered to be flying. Any opponent caught at the epicenter of the explosion is pitfalled, and a block the size of the smallest stagebuilder block is removed from the stage, permanently, or at least until Lom Lobon is KO'd.

When performed in the air or off a ledge so that there's no ground in front of Lom Lobon, there's a sparkle where this attack takes place, just below and in front of Lom Lobon. Opponents caught in that blast take a whopping 25-35% damage and huge freezeframes as they themselves are shattered, and the attack deals enough shield damage that a fully charged Shatter will completely break a shield. It's a great option out of a float for those reasons, although it needs careful, precise aim to be used effectively.

There is one exception to how this move works though. If there is a block of ice nearby on the stage, either one created by Glaciate or one with a frozen enemy in it, Shatter will target that block of ice instead, dealing 25-35% damage on opponents frozen, and slightly less to opponents caught by the explosion of ice particles from being nearby, depending on distance and the spray pattern.

& Grab Game &

Grab & Pummel & Telekinetic Grip

Because Lom Lobon can grab while hovering in place, he has a very unique ability to perform throws while in midair, especially since his grab, while slow as most tether grabs, has a monstrous range as he lifts the opponent into the air, gripping them helplessly with telekinesis. For his pummel, he reaches out and grabs their head with his hand, draining magical energy, or shield strength, out of them, dealing 2% damage and 5% shield damage with each hit.

Down Throw & Telekinetic Bounce

Lom Lobon whirls the opponent around him telekinetically, then rises up slightly and slams them down, dealing 3% damage when they're thrown and 7% damage when they hit the ground, bouncing up for set knockback and moderate hitstun that can follow up into an up aerial or up tilt. When performed in the air, only the hitbox from the weak toss into the ground remains, but it acts as a meteor smash to opponents, and can be a powerful gimping tool offstage.

Up Throw & Freeze

Lom Lobon lifts the opponent above him telekinetically, then freezes them in place, dealing 11% damage and strong upwards knockback with poor knockback growth upwards, that KOs around 140%. The opponent is frozen for the duration of a freezie effect by this throw, which can become a killing throw at much lower percentages when used from the air.

Forward Throw & Force Lance

Lom Lobon lifts the opponent above him telekinetically, then generates an ethereal lance made of pure force, and shanks the opponent with it, dealing 12% damage and high base knockback with mediocre, but not terrible, knockback growth, KOing around 160%. What makes it very deadly though is that it can be immediately followed up with an Orb of Destruction, directly comboing at low percentages, while being a deadly follow-up aimed properly at high percentages. It or Ball Lightning can be killing endings to this move, making it superb for kill set-ups.

Back Throw & Mystic Blast

Lom Lobon turns around and fires a blast of magic from his singular eye, exploding behind him for 16% damage and powerful radial knockback in a hitbox the size of Smash 4 Bowser. It's a powerful, long-ranged but slow throw option that can launch opponents up or down for KO's off the top, off the bottom, or offstage.

& Final Smash &

Gloorx Vloq attacks in a flurry of level 9 spells. He starts with Glaciate, freezing all enemies in their tracks, then follows up with Shatter, exploding the ice blocks created into bursts of shrpanel. Then he uses Fire Storm, creating a whiling inferno and four fire vortices, followed finally by Tornado, knocking opponents off the top of the screen for a KO.

& Playstyle &

Lord of Magic & Master of Spells

Gloorx Vloq is a relatively simple character in some ways, and a complicated one in others. His primary KO method is obvious: use a combination of damage racking, obstacles from Glaciate, and upwards knocking attacks to pull opponents into a Tornado and blow them off the top of the screen to finish them off. Actually doing so is more complicated than it seems... after all, Tornado itself deals no hitstun, allowing opponents to counterattack. Being able to use all of his tools against opponents: his aerials and hover-activated grab-game, standards and smashes is a key tool in his arsenal.

When it comes to damage building, moves like his Forward Tilt, Neutral Aerial and Back Aerial, in combination with several ice blocks from Glaciate, is most effective, bouncing and chaining lightning to enemies over and over. Glaciate and Tornado also deal great amounts of very difficult to avoid damage, even if they don't deal hitstun directly usually, making them effective but risky propositions for building up damage. Movement is another key with Lom Lobon, and it's important to learn how to use his hover and mini-teleports effectively.

When it comes to alternate KO options, his smashes and ball lightning make serviceable opttions, giving him no shortage of ways to kill opponents, especially from a distance. Distance fighting is key to Lom Lobon, who is a fantastic zoner and spacer in his own right.


darth meanie

Smash Journeyman
Joined
Jun 6, 2008
Messages
452
& Gloorx Vloq &


Gloorx Vloq is one of the four Lords of Pandemonium in Dungeon Crawl, and the guardian of the Dark Rune of Zot. A surprisingly fast master of Necromancy, the dark lord is a powerful opponent guarded by his soul eaters and executioners, as well as a powerful combatant himself with his mastery of negative energy and dark magic.

& Statistics &

Ground Speed: 10
Air Speed: 7
Size: 10
Weight: 8
Jump Height: 4
Traction: 9
Fall Speed: 8


Gloorx Vloq's large body hides surprisingly quick movement, as he can speed around at just shy the movement speed of Sonic, all the better to harvest the dead with for this hooded reaper. in addition, instead of a traditional recovery, he can float like Peach, but his float allows him to move omnidirectiously in an ominous manner.

& Specials &

Neutral Special & Bolt of Draining

Gloorx Vloq stretches out a single clawed hand from his cloak and points a single finger forward, firing a thick, greenish black bolt of energy out a distance around two thirds the length of Battlefield. The beam deals 8% damage and strong hitstun but little knockback. The move has a noticeable period of start lag, making it easy enough to shield from since you see it coming, but beware, for shielding does not prevent all of its effects.

This attack deals a special type of damage called drain damage, which is attributed as a status effect on enemies, symbolized by a bluish-black flame over their heads. Shielding an attack that deals drain damage prevents ordinary damage but does not prevent drain. Drain saps the opponent of all their movement and damage equal to the amount of damage that is inflicted or would be inflicted by the attack. An opponent hit by a bolt of draining, therefore, would move at 92% of their usual move speed and deal 92% of their usual damage, have 92% of their usual weight, and their attacks would be 108% slower.

The only way to remove drain is by dealing damage to an opponent. Every point of damage dealt to Gloorx Vloq or his minions removes one point of drain, making it relatively easy to get rid of. However, the more drain you accumulate, the less damage you deal and the slower you move, meaning that if you accumulate a great deal of drain it becomes much harder to get rid of it. If Goorlx Vloq manages to deal 100% drain to an opponent, a tall order because many of his atttacks don't even deal drain, the opponent is rendered completely helpless.

Side Special & Executioner's Orders

Gloorx Vloq opens his cloak and pulls out a large scythe, and swings it cermoniously, causing an executioner to apport in front of him in a cloud of black smoke.


A terrifying tier-1 demon with blades for arms and a single merciless floating skull, Executioners are wickedly fast creatures, faster than Sonic even, with 25 stamina that attack rapidly with their scythe-like appendages for 8% damage a hit, hitting up to three times in a row, with strong knockback on the last hit. Gloorx Vloq can have up to two Executioners at once.

Executioners have one weakness in Gloorx Vloq's grand plan though. Because they cannot perform any defensive maneuvers, they're easy to destroy and rack up damage on, allowing enemies to remove their drain by attacking Executioners. Thus Gloorx must weigh whether the benefits of the damage they can potentially inflict is worth the cost of the drain he can inflict on them otherwise.

Up Special & Symbol of Torment

An arcane symbol appears to float above Gloorx Vloq's head, signalling the beginning of his most devastating ability. This spell is the bane of many an adventurer foolhardy enough to enter the halls of Pandemonium, Tomb, and Hell, for even the most powerful characters can only partially resist this devastating attack.

This attack must be charged over time, and even at minimum charge takes nearly a full second to complete. Charging doesn't increase the power of the move, but its range. Uncharged, it barely hits a stagebuilder unit's radius arouund him, while fully charged over two seconds, it will nearly cover the entire screen. Charging the attack also lengthens the time between the end of the charge period and the actual hitbox, making charging up doubly vulnerable.

When released though, the effect is incredible. A sphere around Gloorx Vloq, the size of which is based on charge, glows black, and a horrible scream pierces through the speakers as a floating skull appears over his head. Every opponent in the field, whether shielding, dodging, or any other trick to avoid damage, is immediately affected by this move, increasing their damage and their drain by 100% of their current damage or drain. An opponent at 60% damage would therefore be at 120% damage, and an opponent at 20% drain would be at 40% drain, and so on. It's a devastating attack that can completely turn the tide of battle.

Opponents have two choices when facing this move. Flee, or fight. Flee can be the safer option, as jumping offstage usually prevents the symbol of torment from hitting. It puts Gloorx Vloq in an advantageous position though, and allows him to zone out with Executioners and Bolts of Draining. Fighting is the more tempting option... Torment cannot be canceled once initiated, but opponents run the risk of running directly into range and being affected regardless. The decision becomes even harder when drained, as the characters can move away or closer more slowly.

Down Special & Invisibility

Showing skill with hexes as well as negative energy, Gloorx Vloq fades away into invisibility, lightly contaminating himself with magical energy. This has to be charged up for it to be effective, able to be charged for up to two seconds, giving him from three to eight seconds of invisibility at once. While invisible, all of his scythe attacks deal extra damage and knockback when hitting the opponent from behind, and all of his moves are usable without breaking invisibility.

The weakness to invisibility, however, is that blasted magical contamination. It takes about fifteen seconds to go away, and if he uses Invisibility or another contaminating ability while already contaminated, he will glow slightly. This too, is harmless, but makes invisibility useless as opponents will be able to attack the source of the glow. Use a contaminating ability once more, and Gloorx Vloq will take minor damage of 7% as violent energy is released from his body.

& Standards &

Jab & Draining Touch

Gloorx Vloq extends a single finger from his cloak and touches in front of him, dealing 9% damage in a relatively slow jab attack, with negative energy sparking off his fingertip to extend the range. It can't be repeated quickly, but does deal drain damage, even on successful shielding of the attack.

Forward Tilt & The Reaper

Gloorx Vloq swings out with a massive scythe in front of him in an attack with a unique hitbox. Enemies within a range of a stagebuilder unit of him are completely unaffected, but half a battlefield platform beyond that is hit by the scythe, dealing 14% damage and significant knockback, making this a formidable kill move on his part. Spacing it properly is important, but with Gloorx Vloq's speed and traction, keeping opponents at the right distance is easier than it may seem. While invisible and behind an opponent, this attack deals 18% damage and knockback that KOs around 90%.

Down Tilt & Reaping Slash

Gloorx Vloq swings his scythe out in a low sweep, as if harvesting souls. The blade stretches from just in front of him at the beginning of the slash to stretching out nearly two stagebuilder units ahead of him at the very end of the attack. This deals 9% damage and medium knockback, 13% damage and stronger knockback when done from behind while invisible.

Up Tilt & Agony

Gloorx Vloq points up and generates a crackling buzz of negative energy around his finger, which then explodes in a shockwave of electrical explosion around him, dealing 1% damage and only moderate hitstun. Well, it only deals 1% damage against opponents with no drain on them; against drained opponents, it deals damage equal to their current level of drain. Like all negative energy attacks, this cannot be shielded, only dodged or avoided. It does not inflict any drain in addition to drain already inflicted though.

Dash Attack & Grazing Slice

Gloorx Vloq disappears, then reappears up to two battlefield platforms in front of him, almost as if performing Fox or Falco's Side Special, his scythe outstretched as he ends it. A moment later, a slash mark appears over the distance he covered, dealing 12% damage to any opponent caught in it. It's a great approaching tool and way to avoid attacks, and deals 17% damage and powerful knockback to opponents when used from behind while invisible.

& Smashes &

Down Smash & Miasma Cloud

Gloorx Vloq points down in front of him and creates a cloud of miasma that crawls along the floor in front of him. This cloud stands about a Kirby-height tall and between one and two Gloorx Vloq-heights long, depending on charge. Opponents who stand in the cloud take unaviodable constant damage and have their movement speed cut in half for five seconds, in addition to any slowing from drain. It's a great way to zone opponents out. Only one miasma cloud can be out at a time, and it lasts for about twelve seconds before dissipating.

Forward Smash & Poison Arrow

Gloorx Vloq generates a sickly green orb in his hands in front of him, which then flies out at a slightly angleable direction forward, shooting forward at the speed of Fox's blaster, dealing 10-14% damage and decent knockback, along with a poison effect that deals an additional 8-12% damage over six seconds to the opponent. It's more powerful and faster than Bolt of Draining, making it a more effective choice when you don't want to focus on building up an opponent's drain too much and would rather just build up damage.

Up Smash & Lethal Infusion

Gloorx Vloq generates a ball of pink light in his palm, then slashes upwards with his scythe, coating the scythe with the energy as he does so, dealing 13-19% damage. This gives him the temporary status of making all of his scythe attacks have a drain effect, dealing drain damage to opponents equal to the damage dealt by his attacks, even on shield. It only lasts for about six seconds, while he takes magical contamination for twelve seconds for doing so.

& Aerials &

Forward Aerial & Crescent Moon Slash

Gloorx Vloq extends his scythe above his head, and then slices it down in a circular slash in front of him and below him, in a wide, arcing blow that deals 11% damage and strong tangential knockback. While invisible from behind, this attack deals 15% damage.

Neutral Aerial & Darkness

Gloorx Vloq disappears into shadowy darkness, then reappears in the direction you angle the control stick, half a battlefiled platform away. He can only actually move with this attack once per trip in the air. When he reappears, he deals 11% damage and decent radial knockback that won't KO anytime soon. This can be canceled into another aerial when he reappears, giving him an additional movement option alongside his hover in the air.

Up Aerial & Pain

Gloorx Vloq raises a hand up, and there is a burst of negative energy above him, dealing 1% damage to opponents or damage equal to their current drain level, whichever is greater, as well as hitstun that scales logarithmically based on their drain percent.

Back Aerial & Defiant Slash

Gloorx Vloq turns around spookily, and slashes behind him with his scythe in a long-ranged hitbox, dealing 14% damage and powerful horizontal knockback. When performed while invisible from behind, this deals 18% damage and killing knockback.

Down Aerial & Drain Drop

Gloorx Vloq turns into shadow and rushes downwards, exploding when he hits the ground into a cloud of negative energy, draining opponents for 12% damage and 12% drain, even if shielded. A stall-then-fall attack that can be surprisingly effective for changing his momentum in the air and its wide range of effectiveness, as well as having invulnerability on start-up, allowing him to avoid attacks that would otherwise reduce opponents' drain.

& Grab-Game &

Grab and Pummel & Draining Grip

Gloorx Vloq extends an arm and grips the opponent, lifting them into the air. For his pummel, his hand glows with green-black lightning of negative energy, dealing 2% damage and 2% drain per hit.

Down Throw & Drain Slam

Gloorx Vloq throws the opponent to the ground, his fist charging with negative energy as he does so, exploding when the opponent hits the ground for 12% damage and 12% drain, as well as decent set upwards knockback and good histun as well, making this in many ways his go-to throw.

Up Throw & Drain Charge

Gloorx Vloq sucks the drain out of the opponent, healing himself for 1% damage for every 1% drain he absorbs from the opponent, and buffing up his strength temporarily, giving him an extra 33% damage and knockback for as many seconds as there are points of drain he abosrbs. He then tosses the opponent up for 5% damage and weak knockback. His best throw for setting up for kills or late-stock rejuvenation.

Back Throw & Scythe Spin

Gloorx Vloq turns around, tossing the opponent a short distance behind him, then finishes his spin with a slash of his blade, dealing 14% damage and knockback that kills around 110%. His best killing throw.

Forward Throw & Shadow Hold

Gloorx Vloq pushes the opponent away from him, who is gripped in a field of shadowy energy, dealing 8% damage and trapping the opponent in a grab hitbox for as long as they would have had left caught in his grab, meaning that the sooner you throw, the longer the hold lasts. Fortunately for the opponent, they are immune to damage from all sources in this state, except for torment and drain damage, which means that Gloorx Vloq can follow-up at mid-high percentages with a move like an Up Smash or Symbol of Torment to get the opponent to a finishing position.

& Final Smash &
Gloorx Vloq summons the souls of the dead to haunt the opponent. An army of phantasmal warriors appears, attacking opponents alongside Executioners at random. Phantasmal warriors' attacks all inflict drain damage, making this long-lasting final smash a very good way to rack up drain onto your opponents.

& Playstyle &

Lord of Darkness & Fear the Reaper

Gloorx Vloq is a character based around his singular debuff against the foe, drain damage. Drain is relatively easy to get rid of, yet difficult at the same time, because it never wears off over time, only being eliminated by dealing damage to enemies. This makes him an interesting character who can combine zoning with fast approaches and retreats, staying out of harms' way as he tries to drain the opponent. Small amounts of drain are mostly ignorable... a single bolt of draining has less impact on a player's damage output than move decay does... but as drain builds up, it becomes a great deal more prominent and weakening, so opponents must be aggressive against Gloorx Vloq to avoid it. So Gloorx has no trouble forcing opponents to approach, as drain damage can be dealt on shield from far away.

When opponents actually do approach, he has a few options. Invisibility lets him avoid damage and try to finish off opponents who are at high damage by attacking them from behind, but its impossible to spam. Other scythe attacks, especially ones boosted up by Lethal Infusion are dangerous as well. Miasma clouds can also be used to zone out opponents who try to approach, as can his effective grab-game.

If an opponent doesn't have drain, or has a strong projectile game though, Gloorx is perfectly comfortable approaching on his own, and using his fast movement speed to mix in approaches with his fast tilts and dash attack can be a very effective tool.

Executioners are a choice to be made; between more damage and more drain. They're very effective minions when it comes to damaging opponents, what with their fast multi-hitting attacks, but they're very vulnerable to attack themselves, and are just bulky enough that one Executioner is enough to remove 25% drain. Using them early on to build up damage is a good strategy, but ceasing to rely on them when you're building up drain makes sense.

And of course, mention of Gloorx Vloq would be incomplete without mentioning his most powerful tool, Torment. It's a difficult to set-up move, usually requiring a drained opponent to slow down their ability to counter it, or assistance from a Forward Throw or Invisibility to land it. It's an incredibly threatening, wide-reaching move that forces approaches like nobody's business or forces enemies to run for cover, playing into Gloorx's zoning game with Bolt of Draining and Poison Arrow again.


darth meanie

Smash Journeyman
Joined
Jun 6, 2008
Messages
452
& Cerebov &


Cerebov is one of the four Lords of Pandemonium in Dungeon Crawl, and the guardian of the Fiery Rune of Zot. He wields the sword of Cerebov, a fiery blade that slowly burns away at opponents fire resistance and makes them more vulnerable to his powerful fire magic. Along with that, he has access to other powerful spells and massively strong melee attacks.

& Statistics &

Ground Speed: 3
Air Speed: 2
Size: 11
Weight: 12
Jump Height: 6
Traction: 10
Fall Speed: 9


Cerebov stands impressive and intimidating, being the largest and heaviest opponent in all of Smash. While slightly slow, he's actually quick enough to be more than dangerous, and has very impressive range on his melee and projectile attacks. His downfall however may be the most embarrassing though... unlike the other Lords of Pandemonium, Cerebov cannot actually fly. He has no true recovery to speak of either, making him humilatingly gimpable. His crouch also happens to be the most pathetic in the game, barely bending his knees and leaving him still a huge target. Make no mistake though, he's a huge threat and deserves respect.

& Specials &

Neutral Special & Flame Tongue

Cerebov defaults to the simplest of Fire Magic for this attack, channeling it through his sword. He slashes out with his sword, and a long tongue of flame whips out one and a half battlefield platforms in the direction the attack is angled, dealing 9% damage and decent, if somewhat weak knockback. If he hits the opponent with the sword itself, the sword deals 10% damage, and knocks the opponent into the tongue of flame for 12% damage.

Wait, where did that 12% come from? I thought the spell dealt 9% damage? Well, every time an opponent is hit by the Sword of Cerebov, the weapon strips away their fire resistance, causing all fire attacks to deal 33% more damage and knockback to them for eight seconds. If he hits an opponent twice with it, it doesn't refresh, but stacks to 67%. A third hit in a row stacks the effect to 100%. Please try to avoid that if you're fighting Cerebov. It'll be very painful for you.

Side Special & Fire Storm

Cerebov points his sword forward in the air, and a blast of fire appears in front of him, between two and four battlefield platforms away, depending on whether the input was tilted or smashed. The fire swirls slowly at first, not doing damage, but after half a second explodes into a torrent of flames. This creates a powerful storm of fire the size of two battlefield platforms in diameter, and tall as Cerebov is. It can be angled slightly to put it in the air up above him, or down below, as if using it against a recovering opponent.

Opponents caught in the fire storm during its one second duration are bounced back and forth and take rapid hits of damage for up to 20% total damage if caught in the entire storm, which has a suction effect similar to Meta Knight's Mach Tornado. The final hit has knockback that kills around 120%. When it ends, it leaves behind three fire vortices, swirling vortexes of fire, that linger and fly around randomly as traps, dealing 5% damage and weak upwards knockback to opponents who touch them.

Needless to say, this is a devastating attack even against opponents with full fire resistance, and utterly obliterates enemies who are weakened to fire.

Up Special & Haste

Cerebov charges up with flaming energy, taking about half a second to perform. The next time he dashes, jumps, or performs an attack, he will dash at Captain Falcon's dash speed, jump at 1.5x Falco's first jump height, or attack with 33% less starting and ending lag. This includes all of his moves, including specials. Cerebov can store up to three charges of haste at once, and then use them one after another, or store just one for a quick dash-in. If there are Fire Votices nearby, or an enemy covered in sticky flames, they will be absorbed during this special, cutting the lag to a mere fifth of a second before it ends.

Down Special & Summon Greater Demon

Cerebov points his sword forward in the air, and after a significant delay, a demon appears in a torrent of fire in front of him, cascading upwards and giving him a slight vertical boost when in the air. He summons randomly one of the following two demons. He can only have up to two demons out at once.


Balrugs are a tier-2 demon, but do not mistake that for being less threatening than tier-1 demons. Summon Greater Demon has a 2/3rds chance of summoning a Balrug, which appears with a signature demon whip of flaming. They have 30 stamina and an AI level of 3. They attack with their demon whip for a long ranged attack with a flaming brand for about 7-11% damage, but can also use the following moves:

Balrug Neutral Special 2 Fireball

Balrugs can lob a ball of fire at opponents that explodes with the radius of Snake's C4 detonation, dealing 12% damage and moderate knockback.

Balrug Side Special 2 Sticky Flame

Balrugs can throw a ball of fire straight at opponents that sticks to opponents like a gooey bomb, transferring from opponent to opponent that brushes up against them in multiplayer matches. It deals rapid damage of 2% fire damage a second over six seconds. Obviously, there's an incentive for Cerebov to follow up with melee attacks following this. The attack can be shielded, but the flames still stick, dealing damage as long as the opponent doesn't shield, but no hitstun.

Balrug Up Special 2 Flight

Unlike their master, Balrugs can fly at the speed of Meta Knight's dash, and can freely attack while flying. Their flight is unlimited.

Balrug Down Special 2 Smite

Balrugs can smite foes directly, an unavoidable attack, even by shielding or dodging, invoking divine providence against foes with spiking knockback. Balrugs only do this against very distant opponents, preferring to chase down enemies or lob fire at them from mid-range. They take two seconds of flying or standing still to charge up, and when released, deal 7% unavoidable damage to the opponent with weak spiking knockback.


Brimstone Fiends are a tier-1 demon, and deserve all the respect that entails. Summon Greater Demon has a 1/3rds chance of summoning a Brimstone Fiend, which has 25 stamina and an AI level of 4. They attack aggressively with their claws for three hits combos for 3%, 3% and 5% damage, but also have the following specials.


Brimstone Fiend Neutral Special 1 Hellfire

Hellfire is serious business. So serious that not even Cerebov uses it directly. Hellfire ignores all fire resistance (but not vulnerability), and its damage cannot be avoided or reduced in any way whatsoever. Shields? It'll eat up the shield first, then hit through. Dodging? It lingers too long to dodge. Hellfire deals 12% unavoidable damage when thrown at the opponent, and the only way to avoid it is by getting out of the way of the attack in the first place.

Brimstone Fiend Up Special 1 Flight

Unlike their master, Brimstone Fiends can fly at the speed of Bowser's dash, and can freely attack while flying. Their flight is unlimited.

Brimstone Fiend Side Special 1 Claw Strike

The Brimstone Fiend claws at opponents in a way to leave slash marks like Bowser's Side Special in melee, dealing 10% damage and strong knockback.

Brimstone Fiend Down Special 1 Symbol of Torment

The Brimstone Fiend charges this special over the course of two seconds. The opponent must escape the range of a smart bomb explosion of the brimstone fiend or kill it first, or a blast of energy will hit them, increasing their damage percentage by 50% of its current total. So an opponent at 100% damage would be knocked up to 150%, and an opponent at 80% would be put at 120%.

& Standards &

Jab & Double Slash

While hitting twice in a row may be taken for granted with other character, for Cerebov, two hits from his sword has much stronger implications. That's why this is the slowest jab attack in the game. Cerebov reaches back and does a quick, weaker slash for 5% damage just in front of him, although given his size it'll still outranges most other jabs, then does a more powerful slash while stepping forward for 7% damage.

Forward Tilt & Overstrike

Taking a page out of King Dedede and Ike's movesets, Cerebov swings his sword from over his head and smashes it into the ground, dealing 21% damage in a huge hitbox. There's even a shockwave effect of fire around when the blade hits the ground itself, dealing 8% fire damage as it explodes out, covering a wider area than even his massive blade covers. A trail of fire follows the blade that lingers for a few split seconds after the attack ends, covering his ending lag and dealing 6% damage and weak hitstun to anyone who touches it. He also has super armor against all attacks that deal 12% damage or less during this move, making up for its slowness with defense.

Up Tilt & Rising Slash

Cerebov holds his sword straight out in front of him and then lifts it, identically to Ike's Up Tilt for 13% damage. Unlike Ike's Up Tilt, this leaves a wall of lingering flames in front of him that makes approaches from directly in front of him impossible, making this an excellent defensive tool as well.

Down Tilt & Flaming Slash

Cerebov swings his sword down low in a low slash, sending a jet of flame upwards and forwards that is propelled by the attack, which lingers in the air briefly, dealing 6% damage to opponents caught in it. The sword itself deals 11% damage in an attack slow for a down tilt, but still one of his fastest attacks.

Dash Attack & Rushing Slash

Cerebov charges forward, gaining super armor for the start of this attack. He then performs a spinning slash all around him for 11% damage and knockback that kills around 120%, covering him with protective flames that linger a little while longer. This has a follow-up attack he can use for a second, stronger slash for 15% damage that can hit opponents who shield or spot-dodge the first attack, but has longer ending lag. The second hit kills around 100% and hits all around him as well.

& Smashes &

Up Smash & Ring of Flames

Cerebov holds a single gauntleted hand up in the air, which glows with everburning fire, before he throws it down, causing an explosive ring of flames to engulf around him, dealing 15-19% damage and decent hitstun with set upwards knockback. The flames die down from their original strength quickly, but remain for two seconds, plus thrice as long as the move was charged for, up to five seconds, dealing 6% damage and weak hitstun to anyone who touches the flames. This isn't a complete defense against melee attacks though; highly disjointed moves can still strike Cerebov, and the flames only guard him from the waist down. Opponents can easily shorthop over and smack him in the face.

Forward Smash & Iron Shot

Showing his mastery of earth and conjurations magic as well, Cerebov summons a black orb the size of a soccer ball into existence by merely outstretching his off-hand, and then after a moment, fires it straight ahead for massive knockback and 18-25% damage. He can slightly angle where the Iron Shot starts from and the angle it fires at, but not much. Once the orb is summoned though, the attack is cancelable, and Cerebov can then launch the shot by using one of his sword attacks to propel it like a soccer ball item towards his foes. The most popular move to launch it with is of course, a forward tilt or up smash, but a short hopped aerial or up tilt or even a down angled iron shot into a down tilt can be effective, depending on where you want to launch the orb into.

Down Smash & Bolt of Magma

Combining his use of Earth and Fire magic, Cerebov generates a bolt of magma that travels across the ground a battlefield platform ahead of him, further and faster when charged up. This slow moving wave of lava slides forward, dealing 12-17% damage, but also setting opponents on fire with sticky flames, dealing 2% damage a second for three seconds afterwards, even if the attack is shielded. The magma lingers for a few seconds after the attack is performed, making it good for zoning opponents out or following up with attacks.

& Aerials &

Neutral Aerial & Dropping Slash

Cerebov swings his sword out in front of him in an animation eerily similar to his forward tilt, dropping it to be horizontal with him, dealing 15% damage and leaving trails of flame behind. Hold down the input though, and he'll cancel this into a drop attack, dropping with his blade out, dealing 12% spiking knockback to anyone hit by the second part of this stall-then-fall attack.

Forward Aerial & Sticky Flame

Cerebov swings his sword out almost lackadaisically, flinging flames out onto the opponent in front of him in a slightly downward angle. These flames deal no damage directly, but stick to the opponent, dealing 2% damage a second for 6 seconds, even if the opponent shields the attack. The sword itself deals 11% damage in this attack as well as leaving behind flame trails and debuffing the opponent's fire resistance, although the sword's hitbox is awkward to hit with, as the main goal is to fling the sticky flames onto the opponent, which has a good range to it.

Down Aerial & The Boot

Cerebov simply kicks down below him for this attack in a powerful stomp that deals 22% damage, good hitstun, and spiking knockback. It's quite similar to Ganondorf's down aerial, and just as effective when used right. It even has very little landing lag, so you can use it out of a short hop and follow up with an Up Smash at low percentages. Cerebov has super armor for this attack against all attacks that deal less than 12% damage.

Up Aerial & Soaring Slash

Cerebov swings his sword upwards from his side very quickly, in a way that almost mirrors Marth's Up Special, but without the rise in height. It deals 11% damage and powerful upwards knockback in a wide hitbox that is great for hitting opponents above and in front of Cerebov, and can even be used for air-to-ground combat. An all-around all-star attack in his arsenal.

Back Aerial & Counter Slash

Cerebov gains super armor for this attack, ignoring any attack that deals less than 12% damage, and spins around, drawing his blade and slashing behind him for 15% damage and powerful knockback. It's a great approaching tool and defensive tool all-in-one.

& Grab-Game &

Grab & Fiery Grip

Cerebov reaches out and grabs his opponent in a bog-standard grab, albeit one with excellent range just considering his size. His pummel however, is a bit unique. It burns the opponent for 2% damage as he engulfs them in fire, but if the opponent has increased fire vulnerability, he then absorbs their fire vulnerability into him, removing it from the opponent but giving him an instant use of haste. While hasted, his grab release instantly combos into a jab, making this a very threatening option indeed. He can even absorb an enemy's fire vulnerability, then hit them twice with the jab to boost their fire vulnerability higher than it was to start. He cannot however, cancel a jab into a grab, preventing this from being used for an easy infinite.

Forward Throw & Incinerate

Cerebov throws the opponent to the ground, opens his hand filled with fire magic, and blasts the opponent for 10% fire damage and medium diagonal upwards knockback. Against an opponent fully vulnerable to fire, this is a very scary throw indeed.

Up Throw & Skewer

Cerebov lightly tosses the opponent into the air above him, then jabs his sword straight up, skewering the enemy on it in a meaty attack for 13% damage. The opponent takes copious freeze frames from this attack, then is launched straight up, although they can use the freeze frames to change their DI. It normally kills at around 130% because of DI.

Down Throw & Crush Stomp

Cerebov throws the opponent to the ground and brings down the foot, dealing 18% damage to the opponent and spiking knockback, killing opponents around 120% damage and spiking opponents when performed on the ledge.

Back Throw & Sticky Flames

Cerebov turns around with the opponent and opens his hand, filling it with fire magic, and thrusts his palm into the opponent's chest, coating them with sticky flames that burn for six seconds, dealing 2% damage a second.

& Final Smash &

Cerebov glows with pure power, and then unleashes fire storm after fire storm across the battlefield, firing them at random across the stage. This final smash is obviously more powerful after having debuffed the opponent with your melee attacks, so make sure to wait to land it at the right moment.

& Playstyle &

Lord of FIre & Wrathful Demon

Cerebov is a powerful opponent with a clear strategy to his play: weaken the opponent to his all-consuming fire, then strike at range with his powerful spells. He's one of the least combo-oriented characters there is; his only true combo is his jab attack, and for good reason: every hit from his sword has such a massive effect on his opponents' ability to defend from him.

Haste is a powerful tool in his arsenal, taking away his slowness and allowing him to approach effectively and land his laggy attacks, but actually getting Haste charged successfully is difficult without knocking opponents away with his attacks, giving him a bit of a self-propelling engine once he gets going. He can knock opponents away, and either haste up for further attacks, or Flame Tongue, summon minions, or Fire Storm to press his advantage.

A good strategy for Cerebov is to launch opponents away, throw out a fire storm or minions, and then approach into the fire storm or with the minions, using them as cover and later using the vortices left behind to bounce attacks off of or absorb for Haste.

When it comes to actually landing the kill, Cerebov has a glut of options. Fire Storm or Flame Tongue are the best options against an opponent mostly or fully debuffed to fire attacks, potentially killing at absurdly low percentages. He's not completely reliant on fire for landing kills though; his Forward Tilt and a properly aimed Forward Smash can kill effectively too, as well as his throws and Up Aerial.

Cerebov needs to be careful when it comes to ledge games though. The closest he has to recovery is a haste boosted second jump; so he'll often be KOing from the middle of the stage, reducing his kill percents... not that he needs to be near the edge to kill.

 
Last edited:

darth meanie

Smash Journeyman
Joined
Jun 6, 2008
Messages
452
& Mnoleg &


Mnoleg is one of the four Lords of Pandemonium in Dungeon Crawl, and the guardian of the Glowing Rune of Zot. He takes the appearance of a harmless jester, levitating upside-down, but he is far from a joke. Lord of eyeballs and master of summoning magic, he delights in mutating his opponents into abominations before killing them.

& Statistics &


Ground Speed: 7
Air Speed: 7
Size: 10
Weight: 4
Jump Height: 9
Traction: 0.5
Fall Speed: 2


Mnoleg is a slightly speedy character with an unusual movement style. He soars through the air fairly easily and floats downwards slowly, flipping right-side up when jumping. His traction is horrible due to habit of levitating upside-down instead of walking, causing him to slip and slide around as he moves, and making him difficult to control. Coupled with his large size, awkward hurtbox, and general floatiness, he's a bit vulnerable. Overall, not the most impressive statistics for a master of evil. But his abilities more than make up for that.

& Specials &

Neutral Special & Summon Eyeballs

Floating eyes begin to revolve around Mnoleg as he charges this special, which can create an assortment of different minions to attack with. He can summon up to three eyeballs at once with this attack, depending on charge time, of a variety based on the last time he used the move. He rotates through five different types of floating eyes, each with their own unique and devastating abilities.

G - Giant Eyeball


The flimsiest, but perhaps the most dangerous of floating eyes, Giant Eyeballs have a mere eight stamina before being destroyed. They're slow, and generally just float there, unassumingly looking around at random, moving back and forth occasionally, their solitary pupil scrolling across the map. If they happen to look directly at an opponent though, no matter how distant that opponent is, they will instantly flash with energy. It then fires out a slow-moving golden projectile, about the speed and size of Wolf's blaster shots. If an opponent is struck by this bolt, they flash with electricity. In three seconds, they will be paralyzed, taking a full two thirds of a second of hitstun before being able to move again. If the eyeball is destroyed before the stun kicks in, the opponent is not stunned. Players must decide whether to counterattack to save themselves, or run away before the flinch kicks in.

G - Golden Eye


Golden eyes, like their giant cousins, can do no damage to enemies, and only have eight stamina before being destroyed. What they do do however is teleport constantly, blinking randomly across the stage, and pursue opponents with their gaze much more aggressively than giant eyeballs do. What they do when they lock eyes with opponents is glow with golden light, causing opponent to do the same for ten seconds.

G - Eye of Draining


The eye of draining is a considerably bulkier eye, and like its relatives deals no direct damage to opponents. It can however take more punishment than giant eyeballs, having twelve stamina. Eyes of draining slowly float towards opponents at about the speed of Jigglypuff's walk, and as long as they are within half a battlefield platform of the enemy slowly drain their shield, dealing 2 damage to the 50 stamina a shield has a second, and draining shields at ten times that rate when the enemy actually has their shield up. Shield breaks are a definite threat with this eye around.

G - Shining Eye


Shining Eyes deal no damage, like the rest of the eyeballs Mnoleg can summon, but what they do is much, much more sinister. They have ten stamina, a compromise of durability, and float around, staying away from enemies mostly, and fire bolts at enemies at random intervals. The projectiles they fire even have random movement speeds and patterns, some bouncing, others curving towards enemies, reflecting their chaotic nature. When an enemy is hit by one of these projectiles, they are mutated. What does that mean? Well, we'll detail that later.


G - Eye of Devastation


The final eye that Mnoleg can summon, Eyes of Devastation are the only truly offensive eye in his arsenal. The toughest eyes with twelve stamina, they fire bolts of energy at opponents. These are slow-moving projectiles that deal rapid hits of 2% damage as they pass through enemies, with significant stun. Most notably, their projectiles are too slow to be spot-dodged and eat up enemy shields, being completely irresistable bolts of damage, after all.

Down Special & Summon Horrible Things

A gate appears on the ground in front of Mnoleg, and a small abomination comes into view. it's a relatively standard minion, it's only notable feature being its somewhat beefy 40 stamina and weak punch attack for 6% damage. It shuffles around at Mario's dash speed, attacking at random intervals with an AI of about 4. Mnoleg can have up to five abominations out at once though... although they don't all have to be separate...

Side Special & Malmutate

Mnoleg glows with radiant energy, then pulsates a blast of bluish-green light in a cone out in front of him, exploding out just short of a battlefield platform's distance in front of him, and making them glow for five seconds. It has a very long start-up, but the effect is quite powerful. Any opponent caught in the blast will randomly gain 1-2 mutations from the following list. If mutated multiple times, they can gain higher tiers of the same mutation or more of the mutation they already have. An icon appears over the player's head when they are mutated, to indicate which mutation they received.

Bad Mutations
Clumsy
1) You are somewhat clumsy (5% trip chance)
2) You are clumsy (10% trip chance)
3) You are very clumsy (15% trip chance)

Shield Regen
1) Your shield regenerates slightly slowly (20% slower shield regen)
2) Your shield regenerates slowly (40% slower shield regen)
3) Your shield regenerates very slowly (60% slower shield regen)

Stale Moves
1) Your moves get somewhat staler (15% stale move penalty)
2) Your moves get staler (20% stale move penalty)
3) Your moves get very stale (25% stale move penalty)

Situational Mutations
Teleportitis
1) You occasionally randomly translocate short distances (approx 1/per twelve seconds)
2) You randomly translocate short distances (approx 1/per ten seconds)
3) You wildly translocate short distances (approx. 1/per eight seconds)

Berserkitis
1) You tend to lose your temper in combat (+damage and speed low random chance, penalty after 5 seconds)
2) You lose your temper in combat (+damage and speed random chance, penalty after 5 seconds)
3) You quickly lose your temper in combat (+damage and speed high random chance, penalty after 5 seconds)

Good Mutations
Appendages
1) You have horns (+ head damage)
2) You have claws (+ arm damage)
3) You have talons (+ leg damage)

The more mutations you have though, be they good or bad, the more deformed a characters body gets. With three or more mutations, a character begins to look hunched over when fighitng, and their hurtbox slightly expands. Their DI also weakens, making it harder to escape combo attacks.

What about this glow effect though? You see, glow stacks over time from all sorts of sources, including Golden Eyeballs and other sources of attacks, and slowly wears off. The longer an opponent glows, the brighter they glow as well, slowly wearing off over time. If an opponent gathers enough glow to last for fifteen seconds though, they'll start to flash. In five seconds, they'll explode, taking damage equal in percentage to all the seconds glow they've accumulated and cutting their current glow in half, as well as dealing knockback that scales strongly with their glow percentage. At fifteen seconds of glow, it's a potent KO tool. With more glow stacked on, it's even stronger. Beware though, Mnoleg can get caught in the blast radius himself, and if he's at a high percentage, it may end up KOing him!

You see, by pressing this input when there are already two abominations in front of Mnoleg, they'll combine into a large abomination, combining their total stamina as is and giving them a slower, but longer reaching and more powerful punch attack for 10% damage. You can combine up to five abominations at once into a single hulking monstrosity, or two separate abominations... whatever you like. Larger abominations are even slower than smaller ones, but have greater range and power.

What's more, you can combine eyes with abominations to create an entirely new minion, a minion with the powers of it eyeball but the movement and stamina and attacks of an abomination. This opens up whole new avenues of customizability in your minion entourage. Combine an eye of draining or two with small abominations to create quickish minions whose attacks cannot be shielded. Combine a larger abomination with a golden eye to create a monster that is slow, but can teleport to attack enemies. Create a small army of Eyes of Devastation with enhanced durability. Or come up with your own sinister combination!

Up Special & Mailgn Gateway

A portal appears in front of Mnoleg, a gate about the size of Bowser, which Mnoleg can slip inside of by tilting forward on the control stick, causing him to disappear and then teleport out in the direction you point the control stick, reappearing about two battlefield platforms away. Opponents can also use this portal, although at the cost of 5% damage from the effect.

After two seconds though, it becomes apparent that there is something else on the other side of the portal! A single long, eldritch tentacle extends out of the gateway, which proves to be quite lengthy, able to stretch out the entire distance of Smashville. It appears benign at first, but will stretch out and strike at opponents, either crushing them with its arm for 9% damage and moderate knockback, or constricting them if the end of the tentacle gets near them, dealing constant damage over time and slowly pulling the opponent back towards the gate, pulling opponents faster the higher their damage percentage is. Opponents caught by the tentacle cannot move or dodge, but can still fight back, and can destroy the tentacle by dealing 35% damage to it, causing the gate to close. If they are pulled into the gate, they rapidly take 15% damage per second and are caught in grab difficulty until they escape.

The eldritch tentacles summoned by Malign Gateway make for an amazing edgeguarding tool as well if you summon one offstage, which you likely will if you're using one to recover. You can pull opponents away from the battlefield and towards the blast zone, and then finish them off when they try to escape or elsewise take advantage of their sudden unfavorable position.

& Smashes &

Up Smash & Smite

Mnoleg charges up by glowing with white light for this slow attack, laggy on par with Ganondorf's Up Tilt even without charging the smash up. Every opponent sees a pillar of light shine over them while this attack is charging though, indicating what's about to happen. When released, an irresistible bolt of energy smites every opponent on the screen, dealing 7-17% damage that cannot be dodged or shielded. It does not, however deal hitstun, and only mild upwards set knockback, making it impossible to kill or gimp with.

It's a great way to deal damage to opponents caught by eldritch tentacles or busied with abominations though, and allows Mnoleg to be directly threatening even when hiding behind his minions like a coward.

Forward Smash & Mutagenic Blink Claws

Mnoleg charges up by glowing with energy, tensing his body up, before releasing, teleporting in the direction the control stick was smashed: a mere stagebuilder unit in the direction when merely tapped, up to two battlefield platforms when full charged. It's an effective way to suddenly move around the stage and attack opponents from a distance. What's more, by tapping the opposite direction before reappearing, Mnoleg will turn around when he teleports and attack in the opposite direction, allowing him to mix-up opponents as to where he's going to appear... or to knock opponents back into his minions or eldritch tentacles awaiting. He delivers a claw slash with a claw mark effect that extends the hitbox, dealing 14-20% damage and knockback that KOs starting around 150%. What's more, his claws leave behind a glowing wound, preventing glow from decreasing, and actually increasing it by three seconds over the next ten seconds. Hitting with this move again resets the timer for the glow increase.

Down Smash & Meltdown

Mnoleg charges up by glowing with sickly green light for this attack, then emits in two pulses to each side from his hands, dealing 10-14% damage and moderate hitstun and knockback to opponents. If it hits an opponent who is currently glowing though, it instantly causes their glow to detonate, no matter how low or high it is, adding the damage from Meltdown to the effective strength of their detonation. Careful though, the move has long range, but opponents at high glow already may catch Mnoleg in their explosion, especially if they're close-up when you use this move. They may even intentionally get hit by it...

& Standards &

Jab & Blink Kick

Mnoleg leans forward as his legs stretch cartoonishly, doing three spining kicks in a row at the enemy for 4% damage each, chaining into each other. Each kick however teleports the opponent to the other side of Mnoleg and leaves them facing the opposite way, making it nearly impossible to DI out of this combo attack. Mnoleg can even combo it into itself against heavily mutated opponents. Mnoleg can stop the combo at any time, to confuse the opponent on which side of Mnoleg they'll end up on, or to reposition them where you want them to be. The final hit deals knockback that kills around 230%. The kick can also work on eyes or abominations, allowing you to reposition them around you as you please.

Forward Tilt & Stretchy Legs

Mnoleg extends a single leg out, stretching far, reaching nearly a battlefield platform forward in an attack that deals 8% damage. A powerful poking and spacing tool in his arsenal that can poke at enemy shields. He can also angle it up and down, a down angled forward tilt makes a great poking tool as well and has a chance to trip, while an up-angled forward tilt launches opponents further and makes great anti-air.

Up Tilt & Jester Flip

Mnoleg does a complete flip in mid-air, kicking nearby opponents upwards with his silly little booties, dealing 7% damage and weak knockback upwards which can combo into a neutral aerial or up aerial at low percentages. The attack has an extra hitbox as well, opponents who are nearby Mnoleg but not hit by the kick itself will take weak pushback and be turned around. This can be useful for messing with opponent's approaches or for reorienting Abominations into the direction you want them to go, who will dutifully begin to walk in that direction at command.

Down Tilt & Spinning Claws

With a twist, Mnoleg spins in place, slashing out low around him with his mutagenic claws for two hits of 5% damage that chain into each other, and can deal a little bit of shield pressure, as well as increasing opponent glow by three seconds over the next ten seconds. Abominations caught in this attack experience an AI change, and will instead of mindlessly shuffling around and pursuing opponents at random, will attempt to body-block for Mnoleg, staying between Mnoleg and the nearest enemy to the best of their ability, trying to cover attacks for him, and attacking only when a clear opportunity is open. Hitting it with an Up Tilt will revert it to its original AI.

Dash Attack & Fade Away

Mnoleg rushes forward, performing a spinning kick, each hit dealing 3% damage for up to five hits in a row, then teleports back to where he started his dash from. It's great at attacking shields and poking at enemies without commiting to an attack, as even if they successfully dodge or shield it, they can't counter-attack. It fits well into his tricky playstyle. Abominations or Eyeballs hit by this move will head back to where Mnoleg initiatied the dash from as well as soon as possible, allowing him to bring them back where he wants them.

& Aerials &

Forward Aerial & Blink Strike

Mnoleg slashes forward, dealing 7% damage to any opponent in front of him. It seems like a simple, standard aerial at first, until Mnoleg actually hits someone with it. When he does, the opponent takes huge freeze frames, stuck in midair temporarily. Mnoleg then seems to almost smile, and can point the control stick in any direction. Instead of knockback, the opponent is teleported in that direction based on their damage percentage. It's never a great deal of distance, even at high percentages, so this isn't a killer gimping method as it refreshes recoveries. But it can easily reposition opponents into unfavorable circumstances, buy space to build up your army, or toss opponents into eldritch tentacles summoned from malign gateways awaiting in the air.

Back Aerial & Grinder Kicks

Mnoleg's legs stretch cartoonishly, doing three spining kicks in a row at the enemy for 5% damage each, chaining into each other. Each hit teleports the opponent randomly further into the attack, making it impossible to DI out of it. The final hit deals decent base slightly diagonally downwards knockback that kills around 170%. It's a good move for covering Mnoleg's entire body in the air and makes a powerful defensive maneuver, and can even KO against offstage opponents.

Up Aerial & Tumbling Joker

Mnoleg does two complete flips in mid-air, kicking nearby opponents upwards with his silly little booties, dealing 9% damage each time, though it doesn't combo into itself. Like the grounded version of this attack, properly spaced it turns opponents around and deals pushback, making this into an effective gimping and edgeguarding tool as well. Eyeballs hit by this attack take no damage, but will instead begin to orbit around Mnoleg, changing their movement patterns. This can be used to make Eyes of Draining assist with his shield pressure, keep important eyes out of harm's way, or set up for fusing them into abominations later. Overall, a very useful move in Mnoleg's arsenal.

Down Aerial & Clawing Slash

Mnoleg slashes downward with his claws for 12% damage and relatively strong knockback, although it's a bit of a slow move, similar to Mario and Donkey Kong's Forward Aerials. Like with his Forward Tilt, it inflicts a mutagenic wound on the opponent, causing their glow to increase rather than decrease over the next ten seconds. Chipping at the opponent with these two moves with other glow moves interspersed can help get the opponent's glow level up and keep it from going down. It also pops him up in the air a short distance about the same as a footstool, if he successfully lands the attack or hits a shield with it, allowing him to poke at opponents from above with this move.

Neutral Aerial & Exglowsion

Mnoleg curls into a ball and charges with energy over the duration of this attack, glowing all over. He then explodes a burst of energy around him, hitting a surprisingly wide area for 12% damage and an impressive ten seconds of glow added to their timer.

In addition, after using this move, Mnoleg himself glows, causing all opponents within half a battlefield platform of him to gain one second of glow every half second they're next to him, but at the cost of lowering Mnoleg's movement speed and damage output by 33%. Using his Neutral Aerial again while in this state will cause him to stop glowing and regain his full power, but is slightly laggy and deals no damage.

& Grab Game &

Grab & Joker's Grip

Mnoleg's arm stretches forward in a long-ranged but slightly slower than average grab, reaching out and pulling the opponent in, holding them upside down to face him. His pummel deals 2% damage as he blasts them with glow from his eyes, giving them one second of glow for every time his pummel hits. Mnoleg can also grab his abominations with this move, but not his eyeballs. He can however grab the fused combination of the two.

Up Throw & Overglow

Mnoleg explodes in golden light, dealing no damage but pushback and inflicting glow on the opponent, causing them to gain two seconds of glow every second for the next ten seconds, but also giving them increased strength. Over the next ten seconds, the opponent's movement speed, attack speed, and attack power grow, maxing out at 50% stronger by the time they've accumulated ten seconds of glow. Of course, they're doomed to explode about seven and a half seconds later, at which point the buff fades away.

When Mnoleg grabs an abomination with this throw, they start glowing as well, giving them the same effect of slowly improving movement speed, attack strength, and even smarter AI as time goes on. They unforunately take 5% damage a second as they do so, but gain two seconds of glow every second. When they die, they explode in a burst with strength equal to the amount of glow they had when they died. This makes very bulky minions into devastating bombs potentially.

Down Throw & Absorption

Mnoleg drains the glow out of the opponent, glowing himself with radiant power as he buffs himself up, dealing 8% damage as he casually tosses them away. Mnoleg gets 33% increased movement speed, attack speed, and attack power for as long as the opponent would have been glowing had Mnoleg not drained the glow from them.

When grabbing an abomination with this throw, he instead drains the strength out of his abomination, destroying it but gaining a 1 second buff for every 5% health the abomination had left.

This move allows Mnoleg to change his playstyle drastically on a single grab, making his fast movement blazing quick and his attacks much more powerful, giving him increased KO range on attacks like his Forward Tilt, Forward Smash, and others, making him much more threatening on his own than he is otherwise.

Back Throw & Malign Surprise

Mnoleg opens up a portal behind him, then tosses the opponent forward for a mere 6% damage. Immediately a tentacle appears out of the portal and pulls the opponent in, pulling them in more quickly if the opponent is at a higher damage percentage. If it reaches the end of the portal, the opponent will instead be discharged violently backwards out of the portal, dealing knockback that kills around 110%.

Abominations caught by this throw are caught the tentacle in the portal, and can then be thrown at an angle of your choosing in the direction you want, allowing you to literally bombard opponents with your abominations.

Forward Throw & Evolution

This throw is unique in that it has follow-ups similar to Marth's Side Special. When performed on an opponent, Mnoleg blasts the upside-down victim with a wave of malmutate, inflicting the same mutations and glow as always, then can tap up, side, or down, to toss the opponent away in that direction for 8% damage, leaving opponents prone when tossed down, popped up and tumbling when thrown up, and killing around 170% when thrown to the side. When used against abominations though, it blasts them with malmutate, healing the abomination 8% damage, then also has a follow-up to determine a new evolution for the abomination.

Up gives the abomination a long-ranged tentacle attack, allowing the abomination to constrict foes up to a battlefield platform away like an eldritch tentacle does, dealing damage over time and pulling opponents in for further hits. This combos well with eyes that have effects that work best up close, like Golden Eyes and Eyes of Draining.

Side gives the abomination a fire breath attack, allowing them to briefly breath flames identical to Bowser's fire breath for a full second. They only do this against opponents at medium range, but can use their eye abilities at the same time while catching opponents in fire. As you might imagine, this works great with Eyes of Devastation, Giant Eyeballs, and Shining Eyes.

Down gives the abomination a poison spit attack, allowing them to lob poison as a projectile like Yoshi eggs at enemies, dealing 5% damage and 10% damage over ten seconds in a poison effect. They only do this rarely, but it's a great boon to slower, bulkier abominations, or abomination fusions that don't mind fighting opponents from far away, like ones with Eyes of Devastation fused to them.

All three together give Mnoleg one final method of customizing his minions to be exactly the way he wants them to be, and even when a monster already has a mutation from evolution on them, it still can be used to heal up abominations slightly, although fusing fresh abominations into damaged ones is usually the best way to do that.

& Final Smash &

The camera zooms in on Mnoleg, who spins around and starts teleporting randomly across the stage, slashing at opponents with mutagenic claw strikes while glowing with intense power, giving every opponent near him three seconds of glow every half second they're near him. This lasts for ten seconds, at which point most enemies will be exploding from overcharged glow.

& Playstyle &


Lord of Chaos & Killer Klown

Mnoleg is a unique character to play as, what with his infinitely customizable minions, combination of keepaway and pressure tools, and unique movement and approach options. Where does one even begin to break down this set.

Let's start from the beginning, Summon Eyeballs. Each eye that Mnoleg can summon is a highly specialized tool in his arsenal, and which eyes you have out to play at any one time affects your playstyle hugely. The eyes are, unfortunately, very fragile, so you'll have to be summoning them rather frequently to keep their effectivenes up, as opponents will be eager to destroy them. Of course, you can give an eye some more permanency by fusing it with an abomination or two. While you can have almost as many eyeballs as you want at any time, you can only have five total abominations out at once, including abominations that are fused into other abominations, so choosing which eyeballs to fuse into abominations is an important choice to make, although it'll often be one made out of tactical opportunities rather than long-term strategy... it's difficult in a match to plan for a specific eyeball to fuse into abominations, so often you must make do with what you've got. That just makes Mnoleg more unique to play in every match though, rather than a summon character who you go through a rote set of summons for each particular match-up. Abominations serve multiple purposes in your armies. They tank enemy attacks, serve as specialized troops to use your eyeballs for, and can even deal some significant amounts of damage on their own... with the proper support. Abomination attacks are slow and predictable though, even from small abominations, meaning that they'll only ever be effective with support from eyeballs and other tricks up Mnoleg's sleeves, requiring him to manipulate their behavior with his throws and attacks that change their AI... as well as tricks like mutation.

The mutation list may seem a bit randomly selected at first, but Mnoleg has ways of taking advantage of all of the negative and situational mutations. Lowered shield regeneration rate is a fantastic opportunity to take advantage of eyes of draining and devastation in your arsenal and to use Mnoleg's shield pressure attacks like his down aerial, down tilt, forward tilt, dash attack, and even jab to push at enemies' buttons. Tripping makes opponents less likely to dash, and allows for openings for attacks like Smite and attacks from Abominations to take advantage of their randomized movement. Teleportitis allows for Mnoleg to use his wide-ranging moves and multiple abominations scattered around the field to attack at foes wherever they teleport, and Berserkitis just means that Mnoleg has to let his abominations tank for him for a little while, then he can rush in and counterattack once they wear out. Mnoleg can even start to combo against heavily mutated opponents, with moves like his jab, down tilt, up aerial, and such, taking advantage of enemies' enlarged hurtboxes. He can even combo jab into jab until they DI out, which is tricky but possible.

When it comes to the mid-game, Mnoleg is a push and pull between fighting the opponent and setting up your abominations. By now you should have one or two, or even three abominations that have eyeballs fused to them, maybe even an evolution attached as well. Be careful though, as abominations are not as sturdy as you would like them to be, and trying to maintain three or more abominations at once by fusing new ones in is likely going to end up with you having no abominations left. So stick to one or two, along with plenty of standard eyeballs to support you. While in the mid-game though, Mnoleg should also be focused on playing with one other mechanic of the opponent's though, and that is their glow. He has only a few moves that directly deal glow, and the one that deals the most, the Neutral Aerial, has a significant down-side to it. Since glow is without a doubt his most dangerous kill move though, you'll want to be managing enemy glow carefully, to ensure that they only explode once they're at a ripe KO percentage. His moves like his Forward Smash, Down Tilt and Down Aerial are the best attacks for maintaining glow, as they stop glow from decreasing temporarily, while his neutral aerial and side special are better for building up glow once you want the opponent to blow. Golden Eyes have the most powerful glow ability , so managing their behavior is an important trick too, but with a few golden eyes and an opponent already begining to flash with an incoming glow explosion, you can potentially get the explosion absolutely huge. Don't get greedy though, opponents will want to take you out with them with their explosion, so also distract them with eyeballs, abominations, and eldritch tentacles as you take cover for the killing blow.

Of course, if you don't get glow high enough, you can always kill with moves like an offstage down aerial, especially after pulling an opponent offstage with an eldritch tentacle, a charged up forward smash, boosting himself up with his down throw... Mnoleg is not lacking for kill options, though without glow he does need a bit of a higher percentage, and he's not the best at damage racking. Indeed, actually building damage is one of the toughest things for Mnoleg. Down throw is the best option for building up some damage if you have built up glow faster than damage, entirely possible, as it turns Mnoleg into a monstrously fast attacker who can build up damage with his claw moves effectively. Otherwise though, Mnoleg does have to actually get into the thick of fights to build up damage himself generally, his only reliable minions for dealing damage are his eyes of devastation and eldritch tentacles. Mnoleg attacking opponents with support of abominations can be a very effective way to start getting the opponent to a kill percentage though. So don't think of him as simply cowering behind his summons, Mnoleg has to get in himself and get his hands dirty to really win.


darth meanie

Smash Journeyman
Joined
Jun 6, 2008
Messages
452
PANDEMONIUM

The halls of Pandemonium are a unique stage among stages in Super Smash Brothers. You see, Pandemonium is an infinite realm of despair and horror, and this nature is reflected in Smash. Instead of having a default layout, it procedurally creates random layouts of stage, platforms, moving and stationary, and cycles into a new arrangement every thirty seconds as the match goes on, making play on Pandemonium completely unpredictable. Sometimes it will have walk-off elements. Sometimes it'll look something like Smashville, Battlefield, or Final Destination. The materials of the stage change as well, between vivid blues, purples and greens, to even flesh colored terrain that is surprisingly supple when stepped on. For that reason, it's the most unique of all default stages to select in smash brothers, as both players don't know who will have the advantage at any one time.

Playing on Pandemonium also allows for one other thing. You may think that you've beaten the four named Pandemonium Lords, but that's only because you haven't faced them in their BOSS MODES yet. When playing on Pandmeonium in a team battle between three players and a Pandemonium Lord, Pandemonium takes on a unique, larger than ever layout for the battle to come, unique to each Pan Lord.

((MORE TO COME))
 

darth meanie

Smash Journeyman
Joined
Jun 6, 2008
Messages
452

Congratualtions, you defeated the four Pandemonium Lords and collected their runes!


However, your quest is not yet over. The four runes of Hell have yet to be gathered, and you still have yet to retrieve the ultimate prize...

THE ORB OF ZOT


Katapultar

Smash Lord
Joined
Nov 24, 2008
Messages
1,251
Location
Australia
[collapse=Kholdstare]I quite liked the tone you adopted for this movement - a minimalist approach that leaves details normally described in other movesets to the readers' imaginations. It actually feels very fitting with the nature of the characters, not just by their lack of background details but also the fact that they're just sprites. It also made reading through the movement far less of a slog than one would normally expect, but at the cost of certain important details. This wasn't too bad most of the time, but I felt it had a dramatic effect on this particular set's enjoyment, more than any of the other sets in the movement.

Put simply, Lom Lobon feels vague. For one, the Neutral Special felt lacking in detail for how much of an impact an ice block would have on a match. I assume the ice storm itself would never cause flinching (though I guess it’s a given since you mention dealing damage near Lom Lobon) and that ice blocks would function as barrels that can be broken in one hit, as both would feel balanced and I’d be very willing to accept that. There’s also a lack of detail on how much damage ice blocks would deal when thrown around in a tornado, but I assume it wouldn’t be much at all.

Even with that little nitpick out of the way, the concepts felt a little distant. They’re fairly cool, especially the tornado which lasts until you’re attacked, and most of them make it obvious that Lom Lobon wants to fight from a distance, but they don’t seem to come together all that well nor utilize their full potential. The projectiles somewhat conflict with the tornado in that they knock enemies away from it when it moves with Lom Lobon and is his main KO move, and I assume it conflicts with ice blocks as well if they can only be created on the ground (or fall if made in midair). The healing seems a bit strange, and the terraforming I inherently have no problem with just that I’d prefer if there was some kind of in-character (or gameplay) focus on it like with Sloth instead of being there for the sake of it.

Overall, Lom Lobon felt like a mish-mash of different ideas, just that they didn’t come together in a really convincing way, the vagueness sort of working against it. Certainly not a bad set though; the character and the potential is there, just that he needed more attention-to-detail and development in order to be truly good. [/collapse]

[collapse=Sonic the Necromancer]Drain seems overpowering at first glance, and I admit it took me a moment to wrap my head around the percentages presented given what they’re usually associated with in Smash, but it actually presents for a very interesting playstyle – rather than just be a straight-up status effect, it starts off weak and grows as you feed it more, and if opponents ignore it for too long they’ll really start to suffer and it’ll only get harder to remove. Also, I assume a 100% drain is equal to a Pummel KO (if so, a very coolly-described one), because it’d be pretty annoying to have to run off the ledge and kill yourself if you can no longer deal damage – especially given how slow you are, if you can even move at all.

I have a few nitpicks on the Specials in that 2 seconds feels way too short a time for a fully-charged Up Special given how ridiculously good it is at higher percentages/drain, and the “magical contamination” of the Down Special feels hard to understand, I assume that simply being you can’t use it invisibility properly until 15 seconds once initiated. U-tilt looks like an attack of extremes, overpowering even if you hit the opponent with a few drains and don’t get hit.

In a strange case for a DM set, I actually thought Gloorx Volq -lacked- reliable melee attacks. His Jab is a bit slow, his F-tilt hits from afar, D-tilt must be laggy given its ludicrous range and U-tilt obviously can’t hit from the sides, F-Smash, N-air and D-Smash all being unorthodox moves (the latter doesn’t even have a proper hitbox and does not seem to benefit from being charged, similar to Smashes from old Rool sets). It sort of makes Gloorx Volq very predictable in melee combat to the point where you -have- to use his ridiculous speed to run from opponents, being a weird way of zoning, though it was probably your intention when designing the set. F-Smash doesn’t seem to offer much given it’s compared to the Neutral Special, and would probably benefit from being changed to a more defensive-orientated scythe slash to intercept nearby opponents and knock them away from you reliably. The invisibility is used well for this cause, though it seems like it’d be a bit hard to control given how fast the character moves.

Gloorx Volq feels stronger than his blue brother with his interesting mechanic, good use of zoning and flow in the Specials, but he’s not entirely flawless: handling him would feel awkward, some of the unorthodox inputs leave less room for practical stuff that could give him more choice in battle and the Up Special, U-tilt, U-air and healing throw almost feel overpowering. An extreme feel is a good feel for this kind of moveset, just that with the former 3 moves there’s nothing stopping you from spamming the hell out of them once you can get away with it. But I do like this set, I’ll give you that.[/collapse]

[collapse=Hellfire]Cerebov certainly has the power going for him and a clear extreme in his fire resistance-removing sword. Unlike Gloorx Volq though, that power feels incredibly blatant to the point of being completely overpowered. And that Side Special feels incredibly cruel: Cerebov can easily knock foes away to get into the attack’s range, which is absolutely massive, and combined with the duration prevents any foe from being able to dodge their way through. It’s essentially an invincible move against edgeguarders, and that’s not even taking the fire traps it leaves behind or the fact that it deals more damage when you hit with your sword attacks! It would be significantly more balanced if the fire had a very short duration that let enemies dodge it without a problem, and if there was actual lag mentioned since it would feel especially important to know whether it’s telegraphed or leaves Cerebov open to punishment afterwards (though apparently he can actually capitalize on the second it lingers, according to the playstyle section). The demon minions both feel quite overpowering as well, one having a completely unavoidable attack while the other can potentially deal 50% to you in one go, and possibly the U-Smash. It’s a bit strange to be met with a set from you that’s just so crazy powerful.

It’s interesting to have a character who blows enemies away with such force on each hit, but Cerebov does not feel as especially interesting or even as focused as the other sets, being the weakest of the bunch in my opinion – even if he wasn’t completely overpowered. [/collapse]

[collapse=DM/FA joint set]The title for this comment should speak for this set’s quality… by far the best of the movement, and maybe even one of your best. It does not suffer from any striking balance problems unlike the previous 2 sets, nor does the tone bring it down massively. If anything, it actually benefits from the writing style, which is a good balance to the amount of detail usually involved in the minion genre. I thought the attack name “Summon Horrible Things” and the mutation descriptions were especially humorous, along with the recurring mention of “silly little booties”.

Experimental minion set is definitely something FA would do, hence the comment title, so it’s surprising to see you handle it. Yours is a far more simple read with no less content, the eye minions all being unique and balanced and the abominations being refreshingly simple, their combinations only taking 2 mere paragraphs to describe. If anything, the glow is brought up at a strange time and is the one thing that could do with a bit more detail, but it can’t be helped if you introduced it on a minion.

I like the way Mnoleg was handled, having a few tricky moves but never feeling overpowering in his attacks, helped by his lack of projectiles outside of the laggy U-Smash. He only has one truly reliable KO move, but it’s a recurring one with a good deal of presence. He has a few wacky, unorthodox attacks like Gloorx Volq, but these work well with the fact that can summon minions and balances out their existences, along with some of the crazy stuff you can do with them via combinations and effects from the throws. Heck, even the glow KO mechanic feels extremely well-executed and works marvelously with the minions: actually pressuring the opponent yourself is high-risk due to the fact that the blast can hurt you, yet they can’t easily shield it due to your means of hurting shields nor can they dodge it easily because of your minions. One of the best things about this set is just how scarily well all the fun ideas flow with each other.

For all I’ve said, there is one thing bogging the set down for me, and only one thing: the Malign Gateway Up Special. Specifically, the eldritch tentacle with the ridiculous reach that effectively keeps opponents in place if grabbed. It doesn’t seem to have a place in Mnoleg’s grand scheme, and feels blatantly overpowered even if the tentacle just disappeared if it were dodged. The set would actually be better if it were removed and it were just a simple portal recovery, or if you incorporated the tentacle into the playstyle in a unique and balanced way.

Overall, and regardless of the Up Special, Mnoleg is a great, well thought-out set and the shining jewel of the Pandemonium movement. I really like the set as is, but if the Up Special was removed or changed for the better it would have a very good chance of getting a Super Vote from me at the end of the contest. Splendid work, DM; if you keep this up you could return to being the powerhouse that you were in the old days.[/collapse]
 

ForwardArrow

Smash Ace
Joined
Aug 17, 2011
Messages
502
Lom Lobon
I will say I liked this set a fair deal more than Kat did, as I do feel the concepts here actually flow together pretty well. Build up some ice cubes, make a tornado and loop the opponent through it, bringing up the ice cubes along with them to assist your projectile game, which in turn makes the sweetspots on shatter and the rather unorthodox tornado KO easier to pull off. Its good stuff, if maybe a bit too redundant with using ice blocks as ways to transmit projectiles, but the FSmash and DSmash bring into account some new ways to utilize the ice blocks for Rock Smash effects as well. I find the set a bit easier to like than Sherry, as the design of the hitboxes on a lot of moves leads to some interesting depth and the flow that's here isn't very reliant on stun(there's a total of one pitfall and no other stun effects in the moveset, and the pitfall is really hard to land).

I do think the set's not perfect though, a few aspects sticking out as disconnected to the rest of the set. Major Healing is probably the biggest one, as I don't really see what this is supposed to provide him with aside from survivability. I guess camping gives you more time to charge it, but that doesn't exactly make it feel like it adds anything to the set. Aside from that, I really wonder what Shatter's terraforming effect was supposed to accomplish, as its fun to see you attempt to work with a little terraforming but not much mileage is gotten out of it, though square shaped pits are a lot more unpleasant to work with than slopes in a non-lockdowny way. Aside from that, there's some obvious filler here and there, though not so much that it turns the set into a dull read. Its a very solid effort from you DM.

Gloorx Vloq
Drain damage is a cool concept, but a small portion of me is thinking of playing against Viper in DoTA2 when I read it due to how it slows down the opponent's everything. And my god do I hate playing against Viper, probably because I have all the skill of a dead walrus. Tangents aside, I think after a certain amount of drain damage, like 45% or so, it'd just snowball so hard the opponent could never feasibly fight back, though at the very least its not that hard to get rid of drain damage especially if Gloorx wants to go and use the fairly powerful minions. Its sort of fun to work with the drain damage as a minor slow to allow your somewhat awkward hitboxes to work better too, though that may just be me who likes strangely shaped/sweetspotted hitboxes a lot more than he should.

I do have to wonder how connected all the concepts you introduce are, as while the way the invisibility plays is interesting I'm not as convinced it flows into the drain as it should, though at the same time you do introduce ones that do flow into it quite well like the rather awesome Symbol of Torment. I think my main complaint with the set is the Smashes, which barring Lethal Infusion have basically nothing to do with the rest of the set and come across as wastes of potential, I'd figure you could work the Miasma and poison damage into the drain damage/minions somehow and you really don't. I get wanting to use them in the set as they sound like fairly important spells of his from our conversations about this set, but their relevance amounts to fairly little for how awkward they are as Smashes(especially Miasma). I've probably nitpicked this set too much though, it feels very interesting to play and on a whole I like the concepts introduced and the slightly loose but still connected nature of them. Its just a good bit worse than Lom Lobon for me.

Cerebov
This has probably the least compelling bunch of ideas and worst execution of the bunch, reminding me a bit of Argent Commander with the overpowering stacking damage and lack of recovery. That said its not really all that bad, I think Haste at the very least makes the set have very real depth what with cutting your lag by absorbing fire traps, while being somewhat limited by the fact that you can't store them so you better make efficient use of them or its a waste of your time and fire traps. The sword increasing the opponents damage/knockback from fire traps so massively makes him rather terrifying to play against, kind of reminding me of Ganondorf in terms of abilities but becoming a lot more satisfying and dangerous when you see all the lingering hitboxes and stacking damage he can pull off, as well as the small but relevant chances he has to actually use fast attacks for once.

Of course, I do say its the worst of the group for a reason, as past the specials you don't really find much to do with the concepts introduced, either working with irrelevant but admittedly cool material in the iron ball or just throwing out fairly generic attacks with the effects shown in specials. There are a few good ones in there in how they use the attacks, but stuff that was interesting the first time like Sticky Flame is not so interesting when it shows up for the third time. Unlike Gloorx and much moreso Mnoleg, the minions come across as very ignored, they just kind of are introduced in a special and then never mentioned again, which is fairly bad when they feel as powerful/interesting as they do, but I can't really count them as much as a good point for the set when they basically are never acknowledged and one of their most interesting moves(Sticky Flame) is just casually reused twice in Cerebov's actual set. That said, for all my complaints the set still has very real depth from the specials alone and honestly, I would probably main it for how satisfying a lot of the attacks feel even if there isn't much too the later parts of the set.

Mnoleg
Oh is it really a surprise this one is my favorite. I love build-a-minion stuff, and you give some very interesting components with the eyes, which have very unique effects to make their rather generic body template into something that is actually extremely interesting to play with. That alone is good, and you actually play off it in some fairly exciting ways with the glow, ability to evolve the minions, and the awesome grab game. Glow stands out to me as a particularly great idea on your part, its a time bomb effect that is potentially extremely rewarding and works well into the minions and doesn't feel unfun in the slightest, hell it actually is kind of enjoyable to play against if anything because using it against Mnoleg to bring him down with you sounds hilarious. The minion commands, camping, and shield poking stuff aren't nearly as exciting, but honestly it does all at least flow off the minions(largely on account of the one that drains shields in the case of the last one).

I actually don't have that terribly much to complain about, even if the standards/smashes/aerials are less compelling than the Specials and Grab Game they still have plenty of relevance and can still do interesting things(I quite like the Nair/Uair). Two things that bug me are that, animation wise, the minion commands are a bit awkward because I don't fully understand why these moves make the minions respond, especially in the way they do, though that's a complaint that can be leveled against a good number of MYM sets. Aside from that, the mutations on the opponent, while interesting in their own strange way, maybe should've been handled a little differently than pure randomness, I proposed a ROB laser charge to determine how harmful the selection of effects would be, though honestly the mutations feel subdued enough that they don't detract from the moveset regardless, its more just a matter of wishing they were capitalized on a little more and giving the player a bit more control over them, even if there was still a random element involved. On a whole though, this is a pretty great set and a lot of people are calling it an early frontrunner for a good reason.
 

n88

Smash Lord
Joined
Oct 10, 2008
Messages
1,527
Lom Lobon
Oy, commenting. Been a while. In fact, this is the first set I've even read in quite a while. That probably contributed to some of the difficulties I had reading this moveset; it's a bit vague in parts, and at times a bit too quick to jump from one mechanic to the next. There were a couple times I had to double back and re-read things to make sure I understood everything. I'll trust that this is more on me than you, though.

I really like the tornado centerpiece here; it adds up to something very fun, with Lobon and the opponent battling toward the top blast zone in the middle of a maelstrom. It's also much appreciated that the set's smartly designed enough not to bottleneck at the tornado, with other options abound.

I'm not sure I'm a fan of the float with aerial ground moves, though. I understand wanting to give him the option to use those moves in a tornado, but it seems like a strange addition. I'd almost rather you found a way to let him do that with the Down Special, since the current DSpec seems a bit disconnected from the rest of the set anyway. It gives him a motivator to stay away from the opponent (and as a corollary, the opponent a reason to not give him too much breathing room), but I'm not really convinced that he needed another one.

My problems with the set aren't exactly overwhelming, though. Heck, I'd say they're not even whelming. Solid work on this one. On to the next!

Gloorx Vloq
Starting off with a nitpick is a breach of etiquette, I know, but at the beginning of the set you say that 8% drain damage makes the opponent "108% slower". I suspect you mean 8% slower, or that Neutral Special is terrifying indeed.

I'm afraid that Gloorx skews a bit too restrictive in terms of the status effects he inflicts on the foe. He's not quite a lockdown character, but once he gets rolling, retaking the momentum will be no small feat. Still, the drain damage is a novel effect, and the way it's handled here is interesting. My first impression was that Gloorx was way over-powered, but after dwelling on it, I'm less convinced. You might need to make a couple tweaks (some number-crunching on Symbol of Torment might be in order), but he's far from unfixable. That Forward Throw seems like it makes drain damage a bit too easy, though.

Some of the effects on the Standard seem odd. The Up Tilt/Aerial dealing damage based on drain level feels most out of place, but the Up Smash affecting his scythe attacks also doesn't quite sit right with me either. I'm just not getting what they have to do with the inputs.

I do wonder at how Gloorx would function in a FFA match. A lot of his tricks that require more set-up would be out, but he could probably have a fun keep-away game, using drain damage to play foes against each other.

This one feels a bit more solidly written than Lobon, and more fun to think about, but I'm not sure Gloorx would be quite as much fun when translated into the actual game.

Cerebov
All of these sets (so far; I haven't read Mnoleg yet, as I type this) have had a very solid sense of atmosphere and character, but I think Cerebov does that best of all them. Though I might just be biased because Morgoth Cerebov fits neatly into an archetype I like, both in terms of character and moveset. He's handily the Pandemonium Lord I'd most like to actually play as or against.

I like him, but I probably have the least to say about Cerebov. I enjoyed reading the set, and I really like the sense of power here. He's definitely more loosely constructed than Lobon or Vloq; it might have been nice to see the minions and fire vortexes woven into the playstyle a bit more smoothly. It feels odd to me that he can reabsorb a fire vortex to charge Haste, but not for any other purpose; with the random movement of the vortex thrown in, it seems rare that he'll ever get a chance to do that. Still, that's a nitpick and, though I suspect he won't set the rankings charts on fire (*rimshot*), I count Cerebov as a good read.

Mnoleg
This one seems to be the DM set (or any set) with the most buzz. So naturally, I went into this one trying to find problems. I have to say that it handles some really off-the-wall concepts in a reserved, logical way. The various mutations, minions and freakish glow-induced explosions are all implemented incredibly smoothly here.

I think the set loses some of that sheen when it gets into the standards, though; some of the attacks here feel like they're trying a little too hard to get creative, with effects that left me a little confused. Why do Down Tilt and Up Tilt adjust his minions' AI? I guess there's an implied Mutation effect on Down Tilt, but it still feels like a very strange mechanism for manipulating the abominations. Another oddball is the Forward Aerial with the customizable knockback direction.

All the main parts of the set are beautifully handled here, but some of the mechanics in Mnoleg's basic inputs strike me as a little forced. It's still a very fun set, of course, but I wasn't as impressed by it as I thought I was going to be after finishing the Smashes.

----

I do quite like this little project as a whole. I don't have a clear-cut favorite, but I don't have a least favorite either. Good job getting this done. Thanks for bearing with me as I try and get back in the swing of MYM
 

allison

She who makes bad posts
Joined
Jan 25, 2014
Messages
5,138
Location
Maple Valley, WA
NNID
crazyal02
3DS FC
0216-1055-4584
^I don't know what this series is, but liked for awesome teaser anyway
 
Last edited:

Bionichute

Smash Champion
Joined
Jun 30, 2012
Messages
2,151
Metal Form:


Specials:

Neutral Special: Memory Change:

Double pulls out both of the Gaia Memories in his belt for a split second, before putting them back in. That seems… useless. Actually, this is by far Double’s most important move, as it allows him to switch between any of his Gaia Memories almost instantaneously. By holding the button, and then moving the control stick either left or right (During this period Double cannot move left or right), this will make Double pull out another Gaia Memory, which he will switch in immediately, with very little lag, allowing Double to get straight back into the action. The direction the control stick is tilted will choose which memory to swap out, left for Body, and right for Soul. The move can also be used in the air, where it acts mostly the same, but you will need to be a bit faster, but the move also gives Double a bit of extra airtime. The move will also create a burst of light that will knock opponents away, but not actually damage them. The move can also be cancelled out of into a dash by double tapping the joystick.

The memories come in a specific order:

Body: Joker > Metal > Trigger > Joker etc.

Soul: Cyclone > Heat > Luna > Cyclone etc.

Double will ALWAYS start in Joker/Cyclone form. Unless you change colors, which will allow him to either start from Metal/Heat or Trigger/Luna.


Up Special: Rider Jump:

In a similar fashion to Captain Falcon’s USpec, Double does an uppercut, launching himself into the air. Unlike the good Captain’s USpec, this move does not latch on to the opponent if it hits, instead it will just simply launch them up, but with some really good knockback, and a decent 17% damage. The move launches Double upward up about 4.5 Stage Builder blocks, which might sound amazingly good, but the move will instantly put Double into prone, meaning that, if you don’t aim the move right, you will fall right to your death.


Down Special: Rider Kick:

In a similar fashion to Captain Falcon, again, Double does a sliding kick across the ground. The only real differences are the lack of flames, and the distance the move goes for. Falcon Kick only travelled a short distance, but the Rider Kick can travel indefinitely across the ground, only stopping once the button is held down, meaning that you can fall off edges. The move also only causes 8% damage on contact… if you use it on the ground that is. If the move is used in the air, Double will do a downward kick, once again similar to Captain Falcon. However, this move is incredibly fast, almost too fast, as most kicks might end up missing opponents by a few milliseconds. But, if the move does hit, it will cause a stunning 25% damage, measuring up to the good Captain’s own trademark move.

Side Special: Memory Attack:

Double swings his metal pole over his head, and then slams it into the ground, causing 15% damage to any opponents that it hits. The pole reaches fairly far, about half a Stage Builder block. With the Cyclone memory, the swing of the pole will create a large, crescent shaped air projectile, which travels across the stage at a fairly decent speed for 3 Stage Builder blocks. The projectile will deal a total of 6% damage to any opponent it hits, and also causes some fairly decent knockback due to the wind.

With the Heat memory, the swing will again create a projectile, this time a crescent shaped one made out of fire. The wave of fire travels across the stage at a fast rate, and has infinite range, but only causes 3% damage, with 2 seconds of burn damage as well, and very little knockback to it.

With the Luna memory, the move changes a bit. This is the most straightforward of the three, with the pole simply extending as it swings, increasing its range. However, the move does a lot less knockback than the other versions.


Standards:

Jab:

Double jabs the metal pole forward rapidly, with it eventually becoming a flurry of strikes. The move is an infinite chain, much like Kirby’s jab, and causes 2% damage with every strike. Like most infinites, it will push the opponent away from it gradually, allowing them to escape. The maximum amount of damage that the jab can do is 12%. With the Cyclone memory, the jab will move even faster, making it more likely to rack up damage, but it will also push opponents away faster as well.

With the Heat memory, the move will have an added finisher to it. After about 5 hits from the pole, Double will perform a stronger strike, launching the opponent off, and causing 3 seconds of burn damage.

With the Luna memory, the move behaves almost exactly the same except for the pole extending a bit every strike, going up to .8 Stage Builder blocks in length. It also causes less knockback.


Forward Tilt:

Double jabs the metal pole forward incredibly quickly, causing 7% damage and decent knockback. With the Cyclone memory, the pole will create a gust of wind that will increase the knockback of the move if the opponent is hit.

With the Heat memory, the pole will cause 2 seconds of burn damage, as well as slightly lower knockback.

With the Luna memory, the pole will simply extend forward again, this time going a full Stage Builder block instead of just half of one. The move has a longer reach, but does a lot less knockback.


Up Tilt:

Double spins the metal pole around, and then quickly strikes it upward, where it reaches about half a Stage Builder block into the air, doing 6% damage to any opponents that touch it, and doing very little knockback. With the Cyclone memory, the pole will create an upward gale from the ground, which will push nearby grounded opponents up into the air, and increases knockback from a direct hit.

With The Heat memory, the move will cause a bit more knockback than usual, but not as much as the Cyclone memory, and inflicts 2 seconds of burn damage.

With the Luna Memory, the pole will extend an extra .5 Stage Builder blocks, boosting it to one full Stage Builder block, and decreases knockback by a bit.


Down Tilt:

Similar to his Special, Double slams the pole into the ground, causing 9% damage and causing low knockback. The move has less range than the other moves, only going about .3 Stage Builder blocks instead of .5. The Cyclone memory creates a large gust of wind on the area that the pole slams into, causing nearby opponents to be flung into the air.

With the Heat memory, the slam will create a patch of fire on the ground, which will remain there for around 2 seconds, and will rapidly cause 2% damage for as long as the opponent stands in it. Even when they step out, they will gain a 1 second burn effect. If the pole hits the opponent directly, it will cause a 3 second burn damage effect.

With the Luna memory, the pole will simply extend a bit forward with the slam, giving it a full half a stage Builder block of range. It also increases knockback.


Dash Attack:

Double holds the pole close to his chest, leaving the ends of it to stick out on both sides of him, as he starts spinning around. This creates a hitbox on both sides of him that cause 11% damage. With the Cyclone memory, the move will create a suction effect that sucks in opponents, and speeds the move u a bit.

With the Heat memory, the spin will increase the knockback of the move by a bit, and cause a 3 second burning effect on the opponent.

With the Luna memory, the pole will extend a bit, increasing the general size of the move’s hitbox, but also decreases knockback by a lot.


Smashes:

Forward Smash:

Double performs rapid strikes with the pole, similarly to his jab attack, before finishing with a launching final strike, which causes 15% damage at lowest charge, and 22% damage at highest charge. With the Cyclone memory, the attack moves a bit faster, but does less knockback on the final blow.

With the Heat memory, the move will cause 4 seconds of burning damage, but also decreases the total knockback of the move by a bit.

With the Luna memory, the move changes drastically. Instead of rapid strikes, Double will instead perform one strike, which will extend forward depending on the charge level, being able to reach the entirety of Battlefield while at full charge. Unfortunately, the charge takes a lot longer to fully charge than usual.


Up Smash:

Double swings the pole over his head, which reaches upward about half a Stage Builder block, and causes 17% damage at lowest charge, and 21% at highest charge, with some great upward knockback to it. With the Cyclone memory, the move will create a strong gust of wind that, is the pole hits the opponent, will increase knockback by a lot, however, charging it takes a lot longer than the other versions of the move.

With the Heat memory, the move will create a wave of fire that travels upward at a decent speed for about 2 Stage Builder blocks. The wave is about as long as the pole itself, which means that is stretches out about 1 Stage Builder block. If an opponent hits it, they will take 3 seconds of burn damage, plus 6% damage.

With the Luna memory, the move changes a bit. Instead of swinging the pole above his head, he will extend it, and spin the point facing upward above his head. The move causes about 4% more damage, but will cause less knockback.


Down Smash:

Double slams the pole onto the ground, and then starts spinning around rapidly, causing 20% damage at lowest charge, and 27% damage at highest charge. The move has less range than the other Smashes, but does more damage. With the Cyclone memory, the spin will create a tornado around Double, which will suck in enemies that come near, and then spit them out after the move has finished, causing good knockback.

With the Heat memory, the spin will create a patch of fire on the ground, which will rapidly cause 2% damage for as long as the opponent stands in it. If the opponent leaves the flame they will carry a 2 second burning effect with them. The amount of time the fire lasts on the stage depends on the charge. Lowest charge will have it stay for 3 seconds, while the highest charge will have it stay for 7 seconds. However, this version causes the move to charge slower.

With the Luna memory, the move changes again. Instead of placing the pole on the ground, Double will instead stick it outwards, extending it, and then spinning around. The move has some amazing range to it, about 1 full Stage Builder blocks, but does a lot less knockback.


Aerials:

Neutral Aerial:

Double spins the pole around in a clockwise motion, which covers the entirety of his body. The move will continue until another attack is inputted, or until Double hits the ground. It also causes 11% damage. The Cyclone memory will create a vortex in the pole, which will suck in items and opponents, and then spits them out on the other side. It does this in exchange for 2% of the attack’s total damage, lowering its percent to 9%.

With the Heat memory, the spin will create a blast of fire from its hitbox, expanding it a bit, while also causing better knockback, and leaving a 2 second burn damage effect on the opponent.

With the Luna memory, one side of the pole will grow in length, about .3 Stage Builder blocks, increasing the range of move on one side, but decreasing the total knockback of the move.


Forward Aerial:

Double quickly thrusts the pole forward, which stretches out about half a Stage Builder block, and causes 13% damage. With the Cyclone memory, the pole will create a gust of wind that increase the total knockback of the move, and also push any nearby opponents forward.

With the Heat memory, the pole will briefly turn into a torch, with the end of it lighting on fire. This increases knockback a bit, and causes 3 seconds of burn damage.

With the Luna memory, the pole, instead of going straight forward, will be pointed diagonally downwards. The pole also stretches out, increasing the general range of it, but this also decreases the knockback of the move by a bit.


Up Aerial:

Double thrusts the pole in an upward diagonal angle, going about half a Stage Builder block forward, and causing 13% and light upward knockback. With the Cyclone memory, the pole will create a gust of wind that blows upwards, taking any nearby opponents with it, allowing Double to set up a good combo.

With the Heat memory, the pole will heat up, increasing the knockback of the move, and also causing a 3 second burn damage effect to the hit opponent.

With the Luna memory, the pole will simply stretch out a bit, going about .7 Stage Builder blocks instead of half. It also lowers knockback by a bit.


Back Aerial:

Double grabs the pole by its midsection, and then quickly thrusts it backwards. This attack has less range than the other pole moves, but does a great 16% damage when it hits. With the Cyclone memory, the pole will create a gust of wind that travels backwards, increasing knockback, and pulling other nearby opponents.

With the Heat memory, the pole will become red hot, which decreases knockback a bit, and causes a 4 second burning damage effect on the opponent.

With the Luna memory, the pole will extend, making it about as long as most of the other poles, about half a Stage Builder block, in exchange for half of the move’s total knockback.


Down Aerial:

Double thrusts the pole downward, where it stretches about half a Stage Builder block downward. This acts as a meteor smash, and can actually bounce Double up a bit if he touches the ground. Causes 12% damage. With the Cyclone memory, the pole will create a downward gust of wind that pushes opponents into the ground, stunning them for a bit.

With the Heat memory, the pole will create a small patch of fire if it hits the ground, which will cause a rapid succession of 2% damage for as long as an opponent stands on it. If the opponent touches the fire, or is hit by the pole, they will take 2 seconds of burn damage.

With the Luna memory, the pole will simply extend downwards, going .7 Stage Builder blocks instead of half. This, however, removes the meteor smash aspect of the move, thus decreasing the knockback of it.


Grab Game:

Pummel:

Double grabs the pole by the midsection, and then starts rapidly jabbing it into the opponent, causing 3% damage for every strike. With the Cyclone memory, the attack will become faster, and be able to rack up more damage.

With the Heat memory, the pole becomes incredibly hot, adding an extra 2% to the move, but also slowing it down a bit. After the opponent escapes, they will take a 3 second burn damage effect.

With the Luna memory, the pummel will change up a bit. After 4 normal hits of the attack, the move will finish up with a weak launching move that causes 5% damage.


Forward Throw:

Double lets go of the opponent, and then thrusts the pole forward quickly, launching the opponent away and causing 9% damage. With the Cyclone memory, the attack will create a gust of wind that increases knockback, and also pushes other opponents in the direction that Double was facing when the move was used.

With the Heat memory, the move will causes a 3 second burning effect on the opponent when they are launched, but decreases knockback by a bit.

With the Luna memory, the move changes a lot. Instead of just striking the opponent, Double will lift the opponent off the ground, and then extend the pole upwards, before finally slamming the opponent into the ground, launching them.


Up Throw:

Double flings the opponent up into the air, and then strikes them with the pole, launching them upward and causing 8% damage. With the Cyclone memory, the move will launch the opponent up higher, and create a gust of wind that launches nearby opponents upward.

With the Heat memory, the move will cause the opponent to take a 3 second burning effect after they are launched, but it also reduces knockback by a bit.

With the Luna memory, the the move changes a bit. Instead of one strike from the pole, Double will throw multiple strikes, up to 3, before the opponent is launched. This decreases knockback, however.


Back Throw:

Double strikes the opponent with the pole, and then swings them around behind him, launching them off the pole and causing 10% damage. With the Cyclone memory, the move will create a gust of wind that increases knockback, and sucks in and forces nearby opponents behind Double.

With the Heat memory, the move will cause a 3 second burning damage effect on the launched opponents, but decreases knockback by a bit.

With the Luna memory, the move changes a bit. Instead of just spinning around, the move will instead become a tornado that lasts for about half a second before the grabbed opponent is launched off. During this time, the grabbed opponent acts as a weapon, causing 5% damage to any opponents that come near.


Down Throw:

Double lets go of the opponent, causing them to fall on their back, and then jabs downward with the pole, right into the opponent’s stomach, causing 11% damage. With the Cyclone memory, the move creates a blast of wind from the pole, causing nearby opponents, about 1 Stage Builder close, to be flung away.

With the Heat memory, the attack will create a heat blast, which causes every nearby opponent to take a 1 second burning damage effect. It also causes a 3 second burning effect on the opponent.

With the Luna memory, the move changes a bit. After the opponent falls down, Double will jump upward, and then extend his pole into the opponent. This, unlike the other versions, actually causes the opponent to go flying.

 
Last edited:

Katapultar

Smash Lord
Joined
Nov 24, 2008
Messages
1,251
Location
Australia


Bahamut is a novice fire mage who diligently practices her magic in hopes of receiving praise from her busy father, the village leader whose also a mage. Spoiled and sheltered, but also adventurous, Bahamut will often go out on her own to practice, only to get into trouble in the end. She eventually meets and befriends the other 2 heroines of the series when the tiny fairy Syrup tries to recruit her in order to stop the impending invasion of evil insect-like aliens, which in turn leads to a series of events that set the plot in motion. Bahamut is quick to complain about uncouth matters such as walking long distances or physical labor given her upbringing, but no matter how much she complains she'll always press on in the end and be there to help her friends, making her that one tsundere character every moe anime needs. Though relatively weak in the beginning, Bahamut's skills improve near the end of the series.


Height: 148cm
Weight: 2
Ground Speed: 4
Jump: 10
Air Speed: 10
Fall Speed: 2
Traction: 5


Bahamut is similar to Leviathan ability-wise, only she's a bit faster in exchange for being less floaty.


Neutral Special - Fire Manipulation

"Prominence, show yourself and obey me here."
Bahamut performs a conducting gesture to create a small flame that dances at her side. It takes half a second to create a single flame and up to 8 of them can exist, which would require 4 tedious seconds of set-up time, but you can continue holding B to have Bahamut convert any fire-based traps/projectiles within a good area in front of her like how Oil Panic works. Flames can be utilized for certain attacks, but they also trail behind Bahamut spaciously whenever she moves (extending as far as a platform) and deal 2% with okay set diagonal knockback in the direction she was facing on contact with a foe, but they fizzle out on contact. Being hit by an attack of average power will cause Bahamut to lose her concentration and for all the flames she's manipulating to burn out, meaning she'll want to use them or lose them.

Side Special - Fireball

"Fireball!"
Bahamut holds her hand out and conjures a fireball that gets released as an angle-able projectile that travels 8 SBBs across the stage before fizzling out. Fireballs start off small and weak, but they can be charged for up to 2 seconds to increase their size to that of a Party Ball, exploding on contact with whatever they hit to form a blast radius 1.4x their size that inflicts anywhere between 8-18% and decent-high knockback that'll KO between 400-120%. Smaller fireballs travel quickly while bigger fireballs travel slowly (Dedede's dashing speed), but either way they begin slowing down after traveling 3 SBBs and lose an appropriate amount of power based on their speed, traveling at half their original speed after covering 5 SBBs and a quarter of that after covering 7 SBBs. Hitting closer-up lets Bahamut make use of a fireball's full power, but letting it slow down allows her to exploit it as a pseudo-trap at the cost of it being easier for enemies to out-prioritize. Going up to a fireball (generally those of higher charge) allows Bahamut to interact with it, either to convert it into a flame using her Neutral Special or refresh its speed, power and distance cap by re-using this move, as well as re-direct them, making it dangerous against those who initially thought they were safe.

If you smash the input while flames exist around Bahamut, she'll utilize them for the fireball, each flame making up 0.5 seconds worth of charge to the point where having 4 lets her instantly throw out a fully-charged fireball. This lets Bahamut throw out 2 fully-charged fireballs in quick succession if she had a full set of flames, which is deadly considering their sheer size and power. On that note, if 2 fireballs of similar size come into contact with each other, they'll create a massive explosion nearly double the size of a blast from either that deals the normal damage of the faster fireball or 1.3x that much near the center of the blast. This can happen if a fireball is reflected into another or Bahamut catches up to a declining fireball and fires another one near it, but either way she's immune to damage from the blast unless one of the reflected fireballs could have damaged her. Fireballs of contrasting size will ignore each other, letting Bahamut shoot smaller fireballs through bigger, slower-moving ones.


Up Special - Fireflight
Bahamut performs a fire-cloaked version of Lucario's Extremespeed that deals minor non-flinching hits to anyone she passes by, but otherwise it's a weak recovery with no protective hitbox, ledge-snapping or ability to be cancelled into a wall cling. Not that Bahamut is especially worried however, since she has such a good midair jump.

If Bahamut flies into one of her own fireballs, she'll cancel out of the recovery and not be put into helpless, but she'll be unable to use it again until she lands. If Bahamut flies into one of her fireballs near the start of the move however, she'll convert it into intense flames that wrap around her and become a fiery hitbox that drags opponents along for half a dozen hits that accumulate the same amount of damage the fireball would have inflicted before knocking them away for the same amount of knockback too. This also ends with Bahamut not entering helpless, and depending on how powerful the fireball was it can either be a powerful KO move or excellent comboing tool.

If Bahamut angles the recovery along the ground or dives into it from midair, she'll be allowed to dash across it indefinitely, able to cancel out of it anytime for minimal lag. This puts Bahamut at greater risk than if she just dashed normally due to being defenseless outside of the fiery hitbox, but it gives her extra mobility and lets her reach fireballs quicker given her weak dash. Angling the control stick upwards during this dash allows Bahamut to curve her flight upwards and take to the air anytime she likes.


Down Special - Magma Magic
Bahamut raises her hands, and the tip of her staff glows, resulting in the creation of a SBB-wide lava pool over the course of 1 second that stays out for 5 seconds or until Bahamut is struck by a powerful attack. The lava pool deals 10% and high upwards knockback to anyone who touches it, capable of KO'ing at 150%, and while Bahamut is not immune to it she can easily fly over it. Lava pools are great for launching enemies up to where Bahamut is since they can be created high off the ground, but they cannot be created offstage; they can also be created beneath the nearest fireball if the input was smashed, able to catch enemies attempting to avoid the latter off-guard. Bahamut can convert lava pools into flames or use her Up Special to dash over them safely, using the lava to wrap herself in flames to deal its damage/knockback output to anyone she hits along the way.

If you use this move again with a lava pool out, Bahamut will repeat the animation to have relatively thin, yet tall lava geyser erupts upwards, resulting in similar lag and feel to Pikachu's Thunder. This geyser goes up 4 SBBs by default, or right next to/beneath Bahamut if she was higher up in midair /directly above the pool, dealing 10% with average upwards knockback that'll KO at around 140%. It's perfectly possible to spam this and juggle foes to their death, but it doesn't deal as much hitstun as the trap variation and is more predictable, Bahamut needing to be very high up in the air in order for it to KO early. There's also the lava's limited timer to consider, but if utilized well it can massively assist Bahamut's aerial game. Lava geysers will push fireballs upwards as though Bahamut re-fired them, but this will likely only happen if a lava pool was created directly below a very slow-moving fireball and then made to erupt almost immediately after. If a fireball comes into contact with lava, it'll explode and send a 1.5-4 SBB tall geyser upwards that deals the same damage the fireball would have done, able to be exploited with the other 3 Specials (Side Special can re-fire the geyser horizontally if you have -really- good timing).

If Bahamut attempts to create a lava geyser with enough horizontal distance from the pool, she'll instead amass it into a Bowser-sized glob of lava that gets flung up on an arc (reaching as high as 4 SBBs) before crashing back down to the front of where Bahamut was when she issued the command. The glob explodes on contact with opponents for the same damage it would deal as a geyser, but otherwise it settles down where it landed as a new lava pool. Again, the glob can be exploited with Bahamut's other 3 Specials, and if fired out with the Side Special it'll travels 4 SBBs forward in an arc.


Jab - Fierce Flame
Bahamut points ahead and creates a small ember at the tip of her finger that delivers 3 hits of 2% before pushing enemies away to get a little bit of spacing. If A was held during the combo, Bahamut will finish it by alternating hands and throwing out her other to create a fiery explosion in front of her that blasts enemies away for 7% and very reliable keep-away knockback that'll KO at around 175%. If A is tapped anytime during the attack or after it, Bahamut will point ahead more forcefully to send out flames at her side as mildly fast-moving projectiles that travel across the screen, one for each tap of A. The flames either go in a straight line or home in on a foe struck by the attack, dealing 1.5% their usual damage and knockback to the point where throwing out 8 flames will net Bahamut an impressive 24% and a bit of extra knockback. It's not usually worth just wasting all your flames in one go despite the damage output, but they can be used for other things like adding to existing fireballs they run into so that they can grow in size, power and stay out for longer. In any case, the explosion on the attack is good for getting foes out of Bahamut's face and resides as harmless flame for one second afterwards, the likes of which can be converted into a flame, but doing so against a shielding opponent is asking to be punished.

Dash Attack - Blazing Ahead
Bahamut charges forth with her staff out like a battering ram, fire burning at the tip, but she doesn't get very far before physically exerting herself for some punishable end lag. This comes out decently fast with good range and deals 11% plus pretty good knockback on a 110 degree angle that can leaves foes in prone, but it won't KO until around 155%. For what it's worth, it can set-up for Bahamut's grounded projectile game, a charging Up Special along the ground or simply knock opponents into a fiery trap behind them. It will also push Bahamut's fire traps along with her, whether they be directly in front of her or at the tip of her staff, but lava pools part into the background temporarily so she can move past them without trouble.

F-tilt - Heated Prod
Bahamut readies her staff before poking it forward as an angle-able, far-reaching attack that delivers spacing on demand with its 7% and decent mostly-horizontal knockback (KOs at 225%). The red gem on the end of Bahamut's staff shines during the move, and is actually a sweetspot that blinks on contact with an opponent, specifically causing fireballs to move towards where they were hit and for a lava pool with 2 SBBs of them to vertically align itself with them post-launch, if possible. This is great for putting more pressure on opponents who moved past your fireballs and lava to reach you, and if you don't want to manipulate them simply don't hit with the sweetspot. Hitting a fireball with this move will send it in the direction the staff was angled on while keeping its speed in-tact, which is good over the Side Special if you want to continue exploiting it as a pseudo-trap. Finally, holding A at the end of the attack will cause the nearest fireball ahead of Bahamut's staff to explode, if you want to snag opponents close to it.

U-tilt - High Flare
Bahamut pokes her staff out on a high angle and keeps it there for a moment. This makes for a difficult-to-utilize hitbox that doesn't hit directly above or in front of Bahamut, but its speed and range make it fantastic for punishing aerial approaches - namely against opponents who jump over her traps. The glowing gem is a sweetspot that hits foes for an explosive 12% and high knockback that can KO at 140%, the base knockback being much better than the Jab's, while the rest deals 8% and some alright knockback that won't KO until around 230%, upwards knockback if you struck from below or knockback on a 130 degree angle if you struck from above.

D-tilt - Campfire
Hugging her knees in boredom, Bahamut nonchalantly points down in front of her to magically kindle a campfire that dishes out 6% while bouncing enemies a small distance into the air, capable of KO'ing at around 190%. Once started, the fire acts as a weak trap that comically burns enemies for rapid hits of 6% per second for the 2 seconds it stays out for, dealing its usual damage against opponents occupying it when it extinguishes. Though small and weak, the fire is easy to start and thus only one can exist at a time. It doesn't do a lot for stage control, but it can be converted with the Neutral Special and fired out with the Side Special, turning it into a mini-projectile that travels 2 SBBs along the ground and burns enemies for damage and a delayed hitbox. It can also be charged through with the Up Special, and while the knockback will be weak it does keep foes close to Bahamut.


F-Smash - Firewall
Bahamut throws out the top half of her body and holds her hand out, her tail sticking out behind her. This results in the creation of a fiery wall 2 SBBs ahead of Bahamut, burning enemies for 3 quick hits that accumulate 12-16% before launching them on a 60 degree angle for some surprisingly light knockback that won't KO until around 150-120%. The fire wall is rather thin and only as tall as Bahamut herself, but it's a rather quick Smash that can be used to intercept opponents from afar thanks to its its healthy duration, either knocking them away further or towards Bahamut for a potential air combo (or into a fireball) if timed well enough. What's more, the fire wall stays out for slightly longer then the attack was charged afterwards, acting as a trap that deals 4-5.5% and its usual knockback while being exploitable by the Neutral, Side and Up Specials if Bahamut runs up to the wall. The fire wall can be angled slightly, but doing so doesn't have much of a noticeable effect.

Fire walls will bounce fireballs that make contact with them on the same angle the wall was put on, letting Bahamut bounce them back to her, but only once per fireball. If a fire wall would overlap with another fire trap, it'll be created right before it.

U-Smash - Mega Fireball
Bahamut floats off the ground with her tail hanging downwards and raises a hand upwards, creating a huge fireball above her that resembles a blazing sun. The attack is understandably telegraphed and has a very short duration that allows wary foes to easily avoid it with an air dodge, not to mention it only hits high above Bahamut, but it's a rather powerful attack: delivering radial knockback, the fireball dishes out 10-14% and average knockback to those near the outer perimeter (KO'ing between 160-130%), 16-22% to those near the center (KO'ing between 120-90%) and 24-32% with powerful upwards knockback to those hit at the center, able to KO between 80-50% but sometimes earlier given how high up it is. The attack has surprisingly low end lag for how crazy it is and actually leaves Bahamut in midair afterwards, letting her capitalize on the aftermath with her good air abilities but making it difficult to spam due to having to land again to use it. If the attack was charged, harmless residual flames will tint the air for about 2 seconds at most, letting Bahamut absorb them with her Neutral Special or even charge through them with her Up Special; resulting in 10-14% and knockback in the direction Bahamut was moving in at the end of her flight, but never downwards.

A follow-up attack will cause Bahamut to clench her hand into a fist, breaking the fireball up into 2 smaller (medium-sized) fireballs that arc down next to her on both sides before bouncing back up to the top of the screen on a high angle, good for catching opponents who dodge through the main fireball. These smaller fireballs travel at a consistent pace and inflict 12-16% with decent knockback that KOs between 170-135%, knocking opponents on a high angle as they come down or on a low angle as they come up. It's possible for Bahamut to capitalize on the fireballs as they bounce up due to being in midair and even chase them with her flight, able to mess with them using her Specials and Aerials. The only thing preventing Bahamut from releasing fireballs with each use of this move is that they each require a flame on her person, but the cover they provide for the main attack is invaluable.

D-Smash - Fire Ring
Bahamut points ahead and commands 3 flames to spin around her in a quick attack that catches opponents for accumulative damage of 14-18% before launching them backwards for average mostly-horizontal knockback that KOs between 150-120%. While not a reliable finisher, it's a defensive move that's well-suited to nailing approaching foes, knocking them offstage if Bahamut was near the edge or possibly into a trap if they rolled behind her. You can tap A anytime during the attack to have the spinning flames move out slowly on a 70 degree angle, extending their reach slightly at the cost of giving Bahamut some blindspots. Furthermore, you can perform a follow-up attack to keep a flame out on each side of Bahamut as a trap that stays out for 2 seconds, using up 1-2 that she has on her person.

Using this attack next to a fireball or any sort of fire trap will actually cause Bahamut to use it for the attack, altering its properties and making it deal more damage than usual when charged (up to 1.4x). This is especially interesting with fireballs since they'll actually be kept in place as a hitbox while Bahamut charges, which is very good for intercepting opponents, but if they don't hit anyone before then she'll make it explode for 1.0-1.4x however much damage it would have done. Lava will swirl on both sides of Bahamut to extend its hitbox before being re-positioned on the opposite side of her, a very wide hitbox that sadly only hits grounded foes. If a fireball and lava are vertically-aligned with each other, Bahamut will use both of them for the attack, creating a chain-reaction where the fireball's explosion will cause the lava to erupt in what will be a very powerful attack. Flames and D-tilt fire traps can be used as well, but only increase the damage done slightly and are mostly there as defense while Bahamut charges.


N-air - Combust
Bahamut prods her staff fiercely in a semi-laggy attack of no significant visual, other than the red gem glowing brightly. If the gem hits an opponent however, they'll be engulfed in a large blast of fire that deals 16% and some impressive knockback that'll KO at around 135%, by far Bahamut's best move for KO'ing offstage but also requiring some spacing to pull off. Bahamut's staff and her body are also weak hitboxes at the start of the attack, but of no real significance other than a bit of defense.

If Bahamut pokes her staff out with a fireball or lava glob out in front of her, it'll explode instantly, giving this attack more range and making it more dangerous. If Bahamut hits a fireball or lava glob with the gem of her staff, they'll explode once they disappear/land or come into contact with another fireball, the latter being dangerous if Bahamut decides to throw out an uncharged fireball towards it.

F-air - Torch
Bahamut swings her staff sideways, serving as a typical wall-of-pain that deals 9% and rather low knockback on a low angle that'll KO at around 180%. Like the F-tilt, there's a sweetspot at the tip of the staff that causes fireballs to move towards opponents and for lava to align itself vertically with them, except fireballs close to Bahamut will have their speed, power and distance cap refreshed. Hitting a fireball with the tip of the staff will cause it to split into 1-4 fireballs based on its size, each of which spread out rather thinly and evenly. It's perfectly possible to have all these fireballs home in on an opponent by hitting with the sweetspot, and if they miss Bahamut can just absorb them all at once using her Neutral Special. The ease of self-comboing means that Bahamut will be frequently guiding stray fireballs towards opponents, and the move makes for a good combo out of a fiery rushing Up Special, like the F-Smash fire wall.

B-air - Tail Whip
Like Leviathan and Jormungandr before her, Bahamut looks back in embarrassment and whips her tail behind her several times, doing so more frantically than her friends. Her attack drags opponents caught in it and accumulates up to 12% on them before throwing them up on a high angle for decent knockback that won't KO until 200%. You can drag opponents back and even take them offstage, but the move isn't designed for comboing into itself due to the knockback trajectory, rather letting Bahamut chance a lava geyser, U-Smash or just smack the opponent as they fall to her. The attack can also be used as shield pressure and to maneuver past the opponent at the same time, being especially deadly if there was a fireball slowly advancing towards them.

If Bahamut hits with the tip of her tail, she'll instead deal 4% and push foes back a little while turning around, prematurely ending the attack almost instantly. This lets Bahamut position herself accordingly for her N-air or F-air, which can be pretty much thrown out right after, especially good since it works on fireballs.

U-air - Fire Gun
Bahamut looks up slightly and points skywards, releasing a burst of flame at the tip of her finger with surprisingly good vertical range. Hitting close-up results in 10% and good juggling knockback that'll KO at 200% while the tip deals 6% and decent hitstun. If Bahamut had a flame on her during the attack, she'll place it directly above her as a trap that stays out for one second before fizzling out, or 2.2 seconds if she connected with the attack. The flames can make moving through the air difficult for opponents and provide aerial opportunities for Bahamut, but they should be positioned carefully since they take from her flame count and don't last long enough to induce a lot of stage control. If Bahamut wanted to, she could combo into her Up Special after having placed a flame to drag opponents further through the air.

D-air - Flame Rain
Bahamut readies her staff before plunging it downwards in a typical semi-laggy attack, falling a bit faster than usual if she was moving downwards at the time. The staff itself deals 7% and extremely mild set upwards knockback that can allow Bahamut to move through airborne opponents, but the gem deals 10% in fiery damage and some nice downwards knockback that can KO offstage at around 150%. While the spike isn't especially powerful, Bahamut automatically follows up by shooting a fireball downwards that deals 12% and some very nice knockback on a high angle that'll KO at 160%, but it can dodged without too much of a problem. The fireball is obviously ineffective against foes launched upwards from the ground, but it can rack up damage against shields, make offstage recoveries more difficult and even trigger a 4-SBB tall lava geyser if it somehow hits a pool. Finally, this move can be used to bat fireballs downwards, and will produce a fireball anyway if you hit with the sweetspot. If you play your cards right, the extra fireball can knock foes into the slower-moving fireball, or force them to shield as the big thing closes in on them.


Instead of grabbing with her hands, Bahamut prods her staff forward and uses it to scoop a foe by an article of their clothing, just like she did to a fully grown man in the 1st episode. Bahamut looks quite proud when she's "holding" a foe this way, and why shouldn't she be? This grab has very good reach due to its disjointed nature, though it's a bit slow, so it doesn't fare very well against shield pressure. Her pummel involves the tip of her staff lighting up to deal a minor 2%.

F-throw - Flame-Thrower
Bahamut knocks the foe away on a low angle with a blast of fire for 10%. The knockback doesn't scale all that well, but Bahamut immediately follows up by shooting out 2 smaller fireballs that travel side-by-side, homing in on opponents at a moderately slow pace but easily being outmaneuvered and disappearing upon traveling 8 SBBs. Each fireball deals 5% and decent hitstun or 12% with good knockback capable of KO'ing at 180% if they both hit at the same time, meaning they're actually quite potent and Bahamut can catch up to them with some effort, but foes can easily swat them back by hitting them or shielding against them. The fireballs can be absorbed by Bahamut as they come back to her, however, and if they're in the path of a smaller fireball they'll contribute to it. It goes without saying that the throw is great for set-up, regardless of how foes react.

B-throw - Eruption
Bahamut swings her staff behind her with tremendous effort, creating a trail of fire from the gem that carries foes and throws them behind her for 11% and superior base knockback to the F-throw, but the same poor scaling that makes it difficult to KO with until crazy high percentages. Thus, Bahamut will often need to follow-up by edge-guarding with her fireballs or attempting an offstage gimp. This throw can however be angled, upwards dealing a bit more knockback and downwards dealing less, but putting enemies into prone if they didn't go offstage.

If there was a lava pool behind Bahamut when she used this throw, it will actually subside and reemerge above the ground the opponent was during the apex of their knockback, actually hitting them if the throw was angled downwards and they were still onstage. This is quite convenient for Bahamut since the lava won't be in her face if she tries to pursue the opponent, possibly putting it near the edge of the stage where it can make recovery difficult. The throw will also pull a fireball ahead of Bahamut towards her and refresh its speed/power, increasing her offensive.

U-throw - Dragon Fire
Bahamut raises her staff and holds her free hand towards the opponent, conjuring a fire that burns at them for accumulative damage of 13% before launching them on a very high angle for some dangerously good knockback that would KO at around 150%. This is the move Bahamut uses when she wants to launch foes upwards, being her most effective way of doing so.

D-throw - Fire Slam
Bahamut slams her staff into the ground that creates a small blast of fire that bounces opponents up into the air lightly for 6%. Easily Bahamut's weakest throw, but the one that keeps opponents at arm's reach for aerial assaults. The throw also creates a flame that travels along the ground slowly for one second before suddenly rushing forward a small distance before snuffing out. The flame can make landing somewhat difficult for opponents since they'll be damaged if they just fall on it, having to dodge, attack, jump or maneuver past it in which their options are lessened. Bahamut can absorb the flame if she's feeling up to it, or use her F-tilt/F-air to have it home in on foes as though it were an uncharged fireball. The flame will also add 2 seconds of time onto any fire trap it runs into, lava included.


Fire Drake
On their journey, the girls encountered and helped massive dragons with their individual ordeals, by which they were granted their permission to call on their help by breaking open a rare rainbow-laced summon sphere. For Bahamut's Final Smash, a summon sphere will shine into existence in front of her, much to her surprise, which she reaches out for as it becomes a special item that replaces whatever she was previously holding. The summon sphere functions identically to a Pokeball, whereupon shattering against the ground a brief cinematic will occur: Bahamut will call out "Fire Drake!" as a reddish portal opens on the ground and the Master of Rajima Volcano rises from it, dealing token fire damage to any foe in the way in the same vein as a Legendary Pokemon. At this time, Bahamut acquires free flight, and Fire Drake lets out a lengthy roar before flying to the top of the screen. He then descends into the background and inhales deeply before unleashing a massive fire not unlike the laser beam on Halberd, dealing as much as 50% with knockback that'll usually KO foes who had 45% before getting hit. After firing the blast, Fire Drake's body takes on a light red hue and fades out of existence.

Bahamut is free to attack normally while Fire Drake is attacking, but she can also pull off her own finishing move anytime if you press B. By doing this, the camera will zoom in on Bahamut as points her glowing staff forward and holds out her free hand, chanting "Flare of the sun, show yourself and obey me." before firing a blast across the screen with identical properties to Fire Drake's attack. Bahamut can time her attack in different ways before or in-between Fire Drake's attack, like if she wants to hit a foe Fire Drake missed or a different one, even gang up on the same victim so they take 100% from both attacks. Of course, if you really want to be cool and have the two sync their attacks perfectly, simply attempt Bahamut's attack as soon as Fire Drake inhales and he'll time his attack to match his summoner's.

Only those with a contract can use a summon sphere, so it will be wasted if it is reflected or thrown by any fighter other than Leviathan, Jormungandr or Bahamut herself. Indeed, the summon sphere can be caught and used by other players in a FFA Match, but that's unlikely to happen.
 
Last edited:

Katapultar

Smash Lord
Joined
Nov 24, 2008
Messages
1,251
Location
Australia
[collapse=Banjo TWEWY]As the (extremely fitting) title of this comment implies, I hold this set in similar regard to to Banjo-Kazooie, as both sets have a lot in common with each other. Both are incredibly stylish. Both revolve around custom. Both are for main characters. Both stay true to their respective series to an commendable degree while still working in smash. But most of all, both make good use of a feature in the upcoming Smash game. BK used Custom Specials, but this set uses the fact that Smash is playable on a 3DS now. That is great.

Oh, and both sets use partners. Just in... different ways.

The difference between the 2 sets is that Neku is not your typical Smash set, and that he has a lot more custom options going for him. The invincible dash and tech are slightly questionable, though the latter is not totally overpowered since it's not like a player would have time to mash the touch pen in one place upon being hit and furthermore would have to predict the knockback trajectory of the attack they were hit by. Neku also appreciates spacing given his vast repertoire ranged-attacks, so just teching all the time is like asking to be comboed. Now, I'll assume that the screens' roles are reverse to the 3DS version (percentages at top, main screen at bottom) and that opponents have some way of knowing where their Neku opponent is aiming the effects of a given pin move, especially in the case of attacks that can be aimed anywhere like pyrokinesis and the freezing effect.

I've never played TWEWY myself despite MYM being veeery familiar with it, but Neku seems like he'd be pretty fun to play as, especially given some of the unique touch-screen options that let you position your attacks in ways no other character can. His set essentially boils down to a weak Jab, Grab, 4 assist-based Specials at a time that cycle with each successful hit and 6 custom attacks with varying cooldown. That's a little less than the average character, though Neku is indifferent to being grounded or in midair so one could almost argue that he has more options. Like Banjo and Kazooie, it's a little difficult to judge. Neku seems like he'd be predictable, but that doesn't seem to be the case. On the other hand, he feels a bit starved for melee options compared to other characters when he's trying to raise a meter, even with partners given they alternate automatically, making him feel very campish when he has tons of pin projectiles given he's encouraged to use traps and what not to raise that meter.

Like Banjo-Kazooie, the set is great in being serviceable to its series in the best way possible, but I have a hard time really, REALLY liking the set anymore than I do because it doesn't have one set playstyle or goal unlike most sets, much like the aforementioned set. It's potentially more fun, yet a bit more difficult to truly judge and grasp due to relying on custom far more. A Neku set for Smash could work just as well, but this was certainly an interesting set.[/collapse]
 

FrozenRoy

Smash Lord
Joined
Apr 26, 2007
Messages
1,260
Location
Las Vegas, Nevada
Switch FC
SW-1325-2408-7513
Kunkka

The Admiral

Hailing from Defense of the Ancients 2 (DoTA2), Kunkka is commonly played as a carry or initiator, meaning he is good at initiating teamfights and/or geared to become stronger late in the game, utilizing a combination of physical power and water-based magical power. However, Kunkka requires careful timing and map awareness, especially due to the long cast time on some of his abilities. His passive ability Tidebringer periodically cleaves on hit, giving him additional range and power, while X Marks The Spot allows him to snap any unit he has marked to the location he marked them at, which synergizes well with his Torrent ability's long start time by snapping the opponent to it. Finally, his Ghost Ship ultimate deals a large amount of damage and buffs allies who pass through it, but moves in a straight line and requires a precision to hit with.

Statistics

Kunkka is a fairly large character, roughly the same size as Captain Falcon with a bit more bulk, while weighing the same as the racing captain. Kunkka is more average in terms of ground speed, a bit faster than Lucas, with slightly poor traction but not particularly noticable.

Aerially, Kunkka is slightly floaty, but not particularly so, with slightly good air speed and aerial control, but still nothing special. His first jump goes fairly high, while his second jump is quite average, and he doesn't have any other special Brawl attributes.


Passive Ability: Tidebringer


Kunkka's passive ability, Tidebringer, carries over from DoTA2 into Smash, though not necessarily in the same specific form, but close enough. (I've never played Kunkka. I've played like 3 total DoTA2 matches.)

Tidebringer's ability becomes active 5 seconds after the match starts and then reactivates every 5 seconds after use afterwards. This is indicated by Tidebringer itself glowing an aqua color, in addition to Kunkka flashing as if he had something charged up. When Tidebringer is active, Kunkka's next attack with his sword will have its range increased as water extends past the end of the blade, specifically extending the range by exactly double, with this watery blade extension having all the same damage, knockback etc properties of the original attack, in addition to overlapping the blade's hitbox itself.

Not only does this allow Kunkka an impressive range, but it increases his damage dealing as well: If the foe is struck by the normal blade, they will end up taking the damage of both the normal blade and the watery Tidebringer blade. However, this will not apply if only hit by the extended, water-only part of the blade: Thus, Kunkka should be careful and note where he is hitting with the move, having to trade off range for power or vice-versa. In addition, the watery blade extension hits right through shields, this "cleave" damage only be able to be avoided through dodges such as rolls or not being in the way, or via counters. This will NOT cause the real blade to hit through, only the cleave part, so hitting up close only hits once and thus you don't get the essentially "doubled" damage. Some specific moves have other special attributes while the Tidebringer passive is active.

While this is all well and good, you'll mention that I said it reactivates after use? The Tidebringer passive lasts for only a single attack: If you whiff that strike, you have to wait 5 more seconds before you can try again, so you should be VERY careful with what you use this on and to hit with it! Using attacks that do not use your sword will not use up the Tidebringer passive, so you are hardly helpless if you don't want to waste it: You just need to be careful, time it right, and then turn the tide of battle!


Specials

Neutral Special: X Marks The Spot


Kunkka raises his hand in front of himself, causing an X-shaped burst of water to slice in front of him, dealing 8% damage and fixed 1.25 Battlefield Platform knockback to anyone hit by this disjointed move. If an enemy is struck by this move, the water will fall to the ground and remain marking the area as an X for 15 seconds: If it misses, it simply evaporates into nothing. This move has rather low starting lag, but the ending lag is fairly average and it is a fair deal punishable.

After you've struck someone with this and the X marks the spot, you can't use the attack part of this: Rather, hitting B will cause the foe to near-instantly (a mere few frames) be transported to where the X is. This action itself has very few frames of starting lag and qutie short ending lag: If Kunkka were to be standing next to the X, him and the opponent would be in a frame neutral situation after taking into account animation and ending lag. By doing this, Kunkka gives himself a potent option to bring foes to that spot whenever he wishes for 15 seconds, for whatever he desires. Foe pressuring you too much? Bring them back to your mark. Wanting to get them close to you? Bring them back to your mark and be near it. Have something set up to hit them? Put it on the X.

Of course, it isn't quite that simple: The opponent will, in fact, continuing doing whatever they were doing uninterrupted after teleport, in essence not stopping the opponent from doing anything at all. So, for example, if the opponent knows that something you set is gonna blow, they can hold down shield and block it if you bring them to the mark. If they expect you to try and smack them when they are teleported, they can use an attack and try to hit YOU instead. But of course, this all comes with downsides. For example, just plain shielding an expected move that's about to open leaves you open to being grabbed. If Kunkka expects you to use an attack to try and hit him, he might choose to wait out his teleportation for a moment, and now you're caught in ending lag and free to be struck. Fighting game style reading is key to using this properly, in addition to just plain setting up advantageous situations. Keep in mind, though, that you'll only get one shot of teleportation per hit, so try not to waste it given how valuable a tool it is.


Down Special: Torrent


Kunkka places his palm against the ground, causing the ground to ripple as if it was made of water, glowing a faint blue. About three seconds later, the ground erupts into a torrent of water approximately 1.5 Ganondorfs high and 3/4ths a Battlefield wide, dealing constant hits of 2% that total 20% along with a final hit that deals 5% with fairly poor knockback for killing, only KOing at 175% due to the fact that the constant hits pull the opponent up to the top of the geyser. DIing the geyser is possible and thus how much damage it deals will depend on where the foe was struck: This move will do rather poor damage if the opponent is on the edges of it and thus DIs out early, but it can do a lot of damage if the opponent is struck in the middle, especially at low damage %s. This is where your Neutral Special comes in: Set this so the middle erupts on the X and teleport foes into it! If they don't see it coming, that is...this move does rather poor shield damage without shieldstun and a lot of rolls can help get out of it quickly, so an opponent who is prepared for it will find it rather tame.

The actual process of putting one of these down, however, is very fast, and the ending lag is very low, so it is hard to punish Kunkka laying it down...it just has a very long time before it hits. Still, due to this it can be reasonable to throw out without comboing it. Kunkka may only have one Torrent out. Kunkka may stand inside of a Torrent geyser without incident, but laying one down will instantly cause the geyser to end, so Kunkka cannot stall inside of one. Kunkka may also jump as per normal or he may hold down jump/tap jump while inside the torrent to steadily rise into it like a waterfall. Kunkka is perfectly free to hit enemies inside the torrent, but odds are quite likely it will send them flying out of it, likely cutting short the torrent's damage, though it allows Kunkka to set this up for more of a KO. Alternately, Kunkka can use a lighter, tapping hit to try and keep the foe in the geyser for its full time.


Side Special: Ride the Tide

Kunkka pulls Tidebringer back, before rushing forward at a blazing speed a bit faster than Ike's Quick Draw, slashing when he reaches an opponent for 12%-24% damage based on charge (same charge time as Quick Draw) and KOing at 240%-140%. This move has decent starting lag, but the ending lag is poor and becomes downright bad if he performs the slash, however the actual attack comes out lightning quick and allows Kunkka to traverse distances with both speed and striking potential on a decently strong attack. In addition, Ride the Tide may be used in the air, where it will send him into helpless at the end, giving him a secondary recovery. If Kunkka enters a geyser during this move, he may rise up it by holding down the jump button as per normal, allowing him to hit people being carried up by it sometimes.

If Tidebringer's passive has activated, this move gains a few new attributes in addition to the norm. Kunkka visibly has water rush around him as he dashes forward, which turns into a wave that follows him as he does so. This wave deals 4-6 hits of 3% (depending on charge and how far into it the foe is hit) that drags the foe with it, usually not escapable by DI but there are rare circumstances, usually near a ledge or if barely hit by the move. If the opponent is dragged to the end, they will end up in front of Kunkka having taken enough hitstun that, combined with travel time, they will usually end up in a near frame neutral (Kunkka has a very few frame advantage) position directly in front of Kunkka, a good spot to try and wail on a foe who tried to dodge you. This hitbox does not appear in the air.

In addition, this move charges 1.5x as fast while Tidebringer's passive is active and will not send Kunkka into helpless in the air, though he may not use his recovery moves until he safely lands on the ground.


Up Special: Do the Wave

Kunkka performs a rising upperslash not too dissimiliar from Marth's Dolphin Slash, a very quick recovery that goes 1.25x the distance of said Dolphin Slash. This move has two distinct hitboxes: The strongest one is right at the start, as the slash first comes out, which deals a solid 14% and KOs at 90%, making it one of Kunkka's better kill moves. However, the timing for this hitbox is fairly small and the range is short. If hit with any part of the attack aside from the start of the slash, it deals a more modest 9% damage and KOs at 190%. The starting lag on this move is quite quick, but the ending lag is quite bad: Both are comparable to the Dolphin Slash in this regard as well, though with worse ending lag.

This move goes through a few changes if the Tidebringer passive is on, though. First and foremost, it becomes a move that can combine very good damage dealing with strong KO power while being quick to boot. However, just like the normal version, this does not come without a price, as this is quite risky and will leave Kunkka in helpless if he whiffs, open to be punished by just about anything. Because of this, Kunkka must always be aware of the possibility of using this move, but wary of using it. Secondly, the increased range of the sword combined with the leap makes this an amazing anti-air poker. Thirdly, by tapping B when the ending lag is about to start, the watery end of the blade will morph for a brief moment into a small anchor. By doing so, this tip becomes a tether for a moment, allowing Kunkka to extend his greatly extend the range of an already good recovery, and the sword's length can mean smacking edgehoggers. Finally, this is the rare move that allows Kunkka to opt out of using his passive by holding down B until the attack starts, giving Kunkka a risky sword melee option that won't eat his Tidebringer buff.


Standards

Jab: Side Swipe

Kunkka performs a quick, repeating slash with Tidebringer, each hit dealing 3% and coming out and ending quite quickly, making it a rather normal jab, a fairly important if standard tool given your want of a quick move for situations such as Side Special's wave. Utilizing your Tidebringer debuff with this, though, can turn this into a potent damage racker, as the Tidebringer passive for this move will last for as long as you hold down A, allowing you to dice up close by opponents a fair deal with double damage or to suddenly poke and interrupt or deal damage on opponents a fair deal further away than your jab would normally allow, though note the sword is not fully extended for this move and thus the double range is only double that but is still quite impressive, especially for a jab.

Forward Tilt: Sea Stab

Kunkka stabs Tidebringer straight forward in a fairly quick motion, with quick starting lag, doing 8% damage to opponents with rather weak knockback. This move has very nice range and the ending lag is average, so Kunkka will often be using this to space out foes, especially after a Side Special or when interacting with your Neutral Special, and can also be a good way to get a foe near or into a torrent. Kunkka may even hold down A to keep this move out for a brief time after the attack would normally end, at the cost of increasing the end lag by a good deal.

Holding out this move becomes a fair deal more useful and interesting with the Tidebringer passive buff on: Normally it would catch spot dodgers, but the increased length of the sword means that rolling is by far out of the question unless it is near to Kunkka, and close at that, while the blade slashing through shields makes this an indispensible way to break defenses, at the cost of not using your Tidebringer buff to deal a great deal of damage instead. Ending lag increase still applies on holding the attack out.


Up Tilt: Rising Slice

Kunkka stabs his sword skywards, striking enemies above him with fairly decent 9% damage and okay upwards knockback, though it fails to KO until 250%. However, the tip of Tidebringer is a sweetspot that increases the damage to 11% and spikes the opponent downwards and slightly to the sides, just enough to allow Kunkka to perhaps spike a recovering foe back off the ledge. They'll even be sent hurtling through fall-through platforms! The starting and ending lag of this move are about average for what you'd expect from this kinda move, though it should be noted it has fairly large range, a bit longer than even Marth's Up Smash.

This is combined with the fact that with Tidebringer's passive, as the sweetspot carries over to the end of the extended water blade, giving this move enough range to poke people from quite high up, snagging people almost perfectly on the top of the topmost platform on Battlefield. A studious player might note that is higher than torrent's rising waters, allowing Kunkka to spike foes with this move right into his torrent even when it is active! Of course, you need to hit with the sweetspot for that, so you can't just throw it around easily, especially since you get one shot every five seconds at best. This also serves as an excellent anti-air and the spike is strong enough to send even enemies fairly high up hurtling to good melee range for Kunkka.


Down Tilt: Aqua Sphere

Kunkka points downwards towards the ground, shooting out a sphere of energy that quickly bursts, dealing 7% damage and good knockback that allows Kunkka to send the foe away from him. This move's quick starting lag allows Kunkka to use this in a pinch to gain space and he can even combo it with a single hit of his jab to confirm it, but it'll generally do less than catching a foe in your jab, especially if Tidebringer's passive is active. It also generally serves as a good way to end close combats by sending the foe away once Kunkka has done his work. It also has rather poor ending lag, making it punishable if abused or easy to see coming. Since this move does not use Tidebringer, it serves as an important melee tool that won't turn on Tidebringer's passive, allowing you to better save it.

Dash Attack: Water Burst

Kunkka swings his palm forward and releases a strong, close ranged blast of water in front of himself, dealing 14% damage and KOing at 125%, making it a fairly potent move on a dash attack, even if it doesn't stack up against titans like Ganondorf's. The starting lag on this move is decent, but the ending lag is quite long, and because this move travels quite a short distance it makes for a near-useless DACUS. Since Kunkka is a bit low on KO moves, however, it is quite valuable.

In addition, Kunkka may press A when the attack is released, which will cause him to recoil about one Battlefield Platform backwards from the blast, allowing Kunkka to better escape attacks with his bad ending lag...at the cost of making the ending lag even worse. However, Kunkka may get around even this with proper spacing, as Kunkka will go right off ledges while using this, which will cut his ending lag short and replace it with some very brief lag of entering his aerial state. Not only can this be used as a lag cancelling move, but it can also be a good mobility option shooting from platforms or the like.


Smashes

Down Smash: Anchors Away

Kunkka stabs Tidebringer into the ground, causing water to erupt and wave on the ground around him, dealing 17%-25% damage, but knockback that only KOs at 160%-130%, making it more of a mid tier KO option if that. The starting lag of this move is somewhat long, it takes a moment after Kunkka stabbing Tidebringer into the ground for the wave to rush out, but the ending lag is quite low. The range is quite large, so it is quite nice at midranges as well and can be fairly hard to escape at close ranges.

While your Tidebringer passive is on, however, water will be left behind after this move as a trap. If an opponent steps onto this Bowser width of water, it will quickly leap into action and morph into a chain-link of water, with a somewhat small anchor stuck into the ground. This not only deals 8% damage, but roots the opponent to that spot and keeps them from moving at all for 3 seconds + however much time was left on the trap, said trap lasting 8 seconds, or until the anchor's 45 HP is depleted, though it should be noted that since it cannot move it is a great deal easier to damage rack than a character. The fact that the foe will be stuck in place is useful for a variety of moves, for example you can try and start a torrent under their feet or you can take the chance to hit X Marks the Spot to mark them there or to try and smack them with a very strong Tidebringer'd move...however, the opponent still do anything as per normal save move (movement things like rolls are simply done in place), so this can be rather predictable or easily avoided (For example, a Tidebringer passive might just be shielded if thrown out too predictably) and moves like torrent that take time will allow the foe amply time to deplete the HP of the anchor, especially if they have a Down Smash that hits it multiple times.

Only one of these traps may be out on the field at one time, the other one evaporating if a new one is made, and one can tap A when the attack is released to not create one if so wished. Note that since Kunkka can bring the foe to X Marks The Spot at any time, Kunkka can technically root the opponent either where the trap was laid or at the X if he has marked them previously by simply porting them there. Finally, while this move benefits from the Tidebringer passive it does not use Tidebringer to attack and thus does not use it up. This also means it doesn't gain the increased range and so on of utilizing the Tidebringer passive.


Up Smash: Heavy Rain

Kunkka raises his hand upwards and releases a rather large blast of water that shoots upwards about half of a Ganondorf, hitting anyone who touches it for 19%-27% damage that KOs at 120%-85%, which given the average starting lag and good range is quite nice. The ending lag is a fair deal poor, however. Similiar to the Down Smash, this move gains power from the Tidebringer passive but does not use it up.

Specifically, normally the water from this move simply evaporates at the end, but while the Tidebringer is on it will instead fall to the ground as water droplets as the attack bursts, which deal multiple hits of 1% (Adding up to 4%-8% damage, but you'd need to DI INTO more droplets on purpose to take more than 4%) that cover a good deal of this move's ending lag. This water then stays on the ground for 6.5 seconds, though it does not function as a trap, but instead cuts the starting lag of any water-based move Kunkka uses on top of it by half, allowing Kunkka to better fight with his watery moves while not using his Tidebringer passive or just to better fight with them, though note that even with the Tidebringer passive on Kunkka's sword moves do not count for halved starting lag. If Kunkka just keeps spamming his Up Smash like this, note that the droplets do not cover the whole move and there is still starting lag on it, so there is ample time to rush in and shield grab him. Only one group of puddles, which are about a Bowser in width, may be on the field at once, and making another causes the previous one to evaporate: Double tap A to not make puddles. Being in the air above a puddle will reduce the lag time of aerial water moves.


Forward Smash: Wave Slash

Kunkka swings Tidebringer forward in an overhead motion not dissimiliar to Marth's Forward Smash, dealing 14%-19.6% damage unless the tip is hit with, which increases the damage to 19%-26.6% when tipped: Both of which are very scary numbers when Tidebringer's passive can double them, especially the tipper version, and when it can gain absurd range thanks to the increased blade length, including a replicated tipper! The knockback, however, is rather poor for a smash, the sourspotted hit not KOing until 230%-200%, while the tippered hit KOs at 120%-95%. It should be noted, however, that the sourspot's knockback is small enough that it can actually be followed-up on with attacks at low %s and allow you to keep melee pressure up until higher %s. The starting and ending lag of this move are similiar to Marth's Forward Smash, except a tad bit laggier on both ends and just like Marth's the tippered version is much less safe to hit on shield due to large hitlag.

As noted, this move is a very powerful option everyone must keep in mind, as Kunkka can quite suddenly shank the opponent for 38% damage while Tidebringer's passive is active, but it also is a fairly punishable move and Kunkka only gets one shot at it before Tidebringer's passive must be charged again. In addition, the double damage will only occur at the original tipper, so going for that means foregoing this move's excellent Tidebringer passive range: Sometimes it is better to hit with the "second" tipper instead. Finally, while the Tidebringer passive is on this move is the only sword move that gains a buff while over water which has fallen to the ground with Up Smash and will even gain a buff from standing on your Down Smash traps, charging 3x as fast! While this move is super potent fully charged and with the Tidebringer passive, taking time to charge an easily punished move that requires spacing and you only get 1 shot every 5 seconds of is a rather dangerous choice.


Aerials

Forward Aerial: Swift Slice

Kunkka performs a swift forwards slice with his sword, containing simularities to Marth's, such as the blazing fast start-up and a similiar motion with the sword. Smacking the foe with the tip deals 13% damage and strong knockback that KOs at 100%, while the base deals very weak knockback and 10% damage, but this isn't a downside. Rather, the low damage and knockback combined with blazing fast start-up and ending lag similiar to Marth's Forward Aerial allows Kunkka to use a sourspotted Forward Aerial to set the opponent up or combo them at lower damage %s: Particularly nasty is the ability to combo a sourspotted Forward Aerial into a sweetspotted Forward Aerial until mid %s, though by the time you get into KO range it is not reliable...

...Until Tidebringer's passive ability to increase range and replicate the tipper comes into play, especially as the Forward Aerial is the other move you can hold down A to prevent Tidebringer's passive from turning on. This allows Tidebringer to, at high %s, potentially smack an opponent with the sourspot of this move without Tidebringer and, by properly moving the character (and, sometimes, a second jump), then proceed to hit the opponent with the sweetspot of the extended blade to send them flying. This can even be done in reverse, by first hitting the foe with the weak sourspot of the extended blade and then properly adjusting yourself with a jump to hit with the sweetspot of your normal blade. All of this requires quite precise spacing, timing and the ability to read DI, though, otherwise the opponent might just DI towards you and without reading it you'll just hit them unsweetspotted again, which is a rather large waste of Tidebringer's passive. In addition, how much you adjust will vary based on many factors such as weight, falling speed and damage percentage.

Of course, even outside of that, this move has a variety of uses: For example, it can be performed twice in one shorthop, making it an impressive approaching tool that Kunkka can use to coem in, try to retreat and DI away if it is shielded or misses, or even a retreating move with a backwards shorthop forward aerial. As an edgeguard it can be used to wall of pain the opponent and if you can get the opponent off the edge early, the sourspot into sweetspot even without the passive can become a potent tool, and the large disjointed range of the normal move makes it one of Kunkka's premeire ways to space out enemies and a vital component of Kunkka's melee game.


Down Aerial: Roll Tide

Kunkka takes his sword and plunges straight down in this stall-than-fall move, which has moderately laggy start-up while striking foes it hits for 12% damage and a weak spike, with the sword plunging into the ground itself being a stronger 16% hitbox that KOs at 110%, but it is rather hard to hit with since they have to be on the ground and see this rather slow move coming and the fact that the spike is weak enough that at high altitudes opponents might be able to escape before he plunges into them. The ending lag is quite long as well, as Kunkka pulls Tidebringer out of the ground. Kunkka falls about as far as Toon Link's Down Aerial, but much slower, a bit slower than Mr. Game & Watch's overall.

This move becomes substantially stronger with Tidebringer's passive on, though, as the extended range of the sword greatly increased the ability to spike enemies into the ground. Furthermore, as the extended blade plunges into the ground it gains the same hitbox as when the main blade does, allowing Kunkka to pull out the stronger hitbox much faster. When Kunkka himself hits the ground, two waves of water will be sent to both sides of Kunkka, which are 2/3rd of a Ganondorf high and a Ganondorf wide while going 1.25 Bowsers in each direction, dealing 8% and rather low knockback to anyone they hit, giving Kunkka a decently strong, projectile-esque move and covering the horrendous ending lag of this move, though it does not cover him from above. If Kunkka uses this and plunges into Up Smash puddles, the puddles will increase the size of the wave and the lengths it goes by 1.5x and will cause them to deal 12% damage and slightly higher knockback, while the puddles themselves will be split and carried along with the wave without their timer going down, crashing back to the ground after the move ends and allowing Kunkka to split his puddles into two, though he must be wary of the fact that if the waves go offstage the puddles will be lost.

Regardless of if the Tidebringer passive is on, if Kunkka uses this over an active Torrent geyser it will cause the Geyser to split in half from where he entered it, causing both sides of it to tumble over and crash as if it was a vertically bisected tower. If they are split exactly evenly, each falling tower deals 15% damage when it crashes to the ground while KOing at an impressive 80%, with each side split gaining or losing power propertionally if Kunkka splits somewhere aside from the middle, though this is a rather extremely telegraphed move as Torrent must first pop up and then Kunkka must go above it and then must use his laggy Down Aerial. Enemies who are on the same direct vertical plane with Kunkka as he plunges down will not follow the Torrent and instead be in the air for a brief moment, which will almost always lead to them being stabbed by the Down Aerial (or at least the air hitbox), while if they are a bit to the side they will follow and be stuck in the water and must frantically DI out before the water crashes to the ground and they are dealt the falling Torrent hitbox. Enemies may wish to actively DI towards Kunkka as he falls to avoid the water hitbox and instead be hit by the sword hitbox if they are at KO range, presumably to only be hit by the air hitbox, but this DI direction could also make it harder to escape the Torrent, though this depends on how they are currently positioned. The torrent, naturally, dissipate when it crashes to the ground after being split.


Up Aerial: Blasting Water

Kunkka raises his hand into the air and fires a blast of water above him, a move with short starting and ending lag that deals a mere 7% damage and lightly knocks the foe into the air, which can be good for juggling or allow for minor escapes, in addition to being a fairly solid general move to use. With a puddle under you, this move comes out blindingly fast and makes approaching an aerial Kunkka from to close from the top a pain. When used over a puddle, it will cause droplets to spring out of the puddle about a Pikachu in height, which deal a mere 4% damage but pop the foe up lightly, giving Kunkka some semblance of ground control even high into the air, and also giving this interesting shorthop implications as Kunkka may shorthop this move over a puddle, perhaps just as he exits it, allowing him to stack hitboxes above, below and sometimes even just behind him, creating a rather focused defense. Just be careful about landing this move, as it has poor landing lag, and remember it provides 0 protection from the front.

Neutral Aerial: Swirlpool

Kunkka summons water which quickly circles around his body, performing a swift starting attack that deals 11% and nice getaway knockback: Especially out of shorthops, this is a strong melee option for Kunkka and allows him to preserve Tidebringer charges. The ending lag is about average as well and it can be especially nice over puddles. And while it doesn't have the straight-up range of Kunkka's sword moves, it covers Kunkka's entire body and can even eat through some smaller projectiles.

Back Aerial: Backhand Slash

Kunkka swings Tidebringer behind him, a move with a rather normal starting lag but quite nice range for a back aerial, dealing 14% damage but rather low knockback that doesn't KO until 230%. While it has low KO power, it is a potent damage dealer for Kunkka to throw out there, especially if he can double the damage with his passive at the time and one of the moves you feel good about landing the lenghtening hitbox with thanks to the high normal damage output and the low ending lag meaning you have a good choice of what you want to do after. This move also turns Kunkka around, like Marth's back aerial.

Grab Game

Grab: Admiral's Grip

A rather simple grab where Kunkka swipes his hand forward and grabs at the foe. A fast but rather short ranged grab.

Pummel: Backhand

Kunkka backhands the foe for 2% damage with general pummel speed.

Forward Throw: Deep Cut

Kunkka takes Tidebringer and deeply slashes it into the foe's gut, sending them flying at a moderate to high amount away with very little knockback growth and 11% damage. The knockback length makes it so this move has absolutely zero follow-ups, but because this move uses Tidebringer it'll deal double damage while the passive is up, making it the strongest throw in the game, not to mention giving it some range that can let it hit other people outside of the throw.

Back Throw: Throwback

Kunkka takes the foe and lightly trips them behind him ala some of Marth's throws, though the foe is not tripped into prone, but instead takes 4% and low backwards knockback, with many of the same uses as Marth's B-Throw, though Kunkka has a very short window to put this into a tipper F-Smash at very low %s, though Kunkka still gains the ledge game by lightly knocking opponent's there, especially useful with a puddle under you to chase with Up Aerial or to use a Dash Attack.

Up Throw: Aquatic Strike

Kunkka slams his fist into the foe and flings them upwards with a blast of water, dealing 9% damage and sending the foe straight up with knockback that KOs at 200%: However, over puddles, this knockback is drastically increased to KO at 110%. Over normal ground this serves as a solid way to start an assault in the air, then you can transition over a puddle to knock a foe out, though this is rather precise since a foe will be aware of it.

Down Throw: Davy Jones' Locker

Kunkka lifts the foe up and then slams them into the ground for 12% damage, bouncing them off the ground and leaving them close enough to have decent but not amazing follow-ups, though this is definitely Kunkka's most powerful throw that doesn't use up the Tidebringer passive and unlike that throw it keeps the foe close enough to have them still be in melee range. A nice way to deal some close range damage without wasting Tidebringer's passive. The knockback hardly scales at all.

Final Smash: Ghost Ship


Kunkka's snagged the smash ball and calls upon the power of his Ultimate, Ghost Ship! This ship begins behind Kunkka, one Battlefield Platform behind him specifically, and is 1.5 Battlefield Platforms wide and 1.5 Ganondorfs tall, moving forward at Kunkka's dash speed until it has travelled 3 Battlefield Platforms, dealing 60% and knockback that KOs at 70% to any enemy in its path, while allies that are travelled over gain the "Kunkka's Rum" buff, dealing 33% more damage and knockback and going 33% faster on the ground and in the air for 13.3 seconds! A very strong Final Smash, but it is very telegraphed as Kunkka summoning the ship is not a cinematic and takes some time and it takes a moment for the Ghost Ship to crash forward, so it is a bit hard to time it and enemies can easily dodge the ship itself. Perhaps if they were marked before the Smash ball was grabbed...

Playstyle: Crashing Waves

Kunkka has a variety of fairly powerful KO options, but can have a poor time KOing due to the properties of each one: His Up Special is a potent KO option, but leaving him in helpless and the precise hitbox makes it a risky proposition, while his Forward Aerial requires intricate reading of the game state and properly either spacing the foe for a tipper or to combo out of the sourspot. Up Throw is a powerful KO throw, but he needs to be over setup to do so and thus is easy to telegraph. His Down Aerial is a powerful KO tool upon slamming the ground, but this is a slow move overall, while the falling Torrent requires much planning to be remotely effective. So, how does Kunkka do it?

He relies on his ability to control the battlefield, precision and patient damage racking. Kunkka might not normally be a particularly amazing damage racker, but properly using his Tidebringer passive ability allows him to spike up the opponent's damage or to amazingly zone out or in the foe with increased range and utilizing some of his sour/sweetspot abilities. By marking the opponent with X Marks The Spot, Kunkka can control the pace of the game by snapping the foe back as a defensive measure, setting up devastating strikes if the foe doesn't play around it right and can use Torrent's much delayed yet strong hitbox to either be a great damage dealer or as a way to corral the foe to where you want them, while utilizing precise strikes to take advantage of things like the placement of your Up Smash puddles and Down Smash chains, in addition to fully using the reposition of X Marks The Spot effectively.

Moves like your Jab provide a solid damaging ability with Tidebringer and moves like Down Tilt are excellent ways to control the foe, while moves like Forward TIlt and Forward Smash provide powerful offensive options to keep the foes on their toes, and a sudden Torrent springing can allow Kunkka to plunge down and force the opponent to reach to crashing towers of varying powers. Kunkka even has solid options like Dash Attack and Up Aerial near ledges to make recovering a pain, while moves like Up Tilt, Up Throw and Back Throw are excellent ways to get the opponent where you want and Side Special provides not only a strong alpha strike but the ability to place foes in prime close range and to close in without having to use your important Mark.

However, Kunkka has a rather strong issue with projectiles, as Kunkka lacks a true projectile of his own and it harms his precision to deal with annoying projectiles. In addition, Kunkka's required precision means opponents can put him into tough positions by moving into areas that limit what he can do and he requires using moves like Forward THrow, Down Tilt and the like to gain space and time for moves like Torrent as he lacks something like a laser to gain that from a distance. Finally, while a whole host of options opens up to Kunkka when he hits with X Marks The Spot, he must utilizie various close range means to get it, so opponents who can manage to outdo him with melee can force away one of his prime options against all opponents.
 

ChaosKiwi

Smash Apprentice
Joined
Feb 1, 2014
Messages
104
NNID
ChaosKiwi
Time for a set you all have been waiting for. A variation of a character, already in Smash, who was introduced in Melee. This particular character is known for appearing in a popular Mario Spinoff series that's been around since the 90's.

That's right, it's...


BABY BOWSER


You were perhaps expecting Dr. Mario?

That's right kids, it's Bowser as an infant. Villain of such games as Yoshi's Island, Yoshi's New Island, and Mario & Luigi: Partners in Time, the tiny tyrant has all of Bowser's abilities, but weaker. So, he has to fight differently than his fully grown counterpart, as you'll soon see.

STATS!

Size- 3
Weight- 4
Jumps- 6
Ground Speed- 5
Aerial Speed- 4
Falling Speed- 4


SPECIALS!

Neutral Special- Fire Breath!
Baby Bowser inhales, then fires a single, cute fireball straight forwards. He's still young, he hasn't gotten the hang of the fire breathing thing. This fireball will travel one point five Battlefield platforms before dissipating, in a straight line. The fireball deals 8% damage, and travels slightly faster than Baby Bowser's dash speed. Overall, a simple special, similar to Mario's fireball in an almost ironic way. Something poetic, about mortal foes being oddly similar at their core, or some nonsense.

Side Special- Bowser Hammer
Baby Bowser pulls out a Mario Bros. Style hammer, sized down for his small frame. Instead of being a super powerful item, as hammers usually are in smash, this is a simple side special. Baby Bowser swings down with the mallet, mustering all his strength to bring it from behind his back over his head.

The hammer travels in an arc, from behind BB to above him to in front of him. The hammer, normally, does 14% damage. However, if you hit somebody with it while it's still behind Baby Bowser, it'll instead deal 20%!

It's not just a hammer, however. Similar to Mario's Cape or the Homerun Bat, you can use the hammer to reflect projectile attacks! To do so, you have to have excellent timing, striking the projectile at just the precise moment necessary to send it flying back to its source.

Down Special- Baby Bowser Bomb
Baby Bowser jumps straight up into the air, does a cute little flip, then comes crashing down, creating shockwaves around his impact point. This move, along with being a useful recovery option, is a very good attack for getting into the middle of a scuffle between other fighters. The fall/slam to the ground Baby Bowser does can inflict 15% to unsuspecting enemies, while the shockwaves, though not doing damage, trip enemies who get caught by them. Use this to create an opening!

The shockwaves travel exactly half of a one Battlefield platform from Baby Bowser's point of impact before going away.

Up Special- Kamek!
Baby Bowser's guardian and caretaker, Kamek the Magikoopa, arrives on the scene! He teleports to behind Baby Bowser as the tyrant prince shouts for him, plopping the koopa kid in the backseat of his magic broom before flying up, at a 70 degree angel in whichever direction Baby Bowser was originally facing. They travel at breakneck speeds, clearing two Battlefield platforms of distance in an instant, before Kamen drops Baby Bowser off and warps away. Baby Bowser is then left in a helpless state.

You can't do much damage in this state, but the startup and ending animations both come with a lot of invincibility frames. This, combined with the high speed of the maneuver, makes this move excellent for escaping a sticky situation!


TILTS!

Jab-
Baby Bowser slashes forward with his meager baby claws, dealing a cute 2% to any enemies unlucky enough to invoke his terrible fury swipes.

Side Tilt-
Baby Bowser smirks, and turns around quickly, smashing forward with his pointy little shell. This attack does 10% damage, and rather high knockback for a tilt, capable of KOing at 180%. I guess Baby Bowser packs a punch!

Up Tilt-
Baby Bowser does a quick flip, using his body as a spinning Baby Bowser Bludgeoning Boomerang type thing, to deal 12 to anybody above him. Foes are knocked in the opposite direction they were hit from. That is to say, foes on his left are sent flying right, foes above him are sent down, etc. etc.

Down Tilt-
Getting down on his back, er, shell, Baby Bowser performs a totally rad breakdancing style spin attack, dealing 13% on either side of him and high knockback. However, his soft underbelly is exposed during this move's duration, meaning attacks from above cause 2% more damage than normal! (That is to say, a 10% attack will deal 12%)

Dash Attack-
Baby Bowser accidentally trips, like a cute little bugger, and rolls forwards, before landing on his feet like a champ. Because he totally meant to do that, gosh, get off his back. The rolling strike does 14% damage, and its increase in speed lets you get at faster opponents.


SMASHES!

Side Smash-
Baby Bowser puffs up his cheeks, then lets out a short range spew of flames from his mouth. The fire causes 24% at full charge, and that damage is, of course, fire damage. The longer the charge, the farther the flame travels/larger it is, so a full charge is often worth the risk of interruption. This move will usually KO an enemy at earlier percentages the closer to the bed

Up Smash-
Baby Bowser withdraws into his shell, and quickly spins upwards, similar to regular-sized Bowser's up special attack. He exits his shell midair, as to perfectly land on his little feet. The spin attack does 22%, and, if you hit a foe at the apex of the spin, you can KO them much easier, at as little as 120%, though the window of opportunity is small. Normally it KOs at 150%.

Down Smash-
Reeling back, Baby Bowser prepares to attack. The attack in question, is a quick forward swipe of his claws. However, he swipes a bit too fast! This causes him to trip by accident, and flip onto his face! The claw swipe does 23%, while the flip, as in his shell smacking around people behind him, does 22% and slightly more knockback. The swipe can KO at 145%, while the shell KOs at 140%.


AERIALS!

Neutral Aerial-
Baby Bowser straightens all of his limbs into a star formation, and does a midair cartwheel. His range on this move is only as far as he can stretch his cute like arms, and the attack does 10%. A good move if there's a foe right on top of you.

Up Aerial-
Baby Bowser does a cute little flip midair, moving himself slighting upwards and dealing 9% to foes. If he can manage to hit somebody with his shell during the flip, though, he will instead deal the enemy who is hit 12%. This move is good for getting a bit more recovery without going helpless.

Forward Aerial-
The young koopa prince spews a small fire stream from his mouth, the flame dealing 11% fire damage to all who stand in his way. This move can be performed from a short hop, and the fire stream travels one stage builder block.

Down Aerial-
Bowser turns so that his back is facing down. That is to say, his spiky shell. He puffs out a small bit of fire, propelling himself downwards at a faster than normal falling speed. His shell spikes can spike enemies like this, along with dealing them a neat 12% damage in the process. The small puff of fire doesn't have hitstun, but does deal 4%.

Back Aerial-
Baby Bowser does what can only be described as art. That is to say, he does a pirouette in the air, like some sort of beautiful Baby Bowser ballerina, while spitting flames, creating a ring of fire around his body. Like the rings of Saturn, but made of fire and around Baby Bowser instead of Saturn. This spin moves him backwards slightly, and deals 14% to enemies. However, it has a short range, so it's gonna be hard to hit with.


THROWS!

Grab-
A simple grab, Baby Bowser tries to grasp a foe in his claws.

Pummel-
Baby Bowser puffs fire in his foe's face for 3%.

Up Throw-
Baby Bowser throws his foe upwards, followed by a stream of weak flame. The flame causes the foe to cartoonishly boost into the air after a short delay, a period of time during which Baby Bowser can use other attacks. Perhaps follow this move up with an up tilt? Or get above them with Kamek, then hit them with an aerial?

The throw does 15%.

Down Throw-
Baby Bowser jumps on top of his foe and rolls around on them, the spikes in his shell causing them 15% before he kicks them away in the direction he was facing.

Back Throw-
Pulling out his trusty hammer, Baby Bowser swats his foe with it. This causes them to spin forward, taking 8% from the hit. Then, BB jumps to the other side of the spinning enemy and winds up, taking another swing at them with his hammer, dealing 8% and sending them flying backwards. This move can KO at 160%, making it his best throw for KOing.

Forward Throw- Baby Bowser ties his enemy to the tail end of Kamek's broom, which he stol- borrowed just for this occasion. He then drags the foe along the ground with it, travelling two battlefield platforms before the broom disappears, with the momentum causing the enemy to fly forward. This move does 16%, and it's good for KOing people near the edge of the screen.


FINAL SMASH!
BIG BABY BOWSER

Baby Bowser screams for Kamek, who flies over him. As he does, he cropdusts the young prince with magic, causing him to grow to Puff Up Jigglypuff size for 10 seconds! He loses his attacks in this form, but merely walking around can be enough to KO people!​
 

Katapultar

Smash Lord
Joined
Nov 24, 2008
Messages
1,251
Location
Australia
[collapse=Cap'n Marth]I had a hard time thinking of what to say about this set for some strange reason, hence why it didn't get a comment at my usual super speeds. But I can say this for certain: I absolutely love the Neutral Special and everything it encompasses. It's sort of like how I really loved G-Man's intangibility mechanic back in MYM12 (and still do), and something about tying the opponent in place feels right for the character despite the fact that he doesn't seem to have any character. The playstyle and what the character is trying to do are respectable to some degree, even if he's basically just a pirate version of Marth (but the watery hitbox is pretty cool), and it's nice that he has at some traps he can use to take advantage of his X-trap. If anything, some of the stuff in the set feels a bit forced and awkward because of the way the mechanic works. You're forced to use certain attacks that don't use the mechanic if you want to save it, and there are a few attacks that let you not use the mechanic but feel really forced and disjointed from the fact that you have to use it on some of your standard attacks. The Smashes are also strange in that they require you to have water if you want a trap but don't use it up, so if you do use up water for a strong attack you can't just set-up afterwards. There are some cool thing you can do with the water like with the F-air and a few of the standard attacks, but it's a one-time and you have to wait 5 seconds to do it later, leaving you a bit vanilla. I think the set is really restrained by the mechanic being passive: it forces the rest of the set to bend to its will and creates an inconsistent feel. It would probably have been a lot better as a Special, but such would be untrue to the character. At the moment, the set is sort of a very weak like for me, barely held up by its very fun Neutral Special and respectable gameplan.

Also, I think the F-air is way overpowered for what is Marth's F-air, being able to kill at 100% through the sweetspot. [/collapse]

[collapse=Bowser Jr. Without Car]Baby Bowser is... okay. The Specials are at Mii Fighter quality level, but the set surprisingly gets -better- as it goes on. Which is to say, I found the B-air and F-throw funny. I'd say he's better than Scorpion, and that he's a good offering for the MYM16 SM I will probably write when the contest comes to a close. [/collapse]
 

ChaosKiwi

Smash Apprentice
Joined
Feb 1, 2014
Messages
104
NNID
ChaosKiwi
Everybody! It's time, for a fan favorite character from The Legend of Zelda: Skyward Sword to be loose, once and for all. Ladies and gentlemen, please give a warm welcome to...


FI
"Master, there is a 96% chance of Smash Brothers occurring in the near future."

Fi is the embodiment of the spirit of the Master Sword, and eternal companion of the legendary hero. Don't let her role as a servant fool you, however, she can hold herself in a fight better than you'd expect. She is a sword, after all. It makes sense she'd pick up a thing or two.

~STATS~
Size~ 5
Weight~ 6
Jumps~ 7
Ground Speed~ 8
Aerial Speed~ 8
Falling Speed~ 7


~SPECIALS~
"Master, I'm afraid even you are my opponent."

~Neutral Special- Skyward Strike~
Fi floats in place, straightening her body before shifting, magically, into the form of the Goddess Sword. She points straight upwards, charging energy in her blade for as long as the input is held. Once the input is released, she flicks herself down and forward, expelling the charge in the form of a slash of energy, which travels two Battlefield platforms at full charge. The damage varies, from 10% at no charge to 18% at full charge. The slash is slightly taller than Fi.

While charging, Fi is vulnerable to projectiles. However, her blade will deal 7% on physical contact, except for the very tip of her blade, which is in fact capable of dealing 10% to people who land on it. Additionally, you can roll out of this, reverting to her normal form while storing the charge, similar to Samus.

~Down Special- Trial Gate~

An intricate, flowering design appears below Fi, accompanied by elegant singing and harp music. This pattern is glowing gold, and extends one SBB to the left and right, with Fi in the center. What does this do, you ask?

The pattern, called a Trial Gate, is a portal to the Silent Realm, where the hero is tested by the Goddesses. However, only the hero can enter the Silent Realm. Not even Fi is allowed withing. Thus, the Trial Gate acts as a barrier, forcefully repulsing anybody who is too close to Fi when she makes the portal appear. However, it does no damage, so it's more defensive than offensive. The force of the repulsion can KO at as low 160%, with it KOing quicker the closer an enemy is to Fi. The area of effect for this repulsion zone is everywhere on the ground within the trial gate, extending upwards in a perfect dome.

~Up Special- Spin Attack~
Fi starts spinning like a ballerina, before jettisoning herself upwards at high speed, like a dancing drill. She gets about as much height as Link does when she uses this attack, and deals 10%.

If used on the ground, she will instead spin in place, with no vertical movement. However, she can move horizontally while on using it on the ground, gracefully skating along the floor as she spins.

~Side Special- Dowsing Pierce~
"Enemies detected, Master."
Fi once more changes into her sword form, and points straight forward. If there is an enemy within range (that range being two Battlefield platforms in front of Fi, this range also extending one SBB up and down in that direction), Fi's blade will flash with light, before she homes in on the detected enemy with great speed, aiming to impale them. Should she hit her target, she'll deal 14%.

Fi is vulnerable to attacks from behind while trying to detect foes, and while homing in on a target she's stuck to a generally straight line, not able to make sharp turns (though wider turns are possible).

In the case of multiple foes being in range, Fi will automatically home in on the closest one. If the others are still in the original range after she hits the first target, she will switch to homing in on the next nearest.


~TILTS~
"I can hold my own in a fight, Master."

~Jab~
Fi kicks, plain and simple, yet somehow quite elegant. The kick can be followed up with a twist kick and then a high kick. The whole combo then loops back around to the original side kick. The first attack does 4%, then 5%, then 4%, and so on.

~Side Tilt~
Fi spins on her toes, delivering a spinning kick to anybody in front of her. This kick is accompanied by a gold glowing ring around Fi's grounded foot, and the kick itself deals 11% damage.

~Up Tilt~
Fi jumps up slightly, performing a bicycle kick to hit anybody above and slightly in front of and behind her. This kick deals 13% and has a fairly wide range of effect. If you're wondering why she has so many kick attacks, just look at her. No arms. What else is she to do?

~Down Tilt~
Fi does a quick flip, doing an upside down double spin kick. Imagine somebody kicking while spinning on their head, except floating so that their head doesn't touch the ground. That. This hits on both sides of her, but can be avoided by crouching, meaning it's best for hitting tall or airborne foes. The kicks do 12% damage to anybody who's caught in them.

~Dash Attack~
Fi glides forward, the sigil of the goddesses (that red symbol on the Hylian Shield, for those not in the know) appearing in front of her in the form of a golden light. This sigil deals damage to enemies and pushes them out of the way, plowing through foes with 12% damage. Instead of knocking foes forward, it actually knocks foes up and behind Fi!


~SMASHES~
"There is a 100% chance of you being shown no mercy."

~Side Smash~
Fi does a quick flip, turning into her sword form before thrusting herself forward, blade poised to stab, maim and impale anybody in front of her. At full charge her blade does 20% damage, and, similar to Marth, the tip of her blade does more damage and knockback. The tip deals 24%, and can KO at 140%. She can pass through multiple foes with this attack, making a veritable shish kabob of enemies.

~Up Smash~
Turning once more into the form of the Goddess Sword, Fi spins in a circle upwards, quickly ascending one Stage Builder Block's height into the air. This hits on all sides of Fi as it is, again, a spin move. The blade deals 20% while the tip deals 23%, at full charge. Good for dealing with opponents from multiple sides/above, and good for KOing, as the tip can knock foes off the stage at 160%.

~Down Smash~

Leaping straight up, Fi quickly turns into the Goddess Sword before stabbing herself into the ground, creating a shockwave of golden energy around her that sends foes flying straight up. The area of effect for the shockwave is one stage builder block on either side of Fi, and it deals between 16% and 23%.


~AERIALS~
"Air superiority will be my advantage."

~Neutral Air~
Fi spins midair, extending one leg behind her to kick foes. This hits on both sides, and deals 7% to anybody who is hit.

~Forward Air~
Repositioning herself to face down and forward at a 45 degree angle, Fi zooms in that direction at high speed, similar to her Dash Attack, with the Goddesses' symbol in front of her as she plows through foes. This deals 13% and doesn't stop until she cancels out of it with another attack or she hits the ground, though she can be hit out of it.

~Up Air~
Fi simply transforms into her sword form, stabbing straight upwards and traveling that direction just a bit. The blade's sides do 10% to people who hit them, and the tip does 14%, along with much higher knockback, able to KO at 160%.

~Down Air~
Similar to the above, Fi transforms into the Goddess Sword, this time stabbing herself straight down. It, again, does 10% on the blade, and 14% on the tip. The tip of the blade, this time, spikes foes downwards.

~Back Air~
Fi pirouettes mid-air, her leg sticking out to kick behind her. The reason for this is because pirouettes are awesome. The kick does 12% damage, and knocks foes downward every time instead of however they'd normally get sent by an attack from this angle.


~THROWS~

~Grab~

Fi stabs into the ground in her sword form, creating a golden version of the seal pictured above on the ground around where she stabbed. Anybody caught in this seal, on either side, is considered grabbed. If more than one foe is within this seal, both are considered grabbed. Unfortunately, the more foes who are grabbed at a given time, the easier it is for them to break free.

~Pummel~
Fi unsheathes her blade from the ground, and spins horizontally, slashing through the captured foe(s) for 4% per hit.

~Up Throw~
Fi turns into her normal form for a second, before a surge of rainbow energy throws the captured foe(s) into the air above her. They fall into a straight line directly above her head, as she shifts into the Goddess Blade form, kabobing the newly lined up enemies. She flies straight up before stopping short, the momentum keeping the foes flying up and leaving Fi in the air as she reverts to normal, allowing her to follow up this move with an aerial or two. The enemies who are higher up in the kabob are sent farther. Order is determined by current damage percentage, with tied percentages resulting in random order (whoever has the highest percent is at the top).

The total damage of this throw is 15%, and Fi travels one point five Battlefield platforms into the air over the course of it.

~Down Throw~
Fi stabs herself into the foe closest to her, impaling them on the ground and making them fall prone. Should there be a second or third foe grabbed, she will then stab into the, and slam the impaled foe(s) into the first one. The first takes 10%, then another 4% per enemy they are bludgeoned with, while the second/third enemies take 15% total. All are left prone.

~Forward Throw~
Fi jumps to behind her foes, and charges up a Skyward Strike, unleashing it on the unsuspecting captives. The ones closest to her are sent flying into the second one, meaning the farther foe takes more knockback while the closer one takes more damage. The closer foe takes 15%, the farther one takes 12%. The closer foe will fall helpless after hitting the second foe, while the second one can be KO'd at 150%.

~Back Throw~
Fi returns to normal, and appears on the side of the seal. She starts spinning, then kicking while doing so, creating a sort of kick tornado. Such is the awesome power of ballet. She picks her foes up in the kicknado, delievering 16% damage over 8 hits and flinging them straight up.


~FINAL SMASH~
~~TRUE MASTER SWORD~~


Fi is surrounded three Sacred Flames of the Goddesses, absorbing them into herself. She glows with energy, signifying a boost in power. During this time, all attacks do double the damage and double the knockback. Additionally, her Goddess Sword form becomes that of the True Master Sword, the iconic blade. This form lasts 10 seconds before she reverts to normal.


~PLAYSTYLE~
"Master, strategy is the key."

Fi is a very FFA or 1v3 focused character. Many of her moves have a wide area of effect, making her good going up against many foes at once. Additionally, her ability to grab three foes at the same time gives her a lot of options when enemies are ganging up on her.

Unfortunately, she excels quite a bit less in one on one confrontations, as many of her attacks are telegraphed and thus somewhat easily avoided if the confusion of a free for all isn't available to distract her enemies.


"Goodybye, Master. May we meet again in another life..."


Well there you have it kids, the only character from Skyward Sword worth making a set for. I hope you enjoyed it, I certainly di- What's... what's that? In the distance?


Last edited:

ChaosKiwi

Smash Apprentice
Joined
Feb 1, 2014
Messages
104
NNID
ChaosKiwi
By the goddesses... The hero of legend...!


GROOSE

Groose. What more is there to say than Groose? He's an icon, a hero, a legend. Like Link, he too hails from Skyloft, and was a student in the Knight Academy. He was something of an antagonist towards Link, a rival in school and a rival in vying for Zelda's affection. However, once he and Link came the land below the clouds, named Grooseland, and Link fought the Imprisoned, Groose changed his tune. Now, he and Link are friends, Groose doing what he can to support him.

That isn't to say Groose is to be trifled with, however.

GROOSTATISTICS


Size- 8
Weight- 8
Ground Speed- 7
Aerial Speed- 3
Fall Speed- 8
Jumps- 4


GROOSEARRIFIC SPECIALS


Neutral Special- Groose Grappler!
Groose leans forward and gives what can only be described as a bear hug, a two armed command grab. Normally, anybody hugged by the Groose can be described as the luckiest person alive. However, in Smash, it's lethal. Should he catch somebody in his clutches, he'll throw them down in front of him and deliver an elbow drop on the unlucky sucker. This drop does 23%, and comes with some sweet super armor. There's severe ending lag if he misses the initial grab, but if he lands it, it's one of his best KO moves, finishing off foes at 140%

Up Special- Groosewing Bomber!

Groose's signature Black Loftwing appears, carrying his rider up three Battlefield Platforms before dropping him, the horizontal angle controlled by the player. While falling, Groose spreads his body, making his boring fall into a radical body slam. Should he land on somebody, they take 15%.


Should he hit somebody who is also in the air, however, he'll latch on to them, and take them down with him! The foe, trapped under Groose at impact, breaks his fall, allowing him to have no ending/landing lag while themselves taking a boosted 20%. However, Groose falls straight down, so it's easy to avoid if they're paying a lot of attention.

Side Special- Bomb Bowling!

Groose reels his arm back, plucking a bomb flower from the ground behind him. He pulls it in front of himself, similar to how a bowler holds their ball, then tiptoes forwards for as long as the player holds the button. When the button is released, he was roll the bomb forward, it travelling double the distance Groose tiptoed. The bomb's explosion cannot damage Groose, because he's incredible. The explosion's damage to other people, however, is 17%, with KO force at 160%.

The bombs roll slightly slower than Groose's running speed, meanign it's possible to get past them and get foes into them via grabs or what have you.

Down Special- Groose Charge!
Groose dashes forward, using his broad shoulder as a battering ram, similar to that move that isn't in Wario's moveset for some reason. He'll travel two Battlefield platforms before skidding to a stop, but anybody caught by this move before that gets grabbed by the Groose-Man, before being hammer thrown in the direction opposite the one that Groose was initially charging in. The shock of the attack causes the enemy to take 13% emotional damage (and also real damage). The throw can KO at 170%, and initial charge can be used for quick horizontal recover.

While charging, Groose's front has super armor, but he's still vulnerable from all other angles, so watch out! You don't want him to get hurt.


GROOSETACULAR TILTS


Jab
Groose delivers a swift punch of his mighty fist, dealing an outstanding 6% to anybody he hits. Somewhat slow for a Jab, but the high damage makes up for it.

Side Tilt
Groose clasps his hands overhead before bringing them down in front of himself, in arc. This deals 12%, and knocks foes downwards. It's pretty good for edgeguarding.

Up Tilt
The Groose Man pumps his fist in the air above him, as if celebrating his incredibleness. This is a three hit move, which each hit doing 4% damage, and slighlty more knockback than the hit that preceeded it.

Down Tilt
Groose shoves a bomb into the ground directly in front of him. There's a slight delay, before it explodes, kicking up dirt and, if timed correctly, enemies. The explosion does 14%, and blasts foes straight upwards into the air, leaving them open for, perhaps, the Groosewing Bomber! technique?

Dash Attack
Groose trips. On purpose, I assure you. As he performs this majestic somersault, he rolls through enemies like Sonic, except cooler. This deals 12% over multiple hits, and knocks foes into the air slightly behind Groose.


GROOSEALICIOUS SMASHES


Side Smash
Groose reels back, as if preparing for some incredible attack- And an incredible attack it is! Groose imitates Donkey Kong, delivering a strong, downward arced head-smash to anybody in front of him. This attack is one of the slowest smashes there is, comparable to the Falcon Punch in terms of startup, but it deals 19%-24%. That not enough to convince you? How about this: It KO's at 110%! However, there is considerabe ending lag if Groose misses.

Up Smash
Bomb Bowling isn't the only use Groose has for his near endless bomb supply, no sir. He, for this move, throws out a short-fused bomb above his head, before crouching and plugging his ears. The Bomb travels up, about half a stage builder block, before exploding, dealing 18%-23% to anybody caught in the blast and KOing them at 140%. If the bomb hits somebody before reaching it's apex, it will blow up prematurely, doing the same amount of damage but slightly more knockback, KOing at 135% instead!

Down Smash
There's a wrestler in all of us, and Groose lets that wrestler loose! He holds out his arms, and performs a double lariat spin attack! His bulky arms deal 25% over multiple hits at full charge, and 17% when uncharged, but have trouble reaching foes with lower centers of gravity. Damn you, short people, for being able to avoid his Groose-iness.

The spinning clothesline style move can KO at 150%, and, should you hold a direction (left or right) while Groose spins, he will inch in that direction, slightly extending his range! What a smart strategy, Groose!


GROOSE-O-MATIC AERIALS


Neutral Aerial
Groose punches the air in front of him multiple times. Though it certainly looks as if he's flailing his arms like a ninny, it's clearly because his martial arts skills are so incredible he can make the very air feel his wrath. What a guy!

Over 4 hits, this move deals 12%. High knockback, but not really a KO move.

Forward Aerial
Groose holds out his arm and leans forward, performing a flying elbow drop on unsuspecting enemies below and in front of him. Normally this move deals 13% and regular knockback, but should you get him by the very tip of his elbow, you will be spiked to the ground below! Stay out of Groose's sky, you peons!

Down Aerial

Groose spreads his legs and redistributes his weight, going into a leg drop move. This causes him to fall faster, and deal damage and knockback to foes depending on where he hits them.

Hitting enemies with his feet alone with cause 12% and horizontal knockback in the direction he's facing. Hitting them with his legs will deal 10% and low downward knockback. His glorious tush will deal 14%, and high downward knockback.

Up Aerial
Groose points upwards, as if to say "Aha! I am Groose, and I am better than you!" because, hey, he kind of is. If he hits somebody with this pointing, he'll grab them by the foot (or nearest appendage) and fling 'em down, dealing 10%. Now, this may sound like a command grab, but it's more of a standard aerial with a unique animation, so don't worry.

Back Aerial
As you know, Groose is very creative with bombs. Thus, he pulls one out and sits on it, leaning forward as the blast propels hims one stage builder block ahead. The blast is it's own hitbox, while Groose becomes a living projectile, and also a hitbox. The explosion does 14% and has a very short range, but high knockback. The Groose Missile, as his fans (me) lovingly call him in this state, deals 12% and low knockback, but hitting somebody with it stuns them enough to be caught in one of Groose's command grab specials (Groose Grapple or Groose Charge, specifically).


GROOSE GRAB GAME


Grab
Groose faces the screen and holds both arms out, hoping to grab one foe in each hand! That's right, he can grab two foes at once! In situations where he has two foes captured, the one in his right hand is considered the "first" one, while the left hand is considered the "second".

Pummel
Groose, should he have two foes, bangs their heads together, dealing 5% to each. If it's only one foe, he'll bear hug them as tight as he can, dealing 3% per squeeze.

Down Throw
Groose throws his captives on the ground, one on each side of him. Both are made prone, and both take 14% from the impact. Tech chase those suckers!

Forward Throw
Groose throws one foe in front of himself lightly, but before they hits the ground, Groose beans them with the other one, causing the first foe to fly far as the second one falls to the ground not far from Groose. Both take 14%.

What if Groose is only grabbing one foe, though? Well, he'll punch them in the face as hard as he can, causing them to go flying but only take 10%.

Back Throw
Groose sets up the first foe behind him, patting them on the head. He then grabs the other one by the legs (or whatever) and uses them as a baseball bat, smashing away the first for 13%. Then he hammer throws the second one so hard their speed overtakes the first's, causing them to collide, making the second foe take 14%. They then fly off at opposite 45 degree angles.

Should there be only one foe held, Groose places a lit bomb in their hands and then backflips away, landing on his face (on purpose, duh). The bomb explodes, dealing the enemy 11% and causing them to fly on a perfect horizontal trajectory.

Up Throw
Groose throws his first captive into the air above him, lightly, while throwing the other to the ground below him. He then leaps straight up, past the thrown enemy, and palm strikes them in their midsection. There's a slight delay, before they are sent plummeting down onto the second foe. The first one takes 14%, while the second takes 15%. The first bounces back up, past Groose, while the second falls prone. This leaves Groose with a difficult choice: Go after the prone enemy, or chase the flying foe?


GROOSEATOMIC FINAL SMASH

GROOSENATOR

Groose whistles with his fingers, and jumps offscreen. Quickly, a track appears in the background, and onto it rolls Groose! With his trusty catapult, the Groosenator! Similar to Snake or Zero Suit Samus's final smash, the player has to aim the bombs the Groosenator launches, by adjusting a blue arc, which shows where the bombs will land. Each bomb does 12%, and Groose can launch ten before the Final Smash ends.


GROOSESTYLE


Groose, if you couldn't tell, is a very up close and personal fighter. His variety of grabs, short range traps and powerful melee attacks make him excellent for dealing with nearly anybody in straight up one on one combat. He can even handle two enemies at once, thanks to things like his dual grab game and down smash. Three foes, however, is where he draws the line. In such a situation where three foes are ganging up on the Groose Man, it's best to make a tactical retreat and pick them off one by one. Or, two by two.​
 
Last edited:

ChaosKiwi

Smash Apprentice
Joined
Feb 1, 2014
Messages
104
NNID
ChaosKiwi
What's a hero, without his tools?

RAVIO
"Hello, Mr. Hero! I have many wares available for rent. Would you like a demonstration?"

Ravio is a character introduced in A Link Between Worlds, a traveling merchant with mysterious motives who ends up taking up residence and taking up shop in Link's house (whether the hero likes it or not). There, he sells and rents out various items Link can use over the course of his journey. Accompanied by his strange pet(?) bird(?), Sheerow, Ravio is a constant during Link's journey to stop the evil Yuga and save Zelda and the Sages from the evil sorcerer. However, Link and Ravio have more in common than his cowardly, business savvy persona lets on...


STATS

Size- 6
Weight- 5
Jumps- 5
Ground Speed- 4
Aerial Speed- 6
Fall Speed- 5


Ravio fights using the various items he sells at his shop, meaning that, though he has the same arsenal as Link (minus the Master Sword and Hylian Shield, of course), he has a much broader range of weapons to choose from than the Hero.


SPECIALS

Neutral Special- Fire Rod

Ravia slides out of his sleeve the Fire Rod, a red scepter with a red orb on the end. He grabs it tight and swings it forward, the rod's magic creating a vortex of flame in front of Ravio that swirls and travels two stage builder blocks before dissipating. The flame does 14% fire damage, but travels somewhat slowly (as in, Ravio can outrun it).

This move can, should an enemy land in the vortex, or fall into it, they get caught, and are dealt the initial 15% plus an added 6% dealt over three hits. So, with good timing, this move becomes quite a bit more powerful!

Side Special- Ice Rod

Ravio whips out another scepter, this one blue with a matching, icy diamond on the end of it. He holds the rod out, and a shadow appears in front of him. This shadow moves farther away from Ravio the longer the input is held. and can extend up to one and a half Battlefield platforms. When the input is released, a chunk of ice forms about one and a half Ravio heights above the shadow. That may not be a real unit of measure, but it's Ravio's Ice Rod so it's his rules. The ice chunk then falls to ground, shattering on impact.

The ice can deal damage the second it forms, even before it falls, so it can be used to strike foes who are in the air as well. Additionally, you can extend the shadow even off platforms, making this move very good for edgeguarding. The ice chunk deals 12% when it hits somebody, and if actually forms on somebody, it will freeze them solid as well!

Down Special- Sand Rod

Ravio now holds out a another rod (How many does he have?), with a really neat... thing, on the end, whatever that could be described as. Once more he charges the rod's magic for as long as the input is held, and when the input is released he slams the rod down. This creates a pillar of sand in front of him, forming almost instantaneously. This pillar is two stage builder blocks tall, and 2/3 of one wide. It deals 8% if it hits somebody while it's forming, but very high vertical knockback, knocking somebody straight up with the ability to KO at 160%.

What does charging this move do, you ask? Well, I'm glad you did! There are three charge levels. Uncharged, the attack goes just as described above. After a small bit of charging, the attack onfolds as was said, but then a second pillar forms once the first is created, right next to the original! And at full charge, a third one appears in the same manner! Each has the same properties. By this I mean that they all appear in a line, touching eachother side by side. Essentially, they double and then triple the width of the first pillar.

The top of the pillars actually acts as a solid platform that Ravio or other fighters can stand on, while their bodies act as walls., and the pillars each last 5 seconds before dissolving, dissolving in the order they were created. Ravio can only have one set of pillars out at a time, and attempting to create more while one set is out will do nothing. The pillars only hurt/knockback when they are initially forming.

This move will not work if there is no ground in front of Ravio, but will still work if he's in the air and there's ground directly below him/in front of him but also below him/you know what I mean.

Up Special- Tornado Rod

Sheerow hands Ravio his Tornado Rod, a brown and green thing with a pair of thin leaves on the top. He holds the rod above his head with two hands, and the leaves spin like propellers, creating a tornado around Ravio that lifts him up two Battlefield platforms before making him quickly drop down again.

The tornado has a windbox on the outside of it, pushing foes away without doing damage. If foes are trapped inside, however, they are pulled up with him in a helpless state. The only way to have them be pulled up, though, is if they're pretty much right next to him. Since they are pulled up to the same height as Ravio, it'll be easy to hit them with an Ice Rod, Fire Rod, or aerial attack right afterwards.


Tilts

Jab
Ravio throws out a pointing gesture, aimed at anybody in front of him. But this isn't the attack, no sir. You see, Sheerow is perched on his finger, and he pecks the air in front of the duo, attempting to poke the enemy for 4% damage. Sheerow's such a good buddy.

Side Tilt
Ravio turns quickly, smacking his enemies with a large white bag, marked with a green rupee symbol.The heavy sack of money does quite a bit of knockback for a tilt, while simultaneously causing enemies to take 12% if they are caught in its way.

Up Tilt
Ravio points straight up, and Sheerow flies in that direction, striking any enemies directly above them before returning to his perch on Ravio's shoulder. The bird(?)'s strike deals 5%, and is good for juggling, as repeated inputs will get rid of ending lag, because Sheerow will just stay in the air. Essentially, this up tilt acts like a jab, able to be used repeatedly in quick succession by pressing the input over an over.

Down Tilt

Ravio makes appear, seemingly from nowhere, a large orange mallet. He brings the heavy thing down in front of himself, dealing 13%. If an enemy is hit while the hammer is still being brought down, they will bounce off the ground (or otherwise be downward, should there be no ground beneath them) and fly straight up, as opposed to the usual mostly horizontal knockback.

Dash Attack
Once more utilizing his mighty hammer, Ravio holds it in front of himself and spins, not losing speed. The spinning hammer strike deals 13%, and hits on both sides of Ravio, dealing high horizontal knockback to anybody who gets hit by the attack.


SMASHES

Ravio's Smash attacks are, generally speaking, not the most powerful in terms of damage output. However, they have ridiculous range and, with proper timing, are the most dangerous KO moves he has at his disposal.

Side Smash

Ravio pulls out an average yellow boomerang, and throws it forward with all his might. It will travel one Battlefield platform before returning. However, Ravio is not obligated to catch it. The instant it leaves his hand, Ravio is free to move again, allowing him to perhaps jump over the boomerang, or throw another enemy into into it. Should the boomerang not hit a foe or successfully return to Ravio, it will keep traveling back in the direction it came from, not stopping until it hits a wall, other projectile, or enemy, or until it goes off screen.

On the initial throw at full charge, the boomerang does 22% and knocks foes towards Ravio, and can KO at 170%. Once it's on the way back, however, it deals 20%, but does more knockback, KOing at 150%. Ravio cannot have more than one boomerang out from this attack at once. Uncharged, the damge done is 17% and 15%, respectively.

Up Smash

Ravio pulls out a bow, and then an arrow from his mask (Is that where he stores these items?). He takes aim, pointing both straight up before firing. The arrow travels two and a half Stage Builder Blocks straight into the air, before reaching the apex of its arc and traveling back down to the earth. On its way up, the arrow deals 16%-21% depending on charge and, unfortunately, low knockback for a Smash, enemies getting KO'd at 175%.

On the trip back down, however, the arrow is downright deadly. It deals 19%-24%, and spikes foes who are airborne. If the enemy is on the ground, they take the same damage and are instead bounced upwards, getting KO'd at 150%. Good timing/using it next to a pit is very, very helpful, as the arrow travels on a slight angle, meaning it will come down a little in front of Ravio instead of directly on top of him. Thus, the move can be used to edgeguard. Like the Side Smash, Ravio can move around once he looses the arrow.

The arrow itself has a small hitbox, as only its point deals any damage, and if it hits Ravio instead of a foe he will flinch and take 10%. So watch out!

Down Smash

This time taking an item from his scarf, of all things, Ravio reveals a blue, cartoony bomb in his grasp. He puts it on the ground and watches it while the Smash is being charged, then lights the fuse on release. The longer the charge, the larger the blast. The bomb, like his other Smashes, works best as a delay. It won't go off at first, instead waiting an amount of time determined by how charged it is (less charge, less wait) before exploding, dealing a maximum of 25% and KOing at 140%. The minimum, on the other hand, is 20%.

Like his other Smash attacks, Ravio can move once putting down the bomb. And he'll need it, too. He only has a short time to get foes in range, or get the bomb in range of them. Perhaps he'll use his Tornado Rod to carry the bomb into the air where it can hit a flying foe, or use the Sand Rod to raise it in a pillar to reach somebody on high ground. He, and his foes for that matter, cannot pick up the bomb directly, however. There is a way for Ravio to move it, outside his specials, though. This will be detailed later.

Ravio is hurt by the bomb, as well, but not nearly as much as his enemies. He takes 12% if caught in the blast, but almost no knockback, instead getting a comical singed mask.


AERIALS

Neutral Aerial
Ravio allows Sheerow to circle around him, dealing 10% on both sides. This is disjointed, hitting a small distance away from Ravio, giving it good range. However, there's a blind spot in that Sheerow's orbit is wide enough to miss and enemy who's more or less right next to Ravio.

Down Aerial
Ravio holds out his hammer, the weight of it causing him to do a midair flip. Thus, he attacks all sides, dealing 13% and spiking foes who are hit when the hammer initially comes out. Timing is key!

Forward Aerial
Ravio fires an arrow from his bow, which travels one SBB before arcing down towards the ground. Like his up smash, the arrow deals different amounts damage, dealing 12% and low knockback if the arrow is touched at the start, but then dealing 14% and spiking after arcing downwards.

Back Aerial
Ravio turns around, releasing a handful of rupees in the faces of the enemies who would dare try to sneak up on him, let alone in midair! The rupees are of all different colors, but that's mainly aesthetic. The flurry of currency deals 10% and has remarkably high hitstun. Perhaps its the shock of suddenly being much, much richer? Regardless, this hitstun leaves the enemy more open to followups, such as the Fire Rod, or what have you.

Up Aerial
The salesman throws a bomb straight up. Oh no! But don't worry, kids, it's just a dud. A distraction! The bomb acts as a blunt object more than an explosive, traveling up and then back down into Ravio's hand. It travels one SBB total. On the way up, it does 10% and low knockback, but on the way down it meteor smashes foes and deals 13%. It all takes place in less than a second though, so your window is small!


GRAB GAME

Grab
Ravio does nothing, instead allowing Sheerow to do the work. The little bird(?) flies one and a half Stage Builder Blocks forward, and if there is an enemy in his path he will latch on to them and drag them to Ravio, who chuckles at their misfortune.

Remember when I said there was another way to move his bombs? This is it! If you use the grab and Sheerow latches on to the bomb, you have two options. Depending on which direction you flick the stick (left or right) after Sheerow picks it up, Sheerow will fling the bomb in that direction!

Pummel
Sheerow pecks the enemy he's holding, dealing 3%.

Forward Throw
Ravio whistles, signalling Sheerow to do what they practiced. The bird(?) obliges, and drags the captive across the ground, dealing them 14% over multiple hits, rupees falling out of their body (where were they hiding those, I wonder)? Once Sheerow has dragged them a certain distance, specifically two and a half Battlefield Platforms, he will chuck them into the air at a 45 degree upward angle, sending them flying.

Down Throw

Ravio has Sheerow carry the foe high, high into the air, before Ravio fires a hookshot at them, latching onto some part of their body. Sheerow releases his grasp, and Ravio tugs down, slamming the foe into the ground. If used next to and facing a pit or other drop off, the hookshot will release once it's level with Ravio, but the foe's momentum will carry over, effectively spiking them. This throw deals 13%.

Back Throw
Sheerow notices Ravio raising his hammer, and thus drags the foe behind him. As he raises the hammer above his head, the weight is too much for him, causing Ravio to fall back and hit the enemy with the hammer anyway! Can't believe Sheerow saw that coming! The hammer strike deals 14% and causes the enemy to fall prone, and open to attack.

Up Throw
Ravio whips out his Tornado Rod and a bomb, creating a vortex around the captive that lifts them into the air. At the same time, he lights the bomb's fuse and releases it into the tornado, where it explodes and sends the enemy flying in a completely random direction. This does 16% and high knockback, but the unpredictability makes it hard to follow up with other attacks.

FINAL SMASH
Mother Maiamai


Ravio throws his arms into the air, as an ominous chorus chants "Maiamai" in deep voices. Suddenly, an octopus-like creature emerges behind Ravio, her smaller children circling them. She then upgrades all of Ravio's weapons to their Nice forms, giving them 1.5x as much knockback and damaging powers, signified by them all changing appearances for the Final Smash's duration. This applies to all his attacks, even ones that don't use his items.​
 
Last edited:

dimensionsword64

Smash Champion
Joined
Jan 23, 2014
Messages
2,495
3DS FC
3609-1605-6649
Oh darn, completely forgot about this thread. In August, I started a Zant MYM. I'll try to finish it and post it in this thread.
 

JOE!

Smash Hero
Joined
Oct 5, 2008
Messages
8,075
Location
Dedham, MA
Fi
Here we have a refreshingly "grounded" set that still manages to be creative in both character and function.

The specials fit fi like a sheath, with the trademark skyward strike, an interesting pirroutte reminiscent of the mach tornado, and two moves I feel you under sell. Dowsing Strike is a mix of Shield Breaker and Homing Attack which mixed with her great spacing maneuvers makes for a deadly "bubble" around her that she can use as combo space. Making sure foes are in said bubble is the Trial Gate which feels criminally underdeveloped. You have a unique area denial move that simply stops folks from moving through it, but I assume anything else could move past. This highlights her dancing, spacing playstyle even more as she can force foes to stick around that "bubble" I mentioned. A bit more details into how it works would have been nice.

Aside from that, her ability to shrink into a skinny sword form is certainly interesting, as is her grab game. I love the way the grab works as more a "net" than a tether or such to add to its range, able to catch multiple opponents. However, the mirrored skyward strike throw takes a little away from the normal one in her arsenal imo.

Overall a very enjoyable read that brings out Fi's character in a vet fitting fashion. The only complaint would be to look into the %s your smashes are dealing. Not even ganon tosses out 25% per smash uncharged!
 

ChaosKiwi

Smash Apprentice
Joined
Feb 1, 2014
Messages
104
NNID
ChaosKiwi
Thanks for the feedback Joe! I'm glad you liked her, I'm particularly proud of her myself. You're right, yeah, when you say I should have gone into more detail on the various uses of/combos made available by the Dowsing Strike and Trial Gate. When I go back and edit my sets later on in the contest, I'll definitely elaborate more!

However, I'd like to point out that in my sets, the %s I put for Smash attacks are alway when they're at their max charge. Not uncharged.
 

Ffamran

The Smooth Devil Mod
Joined
Aug 25, 2014
Messages
14,629
Okay, this is awesome and Sly Cooper characters? Hell yes. I'd like to do one, but there's so much detail which leads to a request: Can people edit their posts to have spoilers and label them like Specials and under it is the spoiler for it since there's these huge walls of text.

Anyway I'm torn between doing a Muramasa: The Demon Blade character - probably Momohime - or The War Mage from Orcs Must Die! since I'm almost done with the game and I fell in love with the game since I watched a LP on it. The game's hilariously fun! Momohime would be an awesomely stylized and have beautiful move set, but The War Mage would be the quintessential trapper character. Oh, and I'd like to do a joke character for the hell of it; a character so bad that you can't help, but use them to laugh and enjoy.
 
Last edited:

FrozenRoy

Smash Lord
Joined
Apr 26, 2007
Messages
1,260
Location
Las Vegas, Nevada
Switch FC
SW-1325-2408-7513
Okay, this is awesome and Sly Cooper characters? Hell yes. I'd like to do one, but there's so much detail which leads to a request: Can people edit their posts to have spoilers and label them like Specials and under it is the spoiler for it since there's these huge walls of text.
Probably not. While some people use spoiler tags to section off parts that might be long, it isn't something a lot of people like, for a variety of reasons: Mass spoiler tags to be a bit ugly to look at and read, XenForo has a tendancy to break spoiler tags, especially if edited, they can tend to mess with organization and also pinch text, they don't really woek well with image sets that some people make and since movesets are the core of the contest most people don't mind them having a lot of text compared to other stuff in the thread.

I look forward to your setmaking, at least.
 

JOE!

Smash Hero
Joined
Oct 5, 2008
Messages
8,075
Location
Dedham, MA
Groose
The writing is to the point and hilarious here. The side B especially slayed me with the image of Groose tiptoeing ala Fred Flintstone with the bomb. The photoshopped pictures were fun as well. Many of the same compliments should be said for Groose as I mentioned with Fi. The characterization is great, and the dual grab is a nice touch that still managed to be different from Fi's wide grab. The useage of the Bomb Flowers here and there was a nice touch of characterization along with his "Bully" grapple style.

However, he has a few problems, mainly just the Uair and Neutral B. The Uair while not as bad, is just sort of a weird move in how it's a command grab yet not. The Nspec however is a different case in that I feel it really has no place in the set. For example, on the ground you have a grab that hits on both sides of you to cover "foes going by you" for your grapple strings. In the air, you have Down B which will rush your forward as well as immediately grba at point blank going by the description. And for a suicide (which I think this does?) he has the Up B slam down. Aside from a KO move, what is the purpose of this grapple? He already has strong finishers throughout the set, so its not like it is super needed for him, and he would tech chase better with his normal gab and down B (or even Up B) anyways.

Overall, another great set by you.

Ravio
This guys gives me Robin vibes in a good way. The usage of all the items is done very cleverly, and you even find efficient use of his little bird friend thingy. Pretty much echoing my comments of the other two Zelda sets, the characterization is superb (The Specials and throws I especially liked), but there are some things that are sort of missing from the move descriptions that leave me wanting more (as well as the whole Smash attack thing... at least list both the uncharged and charged %'s to avoid confusion?).

In essence, here and there some moves are just missing something. The Sand Rod for example isn't really clear if it is a wall or not. Going by the picture it seems to be, but then you say it acts as a platform as to imply you could go beneath it? Also, while u can have 1 "area" of them at a time, can you have 3 different pillars spread out among the stage? The Dsmash Bomb also states that there is a way to move it "later in the set", yet that is never mentioned again, just a little something that bugged me. The Fair also felt a little OP if still cool when combined with a delayed Usmash. Near an edge you could have 2 arrows (or more depending on Fair's lag and such) that fall and make a wall of spike-tacular death (not to mention the Ice rod) that makes Ravio incredibly scary at edgeguarding. Luckily that seems to be balanced out by his rather crappy recovery to make it sort of a "he can taste his own medicine" kind of deal, but still. Actually, between the Fire Rob making a moving wall of fire to cover edge jumps, the sand rod to make pillars at the edge to limit options, and the ice rod making a falling projectile and arrows, he has quit the cool edge defense going on that you didn't really mention! Well, there is also no playstyle section, so yeah...

Overall, Ravio rounds out this great set of three Zelda sets that combine a "grounded" smash feel while still being creative and very true to character. Aside from a few hiccups here and there, well done man.
 

Ffamran

The Smooth Devil Mod
Joined
Aug 25, 2014
Messages
14,629
Probably not. While some people use spoiler tags to section off parts that might be long, it isn't something a lot of people like, for a variety of reasons: Mass spoiler tags to be a bit ugly to look at and read, XenForo has a tendancy to break spoiler tags, especially if edited, they can tend to mess with organization and also pinch text, they don't really woek well with image sets that some people make and since movesets are the core of the contest most people don't mind them having a lot of text compared to other stuff in the thread.

I look forward to your setmaking, at least.
Yeah, but sometimes people want to skim a post. Another thing would be making concise details. Hmm, I'm going to try to make a quick one on The War Mage. I'm not good with damage percentages, so it's going to be weird.

Here's what the oaf looks like. He is a really, really dull and dim-witted character. I'm not kidding, go play the games.


The War Mage
"Traps are just so cool!"

Lore

He's the best orc slayer from The Order, but also the dumbest or bravest of them all. Tenacious isn't enough to describe the man nor is eloquent, intelligent, bright... you get the idea.

Attributes

He'd be like Snake from Brawl, not that slow, but not that fast. Heavy and tall, but mobile enough that he won't end up like Brawl Ike or pre-SSB4 Bowser. Also, like Snake, Duck Hunt, and other similar characters, this guy will control the battlefield if you're not careful. He's stupid, but he's dangerous.

Normals

Jab
Repetitive swings of his Bladestaff similar to Marth's, Roy's, and Lucina's neutral attacks. Covers his sides, since he swaps sides per swing. 2% backswing; 3% front swing.

Up
Blunderbuss. Shoots up quickly and twirls to holster at the end - ending lag. As a primitive shotgun, it the shot spreads out. At point blank, it does a lot of damage, but its damage drops severely the further away it's used. Kill move at point blank, otherwise a good anti-air move since it's quick, safe, and covers well. 1% far away; 11% point blank.

Down
Bladestaff shockwave. Only covers his front, but can act as a pseudo-ranged attack. Goes about a character and a half and has a chance to trip. Good knockback, but low damage. 4%?

Side
Pokes with the stabby end of his Bladestaff. Lateral range, can be angled, and pushes; if at point blank, then enemy is moved to the end of his Bladestaff. Not a kill move; more of a spacer or interrupter. 4% for blade end; 2% sour-spot - the staff part of the Bladestaff.
Aerials

Neutral
Ice Amulet explosion. Not really an explosion where it launches people, but he basically covers around himself with an ice blast. Sweet-spot is the inner explosion; sour-spot is the outside of it where it just grazes. Can freeze and interrupts easily. 7%? sweet-spot; 2% sour-spot.
Front
Lightning Ring. Shoots a ball of electricity that stuns and interrupts along with having decent knockback. Will kill at higher percentages. Hits 3 times; 3% for the first 2 and 5% for the last hit so, 11% total. Expect to be annoyed.

Back
Ice Amulet. Fires 5 ice shards in an vertical arc behind him while turning. Has range, but it spreads so it covers but won't do a lot of damage far away and smaller opponents might not even be hit with all of them. 3% per shard; 15% total.

Up
Alchemist Satchel. Throws a glass bomb of acid up. High damage and splashes, but won't kill no matter what. 13%?

Down
Flame Bracers. Fires a fireball downwards that splashes if it hits the ground. At the beginning when it's being fired, it can spike, but it's fast so you need to time it. So, sort of like Link's Dair's spiking mechanic. If used too close to the ground, then ending lag that will lead to punishment. 10%; 3% for the splash wave.

Grab
Pummel
Liver shots; as in he punches your liver. 3%.
Up
Steam Trap. It steams people up. 5%?
Down
Wind Belt dunk. Basically, he levitates his opponent and throws them down. 5%.

Front
Push Trap. Spawns a trap that launches someone forward. 4%?

Back
Wind Belt push. No damage, but pushes his opponent far away.

Smashes

Up
Brimstone. Places a trap in front of him that well, burning hot coal. Launches enemies easily at high percentages. Low damage, good knockback. 7% uncharged; 16% charged.

Down
Pounder. Crushes his opponent and grounds them. High damage, has ending lag, only covers his front, and no knockback since it grounds people. It will spike people since it's spawned above. So, edgeguarding? 15% uncharged; 26% charged.

Side
Blunderbuss grenade. The War Mage shoots out a magical grenade that can freeze. Explodes on contact, but if it doesn't hit, it'll stay active until someone or something hits it. Arcs, has decent range, the grenade will roll, but there's lag from the recoil. 9% uncharged; 18% charged.

Specials

Neutral
Crossbow. The first shot always goes straight, but spamming causes it shoot to in random directions from recoil. Slightly stuns like Falco's Blaster, shoots slower than Fox's, but faster than Falco's. It also, does more damage to compensate for a lack of accuracy when abused. 4% or 5%? Holding, however, launches a slower bolt that stuns like an electric attack. Can't stock, but deals more damage. 8% or 9%?

Up
Spring Trap. Launches The War Mage at a 60 degree angle. In the air, it drops and hits whoever is below. On the ground, it resets and if someone steps on it, then they get launched at a 45 degree angle. No helpless animation. So, it's Sonic's Spring Jump except angled instead of straight up and has a larger hit box. 5% when it drops, otherwise, no damage.

Down
Boom Barrel. Sort of like Snake's C4 and Duck Hunt's Can. So, he drops a smallish barrel that can be picked up, launched by being attacked, or just explodes when enough damage is done. Obviously, fire moves will set it off, otherwise, it just stays there being all barrel-like. Has fast deploy, is affected by gravity, will roll, and will damage The War Mage if not careful - in OMD, it doesn't, but for balancing, it will damage The War Mage. Instant kill at 100%.

Side
Dwarven Hammer. A whirlwind attack that functions like Link's Spin Attack but this only goes horizontal and hits once. In the air, it functions like Toon Link's Hurricane Slash custom. So, a decent recovery move, but has start-up and end-lag due to the weight of the hammer. 16%?


Final Smash

Orc Overrun
Kind of like Mario's Mario Finale or Ganondorf's Beast Ganon where it goes straight. What happens is that a bunch of orcs go on a stampede while our hero tries to shoot them down. So, the orcs push people towards The War Mage while he shoots them. It ends with a him ducking into the background as an ogre smashes through.
 

FrozenRoy

Smash Lord
Joined
Apr 26, 2007
Messages
1,260
Location
Las Vegas, Nevada
Switch FC
SW-1325-2408-7513
If skimming posts means movesets, it is generally considered a bad idea to skim movesets for a variety of reasons, including the fact that even with sets that lack a huge amount of detail you'll miss things and process the ideas behind the moveset less, plus some things don't really do well concise.
 

Katapultar

Smash Lord
Joined
Nov 24, 2008
Messages
1,251
Location
Australia
[collapse=Groosendorf]This set probably has your best writing style and is the most amusing to read...period. And that grab game blows Duck Hunt Dog out of the grass. It's a gem, and not just because the Groose is finally loose.

I wish I could like this set, and that its execution as an actual set lived up to the humour, but that wasn't the case for me. I don't think the Specials were all that conceptually strong, as is maybe the case with a few of your recent sets, and you've done better. That makes it a bit more difficult to like the set, compared to say Lore. There are some fun animations like with the Up Special, bomb uses in the standard attacks and grab, so maybe you could have had a basic bomb attack like Link's you can play around with to make use of the grab. The set is definitely one of your more fun ones though, and a more convincing set of Specials would have made it one of your best.[/collapse]

[collapse=Raviolo] Ravio is one of your more creative sets and a nice return to the department of neat concepts. It has a bit of interesting playground with the cool projectile smashes (especial arrow reaching a sand pillar), to the point where I somewhat wish maybe like the Side Special did more, but the Specials do all serve their own purpose otherwise and are fairly solid. Delayed hitboxes are always fun, and the execution with mish-mashing them together is certainly not bad, possibly some of the strongest in any of your sets and a well-founded playstyle. The only real point against the set with how it works at the moment is that your sand pillar can shut off your own projectile game, but it's nothing terrible and is good for the arrow interaction. I also like being able to carry the dsmash bomb with the Up Special, maybe along the side of the wall to meet opponents. It may not flow all the time, but this is a solid attempt at playground and possibly your best set. Which is great, man, and all the more impressive since you apparently pulled it off in 3 hours.[/collapse]

[collapse=The War Mage]Welcome to Make Your Move! You've certainly got an interesting way of presenting details, and that character quote is quite fitting. No beating around the bush here.

There's a good understanding of the way attacks work, and the damage percentages are handled nicely despite the fact that you're unsure... If anything, I'd say that your U-tilt, D-tilt and N-air could be a bit stronger and have their sweetspots deal 10-11%, as they seem underpowered compared to some other moves with reasonable percentages. It's also reasonable to have throws that deal 8-12% on average, or at least in Make Your Move, unless you're going for something like Marth.

From what I get, the set uses a prop on every input, which is pretty admirable and represents his game (even though little attention is called to it in the intro, though I guess the premise is obvious enough). It would have been fun if War Mage's stupidity was represented in his set though, like in his attack animations, mostly because they're brought to attention at the start. The set is pretty basic with Specials drawing comparisons from Smash, but I do like the idea of the inaccurate crossbow and think it's an interesting, original idea. It actually kind of represents War Mage's stupidity, and I can imagine hilarious moments where you accidentally set off your own bombs because of a random stray arrow. I love it.

This is actually a very good start for a first set, and I look forward to seeing if you can throw out more. You might want to put replies and the set itself in separate posts in the future, though. [/collapse]
 

ChaosKiwi

Smash Apprentice
Joined
Feb 1, 2014
Messages
104
NNID
ChaosKiwi
Well, thank you everyone for your valuable feedback! Taking it all into consideration, I've made some edits/clarified some things on the various sets! The changes include:

  • Some changes on Fi's NSpec, specifically her vulnerability. Also, clarified the size of the projectile.
  • Clarification on how her DSpec works.
  • Clarification on the speed Groose's bomb bowling
  • Removed the pitfall on Groose's SSmash.
  • Added the third method for moving Ravio's bombs. Check his grab!
  • Clarified how the Sand Rod works, specifically the sand pillars' properties and how multiple sand pillars work.
  • Added clarification that posted percents for smashes are the maximum, in addition to adding many minimum values.
 

Bionichute

Smash Champion
Joined
Jun 30, 2012
Messages
2,151
Trigger Form:


Specials:

Neutral Special: Memory Change:

Double pulls out both of the Gaia Memories in his belt for a split second, before putting them back in. That seems… useless. Actually, this is by far Double’s most important move, as it allows him to switch between any of his Gaia Memories almost instantaneously. By holding the button, and then moving the control stick either left or right (During this period Double cannot move left or right), this will make Double pull out another Gaia Memory, which he will switch in immediately, with very little lag, allowing Double to get straight back into the action. The direction the control stick is tilted will choose which memory to swap out, left for Body, and right for Soul. The move can also be used in the air, where it acts mostly the same, but you will need to be a bit faster, but the move also gives Double a bit of extra airtime. The move will also create a burst of light that will knock opponents away, but not actually damage them. The move can also be cancelled out of into a dash by double tapping the joystick.

The memories come in a specific order:

Body: Joker > Metal > Trigger > Joker etc.

Soul: Cyclone > Heat > Luna > Cyclone etc.

Double will ALWAYS start in Joker/Cyclone form. Unless you change colors, which will allow him to either start from Metal/Heat or Trigger/Luna.


Up Special: Rider Jump:

In a similar fashion to Captain Falcon’s USpec, Double does an uppercut, launching himself into the air. Unlike the good Captain’s USpec, this move does not latch on to the opponent if it hits, instead it will just simply launch them up, but with some really good knockback, and a decent 17% damage. The move launches Double upward up about 4.5 Stage Builder blocks, which might sound amazingly good, but the move will instantly put Double into prone, meaning that, if you don’t aim the move right, you will fall right to your death.


Down Special: Rider Kick:

In a similar fashion to Captain Falcon, again, Double does a sliding kick across the ground. The only real differences are the lack of flames, and the distance the move goes for. Falcon Kick only travelled a short distance, but the Rider Kick can travel indefinitely across the ground, only stopping once the button is held down, meaning that you can fall off edges. The move also only causes 8% damage on contact… if you use it on the ground that is. If the move is used in the air, Double will do a downward kick, once again similar to Captain Falcon. However, this move is incredibly fast, almost too fast, as most kicks might end up missing opponents by a few milliseconds. But, if the move does hit, it will cause a stunning 25% damage, measuring up to the good Captain’s own trademark move.


Side Special: Memory Attack:

Double pulls out his gun, the Trigger Magnum, and then shoots a large, crescent shaped laser blast from it. The shot is about half as tall as Double himself, and travels at a fast pace for 4 Stage Builder blocks. If the blast hits an opponent, it will cause 12% damage, with some decent knockback. With the Cyclone memory, the laser blast will turn green, and, after traveling the maximum distance, will explode into a tornado, which sucks in nearby opponents and causes 14% damage. The tornado is about as big as 1 Stage Builder block, and only sucks in opponents that are half a Stage Builder block away from it.

With the Heat memory, the blast will turn red, and speed up a bit. After reaching the maximum distance, the laser will explode, turning into a pillar of flame that reaches up about 1 Stage Builder block. The pillar lasts for about 2 seconds, and causes 10% damage to any opponent who touches it. It will also cause a 3 second burning effect.

With the Luna memory, the blast will turn yellow, and travels a shorter distance, about 2 Stage Builder blocks instead of 4, and at a slower speed. This version of the move changes it fairly drastically as well. After firing the blast, you will be able to move around. Once the blast reaches its maximum distance, it will immediately fly off in the first direction that you imputed at very fast speeds. That blast will travel about 2 more Stage Builder blocks, and then fly in the direction that you first imputed after the first time. This can happen about 3 times in a row. The blast causes an extra 3% damage than usual, doing 15% damage.


Standards:

Jab:

Double shoots a smaller laser blast out of his gun, which travels forward at a decent pace. They’re about as big as MegaMan’s blaster pellets, but have a slightly bigger hitbox, and cause 3% damage. Double can move around while firing them, but he can only have 3 blasts out at the same time. With the Cyclone memory, the blasts will start out traveling slow, but increase in speed as they travel, increasing their damage as well. At the slowest speed the blasts will cause 2% damage, while at their fastest speed they’ll cause 7% damage.

With the Heat memory, the shots will travel faster by default, and explode when they hit an opponent, increasing knockback and causing a 2 second burning effect.

With the Luna memory, the blasts will move a bit slower, but are also a bit bigger, and, after a bit of being on screen, about 3.5 Stage Builder blocks of travel, will arc upwards or downwards, increasing their speed, and increasing range a bit. This comes at the sacrifice of knockback, and the trajectory of the shots are uncontrollable.


Forward Tilt:

Double bends down a little, and then fires another laser blast, this one being thinner and longer than usual. This results in the shot having a smaller hitbox, but with the added bonus of being able to travel through opponents after it hits them, continuing until it reaches its maximum distance of 4 Stage Builder blocks. It does not do much knockback, and only causes 8% damage. With the Cyclone memory, the move will carry opponents that it hits forward about .3 Stage Builder blocks, after which it will continue through the opponent, but it will never carry them off of edges.

With the Heat memory, the shot will become faster, and, after piercing through opponents, will cause a 3 second burn damage effect on them.

With the Luna memory, the shot will be fired in a zig-zagging motion, going up and down until it reaches 4 Stage Builder blocks in length. The shot increases in knockback and range, but has lowered damage, only doing 6% instead of 8%. Luckily, multiple shots can be on screen at once, unlike the other versions, which can only have one shot on screen at the same time.


Up Tilt:

Double aims his gun upward, and then fires, shooting off a rather large laser blast. The blast travels at rather slow speeds, but causes 10% damage on contact, with some great knockback to it. It has an infinite range, can hit multiple opponents, and is about 2/3rds as big as Kirby. With the Cyclone memory, the energy blast will create a blast of wind after it hits an opponent, increasing knockback. It also moves much faster than normal.

With the Heat memory, the energy blast will become a large fireball, which makes the hitbox slightly bigger, but decreases knockback a bit. It also causes a 3 second burn damage effect on any opponent that it hits.

With the Luna memory, the energy blast will, after travelling about 3.5 Stage Builder blocks, will explode into 3 much smaller orbs, which have increased speed, and still have infinite range. The smaller blasts only cause 4% damage each, however.


Down Tilt:

Double aims his gun diagonally downward, and then fires, either creating a small explosion on the ground he was standing on that causes 8% damage to anyone near him, or a fast moving laser blast that causes 12% damage on contact. The different effect depends on where Double is standing. If he’s standing on solid ground, it will create the explosion, and if he is standing on thin platforms, or at the edge of a stage, it will create the projectile. With the Cyclone memory, the explosion will create a burst of wind that increases knockback and pushes other nearby opponents away, while the projectile will simply move a bit faster and increase knockback.

With the Heat memory, the explosion will create a patch of fire on the ground, which causes a stream of 2% damage for as long as an opponent stands in it, and stays on the stage for 3 seconds. The projectile will simply move a bit faster. Both also cause a burning effect that lasts 4 seconds.

With the Luna memory, the move changes a bit. Instead of an explosion it will just create the projectile version, which will bounce off the ground and go flying in a diagonally upward direction. The projectile can bounce off of any solid surfaces a total of 3 times, including the first bounce off the ground. The same goes for the regular projectile version.


Dash Attack:

Double pulls out his gun while he is dashing, and then flips, firing the gun three times as he does so, shooting off 3 laser blasts that travel directly upward, diagonally upward, and forward. The blasts have very little range, going about 1 Stage Builder block, but move very fast, are about as big as a Pokeball, and cause 10% damage on contact. With the Cyclone memory, the shots will explode once they reach their maximum distance, creating 3 small vortexes that can suck in nearby opponents and cause 7% damage.

With the Heat memory, the shots will still explode when they reach their maximum distance, but will violently explode, launching any nearby opponents, and giving them 3 seconds of burning damage.

With the Luna memory, the shots, once they have reached their maximum distance, will stop, and then fly in the opposite direction that they came at incredible speeds. They have infinite range, but do less knockback, and only do 6% damage.


Smashes:

Forward Smash:

Double aims his gun forward, and then shoots a charged laser blast from it. The charged blast is about as big as Double himself, but travels at a fairly slow pace, and only travels 2 Stage Builder blocks before disappearing. However, it causes a great 26% damage at lowest charge, as well as great knockback, and 38% damage at highest charge. With the Cyclone memory, the charged shot will explode when it reaches its maximum distance, creating a blast of air that launches away nearby opponents.

With the Heat memory, the charged shot will leave behind a trail of fire for the entire distance that it travels. Standing in the fire causes a stream of 2% damage, as well as a 2 second burn damage effect. Getting hit by the charged shot itself will show that the knockback has increased, and causes a 4 second burn damage effect.

With the Luna memory, once the charged shot reaches half of its maximum distance, it will fly off in the first direction that you pressed after shooting it. It will fly at the same speed, and still only goes 2 Stage Builder blocks, but this increases its range by a lot.


Up Smash:

Double aims his gun upwards, and then shoots a large laser blast. The blast is rather quick, and travels about 2.5 Stage Builder blocks in total. After it reaches the maximum distance, or hits an opponent, it will explode. The explosion is about half as big as a Bob-Omb explosion, and causes 28% damage at lowest charge, and 39% damage at highest charge, with some great knockback. With the Cyclone memory, the explosion will create a type of suction effect, sucking nearby opponents into the explosion, but doing less knockback in the process.

With the Heat memory, the explosion will create a large ball of fire in the sky, about as big as the shot itself, which hangs around in the air for 2.5 seconds before creating another, weaker, explosion that only causes 16% damage no matter the charge. It also causes 3 seconds of burn damage.

With the Luna memory, the shot will be able to be controlled, similarly to Ness’ up special. It only has two limits to it, as it can only be controlled for around 1.5 seconds, and it can only be controlled for 2 Stage builder blocks in any direction. This essentially creates a box around the area that the shot can be controlled, as it can move freely while inside the box, but once it reaches the 2 Stage Builder block limit of it, it will explode. The move, however, does increased knockback


Down Smash:

Double aims his gun at the ground, and then fires, creating a blast on both sides of him. The blasts are about as tall as Double, and are also about as wide as him as well. The blast causes a stream of 3% damage to any opponent caught in it, doing a total of 27% damage at lowest charge, and 39% at highest charge. It also does decent knockback. With the Cyclone memory, the blast will have a suction effect to it, sucking in any nearby opponents as soon as it goes off. It also has increased knockback.

With the Heat memory, the blast will create two patches of fire on the ground. The patches will cause a stream of 3% damage for as long as someone stands in it, and will also cause 2 seconds of burn damage. The blast itself does less knockback, but causes 4 seconds of burn damage.

With the Luna memory, the blast will instead turn into a shockwave, which are about half as tall as Kirby, and travel across the ground for up to 3 Stage Builder blocks before stopping. The shockwave has higher knockback, but does 5% less damage than the other versions.


Aerials:

Neutral Aerial:

Double fires a quick, but low ranged projectile from his gun. The projectile travels just over half a Stage Builder block before disappearing, but due to its speed, it will only stay on the stage for a second. It does, however, do a decent 14% damage. With the Cyclone memory, the projectile will create a wind effect after it reaches its maximum distance, which pushes back opponents and increases knockback a bit.

With the Heat memory, the projectile will simply create an explosion after reaching its maximum distance, which increases range, but decreases knockback. It also causes a 3 second burn damage effect on the opponent.

With the Luna memory, the projectile changes into a boomerang type projectile. Once it reaches its maximum distance, it will hover in the air for a second, and then quickly dash backwards. While it is dashing backwards, it has infinite range, but only does 10% damage to any opponent it might hit.


Forward Aerial:

Double swings his gun forward in a swiping movement, performing the only melee move of the entire set. The move has very little range to it, but does a great 16% damage, with some decent knockback to it. With the Cyclone memory, the attack will create a wind effect in front of the attack’s hitbox, pushing away any opponents if it happens to miss one.

With the Heat memory, it will create a burst of fire in front of the attack, boosting its range and knockback somewhat and causing 3 seconds of burn damage.

With the Luna memory, the attack will increase its range even more by having Double extend his arm while swinging his gun, boosting it to 1 full Stage Builder block in length. The arm will retract quickly once it has finished, which also counts as a hitbox that causes 8% damage and low knockback.


Up Aerial:

Double points his gun at an upward diagonal direction, and then fires a laser. The laser travels in an upward diagonal direction, and continues for 2 Stage Builder blocks before disappearing. It causes 15% damage, with some decent knockback. With the Cyclone memory, the laser will deal increased knockback, and move at a faster speed, but will deal 3% less damage.

With the Heat memory, the attack will cause an explosion that simply increases the total range when it reaches maximum distance. It also causes 3 seconds of burn damage to any opponent it hits.

With the Luna memory, the laser will hang in the air for a second once it reaches its maximum distance, and then drops downwards at a very fast speed. The falling laser acts as a meteor smash, and only disappears once it hits the ground of the stage, or goes past the kill zone.


Back Aerial:

Double points his gun behind him, and then fires a close range blast from it, the force of which pushes Double forward a bit. The blast itself is about half as big as Double, and causes great knockback and 16% damage to any opponent it hits. With the Cyclone memory, the force of the blast will increase the amount of distance that Double travels after using it, and also increases knockback as well.

With the Heat memory, the blast turns into an explosion, which, while it increases that total range of the move, decreases the amount of distance that Double travels. It also causes 3 seconds of burn damage.

With the Luna memory, Double will actually be able to aim the move up and down, which now fires in a more straightened fashion. It increases the amount of distance Double travels by a bit, but does 3% less damage and less knockback than the other two.


Down Aerial:

Double points his gun downwards, and then fires a rather large, slow moving blast. The blast travels downward until it either hits something, or reaches the edge of the screen. It causes 13% damage if it hits an opponent, and acts as a meteor smash. With the Cyclone memory, the blast will over a bit faster, but at the cost of knockback, while also creating a downward suction effect.

With the Heat memory, the blast will move slightly slower, but will have increased knockback, due to it exploding when it hits something. The explosion effects nearby opponents as well, dealing 5% damage. It also causes 4 seconds of burn damage.

With the Luna memory, the blast will start off incredibly slow, but speed up as it travels, taking about 5 Stage Builder blocks to reach full speed. As it increases in speed, it increases in knockback as well, with it being able to KO at 40% at full speed.


Grab Game:

Pummel:

Double holds his gun up to the opponent’s head, and then fires, causing 2% damage for every hit. The move is fast, so it can cause a bit more damage than normal pummels. With the Cyclone memory, the attack will create a suction effect after hitting 4 times. The suction effect keeps the grabbed opponent in Double’s grasp for a few extra hits. However, it only works once per grab, allowing the opponent to escape once it has finished.

With the Heat memory, the attack will simply cause 3 seconds of burn damage after the opponent escapes from the grab.

With the Luna memory, the attack changes a bit. After the blasts hit the opponent, they will stop, and then zoom backwards through the opponent again, causing another 2% damage for one pummel hit. This gets gradually slower during the use of the move.


Forward Throw:

Double shoots a point blank blast at the opponent in his grasp, which launches them off, causing 9% damage. With the Cyclone memory, the blast will create a gust effect, which pushes opponents forward, toward Double. It also increases the throw’s knockback.

With the Heat memory, the throw will simply cause 5 seconds of burn damage onto the thrown opponent, while also decreasing knockback

With the Luna memory, the blast goes right through the opponent, and then back through them. It does this 4 times, before ending with a lunching hit. The direction the last hit launches depends on how you move the control stick, with it blasting them in the first direction that you pushed.


Up Throw:

Double knocks the grabbed opponent upward into the air, and then shoots 3 lasers from his gun at them, causing 7% damage. With the Cyclone memory, the uppercut will create a gust of wind that knocks opponents upward, and increases the knockback of the move.

With the Heat memory, the attack will cause 4 seconds of burning damage to the opponent, while also decreasing knockback a bit.

With the Luna memory, the 3 blasts will, instead of stopping once they reach the opponent, circle around and through them, causing a few extra hits of 1% damage, before launching the opponent off. The blasts stay on stage for a bit after the launch, leaving a lingering hitbox.


Back Throw:

Double throws the opponent behind him, and then shoots them, knocking them back and causing 8% damage. With the Cyclone memory, the attack will create a gust effect that pushes nearby opponents behind double, and also increases the knockback of the move.

With the Heat memory, the attack will cause 3 seconds of burn damage to the thrown opponent, but decreases the knockback a bit.

With the Luna memory, the laser blast will go in an upward arc once it hits the opponent, carrying the opponent upwards about 2.5 Stage Builder blocks, before exploding and launching them downwards. If another opponent hits the blast, it will cancel out, freeing the trapped opponent, and causing 5% to the other.


Down Throw:

Double throws the opponent down to the ground, and then blasts them with his gun, launching them off the ground and causing 7% damage. With the Cyclone memory, the attack will create a gust of wind that pushes nearby airborne opponents downwards, and increases the knockback of the move by a bit.

With the Heat memory, the move will cause 4 seconds of burn damage to the grabbed opponent, and decreases the knockback of the move.

With the Luna memory, the laser blast will actually bounce off the ground with the opponent, following closely behind them before exploding when the opponent reaches the peak of his knockback. The explosion increases knockback by a bit.
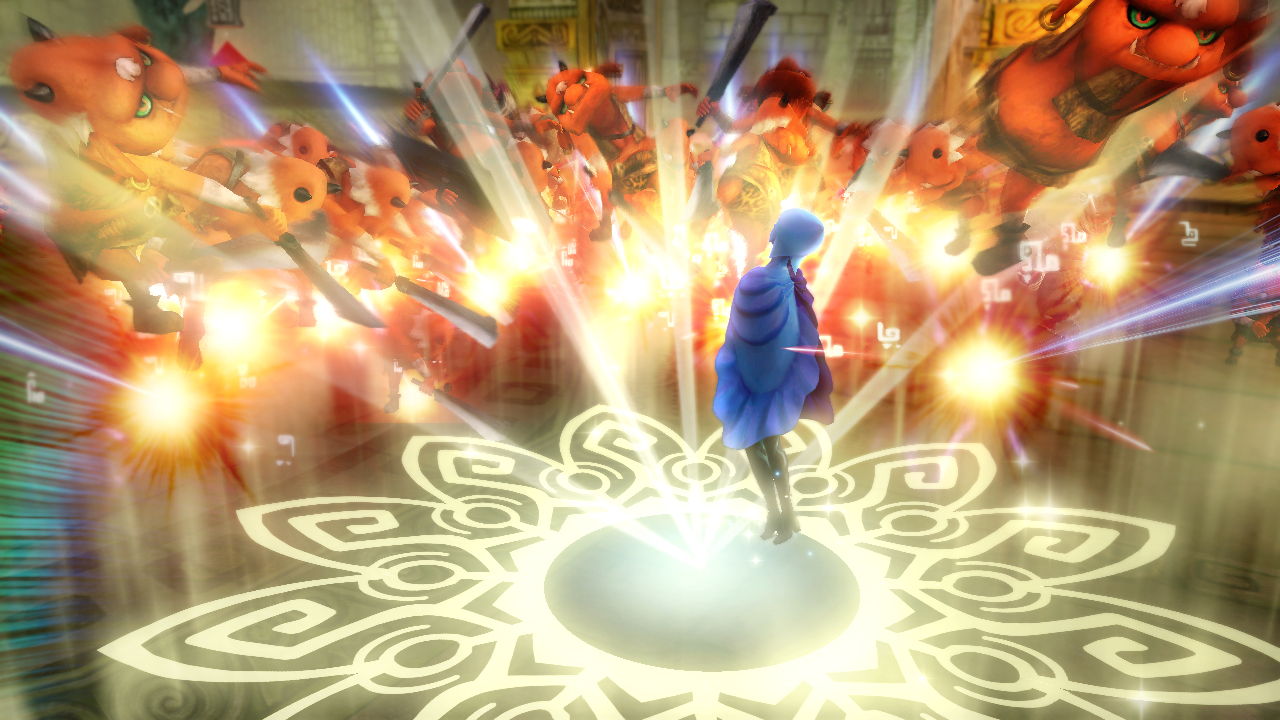
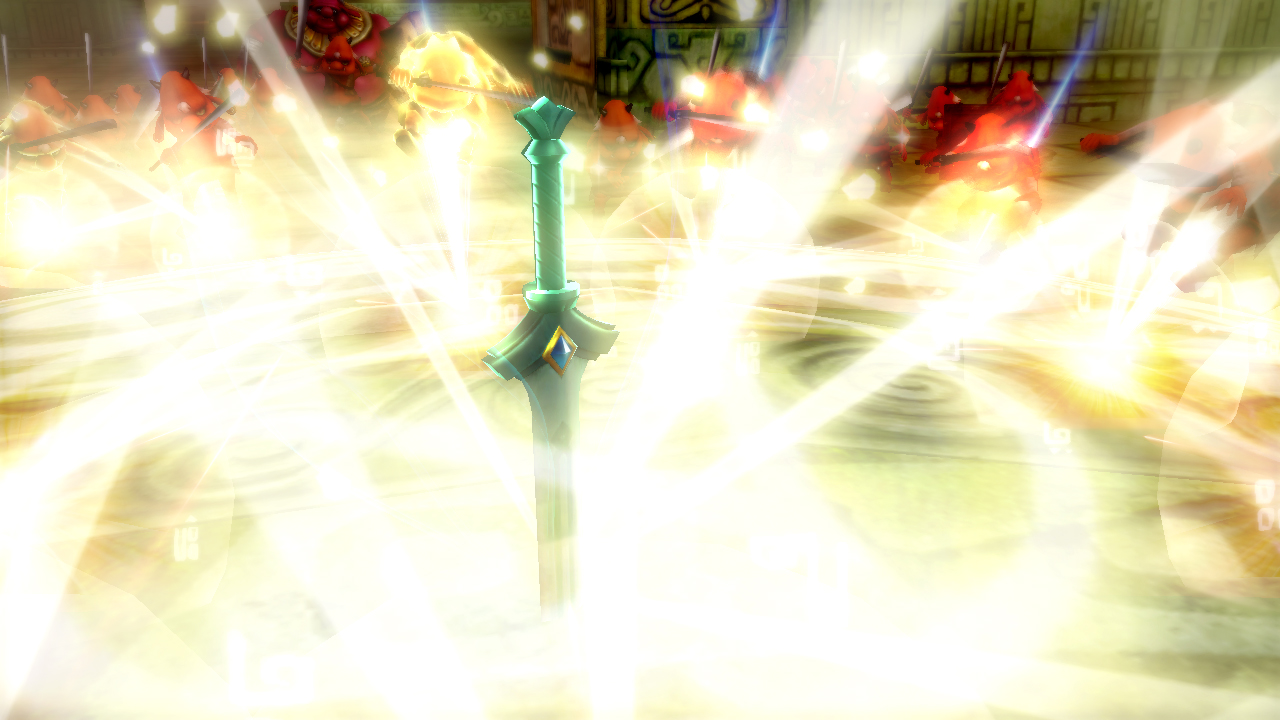


Final Smash:

Maximum Drive

“Now, count up your sins!”

This Final Smash consists of 9 similar, but slightly different, variations, depending on Double’s current Soul/Body combination, with each combination having a different Final Smash. The Final Smash’s start up animation will also change a bit for each Body memory. If Double is using the Joker memory, he will take it out, and then place it in a section on his side. If he’s using the Metal memory, he will place it in the middle of the pole. If he’s using the Trigger memory, he will place it in the gun itself.

This move is similar to Captain Falcon’s Final Smash, as it will cause an effect where nearby opponents will be trapped in a cinematic, instant KO attack. Each Soul memory has a different effect that will suck in nearby opponents. The Cyclone memory will create a giant tornado that covers a good chunk of Final Destination in length, which will trap opponents if they’re sucked in. The Heat memory will create two explosions on both sides that trap opponents if they’re hit by them. The Luna memory will cause Double to stretch his hands out incredibly far on both sides of him, which grab any opponents that they come in contact with.

Now let’s get to the combinations.

Cyclone/Joker will result in Joker Extreme, where Double rises into the air, and then flies forward feet first towards the opponent. Halfway through he will split in half, doubling the power of the attack, and launching the opponents off.

Cyclone/Metal will result in Metal Twister, where Double spins the pole around a few time, hitting the opponents, before finishing with a wind powered blow that launches them off.

Cyclone/Trigger will result in Trigger Aerobuster, where Double pulls out his gun, and then shoots several blasts of pressurized air at the opponent, before finishing off with a giant tornado blast, which launches them off.

Heat/Joker will result in Joker Grenade, where Double umps up into the air, and then splits in two, before both sides come down from the sky and punch the opponent, creating a large explosion that launches them off.

Heat/Metal results in Metal Branding, where both ends of Double’s pole catch on fire. He then runs toward the opponent, and hits them with it, creating an explosion that launches them off.

Heat/Trigger results in Trigger Explosion, which has Double shoot a large stream of fire at the opponent, which launches them off after an explosion.

Luna/Joker results in Joker Strange, which has Double splitting down the middle and separating. The yellow half of him forms into 5 other halves, which all stretch their arms out and unleash a barrage of punches on the opponent, before the other half goes forward and punches them, launching them off.

Luna/Metal results in Metal Illusion, which has Double spin his pole around a few times, creating 5 large disks that proceed to fly at the opponent, hitting them a few times, before coming back all at once and causing an explosion that launches the opponent off.

Luna/Trigger results in Trigger Full Burst, which has Double pull out his gun, and shot several gigantic laser blasts from it, which all surround the opponent, before the final shot explodes and launches them off.


Ffamran

The Smooth Devil Mod
Joined
Aug 25, 2014
Messages
14,629
No damage percentages this time. Now there are damage percentages.

Ephraim
"Trust me. I don't pick fights I can't win."


Lore
Twin brother of Eirika and prince of Renais, Ephraim is a capable soldier and leader. With spear in hand, Ephraim strives to do what's best for his country and the rest of the world when things go out of hand in Sacred Stones.

Attributes
This is neat and plays on his spear usage. Like Marth, Ephraim has tippers, but unlike Marth, certain moves that sour-spots just go through them and will hit whoever is behind and some moves won't have sweet-spots at all. So a thrusting move will go through a character and hit the person behind. To make it less insane and potentially game-breaking, it won't sweet-spot. Also, because of his range and ability to sweet-spot, Ephraim is weaker than Marth, but more durable like Ike. I can't comment on his build since stuff like that is never mentioned, but either shown like in the recent games or through art like how we know Ike is muscular.

Anyway, relating back to Sacred Stones, Ephraim's stat growth percentages are considered great and that makes him, according to many, one of the best Lords in Fire Emblem.

Here's his stat growth percentages which shows that even with a low Resistance growth - magical defense -, Ephraim is pretty much a jack of all trades and in a game like Fire Emblem, jack of all trades tend to fare well over specialized troops like Myrmidons who are fast, but have low defense, HP, and strength along with low resistance like all melee units. To balance this out, Ephraim has low caps meaning he can't become a broken unit with like 40 Strength - Awakening had higher overall stat caps - and murder everything. So, Ephraim's a beast, but a tamed one. We can't have broken things or else it wouldn't be fun.

HP S/M Skl Spd Luk Def Res
80% 55% 55% 45% 50% 35% 25%


Normals

Normal:
Three-Hit Wonder. Ephraim swings diagonally twice and ends with a turn-around stab. It only covers his front and won't sweet-spot.


Damage
The first and second hits each deal 3% while the third deals 4% for a total of 10%. There's little knockback - this isn't Ike's neutral combo or Snake's neutral, kill combo. Well, the first two swings don't have much knockback, but the stab has enough to give Ephraim some space. So, it'd be similar to Link's and Toon Link's neutral combo. It's a safe combo since there's little start up or ending lag and it has range; a lot of range.

Side Tilt:
Sting. Ephraim stabs with his spear. It will sweet-spot.


Damage
11% at the tip; 7% normal. If it tips, then expect to kill at 90% since this has a lot of knockback. Essentially, it's a Shield Breaker, but without the shield breaking part and weaker and faster. Otherwise, it'll push enemies away from his spear - it will literally push enemies away from his spear.

Up Tilt:
Arc or "The Rainbow". Basically he does Ike's Up Smash, but much faster and much weaker. It will sweet-spot.

Damage
10% if tipped; 6% if not. It can kill at ~100% when tipped, but most things kill at 100%. Regularly, it'll send opponents about a Ganondorf's jump height away when tipped. Also, like Toon Link's Up Tilt, he can combo with this by not tipping it. So, low knockback when not tipped.


Down Tilt:
Tripper. Ephraim swipes the at the ground. It only trips if it sour-spots and that's with a chance and not a guarantee. Otherwise, it sweet-spots and knocks back decently.

Damage
7% when tipped and 4% when not. It's a weak move that functions more like a disruptor or a spacing tool rather than a kill move. Tipping will send opponents about a 1/4th of Final Destination while a regular Tripper will just send them about a "Mario" away. It comes out fast, though; faster than Link's, Toon Link's, or Ike's, but you can't really combo it unless you follow up with something else. The chance of tripping, however, would be a great tool to mess opponents up

Dash:
Scorpion's Tail. Ephraim leaps and stabs in front of him. It's basically Link's Jump Attack, but with a stab and a spear. It covers more range, but does less damage and kills at higher percentages compared to Link's Jump Attack. Will sweet-spot.

I couldn't find the Assassin's Creed Brotherhood version where Ezio does this move with a saber, but the Troy film with Brad Pitt shows the same thing.


Damage
12% when tipped; 10% when not. Tipping guarantees a kill at 90%, though, but its telegraphing can make it easy to punish, just like Link's Jump Attack. Unlike Link's, it doesn't move Ephraim that far away, so beware or you might just give an opponent an easy kill. When not tipped, it'll kill around ~100% and has decent knockback.

Smashes

Side:
Critical Hit. No, this isn't his Final Smash, but it just uses his animation for criticals in Sacred Stones.


It's a multi-hitting move that covers Ephraim with two spin attacks and ends with one stab. None of the hits sweet-spot, but that doesn't mean they don't have power or can't kill.

Damage
Each spin hits thrice for 1% and keeps the opponent inside the full move while the stab does 10% uncharged and 17% charged; totals: 16% uncharged and 23% charged. It's powerful, but risky since as you can notice from the sprite gif, it has a lot of ending lag although there's little start-up - it won't have the weird "switch to the side" thing. It'll definitely kill at ~70% fully charged or 85% uncharged. Just make sure to land it and that nobody's waiting for you to finish.

Up:
Spiker. Ephraim stabs his spear three time skywards. All of them will connect like how Link's Up Smash connects. Although all the hit sweet-spot, only the last one will give the full effects of it: knockback and damage.


Damage
Uncharged: The first two hits do 3% normally or 4% if tipped. Charged: They'll do 5% or 6%. The final hit does 5% normally uncharged and 7% tipped; 7% normally and 9% charged. It will not lead or raise the opponent up to a tip nor can the opponent force themselves to move away from the tip. So, totals are: 11% normally and 15% tipped uncharged; 17% normally and 21% tipped charged.

Knockback-wise: Normally it will launch an opponent from a Ganondorf's jump height to a Mario's jump height - uncharged and charged knockback. When tipped, an uncharged Spiker will kill at ~85% while a charged one will kill at ~75%. Without tipping, an uncharged Spiker will kill at 115% while a charged one will kill at 100%.

Down:
The Sweeper. Ephraim sweeps his spear around him. It can trip and kill, plus it almost covers the ground so nothing can get away from this attack. It's slightly telegraphed, otherwise, it's a fast move. To compare, it'd be similar to Pikachu's Down Smash. It will not sweet-spot and the front hit will do more damage.

Damage
The back hit will do 6% uncharged and 10% charged. The front hit will do 8% uncharged and 13% charged. The back hit will push an opponent about a "Bowser" length while the front hit will push them about a "Bowser and a half" length uncharged. When charged, well, the back hit will push them about another "Bowser half". The back hit can kill, but around 115% while the front will kill around 95% uncharged.

Aerials

Neutral:
The Circle. Ephraim swings his spear around him. It covers only his front and back. It won't sweet-spot; it's more of a cover and interrupter.


Damage
7%. Not a lot of knockback with this move - it's comparable to Ike's Nair, but faster, weaker, and only covers his back and front. It can combo with hops and for air combos - read this in the Ultimate Marvel vs. Capcom 3 announcer voice.

Front:
Overhead Thrust. It works like Ganondorf's and Mario's fair where they do an overhead punch that can spike opponents. Ephraim can spike, but only at higher percentages with a tipper. It will sweet-spot.

Damage: 13% tipped and 9% when not. This move is sort of weird. If an opponent is struck when the spear shoots forward so, like half of the animation, it'll launch them forwards rather than at a sharp, downwards angle when hit by the end of the animation. Tipping and spiking guarantees a kill, but just tipping will only kill at 85% - you really need to time this move to get that. Normally, it'll kill at 120% when not tipped. Knockback for that is about a "Snake Bair" length.

Back:
Backstabber. Ephraim quickly turns while stabbing behind him. Will sweet-spot and turn him around.


Damage
12% when tipped and 8% when not. Tipping will guarantee a kill at 100% while not tipping just leads to some knockback relative to the damage. Normally, it won't kill unless it's at the upper 130%.

Up:
Tipper or the "One-Way Ticket to Paradise". Basically Link's and Toon Link's Uairs except it sort of has a bottom hit box since Ephraim will twist to orientate himself and stab up. It'll sweet-spot, but only at the beginning when Ephraim stabs upward.


Damage
Right at the beginning of the drive up: 13%, otherwise: 7%. The "twist" will do 3% and will lead up the stab. So, as an "up spike", you need to hit with the stab, but as a regular hit, it'd be beneficial to hit with the "twist" for a full combo. The tipper will kill around 85% or 65% with enough height. Normally, it'll kill at 110% while the combo will kill around 95%.

Down:
Helm Piercer. Basically Toon Link's Ending Blow or any stall and fall move. It will spike at the beginning when Ephraim drives the spear down - that's the sweet-spot. Otherwise, it'll just do damage.


Damage
14% right at the beginning. After that, it'll do 11%. As a spike, it'll have tons of downward knockback as all spikes do. As a normal hit, it'll just send opponents in a slightly downward angle away from Ephraim in the air and push them about a "Mario" length away on the ground. This will also kill in the upper 90%. Since Ephraim drives his spear downwards, there will be ending lag, but not as much as Link's and Toon Link's. More like Ganondorf's Dair stomp or Captain Falcon's Knee of Justice. It also has a quick start-up, so you'll need to time and distance it or you'll just end up with a regular stall and fall.

Grabs

Pummel:
Kneeing, there's not much to do when clinching.


Damage: 3% per knee.

Front:
Kick Off aka "The Sparta". Ephraim kicks his opponent away from him.

Damage
4%, but it has good knockback - almost as much as Ganondorf's "THIS IS HYRULE" kick.

Back:
Swatter. Ephraim turns around and swats his opponent away with his spear.


Damage
6%. Not as much knockback as the Kick Off, but it'll kill on Sudden Death if you fumbled and didn't use Kick Off. So, about 2/3's of a Kick Off which is 2/3's of a Ganondorf "THIS IS HYRULE" kick.

Up:
Lift Off. Ephraim launches his opponent with an uppercut.


Damage
5% and with somewhat low knockback. Could you chain with this? In Brawl, sure, but no, you can't if this is SSB4, Melee, 64, or another SSB game. Functionally, it's like Ike's Up Throw, but weaker.

Down:
Pin Down. This is brutal. Ephraim trips his opponent and slams his spear through them.


Damage
13%. It's like Snake's Down Throw which means no knockback, but a ton of damage. Also, since Ephraim slams his spear through his opponent, if this is done on a platform, it can hit the person below it for about 5% along with a funky meteor. Oh, and the trip kick makes the tripping sound too.

Specials

Neutral:
Javelin. Oh, you thought he'd have a Shield Breaker move, didn't you? Nope, Ephraim throws a javelin instead. It's more like Pit's Palutena Arrow and Solid Snake's Grenade where you can aim it and it'll arc differently. Higher degrees means it'll hit higher, but drop a bit closer and he can almost hit straight upwards with it and have it come crashing down or he can aim straight down if in the air. Lower angles means he can edgeguard. This move won't sweet-spot since it does not involve his spear, but his javelins.

Damage
6%; 2% if someone touches the back of it. It'll have some knockback and you can kill with it at high percentages like around the 200% range. Also, like Palutena's Arrow, Ephraim won't hold it indefinitely like what with Link's Bow. So, it would work more like Wolf's Blaster where you can't shoot constantly, but it's a strong projectile combined with Palutena's Arrow and Solid Snake's Grenade.

Side:
Piercing Lunge. Technically he does have a Shield Breaker move, except this one's more like Little Mac's Jolt Haymaker except it's usable in the air and as a recovery. Like Jolt Haymaker, be careful or you'll self-destruct. Sweet-spotting will instantly shatter and damage an opponent, but it's very difficult since it's a fast move and enemies can move forward to have Ephraim leap right over him. Still, even if they shield, it will just go through and do half damage. It's a kill move, but it's telegraphed like Jolt Haymaker and much, much weaker even compared to Shield Breaker - tipped or not, however, it has comparable knockback.

Damage
16% at the tip and 7% anywhere else. Knockback-wise, if it tips, then it'll kill around ~80%, otherwise, it'll send opponents about to the end of his spear. With telegraphing, it's not as noticeable as Jolt Haymaker, but it's not instant like Falco Phantasm. So, I guess it'd be similar to Ike's Quickdraw when launched and not charged.

Up:
Double-Rise. Ephraim uppercuts with his spear two times while rising into the air. Sort of like Zero Suit Samus's Boost Kick. It's about the height of Dolphin Slash, but fragmented. Only the last hit will sweet-spot by itself - hitting with the first strike just leads to the whole move.


For reference, it would look similar to Vergil's Rising Sun which I think is based on some other move from Street Fighter.


Damage
6% for the first hit and 8% for the last hit; tipping turns the last hit into 13%. Honestly, this is a weird move because when used normally it'd function like ZSS's Boost Kick with more range and the knockback won't do much until ~75%. Tipping it, however, turns this move into something like Falco's Uair from Melee or Brawl where it spikes opponents up. If that happens, it can potentially kill at 60% with enough height. Opponents can choose to fall into the last or even the whole combo to avoid the tip if they can read the Ephraim player; it's not too fragmented, but it's not so fluid that it becomes broken.

Down:
Spin Stab or "The Vergil". If you don't get the reference, search "DMC3 Dante versus Vergil first fight". Ephraim twirls his spear in front of him, reflecting projectiles and hitting enemies. Pressing Special again will cause Ephraim to follow up with a stab, otherwise, he'll just spin it for a moment. The spin won't sweet-spot, but the stab will.

Apparently this image was used before on this forum. Hmm... Whatever here's another visualization helper... Thing.


Damage
The spin does 1% per hit - it's like Fox's, Falco's, Melee Link's, or Captain Falcon's neutral combos, but it will push the enemy slowly away. The stab does 9% if tipped and pushes the victim about a 1/3 of Final Destination or 4% when not tipped with a fair amount of knockback (a "Mario" length) away from his spear. It'll kill if you land the tip around ~80% and it's great if you can read a rush-down projectile player. It can kill, however, without tipping around the upper 120%.

Final Smash

Great Lord Ephraim
Ephraim immediately promotes and rushes through with his horse. Sort of like Ganondorf's Beast Ganon, but with an instant guaranteed KO for the first person hit unless a wall it perfectly teched.

I guess, something like this.


Oh, and he could look like his Awakening concept art for his Final Smash.


Damage
Well, it's
55%, but drops to 45% for the second, and 35% for the last person hit. As an "instant KO" for the first person, knockback doesn't matter, but for the following people, it diminishes, but not enough to say, "Welp, it's useless". For the final two, expect enough knockback to kill at 50% to 70% percent.
Edit: Adding Added damage, knockback, and such.
 
Last edited:

ChaosKiwi

Smash Apprentice
Joined
Feb 1, 2014
Messages
104
NNID
ChaosKiwi
EPHRAIM
Well, I'm glad to see you have a lot of enthusiasm, putting out a second set already. However, this one seems pretty rushed. Namely, the utter lack of knockback and damage. Like, those are pretty essential. The thing is this isn't, in theory, a bad set. There's a lot of potential here, it's just so barebones that it's near impossible to give commentary more than "add more information".


Bion, expect a Double comment later today.
 

Bionichute

Smash Champion
Joined
Jun 30, 2012
Messages
2,151
Pretty Loose
Groose is a fairly good set. It manages to both show Groose's INCREDIBLE MANLINESS and his buffoonery at the same time, while doing a neat grappling type playstyle. My only real complaints are the lack of detail, and the Grabs. The problem with the Grabs is that you really don't make use of being able to grab two opponents at once. You could have some neat chain grabbing stuff with the other command grabs, but it mostly just boils down to "Doing more damage".
 

Ffamran

The Smooth Devil Mod
Joined
Aug 25, 2014
Messages
14,629
EPHRAIM
Well, I'm glad to see you have a lot of enthusiasm, putting out a second set already. However, this one seems pretty rushed. Namely, the utter lack of knockback and damage. Like, those are pretty essential. The thing is this isn't, in theory, a bad set. There's a lot of potential here, it's just so barebones that it's near impossible to give commentary more than "add more information".


Bion, expect a Double comment later today.
Yeah, I'm not going to do damage since I'm not comfortable enough to give out a damage and then find out it's way too overpowered or too under-powered. Knockback I could do, but I started and finished Ephraim right after I did most of my homework for uni so...

Anyway, Ephraim is much more different since nobody uses a spear and there's little to draw from. He, Hector, Lyn, and Micaiah would be the most interesting Fire Emblem representatives. Eirika would be too, but she could end up as a "faster Marth" since she's a fencer and tippers would make sense for her. Or something hilarious happens where she gets a unique moveset, but Marth ends up being her clone so he can abuse tippers.

I was thinking of doing a Hero's Spirit one and that would be easier since in theory, he'd be a much stronger and more durable Link who uses only his sword and shield and magic - he only casts a Dead Man's Volley move once to show Shield Attack can reflect projectiles. Hero's Spirit would be the Ganondorf or Dr. Mario to Link. There's no Toon/Young Link to Captain Falcon or Mario yet. Maybe Jody Summers could be a future F-Zero representative...
 
Last edited:
Top Bottom