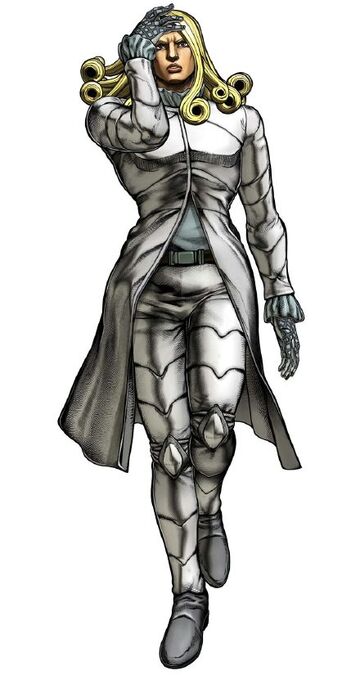
• Welcome to Smashboards, the world's largest Super Smash Brothers community! Over 250,000 Smash Bros. fans from around the world have come to discuss these great games in over 19 million posts!

    You are currently viewing our boards as a visitor. Click here to sign up right now and start on your path in the Smash community!

Make Your Move 15: Top 50 up! Make Your Move 16 starts August 25th!

darth meanie

Smash Journeyman
Joined
Jun 6, 2008
Messages
452
Ruby

I've already told you that I like Ruby, and it's a fun little set you've got here. The control scheme is a bit overwhelming, what with the constant use of Neutral Special in the middle of other attacks, and I wish that you'd come up with a more simple way to execute these moves. Maybe a simple double tap of the A button? The two varieties of ammo types are my biggest problem with the way the set works, with how neither of her two 'styles' feel really intuitive to me and a lot of the changes to her moveset seem a bit unpreditable, with some moves becoming faster, others slower, etc. Still though, the combination of mobility and offensiveness of the set is fun, and something that I always enjoy seeing from you.

Weiss

It's not hard to see why this set is getting the most attention of all your RWBY movesets; it has by far the most imaginative ideas in mind. A little bit of it feels tacky to me, the down tilt flusters my scruples in more than a few ways, but with some of the changes you've made to the set I can wholeheartedly endorse it as a good job on your part. The set is imaginative, has plenty of potential for user innovation yet remains relatively straightforward and easy to understand, which is a duality that I enjoy especially.

Blake

Blake confused me when I first read through it, the way her weapon works is by far the most complicated of all the characters. What you've got here is more than solid though; I like how her duplicates are used offensively, it's an idea that I've been toying around with myself for quite a while but never put into a set the way I meant to. I feel that Blake especially suffers from the lack of a real playstyle section though; I'd like to see more in depth how you envision her working.

Yang

This set has gotten some flak for many of the reasons that I like it. It's a relatively simple, aggressive moveset with a lot of potential in how its ideas are used. The use of triggered land mines is very interesting in all the ways it can affect the spacing game, and I like when simple ideas are expanded on in movesets like this. Again, I feel like you overpower the throws in movesets like Sho did, and Yang feels like a very powerful grappler on a character where that doesn't seem to be the focus.

Iku

Who do you think you are with this coy electrical charge mechanic, Junahu? I'm immediately worried about how viable the character's core concept actually is... you're requiring that you first off land a counter, then that you grab the opponent within fifteen seconds and pummel them in order to actually get any charge whatsoever. It especially seems troubling that since Iku has such a strong incentive to land a counter that it would be easy for opponents to bait her into countering and grab her instead. I suppose she doesn't need a charge to be able to do anything, but that seems like an awful waste of a good idea. WIth that concern out of the way though, I feel rather neutral about the set, not liking it or disliking it particularly strongly. There's a tad too much creativity with moves like the airflow turning projectiles into traps, on a down tilt and all the different ways moves use, expend, or trade charges, without a clear rhyme or reason to why. Still though, it's a solid addition to your impressive repertoire of movesets.

Pompy

Pompy is a fairly shallow moveset, and struggles with the fact that its central gimmick seems tacked on to every move. Each move is structured in nearly the same way: here's how this move works, here's how this move interacts with a fish. I would have preferred if the fish took more organic knockback from Pompy's attacks rather than being affected differently for each attack, and that each move had a bit more thought put out into how Pompy can have some more depth to him besides just fish slapping. Overall though, this is one of your better sets, BIonichute. The core idea isn't bad at all, it just feels a bit flat.

Skowl

Skowl is a moveset from another time period, in a way. There's plenty of playstyle and flow here, that's never been your problem Kupa. It's lacking in balance and playability though. You don't need me to break down every bad point in this set, Arrow's already done that for you. I'm really concerned about how easy it is for Skowl to simply gimp opponents with combinations of the Forward Smash and Side Special, not to mention the Down Special. There's also a plethora of stun in the moveset, an easy trap to fall into that even I've occasionally made the mistake of doing. It creates a moveset that isn't nearly as fun to play against as it is to play as, and a moveset that isn't interesting to fight ultimately isn't interesting to play as either. It becomes boring and monotonous. Surprisingly, I don't hate this set overall, I just feel that it's broken but has good core ideas besides of minion manipulation.

Fugu

This is one of those characters where you have to be credited for taking on such an imposing, challenging design and trying to successfully make a moveset for. While the way you manage to convey the character to Smash is impressive, it's also largely underpowered; his rolling nature is going to be completely uncontrollable in a fast paced game of Smash where opponents will be knocking him about and sending him facing which-way. You try to mitigate this overall, but the fact that he can't turn without moving, or move without turning is a serious weakness. Consider that in order to roll to get in front of an opponent, he may have to end up facing the opposite way. Not a good situation to be in. You've got some decent mechanics with the bubble interactions, but pulling them off in a match is a luxury Fugu doesn't really have.

Bashmaster

Overall, I do like Bashmaster. It's a set that takes a simple central core mechanic and expands on it without feeling too tacky and mostly making sense in how it expands off of it. It still keeps the core concept of a Smash heavyweight antagonist at the fore-front, using weak fast moves in conjunction with high-risk, high-reward moves. The Neutral Special is a very interesting move to add in, a charge-up to all of his hammer attacks that feels unique and surprisingly natural. Combined with the ice block mechanics, it's a set that has plenty of depth to play around with without going off the deep end in any area and stays very playable and viable, without overspecializing his moves. For that reason, I can wholeheartedly say I enjoyed this set.

Lord Fredrik

I'm not usually a big fan of your sets Smady, but Fredrik is a set that I actually reasonably enjoyed. The key mechanic of firing projectiles and sucking them back up along with the opponent is implemented here, like it was in King K Rool, and I have to say that I like this implementation better. Creating a gauntlet of penguins to dodge as the opponent recovers or firing projectiles at them after shooting them out is interesting and unique, to say the least. There are a few moments of awkward writing through the set and moves that feel a bit off to me, and there's a bit too many interactions for my taste, like in the Down Smash for example, which introduces new mechanics pretty late into the set, like the jagged ice puddles. The forward tilt throwing ice pillars too felt like a bit too much. Overall though, he's a fine moveset with fun projectile manipulation that I don't regret reading.
 
Last edited:

FrozenRoy

Smash Lord
Joined
Apr 26, 2007
Messages
1,260
Location
Las Vegas, Nevada
Switch FC
SW-1325-2408-7513
(Goo)dra

A JOE and DM joint? Two great tastes that taste great together! Haven't had one since Toxicroak, have we? Perhaps we should have more...

Goodra's Up Special was, I felt, a very odd animation, perhaps consistant with how it might work in the game itself but quite odd to imagine. I point this out before anything else because I felt some of the other animations in this set were odd and while that is not a huge deal I still noticed it. I actually like Goodra's gooeyness and what it can do, though preventing sidestepping might be a bit too strong, and Sap Sipper/Hydration are pretty interesting, perhaps slightly anti-synergy but in a way that is doing it for choice. Draco Meteor coming from the top of the screen is a bit odd and the fact you don't mention how platforms would play into using this move seems like an uncharacteristic oversight.

However while I feel the Specials form a solid base, the moveset itself seems to play little with them and I did not get a very strong sense of playstyle or flow here, though there is just enough to please me. The Jab and F-Tilt in particular feel like quite nice moves to work into everything, though it's reappearance on the FAir is not welcome because it adds little to Goodra plays positively, down tilt is also fine. Dash Attack is a good move, but it honestly did not feel like it fit the set much, so it ended up just being a good move by itself without much to work with. The smashes overall are...okay, I liked Muddy Water but Outrage felt irrelevant and Power Whip was a good move, but Goodra has little to work with his sweetspot I feel and the unique properties of the move don't play well with the set. The aerials are also okay, though I am not a fan of the BAir (It seems to exist just to be there). The grab game I felt was this set's low point, as it only in general rehashes parts of the set that do not need to be rehashed again, it doesn't particularly flow into the set, it just sorta...exists.

But on the plus side, the concepts are good, the Specials are largely fairly good and moves like Jab, F-Tilt, D-Tilt and D-Smash and such help elavate the set to being better than average, but there was a lot more to do with the Goo.

Bat the Fish the moveset

Pompey has one central theme that it hits again, again and again: Take a fish and bounce it around. For the standards and smashes this was good, but it did start to wear out it's welcome around the aerials and the grab game was not very good at all. Part of why it works in the standards and smashes is the fact they tend to do different things to the fish, so they manage to feel fresh enough, though the moves themselves tend to feel like they don't work amazingly together, perhaps if we had any idea what they were working for outside the fish it'd help. I'm pretty sure he wants the opponent either quite close or qutie far, but little attention is paid to getting foes in one way or another or how, say, he deals with midranges and so on.

The grab game in particular drags this sets down: None of the throws really seem to do anything aside from throw a foe in a direction and any potential cool stuff with the fish on the throw is lost to just throwing it like on the specials. I do also wonder if, even with them being his minions, he should have been able to eat the fish. It also may have been interesting of his penguins became minions or perhaps done some with the fact they seem to be projectiles that last quite a while, perhaps even just some stuff like a Mario cape effect? I dunno, it feels like some more penguin stuff could have been done.

Still, though, I think Pompey had enough between batting the fish around and reading between the lines for some flow to become a set above average and is probably your best Bionichute. While it is heavily brought down by redundancy and bad aerials/grab game, it certainly represents a step up.

Fowl

This comment might be a bit shorter or more redundant than expected since ForwardArrow wrote a full-on REVIEW of Skowl and we already had a fairly long Skype discussion, but I would like to add that I do enjoy you making a set Kupa and hope to see more from ya, even if I did not enjoy Skowl. As mentioned, the smashes are all horrifically strong, with the F-Smash a terrifying gimping tool that can easily cover entire stages, double D3's Inhale might not be absurdly strong but it is still enough to essentially make ground combat impossible as you get blown away if you even attempt to stop moving and utterly destroy many recoveries, Down Smash doesn't add much and is very potent as a psuedo-stun, especially if you add in Down Tilt dust, not to mention throwing F-Tilt stunners into it, Up Smash is frightening because it can easily go up or over the ceiling on many stages, or Skowl can use it to either infinite stall or even stall + projectile like a mofo for a looooong time since he can use his Smashes in the air. On the flipside, the minions are incredibly UP, and from a standpoint of non-balance the amount of effort put into the minions leads into something very underwhelming given the minions are not that great. Even aside from balancing it, it is an extreme dissapointment when you put a lot of effort and get very little in return, and the eggs DO require a good deal of effort (Even Up Special shenanigans are a fair deal of it compared to your reward). I will say that the idea of minions who you have to keep alive before they turn into actual minions and can use as a lingering projectile is relatively interesting, but I am a guy big on execution and it fails badly in that regard.

Down Specials adds to the horrific power of the smashes with a projectile grab that can just utterly make the foe helpless as they get blown off stage: It requires some damage, since grab difficulty, but not that much and reminds me all too much of Willy Wonka's horrible ballooning throw. Plus, what use does it have in the playstyle that is good? Storing minions and stuff is good, but that is about it, and it could have been done in a better way. F-Tilt + Jab is pretty horrific as both are fairly fast, one has decent range (1/3rd of Battlefield essentially) for a non-true projectile, F-Tilt leads into your Jab at anything resembling close range (IE in hammer range), this combo does a good deal of damage and the foe is pitfalled at the end for more follow-ups, or even just using the time to set up your extremely powerful wind/Down Tilt dust/etc. More to the point, these moves simply do not add anything to Skowl's playstyle aside from a very boring "the foe cannot move, set up" kind of deal, which is probably one of the worst ways to acquire setup time, as it is much more fun and interesting for both you and the opponent to have to actually play around for you to setup. The Up Tilt is fine, at least. Another problem is encountered on the Dash Attack, NAir and the like, which is that combined with the wind hitboxes, a LOT of this moveset is really just pushing your stuff around, except that none of it is really so different in effect, even if it may be different in starting point, that any of it really matters, especially because the rewards tend to be rather lame. Far too much of this moveset is dedicated to repositioning and far too little is dedicated to actually using the repositioning, so it gives this "illusion" of depth, where the actual gameplay is quite shallow with far less options than you'd think because many of your options just lead to the exact same thing with little to differentiate the various moves. The fact this moveset has so many grab hitboxes is a similiar deal: Positioning with wind, by grabbing your eggs/whatnot and grabbing the foe takes up almost the entire moveset...meaning you have very little to actually do once anything is positioned and that many of your moves just don't matter because they are redundant.

Forward Aerial and Back Aerial are probably the most enjoyable parts of the moveset, if anything Forward Aerial's idea could have better been used as a special, as relatively basic but fun playstyle relevant moves that are balanced, fit the character and so on. Down Aerial is pretty strong as a gimper and stuff, but aside from that it doesn't feel like it works into the moveset, it can't even be used with the main repositioning theme (Not that that'd help) and aside from that feels like I guess spacing? It just doesn't do much with the moveset. The grab game is generally pretty bad, the Forward Throw being a no damage move kinda sucks (And it feels very weird he has so few moves that do no damage or 1-3% damage, kinda like Wonka again), the minion making move is actively anti-synergy with his playstyle and he will probably never enough minions out to use it well anyway and so on, plus an amusing accidental text splice.

Overall, Skowl had some concepts that could have gone far, though I will admit that few...ahem...blew me away, but it is largely undone by extremely poor execution on most fronts, including very large redundancy that ends up creating a very shallow playstyle. Still, this could have been a lot worse, and you might just need some time to get acclimated to MYM again, or catch up on execution developements. If nothing else, I feel glad that you made this moveset, even if I disliked it.

Fatty Puffer

Ah, so this is what happens when you strike Fatty Puffer with the Stand arrow...

Fugu is the first of two MasterWarlord sets for the Tropical Freeze movement. Fugu's size changing and bubbles provide a nice base for the moveset and the oddness of rolling around to redirect where your hitbox comes from is good enough and it tends to be worked on in nice, simple but fairly deep and effective ways. I did enjoy the use of Fugu's melee game here, a more basic but nonetheless effective approach overall, and the bubbles are not overused which is a plus, especially considering how Fugu is a pretty difficult character to create. One problem I had with them that I noticed largely upon reading it all again at once, instead of over multiple previews, is that it does not feel like a true playstyle necessarily shines through with them, as at times it feels as though there are moves that are good in a vacuum but not necessarily good overall, I feel Up Smash might be a good example of this, as I actually quite like the move and it certainly has some uses, but I am not sure how it necessarily plays well into Fugu's overall game. This is probably odd to bring up, but to me the playstyle summary did not help this: While it accurately explained uses of moves, it did not feel like it helped give me an understanding of how Fugu plays overall, instead being more of, as you said, a strategy guide, except in this case it was more explaining things you could do with Fugu and not how he plays overall. The playstyle section did not actively hurt this set, but I felt like it tied into my previous point and thus I felt I should bring it up. One move I did like that felt like it actively worked into what Fugu did was the Forward Smash, which is a very fun variation on Jigglypuff's rollout and plays very nicely with Fugu's momentum abilities and setup.

In terms of balance, Fugu seems fairly balanced, though I will say that I am slightly iffy on the strength of his puffed upness, buuuuut it isn't something that seems blatantly brokeo or anything, especially since Fugu's moves are not too absurd, so it limits the abuse a lot: I could see Fugu getting way too strong if he got some really crazy stuff, but keeping him grounded (seabound?) keeps him much more balanced and is a definite plus. One thing I do wish I had seen, however, was some more moves that took advantage of being small: There are a lot of moves in the set that take advantage of getting larger, but very few that take advantage of not being large and thus give you more reason not to be large, mostly the dash attack. It makes it feel like there isn't much of a reason not to just blow yourself up in general unless the foe has some super killer combo they can pull on you or something. And to bring up specific moves again, in retrospect the Down Aerial feels very filler-y without actually aiding what Fugu can do, something I wish I could have pointed out...just kinda feels there.

Still, Fugu is a pretty good set overall, with enough playstyle and flow combined with some fairly good concepts and fairly good balance to make it a fairly good set, but it feels like it could have definitely had a stronger, tighter style of play, perhaps some moves mixed around and maybe slightly tighten up the use of the concepts more without going crazy, stuff needed to make it truly great...but I definitely wouldn't mind RVing this set, so that tells ya it is pretty quality.

Coca Cola Polar Bear

And the second Warlord set for this movement, Bashmaster, is a pretty appropriate for him, a nice big fat bear with a spiked hammer to crush all who oppose him. And is introduced eating.

Right off the bat, the Down Special shows growth from Koala Kong, removing some of the issues that set had by making them more compact, more able to be destroyed and overall less overpowered. In turn, this opens up more space to actually do interesting things with it, and the ice blocks become a nice centerpiece of the set, though I am also quite fond of the Neutral Special, it's a fun take on the Donkey Punch and honestly I am surprised that we have not had more movesets where a higher charge on a Donkey Kong Punch does stuff with the moveset. I do slightly worry if him losing it all on hit is a bit not balanced right, but it didn't feel right to have him only lose a % in this case and I felt it ended up balanced enough. One thing I did dislike and continue to dislike is the Up Special homing when used in the air: It makes recovery this very awkward thing where you can only use your Up Special if they are not trying to actually stop you from getting back to the stage, because otherwise you will just target them off stage (and thus fall to your death unless they are close enough for you to cancel and DI) or target them on the ledge and thus have to cancel or be edgehogged. It's especially awkward because the grounded version does not do this, when you would probably prefer it from the ground and not in the air, and because it honestly doesn't add anything gameplay-wise but instead actively subtracts from it. I can understand wanting the aesthetic, since he homes in during the boss fight, but I feel that in this case it hurt the gameplay some.

The standards are all nice things, generally simple but effective moves and I feel it was correct to keep Bashmaster from overstepping too much in some cases, but one thing I did notice some upon reading the entire set is that perhaps the melee games, here and in the aerials, could have worked a bit better into an overall gameplan, as right now they feel a bit like good melee moves but not necessarily ones that work too much together, though ultimately there is enough there and enough little interactions and bonuses that it all comes together to be actively pleasing. I particularly like the differences that can be done with Forward Tilt and Down Tilt and how Down Tilt works with the playstyle, and to go into the aerials for a moment I also enjoy the Forward Aerial, Neutral Aerial (Lots of Mach Tornado-esque aerials lately) and I found the Down Aerial both fairly good and with an amusing and appropriate animation. While minor, the Jab not being a hammer move was a good idea.

I did not talk about the Smashes there because I feel they were enough of a highlight on the set to talk about on their own. Up Smash is pretty cool, I feel it's melee uses are quite nice and the way the freezie works more if you can keep them in there longer is interesting, especially when you consider this would mean it works a bit better in that regard at lower %s, while it also uses the Neutral Special in inventive ways like bypassing starting lag and being able to cancel into it, which helps keep the Neutral Special from being too one note. Likewise, the Down Smash is a fine move on it's own with proper superarmor to work into the Neutral Special and utilizes the ice in an interesting manner that is different for the set: I like how, if Bashmaster sets up, he is able to use that setup to do stuff like reduce lag on the Down Smash and Up Smash and the like. Forward Smash feels like the weakest smash to me, though I still find it nice and I do like it's interactions with the ice blocks. It feels the weakest outside of it's interaction though.

The grab game is probably the weakest part of the set overall: I'm actually quite fond of the Up Throw, it's more cool use of the hammer and what it can do, and I also thought the Back Throw was both a good move and helped keep Bashmaster viable. The Skiing Down Throw feels a bit odd to imagine and the effect is only okay, though it isn't overall a negative. The Forward Throw is filler, but it's not especially bad filler, the only problem is just that it probably doesn't KO much faster than the Up Throw and the Back Throw also KOs at a decent percentage, so thinking about it it was kind of redundant: Maybe a more setup-y throw would have been better?

But either way, Bashmaster was probably my favorite Tropical Freeze set and is a valuable entry into MYM15. It's solid use of nice concepts which are explored in fun ways without ever going overboard and thus rendering itself redundant or too reliant on his setup when the character should be fairly melee based and it flows pretty nicely with it's concepts. Certainly it could improve, but as it is it is a very good thing to put into your hallowed hall of movesets. Plus, it got Ba-boom in!

Superior SSB4 Candidate

And for the end of Tropical Freeze, we have the big (and we do mean big!) bad leader of the Snomads, Lord Fredrik!

Fred's specials are perhaps not the most blow-you-away specials around, but I feel that they set up a pretty strong base for the rest of the set to work off of. The idea of minions and what they come in being used as projectiles is much more better handled here than in Skowl, as is wind with the Down Special and later Jab. The Ice Dragons are pretty nice, maybe some number fixing to do there but it'd be hard to figure out exactly what and it's minor, and the Up Special is okay. I felt the biggest problems with the set came in the aerials and standards, though the addition of moves like Forward Tilt helped alleviate it, but I still don't like the Up Aerial much, the addition of knockback choosing helps add some flow but without a melee game that helps support it like in some other sets it doesn't add as much as it could. The rest of the aerials tend to be okay moves, but they do not often work into what Fred is actually doing, with some exceptions: Forward Tilt is probably the biggest highlight of this game for it's fun interaction and Jab is pretty good, I'd say that Down Tilt works well into it too and Forward Aerial is a bit fine, but the Up Aerial as mentioned only has some base flow and I didn't find moves like the Up Aerial, Neutral Aerial and Down Aerial to play well with him THAT much, even if they were not necessarily bad individual moves...though I still do not understand how Fred is supposed to "stage spike" with the down aerial without dying.

But the coup de grace of goodness in the moveset comes from the grab game which feels similiar to K. Rool's but better. The pummel is not amazing to me, but is good enough, but I particularly like the Forward Throw here: Not only are the options that are presented all different and good enough to have reason to exist, but the Dancing Blade-esque choice on the move is a real stroke of goodness here, reminiscant of Pinsir's command throws in a way, and it + the grab game overall feels like the primary reason people will remember this set. Back Throw is also quite nice and I like the risk-reward this can have, plus it interacts well on foes, and Up Throw may be the most direct throw but the way it is direct plays into Fred's game well and is still pretty fun to see, so it's good. And the Down Throw once again is something similiar to Skowl but better, as it does not put the foe into new grab difficulty but just continues the one you have which they can already be button mashing out of, not to mention as a throw it isn't an imbalanced projectile grab. Definitely one of the stronger, if not strongest, grab games this contest.

The Smashes are overall pretty good here, the pillars are probably the best smash here and add a lot to the playstyle and the Down Smash is a good but not great kind of deal, where it fits well into the gameplan and adds to the set and makes it better but it isn't the centerpoint or anything, the addition of letting Fred get big with it was a small buff. The Up Smash is...okay, a good move but it doesn't seem to work into what Fred does outside of getting big for the pillars, some of the sound wave interactions are cool but it can be a bit awkward on the move and the strength of the icy explosion is perhaps a bit much. I'm also going to bring up a bit of an odd point here and say I felt the writing/presentation/something for this set felt a bit...off, obviously you don't like Fred and like K. Rool but this got to be a bit weird in writing, and it felt like you were trying too hard to make Fredrik silly and rather than adding to his characterization it felt more like it was put into situations where it just made things sort of awkward. This is also true because at times in the moveset Fredrik felt more imposing or menacing or whatnot, so it created this odd disconnect between the two styles, plus honestly from what I have seen and read Fredrik is not, or at least does not feel, as silly as he can in this moveset. It's a bit of an odd complaint, but it was definitely something I felt came up in the moveset.

But ultimately, Fred was still a good moveset that took a solid base and did some pretty nice stuff with it, even if there were some places where perhaps it could not have specifically improved individually but improved overall, and it was good to see you get a set out Smady...let's not wait 71 movesets before the next one, yes? :)

Quick Comment

Quick Man gets a Quick Comment here as a set I liked...but only just barely and it has a very large amount of room for improvement. A lot of my like for the set comes from the Neutral Special, as the ability to cancel moves into a jump-projectile throw is going to have a lot of uses, and the Specials even plays off it some, mostly the Fox Illusion-esque Side Special. I also actually like the Up Special, as the boomerang that drags foes to Quick Man is a pretty cool idea. The Down Special is really the weak link here: Counters aren't bad, but this one just didn't have any relevance to what Quick Man was doing in general and it could have been replaced with a better move. The rest of the moveset in general is better than most of your sets, but it still has room to improve, but it has some nice stuff in there: Forward Tilt is fine, Up Tilt is actually pretty interesting when you remember he can cancel it at the apex of his jump into the Quick Boomerang and maybe even short hop with it to stay in the air and open up some new avenues of attack and the Jab is vaguely interesting due to it's differences from his normal boomerangs, most notably the fact he has more control over where it returns. The Smashes in particularly make me feel sad, as only the Up Smash really fits well into playstyle or any sense of flow when you would think the smashes would be important on this kind of set.

The aerials are largely kinda filler-y, though not too especially BAD, with the exception of the Neutral Aerial which actually does fit decently well into the set, especially as a shorthop. The throws are pretty much all filler and could all be improved even just by having them work with what is here in an appreciable way, though maybe I am missing something, and this could have been a prime spot to set the foe up for a Quick Boomerang, Illusion or some kind of thing like that. I will also agree with MasterWarlord in that the writing in this set can at time just be used to disguise one line attacks, though I will say I did actually enjoy the way the set was written...it just could have used some more meat on the bones, so to speak. A set with a fairly neat basis and just enough taken advantage of to be better than average, that's what Quick Man is to me.

Barely Tea

Kat, it's so good to see you movesetting again! Always a treat.

The first thing I want to point out is minor, but it happens so consistantly I must ask if it is something in the show I do not know about or if it is a typo: I am pretty sure that you are spelling it as "Barely Tea" when the type of tea is "Barley Tea". I wouldn't point this out usually, except the tea is very prevelant and so you say it a lot and it is spelled this way every time, so I couldn't help but laugh. The move itself is actually pretty nice though: Using tea this way is a bit odd, but only because of character reasons and she seems to actually use tea like this, so it ultimately ends up fairly fine, and the mechanics behind it are interesting. This is especially true when combined with the other specials: The Down Special's tea interaction is nice with putting the Geyser on your shield, Side Special works well to split it around and is fun anyway with it's water interactions and Up Special letting you bend the geysers leads to all kinds of fun stuff, especially when you consider for example that you can bend a geyser and then have it become part of your water barrier, which now has the geyser flowing about at this new angle. The Down Special is pretty interesting and fun too, protecting Leviathan at the cost of movement speed is fun and could have some interesting applications with Up Special and Neutral Special and the application of water physics here is something we haven't seen in a while: Having it merely a short ranged is something most water physics sets have not done and offers a new dimension to her playstyle when you consider she can drag players and projectile through or throw tea canteens in there to rise and whatnot.

The Standards are overall pretty nice. Jab is only okay, with some requisite puddle moving that is sorta necessary in the set, but I actually quite love the Dash Attack, it's a fairly simple interaction but it works a lot with her playstyle, being an effective closer to the foe, which fits her fairly mid to long range playstyle, but having a lot of fun with the fact you can simply propel the foe forward and serving as one of Leviathan's bread and butter melee moves over water, with the non-interaction attack also being okay and fitting well into the game with it's weaknesses. The Forward Tilt interactions are fun and again work into her mid to long range playstyle, an arcing and very controllable kind of projectile, which considering stuff like her geysers and Down Special is of fair importance, but it also has interesting applications if a foe is nearby due to the ability to cancel it with no problems (Or as the move says, Leviathan suffering no!). I will say though that unlike most of the standards, the actual melee move on the Forward Tilt is rather lacking, which is dissapointing. Up Tilt's actual hitbox is a nice little upwards juggler, very useful given her Up Special properties, and I quite like the water effect as well, a sort of either minor or super Snake Up Smash-ish effect that works well into spacial control and has quite interesting applications and descision making in it. Is it worth it to send such a powerful move up at the cost of so much water when it takes 7 seconds? She can play off it quite well and given how she tries to range foes in from a distance or reign them in with her water, it creates exquisite gameplay. I also quite enjoy how with the water barrier up, Leviathan has to sort of knock them out of it and keep them from using it as a shield themselves, it's a good tension point. Finally ending with the Down Tilt, the effect on the water is strong enough I can forgive the more meh melee move, as seperating all the water is very interesting despite being so simple on the surface. Seperating water barriers is insanely interesting with the idea of water physic-esque "traps" from it, plus Leviathan being able to fill them and keep them going, or to even just have half of a water barrier around her, not to mention the fact you can pull geysers into positions, say something like an upside down U, then split it down the middle to create some fairly fun effects which work well with some later moves, even if only for as long as you hold down A...which lets Leviathan also suddenly crash them into foes if they don't stay on their toes and adds a good close range option, which is necessary on these kind of sets. Oh, and you can chop up puddles nicely.

The Smashes also tend to be pretty good, though I am somewhat worried about the Up and Down Smash's balance, moreso Up Smash because I feel what can be done shielding-wise with the Down Smash keeps it in check easily. Forward Smash isn't the best move in the set, but I do enjoy that her best kill move is a close range strike when a lot of her other stuff with the water is more long ranged control with aerial elements, because it creates this fun tension where Leviathan wants to find time to sneak into a hurt foe and finish them off with Forward Smash, but that leaves her more open than usual, especially since she'll be sending water out...she can go for other options to kill later, but of course everyone has more than one KO move and Leviathan has to decide if her defense is not strong enough then to just wait it out or whatnot, it's a fun thing. Down Smash is the true big point of the smashes though, I don't mind the fact the move needs water myself (I did something like that with Alice and her dolls, after all) and the effects are fun. The powershielding to remove it and shield to bounce it around create good situations with the foe where they want to get close to remove it, but they have to beware the fact Leviathan might be there to smack them or, more dangerously, has properly set up watery defenses around there, though prioritizing/clashing with the tornado is generally a good backup option. The reflection on this move may not be the most innovative thing here, but usage-wise it is pretty amazing, especially when you bend geysers around and then reflect them around, creating these awesome striking paths and having some nice freeform creativity...not to mention adding onto that the fact that the geyser will be able to fire lasers out from it's new orientation, which can then be adjusted with the tornado itself, so you have a lot of options in where to shoot in very unique and bounce-y ways that the foe has to keep track of...oh, also, you can bend the TORNADO itself if you want, then you split them in half and well I've talked about Down Smash enough. The Up Smash is okay, I will admit I might want the pull to be a bit weaker, but I do like the idea of just puking out this big inward dragging whirlpool with a sweetspot at the center and firing off lasers from the whirlpool is good, but thinking about it this is probably a bit weaker than the Forward Smash.

The aerials are where this set starts to get iffier: Up until this point I was extremely hype for this set, but I will admit that I was also getting a bit tired of the water interactions, or at least thinking they should be toned down, especially since Leviathan certainly wants moves that do NOT manipulate the water. Unsurprisingly, Back Aerial was an aerial I really liked, being the simple and long ranged spacer she needed on the aerials to tie herself together, but the water manipulation on the aerials is generally not as exciting as on the standards/smashes and sometimes just feels needlessly bizarre (The UAir water tower). What saves the aerials is that the actual attacks on them are fairly decent. Forward Aerial's wall of pain properties with range are pretty nice with an enjoyable little sex kick property on it and it probably has the best water interaction of the aerials and maybe the only one I'd keep, with the exception of the weird water spike thing at the end. Down Aerial is a fairly standard spike, but that's okay here since you can do stuff with Geysers and Whirlpools with a normal spike and so it has some above average uses here, but it's water effect is superflous. Up Aerial is basically just a juggler, but as someone who can pop foes in the air nicely, has good aerial stats and that Up Special of hers a fairly normal juggler is the kind of move she needs, and it has some added elements to it when you pop foes around with your Down Special out. NAir is probably the aerial with the least importance, but I felt that the effects on the water were not something that played well and felt horribly out of place on a Neutral Aerial, though it's usage as a shorthopped moved into the lack of landing lag is okay, but it is still not that interesting.

The grab game, however, is really by far the worst part of the set and the biggest thing that keeps me from placing it higher personally. It is horrifically powerful when she can spread water around like this to have a grab with that mechanic, even if it is laggy, especially considering the ways she can manipulate it. The Special Pummel is just not that necessary or interesting with her other water options. And most of the water interactions on the throws feel very out of place or do not flow into her playstyle well: I honestly can't say there is a single throw here I liked. The best way you could improve this set, if you wish to edit it, would be to scrap the grab game and put in even a generic one in (as long as it flowed). To pile on more criticalness this paragraph, the water interactions as mentioned did get to be a bit too much by the aerials and there were definitely some moves that could have improved melee hitboxes and there's probably some balance tweaks to be had on the Up Smash and perhaps some other areas as well. And Leviathan reeeeeally does not look or feel like a 1.5 weight character, more like a 3 or something.

But overall, Leviathan was a set I felt was a big surprise and in a good way. The flow can require a bit of looking, but her playstyle of more ranged play with some aerial play is fairly obvious. What Leviathan can do with her water and tea is very cool overall and while it does go a bit too far after a while the parrs where it doesn't get too far tend to be pretty awesome in my opinion and this has a lot of concepts to it that are overall executed in a fairly good way. This set could have been a true great if it had a grab game that was not entirely negative, I feel, and less aerial interactions with maybe some more expansion on normal stuff there. But, to me, that merely keeps it from being at the top echelons and being merely the upper echelons. I hope to see more from you! Maybe a certain very Funny set?
 
Last edited:

Katapultar

Smash Lord
Joined
Nov 24, 2008
Messages
1,251
Location
Australia
Oh Froy, analysing sets from top-to-bottom. Nothing escapes your sights!

I'm pretty glad that your opinions more or less matched mine, as that generally means that: for my future sets, if I'm happy with something, you'll be too! Certainly a good way to predict whether one of my sets will be cool or not.

I guess really I have a bad habit of shoving in unnecessary gimmicks in my moves, which is especially bad since I have to waste time thinking of them and that they don't come naturally. That being said, it's mostly because of this set's nature (and because I felt it was necessary because of the character), and I don't intend to keep making sets like this - I just wanted to finish the set. I've got different ideas in mind for my next sets and reckon they'll be a change from my style last contest, which is why I posted this set first.

I do care for the set, but I don't know whether I want to improve the (admittedly terrible) grab game due to wanting to work on other sets and not being sure where to start, but if I did I would probably keep it a close-range one. Don't really know how it would work in with the rest of the set other than generic spacing throws.

I was nervous coming into the comment, but after reading it I suddenly feel confident, like I could make a set you'd really like. So thanks!
 

FrozenRoy

Smash Lord
Joined
Apr 26, 2007
Messages
1,260
Location
Las Vegas, Nevada
Switch FC
SW-1325-2408-7513
Oh Froy, analysing sets from top-to-bottom. Nothing escapes your sights!

I'm pretty glad that your opinions more or less matched mine, as that generally means that: for my future sets, if I'm happy with something, you'll be too! Certainly a good way to predict whether one of my sets will be cool or not.

I guess really I have a bad habit of shoving in unnecessary gimmicks in my moves, which is especially bad since I have to waste time thinking of them and that they don't come naturally. That being said, it's mostly because of this set's nature (and because I felt it was necessary because of the character), and I don't intend to keep making sets like this - I just wanted to finish the set. I've got different ideas in mind for my next sets and reckon they'll be a change from my style last contest, which is why I posted this set first.

I do care for the set, but I don't know whether I want to improve the (admittedly terrible) grab game due to wanting to work on other sets and not being sure where to start, but if I did I would probably keep it a close-range one. Don't really know how it would work in with the rest of the set other than generic spacing throws.

I was nervous coming into the comment, but after reading it I suddenly feel confident, like I could make a set you'd really like. So thanks!
If you want my opinion on the grab, it would be radically improved by simply making it a more normal grab instead of the huge grab that grabs all the water, maybe let her increase her range to a tether if she is standing on water or something. Don't know what do with the throws exactly, but honestly I don't think a generic spacing throw would be bad: Maybe she could throw opponents down and if they are thrown in water they pop out in water elsewhere? It might not be worth it if you want to work on other sets, but I wouldn't mind a fairly quick and not too complex grab game there, or maybe just toning it down some. Maybe she could make a water tether on a throw? It wouldn't surprise me if you could do something with the water barrier.

Anyway, I am very glad you enjoyed my comment, and I hope to see more sets from ya. c: Thanks for the set!
 

Katapultar

Smash Lord
Joined
Nov 24, 2008
Messages
1,251
Location
Australia
If you want my opinion on the grab, it would be radically improved by simply making it a more normal grab instead of the huge grab that grabs all the water, maybe let her increase her range to a tether if she is standing on water or something. Don't know what do with the throws exactly, but honestly I don't think a generic spacing throw would be bad: Maybe she could throw opponents down and if they are thrown in water they pop out in water elsewhere? It might not be worth it if you want to work on other sets, but I wouldn't mind a fairly quick and not too complex grab game there, or maybe just toning it down some. Maybe she could make a water tether on a throw? It wouldn't surprise me if you could do something with the water barrier.

Anyway, I am very glad you enjoyed my comment, and I hope to see more sets from ya. c: Thanks for the set!
Funny, Kitaniji and his U-throw came to mind at one point when I was working on the throws. Anyways, I took some time to make a new grab game, though it's a bit rushed and not -fully- fleshed out on how some of the more complex stuff works, but I still reckon it passes. Can't stand my own sets being extremely overpowered unless I want them to be, especially if the character is not canonically overpowered. In addition, Leviathan's weight is increased to 3 and the tea that was not quite barley is now barley - I just got the joke when working on it, lol. I can get the original grab and throws back anytime since they're saved on my computer.

Interestingly enough, this lesson on grab games has helped me on my next set, which by the way I need to finish that F-throw...
 
Last edited:

FrozenRoy

Smash Lord
Joined
Apr 26, 2007
Messages
1,260
Location
Las Vegas, Nevada
Switch FC
SW-1325-2408-7513
Funny, Kitaniji and his U-throw came to mind at one point when I was working on the throws. Anyways, I took some time to make a new grab game, though it's a bit rushed and not -fully- fleshed out on how some of the more complex stuff works, but I still reckon it passes. Can't stand my own sets being extremely overpowered unless I want them to be, especially if the character is not canonically overpowered. In addition, Leviathan's weight is increased to 3 and the tea that was not quite barley is now barley - I just got the joke when working on it, lol. I can get the original grab and throws back anytime since they're saved on my computer.

Interestingly enough, this lesson on grab games has helped me on my next set, which by the way I need to finish that F-throw...
I'm glad you edited it, I find the new grab game a pretty significant improvement, so if you check my rankings you can see that I moved Leviathan up some. It'd probably be a more significant movement if there was more to move above.
 

FrozenRoy

Smash Lord
Joined
Apr 26, 2007
Messages
1,260
Location
Las Vegas, Nevada
Switch FC
SW-1325-2408-7513
A fairly major change has been made to Tenshi: Specifically, her Shield Special is now a Boss Mode only move, though it has a bit longer range to be used in now.
 

darth meanie

Smash Journeyman
Joined
Jun 6, 2008
Messages
452
Chester Bennington

Welcome to Make Your Move! I'm happy to provide some constructive criticism on your set. You picked a definite oddball of a character to put into this contest, but that's perfectly alright, there have been odder still this contest alone. There's definitely a lack of detail here... what does these projectiles he shoots look like, how much damage or knockback do they do? What's their range? These kinds of questions need to be answered to really judge a moveset.

I'd also recommend describing each tilt and smash individually instead of all as a group. Smash characters all have unique, different smash attacks, so Chester should too. Look at how different each of Snake's Smashes are foe example. One's a close range blast, another a projectile, and a third a trap! You've got a decent start to this character's playstyle by describing him as a defensive character using his long-range normals, but there needs to be more depth to each individual move to really make it in Make Your Move. Regardless, I'm excited to see what you make next.

Chozo Warrior

This set really suffers from a criminal case of underdetail. There's not enough information about damage, knockback, and follow-up opportunities and the like to really compare it to an actual moveset in smash brothers. I'd also recommend against cloning inputs, the Side Special is completely pointless when the Up Special can already do the exact same thing, and with less limits at that. There's a pattern here in him being able to counter projectiles, which is interesting, but not strong enough to base an entire moveset around... such a strategy is useless against a character like Meta Knight who has no projectiles. There's also a bit of laziness when we get to moves like the aerials and throws. A typical sex kick? Opponents are slammed into the ground? You can write more detail than this. Smash has interesting animations and follow-ups from throws, like Bowser's Down Throw or King Dedede's Down Throw, just as examples of both.
 

darth meanie

Smash Journeyman
Joined
Jun 6, 2008
Messages
452


It's too early for good-byes! I'm taking you with me!

The Great Dusknoir is the primary villain from Pokemon Mystery Dungeon 2: Explorers of Sky. Herald from a future where time has stopped and an insane Dialga rules supreme over the world, Dusknoir comes to the present for one purpose only: to exterminate all those who would seek to change the future. As clever as he is powerful and sadistic, he is no ordinary Pokemon. He was granted the ability from his master Dialga to tear open portals in time known as Dimensional Rifts, enabling him to travel through space and time at his master's bidding. Accompanied by a retinue of loyally vicious Sableye, the one and only Great Dusknoir comes to Smash.

Stats

The definition of bulky, the Great Dusknoir is big and heavy, but. as a ghost, is a very slow faller with low traction. This gives him a feel of almost a glacial wall character, which fits given his cold as death personality. He's certainly not lacking in power either though, hitting like a truck, if not particularly quick himself. Of course, as the servant of the master of time itself, he has certain ways around his slowness...

Specials

Up Special: Dimensional Rift

Dusknoir throws both of his hands out in front of him and tears open a portal in space and time, a gateway to the future. The portal is about the size of a door from the Subspace Emissary, a dark portal to another world. It lingers until the Great Dusknoir either is KO'd, or until he uses this special again while in close proximity to an existing dimensional rift to dispel it. If Dusknoir steps through the portal, he reappears a moment later in a dark explosion, two battlefield platforms away in the direction pushed by the control stick, dealing 9% damage to anyone nearby him. If one of Great Dusknoir's own projectiles is launched into a Dimensional Rift, Dusknoir stores it, and can fire it out in front of him by using Up Special again.

If the Great Dusknoir uses this move while a distance away from his dimensional rift, he turns to tear open a portal to the side, slipping in before it seals up behind him, then reappears in the rift he originally summoned, slipping out automatically. it has a bit of lag on both ends, but with a well positioned rift it becomes a recovery that is impossible to edgeguard. Well, with one exception. He can't enter into his dimensional rift through his Up Special if an opponent has occupied the rift. Opponents can step or fall inside the dimensional rift, and are stuck for a period of time based on percentage, taking 2% damage a second.

What the Great Dusknoir really wants though, what becomes really interesting, is what happens if Dusknoir gets all opponents to pass through the Dimensional Rift., and then pass through himself. The screen turns dark, and all of a sudden, the stage completely changes as the players all warp back to the future.


Temporal Spire


The Temporal Spire stage is a unique stage that can only be accessed through the Great Dusknoir's dimensional rifts. The stage appears similar in design to Spear Pillar, but much darker. Floating boulders occasionally spawn from offstage, which can be knocked around like heavier versions of soccer balls, but without the insane damage scaling. The entire area appears bleak. Most importantly though is that instead of the game cycling between many legendaries, only one ever appears: Primal Dialga.


Primal Dialga takes center stage on the platform in the background, appearing with more frequency than the legendary Pokemon normally do on Spear Pillar. Primal Dialga has a few attacks that he uses: a standard attack where he stomps opponents who get too close for a clean 12% damage and powerful knockback. He can also use Ancient Power, summoning boulders to attack with, dealing 18% damage and spiking knockback to opponents, leaving boulders around for Dusknoir and opponents both to knock into each other. Floating boulders will be launched by any attack to deal the same amount of damage that attack would do, then slowly slow down as they travel before floating in mid-air again, dealing less damage as they travel. Boulders hit by an attack that deals more than 15% damage shatter in a Rock Smash-like explosion of rubble for good hitstun. Finally, he can use Roar of Time, a powerful, telegraphed attack that completely clears a side of the screen offstage or one of the two levels of Temporal Spire horizontally, dealing upwards of 25% damage and knockback that kills as low as 60%. Dusknoir is not immune to these attacks, but has ways of avoiding them with his ghostly powers.

There is only one way out of the heart of darkness that Dusknoir summons his opponents to. After Primal Dialga has been on stage for at least thirty seconds, the next time a legendary Pokemon appears it will be a shiny Celebi, who opens up a portal in time, whisking the players back to the original stage. Players must rush towards the portal before it closes after five seconds, while the Great Dusknoir fights them off to keep the battle where he likes it.

While on Temporal Spire, Dusknoir's Up Special acts as a standard portal recovery.

Neutral Special: Swallow / Shadow Ball


Dusknoir thrusts his chest forward, and the mouth on his body opens up, sucking in air... and any unfortunate foes in range slightly greater than King Dedede's own inhale. Opponents caught in the Gripper Pokemon's ... grip... must escape at grab difficulty, button mashing while taking damage, just like in King Dedede's own version of inhale. Dusknoir cannot spit opponents out into stars like King Dedede can... he's much too happy having the opponent at his mercy to simply let them go. There's plenty of value in holding on to them though, especially if he's able to drag them into a dimensional rift...

Holding the B button will cause Dusknoir to instead start to generate a Shadow Ball, charging it up similarly to Samus's own charge shot. Letting go of the B button causes him to shoot out a Shadow Ball for 10-18% damage at the same speed as Lucario's Aura Sphere. He still inhales while charging the attack, potentially pulling opponents into the shadow ball hitbox before he fires it. The Shadow Ball he shoots though can be bounced back by any attack, enabling him and his opponent to get into a game of Dead Man's Volley. Shielding will cause him to store his charge, much like Lucario or Samus do, but prevents him from being able to inhale, his mouth instead storing the shadow energy.

Side Special: Sableye Soldiers


The Sableye are the Great Dusknoir's loyal minions, a group of vicious little goblins that live and die at his pleasure. Sableye each have a mere 25 stamina, easily blown away by a few attacks or one particularly strong attack, and a deceptively simple attack pattern. Sableye will normally rush down the nearest foe at Sheik's dash speed, attacking with Fury Swipes for 3% damage per hit, fairly easy to DI out of. Sableye however will sometimes stop approaching without warning and grin, using the move Astonish instead. When using Astonish, the Sableye are invincible and will counter any attack with a slash of Ghost-type energy for 9% damage in a counterattack. Sableye will also kindly use Fury Swipes on any Shadow Ball that has switched allegiances from Dusknoir, sending it back at foes again. Dusknoir can also swallow up Sableye, shooting them out as projectiles for 8% damage and giving them a a headstart on attacking foes.

When Dusknoir uses this attack, a Sableye sucrries from behind his back, then rushes forward at the nearest opponent, in a relatively lengthy start-up animation. With a dimensional rift in place though, the Sableye will instead leap from the rift, attacking immediately if any opponent is nearby it. On Temporal Spire, the animation is much faster as well, as Sableye crawl from out of the woodwork in the background of the spire itself to join into the battle. Dusknoir can have up to two Sableye out on the field at once, summoning a third removes the first one summoned.

Down Special: Time Control

Dusknoir throws one of his hands above him, holding a strange artifact, a Time Gear. He unleashes its power, and all stage hazards, projectiles, and everything else freezes in place, leaving only Dusknoir and the opponents unaffected by the sudden freeze in time. Projectiles like his Shadow Ball become traps that can be launched in any direction by an attack by either player, while boulders become effectively nullified until hit by another attack to send them flying again. Projectiles will resume movement in eight seconds.

When on Temporal Spire, this has a secondary ability. Holding down the input will cause him to struggle with energy, having difficulty invoking his god to action. After a full second of holding down the button, time will slow for all players except Dusknoir, a massive advantage that he can take to rack up damage or finish off opponents, though not as slow as the timer item makes enemies. The slowed time lasts for a mere three realtime seconds, so make the most of it.

Grab Game

Grab: Bind

Dusknoir reaches out with both of his long, thick arms, catching any opponent nearby into his tight grip. His grab is quick, and has absolutely insane range, beating out Ivysaur's tether grab just from a normal grab. Calling it the best grab in the game is an understatement. His pummel is a powerful punch for 5% damage, much like Ganondorf's, but is very slow. You're lucky to get two off in one grab. Dusknoir can also grab his own minions or boulders and throw them like projectiles with his various throws. Note that his throws still do damage to the Sableye though, so he can potentially KO them by accident. Or perhaps to punish them for their failings. Pummeling with a Sableye grabbed releases the Sableye quickly, forgiving their trespasses... this time.

Forward Throw: Crunch

Dusknoir pulls the opponent in to his chest and opens his mouth on his chest, sucking them inside of him. This puts them in the exact same state as when swallowed by his Neutral Special, allowing for him to move around with the opponent inside, and potentially drag them into a Dimensional Rift. If Dusknoir has a Shadow Ball stored up, he will instead release it at point blank, dealing the same damage and knockback the attack normally would. When he grabs a Sableye or boulder with this attack, he either swallows him to spit out with the B Button, or releases a Shadow Ball to blast the Sableye away as a projectile, dealing damage equal to what the Shadow Ball would have done, but at an angle with more of an arc to it, plus the bonus of getting a Sableye into position to attack the foe as a follow-up.

Back Throw: Whirlwind

Dusknoir raises the opponent over his head and whirls them around, before flinging them away behind him for 12% damage and knockback that kills around 115%. It's a pretty safe killing throw to use. If used with a Sableye or a boulder, it will be a projectile that deals 12% damage on hit and travel at the angle of a Mario at 50% damage.

Up Throw: Phantom Force

Dusknoir sinks into shadow with the opponent in tow, identical to his Down Tilt, only this time he takes his opponent with him, although he can only move as long as the opponent fails to button mash out. He cannot travel out through the bottom of the stage when performing this throw, for obvious reasons. When he releases the throw, he slams out of it, tossing the opponent upwards for 9% damage and powerful knockback. When caught with a Sablyeye, he simply releases the Sableye when he bursts out of the shadows to attack the opponent instead. With a boulder, he fires it up as a projectile with his punch.

Down Throw: Slam

Dusknoir slams the opponent into the ground with one hand for 11% damage, batting them away at a very low angle, with knockback that scales poorly. Boulders will be launched at a low angle as a projectile as well. Sableye however will sink into the ground, ghost-like, appearing as a shadowy spot on the ground, automatically using Astonish on any foe that passes over them, or escaping twelve seconds later.

Standards

Forward Tilt: C0nfuse Ray


Throwing out his right hand, Dusknoir releases waves of energy that deal 5% damage and mild stun, as well as darkening the screen in front of him. This darkness becomes a projectile slightly larger than Bowser that obscures the screen, but has no other effect. Like all projectiles, it can be stopped in place by invoking a Time Gear, hiding things like Sableye, which love to stop and use Astonish inside confuse rays, or DImensional Rifts entirely from view. Surprisingly, this move can be angled.

Down Tilt: Shadow Sneak

Dusknoir melts into shadow, becoming naught but a shadow on the ground, completely invincible. He can then move quickly at Captain Falcon's dash speed along the platform he's on for up to three seconds, or until you release the control. He can even travel through the bottom of the stage to access areas like the second level of Spear Pillar by holding down the control stick. When released, Dusknoir performs a powerful rising uppercut from out of the shadows, completely invincible for the first few frames and dealing an impressive 16% damage that KOs around 100%. Although predictable due to its long start-up, when released the attack is lightning fast, and can be a very powerful tool, especially when delayed or the opponent is distracted dealing with Shadow Balls, Sableye, and Primal Dialga. It's also great for avoiding the damage from Primal Dialga's Roar of Time, using the copious invincibility from the move to survive an otherwise lethal attack. The move can also shatter boulders, protecting him during the move's ending lag and letting him follow up instead.

Up Tilt: Shadow Punch

Dusknoir flattens his body somewhat, using his ghost like incorporeal form, and then rockets up with an uppercut, similar to the one from his Down Tilt, only without the telegraphed start-up or ability to move around, dealing 13% damage and powerful knockback. It's a great anti-air and close up tool in Dusknoir's arsenal. Like his Forward Tilt, it can launch boulders summoned by Primal Dialga upwards this time, for 13% damage and powerful upwards knockback, making this into a very threatening kill move for aerial opponents.

Jab: Comet Punch

Dusknoir performs a quick low punch for 5% damage, followed by a higher punch with his other arm for 8% damage in a true combo. The second punch deals knockback that kills around 180%. It's a relatively simple move in Dusknoir's arsenal, but a fast, useful attack that is great out of shield or against enemy shields, especially since the first hit can be hit-confirmed into a grab, even on shield.

Dash Attack: Mach Punch

The Great Dusknoir plows through enemy attacks, gaining super armor for a few frames as he unleashes a haymaker for 14% damage. It's a decent defensive and offensive technique for breaking through enemy approaches and landing an attack regardless, especially since as a heavyweight he's more than happy to trade blows with his opponent.

Smashes

Forward Smash: Arm Thrust

Dusknoir performs a blindingly quick punch straight out in front of him with his bulky arm, dealing 12-17% damage and powerful pushback that is purely horizontal. This move is great for knocking opponents into Dimensional Rifts that are on ground level, as the unusual form of knockback makes this attack impossible to DI up out of. Besides that, it's just a fantastic all around spacer and damage dealer, and even a potential KO set-up by knocking the opponent further away towards the edge, or outright KO move at high percentages. It can even launch boulders summoned by Primal Dialga as decent projectiles, dealing 12% damage to opponents struck by them. If angled upwards, the attack changes to have standard knockback, killing around 110% uncharged.

Down Smash: Ice Punch

Just like in Pokemon: Explorers of Sky, Ice Punch is in Dusknoir's moveset. Dusknoir performs a powerful piledriver punch with his fist glowing a soft blue, freezing any enemies for a length similar to that of PK freeze, with total time based on damage percentage as you would expect. The attack deals 16-23% damage and decent upwards knockback. Dusknoir can also freeze time to freeze frozen opponents in place, allowing him to follow up with an aerial attack or a launched boulder at the opponent. Especially good if he can then launch the opponent towards a Dimensional Rift. Frozen opponents can still button mash out, but it becomes more difficult as the timer to escape is no longer ticking for them either.

Up Smash: Rock Slide

Dusknoir charges up this attack by summoning two dimensional rifts on the ground to either side of him, then shooting out a pair of boulders up Ganondorf's height from each portal, which deal 14-19% damage to enemies and vertical knockback that KOs around 140%. He can then smash the boulders away with other moves like his Forward Smash or a short hopped Forward or Back Aerial to launch them at foes as projectiles. Using the Up Smash again with boulders nearby will have him quickly slam the boulders back down for 18-24% damage and strong downwards knockback that can bounce opponents back into the air.

Aerials

Neutral Aerial: Rapid Spin


Dusknoir turns into a whirlwind in midair, sweeping up opponents into his body like a weaker version of Mach Tornado. His arms are extended out, giving him a bit of disjoint near the top of his body as he spins, each hit he dishes out dealing 2% damage and slightly sucking the opponent in for more, with the last hit dealing 2% and knockback that KOs around 150%. It's a solid all-around defensive maneuver that can even be used offensively. Mashing A while in this state will cause the attack to extend and increase his aerial DI while using the move, as well as elevate him ever so slightly, but not enough to seriously stall with, as doing so also increases the ending lag to the move.

Forward Aerial: Mega Punch

Dusknoir performs a piledriver punch in front of him, dealing knockback similar to Mario's forward aerial, with it knocking opponents forward early on and downwards near the end of the attack. Early in the attack it deals 13% damage and is great for knocking floating boulders around or enemies, and even Sableye as projectiles into opponents. Later on it deals 16% damage and spiking knockback. Either way, it also has almost no landing lag, surprisingly, as Dusknoir's ghostly body easily transitions to floating just off the ground, making it usable out of a shorthop. It can also shatter boulders at close range fairly easily, allowing him to follow up with his low landing lag into another attack.

Back Aerial: Payback

Spinning around, the Great Dusknoir performs a haymaker at opponents behind him for 15% damage and powerful knockback, before returning to his original position in a laggy animation. If he lands during the attack though, his landing lag is cancelled as he reorients himself in the opposite direction he started in, allowing for a quick follow-up instead and possible shield pressure, especially if followed by a jab.

Up Aerial: Shadow Punch

Dusknoir shifts into an ethereal mist, allowing him to glide up through structures above him, like the lip on Final Destination or the lower level of Temporal Spire / Spear Pillar. As an attack, he raises his fist in a punch, dealing 13% damage and powerful upward knockback, if a relatively laggy move. Opponents on platforms or stages above him will be hit by the attack while he is invincible, phasing through it.

Down Aerial: Smack Down

Dusknoir stalls in midair and throws his right hand down, palm open, hitting any enemy beneath him in a hitbox for 3% damage. Whether he hits someone or not, he then falls quickly downward, smacking into the ground below him with his hand for 12% damage to anyone hit, including an opponent caught by this down aerial, dragged down with them. Offstage, this move is suicide, but can potentially grab a KO if it hits an opponent successfully. Opponents do have a chance to avoid being killed by this attack... they can repeatedly Smash DI to escape.

Final Smash

Primal Dialga: Roar of Time

Primal Dialga is summoned to the battlefield behind the Great Dusknoir, and uses his signature attack, this time buffed up beyond its normal power, dealing a whopping 35% damage and powerful knockback that can kill as low as 40% to any opponents with a range similar to Samus's Zero Laser.

When on Temporal Spire, Primal Dialga instead roars, freezing every enemy in place for 20% damage, then fires a blast of energy that expands from the center of Temporal Spire in a ring to every spot on the battlefield, dealing an extra 20% damage and powerful knockback. This move can KO anyone on the field at as low as 25% damage from the center of the stage, and at 0% near the edges.

Playstyle

The Great Dusknoir is a character who seems relatively straightforward from the outset. Knock the opponent into a Dimensional Rift, and use Dialga and his powers to annihilate the opposition. The actual play of such is a little more tricky than that though.

There are a number of interesting ways that Dusknoir can set up his Dimensional Rift. He can put it in the center of the stage for ease of access, or if he's feeling particularly tricky put it offstage where the opponent is trying to recover to force opponents in, although that weakens his recovery substantially by doing so. When it comes to getting opponents into the Dimensional Rift, he has a number of options. His Swallow attack is the most obvious way to move opponents around and force them into the rift if he has them in close proximity, and he can access it from his grab. His Up Throw is another move that allows him to easily move opponents around. His Forward Smash can also slide opponents into Dimensional Rifts on the ground. He can even freeze opponents with his Down Smash and then use a well placed aerial to knock opponents into them. Note though, that all of these methods require that he's built up some damage on the opponent to be truly effective.

When it comes to dealing damage, Dusknoir prefers long distance confrontations, firing Sableye, Shadow Balls, and boulders at opponents. When it comes to projectile games, his ability to freeze all projectiles on the screen and nullify them is a huge asset, allowing him to be a threat to even the most projectile heavy opponents with only a few projectiles of his own. He has a few good moves to launch boulders with, namely his quick FSmash and Fair, but also his Down Smash and other aerials can allow for accurate shots. Turning Shadow Balls into stationary traps is another great strategy with Dusknoir, allowing him to better control space. Opponents can of course knock these traps back at him, but Dusknoir can just freeze them before they hit him and then fire them back at them again. With Sableye and other projectiles flying, he has the advantage, if not an overwhelming one.

Dusknoir is no slouch up close though either. He has a surprisingly strong ground-to-air game thanks to the nearly absent landing lag on his forward and back aerials letting him quickly smash into opponents from the air, while his air-to-air combat is... less than stellar. His Up Aerial is intentionally fairly weak, and he'd much prefer to deal with aerial opponents with anti-air moves like his Down Smash, Up Smash, and Up Tilt. Don't forget his incredibly powerful grab game and ability to hit-confirm the first hit of his jab into a grab. It's a very powerful tool for building up early damage or grabbing late game KOs.

But what you're really here for is how Dusknoir can utilize Temporal Spire to the maximum. He can camp at opponents with Primal Dialga, and use his Down Tilt and Up Aerial or Up Special to easily transfer between the two levels of Temporal Spire. Ancient Power is another move that Dusknoir can take advantage of, especially by launching boulders into portals from Dimensional Rift. But the real key two elements are Dusknoir's ability to slow time, allowing him an even further advantage with his fast Sableye attacks being harder to avoid in combination with attacks like his Down Tilt and Shadow Balls firing at opponents, as well as his surprisingly competent air-to-ground game.

The real fun comes in Dusknoir's most fun way to land KOs though. Primal Dialga regularly uses his Roar of Time attack to completely clear an area with a giant beam of draconic time energy, which Dusknoir can manipulate the opponent into much the same way as he manipulates foes into his Dimensional Rifts. He can avoid the attack itself using his Down Tilt, while opponents are unable to shield or dodge past the all-consuming beam attack. If he gets an opponent into a Dimensional Rift at an early percent, he can even get a very early kill on an opponent, giving him a huge advantage.

More fun comes in preventing the opponent from being able to escape Temporal Spire. The main thing that prevents opponents from being able to camp and plank their way out of fighting Dusknoir is that the shiny Celebi only appears in the same place that Primal Dialga appears, and only is there for five seconds. This is the time to fight your hardest, using nearby boulders from Ancient Power, projectiles, Sableye, and your own powerful attacks and stalling grabs to keep the opponent from escaping your living nightmare.
 
Last edited:

ChaosKiwi

Smash Apprentice
Joined
Feb 1, 2014
Messages
104
NNID
ChaosKiwi


DWN-079, Chill Man, is a robot designed to help fix the effects of global warming in the Antarctic. Using his freezing gel, he can create ice in any form, which is quite useful in his line of work. Also, he runs a blog, posting images of the wonders of nature to raise awareness! How nice!

STONE COLD STATISTICS

Size- 6
Weight- 7
Jumps- 5
Ground Speed- 6
Aerial Speed- 5
Fall Speed- 6

SUB-ZERO SPECIALS
Neutral Special- Chill Spike

Chill Man, like all Robot Masters, has a special weapon! His is the impeccable Chill Spike weapon! When the input is input, he'll level his Buster arm in front of himself. At this point, the player can angle the stick to aim his weapon. However, there's only a short amount of time to do so before he fires his Chill Spike. Though, when you fire it, you may be disappointed to find that instead of a spike of ice, the Buster only fires a glob of freezing cold gel! But wait, before you call foul, that glob of light blue gel is quite effective! You see, once it hits a solid surface, be it floor, wall or ceiling, it will solidify into a patch of icy spikes, about as wide and tall as Kirby.

The ice spikes themselves act as you'd expect: A stage hazard, harming anybody who comes into contact with them aside from Chill Man himself, giving them 8% damage. The spikes aren't immortal, however, as they'll disappear after taking 20% worth of damage.

The Chill Spikes aren't the only threat that the freezing gel pose, however! Should the glob of gel instead hit an opponent, not a solid surface, it will freeze them solid (in addition to causing them 2%)! Unlike other freezing attacks or items, which freeze foes in a large iceberg looking thing, the gel just gives them an icy texture. During the one second of frozen, the enemy cannot move at all! At least, not of their own power! They still maintain any momentum they had, allowing Chill Man to, say, freeze a foe and allow them to slide forward into a set of Chill Spikes!

There can be a total of three Chill Spikes on the field at once. Should Chill Man try to create more, the gel will simply disappear upon contact with a surface, not turn into Spikes. They'll still freeze people, however! After 40 seconds, they'll disappear on their own, via the horrific process known as... melting. Though, it is possible to extend their life by ten seconds, via hitting the Spikes with another gel shot during their last ten seconds of life. Hit it any earlier than that, though, and nothing will happen.


But, as their life can be extended, so can it be shortened. Every time a person comes into contact with them, the person, of course, takes damage, but the life span of the chill spikes is reduced by 10 seconds! Meaning, the chill spikes can hit people a maximum of four times.

Side Special- Chill Zone

Chill Man again raises his Buster arm, but this time lowers it a bit, aiming it at the ground just a bit in front of himself. Again, he fires a glob of freezing gel. But wait! What's this? Instead of Chill Spikes, he covers the ground in a slick of ice, one SBB long, called a Chill Zone! Though he can only have one Chill Zone on the field at a time, Chill Man can make them count with proper planning! You see, the Chill Zones act as patches of ice would in real life. That is to say, they're slippery! People who walk on them lose traction, making it easier to slide into things like, say, Chill Spikes?

Chill Zones do not disappear until Chill Man is KO'd or until he creates a new one (as there can only be one out at a time). The glob of gel, unlike his Neutral Special, does not freeze people upon contact, instead simply dealing them 4% damage... But it will freeze the ground directly below them, provided they are on the ground! Use this to create a slippery patch right below them and slide them into a trap! Or, freeze them with Chill Spike gel and then slide them on a Chill Zone, while they can't escape! There are tons of possibilities!

Up Special- Chill Cannon

Now, I won't lie, the name of this special is misleading, as it doesn't involve any sort of literal cannon. But that doesn't make it less... cool. By firing a blast of particularly high pressure freezing gel at his own feet, Chill Man creates a rather jagged pillar of ice, about one point five SBB's high, directly below himself. This, instead of, say, impaling Chill Man, launches him into the air a full two and a half Stage Builder Blocks.

Now, that pillar of ice isn't only good for a quick boost in height, no sir. It also has the nifty effect of damaging those it comes into contact with in its first half second of life, delivering a nice 12% damage! Though, it isn't always easy to get a hit with this attack, as the pillar's hitbox is rather thin, despite being quite tall.

Despite only having a damaging hitbox for half of a second, the pillar stays around for a full second. During this full second, it is capable of blocking one attack, or acting like a wall to get in foes way, or even help give them an obstacle during their own recovery!

Down Special- Save the Environment

Chill Man is quite keen on preserving the glacial planes of our planet, as it's literally his one purpose in life. Thus, he makes good use of his abilities by, what else, creating a glacier! Not a full glacier, mind you. That'd be ridiculous, the hitbox would be massive! Instead, he creates a smaller one by quickly firing three shots of freezing gel directly in front of himself, the gel solidifying into a chunk of glacial ice about as wide as he is tall (and about half the height).

Now, what you do with this glacier is up to you, the player! You can leave it there, as a sort of obstacle for the foe to surmount, slowing them down or blocking their lower attacks. Alternative, however, Chill Man, and nobody else, is capable of moving the glacier via hitting it, the speed the glacier moves being dependent on how much knockback the attack would do to another player. Should a moving glacier hit somebody, it doesn't (normally) do any damage to them. Instead, it just carries the foe along, pushing them as it moves.

"But Kiwi," you shout, banging your fist on the desk in anger, "What's the point of a move that's only function is slowly pushing somebody?" I'm glad you asked, fine reader! The ability to remotely push somebody via glacier has tons of uses. For instance, say there's a foe you've frozen with a Chill Spike's gel shot! you can use this move to get them going in the direction you want, perhaps onto a patch of Chill Zone or into a set of Chill Spikes? Heck, push them off the edge of the stage while you're at it! Speaking of things falling off the edge of things, that's another neat facet of the glacier: It is, being a glacier, very heavy. Thus, it falls fairly quickly, and should it, say, slide off the edge of a platform and onto somebody, it'll deal them a hefty 18% damage! Now, this may seem like a bit much, but remember, the glacier is large, slow, and easy to see coming. If the foe can't get out of the way, it's nobody's fault but their own.

The glacier has its own stamina, similar to the Chill Spikes, but its stamina is higher, being 30% damage. Alternatively, a glacier will break after falling from a suitable height (1 SBB or more). There can only be one glacier on the field at once, so if Chill Man attempts to create a new one, the old one with quickly melt while the new one is made. If Chill Man is KO'd, the glacier will, again, melt. Finally, the glacier moves faster on Chill Zones.

COLD STANDARDS
Jab- Chill Out!

Holding out his buster arm, Chill Man fires a blast of freezing gel directly in front of himself, quicker than normal but still abnormally slow for a jab. What does this gel do that most of his other gel-based attacks do not? It freezes things! Differently, I mean. instead of creating spikes or freezing something solid, the gel will travel a half SBB before evaporating. But, should it hit a foe before that, they take 2% and take on a slightly icy tint. Once they are hit by a gel shot from this jab, the foe will move 1/10 slower for one second. This effect stacked, too! That doesn't mean they'll be 5/10 (or 1/2) slower, though! No, only the time stacks. That is to say, you can hit somebody with this jab ten times, and they'll be slowed for 10 seconds, but still only be slowed by 1/10!

Side Tilt- Chill Pill

By solidifying freezing gel immediately as it leaves the Buster, Chill Man is capable of creating a sort of melee weapon, like an icy baseball bat built into his arm. He swings it forward, dealing 12% damage. This attack is somewhat good for keeping approaching enemies away, though that's not the main function. Chill Man would be smartest to use this move to quickly move around a glacier created by Save the Environment, as, unlike other attacks, it will cause the glacier to move more than it should based on how much knockback it does to enemies! If it hits a slowed enemy, it will deal them an added 2% and send them sliding farther than it would normally!

Up Tilt- Chill Burst

Chill Man aims his buster upwards, firing a shot of freezing gel that- What's this? It's exploded mid-air, immediately over Chill Man's head! And by explode, I of course mean, "The gel freezes into a blast of icy shards and cold air, which deals 10% to anybody it hits and causes them to very shortly stall midair, allowing for them to easily be hit by other attacks that Chill Man has which hit upwards, such as his Chill Cannon!" Hope that was clear. Also, the burst of cold has the same effect as Chill Man's jab, even adding on to the stack of slowness.

Down Tilt- Frostbite

You may be noticing that the Buster and freezing gel are used in many attacks of Chill Man's. Well, you'll be happy to know that this attack is no exception. You see, Chill Man aims his Buster at the ground immediately below himself, firing a freezing gel shot as he performs a small jump. The freezing gel freezes into a peculiar shape-- What looks like a bear trap, made entirely of ice! After a small delay, the bear trap bites closed, snapping anybody to either side of Chill Man, or just above the bear trap for 13%.

How can somebody be above the bear trap if Chill Man is jumping above it, you ask? Well, should Chill Man use this attack while moving, he'll maintain his momentum during the jump, allowing the Robot Master to jump over the trap and leave it behind, meaning he can leave a (rather short term) trap for his enemies!

Dash Attack- The Cold Shoulder

Chill Man takes a cue from various other ice themed, uh, people, by freezing the ground immediately in front of himself as he runs. This allows him to pick up speed, before performing a spinning strike, using his Buster arm as a blunt instrument, before ending the attack with a quick shoulder barge of sorts. The initial spin does a meager 8%, but should you get somebody during the small window of the shoulder barge, they'll take a nice 13%!


FROSTY SMASHES
Side Smash- Icicle Impaler

Thinking quickly (but not as quickly as Quick Man), Chill Man kicks up some of the terrain in front of himself, before blasting it with freezing gel. The gel solidifies the material into a single, large spike of ice that juts forward at a 45 degree angle before quickly melting. Should somebody be hit with this large icicle, they are dealt 21% and launched at the same 45 degree angle into the air. This is the best KOing smash, for good reason. After being hit by this attack, foes remain frozen for a brief period after being hit. Since Chill Man's frozeness means that foes cannot move at all but retain momentum, foes won't be able to use DI while they're flying, making it harder to avoid being KO'd!

Up Smash- Head Cold

Aiming the Buster at his own head, Chill Man fires a blast of freezing gel into his own face. Or does he? As you can see above, our man Chill Man has a block of ice around his head. So in this move, he simply makes it taller, and also deadlier! The freezing gel causes his head... ice to grow larger and spikier, hitting a wide area above him directly and to the sides (but still above him). Anybody caught in this attack is hit with a ansty prick, taking 22% in the process! They'll feel that tomorrow! After this attack, it takes two seconds for the head spikes to melt, meaning the spikes remain as a hitbox in that time, dealing 5% to those they touch!

Down Smash- Coldplay

Chill Man gets low to the ground, aiming his Buster into the air as he unleashes a mist of vaporized freezing gel, which extends to his left and right. When the mist first, uh, mists, anybody hit with it takes 21% and is knocked back some, unless they're frozen. This mist has two effects. The first is to slow down any foe inside of it by 1/10, which stacks with any other slow down the foe may have... but instead of stacking on with the timer, this is Chill Man's only attack that will actually stack the slowness itself! That is to say, that, while the foe is in the mist, should they have slowness already, they will be slowed by 2/10 while in the mist! Neat! The secondary effect is that they will take non-flinching damage while in the mist, 1% per second. The mist lasts ten seconds and only two clouds can be out at a time.

However, should a foe who enters the mist be frozen solid by another of Chill Man's attacks, their speed will increase by 2/10 while in the mist! That is to say, if there's, say, a chill spike near the mist that, normally, the frozen foe wouldn't have enough momentum to reach/be stabbed by, the mist will speed them up enough to hit them! Awesome!

ARCTIC AERIALS
Neutral Aerial- Freeze!

With great speed, Chill Man releases a mist of freezing gel around him in a perfect circle. Should anybody hit this gel, they take 9%, and minimal knockback. That's not the meat of the attack, though. The real use of this move is to add to the slow down counter's stack midair, helping act as a deterrent for foes who get too close mid-air.

Forward Aerial- Cold Front

Your best bet for mid-air KOing, Cold Front is when Chill Man sprays, again, a mist of freezing gel, this time directly ahead of himself as almost reverse flamethrower (reverse in the sense that it shoots cold stuff, not fire). The spray travels about one SBB in before evaporating, but, should it hit somebody, it'll instantly solidify into a spear of ice, the tip of which is a sweet spot with KO potential at 120%. The damage taken from this spear is 12%.

Back Aerial- Chill Attack #79

Cold Man, unlike many other fighters, doesn't turn around for his BAir. Instead, he blasts a high pressure burst of cold air from his buster, angled upwards at a forty five degree angle in front of himself. The burst of air does no damage (though it will push foes away), but the force of the blast sends Chill Man himself flying backwards as a sort of (in)human projectile, dealing 13% to anybody he hits!

Down Aerial- Cold Feet

Chill Man straightens his metal legs, blasting his feet with freezing gel. This solidifies around his feet, creating a block of very sharp, pointy ice around the bottom half of his legs! After stalling very shortly, he blasts downwards, his feet meteor smashing those below him and dealing them 14% damage! If he hits the ground without hitting anybody, though, his icy feet shatter, giving him a lot of ending/landing lag, so make sure you time it right!

Up Aerial- Cold and Refreshing

Aiming his Buster arm straight up and swirling it around slightly, Chill Man takes a cue from air man, releasing a miniature tornado of cold freezing gel mist! This mist spins those it hits around, randomly flinging them either left or right while giving them 10% damage and adding another two seconds to their slow down timer stack! What a move!


FROSTY GRABS AND FREEZING THROWS

Grab- Stopped Cold

Woe to the foe caught in this icy grab! Chill Man fires freezing gel at the ground in front of him, freezing any foes caught in it in place to allow him to throw them!

Up Throw- Old King Cold

Chill Man chucks his foe into the air, and as they fall he blasts them back up with a steady streamy of freezing gel mist! This throw doesn't damage them, however! Instead, it adds a big honkin' 5 seconds to the slow down counter before they're blasted away!

Forward Throw- Ice Slick

Chill Man, again, throws his foe into the air (just a bit), before quickly creating an ice slick two SBB's long in front of himself. As the foe lands, he tackles them, sliding both himself and the captive foe across the ice slick before the foe is launched upwards at a slight angle! The foe takes 13% damage, and the ice slick stays behind for 10 seconds, acting the same as the ones created by Chill Zone, but longer in size!

Back Throw- I'm out of cold puns

Freezing his foe solid with a quick blast of freezing gel, Chill Man ducks to the behind of the foe. Giving them a strong kick to the back, Chill Man shatters the ice around them, sending them flying with 12% damage and adding 2 seconds to their slow counter! Excellente!

Down Throw- Ice Ice Baby

This throw is another non-damaging one, but it still has a nice use! Freezing his foe in a block of ice, Chill Man kicks them away. They slide forward, with all the same physical properties as a glacier created in his down special! While in the ice, the foe is helpless! But, all is not lost, as the frozen enemycicle can escape via a lot of button mashing, or via somebody else dealing 10% to the block of ice they are contained in!

FINAL SMASH

WHAT KILLED THE DINOSAURS? THE ICE AAAAGE!

Chill Man's stage is full of ice and snow, a slippery place where you need to watch out for frostbite and or polar bears. Thus, when he gets the Smash Ball, he tries to make the stage that he's fighting on resemble home! It starts to snow, and every solid surface becomes ice, causing everyone but Chill Man to randomly trip and slip around! In addition to that, Chill Man's attacks do 1.5x as much damage, and everyone takes 1% damage per second due to, you know, horrific frostbite.

PLAYSTYLE

Dude, just... chill, man.
 
Last edited:

ForwardArrow

Smash Ace
Joined
Aug 17, 2011
Messages
502
The Great Dusknoir
You know I probably should've mentioned this before you just dove right into the set, but I'm not a fan of Fly mechanics at this point. While it certainly can give them options for things to do inside the Fly, it makes their set a lot flatter outside of it because it causes everything to bottleneck into "force the foe into the Fly". If it's anything less than that, it starts to feel really tacked on instead, and it's very hard to find a proper middle ground. I will say that Great Dusknoir, at the very least, attempts to find the middle point, but it honestly leans a bit towards the later because when you include something as big as another stage and then he doesn't entirely revolve around it, being perfectly functional outside of it to a degree that he probably can win matches entirely fine without it. This is a good thing, don't get me wrong, but making something as big as an entirely different stage into "just another cool feature" is pretty... tacky, I suppose that's how it could be put.

I spent an entire paragraph rambling about something the set doesn't even do that badly, onto the good, you play off the alternate stage in a fairly cool way, there's a fair amount of strategy to how he utilizes the Spear Pillar layout, as well as Primal Dialga. Aside from that, he has the fairly cool mechanic of being able to freeze projectiles as traps, and his can at least all be reflected around or destroyed by anyone to keep things fair. The projectile tennis aspect to the set is pretty interesting on a whole, and there are lots of little details in both the specials and later moves to give depth to it, such as the lack of landing lag on the Fair/Bair or the ability to smash boulders in a Rock Smash-like way, or of course using the Down Tilt/Down Special to avoid the projectiles the foe is throwing back at you. I feel to a degree the Sableye are underutilized as minions, mostly just serving as worse boulders when used as projectiles and while you do some fun stuff with DThrow/FTilt to utilize them better as minions, there isn't as much depth to them as I wish there was. This comment was overly nitpicky I will admit though, actually talking about the set made me like it quite a bit more, I would say this is definently one of your better sets.

Tenshi
Tenshi immediately rings some warning bells with the mechanic, which brings back Dr. House's mechanic and it's very awkward vaguely defined concepts of offense and defense and "adapting". Tenshi does it in a more appealing way, just applying a straight buff rather than arbitrarily changing the entire set. I still feel its existance is very awkward, as frankly it doesn't work into the earthquakes playstyle at all, aside from providing some minor buffs for the tech chase aspect of it. The set definently does have fun in parts though, the earthshaking and pillars are fairly interesting, as is how you get the earthquakes in the first place with those keystones, and of course you have some standard fun stuff with reflecting them or terraforming the pillars to create weird earthshaking patterns... my problem being that after a while, it ultimately just starts to amount to more and more angling, it honestly gets a bit dull, and a lot of inputs are used redundantly or wasted on stuff dealing with Scarlet Perception, which ends up amounting to very little in the set. On the plus side, the boss mode is pretty fun, and it's not like the earthshaking aspect is at all bad, it's standard fun projectile play except utilizing the fact that it always remains grounded. I just came away feeling like there wasn't much to the set, and perhaps I'm having trouble explaining exactly why here, but it's definitely not a bad effort from you Froy.

Chill Man
Now that you've made your edits, I actually do like that Chill Man displays some awareness of playstyle, with the way the various ice objects work off each other in the glaciers, frozen ground, and spikes. I don't feel there's nearly as much depth to these aspects as there could be, the spikes basically being Snake's mine but worse and allowing more of them and we've seen icy ground used more successfully in Fredrik and Bashmaster last page. That said, I'm pleased that you actually put some effort into the Standards and improved the Smashes somewhat, but the aerials/throws are pretty horrible by comparison, just being redundant with the Smashes/Standards or worse, what sticks out in my mind being that one of the throws is just a superior version of a special. Either way, you clearly have the idea of how to handle flow, but I'd like it if you tried to be a bit less redundant in future sets, and try to keep the quality going into the aerials/grab game at all. That bit is hard, but I think you can do it.
 
Last edited:

darth meanie

Smash Journeyman
Joined
Jun 6, 2008
Messages
452
Quick Man

There's definitely improvement to be seen here, Kiwi. The Quick Boomerang is an interesting, versatile projectile that you capitalize on well with its ability to cancel into other moves easily, and moves like the Up Special are interesting. The Down Special is a bit... lacking though. There's nothing it does that a roll wouldn't do better. It feels a bit like you designed the moves one by one as you came to them... instead, I'd recommend thinking up a few key moves, like smashes, tilts or aerials that will be important, and building around them. As it is, the moves kind of fall short without really fitting altogether nicely. That said, it still has a certain amount of flow as a quick combo-focused character whose fast hits rack up damage with projectiles and close range attacks. Overall, this is one of my favorite sets from you so far Kiwi.

Crash Man

Two Robot Masters in a row, huh? Crash Man struggles a bit from underdetail and a bit of a poor sense of balance. I dislike that the Crash Bombs explode immediately, as they have a delayed explosion in MM:2, if I recall correctly. It feels less authentic. The drill run attack also seems a little too powerful... up to 30% damage, and you can combo after it? That's a lot of damage off of one attack. The Down Special is interesting, but thirty seconds is a little long for an explosive, a shorter time limit would be more frantic. Unfortunately, the rest of the moves struggle under a criminal case of underdetail and lack of information to really go off of... they look like you put some thought into them, but not enough to really compare them to actual smash characters. You also forgot to include two moves: a dash attack and an up aerial.

Rain

I'm not too familiar with the Mortal Kombat universe to say how accurate this moveset is to the original game, but it seems like you did a good job of adapting the character's ability to the smash universe with moves like the Up Special and such. I would have liked to seen some interactions, such as getting opponents wet with water attacks and then electrocuting them with the Down Special. As it is, the move is just a weaker version of Pikachu's move. The move sort of loses steam once it gets to the aerials, and you completely neglect to include a grab-game to the set at all, which is a shame as I imagine Mortal Kombat characters to have quite, er, colorful grab-games.

Shadow Naoto

Ah, back into Froy sets. You made a couple on this page, let's see how many I comment in this comment block. Immediately though, I'm not a huge fan of the direction the set goes. I'm not a huge fan of status effects, especially complex, elaborate effects like the ones you introduce in this set. I'm especially not a fan of moves like the Down Smash, where Naoto's fire randomly burns hotter or longer than any other character's fire. Having said that, the Neutral Special is an interesting twist on the usual status effect mechanic, but ultimately it just adds another layer of debuffs to put onto the foe. In the end, I rather dislike this set I'm afraid, which makes it an outlier for your sets as far as I'm concerned.

Armored Toad

Aw geez, this set. First of all, I think you need to understand what a liability his weight changing mechanic is. Weight is bad at low percentages, and good at high percentages, because you're combo fodder at first, but you can survive longer later in the game. Armored Toad is more combo fodder than any other character in smash by a long shot, but he doesn't even get the advantage of longer survival later in the game. Second of all, becoming weaker as the match goes on is a strictly un-fun mechanic. Imagine if Lucario started off at full strength, and then got weaker and weaker every time he took damage. It takes away the comeback factor. Beyond that mechanic, the moveset doesn't have much of a flow or playstyle to it either. It's a pretty unfun set to read, and that's quite unfortunate.

Leviathan

It's been a while since I really sank my teeth into a Kat set. There's something about the way you make sets that's so in love with the character you choose that's really compelling. Anyways, on to the set itself. The neutral special is a decent move, though I dislike that she randomly takes more knockback as an extra punishment for getting hit, getting hit should be punishment enough alone, and it doesn't make terribly much sense on its own. I dislike the feeling that her moves feel like two moves in one... an attack and an interaction both together, especially since there's no real rhyme or reason to why one move has an interaction that the other doesn't. I also don't much like that the Up and Down smashes need water nearby to activate, instead of generating water for themselves. There's certainly some interesting depth to this set, and it is one of the few sets that I really feel like I'd enjoy playing with and having in my hands, so that's a credit to it.
 

MasterWarlord

Smash Champion
Joined
Aug 24, 2008
Messages
2,902
Location
Not wasting countless hours on a 10 man community
RETURN OF THE SLIP’N’SLIDE

Chill Man’s flow mostly comes from turning the ground to ice, moving around a glacier along the ice, and sliding a frozen foe along the ice, most obviously during dthrow. This is a very basic direction to take an ice set and has been done many times before, building most of the moveset’s flow. While I could recommend far better sets than Hockey Man (MYM 12, UserShadow), I would suggest looking at him because it’s still very down to earth, the same aesthetic, and you could very feasibly have reached that level of quality with this set.

When the moveset isn’t about simply sliding things around, it’s about slowing the foe down. Slowing a foe down already is a pretty useless effect, when it’s only by 1/10 it becomes almost trivial. If it was buffed a bit I could see it flowing into a simplistic camping game, but Chill Man would need a better projectile to do that rather than awkwardly kicking the glacier around everywhere. The dsmash also is tacky in that it is the only move that stacks the slowing up to 3/10 rather than just the usual timer.

RETURN OF THE FLY

FA made a very good case for why a fly is awkward when it’s barely utilized – it just comes across as tacky when the moveset goes in such a very boring and mundane direction. I never would have expected Dusknoir to do so much punching going into the moveset, and the most you really attempt to interact with the fly most of the time just consists of mentioning how a move is slightly better at demolishing boulders even though all attacks can do that. Aside from tackiness, it’s just really weird when you have an entire other stage and a bunch of minions, and they’re barely played off of. It’s not like a simpler fly set couldn’t work, but this isn’t it, and the character and presence of the fly just makes me expect something much wackier from the outset. I wouldn’t bother to reference the set if you hadn’t responded remotely positively to it, but I would cite Manfred Von Karma as an example of what I would want if you were really going to try to play this concept as more “in-smash”.

The fthrow is the Neutral Special, and the utilt and the uthrow are the dtilt. That’s already bad, but this has some more relevance in that the dtilt says you can go around the edge of a stage to reach the underside. Uthrow is directly stated to use these mechanics, meaning you can pull a guy under there at Captain Falcon’s dashing speed and stagespike them. Dusknoir may then recover back to the main stage either by portal recovery Up Special, or by phasing through the stage via uair. In order to use this throw, all he has to do is land a "fast grab with range better than Ivysaur's." With this combo in mind, his pocket dimension alternate stage is actually worse than a regular stage due to it not having a bottom.

Dusknoir decimates and invalidates enemies who use projectiles. While his Down Special is an improvement over Mewtwo’s against projectiles, certainly, just having the Up Special portal out will passively absorb enemy projectiles for Dusknoir. While it’s a bit of a loss for Dusknoir to not use his own as easily, he’s not especially reliant on them given his moveset most heavily consists of punching. The Down Special for some reason lasts forever, meaning if a minion is not in the middle of an attack it will effectively kill the minion by freezing them uselessly forever.

RETURN OF DR. HOUSE

I don’t think my comment will be all that much more helpful than FA’s, but I did like this set a fair bit better than him. The concepts introduced, while nothing groundbreaking, are enough to keep my interested, and there’s really not much more to complain about with the removal of the Shield Special. I am glad you didn’t try to shoehorn comboing into this moveset like the majority of your recent ones, as I doubt it would’ve worked especially well here. The remaining moves do actually attempt to play with the established mechanics in some way. While there’s little execution that’s bad, it’s still not perfect, so while I certainly like the set it’s not something I’m especially enthusiastic about. These comments largely also apply to the boss mode, though it was nice you attempted to do anything with how it handled itself mechanically.

I agree that reviving Dr. House’s mechanic doesn’t seem to have much purpose and does little for the moveset, but I can forgive it because it doesn’t take up a Special and appears to have been done largely for characterization reasons. The two throws that play off of it directly give it some vague flow and it’s good the moveset doesn’t entirely ignore it, though the main place where I actually like it right now is in the 3v1 mode. Also, a nitpick is that when you destroy a portion of a slanted pillar with nair, the upper half will ignore gravity and be magnetically attracted to the lower half. Making the rest fall would be mechanically awkward, yes, but as is it’s a weird aesthetic.
 
Last edited:

ForwardArrow

Smash Ace
Joined
Aug 17, 2011
Messages
502


Divinity of Pride
The Divinity of Pride is a powerful spirit that lurks the land of Shadowmoor, an entity powered by either white or black mana that drains the life force of those it fights and adds it to it's own. While not much else is known about it, given it's a random MtG card with little to no backstory, the flavor text indicates it is quite feared.

Attributes

The divinity, as you might expect, is quite large, taking a form a fair bit larger than Bowser, while having weight slightly less than that of the Koopa King. It's also fairly slow, but one thing about it is it has an incredible amount of aerial control and actually decent air speed, giving it much greater ability to escape combos than expected for its size. It is rather ghostly in appearence too, and it leaves behind trails of smoke as it travels. These trails last for half a second but obscure what occurs within them. Not that they're large enough to cover the divinity himself, but he can use this brief period of obscuring to cover some of his attacks. It also has two very large jumps as it seemingly propels itself through the air without effort.

Specials
The Divinity's form grows tall for a moment, actually increasing in size slightly as the smokey composition of its body expands while performing the Neutral Special. When the opponent attacks him during this time, he let's out a screech and slashes back, dealing a fixed 4% and weak diagonal knockback, as well as healing himself for 4%. A fairly weak counter, the timing is even slightly less forgiving than it is on the counters of Marth and Ike.
However, the Divinity's retaliation grows stronger the more the foe has struck it beforehand. With every blow the divinity took beforehand, the power of this attack increases by 2%, and the knockback increases slightly as well. This does not count multi-hit attacks, and if the Divinity misses the counter, it lose all the built up power on this move. Regardless, this can become quite powerful, even moreso when you remember all the associated healing, which will come in handy later.


In the Side Special, the Deity slashes it's sword in an arc that covers the entire front of its body, the sword partially disintegrating into mist the whole time. This deals 12% and horizontal knockback that KOs at 150%, but has a more interesting effect if it strikes a projectile. It will cause that projectile to disintegrate into a mist, which lingers for 5 seconds and is a lighter color than the mist from his movement and as such less capable of obscuring.
The mist covers a Bowser-width area of the stage once it's done, and deals 1/3rd of the projectiles damage per second. If multiple projectiles are intercepted by this, they all add to this damage, making it potentially fairly scary. The main thing is, the Divinity also heals in the mist at the same rate, giving the foe very serious incentive to come after him in the mist. The mist can thankfully be dispersed with one attack dealing 16% or more on the opponent's part, as long as the hit strikes near the center of the mist, and vanishes anyway after 6 seconds pass.


For the Down Special, the Divinity spreads it's wings and unleashes a flurry of ghostly black spheres, a total of 15 which each deal 2% and flinching knockback. They travel in a variety of patterns, some going in loops, some travelling straight forwards, some zig zagging, some travelling fast, some slow, some varying their speeds. This has some horrific wind up lag, as much as a Warlock Punch, but thankfully little ending lag. The spheres make some noises that vaguely resemble human voices... perhaps they are spirits?
Most of these travel slow enough or in strange enough patterns that you can transform them into Side Special mist by slashing them, but the mist would be incredibly weak were you to destroy just one. Ideally, you'll catch a large group and turn them all into one powerful mist. They all travel a maximum of two battlefield platforms before vanishing.


Recovery is one of the Divinity's strongest points, as its Up Special shows. It's body condenses into a thinner line of black smoke, with it's blade as the tip, and it then flies in a path similar to Lucario's extremespeed, only much much longer, about two times as far, and the blade deals 11% to anyone it comes into contact with. The only problem is, if the sword hits the stage, he will take massive landing lag as the Divinity must reform to pull it's blade out of the stage. This will actually happen if the Divinity runs into a ledge, preventing it from jumping off the ledge and adding massive lag to it's ledge attack. While an insanely powerful recovery, keep in mind you basically have to go into helpless after using it.

Smashes

The Divinity lets out a ghostly wail before slashing forwards with it's sword for the Forward Smash, dealing 13%-20% and KOs at 200%-150% and sending forth a projectile wave of white energy that deals 8%-14% and KOing at 220%-140%. This can be angled up or down, and bounces off the stage. How exactly the divinity angles this can potentially be obscured by the lingering mist, meaning the foe can't exactly predict from what direction this attack is going to come until it happens. The attack overall has about lag similar to Meta Knight's Forward Smash, with a bit more on both ends.
Tapping A immediately after this attack, or during it, will have the Divinity fire a second sword wave, and subsequently more and more, at a cost. For every additional wave it fires, it gives up 10% worth of the healing it has accumulated over a stock. If you don't have 10% worth of healing stored up, you can't use subsequent strikes on this. Regardless, you might wonder if the 10% self damage, which is on top of having to already store it up in the Specials, is worth it. Well consider the absolute bullet hell he can perform with this and Down Special, and yes, it actually is worthwhile, especially if you're already camping in a reasonably powerful healing mist to get back what you expended on this attack. As an aside, if you heal yourself to 0%, the additional healing will be stored up for this attack and the other Smashes as well, and not cause you to take any damage, giving you any reason to try to overheal through mists.

The Divinity raises itself in a similar motion to the Neutral Special for the Down Smash, but grows a bit larger than it does in Neutral Special, making it hardly a perfect mindgame. It is made less perfect by the fact that it creates a wind hitbox as it grows that draws in everything within a battlefield platform, not that strongly on foes, but much more powerfully on projectiles. If a ghostly orb from his Down Special comes into contact with him, he will absorb it into himself for this attack, before he slams his wings into the ground, dealing 18%-25% and knockback that KOs at 100%-70%, and pushing away orbs that have not quite reached him at a very high speed, allowing you to mess with their movement patterns a bit. It also produces a wind hitbox pushing the foe away with the same strength as the one pulling them in when he slams down, not a terribly powerful thing, but it might cover for you if you whiff the attack. This does have a large amount of lag on both ends.

This deals an additional 2% and KOs 5% earlier for each ghostly orb absorbed, which is especially effective when you factor in that the foe can potentially be helped into the attack by orbs being pulled into it. Aside from that, pressing A in a similar manner to the Forward Smash will cause an interesting effect. It will release the three most recently absorbed orbs back out, complete with their same movement patterns. Tapping A again will release the next most recently absorbed ones, and this can be repeated any number of times, to cover the attack's end lag further. If the move runs out of orbs to release this way, it will just loop back to the first ones absorbed. This is actually a noteworthy feature, as if you turn specific orbs into mist with Side Special, you can potentially only get ones with particularly ideal movement patterns with this move, allowing you to create mass quantities of the best possible spirit orbs. Keep in mind this takes 10% of your healing per use, and what I just mentioned is admittedly not always going to happen.


The Up Smash has the Divinity raise its sword over its head, before it's blade bursts into a tornado of fog, dealing rapid hits of 1% that add up to 15%-21%, and dealing a final hit of knockback that KOs at 170%-150%. This leaves behind splotches of black energy above the Divinity that linger for about a second and deal 3% and flinching each. A total of 3-5 are left behind based on charge. This attack is fairly fast on both ends, making it an excellent defensive move, but only against opponents directly above you.
Tapping A during this move produces a bit of a different effect than the other Smashes, as it has the tornado grow considerably in size and power, shaving 25% of the KO percentage and adding on 5 more hits. Due to the size increase, DIing out of the the move remains challenging no matter how much the duration and number of hits increases. This also leaves behind an additional 2 splotches, covering a wider area above you.


Aerials
The Neutral Aerial has the Divinity disperse into a thinner, whispier form for a moment, growing to 1.5x it's normal size in a much more circular shape, before the mist constricts back in, pulling the opponent directly to the Divinity for 12% and diagonally upwards knockback that KOs at 250% at the edge of the hitbox, but less and less damage the closer the foe was to the center at the start, to a minimum of 4% and a flinch. This also heals the divinity for half the damage the foe took, as it starts sucking away the foe's lifeforce as they are pulled in.
This attack's radius can be spread to be much bigger, as if it comes into contact with the black splotches from your Up Smash, it will absorb them and expand a Kirby sized area, which will usually amount to a few more Kirby sized areas as they are fairly closely spaced together. If it touches a ghostly orb, the hitbox will travel along it's path briefly, expanding along the orbs trajectory. If it comes into contact with a Side Special mist, it instantly fills the entire mist. The further the opponent was away, the more powerful this attack becomes, capping out at 25% and knockback that KOs at 80% if the foe was a full 2 battlefield platforms away from the center. That'd require a pretty intense set up, but it's fairly rewarding to pull off, especially when you get attached healing.


For the Forward Aerial, the Divinity beats his wings forwards, dealing 12% and horizontal knockback that KOs at 175%. This attack is a bit laggy for an aerial, but it makes up for it by creating a lingering wind hitbox about the size of Bowser that pushes opponents and projectiles away with about the same strength as the Down Smash's wind hitbox. It only lasts half a second, but it makes this an excellent defensive move to use while setting up. You can also press A during the start up lag to expend 5% worth of healing to double the strength of the wind hitbox, if you want to be able to camp a bit harder with this move.

As he naturally leaves a trail of mist behind him when moving, a strike behind him would be designed to capitalize it. So for the Back Aerial, he winds up and performs a fairly laggy stab with his mist blade, dealing 16% and knockback that KOs at 140%. You can hold A during this move to delay the stab a bit, however, in order to mess with the opponent's dodge timing. If you're DIing sideways too, they can't really see exactly when the strike is coming out either due to the mist masking the lag, making this a fair bit scarier.
You can actually tap A during the start up lag to have him strike early too, for a price of 10% worth of healing. Again, this is a lot scarier when masked by the mist, as the foe now has absolutely no idea when the Divinity will strike. The cost of this is, aside from the required expense of healing, it actually increases the end lag of the move heavily.


Likewise, a falling Divinity can of course abused the trail of smoke left above him. This move, the Up Aerial has two slightly different variations, based on whether it was tilted or smashed. If tilted, the Divinity performs an upwards slash with it's blade, dealing 10% and upwards knockback that KOs at 180%. Fairly standard. Smashing it however, will have the smoke condense just past the max length of the blade and have him swipe regardless, causing the same hitbox to appear at the end of the range of the original attack, leaving a blind spot directly above the Divinity but giving more range above it. If the opponent can't predict which range you're striking at, it will prove more difficult to stay out of it's range, and aside from that it is a fairly versatile move for fighting foes above you due to the sheer range it possesses.

Swooping down, the Down Aerial has the Divinity burst down a full Ganondorf height before striking below with his blade. This deals 16% and knockback that KOs at 125%... though it's angled downwards unless the foe is on the ground, so if used as a spike it will likely KO far earlier than that. You can tap A to expend 5% worth of healing during the move's start up, and increase the power to 24% and KOing at 75%... the problem being that you have to descend 2 full Ganondorf heights before you use it, requiring some rather precise positioning of you and your opponent. This may be more possible if the opponent is dealing with some splotches from the Up Smash... Either way, this attack has a fair bit of start up lag and bad end lag.

Standards
The Jab has the divinity stab it's sword into the ground for the first hit, having the same lag as Ganondorf's Jab and dealing 6% and some acceptable GTFO knockback. Holding A after this move will have the sword shoot forwards a pure black mist as he holds it in the ground, dealing rapid hits of 1% that extend a short distance in front of you, though the actual mist itself will fly forwards up to 1.5 battlefield platforms. While very dark in coloration, it doesn't conceal anything due to being very thin.
If this mist comes into contact with your spirit orbs, they will gradually grow in size, allowing you to use this attack as a follow up to make the slower spirit orbs more powerful, then potentially store them up with Down Smash. Of course this is a rather predictable approach and their strength doesn't increase a ton, all but the absolute slowest ones will be out of range by the time their power is raised to dealing 5%. Of course you can potentially get them far larger and more powerful than that with use of Down Smash, but at that point you're just being predictable.

Aside from that, this also causes Side Special mists to expand slightly in size when used on them, and also increases their resistance to attack, as well as their duration. The effect is again, fairly weak, to the point this can't be used to even stall a mist in creation for much longer than it's normal length, but it does help buff it up.


The Down Tilt has the Divinity fold his entire body inwards and compress his mist, decreasing his size tremendously, before stabbing forwards low to the ground with his sword as he expands back out. This is a faster process than it sounds and deals 8% and straight horizontal knockback. Again, this largely just functions as good defensive melee, in a similar manner to the Fair, but reducing his size so he can be out of range of the opponent's attacks briefly, mitigating that weakness to a degree.

In yet another fairly simple move, the Divinity stabs forwards with its blade for its Forward Tilt, before tiny wisps of smoke extend out of the blade a short distance further. The blade itself deals 10% and knockback that KOs at 175%, and as this move is fairly fast it serves as fine melee. The tiny wisps are either a sourspot or a sweetspot depending on your point of view, as on one hand, they only deal 6 hits of 1% and flinching, not even providing a proper GTFO move, but on the other hand it heals you 6%, which can be useful in an emergency if you're having extreme difficulty getting healed up to properly prepare moves such as your Smashes or Fair/Bair.

The Up Tilt is a fairly simple launcher, as the Divinity simply swings it's knife over itself in a motion similar to Ike's Up Smash, only much faster and much weaker. This deals 10% and weak upwards knockback, but it at least sets up for the Up Smash and all the positives it entails.

While in motion, the Divinity can turn itself into a denser smoke, similar to the Up Special but without the dagger in front, for its Dash Attack. On contact, the Divinity deals rapid hits of 1% that are easy to DI out of, but heal the divinity by 1% for each one landed. On average, without anything else to distract a foe, they'll only take 8%. In the midst of Down Special projectiles, this gets a lot scarier. The Divinity holds this attack out for quite a while, and in very idealized situations can deal up to 30% with it. It does have super armor for most of the attack, but towards the end of the hitbox and during the fairly long end lag, it does not. The Divinity will travel a total of 1.5 battlefield platforms over this attack at a fairly slow rate, making it a decent but not amazing DACUS, due to the lack of speed.

Grab Game
The divinity does nothing terribly out of the ordinary for its Grab, simply reaching forwards with a hand of smoke in a grab with fairly big range. The pummel deals 1% per hit and is fairly fast, though not quite as fast as Lucario's pummel.

For the Forward Throw, the Divinity simply blasts the opponent forwards along the ground with black magicas a thin line of smoke extends out of it after the throw. The line will grab them after they reach the end of their knockback or the edge of the stage, and the throw itself deals 8% and fixed medium horizontal knockback. The line of smoke then attaches as a tether, dealing the foe 3% per second while attached while healing the Divinity the same amount. Unlike most tethers, it actually doesn't restrict the opponent at all, extending or retracting based on how far away they move from the Divinity, merely providing healing and damage until its 20 stamina is depleted.
The tether actually heals as the Divinity does, and its health can easily go above the maximum. This can quickly turn into a situation that spirals out of your control for your opponent if you land a big Neutral Special counter on the opponent while it remains out, or perhaps land most or all of the Dash Attack. Either way, a fairly potent move when used correctly, just keep in mind the tether starts out rather fragile before it reaches its potential to become a humongous nuisance.


The Back Throw has the Divinity surround the foe in a small cloud of mist before tossing them behind him, dealing 7% and weak horizontal knockback. The mist will then try to drag the opponent away from the Divinity, as a weak wind hitbox that sort of "sticks" to the opponent, effectively forcing them away from the Divinity constantly until it is dispersed with a total of 20% damage. If you grab them with this effect multiple times, you can stack the stamina of the wind hitbox, though that isn't very likely given it is deliberately trying to keep the foe away from you to set up for your powerful camping game.

The Divinity raises the foe over his head for the Up Throw, and then releases a powerful burst of black magic, sending them rocketing into the sky with 10% and huge upwards knockback that KOs at 130%. This is your go to KO throw, and aside from that sets up much more powerfully than the Up Tilt for Up Aerial/Up Smash camping, but at the same time, it does give the foe more time to DI out of the way and prepare their own assault.

The Down Throw has him simply drop the opponent to the ground in prone for 6%, and push them away with a wind hitbox. It puts the foe at a disadvantageous position as well as away from the Divinity, a fairly useful move despite its almost disgusting simplicity.

Final Smash
The divinity lifts it's sword high above it's head, as massive tendrils of fog begin spewing out of it, extending it's range to nearly that of 2.5 battlefield platforms. It then swings it forwards, tendrils grabbing all who come in contact with the massive blade and sucking life energy out of them for 45%, and healing Divinity of Pride the same amount. Afterwards, the sword disperses but leaves 5 fog tendrils around the stage as traps. They are basically living grab hitboxes with 20 stamina that if they grab the foe drain 5% per second until they break out. The tendrils are about the height of Marth and the width of a pokeball.
 
Last edited:

MasterWarlord

Smash Champion
Joined
Aug 24, 2008
Messages
2,902
Location
Not wasting countless hours on a 10 man community
LGBT ACTIVIST BOT

Shadow Naoto has some weird specials with long cooldowns and applying status effects. They don’t feel especially special and I could see maybe one or two just being restricted to a throw in favor of giving her something more functional on her specials, but it does give the moveset a very unique feel. The elements are one of the more played upon mechanics of the moveset, most obviously with dtilt and uair, and I wonder if there should’ve been a more universal mechanic for these present in one of the Specials. Granted, the mechanic would probably run dry quickly as you have to arbitrarily mention effects on each and every move, so I don’t mind taking the approach you did. . .If there wasn’t so much generally weird stuff going on, anyway. Despite being straightforward, the moveset feels rather unintuitive and difficult to play.

I do like the theme of stacking status effects, even potentially on yourself. The Up Special is probably the highlight, as you have to transition between play with it both on and off, and I could picture her transitioning from offensive to campy while waiting for it to recharge for a fairly fun playstyle. Beyond just that, though, the risks prevented by both it and weakened your own shield along with the foe’s are interesting , letting her really go all out, probably using ice, before just going back to being campy with electricity and status effects when it wears off. The status effects provide her with a decent way to set up the foe to be vulnerable to Up Special, potentially waiting for the foe to be at their weakest rather than just spamming Up Special whenever possible. Of course, there’s plenty of filler and the pummel is bad, characterization reasons or not, but this one was surprisingly entertaining.

MEMEDRA

This one was better than I expected, and I actually like what it’s doing a lot when it’s playing with the goops with the first 3 specials, dash attack, usmash, dsmash, and fthrow. I think that with the two different types of goop that the moves that combine goop (dsmash, fthrow) should’ve probably had some sort of effect by directly combining them. The goop could also use more elaboration in places, as for some reason the moveset regularly skimps on numbers despite being a JOE/DM joint.

I like the melee game in the jab and ftilt, and could’ve seen the moveset go places, but there’s too many moves that are unsatisfactory in relevance to me to say that I like it, especially when one of them (Draco Meteor) is a special. I will say that this set (quite literally) is oozing with characterization even when it’s not flowing, and moves like the dair and grab-game are well thought out animations if nothing else. Still, I will say that Whiscash accomplished most of what this set does better (Particularly with combining goop types) with a similar mission statement and style, and we all know that I’m far from Whiscash’s biggest fan.

SLAKING

This is definitely much better than any other efforts that I know you’ve done this quickly. The speed it’s made at shows with a lack of detail, slightly underpowered balance, and some filler, but it’s still better than plenty of other sets posted this contest. The moveset is mostly just some basic projectile manipulation, and while it doesn’t flow perfectly I like some of the more creative individual move ideas such as Down Special, bair, and Neutral Special. Rather than just having the guy take damage for using his attacks or just have to work up a mechanic, having healing double as both actually is really interesting, especially when you can “overheal” just to store up more “ammo”. While some interesting melee moves are present in the set, mostly the ones that use this ammo or his passive shadow behind him, I think you could’ve still done a much better job at making it flow into his shadow orb projectile game, though. This is still a solid effort, and I would be happy to see you perhaps build upon it now that the pressure for time is off if you don’t have any immediate moveset plans.
 
Last edited:

allison

She who makes bad posts
Joined
Jan 25, 2014
Messages
5,138
Location
Maple Valley, WA
NNID
crazyal02
3DS FC
0216-1055-4584
Gomez


Gomez was the 2D protagonist of the indie game FEZ, created by Polytron. He was tasked with saving the world by collecting pieces of the Great Cube that had shattered, leaving the world in chaos in its wake, with the talkative tesseract Dot to help him. Gomez had always thought his world was 2D, but he obtained a mysterious fez that allowed him to rotate in 3 dimensions; although he was still limited to a 2D plane, he could rotate that plane 90 degrees.

Stats

Size: 2.5
Weight: 3
Ground Speed: 5
Jump: 4
Air Speed: 9
Fall Speed: 2
Traction: 5


Gomez is fairly small and light, with average ground speed and traction. His fall speed is very low, but his air speed is excellent. His jumping ability is below average, but still decent.


Specials

Neutral Special – Cube Anchor
Gomez pulls out a small yellow featureless square, holding it above his head. The Cube Bit (as it is known as) will then hover in place, doing nothing at the moment. (Pulling out a cube in this way has .5 seconds of lag.) At any point afterwards, Gomez can pull out another Bit and it will fly (sometimes across the stage) to the location of the other Bits. When Gomez collects 8 Cube Bits, they will transform into 1 Cube (as seen in the image above). From then on, Gomez will produce blue Anti-Cube Bits, which orbit around the Cube. 8 of them will combine into a blue Anti-Cube, which encases the Cube. Henceforth, Gomez can't make any more cubes. But what is all this for? The Anchor has a stamina of 50% (as displayed above Gomez's portrait in the GUI). When 50% damage is dealt to the Cube Anchor, all the Cube Bits will fly at randomly chosen opponents! Both Cube and Anti-Cube will shatter, and the Bits will fly through walls to deal 4% damage (for Cube Bits) or 6% damage (for Anti-Cube Bits) and flinching to anyone hit by them. (They can be dodged, but their speed makes this difficult. Foes can destroy Cube Bits by dealing 4% to them, and Anti-Cube Bits by dealing 6%.) After this, you can start a new Anchor. However, the Anchor can be broken before you have achieved an Anti-Cube, and all collected Bits will then fire at other players. Additionally, other players can destroy the Anchor; the Bits target all players other than the one who broke it, so you could get hit by the Anchor you created. If the Anchor is placed when Gomez is in midair, a purple platform will appear beneath the Anchor. Only Gomez will collide with this platform.

Side Special – Anchor Shift
Gomez points his arm forward, and the Anchor moves in the direction of the input at Gomez's walking speed. You can hold the input for as long as needed, but the Anchor can't be moved vertically.

Up Special – Caught in the Wind
A white noise sound effect plays, and Gomez appears to be caught in a gale, getting whipped upwards a distance of 2 SBBs. He then floats down like a leaf. The move plays out very similarly to G&W's recovery. Gomez can cancel the floating effect with an aerial attack, or with his Down Special.

Down Special – Warp Gate
Gomez quickly passes through a small, square gate with stars visible through it. He reappears at the location of the Cube Anchor. All this takes .5 seconds. If used in the air, he very quickly falls to the ground first, so trying to use it for recovery is a lost cause.

Standards

Jab – Tri-Combo
A basic triple jab combo, with bad range. Gomez throws some punches, the first two dealing 5% and flinching, the third 7%, KO'ing at 145%.

Dash Attack – Cyclone Somersault
Gomez does four quick forward flips in a 4-hit attack. Each hit is 1% damage more powerful than the last; first hit deals 4%, last hit deals 8%. The first three hits deal flinching, while the fourth hit KO's at 190%.

F-tilt – Grounded Energy
Multicolored energy is emitted from Gomez's hand for a distance of half a SBB. It deals 7% and KO's at 150%.

U-tilt – Backflip
Gomez performs a backflip kick, dealing 8% damage and KO'ing at 180%.

D-tilt – Cube Blockade
Gomez sends two Cube Bits to the left and right, each of which travel 1 SBB in a straight line. Each Cube Bit deals 5% damage and can KO at 200%.

Smashes

F-Smash – Cube Pierce
Gomez shoots a thin beam of light one SBB in front of him. It normally deals 10-20% damage, KO'ing at 150%, but its effects on the Anchor are interesting. It deals 10-50% damage to the Anchor, so it can destroy it immediately when fully charged. In a mirror match, it only has this effect on *your* cube.

U-Smash – Upward Energy
Multicolored sparks appear above Gomez, dealing 10-19% damage and KO'ing at 100%.

D-Smash – Bomb
Gomez produces a bomb with a skull printed on it before the smash is charged. After the charging, he throws it forward in an arc. The bomb goes forward 1 SBB, and deals 12-22% damage. The bomb explodes upon contact with anything, and KO's at 130%.

Aerials

N-air – Air Spin
Gomez spins around 360 degrees. This turns his whole body into a hitbox, but deals a measly 4% and flinching.

F-air – Energy Scythe
Multicolored energy slashes in front of Gomez, dealing 10% and KO'ing at 200%.

B-air – Reverse Kick
Gomez kicks backward, dealing 4% and KO'ing at 130%.

U-air – Bit Launch
Gomez launches a Cube Bit upwards. It deals 7% damage and flinching.

D-air – Beam Strike
A thin beam of light extends downward from Gomez. Interestingly, it deals no damage but has a large Meteor Smash hitbox.

Grab

Rather than grabbing the enemy himself, Gomez summons Dot the tesseract to act as a grab hitbox. It behaves like a normal grab, not a tether. When someone is grabbed, Dot encases them. This is only a visual element, as it all behaves like an ordinary grab. It does give Gomez an unusually good grab range for his size, however.

Pummel – Dot Zap
Electricity courses through Dot, causing 2% damage.

F-throw – Dot Spin
Dot revolves around Gomez, while the opponent remains in place. Each time Dot hits the enemy, it deals 3% damage. The fourth hit deals 6% damage and KO's at 112%.

B-throw – Dot Beam
Dot positions behind Gomez, and Gomez shoots a thin beam of light behind him (similar to his fsmash). It deals 10% damage and KO's at 170%.

U-throw – Dot Kick
Gomez kicks the opponent upward out of Dot's grip, dealing 5% damage and KO'ing at 111%.

D-throw – Dot Flight
Dot flies up off the screen, like Kirby's uthrow. The moment this move is used, Gomez regains movement control, and Dot slams the enemy down 2 seconds later, dealing 9% damage and KO'ing at 175%.

Playstyle

The most important thing to remember when playing as Gomez is this: protect the Cube Anchor. It's the most efficient way to rack up damage! Adding Cube Bits whenever possible will make it more powerful, but failure to guard it will result in disaster. Staying near the Anchor isn't the best idea in 1v1 matches; luring your opponent away from it will keep them from damaging the Anchor at all. In 3-player or 4-player matches, however, you'll be forced to keep nearer to it and camp, which is risky. It's worth noting, however, that if someone else catches you far away from the Anchor you can teleport back with Dspec, and engage them there. The fact that Gomez has high-knockback and low-damage moves with good range like Dtilt also helps him with this difficult task. Cube Shift can help if you then put the Anchor in a more tricky-to-reach position, but putting it offstage isn't as good of an idea as you might think; Gomez doesn't have a decent projectile, so projectile characters could steal his victory right out from under him. When you finally break the Anchor, it'll rack up damage against opponents, leaving them vulnerable to one of Gomez's myriad finishers. Combining this with moves like Fsmash can keep constant pressure on foes, and thus contribute to the goal of protecting the Cube Anchor. The Dthrow will keep the foe offstage for 2 precious seconds, which can give an opening to use Fsmash to destroy the Anchor. As for finishers, the Usmash is the only one you can do on the fly, but both the Fthrow and Uthrow can KO foes as well. As such, grappling is important when your opponents damage is high, but that makes you predictable, so you'll have to mix in some other moves as well. Overall, constant knowledge of the state of the battlefield and, specifically, where your enemies are is important to anyone looking to play Gomez.

Final Smash

Heart Cube
Gomez summons the most mysterious artifact in the universe: The Heart Cube. It glows with a blinding light, and sends out no less than 32 Anti-Cube Bits, each of which deal 17% damage!


*Made the Cube Anchor less insanely powerful; Bits deal less damage and can be destroyed
*Removed Fez Shift entirely, replaced with Cube Shift, which can move the Anchor side to side
 
Last edited:

tirkaro

Smash Champion
Joined
Jun 24, 2006
Messages
2,808
Location
but a pig in the sun
CHARLOTTE EVERGREEN

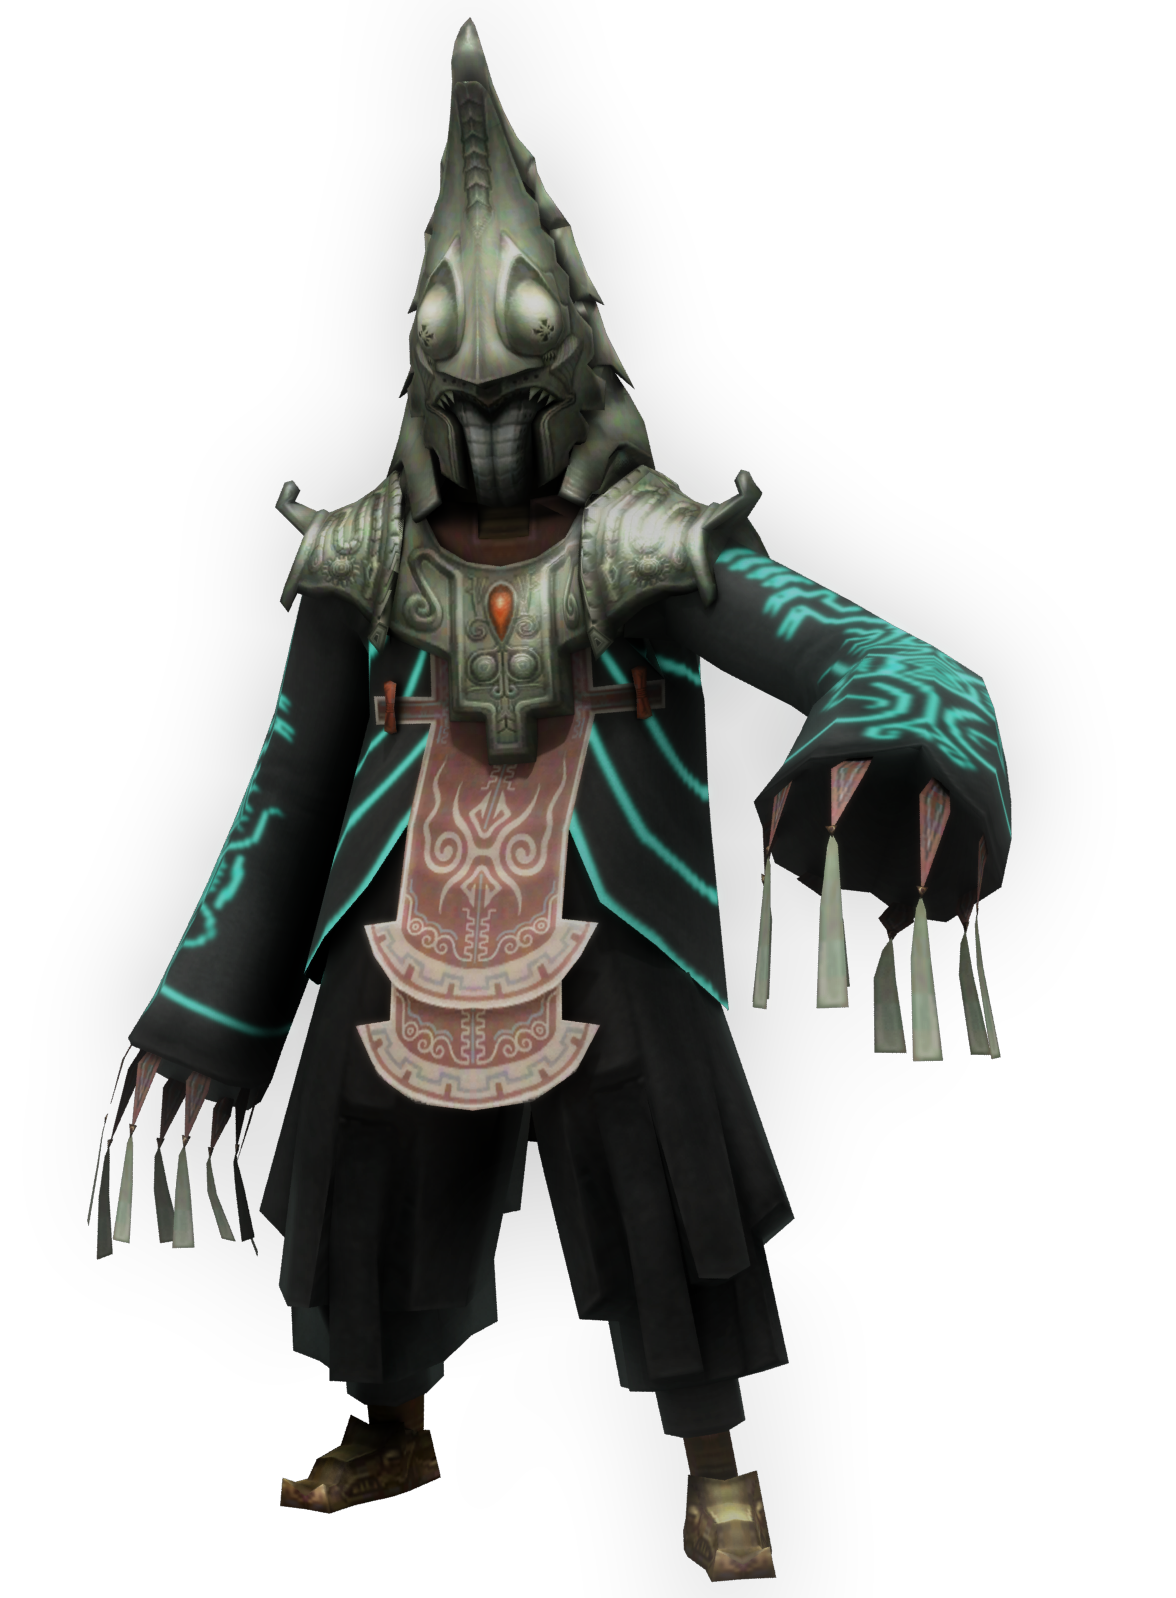
Art by awesome artist and all around total bro ShogunPrinny.
"I didn't sign up for this...I didn't sign up for this, AT ALL."


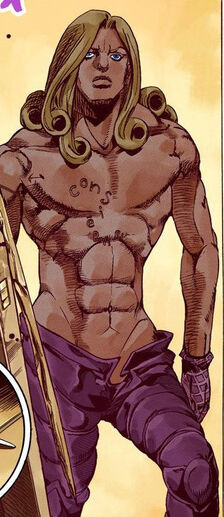
Charlotte couldn't help but wonder how her life came to this. At one point she had all the makings of a normal, privileged life. Once enrolled in one of the finest private schools in town, with a promising career as a professional violinist, her enviable upbringing took a turn for the worse lighting quick. Her rich father made a few sour deals, and soon enough her family lost enough money for her to demote her from a lavish private school to a run-down public school for the unwashed masses. Rampant bullying permeated her new school life, and before she knew it she ended up violently lashing out against her oppressors. She soon fell into the -wrong crowd-, forming an unlikely bond with a violent punk rocker by the name of "Cheryl", and somehow wound up playing bass for her underground band, Prostitute Facility, hopefully with the rest of her family being none the wiser of this seedy downfall.
And yet this was just the beginning of these bizarre adventures! Later on an outbreak of an otherworldly substance granted a new breed extraordinary superpowers known as Replicants! (Who are in no way related to Stands whatsoever, no siree.)
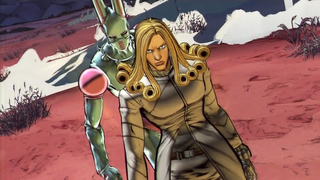
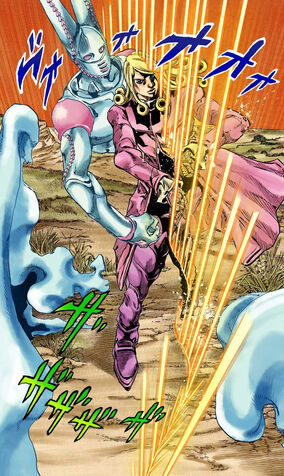
And as luck would have it, Charlotte herself ended up developing one of her own, a monstrous being made entirely of strings of various tension, known only by the name Aphex Twin! With this mighty power in hand, she along with the rest of her band hop further down the rabbit hole laden with brutal gangsters, conspiracies involving ancient Japanese warriors, crazy pet fish out for revenge, womanizing mad scientists, zombie jazz singer martial artists, and maybe actually getting to perform once in a while!
Charlotte comes to us from the tabletop monstrosity, Shiokaraiken no Densetsu, better known as just Fight, a very bizarre tabletop campaign that is not in any way inspired Jojos whatsoever despite what they may say.


HOW SHE (HYPOTHETICALLY) PLAYS
WEIGHT- 4
SIZE- 6 (10 WITH APHEX TWIN OUT)
JUMP- 5
GROUND SPEED- 7
AIR SPEED- 5
TRACTION- 8


Charlotte is a character that's mainly effective at a specific distance, so it's safe enough to say she's very zoning oriented. Her options are rather limited up-close, so Charlotte's game tends to focus around getting into a position where she can rack up big damage via combos and go in for the kill. This means playing a somewhat defensive game, especially against more aggressive rushdown-based characters.
Thankfully Charlotte has plenty of tools and options to deal with this, almost too many in fact. Not only can she switch between two distinct weapons, the Violin and the Bass Guitar, each with their own styles philosophies, but she can summon her Sta- Replicant to assist her as well. It's almost like fighting with 4 movesets at once!
Charlotte herself is, as her weary frame implies, a rather fragile character. Her running and jumping speed on their own aren't much to write home about, but that's somewhat relieved by Aphex Twin's antics. Speaking of...


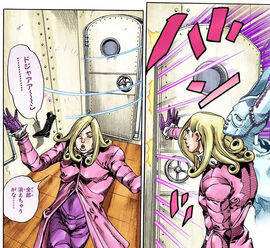
NEUTRAL B- APHEX TWIN
"Wh-what is this...thing?"


The designated button for calling the mighty Aphex Twin on and off. She's strictly attached to Charlotte's side, so there's no desyching nonsense to be had here. She's an absolute giant, standing tall above Charlotte's frame, and thus has all the advantages and disadvantages associated with that. Any attack that hits her also deals half as much damage and knockback to Charlotte herself. And if you thought that was bad enough, if Aphex accumulates 50% damage, this'll cause Charlotte to undergo a "replicant crash." This works like a slightly shorter shield crash, and afterwards Charlotte can't take out Aphex for 10 seconds. The amount of tension damage accumulated will go down overtime as she puts her replicant away, by about 5% a second.
It's not too hard to work around these drawbacks though. Being a projection made entirely of wires, Aphex has an incredible range, and is vital for defining Charlotte's space control.

Aphex also changes up the properties of Charlotte's shield as well! While Charlotte's shield is a regular bubble normally, Aphex's take on it varies depending on what instrument you have out. (More on that later.) Having the Violin out makes Aphex shift into a veil of sharp wires that covers our schoolgirl up and makes anything that comes into contact with it take 4% damage. It's also quick enough to act as an attack at times. Main problem is that it doesn't work against projectiles, and doesn't have the -best- priority in the world, so it's not reliable against things like fully charged smash attacks. Breaking it stuns her a bit, but not nearly to the effect of an actual shield break.
When she has the bass guitar out, Aphex instead shape shifts to 2 solid walls on both sides of Charlotte. These are a -lot- sturdier than a usual shield, capable of taking twice as much punishment as an actual shield, though typical shield break rules still apply. Additionally the walls are only as tall as Charlotte herself, and leaves the space above her completely open. Try to keep this in mind!

Taking out or putting away Aphex involves a slight bit of cooldown time, easily punishable in most situations, but this can be negated by liberal use of Charlotte's down B.

SIDE B- TWO WORLDS APART
"No turning back now..."

The button for switching between her two instruments: Bass and Violin. One represents Charlotte's desperate attempt to hold onto what integrity she had in her past life, and the other represents the descent into confusion and unsettling violence that lies far beyond her control.
The main difference between her Violin and Bass stances is a matter of playstyle: Violin moves tend to be about precise timing and effectively "sniping" your opponent as a means of punishment, while Bass moves are more about less precise pressure and overwhelming your opponent head-on. Both styles are pretty generally defense-oriented, but violin is more about strict punishment while bass is about being rock solid. There's a slight punishable lag time between normally switching them, but it's relatively painless to switch between both while fine tuned, so this makes Charlotte's defensive game very strong.


DOWN B- FINE TUNING
"I just need to get into place..."

Charlotte's instruments are rarely out of tune, but to say she's an utmost perfectionist is a bit of an understatement. For this special, Charlotte will spend an indefinite amount of time tuning her instrument into place. For as long as you charge this special, Charlotte will go into a "refined" state that lasts about as long as you were tuning it, up to 10 seconds. She'll glow red, become 1/4ths faster, and have increased hitstun on all her attacks. While the speed boost is always nice, the real reason to use this is for the increased combo opportunities all around; indeed, a good amount of her combos are entirely exclusive to being in this mode. Keep in mind however that there's a small bit of cooldown lag at the end of this move, so it's very punishable up-close. Space your foes properly before throwing this out. Learning just when to fine tune is arguably one of the most vital aspects of Charlotte's game.
Charlotte cannot fine tune the Bass without Aphex Twin being out; Her brittle fingers aren't quite as efficient enough, so Aphex just alters the strings for her.

UP SPECIAL- NO ESCAPE/VIOLENT RAPPEL

One of a few moves that utilize Aphex Twin in some way even when she's not out. This means that this along with similar moves can't be used whatsoever while Replicant crashed.
Essentially, all you need to know about this move is that Aphex's stretchy wires protrude out of Charlotte's back and latch onto various objects with extreme prejudice. The length of the wires depend on if Aphex is out or not, and the exact effects of this depends on what instrument you're playing to the tune of.
In Violin Mode, this move is called No Escape! Charlotte shouts the move name and shoots a swarm of wires that home in on the closest opponent, (The length of these wires are about 40% of battlefield without Aphex, and 60% of the stage when she is out.) and reels 'em in. The length that they're reeled in is about half the length of the wires themselves, so it'll rarely result in them being sent straight up in your face. In fact hitting with the very edge of them gets them very close to Charlotte's "sweet spot," the implications of that being more apparent later. The 2% damage on this move isn't much to write home about, but while fine tuned, this chain yanker has significantly increased hitstun, leading to all kinds of combo follow ups. Likewise for the kind of move it is, missing with it leads to nearly half a second of cooldown lag, and is still easily punishable even when fine tuned.
In the air, this attack has a slightly different effect: Instead of reeling the opponent in, it'll result in Charlotte straight on switching places with the opponent. This is the closest way it can be used as a recovery. While certainly effective, it can get predictable later on, so it's an invaluable strategy to use this in conjunction with her Fsmash and Nair.

In Bass mode, the move goes by the name Violent Rappel! Charlotte instead shoots out a single, thick wire that can be aimed and can stick to anything. Opponent, edge, ground, you name it. Once it gets a hold of something, it instantly reels Charlotte right to it. Even better, if you stick your wire on your opponent, our girl will follow up by zipping forth and double kicking them right in the chest! Dishes out 6% damage, slight knockback as well as a knockdown state, and feels sooo good.
While this move makes for a great tether recovery and grants Charlotte a lot of movement options, the startup and cooldown lag is relatively slow, meaning it leaves her open for a brief second if she's just slinging about willy nilly. Very punishable when predicted.
The range of this move is only 75% of No Escape's, and has similar cooldown lag on miss, but thankfully this is a lot harder to miss with.

NEUTRAL A- ARPEGGIO/PULSEWIDTH

Unlike an actual neutral combo, this move comes in the form of a chargeable projectile. Charlotte plays her instrument of choice wildly as a gaggle of musical notes encircle around it. As soon as you let go, which automatically happens after a few seconds much like a smash attack, this cluster fires off as a single projectile.
The Violin variation shoots out a small, narrow, and incredibly fast bolt of sound that travels as far as half a battlefield. It dishes out 2~5% damage and puts anything it hits into a knockdown state; helpless state if they're in the air.
The Bass variation creates a very slow moving Charge Shot-sized ball of green energy about a Battlefield Platform in front of her, which chugs along for a few seconds before dissipating. It deals 3% damage each hit, and hits 2-5 times depending on how long you charge it. Knockback is only middling though.This version is excellent for building pressure at more precise ranges, even if it's not all that powerful on its own.

When Aphex Twin is out, this instead turns into another move entirely: Pulsewidth! A more traditional natural combo in every way, while in Violin mode, Aphex uses her uncoiled arms to rapidly pummel an area about a battlefield platform ahead of her. This deals 2% damage each hit, followed by a single uppercut that does 3% assuming the combo is successfully pulled off.
In Bass mode, Aphex instead pummels the area right in front of Charlotte. However, this pummel is slightly slower and is more easily escaped. Likewise it does the same amount of damage for most of the hits, but has a combo ender that deals 5% and slightly more knockback than the Violin one.

DASHING A- THUNDER DASH

While making a rather clumsy run for it, Charlotte charges forward while holding her instrument in front of her, engulfing her in a rapid yellow wind.
The Violin based dash is a very quick dart about 2 Charlottes in length and passes right through the opponent while dealing 4% damage. Comparable to a single quick attack in most ways.
While Aphex is out, she does a short delayed dash right after Charlotte does, with the same properties, potentially allowing this move to hit multiple times, in a sense.
The Bass version is a much more slow, collected charge that hits up to 3 times, dealing 4% damage each. Has an intermediate amount of knockback, meaning at lower percentages it's useful for setting up your opponent into your "sweet spot."
For added punishment, having Aphex by your side for this version will make her perform a Wario-esque shoulder charge right by Charlotte's side, completely with cartoonishly exaggerated shoulder. This'll mainly tack on 4% more damage to each hit, making this one of Charlotte's better up-close options. Just keep in mind that the end of the Bass thunder dash is slightly punishable if you're reckless.


FORWARD TILT- I JUST WANNA LIVE!

Finally we're getting to the more down-to-earth moves. As you hold the violin in your arms, this forward tilt will make Charlotte turn slightly and pull off a short but quick side kick for 7% damage. One of Charlotte's safer short-distance moves, it also does quite middling knockback.
With Aphex on the field, she assists with this move by shooting a single thin wire from her finger at the same time as her kick, aiming directly down at a space a few feet away from Charlotte. It's kind of precise, but it's quick and deals an additional 10% damage. This wire finger has a pretty healthy amount of hitstun while tuned up too, making it an excellent combo move.
If you're going bass, our troubled schoolgirl here will instead violently swing her guitar while yelling this move's name at the tippy top of her lungs. There's a bit more lag time in general for this move, but it deals 11% damage and has pretty hefty knockback, capable of actually killing at higher percentages.
But if that wasn't enough for you, the Aphex version of this is pretty scary too. Along with Charlotte's bass swing, Aphex assists by shooting out 3 thick wires at the ground from her fingers, each extending one at a time. The animation for this is suitably slow, but she has super armor all throughout it. This covers a lot more range compared to the violin flavor, and dishes out 4% damage per hit with each wire, along with decent knockback. (It's unlikely that you'll end up hitting with all 3 wires though.)


UP TILT- MUSICAL BURST

Don't go out of tune just yet. When brandishing the violin, pressing up tilt will make Charlotte play a single note, which somehow infuses one of the strings with musical energy; It immediately shoots off from the violin, travels diagonally downwards to the ground until it reaches half a battlefield platform in front of her, and then finally fire directly upwards, about the height of two Captain Falcons, and deals 15% damage with almost no knockback. Despite the elaborate description, this is actually a very quick move, and acts as an effective anti-air assuming you're at the right distance.
In Bass, aside from a slight speed decrease, this works the same except it fires a larger cluster that lingers on the ground for a while before shooting up into a thick, powerful pillar about the same size as Charlotte, and deals 3 hits of 3~4%. A great pressure tool for when you need it, but not incredibly good for anti airs.
When Aphex is out, this move turns into WIRE BURST! Aphex instead points at a set location on the ground, same place as the musical version. For the Violin version, it creates an almost instant pillar of wires that pierce the opponent in every direction. Oh the humanity! It does less damage than the musical one at 9% damage, but it has a wider area of effect and Charlotte can get a move on shortly after it occurs.
The Bass version has the same delay as before, but it instead spawns a series of 3 thick stalks composed of wires wrapping around eachother that shoot a good deal upwards. Has much more range than the musical version at about 2 Ganondorfs high, but is even slower to start and does ever so slightly less damage at 7% (great for following up on though due to minimal knockback and somewhat formidable hitstun when fine tuned.)


DOWN TILT- LOGAN ROCK WITCH

The Aphexless versions of this move aren't anything special, which may be a good thing.
When holding the violin, Charlotte gets down and performs a quick sweeping kick for 6% damage for some much needed close range pressure. Has the potential to trip at the very tip of this attack.
On bass, our girl instead pulls off a violent lower sweep with her bass guitar. The bass sweep dishes 7% damage worth of pain in exchange for a slightly slower and more punishable startup, and knocks the opponent upwards a bit. At lower percentages while tuned up, this can act as a pseudo launcher, leading to some great combo opportunities so long as you can pull this move off at the right time thanks to the bass's great pressure tools.

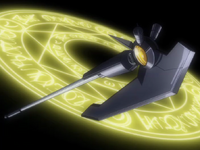
Aphex's take on this input is entirely different. Instead of all that nonsense, the sta- REPLICANT digs into the ground with her hand and immediately pulls up a lining of sharp wires from the surface, creating an acute angle of damaging threads that extend from Aphex herself to 1 1/3 battlefield platforms. This is a bit difficult for me to explain in words so here's a tiny diagram made in roughy 1000 hours in Mario paint.
These wires damage foes on their way up, but their exact properties depend on your instrument choice:
The Bass version gets pulled up at a higher angle, meaning it's better for all around defense, and does 7% damage for this moves entire duration
The Violin version on the other hand has a slightly lower angle to take up, but it possesses a special timing based sweetspot of sorts at the very end of this move, right when the wires are at their tensest. You can tell because they flash for this split second moment. Hitting with this deals 16% damage and great upwards knockback. If you're not as careful, the attack simply deals 4% damage and nearly no knockback. It's almost impossible to hit with the sweet spot while tuned up.
Both versions of this move have somewhat unsafe startup times, but very safe cooldown ones, even on block. Definitely one of Charlotte's go-to combo moves.


FORWARD SMASH- TRIPLE CONCERTO KICK

With a brisk shorthop into the air, Charlotte defies all laws of gravity and does a triple spinning kick in the air! While of course yelling this move name as hard as she can. She has a bit of help though; While she's kicking, Aphex's wires spurt from the soles of her foot! This extends the range of this move to a whopping 1 battlefield platform. When on violin, this move actually has a sweetspot on the very tip of the wires that deal the most damage here: 10~15% damage each hit with decent knockback on the final hit. Of course it's quite the feat to hit with all of them, but it goes to show just how valuable keeping the opponent in Charlotte's "zone" can be. When not sweetspotted though, it only deals 3~6% per hit
The Bass version of this move has only a 6~10% damage ratio, but this is universal no matter what length of the wire you're hitting.

FORWARD SMASH (APHEX)- HOLD ON

Yes, this move is different and vital enough for it to have its own header. Honestly it would have been a prime contender for the Neutral B if that wasn't currently being eaten up by the whole Replicant switching thing. Smash needs more inputs. ;A;

For the startup animation, Aphex Twin shoots a long, thick wire off-screen and pulls back either a wrecked car about 50% bigger than Bowser (when on bass) or a street sign (on violin.) Yes, this move does have some mean startup at 2 seconds, but it shouldn't be too hard to keep your opponent away during it. She holds the piece of junk about a battlefield platform ahead of Charlotte, and this is where the actual charging animation starts. You can move at walking speed while charging this.
Depending on how long you charge the rest of the move, you can yield some entirely different effects of greatly varying practicality.

For the wrecked car variation, if you let go immediately, Aphex'll simply drop it down from about a Ganondorf's height. Getting hit by it results it 36% damage as well as huge knockback, but this is incredibly rare. Great edgeguard tool though if you can get the incredibly precise timing right. But the main reason to use this variation is because the dropped car remains on the stage for either 15 seconds or until it takes 50% damage, by then it'll just break down and disappear. This car is a nifty bit of stage hazardtry, as not only does it provide good cover and space control if you're playing a super defensive game, but it can be used in conjunction with the neutral aerial as well, which is always nice.
If you hold the charge for an intermediate amount of time, and let go, Aphex will constrict the car with its thick coiling wires, squeezing all the oil from it like a fresh fruit, and then throws the vehicle off to the side. This creates a BFP-sized oil slick on the ground, causing anyone besides normally Charlotte herself to slip while walking over it. (How does this work? If you zoom in, you can see that Aphex is creating a tiny wire surface over the slick whenever Charles walks over it. So likewise, she slips as usual when replicant crashed.) This slick lasts for 15 seconds as well. Another form of space control, it's more subtle than the car wreckage, but has the added benefit of not effecting Charlotte under most conditions while doing so. Is it really worth the charge up time though? This is entirely situational.
Finally, getting it to MAX CHARGE results in Aphex squeezing the car so hard, it straight up explodes! The exploding car isn't quite as powerful as just dropping it, being about worth 18% and some good knockback, but it has a far greater area of effect, being x3 as big as the car itself.

For the street sign, it takes slightly less time to pull this one out from offscreen, and letting go immediately makes Aphex brutally swing the sign down! As powerful as it may seem, it only sweetspots with the actual sign portion. It dishes 25% damage and great knockback while sweetspotted, but only 9% damage and piddling knockback when it isn't.
Somewhere in the middle, she simply sticks the sign into the ground, in a slightly crooked fashion. This lasts on screen for about 20 seconds or so, and can't really be damaged or get in the way of anyone at all. No, the main reason for this move is to act as a dongle for both Charlotte's Up B and Neutral Air. With No Escape, she can draw the sign towards her, resulting in a super quick attack that deals 11% damage and decent knockback to anyone in the way (Sadly once she does this the sign tumbles on the ground and disappears, meaning you can't use it as an item or anything) OR use Violent Rappel to have another handy substance to stick onto. Incredibly handy to have around for these reasons.
Finally for those that are far too patient, going to max charge results in Aphex crushing that poor sign with no remorse, crumbling it into 3 pieces on the ground. These act similarly to ZSS's suit pieces, although most of them do absolutely terrible damage at 3% with little knockback. The main portion you want is the actual sign portion, which does 25% damage and intermediate knockback. Of course, keep in mind anyone can pick it up...

All around an incredibly versatile move to have on hand, any Charlotte player worth their salt will be mainly using the sign or car placement to give her some much needed spacing-related options. You can only have one piece of junk on the stage at one time, and can't use it again until 10 seconds pass. If you do use it exactly then, the junk you placed previously will promptly crumble and disappear.


DOWN SMASH- STROTHA SHOCKWAVE

Get your violin ready; in this mode, pressing down smash will make Charlotte play a note that produces a Reppuken-style projectile that travels along the ground for about 1.5 battlefield platforms. This may seem nice, but this move has a special timing based "sweetspot" that activates once it travels 1 platform. This deals 19~26% damage when sweetspotted, with good upwards knockback, but only 11~13% with mediocre side knockback otherwise.
Going on bass, Charlotte clumsily swings her guitar over her shoulder and SLAM! Drops the bass hard, creating a series of 3 erupting shockwaves that slowly burst along the ground, eventually covering about 1.2 BFPs in space. The guitar portion of this move is kinda weak, only worth 5~9% damage. It's the shockwaves that really matter, doing 13~16% on each hit, which is pretty significant for a multi-hitting move, but given the decent knockback on each, it's highly unlikely you'll hit with all 3 of them, or even 2. (There is one way to hit with all 3, by getting the timing on getting hit with the first shockwave exactly right combined with tuning up.) This move therefore is meant moreso for pressure than anything else.

Aphex's take on this move doesn't play around, and is probably one of the most common uses for Aphex Twin as far as offense go; The replicant will whip a strain of her wires forward, about 1.5 battlefield platforms ahead. This whip leans downwards to a certain extent, so it's only particularly useful against grounded opponents.
In Violin mode, the inner wires do a minimal damage amount of 6~11%, but pushes the opponent back a touch to get them into a more desirable position. The very edge of the wires are a sweetspot that deals 15~20% damage and great knockback. The sweetspot is actually less safe on block though, so be careful around foes with similar long reach.
The Bass version of this move hits 3 times, starting at the edge of the wires, and pulls the opponent in on each of the 9% damage hits. Actually more damaging on tip than the Violin version, and safer on block to boot, but uh...you're pulling the opponent in your face. Why are you doing that exactly?


UP SMASH- WING BURST
"Soar!"

The violin version is a simple, but effective anti-air/literally anyone who dares lie above you attack. Charlotte leaps directly upwards, about 1.5 vertical BFPs in height,(try wrapping your head around that one) and shoots wires from her body in all directions, looking a bit like a screeching hawk while doing so. This is straight up incapable of hitting most grounded opponents (as only the actual wire burst does anything), but a successful hit results in 22~28% damage and good knockback.
Bass mode is kind of different: She instead soars like a hawk diagonally, 1 diagonal BFP of course, as Aphex's wires form an aerodynamic shell around her. This hits 3 times, 7% each, and some degree of knockback. Not as good overall as the violin version, but easier to hit lower elevated opponents with.
These moves do only 1% damage each while replicant crashed.

The Aphex mix of this move is called Top Speed, a far more wilder take on the violin Wing Burst: Aphex wraps Charlotte around in a thick wire, from head to toe, and then lets it rip! Poor Charlotte goes spinning like a top, her eyes looking visibly dizzied, and screaming like a schoolgirl as she quickly rises 3 stage builder blocks in the air! The startup time isn't too bad for what it is, but obviously you shouldn't go throwing it out with someone close by.
The violin version of this move is notoriously tricky to hit with: At the peak of this top spinning journey, Charlotte aggressively fires the wires from her body in every direction as usual, dealing 27~36% damage, great knockback, and has a slightly wider EoA compared to the Wing Burst. Only problem is that it requires travelling a longer distance, meaning your opponent has more time to react. Also it's not incredibly common for your opponent to be at such a specific distance, but the option is there if you want it.
The bass version is safer overall, as it universally deals 14~19% damage as Charlotte spins upward, with decent side knockback. The bass Charlotte tornado also possesses some of the highest priority out of all of her moves, being worth at least as much as a 36% move.


NEUTRAL AERIAL- TENSION PAGE
"There's still more to this mystery!"

One of Charlotte's primary moves, this is one of the main reasons why the forward smash is worth writing home about. Charlotte grabs a book from hammerspace and rips a page right off it, and uses Aphex's wires to stick it onto a nearby surface where applicable. This page can stick to opponents as well as stage obstacles and hazards. When attached to an opponent, it only dishes 3% damage and slight stun, but it's really the side effects of this move that you want.
When the page is stuck on the foe, the range and homing properties on Charlotte's up B maneuvers increase by 40% for 15 seconds, which is neat in of itself.
For obstacles, this is where Hold On comes in!
Once placed on a piece of junk or similar stage hazard, you can press nair again, causing the page to transform into a wire that latches onto the opponent if they're close by enough. This automatically drags them to the page's position. A very situational move, this can still lead into shenanigans like forcing the foe to get into the place you want them, and having a wider area to do just that. Additionally, you can place a sign or car by the ledge, emblem it, and get the foe into position for you to switch places with them while off the stage. The possibilities are truly endless...


FORWARD AERIAL- THUNDER DIVE
"Thunder Dive!"

Engulfed in a sharp wind current, Charlotte air dashes! Yes, this acts much like a weaker, aerial version of the Thunder Dash, but you can control its direction during its 1 second duration slightly.
In violin mode, it passes through the opponent for 6% damage, while the bass version just knocks them back on hit with 9% damage to be had.
Aphex's forward aerial however is a single whip of her wires. This is highly comparable to a single dosage of Charlotte's Triple Concerto Kick, having the same exact range and dealing 15% damage and great knockback when sweetspotted on the edge for the violin version (4% damage otherwise) and 9% overall damage with mediocre knockback on the bass one.
A very fast move, it's a great zoning normal to throw out while keeping your foes stuck in your sweet little area. It doesn't hit crouching opponents however...

DOWN AERIAL- FENDER SWING
"I'm too reckless!"

Charlotte swings her instrument down using Aphex's wires by the tips of her fingers.
The Violin swing has a longer range, as long as the space between the middle battlefield platform and the ground, but of course it only sweetspots with the violin portion, at 17% damage and good side knockback. Otherwise it's a weak 5% everywhere else.
The Bass swing is only half as long as the Violin one, but it delivers 13% damage with okay knockback everywhere it hits. It possesses a slight moment of cooldown lag afterwards as Charlotte struggles to hold onto her guitar.
When Replicant crashed, there's no range extension to this swing whatsoever. Funnily enough, this actually makes the Violin version easier to hit with. Keep that in mind.
The Aphex dair is completely different; She wraps around Charlotte's body and shoots directly down as a formless blob, finally dissipating as she hits the ground. There's actually no damage difference between the Bass and Violin versions: instead they affect fall speed, violin being faster and bass being floatier.


UP AERIAL- WIRE FU

This is in every way a slightly shorter ranged upwards version of Aphex's forward aerial: Charlotte pulls of a wicked flip kick, but with one of Aphex's wires trailing on the sole of her foot. But still, it's a fine delivery of 15% damage and great knockback when sweetspotted on the edge for the violin type (4% damage otherwise) and 9% overall damage with mediocre knockback on bass. Does only 3% damage and no range increase while Replicant crashed.

The Aphex edition is more horizontally minded; Aphex whips her spaghettified arms 3 times, rotating her torso like a blender. This creates a hitbox about .8 Battlefield platforms around her. Likewise the violin and bass damage split still applies here. A sweetspotted hit on the edges of her wires do 9% damage each, 2% otherwise, with decent knockback, and 5% damage overall on bass.


BACK AERIAL- CARE BECAUSE I DO!

As Charlotte definitely isn't one to get into the heat of things, her back aerial has her performing a backwards rolling dodge, going as far as half a stage builder block and kicking anyone in her way for 7% damage and a tiny dose of side knockback. Simple, but a fine method of getting out of trouble when you need to. Because of course, what else could embody Charlotte better? (There is no violin/bass split on this move of all things.)
But of course Aphex says otherwise, as her take on this is primarily offensive: Her back aerial is a wirey kick backwards, with it's main distinction being that it has the same properties as a sex kick! This makes things even harder to approach you, even from behind!
When sweetspotted in violin terms, this deals 14~8% damage, and 5~2% otherwise. 9~5% overall damage while on bass.


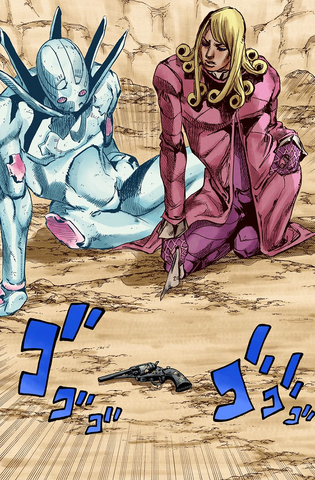
GRAB/THROW- Ally Oop!
"Aiya..."

Charlotte's grab game is...weird to say the least. Closing her eyes, she yells and charges forward, shoulder-first. If she somehow makes contact with a foe, she takes ahold of the and can either throw them forward or backward depending on what you input while grabbed. Otherwise, it'll just choose at random.
When she throws, she clumsily topples the opponent along with herself, putting the foe into a knockdown state while she immediately roll dodges back up. This deals 11% damage, and can potentially lead to whatever setups you need that relies on taking advantage of your opponent being in a lying position. But otherwise, it's kinda unremarkable. I wonder why it's even here...


GRAB (APHEX)- SO PREDICTABLE
"I can't believe I saw that coming!"

Aphex's grab is what you really want here. She points forwards and makes a pair of kirby-sized wires sprout up from the ground. This grab is actually chargable! She can charge it for about 1 second, resulting in the wires sprouting about 1-2 battlefield platforms ahead of her. This is quite tricky to get the timing down, but when mastered, the potential for mindgames are an incredible tool for getting an unexpected kill in.
This grab can even work while in the air, though obviously the wires can only manifest on the ground. This whole setup gives Charlotte a unique sort of control for her enemies' ground game, but it may not be so effective against air-happy foes.
Once it hits, the wires wraps and binds the opponent into place. The pummel is, as you'd expect, Charlotte playing her instrument while blasting rhythmical energy through the wires for 1% damage each. Wait, what do you mean you didn't expect that?

Your instrument of choice doesn't come into play during the throws at all.

FORWARD THROW- DOUBLE CLOTHESLINE

Two drawn-back wires appear at the opponent's neckline and ankle, snapping from behind on the lower and from in front up above, flipping them around! This does minimal damage, only 5%, but has a very hefty amount of hitstun on its own; When tuned up, this puts the opponent into a straight up "dizzy" state, similar to Jiggly's sleep...but with dizzy.

DOWN THROW- DODGBAW
"How deep can I go?"

A more unusual throw, a few of Aphex's wires hold the opponent's appendages in place, and the rest split off and coil themselves into the shape of...balls?
The camera closes in on Charlotte adjusting her gleaming glasses, frowning while holding the Aphex balls in her hand, takes a deep breath, and yells a mighty battle cry as she tosses as many balls as she can at the poor defenseless opponent.
This is essentially an intensified pummel; mashing A as many times as you can will result in Charlotte rapid firing balls, each doing around 2% each. She -really- brings on the hurt here, so the average mashing session will usually yield 18-20% damage, though the max you can get in 36%, with a final dodgeball hitting the opponent visibly in the jaw, breaking them out of the web with decent knockback.

"Balls deep!"

UP THROW- WIRE VOLLEY

Of course, it just wouldn't be not-Jojos if it didn't have a liberal amount of rapid fire fisticuffs flying around here and there.
On a whim, the opponent becomes completely wrapped up from head to toe in wires, and are sent hurling up into the air. A *shing* goes off in Aphex's eye, and she engulfs the poor foe in a tropical storm of rapid fire fisticuffs, capped off with a final sock to the stomach that dissolves the wire wrapping restraining your victim, and lets that bad boy fly into the air. Does only 17% damage in total, but has amazing upwards knockback, easily one of the best in Charlotte's arsenal. It may seem simple, but this move definitely puts her grab on the map, and forces any grounded adversary to respect it at all times.

BACK THROW- CRAWLING IN MY SKIN

In a rather cruel maneuver that makes even Charlotte squirm, Aphex burrows a few of her wires into the opponent's skin and throws them a short distance forward in a knockdown state. For the next 5 seconds, the wires whip around and gradually damage your victim every second or so.
The actual damage may as well not exist, only 1 percent per hit, but unlike the lip stick effect, every time they take damage, they take a small degree of hitstun. These occasional moments of vulnerability are the real valuable aspect of this move, especially when combined with a tuned up assault. Of course, only really advanced players will be able to fully take advantage of this, and in most cases it might not be worth wasting your grab on it unless you're truly confident.


FINAL SMASH- CHARLOTTE'S WEB

Against all odds, Charlotte managed to grab ahold of the smash ball! No idea why you're playing with FSes on, but hey, I won't judge!
Keeping with tradition, the exact specifics of this move will depend on what weapon you're running with at the time.

When on violin, the camera will close up on Charlotte's more confident outlook, punctuated by scary shining glasses, as she rushes a slight distance and fires a single wire from her arm! This wire goes about half the length of battlefield, and has slightly better homing properties than her vanilla No Escape! This will mainly just hit one opponent, though you can catch 2 or 3 in there if your foes are really that bunched up together.
If she gets the hit in, the scene will transition to a dark concert hall with the victims being bound in place. A curtain opens, shining a spotlight on Charlotte holding a violin with a somber expression on her face. With the cue of an unseen orchestrator, she puts her heart and soul playing the chorus of a heavy string piece, all the while saying to herself, "Yes, this is who I am! Never let hope go!"
After a hefty few seconds of mean violin noodling, the entire concert hall dissolves into wire, and the glowing eyes of Aphex Twin glare overhead as the millions of wires of death shoot directly at the the foes.
"I will...figure this out...and end this madness!" Charlotte triumphantly declares as she finishes her piece, just in time for the millions of coils to form into hard-hitting fists, beating the ever living tar out of everyone until the entire hall collapses onto itself.
The scene transitions back to the stage, as the poor victims are instantly KOed.

On bass, Charlotte will look more somber and unsure, but she rushes forward for the kill anyway! She fires a grouping of wires from her arm, which forms into a giant web, the size of the quarter of the screen on battlefield!
If you get your gaggle of losers trapped in this mess, the scene will transition as usual, but this time into a dark, seedy punk rock club, with the victims bound into greasy chairs. The spotlight shines on a dreary looking Charlotte, who without hesitation busts out a facemelting bass number that blasts over the speakers.
"I guess...this is the world I've been sucked into now..." she flatly expresses as the faces of your victims begin flopping around like jelly. "...but as long as the future remains...I will fight my hardest!"
The booming speaker system behind her then beings to deform into a writhing mass of wires, who then reform into the menacing body of Aphex Twin, winding up her mighty fist.
"Tiffany, Charlotte, none of that matters as long as I can make right again!" the newly confident Charlotte finishes her bass solo with a final note, leading Aphex to punch the ever loving goodness out of the opponents, causing the entire building to collapse.
This version only deals 33% damage in total and doesn't really KO until higher percentages.


ANIMATIONS

*Idle- With the violin in hand, she holds it between her arms meekly while fidgeting around, occasionally tugging at the bass guitar strapped to her back. She doesn't hold the violin up to her neck until she attacks.
With the bass guitar she clumsily holds it in position while occasionally fiddling with the strings to make sure she has everything correct.
Aphex herself simply stands proud along her side, crossing her arms as the winding wires that comprise her body whip out and about.
*Walking- Charlotte turns straight again and walks forward with her instrument in hand, Aphex leaning forward as her wires sway in the wind.
*Running- Charlotte dashes with the sort of clumsiness and compsure you'd expect from a panicked schoolgirl, struggling to hold onto her instrument.
*Jumping- Charlotte hops with a surprising amount of retained daintiness from a young refined lady.
*Falling- She holds her skirt down while struggling to keep ahold of her instrument.
*Fallen- Charlotte lies on her side with her glasses off center and her eyes doing that continuous swirly thing.
*Taunt 1- Our schoolgirl plucks her instrument's string out of sheer boredom, sometimes plucking out a coherent song such as a segment from Canon part 4 or that one Mario Party 2 song.
*Taunt 2- Charlotte answers her 1999 era cell phone and angrily shouts into it, "I REALLY don't have the time now!"
*Taunt 3- Charlotte takes out a nondescript book from her pocket and fingers through it, and finally exclaiming "I think I got it...!"
*Win Pose 1- Charlotte plays a somber melody on her violin, both her and Aphex's giant cross-armed body looking into space.
*Win Pose 2- Charlotte angrily fingers a number on her bass guitar, so hard in fact that she ends up breaking 2 strings. After a prompt moment of shock, Aphex places her fingers on it and replaces the broken strings, leading Charlotte to bashfully scratch her head.
*Win Pose 3- A giant yellow hawk flies onto the screen, and lands on Charlotte's arm. "H-hey! You finally came back!" She excitedly cheers as the hawk cleans out its feathers.

COMBOS

To be added in the full version of the game we'll patch it in later I swear

OTHER NOTES

Nothing here yet
 
Last edited:

Kholdstare

Nightmare Weaver
Joined
Oct 10, 2008
Messages
1,439

Seems it takes some MtG to make me appear, huh? Divinity of Pride was a fun read. You have a certain way with regular Creatures from Magic, FA, although Pride is much better than Gatstaf Shepherd and Grim Poppet (and any other nonlegendary creatures I may have missed). It takes a creative mind to come up with an in-character moveset from just one card, although I'm not sure how well-versed on Lorwyn/Shadowmoor's story, which was kind of just a bunch of different stories put together while loosely connected. So anyway, as for the moveset, it sounds like a blast to play. How often has life gain been done in movesets before? Not often, since it's a balancing act, but you've put together something fair, I think. The mist mechanic fits in well, as does the synergy between them and the overall feel of the moves. The presentation is delightfully simple as well.

While I'm on the topic of me being dead and Magic the Gathering, here's a teaser of something I've been drafting on paper. With the new Smash Bros coming out and new Smash innovations, I'll probably get back into MYM as I got into it originally because of Brawl released. History repeats itself, after all.


ChaosKiwi

Smash Apprentice
Joined
Feb 1, 2014
Messages
104
NNID
ChaosKiwi
Time for Kiwi's Komment Korner again!

Cubert
My first problem with this set is how absurdly overpowered the nspec is. Like, if it's a 1v1 match, a fully charged Anchor will do 232%. That's, uh, kind of absurd. It wouldn't be so bad, but there's no indication of how you can destroy pursuing cube bits, how far they can go before disappearing (if they even do disappear), and you outright say it's hard to dodge!
The other specials aren't much better. That side special... I'm having trouble wrapping my head around how it'd work... or even fit in with the rest of the moveset? The uspec is pretty generic, and the down special just adds to the OPness of the nspec.

Pretty much all the rest of Gomez's attacks do too little damage/KO too early, as well, and most lack any real pizazz/description.

Really, the biggest issue, despite being OP as heck, is that this set lacks any real flow to the moves or a playstyle. you only have one move, the Down Special, that capitalizes on the Anchor, and no moves that make use of the Side Special, which is a legitimately interesting special that could have a lot of potential.

No Matter How I Look at It, It's Your Fault I'm Not a Stand User
Oi, let's see here. Well, for one, I like how you have a lot of different sorts of ways to mix n match her weapons/whether or not her stand is on, allowing for there to be a lot of options here... However, you don't really make good use of it. The way it is now, it's mostly generic attacks without the Replicant, then you turn on the Replicant, and... you just get new, also generic attacks. Same goes for the two weapons.

Also, I shlould note that the stand really seems to not ne that great. It sounds quite easy to destroy, and it looks quite easy to just not use it at all. Why even have it at all?
 
Last edited:

tirkaro

Smash Champion
Joined
Jun 24, 2006
Messages
2,808
Location
but a pig in the sun
No Matter How I Look at It, It's Your Fault I'm Not a Stand User
Oi, let's see here. Well, for one, I like how you have a lot of different sorts of ways to mix n match her weapons/whether or not her stand is on, allowing for there to be a lot of options here... However, you don't really make good use of it. The way it is now, it's mostly generic attacks without the Replicant, then you turn on the Replicant, and... you just get new, also generic attacks. Same goes for the two weapons.

Also, I shlould note that the stand really seems to not ne that great. It sounds quite easy to destroy, and it looks quite easy to just not use it at all. Why even have it at all?
Clever title.
However, erm...don't know how to put this without sounding like a poothead, because I'm a kind of an overly modest guy who REALLY dislikes defending his movesets himself because it kinda makes me come off as self-centered, (Seriously this is probably like the first time I've ever actually responded to a set comment.) but...I'm kinda confused what you're trying to go for by saying "generic." How do I even respond to that? It's kind of a pointless buzzword that means nothing, and makes for weak conversation overall.

Now what you CAN say is that it's more down-to-earth, as far as fighting games go, when it comes to the moves. Charlotte is kind of hard-focused on a specific playstyle that relies on control of ranges with her more unique moves to get herself better situated to make up for her most effective moves being awkward and unsafe. -When- the opponent is in this range, then they have no choice but to respect her options and wide variety of mixups(in a sense) whenever they come out, especially when she becomes a scary combo beast via tune up. Until then she plays a primarily defensive game with lots of potential to dish out punishment every time the opponent slips up via use of either pressure or precise strikes. It's a setup that was kinda inspired by Under Night in Birth among other french bread games, which obviously isn't like Smash, but the same basic idea applies. Now you CAN argue that it doesn't succeed at doing what it set out to do, which is perfectly acceptable, but throwing out buzzwords like "generic/tacky/whathaveyou" is about as constructive as that guy who was tasked with building my 6 inch the other day and couldn't tell Chipotle Southwest from American Sauce. Seriously american sauce be nasty as hell.

But if I'm to be perfectly honest, it feels like even if I did give this justification it'd just make things seem worse, because while "generic" is meaningless, the intention is clear: There's always been a kind of stigma that permeates around more traditional (or "In-Smash" as they'd say) movesets (although I wouldn't say Charlotte is incredibly traditional) and it's kinda bad, especially since it seems these people don't really get the intricacies that go into these moves. It feels like people would just say most Street Fighter movesets or even early Sakurai movesets are composed of "generic" attacks (Which they most certainly are not). I mean, I made plenty of incredibly stupid and tacky movesets back in the day, but there's really nothing wrong with these "generic" movesets that model themselves after Sakurai sets or other fighting games rather than the footsteps of usual Top 50 sets. You can argue that more outlandish sets make for better reading but I firmly believe there's enough room for both flavors to be had without anyone getting hurt.

But idk this very topic has been discussed to death before, but I dunno, this just bugged me hard and I had to address it.

(Also the stand system works pretty much exactly as it does in Heritage to the Future, another pretty big inspiration to this moveset. Charlotte is better off overall in terms of offense and options when Aphex's tools are used diligently, though there's clearly a big risk factor involved there. But this is getting dangerously close to that self-defense thing I said I disliked before, so I'll just shut up now.)

However, admittedly, there was once a time where I first planned Charlotte to be a setup-based character (even moreso) that utilized stuff like momentum-based movement via strings, and various string tensions, and wire traps and the like, but I thought it was kind of dumb, didn't fit the character, and that "style" felt kinda overdone and ditched the whole thing in favor of something more in-line with traditional anime style fighting games. I might try finishing it and posting it later on to see how it goes. (Or just tack it onto an entirely different character.)
 
Last edited:

FrozenRoy

Smash Lord
Joined
Apr 26, 2007
Messages
1,260
Location
Las Vegas, Nevada
Switch FC
SW-1325-2408-7513
Night's End Sorcerer Remix

REMOVES HIS OPPONENTS FROM PLAY

Night's End Sorcerer is a Yu-Gi-Oh! card of minor importance, but I am quite fond of the design, and also I have made a set for it before. There isn't much to say aside from that.

Statistics

Night's End Sorcerer stands at about the same size as Marth all things considered, but runs significantly faster, going only a bit slower than Fox. However, he is also pretty light and weighs about as much as Falco, with decently good traction.

In terms of air game, Night's End Sorcerer goes through it at a fairly average speed with slightly better than normal control and is a bit floaty, but not absurdly so. His first jump is only okay, but he has one of the larger second jumps in the game, aided by his magic. He also has the ability to wall jump, but that is all for special Brawl things.


Specials

Neutral Special: Wisps

Night's End Sorcerer's hand, outstretched with palm open, glows a light purple as ethereal looking energy begins swirling around it for this chargable move, which takes about 2/3rd as long as Samus' Charge Shot to finish charging and can be stored like those. Upon release, Night's End Sorcerer releases 1 to 6 tiny wisps depending on the charge, which lazily and uneasily float forward about half the distance of Final Destination in a decently close cluster, before seperating and going their own ways and essentially move in whatever direction they please. They will generally like to stay grouped though, more around groups of 2 than all together, and will try not to stray tooo far away from being relevant, but it is a very rudimentary thing.

Wisps do not deal damage, knockback, hitstun or even hit anything as they travel. They simply act as immaterial ghosts, freely passing through anything as they float about the stage, unable to be removed unless Night's End Sorcerer destroys them himself or dies. Night's End Sorcerer can have a maximum of six Wisps on the field at any time and since this move is fairly central to how he plays he will often find himself shooting them out quickly after a stock loss ala Olimar. Night's End Sorcerer may, however, charge this move and even fire wisps out when he has the maximum, they will just vanish back into the ethereal after their flight path. So you could say that he can have more than 6 out, it is just that they won't stick around past 6. If you double tap the B button AND hold on the second tap, just tapping twice will result in firing off a single wisp, Night's End Sorcerer will enter a "control" move for a short time, where Night's End Sorcerer can very lightly direct the wisps in a direction he wants. They won't go very far in that direction but this stance has almost no starting or ending lag, so it is useful for small adjustments. They'll go back to doing whatever they want when they're done with the path, though.

The actual starting and ending lag of shooting out the Wisps is pretty low.


Side Special: Magical Dimension

Night's End Sorcerer extends a palm forward as a much darker, inky black-like energy swirls around it, before it expands into a fairly large circle of energy in front of him, about the size of 1/3rd of a Smart Bomb blast radius. This blast deals 10% damage and a mere flinch, with pretty average starting lag and slightly faster than normal ending lag. Projectiles, including your own, that are caught in this circle of energy are stored inside it, with enemy projectiles switching to Night's End Sorcerer but not changing the path they were on. This allows Night's End Sorcerer to store his wisps inside this move and then be released at a later date, preferrably now close to the foe as you hit them with the flinching knockback. In addition, wisps that are stored in his magical dimension do not count as "existing", so Night's End Sorcerer can hide wisps inside of this, shoot out more wisps and then release them and they will all stay around, allowing him to artifically bypass the limit of wisps that can stay on the field. Interestingly, this can also be a good back hitting move, as if you absorb something like a Charge Shot heading towards you it'll keep heading towards you and hit the foe that is behind you. Note, however, that absorbing enemy projectiles will increase the ending lag of this move to just a touch under the lag of Mr. Game and Watch's bucket absorbing a projectile.

Normally, Night's End Sorcerer will release his projectiles the next time he uses this move, but you may double tap B to keep the projectiles stored and still use this move. However, projectiles stored with this will not be added to your currently stored projectiles, but become their own storage, which means you can release it seperately. To put it simply...if you store projectiles via two different Magical Dimension uses, not expending the first, you will release the first stored projectiles the next time you use it and the second stored projectiles the second time, in essence allowing you to store multiple "patterns" of projectiles in it. If you have multiple dimensions of projectile storage, you may hold down B to cycle through them fairly quickly, Night's End Sorcerer's palm glowing brighter whenver it switches. This obviously takes some time, but hey, nothing in life is free.


Down Special: Magician's Circle

Night's End Sorcerer slams the handle of his scythe into the ground, a swirling purple-darkness energy surrounding him. The energy has a "border" around it which forms the primary hitbox and only deals a little damage, 4%-9% damage or so, but has high base knockback with low knockback growth, low enough this does not KO until 330% or so but functions as a good GTFO move. This is especially true because the "border" barrier functions as a good defensive move, nullifying hitboxes that come into contact with it and reflecting projectiles that do as well. Since this move has pretty low ending lag, it is feasible to reflect a projectile with this and then store it with the Side Special. The border does not extend very far, barely further out than Night's End Sorcerer itself, but the raging swirls of dark energy inside are much more powerful and deals about 26% damage while KOing at 80% or so, being a very potent move in that regard. However, it has a hitbox that is about as easy to hit with as Rest, maybe even slightly more difficult, and the starting lag on this is a bit longer than normal, so good luck with that. The energy inside only lasts for a brief few moments, though. Grabs will manage to pass through the barrier and will interrupt the innter hitbox and so are perfectly safe against this move.

If this move is used and nullifies an attack or reflects a projectile, a dark sounding ping noise will be heard, which is this move absorbing the power of the stopped move. The next time your Down Special is used, the border will extend out more based on how strong the hitbox's damage and knockback was. Weak moves like Jabs will hardly add any range at all, but strong smashes and specials are particularly adept at giving this move some nice range. Because the swirling inner dark energy extends out to the border, this also turns the Rest hitbox into something that is much easier to hit with...however, as mentioned, it only lasts a moment, and the border will be past where the foe would be if they, say, shield this. This leaves Night's End Sorcerer quite vulnearable as he finishes the move to a strong attack from an opponent, so this move should be used carefully.

If the inner part of this hitbox comes into contact with your wisps, they will go flying out at about Fox's blaster range and speed covered in burning dark energy as they are overloaded by the spell, dealing 3/4ths the damage and knockback of the inner hitbox. They will be sent in directions that follow how they are oriented compared to Night's End Sorcerer. Something directly above him goes straight up, something straight in front of him goes straight forward, something up and in front of him goes upwards and forwards and so on. Even with no range boost this will happen, so this is a very nice way to extend some range and can let it be a lot safer on-shield as they need to keep it up to avoid being pelted by a powerful wisp. Sadly, the wisp is totally burn out by this move and disappears at the end of it's trajectory. It's also a decent option to Side Special out some wisps and use this almost ASAP to send them flying.


Up Special: Dimension Hop

Night's End Sorcerer closes his eyes for some moments for the starting lag of this move and then, shoop, he's teleported away! Specifically, he teleports to his wisps, the nearest one, causing it to sadly explode as he does so, though this does deal 9% damage with some good knockback that covers his body during the short ending lag. The wisp, naturally, dies though. He slowfalls while starting this move up, which helps keep him from dying. By default he will teleport to the nearest wisp, but if you use the control stick and tap it you can select other wisps instead, just tap in their direction. Night's End Sorcerer and the foe will want to pay attention to wisp orientation a lot as he gets to higher %s, as he is going to want the wisps in a good position if he is sent flying and the opposite for the foe, plus wisps in easy range of getting smashed by the foe are useless for this. If there are no wisps out, Night's End Sorcerer merely performs a jump that goes the same distance as his second midair jump, though this does not put him into helpless. If he wishes to use this move with wisps out, perhaps to chase aerially, he merely needs to double tap B.

Smashes

Forward Smash: Crescent Howler

Night's End Sorcerer swirls his scythe by his side before performing a single circular slash in front of him, sending out a crescent shaped projectile about as tall as he is forward. The actual slash itself deaos 14%-17% damage and KOs at a late 210%-185%, so it is hardly an ideal killer. The crescent projectile, however, is a fair deal stronger, dealing 17%-24% damage that KOs at 140%-100%. It travels decently long, 1.5 Battlefield Platforms give or take, and while pretty tall is also quite thin, so spot dodging while it goes past you or rolling is a good idea...however, the crescent will actually boomerang back to where Night's End Sorcerer released it before disappearing, so it can get people on a second pass, the end of it hitting spot dodgers and rolling towards it near the end/late middle getting them hit on the rebound unless they are far enough away to perform a quick dodge or whatnot. This move's start-up is about average and it has longer than normal ending lag, but it isn't super heavy ending lag or anything.

If Night's End Sorcerer charges this move, the spinning of his scythe will begin to draw his wisps towards him at a slow rate, ones closest to him being a bit faster and ones quite far away from him even more lightly, allowing Night's End Sorcerer a slight degree of control of them by "clustering" them. If you want to use this move and don't want this to happen, simply do not charge the move. The boomerang can naturally be stored in your Side Special and is fairly useful in this regard, as you can utilize it to hit going forward or back and in addition can use it as a "punisher" of sorts for spot dodgers or, in some scenarios, rollers by catching it in the middle of it's path so they have to deal with the rebound. A pretty important move.


Down Smash: Magical Explosion

Night's End Sorcerer spins his scythe above his head once before plunging it in the ground in front of him, causing an explosion of light purple energy around him. This is a fairly strong attack, dealing 18%-24% damage to those it hits, with okay but not great range, the explosion itself doesn't go that far out from Night's End Sorcerer. It KOs at a pretty good 95%-70% too, making it one of his best kill moves, with only slightly laggy startup though hefty ending lag.

This move will also cause wisps to explode quite potently, becoming hitboxes the size of a bob-omb explosion if they are 1/3rd of a Smart Bomb radius close to Night's End Sorcerer when he uses this for the same power as the Down Smash itself. This can create a nice, big and potent killing move, especially if you store a bunch of wisps and let them fly nearby, but it will destroy your wisps and probably wreck some setup too. In addition, neither this explosion nor the wisps deal a lot of shield damage or shieldstun, so shielding them is a fine idea to try and stop it. Forward Smashes that are within that radius are also changed by this blast, destroying and exploding into small bitx of dark energy that go flying, dramatically increasing the width of the hitbox in exchange for ending it's path quite early and reducing the damage to 12% that only KOs at 220%. Still, it is quite a wide hitbox and it actually will hit shields more than once, so it is pretty useful to go ka-blooey.


Up Smash: Rising Moon

Night's End Sorcerer rapidly spins his scythe above his head before swinging it upwards as a single slice, dealing 16%-23% damage and some good but not great knockback, it KOs at 165%-135% or so. Primarily, it tends to set up for Night's End Sorcerer's aerial game due to his decent air statistics, and is also a good anti-air in general. It also starts up quite quickly and the ending lag is slightly faster than average, so it is a pretty quick smash. Charging this move produces a similiar effect to your Forward Smash, but in reverse: It will blow your wisps away from you at the same rate Forward Smash draws them in, allowing Night's End Sorcerer to scatter them around more easily.

A Forward Smash crescent hit by part of the swing will find itself boomeranging back early, allowing Night's End Sorcerer the ability to well...boomerang it early! Although it boomerangs early, it still goes the same total distance, so one boomeranged after going 1 Battlefield Platform will go 2 Battlefield Platforms the other way. Night's End Sorcerer can also use this to smack back a Forward Smash that already boomeranged around, allowing him to have it go back and forth in a shorter area.


Standards

Jab: Night Crash

Night's End Sorcerer performs two quick, darkness infused punches in front of him for 3% each, before slicing with his scythe in a way starting overhead but coming down and ending horizontally for 6% damage, his scythe glowing dark as he does so. The first two hits always combo into each other and the third will most of the time as well, but only the third has any knockback to speak of, though it is fairly good in said knockback even if it isn't a KOer. The first two hits of this also come out very fast and have very little duration, so Night's End Sorcerer has some safe jab poking ability and can get to his third hit quite quickly. Quick on both ends and overall very Jab-like.

When used against Night's End Sorcerer's projectiles, or any opponents projectile that he now owns due to reflecting or Side Special, the first two hits of the jab will cause it to be stuck in place for a few moments, about half a second actually, allowing him to "stall" the path of his wisps or crescents by jabbing them, though since he would have to just constantly jab them to keep them in place it is infeasible to keep them stalled forever, though you can perform a Side Special to save them while about half stalled. The third hit will cause wisps to fly forward 1.5 Battlefield Platforms as a weak hitbox that deals 6% damage and a flinch, in addition to piercing the foe (AKA going right through them), and they are out-prioritized by any move, which is bad because while made solid by this move they have 15 HP and thus can be killed by the foe. After going the distance, they will return to their ethereal state and float about happily.

On your Forward Smash, the slash will instead cut it clean in half, sending the top half flying the direction it was going + up and the down half the direction it was going + down. If the downward projectile hits the stage it will continue to grind against it for a while, a hitbox and essentially trap, before rebounding off, though by firing it from a platform or using a Side Special by one and then cutting it down, you can use to strike downwards just fine, especially since saving it like this means if you use the Side Special it will fly down, and can also be used to edgeguard, especially with the upwards one as well. Both pieces will also still boomerang along their new diagonal paths, which can become pretty deadly, and even the short term trap is fairly nice. Their power is cut to 4/5ths of what it usually is, though. Night's End Sorcerer can actually cut already cut crescents if he so wishes and thus save a bunch of tiny but annoying projectiles, but this does require some time and effort to do so.


Forward Tilt: Dark Hole Blast

Night's End Sorcerer brings his hand back before jutting his palm out, releasing a blast of dark energy from it. This blast is decently wide, but not very tall, and travels slightly slower than Falco's laser while going about 1.25 Battlefield Platforms, not enough to camp but enough to outrange pretty much any melee game. It deals 8% damage and some okay knockback, enough to gain some good space and time, though this move does take a decently long amount of time to fire out, with short ending lag. At the end of the projectile's path, it explodes into a swirling hole of dark energy, which passively sucks in players towards in, though it does not affect projectiles and the like. It will get minions close to it, since they count enough as characters. The pull is not very strong, it is weak enough any character's dash can escape, but it does get a bit stronger if you get closer and weaker if you get further away. It lasts for 6 seconds total, but it can be dispelled by depleting it's 35 HP to 0. It is not a hitbox during this time.

Night's End Sorcerer has little in the way of directly interacting with the black hole, but he can save it with his Side Special, allowing him to add a drag in effect to the projectile state he saved, though naturally this is just dragging and it doesn't stop the foe from shielding and whatnot. However, Night's End Sorcerer can also chop the projectile in half with his Jab, which allows two holes of weaker power to be created, which can have some strange effects as one is higher and one is lower and can tend to pull enemies towards the middle some. If Night's End Sorcerer uses an Up Smash on it, he can knock it away, while a Down Smash will cause it to create an extremely strong pushback effect if it is in range, which is an excellent way to hit foes into your exploding wisps, though this consumes the hole. Likewise, catching it on the inner part of the Down Special will cause it to rapidly suck foes in, which can bring foes just outside the border into it to be smacked by it or be used to keep them in place while the wisps go flying. This also consumes the hole.


Down Tilt: Night Strike

Night's End Sorcerer raises a dark energy coated fist to the sky before slamming it into the ground, causing purple energy to burst out around him. The hitbox extends circularly outside him a fair deal, but it is still a pretty close ranged move, dealing 11% and some pretty good knockback, KOing at 180% and being a very good early GTFO move, especially because it starts up quite fast...though it has some quite heavy ending lag, though. What is cool about this move is it can be used to rocket your projectiles forward, as any that are in range of the move when it is started will get a nice and sharp shot forward one Battlefield Platform at 1.25x their normal speed. In addition, this distance they travel does NOT count towards their normal duration, allowing Night's End Sorcerer to artifically "extend" the length of his projectiles, if he wants to take the time to do so. It also has some fun implications with the crescent, as it can send itself flying right back, perhaps into some jab stuff, and can also make a cut in half crescent a big aerial menace.

Wisps, on the other hand, react a bit differently, as they will glow as they are sent flying one Battlefield platform in whatever direction they were in, leaving behind a faint trail of dark energy as they do so. This trail is as long as the distance travelled and lasts 4 seconds, but enemies who come into contact with it take 4% non-flinching knockback and can take more if they are repeatedly knocked in and out of it, which is fairly nice with your stage controllers like Forward Smash and Forward Tilt, which will keep the foe moving around. In addition, the wisp will be a bit tired after being sent this way and will not move for about 2 seconds, allowing Night's End Sorcerer some degree of certainty of where the wisp will be. Naturally, these trails can be saved with your Side Special, adding a bit of a bonus if placed right to foes who avoid your projectiles with movement.


Up Tilt: Moon Shine

Night's End Sorcerer starts with his scythe in front of him and swings it upwards quickly, a swift movement that deals a nice 9% damage and hits foes up into the air a fair deal: It's not impossible to follow-up on, but it is too far to be called a mere pop. Since this move starts in front of Night's End Sorcerer, he actually has his hitbox just in front of him too, and the very end of the swing produces a small hitbox that deals 2% and flinching to people directly behind NES, basically only useful for maybe interrupting an attack on the back end due to this move's low ending lag, it is also fast to start up. The hit in front of Night's End Sorcerer has impressively large pushback and will generally put a foe at just about the edge of his scythe range. So it is good for both some non-projectile combat and for just gaining space. Since it's so quick and it has some nice range above him, it also is a very good anti-air.

Dash Attack: Slide

NES slides to the ground, feet first and scythe raised above him, ending the slide with a kick which helps him get to his feet. The first part of the slide deals rapid hits of 1% and dragging knockback that will usually drag a foe with him while the kick deals 8% damage while okay, slightly light, knockback. Overall, this will do around 13% damage with the multi-hits. Night End Sorcerer's scythe is also a hitbox during this move, a very light upwards knockback that deals 3% and primarily is used to catch those who wish to shorthop right over the move. Because the slide and kick is a hitbox that is so low to the ground, it is also an excellent way to poke shields, and Night's End Sorcerer appreciates the ability to drag foes along for the ride when he has moves like Forward Tilt and Forward Smash or sees some nearby wisps he can take advantage of. It also keeps opponents relatively close, so you can try and pressure them by releasing a Side Special with projectiles stored, a charged Down Smash and what not. A very useful if simple tool in his arsenal.

Grab Game

Grab: Graveyard's Grip

Night's End Sorcerer reaches his hand out and, well, grabs. It's a pretty standard Brawl grab that is average is most respects, perhaps slightly faster than usual. By double tapping A or the grab button, the wisps on the stage will flare to life, also becoming grab hitboxes, which can become incredibly scary. When a wisp grabs the foe, they are instantly teleported into Night's End Sorcerer's grip and grab by it, at the cost of the little wisp's life. After using this, the wisps will glow a bit dimmer for about 2.5 seconds, and you can't use them to grab again, though naturally your normal grab is just fine. Wisps are only grab hitboxes for a brief moment.

Pummel: Shadow Strike

Fills the opponent with dark purple energy, dealing 2% damage. Longer than usual for a pummel and not the best at it for damage dealing.

Down Throw: Wistful Wisps

Night's End Sorcerer lifts the foe into the air while pouring purple swirling energy into them, before slamming them into the ground for 9% damage that bounces them off the ground. The energy will continue to swirl around them for a bit over 5 seconds and serves to draw in yout wisps towards the foe, albeit at quite a light speed, and they'll still be moving around in their own way. Still, combined with your other light ways of diverting their direction, it is a very nice way to get them where you want. If you would prefer, you may hold down A or Z during this move and the effect will be reversed, causing the wisps to instead be lightly pushed away for that time, which can have some minor fun with sending them around flying and can be useful for things like delaying the speed of Forward Tilt wisp projectile. Finally, double tap A or Z and this move will simply not have any special effect, if you wish to set the foe up into a spot without messing with your wisp setup. Using this repeatedly wil ljust refresh the timer.

Forward Throw: Magica Strike

Throwing the foe forward with an open palmed strike to the midsection, Night's End Sorcerer releasing a surge of black energy into the foe as they are sent forward for decent knockback and 7% damage. The energy will stick around on the foe for about 6 seconds before it goes KA-BOOM, exploding in a rush of energy for 12% damage and some decently strong knockback, can KO at 175% or so. This makes it a pretty potent damaging throw, but the explosion can be fairly easily shielded or dodged unless NES pressures the foe, be it with projectiles or close up. You can actually suspend this explosion as a true trap by hitting an opponent with your Side Special, making it one of Night's End Sorcerer's only "true" traps when done, and thus can be placed wherever you then want with another Side Special, whereupon it'll start counting down in it's new place.

Some obvious uses of putting this on the foe are to strike at them when they are shielding in the middle of projectiles and shield pressure, in addition to making the foe more predictable, but Night's End Sorcerer can also choose to go on the offensive with things like the Dash Attack to pressure the foe. When seperated from the foe, it provides one of the few hitboxes the foe has to worry about that is an actual trap and not a projectile and will be difficult to remember how long it has left, in addition to the fact it is a good way to leave something behind along with a projectile splurge.


Up Throw: Night Fury

Night's End Sorcerer performs a driving, upwards and darkness infused punch to the foe, sending them up a fair deal while dealing 8% to them. The darkness continues to smoke off of the foe, visually much different from other ways, for about 4 seconds after. During this time, any wisps that contact their hurtbox will in fact explode for 8% damage, though no hitstun/knockback, offering NES a choice between if he wishes to sacrifice wisps for damage or not. This can be particularly potent if you have a lot of saved wisps on a Side Special, giving the foe a lot to dodge, or can even grab them twice to get Down Throw on as well: It should be noted that, with near frame perfect timing, you can actually grab a foe with a wisp as it explodes, which is a pretty neat trick to deal. Using this repeatedly will just refresh the timer. If you want to use this throw but do not want exploding wisps, just hold down A or Z and that effect won't be added on.

Back Throw: Purple Surge

Night's End Sorcerer lifts the foe up, darkness trailing down his arm like flames and onto the foe, and then slams them behind him for 7% damage. The dark "flames" will continue to engulf the foe for about 4 seconds after for 1% non-flinching damage per second. While this is a bit weak, only 11% total for a throw without a lot of setup possibilities and only decent space gaining ones, the flames will flare up more every time the foe is hit, causing them to survive an extra second for each hit. Because of this, Night's End Sorcerer can turn this from a mediocre damage dealer to a raging inferno of damage by pressuring the foe, be it with little wisp pokes, the quickness of his jab, his Side Special suddenly popping out or things like his Dash Attack's sliding hitbox. Using this move on a foe again does not add to the timer, not even for hitting the foe, but instead increases the damage done per second by 1%, so if you grab a foe with a lot of time left you can get off quite a lot of damage with this!

Aerials

Neutral Aerial: Full Moon Fury

Night's End Sorcerer performs a single spin with his scythe, like Metaknight's NAir but with a scythe and only once, quite quickly, with a fairly short start-up lag and a quick duration. Combined with the fact it deals 14% damage and actually KOs at 145% or so, it is a very useful move, and shorthopping it is one of Night's End Sorcerer's better close range melee options, serving as a strong GTFO move and a good damage dealer with good range. In the actual air itself, it has pretty poor ending lag, but if you activate it's landing lag it is quite short. A shorthopped NAir on a close range opponent is good to get them off of you, but a NAir to approach is also quite excellent. A key part of NES' melee game.

Down Aerial: Crashing Moon

NES raises one hand high, enveloped in a dark purple energy, before he crashes down knuckle-first. Opponents struck by him while he falls down this slower-than-normal stall than fall are hit for a fairly strong 18% damage and while they are not spiked as hard as Ganondorf's DAir or Ike's DAir, it is still a pretty strong spike, though since Night's End Sorcerer cannot cancel this move for some time it is a pretty risky move to spike someone offstage. Though if Night's End Sorcerer hits a foe, he will bounce off them ala Toon Link's down aerial and be free to move after some short lag. Instead, try spiking them into your projectiles as they patrol the stage or whatnot. If Night End Sorcerer's projectiles get in his way, he'll drag them down with him, crushing them as he strikes the floor, which also sends out two "spires" of darkness about half his size to both sides of him, which strikes enemies powerfull upwards for 16% damage. They have a very short duration, however, and Night's End Sorcerer suffers very high ending lag on this move, even more than your normal laggy stall than fall. Starting lag is about average.

If Night's End Sorcerer crushes a wisp as he lands, then Night's End Sorcerer will have his spires get larger for each wisp crushed, specifically by 1/4th his height for each wisp crushed, which while it will not usually amount to a huge amount unless you focus a lot on wispy Side Specials still can get pretty tall and can be good to do when you first fire out 6 wisps. A crescent that is crushed under this move creates a shockwave that eminates out from both sides of Night's End Sorcerer in addition to the spires, dealing 7% and a trip and offering a great thing to add to your projectiles if you get in there melee-wise, in addition to ending lag coverage. If you manage to crush multiple crescents somehow, then it will have another shockwave pop up a bit later. If you are able to save these shockwaves with Side Special, they will travel the air freely in a straight line. Much easier if you crush two crescents. Crushing a Forward Tilt projectile will create a heavy suction effect when the spires are first created, follow by a heavy push effect as the spires disappear, utilizing them to both draw and crush the foe inside and then blow away any who dodged it to help keep NES safe. Finally, any foreign projectile that NES has turned to his side will decrease his ending lag a little when it is crushed, which is a pretty nice benefit.


Back Aerial: Dark Lily

Night's End Sorcerer juts his palm out behind him and releases purple energy from it, which deals a solid 8% damage and fixed knockback of about 1.33 Battlefield Platforms. The hitbox lingers for a fair while, which combined with the decently fast starting lag makes it probably your most consistant way to get enemies off your back even if it is not always the best, though it has somewhat lengthy ending lag. However, if this move hits a projectile you own, you can instead redirect it by tilting the control stick when this move is out, which offers a lot of usage when you consider that, for example, this will alter a crescent's boomeranging path to fit it's new trajectory, or that it allows you to place dark holes in whole new areas. This cannot be used to redirect wisps sadly, only true projectiles.

However, that this CAN do is actually "redirect" a foe if they have been hit by your Forward Throw magic mine if used right when you hit the foe, as Night's End Sorcerer curls his fingers and "throws" the foe in that direction for the usual fixed knockback, though this is not a grab hitbox but just an animation. This adds a new dimension to placing it on your foe, as you can use this to help throw foes offstage and as an edgeguard if they are mined, throwing them right down with this, and it is incredibly useful to direct an enemy's position so simply when you have a myriad of crescent boomerang possibilities, especially when cutting them in half, not to mention wisp and dark hole placement, or even just popping the foe away from you as best you can. And yes, this can also move the mines this way when they are Side Specialed off a foe, which gives Night's End Sorcerer a great degree of control with his one trap and has to have the foe be kept on the lookout for him shoving it towards them.


Up Aerial: Half Moon Havoc

Night's End Sorcerer performs a graceful upward swing with his scythe that deals 9% damage and pops foes up with some lightness, though a bit heavier then you'd expect an average juggler too, and this move actually hits a bit in front of and behind Night's End Sorcerer thanks to the swing path, making it one of his better full on aerial combat moves. This is especially notable due to fairly quick startup and ending lag, making it less conditional than some of his other aerials, although it does not cover a good deal of his front/back. NES is not a dedicated juggler, but he does appreciate it due to some nice upwards hitting moves in his set, and it serves as one of his more notable ways to purely damage rack when going into closer ranged combat. This move has a bit high of landing lag, though, as the backswing of the scythe clashes against the ground.

Forward Aerial: Lunatic Black Rose

Night's End Sorcerer raises his scythe high before slamming it in front of him, a long start-up giving way to 17% damage and strong knockback that KOs at 105%. This move's quite long start-up might make it hard to hit with, but being one of Night's End Sorcerer's most direct killers is a good plus, and it has the important feature of crushing shields for a lot of damage: Since foes will want to do things like shield his Forward Smash and Forward Throw, not to mention trying to avoid the dark burn damage of your back throw and the like. Since these moves provide shieldstun (as pretty much every attack does), they also help cover for the starting lag. This move similiarly has fairly long ending lag, so it is something you should commit to.

Final Smash: Night's End

A large pillar appears in the background of the stage as the scene turns to night, bats appearing all around, as Night's End Sorcerer hops onto the large pillar, evoking the image of the card as his scythe glows light with power. As he gathers power, the bats will attack foes, making quick swoops which deal 5% damage and fairly low knockback repeatedly for about three seconds. Unlike Centurions, the bats do not die when they attack or hit something, just coming around for another pass.

After gathering enough energy, which is at the end of the three seconds, Night's End Sorcerer lets out a massive downward-crescent energy slice, cleaving from one side of Battlefield of about just under the top platform's height to the other side, dipping down as it goes in the middle and rising at the ends as a slash would. This attack does 30% damage and huge knockback, though jumping timed well can dodge it...but the bats being able to catch you in hitstun and whack you means avoiding this is all about timing.

After this move is use, Night's End Sorcerer hops off his pillar and lands in the middle of the stage, the bats fleeing and the background regressing to normal.

The attack is truly majestic, wouldn't you agree?


Playstyle: Black as the Night Sky
 
Last edited:

Katapultar

Smash Lord
Joined
Nov 24, 2008
Messages
1,251
Location
Australia
"There must have been someone who first determined the value of money. The size of the rails on a train track? The magnitude of electricity? Laws and regulations? Who was the first one to determine those things? Did we all do it because this is a republic? Or was it arbitrary? NO! The one who took the napkin first determined all these things! The rules of this world are determined by that same principle of right or left?! In a society like this table, a state of equilibrium, once one makes the first move, everyone must follow! In every era... this world has been operating by this napkin principle. And the one who takes the napkin first must be someone who is respected by all. It's not that anyone can fulfill this role... those that are despotic or unworthy will be scorned. They are the losers. In the case of this table... the eldest or master of the party will take the napkin first... because everyone respects those individuals."


((Funny Valentine))


23rd President of the United States

"For example, if Jesus Christ were sitting at this table. No matter who you are, even if you are the pope, you would have no choice but to take your napkin after Jesus Christ, yes? Once this race ends, it mean the beginning of our rise to power. Soon, I will obtain that power... the object that all will pay their respects to. Something irrefutable, something immovable. That is true power. And those under this power's influence can only be allies."

Possibly the most badass fictional President ever, Valentine is the primary antagonist of Steel Ball Run, Part 7 of the ongoing Jojo's Bizarre Adventure manga that the majority of MYM is only now familiar with. Valentine is responsible for orchestrating the titular race around America with the secret intent of having a good few participants stumble upon the corpse parts of Jesus Christ, sacred objects said to imbue people with a "Stand" ability and even repel all manner of bad luck away from them if they're in possession of all 9. Rather than selfishly use this power for himself, Valentine desires it to reflect misfortune away from his country and ensure that it doesn't fall into the wrong hands, but the way he goes about this is what makes him villainous: like all JoJo antagonists before him, Valentine is a solve believer in the idea that the end justifies the means, going as far as to kill off his own men when they're no longer useful to him and even threaten innocent people to get what he wants. That is all for a noble purpose however, or so says Valentine - some of his dialogue actually implies that he just wants the Corpse Parts to become even more powerful than he already is despite his authority already being among the greatest.

Though he may not look it, Valentine is no pushover in battle, having more than enough power to match his presidential authority: his Stand in particular - Dirty Deeds Done Dirt Cheap (or D4C for short) - is an advocate of superhuman speed and strength like most other Stands in the series, but what it makes it so terrifying is its ability to travel between a seemingly-infinite number of parallel dimensions. Valentine is able to send himself or someone else to any one of these dimensions by placing them between two objects (for example, by slamming a door on them when they're up against a wall), which then appear in that world by appearing from a gap between two objects, but if anyone or anything other than Valentine makes contact with another copy of themselves both will break apart into Menger sponges and be obliterated, effectively letting him kill anyone just by throwing a cloth over them. Valentine can also switch places with another version of himself in order to heal all his injuries and even bring as many versions of himself as he likes into one world to gang up on an opponent, though none of these Valentines have their own D4C since it only exists in the "Root World" where the main story takes place. With its insane dimension-spanning abilities, D4C is considered to be one of the strongest Stands in the JJBA-franchise, making Valentine one U.S President you don't want to go against without good reason.

He also has an incredibly funky theme.


((Stats))

Size: 9
Weight: 5
Ground Speed: 5
Jump: 5
Air Speed: 5
Fall Speed: 9
Traction: 7


Valentine's stats are well-grounded in realism thanks to coming from a realistic series - he jumps fast and falls fast, but unfortunately he suffers a good deal of jump delay that makes out-of-shield games less effective and weakens his aerial prowess. Despite not being a superhuman creature such as a vampire, Valentine still has decent physical prowess thanks to his time as a soldier and having Jesus's heart inside of him, which slightly increases his physical abilities.


Also, he makes no sound when he walks, an actual canon trait of his.


"I will become the one that can take the napkin first. I Funny Valentine will be the one sitting at that table."


((Specials))

Neutral Special - D4C
Valentine calls out "D4C!" to summon his Stand behind him in an instant until you press B again to dispel it. You can also double-tap B to have D4C appear behind the nearest opponent or tap the control stick in the opposite direction to have it face the other way, and if you hold B upon summoning D4C, Valentine will send his Stand forward at high speeds until you let go of the input as a means of positioning it, though it cannot stray any farther than 4 SBBs from its user due to having an average range stat and will disappear if Valentine moves away from it. D4C is perfectly capable of moving through walls like all Stands due to being ethereal, and if it makes contact with a ledge Valentine will automatically be drawn to it, giving this move use as a recovery.

Sending D4C out from Valentine lets the President cover twice as much area with his attacks, but anyone who knows JoJo knows that Stand-users sustain whatever damage their Stand receives in battle, meaning foes can attack Valentine's Stand to inflict damage and status ailments onto him. D4C won't flinch from attacks that inflict low knockback at best (or none at all), but if it's hit by anything stronger it'll disappear and Valentine will receive the entirety of that knockback, which is completely and utterly unavoidable for him, even if he was invincible or had super armor. Valentine can also be grabbed through his Stand, which disappears upon being hit with any throw, so be wary of foes looking to exploit that with B-throws to create combos against you on the spot. Finally, D4C will automatically be dispelled if Valentine is sent flying by a strong attack.

Side Special - Dirty Deeds Done Dirt Cheap
Valentine takes out the American flag and swirls it around himself, uttering his signature catchphrase "Dojyaaa~~n!" while summoning a new fighter from another dimension.

If you tap the input, Valentine will summon a copy of himself from another dimension, an "AU Valentine" for future reference. AU Valentines spawn with 12% less than the "Root" Valentine and have full access to his moveset except for D4C-based attacks, shields and dodges, fighting with a Lv5 AI that tends to semi-aggressively go after the nearest opponent in groups. AU Valentines are not particularly difficult to KO due to their high fall speed and lack of recovery thanks to no D4C, but they can still be a chore to defeat with how well they blend in with the original. Valentines are incapable of hurting each other with their attacks, and there can only be 3 AU variations onstage at a time.

If you smash the input, Valentine will instead summon an alternate version of the nearest opponent whom is immediately locked into hitstun that gives the President several frames to get a free attack on them. This "AU opponent" spawns with 0% and also fights with a Lv5 AI that behaves in a manner befitting for the character in question, obviously going after Valentine much like they were doing before suddenly being dragged into this dimension. AU foes will generally ignore their counterparts unless they're attacked by them - accident or not - in which case they'll fight back and attack them whenever they get in their way, something Root foes should really try to avoid. Even so, summoning another copy of the opponent is incredibly risky for Valentine given he already has his hands full trying to take care of one, but the fact that neither can make physical contact with one another without incurring a fatal risk means that AU foes are just as bothersome to foes as they are to the President. If two of the same extensions (projectiles, minions, traps and what not) from two of the same foes come into contact with each other, they'll immediately disintegrate, and if these two foes touch each other they'll both take 10% and flinching knockback away from each other. That's not even the worst part, because if one foe is knocked into their counterpart, both will take 16% and diagonal knockback away from each other that KOs 1.5x more easily than the attack responsible for the collision would have - that, and the combined damage percentages of both fighters is shared and split evenly among them when calculating the knockback, so both will suffer the same knockback regardless of their individual damage percentages and be KO'ed at the exact same time, unless one DIs or there are stage obstructions in the way. This potentially allows Valentine to bully a single variation of his opponent and then slam them into their counterpart so they're both KO'ed, exempting the need to fight both of them. Valentine can summon up to 3 copies of a single enemy just to ensure that dumb players don't accidentally screw themselves over or massively lag the game, and he can also summon one copy of any ally per stock. Yes, that's kind of broken, but this is Valentine we're talking about and not to mention foes can use the rules of his Stand against his ally.

If you "charge" either variation of the input for half a second, Valentine will cancel the move and retain a special hue that outlines his body, blue for an AU Valentine and pink for an AU foe. If the Root Valentine or D4C open up a gap between a foe and the ground they're on by knocking the former off it, the most recently "stored" AU player will be summoned on the ground the victim was occupying, giving Valentine a unique way to summon them. Valentine can overlap and stack as many hues on himself to store AU players as the number of each he can still summon, and is able to rid himself of the hues by performing a taunt.

In Steel Ball Run, people or objects summoned from another dimension could be sent back to their own if slammed between two objects by an individual. In Smash, players can send AU players back to their own dimension by sandwiching them between the ground and their own body through a footstool jump, which will instantly make them disappear from the match without bloodshed. This won't work for foes dealing with their own AU counterpart however, in which case they'll need to knock another player into the ground that character is currently occupying and standing on. Foes use Valentine or one of his AU counterparts to pull this off, but it requires them to be airborne and to actually pull off a spiking on them let alone aim it towards the AU character you want to banish, making it a very tedious process. It's at least a countermeasure foes can take to control how much chaos their AU counterparts contribute to the match.

If Valentine's fighting against an opponent with multiple movesets made for them, there's a 10% chance that he'll summon a different set to the one they're using. This not only includes identical characters, but also ones different versions of the same character from alternate timelines or spin-offs of their own series, like summoning Cartoon Donkey Kong instead of normal DK.

Up Special - Escape to the Other Dimension
Valentine throws out the American flag ahead of him as though it were a rug he were throwing over a (American) clothesline, a reasonably fast grab hitbox that covers a good SBB length, but only the center acts as a hitbox and it only works against grounded opponents. Once it hits, the opponent is sent to another dimension and trapped there until they escape with 0.7x grab difficulty, but they'll only escape by putting the effort in through button mashing - the opponent suffers no lag upon escaping however, and they'll know they're about to get out when the flag suddenly appears to bulge. Once Valentine traps someone, he'll keep the flag with him as a strange item that travels up to 1.5 SBBs when thrown, but it glides forth slowly and just kinda floats down at a painfully slow pace, so gimping opponents by throwing the flag offstage is somewhat impractical. This is made even more so by the pretty bad end lag Valentine suffers whether he whiffs the attack or not.

Valentine can store his AU counterparts in the other dimension, who are then released once the flag reaches its apex upon being thrown or hits the floor. Valentine can also store AU foes if he's starting to feel the pressure or wants to move, but also if he uses the move again and traps their counterpart as well both characters will be annihilated for 15% and very high that'll KO both if their equalized damage amounted to 120%, regardless of their weight. The annihilation only works with the same flag however, so if you drop a flag with a foe "inside" you'll have to pick it up by standing next to it. Flags without characters inside stay around for 10 seconds and are largely useless, but there can only be one stray flag onstage at once: trapping a character inside another flag will cause it to disappear once they escape.

If Valentine uses this in midair, he'll wrap the flag around himself to escape to another dimension as the flag magically travels 2.5 SBBs on a 20 degree angle. Valentine can stall inside the flag for up to 4 seconds by holding B before he's kicked out and enters helpless, the recovery not being all that good due to the lack of reach or auto-ledging despite the invincibility. If Valentine had a stray flag lying on the ground however, the player can tap A or the control stick to to have the President re-emerge from it as an infinite recovery, but a rather predictable one that leaves him open for a fair bit.

Down Special - New Valentine
Valentine flashes for a split second, but this does nothing unless there are AU Valentines near him (within 2 SBBs). In that case, all Valentines will flash and the Root Valentine's movements will become AI-controlled and blend in with those of his dimensional doppelgangers, always staying behind at least one for protection. This doesn't seem like much of a mindgame, but remember that you can summon D4C where the foe is and have it attack from afar, meaning you don't necessarily have to give away your position just to attack. If you do move Valentine while his movements are synched with his AU counterparts, they'll also synch their movements with his, so this way you can control a cluster of Valentines together as one. Also, if you attack with a Standard, Aerial or Grab shortly after synching the Valentines together, they'll all perform that attack at the same time providing they weren't using another attack, giving you a bit of direct control over how they attack foes.

If you smash the input, Valentine will pose towards the camera stylishly before a transparent copy of himself jumps to the AU Valentine closest to him, or fartherest away if you held the control stick diagonally. This transfer's the Root Valentine's conscious to the chosen AU Valentine and in turn essentially swaps around their AI, damage percentage and overall condition, actually letting Valentine slowly recover from all the damage he's taken since remember AU Valentines start off with 12% less than the Root President. AU Valentines remain frozen in whatever position they were for half a second when you input this move however, before the body jump instantly takes place afterwards, making them perfectly vulnerable to being attacked by nearby foes. If you perform this move the instant an AU Valentine's attack connects with a foe and locks them into hitlag however, that foe will also be frozen in place during the period before the body jump occurs, not only making it much safer but also an interesting way to follow-up on whatever that AU Valentine was in the middle of doing. Furthermore, Valentine is able to summon or dispel D4C within that frozen period of time, allowing you to adjust his position to accommodate the new changes.


((Standards))

Jab - Sex Pistol
Valentine takes out a pistol and fires it ahead of him, a semi-laggy projectile that zips 4 SBBs across the stage as quickly as a real bullet would. While most Brawl pistols only stop at dealing token hitstun, the sheer patriotism behind Valentine's attack, as well as the realistic weight of actually being shot by a gun, cause his attack to deal 5% and surprisingly solid knockback on a low angle that can KO as early as 165%. This is excellent for when Valentine needs some range in order to finish an opponent, knock them into their counterpart or even use the attack's knockback to summon an AU character from afar. This is only made deadlier by the fact that AU Valentines can use this attack as well and will use it to deliberately knock a foe into their AU counterpart if possible, but they only came equipped with one bullet, meaning they can only use this attack once.

Dash Attack - Political Plunge
Valentine dives forward spontaneously as though he were dodging an oncoming bullet, covering a good SBB's distance with his leap before rolling back onto his feet like the badass he is. Foes in front of Valentine when he starts his dive are knocked behind him for 8% and good mostly-horizontal knockback that won't KO until 200%, while those hit the rest of the way receive 6% and low diagonal downwards knockback that instantly puts them into prone. Alternatively, hitting a foe above you during the dive will deal 5% and weak diagonal knockback that only KOs at 300%. The roll that occurs at the end is not a hitbox, but it does give Valentine 10% heavy armor and he recovers quickly from it, even more so if he exits into a crouch. This isn't a bad move for knocking enemies down, but it's also great for knocking a foe towards AU Valentines in the event where the Root Valentine decides to take the napkin first.

If the Root Valentine dives into an opponent with most of their body against the ground, either through a crouch that achieves such (Snake's or Kirby's) or being in prone (automatically achieved by landing the diving hitbox against them), they'll be sent to another dimension and be met with something painful, as indicated by menger sponges appearing where they once were along with trace spits of blood. This causes the victim to receive an extra 10% before being shot out vertically in front of Valentine once he finishes his roll, suffering moderately-low knockback that actually scales surprisingly well for a Valentine attack thanks to him utilizing his dimensional prowess, KO'ing foes at 160% regardless of their weight - extremely useful for still keeping foes near you at lower percentages (especially in the case of fresh AU foes) while letting you utilize them as a "projectile" against their Root counterpart later on without worry that they'll die too early or late since the knockback never changes with a character's weight.

If Valentine ends his dive with a crouch after sending an opponent to another dimension, something funny will happen. The foe will not be shot out until Valentine jumps, rolls, goes through the entire animation of this move or the victim escapes with regular grab difficulty, but if the latter occurs a super-armored grab release animation will occur between the victim and the President, the former not receiving the knockback they would have otherwise suffered. This allows Valentine to position his victim freely within a limited time, letting him align himself with their counterpart so the two collide with each other and die together. On another note, Valentine can also send very short grounded items, minions or traps without hitboxes to another dimension through the same method he uses on foes, letting him re-position anywhere else on the stage as he pleases. For example, you could take an enemy's trap and place it next to the same kind of trap of their AU counterpart so they both get annihilated. You can also re-position flags this way.

F-tilt - Presidential Combo
Valentine throws out a backhand in front of him for 3%, which can then be followed into a diagonal chop with the same hand that deals 5% and very low mostly-horizontal knockback that won't KO until 300%. This doesn't have the best range nor is it terrifically fast, but it does have some decent duration on the second hit and keeps foes to Valentine where he normally wants them. This move's knockback is low enough that it can actually create a combo if you had a SSpec charge in place to summon an AU Valentine, who will in turn be close enough to the opponent to perform an attack of his own providing their damage is at 0%. AU Valentines are rather fond of poking and locking enemies in place with the backhand, though it's not hard to DI out of a group attack.

If you input this move after the chop or have D4C out, Valentine will make a forward gesture to send D4C moving forward at a moderately fast pace, who then performs a flurry of chops in front of itself that deal 12% and good knockback that KOs at 135%, continuing this until it can stray no farther from Valentine in which case it will return to where it started the attack. Valentine is able to move almost instantly after gesturing and thus can attack alongside his Stand to pressure enemies so they can't as easily take advantage of the fact that he has an extra hurtbox active, or you can simply use AU Valentines to distract a foe while D4C rushes into them and knocks them away. D4C's chopping also has some rather high priority, so it can be used as a means of approaching opponents who want to spam projectiles against you providing you're careful.

U-tilt - Revolution
Valentine crouches down and throws out a rising uppercut that deals 6% and okay juggling knockback that only KOs at 330% - juggling that serves Valentine well in conjunction with all his AU fighter shenanigans and remains consistent even with large changes in a foe's percentage. The range and speed leave something to be desired for how weak the attack is, but it's got good duration, almost no end lag and gives the Root Valentine brief super-armor frames right at the start, making this a particularly good counter since enemies will often be close enough to attack you even after being hit.

Following up with D4C or having it out results in a semi-laggy rising chop that deals a much better 9% with good upwards knockback that'll KO at 160%, a useful KO move with a good bit of duration on it. This will almost definitely hit large foes or those with high falling speed at lower percentages, but even if it doesn't you can use the foe's knockback as a catalyst to summon an AU version of them from the gap they were occupying and the knock it into them with the second hit. The process isn't so fast that foes can't dodge or jump out of the way of the oncoming AU foe, but that's not to say that you can't go into the air to pressure one or the other either. You could also summon an AU Valentine instead of an AU opponent if summoning another of the latter would be too much, and D4C's chop will propel the former into the air as though he pulled off a footstool jump, letting him easily pursue the original victim without the worry of jump delay.

D-tilt - Cruel Beatdown
Getting down on one knee, Valentine throws out two punches diagonally beneath him in quick succession, each one dealing 4%, flinching and a slight chance of tripping. Just like in Valentine's HHA from All-Star Battle, the President's AU counterparts absolutely love pummeling prone opponents and will always take the chance to do so whenever an opportunity arises, such as in said situation or when a victim is being held in place. This can then be followed-up by an attack that sees Valentine boot his opponent for an additional 5% plus okay diagonal knockback that'll KO at 250%, which in itself possesses the best range of Valentine's 3 tilts. Surrounding and beating on a helpless opponent is a good way to get in some dirty damage done dirt cheap.

D4C's follow-up attack is a fast, brief low kick that deals 12% and moderate diagonal downwards knockback that KOs at 170% and puts foes onto prone while they're in contact with the ground. This won't connect from the previous hit and knocks an AU foe summoned from the previous attack on a different angle than the original victim, but it sure does a good job keeping them grounded and if there are any AU Valentines nearby when their knockback begins to decline they'll take the chance to use their D-tilt attack to beat up on them, which in turn kills off any remaining momentum from their knockback. This is arguably the safest D4C tilt move in the event where Valentine wants knockback but does not want to get punished too easily for using his Stand to attack.


((Smashes))

F-Smash - American Chopper
D4C rears its hand back before stabbing it forth in a violent, relatively fast smash that deals 18-24% with impact stall and high mostly-horizontal knockback that'll KO between 112-84%, a powerful finisher and means of sending an opponent flying on demand. The brutal stabbing nature of the attack also causes blood to splatter out from behind the victim and form into a 0.75-1.25 SBB-wide puddle that stays out for a good 5-8 seconds before evaporating, seemingly as a gruesome aesthetic to remind foes of how cruel the Jojo universe is. If a counterpart of the victim steps over the blood splatter however, it'll be attracted to their own blood like a magnet and seep its way through their skin like a cluster of sharp needles, disintegrating a good chunk of their blood along with the pool itself for a very painful attack that emulates the damage done by D4C's stab right down to creating another blood pool... which in turn is capable of damaging the original victim of the attack. Then, should that blood pool take its victim, it'll create a bloody loop, with enemies having to memorize whether the blood belonged to them or not. Only one blood pool will form from a single opponent and their counterparts; if any more is spilled again, it will overwrite the previous pool.

Valentine can "store" a blood pool using his Up Special and keep it as a weapon to use against the appropriate foe when he captures them, in turn creating a blood pool in front of the flag, or he can use his Dash Attack to reposition a pool for a sneaky surprise attack. Neither method halts a blood pool's timer however, so you'll need to act quickly if you want to exploit it.

U-Smash - Rise to Power
D4C appears behind Valentine if it wasn't already out before crouching down and holding its hands apart evenly and neatly. Afterwards, it forcefully straightens its body out on a high angle and holds its hands together as though performing a breaststroke, effectively turning itself into a spectral lance of destruction. This has a similar feel to Ganon's bulky Brawl U-Smash, once again brutally impaling opponents for 20-26% and a dramatic moment of impact stall. That's not all either, as once D4C has its hands tucked inside an opponent's gut it'll pull them apart with such force that it rips the opponent from the inside out and sends them flying for very high upwards knockback that'll KO between 88-55%. The act of impaling an enemy once again causes them to bleed, but a little differently this time: when D4C first impales, blood sprays diagonally downwards from the victim as far and wide as the Stand itself for the duration of the impact stall while dealing 5 hits of 3% to counterparts of the victim and mere flinching. Then, after they're ripped apart, massive amounts of blood splatter all around them within a 1-1.3 SBB radius which in turn deals 17-24% plus high radial knockback to their counterparts that can KO between 100-75%, though the "hitbox" for this only lasts for a split second.

D4C's overall hitbox only hits directly behind and above Valentine if used as a regular melee attack, requiring a good deal of precision to actually outright impale foes. If D4C only scrapes a foe with its back, it'll deal 14-20% and wonky knockback behind it on a 50 degree angle that'll KO between 128-102%, and diagonal knockback if it scrapes with the front of its body. If D4C only manages to hit with its hands and not its arms as well, it'll still impale foes, only it won't rip them apart and instead deals 16-22% and high knockback on a high angle that'll KO between 100-70% while causing the victim to drip blood directly below them that functions identically to the F-Smash's effect, even dealing the exact same damage and knockback.

Valentine is capable of pulling off the physics-defying DACUS technique upon using this move out of a Dash Attack, giving him a way to move across the stage quickly. This gets more interesting if you time the technique the moment you send someone or something to another dimension using the Dash Attack given it allows Valentine to make good use of his increased mobility to take a foe/object from one end of the stage to the other. D4C will move with Valentine if it wasn't manually separated from him, actually dragging impaled foes along for the ride, but if it was it'll perform the move in place. Just be careful not to move too far away from D4C or else it'll disappear, and that Valentine doesn't have much protection when sliding during the DACUS, or at least outside of AU Valentines and other lingering hitboxes.

D-Smash - Backlash Impaler
Valentine throws out a stylish Jojo-pose towards the screen as D4C stands in the background with its back against the President's, head raised high and arms crossed neatly with the stillness and perfection of a statue. Afterwards, the two swap places before D4C crouches down and stabs its arms out on either side in hopes of impaling foes next to it, taking an anti-crowd technique used against Valentine by one of his adversaries in the manga. This deals 17-23% and once again impales victims with impact stall before dishing out moderately-high horizontal knockback that'll KO between 121-93%. A blood pool is left behind, of course, but this one deals vertical knockback instead of fully emulating D4C's attack and only lasts for 2/3rds as long as the F-Smash, but you'll get 2 pools out of it if you hit 2 foes on each side of you at the same time. There's also a follow-up to this attack that can be initiated if you input the move during the impact stall, which causes D4C to cross its arms over its chest forcefully to fling its victim(s) diagonally behind the direction they were hit from as they're released for the same amount of knockback they would've usually taken. If you only impale one foe, this simply exists as an extra option if you want to send them flying on a different trajectory, but if you get two foes they'll inevitably go flying into each other... and obliterate one another if they were the same being. This is arguably more difficult than trying to knock one foe into the other, but it's incredibly effective if it lands and Valentine gets blood pools out of the deal regardless. On a whole, this move is the closest thing Valentine has to something that lets him deal with multiple opponents without separating himself from his Stand or relying on AU Valentines, and you can bet your other self he'll need it when an opponent and their AU counterpart try attacking him from both sides.

You can also use this as a pseudo-dodge if D4C and Valentine are separated since the latter will still sidestep, though it's not the best substitute for a dodge since D4C can still be attacked by opponents.


((Aerials))

Both Valentine and D4C have their own aerials for the directional inputs, but they work a bit differently from the tilts. Under normal circumstances, you simply tap the input if you want to perform a Valentine aerial and smash it to perform a D4C aerial, but if the latter is airborne while Valentine is grounded the former will use his own tilts whereas trying to use a Smash will cause D4C to use his aerial attack.

N-air - Wave of Patriotism
Valentine sweeps the American flag out in front of him for a fast, short-ranged attack that turns enemies around and reverses their momentum, keeping harm away from the face of America. This also kills Valentine's momentum when used and reflects any projectile that makes contact with the flag, converting them to the cause of American Justice. A simple move, but one with a ton of purposes: it can gimp foes, wreck their momentum-based advances, turn their projectiles against them or even be used to re-direct their attack onto their AU counterpart or vice-versa. This can also be used on AU Valentines to save them from being sent flying if necessary, and they in turn will short-hop this attack to reflect any slow, telegraphed projectiles that would come their way. This can also be used to manually turn D4C around.

F-air - Leg of Liberty
Valentine raises his leg before slamming it down for an ax kick that comes out decently fast, dealing 10% and decent mostly-horizontal knockback if you hit close to Valentine's leg (KO'ing at 200%), 8% and okay knockback behind Valentine at the center of his leg (KOs at 300%) and 12% with surprisingly powerful spiking knockback at his foot, but rather low knockback growth that prevents the move from KO'ing before 150%. This is a lot easier to land than Snake's ax kick due to having drastically less starting lag and a slightly bigger sweetspot, but it has equally rough end lag and landing lag that's troublesome to Valentine given his high fall speed. Still, this is a prime Valentine move for knocking foes down to earth where most of the action takes place, and AU Valentines will also resort to using this in order to intercept airborne opponents, sometimes even hitting with the leg to try and knock foes towards Valentines behind them.

If you smash the input to access D4C's F-air, it'll take up a fighting stance before throwing out a powerful roundhouse kick ahead of it that deals 21% and high knockback on a 60 degree angle that's capable of KO'ing at 115%. This is as horribly laggy as a Warlock Punch, but that doesn't actually matter since Valentine is free to move about during the whole thing and D4C has super armor at the front during the start-up and execution of the attack, making it a viable power move to pressure opponents into with all your Valentines.

B-air - Lay Down the Law
Valentine lays on his back, looks over his shoulder and holds one hand out as though desperately reaching for something, an odd hitbox with a similar duration and feel to Mr. Game and Watch's B-air save for the fact that Valentine falls quicker. This deals 8% and very weak mostly-horizontal knockback to those hit by Valentine's hands or feet (KO'ing at 280%) while those hit from above are dragged down with him for roughly 5 hits of 2.5% before being forced on a diagonal downwards angle for very low knockback that won't KO until 300%. It's effectively a way of letting Valentine take advantage of his height to block the air and drag does down with him. AU Valentines are more than happy to use this attack if someone rolls behind them, but unique to the Root Valentine is an effect identical to that of the Dash Attack: the only difference here is that Valentine is not restricted to short targets, just so long as he hits the ground within a short time after doing so lest his victim be released prematurely.

D4C's attack is an identical animation that deals 1.5x as much damage and twice as much knockback, actually moving with Valentine when not manually separated from him. D4C can also send targets to another dimension, in which case they'll re-appear at Valentine's location once he meets the conditions for doing so.

U-air - Border Control
Valentine uses his absolute hand of authority to sweep above him and keep would-be terrorists off the mainland. This deals 7% and weak juggling knockback that won't KO until 270% but only 5% and light histun if it hits at the tip, being a good way to keep foes within the President's grasp with the option to swat them away or keep them held in place for a variety of reasons. While not powerful nor that far-reaching, the President's hand of justice is quick and efficient in its execution, not to mention it covers a good area around him and is capable of hitting foes next to the upper-half of his body. You can't go wrong with this move, whether you're using it for offense or defense.

D4C's U-air causes it to straighten its body vertically and cross its arms before spinning around like a ballerina, bizarrely enough. The tip of D4C's "ears" and feet deal 11% with sharp vertical knockback that'll KO at 145%, upwards and downwards respectively, while the rest of its body deals 10% and average horizontal knockback on contact. That's not all either, as D4C will continue spinning around indefinitely until you use this move, another aerial or the Neutral Special, remaining in place as a hitbox that deals half the damage and knockback it did at the start, except the tip of its feet now deal horizontal knockback. You could essentially use D4C as a trap this way to get a lot more stage control, but with such little reach on its hitbox foes are bound to exploit this with a simple aerial and turn it against Valentine. Also, D4C will appear directly above Valentine if he uses this move without positioning his Stand via NSpec beforehand, giving him an U-air with huge reach but huge risk, and if he uses the move with D4C hovering behind him it'll perform the move right there on the spot.

D-air - Marching Pride
Valentine stomps down 3 times in quick succession, dealing 4% apiece before the final hit delivers 6% and rather weak knockback, either diagonally if you hit with the leg or downwards if you hit with the foot, the latter of which leaves grounded opponents in prone. This is a nice pressure move that doesn't actually suffer from too much landing lag if you land in the middle of it and works wonders if you fall towards a foe with their hands full against AU Valentines. You can also tap A anytime during the kicks to have Valentine footstool jump off his opponent during the final hit, but the jump is only half as effective as performing a regular footstool jump due to a difference in execution. Actually being able to footstool jump off opponents this way is more important than you'd think since it lets Valentine send grounded AU opponents back to their own world more easily then gunning for a regular footstool jump, just in case you absolutely have to correct one of your mistakes.

D4C's D-air causes it to perform a stall-then-fall-based divekick that deals 16% and high knockback that KOs at 130%, horizontal if only the tip D4C's leg connects, diagonal if the main body connects and backwards if the "ears" happen to hit. D4C also creates a small shockwave around itself upon colliding with the ground that in turn pops enemies into the air for 11% and moderately-good upwards knockback that KOs at 180%. This is a very powerful attack, and it even lets Valentine move around as soon as the hitbox appears, but it's definitely not something to be abused as D4C suffers quite a bit of end lag upon hitting the ground, moreso if the attack was started closer to earth much like how Sonic's D-air works. If D4C manages to not get hit however, it'll teleport back to where it was before performing the move, allowing Valentine to somewhat keep D4C in midair and spam this if he's feeling lucky.


((Grab))

Valentine reaches out with excellent speed and range both worthy and befitting of the U.S President, holding victims by their collar using a single hand. If the victim is a lightweight female protagonist however, Valentine will instead look down on them and hold his hand under their chin lustfully despite the fact that he's already married.

If you perform the grab as a smash attack, D4C will manifest out of Valentine and grab foes instead, which results in a different set of throws being performed on the opponent. If D4C was separated from Valentine, it'll perform the grab from where it stands and take any victim it catches to the President almost instantly. Should there be a wall between D4C and Valentine however, the foe will automatically be released with a bit of hitstun, so you'll have to watch out for those. While D4C is holding a foe, you can press B anytime to dismiss it and have Valentine do the grabbing and throwing.

AU Valentines are capable of grabbing, and can be grabbed by the Root Valentine, but not D4C. AU Valentines do not immediately throw opponents they grab, so you can use your Down Special to take the place of one if he succeeds.

Pummel - Corporal Punishment
Valentine pimp slaps the foe for a moderate 2%, while D4C slightly crushes the foe's neck for a strong 3.5%. Using this on an AU Valentine will automatically release them with no grab-release animation.

F-throw - Whisked Away
Valentine throws himself on top of his opponent as though he were performing some kind of wrestling move, except here he's trying to force them into another dimension. Similar to the Dash Attack, foes encounter something terrible that sees blood and Menger sponges being forced out of them, only more severe at 16% with decent mostly-upwards knockback but surprisingly high knockback growth, capable of KO'ing at 120%. This seems like an insanely good throw since it deals huge damage, can be easily followed up at lower percentages and KOs early, but it also has a long duration. While that might not seem so bad, it works against Valentine in advanced play since it gives foes plenty of time to DI, not to mention their AU counterparts can come to their aid if they're close-by. Half of the throw's duration comes from the victim being attacked in the other dimension however, and if Valentine is sent flying during that time his victim will still take all the damage and knockback from the attack, meaning this can be used as a sort of pseudo-counter against opponents who try to rescue their counterpart since they'll suffer severe consequences if they're close-by.

If you make a specific before the foe gets sent flying, a pinkish hue will appear beneath a specific grounded character or flag while they remain grounded. Should that target not leave the ground, the victim will be shot up from the space between the ground and said target, effectively allowing Valentine to transport the foe to another part of the stage so long as there's a catalyst waiting for them - most obviously, hit them into their AU counterpart for deadly results. As far as where the pink hue will appear, pressing B will make it appear beneath D4C if it's grounded, Side B will make it appear beneath an AU opponent, Up B will make it appear beneath a flag and Down B will make it appear beneath an AU Valentine, whereas A makes it appear beneath a normal opponent. Alternatively, you can tap the control stick in any direction to have the hue appear beneath whoever's grounded and closest to Valentine on that corresponding angle. Regardless, the closest character/flag will be targeted if you tap the input whereas the fartherest one will be targeted if you smash the input, though you can cycle between multiple targets by pressing the input again. AU Valentines won't take damage when hit by this throw, so you can use it on them as a means of transporting them elsewhere. You can even make things more interesting by having a Side Special charge so you summon an AU character at the location where the victim was sent flying, which can lead into all sorts of different situations.

If an AU Valentine uses this throw, he'll deal 10% and decent knockback on a low angle that won't KO until 300%. If D4C uses this throw, it'll violently boot the foe away on the same angle for 13% and high knockback that'll KO at 130%.

B-throw - Dimensional Suplex
Valentine performs a suplex on his opponent with enough force to send them sliding behind him for 6% and good diagonal downwards knockback capable of KO'ing at 300%. This is no ordinary suplex however, as Valentine gives it a creative use with his Stand ability by using the foe as a catalyst to escape to another dimension - as such, Valentine actually follows the foe when they take their knockback, but he can return anytime by cancelling into a roll, shield or jump. If Valentine chooses not to return early, he'll do so when the foe rolls back onto their feet/moves after getting up from prone or will automatically be placed next to the ledge if the foe goes offstage. Having D4C perform the throw will cause it to assist Valentine in suplexing the foe, which results in the attack dealing 10% and much more base knockback, capable of KO'ing as early as 180%. The uses of this move should be obvious enough what with the foe's knockback along the ground and Valentine moving along with them at the same time, making this one of the President's most interesting throws.

Valentine can use this throw on his AU counterparts no-holds barred. This might sound pretty bad given your counterpart's percentage is taken into account and they'll likely die if taken offstage, but it's actually a really good withdrawal tactic at higher percentages since you'll often be hiding behind your counterparts when banding together with them. Not to mention you can just body swap with your counterpart to save him from dying or just summon a new Valentine to take his place.

U-throw - Capitalism
Valentine takes off one of his gloves and uses it to perform a pimp slap to the victim's jaw, hitting them with enough American pride to inflict 10% and decent set vertical knockback 1.1 SBBs off the ground. This isn't very impressive nor is it that satisfying, but it comes out almost instantly (and looks cool) while serving as a way for Valentine to damage-rack foes and keep them close without worrying about them dying by accident. D4C's throw, on the other hand, is a violent, suspenseful uppercut that deals 16% and very high set knockback of 4.2 SBBs. This is not only useful for knocking healthy foes away but also for launching an AU opponent you just summoned, potentially into their Root counterpart. Sadly, you can't KO your opponents this way due to the knockback being set unless both players start flying high off the ground and the stage's ceiling is very low. Still, this does a very good job at dispersing the two characters just in case the situation demands it.

If Valentine uses this throw on one of his counterparts, that Valentine will give his Root self a boost that sees him instantly perform a footstool jump, or vice-versa if the input is smashed. This is a good way for Valentine to get around his clunky first jump and to get higher in midair so he can set-up D4C even better, even pursue foes in midair.

D-throw - Replacement
Valentine uses his American elbow to deliver a lethal to the opponent's head (or shoulder if they're around his height or taller) for 8% and an instant knockdown, making for a nice and simple throw that keeps foes close to him. AU Valentines particularly love to spam this throw in groups and will use the chance to dish out some dirty damage done dirt cheap with their D-tilts. If D4C throws the opponent, it'll follow up with a stab through their chest which deals 10% and leaves behind a pool of blood that stays out for 4 seconds and deals the same damage to the victim's counterpart, though said throw has a longer duration than Valentine's throw.

If you're still holding the control stick down when the opponent is knocked down, Valentine will pause for a moment. If D4C isn't in the middle of doing anything, it'll appear behind the victim's counterpart and attempt to grab them, or if it's out-of-range a nearby AU Valentine will attempt to grab the opponent. If either succeed, Valentine and his counterpart will throw the flag over their respective victim and they'll swap places with each other! Dojyaaan~~! Your original victim will be knocked up slightly with hitstun while the new one is knocked down in their place. Works wonders with an AU opponent you just summoned, or if you just wanna beat up on that other version of your opponent.

Using this throw on an AU Valentine does something different: they'll be sent back to another dimension and will return when Valentine leaves the ground. You can use this on all AU Valentines if you like, and it can make for some interesting situations by having the AU Valentines defend you when you're sent flying or assault the opponent on the ground when you jump at them.


((Playstyle))

Dirty Deeds Done Dirt Cheap

"As you would know from world history, during times of dramatic change, there is always battle."

Valentine could be summed up as a clunky, juggling-orientated duplicate character, cycling between his weak human attacks and powerful Stand-based attacks that give him great power over how much space be wants between himself and his opponents. Timing and handling of your summons is also a huge part in playing Valentine, enough so that it can determine whether he rises to the top or hits rock-bottom in his match-up.

Valentine could easily summon up a bunch of clones and let them do the dirty work right from the get-go, but that would be denying the President most of his potential. Rather, it's usually wiser to play conservatively, as Valentine has a good deal of combo and set-up potential when one takes his chargeable Side Special into account - simply knock the enemy off the ground and then have the AU Valentine follow-up with his own attack! The sheer combinations you can make from Valentine's attacks is nigh-endless, especially when you take D4C and the Down Special body-jumping into account.

When you do get to the clone-summoning, one of the biggest questions is then how far you want to take it. Summoning all your clones at once maximizes your damage output and gives foes quite a bit to deal with given you'll have 3 extra copies of yourself at your beck and call, but you won't be able to repeat the combo unless you go out of your way to get rid of all your clones first among being able to throw them out later when you'd want them such as to footstool jump off them via U-throw. Clones aren't really that much of a threat by themselves given Valentine's own melee game is relatively weak, but they can give the President a nice opening for his otherwise risky Stand-based attacks, his main way of finishing foes off via normal means given he doesn't have the best off-stage game.

If Valentine wants to get really crazy, he can summon an AU copy of his opponent, his big high-risk, high-reward move. Being able to get a free hit on this AU opponent alongside many of Valentine's set-ups like D4C and his clones means you can dish out a ton of punishment against them, which is good because your ultimate goal with this clone will be to either exploit them for blood pools and eventually hit them into your main foe with a powerful attack so they both die. The more Valentine set-ups against his AU opponent, the better, but he has to remember that he's also fighting another opponent at the same time and that they obviously won't let him get away with doing all that crazy stuff. This is another part of why being conservative pays-off later on, as since you're fighting 2 opponents at once you'll want to be careful about what you do with your clones, the main aspect that helps level the playing field for the President.

AU opponents serve as an interesting KO method against the main opponent given how the damage calculation works, meaning you can choose to focus only on one character or pepper them both at the same time. The aforementioned set-up combos involving your clones work quite well with the summoning of an AU opponent since you can distract your main opponent and damage them at the same time while preparing a counterpart to knock them into, potentially making approaching you difficult given they can't touch their counterpart without being damaged. Heck, you could even completely ignore the main opponent and just focus around damaging your more vulnerable AU opponent before knocking them two into each other for a KO! It's unlikely that most foes will let you do that though, but it's worth a try if you wanna go distract them en masse with your clones.

The most obvious risk with AU foes is that you can end up being overwhelmed by them in conjunction with your main opponent if the latter manages to break through and disrupt your damaging session, turning the match into an unfavorable 2v1. While Valentine does have clones, said clones more or less share his percentage when summoned and become less effective as the President receives more damage, in turn making them much easier to knock out. With this in mind however, if a healthy AU Valentine ends up going ignored for most of the match due to the foe focusing on Valentine to try and pressure him, the President can give foes a nasty surprise by jumping into the body of his clone and in turn become healthy again! Dojyaaa~~n!

Overall, Valentine is a bizarre, technical character who requires a good deal of understanding in how his opponent works and good management skills, but those who master him will find themselves able to obliterate any opponent who'd dare threaten American welfare with his super-sized assortment of political tactics.


((Final Smash))

D4C Love Train

"The corpse has drawn out this ability... D4C has progressed to a higher level!"

With the Smash Ball in his grasp, Valentine now has the power to fully secure America's future and completely destroy anyone who gets in his way. All 9 Corpse Parts - heart, left arm, eyes, spine, rib cage, ears, right arm, legs and the skull - appear around Valentine like evenly-scattered pieces of a model before slowly being absorbed into his body, giving the U.S President ultimate power in the form of golden streaks of light that shoot up from the ground beneath him wherever he goes. This is Love Train, the absolute dimensional wall that redirects all aspects of misfortune away from the user.

Misfortune means anything that could harm Valentine, and this effectively makes him completely invincible: hitboxes will still interact with Valentine, but they do not harm him, instead being redirected to another part of the world where a random individual suffers their repercussions, suffering a horrible death in the process. This could be anything from a hunter accidentally being shot by his partner as a result of receiving the misfortune behind Link's arrow, a mover being crushed to death by a falling cabinet due to Dedede's D-throw or even someone being burned to death in a fire because of Bowser's fire breath, and this is all shown by a transparent image flashing for a moment just to show how gruesome it would be if an ordinary person were realistically hit by these attacks. Outside of repelling misfortune from Valentine, Love Train also has the nasty ability to move wounds on a person's body to another location in order to make them fatal, like moving a mere cut on the finger directly to a vital organ like the heart - this simply increases the knockback Valentine deals with his attacks to such a ridiculous degree that it's like hitting a foe when they're at 999%, meaning any and every attack with KO potential will in fact kill the foe in one hit, even if they had super armor or were invincible, even intangible. And if that wasn't broken enough, Love Train also has the strange effect of letting Valentine move along the ground more easily, effectively giving him the Bunny Hood effect. Objects such as signs, trees and even the ocean are drawn in closer to Valentine and shifted in his favor, causing all Stage Hazards to start functioning simultaneously in an endless loop, scrolling screens to start moving only when Valentine does and for all items to be drawn towards Valentine. Valentine will also loop between blast zones if he makes contact with one, and if any explosive items such as bomb-ombs and item capsules are turned on they will deliberately fall to where the foe is when they produce a hitbox near them so they explode in their face and kill them. Also, all walls - makeshift or not - will be pushed as Valentine moves towards them and will defy gravity if they go offstage, letting you gimp foes to your heart's content. Sadly, this Final Smash only lasts a mere 5 seconds before the Corpse Parts exit Valentine's body and sink into the ground, but if he so much as even gets the Smash Ball he'll be taking a lot of stocks from all his opponents. What can I say? Dirty Deeds Done Dirt Cheap.


((Boss Mode))

Valentine VS The World

"You should feel honored."
Being the U.S President AND the owner of one of the most powerful Stands in existence, of course Valentine has the potential to hold his own against 3 opponents at once. Below are a list of changes that occur when the President is made to fight this way:

|| Valentine fights with his shirt off, now looking 300% more boss. His suit also becomes purple to represent the surreal coloring of the Jojo universe and to make his manly chest stand out.

|| D4C's appearance changes to that seen above.

|| Valentine himself gets no stat boosts, but D4C now has full super armor and only takes 1/4 of any oncoming attack's damage or status effect, making it much safer to throw out in the midst of chaos.

|| AU Valentines start off with 60% less than the Root Valentine, have a Lv7 AI and are capable of shielding and dodging. Their summoning is also sped up, and up to 5 can exist onstage at once.

|| Valentine is now able to choose the physique of the AU Valentine he summons. By holding the control stick up, Valentine will summon a taller, lankier counterpart of himself, and by holding the control stick downwards he'll summon a short, pudgy version of himself that's somewhat reminiscent to Wario in physique. The lanky Valentine is a taller target, deals 0.8x as much damage with his attacks, has an air speed of 2 and a weight stat of 3, but he has greater reach in his limbs and has a ground speed of 7.5. The fat Valentine, on the other hand, is a shorter target, has a weight stat and air speed of 7 and and deals 1.2x more damage and knockback with his attacks, but has less reach and only has a ground speed of 3.

|| AU foes now start off with the same damage that their Root counterpart currently has, and Valentine is able to choose which foe he brings back an AU version of by tilting up for P1, forward for P2 and down for P3. Making contact with your AU counterpart is now an instant KO that sees the two characters obliterated as they both scream their death cries in unison. Given this is 3v1 however, foes can deal with their AU counterparts more easily when they have allies who won't be hindered by them, not to mention the fact that turning the match into a 6v1 poses a huge risk to Valentine since he himself doesn't get that many buffs to begin with.

|| Valentine's attacks deal 1% more, while D4C's attacks become 1.15x stronger.

|| Valentine and his AU counterparts can now fire up to 3 bullets in a row via the Jab with absolutely no repercussions, making for an effective way to deal with a crowd from a distance. The bullets also travel 3x farther now, going all the way across most medium-sized stages.

|| Blood pools last twice as long, and with no limit to how many you can have out.


"As President, it is my sworn duty in this world to guarantee the safety of the people of my country. That is what it all comes down to!"
 
Last edited:

allison

She who makes bad posts
Joined
Jan 25, 2014
Messages
5,138
Location
Maple Valley, WA
NNID
crazyal02
3DS FC
0216-1055-4584
Made some changes to Gomez:

*Made the Cube Anchor less insanely powerful; Bits deal much less damage and can be destroyed
*Removed Fez Shift entirely, replaced with Cube Shift, which can move the Anchor side to side

The set still isn't perfect by any means, but those two were the most glaring issues.
 

darth meanie

Smash Journeyman
Joined
Jun 6, 2008
Messages
452

Fate Testarossa is one of the main characters of Mahou Shoujo Lyrical Nanoha. Originally an adversary to Nanoha who fought with her over the Jewel Seeds, Fate became Nanoha's most trusted friend and ally, growing up together with her as they both entered into the Mid-Childa Military. Fate works as an enforcer, and as an S+ ranked aerial mage, is on the same level as Nanoha when it comes to pure power. Fate is an artificial mage, created as a clone of her mother's original daughter who had died in a tragic accident, and as a result has access to powerful lightning magic.


Her weapon of choice is Bardiche Assault, a weapon forged by her mother that is an intelligent device that is utterly loyal to her. Bardiche has a deep, male voice and booms out, saying her attack spells for her. It's also a practical Swiss Army Knife when it comes to forms, having quite a few, but using three main ones in her set: Assault Form, pictured above, Haken Form, where it takes the appearance of a double edged scythe, and Zanber Form, where it becomes an oversized two-handed sword with significantly greater range than even Ike's sword. Fate starts the match in Haken Form, but can switch to Zanber Form over the course of the battle.


Statistics
Fate has the body of an average, slightly tall nineteen-year-old girl in excellent physical condition. She has a fairly brisk walk, and her dash has her float above the ground, putting her slightly slower than Captain Falcon. She has absolutely superb air control and is fairly floaty, reminiscent of Jigglypuff in that regard. Her second jump is also exceedingly excellent, giving her a speed boost as well as a great deal of height. Her weight is surprisingly high, though not due to her diet, but her bulky Barrier Jacket that keeps her well defended, making her a solid middleweight combatant. In addition, Fate has a few special abilities as a Nanoha character. Fate can hover, much like Peach can, floating in place and able to glide back and forth for a few seconds, much faster than Peach can as well due to her excellent air DI, but she can also perform unique defensive options.

One such option is using her shield in midair. Her shield is normal otherwise, save for always being a bright gold color, acting as her Defenser Spell. By smashing the control stick left or right and pressing the shield button she can also cast a spell called Round Shield. Round Shield creates a magic circle in front of Fate that protects her from attacks from that direction, which has a whopping 75 stamina, blocking any attack that comes its way for as long as the input is held out. Besides this, Fate also has an excellent spot-dodge and air dodge that is very quick and can avoid most attacks.


Round Shield pictured above.

Specials

Side Special // Haken Saber


Bardiche switches into Haken Form if the weapon isn't already in it, and Fate slashes forward for an attack for 9% damage and weak knockback. The attack has a bit of ending lag to it, making it impossible to spam. The energy blade from the scythe is then fired out in a nearly complete ring.The saber automatically chases down foes at the speed of Samus's Super Missile with very good homing capabilities, even capable of boomeranging back once if it misses an opponent. If it hits, it deals 9% damage and middling knockback, but has a special animation when it hits a shield. When Haken Saber hits a shield, the ring stays out and grinds against the shield, dealing rapid hits of 2% damage to the shield for a full second, eating away at shields.

Because of its homing and shield-eating properties, the best counter to Haken Saber is to attack the projectile outright. Any attack stronger than a repeatable jab will cancel the Saber out, but attacking to counter it also makes it easier for Fate to follow up behind the blade and attack herself.

Neutral Special // Plasma Lancer


Bardiche calls out this move, summoning two golden arrowheads to appear to either side of Fate. After a brief period of starting lag, Fate shouts, "Fire!" and shoots out the two projectiles at the speed of Falco's laser. Each projectile deals 3% damage and moderate hitstun, with just a touch of knockback. The lances fly out straight if Fate is standing, and at a slightly downward angle if used in the air. The move has a fair bit of start-up lag before it actually fires, but Fate is free to move around and attack once the shots are actually summoned, letting her follow up with another attack or more projectiles. If she uses this move again, the attack will delay until the second set of projectiles are summoned, allowing her to fire a large volley of projectiles at once, up to six total. This also makes the attack impossible to spam.

Up Special // Sonic Move

Fate disappears in a burst of air pressure, then suddenly reappears in the direction you point the control stick, leaving only a blur behind of where she traveled. Though not a true teleport, she's invincible after the brief start-up to this move, making it virtually the same. She can traverse up too the same distance as Pikachu's full Quick Attack in a single movement.

Holding Up Special will instead put Fate into a command glide status, allowing her to hover upwards and downwards slowly, as well as capable of quickly diving down and gaining speed for attacks. Attacking or landing will cancel her out of this state, as will staying in it for more than three seconds. Using this move in this way removes her hover. With both these forms of recovery at her disposal, Fate can recover from potentially anywhere on the stage.

Down Special // Zanber Form / Sonic Form

When this move is tilted, Fate switches from Haken Form to Zanber Form, a more aggressive, longer reaching form that is prime for KOs, but less effective at combos and quick attacks. It takes her a few moments to switch to Zanber Form, but by tilting it again she'll quickly switch back to Haken Form, reversing the process.


When smashed, Fate's armor explodes off in a burst of golden light, dealing 12% damage and moderate knockback, changing into her lighter, faster Sonic Form. In Sonic Form, her aerial DI is legendary, and she loses her floatiness, becoming a fast faller altogether, which helps with her air-to-ground conversion opportunities, and allowing her to better shorthop aerials. She also gains a much faster dash on the ground, as fast as Captain Falcon, and can repeat Sonic Move twice in a row to gain truly absurd mobility. Her second jump can even be angled in this form, allowing her to jump forward and even downward to rush in at opponents or escape. Her dodges and rolls also have fewer recovery frames.

What's the cost to all this? Well, while in Sonic Form, Fate only weighs as much as Jigglypuff, and she takes 33% more damage from all sources. It's a big risk to take, especially early on in matches or when Fate is close to KO percents, but can be useful, especially as a last resort, when she's close enough to getting KO'd that more damage and knockback isn't going to do her any worse. Smashing the Down Special again while in Sonic Form will have her revert to her original, Impulse Form.

Shield Special // Lightning Bind

Fate gestures forward, be it from her regular Defenser shield or from a Round Shield, and a few moments later magic circles appear around the nearest opponent in front of her. Opponents have only a few brief moments to escape or to smash the three magic circles that appear around them with any attack, as a second later they are caught in her lightning bind. Golden rings of energy appear around each of the opponent's limbs, trapping them at grab difficulty. Fate is free to attack while the opponent is stuck thusly. If used during Round Shield, her shield does not deactivate, though this does deactivate Defenser.

Smashes

Forward Smash // Zanber Slash

Fate switches into her powerful Zanber Form, which takes a couple moments to switch into if she hasn't already switched into it, changing much of her moveset from its Haken Form to her Zanber Form style. By default, most of her moves are used in Haken Form, but switching into Zanber Form with the Forward Smash or Down Special changes her moveset. She then takes Bardiche Assault and swings it in a powerful, overhead slam straight into the ground, dealing a whopping 19-26% damage and powerful knockback. It's a slow attack, but great on an opponent caught in Lightning Bind or dealing with another projectile.

Down Smash // Thunder Rage

Fate swings her weapon, regardless of what form it is in, down and smashes it into the ground, leaping up into the air and holding herself up with her weapon, releasing bolts of lightning to either side of her. These bolts of lightning have quite impressive horizontal range as well as decent vertical range, covering a large hitbox with 11-15% damage and powerful hitstun along with decent upwards knockback. A great move for putting opponents into the air for further follow-up opportunities after a Sonic Move to chase the foe.

Up Smash // Cyclone Slash

Fate takes her weapon and brings it down low, and then jumps up in an upwards, circular slash. In Haken Form, she does two slashes in a row for 9-12% damage, while in Zanber Form she does a single slash for 15-21% damage and greater knockback and range.

Aerials

Neutral Aerial // Spinning Strike

Fate quickly makes a full rotation with her weapon outstretched, up close with Haken Form and out long in Zanber Form. In Haken Form, this deals 8% damage and mild knockback that pulls the opponent in behind Fate to combo into her Back Aerial, while in Zanber Form it deals 11% damage and strong radial knockback.

Back Aerial // Thunder Arm


Quickly, Fate takes her left arm and extends it behind her, fist clenched, and pumps electrical energy into her arm. Her arm acts as a piece of armor now, and clashes with any attack automatically, as well as dealing 8% damage and stun to anyone who gets to close. It's an unusual, close-ranged back aerial that has a lot of potential opportunities to turn enemy attacks into new opportunities, and is even useful shorthopped due to its near negligible landing lag.

Down Aerial (Haken Form) // Scythe Slash

Fate takes Bardiche and thrusts him downward, then dives down herself after her blade, at a very low angle, cutting into any enemy that comes her way. dealing 9% damage on hit. The opponent is the dragged into the second half of the attack, the back portion of Bardiche's energy blade, dealing rapid hits of 1% damage as she drags the opponent with her. Opponents can DI out of this to escape after about half a second, but if she lands they are knocked away with heavy stun, putting both players in a neutral position about two battlefield platforms apart from each other, with Fate having the slightest upper hand. She can also cancel this in midair by air dodging.

Down Aerial (Zanber Form) // Spike Slash

Fate turns and raises Bardiche over her head, then slams him straight down in front of her, a powerful spiking hitbox that deals 13% damage and utterly lethal knockback offstage.This attack is relatively slow though, but has a very large hitbox beneath her and a wide area of effectiveness.

Forward Aerial (Haken Form) // Piercing Lancer


Fate takes Bardiche and thrusts him almost directly forward for 7% damage, and with a second tap of the A button, dives in an almost straight-on angle, her weapon reconfiguring to a slightly different form, blade edge out. She charges forward, dealing 9% damage on hit, and this can be cancelled into her down aerial but no other aerial, allowing her to change the direction of her dive on the fly. Piercing Lancer also deals extra damage to shields, dealing triple its usual damage.

Forward Aerial (Zanber Form) // Overhead Slash

Fate takes Bardiche and strikes with him in an overhead arc, much like Ike's Forward Aerial. This deals 15% damage and powerful knockback based on the time at which the attack was released, dealing horizontal knockback early on and downward knockback later into the attack.

Up Aerial // Rising Strike

Fate takes Bardiche in either form and slashes upwards, gaining just a bit of air before falling back down to the point she started at, dealing 7% damage in Haken Form and 13% damage in Zanber Form. Haken Form takes more of an overhead slash, while Zanber Form takes an angle more similiar to Ike's Up Tilt. This move works as a good, quick option in aerial melee in either style. She can only get the boost in height from the move once though per jump in the air.

Standards

Dash Attack // Blitz Rush

Fate quickly blitzes forward in an extra burst of speed, blurring as she travels nearly a battlefield platform forward, before swinging her weapon forward, a quick slash for 7% damage in Haken Form, and a more powerful, longer ranged slash for 12% damage in Zanber Form. If an opponent is within the range of her initial dash, she'll dash right past them, invincible, before turning around at the end of her movement for her attack. Needless to say, this makes for quite an interesting approach option, especially when cancelled into an Up Smash.

Down Tilt // Low Slash

Like most Down Tilts, this is a quick attack, but has surprisingly long reach as well, making it a staple in Fate's ground arsenal. In Haken Form, her low sweep of the blade deals 6% damage and actually pulls opponents in closer, with a chance for tripping, while Zanber Form pops them up for 11% damage.

Jab // Plasma Arm

Fate charges up her left hand with electrical energy, coating it in plasma, and punches forward for 8% damage and weak knockback. The charge on her arm automatically clashes and beats out other attacks, regardless of their priority, unless of course the move has transcendent priority.

Forward Tilt // Splash Edge

Like most Forward Tilts, this attack can be angled up or down. Fate reaches back and generates a blade of pure electricity in her left hand, then slashes forward with it, dealing 11% damage. Despite the animation, it's surprisingly quick, and deals the most hitstun of her ground game besides her Down Smash, as well as mild to moderate knockback.

Up Tilt // Anti-Air Slash

Fate performs a quick anti-air attack with whichever weapon she has out at the time, starting low and bringing her blade up above her. She deals 8% damage in Haken Form and 14% damage in Zanber Form.

Grab-Game

Grab // Lightning Grip

Fate reaches out and grabs the opponent. Because she can shield in the air, she can also grab in the air, which is nice for her. Grabbing an opponent in midair will cause both players to stand on a magic circle summoned by her. Her pummel has her bash Bardiche into the opponent for 2% damage.

Forward Throw // Flying Strike

Fate takes off, flying straight forward and slightly upwards, before throwing the opponent away and hitting them with a spinning slash from her weapon, dealing 11% damage and reasonably powerful knockback. Near the edge, this is a great early kill option, especially if pulled off offstage.

Up Throw // Trident Smasher

Fate tosses the opponent above her lightly, then holds out her hand to summon a magic circle directly above her. A moment later, three powerful beams of lightning fire from the circle, each dealing 15% damage to the opponent, as well as powerful knockback. A premier killing move and damage builder, it's a fabulous tool in Fate's arsenal that can even hit multiple opponents. Note however, that the opponent has time to dodge and escape the throw, and that all three will only hit opponents the size of Bowser or larger. The long length of the beams makes air dodging alone insufficient to avoid the attack.

Down Throw // Splash Edge

Fate tosses the opponent down on to the ground or magic circle she's standing on, summons a blade of lightning in her hand, and impales them with it for 13% damage and moderate knockback, bouncing them off the ground or magic circle with significant hitstun.

Back Throw // Spinning Throw

Fate spins around and throws the opponent behind her for 9% damage and strong knockback. It's a throw on a character who's absolutely not made for throwing, what do you expect?

Final Smash

Impulse Form // Jet Zanber


Fate switches to Zanber Form if she isn't already in it, and her blade grows to absolutely ridiculous proportions, as long as Battlefield is across in fact. She then holds it overhead, where the blade is struck by lightning, and swings the blade down for 28% damage and powerful, killing knockback.

Sonic Form // Shin Sonic Form

Fate stops and breathes, saying "Overdrive. Shin Sonic Form." Bardiche replies with "Sonic Drive" and activates this ability. There is a burst of golden light around Fate, and she enters into a brand new stance.


In this state, Fate gains the ability to automatically dodge attacks, even if she's in the middle of attacking, making her completely invulnerable. She also dual wields two shorter blades in Bardiche's Riot Zanber Form. her attacks become ultra-fast combo tools. She can switch by pressing the B button to Zeus Zanber Form, combining the two blades into a gigantic blade more than a battlefield platform long. This transformation lasts for 12 seconds before she returns to her normal Sonic Form.

Playstyle

 
Last edited:

darth meanie

Smash Journeyman
Joined
Jun 6, 2008
Messages
452
Vivio Takamachi


Vivio Takamachi is Nanoha's adoptive daughter, and an artificial mage herself. A clone of the last ruler of Ancient Belka, a sprawling dead empire that spanned dimensions, Vivio was created so that her genetic code could activate an ancient superweapon to bring Mid-Childa to its knees. Forced by ancient relics to battle Nanoha, Nanoha defeated and befriended her, taking her as her adoptive daughter. She now lives a normal, carefree life as a ten-year-old girl who loves learning magical combat. She also has eyes that are two different colors, and if that wasn't enough to establish her as a super special character, her magical color is RAINBOWS.

In Smash, she enters in her normal school uniform, but then uses her device, Sacred Heart, the bunny pictured above, to transform into her battle mode.


VIvio enters into 'Adult Mode', transforming into the body of the Ancient King Olivia, multiplying her battle prowess significantly. She has overall statistics similar to Zero Suit Samus: lightweight, fast faller, fast dasher, excellent traction, excellent jumps.

Specials

Neutral Special // Sonic Shooter

Vivio shouts this spell's name, and summons two projectiles behind her immediately, floating rainbow colored balls of energy. The projectiles fire themselves out half a second later, homing in on opponents one by one, each dealing 4% damage and mild knockback and hitstun. There's a fair bit of ending lag to this move, but the start-up is lightning quick, allowing Vivio to summon a pair of Sonic Shooters and fire them at an opponent, even if she was hit by an attack immediately after, trading blows with them and allowing her to turn what would have been an opponent's advantage into her own opportunity to follow-up.

Side Special // Jet Step

Vivio immediately reappears one battlefield platform's distance or directly in front of the nearest opponent, whichever is shorter in the direction tapped, with almost no starting lag whatsoever, and just a touch of ending lag. If she steps forward, she can press A immediately after using Jet Step to cancel into a Revolver Spike, a roundhouse kick that deals 12% damage and knockback that KOs around 130%. If she steps backwards, pressing A will have her immediately jump back forwards and perform Revolver Spike, stopping early if she runs into an opponent. She can only use Jet Step once while in the air.

Up Special // Accel Smash


Vivio immediately performs a powerful uppercut punch, dealing 13% damage as she jumps the height of Mario's Super Jump into the air, at a slightly forward angle. Vivio is completely invincible for the start-up and active frames of this move, but ends it in helpless, making her completely vulnerable to counterattack afterwards. Fortunately, it kills at an astonishingly low 110% for a move that starts up so incredibly fast.

Down Special // Divine Buster

Vivio throws out her hands and generates a rainbow-colored ball of energy that floats in mid-air, saying "Divine..." as she does so. This acts as a floating trap that deals 12% damage and moderate radial knockback to anyone who touches it, and lasts for a scant five seconds before disappearing. If Vivio attacks it though, it fires in a beam two battlefield platforms long in the angle of the knockback of Vivio's attack, adding the damage and knockback of Vivio's attack to its own, making it powerful indeed! When shooting Divine Buster, Vivio finishes the spell, shouting "Buster!"

Standards

Jab // Plasma Arm


Vivio's fists glow with aurora-colored lights, and she delivers a rapid flurry of punches straight forward, each dealing 3% damage with decent hitstun to them, allowing it to combo into itself several times until opponents DI out of it. Pressing A again will cause her to cancel it into a high kick for 6% damage and upwards knockback.

Dash Attack // (Sacred Defender) Sacred Cluster

Vivio's right hand glows with an awesome power! It's loud roar tells her to grasp victory! She runs forward and delivers an overhead piledriver punch, releasing bolts of magic from her fist that reach out a short range before dissipating, six in total, each dealing 2.5% damage. They spread out like a shotgun, eating up enemy shields and dealing good damage. The more that hit the opponent at once, the more knockback this attack gets, maxing out at killing at a low 120%. If it htis an aerial opponent close to the ground, there's a good chance this attack will knock them prone. There's a curious sparkle right at eye level of Vivio right before the attack fires.

Forward Tilt // (Sacred Defender) Side Kick

Vivio steps forward and turns her body so her shoulder faces her opponent, then delivers a powerful side kick that can be angled up or down, dealing 11% damage. It's a hair slow to start up, but delivers good knockback, killing around 140%. There's a curious sparkle that appears during the start-up of this move though, floating right in front of her chest.

Down Tilt // (Sacred Defender) Drop Kick

Vivio performs a blindingly fast spinning kick on the ground that deals knockback at the dreaded Sakurai angle, often tripping opponents as well as dealing 9% damage to whoever is hit by it. There's a curious sparkle that appears right above her upper thigh when she starts up this attack.

Up Tilt // (Sacred Defender) Uppercut

Vivio performs a powerful uppercut attack, dealing 10% damage and decent knockback that sets up for juggles. There's a curious sparkle just above Vivio's head when she starts up this attack.
Aerials

Neutral Aerial // (Sacred Defender) Spinning Kicks

In an aerial you've all seen before, Vivio delivers a rapid flurry of kicks to the opponent, each dealing 4% damage and possibly chaining into each other, with the last kick dealing knockback that KOs around 160%. It's great against shields, air dodges and the like, making it a decent staple in Vivio's repertoire. There's another curious sparkle in front of Vivio's chest during this attack.

Back Aerial // (Sacred Defender) Back Kick

Vivio... kicks... backwards. It deals 12% damage... knockback that kills around 110%... It's an amazing tool to hit Divine Busters with, and starts up really quickly... There's a curious sparkle behind Vivio during the start-up of this attack.

Forward Aerial // (Sacred Defender) Sacred Cluster

Vivio performs Sacred Cluster again, dealing 2.5% damage per hit of the six shots. If it hits against an aerial opponent low to the ground, there's a good chance this attack will knock them prone. There is a curious sparkle a decent distance in front of Vivio during the start up of this attack.

Down Aerial // (Sacred Defender) Dive Kick

Vivio drops down at the angle of Sonic's Dair, performing a standard dive kick, dealing 13% damage and spiking knockback on landing. There's a curious sparkle at the end of Vivio's foot during the start-up of this attack and during the first few active frames.

Up Aerial // (Sacred Defender) Flip Kick

Vivio flips upside down and kicks above her, dealing 10% damage and juggling knockback. There is a curious sparkle at eye level of Vivio during the start up of this attack.

Smashes

Forward Smash // Impact Cannon


Vivio creates a rainbow-colored ball of energy in front of her, and smashes into it with her fist, creating a wide spray of magic that deals 13-18% damage and powerful hitstun, along with strong knockback. It is by far her longest ranged smash, and covers a wide area as well, making it good even as anti-air, especially when you consider that you can angle the attack. Impact Cannon cannot activate Divine Buster, however. It can however eat through enemy projectiles at close range fairly easily though and hit them with its long ranged splash damage.

Down Smash // Impact Cannon (Ground)

Vivio generates a ball of aurora-colored energy, but this time punches it straight into the ground in front of her, creating an explosion of mana around herself and the opponent, dealing 13-18% damage and powerful hitstun along with radial knockback. This attack is shorter ranged than her Forward Smash version, but deals more vertical knockback and completely covers her in a protective hitbox. Like the Down Smash version, it cannot activate Divine Buster.

Up Smash // Sacred Shower

Vivio thrusts her fist up and sends a shower of multi-colored lights into the air. Her fist is a hitbox that deals 8% damage, while the lights that are released are an amount depending on charge, releasing 8-11 blasts of light that deal 1% damage each in a wide spray. It's an absolutely fantastic anti-air move that nearly hard-counters aerial approaches when done right, but is a bit slow to start-up, requiring prediction to use effectively.

Grab-Game

Grab // Counter Grab

Vivio flashes when her grab first starts, indicating this move is a counter... but a counter to grabs, as opposed to regular attacks! If Vivio would be grabbed during the start-up of her own grab, she will immediately grab them instead and throw them to the ground for 7% damage, leaving the opponent prone. To make up for this, her grab is slightly slower than most players' grabs. Her pummel is a punching attack for 3% damage.

Down Throw // Drop Throw

Vivio tosses the opponent to the ground, dealing 7% damage and leaving them prone. She's in a great position to tech-chase using Jet Step, making this often her go-to throw.

Up Throw // Impact Cannon

Vivio tosses the opponent straight up and summons a ball of rainbow-colored plasma above her, punching it into the opponent for 13% damage and powerful hitstun that sets up for a juggle opportunity on fast-fallers or characters at low percentages. It can kill starting at around 160%.

Forward Throw // Sonic Shooter Combo

Vivio tosses the the opponent up and away slightly with a punch for 5% damage, then summons two Sonic Shooters, which immediately fire at the opponent one at a time for an additional 4% damage each. This allows for Vivio to get a follow-up opportunity with frame advantage, though a true combo is impossible due to the knockback of the Sonic Shooters.

Back Throw // German Suplex!?

Vivio takes the opponent and flips over backwards, slamming the opponent headfirst into the ground, knocking them away for 15% damage and powerful diagonally backwards knockback in what is her best killing throw, killing as low as 100%.

Final Smash

Full Drive Ignition // Sacred Blazer

Vivio rushes in and delivers a flurry of blows to an opponent, five quick hits of 5% damage to any opponent in range, then jumps up and generates a powerful ball of pure magical energy. She shouts... "Sacred... BLAZER!" and throws her fist down, firing it at the opponents dealing 25% damage and knockback that kills around 60%.

Playstyle

So what is this curious sparkle? Well, that is her activation of her special ability, Sacred Defender. She focuses a great deal of her own mana into a single point, enabling her to block attacks at that point. Any attack that hits one of those curious sparkles will automatically clash and be cancelled, allowing VIvio to deliver her attack with impunity. These sparkles are short-lived however, learning to get the timing down to block attacks, as well as predict the hitbox that will come her way so that it will block effectively, is key to playing as Vivio.

Rest to be edited in later.
 
Last edited:

MasterWarlord

Smash Champion
Joined
Aug 24, 2008
Messages
2,902
Location
Not wasting countless hours on a 10 man community
ZANT


Zant is the main antagonist of Twilight Princess. By helping to free Ganondorf (Who Zant believed was a god), Ganondorf in return gave him powers over the twilight realm and ousted Midna, her incompetent rule having nearly driven Zant insane. While Ganondorf is using Zant to a degree, Ganon seems to have minimal interest in ruling over the Twilight realm and just wanted Zant to help him reach Hyrule, so while he is an underling he is more of an actual partner to Ganon.

While he acts as a rather ominous and serious antagonist for most of the game, when you encounter him in his palace he goes insane for a very wacky boss battle. Over his impending death? Over what has become of his people? Over seeing Midna again? It’s largely left open to interpretation.

STATS

Aerial Control: 9
Jumps: 8
Size: 7
Aerial Speed: 7
Weight: 5
Ground Movement: 4
Falling Speed: 3
Traction: 3

No catch to the stats, Zant’s a middleweight humanoid with a decent aerial affinity. His aerial jump is among the best in the game, giving him the best jumps of any character with only two.

SPECIALS

DOWN SPECIAL – SHADOW MINIONS


Zant brings his arms together, circles them around, brings them together again, then extends them out to his sides in an elaborate channeling motion to summon a portal above his head in front of him. This causes a single Shadow Beast to fall out before it closes. This gives Zant lag comparable to Snake placing a dsmash mine, but the Shadow Beast will not act until it falls to the ground and even then will have to get up off of it for a bit more lag. Zant may not use this move again until the Shadow Beast is ready to act, taking a full second from the move’s input.

Shadow Beasts patrol the stage back and forth at Ganondorf’s dashing speed. If a foe comes within a Mario width of them, they will actively pursue them at Mario’s dashing speed. If the foe continues to run from them, the shadow beast will perform a “dashing attack”, where they headbutt foes with their metal heads/helmets in a telegraphed attack, dealing 11% and knockback that KOs at 140%. This headbutt has end lag and stops the shadow beast’s dashing, enabling characters slower than Mario to escape pursuit. If the beast reaches the foe and they do not attempt to flee, the shadow beast will swat at the foe with a single hand, dealing 7% and knockback that KOs at 180% in an attack as fast as Bowser’s ftilt. If the foe is stunned, dodging, or shielding, the shadow beast will clasp his hands together before smashing them to the ground in front of him for an attack even laggier than the headbutt, dealing 15% and knockback that KOs at 120%.

Shadow Beasts have 50 HP and do not take stun, making it more feasible for them to complete their exceedingly laggy attacks. On death, their corpse will continue to rot on the stage. If only one live shadow beast is present on the stage and there are any corpses, it will laglessly howl (Not interrupting whatever it was doing), resurrecting all shadow beasts with full HP. To kill them for good, you must kill the last two of them at the same time. If all shadow beasts are dead at the same time, their corpses will explode into shadowy particles and vanish, so that Zant cannot just summon another one to revive them all.


If the input is smashed, Zant summons a common enemy type called a “Zant Mask”, that looks like a DK sized version of Zant’s helmet. Zant masks will float where they are summoned and will attack immediately upon coming out of the portal. They have a single attack of opening their mouths by retracting their “tongues”, shooting a generic dark red projectile at the nearest foe’s position before putting the tongue down into the usual position. These projectiles are the size of Mario’s fireball, go at Luigi’s dashing speed up to a max of Final Destination’s width, and deal 5% and flinching on contact. They will fire a projectile once every 1.65 seconds.

Zant Masks have 50 HP, but they will quickly teleport to a random position within a platform’s width every 5 seconds. They will never randomly teleport higher than 1.8 platforms above or away from the stage, and will never go under the stage. If a foe is within half a platform of them when they would normally teleport, the mask will specifically teleport away from the foe. If a foe is within a Wario width, the mask will specifically teleport away from the foe instead of shooting a projectile when it normally would.

UP SPECIAL – TWILIGHT BARRIER

Zant performs Zelda’s Up Special, with a twilight effect replacing the fiery explosion. His version is a bit faster and weaker than Zelda’s, who for some reason is more of a slow heavy hitter archetype. It still goes just as far as Zelda’s, which is a little under two Battlefield Platforms . Two Wario sized clumps of twilight appear where Zant uses the move and teleports to that do nothing, using the move again destroys the old twilight.

If a shadow beast enters pursuit range of the foe when the foe and it are between the two areas of twilight, two infinitely tall orange transparent barrier spawn at the two twilight patches as they vanish. The barrier actually stretches into the foreground and background with four twilight posts connecting the walls to make a realistic “cage” to trap the foe in, though this is entirely aesthetic and only the two walls matter. The walls are solid, and on contact it deals tiny set weak knockback away with no stun or damage. To destroy the barrier, foes must destroy all shadow beasts inside of it with them. It doesn’t matter if one’s outside the barrier to revive them, simply killing them all once will suffice to break the barrier. Having all of the beasts inside the barrier can work nice too, as they can actually be revived without the barrier breaking that way.

You can potentially move off-stage and teleport back to put some off-stage inside a barrier if you want, but this will just give an easy option for foes to kill shadow beasts. In any case, an entirely off-stage or a tiny pen of a barrier cannot be created, as at least one platform of ground must be inside the barrier’s space for it to spawn. Only one barrier can exist at a time.

Of course, Zant doesn’t get to just stand outside and do nothing while his minions fight the foe in a cage match. Who would want to do something so boring? All of his projectiles can go through the barrier to enable him to camp, and he can also teleport through the barriers with this very move (He cannot set up a second barrier while one is up) to fight them directly if he wants. Zant Masks can teleport around barriers and shoot projectiles through them in a largely identical manner to Zant.

NEUTRAL SPECIAL – SIZESHIFT

Zant enters a constipated charging position as either he or the minion/foe in front of him (If there is one) begins to massively increase in size. This gives Zant a surprisingly brief period of lag, as he is able to move after .4 seconds. He is still growing after the lag and he does not gain the power/weight bonuses of being large until he finishes it half a second after the initial input, but his hurtbox/hitboxes increase directly with size as you’d expect.

Projectiles made by giant Zant are giant like a regular giant character, but being giant does not change the size of shadow beasts. Aside from larger projectiles and more power, giant Zant in particular enjoys being able to hit foes inside of a barrier from outside with melee moves. Zant’s barriers are paper thin, meaning if he goes up against one he can hit a foe through it like any other solid obstacle in Smash. If giant, though, he has enough range to reach foes further away from the edge of the barrier.

Characters made giant by this move can potentially stay large forever, but upon being hit by anything that deals hitstun (or taking damage in the case of a Shadow Beast) the giant character will shift down in size to poison mushroom size over 5 seconds. The character will still have their giant power/weight until reaching regular size in 2.5 seconds, and their regular power/weight until they become tiny after the full 5 seconds. The character will remain tiny for 8 seconds before popping back to normal size.

Using this on a shadow beast will increase their range where they will pursue foes to a platform’s width, and in addition to powering up their moves will cause the two handed overhead slam to create an earthshaking hitbox where he slammed his hands for one second, dealing 8% and vertical knockback that KOs at 160%. Making a foe giant will make it easier for them to bump into shadow beasts and trigger barriers, and they should hopefully be hit by said shadow beasts shortly after to remove their giant size. If both the beast and the foe is giant, they won’t have much room to evade them given they take up half the stage.

Making a Zant Mask giant makes it solid from the inside, and when the Zant mask goes to retract the tongue, characters can go inside of it and even refresh their recoveries like perfectly normal ground. The projectile is generated outside the mask’s mouth so characters inside won’t be hit by it, and the mask’s AI will not change if the foe is inside of it rather than close by it. Characters inside the mask are invulnerable to characters outside of it when the mask’s tongue is down to block entry. That said, if the foe attempts to destroy the mask from the inside, if they don’t fully kill the mask it will shrink down with them inside of it, constricting the foe in a grab escape that deals 4% per half second to the foe. The point this is determined is when the mask becomes smaller than the character’s hurtbox, so making the foe giant can make this happen faster. Whenever the foe busts out from the mask constricting them, they will shatter it as they burst out from inside of it.

Zant can teleport inside of a giant mask to hide, and while he can’t shoot projectiles through it, he can shoot projectiles out at the same time the mask does when it retracts the tongue to shoot out projectiles alongside it. Sitting inside of a mask is generally the easiest way to bait the foe in to trap them, as they will oftentimes hit it to make it start getting smaller at the same time they hit you. The only particularly guaranteed way to not hit the mask is to land inside of it and grab Zant specifically. That said, they always have the option of just hitting the mask from the outside to force Zant to leave sooner or later, as he is vulnerable to the hitbox the mask has when it closes in on characters inside.

If two masks are close enough for Zant to teleport into and he goes into one, there will be no indication of which one he went inside of, and he can also teleport between them freely with no visible animation if the tongues are closed. This is not very abusable due to how hard it is to keep up 2 giant masks at the same time, but is a nice option when available to make you more elusive and obnoxious.

SIDE SPECIAL – SHADOW SHOOT

Zant raises his arm and shoots out a single dark red projectile that travels forwards a bit faster than Mario’s dash. The projectile has infinite range and the main body of the projectile is the size of a pokeball, dealing 5% and flinching on contact. It has a fiery/shadowy trail going behind it as it goes, though, that reaches out behind it as wide as Falco’s laser. The trail deals 1% and no stun per tenth of a second it’s in contact with something. This is a very spammable projectile and if you hold down B, Zant will continue using this version of the move rapidly as soon as he is able.

While it would be ideal if you could hit a foe with the main projectile and the trail, if the projectile hits something, the trail will only come up to where the projectile was as it disintegrates. The main thing the trail does is give something to hit a foe who dodges the main projectile, giving you some damage as a consolation prize. Giant foes in particular will find the trails very obnoxious, and will absolutely have to specifically shield the projectile, not dodge it, if they intend to avoid all damage from it.

Smashing the input increases the lag very slightly, but doubles the flight speed of the projectile without increasing power, but more importantly doubles the length of the trail. You can mix in the two projectile speeds together to create alternate lengths of trail and to create longer lingering main projectile hiboxes to deal actual hitstun to foes.

SMASHES

FORWARD SMASH – SHADOW SPREAD

Zant brings both of his arms up against himself during charging, then on release swings on upwards and one downwards as a huge spread of shadow projectiles get shot out in front of him. This has lag comparable to Bowser’s fsmash, but shoots out 6-11 projectiles at varying trajectories. While they all start next to each other, they spread out the further and further they go, though the ones aimed at the ground will inevitably hit it more quickly and expire faster. Each projectile does 5% and knockback that KOs at 200%. The projectiles move a bit faster than Mario’s dashing speed, much like the Side Special projectiles, though that move is spammable and doesn’t leave you overly vulnerable. Holding down Side B will get you more raw projectiles than this move will, and you can still “spread” them slightly by jumping in place as you spam with it much like how Falco would.

So what does this move accomplish over Side B? It lets all the projectiles be out at the same time to make them harder to avoid rather than a constant stream, and is worth mixing in with Side B spam if just sitting outside of a barrier camping. It’s also a worthwhile move to consider if sitting inside of a giant Zant Mask camping, as you can time the release of the move’s lag as the mask’s tongue retracts open.

Hitting with this move in melee range is not unheard of, Bowser can still land his fsmashes in competitive matches. Using this as a melee move causes all of the projectiles to immediately hit the foe at once before they spread, netting you a massive 30-55% damage on the foe, giving you the pay-off of Bowser’s fsmash for the lag of said move, at least damage wise.

If the foe is taller by being made giant, you can get this shotgun effect without firing at point blank. The bigger they are, the more the projectiles can spread out without exceeding their height. Being giant yourself can also be helpful with this move, though more for using the projectiles as projectiles and not as a shotgun blast. Keeping in mind the projectiles originate at your mid-torso section, being giant will also enable the projectiles aimed down to have some more distance to travel. Don’t get any ideas about using this while tiny on a regular sized foe, as this is much riskier and power of each individual projectile will be nerfed to make it very weak.

UP SMASH – SHADOW SWARM

Zant raises his arms above his head and moves them about as a giant red orb Wario-1.5x Bowser’s size materializes within his grasp (If he bothered to use his hands). Once it finishes being made, Zant will then fire it at any angle in front of him or above him, but will not fire it even slightly backwards. Whenever the orb comes into contact with solid ground or something it can damage, it will burst open into a portal. If it hits something it can damage, it deals 5% and flinching. If it hits nothing after going 2 platforms, it will burst open in place in mid-air. The portal’s large dark red graphic covers about a platform, but the only relevant part is a swirling portion in the middle Bowser’s size, the actual portal.

25-37 shadow bugs will come out of the portal and chase after the foe at Mario’s dashing speed if they were within a Bowser width of where they come out, otherwise they’ll just fly off the top blast zone. Each bug deals 1% and flinching and dies on contact with the foe in a tiny explosion, and they will continue to chase the foe until they get 1.3 platforms away from them, at which point they’ll take their leave off the top blast zone. The bugs are out-prioritzed by anything, and can be killed with even jointed attacks without the foe taking damage. The bugs cover about the size of 0.8-1.3x Bowser’s hurtbox as they move around, so it’s unlikely the foe will kill all of them in this way, leaving them to get hit by the rest in their ending lag. After the bugs come out, the portal vanishes into shadowy particles before quickly dissipating.

Shadow bugs cannot go through barriers, but the initial orb that you throw that places their portal can, enabling you to place a point for them to pop out and harass the foe. It’s much more difficult to outrun them inside barriers if it’s not massive, leaving foes to either awkwardly recover up high into the air or to fight some of them off, both leaving themselves open to other attacks. Giant foes will have difficulty running away due to it being harder to get their whole hurtbox 1.3 platforms away, but their increased hitbox sizes can kill all of the bugs at once for many characters. That said, tiny foes will have largely no choice but to run away, so if they get even once and start decreasing in size, their hitboxes generally will not be enough to kill a remotely worthwhile amount of the bugs.

This is not strictly a projectile attack, and can be used as very competent anti-air. It doesn’t take long at all for the initial orb to materialize, and if a foe lands on it from above as it spawns they will generate the portal and bugs near immediately to eat away at them. In addition, this can be used as a non anti-air melee move on foes taller than Zant, increasing the foe’s height enabling them to reach the hitbox.

DOWN SMASH – TANTRUM

Zant’s arm twitches a bit during charging as he crouches down, then he screams wildly as he jumps up into the air 1.5x Ganon’s height before coming back down and slamming onto the ground, stomping down with both legs. His body as he goes up deals 10% and knockback that KOs at 220%, and 16% and knockback that KOs at 170% on the way down. This move actually comes out very quickly, though it takes about as long as Dedede’s fsmash starting lag for Zant to hit the ground and generate an earthshaking hitbox, the main point of the move. The earthshaking hitbox will reach out .75 platforms to either side of Zant and deals 12-17% and vertical knockback that kills at 165-120%, lasting a half second to well more than cover Zant’s ending lag.

This is a pretty direct way to hit a foe inside of a barrier rather than just projectiles, though even with a minimum size barrier foes can run to the opposite side of the barrier to evade it without jumping. If the foe is big, they will be wider than .25 platforms in the case of all but the smallest of characters and will be hit by it. If –you- are big, the range of the earthshaking hitbox doubles, enabling you to hit all of even some larger barriers and most of a max size one. This does not come without a cost, though, in that your increased hurtbox will actually cause your leg to clip into the barrier during the ending lag if you use this move right up against the barrier, making you vulnerable. You can move slightly away from the barrier to get less range if you wish in exchange for being invulnerable, and this will still be enough to hit all of a minimum size barrier. Catching a foe as they land from being chased by usmash bugs with this can work nicely, though requires you to predict it in advance.

If you include the edge inside of a barrier, you will be pleased to learn that the earthshaking will wrap around a stage and hit ledges, doing horizontal knockback on a ledge and downwards knockback under the stage. This gives you a nice move to hit foes casually planking minions if you’ve included the edge inside of your barrier.

AERIALS

NEUTRAL AERIAL - BLADESTORM

Zant’s swords jut out of his sleeves as he starts spinning around, wind whirling around him. This move is very comparable to Mach Tornado, multiple hits of 1% and flinching, and mashing A to both make the move last longer and causing Zant to rise into the air a comparable distance to said move. Landing on the ground will not interrupt this move, and you can keep it going up to 1.2x as long as Mach Tornado for a total of 20 hits of 0.5% and flinching and a final hit that does 3% and knockback that KOs at 200%. When Zant comes out of this move, he enters his dizzy animation and has to button mash out, easier at lower percentages, though it’s around a third easier than if Zant had broken his shield. If you do not mash A to extend the move so much as one time, the ending lag will be as brief as Mach Tornado’s.

Zant has a unique sort of superarmor during this move, that will protect him from hitstun, but not knockback. If he is knocked away, Zant will still keep spinning around with the move uninterrupted, becoming a single constant momentum based hitbox rather than a multi-hitting one and increasing the max duration of the move by 1.35x. As an example, if he is hit by Mario’s fsmash at 50%, he’ll deal 15% and knockback that KOs at 120%. It doesn’t take much to reach the power cap of 20% and knockback that KOs at 100%. If Zant bumps into a wall when he has momentum from being hit, he will bounce off of it and increase his momentum by 1.2x and the max duration of the move by another 1.35x. While it is perfectly possible to make a tiny twilight barrier to bounce back and forth on the inside of infinitely (More likely a giant Zant mask), the foe has to hit you before the move mechanics change to allow you to do so from the usual Mach Tornado-esque version.

Zant may press any button other than A and make a directional input during this move to teleport a single Bowser width in the selected direction. He may do this up to twice throughout the course of the move, though he may only do this twice per air trip no matter how many nairs he uses. This enables Zant to teleport past barriers while using this move to bounce around after the foe before teleporting out to be safe during the ending lag. In addition, if Zant is in momentum mode during this move from having been hit, he can make a second input before he reappears to change his momentum to go in that direction. This enables him to redirect his momentum towards the foe outside predictable means of walls, slightly delay his approach on the foe to make them dodge in anticipation, or just redirect his momentum up to try to be safe during lag if there is no barrier/the shadow beasts are almost dead.

FORWARD AERIAL – BLADE DRILL

Zant goes horizontal in mid-air as blades extend out of his sleeves and he brings them together above his head, then he starts spinning around, somewhat comparable to Falco’s fair. This deals 13 hits of 1% and flinching, with the last hit dealing knockback that KOs at 180%. This is a decent attack to try to “escape” from the foe if cornered without a barrier up as you DI through a foe, and can also just delay them to a degree.

If the move’s landing lag is triggered, Zant will immediately enter prone on his stomach and will be free to act from that state. Zant’s stomach prone attack is quite good and involves him pouting as he pounds the ground childishly (8%, knockback KOs at 155%) as he gets up. Foes can generally DI out of the move before the end, at least if not giant, so ending the move early to finish it with the prone attack is actually safer. Zant can also instead roll up from prone instead of flopping about to use this move as a “set” spacer, most probably choosing to roll back towards a minion.

BACK AERIAL – TOUCH OF TWILIGHT

Zant extends out a sleeve behind him as he turns to look, then actually brings his hand out of his sleeve as he goes to poke the foe with his pointer finger. The arm and hand are a hitbox that deal an embarrassing 2% and set tiny knockback of a Mario width, with a microstun shorter than a flinch. There is a tiny hitbox placed on the tip of Zant’s finger, though, that deals 18% and knockback that KOs at 130% as the foe gets sent off flying covered in dark red flames. This is a very quick move to start, and while the ending lag is long enough it’s not “spammable” this can be Zant’s best move if you get good at spacing.

If the foe is giant, it will be much easier to hit them with this move. If Zant is giant, the hitbox’s size will get exaggerated along with his own, making this move easier to throw out in addition to making it even more powerful. This move’s range, while not fantastic, is better than most moves of this type, meaning a giant Zant can also spam this move against a barrier to try to hit a foe inside to moderate success. Ideally, he can constantly be spacing himself to try to not let the foe get past his finger, only coming up against the barrier and humping it when he has to reach for a foe hiding on the other side of a barrier.

UP AERIAL – DARK PORTAL

Zant raises his arms above his head as a small portal spawns there, sucking foes in with the power of Dedede’s inhale in a Bowser sized radius around Zant. Foes can be sucked up from below Zant, but they will have plenty of time to hit Zant out of the move if he chooses to do that. The portal is the size of Wario at the start of the move and slowly shrinks over the move’s duration, but deals 25 hits of 1% and flinching over the course of the move with the last one dealing knockback that KOs at 225%.

The portal will suck up projectiles, enabling you to bring in the foe and the projectiles to all collide together. This is of course most powerful in combination with the fsmash, though is rather predictable. If you don’t want to do any work whatsoever for a projectile bonus, you can use projectiles from Zant Masks for this. If an enemy projectile manages to reach the portal, ownership will change to you, but it can still hit you before it reaches the portal, meaning it only really “invalidates” enemy projectiles from above, which are very rare and rather impractical to begin with.

Any projectiles sucked up by this move that aren’t used up by damaging something will phase out of existence. If you use Down Special, though, all projectiles stored by this move will come out alongside the minion, going at the angle they were going though being aimed in the direction Zant is facing. Aside from some situational offensive use, any projectiles whatsoever now becomes useful as it will cover Zant while he’s summoning a minion.

DOWN AERIAL – SHADOW BLAST

Zant joins his sleeves together as he raises his hands over his head before a black shadowy ball of energy pops between them, pushing them apart, before Zant forcefully throws it downwards. This is a laggy attack for Zant to actually fire the projectile, but strangely can hit foes above him quite quickly, the ball becoming a hitbox as soon as it spawns. Weirder still, the ball specifically does vertical knockback, KOing at 145% along with dealing 12% damage. Upon contact with the ground, the ball explodes and sends up three Side Special projectiles, one directly upwards and two at 45 degree angles to the sides up from the ground.

This projectile will immediately expire upon damaging something, so if this is used as a melee move Zant can interrupt himself out of the rest of the long animation. If a foe air dodges through Zant when falling into him to evade this attack, hitting with the move as a projectile instead becomes possible if Zant DIs to stay on top of the foe. Given the status this has as laggy, though, it’s doubtful you’ll actually still hit them (Unless giant), but you can at least send it after them immediately and force them to do a second panicked air dodge. This is also one of those “bad” downwards angled projectiles mentioned by the uair, which can be made more practical by limiting horizontal space with a barrier. Using this directly followed by uair is a very powerful combination if the foe happens to be high up, and it can also possibly catch some of the smaller projectiles you made.

STANDARDS

NEUTRAL ATTACK – SHADOW PARTICLES

Zant swipes his arm forwards, causing some small shadowy particles to spawn in front of him and swirl around. With each press of A, Zant will swipe his arm back in the opposite direction, making the shadowy particles swirl around in reverse. Each hit deals 5% and turn the foe around like Mario’s cape. Due to this being a grounded attack, this sadly can’t be used to gimp, but it can still serve as a crude counter unless the foe does a move that hits to both sides like a traditional dsmash. This attack is extremely fast, and can actually rack damage as quickly as Fox’s laser on a foe who stands there doing nothing. Like Fox’s laser, this will not knock a foe out of stun, so this is a go to move if you manage to break the foe’s shield, which is possible if you actually land some hits while giant and/or some hits alongside minions.

While you can simply use this while standing on the same side as a minion in a very straightforward way to try to defend the minion, it’s still worth looking into if on the opposite side of the foe as a minion. If you’re inside a barrier, it can actually be a very legitimate consideration to want to tank a hit for a Shadow Beast in his stead – especially if at high percentages, as the extra damage won’t matter and the attack won’t kill you unless it does very direct vertical knockback. Meanwhile, the Shadow Beast will punish them and not take damage.

If this is used on a Shadow Beast, it will turn it around too, which is actually quite useful given their mindless patrol patterns. You can send them back after the foe if they passed them up, or maybe even send one away from the foe to try to get it out of barrier range so it can easily revive the rest.

DASHING ATTACK – BLADE RUSH

Zant alternates chopping with each arm as he runs forwards a fair bit faster than usual, babbling something with each chop, traveling a platform’s distance over the course of the dashing attack. Zant is consistently a hitbox that deals 11% and knockback that KOs at 150% over the course of the move. The beginning of the attack is superarmored, making this a popular move for Zant to tank damage. Despite not being especially heavy, Zant is good at surviving with heaps of damage on him due to only being killable by vertical KOs inside of barriers. While he can be a bit more offensive if he wants at lower percentages, when he’s actually damaged enough to kill him it’s rare he’ll fight you outside a barrier if at all possible.

This attack does a good shieldstun, as well as some shield push. You can drag a shielding foe with this and get 2 hits on them before they’ll be pushed too far out of range, possibly pushing them into a Shadow Beast. If inside of a barrier, the barrier will prevent the foe from being pushed back too far, enabling you to get in a third hit to heavily cripple and almost destroy their shield. If giant, this will most definitely shatter it from even full strength if you land all 3 hits, enabling you to rack heavy damage with the jab.

FORWARD TILT – LONG SWING

While the dashing attack is the more well known animation, when Zant is less damaged in his final phase he will do more exaggerated long swipes with his blades instead of the rapid advancing cut. He leans back a bit before slicing forward with one arm here, giving him a fairly fast and ranged tilt that deals 6% and above average hitstun. This is a two part ftilt like Snake’s and if A is input again he will do a similar slash with his other arm. This is just as fast, but is slightly more powerful due to Zant leaning heavily into the attack, so far that he spins around to face the opposite direction. This second attack deals 9% and knockback that KOs at 140%, and has no ending lag, with Zant facing the other way being considered enough “penalty”.

If the foe dodges or shielded the attack, facing the opposite way will make this a bit too difficult to actually capitalize on their slight delay, but you’re still free and in fact set-up to just try to run away from the enemy after having failed to hit them. If you want to use the move more offensively, you can just try to use only the first hit to stun the foe, similar to how characters like Ike rarely use the last hit of their jab. Nothing will true combo into it outside of your jab and utilt, though the jab can put the foe in an awkward spot. Whether used offensively or defensively, it puts you in control of how the match is being dictated and takes the pressure off you, either directly or by applying some immediately to the enemy.

UP TILT – REDIRECTION

Zant swats over his head in a half-arch arc in a very quick and spammable move, dealing 6% and mostly vertical knockback that KOs at 200%. This is a good anti-air and even a decent juggler at low percentages, which has some use in barriers and in the context of uair/dair.

Shadow particles spawn in the arc he swings his arm. They’re not entirely for show, as any of Zant’s projectiles that come into contact with this will be bounced off by this attack. The projectile will be reangled to go in a new direction based off where on the utilt the projectile was hit, going directly away from him. This lets Zant reaim projectiles most anywhere with good timing, and is a much more immediate course of action than the uair.

DOWN TILT - STOMP

Zant raises his leg high into the air to do an overly dramatic stomp forwards with a single leg. This is laggy for a tilt, a bit laggier than Samus’ dtilt, but has good range and is quite powerful for a tilt, dealing 15% and knockback that KOs at an early 110% in one of Zant’s best KO moves.

This move has a counter hitbox on it, but triggering it does not nullify all knockback. Instead, only all vertical knockback is negated, and Zant takes his horizontal knockback as he holds onto his foot, yelping in pain as he hops on his other foot repeatedly. Zant will hop forwards a platform’s distance at Captain Falcon’s dashing speed over the duration of the “counter”, negating a quarter of his remaining horizontal knockback with each of his four hops over the duration of the counter. Zant deals 5% and set knockback forwards during the counter that will drag foes along with him, potentially hitting foes up to four times. Most foes will probably DI out before then, though giant ones won’t and will still be giant long enough for all the hits to connect.

This functions well when you can better deal with the fact you still take some horizontal knockback from this move. The most obvious use is just having a low percentage, and using the dragging hits to bring the foe into a Shadow Beast. It also works well if a barrier is already up, as the barrier puts a strict cap on how much horizontal knockback you can take. If Zant is big, while he will still start shrinking once hit like in his boss fight, but he will hop forwards twice as far over the course of the move, enabling him to hop back to reach the foe very quickly and enabling him to drag them far further.

GRAB-GAME

GRAB – NO HANDS

Zant extends out his sleeve without bothering to grab the foe with his hand. Rather than an MYM grab where he actually physically grabs the foe, the foe just becomes magically restrained up against Zant’s sleeve, much like Dedede’s grab and many others. This has comparatively good grab range to the Brawl cast, but is still not what you’d consider “good range”. It is a somewhat laggy grab on par with Falco’s.

PUMMEL – SHADOW BURST

Zant waves his arm as the tassels at the end of his sleeve move about, generating a small burst of shadow on the foe to deal 0.7% in a pummel nearly as fast as Lucario’s (Which deals 0.5%). Having this sort of pummel is good for Zant because each pummel will enter the stale moves list, enabling him to easily push out everything else. Why he appreciates it more than a standard character is simply the ability to refresh his Side Special, enabling him to power his camping back up to full strength quickly. You’ll also passively use this when just waiting for a Shadow Beast to smack the foe.

FORWARD THROW – SHADOW BLAST

Zant blasts the foe diagonally upwards, dealing 9% and knockback that kills at 180%, but only due to the poor angle. Zant proceeds to spawn the projectile from dair in the same fashion as he does in said move, but launches it upwards at the same angle he threw the foe, sending it after them with the speed slightly adjusting to that of their knockback. This will never combo into the foe, even at low percentages, but will provide them something to dodge.

While you can fire this projectile at will with your dair, you are not normally allowed to fire it at this angle. The angle the move is fired at it enables it to hit walls, and it will act the same as if it hit the ground, spawning three Side Special projectiles for you. This means the foe will have to dodge the projectiles twice, opening things up for you to add in whatever else you feel like or just grab some of the free projectiles with uair.

BACK THROW – TWILIGHT AURA

Zant places his sleeves on either side of the foe’s head before blasting them behind him, dealing 13% and knockback that KOs at 175%. As they are shot away, a completely black shroud covers where they go, as large as their hurtbox. The foe will continue to make more of this wherever they go for the next 3 seconds. The black twilight aura does nothing, but it does obscure vision and lasts for 5 seconds. Even if this won’t KO, having a good chunk of damage on the foe is good for this throw so that if they come into contact with a shadow beast, they’ll fly into the opposite side of the barrier as they spawn to cover the entirety of the ground level with obscuring black shadow.

The AI doesn’t care about having their vision obscured, so this can be a rather awkward handicap to fight the Shadow Beasts, foes largely just having to either dodgespasm or flail out hitboxes mindlessly without skilled play. If a barrier is up, Zant doesn’t especially care about seeing the foe either and he can just leave the barrier so it can’t be used against him. He will know the general location of where they have to be and can just fire projectiles in their vague direction that will be more difficult to dodge than usual.

UP THROW – DARK DIVE

Zant spawns a portal underneath himself and throws the foe into it, then hops into it himself carelessly with his arms raised high in the air with the tassels on his sleeves blowing upwards, letting out a maniacal laugh. The foe and Zant will stay inside the portal for half a second as the foe takes 10 hits of 1%, then the portal will open back up with Zant uppercutting the foe out of it, dealing knockback that KOs at 140%. This is Zant’s favorite kill move due to it being reliable out of a grab and sending foes entirely vertically so it has no problem killing enemies inside of barriers. Zant is propelled upwards a set distance as he uppercuts of double Ganondorf’s height – at low percentages he’ll be in the air above the foe able to summon a minion or send a dair at them. If below them, he can use his dair and uair to juggle the foe, possibly attempting to go for the kill with dair.

Any projectiles absorbed with uair will be shot vertically after the foe when this move is used. At low percentages, this will guarantee all of them hit, though it’s doubtful you’ll have many projectiles stored at low percentages unless the foe has respawned from having been killed, I which case it’s quite good. It can still create some projectiles for foes to avoid as they come down, and directly plays into a uair follow-up as Zant goes to recollect his projectiles before they go off the top.

DOWN THROW – TWILI CURSE

Zant kicks the foe to the ground in prone and dances on their corpse like a lunatic while shouting something incomprehensible, causing shadowy particles to swirl around the foe, then kicks them in the buttocks for weak knockback that KOs at 220% while they’re still in prone. This deals 14% and would already pass as a great throw for some other characters, though Zant isn’t an especially big abuser of prone state.

The shadowy particles will continue to swirl around the foe for a long 8 seconds, giving them far more than enough time to recover from prone before an actual effect happens. A portal will spawn on top of the foe’s current location and begin sucking them in – it’s identical to the uair, it’s essentially as if an invisible Zant just spawned there and used the move. The foe still has enough time to move out of the immediate hitbox of the portal, though they typically have to be dashing/dodging already when it spawns to do so. Zant can be affected by the pull of this and even be hit by the portal’s multiple flinching hits, so if a foe is on top of him and pressuring him they can actually use this to their advantage. Zant will want the foe in a barrier when this goes off and to fire lots of projectiles if at all possible – the possibilities are a lot bigger than with uair given he doesn’t have to personally channel the portal. This still keeps the properties uair has of absorbing projectiles to be later reusable with your Down Special, so it’s still massively beneficial even if you miss.

FINAL SMASH

Zant takes off his helmet before he snaps his own neck, simply by bending it out of place as a snapping sound is heard. This will deal 35% to Zant, but will kill the nearest enemy as their own neck snaps and they die stamina style. In order to stop this, foes can just interrupt Zant during the Final Smash. It takes a second to perform this, so it’s quite easy to interrupt if you don’t trap the foe in a barrier. Trapping the foe in said barrier also isn’t free once you get the smash ball, as they can knock the smash ball out of you while you’re trying to do it.

PLAYSTYLE SUMMARY

While Zant’s more evasive and vaguely counter-based standards may seem odd, he actually makes heaviest use of them at the start of the match when he hasn’t set anything up yet. Contrary to popular belief, set-up isn’t entirely free. Using the fair as an air to ground move also works well here as Zant tries to buy some time to get a Down Special off. If possible, Zant will want to mix at least one Up Special into his evasive melee game here, so he doesn’t have to arbitrarily set-up the position where the barrier will set-up later.

You’d like to think that Zant could just wait for the foe to bump into the Shadow Beast then endlessly make more, but foes will be waiting until Shadow Beasts are out of the barrier’s spawn range to kill them and send them plummeting off the edge so they can’t be revived either. A competent foe will rarely let you revive Shadow Beasts unless a barrier forces them to. Zant has to supply a rather surprising amount of pressure in order to protect the Shadow Beasts. Zant Masks can be more helpful here than you’d think in this early phase, as foes will generally ignore them since they can’t spawn barriers. While they’re weak, having one out can be good as a slow burner. If the foe targets one, they’ll be wasting their time given how evasive they are, letting you get the needed beasts out on the field.

With one good barrier up, it’s easy to make more and more beasts to keep getting them up. You have to be careful of a foe baiting a large group off the edge to their deaths, and may even want to set up one of the two edges as one of the end points of your barrier to help deal with this – dsmash’s hitbox that hits the ledge will be seeing a lot more use than you’d think. Turning Shadow Beasts around to keep them separate can become crucial. While Zant’s playstyle of camping, projectile manipulation, and more becomes very obvious with a barrier up to the point it’s not worth going over again if you’ve read the set, he will actually need to be doing a lot of camping by the time he’s going at full strength so he doesn’t die – Zant will be at a high percentage for most of the match, but he will still live a very long life. Of course he can still come inside the barrier to help, though he will largely be doing so towards the end of a stock when it’s time to go for the KO.

3V1 BOSS MODE

  • Zant has invulnerability to grabs for a second after being grab released or thrown.
  • Down Special summons 3 minions per use.
  • You can create as many barriers as you want, but you cannot create barriers inside of barriers. The minimum width of barriers is reduced to Bowser’s width rather than a platform.
  • Zant’s Up Special is lagless. He can use it twice without touching ground, and the second use of it does not put him into helpless.
  • Zant is ungrabbable while giant and will come out of stun immediately if he remains in it for longer than .1 seconds. 50 damage must be dealt to Zant before he shrinks in the usual fashion, but he will only shrink to regular size, not to his small size. Zant’s weight while giant is buffed to double Bowser’s.
  • Zant Masks must take 26 damage to lose their giant status.
  • Fair moves Zant in an identical manner to Meta Knight’s Side Special. He may use it two times in the air before it reverts to the usual version until he touches ground again.
  • Uair’s portal may now suck up foes that are smaller than it. Zant may become giant or turn a foe tiny to achieve this. Some small foes can be captured immediately by the uair, but you basically have to get them as soon as the hitbox spawns due to the already small hitbox getting smaller over the course of the move. If Zant does not use Down Special to release the foe, the foe may break out at grab difficulty, causing the portal to spawn where the uair was last used with the foe gaining grab invulnerability for a half second.
  • The dair/fthrow projectile will now spawn 8 projectiles on contact with ground/walls. Foe may go out of their way to shield the dair, or even voluntarily choose to be hit by the fthrow to stop the projectiles from spawning.
  • Zant does not go down with the foe in uthrow, leaving them to get shot out of the portal with his projectiles by themselves.
  • Dthrow’s knockback is buffed to KOing at 130%, and the foe will become a hitbox that deals 12% and knockback that KOs at 160% to other foes as they slide in prone. It is now an even more amazing throw than it already was, but the laggy animation actually matters now.
  • If no foe is in range of Zant’s grab and he inputs it, he will summon a “Zant’s Hand”, the Wallmaster rip off found in the Palace of Twilight. This will pursue the nearest foe at Ganon’s dashing speed and attempt to grab them, and upon success will drag the foe back to Zant at Meta Knight’s dashing speed. The foe can escape the grab before reaching Zant, though if the hand releases the foe to Zant the grab escape timer resets. The hand will vanish upon one failed grab attempt or a successful grab. Other foes can attack a hand that has an ally grabbed, killing it early by dealing it 30 damage. Zant can only have one out at a time, and it is quick to summon.
  • Dsmash is replaced. Dtilt now has the earthshaking effect from Zant’s original dsmash.

DOWN SMASH – TANTRUM

Zant’s arm twitches a bit during charging as he crouches down, then he screams wildly as he jumps up into the air 1.5x Ganon’s height before coming back down and slamming onto the ground. His body as he goes up deals 10% and knockback that KOs at 220%, and 16% and knockback that KOs at 170% on the way down. On contact with the ground, he will cause a Wario’s width of ground to either side of him to become hitboxes that deal 10-20% and vertical knockback that KOs at 180-150% for half a second. Zant is allowed to move through the air with his normal DI when he jumps up, but may not perform any moves. Regardless, it makes this otherwise laggy move a lot safer and more evasive.

The move’s description above is what happens if Zant slams down on the center a stage or platform. The further towards one edge of a platform Zant slams down, the more it will tilt in that direction when Zant slams down on it. Zant can tilt the entirety of most tourney legal stages as they’re all one “platform”, but will have to settle for tilting separate parts of giant stages like New Pork at a time. If he slams down all the way on the edge of a platform, the platform will be tilted at a 45 degree angle. The further away from the edge and closer to the center Zant slams down, the smaller the angle of the tilt will be. The platform will tilt back into place at a rate of 5 degrees per second. Barriers will also be tilted if the main stage is tilted, and you may never tilt a platform more than 45 degrees.

Aside from altering the stage when used closer to an edge, using it like this will generate a hitbox towards the opposite end of the stage that gets tilted upwards for a third of a second, essentially catapulting foes. The closer to one edge you use the move, the further the hitbox will reach out from the opposite edge, potentially covering up the entire opposite half of the stage. The power of the hitbox at the opposite edge is increased the closer to your edge you use the move, then weakens as it goes out. If you somehow get the foe standing at the other edge when you use this on an edge, they’ll be dealt an astonishing 36% and knockback that KOs at 65%, though it likely won’t KO that soon because of the foe being sent towards the blast zone they’re further away from. This description of power assumes the stage is as wide as Battlefield at least, getting proportionately weaker if the platform is smaller. The earthshaking hitbox will send the foe in the direction the stage is being tilted at a diagonal angle based off the stage’s tilt, not straight up. This is more usable than you might think if the foe is stuck at the opposite side of a stage in a barrier.

While Zant is mostly doing this through magic, if he is giant it will slightly increase his power to tilt the stage as he becomes an actual heavyweight. While giant, Zant can tilt the stage to a maximum of 60 degrees. This does not increase the power, but the giant buff increases the power anyway.

Tilting any platform/stage at least as wide as Smashville’s moving platform will change its center of gravity. Any characters standing on the ground, including Zant, will begin to slide downwards at the rate of Ganondorf’s dash if the stage is tilted 45 degrees (Link’s at 60 degrees), progressively getting slower and stopping once the stage is only tilted 10 degrees. Characters are immune to this when performing ledge attacks/rolls so they don’t just slide off the stage while trying to climb up. If they dash in the direction the stage is tilted/against it, this rate will be added/subtracted to their dashing speed. If it decreases the character’s speed less, it will be cut by up to one third (One half at 60 degrees), this amount decreasing as the stage tilts back into place. Characters in prone will slide down the slope at Mario’s dash speed at 45 degrees, and Meta Knight’s at 60 degrees.

You almost always want to be on the higher ground when the stage is tilted, as if you sit and attack a foe above you with a grounded attack you can often slide downwards in the middle of your attack and be unable to hit them. If on higher ground, performing a grounded attack can enable you to “slide” forwards while using it as if you were some kind of momentum character. The sliding can also be very obnoxious as they get slid into a barrier and bump against it over and over.
 
Last edited:

ForwardArrow

Smash Ace
Joined
Aug 17, 2011
Messages
502
Leviathan
Fixing the grab game really was a godsend to this moveset, as I honestly couldn't enjoy it with the awareness in the back of my mind that the previous grab game was pretty much all the player would ever use. The new one has a couple throws that are actually kind of fun too, I rather like the water tether/portal throws. Now that aside, the set still has a fair share of problems. The obvious one is that the Up and Down Smashes have no hitbox without water around, which really shouldn't be the case, Smashes should have hitboxes as a general rule, and the actual hitboxes in the set are rarely utilized. There are a couple cases where there's actually any attempt at flow with them, so its a step up from Tabitha. Regardless, the water effects are certainly decent, occasionally pretty great actually in the case of the Down Tilt/Dash Attack and while the stuff on Smashes/Throws didn't wow me, its still decent stuff for utilizing the water/tea projectiles. Though truth be told, I do feel you may have chosen something rather hard to play off in the tea, it's a fun little turret but the most you can do with it is put it in odd locations and reflect the projectiles, which ultimately gets a bit old after you've mentioned the third or fourth way to suspend it. Aside from that, while not all the aerials are bad, the Up Air sticks out as a really jarring input, I don't think I even fully understand how the water tower works, let alone what the point of it really is in the moveset. Regardless, certainly not a bad effort on your part, and I applaud you for going back and fixing the grab.

Zant
I really like the concept you came up with for Zant here, utilizing a cage that only is destroyed/activated when his minions are. Aside from that, there's the obvious camping aspect so Zant can abuse the cage and assist his beasts from afar, though he can also join in with material like the Jab and Nair. A lot of the camping stuff is very well executed early on, the Side Special projectiles have a surprising amount of depth to them despite being such a simple move, and you also have fun material like the Smashes to add a lot to it as well.

And for all its worth, that is enough for the set to stand up on its own, and the later inputs manage to avoid really taking away from the earlier stuff while still doing some decent things, mostly in playing around with the projectiles and being useful in the context of walls/controlling the foe inside the cage. I won't deny however, that it does feel like the set lost a lot of drive once you got past the Specials/Smashes/Nair, and struggled to really pick up again. I really wonder if much better could really be done with it, given the set is a cage concept and you try too hard to do flashy stuff with that and you're setting up for disaster. At the same time, when it comes down to it far too much of the set just comes down to projectile manipulation and some occasionally slightly awkward play off the walls(see Down Tilt). At the very least though, you're always deriving from Zant's actual source material even then, unlike Rool who just made him into a generic dark Wizzerd.

Fate
The most immediate and obvious complaint I can level against the set is the weapon switch, which thankfully isn't overly prevalent to detract from the quality of individual moves, but none-the-less hogs up a Special and fails to really contribute much to her playstyle, just giving her multiple options on a few aerials/tilts. Aside from that, the set really does nothing terribly offensive, mostly just playing the role of a straight rushdown character with a few projectiles to set up for combos, the boomerang one actually being fairly interesting as well, and the option to switch between a ridiculously fast rushdown mode for a more standard one with actual durability. I will admit maybe the drawback on Sonic form is too great, which may prevent Fate from making it as much of an option in her playstyle as she could. Aside from that though, I feel the set doesn't really manage to sustain much in the way of quality once you get past the Specials, with the standards being inoffensive but simply being, and I wonder if this is really a fair criticism to you, generic. There's not much substance to any of them either, a straight up melee move can be used for very interesting things and you've done it before, but this set doesn't manage that on the melee game at any point. I had my doubts I would like this set regardless though, and the rather contained use of the weapon switch makes me think it is a lot bette than it could have been.

Vivio
I know you were hoping this would go over better than Fate, and I wanted to like it more because the Down Special is cooler than anything Fate has going for her, but really I don't see it. The other specials really lack any substance to how they're used barring maybe Neutral Special, and with how fast Side Special it may honestly be a bit broken as well. Pretty much every input that isn't a special is very bland in the same manner as Fate, but it may honestly be worse here, as Fate had some fairly standard comboing stuff she could at least make use of. Vivio instead has this defensive mechanic, which could've been more interesting than straight up comboing but you never do anything with it other than vaguely flowing into it with the ability to counter grabs. Aside from that, I find it fairly hard to give credit to a set where the melee moves really have nothing to how their used aside from a mechanic or two slapped on, even Brawl characters tend to have a bit more to their attacks than this, with sweet/sourspots around or little details like strange hitboxes or multi-hit properties. There's really nothing of that sort in here barring like 2 moves, and ultimately it makes the set very hard to appreciate.

Night's End Sorcerer
This set does feel like a bit of, aside from just a callback to the original, a callback to N. Tropy with the ability to make projectile saves on Side Special. Of course, the set doesn't entirely rely on Tropy, having a lot of very fun wisp interactions on its own, from storing them to turning them into very powerful projectiles, or doing weaker but still threatening setups of making them basically explode on contact. The projectile manipulation is never really dull either, when you do some actually very fun stuff like the Jab to cut up Forward Smash boomerang projectiles or crush them with Dair to make said attack more powerful as well as create new stuff to save. Unlike the usual for your sets, you rarely just devolve into filler, with pretty much everything the set has barring a couple juggling tools playing off the projectiles, and it is never redundant either. Admittedly it is just projectile manipulation, so it wouldn't be good if the projectiles weren't themselves quite fun, but the ones you provide actually do have a fair amount of depth to them even on their own. If I had to nitpick, the few filler inputs dedicated to juggling are a bit jarring and I feel the logic on having more wisps via Side Special is a bit wonky, but those are very small problems in an otherwise great set.

Charlotte
So what is clear from your reply is you take some offense to the set being called generic, and frankly I do think that's not really a fair complaint towards the set. That's not a compliment, generic is a compliment towards this set because it is actually much worse. I figured I'd start off by mentioning something that is fairly important about this set, the writing. Yes I usually will never go after someone for writing style, I've sat through Kat sets and not even bothered to criticize it unless something is truly incomprehensible, but this set is flat out painful to sit through. It may be because of the organization smashing what can frequently be four different variations of a move together, but when the animations are frequently as awkward as they are, the differences between moves get stretched kind of thin due to it just being "oh its multihit instead now", and the fact that sometimes you can't even explain them properly(looking at the Down Tilt, though if anything the image made me understand it less). Never mind the occasional pretentiousness where you go into weird talking about how different moves represent aspects of her personality, which is especially awkward when you give backstory in the introduction but not really much in the way of her personality, which based on the animations actually feels a bit all over the place.

Now, writing style doesn't prevent a set from achieving the standards of "generic", because that is again the high bar on what this set is. It doesn't manage that at all, as the set very frequently tries to flashier animations than it really needs, with stuff like the Up Smash turning her into a wire bird or bizarre stuff like a normal schoolgirl being able to produce shockwaves. She feels oddly stronger than her stand here, when the stand has several handicaps attached to it and the moves it uses are frequently weaker than Charlotte's own, and it makes bizarre unnecessary changes like the ones to her shield based on her weapon. Speaking of weapon, the weapon switch. Dedicating a special to switching between 2 weapons is bad as is, but then you have moves where the attack changes based on which instrument she's holding, despite the fact that the instrument isn't even used in the attack. A particularly jarring example is again, the Up Smash, where the instrument isn't involved at all and yet it changes the hitbox a lot, or better yet the Forward Smash where it randomly changes what prop Aphex pulls out of nowhere. Having four variations on every attack is also pretty bad for the quality of each individual one, it creates a lot of inconsistency within the set between what kind of goal it could ever be going for, even Street Fighter sets tend to have a consistent goal even if it's just "punching hard" or "punching fast", this set is all over the place. It wants to combo based off the(rather useless given the numbers and boring even with them fixed) buff, but also has several moves that are based around camping and are in no way built for comboing. This kind of inconsistency does come out in playing the set, when you want to go for one playstyle and have several moves become nigh useless because you're not going for the other, it becomes quite a pain to play, and this is something that could have been addressed in the weapon switch, but it really isn't, being based around more vague concepts of "safety" or "larger risk/reward" than something actually sensible like comboing versus camping. At least then it could claim to be legitimate versatility.

Aside from that, you have the extremely bad Forward Smash and Nair in the set, occupying some pretty terrible inputs. Given how little the buff and the weapon switch honestly do to help the set, if anything making it worse, these would have been better suited to their specials. Even ignoring that though, the Forward Smash's use of the props is absolutely bizarre, especially the car which for some reason you can squeeze oil out of like an orange. Tirk, that is not how cars work, they are not fruit, and I can't believe I have to tell you this. Even in cartoonish material, when a car is under extreme pressure it just explodes(as the full charge does), not spurt oil everywhere. Aside from that it basically has no playstyle relevance aside from being an arbitrary tether point in the car state, and the oil slick does absolutely nothing for the set whatsoever. The sign is a little less offensive, but still awkward on the input and I don't see why it can't just be used as a battering item, why do you have to ball it up into a Zamus suit piece? The Nair actually is the worst move in the set though, there's absolutely nothing in her established powers that would imply that she can randomly create these tethers/pull effects out of sheets of paper, she's strictly been using wires up until this point. If she actually can use this stuff, at least bother to explain why, and no, not in a later post, in the actual set please and thank you.

Lastly, this is a set that very very clearly wants to be Jojo, between the concept obviously being based off stands and the random Jojo references in the Forward Smash/throws. Well, it fundamentally fails at that, for a few reasons. One, Jojo characters are creative and make the best of their powers, while Charlotte here is busy awkwardly flipping between instruments and not creating a consistent plan with this honestly really easy to work with power set, this is a stronger version of what Jolyne had in Part 6 and you would know how much great stuff she does with her power in the manga. Two, Jojo characters are very self contained, they don't throw out random arbitrary jokey references to other characters like randomly using the car/stop sign of a villain from an entirely different chunk of the story unrelated to them. Perhaps the most offensive is the baseball throw, being again a callback to one of Jolyne's best moments in Part 6, but just arbitrarily being slapped onto this character entirely because "oh look MYM you like Jojo well here's a cool thing this Jojo character did please love me." The character isn't technically a Jojo character yes, but if you want to really respect Jojo the best thing to do would be to imitate the highly intelligent uses of powers and style of humor, not throwing out random references to things Jojo characters actually did like some 12 year old internet user would spout memes.

Funny Valentine
In stark contrast to the previous set, I think Funny Valentine is absolutely brilliant. You make some very cool implementation of his stand's alternate universe mechanics, transporting in clones via a fairly simple and consistently used flag prop and creating a huge risk reward to creating clones like this, not in a somewhat awkward way like the Etranger duplicates of "KO one KO the other", but rather just having them share damage and serve as hazards to each other if they touch each other, or better yet the utilization of the amazing blood puddle mechanic, where the blood of the normal character hurts the copy and the copy hurts the character. Not that Funny Valentine's own duplicates aren't fun, whether he's using them to set up for combos, which are made a lot more interesting by the presense of the far more powerful D4C in the midst of all them, storing them up to release at convenient times, playing off them in very cool ways in that grab game. Perhaps the body swap is too good for healing, but it actually adds a lot of strategy to the mechanic, as you want to deploy duplicates at more varied points in the match rather than all at once to heal with them. There are a lot of really great balancing acts in the set and while it appears redundant in some spots on a first read, when you bother to actually analyze it in more depth stuff like the Bair/Dash Attack actually have very different uses for each other, and the same is true of the Smashes.

What really makes me love the set is how it utilizes the character in a way that feels so true to Jojo. He doesn't automatically have a huge field advantage/set up, which is what Jojo characters usually want to make their powers work well, but Funny Valentine proves how sheerly versatile he is by doing some insanely clever and effective things using only his barely above human body, some copies of said body, and his stand's super strength in conjunction with his ability. I'm surprised how much mileage you get out of such a simple flag prop too, in the throws and in that awesome Nair which seems like just a Mario Cape at first, but the more you think about it the more complex and interesting the uses of it get. I do wish that Nair had a hitbox, and there are a couple other niggling complaints I have with the set, mostly that the Forward Smash feels a little bit less important when it only really has the function of creating blood puddles when the Up Smash/Down Smash do that too while having a lot more too them, and perhaps the flag in Up Special is a bit unfun to play against due to the grab difficulty(which really should just be regular or slightly less than normal) and stalling properties(which have a purpose when D4C and duplicates exist, but could maybe be reduced to 2-3 seconds). Regardless Kat, this set is fantastic and by far the best one you have ever made.

By the way, I think you have me beat for the best Final Smash in the contest. I have never wanted to use any Final Smash as much as that one, its such a fun implementation of that upgrade to D4C.
 
Last edited:

Bionichute

Smash Champion
Joined
Jun 30, 2012
Messages
2,151
Mr. Dark


Mr. Dark is one of the many villains Rayman has faced during his adventures, and he is considered one of the most popular ones by far, having a cool design, but has less backstory than most characters in the series. A wicked mage, Mr. Dark used evil magics to steal the Great Protoon, which keeps the world in balance.


Stats:

Size: 6/10 (Mr. Dark is only slightly bigger than the medium sized Rayman.)
Weight: 3/10 (Mr. Dark is incredibly light, considering he is most likely just a cloak with some hands.)
Speed: 7/10 (Mr. Dark is also very fast, mostly using his magic to hover above the ground quickly.)
Jump: 8/10 (Using his magic, Mr. Dark can propel himself into the air very well.)
Air Movement: 9/10 (Mr. Dark is very adept at moving around in the air by using his magic.)


Specials:

Neutral Special: Double Fireball:

Mr. Dark holds up his hand and shoots two fireballs out of it. The Fireballs have a crisscrossing effect to them, with one crossing over the other every half second. The fireballs are rather big, being about the size of a Mr. Saturn, and leave a Mario and a half amount of space in-between before each crisscross. The amount of space lets most of the Brawl cast (Aside from larger characters like Bowser and Dedede) move through it, making it a surprisingly dodgeable move. The fireballs each cause 15% damage, and 30% damage if they hit at the exact moment of crisscrossing. The fireballs travel an incredible length, about a full Final Destination before dissipating.


Side Special: Flame Prison:

Mr. Dark holds his hand upward, and shoots two smaller fireballs, which go in an upward arch, with the closest fireball landing about 1.5 Stage Builder blocks forward. The fireballs have a large gap in-between them, about a full Stage Builder block. When the fireballs land they’ll create two large pillars of fire, rising about 1.5 Marios in height. If the two fireballs land on either side of an opponent, the pillars will surround the opponent and close in on them, eventually completely closing in around them, dealing around 32% damage with some incredible upward knockback. During this, the foe cannot escape at all, as trying to jump over the flame pillars will simply cause them to rise up and match the trapped opponent’s height. The overall time for the pillars to take to close in on someone totals in at around 2.5 seconds. On their own, the flame pillars will only cause 16% damage with minor upward knockback to an untrapped opponent.


Up Special: Shape Shift:

Mr. Dark flicks his cape around himself, morphing into a lightening covered ball of darkness. While in ball form, Mr. Dark can fly around in free flight for around 5 full seconds. The ball is about 1/3rd the size of Pikachu’s Final Smash, and flies around at around half of the speed of the Final Smash, making it incredibly fast for a recovery move. The move, on contact, causes 3% damage and a bit of light knockback to it, but if the A button is pressed during the move, it will cause lightening to surge through the ball for a brief second, boosting the attack to 9% damage with surprisingly good knockback. If Mr. Dark is hit while in the ball, it will knock him out of the ball form and send him into prone. Mr. Dark can also cancel out of the ball by hitting the B button for a second time, but this will also send him into prone.


Down Special: Crystal Ball:

With a flick of his wrist, Mr. Dark summons 3 crystal balls that fly around him once. The rotation takes around half a second to fully complete. The crystal balls can capture any projectiles that hit it while they spin. If a projectile hits one of the balls, the other two will shatter, leaving the last ball to float in front of Mr. Dark. Mr. Dark can hold the ball in front of himself until he is hit, or until an attack button is pressed. Doing this will cause that ball to shatter, releasing the projectile, which acts as it does when used by another character.


Standards:

Jab: Fireball:

Mr. Dark flicks his wrist, shooting out a small fireball about the size of a Pokeball. The fireball flies forward a good distance at about Pikachu’s run speed, and goes about 1.5 Stage Builder blocks before disappearing into thin air. The fireball does only 4% damage, with barely any knockback to it, but it can be used mainly to distract enemies and deal light damages from far away.


Forward Tilt: Fire Wave:

Mr. Dark swipes his hand upwards, creating a wave of fire shaped like a crescent, roughly 2/3rds as big as Mr. Dark. The flame is fairly powerful, doing 8% damage with decent knockback, but it travels very slowly, and only goes about 1 Stage Builder block before disappearing. However, due to its slow movement, the wave can be used as a decent trap projectile, as it stays in the air long enough for opponents to stumble into it.


Up Tilt: Flamethrower:

Mr. Dark holds his hand directly above his head, and shoots a direct stream of fire from it, which is about as tall as ½ of Ganondorf. The stream of fire can be used for as long as the input is held. The flamethrower causes a stream of 2% damage, and is able to juggle opponents for around 5 or 6 hits, equaling around 10 or 12% total direct damage. The flames from the flamethrower linger in the air for a bit after the button is released, adding some more utility to the attack. The moves main use is to keep opponents in the air away from Mr. Dark so he can run off and set up some more moves.


Down Tilt: Fire Trap:

Mr. Dark places his hand on the ground, and ignites it, creating a small patch of fire on the ground that is about 1/3rd of a Stage Builder block big. Mr. Dark can have up to 3 of these patches on the stage at once, allowing him to edge guard fairly decently and easily prevent foes from coming near him. The traps will explode on contact with an opponent, causing 7% damage with minor knockback that could also double as minor stun. The traps can also stay on the stage forever, and only disappear when more than three are on the stage, or when an opponent touches one.


Dash Attack: Spin Attack:

Mr. Dark stretches out his hands outward and ignites his hands, which does 9% damage on contact, and minor upward knockback, just enough to launch the hit opponent up above Mr. Dark’s head.


Smashes:

Forward Smash: Fire Clap:

Mr. Dark slams both of his hands together, creating a large blast of fire from them. The fire blast is incredibly large, about half as wide as Bowser, and going as high as Ganondorf. The blast also does an amazing amount of damage, doing 26% damage at lowest charge, and 36% at highest charge, but the move is fairly laggy, taking about half a second to fully complete the animation and send out the hitbox. It also takes a bit longer to charge the attack, but only by a few half seconds. The move also causes a great amount of knockback, being able to KO at around 75% at highest charge.


Down Smash: Eruption:

Mr. Dark places both of his hands on the ground, and creates two large pillars of flames on both sides of him. The pillars are rather large, being about 1.5 Ganondorfs tall and 1 Ganondorf wide. The pillars are incredibly powerful when they burst upward, doing 28% at lowest charge and 38% at highest charge. The move also has amazing upward knockback when first coming out, being able to KO at 70%. The flame pillars will stay out of the ground a while after the move is activated, giving it some heavy end lag, but the hitboxes will still remain until the end. If the pillars are touched after rising, they will only cause roughly 12% damage with decent knockback.


Up Smash: Burning Explosion:

Mr. Dark raises his hand above his head and shoots a large fiery explosion out of his hand. The explosion is fairly big, rising about a Bowser tall and stretches about 2/3rds of Bowser. The explosion is fairly powerful, doing around 24% at lowest charge and 34% at highest charge. The knockback is also great, doing immense upward knockback that can KO at around 80%. After the animation of Mr. Dark shooting out the explosion is finished, the explosion will stay there for a bit, causing up to 3 extra mini-explosions to damage opponents for 15% damage.


Aerials:

Neutral Aerial: Flame Pulse:

Mr. Dark creates a large burst of fire around him, which is about as big as Bowser, spreading out around Mr. Dark. Since the burst goes all around him, it winds up being a very good move to protect from aerial attackers. However, using this move halts all momentum Mr. Dark had while in the air, so using the move at the wrong time can result in death. Any opponent who comes in contact with the blast will take around 13% damage and some brisk knockback in whatever direction they were hit.


Back Aerial: Fire-Port:

Mr. Dark disappears into a burst of fire, and then reappears 1/3rd of a Stage Builder block behind where he originally used the move. The move is mainly used for avoiding attacks, or getting out of tough situations, but the move can also damage as well, creating an explosion as big as Dark himself when used. The explosion does 9% damage if it hits when first being used, and 3% damage after the move is used, as the cloud remains on the field for a bit after Mr. Dark has teleported.


Down Aerial: Lightning Trap:

Mr. Dark points his finger downward, shooting off a small lightning bolt that travels in a 45 degree angle from where Mr. Dark originally shot it. The bolt itself is about as big as a Pokeball, and travels at about Meta Knight’s dash speed. If the bolt hits the ground, it will cause a patch of electricity to appear on the ground, about as big as Dark’s own flame trap, which behaves similarly to it as well, as Mr. Dark can only have 3 out at once, and they can last forever. However, the lightning trap has several different effects, as touching it will cause 6% damage and minor stun. The lightning bolt has these same effects while it has been shot as a projectile, but instead of minor stun, it will instantly cause the hit opponent to go into prone, making it very good at edge guarding if used right.


Forward Aerial: Floating Flames:

Mr. Dark reaches out with his hand, and ignites it, creating a floating ball of fire that is about as big as a Pokeball. The fireballs mainly act as aerial versions of the grounded fire traps, but serve a more important role in keeping opponents away from Mr. Dark, as they have a hitbox larger than you would expect, and when an opponent enters that hitbox, it will cause the fireball to explode, dealing around 7% damage with minor knockback, and a bit of stun. This move is also very good at edge guarding. Like the rest of his traps, Mr. Dark can only have 3 out at a time.


Up Aerial: Flame Shot:

Mr. Dark holds his hand up above his head, and then shoots a ball of flame, which explodes after travelling about 2/3rds of a Stage builder block. The shot is fairly large, about the size of a Mr. Saturn, and the explosion is about the size of one of Samus’ missile explosions. The move is mainly used to prevent attacks from above, or to juggle opponents, as it has rather good upward knockback. The shot will also prematurely explode if it hits an opponent before reaching maximum distance, and will cause 15% damage.


Grab Game:

Grab: Crystal Prison:

Mr. Dark snaps his fingers, creating a small flash about half a Stage Builder block in front of him. If an opponent gets hit by the flash, they will suddenly become trapped in a large crystal ball. The pummel has Mr. Dark Squeezing his hand, causing the crystal ball to squeeze as well, causing 3% damage to the trapped opponent. The grab requires a good amount of struggling to break out of, just a bit more than the usual grab takes.


Forward Throw: Curse of Speed:

Mr. Dark snaps his fingers, causing the crystal ball to burst into a black flame and fling the opponent forward, doing 14% damage. Once the opponent has recovered from the throw, they will now find themselves forced to use their dash non-stop, not being able to stop or slow down for 4 seconds. Opponents can still jump and attack, but will immediately return to running once they touch the ground or finish attacking.


Back Throw: Curse of Slow:

Mr. Dark snaps his fingers, filling the crystal orb with flames, and causing the opponent to fly behind Mr. Dark, and do 12% damage. When the opponent recovers, they will find that their speed has been cut in half, rendering fast characters like Sonic to moving at a brisk pace, and slow characters like Ganondorf to be reduced to a snail’s pace. It isn’t just movement speed that has been reduced, as attack speed and jumping speed has also been cut in half, rendering opponents mostly defenseless. The curse, thankfully, only lasts 3 seconds before going away.


Up Throw: Curse of Reverse:

Mr. Dark snaps his fingers, causing the crystal trap to burst with a black energy, and send the trapped opponent flying upward, doing 13% damage. Once the opponent recovers, they will find that all of their controls have been reversed. Up is down, left is right, and the standard attack button is now the special attack button. This move can be very disorienting to the opponent, and allows Mr. Dark to make a quick escape. The curse lasts around 4 seconds before lifting.


Down Throw: Curse of Darkness:

Mr. Dark snaps his fingers, creating a flash of dark light in the crystal ball, and knocking the opponent downward and doing 15% damage. Once the opponent recovers, they will find that a shadowy clone of themselves with bright yellow eyes has spawned about half a Stage Builder block behind him. The clone will follow the copied opponent, doing exactly what the opponent does, even copying attacks. If the clone reaches the opponent, it will explode into dark flames and damage them for 20% damage. The clone cannot hurt other opponents with direct contact, but any attacks they copy will hurt, and will hurt Mr. Dark as well. The clone lasts around 6 seconds, giving it a good enough time to catch the copied opponent.


Playstyle:
Mr. Dark's standards, specials, and aerials have a very simple purpose: Racking up damage while keeping Mr. Dark as far away from opponents as possible. The traps are by far the best choice for this, as a lot of them can be placed on stage, and can rack up a decent amount of damage very quickly. However, Mr. Dark's projectiles can also be used effectively for this, as the tend to move faster, but do slightly less damage and are easier to avoid, but Dark firing a bunch of them can easily mess up quite a few opponents. Mr. Dark's smashes are his main killing moves, being incredibly powerful, but with an incredibly short range to them, which, of course, requires Mr. Dark to get in close to the opponent, which of course is a very dangerous for him. However, his throws can negate the danger, as they can make opponents stumble into the attacks with the status effects.
 
Last edited:

darth meanie

Smash Journeyman
Joined
Jun 6, 2008
Messages
452
Heat Man

Heat Man I found to be a very meh set to be completely honest. Healing is always something that you have to be careful getting into, although he can't heal too much and has other aspects that sort of balance that. I do worry a little bit about the ease at which he can cover the stage with hitboxes, especially on smaller stages, but then there are platforms to consider as well which helps things. The main complaint I have to level at this set though is how there's such a generic, "makes everything you do better" mechanic that doesn't have the focus or interesting possibilities that one might expect from it. There's no downside to not being at blue flames all the time, except maybe taking more self-damage from his recovery move. The fact that so many of the moves have super special one-off bonuses for being at blue flames hurts as well, making it feel almost tacky.

Tenshi

Tenshi is a set that I enjoyed, much to your surprise. There were a few things here and there that I did not like... the throw game particularly urked me, what with the almost useless forward throw with how often you'd have to regrab to make use of it, or the other throws that placed severe limitations on opponents that seem outright unfun. The key mechanics of earthshaking and collapsing pillars onto foes has a lot of fun to it though, and plenty of potential for user-end creativity, which I particularly appreciate. The mechanic of changing based on the opponent's playstyle is a bit awkward, and I feel it could have been implemented better if it was less granular... there are a lot of uses of percentages and generic, marginal increases, but it's impossible to tell just how it would work in a real match when we can't even really say what a likely percentage any one opponent would accumulate, which makes it really feel more like an easter egg to the set. I also don't really like that it has nothing but positive changes, which makes her just plain stronger over time with no drawback.

Chill Man

There's definite improvement to be seen here, although there's still a ways to go. You do a good job overall of keeping in the theme of the character, using abilities that play off of what his powers are and keeping animations consistent rather than just giving him magical ice powers that I feared such a character might succumb to. There are some balance concerns... 1/10 movement speed reduction for one second is the very epitome of a trivial debuff to place on an opponent. There is playstyle here, simple as it may be, but simple can be good too. Overall, easily the set I've enjoyed the most out of you yet.

Divinity of Pride

As I just now mentioned with Heat Man, there's a certain amount of concern I take when it comes to healing focused characters, particularly characters as focused on it as this one is. Using healing as a sort of meter mechanic is an interesting direction to take it though that I feel confident has never been taken before. I'm not entirely convinced the buffs that these attacks gain are worth the 10% self-inflicted damage (or unhealing, techinically) though, which has me a little concerned. Perhaps if the amounts he could heal and the amount of healing his attack used up were both reduced, I could see myself liking this set a little bit more. Other than that though, it's your standard projectile focused character, which isn't all that much a bad thing. The large number of different projectiles with different trajectories are reasonably fun to imagine playing with. For a one-day set, this sure isn't bad at all.


More reading and comments to come.
 

Katapultar

Smash Lord
Joined
Nov 24, 2008
Messages
1,251
Location
Australia
Tirk, that is not how cars work, they are not fruit.
I love this.


Funny Valentine
In stark contrast to the previous set, I think Funny Valentine is absolutely brilliant. You make some very cool implementation of his stand's alternate universe mechanics, transporting in clones via a fairly simple and consistently used flag prop and creating a huge risk reward to creating clones like this, not in a somewhat awkward way like the Etranger duplicates of "KO one KO the other", but rather just having them share damage and serve as hazards to each other if they touch each other, or better yet the utilization of the amazing blood puddle mechanic, where the blood of the normal character hurts the copy and the copy hurts the character. Not that Funny Valentine's own duplicates aren't fun, whether he's using them to set up for combos, which are made a lot more interesting by the presense of the far more powerful D4C in the midst of all them, storing them up to release at convenient times, playing off them in very cool ways in that grab game. Perhaps the body swap is too good for healing, but it actually adds a lot of strategy to the mechanic, as you want to deploy duplicates at more varied points in the match rather than all at once to heal with them. There are a lot of really great balancing acts in the set and while it appears redundant in some spots on a first read, when you bother to actually analyze it in more depth stuff like the Bair/Dash Attack actually have very different uses for each other, and the same is true of the Smashes.

What really makes me love the set is how it utilizes the character in a way that feels so true to Jojo. He doesn't automatically have a huge field advantage/set up, which is what Jojo characters usually want to make their powers work well, but Funny Valentine proves how sheerly versatile he is by doing some insanely clever and effective things using only his barely above human body, some copies of said body, and his stand's super strength in conjunction with his ability. I'm surprised how much mileage you get out of such a simple flag prop too, in the throws and in that awesome Nair which seems like just a Mario Cape at first, but the more you think about it the more complex and interesting the uses of it get. I do wish that Nair had a hitbox, and there are a couple other niggling complaints I have with the set, mostly that the Forward Smash feels a little bit less important when it only really has the function of creating blood puddles when the Up Smash/Down Smash do that too while having a lot more too them, and perhaps the flag in Up Special is a bit unfun to play against due to the grab difficulty(which really should just be regular or slightly less than normal) and stalling properties(which have a purpose when D4C and duplicates exist, but could maybe be reduced to 2-3 seconds). Regardless Kat, this set is fantastic and by far the best one you have ever made.

By the way, I think you have me beat for the best Final Smash in the contest. I have never wanted to use any Final Smash as much as that one, its such a fun implementation of that upgrade to D4C.

...am I hallucinating? Is this a dream? Only there would I have ever expected to receive the same verbal bliss that was once applied to Sakuya and Sho - this comment must be Made in Heaven!

I originally had the Up Special's grab difficulty so high because you could use it to contain a foe's alternate counterpart for a long time, like in the event where you want to take off some of heat from fighting 2 opponents, but then again you can just get the same effect from damage-racking an opponent. This also gives Valentine more to work towards. Edited the grab difficulty so it's effectively halved, but SWF clustered a few paragraphs from the aerial and grab attacks, so you'll have to excuse that. Also, I could go back and give Valentine's N-air a sweetspot right in front of him, but I'd have to take some time to figure out what it would do (maybe something simple like 10% and knockback that KOs at...250%, due to just being a flag).

Also, I still think Don Thousand has the better Final Smash. :]
 

darth meanie

Smash Journeyman
Joined
Jun 6, 2008
Messages
452
As a heads up, I edited a few things on Great Dusknoir to address some issues that were pointed out.

  • Up Special only absorbs his own projectiles
  • Down Tilt, and by extension Up Throw have been reworked to prevent stage spiking / easy suicide KOs
  • Down Special now wears off after eight seconds
 

MasterWarlord

Smash Champion
Joined
Aug 24, 2008
Messages
2,902
Location
Not wasting countless hours on a 10 man community
MR. VILLIAN

I went to rewatch this guy’s boss video in his sole non cameo/remake role, as I remembered you spamposting it during MYM 13 for the original Mr. Dark. The extent of what he does in the boss “fight” is the Neutral and Side Special, along with summoning the old bosses from the game. Apparently he –can- create shadow duplicates like in the dthrow, but I don’t see where he has the power of a magic crystal ball, electricity, or the random status effects presented in the other throws. Given how little he does, he probably should’ve just summoned the other generic bosses, as given how soulless they are they would never get sets for themselves. I will say that it was correct to mostly extend his powers in the direction of fire, as despite his name fire really seems to be the only thing he can really do.

The moveset has (unintentional) flow with basic camping and traps, functioning as a rudimentary MYM 5 set. The dthrow and dair/dtilt/fair probably should’ve been specials given their importance, and the traps are actually very strong due to how they last forever. The wording makes it sound like they don’t even expire when they hit a foe, in which case Mr. Dark can camp inside of them, though I can’t be sure if it’s bad wording or not. The traps have very few discernible features between them, and could’ve easily been combined, as with many of the set’s very thoughtless inputs. Dtilt isn’t sure whether the cap is 3 or 5 traps, and Up Special can be buffed with a “tap of A” for absolutely no disadvantages. Why it isn’t that powerful as the default, who knows.

The set actually flows more than most of yours due to camping and trapping being the single easiest playstyle to do, but just simply having traps and projectiles is far from enough to catch my interest or most others. These things need more actual synergy with each other and differences from one another. Regardless of having a more coherent gameplan than Pompy, Pompy was executed noticeably better.

PHIL FISH

The playstyle summary here is a fair bit more ambitious than most people at your level, but it comes off as more of a strategy guide than anything. While my personal playstyle summaries can sometimes come across this way, this is largely due to me spending towers of text within the actual move descriptions about how moves interact. Several things you say in this summary could apply to any character.

Yes, the moveset is immensely better since the last iteration where it randomly turned Smash Bros into another game and prevented foes from playing the game. The moveset is mostly okay for numbers now, and the worst I would say that remains is the dthrow stunning foes for 2 seconds. Even then, the foe is invulnerable for those 2 seconds and can’t be regrabbed, so could be worse. The current Neutral Special is an okay hook, though it would be nice if you could have made something more organic for destroying it yourself than a single random attack (fsmash) being able to damage it with a hard interaction.

The point is more that most of the inputs do nothing and have little thought into them. This character may be somewhat difficult, but it’s not a wonder you can barely talk about any inputs in the playstyle summary when most of them are so bland. I know you can do better for standards and aerials based off your recent Ridley set, though to be fair this is a much more difficult character than Ridley to make up generic melee moves for. If you can’t find more than 2 lines to say about a move, it will be bad without fail.

ACTUAL CHARACTER FROM CYBERING ROLE PLAY SESSION

There’s really nothing here that can be said that FA didn’t say much better. Four poorly organized forms of the moveset exist on most moves, told to the reader in largely random orders with little to no thought given to coherent animation. Despite have so many versions of each move and doing so many tacky animations, little to nothing is done to actually prevent the moves from being functionally generic. While the tacky version would probably be empirically worse than this one based off some of your previous works, there is still the argument for the generic one winning out as the worst of the two just due to being entirely forgotten in its raw mediocrity.

That’s not to say the moveset is not plenty tacky as is, introducing powers down the line that only people who played the game would get, making implications that she doesn’t even need her stand to use the tentacle wire powers, and making it not all that useful in general when it does show up. Yes, the mechanic does have some similarity to how the direct fighting stands are done in Heritage to the Future, but in that game they will never die in an actual realistic match and can be unsummoned and resummoned on the spot to refresh them, unlike the pushover that is Aphex Twin. You can’t play the cards you’ve played and then get your numbers wrong.

Contrary to what you see here, a hell of a lot of people actually do dismiss the complaint of generic to this day, they just aren’t me. Those people, however, can’t do the cancerous tacky things you’ve done in this moveset and then still claim to be generically in-smash with a straight face.
 

Smady

Smash Master
Joined
Apr 29, 2007
Messages
3,306
Location
K Rool Avenue
MYM15 User Rankings - Update 5
Post #277 - Post #353

Raw Data
FAQ


darth meanie
Movesets: Sherry Cromwell, Chao,
Goodra, The Great Dusknoir, Fate, Vivo
231

MasterWarlord
Movesets: Sloth, Thrall, [Royal Sticker Bowser], Shoot the Rabbit, K. Rool, Fugu, Bashmaster, Zant
218

FrozenRoy
Movesets: Reimu, Marisa, Lucemon, Kaguya, Youmu, Ruby, Weiss, Blake, Yang, Iku, Shadow Naoto, Heat Man, Tenshi, Night's End Sorcerer Remix
197


ForwardArrow
Movesets: Don Thousand, [Usami], Three, Divinity of Pride

165

Bionichute
Movesets: Swap Force, The Lich, Shy Guy, [Cartoon DK], Polygon Man, Pompy, Armored Toad, Mr. Dark
125


ChaosKiwi
Movesets: King of All Cosmos, Lion-O, Jet Jaguar, Clockwork, Zatch Bell, Astrodactyl, Borth-Majar, Holly Summers, Piedmon, Isabelle, Quick Man, Chill Man
81

Katapultar
Movesets: Leviathan, Funny Valentine
64

FlagshipsOnFire
Movesets: Chester Bennington, Rain
61

JOE!
Movesets: Zoroark, Barbaracle, Goodra

35

crazyal02
Movesets: Commander Video, Batman, Ratchet & Clank, Ridley, Gomez
33


Smash Daddy
Movesets: Lord Fredrik
31

Dryn
Movesets: Chozo Warrior

31

tirkaro
Movesets: Charlotte Evergreen
31

BKupa666
Movesets: Skowl
30

RADSheikah
Movesets: Crash Man
30

Getocoolaid
Movesets: Doopliss, Tangela, Snorlax, Roman Centurion
30

Kholdstare
5

StaffofSmashing
Movesets: Mach Rider
1

Peeup
1

Score Breakdown
Moveset - 30 points
Joke Moveset - 10 points
Comment - 5 points
MYmini - 4 points
Post - 1 point

Bolded sets are new this update.

Joint movesets - made by more than one author - are counted towards both users.

Bracketed sets are joke sets.

The point you gain for a post is negated by anything higher - for example a post of one comment is worth five points.

I will not give any points out to posts that have an infraction.

Update 5 Summary

I left this update too late, thanks to FA and Roy for helping double-check my numbers. This was an incredibly active few weeks, one of the most active in recent MYM history, we got around 30 sets, or 10 each week. The overall rankings were drastically changed in a few places by this update, especially in the top tiers. Many comments made for huge scores all around the board. 3 new users were added to the rankings. 15 authors posted movesets this update. The next update's likely going to be the last - please note that only activity (sets, comments) during the submission period counts for this user rankings.

MYM15 User Rankings - Total Scoreboard
 

FrozenRoy

Smash Lord
Joined
Apr 26, 2007
Messages
1,260
Location
Las Vegas, Nevada
Switch FC
SW-1325-2408-7513
With the User Rankings up, I would like to announce MYM15's ending date:

July 14th

Submission period will be ending on July 14th.
 

tirkaro

Smash Champion
Joined
Jun 24, 2006
Messages
2,808
Location
but a pig in the sun
Perhaps the most offensive is the baseball throw, being again a callback to one of Jolyne's best moments in Part 6, but just arbitrarily being slapped onto this character entirely because "oh look MYM you like Jojo well here's a cool thing this Jojo character did please love me." The character isn't technically a Jojo character yes, but if you want to really respect Jojo the best thing to do would be to imitate the highly intelligent uses of powers and style of humor, not throwing out random references to things Jojo characters actually did like some 12 year old internet user would spout memes.
Thanks for the (long) comment
But I do feel the need to pretentiously clarify *SNORTS AND PUSHES UP GLASSES* that this was based on an actual event from my sexy cybering roleplay session, and not just a random epic Jojoke for the sake of it as you seem to imply. (As with about 97% of the set)
Well besides the quote itself, but I couldn't resist.

And they're supposed to be dodgeballs, not baseballs.
 
Last edited:

FlagshipsOnFire

Smash Rookie
Joined
Jun 14, 2014
Messages
9
Location
NYC...I wish
The move sort of loses steam once it gets to the aerials, and you completely neglect to include a grab-game to the set at all, which is a shame as I imagine Mortal Kombat characters to have quite, er, colorful grab-games.
The thing is, Mortal Kombat's aerials are usually pretty bland. The most flair anyone gets is usually the air throw, which Rain doesn't even have in the games. I put the air throw in to add to his "master of misdirection" playstyle.

Also, whoops. I didn't realize I'd forgotten the grabs. However, I don't know what proper procedure is on adding them. Please let me know whether I should edit the grabs in or put them in a separate post.

Thanks for the criticism. In the meantime, I'll try my hand at a joke moveset.
 

Katapultar

Smash Lord
Joined
Nov 24, 2008
Messages
1,251
Location
Australia
The thing is, Mortal Kombat's aerials are usually pretty bland. The most flair anyone gets is usually the air throw, which Rain doesn't even have in the games. I put the air throw in to add to his "master of misdirection" playstyle.

Also, whoops. I didn't realize I'd forgotten the grabs. However, I don't know what proper procedure is on adding them. Please let me know whether I should edit the grabs in or put them in a separate post.

Thanks for the criticism. In the meantime, I'll try my hand at a joke moveset.
You'll want to edit the grab into the set so it's there for when someone reads it. Going back to make edits is never a bad thing.
 

FrozenRoy

Smash Lord
Joined
Apr 26, 2007
Messages
1,260
Location
Las Vegas, Nevada
Switch FC
SW-1325-2408-7513
As an additional note, some images broke on some sets (Most prominently Iku and Tenshi) because I forgot to move them off Photobucket, I will be fixing this tomorrow.
 

Davidreamcatcha

Smash Ace
Joined
Feb 9, 2011
Messages
629
SIDESHOW BOB


What Moriarty is to Sherlock, what The Joker is to Batman, Sideshow Bob is to Bart Simpson. Robert Underdunk Terwillinger, otherwise known as Sideshow Bob, is a recurring villain on the long-running TV series, The Simpsons. Bob is a former sidekick to Krusty the Klown who went crazy and framed him for armed robbery. When Bart got Bob arrested for his crime, the man promised vengeance on the boy and went about inserting himself into his life, vigorously stalking him and attempting to murder him at every possible opportunity. Bob's skills as an acrobat and sadistic bloodlust aid him in his mission, and he reappears in Bart Simpson's life as often as he possibly can to attempt to maim him.

What makes Bob such a compelling villain in the show is that he actually poses a legitimate threat. While Mr. Burns is of course the most well-known and most recurring antagonist for the family, Sideshow Bob manages to be a character who is just as - if not moreso - hilarious while still making himself known to be dangerous. This is most promient in the episode "Cape Feare", where Sideshow Bob is able to make audiences laugh in some of the best jokes in the series, but is still able to leave audiences with the impression that Bart could be sliced into bits by Bob. The first 3 episodes - which constitute a trilogy - are absolutely recommended for an understanding of the character (though the episode "Cape Feare" is by far the most essential). But all of the episodes that feature him during the Simpsons' good period, and make up the inspiration for this set, are listed below.

* Krusty Gets Busted
* Black Widower
* Cape Feare
* Sideshow Bob Roberts
* Sideshow Bob's Last Gleaming
* Brother From Another Series


STATISTICS


Fall Speed: 9
Traction: 9
Size: 8
Speed: 7
Weight: 6
Jump Height: 5
Air Speed: 2


Sideshow Bob himself is above peak-human in terms of speed and power, due to the rigorous training brought on by the Krusty the Clown show and his natural acrobatic abilities. This leads to him having above average stats, similar to the cartoony humans already present in Smash.

Idle
Sideshow Bob stands at a slight hunch, knife held in his right hand - he will sometimes flip and juggle it in one hand. Occasionally, he will hold it behind his back and begin whistling - bouncing on his heels as he does so.

Walk
This is a fairly standard walk as Sideshow Bob begins to stalk forward, still flipping his knife and not stopping if he was in the middle of it.

Run
Sideshow Bob gets serious, beginning to hold out his knife in an offensive position as he increases his pace.

Dashing
Bob enters the traditional serial killer jaunt, raising it above his head as madly dashes forward.

Jump #1
Sideshow Bob does a simple jump into the air, bouncing on his heels.

Jump #2
Grabbing his knees, Bob flips upwards with acrobatic prowess.

Crouching
Sideshow Bob gets down on one knee, holding his knife at the ready.

Dizzy
He stumbles back and forth, attempting to swing out his knife even now - with an occasional "Nyaugghhh...".


SPECIALS

Neutral Special: Roulette
For .30 seconds, Sideshow Bob begins digging in his pocket, looking for a gun. He then pulls something out, which may or may not be a gun...this produces an entirely random effect if the button is just tapped and nothing is done with it. However, the Bob player can determine what happens if they press a certain button/input during the time when Bob is looking in his pocket.. Regardless of what happens, this move offers reliable projectiles and is an excellent way to mindgame opponents, adding on to your approach game. The options/buttons below all assume you are using the Gamecube controller (as you should be).
  • Sideshow Bob extracts his gun and points it forward, releasing a bullet that travels across the stage dealing 10% damage and good knockback. The bullet is the speed of Shiek's needle, but the startup/end lag for this move is similiar to that of Falco's blaster. Bob pockets the gun after shooting the one bullet. This can be triggered by pressing the Special Input (the B button) again before he fires.
  • Sideshow Bob extracts his gun like normal - but quickly realizes that the gun is out of ammo, so he quickly pockets it. This is not triggerable with any input - why would you want to? But it will come up in random chance and is moreso helping the following mindgames to be more believable.
  • Extracting his gun, Sideshow Bob attempts to fire before realizing the gun is empty - with an identical animation to the above. Having an idea, he quickly swings the gun forward instead, leaning forward to get very good melee range and dealing 15% and heavy knockback, being a very good killer at high percents. This has superarmor frames after he finds out the gun is empty, meaning this is an effective counter-attack Adding on to this, this has the same sound/animation and startup as the gun being fired initially, and can fool many foes who seek the opportunity to punish you for your gun. This can be triggered by pressing the Standard Input (the A Button).
  • Once again extracting his gun and pointing it forward, Sideshow Bob decides that this is a useless idea and instead slides forward 1.5 platforms at his dashing speed with his gun at his side. He is a grab hitbox during this time, and if anyone touches him, he will grab them and enter his normal grab-game. This is an excellent opportunity to land your grab, especially if the foe is predicting a projectile and decides to shield. This is triggered by pressing the Jump Input (the Y button).
  • One final gun maneuver ; Sideshow Bob once again brings out his gun, and believes it to be empty as in the other "empty gun" animations. However, he realizes it isn't and fires with a demented expression, with the projectile having the same properties as the normal bullet. Foes will be expecting Sideshow Bob to pocket it or perform a quick melee, but with this, he can fake them into a false approach where he'll shoot at them. This is triggered by pressing the other Jump Input (the X button).
  • Sideshow Bob attempts to pull out his gun, but ends up pulling out a fish instead! He groans, rolling his eyes before he pockets it. This is triggerable with the Shield Input (the L Button).
  • Bob pulls out the fish once again, but looks determined and lobs it forward as a projectile in an arc. The fish deals 6% damage and travels at the speed of Ganon's walk, making it a good close-range projectile. It disappears harmlessly upon landing on the ground. This is triggerable by pressing the Shield Input (the R Button).
  • Once again pulling out the fish, Bob groans and is about ready to put it away when to his shock - the fish's mouth suddenly opens and a bullet comes flying out! The bullet is identical in every way to those used by your normal gun, traveling at the same speed and dealing the same damage. This is triggerable by the Grab Input (the Z Button).
Down Special: Sneaking Along
A bush appears around Sideshow Bob, as he crouches down into it in .20 seconds, leaving only his hair sticking out (yes, it will appear in midair). Sideshow Bob can now move around the stage like this at his normal speeds, having rather heavy armor - he will take damage, but will not be dealt knockback or stun because of it. Any status effects/poison that had been dealt to him beforehand will continue to be effective. however. He can take up to 25% damage in this stance without being knocked out of it, which can be taken through multiple attacks or one large attack (i.e. a smash attack). Sideshow Bob can exit the bush and attack out of it with one of his standards (outside his dash attack) if he really wants - though the attack will have .30 seconds added on to it's startup time. He can also jump out of it with little lag, meaning it's a very really possibility to contort yourself against an smash before jumping out and hitting with an aerial. The issue here is that while he is low to the ground, he can still be grabbed out of this if the foe wants. This limits the use of this for traversing a dangerous stage, as well as surviving and persisting at high percentages. Still, it's yet another multipurpose sinister tool in Bob's arsenal. If you somehow can't knock him out with all the restrictions he has on this, he automatically comes out in 5 seconds and can't go back into it for another 5. The bush will disappear after he leaves.

Side Special: Rakes
With a bitter chuckle, Sideshow Bob sets a devious trap for the foe...a rake, which he places down in front of himself as fast as Snake's dspec. The rake is very low to the ground, being Bowser's width. Walking into the rake's metal teeth will cause the wooden handle to swing upwards into the victim's face, dealing 11% damage and putting them into prone. As is, this is an excellent way to control the stage and your opponent's movement - with Sideshow Bob able to place down 4 rakes at a time. The issue here is that he himself is as vulnerable to the rakes as the foe is...if not moreso. Sideshow Bob with his tall hitbox and high falling speed is combo fodder for sure, and if he ever loses control of his movement to such an extent as being proned, it will be disastrous for him. The wooden handles of the rake can be walked on without issue (though they will be flipped off if someone triggers the metal handle), and dealing the wooden segment 13% damage will cause it to be destroyed.

Up Special: Cannon
A cannon suddenly appears around Sideshow Bob, with him able to aim it for a very small period of time before he is launched from it, screaming, traveling a Battlefield as a hitbox that deals 15% damage and very good knockback before he plummets, still a hitbox. He will continue to be launched like this until he hits the ground or is hit by the foe. This is rather awful to use offstage, as he is forced to use it at least somewhat vertically - not allowing him to use it horizontally lest he be launched past the stage. But using it onstage allows him to traverse it safely from the air, avoiding all ground hitboxes. Just be sure not to launch yourself too far.

STANDARDS
Neutral Attack: Slash-ity Slash
This is a multi-part jab, similar to many already present in-game already, with the oddity here being that this has 4 hits rather than the three that many are accustomed to. The first part is an upward slash with Sideshow Bob's knife, dealing 2% damage and knocking them upward should you not immediately follow up with the second part, a downward slice that deals 3% and moves Sideshow Bob a small distance forward. The third part of this isn't even an attack at all - Sideshow Bob makes a small leap into the air, bringing him up a crouching Kirby. This can be used to manipulate Sideshow Bob's position for the fourth part of the attack, with him simply hopping a very small distance in place if you don't press anything - but able to aerial DI himself forward to catch an opponent or move backwards to safely space himself. The fourth part has Sideshow Bob land on the ground and start to swing his knife rapidly for multiple hits, similar to Fox's jab hits - each swing dealing 1%.

Forward Tilt: Stab-ity Stab
Sideshow Bob leans forward and thrusts his knife in front of himself, dealing 9% damage and typical knockback/hitstun. This can be angled and is relatively fast - serving as a decent keepaway attack as well as a bread-and-butter melee pressure move, with the fact it has good range only serving to help it. With a double tap of A just before or as the attack happens, he will slide forward a full BFP at his dash speed as he stabs, allowing him to catch foes who are just out of his reach. He will, of course, stop at edges or if he's hit.

Down Tilt: Scritch-ity Scratch
Sideshow Bob reaches his arm out and stabs his knife into the ground, before dragging it on the ground towards himself, acting as a laggy dtilt but having a surprising amount of range. If foes are hit by this, they are dragged towards Bob and dealt 6 hits of 1% (if they're hit by the whole thing) and are left vulnerable at the end, allowing Bob to follow up. If you use this on a foe in prone or tripped, they're dealt double damage and a bit of knockback on the last hit. This move gives you options against proned foes, as well as a spacer that actually draws the foes towards you. If they're poking you with attacks, crouch and use this before taking advantage of their vulnerability to follow up.

If a foe is moving when you hit them with this attack, they're put into prone on that hit - the rest of the hits deal double due to being the proned version. This makes it an exceptionally good defensive maneuver, so when you're in the foe's face and they start running towards you, you have something to catch them with.


Up Tilt: Surprise Knife
Sideshow Bob swipes his knife up in an almost uppercut-like motion, this has unusually short range but is relatively quick to get out. It deals 9% damage and low knockback that sends the foe straight up in the air, allowing you to use it not only as a way to scoop up foes in front of yourself, but it serves as a rather simple way to juggle them to build damage at low percents.

By pressing A before or during the initial hitbox, Bob will use his left arm to extract another knife from the sleeve of his right (his uppercutting arm), and jumps into the air (at the height of his first jump), bringing both knives together then slashing outwards for a wide aerial hitbox around his head. This is a much faster process then it sounds like, dealing about 6% damage and higher knockback than the uppercut. This hitbox is a very good one, covering not only the top of Sideshow Bob's head, but reaching to his sides. You can use this second hit as a way to actually deal knockback to foes who you've juggled with your uppercut, but it's also useful against foes who decided to shield or dodge the uppercut, dealing more shield damage to them or hitting them out of your dodge.

Bob can, of course, use aerial DI during his jump - allowing him to reposition himself closer or farther away from his foes depending on his damage percentage and current strategies.


Dash Attack: Pounce
Sideshow Bob places his knife in his mouth and pounces forward a small distance, arms outstretched in front of himself and functioning as grab hitboxes. If he catches the foe, the foe is dealt 7% and the two are locked into a roll together as Sideshow Bob holds them in place. They roll forward a platform together, before both are put into prone at the same time (facing each other). This is an excellent way to set up an attack, as well as closing distance with you and a foe. It's possible for you and the foe to roll into a rake's metal teeth, which has the foe take the rake hit while Bob is released. If you both roll into the air, this can be used as a killing technique, though Sideshow Bob with his poor air movement and heavy falling speed is far more likely to die first.


AERIALS
Neutral Aerial: Maim
Sideshow Bob spins himself around with his knife arm out, hitting on both sides in a quick maneuver that deals 3 hits of 4%. This is an excellent damage racker if shorthopped, allowing you to deal shield damage on both sides of you. Notably, by holding the input, Sideshow Bob spins in such a way that he temporarily reduces his falling speed by half, potentially allowing himself to reposition himself closer to the edge if offstage. This is a handy tool that gives you quite a good amount of control over your aerial movement - something Bob doesn't normally have. It's also quite adept at laying on pressure, possibly allowing him to move over the foe's traps and hitboxes if he doesn't have enough room to get on the ground and contort himself. Keep in mind that this effect will only work once in midair and will refresh once you touch the ground, meaning you must be careful with it's use.

Forward Aerial: Chop Chop
Sideshow Bob swings his knife in a large chopping motion, actually being rather quick in terms of a hit. This deals 8% damage and some light horizontal knockback to foes. Probably the best tool you have in terms of aerial combat, this is reliable due to it's speed and power, allowing you to knock your wretched victim forward before going in for a kill.

Back Aerial: A Little Prick
Sideshow Bob turns around, and with a maniacal expression, pulls back his knife before thrusting it outwards. This is an excellent tool to catch foes who are approaching you from behind, with the knife dealing more damage based on the speed they were going when they come into it - ranging from 6% to 13%. It's not exactly quick or safe to use in terms of the air or edgeguarding offstage, but it'll stop a foe who's attempting to attack you from behind in their tracks and turns you around so you can continue your pursuit.

Up Aerial: Fraiser Crane
Sideshow Bob thrusts his knife above him, extending his legs out to put more power into the thrust. The knife deals 13% damage and very good vertical knockback, being great as a killer if the foe has been taking to the air. Notably, if the foe is hit by Sideshow Bob, the force spaces him downwards a Ganondorf. His falling speed will obviously help him get to the ground faster, but if it looks like you need some room when you're by the top blast zone with your percent especially high, you can use this to get you down even faster.

Down Aerial: Knife Drill
Sideshow Bob leans back a little and extends out his right leg - causing his extra knife to fall through his pant legs, which he quickly catches with his feet as he uses them to twist it around like a drill. This acts like many of the drill dairs already seen in Smash, having little knockback but having multiple hits that total up to 15% if all of them connect. This is an excellent move to use pressure-wise, especially if short-hopped, but also makes an excellent edgeguarder due to the angle - Sideshow Bob doesn't exactly want to leave the stage if he can help it. The main downside is that the hitbox is limited to the knife, but that won't really matter in terms of pressure from above and pressure on shields.

SMASHES

Forward Smash: Sideshow Stab
Sideshow Bob raises up his knife, preparing himself for an absolutely delicious final blow! He stabs his knife downwards as a shrill piano key reminiscent of Alfred Hitchcock plays in the background. This has quite the bad ending lag if you miss, on par with Bowser's fsmash. Should this hit the foe, the initial stab will deal 13-20% damage. However, Sideshow Bob has the potential to perform 3 more wild slashes after the stab, with each being triggered with a press of A - along the lines of Link's multi-hit fsmash. Each slash moves Bob and his foe a small distance forward (say half a platform), with each dealing 3-6% damage and the last one dealing good horizontal knockback. And each slash comes with it's own wicked shrill piano key! Oh, Norman Bates would be proud. This is an excellent attack for Bob, allowing himself to position himself and the foe closer and closer to the edge - with more exact positioning to allow yourself not to come into contact with a rake and foil your own plans.

Oh, did I mention this is a counter? If a foe attempts to attack Sideshow Bob during the startup of this move, he will grab the foe and start bringing his knife down on them. The foe can buttonmash away as in a grab, causing them both to act as though they escaped from a normal grab. However, if they are not able to escape within 2 seconds, Sideshow Bob will activate his forward smash.

The counter aspect of the move will only work on foes using meleeing attacks in a reasonable distance of Bob - no he cannot counter Dedede's ftilt in this manner, but he can counter his jab just fine. Thankfully, most "reasonable distance" are GTFO moves, which they'll be prone to using if Bob is harassing them.


Up Smash: Sideshow Spin
Sideshow Bob shakes his right arm at the ground, allowing a hidden knife to fall through, which he quickly grabs with his left. He then begins to spin, Link-style, but spins much faster - making all of him a hitbox. . Coming into contact with Bob will deal successive hits, 4 hits of 2-4% resulting in one last strong hit of 4-8% that knocks foes upwards with rather strong knockback.

By tapping A multiple times during this, Bob's spinning will raise him up a Ganondorf before the move has ended. He can only move vertically while he's attacking, but gains full control of his DI as he falls back to the ground. What makes this useful is that you can use this to drag foes up in the air - it acts as an excellent killer, which means you can possibly star KO them. Using this out of a DACUS also works wonderfully, allowing you startle foes who are in the air quite a long distance away from you.

Down Smash: Sideshow Slash
Bob charges forward, knife in his right arm, with the distance affected by how long he charges (Battlefield to Half of Final Destination).Sideshow Bob will stop his movement with a horizontal slash once he reaches his max distance, reaches a ledge or comes into contact with an opponent. The slash deals good 11-17% damage and has the potential to hit even spotdodging foes. Once he ends this move, he has some relatively bad end lag - but can tap A immediately after the end of the slash for Bob to perform 3 flips backwards, moving him back a full BFP. This allows him a bit of leeway if needed.

GRAB GAME

Sideshow Bob has a relatively fast grab, but with a very short range - i.e. they have to be near directly in front of him in order for him to land this. Take note, however, that he has plenty of ways to get in close and he already has a method of mindgaming the foes into a free grab with his neutral special. His dash grab is also special - it looks identical to an uncharged down smash, only Bob will grab at the end instead of slashing. This makes it extremely easy to fool foes who will be shielding out of fear that they'll get slashed out of their spotdodge, only to be placed in the arms of a madman instead. Bob holds the foe with one hand, knife in the other, grinning at them with sadistic glee. His pummel is a simple stab in the stomach that deals 3% damage, allowing him to build some damage before he throws them.

Up Throw: Up And Over
In yet another display of acrobatics, Sideshow Bob tighten his grip on the foe as he swings on their body like a pole, making his way up to their head where he displays a marvelous hand-stand! ...Before he uses this opportunity to stab the opponent in the skull. Yeesh. This deals 14% damage and knocks the foe downwards, having them lie on the floor. Sideshow Bob is in the air after this, he'll usually take this opportunity to use a dair or something to follow up.

Back Throw: Backstabber
Sideshow Bob simply takes the foe and lightly tosses them behind himself, them being dealt 3% and moving a small distance from Bob to the point where this can be used just to throw the foe into a rake handle - useful for proning setups. However, if the foe has not been hit by a rake/trap/outside force, Sideshow Bob quickly turns around and stabs the foe in the back, causing them to get knocked back! The stab deals 12% damage and decent knockback. Notably, Bob does turn around for the stab and is left facing the foe at the end of the back throw, which is useful for when he next chases them down.

Forward Throw: Hack n' Slash
Ooh, I think we know where this is going! Sideshow Bob lightens his grip a small bit as he takes his knife - and gives it a stylish flip before stabbing it forward. One stab...two stabs, both very slow. Too slow. His expression turns to that of manic glee as he speeds up! Three stabs, four stabs, five stabs, six stabs, seven stabs! ...Yeah, this guy has some issues, especially considering his insane expression and dialogue as he stabs - "Take this! And that! And this and that and this and that aaaaaanddd this one!" He starts progressively slow with the first two, then gains rapid speed in his stabs before drawing his knife back for dealing one final stab. Each stab deals 3% damage - 21% damage if you hit with all the stabs, with the last stab having the potential to kill Mario at 80%. This is a hilariously slow throw, taking a little more than 3 seconds to execute - the main downside here for this extremely powerful killing move is the fact that due to their grip being weakened, the foe can actually escape from this in the middle of you using it - which will cause Bob to stop slashing. But this is perhaps your best killer - it's just that you need to wait until they're at a higher percent to use it, when it's much harder to execute.

Down Throw: Ride-Along
For perhaps his most sadistic maneuver, Sideshow Bob jumps onto the foe, clinging onto their chest with his legs while he grabs the back of foe's head with his left hand. He then uses his right hand to slash away at their face with his knife every half a second, each slash dealing 9% damage. This is your best damage-dealing throw, but it won't be scoring you any kills anytime soon. The foe can still buttonmash out, but Sideshow Bob has the option to press A to jump off before that happens, jumping backwards into the air and leaving the foe idle. Another interesting aspect to the throw is that the foe can still move about with Sideshow Bob on them, albeit only at their walking speed as they desperately attempt to get him off of them. They can guide themselves into rakes to take the hit and automatically get Bob off of them, but there's not much else they can do other than steering themselves towards advantageous areas. Going offstage won't do much for them, as while Bob doesn't have much of a recovery, he still has the option to leave early and grab the ledge before they can even do anything about it.

PLAYSTYLE

Every match against Sideshow Bob puts his foe into the role of Bart Simpson - a horror victim for Bob who must outsmart him at all costs, lest he be killed by Bob's sadistic methods. What makes Sideshow Bob such a good offensive player is that nearly every one of his moves has the potential to move him, and many of the ones that don't either move the foe or place them in a more advantageous position. Where he falters is the air. His aerials are not bad by any means, and they're actually one of your prime approaching tools shorthopped. It's just that he absolutely loathes being offstage, where if he's not careful, both his air and falling speeds will assure that he drops like a rock. He is perfectly capable of attacking in the air and even edgeguarding as long as he remains onstage, having plenty of tools that allow him to deal with foes attempting to recover (your back air is wonderful for this) and even ways to juggle them around a bit.

Approaching, as you might've expected, is what Bob is truly ideal for. He has plenty of mindgames in every situation, but your neutral special is the best example of this - allowing multiple options for approach that your foe will never be able to predict, even giving you a reliable projectile to work with in the form of bullets. He even has a sadistic mindgame to help him land grabs in the form of the dsmash/dash grab confusion, which allows him to take advantage of shielding foes and their naivety with ease. He isn't loaded with just mindgames, though, as he is perhaps the character with the most control over his own movement. Moves such as his ftilt and usmash among others allow him an extremely unpredictable movement pattern that works well into more advanced tactics for this serial killer. Down Special is of course an excellent movement tool, but Bob has trouble attacking out of it - leaving it more for when you need to get past a static trap.

Once you're actually in the foe's face, your job is to land as many hits as you can before things get too touch for you and you have to retreat. His standards are the backbone of his close range game, allowing him fast and speedy attacks that also have the option to get him out of a dangerous situation at the first sign of trouble. He'll typically be using his melee and grab games to bring his foes closer and closer to the edge, not really needing a powerful hit to bring them to the edge, but able to forcefully bring them there himself. One of his most ideal tools in a melee situation is his forward smash, which will primarily be used for it's counter function. It acts as a free smash if the foe doesn't mash out in time, and leaves Bob with little penalty if they do.

Rakes are a versatile tool for Sideshow Bob, one he may never have to use or one he may rely on. Bob is already very adept at controlling the stage with just his melee moves, but rakes add a static hitbox that can prove to aid him in his own sadistic chase. Stage choice proves to be a vital aspect of Sideshow Bob's placement of his rakes, as he himself is extremely vulnerable to the his own rakes, and he absolutely loathes having to lose control of his own movement. While rakes may flood larger stages such as Hyrule Temple where Sideshow Bob can focus his stalking in one area and leave rakes for those who flee to other areas, it seems unlikely that he'll ever place one down on Final Destination where he'll be moving around quite a bit across the entire stage. Stages with platforms play well with rakes - Smashville is a very good Sideshow Bob stage, allowing him all the space and movement benefits of Final Destination while giving him a moving platform where he can place his rake to catch foes who flee without having to jump into the air to catch them himself, for example.


FINAL SMASH

Sideshow Bob stabs forward with his knife, the final smash ending if he misses. If he should hit with this, he proceeds to wildly stab the foe in as many different ways and places as possible, cartoon blood flying everywhere. Sideshow Bob pauses as he raises his knife for a final thrust before yelling "Just die already!" and stabbing them through the heart. This final smash overall deals 45% damage and OHKO-level knockback.

EXTRAS

Up Taunt: Nobody Who Speaks German Can Be An Evil Man

Bob unbuttons his shirt, showing off his tattoo - Die Bart, Die. He proceeds to correct your assumption: "It's German for "The Bart, The,"

Side Taunt: Taunting
Sideshow Bob flicks his knife in his hand while insulting the foe with one of the following 3 high-brow remarks: "Oh, surely, you can do better than that!", "I deride your truth-handling abilities!", "Copernicus called, turns out you're not the center of the universe!"

Down Taunt: Exercise
Sideshow Bob gets his midmatch workout with kicks and turns - "And turn and flex and shake and bounce!"

Entrance: Stalker
A bush is seen on the stage, with Sideshow Bob's hair sticking from it. He pokes his head up and darkly chuckles, emerging from the bush with his knife drawn.

Victory Theme: Cape Feare
Sideshow Bob's victory theme is a snippet of his own theme music.

Victory Pose: Acceptance Speech
Sideshow Bob gives a rousing acceptance speech to celebrate his victory. The game's announcer himself chimes in - "And just look how happy he is!"

Victory Pose: Party Of Choice
A well-known Republican, Bob sneers towards his foes. "Nobody has ever messed with the Republican party and lived..."

Victory Pose: Terror Lake Marching Band
Sideshow Bob is seen laying down before the Terror Lake Marching Band marches in to celebrate his victory...by squashing him. Bob is heard screaming "Not the elephants!" before elephants come in and stomp on him as well.

Victory Pose: HMS Pinafore
The victory theme here is much more triumphant, and Sideshow Bob is seen in a much more nautical outfit. He proceeds to sing the last segment of the opera, H.M.S. Pinafore.


Last edited:
Top Bottom