• Welcome to Smashboards, the world's largest Super Smash Brothers community! Over 250,000 Smash Bros. fans from around the world have come to discuss these great games in over 19 million posts!

    You are currently viewing our boards as a visitor. Click here to sign up right now and start on your path in the Smash community!

Make Your Move 13 - Most Recent Movesets: The Advertisement Period Begins

MasterWarlord

Smash Champion
Joined
Aug 24, 2008
Messages
2,911
One day Pokeset

CLAYTON


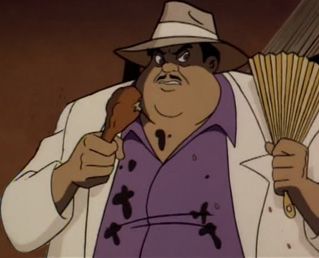
Before he was hilariously obese, Clayton was a miner around the Rock Tunnel area, largely being aided by his Machoke. However, he eventually found the lion’s share of untapped gold in the tunnel. Desperate to find a way to keep it for himself when other miners were coming, he threw the gold down into a pit. . .Of course, he cursed himself out for not finding a better place to hide it, as he then had to tunnel his way down to find the gold he lost. When he started getting close and one guy got a bit too wise? Down into the pit he went. Unfortunately, when people started asking too many questions when he was right next to the gold, he got rather desperate, and ultimately used his dynamite to cause a cave-in on them.

After tunneling out through the other side through some hard work (From his Machoke. . .), he ultimately struck it rich with the gold he got. It didn’t last him forever, but it was enough to put him well enough off to put him on the way to the fat slob he is today. He got a Meowth as an obvious source of income, along with a Ditto for some con-jobs. Ditto would imitate some rare Pokemon, Clayton would sell it off to a poor sap, then at the soonest possible chance when the trainer wasn’t looking, Ditto would deform and make his way back to Clayton. Eventually, the miners Clayton had abandoned dug their way back in through the cave-in Clayton caused. Knowing there was more gold than he got out, Clayton made a hefty investment by purchasing the mining company he used to work for. With Clayton’s knowledge of the mine, a heavier emphasis on Pokemon labor and even hiring illegals from Orre, he gained wealth beyond his wildest dreams. . .

STATS


Size: 10
Weight: 10
Falling Speed: 8
Traction: 6.5
Aerial Control: 4
Jumps: 3
Aerial Speed: 3
Ground Movement: 1

Clayton is the playable character here – he doesn’t have any Hypno to defend himself with in this moveset, so he has to actively evade foes. He gets a shield and everything a regular playable character is. However, his Meowth and Machoke are constantly out, staying in the background. They will move with Clayton at his obnoxiously slow speed, but if he commands them to attack they’ll do their attack, coming in to the main playing field and able to be attacked, before going back in the background. Regardless, you can do attacks while your Pokemon are/command other Pokemon, them essentially functioning as commandable minions. They will move much faster to reach you once they’re done with an attack, Meowth at 7/10 and Machoke with 5.5/10, and have two jumps on par with Mario’s. Machoke will never follow Clayton off the stage, waiting at the edge, but Meowth will, clinging onto Clayton’s coat whenever he goes into the air.

SPECIALS


Neutral Special – PAY DAY


Clayton yells out the name of the attack, causing Meowth to scamper over and use Pay Day at Clayton’s current position. If Meowth was already next to Clayton, he literally kicks Meowth out onto the field.

Meowth’s Pay Day is comparable to SSB64 in range – coins come out of Meowth’s coin on his head in all possible directions. This is not nearly as potent as it is in Pokeball Form, though, as while it deals all of the massive damage of said attack, it deals no hitstun whatsoever. What’s more, Meowth has a damage percentage and is light as Jigglypuff, so he’ll be going down and out quite quickly.

So what’s even the point of having Meowth stand in place like an idiot? Well, Meowth’s coins don’t just fade away into nothing when they fall down onto the ground, instead sticking around as a stage obstruction. You can walk into the coins seamlessly, and you won’t even take any sort of damage from it. Unfortunately, you cannot see your character, your fall speed is increased by Fox’s, and your movement speed is cut by a third. Meowth creates a Kirby height/platform width pile of coins per second. Meowth will never stop this attack unless knocked out of this attack, you press this again to make him return to the background, or order him to do another attack.

Down Special – DITTO


Clayton releases his third Pokemon from his Pokeball, Ditto. Ditto proceeds to transform into the nearest foe, becoming a carbon copy of them in every aspect except for weight, which is half of the foe’s. Ditto fights with a level 7 AI if there are no computers, or an AI 3 levels lower than the lowest leveled AI in the match if other AIs are present. Pressing Down Special with Ditto already out has Clayton start barking out generic orders to Ditto, giving you control of Ditto instead of Clayton.

While controlling Ditto, Clayton is controlled by a very defensive AI. He will mostly just try to flee from the foe, hiding in gold piles and using teleporters. In fact, the only actions he’ll do outside evading the foe are his dtilt to heal himself and commanding Meowth to spam Pay Day more. To regain control of Clayton, simply double tap Down B.

What’s the point of Ditto? Well, with all of the gold obscuring the foe, it’ll be much more difficult for them to tell who’s who. . .

Up Special – TELEPORTER


Clayton has Machoke construct a Kirby wide teleporter panel (Much like those in Saffron Gym) on the stage at Clayton’s current position over a second. As you’d suspect, you need more than one teleporter to do anything. With 2+ teleporters, landing on a teleporter will instantly teleport you to another one, chosen at random. This can be quite frustrating if they’re obscured by gold, considering there is no cap on how many teleporters you can build.

Machoke can technically be killed, but he’s so durable with his 100 HP and infinite weight it’s rather stupid to try when Clayton and Meowth are so much more obvious targets. As if that wasn't enough, Machoke regenerates 4 HP per second, even when he's in the background!

Unfortunately, Machoke cannot embed teleporter panels into thin air, and he refuses to follow you off-stage. Using this move on-stage in the air will just have Machoke build a teleporter under you, while using it outright off-stage will cause Machoke to rip out a chunk of ground and throw it under your current position, giving you something to jump off of. The ground chunk does 13% and knockback that KOs at 150% at outside foes if they hit the –side- (The top is still usable for them), flying at Mario’s dash speed and following the laws of gravity. Getting off-stage to deliberately use this attack is pretty bloody stupid, considering how abominable Clayton’s recovery is. Outside of this awkward recovery, all he has is a zair tether. His recovery is made more tolerable by the fact that his tether works on these ground chunks, ensuring that he can actually get on them.

Side Special – DYNAMITE


Clayton takes out a stick of dynamite, lighting the fuse before throwing it forward 1.5 platforms and plugging his ears. The dynamite explodes in an explosion 1.5x the size of Bowser on contact with the ground/foe, dealing 20% and knockback that KOs at 100%. While this is not that laggy to start up, Clayton is vulnerable for the entire duration due to the animation. Using it inside gold can alleviate most of this, of course.

This move is notable because of it creating a crater if it lands on the ground as large as the lower half of the blast – so in other words, one three quarters the size of Bowser. The crater is a slope rather than a pit, the slopes being angled to connect the rest of the ground to the bottom of the pit. The most notable things these slopes do is that all gold that comes in contact with a slope will slide down to the bottom. Aside from giving you more space to put gold and giving you a way to move it about, you are 100% allowed to make a pit so deep that it goes out through the bottom of the stage, at which point you can just rain the foe down with a heaping helping of gold that they can’t possibly hope to recover through. All terraforming is undone when Clayton loses a stock.

STANDARDS


Down Tilt – LEFTOVERS


Clayton takes a bite off of his chicken leg, chewing it down before gulping it over a second of lag to heal 10%. Yes, this has no hitbox. Who cares, you have the foe’s moveset at your disposal thanks to Ditto, and the meat of this moveset isn’t skimming out on attacks with actual hitboxes. In any case, you’ll find a lot more time to use this than you would otherwise if the foe can’t see you.

Forward Tilt – SKIN RIP


Clayton goes to do the animation for the dtilt, but instead bites into the skin and goes to rip it off. He only gets a little bit of it into his mouth before the rest of it snaps back onto the leg for a surprisingly long range hitbox that deals impressive set knockback 2 platforms away. Even ignoring piles of cash, this move makes dtilt significantly more viable for obvious reasons. Spamming dtilt even in gold isn’t quite as easy as you’d like due to the audio cue being one of Clayton’s single most obvious, but this move can potentially confuse foes even more about their location. They won’t even know they got hit by this if they aren’t knocked out of the gold pile, unless they pay attention to Clayton’s damage percentage.

NEUTRAL ATTACK – BELLY BOUNCER


Clayton puffs out his belly a bit more than it already is, causing it to deal 6% and knockback that KOs at 185% on contact. If somebody dashes into it, they will take knockback that KOs at 135%. If they attack Clayton outright, they will take the knockback of their own attack multiplied by 1.5x, and Clayton will take nothing at all from the attack. Clayton is fully vulnerable from behind, and to grabs.

This counter isn’t terribly useful in general due to how low the damage dealt is, but it’s a miracle worker inside gold, as your counter can’t be countered if they don’t realize you’re using it.

Up Tilt – GOLD!


Clayton throws his arms up into the air in frustration, letting out a thoroughly aggravated groan. This is a generic anti-air move that deals 8% and diagonally vertical knockback that KOs at 200%, being quite spammable. This is the only personal anti-air move in Clayton’s whole arsenal, and with his terrible jumps it’s rather mandatory.

If used in a pile of gold, Clayton will yell “I’M RICH!” as he flings gold to the side as he throws his arms up into the air. This causes two Kirby widths of gold to be removed from the pile you’re currently in, it getting split in half and flung 1.5 Bowser widths to each side. The coins deal 10 hits of 1% and flinching as they fall, giving Clayton a much more defensive hitbox. The downside to this stellar defensive measure is it gives away Clayton’s position. This attack is still just as spammable as the other version, though you’ll eventually use up all the gold in your current position and have to move.

Dashing Attack – SWAT


Clayton swats behind him with his chicken leg, dealing a quick and meaty 9% and knockback that KOs at 160%. Regardless of KOing late, this has high base knockback, being a good method of giving you space as you retreat from the foe simultaneously. Disjointed priority doesn't hurt either, typically beating out the faster dashing characters behind you who will be wanting to hit you with their own dashing attacks.

SMASHES


Forward Smash – MINE CART


Clayton yells out “GET TA WORK!” for Machoke to get out a mine cart and begin pushing it forwards at Ganon’s walking speed-Ganon’s dashing speed, turning around at edges. If a foe goes a Bowser width in front of the cart, Machoke will do a sudden dash forwards at Mario’s dash speed. If the foe is hit by the front of the cart, they will take set knockback to land in the cart and 10%. Foes are stunned for as long as Zamus’ dsmash before they can act and simply jump out of the solid cart. Machoke will automatically scoop up as much gold as he can in the Wario sized mine cart if he passes it, not taking terribly long to do it. Machoke will specifically go through the background to go around teleporters while using this move.

Machoke will dump the cart and return to the background under a handful of circumstances. Firstly, by hitting fsmash or any other Machoke input. Second, by reaching the top of a slope or an edge. Machoke will only dump the contents off the edge if a foe is in the cart, though, not gold. In any case, Machoke is useful for scooping gold up over large distances to a distant slope, as well as for bringing foes to the gold simultaneously, potentially. If the foe is dumped out onto ground from the cart, they will enter prone and take 5%, and will take extra damage if gold is dumped on top of them, up to 10%. Foes will slide down the slope in prone at Meta Knight’s dashing speed, and are able to slide right off edges.

Up Smash – STRENGTH


Machoke pulls up a boulder the size of Wario-1.35x the size of Bowser out of the stage, then throws it diagonally upwards a platform before it lands on the stage and rolls forwards at Mario’s dashing speed. Contact with the boulder deals 20-34% and knockback that KOs at 100-70%. The boulder will pick up speed significantly at slopes (1.5x on Clayton’s), though if it reaches the bottom of a hollow slope and loses all momentum it will simply vanish. Needless to say, this is a rather horrific projectile to follow up dumping the foe off-stage from a mine-cart, or more preferably a giant hole in the middle made by dynamite.

Down Smash – JACKHAMMER


Clayton takes out a jackhammer and turns it on as it starts vibrating against the ground. This terraforms out a slope like the dynamite, varying from Wario sized to Bowser sized, though the dynamite is faster for raw terraforming. In any case, the hitbox on this move is an earthshaking one, reaching out 1-2.5 platforms on either side of Clayton. It always does 11% and vertical knockback that KOs at 160%, nothing too terribly threatening.

So what’s the purpose of this move? Aside from being your best means of camping from inside a pile of gold, it’s the most reliable way to hit your enemy in general if you have lots of gold around. See, it’s all well and nice if you mess the foe up so badly they have no idea where they are, but what if you’ve done such a good job –YOU- have no idea where they are? This is your go-to move for said situation, and the gold making it so much more difficult to jump over the hitbox certainly doesn’t hurt.

AERIALS


Neutral Aerial – PHATCAT


Clayton grabs Meowth off the back of his coat and curls him up into a ball, angrily yelling “GET OFF!” before throwing him in a direction of your choosing. Meowth will fly in whatever direction you flung him at Mario’s dashing speed, going in more of a lobbing arc if you threw him at a more upward angle. On contact, Meowth deals 12% and knockback that KOs at 150%, a fairly competent projectile. Meowth is superarmored during this attack. In any case, aside from giving you a projectile that doesn’t leave you open like the dynamite (This attack is actually quite fast, though it’s not spammable for obvious reasons), this attack is an excellent way to position Meowth, getting him to an unused portion of the stage to more safely spam Pay Day.

Forward Aerial – SUPER REPEL


Clayton doesn’t buy Max Repels. Super Repels are more cost efficient with how long they last and how much they cost! He needs a hell of a lot of it with all the bloody Zubats in the mines, much less the occasional ghost from Lavender that makes its way over and spooks the workers.

This is a Bowser sized disjointed hitbox that deals 10 hits of 1% and flinching per second and lingers for 3 seconds, serving as a way to block the foe’s escape from gold coins or more general defense for Clayton. This cannot be spammed –too- liberally, as Clayton is vulnerable to this attack, and it’s Clayton’s laggiest aerial to make up for the fantastic disjointed range, though at least this move will continue if the “landing lag” is triggered.

If one of Clayton’s Pokemon comes in contact with the cloud, they’ll ignore their current task and go to flee away from it (Moving in the direction that’s quickest to get out of the repel cloud) at their top speed for 2 platforms before resuming orders. Nair is better for positioning Meowth, though this can be useful on a Machoke pushing around a mine cart, as in that specific case he won’t abandon his work (He’s Clayton’s most well trained), but he will change the way he’s going if it would get him out of the repel cloud faster. This is most useful on Ditto of your own Pokemon possibly due to how little influence you have over him otherwise without taking direct control, though that’s an intentional choice – if you were interacting with him left and right it’d be kind of hard for the foe to confuse him for them.

Back Aerial – FAINT ATTACK


Meowth vanishes into thin air, seemingly. He stays behind where the attack was input, invisible, even if Clayton moves elsewhere. This lasts for 2 seconds, if nobody passes by this location, Meowth will “poof” back onto Clayton’s shoulder. If somebody passes where you set up Meowth, though, they’ll be hit by a meaty Faint Attack, dealing a tasty 14% and knockback that KOs at 135%. Meowth has to run back to Clayton manually if he hits, though there are worse fates. Meowth will also have to run back to Clayton if Clayton gives him another order while he’s invisible.

In the sense of using this as an actual bair, this is useful when retreating from someone behind you as it leaves behind a nice hitbox between you and them. In terms of Clayton’s overall game, leaving Meowth in a pile of gold with a foe hot on your heels can serve as a devastating trap that the foe doesn’t realize you even set.

Up Aerial – HYPNOSIS


Meowth comes up on Clayton’s shoulder as psychic waves come out of the coin on his head, hypnotizing foes above Clayton. Needless to say, Meowth is useful for more than just making money out in the real world. . .In any case, this has a Wario sized hitbox positioned diagonally above Clayton’s head, in a fairly fast attack, putting foes to sleep for as long as Sing, which is not long at all. Still, it’s long enough for foes to reach the ground. . .Or technically, gold piled up on top of the ground to vastly increase their fall speed, making them reach the ground.

Down Aerial – BODY SLAM


Clayton body slams the ground in a standard stall then fall, because he hasn’t thrown his weight around enough yet. The power of this move is determined by how far Clayton has fallen – it deals 8% and knockback that KOs at 200% at minimum, while every Ganondorf Clayton falls increases the power by 4% and reduces the KO percentage by 35%. Obviously, with Clayton’s –horrible- jumps, you’ll want to be using this from the top of a slope to attack a foe at the bottom. If there’s gold involved, this attack becomes almost lightning fast, as the increased falling speed from the gold causes you to go downwards even faster.

This move also causes coins to splatter to the sides like with the utilt. If used with no height, the coins splatter in a manner identical to that move. Each Ganondorf you fall increases the amount of coins by a third of a Kirby height, also increasing the damage by 3.3%.

GRAB-GAME


Grab – ESCAPE ROPE


Both in the mines and as a convict, Clayton’s never stopped having uses for Escape Ropes. . .Clayton hurls forward said Escape Rope, a tether grab that works in the air as the earlier hinted tether recovery. This is very easily the best tether in the game, having low lag in comparison to Brawl tethers while still having the range of Samus’, but the foe can escape during the animation where Clayton reels them in. If the foe is hit successfully, they’ll get lasso’d by the Escape Rope as Clayton hauls the foe in.

Pummel – NOOSE


Clayton tightens the rope around the foe’s neck, dealing 4% for a laggy pummel. You’ll only be able to get this pummel off if you grabbed the foe point blank, but it’s well worth it. . .

Forward Throw – CHEAP LABOR


Clayton takes out a mine cart before tying the foe to it, yelling “MAKE YOURSELF USEFUL!”. For each successive use of the pummel before using the throw, there’s less rope between the foe and the cart. There’s a platform at maximum, with each pummel decreasing the amount the foe can walk from the cart by a Kirby width. Once having tied the foe to the cart, Clayton kicks them forward into the cart, dealing 5% and sending the cart sliding forwards a Bowser width.

Attempting to move away from the mine cart will cause foes to move at three quarters their normal speed, barely enabling them to move anywhere while pulling the mine cart, much less through gold. If the mine cart moves through gold that is taller than it is, the mine cart will get filled with a Wario’s worth of gold, making it so the foe can only move at half of their speed when moving against the cart. Alternatively, foes can attack the cart to move it about, but it’s quite heavy at Bowser’s weight at 50%, becoming as heavy as Bowser at 0% with gold in it. If the foe is unlucky enough for the cart to go off the edge, it will drag them down pretty horribly, as it has Bowser’s falling speed normally and Fox’s with gold in it. If the cart reaches a slope, the cart will begin sliding down it with no input. If gold is in the cart, this cannot be fought against, but if there isn’t any you can work your way up the slope at a quarter of your movement speed as you drag up the cart. The main way out of all this is to attack the rope, which has 30 stamina. The cart instantly vanishes upon the rope being destroyed.

No, we’re still not done with this massive throw. If you order Machoke to use fsmash when one of these carts is out, rather than creating a cart he will go to push against the cart the foe is using, going onto the opposite side they’re using. From here, Machoke performs his fsmash normally, with the exception that he is unable to rush forwards to knock the foe into the cart, sadly. He can still dump the cart on the foe, though, and foes at the very best can only prevent Machoke from moving the cart anywhere by fighting his control over the cart, not push against him.

Back Throw – FURY SWIPES


Fat man Clayton goes to swing the rope around himself to put the foe at the opposite side of him, dealing a weak 5% and knockback that KOs at 185%, as well as making the foe face the opposite direction they were initially. However, Meowth will be going after the foe as soon as the animation starts. This is rather predictable and Meowth latching onto the foe can be avoided, as Meowth won’t latch onto the foe at the very start of the throw no matter what. What’s more, if he misses, he has bad ending lag! If he does latch on (He positions himself on the foe’s shoulders), he will spam Fury Swipes on the foe, dealing 4% to the foe per quarter second until knocked off like a Pikmin by taking 20%, or an attack that would deal enough knockback to knock him Final Destination’s width.

Obviously, the foe cannot time their dodge nearly as well if in gold. Better yet, they might not even realize this throw was used on them until Meowth has already dealt some damage to them, as audio telegraphs are only made from Meowth after he has latched onto the foe. The fact this throw swaps the position the foe is facing also further disorientates them, something they’ll have to keep in mind once they realize this throw has been used on them, though they’ll probably be thinking more about Meowth.

Up Throw – SEISMIC TOSS


Machoke comes over if he’s not busy, then performs this signature throw on Clayton’s behalf. He grabs the foe before jumping up into the air, spins them around upside down while they’re in the air, then comes crashing down into the ground. While in the air, you can use the control stick to DI Machoke left and right (Clayton cannot move briefly), able to move at most a platform in any direction before he hits the ground, assuming said ground is level. On contact with the ground, the foe takes a fantastic 15% (Immune to stale move negation), along with upward knockback that KOs at 170% as they bounce off the ground at diagonally upward angle in the way Machoke was currently going, it being less vertical and more diagonal the more you DI’d. Without any DI, the knockback KOs at a slightly better 145%. This throw multipurposes for pretty much all the throws you’d ever want out of a more standard grab-game, and at low percentages the knockback can be pitiful enough that the upward knockback will be too weak to knock them out of a gold pile Machoke drags the foe into.

If you go to use this off an edge for a “suicide” KO with Machoke, the foe can escape this throw with double grab escape difficulty, while you’ll be sacrificing the otherwise nigh invulnerable Machoke for nothing.

Down Throw – HOSTAGE


Clayton kicks the foe to the ground, dealing 9%, then ties them up with the full extent of the Escape Rope before spitting on them. This forces the foe to have to do a grab-escape to get out of their predicament, and during this time they are considered to be in prone. This is the main way to buy set-up time Clayton has, though it also combos very well into fsmash for obvious reasons, great if Machoke is coming your way already before you grabbed the foe. Foes cannot work towards escaping while in the brief stun from being knocked into the cart, though it’s far from lockdown to overcome a regular grab escape and the stun from Zamus’ dsmash.

FINAL SMASH – TV DINNER


The screen zooms in on Clayton as he rings a dinner bell, then zooms back out to show food raining down from the sky! The food will fall down into 3 double Bowser size piles on a stage like Final Destination evenly spaced out, varying from stage to stage. The food deals 20% and Ganon dair level spiking knockback as it comes down. Once it’s out, it essentially functions just like Clayton’s gold, with the sole exception that if Clayton is inside it, he can input jab to eat the food like Brawl food, one Kirby at a time, healing 8% per pop. Foes can also attempt to eat the food, but they are significantly laggier in doing so, taking a laggy half second to do so, while Clayton is eating it as fast as Brawl food. Any uneaten food vanishes 16 seconds later.

PLAYSTYLE SUMMARY


There’s no huge reveal in the playstyle summary – the playstyle is amongst my most obvious if you’ve read the moveset. Let’s not waste either of each other’s time with this summary, alright?

Obviously, you want to disorient the foe inside the gold and confuse about them about where they are – you’re more than well aware of how to go about doing that, so I won’t tell you much about how. Your other specials are the best method of doing so in the teleporters and Ditto, even terraforming the stage can help out if you’re more clever with your set-up and can lead to early KOs if you blast a hole in the middle. As far as reaching that level of set-up, that’s why Clayton has such an extensive library of defensive moves, he’ll need them if he doesn’t want to just hide behind Ditto during the set-up, and if you use Ditto he’ll be too damaged to give you long enough to use your nice set-up you’ve worked so hard for, considering he’s so much lighter than the foe.

It’s true that Clayton’s job is mostly set-up and disorientation while Ditto does the meat of the work, though once you have a set-up you can always take matters more directly into your own hands by taking control of Ditto. If you want to more actively KO the foe with your own moveset and think Ditto’s doing a fine job, you can spam dynamite while inside gold more than anything hoping to get lucky instead of the more reliable dsmash. You should mainly be aiming it to form a more ideal section of terraforming in the stage, and if you make a central/deep enough slope in the middle of the stage, it will become increasingly more obvious where the foe’s general area is while they still have no idea –exactly- where they are. If the pit’s so deep they’re struggling to climb out of it, this is the main time to crack a hole open in center stage to “hide your gold”, and cave in the foe down with it. You may want to take manual control of Ditto here to ensure he doesn’t get caught in the blast.

But. . .Using up all your gold and making it nigh impossible to build another money pit due to making a “leak” in the stage. Aren’t you screwing over your chances at the next stock? That’s practically like a suicide KO! Not necessarily, especially if Clayton’s been eating hearty helpings of leftovers. Your new main non-Ditto method of KOing largely consists of pouring the foe into the abyss out of a mine cart. Both fthrow and dthrow prove extraordinarily useful for more than just annoying the foe here. At this point, you can almost always have Machoke out with the mine cart, as it’s late enough in the stock that it won’t really matter if the foe attacks him. The uthrow can also be considered as yet another potential KO method during this time as you order Machoke to hop out through the center of the stage to his death. While the foe will probably escape soon enough to survive at such a low percentage, Machoke will take the foe through the hole at the very least. From there, Meowth can spam pay day on the slope (Not directly above the hole) for the coins to slide down the slope into the opening, raining down hell on the poor sap. If Meowth’s already set-up, you can take direct control of Ditto to have him go help out if the foe’s moveset is good for gimping themselves.
 

Davidreamcatcha

Smash Ace
Joined
Feb 9, 2011
Messages
629
Joint set with MasterWarlord

STROMBOLI

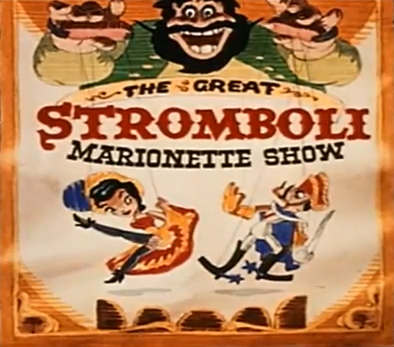
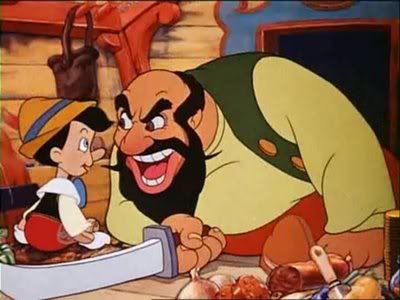
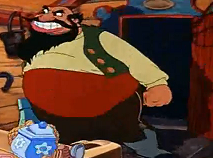
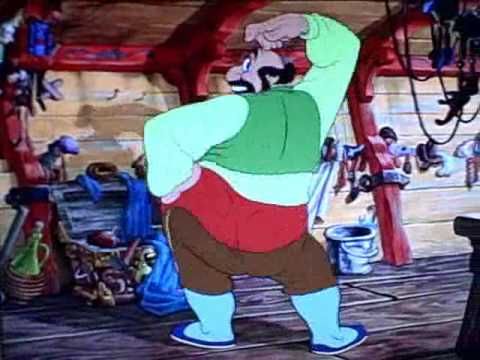
Stromboli is one of the characters found within the animated Disney feature, Pinocchio, a movie loaded to the brim with Disney Villains. In the movie, Stromboli is a gypsy puppeteer, traveling around the world in his caravan. He commands an awe-inspiring presence, the room shaking upon him entering, as he flies into a blinding rages at random. He is incredibly greedy, actively going out of his way to obtain money - which works well with his stagename of The Great Stromboli, as he often plays up to the crowd to obtain more precious gold. He has an encounter with Pinocchio himself when Honest John and Gideon, two street cons, bring the wooden boy to him. After Pinocchio becomes convinced it would make his "father" proud, he participates in Stromboli's puppet show, becoming an instant sensation. However, when he attempts to leave, Stromboli locks him in a cage, bragging about how much money he will make from the little puppet. When he leaves, however, Pinocchio quickly escapes with a little help, leaving the fate of The Great Stromboli unknown...

He is also one of the many playable characters found in Disney Rumble, a hypothetical game in which this set was made for.


Specials

Weight: 9
Size: 9
Falling Speed: 9
Aerial Movement: 7
Traction: 4
Movement: 2
Jumps: 2

Idle Stance

Stromboli stands with his hands on his hips, rarely glancing from side to side.

Walk
Stromboli walks without taking his hands off his hips, his belly bouncing as he walks.

Run
Stromboli runs with gigantic strides of his legs, practically jumping to walk along. He pumps his arms in tandem with this.

Crouch
Stromboli kneels down to the ground as he strokes his beard, as if inspecting something.

Dizzy
Stromboli places his hands on either side of his head as he staggers back and forth.

Sleep
Stromboli sleeps standing in the stereotypical Disney fashion - almost inhaling the tip of his beard as he stares the first part of the snore, before exhaling and sending it blowing back away.

Specials

Down Special: Puppet Show

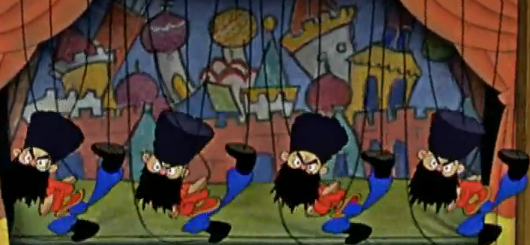
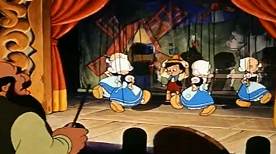
Stromboli motions to the top of the sky and then points down in a very swift motion, taking about the same time as Ganon's jab. Immediately after he finishes motioning, a puppet like one of the ones shown above (Slightly shorter than Mario) falls down from the top blast zone at Sonic’s dashing speed. It’s connected to it by strings, and after being summoned will start dancing in place with the infamous Russian kicking dance. It will kick out to each side two times each, dealing 3% and knockback that KOs at 160%, then extend out all its’ limbs at once as it shouts “HEY!”, creating a hitbox all around itself that deals 5% and knockback that KOs at 180%. The puppet will continue to do this in an infinite loop, and Stromboli can have up to four out at a time. Inputting Down B with one out will replace the oldest one, it getting yanked back up off the top blast zone.

Attacking the puppets themselves doesn’t hurt them in the slightest or even interrupt their dance. They still take the knockback, but their strings will cause them to swing back towards the foe with realistic physics (And back and forth a bit as they lose momentum), boosting the power of their kicks with momentum they pick up from the attack. The puppets are very light, but can never be killed by this. Stromboli himself can attack the puppets like this to turn them into more active hitboxes against the foe, with the more sensible option being that a swinging puppet will force another puppet to start swinging if it hits it - two swinging puppets meeting up will cause a large hitbox to take place, dealing 20% damage and high knockback if the foe is traped between them.

To defeat the puppet, you must attack the string connecting the puppet to the top blast zone. It has a paltry 15% stamina, so this is rather easy. Once the puppet’s string is cut, it will fall down lifelessly and must be tossed off the stage before Stromboli can throw another. It becomes a generic throwing item for foes if they pick it up, but if Stromboli picks up this puppet he will hold it by the cut strings, animating it himself if he stands in idle (And visibly mouthing “Hey!” when the puppet extends out all limbs). Holding a puppet in this manner does not prevent Stromboli from using attacks like when most characters are holding items – he can use all but his grab, which enables him to drop/throw the puppet away. Several of his attacks in fact change if Stromboli’s holding a puppet, largely due to the hand that he uses to punch and what-not being the one he holds his puppet in.

If you don’t want to carry a puppet along with you but still want to get mileage out of a puppet when the foe is adamant about cutting them down, your unseen helpers at the top blast zone don’t have to lower the puppets all the way to the ground. If you input Down B when a puppet is already being lowered, it will stop being lowered and stay at the elevation it’s currently at. In addition, if you use the move in the air the puppet will be lowered to your current location rather than the ground. The puppets must be at least 3 Ganons from the ground at bare minimum.


Neutral Special: Appealing To The Crowd
Stromboli turns to the camera and takes several very deep bows, blowing kisses and yelling happily in Italian. This causes either coins or tomatoes to be thrown at Stromboli from the foreground. By default, tomatoes will be thrown at Stromboli for the next 20 seconds. The off-screen audience will throw tomatoes at Stromboli even if he moves from where he was originally standing. While these tomatoes can indeed hurt Stromboli, if a foe is adamantly chasing Stromboli and he's fleeing it's likely they'll be the ones getting by the tomatoes. The tomatoes deal 5% and flinching on contact, and one is thrown every 2 seconds,

Now, the longer puppets have been dancing since you've last used this move, the more gold coins will be sent your way. A puppet Stromboli is personally using while in idle counts for this. Having more puppets out dancing multiplies this. After a maximum of one puppet dancing for 45 seconds or 4 puppets for 11.25 seconds, this move will be maxxed, with Stromboli flashing gold somewhat like how Wario flashes with a maxxed fart. At max, the move produces 35 coins over 5 seconds.

These coins deal a mere 1% and no flinch to the enemy, but each and every coin heals Stromboli of 1% on contact. Unlike with the tomatoes, this requires Stromboli to stand still to reap the benefits rather than flee, as coins vanish on contact with the ground. Considering how many coins will be coming so quickly, foes will be quite frantic during this brief period to pressure you, making this an excellent time to capitalize on Stromboli's defensive melee moves.

Stromboli cannot use this move again until the audience stops throwing things at him. Also keep in mind that Stromboli will be able to collect coins even if he loses a stock - the puppets remain onstage even after he dies, allowing him to immediately come back and collect coins if needed, or collect them at a much later time.


Up Special: Stromboli Slash


Stromboli reaches behind his head to reach for his sword, before he slashes it forwards. It's a respectable KO move, dealing 12% and knockback that kills at 95%. It's not the fastest KO move around, but it's not unusable by any stretch of the imagination.

This will cut strings if it comes into contact with them, necessary due to strings being immune to the rest of Stromboli's attacks, and him likewise being immune to their attacks. If you want the bonuses of a puppet in your hands but the foe isn't knocking the puppets down, this is your go-to-move.

While in the air, Stromboli slashes it upwards in a very Marth-esque motion - though he only recovers half the distance. As should be rather obvious, he keeps the same damage/cutting properties. However, even with his decent aerial movement, his falling speed ensures that he plops down like a rocket. Stromboli's recovery is hell, meaning that he'll want to stay onstage at all costs.


Side Special: Goldman Sachs
Stromboli takes out a sack, eyeing it with greed. With no coins (You can obtain them via Neutral Special), he simply attempts to grab foes with it - only grabbing their head if it's literally impossible to grab all of them. After this, he'll tie the opening of the bag shut with some string and force foes to escape it with average grab difficulty. Foes can take knockback inside of the bag, but not damage. Foes can still jump while inside of the bag to move about, but cannot attack or move normally.

If there are 10 or more coins in the bag, Stromboli will attempt to slap the bag of gold downwards for a KO move. With 10 coins, this does a token 8% and knockback that KOs at 150%. With 25, it deals 20% and knockback that KOs at 70%. This can go all the way up to 35, this being the cap, dealing 30% and knockback that kills at 55%.

The best part is this move is largely lagless regardless of how many coins are in the bag, making this a reward well worth the effort put in. Beware that every time you use the move, 4 coins slip out/get knocked out of the bag and there's no way to get those specific coins back.


Grab-Game

Grab - The Master Showman
Stromboli attempts to grab the foe with a typically heavyweight grab. If successful, he will automatically tie up the foe, connecting four strings to their limbs, holding the ends of them in his palm. This occurs before the foe can even attempt to grab escape at all.

Now, if the foe "grab-escapes", Stromboli will still be holding onto the string afterwards. This prevents the foe from moving more than a platform away from Stromboli. They can destroy the string, but this string has a bit more HP, 26 to be precise. If Stromboli or the foe deal knockback to each other, both will end up taking said knockback. If the foe is the one taking said knockback, though, Stromboli can cut the string on demand with his sword.

While Stromboli's throws deal knockback to the foe by default, they release them from the string. Holding the grab input while they're being thrown causes them to not take the knockback, only being moved a slight distance away - to make up for this, they take double the damage from the throw. In addition, inputting grab when you already have a foe tied to you in this way will cause Stromboli to yank on the foe's string, pulling them half a platform towards him and causing them to trip if on the ground. If he has a puppet, he will first throw that at the foe before he can yank on the string.

By pressing grab while holding an item, Stromboli will grab it and attach his strings to it. While this hardly has any relevance in a 1v1, this can come in useful in a casual FFA setting, allowing Stromboli to be more of a threat, or be useful in specific match-ups against item-making foes.

Pummel - Italian Rage
This is not a traditional pummel state, rather being one that can be held out for 3 seconds by holding the button. Stromboli pulls the victim up to his level and begins yelling at them in Italian - if the foe attempts to escape during this time, Stromboli delivers a mighty slap that releases them automatically. This deals 18% damage and high knockback, being one of your best killers in this regard, the strings will fly off of them regardless of if you hold the grab input or not. The foe has no chance to slip out in the middle of Stromboli's yelling, but will automatically slip out after the pummel ends. This motion allows you to potentially hold them in place longer - thereby keeping them from destroying your puppets early, allowing you to reap more of the crowd's reward.

Up Throw - Lasso
Stromboli throws the foe up, still holding the strings, before spinning them around in circles above his head. This does no damage, hardly doing any damage - in fact, this throw isn't done yet...

The foe can button mash out of this, having to escape at 1.5x grab difficulty - which causes them to go flying in a random direction and take 4% damage, likely getting deattached from their strings if Stromboli isn't holding the grab input. Now, Stromboli can throw them from this state by choosing a direction on the control stick - though he is only able to throw them in upwards or forward-angled directions. Throwing them deals 5% damage by default - with 2% damage for every second you were able to keep them grabbed without them mashing out. While the foe is incredibly likely to mash out and render your hard work useless, you can time this to throw them just before they escape - and their escape may be prolonged if a swinging puppet is around.


Side Throw - Twirl-Around
Stromboli grabs his opponent by their strings and twirls them around himself 3 times before he throws them in the direction you picked, with 7% damage and good knockback - this move comes off as more useful when you consider that there may be puppets dancing near you, as this allows you to slam your foe into the puppet a few times for extra damage before releasing them - as well as forcing them to build the puppet's momentum for you.

Down Throw - Slamdown
Stromboli grabs the strings and slams them down to the ground in front of himself, taking the foe with them - they smash down on the ground, taking 6% damage and laying down in prone. This is one of Stromboli's best ways of shoving them into prone easily, with the only prerequisite being that you put them into your grab. Take note that this is the only one of Stromboli's throws that doesn't boost damage if you're not releasing them from the strings - as they're not taking knockback anyway, though you can still choose to release them from the strings regardless.

Standards

Jab: Laughter
Stromboli throws up his hands in laughter for the initial hit, dealing 5% and weak vertical knockback. The second portion of the jab has raise up his hand high before slapping his knee, dealing 6% and downward knockback to send foes to the ground.

The first hit of the move will cause a puppet you're holding onto to get sent up into the air. If they're in the air to start with, the first hit can still be of some use as it sends the foe even higher up into the air, potentially putting them out of range from hitting you with their aerials. The second hit will send the object tied to the strings to the ground if it was in the air. If the foe was in the middle of the aerial, they'll now be stuck in the landing lag of said aerial. There's plenty of leeway with when you can use the second part of the jab, so use it in a unpredictable manner to avoid getting hit by aerial enemies. Puppets/foes deal 4% and weak knockback as they are flung about by this move.

Do take note that this is one of Stromboli's only real anti-aerials, and that the puppet forms a hitbox primarily in front of him - meaning he's still vulnerable if a foe chooses to approach from behind...


Forward Tilt: Knock-a You Silly!
Stromboli delivers a mighty backhand in front of himself. This deals 8% and has a pretty good reach, potentially halting approaching foes.

With a puppet in-hand, this will cause the puppet to end up behind you, as Stromboli covers a wide arc with his backhand. The puppet will stay in this position if you enter idle, meaning this can be useful if you predict a foe's going to roll behind you to try and catch you off-guard. The puppet also has a bonus hitbox as it spins backwards for 6% and flinching. This can also be useful while dashing to hit foes chasing you, such as when the audience is throwing tomatoes at you.


Up Tilt: Lariat
Stromboli does his best Zangief impression as he extends out his arms to either side then starts spinning in place. This deals a nice little 7% damage and covers both sides of Stromboli, leaving only his head open to attack.

If this hits a puppet, it will cause it to begin spinning in place for the next 3 seconds - becoming a hitbox that deals multiple containing hits of 2% damage, as well as being hard to DI out of. It will also reflect all projectiles that are thrown at it. After the 3 seconds are up, the puppet will attack using the normal "HEY!" hitbox, before the cycle repeats. Stromboli can use this against a puppet multiple times to increase the time it spins (adding 3 seconds every time he hits it), though as it will swing away from you a bit when you use this, it will be difficult to make it become a constantly-spinning hitbox.

Using this on a puppet with strings attached will cause them to spin around Stromboli with this hitbox for the duration of the attack, allowing Stromboli a way to reflect projectiles as a defense.


Down Tilt: Rolling on the Floor
Stromboli bursts out into laughter again and falls into prone. Stromboli has a unique prone stance - he lays on his back, laughing with his hands on his belly. Rather than his get-up rolls giving him invulnerability, these cause Stromboli to form a hitbox. Likewise, his "get-up attack" doubles as a dodge as Stromboli gets up. Essentially, Stromboli's prone is reversed from a normal character's.

Stromboli's "rolls" cause him to continue laughing as he rolls three quarters of a platform in the direction chosen. This will cause Stromboli to trip any foes he rolls past (He can still be attacked fine and dandy from behind), dealing 6% and if they were already in prone before he passed them cause them to get dragged with him to the end of where he intends to roll, dealing 10% to them in the process. This does not beat out enemy get-up attacks, but will beat out enemy attempts to roll up from prone.


Dash Attack: Charger
Stromboli reaches out with a grab hitbox as he runs forward - stopping with some bad end leg if he doesn't grab anybody. Should he succeed in grabbing someone, he will dash forward with them, holding them in front of himself to act as an attack sponge. After a second of this, Stromboli grabs the foe and takes an item they may be holding, kicking them away for 7% damage.

Smashes

Down Smash: Spinning Punch
Stromboli cracks his knuckles, before he punches so fast that he spins himself around as he punches. This causes Stromboli to turn into a hitbox that deals 19-30% and knockback that kills at 155-95%. If Stromboli is carrying a puppet, he'll spin the puppet around himself for the move's duration, it turning into a hitbox that deals 8-14% and knockback that kills at 160-135%. If Stromboli is holding a puppet -and- a foe (He must grab the foe first for this to work), he will stop holding out one of his arms towards the end of the move, slamming the object that's being held into the other object. This will cause both objects to take 22-32% and knockback that kills at 105-65%, getting sent flying in opposite directions.

While an obvious killing move, this requires some set up - you'll need to not only grab the foe, but get a puppet as well. Even without the foe, this still has it's uses, as this becomes one of Stromboli's best ranged melee attack when he has a puppet attached.


Forward Smash: Italian Rampage
Stromboli spazzes out in place for the charging animation, making an incredibly loud noise. At the end of this, Stromboli begins releasing several wild punches in front of himself as he moves 3 Platforms forward at his dash speed, his beard shaking back and forth as he madly screams in Italian all the while. Contact with a punch from Stromboli deals 10-19% damage and good knockback, launching foes horizontally away from him. This is one of your best tools for when a foe approaches you from the front, as you're an active hitbox and can't be knocked out by standard melee attacks. You can still be knocked out of this by projectiles, disjointed hitboxes and attacks to the back, however.

A more situational use for this, is using it while tethered to a foe - the foe is forced to move forward, lest they get hit by your rampage, potentially causing them to come into contact with a puppet or whatever you've laid out in their path.

When you use this with a puppet in hand, it becomes far more effective - as Stromboli's rapid punches keep the puppet in front of himself at all times as it moves up and down. The puppet deals 8-16% if it hits anyone, not only increasing this move's hitbox by a bit, but more importantly - acting as an attack sponge for the Great Stromboli, making him less likely to be knocked out of this.


Up Smash: Stromboli Stomp

Stromboli begins to look gradually annoyed with the foe, before he jumps into the air, holding his arms behind his back. The distance in which you jump upwards is influenced by how long you charged, ranging from one Kirby upwards to a Ganondorf. During this time, you can move about in the air with Stromboli's aerial movement to choose where you land, obviously being more effective if you charge longer, for obvious reasons. Once he lands back on the ground, he lets out a booming yell of "QUIET!". There is a bit of end lag here, but not enough to make this in-viable.

Upon landing on the ground, the ground around Stromboli shakes thanks to his massive weight - a platform on either side of Stromboli, to be exact. If foes are within this range, they are stunned for half a second - while you don't have much time to capitalize, this is an excellent opportunity to get a grab in on them. No, you can't just spam this to stack stun on the foe, as they cannot be affected by this for 3 seconds after you use it once.

If foes are on the ground in prone when you use this, they take 5-11% damage and are immediately knocked upwards from it - possibly allowing you to capitalize on their newfound state if you can get out of your end lag quick enough, perhaps with a followup fsmash? More importantly, if you land on a foe in prone, they take 16-25% damage and high upwards knockback. This is one of your only attacks that launches them upwards - but it allows you to get them out of your (lack of) hair for a few moments, if you need to gather more coins especially.


Aerials

Neutral Aerial: Stomach Jut
Stromboli faces the screen, and after some minor startup, swings out his right/left half out, which side swinging out depending on what direction you push the control stick in during the startup (it is chosen randomly otherwise). Getting hit by Stromboli deals 6% damage and horizantal knockback - attacking him will cause them to take the knockback of the attack they just hit him with, effectively allowing him a counter - which works well in close range.

Forward Aerial: PUSH!
Stromboli PUSHES the foe in the public's eye! He quickly shoves in front of himself, this is an incredibly fast maneuver that deals 4% damage and pushes the foe away with decent set knockback - allowing you to effectively space them with this move.

This is easily your best aerial to actually deal with midair foes - as it allows you to effectively push them away from strings they might be attempting to cut, as well as possibly into a stray puppet if you want to boost their momentum a bit.

While you have a puppet in hand, the rough shove from Stromboli causes it to fly forwards in an actual hitbox - dealing 8% and good knockback, giving you a hitbox that deals knockback more than the typical set knockback. A foe attached to strings is also forced to fly forwards, dealing the same damage if they meet a puppet or it's strings - Stromboli can quickly cut the string to set them flying forwards.


Back Aerial: Spin Punch
Stromboli turns around as he punches. He turns in such a way that the arm he's punching with is the less practical to more immediately hit behind himself, causing his arm to be blocked off from hitting behind himself for a time due to his fat. This bair turns Stromboli around, and the laggy punch deals 11% and knockback that KOs at 90%.

If you have a puppet, this will cause it to get wrapped around yourself, the string spinning around Stromboli until the puppet is stuck against Stromboli's fat. This causes the puppet to be a hitbox on either side of you during this time, dealing 8% and knockback that KOs at 150%. Afterwards, during what would normally be ending lag, the puppet will spin back around to unwrap itself. At the end, the puppet will spin around rapidly in a blur, a constant hitbox that deals 10% and knockback that kills at 130% and reflecting projectiles. This lasts 2 seconds. This will cause the puppet to go out to the limits of the string of a platform. If you release the puppet via you sword, though, it will go flying forwards Battlefield's length.

Foes who are tied up in strings cannot dodge this attack, getting grabbed when Stromboli attempts to wrap them around his fat in a grab hitbox. To stop this attack, foes must knock Stromboli out of it, which is thankfully for them fairly easy to do due to the laggy nature of it. If they are hit by it, they'll take 10% when they get wrapped around Stromboli before suffering the other consequences.


Down Aerial: Ground Pound
Stromboli's beard and limbs flail upwards as he goes into a full free-fall, letting go of a puppet he might be swinging on, before falling downwards at Sonic's dash speed. His arse is a hitbox that deals 18% and spikes foes as powerfully as Dedede's Up Special. Standard HMA stall then fall.

The move is mainly notable for when you're carrying around a foe tied up in strings, as it lets you effortlessly drag them to the ground or potentially a suicide KO if the stage has bottom blast zones. The foe will be strung up in the air above Stromboli, acting as a hitbox that deals 7% damage to anyone they hit during this - this can also apply to puppets, giving Stromboli some small defense above his head as he falls downwards.


Up Aerial: Cling
Stromboli reaches upwards in a grab hitbox - if he grabs a foe, he will hang on to their legs, combining his fall speed with their's, effectively making the two of you drop like a rock (also helping if you fastfall). Stromboli can break free at any time by pressing the A Button, while the foe must deal 10% to Stromboli. The one with the highest fall speed has the most influence over the pair's movement, which likely means Stromboli will have control unless he is fighting another heavyweight. As soon as you hit the ground, the two break free from each other. You can use this to drag foes away from puppets or back down to the ground, if needed - also serving as a suicide KO, if not one that's easy to break.

By grabbing on to a puppet, you can hold on to it for three seconds. Staying on any longer will cause it to break and fall off, cutting it's strings. This allows you to stall a bit, if needed.


I've Got No Strings On Me

When obtaining the Smash Ball, Stromboli lets out a boisterous laugh as all the puppets onstage go up to the top blast zone, as Stromboli snaps all strings connected to himself and steps into the background of the stage, pulling out a conductor's stick as he enters a new idle. You have 8 seconds to strategize your plan of attack - as you gain control of an arrow that has free-flight comparable to Super Sonic - only a bit slower to allow you more control, as everyone is locked into place. Pressing any input while in this state has a small square appear at the location of the arrow - you can plop down 12 squares in the following order - 4 blue, 4 pink and 4 red. None of these can overlap. If you don't place them all after 8 seconds, Stromboli faceplams and re-enters the foreground, you effectively wasting a final smash.

Once you place them all, Stromboli steps back into the foreground and begins using his stick as though he were a mad conductor, triggering a new idle. As soon as everyone is unlocked from place - 4 blue farmgirl puppets appear where the blue squares were placed, having the same stamina/swinging properties of your normal properties, the only difference being that you can't knock these (or any of the other puppets in Stromboli's final smash) down. The farmgirl puppets dance in a defined space - moving a platform forward with light kicks of 4%, before scooting backwards the platform backwards with their backside sticking outwards - their backsides are solid and deal dragging hits, dragging the foe to where they want them to go. You can use this to drag them into the attacks of other puppets - effective if you can push them into other farmgirls, as two backsides making contact deals 12% and good knockback to anyone trapped inside.

After 4 seconds, 4 pink and blue dancing puppets will appear, the farmgirl puppets remaining on-stage. These constantly kick on both sides of themselves - dealing 8% and high vertical knockback to anyone who comes in contact with them - possibly star KOing foes if they're high up enough, possibly by swinging them.

After another 4 seconds, your standard down special puppets appear. The puppets dance for 8 more seconds before being pulled back up to the upper blast zone in a hitbox - allowing Stromboli a fresh start with a new setup. During all of this, Stromboli is free to attack the puppets and cut them while the foe cannot. One of your most obvious strategies here should be to get some free healing - as your puppets rack up coins for you and are able to defend you thanks to their large numbers.


Playstyle

Stromboli's game, of course, revolves around his puppets. He's rather slow and rather laggy without them, so he needs to play dirty a bit in order to get his way. The puppets, of course, are the main part of your gameplan - they're quick to set up, easy to take down, and can be made into a more offensive purpose if needed. Right off the bat, you're going to want to have a puppet or two set up - not only to rack up some damage a bit, but to cover yourself as well. Stromboli'll most likely be playing defense at this stage in his game, able to bait an approach from foes. If you're not ready for an approach from foes for whatever reason, just get the crowd to throw tomatoes at you and run - the foe should be getting splattered with them while you make a quick getaway, just like an actor getting booed off the stage. Using ftilt during this time works wonders - just use that as you're dashing to make a sudden unexpected blockade at your back.

At some point during all of this, you should try to attach a string to the foe - your grab-game is useful for the sheer ways in which you can use it to stall the foe from meddling with your wonderful puppet show. Even not throwing them is the most obvious example of this, forcing them to stay put, making a lot of money......FOR YOU! This also has the beneficial effect of releasing them at the end of it - leaving them with strings attached. UThrow is an alternative way of stalling them out, especially if you prefer the idea of throwing them away to keeping them attached to a string, as you can aim it in most any direction. DThrow kickstarts your prone abuse game, while you can force foes to build puppet momentum with SThrow.

Let's talk about your tether. Your tether leads into an intricate prone abuse game, and forces the foe to stay subjected to your melees. Among your most obvious things here is your down tilt - by forcing yourself to enter prone, you can trip those who have gotten out of it, starting an offense against them. Your main goal while tethered, is to essentially drag them across the stage with you, then cut the strings. Your USmash and FSmash are amongst the best tools for moving them with you, and you can seamlessly transition back to your coin/puppet game once again with these moves. Your standards and aerials, of course, help in pushing them about. Once you have them far enough away? Feel free to cut the strings and DI back to the stage, or use your downwards aerial to push them down with you if you can't possibly make it back to the stage with your pitiful recovery. Back Aerial can also bring foes attempting to retreat closer to you, before they attempt to knock you away - given they're stuck on the string with you, this can spell out a demise as they knock themselves towards the blast zone - before you suicide downwards.

If the foe insists on cutting your puppets down, you can grab a puppet to begin a much more offensive game, as a good majority of your moves are made to be better when you have a puppet in hand. While you have to stand in idle with the puppet to build up to your down special, you'll have no problem getting that in thanks to how much defense and offense the puppet provides you. Use your ftilt to protect your backside, use jab to protect against assaults from the front - among your best tactics to use here is to start spinning your puppet around your body, as you can make your self impervious to projectiles before running forward. Hands-down, your best tactic for approaching is your Italian Rampage, as it allows you to sponge up attacks as you move forward as a giant hitbox - while spinning punch works better as a standalone attack thanks to the incredible range it provides - especially if you have a puppet and a foe at once, turning it into one of your best killers.

However you decide to play Stromboli, there's always a crescendo you need to build up to - appealing to the crowd. As you play, you should always attempt to keep your puppets alive through any means necessary to make sure you get as many coins as possible. When you finally have enough coins - all you need to do is press it. Foes will be frantic during this time, and you'll be locked in place, meaning you'll have to defend yourself to the best of your ability through clever use of melees and puppets, perhaps having a swinging or a spinning one nearby to keep yourself on the defense and keep the foes from approaching you. If the foe manages to knock you away, you are going to want to build space asap to keep you from losing the coins. You can kill the foe beforehand before healing up with the coins - allowing you to gain money in peace. As the coins can build up between stocks, suicide even becomes a legitimate strategy, allowing you to collect coins upon your return - showing how greedy Stromboli is for them. Whatever it is, you gain a reward well worth the wait - your best killing move through the sack, though it will eventually drain over time and it can hurt you if you whiff it, it's the best possible reward, and the biggest addition to Stromboli's line of excellent killers.

That doesn't mean Stromboli doesn't have his weaknesses, though. Despite all his strengths, he still has a fatal weakness against aerial foes. His anti-airs are all extremely weak or have some sort of flaw to them, keeping them from being especially useful. It's practically required that the foe go into the air to cut down your puppets, meaning they'll very likely find the time to attack him from up there. Even ignoring all the aerial stuff, he has all the standard heavyweight weaknesses: he's slow, he has a lot of end lag - and let's face it: you get off the side of the stage? You ain't getting back on. But as a master showsman, Stromboli is equipped to deal with all obstacles. His main helper in Disney - the one that allows him to stay on the levels of magical fairy godmothers and snakelike sorcerers, is his sheer unpredictability. Stromboli can smoothly transition from phase to phase at the drop of the puppet. Stromboli is the fighter who keeps his foes on his toes, allowing him to keep control of the foe: like a puppet in a cage.


Extras

LOGO - BUT NOW I'M FREE

Stromboli's icon is one that represents him well while also representing the entire Pinocchio series - a pair of strings, without anything attached.


ENTRANCE - SHOWBOATING
Stromboli enters the screen bowing and blowing kisses to the ground, a puppet tucked under his arm.

UP TAUNT - CONS-TAN-TIN-OPLE!
Stromboli announces the above syllables, turning his back to the camera and shaking his arse at it in a taunting fashion.

SIDE TAUNT - FACEPALM
Stromboli facepalms while muttering Italian gibberish, just like he does in one of his key scenes.

DOWN TAUNT - MONEYHUNGRY
Stromboli rummages through his sack, a gold number popping up above his head showing how many coins you have.

If you have less than ten coins, Stromboli pulls out a worthless metal ring from the sack and bites into it, loudly yelling "What's this!?", tossing it aside.

If you have 10-25, Stromboli pulls out a single gold coin, kissing it lovingly, before he places it back in the sack.

If you have 25-30, Stromboli happily grabs a handful of coins and throws it up in the air, catching them all in his sack before they fall back down to the ground. If you're interrupted here, the coins will be placed on the ground - his run animation changes when he runs over coins, kneeling down as he runs to pick them up and place them in his sack. This allows him to place them back in his sack easily - while you can seriously be hurt by this, if you can pull it off, it should be rage-inducing for the foe.


VICTORY POSE 1 - THE ONION
Stromboli takes a large bite of an onion he's holding - taking out half of it neatly, before tossing it aside, back at the losers.

VICTORY POSE 2 - SINISTER STROMBOLI
Stromboli has his sword - which has multiple food items impaled through it, and makes a throat-cutting motion with it to his foes, before he begins eating the food straight off of it.

VICTORY POSE 3 - CAGED
Stromboli grabs the last place loser by their neck and throws them into a cage, locking it and yelling in a booming voice - "THERE!"

VICTORY POSE VS. GARBLE - FIREBREATHER
Stromboli looks straight at Garble and laughs. "You think dat you know how to breath fire? I can show you how to breath fire, boy!" He burps straight at Garble, before laughing.

VICTORY POSE VS. ASHENS - TOYS
"Toys!? Garbage!" Stromboli denounces Ashens, standing amongst his partners. "You should try one of my-a puppets!"

VICTORY POSE VS. MIKE DAWSON - ETERNAL LINE
Stromboli lets out a boisterous cry of "Ehh...you missed, pal!" before slapping his knee in laughter.

VICTORY POSE VS. GHETSIS - THE GREAT MAGICIAN
Stromboli is seen fiddling with Ghetsis' cane, making it fire thunder and energy and other Pokemon moves without Pokemon. "Perhaps the Great Stromboli shall become a magician! Whatchu think?" He turns to Ghetsis, who faceplams in response.

VICTORY POSE VS. YOUNG XEHANORT - NO STROMBOLI IN DDD
Stromboli laughs at the young Xehanort: "Go back to your home and play with your dolls, little girl!"

VICTORY POSE VS. ALAKAZAM - SILVER SPOON
Stromboli has one of Alakazam's spoon-amplifiers in hand, staring at it curiously: "And what do you use dese for, eh?"

VICTORY POSE VS. WILLY WONKA - VIEWING PARADISE
Stromboli has a bunch of Wonka Bars impaled on to his sword, he asks "You tink you can stop the Great Stromboli with food?" before eating the Bars off the sword.

VICTORY POSE VS. CLAYTON - WORKERS
Clayton's Pokemon are seen locked in a cage besides Stromboli. Stromboli turns to a gagged and bound (in strings) Clayton and sneers. "You have given the Great Stromboli many great ideas...THESE SHALL BE MY NEW PERFORMERS!"


"OHOHOHOHOHOHOHOHO!"
 

BKupa666

Barnacled Boss
Moderator
Joined
Aug 12, 2008
Messages
7,788
Location
Toxic Tower
BEASTMAN.EXE
The set’s nature is rather scattered, an approach Rool used to refer to as “sending space junk into orbit then bringing it together with a gravitational pull,” the pull being the playstyle, of course. The claws themselves turning into platforms and walls help differentiate the set from the other members of its ‘disjointed parts’ family. The little implied tactics throughout the set are rather cool, such as placing together two claw walls to cage in a foe, or repeatedly flipping a claw with N-Air and moving it after the foe to juggle them from afar.

Indeed, the various options Beastman has for positioning and recovering his claws add a rather welcome layer of range to the set, despite appearing a bit repetitive at times (particularly when he has multiple options for simply boosting the claw skyward in U-Smash and U-Throw). A nagging problem of mine lies in the clawless attacks, which seem to serve the collective purpose of giving Beastman followup options after placing claws, rather than having more individual functions. Something that does not impact the set in the slightest but is still a minor gripe is the order attacks are shown; it seems as though they were simply listed in the order the moves were brainstormed. Just a tad flustering, is all. Beastman is a happy middle ground between Bubbleman and Flashman (the former being the best ‘man’ of the three), in addition to being a well-crafted simplistic set.

LARFLEEZE
There’s little question that 1 vs. 3 sets have a high bar set for them this contest, after the success multiple bosses had last time. That said, after the initially exciting mechanic, I found Larfleeze underwhelming. Really, until he earns a KO and calls forth a Construct, he plays as close to a textbook summons character as I’ve seen in a good while. He has a Wario fart mechanic applied to a minion move, while using a ton of Brawl attacks, merely with healing or health-siphoning properties tacked on; though this does aid the minions, their addition to random attacks seems very much like forced uniqueness. Racking damage to build the Constructs’ health also seems rather downplayed, as aside from F-Smash and maybe juggling foes on D-Smash, this aspect of his gameplay is largely ignored, seemingly in favor of the entirely reactive option of corrupting enemy traps.

Even once Constructs enter the stage, his gameplay pretty much remains stagnant, just with more focus placed on healing/stealing health from minions without it serving more of a purpose. Though there are glimmers of playstyle and potential buried in Larfleeze, his defensive options mainly just seem dogpiled together in an unsavory mixture. Here’s to hoping he serves as a springboard off of which you can make a superior boss set.
 

Katapultar

Smash Lord
Joined
Nov 24, 2008
Messages
1,284
Location
Australia
[collapse="Clayton"]Why do I get the feeling I'm partially responsible for this set's creation? It almost comes off as a parody at times, and the timeframe in which it was made sorta helps further that conviction. The idea of making the Ditto as competent as being able to transform into foes and use their movesets with only a half-weight penalty sort of much kills it for me right off the bat however, even if it can be used for some mindgaming (of which reminds me of two of my sets...) which doesn't play too much of a role or gets taken advantage of much minus some subtle pit and teleport pad interactions. And possibly due to the convenient nature of having 3 Pokemon and a fat heavyweight male antagonist with a mining theme that each have their own potential for a set, I found the set a bit too straightforward in what it does via distracting the foe with Ditto and either healing or setting up pits to knock foes into, and that's pretty unfair when you have the foe's moveset and your own to work with despite the latter being more vulnerable than the foe....but he can kill them with their own moveset with all the ways you can prone foes - that does bring purpose to those defensive and healing moves, but they're not really enjoyable in hindsight. I did enjoy the "dark" aspect brought about by the forged character however, and all the clever reasoning to go with the uses of Pokemon and striking rich much like Hugo - it's just that it all seems to fall into place -too- conveniently, yet on the other hand all those combined materials made it work well for a one-day set when it's easy enough to come up with stuff.[/collapse]


[collapse="Stromboli"]Another MW/Dave joint? Cools, didn't expect one so soon. A much more "at-home" type of set, it predominately feels like a Dave set and brings certain other characters and elements to mind. The moves themselves and interactions are very respectable, though sometimes it's difficult to see where it all leads too when the concepts are somewhat ordinary and arguably scattered - don't get me wrong, I do like the idea behind the puppets being suspended from a certain point and bumping into each other, though the idea of them just attacking on the spot felt like a bit of a let down. It works together with the gold and doesn't take too long to activate if you have 4 puppets as to flow into a decent recovery method for Stromboli, though I can't help but feel it could have been handled in a more elaborate manner where Stromboli not only gets more indirect control of what his puppets to attack foes from afar but also have it affect the output of gold - we're talking about a fat man who wants to exploit his foes for money, so why not allude the "audience" into thinking they're playing a role in the show? The grab's name also made me think Stromboli would have taken control of the foe by attaching strings to them to move them like puppets, something that could have played a role in the gold output that this man desperately wants. From what's shown here, the puppets are simply used in rather mediocre interactions to help with Stromboli's slow melee game - he seems to be fairly versatile and well-armed, but nothing really leapt out at me. It's a fairly average set albeit a passionate one in my books, one that could have been great had it gone in a different direction in showcasing the greedy Stromboli.

Also, I totally loled at the Ghetsis victory pose.[/collapse]
 

Hyper_Ridley

Smash Champion
Joined
Dec 21, 2007
Messages
2,297
Location
Hippo Island
Stromboli

This always was my favorite moveset for Disney Rumble, and thankfully it makes a very smooth transition to Brawl's engine. Using his puppets as weapons is too much fun, as is all the angry Italian stuff (though I can't help but feel the pummel deals a bit too much damage). It also strikes me as a very practical moveset, quite impressive considering how much craziness is packed into the specials. This might have been the motivation I needed to get back to work on Basil. (h)
 

The Warrior of Many Faces

Smash Apprentice
Joined
Mar 22, 2012
Messages
101
Location
Everywhere and nowhere, as location is meaningless
CLAYTON

This is a set I can get behind! A very nice playstyle that not only feels like the greedy businessman the set is for, but also flows pretty well. Lots of nice mindgames here with the gold, the Faint Attack, Leftovers, the throws, the teleporters… all very well done. Ditto doesn’t flow quite as well, but it’s not as if Clayton has a huge number of offensive options, so Ditto gives him some needed offense. Meowth was fun to imagine; he actually fights rather like an angry cat (minus Faint Attack and Pay Day), which I’d love to see, and Machoke does a very good job at being a bruiser. Heck, even Clayton himself gets in on the fighting, using his weight to his advantage, or just dynamiting to victory. Anything to win. Not only that, but with Clayton’s poor stats, he’s actually quite balanced. This is definitely a set to watch.


***

STROMBOLI

This was an odd set choice, but one that I think worked fairly well. You had somewhat predictable ideas revolving around the puppets (predictable since, y’know, he does puppets), but with the added tweak of Stromboli actually physically attacking a lot with said puppets, giving added depth and keeping me interested. Not only that, but the gold coins give even more depth, working towards the eventual reward in the healing and the Side Special. Very befitting of a puppet master, that slow, deliberate game.

Not only that, but you’ve got plenty of other stuff here that’s fun as well. This was very easy to visualize due to your descriptions of each animation. The basic animations at the front especially were great; I think I’ll be using that for my own sets in the future. The special victory poses for several of the recent sets were also amusing, and actually might be more realistic than normal victory poses; naturally anyone would have different reactions to different opponents. This does bring up something I can’t believe I missed, though: what happens if you battle, say, Alakazam, Ghetsis, and Garble in FFA? Which pose would play? Regardless, you’ve got something pretty good here with Stromboli.
 

JOE!

Smash Hero
Joined
Oct 5, 2008
Messages
8,075
Location
Dedham, MA


Although Yellow was my first, it was Pokemon Gold that really hooked me into the series. With the brand new world of Johto, as well as being able to go to Kanto, new Pokemon, new types, better graphics, the whole package reeled me in! I can't even say how many times I've replayed Gold/Crystal on my old Gameboy, even today I occasionally pop it in (it doesn't save anymore though...) and remember the fond memories of my very first Gen2 Pokemon...


FERALIGATR
When it bites with its massive and powerful jaws, it shakes its head and savagely tears its victim up.


<STATS>

Size=10 At 7'07", Feraligatr stands eye to eye with Ganon (the spikes on his head touch the bottom of platforms), while being as wide as fellow starter Charizard.
Weight=9 In terms of weight, he measures between DK and DDD on the scales. Often surviving well past 140% or more on bulk alone.
Run=3 Not the fastest runner out there, just behind Squirtle.
Crawl=6 When he moves to all fours his speed problem changes dramatically however, doubling to match DK's dash as well as making him a much shorter (but longer) target.
Air=5 Nothing too special here, with all around average stats for his jumps/mobility, though a tad on the slower side for top air speed.
Fall=7 A bit faster than the average character, Feraligatr's gravity is best compared to Marth's.
Traction=8 Pretty solid while being pushed around or dashing, Feraligatr unfortunately has a rather lackluster Wavedash, and should probably crawl back and forth quickly to space due to his impressive Dtilt covering him when needed.

Feraligatr is a fairly standard heavyweight in most respects with a unique fast-crawl for locomotion. But like with any predator, you want to move slowly before surprising the foe with a burst of speed...


<SPECIALS>
<NEUTRAL B = HYDRO PUMP>
Closing his jaws shut and rearing his head back a bit, water is seen splashing around his mouth as he charges up the move for up to 2 seconds and pulsing with a blue aura at max charge much like Squirtle does. The charge is optional, but will stay with you until you use it up. Anywho, when you release the move by tapping B, Feraligatr will shoot out a ball of water about the size of Yoshi's eggs (along with the ability to angle the shot much like the egg toss, but with range varying from Luigi's Fireball to Yoshi's eggs based on charge) that explodes on impact for 8-16% based on charge. The size of the water burst also changes with charge, ranging from 1/2 to a full platform worth of spread, but curiously it will always trip the foe and push them away instead of doing any conventional KB, though the push strength is increased with charge from 1/2 to a full platform's distance while they're prone. Obviously this doesn't trip foes mid-air, but the push is certainly welcome when using the move like artillery to space and set up an approach given his sluggish movement.

While 2 seconds may seem like a lot to charge up the move, Feraligatr's Torrent ability will thankfully shave off 1/2 a second for every 50% damage he takes, which can really help turn the tides in a pinch!


<SIDE B = SURF>
Shooting water all around himself, Feraligatr propels himself forward and actually swims in the torrent of water as he slips along the ground the distance of 1.5 platforms at the speed of Sheik's dash. Foes hit by him as he shoots forward will take 10% and light KB as well as be pushed along with him by the water in a perfect position for a follow up once the move is over. Or, he could always just jump-cancel the move as long as he's grounded, and make use of his wavedash to scoot forward and follow the foe on the ground, or just hop up and use an aerial approach to mix it up.

While airborne Feraligatr will perform a death roll as he surfs, hitting multiple times for a total of about 15% with all the hits before going in to special fall. Unlike most SideB's of this nature, his follows gravity and will slide off platforms and edges until it finishes, so jump out of it if you mess up your spacing!

Oh, and one more thing: Hydro Pump charges this move too! In fact, all his specials, smashes and some of his throws are charged up by HP, and take away the charge once used much like HP itself (they only use a full charge of HP, not variable charge). For Surf, this means an increase in distance traveled to a max of 2.5 platforms, and a damage buff of 16% when grounded, and a whopping 25% while in the air!


<UP B = WATERFALL>
Feraligatr will boost straight up with speed and height not unlike GW's own Up B, trailed by a stream of water just like with Surf that pushes foes straight down with force like Squirtle's Water Gun in Brawl. Anyone above him as he boosts up takes about 6% from his body, and minor KB away from him. Hydro Pump will increase the speed at which he travels from GW's Up B to Marth's, as well as increase the push effect of the falling water below himself to help try to gimp foes below.

Like with Surf, Waterfall is jump-cancelable, but only just before the apex of the move. You cannot use Waterfall again after jump-canceling, but you can at least do another special, aerial or directional air dodge before going into special fall.


<TEAM2 SPECIAL / DOWN B = DIVE>
When foes get near Feraligatr when he's on Team2 he will slam down on the ground with his huge arms, creating a big splash of water with a roar! The splash surrounds his whole body but is more or less point blank with a hitbox similar to Ike's eruption, dealing 13% with high vertical KB. If Feraligatr has Hydro Pump active, the hitbox will increase in horizontal range up to the size of Charizard's Dsmash around himself, while retaining the vertical height.

When done from the air you forgo the slight start up lag as Feraligatr nose-dives toward the floor, hitting anyone on the way down for 9% before hitting the floor with a much more damaging splash! For every 1/10 of a second you plummet, another 1% damage is added to the splash, so combined with a JC'd Waterfall...


<STANDARDS>
<JAB = SCRATCH>
Simple, but effective: Feraligatr rakes his claws in front of him with alternating swipes for 3% each, about as fast as the first two hits of Wolf's jab with mediocre range and negligible KB.


<FORWARD A = BITE>
Lunging his head forward with jaws opened wide, he snaps down hard for two hits of 7% and great horizontal KB, able to kill around 140%ish near edges. The bite is slightly angle-able up and down, and has Feraligatr step forward slightly to give it range not unlike DK's overall. It should mainly be used as a punisher however due to noticeable, and punishable, start up as he lunges, and a bit of cool down as he returns to a neutral pose.


<UP A = SPIKES>
Shrugging up with a bit of a hop, Feraligatr slams his row of spikes upwards for 8% with light vertical KB. Perfect for low-% strings and juggles, take advantage of his entire back and tail being a hitbox to wrack up some easy damage on those above you!


<DOWN A = TAIL WHIP>
Turning his whole body while on all fours, Feraligatr lashes forward with his mighty tail to smack anyone before him for 11% and great horizontal KB at the tip, able to kill at around 130% near edges. While hitting with the body of his tail isn't nearly as powerful, it can still be useful given the sheer speed of the move, rivaling Yoshi's Utilt in how it comes out near instantly with a bit of recoil afterward. Great for covering yourself while crawling, or trying to poke at defenses/recovering foes near the edge.


<DASH ATTACK = WATER RUSH>
As he dashes forward Feraligatr will create some water on the floor below, allowing him to slide around easier as he performs a shoulder bash at the opposition that is much like Falcon's in terms of damage and power, but the decreased traction allows him to slide the distance of Wolf's Fsmash while doing the move. While a little laggy at the start, Water Rush makes up for it with being Crouch Cancelable, IE: if you crouch during the move it will be canceled into well... your crouch, but retain the momentum! Combined with Surfing and Wavedashing, you can make up for your sluggish movement with bursts of speed and sliding to close in on your prey.


<SMASHES>
<FORWARD SMASH = AQUA TAIL>
Leaning toward/away from the camera as he charges, Feraligatr will swing his tail in an arc, slamming it in front of him with a splash of water at the tip for 14-20% and enough power to kill at around 120% uncharged when near a side. With telegraphed beginning and end lag to the move as he winds up, then turns back around, it's fortunate the splash of water will push foes from him for a bit of defensive use. Like all his smashes, Hydro Pump will cut charge time down to a minimum of 1/4th of what it usually is for full effect, as well as increase the splash made from just beyond his tail to the size of Lucario's Fsmash.


<UP SMASH = SUPERPOWER>
Clasping both hands together and bringing them down and to the side as he charges, Feraligatr swings upward in a mighty double-handed smash! Dealing 15-21%, it shares similar properties to Marth's Usmash in it being a mostly vertical hitbox as well as extreme power when you hit with the apex of the swing, being able to kill easily at 100% on most stages. However, while it comes out with speed like Marth's, he suffers from the exertion after using it with hefty cooldown comparable to the time it takes Ganon to choke then drop a foe (about 1/3 of a second). Thankfully, Hydro Pump alleviates this issue with a full charge, cutting the end lag down to nearly nothing!


<DOWN SMASH = RAGE>
Feraligatr clenches his fist and grinds his jaws in anger as he charges this smash, releasing his rage with two mighty stomps as he roars and causes water to erupt up to his waist from the ground where his feet stamp down! Unlike his other smashes, Rage has a multitude of hitboxes, his body hitting twice for 6-8.5%, and the water splashes adding up to 10-14%, for a potential total of 22-31%! Like most attacks of this nature though, it is very rare to have all the hits connect, but at least the ones that do will count more with a fully charged Hydro Pump, boosting the potential damage to 31-43%! As for KB, the first stomp will do light-medium KB, with the second hitting harder and able to kill at around 140%, useful for a later KO or punish due to the move lasting as long as Link's Dsmash.


<AERIALS>
<NEUTRAL A = THRASH>
Every part of Feraligatr's body thrashes about, his tail going up and down, jaws open and shut, claws rake back and forth, even his legs kick out as his massive frame becomes a hitbox! Foes hit during the beginning motions of his thrashing are hit away for 12% and decent KB, not enough to kill until high %'s near edges/offstage mind you, where later hits deal 7% and minor KB that is useful for follow ups. Lasting as long as GW's Nair, Thrash is useful when short-hopped for comboing or in the air as a defensive measure.


<FORWARD A = SLASH>
Lifting a claw above his head, Feraligatr quickly slashes the air in front of him for 7%, with the hitbox just in front of his face dealing 9%. With speed close to Toon Link's Fair, Slash is a great combo tool as well as offstage killer/gimper when sweet-spotted.


<BACK A = SLAM>
Looking back and lifting his tail to his back, a moment later Feraligatr crashes it back down for 14% and spiking force! The lag is comparable to DK's "Slam Dunk" Fair, but due to his tail's size it should be easier to set up for the kill if you get a good read on the foe.

Alternately, this can be used as part of a damage racking "pillar" combo: Up Tilt > Waterfall > jump Cancel > Bair > Fast Fall > Up Tilt > Repeat. Short Hopped+L-canceled Bairs on standing foes can also be a good approach for popping them straight up to the air.


<UP A = WATER GUN>
Looking up, Feraligatr waves his jaws back and forth as a jet of water pours out to cover an area similar to Mario's Up Air. Like with fellow starter Squirtle, this water gun sprays out multiple hits adding up to 14%, but has little to no KB. Good for pressure from below or light juggling.


<DOWN A = SNAP>
Leaning forward, Feraligatr performs what is essentially his Ftilt at a 45* angle downward for two hits of 6%. While a good deal quicker than his Ftilt, the KB is noticeably weaker, only able to kill offstage starting at around 150% for most characters.


<THROWS>
<PUMMEL/Z-AIR = CRUNCH>
Feraligatr hisses as he makes an exaggerated chomp forward towards his foes for a bit less distance than Ftilt, catching them in his mouth with an animation similar to Wario's bite with them comically hanging out of his mouth. Tapping A will deal quick hits of 2% like with Yoshi's pummel.

In the air, Feraligatr will simply catch his prey and fall down to earth with them where he can then pummel and throw them. Feraligatr's jaws are unique in that it while he has one of the laggiest non-tether grabs on miss, it takes about 20% more effort to escape his grab.


<FORWARD THROW = HYDRO CANNON>
Going to all fours to brace himself, Feraligatr launches his foe from his mouth with a jet of water measuring 1/3 of battlefield in length! This throw can easily hit multiple foes as it hits multiple times for 15% total, but deals no actual KB as it moves the foe(s) forward.

Hydro Pump when fully charged will double the length of the water jet to cover 2/3 of Battlefield in a mighty blast!


<BACK THROW = STRENGTH>
Rearing his head to the side nearly all the way behind himself with foe still trapped, Feraligatr then swings 360* and releases with a great amount of force! Dealing 9%, the foe is launched with diagonally upward KB able to KO at around 170% at a ledge.


<UP THROW = GEYSER>
Similar to Hydro Cannon, Feraligatr looks skyward before shooting the foe up with a torrent of water, only this time the jet is as tall as Ivysaur's Bullet Seed. Also unlike Fthrow, Geyser actually does KB along with 8%, but unfortunately only enough to start killing at about 280% even with the added height. Hydro Pump can fix this however, for a full charge will double the power of Geyser and boost it's KO range to about 140%!

Geyser also lingers for about 1/4 of a second after the foe is tossed, and will actively push anyone else that touches it to the tip and KB them too.


<DOWN THROW = SPIT>
Simply put, Feraligatr spits out the foe at a 45* angle before himself. This is by far his fastest throw, taking nearly no time to deal 6% as well as set up a chasing opportunity as the foe skids across the floor in front of him.


<TAUNTS>
<UP TAUNT = ROAR>
Feraligatr says his name triumphantly:


<FORWARD TAUNT = FIST-PALM>
Feraligatr punches his fist into an open palm and leans forward with a growl.


<DOWN TAUNT = INTIMIDATE>
Feraligatr gets on all fours and opens his jaws with a slow, menacing, alligator hiss.


TRAINER TIPS:

Feraligatr is all about ferocious, close quarters combat, and while he may not look it, he carries bursts of speed to follow up on that playstyle.

The main thing to be aware of when playing as Feraligatr is your various movement options, as unlike other characters he isn't consistent in how he moves about the stage. While grounded, you can choose between crawling up, Surfing, or using Dash Attack to crouch cancel a move sort of like a DACUS if it weren't limited to Usmash. But before all that it'd probably be a good idea to shoot a Hydro Pump at them to think about as you rush them, as dealing with watery artillery as well as a charging Feraligatr is probably the worst case scenario for most anybody. Once you get in, you can try to get them to the air with with a variety of moves to try and Pillar them as mentioned with his Bair, or continue a forward assault with Fsmashes, Bites and Grabs. After bullying the foe, make sure to find time to start to charge up your Hydro Pumps to boost up your moves, as after trading some % it should be a bit easier to find the time to prepare. Be wary though of Feraligatr's two weaknesses: 1) he has a blind spot directly below himself while airborne, and 2) he lacks any real diagonal recovery, with his best shot being a Jump Canceled Waterfall > Surf.

In the end, Feraligatr is probably one of the most reliable of the team choices from the roster as even though he may not be as fast, kill as easily, or even be as long-lasting, his combination of traits and unique movement should always keep him as a go-to pick for many teams.


TEAM OPTIONS & SUPER SMASHES:

WITH ALAKAZAM : WHIRLPOOL
Alakazam and Feraligatr join forces to create a platformed-sized Whirlpool on the ground! Animation-wise, Feraligatr is seen spraying a jet of water towards the floor, as Alakazam "stirs" his spoons above it, using his psychic power to turn it into a pokeball-deep vortex of water over the next half a second. Any enemy that moves over the whirlpool will find themselves pulled to the center at the rate of Brawl's PS2 conveyor belts as well as suffering from a 50% chance to trip when they try to dash. When they hit the center, they will be bombarded with a "cape" effect as they are turned around against their will every 1/4 second until they escape.

Whirlpools last for 10 seconds at a time, and have a cooldown of 5 seconds one the last Whirlpool dissipates.
------​
Both Pokemon can easily benefit from the Whirlpool by capitalizing on floundering foes by taking the chance to charge up Hydro Pump, set up Spoons, or just approach in general. But specific synergy between the two include Alakazam using Feraligatr's Dive as a punisher by Teleporting on the ground when a foe approaches, sending them skyward with a splash to their surprise for Alakazam to follow with either an Fair/Uair to damage, or Nair for a kill. Feraligatr can easily use Alakazam as protection from projectiles that can plague him even with his crawl/surf, as well as extend the usage of his Hydro Pump by bouncing them off of Reflect to catch foes off gaurd.

In general, Feraligatr would probably be best used first in the fight to beat up foes, then using Alakazam to "sweep" them with his mobility and powerful KO options for a win.


Up next is a Pokemon first seen in 2003, but may be one of my more recent additions to the team. Here's a hint: He was unique in two ways before GenV!
 

The Warrior of Many Faces

Smash Apprentice
Joined
Mar 22, 2012
Messages
101
Location
Everywhere and nowhere, as location is meaningless
FERALIGATR

Ah, a good old-fashioned melee combatant. I had forgotten how much I missed those.

This set practically screams Feraligatr, from the surprising bursts of speed and maneuverability, to the pure power he possesses, to the Down Taunt. Seriously, I love that taunt. It’d be fun to spam if you really wanted to annoy the foe.

I also love what you did with Hydro Pump. One move to charge them all. Not only that, but the balancing is very well-done on that, with prohibitive charge time unless at higher percentages (kudos on that use of Torrent, by the by). We also see the team options beginning to show, which are pretty cool, since both characters can make equal use of it. I totally want this guy in Brawl already, and you’ve only done two of his Pokémon so far!

Also, have the same no-saving problem with my games. It bugs me. XP
 

Bionichute

Smash Champion
Joined
Jun 30, 2012
Messages
2,151
BIGFOOT, THE MYSTERIOUS MONSTER

Bigfoot is the mysterious man-ape that might be living in the woods. Of course it could be a guy in a suit, but you never know! He is also called Sasquatch sometimes.

STATS:
Power: 9. Very powerful.
Weight: 7. Surprisingly light for a hulking ape thing.
Walk Speed: 2. He swings his arms from side to side while walking very slowly.
Run Speed: 5. Not much better than his walk.
Fall Speed: 8. Falls very fast.
Size: 10. The tallest character.
Jump: 6. Has a very decent jump.
Crouch: 5. He crosses his legs and sits down. Due to his size he barely loses any height.
Traction: 8: He turns very well.

SPECIALS
Neutral: Hide
At first glance, all this move seems to do is make Bigfoot cover his head in fear. We'll come back to this move later, as it has something to do with his Down Special.

Side: Woop Woop
Bigfoot hunches over and makes loud howling noises while banging his chest. Anyone who comes near him will be stunned for one second. An added bit of this move is that you can slide slightly while using it, due to it being a Side Special. The howling lasts 2 seconds.

Up: UFO
As Bigfoot falls, a green beam shoots at him, levitating him upward. During the move you can move the beam from left to right. Anyone caught in the beam will be levitated upwards as well. The move lasts 4 seconds.

Down: Tree Summon
Bigfoot raises his arms while sitting, causing a tree to sprout in front of him. The trees are very important to Bigfoot's play style. While the trees are sprouting, which takes 1 and a half seconds to sprout, it can be used as an attack, launching up any opponent in front of him and causes them 4% damage.

Here's where things get interesting, the trees are not solid objects, anyone can pass through them, but Bigfoot can use them for something special. If Bigfoot stands behind the tree and uses his Grab he will shake the tree, causing health restoring items to fall from it. But Bigfoot can make up to four trees on the stage. If Bigfoot uses his Neutral Special while behind a tree while there are at least 2 on the stage, Bigfoot will teleport from one tree to another. The teleportation goes in a clockwise pattern. The trees have 50% stamina.

STANDARDS:
Jab: Bigfoot swings both his arms and finishes with both hands slamming the ground. The move does 7% in total. Has slight lag.

Forward Tilt: Bigfoot kicks his foot forwards, launching his opponent slightly and doing 6% damage. Has slight starting lag.

Up Tilt: Bigfoot jumps up slightly and slams his hands together, doing 8% damage. Has slight beginning lag.

Down Tilt: Bigfoot kicks his feet upward, launching his opponent slightly and doing 6% damage. Has slight starting lag.

Dash Attack: While running, Bigfoot jumps up and lands back down, creating a small shockwave and stopping directly in the spot he lands.

Forward Smash: Bigfoot places his feet firmly on the ground, charges, and does a shoulder ram, causing him to fall down and causing 9% damage normally and doing 13% when fully charged. Slight ending lag.

Up Smash: Bigfoot flips upside down to stand on his front hands, he readies his legs and kicks upward. This causes 7% damage at minimum and 12% at maximum. Has slight ending lag.

Down Smash: Bigfoot leaps up to the height of Mario and pulls off a body slam, creating a large shockwave. The attack does 8% at minimum and 11% at maximum. Slight ending lag.

AERIALS:
Standard Air: Bigfoot simply swipes at his enemy with his big ape hand. Causes 4% damage.

Forward Air: Bigfoot pulls a body slam, causing him to fall faster than normal. Anyone caught in his path will be caused 6% damage. Has slight ending lag.

Back Air: Bigfoot leans backwards and preforms a move very similar to his Forward Air. Causes 7% damage and has slightly worse ending lag.

Up Air: Bigfoot performs a move similar to his up tilt, but in the air. Causes 5% damage and has no ending lag.

Down Air: Bigfoot rockets downwards, creating a shockwave. The move does 8% and has slight ending lag.

THROWS:
Pummel: Bigfoot shakes his opponent violently back and forth. Each shake does 3%.

Forward Throw: Bigfoot spins around and throws his opponents far away, causing 7% and stunning the opponent for a second. The move also makes for a good getaway move, as Bigfoot can run away from opponents while they are stunned.

Up Throw: Bigfoot throws his opponent very high upwards. The attack not only does 6% damage and stun the opponent, but it also makes for a great getaway, as Bigfoot can move while the opponent is in the air.

Down Throw: Bigfoot throws his opponent to the ground, jumps on top of them, and smashes their face in with his fists. This attack stuns them for 2 seconds and does 9% damage.

FINAL SMASH: NESSIE

The arena is flooded with water, and a giant sea serpent's head bursts out of the water, which Bigfoot sits upon! This is Nessie, The Loch Ness Monster, and close friend to Bigfoot. You gain control of Nessie who takes the form of a giant head in the background. Nessie has 2 different attacks she can use. The first is the head slam, which crashes down onto the stage with great force, doing 25% to anyone under it. The second is the water breath, where she shoots water that slides around the stage, pushing opponents into the water. Any opponent in the water will go down with it when the 15 second time limit is up.

PLAYSTYLE:
Bigfoot is a defensive character. His powerful moves are brought down by his slow, ungainly movement. That's where the trees come in. Bigfoot makes up for his slow movement by being able to teleport across the stage quickly, meaning he can run up to an opponent, hit them a couple times, then run back to his tree to make a safe getaway. And of course, if your in a pinch you can always use your grab moves to throw them away and stun them. His health recovering trees also help him out, too.

EXTRAS:

Entrance: Bigfoot walks in doing his famous walk before looking at the screen and stopping.

Taunts:
Up: Bigfoot picks a flea out of his fur and flicks it away.
Down: Bigfoot sticks his finger in his ear and then wipes it on his fur.
Forward: Bigfoot sticks his finger in his nose and then eats it.

Wins:
1: Bigfoot looks around confused.
2: Bigfoot growls loudly.
3: Bigfoot sheds his ape form and reveals himself as an Alien Gray, and then being beamed up by his UFO.
Lose: Bigfoot looks at the person next to him and imitates them clapping.
--------------------------------------------------------------------------------------------------------
I think this is my best moveset yet, really.
 

Davidreamcatcha

Smash Ace
Joined
Feb 9, 2011
Messages
629

This does bring up something I can’t believe I missed, though: what happens if you battle, say, Alakazam, Ghetsis, and Garble in FFA? Which pose would play?
This would work the same way it works in Brawl in terms of special victory quotes (at least involving the Star Fox cast). If you are a winner with a special animation against a foe, you play it against the foe in second place while normal animations play for the others.
 

Katapultar

Smash Lord
Joined
Nov 24, 2008
Messages
1,284
Location
Australia
[collapse="Bigfoot"]What a hilarious character choice. It's an improvement, as most the Specials do make sense for this elusive creature who wants to hide from people, good characterization to go with his heavyweight nature in the case of not making the trees too elaborate or obscure characters...it's also somewhat hilarious to imagine. The Specials are also a bit of a weakness to the set, as the Side Special doesn't seem to do much and the Neutral requires the trees to work, giving little variety in the process. The standard attacks seem a bit weak for this powerful character damage-wise and are a bit too vague to be interesting despite the nice little established playstyle of heavyweight hit and run - the attacks are allowed to be simple by all means, just a bit more fleshed out with lag and as to why they'd work with the playstyle (your F-throw is somewhat of an example that could be applied to the rest of the set). It's a pretty imaginative set for where you are given the open-ended source material however, and easily your best like you say with a more solid playstyle. [/collapse]
 

FrozenRoy

Smash Lord
Joined
Apr 26, 2007
Messages
1,268
Location
Las Vegas, Nevada
Switch FC
SW-1325-2408-7513
A note on Willy Wonka: I forgot to put this into my comment apparantly and since I was moving Wonka up in the rankings, I figured I should point it out: For all of my ragging on how he plays, the set really is an extremely characterized piece, and it feels extremely Wonka-ish. And the zeal in the moveset is quite apparant, even if I don't personally like it. So I do applaud that part of it.

Warlord As A Pokemon Trainer

Clayton is an interesting little set. The crux of the idea is piling up these, well, piles of cash around the stage, helping obscure everything and giving some little movement debuffs. While that isn't all that special on it's own, I like how the obscuring is handled here, as the mindgames are kept relatively simple and, in my opinion anyway, it avoids the all too easy to fall into pitfall of the mindgames becoming sheer guessing games. I think the jab counter is a good example of this: The counter works wonderfully when obscured by the gold, but by being weak behind and from grabs, it means that foes can still properly counter it with some brains and that it requires some careful use from Clayton's player, since the foe is just as obscured ad Clayton.

Ditto is also a good example: While normally throwing out a level 7 AI copy is just a way to make the MU a little easier it changes a bit in this MU. Level 7 isn't exactly a worldbeater but, most importantly, we all know that AI doesn't make proper use of things like invisibility, so the opponent always has an advantage straight up and Clayton needs to get his hands dirty...or your stock hurtbox becomes vulnearable if you take control directly. It creates a nice choice and helps sort of go with the train of thought that Clayton isn't the most competent of trainers.

This set does have some issues though. The up aerial is pretty bad, to me: Foes that are in the air can't be put to sleep by any attack in Brawl, so it seems sort of odd to have one that works on Clayton, and it only functions as generic stun anyway, so a generic up aerial probably would have worked better. Super Repel also seems a tad off to me, but I think it's more acceptable. The dash attack sweat being a hitbox also seems a tad odd to me. Whoo, nitpicks! ...Also, I still think D-Smash would have worked with Machoke, but I'll accept it since it still makes sense with him as a former miner and all.

So yeah. Overall good, though it could have been better with some polish, but hey, it's a one day Trainer set and a success at that.

Italian Rage

Stromboli's another good set, albeit one with it's flaws. And his name makes me think of DELICIOUS FOOD. And he has Italian rage.

The basis of Stromboli's game is calling down his puppets from the top blastzone, which function as little mini-hitboxes for Stromboli to work with and be swung around. From there, the puppets help turn the audience to his side, which allows him to accumulate delicious healing gold, which also is used for his really strong money bag KO if he can gather enough. These are taken and used competently, though not spectacularly, with some fine flow between moves, though not quite a worldbeater, and I do like how he is aerially vulnearable.

Something I don't like, though, is Stromboli's down tilt, as the fact it merely puts you into prone is odd to me, especially since Stromboli randomly has these odd prone switches. It's a bit jarring to me and I can't say I particularly liked it. Stromboli swinging on puppets also seemed a bit odd to visualize and out of place in the context of the playstyle to me, so I wasn't much of a fan of that and likewise I felt a few other attacks were written in ways that they seemed a bit confusin, Forward Tilt being a good example: The puppet remains behind him after use in idle, until used again? Does that mean Stromboli's arm stays there or he controls it from the front or...what? The animation seems wonkily written there, which makes the attack feel a bit misconstructed.

Still, overall, Stromboli is a good moveset, with solid flow and ideas, but just with it's fair share of issues which could be ironed out. Certainly it is leagues above many of your MYM12 works which, combined with Bubblegum, is an excellent message for you going forward, to me.

Fleet of Foot

Bigfoot is a set with an interesting premise, similiar to a set we saw in MYM12, Bowser Sphinx. Teleportation fleeing via little teleporter setups.

It's actually a cool idea, but poorly utilized here in Bigfoot. The moves could use some more "flow", which is to say, work towards a general gameplan rather than in a vacuum. A good example here would be defensive approaching via teleporting, so you might have...say...a forward tilt with movement, a down tilt with big crouching, stuff like that to use simple attacks as examples. Bigfoot's attacks don't really go together towards any gameplan, aside from "hit a foe".

Another suggestion I have is to look up some Brawl attacks, or if you own Brawl pop it in and check some attacks, to get your damage % on attacks down, as Bigfoot is lacking in the power you intended for him to have in the playstyle section: On average, tilts do 10%-12% damage, and smashes do around 16%, a far cry from Bigfoot doing 6%-8% and 7%-13% respectively.

As a final suggestion, you probably want to slightly expand your attack descriptions, a good example I will try to use here is the Down Smash: You could add in, say, the size/speed of the shockwave, then maybe a bit about it's uses in the context of Bigfoot such as...say...forcing the foe into the air for some reason due to jumping to dodge it. Little things like this make the attack feel more alive and easily pictured.

This moveset certainly is an improvement over Soundwave, though. It's much easier on the eyes(I highly recommend your first few sets using a basic organization of coloring headers only, then experimenting more as you go on). I recommend reading some sets, maybe commenting(great for organizing your thoughts and trying to find out why you like stuff so you can throw in what you'd like) and then go out and chug another out, you'll hopefully get it soon. And as I said, an improvement: So there's always that.
 

Phaazoid

Basket
Joined
Aug 29, 2006
Messages
7,719
Location
Mr. Sakurai's wild ride
NNID
Mr.Grike
3DS FC
4854-6444-0859
I wouldn't simply be able to copy my submission from the old make your move thread to here, would I?

It was quite good ^_^

http://www.smashboards.com/showpost.php?p=3766850&postcount=525

Although I guess you can ignore the subspace stuff at the end, seeing as that was for brawl.

Also, re-reading it, wow I was bad at writing all those years ago @.@ Maybe I'll re-write it later for this thread specifically...
 

Katapultar

Smash Lord
Joined
Nov 24, 2008
Messages
1,284
Location
Australia
I wouldn't simply be able to copy my submission from the old make your move thread to here, would I?

It was quite good ^_^

http://www.smashboards.com/showpost.php?p=3766850&postcount=525

Although I guess you can ignore the subspace stuff at the end, seeing as that was for brawl.

Also, re-reading it, wow I was bad at writing all those years ago @.@ Maybe I'll re-write it later for this thread specifically...
Hmmm, it's nice to see a face way back from the original contest show up nowadays. Copy/pasting a submission from an old contest wouldn't count for this one given it was designed for a previous contest, but you're more than welcome to refurbish it as per the little "MYMini" that approves of such. You could even attempt a different submission too, that'd be interesting in itself.
 

FrozenRoy

Smash Lord
Joined
Apr 26, 2007
Messages
1,268
Location
Las Vegas, Nevada
Switch FC
SW-1325-2408-7513
Froy Remixes a FA Set

"What is worse than a wolf in sheep's clothing?" - Wolfhunter's riddle


Gatstaf Shepherd

Remix

Gatstaf is a simple shepherd. That means he herds things, most notably sheep. Lots...and lots...of sheep. He's from the Magic set Innistrad, by the way.

@---Statistics---@

Gatstaf is a fairly tall fellow, not helped by his staff, which makes him the target for a fair amount of attacks. Captain Falcon is probably the most excellent of comparisons. Likewise, while he is heavy and durable, most likely due to the size and the fact one must be in shape to be as excellent a herder as he, he weighs the same as Captain Falcon and Link. Unfortunately, his ground speed tends towards the Link side of things, though he's a bit faster than our equipment burdened elf boy...let's give him Ike speed as a baseline, shall we?

In the air, Gatstaf is less useful, having a bit of a slow air time and being a bit hard to control, with his fall speed not being particularly floaty nor particularly fast, settling in at a nice middle ground. His traction is very good, by the way, and he has a nice long roll and a decent length spot dodge, so he's got some decent defensive options. Gastaf's first jump is surprisingly good, but his midair jump is sort of weak.

Gatstaf can Crawl, actually getting pretty low when he does, but he can't do anything else special.


@---The Special Shepherd---@

Neutral Special: Sheep

Gatstaf gently taps the bottom of his staff to the stage, while making a quick whistling noise. The entire process isn't very long and can be somewhat spammed. Doing this causes a sheep to dart into the field from...wherever it was before. The sheep are always watching, man. The sheep is a fluffy little ball of friendship and has 25 HP...well, not exactly, it has 15 HP, but it's fluffy coating is strong enough to provide an extra 10 HP as long as it's not taken off.

Sheep largely just stay in place, but at times, they will move back and forth a little, and they don't try to avoid attacks. They also have a single jump that can be used on the ground or in the air and allows them to just barely get onto a Battlefield platform. They will use this to recover if knocked off. They take as much knockback as Kirby at 25%, plus the added damage of whatever they take. So if you inflict 10 damage, they take it like Kirby at 35%. Simple, no? Sheep have no natural attacks, but you can have any number of them on the stage...just remember that you have to be on the ground to summon a sheep. How would he tap the staff on the ground otherwise?

Something to note about sheep is a neat little function of them, in that they function as characters for footstooling. Footstooling off of a sheep will also cause you to jump much higher than a normal footstool, approximately 1.5x the character's first jump, as long as the sheep has wool on it. Characters will regain their mid-air jump upon footstooling a sheep, but it won't allow you to regain stuff like floating or gliding. Sheep, like any character, can be footstooled on the ground or in the air. You can footstool a sheep as much as you want without loss of height gained from it, as long as it has wool. If a sheep is without wool, then you can still footstool it, but it is subject to the normal height gained from a footstool and will degrade in jump height like a normal footstool. Footstooling a sheep is also a lot easier timing-wise than footstooling a character, so pretty much everyone should be able too.

If a sheep dies, any sheep a Battlefield platform close will flip out and run away for three seconds in the direction they face, naturally covering about two Battlefield platforms of distance. They'll fall down any pits in front of them like, well, sheep and won't try to return to the stage until they stop panicking, where their one jump is unlikely to save them. Gatstaf has ways to save his sheep, but for now, just know that this tends to be bad and can send your preciously summoned sheep careening right to their doom. At least they fall slow while they have their fluffy fur coat. Gatstaf Shepherd's attacks won't harm his own sheep, as well. Sheep walk at Kirby's walk speed, but when they panic, they dash at Mario's dash speed.

Side Special: Wool

I've yet to discuss how to get wool, because that move is a standard, but here's a move that uses it! Wool is a substance you shear off of sheep, as an idea of what it is, but I'm sure that's somewhat obvious.

When this move is used, Gatstaf will begin stretching any wool in his hand, using his staff to do so. You can extend the wool in any straight line you can make, so eight directions, with little variances quite possible with the control stick to make it slightly shallower or deeper, though this takes some practice. The wool from a single sheep goes about half a Battlefield platform. When you stop holding down the B button, Gatstaf will set the wool, in essence trying to keep it in place. If it is connected to something, it will stay in place, but will otherwise fall to the ground in two seconds and disappear. As an example, if you start the wool on the ground, then aim it diagonally up to a platform on Battlefield, it will "attach" to it and stay, becoming like a slope. But if there's no platform there, then it will fall to the ground two seconds later from being unsupported and disappear. The sole exception is if you make another wool structure and attach it to the first one quickly, allowing it to "support" the first one, and thus make structures entirely out of wool. For example, you use some wool to make an incline, but it's not attached to anything...but you still have some wool left over, so really quickly, you make a wall and attach it to the top of the incline from ground level. Since they're now attached, they won't disappear!

Wool does not function like a standard platform and reacts in a few ways, depending on how it is placed. You can always place wool on the floor from end to end, since it is attached to the ground on both ends that way, and placing it as a "floor" like this will cause it to function as a spring board, bouncing any player up into the air the same distance as a spring if they get on top of it. Sheep will also bounce on top of it and, in this way, can become hitboxes, as the force propels them up the same distance and causes them to become a fluffy 6% damage hitbox with weak knockback in the direction they were flying and a bouncing effect. By bouncing effect, I mean if they hit someone, they bounce off of them with basic physics that cause them to rebound. As an example, if a sheep is sent flying this way...left and up and hits a foe, it's remaining momentum will send it going right and up, as it bounces off the foe. Simple, yes? Sheep that have lost their wool deal only 4% damage and do not bounce, instead stopping when they hit something, leaving them dead open for an aerial assault by the foe. Sheep will attempt to DI from repeatedly landing on this bouncy wool, but will not try to avoid it otherwise.

The wool will also act as a springboard if used as a ceiling on a structure. If you use it as a slope, then it will bounce foes at an angle, depending on the direction of the slope and where the person landed on it. If a slope goes up and to the right and someone jumps into it from the left, it sends them up and to the left. Very simple, is it not? Sheep will bounce off of these and become hitboxes the same as floor wool.

Wool that goes straight up or at only a very slight angle act as walls. Walls will function more like Mario's cape on the ground, turning foes around but not interrupting their action or sending them any distance away. Foes hit into it, similiarly, only have their direction changed in the same way Mario's cape is. This is an effective way to keep Sheep from running off the stage when they get frightened, since the walls will bounce them the other way, and it's basic structureness acts as a good foundation for wool structures.

Wool structures have 35 HP and, once it is gone, will fall to the ground and disappear. If it's the foundation of any other wool structure, then that wool structure will disappear in two seconds as if it had no support, unless another structure is holding it up and thus making it valid anyway. Gatstaf can have any number of wool structures out, as long as he can get the wool in the first place.

Up Special: Jump

In the most creative recovery ever to go with one of the most creative move names ever seen in MYM, Gatstaf...jumps up. The jump doesn't go very far, a little shorter than Falcon Dive, but Gatstaf will extend his staff diagonally forward at the end of it's ascent, producing a hitbox that deals 6% damage and light knockback...but it will also sweetspot any ledge it touches, as Gatstaf will pull himself up by the staff, essentially making it an easy way to extend your ledge sweetspot.

It's not very useful, but it does function as an at least decent recovery, if nothing else.

Down Special: Migraine

Gatstaf clutches his head in pain, as his voice goes between attempting to calm himself and an almost bestial sounding growl-like noise. This input doesn't seem to do anything and has short lag on both sides. It's not a counter or anything, either.

Man, what a lame special!


@---The Standard Shepherd---@

Jab: Shear

Gatstaf quickly takes out a sheep shearer from his shepherd's...outfit...thing, slashing forward as he does so. This is a very quick action with little lag on both sides, though it only deals 4% damage and light knockback.

As you may have guessed, this is your move that shears sheep. If the hitbox would overlap with a sheep, it's wool is sheared clean off, and Gatstaf picks it up as an item. It doesn't function as a throwing or battering item, though it can be thrown via grab input for 3% damage and minor flinching, and mostly is used for any of Gatstaf's moves that involve wool. Each sheared sheep gives you enough wool for about half a Battlefield platform and does not regrow. But you can summon infinite sheep, so as long as you have enough time, you can also produce infinite wool. Shearing the sheep doesn't damage it of course, but since the sheep has 10 HP of "protection" with the wool on, you could say it essentially deals that much damage. If the sheep has taken enough damage that it would die without it's wool coat, it instead dies the next time it is hit by any attack.

If this move is used to destroy a wool structure by depleting the last of it's HP, it will shear said wool and Gatstaf will pick it up as half of the amount of wool used to make it, which can allow you to recycle wool in structures that are almost gone, albeit to limited degrees.

Shearing sheep is an important part of Gatstaf, as it is the only way for him to gain wool. The fact it is such a quick attack thus provides useful. It also has all the usual pros and cons of a jab, so there you go.

Forward Tilt: Hay

Gatstaf takes a small pile of hay, about as tall as Mario and half a Battlefield platform in size, and flings it forward. You can angle it up or down like a lot of tilts, which affects how far it is thrown: Tilt it up and it goes a full Battlefield platform, don't tilt it at all and it goes half a Battlefield platform, tilt it down and it barely flies. The hay will deal 8% upon colliding with a foe and weak knockback that KOs at around 250%, which is primarily vertical. Hay will stay on the stage for ten seconds if it lands on it.

While hay is on the stage, sheep will naturally flock to it, since it's one of their food sources and all. Any sheep within a Battlefield platform on either side of the hay will dash to it at their panic speed of Mario's dash and, if they reach it, begin chewing it. Sheep heal as a slow proceeds during this, 3% per second, as long as they eat the hay. This means that a sheep with it's wool on can heal itself to full gorging on this hay. Sheep will head to the nearest hay stack to them unless there are so many sheep flocking to it that they can't get to it, in which case they will go to the second nearest hay stack. If two hay stacks are the same distance away, it's chosen at random. Hay is solid and can be jumped on like a small platform, and of course cannot be dashed past and such. This also means you can use it as a starting point for your wool structures, of course. Hay will also pacify any sheep which are panicking if thrown, though if they are caused to panic while the hay is out, then only a new hay being thrown out will pacify them.

Hay will react when bounced against wool, becoming a hitbox that deals the same damage and knockback as when it was thrown. If it lands on a floor wool structure, it will bounce straight up and straight down, until it's ten second timer is done. During this time the sheep, god bless their intelligence, will still attempt to head for the hay...and of course, bounce off of the wool, becoming hitboxes of their own! While they'll still DI away from the wool, they'll foolishly head back for the hay, so you can quickly cover the area in sheep and hay hitboxes if you have wool setup right.

Hay bounced against more slope-y structures will bounce at the correct angle, as detailed in the Side Special, but sheep won't go after these, most likely due to the fact it's flying in the air and not just bouncing against the ground. This can be used to send the hay hitbox behind you or just position where it lands...or, with more wool structures, send haystacks flying every which way as they bounce off of them, with the foe having to either constantly dodge them or destroy your structures. Isn't hay fun?

Up Tilt: Staff

Gatstaf strikes his staff straight up quickly, dealing 4% damage and weak upward knockback. Gatstaf can hold down A to keep the staff out as long as he wants, though it isn't a hitbox any more at that point. Very low starting and ending lag.

The most obvious use of this move is against wool ceilings and slopes, as you can repeatedly bounce foes against the bottom of them with your up tilt for some easy damage racking until they DI out, especially as small percentages. But what was that about holding it out, but not being a hitbox?

Well, if something hits the staff while you hold it out like this, Gatstaf will drag it to the ground. This can of course be used to grab hay and sheep right out of the sky, such as if they were launched off wool, and gently set it on the ground. You can also use it to intercept flying items or even foes who are trying to bounce off your wool structures for their own gain. Because of these factors, it's a pretty versatile move, serving both as setup changing and basic damage racking.

Down Tilt: Sweep

Gatstaf provides a simple sweep with his staff, though it is his strongest straight-up tilt, dealing 10% damage and upward knockback that KOs at 190% or so. Quick starting lag, but it's ending lag is a tad on the slow side for a down tilt.

You're probably expecting some interaction here, aren't you? I'm sorry to dissapoint, but this is one of Gatstaf's simpler move, as it provdes a simple and somewhat strong but still quick attack, with nice range and some pop, but has no real interactions. You could use it's higher upward knockback to bounce people off the bottom of slopes or ceilings at lower damage %s than the up tilt, I guess. It's also effective for setting up an aerial chase game.

Dash Attack: Turn

Gatstaf slams his staff into the ground during his dash, using it to quickly push off for a strong midair kick, holding on to it and using it to turn around. You ever seen someone walking or running, hold an arm out, grab a pole and use it to turn? Like that, but with a kick that takes him off the ground. It deals the most damage of Gatstaf's standards, 12%, and is actually a decent KO move, KOing at around 150%. On the flipside, it's got some high ending lag and while it's starting lag isn't bad, it's definitely the worst of any of Gatstaf's standards.

This move also has no real interactions, but it can be used to hit people bouncing on floor wool or other wool structures without actually getting on it yourself, due to it's turning you around and range on the kick, making it useful in that regard. He could also use it against wool to bounce off of it and make a confusing hitbox for the foe to react to, I guess. He can also hit foes on top of wool with this move easily. And, finally, it is his best knockback standard and the one that deals primarily horizontal knockback.


@---The Smashing Shepherd---@

Forward Smash: Smash

Gatstaf rears his staff back before giving it an extremely hard horizontal smash, which deals 16%-20% damage that KOs at 120%-100%, being Gatstaf's primary KO move. As far as a smash goes, this move has very quick startup, but it's ending lag is pretty bad, as Gatstaf has to right his position after this move. Still, this is your move with actual KO power, so use it wisely.

Similiar to some of Gatstaf's other moves, this thing doesn't really have any advanced interactions, as it's a very simple and effective KO move. Just like the dash attack, though, it can be used to strike at foes bouncing on stuff from a distance with KO power. Because of it's quick startup, it's also nice to have if you bounce a foe off of something...say...a wool wall? Yeeeah.

Up Smash: Swing

Gatstaf raises his staff and gives it three wild, sweeping swings above him, each one dealing 6%-8% damage, with the first two dealing small knockback that tries to lead into the third hit, which deals vertical knockback of 140%-125% KO power. This move has a long duration with average startup and a bit higher ending lag than usual.

Similiar to Link's U-Smash, this is easily DI'd out of...but unlike Link's U-Smash it has a very wide horizontal arc, meaning the only way to DI out of it is up...and hopefully, right into a wool ceiling/slope, allowing you to trap the foe and get the third hit for sure, which can damage rack pretty nicely seeing how it's minimum is 18% with all the hits. Not to mention the third hit will almost assuredly hit them into said slope/ceiling and thus, right back down to you and ripe for followups. While certainly a very simple way to abuse your wool structures, it's also very effective. Be warned that it's very easy to DI out the top without the wool to do this with and that it doesn't actually hit right behind/in front of Gatstaf on the ground: If you whiff or the foe is on the ground, you're going to be heavily punished due it's long duration and ending lag. Be weary of this.

Down Smash: Whistle

Gatstaf puts two of his fingers to each other and lets out a powerful whistle! This doesn't deal any damage or knockback on it's own, but instead commands his sheep to gather to him, dashing at an increased speed of Yoshi's dash at their shepherd's call. This increased speed causes them to become little hitboxes of 2% damage with low flinching damage: Very deadly with lots of sheep!

This move has multiple purposes. Sheep won't avoid wool floors while you call for them, so it's very easy to manipulate a sheep to run over one and send it flying with this, though it will stop trying to come to you and will instead DI away from landing on the floor again. It can also be used to simply reposition your sheep if need be, though at times you may find it easier to simply call a new sheep over, especially since this will not calm sheep. A mere whistle is not calming enough to stop them from panicking. If you want your sheep away from hay for some reason, you can use this for that purpose too., and you can use it to try and get sheep away from your foe since they're too dumb to try and dodge by themselves. And, of course, there is the obvious use of all of your sheep becoming little running hitboxes until they get to where you are or are unable to advance to you further or what not: With a lot of sheep, this can be a great damage racker! As a note, sheep will stop trying to come to you if obviously impossible, such as a bunch of sheep blocking the way because they all tried to/got to you or a wall they can't pass or such. They're not quite that dumb!
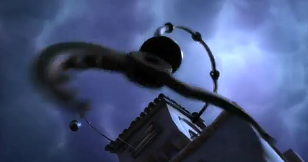
Gatstaf can move after using Whistle, but the sheep will still gather at wherever you used it, though you can use whistle again to make them go to there. Like a whistle train. This also does have the downside of gathering sheep and forcing you to use hay to seperate them again, making it easy for an oppourtunistic foe to swoop in and start murdering them all. How annoying.


@---The Gripping Shepherd---@

Grab: Grab

Gatstaf holds his staff forward and tries to pull the foe towards him by the little curvy part. Quick and has good range, though not as much as a traditional tether. Likewise, though, it has less ending lag. Gatstaf can grab sheep with his grab.

Special Grab: Tether

If you have wool in your hand, your normal grab is of course replaced by throwing it...but if you press the B button instead, you get this special grab! Gatstaf will throw the wool forward like, well, any normal tether grab, with the grab equal in length to the amount of wool on hand. Foes caught in this are pulled to Gatstaf like a normal tether grab. Initial starting lag is quick for a tether, but gets laggier the longer it is. Likewise, the ending lag starts as the same as Link's tether, but gets longer as the wool gets longer. Very simple. Very easy to understand. Gatstaf can grab sheep with this grab, too.

Pummel: Pacify

Gatstaf pacifies the foe...by hitting them in the face for 2% damage. Yeah, that'll work. Pretty quick, though. If Gatstaf uses this pummel on a sheep, Gatstaf will instead gently calm the quick in a somewhat rushed manner, since they're in a battle and all. This will instantly pacify any paniced sheep and return it to normal. Using this on a sheep that is already pacified will cause him to simply set it down.

While very useful for saving idividual panicking sheep, Gatstaf will not be fast enough to save herds of sheep if they all go panicking, so he should use other methods for that, such as hay and preventive wool walls.

Forward Throw: Push

Gatstaf moves his staff to the side while giving the foe a rough shove. This deals 7% damage and sends the foe a set distance of one Battlefield platform away, though the ending lag means he can't follow the foe up effectively. This provides him a very basic spacing tool, it's also very useful for forcing the foe on to fool floors or into wool walls or, if above them, wool slopes, so it's usefulness cannot be And no, this can't infinite against wool walls, too much ending lag.

If you use this on a sheep, Gatstaf will instead gently set it on the ground and encouragingly tell it to get goin'. The sheep will oblidge him and travel a Battlefield platform forward at it's normal walk speed. Similiar to the normal forward throw, this is an excellent way to get sheep on to wool floors and the like, though it has to be done on individual sheep.

If you grabbed the foe via your special grab, then Gatstaf will constrict the tether around the foe before pushing the foe away. This adds 5% damage, but causes you to lose the wool as it remains tied around the foe. The foe can get rid of it by dealing 30% damage or you can shear it off of them with your jab to get the same half amount as you do when shearing wool structures. The wool doesn't actually do anything negative to the foe, though.

Back Throw: Slam

Gatstaf pulls the foe over his head and slams the foe into the ground behind him, dealing 13% damage and strong knockback that KOs at around 150%, which is pretty good for a throw. Like with the forward throw, it's simple without any real frills, doing large damage and large knockback. It's diagonal knockback makes it nice to knock the foe into slopes at angles, as well.

If you use this on a sheep, Gatstaf will do the opposite of his forward throw, gently setting his sheep down behind him and encouraging it to go that way. Just like before, it'll go a Battlefield platform that way. It has all the uses of the Forward Throw, but the other way.

If you use this with the tether, this move changes a little. Gatstaf will instead swing the foe around on the tether at about the speed Mario swings Bowser during his back throw, dealing 3% damage per revolution until the foe escapes. Foes escape at the same grab difficulty they were grabbed at...in other words, struggling before the throw counts for the throw. While it doesn't have the knockback potential of the normal back throw, it can potentially deal more damage, and the foe is liable to grab escape into an unfavorable spot unless they time carefully, such as a slope or some bouncing hay. Note that when the foe escapes, they'll snap half the wool off of your tether, so there's a wool cost involved as well.

Up Throw: Toss

Gatstaf uses his staff to throw the foe into the air, dealing 11% damage and knockback that KOs at around...180% or so, all vertical. While it's not really a KO move, it does set up aerially juggling well, especially if you've properly set up some wool floors nearby or the foe is going to face a wool ceiling/slope above them. What else needs to be said in this regard? Deal damage. Set up aerial juggles. Do gooder.

If he uses this throw on a sheep, he'll give it a little boost and send it non-harmfully flying through the air at twice it's normal jump, so you can get a sheep to the top platform of Battlefield with this. This is of course used to send sheep to a higher platform and so on. It's pretty self explanatory, I feel.

if you use this with your special grab, Gatstaf will throw the foe up, sending them flying out of the tether and reeling it back in, allowing him to keep the wool in full, a rarity among Gatstaf's throws. Deals the same damage and knockback as the normal throw. So pretty much the same uses as before.

Down Throw: Slam

Gatstaf slams the foe into the stage, dealing 15% and weak knockback up and forward. This move's primary use is as the high damage throw, making it excellent for damage racking, although it's knockback is weak...but that also means that you can use it as a setup for follow ups, especially with wool structures nearby, moreso than your F-Throw due to it's lower ending lag. Though, of course, it doesn't work with floors near as well, and it's non-set knockback...

If you use this throw on a sheep, then it will cause Gatstaf to set the sheep down and shear it. It has the same effect as the jab's shearing, but from the grab. It's not as fast to do on a wide scale as the jab, but it does mean you can pacify and shear a sheep in one go. If the sheep is already sheared, Gatstaf will just gently set it down, like in his pummel with a pacified sheep.

If you use this from your special grab, though, Gatstaf will instead stick the tether to the ground, essentially tethering the foe to the ground. Though the foe can still move past the tether's length, staying still will cause the tether to "snap" back, sending the foe flying/skidding back to where the tether is at Sonic's dashing speed. This can also be done in the air, though in that case it's based on time falling/rising without input. The shorter the tether, the better the move, but the harder it is to land! You can use the tether's snapback properties to repeatedly bounce foes against wool floors and other such structures unless they're kept constantly moving or in a confined area, making it pretty useful, though foes can break the tether by dealing 35 HP damage to it, or by waiting for it's strength to fade, which it does after 10 seconds, causing it to become ineffective and disappear. While it's a hefty wool investment for something which will surely fade, it's ability to set up bounce and snapback combos or help with setup is not to be underestimated.


@---The Windswept Shepherd---@

Neutral Aerial: Swat

Gatstaf very quickly smacks his staff forward, dealing 2% damage and light knockback. This attack is lightning quick with low ending lag, much like an aerial jab, but has very little range because of it. While useful for tacking on a little damage in the air, it's not necessarily the best option...

But pressing A again will cause Gatstaf to do a wide sweep with his staff, which deals 8% and some actually good knockback! This has some decent starting lag and above average ending lag for an aerial, but the first hit can help chain into it and, mosti mportantly, it can be used to punish people who are good at air dodging the first hit, smacking them right as they come back into the plane of battle! It also has some nice range to it, so that is pretty cool. A very simple move, but it has it's uses.

Up Aerial: Plank

Gatstaf shoves his staff straight up, dealing 10% damage and solid upwards knockback, though it's not a KO move and more of a juggle-y option. It's startup is quick but it has some decent ending lag...and most curiously, you can hold it out with the A button, though it does not become a hitbox during this.

As you may have suspected, this move has a similiar use as the up tilt, as while you hold the A button, Gatstaf will save any sheep, hay, etc that come into contact with his staff, halting it's movement. When A is released, he'll bring them level with him, allowing you to aerially position all of your stuff in a similiar manner to the up tilt. This move does have an added use, albeit yet another one we've seen: The staff will act as a ledge sweetspot while it's out during this move, allowing a little extra recovery outside of your Up Special or an easy way to shorthop an up aerial and grab onto a ledge...or get onto a bouncy wool ceiling while striking the foe up! Sure, it's some basic juggling, but some simple yet effective tricks help it out.

Down Aerial: Spike

Gee, I wonder if this attack will be a spike? Gatstaf raises his staff high before quite violently smashing it downwards, dealing an obscene 15% damage and a very strong spike, almost as strong as the king of evil's! While this is all well and good, it also has some hefty startup from that staff raises, though this does cause it to actually hit above him some as well, making for quite the dangerous spike indeed. And the ending lag isn't too bad, though it's not quick.

This move has a variety of uses, the most obvious being off-stage killing, but you can also use it to send someone slamming into a wool structure before bouncing them right back up, possibly essentially doing the reverse of your up combos against the bottom of the wool. You could also slam them into sheep/hay that's bouncing against wool, where the weak upward knockback might even help you slap them around more. No real interactions, but some soft little stuff, you dig me?

Forward Aerial: Chop

Gatstaf swings his staff forward and wide, dealing 12% damage and shallow forward knockback that KOs at around 160%. This has some pretty average lag for this kind of attack, but it's ending lag is relatively low, so it's a bit hard to punish, and it's shallow angle can make for some fun position bouncing via wool.

This move has a fun little interaction with your wool structures, as you can press the A button if the staff overlaps with a wool structure, causing him to use it to swing to the other side of it. This leaves Gatstaf the same distance on that side of the wool structure as he was when he hooked it. So if you are right next to the structure and swing to the other side, you'll be right next to the other side. Pretty simple, I say. Adds some good aerial mobility to Gatstaf, allowing him to throw out this attack and swing out of danger, or pursue foes who jump behind a wool structure to hide or something.

Back Aerial: Turn

Gatstaf swings his staff backwards in a wide angle similiar to his forward aerial, though this has more of an upward swing to it and he puts some more power behind it, causing it to deal 13% damage and good knockback of around 145% KO power or so. It has a bit above average starting lag for a move, but it has surprisingly low ending lag, most likely due to turning around Gatstaf and thus absolving him of the need to right himself.

This move can also be used to swing to the other side of wool structures by pressing A, just like the forward aerial. The uses of that are the same as said forward aerial, but backwards. Dig me? This move has more vertical knockback, so it's more for a vertical followup than the more shallow, edge or wool wall based plays off of the forward aerial.


@---The Super Shepherd---@

Final Smash: Counting Sheep

Gatstaf raises his staff after gaining the smash ball, as...counters appear above each character's head? Opponents can move the counter up and down with the control stick, with up making the number higher and down making it smaller. A confirms the number. So what's the point of this?

Well, you're counting the sheep: Put the number to how many sheep are on screen and you'll totally avoid the final smash. Hope you've got your counting skills up to par! And if you fail? Well, you start counting sheep in the more figurative way and fall asleep for twice as long as Jigglypuff's sing, except attacks won't wake you up. Yikes! You only get five seconds to count and Gatstaf can attack you during this, too...


@---The Extra Shepherd---@

Up Taunt:

Gatstaf yawns lazily and puts his arms behind his neck, relaxing. It's hard work being a shepherd.

Side Taunt:

Gatstaf twirls his staff in a fancy manner. It is very fancy.

Down Taunt:

Gatstaf taps his staff against the ground a few times, as if testing it for something.

Win Pose 1:

Gatstaf bends down and pats one of his sheep on the head. The sheep is eating some hay. He looks really regretful for some reason...

Win Pose 2:

Gastaf spins his staff a few times before planting it solidly next to him. Show off.

Win Pose 3:

The entire screen becomes flooded with Gatstaf's sheep, as Gatstaf stands in the middle. My god. Sheep.

Win Pose: Vs. Mike Dawson

Gatstaf tries to herd Mike while going "Ehh...you missed pal!"

Win Pose: Vs. Willy Wonka

Gatstaf furiously throws the chocolate away from his sheep while Wonka watches amusedly. Chocolate is bad for sheep, you know?

Win Pose: Vs. Bigfoot

Gatstaf scratches his chin while looking at the knocked out Bigfoot. Is he supposed to herd this somehow...?

Win Pose: Vs. Lambert the Sheepish Lion

Gatstaf and his flock begin to leave the screen as he herds them off it. Lambert joins the flock as well.

Win Pose: Vs. Aquaman

Gatstaf proclaims that he can surely use Aquaman's nipple powers to herd sheep and proceeds to steal Aquaman's nipples.

Entrance:

Gatstaf enters the stage while using his staff like a cane. He appears to be looking around for his sheep. Where oh where could they be?


@---The Shepherd Style---@

So, you've chosen Gatstaf Shepherd. An excellent choice, if I do say so myself.

The first thing to remember when playing Gatstaf is you need sheep. While you can play without them if you want he sort of just becomes a Brawl character without some inputs if you do. Your early game should be all about summoning sheep and keeping them safe, using your useful disjointed staff to space the foe away from you. Your F-Tilt's projectile properties and D-Tilt's nice range make them good options.

Once you get out enough sheep that you can shear without too much worry, you should do so ASAP. Your jab is the quickest way to do this, but you can always shear your sheep with the Down Throw if you need to. After that, go wild with your wool. I recommend building either walls near the edges or a pen for your sheep to cause the foe to need to remove your walls to send sheep flocking off the edge: Time you can use to summon and shear more sheep, of course. Aside from that, what kind of structure you want to build depends on your style, so go nuts. You could line the floor with wool to make it so the battle is eternally aerial until they kill the wool, you could set up a bunch of wool walls and slopes to bounce yourself or your hay around multiple times to get them down, or just plain use wool floors as hay/sheep projectile platforms. Or create your own device, if you want!

Generally speaking, you want the foe to be on the ground for your KO moves, while damage racking via stuff like your Up Tilt combos against wool, but you can still go to the air for damage racking with DAir against wool floors or NAir and KOs with the same DAir or a FAir/BAir. Whether you want to go in the air or on the ground largely depends on how you set up your structures and your opponent really.

And yep, that's Gatstaf and the end of the Playstyle Part 1.

...


Part 1?

<o Gatstaf Howler c>

Oh, I suppose I forgot to mention Gatstaf's little secret, though I'm sure you all knew from the old set...Gatstaf is actually a werewolf, you see. Every 30 seconds, Gatstaf loses control of the animal inside and transforms into his werewolf form, Gatstaf Howler. He gains new stats, a new moveset and so on. Gatstaf can manipulate that amount some, but more on that later.

While Gatstaf is in his Howler form, he can harm his sheep, although they won't run from him unless he kills one. Because Howler can't summon his own sheep, you might want to be a bit careful. Gatstaf will turn back into his human shepherd form after 30 seconds: His sheep will not be hostile to his human form, even if they were around while he was a werewolf. Gatstaf Howler can still hold on to wool he was holding onto from his human form, but it's only use is as a weak throwing item to him.

The answer to the wolfhunter's riddle, of course, is a wolf in shepherd's clothing.


<o Statistics c>

The added muscle mass and other such things on Gatstaf Howler make him significantly heavier than his human form, giving him a weight on par with Charizard, but also increase his size. He's a bit hunched over, sort of like an animal going low for the kill, so much of the increase is horizontal and not quite as dramatic as you'd expect, giving him a size attribute roughly equal to Wolf's but slightly larger. His ground speed is also massively increased and his speed is quite fast given his heavyweight attributes, going as fast as Fox. Yeah, that's fast. His traction is a bit poor, however, so turning can be a bit of a problem.

He also moves through the air quite quickly and with decent control, although he also falls pretty quickly, around Donkey Kong speed. He makes up for this with his jump height, with his first jump going further up than Falco's(barely) and a large second jump as well, allowing him to properly chase foes who would think to escape aerially.

Gatstaf has a nice low crawl with a decent speed, along with a high wall jump. He can't cling, glide or float, though.


<o Specials c>

Neutral Special: Wolf in Sheep's Clothing

Gatstaf crouches down as his fur bristles a little...before slowly turning white. In fact, it looks very similiar to a sheep's...to the point that it is near impossible to tell him apart from sheep if you join a little flock of them. The uses of this should be obvious: Hide in the sheep, strike at the foe when they least suspect it. Your dash might move faster than the sheep, but you can reasonably blend in speed-wise by just running, letting you change speeds and still blend in. Note that although your dash is faster, it does slow down some due to Gatstaf having to crouch some to blend with the sheep, down to about Meta Knight's. Hurtbox lowering is negligible at best. And remember, you won't blend in with sheared sheep.

The more sheep you had that survived, the more useful this move is, as foes will have to wade through your sheep and kill them to find you while you can strike at them, either saving the sheep or plowing right through them. Not to mention their running can send them away from the foe...or right off the edge. But you still have wool walls to stop that, don't you?

Side Special: Bustah Wolf

Gatstaf pauses and readies himself, before releasing a lightning fast lunge! It goes about the length of Fox Illusion and at quite a similiar speed, dealing a solid 12% damage and vertical knockback that KOs at around 150%. Pretty neat with some fast starting lag, but it's got some bad ending lag tacked on to it.

During the pause at the start, though, you can angle this move! Angling it up causes you to travel upwards at an angle the same as Wolf's side special, while angling it down causes you to travel at the same angle but downwards. Angling upwards is just an upward angling, but a downward angle actually changes the move's knockback properties, as all that vertical knockback has been turned into downward knockback, AKA a spike! It's quite deadly...though of course, it'll bring you down, and thus is very risky off the stage and such. This doesn't send Gatstaf into helpless in the air, but he can only do it once in the air. So it's a cool recovery option, too.

This move has a lot of uses in Gatstaf Howler's game, being an attack and movement option first and foremost, but it's also amazing to use against wool structures, as it can allow him to become an excellent chaser. For example, angle the attack up and charge at a wool wall, popping the foe up and rebounding off of it to follow the foe! You can do the same with a downward movement to follow the foe to the ground or rebound off an angled slope to launch yourself in funny ways...or just plain rebound off a wall on the ground to hit someone who shields twice or to punish a spot dodge. Very versatile.

Up Special: Riser Wolf

Gatstaf stops in midair like the space animals while you choose a direction, with similiar starting lag to Fire Wolf. No, I don't know why it's called Fire Wolf when there is no fire involved either. Anyway, Gatstaf proceeds to leap in that direction about the same distance as the aforementioned Fire Wolf with his arms outstretched, clawing anyone who gets in his way for 10% damage and some weak knockback. There's some decent end lag attached to it and unlike your Side Special you go into helpless.

What's cool with this move is when Howler runs into a wall with this, as he'll grip it with his claws and go into a wall run! Gatstaf can wall run for about three seconds at his normal dash speed before he automatically loses his grip, but during this time you can run up and down any wall freely, detatching by pressing B. You can use any of your standards/smashes or your dash attack from here, although not all of them will be too useful on a wall given you'll be...well...sideways. The other cool thing about this is you can use this on your wool walls, letting you traverse the stage your human self set up with increased alcarity and overall coolness factor...

Do note however that you will need to rest on the ground for however long you wall ran to get back that wall run time. No infinite stalling for you!

Down Special: Intelligence

Gatstaf Howler clutches it's head in pain as it's voice goes between it's bestial howls and growls and seemingly random human speech. I should explain what this and Gatstaf Shepherd's Down Special do now.

When this move is used, the timer for you to turn to your other half goes twice as fast. For example, if you have 30 seconds before you transform into Gatstaf Howler, and you hold the attack for one second, two seconds have passed and you only need to wait 28 seconds. If you hold it down for two seconds, four seconds count as passed, and so on. In essence, you can accelerate turning back into the shepherd/howler at will.

This move can be used to simply try and get to your other form ASAP, such as if you don't want to play one half of the character or need the other side more ATM, or on the spot to accelerate the transformation when Shepherd has set up or Howler has exhaused the setup or what not. Simple yet effective, no?


<o Standards c>

Jab: Devour

Gatstaf slashes his claw ahead of him, as if trying to grab something. This merely does 4% damage and some weak knockback however, though it is very quick and spammable on both ends. Gatstaf will also do it lower while he's crouching like a sheep from his Neutral Special, so you won't notice it being used.

However, it will be hard to use it as an attack within sheep, because this move interacts with them. Use it on a sheep and Gatstaf will grab it and quite quickly devour it, healing himself 6% health and giving him 1% super armor for five seconds. This is a key thing to use your sheep for, as you can stack the 1% super armor over and over: Each devouring resets the time period and gives 1% more. Of course, this counts as killing a sheep, so they'll all start panicking and running away...and the sheep will give out a pathetic little "baa" while it's being eaten, alerting a foe to your relative position. Proper use of this is important: You'll probably want to knock the foe away or set the sheep up inside a pen or close to a wall first. You could always use this to move the sheep somewhere you want, too...

As a sidenote, this is excellent when combined with a Down Smash from your shepherd form right before you transform, bringing your meals to you!

Forward Tilt: Fear Monger

Gatstaf rears back on his hind legs before slamming his front ones forward for this move's starting animation, giving it slightly above average starting lag, After this, he rushes forward a solid Battlefield platform, totally vulnearable but a solid hitbox that'll deal 13% damage and some nice knockback that KOs at 130%, though it comes with some above average ending lag as well as Gatstaf comes to a halt.

The reason for the big starting lag discussion is the animation is actually important: It scares the hell out of sheep and if you use it while a sheep is within a Battlefield platform and looking at you, they'll turn tail and run a Battlefield platform away, making this the only way to turn your sheep around as Howler that isn't a Shepherd setup. Very important for coralling your meals for later or just to get them to start running. The starting animation does mean that it's pretty obvious where you are, though...

Up Tilt: Drag Down

Gatstaf raises a front claw up, a very quick movement, and will hold it there for a bit before bringing it down. The initial hitbox here deals 4% damage, but if he hits a foe with it or after a moment as previously started, he'll bring it down and slam the foe against the ground for 8% more damage and that "sliding" knockback that's so popular with the kids nowadays. Which is basically the foe sliding across the stage, like when Luigi gets shieldpushed or when you stop dashing on Brawl ice, though they can still use their moves. The knockback is set at one Battlefield platform.

This move is a very useful anti-air, good reach on the claw, but the set knockback is useful for positioning the foe properly, most notably into a wool floor to pop them right up or against a wall to leave you close together with close to frame neutralness. It can also be used to suddenly bring a foe who is above your flock down to the stage while hiding among sheep, popping up and then fleeing to somewhere in it with the foe none the wiser. This move's hitbox is purely vertical though, so you can't hit anyone in front of you with it: This also prevents infinites.

Down Tilt: Tail Sweep

Gatstaf performs a quick, well, sweep with his tail, which gives it some decent range. The move deals 11% damage and some decent knockback that pops the foe up some, though the knockback is still primarily horizontal, and it has quick startup, though ending lag is pretty damn average.

This move fulfills the important position for an aggressive character like Gatstaf Howler by being a quick close range attack with no real frills on it, making it useful all the time. The only little "special" thing is that Gatstaf will specifically avoid hitting sheep's legs with this, so you can use it inside a flock without knocking them away, making it so it won't give away your position and thus invaluable if you play a more hide and seek game.

Dash Attack: Prey Pounce

Gatstaf continues sprinting on all fours for a moment, but pretty quickly leaps forward, travelling a Battlefield platform total. Anyone who gets hit by this part of the move will take 9% damage and dragged to the end of this move, where Gatstaf's natural body movements slam the foe down to the ground for 2% more damage and puts them into prone. This move has average starting lag for a dash attack and has some heavily variable ending lag: If you whiff with this then you have HORRIBLE and punishable ending lag, but you actually have quite little ending lag if you hit with it, the foe essentially cushioning Gatstaf's fall.

If you use this move and would fall off the stage, then you'll suicide if you hit a foe, with both of you dying at the same time and thus going to SUDDEN DEATH if on the last stock. If you don't have a foe, you'll merely take the normal ending lag, though that's pretty bad on it's own anyway. This move has it's uses, but be careful with it.


<o Smashes c>

Forward Smash: Crushing Blow

Gatstaf leans back before jumping forward half a Battlefield platform, claw outstretched. If there's a foe in the way, he'll slam the claw against them for 18%-23% damage that slams the foe against the ground in prone. Starting lag is a tad high on this attack, with variable ending lag similiar to the dash attack: Horrible if you whiff, very little if you hit.

Prone is a pretty good place to put the foe, as you can push them between wool walls or such and make rolling in that direction unenviable, since they'll just be bounced the other way, or simply use it as a nice little way to ruin the foe's momentum fighting you. It can also be used as a just plain offensive tech chase game. This move's starting animation will easily reveal Gatstaf in the sheep, but if you hit with it, the low ending lag will let you run away somewhere if you want...high ending lag means a strong attack against you is nearly assured now that they know your position, though.

Up Smash: Scoop Claw

Gatstaf swoops his claw down against the ground before flinging it up. Opponents caught in the initial ground-level swoop take 4% damage and are easilly dragged into the next hit, which deals 12%-18% damage and some sweet vertical knockback that KOs at 130%-100%. The primary usage of this should be obvious: Get the foe in the air or, with timing to account for the claw swoop, to whack a foe approaching aerially. It also hits in front of you AND in the air, unlike Up Tilt.

The other use for this move is how it reaches foes in prone due to the swooping scooping motion made early in the attack, allowing you to rocket prone foes into the air for your game, plus the usual tricks of tossing someone up into the bottom of a wool slope/ceiling that the Up Tilt can't do. Starting lag is a tad high, but it has surprisingly low ending lag, making it the safest of your smashes to throw out.

Down Smash: Claw Sweeper

Gatstaf gives a quick sweep of his claws to both sides of him, dealing a solid 16%-21% damage and excellent knockback of 110%-85%, making it one of your best killers, which is only helped by it's fast startup. It is not helped by it's hefty ending lag, though. You'll want to try to throw this out when the opponent doesn't expect it and send them flying for a KO, most notably if you're hiding in the sheep, though it's also a great move to use against foes in prone due to hitting on both sides, so the foe pretty much has to roll away from you (and hopefully into a wool wall) unless they have a quick getup attack. And, you know, it's a killer KO move anyway. Yep.


<o Aerials c>

Neutral Aerial: Spinner Claw

Gatstaf keeps a claw out as he spins through the air in classic Brawl spinning NAir fashion. Gatstaf's body is a hitbox of only 4% damage and weak knockback, with the claw being the focal point of the attack, dealing a solid 12% damage and knockback that KOs at 140% of a primarily horizontal nature. This move starts up quickly, but it has a long duration and some bad ending/landing lag, making it an unreliable option to just throw out all willy-nilly. It's range is pretty excellent, however.

Cool ideas to combine this with mostly come from your wool, as you can rebound off the wool during the attack without interrupting it, possibly even timing it so the claw is rotated the other way to minimize wool damage, turning yourself into a little living pinball-like projectile during this time or bouncing off wool floors to help with the lag issues. It also serves the standard Brawl use of a generic attack that hits all around you, of course.

Forward Aerial: Wolf Claw

Gatstaf rips his claws forward in a vicious slashing movement, dealing a dreadfully strong 15% damage and great knockback that KOs as early as 115%. Unfortunately, such great power is diminished by it's high starting lag, which means you've definitely got to set it up, although it's ending lag is at least merely average, so it's not spectacularly punishable on your whiffs. It's a good way to attempt to finish off some aerial shenanigans, but it can be very difficult to utilize.

On the other hand, if your claw overlaps with a wool wall/slope/whatever and doesn't snap it right there, you can hit A to have Gatstaf Howler grip on to it and use it to swing to the other side of it, or hold down A as you do to simply use it to turn around Gatstaf in the air, which gives you some nice aerial mobility options to fight with in the air. There's no invicibility frames on this though, so don't be stupid with it.

Back Aerial: Reverse Claw

Gatstaf gives a quick rip behind him with his claw, jerking his body back as he does and forcing it to turn around. It's a lot weaker than your forward aerial, 13% damage and more vertical knockback that KOs at 135%, though it's still primarily horizontal. But on the plus side, it's lightning quick to come out...unfortunately, it's quite slow ending lag-wise, so while it's easy to hit with, it's also easy to punish. Use with a little caution, you know?

This move can be used to swing to the other side of wool structures just like the forward aerial, including the same input, which can be useful to try and help cover the ending lag some. Still no invincibility frames. Have fun with that.

Up Aerial: Claw Rizer

Gatstaf slashes upwards with one of his claws, his body spinning a little as he rises half a Ganondorf up, dealing 12% damage and solid upward knockback that KOs at 160%. It's got some quick start up and the movement makes it pretty nice to hit with, but it's got some nasty ending lag, preventing the rising movement from actually helping Gatstaf recovery wise and meaning you'll probably get up aerialed if you miss tagging the foe with this.

There isn't really anything else to this move. Use it to keep the foe in the air, maybe get a cheap KO if they're high in the air, that sort of thing.

Down Aerial: Werewolf Stomp

Gatstaf Howler plummets quickly to ground in a stall then fall with his hind legs ready to slam some poor fool right into the ground. It's very light on the "stall" and Gatstaf startins falling very quickly after input. The move itself only deals 10% damage, but it deals strong vertical knockback that KOs at 150% on grounded foes and very noticeably knocks foes who it hits in the air onto the ground and into prone, with only barely below average starting lag and variable ending lag quite similiar to some of his other moves: it's terrible end lag if you miss a foe, but you recover pretty quickly if you do hit them as they absorb the impact.

This move is also much more effective against a foe who is already IN prone, as it deals 20% damage and extremely strong upward knockback that KOs at 90% or so against them, along with a satisfying little CRUNCH sound effect. This move has a lot of uses: Making prone very scary and trying to do some tech-chase style shenanigans, falling even faster and perhaps most fun, putting a foe into prone via hitting them aerially, which usually leads into a grab, though they can tech it of course. If you can't finish with a KO, this makes an excellent finisher to go into the grab game in the air...


<o Grab Game c>

Grab: Grab

Gatstaf makes a downward grabbing motion, like he was trying to take someone's legs out from under them. This makes it hard to in some cases impossible for him to shieldgrab an aerial character, but he can grab foes who are crouching hardcore...and he's able to grab people in prone. Down aerial to grab, anyone? Decent range standing, but much better dashing grab range. it's also mighty easy to grab a foe while disguised as a sheep, as long as you have a button mapped out for a grab...

Pummel: Chomp

Gatstaf quickly bites on the foe for 1% damage. Lucario-esque rapidity.

Down Throw: Throw Down

Gatstaf leaps into the air with the foe, being throwing them straight down. They slam hard into the floor for 11% damage and take no knockback, instead being thrown into prone, although this is techable. Although this puts the foe into prone, Gatstaf is still in the air when it ends, which can make followups hard...but you of course can also threaten with a down aerial immedietely due to being right above the foe, making them need to go quickly, and perhaps follow to your beat with proper use of leftover wool. Gatstaf's good aerial speed should also allow some followups and, if nothing else, this can totally ruin a foe's momentum and reset the match to a more neutral position. Good at what it does.

Forward Throw: Dragging Demise

Gatstaf slams the foe against the ground and begins dragging them against it, dealing rapid 1% damage as he rushes forward. Foes must continue trying to escape as if they were still in the grab as this happens, lest Gatstaf toss the foe once he reaches an edge for 4% damage and a somewhat weak spike that probably won't hurt people with good recoveries but can be deadly to the verticall inclined or try to set up a dash attack suicide. Gatstaf can also press A at any time to have him end the throw early and toss the foe forward one Battlefield platform for 4% damage, letting you set up at an exact distance in exchange for possibly losing out on further dragging damage or spike shenanigans. If the foe breaks out of the throw, Gatstaf will suffer enough lag that they can probably retaliate.

If you run over a wool floor, Gatstaf will almost immedietely perform the spike throw as he enters the air, bouncing the foe off the wool floor and letting you set up aerially, while he will simply bounce the other way if you hit a wool wall, allowing you to theoritically keep racking up damage via this between two wool walls. Kinda neat, I think.

Up Throw: Up Slam

Gatstaf grips the foe and tosses them pretty harshly upwards in what is a much more basic throw than you'd expect, dealing 8% damage and some decent but not killing knockback, making it an excellent way to setup some basic aerial stuff and...that's about the extent of it's use, really. If you don't have the setup for F-Throw/D-Throw, this and B-Throw are where to go.

Back Throw: Crouch Slam

Gatstaf rushes forward about a quarter of a Battlefield platform, before turning around and dashing forward half a Battlefield platform and using the speed to give the throw a strong toss, with Gatstaf ending up a quarter of a Battlefield behind where he was before. This throw does a grand 15% damage and some nice KO power, nixing the foe at 140%. While Up Throw is for setups, Back Throw is for some kills or basic movement.

Something to note is that Gatstaf ends this throw in his crouch, which means you can immedietely go into your crawl if you want too for some reason, like sheep blending or such. That's sorta neat, I guess.


<o Playstyle Redux c>

So, Gatstaf Howler adds a whole new dimension to how you approach Gatstaf, let's go through it.

Shepherd is able to setup both for himself, Howler or try both and deciding which one you want to do is key to playing Gatstaf. If you prefer the Shepherd, you probably want to set up for projectile combos via hay interactions bouncing off of the wool walls or just plain projectile platforms with stuff like your wool floors + sheep/hay. Howler, on the other hand, wants wool structures more made for bouncing off of and pressuring the foe, making hotspots that make getting up from prone tough and allow him to approach with options like Side Special, Dash Attack, Forward Smash and his grab.

Generally, Howler wants to start off his aggression with a solid Side Special hit, usually up angled to get off of a wool wall, or angled straight forward with a wall to double-hit a shielder/spot dodger. Dash attack is another cool approach option though, as it puts the foe in the unenviable prone spot that Gatstaf can abuse and forces the foe to move quickly to escape being grabbed out of prone. Likewise, your grab provides some simple but effective throws, like Forward Throw into structures for damage racking or a somewhat unique aerial launching option or Down Throw to force the foe into a prone descision while threatening your deadly Down Aerial on prone foes.

Properly set up, Gatstaf can also have more aerial mobility then he has any right to, bouncing off of wool structures and swinging around via his FAir/BAir for mobility, not to mention UAir and going to UpSpec to chase right up walls. On the ground, you can instead go around with Forward Tilt/Forward Smash/Down Smash and not to mention quick jabs and your down tilt. And one should not underestimate the ability to blend in with a large amount of sheep and provide sudden throws, Up Tilts to keep the foe down and Down Tilt to slap the foe around or do a sweet surprise down smash for a KO.

If you're more shepherd based though, Howler probably will play the role more of protecting setups and damage stalling, so you'll be focusing a lot more on your prone moves. Howler can also make great use of your sheared sheep by straight up eating them to heal Gatstaf, so don't be afraid to devour some sheep for when you turn into the shepherd once more. Setting up with a Shepherd Down Smash for your eating is a good idea for this. And you can always use your Down Special to try and switch between the two quicker or at oppourtune times...


<o Playstyle Redux c>

Entrance:

Gatstaf Howler does not usually have an entrance due to not being pickable. If you hack the game to start with him however, he will simply go through his normal transformation, but more slowly.

Up Taunt:

Gatstaf Howler lets out a long howl as he arches his back, like a true blue wolf.

Side Taunt:

Gatstaf Howler snaps his jaws in the direction inputted three times, making feral growls the entire time.

Down Taunt:

Gatstaf Howler goes "baa" in a deep wolf tone, making it sound sooooooo wrong.

Win Pose 1:

Gatstaf Howler stands over the dead corpses of some sheep, imitating his card art.

Win Pose 2:

Gatstaf Howler does his up taunt, but for a longer amount of time.

Win Pose 3:

A sheep runs past Gatstaf Howler trying to escape, causing him to chase it off the screen.

Win Pose: Vs. Fruit Bruit 1

Gatstaf Howler growls at Fruit Brute while making quite the aggressive posture, establishing dominance over the lesser werewolf.

Win Pose: Vs. Fruit Bruit 2

Fruit Bruit sets out a bowl of cereal, but Gatstaf Howler decides to eat Fruit Bruit instead.

Win Pose: Vs. Mike Dawson

Gatstaf Howler chews on Mike Dawson's dismembered leg while making some chomping noises that sound kind of like "Ehh...you missed pal!".

Win Pose: Vs. Madolche Majoleine

Gatstaf Howler eats all the sweets. Aaaaaaaall of them!

Doc Scratch Smash Taunt:

Gatstaf's bowl is full of MARSHMALLOW SHEEP. If he eats it slowly, then he just chomps on some like a dog. If he devours it ravenously, he puts the entire bowl in his mouth and devours the sheep, before spitting the nowl out.
 

Junahu

Smash Ace
Joined
Nov 15, 2005
Messages
899
Location
Shropshire Slasher
thought you could get away from these?

MYmini #1
You must construct additional extras


[21st August-3rd September]
We've had plenty of fun, quirky and awesome sets these last two weeks (we also had Mike Dawson). And for this MYmini, we're going to be good neighbours and give these sets more extras. It can be any extra(s) you wish, assist trophy/stage/animations/etc, but they have to be extras for (related to) one of the MYM13 movesets posted prior to 21st August. Also, no coughing up extras for your own movesets, that'd just be too easy.
 

Katapultar

Smash Lord
Joined
Nov 24, 2008
Messages
1,284
Location
Australia
[collapse=Gastaf Shepard"]This being a remix of somebody else's set makes it a weird experience right from the get-go, and I haven't read FA's version - it helps that your style is vastly different. I found it a bit awkward that the sheep's wool acts as a springboard of all things right off the bat, making it feel a little forced for the general sake of giving Howler a chase game and something to rebound off when you could probably use other props for the same purpose, and that's the only thing you can really do with wool. Having to set-up as one character to support the next is a pretty cool basis for a playstyle, if sort of being light on said setting up and being heavy on melee attacks which makes it fairly ordinary...it does work for what you intend however, as it's fairly fitting for Gastaf not to have control over his transformation and at least he isn't all desperate to keep his sheep alive just to use them for the transformation. Not to mention that by the time you do transform, the sheep will be useless to you anyway so why not just eat them? (I was expecting some more sheep interactions to pump up Howler's game aside from Standard when you have a Side Special that dashes through them, however) Given your style, I think you took a pretty good direction with the character via making the player go with the flow, but the main ideas could have been a fair bit more interesting to make a great simple set.[/collapse]
 

Davidreamcatcha

Smash Ace
Joined
Feb 9, 2011
Messages
629
By special request of FA, I have made Gatstaf worse


Gatstaf Shepherd


Gatstaf Shepherd as he appears in Smash

How bad can I be? I'm just doing what comes NATURALLY.


The Shepherd is a character from Dr. Seuss's Magic of the Gathering, this specific incarnation hailing from the 2012 animated feature.

In any case, The Shepherd appears as a main character of Dr. Seuss's Magic of the Gathering - he leaves his small yet abusive family looking for material to use for his invention, the Wool. He finds the Sheep Forest and chops down a single tree - awakening the Urabrask, the guardian of the forest. He agrees to harvest the tuff of the tree rather than chop them down, but is eventually egged into chopping down more trees for quicker production - by his family, who come to The Shepherd to leech off of his money and work for him. With that, The Shepherd gives into greed (mostly in the fantastic song "How Bad Can I Be?") - slowly growing from a small shop to a series of factories as he chops down more and more trees. The once bright, wide-eyed young man became a greedy, arrogant entrepreneur who was too blinded by his own success to notice the damage he was doing to the ecosystem.

Eventually, despite warnings from the creatures of the forest, including the Urabrask, he continues this trade until he eventually destroys the forest - which ends up turning him bankrupt and driving the creatures in the forest away. He does eventually return to his former self once his family leaves and viewing the destruction he caused. He found the last Sheep Corpse around this time, but didn't trust himself enough to plant it. This does, of course, become relevant to the plot when Ted visits him. But this isn't the time or the place for that, as this moveset is pulled from when he was greedy.

The Shepherd's snazzy green coat has been pimped out with trinkets and props from sheer "I need to spend my money on SOMETHING" level-greediness, helping the usage of props in the moveset a bit. Some of his attack library is inspired by the original version of the character, who is also available as a Wario-style series of costumes for The Shepherd.


Stats

My company's an animal that's trying to survive - struggling and fighting just to keep herself alive.


Traction 9
Size 9
Movement Speed 6
Fall Speed 6
Aerial Speed 5
Weight 5
Jumps 3


The Shepherd Howler


The Shepherd's entrance has him riding in onto the stage atop the Howler - he will be on it when the match starts, able to jump off whenever you want. The back of the Howler is Ganon's height and 1.5 Battlefield Platforms long, the front being 2 Battlefield Platforms long. It can be knocked around by being attacked, weighing 1.5x Bowser's Weight.

The Howler is subject to the laws of physics much like anything else with wheels should be, rolling down slopes and whatnot. If the Howler gets knocked offstage, The Shepherd can only regain it the next stock (he doesn't appear in the typical floating platform that the others do when replaying it, he instead performs his default entrance.)

If the Howler comes in contact with an obstacle, it will stop in place before a large amount of Seussian balloons pop up from the side. It will drift upwards at a speed equal to Ganon's walking speed over the obstacle, before the balloons retract into the side and the Howler drops to the ground. The Howler will automatically fly upwards if it falls off the blast zone in a scrolling stage, and will automatically move if it goes off the side in a scrolling stage.

It should also be noted that the Howler is immune to anything happening below it, basically all ground status effects. Doc Scratch, of course, doesn't appreciate the Howler not slipping when he slips. But Arrow would've hated this moveset anyway, amirite? Hook revenge besides the point, this means people will be fighting over the Howler as a camping platform if the ground is covered...


THE Urabrask


This guy here? He's the Urabrask - a mystical spirit that protects the Sheep Trees. He speaks for the trees, because the trees have no tongues. Why is here, you may ask? He's going to plant some Sheep Corpses - the thing that EVERYONE needs.

Every 20 seconds or so, the Pikachu-sized Urabrask will appear at a random location on the stage (however, he cannot appear more than half a Final Destination away from the location The Shepherd was at when he first appeared) and take out a small Sheep Corpse, planting it into the stage below him with about as much lag as Snake planting a C4. He points at the Corpse very quickly, covering it in a bright flash before retreating off the stage. Any attack that hits the Urabrask during his time onstage will cause him to retreat early, potentially preventing the Corpse from being planted. This also has a notable side effect: every time the Urabrask is hit, another 10 seconds is added to the time it takes for him to appear, becoming a bit discouraged from the attacks he's given. This time is reset upon The Shepherd losing a stock.


Once the Corpse is in the ground, it will grow into a Sheep Tree after 5 seconds - nothing can be done to stop this process. The tree, once grown, is half as wide as Mario and as tall as Ganon, acting as a solid wall of which can be stood upon. Every 5 seconds, it will grow half a Ganon taller, stopping when it's as big as 3 Ganons. Once the tree takes 15%-40% damage (depending on size), it will topple over, away from the person who attacked it. If anyone, including The Shepherd, is underneath the tree when it falls, they will take 12-25% (also depending on size) and be launched away - one of your best killers. The tree will stop toppling over if it comes into contact with a solid object, like a wall or your Howler - but will continue falling if that object is removed.

Once it's on the ground, the tree lays on it's side and can be launched around to turn it into a damaging hitbox, dealing as much damage as it did when it originally fell - it weighs from Mario - just above Bowser, depending on size, of course. The tree doesn't disappear until it is destroyed by taking another 15% damage or taking exceptionally good knockback, causing the fragile tree to break apart and disappear. This is likely something the foe will want to do more than The Shepherd, as he benefits far more from having a tree on the ground rather than a tree rising tall.

If the foe performs an aerial attack by the tree's top, specifically, the fluffy "sheeps", they will yank out the sheep. Sheep Trees that are standing tall will regrow sheeps after exactly 2 minutes, while dead can't grow sheeps at all. Once the foe has the sheep, they are able to use it as a throwing item - this deals no damage, but does deal a bit of flinch. Things work a bit differently if The Shepherd has a sheep, he will pocket it, unable to throw the sheep like the foe can.

One more thing about the Urabrask, now that we've discussed Sheep Trees. Many of The Shepherd's moves can apply status effects to the trees, such as coating them in goop or setting them on fire. If there are any trees like this, as soon as he is done planting a Corpse, the Urabrask will run towards the tree, jumping over all hazards in his path to get to it. Once he's by it, he will wave his hands and in a flash, the tree will have all those nasty status effects eradicated - staying at the same exact health it was. He will also make trees that have fallen on the ground automatically disappear, if he gets to one. He can still be attacked to send him back in the background and add to the time in which he appears - something The Shepherd may do, as he prefers the trees being used to his liking. Of course, this will start to deplete the supply of trees onstage...


Specials

Down Special

The Shepherd extracts a cigar from his coat pocket, lighting it and giving it a few puffs. This causes a cloud of smoke 1.5x the size of Bowser to appear from the cigar and stay 1 Battlefield Platform away from where The Shepherd smoked. The direction in which it appears can be chosen during the startup time. The smoke remains onstage for 8 seconds after it appears, anyone who enters the smoke will take poison damage of 2% per second as long as they are in the cloud, and will be footstooled in midair. The footstooling here is far more important than the poison, as you can force a foe fleeing into midair to fall back onto the ground - possibly into into the path of a falling one.

Also notable is the effect on the Urabrask - if he enters a cloud of smoke, he will cough for half a second while standing still, before moving forward again. Also note that he if he is planting the Corpse, he will stop for half a second before starting again. This gives you not a way to knock him away right off the bat, but it acts as a delayer - allowing you to vacate the area where the Corpse will be planted or to cause him to temporarily stop when he is rushing to restore the trees you've worked so hard to be the way you like...


Side Special

The Shepherd pulls out a small remote from his coat, pressing a button as he chuckles. As soon as this happens, the Howler will start moving either to the right or the left (with the direction able to be chosen during startup) as the multiple staffs on the front begin spinning around the front of the vehicle. The staffs on the front deal 9% and insane knockback to whoever is in front of it/on it, acting much like spikes in how they launch foes away. The Howler will stop in front of trees to deal cutting damage to them, causing them to fall forward in front of the Howler - before it moves across the tree. The Howler only moves at Ganon's walk speed, and won't stop moving unless it comes in contact with a wall or as mentioned - a tree. In the earlier case, it will only move if you input this in the opposite direction, causing it to turn around and whir to life again.

Pressing the input again causes The Shepherd to press the button again. This causes the Howler to begin moving even faster - at Ganon's dash speed.

Pressing it for a third time (or holding the input) will have him press it yet again, which causes it to grind to a halt. Naturally, this move allows you to position your Howler about - which has obvious benefits, such as using it to camp or having it shield your approach.

If you tap this special and immediately press a jump input, the Howler will sprout the balloons and automatically move 2 Ganons upwards, while still moving forward.


Neutral Special

The Shepherd takes his trademark staff and tosses it forward, able to move as soon as he is done throwing it, allowing him to runaway or possibly attack the foe while the staff is being tossed. You are crippled, however, as you can't use your staff-based attacks while the staff is flying about. The staff haphazardly spins through the air like a boomerang, covering half of Final Destination and moving at Fox's dash speed. You can change the direction you toss it in during the startup time, allowing him to catch foes offguard. The staff will deal 10% damage and good knockback to any foe it hits, making this a very good projectile especially given the short startup time. After traveling the covered distance, the staff will return back to The Shepherd.

Now, here comes the extremely obvious interaction - the staff's speed combined with it's...staffiness, will cut down a Sheep Tree no matter how much health it has, also able to cut down individual segments. This allows The Shepherd to cut them down from a good distance away - not unlike the tree cutter, which will likely take a while to get to those money-making trees.


Up Special


A claw appears from the back of The Shepherd's jacket, sprouting up from the back and extending 4.5 Battlefield Platforms in the direction you choose. If this grabs on the foe, it grabs and they are dragged across the ground in a prone state to The Shepherd's feet. After this, it retracts back into The Shepherd's jacket as he suffers some brief end lag. This is a state from which they can button-mash out at average grab difficulty, which is very useful for them - given that The Shepherd will probably be trying to drag them into something awful.

As expected, this is a tether recovery - but it doesn't suck. Besides having the obvious effect of allowing The Shepherd to tether himself up to the Howler, iif a foe is on the edge of the stage, the claw will still grab on them and drag them down to The Shepherd. They'll end up going down with him if he can't get to the stage. Unlike Grim Poppet, The Shepherd is too cool to have a horrible tether.

If the claw grabs onto a standing tree, the claw will launch The Shepherd towards it at Fox's dash speed, a state he can use his aerial attacks during - much to his delight. More importantly - if the claw picks up a fallen tree, it will bring it to The Shepherd and keep it above his head for a brief second, before it throws the tree in the direction you pick (attempting to throw it in a downwards direction will have it be thrown in the same angle, except upwards). This gives him a far more direct way of launching fallen trees than the foe.


Standards


Jab

The Shepherd pulls out a cigar, poking forward with it. This is a pretty standard jab, dealing 6% damage and dealing some hitstun that holds them in place for a very short time. There is a second hit, in which The Shepherd tosses the cigar forward like a generic throwing item, dealing the same amount of damage and knockback if it hits the foe. It disappears upon falling to the ground.

One of the much more obvious things here is how this gives Once-Ler another projectile, useful when he attempts to camp atop the Howler.


Dash Attack

The Shepherd hunches forward slightly as he darts forward head-first. If The Shepherd comes into contact with anything during this time, he will grab onto it and suddenly bound over it in a large leap of faith. If used on the foe, this deals 4% damage and some decent hitstun. Your most notable purpose is a getaway option, especially if you and your foe are on the Howler while it drives itself straight off the stage - or bounding over the Howler of any trees that may be in the way.


Forward Tilt

The Shepherd steps forward a small stage builder block as he swings the staff forward with a mighty chop! This can be angled like Bowser's forward tilt. If this hits the foe, they take 12% and are launched away with good knockback. The most obvious purpose here is the use as an obvious GTFO, especially if you need some space.

This also serves as a much more...direct way of chopping down trees. Every swing you do with this will remove 25% of the tree's health, swinging it when it has 25% or less will cause it to fall down away from The Shepherd.


Up Tilt

The Shepherd reaches forward in a quick grab. If he succeeds in grabbing a foe in front of him, he will stop them in place and quickly spin them around, dealing 2% ala Mario's cape. The grab out-prioritizes any attack options from the foe, meaning he can stop their approach in place and send them away. If the foe was dashing or walking when The Shepherd grabbed them, they will continue doing so as he stops them in place and spins them, meaning they will walk for a brief second in the opposite place - much like a classic cartoon gag.

If the foe was holding an item in their hands (not a prop, much to FA's orgasmic delight) when they spin, they will drop it on the ground. This is much more relevant when you take the fact that they can take sheeps from trees before you can...


Down Tilt

The Shepherd points the head of the staff at his stomach, hunching forward as he pushes the handle of the staff at his foes. What would normally be considered a stupid move does, surprisingly, work rather well - if this hits the foe, they stumble 3 Battlefield platforms backwards and fall into a prone state, taking 4% damage. One of the more notable uses, outside a simple spacing tool, is the use of this one your Howler - you can push a foe backwards off of the back, which will be the most likely part fought for, onto the front - which potentially is covered with whirring staffs. Mwahahaha! ...Am I getting the evil laughter right?


Smashes


Forward Smash


The Shepherd leans back slightly, as the above boot appears from the- actually, I think a a picture reference works best when trying to describe this sort of thing. Just imagine Joker as ol' Oncie and the boxing glove as the boot seen above.

You can angle this very slightly during the startup lag, alebit it is very limited with only three possible angles (forwards, slightly upwards, slightly downwards). After this is released, the boot springs forward from The Shepherd's coat, extending a full 3 Battlefield Platforms. He leaves it out for a full 1.5 seconds afterwards before it reels back in. Getting hit when the boot is extending deals 7-14% damage and excellent knockback. This deals excellent shield damage if fully charged, eradicating 75% of the standard Brawl shield - meaning this is your best way of tearing down your foe's main defense. The chain and the boot are solid, meaning foes can walk upon them - making it much easier to get to you, especially with the opening they have during your end lag. You'll want to make sure this hits them, or else you're not going to have the best time. Still, the knockback and possibility of breaking their shield is more than worth the risks. Don't let the boot hit ya on the way out.

If you hit a Sheep Tree with this, the tree will shake and instantly have it's sheep fall to the ground - allowing you to make use of it from afar, especially when you can have your claw come in and take it shortly afterwards. This best works when your foe is attempting to take the sheep themselves.
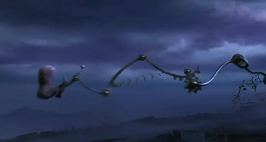


Down Smash

A barrel of toxic schloppity schlop, left over from The Shepherd's experiments on the environment, appears in his hands. After the brief starting lag, The Shepherd tosses the schlop 2 Battlefield Platforms in the direction you chose, it falling to the ground shortly after. If the foe gets hit by the schlop, they will be coated by it, their traction being cut in half and their ground movement slugging by just the slightest bit. This effect lasts for about 5-12 seconds, based on charging time. It can also cover walls and trees, though this doesn't seem to have any noticeable effect...

If it falls to the ground, it will remain there instead, becoming a trail as wide as 3 Battlefield Platforms. This has the effect of causing foes to slip and slide around on it - just like ice. It stays on here 5-12 seconds, just like how it stays on the foe.

Should The Shepherd's cigar hit the schlop, the schlop will be lit aflame! This makes a trail of fire that deals 5% damage and good knockback should anyone fall into it, lasting for 6 seconds before it and the schlop it was covering disappears. The Shepherd can also light foes covered in schlop on fire, which will cause them to take 2% per second over the next 6 seconds, though they can stop the fire by performing 2 rolls. You can also light trees covered in schlop aflame, which causes them to take the same damage as a foe and fall to the ground once they take enough, remaining a firey hitbox until the fire runs out or the tree loses all of it's stamina. Of course, the Urabrask will try to eradicate this...


Up Smash

The Shepherd swings the staff above himself, looking like the Penguin King as he does so. This also has similar charge/attack properties, dealing roughly 9-15% damage and launching them away with good knockback. The Shepherd very much needs an anti-aerial attack, given how many people are going to be trying to jump on the Howler if the ground is covered and dealing with foes jumping up by trees to take sheeps.

If The Shepherd hits a tree with this, he will grind against the bark of the tree, sending bits of bark and sawdust backwards when the staff swing is over (once again, think Dedede). These fly backwards 1.5 Battlefields before disappearing, dealing rapid hits of 1% and flinch/push to any foe who gets hit. This works especially well when a Howler is moving towards the tree with the foe in tow - you can push them at the Howler before making your escape.


Aerials


Neutral Aerial

The Shepherd spins his staff around himself, able to manipulate his direction as he moves through the sky. The staff deals rapid hits of 2% as he spins it around himself, but also acts as a shield - absorbing all hits. The most obvious use is as a defensive tool if you're standing on your Howler.


Forward Aerial

Given how many moves The Shepherd has that pretty much force them to move up into the air, he need some sort of all-purpose aerial pressure move: this is it. The Shepherd pulls out his staff and performs a flurry of swings, his arms become a blur as he does so. This lasts about 2 seconds and deals a large amount of flinching hits that add up to 10%, before launching them away with great knockback. Probably one of your best aerial killers. You can also use the multiple hits to position them a bit.


Back Aerial

The Shepherd reaches an arm behind him in what appears to be a generic aerial grab, holding them out for a second before putting them back. If the foe comes in contact with his arm, he holds them in place for a second before using his free hand to butt them backwards with the handle of his staff, dealing 8% and launching them with strictly backwards knockback. Outside spacing them away from sheeps, this is especially when he's being launched towards a tree from his up special, as the grab hitbox becomes much more potent when you're moving at a fast speed.


Up Aerial

This is very much a generic "grab above you and drag the foe down" as The Shepherd reaches his hand above himself to grab onto the foot of the foe above him, tossing them down the ground shortly after, dealing a token 3%. His hand out-prioritizes any attack that may be directed at him here, giving this a purpose as an attack you can use to deter foes attempting to attack from above as you stand on your Howler.


Down Aerial

The Shepherd turns to face the screen as he raises his staff triumphantly above his head, before tossing it downwards at and incredibly fast rate. The claw from The Shepherd's up special follows in the background shortly after, staying just behind the staff as it falls. The staff plummets down to the ground at the speed of the Ice Climber's stall and fall, dealing 15% and great downwards knockback to foes who are hit in the head by this. This is a gimp, but a not at all ridiculous one like Ganon's or DK's, with the possiblity of the foe getting back to the stage still possible. Of course, this counterbalances the fact that it's a projectile. Still, the great range here makes it excellent at things like knocking them downwards into fires or the front of your Howler.

The staff travels about 4 Ganons downward before the claw grabs it and brings it to The Shepherd, during which The Shepherd can only slightly control his DI without the possibility of attacking. The Shepherd can press the input to bring the staff upwards early, which can help him fake opponents out or defend himself in a FFA, where another foe will attempt to attack while you seem preoccupied with that one.


Grab Game


Wool

I've grown okay with unsmash grabs that actually don't grab the foe - one of my main issues with Beezwax. Now I'm doing one here. Man, am I a huge hypocrite or what?


If you have no sheep, The Shepherd simply shakes his head in disapproval, acting more as a taunt than anything useful. However, if you have sheep pocketed, The Shepherd will pull out all of the Sheep he's gathered out and begin molding it all into some sort of odd creation. After 1.5 seconds, he will reveal his creation...a Wool! What's a Wool, you may ask? A Wool's a Fine-Something-That-All-People-Need! It's a shirt, it's a sock, it's a glove, it's a hat - BUT IT HAS OTHER USES! Yes, far beyond that! You can use it for carpets. For pillows! For sheets! Or curtains! Or covers for bicycle seats! Simply put, the Wool can be made into anything - from nails to hats. It can also be either an incredibly hard or incredibly soft material, depending on how you make it work.

The properties of the Wool made depends on how many sheeps you had when you used this. Your grab-game changes drastically when you make your Wool, as is about to be covered.

When you enter the grab, The Shepherd strikes a pose as he takes out the Wool and eyes it greedily. He will be able to execute any of his "throws" from this stance, and will exit upon pressing the grab input again or from specific throws. If he is attacked while he's holding out the Wool, it will fall to the ground in front of him, where the foe can grab and toss it away. The Shepherd can pick it back up to have his grab-game restored. This does, of course, make your up tilt far more relevant to your game...

Oh, did I mention that the Urabrask will attempt to pick up any Wool that is laying on the ground? 'Cuz he will. Then he'll pocket it, and continue along his merry way ruining your beautiful hazordous wasteland with no way to get it back. More reason to keep him away...


Pummel

If you've gathered any Wool since you first made the Wool you're currently using for your grab, The Shepherd will extract it and add it onto his current Wool. If you don't? The Shepherd destroys his Wool, allowing him to start anew.


Up Throw

The Shepherd steps into the background as he holds the Wool out into the foreground, changing it into what appears to be a circle...it's the size of Kirby with one sheep, adding a Kirby on for each subsequent sheep. stay in the background for 5 seconds, suffering 1.7 seconds of end lag as he steps back into the foreground when this is over. He can press the grab input to leave the background early, if he wishes.

Should the foe come into contact with the Wool as he holds it out, he will lunge out on them and wrap it around them, molding it into a carpet! From here, the foe can button mash out at 1.5x grab difficulty (with .5x grab difficulty being added on for each sheep in the net), while The Shepherd can beat up on them. The foe wrapped up in the Wool carpet has no control until they button-mash out, meaning The Shepherd won't show any mercy if he decides to push them into the path of the Howler or what have you. After they button-mash out, the Wool falls to the ground in front of them.


Forward Throw

The Shepherd begins forming the Wool once again, this time creating a big bouncy net (with a support at the bottom, meaning it can't just magically stand up on it's own), the height covering 1 Ganon for each sheep. The Shepherd places it down in front of him shortly after this. Now, if anyone moves into the net, they will be launched backwards at the speed they were walking into it. While this mostly works well at restricting the foe, it also works wonderfully well in the case of trees - if a tree falls on your net, it will be bounced back upwards and fall in the other net - unpredictability certainly helps in your gameplans. The net will be dismantled after it takes 10% damage.


Back Throw

The Shepherd grabs all of his Wool and forms it into a large chain, the length depends on how many you've gathered, of course (1.5 Battlefield Platforms for every sheep). He takes a small nail from his back pocket and nails the Wool chain into the ground, as he continues to hold the other end of the chain. The Shepherd can't walk very far from it while he's holding the chain, and any attack will cause him to let go of the chain. However, he can throw the chain out in the direction he desires by tilting the control stick in any direction and pressing jab, the chain reaching 2 Battlefield Platforms outwards before falling back down to the ground. If the Wool reaches something, be it the Howler, a tree, a wall - anything, it will attach to it. The superstrong material of the Wool will hold the Howler in place, delay the tree from falling for 4 seconds (before it automatically snaps), and given the solid nature of the Wool chain, can form interesting wall/platform combination when combined with a wall or another platform, sectioning off areas of the stage or what have you.

Now, of course, the foe is tethered to whatever the Wool is tied onto, unable to move away from the Wool, only able to move closer to it. The only ways to to get rid of the tether is to take 20%, which will snap them away from the Wool automatically, deal 18% to the Wool (The Shepherd's staff will cut the Wool immediately, making moves like DAerial or NSpec extremely useful for this purpose) - or stand still for 4 seconds, as their idle animation while chained has them attempting to remove the Wool. Once they get out of the chain, the Wool can be picked up and tossed about.

This has some pretty obvious uses, tether in the path of your Howler and watch them scramble, tie them in front of a tree and pressure them while it's aflame or simply let it fall down on the foes. The possibilities are endless!


Down Throw

The Shepherd gathers up all his Wool and begins molding it into something new and exciting....a platform? The Shepherd molds the Wool into a large platform, before placing it down in front of himself. The length of the platform varies by how much Wool you have, of course (1.5 BFPs for each sheep). The platform is surprisingly strong, being able to hang slightly off the stage with relatively no problem, and acting just like any other platform - with grabbable edges and whatnot. The main thing here is how extending the platforms slightly off the stage extends how far you can have things like your Howler move - you can also cover up enemy traps with this platform. The platform can take up to 20% damage before reverting back to it's normal form, which can, of course, be tossed about. Having foes on your slightly offstage platform can help you quite a bit if you plan to gimp them, as you can easily willingly sacrifice your Wool by attacking it from afar.

Of course, a much more subtle but more valuable purpose than the other mentioned ones - The Urabrask will never attempt to plant Corpses on Wool, which means you can indirectly control where he plants his Corpses with this.


Final Smash
The Shepherd laughs maniacally with the Smash Ball aura glowing around him...until the Urabrask pops out from the background, hitting the Smash Ball out of The Shepherd (who falls into prone on the ground) and using it himself. When the Urabrask uses the final smash, hundreds of Sheep Trees appear and the stage turns into a beautiful looking garden, Barbaloots play in the background and birds fly ahead...of course, this will only last for a short while. Do you know who you are? You're The Shepherd! You should have all this trees taken advantage of in no time! This environment will, however, disappear if 20 seconds go by without a tree being chopped down.

As more trees disappear, the stage grows more darkish, hellish and barren as smog covers the sky. The wildlife disappears as well. The stage's environment remains this way until the Urabrask comes back and plants another Corpse....


Playstyle

Playstyle Section? Pssh. It's a sandbox moveset, play how you want - even if you've got some very strict guidelines and pressure coming at you every few moments.

No, to be honest - this was a quick and somewhat disjointed moveset. I don't think it needs a full playstyle section. However, I will be updating this section with segments/individual strategies based on comments/questions I receive.


EXTRAS


Up Taunt

The Shepherd extracts a wad of bills and waves them around a bit - admiring the new money he's made from the Wool and his changed personality.


Side Taunt

The Shepherd replicates the last few seconds of How Bad Can I Be, as he clenches his fist and yells out "HOW BAD CAN THIS POSSIBLY BE!?"


Down Taunt

The Shepherd gets angry with the foe, yelling out "I'm figgering on biggering and biggering and biggering and biggering!" in regards to his chopping down of trees.


Victory Pose 1

The Shepherd is sitting in a large chair, with the back turned to the screen. Only his arms are seen, which are completely green.


Victory Pose 2

The Shepherd is seen tuning his guitar a bit, strumming shortly after.


Victory Pose 3

The Shepherd pops a marshmallow in his mouth, chewing and giving the screen an evil smirk right after.

Here, Arrow - buy yourself some manners.
 

Katapultar

Smash Lord
Joined
Nov 24, 2008
Messages
1,284
Location
Australia

Luke Atmey


Ace Detective Luke Atmey, at your service! A private detective of utmost class and narcissism, he claims to have solved many cases and retrieved priceless jewels stolen by his proclaimed nemesis Mask DeMasque, returning them to their rightful owners and getting a handsome reward in return. As confident as he is however, one can't help but be suspicious of Atmey, especially when he seems to know when and where the phantom thief will strike -before- the calling cards are sent out...​


Stats

Size: 7 (173cm tall to be specific)
Weight: 5
Ground Speed: 5
Jumps: 3
Aerial Speed: 4
Fall Speed: 7
Traction: 8


Specials I


Side Special

Atmey bends down before swiping to the ground, hoping to snag an item to store in his pockets for safekeeping. A backwards input lets Atmey store the item he's holding or swap it with a stored one via smash input of which he can continuously cycle through repeatedly to get the stored item he wants. Up to 4 items can be stored; storing any more will cause the first item to be dropped behind Atmey. Storing items frees Atmey's hands given how important they are for his occupation, but they're not completely inaccessible to foes as he'll drop them when hit with a strong enough attack. Item timers such as those on explosives will be temporarily halted when stored by Atmey.​


Grab

Being an Ace Detective, it's only natural that investigation comes to mind first. Atmey extends a hand and drags foes right up to his face in an awkward manner before holding his beloved monocle on them.​


Pummel


Zvarri! The truth has once again been elegantly revealed to him! A magnifying glass appears around the foe, zooming onto a portion of their body that reveals a priceless treasure in their possession...not that Atmey's interested in solving the mystery behind how they got it. Rather, he's interested in the calling card that's stuck onto it, indicating that his foe will be the target of DeMasque's next heist! To Atmey, this object is but bait for luring his archenemy which he'll take from the foe and into his smug hands; he's no thief himself of course, and allows the foe a second to reclaim the item by pressing A before putting it away in his comfy pockets for safekeeping, usable with the Side Special. Regardless of the foe's choice, the grab continues on and the time spent on this move does not contribute to their escape - it obviously can't be used when the foe has nothing to investigate, however.

The real steal of the move comes from the calling card that's cosmetically stuck to the item in question, a great find for a great detective. They can also be found on held items by holding Z in the place of a grab, as well as using said input when crouching next to an item. Calling cards indicate that those items will be targeted by the infamous Mask DeMasque, and after 10 seconds of their discovery the phantom thief himself will gracefully fall from the top of the screen (where the first calling card appeared) to do his work!

DeMasque is a Lv5 AI with Lucario's graceful stats (but with turning lag due to the sack he carries) and Snake's moveset, minus the Smashes and Specials and a few changes to the standard attacks: the U-tilt has no invisible hitbox, each hit from the D-air deals downwards knockback as powerful as the last hit and the Dash Attack propels DeMasque twice as far while snagging items from struck foes along the way as does the Pummel. DeMasque will indeed try to use those last two moves to steal items from whoever has them (automatically using the D-throw afterwards if a grab is pulled off), and if he can't pull them off he'll instead try to knock that foe away and make them drop the item by force. DeMasque generally wants nothing to do with foes not holding a targeted item and will attempt to maneuver past them, but if they're approaching him or too close for comfort he'll knock them away for some hefty damage given who's set he's mimicking. Once DeMasque has an item of interest he'll toss it into his sack with a bit of lag before swiftly proceeding to the next until he's done, where he'll gracefully jump off the screen with as much vigor as whence he came - stolen items are indeed stolen for good, and don't remove limitations on their kind in question with their absence, meaning if one Pokeball is stolen only up to two will spawn at the same time, and if R.O.B had his gyro stolen he won't be getting it back. It's not all doom and gloom for those who've had their items stolen however, as the very sack DeMasque carries over his back can be torn open with 20% to make all the stolen items spill out - should this occur DeMasque will settle with stealing the nearest item that came out of the sack before jumping offscreen. The sack protects DeMasque from behind to a degree, but it is not invulnerable and can be grabbed and thrown to dish out damage against it (DeMasque can still attack from the front while this is happening). DeMasque can also be KO'ed to have all the stolen items rain down harmlessly like coins do in a Coin Match, putting him out of commission for a good 25 seconds before he's allowed to come back - as long as there are calling cards about on the stage he won't stop appearing between 10 second intervals. Note that Atmey will not find calling cards while DeMasque is about, and using this Pummel on him will spur the Ace Detective into kicking his nemesis in the gut, making him reel over him pain for 3% as the latest item placed in his sack conveniently flies into Atmey's hands which he stores...suspicious.

If he foe wasn't holding an item upon being investigated they'll find themselves in the possession of a certain priceless treasure dependent on how long it took for Atmey to investigate them - the best detectives find the best leads before the others, after all.

[collapse="List of Treasures"]Within 10 seconds: A jewel-laced sword that mimics the foe's default coloring as do the other treasures. It's a two-handed weapon that replaces their standard attack with a slow, piercing thrust that deals 5-15% and KOs at 200-100% depending on how far it reached into the victim - if the whole went through it'll impale them for 18% and high hitstun while pushing them back. The sword remains embedded in the victim on the side they were struck, and when pulled out by another character it'll cause all the sealed-up blood to spurt out as they take a severe 27% which KOs at 50%, most likely a OHKO. Getting stabbed by the sword in the first place is fatal as there's no way to safely remove it, and DeMasque will try to pull it out in his attempt to steal it. The sword is surprisingly laggy to throw due to being a two-handed weapon, making it difficult for foes to throw it offstage without getting punished in the process. When successfully thrown however, the sword moves and travels slowly (only travelling 1.5 SBBs at most), embedding itself into any surface it makes contact with where it can be picked up with a bit of lag - if the weapon hits a character from the sides it'll impale itself into them, while hitting them from any other angle will deal them 17% with knockback that KOs at 115%.
Within 11-20 seconds: A small, fragile statue made of glass that packs a wallop when thrown - 33% that KOs at 65%. It shatters upon contact with a surface, breaking up into glass fragments which travel 0.2 SBBs outwards and deal 2% with flinching for every 0.5 SBBs height it fell from, only damaging characters and not items or structures.
Within 21-30 seconds: A sacred urn of sorts. It can absorb any one item that's thrown at it for later use by breaking it, which is done through attacks, throwing it against a surface or pressing A when holding it to safely get the item. As a throwing item, the urn deals 10% with good hitstun that doesn't cancel momentum, but if there was an item inside its dealt damage and knockback when thrown will be added on.
Any later: Only a tiny jewel that deals an even less impressive 1% with no flinching and doesn't bounce off surfaces...but there are 4 of them. You can hold any number of jewels at the same time and they all count as 1 item when stored with the Side Special, each having a calling card of their own. They're also thrown individually, and their sheer quantity makes them good for making DeMasque run around the place.

Only one treasure can be found on each foe between each heist and only one sword can exist: if Atmey would find a sword on one foe then grab another quickly enough, he'll instead find a statue on that one. The "investigation timer" resets upon DeMasque's departure, as well as if any treasures are thrown offstage - this means foes can't just carelessly rid items to stop DeMasque's heist as they may find themselves in danger of Atmey finding a sword on them.
[/collapse]​


F-throw

Zvarri! Atmey calls out his iconic catchphrase whilst pointing to the foe as if accusing them of a crime, dealing them 7% and light mostly horizontal knockback that won't KO until 300%. The knockback growth is poor enough that you can chaingrab most characters up until 25% and large characters to around 50% if you're daring enough, and even pin the foe to a wall to deal them an extra 25% worth of chaingrabbing until they start rising off the ground from their knockback out of your reach. Atmey's chaingrab serves a bigger purpose than mere damage-racking or stalling however as it allows him to repeatedly badger foes for the Pummel and D-throw's effects during multiple grabbing attempts instead of holding in place for an excessively long time where their damage percentage would have to be high.​


B-throw

Atmey reaches out behind him to grab a foe while still holding his current one. If he catches someone, he'll set his sights on them and push the other away for 5% and decent set knockback so they don't interrupt. This lets Atmey deal with multiple foes in the case where one tries to sneak behind him, which naturally becomes relevant when DeMasque comes about - for FFAs, this is a quick way to investigate multiple characters in a crowded area as they'll be hit by a victim of the F-throw if they stay in front of you.​


U-throw

Atmey curls up his investigating fist before slamming it into the foe's jaw for the famous Atmey Uppercut, the ultimate criminal-busting attack! It deals 12% and sends foes high up into the air at 0% (about 2.5 SBBs), but isn't as good at knocking out criminals as it claims given it only starts KO'ing at 190%. If the foe had an item on them it'll be knocked above them twice as far as they were knocked back, potentially falling on them if they don't get out of the way - if you think a foe's going to throw the treasure offstage use this. The uppercut disarms DeMasque of his sack and causes everything he stole to fly out in a rain of items that travel 1-3 SBBs upwards based on their weight and land 0.5 SBBs on either side ahead of Atmey, damaging nearby foes. Looks like Atmey saved the day again!​


D-throw

Atmey takes out his most recently stored item with one hand and holds it in thought for about a second, giving the player time to tap A to cycle between stored items before the chosen one is slipped into the foe's hands. The item in question is automatically accessed by the foe whenever they'd perform any action that'd result in them picking up an item providing they weren't holding an item in the first place, an excellent way to make DeMasque go after them when you can store up to 4 items in them. The time spent on this throw does not contribute to a foe's button mashing, though you obviously cannot use it without a stored item.

If you use this throw on DeMasque, he'll place the item in question in his sack if it had a calling card on it, but otherwise he'll attempt to use it as a weapon against anyone in his way. Using this against the sack lets Atmey put the item inside, which DeMasque won't do anything about since they're freebies.​


Smashes


F-Smash

Atmey gets down on one knee and extracts what appears to be a large golden frame reminiscent to a rectangular portrait that's as tall as the detective himself. During the charge Atmey can choose where he positions the frame, with forward having him plant it in front of him as a surprisingly sturdy wall, downwards having him place it on the ground ahead and upwards letting him walk around with it hoisted above his head as if holding a Hammer (meaning he can't attack while holding it). The frame has 55HP and automatically reflects projectiles, meaning players have to either use melee attacks to destroy it or pick it up (while standing at the edge if it's sitting on the floor) and toss it with the lag of throwing Bonsly, albeit a weak throwing item that shatters upon hitting a surface and scatters into small pieces that deal up to 12 hits of 1% to those nearby - the lag leaving foes open means it's generally not worth going through the trouble however. Atmey can have up to 2 frames out at a time, and can stick them to makeshift walls or platforms to amour them if he uses them next to one and can have as many of these out as he wants (I'm sure he has something figured out for that...). It's worth noting that while Atmey can't attack or store these large frames, he can detect calling cards on them with his Neutral Special and DeMasque's sack is large enough that he can fit one inside.

If Atmey uses this move in front of a frame or keeps an extracted one in front of him for 0.5 seconds, he'll hold it overhead before brutally smashing it down with similar execution to Ike's F-Smash. This deals 17-25% with mostly downwards knockback that KOs at 130-105% as the plate shatters upon hitting a foe or the ground, being thrown downwards if there was no ground in front of Atmey. Aside from being a reliable move to knock foes into pits with, the frame retains its reflecting properties throughout the entire move, meaning the charging animation actually has relevance as any items over Atmey's head will simply bounce off. The frame also acts as a wall during the charging animation, but will fall out of Atmey's hands and shatter behind him if attacked (it can still damage foes too).​


U-Smash

Atmey hunches down as if suspicious of the floor, only for a wooden crate to pop up beneath him! Contact with Atmey or the crate during their sudden rise deals 11-17% that KOs at 180-150%, the crate being a solid object as large as a Brawl one or 1.5X that size when charged with grabbable ledges to go with it. The four sides of the crate on the attacking plane are destructible, having 20-30HP before breaking apart and changing the structure of the crate whilst leaving the rest in-tact until all 4 sides are destroyed - on the inside, the 4 sides have twice as much HP. The crate can be tipped over when pushed against on the outside for 0.5-1.2 seconds or when a character is knocked against the inside (squashing foes beneath for 10-15% that KOs at 150-100%), and can be pushed around like Metal Mario-Bowser at 0% with attacks and character sent flying against it on the outside - crates can also be moved with wind hitboxes and pushing attacks, but only 1/6th-1/8ths as effectively. Up to 3 crates can be out at once, and you can even stack one atop the other in which case the newest one will appear beneath the oldest - it goes without saying that that bottom crate becomes more difficult to push around when another is stacked atop it, and the pushing timer to tip the stacked crates will be combined together (it's impossible to move the bottom crate if two are stacked atop it). Once the bottom crate is tipped over or pushed, the top crate will naturally come tumbling down on the side it was closest to and will crush players beneath if they're careful.

Perhaps the most suspicious thing about these crates is how DeMasque will appear on top of the most recent one when his heist begins...surely Atmey isn't planning these checkpoints in advance for him? Oh, but he must be doing it to trick him!​


D-Smash

Atmey places beneath him...a Broach Bomb!? Surely he's not trying to lure in his nemesis by insisting he lost this important part of his attire? Regardless, the broach acts as a time-bomb comparable to Snake's landmine which explodes after 2-25 seconds, is attacked or when something is knocked against it (or if the bomb is squashed between two surfaces courtesy of a falling crate), dealing 20-30% with upwards knockback that KOs at 170-130% to those hit at the center and 9% that KOs at 300% to those hit by the outer-radius, all while propelling nearby items with enough force to make one think they were thrown. The broach can be held as an item and stuck to surfaces like a proximity mine for some neat tricks with a crate, and there's no limit to how many can be out - coat every part of a crate possible with them if you like. And surprisingly enough, DeMasque will indeed attempt to steal broaches with calling cards on them because apparently he just steals whatever they're placed on, almost as if he's just blindly taking someone's advice of what to steal in the first place. If a Broach Bomb has no calling card on it, DeMasque will play it safe by jumping over it to reach his destination, an aspect that can inconvenience players when all of DeMasque's aerials deal solid knockback.

Broach Bombs have their timers delayed when stored by Atmey, but not when snuck into the foes. They also won't explode inside sacks when they're attacked from the outside as will other bombs.​


Specials II


Neutral Special

If Atmey isn't holding an item on hand or in storage, he'll tap his foot in frustration while holding a hand to his chin. Otherwise, he'll face away from the screen whilst mingling with said item for half to one whole second based on whether the input was tapped or held before placing something ahead of him - if tapped the item in question will be placed in a cute gift box that contains it like a weak item capsule and can be opened with A, but if the input was held the item will appear to be unchanged, only to replaced with a forgery designed to trick the thief DeMasque! It's pretty obvious to anyone out in the open, and upon being attacked, walked over, used as a weapon or hitting a surface it'll shatter harmlessly. The real item is obviously stored away by Atmey, yet it seems as if he was not able to remove its calling card and had to forge one along with the item, meaning DeMasque won't be fooled for long and will eventually go after the real thing. DeMasque won't go after anything inside a gift box, but can be made to go after the box itself if a calling card is discovered on it and place the whole thing in his sack. Forging gift boxes or items allows Atmey to throw off DeMasque and distract him among other things, and even mindgame the foes themselves if used inside a crate or some place else where they can't see you. You cannot make forgeries of gift boxes or other forgeries given it'd be too easy to make bait for DeMasque that way when you're meant to use existing items.

The box and forged item can be booby-trapped if the control stick is held in one of 3 directions, activating upon the box being opened or the forgery being picked up by anyone other than Atmey. A Forward input gives off a SBB-sized cloud of sleeping gas which acts much like Brawl's only pummels and damage-less throws can be used on them without waking them up with obvious implications (aerial foes fall asleep the moment they hit the ground). Backwards gives off a similar sized explosion that deals 10% and KOs at 150%, and up gives off a flash that flinches but causes those affected to drop their held items. The most notable thing about the range of the traps is how they'll affect anyone else nearby, meaning if DeMasque steals one of these forgeries from a foe (via slipping it into them with the D-throw) both he and the foe will fall victim. Kill two birds with one stone!​


Up Special

A stepladder appears underneath Atmey, which he jumps off it in a identical move to Sonic's spring before it falls to the ground as an item of convenience, Atmey being able to attack as he jumps. The stepladder is as tall as Ganondorf stretched out and has 10HP, acting as a steep ramp which characters can walk over and footstool jump off the top for extra height. It can also be laggily picked up as an item (the two sides fold back into one in a character's hands) and laggily thrown a short distance of 1 SBB to deal 10% and minor hitstun as the ladder opens back up and falls - if Z is used characters will automatically footstool off the ladder before it falls, though Atmey can only do this in the air given he uses that input to find calling cards on items. It's worth noting that there's a bit of space between an open ladder which can trap small items underneath, meaning players have to do something about the ladder before they can get to the item. Atmey can have up to 2 stepladders out at once, so try not to find calling cards on them if you can really help it. Stepladders serve to help Atmey reach the top of his crate stack given his jumps won't do him any good, yet other characters can use them for the same purpose too.​


Down Special

Atmey dusts off the ground beneath him, revealing a hatch leading to a safe! This safe can only be found on the ground and drop-through platforms that are apart of the stage, as well as crates regardless of their current composition strangely enough....was it secretly a safe all along? This hatch can only be opened by Atmey with another use of the Down Special above it, taking a good second to open before said hatch gets pushed to the side as a mini-wall that can be rolled past but re-seals the hole when the front part is attacked or a character pushes or is knocked against it, making it ineffective as a true wall on the side facing away from the safe. An elusive hole is revealed beneath the hatch, leading to an underground safe that stores items thrown into it and lets characters dig through its contents by pressing A while standing atop it to position the item last thrown in behind the hole and pick out a preferable one - if this move is used atop an open safe Atmey will hunch down to mess with its stored contents as a thought bubble of the item last placed in appear above his head and changes to that of the item placed in beforehand with each tap of B, while using A has Atmey take out said item to hold in his hands, swapping it with the one he's currently holding if necessary. Using the Side Special atop the open safe lets Atmey take the available item and store it in his pockets. Needless to say, discovering a hatch atop a crate provides a way for players to get inside, but once the hatch has been sealed those on the inside have no way to get out from that particular side and said becomes invulnerable to damage anyway - open hatches also become drop-through platforms on crates tipped over, but instantly seal shut if said side is tipped over so it's facing the ground. Only one safe can be discovered on the stage and each crate independently, though another safe can be found on the stage to replace the current one while keeping all the items stored in-tact - if foes are desperate enough for the contents of the safe they can try breaking down the hatch's 200HP, though this takes a long time and is refreshed with a new safe.

The safe is a yet another way to store items and isn't really all that special at first glance...at least until DeMasque comes into the picture. You see, he too is able to open the hatch and gain access to whatever goodies are inside; in fact, if there's a safe onstage DeMasque will target it first regardless of any calling cards around him, knocking characters standing atop the safe without hesitation before opening it, a single second in where he is vulnerable. If there were no calling cards inside the safe DeMasque will move onto his next target, but otherwise he'll place whatever items that do have them into his sack, one by one, indiscriminately attacking anyone who gets near him. If there were no other items left to steal, DeMasque will make his exit by hopping through the hole of the safe with those stolen items that'll never be seen again...

Or will they? If Atmey discovers a safe on the stage -after- DeMasque has left with stolen goods, they'll all be...inside the safe itself! Well, well, it seems we have ourselves a con artist; turns out he was only pretending to "reclaim" those stolen treasures and was working with DeMasque all along, giving him instructions of what to steal via Atmey himself having been the one to place the calling cards...it was all a big scam, but that doesn't explain why DeMasque doesn't recognize Atmey...

All "reclaimed" goods lose their calling cards, making this the only way to truly use a treasure without making one's self a target of the thief. The order in which DeMasque steals his goods is important too, as the last one stolen will be drawn out of the safe first and so on. Essentially speaking, the more DeMasque steals the more items Atmey will have inside his safe to use against enemies (he can even hoard all the potential items in the game), and he can even get DeMasque to steal them again if he wants to make the most of said thief. Any timers on reclaimed items are halted until the safe is summoned in the case of explosives such as the Broach Bomb, which will specifically explode -inside- the safe to create a blast that combines the radius and power of all explosives inside for devastating effects - also remember that Broach Bombs send nearby items flying, and in this case cause every other non-destructible item to fly straight out of the hole an immeasurable speed/distance in random directions, pretty much unavoidable for any character not hiding behind something. Neither hazard means instant death for Atmey however, as his F-Smash screen protects him from the projectile onslaught while the U-Smash crate gives him a wall to hide behind when the massive explosion begins. A rather exteme KO method that puts the safe out of commission, but all Broach Bombs you planted had to eventually go off.​


Standards


Standard

Atmey holds his monocle out like he does for his Pummel, producing a quick hitbox that deals weak jab-based knockback. Atmey can continue holding his monocle out while walking and crouching, but this deals no damage whatsoever...what's the point then? The monocle lets Atmey take a peek inside anything he places it against, the peeked in question appearing in the form of a small thought bubble above his head for 2 seconds. This lets Atmey see whatever items the foe has stored by the D-throw (or if they can store items by themselves) and determines what treasure they'd have to on them investigate - until that treasure is taken from them via the Pummel or they're KO'ed, it will not change over time so using this move within the first 10 seconds of the match guarantees you'll get the sword no matter how much time passes (it might be easier to just pull off the grab however given the two have roughly the same range). Checking DeMasque from the front has the added bonus of Atmey taking a peek inside his sack to determine what items are stored inside as well as a crate. Crouching down lets Atmey check an item, which lets him determine whether it's a forgery (the thought bubble and item will appear cracked) as well as check what's inside a gift box or item capsule.​


Dash Attack

Atmey employs a trait used by the good lawyers of the PW-verse and barges ahead with his shoulder tucked out over a platform's distance. The attack deals 5 hits over its course, starting off with 15% and high base horizontal knockback but gets weaker with each successful hit so each one deals 3% less than the last and less base knockback, but regardless any hit will KO at 155%. Though Atmey goes through some start-up before his barge, he recovers quickly from it and gains 15% flinch resistance along with grab amour from the front during its course (said flinch resistance weakens with damage output however). All 5 hits combined deal a massive 45%, and while foes will only get hit once shields and crates take all the hits, making this a nice way to break through a crate and knock foes into them.

If Atmey uses this move on a stepladder or any slope the knockback dealt to foes will be converted appropriately, with Atmey automatically barging to the top of the ladder if used the move from the bottom and vice versa.​


F-tilt

Atmey raises a fist overhead and slams it down ruthlessly, dealing 11% with mostly horizontal knockback but a bit of downwards knockback against aerial opponents, KO'ing at around 160%. Atmey's raised fist helps against aerial attackers who try to jump over a Broach Bomb or frame and gives the move a bit of range at the cost of some start-up lag. If Atmey hits a foe from behind he'll deal 1.5X the usual damage with some impact stall before putting them into prone, a good deterrent against a foe trying to keep their front away from you due to it being impaled with the sword or against those rolling away something like DeMasque's assault.

Naturally, hitting DeMasque from behind isn't really possible, but if his sack is struck his last stolen item will fly out as if it'd been smash-thrown forward and becomes a projectile which can hit foes ahead of DeMasque, a sneaky way to support the thief from behind if he's been seized by foes. This move does not harm DeMasque's sack (you have other moves for that) and can be used to fire out as many of his goods for as long as you can keep him there, which isn't always possible given this move's lag and that said items can potentially be knocked off-stage if you're not careful.​


U-tilt

Atmey draws an empty sack and holds it upwards. Items that fall on top of Atmey fall into the sack instead, fattening it until after 4 snags it becomes reasonably and has the same mass as DeMasque's, protecting Atmey from the front with the same logic as said thief's sack. If at least half a foe's mass touches the sack, they'll be trapped inside and must escape by either destroying it from the inside (with sack logic as seen in other sets) or at 2.5X grab difficulty, with the latter being the better choice when Broach Bombs have been caught given they'll explode upon being attacked. Using the U-tilt again lets Atmey tie the sack up and place it in front of him, which becomes a throwing item as heavy as a Crate with 4 or more items and deals 10-25% that KOs at 250-120% depending on whether it was empty or had about 7 items in it - if there's no ground in front of Atmey the sack will fall, dealing similar damage to those in the way. Atmey can also cancel this move into another action save for attacking, which leaves the sack open and frees the items and foes inside as they spread out.

DeMasque will typically ignore Atmey's sack unless they had calling cards placed on them or he witnessed one of his targeted items fall inside the sack, in which case he'll attempt to place said sack inside his own. If DeMasque's sack is destroyed however, he'll immediately go after Atmey's sack and replace his lost one with it so he can continue his robberies...and if foe was still stuck inside by the time he leaves the screen, they'll be KO'ed! This flows together with the sack's main purpose, as Atmey can use it to catch the goods falling from DeMasque's torn sack which he can then take from Atmey to continue his robberies as if nothing happened (you can even trigger this yourself by throwing an item towards the sack which will fall into Atmey's); getting the foe inside at the same time is a huge bonus, most likely to occur if they were below DeMasque where he can D-air spike them into the sack. This move also combos fairly well from the U-throw if the foe wanted to keep their treasure, also serving as an anti-aerial which can be used for offstage gimping against foes trying to recover.​


D-tilt

From his obvious crouching stance, Atmey sweeps the ground ahead of him as if wiping some dust off it, dealing 3% and tripping foes while pushing them back a little, footstooling them if they were in the air. Using this while holding an item will make Atmey plant it in the ground half-way, requiring players a good second to pluck it out for use and halving the power/radius of explosives. Attempting to bury an item on top of a crate will make Atmey drop it through an opening, requiring players to destroy a side of the crate to obtain it - feel free to make DeMasque go through this to obtain his loot.​


Aerials


N-air

Atmey holds out his hands as if ready to catch something. If an item makes contact with his hands he'll seize it, but if the item had momentum behind it from being thrown in Atmey's direction he'll be pushed back a fair distance (1-2 SBBs) and experience some hefty lag all the while. Atmey will also grab hold of any character facing away from him and restrain them for as long as you hold A, being a regular grab that transitions into the grab game upon landing - if A is released with the victim Atmey will knock them over the back of the head for 12% that sends them tumbling as if they were footstooled. This move helps provide Atmey with -some- defense against items that can be used against him if he has his back to a wall and also lets him catch characters being knocked back or trying to roll away from one another, potentially "save" DeMasque so he can continue stealing or the foe in order to get their treasures before finishing them off.​


F-air

Atmey gives off a classy man's slap, pushing foes back a SBB's distance (plus another 0.1 for every 10% they have) while turning them around at the same time, dealing both them and any victim they come into contact with along the way 10% that KOs at 200%. This is an incredibly fast and spammable attack to mess with the foe's positioning, being able to redirect their laggy attacks before they can hit you with them (especially with DeMasque's F-air) and even flows into the fact that most foes cannot turn around in mid-air in order to expose their blind spots: if they have a jeweled sword stuck in them and were deliberately facing a certain direction to keep you from pulling it out, they'll become desperate to touch down and you won't have too much trouble following them with your fall speed. This move also tips stacked crates over with enough hits, letting you trap or crush enemies on the other side.

DeMasque's sack becomes a damaging hitbox when swung around, dealing 10-25% that KOs at 250-120% depending on whether it was empty or had about 7 items in it. The sack won't ever hit Atmey given his slap pushes victims away, making it a way to use DeMasque to indirectly attack foes and deters the few who can turn their foes around from ever using those moves.​


B-air

Atmey barely looks behind him as he throws out a dismissive backhand. This only deals 8% and very light knockback which doesn't help for spacing, but it's very fast and if Atmey uses the attack again while within range of the target he'll have a look of frustration as he throws out two ruthless backhands that each deal 12% and KOs at 135% - this is activated even if a foe air dodges and there's enough of a gap between each attack to hit a foe intending to dodge. The buffed attack also doubles Atmey's momentum over its course, meaning he'll fall to earth more quickly or get a boost in his jump if this is used out of it and more likely to hit another character in his fury. This attack generally gives Atmey a way to destroy his crates from the sides in the air given using it twice in a row will do the trick and the boosted momentum lets him safely reach the inside after having used his second jump. It's also a way to scare foes if they try to get behind you from being knocked up with the U-throw or trying to approach you on a crate, and when you have the stepladder it's not hard to follow up.​


U-air

Atmey's proud of the gemstone he wears around his index finger; he raises the left hand that holds the gem like a sentai hero, showing it off as it flashes light as brilliant as the man wearing it! The light mainly extends out to the sides at 0.5 SBBs distance on either side of Atmey, continually stunning foes while they're facing the light, killing their momentum and forcing them top drop whatever item they were holding - while foes won't stay trapped in the blinding light for long given Atmey's fast falling speed, they can still DI out of it to the sides, which is only fair when Atmey can keep the hitbox up for as long as he likes and even when he lands. Despite not being fatal on its own, the light can be incredibly disruptive used correctly - Atmey is able to blind foes near him as he rises with his Up Special, and combined with the U-throw he can potentially trap foes so the treasure bonks them as it comes down. It's also helpful with DeMasque when foes are trying to throw items offstage to keep themselves from being targets, as they'll have to jump over you if they want to throw it offstage when you're blocking that area.

If Demasque is blinded he'll lose his grip on the sack as it falls behind him with the same properties as the U-tilt, and he'll try to get it back providing it doesn't get destroyed beforehand - feel free to time this attack so the sack falls on a Broach Bomb and destroys it if you like, or make a foe beneath the thief a victim. If DeMasque was on ground when you blinded him, he'll stagger back and his sack will be thrown back a small distance behind him, meaning if he'd just arrived on top of a crate he'll have to go back down to get it back.​


D-air

Atmey faces the screen and holds his right hand back before swiping it downwards in hopes of grabbing someone or something. He and his target will have their fall speeds combined for a moment before punching them square in the face with the hand his ring is on, dealing 18% and a powerful spike that KOs at 110% (that must be one -hard- ring); so powerful in fact the sheer force sends foes flying through any crates they go through, taking 5% for each side they busted through where they potentially remain hopelessly trapped at the very bottom - that's a whopping 48% out of this one attack alone, and you might even knock a foe into a Broach Bomb down below to finish them off. If another foe comes into contact with the flying foe they'll be dragged down and that foe will take the damage from the impact of the crate sides.

This attack has other purposes to it too, as it lets Atmey grab stationary items beneath him without having to overlap them, he automatically doing so if he'd land before finishing the attack given he falls quickly. If Atmey grabs a foe who grabbed the item he was about to grab, he'll take it off of them before punching them, either knocking them into prone on the ground or sending them through crates. Also, if you smash this input the attack will be delayed for a moment as Atmey searches his pockets, only to toss out every item he's currently storing in a downwards diagonal arc - the most recently stored item is tossed in front of him, second behind while the third a small distance in front of the first and so on. Aside from letting you empty your pockets at once and set-up all the Broach Bombs you've saved up, said items can help protect DeMasque when he's stealing should you jump above him when he appears on top of the crate - said perch also makes the angles the items are thrown at ideal ones for covering the stage.
This move doesn't produce an immediate hitbox to let Atmey destroy the top of his crates, but he already his Broach Bombs for that.​


Playstyle

As you should have well and truly figured out by now, Luke Atmey is a con artist, his entire playstyle a total scam; all of it, forgeries designed to make himself look as credible as possible, from the so-called "discovery" of the calling cards and treasures to DeMasque's very being. And while everything is indeed fake, there's no denying the hand of craftsmanship behind it all, the very thing that keeps Detective Luke Atmey going.

It goes without saying that Atmey's main goal in a match is to investigate foes for their treasure, and the earlier he does this the more effective said treasure will be at KO'ing foes. It's not just a simple matter of one player casually using the treasure to kill the other either, as the one holding it becomes a target for DeMasque and are inconvenienced in close combat - the difference between the foe and Atmey is how the latter is able to control DeMasque's chaotic nature through clever placing of calling cards and his traps which he can opt to prepare after investigating a foe's treasure to ensure DeMasque stays around for longer. Atmey has complete control over the discovery of the calling cards which determine what DeMasque attempts to steal, meaning he can choose to make DeMasque go on a wild goose chase for the single treasure or give him many objects to hoard.

Atmey has a diverse set-up game with his 3 Smashes and Up Special, having many opportunities to attend to it - quite important given they form the core of his playstyle outside of DeMasque. If you're facing an evasive foe or one staying in the air to avoid being grabbed by you, simply stack some crates together to reach them. If you're facing a campy foe, put up a F-Smash frame for some defense. And lastly, if the foe is simply choosing to set-up, plant some Broach Bombs around the stage; they have a tremendous amount of uses, including being the only practical items you can spawn for the sake of placing calling cards on them to summon DeMasque without having to investigate a foe, though you'll have to give them some decent charge to keep up their timers for long enough. Atmey can punish foes who choose to ignore him when he can set-up all the Broach Bombs he likes, yet he enjoys their focused attention just as much when it means pulling off his grab.

Atmey's game can take many different turns depending on how long he puts off his investigation in favor of setting up, but as a rule of thumb the quicker he investigates the quicker he and his foe can score KOs on each other with the treasure's power, but the longer he puts it off the longer he'll be able to survive with the defenses his set-ups provide. Atmey doesn't -have- to summon DeMasque to win a match when he can use his props instead, but said props can be used against him and it takes a very long time to set them all up given each one requires over 2 seconds to reach their full potential...

And that's one good reason to summon DeMasque and sic him on the foe with the grab game - by keeping foes occupied with DeMasque, who's effectively a Brawl moveset, Atmey actually gets that time he needs to set-up which he can then use to support DeMasque's robberies or further ensure his survival. This all stems back to investigating the foe for their treasure, which if they don't give to you can be knocked into the air with the U-throw or simply let them keep and be punished when they try to throw it offstage. If you managed to find the jeweled sword it's easy enough to knock it up into the air with the U-throw if foes don't let you keep it and catch it in your U-tilt sack if foes weren't skilled enough to catch with an air dodge - from there, you just need to impale the sword in the foe before DeMasque arrives so you're not attacked by him, creating a forgery of the weapon beforehand to throw him off with a sleeping status effect to buy you some time. Of course, it'd almost be easier to let let DeMasque steal the sword in the first place so it ends up in your safe where it won't be targeted by him, providing you're willing to let yourself be exposed to the foe's attacks as DeMasque holds you and then run over to the other side of the stage where within 2 seconds you can summon said safe and get the sword. If you're daring enough, you can try finding another calling card on that same sword and attempt to impale it through the foe within 10 seconds so DeMasque comes along and stabs it out of them without you having to get your hands dirtied.

If you've had some time for yourself to place Broach Bombs, frames, stepladders or found items made by the foe, that just means you can have more fun dragging out DeMasque's heist. Just toss those Broach Bombs across the stage in order to make DeMasque traverse as much ground as possible, and even place them in booby-trapped gift boxes or make forgeries of them - slipping said forgeries into the foe is a great way to make them hold onto something they -won't- want to pick up lest they fall asleep or be blasted. The more Atmey commits himself to preparing, the lazier he can get as the game progresses when DeMasque commits robbery after robbery and fills up the ace detective's vault - you'll probably have all the potential treasures by now, but jewels come in mass quantities which you can use to your advantage to keep DeMasque out for longer and place more forgeries around the place. With all these items, Atmey has no problem keeping DeMasque out for absurdly long times as a minion while he sits up on his perch atop a crate, throwing said items down on enemies while they struggle with the thief.​


Final Smash

The screen zooms in on Atmey as he calls out "I've caught you red-handed DeMasque!", pointing towards the one he wishes to condemn. Naturally it'll be DeMasque is he was around, though otherwise it'll be the foe closest to Atmey....is he really taking it so far he'd want to accuse them of being Mask DeMasque! He has to keep up his public image, you know.

Atmey's outburst gives him a sparkling aura that'd make you think he's Redd White, but more importantly changes his grab game on the accused foe to him smacking them away for OHKO knockback, finally having caught his intended target like the ace detective he is. This super-buff of sorts lasts until the victim or Atmey is KO'ed, and it's obvious which is the better outcome.

If Atmey KO'ed the real DeMasque or a thief-based character tons of random people will appear out of nowhere to praise him as their stolen treasures fall into the sky and into their hands. And guess what? They'll reward YOU with lots of random items! It might not be apparent at first given all they do is cheer and vanish, but if you open your safe lots and lots and lots of items will be there, like 100 or so but only 10 at a time when you open the safe - sure you didn't KO the foe with the Final Smash but all those items are ammunitions for KO'ing them many times over, especially with the good stuff like homerun bats. This doesn't mean DeMasque will stop appearing however as a red one will appear in the green one's place, having been inspired by the first one's thievery attempts!

If Atmey KO'ed an accused character who has been known to commit murder in their own canon, they will lose 2 stock from being heavily accused and haters similar to Junahu's DeMasque Final Smash will follow them around on their next one, only they won't hurt anyone else.

If Atmey KO'ed an accused character who was neither a thief or murderer, it'll become apparent they were innocent and Atmey will become a fraud as random items are thrown at him by the crowd 1 every second for the next 10 seconds with obvious implications to the set. Also, CPUs and Assist Trophies all the like will attack him more aggressively, but that just means he can hoard their treasures for DeMasque.​


Extras


Opening
Atmey walks in from the background, looking quite proud of himself as he says "Ace Detective Luke Atmey has arrived!"

Idle Animation
Like any good detective, Atmey glances around for any available clues, and occasionally holds a hand to his chin in thought. If Atmey stands still while the crowd is cheering for him, he'll face the screen and bow to them, saying "Thank you! Thank you!" - he does love getting attention from people.

U-taunt
Atmey calls out his his personal catchphrase "Zvarri!" nice and quickly.

F-taunt
Atmey points ahead and says "I've got you now!". If DeMasque is about he'll add "criminal" onto the end of his sentence whilst pointing at said thief.

D-taunt

Atmey removes his monocle and starts cleaning it - gotta keep it nice and shiny to see things through it.

Victory Pose 1
Atmey looks through his monocle with a smug look on his face while saying "The truth has once again been elegantly revealed to me!"

Victory Pose 2

Atmey holds his beloved reddish ring up for everyone to see while saying "No one can outwit the world's greatest detective!". Egotistical guy.

Victory Pose 3
Atmey turns around to face his foes with a hand on his chin. "A brawler/camper/trap character, not so good at what he/she does!". There's nothing worse than having your playstyle insulted by Pinocchio himself.

KO'd DeMasque
This is a special victory pose that plays when Atmey managed to KO DeMasque and win the match within the 25 seconds he's knocked out for. Atmey will detaining DeMasque, saying "You can't get away from the great Atmey!" tauntingly, though the latter doesn't seem keen on resisting. If another character won the match and managed to KO DeMasque beforehand the phantom thief will be on his knees in shame along with the losers all the way in last place.

Being DeMasque

DeMasque's KOs do indeed count as Atmey's and self-destructs if he's KO'ed by the thief. This victory pose is attained if DeMasque scored more KOs than Atmey, in which case the Ace Detective will have his hands up in a beckoning gesture, grinning manically whilst admitting "I'm the real Mask DeMasque! It was me who stole all your priceless treasures!". Why is he suddenly admitting to this, you ask? To take the credit for the phantom thief's KO'ing achievements of course!

Loss
Atmey appears angered, angrily shaking a fist at the winner. Like he even has a sense of honor.


Assist Trophy - Half_Silver28

Adrian Andrews is a formal working woman, who, after being summoned from the Assist Trophy, will attempt to submit herself to you walk across the stage and pick up any items before returning them to you in a mindless manner, possibly thinking you're her employer. If summoned by an anime female protagonist, she'll instead take out the whip ProfPeanut taught her to use and walk behind them, lashing out with her whip whenever they pull off an attack of which deals 3/4s the damage and hitstun of said attack. This lasts for 7 seconds, and is surprisingly deadly when the hitstun helps combo into more attacks given the whip's range.


Phaazoid

Basket
Joined
Aug 29, 2006
Messages
7,719
Location
Mr. Sakurai's wild ride
NNID
Mr.Grike
3DS FC
4854-6444-0859
Hmmm, it's nice to see a face way back from the original contest show up nowadays. Copy/pasting a submission from an old contest wouldn't count for this one given it was designed for a previous contest, but you're more than welcome to refurbish it as per the little "MYMini" that approves of such. You could even attempt a different submission too, that'd be interesting in itself.
oh wow, just realized that the 13 in the title meant that this was the 13'th MYM o_0 lol this sure has come a long way, that's awesome.

Yeah, I'll definitely refurbish it for the 'Golden Years' MYMini, it fits perfectly in there, seeing as it's from the original, and as I had already stated, poorly written in my new, older eyes xD.

I'll get around to it, and then sneak it into this post later, lol
 

Ghirahilda

♥Smash Beauty♥
Joined
Aug 6, 2012
Messages
1,197
Location
Sorocaba
NNID
Marcelinho21
Lady Gaga
The Mother Monster is the most known female artist. There is no person in world that never heard about her. With her massive and strange style, she was one of the most influent people in 2010 second the TIME magazine.

The Mother Monster's Statistics

Lady Gaga's main statistics
Taller character
Medium height
Slow speed in the ground
Slow in air
Slow running speed
High jumps
Can crawl
Wall jump
Great dodging game in ground and air
Medium falling speed
Medium range
Huge shield

I made her statistic with slow and graceful movements with great defensive games to counter these problems. I want her to be at least at B or C tier.

Here you can see her running animation:


And crawling


The Poker Face Moveset

Lady Gaga's moveset was made based on some of her video clips, poses, live choreography, etc.

Ground Attacks
Jab: Double Slap
Pressing A will cause her to make a slap, pressing again her will simply make other. The first hit as set knockback, the second will semi spike opponents, but it's very weak. Dangerous only when characters are at like 150% and near the edge.
Inspiration:


Forward A: Paws Up Kick
Put both her arms up and lifts one leg. Her lifting arms can hit and then the leg hitbox could connect after it. Send opponents in a straight to up diagonal direct. Slow and powerful
Inspiration:


Up A: Hair Whip
Whip her hair up. Low knockback but starts up fast with high priority. Good combo starter and good for punishing opponents.
Notes: Because of that, all of her alternative colors/costumes have long hair.
Inspiration:


Down A: Lying Kick
Lady Gaga will simply do a kick while lying/crawling. Send foes upward with moderate knockback.
The inspiration was hard to find. Keep looking here until her does the kick:


Smash Attacks

Foward Smash: Monster Scratch
A triple hit forward smash. Gaga will make a combo with her hand in a monster like fashion. Two first hits have set knockback and last one is very powerful
Inspiration: Various images like this one:


Up Smash: Marrying Hands
Put her arms up while charging, then descends it back. There is a sweetspoot at the end of the attack that launches opponents down. When sourspotted, send opponents up diagonally
Inspiration:


Down Smash: Yüyu ( Lady Gaga's mermaid alter ego)
Lady Gaga will attach her legs together forming a mermaid tail position and will sweep around her. Have two hits: first one will aways sends opponents to the second one. Quick start up and strong, but have some ending lag.
Inspiration:


Aerials
This is the hardest section to create, since no one can see Lady Gaga in air movements. I need to be creative here.

Neutral Air: Sex Gaga
Makes the famous sex kick


Forward Air: Love Chest Ignition
Her chest will release sparks. A multihit move with low knockback. Easy to follow up with another one with double jump.
Inspiration:


Back Air: Just Kick
Gaga will just stent her lag back. Good range.


Down Air: Descending Paparazzi
She will falls down with her back. A stall-then-fall.
Inspiration:
http://www.youtube.com/watch?v=d2smz_1L2_0#t=1m53s


Up Air: Ignition Game
Similar to her forward air, but her will put her chest up this time. It aways sends opponents upward. Good for juggling


Specials

Neutral B: Spike Star
Toss a huge spiked star in opponents. It traveling distance can be altered while charging. A good projectile with priority. Cannot be absorbed, but could be deadly reflected.
Inspiration:


Forward B: Drive This Way
It's like Wario's Bike, but could not change direction and can be chargeable to increase speed and power. Gaga cannot be knocked off the bike, since HER is the bike, but the attack can be canceled via another attack.
Inspiration:


Down B : Bad Romance Reflector
Steel arcs will appear around her, repelling any projectile. It can multihit foes while she is inside, but lasts for only 3 seconds.
Inspiration:


Up B: Monster Rocket Tour
Lady Gaga's cloths ignite pushing her upwards. Players can chosen the direction the want to go. Initial ignition is a weak meteor attack., while the the other parts can hurt opponents. A good recover for her slow air speed.
Inspiration:


Grabs
She can grab foes with a telephone, yes, a telephone.


Pummel: Cook'n'Kill
She will toss poison on his opponents
Inspiration:


Forward Throw: Straight Tour
Spin and tosses opponents straights. Low knockback.

Back Throw: Dance Tour
Launch the opponents backwards over her head. Same knockback as Forward Throw

Down Throw: Alejandro
She will put foes down and sit down on them, sending them in her back.
Inspiration: http://www.youtube.com/watch?v=niqrrmev4mA#t=3m48s

Up Throw: Lady Hat
Her will put opponents in her hair, that will looks like a spike hat and she will spin giving multihits and a moderate knockback. Her best throw in terms of kncockback and damage.
Inspiration:


Final Smash
Marry The Fire

A car will fall on where she is, then she will start to spread gasoline, and put the car on fire while she's above hit. It will act like a very big Torchick, but opponents cannot escape,even being hit with knockback. Then she will jump from the car and it will explodes with a knockback more powerful than Ike's Great Aether


Others
Entrance: http://www.youtube.com/watch?v=wV1FrqwZyKw#t=2m40s

Taunts:
1


2


3 Makes her Poker Face dance


Winner poses:
1.Piano FAIL#

2. Make this (below) while saying "there ain't no other way, baby, I was born this way"


3.


Alternative Colors/Costumes

For Red Team:


Green Team:


Blue Team:


Bonus:
 

Katapultar

Smash Lord
Joined
Nov 24, 2008
Messages
1,284
Location
Australia
[collapse="Lady Gaga"]Your passion for the character, mostly seen in the monstrous amount of pictures, is really quite admirable and you deserve props for it right off the bat - it's also fitting to the character, or should I say person here. I don't think any other set posted before has used such a plethora of pictures, but then again this a character whom a lot can be drawn from. You've got some nice, simple organization and detail that's to the point (though it does get a little rough on certain edges with obvious spelling errors, but we don't tend to judge that much here so it's okay).

As much of an impact as all the GIFs have however, a weakness they have with the set is how overbearing they get when the attack descriptions are incredibly obvious and simple, so much that you wouldn't really need the GIFs - it's great that you're trying to give evidence as to the inspiration for every attack, but here in MYM you're very much allowed to think outside the box and be creative with the attacks given few characters would have enough existing material for one to make an entire set from just by using actions they've already used (most of the attacks being taken from somewhere sort of invalidates the given character type presented at the start). I can see where you were coming from however, as you'd want players to be able to recognize exactly -where- those attacks came from much like those in Brawl...after all, this is a hugely popular celebrity we're talking about, similar to Mario in the video gaming world. Naturally, people will remember the set for the huge amount of GIFs instead of the attacks, having created a new sensation.[/collapse]
 

Hyper_Ridley

Smash Champion
Joined
Dec 21, 2007
Messages
2,297
Location
Hippo Island
MYMini entry

IT'S THE MAIN EVENT MATCH OF THE EVENING


THE ITALIAN DRAGON


"2 heavyweights from Italy compete for the title! Can Joe Calzaghe defend his winning streak?"

Player: Joe Calzaghe

Opponent: Stromboli

Stage: The Ring, as seen in Little Mac's moveset!

Stocks: Infinite

This is a deceptively simple event. Both combatants cannot be KO'd by normal means, and instead must score a TKO as explained in Calzaghe's moveset (score 3 knockdowns or keep a "bleed" status effect on the opponent for 35 seconds). Normally this mechanic only applies to the Italian Dragon, but for this event match Stromboli can achieve a TKO as well, with his up-special creating the bleed effect. If someone does happen to fall-off the side blast-zones of the stage, they will simply respawn in the center with their damage intact. On that note, the other boxers won't show up to disrupt the fight; this is for the title people, let's keep things clean!

This is a tricky battle for Joe, seeing as Stromboli has his stage-controlling puppets to defend himself should he start to bleed, as well as a great tech-chase game that can actually lead itself into another knockdown. Heck, even when you score a knockdown, Stromboli's unique roll-attack is capable of delivering one right back to you! If you plan to win via bleed-out, it's best to do it ASAP, as it will only become more difficult to keep the effect going when Stromboli's damage is so high that he flies across the stage with every attack.

On easy difficulty, Stromboli behaves like a level 3 AI, which includes using his DTilt whenever the AI normally would; free knockdowns for you! On normal, he is a level 5 AI who won't ever use his DTilt. On hard, he is now a level 8 AI!
 

Ghirahilda

♥Smash Beauty♥
Joined
Aug 6, 2012
Messages
1,197
Location
Sorocaba
NNID
Marcelinho21
[collapse="Lady Gaga"]Your passion for the character, mostly seen in the monstrous amount of pictures, is really quite admirable and you deserve props for it right off the bat - it's also fitting to the character, or should I say person here. I don't think any other set posted before has used such a plethora of pictures, but then again this a character whom a lot can be drawn from. You've got some nice, simple organization and detail that's to the point (though it does get a little rough on certain edges with obvious spelling errors, but we don't tend to judge that much here so it's okay).

As much of an impact as all the GIFs have however, a weakness they have with the set is how overbearing they get when the attack descriptions are incredibly obvious and simple, so much that you wouldn't really need the GIFs - it's great that you're trying to give evidence as to the inspiration for every attack, but here in MYM you're very much allowed to think outside the box and be creative with the attacks given few characters would have enough existing material for one to make an entire set from just by using actions they've already used (most of the attacks being taken from somewhere sort of invalidates the given character type presented at the start). I can see where you were coming from however, as you'd want players to be able to recognize exactly -where- those attacks came from much like those in Brawl...after all, this is a hugely popular celebrity we're talking about, similar to Mario in the video gaming world. Naturally, people will remember the set for the huge amount of GIFs instead of the attacks, having created a new sensation.[/collapse]
Thanks for the analysis, I corrected some errors. Also, about the GIFs, I used a lot of them because i wanted to people see what I see, and also I really wanted to use real inspirations on her movesets, although creating some different moves would be very funny.

Thanks again.
 

The Warrior of Many Faces

Smash Apprentice
Joined
Mar 22, 2012
Messages
101
Location
Everywhere and nowhere, as location is meaningless
This would work the same way it works in Brawl in terms of special victory quotes (at least involving the Star Fox cast). If you are a winner with a special animation against a foe, you play it against the foe in second place while normal animations play for the others.
Ah, got it. Thanks!

***

BIGFOOT

Well, this is an improvement on Soundwave. You have a much more readable font and color (although you might try coloring attack names to make it a little easier on the eyes). Not only that, you have a better playstyle here, revolving around teleporting from tree to tree as a hit-and-runner. Most of the problems with this moveset were discussed by Kat and FRoy already: the problems with the damage percentages and the need for a little more description (the latter being something I struggle with myself). Also note that two-second stuns are a bit overkill. Nonetheless, a marked improvement from before.


***

GATSTAF SHEPHERD

Well, my first note on this one is the difficulty in reading it. A bit more color would be appreciated so it doesn’t just look like a big wall of text. Or at least bolding attack names.

My second note is how well you managed to make sheep an interesting playstyle. I would never have thought it would work, but you managed it anyway. The various interactions of these severely unintelligent sheep with Gatstaf’s wool and hay shenanigans are quite impressive and show a great deal of work put into them; I especially like the Down Smash. I also admire the relative simplicity of most of the moves in conjunction with the discussion as to their use; I’ll definitely have to remember that for myself. The Final Smash is also quite creative and fun.

Of course, there’s also the werewolf form, although there’s less to be said about that; while handled well, it basically boils down to more KO power while being able to disguise yourself as and devour the sheep you spent so much time summoning as a shepherd. The Down Taunt in werewolf form was amusing, however.

This was a pretty darn good moveset, with plenty of playstyle; I just wish it wasn’t so wall of text-y.
 

TheSundanceKid

Smash Lord
Joined
Jun 8, 2008
Messages
1,636
Location
The Secret Kingdom
MYmini #1 Entry: Aquaman

VICK'S VAPORUB


As stated in the set, Aquaman's magnificent powers stem from his prized tender nipples. In order to balance these teats of tremendous power, Sakurai programmed Vick's vaborub into the game. Vaborub spawns like any normal item, but it usually spawns twice as much for every Aquaman in a match. The last thing you want to do as Aquaman is grab this item. If you make the foolish mistake of grabbing this, Aquaman automatically opens the little tub up, grabs some of the rub and begins to massage it into his nipples with BOTH hands. As he massages the cream into his nipples, a pleasurable and content look appears on his face. When he's done, Aquaman lets out a pained moan. It feels so right, yet so wrong.

If you're familiar with Vick's, it has a very pungent aroma and gives you a sort of burning sensation that's hard to describe. It's...different. It has a certain...I don't know, like the french say" je ne sais quoi". Now, poor Aquaman has rubbed this stingy concoction onto his supple nipples. It's safe to say that the sensory information provided to the nipples by Vick's shor-circuits the nipples, for they simply cannot handle the sensation.

This kills the nipples.

For 30 seconds after the initial rubbing, Aquaman's nipples numb up and cease to function properly. This causes all nipple-involving moves to stop functioning.

Aquaman now only has about 8 moves in his arsenal as he waits for his teats to recover. When he recovers, however, his nipple related moves do THREE TIMES as much damage for 40 seconds. The reason for this is that Aquaman's nipples gain the power to harden like diamonds, giving them more power. A seasoned Aquaman player will know how to balance his pain and pleasure in order to take full advantage of the nipples.

Oh yeah, if a regular character picks up the vicks, then they gain 150% attack speed or some **** for like 20 seconds. I don't ****ing know.
 

Kholdstare

Nightmare Weaver
Joined
Oct 10, 2008
Messages
1,441
vick's vaporub


as stated in the set, aquaman's magnificent powers stem from his prized tender nipples. In order to balance these teats of tremendous power, sakurai programmed vick's vaborub into the game. Vaborub spawns like any normal item, but it usually spawns twice as much for every aquaman in a match. The last thing you want to do as aquaman is grab this item. If you make the foolish mistake of grabbing this, aquaman automatically opens the little tub up, grabs some of the rub and begins to massage it into his nipples with both hands. As he massages the cream into his nipples, a pleasurable and content look appears on his face. When he's done, aquaman lets out a pained moan. It feels so right, yet so wrong.

If you're familiar with vick's, it has a very pungent aroma and gives you a sort of burning sensation that's hard to describe. It's...different. It has a certain...i don't know, like the french say" je ne sais quoi". Now, poor aquaman has rubbed this stingy concoction onto his supple nipples. It's safe to say that the sensory information provided to the nipples by vick's shor-circuits the nipples, for they simply cannot handle the sensation.

This kills the nipples.

For 30 seconds after the initial rubbing, aquaman's nipples numb up and cease to function properly. this causes all nipple-involving moves to stop functioning.

Aquaman now only has about 8 moves in his arsenal as he waits for his teats to recover. When he recovers, however, his nipple related moves do three times as much damage for 40 seconds. The reason for this is that aquaman's nipples gain the power to harden like diamonds, giving them more power. A seasoned aquaman player will know how to balance his pain and pleasure in order to take full advantage of the nipples.

Oh yeah, if a regular character picks up the vicks, then they gain 150% attack speed or some **** for like 20 seconds. I don't ****ing know.
10/ 10
 

JOE!

Smash Hero
Joined
Oct 5, 2008
Messages
8,075
Location
Dedham, MA


Okay, kinda cheating here since I never actually played Gen3 outside of an emulator, but I did play Colosseum to death, and that counts right? I guess that's what happens when you fall out of handhelds while in high-school, but at least looking back I've found some pretty cool Pokemon in Gen3, like this little guy...


BRELOOM
The seeds on its tail are made of toxic spores. It knocks out foes with quick, virtually invisible punches.


STATS 1..2..3..
SIZE: 4 Breloom stands just as tall as fellow fighter Lucario, minus the ears. His long tail makes him notably wider than his blue counterpart however.
WEIGHT: 4 Breloom weighs in between Toon Link and Peach on the scales, often living to around 120% with decent DI.
RUN: 3 More at home jumping, at least he outpaces Ike.
AIR: 9 With kangaroo-like frame comes kangaroo-like jumping! Breloom has a pretty intense air speed, rivaling the likes of Captain Falcon with decent acceleration. Combined with a great set of jumps, it's more likely you'll hop about to approach instead of run.
FALL: 6 Breloom falls just a tad slower than Wario.
TRACTION: 5 Pretty average here, but his average traction combined with high air velocity does make for a pretty decent Wavedash. In fact, it could be considered better than his normal dash when maneuvering in and out of combat!

Smaller than the last two, Breloom is also noticeably more springy. You'll often find yourself being twitchy with him as he lends towards WD's for movement, as well as having a lot of air-time due to his stellar movement up there.


SPECIALS Effect Spore!
NEUTRAL SPECIAL: SEED BOMB
Breloom hops up a little and back flips his own width backwards as he lobs a green, Pokeball-sized Seed Bomb forward while in the air, much like Mario's fireball in speed as it bounces up to a platform away before detonating in a Kirby-sized poof of "spore" effects like Ivy's. The bombs also explode on contact, dealing 8% and KB similar to Samus' Morph Ball Bombs, but unlike them or fireballs he can only have 1 out at a time.

While the projectile is nice, the real power of Seed Bomb is it's ability to reset positioning and approach/retreat, thanks to two things, the first being the ability to angle the toss up and down right before he throws the seed. Tossing a seed bomb upwards will lob it high enough to land and roll on a platform overhead, otherwise it'll explode midair about a character width away, while angling down has him roll the seed along the floor about 2 platforms before it detonates, losing the bounce but gaining distance. The second being his ability to cancel the flip with an Air Dodge at any point after the bomb's been tossed. This of course means that you can Wavedash back and forth or Waveland onto platforms. Combined with the angled bomb toss you can really mix up your spacing behind explosive cover!


SIDE SPECIAL: FOCUS PUNCH
Pressing and holding Side B will have Breloom stretch his arm behind him as his fist glows red with built-up focus. After a full second of uninterrupted charge, you can unleash the pent up energy in a mighty punch forward for 25% and enough KB to kill around 85%! The range leaves a little to be desired, mirroring Jigglypuff's Pound, but at least you boost forward a bit like said move, and can walk back and forth and even jump as you build your focus. Alternately, you can keep some forward momentum while you charge the punch if you do it out of a (wave)dash, but cannot change direction as easily until you slow down to your walk.

A bit situational due to the wind up, if only you had a sort of substitute for you to take the hits that could interrupt... oh hey, Team2! But, if you panic you can always let your fist fly early without the preparation, dealing a measly 8% and hitting like Mario's Ftilt. The "flubbed" punch does not boost momentum and has barely any KB, but has the same fast punch animation (they both activate as fast as Diddy Kong's first Jab!) and can easily get a jump on a foe trying to punish you for hiding behind a team mate.


UP SPECIAL: SKY UPPERCUT
Breloom hooks a fist skyward, swiftly launching himself Feraligatr's height above his head before fast falling back down to earth. Anyone hit by his fist will be sent reeling in their Footstooled animation with fixed hit-stun that follows the height of the uppercut, as well as taking 12%. Useful for defense in that it will reset most combat situations when the foe gets up close, acting as a combo-breaker, as well as an anti-air by bringing foes down to the ground in their reeling state. If you want to go on the offensive, Sky Uppercut also allows Breloom to On-Hit-Cancel into an aerial if he hits a baddy, but he will still fast fall immediately after.

If used offstage, Breloom will stretch his arm out the length of 1/3 of a platform to try and tether onto an edge if he's in range to try and save himself if he can't reach the edge from the jump alone, otherwise you'll find yourself fast-falling to your doom.


TEAM 2/DOWN SPECIAL: SPORE
If anybody happens to get too close to Breloom while he's on Team2, he'll unleash his famous Effect Spore all around himself just like Wario's low-charged Down B! Er, well not -just- like that, the comparison was more for the radius and timing of the move and such, since it makes a Spore cloud around himself... meh.

Anywho, Spore's effects vary based on the enemy's % when they come in contact with it. From 0-60% they will become Poisoned, taking 1% every 2 seconds for the rest of their stock (non-stacking). From 61-120%, the Spores affect foes more strongly and actually Paralyze them momentarily, as if they were hit by ZSS' Dsmash, and past 120% is when it affects them the strongest by putting them right to Sleep!

A great asset to any team combo to get some free Damage over Time, or to set up big hits at later %, Breloom can also use Spore while solo to great effect. In fact, his Effect Spore carries over to his Tail Club (you know, where the Seed Bomb pops off from?) where any hit made by it during a tail-attack will do extra hit-stun, as well as an extra 3% over 3 seconds worth of poison, complete with spore gfx!


STANDARDS Super fast punches = Priority
JAB: DYNAMIC PUNCH
Breloom does a pretty good impression of Mario's Jab combo, with two faster jabs for 2% each, followed by a slightly stronger kick for 4%. What comes next though if you choose to keep tapping A is nothing like Mario, as he unleashes an absolute flurry of stretchy punches that takes up an area the size of MK's jab in front on him! This can be held indefinitely, and does an impressive 10% per half-second, but with start-up lag and little hit-stun unlike other jabs of it's type. Luckily the flurry of random hitboxes should make it confusing for foes to DI out of for a while!


F-TILT: MACH PUNCH
Breloom reels a fist back before launching it forward a whole 3/4 of a platform away! Dealing 9% with light KB, this is your primary move to use while grounded, especially when it only takes as long as Yoshi's Ftilt!

Unlike most tilts, angling Mach Punch actually changes it's properties. Up-Angled Mach Punch is a ranged uppercut, traveling about 3/5 of a platform as he hooks the punch upwards dealing 8% and minor vertical KB. Angling down has him shoot both fists down at a 45* angle for 10% and medium power, with 1/2 a platform's reach. Remember to use each angle accordingly, with Mid being a poke, High being a launcher, and low being a punisher!


U-TILT: TAIL FLIP
Breloom back flips in place with his tail extended, knocking anybody in reach with it for 8% and medium upwards/diagonal KB. Relatively quick and with some good range, this is a go-to juggle move at low % (especially when you hit with the tip!).


D-TILT: LOW KICK
Crouching down, Breloom kicks a leg outward quickly for 4%, and is able to tap repeatedly once it's extended to loop the move quickly like with Pikachu's jab. Great when used with his jab to get % up quickly, or to just pressure shields.


DASH: HEADBUTT
Although he won't dash much, Breloom's dash attack is surprisingly strong as he uses his mushroom cap as a battering ram as he runs forward a small distance, shooting foes forward for 7% and enough horizontal KB to kill around 180% near edges.


SMASHES Here be kill moves
F-SMASH: DRAIN PUNCH
As he holds his fist to the side while charging you can see Breloom loading his hand with what appears to be seeds before lunging out with a haymaker with reach like Mario's own Fsmash. The punch takes about as long as ZSS's fsmash, but with notably more power as it does 14-20%, killing around 140%.

But what about those seeds you ask? Well, if he hits somebody with the punch, a spore gfx will be seen as the foe becomes "seeded" with Leech Seeds! Shown by the foe sprouting well, a little green sprout from their head, damage done to them by either Breloom or his team mates will be returned as healing for 1/4th the damage dealt for the next 10 seconds. Leech Seeds can't be stacked, but hitting them again will extend/renew the timer where leeching off of them will work.


U-SMASH: MEGA KICK
After a charge animation resembling the first few frames of his jump, Breloom hops up and assumes the classic "sex kick" pose. Extending his right leg out toward the enemy as he slowly falls from a height of a platform above ground, dealing 4-6% and negligible KB.

While a sex kick is all well and good, the real meat of this move is when you press A again, kicking out with his left leg for 16-22% and enough horizontal KB to kill as early as 110%! After the second kick Breloom will back flip off the foe dramatically, giving the move some end lag to an otherwise super-fast smash. Be careful with the timing and spacing of this killer, as unlike his punches the kick is low range, and timing the second kick must be crucial or else you'll be out-prioritized easily.


D-SMASH: BULLET SEED
Facing toward/away from camera as he charges, Breloom can be seen holding hand-fulls of leech seeds in each hand. On release, he launches two clusters of seeds for multiple hits adding up to 8-11% on each side at a downward 45* angle, covering a platform radius in total. As he crosses his arms, his body also becomes a hitbox for 10-14%, and decent vertical KB that can kill around 170%.

Taking as long as Sheik's Usmash to pull off, it's not too challenging to hit foes with a cluster of seeds. But what about the other side that hits the floor? Well, being seeds and all there's a 50/50 chance they will imbed themselves into the floor, and after 5 seconds pop up as the little sprout seen when a foe is seeded. Another 5 seconds later, and it turns into a blue Oran Berry! The berry is a food item that heals for 2%, not much compared to normal leech seed (especially after 10 seconds), but hey, an Easter-Egg never really hurt now has it?


AERIALS C-C-C-Combos!
N-AIR: SPINNING STRIKE
Breloom swiftly does a front flip, hitting foes with his tail for 11% and mediocre KB as he spins 360*. Taking about as long as Luigi's Uair, this move is best used for defensive or pressuring purposes (esp with the club's poison damage).


F-AIR: DOUBLE PUNCH
Breloom stretches one arm out 1/2 a platform at a 25* angle upwards, immediately following with the other at a 25* angle downwards. Each hit does 5% and nearly any KB, but the speed and range make it a perfect approaching tool from the air especially when the whole animation is only as long as DK's Nair. L-canceling this aerial will usually result in only 1 punch coming out, but that should be enough to at least combo into Ftilt.


B-AIR: TAIL SMACK
Looking back, Breloom wags his tail up then down once, hitting for 13% and enough KB to kill at around 140% at an edge, but low enough growth to combo into itself at lower %'s. A slightly different approach option than Fair due to 1) being backwards and 2) doing more damage (poison!) and KB, while being noticably slower, Tail Smack is best used to try and edge-guard foes who are trying to recover high.


U-AIR: STRETCH PUNCH
Much like Mario's Utilt, Breloom punches upwards about 1/3 of a platform while dealing 7% and light KB, perfect for juggling and poking at foes above you!

Stretch Punch has another feature though, that may not be obvious at first: a sweetspot at his mushroom cap. If you hit a foe here just as the move comes out, it deals 14% and enough vertical KB to start killing around 140% when up high. Luckily, you have Sky uppercut to get up there and land the move!


D-AIR: FORCE PALM
Breloom shoots two arms downward, reaching a distance of 1/3 of a platform and making an upside down "T" with his hands, very similar in animation to Wolf's Dair. Dealing two hits of 5%, Force Palm deals variable KB (usually diagonal) based on Foe DI, and is better used as a pressure/landing tool vs shields. However, if you do happen to put some force behind it via Fast Falling, his open palms become a meteor hit, launching opponents down! While useful on stage to pop a foe up, be careful off-stage since you know, fast falling with a tether recovery isn't the best of ideas.


THROWS Free heals
GRAB+PUMMEL: LEECH SEEDS
True to form, Breloom has a bit extra reach for his grab, it being in many ways like Lucas', except not disjointed. For his pummel, tapping A repeatedly will have Breloom deliver rapid punches for 1%, with each punch containing a Leech Seed. This means that not only will pummeling repeatedly heal you up, but doing just one pummel then throwing will set up you or your team mates for easy HP gain!


F-THROW: SPRINGBOARD
Breloom leans back and balances on his tail, feet on the opponent's chest before propelling himself a character length forward using his tail like a spring! This deals 8% and is a bit on the slow side for a throw, it has identical KB to Ganon's Ftilt! The fact that it only does 8% however puts a bit of a damper on the actual kill power though, only managing to start killing around 150% at an edge.


B-THROW: SUPLEX
Breloom lifts his opponent over his head while leaping backwards about 2 character lengths, slamming them headfirst into the floor with meteor power that pops them upwards for 10%. Useful to combo out of, and more interestingly, possibly gimping foes as you meteor them off an edge! (Luckily Breloom stops at edges, he wont suicide with one of his own throws.)


U-THROW: BARREL ROLL
Like with Fthrow, Breloom leans back on his tail, but this time he makes himself horizontal as he begins to kick the foe repeatedly, sending them spinning in the air above him and taking multiple hits adding to 12% before being knocked diagonally upwards with mediocre power. One of his more damaging throws, Barrel Roll can also inflict damage on others who come in contact with the spinning victim, getting hit much like Sonic's Usmash!


D-THROW: STOMP
Breloom tosses the foe to the ground and leaps upwards, his arms still holding on to the prone foe as physics then take over as he snaps back down as if pulled by rubber bands, stomping on the foe for 10% and sending them reeling diagonally downwards across the floor! Like with Bthrow, this is used mainly for follow ups, especially with a low angle Seed Bomb!


Z-AIR: GRAPPLE PUNCH
Like with his grab, Breloom shoots an arm out about 1/3 of a platform, attempting to grab anyone (or any edge!) he can. If he succeeds, he will pull himself towards the foe (halting any momentum he had, and changing it towards them) with his other fist ready to meet their face for a 9% punch with mediocre horizontal KB. While great for resetting the pace of a battle/helping against potential edge-guarders, his other aerials are generally better for direct combat situations. Like Sky Uppercut, this can tether onto an edge.


TAUNTS Just for fun!
U-TAUNT: HAPPY DANCE
Breloom kicks his legs out in a little victory dance while exclaiming his name for a moment, before returning to his serious fighter's stance.


S-TAUNT: WARM UP
Breloom gains a serious looks and jabs twice lightly, then does an uppercut while saying "Brel-Bre-Loom!"


D-TAUNT: LEFTOVERS
Breloom sits down and pulls an Oran Berry from behind his back, happily munching on it for 1/2 a second before getting up to a neutral pose again. A laggy taunt for sure, but at least it heals 2%!


TRAINER TIPS:

Let's address the 800lb Slaking in the room here: Breloom's biggest weakness is when he's in open air, IE off-stage. A tether recover that when it misses, auto-fast falls you isn't the best thing to rely on when dealing with people flying around you off the edge, so it'd be best to play to his on-stage strengths, got it?

On-stage, Breloom is a status-spreading, combo-machine. His combination of great air speed and fast, long reaching tilts and aerials make it incredibly easy for him to build momentum and really put the hurt on a foe with a dizzying array of punches. However, Breloom is also a master of retreating and spacing due to those same attributes, especially when he makes use of Seed Bomb to occupy the foe as he adjusts his positioning, or Sky Uppercut to do a traditional re-set. The constant back and forth to keep the foe where you want him, as well as yourself on Terra-firma with such high air movement, can make Breloom quite a technically challenging character, but very rewarding to have as part of a team due to his great Spore Team2 special, Leech seeds and general ability to wrack up damage and pull out surprise kill moves when he finds opportunity. Always be on the look out for chances to use Focus Punch or Usmash when your team mate has the foe occupied!


TEAM OPTIONS & SUPER SMASHES:

WHILE ON TEAM2 : ASSIST
Unlike all the other Pokemon on the team, Breloom's Super Smash remains static no matter the pairing, and only changes based on which team he is on currently!

Assist stays true to Breloom's fighting-type by having him perform a traditional Assist for his Team Mate on Team1, which he can do every 5 seconds. Breloom's Assist has him leap forward a good distance with Nair, L-cancel it, and immediately go into his full Jab cycle, holding Dynamic punch for 2 seconds before stopping and leaping back to behind his Team1 partner (unless they have their back to the edge, in which case next to them). Alternately, if Breloom is called in to Assist vs a foe at 100% or more, he will do an Up-Angled Mach punch after his Nair, and retreat with an Up Angled Seed Bomb to try and set up the foe better for a kill, instead of wracking damage.


WITH ALAKAZAM : ASSIST
Alakazam's Assist has him Dash Attack forward towards the opposition, then catch them in Confusion while in hit-stun and toss them back towards Breloom for him to attempt an intercept. He then rolls backwards to re-set his position.

Like all Assists, this can only be done every 5 seconds.
------​
Alakazam and Breloom are fairly similar to each other in gameplay, with the former being a more heavy hitter compared to the latter's quick and careful approach to combat, and generally compliment the same type of players. However, Alakazam probably gets much more mileage out of Breloom as a team mate than Breloom does, as Spore and his Assist can do wonders for setting up Alakazam's powerful kill moves. Breloom can work with Reflect a bit with his Seed Bomb, but in general he'll mainly use it as a wall of sorts to try and work in his own kills via Focus Punch. Alakazam's Assist is also great in combination with his Usmash, or comboed from his Fthrow. In general the two are pretty interchangeable while playing and a constant switching approach is recommended to get the most out of the pair.


WITH FERALIGATR : ASSIST
Feraligatr rushes forward with his powerful Surf for his Assist, battering through campers and all sorts of nasty things to set a course for Breloom! Luckily for Feraligatr, Assist-Surf doesn't send him into Special Fall if done off a ledge, but it will still use Hydro Pump's charge if he has it. Time it wisely!

Feraligatr Jumps back to where he was when using this Assist, which can lead to Aerial Dives for more carnage.
------​
This pairing is best when Breloom is front and center for most of the fight, using Feraligatr to soak up hits (building his Torrent!) as well as act as a set-up for Usmashes and Focus Punches. If the foe is being troublesome, hit em with a Dsmash/Pummel/Fsmash and swap to the gator to hit them with one of his huge smash attacks, healing him a bit for the trouble as well as putting the foe in a situation of dealing with a bursting heavyweight that heals as it beats on you! The key synergy here is how each team mate protects the other either by tanking/healing, with each of them being able to provide solid damage racking in the process.


Jumping ahead to the year 2007 in the next set, and on to the DS! Here's a hint: This Pokemon caused quite a stir in 1997, guess it's younger version wasn't ready for TV!
 

The Warrior of Many Faces

Smash Apprentice
Joined
Mar 22, 2012
Messages
101
Location
Everywhere and nowhere, as location is meaningless
Looks like everyone is getting new moves, possibly their whole set revamped.

http://mynintendonews.com/2012/08/2...and-nintendo-3ds-will-have-lots-of-new-moves/

Sakurai said existing characters will get new and exciting moves!
Interesting. Maybe we'll get some more versatility on Samus. I can haz Ice Missiles?

***

LUKE ATMEY

First and foremost, use a different font, please; this one is nigh unreadable, especially in conjunction with your usual wordiness. (Yes, I realize the irony considering that everyone says the same thing about me and Comic Sans MS.)

Nonetheless, I really like the character of this set, as it revolves around Atmey using DeMasque to his advantage without revealing that that’s what he’s up to. With the thief appearing on the crates and using the items Atmey considerately summons/confiscates/whatever, it has the tangible feel of a con artist in Brawl, and your presentation makes it almost feel like you’re telling Atmey’s story as you fgo through the set. It flows fairly well as well. However, it definitely requires a lot of thinking ahead, as usual for a Kat set, which I’m sure you’re aware is not my cup of cocoa. Additionally, there’s the usual wall-of-text stuff; if you could just split paragraphs a bit more often, I’m sure your sets would be more readable. And finally, the Final Smash, while creative, is a bit complicated, and harkens back to a set that I at least don’t want to go and find, which makes it harder to visualize.

In short, a good set presentation and flow-wise, minus the font and wall of text.


***

LADY GAGA

Well, considering the odd character choice, you did fairly well here. The gifs and pictures really do help the reader visualize the moves. Unfortunately, there are bigger problems with this set, revolving around playstyle. Or rather, the lack of one. There doesn’t seem to be a playstyle beyond “hit people”, and since you provided no playstyle section, I (the reader) am stuck over here trying to make a playstyle out of this when there simply isn’t any. Except maybe reflecting the Neutral Special star off of your Up Special metal bars, but one interaction does not a playstyle make.

There’s really not much to say here; you kept to the simple with this set, which I appreciate, and the presentation is good, but there’s no flow here at all.


***

BRELOOM

You’ve done it again, Joe, and with one of my own personal favorites. I always liked Breloom. Pretty cool, decent typing, and with Seed Bomb in 4th gen actually has a grass move that matches his stats. Definitely one of the better grass types in my opinion. I also note that you really like the hard-hitters so far; Alakazam, Feraligatr, Breloom, none of them are really the durable sorts. A team full of sweepers, or are your tanks yet to come?

But, enough about that, let’s talk about the set. First off, kudos on the presentation. I really like the way you used the colors; enough to give the set color, not so much as to be overbearing. As for the playstyle, another nice and simple one that really feels like Breloom, all jumpy and hitty and whatnot. The range with Seed Bomb and the rarely-used-on-Breloom ability to inflict statuses gives the definite feel of the trainer’s hand, giving Breloom tools he wouldn’t normally think to use but that really expand his repertoire. Another nice touch is the general feel of a martial artist to this set with all the varying ways you can use each input by pressing again or angling it. Focus Punch was perfect, rather reminiscent of a certain Warlock Punch. I also liked the way you did Drain Punch; I had always wondered how punching could drain health, so now the question’s answered! Well, for Breloom anyway.

Some things here aren’t so good, though. The last paragraph of Spore was kinda confusing, and the DSmash Leech Seed growing an Oran Berry, although plausible, was jarring. Nonetheless, this was another great set, and I eagerly await the next Pokémon!
 

SmashShadow

Smash Champion
Joined
Jul 9, 2012
Messages
2,660
3DS FC
0104-0598-9588
ARSENAL PRIMID


I'm sure not many expected to see this but hey, he's as cannon as a lot of other characters suggested in this forum. Personally I think he could be be a really fun choice and he is a technically a nintendo character.

What I had in mind is a combination of all the primids from the previous game. Arsenal Primid would essentially have all the weopons and attacks combined into one character. He'd excel at fighting mid to long range by baiting his opponents with his projectiles and keeping them at bay with is mid ranged sword attackes. He would fair less well at close range as some of his attacks tend to be a tad laggy. While most of his attacks aren't strong KO-wise(excluding his foreward smash and charged surge cannon) he can easily rack up damage so that even when his opponent gets close he can knock them back a little.

Weight: 6.5/10
Speed:7/10
Falling speed: 7.5/10
Traction: 4/10
Jump: Equal to that of Luigi


Moveset:

Specials:
Stadard Special: Beam Combo
Basically the standard sword combo from the Sword primid. Would work like marths side B through mashing the b button. If the entire combo hits it does (21%)

Side Special: Boomerang
Throws the yellow boomerang that Boom Primid had. (12% if hit directly 8% if on the way back.)

Down Special: Surge Cannon
Neils down and pulls out the cannon that Scope Primid has.
It can shoot a 3 round burst from tapping down b once or...(3% per hit)
shoot a charged shot(similar to Samus's super missile in range but more powerful and a second longer charge up. (14%) If shot while in the air he will shoot the uncharged 3 round burst downward diagonally while stalling in air.

Up Special: Spear Jump(Regular Primid)
Primid bends his knees then shoots up charging diagonally and raming his body into anything on his way up. During his decent no damage is given. (10%)

Throws:
Pummel: (Hard Tap) Punches the opponent in the face (3% each)
Foreward Throw: (Rapid Punch) Primid preforms his "Rapid Punch" albiet faster and less hits than his one in the SSE. The last hit has knockback. (12%)
Down Throw: (Back Devistator) Primid tosses the opponet below him and takes a short hop. While in the air he turns into a metal primid and comes crashing down on the opponent feet first. (12%)

Back Throw : (Flaming Disposal) Primid throw his opponent behind him while turning into a Fire Primid and shoots a fire ball at the opponent. (9%)

Up Throw: (Elevator Toss) Primid takes both his hands and slings the opponent into the air.(8%)

Combo
A-A-A: Punch, Side kick, Over the shoulder two handed pound (5%-6%-7%)

Smash Attacks:
Side: (Smash Punch) Primid does his signature smash punch (17%-23% charged)
Up: (Detacher) Primid pulls out his sword and swipes upward.(14%-19% charged)
Down: (Craze Kick) Primid does a breakdance kick (13%-18% charged)

Tilts
Side: (Carve Swipe)He does the equivalent of a forward a with the beam sword. While it has less range than the normal beam sword it still has relatively good range as it can hit 2 character lengths away (9%)
Down: (Cruel Stomp) A powerful footstomp that send the opponent upward. This attack takes slightly longer than the averge down tilt. (10%)
Up: (Boomerise) Pimind lifts himself up with his boomerang in hand. This attack is slow but powerful.(10%)
Dash: (Pain Crasher) Primid does his signature faceplant.
(13%)

Aerials
Nuetral: (Shadow Whirl) Primid spins with his left leg held out. While he's spinning shadow bugs spew out of his body. Does decent knockback especially in the air. (10%)
Down: (Crash Pound) he comes down hard with both legs bent. This attack can meteor smash if it hits directly from above (12%)
Foreward: (Nebula Rush) Primid split into shadow bugs that rush forward about 2 character lenghts before refoming into Primid. Has invincability frames.Hits three consecutive times. The third hit does all the knockback.
(4%-4%-5%)
Back: (Fool's Knockout)Primid does a two handed pound spining backwards.(11%)
Up: (Dark Riser) A simple backflip upwards.(9%)

Final Smash: Tabuu Arsenal
Primid puts his hands up and subspace black hole opens up above primid. Tabuu pops out of it and shoots a beam of blue energy at primid. Tabuu then flies upward and exits the screen while the beam forms a sphere around Arsenal Primid and transforms him. He now has Tabuu's wings and a cannon on his arm in the shape of Tabuu's dragon laser. Not only that but all the green on primid changes to the same color as Tabuu. Primid will continuously fly while in this form and have increased speed but will still be suseptable to damage.

Nuetral Special- (Off Wave) Primid creates a wave from his wings that reaches up to 3 character lengths away. Has a 1 1/2second lag (25%)
Side Special- (Dragon laser) Primid uses the canon on his arm to launch a semi-large beam of energy that can reach the entire stages distance. Does different damage percents at different lenghts. (23% up close 19% medium distance 15% far away)
Up Special- (Bullet Rain) Primid shoots a stream of energy balls from his arm cannon diagonally upward. A full hit does (20% damage)
Down Special- (Light Chain) Primid slashes with his arm cannon that creates a chain of light. (18%)
A-A-A combo: changes to the the "Rapid Chop" combo tabuu does (7%-7%-10%)

After 10 seconds he ruturns back to normal as the same blue energy shoots out of him and into the sky.
Drawing
 

rice819

Smash Rookie
Joined
Aug 25, 2012
Messages
9
Cooking Mama


Standard Moves:
Neutral a:knife chop 5%,
dash attack: slams pot 7%
A:knife slash 4%
second a:another knife smash 5%
third a:lots of knife slashes 6%
Tilt Moves:
up: throws multiple measuring cups 10%
down:spins with a whisk in her hand 9%
side:stabs with knife 11%
Smash Moves:
up: spins with knife at an angle upward. 13%
down:spins with a knife at a downward angle 12%
side:smashes pot with pouring boiling water burning them 15%
Aerial Moves:
up: points two knives up 10%
down:slams pot down direction 11%
side:slices opponet with a knife 10%
back: throws knife 12%
Throws:
Attack:stabs with knife 10%
Up:throws up also with a knife 9%
Down:slams down while stabs with knife 9%
Side:throws and after slams with pot 9%
Special moves
Neutral b:throws vegtables or cooking materials vegetable:7% utensils:8%
up:kite. fly up with kite(can be controlled) while pouring food that can be eaten but if mama doesnt eat it then it will poison them food:4% recovery poison:6% damage
down:shovel. pushes up dirt while pushing herself back horizontal movement 16%
side:shopping cart. rides in a shopping cart running them over. 17%
final smash: everybody is skerwerd and put on a grill the damage% goes up and finally mama thinks heres a mistake say mama will fix it and smother them with bbq sauce. finally theyll reach a boiling point and explode
other
has three jumps
lightweight
Fast

:phone:
 

darth meanie

Smash Journeyman
Joined
Jun 6, 2008
Messages
452
Cooking Mama
a moves
A:knife slash
second a:another knife smash
third a:lots of knife slashes
Tilt moves
up: throws multiple measuring cups
down:spins with a whisk in her hand
side:stabs with knife
Smash moves
up: spins with knife at an angle upward.
down:spins with a knife at a downward angle
side:smashes pot with pouring boiling water burning them
Special moves
up:kite. fly up with kite(can be controlled) while pouring food that can be eaten but if mama doesnt eat it then it will poison them
down:shovel. pushes up dirt while pushing herself back
side:shopping cart. rides in a shopping cart running them over.
final smash: everybody is skerwerd and put on a grill the damage% goes up and finally mama thinks heres a mistake say mama will fix it and smother them with bbq sauce. finally theyll reach a boiling point and explode
other
has three jumps
lightweight

:phone:
Brilliant Moveset, instant super vote.

I would recommend a few edits though, you forgot a neutral special and throws or aerials, or a picture, which are all necessary for a moveset to qualify the contest. Some line spacing and more detail would also make it more palatable. :phone:
 

ForwardArrow

Smash Ace
Joined
Aug 17, 2011
Messages
503
up:kite. fly up with kite(can be controlled) while pouring food that can be eaten but if mama doesnt eat it then it will poison them

Cooking Mama

DM is correct. This is truly worth of a Super Vote. As a matter of fact, contest winner right here.

I mean, this set is truly a work of genius. The sheer ingeniousness of every input here, as well as the loving detail put in, is something astounding. You come up with such wonderful inputs as the shopping cart, a completely original take on Wario's bike that we've never thought of in all our years as a community. Not to mention it's such a perfect set for Cooking Mama, really giving us deep insight into her character, such as her incredible desire to knife people in the face and explode them over a grill. This set's not just the best thing posted this contest, it's LEGENDARY.
 

Katapultar

Smash Lord
Joined
Nov 24, 2008
Messages
1,284
Location
Australia
[collapse="Arsenal Primid"]Primid does seem like an obvious choice for the next super smash bros game as a Brawl-exclusive enemy who uses enough attacks to warrant his own set, so it'd be natural to anyone imagining it that he'd use all those different forms seen in SSE. Many of his moves and forms are based off item effects, and I was kinda hoping that he'd emulate their effects in order to represent that side of Brawl - instead of simply doing a Beam Sword combo why not let him wield it afterwards? These various item effects would seem overpowered when given to a character for their set, but foes can use them to their advantage too. Not to mention that the Primid is made of Shadow Bugs; he could give himself one of Brawl's transformation buffs at the cost of some damage and combine them with items to become a fun little character who you can experiment with, just as you intended (Big Primid is missing in the set; I assumed you intended to make that the Final Smash). Some of the moves do seem dumbed down when Primid already takes so much material from Brawl; I would have been cool with he simply ripping off the exact effects of said items and his attacks from SSE when they're surprisingly varied.[/collapse]


[collapse="Cooking Mama"]Simple enough if you want a simple outline of what CM could do in Brawl, but for those who haven't played the game it's hard to relate to anything when there's no picture or that much to go by - there's a little to go by how the character acts, however (in the Final Smash). If the game's about cooking though, shouldn't this character play like a cooking character? It'd be fun if you could cook some actual food and not just the opponent, cus every fighter is able to do that in their own way - CM doesn't have any actual moves to make food items, which would be rather weird considering she's a chef of all things (you could put all the food in a shopping cart to cart it around). Also given there isn't anything about the source material, the Up Special and Down Special come off as being weird; kite? Shovel? If the character is crazy then knives are sorta understandable, but poison seems downright sadistic for this character when it'd be of no benefit to actual cooking unless in the game she works part time as an assassin to kill people with cooking or something, because why else would she use poison? In order to give out your vision to other people, elaboration is naturally needed, though anyone will tell you that - looking at other sets with give you the answer.[/collapse]
 

SmashShadow

Smash Champion
Joined
Jul 9, 2012
Messages
2,660
3DS FC
0104-0598-9588
[collapse="Arsenal Primid"]Primid does seem like an obvious choice for the next super smash bros game as a Brawl-exclusive enemy who uses enough attacks to warrant his own set, so it'd be natural to anyone imagining it that he'd use all those different forms seen in SSE. Many of his moves and forms are based off item effects, and I was kinda hoping that he'd emulate their effects in order to represent that side of Brawl - instead of simply doing a Beam Sword combo why not let him wield it afterwards? These various item effects would seem overpowered when given to a character for their set, but foes can use them to their advantage too. Not to mention that the Primid is made of Shadow Bugs; he could give himself one of Brawl's transformation buffs at the cost of some damage and combine them with items to become a fun little character who you can experiment with, just as you intended (Big Primid is missing in the set; I assumed you intended to make that the Final Smash). Some of the moves do seem dumbed down when Primid already takes so much material from Brawl; I would have been cool with he simply ripping off the exact effects of said items and his attacks from SSE when they're surprisingly varied.[/collapse]
The only concern I had with making him be able to actually use the items like items is that it would be very spammish. I though I did use quite a few of his moves i.e Rapid punch,smash punch, spear jump and my a combo were all primid's :(. I also updated with a final smash. I thought that the Big Primid would just be a little too generic seeing as it just reflects the super mushroom. I came up with this idea reflecting his relation with his creator a little.
 

darth meanie

Smash Journeyman
Joined
Jun 6, 2008
Messages
452
Are you sure it's quite accurate to count your interpretation of Aquaman as DC Comics?
 

The Warrior of Many Faces

Smash Apprentice
Joined
Mar 22, 2012
Messages
101
Location
Everywhere and nowhere, as location is meaningless
Are you sure it's quite accurate to count your interpretation of Aquaman as DC Comics?
Seconded.

ARSENAL PRIMID

Well, the basic idea on this is fairly good, combining the many types of Primid into one. However, this set is a little underelaborated. Aside from the specials, nothing has any damage percentages or any indication of knockback, which is a problem. There also don’t appear to be as many stats as I’d like; what’s Arsenal Primid’s jump capability? Traction? Fall speed? One might assume they’re identical to a real Primid’s stats, but since you didn’t tell us, we can’t know for sure. A playstyle of some sort would also be nice, with at least some discussion on the moves as to how they can be used to further said playstyle (that said, I struggle with that myself). And finally, while the Tabuu thing isn’t a bad Final Smash, I personally think that Giant Primid would have made more sense with what you were doing. You’ve already heard that, though, and defended it, so feel free to ignore me.

In short, good potential here, but it needs a bit more elaboration.
 
Top Bottom