Welcome to Smashboards, the world's largest Super Smash Brothers community! Over 250,000 Smash Bros. fans from around the world have come to discuss these great games in over 19 million posts!
You are currently viewing our boards as a visitor. Click here to sign up right now and start on your path in the Smash community!
It appears that you are using ad block :'(
Hey, we get it. However this website is run by and for the community... and it needs ads in order to keep running.
Please disable your adblock on Smashboards, or go premium to hide all advertisements and this notice. Alternatively, this ad may have just failed to load. Woops!
Hello, all! For those that don't know me, I'm Virg. I moderate things. I'm also in charge of the newly founded Discussion Leader group and I had an idea sprout in my head not too long ago.
Every individual character board is quite different and many are truly contrasting. Seeing as how I'm tasked with encouraging discussion and help throughout the boards, I thought that maybe encouraging some similar layouts on each board would help new people (or board hermits) that eventually strolled into other boards. Not that they would get lost, but just that it would be easier and the process alone would be gratifying.
So with that, I'm here for a proposition (not of that kind!): a reformatting and update of the character guide, if it needs one. I see a lot of good threads...though I have a feeling some are out of date. But I digress.
So for those of you that don't want to read: I would like to try to get every character board to clean up and organize their character board guides/stickies. Some are fine as is. Others...not so much. I'm asking this for a shot of dialogue and cross communication throughout the boards as well as making the stickies less cluttersome.
So, what do you guys say? This is all voluntary. Just wanted to try to spruce the boards up a bit. If you have any opinions or questions, I'd be happy to hear them
Ok, thats probably a good idea. CO18's guide is pretty correct, even if it is a little outdated. We could use that as a base or something. We've also had a lot of other guides such as Vayseths, Buumans, and Gates Mini-guide and Flowchart
Co18 is working on an update he says, the real trouble is we have 3 amazing guides going around right now, one of which isn't stickied yet, but should be. What I purpose is to give Buu, Co18, and Vayseth access to one username used only for having one massive guide.
Co18s got the basics
Vayseth's got the chain grab
and Buu's got all the odd ends.
We could also probably put in the DDD is the greatest character in the game thing. this was get rid of 3 stickies.
As a side note, you're hot, and I generally don't go for white women.
He will have to move down to 3rd place. Below us and captain falcon repectively, as Captain falcon will be the only one unaffected by said chaingrab this alone will be enough to boost him to second place, above metaknight
Sorry. Anyway so... I don't mind writing up part of a guide. I could do the basic moveset, percents and frames and summaries of each move and stuff although I don't have frame data I'm sure its around here somewhere. We could include Vayseth's CG Guide and Buumans list of Dedede facts or something. Anyone else willing?
I also think we should Bump up some of our old threads that helped, such as the stage discussion thread, and the how to deal with certain moves thread.
Sorry. Anyway so... I don't mind writing up part of a guide. I could do the basic moveset, percents and frames and summaries of each move and stuff although I don't have frame data I'm sure its around here somewhere. We could include Vayseth's CG Guide and Buumans list of Dedede facts or something. Anyone else willing?
Of course we appreciate your loyalty Juppities, but the basic moveset is already in The Royal Guide/FAQ, and the percents/frames are in there too I think, or it's in Buuman's Database.
I also think we should Bump up some of our old threads that helped, such as the stage discussion thread, and the how to deal with certain moves thread.
Yes we should include those. And also someone bump my down smash thread with small facts and kill percents for the move. If anyone will, type in "down smash information" in the search forums box.
I'll find your "how to deal with certain moves" thread Jupz...and the stage discussion right away.
I thought the frame data was accurate -_-...there wouldn't be any point in posting that if it's not legit. You can be in charge of the frame data if you earn that debug code Campa.
Yeah we are! We're putting more into than just those three sources.
This mess is gonna take a while you know. I'll start with the stages but I don't think we're doing much discussion on them, unless if you all have extra input for the stages, should we do a week by week thing?
Stage discussion summary.
Are their walls here? How about walk offs?
Does it have a long base to chain grab on?
Can my opponent platform camp?
How good is gimping here?
END.
Yeah I'm just going to make it simple and there won't be any discussion on it. I'll just add some of my own facts and get some of "important" information from the "Expanding the Kingdom".
As far as stage discussion goes, there's not much to discuss about, and you're right we have all the advantage on stages with our grab game mainly, so I'm going to summarize each stage as short as possible to make it look small and descriptive at the same time. If any of you have info on stages, just message me on my profile and I'll consider it.
The only reason I'm concerned about that is that matchups change frequently so we'll need to be able to edit it. It's not something that's set in stone like the other guides.
One thing a few other boards have mentioned is having one shared account that would have the first post for the important thread. The account would only be know to the Mod and a few mature/respectable/active members so updates don't depend on a single person.
However, this idea hasn't been cleared yet so it certainly is not official.
Yeah Matchups should be in there. I wouldn't mind writing any stuff up, I have pictures of all Dedede's moves on my wii but no way to take them short of a camera. I could write up certain matchup summaries.
Below is a brief preview of what the thread could look like. Some information like Buu's frame rate data and Co's move reviews should be combined together, but thanks to Gates incessant quoting I don't have time to show that. Use this as a way to plan out cleaning up the guide, where we need pictures, and we should also allow Buu to color coordinate it, clearly.
Sorry about this... but there are way too many people making new threads or still believeing this and its kind of getting annoying.
If you go to your settings and click on "All Items Off" he will not throw ANY items.
For the people throwing items, you have the item appearence set to "None", in this case items will not appear normally on the stage however Dedede can throw them.
Please no more topics about this.
Well that was it...
Good Luck with your Dededeing!
A guidebook for Dedede.
Of course nothing is certain with the time weve had to play the game so
I will continuosly update this guide with all the information about Dedede we get.
Table Of Contents
1. Introduction
2. Why Dedede?
3. List of Pros/Cons
4. Advanced Techniques
5 Attack Analysis
6. Strategies
I. Recovery
II. Recovering Diminished Attacks
III. Edgeguarding
IIII. Combos 7. Character Matchups
8. Chain Grab
9. Misc.
Introduction
& King DeDeDe is the Best Character in the Game
I'm here to tell you that everyone's favorite new comer, King Dedede, is pretty much already the best character in the game. If he's not your favorite character, that's okay, it just means that you're wrong.
First, we'll start with the obvious.
Look at him. Just look at him. King Dedede is a giant penguin that wears a king's robe, wields a massive hammer, and as far as I can tell, wears yellow boxing gloves. If you can't tell how awesome this is, there is something wrong with you.
So, now we know what King Dedede is, but who is King Dedede? Let's find out!
Taken from from the Dojo...
"The self-proclaimed king of Dream Land formally joins the brawl! Mechanizing his wooden mallet, he delivers a mighty, earth-shaking blow!"
Everything about this is beautiful. Let's break it down.
He's a self-proclaimed king. How freaking cool is that? Sure, there have been many kings, but they're usually only kings through family. Some other kings fought great wars to earn their title. But no, not King Dedede. He basically said "Screw it, I don't have to do any of that. If I want to be King, I'll be King." This kind of attitude is just cool beyond comprehension.
He formally joins the brawl. You see that? He formally joins the brawl. Even during something as chaotic as a brawl, he still remains a gentleman. What a guy.
Mechanizing his wooden mallet, he delivers a mighty, earth-shaking blow. Okay, what's not to like? First off, how many other penguins do you know that have mechanized their wooden mallets? None I'm sure. Plus, with this mallet, he can deliver an earth-shaking blow. Earth-shaking? EARTH-SHAKING? Jesus Christ. I've seen some characters shake the ground, and I've seen the screen shake a few times, but now all of us will know when someone is playing as King Dedede because the entire ****ing planet will shake beneath us. God help us all.
Now, I know if you hadn't before, you now recognize King Dedede as the best character in the game. But just to drive the point home even further, let's just look at his majesty in action.
Check this out. Not only does he look as cool as always, but now there's a giant freaking cannon pointed right at him. But does he care? No. Of course not. He's King Dedede. While someone is helplessly planning a way to take down this mighty beast, he's simply thinking of what he wants to have for brunch. Cool. Calm. Collected.
Let me ask you something. Do you consider yourself to be cool? We'll there's a simple test to find out if you're cool or not. Ask yourself, "Do I wield a mallet that's almost as big as I am?" If you answered no to this question, sorry, but you have some work to do. King Dedede on the other hand, is the real goods.
When King Dedede isn't shaking the entire planet, he likes to be a trend setter! Kirby certainly knows what's up in the world of fashion. Just look how jealous Meta-Knight is! Don't worry Meta-Knight, your mask is kind of alright, I guess.
I'm not even going to go any further with this. This is the best picture ever. Period.
I'm sorry but this is just the coolest pose in the world. Seriously, just look at that! Go find a mirror and try doing it yourself just to see how cool it is. If you're not glowing when you do it, you're not doing it right.
Look at that monster. It's huge! Mario and Samus keep their distance. Captain Olimar tries to make an escape. And King Dedede? He's just chillin'. Monster? Pfft. Big deal. King Dedede just smiles for the camera.
I almost cry every time I see this. Not only is King Dedede a complete pimp, he's also a good person deep down. Watch as he jumps, possibly sacrificing himself, to save the Pikmin from certain doom. Normally, in this game, you want your opponent to lose. But no. Not King Dedede. He's always thinking of the little guys. So inspiring.
King Dedede truly is on top of the world. Not only does he have is own personally sized boxing ring, it's being carried by his loyal servants! How come we never see Bowser or Ganondorf carried by their servants? Hmmm? That's because their servants aren't truly loyal to them the way King Dedede's are to him. That's dedication.
So as you can see, King Dedede truly is the greatest character in this game, possibly of all time. The roster was complete when he was put in. Other characters, such as Mario and Link, are simply bonus.
Why Should I Choose Dedede?
King Dedede is an excellent and very fun character to use.
King Dedede is the only heavyweight character with amazing recovery. This in combination with his weight makes him extremely hard to KO. He has a very useful projectile, incredible grabs, and extremely strong attacks. He has great combo ability for a Heavyweight and quick attacks which makes him a very tough opponent. He also has a devastating chaingrab on more than half the cast.
However, Dedede is a slow moving character and a big target, some of his best KO moves are somewhat laggy as well. Overall though King Dedede is a great and fun character to use and I advise anyone to join in and control his awesomeness.
List of King Dedede's Pros/Cons
Pros
Heavyweight character
Excellent Recovery
Great Projectile
Incredibly Strong
High Priority Moves
Great Aerials
Insane grabbing game
Great Range
Chaingrab on more than half the characters
Cons
Slow Moving
Big Target
Smashes are a bit slow
Anyway, Dedede's pros far outweigh his cons and the few cons he does have are not really a problem.
Attack Analysis.
*Approximate percentages are in red. All were done against Mario from the center of Final Destination.
Neutral A Ground Attacks:
1. Jabs
Description : DDD swings his Hammer
Avg Damage : 6%
range: short
knockback: little
Dedede's jabs are pretty good.
Not many normal uses besides racking up damamge when the opponent isnt expecting it.
However, "Jab Faking" adds a lot more uses to this attack.
Basically at the end of the first or second jab you cancel it and do any of your normal moves.
After the third jab holding A results in DDD extending his spiral in which the opponent racks up some quick damage.
Rating: 3/5
5. Dash Attack
Description: King Dedede runs and and slams onto the opponent
Avg Damage: 13-16% KO : 100%
Range: long
Knockback : Good
This dash attack is Dedede's faceplant from the old kirby games. Its a decent move as it is fast, has long range, and does decent damage. It is good for tech chasing your opponet.
Mix this move up after a down throw sometimes if your opponent is at a high percentage to get a kill.
If I'm chaingrabbing an opponent sometimes I intentionally stop once, to see what they try to do after your down throw.
If you notice they try to spot dodge to escape in case you mess up, then wait until they get to a high enough percentage then use a dash attack out of a down throw to punish them for it.
: 3.5/5
Tilts
6. Forward Tilt:
Description: Dedede extends his rotating hammer into the opponent.
Avg Damage: 12% KO: 280%
Range :Long
Knockback: Little
This is a very good move.
This move is excellent for long range poking and does a good amount of damage.
It is good as a defense maneuver and helps stop incredibly fast and aggressive players.
Use this move after using Dedede's downgrab if the opponent cant be chaingrabbed because of its range and speed for some quick extra damage.
Ftilt also cancels most projectiles in the game.
Rating: 4/5
7. Down Tilt
Description: Dedede lays down in his crouching position and kicks the opponent.
Avg Damage: 10% KO: 135%
Range: Good
Knockback: Good
Dedede's Down tilt is a good move. It has good range and is very fast. This move stops incredibly quick opponents in their tracks. This move also initiates tripping quite often. If you expect your opponent to roll away after tripping, running and grabbing them or doing a dash attack are good options. This move is also pretty useful for edgeguarding. Just stand over the edge and dtilt once the opponent gets close to the edge.
It's the quickest option for Dedede. If you're attempting to Fsmash and your opponent is just waiting until your smash is finished to try to take advantage of your ending lag and rush in, quickly use down tilt, majority of the time it will come out before your opponent gets to you which is basically a safeguard for missed fsmash's sometimes.
Dedede can also Down throw--->Dtilt many characters at the ledge which is another good option after a chaingrab.
Rating: 4/5
8. Up Tilt
Description: Dedede uses his head and hits the opponent upwards.
Avg Damage: 12% KO: 105%
Range: Average
Knockback: Good
This move is very good. It is fast and has Good knockback. It is very good for juggling and can easily set dedede up for the use of his aerials.
Definitley a good move for racking up some damage when the opponent is at low percents and setting up combos. It's a great KO move and is great after spotdodging because of its low startup lag. Nair to Up tilt combos work very well especially against bigger characters.
Simply put up tilt pwns, it kills lighter characters in the 80-90 range and heavies in the 100-110 range, its so fast and has a large hitbox, only snake's up tilt is better(that **** snake).
Rating: 5/5
Aerials:
9. Forward Aerial:
Description: Dedede swings his hammer at the opponent in mid air.
Avg Damage: 15-20% KO: 130%
Range: Good
Knockback: Good
Dedede's forward Aerial is a good move. It has decent speed and is moderatley strong. The move has a large hitbox extending both horizontally and vertically. You can wall of pain with fair when your opponent is at low percents which is ****. Move is great for edgeguarding because of its hitbox and its good strength.
Rating: 4/5
10. Up Aerial:
Description: Dedede sticks his rotating hammer upward into the air.
Avg Damage: 15 – 25%
Range: Good
Knockback: Good
Dedede's Up aerial is a rather good move. It has excellent range and good knockback.
It is a multiple hit attack and when the final hit(rotation of the hammer) hits the opponent that is when the knockback occurs. This move is pretty fast and racks up a good amount of damage, especially if you hit the opponent with all rotations. Move has some ending lag so if you miss, you can be punished for it.
Rating: 3.5/5
11. Down Aerial:
Description: Dedede sticks his rotated hammer down in mid air.
Avg Damage: 12-17% KO: 160%
Range: Average
Knockback: Below Average
This is a good aerial. It does a good amount of a damage.
It has good range and priority as well.
Doesnt have much starting lag but has a good amount of ending lag.
Doesn't really matter that much because Dedede's jump cancels the lag after the dair.
If the opponent is near the edge trying to edgeguard you while youre holding on to the ledge, jump off and dair. You get high enough in the air to execute this move without having to hit the ground before its done so you cant really be punished for it. Full Hopped dairs are a great option out of the shield as well , it's hard to punish and will **** their shield.
Rating: 4/5
12. Backward Aerial:
Description: Dedede kicks backward into the opponent.
Avg Damage: 13% KO: 130%
Range: Above Average
Knockback: Average
Definitley Dedede's best aerial(Best in the game?). This move does a good amount of damage, has solid knockback, good range, high priority, and almost no lag. Keeps your opponent grounded because it's just too amazing for any other aerial.
Great for edgeguarding and wall of pains, reverse bairs are a pretty good approach. Short hopped Bairs also work very well.
Rating: 5/5
13. Neutral Aerial:
Description: King Dedede extends his arms and legs(looks similar to an air dodge)
Avg Damage: 12% KO: 170%
Range: Average
Knocknack: Below Average
This move is ok.... It is good for fastfalling on someone and following with a grab U-tilt or U-smash It is quick but it has only average range and little knockback.
The move is good for oppurtune moments where the opponent is in certain positions because of its speed. Other than setting up a couple of moves, it doesnt have that many uses.
Rating: 2.5/5
Smashes:
14. Forward Smash:
Description: Dedede swings his hammer over his head directly on the opponent.
Avg Damage: 24%(uncharged) 33%(Fully charged) KO: 42% (Uncharged) KO: 17% (Charged)
Range: Good
Knockback: Amazing
King Dedede's Forward Smash is Uber Strong.
As well as being incredibly strong it has Good range.
However, in order to get all that damage and power, this move must be sweetspotted, hitting with the sides of the hammer makes it much weaker.
In addition, this move is probably the slowest in the game.
Startup lag is insane, ending lag isnt that terrible. This move can still miss the opponent completely and as long as they are within one body length away and still do 5% damage with good knockback. Basically, randomly using this move when youre expecting your opponent to come attack is mainly where youll get your hits. You can use this move for edgeguarding as well because with good timing you can hit a recovering opponent for an almost instant KO. You can also get some fsmashes in predicting where an opponent will roll.
This move is pretty good imo. Even when you use this move, majority of the time you wont be punished if you miss because often times your opponent will just stay away when they see this because they know its a powerhouse.
Downtilt is pretty much a safeguard for this move if you miss because it comes out uber quick.
Rating: 3/5
15. Up Smash:
Description: Dedede swings his hammer upward across his body.
Avg Damage: 14%(uncharged) 21%(fully charged) KO: 110% (Uncharged) KO: 75% (Charged)
Range: Good
Knockback: Good
Pretty Useful Smash. It has decent speed, does ok damage, and has good knockback. I definitley prefer up tilt to this but this move is good to because It's hitbox surrounds Dedede's entire body.
Rating: 3/5
16. Down Smash:
Description: Dedede swipes his hammer on the ground in front of then behind him
Avg Damage:14%(uncharged) 21%(charged) KO: 115% (Uncharged) KO: 75% (Charged)
Range: Good
Knockback: Good
Fairly good move as well. I use it quite alot.
It has pretty good range and knockback. The knockback of this move is vertical, so it is good for getting the opponent in the air to set up for Dedede's aerials. Its a great KO move and has decent speed. When your opponent is constantly rolling around you, you can rely on this to punish them for it. If youre opponent is on the ledge and their invincibility frames are over, dsmash will stage spike them to oblivion
Rating: 3.5/5
Grabs
17. Standing Grab
Description: Dedede grabs his opponent with one hand.
Avg damage: Dependant on headbutts and Throw
Range: Amazing
Knockback: Depends on throw
Dedede's grab game is simply amazing. His grab range is incredible, he has an extremely good chain grab can tech chase beautifully out of his down grab which I will get more into later in the down grab analysis. And the rest are very powerful
Overall Grab Rating: 5/5
18. A attack in grab(Headbutting)
Description: King dedede headbutts the opponent while having them in his grip
Avg Damage: 3%
Adds a little more damage to the opponent when you grab them.
Nothing has been offically tested yet but about one headbutt per 50% your opponent has is a good estimate for them not breaking out.
However, I dont see people use this enough however when chaingrabbing. When you're chaingrabbing use this to get in the extra damage! Anything helps.
19. Forward Throw:
Description: King Dedede whacks the opponent out of his hand with his hammer
Avg Damage: 13%
Knockback: Good
King Dedede's Forward throw is good.
It does a good deal of damage as a throw and has good knockback as well. Good for getting your opponent off the edge to set up for edgeguarding.
Rating: 4/5
20. Backward Throw:
Description: King Dedede turns around and whacks the opponent out of his hand with his hammer
Avg Damage: 16%
Knockback: Good
Dedede's back throw is very similar to his forward throw. It is slightly more powerful than it making it one of the strongest grabs in the game and also has good knockback. Definitley good for getting people off the edge, so you can edgeguard.
Rating: 4.5/5
21. Up Throw
Description: Dedede grabs the opponent and hits him up with two hands
Avg Damage: 9%
Knockback: Good
Dedede' Up throw is probably his worst throw. Its not bad by any means but its not as useful as the others. It only does 9% damage and throws the opponent really high. You can pull off some aerials after using this but alot of the time they can just DI away.
Rating: 1.5 .5
22. Down Throw
Description: Dedede grabs the opponent and sits on them.
Avg Damage: 8%
Knockback: Below Average
Dedede's Down throw can result in an amazing chain grab.
There are 3 types of chaingrabs.
1. Dashing Grab: Just dash after them and press Z, easiest to execute however some characters can get out of it with certain moves. EX: Marth's up+b.
If you miss a dashing grab, Dedede will tumble and you can be punished for it.
2. Sheild Canceled grab: Dash after the opponent, quickly Press shield immediately followed by A. This type of grab cancels Dedede's dash and as a result Dedede slides a bit into the grab.
This is the best type of Grab and is unescapable unless your opponent can't normally be chaingrabbed.
3. Dashing Shield Grab: Run after your opponent, while still holding forward, hold Shield then press A. As of now it appears some characters can escape this to with certain moves, however for those who can't it's the most effective. The chaingrab is shorter resulting in extra chaingrabs per stage length. You can get in 2 more grabs the entire stage length of FD then you would using a shield canceled grab or dashing grab. If you do this correctly you should see a shield pop up before you grab your opponent.
Messing the timing up will ususally result in a shield canceled grab anyway or you'll just roll.
Dedede's Down throw is also an infinite.
1. You can repeatedly down throw any character that can be normally chaingrabbed against a wall.
2. A few characters can be infinited by Dedede down throwing, staying in place and grabbing quickly again.
Here is a list of chaingrabbable/infinitable characters taken from Mr. C's Infinite guide: http://www.smashboards.com/showthread.php?t=152392
Infinite only: Luigi
Both CG and Infinite grab: Mario Samus Bowser DK
Chain grab only: Lucas Pit Ice Climbers Diddy Kong Ganondorf Ness Toon Link Ivysaur Ike Captain Falcon King Dedede Snake Marth Peach Wario Sonic Yoshi R.O.B Lucario Wolf Link Charizard
Cannot be Chain grabbed: Fox Jiggly Puff Pikachu Olimar Zelda Mr. Game & Watch Sheik Kirby Squirtle Meta Knight Falco Luigi ZSS
Dedede can also be infinited at the edge of a stage.
Downthrow---> Dtilt at the edge.
Another option for Dedede out of a down throw. Is A Dtilt after the down throw at the edge of the stage.
It just adds another killing move when your opponent is at higher percents and is unavoidable.
Thx to Hype for the list.
Rating: 5/5
B-Moves:
23. Side B(Waddle dee Toss)
Description: Dedede pulls out one of his minions and launches it at the enemy.
Avg Damage: 5%(Waddle Dee) 7%(Waddle doo) 23%(Gordo)
Knockback: Little(WDEE) Little(WDOO) Excellent(Gordo)
King Dedede's waddle dee toss is a very useful move.
The move comes out very fast making it spammable. The Wdees and Wdoos do
enough damage for what they're worth. Occasionally Gordos come out too, which are farrr stronger and have much better knockback than the "Waddles". The Gordos also come out faster and go farther than the Waddles as well.
After being thrown Wdees and Wdoos walk around the stage. Wdees can jump on people and if they walk off the edge they can hit an opponent trying to recover. Wdoos shoot a spray of electricity at the opponent when they come near. Dedede can pickup the Wdees and Wdoos and throw them back at the opponent(instantly happens).
The wdees and wdoos can be sucked up but there is no use for this because they are automatically swalloed.
Ness's and Lucas's magnet can not absorb this so dont worry but they can absorb Wdoo beam spray. Also you really dont have to worry about reflectors because the waddle dees and doos wont really come back at you.
However Gordos will..
If you Jump and press Side+B at the same, Dedede wil throw a waddle dee while jumping.
This is different than simply just jumping and throwing a waddle dee because doing that basically wastes a jump actuallying throwing the waddle dee, however Jumping and pressing Side+b at the same time results in Dedede throwing a waddle dee while jumping in one fluent motion.
Overall this move is excellent, not only is it a great projectile, but doos and dees on the field cancel alot of other characters projectiles as well as attack themselves. Rating: 4.5/5
24. Down B(Jet Hammer)
Description: Dedede pulls out his mechanized hammer and swings it at the opponent.
Avg Damage: 30%(Fully charged on ground) 16%(uncharged) 28%(fully charged in air)
Knockback: Amazing
The Jet Hammer is a sort of complex move of Dedede's.
Its start up lag is pretty bad, but its ending lag is not.
Its range is pretty good and its knockback is amazing.
When fully charged this move is a killer. However, you lose about 2% damage every second.
This move should be very useful for edgeguarding as well.
Dedede can jump with this move charged and release it in mid air.
Dedede can also can reverse this attack in mid air, meaning you can face one direction, quickly turn your direction in mid air and release the hammer quickly.
Theres a Jet Hammer glitch that may end up being useful but is too hard to consistently.
While Dedede's Jet Hammer is fully charged if you tilt the control stick slowly in a direction Dedede will sort of superslide across the stage.
Here is a video showing it: http://www.youtube.com/watch?v=FrkWeh87t1I
Overall its not really useful, maybe something will be found out later.
I sort of found a decent use for this. If the opponent is on the ledge trying to recover to the stage, I sometimes charge up my Jet hammer, it usually scares them into jumping up and I just jump with them and they get owned. (try it)
Rating: 1.5/5
25. Up + B(Super Dedede Jump)
Description: Dedede launches into the sky and lands with great force.
Avg Damage: 12%
Knockback: Average
The Super Dedede Jump is a very interesting move. You can change the direction in which Dedede up+b's goes during a little crouching animation.
This move is different than other Up + B's beacause it doesnt grab on to ledges by itself.
Instead you must use the "SDJC" and cancel the move by either pressing down on the control stick. This move will grab onto the ledge and even "auto sweetspot" onto it. This move is also a metor smash and will spike opponents directly down.
Not very useful as an attack but is an awesome recovery.
Rating: 3.5/5
26. Standard B(Inhale)
Description: Dedede sucks the opponent into his belly.
Avg Damage: 10%
Knockback: Average
This is Dedede's inhale move, which is virtually the same as kirby's.
You press B and Dedede sucks the opponent into his belly and in order to do damage you spit them back out. This move has Super Armor as it starts which is very helpful.
This move can be used to stop agressive approaches very well which is its main on the stage use in addition to ****** shield. Use it when in the air and you see your opponent anticipating an aerial and shielding. If you're opponent is just waiting for your bair to shield grab, B reversal inhale to suck them up, spit em out over the ledge and edgeguard.
Another use for this move however, is swallowciding
Basically you suck up the opponent and fall to your death with them in your stomach resulting in a death for both of you. It is pretty dang hard to escape. You should use this if you're at a much higher percentage than your opponent or if youre opponent is on theyre last stock while youre not. They're are a few creative ways to execute this which are told in the strategies section. Swallowciding can basically turn the tide of a match for you many times.
UOTE]
Rating: 4/5
Strategies
This section is for useful strategies involving King Dedede.
Recovery
As you should know by now. King Dedede is a beast when it comes to recovering.
Use King Dedede's multiple jumps to recover as much horizontal and vertical distance as you can.
If that doesn't get the job done then you must use the Super Dedede jump.
After using King Dedede's multiple jumps use his up + b.
King Dedede's Up + B doesnt grab onto the ledge so you must cancel the jump by pressing down on the control stick.
After canceling it, this move will sweetspot the ledge.
Mix up how quickly and when you'll use up+b to recover so you're not too predictable.
For example: If you're up+bing towards the stage, your opponent will most likely try to wait for your super armor to finish and punish you, instead just cancel it and DI towards the stage, after awhile they'll anticipate this, so they'll try to mindgame as if they will try to punish you, then quickly go for the edgehog, predict this and safely land to the stage.
When on the ledge, you have some good options to return safely to the field.
Other than your standard A/roll on the ledge.
Against bigger characters it's very useful to jump and dair which usually works, racks up alot of damage and can combo into another fair sometimes. It's also not very easy to punsih which helps alot.
Against smaller characters it's not as effective unless they jump.
You can also keep your opponents from staying right near the ledge by pressing back and fairing, it will go through the stage and hit your opponent and will keep them from staying near the ledge allowing you to return safely.
Edgeguarding.
Couple of Edgeguarding techniques for Dedede.
More will be added soon.
B-Air's
King Dedede's Bair is very useful for edgeguarding. It has incredible speed and priority and is very versatile. If the opponent is at a high %, majority of the time this move will kill them which just adds to its usefulness.
If not, Wall of pained Bairs off the stage **** hard and leaves opponents helpless while you can easily recover
If the opponent also tries to recover directly under the edge, this serves as a great stage spike. Overall, bairs are definitley your most viable way to edgeguard.
F-Air
Basically the same reason for B-air, but the reason why this is so good because of its large hitbox.
You can wop fairs as well when the opponent is at low percents for the same effect.
Bairs are more useful because of their speed but fairs are very good as well.
Combos
Here are just some general combos without a very indepth report(will come later)
Full hopped Dair-->Dair
Full hopped dair--> fair
Full hopped dair-->bair
Down throw Chaingrab
Bair WOP
Fair WOP
Down throw --> Ftilt
Down throw --> Dtilt(as opponent is being chaingrabbed off the stage)
Fastfall N-air -> U-tilt
Fastfall N-air-> U-tilt-> U-tilt -> U-tilt -> U- air (Must be done with opponent at very low percentage.)
Swallowcide
What you have to do is use Dedede's Neutral B move(Inhale) and with the opponent in your stomach fall off the stage. There are a few ways to use this succesfully..
1. The opponent is off the stage and you jump off the stage to inhale them.
2. The opponent is below the stage and you either jump down or ledgehop and inhale your opponent.
3. The opponent is near the edge after knocking you off, trying to edgeguard you. Falling to the stage you inhale them.
4. The opponent has knocked you off the stage and as you are trying to recover they jump off to edgeguard, you can inhale them then and fall.
5. Youre hanging on to the ledge, your opponent is near the edge edgeuarding you.
You can ledgehop and inhale them.
The majority of the time you should use this technique if you currently have alot more damage then your opponent of if your opponent is at their last stock.
If both you and your opponent are on your last stocks, it will result in a sudden death. If you use this in a Sudden death. You win.
Character-specific match-ups
What Matchup Numbers Really Mean
When you look over Dedede's matchups, you may find a couple of things misleading, whether you main Dedede and are looking for information on one or more matchups or if you don't main Dedede (but why not, amirite?) and just want to see what Dedede mains think of the matchup against your character. A common complaint about many people is that a 60:40 matchup is an auto-win/loss. This is definitely not true. A 60:40 matchup means that one character will win MOST of the time over the other with good effort. It's not an easy win by any means and the other character can win the matchup if they are smart and skilled enough.
ICE CLIMBERS[/color]
DIFFICULTY: VERY HARD - 30:70
CHAINGRAB: POSSIBLE BUT NOT REALISTIC (Normal CG only, Only when there's one)[/center]
As you read these matchup summaries, you may notice several characteristics that characters with an advantage against King Dedede have. These vary from character to character, but the three biggest trends are:
Cannot be chaingrabbed
Can outcamp Dedede
Can get a somewhat significant amount of free, uninterrupted damage on Dedede (via chaingrabs, locks, etc.)
The Ice Climbers share all three of these traits, hence they are Dedede's worst matchup. They take each of these characteristics and increase them to the max. Desynching allows for Ice Shot tricks that are downright ridiculous and can easily negate Waddle Dees. Blizzard racks up a good deal of damage, is a good setup for other moves, and goes past Waddle Dees. Their chaingrabs are more broken than yours by a large margin, to the point where getting grabbed almost always means losing a stock. And, as long as Nana is alive, they can't be grabbed at all. Ice Climbers **** Dedede right through his pants. No matchup in Brawl is impossible, but this is very close.
The first thing you need to realize to succeed in this matchup is that you absolutely cannot under any circumstance get grabbed. This means you need to space like crazy. Space like your life depends on it because it does. Ftilt, bair, dtilt, jab...pull out every trick in the book to stay out of their grab range. Stay in the air as much as you can and use bair, dair, and inhale to keep yourself from getting destroyed when you do have to land. Inhale in particular is good in this match when you're close to them since it's good at seperating them, which I'll talk more about below. Don't try to avoid them by ledgecamping though. They'll just desynch and use an Ice Block Lock to prevent you from getting back up.
The next important thing to realize in this matchup is that when there's only one Ice Climber, it's not even close to as bad as two. Killing Nana will completely turn the match around, so if you have an opportunity to kill her, take it. That said, focusing on her exclusively is too obvious and many good IC mains will realize what you're doing and punish you for it. Instead, just wait for an opportunity to pop up and then kill Nana. Of course, if you have a better opportunity to kill Popo, this is the better option.
Another thing to point out in this matchup is that Ice Climbers have a significantly worse air game than yours. ICs are more horizontally-oriented characters than vertically-oriented, as evidenced by their grab game, projectiles, sideB, etc. By comparison, their aerials are very bad and they really have nothing to do in the air other than Ice Shot and Blizzard. They also don't have great defense above them since your dair outranges their usmash (and I believe utilt) and they just generally have less priority than you. This works out well for you in the long run since you're going to spend most of your time in the air trying not to get grabbed anyway. It also means that if you can get ICs off the stage you will get a significant advantage since their recovery is only about average. Finally, you're going to need to approach in this matchup. The best way to do this is to use bair, dair, or Inhale. I like dair best in this scenario since it splits them up.
Good Stages:
Battlefield, Lylat Cruise, Norfair, Brinstar, Rainbow Cruise
Forget everything you know about what stages are in Dedede's favor. In most of your matchups, you'll want big stages with lots of space to camp and chaingrab. Against ICs you just want to take cover and try as hard as possible not to get grabbed. Due to the nature of Ice Shot, platforms are your best friend in this match since hiding under one can help you avoid it and platform camping can . All the stages listed are good for this reason. Lylat Cruise's tilting is also good for messing with their recovery, which is something you will likely need to do. Rainbow Cruise is particularly good since they can't spend too much time on their chaingrabs without risking suiciding. ICs aren't affected by stage choice a ton, so aside from moving stages and stages with lots of platforms they don't have many other weaknesses.
Bad Stages:
Final Destination, Smashville, Yoshi's Island Brawl
Large stages where they can camp and chaingrab the **** out of you. FD should usually be the stage you ban since it epitomizes what a bad stage is in this matchup.
(3.2) FALCO
DIFFICULTY: HARD - 35:65
CHAINGRAB: NO
The Falco matchup is very difficult. He has a ton of advantages – speed, comboing, outcamping you, being able to chaingrab you while not being chaingrabbed back, and being just heavy enough to not die at percentages below 95%. The only real advantages you have against him are the fact that he is still pretty light, even if he’s no Jigglypuff, and his recovery is easy to gimp.
If Falco grabs you, he’ll chainthrow you up to 6 times from 0% and then finish with either a dair, usmash, smash boost, or fsmash, most likely the first one. His chaingrab stops working on you at about 54% or so according to the Falco boards, but their dthrow is a still a good setup for combos after that, so it’s unlikely they’ll ever stop using it or throw you in a different direction. Because of his chaingrab, spacing is really important in this matchup. Ftilt pokes are essential. Be careful not to get within range of his reflector also, I believe that trips the opponent when it hits and that’ll easily set you up for a smash. Also, be sure not to get too far away from him since he can easily outcamp you.
“What do you mean Falco can outcamp King Dedede? Waddle Dees block the lasers!” you might say. This is true for Falcos who stay grounded while spamming lasers, and Waddle Dees could actually be beneficial in preventing a laser lock, as unlikely as that occurrence may be. However, good Falcos will SHL or SHDL you, and when they do this it is almost guaranteed that at least one of them will hit you. TommyG, a very good and respected Falco player, has said that many Dededes only use their ground game to shield, dodge, and grab and that Falcos should use their lasers, either camping or at close range, to throw them off. What this ultimately means is that you’ll have to do something Dedede doesn’t normally do – Approach.
Approaching Falco with Dedede – or anyone for that matter – is not the easiest thing in the world, but it’s still manageable. Powersheilding the lasers is a good solution but not the best as it’ll wear down your shield and make Falco more able to poke you. Spotdodging and rolling on your way there aren’t bad ideas but they are somewhat preditcable. A good way to approach is through a combination of spotdodging and airdodging through the lasers. Neither of these have much lag so they should be ideal for approaching.
So let’s say you’ve approached Falco. Good job! Now what should you do? If you said “grab him”, that is an acceptable answer. But he can’t be chaingrabbed, so where are you supposed to throw him? Bthrow is probably your best option since it’s your best friend in matchups where you can’t chaingrab your opponent. However, you may also want to think about using uthrow against Falco. You know, uthrow? That move you probably never use? It’s fantastic against fastfallers. After uthrowing you can follow up with utilt, usmash, uair, or just follow where he’s going to land, grab him, and repeat. Uthrow will probably end up being a good setup for you in this matchup since Falco is just barely light enough for you to kill him off the top of the stage at >100% (the exact number is 95% I believe).
But a majority of the time you won’t be killing him off the top but instead gimping him off the side. Falco’s recovery isn’t terrible (though it could really only be worse if it were a tether recovery), but if he’s below an angle of about 30 degrees below the horizontal, he’s basically dead. Almost all Falcos will use their sideB to recover if they’re within sweetspot range of the ledge. If they can sideB back onto the stage, your only real option is to spotdodge, predict where they’re going to land (the easy part) and try getting them off again at a lower angle or just generally punish them. A great way to punish their sideB at high percents is by killing them with an utilt, which outprioritizes it. If they’re far enough out and down, though, you should definitely try and gimp them. Bair and nair both outprioritize Falco’s sideB. After they get hit by one of those, Falco will most likely be forced to use his upB. I’m not going to go over how to gimp that. If you can’t figure it out, you might want to think about using a different character.
A few other notes: Don’t stand there with your shield up trying to perfect shield and spotdodge everything like an idiot. You’ll get grabbed and be up to 60% before you can say “Maybe I should’ve airdodged”. Inhale and fhdair can surprise Falco also, so mix that in and use it to your advantage. And finally, stage choice is very important in this matchup. More on that below.
Good Stages:
Lylat Cruise, Halberd, Pokémon Stadium 1, Luigi’s Mansion
Stages with weird ledges to gimp his recovery further, and areas where you can avoid Falco’s laser camping (the Halberd platform’s indentation, the Mansion’s pillars) are what you want to look for in a counterpick. Lylat Cruise is particularly notable since when Falco is on one of the platforms he’ll be in utilt range.
Bad Stages:
Final Destination, Smashville, Pirate Ship, Jungle Japes
Large stages where Falco can out-camp you. At the same time though, you don’t want to choose a stage that’s too small or else you’re more likely to get grabbed. It’s unlikely that they’d pick a walk-off stage, but those would also be bad in this matchup since gimping Falco’s recovery is where you’ll get most of your kills from.
This is obviously a joke. Many good Falcos know how to get around ledgecampers.
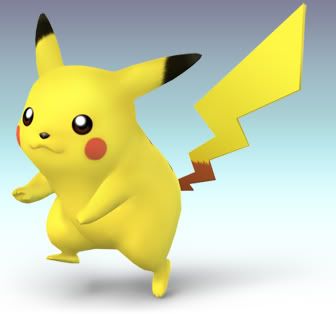
(3.3) PIKACHU
DIFFICULTY: HARD - 35:65
CHAINGRAB: NO
Summary coming soon. I mean it this time.
(3.4) OLIMAR
DIFFICULTY: HARD - 35:65
CHAINGRAB: NO
Summary to be released alongside Chinese Democracy Duke Nukem Forever.
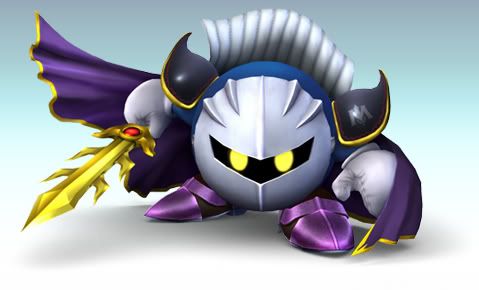
(3.5) METAKNIGHT
DIFFICULTY: HARD - 40:60
CHAINGRAB: NO
This matchup is a rough one, but probably the best to know since you’ll most likely be seeing Metaknight more than any of your other counters. There’s not much to say about MK that isn’t really common knowledge...he’s fast, he combos well, he gimps very well, and his Tornado is widely regarded as the gayest move in the game. He can rack up damage on you like nobody’s business, he can’t be chaingrabbed (without tech chasing), and he can land every single hit of the tornado on you if you don’t break out of it or DI (many Metaknights like to start the match this way). Fortunately, it’s not completely hopeless.
Dedede has several moves that can break out of the tornado (see anti-tornado attack list): Dtilt, Dsmash, Dair, Bair, and Inhale (Gordos can also break out of it, but good luck pulling one). Of these, your best option is probably ffBair, with Dair and Dtilt coming in close behind. Dsmash should be used if the MK attempts a tornado at higher percentages since it will probably kill him or at least set him up for a kill. If you’re feeling lucky you can take M2K’s old advice of DIing up and mashing airdodge, but you’ll probably take more damage from trying to do that than from just Bair or Dairing. Or, if the MK doesn’t start the tornado right next to you, you can just shield the whole thing, but most Metaknights are used to shield poking so don’t be surprised if it doesn’t bother them much.
Due to Metaknight’s light weight (and also his great horizontal recovery), it’s best to try to kill him off the top, which is great news since Dedede has perhaps the second best Utilt in the game (behind Snake) and his Usmash is very solid as well, killing almost as early as Utilt but having more range and being able to do it out of a dash. Dsmash sends them up as well, which makes it good for tech chasing, killing, or setting up for a kill, as mentioned above. Another good option for killing is the Dededecide.
“What? Gates, you can’t be serious, Dededecide will rarely work and there’s no effing way I’m going to incorporate it into my gameplan,” you’re saying to yourself right now. But it does work quite well. If you’re off the stage and MK is trying to edgeguard or Wall of Pain you, a Dededecide can be the right move if you’re tied or a stock ahead. If they’re edgeguarding, even threatening an inhale by the ledge can make them back up and give you some space to recover.
Spacing is extremely important in this matchup, so be sure to use that Ftilt. Don’t abuse it though because it’s kind of laggy and if you overuse it MK can just approach you from different angles. In addition to the Dededecides mentioned before, Inhale can also be great for messing with MK’s approaches by pausing them for a sec. You can easily force him to approach through Waddle Dee toss, but you might not even need to since most MKs love approaching anyway. And most importantly in this matchup, STAY ON THE GROUND. As much priority as Bair has, MK’s aerials are way better than yours and Shuttle Loop can be very dangerous.
Good Stages:
Final Destination, Yoshi’s Island (Brawl), Smashville, Halberd, Pokemon Stadium 1
Generally you want large stages where you can distance yourself from MK. Stages with low ceilings are good too since you’ll be KOing him off the top a majority of the time.
Bad Stages:
Battlefield, Lylat Cruise, Luigi’s Mansion, Norfair, Rainbow Cruise
Smaller stages that abuse platforms, moving stages…generally anywhere Dedede doesn’t have a lot of room to move around in and stages that really make his speed a disadvantage. Luigi’s Mansion may seem like a reasonable idea due to its size, but in reality the areas on the first floor where you can’t jump up to the second essentially form boxes where MK can trap you and use the Tornado on you multiple times.
(3.6) MR. GAME & WATCH
DIFFICULTY: HARD - 40:60
CHAINGRAB: NO
Game & Watch is another fast, light character who can’t be chaingrabbed and can combo Dedede to hell and back. He also has extremely powerful smashes with little lag afterward that can kill you at very low percentages, often less than 100%. He has very good approaches and you really can’t afford to make any mistakes in this matchup. Fortunately, he’s the second lightest character in the game (after Jigglypuff) and very easy to tech chase, so all hope is not lost.
I mentioned the strength of Game & Watches approaches, but unless you play a Game & Watch on a daily basis you’ll probably only see one approach – the bair, aka. The Turtle. The Turtle is comparable to Metaknight’s tornado in the sense that it does multiple hits that are hard to DI out of and can end up doing a lot of damage if you don’t avoid it somehow. It does 5 hits of 3% each, making 15% total. Because of how long it stays out, spot dodging and air dodging are not good options and due to its fairly large hitbox it may not be easy to roll away. The best thing to do is to shield and then punish the lag. Make sure you shield all 5 hits (it helps me to count them out) before attempting a shield grab or other form of punishment.
If you do get hit, Game & Watch will most likely start juggling you. Dtilt, utilt, nair, uair, he has lots of tricks up his sleeve. He’ll probably finish all this off with a fresh smash attack to kill you at about 100%. As far as edgeguarding goes, G&W has many options in the form of dtilt, dsmash, fsmash, dair, usmash, and his dash attack which spikes if you approach the ledge from the bottom. As cliché as it sounds, the best thing to do is not get hit.
The best way to not get hit in this matchup is, you guessed it, spacing. Ftilt is so good that when you start practicing with the matchup you may want to spam it along with Waddle Dee toss to keep him at bay, though if you toss a Waddle Doo you should get rid of it since a bucket filled with eye beams can kill at around 100%. Staying on the ground is a good idea in this matchup since, as mentioned before, it’s better to shield the turtle than airdodge it. Game & Watch can also do a lot of nasty things to you if you’re above him in general. If you do get above him, your best hope is dair, which outprioritizes most things. If he’s above you though, you won’t have much to worry about since his dair is laggy and easy to see coming. As mentioned before, he’s the second lightest character in the game, so utilt should be able to kill him at under 90%.
I mentioned dthrow tech chasing above, but most good Game & Watches will see this coming and avoid it with their upB. For upB-happy Game & Watches, Fogo has devised a good strategy, so if you want to read it you should check out his post which I quoted below since I personally believe regurgitating what is used in quotes is bad writing (but that’s a different story altogether ). Ultimately though, you shouldn’t be dthrowing Game & Watch. Instead you should opt for bthrow -> Waddle Dee or ftilt/bair if you’re close enough. Even if he airdodges it, he’ll end up in a bad position and have to reset his spacing, giving you a window of opportunity.
A few other miscellaneous things: You can techroll out of Game & Watch’s dthrow -> dsmash combo or just avoid it by hitting left or right during the actual throw. If you grab Game & Watch out of his upB, don’t attack, and wait for him to break free, he will fall helpless. Inhale is not a good move to use in this matchup since it doesn’t break The Turtle and it’ll just pull the smash towards you. Many people have made the latter mistake and suffered the consequences. One new piece of information to keep in mind is Game & Watch's newly discovered AT, Bucket Braking. Bucket Braking allows Game & Watch to cancel all of his momentum, horizontal and vertical, when hit far offstage by an attack. Since Dedede's kill moves have enough knockback that they'll most likely die before getting to use this unless they have incredible DI, it doesn't change things that much, but try to keep in mind that it can happen when you're deciding whether to try and land a kill move or to keep racking damage.
Good Stages:
Final Destination, Smashville, Halberd
Big stages to distance yourself from him and stages with not many platforms. Those are really the only criteria you need to think about. And of course, stay off the platforms or you’ll get nair’d like crazy. Small blast zones are also good ways to limit Bucket Braking, so if you're really worried about that then try taking them to Halberd.
Bad Stages:
Battlefield, Corneria, Rainbow Cruise
Smaller stages and stages with lots of platforms. Game & Watch players like to juggle you on platforms with nair. Corneria is arguably Game & Watch’s best stage. The weird angles on the front and back of the ship make perfect spots for him to pull a dsmash kill and a usmash at the top of the tail can kill at ridiculously low percentages. He can also fill up his bucket with lasers from the Arwings. Most Game & Watches will take you to Rainbow Cruise though, so I’d ban one of those.
(3.7) KIRBY
DIFFICULTY: t("t) - 40:60
CHAINGRAB: NO
Summary forthcoming.
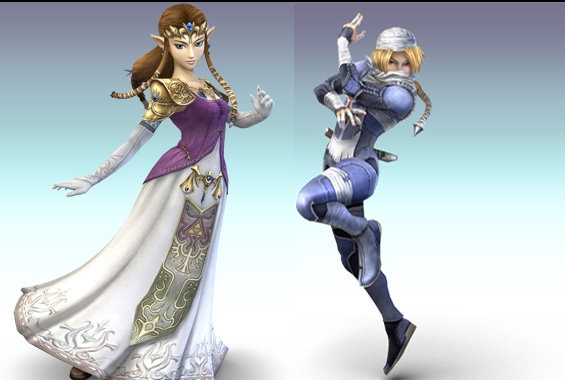
(3.8) ZELDA, SHEIK, AND ANY COMBINATION OF THE TWO
DIFFICULTY: ZELDA: HARD - 40:60 SHEIK: EVEN - 55:45 ZELDA/SHEIK (Switching between the two): HARD - 40:60
CHAINGRAB: NO (Neither)
Summary coming soon.
(3.9) WARIO
DIFFICULTY: EVEN - 45:55*
CHAINGRAB: YES (Normal CG and Ledge Infinite)
*VERY stage dependent.
Summary forthcoming.
(3.10) DIDDY KONG
DIFFICULTY: EVEN - 45:55
CHAINGRAB: YES (Normal CG Only, Watch For Bananas)
Sometimes I wonder if I should let someone else take over this thread.
(3.11) ZERO SUIT SAMUS
DIFFICULTY: EVEN - 50:50
CHAINGRAB: NO
Summary forthcoming.
(3.12) PEACH
DIFFICULTY: EVEN - 50:50
CHAINGRAB: YES (Normal CG only)
Awesome.
Sexy summary soon.
(3.13) FOX
DIFFICULTY: EVEN - 50:50
CHAINGRAB: NO
Summary pending.
(3.14) MARTH
DIFFICULTY: EVEN - 55:45
CHAINGRAB: YES (Normal CG only)
Summary coming soon. I swear on my unborn children.
(3.15) ROB
DIFFICULTY: EVEN - 55:45
CHAINGRAB: YES (Normal CG Only)
Summary pending.
(3.16) TOON LINK
DIFFICULTY: EVEN - 55:45
CHAINGRAB: YES (Normal CG only)
Wow, I haven't contributed in awhile, allow me to rectify that.
Firstly, as we know, it's Toon Link. If you're somewhat familiar with the game you know he has a nice little arsenal he can use against you to rack up damage. How well you can time your powershields will be put to the test here.
Anyway, first off, Ftilt cancels boomerangs and arrows. As do Waddles and Utilts, but they take a little bit longer to come out (Waddles do, at least). So that narrows down the TL's options that much more. So all that's really left is the bombs. Learn to catch them and powershield. Be wary though, they'll sometimes bounce off your shield, so keep that in mind.
So you've "broken" their projectile game, don't be surprised if they still sneak in a few, just keep doing what you're doing. They might try to do some cross-ups*, so make sure you've practiced your pivot grabs. Zair can be tricky if they do it right, learn the range of that if you don't already have it.
Gimping, I'd say Dedede definitely has the advantage here. Again, big, but he also has a lot of recovery himself, he can follow TL out there and finish him off if need be, then float back safely to the stage like nothing happened. Something I'd like to try, as it just popped into my head, would be to try pulling the Jet Hammer on a recovering Toon Link, assuming you're playing one that ends up going a little above the stage before they cling to the edge. Again, just a thought, no idea if it's actually reliable.
TL is light and has a little trouble killing Dedede due to his bulk, but don't take him for granted, he's fairly agile. I'd say the matchup is 60:40ish in Dedede's favor, maybe the previously suggest 55-45, but regardless, Dedede does have the advantage here.
*cross-ups are basically using attacks (typically aerials) that go past the opponent, as to get behind them, for example jumping past the opponent and using a Bair.
I run around and shield, then when they're in the air i bair them. When they come within range I grab them. Sometimes I up tilt but i believe Jet hammer is a far better killing move in this matchup by a fair margin since DDD is allowed to nibbly dodge projectiles while holding his massive hammer. Sometimes I also Up b at them, since DDD is also a pokemon UP B has the same effect as scary face, They're un able to escape and get hit by it. Then I taunt them 3 times in a row and push up up down down left right left right B A Start and my hammer transforms into the golden hammer.
I play a pretty good Pit on an almost daily basis, lets see if I can spread some light on the subject of this match-up.
First and foremost, Pits arrows needs to be addressed. While most long range projectiles give D3 trouble, I find this one of the easiest to power shield. Maybe it's because I play him so much and no the timing for uncharged and charged, but if you can get past this, you take away one of his biggest assets in the match.
Nair does in fact **** shields in two instances. If it's not almost completely fresh, or you don't tilt it up. One thing my Pit player loves doing is FFNairing and landing behind me in an attempt to perform the CG if my shield isn't fresh, which is pretty smart. However, one most examine the risk - reward ratio here. Since Pit's Nair can be SG'd, and Pit only has a CG up into the 40s - 50s, it's generally not a good idea to approach since D3 can CG to the end of the stage. Pit for the most part will in fact be eating more damage, and since D3's weight doesn't allow him to die early, Pit loses in this aspect.
Does Pit want to space Fairs/Bairs to shield pressure? Jump back/forward with him and Fair/Bair yourself. Most of the time you'll win, if not trade damage. But even then, trading damage is ok, since you kill Pit way earlier then he kills you.
Is the Pit attempting to run up and grab you? Ftilt will stop him in his tracks, but most good Pit players mix up their grab game. Watch out for Jab, grab, jab, Dtilt to space. Most of the time you need to be just outside of his range to beat all these efforts with a proper SG. ( The tip of your boxing glove ).
Now what I've done here is effectively shut down Pit's long range game and approach game, meaning the one advantage he has left is edge camping. He has a lot of options here, but with a little knowledge, good D3's can shut down this part of his game plan as well. Firstly, always hit with the tip of your Dtilt in an attempt to pressure the Pit. You wont him to be clinging on the edge, jumping down, and reclinging. If he ever lets his invincibility frames wear off, start edgegaurding, because even with the Up + B, dair wing renewal, I think that's what it's called, gimping pit isn't very hard. Bairs simply **** this angel offstage. Smart ledgecampers attempt to Uair through the stage. When this happens, either realize he is going for it, float around, and bair for the stage spike, or dair. You win either way. The safer option is dair, as pit bairing you offstage hurts.
I'd say the match-up is 50:50 => 55:45 ddd. A good Yoshi can outcamp DDD with eggs which (unless you've got perfect shielding down perfectly) will deal some good damage or weaken ddd's shield considerably. Once the shield is lowered a bit, a Yoshi can approach with a combination of either a turn-around neutral B which can go directly into an up-aerial (14% damage every time and the Yoshi can get away fast enough not to be punished), or the Yoshi can approach with the back-aerial which is guaranteed to hit if the ddd side-dodges or tries to shield because the last portion of the attack will hit after the side dodge is over and since the shield is weakened, it'll hit the vulnerable part on the top portion of the body. The back-aerial is probably Yoshi's best combo starting move; he can use back-aerial => up-tilt => up-aerial (or back-aerial if he's fast enough which can lead to more combo potential) => egg-throw.
If a Yoshi plays defensively like that and waits for opportune moments, he can almost take out the chain-grab entirely. The Yoshi CAN NOT get out of the chain-grab if ddd does it correctly. If the ddd's timing is slightly off, the Yoshi can double-stick DI just far enough away to get a neutral A off which stuns ddd just long enough to escape the chain-grab (but like I said, if the ddd's perfect with the timing, this will never happen). Some Yoshi players will think that side-dodging is the best way to escape the chain-grab. This is entirely false and the reason is that ddd (if you predict the side-dodge) can run PAST Yoshi and do a pivot grab which connects right as Yoshi gets out of the dodge so the ddd can chain-grab back across the stage. Bwett has fallen for this a few times against ddd's (there's one video where he gets chain-grabbed 4 times across the stage (twice right and twice left) and the damage was insane.
DDD can outcamp Yoshi from the edge easily. Yoshi's up-B from the edge (when the Yoshi is hanging on the edge and hits away from the edge and does the up-B toward the stage and regrabs the stage) can only be done 5 times before it doesn't work anymore. Yoshi's up-B is unique in that the first two eggs send Yoshi up a bit, the 3rd and 4th eggs keep Yoshi at the same height, the 5th egg barely slows his down-ward momentum, and the 6th egg onward shows no change in Yoshi's vertical height when falling. Because of this, a Yoshi can only throw 5 eggs from the edge; if he throws a 6th one, he's dead (no question. The lag after throwing the egg is enough where the double jump won't make it back to the edge). To get the vertical height back on the egg throws, Yoshi MUST land on the stage. Once he's back on the stage, everything resets. Because of this limitation, a ddd can easily outcamp from the edge with waddle-dees (and the occasional gordo... god I hate the stupid gordos), drop => up-aerial, etc...
In the air, Yoshi has ddd beat. Yoshi's back aerial and neutral aerial have more priority and are faster than ddd's forward, back, and neutral aerials. Ddd's up-aerial goes through Yoshi's down aerial and ddd's down-aerial goes through Yoshi's up-aerial. Based on that, it's a 3:2 advantage in the air for Yoshi (and most Yoshi players won't use the down aerial unless they're sure at least some of it will connect or they're trying to break your shield with a down-aerial => neutral aerial (44% damage directly to your shield which means if your shield isn't a full shield, it will break)).
The edge-guarding aspect for both characters is pretty close. With ddd's numerous jumps that reset every time he grabs the edge and Yoshi's super-armor in the 2nd jump; it's incredibly difficult to edge-guard either one. Most Yoshi players will save the 2nd jump and instead throw an egg or two first which can grab the edge by itself or just move the Yoshi closer to the edge so he can double jump => air-dodge to be safe while coming back. Something that I've recently discovered is the down-tilt is great for both characters to edge guard. Ddd can use the down-tilt if a Yoshi is trying to throw eggs from the edge to interrupt it and a Yoshi can do a down-tilt to interrupt the up-B and keep Waddle-dee's away safely.
The last thing that I can think of is mentioning Yoshi's chain-grab. I've been told that Yoshi can chain-grab ddd but it's one of the hardest chain-grabs in the game to do. I've only managed it a couple times myself and I think it was only because I caught my opponent off guard. Basically, if Yoshi grabs ddd, he chews until ddd breaks out and then Yoshi dashes forward and regrabs. If done correctly, Yoshi's tongue should knick ddd's foot in the air and he'll get regrabbed. Like I said, I've only been successful a couple times with it, but it's been proven that it exists and it's extremely difficult to do but it was worth mentioning anyway.
So, summary for people who don't like reading:
Aerials => Yoshi's advantage
Ground => DDD's advantage
Edge-guarding => Even
Camping => Yoshi's advantage
Edge-camping => DDD's advantage
Grabs => DDD's advantage
Smashes (though not mentioned up there) => Yoshi's advantage
Tilts => Even
Overall => 50:50/55:45 DDD
Well, that's all the info I can think of right now. If any of you have any direct questions about Yoshi, you can private message me and I'll get back to you. I've had LOTS of experience playing against a ddd so I'm sure I can offer helpful advice on what ddd should do and watch out for in certain situations.
"Jiggs is so broken, all she has to do is press downB to win."
- Wife
OH SH*T IT'S THE JIGGERNAUT B*TCH! Jiggs just got out that Pokeball and just f*cked a Mudkip and done f*cked around and caught the Pokevirus but it's cool cause now Jiggs got all his EVs and IVs maxed out CAUSE I'M THE JIGGERNAUT B*TCH!
Ok enough of that.
I have a mild amount of experience against a Jiggs of questionable skill (He plays Jiggs about as well as I play Ganon) so I guess I can say a couple things on the matchup.
Dedede can get out of the WoP with his UpB's super armor if he times it right, but a good Jiggs player can probably time it so Dedede won't have time to do so. I have a hard time grabbing Jiggs because she's in the air so much and basically spends most of her time poking me with bair and such. On top of that she's so floaty that often times I won't be able to techchase her since she'll just jump out of it lol (but it's ok because fresh bthrow does 16-17% which is like 1/5 of the amount needed to kill Jiggs with utilt). Jiggs has a ton of range on her aerials which when combined with her air speed makes her even harder to grab than Wario sometimes. I'm not sure whose aerials beat whose but I think Dedede's bair has more priority than Jiggs' aerials. If Jiggs gets Dedede in the air she can juggle him pretty well with uairs for some good damage but she doesn't really have anything to follow them up with that I know of (Rest maybe? lol).
Rest is actually pretty bad on Dedede since it doesn't really kill him until well over 100%. At the same time though I can't think of any better kill moves Jiggs has lol. Another important thing to note is that if Jiggs misses a rest, Dedede should charge an Fsmash which, if it gets charged fully, can kill Mario at 17% (This means that Jiggs can be killed at like, idk, 12%). In fact, because Dedede is so heavy and powerful, if Jiggs don't kill him with rest he can come back down charging Jet Hammer in the air and hit her with it while she's sleeping to take a stock off.
One more thing: Dedede must cancel his upB before he lands it or else Jiggs will be able to rest him out of it.
This matchup is really close, and it's hilarious how Dedede is considered a counter for Snake but has a decent amount of trouble with this little puffball.
Dedede is so imbalanced, lol. He has the tools to beat Snake, but has such glaring flaws(he's practically the epitome of easy combos) that even Jiggly can effectively exploit them.
From a Dedede player's perspective:
Jiggly is really annoying. Jiggly's fast air speed vs. D3's slow air speed is a very bad combination. Otherwise, you have the range and power advantage here, use it the best way you can. Bair is godly here, as is utilt. Even without the CG, D3's grab is still a major asset for him. It's a battle for spacing, and D3's great defense game should be used to its fullest. Shieldgrab and bair are what it really boils down to.
As far as stages go, Jiggs wants to avoid ceilings with low stages like Halberd and take Dedede to places with plenty of platforms like Battlefield, Brinstar, and Norfair (if it's legal) or places with big ceilings like Jungle Japes (I think Pictochat has a big ceiling too? idk).
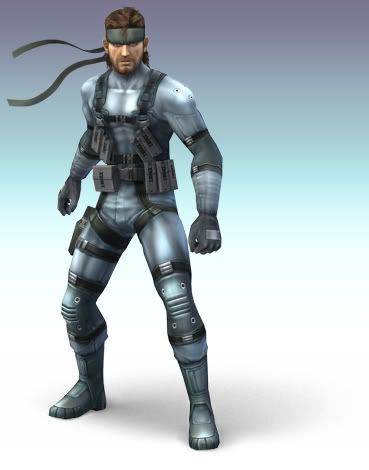
The matchup between Dedede and Snake is a very interesting one. Snake is faster than Dedede; can camp better through grenades and the Nikita (but mostly grenades); utilizes explosives to smack Dedede around all over the stage; spkies Dedede off the stage with fair, racks up lots of damage with nair and dair; edgeguards well with a combination of mortars, C4, mines, and, surprisingly, his bair; and kills Dedede at a lower percentage than other characters due to his extremely strong ftilt, utilt, uair, and fsmash. Yet at the same time, Dedede is considered by many to be Snake’s worst matchup.
Snake has more tricks up his sleeve, sure, and he’ll most likely outcamp you since his Waddle Dees can’t always hold their own against grenades. But once you grab him, you have a very significant advantage. Not only can Snake be chaingrabbed to the edge of the stage, but once you throw him off you can hit him with a dtilt and gimp him very easily. Gimping Snake is an interesting ordeal. With most characters the phrase “gimp” is synonymous with “WoP”. However, due to the nature of Snake’s cypher (better vertical recovery than your upB, which translates to horizontal recovery thanks to DI), it is better, in my opinion, to stake spike him. Snake is particularly vulnerable to stage spiking due to the fact that his upB goes straight up first and then slowly gains horizontal momentum. This means that many times, even if Snake has not been stage spiked but is still under the stage and not in range of the ledge, Snake will cypher under the stage until he lets go and falls to his death (or C4s himself, in which case he’ll be in a slightly better position to recover, but ultimately still vulnerable). The best way to stage spike Snake is The King’s bair, though his fair works well to. Inhaling Snake and spitting him out under the ledge is a fun alternative to Dededecide and works just as well as fair, but setting it up can be difficult due to Snake’s relative resistance to Inhale (his bair outranges it and he can feed you grenades instead).
Edgeguarding Snake in general is an important thing to learn since you’ll probably spend a decent portion of the match doing it. If he ciphers close enough to the stage, grab him out of it, don't attack or throw, and wait for him to release on his own. He’ll have to C4 himself, taking an extra 15% damage, and try to get back to the stage again, where you’ll be waiting with bairs, fairs, or an fsmash. I know I said stage spiking was probably a better option than WoP earlier, but on several stages that’s not an option, so if you think you can, Wall away.
Inversely, Dedede needs to be careful when recovering against Snake as well. Nair and bair go through mortars, so they aren’t a terribly big issue unless the Snake really starts spamming them, at which point you’ll have to stop using aerials and use the super armor from Super Dedede Jump. If you do use the upB, don’t be surprised if the Snake player starts smiling as this is very exploitable on the descent. Fair, dair, nair, bair, ftilt, fsmash, Nikita… these are all things he can do to you while you’re airborne. According to M2K, dair kills Dedede off the ledge at about 100%. Fair kills even lower than that. Be EXTREMELY careful when recovering against Snake.
But before all this edgeguarding business comes into play, you’ll have to face eachother on the stage first. As I mentioned earlier, Snake will probably be outcamping you with his grenades and try to force you to approach. Before that, however, toss a waddle dee at him to provide you some cover against low grenades and mines. The optimal angle of attack for approaching Snake is an interesting debate. Dashing straight on opens you up to grenades, ftilts, jabs, mortarslides, and lots of other stuff. On the other hand, approaching from the air opens you up to grenade bounces, aerials, mortars, and his insane utilt (you should see the horizontal range on it, it’s ridiculous). Ultimately you have to make the call here on what is best for you to do. If he seems to be wanting to continue to spam grenades, follow your Waddle Dees over there and RAR a bair when you’re close enough. If you start to approach and he begins a mortarslide, shieldgrab him and either chaingrab (provided the mortar isn’t heading towards you or didn’t go off for some reason) or fthrow/bthrow (the more likely choice). Of course, the BEST way to approach Snake is from below. Your utilt will probably not be what kills him in this match so feel free to set him up in the air and follow up with whatever you can throw at him. Uair, another utilt, you name it.
About Snakes explosives. Mines aren’t that big a deal since, as mentioned before, Waddle Dees can trip them easily. C4 is more dangerous and you’ll most likely be forced to avoid it. However, most Snakes will not leave their C4 in one place for too long (it explodes after 25 to 30 seconds anyway), and when you get them off the stage the first thing they do after cypher is detonate their C4 to try recovering back that way. Nikita is pretty easy to avoid if you’re not careless and not much else about it is worth mentioning. Snake’s most notable explosives are his grenades. A good Snake player can and will do tons of different things about them. Not just simple stuff like camping and bouncing, but advanced things like dropping a grenade in front of you, rolling behind you, cracking you neck a few times, and then throwing you into it as it explodes. Hell, I’m surprised nobody’s written a full guide about grenades yet. It’s also worth mentioning that many Snakes will mash B during the chaingrab since there is a very, very small window of opportunity (like 1 frame) for them to pull a grenade and stop your CG, but this is unlikely to happen and if you’re chaingrabbing properly it won’t matter much anyway.
Ah Snake, you lovable old card, you. You're success with Snake will invariable differ based on the skill of the person controlling Snake. Especially when it comes to his recovery. First up you should realize, that zhain grabbing Snake is a bit more difficult as if you attempt your normal Chain grab he will grenade out on the second hit. This makes it harder to get to the "CG to Edgeguard" phase that Dedede most excels at. If I'm not mistaken though, a shield canceled chain grab can actually outspeed the grenades. Any chance to Dthrow Snake off the edge should always be taken. The position it ptus him in is highly unfavorable. If he attempts to Cypher, just grab him again, forcing a C4 recovery which is free damage for you. If he double jumps back to go for a high cypher, you can often Fsmash him right at the height of his double Jump. If you CGed to the edge, this is actually a kill from 0-death. amazingly enough (providing you sweet spot the Fsmash).
Waddle Dees can help quell those grenade camping snakes by smacking into them in mid air. Dedede needs help in this department, his large hit box is vary susceptible to grenades. Mortar Sliding is easily dealt with. Feel free to grab Snake out of it if he tries. Go ahead, it's fun. Suck Up will also work. Speaking of Suck Up....Feel Free to Suck Up and Spit Snake out under the stage. Often, he will -have- to C4 back to recover and you're UpB should allow you ample time to get back as well.
The downside in this matchup is Snake is one of the few characters with enough power to kill Dedede's lardy body at normal percentages. His Ftilt is godly and clashes with your own. It also works well for spacing you back out of grab range. Snake's utilt isn't as effective against D3 as he might like, but he can still Ftilt you off the side and deliver a devastating bair kill. Be wary of this as I believe it outranges DDDcide attempts and Fair.
Speaking of the air, get snake there and keep him there. It will take a while to kill with Utilt, but because of this, you shouldn't be afraid to use it as a damage dealer, you should primarily be using your edguarding for the kill anyway, so try and freshen up Bair when you can.
Overall, I put this matchup at about 55/45 for Dedede. I think he can handle Snake quite well so long as he plays smart, but it will be a much more difficult battle and could go either way if the DDD is sloppy.
Good Stages:
Final Destination, Pokemon Stadium 1, Rainbow Cruise
Big flat stages, weird ledges, no platforms, walls, and moving stages generally aren’t that good for Snake. Pokemon Stadium in particular is great in this matchup due to its odd ledges that Snake can’t cipher around and its walls on the rock and fire portions of the stage.
Bad Stages:
Battlefield, Lylat Cruise, Norfair
Stages with lots of platforms, congested stages, anywhere you can’t really get a good amount of spacing from Snake.
Another stage worth mentioning is Smashville. Though Snake players generally enjoy it for the moving platform since it’s a good place to put explosives, Dedede players also love it because of chaingrabbing tricks associates with it. Also, both Snake’s and Dedede’s utilts can reach through the platform to kill. This stage doesn’t particularly favor one character over the other, but I still felt it was worth mentioning since you may see it a lot against Snake.
I fight a D3 mainer on a semi-regular basis, and a few others at tournies. D3 might be Lucario's worst matchup. If it's not his worst, it's definitely his most frustrating.
-Luc is pretty much forced to approach for the majority, of not all of this match.
- Lucario can't pressure with auraspheres (AS) very well, partially because the waddles block it, but also because a surprise gordo can destroy Luc, making it too risky.
- D3 can obviously chaingrab Luc across the stage and set him up for some edgeguarding pain. I honestly don't see many gimps, but racking the damage on hurts.
- If Luc is lucky enough to get a forcepalm grab (FPG) on D3 when they're at low percents, he can take good advantage of it. It's rare though, and with D3's monster grab range it's often not worth the risk, unless D3 does something punishable.
- On the ground, D3's ftilt outranges everything in Luc's arsenal other than an AS. If close enough and timed just right, I suppose Luc could powershield it and punish, but I'm not sure about that.
- In the air, D3's dair, uair, and bair win over mostly anything Luc can throw at him. Luc can approach from the front (if D3 doesn't have enough time to turn around and bair), or a 45 degree angle to get in some fairs.
- If D3 isn't careful, Luc can charge an AS on top of his shield to chip away at it. Luc can mixup approaches coming out of shfair. The only unpunishable approach is shfair then jump away. If Luc can read D3 well enough, he can mixup beween shfair->bair from the other side, shfair->dair (delayed),shfair->nair, shfair->AS. All of those except for shfair->AS can be punished easily if D3 just holds his shield up. The trick is to make D3 think you're not using a 2nd attack, or that he has time to interrupt, then surprise him with a hit.
- The main problem is that any trick Luc tries obviously has a risk. If he outsmarts, D3 Luc stands to gain a short combo assuming D3 can DI properly, while if D3 reacts properly he gains a changrab across the stage followed by offstage fighting in his advantage.
- Luc wants to get D3 in the air and generally above him in this match, it's hard to do but a definite advantage.
- If D3 is forced to use his upB and land on stage, Luc can Usmash through it, or shAD then dair. If D3 is careless and hangs onto the edge too long, Luc can fsmash him. Luc can put some reasonable pressure on D3 recovering... as long as he doesn't fall for D3's neutralB.
- It's not uncommon for Luc to live to 140%, because while D3 can rack up damage, he doesn't have that many KO moves that Luc easily falls for or can't handle.
- Luc, however, has an even harder time KOing D3. If Luc is high in damage, then D3 still needs to be well into the 100's. If Luc is on a fresh stock, it's pretty easy for D3 to live to 170%.
If I had to slap a number of it, I'd say that at the very least it's 60:40 in D3s favor. I wouldn't hesitate to say 65:35.
I have to disagree with you there. D3 loooooooooves when Lucario dairs, because as long as he shields it (unless Luc is higher than he'd be from shorthopping) he gets a free grab. Ftilt can be decent, but the range of D3's ftilt makes it hard to get in such a position. Nair is great for finishing combos, but if you use it on a grounded D3 and didn't hit him with a fair leading to the nair, or manage to fake him out, you will get grabbed before you even land.
Projectiles aren't really a big issue agaisnt D3 if you're moving. We know that D3 rely on Grabs, and tilts on the ground. if you get grabbed, you will get chained unless they mess up which on most neutrals means a free edgegaurd attempt. However, sonic can minimalize the effect of grabs pretty well if he is solid withi hi sground game.
Quick movements outside of his f-tilt range, and fakes and punishment with spins; used intellegently they seem to be the best option for damage against d3, because not only is his size a weakness agaisnt Spindash combos, they also give you the option of escape if it is blocked, preventing a possible chaingrab attempt. Also, tilts are very unsafe against a defensive d3 due to the grab range. D3's best options to try to stop your graound assult is to try to predict and punish with tilts, and bair, and as a last resort use his quick sidedodege, which you should expect. if the D3 is really good expect several reverse grab attempts. punish with grabs and get the most damage u can the moment he gets predictable, using your speed and feints to trick the D3 into additional setups.
either of you are over the edge, i thnk its 50/50. both characters have strong recovery and can have a hard time gimping the other one just as well IMHO. Beware of bair edgegaurding and the strong possibility of a DDDcide if the match gets close or he has a stock lead. remember, that if he gets you with it and you both have one stock, he wins in tourneys now.
dair and uair are really good tools for punishment and ledgecamping for D3, but the tendancy to use them varies from player to player. he can anticipate attacks from below with it, so bait and punish that if you can.
Predict patterns in the usage of his tilts and bairs, then punish the likely spotdodges. Constant movment to avoid getting chaingrabbed. Use the spins and thier feints, throw setups. and followups to the fullest extent to deal damage and put pressure on D3. You can deal lots of damage quickly to him and for the most part take little, but the secoond you get grabbed DDD gets the advantage. combined with his wieght he gets more chances to do it.
Kojin's judgement: 55:45 slightly disadvantage for Sonic, but winnable nonetheless.
I play this matchup pretty much every day, and my older brother is a pretty decent Dedede.
Squirtle has a slight-to-moderate advantage. He can't get in safely on a grounded Dedede unless he powershields a Waddle Dee or a Forward-Tilt, but you can literally spam Water Gun on Dedede all day with a positive outcome.
If Dedede falls off the level, Squirtle will hurt him a lot. When Dedede gets the ledge, he's at a disadvantage, as Squirtle's F-Tilt beats out a normal multi-jump Dedede F-Air after the first one, and Squirtle can give chase after a ledge jump or ledge roll to knock him off the stage again. Dedede is also notoriously easy to footstool, so Squirtle can mix up annoying F-Airs and B-Airs with simple footstools. If Dedede is recovering, he's probably going to die, since Squirtle can pelt him with aerials until he's forced to Up-B, where he can restart the process all over again. Squirtle's D-Air has the ability to "kill" a recovering Dedede at as low as 90-ish%, as well; if Dedede runs out of jumps, you can D-Air him out of his Up-B, dealing significant-enough knockback to allow you to Water Gun the next Up-B.
The only thing Dedede has in this matchup is much better range on his grounded attacks and his grab. Dedede can kill Squirtle at low percentages, but he has no solid way to land those attacks if Squirtle just stays away from him. Dedede cannot chaingrab Squirtle, so getting the free 16% from a B-Throw is usually the best option from a grab. While Dedede has better range on his aerials, the fact that Squirtle maneuvers much better makes this point almost moot. It's usually a very long, since Squirtle can't kill well, Dedede is fat, and fatigue will set in fairly quickly. Still, Squirtle doesn't have to approach on the ground at all, which makes this a tough fight for Dedede. I'm going to say 60-40 in Squirtle's favor.
Ivysaur vs. Dedede isn't as bad for Ivysaur as one might think. A good Ivysaur will be doing everything in his power to prevent himself from getting grabbed, and he has good tools for that. Some lesser-known ways of doing that is short-hopped Razor Leaf and his incredibly-safe D-Tilt, which is sort of like a B-Air that doesn't move, but has good knockback.
Ivysaur will B-Air all day if it means that Dedede doesn't get inside...but it's a bit nerve-racking for both characters. If Dedede whiffs something on the ground, he eats a Bullet Seed, which is usually a free 30-40%. If Ivysaur whiffs something on the ground, he eats a chaingrab -> D-Tilt, which is usually a free 20-40%, as well as setting up for a potential edgeguard. As a result, it's usually a waiting game...and Dedede is better-equipped for it, honestly.
However, Ivysaur is well-equipped for killing a recovering Dedede. B-Airs essentially force another jump, and D-Tilt outspaces Dedede's F-Air/B-Air at the ledge while doing significant knockback. An Up-B from Dedede is just begging to get Up-Smashed by Ivysaur, as well, killing him at about 90%. Getting Up-B'd by Ivysaur is also a good alternative, and is a potent kill move.
And, while you don't need me to tell you, Dedede can edgeguard Ivysaur pretty easily with F-Airs and B-Airs. Simple and effective; if Dedede can use a throw to get Ivysaur off the level, he's in a good position to potentially take a stock.
I'd put this at about 60-40 or 55-45 in Dedede's favor, and that's mostly because of Dedede's speed (You don't hear that often, XD) over Ivysaur. This is mostly about who gets the other off the level first, and we all know how good Dedede is at that.
Charizard vs. Dedede is probably the most comfortable matchup for Dedede, because Charizard can't really space Dedede out via aerials. Charizard is going to be spamming Flamethrower all day, since Dedede can't really get around it. If Dedede is lucky, he might get a Gordo to go through the fire if he does it early enough, but otherwise it'll be shielded.
If he gets above Dedede, Charizard can't land on the stage safely at all, because none of his aerials are safe enough. Dedede should seek to get immediately under Charizard and grab him when he hits the ground. The only things Charizard can do is attempt to Flamethrower Dedede before he gets in range, or use Rock Smash as soon as he gets into range. Flamethrower is easily telegraphed this way, and Dedede should be able to roll behind and grab him with little problem. Rock Smash can usually be shield-grabbed, but if Dedede's shield is low, he might eat some damage instead. Since Dedede is a large character, it's not difficult for Charizard to space Rock Smash so that it deals that dreaded 45% from the shards. Either way, Dedede should be able to deal with a falling Charizard with little trouble.
Charizard can attempt to space you out with B-Airs, but any other aerial will be getting shield-grabbed. If Dedede throws a Waddle Dee while Charizard is on the ground, it's probably going to get powershielded, and Dedede is probably going to get grabbed.
Charizard's best bet for damage is going to be doing a F-Throw/B-Throw to get you off the level, and attempt to edgeguard. F-Air has massive gimping potential, so if a Dedede is recovering from high, you should try to land that for a KO. If Dedede is recovering from really high and you expect an airdodge to safety, a short-hopped N-Air from Charizard will always hit him when he lands. If Dedede is recovering from below, Flamethrower pretty much renders the edge ungrabbable, and if Dedede is caught in the fire, he's almost forced to take a large chunk of damage...and U-Smash is a reliable kill move around 120-130%. F-Smash is a given if Dedede lands on the ground from an Up-B. If you can outsmart Dedede, sometimes a D-Air spike is in order, as well.
Charizard is easy to edgeguard because of his large size and lack of helpful aerials while recovering. A couple F-Airs or B-Airs from Dedede will put him out of the game, or at least in a position where he has to land with Fly, which starts up another chaingrab. Charizard also has no reliable means of getting back on the stage from the ledge, as every realistic option can be shield-grabbed, so Dedede will take full advantage of that.
This is probably 60-40 in Dedede's favor. Charizard hates being in the air against him.
As such, the matchup itself is probably at about 55-45 in Dedede's favor. Hardly an easy fight, but it's doable on both sides if they play right. Mostly about who gets the momentum first.
I will say this match up is 50:50. Lucas can keep u at bay with pk fires...his air dodge is nuts. He can short hop fairs and nair, and side Bs...then mix and approaching short hop air dodge into you followed up with a short hop nair. This is tough when Lucas gets inside of you...he can cover himself with up tilts f tilts and jabs. Also beware of lucas' up b...it can be deadly. His f smash is his most dangerous move in my opinion. Also...his dair will prevent u to do anything from under him...not even an up air... This is 50:50 or 55:45 at most in D3s favor
Ness is an aerial atacker, who's moveset supports getting people into the air for juggling and throws build dmg and knock into air.
Anyway, D3 needs to be careful of that waddle spam as Ness can absorb Waddle Doo's lasers for like 30% if he absorbs all of them.
Also, if Ness gets D3 in the air or inside his defenses, he gets aerially jugggled as Ness can chain his aerials in succession. And with D3's weight, its gonna hurt.
But that's only if Ness gets D3 in the air which means getting into D3's defense and knocking or throwing him into the air without getting grabbed or sheild grabbed. And most of Ness's ground moves knock someone into the air.
As for Pk Fire, if Ness does it from a full jump as soon as he jumps, the lag wears off when Ness is still in the air after he throws the bolt and he can do a double jump which means either another Pk Fire or another move. He can also do a rising aerial attack due to the properties of his double jump so if D3 gets hit with a lagless aerial Pk Fire Ness can drift over to him and do a rising aerial. Or if a D3 persues Ness high enough into the air, Ness can do an aerial Pk Fire. If Ness is too close, he gets grabbed of course.
Concerning gimping, Ness has a large 2nd jump and he can do a rising aerial during that 2nd jump as it curves. Of course, D3's bair could take care of that unless he does a rising fair early enough but it depends on the space. Another thing is not let D3's up-b land him on Stage as if the Ness camps your landing spot(even away from the stars) he can use a fully chraged Pk Flash, which is very strong and a Ko move at med/high dmg. Though its not that easy as D3's can alter his landing spot somewhat. Of course, if D3 cancels his Up-B on the way to grab the ledge, you're okay.
Ness can juggle d3 with up-tilt if he gets really close.
If D3 spot dodges(how good is his spotdodge?), Ness' short hop down aerial has a long enough hitbox to hit you which will get you in the air. same with both of his Yoyo smashes as he can leave them out for a bit. Also concerning Ness's Down Air, it is one of the most powerful spikes in the game next to Ganon's. It can intercept the part of D3's Up-B thats not super armor(on the way down). Another thing is watch for the tail of Pk thunder as it can intercept the on the way down also.
As for Pk thunder, it can only be canceled out if you hit the head of it which D3's aerials should take care of if the head is nearby but it depends how maneuverable D3 is in the air. The tail is the real problem. As Ness's thunder is faster(and harder to turn) than Lucas's, air or spot dodging will get you hit by the tail. Shielding takes of it unless D3 is in the air which means you have to atk the head if its nearby. Also if you throw a waddle when Ness sends out a PKT and that waddle hits the tail of Thunder, that waddle may stop moving and land. Ness can wiggle the Thunder around you to bait you or juggle(if in the air).
PK Thunder 2/Pk Missle/Pk Jibaku/whateveryouwanttocallit is a devastating KO move if it hits as the move is telegraphed in advanced. Its when Ness hits himself with the thunder and the Ness strikes someone. And unlike Lucas's, its a single strike with a lot of power behind it on startup until the later weaker part of it which can be intercepted. And it does have invincibility frames on startup. Since D3 is a big target, getting hit by this one is a nono.
Now, the only ways Ness can hit you with that move is
1. D3 is in the air(which he shouldn't be unless he is edgeguarding or ness kocks him in the air), and Ness is nearby and you get hit by the tail. Ness then directs the head of thunder back to himself and hits you while you are still stuck in the tail. Now can this only be done thru either mindgames or if D3 gets hit by the tail with Ness nearby in a position to redirect the head to himself at an angle.
Since d3 is a defensive guy(is he?), this shouldn't happen unless Ness gets you into the air and even then its still not always a sure thing as it takes The head of thunder hitting Ness at the right angle to launch him into someone that is stunned. On the ground, he can only be launched sideways and slightly diagonal. Just aim for hitting the head of thunder and there will be no problems unless its in D3's blind spot(does he have one?). Also if D3 stays grounded. And of course Ness is vulnerable when hes using Thunder.
2. You try to intercept Ness's recovery and you get hit by the tail and Ness hits you on the startup of PKT2, which is when its the most powerful. Of course that extremely fast back air of D3 takes care of that unless you are too close and get hit by the tail. Just know that most good Ness SHOULD recover with 2nd jump w/rising aerial unless hes too far away from the stage. Wall of pain or Dededecide or swallow and spit out under stage should work.
Any other way is too easy to intercept I believe by a good D3.
Ness has a bad grab-range (nice running grab or pivot grab though), but if he gets into your defenses and grabs you, he'll throw you into the air with any of them as all of his throws put em in the air. From there he will start his aerial assault or Pk thunder.
Ness''s Fair is a fast multi hit move with seperate hitboxes that Ness can use to atk and space. He can also do more than 2 when in the air. When spaced right against D3's sheild, it can sheild stab. D3's back air can trade hits with it if both are done somewhat at some time. depends on the spacing anyway
His Nair is a even faster get out move thats similar to Peach.
His Up-Air can be used to Ko or get someone even higher in the air.
Back-air can also Ko, and has some good knockback.
Down air can knock someone to the ground or spike really fast. And Ness can fast fall to the ground, wait until the get-up atk is initialted and short down-air you to knock you into the air again to resume his assault or just wat until get-up atk is over and then grab.
D3's aerials can trade hits with Ness's sometimes depending on spacing and who initiates them first. D3's vertical aerial moves has more range.
As for KOing, Ness's isnt a light weight. He's a near middle weight(slim) that's near to Mario. Like Mario=1.000 and Ness=0.980. Once D3 gets to around 120, Ness'll try to grab into back-throw, which is a instant ko. Since D3 is heavy, Ness should wait until D3 is around 140 or 150. Also, dont get grabbed on the edge when at high % and Ness's back is to the stage. Back throw will ko even earlier then.
So yeah, just keep Ness grounded and try to gimp once you get him off-stage. Watch out for his aerials as D3 is a big target and don't let him knock you into the air and recover by cancelling up-b by the edge. And watch out for that thunder. This is a 60:40 D3 advantage as D3's tools prevent Ness from doing too much to him but once D3 gets knock into the air, its a bit closer. Ground=D3 Air=Ness to an extent as D3 has a good down and up air.
These vids arent too bad in demonstrating the matchup somewhat.
http://www.youtube.com/watch?v=LOttqA0X9XQ
That one, the Ness stayed out side of D3's range and did aerials when close enough which juggled and sheild stabbed and he camped the ledge to avoid grabs. Though he still got grabbed and the match was close. The small stage also helped.
http://www.youtube.com/watch?v=MJYNRfBe5do&feature=related
This one, Ness got edgeguarded when thunder was used and D3 used swallow when Ness's jumps were predicted. It was harder for Ness to stay out of range as the stage was bigger also causing more damaging chain grabs. Some of the times Pk Fire was used grounded and D3 punished the lag.
I know they are the same people but basically what Im getting at is that D3 can keep Ness at bay, but Ness can juggle him if he gets inside. And since Ness needs to get close to fight aside from thunder and fire its not in his advantage if D3 plays a strong defense.
Wolf vs Dedede is strongly in dededes favor and its probably wolfs worst matchup. Even without the weird chaingrab he does to wolf its still in dededes favor. Dedede can like chaingrab to the edge, edgehog and then after wolf tries to recover just grab him and chaingrab him to the other edge.
This is probably like 75:25 or more in dededes favor if he knows how to do the grab thing. Dededes also heavier and racks up damage faster than wolf and kills earlier than wolf.
DeDeDe's bair usually clashes with wolf's, or at least for me. My spacing is far from perfect though. The main issues I have are the cg and bair. Unless the wolf has near perfect spacing, a good DeDeDe will shieldgrab and ensue cg to edgeguarding ****, which sucks. Wolf has few really safe moves to begin with, so getting that grab on most wolves won't be that hard. Bair eats wolf's recovery like sonic mains eat steak, so yeah, that's not good for wolf. Just get him offstage and harass him to no end. Once he's back on, get a grab, or just play keepaway.
Wolf, uhhh..... he has a laser. Yeah. Refreshes dsmash when it hits waddle dees, and it's slightly difficult for the D3 to get around if they don't know how easy it is to powershield. He can't kill better than DeDeDe (hate utilt), can't edgeguard better, MAYBE equal damage output? Yeah this is a bad matchup.
@kimchi, DDD does not need to kill Ike. He gimps him well enough. Course when it comes to killing, DDD is at a disadvantage since his utilt is too short ranged to hit a spacing Ike. And I think DDD's smashes are slower than Ikes o_o (at least pre lag is)
Ike can't space nair since DDD's grab range exceeds it. So Ike can only use fair and jab safety but he has to be spacing fair to the max.
Now the simply strategy of CG > gimp works... on noob Ikes. You actually have to THINK how to gimp Ike since he CAN do something about it.
Sometimes during the CG if you just keep dthrow only Ike will slide and grab the ledge. (Although I think you can ftilt before he grabs it, I don't remember well enough since I don't go Ike vs DDD much)
Anyways, Ike is off stage, you are gonna gimp him. If you go out too early, Ike will fair you before you get to him. Ike can only do one aerial when recovering so you have to avoid it then bair him and he's gone. But, Ike can also UAIR to stop you. Not only will it stop a bair, it will stop an AD > bair since it lasts longer than ADs. The 3rd thing is Ike aethers RIGHT AWAY not giving you time to go and bair him.
Oh and just fsmash aether, you'll even sweetspot it.
The thing about DDD though, he's PRIME spiking material for Ike once DDD is offstage and recovering. walk off dairs and dtilt pretty much get the job done. And if DDD uses Up B Ike can easily do some major damage. if DDD ends up landing on a platform, he's gonna get fsmashed.
And platforms help with this match up for Ike.
So yea, I think its 65-35 since Ike can space and spike DDD easily. Heck thanks to stage striking, I think it can become a 60-40 match up with platforms and slants (if not BF) with Ike's strikes being FD and SV to avoid long flat surfaces.
DIFFICULTY: VERY EASY - 70:30
CHAINGRAB: YES (Normal CG)
That old Ganon's no match for The King!
A lot of Ganon mains think this matchup is "not that bad" for Ganon. However, for them "not that bad" means 70:30 in the opponent's favor, considering they have other matchups that are literally unwinnable (namely Ice Climbers and Shiek).
70:30 in D3's favor, my worst match-up personally. However, a grab is NOT a stock, that's a plain ridiculous assumption. D3 and Ganon have about equal range with Ganon's dtilt (which he CAN use to stay out of D3's grab range). In the air, good spacing can make either win (D3's dair works pretty well against Ganon, Ganon's uair and bair work pretty well against D3). D3 can be combo'd wicked easily, and D3... chaingrabs.
D3 can use a side-b, but can't use it as a bait. Ganondorf can just smack those *****es away any time he likes. Flame Choke works wonders on a dumb D3, if they whiff an aerial that's 21% garanteed, then another uair can easily be chained in. At low percents you can even do flame choke and 2 dtilts, it's ballin'
On the other hand, D3 has Z+Down.
That's all that needs to be said, really. Yeah, you can chaingrab us. Yeah, it does hurt. No, it's not a stock. It's still annoying as hell though.
A Ganondorf player can win by getting D3 up in the air as much as possible, use flame chokes to punish and add damage and go for a good dair or fair (reverse uair isn't as good against D3).
A D3 player can win with side+B to camp and down+Z to gay.
My other quick 2 cents. What i like to do is, bait D3's shield out. Make him hold it out enough for us to shield poke it. Nair preferablely. Dair/upairs work for shield poking too. Whenever D3 is on a platform, he gets like pressured like mad eats at least 60%~ and/or could result to a jabupb. Crawldashing can be a easily way to bait out D3 since they tend to put up their shield the minute luigi approachs.
All in all, it should be really a campfest. Anyone who loses patience (luigi gets hurt slightly more by this) should be eating tons of stocks for dinner. If luigi approachs, he gets shield grabbed. If D3 approachs, he'll get eatened by oos options. Back in the day, I've used to play gay as possible by camping with fireballs, and D3s would just camp with side b until I got hit by a gordo (which i hate btw >_>).
As for Kor's post, Luigi is probably best char who can actually put up a fight out of the infinite'd characters. Assuming WITHOUT the perfect frame CG, and assuming WITH the standing infinite, imo it changes the gist of the battle. Luigi has to be extra careful and has to space like a mad person. Buffered spaced Bairs is probably his best bet. Once he gets D3 on the air, he needs to keep D3 in the air as much as possible while D3 needs to get to the ground asap.
I don't really have time to do a large write up of this matchup, but i do have a lot of experience in it sooooo. Both Luigi and D3 have very good moves that can punish and kill quickly. Don't underestimate luigi's killing power or you'll end up dieing at like 80. Luigi's Fsmash,Usmash, and up b can all kill at relatively low percentages. When the match first starts i usually just walk away from luigi and he does the same, because as previously stated the person who approaches first usually gets *****. Do not get grabbed at 0 by luigi. A good luigi can combo with dthrow for about 45 percent maybe even more. One thing i cannot stress enough is never keep your shield up too long. Luigi is very good at shield pressure and jab pokes can end up with you dying off the top from an up b. Racking up damage with the cg is always a good idea, but if you're not sure if you can do it perfectly DON'T RISK IT just do a few bthrows and fthrows. Killing luigi isn't too hard they all love approaching from the air so just space yourself and wait for a utilt oppurtunity. I don't find myself killing luigi with dsmash very often mostly because it's very slow and luigi would probably sh nair before it even comes out. The thing that keeps this matchup from being in luigi's favor is the fact that we edge guard him so well. When luigi is offstage grab the ledge and be quick to start throwing out bairs. His side b can't do anything against it and once he losses his jump he'll be using side b until he either dies or gets a missfire *sucks*. If he missfires and it hits you just tech the stage, and commence the bairs. When he gets in kill percent try to sweetspot a bair or just throw in a fair and he should die. A lot of luigi's like to approach with tornado which can be a problem because it eats shields. Just hold your shield and grab when he's done, if he's too far out just ftilt and continue your defensive play.
hey looks like i did have time for a large write up
DIFFICULTY: VERY EASY - 75:25
CHAINGRAB: YES (Normal CG)
I couldn't find any good quotes for this, but does anyone really care? Just don't get knee'd and don't get stagespiked by his upB.
Also, there is a special AT that was developed specifically for use against Captain Falcon.
In order to do it, Falcon needs to be between 0% and 20% and Dedede needs to be at least a stock ahead with less than 45% damage and must not have used Inhale the entire match. In order to perform it, first grab release Falcon and force a pummel break, then do an autocancelled fair -> dair, crossup with bair, pivot grab into another pummel break, wavedash behind him, shffl a nair, grab the Smash Ball, then turn around to get a charge (if you whiff the combo you can still do a Wall Dive), throw a Gordo (and it MUST be a Gordo), approach with Psycho Crusher, FADC a kara Tiger Uppercut, hit him with all hits of Sakura Otoshi, juggle with EX Yoga Flame, and while he's getting up press LP LP F LK HP. You'll either do the Dedede Punch or brick the Wii you're playing on. Or both.
(3.31) LINK
DIFFICULTY: VERY EASY - 75:25
CHAINGRAB: YES (Normal CG)
Use Bthrow to Bair and Squadalah, he is off!
Seriously, that's my entire summary of the matchup.
Alright, I was informed that you guys are starting your discussion on Link (http://allisbrawl.com/forum/topic.aspx?id=90823), so I guess I'll start despite the fact that you haven't announced you are on to Link yet.
D3 is one of Link's top 2 worst matchups, if not THE worst. CG to fthrow+bair gimping, or just CG to bair gimp, will destroy Link.
Just ban Battlefield or Norfair against Link (preferably Battlefield, it has smaller platforms so less CG'ing), because that is the only stage where Link has a slim chance of winning. On Battlefield Link will jump from platform to platform bombing you, although if you predict well it will be easy to dodge the spam. Just jump up and bair/nair him. You can utilt as well, although don't expect to finish Link off with it.
Really, no damage racking is necessary unless you want to do the fthrow gimp; just get him in the CG and bair gimp him.
85:15 or 90:10 D3's favor. Links only chance is on Norfair or Battlefield. D3 is good at doing the only two things that Link mains really fear: getting him offstage, and gimping him.
As a side note, D3's Waddle Dees, Doos, and Gordos cancel out all of Links projectiles, forcing Link to FH to throw them if he wants a chance of hitting D3. Link is just too slow to run away from D3, and his projectile game is useless. Have fun, joke around, let Link get 150% damage on you on your last stock, then just CG all three stocks away.
Have fun D3 mains.
If you D throw us off the edge, we can indeed tether after a short period of hitstun. You can just walk lazily offstage, bair towards the stage as we try desperately to retract to the ledge, and stagespike us.
There is no excuse for D3 to not kill Link once he is offstage.
Btw, bombs going off will save Link's butt about 25% of the time. The rest of the time it won't make a difference for you D3 mains.
The only redeeming factor Link has is his bombs on Battlefield or Norfair. Ban Battlefield, and expect that Link won't do any good on Norfair anyways, and follow the instructions given at :20 in this vid: http://www.youtube.com/watch?v=lltHMlOoZi0
90:10 D3.
Really...are we REALLY discussing this lol. Well I'll give both sides to this sad matchup.
Link can be a nuisance if he spaces the 2 hitboxed, 10% zair. I assume some good links will have a bomb in hand and shorthop air dodge zair a few times, and then finally throw the bomb. Link can do triple canceled and double canceled arrows if he wants to camp for minimal time before the D3 perfect shields --> grab ->win
NOTE: All tethers can be used three times only (3 snaps to the ledge). In this case, hookshot the ledge 3x
After that they can no longer tether UNTIL they touch the stage
D tilt can shield stab, but overall easy move to punish (shield grab). Smart links will know how to use the boomerangs reverse suction affects and air push aways effectively so watch out for that.
Watch out for links boosted up smash ( 3 hits and knocks you into the air which may or may not be a bad thing. Just watch out for links up air, if you air dodge, it WILL go to waste, and you WILL get hit by his up air. )
Link also has some good jab follow ups. The first two slashes come out fast and can lead into a down smash, grab, f tilt, and much more
Respect links bombs, they are dangerous, just chain grab and edge guard accordingly. After chain grabs, links, most likely, will use there second jump accordingly to snap to the ledge. Some may zair quick to snag the ledge, which you can counter with a fast fall bair. And others may not have second jumps at that point and will Up B. Down tilt, BAIR to edge guard. If you presume link is going to do an up B, it has a weird angle and may out space your bair, so get underneath and slam him with the top part a fair.
Against passive links, inhaling them after they used their second jump and spitting them out will prove to be effective due to links horrible recovery. Inhale --> drop off the stage ---> fall ---> keep falling...(don't worry you can recover...and he can't xD) --> spit him out...mash the jump button so you don't touch the death pit...and you're golden...link is dead..and you've recovered.
If there are anymore concerns with this matchup, I will be more than happy to add more, but for now, this matchup doesn't seem to be posing a threat, even to Dededes that don't use Dedede.
We have a few tools here and there to avoid grabs, but this matchup is pretty much D3's with and without the infinite. Like Hero mentioned, mashing out is an option at certain percentages, but never should be relied upon. It's more of a last resort in the event that we ARE grabbed rather than a defense against it. Something rather important and another reason to be frame-perfect. Mario's upB comes out faster than Marth's IIRC, so keep that in mind.
As far as gimping goes, you generally haven't got much to worry about. We have a few methods of taking your jumps but most of them are rendered unsafe offstage because of suck and your high range/priority on both Fair and Bair. If you're forced to upB or do so prematurely, however, Mario's cape CAN reverse your direction and Fludd CAN push you from the ledge if you cancel it too early. Mix up your recovery to prevent this, and generally don't upB unless it's your only option. Be aware of the threat Mario presents offstage, and you should be okay. Fireballs are the only things that Mario can really safely do to edgeguard before you upB.
As far as gimping US, you have the luxury of having an attack that beats our upB; your Bair. THIS would probably be a good time to fastfall that Bair if your timing is right. The trajectory at which it knocks Mario with undoubtedly gimp him if he has no DJ. If Mario times his upB on the invincibility frames, however, it can beat bair and potentially stagespike if the circumstances are right. In the event that this happens, you probably won't die unless you're high %, but you MAY need to use your upB to recover. Do so with caution. Inhale is also hell to deal with offstage for Mario, so keep that in mind.
Onstage, Mario can lay on pretty thick shield pressure with Dair and can't be shieldgrabbed till the last hit and can be autocancelled behind D3's shield or DJ'd out of. Not COMPLETELY safe, but a great tool vs D3 in particular to thwart grabs more often than not. Cape suffers no shield stun and can be used to bait grabs -> Stutterstepped Fsmash. Just be wary of this. D3's weight is a huge adv in this matchup, so don't forfeit it by being too aggressive with shieldgrabs.
My guess is 60:40 D3 to 65:35 without the infinite. 80:20 or more with.
To be honest the infinite doesn't make a lot of difference, very little in fact. It is extremely easy to get out of the infinite until Mario is already in KO range (120% or so). So in actuality the ratio change is very minimal.
The main problem that Mario has against DeDeDe is that he doesn't have alot of options. All he can do is camp and camp alot. He has to work extremely hard to not get grabbed, and matches like these will take a very long time. With that taken into account, a camping Mario will not be approaching. He'll be baiting DeDeDe to approach. An approaching D3 will give Mario alot of counter options.
Mario's Air game > DeDeDe airgame. DeDeDe is extremely combo-able if Mario gets inside.
DeDeDe's ground game >>> Mario's ground game. It's literally no contest here. Any ground game work from Mario here will be used to get DeDeDe in the air.
DeDeDe is not difficult to gimp, but a good DeDeDe won't let it be easy.
This matchup is 70:30 DeDeDe, both with and without infinite. I would go more towards Mario's favor, but I myself haven't fought a great DeDeDe player that I could test my camp game against.
Lol D3 Vs Bowser without infinite is 6:4 D3 Max. Ive played this matchup ALOT from both ways when I
2nded Bowser. Bowser shouldn't be getting grabbed that much, hes also got a cg to grab release stuff, He can kill early, can actually edgeguard D3 pretty well if your smart. Side b ***** in this matchup. Bowser just has to be smart but its definitley not worse than 6:4 without the infnite. Im pretty sure Vex even thinks its even but Ima call 6:4 without infinite. 100:0 with(like every matchup with the infnite is lol)
Dedede can infinite Bowser at the edge so yea basically one grab is still death.
D3 vs bowser is pretty one sided. D3 obviously has the upper hand with the infinite, it isn't even worth the discussion and since I don't do infinites unless it's a wall one I will discuss this without the infinite in mind.
Now to start this, D3 outranges bowser in the air and on the ground, thats already a immediate disadvantage. D3s ftilt has more range than all of bowser ground moves and can't be punished on shield while bair is pretty dominant in the air, the only aerial I question that it doesn't outprioritize is fair but my disc is broken right now so I can't test it. D3s dair outranges bowsers upair and same with d3s upair and bowsers dair.
Bowser has a hard time approaching dedede as he outranges him completely on the ground so thats out of the option, one of bowsers only approaches is his klaw and even then is pretty bad as d3 can simply just bair it. The best thing about this is that D3s waddle dees n doos force him to approach.
Then D3 also has the CG which he can choose to end with a dtilt or a bthrow which makes this matchup even more dumb. One thing saving this matchup for bowser are his grab releases, mainly to fair which can put bowser in a good position depending on how far d3 gets knocked back, if d3 is knocked offstage, bowser has the control and can force d3 to use his upb and punish accordingly. But the d3 would have to screw up for bowser to even get close enough to grab. Fair, klaw, and upb have their own merits in this matchup but even with them, it's still in d3s favor by a good amount, I just felt like going into the grab release more as it's less known what it can do.
Overall I think the matchup is 75:25 in D3s favor without the infinite, with the infinite it's most likely 90:10.
Keep in mind this is all my opinion and that I do not have the means right now to test some of this.
DIFFICULTY: With Infinite Chaingrab: VERY EASY - 90:10 (!?)* Without Infinite Chaingrab: EASY - 60:40
CHAINGRAB: YES (Normal CG, Walking CG, Infinite CG)
*For the record, I made this value by taking the average of the few people who gave values for the matchup with infinite. The two people whose numbers I used were Ripple and Darknid, who are Donkey Kong mains.
Uh..What's the point? You have the infinite, that ruins the matchup for DK. 99-1 infinite *****.
Without infinite it's probably 6-4 D3 because you still have the dashgrab CG which deals ridiculous damage(B throw too..).
Without the CG it's probably 65-35 DK advantage to be honest.
DK isn't too hard to grab but he can make himself a real ***** to grab. This is why he beats ICs. DownB beats your whole ground game, and Ftilt isn't safe because he can up B and shieldpoke you. It's extremely safe, actually, and if you don't shield, good luck with that, because the super armor will absorb your hit if you try to interrupt it. It deals 37% damage if all hits connect. He can also cancel it on a ledge for that perfect unpunishability(and don't get me started on japes..)
Basically, without the infinite you're going to want to CG him all game then U tilt or bair to kill. His bair is better than yours, it has more range and it has very little landing lag, so he can land with it for spacing unlike you.
If you take his first stock, CG him to get him offstage then swallowcide as he returns. DK's recovery goes the same way every time, take advantage of that. I tell you this because there's no way in hell I'm facing D3 as a character that's easily chaingrabbed.
Also, don't face his back in the air, you won't win. You're his toy in the air, you're much better off on the ground, fortifying your defenses. To kill you, he will use punch or F smash, both of which kill you pretty nicely. At the side of a stage, F smash will take care of you at 90%, maybe 70% with bad or no DI. Powershield this move and you've a free grab. Otherwise, I'm pretty sure it's safe on block.
Punch kills a bit later but it comes out a lot faster, can be used in the air oh and it has super armor, so if DK has a punch stored you want to bait it before you try any kill moves.
So..Just do the crap you always do. Camp with your projectile, shieldgrab any aerial approaches, though any good DK won't choose DK or will be extremely careful not to get grabbed, so you may have to..hey, just camp some more. Your only problem is if he's ledge canceling up Bs and getting past your projectiles with the super armor because then you can't grab him and you get rocked. If he does this a lot, you can dashgrab him to interrupt the up B.
If you're playing without the CG..Well, good luck LOL. Your only shred of sophistication in a real fight with DK is F tilt.
As for stages, choose Delfino for the walkoffs and wall infinites. Don't go cruise, because he has wall infinites too and one grab from him leads to them with cargo plus he loves the close blast zones more than you do with his insane killing power.
Ban Luigi's or Japes, idk, you probably won't win on either without the infinite. You're better off on Japes because you can Dthrow him into the klap trap plus you can camp the middle platform if you're smart.
Samus has zair a missles which COULD collect a nice load of % on ddd. That is, untill they learn to power shield and approach. Once this happens they can CG across FD and throw for like 40-50% damage. This take 10 homing missles or 12 zairs to catch up to that massive amount of damage. Sure, we could try and F/D/U smash but it doesnt matter, your grabs are fast and long and if we mess up JUST ONCE....BOOOM 40-50% damage. THE ONLY THING WE CAN DO is weaken your shield slightly and then do a falling U-air to UP+B but even then thats on 11-14% damage. And even then, thats assuming u dont see it coming and uptilt.
DDD vs SAMUS= 100-0 in DDD favor with ICG.
Samus is part of the sad 6. You can infinite us(even thought u gotta pummel ever 4-5 grabs) till what ever you feel like then back throw for easy KOs. There is no hope and its 100% unwinnable for Samus. That is why i ban that tech at all of my events and try and get his ICG banned at each event i attend. It makes an already near impossible match-up, impossible.
Please be merciful. This is my opinion and some of my views on the matchup lol.
Dedede vs Samus matchup
Okay, first thing is first, Dedede can infinite and normal chain grab Samus like crazy. When up against Samus, the Waddle Dees and Doos can provide as a shield to all of Samus' projectiles when she is on the ground. So basically, the only thing you may need to worry about is Samus' grapple beam(or Z button attack) when she is in the air. Samus really doesnt have the potential to KO a heavy with brute strength. Most Samus mains try to KO with a spike or use projectiles while you are off stage. Dedede can just chain grab her to the edge and back air till she is far enough to not come back to the stage. Hmm...what else? Im not sure how early Dedede can KO Samus, but probably around 80%-90% give or take. So yeah, if im wrong about anything just tell me. I tested all of this so im sure there wont be alot of changes.
Also some counterpicks......yeah......not sure lol.
Rainbow Cruise- Lots of space for Dedede to exploit his recovery. The walls are very close for Dedede to KO Samus early.
Jungle Japes-Ahh yes, Japes. People counterpick this just to avoid the up tilt KO, but then there is the water. With Samus' recovery, this would make somewhat of a perfect counterpick(opinion). I mean throw Samus in the water on the left side and she is pretty much not coming back.
There comes a time within everyones smash career where they must face their greatest fear, themselves. As cliché as it sounds, that's exactly what this match up consists of. Stay in the air at all times, as one grab in the hands of an experienced DeDeDe main means the loss of a stock, so three grabs means game. Full hop down airs applies great shield pressure due to how large the king is, but your going to want to utilize every one of your jumps in an attempt to evade his mittens. Learn the timing of D3's infinite on himself, just in case you find yourself being death grabbed by your opponent so you can fight fire with fire. As said in all of my previous summaries, spacing is key in this match up, edge guard with back airs, but be cautious of regicides, and don't get grabbed. In all honesty, D3 dittos do not have a whole lot of depth to them, if any. They don't determine who is the better player, just who knows this particular match up more. Really, you should just avoid this fight if you can, it's extremely boring.
Random Info:
Jet hammer wrecks high up B recoveries.
You can grab high up B recoveries.
If you predict or force a high up B recovery, it's a free forward smash.
Ugh, just watch this set. It's a video of CO18 and Seibrik playing, this basically sums up every thing in a nutshell.
I'd say it's a random chance of winning or losing. You may have the better Dedede, but the other guy can pull a random gordo and poof, there goes your stock. If you're really unlucky it'll happen three times in one match (has happened to me before, on more than one occasion). You can also get Jet hammered or Fsmashed if you're not careful, each will most likely take off a stock if they hit.
Honestly I don't think we can talk much about this matchup.
Main thing is: Make sure you are the one who gets the grabs, which actually means: spacing determines the winner.
I never, ever play DDD dittos at tournaments. I actually scout out to see if there are any other DDD's and if there are, I remember them and CP Olimar just because I won't infinite. Call me a scrub. I've beaten some good DDD's in tourney without infiniting while they were desperately trying to grab me, but all in all it's a headache I don't want to endure.
Basically, an infinite grabbing DDD beats a non-infinite 90-10. If your opponent is strictly of the "play to win" mentality (and doesn't use metaknight lolol) and you don't and you know it, you should prooobably counterpick. Otherwise, DON'T GET GRABBED.
EDIT - Might as well give some anecdotal support.
I beat Kaiser's DDD with my own while he was going for the infinite and I wasn't. It was a really close match, but I pulled it out. It was my first tournament and naive as I was, I decided to CP Pit, lost, then CP Lucas and lost.
Point being, if your DDD can beat ANOTHER DDD, FOR GOD'S SAKE DON'T CHANGE.
Vayseth's In-Depth King Dedede Chaingrab and Grab Release Guide
Table of Contents:
Chapter 0.0: An Introduction by Vayseth
Chapter 1.1: Grab Release General Information
Chapter 1.2: Forcing a Specific Grab Release Animation
Chapter 1.3: The Pummel Break
Chapter 1.4: Applications of the Grab Release
Chapter 1.5: Edgeguarding with the Grab Release
Chapter 1.6: Guaranteed Combos with the Grab Release
Chapter 1.7: Mindgames with the Grab Release
Chapter 2.1: Standard Chaingrab General Information
Chapter 2.2: The Chainable Few
Chapter 2.3: The Lucky Ones: L2Tech Chase!
Chapter 2.4: Follow Ups From the D Throw
Chapter 2.5: Characters who Attempt to Disrupt Your Chaingrab
Chapter 2.6: The Chaingrab in Doubles Play
Chapter 3.1: The Standing Infinite Grab General Information
Chapter 3.2: The Wall-less Standing Infinite Grab
Chapter 3.3: The Wall-less Standing Infinite Grab on an Edge
Chapter 3.4: Stages that Cause or Aide in King Dedede's Infinite Chaingrabs
Chapter 3.5: The Yoshi Controversy
Chapter 3.6: The Wario Controversy
Chapter 4.1: The Walking/Nudging Chaingrab General Information
Chapter 5.1: The Conclusion and Thanks!
Chapter 0.0: An Introduction by Vayseth
Before we begin, I'd like to introduce myself. Hey! I'm Vayseth, also known as Alex (my real name). I live in various cities in Michigan so I have the pleasure of bouncing ideas off of one of the best DDDs out there, lain, while also getting to play against some of the best players in the country who use some of the more unique characters so I can fully test all aspects of my game. Compiling this guide has been the tedious work of playing against some of the best in the business including Quivo's Toon Link, Alpha Zelot's Diddy, Anther's Pikachu, lain's ICs and DDD, Omniswell's Wolf, ICs, Wario, and Metaknight, Judge!'s Metaknight, Snake, Wario and Falco, Ankoku's Sheik and Zelda, Mikey Lenetia's Peach and Zelda, SamuraiPanda's Snake and Random, and SamuraiPanda, SCOTU, and Ankoku's help in figuring out some more technical aspects of the game. So, if you haven't heard of me, you definitely have heard of my competition. I have been trying to figure out how to do this for many months and I hope that you guys enjoy the finished product. Thank you guys for your help and support. Without any further interruption, here's my chaingrab guide!
Chapter 1.1: Grab Release General Information
Here I will go more in-depth into Grab Releases than anyone probably has in smash boards history. There is a lot of information here that people do not know, so I would try and make sure you understand everything here before moving on to the applications I have come up with later.
The first thing you may not be familiar with is that there are three types of grab releases in the game. Yes three. They are what I have termed Ground Breaks, Air Breaks, and Pummel Breaks. It is possible to force the first two guaranteed, but the third requires some luck.
Everyone is familiar with what I have termed Ground Breaks and Air Breaks. An Air Break is when you force the opponent to break in an upwards motion. A Ground Break, therefore would be when the opponent breaks downward. But then what's a Pummel Break? That's going to require a bit more explanation.
For most of the cast, an Air Break is defined as a grab release animation where the opponent is sent in an arching motion going up and away from where the break happened. The distance and height vary based on the character but there are also three major types of Air Break trajectories. The most common is one which sends the opponent noticeably higher and far away, like Snake's for example. Most characters have these. Some characters get sent on a low arch trajectory for some reason, which can be really helpful in regards to edge guarding. Examples include Squirtle, Sheik, Fox, Falco, etc. The third I only remember seeing in Wario and Metaknight. This is the strange parabola-shaped motion which sends them up and they hopelessly fall down unable to do anything until they reach the ground. This is why there are so many things you can do out of grab release on these characters, because of their strange Air Break properties, where most other characters can input commands much faster. I will tell you how to force an Air Break in a moment. It's required for explaining the Pummel Break.
So if an Air Break is something which forces the opponent up and away, then a Ground Break is defined as a grab release animation where the opponent is sent a short distance away and stays grounded. There really isn't much to note about Ground Breaks other than depending on the opponent's amount of traction they will slide further away. Wario and R.O.B. are members of the group who break closest (conveniently enough in regrabbing range) while Luigi rockets clear across the stage from a normal Ground Break. There are in general five classes of characters who slide a set distance away but other than that, every character has the same animation. Which character slides how far is listed in Chapter 1.7, Mindgames.
Chapter 1.2: Forcing a Specific Grab Release Animation
To actually force one animation over the other is somewhat tricky. A Ground Break is the easiest. Simply standing grab the character over the level or platform with a normal grab and either pummel until they break out or just hold them until they do. If the opponent has some sort of ground underneath them, they will perform a Ground Break. Note I said "standing grab". If you perform a dashing grab, this may still happen, but depending on the size of the two characters, it may not.
The size of the characters involved plays a huge role in whether or not you can force an Air Break Grab Release. It is extremely character specific. Luckily for you, I have provided you with a list of characters who King Dedede can perform Air Breaks on. Basically, to perform an Air Break you need one thing: to make sure the character is not touching the floor. Anyone can be Air Breaked over the edge. To perform one, just make sure they have nowhere to go and do nothing. When they break out, you will force an Air Break. If they break out during a pummel when they are dangling, oh, well, you'll see what that yields soon enough. For most characters, the only way to get the feet dangling animation while you are still on the level, is to dash grab them. The dash grab will hold them higher off of the ground so it is possible to get that animation. The characters who King Dedede can force an Air Break on over the level are:
Mario
Luigi
Yoshi
Wario
Ice Climbers (Solo Popo or SoPo).
Kirby
Metaknight
Olimar
Pikachu
Squirtle
Jigglypuff
Ness
Lucas
Mr. Game and Watch
That is to say, only the listed characters are small enough to cause a feet dangling animation, which allows you to force an Air Break on them. To do this you must dash grab them to trigger the feet dangling animation and then let them break out naturally. They will always perform an Air Break.
I know this is pretty dry so far, interesting, but dry. Don't worry, the application of this knowledge is coming soon.
Chapter 1.3: The Pummel Break
I believe I am the first to discover this animation so it's possible you will not have heard of this before. If someone has, please let me know and I will credit you for the discovery. Everything else I have listed until now is common knowledge. Here's the fun part:
The list I gave for who can be forced into an Air Break over the level is extremely important. To force the Air Break every time, you just dash grab them, trigger the feet dangling animation, and let them break out. The reason is if you are pummeling them at the time when they break out, they will perform a completely different animation.
To prove all three animations exist I suggest trying them on Luigi, who with King Dedede can show all three work.
1. Ground Break: Standing grab Luigi and let him break out. He will slide pretty far away along the ground.
2. Air Break: Dash grab Luigi and let him break out. He will float up and away really far away.
3. Pummel Break: Dash grab Luigi and pummel him until he breaks out of a pummel hit. He will land right next to you.
*Note, 2 and 3 work with King Dedede. Forcing the feet dangling animation is extremely character specific, so you will have to test it out for yourself who you can force an Air Break on. Remember, it has to do with the size of the characters involved.
So, the Pummel Break is defined as a grab release animation where the opponent would normally perform an Air Break, but broke out during a pummel, forcing them to break downward. The cool thing about the Pummel Break is that it breaks the opponent closer than a normal Ground Break which can allow for follow ups, or serious edge guarding. Because they broke out during a hit, the opponent is actually in hit stun and recovers slower than Dedede does. This can guarantee a regrab on some, or for Ness and Lucas, this can guarantee a D Tilt.
Chapter 1.4: Applications of the Grab Release
There are a couple things you need to know about the grab release that help out King Dedede's game. The three main things they allow you to do are edge guard more effectively, allow guaranteed combos, and allow for serious mindgames. This is where we combine everything I've talked about so far so if you get lost please ask me. I may have written down some things in a hurry and they may not have come out the way I wanted them to. I would ask you to, if you do not know what's going on, check back in the sections before and if you are trying this yourself, make sure you are correctly performing an Air Break, a Ground Break, or a Pummel Break when I'm listing those. It's very important to distinguish between them so I ask that you please check to make sure you're doing everything right before you flame me =P
Chapter 1.5: Edgeguarding with the Grab Release
Believe it or not you can do a lot of damage to people by mixing in grab releases after a chaingrab instead of always doing a forward throw. Here's some key examples:
Example #1: Snake and Link.
Snake and Link have some of the most gimpable recoveries in the game. If you force a Pummel Break on either character and immediately edge hog, the character has no choice but to jump and up B. For Link, his jump and Up B are so shallow he can't even make it onto the stage again! Play your cards right and a Pummel Break at any percent could cause instant death for Link. For Snake, you are forcing him to Up B which is good. If he Up Bs at the level, there's a free cypher grab. If he Up Bs away from the level, he's low enough and moving slow enough that you can time a fair right to the face. For both Link and Snake and their gimpable recoveries, causing a Pummel Break on them and landing a fair or bair or two might be enough to kill them every time!
Example #2: Sheik, Fox, Falco, Etc.
Their strange downward arching Air Break animation sets them up for PERFECT edge guarding. It might be more risky against Fox or Falco who can just Illusion back, but a well-timed edge hog could limit their options. For Sheik, she is placed at perfect bair range and since she doesn't have a great recovery, it's just a matter of landing one bair and an edge hog to finish her off.
Remember, mix in Air and Ground Breaks over edges instead of forward throw after a chain grab! Air and Pummel breaks over the edge will send people on a very specific trajectory which allows you to put them exactly where you want them so you can edge guard them more easily. If the opponent has a poor recovery, forcing a Pummel Break can even lead to their deaths! King Dedede will recover before the opponent in both cases allowing for an easier edge guard.
(Credit for this application goes to lain, who initially told me that I should grab release Snakes off of the edge after a chain grab because if you forward throw them they can recover too high to edge guard them. Little did he know that it would spark me to find many more instances to use it for edge guarding. Thanks lain! <3)
Chapter 1.6: Guaranteed Combos with the Grab Release
Let me preface this, the only guaranteed combo that is worth anything in game is the guaranteed link to a D Tilt on Ness and Lucas. Everything else is purely speculation, and really isn't metagame changing, but is interesting to note.
The Pummel Break is very unkind to Ness and Lucas. Ness and Lucas players both know this very well. An infinite regrab from Marth, a guaranteed Bowser Bomb from Bowser, and now a D Tilt after a chain grab from King Dedede, what else could the Pummel Break do to these poor guys?
The Pummel Break, as I explained earlier, puts the opponent in brief hit stun and they drop from the feet dangling animation, placing them closer to the opponent at a frame disadvantage. For some reason, Ness and Lucas have a HUGE frame disadvantage on a Pummel Break. This allows for a guaranteed D Tilt after a chain grab on Ness and Lucas which could lead to death.
Notice before that I said there were a list of characters who were small enough to trigger the feet dangling animation over the level. Well, of those characters, the following six characters fall right next to King Dedede and are in range of a D Tilt:
Mario, Kirby, Metaknight, Olimar, Ness, Lucas.
I know what you all are hoping for and unfortunately that is not the case. The other four characters have faster Pummel Break recoveries and a D Tilt is not guaranteed. Could it work as a mindgame? OH YEAH. Not guaranteed though. However, people might not be conscious of this information, so you never know who you could get with it. I was, however, able to get a regrab consistently on each character. What does this mean? If you just so happen to dash grab any of those characters (three of which can't be chaingrabbed, so there's no guaranteed set up for it), and just so happen to force a Pummel Break instead of an Air Break, you can regrab them and pummel them some more. So... at most 10% more in damage, if the stars and planets align and your opponent put down his controller. Also, since you had to dash grab them to cause the Pummel Break and there isn't time to dash grab again (only time for a normal, standing grab) you cannot force the animation to happen twice in a row, so all you get is some extra lousy pummel damage but it's interesting to note!
In summation, this is more for my next section "Mindgames" than it is for guaranteed stuff. The only thing I have noted being guaranteed is the D Tilt on Ness and Lucas following a chaingrab (if you force a Pummel Break on them on the ground, and not by the edge). If you want a short version of what guaranteed combos King Dedede has out of grab release, here is the list:
There are plenty of characters who after being Ground Breaked can have many follow ups because they are in range of your attacks. The following lists of characters are groups segregated by distance sent away from King Dedede as a result of a Ground Break. Maybe you can catch the opponent off guard and hit them with any of the moves that they are in range of? None of them are guaranteed, but if I was playing against a Dedede and getting chaingrabbed, I probably would stop and go "WTF?" when I'm now suddenly getting grab released. If you think they are going to spot dodge, start charging that D Smash! There's quite a few possibilities here.
Here's my philosophy: If you can jab someone, jab them, see if they sheild and run and regrab. If you can regrab someone, try and regrab them. If you can D Smash, try and do that! If you can do all of these out of a chaingrab, you can confuse your opponent and hit them with a killing move before they even figure out why you are suddenly grab releasing them when you could easily get in another grab in your chain. The possibilities are endless, and I'd like people to experiment with some of it.
Once again, the groups are segregated based on the distance they slide away from King Dedede after a Ground Break. A being the closest to King Dedede and E being the farthest. For each group I have listed attacks that if the opponent did nothing (or had a low sheild) could not get out of. I have consistently hit people with low shields with D Tilt after a grab release. It WILL shield poke. Try out your own combinations!
Group A: In range for Regrab, Jab, D Tilt, D Smash.
Jigglypuff
Lucario
Ivysaur
Charizard*
Bowser*
R.O.B.
Wario
*If they shield they bend their head back just enough to not be able to be regrabbed.
Group B: In range for Jab, D Tilt, D Smash.
Mario
Peach
Donkey Kong
Link
Sheik
Ganondorf
Samus
Olimar
Wolf
Mr. Game and Watch
Group C: In range for D Tilt
Metaknight
Kirby
Toon Link
Fox
Falco
Marth
Snake
Sonic
Group D: Nothing is in range.
Diddy Kong
Yoshi
Zelda
Zero Suit Samus
Pit
Ice Climbers (Solo Popo or SoPo)
King Dedede
Captain Falcon
Pikachu
Squirtle
Ike
Ness
Lucas
Group E: Nothing is in range because he slides all the way across the stage.
Luigi
While all of the characters in each group do not slide the EXACT same distance (Falco can be hit by a jab but Toon Link can't) it's just a rough estimate of where each character slides away from King Dedede.
I think there's plenty more we can learn with grab releases and I encourage your comments and suggestions (or even additions) to my section if you know of anything else.
Chapter 2.1: Standard Chaingrab General Information
Did you know King Dedede's D Throw is actually two hits? Yes, if you go into training mode and perform a down throw you can see that there are two consecutive hits, each dealing 4% for a total of 8%. The first hit is the sitting down animation and the second hit comes from a waft that is created which sends the opponent away in the direction they were grabbed a set distance, regardless of how stale the D Throw is and what percent the opponent is at. The waft portion of the move can stale, from what we can tell, but the specifics of the throw in detail will be covered in the Standing Infinite Chaingrab section, since it effects how that move is performed.
What allows the chaingrab to work is after the hitstun has taken place the opponent lands. The hitstun is similar for every character. It involves the opponent turning slightly sideways in pain before finally landing in what I like to call "landing dust." If you played melee you'd know precisely what this looks like because to perform a wave dash you must leave the ground and land very quickly causing dust to appear as you're dashing. The same holds true in this game. Why the opponents move that set distance is because their hitstun is being directed in a specific direction at a set distance by the waft, the second hit of the King Dedede D Throw.
The opponent cannot input anything while they are riding the waft. For any chaingrabbable character, this is before they land, which almost always looks like the opponent is kneeling slightly before they stand. They can input moves at that instant. If you see a shield, you know your opponent can input commands. Your goal is to grab them before they get up from the ground. Some characters slide further than others, which was detailed in my grab release chapter. So, instead of listing characters that could be chaingrabbed, I've ordered those characters in order of the difficulty to efficiently chaingrab them by counting the number of times on average the opponent could be successfully chained from one side of Final Destination to the other. I'll order them the same way we order our match ups in match up topic: Red, for "Very Hard", Green for "Average", Blue for "Easy", and Pink for "********". I'll also add in Oranage, for "Hard."
Before we move on, I want to encourage everyone to read Buuman's thread. I will source it constantly, but his "Grab Laws" section are extremely important nuggets to keep in mind when you are chain grabbing.
Buuman's King Dedede Grab Laws:
If you shield grab chain grab perfectly, you will get more grabs/chain grabs off overall.
If you down throw immediately after a re grab during the chain grab, the sliding animation will be negated
If you want to change the distance of the slide during a chain grab, wait a minimal amount of time between dash grabs, OR grab attack during the chain grab, you will get the same effect.
If you input a grab during your running animation you will dash grab. It MUST be finished in order to do a standing grab, this includes the ending part of the dash animation, when Dedede slows down.
A brief explanation of this list:
1. ********- Luigi slides really far away making the difficulty for a regrab as well as the timing required to successfully chain D Throws together is very tight. Be careful or you'll eat a fire punch.
2. VERY HARD- These three slide a good deal out of the way and are able to be grabbed again, but not by much. Again, the timing to successfully chain your D Throws is a very small window.
3. HARD- These guys can be chained effectively more times than the previous three, but the window to chain D Throws is very tight.
4. AVERAGE- These are your average 5-6 grab across the stage guys. Some you'll only get 5, some you can squeeze in 6, it all depends on your buffering and timing. Don't worry about screwing this up.
5. VERY EASY- You'd have to be an idiot to not successfully chain grabs against these guys. The timing is so forgiving it's a joke. They move only a short distance from King Dedede that you won't even need to take more than a step sometimes (*cough* Walking Chaingrab *cough*).
Chapter 2.3: The Lucky Ones: L2Tech Chase!
There are 12 characters in the game who instead of landing standing up after a grab, they land on the ground. Why this is is still largely a mystery but I like to think of it as these are the 12 lightest characters in the game and some combination of weight and size puts them immediately landing on the ground instead of landing safely on their feet. You cannot grab someone when they are laying on the ground, which is why the chaingrab doesn't work. They also have the least amount of time spent in hit stun from the D Throw.
The Unchainable 12:
Zelda
Sheik
Zero Suit Samus
Kirby
Metaknight
Olimar
Fox
Falco
Pikachu
Squirtle
Jigglypuff
Mr. Game and Watch
There are several options these characters have after landing and even before landing that they can do.
DI upward and airdogde even before hitting the ground.
If they do that, the air dodge animation will cancel when they touch the ground, allowing you to regrab them. If you know your opponent likes to do this, do not worry, they have only made themselves unknowingly chaingrabble. Just wait for the air dodge to cancel and regrab. [*]DI upward and either jump or up B to prevent any sort of a tech chase.
Those characters are Metaknight, Zero Suit Samus, Kirby, Squirtle, and Mr. Game and Watch. To stop this, predict what your opponent will do and try and follow it up with a counter of your own. Be creative. [*]Tech upon landing in three different ways: straight up, rolling left and rolling right.
These are the hardest to combat with, except for if they tech straight up. If they do that, they are then chaingrabbable. If you have a tech-happy opponent, you might make their life very hard. [*]Land and then do one of four different get up animations: stand up, roll left, roll right, and get up attack.
You can punish these by reading where your opponent will go preparing for it and regrabbing them. Either shield the attack and regrab, wait and catch them as they roll at you or run after them and grab them after they roll away. The tech chase can be one of your greatest allies. Oh, and don't forget the Buuman trap! (really, read his thread, it's good stuff).
Whether you are chaingrabbing someone or not, there are always guaranteed follow ups to the D Throw. The most common follow ups are F Tilt (guaranteed on almost the whole cast), and D Tilt (guaranteed against a select few, and even fewer only on the edge). But, I'll also include some fun things you can follow up with if your opponent likes to spot dodge or try to run away if you mess up a grab or you cannot chain grab them at all.
Characters Who can be comboed into F Tilt:
Mario
Peach
Bowser
Donkey Kong
Diddy Kong
Yoshi
Wario
Link
Zelda
Sheik
Ganondorf
Toon Link
Zero Suit Samus
Samus
Pit
Ice Climbers
R.O.B.
Metaknight
King Dedede
Fox
Falco
Olimar
Wolf
Captain Falcon
Pikachu
Ivysaur
Charizard
Lucario
Mr. Game and Watch
Snake
Sonic
That leaves the only ones who F Tilt does not link into are: Jigglypuff, Luigi, Kirby and Squirtle.
Characters who can be comboed into D Tilt:
Donkey Kong
Bowser
Samus
Ivysaur
Charizard
Characters who can be comboed into D Tilt (if spaced properly over an edge):
Yoshi
R.O.B.
King Dedede
Snake
Characters who can be comboed into D Smash (if the opponent does not slide off of the edge):
Bowser
To clarify, the first D Tilt list are characters where D Tilt combos regardless of the position on the stage, the second list only combos if you hit them as they are falling off of a ledge or a platform, and the third list can only link D Smash if they are not near an edge.
Here's some moves which tend to take your opponent by surprise if they try and recover and then spot dodge (works as a tech chase against the unchainable 12 as well):
Dash Attack: This is one of the few chances us Dedede players get to use this seemingly useless yet extremely powerful move. It will break spot dodges so even if they are chaingrabbable, if you expect them to spot dodge after a D Throw, hit them with the Dash Attack!
Inhale: D Throw is one of the best set ups for inhale. Your opponent will be set a perfect distance away for you to short hop forward and gobble them up. It'll break spot dodges, but if timed right, your opponent can roll behind you and avoid it. Use sparingly.
D Smash: Nothing like your opponent thinking they're in the clear and then suddenly seeing you spacing a D Smash by the edge of the level only to realize they have nowhere to go from there. This is in essence, the Buuman trap. I also like to grab release people I can chain grab right before the edge so they land on the ground with nowhere to go. I immediately start charging a D Smash and read what they are going to do. If they roll or spot dodge, they're getting hit, if they shield, they're going to be pushed off of the level onto the edge, making me safe. It can be really effective.
Chapter 2.5: Characters who Attempt to Disrupt Your Chaingrab
There are a couple characters who if you mess up the timing of your chaingrabs by even a frame, you can eat an attack, or they can get out of your chain grab. If your opponent can do ANYTHING, you have messed up the timing on your grab. Better get practicing.
The most common counters to the grab are the following:
Snake: If you do not grab Snake perfectly, he can drop grenades in between your D Throws and if you sit on a grenade, you both go boom. This is where ports become a huge issue. If Snake is a lower port than you are, he has faux super armor and takes the damage but no knockback. This could mean death for you if you are not careful. Make sure you are chaingrabbing correctly and secondly, just in case, get a lower port than Snake ALL THE TIME.
Marth: Marth players think they are so clever. They think that they can just use Up B like it is their own personal "get out of jail free" card. Well, in most cases it is. Having an incredibly fast kill move that is invincible is absolutely awesome. If we had it we'd use it too. Oh wait, we do, the U Tilt. Anyway, they're going to want to mash Up B against King Dedede players who might occasionally miss their grabs. I say let them get used to you messing up occasionally so when you prepare for them to Up B, you can hit them with a F Smash or a Down B as they are falling helplessly, unable to prevent their impending doom.
I know there are more ways that other characters try and get out of this so if you have any suggestions let me know and I'll add them to the list!
Chapter 2.6: The Chaingrab in Doubles Play
I'm just recently becoming more accustomed to singles play but if there's anything I know it's doubles. King Dedede can be a serious threat in doubles if played correctly. In doubles there are usually two types of players: the dominant player, who goes for all the kills and likes to take people 1-on-1, and the support player, who distracts the other teammate while their partner is getting mercilessly edge guarded or follows their own teammate's movements in order to set up team combos. King Dedede is in my mind one of the top support doubles characters in the game. His grabs are easy set ups for team combos and also get your opponent's teammate out of the way when you want a chance to edge guard or team combo more effectively.
Here's some rules to live by:
You should always chaingrab in doubles if given the chance.
King Dedede's chaingrab is his best asset. Instead of not using it as much, adapt to the chaos doubles breeds and use it to your advantage. Chaingrab right into your teammate who can then hit them for you allowing you to follow up making a devastating team combo. Don't forget that the F Throw and B Throw are extremely fast and hit everyone in the radius of your hammer. If you are chaingrabbing someone and their teammate comes to save the day, throw their own partner at them. Chances are they'll get hit by the throw animation, their own teammate, or both.
D Throw is the best move in the game for setting up team combos.
If you didn't know before reading this, King Dedede's U Tilt has invincibility frames on it. This allows you to do amazing things with your partner to rack up damage as well as get early kills. All you need to do is D Throw, have your partner space enough away and time an attack that sends the opponent right back at you. When the opponent is shot back, use the U Tilt. If timed correctly you will have successfully chained three moves together, all powerful, racking up a ton of damage sending them sky high, usually to their deaths. My favorite set up is a D Throw into a Metaknight D Smash right back into an U Tilt of your own. It is not only cool looking but so fast that you can perform it regularly during your match! Try it for yourself!
You are big so stay out of giant cluster ****s or you will be eating a ton of damage.
King Dedede plays the support card really well. However, he can become a burden if up against a Metaknight who really likes to edge guard. Try to team with someone who can prevent you from getting mercilessly team comboed which King Dedede is subject to due to his large size. Teams at a high level is just organized chaos. Try to play the tank role and just stay alive throwing your opponents into fully charged smashes.
I hope I've taught you something new about the applications of the D Throw in doubles, especially the D Throw to Smash to U Tilt combo. When performed in a match, nothing feels sweeter in this game. NOTHING.
Chapter 3.1: The Standing Infinite Grab General Information
My original tutorial made over a year ago first explained this phenomenon and I was the original King Dedede player to use it in a tournament (Sorry TheMann). I lost the set (lol...) but that was just as we were learning about the specifics, so don't nitpick my skills please. You can see both videos here:
That video has a lot of outdated information, and information missing which is crucial to understanding this strange phenomenon. Below I hope to clarify myself.
There are three varieties of the Standing Infinite Grab. The ones who can be regrabbed against a wall after a D Throw infinitely, the ones who can be regrabbed without a wall infinitely, and the ones who can be regrabbed infinitely if you have the opponent spaced perfectly over an edge. If your opponent can be chaingrabbed, congratulations, you can chaingrab them infinitely into a wall. The best way to kill out of this set up is probably to U Tilt them because it is fast, one of King Dedede's best killing moves, and will get you the quickest and safest results.
Specifics of the other two are detailed below.
Chapter 3.2: The Wall-less Standing Infinite Grab
The Wall-less Standing Infinite Grab can be performed on 4 characters in the game: Donkey Kong, Mario, Luigi, and Samus. The others require some sort of a perfectly spaced set up to work. Donkey Kong is by far the easiest to chaingrab. You can literally mash the throw button after each D Throw and manage a regrab 90% of the time. The other three require some explanation.
As I said in my video, the others cannot be successively chained more than 5 times before the D Throw stales and they can no longer be chained. Ankoku and I actually used this information to not only prove that the move stales but also to prove that there were only 9 moves in the stale move list. Here's how:
If we assume there are 9 moves in the stale move list, then my move list on Donkey Kong when performing the Wall-less Standing Infinite Grab would look something like this:
D Throw, D Throw, D Throw, D Throw, D Throw, D Throw, D Throw, D Throw, D Throw (with each successive D Throw replacing the first one in the list over and over)
The problem with Mario, Samus, and Luigi is, after 5 successful D Throws, they suddenly are no longer in reach. SCOTU discovered the reason for this. The problem is the waft itself stales which screws up their trajectory and does not allow for a regrab. Why is this? No one really knows. If the waft stales it would make more sense that they move closer not out of your reach but then again, that's one of Brawl's great mysteries. Anyway, to make it an infinite combo, we would have to ensure that there were no more than 5 D Throws in the stale move list at one time. If we add a single pummel in between each D Throw, the stale move list looks like this:
D Throw, Pummel, D Throw, Pummel, D Throw, Pummel, D Throw, Pummel, D Throw (therefore, the next stale move list would have 5 pummels and 4 D Throws and would rotate constantly in that order)
Because there are never more than 5 D Throws in my stale move list, the D Throw never stales enough to make them miss the trajectory, so they will then be stuck in the grab infinitely. The only problem is at lower percents you probably will not be able to guarantee even 1 pummel in the chain, so this is only an infinite at higher percents. Even then, you must buffer in a hit and buffer in the D Throw immediately for this to be a true infinite.
Chapter 3.3: The Wall-less Standing Infinite Grab on an Edge
For some unlucky few, the Wall-less Standing Infinite Grab works on them but only when they are spaced perfectly on an edge, and the timing is the most strict of any chaingrabs listed so far in this guide. You have to buffer in the down throw immediately or they will break out due to being off of the edge partly. It really screws with the game's physics. The characters who can be infinitely chaingrabbed over an edge are: Bowser, King Dedede, and Wolf. Of the former characters who can be chaingrabbed anywhere, Mario is the only character who cannot be chaingrabbed infinitely over an edge, no matter the situation. This works the exact same way. Obviously, because of the spacing, it is stage specific where you must grab each character to make the infinite work, but there is a way to get it on almost any stage.
Chapter 3.4: Stages that Cause or Aide in King Dedede's Infinite Chaingrabs
These are a collection of stages, still allowed by the SBR, where characters can be chaingrabbed infinitely into a wall, off of a level, or on a moving platform. I'll detail where and for how long you can successfully infinite chaingrab someone on these levels.
Starter Battlefield:None. Final Destination:None. Smashville: The floating platform can cause an infinite regrab situation if you grab them on the platform and are grabbing them on the edge of it in the direction the platform is moving. Extremely situational, but M2K used it against TheReflexWonder in the grand finals of FAST1 (1:52). Follow it up with a D Tilt on everyone in the cast. Yoshi's Island:None.
Starter/Counter Castle Siege: During the second transformation King Dedede can chaingrab followed by a forward throw off of the sides. Halberd: There's a walk off and 2 walls in the beginning 11 seconds of the stage. When the match starts out, the entire arena is flat. About 3 seconds into being on that stage, the platform appears from a shaft under the players. Once the 'primary' platform completely rises up [about 4 second into the match] 2 walls are available inside that shaft the platform raised out of. That shaft has a door that closes over top of it shortly after the primary floaty platform comes up. (credit to "D.E."). Lylat Cruise:None. Pokémon Stadium 1: Walls are formed twice on the stage and there are three altogether. The first is during the rock transformation in the little area formed next to the big rock which takes up the majority of the left side of the stage. The other two are during the fire transformation. One on the left side of the tree and the other on the right side of the tree.
Counter Brinstar:None. Delfino: There are so many I can't even count them. Anytime there's a walk-off section, you can chaingrab to forward throw to kill them. There are also mini half walls which spawn with some water running through them. They count as walls. The other one people might not know about is the transformation with the house that doesn't have a ledge. On the left, it is a walk off, so you can chaingrab them off of it like normal, but on the right there is a part of the house with no edge on it. If you Pummel Break a character there, it can lead to instant death depending on the character. I have done this successfully to Wolf, but I'm not sure who else it works on. Anyone with a crappy recovery might mean instant death too. Be careful not to be so concerned with the kill that the stage leaves without you however! Frigate Orpheon: When the platform on the right is at it's lowest on the first transformation, you can chain a couple grabs into the wall on the left before it goes back up. Also, on the second part, you can technically chain them off of the platforms that appear and disappear, but it could also get you killed. Jungle Japes:None. Pictochat: A few walls form temporarily during a few of the transformations. Pirate Ship: The small ship that comes on the right has a tiny wall, but it's not worth your time. Pokémon Stadium 2:None.(you'd think the sandpile might work, but a lot of the time it doesn't.) Rainbow Cruise: The right side of the boat acts as a wall there are also walls at the top after the big swing and one just as the stage is returning to the boat.
Counter/Banned Distant Planet: Walk-off on the left side (timing is tricky!) Watch out for the water Green Greens: The blocks, once collected form walls. Watch out for the wind which can disrupt the infinite. Luigi's Mansion:None. Port Town Aero Dive:None. (Well... kind of. No walk-offs that guarantee death, that I'm aware of). Yoshi's Island (Pipes): The right side has a walk-off (timing is tricky!) Norfair:None.
Use this knowledge to your advantage because nowhere are chaining off of walk-offs or infiniting into walls banned!
No, Yoshi is not able to be infinitely grabbed. Why did this happen? I'm not sure. It could be a combination of the King Dedede player using inhale, followed by grabbing Yoshi out of his egg followed by it being an online match. If you watch, the Yoshi's distance traveled after the second D Throw is noticeably different from the first. What caused it? I'm not sure, I haven't been able to recreate it. If you can explain it, I'll add you in here.
Chapter 3.6: The Wario Controversy
Seibrik got a lot of people wondering just how devestating the Air Break was on Wario when he released one of his latest combo videos.
This was possible because Seibrik managed to grab the Wario player out of his second jump so he had nowhere to go. Wario could have inputted other commands but did not. As far as we know, Wario cannot be Air Break infinited.
Chapter 4.1: The Walking/Nudging Chaingrab General Information
The Walking Chaingrab is where King Dedede does not dash between each grab of the chaingrab but instead takes a step and regrabs the opponent. It works on a variety of characters but how effective or practical is it? You be the judge.
A while back someone posted this video online which got us all thinking. Does it really work?
My conclusion: It works on some but not others. Could it work on more than two people? I think it may but we're going to have to test it thoroughly. Here's my data:
On Bowser and Donkey Kong it really does work. From one side of the stage to the other you can manage anywhere from 20-25 grabs on average as opposed to approximately 6. That's a HUGE difference. It doesn't help that both of these characters can be comboed into killing moves and infinited in addition to that. I have proven that this does work for these characters.
As for Wolf, Wario, and Ganondorf I'm not so sure. If it works, the timing is insane and the hardest of all of King Dedede's chaingrabs. I have not been able to consistently do it and it might be a combination of me screwing up or my friend who was helping me test it screwing up. If it did work, I've calculated that you can get approximately 10-12 grabs across the stage on each of them. I have found no concrete evidence if this really can work in a real match or not. If someone can prove me otherwise, I'd love to see it.
The rest of the cast are unaffected by the Walking Chaingrab. A dash is required in order to do the chaingrab correctly.
Chapter 5.1: The Conclusion and Thanks!
In conclusion, King Dedede's chaingrabs are absolute ****. Learn them and watch your opponents cower in fear as you destroy their will to play this game.
Thank you so much for your help in support with this guide. I hope I opened up a new world to your smash game and can help you improve King Dedede's metagame in the process. Now I leave it up to you guys to take the information here and integrate it into your play styles.
Thanks goes out to: lain Ankoku SCOTU SamuraiPanda Buuman
Quivo
Alpha Zealot
Anther
Omniswell
judge!
Mikey Lenetia
TheMann
Dogma
JimboCav09
JustKindaBoredUKno
BOODA
What's the Point
Kel
The King Dedede Boards
...and everyone else who contributed towards this guide or practicing with me to help me figure out the specifics I have listed here or causing some strange event that allowed me to research it and find out why and post it for everyone to see.
King Dedede has many crazy aspects to his grab game aside from just chain grabbing. This is a guide to KingKing Dedede's strategies aside from the standard chain grab (will go into detail about options and audibles after down throw), a few tricks, statistics, facts, helpful threads for tournament players (all of these threads I have read thoroughly and feel it would be useful to Dedede players), and a list of options and guidelines of what to do against characters in certain situations. Lets get to it.
INDEX: Section I - Useful threads, that I organized for the Dedede community
Section II - Tech Chasing With the King a. TheBuumanTrap b. Reviews
Section III - tricks, tips, facts, and/or statistics a.Facts
b. Grab Laws
c. Range of Dededes Grabs
d. Physics and Applications of Special Attacks e. Ledge Options
f. Frame Data and Percents g. Characters that can Chain Grab Dedede
h. Tripping Data and Facts
i. Projectiles that the F tilt Stops
j. Super Armor
k. Objects that can be inhaled
Section IV - Follow ups from down throw a. Characters that can't be f tilted after a down throw
b. Characters that can be Down Tilted at the edge after a down throw
c. Characters that can DI out of the down throw tech chase
Section V - vertical killing data, stages with low ceilings, %s of upsmash and uptilt kills
+"Formula and Proofs to King Dededes Chain Grab (Finished 12/21/08)" by Buuman http://www.smashboards.com/showthread.php?t=204082&page=2
My chaingrab formula, with some example of distance and why the shield grab chain grab is more effective.
Sec. II Tech Chasin' with the King
This is absolutely crucial for all of you die hard Dedede mains out there that play against opponents whose characters can't be chain grabbed. (Back throw is also great for damage, but at certain areas on the stage, tech chasin' tops the back throw - (16% right off the bat fresh)
Tech Chasing - With King Dededes down throw, many characters CANNOT be chain grabbed. You will notice the difference, because the characters that cannot be chain grabbed will hit the ground and now are forced to do something. This, in my opinion is one of the funnest aspects of dededes grab game. They only have FOUR options! (if they miss the tech)
Roll left
Roll right
stand up in place
and get up attack
This is amazing by the way. Because if you can read them well enough, you can get so many series of grabs off it can be more damaging than a chain grab. Now you don't have to always follow up a tech chase with another grab...no no no, you have many other options.
I will describe a few options for certain situations: *This will be updated, and many more attacks will be added to this list in the future.
Down B - I usually do this when I can anticipate where the person is going to roll, or if they start jumping out of tech chases, like kirby, and squirtle. Omegablackmage - "A very intimidating move"
Side B - for characters that have long rolls if you react late on a tech chase. Always the chance of a gordo >:D
Forward Tilt - solid move in general for guaranteed damage if you read a roll correctly. Although not that damaging (6%), has great reach, and will not allow punishment on his majesty.
Inhale - (Has the ability to take the second jump away) Great every now and then, because if you beginning inhaling them when they're on the ground, they begin getting pulled towards you, and if they decide to roll away...they get sucked during their roll into your mouth anyway. Inhale is decent, does 10% right off the bat, and is good for placement. Also keep in mind, if you space yourself right, if they get up, and you inhale they can't react quick enough after their get up in place. Same applies for Get up attacks. KEEP IN MIND DEDEDE HAS SUPER ARMOR FRAMES WHEN THE CHARACTER GETTING INHALED JUST BEGINS THE JOURNEY INTO HIS MOUTH (before they go into the spinning helpless animation). And don't forget guys, you can stop your run by doing ANY B moves. Inhale applies as well.
Down Tilt - Great move, come's out extremely fast, has a huge, high priority hit box that has a long duration.
I use this usually when I anticipate someone that has to think from a tech chase (Due to earlier failures in the match, where they just roll on instinct and I punish them) Use this after you've punished your opponent with tech chases, so they have to think that extra millisecond before making their move, but before the thought even pops into their head, you've down tilted them.
Note: Inhale destroys spot dodgers out of tech chasing. *This will be updated, and many more attacks will be added to this list in the future.
TheBuumanTrap
(Devised and used by me )
See video below for the actual application during tourney:
<_________________> <-- This is Final Destination
x - symbolizes Dedede
x - symbolizes opponent
*Now obviously this is just a visual so it's not going to be 100% accurate. I will try to make this as easy to understand as possible. Step 1: Postition yourself similar to the diagram after the down throw. Note: This can be done on ANY stage! FD is just used as and example
<_x_X_______X_x_>
\_____________/
*They should be on the ground either on the left or right side of the stage, and you should be facing them
Step 2: Start charging a down smash.
<_x__X_____X__x_>
\_____________/
The result...you lean back during the charge and although this diagram doesn't show you directly, you're out of harms way during the down smash charge, when released, Dedede leans forward to the neutral position again.
Theselocations, inmy experienceare death zones. So anyway when your opponenthas failed to tech and they are in these positions, get ready to orgasm. Vids WILL BE UP OF THIS used in my tourney matches. I've been keeping this to myself for awhile but have told a select few people about it likeOmegablackmage.
Notice this scenario, your opponent is on the ground, and your just far enough away from them to get hit by their get up attack? Well stay tuned, because this is an insane way around their attack plus a 100% guaranteed Down Smash.
HERE IT IS: 'In this situation, wait until you see a frame of motion from your opponent, and begin charging a Down SMASH. Here's something many of you probably don't know, King Dedede leans back when he charges a down smash
THERE IT IS! The loop hole to this trick.'
THIS IS A GUARANTEED DOWN SMASH ALL THE TIME, EVERY TIME
They can't do anything to get around this. If they roll to the edge, the end of the stage prevents them from getting their complete distance of their roll, and the tip of the hammer will nick them if you've spaced yourself correctly. If they roll to you, release the smash, *the spin guarantees 100% precision. If they get up in place, they should get hit by the solid middle of the hammer, and if they get up attack....^_^.... IT WILL MISS!- Due to the lean back of the down smash charge.
Reviews lain ~ "Buuman trap is ****."
PC Chris ~ "Im glad I didn't play you "
Fatal ~ buumann has the best d3 hands down in NE and maybe better than atomsk
sMexy-Blu ~ "The enemy can't avoid it thats why its called "The Buuman Trap" lolz"
T3h Albino ~ "Use the buuman trap ***** works"
RATED ~ "I am using the Buuman's trap , I started to use it against human players yesterday and it works wonders. thanks buuman."
Jupz ~ "it works well :D I just gotta learn how to space it well :D"
TheMnm ~ "Great guide
The Buuman Trap looks promising."
Semifer ~ "The Buuman trap is broken"
Sec. III
Tricks, Tips, facts, and/or Statistics
Facts
-Dedede weight is 1.071(4th heaviest)
-Dedede Horizontal Air Speed is 2.10 (slowest)
-Dedede Fall Speed is 0.29 (relatively fast)
Tricks
Running Z grab - Run towards any item on the ground, release the control stick as you approach and press Z. Effect: You will pick up the item during a run. Note: You must initiate Dededes running animation, and not his fox trot, once you get past the initial acceleration and reach top velocity, this trick can be put to effect.
*If you down throw immediately after a re grab during the chain grab, the sliding animation will be negated
*If you want to change the distance of the slide during a chain grab, wait a minimal amount of time between dash grabs, OR grab attack during the chain grab, you will get the same effect.
*If you input a grab during your running animation you will dash grab. It MUST be finished in order to do a standing grab, this includes the ending part of the dash animation, when Dedede slows down.
Range of Dededes grabs Longest reach - Pivot Grab
(Does not count as a dash grab for grab releases)
Mid reach - Standing Grab
Shortest reach - Dash Grab
(Good for air grab releases ex.'Wario')
Physics and Applications of Special Attacks
Side B Notes - You will auto pick up Waddle Dees and Doos when you are near them if: You press Jab, F tilt, D tilt, and if you air dodge near it. YOU CAN UP TILTWADDLES without worrying about auto picking up
-Waddles (Dees(5%), and Doos(7%)) can be angled up or down by rolling the control stick up or down after the initial side B input
-Waddles' (Dees(5%), and Doos(7%)) distance can be changed by tilting/smashing the control stick during the side B input.
LedgeOptions
*Get-up attack after 100% -10% damage, Invincibility frames, crazy range, and decent hit stun *Ledge Hop Up air (Let go of the ledge, use a jump and up air simultaneously)
- Up air nails them for 19%, and you can re grab the ledge, using the stage as a shield)
*Ledge Jump Dair(From the ledge, input the jump command, and down air simultaneously) -You will provide a damaging shield between you and your opponent, if they're near the ledge
FRAME DATA and PERCENTS
2-20 - Invincibility frames duration ~ 25 - Total number of frames
Falco
Down Throw -> 54% (I think, can someone help me out)
Pikachu Down Throw -> Down Smash/Up Smash->60% (Needs testing)
Wario ->Standing infinite boost grab
Dthrow, boost Dthrow until around 192%
Ice Climbers D-Throw / F-Throw / B-Throw -> Any move
->Infinite ( The D-throw chaingrab is NOT an Infinite)
Lucario Side-B -> Fsmash / Fair
-> 38%
Marth F-Throw -> Dash Attack / Fair / Nair /Dair
-> 50% Yoshi
Grab Release -> Fair
->Infinite
Bowser Grab Release -> Neutral A/Side B
->Infinite
King Dedede Down Throw->Ftilt
->Any %
Pikachu Forward Throw -> Upsmash
60%
Tips: Abuse your grab range and try to stay in the air and beat out his arials with bair.
Wall Infinites/Chain Grabs
These ones can only be performed next to a wall such as Shadow Moses Island.
Marth Dtilt
->%??
Metaknight Dtilt
->%?
Mr. Game and Watch Dtilt
->%?
Donkey Kong Dtilt->%?
Similar to Marths
Ledge Infinites/Chain Grabs
These infinites can be performed at a ledge of a stage or platform. These can also be performed on neutrals.
King Dedede Down Throw->Ftilt,down tilt
->Infinite
Snake Down Throw -> U-tilt/Side-tilt
->Infinite
Attacks that cause tripping and percents
*Less than or equal to = "<="
Down tilt - <= 18% Bair - <= 10% Down B (Uncharged) - Between 10-15% Fowardair - Between 10-14%
Projectiles that the F tilt negates
Pits'Arrows
Ice Blocks
Pikachus' Thunder Shock
Razor leaf
Diddy'sPeanuts
Aura sphere {CHARGED and UNCHARGED} (Dedede can F tilt a fully charged aura sphere when lucario is at 38% and its fresh)
Fireballs
Ness and Lucas'PK Fire and PK thunder
Boomerangs
Arrows (Link and Toon Link)
Samus' Charge beam (Uncharged)
Samus' Missles
Super Armor
*Inhalehas super armorframesduring the initial suck up animation!
*Up tilt hasinvincibility, that is triggered when you connect with it during the beginning of the animation up until his head inflates.
*Up Bhassuper armorframes up until his velocity has reached zero (Until he has reached the peak of his Up B)
Objects that can be inhaled
*Snakes' grenades, and his proximity Mine (Glitch) http://www.youtube.com/watch?v=ya8dhMpspHQ *ROBs' GYRO(Charged and uncharged) *Warios'Bike(andpieces) *Zero suit samus'Armor Pieces *Diddy Kongs'Bananas *King Dededes'Waddle deesand Waddle doos(NOT GORDOS!) *Peachs' turnips
*Toon LinkandLinks'bombs Sec. V Follow ups from down throw Snake - *Only fthrow snake off stage when youre in a position where you wont be able to edgeguard him after the downthrow because he'll slide to the ledge
Double jumps right away either straight up or away from the stage - F-tilt his Second jump (forcing him to Up B) edge guard him or WoP him with Forward airs and Back airs.
Up Bs Close to you - cyhper grab him
Double Jumps towards you - grab him which forces him to Up B, and grab him a last time out of his Up B
Jumps to ledge (too high for any grab follow ups) - D tilt his Second jump then **** him accordingly.
*If snake starts jumping to the ledge perfectly, run and grab the ledge, he falls and is forced to up+b then edge guard.
Most characters can be F tilted after a down throw
The characters that can't are:
Jigglypuff Luigi Kirby Squirtle
Characters that can be D tilted at the edge (after a down throw)
Snake King Dedede Donkey Kong Wolf Yoshi R.O.B. Bowser Charizard Samus Ivysaur NOTE: Some characters can DI up and jump or even Up b out of his down throw
Here's a list of Characters that can DI/jump/attack/or B special out of it
(With respect to a missed tech of course)
Meta knight - CANNOT ESCAPE THE TECH CHASE
Squirtell - Can DI up and Jump out
G&W - DI up Jump and UpB out
Zero Suit Samus - DI up and Down B out
Kirby - DI up and jump out Sec. VI
Vertical Data
Up TiltKilling Percents with DI
(Tested in the direct center of FD, with best DI possible, and best option for momentum canceling with each character)
META KNIGHT - DIES at 100% DIES at Halberd at 93% FALCO-DIESat 109% Snake - DIESat132%
Mr. GAME & WATCH- DIESat 98% Olimar - DIES at 103% Marth- DIES at 110%
Toon link - DIES at 109%
Diddy Kong - DIES at 111%
Killing up with Dedede, stage choices, and ceiling heights (I just picked out, organized and simplified it down for Dedede players)
Percent damage required to be killed by a fully-charged Mario up-smash on Final Destination; Mario up-smash was chosen due to its large and low hitbox, along with almost straight vertical knockback. 99%
Uncharged Up-Smash Killing Power, Grounded Opponent (Dedede performed a C-stick uncharged up-smash on Mario immediately in front of him; the percentage required to kill on Final Destination is given 109%(103% for u-tilt)
Charged Up-Smash Killing Power, Grounded Opponent (Dedede performed a fully charged up-smash on Mario immediately in front of him; the percentage required to kill on Final Destination is again given.) 72% Uncharged Up-Smash Killing Power, Aerial Opponent Dedede performed a C-stick uncharged up-smash on Mario immediately above him on right-side platform of Battlefield; the percentage required to kill is given: 100(95 for u-tilt...)% Charged Up-Smash Killing Power, Aerial Opponent: D3 performed a full charged up-smash on Mario immediately above him on right-side platform of Battlefield; the percentage required to kill is again given. 65%
Up-Aerial Killing Power D3 performed short-hop up-air, dair, and Up B on Mario immediately above them on right-side platform of Battlefield; the percentage required to kill is given. 143% - Up air
143% - Down air
95% - Up B
Stage Ceiling Height
(highest to lowest, from bottom platform)
(Amount of damage required for grounded Mario to be KO'd by an undiminished, fully charged Mario up-smash. Less damage needed = lower ceiling. Damages/heights are listed for major platforms as well on some stages, in ascending order. Some stages that were difficult (like Delfino) were not closely examined, and some stages no one cares about were skipped entirely.) Jungle Japes: 100/97/93 <---bad stage for D3 IMO, sinks in water, water helps foes recovery, and can't kill with up tilt here, nor edge guard Pirate Ship: 85
Havenbow: 85
Pictochat: 84
Pokemon Stadium 2: 83/75 Battlefield: 82/75/68
FD: 82
Delfino: 82
Norfair: 82/74/67
Yoshi's Island: 82/75
Lylat Cruise: 82/74
Castle Siege: 82-88-81
Smashville: 82/74
Frigate: 81-77
Brinstar: 81/74/68
Halberd: 77/75/68-73/65 <-- awesome stage for dedede Rainbow Ride: 75
Corneria: 74/70/57
*Credit goes to Thinkman
One thing a few other boards have mentioned is having one shared account that would have the first post for the important thread. The account would only be know to the Mod and a few mature/respectable/active members so updates don't depend on a single person.
However, this idea hasn't been cleared yet so it certainly is not official.
That seems like a good idea. Alternately we could reserve like 5 posts in the thread for CO18, Vayseth, Buuman, etc. for people to put their individual sections in so they can edit those parts themselves later.
That seems like a good idea. Alternately we could reserve like 5 posts in the thread for CO18, Vayseth, Buuman, etc. for people to put their individual sections in so they can edit those parts themselves later
Can we take it in pieces so we don't have to take it all at once?
That seems like a good idea. Alternately we could reserve like 5 posts in the thread for CO18, Vayseth, Buuman, etc. for people to put their individual sections in so they can edit those parts themselves later.
WHAT
SCREW THIS, FELLATIO PIC STAYS OR I GO.
This.
Can we take it in pieces so we don't have to take it all at once?
That's also what she said.
But seriously, what I was thinking was that we could set it up like CKit's Melee Fox guide.
I've got a few more pieces I'd like to add for the guide, if anyone wants. We should also add a section for Stages and how dedede can deal with certain moves.
IMO, we could have the guide like this (just an idea)
Post 1
Lains quote at the top of the matchup thread.
Dedede Pic
Contents
Intro
King Dedede is the best character in the game.
Post 2
Moves analasis, eg frames etc.
Post 3
The chaingrab and relevant information, tech chasing, buuman trap
Post 4.
Dedede and his playstyle. (someone could write this section, we have guides on all the technical stuff but no stuff on how to actually play him). We could give info about how Dedede can deal with certain situations eg.shield pressure, getting gimped. Gates flowchart could go here.
Post 5.
Stage guide
Post 6.
Matchup guide
Post 7.
Random Dedede Facts and Info
Post 8,
Conclusion
Just an idea, dont flame meh for it
EDIT
I wrote up an intro for the guide, don't mind if you don't wanna use it, you could use it but change parts if you want. Looking through most guides on the site, the intros tend to give off stupid info that everyone knows eg. falco can camp (no **** lol) so I tried to make it a little different, and give it a little of Dedede flavour
King Dedede is a very unique and special character, only appreciated fully by a select and elite group of people with a better understanding of The King and his metagame. Anyone can enter this group, but they require an in-depth knowledge about The King's Metagame, which is evident in all Dedede mainers, from the pro's...
King Dedede pro's outweigh his con's by far, which is part of the reason why he is currently placed 6th on the Smash Back-Room's official tier list. Another reason is that he preffered he would be placed in that position, and it happened.
PROS
-Hardest to kill character in the game with proper Directional Influence
-Good range on most of his attacks
-Excellent priority on most of his attacks
-Quick Tilts and Aerials
-A few excellent kill moves including Up Tilt and Down Smash
-A great chaingrab that works on around two-thirds of the cast until any percent
-An insane grab range (the longest non-tether grab)
-Can Tech Chase characters that he can't chaingrab
-Most damaging throw in the game
-Multiple Jumps
-A good recovery with Super Armour on his Up Special (Super Dedede Jump)
-A projectile that can block other projectiles
-A suicide move (Neutral B/Inhale)
CONS
-Being heavy means he is easy to Combo
-Laggy recovery move means he can get knocked back out easily
-Very slow running pace
-Worst Aerial movement in the game
-Big target which means moves are easier to connect on him.
King Dedede is a very fun character to play and you will soon find yourself falling in love with The King. He is amusing to play because of his many awesome facial expressions and his lovable look. His metagame does not evolve as fluently as less awesome characters, such as Diddy Kong or Snake. This is simply because he would rather not put in the effort to keep his metagame moving. Yes, King Dedede has the power to do that. He basically said "**** this, I can't be screwed keeping up my metagame".
Tank McCannon realised that King Dedede was in fact the best character in the game before anyone else, and some people have still not realised this fact today. The thread he made about his discovery is located below so people could educate themselves further about The King.
*insert King Dedede is the best character in the game thread*
Like I said, if you don't like it we don't have to use it also feel free to edit parts of it if you want :D
Now I was thinking about conclusions and most guides conclusions is basically reinstating the introduction. Instead of having a generic conclusion, we could have something like this:
With the tl;dr referring to the whole guide lol. For the lazy new Dededes. of course everyone will be given credit for their pics and charts in the guide.

")