
Reaver197
Smash Lord
- Joined
- Sep 30, 2006
- Messages
- 1,287
Captain Falcon

Welcome to the Brawl guide to Captain Falcon.
Note: These percentages are for the Japanese version of Brawl. They may be adjusted for the US NTSC release.
Also, please be aware that repeatedly spamming a move (and connecting with it) will decrease it's damage and knockback. These percentages are a range made from using a particular move 2 - 3 times in a row. You may get much lower/different results from using a move more than that amount. More specific info can be found here: http://smashboards.com/showthread.php?t=141977
Table of Contents
I. The B Moves
II. Throws
III. Ground A Moves
IV. Aerials
V. Final Smash: Blue Falcon

Damage: Initial hit = 10%; 2nd hit = 21%
Knockback: Super High
Notes: For his Final Smash, Falcon calls in Blue Falcon, which drives by in front of him. If it hits someone, it starts a mini cutscene in which Falcon runs them over with Blue Falcon again. It's not really an assured instant KO, though it can kill people at 0% depending on how light they are and what level it is. In general, it usually kills after the 40 - 60% range (also depending on character and level).
VI. General How to Play
*Coming Soon*
VII.Miscellaneous Info
VIII. Techniques
IX. Match-Ups
X. Stage Selection
*To be worked on and improved*
XI. Videos
If anyone has suggestions, mistakes to point out, or new information about attacks, I'd be more than happy to receive them and include them in/fix them.
Welcome to the Brawl guide to Captain Falcon.
Note: These percentages are for the Japanese version of Brawl. They may be adjusted for the US NTSC release.
Also, please be aware that repeatedly spamming a move (and connecting with it) will decrease it's damage and knockback. These percentages are a range made from using a particular move 2 - 3 times in a row. You may get much lower/different results from using a move more than that amount. More specific info can be found here: http://smashboards.com/showthread.php?t=141977
Table of Contents
I. The B Moves
II. Throws
III. Ground A Moves
IV. Aerials
V. Final Smash
VI. General How To Play
VII. Miscellaneous Info
VIII. Techniques
IX. Match-Ups
X. Stage Selection
XI. Videos
II. Throws
III. Ground A Moves
IV. Aerials
V. Final Smash
VI. General How To Play
VII. Miscellaneous Info
VIII. Techniques
IX. Match-Ups
X. Stage Selection
XI. Videos
I. The B Moves
Standard B: Falcon Punch

Damage: 24 - 29%
Knockback: High
Notes: Can be turned around for a reverse Falcon Punch
Side B: Raptor Boost
Damage: 5-7%
Knockback: Low - Medium
Notes: Can now sweetspot ledges with it. If you hit somebody in the air with it, it spikes them and sends Falcon over them, enabling you to hit people with it as you're recovering without just falling and dying. Also, it seems that this move no longer has the dodge frames that it had in Melee.
Up B: Falcon Dive
Damage: 15 - 18%
Knockback: Low - Medium; higher damages: Medium - High
Notes: Has a much increased grab height, enabling to grab ledges and people that are higher than Falcon's model.
You can now grab people who are edgehogging you and are no longer invincible, which is awesome because then it's an assured level spike. However, against a knowledgeable opponent, this most likely won't happen often.
Down B: Falcon Kick

Damage: 10 - 14%
Knockback: Weak: Low; Strong: Medium
Notes: You no longer regain a second jump after using this in mid-air
*Addendum There is two different strengths to Falcon Kick now. If you catch an opponent in the frames immediately after starting a Falcon Kick, it does a decent amount of knockback. However, if you hit towards the middle or end, the knockback is not as strong.
Have to see whether there is a damage difference, and whether it affects an aerial Falcon Kick.
Damage: 24 - 29%
Knockback: High
Notes: Can be turned around for a reverse Falcon Punch
Side B: Raptor Boost
Damage: 5-7%
Knockback: Low - Medium
Notes: Can now sweetspot ledges with it. If you hit somebody in the air with it, it spikes them and sends Falcon over them, enabling you to hit people with it as you're recovering without just falling and dying. Also, it seems that this move no longer has the dodge frames that it had in Melee.
Up B: Falcon Dive
Damage: 15 - 18%
Knockback: Low - Medium; higher damages: Medium - High
Notes: Has a much increased grab height, enabling to grab ledges and people that are higher than Falcon's model.
You can now grab people who are edgehogging you and are no longer invincible, which is awesome because then it's an assured level spike. However, against a knowledgeable opponent, this most likely won't happen often.
Down B: Falcon Kick
Damage: 10 - 14%
Knockback: Weak: Low; Strong: Medium
Notes: You no longer regain a second jump after using this in mid-air
*Addendum There is two different strengths to Falcon Kick now. If you catch an opponent in the frames immediately after starting a Falcon Kick, it does a decent amount of knockback. However, if you hit towards the middle or end, the knockback is not as strong.
Have to see whether there is a damage difference, and whether it affects an aerial Falcon Kick.
II. Throws
Jabs
Damage: 1 - 2% per hit
Knockback: None
Forward Throw
Damage: 8 - 9%
Knockback: Low
Notes: At lower percentages and with certain heavier characters, they might land on the ground be being able to recover, opening up the possibility of a tech chase.
Up Throw
Damage: 7 - 8%
Knockback: Low
Down Throw
Damage: 6 - 7%
Knockback: Low
Notes: Most useful throw overall.
Back Throw
Damage: 8 - 9%
Knockback: Low - Medium
III. Ground A Moves
Neutral A: Jabs
Damage: 1 Jab = 3%; 2 Jabs = 5%; "Gentleman" = 10%; Multi-jabs = 1 - 2% per hit
Knockback: None
Notes: Using the "Gentleman" motion no longer causes knockback but instead is treated as a jab. You can also hold down the A button to just automatically do a jab combo. Also, during the jab animations, hitting the c-stick will count as pressing A, only adding to your jabs. You can't just tilt or smash in the middle of a jab combo.
Forward Tilt
Damage: 8 - 10%
Knockback: Low - Medium
Down Tilt
Damage: 9 - 11%
Knockback: Low
Up Tilt
Damage: 10 - 14%
Knockback: Medium - High
Forward Smash
Damage: 17 - 20%; Fully Charged = 27%
Knockback: High
Down Smash
Damage: 16 - 19%; Fully Charge = 26%
Knockback: High
Notes: If you are close enough to the opponent, it seems that you'll do a Ganon styled d-smash, in which you hit your opponent from one kick to the other. Will work on getting damage info.
Up Smash
Damage: 19 - 22% (both kicks hitting); Fully Charged = 31%
Knockback: Medium - High
IV. Aerials
Neutral Air
Damage: 11 - 12% (1st Kick = 3%; 2nd Kick = 8%)
Knockback: Low - Medium
Forward Air: The Knee
Damage: Sweetspotted = 16 - 19%; Flubbed = 3 - 5%
Knockback: Sweetspotted = Medium - High; Flubbed = Low
Notes: You need to be much more precise with your timing to sweetspot now.
Down Air: Stomp
Damage: 11 - 14%
Knockback: Medium - High
Notes: The changed hitbox for this move sometimes results in very different trajectories. You can hit people horizontally with it.
Up Air
Damage: 11- 14%
Knockback: Medium - High
Notes: Hitting opponents in different areas of the attack will result in varying amounts of knockback and trajectories.
Back Air
Damage: Strong = 11 - 15%; Weak = 5 - 7%
Knockback: Strong = Medium - High; Weak = Low - Medium
Notes: The difference between a strong attack and a weak one is different from Melee. To get the strong hit, you have to hit opponents with the Bair as it's extending/reached full extension. Also, it seems that getting hit the forearm hits with better knockback and trajectory than with the fist, but I must try it out some more to really confirm that.
V. Final Smash: Blue Falcon
Damage: Initial hit = 10%; 2nd hit = 21%
Knockback: Super High
Notes: For his Final Smash, Falcon calls in Blue Falcon, which drives by in front of him. If it hits someone, it starts a mini cutscene in which Falcon runs them over with Blue Falcon again. It's not really an assured instant KO, though it can kill people at 0% depending on how light they are and what level it is. In general, it usually kills after the 40 - 60% range (also depending on character and level).
VI. General How to Play
*Coming Soon*
VII.Miscellaneous Info
- Falcon's alternate colors.
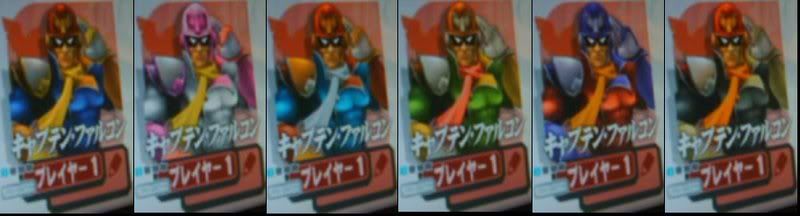
Courtesy Ferio Kun
- You can spot-dodge repeatedly very quickly now. So much so that you might be able to time your spot-dodging well enough to never even be hit in between dodges.
Courtesy Ferio Kun
- You can spot-dodge repeatedly very quickly now. So much so that you might be able to time your spot-dodging well enough to never even be hit in between dodges.
VIII. Techniques
Increasing the Range of Falcon's Forward Smash
*Discovered by T0MMY; notified by the_yoshinator & k4polo
Short Dash Upsmash
Auto Cancel SH Dair
*Notified by WastingPenguins: original thread
Auto Cancel SH Knee
"Autodashing" / "Buffering"
*Discovered by T0MMY; notified by the_yoshinator & k4polo
You can increase the range of Falcon's forward smash by starting to dash in the opposite direction you intend to hit in, then immediately hitting the c-stick towards your target. What will happen is Falcon does a little jump forward as he smashes, increasing it's range further than a standing fsmash.
Alternate Method: (Discovered by domiNate) Essentially, what you do is tilt the control forward slightly so you do the first step of Falcon's walking animation (not dashing), then you proceed to hit back on the control stick and forward on the c-stick for an even longer extension on Falcon's fsmash. Takes slightly longer to execute though.
Alternate Method: (Discovered by domiNate) Essentially, what you do is tilt the control forward slightly so you do the first step of Falcon's walking animation (not dashing), then you proceed to hit back on the control stick and forward on the c-stick for an even longer extension on Falcon's fsmash. Takes slightly longer to execute though.
Short Dash Upsmash
Normally, if you try to dash upsmash, you travel the distance of Falcon's rather lengthy initial dash animation. However, if you dash AWAY from your opponent, then quickly dash back towards them (essentially doing a dash dance) and hit up on the c-stick, you can do a considerably shorter dash upsmash. The distance you slide depends on how quickly you hit the c-stick after dashing back towards your opponent. The faster you get the two actions closer together, the shorter of a distance you'll slide. This makes Falcon's dash upsmash much more flexible and accurate.
Here's a video demonstrating this:
http://www.youtube.com/watch?v=e8_KR66O3GM
Here's a video demonstrating this:
http://www.youtube.com/watch?v=e8_KR66O3GM
Auto Cancel SH Dair
*Notified by WastingPenguins: original thread
Doing a short hopped dair with Falcon usually results in a decent bit of lag when Falcon lands, making it dangerous to use against opponents on the ground. However, it has been found that there is a way to perform the dair in such a way that you complete the moves animation before hitting the ground, thereby suffering no lag. Essentially, what you do is you jump, and immediately after jumping, you perform your dair. There are two means to execute this depending on your play style (Note: this is assuming you're using a Gamecube controller).
1. With Control Stick Jumping: Quickly tap up on the control stick to jump and, immediately afterwards, hit down on the c-stick. If you land standing up with no landing animation you did it correctly.
2. Without Control Stick Jumping: For people like me who cannot stand having the control stick jump, what you want to do is hold down on the control stick, short hop, and then immediately roll from the jump button to A. Afterwards, let go of the control stick so you don't crouch after you land (unless you want to).
Auto Cancel SH Knee
Similar in concept and execution to the Lag Free Dair. You start the knee immediately after jumping, thus finishing the animation. You can only hit at a certain height however, since you cannot fast fall it to make it aim lower or else you will get the lag. The way to do this is to push forward, shorthop, then immediately roll your thumb from the jump button to A.
"Autodashing" / "Buffering"
As you're landing from a lag-free aerial or an empty jump, a few frames before you land on the ground, you can hit forward on the control stick to cause Falcon to immediately start running upon landing.
IX. Match-Ups
The general play style I recommend for Falcon (which you will know about if you've my other thread) is trying to bait opponents. Falcon no longer has the raw speed and penetrating power he used to, so you have to be much more cautious and mindgamey.
These match-ups are more like rough impressions rather than any in-depth examinations. I've still only had a limited experience with Brawl, and have only played certain characters somewhat enough to formulate any sort of idea of what it's like to fight them. If you guys have any input to give on characters I haven't covered, or more in-depth input on the ones I have, I'll be glad to include it.
Ike

Advantages
- Very strong attacks
- Good range and priority
- Can cover large distances quickly thanks to his side-B
- Some attacks come out pretty quick
- Difficult to edgeguard
- Heavy, so he doesn't fly as far when hit
Disadvantages
- Is generally quite laggy after doing moves
- Pretty easy to hit, shouldn't have too much trouble landing a knee when you can.
- When not using side-B, he's not that mobile
- Fairly comboable (by which I mean you can probably link a good amount of uairs on him).
Impression
If there was a character to bait and punish, it would be Ike. Ike can be pretty quick on the attack sometimes, or just have the range to hit you, but he's generally quite laggy after doing moves, which should be capitalized on as much as you can since Ike is pretty hard to kill, so every point of damage counts. There are only a couple of moves which Ike can do without much or any lag it seems, which would be his nair and a whiffed ground side-B. Everything else should be fairly laggy, so be sure to try to be near enough to get in the hits/grabs you need.
Edgeguarding Ike should not be attempted if he's going to use his up-B at all. It's very fast and is a projectile, so you won't be able to do anything to him while he's doing it. If he's hanging on the ledge, just stay away until he gets back on the level or else he'll just up-B stall on the ledge which will be very painful for you. The only time you should edgeguard him is when he attempts to use his side-B to grab the ledge. Then, you should be sure to edgehog while being invincible to ensure a kill, since he'll just fall helplessly after an aerial side-B. If you're feeling particularly hilarious and are at low damage, you could just simply jump off the level and tank an aerial side-B, causing him to stop and fall prematurely.
A note about his side-B. It has ridiculous range when charged, like almost enough to go from one end of Final Destination to the other, and has fairly decent knockback, so never underestimate its distance, but don't fear it either, since there's a trick to dealing with the side-B. Against an inexperienced Ike, they'll probably start to use and charge up their side-B if they see that you're far away and want to hit you from far away. What you should do is try to act like you're doing is staying just out of their range, but you'll really be within range and waiting for them to unleash their side-B. When they do, make sure that you're facing them, and then shield and take the hit. Don't try to dodge it or jump over it, just shield it, because when they hit, the move becomes pretty laggy and then you can just grab them and throw them.
A more experienced Ike player will try to purposely fall short with his side-B so he can, lag free, flow right into an A combo, which has decent knockback and does a lot of damage. So, against an experienced Ike, you're going to probably want to run at him when he unleashes his side-B then shield so you get hit anyway and are free to grab him.* Try to take advantage of his side-B like that when you can, which they might use a lot since it vastly increases their maneuverability and range, and if you're good at getting at it and shielding, you'll have an assured way to grab him. If you get them to use it less, then that's good too since they can't be as fast or as maneuverable.
*Addendum: You cannot shield cancel during the initial dash animation, which for Falcon is very long, which is usually a good thing, but not for this. So this tactic only works if you have time to run for a little while, which you probably won't. Instead, if Ike falls short, be sure to stay shielded in preparation for a jab combo and try to shield grab during that instead.
MetaKnight
Metaknight section totally out of date and sucks. Will fix when not being lazy.

Advantages
- Fast, high priority attacks
- Good range
- Difficult to edgeguard
- Can combo Falcon a bit
- Edgeguards Falcon well
- Ground game is much better and faster
- A lot of his attacks can hit on both sides of him
- Very good recovery
- Good grab and throws
- Small (can't hit him with short-hopped aerials while he's on the ground)
- Has hardly any lag
Disadvantages
- Somewhat light.
- Um...
Impression
If you're playing against a MetaKnight, then let me just say "owch". Metaknight is a counter to Falcon if I've ever seen one. He's fast and attacks quickly with good range and great priority. His moves will eat through any move you're doing, and some of them can do a decent amount of knockback, making it seem like he's hardly KO challenged.
The strategy of bait and punish is pushed to its max in this fight. I'm not quite even sure if it works, but it's better then just flinging yourself at him in desperate attempts to hit through his attacks. Metaknight has multiple jumps, can double aerial in them, and has very little lag. It's very difficult to punish him, even if you manage to bait him (and don't get baited yourself). Uair is definitely the move of this match as it is the only move that has a chance to match MetaKnight's range, speed and priority. Even if you do manage to hit him and knock him off the stage, it's very difficult, if not next to impossible, to edgeguard him.
He has a really good return distance. He can either use his side-B for a completely impenetrable and unstoppable spin recovery (I doubt anything short of a perfectly timed Falcon Punch can beat it, and probably not even then) or he can do his Up-B, which has ridiculous knockback and can sometimes even hit you away from the level, completely reversing the situation or killing you outright. The best solution is to edgehog if he's low enough and to make sure you're invincible when he gets close. If he's higher than the ledge, don't even bother, and simply wait on the level and see if you can get a hit in after he lands or something.
I unfortunately do not have any sort of sound, specific strategy for fighting MetaKnight since hardly anything seems to work on him. If anyone has any sort of strategy to give MetaKnight a decent fight, I'm all ears.
R.O.B.

Advantages
- Very good recovery
- Has two projectiles
- Laser is very fast when fired, almost instantaneous
- The top can be stored to shoot later, and can be picked up and used multiple times
- Dsmash can come out very quickly after a roll.
- Good edgeguarder; WOP
Disadvantages
- Not very fast in movement or attack speed, especially aerials.
- Huge model, very easy to hit.
- Can shield his top to make it disappear
- Needs recharge time for his laser
Impression
R.O.B. is one of the easier characters to play against as Falcon. He shouldn't give you too much trouble other than possibly being pretty annoying with well placed lasers, and dodging to dsmashing. ROB's strength is in his ground game, but is fairly weak in the air. His aerials can pack a bit of a punch, but they're generally pretty slow, and combined with ROB's huge model, you shouldn't have too much trouble with him in the air.
ROB's model seems to be a huge, square, going from the front of his arms, to the pipe sitcking out his back, and then (obviously) from his head to his treads. It's huge, and thus is incredibly easy to knee him. The one thing that ROB might have going for him is that he can recover from practically anywhere as long as he isn't outright killed by an attack.
Addendum: ROB, as it turns out, by virtue of his up-B, is very effective egdeguarder. If he gets you off the stage, he can pretty much WOP you with his fair off the screen, then come back. Be careful and creative when coming back against ROB. Coming from lower down will probably work best.
Zelda

Advantages
- Disjointed hitbox
- Has one of the best projectiles in the game
- Long duration smashes
- Shield pressures well
- Can switch quickly between fair and bair.
- Can double fair in a jump
- Very little lag after smashes
- Usmash can kind of juggle Falcon at low percentages
Disadvantages
- Not as maneuverable or quick on the ground
- Slowish dair; vulnerable from below.
- Smashes aren't very strong KO moves
- Uair juggling works well
- Can get past her side-B
Impression
Despite my longer list of advantages than disadvantages, this match is a very close and even match, as far as I can tell, when you know what you're doing. The first time you meet a Zelda, however, it might seem kind of painful, but once you get used to what she can do, then the playing field evens considerably. This match up also feels very stage dependent. Falcon does better on levels with platforms, whereas Zelda seems to be more in tune with open, flat levels.
First off, Zelda has an amazing projectile. The side-B has a very huge hitbox now, especially in the vertical direction it seems, so trying to jump over it is questionable at best. Instead, shielding it or dodging it is better. You never want to be too far away from Zelda or else she can side-B you with impunity. Instead, you always want to be kind of close to her, so that you can Falcon Kick her if you see her starting her side-B animation. This is an incredibly useful counter to her side-B. It won't do much knockback or damage, but it's there nonetheless.
However, you don't want to be constantly dashing at her recklessly. You want to be close, but not always in-your-face close. Zelda has very high priority, damaging, long-lasting, and spammable smashes. There is very little downtime between her smashes, so she can go from one to another fairly quickly, so be careful and space well. Always try to see what smash Zelda is going to try to do, then attack her from a different angle. Trying to attack after a smash for a hope to her while she's laggy is a risky thing. Try to hit her while she's actually smashing, but (obviously) from another direction. If you're going to shield or spot-dodge a smash of hers, be sure to hold down your shield extra long or spot dodge as fast as you can repeatedly. I can't count the number of times I initially shielded a smash, thought I was safe, let it go, then got hit by the rest of the smash. However, you generally don't have to worry too much about being KO'd by smashes unless you're at very high damage and she uses a fresh smash on you. Also, watch out when approaching her from the side when she's usmashing, her hand can hit you if you're close enough.
Being in the air generally works out to your advantage, especially if she's above you. You can just uair away with very little worry. Just be careful if she gets below you, her uair is a strong vertical KO, or draws even with you. Her bair/fair is the same as your knee except longer, faster to come out and maybe slightly more knockback (if so, not by very much). She can also switch between the two very quickly. If she misses with an fair as she flies past you, she can very quickly switch to her bair and sweetspot you. It's very dangerous, so be wary of it. Don't try to get into sweetspotting duels with her. Try to get her with knees as shes recovering, or after uairs.
Zero Suit Samus

Advantages:
- Some moves have better range and speed
- Can combo you to a vertical KO with uairs
- Bair is a very powerful KO move
- Has a projectile that can stun
- Grab Range
- Has three jumps
- Good, lag-free dash attack
Disadvantages
- Missed grab is very laggy
- Can be edgehogged fairly easily
- Seems fairly light, thus is sent far/easily KO'd
Impression
ZSS has a bit of an advantage over Falcon, but if you play smart and space well, you can beat her. Keep on your toes for this, for she has quite a few ways to get you. Her side-B looks kind of similar to her grab (they both shoot her whip forward) but has a circular flash at the tip and is more wiggly in the middle. Be sure to learn the distinction between the two because it's fairly critical to being able to tell when to shield and when to jump over it.
Her side-B is pretty ridiculous, since at the tip it does quite a bit of knockback, but the ridiculous thing about is that if you're hit in any area before the tip, the whip will push you into the tip and still send you flying. So learn to expect this and shield it. As for her grab, ZSS might not use it that much as other characters, since she has so many similarly ranged moves, and probably knows it's a weakpoint (or will soon learn it is anyway). The knee is a very good punishment for a missed grab.
In the air, Uairs work the best on her, since they have the most range, are fast, and you can hit her multiple times with it in the air. However, watch out for her bair and uair. Her bair has very good speed, range, and is a very good KO move, rivaling your knee. Her uair can juggle you, and she can vertically KO you with it if she moves fast enough and you do too little to get out. I recommend air dodging if you start getting hit by uairs, because none of your aerials, especially dair, will really be able to get through in time. Her dair is very laggy, so if you ever see her use it, be sure to be nearby enough to punish her for it. Also, be aware that her down-B give her a third jump, and often may try to use it to mindgame you. So, be aware and try to keep track of how many jumps she has done so you can be sure to cover her when she tries to land.
Edgeguarding ZSS consists mostly of just edgehogging the ledge. She can't use her Up-B whip thing to grab the stage and pull her up if someone else is already on the ledge. Be sure to be invincible too, just in case the Up-B hits you, because it can spike. Which is something to be careful of when you're recovering from high up and are off the level. ZSS can jump out and use her Up-B to spike you as you try to fly over her. I found out by accident, however, that you can cancel out her Up-B spike if you clank it with an aerial (they hit each other at the same time and "clink"), but I don't know if bairing her Up-B to cancel out it's spike effect is going to be consistent enough. You can also try stomping or ledgehop stomping to spike her yourself.
Watch out for her dash attack also. It's fairly fast, but it has no lag after it, so she can combo it into something else (usually utilt for me). If you think she's going to dash attack you, just shield and shield grab her since you can grab before she recovers from the slight hit stun.
*Addendum: Your dash attack is very good as well, but the best thing about it, I found out, is that it clanks with ZSS's side-B, which is awesome. It may really help Falcon's game, especially approaching, or hitting her while she has some lag, but not enough to use a smash or tilt on her. Plus, it then sets up for your second-favorite aerial; uair.
These match-ups are more like rough impressions rather than any in-depth examinations. I've still only had a limited experience with Brawl, and have only played certain characters somewhat enough to formulate any sort of idea of what it's like to fight them. If you guys have any input to give on characters I haven't covered, or more in-depth input on the ones I have, I'll be glad to include it.
Ike
Advantages
- Very strong attacks
- Good range and priority
- Can cover large distances quickly thanks to his side-B
- Some attacks come out pretty quick
- Difficult to edgeguard
- Heavy, so he doesn't fly as far when hit
Disadvantages
- Is generally quite laggy after doing moves
- Pretty easy to hit, shouldn't have too much trouble landing a knee when you can.
- When not using side-B, he's not that mobile
- Fairly comboable (by which I mean you can probably link a good amount of uairs on him).
Impression
If there was a character to bait and punish, it would be Ike. Ike can be pretty quick on the attack sometimes, or just have the range to hit you, but he's generally quite laggy after doing moves, which should be capitalized on as much as you can since Ike is pretty hard to kill, so every point of damage counts. There are only a couple of moves which Ike can do without much or any lag it seems, which would be his nair and a whiffed ground side-B. Everything else should be fairly laggy, so be sure to try to be near enough to get in the hits/grabs you need.
Edgeguarding Ike should not be attempted if he's going to use his up-B at all. It's very fast and is a projectile, so you won't be able to do anything to him while he's doing it. If he's hanging on the ledge, just stay away until he gets back on the level or else he'll just up-B stall on the ledge which will be very painful for you. The only time you should edgeguard him is when he attempts to use his side-B to grab the ledge. Then, you should be sure to edgehog while being invincible to ensure a kill, since he'll just fall helplessly after an aerial side-B. If you're feeling particularly hilarious and are at low damage, you could just simply jump off the level and tank an aerial side-B, causing him to stop and fall prematurely.
A note about his side-B. It has ridiculous range when charged, like almost enough to go from one end of Final Destination to the other, and has fairly decent knockback, so never underestimate its distance, but don't fear it either, since there's a trick to dealing with the side-B. Against an inexperienced Ike, they'll probably start to use and charge up their side-B if they see that you're far away and want to hit you from far away. What you should do is try to act like you're doing is staying just out of their range, but you'll really be within range and waiting for them to unleash their side-B. When they do, make sure that you're facing them, and then shield and take the hit. Don't try to dodge it or jump over it, just shield it, because when they hit, the move becomes pretty laggy and then you can just grab them and throw them.
A more experienced Ike player will try to purposely fall short with his side-B so he can, lag free, flow right into an A combo, which has decent knockback and does a lot of damage. So, against an experienced Ike, you're going to probably want to run at him when he unleashes his side-B then shield so you get hit anyway and are free to grab him.* Try to take advantage of his side-B like that when you can, which they might use a lot since it vastly increases their maneuverability and range, and if you're good at getting at it and shielding, you'll have an assured way to grab him. If you get them to use it less, then that's good too since they can't be as fast or as maneuverable.
*Addendum: You cannot shield cancel during the initial dash animation, which for Falcon is very long, which is usually a good thing, but not for this. So this tactic only works if you have time to run for a little while, which you probably won't. Instead, if Ike falls short, be sure to stay shielded in preparation for a jab combo and try to shield grab during that instead.
MetaKnight
Metaknight section totally out of date and sucks. Will fix when not being lazy.
- Fast, high priority attacks
- Good range
- Difficult to edgeguard
- Can combo Falcon a bit
- Edgeguards Falcon well
- Ground game is much better and faster
- A lot of his attacks can hit on both sides of him
- Very good recovery
- Good grab and throws
- Small (can't hit him with short-hopped aerials while he's on the ground)
- Has hardly any lag
Disadvantages
- Somewhat light.
- Um...
Impression
If you're playing against a MetaKnight, then let me just say "owch". Metaknight is a counter to Falcon if I've ever seen one. He's fast and attacks quickly with good range and great priority. His moves will eat through any move you're doing, and some of them can do a decent amount of knockback, making it seem like he's hardly KO challenged.
The strategy of bait and punish is pushed to its max in this fight. I'm not quite even sure if it works, but it's better then just flinging yourself at him in desperate attempts to hit through his attacks. Metaknight has multiple jumps, can double aerial in them, and has very little lag. It's very difficult to punish him, even if you manage to bait him (and don't get baited yourself). Uair is definitely the move of this match as it is the only move that has a chance to match MetaKnight's range, speed and priority. Even if you do manage to hit him and knock him off the stage, it's very difficult, if not next to impossible, to edgeguard him.
He has a really good return distance. He can either use his side-B for a completely impenetrable and unstoppable spin recovery (I doubt anything short of a perfectly timed Falcon Punch can beat it, and probably not even then) or he can do his Up-B, which has ridiculous knockback and can sometimes even hit you away from the level, completely reversing the situation or killing you outright. The best solution is to edgehog if he's low enough and to make sure you're invincible when he gets close. If he's higher than the ledge, don't even bother, and simply wait on the level and see if you can get a hit in after he lands or something.
I unfortunately do not have any sort of sound, specific strategy for fighting MetaKnight since hardly anything seems to work on him. If anyone has any sort of strategy to give MetaKnight a decent fight, I'm all ears.
R.O.B.
Advantages
- Very good recovery
- Has two projectiles
- Laser is very fast when fired, almost instantaneous
- The top can be stored to shoot later, and can be picked up and used multiple times
- Dsmash can come out very quickly after a roll.
- Good edgeguarder; WOP
Disadvantages
- Not very fast in movement or attack speed, especially aerials.
- Huge model, very easy to hit.
- Can shield his top to make it disappear
- Needs recharge time for his laser
Impression
R.O.B. is one of the easier characters to play against as Falcon. He shouldn't give you too much trouble other than possibly being pretty annoying with well placed lasers, and dodging to dsmashing. ROB's strength is in his ground game, but is fairly weak in the air. His aerials can pack a bit of a punch, but they're generally pretty slow, and combined with ROB's huge model, you shouldn't have too much trouble with him in the air.
ROB's model seems to be a huge, square, going from the front of his arms, to the pipe sitcking out his back, and then (obviously) from his head to his treads. It's huge, and thus is incredibly easy to knee him. The one thing that ROB might have going for him is that he can recover from practically anywhere as long as he isn't outright killed by an attack.
Addendum: ROB, as it turns out, by virtue of his up-B, is very effective egdeguarder. If he gets you off the stage, he can pretty much WOP you with his fair off the screen, then come back. Be careful and creative when coming back against ROB. Coming from lower down will probably work best.
Zelda
Advantages
- Disjointed hitbox
- Has one of the best projectiles in the game
- Long duration smashes
- Shield pressures well
- Can switch quickly between fair and bair.
- Can double fair in a jump
- Very little lag after smashes
- Usmash can kind of juggle Falcon at low percentages
Disadvantages
- Not as maneuverable or quick on the ground
- Slowish dair; vulnerable from below.
- Smashes aren't very strong KO moves
- Uair juggling works well
- Can get past her side-B
Impression
Despite my longer list of advantages than disadvantages, this match is a very close and even match, as far as I can tell, when you know what you're doing. The first time you meet a Zelda, however, it might seem kind of painful, but once you get used to what she can do, then the playing field evens considerably. This match up also feels very stage dependent. Falcon does better on levels with platforms, whereas Zelda seems to be more in tune with open, flat levels.
First off, Zelda has an amazing projectile. The side-B has a very huge hitbox now, especially in the vertical direction it seems, so trying to jump over it is questionable at best. Instead, shielding it or dodging it is better. You never want to be too far away from Zelda or else she can side-B you with impunity. Instead, you always want to be kind of close to her, so that you can Falcon Kick her if you see her starting her side-B animation. This is an incredibly useful counter to her side-B. It won't do much knockback or damage, but it's there nonetheless.
However, you don't want to be constantly dashing at her recklessly. You want to be close, but not always in-your-face close. Zelda has very high priority, damaging, long-lasting, and spammable smashes. There is very little downtime between her smashes, so she can go from one to another fairly quickly, so be careful and space well. Always try to see what smash Zelda is going to try to do, then attack her from a different angle. Trying to attack after a smash for a hope to her while she's laggy is a risky thing. Try to hit her while she's actually smashing, but (obviously) from another direction. If you're going to shield or spot-dodge a smash of hers, be sure to hold down your shield extra long or spot dodge as fast as you can repeatedly. I can't count the number of times I initially shielded a smash, thought I was safe, let it go, then got hit by the rest of the smash. However, you generally don't have to worry too much about being KO'd by smashes unless you're at very high damage and she uses a fresh smash on you. Also, watch out when approaching her from the side when she's usmashing, her hand can hit you if you're close enough.
Being in the air generally works out to your advantage, especially if she's above you. You can just uair away with very little worry. Just be careful if she gets below you, her uair is a strong vertical KO, or draws even with you. Her bair/fair is the same as your knee except longer, faster to come out and maybe slightly more knockback (if so, not by very much). She can also switch between the two very quickly. If she misses with an fair as she flies past you, she can very quickly switch to her bair and sweetspot you. It's very dangerous, so be wary of it. Don't try to get into sweetspotting duels with her. Try to get her with knees as shes recovering, or after uairs.
Zero Suit Samus
Advantages:
- Some moves have better range and speed
- Can combo you to a vertical KO with uairs
- Bair is a very powerful KO move
- Has a projectile that can stun
- Grab Range
- Has three jumps
- Good, lag-free dash attack
Disadvantages
- Missed grab is very laggy
- Can be edgehogged fairly easily
- Seems fairly light, thus is sent far/easily KO'd
Impression
ZSS has a bit of an advantage over Falcon, but if you play smart and space well, you can beat her. Keep on your toes for this, for she has quite a few ways to get you. Her side-B looks kind of similar to her grab (they both shoot her whip forward) but has a circular flash at the tip and is more wiggly in the middle. Be sure to learn the distinction between the two because it's fairly critical to being able to tell when to shield and when to jump over it.
Her side-B is pretty ridiculous, since at the tip it does quite a bit of knockback, but the ridiculous thing about is that if you're hit in any area before the tip, the whip will push you into the tip and still send you flying. So learn to expect this and shield it. As for her grab, ZSS might not use it that much as other characters, since she has so many similarly ranged moves, and probably knows it's a weakpoint (or will soon learn it is anyway). The knee is a very good punishment for a missed grab.
In the air, Uairs work the best on her, since they have the most range, are fast, and you can hit her multiple times with it in the air. However, watch out for her bair and uair. Her bair has very good speed, range, and is a very good KO move, rivaling your knee. Her uair can juggle you, and she can vertically KO you with it if she moves fast enough and you do too little to get out. I recommend air dodging if you start getting hit by uairs, because none of your aerials, especially dair, will really be able to get through in time. Her dair is very laggy, so if you ever see her use it, be sure to be nearby enough to punish her for it. Also, be aware that her down-B give her a third jump, and often may try to use it to mindgame you. So, be aware and try to keep track of how many jumps she has done so you can be sure to cover her when she tries to land.
Edgeguarding ZSS consists mostly of just edgehogging the ledge. She can't use her Up-B whip thing to grab the stage and pull her up if someone else is already on the ledge. Be sure to be invincible too, just in case the Up-B hits you, because it can spike. Which is something to be careful of when you're recovering from high up and are off the level. ZSS can jump out and use her Up-B to spike you as you try to fly over her. I found out by accident, however, that you can cancel out her Up-B spike if you clank it with an aerial (they hit each other at the same time and "clink"), but I don't know if bairing her Up-B to cancel out it's spike effect is going to be consistent enough. You can also try stomping or ledgehop stomping to spike her yourself.
Watch out for her dash attack also. It's fairly fast, but it has no lag after it, so she can combo it into something else (usually utilt for me). If you think she's going to dash attack you, just shield and shield grab her since you can grab before she recovers from the slight hit stun.
*Addendum: Your dash attack is very good as well, but the best thing about it, I found out, is that it clanks with ZSS's side-B, which is awesome. It may really help Falcon's game, especially approaching, or hitting her while she has some lag, but not enough to use a smash or tilt on her. Plus, it then sets up for your second-favorite aerial; uair.
X. Stage Selection
*To be worked on and improved*
Ike
Zero Suit Samus
Bad Stages
- Battlefield: Due to her up-B and Up Smash, ZSS can hit you and even combo you easily due to the platforms.
Bad Stages
- Battlefield: Holy ****, do not play an Ike here (or probably people with swords in general). You will get ***** from below if you land on those platforms, and you will not be able to fight back as you can no longer utilize your dair to hit tall enough opponents through the platforms.
- Battlefield: Holy ****, do not play an Ike here (or probably people with swords in general). You will get ***** from below if you land on those platforms, and you will not be able to fight back as you can no longer utilize your dair to hit tall enough opponents through the platforms.
Zero Suit Samus
Bad Stages
- Battlefield: Due to her up-B and Up Smash, ZSS can hit you and even combo you easily due to the platforms.
XI. Videos
Matches: 1 vs. 1
Matches: 2 vs. 2
Combo Videos
Hylian:
Hylian (C. Falcon) vs. Cjour (R.O.B.)
http://www.youtube.com/watch?v=HDMjuGs6hPk
Hylian (C. Falcon) vs. Romo (Ness)
http://www.youtube.com/watch?v=FYKHUn_XCqo
Hylian (C. Falcon) vs. Tobias (Ice Climbers)
http://www.youtube.com/watch?v=t5PWf_UKKJQ
Jiano:
Jiano (C.Falcon) vs. Souroush(Marth)
http://www.youtube.com/watch?v=UJ74ZLM3mgE
LeeHarris:
Lee (C. Falcon) vs. Ryan (Ike)
http://www.youtube.com/watch?v=LTRvSsYtEDw
Lee (C. Falcon) vs. Marcus (Wolf)
http://www.youtube.com/watch?v=igpjjxDqSHc
Lucky
Lucky (C. Falcon) vs. Gimpyfish (Ganondorf) Match 1
http://www.youtube.com/watch?v=Shfk871riNM&feature=related
Lucky (C. Falcon) vs. Gimpyfish (Ganon) Match 2
http://www.youtube.com/watch?v=ZLNn6YUe2r8&feature=related
Lucky (C. Falcon) vs. Gimpyfish (Ganon) Match 3
http://www.youtube.com/watch?v=pAfRbi0stZY&feature=related
Unknowns:
Unknown (C. Falcon) vs. Unknown (C. Falcon)
http://www.nicovideo.jp/watch/sm2495642
Unknown (Marth) vs. Unknown (C. Falcon) *Hand Cam*
http://www.youtube.com/watch?v=Bi_wBtdYRDM
Unknown (C. Falcon) vs. Unknown (Falco)
http://www.nicovideo.jp/watch/sm2495882
Matches: 2 vs. 2
Combo Videos
Chillindude: It's Falcon and ****
http://youtube.com/watch?v=HWYvGzUq5B8
http://youtube.com/watch?v=HWYvGzUq5B8
If anyone has suggestions, mistakes to point out, or new information about attacks, I'd be more than happy to receive them and include them in/fix them.

