• Welcome to Smashboards, the world's largest Super Smash Brothers community! Over 250,000 Smash Bros. fans from around the world have come to discuss these great games in over 19 million posts!

    You are currently viewing our boards as a visitor. Click here to sign up right now and start on your path in the Smash community!

Super Smash Bros. PC Edition. (Animators, Programmers, Designers, and Voice Actors needed.)

CodakTheWarrior

Smash Ace
Joined
Jun 7, 2017
Messages
548
Alright here's the Eddy move set! Sorry it took a while, today's been a busy day.

Eddy Moveset

From the hit show "Ed, Edd, and Eddy", the less-than-intelligent, bumbling idiot that is Eddy has somehow found his way to the game of Smash! Eddy uses a cacophony of different toys and gadgets from the cul-de-sac to leave his opponents questioning what they've even witnessed. Eddy is ready to bring his own 'special' flair to the opposition!

Eddy is overall quite speedy despite his lumbering appearance, falling ever so slightly on the higher side of the speed scale. Coinciding with this speed, Eddy is also, surprisingly, pretty light. Eddy's got an above average jump height as well, putting a seriously springy pep in his step. Unfortunately, to balance all of his other superb stats, Eddy's attacks are overall weak in the damage and knock back department. However, Eddy can also attack very quickly to build up damage in a quick period of time to make up for this. Eddy cannot crawl or wall jump either.

Specials:

Neutral Special: Jawbreaker- This is one of Eddy's strongest moves and is a major source of kill power for the character. Once the move is initially used, Eddy will throw out a small jawbreaker towards opponents that does a pathetic 1% if it hits. Once it hits solid ground however, Eddy can then begin to interact with it (the jawbreaker is not a recovery item). While it's still small, Eddy can continue to throw the jawbreaker around, or push it along on the ground. The more it touches solid ground, the bigger the jawbreaker will get as if it were a snowball. Once it reaches a big enough size, Eddy can't pick up the jawbreaker and can only roll it, and it will eventually reach a limit on its size. Eddy can then hit the jawbreaker with his own attacks to knock it into the opponents, which will deal major damage if its big enough. However, be wary as opponents can also interact with the jawbreaker as well, meaning it could backfire on yourself (only Eddy can push it). If the jawbreaker falls off the stage at any point, it will have to be built up again. This makes careful strategy around the maintenance of the jawbreaker vital, just like his addiction to jawbreakers in the show.

Side Special: Lawn Mower Mush- Using this attack will automatically have Eddy hold onto a lawn mower for dear life and blaze straight forward at an intense speed, functioning similarly to Bowser Jr.'s side Special from smash 4. Unlike that attack, however, Eddy can't stop the move nor jump out of it. He can jump off of the mower, though, and he'd better do so if he doesn't want to receive recoil damage for hitting the opponent while on the mower (upwards of 10% to be exact). Eddy can also utilize the mower as an additional recovery move as well, allowing the move to be very dynamic on the battlefield.

Up Special: Eddy's 'Car Wash'- A hose appears that Eddy foolishly puts in his mouth, only for the hose to turn on and rise Eddy up in the air. The move does cover some impressive distance and Eddy can move back and forth while the move is active. However, the move doesn't do any damage, making it a strictly-recovery move.

Down Special: Helmet Head- This move is a very interesting move that changes the Eddy's stats at will. Using the move will put a Football helmet on Eddy's head for a total of 20 seconds. While wearing the helmet, every attack of Eddy's will be GREATLY amplified, allowing Eddy to become a serious powerhouse when he isn't normally. However, due to his increased clumsiness in this state, Eddy will receive recoil damage for EVERY move he uses, including those that don't deal damage to others. This makes the move a serious risk that could pay off if he plays his cards right. Once the 20 second duration is up, Eddy will have to wait through a 10 second cooldown before he can put on the helmet again.

Normals:

Jab: Eddy takes a Ping-Pong racket and repeatedly smacks the ball into the opponent. It deals incredibly minor damage at first, but will quickly stack up the longer it lasts.

F-Tilt: Eddy takes candy out of pockets and slings it towards opponents, deals minimal damage but stacks up.

U-Tilt: Eddy swipes upwards with his arm to deal minimal damage, very quick.

D-Tilt: Eddy spins around in a circle, causing damage with his jacket. Move is very quick, which leaves Eddy dizzy for a moment.

Dash Attack: This move has Eddy hop in a wagon and speed through opponents. The move does some decent damage and keeps Eddy's speed up as well.

Smashes:

F-Smash: A pile of leaves appears in front of Eddy as he holds a leaf blower. Once he releases the attack, Eddy will blow the leaves into the opponent with some force. The individual leaves do virtually no damage but, given the sheer amount of leaves, ends up doing a good lot of damage anyway.

U-Smash: Similar to Ness's up Smash, Eddy takes a yo-yo and slings it in the air. Unlike Ness's, though, the attack doesn't go from one side of Eddy to the other. It instead goes straight up in the air a good distance before returning to where it started.

D-Smash: Eddy takes out a baseball bat and swings it on the ground in a circle. One of Eddy's strongest moves, but doesn't have too much range.

Aerials:

N-Air: Eddy spins a yo-yo around him in a quick circular motion.

F-Air: Eddy head butts the opponent with his big head. The move is veeerry slow when its starting up, but has a devastating meteor Smash effect if it hits.

U-Air: Eddy claps the air quickly in an attempt to catch a fly, doing minor damage in exchange for a fast attack.

D-Air: Eddy takes out a fishing rod and slings it down beneath it. The move is incredibly slow I'm start up, and most of the rod does little damage. However, if opponents are hit by the actual hook of the line, they will be met with a guaranteed meteor Smash and will plummeted downwards, essentially a guaranteed kill if used in midair.

B-Air: Eddy slaps behind him in the air. Very minimal damage but incredibly quick.

Grab/Pummel: For the grab, Eddy lunges forward to snatch opponent with his hands. In Pummel, Eddy merely bashes the foe repeatedly with his head while laughing like an idiot.

Throws: For Forward throw, Eddy picks up opponent and rolls them across the ground like a bowling ball. Back throw has Eddy throw opponent between legs and behind him like a Football. Up throw has Eddy dribble opponent on ground like a basketball before throwing them upwards. Down throw has Eddy leap up in the air and spike opponent downwards like a volleyball, meteor smashing them.

Final Smash: Horror Movie Night- Eddy hops in the middle of the screen where a small TV plops down with horror movies playing on it. While it's playing, various shadowy, demonic creatures will come out of the screen and cause havoc to the other players for around 15 seconds or so, all the while Eddy is obliviously watching the TV. Once the time is up, the creatures will return to the TV and Eddy will resume the fight.

Taunts: Up taunt causes Eddy to blow bubble gum, only for it to blow up in his face. Side taunt has Eddy blow up a balloon animal, laugh, and then accidentally pop it. Down taunt has Eddy lie down and sketch on the ground with chalk for a bit before standing up, can actually doge some attack while laying down.

Alts: Eddy's 7 color swaps change his clothing color to match other characters from the show, such as yellow for Rolf, red for Double-D, etc.

Stage: Peach Creek Alley- A basic stage set behind a fence and on a river. The stage doesn't scroll so players have to constantly hop across pieces of debris and trash to stay alive. The various bits of trash have varying effects that will change the way the battle is done in a flash.

Poseidome title: "Dumb, Dumbb, and Dumber"


I had to get creative with some stuff, but I'm happy with it me think it captures the character well. Let me know what you think!
 

MonadoBoy16

Smash Apprentice
Joined
Jul 3, 2018
Messages
91
Alright here's the Eddy move set! Sorry it took a while, today's been a busy day.

Eddy Moveset

From the hit show "Ed, Edd, and Eddy", the less-than-intelligent, bumbling idiot that is Eddy has somehow found his way to the game of Smash! Eddy uses a cacophony of different toys and gadgets from the cul-de-sac to leave his opponents questioning what they've even witnessed. Eddy is ready to bring his own 'special' flair to the opposition!

Eddy is overall quite speedy despite his lumbering appearance, falling ever so slightly on the higher side of the speed scale. Coinciding with this speed, Eddy is also, surprisingly, pretty light. Eddy's got an above average jump height as well, putting a seriously springy pep in his step. Unfortunately, to balance all of his other superb stats, Eddy's attacks are overall weak in the damage and knock back department. However, Eddy can also attack very quickly to build up damage in a quick period of time to make up for this. Eddy cannot crawl or wall jump either.

Specials:

Neutral Special: Jawbreaker- This is one of Eddy's strongest moves and is a major source of kill power for the character. Once the move is initially used, Eddy will throw out a small jawbreaker towards opponents that does a pathetic 1% if it hits. Once it hits solid ground however, Eddy can then begin to interact with it (the jawbreaker is not a recovery item). While it's still small, Eddy can continue to throw the jawbreaker around, or push it along on the ground. The more it touches solid ground, the bigger the jawbreaker will get as if it were a snowball. Once it reaches a big enough size, Eddy can't pick up the jawbreaker and can only roll it, and it will eventually reach a limit on its size. Eddy can then hit the jawbreaker with his own attacks to knock it into the opponents, which will deal major damage if its big enough. However, be wary as opponents can also interact with the jawbreaker as well, meaning it could backfire on yourself (only Eddy can push it). If the jawbreaker falls off the stage at any point, it will have to be built up again. This makes careful strategy around the maintenance of the jawbreaker vital, just like his addiction to jawbreakers in the show.

Side Special: Lawn Mower Mush- Using this attack will automatically have Eddy hold onto a lawn mower for dear life and blaze straight forward at an intense speed, functioning similarly to Bowser Jr.'s side Special from smash 4. Unlike that attack, however, Eddy can't stop the move nor jump out of it. He can jump off of the mower, though, and he'd better do so if he doesn't want to receive recoil damage for hitting the opponent while on the mower (upwards of 10% to be exact). Eddy can also utilize the mower as an additional recovery move as well, allowing the move to be very dynamic on the battlefield.

Up Special: Eddy's 'Car Wash'- A hose appears that Eddy foolishly puts in his mouth, only for the hose to turn on and rise Eddy up in the air. The move does cover some impressive distance and Eddy can move back and forth while the move is active. However, the move doesn't do any damage, making it a strictly-recovery move.

Down Special: Helmet Head- This move is a very interesting move that changes the Eddy's stats at will. Using the move will put a Football helmet on Eddy's head for a total of 20 seconds. While wearing the helmet, every attack of Eddy's will be GREATLY amplified, allowing Eddy to become a serious powerhouse when he isn't normally. However, due to his increased clumsiness in this state, Eddy will receive recoil damage for EVERY move he uses, including those that don't deal damage to others. This makes the move a serious risk that could pay off if he plays his cards right. Once the 20 second duration is up, Eddy will have to wait through a 10 second cooldown before he can put on the helmet again.

Normals:

Jab: Eddy takes a Ping-Pong racket and repeatedly smacks the ball into the opponent. It deals incredibly minor damage at first, but will quickly stack up the longer it lasts.

F-Tilt: Eddy takes candy out of pockets and slings it towards opponents, deals minimal damage but stacks up.

U-Tilt: Eddy swipes upwards with his arm to deal minimal damage, very quick.

D-Tilt: Eddy spins around in a circle, causing damage with his jacket. Move is very quick, which leaves Eddy dizzy for a moment.

Dash Attack: This move has Eddy hop in a wagon and speed through opponents. The move does some decent damage and keeps Eddy's speed up as well.

Smashes:

F-Smash: A pile of leaves appears in front of Eddy as he holds a leaf blower. Once he releases the attack, Eddy will blow the leaves into the opponent with some force. The individual leaves do virtually no damage but, given the sheer amount of leaves, ends up doing a good lot of damage anyway.

U-Smash: Similar to Ness's up Smash, Eddy takes a yo-yo and slings it in the air. Unlike Ness's, though, the attack doesn't go from one side of Eddy to the other. It instead goes straight up in the air a good distance before returning to where it started.

D-Smash: Eddy takes out a baseball bat and swings it on the ground in a circle. One of Eddy's strongest moves, but doesn't have too much range.

Aerials:

N-Air: Eddy spins a yo-yo around him in a quick circular motion.

F-Air: Eddy head butts the opponent with his big head. The move is veeerry slow when its starting up, but has a devastating meteor Smash effect if it hits.

U-Air: Eddy claps the air quickly in an attempt to catch a fly, doing minor damage in exchange for a fast attack.

D-Air: Eddy takes out a fishing rod and slings it down beneath it. The move is incredibly slow I'm start up, and most of the rod does little damage. However, if opponents are hit by the actual hook of the line, they will be met with a guaranteed meteor Smash and will plummeted downwards, essentially a guaranteed kill if used in midair.

B-Air: Eddy slaps behind him in the air. Very minimal damage but incredibly quick.

Grab/Pummel: For the grab, Eddy lunges forward to snatch opponent with his hands. In Pummel, Eddy merely bashes the foe repeatedly with his head while laughing like an idiot.

Throws: For Forward throw, Eddy picks up opponent and rolls them across the ground like a bowling ball. Back throw has Eddy throw opponent between legs and behind him like a Football. Up throw has Eddy dribble opponent on ground like a basketball before throwing them upwards. Down throw has Eddy leap up in the air and spike opponent downwards like a volleyball, meteor smashing them.

Final Smash: Horror Movie Night- Eddy hops in the middle of the screen where a small TV plops down with horror movies playing on it. While it's playing, various shadowy, demonic creatures will come out of the screen and cause havoc to the other players for around 15 seconds or so, all the while Eddy is obliviously watching the TV. Once the time is up, the creatures will return to the TV and Eddy will resume the fight.

Taunts: Up taunt causes Eddy to blow bubble gum, only for it to blow up in his face. Side taunt has Eddy blow up a balloon animal, laugh, and then accidentally pop it. Down taunt has Eddy lie down and sketch on the ground with chalk for a bit before standing up, can actually doge some attack while laying down.

Alts: Eddy's 7 color swaps change his clothing color to match other characters from the show, such as yellow for Rolf, red for Double-D, etc.

Stage: Peach Creek Alley- A basic stage set behind a fence and on a river. The stage doesn't scroll so players have to constantly hop across pieces of debris and trash to stay alive. The various bits of trash have varying effects that will change the way the battle is done in a flash.

Poseidome title: "Dumb, Dumbb, and Dumber"


I had to get creative with some stuff, but I'm happy with it me think it captures the character well. Let me know what you think!
King of scams is a better one
 

CodakTheWarrior

Smash Ace
Joined
Jun 7, 2017
Messages
548
If you want to program, You should check the unity tutorials,
Otherwise, I need a Moveset for Sandy cheeks.
Well I unfortunately don't think I'll be able to program, school's coming up and stuff you know.

However, I'll definitely make a Sandy move set, I've already thought of some ideas so it'll be done tomorrow! Thanks for letting me be a sort of designer for this game too, this is a ton of fun for me!
 

CodakTheWarrior

Smash Ace
Joined
Jun 7, 2017
Messages
548
If you want to program, You should check the unity tutorials,
Otherwise, I need a Moveset for Sandy cheeks.
Yo one more thing, I just realized that that Eddy Moveset was actually meant to be an Ed Moveset in my head... I mixed them up. So do you already have an Ed Moveset, because that's who I envisioned this Moveset with. Or, do you still want to use this on Eddy, the con man. Either way, I'm cool with making a new Moveset for Eddy and have this be used for Ed, or whatever. Sorry for the mistake.
 

CodakTheWarrior

Smash Ace
Joined
Jun 7, 2017
Messages
548
Here's the Sandy Moveset:

Sandy Moveset

The most rootinest-tootinist, cow-wrangling, whip-slinging mammal under the sea, no tussle is complete without the one and only Sandy Cheeks! Sandy is here to add some Texan flair to the game of Smash! The third and final Spongebob character in the game, Sandy uses her signature wrangling whip from the games to add a little taste of her rodeo roots. Sandy also makes full use of her other skills as well, including ka-rah-tae, various Texan tools, and even skills she's naturally learned as a squirrel!

Sandy's weight is overall right in the dead center of the weight scale, making her very well-rounded in combat. Sandy's speed is close to average as well, falling slightly more on the slower side due to her suit slowing her down. Sandy's jump height is pretty high too, allowing her to have a pretty easy time recovering all things considered. Her attack power is not only high, but is pretty quick as well, making Sandy a seriously volatile force. Sandy does not have the ability to crawl or wall jump.

Sandy also possesses an ability unique to her. Functioning somewhat similarly to Peach's float from the main games, holding the jump button in midair will allow Sandy to hover in the air and slowly descend to the ground by waving her lasso in the air like a helicopter (like she could in 'Battle for Bikini Bottom'). This ability allows Sandy to recover even better than she normally can, and could potentially even allow her to trick opponents by cancelling her momentum in the blink of an eye.

Specials:

Neutral Special: Tumbleweed- Sandy sends out a tumbleweed that acts as a lightweight projectile. It does incredibly minor damage, but is very fast and bounces along the ground, making it somewhat difficult to avoid. Sandy can also have a maximum of 5 tumbleweeds on screen at once, allowing her to constantly have tumbleweeds out to pressure and limit the opponent's movement.

Side Special: Whip-Lash- Working like ZSS' side Special from Smash 4, this attack has Sandy give a quick slash of her whip to opponents. The attack deals some really good damage, and it is incredibly quick. If used in the air, the move can even help Sandy recover if it's used near the edge. A very solid move overall.

Up Special: Swingin' Sandy- This move has the Texas-shaped symbol from 'Battle for Bikini Bottom' appear, which Sandy will attach her lasso to. Sandy can then swing back and forth on the symbol a total of three times, and can jump off at any point in the swing. After jumping off, she will not be in a helpless state, either, meaning she can still recover with her whip hover or side Special. To balance the move's incredible versatility, the move will have a 10 second cooldown after Sandy uses it, meaning she could end up in a bad spot if she isn't careful.

Down Special: Rodeo Practice- This is one of the most risky moves in the entire game, but has some INCREDIBLE payoff if used correctly. Using this move will cause a mechanical bull to appear on the stage, which Sandy will immediately hop onto. While on the bull, Sandy will be locked onto it for a total of 20 seconds and will have to rock back and forth to stay on it. The bull will start out very slow, but will progressively end up getting faster and faster until it reaches practically uncontrollable levels. If Sandy is somehow able to stay on the bull the entire time, she will receive an EXTREME buff in all of her stats for the remainder of the battle, making her borderline overpowered. However, if Sandy does end up falling off the bull at any point, she will receive recoil damage, with it scaling the faster the bull is. The recoil damage will start out minor (around 3%), but could be upwards of 50% if she falls off near the end of the timer. Sandy is also launched off of the bull at an incredible speed later on in the timer, which could be devastating to opponents. This move has multiple uses and is incredibly flexible. However, it's intense learning curve means it should only be used by those who understand Sandy well.

Normals:

Jab: Sandy hits the opponent with her fist while wearing a karate glove, being a slow but damaging attack.

F-Tilt: Sandy kicks the opponent with her foot to deal damage.

U-Tilt: Sandy's karate headgear appears on her head as she head butts opponents, dealing some decent damage.

D-Tilt: Sandy takes the foam karate practice stick from an early episode and swings it around on the ground quickly, with the tip of it dealing the most damage.

Dash Attack: Sandy's inner squirrel kicks in and she gets on all fours and lunges into the opponent. The attack is both incredibly quick and has high damage.

Smashes:

F-Smash: Sandy takes out a cow bell and shakes it while it's charging. Once she releases, she bashes the opponent with it, having a multi-hit property as well as dealing heavy damage.

U-Smash: Sandy takes out a basket full of nuts and acorns and throws them up in the air. They don't do much damage individually, but stack up.

D-Smash: Sandy takes her snowboard and slams it down in front of her before sliding it to her other side. Deals very good damage.

Aerials:

N-Air: Sandy spread her limbs out in a flying position as if she were a flying squirrel, dealing overall minor damage at a quick speed.

F-Air: Sandy kicks with both of her feet in midair very quickly to deal damage.

U-Air: Sandy quickly flips in midair while kicking upwards to deal damage.

D-Air: Sandy slams her foot downwards sharply, dealing heavy damage and having a meteor effect despite being very slow.

B-Air: Sandy swipes her tail in midair quickly, dealing intense damage if it hits.

Grab/Pummel: Sandy's grab has her use her rope to lasso opponents to her. Using grab in midair will allow Sandy to tether grab as opposed to an air dodge. For the pummel, Sandy wears her karate gloves and alternates chopping the opponent repeatedly.

Throws: Forward throw has Sandy hold and swing foes around with lasso before throwing them forward. Back throw has Sandy do the same movement but throws opponents behind her instead. Up throw has her do a series of karate chops before kicking the foe upwards. Down throw has Sandy leap in the air and perform a drop kick on the opponent to send them flying.

Final Smash: It's Worm Season...- Once Sandy uses this attack, she leaps off screen for several moments. Soon after, the giant worm from the Alaskan Bull Worm episode will stampede through the screen from the left to right, dealing so much damage that those hit will almost certainly be KO'd. The sheer length of the worm will mean it will take nearly 10 seconds to fully leave the stage. However, the worm isn't too awfully high, meaning players could avoid the worm altogether if they are in the right place at the right time.

Taunts: Up Taunt has Sandy wave her lasso around while yelling "Yeehaw!". Side Taunt has Sandy take out a blowtorch and turn it on for a few seconds while wearing scientific safety goggles. Down Taunt has Sandy maneuver acorns into her suit and gnaw on them, actually healing 1% of health.

Alts: Sandy's color swaps change the color of her suit to match the various colored planets in our solar system. Examples include Red for Mars, Turquoise for Neptune, Blue for Earth, etc.

Stage: Poseidome- An incredibly basic stage, this stage is a large boxing arena where King Poseidon himself will narrate the battle. The players pictures will appear on a screen in the center with their special titles as well. In addition, players can attack the large score counter sticking down from the ceiling. After its been damaged too much, it will fall down the ground and cause massive damage, where it will then stay for the rest of the battle. Overall a very simple, fun to play on stage.

Poseidome title: " The Sassiest Squirrel Under the Sea"

Hope you like it, let me know what you think whenever you can!
 

MonadoBoy16

Smash Apprentice
Joined
Jul 3, 2018
Messages
91
Here's the Sandy Moveset:

Sandy Moveset

The most rootinest-tootinist, cow-wrangling, whip-slinging mammal under the sea, no tussle is complete without the one and only Sandy Cheeks! Sandy is here to add some Texan flair to the game of Smash! The third and final Spongebob character in the game, Sandy uses her signature wrangling whip from the games to add a little taste of her rodeo roots. Sandy also makes full use of her other skills as well, including ka-rah-tae, various Texan tools, and even skills she's naturally learned as a squirrel!

Sandy's weight is overall right in the dead center of the weight scale, making her very well-rounded in combat. Sandy's speed is close to average as well, falling slightly more on the slower side due to her suit slowing her down. Sandy's jump height is pretty high too, allowing her to have a pretty easy time recovering all things considered. Her attack power is not only high, but is pretty quick as well, making Sandy a seriously volatile force. Sandy does not have the ability to crawl or wall jump.

Sandy also possesses an ability unique to her. Functioning somewhat similarly to Peach's float from the main games, holding the jump button in midair will allow Sandy to hover in the air and slowly descend to the ground by waving her lasso in the air like a helicopter (like she could in 'Battle for Bikini Bottom'). This ability allows Sandy to recover even better than she normally can, and could potentially even allow her to trick opponents by cancelling her momentum in the blink of an eye.

Specials:

Neutral Special: Tumbleweed- Sandy sends out a tumbleweed that acts as a lightweight projectile. It does incredibly minor damage, but is very fast and bounces along the ground, making it somewhat difficult to avoid. Sandy can also have a maximum of 5 tumbleweeds on screen at once, allowing her to constantly have tumbleweeds out to pressure and limit the opponent's movement.

Side Special: Whip-Lash- Working like ZSS' side Special from Smash 4, this attack has Sandy give a quick slash of her whip to opponents. The attack deals some really good damage, and it is incredibly quick. If used in the air, the move can even help Sandy recover if it's used near the edge. A very solid move overall.

Up Special: Swingin' Sandy- This move has the Texas-shaped symbol from 'Battle for Bikini Bottom' appear, which Sandy will attach her lasso to. Sandy can then swing back and forth on the symbol a total of three times, and can jump off at any point in the swing. After jumping off, she will not be in a helpless state, either, meaning she can still recover with her whip hover or side Special. To balance the move's incredible versatility, the move will have a 10 second cooldown after Sandy uses it, meaning she could end up in a bad spot if she isn't careful.

Down Special: Rodeo Practice- This is one of the most risky moves in the entire game, but has some INCREDIBLE payoff if used correctly. Using this move will cause a mechanical bull to appear on the stage, which Sandy will immediately hop onto. While on the bull, Sandy will be locked onto it for a total of 20 seconds and will have to rock back and forth to stay on it. The bull will start out very slow, but will progressively end up getting faster and faster until it reaches practically uncontrollable levels. If Sandy is somehow able to stay on the bull the entire time, she will receive an EXTREME buff in all of her stats for the remainder of the battle, making her borderline overpowered. However, if Sandy does end up falling off the bull at any point, she will receive recoil damage, with it scaling the faster the bull is. The recoil damage will start out minor (around 3%), but could be upwards of 50% if she falls off near the end of the timer. Sandy is also launched off of the bull at an incredible speed later on in the timer, which could be devastating to opponents. This move has multiple uses and is incredibly flexible. However, it's intense learning curve means it should only be used by those who understand Sandy well.

Normals:

Jab: Sandy hits the opponent with her fist while wearing a karate glove, being a slow but damaging attack.

F-Tilt: Sandy kicks the opponent with her foot to deal damage.

U-Tilt: Sandy's karate headgear appears on her head as she head butts opponents, dealing some decent damage.

D-Tilt: Sandy takes the foam karate practice stick from an early episode and swings it around on the ground quickly, with the tip of it dealing the most damage.

Dash Attack: Sandy's inner squirrel kicks in and she gets on all fours and lunges into the opponent. The attack is both incredibly quick and has high damage.

Smashes:

F-Smash: Sandy takes out a cow bell and shakes it while it's charging. Once she releases, she bashes the opponent with it, having a multi-hit property as well as dealing heavy damage.

U-Smash: Sandy takes out a basket full of nuts and acorns and throws them up in the air. They don't do much damage individually, but stack up.

D-Smash: Sandy takes her snowboard and slams it down in front of her before sliding it to her other side. Deals very good damage.

Aerials:

N-Air: Sandy spread her limbs out in a flying position as if she were a flying squirrel, dealing overall minor damage at a quick speed.

F-Air: Sandy kicks with both of her feet in midair very quickly to deal damage.

U-Air: Sandy quickly flips in midair while kicking upwards to deal damage.

D-Air: Sandy slams her foot downwards sharply, dealing heavy damage and having a meteor effect despite being very slow.

B-Air: Sandy swipes her tail in midair quickly, dealing intense damage if it hits.

Grab/Pummel: Sandy's grab has her use her rope to lasso opponents to her. Using grab in midair will allow Sandy to tether grab as opposed to an air dodge. For the pummel, Sandy wears her karate gloves and alternates chopping the opponent repeatedly.

Throws: Forward throw has Sandy hold and swing foes around with lasso before throwing them forward. Back throw has Sandy do the same movement but throws opponents behind her instead. Up throw has her do a series of karate chops before kicking the foe upwards. Down throw has Sandy leap in the air and perform a drop kick on the opponent to send them flying.

Final Smash: It's Worm Season...- Once Sandy uses this attack, she leaps off screen for several moments. Soon after, the giant worm from the Alaskan Bull Worm episode will stampede through the screen from the left to right, dealing so much damage that those hit will almost certainly be KO'd. The sheer length of the worm will mean it will take nearly 10 seconds to fully leave the stage. However, the worm isn't too awfully high, meaning players could avoid the worm altogether if they are in the right place at the right time.

Taunts: Up Taunt has Sandy wave her lasso around while yelling "Yeehaw!". Side Taunt has Sandy take out a blowtorch and turn it on for a few seconds while wearing scientific safety goggles. Down Taunt has Sandy maneuver acorns into her suit and gnaw on them, actually healing 1% of health.

Alts: Sandy's color swaps change the color of her suit to match the various colored planets in our solar system. Examples include Red for Mars, Turquoise for Neptune, Blue for Earth, etc.

Stage: Poseidome- An incredibly basic stage, this stage is a large boxing arena where King Poseidon himself will narrate the battle. The players pictures will appear on a screen in the center with their special titles as well. In addition, players can attack the large score counter sticking down from the ceiling. After its been damaged too much, it will fall down the ground and cause massive damage, where it will then stay for the rest of the battle. Overall a very simple, fun to play on stage.

Poseidome title: " The Sassiest Squirrel Under the Sea"

Hope you like it, let me know what you think whenever you can!
Good
 

Russell_SSB

Smash Journeyman
Joined
Sep 28, 2014
Messages
496
Location
Fennville, Michigan
NNID
MrRussellgro
3DS FC
0662-7159-3567
Switch FC
SW-3345-3263-9133
Yep, worked that time. Great work man!
Thanks! I tried to come up with something similar to the SSB announcers. I hate to go off-topic, but I am also the one who does the announcer in another game. If you haven't heard of the game, go check out Battle Arena All-Stars and try the game out. You can hear me there as well. ;)
 

CodakTheWarrior

Smash Ace
Joined
Jun 7, 2017
Messages
548
Thanks! I tried to come up with something similar to the SSB announcers. I hate to go off-topic, but I am also the one who does the announcer in another game. If you haven't heard of the game, go check out Battle Arena All-Stars and try the game out. You can hear me there as well. ;)
Sounds cool! This is my first time really working and contributing to a game, and it's something I've always wanted to do. This is a ton of fun!
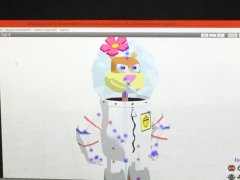
 

Russell_SSB

Smash Journeyman
Joined
Sep 28, 2014
Messages
496
Location
Fennville, Michigan
NNID
MrRussellgro
3DS FC
0662-7159-3567
Switch FC
SW-3345-3263-9133
Look what I've made in Blender as a trophy! Now if only if I could get the model exported I can give it to you with or without the base. It's Nood for Cartoon Network!

Info:
The Noods were Cartoon Network's mascot back in July 14, 2008. The Noods were little characters that represent Cartoon Network's biggest cartoon characters from the channel. Before the CHECK it era began, they made a comeback as they would get covered in silver, dirt, confetti, etc. They were based on the D.I.Y. toys called Munny.

Appearance: Cartoon Network (2008)
 

Attachments

CodakTheWarrior

Smash Ace
Joined
Jun 7, 2017
Messages
548
Here's the (actual) Eddy Moveset, this time based more on his con-man attributes!


Eddy Moveset

A true con-man knows that sometimes you gotta play dirty in order to make a profit, and that's exactly what Eddy has come to Smash to do. The most sneaky and mischievous of the three titular characters in "Ed, Edd, and Eddy", Eddy uses a plethora of tricks of the trade he's picked up in his years as a con artist to baffle his foes. He also utilizes his skill as a salesman to set up cheap shops and schemes to harm his opponents while also earning massive benefits for himself. Eddy is here to win, no matter the means.

Despite his overall short stature, Eddy is actually somewhat slow as a default. Eddy is also pretty heavy too, which also means his attacks could leave quite a mark on those he comes across. Eddy's jump height is slightly above average, so, combined with his decent recovery move, allow him to bounce back from most nasty situations. Eddy can crawl, but does not have the ability to wall jump.

Eddy's main gameplay style revolves around a central mechanic unique to only him; money. At the beginning of the battle, Eddy will have a total of 50 cents, with 100 cents being the max Eddy can have at once. As Eddy uses his specials and some of his other attacks, his coin supply will be drained. If Eddy is able to successfully land and reap the benefits of these attacks, however, his coin supply will continue to raise. It is not only important to keep Eddy's coin supply high so he can use his attacks, but if is coin supply drops below 10, his stats will take a massive hit. His speed will be even slower, he will be significantly lighter, his jump height will be lower, and his attacks will be generally weaker until he can have more than 10 cents again. This makes constant management and planning of Eddy's money vital to playing the character, and also makes Eddy one of the most risky, yet rewarding, characters to play as in the game.

Specials:

Neutral Special: Pet Boutique- This move takes 10 cents to use and stays on the battlefield for 10 seconds. Every two seconds, a dog will escape from one of the kennels and run in a straight line towards the nearest opponent, tracking them down and dealing some good damage in the process. If Eddy is able to successfully hit foes with a dog, he will earn 4 cents back. A total of 5 dogs will be spawned with the Pet Boutique, meaning Eddy could earn a double profit if he is able to hit opponents with all of the dogs. Once the 10 seconds is up, Eddy will have to wait through a 5 second cooldown before he can use the move again.

Side Special: Bus Service- Using this move will cost 5 cents. This attack will cause a shoddily-drawn cardboard bus to ride straightforward in a line at a very fast speed. Any fighters touched by the bus will not only receive some decent damage, but will also be stuck to the bus for a matter of a few seconds. If Eddy is able to hit opponents with the bus, he will double his profit and earn 10 cents back. However, the bus moves at a very quick speed meaning opponents can avoid it relatively easily. There is no cooldown on the move after Eddy uses it either.

Up Special: Tire Swing- Eddy's recovery move costs 3 cents to use and will cause a tire swing to appear. Eddy will be locked in the tire swing and will be able to rock back and forth on it until he jumps off. The tire swing will be present for 5 seconds before it disappears, when it has another 5 second cooldown before he can use it again. In order to prevent a constant stream of profit, using this move cannot earn Eddy more coins in return.

Down Special: Lemonade Stand- By far one of Eddy's most risky moves, this move needs a whopping 20 cents to function. After the payment is made, this move spawns a lemonade stand that will stick around for 10 seconds. The stand will have 8 special Lemonade pitchers that will heal 5% of health, with Eddy being the only one who can use them. This means if Eddy is able to successfully heal up without being kept away from the stand/letting the stand's timer run out, he can heal an astounding 40% of health. However, there is no way to earn any money back on the purchase, meaning the Lemonade stand should only be used if Eddy has some cash to spare. The stand has a 20 second cooldown before it can be used again.

Normals:

Jab: Eddy alternates punches in giving a one-two punch to opponents, dealing some pretty good damage.

F-Tilt: Eddy has his arm outstretched to shake the opponent's hand. The attack itself does minute damage, but it has a special effect. If the opponent attacks Eddy while his arm his outstretched, Eddy will actually counter with a massive punch using his other hand, dealing INCREDIBLE damage. However, this makes using the move at opportune times a huge benefit, and at others a borderline negative.

U-Tilt: Eddy jumps up in the air slightly with his arms outstretched above him, dealing damage.

D-Tilt: Eddy kicks downward at an angle slightly, dealing minor damage and moving him forward slightly.

Dash Attack: This attack has Eddy dive into opponents by sliding along the ground, with coins spilling of his pockets if he has a measly 2 cents to spare. The attack does decent damage normally, but with the added coinage, it deals FAR more damage.

Smashes:

F-Smash: Eddy takes out a Baseball bat to hit opponents, like Ness' F-Smash. The attack is even more fatal than Ness', but it does cost 4 cents to use. If Eddy is able to land the hit on foes, not only will it do unbelievable damage, but he will earn a double profit and receive 8 cents in return. A very good move overall.

U-Smash: This attack has Eddy chuck a literal beehive up in the air, costing 6 cents to use. Although the cost is decently high, the attack has some special effects. If opponents foolishly attack the beehive while it's in midair, it will break and a swarm of bees will pursue foes, like the beehive item from Smash 4. If Eddy hits opponents with the beehive normally, he will earn a double profit and gain 12 cents. If the beehive is broken, he will earn an additional 3 cents as well, meaning Eddy could earn a net profit total of 9 cents through the attack.

D-Smash: Another move that comes at a price, Eddy takes out a golf club and sharply swings it around on the ground, dealing heavy damage but at the cost of 5 cents. If Eddy hits opponents with the golf club, however, he will earn a double profit and receive 10 cents in return.

Aerials:

N-Air: Eddy does a front flip in midair, dealing decent damage.

F-Air: Eddy quickly throws a coin in front of him, costing 1 cent to use. The move is a lightweight projectile that does minor damage but can be spammed, just be careful not to drain Eddy's coin supply in the process. If Eddy uses the move when he's completely broke, the move will do nothing.

U-Air: Eddy quickly head butts the opponent in midair to deal decent damage.

D-Air: This move will have Eddy sharply bash the opponent with a rolled-up newspaper beneath him. It has a strong meteor effect, but costs 3 cents to use. Luckily, if Eddy can successfully hit opponents with the newspaper, he will earn 6 cents back in return.

B-Air: This attack works identically to Eddy's F-Air in every way, except it's done behind him as opposed to in front of him.

Grab/Pummel: For the grab, Eddy merely leans forward to snatch opponents with his hands. Eddy's Pummel is incredibly strong, as Eddy violently shakes opponents to knock the money out of them. This means every attack of the Pummel will have Eddy earn two cents, allowing him to increase his money count in a flash.

Throws: For forward throw, Eddy holds opponents before kicking them in the crotch region, sending them flying. Back throw sees Eddy take and roll over opponent to send them behind him. Up throw has Eddy throw foes above him and then bash them upward with his head. Down throw has Eddy jumps up in the air and do a cannonball onto enemies, dealing major damage.

Final Smash: Debt Collection- After using this attack, a tree will appear in the middle of the screen with a branch hanging down, which Eddy uses to get up in the tree and hide. Once he's concealed, all of the other kids from the cul-de-sac (except for Ed and Double-D) will stampede onto the screen to earn their money back. The kids will search for Eddy for around 10 seconds, dealing massive damage to opponents. Once the 10 seconds is up, the kids will leave and Eddy will hop out of the tree, with the tree leaving soon after.

Taunts: Up Taunt has a thought bubble slowly appear above Eddy that has a dollar sign on it before disappearing. Side Taunt has Eddy flip a coin up in the air and catch it, has no effect on the coin count. Down Taunt causes Eddy flip on some shades and give a 'cool guy pose' to the foreground.

Alts: Most of Eddy's color swaps are based off of other characters from the show, with swaps like a Red for Double-D, Green for Ed, Brown for Jonny, and others. However, Eddy does have one special alt where he dons an Elvis costume, allowing him to put some rockin' style to the fight.

Stage: The Cul-de-sac- A very large stage that spans the length of a street. Players will fight not only on the street itself, where cars and buses will occasionally drive directly into the fight, but also have two houses on either side as well. Players can jump on top of the rooftops of the houses, as well as enter the houses, in which the houses will become hollow and allow you to see in them. Note however that attacks will not harm the buildings in any way. Overall a very dynamic and fluid stage that really captures the chaos and mishaps of the "Ed, Edd, and Eddy" world.

Poseidome title: "King of Scams"


I know it's a bit complicated, but I'm incredibly happy with it. Tell me what you think when you can!
 

MonadoBoy16

Smash Apprentice
Joined
Jul 3, 2018
Messages
91
I don't want the cent mechanic., I want his Final Smash to be Say Cheese.
 
Last edited:

CodakTheWarrior

Smash Ace
Joined
Jun 7, 2017
Messages
548
I don't want the cent mechanic.
Well are you ok with the moves not having it, and instead just increasing their cooldowns to balance them better? Basically do you like the actual moves themself?

Also yeah the final Smash change is fine too, I just need to know if everything else with it is alright.
 
Last edited:

MonadoBoy16

Smash Apprentice
Joined
Jul 3, 2018
Messages
91
Well are you ok with the moves not having it, and instead just increasing their cooldowns to balance them better? Basically do you like the actual moves themself?
My Special Moves are

Neutral: EL Mongo Stink Bomb
Up: Jet Pack
Side: Chaos Boomerang
Down: Gum Trap[
 

CodakTheWarrior

Smash Ace
Joined
Jun 7, 2017
Messages
548
My Special Moves are

Neutral: EL Mongo Stink Bomb
Up: Jet Pack
Side: Chaos Boomerang
Down: Gum Trap[
That sounds good too, but I made mine with the intention of really capitalizing on his con-man attributes while yours doesn't really. I understand why the cent mechanic would be tough to implement, but I feel like it's the best way to exemplify the character. It would make him unique compared to the other characters in the game, and I feel it would give him a unique play style in Smash that's never been done before. However, you're the head honcho of it all so it's your call.
 

CodakTheWarrior

Smash Ace
Joined
Jun 7, 2017
Messages
548
Here's the Buttercup Moveset!


Buttercup Moveset

Buttercup has come to Smash to prove that 'tough' and 'Powerpuff' are one and the same. The most fierce of the three Powerpuff girls, Buttercup's play style has a sense of untamed, unbridled power as she bursts through her foes. Buttercup also makes full utilization of the numerous Powerpuff power-ups from the show, which allow her to seem like a true force of nature on the battlefield.

To match her small size, Buttercup is incredibly fast, being overall one of the fastest characters in the entire game. This also means that Buttercup is VERY light, meaning she needs to be careful if she doesn't want to get launched too easily. Buttercup's jump height is very high and floaty, and combined with her incredible recovery, allows Buttercup to have one of the easiest times recovering in the whole game. Buttercup cannot crawl, but she can wall jump.

Specials:

Neutral Special: Heat Vision- Buttercup harnesses her rage into a beam of heat energy at her foes. The ray shoots a good distance away from Buttercup and can be aimed in any direction. The move deals above average damage as well, meaning Buttercup can easily halt the opponent's onslaught with a quick use of this move. An incredibly simple move, but has a lot of beneficial uses in battle.

Side Special: Supersonic Burst- Using this move will cause Buttercup to burst forward with incredible strength into her foes. The move is very quick, but deals some decent damage as well. However, if Buttercup uses the move as she's being attacked, it will work as a counter and deal FAR more damage than normal. Using the move in midair will also assist Buttercup in recovering as well, making the attack very versatile.

Up Special: Flight- As the name would imply, this move allows Buttercup to fly in the air for 3 seconds. While in flight mode, Buttercup is completely vulnerable and can't attack opponents herself. However, Buttercup does have full range of movement while flying allowing her to slip past and avoid opponents' attempts to attack her. Be careful though, as if Buttercup is hit while flying, she will be put in a helpless state, leaving her with no means of recovering unless she is hit again. There is no cooldown on the move either, making this one of the best moves in the entire game in terms of pure recovery potential.

Down Special: Tornado Generation- This move will cause Buttercup to generate a large tornado that will head in a straight line for several seconds. The tornado deals lots of chip damage, and opponents hit by the tornado will be trapped in it for a few seconds before they're released. Using the move in midair will cause the tornado to defy gravity, making using the tornado to carry opponents off stage a very wise choice. After using the tornado, there will be a 5 second cooldown before it can be used again.

Normals:

Jab: Buttercup gets a surge of energy and repeatedly punches the opponent, before ending with a kick leading into a flip for the finisher. Deals pretty good damage.

F-Tilt: Buttercup quickly shoots out a bright green burst of energy directly in front of her. The move deals alright damage, but if it hits just right it will actually make the foe dizzy for a few seconds, allowing Buttercup to easily follow up with a combo.

U-Tilt: Buttercup spins upward in the air a distance with a surge of energy, dealing good damage.

D-Tilt: Buttercup kicks downward at an angle, dealing minor damage but at a staggeringly fast speed.

Dash Attack: A large, light green energy fist comes out of Buttercup into opponents, not only dealing good damage, but also at a high speed as well.

Smashes:

F-Smash: Once Buttercup releases the attack, a large stream of fire will come out of her mouth and burn opponents. It deals extremely high damage, but it's small hitbox makes it difficult to land.

U-Smash: This attack makes use of Buttercup's unique tongue curling skill. While charging, Buttercup's tongue will be out with a small weight on it. Once the attack is released, Buttercup's momentum will give and the weight will fly up in the air. Although the weight's small size makes it hard to hit opponents, it deals MASSIVE damage as well as a meteor Smash effect, making it a solid choice to use near the edge.

D-Smash: Buttercup will send out an electric force field with this attack. After releasing the attack, Buttercup will aggressively punch the ground, causing a light green field to completely cover her. The move not only deals heavy electric damage, but also works as a shield while it is out, and will deflect light projectiles that hit it. A unique smash attack overall.

Aerials:

N-Air: A surge of light green energy surrounds Buttercup, dealing damage before disappearing. The move is great for combos due to its speed.

F-Air: Buttercup kicks with both of her small stubs of feet, dealing light damage but very quickly.

U-Air: Buttercup shoots upwards a slight distance with a surge of energy, dealing slight damage but also helping her recover as well.

D-Air: The energy fist from Buttercup's dash Attack smashes downwards, dealing heavy damage as well as a meteor effect. Definitely one of her best moves overall.

B-Air: Buttercup kicks sharply behind her, dealing heavy damage if she can hit opponents with the move's small hitbox.

Grab/Pummel: In Grab, the energy fist from her other attacks reaches forward to grab opponents. In Pummel, Buttercup repeatedly punches with her stubby arms until letting go.

Throws: Forward throw has Buttercup throw enemy away with the energy fist. Back throw has Buttercup spin for around before launching them behind her. Up throw sees Buttercup hold opponents, fly up in the air a ways, and kick opponents away. Down throw has Buttercup repeatedly stomp on opponents, causing damage and sending them away.

Final Smash: Furious Fiery Feline- Buttercup's rage will reach an all time high as a large, flaming cat surrounds her. For 20 seconds, Buttercup can control the cat as it can run into opponents, dealing incredible fire damage. The cat can also scratch, breathe fire, and even teleport to recover. Once the 20 seconds is up, the cat will dissipate and Buttercup will resume the fight like normal. Very strong final Smash overall.

Taunts: Up Taunt has Buttercup reference Dragon Ball and make the 'Super Saiyan' pose. Side Taunt sees Buttercup rear back and rub her feet along the ground rapidly, as if a bull ready to pounce. Down Taunt causes Buttercup cross her arms as energy flares around her, making a cool pose.

Alts: Buttercup's color swaps are based off of other characters from the show, such as a Blue for Bubbles, Red for Blossom, White for the Scientist, and others.

Stage: Townsville Rooftops- A stage that takes place on top of two building rooftops. In the background, numerous large robots and enemies from the show will be destroying parts of the city, and a variety of hazards, such as UFOs, robots, and others, will wreak havoc on the battle. A very chaotic stage despite the incredibly simple layout.

Poseidome title: "Rough 'n' Tough Powerpuff"


I tried to go more simplistic with this one, so I'm pretty happy with how this turned out. Let me know your opinion of it whenever you can!
 

MonadoBoy16

Smash Apprentice
Joined
Jul 3, 2018
Messages
91
Here's the Buttercup Moveset!


Buttercup Moveset

Buttercup has come to Smash to prove that 'tough' and 'Powerpuff' are one and the same. The most fierce of the three Powerpuff girls, Buttercup's play style has a sense of untamed, unbridled power as she bursts through her foes. Buttercup also makes full utilization of the numerous Powerpuff power-ups from the show, which allow her to seem like a true force of nature on the battlefield.

To match her small size, Buttercup is incredibly fast, being overall one of the fastest characters in the entire game. This also means that Buttercup is VERY light, meaning she needs to be careful if she doesn't want to get launched too easily. Buttercup's jump height is very high and floaty, and combined with her incredible recovery, allows Buttercup to have one of the easiest times recovering in the whole game. Buttercup cannot crawl, but she can wall jump.

Specials:

Neutral Special: Heat Vision- Buttercup harnesses her rage into a beam of heat energy at her foes. The ray shoots a good distance away from Buttercup and can be aimed in any direction. The move deals above average damage as well, meaning Buttercup can easily halt the opponent's onslaught with a quick use of this move. An incredibly simple move, but has a lot of beneficial uses in battle.

Side Special: Supersonic Burst- Using this move will cause Buttercup to burst forward with incredible strength into her foes. The move is very quick, but deals some decent damage as well. However, if Buttercup uses the move as she's being attacked, it will work as a counter and deal FAR more damage than normal. Using the move in midair will also assist Buttercup in recovering as well, making the attack very versatile.

Up Special: Flight- As the name would imply, this move allows Buttercup to fly in the air for 3 seconds. While in flight mode, Buttercup is completely vulnerable and can't attack opponents herself. However, Buttercup does have full range of movement while flying allowing her to slip past and avoid opponents' attempts to attack her. Be careful though, as if Buttercup is hit while flying, she will be put in a helpless state, leaving her with no means of recovering unless she is hit again. There is no cooldown on the move either, making this one of the best moves in the entire game in terms of pure recovery potential.

Down Special: Tornado Generation- This move will cause Buttercup to generate a large tornado that will head in a straight line for several seconds. The tornado deals lots of chip damage, and opponents hit by the tornado will be trapped in it for a few seconds before they're released. Using the move in midair will cause the tornado to defy gravity, making using the tornado to carry opponents off stage a very wise choice. After using the tornado, there will be a 5 second cooldown before it can be used again.

Normals:

Jab: Buttercup gets a surge of energy and repeatedly punches the opponent, before ending with a kick leading into a flip for the finisher. Deals pretty good damage.

F-Tilt: Buttercup quickly shoots out a bright green burst of energy directly in front of her. The move deals alright damage, but if it hits just right it will actually make the foe dizzy for a few seconds, allowing Buttercup to easily follow up with a combo.

U-Tilt: Buttercup spins upward in the air a distance with a surge of energy, dealing good damage.

D-Tilt: Buttercup kicks downward at an angle, dealing minor damage but at a staggeringly fast speed.

Dash Attack: A large, light green energy fist comes out of Buttercup into opponents, not only dealing good damage, but also at a high speed as well.

Smashes:

F-Smash: Once Buttercup releases the attack, a large stream of fire will come out of her mouth and burn opponents. It deals extremely high damage, but it's small hitbox makes it difficult to land.

U-Smash: This attack makes use of Buttercup's unique tongue curling skill. While charging, Buttercup's tongue will be out with a small weight on it. Once the attack is released, Buttercup's momentum will give and the weight will fly up in the air. Although the weight's small size makes it hard to hit opponents, it deals MASSIVE damage as well as a meteor Smash effect, making it a solid choice to use near the edge.

D-Smash: Buttercup will send out an electric force field with this attack. After releasing the attack, Buttercup will aggressively punch the ground, causing a light green field to completely cover her. The move not only deals heavy electric damage, but also works as a shield while it is out, and will deflect light projectiles that hit it. A unique smash attack overall.

Aerials:

N-Air: A surge of light green energy surrounds Buttercup, dealing damage before disappearing. The move is great for combos due to its speed.

F-Air: Buttercup kicks with both of her small stubs of feet, dealing light damage but very quickly.

U-Air: Buttercup shoots upwards a slight distance with a surge of energy, dealing slight damage but also helping her recover as well.

D-Air: The energy fist from Buttercup's dash Attack smashes downwards, dealing heavy damage as well as a meteor effect. Definitely one of her best moves overall.

B-Air: Buttercup kicks sharply behind her, dealing heavy damage if she can hit opponents with the move's small hitbox.

Grab/Pummel: In Grab, the energy fist from her other attacks reaches forward to grab opponents. In Pummel, Buttercup repeatedly punches with her stubby arms until letting go.

Throws: Forward throw has Buttercup throw enemy away with the energy fist. Back throw has Buttercup spin for around before launching them behind her. Up throw sees Buttercup hold opponents, fly up in the air a ways, and kick opponents away. Down throw has Buttercup repeatedly stomp on opponents, causing damage and sending them away.

Final Smash: Furious Fiery Feline- Buttercup's rage will reach an all time high as a large, flaming cat surrounds her. For 20 seconds, Buttercup can control the cat as it can run into opponents, dealing incredible fire damage. The cat can also scratch, breathe fire, and even teleport to recover. Once the 20 seconds is up, the cat will dissipate and Buttercup will resume the fight like normal. Very strong final Smash overall.

Taunts: Up Taunt has Buttercup reference Dragon Ball and make the 'Super Saiyan' pose. Side Taunt sees Buttercup rear back and rub her feet along the ground rapidly, as if a bull ready to pounce. Down Taunt causes Buttercup cross her arms as energy flares around her, making a cool pose.

Alts: Buttercup's color swaps are based off of other characters from the show, such as a Blue for Bubbles, Red for Blossom, White for the Scientist, and others.

Stage: Townsville Rooftops- A stage that takes place on top of two building rooftops. In the background, numerous large robots and enemies from the show will be destroying parts of the city, and a variety of hazards, such as UFOs, robots, and others, will wreak havoc on the battle. A very chaotic stage despite the incredibly simple layout.

Poseidome title: "Rough 'n' Tough Powerpuff"


I tried to go more simplistic with this one, so I'm pretty happy with how this turned out. Let me know your opinion of it whenever you can!
Neat
 
Top Bottom