• Welcome to Smashboards, the world's largest Super Smash Brothers community! Over 250,000 Smash Bros. fans from around the world have come to discuss these great games in over 19 million posts!

    You are currently viewing our boards as a visitor. Click here to sign up right now and start on your path in the Smash community!

Make Your Move 4

Status
Not open for further replies.

Chris Lionheart

Smash Champion
Joined
Apr 6, 2008
Messages
2,076
Location
Make Your Move
I think it would be pretty cool to have tourettes. Then you could yell and cuss and make sex jokes in public and nobody will hold it against you.
Dude.... that is not cool...

I had a friend with tourettes. He was so messed up. Blurted out things randomly. Couldn't think rationally. Constantly embarassed himself. Was among the school's most unpopular students. Tried to kill himself before.

Its not fun.
 

GenericTacoKid

Smash Cadet
Joined
Oct 23, 2008
Messages
51
I think it would be pretty cool to have tourettes. Then you could yell and cuss and make sex jokes in public and nobody will hold it against you.
they it's cool having mild autism you dont get in so much trouble i called my teacher a
c*nt once and my only punishment was the princple's office not even a detention
 

PowerBomb

Smash Master
Joined
Dec 11, 2007
Messages
3,791
Location
California
My first moveset :/


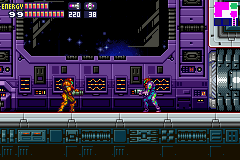
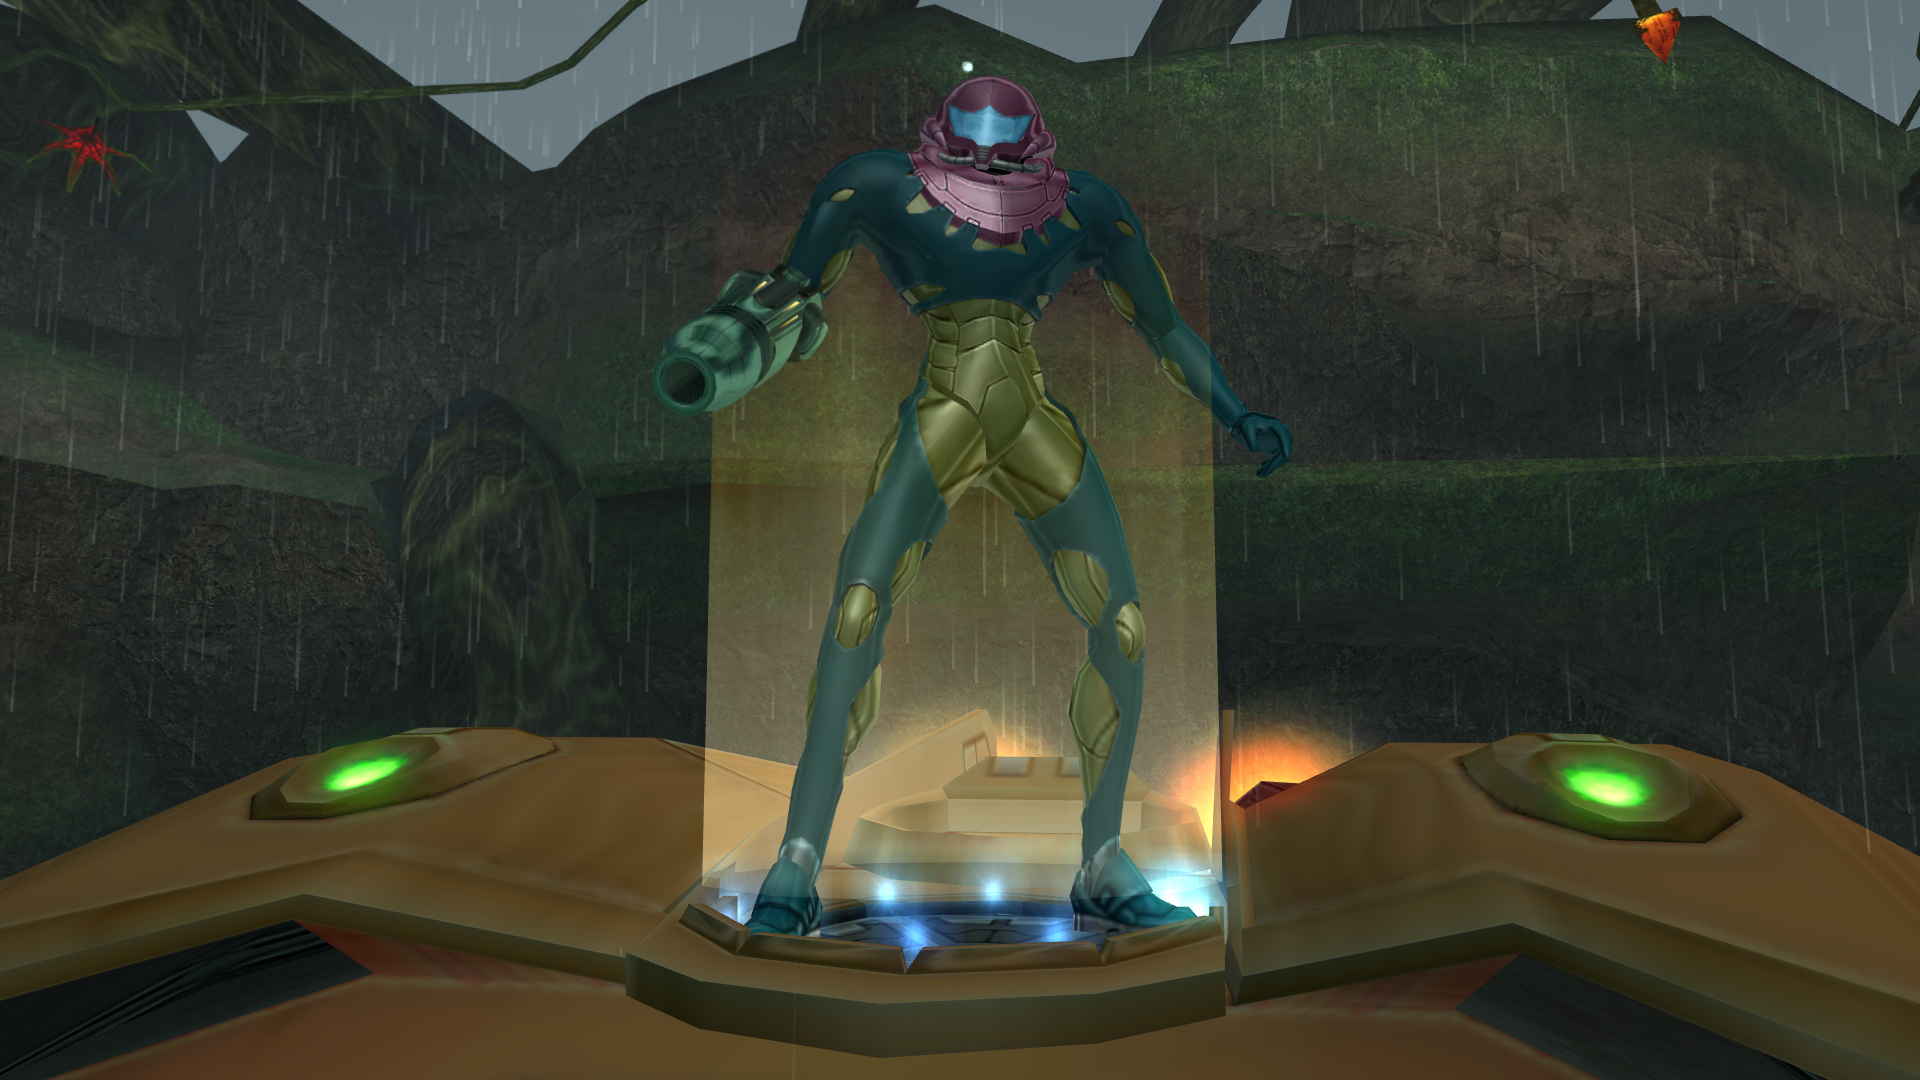
Samus-X (Or SA-X for short)


Ready to infect, destroy, and wipe out the competition, SA-X has joined the Brawl!


========================= - Who is the SA-X? - ======================================
http://www.youtube.com/watch?v=NfEE3Xbq1oA

The SA-X is an X-parasite mimicking Samus. Who are the X-parasites? They are parasitic,
blob-like organisms that, upon infecting a creature, rapidly reproduce inside them,absorbing
DNA. The creature dies shortly after being infected by the X-parasite. The X-parasite can
then use the DNA absorbed to transform into an identical- or near-identical- copy of the
creature. The X-parasites can also absorb memories and intelligence of the creature
infected.
-The X-parasites natural predator is the Metroid! Everything else is prey...
When Samus got infected by an X-parasite, she almost died as the X-parasite reproduced
within her. The only thing that saved her was the Metroid vaccine.


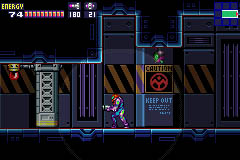
That is what the X-parasites look like. There are also green, yellow, and blue versions of
the X-parasites.

=====================================================================================

Statistics
*Out of 10 when nescessary


Size: The exact same as Samus from SSBB. It IS an X-parasite mimicing Samus after all.
http://i25.tinypic.com/2e3pyk4.jpg about Samus' height from this Brawl picture.

Weight: 8/10 -> Iron armor isn't light y'know!

Walking Speed: 3/10 -> The SA-X patrols around like it did in Metroid Fusion.
http://www.youtube.com/watch?v=NfEE3Xbq1oA (Around the beginning)

Running Speed: 6/10 -> The SA-X jogs just like Samus, albeit a bit slower.
http://www.youtube.com/watch?v=EsESd1ZrcRw First 20 seconds of the vid.

Falling Speed: 8/10 -> This thing isn't floaty like Samus at all.

First Jump: 5/10 -> The SA-X does a simple hop. No thrusters on its back activate
like Samus' first jump though.
-Short Hop: The SA-X has an extremely small Short Hop. Jumps about a head
high.

Second Jump: 4/10 -> Like Samus, its Second Jump isn't very high, but it spins using the
Space Jump.

Third Jump: 3/10 -> WTF? A Third Jump? Remember, the SA-X has the Space Jump, meaning it can
jump again while in mid-air. This one continues the spinning motion from the Second Jump.

Crouch: 5/10 -> The SA-X simply kneels down on one knee.

Crawl: Nope.

Wall Jump: Yes. The SA-X kicks off from the wall, imitating Samus.

Wall Cling: No.

Gliding: No.

Tether: No.

Standard Attacks

A, A, AAA...: Arm Cannon Sweep
On the first hit, the SA-X swipes its Arm Cannon from the right to the left.
On the second hit, the SA-X sweeps the Arm Cannon back to the right. It then unleashes a
flurry of fast, continuous sweeps from its Arm Cannon, which look similar to the first and
second hits of this attack. The first and second hits are fast, coming out on frame 3, and
have very good hitstun, allowing an opponent to get hit by the first two hits, and then by
the flurry of Arm Cannon swings. However, this move has horrible priority, next to no knockback, low range,
and does bad damage.
1st Hit -> 3%
2nd Hit -> 2%
Flurry of Hits -> .5% each time the Arm Cannon swings from right to left.

Dash Attack: Screw Attack Ram http://www.youtube.com/watch?v=EsESd1ZrcRw (after SA-X gets hit by the charged Wave Beam)
While dashing, the SA-X quickly "rolls" into a green Screw Attack that bounces along the
ground, electrocuting anything it touches. After this move is executed, the SA-X continues
running. It has a fast start-up and a fast ending, so you can't really get punished for this.
The range is all around the SA-X's body, which is the green sparks. The priority for this
move is high, but it does low knockback and damage.
Damage -> 6%

F-tilt: Double Roundhouse Kick
The SA-X quickly spins and delivers a roundhouse kick to the opponent, and if you press the
A-button again, it delivers another roundhouse kick to the opponent. This attack has very little
start-up lag, and little ending lag. This attack also has average priority, but deals very
good damage and knockback, like Snake's F-tilt. Also, like Snake's F-tilt, it has pretty good range.
However, only the second roundhouse kick will knock the opponent away, the first merely
keeping them in place for the second kick.
1st Kick -> 9%
2nd Kick -> 10%

U-tilt: Cannon Flip
The SA-X quickly sweeps its Arm Cannon in an "arc". Because the SA-X stretches out the Cannon
for this move, it has fairly good range. There is next to no start-up lag, and nearly no ending
lag. This move has OK priority, but deals bad damage and knockback. Because of this, the SA-X
can juggle heavy characters who don't know how to DI out of it. Just DI in the direction the SA-X
is facing!
Damage -> 5%

D-tilt: Leg Sweep
The SA-X kicks its leg downward in a sweeping motion. This attack is fast on start-up and has little
ending lag. This attack has low priority, low damage, and low knockback. The range is pretty
mediocre as well. It can be spammed for some damage however.
Damage -> 5%

Aerial Attacks

N-Air: Screw Attack
The SA-X does a spinning motion, and enters a green, rotating Screw Attack, which can electrocute
enemies. This attack hits a total of 8 times, dealing good damage. One of the SA-X's damage rackers.
This attack has good priority, but really bad knockback (kind of like Ivysaur's Nair) and range.
This attack can also be DI'd out of fairly easily.
Individual Hits (Total of 8): 2-3%
Total Damage (varies): 16-24%

F-Air: Cannon Whack
The SA-X rears back its Arm Cannon, and swings it forward, making a dull *THUNK* if it hits.
This has quite a bit of start-up lag, and a bit of ending lag. This attack has higher than average
priority, so expect it to eat through a lot of other attacks. It also has really nice knockback, capable
of KOing lighter characters at around 80% from the middle of Final Destination. Unfortunately, its range is limited,
and it deals lower damage than expected. The landing lag is about as bad as Ganondorf's Fair.
Damage -> 9%

B-Air: Vertical Drill Kick
The SA-X turns and starts drilling its legs, kind of like a sideways Fox Dair. This attack has
mediocre priority, and deals OK damage. The range is quite nice though, the hitbox is the entire
SA-X's body while spinning. It starts up fast, and ends quickly. This attack can also Auto-Cancel,
and has very little landing lag, so you can use this to pressure an opponents shield.
Damage per Spin -> 1-2%
Total Damage -> 15%

U-Air: Spiral Kick
The SA-X turns itself upside-down, buckles its knees, and kicks directly upwards. This hitbox
is the SA-X's entire body, and a bit after its feet. This attack has a bit of start-up lag,
and a bit of ending lag as well as the SA-X turns rightside-up. The landing lag isn't too bad,
but you WILL get punished if you miss a short hopped U-air. However, this attack Auto-Cancels.
It does OK damage, and has good priority.
Damage -> 13%

D-Air: Cannon Chop
The SA-X swings its Arm Cannon downward in a "chopping" motion that sends the opponent directly
downwards (it's a Meteor Smash). This attack executes similarly to Diddy Kongs Dair, but has
more start-up lag on the Dair. This move has high priority, deals good damage, has good vertical range
(poor horizontal range) and has very little ending lag and little landing lag. This attack has a
drawback though: it has HORRIBLE knockback, meaning that the SA-X has to get their damage up
to a reasonable % to actually Meteor Smash them to their doom.
Damage -> 15-17%

Smash Attacks

F-Smash: Triple Energy Bursts
The SA-X grabs its Arm Cannon with its left hand, leans a bit backwards, and fires 3 large bursts
of energy from the Cannon. All of these hits have high knockback, priority and damage, and this move has large
range (a bit more than Dedede's F-smash). This has BAD starting lag as the SA-X prepares to fire, and has
slight ending lag as the SA-X recovers from the recoil. These energy bursts DO NOT count as projectiles.
1st Burst Damage: 16% Uncharged, 21% Charged
2nd Burst Damage: 18% Uncharged, 24% Charged
3rd Burst Damage: 21% Uncharged, 28% Charged

U-Smash: Sky Blast
Corny name o.O. Anyways, the SA-X turns its back to the screen, aims upward, and begins firing
a LOT of explosions, some big, some small. http://www.youtube.com/watch?v=aOGX_QKknMU 0:26-0:37.
These explosions are high priority, HUGE range (about as much as the video), high knockback,
and high damage. Start-up is quite fast as well. However, the ending lag is so ridiculously bad
(since the SA-X pauses a bit to regain its breath after using such a strong attack), you can get punished
severely if you miss.
All of the Explosions Each Deal: 22% Uncharged, 31% Charged

D-Smash: Screw Attack Rotation
The SA-X activates its Screw Attack yet again, rotating in place while the green electricity surrounds it.
The SA-X will also move to the left and right very quickly, like Sonic's D-smash. Unfortunately, the
range is kind of bad, and the damage it deals is sort of low, but the knockback is really quite nice, and
the priority isn't too shabby either. This attack activates FAST, and has little ending lag, making
it one of the reliable killing moves for the SA-X. If this attack lands, the opponent gets electrocuted.
Also, while charging this Smash Attack, green electricity surrounds the SA-X as it prepares to
launch the attack, so you can actually hurt people while charging the smash, like Ness' Yo-yo.
Damage While Charging the Smash: 5%
Damage While Unleashing the Attack: 11-12% Uncharged, 16-17% Charged


Grabs

Standing Grab Animation: The SA-X takes a step forward and reaches out with its hand. This actually has
pretty good range because of the SA-X stepping forward.

Dashing Grab Animation
: The SA-X dashes forward, skidding a bit on its heels as it reaches out
for the opponent. Unlike the Standing Grab, the Dashing Grab has bad range.

Grab Jab: While holding on to the opponent with its hand, the SA-X aims the Arm Cannon at the
opponent, and fires small bursts of energy. Does 2% with each burst, 1% while decayed, and
the bursts can be fired relatively quickly. The bursts also burn your opponent for effect.

F-Throw: The SA-X spins the opponent around (kind of like Pit's B-throw) and throws them forward.
Because of the momentum, the opponent is knocked back pretty far. This deals low damage, but can kill
lightweights at around 150% if you are at the edge of Final Destination.
Damage -> 8%

B-Throw: The SA-X simply throws the opponent behind its back. Kind of like Donkey Kongs B-throw,
but with really bad knockback. It deals pretty nice damage to make up for the knockback.
Damage -> 12%

U-Throw: The SA-X jams its Arm Cannon into the opponent, aims upward, and fires 3 shots, each
knocking the opponent higher into the air. This attack deals nice damage, and the three shots
each count separately as a "move refresher".
Damage -> 13-14%

D-Throw: The SA-X slams the opponent onto the ground, and fires a few shots into the unfortunate
victim. Despite the appearance and the shots fired, this deals low damage and knockback, meaning
that the D-Throw is mostly cosmetic.

Specials

Neutral B: Ice Beam http://www.youtube.com/watch?v=cJvxi8QPsC4&feature=related

This thing has no Charge Beam! In the video, the SA-X fires 1 part of the Ice Beam,
it actually fires three Ice Beam...beams. This has as much range as Falco's laser: it will not
vanish until it goes offscreen. You can fire this attack slightly faster than Falco's lasers as well.
The 3 Ice Beams make this attack have a CRAZY hitbox, and it travels VERY fast. This attack will
also pierce your opponents, hitting enemies beyond (and it also is Waddle Dee proof :D).
However, it does not pierce walls/surfaces. This attack *barely* makes your opponent flinch, but
it can be a suitable obstacle for your opponent to overcome. The damage this attack deals might
be bad, but it can occasionally freeze your opponent. When frozen, the opponent will stay frozen for
2-5 seconds, depending on their damage %. This attack has nearly NO startup or ending lag.
Damage -> 1-2%

Side B: Super Missile

SA-X stops completely in its tracks, and fires a fast moving, very powerful Missile. This has
little startup lag, but has bad cool-down. This Missile deals nice damage, and high knockback.
The range is about the length of Final Destination, but the Missile travels very fast. The blast
radius is kind of small, however.
*However*
If the opponent is frozen by the Ice Beam, and the Ice Beam only, a Missile that collides with
that frozen character will shatter the ice and send the opponent flying away dealing even more damage and
knockback than normal. This knockback is VERY powerful, enough to kill Jigglypuff from the center of FD
at 55%

Normal Damage -> 15-17%
Ice Break Damage -> 22-25%

Down B: Power Bomb http://www.youtube.com/watch?v=3N8yrCxlNhE&feature=PlayList&p=67C97EE6BC0BE8CE&index=10

The SA-X quickly goes into Morph Ball mode and lays a Power bomb. The bomb takes a full 10 seconds
to detonate, and you can't lay more than 1 Power bomb at one time. When the Power bomb detonates,
it will let off an explosion with HUGE range. This range is roughly the size of Battlefield.
The explosion will cancel/destroy ALL projectiles in the vicinity, and will damage any opponents in range
for OK damage. This attack has literally NO knockback. In fact, it won't deal any knockback at all!
It will, however, cause the opponent to slightly flinch in order to make up for the lack of knockback.
Damage -> 10-12%

Up B: Screw Attack http://www.youtube.com/watch?v=x6folBJY7Ns&feature=PlayList&p=67C97EE6BC0BE8CE&index=12

The SA-X needs a recovery! But this green-tinted Screw Attack doesn't Screw Attack straight up.
In fact, the Screw Attack goes diagonally, giving it a pretty good horizontal and vertical recovery.
You can even sweet-spot the ledge with this move! However, it does not go into Free-Fall. Instead,
the SA-X will continue to Screw Attack diagonally downward to its death if you miss the ledge or the stage.
During the Screw Attack, if the opponent is hit during the "upwards" portion of the attack, they will
receive meager knockback and damage. If hit by the "downwards" portion of this attack, the opponent will then
receive mediocre damage and high knockback. However, the range is limited strictly to the SA-X's
body while Screw Attacking. No invisible hitboxes here. Overall priority of this attack is fairly high.
*If the SA-X hits a wall while Screw Attacking, it will wall jump off of the wall and continue Screw Attacking.
Upwards Portion of SA Damage: 7%
Downwards Portion of SA Damage: 13%

Other Attacks

Ledge Attack (under 100%): The SA-X quickly shoots a small blast of blue energy onto stage
upon getting up that has good range and does OK damage and knockback. The attack has high priority.
Damage -> 4-7%


Ledge Attack (above 100%): The SA-X slowly gets up on the stage and then quickly fires a small
burst of purple energy that has good range, bad damage and knockback. The attack as low priority.
Damage -> 2-5%

Get Up Attack (Face-down): The SA-X jabs with its Arm Cannon and left arm toward any opponents
near it. Has bad range, damage, and knockback, but the priority is really nice.
Damage -> 3-4%

Get Up Attack (Face-up): The SA-X raises its Arm Cannon and quickly fires small, blue energy
spheres at nearby opponents (both sides and a bit above). Has good priority, range, and knockback,
but the damage is still low.
Damage -> 3-5%

Misc. Animations and Poses

Standing Animation: The SA-X pauses and breathes in...and out... slowly.
http://www.youtube.com/watch?v=3N8yrCxlNhE&feature=PlayList&p=67C97EE6BC0BE8CE&index=10
0:12-0:14.

Shielding: The SA-X holds up its Arm Cannon to its visor in a defensive position.

Spot Dodge: The SA-X swings its right leg quickly into a side step.

Rolling Dodge: The SA-X does a *Gears of War-esque* kind of dodge, rolling behind the enemy.

Air Dodge: The SA-X leans its body backwards as it avoids a potentially dangerous attack.

Foot-Stool Animation: When foot-stooled, the SA-X's helmet gets "squashed", like Wario's head
when he gets foot-stooled.

Dizzy Animation: http://www.youtube.com/watch?v=yaWUwvgLjoE&feature=related (0:25-0:33 watch the SA-X closely).
The SA-X's body kind of...blurs...in and out as it struggles to regain a hold on itself.

Sleeping Animation: The SA-X's arms droop down, and the helmet lags downward. The SA-X sleeps
standing up, meaning it can still be hit quite easily.


Final Smash
Hard Core-X
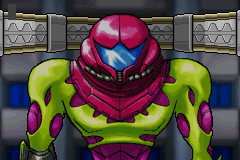
The SA-X starts to kneel, and then starts to...transform...into this huge, hideous beast thing!
http://www.youtube.com/watch?v=yaWUwvgLjoE&feature=related (0:42-0:46) The beast does a huge
roar, and then jumps directly upwards, off-screen. When it comes crashing down, anyone directly underneath
it will get Meteor Smashes downwards, and then launched by the things feet. While crashing down,
anyone caught will receive 20% damage, and anyone then launched as they are hit by the beasts feet
receives 40% and HEAVY knockback. It is entirely possible to dodge this attack by simply air dodging
at the right time, the timing itself isn't even hard. However, if the SA-X fails to hit anyone, the beast
collapses, and then morphs into a Hard Core-X. http://www.youtube.com/watch?v=fK3v6UZ6W40 1:05-1:15.
You can control the Hard Core-X and fire Ice Beams that deal high damage and knockback. This part of the
Final Smash only lasts for about 3/4 of the time Super Sonic is on the stage. The Hard Core-X cannot
move very quickly either, so a key part of this Final Smash is to launch enemies with the Ice Beam.
Hard Core-X Ice Beam Damage -> 15-20% each hit, high knockback

Taunts

Up Taunt: The SA-X stops moving, and turns to face the screen. If you are zoomed up to it, you
can see its lifeless eyes.


Side Taunt: The SA-X holds out a hand and examines its new, Samus-like form.

Down Taunt: The SA-X kneels down on one knee, visor facing the ground, breathing slowly.

Entrance

You see a Hard Core-X materialize out of nowhere and it transforms into the SA-X, kind of
like http://www.youtube.com/watch?v=pjela1zTUfQ&feature=related 1:10-1:20. However, the SA-X
lands on one of its knees, and turns and faces the screen, indicating it's ready for battle.

Costumes

Orange Varia Suit -> Default/Red Team
(on the left)

Fusion Suit -> Blue Team


Fusion Varia Suit -> Green Team


Fusion Gravity Suit -> Color scheme of Samus' Gravity Suit from Fusion


Dark Samus -> Dark Samus replaces the SA-X. Same physics/moveset though.
http://images1.wikia.nocookie.net/metroid/images/7/7d/Mprime2_DarkSamus.jpg (Too big :/)

Light Suit Samus -> Light Suit from MP2: Echoes scheme.
Pic: http://images2.wikia.nocookie.net/metroid/images/6/68/Lightsuit.jpg (Another big pic :/)

Victory Poses

Victory Pose 1: The SA-X is seen kneeling at the ground with one knee, and then turns its helmet
to face the screen. The dead, lifeless eyes the SA-X has are visible in the helmet if you look hard.

Victory Pose 2: The SA-X faces the screen, slowly walking toward the audience. It then pauses and aims its
Arm Cannon directly at the audience, while slowly breathing.

Victory Pose 3: The SA-X morphs into the Blue, Hard Core-X seen during its Final Smash and turns
the eye (the one that shoots the Beams) toward the screen, the eye focusing and unfocusing.

Loss: Because the SA-X is an imitation of Samus, it stands in place and claps its left hand onto
its Arm Cannon, just like Samus does in Brawl.


Other Stuff
Codec Conversation

Snake: Colonel, Samus is acting rather...different. She's more bloodthirsty than before!

Colonel: Snake, watch out! That's not Samus! That is the SA-X, an X-parasite mimicking Samus!

Snake: X-parasite? What are those?

Colonel: X-parasites are parasitic viruses who will infect almost anything and absorb DNA upon infection. They reproduce
very fast, and can kill their host organism quickly as well.

Snake: But how did this X-parasite infect Samus?

Colonel: Samus encountered her first X-parasite on the planet SR388. This one infected her
and transformed into the SA-X. It's armed with some of Samus' most powerful weapons, so be
careful!

Snake: Don't worry colonel, I'm armed with some powerful weapons myself. I won't go down
without a fight!

Kirby Hat

Kirby receives Ice Beam after copying the SA-X.


Wii-Mote Sound

Makes the Screw Attack sound the SA-X usually makes while Screw Attacking.
http://www.youtube.com/watch?v=KqJRSmruY70&feature=related

Credits Music for Single Player

First Music from this vid.
http://www.youtube.com/watch?v=iVlm5v--3_k&NR=1

Symbol While Playing


Why, the Screw Attack of course!

Victory Theme

2nd Music of this vid http://www.youtube.com/watch?v=iVlm5v--3_k&NR=1 Footstep sound only plays
while the SA-X is walking.
Plays during the SA-X's 2nd Victory pose ONLY. Otherwise, the regular Metroid victory theme
plays.


Trophies

SA-X

The SA-X is an X-parasite mimicking Samus. Samus originally found this parasite on planet
SR388, where it infected her. The SA-X was born out of the infected Power Suit upgrades
sent to the Quarantine Bay at the Biologic Space Laboratories Research Station. It
escaped using a Power bomb, which released all of the X kept captive at the Bay.


Final Smash: Hard Core-X

The Final Smash of the SA-X. It turns into a gigantic beast resembling a Hornoad and
Samus combined. It jumps HIGH and then slams onto your opponents. Beware! The SA-X will
then transform into the Hard Core-X Samus battled! To gain maximum effect from this
Final Smash, you have to control the Hard Core-X and fire Ice Beams at your opponent.
Unfortunately, the Hard Core-X's movement is hard to control and is slow-moving.
 

darkserenade

Smash Ace
Joined
Aug 1, 2008
Messages
793
Location
SoCal
Direct me to a single person more likely for Smash 4 then K. Rool not named Megaman. The 5th gen rep and New FE Lord also don't count.
I made a bet with myself that you would be the first person to comment on that...
I rolled in the cash this time.

Anyway, that was a joke. Also...

Canonize this as an MyM meme before Mentos logs on.​
 

SirKibble

Smash Champion
Joined
May 2, 2008
Messages
2,400
As did I. Although I WOULD say that the vampires are bad guys. Selene is borderline at the end when she turns against Viktor, but for the rest (and millenia earlier)...

That, and Lucian is just waaaaay too awesome, even while we think he's a bad guy.

/spoilers
No, no. Viktor is a definite bad guy, so Selene turning on him solidifies her as a good guy girl. Really, most of both the vampires and likens aren't either, since they're just following orders/tradition. There are only a few characters you can really classify as good or bad. Only three real "good guys" stick out in my mind: Selene, Michael, and Lucian. Bad guys would be Viktor, Kraven, Erika... Yeah, a lot of the vampires. Anyway, my point was that not all vampires are bad. One example is enough, right? :bee:
 

SonicBoom2

Smash Journeyman
Joined
Oct 12, 2008
Messages
480
Location
Florida
F*** Damn S*** Son of a B**** Ass Loser
MOMMY! THAT BAD PERSON SAID A BAD WORD!!!
(even though he was nice enough to help me spell Nibelheim)

@Blitzkri... however you spell it: Psh, oh well. It's my first darn one! You can't hold it against me! :p
 

Hyper_Ridley

Smash Champion
Joined
Dec 21, 2007
Messages
2,298
Location
Hippo Island
Cool Sa-X move set Powerbomb. Despite only being your first set, that was already above average. You could definitley see yourself in the top 50 if you improve in any future submissions.
 

Collective of Bears

King of Hug Style
Joined
Nov 10, 2007
Messages
6,507
Location
North Carolina
NNID
Gark430
3DS FC
1805-3069-0371
I'm working on The Penguin's stats right now. But before I can really get into it, I'll need to watch more old Batman episodes.
 

KingK.Rool

Smash Lord
Joined
Nov 26, 2005
Messages
1,810
No, no. Viktor is a definite bad guy, so Selene turning on him solidifies her as a good guy girl. Really, most of both the vampires and likens aren't either, since they're just following orders/tradition. There are only a few characters you can really classify as good or bad. Only three real "good guys" stick out in my mind: Selene, Michael, and Lucian. Bad guys would be Viktor, Kraven, Erika... Yeah, a lot of the vampires. Anyway, my point was that not all vampires are bad. One example is enough, right? :bee:
Meh, I think that's kinda oversimplifying it. She turns against him for purely personal reasons, not because it's the right thing to do. I guess you could call it kinda anti-hero-like. Anyway, I would only call Michael a good guy, in the end. Everyone else is morally gray in some way or another - Selene, until the end, takes pleasure in killing Lycans, and doesn't really appear to care about anyone or anything else. That's evil in my book.

And Lucian... he's also pretty focused on his goals. I wonder how many humans died while he was looking for an heir to Corvinus to mix the races. And yet he's also caring, polite, and reasonable. Gray, gray, gray.

Too bad Underworld: Evolution so totally butchered a great concept. I could talk about this stuff all day.
 

SonicBoom2

Smash Journeyman
Joined
Oct 12, 2008
Messages
480
Location
Florida
Cool Sa-X move set Powerbomb. Despite only being your first set, that was already above average. You could definitley see yourself in the top 50 if you improve in any future submissions.
That was a compliment to him rite?
I saw a statement saying we hear that so much now its barely a compliment.

*** f*rt b*tch c*nt boner bitting dieherea eater
Dude, just stop!
 

Chris Lionheart

Smash Champion
Joined
Apr 6, 2008
Messages
2,076
Location
Make Your Move
That was a compliment to him rite?
I saw a statement saying we hear that so much now its barely a compliment.
We shouldn't even be judging that right now...

Remember back at the beginning of MYM 3.0, the sets were considered awesome even when they weren't a huge improvement over 2.0 sets?

Then Warlord comes along and shows everyone the definition of long with Nightmare...

What if that happens again this time.... imagine a moveset so long that it fills the page worse than all of those Richard Simmons pictures.
 

SirKibble

Smash Champion
Joined
May 2, 2008
Messages
2,400
Meh, I think that's kinda oversimplifying it. She turns against him for purely personal reasons, not because it's the right thing to do. I guess you could call it kinda anti-hero-like. Anyway, I would only call Michael a good guy, in the end. Everyone else is morally gray in some way or another - Selene, until the end, takes pleasure in killing Lycans, and doesn't really appear to care about anyone or anything else. That's evil in my book.

And Lucian... he's also pretty focused on his goals. I wonder how many humans died while he was looking for an heir to Corvinus to mix the races. And yet he's also caring, polite, and reasonable. Gray, gray, gray.

Too bad Underworld: Evolution so totally butchered a great concept. I could talk about this stuff all day.
I didn't see Evolution. Maybe I won't, if it ruins it so.

I guess I'm looking at it kind of relatively. Selene and Lucian definitely stand out as having purer motives than most of the cast. I don't know, I generally call love a good motive, so most anyone that's fighting for it gets a "good guy" label in my book. Lol. Call me soft for it and whatever, but that gets the three of them in as good guys for me.

Plus Selene is totally hot, so I like thinking she's not evil.
 

Hyper_Ridley

Smash Champion
Joined
Dec 21, 2007
Messages
2,298
Location
Hippo Island
We shouldn't even be judging that right now...

Remember back at the beginning of MYM 3.0, the sets were considered awesome even when they weren't a huge improvement over 2.0 sets?

Then Warlord comes along and shows everyone the definition of long with Nightmare...

What if that happens again this time.... imagine a moveset so long that it fills the page worse than all of those Richard Simmons pictures.
If that happened, then it would be even longer than Dr.Eggman, who even Warlord felt was over-detailed, so I don't think that'll be a problem
 

SonicBoom2

Smash Journeyman
Joined
Oct 12, 2008
Messages
480
Location
Florida
We shouldn't even be judging that right now...

Remember back at the beginning of MYM 3.0, the sets were considered awesome even when they weren't a huge improvement over 2.0 sets?

Then Warlord comes along and shows everyone the definition of long with Nightmare...

What if that happens again this time.... imagine a moveset so long that it fills the page worse than all of those Richard Simmons pictures.
lol, that mind end up as Zack. You already saw the STANDARD B MOVE. Imagine it in BOLD, colored, and size 7 @_@

JK

Dont remind me of that troll...
 

Chris Lionheart

Smash Champion
Joined
Apr 6, 2008
Messages
2,076
Location
Make Your Move
If that happened, then it would be even longer than Dr.Eggman, who even Warlord felt was over-detailed, so I don't think that'll be a problem
Lol I was giving a hypothetical situation.

There is nothing absolutely incredible about Dr. ROBOTNIK's detail.

Warlord said it was over-detailed because it was unnecessary. Warlord goes into detail because his moves are special enough to MANDATE it.
 

KingK.Rool

Smash Lord
Joined
Nov 26, 2005
Messages
1,810
I didn't see Evolution. Maybe I won't, if it ruins it so.

I guess I'm looking at it kind of relatively. Selene and Lucian definitely stand out as having purer motives than most of the cast. I don't know, I generally call love a good motive, so most anyone that's fighting for it gets a "good guy" label in my book. Lol. Call me soft for it and whatever, but that gets the three of them in as good guys for me.

Plus Selene is totally hot, so I like thinking she's not evil.
Don't. Never. Please. :p

And yeah, I see where you're coming from. I'm kinda playing devil's advocate here. When we talk motive, yeah, those two are purest.

I can agree with that reasoning. :laugh:
 

darkserenade

Smash Ace
Joined
Aug 1, 2008
Messages
793
Location
SoCal
By yours truly.​

Weak attacks

A: Sephiroth
AA: Sephiroth
Ftilt: Sephiroth
Utilt: Sephiroth
Dtilt: Sephiroth

Aerials

Nair: Sephiroth
Fair: Sephiroth
Uair: Sephiroth
Dair: Sephiroth
Bair: Sephiroth

Smash attacks

Fsmash: Sephiroth
Usmash: Sephiroth
Dsmash: Sephiroth

Specials

B: Sephiroth
^B: Sephiroth
vB: Sephiroth
>B: Sephiroth

Final Smash

Kingdom Hearts Sephiroth

Assist Trophy

Cloud
--------------------------------------------------------------------------------------------------------

I remember a CERTAIN King Sandbag requesting more joke movesets...
 

~Cruxis~

Smash Ace
Joined
Nov 27, 2008
Messages
768
Location
In a timeless world
By yours truly.​

Weak attacks

A: Sephiroth
AA: Sephiroth
Ftilt: Sephiroth
Utilt: Sephiroth
Dtilt: Sephiroth

Aerials

Nair: Sephiroth
Fair: Sephiroth
Uair: Sephiroth
Dair: Sephiroth
Bair: Sephiroth

Smash attacks

Fsmash: Sephiroth
Usmash: Sephiroth
Dsmash: Sephiroth

Specials

B: Sephiroth
^B: Sephiroth
vB: Sephiroth
>B: Sephiroth

Final Smash

Kingdom Hearts Sephiroth

Assist Trophy

Cloud
--------------------------------------------------------------------------------------------------------

I remember a CERTAIN King Sandbag requesting more joke movesets...
Wow, that was insanely irrelevant
 
D

Deleted member

Guest
MOST ORIGINAL OC EVAR

A: Like Mario's
Side A: Like Ganondorf's
Up A: Like Samus'
Down A: Like Pikachu's
Side Smash: Like Ike's
Up Smash: Like Kirby's
Down Smash: Like Bowser's
Nair: Like Falco's
Fair: Like Captain Falcon's
Bair: Like Luigi's
Uair: Like King Dedede's
Dair: Like Sonic's
B: Like Wolf's
Side B: Like Meta Knight's
Up B: Like Link's
Down B: Like Marth's

FINAL SMASH: Like Fox's
 

PowerBomb

Smash Master
Joined
Dec 11, 2007
Messages
3,791
Location
California
Cool Sa-X move set Powerbomb. Despite only being your first set, that was already above average. You could definitley see yourself in the top 50 if you improve in any future submissions.
Thanks :D

I'll be making some more movesets, once I get some more ideas :/
 

Tanookie

Smash Journeyman
Joined
Nov 17, 2008
Messages
436
Location
*sends Sundance a leather harness on Dragon Apprec
Do not hate humans, for theirs is a hard lot.


- Alucard Tepes -
“The only thing necessary for evil to triumph is for good men to do nothing.”


- - - - -

I. Primary Information

Character Biography:

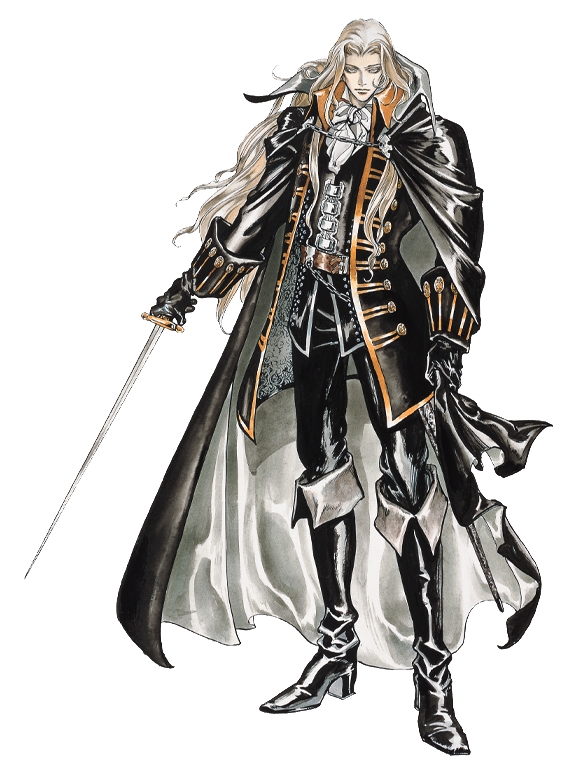
Adrian Farenheights Tepes was born from an unnatural union between the Lord Dracula and Lisa Farenheights, a human, he is a dhampir, or half-vampire. He possesses many of the strengths of his father: an affinity for magic, shapeshifting prowess, and unnatural strength are just a few. However, he also has a unique ability that even Dracula cannot fathom: the power to love. Despite having been raised to fight for the side of evil by his father, Adrian was always reprimanded for clouding his “better judgment” with human emotions such as kindness.

When Lisa was accused of witchcraft and burned at the stake, Adrian was by her side. Her last words to him were as follows: “Do not hate humans. If you cannot live with them, then at least to them no harm. For theirs is already a hard lot.” These words touched Adrian, and from that moment on he swore to protect the memory of his mother by following her dying words. Unfortunately, his father was not as understanding. Enraged at the death of his wife at the hands of such filthy creatures, Dracula swore an oath to exterminated mankind for good. This, understandably, created tension between Dracula and Adrian, who was soon banished from his father’s realm. It was at that moment that Adrian took the name “Alucard,” a reversal of his father’s name which symbolized their differing views…views which could never be compromised.

Shortly after, in the year 1476, Alucard joined Trevor Belmont in his quest to defeat Dracula, convinced that with the aid of his three comrades his father would fall. Indeed, they did succeed, and there was much rejoicing; unfortunately, Alucard was wracked with guilt. Despite his differing views with this father, Alucard’s act of patricide affected him greatly, and he entered a self-induced slumber in which his great powers would no longer cause harm to anyone.

Over three centuries later, Alucard was awakened because of a shift in the balance of good and evil: his father, Dracula, had awoken once more, but this time there was no Belmont to face him. Alucard had no choice but to search out his father, lest humanity be wiped out for good. Once in Castlevania, Alucard encountered Maria Renard, who, as it turned out, was searching for the very Belmont who should have been in Alucard’s place. Maria was of the belief that Richter was under some sort of mind control, as she steadfastly believed in his sense of right and wrong. With Alucard’s help, Maria was able to save Richter and help him see past his magical coercion. This cleared the way for Alucard, allowing the dhampir to defeat his father once more, this time by himself; this was a perfect testament to the son overthrowing the father. Once more, Alucard moved to seal away his cursed bloodline, but Maria ran after him in an attempt to stop him.

It is highly probably that Maria managed to convince Alucard to stay, and that the two sired a separate bloodline known as House Lecarde. It was to this family that Alucard entrusted his magical spear, the Alucard Spear, as a way to complement the power of the vampire killer so that his and Maria’s strength would always live on in the battle against evil.

Alucard also had a part in the 1999 Demon Castle Wars, in which his father’s power was sealed away for all eternity in a solar eclipse, as was foretold in an ancient prophecy. He, Julius Belmont, and another descendant of the Belnades clan were all major characters in this event, as were the Hakuba family; it was at their shrine that Dracula was defeated. However, another prophecy was soon foretold, that another human being would be born…one doomed to be Dracula reincarnated. Once again taking responsibility, Alucard infiltrated the Japanese government and formed a false identity: Genya Arikado, who aided this young man (Soma Cruz) along with the young Yoko Belnades. After Soma’s final victory, Alucard left the world with this chilling, ominous statement: “If the world needs a Dark Lord, one will emerge…even if it’s not Soma.”

External Links: Will be posted as I find them.

Play Style:

Alucard has a wide variety of moves. Magic, swords, shapeshifting…you name it, he’s got it. The only problem is, while he possesses all of these traits, he doesn’t shine in any particular category. His sword attacks, while quick and flashy, don’t do much damage, and his magic, while also flashy and (somewhat) hard-hitting, are slow and easily avoided because of the lengthy animations that accompany them before. His shapeshifting abilities somewhat make up for his lackluster recovery and speed, but both animal forms are exceedingly weak and low in defense, making Alucard perfectly vulnerably to enemy assault.

The key to Alucard, therefore, is mixing everything up. He has a few good kill moves, but you can’t quite spam those without the risk of becoming too predictable. Even though he should, in theory, be able to quickly switch between long and short ranges like Maria, Alucard has a slightly harder time of it. His slow yet elegant movement speed requires that he put good distance between himself and opponents before attempting his powerful magical attacks. Use of his Forward Tilt is a great way to keep opponents on their toes, due to its countering effect. His sword attacks (and other weapons), due to their quick speed, are the main way of putting pressure on foes, so keep that in mind.

Alucard’s aerial game is also quite good. A heavy, yet floaty fighter, Alucard’s aerial attacks cover a wide range of purposes, from KO to spacing to mere damage-dealing. He would be absolutely formidable in the air if it were not for his terrible jumps and recovery. Therefore, more than anything, Alucard must know when to use certain moves. Use a well-timed Tetra Spirit, and the opponent racks up damage and flinches, giving you a perfect window of opportunity for finishing them. Miss a Teleport Slash, however, and you could easily suffer a quick KO.


II. Statistics

Stats:

Power = 7
Weight = 6
Speed = 4
Range = 8
First Jump = 5
Second Jump = 4
Recovery = 7
Traction = 6

Glide: No.
Wall Jump: No.
Wall Cling: No.
Tether: No.

Pros:
  • Quick, unique sword attacks.
  • Several projectiles to keep opponents at bay.
  • Can shapeshift into a wolf to make up for lack of speed.
  • Can shapeshift into a bat to make up for lack of recovery.
  • Final Smash restores life.
  • Forward Tilt can counter.
  • Good aerial game.
  • Heavy.
  • Powerful attacks.
Cons:
  • Bad jumps and recovery.
  • Slow movement speed.
  • Almost all attacks have significant ending lag.
  • Many projectiles are slow and easily telegraphed.
  • Wolf form has terrible defense and recovery.
  • Bat form has terrible defense and has only one attack.
  • Both shapeshift forms are slow to work and can be cancelled.
  • Timing is essential.
  • Counter does not deal damage and only reflects solid attacks.


III. Special Attacks

Neutral Special: Tetra Spirit - As this button is held down, Alucard gathers white magical energy around his hands, preparing this spell. When you release the button (minimum of two seconds), he bends down and cries out, releasing a quartet of white orbs that slowly wend their way through the air towards random opponents, curving in the air and homing in. If the button is tapped, Alucard merely summons one spirit of the same size with all the same properties. This attack is a good way of racking up damage, but its slow movement and lengthy preparation time make it easy to predict and subsequently avoid. This move is best use in FFA’s when no one is paying much attention to everybody; unfortunately, when used in this situation, the odds of one person taking the full brunt of all four spirits is highly unlikely. [4% per spirit. 4 spirits.]

Up Special: Hellfire - Alucard’s main recovery is actually focused more on damage dealing than recovery, and that alone is its greatest weakness. When activated, a shaft of red light surrounds Alucard’s body and disappears along with him, carrying him in whichever direction you move the control stick. The distance traveled is about half the length of Final Destination. Once the distance is traveled, a second shaft of light beams Alucard down and he opens his cape, releasing a trio of fireballs that travel until they hit an obstacle or enemy. If Alucard’s teleport lands him in midair, he will freeze in midair as he attacks but will enter freefall after the attack. Also, you don’t have to move during this attack, meaning you can sometimes catch opponents off guard with it. Approximately one out every five times this move is used, Alucard will release two Hell Meteors that do increased damage, travel through enemies, and speed up as they travel. [Fireballs: 6% Meteors: 9%]

Side Special: Teleport Slash - This ability is inherent to Alucard’s weapon, the Alucard Sword. Alucard immediately disappears, leaving only a faint silhouette of him behind. He flies forward two character lengths as a tiny orb of light, and then reappears, facing the opposite direction he was looking before and glowing blue (he cannot be hit while in this state). He then slashes his blade very quickly twice before teleporting back. This move does almost no knockback (otherwise the second sword slash wouldn’t hit), but its damage is nothing to sniff at. Alucard can use this move in the air; he will freeze in the air but not enter free-fall afterwards. A significant downside to this move is that the distance is set and is very easily telegraphed. In addition, this attack has a lot of ending lag, leaving Alucard wide open for attack. [14%]

Down Special: Metamorphosis - This move is one of Alucard’s most unique abilities, as it allows him to transform into not one, but two, animals depending on the length the B button is held down. By tapping the button, you transform into a bat; however, if you hold down the button, you will transform into a wolf instead. When transforming, Alucard freezes in place (no matter where he is, unless he’s being knocked back) and his form distorts for one second as he transforms. Each form has bad defense, but each serves a specific purpose. Further details about these two separate forms can be seen below.
  • Bat Form: By tapping B while pressing down, Alucard will transform into the stereotypical bat form. This bat isn’t exactly small for its species, as it rivals Jigglypuff in general height. This makes it difficult to avoid attacks, only one of which is needed to force Alucard back into his humanoid form. In addition, any attack inflicted on the bat will do double damage. This form is primarily for recovery, although its slow speed requires that it be activated almost immediately after falling. While in bat form, Alucard can move freely around in the air in a manner similar to Pit’s, but at a 25% decrease in speed. This form only has one attack: pressing A releases a small fireball that moves slowly in a horizontal direction for approximately two character lengths before disappearing. After five seconds, Alucard automatically reverts back to humanoid form. [4%]
  • Wolf Form: By holding B while pressing down, Alucard will transform into a wolf, which is a form focused more on offense and speed. Unlike the bat, however, the wolf only has one jump, which only travels about the height of Mario. The wolf runs very quickly, though, which allows his horizontal jump to go a bit further than normal. There is no time limit for being in Wolf Form, but if you wish to transform back into Alucard, simply input the button combination again (Down + B). If you are killed while in Wolf Form (which usually happens around 90%), you will respawn as Alucard. The wolf’s main purpose is speedy attacks, of which it has three:
    [*]Neutral Combo: Feral Frenzy - If one rapidly presses A, the wolf will leap forward, performing a series of quick bite attacks. He leaps forward with each press of the A button; he can use this an infinite number of times, but the knockback on the third successive bite usually does not allow Alucard to immediately begin another combo without some sort of approach. [2% - 2% - 3% - 7% total]
    [*]Forward Smash: Crimson Claw - Wolf Alucard lunges forward with a howl, raking the opponent across the chest as his paw glows crimson and leaves a smoky trail behind it. The initial leap is about one half-character length, while the slash is directly in front of the wolf and slightly above it as well. This move has good priority and is a good, solid damage dealer. Unfortunately, its startup time makes it somewhat easy to dodge after a bit. [8%]
    [*]Forward Special: Wolf Charge - This attack comes from the spell that Alucard uses in Symphony of the Night. By inputting the button combination (Forward + B), wolf-Alucard barks loudly and shoots forward about three character lengths. This attack knocks opponents upwards and also provides a good opportunity for horizontal recovery. Be warned, though, that this move can result in a self-KO; you will fall of the stage if you use it on the edge, and after this move is activated aerially, Alucard enters free-fall mode. [12%]​


IV. Melee Attacks

Neutral Combo: Tactics - What’s a swordsman without a slash attack? By pressing the A button up to three times, Alucard slashes his blade horizontally (his blade is rather long, reaching about the length of another Alucard) two times in quick succession before ramming his shield out, knocking opponents back slightly. The shield ram does not have a counter effect but serves as a knockback so as to keep the opponent away from Alucard after his assault. Unfortunately, the shield comes out a tad slowly, making it easy for an opponent to dodge. [3% - 3% - 2% - 8% total]

Dash Attack: Wing Smash - Alucard quickly morphs into a bat shape, flying forward for up to the length of Battlefield in an attempt to ram enemies down. This attack does good damage and is a good way to catch enemies off-guard due to its sudden high speed. However, opponents can usually see it coming because, while the bat is faster than Alucard, it isn’t that fast. In addition, while it looks flashy, it actually does not knock opponents back at all; it pushes them back with Alucard, so that when Alucard automatically shapeshifts back to humanoid form at the end of the attack (which is a slow, obvious process), he is right in the opponent’s face, wide open to be attacked. In addition, you cannot push opponents off ledges, but you can fly off ledges if you do not connect with this move. This attack can be angled up and down slightly (approximately by thirty degrees), allowing you to hit opponents in the air if wanted. If you manage to hit an aerial opponent with this attack, they WILL be knocked back a good distance. [9%]

Forward Tilt: Counter Guard - Alucard thrusts his red shield forward quickly before drawing it back in. At first, this move may seem worthless, as it does no damage or knockback. However, that belies its true purpose as a counter maneuver. This attack counters almost all attacks save Final Smashes and most energy projectiles (PK Fire, Blasters, Aura Sphere, etc.) It will reflect, however, solid projectiles like arrows or boomerangs. In addition, it reflects melee attacks. When an attack is successfully countered, Alucard thrusts his shield forward further, creating a flash of light that knocks the opponent back as Alucard advances on them. Since it stuns enemies momentarily, this is a perfect attack to gain the upper hand on your enemies in the midst of a vigorous fight. [0%]

Up Tilt: Crimson Needle - Alucard glances upwards, and a red needle about the height of Mario suddenly appears over his head, thrusting upwards slightly and glinting at the tip. This attack is a good juggling move, allowing Alucard to jump in and attack with his fantastic aerials. Unfortunately, it causes a bit of damage to Alucard every time he uses it, as the Crimson Needle is powered by blood—Alucard’s blood. While the cost seems minimal, it can add up in the long run. Besides its main, drawback, however, it is a rather fast attack, giving a good amount of knockback while setting opponents up. However, it only hits opponents directly above Alucard, and only the tip area does maximum damage and knockback. [Tip: 9% Other: 6% Cost: 2%]

Down Tilt: Demonic Helper - Alucard’s Down Tilt has him summoning his devil familiar, which zooms out from within the folds of the half-vampire’s cape. The devil flies towards the nearest enemy (as long as s/he’s close to Alucard and in front of him) and slashes him with his spear, crying, “For the Master!” The devil flies rather quickly and his attack is quite quick, but lacking in damage. It seems to be a rather useless attack, if it weren’t for the stun the devil’s attack inflicts. That’s right: after being hit, your opponent has a one-in-three to be stunned for one second. In addition, the devil will sometimes (about 20% of the time) use a stronger spear attack: “Ice Spear!” he shouts; this attack does extra damage but has no stun effect. [Normal: 7% Ice Spear: 10%]


V. Smash Attacks

Forward Smash: Aguena - Aguena was one of the rarest, yet most powerful and costly subweapons in Symphony of the Night, and for good reason. It usually cost a chunk out of Alucard’s heart meter, making it useful only when you had a large stockpile. When this attack is used, Alucard tosses a glittering blue crystal forward, which flies about half the length of Battlefield before it disappears. The crystal is not very large, but leaves a blue streak behind it as it travels. When the attack connects, three large azure lightning bolts immediately shoot from Alucard’s body and arc across the field to the hit the opponent in quick succession. If the initial crystal connects, the three bolts will always hit, as they come out too quickly for opponents to dodge. The main advantage of this move is its range and power, in addition to its finishing knockback, which sends opponents flying backwards and up. However, this move is very easy to dodge if an opponent sees it coming; since Alucard cannot move until the attack finishes or the crystal disappears, missing it could be absolutely disastrous for him. [18%]

Up Smash: Light Rod - Strangely enough, Alucard holds a weapon within the folds of his outfit that has to do with light? Yes, that’s right; even though he’s half-vampire, Alucard can use holy weapons, as seen in his use of crosses and holy water. Upon its use, Alucard swings the Light Rod up, its end flashing briefly at its tip when it reaches maximum height. If an opponent is hit during the flash, it does extra knockback and damage, making it a good This move does not do a lot of damage, as the weapon is merely a staff with a gem at the end. However, it does a good amount of upwards knockback, allowing Alucard to smack enemies up into the air so he can assault them with his aerial attacks. [12%]

Down Smash: Pyre - Alucard holds his hand up as if about to slap an enemy below him. When the smash attack is released, Alucard swings his fist downward and spreads his fingers wide, palms pointing down. A spurt of fire then is released from his palms, hitting the ground and ‘ricocheting’ off the ground, so to speak, as it curves up to about half of Alucard’s height. The range of the whole flame is approximately one character length, so it has a good amount of range, able to keep opponents away if necessary. Dark Pyre gives a good amount of knockback, and it also does solid damage. However, its startup lag as the flame extends takes a little less than a second; the tip of the flame does the most knockback, so timing is essential to get the maximum effect. [16%]


VI. Aerial Attacks

Neutral Air: Sword Brothers - Alucard’s famous Sword Familiar appears centered on his body, pointed downwards, and it releases a ring of white energy that extends outwards one Pichu-length before beginning to fade away. It’s a simple move, really, and the damage isn’t exactly fabulous, but it does provide a good source of knockback for the dhampir. It’s a good edge-guarding tool, as the knockback and hitstun effect is good enough to gimp recoveries and knock others away, clearing Alucard’s way to follow up with a Runesword attack. Alucard can use this attack as many times as he wants while in the air, although he usually has enough time to do two or three because of the ending lag in which the sword spins around and disappears. [8%]

Forward Air: Runesword - Ah, this is undoubtedly Alucard’s strongest aerial attack. When activated, Alucard makes a tossing motion with his hands, releasing his blade as it flies up to 2.5 character lengths starting slightly above Alucard and then slanting downwards. As it flies, the sword makes a quick slashing motion, dealing good damage and a great amount of knockback. The sword does not home on enemies, but its wide range more than makes up for it. The main downside to using this move is its horrible ending lag, as it takes a while for the sword to fly back into Alucard’s hand. Alucard will usually only have time to do this move once before he touches down again. [12%]

Back Air: Wing Slap - Not to be confused with Wing Smash, Alucard’s Twilight Cape extends into the familiar winged shape that appears when Alucard jumps in mid-air. However, instead of propelling him upwards, Alucard’s cape extends back further, swinging to the side with a bit of force that is just enough to knock back his opponents. The damage is minimal, but it’s a good way to keep assault off Alucard’s backside when he’s not facing the proper way to perform a Runesword attack. [5%]

Up Air: Children of the Night - Despite Alucard’s differing views with his father, he shares the same affinity for bats. When this attack is activated, Alucard sweeps his hand above his head, releasing a line of bats as he does so. Shrieking and madly flapping their wings, the bats ascend in their crescent formation, smacking enemies senseless and gnawing at them to cause damage for their master. After approximately two seconds, they all disappear in puffs of black smoke. This attack does good damage but almost no knockback whatsoever, making merely a pummel-type move as opposed to a spacing move like many of other Alucard’s aerials. [7%]

Down Air: Heaven’s Rain - This move looks flashy but actually isn't that special in its properties. Alucard pauses in midair and shoots upward slightly before holding his hand downwards at an angle. Immediately, a plethora of small swords (or daggers, if you wish) come raining down at high speeds, flying until they hit the ground. These daggers do very little damage, but the sheer number of them allows for a lot of hitstun. Obviously, they don’t a lot of knockback, and the move only lasts for a very short time, as Alucard doesn’t have the strength to keep the blades flying indefinitely. The rain is about one character length in width and lasts for approximately one second, during which time Alucard is suspended in the air. He cannot use this move more than once per jump (meaning he has a maximum of two uses each time he’s in the air). [10%]


VII. Grabs and Throws

Grab: Rope of Death - Alucard makes a horizontal swiping motion with his hand, sending out a white ghostly rope that can grab opponents up to a character length in front of him. As soon as the opponent is grabbed, Alucard pulls them in. [0%]

Grab Attack: Hilt Punch - Alucard rams his opponent with the hilt of his sword, using his free hand. [2%]

Forward Throw: Bloody Blade - Alucard releases his opponent briefly before swinging upward with his sword, which glows bright red and leaves a trail of blood behind it. The sword sends opponents flying forward. This attack has good knockback but bad initial damage; the kicker is that all opponents affected by this attack are inflicted with the “Cursed Blood” status for the next five seconds, during which they take an extra percent of damage per second. However, there is lag after this throw is completed as Alucard cancels the spell on his blade. [Throw: 7% Cursed Blood: 5%]

Back Throw: Bat Storm - Alucard tosses opponents backwards up into the air, using his inhuman vampiric strength. He then follows up by opening his cape, out of which a thick line of bats fly, shrieking as they speed towards Alucard’s opponent. Each bat does extra knockback, but there’s not super-awesome ending knockback like many moves have. It’s kind of a collective knockback, but the opponent can easily recover after the bats fly away; they fly through the opponents and then up off the screen. [10%]

Up Throw: Triple Cutter - Alucard throws the opponent upwards, once more complementary of his vampiric blood. He doesn’t toss them up fully, though; instead he tosses them up just enough so that they reach the maximum height of Alucard’s jump. He jumps as they fly up, slashing with his sword three times so quickly they simply appear as streaks through the opponent’s body. The first two form an X shape, and the third slash is horizontal and sends the opponent flying. Alucard, unfortunately, enters free-fall mode after this, but he only has to fall a short distance to hit the ground. This move is a great all around move, as it allows Alucard to deal good damage while still separating himself from his opponent. [13%]

Down Throw: Comet - Alucard slams the opponent down and binds them down with his ghostly rope momentarily, as he summons a small, rounded meteor above his head. Using his sword to direct it, Alucard sends the comet flying down at the opponent, exploding right on top of them and sending them flying upwards. This move has really good knockback, but the damage does not match its flashiness, unfortunately. It mostly serves as a set-up move to let Alucard once more meet his opponents in aerial combat. The explosion generated by the comet will damage other opponents (NOT the opponent thrown) caught in the radius, but only minimally. [Throw: 8% Explosion: 3%]


VIII. Miscellaneous Attacks and Animations

Rising Attack: Jaw Snap - With surprising speed, Alucard leaps to his feet, ghostly red jaws closing directly in front of him. It doesn’t do any damage, but it does knock the opponents back a good deal. This is just one more example of Alucard’s self-emphasis on spacing. [0%]

Ledge Attack (>100%): Foggy Encounter - Alucard shifts into mist form, speeding THROUGH the ledge and up onto stage; Alucard quickly forms from the fog and swings his blade across, striking back anyone who dares to get too close to him. [6%]

Ledge Attack (<100%): Foggy Recovery - Alucard, once more, turns into mist, but slowly goes around the ledge and slowly morphs back to Alucard without the sword attack. It shows he’s getting tired if he’s taking longer to change forms…I’d watch out. [0%]

Standing: Alucard stands staring ahead calmly, holding his sword loosely at his side; his shield only appears whenever he uses an attack that dictates the use of his shield.
Walking: Alucard moves forward with a purpose, remaining almost perfectly still with the exception of his legs.
Running: Alucard finally moves another part of his body, hunching over to bring himself to a run; he reaches top speed quickly but unfortunately it’s not much faster than his walk speed.
Crouching: Alucard bends down at the knees, his hands placed to his sides to get some balance. His sword is still in his fist, pinned against the ground. His cape trails behind him and spreads behind him on the ground, looking like a pool of tar against the ground.
Dodging: Alucard transforms into a cloud of mist, quickly moving around his opponent’s attack. Unfortunately, the ending lag on Alucard’s dodge is somewhat noticeable, as it takes a moment for him to shift back to human form.
Double Jump: Alucard’s cape forms into the shape of wings, pushing down and allowing the dhampir to gain some extra air.
Sleepy: Alucard lays perfectly prone on the ground, facing upwards with his hands clamped together His sword is pointed downwards, the hilt held in place by his two fists. Alucard is no stranger to sleep; he’s done it for centuries at a time!
Dizzy: Alucard’s face is in his hand, and he slowly sways back and forth, moaning in pain.


IX. Final Smash: Soul Steal

This attack was Alucard’s most expensive spell in Symphony, so it comes as no surprise that he uses it as his most powerful attack. When Alucard gets the Smash Ball, he holds one side of his cape open and shouts, “Soul Steal!” as he holds his arm out, palm open. An unseen wind carries Alucard’s hair and cape about, making him look very dramatic, as each enemy onstage stops with whatever they’re doing; the whole stage freezes, in fact. Every part of the environment that can be interacted is targeted by this attack. Small glowing orbs of light fly out of every target, the number of which is dependent on what it is and how far away it is:
  • All opponents lose at least two souls, doing 5% for each one. If the opponent is a Final Destination’s length away or closer, they lose a whopping four souls. Losing these souls gives no knockback, it just does damage. [Two souls: 10% Four souls: 20%]
  • Items lose only one soul and are destroyed.
Each soul goes flying through the air and Alucard opens his cape, welcoming the souls to feed. Each soul heals him [4%]. After the Final Smash is over, Alucard says, “I thank you for a most delicious meal,” and the stage unfreezes, returning the battle to normal.


X. Extras

Up Taunt: Alucard rises into the air, holding his cape outside from both ends and facing the screen. He glows with purple energy and chuckles.
Side Taunt: Alucard holds his blade out, as if pointing towards his opponent, and threatens them: “Do not stand in my way.”
Down Taunt: Alucard quickly morphs into his wolf form (far faster than he does in his actual attack) and howls to the moon. He then morphs back.


Kirby Hat: Kirby takes Alucard’s black and red cape for his own, as well as a mop of flowing white hair (Bishie + Puffball = WIN). In addition, Kirby gains the ability to use Tetra Spirit as his Neutral B.

Symbol: The reverse-crucifix and devil wings; a Castlevania standard.


Entrance Animation: The same orange shaft of light from Hellfire shines down on the field, and Alucard appears at the bottom, covering his front with his cape. When the light fades, he swings his cape behind him dramatically and draws his blade.


Victory Theme: The main riff from Dracula's Castle.

Victory Act 1: Alucard brandishes his blade and then sheathes it as he says, “My deepest condolences. Perhaps you should practice?”
Victory Act 2: Alucard examines his sword closely and murmurs to it, “Mother…I will fight for your memory.”
Victory Act 3: Alucard says “We are finished,” and then opens his cape from both ends, rising into the air as dark energy surrounds him. He then turns into a bat and flies away, numerous other bats following him with echoing shrieks.

Bonus Victory Acts:
  • If Maria is among the losers, Alucard bows deeply and says, “Maria, I apologize. You must understand that it was necessary.”
  • If Dracula is among the losers, Alucard looks up, as if speaking to his father. “Father, you have been doomed since you lost the ability to love. Mother would be disappointed.” He then turns away disdainfully.
  • If Eric is among the losers, Alucard will admonish the lad by pointing his sword towards the screen and saying: “I have told you that you expect too much out of my lance.” He pauses as he sheathes his sword, and then says, “Do you believe me now?”
Losing Act: Alucard respectfully applauds the winner, sword impaled in the ground and shield hanging on it.


Wiimote Selection Sound: “Mother…”

Crowd Chant: “A-lu-card! A-lu-card!”

Snake CODEC Conversation:

Snake: Mei Ling, who is this guy? He looks like a girl.
Mei Ling: Omigosh, it’s Alucard!!! Oh, he’s so dreamy…
Colonel: Apologies, Snake. I’ll take over.
Snake: Wonderful. So would you mind telling me WHAT Alucard does besides turn Mei Ling into a squealing fangirl?
Colonel: He has a wide variety of magical attacks. I’d stay away from them; that fire REALLY burns.
Snake: I think that goes without saying, Colonel.
Colonel: I’d watch out for the shapeshifting too.
Snake: Wait, what?!
Colonel: He’s a half-vampire, Snake. What would you expect?


Alternate Outfits:

Classic Alucard: Alucard bears the very old-fashioned, classical vampire look that he used in Castlevania III: Dracula’s Curse. This game marked Alucard’s premiere as a playable character, and he looks stereotypically vampiric. Slicked back hair, dusty cloak, and a morose expression all contribute to this retro costume.

Judgment Alucard: A more recent design, Alucard’s costume from Castlevania: Judgment, makes him resemble an anime character. His hair is now silver and perfectly straight, and his outfit bears a significant more amount of metal, that is almost like that of a knight’s. His cape ditches the glowing red interior for a violet, plush interior.

Unlocking Alucard:
  • Win 15 matches with Maria Renard on the stage “Dracula’s Castle.”
  • Play 425 Brawls.
  • Encounter him in the Subspace Emissary.
Unlock Message: Alucard, the son of Dracula, is available for play!


+ Trophies

Alucard
+ Adrian Farenheights Tepes, the son of Dracula, sworn to destroy his evil origins.
Soul Steal
+ Alucard’s Final Smash, which restores his life energy.

Simon Belmont
+ The legendary Vampire Killer of the cursed Belmont clan.
Grand Cross
+ Simon's Final Smash, shown destroying Lord Dracula.
Lord Dracula
+ The Lord of Evil, eternally reborn to bathe the world in darkness.
True Dracula
+ Lord Dracula's Final Smash, and the ultimate form of his black heart.
Maria Renard
+ A young woman who wields magical power rivaling that of the Belmont Clan.
Seiryu’s Wrath
+ Maria summons her animal companion: Seiryu, the Azure Dragon.
Cornell
+ A man hailing from a tribe cursed to turn into beasts at full moon. His nickname is Blue Crescent Moon.
Full Moon
+ Cornell's Final Smash. He summons the moon to shine and strengthen his attacks.
Jonathan
+ Jonathan Morris, son of John Morris. He sets out to Dracula's Castle to defeat Brauner
Charlotte
+ Charlotte Aulin, a mage in training. She is Jonathan's childhood friend and helps him on his adventure in Dracula's Castle.
Holy Lightning
+ One of Jonathan & Charlotte's Final Smashes. It unleashes a cross-shaped lightning bolt of holy energy.
1000 Blades
+ With this technique Jonathan throws a barrage of knives onto the their foes, being made faster by Charlotte's magic.
Volcano
+ This attack summons a small volcano spitting balls of magma into the arena.
Dark Gate
+ This spell causes a gate to hell to open. A demon waitsinside, will try to crush mortals with its huge claws.
Death
+ Lord Dracula's ever-faithful servant, and master of the Underworld.
The End is Now
+ Death's final smash. He uses the spirits of the dead to assist him in destroying his foes.
Stella & Loretta
+ A pair of vampire sisters: Stella is a master in swordsmanship, while Loretta is a powerful magician.
Werewolf
+ A man cursed to turn into a beast when the moon reaches its full state.
Bible
+ The main scriptures for Christianity, the Bible has holy powers so strong that this mere book is even able to deflect projectiles.
Dracula's Castle
+ The setting for most Castlevania games, and the stage in Super Smash Bros.
Nightmare Portraits
+ This is where Castlevania: Portrait of Ruin takes place. Every picture is a gate to another dimension.
Brauner
+ A vampire and main villain of Castlevania: Portrait of Ruin. He wants to destroy humanity and hypnotized the sisters Stella and Loretta to think they are his dead daughters.
Medusa and Medusa Heads
+ The mythological beast and her innumerable servants.
Young Maria Renard
+ A village girl who rises to her fate, and defeats Count Dracula in Rondo of Blood.
Richter Belmont
+ While Simon may be the most well-known Belmont, Richter is the more powerful of the two.
Soma Cruz and Mina Hakuba
+ Two teenagers from the year 2035. Due to Soma's mysterious "Soul Steal" ability, mysterious forces attempt to turn him into Dracula's successor...
Vampire Killer
+ The legendary whip of the Belmont clan.
Hearts
+ The source of Simon's special abilities.
Order of Ecclesia
+ The only organization that is capable of standing up to Dracula in a time without a Belmont or the Vampire Killer.


Stage:

Dracula's Castle
+ A moonlit stage atop Dracula's famed castle. There is the main platform on top of the tower, followed by two smaller ones on either side (think Pokémon Stadium). There are another two directly above those, and a final platform in the middle of the stage, above all the others. Skyward KOs are difficult to accomplish on this stage. There are also two platforms that jut out on either side of the tower, and whenever clouds cover the moon, the stage darkens and torches set all around the stage light themselves.

Hazards include the ever-present Medusa Heads, simple Bats, and bone-tossing skeletons. The former two make their ways across the stage every now and then, dealing a few points of damage and small knockback to whatever they come in contact with, though any attack will destroy them. The Skeletons climb up the castle walls and position themselves on the platforms that stick out from the sides of the tower, and proceed to hurl bones at players on the main level. These bones damage similar to Bats and Medusa Heads, and travel in an upward arc before falling to the ground, where they can be picked up and thrown by players in the same upward arc at other players. The Skeletons can also be destroyed, though they take more damage to slay (around 20% damage), and fighting them in close-combat can result in the player being knocked off the edge of the stage, as contact with the Skeletons deals damage as well.

Item:

Bible
+ After a player picks up the item, it flies around them in a circle for a limited time, spewing papers as it travels. If it contacts an enemy, it will deal 8-10% damage and good knockback. It also reflects energy-based projectiles, though due to its small size and constant rotation, this rarely happens.

Assist Trophies:

Stella and Loretta + The two vampire sisters from Portrait of Ruin appear from the capsule and float around the stage, unable to be attacked. They each select random opponents and begin attacking in separate ways: Stella performs a quick slash attack, while Loretta shoots ice crystals at her foes. The slash attacks have good knockback and do about 4% while the ice crystals have no knockback and do about 2%, though there are far more ice crystals than sword slashes.

Afterwards, the two pick one last target and Loretta says, "Ready, Sister!" as she charges a magical spell, spinning ice crystals around Stella's body. Stella holds her sword aloft as it is coated in ice and grows to three times its usual size. "I shall kill you!" she screams, and she flies towards her target, slamming the blade down and dealing 20% damage and lots of knockback. However, this attack can be easily dodged. Afterwards, the two sisters disappear.

Werewolf + After breaking the Assist Trophy, a Werewolf appears on the field. It howls at the sky, and suddenly randomly wolves pop out on the stage, trying to run and jump into enemies, biting them. There are around 5 wolves around at a time, and they do 6% damage and average knockback with each bite. After 10 seconds, the pack disappears, and the werewolf slashes around himself, dealing 9% and good knockback to anyone in his range (except the summoner, of course), then vanishing as well.

If the world needs a Dark Lord, one will emerge…
 

TheSundanceKid

Smash Lord
Joined
Jun 8, 2008
Messages
1,636
Location
The Secret Kingdom
Kid Goku Preview

Forward Throw: Goku Top- Goku pushes the opponent a few inches from him to get some breathing space. Goku then balances clumsily on his tail, lifting himself with it. He then holds out his arms to the side and opens his legs a bit as he begins spinning rapidly. After about a second of spinning, Goku has his back turned to the opponent and dizzily performs a spin kick, sending the foe flying. This does 15% damage with good knockback that could kill at 115%. This throw also lasts about two seconds, making it unusually long for a throw.

Side Special: Kamehameha- Goku holds both his hands to his side, fingers apart with one facing forward and one facing back. A small blue and white sphere begins to form in his hands, growing more powerful by the second. You can wait for it to charge fully by itself or release it prematurely with another tap of the B button. You can slightly angle the Kamehameha up or down before it comes out, sort of like Samus’ Final Smash. When the time is ready, Goku yells “Kamehameha!” releasing a large beam of energy from his hands. The complete charge time is five seconds, with two seconds ending lag while the beam dissipates. A fully charged Kamehameha will reach all the way across Final Destination, dealing 20% damage will great knockback. Use caution when using this against characters with multiple jumps can easily avoid this move and hit Goku from behind.

Cnc, por favor?

Btw, Inertia is a property of matter...
 
Status
Not open for further replies.
Top Bottom