SPOILER WARNING! DO NOT READ IF YOU WANT TO BEAT ORDER OF ECCLESIA SPOILER FREE!!
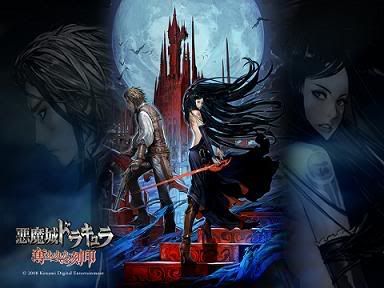
The morning sun come to vanquish this horrible night; Shanoa joins the Brawl!
+
+ Back Story
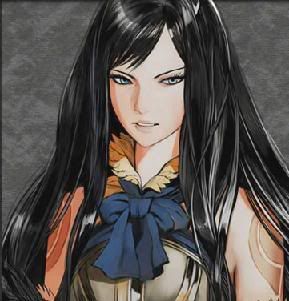
Shanoa is a female warrior from the group known as the Order of Ecclesia, a group established as a countermeasure against Dracula’s eventual return. The Order of Ecclesia seemed the most promising organization against Dracula’s return because of their secret weapon; the trio of glyphs known as Dominus. Shanoa is able to absorb these glyphs into her body and harness them as various types of weapons or magic and when the day finally comes, she steps up to absorb the Dominus glyph. This however backfires as Shanoa’s close friend, Albus stops the process and steals the Dominus glyphs, effectively erasing Shanoa’s memories and emotions. When she recovers, her master, Barlowe informs her that she must recover the glyphs from Albus if they hope to stop Dracula when he returns, and so, Shanoa sets off in search of Albus and the Dominus glyphs.
Eventually, after freeing all the villagers of Wygol Village, defeating Albus and recovering all the pieces of Dominus, Shanoa discovers that in actuality, the Dominus glyphs will kill her when used. Upon learning this, Shanoa heads back to Ecclesia and confronts her master Barlowe who quickly falls at her hands. Unfortunately, Barlowe is able to use himself as a sacrifice and manages to revive Dracula. With no emotions, no memories and those closest to her dead, Shanoa now realizes that the one thing she has left is to defeat the evil Dracula, and so, she sets off to the castle to confront Dracula and return him to his eternal sleep.
+ Gameplay Videos
~ Intro
~ Final Boss Fight
~ Castlevania Judgement
~ Barlowe Battle
+ MP Mechanic
In Castlevania: Order of Ecclesia, Shanoa has an MP bar which, when fully diminished, leaves Shanoa vulnerable for a few seconds until it recharges. In Smash, this mechanic is represented in sort of a “Stale Moves” kind of way. For example, if you’re attacking the opponent too much, Shanoa’s attacks will become slightly sluggish. If this happens, simply run away from your opponent and wait about two seconds. The guideline for attacking an opponent “too much” is using more than 16 attacks in 8 seconds.
+ Play Style
Shanoa’s play style involves using her quick attack speed and movement speed to your advantage. As well as having a good understanding of her glyph system. As mentioned above, if you attack too frequently, Shanoa’s attack speed will decrease slightly. If you start to notice her attacks grow sluggish, simply back away from your opponent and wait about two seconds; Shanoa’s attack speed will return to normal. If you attack at a moderate pace however (as in simply not spamming attacks) you shouldn’t have any problems with the slow down attacks.
As mentioned before, the glyph system is vital to playing well as Shanoa. Having an understanding of what Glyph you’ll absorb from an opponent and how to use said glyph is of the utmost importance. Most of the glyphs absorbed from other characters have ranged properties to them, which is VERY important considering Shanoa’s lightweight and overall mediocre attack power.
Essentially the best strategy for a good Shanoa player would be to use her ranged attacks to their advantage, keep on the move and strike with hit and run techniques. Strike the opponent with a flurry of attacks and then back away so your attack speed increases to normal, then attack again.
Summary: Clever dodging and a good understanding of the “MP System” and glyph mechanics should help a good Shanoa player go above and beyond in one on one matches; free-for-alls are slightly harder considering there’s less room to stop and recover.
+ Stats (Out of 10)
Offense: 5
Speed: 6
Size: 4
Weight: 3
First Jump: 4
Second Jump: 6
Fall Speed: 5
Recovery: 7
Range: Varies; 4-8
Attack Speed: Normal - 6 Slowed – 4
Traction: 4
Glide: No
Wall Jump: No
Wall Cling: Yes, using Magnes
+ Pros
+ Can Wall Cling
+ Has access to various projectile attacks depending on opponent.
+ Decent range on most attacks
+ Various recovery options
+ Down B gives super armor and invincibility frames
+ It’s Shanoa, Shanoa’s awesome
+Powerful Final Smash
+ Cons
- Very lightweight
- Self damaging Final Smash
- Learning curve on glyph system
- MP mechanic can cause attacks to slow drastically
- Low traction
- Gimpable recovery
- Most throws are weak
- Weak tilts
- Announces many of her attacks
+ Standard Attacks
A,A,A: Confodere Combo- Shanoa uses a Confodere glyph (a rapier) to slash the opponent horizontally, then once again vertically and finally, she switches to the Macir glyph to smash her opponent away with a powerful hammer strike.
Notes: The first two attacks of this combo come out very fast but deal little damage and knockback. The third strike however knocks the opponent back a bit making it ideal for spacing an opponent. (First hit: 3%, Second hit: 2%, Third hit: 4%)
Side Tilt: Scutum Smash- Using the Vol Scutum glyph (a gray, relatively smooth shield) Shanoa pushes forward, knocking opponents backwards.
Notes: While this may be weak, it’s ideal for knocking opponents away as it comes out fast and has a decent knockback. (5%)
Down Tilt: Ankle Slice- A basic sword sweep along the ground using the Secare glyph. Has moderate range and may cause the opponent to slip.
Notes: Your basic down tilt, nothing particularly note worthy about it besides the fact that it has nice horizontal range, may cause the opponent to slip over and is rather fast. Overall a good move to edge an opponent away from you. (6%)
Up Tilt: Ascia Ascension- Shanoa forms the Ascia glyph in her hand (an axe) and then swings it upward. At the top of her swing, the glyph disappears and she lowers her arm again.
Notes: Probably the most useful of Shanoa’s tilts, with moderate attack speed (slower than the other tilts admittedly) and decent upward knockback. Unfortunately the hitbox is surprisingly small for enemies above her, in fact, it’s actually a lot easier to hit enemies in front of Shanoa with her up tilt then it is to hit them when they’re above her. (6%)
Dash Attack: Lizard’s Tail: Shanoa ducks down to the ground and slides into her enemy feet first. Unusual for a dash attack in the sense that it keeps some of the momentum Shanoa had while running. Unfortunately there’s some end lag as she’s required to stand up again.
Notes: An effective KO move at higher percents, Shanoa’s dash attack has a surprising amount of knockback to it and does a nice bit of damage. The end lag is easily excusable considering the good knockback it does. (8%)
+ Smash Attacks
Side Smash: Dual Impaler- Shanoa uses the Melio Hasta glyph to form a gigantic spear in her hand. She then pulls the spear backwards and thrusts it towards an opponent. If the attack is fully charged, right after the spear hits, Shanoa will thrust a second spear forward, adding more damage.
Notes: Obviously a fully charged Side Smash is going to be the way you want to go here, but if that’s not possible, an uncharged version of it won’t be anything to sneeze at. Unfortunately with the increased damage of the fully charged smash attack comes a slightly longer end lag time, but sometimes it’s just worth the risk, especially if you know the attack can finish the opponent off. (Uncharged: 13%, Charged: 22%)
Up Smash: 1000 Blades- Shanoa ducks down and forms several Culter glyphs in her hands. Once the move is unleashed, Shanoa throws the knives directly above her rapidly, striking the foe multiple times. The minimum number of knives Shanoa will throw is two while the maximum is five.
Notes: This move has exceptional vertical range but is truly only useful for hitting opponents directly above Shanoa. Instead of increasing in damage when charged, this move increases in the number of knives Shanoa will throw. Useful for aggressive aerial foes. As a a note it doesn't actually fire off 1000 blades, its name is just a reference to the unison attack in Portrait of Ruin. (3% per knife, maximum of five knives)
Down Smash: Ferocious Falcis- Shanoa summons two Melio Falcis glyphs, one in each hand and crosses her arms. When the move is unleashed, Shanoa swings her arms to the side and then sweeps the scythes along the ground to both sides of her. When fully charged, the axes will actually extend outwards once they've reached the bottom of the swing, essentially lengthing the hitbox greatly at the very end of the move. An exceptional smash attack if only because of its large hitbox.
Notes: As mentioned before, this smash attack is amazing due to its large hitbox. It unfortunately has a bit of start up and end lag (about a second and a half total lag on this attack) but it can be amazing for clearing away foes attacking from both sides. Certainly Shanoa’s most useful smash attack. (Uncharged: 12%, Charged: 19%)
+ Aerials
Neutral Air: Ebony Wings- Shanoa will activate the Volaticus glyph, causing her black and purple wings to grow. She then spins in circle, striking her opponents with the long wings.
Notes: Not very powerful at all (considering you’re only hitting opponents with wings) but very good for knocking opponents away who are trying to crowd you in the air. (6%)
Forward Air: Fangs of the Guardian- Shanoa summons the Arma Custos glyph; the central head of Cerberus, Guardian of Hell to bite fiercely at her opponent.
Notes: This move is rather powerful but can be odd to aim at first because the attack actually comes from behind Shanoa. The hitbox for it is the size of the hitbox for the Dextro Custos glyph so it can be rather hard to hit with. Fortunately it comes with nice knockback and decent damage. (12%)
Backward Air: Winds of Change- A backward air that does no damage; Shanoa summons a gust of wind to blow her opponent away from her. This also blows Shanoa forward slightly and is very useful for edgeguarding if your opponent has just used their third jump.
Notes: Obviously this move is very situational doing no damage and requiring good timing to use appropriately. Be careful not to blow yourself around with this attack too.
Up Air: Holy Lightning- Shanoa extends her arm upwards, forming a ball of electricity in her hand. Any opponent hit by this takes repeated damage and will be knocked a fair bit away upon receiving the last blow of the attack
Notes: A multi-hit aerial attack, very useful for adding up damage and then knocking the foe away. It also has quite a nice range, the downside of course is there’s a bit of end lag meaning you can’t abuse it really. The name of this attack is also based off of a Portrait of Ruin unison attack. (2% per hit, hits five times)
Down Air: Ordinary Rocket- Shanoa falls quickly downward, her leg extended beneath her. This move delivers no knockback at all but it does have a unique attribute to it; once Shanoa has hit her opponent, she bounces up a way. This means that you can continuously bounce off of your opponent’s head. This move can also be angled diagonally to down and left or down and right.
Notes: While this move may seem weird, essentially all you’re doing is just repeatedly bouncing off of your opponent’s head. This is excellent for adding up small amounts of damage and it IS quite funny to see the look on your opponent’s face when you’re bouncing off their character’s head repeatedly. The name of this move is also a play off the the "Ordinary Rock" artifact, allowing Shanoa to double jump in OoE. (5%)
+ Ledge Attacks
Get Up (Under 100%)- Shanoa teleports through the ledge using Paries, taking her idle stance when she steps onto solid ground.
Get Up (Over 100%)- Shanoa slowly crawls onto the stage, stands up and shakes her head.
Ledge Attack (Under 100%): Confodere Clamber- Shanoa pulls herself up quickly and then thrusts forward with the Confodere glyph.
Notes: Good range and decent damage/knockback, certainly a good move to keep opponents from crowding you as you try and get back onto the stage. (5%)
Ledge Attack (Over 100%): Glyph Confusion- Shanoa, in her exhausted state, swings forward with a Macir glyph, but unfortunately, before it can hit an opponent it transforms into the much shorter Culter glyph.
Notes: Not nearly as powerful as her Under 100% ledge attack and with considerably less range. The only thing you can hope for is that your opponent expects a Macir to be heading towards them and doesn’t realize Shanoa’s mistake. (3%)
Rising Attack: Scythe Sweep- Shanoa forms two Falcis glyphs and spins the scythes around her as she rises.
Notes: Decent range but fairly weak in the knockback and damage departments. (4%)
+ Special Attacks
Neutral B: Glyph Absorb- Shanoa spins around and lifts her hair up, revealing the large glyph imprinted on her back. At the same time, a glyph will appear around the nearest opponent and be suctioned towards Shanoa. After one and a half seconds, Shanoa will absorb said glyph and gain a new power, replacing Glyph Absorb with a new attack. Unlike Kirby’s Swallow however, the attack Shanoa gains is entirely unique to her only and isn’t a copy of the opponent’s neutral B (however the glyph gained is related to the character Shanoa obtained it from in one way or another). Each character gives off a unique glyph, see the list below for each character…

:
Vol Ignis- Shanoa gains the power over fire from Mario. When the B button is pressed, Shanoa swings her arm upwards, creating a pillar of fire before her with a cry of “Raging blaze!”
Notes: The pillar of fire created is about twice the height of Shanoa so it reaches up to just a bit underneath the center platform of Battlefield. It is however fairly easy to see coming and, because of the fact that only one may be on stage at once, rather easy to dodge. (6% for initial strike and 1% more for continuous damage, it acts like a large PK Fire)

:
Ignis- Being Mario’s younger brother, the glyph Shanoa obtains from Luigi is a slightly weaker version of Vol Ignis. Shanoa holds out her hand and shouts, “Flames!” causing three green fireballs to shoot out before her, one going straight, while the other two go off diagonally upward/downward.
Notes: While this move can’t be spammed, it can be used as a good edgeguard as it has a good bit of range (about half of Battlefield) and can cause opponents to flinch. It is however rather weak and, as mentioned before, fairly slow. (4%)

:
Pneuma- Going off of Peach’s ability to float (or possibly her ability to create tornadoes seen in Super Princess Peach) when Peach’s glyph is absorbed, Shanoa gains the ability to create gale force winds that travel along the ground. Holding the B button creates a stronger wind to blow opponents away with.
Notes: Pneuma acts as a perfect edgeguard for when opponents try and make it back onto the stage but is fairly useless elsewhere. This attack also does no damage but can be useful for blowing foes away when you need to let your “MP” recharge.

:
Melio Scutum- With a rock-hard defense like Bowser’s it’s no surprise that Shanoa gains the most powerful shield of OoE when she absorbs Bowser’s glyph. A large blue and gold shield will appear before Shanoa, nullifying most projectiles and blocking most physical attacks.
Notes: While this glyph may seem too good to be true, it does NOT protect Shanoa from attacks from behind, worse still, Shanoa is unable to move while using it. Fortunately there isn’t much start up lag so if you do need to turn around to block an attack from behind, drop your shield early so you can spin around and use it again. Attacks like Wario’s Bite and Yoshi’s Egg Lay will still effect you however, so be cautious.

:
Lapiste- From the great brute Donkey Kong, Shanoa gains the ability to launch powerful punches of pure stone to attack her foes! This move is surprisingly fast but can blow through your “MP” meter like nothing. Use it carefully or you’ll end up attacking far slower than you hoped.
Notes: Unlike Donkey Kong, this attack is fairly weak, however it does have fairly good range (longer than your average sword swing) and good attack speed. As mentioned before though, it’ll drain your MP quickly causing Shanoa to possibly be vulnerable to counterattacks. This move also has fairly low knockback which is also surprising considering who it’s coming from. (5%)
 Arma Cercopis-
 Ack, the lovely Shanoa gains a glyph to transform her from Diddy Kong! With a tap of the B button, Shanoa gains the abilities of Diddy Kong; meaning that she’ll have his speed and jumping abilities. By holding a direction a pressing the A button, Shanoa will do a different attack (see the Notes below for a list of these) while pressing the B button will return her to her normal form.
Notes: Each direction (up, left/right, down) and A will give Shanoa a unique move (essentially it’s similar to the B button moves except B will transform her back).
Neutral A: Tail Dice- Shanoa will use her new tail to whip violently before her. This attack hits multiple times but causes miniscule damage (1% per hit, hits eight times max)
Up A: Chimp Kick- Shanoa does a crescent kick upwards accompanied by a blur of blue energy. Fast but not very powerful although it does have decent knockback. (3%)
Side A: Chimp Leap- Shanoa leaps at her opponent, grabs them, and then kicks them away. This move acts as an attack grab so it’s very useful for defensive opponents. Very little knockback but decent damage, there’s also some start up and end lag but it’s hardly noticeable. (6%)
Down A: Banana Toss- Shanoa tosses a banana peel behind her; identical to Diddy Kong’s Down B.
B: Transform- While in Arma Chimpotera form, press B to revert back to Shanoa.

:
Vol Ovum- Shanoa gains a slightly modified glyph from Yoshi; a modified version of Vol Ascia. Instead of axes however, Shanoa will toss eggs in an arc upward, similar to Yoshi’s Up B. Holding B will determine the angle at which the egg is tossed, it can even be fired directly ahead if you’re able to angle it right.
Notes: This move has fairly good range but can be difficult to aim unless you get the angling down. It’s also fairly slow on the upstart and can’t be spammed; it is however fairly powerful and also good for edgeguarding as it causes flinching but little knockback. (6%)

:
Morbus- While certainly not THAT morbid, morbid can also be defined as “unhealthy or unwholesome” which seems to fit Wario quite well. Unlike the orb of blood created in OoE, this one creates a ball of garlic (believe me, you’re glad I chose garlic) that flies forward and slowly rises up at an angle.
Notes: This attack can be fairly hard to aim and travels fairly slowly meaning it’s not too hard to dodge. If it does hit however, it’ll cause a nice bit of knockback. Best used as an edgeguard because as a long distance projectile, it’ll likely float over their head as it nears them. (8%)

:
Vol Arcus- A powerful bow glyph is gained from the powerful bow user. This one however make take a bit too learn; instead of firing straight ahead, it fires diagonally upward. Holding the button charges the arrow and makes it fly straight diagonally, if not charged, the arrow will arc and have less range (but that may be effective if you’re trying to aim in front of yourself).
Notes: If you learn how to aim this, it can be a valuable lifesaver from attacks from above. It can also be used as an effective edgeguard if used carefully. (4%)

/:shiek::
Vol Luminatio- A powerful orb of light is obtained when a glyph from Zelda is absorbed. With a cry of “Light!” Shanoa fires a single slow moving orb at her opponent; while it may be slow, it also homes in, creating a perfect edge guard with a mild stun effect added as well.
Notes: This move was MADE to be an edgeguard. While it may move slowly, the opponent will be too focused on trying to recover to notice the slow moving orb of light. The downside is however that there can only be one on screen at once and, because it move so slowly, it’s incredibly easy to dodge. Fortunately, it does creating a stun effect (like Zamus’ Neutral B) which can be taken advantage of. (6%)

:
Umbra- From the king of evil, Shanoa gains a glyph that gives her power of the malice of the undead. With a cry of “Be gone!” Shanoa extends her hand and fires off a long, snaking trail of darkness that flies forward a short way before snaking off into a figure eight like pattern.
Notes: A useful glyph that can strike a foe various times, unfortunately it’s rather slow upon starting and is fairly predictable. When it does hit however it’s likely to hit multiple times, most likely trapping the foe in place for a follow up attack. (5% per hit, can hit multiple times)

:
Arcus- Similar to the glyph obtained from Link but not nearly as powerful, Arcus does have the advantage of being able to fire directly ahead. If it hits an opponent, it causes them to flinch and has the advantage of firing slightly faster than Vol Arcus, effectively acting like Falco’s lasers.
Notes: This is an excellent edgeguard and is one of the Shanoa’s projectiles that can be spammed quite easily. Like Vol Arcus, you have to charge it to get the maximum distance out of it but it is equally powerful (or weak actually) no matter how long you charge it for. So if you’re going for distance, charge it; if you’re going for damage, fire short range. (3%)

/zerosuitsamus::
Acerbatus- A truly powerful glyph is absorbed from a truly powerful warrior, the Acerbatus glyph fires off a huge ball of energy about as high and wide as Shanoa is tall. Essentially, it’s like a fully charged Charge Beam attack.
Notes: The major downside to this is the move is PAINFULLY slow. To begin, Shanoa will shout, “Take this!” then swing her hand forward to launch the ball of energy at the opponent. All in all this takes about a second and a half, all of which Shanoa is stationary for, to launch the attack. Because it’s slow and easily dodged however, this move DOES do a considerable amount of damage and moderate knockback. It also travels about half the distance of Battlefield, so it MUST be jumped over instead of rolled out of the way of. (16% for the first hit plus 2% hit after that; hits five times after first hit)

:
Melio Arcus- The best bow glyph for the angelic archer, Melio Arcus has the distinct advantage of not only being able to fire two bolts at once, but these bolts actually loosely home in on opponents.
Notes: While Melio Arcus does have the advantage of two arrows at once AND homing abilities, it’s also a bit slower and only as powerful as Arcus. That being said, like the other Arcus glyphs it’s also rather effective for edgeguarding or adding up damage quickly. (2% per arrow)

:
Grando- The frosty Ice Climbers give Shanoa an icy glyph known as Grando. When the B button is pressed, Shanoa holds out her arm and cries out, “Ice bolt!” forming a large icicle in midair. She then lowers her arm and the icicle flies forward at an alarming rate.
Notes: Fast and with good knockback, this is one of Shanoa’s better projectiles. It is however only fast in midair; once it forms, it’ll take half a second before it flies forward giving the opponent enough time to react. (8%)

:
Globus- The robotic R.O.B. with his piercing laser gives Shanoa the Globus glyph; creating two balls of pink energy that ricochet off of solid areas just like R.O.B.’s laser.
Notes: A relatively effective projectile, Globus keeps your opponent on their toes as they may not know where the ricocheting projectile may end up, and since there’s two of them, it’s even harder to dodge. An opponent can however simply jump between them before they ricochet, but the most likely won’t be close enough to do so. (7%)

:
Cubis- A spin on the Cubis glyph, Shanoa will drop a cube shaped like one of Kirby’s various Stone transformations directly before her causing good knockback and damage.
Notes: The Kirbis glyph is very effective if your opponent is crowding you, but not very effective elsewhere due to its incredibly short range. It will however KO at higher percents unlike most of the other B glyphs, which is a plus. (12%)

:
Mucronitesco- A twist on the Nitesco glyph, Shanoa gains the ability to summon a glowing sword made of pure energy to appear before her and strikes repeatedly.
Notes: One of the best Neutral B glyphs Shanoa can get (what did you expect from Meta Knight?) The Knitesco glyph strikes the opponent five times in quick succession, trapping them until the move is over. The opponent is then knocked away and Shanoa lowers her arm to her side again. (3% per hit, hits five times)

:
Vol Macir- From the self-proclaimed king of Dreamland, Shanoa obtains the Vol Macir glyph, a powerful hammer with a spiked tip capable of smashing foes away with tremendous force.
Notes: A rather slow attack with considerable beginning lag, Vol Macir is capable of delivering crushing blows against an opponent. It may be slow (one second of start up lag) and it does have slightly less range than Dedede’s side smash, but it’s an incredibly useful KO move. (19%)

:
Fidelis Pikminicus- Changing the Fidelis Caries glyph into something more Pikmin related (and less zombie related) causes Shanoa to gain the ability to summon Zombie Pikmin into battle with her, bringing with them their Pikmin 1 appearance; purple Pikmin with whited out eyes and mushrooms in place of leaves.
Notes: Using this glyph, only three zombie Pikmin may be summoned at a time, fortunately they’re slightly more powerful than normal Pikmin and will attack on their own. All three zombie Pikmin must be killed before the person playing as Shanoa can summon three more. If they latch onto an opponent, they’ll do about 2% every 2 seconds.

:
Dextro Custos- The right head of Cerberus, Guardian of Hell is at your disposal when you absorb a glyph from Fox. This has slightly longer range than most sword attacks but is also fairly slow…the slowness however is made up for when it comes to the power behind it! Bite forward with the power of Cerberus!
Notes: A powerful glyph attack with some start up and ending lag (about half a second on each), Dextro Custos is capable of doing some good damage and good knockback if it connects. While it looks huge, only the biting mouth of Cerberus is able to damage a foe making for a surprisingly small hitbox. (18%)

:
Fidelis Aralae- A form of the Fidelis Alate glyph, with a tap of the B button a miniature sized Arwing will appear behind Shanoa and fire a single shot forward. While not very powerful, the shot is fast and can make the opponent flinch.
Notes: Not as powerful as Fox’s glyph, Falco’s is all about speed. The laser fires almost instantaneously after being summoned and if you tap the B button, the mini-Arwing will fire up to four more lasers. After firing a max of five lasers however, it disappears for three seconds meaning it can’t be used to lock opponents in place. (2% per shot)

:
Sinestro Custos- The left head of Cerberus, Guardian of Hell is at your disposal when you absorb a glyph from Wolf. Unlike Dextro Custos, Sinestro Custos is slightly faster but also has less range. The head for Sinestro Custos opens its mouth a bit wider however, increasing the size of the hitbox.
Notes: A powerful biting attack, Sinestro Custos is arguably more useful than Dextro Custos given it’s increased attack speed and larger hitbox. It is however slightly weaker and a bit shorter so both Dextro Custos and Sinestro Custos are good depending on the situation. (16%)

:
Quadruple Ignis- A move actually borrowed from Albus is also borrowed from Captain Falcon. When absorbed, Shanoa gains the ability to launch a flaming kick at an opponent with the tap of B. If used on the ground, Shanoa will leap forward and spin in a circle, surrounding herself in flames. If done in midair however, Shanoa will fall to the ground, all the while spinning in a circle, her leg outstretched and flames surrounding her
Notes: Powerful but easy to miss with (especially when used in midair as you’re sent falling straight down) this move has a bit of start up lag (about half a second when used on ground, less in midair) and some ending lag, but it’s still very effective for closing a gap between you and an opponent. (15%)

:
Vol Fulgur- Absorbing a glyph from Pikachu earns Shanoa the ability to use Vol Fulgur; a powerful electrical glyph capable of summoning lighting bolts to strike before the user.
Notes: Vol Fulgur is relatively fast and moderately powerful, striking four times in total. Unfortunately it can be somewhat difficult to hit with as the bolt strikes about a Battlefield platform away from Shanoa while directly before her is perfectly safe to stay near. (4% for being hit by the first strike, 2% for the last three strikes, 2% for hitting the middle of the stream)

:
Fidelis Noctua, Fidelis Aranea or Fidelis Polkir- Depending on the Pokemon that the Pokemon Trainer has out, one of three possible monsters will be summoned to aid Shanoa; an owl from Charizard, a Skull Spider for Ivysaur or a Polkir for Squirtle. Each summon only lasts for 15 seconds (or until its 30% health is depleted) and then can’t be summoned again for five more seconds.
Notes By Monster

-
Owl: A simple owl that will follow Shanoa around for 15 seconds then vanish for five. When an opponent nears the owl, the creature will swoop down and strike them, causing low knockback but causing them to flinch. Fortunately, the owl is rather fast and capable of keeping up with Shanoa. (5%)

-
Skull Spider: A slow moving arachnid creature with a skull for a body, the Skull Spider slowly follows Shanoa around, leaving her side only to attack nearby foes. If an opponent touches the Skull Spider, they’ll take a small amount of damage but also be “poisoned,” causing them to receive 1% of damage for five seconds afterward. (2% for first strike, then 1% for five seconds afterwards)

-
Polkir: Polkir is a flying octopus-esque monster with a single eye. Polkir will hover behind Shanoa and, when he approaches a foe, will outline an area on the ground with a laser. A second later, fire will erupt from the ground beneath where the line was outlined. Causes good damage and moderate knockback however it’s fairly easy to dodge. (8%)

:
Vol Umbra- From he powerful aura Pokemon Shanoa gains a glyph of pure darkness. When you press the B button, Shanoa will hold out her hand and fire an orb of darkness forward. When this hits an opponent, they take continuous damage and become trapped inside it. Fortunately for the victim, only one of these can be on screen at once.
Notes: Vol Umbra is best used for wracking up damage quickly. This move is easily capable of dealing out 14% if it captures a foe in it. This is another one of Shanoa’s moves that can’t be spammed however; after the final damage is taken, the opponent is knocked back a short ways. (2% per hit, hits seven times)

:
Torpor- The singing wonder gives Shanoa the ability to immobilize her foes using the Torpor glyph. Tossing a yellow crystal at her foe, Shanoa is able to freeze a grounded foe in place for a second and a half. A very useful glyph considering how fast it is.
Notes: A very spammable attack, Torpor is excellent for grounding a foe in order to land a powerful smash attack against them. It unfortunately doesn’t do any damage, but unlike Jigglypuff’s Sing, Shanoa actually has time to attack a foe after they’re immobilized.

:
Melio Confodere- The pinnacle of rapier glyphs is of course obtained from the master swordsman Marth. When absorbed, Shanoa gains the ability to perform an attack similar to Marth’s Shield Breaker. The unique feature of this attack is that if the B button is tapped instead of held, Shanoa will do an attack similar to Marth’s Dancing Blades except stationary.
Notes: A very useful glyph mainly because of its secondary function. By tapping B, the move acts as an excellent edgeguard or damage builder while holding B is a good way to punish defensive players. Whichever way this move is used however, the damage is still the same (7%)

:
Melio Secare- A powerful sword glyph from a powerful swordsman, the Melio Secare glyph gives Shanoa the ability to swing a large sword downwards to deliver a crushing blow.
Notes: Not surprisingly, since Shanoa obtains this glyph from Ike, this move is VERY slow (we’re talking Ike side smash slow here…). Fortunately, it makes up for this with its considerable range and impressive strength, delivering both high knockback and moderate damage. (10%)

:
Refectio- Ness’ PK Magnet is modified to become Shanoa’s Refectio glyph. When the B button is pressed, Shanoa will cross her arms and will glow blue a second later. While glowing blue, any projectile attack (except explosives) that hits Shanoa will be absorbed, reducing her damage.
Notes: While this does suffer from some start up lag, it can be especially useful against a Ness player since most of their game will revolve around projectiles. Use it carefully however as it can easily be predicted and countered.

:
Vol Grando- Shanoa obtains a twist on Lucas’ PK Freeze attack (which really isn’t his but whatever) with the Vol Grando glyph. Shanoa outstretches her hand and causes an eruption of ice to form before her a second later. Any opponents caught in this splash of ice are frozen instantly.
Notes: Vol Grando unfortunately doesn’t have the range of PK Freeze or the speed but it does cover a slightly larger area. Unfortunately, Vol Grando can only be used on the ground and can easily be dodged by simply getting out of the way. It does however make up for these slight drawbacks with it’s freezing power, decent attack strength and impressive range. (13%)

:
Fidelis Duo Dimensionis- A spin on the Fidelis Mortus glyph, when Shanoa obtains a glyph from Mr. Game & Watch, she’s able to summon a mini Mr. Game & Watch to fight by her side. Unfortunately, the mini Mr. Game & Watch won’t use any of G&W’s attacks, but instead will simply hop into opponents, damaging them slightly.
Notes: Only one mini Mr. Game & Watch may be summoned at a time, although these have a slightly higher endurance level than most other summons (45%). While slightly faster than the Pikmin zombies, the hopping Mr. Game & Watch clone isn’t fast by any means and can easily fall off the edge of the stage; fortunately the add up damage quickly. (3%)

:
Culter- While knives are more Naked Snake’s kettle of fish, Shanoa gains the ability to throw a knife with deadly accuracy when she absorbs a glyph from Snake. With a tap of the B button, Shanoa will throw a knife forward with incredibly speed.
Notes: Only one knife can be thrown at a time using Culter, but they’re surprisingly powerful and surprisingly fast. Coming out at a speed a little faster than Falco’s lasers, Shanoa’s knives unfortunately don’t have the flinching capabilities that the lasers do, but they do add up to a nice chunk of damage. (3%)

:
Rapidus Fio- From the fastest thing on two feet Shanoa gains the ability to move at super fast speeds. Pressing the B button causes Shanoa to dash forward (about the length of a Fox Illusion) with a short burst of speed, while holding the button causes Shanoa to keep the momentum, allowing her to run at Sonic’s speed.
Notes: Only the initial burst of speed does any damage (and it’s rather weak damage at that) but this is a VERY useful glyph if you’re fighting an evasive Sonic who’s only trying to run away, use your quick movement speed to catch up to escaping foes! (4%)
+ When Shanoa absorbs a glyph from another Shanoa; any one of the above is chosen at random.
Up B: Volaticus- With a cry of, “Wings!” Shanoa will gain a pair of jet-black/purple hinted wings. Volaticus will give Shanoa eight seconds of unrestricted flight (any direction) with fairly accurate controls. After six seconds, Shanoa’s wings will fade away and she’ll drop to the ground instantly. Upon activating this move, a slight push of wind (such as that seen around Latios/Latias) will surround Shanoa before she's able to fly allowing her to push enemies away (or possibly even downward) as a self-defense measurement.
Notes: While this may seem like a rather broken recovery option, the MAJOR downside to this is that if Shanoa is hit even ONCE, even with a projectile, her wings will fade away and she’ll instantly drop, regardless if she’s over solid ground or not. Essentially, while it may seem incredibly easy to recover with this move, in reality it’s rather easy to be gimped while trying to recover; careful strategy is required to make it past a carefully guarding opponent.
Side B: Redire/Magnes- Shanoa tosses a spinning blade before her which flies forward a ways before looping around and flying back toward her. The real strategy behind this move is if the B button is held after throwing the blade. If you press and hold the B button, Shanoa will activate Magnes which will magnetically attach her to the blade as it spins in its loop. A very useful move for closing the gap between you and an opponent but it can also be rather hazardous if you’re not careful.
Notes: The Redire/Magnes combo can be potentially VERY useful when it comes to recovering horizontally. It does however take quite a bit of practice to fully get the hang of. If B is released while the Redire blade is flying forward, Shanoa will fly forward a short ways. If released at the top of the loop, Shanoa will fly straight upward, however if you miss the opportunity to release at the top of the loop and release the button too late, you may end up flying backwards off the edge. Also keep in mind that the blade won’t stop at the location you threw it; if you’re still holding on it could easily pull you off stage accidentally! (9%)
Down B: Paries- Shanoa will glow a teal color and two glowing orbs will circle her. With a cry of, “Disappear!” Shanoa will sink into the ground, effectively avoiding any attacks. Shanoa is completely invulnerable for a second and a half but does suffer from a full second of end lag meaning that this move can’t be spammed. As another downside, Paries may only be used on the on solid ground; if used in midair or a drop-through platform, Shanoa will simply glow but not disappear until she hits solid ground.
Notes: A useful move mainly for dodging powerful blows (such as Final Smashes), Paries does have the obvious drawback of only being useful on solid platforms. The ending lag means it’s not nearly as spammable as Dimensional Cape but it’s still incredibly effective at dodging those hard to dodge Final Smashes like Kirby’s Cook or even Super Sonic. As far as speed goes, it takes Shanoa a second to go into the ground (she has super armor while she’s going under) followed by one and a half seconds of invincibility and one second of end lag (once she’s left the ground, she also has super armor while in the process of coming out).
+ Grabs and Throws
Grab: Shanoa extends out her hand and pulls the opponent in using Magnes. A ranged grab, although it’s grab range is about that of Yoshi’s grab (so the shortest ranged grab there is essentially).
Grab Attack: Fulgur Shock- Shanoa electrocutes her opponent with a brief blast of electricity.
Notes: A moderately slow grab attack although it is powerful, nothing particularly note worthy about this move. (4%)
Up Throw: Polkir- A Polkir appears above the opponent and grabs them by the head, slowly lifting them up into the air all the while damaging them slowly. After a second, the Polkir drops them, damaging them more.
Notes: A throw with very little knockback, this throw is best used for adding up damage to an opponent. While it may seem like Shanoa could move during this attack, she’s entirely stationary until the opponent hits the ground. (3% from Polkir, 4% from drop)
Forward Throw: Macir Masher- Shanoa swings her arm behind her and summons the Macir glyph. She then swings forward, smashing her opponent in the stomach with the powerful mallet glyph.
Notes: Very good knockback on this throw and easily Shanoa’s most powerful throw. Unfortunately, like all of Shanoa’s grabs, it’s near impossible to chain these together and because of the high knockback, Shanoa isn’t able to combo out of this throw. (9%)
Backward Throw: Surprise Execution- Shanoa sinks into the ground using Paries and then emerges behind her foe, slashing them with the Confodere glyph.
Notes: This throw has surprisingly good knockback with mediocre damage. It also has the advantage of placing Shanoa behind her opponent and knocking them a considerable ways away; one of Shanoa’s best grabs. (7%)
Down Throw: Ignis Inferno- Shanoa swings her hand upwards, creating a pillar of flame that appears below her opponent, engulfing them in flames and causing them to drop to the ground. She then swings her hand towards her opponent and blasts them with another fireball.
Notes: Very little knockback but very cool indeed to see, another grab best used for adding up damage to an opponent quickly. (5% for pillar of flames, 3% for fireball)
+
Final Smash
+
Dominus
+Shanoa cries out, “I am the morning sun come to vanquish this horrible night!” as the glyph on her back glows. Shanoa’s B moves now change to those seen below. Shanoa can still be KO’d and is still vulnerable to attacks but gains several powerful attacks of her own. This Final Smash lasts for 15 seconds or until Dominus Union is used.
B: Dominus Hatred- Shanoa cries out, “Hatred!” and swings her arm forward causing a single beam of green shoots into the air and then several (eight) bolts of green rain onto the stage. They’re spaced out enough that it’s possible to dodge but quite hard to. Every time this move is used Shanoa takes 7%, damage to opponents is higher but knockback is minimal. (10%)
Side B: Dominus Anger- Shanoa cries out “Anger!” and an orb of red energy flies forward. This damages any opponent hit by it rapidly but is fairly easy to dodge as it waits about half a second after being formed to fly forward (it also doesn’t home in, it just flies in a straight line). Shanoa does 9% to herself each time she uses this attack. (6% per hit, hits 4 times)
Down B: Dominus Agony- Shanoa shouts out “Agony!” and a purple aura surrounds her. Her attack strength is increased by ½ but she also takes a constant 3% per second this form is activated, pressing down B again will disable it.
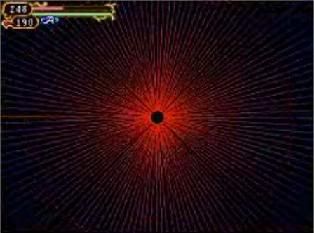
Up B: Dominus Union- Shanoa will cry out “Vanquish!” and the screen turns a dark purple with orange lines flowing through it. This attack does 50% to each enemy and tremendous knockback…but the downside is that Shanoa will collapse after using it. A brief outline of Albus standing above her will appear and then vanish. Shanoa will then stand up, but she’ll unfortunately have 100% added onto her total. A risky Final Smash indeed, but certainly well worth it.
+Random Animations
Idle- Shanoa simply stands there, her hair and dress blowing in the wind.
Dizzy- Shanoa rocks slowly in place while looking down.
Sleep- Shanoa falls to a sitting pose and rests her head on one hand.
Stamina Death- Shanoa drops to her knees and then falls forward.
Forward Roll- Shanoa simply rolls forward.
Backward Roll- Shanoa does a backwards cartwheel.
Air Dodge- Shanoa pulls her body backwards.
Step Dodge- Shanoa activates Paries which momentarily pulls her out of the way.
+Taunts
Up Taunt- Shanoa raises her hand and summons a variety of different glyphs before swinging her arm to her side.
Side Taunt- Shanoa crosses her arms, shakes her head and says, “I have no memories…no emotions…”
Down Taunt- Shanoa spins around, lifts her hair and looks over her shoulder.
+ Win Poses
Win Pose 1- Shanoa swings her arm to the side with a Secare glyph in hand and turns around saying, “I cannot lose…Combat is my sole reason for living” as the glyph disappears.
Win Pose 2- Shanoa extends both arms to her sides and looks up as a massive sword falls before her. She states, “That is the power of our Glyphs, the might art of Ecclesia” as the sword vanishes.
Win Pose 3- Shanoa stares at the ground then looks up as a Confodere glyph forms in her hand, she then says, “I am the morning sun come to vanquish this horrible night!”
Victory Theme: http://www.youtube.com/watch?v=6zAEkwOPtO4 1:56-2:02
Lose Pose: Shanoa simply stares at the ground, disappointed by her loss.
+ Extras
Entrance: Shanoa flies onto the stage using her Volaticus glyph. She then lands and says, “I wish to measure my strength. Come, let’s begin.”
Kirby Hat: Kirby gains Shanoa’s long black hair and, yes, you guessed it, Glyph Absorb.
Symbol
Wiimote Sound- A crowd of mostly men chants, “Sha-no-a! Sha-no-a!”
Unlock Method- Have Shanoa join your team in the SSE, play 666 Vs. Matches or obtain 300 Stickers
Classic Mode End Theme-
Rituals
All-Star Mode Clear Image
+ SSE Role
Shanoa appears in the new area known as Ecclesia which actually takes place before Marth makes it to the ruined castle. Shanoa meets up with Marth when he enters Ecclesia in hopes of finding a familiar face but the two realize neither is a threat to the other. Shanoa and Marth then traverse Ecclesia (which isn’t entirely long) until the reach the final room which contains the seal used to imprison Dracula. Here Shanoa’s mentor Barlowe attacks the two (insert Barlowe boss fight here). Upon his defeat, Barlowe goes a bit insane and sacrifices himself to revive Dracula. Dracula then heads off to do his own thing while Shanoa joins up with Marth, Meta Knight and Ike in hopes of finding Dracula in order to confront him. Later, Dracula is found in Subspace where he must be confronted before the group even sees Tabuu. After Dracula is defeated, Tabuu appears and turns them all into trophies. When Kirby comes along and revives Shanoa, she takes a long look at Dracula’s trophy before reviving him; realizing they’ll have a true final battle once the world is safe.
+Snake Codec Conversation
Snake: Otacon! This girl…she’s pulling weapons out of nowhere!
Otacon: Relax Snake, that’s Shanoa, she’s a specially trained warrior capable of using glyphs.
Snake: Glyphs huh?
Otacon: Yes. They’re kind of like built in weapons she can use on command; it seems incredibly handy and convenient.
Snake: Yeah…I wonder if I could get some of those…it’d certainly beat lugging all this stuff around…
Otacon: Uh…yeah…maybe with some training Snake…
Snake: Back to the VR room then…?
~END TRANSMISSION~
+Colors/Alternate Costumes
Default Costume
Red Team
Blue Team
Green Team
White Costume
Dark Costume
+Trophies
Shanoa
- A young woman warrior for the Order of Ecclesia, Shanoa has the ability to use “Glyphs;” magical artifacts that give her control over weaponry and magic. Her destiny appears to be to absorb the Dominus Glyph and prevent the coming of Dracula…but the truth behind the matter remains a mystery…
Castlevania: Order of Ecclesia (NDS 2008)
Dominus
- An extraordinarily powerful glyph harnessed from the power of Dracula; Dominus has the unfortunate side effect of draining the life of its user, requiring them to give up their soul in exchange to use the powerful glyph. In Super Smash Brothers, Dominus acts as Shanoa’s Final Smash, doing exactly as it does in game; creating powerful magic at the cost of damaging the user.
Super Smash Brothers IV (TBA)
Albus
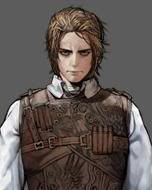
- Shanoa’s close friend and another member of the Order of Ecclesia, Albus is unlike Shanoa in the sense that he can’t absorb glyphs. Albus can however use glyphs to power his magical gun, Agartha, allowing it to do incredibly magical attacks similar to Shanoa’s glyphs. While the two seemed close friends, Albus interrupts the Dominus ritual, stripping Shanoa of her memories in the process. While Barlowe claims it was so that Albus could use Dominus for himself, the true intentions of Albus are unknown…
Castlevania: Order of Ecclesia (NDS, 2008)
Barlowe
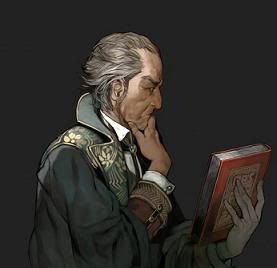
- Shanoa’s mentor and founder of the Order of Ecclesia as well as the creator of the Dominus glyph; Barlowe is a man who seems intent on recovering Dominus from Albus. When Shanoa does manage to recover Dominus from Albus and after she learns that using it will kill her, she confronts her mentor who denies all knowledge of the glyphs deadly side effects. After her persistence continues, Barlowe deems that he himself can use Dominus in order to ensure, not prevent, Dracula’s resurrection. Barlowe clearly loses his mind in his pursuit of pleasing his “lord” Dracula and attacks Shanoa believing that she was the one who betrayed him.
Castlevania: Order of Ecclesia (NDS, 2008)
+Also include all of the trophies used in Tanookie's Maria moveset.
+Stickers
Shanoa
Albus
Shanoa and Albus
Barlowe
Dracula
Dominus
Shanoa/Confodere
+Event Matches
Event Match 35: Dance To The Death
Description: Dracula must be defeated; only a warrior of Ecclesia can finish the job!
Play As: Shanoa (CPU: Maria Renard)
Play Against: Dracula
Stage: Ecclesia
Goal: Defeat Dracula; if Maria defeats him, you lose.
Event Match 43: Vampire Killer Killer
Description: Only one can rise to defeat the Lord of Darkness, defeat Simon!
Play As: Shanoa
Play Against: Simon
Stage: Dracula’s Castle
Goal: Defeat Simon; you each have two stock.
+When summoned into battle, Albus will dash around the arena. Touching him does no damage, but soon after being summoned he’ll rain down a hail of bullets on anyone who gets close. Albus stays active for 15 seconds and in the last five seconds, he’ll do one of two attacks.
Attack One: Optical Shot- Albus raises his gun and two bullets appear, one black, one white. The two bullets will then weave in and out of each other and fly directly across the stage. Very hard to dodge and does quite a bit of knockback.
Attack Two: Max Shot- Albus raises his gun and cries, “Max Shot!” before firing a massive bullet the size of Acerbatus across the stage. Unlike Acerbatus, this move has no lag at all and fires instantaneously.
Once Albus has fired his special attack, he collapses and lets out a scream of “SHANOAAAA!” before disappearing
+
Barlowe
+
100% Attacks
Book Burning- Barlowe holds up a book before him which starts spinning in place. Moments later the books engulf in flame and fly directly towards you. Five books in all will fly towards you and will shatter your shield quickly if you try and shield all five of them. He announces this attack by screaming; “There you go!” (6% per book)
Globus- Barlowe holds out his hand and a glyph will appear (if you’re actually playing as Shanoa you can absorb it by the way). Once the glyph forms a few seconds later, Barlowe will fire two pink orbs at you that will ricochet off the walls. These will do considerable knockback if they hit but they’re fortunately rather slow. He’ll announce this attack by screaming, “Take that!” (10%)
Brain Freeze- Barlowe disappears and then reappears near the floor. He then drops a book which freezes the floor on contact. If you’re on the ground when he drops the book, you’ll be frozen solid and likely to be hurt by his follow up attack. He’ll cry out “Hiyaaaah!” before launching this attack. (9%)
50% Attack
Electro-Sphere- Barlowe will hold out his hands, a book in each. The books will then levitate, one above him one below him as an electrical cage appears around him. He’ll then fly towards you in an attempt to strike you with the electrified cage. Be cautious as he flies past twice; this attack also does nasty knockback. He’ll laugh maniacally before using this attack.
25% Attack
Flurry of Punches- Barlowe will begin this attack by flying at you from either side of the screen. If he punches you here, you’ll be hit by all five punches, so carefully dodge each one so as to not be knocked into the next. In total, you have to dodge five punches by jumping them; be cautious as the final punch does massive knockback. Barlowe will announce this attack as well as each punch with a different line.
First Punch: How dare you…
Second Punch: Even forgetting…
Third Punch: Who raised you…
Fourth Punch: You…
Fifth Punch: Stupid disciple!
Mario: Stupid plumber!
Luigi: Stupid brother!
Peach: Stupid princess!
Bowser: Stupid turtle!
DK: Stupid ape!
Diddy: Stupid monkey!
Yoshi: Stupid dinosaur!
Wario: Stupid fat man!
Link: Stupid hero of time!
Zelda: Stupid sage!
Ganondorf: Stupid old man!
Toon Link: Stupid fairy boy!
Samus: Stupid ma-…woman?
Pit: Stupid fairy!
Ice Climbers: Stupid snowmen!
R.O.B.: Stupid character!
Kirby: Stupid puffball!
Meta Knight: Stupid broken character! (Or: Stupid knight!)
Dedede: Stupid penguin!
Olimar: Stupid space man!
Fox: Stupid fox!
Falco: Stupid bird!
Wolf: Stupid wolf!
Captain Falcon: Stupid nerfs!
Pikachu: Stupid rat!
Pokemon Trainer: Stupid brat!
Lucario: Stupid mutt!
Jigglypuff: Stupid balloon!
Marth: Stupid swordsman!
Ike: Stupid friend!
Ness: Stupid boy!
Lucas: Stupid coward!
Mr.G&W: Stupid pixels!
Snake: Stupid SNAAAAAAAAKE!
Sonic: I hate that hedgehog!
+Stage One
+Ecclesia+
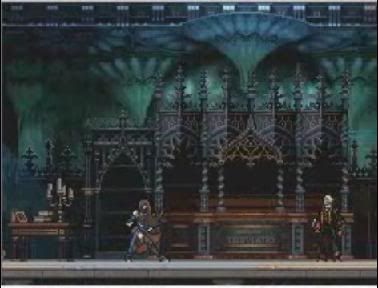
A basic indoor stage with no blast lines on the top or bottom; Ecclesia is purely KO-able off the sides. There is one major stage hazard in this stage though…and that’s Barlowe. Randomly throughout the match, Barlowe will appear and use either Globus or Book Burning to attack characters on the stage. On rare occasions he’ll also use his punching attack too.
+Stage Music
Riddle
Ebony Wings
An Empty Tome
Tower of Dolls
Lament to the Master
Order of the Demon
Iron Blue Intention
+ Stage Two
+Kalidus Channel+
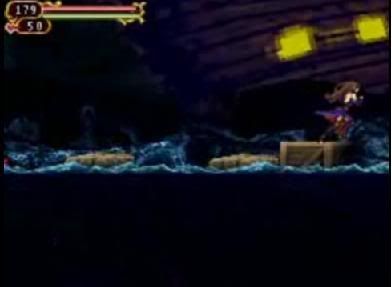
A stage set in water, the platforms consist entirely of floating debris. While there are boxes and such to stand on, you most likely will be forced into the water at one point. Fortunately there’s no giant one-hit-kill fish here, but there are nasty little Sea Stingers that will jab you if you’re in the water. Occasionally, Mermen will pop out of the sea to spray jets of water at you.
+ Stage Music
A Clashing of Waves
Jaws of the Scorched Earth
Unholy Vespers
Wandering the Crystal Blue
Edge of the Sky
The Wolf Revealed
Mad Forest
____
And with that; my greatest moveset yet has been posted! Hope you guys enjoy it!
Special Thanks To
Spadefox for helping me out with the Latin names!
Tanookie for the brief review, I revised some of the moves (especially the smashes) so they're not that dull.
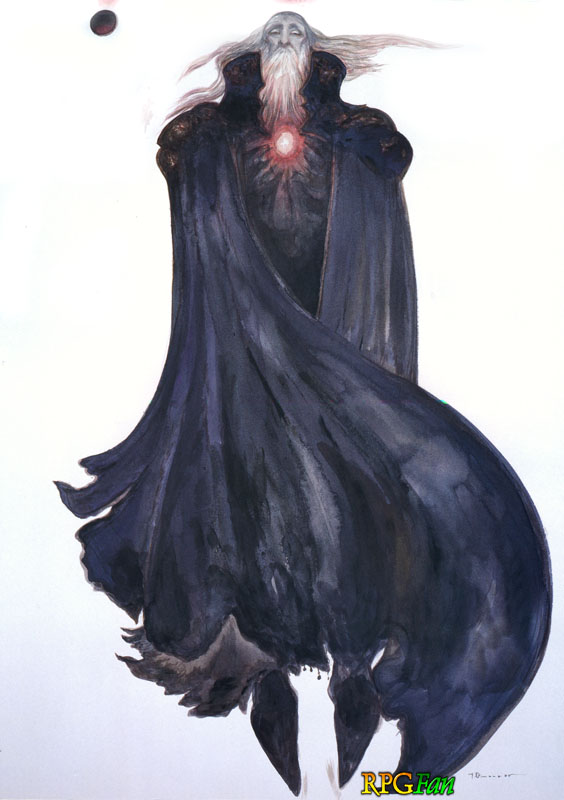
Chief_Mendez: I loved your display for Dracula, so I kinda used it ^^;
Everyone who actually bothered to read that massive Neutral B xD




 :
: 