• Welcome to Smashboards, the world's largest Super Smash Brothers community! Over 250,000 Smash Bros. fans from around the world have come to discuss these great games in over 19 million posts!

    You are currently viewing our boards as a visitor. Click here to sign up right now and start on your path in the Smash community!

Make Your Move 21: The Moveset Design Contest | Top Fifty Is Up! Next Contest Approaches...

Munomario777

Smash Master
Joined
Nov 18, 2014
Messages
3,253
Location
Charleston, South Carolina
3DS FC
0387-9596-4480
Switch FC
SW-8229-3157-8114


Hey there, welcome to Make Your Move! Make Your Move (or MYM) is a moveset writing contest, where you can design a moveset for absolutely any character you want and pit it against the creations of other writers to see who comes out victorious! By "any character," we really do mean any character – Nintendo, third-party, TV, comics, film, novels, OCs, ancient mythology, or even Real Life! There's no real limit on the character you can pick in terms of source medium. We focus on sets made in the Smash Bros. engine, whether it be the upcoming Smash Ultimate, Smash 4, Brawl, Project M, or even Melee and 64 if you so choose. Whatever character and game you pick, give it your best shot!!

MYM Overview
Moveset Creation

A moveset is made up of 23 inputs:
  • 4 Special Moves [ Neutral | Up | Side | Down ]
  • 5 Standard Attacks [ Jab | Dash Attack | Up Tilt | Forward Tilt | Down Tilt ]
  • 3 Smash Attacks [ Forward | Up | Down ]
  • 5 Aerial Attacks [ Neutral | Up | Down | Forward | Back ]
  • 6 Grab Game Inputs [ Grab | Pummel | Up Throw | Down Throw | Forward Throw | Back Throw ]
  • Plus a Stats Section [ Movement | Size | Weight | any Unique Mechanics | etc. ]
You can list them in whatever order you want. Most movesets list Special Moves first, since their unique properties often tie a moveset together as a "core" and can be relevant to the rest of the moves. For example, Shulk's Monado Arts change up how the rest of his moves are used, so it'd be helpful to list his Special Moves at the beginning. Similarly, a character's Stats should go in the beginning bit.
Outside of that, the order varies a lot, but moves are almost always grouped together into the five sections bullet-pointed above. Do whatever you'd like here!
Other optional things you might want to include:
  • Image of the character [ Recommended! ]
  • Intro writeup for the character [ Recommended! ]
  • Final Smash [ Recommended! ]
  • Taunts
  • Custom Specials
  • Situational Attacks [ Ledge Attack | Getup Attack ]
  • Miscellaneous Flavor [ Home Stage | Alternate Costumes | etc. ]
Having trouble writing a set? Just post in the thread or DM one of the five Leaders listed later in this post! We're always happy to check out WIP sets and provide feedback. :)
Traditionally, movesets are posted in the thread itself, as regular posts. However, it is allowed to host movesets offsite, such as with Google Docs, for the sake of formatting control, reliability, or the like. For Google Docs in particular, there is a handy [ TEMPLATE ] you can use. If you're signed into Docs, just hit file > make a copy and you're good to go.
Finally, for a more "in-depth" guide to moveset writing, see the second post in this thread. Check it out if you want to really step up your movesetting game!
Commenting

"Famous writers got to where they are due to reading a large amount of literature, and it’s the same with movesets. Commenting forces you to articulate that knowledge and put it to word; the helpfulness of this exercise cannot be overstated."
After reading a moveset, why not share your thoughts on it? That's what a Comment is! You can share your impressions, give advice / feedback on what you think could be improved, and / or praise the moveset's strengths. Just anything you want to say after reading the set! The author of the set'll really appreciate it! Also, do leave a Like on sets you read and enjoy, which while not as strong as a Comment still gets the idea across to an extent.
Not only is reading and Commenting movesets helpful for the author of the set, but it can also help the Commenter's skills improve by learning from other sets' strengths and weaknesses. Also, in order to Vote at the very end of Make Your Move 21, a user must post at least 10 Comments throughout the course of the contest, to demonstrate that he has read enough movesets to give an informed vote.
Ranking

If you want to take Commenting a step further, why not start your own Rankings? Rankings are a post (in the thread or otherwise) where you list the sets you've read, and say how good you think each set is. Many Rankings use a ten-star system, but other systems are definitely possible. Five-star, category-based, and other types of Rankings have all been used in the past, so just use whichever format you'd like. One common theme is humorous "Ranking images," or a funny image posted along with each set's Ranking.
You'll see Rankings from a lot of experienced MYMers, but anyone is free to make one of their own! Just make sure to put them in spoiler tags, so you don't take up a lot of space in the thread. This also has the handy benefit of resizing images to be more uniform.
On the subject of Rankings, the User Rankings are an entirely separate, Leadership-run competition which tracks all activity by users in the thread. You'll get points for posting sets, but you'll also get some for posting Comments or even just posting in general!
Contest's End

In the past, each Make Your Move contest ended around the time one hundred movesets had been posted in that contest. Since Make Your Move 19, however, a strict deadline has been used instead. For MYM21, that deadline is [ February 10th ]. Don't miss it!
At the end of a contest, it's a MYM tradition to vote on all the sets posted in the thread! Any user who has posted at least 10 Comments may submit a Vote to one of the Vote Gurus via a Smashboards DM. You have 36 Votes to award to movesets you think deserve it, split between these categories:
  • 15 Weak Votes [ 2 Points ]
  • 12 Regular Votes [ 5 Points ]
  • 8 Super Votes [ 9 Points ]
(These votes are listed in order of ascending value!)
Give these Votes to sets you like, and the set with the most points wins! You don't have to use every single Vote, but you can't go over the maximum for each category.
You may also choose to upgrade some of your Votes into Vote Pluses. You may upgrade one Super Vote into a Super Vote Plus, making it worth 11 Points instead of 9 Points. The other two Vote types may each have three Vote Pluses, becoming worth 1 Point more than usual.
It goes without saying, but you can't vote on your own sets. This would give those who vote a disadvantage in terms of placing well, so there are measures in place to reward those who vote with extra points to compensate.
Immediately after the contest ends, there is a Voting Period, where everybody has time to read movesets they missed, compile a Vote List, and submit it to the Vote Gurus. After that, the Leaders will work hard on completing the Top Fifty, a ranking of the top-voted movesets!
Despite the name, the Top Fifty no longer always has fifty movesets, due to the deadline changes made in MYM19. Instead, any moveset with at least two Votes of any kind, OR at least one Super Vote, is eligible for the Top Fifty. It's posted in the thread along with some fanfare, as per tradition. Will your set place on the Top Fifty?
For the Top Fifty, the Leaders will break ties when needed. There'll always be raw voting data available, so you can peek behind the curtain if you'd like.
Beyond The Thread
MYM-Operated Communities and Sites

Make Your Move has a very active Discord chat, where all the discussion happens. There's a handy [ LINK ] to join it right away! Feel free to pop in and say hello after reading the rules.

The Bunker [ LINK ] is pretty much a Make Your Move encyclopedia, filled with links to past movesets from contests of yesteryear and even handy articles! Smash Daddy and Warlord hold the admin powers to this website, so DM them if you want to post something here.
The Stadium [ LINK ] is like the home page of Make Your Move outside of the thread. It houses the current contest's moveset list (so right now, MYM21's), raw Top Fifty data, and MasterWarlord's personal Rankings.
The Whiteboard [ LINK ] is an ancient forum where unfinished or "lost" movesets were posted long ago. It's now largely defunct due to changes in the forum's host, but lives on as an archive.
Unaffiliated Resources

KuroganeHammer [ LINK ] is a treasure trove of technical details about moves in Smash Ultimate, as well as a handful of other games. Check it out if you want a reference point for how much damage a move should deal, how quick it should be, or anything like that.
There exists a thread on Smashboards [ LINK ] which houses gifs for some characters' attack hitboxes. The data is from Smash 4 and not Ultimate, but it's still a handy resource for the range and animation of moves.
Art of Smash [ LINK ] is a video series by Izaw about the intricacies of how Smash 4 is played. The first four videos talk about the game as a whole, a valuable resource for understanding both the controls and the mentality of the game. Then there's an ever-growing list of character-specific videos, going over lots of tricks, combos, and techniques which can inspire moves in a MYM set. Most important, perhaps, is the videos' emphasis on the "playstyle" of a character, or the method by which one makes a moveset feel like a cohesive whole.
There's also a sequel series to Art of Smash, called Art of Smash Ultimate, made by the same person and for the same purpose: [ LINK ]
Leadership
The organizers of Make Your Move, the five Leaders of the community make sure everything keeps running smoothly here in our little contest. Leaders are generally well-respected and usually very seasoned MYMers, sometimes having been in the community since MYM's inception! Feel free to hit us up via Smashboards or Discord if you want to chat, we're here to help.
Here's some of our Leadership's funky-freshiest sets to date:
MasterWarlord | "WL" | "MW" | "Warlord"

If MYM were a game, Warlord would be its final boss. He appears semi-rarely in chat, but makes shockwaves when he does, packing huge influence due to his extensive history and unparalleled Top 10 placings. His commentary is harsh, but loaded with useful advice, insights, and a special brand of blunt comedy. Warlord's movesetting resume, even, is filled with Heavyweight Male Antagonists – expect lots of intricate sets with interactions between moves, minions, constructs, and terraforming. Plus move animations involving the physical abuse of at least two of those four things.
First Contest
Make Your Move 3

First Set
King K. Rool

Highest Placing
1st [ The Count, MYM6 | Dark Bowser, MYM8 | Yangus, MYM18 | Ribby and Croaks, MYM20 ]

Total Movesets
142, as of MYM20

Notable Franchises
Dragon Quest [ Yangus, MYM18 (1st) ]
Fist of the North Star [ Lord Morgan, MYM17 (5th) ]
Ultimate Muscle / Kinnikuman [ Blocks, MYM17 (11th) ]
Warcraft [ Varimathras, MYM18 (10th) ]
One Piece [ Arlong, MYM16 (10th) ]
Donkey Kong [ Bashmaster the Brash, MYM15 (5th) ]
Fullmetal Alchemist [ Father Cornello, MYM16 (2nd) ]
Crash Bandicoot [ N. Brio, MYM19 (3rd) ]
Dragon Ball Z [ Guldo, MYM20 (6th) | Burter, MYM20 (20th) | Recoome, MYM20 (4th) | Captain Ginyu, MYM20 (12th) ]
Cuphead [ Ribby and Croaks, MYM20 (1st) | Grim Matchstick, MYM20 (16th) ]

Smash Daddy | "Smady"

Smady is a pillar of MYM through and through. His achievements and history are really, really impressive, but the first thing you notice about him is what he does in the community today. Smady posts in-depth comments, regularly has a presence in the Discord chat, and of course creates top-notch movesets for all to enjoy. The main trend to his sets in terms of characters is poison comedic-end villains, but he does have quite a varied pool. No matter the character, anticipate a next-level set with lots of depth to it.
Also, last contest (and this contest too, I do believe), Smady ran / is running a challenge for MYMers to post sets under 5,000 or 10,000 words, which believe it or not is a challenge for quite a few of us! If you happen to be new around these parts, that oughta be the perfect jumping-in point! Not much point in trying to write a dissertation of a moveset on your first day. Personally I really enjoy writing shorter sets, so last contest I had a lot of fun with this challenge. ^^
First Contest
Make Your Move 3

First Set
Vivi

Highest Placing
1st [ Raiden, MYM5 | Death, MYM11 | Ameno-Sagiri, MYM12 | Fassad, MYM17 ]

Total Movesets
72, as of MYM20

Notable Franchises
Dragon Quest [ King Korol, MYM17 (4th) ]
Ace Attorney [ Kristoph Gavin, MYM18 (4th) ]
Shin Megami Tensei [ Ameno Sagiri, MYM12 (1st) | Matador, MYM18 (5th) ]
Final Fantasy [ Jecht, MYM18 (6th) ]
Resident Evil [ William Birkin, MYM17 (6th) ]
One Piece [ Vander Decken, MYM16 (3rd) | Magellan, MYM19 (4th) ]
Illbleed [ Michael Reynolds, MYM13 (5th) ]
CD-i [ Hotel Mario Roy, MYM19 (9th) ]
Cuphead [ Goopy Le Grande, MYM20 (29th) | Wally Warbles, MYM20 (32nd) | Werner Werman, MYM20 (10th) | Djimmi the Great, MYM20 (17th) | Dr. Kahl, MYM20 (13th) ]

ForwardArrow | "FA"

FA, like the other two so far, has a really impressive history behind him! Beginning to notice a pattern between these Leaders, I reckon. His set output is notable not for quantity, but for quality, with lots of Top 3 placings, wins, and popular hits under his belt. Expect a healthy blend of different villain varieties from FA, but with a higher proportion of brutal / "edgy" characters than of anything else. In his commentary, FA is sometimes blunt, sometimes slightly less blunt, but pretty much always helpfl.
As a bit of an aside, FA as of late really has been a quality friend for me personally, so I'm quite thankful for him myself. :)
First Contest
Make Your Move 10

First Set
Hoppip

Highest Placing
1st [ Jarad, MYM13 | Vector, MYM15 | Three, MYM15 (tied, lost tiebreaker) | Iguana, MYM19 ]

Total Movesets
45, as of MYM20

Notable Franchises
Yu-Gi-Oh! [ Vector, MYM15 (1st) ]
Magic: The Gathering [ Jarad, MYM13 (1st) ]
Original Characters [ Iguana, MYM19 (1st) | Knight, MYM19 (2nd) | Metireon, MYM19 (2nd) | Hee-Mo, MYM20 (36th) ]
Puella Magi Madoka Magica [ Homura Akemi, MYM10 (22nd) ]
Dark Falz [ Dark Falz Remix, MYM14 (20th) ]
Drakengard [ Intoner Three, MYM15 (2nd) ]
Cookie Clicker [ The Grandmatriarchs, MYM16 (5th) ]

FrozenRoy | "Froy" | "Roy"

Froy is a pretty down to earth guy, which makes him awesome to have around in chat and in the thread in a lot of ways. His tastes, though, are anything but down to earth in the context of MYM's Leadership. A lot of Froy's movesets take the form of characters from MOBAs, card games, and the pièce de résistance, Touhou. A break from the villain spam is pretty welcome. Also, this man has a huge moveset output given how he joined more recently than any of the three Leaders listed above! Even at this breakneck pace, Froy really puts a lot of care into each set, and you can always expect to find a lot to enjoy.
First Contest
Make Your Move 12

First Set
Scizor

Highest Placing
1st [ Sho Minamimoto, MYM14 ]

Total Movesets
80, as of MYM20

Notable Franchises
Touhou [ Remilia Scarlet, MYM14 (8th) ]
Warcraft [ Baron Rivendare, MYM16 (13th) ]
RWBY [ Weiss Schnee, MYM15 (14th) ]
League of Legends [ Viktor, MYM16 (8th) ]
Dark Souls [ Artorias the Abysswalker, MYM18 (11th) ]
Defense of the Ancients 2 [ Anti-Mage, MYM18 (17th) ]
Yu-Gi-Oh! [ Night's End Sorcerer Remix, MYM15 (21st) ]
The World Ends With You [ Sho Minamimoto, MYM14 (1st) ]
Pokémon [ Haunter, MYM20 (18th) ]
Star Wars [ Count Dooku, MYM17 (18th) ]

Munomario777 | "Muno"

And as of MYM20, I am also a Leader! My history is much less impressive than the other Leaders', since I joined as late as MYM16 and only really became a Good MYMer last contest. I make sets for an unusually high amount of Generic Nintendo Protagonists compared to most other setmakers. In terms of style, a lot of my sets (such as Doomfist from MYM20) are kind of simpler in some ways. I really enjoy focusing on a core mechanic or playstyle idea and fleshing it out, as well as integrating lots of cool mechanics from the Smash Bros. engine. My tastes are really weird and contrarian, too – expect me to complain about sets having too many hard interactions and AI minions despite the fact that I never read anywhere near as much as I should. :upsidedown:
I also run some of the external communities of MYM, namely the Discord server and r/MakeYourMove (links to which can be found in the "Beyond The Thread" section of this post). Let me know if you have any questions / etc about them!
First Contest
Make Your Move 16

First Set
Sonic Heroes

Highest Placing
8th [ Doomfist, MYM20 ]

Total Movesets
57, as of MYM20

Notable Franchises
Overwatch [ Doomfist, MYM20 (8th) | Zenyatta, MYM19 (15th) ]
Splatoon [ Inkling, MYM19 (29th) | Doc To, MYM20 (42nd) ]
Fantasy Strike [ Jefferson DeGrey, MYM20 (26th) | Valerie Rose, MYM20 (25th) | Jaina Stormborne, MYM20 (23rd) ]
Original Characters [ Yomi Mekura, MYM18 (23rd) | Iris Harding, MYM20 (35th) ]
Sonic the Hedgehog [ Sonic Heroes, MYM16 (44th) | Tails, MYM17 (26th) ]
Pokémon [ Alolan Pokémon Trainer, MYM18 (41st) ]
The Legend of Zelda [ Tri Force Heroes, MYM17 (25th) | Link, MYM18 (47th) ]

Rules

This goes without saying, but MYM abides by the [ RULES ] set in place by the folks in charge of this website, so keep that in mind! Please remember to report posts that break the rules, instead of replying to them.
And that's pretty much it! Go have fun writing, reading, and critiquing sets. Write your moveset, carve your legacy, Make Your Move!
 
Last edited:

Munomario777

Smash Master
Joined
Nov 18, 2014
Messages
3,253
Location
Charleston, South Carolina
3DS FC
0387-9596-4480
Switch FC
SW-8229-3157-8114
Moveset Creation - In-Depth Guide

Important Note

This guide is kind of long, so you don't need to read everything if you are just joining MYM. If you want to step up your game and really improve, however, this is a great place to start!


The Creative Process

The creative process of writing a set is very simple! However, there are some guidelines that we can give you.

First off, the strongest sets start off with a "playstyle" in mind from the very beginning. This might be a certain character archetype, such as a "zoner," or it might be something based around some cool mechanic like Shulk's Monado Arts. You could even draw from the character's personality, such as an arrogant, hotheaded character having a sort of rushdown playstyle. This takes a while to get the hang of, though!

Also, when writing moves, you should include enough detail so that we know what you want to convey. Things like the damage, knockback, range, and speed (lag) of a move are very important! Damage is given in actual numbers (like 5% damage), but for the others, things like "strong KO knockback" or "really slow startup" work just as well.

It is recommended that you have the "foundation" of a moveset in mind before you start writing. This goes hand in hand with the "playstyle" stuff. The main idea is that if you have the moves in mind from the get-go, you can do interesting things with how they interact. For example, maybe you have a minion your character can summon (like Dedede's Waddle Dees), and then several of the moves can do something WITH that minion (like if Dedede could inhale his minions, or pick them up with his Grab). Stuff like that.


The Content of a Moveset

The following sections are the moves that make up your moveset, as well as the other content included in a moveset post.
Sections labeled "recommended" are optional, but still VERY recommended.
Anything labeled "optional" is something you can include if you want to.
Outside of those two labels, these inputs are required to qualify your set for the final ranking at the end of the contest, unless you have a good reason for excluding them (which is rare).
These, by the by, are just the "MYM norm" if you will. We do have reasons for separating and ordering sections in the general way that we do, but as long as you have all the required content, we will still approve the set for voting and whatnot. :)

Intro to the Character [ Recommended ]
This is basically an introduction to the character who stars in your moveset. A paragraph or two about why you like the character, what role they fill in their home series, maybe their personality or abilities, stuff like that. Also, if available, you should have an image of the character of the top.
This section should probably go at the start of your moveset, since it helps the reader understand the rest of it.

Stats
This section includes stats about how your character controls outside of their moves. Stats might include running speed, jump height, size, weight, or anything else not determined by an actual move. Things along the lines of Peach's float are also commonly put here.
Like the intro, this section should go near the beginning too, since the stats affect how each move will be used. For example, if your character dashes quickly, their Dash Attack might be more potent!

Unique Mechanics [ If Applicable ]
If your set happens to have some big, overarching mechanic to it, it is common to put that outside of the Stats section. To use a Smash moveset as an example, if you were writing Robin's moveset, his Tome durability system might be explained here, as well as his Levin Sword.
Again, this is gonna affect the rest of the set, so you should place it at the start.

Special Moves
Now we get to the juicy stuff! There are four Special Moves:
  • Neutral
  • Side
  • Up
  • Down
You can list those four in whatever order you like. Specials are very freeform in how you handle them, but Up Special is usually a recovery move in Smash, so it is a good idea to put one there.
Outside of that, Special Moves are often very unique moves which "glue" a character's playstyle together. Toon Link is a projectile zoner, so his Special Moves (especially Boomerang and Bomb) give him the tools he needs to fight at a distance.
Similarly, if you want your character to do something like summoning a minion, it should be on a Special. Just like how Olimar and Brawl Dedede summon their Pikmin and Waddle Dees!
So this sounds like a broken record, but because Special Moves shape the way a character plays, it is usually recommended to put them before the other attacks (such as Standards, etc).

Custom Moves [ Optional ]
In Smash 4, each Special Move has two additional "custom variants," which tweak the move in different ways. These are hardly ever done in MYM, but feel free to add them if you want!
Standard Attacks
Standard Attacks are the character's basic ground moves:
  • Jab
  • Dash Attack
  • Forward Tilt
  • Up Tilt
  • Down Tilt
Note that Smash Attacks and Grabs have their own sections later on!
Unlike Special Moves, a character's regular attacks (including Standard, Aerial, and Smash Attacks, as well as Grabs to an extent) should be direct attacks. So it is probably a bad idea to put, for example, a healing move on a Tilt or something like that. Projectiles are more reasonable, though. Also, in Smash and MYM, attacks almost always correspond to their direction, e.g. an Up Tilt is an upward attack.
As a change of pace, the order here is not as strict! Depending on how the moves are designed, every set has a different order for the Standards, Aerials, Smashes, and Grabs. Generally, the "important" moves come first, if you have any of those.

Smash Attacks
Smash Attacks are usually the most powerful moves at a character's disposal!
  • Up Smash
  • Forward Smash
  • Down Smash
(The order is anything but strict, of course.)
Note that these attacks can be charged for up to one second, or sixty in-game frames. At full charge, the power is multiplied by 1.4x. In MYM, it is not rare for Smashes to change in some way when charged, such as gaining extra range or some sort of cool bonus effect! You can add that sort of thing if you want.
Another trend in MYM is that Smashes are almost like "pseudo-specials." They should still be a powerful attack, but some MYMers also like making Smashes which have a lasting effect like a Special Move might. For example, there might be a Down Smash where the character punches the ground with great force, and then a pillar of earth emerges in front of them as a lasting construct. Or something like that.

Aerial Attacks
There are five or six Aerial Attacks:
  • Neutral Air
  • Forward Air
  • Back Air
  • Up Air
  • Down Air
  • And, if applicable, Grab Aerial, AKA Zair (like Link's midair Hookshot)
Like Standards and Smashes, Aerials should usually correspond to their direction. Outside of that, there is not a lot to say here. Notable, though, is Aerials' usage as spacing moves, since you can retreat or advance while using one by jumping off the ground with sideways momentum. Also, you can edgeguard with them of course.

Grab Game
This section is all about grabs!
  • Grab
  • Pummel
  • Grab Aerial / Zair can go here instead of Aerials if you want
  • Forward Throw
  • Back Throw
  • Up Throw
  • Down Throw
Pummel can be lumped in with Grab most of the time, unless you have some particular huge thing you want to do with it (usually related to a Unique Mechanic).
Throws are one of the trickier parts of a moveset, for sure. As inspiration, some ideas for types of throws to have in a set include:
  • Combo Throw
    • Low-Damage Combo Throw (low knockback)
    • High-Damage Combo Throw (high knockback, used for "kill confirms")
    • DI Mixup (confuses the foe when they try to DI out of the throw, since the right DI for one throw is the wrong DI for another throw; usually in pairs of two)
  • KO Throw (high knockback)
  • Spacing Throw (middle-strength horizontal knockback)
  • Status Effect Throw (applies an effect such as poison)

Playstyle [ Recommended ]
The ever elusive concept of "playstyle" in a moveset. Once you have described all of your moves, now you can go over their general gameplan and style of fighting! This is tricky to nail down, but one good place to start is describing what "goals" your character has.
For example, Mario's goal is to land a grab most of the time, due to his awesome grab combos. Then you can describe HOW they accomplish that goal, such as how Mario might force a shield (which is beaten by grab) with Back Air or Fireball. Stuff like that.
But really, the best sets come about when you have a playstyle in mind BEFORE you start writing a set, since all the moves can kinda feed into it. Give it a shot sometime, but don't feel like you HAVE to make an outstanding moveset on your first day or anything.

Final Smash [ Recommended ]
Now for a true show of power! Your character has gotten the Smash Ball, what kind of insane stunt are they gonna pull off? You can go crazy with flash, personality, and brute strength here, there is no real bound on balance (to a reasonable extent).

Flavor [ Optional ]
Finally, some ideas for miscellaneous "flavor" you can add if you want.
  • Taunts
  • Alternate Costumes
  • Home Stage
  • Music (maybe put this at the start, so people can listen as they read the set?)
  • Codec Conversations
  • Matchup Descriptions (how Your Character VS Someone Else goes, either from Smash or MYM)
  • Anything else, really!
Summary

Just to sum things up, here are all the "required" inputs:
  • 4 Special Moves [ Neutral | Up | Side | Down ]
  • 5 Standard Attacks [ Jab | Dash Attack | Up Tilt | Forward Tilt | Down Tilt ]
  • 3 Smash Attacks [ Forward | Up | Down ]
  • 5 Aerial Attacks [ Neutral | Up | Down | Forward | Back ]
  • 6 Grab Game Inputs [ Grab | Pummel | Up Throw | Down Throw | Forward Throw | Back Throw ]
  • Stats Section [ Movement | Size | Weight | any Unique Mechanics | etc. ]
Learn More
The best way to learn how to make sets is, well, making sets! As well as reading what others have made.
Outside of that, many of the resources in the OP are helpful, such as The Bunker, Art of Smash, etc. The Discord chat is a great place to discuss movesetting in real-time. Also, if you are having trouble writing a set, feel free to post in the thread, or DM a Leader or something like that. We are always happy to help!
 
Last edited:

Katapultar

Smash Lord
Joined
Nov 24, 2008
Messages
1,284
Location
Australia


Hidan is an antagonist from the mega-popular, love-it-or-hate-it manga/anime Naruto. He is a member of the Akatsuki, the main evil group in the series recognisable for the patented black and red cloaks they all wear - not unlike a certain other emo organization from a certain popular crossover franchise also backed by a massive fandom. Whereas most of the Akatsuki are really edgy people, Hidan himself is a relatively simple and religious guy devoted to Jashinism, a cult-like religion that endorses killing for their god Jashin. He joined the Akatsuki to receive protection from the authorities, and desires to convert all his compatriots to Jashinism so he can go on a mass killing with them.

Because being a generic killer would be totally bland, Hidan happens to be immortal as a result of experiments performed on him (through blood sacrifices) by his cult, and actually enjoys receiving pain. This works hand-in-hand with his one and only "Jutsu", where by ingesting a victim's blood and standing over a bloody circle he can essentially act as a living voodoo doll to that target. This technique can be deadly against opponents with no prior knowledge of it, but otherwise Hidan is a one-trick pony with only his melee skills to fall back on, he actually being pretty dumb for the series' standard of intelligence. He manages to kill off a named character despite this, but is later blown to pieces by Agi's favourite character and buried alive until he slowly dies off from the only known means of killing him: starvation. This leaves him alive for the rest of the series until the big timeskip that jumps to little Borutard, which turns out to be a massive blessing as it prevents him from being revived as a zombie alongside a ton of other characters in the final story arc. But I digress. You all came to see why you should stick to One Piece and JoJo, no?


Height: 177.1cm
Weight: 9.5 (127)
Ground Speed: 5
Jump: 5.5
Air Speed: 5-10
Fall Speed: 8
Traction: 5
Wall Cling/Jump: 7

Being from a series full of ninja, it's only natural that Hidan would come packing some degree of deftness - but not as much as you'd expect, as he is not exactly known for his speed. The speed mostly comes from the huge air speed just jumps provide him, which make short-hopping a viable tactic and emulate the aerial swiftness of ninjas. Hidan is also very heavy thanks to his immortal body, so he can take on more pain than you'd expect for a character around Marth's size.

On an aesthetic note, Hidan's wall-cling animation involves him standing on the side of the wall he is clinging to, a universal ability all trained ninjas in the Naruto universe possess.


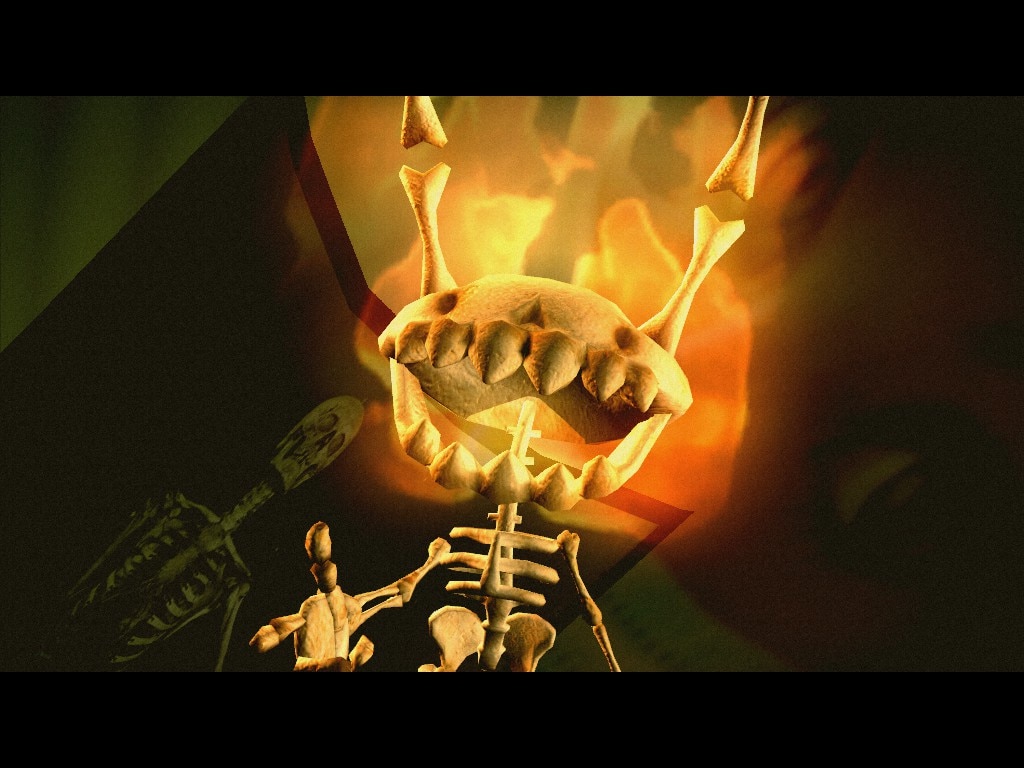
Hidan starts out the match with a human-like appearance, but if he draws enemy blood with one of his weapons he will ingest that blood and take on the above Grim Reaper-like appearance, fulfilling the prerequisite to activate his Down Special. This change lasts until Hidan or all of his victims KO’ed, but even then it will be his most common appearance throughout the match unless he is somehow unable to land a single hit on his opponents. Aside from this, Hidan has no real special gimmicks despite his immortality, similar to another immortal scythe-wielding man. Sure, there aren't that many pummel KOs nowadays, but still...


Down Special - Curse Technique: Death Controlling Possessed Blood
Hidan cuts himself across the chest begrudgingly for 10% and uses the spilled blood to draw the bloody insignia of Jashin with his foot. These actions take 40 and 60 frames to complete respectively for a whopping 100 frames, making the set-up excessively punishable on top of the self-damage that will contribute to any knockback he takes. Fortunately, any self-damage inflicted through a move will regenerate 20 frames after it ends/is interrupted, and if Hidan was struck out of this move the blood will remain for him to exploit for reduced set-up time, lingering for 5 seconds before evaporating.

If Hidan was standing over blood belonging to another character, his set-up time is cut down to 40 frames as his sadism kicks in to make him more enthusiastic, and that blood was fresh - no older than 2.5 seconds - it will be cut down to a mere 20 frames. When drawing blood through his scythe that's not ingested for the reaper form, it will drip a drop of blood every 6 frames for every 1% that move dealt, taking 5 drops at the same spot to form sufficient blood for the circle. Being struck will splatter all of Hidan's blood off his scythe.

Once you're standing over a circle and got the reaper state going, Hidan's curse will take full effect on victims as they take every bit of damage he does. If the damage was self-inflicted, foes will take every facet of its suffering right down to the knockback, hitstun and even status effects, but otherwise they'll just take damage from outside sources like their own moves - while also cringing in pain to halt their current action by 1 frames for every 2% they took if they inflicted the damage, effectively serving to artificially increase their end lag. If the victim was shielding at the time, it will count as being held out and can potentially drain if they took enough damage to be stalled long enough for that to happen.

Voodoo damage ignores shields while still dealing shield stun if applicable. Foes will also suffer shield damage/drain when Hidan does, though he can't actually break their shield this was unless they were holding it up at the time, instead just putting it down to 1HP and keeping it from regenerating if his own shield wasn't. This gives Hidan an incentive to hold up his own shield for the sake of it, just so long as he's careful not to weaken his defences too bad. Voodoo damage is rather vital to damaging shields and percentages, as Hidan's weak scythe is designed to draw blood rather than cut or outright kill things. He mustn't disappoint his god Jashin by forsaking the evil ritual either.

Foes can bypass the voodoo damage by grabbing and throwing Hidan, under the logic that he is being "moved/lifted" off his circle and thus it won't take effect. One can also try breaking his shield and pushing him off the circle while he's stunned, if he's deliberately damaging his own shield to weaken yours. The circle disappears if 5 seconds pass without Hidan standing over it, which is troublesome given how tedious and risky they are to make without first getting bloody. Only one circle can exist at once, but Hidan is more than welcome to create a new one elsewhere if he can afford it.

Used over a circle, Hidan will spread his arms in embrace for a slightly quicker and safer counter than most. Triggered, both he and his victim(s) will suffer 140% of that attack's damage as he drops his guard completely; as well as its full knockback and hitstun to a victim who attacked him directly. Afterwards, he regenerates half the health he received from the attack at a rate of 1/8ths every half a second. This is useful against most attacks, either killing the opponent with their own melee or damage-racking them with projectile play, but the latter leaves him open for 1.35x longer than if he shielded the move and can potentially punish him if the move didn't deal a heap of damage.

Side Special - Reaper's Chain
Hidan throws his scythe out 1.5 platforms forwards before he yanks it back by a metal cord connecting it to his sleeve, dealing 3% and 4% respectively with slight inwards knockback on the latter. This comes out relatively slow at frame 23, but the projectile is lightning fast and this leaves Hidan with a frame advantage against opponents close-up, but is still punishable against shields. It's also his best means of drawing blood from a distance. The scythe can be curved on the way out and moves more slowly the greater the curve, down to a minimum of Mario's dashing speed if curved the full 90 degrees.

Using this move in midair makes Hidan defy gravity, and the scythe extends 1.5x quicker and comes out on frame 11. Hidan suffers more end lag though, and the second hit deals less convenient diagonal knockback. If the scythe hits the surface on the way out, the blades will impale themselves into the surface and deal the second hit to close-by foes, before Hidan gets pulled towards that surface at Pit's dashing speed. Hidan is not a hitbox on the way in, but he suffers virtually no end lag/landing lag and can transition into a wall cling when reeled into a wall. This can be done offstage, but you can only use this move once per air trip. You can also hold B on the way in to have Hidan perform a flying kick that deals 6% that KOs at 225%, but has more end lag. This is immensely useful for reaching Jashin symbols given the scythe can be curved towards the ground and pierces through foes, and works well short-hopped given Hidan's aerial deftness.

Side Special (Smash or Hold) - Reaper's Swing
Hidan throws his scythe into the background (this can be angled) and has it do a wide swing into the attacking plane 1.5 platforms ahead of him, dealing 10% that KOs at 180%. This takes a long 65 frames to come out and is pretty weak for the low damage output and spacing required, except for one thing: Hidan suffers absolutely no end lag afterwards! You also get a hitbox as the scythe makes its return trip (taking one second if Hidan doesn't move) to Hidan, dealing 3% with slight inwards knockback and minimal hitstun, or 6% that KOs at 190% up-close. If the scythe was angled down into solid ground, it will take twice as long to return as it gets dragged along the ground and trips opponents along the way. Once the scythe gets within half a platform of Hidan horizontally, it will dislodge itself and return to him at its regular speed. Hidan cannot use his scythe-based attacks while the scythe is out this way, but that's only fair given he can capitalise on the hitbox, and it stays out for such a short time that being deprived of it won't really matter.

Once the scythe returns to Hidan, he will let it cut into his abdomen to deal himself 10% and platform of set mostly-horizontal knockback with low hitstun, scaling on voodoo'd victims to KO them at 175%. Hidan can counter his own scythe through DSpec, but he cannot dodge it. The scythe deals Hidan surprisingly good shield damage, but greater stun than what opponents would receive for shielding it close-up. This makes it punishable against shields, but used over a circle it's one of Hidan's best ways to inflict shield damage and has a good chance of breaking the foe's shield. Letting yourself get hit is generally safer; this can also be used to interrupt non scythe-based attacks such as the Down Special, but the starting lag is bad enough that it's not always practical.

If Hidan was launched before his scythe returned to him, it will follow him and gain more power from the momentum build-up; dealing anywhere between 12-18% and diagonal knockback that KOs at 160-120% that caps upon taking at least 3 platforms worth of knockback. This can most definitely hit opponents as something of a "counter" with the correct positioning, but it will always hit Hidan right after he finishes his knockback so he can't avoid this. He won't be KO'ed from this unless he ended up at the bottom blast zone by some freak accident, but it does give his opponents more set-up time and a good chunk of extra time to stall out a Jashin circle. Worse yet, this can actually be triggered after the first 15 frames of this move's starting lag as the scythe will have left Hidan to swing in the background during that time; a hit causing it to be yanked towards him from the background and strike him and only him. These return risks may encourage opponents to go on the offensive to exploit them, though that can be difficult when the scythe is out with voodoo due to how volatile Hidan can get with his options.

Neutral Special - Pleased by Pain
Hidan digs a metal rod into his shoulder; dealing himself anywhere between 4-11% per second based on the intensity of your button mashing and regenerating this damage after one second. This can be increased midway but not decreased. Afterwards, he suffers low or severe end lag due to his reluctance to part with the sheer euphoria of pain - an ideal situation to cancel with the Smash Side Special. This is Hidan's primary damage-racking move over a circle, but it also serves another lesser purpose: if Hidan gets through the first half of his end lag after stabbing himself, his shield will be restored by the total damage he dealt to himself.

This move will only damage cursed opponents, but that's not to say it's useless outside of such; as the sheer ecstasy of pain keeps Hidan from taking damage! He can withstand a total % equal to the damage he inflicted on himself through this move while still dealing voodoo damage to opponents . . . but only for the first 5 seconds of damage being withstood this way, and it doesn't reduce damage that surpasses the threshold. Once his time is up, Hidan will re-accumulate all the damage he sponged over 2.5 seconds at a rate of 1/10ths the total damage every quarter a second. This can be shielded to have it translate to shield damage. The big thing here is that you can share all your damage with cursed opponents if you've got the circle going, even using the self-damage from your Down, Side and even Neutral Special to damage them while you regenerate from it as usual. Hidan cannot become ecstatic again for 3 seconds once he has fully re-accumulated all his damage, but he can still use this move to damage cursed opponents.

If B was held, Hidan will impale himself through the abdomen with his rod and deal himself 10% while voodoo'd opponents receive frame-neutral hitstun. While impaled, Hidan suffers 1.175x as much damage from attacks, 1.25x as much shield damage (including drainage over time) and 1.1x as much knockback, even if it was self-inflicted. Better yet, voodoo'd opponents suffer this effect too while Hidan is experiencing it, and suffer it for 10 seconds if they were voodoo'd by the initial hitbox. This is good, because if Hidan takes multiplied damage the multiplier on a voodoo'd victim will multiply their damage from him to have them take more than he did! With this, Hidan can damage his own shield to damage a foe's shield more effectively and more quickly, giving him an advantage if both their shields were on the same health. What's more, the protruding rod will deal 1% to opponents who get very close to Hidan from either side or use an attack while exposed to it, as well as stalling them for 10 frames while they're being held by him. This is a great counter against those pesky grabs that bypass the curse, and is especially punishing against pummels as victims will take 1/1.5% whenever they use one. The extra damage is still risky to Hidan however, and becomes totally detrimental to him when the curse isn't taking effect. The rod remains stuck in Hidan for 10 seconds or when he uses this move to pull it out for 5% (no hitstun against voodoo'd opponents) over 30 frames, something he is not going to do while standing over the circle.


Up Special - Sacrilegious Suicide
Hidan turns around and stabs a rod straight through his heart, dealing himself 20%, massive set skywards knockback and profuse bleeding that creates a blood puddle beneath him. This functions as a surprisingly effective recovery, albeit a crude one. If Hidan was grounded, he'll experience a bit more starting lag and minor hitlag before being launched that voodoo'd foes don't experience (giving them more time to react), but he can launch himself in any direction except anywhere between backwards or downwards, going diagonal by default. When Hidan stabs himself, the protruding rod is a hitbox that deals opponents identical damage of 20% and knockback that scales to KO at 120%, and if he flies into someone his rod will stab them for 18-5% depending on how early he hit. This can be used to cross the stage via horizontal movement and has very little end lag, but the protruding rod is short-reaching and thin and overall it's very punishable given the high amount of self-damage. This does not put Hidan into helpless and he can in fact use this move even if he started up from the ground, but doing so will put him into helpless afterwards.

This is one of Hidan's most powerful voodoo attacks, but it puts him in a disadvantageous position away from his circle if he misses. Nonetheless, it is deadly in the right situation. It can form a true combo when a returning scythe connects, well-deserved given how hard that is to hit early on, or the self-knockback can be used to power-up the returning scythe and punish opponents who air dodge the flying Hidan/his curse. You could even do this on the ground by throwing the scythe behind you beforehand. Better yet, if the rod hitbox connects against a cursed foe, they will take 40% and OHKO knockback - instant death. This is hard to hit with under normal circumstances, but not if you can break an opponent's shield if they're close to you, which in turn works with Hidan's Smash Side Special. Curiously, airborne opponents hit by the voodoo stabbing will always be launched upwards while grounded opponents are launched diagonally, independent of the direction Hidan was launched; this can be used for some unique positioning.


Jab - Bludgeon
Hidan throws a punch that comes out on frame 3, not the fastest Jab 1 because he's the slowest attacker in the Akatsuki. This deals 1.5% and knocks opponents towards his fist or just past it depending on how close they were. The second hit is a roundhouse kick that deals 2% and knocks opponents about 1 platform forwards almost horizontally. The final hit, which can be shielded (or dodged if the second hit knocked the foe offstage) has Hidan swing his scythe by the cord to hit the target - hitting 1 platform ahead of him if no target was caught and clipping through the stage if necessary - to deal 2.5% and very low knockback towards him if they were grounded or upwards if they were airborne. Note that this move can be jab cancelled, so attempting to dodge the hit in midair isn't really worth it as Hidan can capitalise on that with a rushdown or even his voodoo if opponents do dodge. The end lag on the last hit is low, so it can be used as a way to interrupt foes from a specific distance or, at higher percentages (about 80%+) knock opponents in front of him and potentially follow into his Up Special. That being said, the move is completely punishable against shields from close-up.

The first hit can jab lock, which is necessary for performing follow-ups close-up given the second hit. Opponents can shield these follow-ups however, and Hidan's faster attacks from here like his U-tilt are punishable. He can repeat the Jab, but a single hit is punishable by perfect shield if opponents expect it, or try to go for a grab. This shield factor is important: the punch and kick are some of the few moves Hidan can perform during a SSSpec to deal with opponents between him and the returning scythe. If he can pressure opponents into holding up their shield, it'll be worth his while when the scythe passes through to deal them good shield damage. Done quickly and from far enough, he can just hit once to condition the foe's shield, then put up his own shield over a circle to damage his own shield and very possibly break the opponent's. Even if Hidan gets his shield broken in the process, he's more likely to have a higher percentage than his opponent due to his weight and mostly lacklustre damage output, so he'll likely recover first - with possibly enough time to use his voodoo Up Special. If the foe didn't shield, then hopefully they'll still be close enough to get hit by the close-up sweetspot.

Dash Attack - Trail of Carnage
Hidan performs a hasty diagonal slash that deals 2 hits of 5.5% with a notable gap between each, followed by high knockback that KOs at 165% - his strongest Standard move. This comes out fast and has good reach, also giving Hidan brief invincibility when the hitbox comes out (he is immortal after all), but only the blades on the scythe are a hitbox - the handle is a blind spot directly in front of Hidan.

After swinging his scythe, Hidan will drop it close behind him and keep on running for a further 0.7 platforms. This makes the swing even more punishable, as its unusually high shield push and reach prevent cross-ups from occurring, but the dragged scythe acts as a hitbox! Each blade on the scythe deals 2% before the final, longer blade deals 3.5% and above-average diagonal knockback away from Hidan but with low scaling. Hidan then suffers very little end lag, on account of the running acting as "end lag" for the punishable swing.

As awkward as the second hitbox is, it's actually a great mix-up tool with the main hitbox. By starting the attack at the blind spot, Hidan will run past his opponent and they'll caught on the dragged scythe, which can very easily shield poke given how low it hits. Opponents can react and even punish Hidan by rolling backwards, but they'll need to hold up their shield for a wee bit against the 2 hits of the swing and it comes out fast, making the mix-up quite possible to perform. While the dragging hitbox isn't particularly impressive, this mix-up serves the important purpose of cross-ups, which are important to Hidan when he needs to get to his circle. The final hitbox leaves foes at frame-neutral with Hidan regardless of whether they ended the move shielding or not, where he can scare them into making a hasty action if he ended up over his circle.

F-tilt - Mutilate
Hidan heftily swings his scythe horizontally and can angle this slightly. Like Dash Attack, the handle is a blind spot, but it's so thin that only the most slender characters can fit and the adjustment of their hurtbox at the time can compromise this. Each blade on the scythe is a separate hitbox: the smaller blade deals 3.5%, the medium blade deals 4% and the longer blade at the end deals 4.5%. More than one blade can connect if this was spaced correctly, in which case this move will deal a remarkably good 12% for a Hidan attack. The base knockback is only average if the smaller blade hits, but slightly better if a bigger blade hits and very high if all 3 blades connect. While the move has a bit of start-up, the end lag is decently low. This is one of Hidan's best moves for transitioning into a Jashin set-up when the "sweetspot" connects, as this also has the secondary effect of shedding a blood pool from a cut foe this way that lasts for 2 seconds. Sadly, the knockback will never KO til past 185%.

When more than one blade hits a shield, each blade will hit separately instead of all at once and there is a slight gap between the hits due to hitlag. Like Mr. Game and Watch's B-air, foes may end up dropping their shield too early and get hit by the attack, but it's a bit trickier here because the number of hits are not entirely set and the gap between the scythe blades is not notable. And if foes hold their shield up expecting all 3 hits there they may only be 2 or 1, they may leave themselves open for longer than they should and Hidan can capitalise on this with his low end lag. You can also do a bit of a mix-up with Hidan's other more typical attacks that deal 1 hit on shields, and get the foe to let their guard down. When hitting a shielding foe this way, they will take damage and knockback equal to the remaining hits rather than how much they would have suffered as a whole, and as such you sadly won't get the full base knockback nor the blood pool when hitting them.

U-tilt - Brutalise
Hidan swings his scythe overhead somewhat slowly, starting out from the front and ending behind him. This comes out quicker than any of his other tilts, dealing 4.9% with solid upwards knockback that KOs at 180%, but is most punishable and weakest at the start, and will also miss opponents very low to the ground. The attack gets stronger farther in as Hidan builds momentum and an aura around his scythe, dealing 6% that KOs at 166% directly above him and finishing with 9% that KOs at 144% from behind. Hidan's immortal body has 10% heavy armour from the front during the second half of the swing, while his back is armoured during the first half.

The duration and end lag balance out to make this move competent at juggling foes from directly above, but if you get them from behind a little you'll get more power in exchange for the greater scaling knockback making follow-ups more difficult at higher percents. Not that that really matters if you're standing over a Jashin circle. If you don't have a circle, the juggling can help rack up damage early on and stall opponents for blood dripping. This move combos well into the Up Special and U-Smash.

As the move hits hardest behind Hidan, it's actually really good for punishing cross-ups against him (especially with the armour with good timing), which can be good if he's gone out of an offensive from his circle and opponents - possibly having been cornered - suddenly want to keep him away from it. It can also be good for punishing landings and intercepting opponents who try to land over the U-Smash's blind spot behind him. Finally, this can be used right out of a sliding Up Special if Hidan ended close to an opponent, preferably just short of reaching them so he can exploit his back armour as counter to weak attacks and punish with the sweetspot.

Dtilt - Leg Chopper
Hidan performs a relatively slow but far-reaching sweep of his scythe along the ground. The handle deals 2.8% and typically trips at lower percents, but will start to knock foes back on a bit of a semi-spiking angle starting at 50%. The two blades deals 5.7% and surprisingly decent mostly-upwards knockback that KOs at 235%, but the very tip of the scythe actually deals 4% and low inwards knockback on a low angle.

The sourspot is very punishable on whiff, but can shield poke opponents with decent ease due to the scythe handle hurtbox being short and can start offensives on hit, especially at lower percents. Between this and Hidan's other Standards, it's worth noting that he doesn't really have any particularly quick or safe attacks close-up, mostly having to space his attacks, rely on his air speed or rely on his counter close-up if he's on a circle. The sweetspot is safer and pushes foes a respectable distance on shielding. With the correct spacing, this can push foes into the tipper, which can potentially shield poke more easily if it struck a foe diagonally. This will knock opponents towards Hidan at lower percents and potentially catch them off-guard, and is especially deadly when he's over a circle: as this can set-up into his OHKO voodoo Up Special or he can just counter if foes throw out a hasty attack. This won't work starting at 50% as foes will be knocked behind Hidan, where he can instead pursue them with his reliable B-air. It's especially good if Hidan had his back to the ledge as it can start gimps, and relatively common as he likes to camp near the ledge.


F-Smash - Soul Hunt
Hidan stabs his scythe forwards (this can be angled) for 2.2-8% and pulls it back out for another hit. He then spins to perform a horizontal swing for 3-4%, followed by a rising vertical slash that deals another 3-4% and average knockback on a low angle, taking Hidan 1 Ganon off the ground in the process. This deals 10.13.6% overall and KOs at 168-140%. The first hit comes out fast for its sheer reach and lingers somewhat due to the second hit, but shielding opponents can react after the second hit. They only have 4 frames to do so however, which is generally enough time to land a Jab or really quick tilt close-up but not enough time to grab as grabs typically come out no earlier than frame 7. This isn't too bad over a circle, as foes will have no way not to take their damage unless one of their earlier Jab hits knocked Hidan off the ground like with Robin's Jab. If Hidan doesn't want to get punished out of this however, he'll need to space the first hit from max range.

This move deals a respectable amount of shield damage overall, but most of the damage comes from the first and third hits - both of which can be perfect shielded against if the first hit was blocked successfully. Too bad the final hit is very punishable as Hidan has to descend after the rise, and furthermore being in the air will keep foes from taking voodoo damage if they attack him quickly enough. This end lag also keeps him of really taking advantage of the convenient knockback, which is a shame because it always puts foes in an untechable spinning animation so they will always be put into prone at higher percentages with enough ground beneath them. Though risky, if you can land this move it's good for intercepting opponents trying to knock Hidan off his Jashin circle due to its multi-hitting nature.

This move has a second part ALA Link's F-Smash, where the airborne Hidan twirls his scythe overhead for roughly 38 frames before using its built-up momentum to swing it down with the greatest force he can muster. The twirling scythe deals a non-flinching 1% every 2 frames, strangely producing an upwards push above the hitbox that can keep the average falling foe airborne if they don't resist (or fastfall), but is highly impractical. The swing itself deals 17-24% on a high angle and KOs at a disturbingly low 110-80% for Hidan's Standards, because the scythe is swung with a bloody aura that has his god Jashin's blessing! Too bad this will never hit out of the main attack for obvious reasons, as only a braindead idiot would let themselves get hit after shielding and as such this will only land practically by the hardest of reads.

If Hidan broke a foe's shield with any hit from the first part, however, the deadly descent is guaranteed to hit! This works out of any of the first 4 hits, as the bizarre wind hitbox from the spinning scythe keeps the tumbling foe in place and times it so they're guaranteed to get hit by the apex of Hidan's slash, KOíng just a bit earlier than the stated percentages. This works hand-in-hand with Hidan's shield damaging game, and makes perfect shielding the first and third stronger hits all the more necessary for opponents. While the voodoo Up Special is a far superior KO move, this particular kill can be pulled off without a Jashin circle, and is especially good for capitalising on a foe's weakened shield if they're trying to stay away from you to recover (where the Smash Side Special can be deadly close-up). We can't always assume that Hidan will always be standing over his beloved ritual circle, after all.

U-Smash - Sky Ripper
Hidan crouches and twists his body before tossing his scythe straight up to reach 1.45-1.9 platforms above him, going slightly faster with higher charges. This initially deals 3-5% to opponents in front of Hidan with deceptive reach and knocks them into the rising scythe, which drags victims along for 20 hits of 0.4-0.65% followed by average diagonal knockback that KOs at 174-150% from where it launches. The scythe then plummets back down to Hidan, stalling a moment beforehand and for longer the less the move was charged. Fully charged, the cord will snap back to Hidan immediately due to being stretched past its usual 1.5 platform length. The falling blade deals 8-13% with average upwards knockback early on, 10-15% midway and hits hardest upon reaching the grounded Hidan (about a sword length in front of him), able to KO at 140%.

This move has very low lag for its range, most of it being a combination of the pre-charge and post-charge lag when uncharged. With no charge, the scythe's range can take opponents by surprise, and if they air dodge it from high up and do not drift out of the way they will be hit by the falling scythe. The move is most punishable when not charged however, due to the scythe's ascent and descent being slowest here combined with the stall in between. A full charge is more difficult to land without a good read and requires more commitment, but leaves less gaps open in between and makes the move virtually unpunishable on the end lag. This forces foes to rush in ASAP to punish Hidan where they can if they see him charging up, or stay clear if they can't do that which can give him some breathing room. It's also worth mentioning that higher charges allow Hidan more time to act out of a successful rising scythe hit, which is good because the move is one of his best spacers at any percentage for his Jashin set-ups and gives foes very little time to react if he decides to Up Special finisher out of this. The move is also a good anti-air and for challenging moves like stall-then-falls if Hidan doesn't want to move off of his circle, unless they have super armour in which case he's better off going for his circle counter.

Attacking Hidan out of this move will not remove the scythe hitbox as it needs to fly back to him ALA the Smash Side Special. The scythe is perfectly capable of hitting foes on the way back and can build up momentum if it flew past its usual descent length to deal 18% that KOs at 120%, though given the trajectory of the scythe and the fact that this move is performed over groun it's extremely unlikely that foes will actually get hit. If Hidan wasn't knocked back at all however, foes can get struck by the falling scythe, which essentially acts as a counter against grabs and moves that don't deal knockback. The scythe will also hit Hidan however, dealing him high or huge set downwards knockback that typically won't KO him unless the knockback he took was on a very low angle, but puts him in a difficult position offstage and pops him up a fair distance when knocked from the ground. It is possible for Hidan to act before the scythe hits him if the move that hit him dealt little hitstun and there was a decent amount of time before the scythe would descent to him, but like the SSSpec he cannot dodge his scythe and can only really shield it to not take knockback. The scythe hitbox on Hidan can serve as extra punishment depending on the situation, but it can also save him unless the knockback he took was particularly high, in which case the scythe won't interrupt his current knockback.

D-Smash - Pain and Sickle
Hidan swings the cord of his scythe overhead like a lasso while appearing strangely aroused. This has a very long pre-charge animation of 33 frames, but it comes with several charging bonuses to compensate. The scythe whirls 1.15 platforms above Hidan from either side and on a slant to hit opponents level to him, dealing 1.25% (no flinching) every 3 frames. This can rack up 25% if all the hits connects, but foes would have to be either moronically masochistic or downright dizzied to take it all - the latter a deadly damage-racker against stunned foes with the right spacing, especially if you don't have an accessible circle, or want something safer than the NSpec as remember this move is an actual attack too. The cord also deals 0.75% every 3 frames for up to 15%, but it will not hit opponents level to Hidan (though it can hit opponents on platforms above him). Grounded foes close to the spinning scythe will be drawn towards it, so absolutely precise spacing against stunned foes isn't necessary.

The whirling scythe very quickly draws blood to Hidan's feet, taking it from 1.2 platforms to either side or from an infinitely vertical area. This is useful, as the long pre-charge gives foes plenty of time to get in and exploit the knockback multiplier that occurs when charging smashes. If Hidan was struck within the first or last 12 frames of charging whilst over a circle however - indicated by an ominous bloody aura around him - his opponent will take the full knockback and hitstun of their attack, multiplied knockback included! You can even use this against projectiles, though it's extremely difficult and impractical unless they were slow and foes can shield or dodge if they were able to move anyway. If Hidan took more than 2 platforms of knockback, his scythe will snap back to him ALA the U-Smash, which can hit grounded opponents if his knockback was on a low enough angle. Grabbing or hitting Hidan with a weak enough attack will just cause the spinning scythe to drop to the floor and get reeled back to him like a fishing line.

The actual attack has the scythe zip through the background and towards Hidan's hip, where it gets lodged in there and comes dangerously close to cleaving right through him. This has a hitbox where the scythe was spinning in front of Hidan, which comes out on frame 1 and deals 10-14% with solid knockback that KOs at 180-150% - a whopping 39% if the swinging scythe hits connected beforehand. It only takes 6 frames for the scythe to reach him, and it hits from surprisingly far as the impact somehow causes a bloody shockwave to hit on either side. This deals 12-16% with high knockback that KOs at 140-110%, being very safe on shields due to its surprisingly high hitstun but average end lag as Hidan removes the scythe gleefully. Both hits cause foes to gush out a pool of blood beneath them, as unrealistic as it might sound for a foe to have that much blood in them (it probably regenerates over time given the superhuman status of smash characters).

Voodoo'd foes will not take knockback or hitstun from the impalement hitbox unless they were hit by one of the prior hitboxes. Landing this from the frame 1 hitbox will net you 22-30%, but not much more knockback other than what that first hit contributed due to the small gap between each hit. Connecting with the flailing hitbox will also trigger the voodoo, which makes it surprisingly dangerous over circles because if foes try to dodge it they'll just get hit by the main hitbox - unless they dodged near the end of the charge, but many characters will be close enough to the ground to trigger their landing lag and the ones who don't are the floatier type who Hidan can get more out of with his voodoo and gimping anyway. This is a good defensive move if you've got the time to pull it up, and it's not that difficult to get one of your circles towards you if they exist. If it would lead into a voodoo, foes can be tempted to pressure or rush you down before the circle reaches your feet. The move is also a great anti-air alternative to the thinner U-Smash and a fantastic edge-guarder over a circle; as foes are very likely to get hit by the flailing, and can't easily attack Hidan during the start and end of his charges due to the counter hitbox. A well-timed dodge, ledge attack or ledge grab is required not to get hit by the voodoo if a foe is clipped by the flailing, and if they can't afford that they'll want to try and recover low - but risk getting hit by the main hitbox as this can hit low to Hidan.


N-air - Bloody Windmill
Hidan performs a cartwheeling slash that's a bit slow to come out, but it covers a huge area and is difficult to out-range. It also gives the man super armour during the first and last few active frames. Deals 5 hits of 3.4% (17%), but doesn't drag opponents and you'll only get the full damage if the first hit connects from as low as possible and there was sufficient space beneath Hidan not to land. The final hit deals solid mostly-upwards knockback or Sakurai knockback when hitting horizontally and will KO at 156%, a good finisher if somewhat telegraphed if Hidan doesn't hit from the optimal position - especially from higher-up, though it can kill much earlier up there. This final hit deals average shield damage and push.

The earlier hits can lock a foe in place to fall past them to your circle or position them for a combo. The low end lag is especially helpful, and the first 4 hits actually deal a considerable amount of hitstun - the 4th hit actually giving Hidan a frame advantage over his victim, but almost never allowing him a true combo given the spacing required not to land the final hit. Only by jumping through an opponent and timing this move very precisely can Hidan be close enough for a true combo as he falls back down towards them, but even if he can't manage that his Up Special is an optimal follow-up from a fall-through that opponents will have to be wary of if he can still use it.

This move comes out too slow to be used as a combo-breaker, which is troublesome as Hidan is very easy to combo given his size, weight and high falling speed. His Specials do him no favours here, so if he finds himself being pressured he'll have to rely on the air speed of his double jump to escape or air dodge, which a clever opponent can use to frame-trap him if he gets too eager to return to his circle. If opponents ease off and give Hidan the space to use this move however, which becomes easier at higher percentages, it'll be difficult for them to punish him and he essentially gets some much-needed breathing room. This and Hidan's D-air are heavily relied upon to deter those sinful jugglers who would keep him away from his god. Time this move right, and you'll find that it'll outlast dodges.

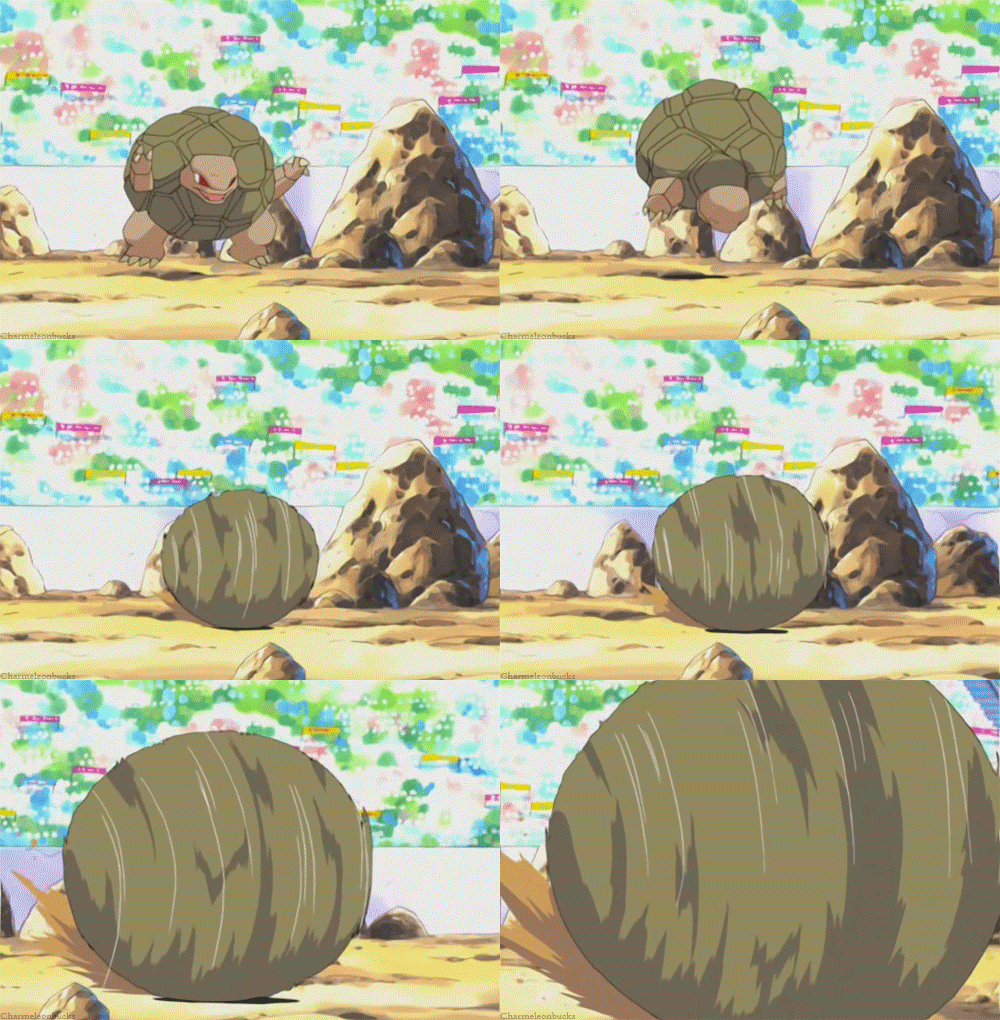
Hidan can auto-cancel this move by landing on the first hit. This is safe on shields and guarantees a decent follow-up, one that is well-deserved if you can time it right and foes are foolish enough to not heed the starting lag. If Hidan lands during hits 2-5 however, the momentum he built up from his cartwheeling will culminate into a stronger blow that shatters the ground in front of him like in the GIF, dealing 4-12% depending on how late he connected. This has lag based on the strength of the blow and is always punishable on shield (though the strongest hit deals good shield damage), meaning Hidan must finish the attack in midair for the safest outcome. The strongest hit actually KOs a little later than the final airborne hit, but the knockback is on a more convenient lower angle that'll inconvenience foes with a stronger hit or let you follow-up safely from a weaker hit.

By suddenly fastfalling towards a grounded opponent expecting you to end the attack safely in midair, you can surprise them - hopefully they won't have put up their shield - to such an extent that they won't be able to DI against the dangerous knockback. This won't do you much good against opponents already shielding, unless the big hit would break their shield or you just want the shield damage badly enough to get punished for it. Foes can certainly be deterred from shielding if you weakened it enough from voodoo, and if they it you did so discreetly you just might break their shield out of nowhere!

F-air - Rash Execution
Hidan swings his scythe down hastily, which has good coverage and start-up for a wide, longer-ranged swing, but an extremely short duration and end lag. This deals 9.5% and high radial knockback starting from above Hidan all the way down to a shallow angle, but no lower than diagonally and KO'ing at 170%. Hitting very close-up to Hidan will knock foes diagonally behind him instead of forwards. Diagonally below Hidan where the attack ends is a sweetspot that deals 11% and even higher mostly-upwards knockback that KOs at 153%. The end lag and landing lag are both punishable by shield or dodge, unless Hidan spaced the move well against shields or used his air speed to get behind the opponent safely.

The knockback and end lag make this move impractical to combo off of. Rather, this move is largely designed to knock opponents far away so Hidan can have some much-needed time with his god, and while he has other aerials that can do the same this one requires by far the least commitment from him. It is highly effective from his boosted air speed as he can rush in like a maniac to catch opponents by surprise or capitalise on their openings. It will also cut opponents deep enough to leave a puddle of blood if they were grounded, making it one of Hidan's best moves for drawing blood and setting-up into a Jashin circle. It's very tempting to use at the start of a stock/match, but be aware that as both characters will likely be at 0% the base knockback will start off weak enough that opponents will still be close enough to potentially keep Hidan from completing the circle. Furthermore, while short-hopped approaches are an optimal way to execute the move and mix-up a auto-cancelled N-air, using the F-air from this position will trigger the landing lag and give Hidan less time to react, as well as making him more punishable.

B-air - Quick Suicide
Hidan stabs himself with a rod for 10%, but deals opponents 9% that KOs at 205% or 4.5% at the very tip, the former with a bit more shield damage than you'd expect. This fairly spammable like Meta Knight's U-air and has decent reach, but it has some of the worst coverage of any aerial as much of Hidan's back still remains exposed. It also has surprisingly harsh landing lag. Nonetheless, Hidan's high air speed makes this a great self-comboing move and even KO tool when fresher during a gimp, as well as an important cross-up tool out of short-hops that can quickly follow into another aerial, most notably his F-air. Beware though, as the self-damage makes Hidan more likely to be KOéd by counterattacks, especially if he spams it as he can find himself with an extra 20%. On the other hand, this self-damage contributes to his rage for the attack, which means that spamming it actually turns it into a better KO move before you reach 150%.

By landing over a Jashin circle during the landing lag, Hidan will use his self-impalement for voodoo. This only deals 4.5% and no knockback or hitstun for balance's sake however, quite inferior to the NSpec and this does stale the B-air for better or worse. If the B-air struck however, foes will immediately suffer a second hit for 9%. If both this and rod hitbox connect at the same time, foes will suffer a whopping 18% that KOS at 130%, requiring Hidan to land with very precise timing. You can also delay the voodoo hit by landing during Hidan's end lag, but said end lag is very brief. Delaying the second hit will not net you the high knockback or shield damage and is a much worse option with the voodoo, except against shields where you can deal a foe 9% on block. The landing lag leaves Hidan punishable enough to not really be worth it, but if foes drop their shield too early after the first hit they can potentially get nailed by the voodoo. This might occur if the foe is expecting Hidan to cross-up and they try to punish this, in which case he just needs to fastfall if he gets the read. It's also a good mix-up for the full hit given that is punishable against shields.

U-air - Rapid Devotion
Hidan performs three quick spinning kicks resembling Falcon's U-Smash, dragging foes for 2% apiece followed by above-average vertical knockback. While fast, the knockback scales poorly and has a hard time killing even near the top of the screen. This is made worse by the notable distance foes are dragged down given Hidan's falling speed (unless you only connect with the final kick, though this is somewhat telegraphed), and while killing is good I doubt Jashin would approve of his followers kicking people to death over stabbing them. The kicks also hit diagonally above and in front of Hidan, but only a very short distance.

The dragging aspect is counterproductive to Hidan's need for spacing, but it's actually useful for positioning foes as the knockback is consistent throughout most percentages. The move can combo into itself and more easily when staled, or with a weaker Up Special follow-up, but more importantly it positions Hidan for an overhead follow-up like with his U-Smash or voodoo when he's closer to the ground. The first 2 hits can auto-cancel from landing too, and if a foe was being dragged during that time both characters will end up in frame-neutral with one another and in a good position for Hidan to counter over his circle. You may also be able to get off the covted voodoo Up Special if you can read a dodge in anticipation for an attack.

On a final note, this move is a surprisingly safe landing option right up-close given it can hit in front of Hidan. Providing it was safe, it can be a much more optimal than the N-air or D-air, as well as a good short-hop or out of shield option.

D-air - Dead Man Falling
Hidan lays down in midair and stabs a rod through his chest, spiking himself for 13% in what is essentially a very unorthodox stall-then-fall that keeps going until he lands or dies trying, being the devout he is. This deals 13% with high mostly-upwards knockback (KOs at 160%) within the first Bowser of the fall, 10% that KOs at 200% within the next 2 Bowsers or 5% on a low angle for the rest of the fall. This comes out disturbingly fast for a stall-then-fall and the rod here protrudes pretty far out of Hidan, but the hitbox is extremely thin - at the centre of Hidan's underside - and the fact that Hidan is laid out leaves his hurtbox very exposed if opponents drift or can outrange it, combined with the temporary self-damage. The descent starts out a bit slow, but as Hidan's percentage rises it quickly builds up, matching Bowser Bomb in speed at 75% and having the potential to become even faster - even practically instant - at later percentages that Hidan can reach thanks to his weight.

One of this move's more blatant purposes is to let Hidan reach his Jashin circles quickly and safely(?) from high up, especially at higher percentages where this move becomes scary to challenge. Furthermore, this move's landing lag is relative to the current strength of the hitbox, high on the sweetspot and low on the sourspot. The former adds risk to landing the sweetspot on grounded foes, which is only fair given it has good damage output by Hidan's standards and deals the best shield damage out of all his standard attacks (but is of course still punishable this way). This move is also perfect and obvious to use out of a vertical Up Special trip if opponents air dodged it, especially from higher up where the D-air's hitbox will be stronger. Done immediately, the self-damage from the Up Special will actually contribute to the rate of Hidan's descent.

If Hidan lands over a Jashin circle, he will immediately deal damage to voodoo'd opponents based on the current strength of the hitbox. This typically deals no knockback or hitstun and can act as an "aerial" version of the voodoo NSpec. It does however deal knockback and hitstun to opponents struck by the descending hitbox, after a moment of impact stall or hitlag on Hidan's part based on the strength of his hitbox. This makes the sweetspot more rewarding to hit with on the ground, as it will essentially deal 26% and the foe will pretty much take knockback twice in a row. The first instance won't go through all the way, but still contributes to an earlier KO. Hitting from higher up is a little less effective, but thankfully the sourspot is too weak to impede on the knockback of the sweetspot or midspot. Scarier yet, this particular voodoo straight-up bypasses shields, and if the sweetspot gets a shield break the shield jump can contribute to a star KO. All this can discourage foes from standing directly over a Jashin circle to keep Hidan from it, especially when his percentage was higher.


Hidan has a fairly basic and average grab as he holds his foe by the collar like a punk, lifting them if they were notably shorter than him.

If Hidan's scythe hits the grabbed victim while flying back towards him, it will get lodged in their abdomen for 5% and remain stuck until the grab game ends. This can be more common than you'd expect, as dash grabs are the most effective move out of a Smash Side Special given the chance of opponents shielding the incoming scythe. The lodged scythe directly benefits some of Hidan's throws, and allows him to hold his victims for an extra 60 frames due to their injury.

Pummel - Jashin's Torture
Hidan balances his scythe on his shoulder (if it wasn't impaling his captive) as he uses his free hand to stab the foe with one of his torture rods. This deals 2%, but is as slow as a pummel that would normally deal 3% and is not too effective despite the satisfyingly sadistic animation.

If the victim was voodooed and Hidan was standing over a circle, he will stab himself for 7% apiece twice as quickly while dealing his victim their usual 2% for an above-average pummel plus another 0.5% for each consecutive pummel. This self-damage is regenerated 2 seconds after the grab game ends, and is somewhat notable in that it can contribute to Hidan's rage for the duration of his throws to enhance their knockback, something that most of them benefit from. It's best not to use this with combo throws for the sake of racking damage at early percentages however, as foes can potentially exploit Hidan's self-damage if they were quick enough. The self-damage can also be exploited if the foe escaped from Hidan's grab because he was going overboard with his pummels, as foes do have time to exploit his extra damage from this position - but he can just bait this with a counter! (his shield might be too weak given he likes to damage his own shield)

F-throw - Ride to Hell
Hidan pins the foe down in front of him with his scythe and runs along the stage with them slightly faster than usual, cackling wildly as they're brutally scraped along the floor. This deals 0.5% for every 0.25 platforms of ground covered and lasts until you either stop holding down the control stick or the victim button mashes out, after which Hidan will swing his scythe like a golf club to bowl them away. This deals 5% and fairly good horizontal knockback, but with very poor scaling (won't KO til 300% at the ledge!). The end lag is pretty bad too, enough so to actually put Hidan at a frame disadvantage against foes though he will almost never get punished for this. The throw becomes much safer near the ledge where foes will be forced to recover low from the semi-spiking angle and won't get to exploit their frame advantage.

This move is blatantly designed to safely and accurately position Hidan over a circle, and greatly benefits from the extended grab time an impaling scythe provides. Given this purpose, you can actually reverse-input this move to have Hidan turn and run in the opposite direction like a pseudo-B-throw, but it takes him a bit of time to turn and foes can use this time to mash out. In a best-case scenario, you'll be over a circle close to the ledge and can use the time a foe spends recovering low to get some NSpec hits in or try to land the USpec from afar more easily. Hidan is still vulnerable while running in FFA situations, but his victim acts as a meat shield that can soak up hits for him along the way.

Even without a circle, this move is still useful providing you're near the ledge, as Hidan has a pretty decent gimping game with his aerial prowess and 2 recoveries if KOíng through voodoo is too much trouble. You can also use that moment to set-up a Jashin circle more quickly with the blood from your victim. And if Hidan doesn't have to turn or run to get near the ledge, you'll find that the main throw comes out exceedingly fast - enough so that may find themselves falling farther than they'd like before they actually react, especially if they have a high gravity. Foes may be expecting this from the position required for it by Hidan and use their second jump ASAP to avoid having their recovery jeoparised.

B-throw - Jaws of Death
Hidan swings his scythe into the side of his victim and heftily swings them behind him for a launch, swinging with both hands as opposed to one in the GIF for extra strength and realism. This deals 6.5% and high base knockback, which makes it Hidan's most blatant keep-away move and the way he'll transition into Jashin set-ups at lower percentages, though the knockback can KO near the ledge at 144%.

By holding the input when the foe took their knockback, Hidan will let go of his scythe and it will remain lodged in the victim's hip as they're launched. When the foe is launched past the cord's absolute maximum and strained length of 2 platforms starting at mid percentages, Hidan will get pulled along for the ride. This won't last forever though, because if Hidan would be pulled off the ground - reaching the ledge or his victim would be vertically launched more than 2 platforms away from Hidan (typically starts at 70%) - the scythe will get dislodged from the victim for a painful 10.5%, but halving the rest of the knockback they take as the hitbox actually deals lesser inwards knockback that conflicts with the main knockback. The scythe then flies back to Hidan and damages him from the built-up momentum for 12% like with the Smash Side Special, essentially acting as a drawback for the huge overall damage of 17%. Hidan can actually shield against this, but strict timing is required for a perfect shield. You can buffer a shield out of the B-throw if you flat-out don't want to take knockback, but this will never be a perfect shield and the shield damage and stun will be greater than your usual Smash Side Special self-damaging fare due to momentum powering up the scythe.

It is possible for Hidan to end up over a circle after being pulled along, but this is very unlikely given he'll never really get pulled too far and the sheer unrealistic precision required for it. This can work if he was already over a circle next to an edge (ledge or platform) or got pulled towards one. In that case, the rebounding scythe becomes absolutely deadly as the victim will take the 12% Hidan does and the knockback from this can actually KO before 95%. That's bloody good! Note that this won't work just by standing over a Jashin circle if there was space behind you, as Hidan will get pulled away from the circle. This can actually reward Hidan however if he got off his circle to land the grab ahead of him, as with enough precision he'll get pulled back in to go for gold.

Even non-powershielding becomes good from this as foes will take the same huge shield damage Hidan does and be in a position to take further shield damage, though you obviously can't break their shield from this and you have to be careful about getting your own shield broken. Actually, it's largely an inferior option to the extra knockback, unless you've got mad skills in a Team Match or FFA and can damage the shields of multiple enemies, possibly even breaking some.

If foes were launched less than 2 platforms from the throw or you held the input when the cord reaches its max length, the foe will immediately have their knockback halted for 5% as the throw ends there without Hidan being pulled along. The scythe now remains lodged in the victim as a sort of "tether", under similar conditions to the Smash Side Special in that Hidan cannot use scythe-based attacks. Using that move again will pull the scythe back in towards Hidan under similar conditions to the move and only takes 38 frames to start-up, dealing its sweetspot knockback of 10% to impaled victim if struck. If either character moves away from the other while the foe is impaled, they will take 5% and solid hitstun as the scythe rips out of them, the stun of which can open them up for a voodoo attack from afar. The scythe then flies back to damage Hidan per usual, however. Launching foes with the scythe lodged in them results in it being ripped out with more than 2 platforms of knockback for the usual high damage and scythe being shot back towards Hidan, who is in more of a position to exploit this with his circles - but actually launching the foe this far without access to scythe attacks is very difficult and predictable.

U-throw -Blood Rain
Hidan swings the foe overhead and rapidly twirls his scythe to grind them up, laughing manically or shouting "Offer your blood to Jashin!" as he does. This cuts up victims for 7 hits of 1% before they're spiked and bounced back up for very low untechable knockback on a high angle (the spike puts foes into an untechable spinning animation), scaling decently to KO at 185%. End lag is low, and this throw creates a literal bloodbath over Hidan that forms a pool beneath him that lasts for 10 seconds, letting him create a Jashin circle in the least amount of time possible! Unfortunately, you probably won't get the space necessary to follow-up on this at lower percentages, given the abysmal base knockback and the fact that this throw is very easy to DI against (long animation and knockback not being purely vertical), allowing foes to stay closer to Hidan so he doesn't get the set-up. As such, he will have to earn this at lower percents before the scaling makes it totally safe for him. He can also just take advantage of the low knockback to start combos with moves like his U-Smash.

Even if Hidan had a circle elsewhere, this throw gives him a way to easily reposition it should be need to. If he was already over a circle, the blood won't do him much good and he's generally better off using another throw. If the foe's percentage was low however, he can attempt the voodoo Up Special for an instant KO where it's best effective. Between this and Hidan's circle counter which can react to hasty aerials attacks, foes may want to retreat instead and use their second jump, which can make aerial assaults on them easier if you dare not exploit the circle or better time slower moves like the Smash Side Special for their landing.

If the foe was impaled, Hidan will swing his scythe overhead by the cord as his victim is spun around all the while. This only deals 3% due to the victim not actually being cut, but the extra time you got for pummels plus the impalement hitbox still add up to deal at least 8%. This launches the foe from the overhead scythe diagonally behind Hidan, and because the knockback wasn't softened by a spike it now starts out high and will KO considerably earlier (around 148%). It also comes with a copious amount of blood from the wound caused by the impalement, which covers a generous 1.5 platforms but only lasts 5 seconds due to being more thinly spread.

D-throw - When Your Curse Someone, You Dig Their Grave
Hidan swings his scythe through the foe's legs to trip them for 3%, only to swing it around him in a circle twice to cut them for 2 more hits of 2%. This knocks victims into prone and sends them sliding short distance from Hidan, enough so that if they rolled towards him they would end up in front of him. This will not knock opponents offstage.

Hidan is decently effective at tech-chasing with his high air speed, Side Special and even using the Up Special to slide along the ground, though the latter will miss opponents who remain downed. Rolling towards Hidan is pretty suicidal if he hasn't already committed to a pursuit or other option, and rolling away from him gives him a bit of space for set-ups. Yet the tech chase is only truly deadly out of a voodoo set-up, as Hidan can now hit foes anywhere from their vulnerable frames with a well-timed voodoo Up Special. Foes now have to be very careful when they time their get-up, because if they rise ASAP Hidan will pretty much nail them if he went for the voodoo right away. And even if they do dodge the voodoo, Hidan can still hit them with the slide if they roll away from him get up in place, ironically making rolling towards him the only safe option - or to intercept him with a get-up attack, in which case both characters' hitboxes will typically hit each other at the same time.

If foes had the scythe lodged in them, Hidan will simply tear it out of them for his throw. This deals a strangely low 1%, essentially 1% less than normal given the initial impalement hitbox for 6%, but it comes out much faster than the regular variant, giving foes less time to react and comprehend Hidan's follow-up action.


Wrath of Jashin

A Jashin symbol magically appears beneath Hidan as a bloody mist rises above him to form a skull-shaped apparition, saying "WELL DONE, MY CHILD. LET US BECOME ONE AND SLAUGHTER THESE HERETICS." Oh no, it's Jashin, the god of evil himself! Hidan is beyond enlightened, even when the mist forms a makeshift scythe to decapitate him, and he shouts "See, I told you Jashin was real, and now he's going to kill you all!". His erstwhile body crumples, and an unrealistically massive amount of blood gushes from his neck to form a gargantuan bloody reaper over it, the true edgy form of Jashin. This is similar to the Susanoo that is employed by the emo Uchiha in the main series, a giant chakra entity that surrounds its user and is totally not a Stand from another popular, yet vastly superior Shonen Jump series.

Jashin is absolutely massive; his head alone is 2.8 platforms wide, positioned directly over Hidan's corpse. His body is so tall and huge that it will never be fully visible on small to medium-sized stages, requiring Hidan to activate his Final Smash from high up on the largest stages for this, where it will be revealed that Jashin constantly remains afloat. No wonder nobody makes Naruto sets - their summons are too darn big! Jashin will almost always clip through the stage; he is not solid due to being made of blood, but opponents inside of him are subject to a slight low gravity setting because of this and suffocate for 1.1% per second, because blood is thicker than water and also I imagine that Jashin's blood would be poisonous to the pure-hearted. Hidan's head remains rested squarely on Jashin's shoulders on the side closest to the screen, where he does nothing now that he's just a head except taunt and offer glib commentary like he was born to.

Jashin acts like something of a boss who has a whopping 250HP, any projectile fired from inside of him continuing to pass through unimpeded and regaining a hitbox on him after travelling 2 platforms - essentially dealing double damage to him. Hitting Hidan's corpse also deals 1.5x as much damage to Jashin. You can choose how much of Jashin's hurtbox is exposed based on where you activated the Final Smash, even using it offstage and/or close to the abyss to minimise or even prevent the foe from reaching your god, but that's not necessarily the best idea. There is a platform of solidified blood 2 Ganons below Hidan's corpse that's 1.5x wider than a regular platform, constantly undulating 1 platform height vertically, but even if you use the Final Smash low enough to the abyss that foes can't use it, Jashin's duration is specifically based on how high his head was positioned. He lasts for 45 seconds if placed near the top of the screen and only 7 seconds if placed near the bottom, longer times exposing more of his hurtbox but essentially forcing foes to deplete his stamina. This max time can be achieved by using the Up Special from the ground, then your second jump and then Up Special once more, preferably from a platform, as Hidan can actually use this Final Smash while in helpless (he doesn't actually do anything himself for it, after all!). Finally, Hidan suffers some end lag out of the Final Smash, and if it ends too close to the abyss he will straight-up die. A fitting punishment for a coward who'd dare shirk away from concealing Jashin's full glory!


JASHIN NEUTRAL SPECIAL ~ REANIMATION
Jashin booms "GO AND DRINK THEIR BLOOD, MY MINIONS." or has Hidan shout "Got some Narutards for you to play with!". This takes 40 frames and has no effect unless a part of Jashin was level to the stage's ground, in which case blood will bubble from a random part of the stage and a reanimated Narutard will rise from it immediately upon this move's use, complete with the eerie black eyes and a paper-like body. This is similar to the Reanimation Jutsu that Hidan was spared from during that Fourth Great Ninja War, except these ninjas appear slightly more decomposed and are constantly dripping blood from slits on their fingertips and exposed toes (Narutards love to wear sandals) as well as their eyes and mouth, representing their loyalty to Jashin.

A cut above that silly nerd with the zombie army, Jashin has the power to summon ALL of the most prominent Narutards in the Naruto universe! (except Hidan, of course) If you're wondering why Jashin can do this, it's because the Naruto universe once existed in the Katverse, scary I know, but then the Jashin cultists were able to summon Jashin and he killed virtually every single ninja. That's because he has the ability to completely absorb the chakra of living beings close-by and is completely immune to all forms of jutsus, on account of being a manifestation of hate (the Naruto world has a lot of hate and haters in it) and all that smoke that goes up in the air when those silly little jutsus are used. Kind of like global warming. This backstory makes perfect sense, because it's almost certain that this will be the last Naruto moveset ever on account of the last one being posted in MYM10, and being so popular if anyone had any interest in making sets for the franchise they would have done so in the last 11 contests.

If somebody did prove me wrong by making a Naruto set afterwards, then we could just say that they were a survivor of the Jashin Massacre or came from a parallel universe or something.

Also, because we've just established that Jashin can absorb chakra, his mere presence deals an extra 1% per second to any ninja character who can jutsus (which require chakra), and if their percentage reaches 200% this way they'll die from having all their chakra sucked away. This might sound unfair, but it's not because it will almost never come into play unless you're playing as a Narutard. It can also affect ninjas from other franchises like Agiri, Shinobu and Dororo to toot my own horn, but not Izuna because she uses talismans and not jutsus. It also doesn't affect Greninja or Shiek, meaning it doesn't affect any character in Smash Bros. But it would affect Kat and Ana if they were playable.

This move summons 2-4 Narutards based on how high Jashin's head was. It takes 70 frames for them to rise from the ground, and they can destroyed with any attack during that time. If not destroyed, your Narutards will have a measly 25HP, a weak Lv3 AI and 20 less weight units than stated in their sets.

Your first zombie wave has a chance of summoning the following characters:
  • That emo Sasuke, who uses his MYM1 moveset. Likes to spam his grab game and often uses his D-throw, which has zero damage and zero lag. He will immediately try to grab you again after this, but given the one second cooldown on grabs in Smash 4 this will do nothing and leave him open. The set has no Up Special and will instead copy an opponent's, but it would pretty tacky if he could copy any MYM character's recovery. Instead, he'll always copy Hidan's recovery, but he'll automatically kill himself in the process due to not being immortal.
  • MYM1 Naruto! His Standards, Smashes and Aerials deal no damage however, because they do not have any damage or knockback or hitstun values listed for them. Throughs deal no damage. Sexy Jutsu (DSpec) does not stun opponents, because not every character in MYM would be fazed from seeing a naked Narutard, but this instead stuns all the other Narutards looking in Naruto's direction as they react comedically, leaving them open to attack. This makes Naruto hugely detrimental to summon, which is a shame because not only does he like to spam his DSpec as a taunt but he also has by far the highest chance of being summoned due to being the main character of his series. His chances of being summoned drop when Hidan's percentage is higher and when he's a a stock or two behind his opponent.
  • Sakura Haruno AKA Amy Rose, who does in fact use the Amy Rose moveset from MYM5. The set is actually quite normal, but to make up for that Amy is quite the wimp and will greatly hesitate to attack opponents.
  • Kakashi, who uses his MYM4 moveset.
  • Naruto's wife Hinata, who uses her MYM2 moveset. Like Naruto, none of the moves other than the throws have hitboxes, as they only have an animation listed for them and no damage output - perfectly fitting for such a timid Narutard. Her Neutral Special stuns opponents for ten seconds, which is absolutely ridiculous so here it doesn't have a hitbox against opponents and will only stun other Narutards, but Hinata will never use this when Naruto is in range. None of her other Specials have hitboxes, actually making her an even bigger liability than Naruto. But for some reason, she will never be summoned at the same time as Naruto because I guess Hidan is a sadist trying to keep 2 lovers apart.
  • Rock Lee, who uses garbage tier Brawl's Captain Falcon moveset.
  • Gaara, who uses his MYM4 set that was in HR's Playing God Story Mode for some reason.
  • Shikamaru, the highest placing Naruto set at 27th but that doesn't matter because all the other cooler Shonens like DBZ, One Piece, JoJo, Yu-Gi-Oh! and Kinnikuman got higher placings. He doesn't go after opponents, because he's lazy and is totally a drag. Also because his moveset is from MYM7 it doesn't have many hitboxes (MYM7 was the un-smash era, remember!), making him terrible in combat. Instead, he'll use his NSpec on another Narutard with a reasonable number of hitboxes on them and possess them to fight more intelligently. Too bad this can be undone by hitting Shikamaru was well as the possessed Narutard, and Shikamaru will perform the same action as his ally so there's plenty of opportunities for him to screw himself over.
  • Choji, who uses Jigglypuff's moveset without the extra jumps or an Up Special.
  • Kiba and Akamaru, who use their MYM4 moveset and are pretty generic.
  • Any of those other kiddy Narutards like Neji or Tenten.
Hidan cannot use this move again until at least one of the Narutards have been killed, in which case he will summon zombies to replace the fallen plus one extra. You might not think the move is worth using given how horribly inept the Narutards are, but when used a third time you'll get a second wave of different characters! These characters are a bit more competent on account of being Hidan's former Akatsuki buddies, having a Lv5 AI and 47HP but still with 20 less weight units. They take 36 frames to spawn and cannot be destroyed early. You can only have 1-3 of these guys out, however.
  • Itachi Uchia, one of the most popular Narutards who for some reason is ranked 20th out of all anime characters on My Anime List. He uses his MYM6 moveset and is by far the most common Akatsuki member to be summoned for obvious reasons. His Down Special is banned because it would be OOC for most MYM characters to be annoyed by fake crows, so instead he steals the Down Special of another random Narutard because he has the Sharingan like his little emo brother. This can include Naruto's horribly detrimental DSpec or Hinata's which has no hitbox, both common cases because an opponent will likely keep either of them alive to cripple the rest of Hidan's zombies. Itachi can also steal Hidan's Down Special to extremely OOC effect, but it has no effect because he cannot draw blood from his victims. If Sasuke was out, he will attempt to kill Itachi with a more aggressive AI than usual, and both characters will attempt to kill each other. This is unlikely to occur however given how easily Sasuke can kill himself.
  • Kisame, who uses his MYM7 moveset. This is pretty generic, but that's not too bad given all the other garbage you've had. The only difference here is that opponents cannot drown from the Down Special.
  • Orochimaru, who uses MYM6 Voldermort's set because I can't think of any other creepy MYM characters with an affinity for snakes. Also because Orochimaru is compared to a cross between Voldermort and Michael Jackson. If Sasuke was around, he will attempt to use his SSpec to control him and make him more competent, despite the fact that Orochimaru does not have mind controlling skills as his canon powerset. Maybe he found Voldermort's wand?
  • Deidara, who uses Demoman's moveset from MYM13 because he is not worthy of having a more balanced and competent explosive moveset like Bomb King.
  • Sasori, who uses Stromboli's moveset because he is a puppeteer.
  • Konan, a paper woman who fittingly fights using Paper Man's moveset.
  • Hidan's edgy boss Pain, who uses Gangreen Gang's moveset because he fights with multiple bodies in his series.
  • Some other Narutards like Jiraiya and Tsunade of course, who fight using Mii Brawler's moveset. There are a bunch of other "powerful" Narutards like the Kages and Hidan's edgy partner Kazaku, but this Final Smash is long enough as is so I'm just gonna skip them.

By using this move a 5th time, you'll a third and final wave consisting of one character, but they have a LV7 AI and 70HP and 2+ weight units due to being among the canonically most powerful villains in the series. They appear instantly when summoned.
  • The first use of this move summons Marada Uchiha, another edgy Uchiha who is really popular and OP. He spawns in his final Sage form, so opponents can have the glory of defeating him at his best. His set is taken from Don Thousand, pretty scary considering he's a 3v1 boss, with Numeronious instead being replaced with Ten Tails and being severely nerfed - only having 250HP instead of 1500HP for one. The villainous Narutards can and will contribute to the gate's destruction, and so can Jashin as well as opponents of course. It's not the end of the world if Ten Tails is summoned, because that's supposed to be Jashin's job, but he can still be quite a pain for opponents as they now essentially have to fight 2 bosses at once and Ten Tails will actually stick around after the Final Smash ends if not killed before then.
  • When Madara is killed, this move can be used one more time and will summon the series' main antagonist Kaguya Otsuki, not to be mistaken for the Touhou character that got a set in MYM15. This doesn't use that set though, but rather it uses Flying Dutchman's boss set because Kaguya's main powerset involves Flys. And of course it would be a terrible shame if Kaguya was outclassed by the above villain given she was manipulating him all along. Her weight is 130 units though because being a 30/10 would practically give her super armour. All traps and static hitboxes are balanced to only deal knockback and hitstun when first spawned.
If Kaguya is killed, you cannot summon any more Narutards as now the main series just ended. The Final Smash is likely to end at this time however, and even if it doesn't Jashin still has a few other moves it can use.

Actually, you can use this move within the last few seconds when it's depleted to summon Evil Naruto - anyone remember him? He likes to spam his incredibly overpowered D-air and will frequently try to grab you, but can end up hilariously grabbing another zombie instead - and maybe even kill them for you. On that note, Narutards will continue to linger after the Final Smash, but their AIs are dropped by 3 levels and they take 2% every second as their bodies start to break down without Jashin's support.

JASHIN SIDE SPECIAL ~ BLOOD BEAM
Jashin tilts back and charges bloody energy in his mouth, before firing off a laser of similar size to the ones on Spear Pillar and sweeping it from the background all the way into the foreground. This comes out very slow, but deals 35% that KOs at 95% in what is Jashin's strongest attack. You'll likely only hit with this through a hard read or if the zombies are distracting the opponent, as it takes 150 frames to come out.

JASHIN UP SPECIAL ~ PUNISHMENT FROM ABOVE
Jashin raises a finger that glows black and presumably creates a strong gravitational pull towards space, because moments later a Bowser-sized meteor drops down on every opponent and zombie in the match. The strongest Narutards like Madara are able to summon meteors, so it's only natural that Jashin - the real villain of the series - is able to do this as well. These meteors deal 25%, which is huge for an attack that can be repeated, but it has a lot of lag of course and the knockback isn't that great - only KO'ing at 170%. Foes can get out of the meteors' way as they drop at Falcon's dashing speed, but they'll home in on zombies - only failing to hit if foes knocked them out of the way or the stage got in the way - and serve to instantly kill the weakest tiers in one hit as well as act as extra hitboxes for your opponents. The higher tier zombies can take more than one hit, but you get more zombies and hitboxes out of the lower tiers. If the meteor descends on Madara or Kaguya while they were not being attacked, they'll hold the meteor over their heads as it acts as a crate-sized heavy item that explodes on contact with a surface, creating a 1.2x platform-sized hitbox that deals 30% that KOs at 90%. Both characters are open to attack all the while, and the meteor will be destroyed if they were attacked while holding it.

JASHIN DOWN SPECIAL ~ BLOOD CONTROL
Jashin opens his mouth to release a Small Ball-sized blood mist that you can control freely like the cursor on the select screen until you let go of B. This deals 1% every 4 frames it overlaps an opponent as they're infected by the evils and hate of the Naruto universe, but they can easily escape from it. Rather, if you place the mist over one of your zombies you can control it directly and often more competently than their AI would allow. The mist then remains around the zombie and damages opponents literally touching or overlapping it, as well as healing them 2% every second. You can't perform Jashin Specials while controlling the zombie unless it had a set of useless Specials, in which case it's going to get killed by them anyway most of the time, and you lose control when the zombie is killed or the Final Smash ends. You can release control of the zombie by making it perform a taunt - this can't be done in midair - which has the downside of leaving it open to attack as it taunts.


BOSS SET
By beating Classic on intense difficulty with Hidan, you can unlock an edgy form that's suited to a more challenging 1v1 or straight-up 3v1. Here, Jashin takes a more direct presence as a bloody aura around Hidan and a black skull that hovers over his head. Once the reaper form is going, Jashin will melt over Hidan like a second skin, turning his entire body a glowing black and red like that Narutard's final form with the big orange fox.
  • Blood constantly drips from Jashin, so if Hidan stands in place for 5 seconds his god will automatically form a circle for him.
  • Jashin uses the blood his follower sheds from opponents to automatically create a circle beneath him or when he lands.
  • Down Special always activates the counter and creates a circle beneath Hidan if it's triggered. Voodoo from this will still take effect in midair so long as there was at least one circle onstage.
  • Hidan can have an infinite number of Jashin circles out, but they cannot stack and they only last for 3 seconds if he's not standing on them.
  • Any temporary self-damage Hidan takes will instead heal him. This makes his more ecstatic NSpec torture much safer as he can potentially drop his percentage back down to 0% this way, but it makes him susceptible to combos that can go into finishers if his percentage spiked.
  • After finishing a self-harm NSpec session, a ball of blood will form from Hidan's wound and is fired forwards as a projectile with speed, size and power based on how much "self-damage" the man took. At the minimum 4%, it's fairly slow and small and only deals a minimal amount of flinching, but it can give Hidan a frame advantage against opponents from afar as it travels 2 platforms. At 11%, the ball becomes medium-sized, decently fast and covers 2.5 platforms while being able to KO at 160%. At max damage, this deals 30% in a projectile that's slightly bigger than Bowser and has seemingly infinite range, KO'ing at 95% on contact. Blood balls pierce, which is relevant in a 3v1 setting, and any damage an opponent suffers will contribute to the power of a projectile. Note that a slight delay occurs when firing the projectile and it comes out 2/5ths of the way into Hidan's end lag, giving opponents more forewarning the more ecstatic his mutilation in exchange for speeding up the "charge". Being able to create a projectile helps to cover Hidan's end lag a little, encourages him to actually end the attack instead of letting opponents do it for him and furthermore he can do this without a circle.
  • All of Hidan's scythe extension attacks go 0.5 platforms farther than normal.
  • Hidan's melee attacks deal an extra 1% overall.
 

Katapultar

Smash Lord
Joined
Nov 24, 2008
Messages
1,284
Location
Australia
Belated happy Froy Day!


AROMAGE ROSEMARY


Size: 5---Weight: 3---Speed: 2---Jump: 5---Traction: 10

Rosemary is a plant girl who lives in a beautiful flowery cottage with 3 other Aromages who study an aroma-based magic. Embodying the energy, wisdom and love of the rosemary flower, she's an eighteen year old girl (she has 1800 ATK!) known for her optimism and motherliness, being like something of a mother to the 2 younger Aromages Cananga and Jasmine. While she spends much of her time indoors studying, she's surprisingly adept and knowledgeable in combat, specialising in nullifying her opponents' abilities and skillfully controlling the positioning to strike them at their weakest. She can even defeat opponents much stronger than her this way!

Rosemary dreams of ending conflict and making the world a happier, more flowery place through the power of aroma magic. To this end she seeks the Aromaseraphy Angelica so she can ascend to the divine status of Aromaseraphy, as she recently discovered that she's the only one of the Aromages with the potential to become a seraph. She's rather clueless about outside life however, as being raised mostly in a sheltered and secluded cottage doesn't do much to help her street smarts. She's plenty strong however, thanks to all that moving around they did before finding the cottage and being taught by a cool big brother figure with 2400 ATK to his name. Will this be enough to get her through all the HMAs of MYM20?


Stats
Rosemary is a slight glass cannon thanks to her good ATK but low DEF stats. Her height is average as expected of a teenage girl. She's not fast, as Aromage decks are a bit slow and feminine girls aren't really known for their speed, but she's floaty for better or worse and her traction and friction are both high so she has good control over her own mobility. Overall her stats aren't good, but she packs some power and doesn't need to rush at opponents anyway - she has plenty of tools to makes sure they be where she wants them to be, as her battle position changing card effect would imply.

Aromatherapy
If Rosemary's percentage was lower than her opponent(s), the incense on her staff will flare up and she'll receive a buff! Her Specials and fully charged Smashes will ignore powershielding, and all her attacks gain transcendent priority. The latter is extremely useful to Rosemary; her grounded attacks typically hit multiple times and can be beaten out easily, but they compensate with great reach and power. This gives Rosemary an incentive to keep her percentage low and focus on damage control rather than position advantages. The former is especially important in 1v1s, as the buff will go away when the foe respawns at 0%. This also works in reverse however, allowing her to make a comeback when she's just been KO'ed.

Whenever Rosemary is healed, a blue, Bowser-sized aroma will form and linger in place. The aroma is a one-use trap that delivers 7 frames of hitstun to any opponent who touches it. It will ignore shields, rolls (including the start-up frames), intangibility/invincibility, and any opponent being dragged by an attack (be it a multi-hitting move or command grab/throw) or who are launched from the cloud by such a move. The aroma lingers for 4 seconds before drifting to the top of the screen at Dedede's dashing speed. Rosemary cannot produce another aroma for 7.5 seconds or until the previous aroma has disappeared, but will give off a faint aroma from her staff when she's ready.

The aroma will generally form around Rosemary, and will stun her if she remains inside of it for one second. But she'll only get stunned for 3 frames! The aroma will instantly affect Rosemary if she re-enters it, but this is actually an amazing too for cancelling moves and creating combos! It also cancels the momentum of any character knocked through it, which can be used for combos, to save herself or even a teammate. Opponents can use it too though, and like Rosemary's in-game effect it activates automatically when she heals and can end up being wasted - or backfiring on her - in a bad situation.


SPECIALS

Neutral Special ~ Aroma Burst
Rosemary projects a tall and transcendent crescent that quickly covers 3 platforms. This deals 15-11% (more damage close-up) and high shield damage, but no hitstun and only slight shield stun. It's easily punishable, even when shielded, but low lag (FAF 42 frames) combined with height and speed make for an extremely damaging projectile when spammed - Rosemary's go-to move for taking the percentage lead.

Upon hitting something, the crescent bursts into an aroma cloud that heals opponents 1% when it first spawns and every 9 frames, Rosemary half as much. It vanishes with 3 seconds or upon healing 16% total, but up to 2 of them can exist. Opponents can use these clouds to alleviate the damage or even get free healing if they shielded, bypassing the high shield damage with a perfect shield - giving Rosemary incentive to get her healthy buff or not be too predictable with this move for the sake of damage-racking. This is especially the case since the crescents' speed and height make them difficult to manoeuvre around. Opponents who stay inside the clouds may deny themselves the opportunity to punish Rosemary for her lag, but this largely depends on the distance between them and how fast they are. At best, the punish will by outclassed by the crescent damage-wise, while at worst it can lead into a combo opportunity or something similar. Hence the importance of understanding your opponents like a real sage!

If a crescent connects against a target overlapping 2 healing aromas, it will burst into an aromatic blast that delivers powerful knockback that KOs at 92-126%. Not so safe after all! Stale-move negation will often weaken the knockback due to needing to hit with the move twice in quick succession, but this won't occur if you hit a shield, making it great for "punishing" attempts by a foe to avoid damage. The threat of the huge knockback can also force foes to back away from overlapping clouds, turning them into something of a very short-lived "trap".

Shielding against the crescents can prove risky, as they can easily break a shield with just 3 or even 2 hits. Worse yet, a shield break allows Rosemary an absurd damage racking opportunity with this move - jumping up to hit an opponent mid-bounce, then hitting them 2 times to create overlapping clouds followed by one last hit to knock them away. The first 3 crescents can deal over 35%, on account of staling and damage mitigation by the clouds, and while a KO crescent will be fairly staled - even more so if crescents struck before the shield break - Rosemary can just a fresh KO move instead, assuming the foe is still dizzied. The clouds' healing can help to keep foes dizzied for longer, ironically, and best of all Rosemary can profit from this healing all the while! Just make sure her stun aroma doesn't activate too close to the foe, or else it'll be wasted and you'll have helped the foe recover from their dizziness. Might want to use up the aroma before attempting the shield break to maximise the benefits from it.

Rosemary can go after her clouds for healing, but that's easier said than done when opponents are factored in. Creating the cloud close-up offers the best healing opportunities, but is extremely punishable and grants foes that golden opportunity. On the other hand, creating the cloud from a distance greatly limits the healing Rosemary can get, on account of her slow movement and foes being able to wall her off and even punish if she gets too desperate. It's not all bad though; the cloud discourages foes from backing away to allow Rosemary the opportunity to heal herself - especially closer-up - generally forcing them to keep her away from it for the short time it lingers. This supplements Rosemary's melee game, and her general ability to manipulate the positioning of her opponents.

The stun aroma makes touching clouds extra rewarding for Rosemary. Opponents occupying the cloud as Rosemary enters will be stunned - possibly opened up into a free attack - if they didn't shield or exit, forcing a reaction from them as Rosemary approaches either way. The stun can also be used to mitigate the punishment from hitting with the crescent close-up, disrupting foes suddenly and giving them exactly 9 frames advantage over her. If you caught the foe off-guard from a certain commitment however, they might not react in time! And even if foes don't get stunned, Rosemary can just stun herself to cancel lag on her attacks, making her potentially dangerous close-up while the cloud exists.

Side Special ~ Humid Winds
Rosemary sweeps her hand to conjure a strong aromatic wind that deals 15% to enemies close-by, KOíng at 130% or much earlier near a blast zone. This deals low shield damage, but decent stun and a considerable amount of pushback. This comes out on frame 2, one of Rosemary's fastest attacks and most reliable for staving off pressure. It also reflects projectiles with a 1.75x multiplier, ridiculously powerful for something so fast and great for countering camping attempts within a healing cloud. Grounded opponents within a platform of Rosemary will be pulled towards her, directly beneath her if she was above them (or vice-versa), and while this move has very low end lag she can still get punished if she carelessly pulls in an attacking foe - or even just mis-spaces this short-ranged attack.

Though powerful, using this spell costs Rosemary 10% - more crippling than it sounds given her reliance on health and the suction effect being potentially punishable. This move cannot be spammed either, because once cast the wind becomes a cool, pleasant breeze that surrounds Rosemary and provides her with the following effects:
  • Enhances her ground speed to a 7.5 (1.8) and air speed to a 9.5 (1.265).
  • Falling speed increases to a 7 (1.7), and increasing her jumping speed to match. Her second jump covers notably more area.
  • By holding the jump button at the apex of a jump, Rosemary will 'hover' for a very short time before gravity kicks in. This can help cancel out the effects of her higher falling speed to some degree.
  • Increases the speed and distance of her rolls.
  • Some moves receive wind-based effects.
  • Makes crescents even faster - travelling across the screen almost instantly - and potentially messing up the timing for a foe's perfect shield. Foes hit by a crescent up-close will be blown back a short distance, typically enough to keep Rosemary safe from being hit by moves lacking reach.
  • If Rosemary perfect shields an attack, her healing aroma will be blown 1.25 platforms towards her.
  • Healed 5% every 4 seconds if her % wasn't lower than her opponents'. This can prove extra deadly when combined with stun aroma, but it can also waste it. Especially good when your foes are on a fresh stock - like if they got KOéd by this move!
The wind surrounds Rosemary until she is struck twice. This as excellent bait given the self-damage and healing potential of the buff, and needing to be struck multiple times can bait combos or grabs, as a pummel and throw will count as two hits. While opponents could just launch Rosemary, the winds greatly enhance her poor recovery, useful at higher percents where she's less likely to be comboed, and all that time uninterrupted might help some healing kick in. This is important to achieve, because Rosemary does not want to suffer 10% from buffing herself offstage just to boost her recovery.

Using this move while buffed will have Rosemary dispel the winds over 16 frames. This is generally a waste, given the winds can be essential to Rosemary's survival at higher percents and disadvantaged states, but the attack itself is so good that you could be forgiven for wanting to spam it - or to store it as a deterrent against projectile-users. The two states cannot be switched between liberally, unless Rosemary is feeling downright reckless or her percentage is absurdly high anyway, though she still has to be careful about leaving herself open when dispelling a whiffed wind.

Up Special ~ Rising Aroma
A strong wind forms beneath Rosemary and propels her! This goes even farther than Sonic's spring and can be steered at her usual air speed before she enters helpless. The wind also forms a platform-wide and Wario tall wind hitbox beneath Rosemary that deals 14% and very strong upwards knockback that KOs at 154%. If HW was active however, you'll instead deal 17% and massive upwards knockback that KOs at 145%. Sadly, this knockback is actually detrimental to Rosemary, as it brings opponents up with her where they can easily combo or even get a star KO. To this end, you'll need to anticipate your opponent's movement, try to hit their shield for some good damage, not land the hitbox at all or better yet actually KO with it.

Everything changes with stun aroma however, as running into this will cancel the recovery and allow Rosemary to act! This allows Rosemary to exploit stun aroma high off the ground, and can be used to pursue opponents near the top blast zone. Not to mention it opens up comboing opportunities with the wind hitbox as Rosemary will almost certainly reach her aroma before her opponent. If opponents are flying fast enough to reach the aroma before Rosemary, it means the hitbox could have KO'ed them and that using a different KO move in the situation would be more optimal.

Sadly, the airborne version only goes half as far as the grounded version, and gradually gets a bit slower during the ascent. It does have better drifting capabilities, however. The hitbox is only 2/5ths as wide too, but has a cone shape that reaches 1.1 Ganons directly beneath Rosemary, acting as a spike if it connects right at her feet. Otherwise the hitbox deals purely upwards knockback any lower than that or diagonal knockback, weakened to 11.5-14% that KOs at 165-152% - but still able to KO early near the top of the screen. While the recovery isn't lacklustre distance-wise, highly necessary when Rosemary doesn't have her HWs active, it's still a bad recovery for its complete lack of protection during the ascent. This is a big reason why Rosemary relies on her healing and the buffs from Humid Winds to survive, as she'll be hard-pressed to recover from long distances with her poor base air speed. HW plays an important role in boosting her midair jump and enhancing her air speed for drifting during the recovery and helpless state, so it's important to keep it active.

This move can be charged, but all it does is generically pull aromas towards or away from her if the control stick was smashed. Aromas are pulled in/pushed back at a dash value of 1.65 (Pit) if they were drawn in horizontally, 1.25 (Villager) if they came from above or 2.3 (Captain Falcon) if they came from below, or between these appropriate values if diagonally. HWs increases any given value by a decent 0.35-0.28. You can hold a direction while charging to influence aromas within a platform of Rosemary to position themselves adjacent to her from that direction, otherwise attempting to overlap with her if no direction was held. If the control stick was smashed and held, aromas will move to that adjacent point where Rosemary first made the command, really only relevant in midair where it can be used to position aromas higher above her. These inputs must be decided at the start of the move and cannot be changed midway.

Aromas will peculiarly have their timers paused when moved. Stun aromas will not disappear upon touching a fighter, but only once this way for any specific aroma before it disappears as usual. This includes Rosemary herself and can be used to cancel the charge. Rosemary can charge this move for exactly one second, after which she suffers 10 frames of end lag. If Rosemary doesn't charge all the way however, she'll perform the recovery as usual and won't really get to exploit the new positions of her aromas. You could even use this for something as simple as keeping healing aroma active for longer to milk all its healing, and while you're entirely defenceless all the while escaping with your grounded recovery is not really optimal for how open it leaves Rosemary.

If Rosemary was struck while charging, a wind hitbox 1 platform around Rosemary will push opponents away. This isn't very strong by default, but is more profound when triggered close-up and between frames 5-20 and frames 50-60 of the charging. It's very weak when triggered in midair, but noticeable on the ground and very powerful if the "sweetspot" was triggered on grounded opponents or those above Rosemary. What this does it act as something of a "counter" to deter combos against successful hits. What's more, it can be used offensively to some degree as stun aroma will activate it. It can be countered through grabs, unless Rosemary was grabbed during the sweetspot frames in which case the wind will automatically push opponents away for a grab release. This doesn't work against command grabs that can't be escaped/mashed out of like Bowser or Ganon's Side Specials, however.

Down Special ~ Aroma Garden
Rosemary taps the floor with her staff to bloom flowers beneath her within 15 frames. Used in midair, she'll circle with her staff gently to bloom flowers where she last stood within 19 frames, and if HW was active she'll hang the entire time. You can tap the input to plant the flowers at a different location. Holding B, Rosemary will wave her staff over the flowers or trace a circle over her head to make the flowers glow and produce a white aroma over a platform tall and wide area. This takes 50 frames, and heals Rosemary and her teammates 5% and increases the damage output on their moves by 1.2% for the next 5 seconds when exposed to it. This is Rosemary's only means of healing herself and obtaining stun aroma without hitting an opponent, other than using Humid Winds. Rosemary can only heal herself this way once every 10 seconds.

If Rosemary was struck on the flowers by any means other than a grab/throw, she'll be healed 10%. This can potentially cancel out or give Rosemary net healing from weaker attacks, but usable stun aroma will be left behind and wasted. Worse yet, opponents will probably be close enough to trigger the aroma, cancelling out the end lag of their attack and likely giving them a unique combo opportunity - one that might even make up for Rosemary's healing! She'll ideally want to have her stun aroma used up to keep this from happening, but it's not something she can get on demand other than using this move, and even then she has to time it right so she doesn't waste the stun aroma. Alternatively, she can charge her Up Special to deter comboing and effectively get free healing when timed right.

The flowers don't disappear over time, but foes can destroy them with low-hitting attacks by dealing them 10%. Once a new set of flowers are sprouted, Rosemary must wait 10 seconds for them to bloom and until then she cannot get any healing out of them. This timer is cut in half while she's standing over the flowers and half again while the Humid Winds are in effect.


STANDARDS

Jab ~ Plant Food Chain
Rosemary pokes her staff as it flares up, which comes out on frame 2 and deals 6% (8% close-up) with slight pushback on top of having solid range - or at least far more than most frame 1-2 Jabs. This is then followed by an upwards swing of the staff that deals 12-13% with decent 50* knockback that KOs at 145% - totally at 18-21%. That's a lot of damage for a Jab, but much like Samus's Jab foes can act before the second hit even if they were struck by the first. A quicker foe can snag Rosemary with a frame 1-3 Jab or similar fast move close-up before that second hit comes out, though she does have a range advantage. But even if foes don't have a fast attack, the second hit is totally punishable and inept against shields.

The first hit is designed to intercept opponents, and can potentially follow into the grab game if foes immediately shield expecting to punish the second hit. A fast close-up attack from the foe can ruin this however as they have a frame advantage over Rosemary, making this attack entirely unsafe close-up against most opponents. Instead, you'll want to hit with the tipper where retaliation is less likely. But on the other hand, getting hit by a Jab while over your Aroma Garden can provide Rosemary with healing that may trump the foe's damage output (unless they have a similar fast and powerful move like Rosemary's Humid Winds!), and they won't benefit as much from ensuing stun aroma.

The second swing has an additional hitbox as the enlarged flame on the staff breaks off into miniature energy balls during the animation, which fan out a very short distance over 4 frames. This will not hit opponents struck by the swing itself. These energy balls all count as one hitbox which deals 5% and minor knockback on a relatively low angle, which doesn't sound that good by itself - except they give Rosemary a frame advantage over struck foes! This won't ever true combo, even with Humid Winds active, but it does put Rosemary in a good position to pressure opponents, especially with lesser knockback. Note that rage weakens this advantage somewhat as foes take more knockback, but if the move was staled this will be alleviated. In any case, the energy balls can be a bit difficult to time, but they work as a nice defensive option to keep opponents at bay if you get it down.

You can hold A when using this move to have Rosemary just use the second hit, which is essentially a slower Jab and arguably more usable than the 2-hit variant. You can also hold A on a successful hit (even against shields) from the second hit to have Rosemary converge all her aromas to where the foe was when struck (to the nearest target if multiple were struck). This affects all aromas within 1.5 platforms of Rosemary and draws them in at Mario's dashing speed (Falcon's with Humid Winds), but stun aromas will ignore foes who took knockback or hitstun all the while. With healing aromas, you can use this as something of an extra reward for landing the second hit (though this can backfire against Rosemary if foes punished it), or use it with stun aroma to keep Rosemary from being punished. This works even if you just hit with the energy balls, in which case the aroma will converge to where the foe was launched to - opening them up for a true combo via stun aroma if they don't move away quickly enough, or gathering all your healing aroma unto them for a deadly NSpec follow-up!

Dash Attack ~ Rosemary Rush
Rosemary charges forth for her dreams! She holds the staff out like a lance as a semicircle of dense aromatic energy covers the staff head during her platform-long trip, dragging opponents for 10 hits of 1.1% and strong mostly-upwards knockback that KOs past 152%. It also deals very high shield damage overall, but only if all the hits connect and that is unlikely given the movement-based nature of the attack. Not only does this move come out deceptively fast for a dash attack, it also has excellent reach and is overall great for exploiting openings - especially when Rosemary has the humid winds to increase her dashing speed.

While powerful, only the semicircular energy is a hitbox, the staff itself a blind spot so wide that Rosemary will straight-up miss all but the widest opponents if they were right in front of her. Adding to this is a fairly long duration on the move, making it straight-up punishable against shields early on as foes can hit Rosemary when the hitbox goes past them - unless she can break their shield or somehow hit as late into the attack as possible where it becomes safe on shield. Rosemary also slides forth a little after her attack

This move is easily beaten out due to its multi-hitting nature, but if Rosemary was healthy it becomes an incredibly powerful approach move - having huge reach and transcendent priority that makes it "win out" against most attacks. It actually works quite well out of the NSpec, by damaging the foe from afar to become healthy and then approaching with this move. While Rosemary's low dashing speed makes the move predictable, HW will fix that problem at the cost of needing more damage on the foe to be healthier than them.

F-tilt ~ Mist Ball
Rosemary flicks lightly to conjure a tiny ball of brightly concentrated aroma that travels 1 platform forwards, starting out moderately fast but quickly slowing down a quarter of the way through. This is treated as a disjointed hitbox rather than a projectile, and drags opponents along for 14 hits of 1% followed by relatively weak knockback. It's good for zoning and shutting out approaches, but is easily beaten out by other attacks and hideously punishable if it misses up-close, quite possible given its small size. The ball is destroyed if beaten out by an attack, but will mysteriously linger if Rosemary is attacked out of the move.

This move can be angled very sharply, up to 60 degrees, and if the ball makes contact with a surface from this it will flare up into a Kirby-sized hitbox that traps opponents for its multiple hits and actually deals some pretty nice shield damage. This can be used as a trap of sorts, and a bit of a way to mix-up the projectile.

If the ball is allowed to travel below Rosemary's height, it will curve upwards and travel on a 45 degree angle for the remainder of its flight - usually taking effect offstage or if Rosemary was standing at the edge of a platform. Angled downwards, the ball will instead curve downwards in an arch arc shape until it reaches the height it was cast from, travelling faster than usual on a shallow arch but slower than usual on a steep arch. The former can hit opponents from 1.5 platforms away, albeit with some good spacing and prediction, while the latter keeps the hitbox closer to Rosemary as well as opponents caught by it.

If HW was active, the ball will travel twice as fast and therefore travel twice as far, as its lifespan is based on time and not distance. This allows Rosemary to better harass opponents from afar and catch them off-guard; the sped-up ball is still substantially slower than crescents.


U-tilt ~ Mystical Wind Typhoon
Raising her hand joyously, Rosemary conjures an aromatic tornado around herself! This starts out at her feet and quickly spirals to the space above her, being a reasonably wide and tall hitbox. The hitbox is strongest at the start, dealing 12% and strong inwards diagonal knockback that KOs at 144%. Hitting midway nets you 9% and decent mostly-upwards inwards knockback (KOs at 200%), which will take effect on airborne opponents, while hitting at the end above Rosemary gets you 6% and juggling knockback. This move has low lag on both ends, and would be quite spammable if it didn't have a slight duration to it.

This attack has numerous uses thanks to its varying hitboxes. For one, it's Rosemary's most reliable keep-away move among her standard attacks, or at least against grounded opponents where the hitbox comes out earliest. The knockback on this also doubles as a "reversal" that can put opponents in a difficult position if they got from the front while she was close to the ledge, a potentially common situation when she's camping with her crescents. On that note, the move is also good at covering an opponent's ledge options (ledge jump, ledge roll and regular get-up), but this requires proper timing and the correct read.

The wind is also highly useful for knocking opponents away from your aroma clouds if they were trying to keep you away from them. Finally, the hitbox is good for punishing rolls, and is a good out-of-shield option to punish whiffs and cross-ups given her high traction. This ties in with Rosemary's bait-and-punish game and her need to play defensive for the sake of preservation.

The sweetspot inflicts a strong amount of shield push that draws opponents in and typically places them on the opposite side of Rosemary. It deals decent shield damage and stun, but can actually still be punished if the opponent had some fast options for attacking from behind - like some U-tilts and D-Smash among other potential inputs. The farther the opponent was to Rosemary prior to being pulled, the closer they'll be to her afterwards and the more likely they can get a punish. If the opponent was right up close to Rosemary however, they'll end up a slight distance behind her and this move becomes practically safe against most shielding opponents.

The sourspot is a decently effective juggler that has good damage output, but is a bit predictable given the move's long duration. Both the mid-spot and sourspot can benefit from staling for comboing purposes, but this also weakens the hitbox on the sweetspot; not only weakening its KO potential, but also worsening the shield push and shield stun to make Rosemary more punishable, so you have to be careful.

If HW was active, the tornado will rise to the top almost instantly and linger there for the move's standard duration, making it easier to catch foes and thereby juggle them.

By holding A while HW was active, aromas very close to Rosemary will be drawn in towards her. This serves the basic purpose of cancelling the first part of the hitbox to make Rosemary less punishable via stun aroma, which will not take effect until the pull ends.

D-tilt ~ Rafflesian Repellent
Rosemary sweeps her staff along the ground and produces a watery trail of energy as she does. This deals 13% and respectable knockback on a high angle, but slightly towards Rosemary if she hit with the tipper. Although the damage output is very high for a tilt, it's deceptively bad at KO'ing with its shallow scaling and is more designed to follow into combos. Follow-ups are relatively easier to pull off with no rage, whereas having higher or max rage is actually something of a detriment to this aspect, even though it does allow Rosemary a breather in a situation where she would need it. This gives Rosemary yet another incentive to stay healthy!

This move deals decent shield damage, but very little stun or push and is unsafe on shields except at max range. Having solid range and being one of Rosemary's faster standards, this is a reaction you can expect from opponents if she gets predictable with the move. On the other hand, the move has a very low hitbox due to how thin Rosemary's staff is, and as such it can shield poke like most D-tilts - if more effectively due to the thinner hitbox, due to shield poking not taking effect if the hitbox touches the shield. This works well with the high shield damage from Rosemary's NSpec, of which can force foes to be wary of this move when they try to shield close-up - or even catch them off-guard if they forgot about their weakened shield, or underestimated how little shield damage is required for Rosemary to get the poke. You could also wear down the foe's shield with this move and then suddenly poke them when they try to put it up again.

Another note on this move is that while the hitbox appears short, it actually reaches down a little ways beneath Rosemary, slightly more so with an invisible hitbox around the tip. As such, this can be used to pressure opponents beneath Rosemary if she was on a platform, knocking them up to her for a more effective combo at lower percentages. This can also shield poke opponents, albeit from above, though it's less effective at doing so from the tipper due to dipping down farther than the rest of the hitbox. Just be careful, as Rosemary is obviously not immune to punishment from this when opponents can OoS an Up Special or U-Smash if she fails to get the shield poke.

Like most sweeping D-tilts, this move allows Rosemary to identity her opponent's behaviour as they react from being struck, which is obviously very important for a wise sage to learn. But it's more so designed to create opportunities and take advantage of a foe who was shielding Rosemary's crescents to avoid giving her a damage lead - because now they'll just take big damage from the D-tilt itself and any possible follow-ups! If opponents have a weakened shield, they may take to the air more often and try to attack Rosemary from above/with short-hops, which has the double benefit of keeping their shield safe and lessening the likelihood of getting hit by the D-tilt's very low hitbox.

Having HW active increases the shield push dealt when hitting close-up, making the move just a bit safer.


SMASHES

F-Smash ~ Rose Whip
Rosemary swings her breezy staff! This deals 8-12% that won't KO til past 200%, and comes in one of two different forms: a baseball swing that knocks foes on a low angle or, by angling the control stick upwards, a golf swing that delivers purely upwards knockback. Adding to these oddities are notably high starting lag and a short duration, but very, very low end lag. The move is virtually unpunishable too, as a wind hitbox comfortably pushes shielding/armoured foes back so you're out of their reach! It even deals surprising shield stun that gives Rosemary a frame advantage when the move isn't perfect shielded.

Connecting with this move heals Rosemary 1-2.5%, but any stun aroma created as a result will immediately be pushed 1-2.5 platforms forwards or upwards. If pushed forwards along ground, the aroma will not go offstage, and will not take effect until Rosemary is able to act - never taking effect on the launched foe. Needless to say, this is all a good way to generically position your stun aroma as it will typically end up between the two combatants. The stun aroma can act as a 'wall' from the default version to help Rosemary pepper some crescents on the foe, making them wary of venturing too close to the aroma and how Rosemary can use it, but even without such the move still provides good follow-up opportunities regardless of the angle.

Charging this move draws aromas to Rosemary at Villager's slow dashing speed, and grounded opponents 1.3 platforms ahead of her at walking speed. With HW active, aromas are drawn in at Mewtwo's dashing speed and opponents at Robin's dash from up to 1.75 platforms away. Once drawn in, the aromas will be positioned next to Rosemary and are blown out if they were in front of her, otherwise remaining adjacent to her. Aromas will have their timers paused during this and will still affect outsiders, stun aromas not vanishing on touch when drawn in and if blown back out. The suction effect can be more trouble than it's worth though, especially when you're in danger of suffering 1.4x as much knockback from an attack that hits you while you're charging. Not to mention the high starting lag isn't much of a deterrent for rush down. On the plus side, the shield damage, shield stun and pushback are all enhanced with HW, greatly so with a full charge, and if you break a shield close to the ledge it will instantly kill the target as they get pushed offstage. The move functions better as a hard read or way of surprising landing opponents who think they're out of Rosemary's range, and has the benefit of being shield-proof if they try to do that.

U-Smash ~ Super Solar Nutrient
Rosemary conjures a miniature, Kirby-sized sun in her free hand, which is then casually tossed upwards and then made to loop over and around Rosemary at surprising speeds. This comes out decently fast in front of Rosemary to deal 10% that KOs at 165%, only to become brighter and stronger into the loop so it deals 16% that KOs at 136% by the time it comes back round behind Rosemary. The knockback here is typically vertical, but getting hit by the part of the looping sun facing Rosemary will result in knockback in that direction, albeit toned down to roughly 0.75x the usual strength if it was diagonally downwards. The sun behind Rosemary also deals diagonal knockback to the front of her no matter what.

The fireball peaks so that the tip would barely reach the top platform of Battlefield (not harming opponents standing over it), meaning this move has a glaring blindspot directly above Rosemary. Combined with her U-tilt which takes time to hit directly above her, this makes Rosemary somewhat vulnerable from above, often needing to shield or use short-hopped aerials as a defensive measure. In any case, the sun covers a wide area and works well as a more distant anti-aerial, whether that's to intercept jumping opponents (if they want to avoid your NSpec) or just to follow-up on the U-tilt or D-tilt and don't have Humid Winds active/want to mix-up.

Charging this move increases the size of the sun somewhat, capping at Bowser's size at full charge and now able to hit opponents on the top platform of Battlefield. It also increases the number of times the sun loops from 2 times with half charge and 3 time at max charge. The sun keeps its enhanced power from the first loop this way, and is strengthened to deal up to 22% that KOs at 118% on the second loop and finally 28% that KOs at 80% with the final loop. As terrifying as that sounds, the move is telegraphed enough that you'll only ever really land the final loop with a hard read.

Once the final loop is done, the fireball will be absorbed into the ground beneath Rosemary as it flashes white and deals half the final hit's damage and knockback to opponents standing very close to her. This also heals the Aroma Gardens 10% as well as any other grounded constructs from other friendly characters. Rosemary suffers surprisingly little end lag from this move, especially considering the grounded hitbox, and can actually exploit this by stopping her charge just short of a new loop to trick opponents into thinking they have to deal with an extra loop. That being said, the fireball is slow enough that foes can find a gap between loops without much difficulty, and worse yet they can punish a loop out-of-shield. The shield damage from this move is very high however, and a blow from the final loop will instantly break shields. Better yet, if Rosemary breaks the shield of a foe on either side of her and the fireball still has another loop, it will be timed so that the jumping foe will end up in the fireball's path at their peak, taking strong damage from a higher point that will likely star KO! Or you could just not charge to exploit the dizziness with the rest of your moveset, but a looping fireball is Rosemary's strongest move in her set and she won't really get a better opportunity to land it.

If Rosemary was knocked out of this attack, the sun will linger for 30 frames and temporarily acts as a trap that deals half its current damage and knockback in upwards form, but it will not harm opponents who have been struck by it within the last second. If Rosemary was knocked into the sun, which will almost always happen on the correct trajectory (except against moves dealing impact stall that would stall out the sun's duration, among other things), she will be healed 1-2%, but this can serve as a punishment to some degree as it uses up an available stun aroma in a somewhat inconvenient position. For what it's worth, the sun trap can punish more extreme movement-based attacks as the foe runs into the sun after hitting Rosemary, but it's largely situational.

Despite being a disjointed hitbox, Rosemary will actually get pushed back if the sun hits a shielding foe close-by, naturally going farther the stronger the damage. This is worth mentioning simply because it can be used to shield push cancel when facing the ledge from either side, mostly to escape from any additional loops that charging might bring. What's more, Rosemary get pushed into her stun aroma to cancel the attack. The first frontal hitbox is the most practical for getting the push, but provides the least amount of push. Having Humid Winds active increases the push Rosemary receives by 1 Wario length however, which can potentially surprise foes expecting the usual amount.

D-Smash ~ Fragrance Storm
Rosemary stabs her staff into the ground and focuses, only to sweep her hand as a whirlwind of wind, leaves, aroma and bits of bark swirl around her with great intensity, just high enough not to hit most foes hanging onto the ledge. This fierce, multi-hitting attack deals 16 hits of 2.1-3% with high base knockback that KOs at 145-115% on hit 8, then above-average knockback that KOs at 152-125% on hit 16. It comes out quite fast and covers a great amount of area, good for punishing or a more reliable, lingering form of defence, but it has plenty of flaws that make it punishable. Hits 8 and 9 have a slight gap between them, enough for the former to shield push foes out of the hitbox's range. This leaves Rosemary vulnerable for the rest of the attack, which is easily beaten out given its multi-hits unless she was healthy. Furthermore, this move has high ending lag, somewhat opposite to the F-Smash.

Charging this move will cause the wind to slowly draw in grounded opponents who were next to the hitbox; this can help pull shield pushed opponents back in for the second part. Higher charges make the wind slightly stronger, giving foes plenty of time to react with little charge or almost no time and forcing them to keep their shield up at full charge - of which can cause this move to shield poke them if their shield was weakened enough, but the first half deals low shield damage (second half is average). Having HW active will cause foes to get pulled in with no charge and with microscopically better range, now giving them no time to react OoS from the first part just by charging halfway. All and all, being healthy and HWéd and having a foe's shield weakened make this move a lot more powerful, but its end lag can still be exploited and it does not protect Rosemary from above.

Charging this move pulls in aromas in the exact same way as with the F-Smash. As redundant as this sounds, it actually serves as a "mix-up" to the F-Smash: the drawn aromas are a tell-tale sign of these move's usage, and if foes go in too early expecting to punish the F-Smash they may get intercepted by the D-Smash. Likewise, expecting the D-Smash will save Rosemary from a punish if they try to shield. The only ways to tell each move apart are the charging animations and the different rates and distance that drawn grounded opponents are affected, but if they're landing or try to go for an aerial to get into the D-Smash's blindspot, or are too far away (farther than 1.3 platforms) they won't feel the difference.

Likewise, close-up aromas (within range of the hitbox) are pushed out during any launching phase of the move, but they go farther (between 2-4 platforms) and can now go offstage. Furthermore, the aromas are pushed in towards Rosemary and out the opposite direction. This means that stun aroma will naturally cancel her attack as it passes her and will still be able to affect other characters. Healing aromas will also heal Rosemary the instant they pass her and she can produce a stun aroma this way, which will then typically be blown away by the second wave if Rosemary was not struck before then, but before it has the chance to stun her.

This move gets more mileage out of the drawn aromas than the F-Smash, especially if they were behind Rosemary, but it's arguably riskier and it doesn't heal. That being said, the ability to push aromas offstage can actually help Rosemary recover if they linger for long enough; ascending into stun aromas with the Up Special to gain another use of it, or ascending into a healing aroma when you've got stun aroma to then land back into the aroma. Healing aroma will almost never last long enough for this to be practical, but stun aroma created in the process of this move from such passing aroma has a chance. Recovering like this is all situational, but it does have one practical use: if Rosemary was punished out of the D-Smash and knocked towards the direction the aromas were cast offstage, she can use them to assist her recovery!


AERIALS

N-air ~ Fragrant Whirlwind
Rosemary twirls and clutches her staff upright as a flurry of aroma and vines swirl around her. Rosemary's body and her overhead staff head are the primary hitboxes here, but there's also a moderately sized invisible hitbox beneath her at the start. This deals 11%-7.5% depending on when it hit (stronger earlier on), dealing diagonal knockback from the sides or purely upwards knockback vertically. The sweetspot delivers strong base knockback that KOs at 152%, all the way down to fairly low knockback if you hit right at the end.

This move comes out extremely fast, making it a solid but riskier combo-breaking alternative to Humid Winds. That's because the twirl is plagued with a long duration, making it susceptible to being frame-trapped, as well as some unfortunate landing lag - for the most part. If Rosemary lands right at the start or end of the attack, she'll suffer no landing lag at all! The sourspot is able true combo at most percentages this way, but attempting this on a grounded foe will obviously be very predictable. You can also true combo out of a late vertical hit at lower percentages, as the end lag airborne is still very good. Another use of the move is to use the overhead hitbox as a short-hopped anti-air, which is very important to Rosemary because it is a blind spot on her U-Smash and D-Smash and the U-tilt comes out late above her.

If Humid Wind was active, the twirling will be sped up slightly. While Rosemary's enhanced air speed makes it easier to DI and possibly catch foes or escape from them, the winds also make it easier for the landing lag to be triggered due to her greater falling speed - for better or worse. Rosemary also gets 13% heavy armour 3/4s of the way into the twirl's hitbox, giving her some safety and a potential pseudo-counter that can be used offensively. It can also be good for trading blows if the sourspot and a spare midair jump would present a true comboing opportunity, because if that hit would remove Rosemary's Humid Winds she can start up the hitbox again for an early KO! While Humid Winds greatly enhance the effectiveness of this move, having them inactive can prove the N-air a good mix-up with that move's hitbox - but come out fairly fast and have similar range, except the N-air has better vertical reach.

By holding A with HW active, Rosemary can pull along aromas within a platform of her as she moves. This can be used to generically reposition aromas, or if you're clever even use it as you jump out of some stun aroma so it comes up with you, then catches up at the apex of your jump to cancel the rest of the move. Lingering clouds can also be used to cancel out the move's long duration with good positioning.

F-air ~ Tenderise
Rosemary tucks her legs in and leans forward as she swings her staff sideways twice, a noticeable gap between each hit. This first hit deals 5% and solid hitstun, while the second hit deals 6.5% and consistently-scaling knockback that KOs at 185%. Knockback from a distance is 40*, while close-up is on a high angle and directly behind Rosemary will get you backwards knockback.

Rosemary's staff has great reach, but some starting lag, general landing lag and lack of frontal coverage somewhat limit its time and place. On the other hand, it can combo into itself at more reasonable percents, and if Rosemary lands right after the first hit she'll suffer almost no landing lag! This can be a sneaky mix-up when short-hopped, either up-close in a similar vein to Jab-locking or hitting from a distance to establish some zoning with the high range. HW even allows for some cross-ups where Rosemary can drift to "choose" which direction she launches her foe. It can be used to poke, pressure or potentially approach, able to reach opponents inside your aroma clouds without touching them yourself, and is also good for walling off opponents with decent timing - be they from the front or landing/air dodging. Finally, the relatively spammable nature of this move makes it good for conditioning opponents.

As a footnote, this move benefits itself and other moves when made stale. This increases its combo potential, especially at higher percentages, and helps moves that need the refresh such as your NSpec. In addition to comboing into itself, Rosemary can just land the first hit and cancel its landing lag where applicable, which still keeps opponents close and can potentially be repeated.

B-air ~ Aroma Shield
Rosemary spins around and waves her free hand to create a swirling aroma barrier behind herself, which deals 8.5% that KOs at 199%. The knockback is normally diagonal, but is diagonally inwards if the very top of the barrier connects or vertical if the bottom hits. The reach is only average and the power is unremarkable, but the tall barrier provides Rosemary with plenty of coverage that her other aerials don't really provide. Furthermore, this is Rosemary's "safest" aerial in that it requires the least commitment and gives her some knockback from it right away, unlike the N-air and F-air which can 'fail' if used too close to the ground for instance. It is designed to push opponents around more quickly and efficiently than the F-air, even usable as a pseudo F-air with the top hitbox to keep opponents from getting at Rosemary's guarded goods like the Aroma Garden or healing aromas. Unlike the F-air though, this move is unsafe against power shields.

Rosemary's barrier reduces damage from oncoming attacks by 5-10% if they pass through it, being more effective closer to the centre of her body. This does not reduce the knockback or hitstun taken from attacks, even if they would deal 0% as a result. The barrier lingers halfway into the end lag and Rosemary's landing lag if that was triggered while the barrier was still up, reducing damage by 4-8% this way but working well with the Aroma Garden. Speaking of the garden, attacks that pass the barrier won't damage it!

By holding A during the attack, the barrier will appear more solid and can be used to push healing aromas around, but not stun aromas. This is especially useful with the enhanced air speed from HW, where Rosemary can ram into a foe occupying her healing cloud and move it back with her. If foes shield, this will provide them with an incentive to pressure Rosemary, and she can potentially counter by producing stun aroma if she can. But if foes are struck, they'll likely find the aroma between them and Rosemary.

U-air ~ High Breeze
Rosemary kneels in midair and holds up her free hand to create a thin vortex of wind directly above her head. This covers the exact area the staff would if it were being spun instead (Rosemary's opting for a more feminine and magical form of attack here), meaning the wind covers a wide area but has barely any height. The vortex drags opponents along for 5 quick hits of 1.8% (9% total), followed by a 6th hit that deals 3% and purely upwards knockback. This deals low base knockback and has low end lag, so it can combo into itself at lower percentages. It even scales pretty well to KO at a respectable 160%, but the low hitbox, dragging aspect and Rosemary's weak midair jump make KOíng. near the top of the screen difficult. Humid Winds and the N-air have better vertical reach and power, but are both risky in their own ways.

The kneeling animation and low hitbox allow Rosemary to hit most grounded opponents with the wind, like something of a pseudo N-air. You could even shield poke opponents this way as the hitbox comes from directly above. There is some landing lag, but it's safe if a foe was being dragged in which case both characters will end up in frame-neutral - with Rosemary having a huge advantage if she was close enough to land Humid Winds. If Rosemary lands during the first or final hit however, she'll suffer no landing lag! The latter is an amazing landing option, though it does require timing - especially given Rosemary's floatiness - and to go through a slight duration. Landing on the first hit opens up true combos against struck opponents, but is even more difficult to pull off because it essentially requires Rosemary to start the attack directly above the ground. It's even less likely that you'll have an opponent close to you at the time (and that they'll let you get away with the starting lag), but if you succeed you're guaranteed to pull off a Humid Winds. The difference in timing of the landing lag compared to say, the N-air, can also be used as a mix-up, especially against opponents directly above you.

Humid Winds allow Rosemary to drag opponents farther with her enhanced speed and cross-up a lot more easily with short-hops, which is a pretty fair trade-off given she can't Humid Winds hitbox from this. You can also hold A at the start of the attack to have the wind descend at Rosemary's regular falling speed, essentially turning it into a disjointed hitbox high above her if she fastfalls or is falling faster because of Humid Winds. This can be used for substantial spacing, or to position the foe a specific distance above Rosemary for spacing purposes - like if you want to set-up for the U-Smash. The hitbox also drifts sideways at Rosemary's regular air speed as she drifts, meaning she will outrun it with HWs and can use this for further positioning purposes.

Rosemary can cancel this move by landing over stun aroma, in which case she gets a slight frame advantage over her opponent. This doesn't serve much purpose if the foe wasn't being dragged close-by, and while it can transition into Humid Winds or a quick N-air those require them to be directly above you.

D-air ~ Seraphic Descent
Rosemary appears to pray as a wind suspends her and gently tips her upside down. She appears to dissolve into a cocoon of light, only to plummet straight down! This has very high start-up lag, but hits real fast and hard for 20% that KOs at 112% and will straight-up spike opponents hit at the start. What's more, Rosemary is invincible all the while!

Landing in this state causes the energy to become a platform-wide shockwave on either side of Rosemary that deals 16% and strong shield damage as the girl reforms. Sadly, this is fairly punishable unless it connected from a distance, where the shield push and stun will generally protect Rosemary.

After plummeting 1.7 Ganons, Rosemary will reform covered in streaking energy, her descent slowed somewhat to Pit's dashing speed over 4 Ganons. No longer invincible, she hits for 16-12%, but on a 50-90* angle that can cause a nasty case of semi-spiking if it connects. This has low end lag if it ended in midair, and no landing lag if Rosemary lands near or right at the end of it - strange given she was upside-down and all. Landing before then in this state will see the energy spread half a platform on either side of Rosemary to deal opponents 10% and good upwards knockback, but it's still punishable on whiff.

Similar to Game and Watch's D-air, Rosemary can manipulate the speed of her descent by holding up or down to travel 1.25x or 0.75x her usual distance. This must be decided during the starting lag. Additionally, Rosemary can shift herself sideways by a fraction (up to 0.3 platforms) during the starting lag. While extending the plummet seems like the optimal choice to increase the sweetspot's length, she has to watch out for that landing lag. Furthermore, it should be noted that an invincible Rosemary will not trigger her stun aroma.

It can be difficult to pull off effectively, but stun aroma is very helpful for cancelling Rosemary's descent and to potentially follow-up on a successful hit. This can even allow Rosemary to intercept a foe who dodged the plummet itself as she'll be able to move before them. But nowhere else is the aroma more useful than the ground itself out of an invincible plummet - as the stun takes effect immediately upon her landing! This is downright scary as you get the shockwave hitboxes too, but you need to be relatively close to the ground to work it and - if predicted - opponents could jump up to intercept Rosemary. Still, the sheer terror and implications of the combo can force opponents to back off well away, because even the shield stun from a shockwave can lead into a free hit or grab from Rosemary if she acts quickly enough from close enough.


GRAB

Rosemary splays a hand, and a victim close-by is ensnared by a pair of multicoloured aroma vines that spiral up next to them. This is a solid grab with reliable speed and reach, and with Rosemary's high traction it's great for punishing whiffs against her shield - playing into her very necessary bait-and-punish game.

Aroma clouds occupied by either character will have their timers paused during the grab game. While this can make the grab game predictable against a foe occupying a healing cloud to some degree, Rosemary will want to get up-close to work her stun aroma anyway, and one of the ways foes can avoid that is to put up their shield - the likes of which the grab game counters anyway.

Pummel ~ Aromatherapy
Rosemary makes a fist with her free hand - determinedly or hesitantly depending on her captive - as the astral vines squeeze their victim for a scant 0.35%. Is she even trying? It's hardly good for damage-racking, despite being a very fast pummel, but the speed factor can help with Rosemary's stale que to keep the NSpec fresh, the actual move she wants to use for damage-racking. A large puff of aroma also gets released from the vines - or the foe? - with each squeeze, which acts as a cosmetic effect unless there was aroma within 1.2 Bowsers in which case it gets 40 frames added to its timer. This caps at an extra 280 frames so that aroma can potentially last for 8+ seconds.

By pressing B, Rosemary will instead wave and the vines will rub themselves against the captive, healing them 1% a pop. This too releases a puff of aroma that also heals outsiders 2.5%, including Rosemary and her Aroma Garden! The pummeling speed is average, yet despite the lack of damage it still does contribute to the stale move que. It exists primarily to heal Rosemary, and can prove rather useful against foes with high percentages.

F-throw ~ Wind Gift
Rosemary waves a hand to shape the tendrils into a swirling wind around the victim, followed by sweeping that hand upwards to blow them away for 5% and relatively low knockback that scales to KO at 250%. Sporting low end lag, this has some basic follow-up and 50/50 potential at lower percentages, but the numbers are lacking and the animation is fairly slow so foes can react easily enough. On the other hand, the slow animation can be used to stall somewhat.

The real benefit comes from the magic wind that surrounds the victim, significantly reducing their falling (or fastfalling) speed until they touch down, or are struck by an attack or 10 seconds pass. While this can aid in a foe's recovery, remaining airborne for prolonged periods of time is highly disadvantageous with the extra juggling and comboing opportunities available, not to mention this does actually make the foe take more upwards knockback. Even landing this move at higher percentages can help Rosemary stall as she waits for the foe to descend, be it to exploit a healing cloud, have the stun aroma or Aroma Gardens recover or get healing from Humid Winds - even if the latter can be difficult to achieve at higher at the percents you need a foe at for this.

B-throw ~ Ring Around The Rosemary
Rosemary twirls joyously as the blue vials on her dress open and their contents become twin spirals of aroma. While this is happening, the vines plant themselves directly beneath Rosemary and carousel their captive around her, exposing them to the lovely aromas. The movement gets faster and faster until Rosemary points her staff backwards and commands the vines to toss her foe far!

This lengthy throw nets the foe 7.5% and very strong base knockback on a 52* angle, but it won't KO til well past 215%. That's okay though, because the aroma placed on the foe has a sort of "relaxant" effect that cuts many aspects of their mobility down to 70% - including movement and jumping and falling and rolling, but excluding attacks and any sort of movement-based lag such as landing lag or pre-jump lag, as well as knockback and fastfalling. This lasts for 12 seconds or until Rosemary has taken 3 hits, whichever one comes first.

This throw has strangely low end lag considering how much Rosemary enjoyed herself, but it doesn't really provide direct damage, combo or KO options. Rather, it's designed as a simple keep-away move and puts Rosemary in a better position to use her NSpec, where foes can't as easily rush in to punish her with their slowed movement. This, in a sense, is how Rosemary will do her "comboing" to pepper on damage and maybe even score a KO. The speed cut also makes it more difficult for opponents to combo Rosemary, while making them a bit easier to combo due to having less air speed and base fall speed. And of course, it can make foes a bit more predictable where the loss of speed can remove the effectiveness of a certain action, such as gimping.

U-throw ~ Bond of Aroma
Rosemary raises her staff as the aroma vines lift the foe off the ground, then slam them back down for 5%. Rosemary then splays her hand again to conjure a blast of wind beneath her captive to deal 12% and purely upwards knockback. That's an impressive 17% altogether, and even then the throw still has low end lag! (but it does have a long animation like Rosemary's other throws) This has relatively low base knockback, but it scales well enough to KO at 123% and is Rosemary's primary KO throw. Sadly, the long throw animation gives foes sufficient time to DI and survive til higher percents.

The aroma vines remain tied to the foe after the throw and acts as a "tether" that's anchored to the ground they were thrown from. These vines can stretch infinitely and have absolutely no negative effect on the opponent (only fair given how powerful the throw is). Instead, they heal the opponent 1% after one second and 1% every half a second after that! In other words, the throw doesn't actually do as much damage as you'd think.

The aroma tether remains on the foe until they land or its 19HP is depleted by an opponent of theirs, including Rosemary. The tether regenerates health at the same rate it heals, and receives any healing Rosemary gets when she's close to it. This is where the tether becomes a plus for Rosemary, as she can use it as a target for her crescents to create healing aromas without needing to hit an opponent. Better yet, projectiles will continue to pass through the tether on contact and this can be used hit other opponents and possibly create 2 aroma clouds with one crescent! The tether also stales moves that hit it, which is of course a plus for Rosemary's attacks other than her crescents, but that's a fair price to pay for getting an easy set-up for that move's sweetspot.

Sadly, the tether will instantly vanish if the victim gets KO'ed, even by this move, in which case Rosemary will only have a very short time to pull off one move - preferably her NSpec - on the vines.

D-throw ~ Peace for All!
Rosemary claps her hands and the tendrils straight-up detonate in a puffy rainbow blast. This deals 5% and low mostly-upwards knockback that's more suited to follow-ups from any percentage compared to the F-throw, namely your F-air and N-air and Side Special and Neutral Special and Up Special. Adding to this is the aroma cloud that lingers from the blast, which has the peculiar effect of resetting any fighter's percentage back down to 0% while they occupy it. This has no effect on shields or stale moves or constructs, however. This clouds acts like Rosemary's other aromas and can be manipulated all the same, being just as wide but flat enough that it'll only affect grounded fighters while it's grounded. It lasts for 12 seconds, but the timer ticks down thrice as fast for each fighter that occupies it.
The cloud will almost always make Rosemary healthy while she occupies it, bolstering aspects of her melee game. Peculiarly enough, she will not produce stun aroma when being 'healed' this way and any healing she receives will still count when her percentage reverts. She also has her survival enhanced due to being at 0%, which can be quite useful if she was standing over her Aroma Garden. On the other hand, she loses all her rage from being damaged, becomes easy to combo - of which could straight-up lead to her death if a combo move scaled enough to KO - and if her shield got broken she'll be stunned for the most amount of time possible... where opponents can just push her out of the cloud to revert her percentage and profit. Rosemary can do all of this to opponents who enter the cloud, however! They can enter if they dare, and that might not be such a bad idea given they'll be 'immune' to being KO'ed inside and their % being reset will negate Rosemary's healthy effects.

You may even want to leave the cloud aside for later, as it lasts decently long if nobody uses it.


FINAL SMASH

Aromaseraphy Rosemary
Rosemary is visited by the tiny fairy Angelica, perplexed but overjoyed by this sudden encounter. Rosemary reaches out to the fairy, who circles her vigorously and leaves a spiralling trail of sparkles and rainbow aroma. The aroma envelops Rosemary, and when it clears she becomes an Aromaseraphy, finally achieving her goal! She gains brass, net-like wings, a more frilly outfit and some delightful buffs to ensure that lives on to fulfil her ambition.
  • Healed 15% upon transforming.
  • Being tied to another fighter in healthiness (0%) will give Rosemary her health buffs anyway.
  • Standards, Aerials and Throws deal an extra 2% and 1.04x more knockback. Smashes and Specials deal an extra 3% and 1.075x more knockback. Plant-based teammates like other Aromages or Grass-type Pokemon deal an extra 1% with their attacks, or 2% when near Rosemary.
  • Air speed enhanced to a 10 (1.275) while HW is active, and she gains 2 midair jumps. This greatly improves her air game.
  • Heals herself and teammates 1.25x more.
  • Humid Winds take 3 hits to cancel out, and are cancelled instantly when done manually.
  • All aromas cancel out rage, powershielding and buffs on opponents to "negate their effects". This lasts for 10 seconds with stun aroma, or however long a victim remains in a healing aroma plus one second after they exit it.

The Final Smash's effects aren't as powerful as other characters', but it lasts for a good 25 seconds or until Rosemary is KO'ed. And now she has to go out and find Angelica again! (or maybe she hid inside of her...)


Katapultar

Smash Lord
Joined
Nov 24, 2008
Messages
1,284
Location
Australia
5k set challenge


"The hated boss who beats you down and beats you down and never lets up. That's right, Big Bad Guzma is here!"


Guzma is the leader of Team Skull from Pokemon Sun and Moon. Whereas most Pokemon villains have overly grand or edgy ambitions involving Legendary Pokemon, Guzma and his homies live a relatively simple gang life of causing trouble for the Alola region. His past is filled with a bit of angst involving an abusive daddy and being rejected as one of those Trial Captains who replace Gym Leaders from other regions, but that's okay because it gave us an arrogant and bombastic Pokemon villain!

With a flashing slash of its giant sharp claws, it cleaves seawater—or even air—right in two. This Pokémon will do anything it takes to win.

Guzma actually specialises in Bug-type Pokemon, which is good because all the other Bug-type specialists in the Pokemon series are utterly boring and forgettable characters. He even has a favourite Pokemon in Golisopod, which he will always send out first in battle. Why use his other Pokemon when Golisopod is more than enough to crush his opponents? This carries on over in his Smash Bros. appearance, enough so that this may as well be a moveset for just Golisopod, but it would be a capital crime not to involve big bad Guzma in all this somehow! Multi-man movesets are dead as of Smash 4, so no Ariados and Masquerain for you. And no Mega Pinsir either.


"Want to see what destruction looks like? Here it is in human form - It's your boy Guzma!"


Girth: :4bowser:
Speed: :4ganondorf:
Traction: :4lucario:

When Golisopod's shield is reduced to 21 out of 42HP, it will make an Emergency Exit (EE) to retreat 1.25 platforms backwards and cancel out of any shieldstun. Going offstage will kill its momentum and can be used as a pseudo shield push cancel. This can also be used to approach with your back to the opponent and even punish their attack - such swagger! Golisopod cannot EE again until its shield is back at full health, and it only regains 0.05 health per frame when half full.


NSPEC ~ FIRST IMPRESSION
Golisopod throws out a mean green slash that hits fast and hard for 30%, but only deals 12% to shields and can be punished if it doesn't break one. Once used or a different attack connected, First Impression is added to the stale move que and cannot be used again until it has been emptied off. This requires Golisopod to land 9 other attacks and find the opportunity to land them - easier said than done given its poor mobility. Clashing or hitting a shield will not add to the stale que. Shielding is a good counter to First Impression, but Golisopod also has moves that are good against shields and can use them without wasting FI if they did shield expecting it. With a bit of conditioning, you can potentially intimidate the foe into not putting up their shield, and that's when you can go for the killing blow.

Golisopod gains a lime green outline when it can use First Impression.

SSPEC ~ RAZOR SHELL
Rears a watery arm and slashes 1.4 platforms in one of 4 directions. Takes 42 frames, but ignores shields and has super armour on frames 21-40. Deals 15% close-up, 5% with tripping midway or 9% and low inwards knockback when tipped - able to start combos at mid-percents and set-up into FI. Aerial variant comes out on frame 30, but lacks armour and requires more precision to hit with. A good pseudo-counter close-up and set-up move at mid-range, able to punish more severe cooldown out of EE.

Being struck by any watery attack will give the foe a "soaked" status effect for 38 frames per 1% they took. Their shield takes one quarter of any damage they receive directly, and they take 2/5ths of an attack's damage when blocking it (1/3rd from Specials and Smashes). This helps Golisopod get more mileage out of FI and its other slower attacks.

USPEC ~ LIQUIDATION
Hunkers down and becomes watery before charging forth slowly. Goes 2.8 platforms forwards, diagonally or upwards while partially influenced by gravity, dragging opponents for 15 hits of 1% followed by 3% that KOs at 150%. Covered by super armour and spreads water while travelling along the ground; this lasts 10 seconds and greatly decreases traction. It also increases the distance Golisopod covers with movement-based attacks and mechanics like EE by 1.5x, but you can hold the control stick downwards or in the opposite direction to move the normal distance. Landing during the rush sees Golisopod continue along the ground and go one-thirds its remaining distance if rushing diagonally downwards. Liquidation is punishable on the ground and not a safe approach, but landing at the ledge or on the last hit will negate the lag.

DSPEC ~ SUCKER PUNCH
Golisopod lowers its guard, but don't be fooled: this is actually a counter! You can tell from the twinkle in its eyes and faint wisps of black. Trigger this, and Golisopod will slide 1.5 platforms in one of 8 directions with a punch streaked in a ominous black aura, invincible all the while. That'll teach you to mess with his boy! This deals 10% plus half the damage of the countered move. Knockback is typically average and scales to KO at 150% - this gets stronger if the countered attack dealt more knockback, but it's a bit weaker than your average counter. The punch has no delay and little end lag: usable as an approach against projectiles, and at lower percents you can start a true combo by countering close-up.

If Golisopod punches into the ground, it will create an earthquake 1.5 platforms to either side of it, dealing 3 hits of 4% followed by tripping. This has a notably longer duration than the punch, able to catch out opponents who might dodge or slip by you. It can potentially read into a finisher at mid-percents where the punch would not KO.

The black aura represents Golisopod's spite. The move it countered is added to its stale que thrice, cutting the effort needed to regain your FI. The more predictable the foe gets with their projectiles, the more they help Golisopod. The input added to Golisopod's que doesn't affect its own damage output, but rather the countered attack. It is hypothetically possible to stale a foe's move more than 9 times, up to 18 times and this will actually weaken their attack even more! Spite also takes effect during the first half of the end lag, staling 2 moves instead of 3, which does give Golisopod some leeway as the counter windows are not super generous.

JAB
The four small arms slash rapidly, reaching notably farther than Golisopod's head. This deals solid damage for a multi-hitter, 5% with just a tap, and can deal as much as 15% to a close-up foe pushed back all the way. You can finish up with a scissor slash that deals 5% that KOs at 200%, but the Jab itself has very low end lag - putting both characters at frame neutral - and can follow into melee like FI or provide spacing. While powerful, Golisopod's exposed head is not a hitbox and is vulnerable to aerials, making them the perfect counter to this move. It's great against grounded approaches though, and can be used to bait aerials and then punish with a counter or shield.

DASH
Tucks shoulders in and rams 1 platform forwards for 10% at the start or 6% later on, superarmoured during the first half and only taking half as much knockback during the second half. A bit slow to start, but quick to end and Golisopod will slide 1.3x farther over and an extra 0.8 platforms afterwards while over water. Second hit knocks foes on a low angle, able to push foes around or tech them at mid-percents, which can follow into Razor Shell over water.

F-TILT
Two meaty swipes that can be angled individually, dealing 11% and 17% that KOs at 125% respectively or 9-14% that KOs at 148% on the claws. High starting lag, with 5% heavy armour halfway into it on the head, each hits delivers good shield damage and push, with massive damage if both connect but foes need to be relatively close-up for this or else the first hit will push them out of range. Alternatively, correctly spacing the first hit on a small shield can result in the second hit shield poking opponents for its sourspot, or even connect with the sweetspot from right up-close against taller opponents by angling the second hit. Can 2-frame opponents by angling downwards, and the second hit actually lingers enough that careless approaches - even shielding foes pushed out of the hit's reach by the first - will get caught out, albeit for the sourspot's damage. You can also rarely send shielding foes tumbling off the edge and catch them out with a downwards second hit.

U-TILT
An uppercut slash that deals 12% close-up or 6% above Golisopod. It doesn't have much horizontal reach, but is pretty fast in all aspects. It's also safe on shield and pushes them back far enough to potentially follow with a farther reaching attack. The sweetspot won't KO til 200%, while the sourspot is is an excellent combo-starters and can easily follow into FI or even juggle opponents. Unfortunately, this move doesn't cover Golisopod from behind.

D-TILT
Swipes across the floor for 10% and knockback that KOs at 160%, diagonal close-up and upwards farther away. Can start combos at lower percentages and is good for footsies, being safe on max range. Like some heavyweight D-tilts, it can be used to identify enemy behaviours, which can help with the bait-and-punish of countering or better land FI if it's ready.

F-SMASH
A massive, meaty upwards slash that deals 24-32% and Golisopod's best killer. Covers a deceptively huge area, especially when charged (0.75-1.35 platforms), but won't quite break a full shield. Much of the lag is on the pre-charge, followed by some notable post-charge; this makes the move excellent for "baiting" foes to dare hit Golisopod out of the charge so they get 20% more knockback from their attack, which can work well with Spite. Has super amour just before and during the attack. Has a short duration, but the end lag is frighteningly low and the shield pushback is massive (especially over water), making it relatively unpunishable. Timed right, it can be used to ward opponents without having to hit them (good for FI) to afford Golisopod some space.

U-SMASH
Arches back and swings its arms down from an overhead position, dealing 13-17% and upwards/diagonal knockback. This is followed by an earthshaking hitbox in front of Golisopod as its fists hit the ground, dealing 11-15% and another hit to shielding/armoured opponents (but not much shield damage). Most of the average shield damage is on the first hit, and if the enemy shield was small enough the second hit will poke through like with the F-tilt. But this is more designed as an anti-air; coming out fast and the arching animation shifting Golisopod's hurtbox, very necessary given its vulnerability to aerials (it is Bug-type after all!). Unfortunately, this move has a lot of end lag.

If any part of this move connects, even against shields, the ground will get Rock Smashed from the impact and produce 1-2 rocks in front of Golisopod. These act as fast and far-reaching throwing items that deal 2% and no hitstun initially, but gain power as they fly and can deal up to 5% that KOs at 200% with Golisopod's heavyweight throwing strength (only dealing hitstun near the end). This can be used to finish foes from afar after they've been launched upwards by the hitbox. But more importantly, the rocks can be destroyed and they stale the move responsible (items don't stale), allowing Golisopod to regain FI at its own leisure. This can backfire on Golisopod though as foes can punish its end lag can then use the rocks against it, but they can also bait for a Sucker Punch.

D-SMASH
A sweeping slash behind it for 15-20%, then followed by a heftier water slasher in front of it for 21-28%. Both deliver diagonal inwards knockback, the second on a higher angle. Comes out fast, great for punishing rolls and used out of an EE approach. A noticeable gap between each hit, this makes the first hit very punishable, while the second is more of a hard read. This however can be used to two-frame and intercept ledge rolls. Shield push is very notable and is actually inwards, typically positioning foes close to Golisopod or on the other side close-up even with rebound.

Shield Push Cancelling is useful on the first hit to avoid punishment, but requires Golisopod to be practically next to the ledge uncharged. It's also good on the second hit despite there being no necessity to cancel lag, as the inwards pull will position foes for a B-air, B-reversed FI or U-air if they were close enough to be pulled offstage (they can react though in which case you can counter). SPCíng can be supplemented with water, which provides Golisopod with further spacing.

N-AIR
A cross-slash halfway towards the screen, dealing 14% that KOs at 160% directly in front of Golisopod. Deals 9% and below-average knockback from the sides or upwards knockback from vertically. The slash also creates an X-shaped hitbox over Golisopod that protrudes a fair ways from it, dealing 7.5% and solid hitstun to those struck. This can keep opponents held in place and even start combos depending on where you hit from, also being a good landing option. It's not as fast as other N-airs though and not a good combo-breaker for this, which is why DSpec is necessary for protection. Landing lag can be cancelled at the end, and it has super armour during the hitbox.

F-AIR
One arm is reared for a weaker slash dealing 6.3%, followed by a meatier blow dealing 14.4% that KOs at 144%. It's a bit slower than Ganon's N-air and with a bigger gap between the two hits, but its reach is huge, the claws are superarmoured and the high stun on the first hit guarantees the second. The end lag isn't bad either. The first hit can be auto-canceled on landing, a good reset against shields. It can also refresh FI while keeping victims close, that move easier to land if you smack a foe above the ground and then fastfall to cancel the end lag. The second hit deals large shield damage and push, but is punishable on land. This move can keep opponents at bay with its reach and KO with the right timing, being a half-decent approach. A good mix-up with FI or other moves, its delay able to catch out dodging opponents with the second hit.

B-AIR
Falls over to crush enemies with its hard back, dealing a huge 19% that KOs at 130% and massive shield damage. Hitbox lingers on Golisopod's upper-back. Relatively fast, but poor range and end lag make it susceptible to punishment, having especially harsh landing lag. Mostly kills offstage and deters shielding when approaching from behind (this can play into a B-reversed FI), encouraging pokes and attacks that would out-range this move - opening up more predictable behaviour that can be countered or fastfall shielded. Can be used as a pseudo D-air, but watch out for that landing lag.

U-AIR
Forcefully arches back diagonally for 9% and diagonal/upwards knockback on its upper-half, hitting in front and above and behind very close-up. Its most spammable aerial is great for chaining hits at lower percents, all the better for it and FI when staled, but can kill at 80% near the top when fresh. Basic combo fare from the U-tilt. Can be used as a pseudo F-air, and a good landing option against taller opponents.

D-AIR
Dives downwards and spins to Drill Run through its opponents over a similar duration to Wario's D-air. Spikes for 10% that KOs at 200% at the start, 15% and mostly-upwards knockback halfway and 20% with upwards knockback that KOs at 130% at the end. A bit slow to start, but Golisopod's far-reaching arms are super-armoured - great for trading blows against oncoming juggles while still getting a Spite in, but needing to be premeditated. Boosts Golisopod's fastfalling speed and can be used as a pseudo stall-then-fall. All 3 hits will connect against a shielding foe with good positioning, and while the overall shield damage isn't huge (being nerfed), it gets you more chip damage from soaking than any other move at 18% without being punishable! Used to pressure from above via jump approach, this can scare foes into intercepting Golisopod via jump which can be read with a counter or quick N-air. End lag is low, but the landing lag is harsh and cannot be compromised.

At lower percentages, the final hit can connect from the first hit with no DI/correct DI read for 30%, but used too low offstage Golisopod may not recover. Spiking towards the stage, Golisopod can land the final hit against a foe who techs with or without fastfalling, depending on their percentage and height struck from. On the other hand, a foe who doesn't tech may fall victim to a sudden fastfall follow-up from the second hit if teching would protect from a non fastfall final hit, making it a 50/50 in some situations. The danger of teching can force a foe to get proned and give them a slight frame disadvantage to Golisopod.

GRAB
Grasps with the small arms; short but fast and good from a shield grab with Golisopod's traction. Done from a dash or pivot grab - which get boosted over water - it will instead use its big arms for a slower, but farther reaching grab with stronger throws. This gives Golisopod 8 throws to showcase its savagery, but only the big arms have KO potential.

PUMMEL
A big arm smacks for a very slow 3.6%. The arms not holding the foe smack them for one of 2 different pummels. This is normally the big arm which deals a very slow 3.6%, or the small arms that hit for 0.4% apiece. The latter gets a bit quicker when repeated and is amazing for filling up the stale que, to the point of sometimes being more effective than a regular throw.

FTHROW
Shoves the opponent away for 6% and sprays them with water that incurs pushback simultaneously (Does not soak). Ends quickly, but the above-average base knockback and low scaling don't make it useful for follow-ups. It does cover 2 platforms of ground ahead of Golisopod in water however, useful because the Up Special isn't particularly safe when used for that and this supplements approaches.

The big, watery arms squeeze the foe between them for an instant before expelling them with a huge blast of water that deals 13%. Low base knockback, but KOs at 160%. Not only soaking victims, this covers the stage in water like with the regular version, also reaching over and behind Golisopod and platforms directly above the affected ground it was occupying. The lasting soak effect helps too, best applied at lower percentages where the knockback is at its lowest. This can work well with FI active at the start of a match/stock, by taking advantage of a foe's expectancy to shield this by rushing in with a dash grab.

BTHROW
Curls up and rolls back like the yellow rat, but farther (1 or 2 platforms) and crushing the victim within for 6 hits of 1% followed by 4%. High base knockback on a low angle, enough to always cause tech situations (even at 0%!), but the backwards movement means that victims will likely end up offstage. Very low scaling, but a recovery situation can set-up into a solid kill like the D-Smash. Moves back a little afterwards over water, which can supplement a tech chase. Rocks rolled over are crushed and damage the victim, as well as adding this move to the stale que twice unless one use would be enough to restore FI.

The big arms slam the opponent into the dirt and swing them around 3 times before bowling them away, dealing 2.85% per semi-rotation for up to 6 hits (nearly 18%!). The hits aren't guaranteed because they will not actually occur if the victim wasn't over ground during a semi-rotation. On the other hand, the knockback is similar to the weak version but now scales to KO at 170% or 105% near the ledge. The throw can also be used to tech chase, and past 50% it will always put the foe into an untechable spinning animation. No combos are guaranteed from this given Golisopod's slowness, however.

UTHROW
Tosses straight-up for 4%. Golisopod's only real combo throw, but if the victim's percentage gets too high (120%+) it can compromise the comboability in which case it will need to finish with a more powerful move. Holding an input, Golisopod will catch the thrown victim with its big arms and slam them back down for 4%. What a bully! It can now use its strong throws, which essentially makes this its kill throw from a weak grab. Too bad victims can still escape, and do so easily enough before 150%. But even if they do escape, they still took damage from this throw to contribute to the stale que, the grab escape situation still keeping them close, and you get a free rock from the victim being slammed into the ground.

The big arms toss the victim high into air before Golisopod leaps up to catch them, descending for a brutal piledriver dealing 14% and infinitesimally more knockback than a Seismic Toss - up yours Alolan Ride Pokemon! The knockback is vertical too, so DIíng this ain't gonna help you as much. It gets even better over platforms, but if Golisopod lands over solid ground - you can choose to fall through platforms during the descent - it will shatter the ground on contact and create 2 rocks on either side of it, or 3 if it descended from 1.5 Ganons higher than where it started the throw. The best kill throw by far, just be careful with your weak U-throw usages for starting combos (they are tempting given how easy the weak grabs are to land!) as these will stale the big throw to make it a weaker KO move.

DTHROW
Leech Life 5% from the foe before letting them collapse into prone. If the counter was staled, this will drain 1% less for each stale but refreshes it fully. Has high end lag, making tech-chases impractical with Golisopod's slowness, but not slow enough that it can't counter get-up attacks.

The big arms retract their claws before stabbing them into the victim's hips, draining 8% before finishing with a savage headbutt that deals 4% and a knockdown! This also drains less when the counter is staled. This starts up tech-chases unlike the weaker variant, both of which are good for restoring health lost to Spite attempts and to help Golisopod's survival because its recovery is not that amazing.


FINAL SMASH
Guzma reluctantly withdraws Golisopod and sends out his Ariados where the former first spawned, a Pokemon that's popular with villains for some reason. Gotta give his other Pokemon some glory in a Trainer Battle! Ariados has 55HP and similar stats to a slightly faster Ivysaur, being controlled as a mini-character with a few Specials and Standards. Golisopod recovers 1% per second while Ariados is out; upon fainting, your boy will be sent back out with respawn invincibility and its stale que emptied and counter reset. Knocking Ariados off the blast zones still counts as a stock loss, because while Guzma is a big bad man he's not evil enough to kill off his Pokemon just so he can send out his favourite again. Worse yet, losing a stock this way will not reset Golisopod's percentage. Ariados has a weight of 89 and starts out at 0% along with having a decent recovery however, which combined with its stamina makes it very unlikely for it to actually be KOéd.

  • NSpec - Venom Drench: Fires an arcing glob of poison that lands 1.25 platforms ahead of Ariados level to the ground (can go farther when fired higher up) and deals 5% and slight knockback. Creates a puddle of poison that lasts 20 seconds, dealing 2% and a further 1.5% every second a fighter remains standing over it, disappearing after inflicting a total of 14%. Only one puddle can exist. Ariados is immune to the puddles, but Golisopod is not, though they can be used to trigger Sucker Punch (but not Spite).
  • SSpec - Fell Stinger: Stabs forth deceptively far with its horn, dealing 12% that KOs at 140%. Its main and best finisher, but is punishable. If it KOs an opponent, Ariados's attacks will deal 1.25x as much damage and 1.1x more knockback until it is defeated. This can stack up to two times like in the games, but it's unlikely that you'll get that far.
  • USpec - Toxic Thread: A typical speedy tether that can be aimed forwards, diagonally or upwards. Deals 5% on contact (no hitstun) and 1.15% poison damage every second it remains stuck as well as cutting the victim's movement speed by 20%. Destroyed by receiving 35% from melee attacks (does not trigger hitlag) or moving past its 2 platform long length. If the latter was done however, foes will trip or tumble when the thread breaks, be they moving away of their own volition (unless invincible such as rolling or dodging), or if they were launched the thread will snap towards them and infest them with a glob of poison that continues to damage them over another 5 seconds. Can stack.
  • DSpec - Spider Web: A sticky glob similar to Venom Drench, but deals 3% and slight downwards knockback against airborne foes. Grounded foes get glued in place for one second, but can still attack and dodge. The catch is that Ariados suffers extra end lag and this does not deal hitstun against grounded opponents, still able to punish. Will not stick the same foe again for 3 seconds. By pressing B while the glob is out, it will explode into a platform-wide net with no hitbox, but remains as a trap for 15 seconds that slightly increases the landing lag of foes and decreases it for Ariados. Its timer ticks down thrice as quickly while a fighter is occupying it. The net can be placed between 2 horizontally even platforms with good timing, such as the ones on Battlefield, in which case it can be used as a spring up to 3 times before disappearing. This can help immensely with Golisopod's air game if it's still around for it. The net can be poisoned with Venom Drench to create an extra puddle that doesn't count towards the usual limit, damaging those who touch or fall/jump through it.
  • Standards and Aerials: A series of quick poking and tripping attacks and combo starters with the legs, but the Dash Attack is a punishable ram that can KO at later percentages. Does not have Smashes.
  • Grab - Venoshock: Short-ranged bite, one throw that can be aimed forwards or backwards; biting down for 8% and high base knockback but low scaling. If the foe was poisoned, this will instead deal 12% that KOs at 150%.
If the Final Smash is used again in the same match, Guzma will instead send out his Masquerain. Masquerain only has 70 weight units and a mere 30HP, but it has high air speed and 20 tiny jumps that give it more jumps than any other character in the game, surpassing even Giant Bat. This is Masquerain's sole means of recovery that outclasses the common Jigglypuff (they have nothing on a Guzma Pokemon!) and can in fact be use to stall excessively combined with its floatiness, but don't get too full of swagger or else a foe could punish this and take a stock from you. Once Masquerain is KOéd, Guzma will cycle back to Ariados with his next use of the Final Smash.

  • NSpec - Ice Beam: Charges energy to fire an icy beam 2 platforms forwards, dealing 10% that KOs at 180%. Fired downwards in midair, with infinite range and mostly-upwards knockback that can start combos. Can hold B midair to charge further and have the beam sweep forwards quickly so it ends 30* downwards, potentially covering a huge area. This variant has more end lag though. Hitting a surface will freeze it for 15 seconds and has the same effects as Golisopod's water, though Masquerain cannot benefit from it.
  • SSpec - Scary Face: Makes an angry face and the eyes on the antennae glow to intimidate opponents! No wonder Guzma uses this Pokemon despite its non-threatening appearance. This deals high base knockback on a low angle and actually ignores shields, but is easily avoided through dodges. Once landed, Scary Face becomes less effective (now only dealing below-average knockback on contact) and will not go through shields. Takes 6 seconds for the knockback to gradually recover.
  • USpec - Bubblebeam: Blow a Pokeball-sized bubble that hovers 1 platform forwards before curving to slow drift to the top of the screen. Can be spammed for 5 bubbles a second that deal 2% and no hitstun, but staling makes them do less overall if they hit. It can be useful to not hit with the bubbles and let them drift so you can keep the full power on as many of them as possible. Bubbles will stale when they hit from lingering, which can actually be useful for refreshing Masquerain's other attacks like its U-air which is used to juggle foes into them. Ice Beam will pierce bubbles and turn them into ice balls that fall and deal 6% with some mostly-upwards knockback, breaking on contact with a foe or surface.
  • DSpec - Bug Buzz: Buzzes to create a 1.5x Bowser wide green sound wave that deals 5 hits of 2%.
  • Other Attacks: Similar to Ariados, but a mix between more ranged attacks on the forward inputs and less range on the vertical inputs, but dealing multiple hits. Throw attack is Psybeam, which has Masquerain hover up as high as Falco's Jump while pinning its victim down with a rainbow beam before they're knocked up on a high angle for 10% that KOs at 170%.

If Golisopod used its Final Smash close to an opponent, it will instead use the Bug-type Z-Move Savage Spin-Out! It would be criminal not to include this move in the set, given Guzma is the Bug-type specialist in Alola and he does have a huge stash of Bugnium Z Crystals that you have to steal from to even get one in the first place. The triggering hitbox is completely identical to FI except it goes through shields, and deals 35% that KOs at 70%. This also refreshes FI and its counter if it lands.

Ariados and Masquerain can use Savage Spin-Out too, as the Smash Ball will spawn while they're out due to the indefinite nature of their stay. Here, they'll fire out a quick, thin projectile across the screen (String, Psybeam) that pulls the victim towards them before they go and do their bug thing. This only deals 24% that KOs at 115% however due to the range and the fact that both Pokemon are vastly inferior attackers to Golisopod.


Changes

- Golisopod only slides 1.5x father over water during movement attacks @ Up Special. You can choose not to move the extra distance by holding down or in the opposite direction.
- Sucker Punch and Spite on the Down Special are combined, staling 3 of the foe's moves if you counter or 2 if you're hit during the first half of your end lag. Punching downwards creates a shockwave that can trip foes. Frame data is not specified on this version.
- B-throw KOs at 105% near the ledge rather than 50%.


DSPEC ~ SUCKER PUNCH
Lowers its guard for 60 frames and counters between frames 5-25; a quick sliding punch that goes 1.25 platforms in one of 8 directions and deals 12% that scales well. That'll teach you to mess with his boy! No delay and little end lag make it a much-needed safe and powerful approach for Golisopod, especially against projectile users. Can true combo the knockback close-up at lower percents (mid-percents over water) or punish shields at max range.

Once triggered, the next counter window comes out 1 frame later (6-25), and a noticeable delay between the trigger and slide occurs. The slide also becomes a bit slower, giving foes more time to react as Golisopod is not actually invincible during the rush. The counter is restored after 7 seconds, but can stack if used again before then and practically render the counter useless.

Triggered too early or late (frames 3-4 / 26-45), SP becomes Spite. Half of the attack's damage is suffered, and that move is specifically added to Golisopod's stale que. This doesn't stale its own attack for that corresponding input, but rather treats the attacker's move as it though it were on their stale que when it hits Golisopod! This makes it so a foe can potentially have 18 moves staled, and this will actually weaken an individual move farther if it was listed 10+ times. Spite persists for 2 seconds beyond the counter and is reset when Golisopod is attacked (even when shielding or countering). This allows Golisopod to regain FI without having to land hits on a foe, but Spite still counts towards triggering the counter and will delay Sucker Punch with each use.
 
Last edited:

UserShadow7989

Smash Journeyman
Joined
Aug 13, 2007
Messages
315
[][][] Warning! Challenger Approaching! [][][]

[][][] Paper Witch Mint [][][]


[][][] Introduction [][][]

The latest in a line of OCs for a hypothetical metroidvania game, following Marin and Garnet from prior contests. Mint is another student of the magic academy the game is based within, and another boss battle caused by the unknown influence seeping throughout the building, amplifying desires and personality traits.

Mint is a 'former' delinquent who cleaned up her act upon entering the academy, determined to make the most of her opportunity. Coming from a branch of a highly traditional (though without great prestige) family, she's polite, passive, prim, and proper, born and bred. That's the popular belief, at least. Though bound by old customs in public, Mint's family is much more relaxed away from the limelight. Mint's branch of the family tree in particular are very loose about adherence to ancient (and as some of them might say with some controversy, outdated) laws and rites.

While she does indeed intend to graduate with flying colors and maintain a clean reputation, deep down her love of causing mischief has never faded, and the seemingly no-nonsense and shy student was responsible for a number of pranks and bizarre happenstance around the premises. Her family's encouragement and close friendship with other 'proper' students are what keep Mint in line, not wanting to disappoint them when they've been supportive every step of the way. The combination of her studiousness and her family's reputation leave her past mostly forgotten and scarcely believed.

Her appearance fits her intended image to perfection; where her peers are happy to take advantage of the academy's nearly nonexistent dress code to express themselves, Mint's outfit consists of a blazer, dress shirt, ribbon, skirt, shorts, and knee-highs of deep greens and whites, arranged in a way that would be easily mistaken for a proper school uniform. Her most striking feature, her mint green hair, is meticulously combed and drawn into a ponytail, and her deep brown skin is unblemished. Freckles lightly dot her cheeks and nose.

Her primary equipment for mayhem are her 'study tools'. Her wand doubles as a pen, translating small portions of her magic into ink that she can write with in any color or opacity, on almost any surface, and in various sizes- meaning it also serves as makeshift spray paint, and is an excellent tool for scribing scrolls.

Her scroll case, speaking of, holds a deceptively large amount of paper-thin objects as a small pocket dimension in and of itself. Useful for studying notes, transporting paperwork, and animated origami pieces of great size with the right folds for storage. Toilet paper and fly paper are also stored safely within, for purposes not intended by their makers. The case produces what the holder thinks to retrieve, making it an excellent tool for smuggling in these 'extracurricular' materials.

With the immense excess life energy flowing through the school driving its population to their wits' end, Mint holed herself up in the library, filling it with traps, pranks, and her own paper creations of much more dangerous variants than she'd ever consider using normally. Marin's victory brought Mint to her senses, and a promise to keep her secrets earned Marin a friend and confidant who would prove invaluable for finding alternate routes and forming connections.


[][][] Stats [][][]

Air Speed, Dash Speed, Traction - Mewtwo
Fall Speed, Jumps - Luigi
Gravity, Weight - Pikachu
Size - Robin
Special: Crawl, Hover, Wall Jump, Wind Jumps*

*Mint's jumps create a small area of wind around her feet, which lift several of her creations up with her. They do not affect her opponent, but allow her consistent access to her tools.

Overall, Mint is an exaggerated lightweight with aerial excellence. She can crawl quickly, hover exactly as Peach does, and possesses good wall jumps to boot, on top of the mobility appropriate to her weight class.


[][][] Specials [][][]

[][] Neutral Special [][]

Mint's wand glows as she scribbles furiously onto a piece of paper, stowing it away if the input is repeated. Entering and exiting this stance is nearly lagless, and has no effect on its own.

The player can input any non-Special move at this time, except the Dash Attack. Standards and Smashes are input normally (the latter can be charged as normal), Aerials using the Jump button instead of the Standard button, and the Pummel and Throws are input via the Grab button (plus directionals for the Throw).

After a modest delay, Mint holds the completed scroll in hand to show for her efforts. The scroll can be thrown or dropped like a throwing item; if thrown, she twists her wrist, shaping it into a paper airplane that glides forward at Robin's Dash Speed and slowly loses altitude until it touches an opponent or solid surface, lightly bouncing off the former for 3% damage and flinching, or sticking point-first into the latter.

If smash thrown, it deals double damage, and flies at Captain Falcon's Dash Speed. If she drops it, it simply flutters down to the ground slowly as a regular piece of paper. Either way, it ceases to be a throwing item once it touches something.

Mint's wind hitboxes will blow scrolls around, after which it will be treated as if dropped (if unshaped) or resume its glide as if thrown normally (if in airplane form). Enemy damaging hitboxes destroy scrolls, and they are unaffected by other attacks unless noted otherwise.

If the opponent touches the scroll, it flashes brightly. After 1 second, the move Mint input while scribing appears through the paper, aimed straight up. The move functions just as it would if performed directly by Mint, aside from the shift in angle, after which the scroll vanishes. If affected by wind during this time, it will continue to perform the move even as it flutters about; destroying it interrupts the move.

Mint can have 4 scrolls out at once; creating another causes the oldest to vanish. Repeating the Neutral Special while holding a scroll allows Mint to change which move is stored within.


[][] Side Special [][]

After a moment of thumbing through her scroll case, Mint pulls out a large sheet of pre-folded paper. With a flick of her wrist, it unfolds into an origami frog! It's no mere decoration; animated by magic, its basic intellect has served Mint well.

The frog is slightly shorter and thinner than Jigglypuff. It patrols land at Mario's dash speed and air at Robin's air speed, pursuing the nearest enemy with just enough intelligence not to destroy itself in a hazard or by falling off a ledge. It has two mighty jumps, on par with Falco's, and Mint's own meager fall speed. However, it has half Jigglypuff's weight, and is destroyed by any damaging hitbox that causes hitstun.

To attack, it spits out its 'tongue' as a long-reaching hitbox; this deals 8% damage and flinching knockback, the attack having little lag but a slight 'cooldown' period before it can attack again. Like Mint's scrolls, the frog can be blown around by her wind hitboxes, and will continue its attacks unperturbed even as it's moved about. It's no powerhouse, meant instead to create openings and interrupt foes.

Mint has an extra trick up her sleeve; if holding a scroll when she performs this input, she slips it into the origami frog! If a frog formed with a scroll is destroyed, it unfolds to reveal the scroll, which activates automatically. Foes must either launch the frog away (deceptively difficult despite its weight, as Mint is free to capitalize on slower attacks) or strike again swiftly to neutralize the scroll.

Mint can have two frogs out at once; creating a third dismisses the oldest, which drops its scroll (if any). The input is quick, but lacks a hitbox.


[][] Down Special [][]

Mint whips a blank scroll out from her sleeve, braces her back foot, and presents the scroll in front of herself. This counter has a small window of super armor during which it functions, and has some notable end lag on a whiff as Mint stuffs the scroll back up her sleeve.

Should an enemy hitbox touch the scroll (which stretches a short distance above and below Mint's hurtbox), it releases a cloud of colorful smoke that stuns the opponent, Mint exiting the stance near laglessly. The smoke obscures Mint and a small area around her completely for 1 second, leaving the opponent to guess her next action with minimal time to react.

On a successful counter, Mint can now use the scroll as she would any other, the move it contains being the very attack her opponent used! With the aggressive pace Mint sets for the match, and the temptation to brute force through her scrolls and frogs, Mint can make great use of this counter to punish sloppy or risky gambles and use her opponent's favorite tricks against them.


[][] Up Special [][]

A whirlwind surrounds Mint, holding her aloft. Mint can move freely through the air for 3 seconds at Marth's Air Speed. While levitating, Mint can freely use her Standard and Smash inputs, and can move even mid-input. She can also jump from the whirlwind, equivalent to her second jump's height, which leaves it in place for the remainder of its duration.

The whirlwind generates a wind hitbox out half a battlefield platform length to either side of Mint, pulling in enemies and scrolls alike. The whirlwind itself is a short range grab hitbox that spins caught scrolls and enemies around for 1 second or until the whirlwind ends, then flings them straight up for 11% and solid upward knockback.

Repeating the input causes the whirlwind to shoot in the direction Mint faces from its current position as a projectile, moving at the same speed as when supporting her. Its wind hitbox is weakened and reaches only half as far without her directly present within it. Holding the input allows Mint to steer the whirlwind instead of moving until the Special button is released.

Mint doesn't enter freefall when the whirlwind ends, but must stand on solid ground to create another. If Mint activates her Up Special again, the new whirlwind's pull has priority. If Mint releases a second whirlwind as a projectile while one is already active, she dismisses the old. If it ends mid-input, the input is cancelled, and Mint suffers some lag.


[][][] Standards [][][]

[][] Jab [][]

Mint procures a sizable origami fan from her case, swiping back and forth as the button is held. These rapid hits inflict 2% and light knockback, while generating a small wind hitbox that gradually stretches out from Mint as the origami fan continues to unfurl. The first is a mere crate-width from Mint, but after a full second, they cap out at triple that.

As Mint swings her fan, puffs of paint float off the paper through the wind, doing 1% and light radial knockback at half the rate. Hardly capable of comboing, but can at least give Mint some safety from a direct approach while she's fanning the air. When placed in a scroll, the wind hitbox and paint are flung from the scroll for a full two seconds, with the maximum range. Being aimed upward, the paint can juggle opponents slightly, and the duration can trap them between Mint and a small stun trap.

There's some ending lag as Mint folds and puts away the fan, more the longer she held the input. A quick hit is an easy combo starter, while holding it for the full second it takes to max out is punishable.


[][] Forward Tilt [][]

Mint thrusts her wand like a dagger, dealing 5% and light knockback. The pen-like point at the tip of the move's reach instead inflicts 7% and nearly horizontal moderate knockback.

From this tip sprays pastel ink that coats a crate's width of ground a short distance ahead of Mint. The ink deals 7%, and light, low-angle knockback. The ink falls a short distance from the spray without any ground to land on, making the hitbox surprisingly expansive. Scrolls caught in the ink spray are shunted forward, colliding with anyone caught in the spray with them, and fall to the ground. They lay in the puddle, obscured by the ink and immovable by wind, for 1 second before the ink vanishes.

When used from a scroll, a pen tip sticks up from the parchment, spewing a geyser of ink into the air that comes down over a short area in the opponent's direction. The pen tip is still a hitbox, launching foes standing on the scroll straight up, with the following spray catching them for a second hit.


[][] Down Tilt [][]

Mint spins on one foot, a pair of origami tops flung from her sleeves to either side of her. The tops hit the ground and spin 1/4th of a battlefield platform width from Mint as a pair of Pokeball-size hitboxes, slowing to a stop. The initial toss at point-blank inflicts 6% and light upward knockback, while the very edge of the range deals 1% and no knockback or stun. It's a glorified melee tool (with good disjoint and frame data) used off the cuff.

The tops bounce off solid walls and go flying off ledges, sharing Fox's fall speed. Wind manipulates the tops like scrolls and other origami. If the tops fall or touch a wind hitbox, they start spinning more rapidly; this makes them travel faster, farther, and hit harder. At a full speed spin, they inflict 12% and moderate knockback, travel twice as far from their latest landing point, and move roughly half the speed of Fox's Neutral Special projectile. The tops vanish when they stop moving, when Mint generates another pair, or when struck by an attack that deals more damage.

A scroll shoots both tops up into the air, reaching Ganondorf's height before they fall back down and shoot off at full speed in opposite directions. This pair is counted seperately from ones Mint creates directly; there can be one pair from Mint herself, and one from her scrolls.


[][] Up Tilt [][]

Mint swings her scroll case above her head with an exaggerated motion that starts and ends low to the ground. The extradimensional container releases a rain of pink confetti with a burst of air at the swing's peak. The swing itself does 7% and moderate knockback with some reach.

This passably quick sweep can juggle at the right damage percentage, but more important is the cone-shaped wind hitbox that reaches 1/4th of a battlefield platform length above Mint and an 1/8th of a platform to either side of her at its widest. This is Mint's quickest tool for getting her scrolls and origami airborne.

While the wind inflicts no damage, the confetti does; opponents in contact with the confetti cloud passively take damage (without stun or knockback) at a rate of 3% per second. Small, faintly glowing runes on each square seem to be the culprit, or maybe it's from inhaling the tiny little papercuts waiting to happen? Regardless, the confetti floats down to earth at Jigglypuff's fall speed, where it vanishes. Opponents can clear out swaths of the confetti with damaging hitboxes like most of Mint's creations, and shielding or dodging ignores the effect.

Wind hitboxes will lift the confetti back up and expand the cloud to fill them edge to edge, prolonging the effect and adding insult to injury when Mint catches foes in her whirlwind. Scrolls fire this confetti and the cone-shaped wind hitbox, angled 45 degrees towards the opponent, and the scroll itself is briefly a hitbox with the scroll case's properties on activation; the result covers a surprising amount of space. Like her tops, Mint re-using this input deletes the current confetti cloud, but her scrolls can have their own.


[][] Dash Attack [][]

Mint hurls a blank scroll at the ground and aims her wand at it, vanishing into the resulting smoke cloud. A similar cloud appears half of a battlefield platform length ahead, and Mint emerges from another smoke cloud standing on a similar scroll, facing the direction she came from with magical energy concentrated at the tip of her wand.

Mint releases a small burst of pure energy that dances around (and destroys) the two scrolls, covering the space between in sparks. The clouds deal 5% and flinching, and a wind hitbox follows Mint's path from one to another. The energy deals 10% damage and solid upward knockback. Mint's disappearance is slightly telegraphed, and the actual attack portion of the move has punishible delay before it goes off, though the ending lag is very minor.

If the player performs an input mid-teleport, Mint will use that input instead of conjuring the above surge of magical energy (the scrolls still vanish). She starts the first frame of the move's lag the moment she reappears, poking overeager foes looking for an easy punish, setting a minion to pursue, or readying her counter. Moves performed this way have slightly increased end lag, though the FAF still comes sooner.

The scrolls used in this move's animations do not count toward the limits stated in Mint's Neutral Special; they are purely visual.


[][][] Smashes [][][]

[][] Forward Smash [][]

Mint raises her wand overhead in both hands, visibly shaking from the magical build-up. She swings her wand down, conjuring a crate-sized, papermache log. It rolls across the ground, doing 18 ~ 25% and solid radial knockback on contact. Depending on charge, it moves from Robin's Dash Speed to Kirby's.

The log travels 2 battlefield platforms, until hit with 20 damage, or until contact with an enemy, bursting into paper. If it rolls off a ledge, it has Fox's fall speed. Wind effects push it around with roughly 1/3rd the normal effect. Mint's attacks and solid walls bounce it around, adjusting its course. High knockback inputs can increase the log's speed, and its associated damage, up to its full charge.

It picks up scrolls and other creations of Mint's it rolls over, flattened against its side. Wind, knockback, falling, and its destruction peels attached items from the log and scatters them.

Mint can angle this input for an alternate application. Angled up, it flies in a low arc, and angled down, it hits the ground directly in front of Mint with a thump, creating a short range but instant shockwave that deals the same damage and knockback. Either way, it lands flat on its side as a stationary obstacle.

It has 20 stamina, and serves as a solid platform. Pushing against it for 2 seconds or hitting it with any notable knockback tips it over and sends it rolling at minimum speed and damage, while any appreciable fall causes a log to land and become stationary. Contrasting the slow start, Mint suffers minor ending lag. Mint can have two logs out at once; creating a third destroys the oldest.

A scroll shoots the resulting log straight up if angled up, rolls it in the inputted direction if not angled, or summons it on the spot if angled down.


[][] Down Smash [][]

Mint aims her wand and scroll case at the ground, a Pokeball-sized orb of wind forming at the former's tip. Paper from the case is pulled into the orb and crumpled. She launches the orb straight down, exploding on contact or after traveling half a battlefield platform width. The spherical hitbox expands out from Mint with a radius of half a battlefield platform width, filled with origami shuriken formed from the paper.

The sphere does 15 ~ 21% and solid radial knockback, doubling as a wind hitbox that blows scrolls and origami constructs away from Mint at high speeds. Scrolls within half the sphere's radius of Mint are stuck with the shuriken, pinned to whatever surface they touch next for 1 second. Pinning them to a wall or other surface besides flat ground (such as a log) rotates the angle of the resulting spell fired from the scroll accordingly. Afffected origami items deal an additional 3-5% damage on contact briefly afterwards.

The blast lingers enough to alleviate the lengthy lag, though Mint is still exposed. Other tools- minions, scrolls, tops, confetti- are needed to protect her on a whiff. The effect from a scroll is identical to one used by Mint, but centered on the scroll.


[][] Up Smash [][]

Waving her wand, Mint gathers ribbons of energy around herself. She fires the ribbons skyward, which explode half a battlefield platform away into colorful fireworks. Depending on the charge, the fireworks inflict 17 ~ 24% and solid upward knockback, and cover a space one crate high and 0.3 ~ 1 platform wide for 1 ~ 2 seconds. The ending lag is long, but starts when Mint directs the energy; she's free long before the fireworks end.

Surfaces and Mint's origami constructs in the area catch fire for the remaining duration of the display + 2 seconds. Terrain, scrolls, frogs, and logs deal 4% and light radial knockback on contact, origami weapons have their damage increased by an equal amount. Scrolls are triggered, forming a chain reaction. Enemies can extinguish the flames with damaging hitboxes.

When used in a scroll, the fireworks are centered on the scroll itself instead of the air above. This forces opponents into aerial combat, and leaves them with little safe room to land.


[][][] Aerials [][][]

[][] Neutral Aerial [][]

Mint swings her wand in a circle around herself. A soccer ball-size origami shuriken slips from her sleeve to a spot in front of her wand at the start of the animation, following the wand's tip around Mint until it ends back in front of her again, where it vanishes. Holding the input allows Mint to repeat the motion seamlessly until release, whereupon the shuriken instantly disappears. This short range hitbox does 4% and very light radial knockback with every hit.

If the player holds the input and smashes the control stick, Mint flicks her wrist, propelling the shuriken a battlefield platform width in that direction. It flies forward in small, fast loop-de-loops, and passes through opponents. This is the form it takes when created via scroll, appearing just above the ground and flying upward. If the shuriken strikes solid terrain or a destructible, it embeds itself into that surface, acting as a passive hitbox that is destroyed on contact with the enemy or their damaging hitbox, or when another is created. Its properties as a hitbox are unchanged under both circumstances.

Notably, the shuriken 'catches' scrolls and origami (except logs) on its points, pulling the affected object along until the shuriken vanishes or hits something. This can turn scrolls into hard to evade projectiles, render frogs hard to evade/strike, and change the movement pattern of Mint's other projectiles briefly. Wind hitboxes do affect projectile shuriken as well, though they continue to loop around.


[][] Forward Aerial [][]

Mint draws a paper sword from her sleeve, lashing out with it in the same motion. The slice is so quick, the sword is visible only as a glint of light in motion. The horizontal swing is wanting for reach, but inflicts 7% and moderate knockback. Mint smirks and slips the sword up back her sleeve, holding her hand high to let it slide down into its sheath for ending lag as bad as the start up is good.

Repeating the input has Mint perform a flurry of slices, hitting up to two more times for 4% each. The extra swings are unlikely to hit if the previous one did due to its stronger knockback, but are weak enough themselves that Mint might land the second and third together. Her ending animation has her panting for effort as she roughly shoves the (drooping) sword back up her sleeve, taking just as long as normal.

By holding the input, the sword's keen edge can be used to cut Mint's own scrolls and projectiles. The affected object is split into two halves that are blown roughly in opposite directions from each other (a very small wind hitbox). At half size, projectiles deal half damage, and vanish on touching something. Scrolls are triggered by this effect- both halves of them, resulting in a half damage/range effect from each part.

Her origami frogs, too, are split right down the middle- both halves folding out, doubling the width of the minion and letting it attack both directions at once! This counts as a single minion and otherwise functions normally. Regardless of what it is, Mint can only slice something in half once. The blade appears from a scroll to do a full combo, and holding the input during the Neutral Special has it slice scrolls and projectiles as the input can. The latter has a short delay, letting Mint capitalize on the fly.


[][] Down Aerial [][]

Mint lifts her leg high, then swings it down hard, wisps of wind circling her ankle. This covers some space in front of Mint, and a little ways behind her at the bottom of its arc, deceptively wide thanks to Mint's wind magic. She deals 6% and light forward knockback at a low angle, or 9% and moderate knockback at the edge of the hitbox (her heel a sweetspot). Mint herself gains some altitude on hit with an opponent, or one of her own creations, as the magic is reflected off.

Mint's origami/scrolls are launched at a downward angle with great speed, acting as projectiles. If they deal damage normally, they inflict that damage + 3% and slightly higher than normal knockback on hit. If not, they deal 4% and light radial knockback. With correct timing and positioning, and a little help from the wind magic in her jumps, an active Up Special, or her Neutral Special, Mint can spike powerful projectiles into an opponent's face as they try to approach, evade, or even recover.

The stomp is a little slow, and definitely telegraphed, but still usable thanks to Mint's great mobility and zoning. Getting the most of the projectile takes set up, but it's worth it. A scroll will create a burst of wind with the downward launch effect after a short delay, letting Mint hurl a projectile into it.


[][] Back Aerial [][]

Mint slaps at the air behind herself with a paper fan, the force enough to spin her around fully. The fan does 5% and light knockback, and generates a sizable spherical area of strong wind behind her, both pulling toward her. The input is fast, though the only damaging portion has modest reach.

Repeating the input quickly has her clap the fan shut and reverse her grip with a flick of her wrist, stabbing under her arm behind herself. The fan shimmers, the tip of her paper sword used in her Forward Aerial extending from the fan just as she thrusts. This small hitbox inflicts 8% and moderate knockback. The spacing to chain the first hit into the second is strict, but makes for a potent combo tool. Scrolls perform both attacks.

Scrolls touching the sword are stuck to its tip, carried by Mint until she performs another move, flinging the scroll as if it were struck by her attack (using Jigglypuff's weight) or dropping it (if no knockback is done).


[][] Up Aerial [][]

A wave of her wand creates three Pokeball-sized balloons above Mint, which rise a short distance, fan out, and drop like lead weights (or Fox). On contact with any surface, an opponent, or a damaging hitbox, the balloons burst in a crate-sized spray of water. The balloons and the water each deal 4% and flinching. Mint suffers modest start up and little end lag, though creating more balloons pops the previous ones, and she isn't fast enough to chain multiple uses together.

The balloons can be manipulated by wind, and also interact with paper. Scrolls, origami, and so on are soaked by the water, gaining the balloons' fall speed until they land. This is a particularly useful option with Mint's Up Special, the balloons and soaked items hurled up and down as a makeshift barrier. Scrolls fire the balloons straight up in a line, rising half again Ganondorf's height before falling; controlling less space for longer.


[][][] Grab Game [][][]

Mint has two grabs available to her: tapping the input results in a quick thrust of her palm, tagging the foe with a paper talisman that freezes them in place. If the input is held, Mint instead draws a small white sheet from her case, and slings it like a whip. The case whirls around an opponent in its path, mummifying them with thin, segmented pieces of paper, then retracts with opponent in tow. The former is quick but lacking in range, the latter laggy on a miss but having better reach.

For her pummel, Mint scribbles on her opponent's face, tagging it with comedic expressions or insults that linger briefly. These rapid 'hits' add up to 3% each second.

If Mint was holding a scroll, her Grab Release gains an extra quality. The scroll is stuck to the opponent's back like fly paper, triggering. It falls off shortly before it performs the attack, aimed horizontally at the opponent's behind.

When used by a scroll, paper shoots up and pulls enemies down onto the scroll. It will constrict the opponent for equivalent damage to her pummel if keyed to the grab itself, else it immediately performs the throw.

Mint is a little slow on the draw (and especially vulnerable if she misses), but the long reach gives her a constant threat to hold over opponents who lose track of her.


[][] Forward Throw [][]

Mint swings her wand forward, wind swirling at her command. The opponent is launched at a low angle for 7% and decent knockback, a steady gale flowing across the ground from the lingering magic for 3 seconds. It stretches 1.5 battlefield platform widths from Mint, and is half as tall as it is long. Aside from being a respectable KO option, the wind hampers enemy approach, aids Mint's own, and serves to deliver her scrolls and weapon right to the opponent's new location.

Scrolls generate the wind as an updraft. Unlike Mint's Up Special, the wind doesn't halt forward momentum in the process of pushing things up. Mint can reach new heights with her jumps, and opponents are swept off their feet.


[][] Down Throw [][]

Mint pulls her hand back from the opponent, revealing a colorful paper chain with an origami shuriken attached. She flings the sharp end to the ground with enough force that the point is buried, then knees the opponent in the gut for 9% as she backs away. Without her hold, the paper binding the opponent dissipates- aside from the glowing chain still attached to them.

The opponent is limited to movement within a radius of half a battlefield platform from the point for 2 seconds, until the chain takes 10% damage from their attacks, or until they take knockback that knocks them out of this radius. Mint is free to retreat, or to take advantage of the opponent's trapped state, having a tiny frame advantage and a head start in the former case.

Notably, the tether can be aimed slightly; flicking the control stick during the wind up has Mint throw the chain in that direction, letting it stick to the first piece of solid terrain it touches. If it hits moving terrain features- such as her log- the opponent is pulled along with it when it would move further than half a battlefield platform from them. If forced further apart, or the terrain is destroyed, they are freed.

Applied through a scroll, the tether is set to the spot the scroll occupied.


[][]Back Throw[][]

Mint yanks on the bindings like a rip cord, sending her opponent spinning across the ground past her. The pull causes 7% and light horizontal knockback. The opponent spins the distance of the knockback slowly, stumbling out of the spin at the end of it. The stun is short, and Mint has some end lag, but it's enough to set Mint up for another attack.

Opponents serve as a wind hitbox mid-spin, gently attracting nearby paper. Direct contact lightly tosses affected items up, leaving them to slowly fall toward the foe. Minions, scrolls, and weapons collide just when the opponent seems to be free. Unlike the forward throw, the opponent is unlikely to be KOed, but is much likelier to be caught by your set up.

A scroll will spin the opponent towards Mint, and most likely through her traps in the process.


[][] Up Throw [][]

Mint waves her wand, forming a whirlwind around the opponent. The wind affects out to half a battlefield platform from itself, pulling things in and spinning them around the opponent. The effect is short-lived; the whirlwind explodes, shooting the opponent straight up with 10% and solid knockback.

Things pulled in don't touch the opponent, floating back down after the launch, spread evenly over the affected area. The animation is a touch long, but there's little lag; Mint is in prime position to chase her opponent with scrolls in tow, or prepare as they come back down.

The animation length is notable for use via Scroll; Mint has a head start on her opponent, and can even take advantage of the opponent's immobile state with a smash attack!


[][][] Final Smash [][][]

Mint grits her teeth and, raising her scroll case above her head, hurls it to the ground. Sparks and smoke flow from the abused magical device, and when it clears (showing the case good as new in Mint's hands), it reveals her to be surrounded by copies of herself!

Mint's paper clones are her biggest secret and greatest assets; plausible deniability on demand, witnesses attesting to her being in a completely different location than whatever chaos she caused. In cases where frogs cannot perform a task properly, a paper clone made to look like nobody in particular can act beneath notice (and therefore suspicion) to get the job done.

In this case, Mint is backed up by 4 paper clones who have access to the entirety of her set, minus her Side Special. They cannot actually create scrolls with their Neutral and Down Specials, but will go through the motions and plant 'dummy' scrolls around to further obscure Mint's actions. Their attacks that would manipulate scrolls only affect their own, not interfering with Mint's game plan in their attempt to cover her.

They share Mint's statistics and act as she would if hit at her current damage percentage. However, they do not take damage of their own; a hit that inflicts knockback causes them to crumple where they land (or stand in the case of merely flinching knockback), stunned for 2 seconds before they straighten back up and resume their assault.

The Final Smash ends after 10 seconds or all paper clones are KOed. A paper clone being KOed removes its fake scrolls and various effects from play with it.


[][][] Playstyle [][][]

Mint is an aggressive mid-range fighter on the surface, using various projectiles, AoE effects, and constructs to keep the opponent at bay while she whittles them down with poke after poke. Wind hitboxes push and pull opponents around to extend Mint's advantage state or end an opponent's quickly; this is vital due to her weaknesses. She has trouble when in neutral for too long, as most of her tools are meant to grind foes down instead of delivering a single decisive blow, and her more powerful options leave her vulnerable or require some set up for the full pay off. Her recovery is fantastic, but she lacks the weight to survive a prolonged beat down.

Mint's scrolls are key in securing an advantage state and keeping it. Mint's various attacks and even the act of jumping means these traps move with her, constantly between her and her opponent. While fragile enough to be destroyed by any damaging move, acting to destroy a scroll means Mint is free to punish with her more potent attacks, play off of existing set up, or simply produce another. Her frogs play a similar role in a more passive sense, and the two can be combined into an excellent diversion.

In the situation that Mint and her scroll might both be struck with a single attack, she can simply use her Down Special to block a would-be hit- both replacing her scroll and leaving her with the frame advantage. The opponent playing around her scrolls makes her quick pokes much more effective, keeping them out of melee range and interrupting their plays at the worst time, with the added bonus of sending the offending scroll flying right into them for a follow-up hit!

Mint need not actively babysit her scrolls for them to be effective. Her Up Special in particular can keep them an active threat with minimal input once it's active, and her Down Smash and Neutral Aerials can pin them down and make them stationary traps, at the cost of having to commit to the decision for better or for worse. Her wind hitboxes, lingering projectiles, and her Forward Smash make for excellent means of chasing a foe into a scroll.

Mint isn't limited to using her scrolls as a makeshift paper shield; due to their activation condition and her many means of manipulating them, scrolls can turn her disparate attacks into fairly consistent combo chains with careful play. Up Special and her throws are key examples of guaranteeing a scroll trap does its duty, and proper use of scrolls with the latter can set up chain reactions! Even the simple act of restraining the opponent with a scroll, or sticking a scroll to an opponent with the special grab release mechanic to force them to keep moving, gives Mint free rein to start setting up her scrolls and frogs- or to start charging up a smash for a KO hit.

This is to say nothing about her other ways of playing with her existing tools. All three of her smashes hit hard and are designed to 'expend' her scrolls in the process of hurting the opponent. Forward Smash and Down Smash use nearby scrolls as the second of a 1-2 punch on foes they hit, and Up Smash ensures anyone who survives its hitbox proper will land among flames and scrolls already triggered.

Her Up Tilt provides a passive source of damage that is an irritant on its own, but eases the need to grind foes down. Down Tilt provides projectiles that, with proper follow up, can persist for an annoyingly long time and force opponents to react in a way Mint can punish. Forward Tilt is a temporary way to keep scrolls in place- and hidden enough to be easily forgotten in the chaos- with less commitment than its counterparts in the Down Smash and Neutral Aerial. Her Neutral Combo itself doesn't have any real 'fun' effects to speak of, but it's a quick poke, and like most infinite jabs, it can keep the opponent from going anywhere for a bit- handy if they just triggered a scroll.

Her aerials serve both as her best attack options and utility for corner cases. Forward Aerial acts both as one of her better offensive options and a means to literally divide up her resources, providing more of the same tactical advantages in exchange for a weaker payoff. Down Aerial is a reliable KO option once off stage, or good for punting an opponent right into one of Mint's assorted goodies (or viceversa). Back Aerial can be considered the reverse of her Neutral Aerial in purpose, ensuring she keeps one more trap up her sleeve and being an excellent attack on the occasion foes get behind her besides.

Up Aerial is an odd duck, creating its own projectile like the Down Tilt that does better when tended to. The way wind moves the water balloons and dampened origami being different in speed from normal origami and scrolls makes them more useful when used in combination, making the timing of defending against Mint's options inconsistent and tight. Used from a scroll, Up Aerial is the perfect set up for a smash attack.

Mint's not totally without a means of escape when left to defend herself. Her Dash Attack and the various ways it can be used lets her reset to neutral in a pinch, and a superb read can even give her back the advantage. Up Special gives her the mobility to escape most opponents, while Down Special can catch an opponent who's too aggressive off guard. Even simple short hops back can help, the wind generated by her jumps pulling her scrolls along with her to discourage blind charges.

Up Special can also serve as a last ditch offensive measure; being able to move freely, even mid-input, makes Mint's pokes harder to deal with, and her riskier options safer. Being surrounded by wind can even improve some of her inputs directly- Down Tilt and Up Aerial are two such examples of moves that are immediately better with Up Special in play.

Mint must maintain her advantage state for much longer than most to achieve victory, and she can do that best by being underhanded underneath a straightforward and composed appearance.


[][][] Taunts [][][]

[][] Side Taunt [][]

Mint pops her scroll case open, digging out what appears to be a small academic pamphlet. She jots something down, giggles, and puts it away quietly. If the player pauses and adjusts the camera, they can see she's actually looking at one of a few randomized posters. The ever so popular 'hang in there' picture of a cat holding onto a tree branch is one, for example.

Using this after a KO or self-destruct shows an unflattering, childish doodle of whoever her opponent is; Pit accidentally hitting himself with one of his arrows, or a picture of Bowser with "This space for rent" and an arrow pointing at his head.


[][] Down Taunt [][]

Mint waves her wand above her head, conjuring a chalkboard eraser in midair. The eraser hovers in air for a second before falling and slapping against the ground hard enough to release a cloud of dust. The falling eraser vanishes if Mint is hit before it reaches the ground, but acts as a hitbox that deals 2% and flinching. It can be blown around with wind hitboxes, but will vanish on hit or 2 seconds after the fall, and the time taken to perform the taunt renders it completely useless in comparison to literally any other tool in Mint's kit except for pure disrespect.


[][] Up Taunt [][]

Mint reaches to her side, digging through her pockets (pausing the game and adjusting the camera reveals she's actually looking through her scroll case). She faces forward again, and throws a small handful of confetti into the air, blowing into the blowout noise maker she holds in the other. "Good job." The confetti moves with any wind effects in play, but vanishes without effect regardless of how it is manipulated. Mint smiles placidly as she stuffs the noise maker into her pocket and retrieves her normal equipment.


[][][] Closing Statement [][][]

I finished Mint a while back, though added in the extras and playstyle section some time after the fact. A quick under 5k words set seemed like fun, especially with the concept I had, and I feel she does a lot with a little. She has her own take on concepts I've used before in another OC set, and concepts I'm intending to use in the remake of that set, but plays with them in very different ways and to different ends.

Student and Ninja are commonly combined themes, but connecting both to Witch, Wind, and Prankster themes through paper felt interesting and fresh enough, and the character wound up writing themselves afterwards. I don't feel she's as interesting character-wise as Garnet (but more than Marin, who I feel I should also remake someday given the base concept is so interesting).

The self-imposed 5000 word limit (counting Stats and non-Final Smash/Taunt inputs only) actually didn't hamper her at all, as even after expanding her a bit for the sake of making sure what she did was properly explained and interesting, she comes up 4971 as of the most recent edit. I've done essentially all I can with her (though if there is one regret, it's that I didn't think of paper talismans until the grab despite how obvious a choice that is).

While I feel a little disappointed I didn't make a second set for the first day given the time between finishing Mint and the start of this contest, I feel happy with having a first day entry to add to the intial rush. Mint being a short read makes her ideal for it, even. I'm looking forward to see what everyone has lined up for this contest, and hope it'll be even better than (the already highly successful) MYM 20!


Change Log:
6/29/18:
-Noted the effects of the Forward and Up Aerial in scrolls, and added a short delay for them to add another use to the effects.
-Using Up Special again does not dismiss a whirlwind projectile unless Mint shoots the new one as a projectile.

8/18/18:
-Described Mint's appearance in the introduction section, its absence a major oversight on my part.
-Noted that origami frogs are only destroyed by attacks that damage AND inflict hitstun. Thanks Froy!
-Slightly tweaked the Neutral Aerial's wording.
-Trimmed a word off to keep the count from going up by too much (went from 4969 to 4972).
 
Last edited:

Slavic

Ask not the sparrow how the eagle soars
Joined
Jun 5, 2013
Messages
761
Location
taco bell, probablyn't

What use is food if there is no one to taste it? The enjoyment of a set can be sweet, savory, and divine, but some sets will just leave a bad taste in your mouth. This is why we comment and compare sets, and also why we rank them (plus it makes voting easier). Will these sets have what it takes to win the competition? Or are these moves going to be stale? We're here to find out.

All sets are ranked on a scale of 0 stars to 5 stars. You know Michelin Stars? These aren't them, these are just my stars and honestly there probably won't be any stars BUT there will be hilarious pictures to accompany these sets as per the norm. The contest has started, so let's dig in!

AURELIA
ForwardArrow
5.0


SYLVIA
JamietheAurauser
5.0


HIMIKO TOGA
Katapultar
4.5

giphy.gif


XALDIN
FrozenRoy
4.5


ULRICH HETFIELD
FrozenRoy
4.5


RIME MARZ
Usershadow7989
4.5
tumblr_p3xyfpMAAT1rf588wo2_400.png


OKUMURA
MasterWarlord
4.5
stylized-workers-rights-poster_a-G-13119986-0.jpg


MR. KAMOSHIDA
Smash Daddy
4.5


NIGHTMARE
Smash Daddy
4.0


SCRATCH
Professor Lexicovermis
4.0


YUI HIRASAWA
Katapultar
4.0
A-4438833-1436209855-2829.jpeg.jpg


KILTON
WeirdChillFever
4.0
635.jpg


HONEY WITCH ELEANOR
UserShadow7989
4.0


REX
Munomario777
4.0


HIDAN
Katapultar
4.0

germany-and-hidan_o_1305085.jpg


CHALIS
Smash Daddy

4.0


BLADOS
SmashDaddy
4.0

Screenshot_45.png


PlanetMan.EXE
Usershadow7989
4.0

BBC_Blue_Planet_II_title_card.jpg

SHINOBU
Katapultar
4.0


THE MOUNTAIN
MasterWarlord
3.5
101747130-352-k841311.jpg


FROST WITCH IDELLA
Usershadow7989
3.5
1539891-frost_bio.png


GRI- GIRHI- GIRIM- THE ELEPHANT
MasterWarlord
3.5
hqdefault (1).jpg


TOXICROAK
FrozenRoy
3.5


PAPER WITCH MINT
UserShadow7989
3.5


AROMAGE ROSEMARY
Katapultar
3.0


LEXAEUS
FrozenRoy
3.0
VegetaItsOver9000-02.png


RIBBON WITCH VELVET
Usershadow7989
3.0
65D2DE4B-DCBA-45F8-9457-1A8BDE8CFB9B.jpeg


NECALLI
FrozenRoy
3.0


ROXAS
FrozenRoy
3.0

dd04yvy-ff2f556c-7fc4-423d-8384-9ef6d75e64e9.jpg


PAPER MARIO
Munomario777
3.0
03960d919f7cf2ef79e3e2816af2cace.jpg


ELPIZO
FrozenRoy
3.0


MISKO
WeirdChillFever
3.0


CAT BATTLESHIP
Professor Lexicovermis
3.0


COPY X
FrozenRoy
3.0
Screenshot_43.png


WASHIZU
MasterWarlord
3.0
20110314093319.jpg


BARON VON GUU
Professor Lexicovermis
3.0


ASAGAO
Katapultar
3.0


AATROX, THE WORLD ENDER
FrozenRoy
3.0


THE BLACK KNIGHT
Bionichute
3.0


FARK, THE ELECTRIC JESTER
IvanQuote
3.0


Dead Hand
Kholdstare
3.0


POLIWAG
FrozenRoy

3.0
hqdefault.jpg


GUZMA
Katapultar
2.5


BILL BLASTETTE
Professor Lexicovermis
2.5
110996._SX360_QL80_TTD_.jpg


DARMUK SYREUS
KafkaKomedy
2.5


JUPITER
bubbyboytoo
2.5


KRIS, SUSIE, AND RALSEI
KafkaKomedy
2.0


KING DEDEDE
Munomario777
2.0


WRECKING BALL
Rychu
2.0


THE BOUNTY HUNTER
KafkaKomedy
2.0


OCEANA LOUVIER
Cetus
1.5


Attachments

Last edited:

Altais

Smash Champion
Joined
Nov 14, 2007
Messages
2,083
Location
Starbase, where no turtle has gone before.
This time, I’m doing Rex from Xenoblade 2 (on the left) and Revali from Zelda: Breath of the Wild (on the right). Revali would not just be Falco with a bow—and I intend to prove that. As for Rex, I’ve thought of a simple, yet effective way to incorporate Pyra and Mythra that wouldn’t slow the game down.

I'm almost done with Revali. As for Rex, everything's on pen and paper at the moment. I might do more movesets, if I finish these two before the deadline nears. Also, I might cancel any planned movesets, if the characters happen to get revealed at E3. That said, I’m going to try mine absolute best to get both of these sets done before E3.


Slavic

Ask not the sparrow how the eagle soars
Joined
Jun 5, 2013
Messages
761
Location
taco bell, probablyn't
This time, I’m doing Rex from Xenoblade 2 (on the left) and Revali from Zelda: Breath of the Wild (on the right). Revali would not just be Falco with a bow—and I intend to prove that. As for Rex, I’ve thought of a simple, yet effective way to incorporate Pyra and Mythra that wouldn’t slow the game down.

I'm almost done with Revali. As for Rex, everything's on pen and paper at the moment. I might do more movesets, if I finish these two before the deadline nears. Also, I might cancel any planned movesets, if the characters happen to get revealed at E3. That said, I’m going to try mine absolute best to get both of these sets done before E3.

Awesome to hear, Altais! I'm glad someone is helping to bring out the Xenoblade sets with me, with your Elma previous and now Rex. I'm particularly interested because I've got a set for Mòrag and Brighid in the works, so getting multiple Driver / Blade sets by different people should be very interesting with how the mechanics are tackled.
 

Professor Lexicovermis

Smash Journeyman
Joined
Oct 27, 2015
Messages
273
Location
Pop Star
Baron von Guu


Baron Von Guu is the third boss of the indie roguelite platformer Flinthook. He is an alien creature known as a Fluidoform, an entirely liquid lifeform; his current body is a machine known as a Shapesuit, and was gained in a piratical raid on a merchant ship. Jealous of space explorers with flesh and blood bodies, Von Guu's goal in life is to eventually create a non-liquid body for himself. Taking up a life of space piracy, he cruised the galaxies with his Liquidator Clan, eventually crossing paths with the notorious Captain Flinthook. Having apparently anticipated this, Von Guu assembled a large barrel-like machine and fought valiantly through it. Once it breaks down, unlike the prior boss, Von Guu actually deigns to fight Flinthook head on... only to ultimately lose at the hands of his rival. Humiliated, he upgraded his Shapesuit's combat capabilities, then set out for a strange new world, one crawling with fighters perfect for some field testing...

Slimy Stats:

Height: Ganon
Weight: Samus
Ground Speed: Villager
Air Speed: Jigglypuff


Baron von Guu is a tall chap, standing level with the Demon King (albeit slightly narrower and a bit taller thanks to the electrical coils atop his helmet, though they aren't part of his hurtbox). However, the majority of his weight comes from his own fluid form; his Shapesuit is actually rather light. Despite this, the density of his slime means he ultimately weighs in similarly to the spacefaring bounty hunter herself. Von Guu technically hovers about a Pikmin off the ground, and so has somewhat slow ground movement (and an immunity to certain low attacks); however, his aerial movement is stellar. Unlisted stats include poor traction, high jumps, and a very low fall speed. As a final note: Von Guu only loses a stock if his head is removed from play; conversely, any homing attacks will lock onto his body rather than his head. This may seem trivial, but...

Shapeless Specials:

Down Special: Emergency Eject

...it's actually remarkably relevant. With a tap of Down B, Von Guu bows as his fluid tank head pops off his body, landing at his feet with a PLOP. This whole process takes just a pittance of time, roughly equal to planting a Timber sprout. The falling head gains a weak hitbox that deals 6% and get-off-me knockback that'll never kill. Once it lands, Von Guu's body and head are now separate entities. The player will now control his headless body, with the head lying mostly dormant. Headless, Von Guu becomes shorter by roughly a Pikachu height and loses nearly 10 units of weight, becoming as light as Mario. He may keep his head and body separate for as long as he wishes or until killed. Incidentally, if his head is killed while his body remains, it will go limp and collapse onstage, vanishing once he respawns.

That's fine and dandy, but what are the merits of being split up? Well, remember: Von Guu's body doesn't count as a stock. Indeed, if the headless body is killed, it will return in a blast of electricity only 2 seconds later, appearing where Von Guu originally spawned in. This means he can pop his head off and fight without fear of death, right? Well... not exactly. His head is still onstage, remember? And it's not exactly equipped to defend itself. Not to say it's totally harmless; it can be booted around and obeys physics somewhat similar to a less exaggerated Soccer Ball, gaining a hitbox that becomes more powerful with momentum. This of course means the foe can kick it around as well, but it gains no hitbox if this happens; a solid hit from Von Guu shrouds the flying head in a green aura, while a hit from a foe does no such thing. If Von Guu's head would die from knockback he dealt to it, it'll immediately rocket back onto his body, riding a jet of slime and traveling through the background. Von Guu takes 0.5X any damage his head takes; his own attacks don't damage it.

While there are benefits to having your head and body separate, there are also some downsides. Headless, Von Guu has less fluid manning his Shapesuit, and so his slime based moves (of which he has quite a few) take a range and damage nerf, going 0.75X their normal reach... but they now deal 1.2X their normal damage and knockback. He also has the aforementioned weight nerf and now has to babysit a construct of sorts, lest he find himself dead.

A few more things. Von Guu can actually use this move while suffering hitstun; doing so changes it slightly, with his head launching up similarly to the Koopalings' USpec. This can be used as a last ditch effort to survive a deadly attack, but it requires timing and for him to be "headed" when he takes the blow. Of course, this also usually means he'll be bodiless for two seconds after this, and thus vulnerable to being finished off properly. Finally, Von Guu can reattach his head simply by getting within a Bowser of it and pressing Down B; his headless body will pluck the head, replace it, and screw it back on, again taking about as long as planting a Timber sprout. As a bonus, if let idle, he'll enter an animation in which he polishes the glass of his head. Guess it picked up some dirt!

Neutral Special: Leering Liquidators

After indulging in some canned laughter for around a Fire Fox startup, Von Guu dispenses a blob of purple slime from one of his nozzle "hands," with it hovering about a Kirby off the ground. This Kirby sized blob promptly sprouts eyes, Boo-like flipper "arms," and a scowling mouth, revealing itself as a Liquidator, one of Von Guu's minions! The Liquidator proceeds to lazily pursue the nearest foe at Kirby's dash speed, using a particular homing pattern that often causes it to "swoop" past an area if dodged. Liquidators are unusual in that they're not considered tangible at all; foes and Von Guu can simply stand "inside" them to become momentarily "invisible." However, should any part of a foe touch a Liquidator, they suffer 7%, followed by 3% for every half second they spend with part of their body overlapping it. This damage does no knockback nor even hitstun. Von Guu may have only one Liquidator at a time and they live forever (until a certain condition is met, that is; we'll get there soon), being invulnerable to damage. Upon a Liquidator's death, Von Guu suffers a 5 second cooldown before he can summon a new one.

Being made of slime like their master, Liquidators are rather fluid individuals. Because of this, Von Guu may use his slime based attacks to augment his minions! By landing a slime attack on a Liquidator (and ONLY a slime attack will connect), Von Guu will pump it up to become noticeably larger. This effect is cumulative, with each attack increasing their radius slightly. At certain thresholds of size, they'll transform into different shapes! This'll change their behavior as well.

Upon hitting a diameter slightly wider than Bowser, Liquidators reform themselves to be cuboid in shape. These Big Liquidators behave differently, patrolling back and forth at whatever height they were at when transformed at Ganon's dash speed. Their initial contact damage now becomes 10%, with their DoT becoming 5% every half second.

Land enough slime attacks on a Big Liquidator to nearly double its size, and it will become spherical and gain a comically strained expression. This Huge Liquidator is totally immobile, staying in place and dealing 15% on contact, with it dealing 7% every half second. Naturally, this is an extremely dangerous minion, and one that foes will want to prevent Von Guu from obtaining.

The Huge Liquidator can still grow slightly, ultimately reaching about 2.5 Bowser widths in diameter; if it's struck with another slime attack at this point, things get messy. Having reached critical mass, the Huge Liquidator simply explodes in a gooey blast, dealing very high knockback to any foe inside it, but no damage. Needless to say, this lets Von Guu really get some bang for his buck. This is the only way to get rid of a Liquidator, of course.

Should Von Guu's head be separated and come into contact with a Liquidator, the minion will pick it up, with it visibly hovering inside the purple mass! Of course he laughs when this happens, it's a borderline verbal tic at this point. Basically, this gives his head a little insurance and some mobility. The head will remain there until dealt at least tumbling knockback or until the Liquidator dies; it boasts surprisingly high knockback resistance while inside the Liquidator as well, so it's a bit harder for foes to casually boot your head offstage. It'll even stay there if the minion is pumped up! If Von Guu's head is inside a Huge Liquidator when it's detonated, it'll rocket towards the nearest foe at blazing speeds, achieving its max power of 15% and high knockback! This counts as self-knockback, so he can't kill himself with it.

Side Special: Clingy Caltrops

Pointing a nozzle "hand" forward, Von Guu fires forward a spiked ball the size of a Megabuster pellet. This takes as long as Samus firing a Missile. The spiked ball flies forward for up to three platforms, where it abruptly stops, unfolding into a spiky, square sort of trap with a diamond-shaped bullseye attached to it. This trap is about as big as a Crate, and hovers in place, ignoring gravity. Upon any fighter touching it (that includes Von Guu!), the trap bursts into shrapnel, dealing a sharp 18% and moderately high radial knockback and destroying it. Naturally this makes it a frightening trap for everyone involved, but it can be disarmed by landing any attack dealing 5% or more (any less and it'll hurt you if you melee attacked it!). Von Guu may have up to three of these traps out, and they last until destroyed.

By holding B, Von Guu may aim the spiked ball in any direction, with it firing upon the button's release. Additionally, tapping B with a ball in flight will have it stop and unfold where it currently is. This allots him some much-appreciated customization in his trap placement.

There are a few more quirks to this move. Should the initial shot hit a foe, they will be Pinned (think Corrin's SSpec) for roughly 3/4 of a second, with the trap unfolding "onto" their body. After the half second, it bursts apart, dealing 8% and light knockback. However! If Von Guu attacks the trap with a move that deals 5% or more, it'll explode more violently, dealing 20% and high knockback! Of course, this requires him to land the initial shot and successfully land a strong enough attack within a half second. If he can do this, he'll be rewarded for his efforts considerably!

If the initial shot hits a platform or solid ground, it will simply attach to that platform. If it hits a Liquidator, it will adhere to them where it hit, maintaining its normal properties but following their movement pattern if they're indeed capable of moving. Von Guu can also use this shot to Pin his own head in place temporarily, dealing no damage but temporarily giving it extreme knockback resistance and "soft" invulnerability to melee attacks weaker than 5%.

Up Special: Teslaport

Again playing his canned evil laugh, Von Guu vanishes in a blue aura of electricity. He then reappears elsewhere, having 1.5 times the range of Farore's Wind but bearing slightly more startup than that of Fire Fox (maybe he should laugh AFTER vanishing?). Both the zap on vanishing and reappearing deal 7% and get-off-me knockback, with the reappearance having a Rest-like sweetspot on his head that deals a vastly more threatening 20% and high knockback. Interestingly, he actually DOES NOT lose this sweetspot if headless; it just becomes smaller and located between his shoulders. It even becomes a bit more powerful to compensate for becoming minuscule, now dealing 25% and very high knockback. All in all a straightforward recovery, putting him in helpless if used in air and having somewhat notable endlag if used on ground.

Teleporting into or out of a Liquidator will fill its body with electricity, with the energy coursing through the slimy medium. Electrified Liquidators will now deal momentary hitstun each time they damage a fighter, but will become slower if they can move.

If Von Guu teleports into a Clingy Caltrop, it'll explode into metal shrapnel, increasing the hitbox on reappearing to nearly a Bowser on each side of him and dealing 10% and moderate knockback. If he manages to somehow land the head sweetspot AND land inside a Caltrop, said sweetspot will deal a frankly ludicrous 35% and nigh-guaranteed killing knockback. This is a pipe dream that will never happen, however.

If a headless Von Guu teleports into his head, meaning his body overlaps it when he appears, he'll laglessly put it back on. This is a safer way to grab and reattach your head, but requires good spacing and aim. If he hits it with the aura of electricity and misses it with his body, it'll instead be blasted away with strong radial knockback, becoming a projectile as always.

Slippery Standards:

Jab: Hailshot

With a very short burst of canned laughter, Von Guu points a nozzle forward and fires a spread of 3 gooey projectiles forward, one going straight and the others flying at 45 degree angles up and down respectively; this Jab is about as slow as Ganon's. Each of these shots travels slightly farther than a Megabuster shot and deals 6% and very light knockback, with the Jab having a sweetspot on the tip of Von Guu's nozzle that deals 12% and light-moderate knockback. Landing the sweetspot means the projectiles don't spawn, so he'll have to decide if he'd rather deal more damage or more knockback. The sweetspot is actually good for followups as well; it places foes in a good spot for a few attacks. Meanwhile, the slime shots are good for general harassment of foes, much like the Megabuster. If he mashes A to use this one-hit Jab repeatedly, Von Guu's canned laughter will keep playing from where it left off, slowly playing the full soundbite in small chunks.

This being a slime attack, it's subject to the range and power nerfs associated with being headless. It's also eligible to enlarge a Liquidator, with him being able to pump one up decently fast thanks to this creating three slime hitboxes. Beyond that... this is a pretty simple move. It's decently good for landing the Clingy Caltrop's "pin sweetspot", anyway. It's also quick enough to be a fair option if you whiff a Teslaport. The downward angled slime bullet can bop his head forward as well, with it dealing a tad more damage and knockback than the Jab alone.

Forward Tilt: Hose Havoc

Von Guu's electric coils flare up as he winds back and "punches" with one of his hose arms, having about as much startup as Ganon's FTilt. However, unlike the Demon King, this Tilt has nearly a platform of range thanks to Von Guu's elastic arms. Upon contact, he'll let out a brief guffaw as the foe takes 10% and light-moderate knockback that's good for keeping foes out of his face; it's especially good for defending his head should it end up between him and a foe. At the very end of the move's range, the nozzle of his hose releases a tiny splash of slime, giving the move a sweetspot that deals 14% and moderate knockback; better for sending foes into your Liquidator or a Clingy Caltrop, but a bit too strong to easily follow up on. Take heed that this Tilt has notable endlag as Von Guu reels his hose arm in, and it's actually longer the farther the hose was allowed to go before connecting. This Tilt is angleable up or down, and angling it down will obviously cut the range short under most circumstances, which is good for limiting his endlag. It also makes hitting the "pin sweetspot" on a Caltrop'd foe easier.

Should Von Guu hit a Liquidator with this Tilt's sweetspot, the nozzle will embed itself into them, halting their movement and "tethering" them to Von Guu temporarily. He can then press A to pump slime directly into his Liquidator, with this followup attack bumping them up in size but giving him a Turnip Pluck's worth of lag. He can of course play Dig Dug and burst his Liquidator this way, with him actually playing the entirety of his canned laugh if this happens. A small bubble travels along the length of his hose when this happens, and this bubble deals 8% and light upwards knockback if it somehow hits a foe.

If angled downwards, it's possible for Von Guu's nozzle to contact his own severed head. Rather than bat it away, this causes him to "vacuum" it up, with the head sticking to the end of his nozzle! He can now swing it like a melee weapon, complete with Tilts, Smashes, and the ability to throw it like a normal item (which again won't kill him, as it counts as self knockback). The head deals a little more damage and knockback than a Beam Sword, but obviously has less reach due to the smaller size.

Up Tilt: Shocking Sparks

With a startup similar to the Mega Upper, Von Guu's electric coils flare up before creating a large arc of lightning between them. This hitbox covers his entire top, but does not hit foes beside him; it behaves similarly to Arcthunder, sending a shudder through foes as it deals rapid hits of 2%, totaling to 16% if the whole thing hit, with the final hit launching them upward with light-moderate knockback perfect for transitioning to Von Guu's air game. This entire hitbox behaves identically, with no sweetspot nor sourspot.

If Von Guu is headless, the attack changes due to him lacking his head-mounted coils. Instead of a paralyzing arc, one solitary (Turnip-sized) bolt is fired up from his Shapesuit's neck hole, going about a half platform upwards at the speed of Pikachu's Thunder. This bolt simply deals 20% and moderately high upwards knockback, being stronger than the arc but harder to land. Plus, it's only available if you've used DSpec. This version is exactly the same as the normal one in terms of speed. Notably, this version of the Tilt can detonate a "pin sweetspot" Caltrop, but the "headed" variant cannot.

Much like Teslaport, this Tilt will imbue Liquidators with electricity, being a somewhat easier way to grant them hitstun capabilities. Other than that, this is a simple enough attack to grasp.

Down Tilt: Floodwater Fountains

Grandly gesturing with a "hand" on each side for a short startup, Von Guu sprays two arcing fountains of slime from his nozzles. These fountains arc up and out, peaking at about a Mario height and reaching a Bowser width on either side, giving this some extraordinary range (that's decreased if Von Guu is headless). On contact with a foe, the fountains deal rapid hits of 2%, each one capable of dealing a max of 15% over the rather long duration of the move. However, they deal very little knockback, mainly pushing foes away, with the final hit dealing light knockback that actually leads into FTilt's sweetspot at lower percentages (though the timing for this is a bit strict and this assumes he has his head on). The fountains are far enough apart that one foe will not be hit by both unless they're freakishly wide. One good benefit of this move is its decent duration, letting it defend Von Guu and his head rather well, especially since it starts up quickly. However, he suffers a little endlag at the end, making a whiff rather dangerous. A decent strategy is to fire off a Clingy Caltrop and then use DTilt to protect Von Guu while it's in flight, as this'll protect him from anything but attacks from above.

Being a slime attack means this can pump up Liquidators, and the range on it makes that decently easy; plus, the multiple hits mean it'll increase their size a few "steps" if they stay in contact with the fountain. Besides that, it has a decently strong effect on Von Guu's detached head; it launches the head across the ground at a decent clip regardless of when or where it was hit. Uniquely, this will never launch the head off the floor unless it rolls off a ledge. Due to the awkward angle, this move isn't too good at hitting the "pin sweetspot" on a Clingy Caltrop that's stuck to a foe... just as well, it's too weak to actually detonate the Caltrop anyway.

Dash Attack: Slime Slapshot

In a maneuver calling to mind both ice hockey and Artist Kirby circa Star Allies, Von Guu sprays a stream of slime at his feet while continuing to dash forward for a platform. At the end of this range, he skids to a stop as he "swings" the spray upwards, creating a large splash that goes nearly his own height up and a Bowser forward. There are three hitboxes of note on this attack. The first is on the "dash" itself, located at Von Guu's feet. This hitbox is active almost immediately after the move's extremely short startup and drags foes along his trajectory, dealing up to 7 hits of 1% each, with the last hit dealing light forwards knockback that, at low percents, will put the foe right into range of the move's sweetspot. Said sweetspot is on Von Guu's nozzle hand, and is only active during the final swing; it deals a shocking 20% and moderately high knockback, being a surprisingly potent kill move for the Baron but requiring him to land a somewhat small sweetspot. The slime splash kicked up by the swing is the final hitbox. It deals a less impressive 9% and moderate knockback, but its size makes it fairly useful nonetheless. Thanks to it arcing towards Von Guu slightly, the splash is excellent at protecting him from the front, and its moderate knockback is great for keeping foes out of his face (and maybe knocking them into a Liquidator or Caltrop!).

Since the final hit has a slimy splash, this move can naturally enlarge Liquidators, but only on the last hit (which incidentally is also subject to the range and power nerf of headlessness). The size and shape of the splash makes hitting a pinned Caltrop somewhat difficult, but it's not impossible. Perhaps more interestingly, this move treats Von Guu's head extremely similarly to a normal fighter. The dragging hitbox slides it across the floor, effectively replacing the rapid hits with one solid hit of around 8% and light moderate knockback. It'll then automatically be slapped forward at its top speed by the sweetspot, reaching the maximum damage of 15% and high knockback while flying along a near 45 degree angle. This is not only a potent ground-to-air projectile, it's also handy to send your head into a waiting Liquidator! ...or... to swat your head away from a potentially lethal blow? After all, you won't die if you were the one to hit it offstage...

Slick Smashes:

Forward Smash: Barbican Blast

Charging this move has Von Guu point a nozzle forward as it bubbles ominously, with his electrical coils flaring up as well. Releasing the charge begins one of the laggiest Smashes in the game, with Von Guu humoring himself with a bit of an evil laugh before finally unleashing one of his most impressive attacks: a massive "beam" of slime. This beam is fired about a Mario off the ground, and it grows thicker with charge, ranging from a Pikachu to nearly a Luigi; either way it reaches nearly 1.5 platforms before petering out, with Von Guu maintaining the flow to drag out the beam long enough that it can just BARELY be spotdodged. Unfortunately for him, this Smash suffers from extremely poor endlag as he feels the need to guffaw once more. What a sore winner! Anyway, the beam traps foes inside it, dealing extremely rapid hits of 2% that total to 20-28%, with the last hit launching them with moderately high to high knockback depending on charge. This is one of Von Guu's best killing attacks, but that's all it's really good for. Naturally, this is an extremely intimidating attack, and one that Von Guu's foes will definitely want to watch out for. Of course, the intense lag on either side means he's not gonna be able to spam it without eating punishment.

As per usual with slime attacks, this can enlarge Liquidators. However, the multihit nature means it'll increase their size steadily for the duration, potentially even detonating them to make an absolutely massive pair of hitboxes on Von Guu's part! Of course... this would require you to already have Huge Liquidator out, and the immobility of those means the foe will be wary of this maneuver. This move perhaps suffers more than any from the headless range nerf, though it's still a move that demands respect... especially since it's even more powerful now. As you might expect, this holds Von Guu's head stationary during the beam before blasting it forward at max speed regardless of charge, usually launching it offstage altogether. Not that it matters, since it'll autorecover. The sheer size of this hitbox makes it nigh-impossible to accurately break a pinned Caltrop, but to be blunt, that's not necessarily a bad thing, as this move alone deals more damage and knockback than the pin sweetspot.

Up Smash: Corsair's Carousel

Despite this move being an Up Smash, Von Guu charges it by pointing one of his nozzles down at the floor ahead of him. Releasing the charge has him begun firing a thin beam of slime from this nozzle with very short startup; he then slowly rotates his arm, firing the beam counterclockwise (clockwise if facing left) in such a manner that it almost forms an exaggerated Ness USmash. This Smash has incredible range, with the beam stretching nearly 2 platforms before fizzling out and it hitting a circular radius starting at his feet and ending in the exact same spot. Needless to say, this Smash is incredibly long winded, which isn't necessarily a good thing if Von Guu whiffs it. The beam deals 11-15% and moderate knockback, being rather weak to compensate for its absurd reach and duration. The direction of the knockback is affected by the current angle of the beam, so this move is fairly versatile depending on his aim and timing, capable of shunting foes into the air or potentially putting them in place for a more powerful blow like the Dash Attack; however, if this is your goal, it may be best to face away from your target, so the move's duration will be nearly over when they're hit.

As per usual, this slime based move can pump up Liquidators, and in fact is extremely useful for doing so from a distance thanks to its fantastic reach. However, the move's rather long duration can make it difficult to use on a whim; Von Guu will want to save it for when he's certain he'll be safe from retribution. Perhaps it'd be most wisely used when a hit to his body wouldn't be lethal...? On the topic of headlessness, this attack rather predictably shoves Von Guu's head to the end of its range before firing it in the beam's current angle at max speed, effectively turning the beam into a pseudo "charged" projectile of sorts. All in all a rather handy move... but abysmal for hitting pinned Caltrops accurately due to it typically hitting foes' feet first.

Down Smash: Perilous Pistons

Raising his arms up and tilting his head towards the floor (if he indeed still has his head), Von Guu charges up his only non-slime Smash attack as his electric coils arc wildly. When the charge is released, he gestures downwards emphatically as two spike-tipped pistons, each one containing an electrical coil, burst out of the floor on either side. Seems that he took the time to set the stage up beforehand! These Bowser-thick, Ganon-tall pistons burst up as quickly as Palutena's USmash and linger for slightly longer, with Von Guu unable to act until they've fully retracted. This means that, despite the quick startup, this Smash has a fair bit of endlag. Anyway, the pistons pop up about a Mario away from Von Guu on either side, giving this move a small blindspot. The pistons have two hitboxes: the spikes and the electrical charges lining their sides. The spikes act as a sort of sweetspot, dealing 10-14% and moderately high to very high upward knockback, being a surprisingly deadly kill move. Meanwhile, the charges on the sides deal 15-20% and a stun similar to Arcthunder which eventually gives way to light-moderate to moderate knockback. Both hitboxes are fairly useful, though the killing spikes are perhaps better utilized in the endgame, with the shocking one being better for early to mid game.

As this isn't a slime move, it does not bump Liquidators up a size. It does, however, imbue them with electricity if a side hitbox connects with one. Meanwhile, both hitboxes have an effect on Von Guu's head. The spikes rather uniquely skewer the head, stopping its momentum and dragging it to the floor when the piston retracts. This can be good for catching your head if it's about to fly into dangerous skies, as well as simply letting you get it to a convenient position for reattachment. Meanwhile, the shocks on the side will hold the head for a moment before launching it off slightly faster than whatever speed it was traveling beforehand. This is one of the simpler head interactions, effectively letting Von Guu "reflect" it like a traditional projectile. Unless you managed to stick it to the foe's feet, this will practically never hit a pinned Caltrop.

Aqueous Aerials:

Neutral Aerial: Blasma Blaster

Though it takes its name from the signature firearm of his rival, Captain Flinthook, this attack has Von Guu again fire slimy "bullets" from his nozzle hand. Unlike the Jab, however, he does not fire them all at once. Instead, he performs a quick, upwards sweeping gesture with his hand, firing the shots at varying angles; one goes down at a 45 degree angle, one down at a 20 degree angle, and one straight forwards. These shots are slightly larger than the Jab projectiles, travel up to 2 platforms, and deal a slightly stronger 8% and very light knockback. Von Guu's arm itself bears a hitbox, dealing 5% and just enough knockback to lead into at least one of the shots themselves at most percentages. Meanwhile, hitting specifically with his nozzle hand activates a sweetspot that deals 15% and moderate knockback, being surprisingly dangerous for an NAir but failing to produce any slime shots if it connects. This move is fast on both ends, but it has poor landing lag, so maybe don't get too spam-happy when shorthopping. Despite that, it's a great tool for general harassment and air-to-ground combat.

As you can probably guess by now, this move is eligible to pump up Liquidators, but only if all three bullets strike the same one. This is best done by simply using the NAir while inside a Liquidator, but it can also be done with smart positioning on Von Guu's part. Under normal circumstances, his head will usually be ground bound, but this move still affects it regardless. The slime shots gently coerce it forwards, similar to the Jab shots. Landing the arm hitbox will pop the head up at a steep angle, ripe for landing another Aerial on it. Finally, should you manage to land the hand sweetspot, Von Guu's head will be slapped forward at a fair clip, dealing around 10% and moderate knockback. Only the hand hitbox is capable of breaking pinned Caltrops, unfortunately.

Forward Aerial: Farewell Fount

Raising both hands and pointing them forwards, Von Guu fires two short, powerful streams of slime from his nozzles. The streams have slightly more range than Megaman's FAir, granting Von Guu a useful ranged poke. This move deals 14% and moderate horizontal knockback, making it surprisingly deadly offstage, but suffers from a fair bit of startup and endlag. Indeed, this is Von Guu's slowest Aerial by a fair margin. Thankfully, the sheer force of these streams shoves him backwards in a manner reminiscent of Orcane's FAir, giving him a chance to evade punishment and making it safer to pursue offstage foes. Much like the aforementioned move, careful use of the analog stick can shorten or elongate the distance Von Guu is propelled backwards; skilled players can use this momentum as a decent recovery mixup or to slip away from deadly attacks. If he lands while scooting backwards, he'll maintain that momentum for a moment.

As expected, this move can pump up Liquidators. In fact, it's one of the best for detonating Huge ones that have ended up far offstage, as it gives Von Guu a very good chance of getting back to safety afterwards. If he is careful with his positioning and timing, Von Guu can use the arm sourspot of his NAir to bat the foe forwards and into a Big Liquidator, have the slime shots of NAir bump it up to a Huge one, then use FAir to detonate said Liquidator, potentially scoring an early kill while also using his backwards momentum to return to the stage! This is of course telegraphed by his meticulous setup time, but landing it is an accomplishment that should make any player feel a sense of pride. Perhaps it's best celebrated with his long UTaunt, which plays the entirety of his canned evil laughter.

Beyond this use, the FAir can of course launch Von Guu's head around as well. It'll fire the head forwards like a psuedo-Hadouken, with it traveling at a middling pace and dealing about 8% and light-moderate knock back. The move is also decent for hitting pinned Caltrops that are a decent ways up the foe's body. Simple, but effective.

Up Aerial: Goo Geyser

In an awkwardly slow Aerial, Von Guu tucks his arms close, pointing one hand up, then fires a short stream of slime from that nozzle hand. The animation is nearly identical to that of Super Smash Flash 2's Black Mage's UAir, albeit slower and tailored for Von Guu's lankier form. The stream has about as much reach as Villager's UAir, perhaps a tad more. This short stream manages to pack three hitboxes: one at the very tip of it, one on the bulk of the geyser, and one on Von Guu's actual hand. The top hitbox, indicated by the stream terminating in a minty green froth, is odd in that it deals multiple 1% hits of extremely light knockback that essentially micro-juggles the foe for the move's duration, adding up to about 12% and letting Von Guu drag foes with him slightly. The middle hitbox is essentially the sweetspot, dealing 17% and moderate upwards knockback, being extremely intimidating near the top blastzone. Finally, the hand hitbox is actually almost a sourspot, dealing a token 8% and light downwards knockback. That said, even this has its uses in "persuading" aerial foes to come to Earth. This move has somewhat awkward endlag, but nearly no landing lag, so it's a valid option out of a shorthop; timing it to land the middle hitbox can give Von Guu some nasty juggles, while landing the hand hitbox can knock shorthopping foes down for ground based combat.

This move involves slime, and you've presumably read enough of the set at this point to know what that means for your Liquidators! It's worth noting though that if you somehow manage to only land the hand hitbox, the Liquidator will not gain any size. The froth hitbox is interesting because it can let Von Guu drag foes into a Liquidator... and with careful movements he can potentially drag them into a Huge one and detonate it with the stream hitbox! Of course, this requires very good positioning and for the foe to be close to the Huge Liquidator anyway. The three hitboxes are rather poor for hitting pinned Caltrops, but the hand one at least has any chance of hitting one high on a foe's body. Each hitbox has a different effect on Von Guu's head as well; the froth will "catch" and hold it, then drop it straight down when the move ends, the stream will blast it upwards as a 10% projectile that deals light-moderate knockback, and the hand will simply swat it downwards with just enough momentum to trigger the auto-recover if it falls offstage.

Back Aerial: Blunderblast

Once more taking a cue from Captain Flinthook, Von Guu charges up his slowest Aerial before firing a rather large (2 Turnips) slimeball from his hand-nozzles! This move has obscene startup for an Aerial, and is only barely usable from a shorthop, but it at least has rather low endlag. For his troubles, Von Guu is rewarded with a large, slow (Ganon's dash) projectile that can cover the length of Final Destination before melting away. This slimeball deals a nasty 18% and high knockback, being a very mean kill projectile, if telegraphed and slow. Von Guu may have up to two of these out, with the oldest immediately vanishing if he tries to make a third. This Aerial can also be angled up or down like an FTilt, with him firing the shot at an upward or downward 20 degree angle. This move is absolutely not combo material... but it is a good kill option. Especially since there's not a thing keeping you from simply batting foes into a Blunderblast still in flight...

Once again, slime move, so this will make your Liquidators grow. This can actually be a BAD thing for Von Guu, however, as they may well end up absorbing a shot you wanted the foe to suffer. So... perhaps it may be wise to occasionally let the field be free of your slimy minions for the sake of landing these shots? The size and speed of this projectile makes hitting pinned Caltrops a tricky proposition, but the angle-ability at least helps somewhat. These shots are rather interesting in that, like Liquidators, they can actually absorb Von Guu's head and carry it along with them. This bumps their size up to a frankly absurd near-Kirby, but drops their speed to Ganon's walk. The damage and knockback are increased as well, now dealing 23% and very high knockback. Beware though: this maneuver can prove to be your undoing, as the head slimeball suffers from a negative disjoint of sorts. This means that the head's "hurtbox" pokes out farther than the projectile's hitbox... so foes can potentially swat your head down and potentially even kill you, so be careful!

Down Aerial: Hydrodynamic Hover

Again taking inspiration from the pink puffball (this time Water Kirby), Von Guu points both his nozzles downwards, then fires two constant streams of slime below him! These streams are about a Mario tall, and are as thin as a Pikmin. Hitting a foe reveals that this Aerial deals... no damage? Indeed, the streams merely act as a very weak pair of pushing hitboxes akin to Mario's FLUDD. They shove foes off to either side, so don't expect to casually push your foes into the abyss with this. This move lowers Von Guu's already extremely low fall speed... and can be extended for up to three seconds by holding A, after which he experiences rather hefty endlag that increases for every half second he hovered. He may move left and right while holding this move out.

If the streams touch ground, this move becomes even more reminiscent of Water Kirby's Fountain Hover; Von Guu will be suspended a Mario off the ground for the duration of his attack! He may still move left and right at his normal air speed, and is safe from most grounded attacks. Do note: even the worst jumpers can very well hit Von Guu out of the sky, so... take care. The two pushing hitboxes allow Von Guu to usher his foes into some of his setup, like Liquidators and Caltrops, or to push them away from his head should they come near.

Same old song and dance for this, our last slime move, when it comes to Liquidators. Note that the extended duration of this does mean it can move them up more than a stage at a time. This move deals no damage, so it can't break pinned Caltrops. The two streams predictably scoot Von Guu's head around neatly, turning it into a ground-bound hitbox that deals a measly 2% and light knockback, grinding against foes at very low percents but otherwise being pretty much useless as an attack. This Aerial is far better for moving the head out of danger than making it a hitbox.

Gooey Grab Game:

Despite having some unorthodox moves up his, err, sleeves(?), Von Guu's Grab is very straightforward. He simply outstretches a long hose arm in a slow Grab with as much reach as Lucas'. The Dash Grab sacrifices range for more speed, but is still pretty slow and has decent range. For his Pummel, Von Guu slaps the foe with his free nozzle hand in a moderately fast, 4% attack.

Forward Throw: Slime Slap

In an extremely simple, cartoony animation, Von Guu slaps the foe across the face repeatedly, then releases them before forming a hand of slime and delivering one final, fierce backhand. This Throw ultimately deals 16%, the most of any of his Throws, and moderate knockback. Extremely straightforward move, really. It's good for launching foes into awaiting Liquidators, hovering Caltrops, or to simply get them away from you and your head. It's also good for the raw damage it does, of course.

Since Caltrops inflict Pin from a distance, Von Guu can actually Grab foes that have been Pinned by one! Doing so will have the Caltrop clatter apart regardless of his chosen Throw... unless he used this Throw. Instead, he'll aim his final slap directly at the pinned Caltrop, boosting the Throw to an almighty 21% and moderately high knockback, becoming a force to be reckoned with! ...of course, this requires landing a Caltrop and subsequently grabbing the afflicted foe within the Pin's duration. Plus, the knockback is actually weaker than that of a Caltrop broken by another attack. Swings and roundabouts, as they say!

Up Throw: Voltaic Villainy

Chortling evilly, Von Guu tosses his foe upwards before firing an arc-shaped blast of electricity up at them! The width of this arc, combined with the set knockback of the initial toss, means it will never miss under most circumstances. Anyway, this arc will hold the foe for a split second ala Arcthunder, then launch them up with 12% and moderate upwards knockback. This Throw isn't great for kills or damage... but it is extremely suited to getting a foe airborne. At low percentages, it almost always leads directly into the sweetspot of UAir, and can be the beginning of a very nasty juggle if Von Guu capitalizes. It's also good for getting foes into overhead Liquidators.

This Throw actually doesn't change when Von Guu is headless; the electricity merely fires from his neck rather than the coils atop his head. Oh, and as an electric attack, this can imbue Liquidators with the ability to cause hitstun! ...but that's admittedly rather situational. Oh well... sometimes it's nice to just have a simple, reliable Throw, eh?

Back Throw: Mysterious Magnetism

Again using his electrical coils (or, ah, lack thereof if headless?), Von Guu rotates around, then electrocutes his held foe! This deals 9% and light knockback, rather weak for a Throw... That said, it does have its uses as a generic "get off me" Throw, a simple way to boot foes offstage, or to begin combos. It's still rather underwhelming though, isn't it...?

So, what gives? Well, the foe gains a blue aura of electricity while being electrocuted (which lasts for a fair time, mind you). This aura is actually magnetic! Somehow. MYM Science, I suppose. Anyway, Von Guu's head and Caltrops are attracted to the foe during this Throw animation, and zoom towards them at Wario's dash speed. If they collide, the effect varies depending on the object. A Caltrop will actually unfold and pin itself to the background behind where Von Guu stands; the Throw is buffed to a more respectable 12% and moderate knockback. Meanwhile, Von Guu's head pings off in the opposite direction at a fair clip; it buffs the Throw to 17% and moderately high knockback. Adding either of these objects to this Throw makes it far more impressive, though note that you cannot hit with both of them. If both items collide in the same Throw, the head damage and knockback is dealt while the Caltrop still unfurls where it is. Both variants are good kill throws, but do a little too much knockback to reliably lead into any real combos. Though, you could perhaps fire off a BAir...?

Down Throw: Adhesive Antagonist

In a rather odd animation, Von Guu merely sticks a blob of slime to the foe's feet or equivalent thereof, then kicks them away for 8% and light knockback. Pathetic for the most part, and will never kill... but the foe now has that blob to deal with! Foes with the blob stuck to them suffer a 0.85X speed nerf for three seconds, and their jumps suffer from double the jumpsquat time. They can shake the blob off early by landing a hut that deals at least tumbling knockback on Von Guu, since it's an extension of the fluid comprising his true form. Slower foes that can't jump away from attacks easily are easier pickings for FSmash and other such unpleasantries!

If Von Guu is headless and his head is within his Grab reach, this Throw changes a good deal; he'll grab his own head, then use his slime to glue it to the foe! By default he sticks it to their head, but by using the control stick during the animation, he may stick it anywhere on their front side. He still performs the 8% kick at the end. So... what's this do? Well, it keeps the foe from killing Von Guu until they either hit his foe off of them or wait for the slime to melt away after 3 seconds. It also has his head emit a blast of electricity every second, dealing 7% and a greatly shortened Arcthunder style stun, ultimately stunning them thrice and dealing 21% if allowed to stay on for the full duration of the slime. The usual mobility debuff is NOT applied with this effect. If a foe is inside a Liquidator when they get electrocuted by this effect, it'll be imbued with the electricity! Not a bad deal, eh? Of course, if the foe bats your head off, there's a not-insignificant chance that they'll kill you instantly, so... risk and reward, as they say!
 
Last edited:

Professor Lexicovermis

Smash Journeyman
Joined
Oct 27, 2015
Messages
273
Location
Pop Star
Professor Lex's Library of Wonders!

Note: Professor Lex is not legally responsible if the contents of this Library are not sufficiently wonderful. Results may vary.

Hello there! I'm Professor Lexicovermis, better known simply as Lex. I debuted here in MYM 19, where I put out three rather, ah, poor sets, shall we say. Now, here we are in MYM 21! I'm looking forward to getting some more sets out soon, and I look forward to reading this contest's entrants! But, I digress. This post contains every set I've made! I'll be keeping it updated when I post new ones, so keep your eyes peeled!


Last edited:

FrozenRoy

Smash Lord
Joined
Apr 26, 2007
Messages
1,268
Location
Las Vegas, Nevada
Switch FC
SW-1325-2408-7513
"Quiet, now, my pawn..."

Ulrich Hetfield, the Blood Puppeteer

Ulrich Hetfield was once one of the high priests to the goddess Eatos, the prime goddess of the land of Bathori. Devout and supremely active, Ulrich served as a high ranking church leader alongside his wife Elizabeth Hetfield. One day, his wife became very ill with disease, and so Ulrich prayed every day for her health and safety. He increased the number of missions he would be sent on, studied the holy texts beyond his already notable learning and he sought confession for any misdeeds he could think of. It mattered naught: Despite his belief, Elizabeth's condition never improved and she died pathetically.

Heartbroken by her loss, Ulrich began to feel increasingly betrayed by the church and goddess he believed in. For if someone as dedicated and devoted as him could not receive her blessing, surely she could be naught but an unworthy and cruel goddess! Ulrich left the church in frustration, and to most people, he would seem to disappear for some time. In truth, Hetfield sought new purpose in his life and began to hone in on dark arts forbidden to the church: Blood Magic. Embittered by hatred, his trek across the land allowed him to see what, by perception or otherwise, was the corruption and carelessness of the gods. It was on this journey he decided upon his new goal: The destruction of the gods.

From then, Ulrich appeared from his trek bringing the word of a new god: Morloth, the god of "Humanity" and supposedly the one who birthed them from his own blood. In truth, this god is false, a myth perpetuated by Ulrich in order to gather belief, and having it formed by his powers. From this, Ulrich hopes to create a true "God" from this collective belief, then use him to destroy the other gods and finally reveal the truth of the god's false foundations and erase him as well, leaving a world without "gods". In order to create a true image of the god, Hetfield used his intense knowledge of history and myth to create various plausible scenarios and circumstances Morloth could be slotted into, although the forgery of various historical evidence is scrutinized by others. Ulrich himself has installed himself as the chief religious advisor to the large, militarized country of Carcossi and although he acts little in the way of organized evil he is in fact the one responsible for pulling quite a few strings.

Ulrich Hetfield's power is blood-based: Ulrich has very good abilities to manipulate his power. He can shoot it out as a projectile, form it into solid weapons or objects, and perhaps more strongly has the ability to create humanoid "Blood Puppets" which can store and absorb blood to utilize as its own power, not to mention being a minion in general. It is best not to underestimate blood and Ulrich's mastery of it: He is, in fact, quite the strong combat contender despie his non-heavy stature.


Statistics

Ulrich Hetfield is a rather light character, very comperable to fellow spellcaster Zelda (85/44th, note that 43rd has 89 weight), while being a rather small target, around Mega Man in terms of size. Speed-wise, they are pretty slow, with a confident walk as fast as Robin's (47th) and a dash equal to the entire 38-42nd tie of Ike, Falco, Mii Swordfighter, Lucas and Luigi. His traction is above average, but nothing special.

Aerially, Ulrich is pretty floaty, with gravity like Mewtwo (38th) and a fall speed equal to Palutena and Charizard (40th/41st). His air speed is not especially fast, equal to Samus (28th) and essentially in the middle. His first jump is average and his second jump is above average but nothing to write home about. No other special Smash-ities like floats or anything.


Specials

Neutral Special: Master of Puppets

Hetfield uses his blood magic to open up wounds, causing his blood to flow out, and then with a snap of his finger the blood shoots forward and begins to collect in front of him. This is a move which is overall pretty short to actually perform, which is partially because the move doesn't "finish" during that time: The blood doesn't finish collecting into shape until 1 second after Hetfield's ending lag finishes, giving both him and the opponent a decent chunk of time to prepare for the result. Said result is a human-shaped minion made entirely out of blood, with a somewhat blocky shape and doll-like joints on the limbs along with a face with off, muted features. He puts a lot of work into these, huh? Once made, five strings of blood shoot out towards Hetfield and attach to the hand which created it, which is largely a representative visual.

The blood puppet, a Bluppet if you will, has 50 HP, making it rather beefy for a minion, although Mr. Hetfield can only control one at a time. Notceably larger than its master, the blood puppet stands slightly larger than Ike in all respects, albeit lacking in a weapon to begin with. The blood puppet follows a very simple pattern, it will simply chase after the nearest foe at all times, moving at a 1.135 Walk Speed (Above Mr. G&W's 1.242 but below the 14th-17th tie of 1.15) unless an opponent is within 1 Battlefield Platform in front of the Bluppet, in which case it will move at Mario's dash speed (28th-30th). The Bluppet has two jumps, which are below average but do allow it to traverse stages and make it slightly more difficult to get the Bluppet to stupidly kill itself. The Blood Puppet's weight is 102, 5 less weight units than Ike and equal to Shulk and Mega Man.

While the Bluppet's high HP will keep it around a while, this is not always a good idea: Half of the damage dealt to the Blood Puppet is ALSO dealt to Hetfield, meaning that if the enemy kills it, he'll have ended up taking a beefy 25% damage, not to mention that he has incentive to keep the Blood Puppet around via some stuff we'll get to that can make the damage he takes be more. The damage connection does not transfer hitstun, knockback or any other effects: JUST damage. While Hetfield can damage the puppet with a few moves, for the most part he cannot do so, and so he will need to consider the trade-offs in play when he is utilizing his Blood Puppet.

Every 4 seconds, the Blood Puppet will stop moving and point forward its fingers as if it was making finger guns, shooting out bloody projectiles aimed at the nearest opponent. These fairly fast projectiles are larger than a lemon, but smaller than a Crash Bomb, deal 3% damage and a small flinch to anyone they hit and are fired twice a second for 4 seconds. This means that the Blood Puppet has a very predictable pattern: 4 seconds of moving, 4 seconds of firing, 4 seconds of moving, 4 seconds of firing, repeat ad infinitum. Hetfield does, however, have some ability to alter this, which will come later. Since the shots are fired where the opponent is when they are released but do not home in, you can go full shmup protagonist and stream the shots fairly easily, although the forced constant movement to do so can be punished. Naturally, one could shield or reflect them as well, although both of these options also open up the foe to a potential punish. Hitting the Blood Puppet out of the attack is an option, but it is super armored against any attack which deals 12% or less damage, so it can be dangerous. At the same time, you could potentially use that to just wail on it with weaker attacks and rack high damage on both it and Hetfield.

When the puppet's HP is depleted, it does not die instantly, but instead wobbles and shakes in place for 2.5 seconds, before exploding into a fine circular blast of blood which deals 16% damage and kills pretty early at 80%! This is highly dangerous, which can make killing the Blood Puppet sometimes undesirable, but it IS well telegraphed and unless Hetfield uses one of his rare damaging moves on the Blood Puppet, the opponent is very in control of when to trigger it, so the opponent really shouldn't be getting hit by this without Hetfield actively forcing them into it or something. Hetfield cannot summon a Blood Puppet for 12 seconds after one is destroyed.

When a Blood Puppet is already out, this move changes, with Hetfield instead pointing his finger forward and shooting out a single string of blood 1.5 Battlefield Platforms forward. The effect of this move depends on if the opponent or the Blood Puppet is hit, although this move is a piercing disjointed hitbox and thus can hit multiple people: If it does hit multiple people, then all effects are applied normally (so you can hit a foe and a Blood Puppet to apply the normal foe effect on the foe and the normal Blood Puppet effect on the Blood Puppet). The interaction with the Blood Puppet is very simple, as Hetfield pumps blood into the puppet and heals it for 10 HP, allowing it to simply last longer. This "healing" can go over the Blood Puppet's initial HP cap, so if you get free time, you can potentially make it pretty big. Just remember that you take half the damage done to the puppet, so healing it up means more possibility for damage back to you.

On the opponent, they take 1% damage and high hitstun, as the bloody string shoots at the blood puppet, which in turn shoots out 4 more strings in the same manner as when the Blood Puppet is first created, ultimately connecting 5 bloody strings from the opponent to the Blood Puppet just like the Blood Puppet is connected to Hetfield. It is connected to the foe's hand if possible and the base of the back of the neck if not, or just anywhere on the body if the opponent lacks notable hands or necks. The effect of this is simple, causing the opponent to take half the damage dealt to the Blood Puppet just like Hetfield! This can be a big incentive for the opponent to avoid damaging the Blood Puppet and it lasts for a pretty long time, 12 seconds, and will generally make the battlefield a lot more dangerous. If the Blood Puppet is low, you can try connecting the foe to it, then using hesitation in killing it to heal it!

This also works as a punisher for an incentive on the foe to not kill the Blood Puppet quickly, but instead just hurt it and its predictable AI pattern to damage rack Hetfield at the same time, a legitimate if dangerous strategy as we will soon see. Another option is to try and rush the Blood Puppet quickly and keep it down constantly due to the cooldown on death, however recklessly attacking down the Blood Puppet is very risky because Hetfield does not take hitstun or knockback and thus can punish opponents too focused on a mere minion. This is an integral move to Hetfield's playstyle and has even more to it than discussed, so getting used to its in's and out's is important.


Side Special: Don't Fear The Reaper

Ulrich grins as he materializes a scythe of blood into his hand, ripping itself out from a quickly opening-and-shut wound on his arm, before throwing it forward as it spins rapidly, with the scythe being vertically aligned rather than horizontally aligned and thus taking up a good deal of space. This scythe travels for quite a while, 2.22 Battlefield Platforms, before at the apex of its distance turning back and returning to where it started, which makes this move actually pretty crazy for pure stage control. It pays for it in lag: It is somewhat laggy to throw out and the ending lag won't get you insta-gibbed or anything but is pretty punishable if the opponent is in good position. The scythe itself is pretty strong, dealing 12.5% damage and killing at 111.1%, considering it is a stage control projectile that is pretty potent. Ulrich can aim the scythe slightly up or down like most angle-able moves, where it will return with the same trajectory, up being useful for covering far away but not too high platforms, down can be an edge guarding move with good timing. The scythe moves at a slightly faster than average pace.

So, here's something about the Blood Puppet I have yet to mention. When one of Ulrich's projectiles overlaps with it, the Blood Puppet will absorb the projectile into itself, storing it inside of itself and looking slightly more bloated for each projectile in it, although the visuals cap at 5 projectiles despite the # of projectiles inside being unlimited since, well, limitless size gain is pretty bad. When the Blood Puppet next fires a projectile, it will begin by firing the first projectile it absorbed, and then go down the list. The lag it uses for firing off a projectile is equal to the original lag of the move, which means that the number of projectiles fired can be manipulated by adding laggier or less laggy projectiles to the Blood Puppet as it will still only fire for 4 seconds (although if it begins a move before 4 seconds that would last longer than 4 seconds, it will still perform that move): Laggier projectiles means less projectiles in each projectile cycle since they take longer to perform, while less laggy projectiles are the opposite.

The scythe is particularly interesting when absorbed because of the fact that it will return to where the Blood Puppet fired it, just like it would if used by Ulrich, and the Blood Puppet will re-absorb it if it comes into contact with it while doing so. Depending on when it is put in, this can either mean re-absorbing it into the Blood Puppet early enough it could potentially be shot out again in the same cycle, or late enough that it will be saved for the next cycle! This allows the Blood Puppet to vary up its projectiles and reload itself without needing to shove a ton of projectiles into it each time, as long as you are fine with it repeatedly throwing out scythes. Do note that this can be rather predictable as well, but the stage coverage is pretty great.


Up Special: Freak On A Leash

Ulrich forces his palm forward and shoots out a bloody tether a decently long distance, which deals 4% damage and light knockback most of its path, but the very end of its travel is a sweetspot that deals 8% damage and spikes opponents down with solid-but-not-spectacular strength. The recovery itself is rather long ranged, being a relatively standard tether: Ulrich can hold down B briefly to make the rope of blood and swing it in his hand to build up strength a little, causing it to go 1.25x the distance but adding starting lag and therefor making it more gimpable. But in some situations, it might be your only hope for survival. The starting lag is average, as is the ending lag.

This move can be angled and has some basic interactions with the Blood Puppet. If Ulrich tags the Blood Puppet with the move, then he will reel himself towards it like a ledge, and Ulrich reels himself in to the ledge at a fast pace. The result is that Ulrich can utilize this move as a fairly strong movement option, with Ulrich free to use aerials while he is being reeled into the Blood Puppet. He should note, however, that if the Blood Puppet is on the ground, he will land on said ground, meaning he'll suffer landing lag. In the air, he will obviously stay in the air, taking the normal ending lag. Then again, if he times a move with autocancel frames or whatnot right then he might be able to cancel the lag, which is pretty potent if specific! If Ulrich holds down B when he tags the Blood Puppet, he will whip the Blood Puppet towards him instead of slinging himself towards it, which pushes the Blood Puppet 1 Battlefield Platform closer to Ulrich, in addition to turning the Blood Puppet's body into a hitbox that deals 6% damage and light knockback in the direction the Blood Puppet is being dragged, which 99% of the time will mean towards Ulrich and thus can start a combo potentially. The Blood Puppet can be pulled during its firing phase, which allows Ulrich to potentially, for example, move the Blood Puppet as it fires a projectile to change the path you need to dodge it and whatnot, not to mention the trajectory of the projectile itself which can be important for, say, your scythe and its return path. Nifty, if Ulrich would say so himself.


Down Special: Once

Mr. Hetfield lets out a loud yell, blood exploding out every which ways from his body. This move is quite fast to start up and does a solid 11% damage with knockback that serves primarily to make excellent space for Hetfield, although it will also kill at 155% or so. The ending lag is high, Hetfield collapsing to the ground briefly in a puddle of his own blood as he catches his breath and returns to a fighting stance. In the air, he will take a slightly different pose of course, while the blood falls to the ground at the fall speed of Meta Knight. The blood is far from a mere aesthetic, sticking around on the stage for 8 seconds for Hetfield to interact with it, with its base interaction with each fighter merely being slightly lower traction and slightly higher grounded movement speed. There is no limit to the amount of blood puddles Hetfield can create: The punishability of this move is its own limit to go with the time limit.

If Hetfield uses this move over top of a blood puddle, he will absorb it in order to increase the blast radius 1.3x and the damage 1.2x, which makes the move pretty potent and thus making the area deadly for the opponent to play around. Given the fast starting lag of the move, opponents not already in position when this move goes off may be wary of punishing it despite its ending lag out of worry they won't hit in time and will eat a meaty, secondary explosion. This move technically destroys the Blood Puddle, although it will make a new one at the end: If Hetfield is hit out of it, though, he won't get a chance to make the blood puddle, so you'll end up minus a blood puddle.

The Blood Puppet gains a significantly higher movement speed boost over the blood puddle, which covers 3/4ths or so of a Battlefield Platform, the Blood Puppet going 1.4x as fast as normal. When the Blood Puppet moves over a blood puddle, it will splash it up as a hitbox briefly, dealing 5% and weak upwards knockback if walking or 9% and moderate upwards knockback if running. This only occurs the first time the Blood Puppet runs over a blood puddle per second. If the Blood Puppet stands on top of the blood puddle when firing, it will heal 2.5% HP for each projectile fired while absorbing a little of the blood puddle into itself, although this does not reduce the blood puddle's size. In addition, every 4th shot that the Blood Puppet fires will be 1.5x its normal size and deal 6% damage with somewhat small knockback towards the Blood Puppet, a noticeable increase from the normal base projectile. Projectiles absorbed into the Blood Puppet will gain a universal 1.1x damage boost and will heal the Blood Puppet for twice as much as normal when fired. A noticeable sustain boost!

If Hetfield overlaps with the Blood Puppet when he uses this move, no blood puddle will be created, as instead the Blood Puppet will absorb the blood! This is saved just like a projectile, except instead of firing a projectile, it causes the Blood Puppet to explode in a mass of blood that deals the same damage and knockback as the buffed version (after all, if it is powered up by absorbing blood, a being MADe of blood should get it), although this deals damage to the Blood Puppet equal to the amount of damage of the attack, which can trigger the Blood Puppet's death and will deal half damage to anyone connected to the Blood Puppet. It can also be somewhat awkward to set up as more of a melee-ranged hit, but then again with the predictability of the Blood Puppet Ulrich has ample time to try and get the foe into it.


Smashes

Forward Smash: For Whom The Bells Toll

Ulrich materializes his bloody scythe yet again with a laugh, slashing it forward with a wide, looping swing, with the ending lag having Ulrich finishing the swing with a stylish flourish as the scythe melts away. This move has two hitboxes, both of which are very different: The majority of it is the scythe's handle, which mostly functions as a traditional smash attack hitbox, dealing 12%-16.8% damage and moderate but unspectacular knockback that will fail to kill until 170%-150%, although the move comes out fairly fast so this isn't all that bad. The scythe head hitbox is more...weird, dealing 1% damage for the moment and opening a wound in the opponent through which blood from the scythe forces its way in, the opponent being sent a fixed knockback away that usually forces a tech situation, although due to the above average end lag from this Ulrich can't really flatout follow-up on it.

As anyone could have guessed, a simple nick is not the end of the move. After 6 seconds, the blood which seeped inside of the foe bursts out of them, dealing 6-9 hits of 2% damage (charge scales # of hits rather than damage, rounded up here) to the foe, each dealing small hitstun that causes them to all combo if one of them hits, along with some low knockback on the last hit. Though the hitstun of each individual hit is small, all of them combined make the opponent stuck in hitstun for some time, making it a good combo starting move. The hits all come lightning fast after each other, hitting 1 frame after each other, and the hitstun or knockback of moves which hit an opponent are applied after the multi-hitting move to prevent any really weird knockback-cancelling degenerate combos or something.

If this scythe sweetspot hits a shield, then the blood will seep into the shield instead, visibly pulsing through the shield over the next 6 seconds. If the shield is up after 6 seconds or is pulled up after then, the same multi-hitting effect is applied to the shield! This is not an instant effect: The shield needs to be up 4 frames before it activates, so quick inputting allows dodges and sidesteps, although it does force opponents to choose their options quickly. Not being able to shield is quite awkward when the Blood Puppet is shooting at you but most especially when the Side Special scythe is out, as its ability to control a lot of stage makes dodging and sidestepping difficult. And because the effect doesn't go away until you take the shield hit, it can be surprisingly restrictive. Opponents might even put up their shield in safe situations just so that they can remove this effect! And, of course, the punishing options if the opponent ends up having to throw up their shield in an unsafe position are obvious, such as rushing in with a grab or what have you. It's a high pressure move despite not even having a single chance to actually hit the opponent! Amazing!

The sweetspot will interact with Ulrich's Blood Puppet, active blood flowing into it, although it won't be popping out and damaging the Blood Puppet unlike the foe. This takes the same amount of time as on the foe. Instead, the blood shoots out of the Blood Puppet in the form of deadly spikes! This creates a hitbox all around the Blood Puppet which deals damage equal to the sum total of all the hits inside of the Blood Puppet (12%-18%) and knockback that will kill at 120%. The Blood Puppet is not doing this, rather the active blood inside is, and thus the Blood Puppet will not enter lag during this move and will continue on its normal AI path. The spikes linger for a good amount of time, which can be pretty deadly when combined with this fact: The Blood Puppet moving around with the spikes jutting out of it is a pretty powerful moving trap! And if you stuff it in the Blood Puppet so that it pops out when it is about to fire, it can instead serve as a strong shield to prevent opponents from getting too close, such as to interrupt it, and for Ulrich to have a predictable place to force the foe into, since the Blood Puppet won't be moving. You need to be fairly predictive to utilize the AI pathing and the battlefield situation correctly for this, but it can have a pretty high reward if you do.


Down Smash: Reign in Blood

Hetfield raises his arm to the sky, blood flowing down his shoulder until it covers his arm entirely, and slams it into the ground, sending out a shockwave of blood to both sides of him. This move has two hitboxes: The strongest one is the fist itself, which is overall a pretty small hitbox, which deals 16%-22.4% damage and high upwards knockback that kills at 90%-70%, although this move is not especially fast to start with and it isn't too fast for ending lag either. The main hitbox is the initial wave of blood which is sent to each side, which deals 14%-19.6% damage but KOs at a noticeably later percentage with an upwards-diagonal knockback angle, 135%-117% in total. The shockwave of blood then continues without any hitbox until it reaches the end of the stage it is on (or off screen or whatnot), being paper thin in terms of height and not especially wide. The shockwave travels rather slowly.

When the shockwave passes a blood puddle, the blood puddle will in a sense "mimic" the attack which Hetfield used: Specifically, the puddle will form into a big ol' fist and punch upwards, before splashing itself back down into a normal puddle. The punch happens quite fast and deals 12%-16.8% damage while killing at 139%-118%, which given you can have multiple blood puddles out and it is delayed so you have time to work off of it is still pretty strong. The fists go fairly high into the air, making them pretty good anti-air moves. Splashing back down into a puddle is a small hitbox that drags opponents towards the puddle for 3 hits of 1%, a slight annoyance but no big deal. Since the shockwave is slow, both the opponent and Hetfield have a good amount of time to plan around it, so be aware of that when using this move. It should be noted you can have as many shockwaves out as you want too, so you can end up having a puddle punching upwards repeatedly if you've Down Smashed a few times for example.

If the shockwave passes under a grounded Blood Puppet, then the Blood Puppet will react as well, although it will do so somewhat differently, instead having its bloody arms expand up before slapping both of them above its head in a Donkey Kong styled Up Smash! The spot where the hands meet is incredibly powerful, dealing 24%-33.6% damage to anyone smashed in this somewhat small sweetspot while its knockback is equal to 1.115x Donkey Kong's Up Smash. The lag, BTW, is the same as DK's Up Smash in all regards. The rest of the arm is more modest hitbox which deals 15%-21% damage but has a pretty terrible launching angle which combined with the knockback means it fails to kill until 150%-133%, although you could use it to begin a landing chase situation. The sweetspot is incredibly unlikely to land raw, but the fact the Blood Puppet is constantly tracking the foe when it isn't attacking makes it easier to get in range to try and prepare the foe to land into it when the shockwave arrives, although at the same time opponents have time to try and work around this and can lead the Blood Puppet towards or away from the shockwave to delay or make it slap faster...and then in turn Hetfield can cover these with moves like Side Special to make that more favorable to him as well, so there's a lot of layers here.

The Blood Puppet will interrupt whatever action it is doing to perform the slap, including firing a projectile (if this happens before the projectile is fired and it is a saved projectile it is not used up), which means that it can be used as a mixup or threatening move and potentially make going above the decently large Blood Puppet spooky. You can also use this to trap opponents in some situations: For example, an opponent above the Blood Puppet with an incoming shockwave cannot air dodge a projectile it shoots out because they will get crushed by the arm hitbox right after. Given you can pump a stronger projectile like the scythe into the Blood Puppet, this becomes potentially quite deadly. And when the opponent starts avoiding being directly above the Blood Puppet and drifting to the side, you can go for a read on it and hit with your own attack, either a stronger one or to hit the opponent into the Up Smash!


Up Smash: Raining Blood

Ulrich forms a bow out of blood in his hands, the bowstring's bloodstring connected to the finger he uses to pull it back as the bloody arrow pushes its way out of the palm of his other hand, before shooting the arrow upwards, travelling to roughly where Pikachu's Thunder Cloud would be from the ground, or up to 1.5x that distance with charge. Fairly fast to come out and with low ending lag on top of being a projectile, this arrow deals only 10%-14% damage and won't kill until 180%-150%, making it a lackluster killing move...although you can kill someone earlier by hitting them higher in the air of course and this move's good range works well with that. The arrow will go back down once it has reached its apex, which if fired the default way will come down directly where Ulrich fired it.

This move is highly aimable! It can be aimed slightly to the left/right, which will cause the arrow to drop exactly 1-1.5 Battlefield Platform to whatever side of Ulrich it was launched. If you charge it at all, even for a frame!, and aim full left/right with no up however, you can fire the projectile at about a 35 degree angle, making it much more of a horizontal striking attack than a vertical striking one, and will make the arrow drop 2-3 Battlefield Platforms away. The arrow always dead drops, heading straight down at the same speed it was going before, once it reaches its range distance. When the arrow is heading straight down, it deals the same amount of damage but turns into a slightly weaker than average spike instead of its normal upwards hitbox: This can be pretty good for starting combos and you can potentially use this as an interesting edgeguarding move or gimping tool since it can cover recovery with a spiking projectile.

This move has some interesting applications with the Blood Puppet thanks to its dead dropping capabilities. The puppet will shoot the arrow directly at the foe's current location, but it'll dead drop the moment that it hits its normal (it saves how much range was gained by charging, by the way) range limit, which allows the arrow to drop down in ways which Ulrich cannot perform on his own and to combine it with arrows Ulrich fires normally. The arrows are also an important part of Ulrich's general projectile play aside from the interaction: The shallow anti-air angle is really good for shooting arrows over your Blood Puppet to hit opponents over it or who are trying to jump over the Blood Puppet (which is usually a good strategy), especially when combined with your space controlling Side Special scythe, which will usually cover more horizontally than the vertical arrow coverage. And then the arrow could drop down on the Blood Puppet with spacing to still save it inside of it, as well!

Arrows also interact with the blood puddles if they fall inside of them. If an arrow falls inside of a blood puddle, an identical arrow will shoot straight up out of the nearest blood puddle to the foe (including the same blood puddle if it IS the closest one: This includes if it is the only one), which loses its form as it travels up its original range and dissipates when it reaches it without falling down. This can create quite a maze for your opponent to navigate, especially if you combine it with your Down Smash shockwave to have your puddles fisting your foe after firing it up or having your other puddles punch the opponent up while another one shoots up an arrow. Throw in, say, a Blood Puppet in its shooting cycle or a Side Special scythe flying around and things get really hectic for your opponent to dodge...and if you tagged your opponent with a Forward Smash, then its a lot more deadly to shield a weak projectile like this in the chaos!


Standards

Jab: Blood Red Sandman

Slits open up in the side of Ulrich's two middlemost-fingers, swiping them forward as the blood collects into a handleless dagger that almost looks more like a shard of glass. A second input causes a second swing the opposite horizontal direction, and a final input causes Ulrich to toss the glassblood-dagger forward 1.25 Battlefield Platforms. The first two swings deal 3% damage each, with the second swing having slightly more range than the first hit. The third hit has slightly variable damage: A point blank strike deals 7% damage and knockback that clears the way for Ulrich fairly well, but it won't combo out of the jab combo much. If the opponent is really close, it could catch out a spot dodge, or an attempted punish from your low lag second hit. Past really close range and for the rest of the projectile's duration, it deals 5% damage and light knockback towards where it was launched, which can potentially lead to something given the low lag. This move has low lag on all parts of it, really, which also means you can perform some moves as a mixup out of Jab 2 or whatnot, like a normal grab.

Jab 3 is your most basic projectile to feed to your Blood Puppet. It has less lag than firing out his normal projectile, which can help keep the number of projectiles you fire towards the normal even when firing laggier projectiles or to get more out if you don't mind throwing out a bunch of knives. The inwards knockback can put opponents into awkward situations with other projectiles or an incoming Down Smash shockwave into the clap. But the overall reward for hitting someone with the dagger is rather low, which is its main weakness. Mixing it up with other, higher reward projectiles is generally the best way to do it. Another thing to consider is that just jabbing is low commitment: You can just Jab 1 to threaten feeding a dagger to the Blood Puppet and then not Jab 3ing and punishing if they take any punishable actions or whatnot.


Forward Tilt: Blood Fire Death

Hetfield glares with anger as he raises a curled hand in front of him, blood spilling from his fingers and collecting into a ball in his clutches, before he throws it forward, the projectile travelling at a slightly faster than average speed, the projectile slowly falling downwards during the travel. Upon either contact with the opponent or hitting a solid object it explodes into a burst of carnage, dealing 12% damage that KOs at 130%. If you use this on a flat surface, like Battlefield or FD, it will hit the ground after going 1.5 Battlefield Platforms: If it goes off a ledge, it will go until it reaches the bottom blast zone (which since it will keep going forward unlike the Up Smash makes it a good off-stage mixup). Meanwhile, a platform can be used to explode it early, or what have you. This move can be angled up or down, as well. Angling up simply causes it to go higher, but not as far, only travelling half the distance horizontally if used on Battlefield or FD for example. This does allow it different angles for even more off-stage mixups, however, and it gives Hetfield a pretty good arsenal for fighting aerial opponents, landing coverage, and for hitting opponents on platforms or the like.

Down is the more interesting one, perhaps, as Hetfield instead rolls the projectile on the ground, travelling 1 Battlefield Platform while grounded and thus not exploding on contact with a solid object (it bounces off walls and, well, it is already on the ground). Instead, it serves as a contact bomb that lasts 5 seconds essentially, in addition to the fact that it can be picked up by the Blood Puppet simply moving over the top of it. After 5 seconds, it explodes normally if it has yet to touch an opponent. Because it is so low to the ground, it can potentially shield poke opponents, which can be especially good with your Forward Smash shield hitting attack.

If any of the three so-to-speak blood bombs explodes inside of a puddle, it will consume the puddle to boost its power to 16% and kill at 100%. This is pretty strong, but it does use up resources and is somewhat specific: Something to note, though, is that you could space a Down-angled Forward Tilt so it comes to rest on top of a Blood Puddle, which will mean anything triggering it will trigger the higher explosion. If a Down Smash causes a puddle to punch upwards, it will send any bomb hit by it up 2 Ganondorfs into the air, then it will fall back down and will explode if it hits the ground (including down-angled bombs), which considering that jumping over the bombs is the best way to avoid them means foes have to be careful about shockwaves. Blood arrows sent through puddles will stab into the bomb and carry it up with it, changing the arrow's hitbox to the stronger bomb hitbox, essentially buffing it slightly.

Blood Puppets will usually just fire the standard version at the foe, which is still somewhat useful as a strong hitbox albeit with somewhat long starting lag (tho the ending lag is slightly faster than average), but if a Blood Puppet specifically absorbs the Down-angled Forward Tilt then it will use the down-angled version if it is on the ground, simply firing the normal version if it is in the air. Since the bomb will have a new duration, this can mean that Blood Puppets can keep absorbing and firing out these blood bombs if not kept in check or the opponent isn't keeping in mind how they follow them, and assuming Hetfield doesn't destroy them with a Down Smash or Up Smash interaction.


Down Tilt: Pull Me Under

Swiftly blood-summoning his scythe, Ulrich performs a quick, inward and tripping motion with his scythe, a very fast move with two hitboxes. Most of the scythe is a 6% damage hitbox that hits opponents away from Ulrich decently far but not a lot, it can rarely start a tech situation but is more of a safer but much less rewarding panic button move than Down Special. The sweetspot, the head of the scythe, deals 6% damage as well but instead draws opponents closer to Ulrich, which combined with the relatively high hitstun of the move opens the opponent up for combos, most prominently it will usually true combo into the Jab (which of course has its entire combo combo with the weaker hit of Jab 3), along with some other moves we haven't gotten to yet. The end lag of this move is rather low.

This is Ulrich's primary identification and shield poking tool, along with just in general one of his stronger neutral moves: It has less range than a lot of disjointed moves but still enough to be safe on shield spaced out into the sweetspot, while being low hitting enough to smack people's vulnerable parts under shields, and in general is one of his faster moves to throw out. It is probably one of Ulrich's best moves for catching out a two frame, although this is not especially impressive. Overall, solid.


Up Tilt: Over The Mountain

Opening up his palm and drawing his scythe free from the cut, Ulrich performs a somewhat awkward front-to-back upper swing with his scythe which is rather laggy to start, although it deals a fairly hefty 11% and knocks opponents well into the air, although it will not begin to kill until 175%. Moreso than killing, this move is very good for starting aerial chase situations and landing situations: Both of these are things that Ulrich loves because of moves like his Up Smash, Up-Angled Forward Tilt, the Down Smash interaction with the Blood Puppet, the lesser defensive options available to stop the Blood Puppet's projectiles in the air and so on. This move having decently short ending lag helps towards this as well. It is your primary aerial launcher, essentially, since as you may have noticed he doesn't have a bunch.

This move has enough horizontal range that it can decently be used as something to guard ledge options, such as regular getup, getup jump and so on. Since you get a solid reward off of it, it is a somewhat risky but rewarding option. Because moves like Up Smash also have downward hitboxes, not to mention stuff like your Down Smash puddle interactions or whatnot, this move can be used decently as a frame trapping tool, although it isn't amazing at that. It also can, itself, be used as a riskier option for catching out opponent's landings and continuing the juggle-esque game, althoug hyou should be careful of the high starting lag.


Dash Attack: Ride the Lightning

Hetfield bursts forward from blood blasting out of the soles of his feet, holding back his arm for a moment, before slashing forward as blood spills out of it like a messy slice. While he blasts forward, Hetfield's body is a hitbox that deals 5% damage and lightly knocks opponents in front of him, which will set them up for the slice which deals 9% damage and solid-if-unspectacular knockback on hit. The jet forward starts decently fast, but the ending lag of the attack is fairly punishable. Hetfield usually goes about half of a Battlefield Platform, but there are a few ways to change this.

The first is to hold down A, which will cause Hetfield to dash until A is released or he hits a ledge/wall/etc, at the cost of 1% self damage periodically (it isn't a lot: Going across Battlefield takes about 6% damage). When either of these conditions are met, Hetfield then performs the slash. The other is to go over a blood puddle, which will allow Hetfield to keep dashing over it for free, and allow him to change directions once per dash attack, which thanks to the small delay can also be used to catch out some rolls or dodges or to turn around and hit someone who raised a Forward Smashed shield or, say, a shield blocking a projectile for additional pressure. This is one of Hetfield's better rush-in moves against opponents who are currently under durress, allowing him to be a bit more aggressive when the time calls for it.

If Hetfield finishes this move over a a blood puddle, he can hit A an additional time, which will cause him to whip his other arm forward as blood surges out of it as a very messy, somewhat jagged crescent-shaped projectile which travels at a decent pace 2 Battlefield Platforms. If the opponent was struck by the bloody slice, then the projectile will home in on them, although the homing is somewhat light. The flying crescent slice deals 3 hits of 3% damage each which keep the opponent in hitstun for a good deal, delivering weak knockback at the end, making it good for keeping opponents in place and perhaps comboing, but pretty bad at killing, and it is only 9% damage by itself of course. If you did not hit an opponent with the slice, it merely flies straight-forward.

The Blood Puppet can absorb the slice, of course, and given both track the foe this is more common than you might expect. When the Blood Puppet shoots out the slice, it will home in on the opponent if ANY of the Blood Puppet's projectiles from the current cycle hit the opponent, and interestingly they won't just do this when fired: If they are already out, they will instantly begin to home in on the opponent if they are struck by another projectile of the cycle. On top of that, when the Blood Puppet fires the projectile, it will have an additional property given the Blood Puppet is fully made of blood to shoot it, putting more into it and causing the bloody crescent to go at 1.2x its normal speed when homing in on an opponent, which when added to the bullet hell of the Blood Puppet can be quite intense. They can be re-absorbed, though, so opponents intentionally kiting it back into the Blood Puppet can sure be a thing...but that only delays it until the Blood Puppet fires it again, so no big loss, really.


Grab Game

Grab: In the Court of the Crimson King

Hetfield's base grab is pretty simple: It comes out fast and it has really bad range, requiring Hetfield to get pretty up close to land it, but also can interrupt a lot of moves. Hetfield is rather unique in having a second grab: if A is held (or the grab button, when grabbing using that), Hetfield will hold an open palm and release a huge spray of blood which goes about 3/4ths as far as most tethers, but has some interesting vertical range to allow it to actually catch low aerial people. It has higher starting lag than most tethers, but its ending lag is surprisingly short, as Hetfield doesn't need to real anything in and merely closes the wounds in his hand.

Hetfield's normal grab cannot grab his Blood Puppet, but his tether grab can. Foes are always prioritized over the Blood Puppet for grabs. The timer on the Blood Puppet's cycle will continue while grabbed, which can allow Hetfield some control over it: For example, grab a Blood Puppet during its projectile cycle to keep it from firing more projectiles because you want them for the next projectile cycle. The Blood Puppet escapes pretty slowly, regardless of how much damage it has taken. The Blood Puppet can still absorb Hetfield's projectiles while grabbed.


Pummel: An Observation by King Crimson

Mr. Hetfield's pummel is very simple, placing an open palm against the opponent and piercing their body with blood for 1% damage while drawing out some of the opponent's blood to heal 1%. The pummel is a bit on the slower end for the damage swing, but healing is pretty potent.

This can have one of two effects on the Blood Puppet. If you simply tap A, then the Blood Puppet is released with minimal lag to either party, allowing Hetfield to easily get out of accidental minion grabs and to accurately time releasing the Blood Puppet for its cycle. If you hold down A, then Hetfield will instead begin to pump the Blood Puppet full of blood!

The blood can be pumped into the Blood Puppet for as long as it is held, causing the Blood Puppet's blood to become wavy and less featured, the doll-like joints on the body taking on a "cracked" look that blood flows through like a river. Pumping the Blood Puppet full of blood can cause various effects within the grab game itself, but it does change the Blood Puppet itself some if it is just relased or hit out of it. First off, every second this pummel goes on heals the Blood Puppet for 1%, which can go over its maximum HP count: and increases it's weight units by 1: Weight can be increased by a maximum of 11 units, which takes 11 seconds so GOOD LUCK, which would put the Blood Puppet on par with Ganondorf. Weight is lost at a weight of 1 unit per 5 seconds not being grabbed until it goes back to the normal default, which depletes the pumped blood at the same rate naturally.

When the Blood Puppet moves while full of pumped blood, it will create a small hitbox under it if it has been pumped for at least 2 seconds, which deals 2%-10% damage based on how long the blood has been pumped, with the knockback varying from totally minisicule from weakly-moderate and upwards all the same. Seeing as the Blood Puppet is constantly chasing down the foe when not projectiling this can actually put some okay pressure on opponents, although it doesn't lead to much...you CAN get absurdly specific true combos into a Down Smash trigger on the Blood Puppet, but this requires exact timing combined with the exact right amount of time left on the Blood Puppet being pumped for the correct amount of time for the knockback to be perfect, and for the opponent to be in a damage range that usually exists for only about 5%-10%. So this is pretty much just for those sick hype compilation videos.

If the Blood Puppet has been pumped for at least 8 seconds, it will make shockwaves when it takes a step, which deal 2%-4% damage based on the amount of time it has been pumped and trips opponents. If the opponent is in front of the Blood Puppet, this has a high chance to true combo into the running hitbox OR force an instant roll, which makes it a lot more threatening when normally the running phase it is very vulnerable. The back hit will give enough time for the Blood Puppet to turn around and begin to chase the foe, which puts the opponent in an instant disadvantage state for Hetfield to take advantage of. And of course, either of these hitboxes can go into projectile pressure if the Blood Puppet enters its projectile cycle afterwards.

NOTE: After this point, stacked blood is frequently referred to in terms of "stacks". That's just for simplicity in writing. 1 stack = 1 second of pumped blood.


Up Throw: Transilvanian Hunger

Ulrich grips the foe tightly, blood extending out of his fingertips like claws and piercing the opponent, sucking their blood in spurts of 1% damage until 10% has been dealt to the foe, with 8% damage being healed from Ulrich in return. The opponent is tossed upwards a decent distance with the last hit, which puts them in a bit of an aerial landing situation: It doesn't start as good of one as Up Tilt, as the positioning is a bit worse and Ulrich has less frame advantage, but in return coming out of a throw is very useful and it is pretty important for Ulrich to be able to set up reasonable aerial situations. It also allows it to work together with things like, for example, set up Down Smash shockwaves, Up Smash arrows or even up-angled Forward Tilt explosives, although it is harder to utilize some of these the more damaged the opponent is.

This is probably the most simple interaction with your Blood Puppet in the grab game: The Blood Puppet loses 8 HP, not dealing damage in a way that hurts Ulrich or the foe since that'd be kind of useless, and Ulrich heals 8% damage before releasing the Blood Puppet from his grip. For every second, or stack if you will, of pumped blood in the Blood Puppet, Ulrich gains another 1% of healing, up to 16%, although this does deal extra damage to the Blood Puppet. This can cause the Blood Puppet to trigger its explosive state.

Both of these throws are rather slow. This means that Ulrich stands a good chance of getting interrupted while healing off the Blood Puppet unless, say, he first knocks the foe away: This can be a good alternative way to use the delay of things like the Down Smash's shockwave, the Side Special scythe returning to you or having the Forward Tilt bomb laying on the ground to control space. And with the opponent, you can hold the opponent in place to potentially get hit by a Blood Puppet projectile briefly, although this is not always beneficial as the throw will get cut short if you do so and thus Ulrich will not get full healing out of it.


Forward Throw: Vulgar Display of Power

Ulrich lifts the opponent up as a large amount of twisted blood slithers down his arm, much more than normal. Ulrich then releases the opponent for but a brief moment before the giant, bloody maw that has collected on his arm devours the opponent, trapping them inside it! This puts the foe into a sort of Cargo Throw state, where Ulrich is able to move around with the foe desperately wiggling inside of his gory appendage: Larger foes' limbs can be seen wiggling outside of the teeth as they desperately struggle. Unlike the actual Cargo Throw, the grab difficulty continues over from the normal grab, so be careful about going for those sick 1% healing pummels with this thing.

Ulrich moves at 3/4th his normal movement speed and can press A or Z + any direction in order to shoot that opponent in that direction: The total damage of the chomp + throw is 11% and the knockback is moderate, a bit far away from Ulrich for flatout combos but it keeps them close enough he can pressure (or run away like a coward from) them. Opponents who are shot out this way are treated like a projectile, dealing 8% damage and light knockback in the direction they are travelling to other opponents, minions or what have you that it hits. Obviously, the ability to throw your opponent in such an omnidirectional way is good for the multiple delayed hitboxes of this set, but the fun doesn't end there.

Remember how your Blood Puppet absorbs your projectiles? Your opponent, as a "projectile", will get absorbed by the Blood Puppet as well! This puts the Blood Puppet into a unique state, cancelling out of whatever it might be doing (same rules as Down Smash), aiming directly at Ulrich and firing the foe as a projectile with 1.3x the speed they were shot out from the Cargo Throw and 1.25x the damage! Fortunately, Ulrich cannot be damaged by this, and it instead serves as a setup move for Ulrich to strike at the opponent careening towards them! The distance the Blood Puppet is from Ulrich, how damaged the opponent is and so on determines exactly the kind of move that Ulrich can follow-up with, but it can definitely be a kill confirm in a decent number of situations. It DOES require your Blood Puppet being nearby to work with, but with the cargo capabilities and the Blood Puppet's relentlessness, this is not a super difficult condition to fill. Note that being shot out of the Blood Puppet puts the opponent on a global 2 second anti-grab timer which includes further Blood Puppets absorbing the foe, so no cheese to be had here.

If the opponent is thrown against a blood puddle, then they will need to either tech the throw or they will be placed into prone as they slip against the blood puddle, which can also be a pretty powerful tool to create an advantage state which the Blood Puppet bounce cannot as much, an especially strong state if you use your down-angled Forward Tilt for example for coverage.

If used on the Blood Puppet, then Ulrich will swallow the Blood Puppet just like the foe and can fire him out as a projectile! The Blood Puppet deals a lot more damage than the foe and the animation is shorter since the Blood Puppet is not struggling against Ulrich, with the Blood Puppet dealing 16% damage and killing at 105%, yowza! Of course, like your Cargo Throw, it bans you from other inputs...and unlike the foe Cargo Throw, the opponent is not grabbed and free to whoop on your ass, so you usually need to shoot the Blood Puppet out pretty fast. The Blood Puppet goes 1.4x the distance the foe does when shot out, so it can be sent out a lot further. Note that this works like a Brawl Waddle Dee toss in that it is a minion being thrown, not a true "projectile": It cannot be reflected or pocketed!

The Blood Puppet takes damage from the bite and throw, in fact it takes the throw damage as part of the bite. This is important because the Blood Puppet's explosive state can be triggered by this, which will cause it to count down while inside of your mouth-arm (you can also grab an explosive Blood Puppet). When shot out, it will then explode when appropriate, and if it is during the state it is a projectile it will combine into a MASSIVE damaging hitbox! 25% damage and it kills at 65%! Of course, this is incredibly easy to see coming and for the opponent to dodge given the conditions + needing to line up a shot while in a Cargo Throw state, so it should reward you quite handsomely indeed!

Where Pumped Blood comes into play is that if the Blood Puppet has pumped blood, then Ulrich will absorb that from the Blood Puppet instead, releasing the Blood Puppet with a light shove when done. This causes Ulrich to have a spherical pool of blood inside of his mouth arm which functions like shooting out a Blood Puppet, except it deals 2%-16% damage depending on the amount of pumped blood siphoned out of the Blood Puppet, with the maxmimum amount dealing knockback equal to the normal throw. The pumped blood can also be explosive: It will explode at the exact moment its timer would normally run out, and no sooner! This even has the same absurdly strong hitbox of the exploding Blood Puppet at max strength! ...And only 4% and weak knockback at minimum strength, but you know. DETAILS.

What is really important, though, is that it allows you to get this projectile of customizable strength as seperate from the Blood Puppet, which of course means the Blood Puppet can absorb it and later shoot it back out! The timer of the pumped blood will continue to tick while inside of the Blood Puppet, exploding the moment it comes out if it reaches 0 before being shot out, which means that the Blood Puppet can potentially make the big, scary explosive hitbox! This is not easy, as the Blood Puppet still uses its very simple AI and won't try to time it at all, via how you put projectiles into it or grabbing it to manipulate its cycling, Ulrich can try and manipulate when it is fired to the best of his abilities...and the base 16% damage, 105% KO version is one of your strongest projectiles, although it requires a lot of pumped blood setup. The lower amounts can also be used for more combo-y projectiles for example, making this a versatile and powerful addition into the Blood Puppet's projectile play, albeit one that is pretty gated.


Down Throw: The God That Failed

Ulrich forces the opponent down to the ground, in a kneeling position if possible, with a sharp kick and press to his leg as he thrusts his arm to the side, his scythe ripping its way out of his arm and into his grip. He then places his scythe against the foe, their neck if possible, as if to execute them and performs a single slice against the opponent's throat, sending them flying. Forcing them to the ground deals 2% damage, then the slice itself deals 7% damage, with fairly high knockback that will kill the opponent at 165% or so. The opponent slides around the ground for about half of a Battlefield Platform being launched (less if they wouldn't even be sent that far normally obviously). If an opponent is slid over a blood puddle, it will deal an additional 2% damage and accelerate their sliding, reducing the damage needed for this move to kill by around 10% or so. It will also suspend the opponent's sliding until they reach the end of the puddle or they hit the edge of a platform/the stage/etc, as hitting the edge of the stage causes the opponent to instantly launch. if there are multiple blood puddles in a row, then the foe will take damage and more knockback for each, in addition to being slid further away obviously.

So, with good setup this can be a good killing move, and it also has the possibility of being really good for hitting your opponents into your projectiles and traps. All of the puddle interactions should be obvious: An approaching shockwave will punch the opponent up and out of the puzzle, which can potentially kill the opponent sooner than the throw. An arrow instead allows this move to be more of a combo set-up, although it should be noted this throw has unusually long ending lag which makes following up on it or the foe's normal sliding difficult, but it can be combined with a Forward Tilt explosive to be the most deadly killing move in Ulrich's grab game, albeit one which requires 3 levels of setup (puddle, arrow and bomb). Your Blood Puppet has some interesting implications here as well, as it allows Ulrich to setup a good deal of projectile options that would be hard/impossible on his own during its projectile cycle, or he can even throw it towards a Blood Puppet chasing the foe while powered up by pumped blood to allow the trip or upwards hitbox to set up other options. This is one of the only ways to get the pumped blood -> Down Smash -> Blood Puppet clap combo, although it is still as absurdly specific as before.

So, we've gone over what happens on the foe. What about on the Blood Puppet? Ulrich still forces the Blood Puppet to the ground, but rather than slicing it up, begins using his scythe and other free hand to sculpt the Blood Puppet with his blood magic, modifying it! How much Ulrich can modify the Blood Puppet depends on how pumped blood is inside of the Blood Puppet, with a minimum of 2 seconds/stacks and a maximum of 6 seconds/stacks, with the Blood Puppet simply being released if the minimum is not met. As the animation indicates, this DOES take some time, during which Ulrich can be punished, so you'll want to get into the right situation to do this: Projectiles flying around, the opponent hit away enough to get some breathing space, whatever. You always do the maxed upgrade if possible, so sometimes it is good to have less pumped blood in the Blood Puppet to get your desired upgrade. The Blood Puppet is released with low lag once the modifications are done, and modifying the Blood Puppet does not remove the pumped blood, so if your opponent won't approach, you could keep upgrading if you want. Now, then, what are the upgrades?

Well, with two stacks of pumped blood, Ulrich will construct a pair of large blood wings on the Blood Puppet, one angelic and the other demonic in terms of general features. These increase the size of the Blood Puppet's hurtbox slightly and increase the Blood Puppet's weight by 3 units until it dies. This allows the Blood Puppet a limited amount of R.O.B.-esque free flight with the same timer and whatnot as the R.O.B. Up Special, which the Blood Puppet will use to continue its mindless pursuit of the opponent after it runs out of jumps. It won't use it if it still has jumps, but it makes it harder for the opponent to escape into the air even if they personally prefer it regardless. A big thing, though, is that while normally the Blood Puppet will obviously drop to the ground if starts entering projectile mode, the wings will cause it to hover in place until it no longer can. This opens up a large amount of new possibilities for how the Blood Puppet can throw projectiles at the opponent, becoming more of an aerial projectile platform than a grounded shooter. Note that the Blood Puppet still won't move while firing, just hover in place, and it will slowly drop to the ground if it runs out of hang time, although this itself can make for some different angles than it just hovering.

This is the only upgrade which can be done infinitely, each time adding 2 seconds to how long the Blood Puppet can hover. Not immensely useful, but it does allow you to make the Blood Puppet even more of a relentless pursuer.

The four stacked pumped blood causes Ulrich to build a cannon which starts on the middle of the Blood Puppet's back and extends past its head with some ability to move and a little droplet of blood dripping out of it ocassionally when it is not being used. This slightly increased the Blood Puppet's vertical height, compared to the wings increasing horizontal width, and add 5 weight units to the Blood Puppet. When the Blood Puppet fires off its projectile, the cannon will fire its own unique projectile once a second, specifically at the same time as the second projectile fired each second, with the same aiming AI and all that jazz, the projectile being a bloody cannonball the size of Bowser Jr's cannonball that deals 5% damage and weak knockback. It isn't much of a projectile, no, but it is added for free on top of all the other projectiles the Blood Puppet fires to increase the numerical side of your Bullet Hell, and it is consistant and unaffected by what you put into the Blood Puppet, allowing Ulrich to consistantly plan around a blood cannonball + giving him some options if he is struggling to get projectiles into the Blood Puppet. The cannonball is fairly fast.

This move can be upgraded up to 5 times and is pretty potent, each upgrade adding 2% damage and some knockback to the cannonball, meaning it maxes out at 15% damage and a pretty strong kill at 100%! Obviously that is a bit optimistic, but the consistancy of the projectile gains a lot of value as you repeatedly upgrade it, as consistantly shooting out extra 9% damage cannonballs for example is pretty potent for damage racking. And if you do upgrade it all the way, that's pretty strong...and it is pretty strong without requiring you to keep shoving projectiles into it! The time investment instead comes from needing to upgrade it. It's all pretty useful.

The final upgrade at 6 seconds/stacks has Ulrich morphing the non-shooting arm of the Blood Puppet, transmorgifying it into a hammer! This does not increase the size of the Blood Puppet, but it does increase its weight units by a massive 10, making it rather more tanky. The initial modification only has a single attack, giving the Blood Puppet a "quick" melee swipe in front of it with the hammer that deals 4% damage and knockback that basically just gets opponents off it. I put "quick" in quotes because while it is a faster get-off-me move, it is hardly as fast as many actual fast jabs for example. It will use this move during its moving phase and will simplistically use it when the foe is trying to attack it or whatnot but won't aggress with it basically ever, and will stop moving while it does this attack. It CAN also use this move during its projectile cycle under the same circumstances, but it will never use it when it would fire a projectile or if the lag of the move would prevent it from firing a projectile and thus it has a really strict window to actually use this move. It adds some safety to the Blood Puppet, but not a ton else.

The hammer can be upgraded two times and each one adds a new attack for the Blood Puppet to use with the hammer. The first new attack causes it to stretch its arm far up, before slamming said hammer-arm down in front of it a great distance, about one Battlefield Platform! The arm itself is a large sourspot that deals 6% damage and lightly knocks the opponent into the air, ultimately not really doing all that much but still being nice. The sweetspot is the hammer itself, of course, which deals 11% damage and strikes opponents away with enough strength to KO at 170%. Like some moves in Smash 4, it deals slightly extra damage to shields (3% more before any modifiers). The Blood Puppet will not use this attack during its projectile cycle, but it actually will use it rather aggressively during its movement cycle.

Part of the reason for this is that the Blood Puppet does not stop moving during its starting lag and will even jump (or fly with the wings) during the move! This can put opponents in an awkward situation: The Blood Puppet's mindless pursuit is not altered, so it won't try to line up the sweetspot at all, and thus it will likely land with the easily shieldable sourspot unless the opponent is retreating. This means the opponent is incentivized to go forward to hit the Blood Puppet out of it (it has long starting lag) or get the sourspot, but such predictable movement against a minion can get taken advantage of by Ulrich, not to mention projectiles can clog up the space they would move in or w hat have you. This might mean the opponent wants to retreat, but then they have to deal with the hammer sweetspot, which as you might remember even does extra shield damage! It is messy.

The final modification is probably what you'd expect from a hammer arm and can only be used during the movement cycle and the Blood Puppet can move like normal during it as well. It is the BIG STRONG HAMMER SLAM, as laggy as a Dedede Forward Smash although the Blood Puppet has super armor to attacks which deal 8% or less during it. This move does a quite large 20% damage and kills at 85%, but of course is really hard to hit and super punishable for the Blood Puppet. It will use it a lot more rarely than either of the last two moves. But it makes the Blood Puppet quite a potential threat during the "down" part of its cycle, for sure, and your opponent dealing with it opens them up to projectiles, grabs, attacks like Dash Attack and so on.

The hammer will create an earthshaking hitbox when it slams against the ground, Donkey Kong style not a shockwave, which deals 10% damage and light radial knockback away from the hammer, offering it some safety. It also will interact with a good deal of the set! Blood puddles are splashed when struck by the hammer or the shockwave, with the potency depending on if it was struck by the hammer or the shockwave. The hammer will create a hitbox which deals 3 hits of 1% and a final hit of 3% and light, setup-y knockback at the end before it plops back down. The shockwave produces an entirely different effect, forcing blood from the puddle forward about 0.5 Battlefield Platforms as a crescent wave-shaped projectile which deals 6% damage and light knockback away: It can in theory be saved into the Blood Puppet, but there isn't really any easy way to do this seeing as it is sent away from the Blood Puppet and the Blood Puppet will be in lag.

Bombs explode with 1.2x their normal radius and potency, failing to damage the Blood Puppet but offering a stronger safety hitbox or an aerial hitbox if hit in the air. The shockwave, however, will instead send the blood explosives forward or backwards (depending on if it was in front or behind the hammer) 1 Battlefield Platform, which can really trip up opponents. And while not an interaction, a Down Smash shockwave can be used to interrupt this attack or cut short its ending lag with a slam, which can reall fake out opponents or screw over mindless defensive options, as jumping over the Blood Puppet using this move is common for getting into defensive position. Got all that? Good.


Back Throw: Battery

Ulrich takes his fingers and stabs them into the foe's neck (or anywhere else fittingly appropriate), slicing it open ever-so-slightly with a smaller version of his Jab Dagger and sucking out some of the opponent's blood! This deals a total of 5% damage, with a lot of it being done in super small multihits to represent the blood being sucked from the opponent. Ulrich then contemptuously throws the opponent back him for 3%, giving the smallest kick to them as he does so for an additional 1% and a fun animation: A total of 9% damage. The opponent is knocked very lighlty away from Ulrich, with low scaling. Ulrich has a frame advantage, but the fact he doesn't turn around makes it a bit awkward as a combo starter. The blood Ulrich sucked from the foe will go to good use, although not healing this time, powering up Ulrich as he uses it as additional bloody fuel, a "blood battery" if you will! Ulrich very slowly flashes red during the 8 seconds this is active, along with droplets of blood dripping from his fingertips.

So, what does this power up do? It enhances Ulrich's projectiles! The next projectile that Ulrich uses within 8 seconds, which will use up the blood battery powerup, which increases the range of the projectile by 1.5x! This includes if the Blood Puppet absorbs that projectile: It will keep the range increase when the Blood Puppet throws it out, and if the Blood Puppet re-absorbs it in some way it will continue to have that. The only exception is the Forward Tilt, which because it technically has an undefined range instead increases the range of its explosion by 1.5x. This has some really applications with various of Ulrich's projectiles. For example, the space your Side Special and its return can control become even more immense and allows for Ulrich to vary the timing of it returning to the Blood Puppet after the Blood Puppet fires it off. New dead drop angles from Up Smash can be incorporated or increase the amount of range an arrow that falls into a blood puddle can give. You haven't gotten to it yet, but it allows your Forward Aerial to have longer ranged mixups and so on and such forth. The fact it is used up on your first projectile does mean it has to be used smartly, and that sometimes it is more just a small buff, but better range is hardly a bad thing to get as an addition to a solid throw.

This move is a good deal different on a Blood Puppet. Ulrich grips the Blood Puppet with a strong rope of blood and then uses his blood magic to heave it up, spinning it twice, Ulrich uses the Blood Puppet as a not-quite-living bludgeon! By default, getting hit by the Blood Puppet deals 10% damage and solid enough knockback that will kill at 190%. The double swing means it can catch up some rolls or spot dodges depending on the opponent and how well they spot dodge it: The Blood Puppet is released at the end of the second swing (when the Blood Puppet is in front of Ulrich) and stumbles forward momentarily for some brief lag. As with many of the Blood Puppet throws, a downside is that Ulrich can be hit out of it compared to flatout throwing the opponent.

This move has some noticeable interactions with the rest of the grab game. Most prominently, the damage the Blood Puppet deals is increased with its weight, with the move gaining 1% damage and killing 4% sooner for each weight unit added to it. This might sound small, but in theory a Blood Puppet could have 29 Weight Units (11 from Pumped Blood, 3 from Wings, 5 from the Cannon and 10 from the hammer), which would cause the Blood Puppet to deal a RIDICULOUS 39% damage while killing at 74%, easily one of the strongest things in Ulrich's arsenal...it also requires like 30 seconds of setup. Don't expect to get the max here, folks. And, of course, the SIZE of the Blood Puppet increasing from this or absorbing projectiles increases the size of the Blood Puppet's hitbox when swung this way.

That isn't all, however, as each of the Blood Puppet upgrades with Down Throw will also affect this throw! If the Blood Puppet has wings, you can hit jump during the spin to have the Blood Puppet jump slightly, allowing it to more actively surprise and hit enemies in the air: Every wing upgrade allows the Blood Puppet to jump an extra time, although it cannot go more than twice its own height above the ground. The Blood Puppet will fire its bloody cannon the second time it is swung (when it gets behind Ulrich) if it is being swung, adding some ranged mayhem and protecting Ulrich some when he is spinning the Blood Puppet...and, of course, jumping allows you to change the angle of the shot. Finally, the hammer adds a sweetspot to the Blood Puppet being flung around that is pretty specific, the outer side of the Blood Puppet with the hammer sliiightly outstretched to be specific, but deals 1.3x the current hitbox's power if it strikes! This is good even with the base, but it helps the additional power of the Blood Puppet hard scale, especially since the hammer adds 10 weight units alone (so 1.3x 20% damage that kills at 150%!). And I don't need to tell you how the dream of 1.3x 39% damage that kills at 74% is utterly absurd, which is why it is essentially impossible to pull off. Stick to improving the hell out of the medium numbers. The sweetspot also is, admittedly, fairly small all things considered.

Using the Back Throw on the Blood Puppet to its maximum potential involves really playing the Blood Puppet game hard and rather risky, but it can be extremely rewarding, and even at its base it is a pretty good "clear out" style move that has some scaling even from just some minor setup. Keep it in your mind and see if a good setup shows up, even if you aren't focusing 100% on it!


Aerials

Up Aerial: Slaughter of the Soul

Hetfield crosses his arms in front of him as bloody streams out of them like messy claws, kind of like his character image actually, before slashing both of them above him in a manner not unlike Greninja's Up Smash or Wolf's Up Aerial. This move has two distinct hitboxes. Most of it is a sourspot which deals 6% damage and light upwards, popping knockback: The end lag of this move is too high for proper juggling combos, but it can potentially be used to keep opponents in the air or to shark under platforms. The sweetspot, in the direct middle of the claws as they swipe, deals 12% damage but has very high knockback, enough to kill at 130% or higher if you get the opponent quite high in the air. While moves like Up Smash are for aerial control, landing situations and damage or Up Tilt is for setting them up, Up Aerial is instead your flashy aerial kill move. It doesn't come out especially fast, though it isn't super slow or anything, and it has bad ending lag and thus is punishable.

This move has some specific autocancel frames on it near the start of the ending lag and right when the slash finishes. These aren't especially useful on the ground, although you can get the 1st autocancel on the ground specifically, the specific timing of it can be utilized with your Up Special (hey, remember that?) drawing you towards your puppet. If you use it riiight when you hit the Blood Puppet, it will come out and hit the first autocancel frames when it lands. The timing is pretty strict, but it can create an awkward situation if the opponent is above the pull. And if Hetfield uses it juuust a moment after, then the second autocancel right after the slash will occur, which allows Hetfield to potentially land the sweetspot on, say, someone shorthopping to punish Hetfield for pulling himself to the Blood Puppet, or someone who is in front of the Blood Puppet attacking it. So, it has some nifty uses to it beyond its obvious strong points.


Forward Aerial: Tear of the Goddess

Forming his blood bow into his hand with a burst, Ulrich pulls back the string and fires a weak shot in front of him. The shot itself can be compared to an uncharged or mostly uncharged Link arrow, not going especially far (though a bit further than a Link Arrow) horizontally and dropping vertically while travelling very slow. The arrow, in fact, is Ulrich's slowest projectile he has, which makes it excellent for varying up speeds, be it by putting it into a Blood Puppet, covering the air with Up Smash, Forward Tilt Up and what have you. The arrow itself deals 6.5% damage and fairly weak knockback, being a damage racking and pestering tool, although it can start a combo if Ulrich is close to the opponent when they are hit. The move is a touch on the longer end to start up, while having around average ending lag.

If you hold down A briefly, then Ulrich will more strongly pull the bow back and fire a more straight and powerful if still quite slow arrow that travels more horizontally than downwards but still drops a good amount. This arrow is stronger, 11% damage though still with disappointing knockback, and can allow Ulrich to mix the opponent up. For example, if the opponent air dodges the arrow early, the input being held will catch them coming out of it. You can use it with a projectile closing in on the opponent and threaten them to either use the uncharged arrow (necessitating an earlier dodge) or a charged arrow (necessitating a later dodge) while they also need to keep in mind your other projectile. It can be used as an off stage option if Ulrich is willing to go far or if he gets high on the stage, it can be used to attack opponents on lower platforms or parts of the stage and the charged version can be a sniping move. This makes it overall pretty versatile and useful.

The arrow, of course, can be fired while your Up Special reels you in. What's interesting is that due tot he fast reel speed, the projectile will end up BEHIND (and usually but not always above him, not always due to variable placement of Ulrich) Ulrich, which allows him to play with the projectile in ways he can't with other projectiles which will be in front of him. The uncharged arrow is further behind Ulrich than the charged one, with the charged one usually getting close to going above Ulrich by the time he can move. You can mix the two up to catch out your opponents responses to you closing in, fire them off for safety or moving projectile play and more! Do note that the trajectory means that unless the Blood Puppet is moving, the arrows won't land inside of the Blood Puppet to be absorbed while you reel yourself in.


Back Aerial: Rust in Peace

Ulrich kicks his leg back, a swift action which a moment later is followed by a large blast of blood shooting out of the foot he used to kick with! This spray of blood propels Ulrich pretty far forward, half a Battlefield Platform that can be made slightly more or less depending on if you have momentum with or against it, which creates two hitboxes as well. The kick itself deals 6% damage and light knockback. This can combo into the second hit of the attack, but opponents tend to drop out of it as their damage percentage gets high, and DIing back can allow them to escape even sooner. This burst of blood itself is a fairly strong sweetspot, which deals 12% damage and exists briefly as it propels Ulrich forward at a fairly fast rate. While travelling, Ulrich's body is a hitbox that deals 7% damage and mediocre knockback in the direction he is travelling, the ending lag is somewhat long for super consistant combos but it can lead into attacks and if nothing else is safe for gaining space. Not too bad of starting lag, but it is punishable on the ending: The attack has somewhat better landing lag than ending lag, so it is a viable shorthop option, especially since you can mix up which way you are going to move.

The lower landing lag plus the movement offer some really interesting options combined with your Up Special. In particular, using it allows Ulrich to alter just how he lands. Using it normally, Ulrich can boost himself forward some as he is reeled in, with the exact distance depending on when Ulrich activates the move, usually ending up slightly in front of or behind his Blood Puppet. This is a pretty natural way to cross up and mix up the opponent. On top of that, if Ulrich really quickly flicks the control stick the opposite way after the Up Special, Ulrich can perform a B-Reverse-like move and turn around: This allows Ulrich to instead boost AWAY from his Blood Puppet some, allowing him to put more distance and potentially "trap" characters in the middle of the two. This is especially important for allowing Ulrich to bait a reply to his incoming pull, only for the opponent to whiff as Ulrich ends up further away than the opponent expected as he boosts away and opening them up for a punish!

One issue with the Back Aerial plus Up Aerial is that hitting the sweetspot is more difficult: The kick will pretty rarely combo into the blood burst when he is travelling so fast. Instead, use the sweetspot as a kind of threat, since it is pretty powerful move. Mix it up with boosting forward tn hit opponents preparing to air dodge the Back Aerial's sweetspot and whatnot. Sometimes, you might even catch an air dodge if you boost away from the opponent and then get pulled forward some more! Experiment and you'll find some good uses for this tricky Back Aerial.


Neutral Aerial: Heartwork

Blood jets out of Hetfield's hands and feet like blades as he performs a spin, dealing multiple hits of 2% that total 8% and light knockback away. This is Hetfield's primary combo enabler in the air, coming out decently fast and having low enough ending lag that combined with keeping the opponent close it can lead into other moves. With low landing lag, this can include some grounded moves. Good followup options include: Up Aerial's sourspot, Forward Aerial (combine with a Blood Puppet or other projectiles to get an air dodge mixup/read), Down Tilt (both sweetspot and sourspot), Jab (which combos into absurdly high percentages and can be very safe even in non-true situations) and Forward Smash can situationally combo or serve as a mixup. This move also serves another important point. You see, Mr. Hetfield's aerials generally are somewhat specific, like having sweetspots or being a projectile or having a more narrow range or what have you. Having a decently ranged, all around hitting move is therefor very good for Hetfield and this move helps cover various aerial weaknesses he has.

When it comes to the Up Special, the dragging hitbox of the Neutral Aerial is not necessarily strong enough to drag someone the entire way given the speed of the pull, so depending on the foe's damage percentage you would probably prefer to hit starting with the 2nd or even 3rd hit. The low landing lag combined with the fast pull, however, can open up new aggressive or combo options on the opponent, Up Smash can be an aggressive option for example. Since it will still pull opponents with you as well, this makes it the best move for getting the opponent in range to be hit by your blood puppet as well. And it is your longest lasting aerial, for what that's worth in spacial control.


Down Aerial: Mortal Reminder

Ulrich raises his hand to the sky, blood poking out of it like a small spike, then thrusts his arm downwards like a needle or a lance: Press the control stuck left or right a little and you can aim it at a diagonal. This move has 3 hitboxes, this being 2 seperate ones for aerial opponents and one for grounded opponents. The first hitbox is right when the spike comes out and acts as, dohoho, a spike! It deals 10% damage and is a moderate strength spike downwards. It takes some time for this move to come out at all, so it isn't super easy to hit with, but it can serve the usual gimping purposes of a spike and it actually has some other interesting applications with another part of this move we'll get to. Outside of when it first comes out, the move is a hitbox that deals 9% damage and generic knockback for this kind of "missed spike" kind of move, mostly upwards. It has pretty good range, around that of the Corrin pin, so it is still pretty useful.

Speaking of the pin, on grounded opponents, they are pinned as if hit by Corrin's dragon lance, with Ulrich himself in the same state as Corrin. This actually happens if Ulrich hits the ground even without hitting the opponent, although the opponent themselves are only pinned if they are on the ground, otherwise being hit by the the normal hitbox of the attack. Ulrich does not have an "Instant Pin" technique, instead getting a bit of lag if he pins in such a scenario. Ulrich can only stay pinned for about 4/5ths as long as Corrin and has 3 options: Down/Run Out of Time, Up and Left/Right.

We'll start with Down or running out of time, which isn't an attack. It simply causes the blood of Ulrich's lance to suck Ulrich towards it, allowing him to quickly land on the ground. This has the same landing lag as landing WITHOUT an attack, making it an effective landing mixup for Ulrich along with normal landing or, say, Neutral Aerial. It's the quickest way to be able to perform a defensive action as well. Up has Ulrich using the blood to blast him back in the air, flipping as an attac as he does so. Getting hit by the flip deals 7% damage and launches opponents into the air, which can allow Ulrich to begin another aerial situation. However, at the end of the flip, Ulrich ceases the flip by throwing his arms out and creating a large explosion of blood, which deals 12% damage and fairly solid knockback that kills off the top at 155%. The flip doesn't usually combo into the explosion, but it CAN combo into it if you hit at the start of the flip at medium percents.

This is where the spike can come into handy. If you spike someone into the stage, then the bounce can often combo into the upwards sweetspot, much like Yoshi FAir or Mario FAir combos! This is pretty high damaging with solid killing potential. The non-spike hitbox of the move will usually combo into the flip, although at some specific high percents it can combo into the explosion. It won't come up a ton, but it is a combo opponents need to be aware of! As for the last option, left/right has Ulrich use the spike as a pivot to perform a spinning straight kick in front of or behind him, although unlike Corrin he doesn't travel left or right (which means no obnoxious retreating!). This kick deals 9% damage and pretty good knockback away from Ulrich, a good way to clear out the opponent and reset the situation or just tack on some solid damage. Ulrich retracts the spike-lance of blood into his body as this kick ends, with the move having relatively low ending lag.

This move has some really good utility with your Up Special, which is to say, the pin ends the travel as the tether snaps when the lance pins to the ground. This is the ultimate trick in Ulrich's arsenal, allowing him to rather suddenly and totally stop his seeming course of action and then granting him a second round of options. The actual hitbox is not especially good here, although it can be used if opponents are under you, but the utility of coming to a stop is invaluable.


Final Smash: Metallica

"Your gods have abandoned you. Now your body will betray you."

Ulrich Hetfield, empowered by the Smash Ball, lets out a confident smirk as he flips both of his arms in front of him, causing anyone in a medium-small area in front of him to fly into the air! Grinning confidently, Ulrich seperates his hand and drains captured opponents of their blood. Using a series of intense, rather crazy and almost puppet-like himself movements, Hetfield then begins to rapidly slash the opponent with their own blood, transmuting the metal into various sharp, heavy metal objects to strike them with each time, such as razor blades, swords, daggers, spears, knives and so on and such forth. He does this six times, never repeating the same weapon twice, for a total of 60% damage (10% per hit), before forcefully sending opponents flying by shoving the rest of their blood, with knockback of similiar power to Great Aether except a bit weaker.

Note that this is not a cinematic Final Smash, but instead works more like Great Aether, with people caught in the middle the entire time as the Final Smash plays out. The flying metallic objects are perfectly capable of hitting outside opponents, so they should probably steer clear of the Final Smash for their own good.


Playstyle: Heavy Metal Blood Mage

Neutral Special: Master of Puppets (Metallica)
Side Special: Don't Fear The Reaper (Blue Oyster Cult)
Up Special: Freak On A Leash (Korn)
Down Special: Once (Pearl Jam)
Forward Smash: For Whom The Bells Toll (Metallica)
Down Smash: Reign in Blood (Slayer)
Up Smash: Raining Blood (Slayer)
Jab: Blood Red Sandman (Lordi)
Forward Tilt: Blood Fire Death (Bathory)
Down Tilt: Pull Me Under (Dream Theater)
Up Tilt: Over The Mountain (Ozzy Osbourne)
Dash Attack: Ride the Lightning (Metallica)
Grab: In The Court of the Crimson King (King Crimson)
Pummel: An Observation by King Crimson (King Crimson)
Up Throw: Transilvanian Hunger (Darkthrone)
Forward Throw: Vulgar Display of Power (Pantera)
Down Throw: The God That Failed (Metallica)
Back Throw: Battery (Metallic)
Up Aerial: Slaughter of the Soul (At The Gates)
Forward Aerial: Tear of the Goddess (Pentakill)
Back Aerial: Rust in Peace (Megadeath)
Neutral Aerial: Heartwork (Carcass)
Down Aerial: Mortal Reminder (Pentakill)
Final Smash: Metallica (Metallica)
 
Last edited:

Slavic

Ask not the sparrow how the eagle soars
Joined
Jun 5, 2013
Messages
761
Location
taco bell, probablyn't
GOLEM
Alolan Form
Golem is one of the most iconic Pokemon, acting as the definitive Rock Pokemon archetype, similar to how Alakazam, Machamp, and Gengar do for the Psychic, Fighting, and Ghost types respectively. During a six generation reign as the premier trade-to-evolve Rock Pokemon, Golem could only grab a few niches thanks to a Rock/Ground typing littered with weaknesses, including quad weaknesses to Grass and Water. Low Speed and Special Defense left Golem in pieces in many fights, and the poor Pokemon felt doomed to mediocrity for its life... until one fateful trip to Hawaii, giving Golem its much needed Alola form. Combining the extremely tough designs of gruff facial hair and a taser, Alolan Golem manages to look completely ridiculous, dropping its Ground typing for an Electric type. It's facial hair is made of, presumably, iron filings, making this the second Woolly Willy Pokemon following Probopass, and the weird object on its back acts as both a battery and a launcher for boulders and occasionally even Geodudes. We all know how much I love Pokemon-based infanticide in my sets.

STATS
Anyone with a good pair of eyes can probably piece together the kind of stats Golem has, what with a solid rock body and stubby limbs. Anyone with one eye, honestly, or just a descriptive audio narration of the set. However, this doesn't make the stats any less important, and Golem's mostly spherical body compares to R.O.B., but a bit wider and rounder, and Golem's head is much lower than R.O.B.'s, as the launcher on the top of his body brings his height up. Golem is an absolute heavyweight, right betwixt Dedede and Charizard's weights, unsurprising for a hunk of rock. As anyone could predict, Golem is on the slow side, stomping around the stage at Wario's walk speed and barely bringing any meaningful ground movement with a dash speed like Dedede's. Jumps are also unkind to Golem, whose ground jump equals to Zelda's and an aerial jump to match. His air speed is alright, and has a middling fall speed as well. Statwise, Golem is mediocre, leaning towards the bad side thanks to a general poor mobility, but Golem has the moves in his arsenal to more than make up for it.

SPECIALS
Down Special - Galvanize
Golem clamps his stubby little arms close to his side as he lifts his head and gives out a roar. Simultaneously the highlighted stones inside Golem's rock formation fluctuate with a glow, indicating the power surge undergoing inside of Golem. This move has a pretty quick startup, and can be held indefinitely if uninterrupted. Don't feel like holding this pose for the whole match? No worries, as the ending lag is extremely low as well, making this move safe to use at least for a moment most times in a match. After the initial roar, and as long as the move is held, Golem will continue to hold his arms against his side as he stands with his mouth agape, really enjoying the energy that's inside. As long as the move is held, Golem will remain in this pose, his crystals will be bright yellow with electricity, and Golem will be covered with a faint web of electricity sparking all over his body.

This move acts as a semi-defensive move for Golem, as any foe who makes contact with the Rock type will take damage and a brief few frames of stun, punishment for making contact with the Pokemon. It's not the biggest 'counters' in the game, and regardless of the strength of the attack that makes contact, or whether the foe simply walked or jumped into Golem, they will take a hair-tingling 4% damage and lose control for a handful of frames. This also won't block any physical attacks that strike Golem; for instance, if Golem is in this stance and Marth swings his sword at him, Marth will be stunned while Golem takes full damage and knockback from the attack. Being heavy, Golem shouldn't have to worry too much about this, though stronger moves make this a poor tactic, but on a light move Golem can likely recover to punish the foe in time, making this a more manual style of counter.

This move is near impossible to play on the offensive while grounded, as it leaves Golem entirely stationary with no extended hitbox and really requires the foe's action to activate this effect. However, one of the things Golem can do better in the air than on land is this specific facet; while moving through the air, this move can be activated and Golem's movement will not be stopped. There will be a decrease in speed when used, however, lowering Golem to 60% of its original inertia. This has useful impacts for recovering from hits, of course, but more fun is that the electrical state surrounding Golem remains active until the ending lag is complete. This allows Golem to tap this move to activate this state briefly before barreling into the foe during his ending lag, damaging the opponent and more importantly stunning them, allowing Golem to quickly follow up with another aerial.

This is all fine and good, but the aforementioned effects and uses of Galvanize are all in the moment byproducts of what's truly going on with this move. If Golem releases this move, rather than being knocked out of it, his orange crystals will remain lit up like LED's past the move's end. The duration this effect lasts is based on how long Golem held the move, lasting double the duration the move was held. This does cap out at 10 seconds of use, after 5 seconds of charge, and there's a bright gleam on Golem's body to indicate the charge has been maxed out. Important to note is that Golem does not maintain the electrical field around his body, only this visual indicator that something has changed.

In the games, Galvanize is Alolan Golem's signature ability, where it's effect turns Golem's Normal moves into Electric ones. In Smash, this is also the case, though 'Normal' moves are expanded to incorporate essentially the entirety of the set. Golem's Specials are, well, special cases, as are the Smashes, but by and large Golem's moveset stays the same, but with a wonderful new effect: when Golem hits foes with these galvanized moves, foes will take the same stun mentioned earlier in this set instead, allowing Golem to get a couple of real good, if brief, combos. The biggest issue is that Golem's kit doesn't have a huge number of moves that can properly capitalize off this brief stun, but it has its place in this set. Golem doesn't get away free for this, however, and attacking with galvanized moves will drain his battery, so to speak. Each move takes up an extra second of the duration, adding pressure on Golem to choose his moves wisely.

Neutral Special - Rock Blast
When used, the rock on the top of Golem, between the two horns, retreats inside of his body. This move can be charged, which is also the time it can be aimed, taking a full two seconds to charge. Like Samus' Charge Shot, this charge can be cancelled and stored, allowing Golem to launch this attack fairly quickly when desired. As a helpful visual indicator that this charge is happening, Golem will once again clamp his arms to the side and look up at his horns. Ultimately, this is a projectile move, and depending on how long it was charged will affect the move's power, and at a certain point an even more exciting change will occur, as described a few paragraphs down.

Once fired, it becomes clear what the projectile is, though based on the name and the Pokemon it should be pretty obvious that Golem launches a boulder out of his body. He does this with great intensity, stomping on the ground as he blasts a rock in the direction aimed. Golem indicates where he’s aiming by leaning his body forward, directing his horns in that direction and allowing him to aim in a 90 degree arc ranging from dead ahead of Golem to straight upwards. The launch sequence will have Golem visibly suffer recoil from the shot, giving a somewhat slow ending to the move, though it will launch with less lag with a stored charge than simply tapping the move by a slight margin. The range on this move is pretty good, though far from infinite, and is also dependent on the angle of the shot. Because I'm not a mathematician, I'll provide two reference angles and let the reader intuit the range in between. When fired directly ahead , the boulder will travel in a straight trajectory for two Battlefield Platforms before succumbing to gravity and veering towards the ground, which on a level surface will cause it to land another BFP later. When launched at the 90 degree angle upwards, the boulder will travel two BFP upwards, slowing towards the very top of its range, before plummeting back down to earth.

Enough beating around the bush, it's the actual projectile's properties that everyone cares about, so let's discuss this boulder. Approximately the size of Kirby, this boulder is fairly telegraphed when preparing but moves at a pretty great speed, slightly under the speed of Samus' Charge Shot, which combined with the decent size of the rock makes this move pretty easy to hit. This move can be charged for two seconds, but only the first second and a half will be discussed here, as this increases the strength of the boulder. At nil charge, foes will still be smacked fairly hard, taking 8% damage and hefty knockback, able to KO from the 150% range, which is pretty impressive for the default charge of this move. Right before the 1.5 second mark on the move's charge, the maximum damage will be achieved, instead dealing a whopping 14% damage and even stronger knockback, able to KO as low as 100% from center stage. Fast-aiming players can do amazing anti-air with this move, whether simply forcing a foe's game to be disrupted or straight up knocking them out of the sky. When the boulder hits a foe, or any other solid object, it will burst and disintegrate into dust "harmlessly". We all know the dangers of pneumoconiosis.


So what purpose does the last half a second serve? Well, once the charge hits that point, a sound can be heard, which is Geodude's cry from the games. As the Pokedex mentions, occasionally Golem will launch Geodude instead of rocks, and that's exactly the case here. The charging in the last half a second for Geodude doesn't share the scaling power that the boulder does, instead only checking if the full charge has been achieved or not. Geodudes are a bit smaller than the boulders, hence are a bit smaller than Kirby, though they do have arms. Just like boulders, charged up Geodudes can be stored and used later with ease. So what do Geodude do different from boulders? Well, they actually have a lower damage output than the max charge boulders, dealing the damage and knockback from this move at no charge. Counterintuitive as this seems, Geodudes have a few big things that separate them from boulders in a positive way.

The first is that unlike boulders Geodudes aren't destroyed on contact. This means after hitting a foe, they will instead bounce off and remain on the stage, floating around and waving their arms in anger. They don't have any particular goal, just wandering around the stage semi-randomly, hopefully getting close to an opponent. This is because if the Geodude gets close to a foe, like, within a single Battlefield Platform, it will leap and grapple onto them. This deals only a paltry 3% damage and a single flinch, but its what happens next that's truly terrifying. The Geodude line have access to some of the most infamous moves in the game, Selfdestruct and Explosion, and once grabbed onto a foe a Geodude will activate its Selfdestruct move. Bright lines will pour out of cracks on its body as it prepares to explode, giving foes a second and a half warning before detonating. The explosion has the same range as a Bob-Omb, and will deal an intense 25% damage with fantastic knockback, able to KO from the mid 80% range!

Foes aren't helpless should they be grabbed, as Geodude can be knocked off or away by essentially any move, and dodging or rolling will remove Geodude from their body, though it will continue its Selfdestruct timer regardless. Geodudes are also not very patient, and will only stick around the stage for five seconds before stopping in place in anger and starting to self-destruct right there. If a foe hits a Geodude with any sort of move, it will trigger this action as well, giving a few counterplay options. Golem can fire as many Geodudes as he wants, but thanks to a species clause he can only have three on the stage at one time. Launching another won't cause the oldest to explode but rather disappear in a puff of smoke. This move is nasty for any target, but is especially effective on heavier targets who won't be knocked too far away from Geodude when hit, allowing the smaller Rock-type to follow up easily.

If Golem has a full two second charge on this move, there will be a slight variation, as the Geodude that is launched will already have begun its Selfdestruct! This Geodude will explode upon impact on against any object or player, and will detonate on its own if it somehow doesn't hit anything for a second and a half. Other than the differences just stated, the effect, damage, and knockback of the move are the same as previously mentioned, just quite a bit easier to trigger the explosion in this variant.

This move changes up a bit when Galvanize is in effect, as both the boulder and the Geodude will undergo electromagnetic changes. To start off with, in general these electrified projectiles will actually move slower than they normally would, traveling about 75% of their normal speed, though the range on the move is mostly unchanged (more on that in a second). The boulder, to start with, will be visually different from the normal variant, the same shape and size but coursing with electrical arcs, and appearing similar in design the rocks from Chargestone Cave. As stated, the boulders have the same range not including gravity, which means firing straight ahead will have the boulder travel 2 BFP, but will not continue past that, and the same deal when fired straight up. Instead, the boulders will freeze in place, slowing down at the very end of their trajectory, as electromagnetic waves hold them in place.

If a foe is hit directly by one of these boulders, the rock will still be destroyed as normally, the opponent taking increased damage based on the charge ranging between 10% to 16% damage, but foes won't really suffer any meaningful knockback. Instead, they will suffer a similar stun as described in Galvanize, but lasting a fair bit longer, paralyzing them for a dozen or so frames. This is very powerful, and Rock Blast actually uses more electricity than the average attack, costing two seconds of Galvanize's charge instead of one like other attacks. If the boulder doesn't hit an obstacle and does float around, it will behave just like Golem while using Galvanize, and any foes who make contact will be stunned for the original framecount. These boulders can be destroyed by a single hit, but this is only truly safe for projectile characters who won't suffer from the electrifying effects. There are a couple other utilities to this move besides basic area denial, but that will be brought up when relevant.


As for the Geodudes, once launched it will be revealed that to likely no one's surprise they've been replaced by the Alolan variant. These eyebrowed Pokemon share Golem's Electric typing, and so will behave a bit different from the normal Geodude, and unlike the galvanized boulders, Geodudes won't just float in place where they are fired. The initial hit from the Alolan form shares the same damage property as the Kantonian, dealing the base damage of 10% damage rather than continuing to scale upwards with charge. As one might expect, the foe will be stunned once again, around 12 frames of paralysis, as the Geodude bounces off them.

Alolan Geodudes are just as angry as their mainland counterpart, and will meander, looking for any foes to latch onto for the same 3% damage hit. Once holding on, or after any of the other stimuli described above occur, the Geodude will begin to spark all over its body, rather than glowing with light like before. This is because instead of using Selfdestruct these Geodude will fire off a potent Discharge. This comes with the added bonus of a shorter fuse, launching an omnidirectional wave of electricity after only a second, cutting a third of the wait-time off. This burst of electricity will travel out about Bowser's body in range from the epicenter. Discharge will only deal 15% damage compared to the 25% powerhouse from earlier, and as one might expect also won't knock foes away so much as stun them, making this the most potent stun in the set, as they foe will be paralyzed for a whole half a second. Cunning players can then easily make up the damage difference during that time. Once discharged, the Geodude will fall to the ground, looking burnt out and dejected similar to a dud Electrode, for a brief moment before vanishing in a puff of smoke.

Alolan Geodude have a neat interaction with galvanized boulders while they are on the field, as should it be near one at any point, assuming a foe isn't also right next to them, it will latch onto that boulder, loving the electricity. This won't do much on its own, and the Geodude will vanish as normal if overwritten, but can be used to deter foes from messing with Golem's boulders, as striking the rock will also strike the Geodude, activating its Discharge. The same .75 second startup exists, but perhaps it will catch the foe off guard the first time they find out? As one can likely predict, at full charge the Alolan Geodude will launch with Discharge already underway, allowing foes to be more easily blindsided and, with good aim, electrified on contact. This is a very powerful projectile move, though hindered by a slow charge time to get stronger hits and requiring the expending of Galvanize for the sweet stun, which could instead be used on standards for easier hits.

Side Special - Spark
Alolan Golem leans forward as far as his weird body will allow him, a similar position to when aiming forward with Rock Blast, essentially using his dinky arms as a tiny pair of legs. While in this position, his horns spark with electricity as he charges forward, and will continue to rush forward as long as the input is held, even willing to charge off ledges while using this move. This does actually increase Golem's miserable speed past his normal dash, bringing it to a more middle of the pack pace. The startup on the move is actually pretty quick, but on a whiff Golem suffers some hefty endlag that leaves him very punishable. This also makes the move a little dangerous to run off the stage with, if you truly want to do so.

This is fun to watch, but the sparks truly fly should Golem hit something while charging. Worst case scenario he will hit an obstacle, which will put him in even worse ending lag than just not hitting something, so if the foe can throw a wall up, they should. If the object has durability, this move will deal a nice 10% to it, if nothing else. Don’t expect this kind of standard damaging hit for opponents, however, because Spark’s primary function is as a commamd grab, of all things. Should a foe find themselves in the way of this monster, they will become wedged in his horns, giving Golem a few options. First, by using this again, Golem will resume running forwards, this time holding the foe in front of them. In addition to attempting suicide KOs with the foe, Golem can attempt to crush them against a wall or other obstacle, dealing 15% damage with strong vertical knockback that can KO at 110%. While powerful, this is only situational, as Golem actually can’t produce any solid constructions.

More in his control, Golem can charge a foe into a Geodude or one of his floating galvanized rocks. If the latter, the foe will be zapped for a nasty 10% damage and will be released as they’re stunned as Golem goes through a quick recovery phase. This gives Golem a few frames of advantage over the foe, pressuring them to act quickly and hopefully make a mistake, or perhaps to be tagged by one of Golem’s faster moves, galvanized to stun them for a little more time to secure a bigger hit. The big drawback of this move is that it destroys Golem’s rocks around the field, so some discretion is advised.

If ran into a Geodude or it’s Alolan form, the foe will be battered for 7% damage, nothing absurd, and will be launched at an okay diagonal angle away from Golem. This knockback is also unnoteworthy, KOing does around 170% damage. This seems unimpressive, but Geodude will also take this knockback at the same angle, and having been just hit it will immediately begin either Selfdestruct or Discharge. Depending on where the foe and Geodude align after this move, things could become disastrous for them. For this reason it’s important to disclose Geodude’s only relevant stat, it’s weight, which is a little above Mario’s. This somewhat average weight covers the widest range of foes, incidentally, depending on how much damage the foe has. Because Geodude doesn’t technically take damage, this is a set distance assuming that nothing interrupts the trajectory. While this is also somewhat situational, it depends on a situation that Golem can control.

If Golem uses this move and hits his own Geodude, he gains the same control grab options he does for the opponent. If Golem chooses to continue dashing forward, the Geodude, shocked by Golem’s horns, will begin to use either Selfdestruct or Discharge, depending on the variant. This puts Golem on a time limit to hit a foe with this move, as this is the first instance in this set where Golem can be damaged by his own moves. If he does manage to hit a foe, the two will both be engulfed in either an explosion or a cackling burst of lightning, replicating how the Geodudes act in Rock Blast. Unlike that, however, Golem will also take the full damage, with no knockback, though he will flinch from the explosion and will suffer the full stun from Discharge. Again, this move can be powerful, taking the potent explosion to the foe, but suffers a serious vulnerability to being punished by both the foe and the move itself.

A more cautious way to use the move involves putting any other input in, which will instead cause Golem to launch the foe / Geodude away at high velocity, similar in power and range to Rock Blast. Foes will take 9% damage with strong knockback that can KO from 120%. Geodude will once again have it’s move triggered once launched, but this time it’s extremely unlikely to backfire on Golem. Golem’s galvanized boulders can also be picked up with this move, functionally acting how they do elsewhere in the set, and will retain their charged power when fired again, which can be extremely powerful for edge guarding.

When used in the air, this move is fairly similar. Golem won’t perform the running animation, instead just propelling himself forward at the same speed as on the ground. Golem won’t stop falling, but his descent will be slowed significantly, allowing this to suffice as an offstage recovery. Unlike on the ground, this can’t be used indefinitely in the air, and Golem will go helpless after traveling about 2 BFP, so beware. This recovery ability is amplified if there are galvanized rocks floating near Golem, as he will magnetically lock on to the rock, allowing him to charge towards it, even if it’s higher in the air than Golem is. A useful element for recovery, but also restricted to rocks within a fairly limiting 90 degree arc in front of Golem, meaning he needs to already be traveling to them more or less to latch on. Once on one, he will gain another jump, though no aerial, and will no longer be able to use this move, which can only be used once in the air without refreshing. The rock will also slowly sink while Golem is hanging from it, so only a brief respite should be taken. This is yet another motivator for foes to destroy Golem's set up, making it more difficult for him to return to the stage using this move.

As for combat applications, this move will act as an aerial grab should Golem strike an opponent with it. Being grabbed will deal 3% damage, and in a similar vein to Ganondorf Golem will perform an uncharacteristically quick flip in the air so the foe is lower than Golem and slam down hard. There's some limited horizontal mobility Golem is afforded during this, and this is the first phase of the move where foes actually don't have a chance to escape. The fall is very quick, and upon being pinned to the ground the foe will take a solid 12% damage and surprisingly mild horizontal knockback, only KOing around 160% damage. This can be used to slam foes into Geodudes, or even, if the stars align, to grab a midair Geodude and slam dunk it down for its powerful explosion. Of course, we all know no one cares about that, and just like Ganondorf this is a fantastic way to suicide KO your opponents and make them tear their hair out.

Up Special - Explosion
Of course, Golem is the evolved form of Geodude, and maintains the powerful self destructive moves of its youth. This move has two radically different variants, depending on whether Golem is currently on the ground or in the air, with the ground version being a devastating AoE attack and the aerial form being a unique, very strong recovery. Both forms are slow, and on the ground this move can be charged to amp up the strength of this attack. If Golem decides not to charge the move, it becomes very apparent that this is a slow one, taking a handful of frames just to start the animation as Golem braces himself. A pained expression can be seen on his face. After this, he gains the same beams of light shooting out the cracks of his body that Geodude has, and this will take the same second and a half to detonate. When this move does go off, be prepared, because Golem will be engulfed in a huge explosive hitbox, along with a Smart Bomb explosion’s radius. Without charge, this move will deal a massive 45% damage, which grows to an unreasonable 60% damage with the whole two second charge of the move! The knockback is insane as well, dropping from 50% to KO down to 0% at full charge! Good luck landing this!

How can any special be this powerful? Obviously any attack is balanced if its slow, but more directly Golem himself will never appreciate this move. Since Explosion is known for its heavy recoil damage of, well, self-killing in the Pokemon games, Golem will suffer here as well. Thankfully this doesn't instantly kill Golem, but boy howdy. Regardless if this move actually hits an opponent, Golem will take recoil damage equal to 75% of the damage output, meaning he's guaranteed to take most of the damage from the move. No knockback is dealt, though Golem will have a painful looking ending lag (understandably) for additional punishment should the foe get a perfect dodge off or even just shield the blast. Combined with the move's massive startup and self-damage, Golem seems foolish for even using this move. One saving grace for this move is that there isn't a visible difference between the charging animation and the animation right before the explosion, which forces opponents to play very much on their toes.

When foes see Golem start this move up and, instead of glowing lights, electricity crackles across his body, they'll know they are in for a galvanized Explosion. The activation, charge, and startup all mimic that of the normal version of this attack. However, once the move goes off, Golem becomes a biological EMP, as a massive wave of electricity explodes outwards, with a slightly larger range than the default explosion. As one might expect by this point in the set, this isn't just a standard stronger variant. This pulse still does big damage, anywhere between 15% and 30% damage, though Golem now takes 100% recoil damage instead of three fourths. This just means that, regardless of which version of the move he uses, he takes the same exact recoil damage on usage. Golem even suffers the same burnt out end lag, which incidentally takes a little under a second to recover from.

Aside from the gorgeous aesthetic changes, the electrical explosion actually behaves differently from the rest of the galvanized hitboxes thus far. Foes won't be stunned as they normally are, and instead take good knockback, though it is again put to shame by the default version. The foe will be blasted back and can usually be KOd between 90% and 115%, depending on the move's charge when launched. This is still good, even though it's weaker than Explosion normally is, but comes with one very good feature; it serves to counter foes' attempts to defend against it. First, while this move deals less damage, it will break shields on contact, making this unshieldable, which was a problem the original version of the move had. Additionally, the hitbox on this pulse lingers for a few frames, catching any foes who dodge but don't escape the radius. Not only good for catching foes out of their escape, this covers just a few frames of Golem's vulnerable state, which can help keep him from being hit by, for instance, a full power smash attack.

Keen-eyed readers may notice this move is bound to the recovery button, and make no mistake Golem's recovery is an interesting one. In principal, this is the same move in the air as it is on the ground. When pressed, the player can either choose to tap it or 'charge' it. Charging is perhaps a poor word for it, as Golem won't increase damage or knockback by holding this move, and instead will allow him to aim his move akin to Diddy Kong's Rocketbarrel. Also similar, charging this move slows Golem's descent. At first, aiming will feel unintuitive, as you'll want to aim opposite the direction you want to travel (this is indicated by glowing beams shooting from one part of Golem's body). Once released, a small explosion, about the size of a Bob-Omb's explosion, will erupt from that part of Golem's body. This explosion is much smaller than the grounded version, and much weaker, as foes struck will "only" take 52% and outwards knockback, which "only" KOs around 130%. Thankfully, this explosion does not damage Golem, unlike the grounded version.

That's still pretty powerful for a recovery move, so the actual recovery must be useless, right? Well, not exactly. Golem obeys Newton's laws of physics, even within Smash's game engine, and Golem will be launched in the opposite direction of the explosion. This launch is literal as well, as this is less of a recovery and more of directed knockback. If launched straight up from center stage, this move will KO Golem from 160% damage. This isn't the most powerful killing potential, of course, and Golem has the luxury of aiming this hit, but it also means this recovery functions on a bell curve; at low percentages, it isn't very effective, as Golem won't be launched very far, but at higher percentages, Golem runs the risk of KOing himself the more damage he sustains. He also runs the risk of getting hit after being launched, though again melee-centric characters are at a disadvantage as making contact with Golem when launched by this attack will deal a hunky chunky 15% damage and strong-ish knockback, KOing around 130%.

As I'm sure is expected, this move varies in effect a bit with Galvanize in effect. This is actually the safest version of this move. Again, the start up to this move is the same, with electrical ripples instead of god beams, and in place of the standard explosion Golem will be launched by a pulse of electromagnetic waves. This is actually pretty dramatically different from the rest of the move, dealing no recoil damage to Golem and acting as an actual recovery rather than just knocking Golem through the air. This move will carry Golem a little over a BFP and a half, not making it the most potent recovery but more consistently reliable than his other variants. Like the other form of Explosion, this is omnidirectional, though heavily telegraphed. If foes get struck by the small electric pulse, they will suffer the familiar stun along with 8% damage, and the same effect from getting slammed into from before carries over, knockback and all. Like Rock Blast, this will actually use up two seconds worth of Galvanize instead of one, so beware. As one final note, any of Golem's hitboxes from this move will cause any Geodude to begin their selfdestruct sequence once hit.

GRAB GAME
Magnet Pull
Leaning forward in the same manner described as Spark, Golem once again holds his arms to his side as the rocks on his horns begin flashing, starting from the outermost rocks moving towards the center. Unlike many grabs, Golem can hold this as long as he wants, remaining in this animation until he chooses to stop or gets knocked out of it. The startup on the grab is pretty slow, though still comes out quicker than one might expect, and visible magnetic waves emanate in a small cone in front of Golem, giving him about double the average grab length. This acts like a tether grab in the same vein as Pac-Man's grab, except able to be held out. Instead of spiraling inwards, foes are simply drawn in, getting lodged between Golem's horns.

This is all around a good grab, and comes with the added bonus of a shockingly fast pummel. Golem simply shocks the opponent lightly with his horns, dealing quick hits for 1% each, very useful for refreshing his on average slow, powerful moves. Golem is afforded such a generous grab as his biggest issue is landing hits, and this potent ability is essential for bridging important gaps in his set. Foes aren't the only entities that Golem can pull into his grab, as his galvanized boulders and either variant of Geodude can be pulled into this grab, though Golem is allotted an instant grab release on his own creations to avoid any extra opportunities for punishment. Neither Golem's grab nor any of his throws are directly impacted by Galvanize.

Forward Throw - Rollout
With the opponent locked in Golem's grips, the Rock Pokemon pulls its head and arms into its body cavity. Golem rolls backwards just a little bit before activating the throw proper. This varies slightly, based on if the throw is tapped or held. If the former, Golem will rapidly rotate in place, grinding the exposed foe against the stage repeatedly. Each cycle will smack the foe for 3% damage, and will hit four times in total, allowing a 12% damage by the end, pretty nice for a throw. Afterwards, the foe is launched forward as Golem leaps up, ejecting his limbs from his shell and resuming his battle position. This launches slightly upwards with an awkward amount of knockback, not KOing until the mid 170% range but still knocking the foe far enough to avoid follow ups. This throw is also notable as an attack to parties outside the grab, as making contact with Golem while he spins will net the foe 8% damage and moderate knockback.

While not easy to work into standard gameplay, using this move while holding a boulder or a Geodude will activate their effect / attack, varying depending on the two of course. The boulder's application is very straight forward, as on the first cycle the rock will shatter and surround Golem in a spray of sparks. Any nearby opponent will be zapped for 10% damage with a few frames of stun. This isn't entirely useful, as this will occur at the beginning of the move and foes will have ample time to recover before Golem can act again. Grabbing a Geodude and rolling them will have a similar effect, activating either Self-Destruct or Discharge's timer. The timer isn't sped up by any means, but the delay may even be beneficial, as this allows Golem to throw a Geodude forward only a fraction of a second before it detonates.

The held version of this move trades a lot of its damage for knockback and versatility, as this will cause Golem to roll forward on the ground rather than in place. Golem will go through two full cycles, smashing foes into the stage at 3% a hit once more. This halves the overall damage of the move but not only deals much more knockback, able to KO from 140%, but allows Golem to position the foe closer to the blast zone. This move should carry Golem and his victim twice two times pi times Golem’s radius, but for simplicity we’ll say this goes about a BFP and a half before launching. The same physical properties of this move exist, and it should be noted that Golem won’t go over an edge with this move. Boulders and Geidudes have the same function here as before, though more versatile thanks to the movement.

Up Throw - Launcher
Golem returns to his normal standing posture, still holding the opponent in tow between his horns. In a fairly intuitive, if standard, throw, Golem will launch the foe upwards as he might for Rock Blast. There is a delay between returning upright and firing the foe off, allowing for the same kind of aiming as seen in the NSpec, though this can't be held. Upon being launched, the foe will take 8% damage and the kind of knockback one might expect from being fired from a stone cannon. This KOs around 130% depending on the angle, which is very nice for a throw. Hitting a foe / minion / construction with the blasted opponent will deal a nice 8% damage as well, though this comes with the unfortunate side effect of breaking the target's knockback short. Of course, Golem could choose to fire the foe at one of his own Geodudes or boulders to activate their effect.

This throw can be impacted by Rock Blast's storeable charge, and will check to see if Golem has one of his boulders or Geodudes primed. If so, this throw's effect changes up. Instead of launching the foe directly, Golem will blast the foe at point blank range with the projectile, dealing a much higher 15% damage. If Golem has a regular boulder stored, this move ends after this, and the only difference between that and a galvanized boulder is the latter will do the familiar electrical stun seen before. This sounds powerful for followups, but keep in mind that it takes two seconds of charge to fire an electric boulder and the timer continues to tick down during the grab and throw animations.

Of course, Golem can fire Geodude into the foe's body as one would expect. Both the foe and the Geodude have decreased knockback from making contact with each other, making this an awkward throw that won't KO until around the 180% range. This has similarities to Spark when slamming the foe into a Geodude, and here as well the two objects will be launched with the same angle and power, so at specific percentages for each character this can line up perfectly to blast the foe with Geodude's explosive move. This goes for both the normal and the Alolan variants of Geodude.

If Golem has grabbed one of his Geodudes or boulders instead of a foe, this move functions in the exact same way animation wise, but once launched behaves just like Rock Blast does, with the only difference being that the Geodudes are activated by this launch sequence. This is a great way to get the most out of your money, and makes it easy to reposition your boulders without having to waste time charging both Galvanize and Rock Blast.

Back Throw - Rock Tumbler
The fastest and most straightforward of Golem's throws, he performs a very short jump in the air as he rolls forwards, just enough to pin the foe between him and the stage. This impact deals 3% damage, and is immediately followed up by Golem then rolling backwards quickly to smack the opponent on the stage again for 5% damage. From here, the foe is launched at a backwards diagonal from being wedged between a rock and a hard place. This is a decent throw, able to kill from 150%+, but is unspectacular compared to Golem's other throws aside from the relative speed of it. Golem can use this move with Geodude or a boulder, but this isn't as useful as the other throws, as the quick speed of the throw versus the Pokemon's 'fuse' makes it easy to predict a Geodude's timed attack. The boulder might be a better use for here, as it will 'detonate' on impact into its electrical burst, which makes it harder to read in comparison. Truly, though, this move acts to preserve Galvanize's charge while providing a useful grab option.

Down Throw - Reload
Like Donkey Kong, Golem has his own cargo throw, and using this will cause Golem to try and pull a foe inside his shell. This only works on the smallest characters, with larger characters having only part of their model subducted into Golem's body. This deals a very minor 2% damage and resets the foe's grab escape attempt as Golem can now walk around while carrying the foe. If Golem has his Rock Blast charged, he won't actually be able to store an opponent inside his body. Rather than failing, Golem can simply attempt to try this over and over again for the same power, though this will not reset the foe's escape. This can be another useful way to refresh Golem's movelist in addition to the pummel. The actual attack once used becomes the Up Throw as described above.

There are benefits and liabilities to this compared to simply using the original throw. First, Golem can put out a little more damage than the normal move, not by a lot but free damage is nothing to complain about. Secondly, this allows Golem to move the foe around to a better KO opportunity, which allows for a ton of versatility thanks to the range in angle on the throw. On the negative side, this affords the foe more time to break the grab and punish Golem, a recurring issue for him. Also, this acts opposite of the Back Throw as he will eat up a lot of his Galvanize charge on nothing while carrying the foe around and launching them. This could be used to stall, but honestly the damage output Galvanize allows should dissuade this.

Reload seems like a weird name for this throw so far, but it belies the function of this move while Golem has one of his own entities in his grasp. This will fail as before if Golem has his Rock Blast charge stored, but if he doesn't he can 'reload' himself using one of his Geodudes. This shaves a second and a half of charge time for Golem, as this will also prevent Geodude from activating on its own. With as clunky a moveset as this, Golem loves getting to recycle his own spawn to streamline things. As for one of Golem's galvanized boulders, using this throw won't reload Rock Blast, but instead will add one and a half seconds of charge to Golem's Galvanize. This destroys the boulder, so Golem will need to recreate one should he want, but this can be great for keeping an electrical combo going.

SMASHES
Forward Smash - Thunder Punch
Facing forward, Golem leans back with his arms outstretched as he charges this move. Once released, Golem will lunge forward in a surprisingly fast motion and leaning way forward so his horns take the lead. Like some others, this smash can be angled, allowing a lot of versatility from this powerhouse's move. This move is a bit laggy on both release and recovery, though by far from the hardest to land move in the game. Even without a Galvanize charge, Golem's horns will spark a bit during this move, truly turning him into the taser-face he was meant to be. Foes hit by this will take between 13% and 18% damage, with knockback that can KO at 110% damage at full charge.

While Galvanized, Golem sees a pretty drastic change in this move. Rather than simply sparking as before, Golem's horns will be electrified as streams of lighting will connect the golden crystals on them. This won't deal more damage to opponents than normal, but instead will hold the foe in between Golem's horns, turning this Smash into a very simple command grab that allows Golem to 'throw' the foe in any of the four cardinal directions by launching them like a boulder. This will deal a further 3% damage as the foe is launched in said direction; if launched upwards, foes will fly skyward with the force to KO from 95% at full charge. Launching the foe forward will have Golem lean forwards once more and fire the foe 45 degrees above the stage, starting to KO at 105%. Launching the foe backwards is similar, as Golem will reel back and essentially sit down, firing foes at a slightly higher angle than the forward version, KOing around 100% at full charge.

Throwing foes downward with this is a bit eccentric, as Golem will jump up and pull his head and limbs close to his body as he spins around one time in the air. Once his horns are facing downwards, he will blast the foe downwards, dealing an additional 3% damage once the foe hits the ground and bouncing them off the stage. This has the lowest KO potential of all of them, knocking foes into the air and KOing into the late 170% range. Golem should land after this move roughly as the opponent reaches the peak of their ascent, allowing Golem to follow up at lower percentages but putting foes at an awkward range higher on.

Up Smash - Buckshot
While charging this smash, Golem turns his body towards the camera as he glares above him, very reminiscent to the famously iconic Ivysaur while using Bullet Seed. Once released, a shotgun-like burst of pebbles will launch from the cannon between Golem's horns. This cone-shape of projectiles fans out from Golem, stretching to twice his width at max range, which is a little above the first platform on Battlefield. This is a very fast projectile move, coming out like one would expect a melee move to, which combined with its pretty good range makes it effective at hitting foes, though only above Golem.

If hit at point-blank range, right at Golem's model, they will take between 17% and 24% damage, quite a hefty hit! The knockback is nothing to sneeze at either, and at max charge can kill from 80%+! In tandem with the fairly high speed this move comes out at, this seems like a barbarically overpowered move. However, there is a catch and it's a pretty big one. Once the foe adds distance from Golem's body, the power of this move drops drastically. At max range, foes get grazed between 10% and 14% damage, and at full charge only start KOing in the 150% range. Everything between scales these two evenly, so this move becomes less useful with distance, but much easier to hit.

This is another move which can utilize Rock Blast's charge. Should Golem have a normal boulder stored up, he will actually fire two blasts of rock as he disintegrates the stored boulder for more ammo. Visually, the two shots are nearly identical, but the second one will have a little more oomph to the animation. The two hits are not equal, either to each other or to the default version of the move. Neither of these two hits are as powerful as the first individually, compensated obviously by the multiple shots that Golem fires. Both shots deal the same damage, at point blank range hitting between 12% and 16% damage. As before, this damage drops hard the farther the move is from Golem. Knockback is decreased for both moves, and the first shot, even at point blank, won't KO until 125%. This is both a curse and a blessing, as this can, at lower percentages, allow Golem to land the second hit of the move for free.

While the damage is the same, the second hit has a great deal more knockback, and from point blank Golem can KO foes at 95%, making this somewhat safe to use. There are some problems with this variation, of course, including the raw power drop. While two hits can be nice, it is difficult to land one point blank shot, and basically impossible to hit both unless the foe has superarmor or something similar. Another big one is that Golem can't cancel out, and if he misses the first one the second is highly telegraphed and leaves Golem wide open to punishment.

This move changes should Golem have a Geodude charged up instead of a boulder. With the same startup and animations as the default version of the move, Golem will instead fire a conal explosion out the top of its horns. This explosion covers the same range as the shrapnel burst, but is just one singular hitbox. Unlike the default version of the move, this blast keeps the same damage and knockback at all ranges, making this a much safer and more consistent version of the move. This comes at the cost of some power, unfortunately, and this will hit for 14% to 20% damage, depending on charge, and can KO at 95% damage. This still makes this an incredibly potent move of course, as these numbers still border on ridiculous, but Golem has to be sure he hits, because this uses up a full charge of Geodude to pull off. What happens to the Geodude afterwards? Well... maybe it's best not to say.

If Golem uses this move while storing an electrified boulder, there will be a visual and characteristic shift in this projectile. Rather than a fast blast of stones, Golem will fire off a flat plane of electrically charged stones, which connect to each other via thin fingers of lightning. This projectile also moves a fair bit slower, allowing it to linger but also making it harder to surprise foes, The damage on this is the same as the vanilla flavor, but is a return of Galvanized stun once again, this also dependent on how far from Golem it hits. At point blank range, foes will be shocked and stunned for a solid three-quarters of a second, making this by far the most potent stun in Golem's move, but this has a steep downwards slope and at maximum range will only freeze foes for half a dozen frames.

Finally, all these elements combine to storing Alolan Geodude inside of his body. Fairly easy to piece together, Golem will instead "use up" the Geodude to create a crackling cone of electricity above him. Similar to the other Geodude move, this acts as a constant middle ground, and allows Golem to hit foes above him for 14% and 20% damage. As anticipated, this damage accompanies stun, nowhere close to the powerful 45 frames this move is capable of but instead always locking foes in place for 25 frames. This might not let Golem pull off another smash to smack the foe with but he can follow it up with a tilt or even go into his grab game for some very powerful combos. Even starting up explosion can put a lot of pressure on the foe as they won't be able to simply get out of the way.

Down Smash - Stone Edge
Golem faces the screen and bends down as best he can for the charge of this move. Once released, Golem lifts one foot in the air in a laggy animation before immediately stomping down hard on the ground. This is very telegraphed, especially compared to the general speed of his other smashes. His stomp itself does no damage to foes, but once his foot connects with the ground two chunks of earth with jut out on either side of Golem in a ‘V’ shape. These chunks can hit foes within a BFP across the entirety of the move, measured from the extreme ends of the rocks, and will hit at Kirby’s height at their farthest point. Visually, these outcroppings will remain for a few seconds after the move but this has no effect on gameplay.

Foes will take consistent damage no matter where they are hit on the move, between 15% and 21% depending on charge. The knockback, however, increases the farther the foe is hit from Golem. At the closest point to Golem, knockback is very weak and will only KO deep into 180% and above, especially useful for follow ups. At the farthest point, where the rocks are highest, foes will take significant knockback, and at full charge Golem can net KOs as early as 90%. Throwing this out uncharged can be good for pressure thanks to the wide range of the move, but because the move comes out on the slower side, Golem is vulnerable during both the startup and ending of the move, also unable to hit foes too far off the ground.

While Galvanized, this move varies a bit, as expected. The startup and animations are the same, but as Golem stomps down two electrified stones will instead shoot up from the ground, rather than cracking the earth like before. Suspiciously, these rocks look identical to galvanized boulders from Rock Blast. And that’s because they are! Using this can allow Golem to easily gain some rocks around the stage for use with Spark or his grab game, without sacrificing any pressure for set up. However, this will completely drain Golem’s body of electricity, so be warned. Of course, Golem can reload these rocks to regain, though he’ll only gain back three total seconds of charge in doing so.

These boulders shoot out on either side of Golem and will travel up about 50% higher than Golem’s height, making this variant a great move for covering all of Golem’s sides. Foes will take between 14% and 20% damage, dependent on charge, and thankfully take knockback instead of any more stun, allowing KOs at a relatively early 120% damage. Compared to virtually every other form of Golem’s smashes this is on the weak side, but very useful for Golem’s setup game.


STANDARDS
Jab - Golem Combo
Golem leans back a margin as he lifts one of his stumpy legs. Golem performs a pretty standard kick forward, dealing 2% damage as he falls forward onto his leg. Pressing a second time will have Golem do the exact same action with his other foot, giving him a somewhat slow jab combo. Continuing the combo past this will have Golem aim his horns ahead of him as his orange stones glow and an orb of electricity appears between the horns. This acts as an infinite jab, dealing brief weak zaps of 1% that slowly push the foe back. A basic jab, when Golem is Galvanized this will actually act in reverse, and foes will be pulled into the loop until Galvanize expires and the foe is ultimately ejected from the move. There's significant ending lag, so Golem has limited options out of this. The zap from the third portion can immediately start a Geodude detonation.

Forward Tilt - Header
Golem performs a step backwards as he braces himself before lunging forward and swinging his head downwards. Picture Donkey Kong's Headbutt for a good visual comparison. This is a somewhat lengthy animation, but will smack foes for 14% damage at a sharp downward angle. This can be used for killing at low percentages off stage, but tends to be more useful for comboing into another move by bouncing the foe off the stage. Bouncing foes not only open to a follow up attack but even into Golem's plethora of stage obstacles, making this a pretty threatening move.

Golem can use this to smack any of his creations as well, allowing Golem to become the world champion soccer star he was always meant to be. Headbutting one of his Galvanized boulders will knock it at a sharp downward angle, usually connecting immediately with either the stage or the foe directly in front of Golem. In either case, the boulder will explode into a small electric burst, which while not increasing the range on this move much will deal around half a second stun on foes, leaving them wide open for a semi-charged Smash attack by our hero.

Geodude function a little different, and as volatile as they are they aren't about to explode on contact. Instead, the Geodude, Alolan or otherwise, will show a pained expression as it is slammed at the same angle as mentioned previous. This will cause the Pokemon to bounce off the stage at a shallow angle, and detonate about a BFP ahead of their master. Should Golem use this move and strike one of his creations as they're offstage, they will simply plummet downwards at said angle. This can interrupt an enemy's recovery using a boulder and outright KO offstage opponents with Geodude, but this is tricky to pull off... with this version of the move.

Up Tilt - Rock Hopper
Golem faces the camera with a bit of starting lag as he stares above himself. Golem's horns spark briefly as he performs a short upwards hop, stabbing upwards with his headgear. This is a basic move, but effective, as foes above Golem will take a solid 15% damage and nice vertical knockback, which allows Golem to KO at the 135% range. This is pretty strong, but it's not the fastest UTilt in the game and also only hits directly above Golem, so it might be a good follow up for a move like the DTilt listed below.

This move sees a slight variation when Galvanized, and instead of jumping up Golem will look above him as his horns spark. Similar to Pikachu's FSmash, Golem will produce a ball of electricity a short distance above himself, lasting for a short period of time that makes this version slightly longer. The electricity will cinge for an even better 17% damage with sharper vertical knockback, allowing KOs at just over 100%. This is a very strong tilt, but comes at the expense of Galvanize's charge along with actually leaving Golem somewhat vulnerable during its course, so be aware.

Down Tilt - Shockwave
Wordplay. Using this move will cause Golem to perform a quick stomp on the ground under him, his leg not serving as a hitbox for this particular move. As he connects with the ground, an arrow shaped shockwave spawns from his foot and shoots forward ahead of him along the ground. Reaching off the ground a little under Kirby's height, this shockwave travels at Golem's dash speed for the entirety of whatever platform Golem is standing on. Foes hit by the shockwave will take purely vertical knockback along with 11% damage, with the knockback acting to pop the foe up into the air with a bit of hitstun, only killing in the late 210% range. At close range this can be great for comboing into an uncharged USmash, thanks to the range on that move as well, and this acts as Golem's most efficient projectile as well, great for disrupting foes and covering distance without much commitment.

Of course, physical shockwaves aren't the only kind that exist, and while Galvanized Golem will instead produce an electrical shockwave along the ground, functionally the same in terms of range and speed. Instead of the dust-like appearance, the shockwave will be more similar to Pikachu's Thunder Jolt, though more like an arrow and not bouncing along the ground. Getting struck will deal the same damage as before, but instead of vertical knockback this will push foes along the ground in front of the shockwave. This only deals damage to the opponent once, but is far more disruptive and has the absolute capacity to push the foe offstage. Granted, the lack of knockback means this variant won't kill on its own. Combining with some of Golem's other tools, especially his FTilt or his FAir, allow Golem to play very aggressive at the ledge. It's important to note that this move uses two seconds of Golem's charge up instead of the normal one second for standard moves.

This move interacts with any low-hanging Geodude or boulders the same way it does opponents. The normal version knocks them up into the air, where Geodude will detonate at the apex of their launch and boulders will levitate at their maximum height. This is great if Golem can catch both a Geodude and a foe next to each other with this move, launching them up next to each other. The Galvanized version then, as expected, will carry any boulders and Geodude along the stage, allowing them to smack into foes. Geodude, however, has its timer for Selfdestruct set as soon as it is struck by the move, so the range on this is finite. Caution should be used, as Geodude can be knocked right off stage using this move.

Dash Attack - Diet Rollout
Out of his... poor dash, Golem will quickly curl up into his Rollout state seen from his FThrow, as he spins along the ground at his dash speed. Golem will travel a BFP and a half, or until he reaches a ledge, losing speed over the course of the move. Similar to the aforementioned throw, Golem's rapidly rotating body will damage any unlucky opponents for 8% damage, and will take knockback at any number of angles, depending on point of contact. Basically, foes will be throw in the direction of Golem's rotation, able to kill at 160% damage at the ideal angle. Truly unlucky foes hit right at the front of the move will be thrown against the ground, setting up for another hit which should knock them out of the move.

This move actually switches up significantly through Galvanize, and while Golem will continue to curl up and begin spinning, the almighty magic of static electricity will seal Golem in place as he spins. Shown by the visible sparks flying off his body, the electrified Pokemon will zap foes for 10% damage with comparable knockback strength and angle to above. This move lasts the same amount of time as the normal version, just in place. This actually has another bit of utility as Golem acts like an electromagnetic, and any boulders and Geodude within two BFP of Golem will be slowly pulled towards him, increasing in speed the closer they are. This is decent for bringing Golem's tools closer to him pretty easily, and can also interrupt foes trying to approach him.

AERIALS
Neutral Aerial - Five-Star Strike
Golem quickly turns to face the camera as he performs this aerial. Mustering all the flexibility he has, Golem will spread all his limbs outward, attempting to make a star topped by his horns. Of course, his puny T. rex arms hinder this greatly, forming more of a triangle of damage with very small hitboxes on the sides. Getting hit by any part of these five limbs will deal a mediocre 8% damage with minor outward knockback. The air may not be Golem's game, but this at least comes out with surprising speed and by hitting radially makes for a good get off move, or a decent option outside of a shorthop.

Forward Aerial - Header II: Electric Boogaloo
"But, but, you can't just do a grounded move but in the air!" I hear you cry from behind your keyboard. However, I am the one who created an omni-directional aerial, you are at the mercy of my [lack] of creativity. However, Golem's FTilt is so useful to him it only makes sense to give him an aerial version of the move. Of course, this isn't just a cookie cutter copy, this is still its own move, albeit very similar. With a press of the input, Golem will reel his head back the best he can and swing it forward in an arc as he travels through the air. Unlike DK's Headbutt, Golem will maintain his momentum and simply carry on with the move like it ain't no thing.

Getting struck by Golem's head will deal a consistent 13% damage with variable knockback. Across most of the move, foes will be knocked back with moderate force, KOing around 150% from center stage. The direction of said knockback is determined by where during the move the foe is hit, ranging from a 45 degree angle upwards at the very beginning to nearly horizontal towards the end. However, smacking foes right at the end of the move will instead deliver a delicious spike to the foe, allowing for aggressive guarding tactics by Golem.

Given the name of the move and the lame gag at the beginning of the move, it's expected that this move has the same interactions as the grounded tilt with Golem's, and more or less it does. The angle the entity is launched follows as stated above, actually giving Golem much more range on his projectiles than the FTilt, but at the expense of much more niche opportunities to use them. Geodude will very rarely be in the air naturally, so often Golem will use this on the boulders he leaves around. This is a solid hitting move even without the interactions, but allow Golem to both recover off stage safer and defend the stage from foes.

Up Aerial - Rising Roll
Golem rolls up into a ball quickly as this move starts up, taking a few frames following before the continuation of the move. Golem rolls quickly as seen so many times in this set as he... electromagnetically? lifts up a short distance, using his whole body as a hitbox. Unlike other iterations of rolling out, this will deal purely vertical knockback along with its 11% damage hit. The knockback can KO from the 140% range, though kills will have a tendency to be Star KOs due to the direction of the knockback. Following the quick startup, Golem will plummet in his withdrawn form for a short distance, not only giving him an unsavory ending lag but bringing him down lower in the air than where he used the move.

Similar to Golem's dash attack, Galvanize will allow Golem to stay in place as he uses this move, rather than rising upwards or downwards. In this instance, the move comes out quicker and lasts for about the same time, but perhaps most important for Golem this has a much shorter ending. The knockback and damage are the same as before, but the benefits are weighted by the fact that Golem has much less range on this version than the default.

Back Aerial - Rock Dropkick
Golem rotates his body slightly as he performs a forceful dropkick behind him. This has about as much range as one can hope from Golem's stumpy legs. The move comes out fairly fast, again, making up for its abysmal range with better than average speed. Foes who get kicked will take 11% damage and moderate knockback off Golem's legs, not enough to reliably kill until late in the stock but too much to really combo without using boulders and Geodude. Should Golem miss, he will suffer a significant amount of ending lag, unfortunately leaving him open to punishments.

However, landing the hit will mitigate this ending lag, as Golem will kick off the foe and roll up into his Rollout form as seen in a few other moves in a very quick animation. Golem will then roll through the air a BFP away from the opponent, both giving a great amount of space between him and the foe as well as turning his body into a seperate hitbox. Golem's body for the second portion of this move acts as it has before, and will deal 8% damage as well as decent knockback in whichever direction Golem is rolling, able to KO at its peak at 130%. Of course, this is a difficult move to land 1v1, as the beginning of this move has the two moving apart from each other.

What is fun about this is that this will mitigate Golem's landing lag should he hit the stage while rolling, and will finish rolling along the stage before jumping back into his fighting stance. Performing this move close to the stage is the key to its success, especially as Golem can actually change direction if he hits the stage during this. This turns this into a very fun combo starter, knocking opponents back into the air after both they and Golem land following the hit. Additionally, Golem can use this move off of his own Geodude and even boulders, not only allowing him to reposition them at will but also allowing him to enter the second portion of this move safely, which can be great for getting back on stage.

Down Aerial - Heavy Slam
Like any Slavic-brand Rock-type, Golem’s down aerial is a stall-then-fall, as he turns to face the camera and places his legs in a Bowser Bomb position. Golem will then plummet straight down, one of those real fun aerials where it’s very easy to KO yourself due to the downward range. This is fast as well, comparable to Greninja’s same input, and acts as a very important aerial get away move, given his general aerial weakness. Should a foe find themselves in the unfortunate position of being under Golem, they will take a not insignificant 14% damage with good knockback at the Sakurai angle, allowing KOs from 140%.

Golem will suffer a lot of lag upon landing, but not without good cause as the rock Pokemon slams into the stage. As he hits the ground, a small cloud of dust will shoot up on either side of Golem, indicating a small earthquake from the impact of his landing. This isn’t especially powerful, only dealing 6% damage and only affecting foes on the ground right next to Golem. However, Golem carries great vertical knockback from this tremor, and can KO opponents from 115% damage. This incentives foes to leave the ground, and Golem can be punished on landing, so leaving boulders and Geodude around the stage can cover your weakness.

FINAL SMASH
Continental Crush


He has the Smash Ball. Now he will be witnessed. Activation of Golem's Final Smash will have him perform the Rockium-Z's animation dance as best he can with his shrimpy limbs. I was going to post a gif of said maneuver but I couldn't find it. Luckily I found this and it's probably better. After performing this dance, Golem splays his arms out and opens his mouth as electrically charged rocks lift up around him. These rocks aren't hitboxes but that's acceptable because Golem is invulnerable during this Final Smash. In the background, massive chunks of rock are seen coming out of the ground, electrified, and telegraph the pattern in which they will land around the stage. Each of these chunks of earth are about a third the size of Final Destination, and come crashing down at a fast but fair speed, plowing through everything before disappearing into the bottom killzone. Five of these big boulders will come down over the course of the move, dealing 30% damage and devastating horizontal knockback as foes are squished, able to kill at 60% without DI. Following all five landing, Golem will roar and put his arms down, ready to fight once again.

FLAVOR
Entrance - A standard Pokeball is thrown onto stage as Golem appears out of it in a beam of light, roaring and "flexing" as he does so.
Boxing Ring Title - Alola's Living Mortar
Up Taunt - Golem turns to face the camera and using his comically short arms performs the standard Alola greeting.
Side Taunt - Golem hops slightly and crashes to the ground, roaring at all ahead of him.
Down Taunt - Golem hunkers down to the stage as an intimidating spark of electricity travels along his horns with a short-circuiting sound.
Victory Pose A - A boulder.
Victory Pose B - A barrage of rocks pass by on screen, followed by a single Geodude with a horrified expression on its face. The camera pans over to show off the victor, Golem.
Victory Pose C - Golem is shown rolling around several times before leaping up and into a victory pose, the camera zoomed in on his face.
Defeat Pose - Golem stands entirely vacant, mouth agape, in utter silence during the ending screen.
Victory Theme - The standard Pokemon victory theme.
 
Last edited:

Professor Lexicovermis

Smash Journeyman
Joined
Oct 27, 2015
Messages
273
Location
Pop Star
Professor Lex's Ranxicon!

Quick rundown, I am a very lenient ranker, capable of finding redeeming factors in practically any set! Because of that, ah, generally speaking my rankings won't fall below 5/10 very often!

Ulrich Hetfield - 9/10
Vaati - 3/10
Dehaka - 3/10

Paper Witch Mint - 8/10
The Mountain - 8/10
Oceana Louvier - 6/10
Black Knight 2000 - 7/10
Fark the Electric Jester - 8/10
Zoroark - 6/10
Wario.... DELUXE - 8/10
Blupi - 7/10
Poliwag - 8/10
Jupiter - 8/10
Alucard - 7/10
Sylvia - 10/10
Nightmare - 8/10
Deltarune Trio - 7/10
Honey Witch Eleanor - 9/10
Dead Hand - 8/10
Darmuk Syreus - 8/10
Kilton - 9/10
Planetman.EXE - 9/10
Aurelia Midam - 10/10
Mr. Okumura - 8/10
Paper Munio - 7/10
Mr. Kamoshida - 8/10
:231: - 5/10
Rime Marz - 9/10
Copy X - 6/10
Elpizo - 8/10

DOWN WITH THE DECOUPAGE
9/10
Ulrich Hetfield is a super fun set, I really love the Blood Puppet and everything he can do with it. It almost gives me some faint Doc To vibes in that everything he does ties back to the Puppet in some manner, even if indirectly. It also builds heavily on Djimmi the Great's Cuphead puppet from last MYM, making it into a major part of the set in a very enjoyable manner. The heavy metal flavor and blood weaponry make him a pleasantly "edgy" character that never goes too far over the edge.


High Wind Advisory

4/10
Luigifan18 Luigifan18 's Vaati... has a very serious balancing issue. Indeed, though the set itself insists otherwise, Vaati is almost obscenely overpowered, with massively powerful wind effects everywhere. His drawbacks are low damage output, low weight, and lag, but frankly NONE of these matter in the long run because of his ridiculous amount of full-screen windboxes. Credit where it's due, wind abuse is certainly befitting the wind mage, and I appreciate you making the effort to include his swordsmanship, an element of his character few people acknowledge. As it stands, however, Vaati merely needs a remotely competent player to excel, and in a 2v2 scenario I earnestly believe he's nigh-unstoppable. For some specific feedback, a Gust Bellows effect on Jab is absolutely not balanced, nor are casual "intense" fullscreen winds on a Smash attack. Interestingly, two of his standout oddities are nearly useless for him: namely DThrow and DSpec. DThrow has no hard condition, but supposedly only works after 120%, a percentage that Vaati's foes will never reach thanks to his pittance of damage and tendency to outright kill with wind regardless of percentage. DSpec has a fullscreen vacuum effect... but why would someone as fragile and laggy as Vaati WANT that? It's far better to keep the foe as far away as possible. Side Special 3 is similarly useless on its own, as Vaati is hardly capable of racking up 40% in a reasonable amount of time; that said, in Doubles, this move is blatantly a guaranteed kill if his partner has a pulse and isn't another Vaati. As a final note, though they're typically not balanced well, the Final Smash is a standout thanks to it's absolutely absurd duration. As it stands it's not unreasonable for this FS to kill a foe, then immediately kill them again on respawn. All that aside, Vaati isn't an unpleasant read, and I believe that with more balancing, you could make him a much more fair set.


Collectathons Are Dead

3/10
GolisoPower GolisoPower 's Dehaka immediately opens with a rather problematic mechanic. I understand what you're going for with Essence, but as written it simply does not work. Attack Speed is a case-by-case basis for every move in the game, so if anything Dehaka would gain Mac's ground speed. Not that it really matters, since Essence is only gained by landing a laggy command grab past 100% and is lost when Dehaka is killed. Unless he's absolutely dominating a match, chances are he won't live long enough to really enjoy his Essence before it's stripped from him. The 7% heal is almost comically underwhelming compared to the instant kill and Essence granted by the same move, and honestly feels nearly worthless. Essence ISN'T an inherently bad idea, per se, but I feel it could've been executed better. Perhaps simply have the already laggy and low-ranged command grab not kill, but ALWAYS grant an Essence? If you did that, you could then have Essence expire after X seconds so Dehaka doesn't get to casually get absurd stats, but this simultaneously makes Essence more of an actual entity in a match. As it stands Essence might as well not even exist. On to the rest of the set, NSpec has an unfinished sentence at the end of it. USpec contradicts the apparent implication that NSpec is hard to land by casually informing us that it's easy to Devour a foe he lands on using Leap; it also operates under the notion that 9 frames is a long time, which simply isn't the case. DSpec inflicts a positively NASTY status effect for a ludicrous 15 seconds, farrr too long for its low lag on either side, and especially too much since the move has no cooldown on its use. Bizarrely, the move warns us to be cautious of these stat changes, as they affect Essence... when the Essence mechanic explicitly states that stat changes do not affect Essences gained. Either this one specific move is an exception (which is not good for consistency) or you simply forgot, which, either way, is an easy fix. Dehaka's standards are fairly straightforward (with Jab being unfinished)... but Down Tilt. Down Tilt is ABSOLUTELY the incorrect place to put a non-attack that grants 5 seconds of total invulnerability. Invulnerability that doesn't even explicitly ban you from attacking, I might add, and doesn't even have a written method of canceling it early. This should be a Special, and frankly a free 5 seconds of invulnerability with no drawback outside of momentary lag is obscene and probably shouldn't be a thing at all. The remainder of the set is generally harmless and inoffensive, though the logistics of BThrow baffle me. I cannot fathom exactly how Bthrow animates, much less how the dragging works. Dehaka isn't AWFUL, but there are quite a few major issues that I believe you can remedy with some editing. Even fixing how Essence works would vastly improve the set's quality, honestly.


Origami? You Hardly Know Me!

8/10
U UserShadow7989 's Paper Witch Mint is a set I had the privilege of previewing extensively before the contest launched, and I must say she's certainly lived up to my expectations. NSpec is a straightforward enough trap, but the sheer versatility of it grants Mint a very compelling mechanical hook; manipulating scrolls containing your choice of any non-Special attack is brilliant, and it's definitely a fun concept to play around with. SSpec immediately gives us an interesting way to play with it in the form of a simple minion... that can play Trojan Horse with a scroll of your choice, making a nuisance into a potentially deadly Gotcha trap. DSpec is short, but I legitimately love its mechanics: literally allowing you to hit a foe with their own attack. USpec is a fun recovery, and it ties into moving paper constructs around rather nicely. The mechanics behind moving an existing whirlwind are a bit odd, but I think it's handled fairly well. Perhaps you could make it so that dismissing a living tornado and making a new one requires a double-tap...? Her Standards are the first batch of moves eligible to be placed inside scrolls, and they're a fairly motley crew of tools ranging from a handy 2 second windbox, a damaging geyser of ink, a cloud of DoT confetti, and a pair of projectiles that fly off in opposing directions. The moves function just as well when used outside of scrolls as well, happily. The Dash Attack is a little bizarre, but it's fun and handled well. Her Smashes are a bit unorthodox, but again very fun and have some interesting interplay with scrolls and other paper constructs. Her Aerials have some fun ideas as well, like Nair's more customizable "Leaf Shield" secondary fire, Fair splitting projectiles and constructs, and UAir soaking and weighing down paper constructs. Her grab game, uniquely, grants her access to two unique grabs, both of which are handy for making her more versatile and for allowing better access to her throws. Speaking of, they're all fairly interesting and helpful for the Paper Witch, putting foes into dangerous situations or going for outright kills occasionally; they're even more threatening when a scroll can let Mint remain free to act while the foe suffers a throw! All in all, Mint's a fun sort of playground set, with a lot of interesting mechanics to play around with; she also avoids the pitfall of interactions being obtuse and case-by-case, with the majority being universally applicable to all paper.


How Nice Of You To (Mountain) Drop In!

8/10
Having read the original set for The Mountain, I don't hesitate to say you've definitely improved on it with this remake, MasterWarlord MasterWarlord . The Mountain's new recovery makes better use of the ghost mechanic than his old set did, and lends to some interesting interplay between body and ghost that gives off some pleasant shades of Ribby & Croaks. Volcano is a fun charge move, and I really like being able to set your body to keep charging while you work as the ghost, or to simply set up a two-shot assault by charging with both body and spirit. Mountain Slam is fun, I adore the ability to grab and slam your own lifeless body as the ghost. Mountain Drop is hilariously fast once the startup ends, and I love it for that. Earthquake is an interesting addition to his moveset, and I rather like the interaction with cooled lava. The Smashes are fun, and interestingly enough form their own little microcosm of interactions, with USmash actively lifting and smashing the Fsmash boulders and DSmash softly countering the boulder in lieu of an enemy attack. The FSmash itself makes smart use of The Mountain's hardened lava "ramps" to become a nasty threat with good setup. His Aerials are rather fun, with Nair's customizable knockback angle and UAir's "reversed" knockback being fairly interesting. His Standards are fairly straightforward, but interact with his boulders, lava, and ghost well. Dash Attack is a very fun standout move, I rather enjoy the idea of making yourself into a reusable projectile of sorts. The Grab is fairly expected for a sumo-type, especially the pummel, but his throws are fairly unique; FThrow is potentially horrific if used wisely, and the mental image of a massive ball of The Mountain's body and spirit is amazing. UThrow is fairly simple, but DThrow has a very interesting suite of effects when used atop cooled lava. All in all, The Mountain's new set is vastly improved from the original; excellent work.


TAKE ME BY THE HAND LEAD ME TO THE LAND

6/10
Welcome to MYM, Cetus Cetus ! Endless Ocean is a series that's very near and dear to me, so you can imagine my hype to see a set hailing from it, and Oceana is a rather pleasant set indeed. There are a few niggling problems here and there, but she's honestly a fun read regardless. My main issues are minor balancing problems, like NSpec's stun being a bit lengthy (perhaps a second flat would be better?), the DSpec treasure chest being rather useless (a simple increase in range would do wonders considering the lag!), and the NAir (seems odd that the swarm of fish that is visibly surrounding her... has no hitbox until it's dispersing.). Other than that, Oceana is fun. I rather like her pacifistic animations like petting the enemy on UThrow and getting spooked by a Ray for DSmash, but the set seems to lose that idea near the end altogether! It's a little OOC for Oceana, a nature lover, to be using fish as weaponry... I'd rather like it if more moves had "accidental" animations like DSmash, but that's just my personal opinion. Very nice debut set, I hope to see more from you!
 
Last edited:

Bionichute

Smash Champion
Joined
Jun 30, 2012
Messages
2,151
Once more!

Mr. Kamoshida

9/10

Himiko Toga
8/10

Okumura

8/10

Kilton

8/10

Nightmare

8/10
A very high 8, mostly because I feel the set gets a bit too tacky and complex at points. Most of the complexities are purposeful, but things like the DThrow don't have anything else to do with the set, at least in a way that really matters. Nightmare repeatedly impaling his chess pieces is also very funny. But overall, the set has a great core to it, so I find it hard to really complain.

Aurelia Midam

8/10

Sylvia

8/10

Xaldin

8/10

Eleanor

8/10

Rime

7/10

Necalli

7/10

Lexaeus

7/10
Lexaeus is a lot like Xaldin, good but simple. I put him lower than Xaldin mainly because his gimmick is less interesting, but Lexaeucovermus does feel slightly more coherent than Xaldin on a pure playstyle level, so they are very close together.

Washizu

7/10

The Mountain

7/10

SCRATCH

7/10
A fun set with some interesting gameplay ideas, definitely unique ones at least, and a fun writing gimmick. It is rather standard outside of that, mostly becoming apparent in the throws and aerials, but whatever. also she cute

Velvet

7/10

Rex

7/10

PlanetMan.EXE

7/10

Idella

7/10

Toxicroak

7/10

Aromage Rosemary

6/10

Ulrich Hetfield

6/10

Girimehkala

6/10

Omega

6/10

Von Guu

6/10
Von Guu is a good set with some interesting ideas, but its mostly hindered by how little it really does with those ideas. The writing style can also wind up feeling very repetitive. The head gimmick is really great tho

Percy

6/10

Bill Blastette

6/10

Blados

6/10

Ya boi Guzma

6/10
A simple set, mostly through forced limitations, but an overall quality one that feels like it would fit well alongside Incineroar. Obvious complaint is that its not actually a set for Guzma, but for Golisopod instead.

Jupiter

6/10

Kris, Susie, & Ralsei

6/10

Nabbit

6/10

Wrecking Ball

6/10

Roxas

6/10

Poliwag

5/10

Cat Battleship

5/10

Kammy Koopa

5/10

Copy X

5/10

El Pisso

5/10

Fark

5/10

Bounty Hunter

5/10

Paper Witch Mint

5/10

Misko

4/10

Aatrox

4/10

Revali V1

4/10
Overall an inoffensive set, but mostly just generic as well. It has anything interesting going for it with the arrows, but otherwise there just isn't that much.

Chalis

4/10

Shinobu
4/10

Dehaka

3/10
Just in general a boring moveset, without anything to really make it stand out. The main gimmick is interesting, but the rest of the set does nothing with it, making it feel somewhat pointless.

King Dededemix

3/10
 
Last edited:

Slavic

Ask not the sparrow how the eagle soars
Joined
Jun 5, 2013
Messages
761
Location
taco bell, probablyn't
SLAVIC'S 5 YEAR ANNIVERSARY POST


Today marks the five year anniversary of my Smash Boards account, and this contest marks the [some number] contest anniversary of my participation in MYM. I've had some ups and a lot of downs, and this has been one of my favorite pastimes for the past couple years. I've made some great friends, learned cool things about how Smash Bros. works, and have had the opportunity to represent so many of my favorite characters through this wonderful contest. I don't know a very proper way to celebrate this anniversary, but I think doing a "short" "write up" recounting my previous contests entries (as customary for these things) will suffice. Plus, it always looked fun when other people did it.

So I ended up in MYM14 2 days after making my account on SmashBoards on June 6 for the sole reason of finding a place where movesets could be made and posted. I was on random forums prior where I would make movesets for requested characters (very simple ones) and ended up at Super Smash Mercurious for a while. Well, that site kind of took a sharp downward spiral and so I ollied out of there and through some Googling came across Make Your Move. I really didn't know anything about it, I didn't know it was a contest, and evidently I spent two days working on my first, and most forgotten, MYM set for Spider. Spider was the protagonist of some random PS1 game from my childhood, and so I guess I figured what better place to start! Spider's actually a decent length for being a newcomer set, but that's in large part due to the fact it has a weapon switching mechanic.

Spider starts off with the stats, which I actually started with the comparison method of describing not the numbered system, and I wish I stuck with that for my career following. The stats are very milquetoast until Spider's extra movement abilities are briefly touched on. the lack of detail here is wild, just saying he can walk around the stage and descend on a thread without any explanation as to how or what limitations this has. Several of Spider's many projectiles randomly go through all substances including a metal boomerang and an electric orb, the latter of which homes in on opponents. There's also the humorous and prophetic image of Spider hiding inside a floating cloud of poison. The melee game isn't anything terribly special, though the the Down Smash has a 2 second long pitfall, and a lot of the animations are goofily described. Back Air also seems to have been completely skipped. Spider's Up Throw only works with one of his weapons equipped, and the Back Throw lets him drag opponents to the bottom of the stage and let them fall. Almost mercifully, this is the last opportunity I would have to put a Snake Codec in a set.

Spider wasn't a horrible set, and I think it has more merit than my next few, but it sure does reek of newcomer. There are missing inputs, brief descriptions, no actual knockback data given aside from good or bad, and there's a general lack of gameplay sense. I don't think it's my worst set, and I've thought about returning to this one at a later point because I think Spider's tool kit is very versatile for Smash. Other than that, I participated in a MYMini where I pitted Mace Windu against Croagunk, where I greatly faked my understanding of gameplay. After this, I would be pulled away for a contest and a half never to be seen again.

...Until Make Your Move 16! I had completely forgotten about Make Your Move since 14, but was brought back following the release of Smash 4 and wanting to remake Bowser Jr.'s moveset. Reminded of this, I came back with... Imakuni. I don't know why I decided to go with a Pokemon TCG original character, but it seemed fun I guess? The stats switched to the numbered system, mostly because I didn't know how any characters operated, and I instituted a wonderful ammo mechanic that involves finding random booster packs to replenish. I also moved the Specials to the end of the moveset, which is... good? Imakuni mostly consists of dancing-based Melee that forces him to lose cards which prevents him from using his Down Smash or his recovery. Perhaps the funniest part about the set is the only way to manually replenish cards to Imakuni's deck is by using his NAir three times. Probably the most notable part of this set is the fact it was posted the same page Muno posted his first set. Heart you, boo!

Magcargo was my next set in 16, and really set the standard for how fast I was getting sets out that contest. Magcargo tried to do some terraforming gameplay, replacing his jump with just creating a hill of cooled magma behind him. This is the basis of the whole moveset, with a good amount of Pokemon Syndrome thrown in, and had the concept of randomly giving Magcargo very strong aerials despite not being able to jump. Well, that's what it sounds like is going to happen, but the aerials are very weak, and randomly has Shell Smash in order to make Magcargo lighter until he hits the ground... this is easily where my Pokemon syndrom was the worst, and this whole set ruins a decent set concept with random moves everywhere and a strange mechanic.

A few posts later and we come to the first set I was really proud of when I posted, Yomiko Readman. This was the first character I really actually liked that I made a set for, and this was still when I thought that weapon switching made for a good set 100% of the time. But boy howdy is this some kind of a puzzle to read. In order to handle the weapon switching, I put any common moves at the beginning, which are just the Down Special and the grab game. I still enjoy the concept for a transforming character here, where switching is a vulnerable attack, and the ammo mechanic used for Yomiko is much better than the one for Imakuni, but this is still a newcomer set in every sense. The best part about the moveset, apart from all the now broken GIFs, is that I started to develop a stronger playstyle sense here, something that I think made doing a stance-changing set useful; each stance I focused on how to differentiate and make each one operate. This doesn't mean I did it well, but it certainly was an improvement on my previous movesets.

Genjo Sanzo was my next addition, from the same series as Yomiko, and this set was much shorter, though this might be due to the lack of weapon switching. His mechanical focus is simply on extending his staff, which provides a simple set of buffs and nerfs to his moveset. This set was actually one of my favorites in terms of writing, as I combined source material from Read or Die with Journey to the West, resulting in a set filled with references not to Genjo's actual source material. This also likely still has one of my most elaborate Final Smashes, which is almost a book report of Journey to the West. Aside from flavor, however, this is just an incredibly short and simple set derived from a singular mechanic, which is a great way to transition into the next entry...

Hitmonchan. I've complained about this set before and make fun of it repeatedly, but this is likely my most forgotten set because its just so... nothing. The Specials do have something going on with the Iron Fist mechanic changing how the set works... kind of? There isn't really a gameplay change, it just powers up the Specials, and it doesn't feel different enough from Little Mac to be anything special. I'm pretty sure the only feedback of any kind this set got was when I reposted it as Hitmonlee last contest.

But we do eventually get to the first set that's "good" in any sense of the word, Clawgrip. Like Genjo, a lot of Clawgrip's moves come from outside sources, but again this was one of my favorite sets to write, as I felt like I got to flex my creativity by bringing in other sources. This was my first set to really pull off both gameplay and personality through the moves, and Clawgrip has a few mechanics going on in his set unlike my standard one in sets prior. The use of bubbles in Clawgrip's set actually find a decent amount of mileage, trapping foes, carrying boulders, and even prolonging and delaying Clawgrip's Smash moves. I think this might have been the set where I got invited to the Skype chat? I think it was the first that really stepped away from the newcomer setmaking style, at least. A lot of the attacks are still underdeveloped, and its far from perfect, but the set is the first I would say matched any amount of MYM quality.

Donnel was easily my best set of 16, and best set in general up to this point. Donnel captures one of my common playstyles of messing around with buffs, and with a decently balanced Aptitude system, combined with his Rally attack and his Reeking Box, Donnel does a good job of having the tools needed to pull off his intended gameplay. Donnel's self-heal also is handled fairly competently, and the combination of all his Specials really feel like they pull off Fire Emblem's mechanics well on a character that works. The standards are the most fleshed out of all sets up to that point, though they are still on the short side, and there is a much better focus on gameplay interactions than just representation. One of the weidest parts about Donnel's set is his grab game, which he can simply pull the opponent back into the grab after a throw rather than releasing them, which is... something. Donnel is also the most entertaining set of mine to be written for a few contests, as well, with some fun writing all over the place.

Finally, Castform. This set certainly was something. It did place, making it one of three of my sets to do so and technically being my most successful contest. Castform is kind of a mess, with a weather mechanic combined with an infinite cloud-camping mechanic that in general makes the set hard to read. Combine that with absurd amounts of colors throughout the set and even I get a headache from reading it. Random standards interact only with random cloud types, requiring a lot more memorization and planning to pull off, and there's the beloved omni-directional aerial, one of the worst ideas I've ever had for a move. Personally, I did like and still do have a fondness for the grab game, which gives status effects rather than knockback, but I understand why it's disliked and why it's bad, and is just a great way to top of a great set.

Overall, MYM16 felt like an important experience in my movesetting. While none of my sets could be considered revolutionary or even necessarily good, there is a distinct increase in quality from beginning to end, and I learned about Smash Bros. and setmaking in general. I became a part of the MYM community during this contest, had my most prolific set, and my writing had improved by the end of the set. Everything seemed primed for a much more successful MYM17 off the foundations I had set this contest.

My opening day set for MYM17 was Exeggcute and Exeggutor, which really sets the stage for the misses I'd have this contest. At face value, when it was first posted, Exeggutor was generally well-received, but very soon people began to smell the rotten egg within. As with so many before, Exeggutor was plagued with Pokemon Syndrome, giving many random attack inputs weird utilities to match the game, including Stomp as a recovery move. The interactions with the Exeggcute vary from acceptable to abysmal, and include things like Exeggcute hypnotizing Exeggutor, psychically thrown Exeggcute, and Exeggcute that infamously detonate in the middle of the air. I did spend a decent amount of time coming up with the interactions within this set, and I felt that this was at least a more decent attempt at a playstyle than my previous sets, but boy, the yolk sure was on me. Things didn't get much better with...

Pearl. This was a very poor attempt at a set, and was more of a "love" letter to the character by filling it with many references. Obviously my goal here was successful as this ended up being my second most 'liked' set to date, but almost all of these likes are not from MYM setmakers, which should have been a red-flag. Pearl has weird mechanics in her standards simply to allow her to utilize the Holo-Pearl exactly as it appeared in SU, and wasn't really complimented by the poor AI mechanic used with it. One Special is essentially just dedicated to blocking the Holo-Pearl's moves, and Pearl can randomly summon a second Holo-Pearl on her recovery to fight the first. The standards are fairly simple spear attacks without much gameplay, and there's Warlord's favorite part of the set, the ballet-visual Smashes. For a character I loved so much and that I put a lot of work into making a set to represent them, it did hurt to find out the set sucked, especially after Exeggutor bombed, but boy, these two did deserve all the criticism they could get.

Thankfully, things improved quite a bit with Regirock. Posted much later in the contest, this was a return to my rising quality I showed at the end of 16. Regirock certainly wasn't perfect, but it was the best set I had made thus far, which the same could not be said for Pearl and Exeggutor when they were posted. Some (most) of the standards were underdeveloped, and there was still prominent Pokemon Syndrome, but Regirock's underlying core of creating, destroying, and reusing the boulders from Rock Tomb made the set actually anything. It placed much higher than my other placing set, Pearl, though still lower than Donnel had, and I thought once again I was on the rise after a very poor contest.
I was back on my feet for MYM18, and while not one of my better contests still, I had momentum and it turned to be my second most prolific contest. My contest started with a triple-threat of Xenoblade opening sets, starting with Sharla. I will say I have a better opinion of all sets from MYM18 I put out than Exeggutor and Pearl, including Sharla, likely the poorest received of my sets in 18. I struggled here trying to balance a team-based character with the ability to still fight on her own, and it... could have been worse? I'm actually a big fan still of the utilization of Sharla's heat up mechanic and her different bullets, with how Heat Up acts both as a buff and a nerf, but it isn't enough to save Sharla's poorer standards and general lack of quality. I knew Sharla wouldn't be particularly popular, which ended up being the rational for putting her first out of all my sets.

The second Xeno set posted was Dunban. Dunban actually received a lot more praise than I thought he would, even if he didn't place, and Froy was probably the set's biggest fan, urging me to fix some of the issues he had. Dunban's mechanic is still one of my favorites I've done in terms of self-buffing, which completely changes his stats and playstyle as he takes damage. The Specials attempt to compliment this, so as he loses melee damage he can rely on stronger Specials to make up for this. One of the most underutilized aspects of the set was the combo-starting Gale Slash, which should have been more integrated as per Froy's suggestion to tie in Dunban's melee game. Unfortunately, I didn't have the inspiration to really pull it off like it could have been, and ultimately a lot of Dunban's post-Specials set trails off towards the grab game especially.

The final of the trio, Melia is the most divisive of the three opening sets and also ended up being my only placing set this contest. Melia is mountains ahead of Dunban and Sharla in terms of length and depth, but much of the bulk seems misplaced, and Melia does end up being more or less just a weapon switching set. There's a relative lot to read to Melia, and I don't think most of it pays off. The idea of different elementals is fun, and there's definite potential to it as seen with sets like Medea, but none of that is utilized here, suffering some of the same issues as Castform's weather interactions from MYM16. This at least put me on the board, which wouldn't have happened without her, but I think Melia is one of my less favorite sets from this contest.

I wouldn't post any more sets until about half way through with another Xenoblade set in Riki, another somewhat long set that relies on a lot of hard interactions that mess with the flow of reading. Riki's focus is on throwing pollen all over the stage, using it in clouds, in his biter, in order to hide in while he heals... if there's anything to be said about Riki, he's at least a... focused set. It's certainly not the worst set I've made, and I even think it has more merit than Melia does, but most of the set is derived from "this is a melee attack. is there pollen? yes? then pollen also happens". I think more focus on interesting effects in the pollen, as well as removing some elements like the very powerful Play Dead would have helped make Riki a bit more enjoyable.

The final set I'd post for MYM18 was Lapis Lazuli, another SU set that suffers from a few of the same problems that Pearl did. Again, this set was more in an effort to push a playstyle onto a collection of character references for another character I liked, and not particularly successfully. This was one of the first sets I did take criticism very seriously for in terms of implementing directly into the set, as I was fairly passionate about the set at the time. Lapis is certainly much better than Pearl, but ends up being pretty mediocre due to a few balancing issues and characterization problems. Alas, 'twas not meant to be.

MYM18 certainly wasn't my strongest contest, but I would say it was stronger than 17 was, and was important thanks to how prolific it was for developing my setmaking and writing. With five sets thrown at the wall and none really sticking, it did give a good idea of what does and does not work in MYM, and unlike 16 and 17 I don't think I regret any of these movesets being made, and I think each one has at least some merit buried within it that make them worth reading.

Now MYM19 is where the big kids played. I didn't have very much output this contest, but I did have strong output this time around. My first set didn't come out until over two months into the contest's beginning with Ira Gamagori, but the wait was well worth it. Gamagori's still my most successful set, securing eighth place overall that contest, and I am hard pressed to come up with a better set than it. From a gameplay persepective, Gamagori marries a handful of gameplay elements including tethers, minion control, damage absorption, and self-damage to create a playstyle that feels very unique and enjoyable to read through. It certainly doesn't hurt that Gamagori was my first set whose writing and flavor really surpassed Donnel from 3 contests ago, with plenty of innuendo and over the top wording to really pound in the character. I am actually impressed Gamagori did so well, as I wasn't fully happy with him when I posted him. I had other ideas I thought about utilizing within his set and there were parts I felt underdeveloped and unsatisfactory. I am glad I ended up posting him, however, since he was my one way trip to success.

My other set in 19 was Sucy Manbavaran, and I knew whatever set I posted was going to pale in comparison with Gamagori from earlier. Sucy was, in essence, a second attempt at both Riki and Melia from 18; I think the combination of the two playstyles allowed for a lot more fleshed out set which ended up being much better received. Sucy's my wordiest set, and that does make me cringe a bit because I feel it runs on with some of the mechanics, but I think a lot of gameplay is derived from all the Specials with the mushrooms, the expansion of the mushrooms, and the cauldron, which ties in with a lot of the standards game. Some of the effects throughout the set feel superfluous, such as the different ways Sucy's broom can fly, and Sucy has big issues with balance on both her mushroom buffs and her potion debuffs, but I will say I am happier with Sucy than essentially all my pre-19 sets, and I think she was a solid way to end the contest.

19 wasn't very busy of a contest for me, but it was very strong, with both my sets placing in the top 25 and one placing in the top 10. I would take a hiatus for the next contest, but I felt far more confident in my set-making abilities after these two Trigger sets.

See MYM15.

This brings us to the present. So far, this contest has only featured Alolan Golem from me, though we've only just started, and I have a drive to get more out than previous contests. Golem is a set that I'm torn on, and as I'm still getting input on will likely change in the following week as its strengths and weaknesses are cemented. After a contest break, Golem likely suffers a few more issues than Sucy and Gamagori, who are both more balanced throughout the set. Golem's moves, especially later on, are quite a bit underdeveloped, which can definitely be seen when moves like the Jab and NAir are examined. As the wheels of creativity clear their dust, I expect further sets this contest to fill out more around the late inputs, and is likely one of A-Golem's biggest flaws. There's also a number problem from gamesense deterioration after months of inactivity, but I can find my way back to that through pretty basic trial and error. There's also an issue I perceive in the set regarding how much 'stun' is present from Galvanize, as I feared even when writing that the set might get too close to the Petey pitfall.

However, there's a lot I love about Alolan Golem. I'm very happy with how the stage control is handled, offering a number of soft and hard interactions with Galvanize, Geodude, and the boulders situated around. The ability to essentially recall a move's charge, like Rock Blast or Galvanize, by undoing the stage controlling elements Golem leaves around is fun I believe, and is mirrored by the set immediately before with Uldrich. I'm happy with how the grab game plays, and even some aerials and standards have effects that are decently inspired. Explosion as a recovery is something I am pretty proud of, though no input on that yet either, and I think Alolan Golem, if not a perfect set, is decent for segwaying into this contest after such a period of inactivity.

Overall, MYM has been the best online community for me in the past 5 years, with such a group of creative, talented, and fun individuals who have built such a tightknit group I'm honored to be a part of. I missed this greatly in my various absences in the past, and I hope to continue on here to the distant future and all that sappy stuff.
 

GolisoPower

Smash Master
Joined
Sep 17, 2017
Messages
4,397
I took a shot at this the last game, I'll give it another shot now. Here:


“I am Dehaka. One-who-collects. I kill, I take essence.”

Throughout most of his life, the Primal Zerg pack leader Dehaka had lived on the planet Zerus, the birthplace of the Zerg. After a war between the protoss and zerg at the hands of the xel’naga Amon, a zerg named Zurvan, along with some other zerg, avoided being assimilated into the Overmind, of which made the alien monsters what they are today. The remaining zerg that avoided the Overmind evolved into what is called the Primal Zerg. Many years later, Dehaka would encounter the Queen of Blades, Sarah Kerrigan, who would arrive on Zerus with the intention of gathering Zerg armies for the Swarm. He watched as she awakened the millions of years-old Zurvan and became infested in the Zerg’s first spawning pool. After witnessing her immense power, he and his pack revealed themselves to her, pledging allegiance to her and joining her quest for revenge.

In Starcraft as a campaign unit, Dehaka is a powerful hunter, leaping upon enemies, dragging them towards him, healing himself and devouring enemies for their essence. As a commander, Dehaka gains more abilities: he can reach up and attack airborne enemies, burrow underground, breathe fire and weaken enemies with a roar. As a hero in Heroes of the Storm, Dehaka is a warrior that survives by healing himself through the consumption of enemies and is very aggressive in killing enemy heroes.

Stats:
Aerial Jump: 35.5
Air Acceleration: Base: 0.05, Additional: .08, Total: .13
Air Dodge: Intangibility: 3-28, Total: 34
Air Friction: 0.0085
Air Speed: 1.23
Crawl: Yes
Falling Speed: Max: 1.65, Fast: 2.64
Gravity: .14
Jumpsquat: 5
Rolling: Intangibility frames: 4-17, Max: 31
Running Speed: 2.64
Size: Between Ganondorf and Bowser
Spot Dodge: Frames: 2-17, Max: 27
Walking Speed: 1.01
Wall Cling: Yes
Wall Jump: Yes
Weight: 110

Playstyle:
Dehaka is a crafty stage-control/rushdown character who likes to hunt down his opponents. Dehaka’s mobility is actually high, allowing him to evade many attacks and close in for the kill. Dehaka’s strength truly lies in his ability to collect Essence, which is crucial to Dehaka’s playstyle. In spite of anything gained from Essence, Dehaka has some weaknesses he can’t evolve from: his size makes him a large target, and he is relatively average in attack power early game. His landing lag also leaves him open to attacks, giving this Hunter a weak point. His combo game is very high, whittling down opponents, but the low knockback also applies to his Smash Attacks and Throws, which are still quite decent.

Unique Mechanic: Essence Collection
Any Dehaka player worth their salt would know that his ability to collect Essence plays a heavy factor into his play style. When Dehaka collects Essence, he gains a buff based on the most proficient attribute of that character. When you gain Essence, the effects will be displayed on his UI based on the stat used.

Speedy characters like Sonic, Little Mac or Zero Suit Samus will give an increase in speed, indicated by a boot. Heavyweights like Snake, Bowser and King K. Rool will give an increase in knockback resistance, indicated by a stereotypical weight. Lightweight characters like Jigglypuff, Mewtwo and Squirtle will give increased movement while in the air, indicated by a wing. Balanced characters like Mario, Lucina and Pit will gain a simple increase in Attack power, indicated by Dehaka’s claws.

However, collecting Essence has its limits: it lasts for 10 seconds, and he doesn’t gain the changes made to the character through items such as the Mushroom and the Bunny Hood, and some other forms of stat changes which won’t affect the Essence collected. For example, you cannot evolve the buffs induced by Monado Arts or Deep Breathing. Collecting Essence also doesn’t give Dehaka exclusive mechanics such as Ryu’s inputs or Lucario’s Aura. Additionally, similarly to Kirby-on-Kirby inhaling, Dehaka-on-Dehaka collection will result in no improvement. Also, the buffs aren’t substantial, only increasing stats by 1.15x. You cannot gain a second effect of Essence while one is already active. Each bit of Essence collected will also heal Dehaka for 4% damage.

Specials:

Neutral-B: Devour: This is a command grab that only deals 9% damage on hit, the initial grab coming out on Frame 9. Dehaka grabs the opponent and bite the opponent. Devouring them give Dehakas Essence, which is described above. This move doesn’t have much range, at one Olimar’s worth, and is easy to predict and punish. The slash has some low knockback, making this a good combo starter. If this fails to land, Dehaka will be left open for combos, as the move has 33 frames of end lag, and if you use this while under the effects of Essence, the effect will be gone instantly.

Side-B: Scorching Breath: Dehaka breathes fire a la Bowser and Charizard. Unlike the latter two, the player can tilt down on the joystick to end the move by breathing the fire along the ground in a three-Bowser-wide line with Dehaka in the center. The move only does 2% damage per hit, but the ground breath deals 15% damage. It reaches as far as Bayonetta’s Side Smash and comes out at Frame 11. It has decent knockback, meaning decent combo potential with Dehaka, but it also has some long start-up at 21 frames, as opposed to just using it Bowser-style. The breath also degrades, exactly like Bowser and Charizard. End lag, however, is light, at 8 frames if not burning the ground, and even if you do, said end lag is at 11 frames.

Up-B: Leap: Dehaka leaps upwards into the air before plummeting downwards. The leap goes up to about 45% of the Limit Break Climhazzard, but risks SD’ing. If Dehaka lands on a player while using this, he will follow up with Devour. The player can tilt the joystick to redirect the direction Dehaka leaps. The landing lag of this move is about 13 frames due to its height and utility. The start-up of this move isn’t that large, however, coming out at Frame 9. Dehaka can also cancel out of it with mid-air by aerial dodging. The best way to use Leap is for evasion, as following up with Devour can be difficult due to Leap’s predictability.

Down-B: Intimidating Roar: Dehaka lets out a loud roar with a 2.5-Dedede-radius. All players within range will suffer from a 25% decrease in movement speed and a 10% decrease in attack speed for 15 seconds. Dehaka requires 18 frames to breathe inwards before releasing the roar instantly. The end lag from roaring is 12 frames. However, Intimidating Roar runs on a 20-second cooldown, leaving Dehaka open if he attempts to use it while in such a state. Intimidating Roar doesn’t stack when multiple Dehaka are on the battlefield.

Neutral Game:

Jab: Dehaka slashes sideways with his giant left claw, dealing 12% damage with low knockback, leading for it to be a good combo extender. This also comes out fast and recovers fast. The range of this move is about 20% of that of Corrin’s Side-Smash. The hitbox goes downwards, meaning that any airborne opponents in range will be spiked on hit. First hit comes out at Frame 9.

Dash Attack: Dehaka pounces atop the opponent for 8% damage. This deals hitstun when landing and doesn’t comes out quick, at 15 frames. The hitbox is located below Dehaka after he jumps at 1 Kirby in height. Has 8 frames of endlag.

Side-Tilt: Dehaka stabs in front of him with his tail. The tail has some long reach at 40% of Corrin’s Side Smash. This has some frames prior to the active hitbox similar to Bowser’s Side-Smash, but has less recovery frames. This deals 7% damage and has some tiny knockback for combos. Comes out at Frame 9 and has 11 frames of end lag.

Up-Tilt: Dehaka bites upwards. This has slight range upon use (Akin to Olimar’s Side-tilt). The bite itself is fast and deals 7% damage on hit, and has very little knockback, comes out at Frame 8 and recovers over 13 frames.

Down-Tilt: Dehaka stabs his tail into the ground directly in front of him, dealing 8% damage and burying on hit. Comes out at Frame 14 and has 16 frames of end lag, so this move is risky. The hitbox is about 50% Kirby’s size.

Smash Attacks:

Side Smash: Dehaka reels back and slashes overhead with his giant claws in a half-Corrin-Side-Smash long range. This smash attack deals 16% damage, but like all Smash Attacks in his set, only has average knockback, but is the bare minimum of a killing move, but Devour is more recommended here. The start-up on this is equal to Ryu’s Side Smash, but the end lag is much higher, at 21 frames.

Up Smash: Dehaka jabs his tail upwards. It has the range of Marth’s Up Smash, deals 13% damage and as less knockback as his own Side Smash but more than his Down Smash. The frames of end lag are akin to that of Bowser’s Up Smash. Comes out at Frame 15.

Down Smash: Dehaka sweeps the ground with his claws in a Marth-long radius. The range is 10% longer than Ryu’s Down Smash, deals 14% damage and slightly less knockback than Side Smash. The start-up is equal to Ryu’s Down Smash, but the end lag is akin to Dedede’s Side Smash. Doesn’t hit behind him.

Aerial Attacks:

Neutral Air: Dehaka swings his tail horizontally in front of him and behind him. The attack deals 3% damage on hit and some slight knockback for combo potential. This comes out at Frame 4 in front of him and Frame 9 behind him. Recovers over 9 frames. Reaches as far as Jigglypuff’s Down Smash.

Side Air: Dehaka lunges forward with his large claws outstretched. This has 40% the range of Corrin’s Side Smash, deals 6% damage and deals very little knockback. This comes out slightly slower than the rest of his normals, at Frame 11, but gives him horizontal momentum, giving Dehaka a sort of recovery boost. If using this to recover, the landing lag lasts for 12 frames.

Down Air: Dehaka plunges downwards in a 60 degree angle for 2.5 Ganondorfs. Anyone he hits along the way will be dragged along before the opponent(s) are launched. If Dehaka hits the ground with someone hit, they will be smashed into the ground. The plummet deals 5% damage and small knockback on release while slamming into the ground deals an additional 3% damage and slightly more knockback on impact. Landing lag is at 8 frames when not hitting someone, but at 14 frames when hitting someone. Comes out at Frame 9.

Back Air: Dehaka smashes the side of his face behind himself. Deals 5% damage and slightly less knockback on hit. This comes out at Frame 7, but recovers over 15 frames. The range of the back-air is equal to that of Mewtwo’s F-Air. The landing lag after using this move is at 12 frames.

Up Air: Dehaka swings his tail over himself, dealing 6% damage and very little knockback on hit. The range of this move is about 10% farther than Mewtwo’s U-Air and comes out and recovers similarly. Comes out at Frame 7.

Grabs:

Grab: Dehaka shoot his tongue out in the direction he is facing. This works similarly to those of ZSS, Yoshi and Lucas, reaching at just as much range.

Pummel: Dehaka slashes the opponent with his smaller right claws. Deals 2% damage and is 75% as fast as Ness’s pummel.

Front Throw: Dehaka headbutts the opponent, causing them to be released from his tongue. Deals 9% damage on hit and some decent knockback.

Down Throw: Dehaka stomps on the opponent, dealing 11% damage and 50% the knockback of his Side Smash.

Back Throw: Dehaka will whip his head backwards and toss them away. This is unique, as the player can hold the direction of the input to have Dehaka drag them along the ground for as long as the joystick is tilted. The player can still break free of the grab while being dragged, however. Deals 6% damage when flicking, but with each Dehaka-length moved, they take 1% damage.

Up Throw: Dehaka grabs the opponent with his giant left hand and throws them upwards, dealing 9% damage and 75% the knockback of his Side Smash.

Final Smash: Tyrannozor Swarm: Dehaka lets out a loud roar and two Primal Overlords appear and drop two Tyrannozors on the battlefield that hunt down Dehaka’s enemies. Their movement alone can deal 10% damage and a bit of knockback, they have a spit move that stuns enemies and deals 9% damage and a claw slash that deals 25% damage and is good for being used as a killing blow. The Primal Overlords will use one of the two latter attacks every 5 seconds and they move about as fast as Bowser’s run speed. The claw slash is fast, coming out at 6 frames, and their spit attack has a 2-Bowser range. They last for 15 seconds, then the same Primal Overlords will appear, load them back up and fly off with them.

NOTES: Clarified on range and frame data on some moves. Also completely changed Down tilt and refined the Essence mechanic. Additionally, adjusted damage on some moves.
 
Last edited:

Altais

Smash Champion
Joined
Nov 14, 2007
Messages
2,083
Location
Starbase, where no turtle has gone before.
Revali moveset complete. Hopefully it came out good. As usual, I would benefit more from critical feedback. [EDIT] Fixed some minor spelling errors and typos.

As for Rex, I am determined to have his moveset done tomorrow. I have his entire playstyle mapped in mine head; I just need to write it down. [EDIT] Darn it all. I promised mineself I would finish both of these movesets before E3, but it looks like Rex won't make it in time. At any rate, I'll still post mine completed moveset, even if he is revealed at E3.

Revali Moveset


- Index -
1). Summary
2). Specials
3). Jab & Dash
4). Tilts
5). Smashes
6). Aerials
7). Grab & Throws
8). Author's Notes


1). Summary:

In Zelda: Breath of the Wild, archery is all about patience and precision. You always want keep the enemy away from you, and know the best places from which to shoot and camp. Knowing your weapon and how your arrows react to gravity is also crucial. You always want to keep a cool head and a sharp eye--and have an ace up your sleeve. Otherwise, the enemy will rush you down before you see it coming. I know all this because I only use the bow and arrow in BOTW. Nothing else.​
Revali is a fairly tall character, just barely exceeding Mewtwo's height. Similar to Shulk, Revali always wears his bow over his back, and only holds it when shooting. When he's not moving, Revali stands erect with his hands behind his back. He walks in a stiff, formal manner, and only removes his hands from his back when dashing. When dashing, Revali spreads his wings and propels himself forward with wind.​
Among Ike, Samus, and himself, Revali is the second fastest runner. He has slightly lower walking speed than Palutena. Among Lucario, Cloud, and himself, Revali is the second fastest faller. He has roughly the same jump height as Pit, and has four air jumps, all of which are slightly higher than Pit's. He has slightly lower than average weight, making him easier to kill at higher percentages.​
Revali is an absolute terror from afar, but a pushover up close. He can be a real pain to get close to because of his powerful projectiles and high air mobility. But once the opponent catches him, it's hard for him to get away. And while the focus of his playstyle is rushing the enemy off-stage--and keeping them off stage--ironically Revali also faces imminent doom when he is off-stage, due to his recovery move having only one use until he lands.​


2). Specials:

• Up Special (Revali's Gale): A non-offensive move. Revali crouches, summons an updraft of wind, then leaps upward in a spiral. The vertical distance at which he travels is roughly the same as King Dedede's up-special. By default, Revali flies straight upward, but the angle of Revali's jump can be altered between 100 degrees and 80 degrees. At the peak of his jump, Revali enters a glide, arms and legs spread. During the glide, he can move back and forth freely--at half the speed of Palutena's Jump Glide. Revali will end the glide if he attacks or air dodges. After using this move, Revali will still be able to use his remaining jumps, which will also end the glide. Slightly less startup than Kind Dedede's up-special.​
Recovery aside, this move's main purpose is to get Revali in the air and away from the enemy, so he can barrage them arrows. Unlike most recovery moves, Revali's Gale can only be used once, until he touches the ground or grabs a ledge. So if Revali gets hit after using this move off-stage, he's all but screwed.​
• Neutral Special (Bomb Arrow): Revali draws his bow and readies three Bomb Arrows. Like Link's neutral special, the arrows will fly farther and faster the longer this move is charged. This move charges twice as fast as Link's neutral special, and will fire as soon as the special button is released. Similar to Captain Falcon, at the very start of the move, Revali can change directions if the player presses left/right in time. However, once he pulls the string, Revali cannot turn around. Revali can also aim his arrows up and down. However, he cannot aim any higher/lower than 75/-75 degrees. If this move is used in the air, then during the charge his descent will be slowed for exactly one second, giving the player time to aim.​
The arrows spread out as they travel, and like Link's arrows, are affected by gravity. This allows Revali to either fire directly at the enemy, or shoot the arrows upward for them to rain down on the enemy. The arrows explode upon impact, and have a splash effect. The radius of each explosion is roughly the same as Toon Link's bombs. Uncharged arrows will deal 8% damage, with the splash effect dealing 1%. Fully charged arrows deal 13% damage, with the splash effect dealing 3%. Uncharged arrows will have roughly the same knockback as Link's bombs, and charged arrows will have 1.5 times the knockback. The enemy is always knocked at 45 degrees, and the hitstun increases as their damage builds.​
This move does not have enough power to kill someone on-stage. Rather, its purpose is to rush the enemy off the stage--and keep them off the stage. It doesn't have much shield pressure, but shield pressure nonetheless. Ergo, if the enemy keeps shielding, it's going to break eventually. Quick startup, and little endlag.​
CAUTION: If Revali shoots too close, he will be caught in the explosion, too. And of course, this move can be reflected.​
• Side Special (Wind Dive): Revali tosses his bow off his back, grabs it with his talons, then dives in an arc, wings spread. The horizontal distance at which he travels is roughly the same as Pit's Power of Flight, and the trough of the arc is roughly Revali's height. The speed at which he flies is roughly the same as Ike's fully charged Quick Draw. The angle at which he dives can be lowered; however, the lower the dive, the lower the ascension when he reaches the trough of the dive. The lowest angle at which he can dive is 70 degrees. This move can only be used once, until Revali touches the ground. If Revali collides with a ledge, he will snap right onto it. If Revali hits the ground mid-descent, he will face-plant, leaving him open. Ergo, mastering this move is crucial.​
If Revali collides with an enemy, he will go right through them without stopping, dealing 12% damage. The enemy is also knocked in the air at 80 degrees. After this move has ended, Revali can still attack and use his remaining jumps, making it useful for mixups and mind games. This move deals high hitstun, giving Revali enough time to follow up with a Bomb Arrow.​
Recovery aside, this move's main purpose is to combat an enemy whom has a reflector. This move will go through any reflector, even Mario, Mewtwo, and Palutena's. The only way to counter this move is to shield it, or hit Revali at just the right time. Lastly, though this move is fast, it has a slow startup. So if the enemy sees it coming, they can simply jump over it. Ergo, it should not be used predictably.​
• Down Special (Korok Bomb): A counter move. With one hand behind his back, Revali holds out a pinwheel like a gentleman would a rose, bowing slightly with a smug smile. If the enemy attacks him whilst he is in this pose, he will disappear in a puff of leaves, and a Korok Balloon will take his place. At the same time, Revali reappears above the enemy (about half the vertical distance of his up-special) in a puff of leaves, shooting the balloon with a regular arrow. The balloon then explodes, launching the enemy at 45/135 degrees; depends on which direction they attacked him.​
This move functions differently if Revali is hit with a projectile. If hit with a projectile, Revali disappears in a puff of leaves, then a Korok Seed appears right in front of the enemy whom shot the projectile. Revali then reappears at the same position he was in, then shoots the seed, which explodes, launching the enemy at 45/135 degrees.​
Both versions of this move deal 18% damage. At the centre of Final Destination, both versions are guaranteed to kill a middleweight at 100%. Quick startup, and roughly the same duration as Greninja's counter.​
Like all counter moves, Korok Bomb should not be used predictably, as it can be punished with a grab. Instead, keep a sharp eye on the opponent and predict their next attack. You could also fake an opening, then trap them.​


3). Jab & Dash:

• Jab: With one hand behind his back and the other stretched forward, Revali conjures a sphere of wind blades, similar to Robin's wind jab. The size of the sphere is also roughly the same size as Robin's wind jab. Like Meta Knight's jab, this is a non-traditional jab that keeps going until the attack button is released. Once released, Revali knocks the enemy 35 degrees with a final wind blade. The knockback of this move is roughly 1/4 the knockback of Robin's wind jab.​
The hit rate of this move is roughly the same as Robin's wind jab. Each hit deals 1% damage, with the final hit dealing 2% damage. The cleaner the hit, the longer the enemy stays trapped. However, if held too long, Revali will start to be pushed backward.​
Unlike most jabs, this is not an aggressive move. Rather, its purpose is to trap advancing enemies, or to guard the ledge. Quick startup, but slight endlag, making it punishable if shielded.​
• Dash Attack: Shrouded in wind, Revali flies forward in a spiral, beak first. Travels slightly further and faster than Mega Man's dash attack. Any opponent he collides with will be trapped in the whirlwind. This move has a total of 8 hits. The first 7 hits deal 1% damage, and the final hit deals 3% damage. A total of 10% damage. Quick startup, but noticable endlag. Thus, it is punishable if shielded.​
Like Robin's dash attack, this move is not meant to be used aggressively. Instead, it's best used as a surprise attack, or as a punisher for dodges and laggy moves.​
This move was inspired by the spiral attack Keese perform in Zelda: Breath of the Wild.​


4). Tilts:

• Forward Tilt (Quick Shot): As the name suggests, Revali draws his bow and fires an arrow in a quick motion. The arrow he shoots is regular; non-elemental. Like Link's arrow, Revali's Quick Shot is affected by gravity. The speed and distance at which the arrow travels is roughly the same as Link's uncharged arrow, but it comes out instantly.​
This move deals 3.5% damage. It has very little knockback, even at higher percentages, but noticable hitstun.​
This move's main purpose is to keep an aggressive enemy at bay. If the player has good aim, it can also be used to harass someone off-stage. If the enemy is close enough when hit, Revali can follow up with a grab.​
In Zelda: Breath of the Wild, some bows come with special skills. Quick Shot is one of those skills. I decided to take inspiration from that.​
• Upward Tilt: Revali flicks one hand in the air, conjuring a miniature tornado in front of him. The size of the tornado is roughly Revali's height and waist length. Once it appears, it quickly disperses. Any opponent hit by the tornado is launched straight upwards a short distance. Quick startup, but slight endlag.​
This move deals 5% damage, and has high hitstun, giving Revali just enough time to follow up with a neutral-air.​
This move is best used as a surprise attack, as it is punishable if shielded. Beyond that, its main purpose is to set up the enemy for an aerial, effectively spacing them from Revali.​
• Downward Tilt: Revali viciously pecks the opponent. The opponent takes 8.5% damage, and is pushed back a short distance. This move has just enough hitstun for Revali to follow-up with a grab.​
This move's main purpose is not for spacing, so much as it is for setting up a grab. Since Revali is extremely vulnerable up close, I decided to make this an emergency move that would effectively get the opponent away from him.​


5). Smashes:

• Forward Smash (Ice Arrow): Revali fires a single Ice Arrow in a straight line. The arrow glows a bright blue when being charged, and looks like a comet when fired. As the arrow flies, it slowly descends. The longer the move is charged, the further the arrow goes--and of course, the faster. Uncharged, it flies roughly as fast and far as Link's fully charged arrow. Fully charged, it flies 1.3 times that speed. If the arrow connects, it will freeze the enemy solid whilst sending them spinning straight upward. How long they remain frozen depends on their damage percent. Like Ganon's f-smash, the angle of this move can be altered slightly. Uncharged, the Ice Arrow deals 10.5% damage. Fully charged, it deals 17.5% damage. On Final Destination, this move is guaranteed to Star-KO a middleweight at 100%.​
This move should NOT be used predictably, even at a distance--especially if the enemy is on the stage. Despite its kill power, it has low shield pressure, a slightly slow startup, and noticeable endlag. If the enemy sees this move coming, all they have to do is jump over Revali and punish him. Ergo, you should not use this move unless you're all but certain it will hit. This move is safest to use against an off-stage enemy, be it to kill or distract.​
• Upward Smash (Shock Arrow): Revali fires three Shock Arrows in the air, which rain down on the opponent. The arrows glow yellow while the move is being charged, and give off sparks when fired. Charging the smash increases the speed, height, and distance at which the arrows travel. However, the damage, knockback, and stun duration is always the same. Also, the distance between the arrows when they hit the ground will always be the same. On Final Destination, the distance between the arrows is one Olimar. When the arrows hit the ground, they give off a small blast radius that covers the distance between them. Uncharged arrows fly roughly as high as Battlefield's mid platform, landing right in front of Revali. Fully charged arrows fly 2.5 times that distance, landing on the opposite side of Final Destination. If the enemy is in the air or off the stage, they can only be stunned once, and will not be stunned again until they touch the ground or grab the ledge. The arrows deal 7.9% damage, knocking the enemy a short distance at 80 degrees.​
This move has various uses. You can harass someone off-stage. You can shark someone on an above platform. You can keep the enemy at bay. Or you can trick them into air dodging so you can punish them. If one of the Shock Arrows actually hit, then Revali will have just enough time to finish them with an Ice Arrow.​
• Downward Smash (Fire Arrow): Revali fires a single Fire Arrow at -15 degrees. The arrow glows a bright red as the move is being charged, and is shrouded in flame when fired. When the arrow hits the ground, it leaves behind a flame that damages the opponent multiple times before sending them flying at 75 degrees.​
The arrow itself deals 8.6% damage. The residual flame deals 1% up to three times, before exploding, dealing 3% damage. If the arrow hits, then the flame is guaranteed to hit. This move has just enough hitstun for Revali to follow up with a Bomb Arrow.​
This move's main purpose is to guard the ledge, though it can be used to punish a laggy move. If an enemy is recovering off-stage, Revali can shoot the arrow at the ledge, creating a fiery barrier. He can also shoot someone below the stage.​
In Zelda: Breath of the Wild, Fire Arrows leave behind a residual flame after being fired. Wanting to incorporate this, I immediately knew which Smash I wanted the Fire Arrow to be.​


6). Aerials:

• Neutral Aerial: A two-hit move. With his arms held out, Revali spins around once, slashing the enemy with blades of wind. During this move, Revali's descent will be halted. This move has roughly the same range and duration as Marth's n-air, but unlike Marth's n-air, it slashes at a flat angle. Both hits cover Revali from the front and back, creating a virtual chakram. In other words, any opponent next to Revali--be they in front or behind--is going to take both hits. Both hits deal 6.2% damage, knocking the enemy at zero degrees, and well out of melee range. Quick startup, and very little endlag. Until he uses another jump, this move will only halt Revali's descent once.​
This move has various uses. If an above enemy is open, then Revali can quickly jump and n-air them. If he is recovering off-stage, he can use this move to fend off the enemy, after which he can bombard them with arrows. Lastly, if he is landing near an approaching enemy, he can n-air them just before he hits the ground. Overall an all-purpose defensive move.​
This move was inspired by a cutscene in Zelda: Breath of the Wild, when Link frees Revali's spirit, along with his Divine Beast, Medoh.​
• Forward Aerial: Revali spreads both wings, then flaps them forward, creating a gust of wind that blows the enemy away. The gust of wind travels roughly the same speed and distance as Zero Suit Samus's neutral special, and covers the same vertical distance as Samus's fully charged laser. Revali's wings deal 2% non-flinch damage, while the gust of wind deals absolutely no damage. Similar to Corrin's back-air, Revali will be blown backward slightly when using this move. Slightly slow startup.​
This move's main purpose to keep an enemy off-stage. After the enemy is blown away, Revali can continue rushing them down with his Bomb Arrows. This move can also be used to condition the opponent, as they would naturally expect the move when recovering.​
This move was inspired by the Korok Leaf from Zelda: Breath of the Wild. When swung, the Korok Leaf creates a gust of wind. Very useful for collecting fruit from trees.​
• Backward Aerial: Revali's only direct, reliable kill move. Revali leans forward, slashing the enemy behind him with his talons. This move has very low range, but is rewarding if landed. Deals 12.5% damage, knocking the enemy 15 degrees. At the edge of Final Destination, this move is guaranteed to kill a middleweight at 100% damage. Quick startup.​
Other than killing, this move doesn't have many uses. Due to its low range, landing it requires precision. It can be used as a get-away-from-me move, but in that regard his neutral air is the better choice.​
• Upward Aerial: Revali raises one arm, conjuring a burst of wind that propels the enemy upward. The burst of wind travels roughly as far as Game & Watch's up-air, dealing 3% damage. Quick startup.​
Unlike Mega Man and Game & Watch's up-air, Revali's doesn't have enough power to Star-KO--unless he and the enemy are really high in the air. Instead, its main purpose is to fend off an enemy whom is preparing the Meteor-KO him. It can also be used to put distance between him and the enemy. For instance, on Battlefield, Revali can blow someone above him in the air, then harass them with Shock Arrows.​
• Downward Aerial: Leaning forward, Revali spins around once, swinging one arm, then the other. Each arm shoots a gust of wind at -45 degrees. Revali's arms both deal 1% non-flinch damage, while the gusts of wind deal absolutely no damage, gently pushing the enemy downward. The gusts of wind are roughly the same size as Robin's Elwind, and travel at roughly the same speed, but 1/3 the distance. Quick startup, very little endlag.​
Obviously, this move's main use is to harass an off-stage enemy. However, unlike Gustbellows, it doesn't have enough power to score a cheap KO, unless the enemy has a predictable recovery. Instead, it's better off used as a conditioning tool. For instance, if the enemy has a good recovery, Revali can use this move to stall them long enough to get away from them. Or he can push them far enough so that when they use their up-special, he can anticipate their direction and shoot them with a Bomb Arrow.​
Originally, the gusts of wind went straight downward, but I thought that would be overpowered, as he could simply jump above the enemy and all but spike them. Instead, I decided to make them diagonal, since Revali is safest when he has ground below him.​


7). Grab & Throws:

• Grab: Revali flicks one hand toward the opponent, the other hand behind his back. If the blow connects, the enemy will be trapped in a miniature whirlwind. The range of this grab is roughly the same as Rosalina's. Slightly slow startup, and noticeable endlag. As a result, this grab is best used as a punisher or surprise attack. The main purpose of Revali's grab game is not to kill or deal damage, but rather to get the opponent away from him.​
• Pummel: Revali slices the opponent with blades of wind. Roughly the same hit rate as Robin's pummel. Deals 3% damage.​
• Forward Throw: With a wave of his hand, Revali sends the enemy flying backward at 10 degrees. Slightly higher knockback than Robin's forward throw. This move will have just enough hitstun for Revali to follow up with a Bomb Arrow. Deals 11% damage. This move will have higher hitstun, the higher the enemy's damage percent. At 100% damage, Revali has a guaranteed Ice Arrow kill.​
• Backward Throw: With his other hand still behind his back, Revali stiffly turns around, throwing the opponent at 40 degrees. Slightly less knockback as Robin's back throw. The enemy will have just enough hitstun for Revali to follow up with a properly aimed Bomb Arrow. Deals 12% damage. This move is best used at the ledge, as it gets the opponent off the stage, allowing Revali to bombard them with arrows.​
• Upward Throw: With a flick of his wrist, Revali dismissively launches the enemy high in the air with a burst of wind. Roughly the same knockback as Robin's up-throw. Afterwards, he can follow up with Shock Arrow. Depending on the enemy's damage, speed, and weight, Shock Arrow is almost guaranteed to hit. Deals 10% damage.​
• Downward Throw: With a stiff swing of his arm, Revali slams the enemy into the ground with a burst of wind. The enemy then bounces upward at 80 degrees. Roughly the same knockback as Robin's down-throw. Afterwards, Revali can follow up with a N-air. Deals 9% damage.​


8). Author's Notes:

• Revali is hands down mine most wanted Zelda newcomer, (1) because I like his personality, (2) I'm an ornithomaniac, and (3) we've yet to have a character in Smash whom features an archery-based playstyle. Despite this, however, I struggled to devise a clear playstyle. After watching his cutscene in the Champion's Ballad, however, I immediately knew how I wanted him to play. Originally, he used regular arrows for his Neutral Special, but after watching the cutscene, I thought Bomb Arrows would be much more interesting.​
• For Revali's down-special, I initially thought of "Arrow Swap", in which he changes the arrows for his Neutral Special. But I found that to be a waste of a move. Unlike Shulk's Monado Arts, which affect his entire playstyle, "Arrow Swap" would only affect one move. Furthermore, the Shock Arrows and Ice Arrows would make his N-Special broken, as he could simply stun/freeze the enemy indefinitely by repeatedly raining arrows on them. Then again, I could have made it so that the enemy doesn't get stunned/frozen again until they touch the ground. Nevertheless, I decided to incorporate the Fire, Ice, and Shock arrows in Revali's Smashes.​
• I struggled to think of a unique move for Revali's down-special. Since Revali is basically a camping-based fighter, I immediately decided it would be evasion-based. I initially devised something similar to Meta Knight's dimensional cape--only difference being Revali used wind--but thought that was unoriginal. I then thought of Greninja's counter move, Substitute, and immediately the Korok Balloons popped in mine head. In Zelda: Breath of the Wild, Korok Balloons and Korok Seeds are things you shoot to catch a hiding Korok. I decided to incorporate those, and give them an explosive property. The way I designed the move, it allows Revali not only to get away from the enemy, but also to score a cheap shot.​
• To keep things fresh, from the beginning I decided that Revali's side special would not involve arrows. Instead, I wanted a move that would counter a reflector-happy opponent. I took inspiration from his Champion's Ballad cutscene.​
• I debated for the longest time whether Revali should have multiple air-jumps, or just one. Since Falco has one of the highest ground jumps, I didn't want to take that away from him. The core of Revali's playstyle is getting in the air, then rushing the enemy off-stage with his Bomb Arrows. Taking this into account, it would be much easier for Revali to switch sniping positions as well as change directions, were he able to make multiple jumps. So in the end, I gave Revali four air jumps. Since Revali's Gale already covers a ton of vertical distance, I decided to give his air jumps only a small amount of vertical distance.​
• I considered incorporating the Stamina Bar in his n-special, but decided against it, as I wanted this moveset to have more freedom. Instead, the duration of Revali's slow motion n-special in the air is reset every time he air-jumps.​
• I had a hard time deciding what his aerials would be, especially the up and down aerials. Since Revali is a camping-based fighter, I decided from the beginning that they would not be offensive moves, but defensive spacing tools. For the most part, I took inspiration from his cutscenes, though the forward and down air were inspired by the Korok Leaf.​
 
Last edited:

UserShadow7989

Smash Journeyman
Joined
Aug 13, 2007
Messages
315
I couldn't decide what to enter for ForwardArrow ForwardArrow 's Challenge of Ambition, so I decided to be ambitious to a fault and enter both concepts, one of which is technically three sets on its own.

This totally isn't a horrible idea.

Chief Researcher Leanne, a Pokemon Trainer OC born from a contest winner of old,
and
Bubble Witch Marin, the original "Challenge" winner and the start of a setting's worth of potential.
 

Professor Lexicovermis

Smash Journeyman
Joined
Oct 27, 2015
Messages
273
Location
Pop Star
ForwardArrow ForwardArrow , I accept your challenge! For the Trial of Ambition, I submit...


Jack the Slayer

Slayer's Stats:

Height: Marth/Pikachu*
Weight: Luigi
Walk Speed: Olimar
Run Speed: Meta Knight
Air Speed: Megaman

Jack is a tall, lanky fellow, standing even with the blue-haired prettyboy himself... usually. When dashing or crouching, Jack drops to an insectile crawling stance that dramatically reduces his height. This also means his normally sluggish ground speed jumps up alarmingly when he's running. He moves at a fair clip through the air as well. His traction is good thanks to him using his knives to pull himself along while running. His fall speed is unusually slow for his weight, and he has frighteningly high jumps.

Main Mechanic: Power Stones

Hailing from Power Stone, it's only natural that Jack brings the titular gemstone MacGuffins to Smash with him! Whenever Jack spawns or respawns, he begins with a single Power Stone in his possession, symbolized by a small red gem hovering above his head at all times. On its own, his Stone is useless. Foes may knock Jack's Stone out of his possession by meeting one of the following criteria: landing an attack that deals 12% or more, landing a Grab and throwing him, OR landing an attack that deals at least tumbling knockback after dealing a cumulative 20% to him within the last 3 seconds. When the Stone is knocked loose, it will fly off with half the knockback Jack took, never going off ledges and flying in the same direction he was launched. If Jack touches the Stone at all, he will instantly pick it back up with no lag. If the FOE touches the Stone, it will enter their possession; it can be knocked loose with the same rules as knocking it out of Jack, but he also has some attacks that will always knock a Power Stone out regardless of prerequisites.

Power Stones are useless alone... but if one can obtain three of them, amazing things happen. Luckily, meeting the criteria to liberate a Power Stone from any foe will cause one to manifest from their body! There ARE a few catches to this. Only 3 Power Stones can exist at a time, regardless of whose inventory they are in. What this ultimately means is that Jack can only get all three Power Stones by making sure not a single one rests in his foes' hands.

Once Jack gets all three, he transforms into a larger, more powerful form: the Mad Clown. As Mad Clown, he gets much taller (nearly double his usual height) and heavier (Dedede), and gains access to a new set of Specials. A yellow meter above his head slowly empties while in this form, transforming him back into Jack after 7 seconds. Using Mad Clown's specials burns a little of this meter, and it cannot be refilled. Once Jack returns to normal, all his Power Stones vanish. He'll have to wait for the usual "phantom" Stone hunt to begin anew if he wants to become Mad Clown again...

If Jack's foe manages to get all three Power Stones... well, they won't Power Change like he does (unless they're a Power Stone set that has the same mechanics, that is). In fact, against 99% of sets, Jack's Power Stones are actually functionally useless to them! That said, it does behoove fighters to nab and hoard the Stones purely to keep them from Jack.
 

lordvaati

Smash Master
Joined
Jul 7, 2006
Messages
3,148
Location
Seattle, WA
Switch FC
SW-4918-2392-4599
Does the new official stance on final smashes in the series proper(they are now all more streamlined, quicker and cinematic) effect the criteria of FS ideas now?
 

MasterWarlord

Smash Champion
Joined
Aug 24, 2008
Messages
2,911
THE MOUNTAIN


The Mountain is a member of the original seven devil chojin (superhumans) from Kinnikuman/Ultimate Muscle. He is essentially a man sized sentient mountain with arms, legs, and eyes, like many other "object men" characters in the series. Believe it or not, these object men somehow manage to reproduce and the series has a somewhat deep lore, with there being a second series featuring their children.

Everybody in Kinnikuman has very wacky superpowers that they somehow use in "wrestling", but the Mountain is a lot simpler and more down to earth. His primary superpower is being really, really, really heavy, which he uses to crush people. Beyond that, he's just a sumo wrestler trapped in the body of a mountain. He did eventually attain some more superpowers through popular fan-games that have essentially become canon at this point, essentially turning him from "The Mountain" to "The Volcano."

The Mountain is so notorious in his use of heavyweight cliches that his primary attempt to kill a protagonist involved a suicide kill. He dragged down somebody down a giant canyon with him. This protagonist generically survived the fall with no explanation, but the Mountain, who's primary gimmick is being insanely slow and durable, did not. The Mountain died from this, and has stayed dead for most of the Kinnikuman continuity.

However, the Mountain did not stay dead. He has come back numerous times as a ghost, alongside his other fallen akuma chojin. Most of the time when the ghosts come back, they very rarely accomplish much of anything as they are treated as one collective entity, since they already got their time in the spotlight while alive. The Mountain is different, though, being featured a lot more prominently than the rest when he is undead. He manages to do so well that the surviving leaders of the devil chojin faction even consider reviving him outright as he tries to drag people down into hell with him, but that sadly does not come to pass.

STATISTICS
Weight: 12.5/10 (160 units, 1st over Bowser's 130 units)
Size: 10/10 (Bowser)
Fast Falling Speed: 10/10 (3.2 units, 2nd behind Fox)
Traction: 9/10
First Jump Height: 8/10 (40 units, tied with Rosalina for 6th)
Second Jump Height: 7.5/10 (40 units, tied with Sheik and Rosalina for 9th)
Aerial Control: 5/10
Aerial Speed: 4.5/10 (1 unit, tied at 31st with Bowser and Rosalina)
Ground Movement: 0.8/10 (1.1 units)

The Mountain is a mighty glacier who takes being very strong and very slow to extremes, at least on the surface. Thankfully, you are not expected to play with a character quite this miserably slow, as the Mountain does have ways of increasing his pathetic speed. Even with his base statistics, his aerial stats are acceptably average, with the one big outlier being his falling speed, which is comparable to Dedede. While the Mountain doesn't have anywhere near Dedede's aerial prowess, his stats are competent enough he can still use his aerials to decent success on the stage.

The Mountain is so heavy that at very low percentages, he is not total combo fodder. Moves will do so incredibly little knockback to the Mountain at fresh percents that some moves can even become unsafe on hit for foes sometimes. Once Mountain has got 30% on him or so, he's just as vulnerable to combos as any other super heavyweight, though, if not much moreso due to his high falling speed. This is similar to Giga Bowser in Melee.

SPECIALS

UP SPECIAL - GHOST OF THE MOUNTAIN


The Mountain's ghost comes up out of his body, appearing as a transparent version of himself with a dark blue tint. His body is left behind as a husk, the red eyes on the body fading out as the Mountain's body becomes nothing more than a literal mountain. As a ghost, the Mountain has three extra midair jumps that go 25 units up (comparable to a Kirby jump), while he keeps his original double jump that goes up 40 units. The Mountain now spookily glides along the ground for his dash similar to Cloud and Mewtwo when he is a ghost, boosting it up significantly to 1.9 units while his air speed goes to 1.1 units with high air acceleration and greatly lowered falling speed comparable to Jigglypuff. His weight is greatly decreased to be lower than even Jigglypuff's at only 60 units, though.

Mountain can stay out of his body for up to 5 seconds, after which his body will teleport to the location of his ghost and his ghost will reposses said body. He can input Up Special before that to make this occur sooner if he doesn't want to wait that long. While Mountain is separate from his body, both Mountain and his body can take damage and knockback, sharing the same percentage. If the ghost dies, Mountain dies on the spot. If the body dies, Mountain will die when his ghost would normally expire and he has no body to return to.

While the lag on this move isn't unbearable, there is enough on either end that you want to make sure Mountain is safe on the start and end of it to get the juicy benefits of a faster Mountain. Mountain can safely cover his starting lag though, because Mountain can use this move during other attacks, and even while in hitstun. If Mountain exits his body while it is in the process of performing some kind of attack, the body will finish the attack before it goes totally limp. This is more helpful with the Mountain's large arsenal of slower moves, giving the ghost more time to play off of the body's slow attack by poking them into it with a faster attack. Mountain cannot leave his body when he is hanging on the ledge, in prone, while dodging/shielding, or in any kind of unique stun state like a pitfall or shield break.

If Mountain leaves his body during the air, the body will be surrounded by a blue ghostly aura until it touches the ground, assuming it wasn't performing an attack when the ghost left the body. This aura will greatly slow the body's falling speed down to a floaty 1.3 units, equal to Samus' falling speed, 50th in SSB4. This gives the ghost more time to recover to the stage before the body just dies before he can recover. The body can't defend itself with an attack if you do this, but that's also a good thing. You wouldn't want this lower falling speed to interfere with it performing a stall then fall or something.


Ghost Mountain has a unique crouch that has him only poke his head up out of the ground with the rest of his body phased inside of it, which is very spooky. Mountain will be making heavy use of this as an evasive technique given how much he doesn't want the ghost to be hit. With his blue coloring, Mountain's head practically resembles a shark fin poking out the stage here, and he also has the ability to crawl from this state. Mountain will have much worse ending lag than usual if his body comes back to him while he's using the crouch, so he can't abuse this too much. Ghost Mountain cannot use this crouch on drop through platforms because his entire body would still be vulnerable underneath it and kill the point of the crouch in the first place. Ghost Mountain will get his regular, physical crouch if he uses this move on a drop through platform.

NEUTRAL SPECIAL - VOLCANO


The Mountain enters a stereotypical constipated charging pose as he gets a very angry expression on his eyes and violently shakes. As he charges, his body becomes more and more red, starting from the bottom and going to the top. This is a storeable charge move that takes as long to charge as Giant Punch and Charge Shot, and Mountain will keep his red tint based off the move's charge. When the charge is released, the Mountain blows his top as he shoots a stream of lava forwards. The lava has the range of 0.3-1.2 platforms based off charge, all shooting out in front of the Mountain at once. The lava obeys gravity but will evaporate if it doesn't hit ground pretty quickly, so it doesn't make an especially strong on-stage ledgeguard. The lava deals 15% and high knockback in the direction Mountain fired the lava that kills at 130% if Mountain hits with the move at point blank, though can kill as early as 95% if he hits with the move at the tip of the move's range at full charge. Power does not change with charge, but the actual attack is a bit slower to come out than Giant Punch or Charge Shot.

When the lava hits the stage, it will stay on it for an additional second during which time any foe who walks over it will take 0.1% per frame they stand on it, totaling to 6% if they stand on it for the full second. After this, the lava will harden and become harmless, remaining for 5 seconds. This very, very slightly alters the terrain of the stage, creating a very small "hill" about a quarter of Kirby's height over where the lava was shot.

If the hardened lava is hit by any non projectile attack that does at least 6%, the portion of it that was hit will shatter. Projectiles and moves that do less than 6% do not interact with the hardened lava in any way, so the hardened lava will not block projectiles. If a character takes knockback through it, the hardened lava will shatter and deal 1% to the foe per every 0.1 platforms they are knocked through it, meaning this can be up to 12% if you hit the foe through a fully charged section of hardened lava. In addition to extra damage, this will reduce the foe's knockback slightly at they go through it. This will rarely stop moves from killing that would otherwise kill, at most making moves kill 10% later if you knock them through a whole 1.2 platforms of the rubble. This more strongly affects moves that already did weak knockback, enabling better combos.

Foes can potentially use this effect against Mountain, but he takes zero damage from the rubble going up against his rocky body, so this is used for combos and combos only. Because of Mountain's immense weight in his main body, the effects on this will be more exaggerated on him specifically, pushing his durability to the limit or enabling him to evade combos at super low percents slightly longer.

Mountain's body and ghost do not share the same charge for this move. You can't charge up the body's neutral special then fire it as the ghost. However, this means you can potentially have two fully loaded neutral specials ready to go at the same time. In addition, you can leave your body while you've set it to start charging up to enable you to do other things while it's charging, or potentially just charge both Neutral Specials at the same time if the coast is clear. The body will not fire the Neutral Special when it reaches full charge since that takes another input though, going limp at that point.

It is possible to stack more lava on top of each other to double the damage foes take per second by standing on it, as well as increase the height of the terrain alteration to half of Kirby's height for when the lava hardens. If Mountain fires lava on top of hardened lava, it will melt the hardened lava back into liquid form again, enabling him to stack hardened lava on top of each other without even having to use his ghost.

Stacked layers of hardened lava are a bit more durable, requiring foes to use attacks that are 12% or stronger to destroy it all in one go, with attacks that deal 6% or more only destroying one layer. Knocking a character through it will still only destroy one layer of it at a time, meaning they won't be taking any more damage from it than usual.

When the lava first hardens, any foe who was standing on it will become unable to move until they destroy it or the hardened lava naturally expires. They can still attack and perform all actions other than moving/jumping. Any attack that involves the bottom of the foe's model (usually their feet) in any way will count as an attack that does at least 6% even if it does not normally. With multiple layers, it can potentially take foes a second attack to free themselves, giving Mountain a chance to reignite the lava underneath them with a fresh coat of it.

SIDE SPECIAL - MOUNTAIN SLAM

Mountain reaches forward to grab the foe in a move very similar to Bowser's Side Special. If he succeeds, he jumps up into the air while holding the foe against his body, spinning around before he ends it by crushing the foe underneath his girth, dealing 17% and knockback that kills at 110% once he slams down on the stage. Like Bowser, Mountain can move around during his spinning in the air, and the foe also has some control over where they land. However, this is a lot more rigged in Mountain's favor, as Mountain must have 51% more damage than the foe for the foe to be the one who has control over where they land during the move.

This is really powerful, but the foe can button mash out of this move so suicide kills are basically impossible. Foes can begin button mashing towards their escape as soon as they are grabbed, but they will never be allowed to escape until enough time passes that Mountain would naturally slam them onto the stage assuming the terrain was leveled out, making it only useful to avoid suicides in most cases. If the foe escapes, Mountain won't keep falling and will get out of lag so he won't just die, but he will be at a frame disadvantage and likely be punished, possibly spiked.

This is one of the best moves for Mountain to exit his body during once he's hit with it. Ideally, Mountain can leave his body during the apex of the body's jump so that he will be high in the air, enabling him to combo the foe with his ghost once the foe takes the primarily vertical knockback of the body slamming it against the stage, most obviously with one of his stall then falls.

The issue is that once Mountain leaves his body, the foe has complete control over where they land as they tussel with the now lifeless body. Mountain now has to predict where the foe is going to go, meaning the combo is not guaranteed anymore. If he leaves earlier, he has more time to position himself/can be higher in the air, but if he leaves later the foe has less time to react. Aside from the foe dodging the ghost's followup, Mountain also has to be careful of the foe voluntarily suiciding with Mountain's body if he's ahead. If Mountain isn't in his body, the foe is also allowed to escape from the grab at any time, though Mountain can potentially still predict the escape and combo into that instead, as there are still a few "grab release" frames where the foe will be in lag.

If attempting to suicide with this move, just doing it mindlessly how Bowser does it will never get you anywhere. If Mountain leaves his body as the foe is off-stage, though, he can have a frame advanatage instead of a frame disadvantage like he normally does, and suicidally use gimping moves as he goes down after the foe. It is possible to even use this to begin a gimping session and to try to survive, but some of Mountain's best options are suicidally using stall then falls or just trying to hit them with a second side special as the ghost when they're already far off-stage. Of course, the regrab timer means he can't just grab them again immediately, but ghost Mountain has the jumps to hit them with a weaker move to get rid of it first. If Mountain is at such a high percentage he is seriously considering suicide kills anyway, his terrible ghost weight shouldn't be a big problem.

Ghost Mountain can grab his body with this move if he so pleases, not doing any damage to it over the course of the move and the body taking no knockback upon being slammed down on the stage. Like Bowser's Side Special, this move has a powerful hitbox against outside foes, and this version is no exception, dealing 13% and knockback that kills at 120% to outside foes. This is still very telegraphed to try to hit somebody with and has plenty of ending lag, so it might not seem like there's a lot of point to it. The main thing this is useful for is so the ghost can save his body from being knocked off-stage without having to use Up Special to go back into it and experiencing lag, as well as interrupt it out of a stall then fall if needed. All the while, you're quite a threatening hitbox during it, making this a rather hard to punish technique.

AERIAL DOWN SPECIAL - MOUNTAIN DROP


Mountain extends out his limbs as he goes to plummet towards the ground, complete with piles of both starting and ending lag. Mountain will stall in the air for quite a long time to make this the overall slowest stall than fall in the game, with the landing lag still being just as long as Bowser's Down Special to boot. In exchange, the process of Mountain actually falling, once it finally starts, is incredibly fast, falling at double the rate of Sonic's dashing speed, and during that brief time Mountain is outright invulnerable. Anybody who is hit by him as he falls down will be dealt 24% and diagonal knockback that kills at 70% for an incredibly powerful attack. Unlike Bowser's move, this cannot shatter full health shields and cannot be canceled by grabbing the ledge. This is also strictly an aerial, and Bowser primarily hits people with the grounded version of the move.

The main thing this move has going for it is leaving your body during the attack. The very long starting lag can work surprisingly well for enabling Mountain to use this to his advantage, as Mountain stalls in the air during that time, ideally leaving his hurtbox out of harm's way while the ghost goes out and hits the foe into the body. If you're feeling really cocky, you can try to hit the foe's dodge attempt on a mountain drop with a second ghostly mountain drop, but will be leaving yourself insanely vulnerable upon a failure.

The most powerful thing you can do with this move is to dump your body off-stage, then use up special to teleport it back on the stage where the ghost is, effectively using the dropped body as an incredibly powerful projectile. While dumping lava off-stage from Neutral Special isn't that fantastic by itself and means you get no hardened lava out of it, dumping the ghost's lava charge after dumping your body is a very powerful edgeguarding combination. You have to act on this very quickly in a very predictable manner given how quickly the body drops, but there's not a ton foes can do to react in an off-stage situation sometimes. Just be careful you're not prevented from saving your body in time, as teleporting the body back isn't exactly lagless either.

GROUNDED DOWN SPECIAL - EARTHQUAKE

The Mountain does a sumo stomp, causing the ground 0.75-2 platforms to either side of him to shake, the range maxing out after 25 frames of unstoreable charge. This creates an initial hitbox that does 11% and completely vertical knockback that kills at 160%. After a couple frames of that hitbox, the ground that was hit will still keep shaking for an additional second, which will cause any foes who are standing on that ground to have their movement statistics halved and their jumpsquats increased by 3 frames as long as they remain on that terrain. This is a very severe effect, but it only lasts for a single second, and Mountain will be in ending lag for nearly half the time it's going anyway. Obviously Mountain's ghost can play off of it, and will now look like a speed demon next to the much slower foe. If ghost Mountain also uses Earthquake at the same time, this will stack even further to make the grounded movement of foes quartered and add another 3 jumpsquat frames, but the use of that is a lot more limited when Mountain can't play off of it very well.

If this attack hits hardened lava, it will shatter all of it regardless of however many layers are on it, shooting it up into the air and turning it into a hitbox. The lava will be shot up a Ganondorf into the air as the particles from the rubble disintegrate over the course of a second, dealing several flinching hits that totals to 6% per layer of hardened lava that was just destroyed. After the first 20 frames or so, it will be safe for even the tallest of foes to cross under the debris that was just shot up into the air, but they will be doing so very slowly because of the shaking ground. This removes the obvious answer of casually jumping over the shaking ground, making this a very powerful defensive move. With Mountain's ghost, it can be used offensively to effectively trap the foe and give ghost Mountain a massive advantage in neutral, which he's going to need given how badly ghost Mountain doesn't want to get hit.

SMASHES

FORWARD SMASH - THE BOULDER

Mountain rips a Wario sized boulder out of the stage and chucks it forwards with some difficulty. The boulder goes the same distance as Megaman's fsmash based off charge, and deals 14-19.6% with knockback that kills at 170-145% on contact, so it is not terribly impressive.

The boulder rolls forwards at a slow enough pace that even without his ghost, Mountain will be out of lag before it totally vanishes, with most of the lag being on the start rather than the ending. With his ghost, Mountain can outrun a boulder he produced in ghost form, and can do so very easily for one thrown by the main body, enabling him to use the boulder to force a dodge into his attack or the other way around. It's very important Mountain applies enough pressure to get foes to try to dodge rather than knock him out of it, as his memetically low ghost weight makes the idea of any kind of trade very scary for him.

The boulder will shatter portions of hardened lava, but not all of it like a normal attack would do. Instead, as the boulder rolls over it, portions of it will shatter under its weight rather than the whole of it, removing a proportionate amount of durability/power when shattered/etc. If the boulder starts on level ground and rolls onto the hardened lava, it will effectively make a ramp for itself as its movement decreases, then roll back down the side of it, going 1.2X the distance it was initially rolled by Mountain. The boulder's power will very slightly go up and down based off the speed by 0.9/1.1X at maximum, but the relevant thing here is just getting the hitbox to linger for longer. If the boulder ever comes to a complete stop, it vanishes on the spot.

If Mountain is lucky enough to have two piles of hardened lava to either side of him when he uses the fsmash, the boulder can potentially roll back and forth twice, but by the time it rolls back where it was originally going a third time there will not be enough rubble remaining to stop the boulder with only a single layer. Elaborate set-ups are possible, but unless Mountain is tediously tending to the hardened lava it only lasts for 5 seconds.

Alternatively, if Mountain starts the move already standing on top of the hardened lava, it will be rolling down the small slope which will slightly increase the range and speed of the move rather than making the boulder linger around longer. This has its own use, but the most interesting thing here is Mountain's ability to mix and match between these two options by destroying parts of the runway himself. The easiest way to do it is by turning the hardened lava back into boiling hot liquid lava, and is something regular Mountain can more feasibly do given the high range of Neutral Special. A foe who predicted the boulder to roll back can now potentially be in for trouble when the terrain previously blocking the boulder's path suddenly is gone, causing it to launch off of it with a small "ramp" effect. Launching the foe through the debris is another obvious way to go about doing this, potentially altering the boulder's trajectory to combo into the hit that sent the foe through the debris when it would not have done so otherwise.

UP SMASH - BOULDER SMASH

The Mountain again rips a boulder up out of the stage like in the fsmash, but instead of rolling it forwards, this time mightily hoists it up above his head with both hands. After this point, the mountain crouches down before thrusting his head upwards to shatter the boulder for a very powerful smash attack, dealing 22-30.8% and knockback that kills at 90-60%. This is a laggy smash as you would expect, though Mountain's head at least has superarmor for most of the move, and his entire body has superarmor for a couple frames when the hitbox comes out. Most of the lag of the move is picking up the boulder, but that has a very weak hitbox on it that does a small 3% and weak set knockback that will pop foes up into the main hit of the boulder being shattered. It's a lot easier to hit with that hitbox, though the large disjointed hitbox and superarmor on Mountain's head means it's a lot safer to use on aerial enemies than grounded enemies, so it's not just garbage there or anything.

Most of the lag of the move is in picking up the boulder, but there's no need to bother with going through all of that lag if there's a perfectly good boulder in front of him. Mountain can catch a boulder in front of him with usmash before destroying it, making this move much, much faster. This will happen through use of the ghost most of the time, though regular Mountain can do this by chucking an fsmash boulder at hardened lava and having it roll back down to him. Still, most of the heavy lifting here is going to be on the ghost, and it makes altering the trajectories and speed of the boulder a lot more important when you can sic this powerful hitbox on the foe at any time if everything lines up correctly. Ghost Mountain also enjoys the ability to threaten with superarmor by being next to a boulder, making his low weight irrelevant.

DOWN SMASH - AVALANCHE

The Mountain places both of his hands on his head as he shakes violently during the charge, then extends his arms fully to his sides upon releasing said charge. For the attack, Mountain sheds pieces of stone from his rocky body, shooting them outwards a small distance from himself. This includes his entire body, with some stones getting shot out through his clothes and leaving holes in it. This creates a multihit hitbox around Mountain that totals to 15-21%, with the last hit dealing diagonal knockback that kills at 160-135%. The move is decently fast to come out, and also has superarmor if Mountain chooses to charge the smash. While it has no superarmor with no charge, Mountain's superarmor steadily increases with charge to the point he'll have superarmor against attacks that do 20% or less at full charge during this attack.

If Mountain is hit during this attack with a move that does not break his superarmor, it will trigger a counter effect. This will lengthen the attack's duration slightly and increase the range of the attack, as the attack that hit the Mountain will now cause more rock to get shot out from Mountain's body. The damage of the attack that hit him will be added to the move's power directly, and very slightly boost the power of the knockback. This can theoretically trigger multiple times within one dsmash.

During the dsmash, Mountain becomes vulnerable to friendly fire from allies and his own moveset, including the ghost. This enables Mountain to trigger his own counter to massively boost his dsmash power at the cost of damaging himself. Mountain is so heavy that depending on his percentage, he may not mind taking on the extra damage, particularly if it will get him past a certain percentage where he's obnoxiously vulnerable to a certain combo the foe has. Aside from the ghost hitting the body, Mountain can also roll a boulder towards a hardened lava slope to make it roll back down at him and hit him. When you have the option of both the dsmash and usmash when a boulder is coming towards Mountain, it's certainly a situation a foe will panic in, and something the ghost can easily capitalize on if it's not out already. Another very simple technique is just standing on boiling lava you just shot out. While the power boost won't be too significant from just standing on lava, the increased duration/range of the move will catch a lot of people out.

If Mountain leaves his body while charging a smash, the body will charge the smash fully before performing the attack. It can oftentimes be better to get to the point with some of these moves, but the dsmash especially finds this useful given it increases the superarmor threshold to enable Mountain to pull off shenanigans with the counter. Even just using this move as a direct counter, it can be very useful to try to catch out the foe who's constantly expecting you to leave your body during moves. They might aim for the ghost coming out of your body that never actually comes, and even if they don't hit you, the move's range is respectable enough you can generally still punish a decision like that. The correct answer for the foe is to just grab Mountain, of course, but if they do that they won't be able to hit both Mountain and his ghost at the same time if Mountain ends up choosing to leave the body. While grabs count as a unique stun state Mountain can't leave the body during, if the ghost is already leaving the body as the foe is in the process of the grab it works fine.

It is possible to use two counters at once to double your power with the ghost, but keep in mind Mountain still takes the damage of any attacks he counters with this move, so even if the power is nuts it's a big sacrifice. You also have to get enough superarmor on the ghost to block the attack in question properly, and you have limited time to do so since the body will start charging as the ghost comes out of the body. Sometimes, you can be better off spacing the ghost behind the body a ways and having the ghost counter the body's counter to give the ghost more time to charge, and this will also maximize your range to the fullest. If you want to hit with both, the foe should ideally be in the middle of the body and the ghost and hit the body first. This requires a heck of a lot of prediction to do this specifically, but you've got plenty of other options with the dsmash to make this at all feasible.

AERIALS

NEUTRAL AERIAL - MOUNTAIN ROLLING

Mountain curls up into a ball and rolls for a multihit nair, totaling to 12% before ejecting the foe with fairly average knockback that doesn't kill until 190% or so. This is a fairly fast aerial with the longest part just being the move's duration, just be careful to not land during it.

Throughout the hits of this attack, foes will be sucked in towards Mountain while being "rotated" around Mountain's body with set knockback in a closewise pattern. The final hit does radial knockback outwards from Mountain's large frame. If a foe was hit on the first frame of the hitbox, they will be rotated around a full 360 degrees and end up wherever they started when first hit. This serves the purpose a standard nair should, letting you hit the foe away from you in the direction you hit them from.

However, if you don't hit the foe at the start of the move, you won't have enough hits to rotate them around the full 360 degrees. If you only hit them with the later half of the hitbox, for example, you would shoot them out the opposite direction from where you first hit them. One particularly nice and viable angle is to miss the first quarter of the move, which will cause the foe to be rotated 270 degrees around your body. If you hit a foe in front of you and did this, you'll be ejecting them straight down for a nice gimp! Intentionally delaying when you're going to hit the foe with the nair to get the knockback angle you want is viable, but effectively adds starting lag to the otherwise quick attack, so is a very strategic decision Mountain must make. Since this is a multihit move, Mountain really does not want to trade with this move if he doesn't have to. This move is a really great one for beating out dodges when the foe is under pressure, as if you use nair during their dodge you can effectively choose what angle you're going to send the foe at for free.

FORWARD AERIAL - DRILL

Mountain goes horizontal in midair and spins, turning him into a multihit hitbox, with the final damage of the move totaling to 10% and the last hit knocking foes up and away diagonally, killing them at 170%. The last hit has a sweetspot on Mountain's head that will specifically deal entirely horizontal knockback and be slightly more powerful, killing at 150% and dealing 3% more damage, but is mostly better because of the knockback angle. This is one of Mountain's faster moves, with the only bad thing about it being bad landing lag if he falls on his face during the move. Notably, Mountain will have his falling speed dramatically reduced, almost halted, if he is currently damaging a target. Aside from foes, damaging a foe's shield will still count, and this attack does slightly extra damage to shields. More importantly, drilling through a shield will leave you basically unpunishable, given you shouldn't experience landing lag most of the time if you do it. The move's longer lingering nature is decent at catching air/spot dodges too, but in the case of a spot dodge, the timing is quite tight to not crash into the ground first! For the foe to beat out this move, rolls still work as a defensive option, and they can always trade with the fair and get out favorably because of the fact this move is a multihit. Still, so long as the foe doesn't roll, the landing lag can be circumvented with good play.

Going over hardened lava with the fair does count as something the Mountain can damage and will thus slow his descent, but hardened lava is so low to the ground that by the time it's slowing Mountain's descent, it's not going to save him from crashing into the ground by the end of it, unfortunately. Combined with hitting a foe, it can potentially save you from landing lag, but it's a supplement at best, not the main feature of the move. You're better off hitting the foe through that hardened lava anyway, rather than using it as a cushion.

This move has enough of a suction effect on it that foes shouldn't escape it during the duration. This suction does not extend the range of the move, all being within the move's main hitbox still. If the Mountain is a ghost, he can move fast enough he can potentially drag the foe with it a little, and can more easily move into position to get the head sweetspot after first hitting the foe with his body.

Ghost Mountain does not experience landing lag with this move, and instead will phase through the ground as drilling like a shark. He can now potentially catch rolls with this move as well, given his higher air speed. When the move is finished and Mountain is inside of the stage like this, he will transition into his crouch with some lag. Enough to be punished if he missed, certainly, but if he hit the foe's shield with the fair, he can combo into dtilt to shield poke the foe. You must hit with the last hit of the move to do enough shield stun for this combo, and it must be with the sweetspot on Mountain's head. It is harder to hit the sweetspot when half of your hitbox is inside of the stage and thus useless, and Ghost Mountain only travels at his regular air speed during the brief time he's phasing through the stage.

BACK AERIAL - TURNAROUND PUNCH

The Mountain turns around in the air as doing a punch. This is a simple attack that does 13% over several flinching hits, with the final hit dealing knockback that won't kill from on-stage until like 150%, but has high base knockback. This is Mountain's fastest aerial, but has a limit on spammability because he turns around during it. On the stage, Mountain struggles to get more than a single aerial in on a grounded opponent in an air trip anyway, so this is not a big issue. If anything, it's helpful that it puts him facing the right way to use his grounded moveset on foes there, making for a very nice on-stage move. This is also Mountain's only aerial that doesn't have ten years of landing lag if he lands on the stage during it with no conditions on it. Sometimes, it's not even the worst idea to land early in the event the foe rolled behind you to dodge the bair, as that means you won't get the direction you're facing changed so your back won't be to the foe.

When Mountain is a ghost, he can more liberally use this attack in the air/off-stage. His many numerous jumps not only enable him to stay in the air longer, but let him turn around to use the bair again a lot more casually without having to make use of his specials. His higher aerial movement also enables him to easily move through the foe's model during the multihit part of the move, letting him potentially even combo with this attack. This is one of the most important parts of Ghost Mountain's neutral if you're going to try to use it outside of the advantage state. More commonly, you'll be pestering the foe with an onslaught of bairs in a gimping attempt after they've already been knocked off the stage, with support from the body back at the edge. That's not to say you can't use fair and nair as well, of course, predicting a dodge and landing nair is the biggest of rewards here assuming you're not attempting suicide, but is less safe than bair spam.

UP AERIAL - SMACKDOWN

The Mountain pounds his fists together above himself, with a shattering of rock being heard as he does so. This is Mountain's slowest aerial by a mile, especially on the start, but deals a powerful 18% and knockback on par with SSB4's Ganondorf's dair, which is a pretty big downgrade from Brawl Ganondorf's dair. The comparison to a dair is accurate for this move, as this attack sends foes straight down rather than up. If you want to knock a foe above you upwards, nair's radial knockback is your option for that. A foe who predicts your uair and dodges overly early can be pretty easily caught out by nair and sent downwards anyway, that move has important synergy with this one.

Like Ganondorf's dair, this move cannot be teched when Mountain pounds the foe into the stage, and they will bounce off of it back upwards. If Mountain is high enough up in the air, this can be used to start a combo, typically into his dair, but potentially even into the Mountain Drop Down Special if you are high enough and the foe's percent was high enough. The main way to be able to even get high in the air is of course through Ghost Mountain's many jumps, but that's not the only way. Spiking a foe into the ground already reduces the vertical knockback they will take when they bounce off of it in SSB4, but that can be even further reduced by knocking them into hardened lava. This can potentially enable even regular Mountain to combo off of this in realistic scenarios, and makes it very easy for Ghost Mountain.

DOWN AERIAL - MOUNTAIN PEAK

The Mountain goes upside down in midair and does another stall then fall, this time going to get the drop on the foe head first! By comparison to Down Special, this move is weaker and faster, dealing 14% and knockback that kills at 135%. This one has much less starting lag, starting out fairly quick for this kind of move, but the ending lag is still as bad as ever as Mountain's head gets impaled into the ground at the end of the move before he has to rip his head up out of the ground afterwards.

This serves as an obvious mix-up with Down Special, given it comes out much faster but covers the same area, similar to how Bowser can do mixups with his dair and Down Special. Mountain can't do the mixup nearly as well unfortunately because of how stupidly slow his Down Special is, though, at least without making use of the ghost.

This move's landing lag is much less if Mountain lands on top of hardened lava, as the ground in his way will be shattered meaning his head doesn't get impaled into the ground anymore. This turns the move into an effective pressuring tool there. If Ghost Mountain uses the attack, he will still use his ghostly powers to instead phase into the ground at the end of the move and enter his crouch. He will phase his entire body into the stage since he's upside down, having a few frames of invulnerability before he pops his head back out at the end, right side up. As soon as his head comes out, he's free to act and use his dtilt or crawl. If a foe is trying to punish him, the lag on coming out of his crouch is long enough that it would be ill advised to do.

STANDARDS

JAB - THOUSAND HAND SLAP

Mountain rapidly jabs out his palm in front of himself several times at lightning speed for an infinite jab, dealing damage at a pretty good rate. The jab finisher is a simple palm strike that knocks foes away with mostly horizontal knockback that is capable of killing, though not until higher percents like most other jab finishers.

Despite this attack's low multihit power, it does have the ability to destroy hardened lava bit by bit as if the Mountain was some kind of karate master. This will still register as hitting something, and because of how jabs work in SSB4, will cause Mountain to propel himself backwards as he shatters it, potentially going back quite a distance. If Mountain briefly enters an aerial state by pushing himself off the back of some destroyed debris, he will be able to use his fair as a quick follow-up, potentially traveling forwards again through the debris if there was a second layer for him to be able to drill through to enable Mountain some surprisingly potent "bob and weave" tactics.

This attack has the ability to deflect projectiles, though won't take ownership of them. Deflecting a stream of lava will cause a portion of the lava to overlap itself, which effectively decreases the range of the attack, but will treat it as if Mountain uses two Neutral Specials at the same time over that area, stacking another layer of lava on top of itself. If this attack hits an fsmash boulder, Mountain's hands will shatter it to bits just like with hardened lava. This adds all the damage of the boulder to the jab's damage briefly, and will rapidly propel Mountain backwards even faster than when he stands on top of hardened lava. The shattering boulder hits will drag the foe along, so the foe will actually get to be hit by all of this stuff before getting launched out of the move at the end when Mountain presumably goes to actually use his jab finisher.

If Mountain leaves his body during the repeating jab, the body will keep performing the repeating jab for 1 second before doing the jab finisher. If the body is currently destroying debris/a boulder with the jab, though, it will not stop the repeating jab until it is done with that. This is a useful lingering hitbox to use as a trap, but is mostly appealing for the large backwards movement of the body so that the ghost doesn't have to worry about it being punished. It can be a lot scarier, though, if the foe manages to get hit by a boulder rolling towards the body, gets caught by the jab, then dragged backwards as they get hit by the boulder's power a second time as the body shatters it with his mighty fists. The backwards movement of Mountain during the jab will still be helpful here, as the body moving backwards will minimize the forwards knockback the foe takes, enabling the ghost to combo yet another attack into this for the finisher. This is a very elaborate set-up, of course, involving setting up the body to use jab and having the ghost use the fsmash boulder, when it's normally a lot safer to have the body be the one to generate it.

DASHING ATTACK - MOUNTAIN ROLLING


Mountain curls up into a "ball" and rolls forwards, having the same physics as his fsmash boulders, dealing 10% and knockback that kills at 125%. Mountain rolls forwards a good deal faster than you would expect from his horrible regular dash, enabling him to still get in and punish people with his dashing attack. The sudden increase in speed can be helpful because it gives the move somewhat deceptively good "range." Ghost Mountain doesn't speed up nearly as much when using the dashing attack as he is already quite fast.

Rolling up or down a slope of hardened lava will work the same way as in fsmash, trapping Mountain into the move. This would not be a particularly good thing if not for Mountain's Up Special enabling him to casually leave his body at any time, effectively turning the body into a boulder for him with a lot less lag investment, but it has a lot more potential to go wrong given you're playing with one of your hurtboxes.

If Ghost Mountain is having his body use this attack then uses Up Special to teleport his body back to him while it's still rolling, the body will not have the dashing attack interrupted. The body Ghost Mountain goes to inhabit will keep rolling as if nothing happened, just with the position changed. What's more, Ghost Mountain is still free to leave the body yet again to start the process over if he wants. This lets the Mountain player teleport the dashing attack into the air or back into various hardened lava ramps/slopes as needed to conserve/build momentum, then potentially use that momentum against the foe directly. This turns impractical pipe dream set-ups into things that are a lot more realistic, and provides a lot more versatility and pressure once Mountain starts his dashing attack. Obviously, Mountain cannot shatter his body like he can with a boulder through use of usmash.

FORWARD TILT - SUMO SLAP

Mountain takes a step forward as doing a palm strike, dealing 9% in a multihit move with the final hit doing knockback that kills at 160% with low base knockback. Mountain leans into the slap a lot, giving this move better range than you would expect. Mountain doesn't step back to his initial position at the end of the move. The last hit of the move has some extra hitstun on it where the foe will be stunned in place for a bit before flying off from the force of the slap. This is enough stun to potentially enable the move to combo into itself or a few other moves like jab and dtilt before the foe takes their knockback, but only if Mountain initially hit with the move at the edge of its range to minimize his step forward at the start, meaning this will only combo into itself once at most. His grab, unfortunately, is too slow to get a free grab out of this.

It is possible to combo the foe as well in the process of them taking their actual knockback. This is primarily done through Mountain's volcano Neutral Special if charged enough and his grounded Earthquake Down Special. This is all the more possible with hardened lava for the foe to be knocked through to slow down their knockback, and in the case of Down Special provide debris to knock up into the air. This set-up is one of the best ways to get up the powerful earthshaking effect reliably with the foe nearby without just hoping the foe wanders into it.

UP TILT - CHOP

Mountain turns to face the fore/background and raises his arms above his head, crossing them against each other like an X, before chopping them down to either side of himself. His arms are the hitboxes, giving it decent range all around him. Most of the move's hitbox does 6% and weak radial knockback that hypothetically kills at 300%. Halfway through the move, Mountain's hands become sweetspots that do 10% and more forceful knockback away from him that can realistically kill, doing so at 135%. This translates to largely horizontal knockback given this doesn't happen until the move is already partially complete.

The pathetic knockback on this move's sourspots would be good for comboing if not for the move having a bit too much ending lag as he holds the ending pose for a while, though if the ghost leaves the body during this attack it combos with almost no effort at all, and the move has generously low start-up. The knockback is so pathetic that this will function as a combo starter all the way up until around 90% if you have the ghost come out as the body uses the move, making this move incredibly reliable in that regard. You won't be getting anything special out of this combo, so don't expect any uair or Down Special from it, but it will reliably combo into his faster moves.

This attack can be angled 45 degrees left and right, as Mountain cannot angle his ftilt up and down. This is useful to get the sourspots angled horizontally before the sweetspots come out in case you have hardened lava to knock the foe through, or to use the sweetspot aimed vertically as a vertical kill move.

DOWN TILT - SUMMIT


Mountain leans down as he points his head down towards the ground, then sweeps it upwards in a big, meaty arc, dealing 8.5% and launching foes behind himself with fairly high base knockback, though it doesn't kill until 200%. This is decently fast, but the main weird thing about this move is the knockback angle it launches foes at, launching foes behind Mountain instead of forwards. This is useful to knock foes into boulders or other extraneous hitboxes like Mountain's body without having to exclusively rely on your bthrow to do it. Side Special is another option, but by the time you fly through the air the thing you were trying to space them into will probably be gone. Mountain appreciates having this kind of simple, effective spacer. Aside from politics at the ledge, Mountain really likes being able to get back to the center of the stage where he can use his Side Special combos without fear of the foe taking his body off the stage, and he has more room to get set-up without having to fire it directly at the foe in a predictable manner.

This attack is another good option to use against foes on the ledge, as it reaches down far enough to scoop them up and launch them behind you into whatever you've set up, without letting them enjoy the comforts of ledge invulnerability. Similarly, the angle of this hitbox works well to hit short foes when you're at a slightly higher elevation due to standing on hardened lava. You can also scoop under a foe who is at a slightly higher elevation standing above you, potentially dodging an attack briefly before the hitbox comes out as you stick your head into the rubble.

Using dtilt has the same animation as a ghost, but because of Mountain's much lower height during his crouch with only his head popping out, his head will phase inside of the stage during the starting lag, leaving him invulnerable briefly. This serves as a powerful tool in neutral for the ghost, but ghost Mountain doesn't have much time and this is assuming the body is already a safe distance away from the foe so the foe can't just go punish it instead.

If ghost Mountain crouches through hardened lava, his head will be low enough that he can hide inside of it. It is possible for foes to destroy the rubble Mountain is hiding inside of and hit him with the same attack, but it is significantly more annoying, and even if they do, a well timed dtilt will enable Mountain to dodge the attack in question before retaliating. Mountain should never be using this offensively given the limited time he has in ghost form, but if he's backed into a corner and a foe is pressuring ghost Mountain to prevent him from reuniting with his body in a safe manner, this is a very useful tactic to hit the foe away long enough to get back the precious space you need.

If this attack is used at the ledge as the ghost, it is possible to see the rest of the usual animation aside from just his head, as the rest of his body will clip out of the side of the stage. His model is still there performing the attack animation every time, it's just blocked from view by the stage. This means the attack will come out of the ledge, getting it down even lower and making it more obnoxious for foes to avoid. This can potentially be canceled into grabbing the ledge depending on the angle Mountain does this at, which can ideally ledge trump the foe on a miss. This is very powerful pressure, especially if you've dumped your body on top of the foe while doing all this. Mountain will generally want to use the ledge cancel if he's going to go get his body back, as he'll want to avoid the extra ending lag of getting his body back while crouching. Just know Mountain will have to get up off the ledge before he can start doing that.

GRAB-GAME

GRAB - BEAR HUG

Mountain has the slowest, longest range physical grab in the game. Mountain swings his arms behind himself before throwing them in front of himself in a very exaggerated grabbing motion, giving him just as good of range as Brawl Dedede's legendary grab at the cost of a lot more lag. It's somewhere in the middle ground of a physical grab and a tether grab as far as numbers go.

The dashing grab is more "normal" with average speed and range. That's not to say it's fast, it's just a lot faster than using your regular grab, at least if the lag to dash isn't a factor. It's more desirable with the ghost's high dashing speed.

If the ghost leaves the body while it has someone grabbed, grab escape difficulty will be halved for the foe since it's a lifeless husk restraining them now. This starts as the ghost is leaving the body and is still in lag, not after the ghost finishes leaving the body. This is not a particularly reliable way to stun the foe until very high percents, at which point your throws can probably kill them anyway. As for Mountain's throws, they all have generally pretty fast animations to prevent much abuse.

Ghost Mountain can grab his body and perform throws on it if he so pleases. Pressing the Special button will have the ghost go back into the body with considerably less lag than just using Up Special to teleport your body to you.

PUMMEL - SUMO DOMINANCE

Mountain pushes the foe forwards with his sumo grip on them, moving forwards about half a Kirby width in a spammable pummel, dealing 1% to the foe. This isn't anywhere near as spammable as something like Lucario's, but is fast enough you can move a decent distance across the stage if the foe's at a high percent, enabling you to set up important positioning for your throws better or just simply get closer to the ledge to kill them.

Mountain can use his pummel to move his body without doing damage to it. If he holds the Z button instead of mashing it for about 10 frames, he will just let go of the body without bothering to perform any throw on it, which is important in case you accidentally grab the body.

This is a decent move to use to refresh stale moves, like any fast pummel. The ghost and body unfortunately share the same list of stale moves, so don't expect anything fancy there. The ghost using moves on the body will not cause them to enter the stale moves list unless the body is specifically vulnerable to everything during the dsmash.

FORWARD THROW - BLOOD BIND

While restraining the foe with one arm, the Mountain punches into his body hard enough to make himself bleed blood that he apparently has, dealing 5% to himself. The Mountain then punches the foe with his bloodied hand, dealing 14% and knockback that kills at 135% for his primary kill throw, dealing mostly horizontal knockback with a high base. With the self damage of this throw, the net gain of damage you're getting is only 9% which is the lowest of Mountain's throws, so this should mostly only be used when you're confident it will kill if you don't care about the status effect. If you're at a percentage where this will help you evade combos, though, by all means go for it.

The foe will keep Mountain's blood on them for 6.5 seconds. In Kinnikuman, the devil chojin ghosts are able to better haunt foes who have their blood on them, to the point they are totally invincible against them. This translates to the ghost having complete immunity to damage to the foe the status effect was applied to during this time, unable to be hurt. If the foe really still wants to deal damage, they can still hit the Mountain's totally vulnerable body that is just sitting on the stage as a hurtbox. The most useful scenario for this is for incredibly obnoxious edge-guarding with the ghost, and this move's high knockback sets up very well for that. Without the ability to take damage, Mountain can feel much more confident in trading with his aerials with impunity, assuming the ghost is not at such a high percentage that he would die from the foe's attack. If you're going towards a blast zone and the foe is hitting you towards the other one, though, even with Ghost Mountain's very low weight, it should take a decent percentage on him to outright kill him. With damage immunity, the Mountain's superarmor moves are also basically upgraded to invulnerability, though unfortunately the Mountain's superarmor moves are all ground based inputs and can't be used off-stage.

This throw has high ending lag as the Mountain holds his wound in pain afterwards, so you are encouraged to leave the body during the throw rather than waiting to have the body perform another attack. If you want to wait to have the body use Neutral Special or Mountain Drop before you leave it to use the ghost's new invulnerability, the foe will already have recovered part of the distance back towards the stage.

At early percents, this throw serves as an opportunity to get set-up so long as the ghost just does its best to defend the body. Just beware the ghost is intangible and not invulnerable, so projectiles and such will go through the ghost and still be able to hit the body rather than just being neutralized on contact with the ghost. This effect will not stack with itself, but will renew the duration to 6.5 seconds.

If the ghost uses this throw, it won't have any blood to splatter on the foe what with being a ghost. You'll just get the standard throw, which is a lot more unimpressive now when not boosted by the satanic magic blood. This version of the throw deals 9% and knockback that kills at 180%. This is not entirely a bad thing, as this move is now a good combo throw with Ghost Mountain's high dashing speed, especially if you knock the foe through hardened lava to slow them down.

If Ghost Mountain uses this throw on the body, it will just do the punch to make the body bleed and end the throw there, doing 5% to it. This serves as a counter hitbox to outside foes. If either of the Mountains are hit during this time, Ghost Mountain will perform the regular fthrow on the foe with the body's blood on his fist, gaining brief invincibility to the foe's attack. Mountain is a big character, so having both of their bodies be the counter hitbox is a pretty big deal. The downside to this counter is that if you flub it you deal 5% to yourself with no gain, punching yourself for no reason.

BACK THROW - BOULDERDASH

Mountain grabs the foe's arms with his arms, and wraps his legs around their body. He then proceeds to roll behind himself with the foe against him in an animation similar to Sonic's bthrow of all characters. Mountain travels about half a platform's distance with his foe before he releases them behind himself with knockback at the standard issue diagonal upwards angle, killing at 170% with high base knockback and low scaling. The damage of the throw is dealt over the course of the move as the foe is crushed underneath Mountain three times, taking 3.5% each time, with them taking no damage as they are released with the move's knockback. If rolling over hot lava, the foe will take damage as if they are standing on it the whole time over the move's brief duration.

This unsurprisingly has boulder physics like the fsmash and dashing attack. Mountain will still never roll off of ledges with this attack, though, so building up momentum by having a hardened lava slope collapse under your weight just to travel ever so slightly farther doesn't seem like it has a ton of point at first glance. At most, you'll be traveling a full platform's distance over the course of this throw. That's nice, but not the main thing you're looking to get out of this. Traveling twice as far means twice as many times the foe is smashed against the ground, which means twice as much damage, getting you a nice 21% total.

If you go exactly twice the usual distance, the knockback angle will be the same as usual. If you aren't going down a slope for the entire duration of the throw, though, that can change it to be disproportionate at what angle Mountain ends the throw and flings the foe on. Ideally, you want to roll to the edge and send the foe straight down at a super cheap diagonally downward angle to get an easy, early kill. This throw's high base knockback does it a lot of favors when going for this technique. To do it, you're going to want to perform the throw while traveling down a hardened lava slope for about a third of the move's duration. There is little other reason to be at such a specific location so it can be somewhat predictable (especially with your back up against the ledge), and the hardened lava is not hard for foes to destroy. Mountain has plenty of other ways to use hardened lava, so varying it up is important. Yes, you can reposition with pummel slightly after grabbing the foe, but at early percents when you're going for the cheap kill, the foe will be able to escape if you take the time to do much pummeling.

Alternatives to the cheap kill at the ledge are having the foe take their knockback "downwards" against the stage, which will cause them to ground bounce against the stage and reduce their knockback, making this an okay combo throw, especially if the throw ended on top of hardened lava. If Mountain's ghost leaves the boddy as it's performing the throw and the body throws the foe forwards towards the ghost, a simple combo is also possible.

To foes aside from the main throw victim, this has a hitbox as powerful as Mountain's dashing attack. If Mountain's ghost uses this throw on the body, they will roll together as one gigantic boulder, performing the dashing attack together. This will cause them to go faster and reach max power without the need of slopes, though slopes can still boost their speed further despite the power already being capped. Throw mechanics give some decent superarmor for both Mountains during this time. The ghost will still release the body at the same time as it would fling the foe, at which point the body functions as a good "projectile" and will continue the dashing attack as normal. The ghost can still use Up Special to warp the body to the ghost's current position without interrupting the move, as in dashing attack.

UP THROW - SMOKE

The Mountain blows his top similar to with his Neutral Special, but only ejects smoke rather than erupting with lava. This uses up half of the Mountain's Neutral Special charge, and the power of the move is based off of how charged the Neutral Special was. The smoke is a multihit move that deals the foe 10-14% damage, with a final light hit of knockback that kills at 250%. The power boost is quite unimpressive, but the real buff you're looking at for this move is hitstun. This throw makes more smoke for more hitstun over the course of the move if you have a full charge at your disposal. The foe will be riding up the cloud of smoke over the course of the move, so this requires Ghost Mountain to be the one to get up high enough into the air to combo with his multiple jumps. This still combos better if used by the body and you have the ghost come out during it given this gives Ghost Mountain more time to get into position. This throw has no combo potential if you don't have a Neutral Special charged.

As far as what you can combo out of this attack, don't expect any Mountain Drops, that's way too laggy for this. Dair and uair are the usual things you're going to want to try for, with uair in particular extending the combo to go even longer if you knock them down into hardened lava to reduce the uair's knockback on the stage bounce. Keep in mind that to have hardened lava, you have to have used Neutral Special very recently and you need Neutral Special charge to use this combo. You can have Neutral Special charges on both Mountains, but it makes this either a very set-up intensive combo or a very short term window combo. This is the most realistic way to combo with the ghost out of getting a grab with the body, outside of a fringe bthrow set-up.

DOWN THROW - FACEPLANT

Mountain slams the foe into the ground, then grabs them by the neck and lifts their head off the dirt before slamming them into it. He then lifts the He then goes to jump up and sit on them like Brawl Dedede's dthrow before they take standard diagonal knockback away that kills at 200%. The move does three hits over the course of the move that total to 10%. The knockback is pretty useless as the base is too high for comboing, but too low to be a big spacer.

None of the individual hits of this move are strong enough to destroy hardened lava. However, when Mountain slams the foe's face into it, a small portion of it will get embedded into it. This causes the foe to take 1% per second for 3 seconds until it falls back out of them. This is a really unimpressive effect, but if Mountain attacks the foe during that time, the debris will shatter and deal 5 hits of 1% (no hitstun) for a small damage boost. This gets you up to 17% out of the throw, but is still not terribly impressive.

If Mountain fires his Neutral Special at a foe with hardened lava in them, it will unharden like it usually does. The foe will now be treated as if they are standing on the lava for the usual full second before it hardens, and this can stack with actually standing on lava. To make matters worse, foes will now leak lava out of the holes, pouring it out onto the floor for wherever they go for that second, easily enabling it to stack. With the lava in the foe's body, the lava leaking out of their wounds onto the floor, and the lava shot out by the Mountain, you can very easily get it stacking 3 times. Throw in the lava getting reflected by a jab or something or having both Mountains use their Neutral specials, and you can stack it 4 times. All of the lava will leak out of the foe over the course of the one second, but this is still a prime opportunity to smack the foe a second time if you can manage it. If you do, you can coat the entire stage in lava. This is not easy to do since you'll have to of hit them with a Neutral Special already to start this effect, though you can also just hit them with the Neutral Special at one side of the stage and shoot them off towards the other side.

If the ghost uses this throw on the body, the hardened lava chunks will be embedded into the body without doing any damage, and Mountain will just slam the body into the floor once to do it before setting the body back upright again, doing no damage to it. This is laggier than the regular throw, but this version will keep the chunks embedded in Mountain until he is hit by a move. The hardened lava has 6 HP like usual, but if he is hit with an attack that does not destroy the chunks, Mountain will superarmor through it. If Mountain uses dsmash with these chunks in his body, he will expend them to boost the damage and range of the attack as if he was hit by an attack with HP equal to that of the hardened lava chunks. If he uses Neutral Special, the hardened lava will melt into lava inside his body and get fired out, adding half a second's worth of charge to whatever he has. If already fully charged, Mountain will fire a thicker stream of lava forwards that will harden into two layers of lava, but does not otherwise boost the power.

FINAL SMASH - FACE OF THE MOUNTAIN


The Mountain laughs maniacally and jumps off the top blast zone, invulnerable. When he reappears, he is now a giant, as big as a real mountain! His head will pop up from the bottom blast zone and cover the whole stage in a very similar fashion to the Ice Climbers' Final Smash. As it first comes up, his head deals 28% and knockback that kills at 50%. After a second of that, Mountain's volcano head will erupt, creating a giant geyser of lava that goes off the top blast zone, dealing 10 hits of 3% with the last hit killing foes at 70%.

The lava will rain back down onto the stage after that, covering the Mountain's body and sliding down the sides of his head. As it comes down, it deals a weaker single hit of 10% and small knockback that will send foes down towards Mountain. Mountain's head will then have lava trickling down the sides of it, which is as powerful as 3 Neutral Specials worth of lava stacked on top of each other.

The lava will harden after a second as usual, covering Mountain's head in it. If anybody was standing on it, they will get their feet stuck in the hardened lava like the usual effect. This is very relevant, as after this happens, the Final Smash will end as Mountain's head goes back down off the bottom of the stage, potentially dragging foes down with him to their deaths if they can't very quickly destroy 3 layers of hardened lava to free themselves. They have to do it so quickly to the point it's outright impossible for some characters, leaving their only option as to not be standing on the Mountain's body when the lava hardens. After that, Mountain drops back down from the top blast zone at regular size again.

June 20 2018: Posted moveset
June 21 2018: Removed weight loss mechanic on dsmash and made uair slower.
February 9 2019: Mountain's body is now much floatier when using Up Special to recover.
Feb 16 2019: Rewrote fair. First paragraph is mostly the same, but mechanics of the move are different. Mountain's extra jumps in ghost form go 25 units instead of 40 units.
March 23 2019: Fthrow only grants damage immunity and not invulnerability. As some small compensation, duration increased from 5 seconds to 6.5 seconds. Ghost Mountain attempting to crouch on a drop through platform will result in his physical crouch. Small changes/buffs to bair. The move is now a multihit, enhancing the ability for Ghost Mountain to use it as a combo attack, but is now considerably more powerful.
 
Last edited:
D

Deleted member

Guest
5k/10k Challenge: The Return!


This popular challenge that was a big success in MYM20 officially makes a comeback. In the current age of super long, overwhelming moveset lengths, I created this little side event in Make Your Move to encourage some lighter reading experiences. To qualify as a 5k/10k moveset it's very simple. A 5k set is anything 5000 words or less, and a 10k set is anything 10000-5001 words. To make it easier to count them, you can put somewhere in the set that they are in fact 5k or 10k.

Last time I wrote a small write up for each set that qualified, and I did follow through on that commitment but it felt a little redundant after I already commented those sets. Instead this time I'm going to enter every person who wants to participate into a lottery for each 5k/10k set they posted, and whoever is picked out of the hat can choose a set for me to make, no questions asked. This will run all MYM21 so this will take place in MYM22. (And yes I know I still owe one and that will be posted in MYM21.)

Remember, quality > quantity.
 
Last edited by a moderator:

Idon

Smash Legend
Joined
May 24, 2018
Messages
17,754
Location
Waxing Moon Ritual
NNID
Miyamoto Iori
Switch FC
SW-4826-9581-3305
5k/10k Challenge: The Return!


This popular challenge that was a big success in MYM20 officially makes a comeback. In the current age of super long, overwhelming moveset lengths, I created this little side event in Make Your Move to encourage some lighter reading experiences. To qualify as a 5k/10k moveset it's very simple. A 5k set is anything 5000 words or less, and a 10k set is anything 10000-5001 words. To make it easier to count them, you can put somewhere in the set that they are in fact 5k or 10k.

Last time I wrote a small write up for each set that qualified, and I did follow through on that commitment but it felt a little redundant after I already commented those sets. Instead this time I'm going to enter every person who wants to participate into a lottery for each 5k/10k set they posted, and whoever is picked out of the hat can choose a set for me to make, no questions asked. This will run all MYM21 so this will take place in MYM22. (And yes I know I still owe one and that will be posted in MYM21.)

Remember, quality > quantity.
Thank you.
Christ do I have to read a lot before I vote, lol.
 

The Jim Jims

Smash Cadet
Joined
Jul 9, 2018
Messages
60
Location
"All you do is forward smash!"
Ω OMEGA Ω


Omega is a character from Epic Games’ international sensation Fortnite Battle Royale. In Fortnite, 100 people drop onto an island with all sorts of weapons scattered about. You can harvest materials with your pickaxe in order to build structures and manipulate the battlefield. However, there is a storm that closes in on a randomly selected point on the map, pushing the players closer and closer together. Over an approximately 20 minute game, there will be one person standing. That person standing will most likely be an Omega.


Omega was the Tier 100 Skin during Season 4. In order to unlock Omega’s base skin, you would need to level up your Battle Pass to Tier 100. You could do this by completing the Daily and Weekly challenges and winning games. It took most players almost the entirety of the season to unlock Omega. However, you are not done yet. Once you unlock Omega, you will be stuck with his very ugly base form. In order to get it to the monstrosity pictured above, you would need to get to Level 80 for the season as well. Like in Pokemon, each level takes more and more experience to get to. The term for a Level 80 Omega is known as Max Omega, and usually refers to a player who has put a ton of hours into the game and likely is very good. If you came across a Max Omega, you were likely to get messed up.


Most Omega players in Fortnite are extremely cocky. They will immediately start Ramp Rushing you immediately putting you on the defensive, or they will build the Taj Mahal and wait until they get the chance to win with only a single kill. The drawback is that whenever you got the advantage over them, whether it be by chunking their health with a shotgun, taking the high ground away from them, or trapping them between a rock and a hard place, they will always try to fight their way out of it. They have the right to think that. They’re Omega! Tons of wins under their belt by pushing every player they see or hiding! But by neglecting to use their noggin, they wind up to be an easy kill.

To Read the Moveset, please click here! Thank You!
 

Cetus

Smash Apprentice
Joined
Jul 5, 2018
Messages
190
~Oceana~


(Link to original https://www.deviantart.com/elemental-aura/art/Oceana-Louvier-SSB4-Request-527204515)


Oceana Louvier is a character from the 2009 Wii adventure game known as Endless Ocean: Blue World. A sequel to Endless Ocean which came out in 2007. This ambitious young woman is a key character to Blue World’s main story. And throughout your adventures, you learn more about the story behind Oceana’s father, Matthias, and his hunt for a long lost treasure. Despite its strange premise, Blue World was a truly wonderful game that just isn’t loved and appreciated as much as it should. And also I just think a set based on the weird and wonderful world of the ocean blue will be a blast to make. So, let’s dive in! Pun entirely intended.

~Stats~

Oceana’s not some gun wielding witch who can control time, nor is she a professional boxer who likes to side B off stages. She’s a human who scuba dives for living so her ground mobility would look like Villager’s in terms of walk and run speed. She has very high traction, on par with Little Mac. She’ll be a floaty character on par with Villager and possess an air speed equal to Palutena’s. Her jump height is equal to Robin’s. In the game, there are a few points where Oceana is able to enter certain areas due to her smaller stature. It’d make sense for her to have a smaller hitbox perhaps around the size of a shorter Wii-Fit Trainer with a light weight to match.

~Special Moves~

Neutral Special: Pulsar Gun

Oceana takes out the pulsar gun to fire a quick electromagnetic blast that travels at the speed of Fox's projectile. She can fire three times with a very tiny gap between shots before the pulsar needs to be reloaded. If all three of these shots connect, the opponent will be paralyzed for 40 frames. Oceana can use this move while walking, but if she enters a dash, the pulsar will be put away. There's a small time limit between each pulsar shot to get the paralysis. If Oceana is unable to connect one shot to another within a half second time span, then the effect is reset and she has to stack it all over again. The blasts do not cause flinching.


This special works like a mix between Fox and ZSS’s neutral B. Having the speed of Fox’s projectile and the stunning effect of ZSS’s projectile. With a measly 1.5% in damage, its main purpose is its stunning effect which can lead into a grab or tilt. To prevent a constant barrage of these paralyzing attacks, Oceana will take two full seconds to reload the pulsar before it can be used again.


In Blue World, the pulsar is an item the player gets early on. Its main purpose is to heal injured marine life or soothe territorial creatures like sharks. But here, it’s a battle, so let’s just say Oceana made a few modifications. It fits into Oceana’s moveset to improve her approach game or forcing the opponent to move a certain way if they want to avoid stun. And the stunning effect will help Oceana get safer grabs or other quick punishment options.


Side B: Fish Food

When used, Oceana will produce a glob of fish food and lob it two crate lengths away. Once it makes contact with the ground, a school of yellow tangs will swim towards it to feast. The actual food is treated as an item and will deal 2% to enemies if they're hit, also causing them to flinch. This will still attract tangs and is even a little better because they're guaranteed to take all the damage this move inflicts in addition to the damage from the item. The fish food has the same properties as Peach's vegetables.

The area of effect's size is 3/4ths of the sandbag, and any enemies caught in its hitbox will be drawn into the center of the feeding frenzy and be barraged by the hungry fish. Each hit will deal 3.5% and will hit the opponent 4 times before all the food is gone and the fish scatter. This final dispersal deals a bit of knockback and a total of 6.5% in damage. The effect lasts for a full second before all the food's gone. There's a 2.5 second cooldown between when the fish disappear and when she can use it again. An added note is that energy based projectiles will simply phase through it like Samus or Lucario's Neutral B. Physical projectiles like vegetables or arrows will cancel out.


This is one of Oceana’s best spacing and edge guarding tools. Restricting a small part of the stage, most preferably the ledge, to pressure the opponent. And can deal high damage if the glob connects with the opponent mid air. However, it can’t be used again until the fish are gone. It will still attract fish even if the opponent is in mid air. However, this’ll require some very precise aiming to get down and is generally unreliable without help from throws. Something of note however is that the initial fish food projectile can indeed be pocketed or reflected, but the reflected or pocketed item will not spawn fish.

This is based on the food mechanic in Endless Ocean. The diver has the option of placing food in the water to attract fish to learn more about them or to just get easier pictures.

Up B: Dolphin Trick


Oceana blows her whistle which causes a dolphin to spring out from below her and carry Oceana up into the air. During the brief period before the dolphin comes out where Oceana blows her whistle, the trick will differ depending on which angle you input during that window. The spin jump is the default, frontflip for the forward input, and a backflip for a backwards input. It can be used offstage as well, the dolphin just appears beside her like Wario’s bike. It’s possible to control Dolphin Trick slightly to change the destination. A noteworthy property of the move is that it can knock back opponents who try to intervene. If Oceana is hit during the attack, the dolphin will appear to fall and disappear after a few frames. It can only be used again once the dolphin’s completely gone.

This is obviously her main recovery method. With the hitbox, it’ll discourage close quarters engagement in the air and can even hit unwary edge guarders. The default spin jump sends Oceana sailing completely vertically into the air, covering about as much ground as Rosaluma's Up-B. The dolphin will twirl five times, the first four hits dealing 3.5% damage before capping it off by sending the opponent flying vertically with an additional 6% slapped onto the last hit. It has very little horizontal distance, so it's best used if you're directly below or near enough to the ledge.

The forward and backward inputs have very minor differences. They both launch Oceana at a 50 degree angle and have the same damage output and hitboxes. It's a single strong blow that hits for 8% and deals strong horizontal knockback with a 9.5% sweetspot at the tail that spikes. Their travel distance is slightly lower than the upward input's but they make up for it with much better maneuverability and speed. The forward input is slightly better in the former area, while the backward input is a tad better in the ladder. All three of these are useful ways to discourage offstage engagement with the dolphin's large hitboxes and decent damage output. Sometimes even being able to K.O at higher percents.

In game, you can encounter dolphins to befriend and swim with. They offer fast mobility and can even hunt treasure for you and are all part of one of the game’s side quests concerning dolphin training. (Sidenote: The dolphin training music is also a blast to listen to.)


Down B: Multisensor

Oceana uses the multisensor and unearths an item from below her. The unearthing animation depends on which item is pulled. This is like Peach’s down special but with a notable difference. The items she uncovers depend on how long the B button is held. Each item changing after 20 frames of pressing. The first item Oceana will grab is a piece of ambergris (For those who don’t know, it a substance found in the intestines of sperm whales that’s added to perfumes because people are crazy.), the second item is an ingot composed of an unknown material, and the third item is an entire treasure chest. The multisensor will emit a different pinging sound after an item is shifted to indicate that there's been an item change. The multisensor cannot be used until the item pulled disappears. The maximum Oceana can wait is 60 frames, by then she'll automatically pull up the treasure chest.


Ambergris is a fast, weak item dealing 4% damage and travels in a straight line. Oceana unearths this almost instantly. The throw animation is nearly lagless and a particularly quick player can catch the item again if it manages to hit and bounce off. It can travel half of Final Destination before landing. The ingot has a higher arc in comparison to the others. Oceana unearths the ingot a few frames slower than the ambergris. It deals 10% and has mild knockback. This item has the benefit of being able to lodge itself into the ground if it misses the opponent for half a second. This makes it a much more reliable item to keep up pressure, especially if you're closer to the opponent and they just love to shield. It travels a third of Final Destination with a very slightly slower speed than ambergris before landing with near lagless throwing animation to boot. The treasure chest is one beast of a projectile in terms of raw power, costing half a second to unearth. The chest will also halve Oceana’s movement speed and quarter her jump height. Even the throw animation takes half a second longer than the other two items. The result is a big hitbox that deals 20% damage, greatly damages shield, and has high knockback. A potent kill move if it lands. If the treasure chest hits the ground, it’ll open up and spill a bunch of coins. This has a very tiny windbox during the opening animation as the coins spill out. The chest travels a crate distance away and falls at the same speed Villager’s timber falls. Though, this is negligible since its arc only reaches Oceana’s chin.


This variety of projectiles seems a tad complicated at first, forcing players to keep in mind what item they’ll pull next to maximize effectiveness. All the items can be Z-dropped and will stay on stage for 4 seconds before disappearing. Ambergris’ speed makes it easy to simply pick up and toss before moving onto to the next item. The ingot is a bit trickier to land but is probably the most reliable because it doesn't disappear immediately if missed and the damage is pretty alright. The chest is almost always an edge guarding option due to its slow speed and distance. But it can also be a possible punish for rolls if the timing is right.


This is based on the multi-sensor tool which scans the surrounding area for treasures. These treasures are one of the best ways to get money in the game and are also fun collectibles.

~Standard Attacks~


Jab: Underwater Pen

Oceana grabs the underwater pen and slashes it multiple times up and down. It’ll start with Oceana touching the ground with the pen and then leading into a quick upward swipe before the downward swipe back to the ground. This will continue for three times. Ending with a sideward slash with deals moderate knockback. As it travels, the pen will leave behind a trail of colored ink. Each hit deals 1.5% damage if it connects and the final hit deals 3.5%. This final hit has very minimal vertical knockback, allowing it to follow into many things. The hitbox varies from a bit above Oceana to the bottom of her feet as she swipes it. As the attack is used, Oceana will move very slightly forward to extend its range. This attack, along with all of her tilts are disjointed.


Prior to the final slash, plays may jab cancel with shield. Due to the low hitbox during the first swipe and miniscule knockback, Oceana can also jab lock with this attack on grounded foes. The attack comes out almost instantly but has a vulnerable window of punishable end lag as Oceana puts the ink pen away. The ink trail has no bearing on gameplay and disappears after a second. The disjointed properties of the jab and its wide range allows it to discourage sideways approaches from certain dash attacks or just simple dashes, punishing those players with a barrage of hits. Up-Tilt or short hop Nair are generally reliable followups that can come off this move, furthering its utility in Oceana's neutral kit.


This move is based on the inkpen which the suspends colored ink in the water. Its main purpose is unlocking info on certain creatures.


Forward Tilt: Pen Jab

Oceana thrusts the underwater pen forwards leaving a completely straight line of colored ink suspended in the air. This attack deals 6% with light knockback, sending foes somewhat horizontally. At the tip, it deals 7% while sending the opponent at a very slight upward angle.


This tilt is more of a general damaging move that simply gives her a reliable attack to throw out if other options are too specific for the situation. Its range is the best of her tilts and landing the sweetspot is easier than the others as well. While most of her moves can be described as quick, this attack is probably one of her fastest with the hitbox coming out at frame 5. It also has some use as a potent shield poke tool due to its precise yet easy to perform hitbox in conjunction with Oceana’s smaller stature. The attack as a strange hitbox. A character can be missed completely if they’re standing right in front of Oceana. In exchange for this, it has decent range, low lag, and weak enough knockback to be combod into a quicker attack such as dash attack or neutral special. The sweetspot on the other hand can lead into an aerial such as a nair or fair. Later percents, this will be more of a spacing tool because it scales into moderate knockback.


Down Tilt: Low Pen Sweep

Oceana crouches and sweeps the underwater pen right under the opponent's feet, inflicting 5.5% of damage and throwing the opponent at a straight vertical angle upwards with some moderate knockback. The tip will do 6.5% and cause those hit to trip. The hitbox can slightly extend beyond the stage.

This move's primary use is as an edge-guarding tool and for the occasional trip here and there. It's somewhat slower and has more knockback compared to her other tilts. It still can let up tilt, up air, and shorthop nair to follow up at low percents where the knockback difference is negligible. It can even be a kill confirm at the 90-100 percent range for some characters with up air.

Up Tilt: Aerial Pen Swipe

Oceana grabs the underwater pen and makes a quick upward swipe. It starts in front of her waist to behind her thighs. The very first and last frames of the hitbox deal more damage at 7.5% while the in-between frames will deal 6%. The whole of the attack deals low vertical knockback.


This is a decent juggling option due to the speed of the attack and low knockback. An enemy caught at lower percents can be hit with three consecutive up tilts. Good D.I can let an opponent escape the final up tilt however. It functions similarly to Lucario's up tilt in this regard. Being a fast upward attack to rack up damage. It's safe, easy to combo, and even has decent reach which makes it more effective as a combo tool in that regard. Because the move starts in front of Oceana, this can also be used to stop certain approaches or the opponent risks getting hit into an up tilt combo. The upward knockback of the move reliably combos into nairs or up airs at low to mid percents. As with other pen moves, this one leaves a trail of colored ink in its wake.


Dash Attack: Fin Slide

While Oceana is running, a long fin will materialize on her foot and she'll slide forward. The fin has a decently large with a lingering, disjointed hitbox. For the unlucky fellow hit, they'll take 5.5% damage and also deal with weak vertical knockback.

This move is very useful in conjunction with her neutral B. Almost guaranteeing a tilt or jab if it connects. And hitting it is easy because of its large and lasting hitbox. The weak knockback makes it a perfect tool to start combos and guard ledges as well. Its deceptively lengthy active hitbox time makes it a weird move to shield against like Jigglypuff's side B. This move's not perfect though. It has considerable startup and end lag which means it's not really safe to be using over and over again and easy to punish if it misses.

~Grab Game~


(The petting mechanic all her grabs are based on.)

Grab: Cursor Snatch

Oceana grabs the opponent with the Endless Ocean hand cursor. A simple and solid grab with decent range as well. This makes it a great option for punishing unsafe shield moves thrown at her. Quick startup and safe end lag in addition to its range makes Oceana’s grab game a potent force. Especially for shield or turn-around grab making it one of her primary punishment options.

Pummel: Poke


After a grab, Oceana can unleash a series of quick, weak pokes with the Endless Ocean cursor. Each doing 1% damage. Every hit lasts 10 frames, making it one of the fastest pummels out there.

Forward Throw: Shove

The cursor shoves the opponent forward for 7%, dealing good horizontal knockback with a very slight 10 degree angle. It sports a slow animation and questionable end lag, so it’s best to use this at higher percents to prevent a punish. It also allows for an Multisensored statue to hit at mid percents fairy easily for extra damage. Its primary purpose is as a spacing tool or a way to force the opponent offstage. At the mid to high percents, the foe will often be thrown too far to really retaliate while Oceana can use this time for Side or Neutral B to establish more control over the stage.


Back Throw: Drag


The cursor grabs the foe tightly dealing 3%. It then drags them across the stage behind Oceana. This dragging animation will hurt for 4%. Then finally, a powerful toss which adds on an additional 5%. This back throw has huge angled knockback, making it a reasonable kill option at higher percents. However, it’s also her slowest throw and is practically useless at lower percents due to the punishable vulnerable end lag. Its base knockback is still pretty high meaning the mid percents can make it another spacing tool in addition to her forward throw.


Up Throw: Wave

The cursor wiggles around, waving at the opponent dealing a total of 10% damage. 1% for the first 5 waves, then a final 5% for the last wave. The final wave deals moderate knockback and positions the opponent directly above Oceana. It has good speed making it a safer option than the others. This move is used to get off a few aerial move or up tilts. Its moderate knockback can also just place the opponent up in the air for juggling at higher percents. Lower percents would probably use this with up tilt to rack up some easy damage. While slightly higher percents will see it used with up air and nair. Opponents can D.I in front of or behind Oceana. If you can predict a frontward trajectory, forward air is your best option while a backward trajectory is a back air. If an opponent tries to airdodge an attack while being tossed, Oceana has the option of an Up B or Up Smash which can easily kill on a bad read and the percents are high.


Down Throw: Slamming Slap

The cursor slaps the opponent twice, each hit dealing 3%, before finishing off with a powerful downward strike that hits for 6%. The knockback weak and sends them at a horizontal 75 degree angle. Oceana can react very quickly once the move is done, making it a potent combo throw. Thanks to its very quick end lag, Oceana can easily follow up with a short hop nair or fair. One could also use the knockback and quick end lag to react by using a b-reversed fish food at mid percent then attack with a dash attack or aerial. The knockback scales very weakly so it'll maintain its usefulness as a combo throw for much longer. This can also be a good way to set up edgeguarding if you're close enough to the stage.

~Smash Attacks~


Forward Smash: Humphead Wrasse

While Oceana charges, she kneels back somewhat, with both her hands behind her, hidden from the viewer. Once unleashed she grabs a humphead wrasse and rams it with full force into the opponent or whatever is in front of her. This attack deals 20%-26.5% damage with fantastic knockback. Being able to kill at 100% at the ledge. The sweetspotted tip of the hump is even better, killing as soon as 90% and deals 5% more damage. It’s sourspotted at the base of the tail with 5.5% less damage.


Naturally, an attack of this caliber is slow. In terms of startup and end lag as well. It’s primary purpose is as a punish move and a K.O move. Oceana players must be sharp when using this due to how easy it is to punish. This attack can also be angled. However, it has the benefit of being a disjointed attack with some reasonable range for its power.


Up Smash: Electric Eel

During the charging animation, Oceana will kneel down and look straight up. Once released, she’ll whip out an electric eel that unfurls and wiggles around, dealing multiple hits that deal electric damage. Each hit ranges from 4% to 7%% and the eel hits 3 times. The sweetspotted tip will deal an additional 1.5% for each hit. Sourspot at the base of her hand deals 1.5% less damage. It also has low base knockback for a smash attack, allowing it to be followed up with a shorthop aerial or up tilt. This is further strengthened by the additional frame of hitstun electric attacks provide.


This move is quick on both start and end lag, which is great in conjunction with its phenomenal, disjointed range. Despite this, the hitbox is somewhat awkward due to being long yet thin. It’s also not super useful at later percents due to not being able to combo easily and having mediocre kill power. It’s rather beneficial as a juggling option if the opponent is trying to aim a dair as they descend.


Down Smash: Cowtail Stingray

The charging animation has Oceana looking confused as she struggles to maintain balance.The ground will start to spit out bits of sand. Once charged, a cowtail stingray will pop out of the ground, flail frantically, and then submerge under the stage again. It has 9 frames of startup. It’s a lengthy attack that has three individual hitboxes on both sides simultaneously. Each hit will deal 9%-14.5% depending on charge. It has no sourspot, but the sweetspot is at the base of the tail, or rather, the stinger. The stinger deals an additional 5.5% and has a darkness effect like a white pikmin. Both sides have only average knockback for a down smash making its kill potential only decent.


Its most obvious utility is as an edgeguarding and roll punish tool. The startup animation is lengthy and Oceana is very punishable even while the move is being performed due to its lower hitbox. Its end lag however is slightly above average, making it a tad bit safer is some situations. The tip of the tail can extend even beyond slightly beyond the ledge which can screw up certain recoveries. As usual with her smash attacks, it’s disjointed.

~Aerial Attacks~


Forward Air: Common Fangtooth


(why)


Oceana extends her arm outwards with a common fangtooth held by the base of the tail. It’ll snap in rapid succession three times, dealing 3.5% damage per bite. Similar to Game and Watch’s back aerial with its somewhat lasting hitbox. This move is quick, disjointed, deals low knockback, and has little landing lag.


It’s one of Oceana’s best follow ups to her down throw. Due to its speed, it can sometimes be used twice on characters with larger hitboxes or floaties and is a good out of shield option. Despite its utility, it’s somewhat awkward in close quarters since the hitbox is only active once Oceana’s arms are fully stretched out. This is somewhat exacerbated by its relatively small hitbox as well. This aerial can also be used off stage to potentially gimp characters with weaker recoveries, or just rack up damage while they struggle back on stage. The range gifts it with some decent edgeguarding potential and it can beat out most other aerials or projectiles that come in its path. It's also quite safe on shield because of the range. Though, it deals very minimal shield damage.


Down Air: Indo-Pacific Sailfish


A typical stall-then-fall with a fishy twist. Oceana hugs her arms around an Indo-Pacific Sailfish, briefly cancelling her fall. Then the two plummet to the ground. It’s somewhat slower than other stall-then-falls. It deals a solid 14% damage with a massive 20% bonus if hit at the tip. The landing shockwave has a measly 2.5% hitbox, but sends opponents at an upward diagonal angle which helps prevent punishment. The attack will normally deal some really solid vertical knockback, but the tip of the sailfish’s bill has a spike with outrageously high downward knockback, almost always a guaranteed K.O offstage.. As is typical of a move of this power, it’s rather slow and punishable with its lengthy landing lag. Despite its large hitbox, it’s still somewhat difficult to land a hit because of the downward speed. The startup animation is 12 frames with 2 active hitbox frames before the 20 frame end lag. Its landing lag is quite lengthy as well at 24 frames.


This moves main purpose is as powerful spike to cap a stock, or a way to get Oceana back safely to stage if she’s being juggled. Due to its long, disjointed, hitbox, it discourages juggling attacks from below. Though, a wise player can simply roll or shield then punish Oceana accordingly. Its relatively slower air speed also makes it a tad safer offstage, giving Oceana enough time to cancel the attack and recover back if it misses. As mentioned before, it's very slow and this added with its power means nothing really leads up into it reliably nor can it lead into anything else. But that spike sure is satisfying though.

Neutral Air: Antarctic Silverfish

Oceana will twirl around in the air as a school of antarctic silverfish surround her, trapping her in the group of fish. This hitbox will hits twice, one at the very start of the attack and the next at the very end. It has a very brief moment where the hitboxes are inactive before it activates again once the silverfish finish their swim around Oceana and disappear. Each hit does 5.5% and sends opponents away from Oceana diagonally with weak knockback. It also has very low landing lag making it a safe option for shorthops.


This move is like her forward air but with a hitbox that’s closer to Oceana. While technically it’s disjointed because it’s the fish doing the hurting, the hitbox is so close to Oceana’s hurtbox it won’t matter usually unless you get very lucky with spacing. It’s a potential follow up from her downthrow or up throw that’s a tad faster and safer than her forward air. Unlike her fair which scales averagely with damage however, its knockback scales very minimally with damage. This worsens its kill potential but makes it much more useful as a combo tool even at the moderately higher percents.


Back Air: Dwarf Sawshark

Oceana twists around and jabs a dwarf sawshark behind her. The sawshark’s serrated teeth deal 15% with a sourspot at the base of the fish that deals 2.5% less and sends opponents at a upward vertical angle. The bill will send opponents in a nearly direct horizontal path. The bill has some good K.O potential making it one of Oceana’s better kill options. Takes 11 frames for the move to hop out where you'll be treated to 4 frames of hitbox. Then there's a 12 frame end lag period and a 15 frame landing lag length. A bit slow but its hitbox is naturally long and disjointed so its got something more going for it.


This move can be brought out as a good surprise or even a follow up from her up throw if reacted to with precise timing. It's a tad slow for reverse aerial rushes but it certainly can be done. Pulsar paralysis helps with the slowish speed. And the lengthy hitboxes means it's a possible edge guarding tool to further push your opponent towards that self destruct. It's also quite useful against shield and deals some admirable shield damage to boot.


Up Air: Sea Otter


Oceana reaches upwards with a sea otter held gently in her grasp. The sea otter doesn’t really do much but look cute. Though, it doesn’t really matter what it does because it’ll always deal 10% and throw opponents at a direct vertical angle upwards. Quick startup and safe end lag with moderate knockback that can kill at around 200%. Its sweetspot is at the top of its fluffy head, turning that 200% into a 150% kill percentage. It's also got sex kick properties to boot and decently low landing lag.

It’s a more powerful followup to her up throw than her nair that sets the opponent up for further up airs. And it also can be used to juggle with its (say it with me) disjointed, long, hitbox. The sweetspot is fairly easy to land, though doesn't do much besides more knockback. If the opponent airdodges the up air, nair could follow up and punish that airdodge. Also a good way to punish foes trying to jump over Oceana to land a back or down air. It has a lot that simply clashes with it or that it can pass through and hit regardless so it has a bit of defensive utility there as well.


~Final Smash - The Song of Dragons~


The camera zooms in on Oceana smiling, eyes glowing with yellow delight. She equips the Lapis Lazuli flute and plays the cursed Song of Dragons. The stage rumbles and out breaches the Singing Dragons who pop out from behind the stage and deal massive damage to those caught in their attack. The whales breach three times in quick succession, dealing a massive 50% to those hit and having incredible vertical knockback. It ends with the whales singing their version of the Song of Dragons before vanishing beyond the stage. Tail flukes waving one in the wake of their destruction.

~Playstyle~


Oceana is a character blessed with a variety of long reaching, disjointed attacks and plenty of zoning utility with her specials. Her neutral B’s paralysis allows her to close the gap between more agile characters while her Side B can be a useful zoning projectile. She’ll mostly be using a mix of Side B to prevent approaches, use Down B to get ambergris or Down B cancel to get a statue. Then fire a few Neutral Bs for damage or throw the item she has. Once her pulsar is successful in getting a paralysis, then she can go full on with a grab to an aerial to rack up hefty damage.


A lot of her attacks have long reaching and disjointed hitboxes making them easy to connect and combo into one another. This is a powerful tool alongside her potent and reliable grab and combo throws. Her grabs, aerials, and tilts are reliable to string together such as double up tilt to an aerial, dash attack to a tilt, Neutral B to pretty much anything if she can land it in the amount of time which leads to the opponent suffering from heaps of damage. All it takes is a paralysis or well placed attack and you'll find yourself taking a good percent and be sent flying into the air. Her emphasis on zoning and reliable follow ups make her a nightmare for slower or larger characters, especially with the range of her attacks. It also helps hit those more elusive hitboxes that others might have trouble getting. The rest of her toolkit is for general, situational support like her down tilt, down smash, or jab.


Her biggest weaknesses is her floatiness, light weight, and generally lackluster speed. This makes it harder than usual to effectively approach enemies. Her slow speed also makes the Neutral B harder to paralyze which is the gateway to her damage strings. And most of her kill moves are cursed with slow speed and punishability, with her best kill option being a back throw. Her recovery is somewhat reliable, although rather linear and punishable for projectile users. Projectiles in general are rough in particular because of her low mobility and lack of a reflector. Her light weight also makes her easy to kill if she’s not careful. This is somewhat mitigated by her small frame. But caution should still be exercised if she’s getting into kill range. Oceana is also at a disadvantage against characters with item absorbing or reflecting moves like Villager, Spacies, or Palutena. Three of her four specials are projectile based. To beat these types of characters, Oceana players will have to be much more careful and play smarter with their specials or get a large portion of her overall benefits restricted.


All in all, Oceana places a particular emphasis on zoning with her Side B restricting small parts of the stage, getting damage strings with Neutral B, and her disjointed aerials making it hard to approach without running the risk of taking some hits. Her ground game is somewhat weaker due to the lack of quicker options besides tilts, but her smash attacks do offer a bit of utility and her forward smash is a powerful, albeit, slow kill option.


To play her effectively, one will have to move from a more defensive game to an offensive one depending on where the opponent is and if Oceana can land a grab or neutral B to go into an aerial then repeat until the opponent is able to predict and dodge, punish, or is launched too far away.

~Taunts~

Up-Taunt

Oceana breaths into a respirator, making the diver's breathing sound found in the games.

Side-Taunt

Oceana wiggles a sardine around and then tosses it. The sardine is actually a projectile dealing an instant K.O 0.5% damage. It kills automatically at 999%. Anything before that and it doesn't even make the opponent flinch.

Down-Taunt

Oceana takes a picture using the underwater camera.
~Costumes~

Gatama Midriff-Changes her swimsuit to her Nineball Island midriff clothing.


Ciceros Red-Changes her yellow-red swimsuit to GG’s red-yellow swimsuit.


Cortica Green-Changes her yellow-red swimsuit to Hayako’s green-white swimsuit.


Manoa-Lai Orange-Changes her yellow-red swimsuit to orange and black with a pattern like Katherine's lifevest from Endless Ocean 1.


Thanatos Black-Changes her swimsuit to a battle scarred greyish. Based on the legendary shark, Thanatos.


Ancient Mother White-Changes her swimsuit to pure white. Based on the Ancient Mother.


Okeanos Guardian Purple-Changes her swimsuit to a strange, muddled, purple. Based on the Okeanos Guardian.


So... What do you think? I'd appreciate criticisms and changes that'd improve it overall. This was fun to make.
 
Last edited:

The Jim Jims

Smash Cadet
Joined
Jul 9, 2018
Messages
60
Location
"All you do is forward smash!"
~Oceana~

Welcome to MYM! While my experience with Endless Ocean goes as far as spending an hour screwing around with my friend at his house, I think that what you made here is a very well structured set that I or anyone else can comprehend without actually playing the game. What I would like to comment on is a few of the specifics with the set itself and the writing, if you don't mind. While someone more experienced will be able to offer a better and more in-depth critique than myself, I still believe that I can offer some insight.

For starters, Oceana's Neutral Special has the potential to infinite. I don't know if you caught that while making the set, but with "virtually no startup or end lag", a .5 second cooldown, and a 1.5 second stun time, it is very possible to infinite anyway. Because it is a key component of her set, I don't expect a major change to the fundamental function of it in terms of her moveset, however, I will say that I think that the best way to nerf it is making it so that the cooldown is longer. Think about it this way; If Oceana hits someone with the gun, they are most likely going to want to follow up with something like a Fair or a RAR Bair or Side Special. If it misses, Oceana can still whip out a disjoint to stuff an opponent rushing in. It's a win-win. I think that the cooldown should be on par or slightly above the stun time. Above all else, do you think a diver would be able to create a perfectly functioning electrocution gun out of a utility used to gather information on marine species? :p

Secondly, her Side Special is absolutely busted. At maximum, the move can do 32% (!!!!) and render the opponent immobile setting them up to get FSmashed and die at a minimum of 58%. Racking up damage with Oceana isn't that difficult, otherwise I would like this dynamic, but Oceana can take stage control with it and then prevent her from even getting touched by you because she throws a 32% damage dealing tool with a pretty decently sized range out ever 3.5 seconds that she can hit you into and then Forward Smash you. This is also the best ledge control move in the game because there is no risk for her to throw a massive AOE attack out there that she can chain into an attack. At least in the case of Lucario's Aura Sphere, he has to be at a high enough Aura and close to the ledge. ROB's gyro can be thrown back at him. You can poke DDD's Gordo and it launches at him. There is no risk involved with throwing a massive AOE attack at the ledge that catches and covers literally every getup option (if you count her standing there waiting for your roll, assuming it doesn't reach IDK I'm not gonna test).

The rest of the things here are me nitpicking to an extent. For one, having a diver dive on land as is described in her Dash Attack is... out of character for a diver. I mean, if I diver were to do that in real life on land as they would when diving into the sea, they would probably injure themselves pretty bad. I would also like to call into question her Down Throw's ability to combo. a 25-degree angle is a really sharp angle, and if I am to assume that her Short Hop is similar to Robin's (pretty mediocre in height) and her run speed is the same as Villager's (4th slowest in the game), I'm not sure if she actually would be able to follow up with an aerial. Maybe she can follow u with Dash Attack? At the end of the day, I just wonder how viable Down Throw actually is at combo-ing. Lastly, her Down Smash. Most roll punish tools are good roll punish tools because they can punish one on reaction. Think of Bayonetta's Heel Slide, which punishes rolls back allowing her to do her monster combos for the kill. With Down Smash's lengthy startup time, I don't think that that would be the case. Average human reaction time is ~15 frames. The shortest roll in the game is Duck Hunt with a 27 frame roll. Taking into account the 15 frames it takes to react, you would need Down Smash to come out on Frame 12 to punish, and judging by "lengthy startup time", I don't think that's the case. If I am to take "lengthy startup time" as 20 frames, then you would have approximately 5 frames to punish Samus's 40 frame roll, not even taking into account the "they're rolling time to Down Smash" and the input lag that varies with the monitor you're playing on.

I think that a lot of the properties of the set could be fleshed out if you instead replaced your vague descriptions of startup, active, and endlag time to frames. You can convert seconds to frames with this handy dandy Frame Calculator (don't forget to change the frame rate to 60!) , and use Kurogane Hammer for specifics on character attributes to compare your set to.

Don't be discouraged by what I wrote down here! You can join the Discord or Skype chats for more personal help on designing a set and just to talk to us! I don't think there is a single soul who wouldn't be happy to help you out. I think that the way you have designed the set is very well, but I think that going further in set design, think about how a move will play out in an actual game. Legendary Street Fighter player Infiltration said that if a move is designed to do something, figure out everything it could do that the designers intended it not to. Shoryuken is a good option out of waking up and as a confirm, which the Street fighter 2 developers didn't necessarily intend. Think about it like that. Good luck in the future! :D
 

Cetus

Smash Apprentice
Joined
Jul 5, 2018
Messages
190
Welcome to MYM! While my experience with Endless Ocean goes as far as spending an hour screwing around with my friend at his house, I think that what you made here is a very well structured set that I or anyone else can comprehend without actually playing the game. What I would like to comment on is a few of the specifics with the set itself and the writing, if you don't mind. While someone more experienced will be able to offer a better and more in-depth critique than myself, I still believe that I can offer some insight.

For starters, Oceana's Neutral Special has the potential to infinite. I don't know if you caught that while making the set, but with "virtually no startup or end lag", a .5 second cooldown, and a 1.5 second stun time, it is very possible to infinite anyway. Because it is a key component of her set, I don't expect a major change to the fundamental function of it in terms of her moveset, however, I will say that I think that the best way to nerf it is making it so that the cooldown is longer. Think about it this way; If Oceana hits someone with the gun, they are most likely going to want to follow up with something like a Fair or a RAR Bair or Side Special. If it misses, Oceana can still whip out a disjoint to stuff an opponent rushing in. It's a win-win. I think that the cooldown should be on par or slightly above the stun time. Above all else, do you think a diver would be able to create a perfectly functioning electrocution gun out of a utility used to gather information on marine species? :p

Secondly, her Side Special is absolutely busted. At maximum, the move can do 32% (!!!!) and render the opponent immobile setting them up to get FSmashed and die at a minimum of 58%. Racking up damage with Oceana isn't that difficult, otherwise I would like this dynamic, but Oceana can take stage control with it and then prevent her from even getting touched by you because she throws a 32% damage dealing tool with a pretty decently sized range out ever 3.5 seconds that she can hit you into and then Forward Smash you. This is also the best ledge control move in the game because there is no risk for her to throw a massive AOE attack out there that she can chain into an attack. At least in the case of Lucario's Aura Sphere, he has to be at a high enough Aura and close to the ledge. ROB's gyro can be thrown back at him. You can poke DDD's Gordo and it launches at him. There is no risk involved with throwing a massive AOE attack at the ledge that catches and covers literally every getup option (if you count her standing there waiting for your roll, assuming it doesn't reach IDK I'm not gonna test).

The rest of the things here are me nitpicking to an extent. For one, having a diver dive on land as is described in her Dash Attack is... out of character for a diver. I mean, if I diver were to do that in real life on land as they would when diving into the sea, they would probably injure themselves pretty bad. I would also like to call into question her Down Throw's ability to combo. a 25-degree angle is a really sharp angle, and if I am to assume that her Short Hop is similar to Robin's (pretty mediocre in height) and her run speed is the same as Villager's (4th slowest in the game), I'm not sure if she actually would be able to follow up with an aerial. Maybe she can follow u with Dash Attack? At the end of the day, I just wonder how viable Down Throw actually is at combo-ing. Lastly, her Down Smash. Most roll punish tools are good roll punish tools because they can punish one on reaction. Think of Bayonetta's Heel Slide, which punishes rolls back allowing her to do her monster combos for the kill. With Down Smash's lengthy startup time, I don't think that that would be the case. Average human reaction time is ~15 frames. The shortest roll in the game is Duck Hunt with a 27 frame roll. Taking into account the 15 frames it takes to react, you would need Down Smash to come out on Frame 12 to punish, and judging by "lengthy startup time", I don't think that's the case. If I am to take "lengthy startup time" as 20 frames, then you would have approximately 5 frames to punish Samus's 40 frame roll, not even taking into account the "they're rolling time to Down Smash" and the input lag that varies with the monitor you're playing on.

I think that a lot of the properties of the set could be fleshed out if you instead replaced your vague descriptions of startup, active, and endlag time to frames. You can convert seconds to frames with this handy dandy Frame Calculator (don't forget to change the frame rate to 60!) , and use Kurogane Hammer for specifics on character attributes to compare your set to.

Don't be discouraged by what I wrote down here! You can join the Discord or Skype chats for more personal help on designing a set and just to talk to us! I don't think there is a single soul who wouldn't be happy to help you out. I think that the way you have designed the set is very well, but I think that going further in set design, think about how a move will play out in an actual game. Legendary Street Fighter player Infiltration said that if a move is designed to do something, figure out everything it could do that the designers intended it not to. Shoryuken is a good option out of waking up and as a confirm, which the Street fighter 2 developers didn't necessarily intend. Think about it like that. Good luck in the future! :D
Hey, thanks for the criticisms. I made a few changes so you can check them out and see what you think. It'll certainly help a lot with fixing her set and all. I guess my main problem is I just don't have a reference on if something is going to combo into itself with all the other factors like air speed, ground speed, angle, frame lag ETC. All I really have a is vague feeling that this move should be this fast for this amount of time relative to this amount of power from playing Smash.

As for her dash, I dunno, Villager takes a pot out and trips which is an RNG mechanic in the AC games that's a minor annoyance. Does another disjointed fish attack sound good that uses a sliding momentum to bring her forward similar to Ness' dash?

Anyways, thanks so much! It seems to be better received than I initially expected, so that's a plus.
 
Last edited:
D

Deleted member

Guest
King Dedede is certainly a set that piques my interest as one of those poor souls you mention that mains the character. This set's intention is to make the character viable, and I think it does succeed in that regard. Dedede has a huge amount of pressure now that he can charge his Jet Hammer to buff himself passively and certain moves changing to help him be less predictable. The Waddle Dee special was a very nice change too, giving Dedede some control over their AI and all the interactions were very logical involving Dee.

The set has some changes I don't much like though, for example the decision to turn into Buff Dedede in the throws is very odd as a throws-only gimmick. Some moves like the new nair where he inflates as an attack and many of the throws are surprisingly wacky. The set as is in Smash 4 just seems a bit more consistent and where the set strays into that wacky area, I feel it was at its weakest. The new hammer moves replacing older ones were a tiny bit random where they popped up but were all good moves.

The changes to moves are a bit mixed at times too. I like most of the changes, but the new fair/bair mechanics seem a little complicated, and I'm not sure I like the new smashes that seem a bit too technical for a character like Dedede. Many of the new more technical aspects added to moves like the up special, smashes, aerials and standards kind of fly in the face of Dedede's simplistic playstyle. At the same time they do make Dedede viable and would appeal to an advanced player who's looking for depth. It'd work best if these moves didn't have these overly fluffy animations where I just want Dedede to slam his hammer in that glorious fsmash and not twirl it in a non satisfying manner. As an example personally I would've just buffed his fsmash, maybe buffing its safety if not the move outright (or both, it'd be justified).

Overall I think the set misses the point a little bit on Dedede's set. It's meant to be a big powerhouse character, if he's going to be made viable it shouldn't change that. However I can't say I dislike the set because of its good changes like the Waddle Dee, the standards are quite good overall (though I miss the Smash 4dtilt) and aerials had a few good moves. I did not like the grab game or smashes though, so it can only get so much credit. Nonetheless, nice work Muno.

I have to say, Hidan was an extremely funny set. The Narutards in the final smash, the opening biography of the character, all of the edginess throughout the set. Sets an awesome tone that made the whole experience enjoyable.

The set itself is honestly quite impressive in its dedication to the character. The set opens talking about his personality and you nailed that, his entire playstyle is a one trick pony centred on his circle, yet it avoids being a shallow or simplistic moveset. Largely, hilariously, he is reliant on a gimmick where he stands in place and fights, but the set is very clever in its use of his scythe's weapon reach and shape. It's been some years since Death and this is one of the few sets to make use of the awesome scythe in that time. He can fight by throwing out his scythe as a projectile or use its size to fight the foe even as he camps on a circle. At the same time, he has the right tools to move around in quick bursts in case he wants to leave the comfort of his circle.

The moves here individually are fairly simple, not that that's bad. I was impressed how you managed to work in the minor anti-shield aspect of his damage and how the foe's own grab, an out of shield option, is the natural counter to Hidans' one trick pony circles/voodoo curse. It's a straightforward sort of rock-paper-scissors of shields and grabs and it's extremely important to structuring the set's playstyle. I was surprised how satisfying moves like nair and fsmash felt despite their simplicity. The melee is real solid here, very focused on the playstyle at all times.

If anything was off in this set, I found the core mechanics at times slightly confusing. Mostly for all the conditions the foe can be under, from voodoo, to taking self damage from Hidan. This would be largely solved if they were just named or explained separately. It's no big detriment though and I don't tend to hold such things against a set's quality. The one real complaint I have is when he throws his scythe away, he can't use his scythe moves and that's comically underpowered, even for a short amount of time. It is a fitting punishment for the character but realistically I think Hidan's player might just avoid using those moves. Anyway, this set was pretty great overall and that final smash really caps things off. For me this isn't even far off your very high quality last contest.

Aromage Rosemary reminded me somewhat of Hidan as a camper, the characterisation in this set isn't as good but the set is decent enough. This set is mostly wind attacks and like Hidan is focused around Rosemary in her Aroma Garden, similarly to Hidan wanting to be inside of his circle. The main differentiation in Rosemary's camping playstyle is that she's happy to heal the opponent so long as in the end, she gets the better chunk of the deficit by self healing or out damaging the foe's healing. It's an interesting dynamic for making healing the foe viable and the balance in this set is overall quite good.

I'm not sure about the characterisation, compared to Hidan anyway it's a bit bland. It does remind me a little of some of those old YuGiOh sets by Roy, and has all the good parts too, incorporating all the assorted material and trying to craft a character out of just a card. There is a good deal of redundancy and repetitiveness when so many attacks are utilizing wind. At the same time it's still very well done, I was again pleasantly surprised by the amount of depth in all the moves later on and it's absolutely a high production value set when it's only for a card. That's the most charming thing about it, considering it was made in tribute to Roy, it's a very respectful wish list set. Another very nice set from you Kat.

So lastly we have Golisopod of the first day Kat sets, sorry it took me this long to get to all these movesets. I had a blast reading all three of them, honestly I was surprised how much I ended up liking Golisopod despite the 5k limit. It's one of the more impressive attempts at the challenge I've seen because of the ways it utilizes the Shield Push Cancel, the stale move queue and just implies depth while cleverly avoiding having to explain already existing mechanics. And it's very intelligent about knowing when to focus on what in this difficult challenge environment. At the same time it's a fresh take on all these mechanics, and more than that, it's very well characterised. I went into this set not having any sense of Golisopod's character and I come away knowing it and Guzma's relationship very well. This is one of the best Pokemon Trainer-ish sets I've read and it's rare to see the trainer's personality so strongly in the Pokemon's moveset. Funny that it's the opposite to your no Pokemon Ghetsis moveset's approach. Guzma's not a part of the set but his presence is always strong.

The set's mechanics revolve around the stale move queue in an original way. This is the perfect concept for a 5k set as just trying to get a move off the stale move queue is a simple, cool playstyle that piggy backs off of existing mechanics. Maybe you could add some sort of visual for this though? May as well when it's this central, just something on the HUD or some way of knowing FI is available would be a solid improvement. The set manages to break down Golisopod to basics, he's largely a brawler who just wants to break the foe's shield and work around a focus on "Shield Push Cancel," an obscure but interesting mechanic you dug up from the Art of... videos. It's a cool idea to focus on as it hones in on Golisopod's aggression and cowardice. He basically only wants to attack when he can be assured victory, i.e. break shield or when he can land First Impression. I have not seen before in this exact way, it's a bit like Valerie last contest.

There's still some ideas that aren't fully explored, naturally given it's 5k. The water/soak status effect isn't all that relevant, though it is brought up a few times in the set. The rocks made on the up smash are a little strange on that input when they seem fairly important, I don't mind it too much personally but I'm infamously open minded about input placement. It's also a small missed opportunity the Leech Life down throw isn't explored further, but these are things you largely had to do for the 5k challenge. I did check and for the set minus the FS it's not too close to 5k. The one weird mistake is the one typo in grab where a sentence ends on "but" then nothing. Nonetheless, a cool set that has a few unpolished aspects.

Mint is a surprising set compared to what I expected going in. After the first special, I was slightly confused as the move doesn't go into that much detail on exactly how it works, doesn't say if it's an illusion, or just a bunch of hitboxes happening at once, but I assumed the whole set would focus on that. Ultimately the set is a playground set where most moves seem to create constructs or are interactions. This set really wasn't what I expected It has a lot of ambitious ideas while remaining fairly simple, it's so chock-full of ideas it's practically about to burst. In some ways that's a good thing, in others it does make the set feel unfocused.

There's some moves here I'm not sure about. The up aerial is a prime example, as she seems to just create these balloons and their hitbox is fairly unclear, to the point I have to assume it's more of a construct spawning move on of all things a uair. I don't mind it, but there really ought to be some kind of limit on these constructs, at least a stated duration or it could get busy only using for example uair, down tilt, fsmash together. On those last two though, I actually quite liked those and their interactions, I thought if anything fsmash could've been a fun log roll-ish concept for the whole playstyle to follow.

My other big complaint here is besides a lot of interactions like blowing around scrolls and making all her hitboxes be on fire, the set doesn't have a real focus. The scrolls move isn't really suited for her playstyle as her set is largely constructs, so when you think about it, all it really achieves is spawning more constructs and interactions. Some mechanics like the fair where she cuts up everything into more hitboxes is nice, though all it really achieves for playstyle is more chaos, and there's no deeper playstyle beyond that chaos. It's at least not OOC for this character, it's honestly kind of clever for her to be so spammy in the game's meta as an abashed prankster. Something like Werner's "projectile meter" that fills for every projectile that lands would've worked here. It does feel like it's missing a big central idea in my opinion. It definitely flows but in a pretty simplistic way. On the other hand, it's a tremendous 5k set and one of the most ambitious ones yet, really pushing the envelope. So overall, have to say you did a very nice job here US. Certainly not impossible to improve either if you wanted to refocus things, as it's got a lot of good ideas.
 

gcubedude

Smash Apprentice
Joined
Aug 15, 2009
Messages
83
*blows 5 years of dust off this account*

So I've decided to return to making moveset and being active in This community. That said, I see some new faces, so I figured it'd be best if I introduce myself for those who haven't already met me in the Skype chat.

Hello, I go by Gcubedude. I started making moveset waaaay back in MYM9, although I had read sets and commented before that. In my brief time here, I made all of 5 movesets. My personal favorite that I made was Sanaki, but I think Sothe was my best (at least based on general response).

I have a moveset in the works that I'm hoping to get out before summer ends. I'll also try commenting where I can. Now that I have a smart phone and can read movesets on the go, I should be able to do that more often.
 
Last edited:

JamietheAuraUser

Smash Lord
Joined
Jan 11, 2010
Messages
1,196
Location
somewhere west of Unova
I think that a lot of the properties of the set could be fleshed out if you instead replaced your vague descriptions of startup, active, and endlag time to frames. You can convert seconds to frames with this handy dandy Frame Calculator (don't forget to change the frame rate to 60!) , and use Kurogane Hammer for specifics on character attributes to compare your set to.
I personally would recommend avoiding specific frame data unless it's to make a point. A general description of a move's speed, especially comparing to other, similar moves (if there are any), is sufficient in most cases, and using specific frame data invites a frequently unnecessary degree of criticism. However, I would recommend using Kurogane Hammer for specific character attributes. You might find that some characters are faster or slower than you remember in various ways. For example, contrary to MYM's opinions, most heavyweights are not fastfallers!
 
Last edited:

FrozenRoy

Smash Lord
Joined
Apr 26, 2007
Messages
1,268
Location
Las Vegas, Nevada
Switch FC
SW-1325-2408-7513
No. 454

Toxicroak

Toxicroak, the Toxic Mouth Pokemon
Type: Poison/Fighting
Weight: 97.9 LBs
Height: 4' 03"
Ability: Anticipation / Dry Skin
Hidden Ability: Poison Touch


Its knuckle claws secrete a toxin so vile that even a scratch could prove fatal. The toxin made in its poison sacs is pumped to the knuckle claws through tubes down its arms. It has a poison sac at its throat. When it croaks, the stored poison is churned for more potency. Swaying and dodging the attacks of its foes, it weaves its flexible body in close, then lunges out with its poisonous claws.


Statistics


Size-wise, Toxicroak is lanky and has a similiar figure to Luigi, except for being wider near the top due to his bulbous poisonous sac. He is rather light, tied with Little Mac and Falco at 82 weight for 46th in the game. While his dash speed is above average, it is hardly impressive, barely above Pit and Dark Pit at 1.67 (They're 1.66 and tied for for 24th). His walk is cautious, moving at the same speed as Mii Brawler and Lucario (37th), and he has high traction.

Aerially, Toxicroak's unimpressive aerial speed (Shulk, 24th) means he has little faster approach in the air. While his fall speed and gravity are a bit higher than the average, he is far from a very fast faller: Fall speed is equal to Wario (23rd) and Gravity to Link and Mii Swordfighter (19th). His first jump is rather high, one of the highest in the game, but his second jump is only a touch above average.

Toxicroak can crawl and moves a bit faster than most characters while crawling, however, he does not go very low down, basically hunching down rather than putting his whole body down. This plays into another special ability of Toxicroak: The Crouch Jump. By pressing down on the control stick and then jumping, even right after you crouch, Toxicroak will double his first jump's distance! This allows Toxicroak to, for example, pressure people on the top platform of Battlefield from the bottom platform of it, reach high parts of stages while retaining his double jump and more! By combining it with a crawl, Toxicroak can even approach opponents while ALSO preparing his Crouch Jump!


Specials

Neutral Special: Poison Jab

Toxicroak rears his fist back with a sleazy grin and then performs a very fast jab in front of himself, pointing his stinging claws forward for the hit. This jab comes out decently fast and only deals 4% damage, but it poisons the opponent, their body coated in a slimy looking purple while they are poisoned. Poison deals 1% per second and on Poison Jab lasts 8 seconds and does not flinch the opponent. Being hit by further poison jabs or poisonous moves adds to the timer, so if you hit with two Poison Jabs, it doesn't just refresh to 8, it goes to 16 (Well, minus however long it took to jab 'em again), so it can add up to a lot. The ending lag on this move is rather short, so it is pretty fast overall, with decent range due to the stinger. At very low percentages, Toxicroak can chain a Poison Jab into a Poison Jab, although it quickly scales ouit of range to do this.

This move deals 12% total, quite good overall for the poisonous frog, but all is not lost to the opponent, as they can lower the timer on their poison by hitting Toxicroak: Every time the opponent hits Toxicroak, the timer on their poison is reduced by 1 second as Toxicroak's Dry Skin absorbs it, with multi-hit moves and DoTs only counting as one hit and pummels not counting at all. Opponents are encouraged to approach Toxicroak to reduce the amount of poison timer they have, especially since Toxicroak can get some bonus effects on opponents who are poisoned, and this isn't even the deadliest the poison can get...and the opponent approaching? That's exactly what Toxicroak wants: He is an offensive character who does best when starting his offense by getting the opponent to approach.


Side Special: Gunk Shot

Toxicroak prepares poison in his mouth, shaking his head a little as he swirls poison inside, before shooting it forward as a gunky projectile! The exact distance this projectile travels varies based on how Toxicroak angles it, but by default, it stays roughly Toxicroak torso level going straight ala a Luigi Fireball while being half the size of a fully charged Samus Charge Shot. This goes 2 Battlefield Platforms with no vertical reach: Toxicroak can angle the shot up or down to either lob the shot in the air, at highest going 2.5 Ganondorfs into tue air but landing 1.5 Toxicroaks in front of Toxicroak, to the lowest being Toxicroak shooting the Gunk Shot essentially right to the ground in front of him, think like Zamus' Down Smash. The Side Special deals a fairly respectable 13% damage no matter how it is angled, with somewhat middling knockback, only killing at 160%. With higher than normal starting lag and average ending lag, while this isn't hyper punishable, it isn't the easiest move to get off.

If Gunk Shot hits the opponent, it poisons them just like normal, the same as Poison Jab's poison but half the duration (meaning 4% total damage). Gunk Shot itself is a slow projectile, so it is best for controlling horizontal or vertical space, forcing opponents to either approach in a way beneficial to Toxicroak or to force them to retreat in a way Toxicroak can exploit, making it one of Toxicroak's more solid approach options. When Gunk Shot reaches its maximum range, the sludgy goop it is made of falls to the ground, creating a toxic puddle roughly half the size of a Battlefield Platform. If it is doesn't fall on ground fast, then it turns into a hitbox that deals no damage, hitstun or knockback. Instead, all it does is poison opponents for 4 seconds under normal rules. It falls until it hits ground, goes off screen or somehow falls for more than 8 seconds (no MYM projectile looping shenanigans for you!). Puddles last for 10 seconds and have their duration refreshed if over half of a Gunk Shot's puddle falls on it.

The puddle itself, as you may have guessed, is poisonous: While on it, opponents do not have their poison timer go down due to time, although hitting Toxicroak will still reduce it. Opponents who are inside it take poison damage as if they are poisoned and are treated as poisoned while on it even when not poisoned and become poisoned for 1 second + the amount of time they were touching the puddle when they exit it. There is a half second cooldown before it checks for this, so shorthopping or moving on/off it fast doesn't cause you to rack up absurdly high amounts of poison. Opponents will do their best to avoid your puddles, especially when poisoned, and Toxicroak can use the fact opponents MUST avoid them while poisoned if they ever want to be rid of it against them. If they try to approach, he can lob further Gunk Shots over them, or he can try to intercept them with Poison Jabs and aerials and what have you. It's a decently core part of Toxicroak's playstyle.


Down Special: Croak / Sucker Punch

Toxicroak's poison sac throat expands somewhat as he smirks with a skeevy smile, his mouth churning slightly as if he was swishing something inside! Toxicroak might not be able to Howl and raise his attack like some mutt, but he has a far more fearsome ability in his arsenal: Croaking! ...No, not in the dying sense, although if you play him badly that may be a frequent result. After churning the poison inside of his toxic sac and mouth, Toxicroak will let out a non-damaging and deep croak, showing that he has amplified the poison inside of him! For the next 8 seconds, poison that Toxicroak doles out will go up one "level", causing it to deal an extra 1% per second! So, for Poison jab, that's a whopping 8% damage increase...and it doesn't stop there. Toxicroak can churn the poison in his mouth multiple times, up to 4 to be precise, making his poison do a maximum of a pretty amazing 5% per second...that's an incredible 40% in theoretical damage! Each time Toxicroak croaks, it refreshes the duration of his powered up poison: Croaking when he has maximum stacks only refreshes the duration. In addition to visual cues and memory, opponents can keep track of how much poisonous power Toxicroak has and how poisoned they are by looking over their HUD, where there will be a skull-and-crossbones of poison above Toxicroak and the foe's stock based on how poisonous Toxicroak is and how much damage per second the opponent is taking respectively.

When Toxicroak Croaks, this refreshes the poison of all opponents on the screen, which is aesthetically represented by a light purple soundwave emanating out from Toxicroak across the entire playing field, opponents flashing purple as it passes them by to signal the refresh when it reaches. Given this is aesthetic, it can't be dodged or anything, although it won't refresh the poison if it wears off before the wave gets to whoever is being refreshed. Does not upgrade poison to the next Croak level, nor does adding more Croak poison do so.

In addition to the above, Toxicroak gets another, albeit smaller bonus, as his Dry Skin is coated in a Poison Touch. Opponents who touch Toxicroak but without attacking him receive a single tick of poison, at whatever Toxicroak's current level of poison is. This rarely means anything, you don't exactly just run into your opponent constantly without actually fighting them, but it CAN be relevant for grabs, as it essentially means Toxicroak applies a stack of poison when he grabs a foe OR is grabbed, a grab state isn't a hitbox after all. Croak also can effect Toxicroak's other moves: For example, Gunk Shot slightly increases in size with each level of Croak, until it is equal to a fully charged Charge Shot at max Croaks, and the puddle it creates also increases in size, until it splatters over a full Battlefield Platform at maximum Croaks.

Croaking is powerful, but it also leaves Toxicroak vulnerable, having decent lag on both ends and no hitbox during a fairly long animation: If you use Croak in neutral, you're BEGGING to be punished for it! Opponents are going to want to interrupt Toxicroak when he is Croaking, which sometimes, is exactly what the sneaky frog wants! You see, by pressing B during the animation, Toxicroak will instead suddenly swell his poison sac to extreme sizes! This, essentially, functions as the start of a counter, nullifying a non-grab hitbox that it hits. Regardless of if it nullifies a hit, Toxicroak then sneakily punches forward as his poison sac deflates once again, which deals 8% damage and knockback that essentially resets neutral. Thus, if the opponent tries to simply hit Toxicroak carelessly, they can get smacked in the face...and, since Toxicroak doesn't NEED to counter a hit to smack the foe, simply running in and grabbing doesn't always work: The proper counter to Sucker Punch can be to shield and then to grab, but that runs the risk of Toxicroak finishing his croak. It also can simply be used as a psuedo-counter for Toxicroak in general by simply pressing B fast with the intention of using it solely as a counter.

Sucker Punching the opponent isn't a free action: Toxicroak does not get to Croak and thus raise his poison level or fresh it if he uses Sucker Punch, nor does he refresh his poison stacks. Sometimes, the opponent can think it a victory to eat a Sucker Punch just to help run out Croak or stop it. Of course, Toxicroak is still getting damage in, so this is a plus for him nonetheless, and opponents who want to rush in and stop Toxicroak fits perfectly into him wanting opponents to approach him. Shoot a Gunk Shot into the air and then Croak, for example, and opponents who want to just run in and grab you will have to contend with a Gunk Shot hitting their head or a puddle poisoning them all the while. Very tricky!


Up Special: Revenge

Toxicroak flashes red as he leans back, fist rearing back, before performing a rather classic rising uppercut! This rising uppercut goes more forward than, say, Mario's Super Jump Punch, but it sacrifices some vertical height in the process. Opponents struck by this rising attack are met with perhaps somewhat disappointing damage and knockback, 10% damage and knockback that won't kill until 230%, although it is at least enough that Toxicroak doesn't have to worry about opponents messing with him if he hits them. The starting lag for this is a bit long, but Toxicroak is super armored through almost all of it, with ending lag being slightly long but given Toxicroak enters helpless anyway that doesn't mean much.

Given the super armor, Toxicroak is nearly impossible to knock out of this move, with a small window to strike him out of it at the start. Getting struck for Toxicroak is not merely something he can tank through, but as you may have guessed, it powers the move up, Toxicroak gritting its teeth and punching with more force! This doubles the damage dealt to 20% and the knockback to 115% and even makes it go 1.5x the normal distance to boot, making it actually one of Toxicroak's strongest moves, and is very good for intercepting approaches, Up Specialing right when the opponent is coming in out of a shorthop while attaching for an approach or what have you. While strong, this is also a high commitment, seeing as a whiff leaves Toxicroak eminently punishable given his entering of helpless...on the other hand, hitting with it actually keeps Toxicroak from falling into helpless like normal, which can make this move a pretty great edgeguard, especially since it'll obviously kill earlier than 115% closer to the ledge. As a recovery, while it is not the longest, the fact that it can potentially stuff gimps so hard gives it some potent power and makes killing Toxicroak ocassionally rather tricky.


Smashes

Forward Smash: Cross Counter

Toxicroak takes a step back, a single arm leaning down almost limply as this move starts, before taking a lunging step forward while performing a moving, grounded uppercut, leaning back as he does so! The starting lag on this move is rather long, but if Toxicroak gets his way through it, then he'll find the attack rather safe, as Toxicroak is intangible during the attack itself, essentially functioning as if he had sidestepped. The attack itself is not extremely powerful, dealing 15%-21% that kills at 140%-110% to anyone who is struck by Toxicroak's powerful fist. The ending lag of this move is not excessive, but it is on the longer end: Expect to get punished solidly if you don't strike your opponent here.

One notable thing about this move is that the time in which Toxicroak charges the move is quite long into the starting lag: Toxicroak attacks almost instantly after you stop charging. This, in turn, is important because of the fact that Toxicroak goes intangible when the move starts, which means charging this move can potentially be very dangerous even right in the foe's face, as you can release the move for fast intangability and counter strike them. This gives Toxicroak a strong ability to punish and break approaches when combined with his Up Special: Don't go after Toxicroak out of fear of releasing his charge or using Up Special and poison will wither away, charge in recklessly and risk getting punished for trying. Voila, pressure without an approach!


Down Smash: Vaccuum Wave

Toxicroak rotates his shoulders in place rather fast, arm swinging like Donkey Kong's Neutral Special but a lot faster, relaxing his body muscles and drawing in close opponents with a weak windbox, before spinning with his arms outstretched, striking any opponents for 13%-18.2% damage and solid knockback, gets opponents away from Toxicroak and kills at 145%-120%. The last two spins of the rapid spins, which last long enough to catch spot dodges and inward rolls, deals 9%-12.6% damage and weaker knockback that depending on the damage percentage and opponent will either launch the opponent into a combo follow-up or a tech situation. This is the hitbox that will hit said spot dodges and rolls usually. The starting lag on this move is slightly on the longer end, so it isn't a very good panic button, but the ending lag is fairly solid overall.

The windbox gathers the goop from Toxicroak's gunk shot more strongly than opponents, sucking it in with double the distance and strength, which if Toxicroak uses it from the middle of a base Gunk Shot puddle will cover the entire puddle. Opponents who are on the puddle will be pulled in with the same strength as the puddle, which allows Toxicroak to catch people out from a rather further distance than normal. While on puddles, the goop that is closest to Toxicroak (within the original windbox range) will be drawn to Toxicroak's rotating shoulders as a hitbox that deals 2% damage and some light hitstun for every 1/4th charge that Toxicroak performs, which combined with the longer suction can potentially allow Toxicroak to, say, draw someone from a bit further away with a windbox, hit them with the smaller poison hitbox and then release the Down Smash and smack 'em in the face! A deceptive move in terms of range.

If Toxicroak used this move on a puddle and gets to the end of the move, then he will release a burst of goop that he gathered from the puddle out as a hitbox with limited vertical reach but equal to the horizontal distance of the puddle, which also helps explain how all that goop doesn't go away (when hit, the goop sloshes out, but not with enough strength to be more than an aesthetic animation). This goop only does 7% damage regardless of charge, but it can provide safety to opponents who, say, try to stay outside of range until the last moment and then use the windbox to approach, or other such tricksy opponents, like Super Armoring through the Down Smash to get hit by the goop. This is all very Gunk Shot dependant, but Toxicroak DOES like getting people to approach him, and this makes it a good deal more difficult when Toxicroak has goopy puddles set up.


Up Smash: Headbash

Toxicroak leans back far, faaaaar, placing one of his arms against the ground for balance before springing up and headbutting at the opponent! This moves Toxicroak's hurtbox reeeally close to the ground while charging (the charging starts early into the starting lag, which does also mean there's a bit of a delay before he springs up) which allows Toxicroak to dodge a good number of attacks. This move has two hitboxes: The very top of Toxicroak's head with the "fin" and the rest of the head. The top is a sweetspot and is intangible ala Mario, although Toxicroak gets less mileage out of it since his entire head isn't intangible. The sweetspot deals the same damage as your Forward Smash, 15%-21%, but it has substantially higher knockback that kills at 102%-79%. By comparison, the sourspot merely deals 12%-16.8% damage and kills at 180%-150%: It can be useful for aerial launching scenarios, but it is far from a kill or damage move.

Up Smash is primarily used for catching landings if you launch opponents into the air or, importantly, to catch out opponents who are doing things like jumping over your Gunk Shot puddles. The ability to suddenly lower your hurtbox against shorthop aerials is very strong, especially when combined with Revenge. The sweetspot is kinda hard to hit on grounded opponents which reduces the effectiveness of, say, turn-around Up Smashes. Lag-wise, it is about 3 frames laggier than Mario's on both sides and thus is not nearly as safe as said move. Use it more carefully.


Standards

Jab: Poison Sting

Toxicroak performs two quick punches with his fists, each of which deal 2% damage and very weak knockback. The third hit depends on if Toxicroak holds down A, or if he simply presses A a third time. Pressing it for a third time causes Toxicroak to simply perform a sharp and rather harsh kick, dealing 7% damage and knocking the foe away a decent amount, at low percentages it can cause tech situations if the opponent is a fastfaller. Aside from that, it serves the common jab purpose of resetting neutral and 11% damage sure ain't bad as a total either.

Holding down A instead leads Toxicroak into a repeating jab of his poisonous claws, each of which deals only 1% damage, but applies a stack of Toxicroak's poison, so each one is essentially 2% damage...well, unless you've been Croaking, in which case you can get up to 6% damage per hit of this multi-hit! In addition, the opponent will not have the timer on their poison counter go down while inside the jab, although they will continue to take damage, so keeping opponents in the jab can slightly "extend" the time on your poison. This move does push people out of its multi-hits faster than a lot of repeating jabs, but no other jab in the game has this kind of damage potential. The jab finisher of this move is a low, sweeping kick which deals 3% damage and lightly pops up opponents, can set up some combos but not nearly the best for starting them. It is unsafe on shield, so Toxicroak should be careful about holding down his multi-hit too hard, because if they get out of it they can casually shield the finisher and get off a free grab.


Forward Tilt: Venoshock

Toxicroak's poisonous sac blows up slightly as reddish-purple poison drips down his claws, stabbing forward in a closing-pincer motion with his claws after this. This has slightly higher than average starting lag for a Forward Tilt, dealing 9% damage and moderate knockback that kills at 180%. At low damage percentage, this can set up a combo, like with Toxicroak's Poison Jab after moving forward or his Down Tilt, while at higher percentage it leads into more of chases, 50/50s and sometimes aerial pressure. The ending lag on this move is moderate, it is punishable but your opponent isn't gonna get powerful smashes off on you or anything, it's safe on shield when properly spaced.

Against opponents who are poisoned, the red poison of Toxicroak's claws will react violently with his normal toxins, blowing the opponent back violently (kills at 90%!) while at the same time doubling the damage to 18%! This is Toxicroak's most potent move, although it is not this strong throughout: When Toxicroak's hands move out, it is a sourspot that only deals normal damage, only hitting with the further part of the hitbox (where the stingers meet/are) does this occur, so Toxicroak needs to space carefully to get off his potent killing move, not to mention the obvious requirement of having a poisoned foe, which given their ability to reduce said poison's timer and the ability to wait it out is hardly a given when the opponent is at kill percentage. If you're using Forward Tilt to combo or whatnot, it also can be stale when you actually go for the kill and so kill later.


Down Tilt: Sliding Kick

From his crouching position, Toxicroak sticks a leg forward and sliiiiides across the ground, think like a Mega Man slide kick but lower to the ground. This deals light knockback towards Toxicroak, making it one of Toxicroak's best combo starting moves, but it only deals 5% damage on its own, so it isn't much of a reward to land by itself. Both the starting and ending lag are fairly low, so you can slide across the ground repeatedly at low risk, although despite the range (half a BFP) it is slower than moving around it normally, including with a Crawl. If Toxicroak starts this move on Gunk Shot puddles, then he will move at 1.2x the speed and go for a full Battlefield Platform.

When combined with Toxicroak's ability to both crawl and Crouch Jump, however, it completes a trio of abilities that Toxicroak can toolbox out while crouching: For example, approaching with a Crawl and threatening to Crouch Jump and scoop people who try to get above you out. Projectiles can potentially be slid under, along with threatening it as a movement attack when fighting grounded opponents, and generally being one of your "get in there" tools anyway. It also is excellent at shield poking due to its very low hitbox, although it is not safe on shield unless it does so...OR unless you are actually pretty close to your opponent. If you are, then you'll cross them up, which can make it safe, and gives another option to utilize in instances like this.


Up Tilt: Spurred Strike

Toxicroak performs a swift upwards kich with his feet, striking upwards with the assuredly poisoned spurs on the bottom of its feet! Most of this hitbox deals 5% damage and weak knockback, a perfect move for setting up combos and, well, that's about it. It doesn't combo into itself like a Mario Up tilt, but it leads into an aerial easily enough. It also has a sweetspot on the ends of Toxicroak's feet, which is where the little spiked spurs are, which deals the same damage but poisons the foe for 2 seconds (1% per second, so 7% total damage) and slightly increased hitstun, allowing slightly more true combos and on some percentages a confirm into Up Smash. It doesn't have a lot of reach outside of Toxicroak, so it is a risky anti-air option, but combines with Down Tilt as a combo starting option (at some percentages, Down Tilt into Up Tilt is a combo even!) for Toxicroak to use a lot. A sweetspotted Up Tilt will combo into a Poison Jab from a jump due to the increased hitstun at mid and higher percents, potentially offering a ton of poison in a tiny package

Dash Attack: Power Swipe

Toxicroak stops dead in place, bringing his arm back and putting his shoulder forward as if charging something, then swinging said arm forward as a potent, powerful swipe! Slow and laggy to start with, the fact it completely stops Toxicroak's momentum can be used to trip opponents up and avoid punishes of opponents expecting Toxicroak's dash in approach. The slash itself deals a strong 15% damage and kills at 105%, making it a very strong dash attack. But the ending lag is also fairly poor to go with not the best starting lag, so you don't hit with it often.

If Toxicroak uses this on sludge, you can hold down A from the start of the move to slide on it retaining Toxicroak's dash speed. This allows Toxicroak to mix up between coming to a total stop and sliding forward while preparing an attack. If you let go of A, Toxicroak will stop right where you release it and thus interception is difficult. Note that once you release A, you cannot then hold A again to start sliding. So it is a bit all or nothing in that regard. It's a nice, tricksy kind of move though.


Grab Game

Grab: Lanky Reach

Toxicroak leans forward and reaches out with his somewhat lanky arms, giving himself a somewhat longer than average grab range, which is counteracted by somewhat longer than average starting lag of the move. He has pretty excellent pivot grab range but his pivot grab has longer than average ending lag. His normal grab has average ending lag,

Pummel: Nasty Scratch

Toxicroak scratches deep into the opponent, dealing 1% damage and poisoning them for 1% damage over 1 second. This has the speed of a laggier 3% damage pummel, but the poison has higher potential damage with Croak levels, making it potentially the most damaging pummel in the game!

Forward Throw: Belch

Toxicroak stuffs the foe into his mouth, his mouth and poison sac bulging like if Yoshi ate something, and chewing on the opponent 3 times for 1% damage each, followed by spitting the opponent out in a pretty standard trajectory for 3% damage. This knockback is too strong for Toxicroak to really follow up easily, but situationally it can combo (or force fast reactions to) with a Revenge. For the most part, this is more about gaining stage control, as Toxicroak can either advance to cover their options or he can fire off a Gunk Shot to give more of an approaching option and potentially cover their landing area with goop.

This move will deal more damage the higher that Toxicroak's Croak level is due to the increase of poison, dealing an additional 2% damage per stack of Croak, meaning a maximum of an 8% damage increase, for a total of 14% damage! If the opponent is poisoned, then it additionally will refresh poison similarly to Croak, except it only refreshes at most half of the duration (if it would hit max duration with a refresh of less than half of the poison's duration, then it will not go past the max duration), making it less powerful. And just like Croak's refresh, it doesn't "boost" the poison itself or anything. Nonetheless, this is Toxicroak's most damaging potential throw (well, 100% damage anyway) although it reqires solidly intense setup to hit that damage high, and there's not really much for direct follow-ups as mentioned.


Down Throw: Froggy Chop

Toxicroak grabs the opponent and throws them against the ground for 2% damage, before performing a karate chop against them for 4% damage that pops them lightly forward and up. This is the premiere combo throw of Toxicroak's and it has the particularly nasty ability to combo directly into Forward Tilt at specific ranges (most characters the range will be a 20% range, say 110%-130% for Bowser) that can therefor mean a potential kill confirm if they are poisoned! There's some other options here too: Down Tilt, for example, can turn it into a different combo, while Forward Smash and Forward Aerial are examples of hard read options, or you might fire off a Gunk Shot as a read as well. Overall, a very simple move with a simple purpose, and good for an offensive character like Toxicroak.

Up Throw: Whirlwind Uppercut

Toxicroak holds the opponent up with one arm while rapidly rotating his other one, akin to his Down Smash's animation, before sending them flying with a vicious uppercut! This deals 9% damage but is Toxicroak's primary kill throw that will send opponents off the top at around 145%. Obviously there is no combo potential here, but it is good damage (more than Forward Throw if you don't have croak levels) and can kill.

It has an auxiliary use as well, as they will slurp up your Gunk Shot puddles just like the Down Smash, pounding them into the opponent when this is used! This uses up the puddle, but poisons the opponent for as long as the puddle had remaining time! This allows the Up Throw to actually beat your Forward Throw in damage, albeit damage the opponent can potentially mitigate, and uses up the puddle. Sadly, this poison does not get Croak bonuses, perhaps because it is poison already out from him. The real reason of course is this would be incredibly overpowered if it got Croak bonuses, so it can't really do so.


Back Throw: Judo Frog

Toxicroak lifts the opponent up and tosses them behidn them for a classic judo throw! This deals 8% damage and spaces the opponent away from Toxicroak at a shallow backwards angle. Good for getting space, not so good for combos. Toxicroak will be able to pressure opponents if he rushes them down if he wishes albeit without any combos, but if you can get the opponent to flinch and make a poor descision it can potentially lead to a large punish. For example, an opponent trying to attack you away and you chasing with a Revenge. This is also generally the throw you'll be wanting to Gunk Shot out of, as it is much safer than Down Throw and pressures the opponent from range.

Speaking of Gunk Shot, the judo throw is more effective if the opponents impact the puddle's surface. It adds momentum and power to their knockback, deals 2% more damage and most importantly has a noticeable increase in hitstun. This can actually lead to the ocassional combo, most commonly a Dash Attack, but primarily reduces the options the opponents can perform before Toxicroak is upon them. Less options and less time means it is easier for Toxicroak to punish the opponent and to punish with better moves in addition to easier reads!


Aerials

Forward Aerial: Drain Punch

Toxicroak leans his fist backwards, the claw coating itself in orange poison, before bringing down the slamming fist in front of him in a manner not unlike Mario's Forward Aerial and its ilk. Getting smacked by most of the move deals 9% damage and rather mediocre knockback, not killing until around 155% or so. There is a sweetspot hitbox as the fist comes down, think like Mario FAir or DK FAir in this regard too, which deals 15% (1% more than Mario's 14%: The base hitbox deals 1.5% less tnan Mario's) and sends opponents away with a stronger hitbox, enough to kill them at 125%! This is in part helped because of the fact that the knockback is made more horizontal as well, a better killing angle.

That's not all there is to this sweetspot, however: The orange poison coating Toxicroak's claws will pierce into the foe when the sweetspot is hit, the poison seeping in and extracting poison from the foe, which heals Toxicroak! The amount of healing depends on the number of poison stacks the foe has on them, with Toxicroak by default healing 1% per poison stack. Croak raises this just like normal poisoning, up to 5% healing per stack! ...Now, don't worry too much, Toxicroak has a cap on the healing he can do. Specifically, he can only heal up to the amount of damage this move does, 15% total, so Croak is mostly important for needing LESS STACKS: You need a whole 15 stacks for max healing without any Croak levels, but a mere 3 when maxed.

In addition, this move is rather punishable on whiff, due to its long ending lag and inability to easily autocancel (you need to either shorthop and never fastfall or full hop and fastfall late), and its starting lag is decently long as well, making it a high risk move which offers high reward. Use wisely.


Neutral Aerial: Toxikick

Toxicroak kicks out with one of his legs, his other limbs spreading out a little, with the kick dealing 10% damage and moderate knockback that allows it to kill at around 140%. This move comes out rather fast, but has a long duration: This is because the move has sex kick properties. The damage goes down to 5% over the course of the move, while the knockback drops dramatically. Later hits can, in theory, start a combo, but for the most part it is kind of iffy in that regard as the ending lag is a touch high for that. It is still safe on hit, of course, and thus it is still good for catching out air dodges, controlling space and so on. It is one of Toxicroak's few solid approach options, although like a lot of sex kicks you'll have trouble approaching people with lots of projectiles (like a Mii Gunner) or disjointed walling ability (like Marth) with this move.

The poisonous spurs on the bottom of Toxicroak's feet glow a light purple during this move, signifying poisonous reactions pumping through it. This causes it to interact with foes who are poisoned, essentially reversing the sex kick ala Dr. Mario: The move gets stronger against poisoned opponents as it goes on! This increases up to a maximum of 15% damage at the end that'll kill at 110%: Definitely no slouch, especially on a long lasting aerial! Poisoned opponents should be careful about the potency of this move, although Toxicroak should be aware of the punishability of a long lasting move without the best ending lag even againsted poisoned foes.


Down Aerial: True Swipe

Toxicroak performs a fast swipe below him with his stinger sticking out, which comes out pretty quick and has average ending lag with a moderately sized autocancel window. There are two hitboxes to this attack: The middle of the swipe as a sweetspot and the rest of the swipe. The middle of the swipe deals 11% damage and pops opponents up into the air, but unlike a lot of these moves the knockback is actually rather weak: It's a vertical combo starter! Neutral Aerial from another jump is the most common/easiest follow-up, but you can do some other slick stuff, including Up Aerial and Up Special reads. The sweetspot isn't especially large, but I wouldn't call it noticeably strict either.

The rest of the hitbox deals only 8% damage and weak sidewards knockback. In the air, this is mostly a sourspot: It won't necessarily get you punished but the spacing isn't all that useful and the damage is mediocre. From a shorthop or near the ground however this can function as a bit of a combo tool thanks to the autocancel: Sourspot Down Aerial into Neutral Special or Jab, for example. So this can be a shorthop option, or potentially a landing one.


Up Aerial: Reverse Dropkick

Toxicroak puts its arms down and performs a reverse dropkick into the air, Snake up aerial style, a laggy move that's got a lot of power to it: This is Toxicroak's read heavy kill aerial, dealing a bit less damage than your Forward Aerial with a still beefy 14%, but a lot higher knockback: You can send people flying off the top at 105% or so, depending on where they are on the screen of course. In particular, Down Aerial doesn't combo into this but does put the opponent into an air dodge read (kind of like some Ding Dong percents, where you can either go for an instant Ding Dong they might air dodge or delay it to catch their air dodge but miss if they don't) that can be one of Toxicroak's few consistant kill options, especially since they will be somewhat higher in the air thanks to the Down Aerial.

If Toxicroak gets a Crouch Jump Down Aerial at higher percents, it CAN possibly combo (or go back to a hard read) right out of it! This requires high percents because otherwise Toxicroak will jump too high for the weaker knockback of the Down Aerial to hit the foe high enough. And at especially high percents they might go too high, of course. It is also rather difficult to hit a Crouch Jump Sweetspot Down Aerial obviously. If you do, though, it can situationally kill pretty dang early. It's just difficult to use. And given that it the Up Aerial is laggy on both ends, do note it is a risky play in most situations and you'll eat a good punish if you whiff or the foe dodges it.


Back Aerial: Quick Hook

It's all in the name: Toxicroak quickly hooks a punch behind him! This is one of Toxicroak's fastest moves and it even lacks high ending lag like some back aerials can have. The price it pays for that is in power. It only deals 7% damage and the knockback is mediocre with really no combo potential that leaves it essentially as a spacer. The primary use of this move is as a panic button and to complete Toxicroak's coverage options. If the opponent is getting behind you, then it is back aerial you want to go. Same if the opponent keeps rolling behind you and so on. You don't get nearly as big a reward off it as your other options, of course, but then the back is usually a weak point for characters, and even just having a move with such safety for it is a boon. It should also be noted that it is safe on shield when properly spaced and that it has low landing lag, so you could use it as a funky approach option or whatnot.
 
Last edited:

ForwardArrow

Smash Ace
Joined
Aug 17, 2011
Messages
503
Rex
The effort that went into this set is pretty admirable, what with how you've gone through and done PG edits of the character outfits and made a UI for them that combines the Smash 5 and Xenoblade 2 UI's in a really nice looking way. I will say that translates over to the actual set as well, for once whereas in most of your sets you tend to be content to sometimes let a combo fodder move be a combo fodder move, here every move actually feels like you're trying to catch the readers attention with only a couple exceptions. Having a lot of exciting moves in your set really isn't a bad thing as long as they come down to serving some practical purpose, and this set definitely has plenty of moves that are cool ideas. I like implementing XC2's status effects when hitting the opponent from the back with one of the tilts, as well as stuff like the moves that cause the inactive Blade to show up allowing for multiple Side B uses at a time. The Affinity mechanics are a pretty unique take on the duo character and weapon switch idea that very clearly pushes Rex to switch around his playstyle during the match, providing him a very distinctive playstyle, so the set can't really be said to not be unique in many regards.

With all that out of the way, yeah, I don't really like this set, and I hate to kill your buzz on it because the ambitious mechanics of it do get me excited for what you can do in the future. But there's just too many things that overlap with each other in intrusive ways. I think the easiest example is that if you want to build affinity with Mythra you want her away from you, but using literally any Smash attack immediately teleports her next to you. This is inherently going to be very annoying when playing as Mythra as you basically have to lock off your Smash attacks, and there's plenty more where that came from. If you want to do some particular Blade positioning, its gone as soon as you use any sword attack. If you want to use the grab, you lose all of the reserve character's affinity on any throw. Nevermind that frankly, Affinity is really awkward to build in the first place, as so many of Rex's actions can desync Pyra when you wouldn't want them too and Mythra requires Rex to stay away from a specific place on the stage. It fundamentally doesn't let Rex play organically as he has to either regularly sacrifice whatever he was planning or awkwardly limit the actions he takes based around the half-dozen arbitrary things that can break affinity or ruin a positioning setup or what have you.

The set has other problems too. I like applying status effects by hitting from the back specifically, but 3/4 of them are stun, and you practically encourage chaining them into each other. Stun really isn't fun to deal with on such a regular basis, even tied to the cooldown timers it feels like the opponent will be locked down for a larger portion of the match than is remotely fun if Rex gets an advantage state. Nevermind the cooldown timers giving another mechanic Rex has to be wary of screwing up. There's a few other things that bug me like Pyra's Down B being basically the same move as her Side B, except stronger and forcing a switch to Mythra, giving her fairly little in the way of variety. And while the Affinity system you present is unique, it doesn't really reward good play in a uniform way. Sometimes good play is completely abandoning the affinity stuff or any position setups you have, and that might be true of almost any setup set, but with this set its so often the player has basically no guideline on if they're playing well or not. Its really unintuitive is what I'm getting at, which is weird coming from you, even if I appreciate you making a set where I can claim that's a problem instead of it being too boring or same-y.
 
Top Bottom