• Welcome to Smashboards, the world's largest Super Smash Brothers community! Over 250,000 Smash Bros. fans from around the world have come to discuss these great games in over 19 million posts!

    You are currently viewing our boards as a visitor. Click here to sign up right now and start on your path in the Smash community!

Make Your Move 19 - Top 46 Posted!

FrozenRoy

Smash Lord
Joined
Apr 26, 2007
Messages
1,261
Location
Las Vegas, Nevada
Switch FC
SW-1325-2408-7513
"So...

This is smash..."


Super Smash Brothers vs Street Fighter
The Answer Lies in the Heart of the Smash


Street Fighter: THE fighting game. Love it or hate it, the Street Fighter series was THE game which developed and popularized the fighting game genre as we know it, starting with Street Fighter II, AKA the game with so many rereleases it could qualify as its own franchise. Their home company, Capcom, is known not only for shilling it out, but for the massive amount of crossover games it along with the company has had, creating what many people call "Capcom vs. Whatever".

Street Fighter vs. Tekken marked the first time that a notable 2D fighting franchise crossed over fully with a 3D fighting franchise. While Ryu is already in Sm4sh, we're bringing the crossover in fully to make it a new one and the first full crossover between a traditional 2D fighter and a 3D platform fighter: Super Smash Brothers vs Street Fighter!

Game Mechanics: For the simplicity of making this fit Smash 4 and because a true crossover game would make way more changes than I am willing to make or would be acceptable, Street Fighter does not necessarily bring many overall complete mechanics. However, all Street Fighter characters have the 40% fast fall increase speed of Ryu, making their controls feel more Street Fighter-ish.

In addition, MOST (I hesitate to say ALL as I can see myself designing those that do not) characters in Smash Brothers x Street Fighter on the Street Fighter side bring at least one of three mechanics from the Street Fighter series to the mix:

Super Meter / EX Meter: The classic meter that you know from every fighting game. Traditionally, fills up when you attack (vastly more if you hit) and when you get hit. Super Meter can be used either in part to power up certain moves or to perform an extremely potent "Super" move.

Charge System: Street Fighter uses two seperate systems in their games. The Motion System and the Charge System, both of which pre-exist in Smash Brothers. The Charge System involves holding down a button, which powers it up. In Street Fighter, this usually requires another control stick input. However, thanks to the Smash Brothers input system, this instead is accomplished the same way Ryu's tilts are, and can be found in any input section.

Motion System: On the other hand, the Motion System is traditional fighting game inputs, which can be found in the special ways to input Ryu's Specials. Think quarter-circle inputs and what have you. These also appear in various fighters movesets the same was as Ryu's do. Most Street Fighter characters in Smash Brothers x Street Fighter use the Charge OR the Motion system and not both at once, but exceptions do exist.​

Plot: TBA

Roster: TBA
 

JOE!

Smash Hero
Joined
Oct 5, 2008
Messages
8,075
Location
Dedham, MA


Product of a World War II super soldier experiment, Steve Rogers was recovered from a block of ice years after a mission over Europe went disastrously wrong. Thrown into a future that he's still not used to, he brings an old-fashioned resolve to the Avengers' mission.


ATTRIBUTES


STATS:
Captain America has good all-around stats, sort of the "Baseline" of the cast in that regard. Compared to a smash character, he is about the same size as fellow officer, Captain Falcon, while all other stats would be above average, yet none standing out:

Weight: 104 (:4link:)
Dash Speed: 1.8 (:4marth:)
Air Speed: 1.04 (:4zelda:)
Fall Speed: 1.6 (:4ryu:)
Gravity: 0.092 (:4myfriends:)
Jump: 34 ground (:4dk:) , 31 air (:4corrin:)

Rolls:
Average
Wall Jump: Yes


GUARD:
Blocking uses his signature shield which can never take shield damage. When Blocking, Cap will crouch slightly and duck his head behind his shield, placing it prominently out towards any attackers with the ability to angle the shield straight up, crouch fully to the ground to cover his whole front, as well as turn around very quickly in place. It is sort of reminiscent of Pit/Dark pit's neutral specials when you hold/aim them in speed. Despite the angling moving his shield all over the place, he actually still blocks attacks within a sort of half-circle that covers one half of him at a time. For example, when blocking normally he will have his entire front half covered like a normal block in smash, but his back is vulnerable to being "shield poked". If he angles straight up, his legs are vulnerable, and if he crouches fully then he is vulnerable from the back and very slightly more from the top than when standing at a neutral angle, though he will be protected from below if he was shielding on a platform/at an edge/etc. For a visual, looking at his neutral stance above you can imagine a line dropping straight down from the back of his head as the division between blocked/unblocked.

So, what does the angling really do then? Shield positioning is important as he actually has a sweet-spot! If he angles the shield so that an attack will strike the sizable Star in the middle, it will count as a perfect shield, every time. If an attack hits the shield on the red/white stripes, it is sort of an imperfect-shield that acts as a between of perfect/normal shielding where shield-stun is reduced by 12.5% as opposed to a perfect shield's 25% reduction. Cap will also slide half the distance when taking shield knockback this way as opposed to none when perfect shielding, and full when blocking a standard hit. This is why the crouching shield can be so powerful, the entire front of Captain America is covered! The difference is minor but noticeable with a sound effect of a loud "TWANG" when perfect-shielded, and a softer metallic hit when imperfect-shielded, and hitting around the shield will produce the standard "hitting a shield" sound effect if it is within his block radius. You can still angle the shield during hit stun to "follow" a move if it is traveling, though usually the first blocked hit will negate the hit box. This is an important skill to learn though as multi-hit or cross-up moves can get around your shield if you stand still! If faces with a huge attack that would envelop his shield, like an explosion or something, as long as Cap is shielding as the hit box reaches him it will count as a block, if he is within the hit box and facing the center of it when it occurs he will also be counted as blocking unless there are multiple hit boxes generated.

There are times when Cap may be without his shield if he uses his signature Shield Throw. When he blocks during this time, he has the standard smash "Bubble Shield" like a normal character. While the normal bubble shield does not have the "coverage" setback of his own Shield, you have to weight that against the pros of having a shield that cannot take damage/degrade with on-demand perfect shields based on spacing rather than timing! On the note of degrading, Captain America will only maintain a block for a maximum of 4 seconds before letting go automatically. Performing other actions, such as letting go of shield and pressing shield again, will refresh this timer.


POWER TYPE: CLASSIC

Each character in AvX has a Power Meter that they build up as they attack. However, how they specifically use or build up power may vary per character! In Cap's case, he has a "Classic" Power set-up that builds up to 3 levels of Power at a time.

||||||||||||||| ||||||||||||||| |||||||||||||||

The above is what you would roughly see above Captain America's portrait in game. The Red, White and Blue segments of his Power Meter are each filled for every 15 Power that he gains. As a reminder, Cap gains power from hits equal to 0.6x damage he deals, and 0.2x damage received or blocked. If Cap blocks an attack with his Shield, through either a Perfect or Imperfect block, he will gain 0.4x the damage it would have dealt as Power. Captain America cannot gain more than 45 Power at a time, and any move that spends power cannot gain it.

Classic Power types will use power either in "Chunks" or all at once, much like a traditional fighter would for boosted or Hyper moves. As such, Cap has a couple of techniques that will either use 1 "Bar" of his patriotic meter at a time, or use all available segments to use a Level 1-3 boosted move!

Power
Each character has a meter referred to as "Power". This fills as you play and is linked to various effects and special moves. In general, Power is gained via landing attacks as well as being hit, but the latter at a very reduced rate.

Power is gained equal to 0.6x percent dealt with attacks that do not spend power, and 0.2x of damage taken / blocked. Characters often have other ways of gaining

CLASSIC power types are reminiscent of fighting game characters who have different levels of meter. Separated into 3 bars, CLASSIC types can either spend power 1 Bar at a time, or 2-3 at a time for tiered effects!

With a total of 45 power points to build up, a CLASSIC character needs to either:

Deal 75% damage
Take/Shield 225% damage
Captain America's Shield 112%~113%


SPECIALS

Shield Special: Shield Bash

Pressing Shield + B will have Cap flash white briefly, swinging his Shield out and away from his defensive position with the Shield Bash! This mighty back-hand will cost 1 Bar to perform at any time, and like all shield specials can only be performed on the ground, but has a plethora of benefits to make it worthy of the limitations.

Firstly, Shield Bash is an active hit box on Frame 1 of the input, and grants Cap full-body invulnerability from frames 1-6. Hitting for 10%, foes struck will be sent out at a 40* angle with set knockback of about 1.5 platform's lengths to sort of reset a situation. Projectiles that come in contact with Captain America as he performs the Shield Bash will be Reflected back towards their sender with equal power as well, but only during the 6 frame active window. The hit box is pretty sizeable as well, being the same as his shielded block radius and will even deal 12% if he strikes the foe with his Shield's Star specifically! It should also go without saying that Cap cannot perform this if he does not have his Shield on hand to bash with. While hitting with the bash is almost always safe given it resets the situation for both parties, missing can put you in a bad spot as it has a decent amount of ending lag and of course wastes a Bar of your Power Meter.

Shield Bash has extremely good priority not only due to it being invulnerable and hitting on frames 1-6, but because it uses Shield Priority. Unique to Captain America, attacks that use his Shield will be treated as such when he clashes with opponents. For example, if he performs an attack which uses the shield to punch the opponent and an attacker were to swat at him and strike the shield, their hit box will behave as if they struck a shield! In this example, the attacker strikes the shield portion, so they will enter hit lag, and Cap will enter his Imperfect Shield Stun, both parties freezing very briefly for effect as a metallic "Twang!" is heard. The attack coming towards Cap is then blocked and his attack continues as normal to strike the foe if in range. Similar to Trample priority in practice, the difference is in the details of what the shield then out-prioritizes. Given the foe will be clashing with a shield first, and hit box second, all the same rules apply in terms of what can be clashed with. For example, a Transcendent Laser would normally hit through attacks unchallenged, unless it happens to be stuffed by the shield that is! Attacks that would also beat out his via normal move interactions are also blocked whereas they'd normally bypass even a trampling move. For example, Cap sends out a move which deals 7% only to meet a move that deals a whopping 25%. Since the 25% attack is clashing with a Shield and not a normal hit box, Cap will enter hit lag equal to if he had blocked such an attack using his Imperfect Shield formula, being pushed back and everything just as he would if he blocked normally, as the attacker then behaves as if their attack struck a shield as well with it being nullified vs Cap. In this specific case of clashing with a move powerful enough to beat out his attack (the opponent's move deals more than 9% higher damage than his shield attack), it will be treated like a normal "Clash" where Cap resets to neutral after his shield-stun wears off. While not always advantageous directly for either side based on ending lag and so on, it is a definite plus for Captain America to be able to contest with nearly any attack thrown his way!

Most shield attacks also carry with them some intangibility on his shield-arm to make sure he can clash in this way, though the rest of him is vulnerable to make it a far cry from his normal block. Attacks that he clashes with thanks to Shield Priority also grant him some Bonus Power equal to the amount he gets for blocking normally (0.4x the damage of the incoming attack), which can stack with the hit he lands on his foe!Just keep in mind that Cap will need to actively look to clash with opponents on the invulnerability frames in order to shield-clash, so you won't just be beating out any attack that comes your way. It is still his most potent tool in close quarters combat, though it can also be a powerful ranged asset as well!


Side B: Shield Throw

Taking a very quick moment to wind up, Captain America throws his mighty shield! As you know, all those who oppose the shield must yield, else they want to be smacked around by this unique projectile. Traveling up to 1.5 platforms away when thrown normally, the Shield takes up quite a bit of space as it flies out vertically with it's signature star facing the camera at all times. The toss can be angled up or down 30* to become a nasty anti-air, or to increase the range as it can ricochet off of surfaces and rebound for another 1/2 platform before somehow always boomeranging back towards Cap. To increase the range further, Cap can Smash Side B in order to throw the Shield against something in the background 1 platform away, before it then goes on the path you chose from that point onward. While noticeably slower as Cap takes a moment to aim/throw harder, the increased range is very much appreciated given that it "starts" a platform away from Cap's position. This can be a little tricky to use at times due to the "dead zone" in front of you, and you do need something to hit in the background within 1 platform's range so an offstage or aerial throw may just default to your normal toss.

Foes struck by the shield on it's way forward will receive 8% and set knockback of 1/2 a platform at a 45* angle, as well as a satisfying "TWANG" sound effect! Foes can be hit only once per throw as after striking the first foe dead on, the shield will bounce off of them and return to Cap. When active, the shield has a red/white/blue trail and aura to show it's path and how it is an active hit box, which is also loses after hitting a foe to show it is inactive as well as tilting slightly to not show the classic symbol head on. If you do not hit a foe on the initial throw, the shield will still deactivate once it starts it's return trip back to Cap.

The Shield retains it's Shield Priority as always when thrown, making for some unique interactions. Dealing 8% damage, it will plow through most any other projectile/attack and nullify it on impact. Though, if a projectile/attack deals enough damage that it would have normally out-prioritized the shield, it will cause it to become inert and fall over and down to it's side as it will absorb the blow but lose it's thrown momentum. This also occurs if a foe were to power shield / reflect the Shield, though normal shielding causes it to bounce back to Cap in it's inert state. Hitting the shield while inert/inactive will also cause it to fall to the ground. This makes the shield toss somewhat double edged, in that it is very powerful within it's limits, but proper counter-play can actually strip it away from Captain America!

Not that Cap minds too much, after all he is one with his shield enough to even forgo using it all together! Cap is free to move essentially the moment the shield leaves his hand, which in turn can allow him to follow up on the shield throw in a timely manner, especially if you are able to smash it against a background target for more range. Attacks without his shield are of course vastly less safe and on the whole less damaging, though in certain cases they can still be useful due to a bit less lag and different knockback allowing you to string some hits together in different ways, especially at lower percent or if the foe has a Shield incoming from behind them to keep them close!

Once the shield is out of play, it becomes an Item that anybody can pick up and equip just like a baseball bat or other "weapon" style item. Also like such items, a few moves will change when equipped by another character:

Jab Finisher: Shield Combat
The jab with the shield is unique in that it will augment the jab combos of character rather than introduce a new jab itself. Being surprisingly light, most characters will be able to performs their normal jabs withe the shield in one hand, and if they have a single hit jab finish they will use the shield to add 2% damage and Shield Priority to the attack. If the jab combo only uses the hands sparingly, such as a Punch-Kick-Kick, the "Punch" will use the shield for a bonus.

Side Tilt: Shield Bash

The character performs an overall worse version of cap's Shield Bash. Dealing only 7% at base, the only hit box is on the shield, and hits similarly to Ganon's Jab in both knockback and timing. The shield still grants the user Shield Priority, but does not grant bonus meter for blocking an attack, nor the invulnerability and ability to reflect projectiles.

Dash Attack: Charging Star

The character puts the shield to their shoulder and attempts to ram into the foe. Traveling about their own "width" forward give or take their traction and run speed, this full body hit box will deal 7-10% based on whether the foe is hit by their body or the shield itself at first, sending them either at the Sakurai angle up and away with a body hit, or at a slightly more rewarding 35* outwards angle if they hit with the shield first and foremost. This grants a better chance to abuse Shield Priority, but is somewhat laggy for a dash attack.

Side Smash: Shield Throw

The character winds up and throws the shield! Due to inexperience, it will only fly straight ahead for 2/3rds to 1.5 platforms distance based on charge and bash opponents for 8-12% damage and knockback similar to low-mid power Side Smashes in smash. This can offer KO's unlike Cap's own Side Special, but lacks the combo potential and versatility.

Shield: Captain's Shield

The character bunkers down behind the famous shield, taking on the same properties as Captain America except without the ability to Shield Bash from shield or bonus power. This can be a great boost or a bit of a let down depending on the wielder, though in general it is hard to knock an infinite, unbreakable shield.

Z Dropping / Throwing:

When it becomes an item, the Shield will deal 5-7% based on whether it is lightly or smash thrown and similar knockback to when Cap himself throws it. It will not however bounce around unless Captain America himself is suing his side special to hit just the right angles.

If another Captain America somehow works his way into this same, strange dimension as the Cap who threw the shield, it behaves as a throwing item only and deals 8% damage with the ability to bounce slightly. If they also are without their shield though, they can take ownership of yours! Do not worry too much, you can take theirs back as well. Each Cap's shield has a player icon with their player color over it (P1, etc) when idle for a moment as well.

Captain America's opposition may try to use the shield against him, or his allies may borrow it temporarily, but we all know that 70+ years of combat experience means it won't be staying in their hands for long! If equipped with his shield, any time Cap Grabs a foe he will automatically relieve them of his prized tool upon landing the grab, throwing the shield at Cap usually will not do to much good either as he is able to catch it unlike other characters, the same way you would an item. Better yet, a press of B at any time, within a platform of the shield will cause Captain America to clench his fist, a small blue light/shine is seen on his hand thanks to Tony Stark's suit upgrades, which allows him to create a small magnetic field attuned to the shield that lets it zip right to his hand! This can cause a thrown shield to be caught easily, and offers a stylish way to grab it on the go if it is on the floor. As an easter egg, Down Taunt on top of the shield will have Cap kick the side and flip it from the ground to his arm with style.

It is in fact, imperative to master catching the shield as Cap needs to use the Shield-less Neutral B in order to catch it mid-action. Cap will automatically catch the shield if he is not actively doing anything, like if he were to throw the shield and then stand in place or simply jump / move. However, if he is performing any attack action, rolling, etc, he can ignore the shield to continue using the shield-less moveset unless he presses B in order to catch the shield mid-action. Within range, this pull can also re-activate the shield as it pulls back to Cap through enemies and deals 1 hit of 4% damage and hit stun, which can be useful for extending a combo if you manage to set it up right as you can punch the foe, and even mid animation activate the Shield with B. Without the shield, Side B also behaves just like Neutral B.


Captain America can put more "oomph" into his Shield Throw by Pressing Shield at the start up of the move! At the cost of 1 Bar of Power, a powered shield toss has a noticeable Blue Flash to it and a bit more lag as Cap whips the shield out with even more force, traveling 2.5 platforms (up to 3.5 when smashed) with a much more vibrant red, white and blue trail in the time it takes a normal Shield Toss to travel normally. Unlike the normal version, the Powered Shield Throw will pass through multiple foes on it's flight, dealing 10% and half as much knockback as before, returning to Cap with an active hit box for 10% and the other direction on it's way back! Totaling at 20%, the damage increase is further enhanced by the ease Cap now has in comboing off of the thrown shield. No longer stopping when shielded and having even more wiggle room when it comes to attacks it will beat out, not to mention the speed difference, Powered Shield Toss opens up tons of punishing options with the near guaranteed 2-hit combo. The same rules apply, except the boomeranging hit here replaces the 4% return hit you can perform normally when the shield is in range.

If used either to zone, punish, or even to set up into his "Alternate" moveset, the Shield throw is definitely the bread and butter move for Captain America. Mastery of the shield is mandatory to begin combat with Cap, so get practicing!


Up B: Stars and Stripes

Using his shield for more melee combat, Cap tucks under the shield and performs a powerful rising strike!

Launching upwards about as high as Samus' Screw-Attack but angled about 75* forwards (with a bit of wiggle room forwards or back), the move has two phases. The first is the initial hit as Cap is covered in a blue/red aura where the hit box covers his entire body for 10% and mediocre knockback either straight up or 45* away from where he is facing. The second is when he is rising from the ground, a red/blue trail following him up, where his upper half is a sweet spot for 12% and knockback at the same angle (75*) that can KO in the air at about 120% if hit over halfway up the screen. The rest of his body is a mediocre hit box for only 6% that sort of hits foes up and away similarly to the initial launcher. The initial and secondary hits strike in such a way that they will almost never lead into one another past 0% with sort of bad DI on the opponent's part, but it can be rather rewarding when it occurs.

It should be noted that his upper half is totally invulnerable at all points of the move, making the ol' Stars and Stripes a short ranged but effective recovery when combined with Shield Priority! A better use however is that of a traditional "Dragon Punch" to plow through enemy offenses and kick start your own. Given that the Shield Bash can hit from either side, it is fitting to have this as a more rewarding but riskier upwards option to KO outright or begin a juggle if you happen to have a place to land given he enters special fall at the apex of the move.

During the lunge, Cap can alter SnS from a defensive option into an offensive one by Pressing Shield at any point of the ascent. When pressed, Cap will turn his body and perform an arcing, diagonal shield-slice up and forwards for 12% that sends at a nasty 35* angle with high power to KO around 120% center stage. Costing 1 Bar to perform, this will cancel Stars and Stripes completely once pressed to make for variable attack heights to make sure you connect with the opponent. The SnS swipe has full arm invulnerability for Cap as he swings, and actually allows him to act freely if he manages to connect the hit, bypassing special fall and allowing him to Up B again for recovery purposes, or simply act faster to follow up on the offensive. This can be very useful if done ASAP to do a low hitting swipe, or simply to finish a combo with style as your launcher hit can connect to an Up B either naturally or with the Slice.


Be wary of doing this immediately after a Shield Toss though, as without the shield he loses his invulnerability and priority, which on top of also dealing 2% less damage on each hit with reduced knockback makes for an altogether less rewarding and less safe maneuver. Without the shield, Cap can still perform the follow-up attack by inputting Shield, but it deals only 10% and has far less power and not invulnerability, though it still allows him to act upon a successful strike.

Like Shield Throw, this is a useful tool that again leaves Cap wide open if misused. It always keeps its sort of defensive/KO niche unlike the dynamic that Side B provides when powered or not, and is a definite threat in many match-ups where Cap can find a good juggle at high percent!


Down B: Tactical Counter

Taking a "ready!" stance as a small spark glints from his eye, and flashing blue momentarily, Captain America prepares to counter any attack! Like most all counters, this has a brief window when it works from frames 5-35, as he flashes blue, and then a lengthy end lag period where he is vulnerable until frame 70. When successfully triggered, Tactical Counter will grant freeze frames to the attacker if applicable (non-projectile attacks) as Cap strikes them in the gut for 4%, and then delivers a shield bash away for 6% that sends them up and out at a 45* angle with light knockback growth. At most %'s you can combo off of this, but past about 110~120% you will need to try for a Shield Throw or simply read the situation. If you do not have the shield in hand, the secondary strike only deals 4% but will be able to combo much more reliably combo from it up until 130-150%. Overall this is a decent counter-strike that allows for a combo opportunity unlike many counters in the game where they either reset or KO.

As the name suggests though, Tactical Counter is all about reading the situation at hand and reacting accordingly. Meaning, Cap can actually do quite a lot with the counter based on his Power Meter:

Firstly, Captain America is unique in that he can actually extend his counter time, and even move around during the counter window by spending power! Holding the Shield Button down after activating Down B will have Cap move his arms into a defensive stance, standing tall with the shield in front of him instead of huddling behind it like his normal shield, or putting both hands forwards into a fighting stance if without the shield. With the shield button held down in this state, Captain America will flash blue for an extended period of time where every 15 additional frames will drain 1 Bar of power. When standing still, this can allow Cap to have at maximum, a counter active from frames 5-80! Moving about in this stance in any fashion such as walking back or forth, jumping, or even just drifting in the air, will "burn" your meter much more quickly down to only 8 frames per bar, but still an impressive range of frames 5-59. Letting go of Shield / activation of course stops the meter drain, and if you run it's course or cancel you still go into the end lag, but you can get a huge amount of mileage by spending power to get a meaty activation window, especially if you simply perform Down B, then perform Shield + Forward to run towards an attack!

Using all your meter this way is nice, but still usually a bit of a waste if all that power was spent on just 10% damage. That, and if you were standing around for over a whole second and your opponent falls for the trick, you could have been hitting harder punishes. For more bang for your buck, you can also Press Shield as counter activates to expand your combo tree! Upon activating the counter, you will always perform the 4% gut punch, but you can press Shield up to 3 more times (once per Bar of power) to deal an additional 3 hits before the final strike:

With 1 Bar spent, Cap will add a Knee Strike for 5% to the counter, making the total damage 15% (13% without the shield). These strikes, like with the normal 1-2 combo, are virtually un-DI-able as well due to special modifiers. If you get hit for the first part, you're gonna be eating a flurry of hits!

With 2 Bars, Cap will follow the Knee hit with an additional Elbow Strike for another 6%, and the final bash will deal 7% (5%) damage to bring the total to 22% (20%).

Lastly, using all 3 Bars will follow the Elbow with a new finishing combo as he performs a spinning kick in place for 5% that keeps the foe in place as the spin also winds up a mighty Shield strike for 10% (or a punch for 8%) that deals big knockback as the foe is left reeling with 30% (28%) taken!

In any case, Tactical Counter lives up to its name as there are multiple ways to use it. Do you want to be defensive and go for maximum safety when leaping into an aggressive fight? Do you want to save meter and instead go for massive damage upon a successful punish? No matter the strategy, there's a reason that Captain America is one of Marvel's best tacticians!


Neutral B: Super Soldier

Raising his Shield into the air with one hand in a dramatic pose, or at least his clenched shield hand, Captain America will shout "For Freedom!" as he gains a pulsing Red aura surrounding his whole body. This is his Super Soldier mode! Tapping into his reserved strength, Cap can temporarily increase his own stats, as well as those of his allies given his natural leadership. Costing at least 1 Bar to perform at all, Super Soldier has three distinct levels based on how many Bars he has available to burn:

Level One ||||||||||||||| ||||||||||||||| |||||||||||||||

The basic version of Super Soldier, this has cap say "For Freedom!" as mentioned above, as well as grant a Red aura to himself and allies. His own attributes will be increased by a factor of 1.1x, while allies will be boosted by 1.05x:

Dash Speed: 1.8 -> 1.98 (:4cloud:)
Air Speed: 1.04 -> 1.144 (:4mario:)
Fall Speed: 1.6 -> 1.76 (>:4sheik:)
Gravity: 0.092 -> 0.1012 (>:4cloud:)
Jump: 34 ground -> 37.4 (:4falcon:) , 31 air -> 34.1 (:4pacman:)

Rolls:
Average
Damage Dealt: 1.1x

Base Knockback: 0.9x
Knockback Growth: 1.1x
Heal on Activation: 1%
Damage Reduction: 0.95x


Level Two ||||||||||||||| ||||||||||||||| |||||||||||||||

The next version of Super Soldier, this has cap say "Lets finish this!" , and grant a Red and White aura to himself and allies. His own attributes will be increased by a factor of 1.2x, while allies will be boosted by 1.1x:

Dash Speed: 1.8 -> 2.16 (>:4zss:)
Air Speed: 1.04 -> 1.296 (:4mewtwo:)
Fall Speed: 1.6 -> 1.92 (>:4greninja:)
Gravity: 0.092 -> 0.1104 (>:4metaknight:)
Jump: 34 ground -> 40.8 (>:rosalina:) , 31 air -> 37.2 (>:4fox:)

Rolls:
Above-Average
Damage Dealt: 1.2x

Base Knockback: 0.2x
Knockback Growth: 1.2x
Heal on Activation: 2%
Damage Reduction: 0.9x


Level Three ||||||||||||||| ||||||||||||||| |||||||||||||||


The ultimate version of Super Soldier, this has cap say "Avengers, Assemble!" and grant a Red, White and Blue aura to himself and allies. His own attributes will be increased by a factor of 1.3x, while allies will be boosted by 1.15x:

Dash Speed: 1.8 -> 2.34 (>:4falcon:)
Air Speed: 1.08 -> 1.352 (>:4yoshi:)
Fall Speed: 1.6 -> 2.08 (>:4fox:)
Gravity: 0.092 -> 0.1196 (:4bayonetta:)
Jump: 34 ground -> 44.2 (>:4luigi:) , 31 air -> 40.3 (>:4sheik:)

Rolls: Above-Average
Damage Dealt: 1.3x
Base Knockback: 0.7x
Knockback Growth: 1.3x
Heal on Activation: 3%
Damage Reduction: 0.85x

Regardless of the level, Super Soldier has a max duration of 15 seconds that is clearly seen as power drains from his glowing power meter. At a rate of 5 seconds / bar, you will maintain the level you activated on so if you activated with 2 bars, draining into the 1st bar of meter will still keep the lvl 2 bonuses.This can be cancelled at any time with another press of B, but then goes into a cool down of 8 seconds before you can attempt to use it once again and you lose the current bar you were on. During this cool down time, a Grey aura will be placed on Cap to indicate he cannot activate Super Soldier. Cancelling the move in this way is lagless, and does not refund any cooldown time. If Captain America is KO'ed, the buff is removed from allies as well. If multiple Cap's are on the same team, the others cannot activate Super Soldier if an instance of it is running already, but they can alternate activations to at least have a constant aura. Using any move that uses Power while super soldier is active will still use bars, and in turn slash the duration of Super Soldier by 5 seconds. That said, it can be very beneficial to do so since the damage potential goes way up while active!

On the whole, Captain America and his team will gain mobility overall as well as an important offensive boost. As you may have noticed, Damage and Knockback Growth increase while Base Knockback decreases with each level. This allows moves to string together much more reliably at lower percents, and KO more effectively as their damage grows. Its entirely possible to pull out a show stopping comeback with a combo -> finisher with Super Soldier running, just when you need it most!

This makes any match up vs him that much more dynamic, but it does come with a potent drawback. When in this mode, Power cannot be gained in any way, and ally Power generation is halved. This momentum shift can cause problems for Cap as his power drains to zero, or at least to less than a bar when used. If Cap has no power at all, or is within the cool down phase, he will simply say "Not yet..." or "Not the time...". Also, if he lacks the Shield this move is replaced by "Shield Recall" as noted in his Shield Throw.

Super Soldier is a very powerful tool, not only rallying yourself but allies to victory! It comes with significant cost however, giving up all that power at once and even halting power generation can be quite punishing if momentum was not in your favor. Smart usage of Captain America's heroic resolve will win the day for sure, but being too reckless can just as easily spell an easy defeat as going all out with Super Specials could be a worse idea than playing it smart with your mobility options given that you will be blowing all your resources then and there.


SMASHES


Side Smash: Charging Star

Taking a step back as he charges, this smash has a bit of telegraphed lag as he readies the Shield in front of himself, before charging forward into combat! Dealing 14-20% with moderate-high 40* knockback, Cap travels about half a platform as an active hit box that can KO generally around 130% on the correct side of the stage, and of course earlier if Super Soldier is active. Your run speed will also increase the distance traveled, with Level 3 capping out the base distance at 3/4 of a platform. Charging the smash fully will also increase the distance, between 2/3 of a platform to 1.25 platforms with Super Soldier.

While the knockback is a little lesser than you'd expect, you make up for this with frontwards invulnerability on the start-up and possibly the best placement for your Shield Priority within the set as he pretty much runs forward while shielding. Unfortunately, this of course requires precision as there is hefty end lag on whiff where Cap steadies and returns to neutral stance, and thus it is ironically not very safe vs a shielding opponent.

If you perform this without the shield, the damage drops to 10-14% and of course loses invulnerability. Though it does have less end lag by a notable amount but still not enough to make it super safe on whiff. It can however be nice on hit to keep an opponent close by compared to the standard F smash.

If you input Shield while charging Side Smash, and you have your Shield equipped, you can spend 1 Bar worth of Power to perform a Powered Charging Star! This "Super-Smash" charges instantly to full, dealing the full 20% base damage as Cap barrels forward with a trailing red/blue aura. This version has a bit more noticeable start up time as a "flash" of Red/Blue on the shield indicates you have input the Super version, but will instantly shoot you forward the max distance instead of waiting on a Smash Charge.

Performing a Powered Smash Attack is even better when in Super Soldier! With the increase to movement speed already applied, Charging Star will travel a total 1.5 platforms after the start up, and have bonus knockback to boost the KO power to new heights! Performing this has a cost however, as not only does it shave off 5 seconds of Super Soldier, but you also have about 10 more frames of start up as Cap makes a dramatic wind up before the charge.


Up Smash: Shield Slash
Holding the shield in both hands as he draws it down and to the side, Cap performs a mighty upwards slash! Covering essentially a "Crescent Moon" area starting from his feet, the slash has two separate hit boxes based on when/where you strike your foe. The start up of the slash up until you reach Cap's eye level will hit for 16-22% and deal high, upwards 80* knockback that can KO between 110-140% based on character at base, whereas the later half is more of a sour spot that covers his head and slightly behind for 10-14% and strikes foes behind himself weakly at a 65* angle.

Either hit can be beneficial, though obviously the sweet spot is what you'll be aiming for most of the time as it leads to his aerials or even combos into Stars and Stripes for a sweet finisher. This is interestingly one of the few moves that can arguably be just as good without the shield, as despite losing the range and hand/upper arm invulnerability on start-up, the Double-Fisted swing he performs still deals a respectable 11-15% through the whole swing with a bit less end lag! This is a great option when you land a return hit of Shield Throw and have the foe coming towards you, able to pop them up fast and hard to continue your offense as the lowered damage keeps them closer than a normal U smash usually will.

With Super Soldier, Shield Slash will gain a red/blue streak with the shield like all Powered Smashes as Cap crouches a bit and performs a tiny leap as he swings the Shield over a slightly taller area, as well as gain bonus knockback and +10 frames startup time. It has less overall reach than Stars and Stripes, as well as lacking the ability to perform this mid-air, but the raw power can net certain KO's that Up B cannot, and vice versa with the reach that Stars and Stripe still provides.


Down Smash: Vibranium Shock-wave

Bringing the shield up and back with one hand as he readies himself, Cap slams it down into the ground in front of him with tremendous force and a resonating "TWANNNG"! This smash has two phases to it, the shield itself crashing down, and the shock-wave it creates on impact with the ground around him. The shield strikes down for a decent 17-24% and is a meteor on impact, bouncing foes off the floor and sending foes who are hanging off the ledge down for the count! Seeing as the majority of the time this pops foes off the floor, the KO power is not quite there compared to U smash but it can arguably net more reward for the same reason. The shock-wave portion extends in a slightly red tinted wave that is the shield's own width to either side. This can only hit grounded foes, and strikes for 9-13% and pops them up and away at a 65* angle in the direction they were hit. Striking at the same time, the Shield and Shock-wave hits cannot combine and foes are hit by one or the other, with the Shield taking priority.

A bit slower than the other smashes to start up, this is more oriented towards making a read to continue a combo over a distance, cover options on a platform, or a flashy edge guard. Without the shield in hand this actually becomes his fastest smash attack as Cap performs a downwards hay-maker that slugs the foe for 13-18% that has the same properties as the shield. Of course this won't be gimping anybody as easily given that its range pales in comparison and won't even reach the ground, but it can still potentially get somebody who overshot the ledge! Compared to shield-less U smash, the range difference is really the deciding factor for what you choose as a follow-up. D smash really only hits just and front of Cap where the U smash has a large swing to it that gives more room for error, but slightly less damage. Of course, you could always forgo each and barge into the foe with a shoulder charge F smash, for even less damage, but a guaranteed hit as you meet the foe half way!

During Super Soldier, D smash has Cap use both hands to drive the shield down into the ground! Though it takes 10 more frames to start up, the Super D smash will gain bonus damage as opposed to the knockback the other smashes enjoy. Dealing 13% normally from the shock wave, this gets boosted to an impressive 20% across the range to really put the hurt on foes!


THROWS


Grab: Military Grapple

Reaching out with his free hand, Cap's grab range is fairly standard for a man of his stature. It is important to note that it shares similar reach to his Shield Bash, yet it of course lacks the few frames of invulnerability and comes out much slower at Frame 7. Also this option costs no power, and opens the door to many more potent offensive possibilities. His pummel is fairly standard as well, a knee to his enemy's gut for 3% a pop gets the job done!

As a note, Cap's shield is placed on his back after grabbing a foe with a very quick animation, and the end lag of all his throws incorporates getting it back into his hand just as fast! If his shield has been thrown while he grabs a foe, it can strike them as it returns to his position for the usual 8% assuming the hit box is still active. Throwing the foe then leaves Cap without the shield unless he wants to quickly pick it back up, unless Powered Shield Throw was used in which case it will go through the foe and back into Cap's possession.


Forward: Sock to the Jaw

Holding the foe as he winds up, Cap delivers some old fashioned justice to the face! This punch deals a respectable 8% and pops the foe out at a low 30* angle with high base knockback, but little growth. It can be used to KO at very high percent, such as around 200%, if not a bit sooner with Super Soldier running. This is your trusted option for simply spacing the foe similarly to your Shield Bash, and getting them in a compromising area off the ledge.

Back: Overhead Slam

Tucking his arm under his enemy's, Cap twists his body and lifts the foe up to slam them off the ground behind himself for 10% and a meteor-smash! The foe pops off the ground straight into the air with high base knockback that essentially will never kill given the tiny growth, but still allows for follow-ups. If an enemy does not hit the ground, such as doing this with your back to the edge, they only take 5% and a very weak meteor downwards that should rarely defeat a wise opponent. This is still beneficial though as like with F throw it puts you at a great positional advantage, and you can even try and catch their response with your D smash!

Up: Patriot Combo

Tossing the foe up weakly, Captain America catches their fall with his fist as he socks them with an uppercut for 6% and hit stun, before sending them flying upwards with a grunt and a jumping uppercut with the other hand for 7%!

His slowest but most damaging throw at 13% base, 17% with Level 3 Super Soldier, it is a solid option to simply rack up percent and get the foe out of your face. The ending lag leaves room to be desired as it cannot directly combo as well as say, his Back or Down throws, but it still gives Cap a positional advantage given he can intercept aerial countermeasures with Stars and Stripes or U smash!


Down: To the Ground

Tossing the foe down to the ground on their back, Cap then delivers a very quick but forceful punch downwards for 6% that pops the foe up and away at a 50* upwards angle weakly. This is his fastest throw as well as his weakest, perfect for comboing at low percents! It has overall little stun though, so past mid-high percent it may actually send far enough to not combo as well as say, Back Throw could, but the two will definitely make up the majority of your throw punish game on stage.


STANDARDS


Jab: Ol' One-Two

Taking up a boxing stance, Cap delivers an incredibly fast, Frame 2 punch with his non-shield hand for 3% damage. A second press of A will then slug his Shield-Hand forward for a decent 7% damage and decent knockback away at a shallow diagonal, similar to his Shield Bash. The 2nd hit comes out pretty quickly and is his go-to shield move outside of the throw when it comes to clashing as his upper arm is briefly invulnerable and able to contest tons of moves on demand.

Without the shield, the second hit is a stronger punch but only for 5% as opposed to 7%, and of course without as big a hit box or invulnerability. However, if the 2nd hit of jab connects, it has on-hit cancel properties! This allows Cap to have a greatly expanded combo game on the ground with Jab-Jab-Option, and even more when you mix in the returning shield with Neutral B.


Side Tilt: Roundhouse Kick
Spinning briefly in place to build up momentum, Cap lashes out with a power-packed kick! Having great reach, the kick can be angled up and down and carries a Sweet/Sour spot dynamic whether you hit with Cap's boot or his leg. Each angle has slightly different properties to them if you hit with the boot, though the sour spot generally hits at the same Sakurai angle.

The standard version with no tilt actually hits hardest with 8% sour hit, and 11% on the foot. Foes struck by the foot take decent knockback at a 40* angle that can KO near the ledge at around 130+%, making for another KO option. Upwards angle deals 7%/10% and actually sends foes at a 30* angle to snipe them out of the air and back towards the ground. This version does not have the raw knockback of the neutral angle, but it sends foes out at a better angle for keeping them offstage, though it can KO at about 150%+. Finally, Down angle hits for 6%/9% and pops foes up at a 50* upwards diagonal with the same knockback as Up Angle. Less damage means that it will not send them as far, but as a poke on stage it sends the foe at a juicy angle to follow up on. Each angle coming off of a Jab can be struck with either the sour or sweet spot depending on timing, with the sour more or less hitting if you input F tilt immediately after Jab2, and the sweet hitting more reliably if you wait a moment.

Up Tilt: Uppercut
Bringing his non-shield hand low, Cap punches upwards with a tried and true uppercut to the opponent's jaw! Sort of the standard fair for this type of move, it mirrors Captain Falcon's Side B in how it covers a vertical line from about his knees to above his head to launch foes skyward for 9% and medium knockback, and 10% and knockback that can KO at much higher percent at the very end of the swing. Like similar moves, this lacks horizontal reach but the vertical can still poke at platforms from below. Quicker than U smash overall, it is best used as a combo extension tool or alternate combo starter as it can hit twice at lower damages before leading to further moves.

Down Tilt: Shin Breaker
Stomping down and out with one foot, Captain America hits twice as the foot comes down and again when the foot hits the floor to get through enemy defenses. The stomp's first hit deals a mere 4% with hit stun, but incredible shield damage as Cap expertly places the strike towards a vulnerable area in their guard. The second landing hit deals 3% and pops the foe up and away at the Sakurai angle weakly. A great followup from Jab to continue close quarters pressure at lower percents, its also a great poking tool up close vs a shield given its speed and short range.

Dash Attack: American Rushdown
From a running start, Cap will cry out and swing the shield in a swift, horizontal arc to slam into foes for 6% damage (4% with just his fist) and heavy hit stun like with Ryu's focus attack. Upon a successful hit, Cap will complete the arcing strike with two spinning kicks for 5% each for an acrobatic assault!

Dealing 16% total, the final kick will send foes out at the Sakurai angle with decent knockback that can KO at very high percent, but otherwise can lead to low percent combos, or at least reset with decent damage at mid percent. Like with Jab, this is another great grounded option to clash attacks with as he swings the shield out first and then can immediately counter with the kicks.


AERIALS

Neutral Air: Patriot Kick

A brisk take on the traditional "sex kick", Cap lashes out with one foot with an initial hit box for 9% and knockback at a 40* outwards angle that can KO around 170% or so directly, which then lingers for only a few frames as it becomes a sour hit for 5% and sort of generic Sakurai angled knockback that wont ever kill.

What is interesting about the move is the speed. Generally sex kicks linger a while, but the Patriot Kick only lasts about half as long as your normal neutral air! This makes for a potent if somewhat precise combo and spacing tool that is safe both in the air and coming to the ground.


Forward Air: Shining Star

Bringing his shield hand back for just a moment, Cap then punches out and downwards at a shallow angle to meet foes as he comes down from above! Dealing 11% with the shield, the large hit box is of course invulnerable up to his elbow and will strike foes fast and hard with 50* upwards and away knockback that can KO past 150% in the air. This has a steep knockback growth curve to it, making it excellent at strings at lower percent until past 100 when it starts to threaten KO's.

If you lack the shield, F air changes somewhat drastically as it deals 8% and actually weakly spikes foes downwards at a -30* angle that matches the direction of his fist. This spike wont really kill until obscene percents, but is still very useful for coming down on a foe as it can cause a ground bounce or tech chase situation.


Back Air: Shield Slice

Cap brings his shield up, turns it sideways and then performs a spinning slash with it's edge behind himself! Dealing 12% as it slashes close behind himself, foes struck by the whirling shield's edge will be sent flying outwards at a shallow 25* angle that can easily net a KO at around 100-110% off stage. Like all shield attacks, there is brief invulnerability on his arm that affords a degree of safety to the move. Hitting hard, B air does have some lag to it as he spins back to a neutral position, making it somewhat punishable if the maneuver misses.

Without a shield, Cap merely performs a spinning back-hand/elbow strike that hits at a 35* angle for 9% and won't exactly KO any time soon. However, this version is much faster as it ends as soon as Cap is facing behind himself, nearly halving the end lag! This can be tricky to use as it requires you to toss the shield and then use a backwards aerial, but a RAR can certainly help to hit. Better yet, B-reversing the Shield Throw to then cross a foe up with this move can lead to both this strike and the return hit of the Shield to land in a stylish aerial combo.


Up Air: Rising Star

Drawing his shield back for a moment, Cap leans back then punches it upwards at a ~80* angle towards anything above himself. The shield once again is a decently sized, semi-invulnerable hitbox above Cap that will bash into foes from below for a solid 10% and 85* upwards knockback that is similar in power to U tilt. Great for juggling and stabbing at aerial foes, it pales in comparison to Stars and Stripes for KO power. Though, a solid hit at high percents from far enough in the air can still be quite deadly!

Without the shield, this attack is tremendously faster, beating out B air as the most transformed aerial in this regard! His punches only deal 5% now, but can be repeatedly sent out as they are nearly 2x as fast overall as a shielded U air. This allows you to keep a foe relatively close by on a juggle for 2 or possibly even 3 hits into a returning shield or another follow up option. Be sure to be quick though, as once the shield returns you are back to the standard Rising Star!


Down Air: Falling Star
Captain America quickly tucks up and puts his shield beneath his knees/feet before kicking down at a sharp diagonal as if he were a Vibranium meteor! This maneuver is his slowest aerial, yet possibly his safest as the plunge makes his entire bottom half invulnerable while shielded and deals an impressive 15% as it also meteor smashes those in the way. The downside is that this has quite some lag to perform on either end, without an active hit box until about frame 20 of the animation, and the ending of the more takes some time to readjust to a neutral position when airborne. If you land before, or just as the kick occurs you can afford some safety as a shock-wave is created on the ground below. Just like D smash, waves of energy about 2/3 the size of the shield will emanate from either end to deal 7% and pop grounded foes into the air at 80* with half the knockback of the normal hit. This provides some safety but still does not cover up the somewhat awful landing lag if you do not hit directly.

Without the shield, this follows the trend of his aerials getting faster and weaker, not to mention lacking partial invulnerability. Cap will kick his feet down and out at an angle for 12% after some start up of tucking them in to perform a meteor smash just as before. Its not much faster overall, so the ability to bash through badly timed anti airs is sorely missed most of the time. Though it is incredibly flashy to get a returning shield to combo into this, and it has no landing hit box so therefor less landing lag as he lands normally without having to worry about re-equipping the Shield!


SUMMARY:
Well-Rounded Leader
Captain America is adaptable to any situation, and has the skills and know-how to get nearly any job done. This is what makes him one of the greatest heroes to ever live, as well as leader of Earth's Mightiest Heroes! Boasting a bit of everything with a decent combo game, decent projectile, decent kill moves, a counter, and even limited "disjoints" due to his invulnerable Shield hit boxes, there is certainly a lot to work with here.

If boiled down however, his best assets are definitively his unique Shield Mechanics as well as Super Soldier. The former allows him to play a powerful bait and punish game where he can abuse the ability to clash with nearly any attack, supplemented by his Counter and Shield Bash, to counter strike an enemy from a variety of ways and pick them apart as a fight goes on. Super Soldier takes his game up to 11 as he and his allies can gain an impressive boost in power for a limited time, and at a great cost to Captain America. spending all his power and limiting the gain of it while doing so is quite the trade off considering that for best results he needs to deal 75% to get Level 3 on line! This can be the ultimate comeback tool or a means to finish off a powerful adversary, but at the same time it's misuse can give them the upper hand as the enemy gains a lot of momentum if you do not finish them off!

Cap's specials and Smashes can all be Powered Up as well for 1 Bar per use and allow him to exert more forceful techniques to keep up with other super-powered beings. Of these specials, Shield Throw is easily the most dynamic. His signature move and projectile, you can toss it at nearly any time to extend combos, zone out foes, or create deadly strings and frame traps with a Powered Throw. You can also use this opportunity to grant an ally your shield or drop it entirely to take on a foe that may benefit from a little old-fashioned close quarters fisticuffs. His Smash Attacks are also all great finishers or even punish tools given his Shield Priority and can often start combos alongside his normal moves. Stars and Stripes is potent offensively both on the ground and in the air as a finisher to supplement his smashes and launchers, but in terms of actually getting back to stage it can be a bit of a let down.

Cap essentially has a "bubble" close to the edge where he can realistically recover, both via wall jump and Stars and Stripes to or past the ledge, but you really need to rely on the shield to bash past enemies either by going up from below, or tossing it out beforehand to cover the space between you and the edge. If sent further than this area, it unfortunately may be curtains for the Captain! Luckily his invulnerable Shield and Shield Bash should protect him during combat when used wisely. Both requiring strict discipline to be timed and aimed, mastery of his Shield tactics to block any and all attacks and even reflect attacks away from himself is downright vital. Tactical Counter can help in this regard too, especially the side to side movement options to regain center stage and keep yourself in the fight.

If you survey the fight well and stick to your training, Captain America can come out on top of any fight!


EXTRAS:


FINAL SMASH : Final Justice

A hyper-combo attack that ends in a strong finishing blow, Captain America will start the attack with a zoomed in freeze frame of him beginning an Fsmash, only to barrel past the opponent if he is within a platform's reach of them. Cap then turns around while they are stunned from the tackle and unloads a flurry of close quarter attacks before grabbing the foe to leap upwards and pile drive them Shield-first to the ground with a metallic explosion! Overall dealing a total of 50%, the final hit meteors foes upwards and can easily net stylish KO's.


Up Taunt : Salute

Captain America faces the camera and performs a military salute.

Side Taunt : "Good job!"

Cap takes on a friendly tone and gives a thumbs up to the opposition, stating "Good work, Soldier!"

Down Taunt : Finished the Mission

Cap turns away from the camera and places his shield on his back, indicating that he has finished the fight. A moment later, he returns to his neutral pose.


Entrance : Quinn Jet Leap

A Quinn Jet flies by high off the stage's floor, as it does Captain America leaps out and tumbles to the stage, landing perfectly without a parachute!


Last edited:

JOE!

Smash Hero
Joined
Oct 5, 2008
Messages
8,075
Location
Dedham, MA


Professor X's first student, Scott Summers is one of the X-Men's leaders. Able to discharge devastating energy bolts from his eyes via a breach between universes, Cyclops is one of the most powerful mutants to graduate the School of Gifted Youngsters.


ATTRIBUTES

STATS:
Cyclops has decent stats all together, generally being average on the whole. He stands slightly taller than Captain America, though a bit thinner built:

Weight: 98 (:4corrin:)
Dash Speed: 1.55 (:4lucario:)
Air Speed: 1.03 (:4samus:)
Fall Speed: 1.75 (:4sheik:)
Gravity: 0.105 (:4diddy:)
Jump: 33 Ground (:4bowser:), 33 Air (:4bowser:)

Rolls: Average
Wall Jump: Yes


GUARD:
Blocking for Scott is your standard Smash Shield with the bubble and all as he crosses his arms in defense of attacks.


POWER TYPE: BURST

Cyclops's Power Meter is a solid, red bar that can max out at 50 power, in a way it is almost like his Visor!

||||||||||||||||||||||||||||||||||||||||||||||||||

His Power Meter will dictate the strength and cost of any and all Optic Attacks. His signature Mutant Power, Scott can emit powerful concussive beams of energy from his eyes. He has spent years training on it's use and incorporating it with his fighting style under the advisory of Professor X, and along with his special Visor can use a variety of techniques to blast away the opposition.

All Optic Attacks will scale in damage by a factor of 1.02x per Power in your meter, maxing out at 2.0x the damage! This explosiveness comes with a cost though, as each Optic Attack also consumes your Power Meter to perform after it is used, essentially acting as a severe form of Stale Attacks as spending power will weaken the moves down to heir base forms. While these moves are certainly powerful, they will only spend all power if you miss. Upon a successful strike, you will be refunded half the amount of power drained back as you keep up your momentum.

For an example of this in action, lets take a look at his Neutral Special: Optic Beam. Upon use, Cyclops will shoot a beam that deals (6%) base damage if you have no power to spend, but if you have meter it will cost Power. So if Cyclops had 20/50 power, Neutral B will drain 20 Power, and in return deal 1.4x damage: 8%. If you miss, you lose out on the 20 power, but if you hit, you get 1/2 back so you still have 10 power in your tank! If you are out of gas so to speak, Optic Attacks are still useful given they have great range and do not go on the stale move queue. Using Physical Attacks during this time will efficiently build meter back up again, but it is assuring to know that the beam moves are at least consistent.

Waiting for the right moment to unleash a powerful blast can be very rewarding, but constant bombardments can net positive gains as well, though with diminishing returns compared to a charged up burst. Different Optic Attacks will each have a bonus if performed from Maximum Power, as well as tie-in effects to his non-Optic attacks. Try and mix and match play styles to see what works for you!


Power
Each character has a meter referred to as "Power". This fills as you play and is linked to various effects and special moves. In general, Power is gained via landing attacks as well as being hit, but the latter at a very reduced rate.

Power is gained equal to 0.6x percent dealt with attacks that do not spend power, and 0.2x of damage taken / blocked. Characters often have other ways of gaining

BURST power types treat their meter as an ammo source, as well as a global boost to their powerful, special moves. Each point of power buffs their moves when in use, but using said moves also spends some power to create a dynamic playstyle!

With a total of 50 power points to build up, a BURST character needs to either:

Deal 83~84% damage
Take/Shield 250% damage


SPECIALS

Neutral B: Optic Beam / Optic Blast
Taking a hand to the side of his visor, Cyclops takes a quick pose before firing off his signature Optic Beam! This ruby-red line of concussive force has tremendous range, traveling 5 platform lengths instantly before disappearing, though it stops at the first object it hits. By aiming the control stick during the start up lag, Cyclops is also able to quickly aim the blast 360* to accurately snipe any opponent. After firing he faces a decent bit of punishable lag of around 38 frames if he happens to miss the beam, which is only about as wide as his own head. Cyclops will often need to take advantage of the huge range and aiming radius to make the Optic Blast safe. Despite the end lag, it has fairly little start up at only 7 frames, making it fairly reliable to shoot out defensively, and the Blast lingers for a whole 6 frames making hitting rather lenient. The entire affair takes up only 54 frames, meaning you can shoot a screen-covering beam at a rate of about 1 beam / second!


The Beam will deal a base 6% (12% max with Power) at close range, but then tapers off with distance. The beam will deal 1% less base damage per 1 platform of range, so on your average stage, Optic Beam will still hit decently for the projectile type given how even on the other side of Battlefield, it still will nail a foe for 4% (8%) base, the tapering matters much more for long range hits in the air or off stage, unless Cyclops were to aim the beam at a surface at an angle, in which case it will ricochet at a perpendicular angle from said surface. In any case, even the longest ranged hit will still deal 2% (4%), which isn't too bad considering the sheer range.

The beam will always send the foe out at the Sakurai angle with medium knockback, with a close range blast hitting about as hard as the 3rd hit on most jabs and even able to KO at very high percents if close to a blast zone. Longer ranged hits will of course deal less and less knockback given the damage goes down, being reduced to essentially hit stun when the beam deals only 1% at the very edge. Given the angle, the hit stun even at max range will rarely be able to outright gimp an offstage opponent, though you can certainly harass them. At Maximum Power though, Optic Beam will be notably brighter / slightly thicker as Cyclops puts a bit more power behind it! Dealing the 10%, "close range" hit over the full range, and unlike the normal version can hit multiple opponents in a row. This full-power Optic Beam can easily net a KO if a foe is on the edge of a blast-zone, with one last push being enough to secure a KO. After this blast, Scott suffers the normal lag and has an aesthetic red vapor come off of his visor.

For even more oomph, Cyke can opt to Hold the B button, spending Power to convert Optic Beam into Optic Blast! Holding the button for 10+ frames will cause Cyclops' visor to glow brightly as he turns a dial and prepares to unleash an incredibly powerful version of his neutral special. Covering the length of 1 platform and swiftly fanning out to be as tall as his own torso, the Optic Blast lingers briefly for the same 6 frames before fading out and leaving Cyclops breathing heavily for a decent bit of ending lag as before. Coming out in 22 frames, the Optic Blast at least gives you much more bang for your buck as it deals 10% (20%) damage and actual, respectable knockback that can KO in normal situations unlike the normal Optic Beam, starting at around 125% mid stage though this can of course change dramatically based on the angle you shoot and your position.


The Optic Blast is much slower and stronger and offers a decent alternative to the long ranged poke of the Beam, though with 46 frames of end lag and the inability to ricochet, you may want to be careful when you decide to pull this out! Luckily, the decision can be made a bit easier when you are at Max Power as Optic Blast gets boosted similarly to it's weaker variant. At maximum, Cyclops will shoot the optic blast much more quickly with only 12 frames of start up, and reaching out to 1.5 platforms range! This makes the move significantly more practical with added range and speed, and hitting for 20% damage isn't too bad either!

The Optic Blast makes Cyclops an adaptable and potent adversary nearly by itself, able to follow up targets from nearly any hit, or strike from nearly any position. But, his power alone is not what makes him top of his class, its how he uses it to bait, punish, zone, and even potentially finish off foes depending on the situation! This move should demand respect from any character facing Cyclops given his near un-matched range advantage with this instant, almost always full-screen projectile.


Down B: Optic Stream

Cyclops' visor will glint for a moment as he takes aim, before channeling a beam from his visor that cuts into the floor in front of him and up in a large, sweeping arc to the sky!

Starting at a 45* angle towards the floor, Cyclops' sweep will tear up the ground aesthetically as he swoops the continuous beam upwards to end at a 15* upwards angle. Reaching out a length of 1 platform, and taking about the same amount of time as Marth's F smash to perform, the sweeping beam will hit foes rapidly for hits of 2% (4%) damage, averaging around 14~16% (28-32%) and actually carry them upwards along with the beam if they do not DI away.


This is repeated when airborne, but at a steeper angle as Cyclops goes from a near vertical up to a shallow downward angle. Aerial Optic Stream can actually stall your momentum once per air time, and pops foes up with the final hit at a slightly more diagonal angle than the ground version, but suffers from more end lag than the grounded version if you do not land. While the grounded version is faster to end, by no means is either version a quick move. With some telegraphed start up, long duration and a chunk of end lag, Optic Stream is best used from a distance to both maximize the coverage and to ensure maximum safety. However, this may make some of the hits actually whiff due to just the coverage area and duration, so a close range hit may net more reward despite the harder difficulty of landing it!

Optic Stream lacks the sheer range or sheer power of your Neutral Special, but fills a very important role in your spacing game with it's huge area denial and multi-hitting duration. It is best thought of as a "flamethrower" type of move where you will want to threaten space or simply deal incredible damage as a punish, as well as catch multiple opponents at once. You can often string some melee hits, and then go for the stream to finish the combo with a decent chunk of damage at mid range, and even get some more follow up hits after the foe gets popped up at the end!

At Max Power, the final hit of the stream will also deal bonus damage to strike for 6% up from 4% (with power considered), as well as a bit of bonus knockback. This not only ensures that the stream is safe if you even just nick the foe, but also can offer up better spacing opportunities or even follow ups as the final hit will grant a much greater frame advantage than normal.


Side B: Combat X-pertise

Looking out towards the opposition, Cyclops' combat training allows him to pick apart his targets and identify their strengths and weaknesses. Upon activation, Cyclops' visor will flash red as he points out towards his foes, marking the closest enemy within 2 platforms of him with a red "X-Men" Logo above their head for the next 10 seconds, saying "Gotcha!" or "That's it!" when successful.

Taking about the same time as Mewtwo's disable to perform, Combat X-pertise allows for a handful of different tactics once Cyclops has a read on his enemy! The first and probably most notable boost is that while marked, any attacks will deal 1.1x more damage per hit to the foe as they are now aware of any weak points they may have. More specific to himself and fellow X-Men, marked foes will yield 1:1 Power gain for hitting them instead of the standard 0.6x damage dealt! This boost applies to other meter gain type effects as well, such as if Cyclops were to team up with a certain Boxer or Buster Sword wielder. This confidence boost alongside the added damage all add up to getting a very significant lead in momentum against your opposition, and while Cyclops certainly appreciates the boost in power gained, he is sure his team will also love the chance to go wild on an enemy. Just be careful with who you target though, as only one mark can be active at a time!


If you, or another Cyclops on the field, press Side B again, Cyclops will try to exploit the weakness in the enemy in a more direct way with an Optic Bolt! Having made the plan in his head already, the Optic Bolt can be fired essentially instantly with only 2-frames of start up, and homes right at the target's current location fast as a bullet. There is essentially no max range to the Bolt, but of course the further distance away the more chances that the foe will not be at the same location that your fired at. Upon impact, the Bolt will burst on the foe for 7% (8% with the mark's multiplier, and 16% at max power!), and send the foe out and away at the angle of the shot with medium power. If performed at maximum power, the Bolt is much brighter and carries bonus knockback that can easily KO off stage or near a ledge starting at around 100%.


The Bolt also carries incredibly low end lag at only 8-frames once fired, making it incredibly safe overall. Unfortunately, a successful hit of the bolt will also destroy the mark placed upon Cyke's target! A small price to play for such a fast projectile, you can easily use this to combo into or out of nearly any other move in your arsenal, especially as a finishing hit after launching the foe. You just need to be aware of the fact that you need to leave yourself completely open for about a whole second in order to place a mark. Just trying to mark targets in neutral is just asking for trouble, so it could be worth it to combo into the mark so to speak so that you give up a hit mid-stun in order for more damage down the road. This rounds out his Beam Specials quite nicely as

Additionally, if you land a Beam Attack on a foe you have marked you will gain 2/3 power back instead of the normal 1/2! This is of course a great asset to his game as it can allow more powerful blasts more often, but of course requires the risk of marking a foe to begin with which leaves Cyclops open.


Up B: Evasive Maneuvers

With impressive acrobatic prowess, Cyclops performs a large back-flip to escape the situation! Being a skilled martial artist to supplement his powers pays off, and here it just might save his skin from both direct combat and the blast zone. The flip will move Cyclops high enough for him to land on the top battlefield platform at the peak, just as he is tucked in and upside down with intangibility on frames 1-5 upon starting the move, though it lacks any sort of active hit box.

This flip can be angled back and forth to increase the horizontal distance, but decrease the vertical by about a platform each way. This can be difficult to sweet spot on the ledge as it can only grab ledge after the halfway mark, but the raw speed of the jump and virtually zero landing lag makes it tricky to punish. As his recovery move, it does offer a good deal of flexibility on where you land and has very little lag on either end to actually move about. Scott can also angle this directly into a wall and perform a Wall-jump upwards automatically. Assuming you saved your jumps, this can extend his recovery a fair deal further than just using Up B alone.

With some effort, it can even be turned into an offensive tool! At any point during the leap, Cyclops can cancel into a special aerial with a tap of A or B. Performing a powerful, spinning Axe-Kick with a twist of his body for a bit of lag, Cyke will attempt to smash the competition from the air! The kick covers a decent, arcing range in front of Cyclops and either hits the foe away at a 45* upwards angle for 12%, or spikes the foe at a 45* downwards angle for 13% if the kick connects right near the end of the animation. While it can be quite attractive to attempt, the kick will put Cyke into special fall if he misses, but on the upside if it hits he restores his mid-air jump!

In general, Cyclops has limited but safe routes back to stage thanks to Optic Beam. If sent far enough away, a precise shot or two can keep foes at bay long enough for him to make it into Up B range. He cannot get greedy however, as opting to shoot back to the stage can end up causing him to fall for too long in ending lag and miss his window of opportunity!


Shield Special: Concussive Blast
Raising both of his hands to the visor with a press of Shield + B, taking on a much more "focused" pose than the more straightforward aiming of Optic Beam, Cyclop's visor glows as a shining red gleam crosses left to right over the course of 20 frames. Once he is done with this lengthy wind-up, Cyclops unleashes a powerful Concussive Blast from his visor to stun his enemies!

Taking on a slightly orange tint compared to the usual ruby red, the Concussive Blast is a shorter ranged yet very potent burst of energy. Even shorter than the Optic Blast, the Concussive Blast fans out quickly to be about as tall as Cyclops within half a platform's distance over the very brief, 2 frame hit box. Foes struck will take 7% (14%) damage and be placed under a special shield-break effect. Slowly pulsing between Red and Orange as the foe recovers from the sensory assault, they will be stunned just like a shield-break for variable time if they mash / based on their %, which can of course allow Cyclops to follow-up with whatever he'd like.

What makes this special however is that the stunned state carries a resistance debuff to the foe for as long as they're stunned, meaning they take more damage from all sources! Specifically, the debuff will be equal to the Power put into the Concussive Blast, or 0.02x damage per point. Maxing out at 2x damage taken with 50 pts of power poured into the stun, this not only stacks with Combat X-Pertise, but allows Cyclops to get a bit more bang for his buck off of his non-beam attacks, as well as for allies to take advantage of the stun! Speaking of beam attacks though, a successful hit from the Concussive Blast will still return 1/2 ~ 2/3 of the power spent, allowing for some fun math:

Optic Beam base damage (close) = 6%
With 25/50 power = 9%
Vs a fully de-buffed enemy = 18%

Optic Beam base damage (close) = 6%
With 33/50 power = 10%
With the X-Pertise Mark = 11%
Vs a fully de-buffed enemy = 22%

Obviously taking the meager Optic Beam's damage is paltry example compared to something like a Smash Attack or his Optic Blast, but of course you may have an ally who can benefit even more while Scott goes through the hefty end-lag of the move. It should be noted that multi-hitting moves are not usually the best for a follow up, such as Optic Stream. While they often do a lot of damage outright, only the first hit will be boosted on impact!

In addition to being a solid set-up tool for Cyclops, this also deals considerable shield damage, not enough to break one outright but it can lead to it if the foe holds their shield or it is already damaged. In general though this can be quite risky as if you do not break the shield (which if done with your Shield Special you still get the special stun) as it both has massive end lag as well as striking a shield not counting as a full hit for the power discount.

If an airborne foe is struck, or an already stunned foe manages to be hit by this again, they will be sent flying at a shallow 25* angle and can actually be KO'ed outright at around ~130% or more if offstage! Additionally, the special-stun effect will still apply for as long as they remain in hit-stun from the Concussive Blast. While drastically shorter in duration and set-up potential, and of course interrupted by further hits, this can be very useful both in a team setting or if you plan to follow up on the foe you launched with an Optic Bolt for the great damage increase!


SMASHES


Side Smash: Optic Bomb

Cyclops braces himself, looking towards the ground as his hand comes up and cranks the side of his visor, both actions accounting for the start-up of this move. As you charge, the visor will begin glowing brighter before Cyclops cries out and unleashes an astonishing Optic Bomb at the ground, with enough force to push him backwards!

The potent Optic projectile travels instantly from his visor to the ground about a character length away from his feet, which upon impact will explode in a ruby-red circle that reaches about shoulder-height for Cyclops and shakes the screen due to the sheer force. Foes within the impact radius of the bomb will be launched back with extreme knockback at a 60* upwards angle and 14% (28%) damage taken. This can easily KO at 90% or lower in most situations, but the massive lag on both ends, even with Cyke being pushed backwards about a character length, still makes it rather unsafe if blocked / whiffed. You can play with this a bit however, as the push back can allow you to cancel the end lag by falling off a ledge, and you can hit a bit earlier with this if you strike a foe first between your visor and the ground. This will create the detonation earlier and higher up from the ground, but it is a rarity to happen. Speaking of the ledge, Cyclops' Optic Bomb will detonate just below ledges, after traveling about his height from the visor making it not really a "true" projectile, but this allows for some added utility with the explosion's range and placement.

If you noticed no mention of charging his smashes, Cyclops is a little different than most characters when it comes to this given his Burst Power Type. As he holds the input, Scott will flash Red instead of the traditional yellow/orange hue and actually build up his Power manually. Given that his smash can deal up to double damage with maximum meter, this is certainly nothing to take lightly! A fully charged smash will build up to 20 Power over the course of the charge period, or about 1 every 3 frames, equating to a 1.4x boost in damage from 0 power just like a normal smash charge. If Cyclops is interrupted while charging a smash, he loses focus and loses the gained power up to that point via smash charge, as well as taking the bonus knockback associated with the smash charge state.

If Cyclops begins charging a smash attack at Max Power, or if he reaches Max Power before the full second / 60 frame charging period is complete he will put the overflow power into the range of the move. At base, Optic Bomb's radius is formidable given it reaches up to Scott's shoulders. For every 5 points of charge beyond max that you gain, you will add 12.5% to the range until a fully charged, fully powered smash will cover 1.5x the space in front of you! This makes for a truly MASSIVE area of coverage for such raw damage, as well as push Cyclops back even further allowing for easier end lag cancels as he gets airborne. This is also very useful on platforms, allowing you to hit foes easier from below.

Overall, Optic Bomb is an incredibly powerful, show-stopping move that can easily finish a stock in style if you get the opportunity. Foes may often overlook it, but there is a reason that Cyclops leads the X-Men!


Up Smash: Optic Burst

With similar start up to F smash, Cyclops will face the camera as he cranks up his visor and charges the laser. Looking skyward and taking a bracing, wide stance, upon release Cyclops will send out a large cone of optic energy up above!

Fanning out to be about 1/2 the height of Cyclops from his visor, and ultimately spreading to be about 2/3 of a platform wide, the Optic Burst covers an impressive amount of space over it's 90* arc. Foes struck by the cone of energy will take one of two hits, depending on if they are hit on the edge of the fan or within the center/starting point. Starting with the central, point-blank sweet spot, foes struck by the energy will be launched straight up with very powerful knockback and 13% (26%) damage taken, able to KO at around 100% or so on the floatier characters quite reliably. On the outer edges of the burst, foes will be blasted either straight up, or 80* to either side with 10% (20%) damage taken, and far weaker knockback that while it can still KO at high percents, is much more useful to just keep a foe airborne.

As with F smash, over-charging the move will add up to 50% more height at max charge/power, which in turn increases the spread of the cone significantly. For visual reference, a maximum U smash if done from below the center platform of Battlefield would reach the edges of each platform and easily hit the middle, covering the whole area! This incredibly useful for snagging airborne foes given the wide area, though it is practically useless vs grounded opponents. At high power you can get great KO reads given the large area you cover, but beware of the short duration of the hit box (4 frames) could leave you open if you whiff or the opponent air dodges in time.


Down Smash: Optic Spin

Crouching slightly and looking towards the ground during the start-up, Cyclops puts a hand to his visor as it glows red, before unleashing a solid, thin beam to the ground upon release!

Once the beam is created, Cyclops then maintains it, swiftly turning his body front to back, to sweep it across the floor behind himself to cut into the ground all around in a wide area. Ending with Cyclops turned around, the Optic Spin is rather unique in that you create a solid wall of hit boxes at angles all around yourself. Foes struck by the 45* angled beam as it spins around Cycke will be struck for 11% (22%) and receive knockback at a sharp 35* outwards angle to either end. This is great for making space given the relatively fast start up, though the long duration can make following up from a frontal hit a bit awkward outside of immediately tossing an optic Beam their way. Landing the reverse hit is much faster as Cyclops has minimal end lag, as well as an easier time actually getting to and chasing any opponents he knocked away. Performing the sweeping laser over an edge will show that it has a length of about a platform, but can still be valuable as you can shoot this off to blast recovering foes away at a low angle, which can be more valuable than the Optic Bomb F smash that may allow them to gain height and recover!

Over-Charging Down Smash will cause Cyclops to have the visor glow and smoke brighter just as with the others, as the angle of the beam as well as the total range both go up by up to 50%. Starting at the basic 45*, at max-overcharge this will raise up to 22.5*, or for a visual reference: hitting half a platform away on the ground to hitting a full platform away. This increases the total area to cover a huge chunk of the ground to either side, which on top of dealing 22% will make quite a scary coverage option either on stage, or when it sweeps far off a ledge.


THROWS


Grab: Practiced Grapple

Reaching out with both hands, Cyclops grabs hold of his enemy with slightly above average reach. His pummel is your standard knee to the gut, but with a decently quick pace for 2% a hit.

Forward: Judo Throw

With both hands on the foe's shoulders, Cyclops twists his hips and swings them head over heels out and forwards for 5%. This sends foes away at about a 40* angle weakly, only really going anywhere significant after about 80% on most characters. This is a perfect set up for an optic follow up given the foe is usually released just about at eye level when thrown! A good option most of the time is Optic Stream given the foe is right in range, though of course you can opt for the ever present Optic Beam or Blast since you can aim them freely. You can always opt for his physical moves as well given the low distance, and get some pseudo-rushdown action started!

Back: Back Roll Kick

Rolling backwards, Cyclops kicks the foe up and away at a 45* angle for 7% and decent knockback. Able to KO at a ledge around 160%, this makes for a decent emergency kill move and at least a spacing tool to get a foe away from you as Cyclops scrambles to his feet. B throw does not have as quick a window to cancel into beams as F throw, but given the positioning the extra damage and distance may be worth it. More often than not this is a simply great for setting up harassment with Optic Beams more than any other option due to the angle and distance, though it may even be worth not to cancel and save your power to hit with a Max Power blast to ensure a KO as the foe gets launched towards the blast zone!

Up: Optic Geyser

Hoisting the foe with a grunt, Cyclops throws them into the air with both hands, before leaning back and shooting them skyward with a continual Optic Geyser! Raising the foe up 1.5 platform's length into the air over multiple hits, the final hit of the geyser will pop the foe straight upwards with medium power with a total of 11% (22%) damage taken. The Geyser can catch multiple foes over it's long duration and drag them up as well to pop them up for the final hit, which can even KO off of tall platforms at high percents.

At Max Power this is made easier by the range of the geyser being boosted to a full 2.25 platforms distance. Even at ground level, the sheer height can make for a satisfying, flashy vertical KO option in a pinch.


Down: Optic Downpour

Slamming the foe into the ground, Cyclops leaps up with the same motion and unleashes an Optic Downpour on top of them! Like with U throw, the downpour hits multiple times until a final hit pops them up and away at the Sakurai angle behind Cyclops. Taking a total of 13% (26%), this is his most potent direct throw for sheer damage, but the end lag combined with the distance the foe is popped away make it so only your normal Beams or Optic Bolt can really take advantage.

At Max Power however, the final hit pushes the foe into the ground to change them into being in the prone state. This is a massive increase in damage utility as you can chase the foe for a follow-up such as with D smash, F smash or even a Concussive/Optic Blast Blast!


STANDARDS


Jab: X-Combo

With lightning speed, Cyclops puts his close quarters combat training to use as he lashes out with a left, then a right punch each for 2% and hit stun. Continued presses after this have Cylops go for a spinning kick for 3% that keeps them in place which is then followed by a double fisted, upwards strike that sends them reeling away for 5% and decent knockback for a jab. This 1, 2 and finishing combo are treated as 3 separate attacks where you can stop at one, two, and after the Kick-Strike combo. The final hit sends foes decently far away, still able to combo into Optic Blast from a distance like nearly any of his moves, though it can be a good strategy to Jab-Jab-Optic Stream to mirror a traditional rapid jab with some powered style!

Side Tilt: Practiced Kick
Cyclops leans back and performs a strong, mid ranged kick forwards, holding the pose as if it were a grounded sex-kick... because it is!

F tilt hits hard when it first comes out, dealing 10% at his foot and strong knockback at a 40* angle that can KO reasonably well near edges. For the next few moments though, his leg is a weak hit for only 6% that sort of pops foes back at a 45* angle weakly. Overall this has medium start up, decent duration and very little end lag when you take the duration into account, which when combined with the ability to angle up or down about 35* each way, offer great close quarters utility.

Up Tilt: Mutant's Elbow
Holding onto the fist on the side he is facing with the other hand, Cyclops takes a step and performs a forceful elbow strike! Hitting upwards about 40*, this has deceptive reach given he takes a step forward to use, hitting for 8% and popping the foe up at a 60* angle with medium knockback.

Hitting high, the elbow strike has a deceptive hit box that covers not only his arms, but most of his torso as well. This can easily scoop a foe up into the air, or keep them there at the same time as pushing them forwards towards the edge. Like with F tilt he can get a lot of utility from the move between just juggling the opponent, or even using it as a slight approach in neutral.


Down Tilt: Rapid Kicks
From a crouching position, Cyclops shows off his athletic training by reaching out for a kick with one leg for 4% and hit stun. A second press of A will have Cyclops continue kicking out with a second more forceful kick for 5% and medium knockback at a great 30* angle! A great poking tool, D tilt covers a decent amount of space on the ground in front of him for a good amount of time thanks to the two kicks, offering a great natural combo. Its always a decent option to edge-guard with due to these traits, but better yet it offers an amazing zoning opportunity due to being such a quick poke.

Either of the two hits can lead well into Optic Attacks, allowing Cyclops to mix up his pressure options in a variety of ways. A quick poke with the first hit can be safe on a shield if he follows up with an optic move to counter the foe's out of shield option, or keep a foe closer to rather than send them out with the second hit of D tilt. Conversely, the second hit sends them out and away which can lead to offstage snipes or deadly smash attacks!

Dash Attack: Sweeping Kick
From a dash, Cyclops will dip low and perform a sweeping kick, pivoting on his other knee and hand to get some surprising reach! Hitting a bit low, but still high enough to be considered a sort of "mid" hit, the leg has three different hit boxes. Firstly, being hooked by his foot/heel will deal 9% damage and actually pull the foe up and towards Cyclops at a 60* inwards angle. This has a moderate knockback curve, being able to easily combo into many moves up until about 60% where they start going too far to do much with. Secondly, if you are hit by the rest of the leg you will be sent up and out at a 60* angle for 7% and more or less the same knockback stats except for the lower damage. This can be decent as well, but leads more often to Optic attacks than further close quarters follow ups, except of course for Combat X-Pertise if it is set up thanks to the small homing factor.

The last part of Dash Attack is essentially a "flub" hit that occurs after the sweetspot of the move passes, essentially right after the leg is swept it's max distance and starts to reel in back to Cyclops as he spins slightly for the end lag. This flub hit lasts quite a long time compared to the other two, hitting for 5% and essentially causing tiny 90* upwards knockback that either pops the foe up or causes a tech depending on their percent and physics.


AERIALS

Neutral Air: Cyclone Kick

Tucking his arms and left leg in, Cyclops extends his right leg and with some momentum performs a 360* roundhouse kick! Dealing 9% across the entire leg on either side, N air is a single-hit move with great knockback growth, able to combo well at low percent and grow to even KO outright around 140%, if not gimp foes sooner as it sends them outwards at a 40* angle on either end!

Another bread and butter move for Scott, this fills many niches given it's decent overall coverage area and ability to hit just as hard back and front. It can even auto-cancel if landed just as the first half-rotation completes! This grants some leeway to attempt powerful attacks an aerial hit, though it can be very obvious for the foe when Cyclops is attempting this due to the needed charge up time, and holding Shield can beat out even his powerful smashes. You can always mix this up with a Concussive Blast if you land mid-kick to punish the shield, but an opponent who is observant may just roll away if they see it coming.


Forward Air: Double Kick

Leaning back, Cyclops pivots and lunges out with a kick at a 40* upwards angle for 6% and small amounts of knockback at the Sakurai angle, followed by another pivot as he lunges out with the other leg straight out for 7% and hard knockback at the Sakurai angle. Another bread and butter move like N air, these two kicks fill a similar role to D tilt with their coverage and sort of auto-combo nature. At low percent these can easily be chained into one another in mid air with your double jump, and if you are fancy with a cancelled Up B!

Alongside his Up Air and Down Air, Double Kick will make up a majority of his aerial combos, and can even KO past 150% or so off stage. The angles the foe is sent at makes it perfect to follow through with Optic beam or Optic Stream as always, but better yet he can land between the first and second hits to abuse the fast starting kick. If he does so, he can combo into any grounded tilt or even Combat X-Pertise right away. If the foe gets out of reach from the hits you can always fall back on Optic Beam as a tried and true follow up too.


Up Air: Flash Kick

Another staple of Cyclop's kit, his famous Flash Kick returns! Drawing his left foot backwards for some start up, he performs a back flip mid air with a huge whooshing visual effect on his leg that nails foes for 9% and purely vertical knockback for the first half of the move, before the rest of the flip lingers and hits foes away at a 0* horizontal angle behind himself for only 6%.

The starting hit of the move is fantastic as it allows Cyclops to juggle foes with style, coming fresh off his U tilt or U smash, he can continue his acrobatics with this move multiple times and even score a kill near the top at around 140% or higher! The later "tip man" hit is very weak, but it has a killer semi-spike angle that can gimp foes if you are feeling risky, allowing for a good deal of versatility with the move. If the foe is too far away, you can always spend some power to shoot a high angled Optic Beam to still net some damage, or go for a risky yet flashy Up B to vault towards them for one more aerial kick as a finisher.


Down Air: X-Drill
Cyclops tucks his arms in and performs a spinning, downwards kick towards his foes with this acrobatic X-Drill attack!

Dealing multiple hits that can add up to 15%, the drill drags foes down with Cyclops for the duration with little end lag on his part. While a fantastic move to lead into grounded close quarters combat, you have to keep in mind the priority of the drill. Unlike his other flashy kicks, the drill hits in tiny numbers at a time and has very little range (a bit of an oddity for Cyclops), making it very unsafe to just toss out, nearly anything will trade favorably with it or simply beat it outright if he just tries to jump in with drills. Condition your foes first into shielding with say, close range Optic Attacks so that you can punish them with an X-Drill up close!

Back Air: X-Stomp

Leaning forward this time, Cyclops looks back, tucks in then stomps out and back at a downwards 30* angle with a forceful kick with both legs! This stomp has two separate hit boxes, the first being a powerful spike at the 30* downward angle that only lasts for a single frame, dealing 12% the very moment he begins the stomp and is one of his premiere KO moves that is not an Optic Blast or Side B. That being said, B air does leave Scott turned around which can lead into an Aerial Down Smash or Forward Smash at the right percents.

The latter is as his legs extend to deal 9% and hit foes up and away at an upwards 30* angle, which can still KO decently at around 120% near a ledge, if not earlier off stage. B air carries more risk than his other aerials as it has a tiny duration and high start up and end lag, but it is arguably the most rewarding to land. Like with B throw, it can be better at times to not cancel the lag and instead opt for a full powered Neutral B to keep the foe far off stage as much as possible. That is unless you are at the sweet-spot percents where you can B air into an Optic Blast for great damage.


SUMMARY:
Top of the Class
Cyclops has an incredible ranged game, essentially defined by his ability to blast foes from across nearly any stage with his signature Optic Beam / Blast. His ability to transition from up close and personal to his devastating beam attacks is a sight to behold, but despite the raw offensive power that Cyclops can bring to the battlefield, he isn't without his weaknesses as well.

Firstly, despite the speed of Evasive Maneuvers, it still has no natural hit boxes without extreme commitment to make his recovery actually quite gimp-able if he is hit hard enough. His shield special is also slow, and jumping to an aerial carries the same risks as Up B. Combine this with a sort of ironic "Blind Spot" at mid range where his beam attacks are punishable, and it is clear that Cyclops has a rather hard time defending himself if a foe can actually control neutral. Disjointed attackers or very fast foes can have a possible field day in neutral vs Cyclops if he is not smart with his counter measures!

The one thing everyone underestimates about Cyclops is his combat tactics and how he can unleash devastating battle plans in even the most tense of situations. This is a man who leads the X-Men and has even beaten every single one of them one on one, even his fearsome rival, Wolverine! The key with Cyclops is knowing when to unleash his full power given his super Powered Optic Attacks. Not having the best movement, and with overall sluggish KO moves outside of the odd B air, it is important to make the best of any hit you get and make sure you lay into the foe with all you got! There are a ton of specific spacing's and percent ranges where he can link into one of his devastating smashes, or a Concussive Blast to end a stock incredibly quickly. Else, he is looking at a lucky stray hit or KO'ing much later into the 140%+ range with his other more easily landed moves. Even given his massive range and potency with the smash attacks, needing to charge them up for true power and range can make them somewhat cumbersome to land in neutral. Finding the right percent ranges and DI traps to lay into foes can be very well worth the Power Drain as a simple hit at 50% could potentially be fatal as the next few hits end with an (over-charged) smash!

Combat X-Pertise alleviates some of his KO troubles though, as it not only lets him and allies deal a bit more damage vs a single foe, but it also unlocks much needed KO power through his Optic Bolt, or rapid power generation to fuel his powerful beams. He will want to keep an eye on his foes via Side B often, but it is also very unsafe to toss out as the mark actually does nothing to stop a foe from hitting Cyclops in return. At least Optic Stream can boast incredible damage while being very poor defensively, speaking of which goes hand in hand with Side B given you are able to lay on the laser pressure way more often thanks to bonus power generation!

Power in general is pretty vital to Cyclops as it dictates what kind of followups he has at any given moment, as well as the potential his punishes have. At any given moment he can shoot an Optic Beam basically anywhere on screen to tack on damage, which can range quite a bit and essentially guarantee a good chunk of extra percent off of any combo. The fact that his beam powers then drain away from his Power Meter acts as a form of Stale Move Negation taken to the Nth degree, the same as how his Power itself boosts the damage to way beyond normal. While you may opt not to use the few abilities that use raw power instead of proportional, Cyclops cannot ignore the large swing effects that his blasts provide to his game play each and every time he uses them.

In a sense Cyclops is a bit of a glass cannon with how he can set up a devastating string into an amazing Optic finisher, but at the same time if he loses focus of the battle he can get steamrolled right back. Keep your wits about you X-Man, practice your tactics in the Danger Room, and you can surely win the day!


EXTRAS:


FINAL SMASH : Ultimate Optic Blast

Cyclops has had enough, stating "You want power? I'll show you power!!!" as the screen turns and zooms in on his face, he takes off the mask and visor to unleash the full force of his Optic Blast! Anyone within an area the height of Smashville's main platform in front of him anywhere on the screen is then caught in an incredible beam of red energy that deals multi-hits adding up to 20%, before a final strike of 35% sends foes flying straight out at a 25* angle towards certain doom. It should go without saying that this cannot be blocked, but some characters may just be able to build up sufficient armor or get out of the way fast enough to potentially live through the full might of Cyclops.


Up Taunt : The Shades

Cyclops faces the camera, puts his hand on his hip, and with the other hand takes of the visor! Luckily for the viewers, he has his trademark ruby-quartz sunglasses on just in time underneath with some slight of hand. After a quick smirk and a thumbs up to the side, he returns the visor back to it's rightful place.

If Taunt is held down the entire time, Scott will lower his mask and keep the shades on for the duration of the fight. He can swap to the visor with Up Taunt at any time though, and upon defeat he re-spawns in the standard mask again.


Side Taunt : Ruby Glint

Cyclops faces the camera and crosses his arms as his visor (or shades) glow from left to right, ending in a spark.

Down Taunt : Power Display

Taking a knee and facing the camera, Cyclops looks to the sky and fires off a very weak Optic Blast upwards as he flexes his muscles. The beam only reaches about 1/2 a platform from his eyes, and will deal 2% and flinching to anyone it hits, though it is wildly unsafe on hit most of the time.


Entrance : Mystery Man

Scott is seen with his back to the camera and wearing a heavy, brown overcoat. Moments later he tosses it off and away to reveal himself as Cyclops!

 
Last edited:

IvanQuote

Smash Ace
Joined
Apr 7, 2014
Messages
853
Location
Looking for those who like Mighty No 9
NNID
ivanquote
3DS FC
1693-3075-2999
I'm still working on Samus, but I'd like input on what you think of the different Charge Shots.
First of all I'm pleasantly surprised to see you here. I really liked your extremely detailed manner of writing in the Strongest Character and I can start to see it poking through in the beginnings of this set. To your question, I like how this is implemented. I don't know much about regular Samus' meta, but it seems to me that her most reliable method of killing was a fully charged shot. Here, I like how the beam shifting is done through the use of a fully charged shot. This not only forces the player to not use charged shots with reckless abandon, but also gives incentive for actually using uncharged shots over charged ones. This goes more so for the new additions with added side effects that permeate even without a charge (stunning, freezing, shield breaking). Also I find the order quite nice at the end, with a charged plasma leading into an opportune broken shield, following into a regular charged shot blast to kill. Keep up the good work so far!
 

Munomario777

Smash Master
Joined
Nov 18, 2014
Messages
3,253
Location
Charleston, South Carolina
3DS FC
0387-9596-4480
Switch FC
SW-8229-3157-8114
As the resident Bionichute Bionichute Skylanders moveset, Pain-Yatta, like Acidloli, has a good amount of fun ideas. Bringing items into competitive play is a good core concept for a moveset, and is very fitting for the character. It also has minions, a weapon-switch, a unique recovery / possible attack tool, and other move-specific gimmicks. A lot of these mechanics are really fun, and introduce some unique gameplay scenarios and strategies. However, it also shares the same basic flaw of not expanding on these concepts enough to utilize their true potential. Where Fortis has an abundance of mechanics and interactions to the point where the moveset becomes cluttered, Pain-Yatta introduces a good amount of core mechanics but simply fails to explore them. The buffs from different weapons, the minions, and the potentially interesting Uspec are, for the most part, ignored throughout the rest of the moveset.

A lot of moves have unique gimmicks, such as Utilt's unique repeating nature (and odd music effect) and Nair's bouncing effect, but they often come across as unrelated to the playstyle and unconnected to one another. Some elements even actively play against one another, such as the weird suction grab presumably being too slow to allow Pain-Yatta to take advantage of Ftilt's sweetspot. He also lacks a real fast, up-close hitbox for this purpose outside of the unrewarding Jab and Dtilt, meaning that Ftilt is underutilized. While interesting in isolation, many of these moves are disconnected from the rest of Pain-Yatta's actual kit, and in terms of playstyle are pretty much just filler.

Like a well-decorated cardboard party animal, Pain-Yatta's presentation is refreshing after Fortis, with shorter paragraphs, briefer descriptions, and more of a character to the writing style making for a pleasant reading experience. With that said, some parts of the set, such as Uair's hitboxes, are confusingly worded, and some n's slipped through without a tilde. The weapon-switch mechanic is very underutilized, only affecting a few moves. While changing the entire moveset for each weapon can make for a drawn-out read, it could have also been handled by giving Pain-Yatta the same animation for a move regardless of his weapon, but different properties depending on the weapon – such as damage, range, knockback, attack speed, unique hit effects, or even the move hitting twice with something like the maracas. Forward Smash is the best use of the various weapons, with some fun effects depending on the weapon, but moves like this are only sprinkled throughout the set. I already touched upon the grab, which I find quite tacky if I'm being honest. You could use something like this in a moveset... but Pain-Yatta does not use it enough, in interesting ways, for its inclusion to be justified.

Like Fortis, Pain-Yatta also suffers from not getting enough depth out of its complexity. While Acidloli suffers from having too much, however, Pain-Yatta suffers from doing too little. The amount of mechanics is no problem; where the moveset lacks is in what it does with all of these mechanics. The two main ways to fix this would be to add more hard interactions, which also run the risk of adding too much complexity; or in a future moveset, designing mechanics which more naturally complement each other. One example of this might be giving Pain-Yatta the ability to throw his current weapon, acting as a way to safely destroy one of his minions from a distance (outside the blast radius), at the cost of having to go through the animation of summoning a new one (giving his opponents a chance to pick up the items dropped by the minion). Things like this could go a long way in improving a moveset with the type of ideas that Pain-Yatta brings to the table.

Reposted from my rankings, which can be found here.


Isaac changelog:
- Dthrow reworked. On the ground, it deals a semi-spike. Over a pit, it deals a weak meteor smash.
- Added the wall-tech-chase element.
- Nair's landing hitbox now semi-spikes.
- Fair completely redone.
- Accounted for the wall-tech-chases by adding to the writeups of Bair, Uair, and the playstyle section.
 

Crystanium

Smash Hero
Joined
Apr 28, 2008
Messages
5,921
Location
California
First of all I'm pleasantly surprised to see you here. I really liked your extremely detailed manner of writing in the Strongest Character and I can start to see it poking through in the beginnings of this set. To your question, I like how this is implemented. I don't know much about regular Samus' meta, but it seems to me that her most reliable method of killing was a fully charged shot. Here, I like how the beam shifting is done through the use of a fully charged shot. This not only forces the player to not use charged shots with reckless abandon, but also gives incentive for actually using uncharged shots over charged ones. This goes more so for the new additions with added side effects that permeate even without a charge (stunning, freezing, shield breaking). Also I find the order quite nice at the end, with a charged plasma leading into an opportune broken shield, following into a regular charged shot blast to kill. Keep up the good work so far!
Thanks! This is my third time doing MYM. The first time, I didn't put much effort. I was trying to make a Chozo. It's funny how I was planning on introducing power bombs, even though I wasn't aware that Sm4sh was going to have a custom for Samus' bombs to be power bombs!

I'll give a brief history of Samus' meta. Only in SSBM was she ever good. She was high-mid tier. Every other game, she's been bad. I think SSB64 was her worst, with SSBB being her second worst. She remained a low-tier character. Even now, while she has moved up a bit since the last tier list for Sm4sh, she's still a low-tier character. She no longer has lagless landing, which means she can't do short hop homing missile cancel (SHHMC) like she could in SSBB. Her super missiles suffered since SSBB, whereas in SSBM, they could kill. So I'm trying to at least move Samus up to mid-tier. She hasn't been a viable character, and I'm annoyed Zero Suit Samus is better. The speed change for Samus in my MYM19 is the same as Zero Suit Samus'.

While in Metroid: Zero Mission, there wasn't any noticeable difference in speed for Samus in and out of her armor, in Metroid: Other M, she is faster in her armor. This is ignoring the speed booster, which can only be used when wearing the armor. As for your observation on the order, I honestly didn't even think of a broken shield from Plasma Shot to a KO with Charge Shot! That is a really good strategy! I wasn't sure how to implement all the beams because there are only so many buttons to choose from. So I thought releasing a fully charged shot would make the most sense, and the order would be consistent so that the player would know what to expect next.
 

ForwardArrow

Smash Ace
Joined
Aug 17, 2011
Messages
502
Silent But Deadly
I was rather pleasantly surprised by this set, as it honestly is a noticeably better set than anything you've made before it. That's not to say its flawless, on the contrary it has a decent few problems. The invisibility is handled surprisingly well... for invisibility, but I'm not really a fan of that type of mechanic to start with, and a few of the interactions with the cloud are just kind of "make it bigger" with no real strategic element to them. It really takes until the Smashes for the set to take off much, which leaves the set in a fairly awkward situation where the Specials are honestly not that interesting, and I don't think the set takes that much time out of its day to flow of the invisibility. Lastly, the Ftilt having a punch every 2 frames is completely ridiculous, you should probably tone that down as no jab racks damage that fast.

That being said, I was pleasantly surprised by the set's actual melee game, which actually managed to have some solid substance to it especially in the aerials. This is bolstered by the buffs that are provided by cancelling the Smashes, which are honestly pretty fun and I like that it makes use of his body type with the attacks that combine the arms and legs. The gas wall is also enjoyable, and generally made me come out of the set feeling like its a fair bit more substantial than I was expecting. Honestly even in the case of the cloud-based invisibility, I can't even complain that much as while the strategic depth of it isn't great, there's at least something to be said for having to provide substance to the cloud to reap the reward, making it more interesting than a good number of invisibility sets on the basis of that alone. I also kind of enjoy the characterization here, as bizarre as that sounds. The character seems to take himself seriously and is not some idiot, having more complex fighting patterns than one might expect from a walking stinkbug... but at the end of the day, he's a fart ninja and will never actually be able to be taken as seriously as he wants to be. More than I expected out of what sounds like an admittedly pretty stupid character on paper.

Tracer
I like Rewind quite a bit as a mechanic honestly, its both very unique in the context of MYM and smash itself and surprisingly well balanced. The set makes okay use of it by providing her some decent combo fodder to work off it with, and with the pseudo bullet arts technique and high mobility with her Side Special it ultimately provides enough to be a basic combo set that manages to seem more fun in practice than on paper. That said, it really never goes above and beyond after the specials, and while the set has Tracer's kicking style at least kind of work into the combo mechanics established I don't think it ever really manages to establish itself as having especially unique play patterns for a combo set. Froy did a very good job talking about the weaknesses of this set's style, and your style in general, which you've at least been improving on in Isaac but I think the Overwatch sets are a clear step back from your best material last contest. The points he brings up about characterization are also fairly relevant to me, Tracer never actually kicks anyone in her home game and I swear that's basically all she is here, and while its an understandable thing to do some of the set just does it so damn much it starts to feel pretty out of character, especially with how dry the characterization is otherwise. I liked it a little when I previewed the set, but its aged pretty fast for me thinking about it and commenting on it, which is odd as usually combo sets like this tend to age positively for me.

Agatio
Everyone's made the comment about the Bair being his best projectile but seriously, that's kind of bad. When you're so obsessed with making "deep sets without too much unneeded complexity" and making things as "discoverable as possible", it makes you look a bit stupid when you put the set's best long range move on the Bair. Oh yeah it makes for a really logical and deep set to have Agatio have to turn away from his opponent and go into the air to hit them with a projectile. Anyway, that nitpick which I felt needed to be talked about aside, Agatio's just too subdued for my liking. You introduce a big meteor that explodes 3 seconds after creation in the Neutral Special, which is an actually fun mechanic and at first you start flowing off it in fun ways like the tornado. This is dropped after the Specials for what ultimately just amounts to a game of "re-position the meteor"... which honestly, isn't too bad. The nature of the meteor is good enough it is kind of exciting to play a positioning game around, which is why I was very disappointed when you dropped that entirely for uh, combos I guess? Fine, every character in the Smash 4 engine probably should be able to do some amount of comboing, but there's nothing else to these moves and after the bombast of the start the complete dropoff to absolutely nothing for the last 3 input sections is pretty depressing. This set could've been fun, but at the end of the day it failed to do so because, if I had to guess, you were too paranoid about balance or something. Also isn't he a fairly impressive and brutal HMA brawler with flashy meteor powers and fire dragons and all that? Why the hell is he so boring later on? You're clearly falling on your face a lot with characterization this contest.

Isaac
Rampant negativity on your other three sets aside, I actually enjoyed Isaac quite a bit and would say its your best work. There's a surprisingly in depth amount of combinations you can make with the pillar, from plants to ramps to even some new aerial tech chase stuff you added. Yeah the air tech chases strike me as not exactly the strongest addition to the set, and I'm a little worried by the extra stun knocking them into the hand or wall causes, but its at least better than what was there before. It all does manage to feel somewhat logical and fun to use, and can actually be taken to something of an extreme by using the Down Smash in conjunction with all these other effects on a pillar. See, providing high rewards for high investment is fun, I'd like to see more of that in your sets in the future. The set also takes quite a bit to fall off, having very substantial Smashes and Standards on top of fun specials, especially the great use of the move hand. The grab game, while not amazing, I don't mind the mechanic on especially much though it makes Isaac's game against and out of shield pretty poor, and the aerials at least acknowledge the ability to use your structures in the air in an okay way. You manage to also combine your more traditional smash engine stuff with the cool rock setups, making for an overall enjoyable playstyle that reaches a bar I can't say I've seen from you before. If you're going to emulate your opening day sets in the future, this is a good place to start. Its even remotely well characterized, as Golden Sun's all about flashy magic combat anyway while the set still has enough support for his sword-based playstyle that its not some non-existent thing.

Jr. Troopa
A Warlord set without a single construct? That's something I can't remember seeing in a long time. Has it really been since Crawdaunt? Jr. Troopa is pretty fun stuff though, with the mechanic of getting permanent upgrades to moves in his set through reaching higher damage is executed in a unique and enjoyable manner. I will say there's some awkwardness in how the upgrades are received given it happens automatically, but it at least isn't a total downside as if you upgrade a different move than intended due to having to improvise for the situation that changes up your playstyle in an interesting way for the rest of the stock. The ways to get self-damage and survive to surprisingly high percents given his weight are also good, and I found the combo playstyle had some pretty enjoyable elements to it as well. Making use of little things like the Kamek projectile to make the opponent gigantic for the duration of the hitstun is pretty great, and feels enjoyably underhanded. Also, I love the writing in the set with the use of "Kills Mario at" instead of "KOs at" as well as the sheer hatred for him Jr. Troopa generally shows, its a great display of character here.

I do have a few issues with the set, and the first of them is the Game and Watch bucket-style technique. I like him having that as a way to preserve himself to high percents, don't get me wrong. But I sort of dislike that its automatically something you do if you're going to be KO'd, I think it would be a lot more strategically interesting if it was situational in some way or form. I also kind of worry about the combination of electric hitstun and giant status effects, especially with the set's very efficient combo tools. I doubt he has an infinite, but its a bit scary. It doesn't help that compared to other characters this efficient at comboing, he's actually pretty damn durable, Game and Watch did not have a recovery nearly as good as Jr. Troopa's when you factor in the upgrade which serves as one of the absolute best upgrades in the set. Lastly, there are a few upgrades that just felt unintuitive to me, like upgrading dash attack randomly making his prone options better. None of these things are huge problems, and the balance stuff honestly might not even be very egregious, but it adds up with the fact that I can't find it as exciting as a lot of your stronger efforts so I can't say I particularly love this set. Its certainly solid though.

Hotel Mario Roy

I did not expect this incarnation of Roy Koopa to ever be a candidate for a moveset, but in the age of irony I suppose its only fair. The hotels this set builds remind me of the building block sets of old(and well, Korol too) and the ability to take them apart and combine them or upgrading them ends up in making for a fun product. Its only amplified with the projectile and teleportation games provided by the doors, as well as the projectiles that have pretty fun synergies with Roy's real estate empire. The set plays off this in a good number of fun plays, even simpler moves like the stretchy punch getting quite a bit of substance to them. I will say I didn't find the aerials and throws as fun as what was beforehand, but saying that is such a cliche at this point that I doubt its worth bringing up. The set's really solid and fun, and my only major serious complaint is that it is going a little over the top on the absurdity to have him straight up eat his own hotels. It wouldn't be too relevant if it was a one off, easy to edit out thing, but its pretty integrated into the playstyle, albeit in a way I actually do find fun with him being able to restructure the inside of his hotel and spit hotel chunk projectiles.
 

FrozenRoy

Smash Lord
Joined
Apr 26, 2007
Messages
1,261
Location
Las Vegas, Nevada
Switch FC
SW-1325-2408-7513
Captain Nazi (Captain America JOE! JOE! )

I'll get straight to the point and say that, to me, Captain America boils down to 3 specific issues with the set and 1 with the overall mechanic present in your Avengers vs. X-Man series. Let us dig right in.

The first immediate issue I have with Captain America is his shield mechanic, which to me makes him feel very underpowered. It seems, to me, that it would be very difficult for Steve to deal with something as simple as...say...Link or Tink throwing a bomb towards the top of his head and going in for an attack, or dropping an arrow down, because Cap can't do something as simple as shield directly up or down. You say that Cap's shield only covers the area of its size, but unless it is massively upsized, that is basically Cap's torso, meaning that the benefit of the shield never taking damage is pretty poor because you should be able to shieldpoke him with Down Tilts and the like anyway. He has to go into a crouch to cover himself a lot and even then he is vulnerable from top or above: It also presumably is not lagless to switch the shield's position and Steve here is vulnerable to grabs no matter what, which also means you can bait a little with feints. The overall benefit to Cap's shield is only that it never breaks, since it doesn't actually protect Mr. America here any more than another shield in strength, but it comes with very extreme weaknesses for this.

I also worry how, for example, something as simple as a sex kick or drill kick can potentially muck it up. The fact of the matter is also that even in AvX most of the game is said to have a bubble shield, meaning that the vast majority of the game is going to be balanced around the idea of being able to cover yourself from all sides easily, which Cap cannot do: he seems very vulnerable to cross-ups. The Shield Special also is incredibly weak when you consider it takes 10 Power and deals only 5% damage with no frame advantage. By comparison, Up Throw deals 14%-17% damage and gets foes out of his face just like the Bash, while even his weakest combo throw deals 6% and will assuredly have 100% follow-ups to do significantly more damage. Pretty much the only time you will use the Shield Bash is specifically if the opponent is open to Bash but not grab and you will take a good deal of damage if you don't Bash, because otherwise it really isn't worth a 10 Power cost in any way. Finally, the method of which Cap's shield is angled should be more explicitly said. It should really just be an alternative to regular shielding, maybe give Steve here an incentive to use it over a bubble shield or a weaker bubble shield or something too.

Secondly, while I like the ideas behind it, Captain America's Counter feels hilariously weak to me. Marth's Counter is active from frames 6 to 27 and deals 8% as a base OR 1.2x the attack's damage and doesn't get its counter window reduced on each hit. Cap's Counter is active for about 2/3rds the time and does 8% alone while having absolutely no combo potential past low damage percentages. Now consider that Marth's clearly superior Counter is hardly used. The A/B counter is hilariously weak when you consider 10% + 1/10th (0.1x) the attack's power: Marth's is 8%/1.2x, Roy's is 9%/1.35x, Ike's is 10%/1.2x, Shulk's can go all the way to 13%/1.3x and depreciates to more frames than Cap's! They don't even need to spend Power to use it! When you consider that the Counters are not used much in Sm4sh as is, Cap's Down special may as well not be an input.

Thirdly, the buff move on Captain America feels like it does not offer the dynamic gameplay the playstyle wants to have, as the stat buffs I feel are perhaps a bit not far enough (Although they are not as bad as I thought, but I feel they should be a bit more extreme), and the fact it buffs damage and knockback means you will rarely want to use it at low damage percentages because it will break your combos up. This is further emphasized by the fact it requires Power on each attack, meaning that you won't want to use it much at the start of a stock, even if it is midmatch the most you will have at the start of any stock is 25 Power (50 cut in half), and that's if you die with full Power, which seems like it would be very rare. I mostly believe this would get used as a generic tool to get earlier KOs with the increased knockback and because that means it won't use up a lot of Power since it doesn't take it up on whiff.

The other meme is just that given it has a short cooldown between going on and off, makes him run faster and you don't want to actively use it until later, I predict a lot of people are going to constantly be turning the Super Mode on and then off again if the opponent isn't nearby to heal for 2% repeatedly ala Wii Fit Trainer's sun healing. I can't imagine this was intended.

The final thing I will say, and this also applies to Cyclops, is I find the Power generation in AvX a bit oddly balanced. Cap for example quite clearly expects the player to have way more Power than the mechanic actually gives him for stuff like the shield Throw and Shield Special, when as done Power seems like a somewhat limited resource, especially since you don't even gain Power from Specials. For comparison, Balrog currently has a meter mechanic of his own, and I made it so that his Specials actually give 1.5x Meter. I'm pretty sure Cap is gonna use his Powered Shield Throw often just because his Powered options outside of it are kind of trash, admittedly, while keeping 15 Power in reserve for a better Up Special, but it isn't a good sign when something is only used for the other options being trash. Power generation should go up or Power costs should go down on Captain America. I also feel like Cap could use some more Power uses, say on Smashes, or for his buff to give him some more dynamic effect on his set.

Aside from that, a lot of the set is fairly general, but competently handled, and I actually like the Smashes some. It is somewhat generic, but Captain America's powerset boils down to "is super strong but not, like, hulk strong" and "has a shield" so I wouldn't expect him to have a lot of super fancy stuff, although you could have a bit more fun with the animations, and they are overall competent enough. If you fixed a lot of issues this could be a 5 or maybe a 6 for me, but it has some really, really glaring and obvious flaws.
 

Smady

Smash Master
Joined
Apr 29, 2007
Messages
3,307
Location
K Rool Avenue


#082 | Magnet Pokemon


WHO'S THAT POKEMON?

Magneton is the result of three Magnemite being linked together by a strong magnetic force, although a single Magnemite can evolve by itself when no other Magnemite are in the vicinity. There are several ways that the three Magnemite, that Magneton consists of, can be linked. Magneton is most commonly seen as one Magnemite on top, and two Magnemite linked via body on the bottom, forming a triangle. However, in some cases, the Magnemite will not be connected at all, but still remain in a triangular pattern. In the anime, the sizes of Magneton’s magnets change in different episodes. This doesn't seem to be based on anything except possibly an oversight by the animators. Magneton was originally thought to be a pure Electric-type Pokémon, but it was eventually discovered to have traits of a Steel-type Pokémon as well. Even though Magneton, its pre-evolution and its evolution are all mechanical creatures, they still have emotions, can get hungry, and have a way of reproducing. Magneton has been considered to be related to Metang and Bronzong since both are also half Steel-type Pokémon that float by using electromagnetic waves. (Extract from Bulbapedia.)


The Magnet Pokemon is best remembered as the evolution of Magnemite, a common Pokemon in industrial areas in the first few Pokemon games on the Game Boy. Magnemite presented little challenge or use to players, but its evolution could catapult the creature to the top of the player's collection. The Pokemon itself is essentially three Magnemites joined together, so, in true Pokemon fashion, this means they can learn all kinds of Tri- attacks. Obvious as well, they can manipulate electrical attacks. Both of these traits play a large role in this moveset.


LEVITATION

A defining trait of Magneton is his rejection of gravity - though still close enough to the ground to be hit by ground-based attacks, Magneton never touches the ground unless forced to by, say, Ganondorf's down air. This poses the great disadvantage of having an abnormally bad air game, as Magneton has two weak jumps and also has terrible walk / running speed, as he simply re-arranges his three Magnemites that make up his form, gyrating in either a clockwise or anti-clockwise movement depending on whether he is going back or forward - at walking speed, this is as fast as Luigi's crawl and at running speed as fast as Ganondorf's walk. Therefore, Magneton is one of the slowest and, at a glance, least mobile characters.

However, there are some equally impressive advantages to Magneton's levitation. Firstly, the strong magnetism of the Pokémon’s three parts allow them to pull each other back from the blast zone if positioned rightly. The centre of gravity between the Pokémon’s three segments is strong enough to pull them in at anything but super high knockback and hitting only one part of Magneton will almost never knock him out, although it will thrust all parts into the air. Magneton is designingly a grounded Pokemon, so you'll want to keep him out of the air as much as possible. An example of this extreme magnetism is shown below. By pressing NEUTRAL SPECIAL at any moment, this will forcefully MAGNET PULL the Magnemites together and deal 5% for every Magnemite that hits the foe on the way back to the Magneton reconnecting, but has a ton of lag when and if they do reconnect, but gives super armour of 12% as they pass the foe to not be interrupted.


This only happens with high knockback moves, however. At low percents and against low-middle knockback, Magneton will either stay connected or simply pull back a missing part into place. Magneton is vulnerable while magnetising back together and has a difficult air game, so it should be the objective of an opponent to launch him as much as possible. It takes half-a-second for Magneton to initiate reconnecting of its parts and around that time for them to collect midair, depending on their location. This entire process leaves Magneton inoperable and provides no defence, leaving him wide open for an assault. Notably, when Magneton is launched altogether, he reacts normally in accordance to Smash.

Also to note is that Magneton can neither be grounded by attacks or grab the ledge. Downward knockback ordinarily would have the effect of pushing the three Magnemites that compose Magneton in separate directions, making playing as or against the creature a different affair to most Smash characters. Physics do play a massive part in this part of his playstyle, as the angles of at which he is attacked and the power therein can vary entirely from opponent to opponent, meaning that there is no really reliable place where Magneton may reassemble. With some bad luck or good strategy from an experienced foe, Mag can be trounced and bounced all over the screen.

This Pokemon is a misleading opponent, really. Its size and shape, for one, would instinctively make the other player think that he is a heavy single target, but that is not the case. Each part has low weight, but unless at least two are hit, it's highly likely that Magneton will recover. This is not only because of the aforementioned magnetism, but because each part can act as a cushion if another is hit into it, reducing knockback greatly. Only the strongest moves will propel the other parts to follow just one outside of the blast zone, but their constant connection makes it easy to hit two or three; no matter what part is hit, Magneton will be dealt damage as a whole. You would also gander that this foe had bad recovery, but that is also not the case. Magneton, in fact, has one of the most versatile in the game.


RECOVERY

Magneton does not act like an ordinary character when launched, not only because of his magnetism, but also because of his irregular falling speed. It is similar to how he walks, being just a rearrangement of his parts, as they rotate either clockwise or anticlockwise depending on the very little directional influence the player has (less than even his walking speed). Note that when the ground is 'hit' for Magneton, he simply returns to his hovering state that's always present on the ground. Also, Magneton cannot grab the ledge. However, Magneton's recover isn't bad, it is actually one of the best in Smash if you know how to use it. It's not that complicated, either.

UP SPECIAL
THUNDERSHOCK: This is the first example of Magneton manipulating electricity to manoeuvre the battlefield. First of all, though, its significance in Pokemon. Thunder Shock is the electric move for first forms of Pokemon or lower levels, most of the type knowing it from birth or soon after. It isn't very powerful, but can be used many times before the trainer runs out of PP and has one-hundred-percent accuracy.


Thunder Shock primarily functions as Magneton's vertical recovery. On the drop of that button press, a beam of electricity strikes downward from the top of the stage and travels straight in line with Magneton; this can only be stopped by hard platforms. To travel downward from the top of final destination to the stage takes two seconds, the Shock can, however, not be interrupted by attacking Magneton and it basically has no lag. The beam itself is very thin and deals little damage,* but the button can be held down to continue the attack for up to three seconds and an opponent hit by the bolt will be stuck taking damage for the duration - the same damage is dealt for every second spent hit by the lightning. There is a constantly small knockback with this move that only pushes the opponent a few feet from the attack post-impact, so it cannot knock out at any percentage. Though earlier I said there was no lag, there is the two seconds of discrepancy between summoning the thunder and it striking, but this is also likewise on the end of the attack, meaning if you keep pressing down (B), for example, the lightning will hit for as long as you hold that button. Magneton is only immobilised [charging] when the button is being pressed.
* {3%}

Again, let me stress that this is not the primary use of this move. As you would imagine, Magneton lacking a jump, even with his ridiculous falling speed, would make falling anywhere below the stage a fatality. There are several moves in Magneton's set that make up for his weakness, this is one of them. Electricity - thunder, in this case - is able to free up the components in Magneton and dissolution the bonds that connect its three Magnemites. At this point, they can also freely move through electricity, at considerable speeds. That means that moves such as this one where thunder physically touches Magneton, he becomes three separate parts until the electricity is gone and the 'centre of gravity' rule applies again.


The above works by first, immediately upon electricity hitting Magneton, disengaging the magnetism that connects them and allowing the three Magnemites to float in electricity like Squirtle does in water. They are only vaguely controllable at this point - you can direct them through electricity for as long as they are in it, but as soon as they are no longer, Magneton will again become one. By vague controls, I mean one can press to go up and the three parts will float up at one stage builder block per second. This makes recovering from any vertical distance remarkably easy for Magneton, but keep in mind that two second delay - although it shouldn't be too much of a problem with Magneton's absurd fall speed, but Magneton can possibly be gimped at this point. If other players are caught in the Thunder Shock when Magneton is being pulled up through it, each part that hits them will deal minor damage.* Keep in mind that once to the top of the stage, the three parts will reconnect automatically and the electricity will stop having this effect. There are actually a few moves like this in Magneton's moveset that manipulate electricity, so he's really not that bad.
* {3%}


SIDE SPECIAL
TRI ATTACK: This move is the epitome of three-way, Pokemon inspired attacks, learned by Magneton from the very start of its life. In the games it appears in, Tri Attack functions as any other normal attack would - the user shoots out three balls of energy representing fire, ice and electricity. There are other Pokes who make sense to have this move as well, having three heads [Doduo or Dodrio], but most learn it from TMs.


Magneton - being made up of specifically three bits - was an unavoidable attachment to the move, especially as its three parts are only connected through electric bonds rather than muscle tissue. Magneton easily fits into this one. Tri Attack is appropriately placed here, as Magneton can and should use it as part of his recovery.

Pressing the button input immediately illuminates Magneton's three 'Mites as the elemental colours used by this move - Yellow for electricity, Blue for ice and Red for fire. This order goes YBR from the top Magnemite clockwise, this factor dependant entirely on where they are positioned at the beginning of the match. Note, this is a move that can be held - Mag will continue to glimmer like this until you release your chosen button (possibly (B)). Any kind of advantage this bears is, however, negated after four seconds and the move is only usable after one second of 'charging;' it needs to be used constantly for Magneton to cover large distances.

Upon release of the button input, Magneton's three parts transfer their elemental attacks forward, each with their own individual colour and small elemental effects to correlate. These “balls” of magic travel at about These “balls” of magic travel at about the speed of Ganondorf running and have the approximate range of Luigi’s missile side special, from non- to fully charged. Each of these energy orbs count as individual hitboxes and deal a set amount of damage per hit, reacting similarly to foes hit by Pikachu’s skull bash attack in Smash terms, with knockback little better than flinching.

The real usefulness of this move comes when the player moves Magneton toward the balls – which leave a trail of coloured energy in their path until they dissipate upon reaching their maximum range: Mag can ‘catch up’ with the orbs almost instantaneously and add to the knockback, though not the damage of the move when they hit an opponent, making it an essential part of play for the character, in both faking out an opponent, traveling the battlefield and being aggressive.


DOWN SPECIAL
THUNDERBOLT: Magneton powers up as a yellow-blue ball of lightning emerges from the bolts on his head. If you think this sounds like the start of PK Thunder, you'd be right. The ball travels at about the same speed with the same turning radius as Lucas's PK Thunder, keeping a constant trail between the projectile and Magneton that deals 1% and flinches foes who touch it.

You can control the movement of the ball of lightning with the control stick, but your goal isn't to hit Magneton with it to knock him back to the stage. You want to drive the ball of lightning, until it hits something, anything. When you do, it flashes. Now normally, this would just be the end of the move, but if you smash the B button when it flashes, Magneton will travel along the path of lightning and slam into where the projectile hit, dealing 8% damage and moderate knockback for each Magnemite that hits, certainly enough to kill at high percentages. You can sweetspot the ledge with this, move to a different part of the stage, or even slam Magneton right into opponents. And it doesn't even leave him helpless. This will separate Magneton up if one of its members is hit by the ball away from the others, but hit into the “middle” will launch all of them for a powerful 15%.

When hit the Magneton/Magnemites affected will charge up with electric energy and this will buff the move the next time it is used. It barely travels as far as two battlefield platforms if Magneton is completely out of electricity, but each charged Magnemite adds another battlefield platform worth of length to the projectile. And, to top it off, the charging Magnemites from the bolt have more power with more electric charge! One charged Magnemite deals another 3% damage, but it deals another 3% damage for each charged Magnemite until it reaches a whopping 24%. Be careful though, if you miss, or don't teleport with it, the attack has horrible ending lag. And while it does have decent opportunity for vertical recovery, because of how you have to turn it, if Magneton isn't charged at all, it has basically no horizontal recovery potential either. Though you do have other ways to get back to the stage!
 

Reiga

He sold diddy for a switch
Joined
Dec 8, 2014
Messages
1,256
Location
White Noise
3DS FC
1461-7646-7368

Misdreavus
The Screech Pokémon


Stats
Height: 1/10
Weight: 1/10
Ground Speed: 7/10
Dash Speed: 7.5/10
Jump Height: 5/10
Aerial Speed: 10/10
Falling Speed: 2/10
Traction: 9/10

Misdreavus, as a ghost, is very light, with a weight comparable to Jigglypuff's, she can easily be knocked around, she is also very small, being about the size of Kirby, though she also levitates a crouching Kirby away from the ground, which, while still having the same hitbox, will have Misdreavus be more able to be hit by high attacks, though she will also not receive damage from very low attacks, which can be a nice trade at times, and even if one doesn't like floating a lot, Misdreavus' crouch will have her descend downwards to almost touch the ground, with a crouch walk almost the same speed as her usual walk.
While light, Misdreavus is also quite agile, as due to levitating, she has some top-notch ground speed, almost no traction, and amazing aerial mobility, easily wandering through the stage to close in on opponents, retreat, and having some good area control. Misdreavus also has access to 3 jumps, which, while not having the highest of jumps and the 2 latter jumps reaching about half the height of the first, makes way for a very good recovery, especially combined with one of the techniques Misdreavus has access to.
Overall, Misdreavus has a stat distribution which advises her to not stay too close to the opponent and to try to avoid projectiles, her easy mobility can make the moments where you do want to close in onto opponents a breeze, with her retreat game also being strong, having a quick roll and spot-dodge, though also having a small shield, which can be abused by opponents to ruin your day, as if playing Misdreavus, any careless action can have you fly across a blast zone, and while having a good recovery option, you shouldn't be too cocky and oversecure with Misdreavus.


Misdreavus Techniques

Floating
Alongside 3 jumps with standard reach, Misdreavus also has a mechanic which will surely help when recovering: Floating. To do such action is quite simple, really, all you have to do is hold down the jump button after doing your third jump; doing so will have Misdreavus shout out "Dreavus!" as she then stops in midair, gaining a faint purple glow as she now has activated Floating! In this state, which lasts 2 seconds before Misdreavus enters helpless, Misdreavus gains a limited free-flight for 2 seconds, limited I say because Misdreavus can't just move completely freely, instead, after activating Floating, one can input on the joypad any direction, with doing so having Misdreavus zoom straight through the air at that direction at an 8/10 speed, going one platform forward before the free-flight ends, causing Misdreavus to return to her pos-triple jump animation and not being able to use Floating or attack.
Misdreavus cannot attack during the Float period, being also suseptable to any damage and not being able to air-dodge or the like, though Misdreavus will also not be knocked or flinched by a weak projectile and will have a few frames of invincibility right before zooming through the air.
Floating is very important for Misdreavus' stage control, as it gives her the ability to both traverse the stage easily as it will also be an incredible boon on Misdreavus' part for when dodging enemy attacks, as it travels way more distance than an air-dodge, being able to back off from the enemy more, giving Misdreavus some nice spacing control, while still being able to stay at the same horizontal plane. Recovery wise it is also quite valuable, combining with Misdreavus' jumps to form a solid recovery, with the stane Misdrevus stays in as Floating activates can also be useful, as being able to stay in place midair can be quite good for reading the opponents movement.

Fear Orbs
As said in various Pokédex entries, the red orbs around Misdreavus' neck can absorb fear, which can be converted into nutrition for her. In Smash, right above Misdreavus' health in her HUD is a white bar, which extends from one side of the whole HUD to the other, with 4 vertical lines equally distant one from another place along the bar. Many of Misdreavus' attacks will strike fear onto opponents, and if any of them succesfully hit the opponent, red wind-like energy will be absorbed right out of them, which travels up to Misdreavus' fear orbs as they are then absorbed by them, with the quantity of this energy depending on the move. As any energy enters Misdreavus' Fear Orbs, the meter in Misdreavus' HUD will be filled in with red from left to right accordingly to the energy absorved, with the max quantity possible obviously being a complete meter, with the lines dividing the meter into quarters for a better viewing of the meters contents. One can also tell when the meter is full by noting Misdreavus' orbs, as in full storage they will flash red with an aura of the same color pulsating from them. Of note is that Misdreavus' fear meter will reset once she is KO'ed.
These orbs play quite nicely into Misdreavus' playstyle, as she will want to pass most of her game collecting as much fear as possible, as theres about as many fear-using attacks as there are fear-absorbing ones, with most attacks that use up fear being quite potent, be them offensive or supportive, with the offensive and damage dealing attacks being quite potent and most likely the attacks that will KO Misdreavus' opponents, while the supportive moves give Misdreavus an upper hand, which combined with a powerful attack can be very deadly.
But as much as Misdreavus could very well use her Fear Orb-based attacks, she isn't completely dependent on it, with a good deal of non-fear based attacks, she can really punish any opponents who think they can get an upper hand with you being centered on collecting fear; as said before, never get too cocky or too dependant on certain elements when playing with Misdreavus.


Specials

Neutral Special: Power Gem

If Misdreavus inputs the move with her fear meter completely unfilled, she will cry a "Dreavus!" as from of her middle fear orb flashes a very thin white beam that stretches from Misdreavus' fear orb up 'til 2/4 of an SBB away from her, lasting 20 frames before dissapearing by both it's top and bottom sides closing in until it turns into nothingness, in a very quick animation overall (note: the beam will already form in it's entirety, not increasing in size as it appears). Opponents hit by the attack will receive a petty 3% damage with only a flinch, making this attack pretty useless, especially due to it's short range, though don't worry much about this version of the move, as even with a little bit of fear collected it is much, much better.
If used with fear collected, at the cost of half of her gathered fear, Misdreavus will release out of her middle Fear Orb a sparkling purplish-white light beam, which depending on the quantity of fear used can have a differing lenth, wideness, damage and knockback. If used with less than 1/4 of the meter completed, Misdreavus will shoot out of her middle orb a rather thin beam (still wider than an unfeared beam, being about as wide as the orb itself) with a very weak red shade as it's color, with it stretching up to 1.25 BFPs before dissapearing identically to an unfeared beam after 20 frames, dealing 6% damage with a rather weak horizontal knockback which KO'es at 240% damage.
The beam will progressively get stronger and wider depending on which quarters Misdeavus's fear is between, with it's damage and horizontal knockback scaling along, alongside the beams red tint getting darker and darker (though the move's speed will be the same). If the move is used with Misdreavus' fear meter fully completed, the beam produced will be a red tint, being as wide as a Kirby and stretching to 1 BFP away from Misdreavus, lasting 25 frames, this devastating move will deal 20% damage to opponents alongside a vertical knockback that can KO at only 110%, surely something opponents should fear for.
Addicionally, if the move is quickly inputted when with more than 2/4 of the meter full, Misdreavus will create a beam the equivelent to when with only 1/4 of the meter complete, wasting of course half a quarter of the meter, being a nice option for dealing some passive damage onto the opponent.
Power Gem is a very potent move, while a joke with no fear collected, it can do some solid damage with some harvested, with it being a pretty effective KO move at later stages of the meter, especially when fully charged, easily being Misdreavus' most powerful non-smash move. While a very good move, in the end of the day it can use a lot of that fear you've been collecting the whole match, and so you cannot just use it willy-nilly, or else you'll just look like some idiot wasting valuable fear points. Based on this aspect, the move's quick use can be a double-edged sword, yes, it will make it hard to punish, but will also make it easy to dodge, making you lose your fear points. If one wants to get more risky with the attack, they can use the quick input version of the move, which wastes less and can work good in starting combos.

Up Special: Astonish

On input, Misdreavus will lean herself back a bit before sprinting forward her body, with her neck and face first and her bottom side staying at an almost horizontal stance lagging a bit behind, Misdreavus will also have her eyes and mouth wide open as if to scare somebody, shouting loudly a "Miss!" as in the process she travels 1 SBB forward, at the speed of her regular walk, being so a very fast and simple attack which can be used repeatedly.
The move's aerial version is more oriented towards a recovery, having Misdreavus sprint forward 2 SBBs in an upwards 45 degree angle, being able to use the move up to 3 times before Misdreavus enters a helpless state, not really moving a lot of distances, but being nice for it's apealing angle.
During Misdreavus' sprint, only her head and necklace area will work as hurtboxes (which I guess is good, since it's the part of her body that will hit first), dealing 6% damage to the opponent with a small horizontal knockback, which would KO at around the 250 mark. While this could be considered a good approach move and such just by that information alone, the move could also be considered one of Misdreavus' best fear harvesting attacks, as the shriek Misdreavus makes during the move will disorient and freak out the opponent as they are hit or even close to Misdreavus during the move's execution, which will produce fear for Misdreavus to collect, which when collected will complete about 1/8 of the meter, in other words, half a quarter of it. While at first you may think you can just use the move 8 times on opponents and complete the meter, the process is actually way longer, as after the first scaring the opponent will obviously not react as strongly towards the scare, and so a repeated Astonish will only gather half as much fear, with another Astonish gathering only a quarter of the original quantity, and while the quantity won't decrease from then onwards, Misdreavus will only be able to scare the opponent for 1/8 of the meter again 4 seconds after the move's use on them.
As a quick move with the abillity to rack up a good quantity of fear, a good Misdreavus will definetely be using this move a lot. The move in itself has Misdreavus go forward a bit, making it a good approach-type attack, with gathering fear from the beggining of the game being really helpful for later on. The move's small knockback is perfect for comboing into itself or other moves, with it gathering fear right before a fear-powered combo move also being a nice bonus. The move can also be used for recovery, though the angle Misdreavus moves in can be problematic for when recovering below the ledge, the move can be a pretty nice alternative recovery for when opponents are trying to ambush you when recovering, as you can hit and punish them with this move, something Floating can never do. Despite everything the move does have a bit of start-up lag which can be punishable, the dash itself can also be easily punished by a well placed roll, so the use of the move at times like late-game can be really problematic if punished.

Down Special - Fear Nutrition
On input, Misdreavus' orbs will start shining a small purplish-red glow, as it's shine then intensifies further before about 1/4 second in it dissapears in a sparkling flash, with a bunch of fear energy particles being shown in the flash. The process will heal Misdreavus 8% damage at the cost of losing fear equivelent to 1/8 of the fear meter, with not a lot of ending lag, with Misdreavus instantly gaining back control the moment she is healing, but also having a good chunk of startup lag at the beginning, making this move hard to get along with the opponent still at large, but being a great way for Misdreavus to guarantee better survival if one knows that they cannot be as easily punished, be it while the opponent is offstage or busy with their endlag. The move does have a cooldown period, being that after a first heal, one cannot use the attack again for another solid 1.50 seconds, with you also obviously not being able to use the move with no or insuficient gathered fear.
Misdreavus' playstyle includes lasting on the battlefield to harvest enough fear energy for her more potent attacks, so having around Fear Nutrition can be really great for her. Having a quick damage heal in the middle of a battle is something really valuable, as being a super-lightweight, even at the higher double-digits she can be easily blasted around, so it's important to use the quick version of the move once opportunities are possible, though it can't really be something to be over-dependent, as while 1/8 of the fear bar isn't much, repeated use can take quite a toll out of the fear meter, so one should not be carelessly taking damage thinking they can just brush it off with a healing, as one should mostly use Misdreavus' Up Special at the right time and moment, though if used correctly, the move can really help Misdreavus beat a match.

Side Special: Spite

Misdreavus' eyes glow a pulsating purple as she then whips her ghostly bottom forward shouting "Drea!" as, right as her bottomside is about in front of her, a small Smart Bomb-sized pinkish-purple rather round flame-like ball of shadows is shot right out of her wispy end, at which point Misdreavus can move around again. The spiteful projectile in itself will move directly forward at the speed of Samus's regular Missiles, going 1 platform forward before changing directions and homing back to Misdreavus, who will absorb the flame back , still at the same speed as before, similarly to Toon Link's Boomerang. Just like such move, the energy ball will try to home in on Misdreavus' location, one can easily manipulate this to have the ball hit the enemy on the way back, which will still have the same effect as a regular orb.
The creation of this energy ball will deplete 1/6 of Misdreavus' fear meter, though interestingly if the energy ball successfully homes back to Misdreavus, she will regain her lost fear, though don't go so nily-wily with this attack though, as opponents can easily destroy the energy ball by dealing any physical attack onto it, so you can still lose your fear
What does this orb do to enemies who are hit by it? Any opponent hit by the energy ball will have the energy enter a more cloudy form as it goes to surround the enmy, creating an aura-like outline around them. The opponent will now suffer from Misreavus's spiteful prank for 7 seconds before it fades away, with Misdreavus not being able to spite them again if they're already being affected by one.
The spiteful aura the opponent gains will do a number of things to the opponent, first off, as kind of a translation of the move's original use, the opponent's attacks will do 1.10x less, with this also applying to stale moves, which will do 1.25x less than they should do, with the opponent also having a faster depleting shield and less traction, alongside this and most notably, all of Misdreavus' fear absorbing moves will collect 1.30x the usual sum of fear energy.
With all of this in mind, Spite can be a pretty useful tool for Misdreavus to speed up fear harvesting, with a well-placed spite ball hitting an opponent easily speeding up your fear gain and helping to make use of fear-wasting moves, though one should be careful with the move's use, as while you main just gain more fear, you're wasting fear, which, while easy to come back, is also easy to be destroyed by enemies, so one should want to use the move more when the opponent has his guard down, though it's not like you should rarely use the move, as it's effects are much wanted and the energy balls themselves can be nice for zoning and closing in onto opponents. The moves other effects can also be very nice, lowered attack power means Misdreavus won't be getting too critical health-wise and could stay in good health when this is combined with her DSpec, lowered shielding can also be helpful for when trying to make a combo or overall when trying to wittle down an overly shieldy opponent.
 

Munomario777

Smash Master
Joined
Nov 18, 2014
Messages
3,253
Location
Charleston, South Carolina
3DS FC
0387-9596-4480
Switch FC
SW-8229-3157-8114
Captain America marks the start of JOE! JOE! 's MYMCU with the First Avenger himself, and while the moveset is decidedly simple (fittingly so), it does have a few moves that stand out. The shield throw seems pretty fun ingame, though its lag as described in the moveset seems really long compared to something like the Links' boomerangs. I also think it was a missed opportunity to not allow Cap to hit the shield back with an attack after it hits a foe and rebounds back to him, which would've made for some fun combos. On a note related to the shield throw, it also strikes me as odd how some moves benefit from Cap not having the shield. Sure, it offers some ups and downs to having your shield, but having the shield itself act as a projectile that also rebounds towards you for added utility already fulfills that role in a way that makes logical sense.

I agree with what Froy brought up in his comment, so I won't repeat it here. The shield I think should be reworked to act like Link's Hylian Shield, but with the ability to block normal attacks as well as projectiles and perhaps be angled upward with the control stick. As it currently is in the moveset, the unique shield really only hinders Cap's defensive game, which is odd for a shield-based character. With a Hylian Shield type mechanic, it'd act as a boost to Cap's defense instead of a detriment, and would open up possibilities for a choice between the two shields. Your bubble shield covers all angles and can be used out of a dash, while the "Hylian Shield" needs to be aimed and requires more thought (with the bubble shield, you press R out of instinct), but in return offers a much better frame advantage upon blocking a move and doesn't take damage. The moveset's Shield Special would also work better with a bubble shield, I think, forcing the opponent to respect Cap's shield when he effectively has a frame-one OoS option that resets the situation entirely. This improved defense would better justify the Power cost.

Overall, Captain America is rather simple, like the character himself – both in terms of his powerset (strength and a shield) and his old-fashioned mannerisms. There are elements of the moveset that could be pretty fun to use ingame if polished a bit more. This lack of outstanding elements also means that the main sticking point for Cap is the downsides, the main one being his strangely poor defensive game. Again given his character and powerset, his defensive game should be one of his best attributes. While he has invincibility on a good amount of attacks, the gimped shield really hurts him in this regard, with its lack of shield damage failing to compensate for its weaknesses. Just like the unique shield mechanic, Cap suffers from downfalls and shortcomings that outweigh the upsides.

Reposted from my rankings.
 

Katapultar

Smash Lord
Joined
Nov 24, 2008
Messages
1,258
Location
Australia
THE TRIAL CAPTAINS

I'm pretty sure you all know about Pokemon Sun and Moon, and have maybe even discussed it on Skype! These are the 7 Trial Captains from those games, who are effectively more memorable and memetic replacements to the Gym Leaders of old. We never got around to doing that Gen 1 Gym Leader movement, did we? There are 7 of them, and we all know that doing 2/3-man Pokesets for them all would be a massive pain (and downright impossible), so instead we're going to make it so that you actually play as the Trial Captains themselves! Don't worry, most of their moves involve summoning random Pokemon to attack for them; these -are- Pokemon characters after all, taking the Pokemon away from them would remove what makes them most unique.

By the way, it totally makes sense for the Captains to summon random Pokemon. For one, Sun and Moon introduces the S.O.S mechanic which is present in the Captains' Totem Battles, not to mention the player can summon Pokemon to ride on.

The Trial Captains are linked by Specials that are functionally similar, for the most part:
  • Neutral Special: Use TM.
  • Side Special: Spawn Item.
  • Up Special: Have flying Pokemon come to your aid.
  • Down Special: Spawn construct.
No fancy, exclusive mechanics here, no siree. Pokemon is a simple game for children!


STORY MODE
The story here is pretty obvious, that being the Trial Captains are all "Pokemon battling" against each other for fun or to become the Champion. But honestly, that would be sooooo boring. Assuming we can get all of the MYM19 involved in this, we can have this be the real story instead:

MYM19 takes place shortly after MYM18 (of course), where the main antagonist Kristoph has finally been killed after a big all-out war between his legions of revived memes vs the (unlikely) heroes' team led by Metireon, Yangus and Jecht. Roy Koopa of MYM18 was killed and Kristoph attemped to revive him as a meat shield just before his death, but he didn't make it in time, botching the revival which somehow mutated him into Hotel Mario Roy. He carries a bit of Kristoph's will and thus a disdain for all the various multiverses of MYM. His evil plan involves building a top-quality hotel (worthy of 10 stars on Warlord's rankings), getting Acidloli to destroy all the other hotels and force the various MYM19 characters to come to his hotel through various means - generally through kidnapping one of their loved ones or some other manner of trickery. He is working together with Jr. Troopa, because they are both Mario characters and playground bullies and Troops wants a shot at killing Mario. Somebody better go make a Hotel Mario set so this all makes sense! What Roy wants with all these characters we can't be sure - he may want to kill them off, or even use them for an elaborate scheme involving the summoning/revival of a grand future MYM villain who has yet to have their moveset posted! Maybe someone like Senator Armstrong or Forrest Kaysen, for example. Or maybe just some random incarnation of Bowser, that would make sense as boring as that would be.

The Trial Captains would be one of the generic groups forced into the hotel, in that Roy has kidnapped random Pokemon consisting of the ones who got a mini set made for them. They must fight each other, and others, so they can advance to the "Top 50 level" and eventually confront the mastermind(?) Roy. The winners receive a nice hotel room, while the losers get a crappy suite of CDi levels in quality.
 

IvanQuote

Smash Ace
Joined
Apr 7, 2014
Messages
853
Location
Looking for those who like Mighty No 9
NNID
ivanquote
3DS FC
1693-3075-2999
So think back to days when you were younger. Have you ever been disappointed about something you've done in hindsight? No, not something serious like saying something mean to a family member or splitting someone's head open; I'm talking about cringe territory. Some people have stupid/low quality videos made at a young age. Others have art of a similar low quality. Me? I had a Fan Fiction.

MYM UNIVERSE: My Garbage """"Sonic""" Fan Fiction


First off, like the image above, the story was never actually published or even written. It was all in my head and repeated by word of mouth to all of my friends (much much to their annoyance). Secondly the reason "Sonic" is in massive air quotes is that even though it used Sonic the Hedgehog mythos as a background, it had very little to do with Sonic, opting for op Mary Sue-esq oc's at the forefront of this. This is kinda like how Sonichu has nothing to do with Sonic or Pokémon (or even itself later on). I came to the conclusion that my story and Sonichu were very much alike in ~2014 when I read the latter, and this disturbed me so that I somberly cancelled it henceforth (it had been stewing in my head since I was 5, so it had always been a part of me). Even still, there may actually be interesting ideas in something terrible so at the risk of attempting to polish a turd, I will appropriate them into MYM.

Background
So some scientists theorize that when a universe dies, it closes in on a singularity to make a Big Bang, thus creating another universe, but what if there were some who survived this event for the sake of keeping someone, or something, sealed? From this old world, 5 Immortal beings survived, living in eternity for the sake of protecting all of reality from a single threat that carried over. However, the immortal powers were not necessarily good people. Being individuals with power and immortality thrust upon them, they did not necessarily use them with the fullest responsibilities.
  • One was a megalomaniac, who used his power to conquer worlds, forming an empire with no end. Growing increasingly paranoid for his safety in spite of his immortality, he created a series of genetically modified soldiers to covertly snuff out threats as he maintains a public image.
  • One was a soldier, who wanted nothing more than a chance to atone for his violent service and bring even a single world everlasting peace. Despite being incredibly vain and narcissistic, he would never cease to help those in need through martial pacifism.
  • One was a historian, who used his powers to passively survey a world from the gestation of life, creating the largest damn case study anyone has ever known. His coldness and lack of emotional attachment to any living being made his archive 100% objective. He is the weakest of the guardians.
  • One was a nurse, whose powers gave way to darkness, forming taboo healing techniques and forbidden panacea that extended life of others for a dire cost. He has used himself as a subject of many tests before he attained immortality. After many tests, he is now completely unrecognizable.
  • One was a self-insert Gary Stu, whose personality is so bland and powers so nondescript that even an ocean sunfish would look influential to the course of human events and nature in comparison.
While they may work against each other, they will all willingly work together to protect reality from an angsty force that threatens to send everything to the void.

Gimmick
Each one of these guardians possess a different type of sword. These swords are of magical properties that greatly strengthen the user's abilities. In regular smash matches, the guardians do not wield their swords, or if they do they do not tap into their mystical powers. If they do, their capabilities skyrocket and they become nigh invulnerable. So what happens when you fight them is this state? 3 v 1 Boss Battles! In these fights, the guardians become far more powerful based off of their movesets to the point of nigh invulnerability. If this is the case, how can any 3 characters hope to beat them? Has all been lost!?

No...It's the swords! The swords are their greatest weaknesses too. If you can somehow wretch the swords away from the guardians and use it against them, their powers will lessen. It's not a manner of simply attacking them until they drop it like an item however. You have to be crafty both in how you steal the swords off of the guardians and how you use them to debilitate them. In short, these bosses are not ones you can merely rush in and DK Ground Pound to death; you need to treat it like a puzzle boss and look for an opening you need to defeat them.

Why are they here
This is (very loosely) a Sonic the Hedgehog Fan Fiction, meaning that the events that take place in the StH multiverse. As seen in the Archie Sonic the Hedgehog comic, there is a phenomenon that Dr. Eggman had created called the Genesis Wave. This allows one to tear the fabric of the multiverse, drastically alter reality, and rewrite history. In issue 251, Super Sonic attempted to make a Super Genesis Wave to bring reality back to normal. However, Dr. Eggman attack Sonic in the middle of this act, throwing the universe out of control. As we soon find out, history has been completely rewritten for the entire Archie Sonic comic. This goes through such a grand scale that several of the different multiverses are crunched together, torn apart, and altogether erased completely. This is what happened to the world of my fan fiction. However, the 5 Guardians and the evil threat are still immortal, so they naturally survive this event. That being said, they are now kind of sitting in limbo. Using their space-rending powers, the historian manages to create a portal out of the limbo straight into the Smash Bros. universe. However, the Super Genesis Wave still took a toll on all of the survivors, bringing their powers down from "reality-warping deity" to "just pretty darn powerful", allowing the rest of the cast to have fair fights with them. The guardians do not actually get along with each other and since the evil threat was greatly weakened as much as the rest of them, they do not need to worry about him destroying all reality anymore. Now, they are at odds with each other, trying to beat each other out of vengeance, to take over the new realm, or to form groups with other smashers to combat any threats each may perceive. They may heal back to their full strength in a couple billion years or so, but until then they follow the rules of Smash.

P.S. On a side note, even though it may not count, my last miniMYM entry may count for this too one I finish it, as even though I never made her into this story, Violet does have a rough connection thematically speaking.

P.P.S. Sorry for all the self-depreciation
 
Last edited:

Reiga

He sold diddy for a switch
Joined
Dec 8, 2014
Messages
1,256
Location
White Noise
3DS FC
1461-7646-7368

Turtonator

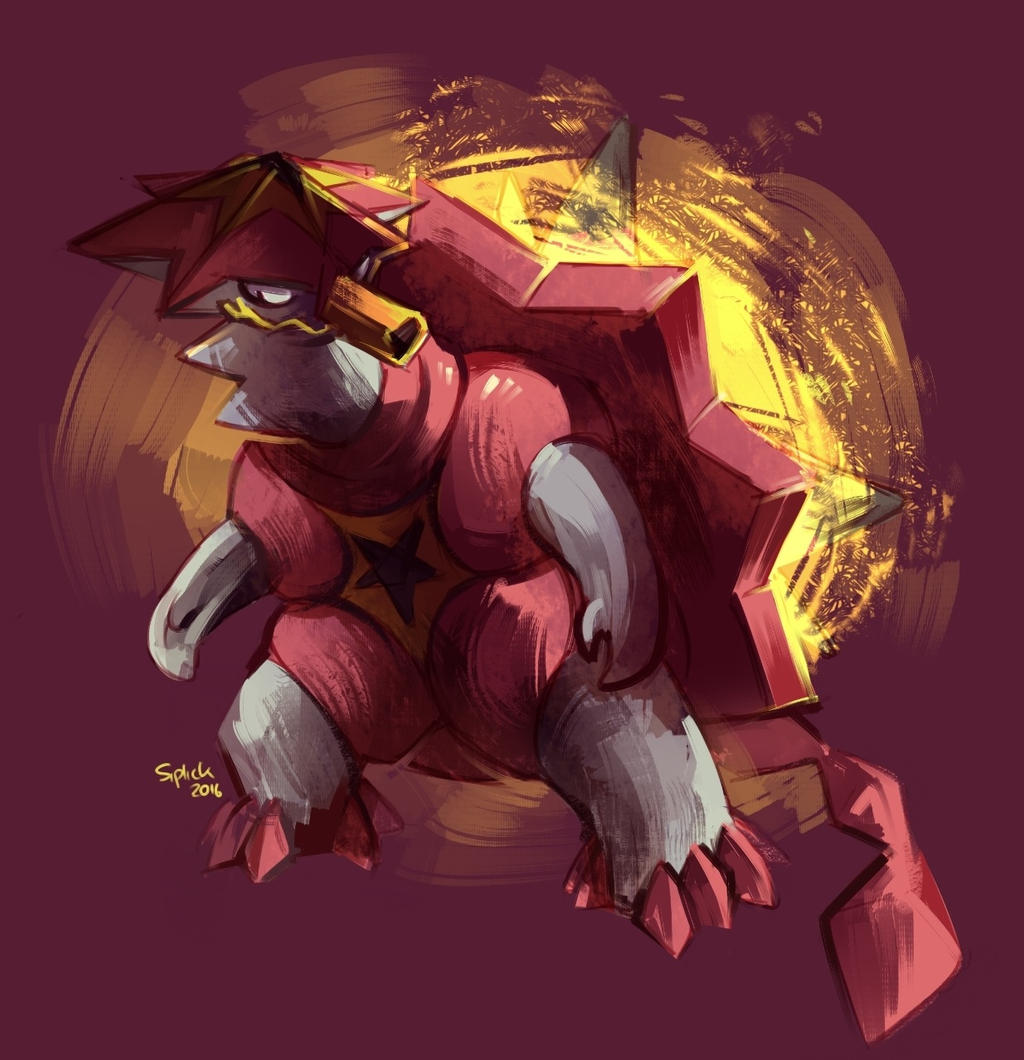
Turtonator is a Pokemon native to the Alola region and exclusive to Pokemon Sun. Living in areas of volcanic activity, this Mata Mata Turtle inspired Pokemon's diet of sulfur and other volcanic materials leads to its massive shell being very chemically unstable, and if struck can lead to a fiery explosion. With this in mind, in its natural habitat it may disguise as volcanic rock, waiting for prey to either step on it for an explosion, or have them close enough so they can still be hit by a blast, which it can activate itself by striking its shell with its own tail, with the sparks resulting from the friction being enough to cause an explosion.

Alongside this, like many other magmatic Fire types, Turtonator can spit both fire and the poisonous gases of its diet, while also having some generic dragon attacks due to its Dragon type. Turtonator's moveset is mainly Special, but as the Detonator Pokemon it still obviously has stuff like Explosion. Alongside this, Turtonator's TM and Egg move lists likely hint that Turtonator can use its knowledge of rocky volcanic places to its advantage, which really isn't out of the book.

Turtonator is also the sole learner of the move Shell Trap, which in the likes of Counter, Mirror Coat and Metal Burst will deal massive damage to any foe who hits it with a physical move, which will trigger a massive fiery explosion that hits all around!


Stats

Height: Ganondorf
Weight: Ganondorf
Ground Speed: Lucas
Air Speed: Ness
Air Control: Mario
Fall Speed: Mr. Game & Watch
Traction: Wario

With a very wide shell and a long neck reminiscent of the turtle species that based it off, Turtonator is very tall, easily being around Ganon's height, though it isn't as wide as him at all due to standing straight forward. Turtonator is just as heavy as Ganondorf, but also comes with a special mechanic:

"The shell on its back is chemically unstable and explodes violently if struck. The hole in its stomach is its weak point."

Just like Bowser Jr., the damage Turtonator takes is modified depending on where it's hit. If hit by the front, the attack against it will deal 1.18x damage, hitting Turtonator right in the weak point. On the other hand, any attack to Turtonator's back side will deal 0.82x the original damage, a pretty rad ability especially for someone already very heavy. For balancing and also logic, hitting Turtonator from above or below, or with a very downwards or upwards tilted move like a Down Tilt will have no modifiers.

Most of Turt's other stats, bar its very nice traction and horrid fall speed, are pretty average, which is nice for a Super Heavyweight. Turtonator cannot work with going head on in a fight, considering if it does it'll likely just get hit by an attack to its weak point. But success with Turtonator likely won't come with simply avoiding confrontation and just wimping around scared to not take a hit, especially considering Turtonator's movepool has tons and tons of risky explosion moves. Really, playing with Turtonator is probably more or less balancing the risk and the carefulness with threading with such a powerful but cumbersome beast.
Don't forget your shell armor is a thing too! With good control input you can easily turn around at the right time and take an attack like it was nothing.

On another note, when crouching Turtonator will enter a stance where his shell will slant forward in about a 50 degree angle, with a crouch walk to boot! While this does increase the size of his shell hurtbox, this pose will still have Turtonator's chesthole poke out in the front, this time lower to the ground, so DTilts or the like can still hit it.
Still, this is very useful, and while scooting around in a crouch walk slowly with a bigger shell shield is pretty clunky, a tactical crouch right before an attack might just be the trick!


Specials

Neutral Special - Shell Trap

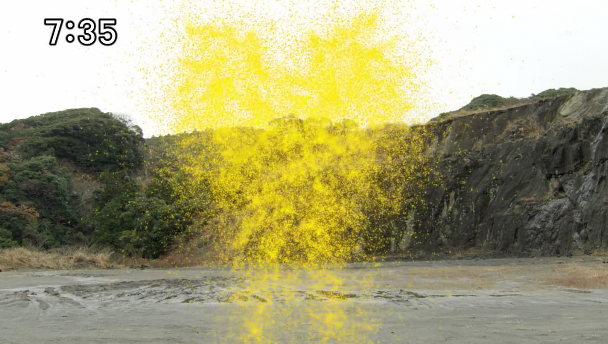
Turtonator turns its head to look behind it as a fiery insignia in the shape of its shell momentarily appears behind it. With in an inwards push of the limbs Turtonator then causes all of the spikes in his shell to jut outwards violently, covered in a fiery effect after crashing through the fiery insignia created moments before. The angle the spikes already are in makes them cover a lot of space once jutted out, and they will pushed out quite a bit too, with range just a bit wider than Turtonator itself.

Opponents found in the way of Turtonator's fiery spikes will receive 8% damage, with some rather unimpressive horizontal knockback for such a snazzy move, killing a foe at around only 180%, which is just garbage when you consider that the move has rather bad starting lag and the knocked foe can easily then punish Turtonator, even if the move does have solid ending lag.
So what's the deal? Well, it's a Shell TRAP! Turtonator's shell might be explosive, but just poking a mook with the spikes won't be enough for an explosion, something's gotta strike it, like, I don't know, a move?...

By hitting Turtonator's extended spike barrage with any non-projectile move, the Detonator Pokemon's shell will trigger an explosion, which shoots away Turtonator's shell spikes, now covered in fiery energy and with an explosion trailing behind them, right into the foe, in a move thats about practically impossible to avoid. After the foe gets hit by the fiery spike arrows, the explosion settles, and Turtonator regrows its shell spikes.
This powerful move will, surprise surprise, deal a ton of damage to the foe, denting them for about a whopping 35% damage, with horizontal knockback that can land a kill at only 50%. Truly, this is the ultimate finishing move, though its a hard cookie to use succesfully, considering the hitbox is behind Turt and requires the foe to attack it, as should they not you'll just be left with lackluster knockback. Turtonator's moveset has quite a few tricks, so by utilizing the rest of Turt's kit you can potentially lead a foe into hitting the Detonator Pokemon by the backside for this move to occur!
On a side-note, on quite the opposite to the Warlock Punch, should you B-Reverse a Shell Trap, it'll actually deal 20% less and KO 30% later. Do you think you can just do it the easy way and turn around?


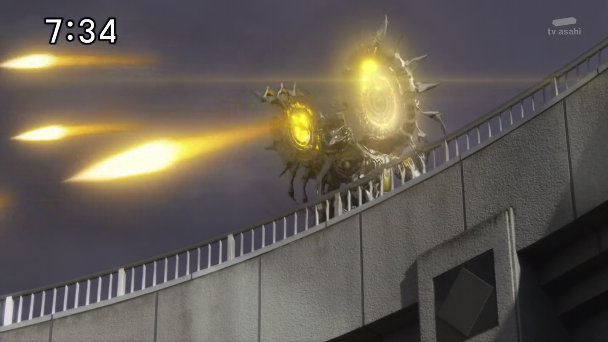
Side Special: Flamethrower / Smog

In a classic move for Fire-types alike, Turtonator scoots forward a bit and tilts its neck so its head is facing forward and slightly lower than usual, then spitting out forward a stream of fire, in a mighty Flamethrower!
Unlike most other fiery creatures, Turtonator doesn't spit fire from its mouth, but from its siphon shaped nose, which causes the fire to come out quite compact, about just a bit smaller than Charizard's NSpec flames. Like a funnel though, the fire from the stream will be bigger the more distant its from Turtonator, and by the end of the stream its double as wide as Charizard's.
This Flamethrower's range is about in between Charizard's and Bowser's, and while it will flinch foes throughout, it will do less damage than Bowser's Fire Breath, dealing only 1% to foes on loop. Like those other moves, this move can be angled a bit, and due to the fire being spat out straight forward, leeway is given and you can tilt Turtonator slightly more than its fiery cousins. This move will over time lose range just like the other fire stream moves, though like with Bowser in Melee, Turtonator's fire will eventually just end instead of staying around as a small flame, though even then Turtonator doesn't start breathing smoke like Melee Bowser, but just straight up ends the move, still suffering from its slight end lag.

So, a pretty nice move for doing some solid damage to a foe or even for edgeguarding, but really its kinda worse than the other flamethrower moves huh? It does less damage and has a rather compact size. But don't get fooled, there's still more to this move!

All that was said before was only what happens if you input the SSpec input like a tilt. If you Smash it, Turtonator will instead scoot back a bit before edging its head forward and shooting from its nostril a cloud of poisonous Smog! Many other Fire types also get Smog, but Turtonator has an even bigger reason to have it since it feeds on poison chemicals. The cloud of toxins Turtonator spits out won't be in a stream like its Flamethrower, but instead bundled up in a circular cloud the size of a Bumper, which at a rather rapid rate is shot forward one SBB away from Turtonator, floating a short enough distance from the ground that only kiddos with extra small crouches like Kirby can avoid it.

After reaching one SBB away from Turtonator, the cloud of smog will stop and stay in place for the next 8 second before shrinking into nothingness. Foes can pass through and stand inside the cloud, but will obviously be affected by the poison. After the cloud stops moving, if any foe goes through it they will receive 2% damage with no flinching, but for every 30 frames they continue under the smog they will receive 1% more damage of the same ilk, which can lead to stacking some very good damage if Turt knows where to make a cloud. If the smog, while being blasted forward, passes through the foe, they will receive 3% damage with some actual flinch. Turtonator is immune to this smog by the way, and can simply pass through it no problemo.

What really links both of the projectiles in this move together is combining them. While the Smog attack will lead to some ending lag, and the Flamethrower move will have some starting lag, if Turtonator hits the smog cloud with any fire-element attack it has (likely Flamethrower due to its range allowing you to touch the cloud from the same spot you made it), the poisonous smog, which has the same hellish combination of chemicals as Turt's shell, will erupt in a fiery explosion about the size of Dedede, which will cause any foe who is hit by it to be dealt 15% damage and be knocked back radially quite fiercely, being KO'd at around 110%. In the case of other fire attacks, the smog might just react differently, and while with a Flamethrower you need to be very close to be caught in the blast, in the case of other moves, Turtonator might just get hit by the bang, since even as a big ol' fire turtle it still sure as hell get hurt by that big of a blast.
A very powerful combination to use, but also a very obvious one to see coming, so if you just keep on trying to use this you'll likely just get pounded over either both move's combined lag, or the foe just dodging the move. Even then, the possibility of any fire move causing a cloud of smog to explode makes this a very nice trap. Just imagine the flashiness of you hitting someone with a Shell Trap while a cloud of smog around them also explodes!

Down Special: Magma Mines
First leaning back, one foot in the air, Turtonator proceeds to crash his entire body forward for a mighty stomp with the once midair foot, which has now also been engulfed in fire. A few frames after hitting the ground, however, the fire around Turt's leg suddenly dissapears into the stage below. Huh? In very short time we see why: half an SBB away from Turtonator juts out a conical chunk of superheated rock out of the ground, so hot that it still has a streak of magma around its middle, glowing brightly as if it were a mine, the rock having been poked out of the ground by Turtonator's stomp thanks to a mix of the fire, Turtonator's knowledge of magmatic activities, as a creature that primarily lives in those places, and of course its hefty weight.

This rock spike is about as wide as 2/3s of an SBB, and is as tall as Ness, and while not too big, it comes out pretty fast, so it can surprise many foes, even if the stomp itself is quite laggy. The rock formation will stick around for 8 seconds until sinking back into the earth, until then acting as a construct that can be rolled past, though it will absorb projectiles in a manner similar to Pac-Man's Hydrant, which is pretty good for Turtonator's fat butt. In Turtonator's case, the rock will act like a wall since its slopes are too steep to be on top of, though it still won't take damage from it and can roll around it.

The rock formation Turtonator uncovers has a pretty similar composition to its unstable shell, and as such has the potential to explode, just like quite a lot of things in Turtonator's kit, acting a lot like a mine. This however, is a bit of a more rudimentary mine, and any foe who touches it will merely be hurt by its superheated nature, receiving 5% damage and some rather weak radial knockback, but after such, the mine will already start reacting unstably, and will begin glowing a strong red. Have any foe touch it again and BOOM! The mine will blow up in their face in a hefty explosion about 1.5x as big as the mine itself, that deals 18% damage to foes and knocks them upwards for a kill at only 100%, which is wi-cked! This, however, is after the foe touching this thing two times, after Turtonator has summoned it in a rather laggy move. There can also only be two mine on the field at a time by the way, as if Turt tries creating a mine while two are already in the field, it'll only do the fire stomp with no mine jutting out, so you can't just go nilly willy with these rocks!
For balancing purposes, in a bit of an opposite to the Shell Trap, if foes strike a mine with a hitbox, it won't explode, and will actually be damaged. Remember the fact that these rocks can block projectiles? Yeah, don't count too much on that, since it has 15% stamina, and eventually the bullet fire will take its toll on it. When it reaches 0% health, the rock will explode in a slightly smaller explosion that still deals the same damage as a bigger blast, which just ensures that unless it was a fully body attack that puts them too close to the mine, a foe can still destroy a mine with physical moves. At the same time, Turtonator can be hurt by both kinds of blasts, and while the damage can be decreased if it hits Turt by the backside, your trap can still backfire immensely if you don't play smart! Knowing the usefulness of stalling it out, Turtonator's moves will not damage any mines.

Regardless, these mines play quite a bit into Turtonator's trappy gameplay by the fact alone that they reassure pressure, as not only do the foes have to watch out for exploding gas clouds, but they also gotta watch out for not touching the exploding rocks, which might just deconcentrate them enough that you can just brute force them into oblivion, or even eventually lead them into hitting you during a Shell Trap!

Alongside this, Turtonator's fiery foot is a hitbox too, and will hurt any foes stomped by it for 10% damage and vertical knockback which can KO at 150%, which while nice on a separate occasion, while you're setting your trap is probably the unwanted kind of hit, since the foe just getting hit by the mine and already making it volatile is way better in such a situation. However, don't think of this move as useless, as since there's some good space between Turt and the mine, should a foe try rolling out of the way of an incoming mine and go in the direction of Turtonator, they'll get severely punished.
Not to mention that when a mine is out you can freely still do a fire stomp, which at late game, where you'd be caught dead without a smog cloud or two and two mine up, can lead to it being used to finish off foes, sorta like how Villager's Axe while his Tree is out can be used for other purposes.

If used in the air, with no ground readily available to stomp into, the move acts a bit differently: Turtonator will still charge its foot with fire and stomp forward, but this time it'll slam itself foot first straight downwards at the speed of a Bowser Bomb! From this, Turtonator will either DI and die miserably, or fall onto the ground and stomp where it lands on, as a mine then juts out at the same speed and distance away from Turt as a grounded DSpec.
Should a foe be hit by an aerial stomp, they will receive an awesome 15% damage with a spike, which while not as strong as say DK's FAir's spike, is still plenty powerful, and alongside potentially KOing foes offstage for some juicy Turtcide, you can also spike foes right into a smog cloud or a mine just waiting to explode!
On the downside, since it literally just got around falling from the sky foot-first, the ending lag for the aerial version of this move is 1.5x as long as a grounded version, so while it can potentially unexpectedly have you slam some foes and set a mine, this version of the move is more punishable than just doing it in the ground.


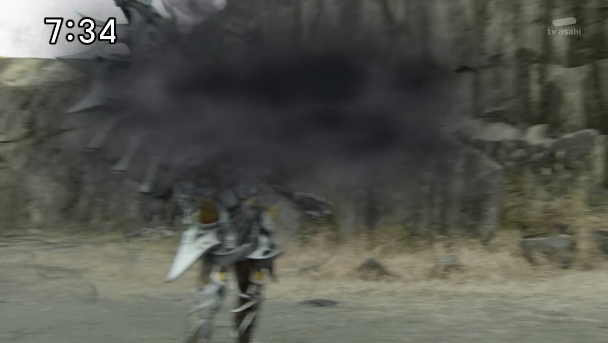
Up Special: Fire Spin
Turtonator very quickly lowers itself into a stance very similar to its crouch, though it crouches even lower to the ground as it very quickly then does what turtles do best: it tucks in his arms and (barely) his legs, folds its tail over its stomach to get it out of the way, and retracts the entirety of his neck back into its shell, leaving only the top part of its head out. Turtonator tucks into its shell! Now inside its shell, which now looks suspiciously similar to Bowser's shell during his Fortress attack, Turtonator adds its own flair to the move, as out each of its arm and leg holes starts igniting a strong fire, that looks like its coming out of a blowtorch or the like. In no time at all Turtonator starts spinning and the flames becomes mere blurs around the shell, and through the power of spinning, fire, and ripping off Gamera, Turtonator can start wrecking havoc!

If used in the ground, Turtonator will whirl around in place before eventually stopping and popping out of its shell with the same lag as a Whirling Fortress. This move will last longer than a Fortress by about 5 frames, but also has lengthier starting lag. During the last few frames of this move's starting lag Turtonator has the most basic form of super armor and most of its hitbox is hit-resistant, but don't think you're safe: you're very punishable if the foe hits you early, and a good DTilt can hit you in the stomach.

Turtonator's spinning will deal a measly 0.75% 7 times, and then a final hit of 4% for a total of about 9% if all connects. The first 7 hits have mild hitstun, while the last one knocks foes up for a kill at about 165%.
This, however, is the move's sourspot, located on Turtonator's shell, as should a foe get hit by the flames instead, they'll be hit by 7 hits of 2% followed by a final 4%. Combined this can deal about 18% damage, and the last hit's knockback launches foes horizontally for a KO at only 120%, this without factoring in damage from the past hits!

Like the Flying Fortress, you can move during this move, though your control over it is greatly diminished due to Turtonator moving by the rocket-like movement of the flames around it, basically, in trade for higher traction that usually means you'll only be able to turn around during the spin like once or twice, you'll be going 1.5x as fast as Bowser in his USpec!
You can input this move upwards too to make Turt rise into the air as it spins. The Detonator Pokemon can potentially go up the distance between Battlefield's main stage and its highest platform. When going up Turtonator will deal the same damage all around as when on the ground, and the average speed it goes at is only a tad slower than on the ground due to gravity being exerted on it. You can potentially hit aerial foes with this, but the main appeal is this since this move uses fire you can zoom past clouds to make them explode! Due to Turt's high speed, most of the time you can make past the explosion before it can damage you. And if anything goes wrong, you can always try getting hit in the blast-resistant shell!

If used in the air, this move is your standard recovery: Turtonator will automatically ascend as it spins, going as much as 1 BFP upwards before it goes into helpless (which also happens with a ground-to-air spin by the way). This is in general a very weak recovery, especially for Turtonator who has an average aerial presence and a horrid falling speed. While you can move horizontally with this recovery, the movement is rather limited, so it ain't no Spinning Kong when it comes to that.
Turt's recovery's only merit is that the speed it goes at during this move is rather fast for a heavyweight recovery, even if a tad slower than a grounded spin. Not to mention this move can deal good damage, dealing potentially 3 hits of 3% followed by a final 4% that can KO at 150% in the sourspot, while the flame hitboxes deal 3x 5% followed by 5%, with the following horizontal knockback potentially killing at 100%, which can make this recovery hard to stop. Regardless though, the starting lag is still chunky, and, all and all, its a rather lackluster recovery, though just like with Bowser, the speed a Fire Spin brings into Turtonator's playstyle can help it tons, not to mention leaving a trail of smog explosions along your wake is awesome.

Smashes

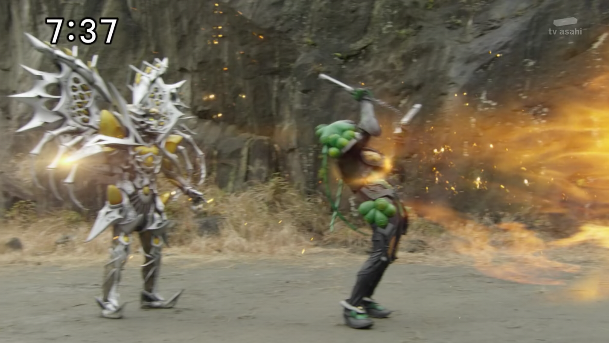
Forward Smash: Dragon Tail
(note: im not dumb enough to give this some tacky shuffling mechanic or something to emulate the move's name, its just named so because hey, Turt is a dragon, and the move uses a tail, what a name!)

Turtonator swiftly turns around, entering a pose it's very naturally accustomed to stay in, facing with its shell forward and its head turned to look behind it, like in the artwork at the beginning of the set. It then raises its very big tail up into the air and in front of its shell. When charging this move, Turt will stay in this pose until released, with the tail slightly curving even more inwards half-way through the charging and also, nicely enough, not being counted as a hurtbox. After this, Turtonator brings its tail down, slamming the entirety of it clean into the ground in front of it. Turtonator's tail slightly increases in size for this attack, and has the reach of 1.2 SBBs, clearly shown once its flat on the ground after being slammed in. That's some pretty nice range, especially since Turtonator's tail is still considered disjointed, and the damage ain't bad at all too, as it does 18 to 25.2% damage, with its horizontal knockback KOing at about 115 to 95%, though foes hit by the tip of the tail, indicated by being the farthest away diamond shape in the tail, will receive only 14~19,6% damage with knockback that'll only really be killing at 160-140%, though that actually may come in handy because it is a pretty long reaching disjoint hitbox that can lead Turtonator into knocking a weakly knocked foe into a mine.

This move's main flaw is that while its starting lag is rather quick, the ending lag is plain atrocious, as Turtonator struggles a tad to flip back and move its tail away from the ground, and while you attack shell-first, a whiffed attack can easily mean a foe rolling behind you and kicking your weak spot. Though thinking about it, with a nice coverage of area with the tail and very respectable damage output, that knocks foes horizontally and can easily pressure them into potentially being knocked into a mine, it might just be worth the risk. This isn't even Turt's riskiest Smash, so just consider that with well enough use of your traps you can work around the lag!

If Turtonator hits one of its mines overhead with its tail, specifically with any part of it that isn't merely the point of the tail, the mighty slam will be be heavy enough to cause the mine to be pushed back into the ground; it will still be poking out of the ground, but in a much smaller area, merely about as tall as a crouching Pikachu. If it was an unprovoked mine, it will start glowing red and shake a bit as the lava in its middle bubbles a bit. Have the mine already be volatile and it'll REALLY look like it'll burst at any second, flashing a strong red to indicate to any foes to get the hell out of there.
Two seconds after this, the mine won't take the pressure anymore and forcibly explode, in a radius that while not very wider than the mine's normal width, is very vertically high due to the pressure actually pushing the mine upwards as it explodes, making the hitbox about as tall two Marios.
The explosion lasts for less time than a regular mine, and since the foe isn't needed to be around for it to explode, alongside the fact that you need to use your laggy FSmash to activate this make this trap rather hard to connect, but also rather worth it, as foes hit by the blast will receive 15 to 21% damage if the mine was originally undisturbed, and 19 to 26,6% damage with the mine was already disturbed, with the vertical knockback KOing at 140 to 110% if undisturbed and 120 to 100% if disturbed. Regardless, at the cost of wasting a mine, you can essentially attack with an FSmash while next to a mine to pressure foes, which can distract them, either by worrying about potentially being caught in future blast or by attacking the mine instead of Turtonator to avoid the explosion, though depending on the match the foe may as well want Turtonator to force a mine to explode and remove the trap.

If a foe is hit by a mine that is set to explode, they will cause it to explode already, which can indeed mean that they should be wary of Turtonator launching them into the trap, but also means they can easily still attack it to cause it to be destroyed and explode, with the more vertically based explosion clearly likely not even hitting them if they hit it from the side.

Up Smash: Head Smash

Turtonator enters a pose in between facing forward and facing the screen as it ducks most of neck back into its shell and lowers its head a tad, staying in such pose while charging the move. On release, Turtonator violently headbutts upwards, extending its very long neck as much as it can and giving this move great aerial reach, since due to standing less hunched back and extending its neck more than usual basically makes Turtonator one Kirby taller. While Turtonator can manage to scrunch its neck back into its place after this move pretty swiftly, extending it isn't as fast, and even if just mediocre, you can still be punished due to whiffing this move and rather majorly, due to a very good chunk of Turtonator's hurtbox during this move being its stomach area.

While it doesn't cover a lot of horizontal area above it, as said before this move is very fun at being able to hit aerial foes who think they can ambush Turt from above. While Turtonator's neck is a clear sourspot, that only deals 11 to 15.4% to foes with weak radial knockback that won't KO until 170 to 150%, its head hat, that suspiciously looks like a miniature version of its shell, will cause foes to receive 15 to 21% damage with obviously vertical knockback that KOs at 135 to 115%. This is very nice damage for this move's range and the damage is actually low enough that at early percentages this move can act as an anti-air. Regardless of percentage though, in plenty of situation this move may as well be better to deal with aerial foes than actually getting into the air.

One third of the way into the charge and after, Turtonator's high speed headbutt will be powerful enough that the small quantity of volatile chemicals present in it will explode once Turtonator's hat hits the foe. This is mostly aesthetic since the explosion IS part of the move's main damage believe it or not, but once you consider that this explosion is fire-based in nature, you can use this fact to your advantage. Simply put, should Turtonator's head pass through an aerial smog cloud (setting a cloud in the air is an actually pretty good and core strategy supported by the aerials), it'll explode as is normal for when in contact with fire. This will hurt Turtonator, but due to the blast mostly hitting it in the protective hat and also as an incentive for you to actually do this, the damage from the blast will be halved and Turtonator will merely be shoved back by the blast as if it were shielding. Additionally, since it was ignited by a cool explosion from a Smash attack, the explosion from the smog cloud will also deal 2 to 4% more damage than usual depending on the charge and will KO foes 5 to 10% earlier too. Essentially with your strategic use of your sulfric clouds you can potentially make an explosion to follow up the foe getting slammed on by Turtonator's head to deal awesome damage.

Down Smash: Explosion
Turtonator turns to face away from the screen as we see the full extent of its radically sized shell. It then starts spinning its tail in a small circle to the side of its shell, spinning it in the direction it was facing before. Foes hit by Turtonator's tail during this period will receive 1% every 20 frames they're hit by it, with mild hitstun and aerial knockback. While normally this animation is rather short, while charging Turt will continue spinning its tail, which is pretty nice for hitting foes before this move and potentially leading the damage into this high power smash attack.
On release, Turtonator finally uses its wound-up tail to strike its own shell, which just as said in its opening description, will cause it to activate an explosion, no strings attached of the foe needing to strike you or some bs, just a straight up explosion coming directly from Turtonator's shell. Though of course, the fact that this move's starting lag is lengthy due to Turt no matter what needing to wind up its tail even if the move is uncharged means that you just can't go boom boom boom as you dearly wish, alongside the implications we'll soon discuss.

The explosion's range and power depends on charge. At no charge, the Explosion is just a tad wider than Turtonator, although it still leaves openings in its feet and head, which the explosion's circular hitbox doesn't cover. At full charge, however, the explosion covers the entirety of Turtonator's hurtbox and reaches half a Turtonator to both sides, alongside some sizable range above Turt, though still nothing compared to the USmash's range. This move's damage is also very impressive, dealing 22 to 30,8% damage to foes with radial knockback that KOs at 90 to 70%, and while the damage is cut by 10% and the knockback is 20% less potent if the foe is hit late during the move, this move has potentially nice horizontal range, great power and the explosion isn't a very quick-lasting hitbox. There's just one teensy tiny enormous problem...

Unlike in its Up Smash where the explosion Turtonator causes is protect via Turtonator only having its head be hit by the explosion, this move has no excuses, the explosion is created and performed directly behind Turtonator and every time it utilizes this move, it'll receive 10 to 20% self-damage the moment the fiery explosion happens. This makes utilizing this move a serious detriment to Turtonator's health, to the point where if when charging you press shield Turtonator will stop spinning its tail and end the move prematurely with its natural ending lag.
This move is the epitome of high risk, high reward, and is best used at late game, when Turtonator has already booby trapped the stage to the brim and has nothing to lose. The foe doesn't seem to be falling for your Shell Traps and you just want to kill the bugger, so you might as well use this move. Though should you whiff, should you freaking whiff this move and have dared to even charge it, Turtonator can easily become even more combo bait than it usually is as a heavyweight.

Should Turtonator use this move while inside of a smog cloud, this move's damage reaches absurd levels as the blast also uses the poisonous chemicals in the smog to increase its power. Inside a smog cloud, the blast will remain with the same range, but will now deal 26 to 35,4% to foes for a KO at 70 to 40%. This will also self-damage Turtonator for as much as 15 to 25%. This is very very risky to the point where anyone will tell you not to do this move, but if you've already asserted yourself as a risky player during the fight, the foe might just be scared to death to even think of seeing you next to a smog cloud, which can crazily enough lead to an opening.

Standards

Jab: Matamata Swing
Turtonator has some weird looking arms, especially compared to its actually sizable and neat looking legs, and comparing the two just makes its arms look like oven mitts or something. Regardless, those arms aren't just for attracting mates, and Turtonator puts them to good use in this move.
With an input of the jab button, Turtonator at quite the fast speed, at least compared to the rest of its kit, swings its arm from one side to the other, horizontally, angling the swing a bit downwards. This attack isn't fast at all and overall has more of a mediocre speed, but Turtonator's lumbering swing can net some solid range and damages foes for 6%, with low knockback that can easily lead foes into this move's second part, though the kind that scales rather quickly, and by midgame or so might not even be leading into hit 2 anymore.

With another tap of the Jab input, Turtonator swings its other arm, the one closest to the screen, also in an arc in front of it, although instead of going in a downwards angle the swing goes slightly upwards, with a bit less lag and so very quick to follow up the first hit, although you can always follow-up jab one with something like a Side Spec. Foes hit by the second hit will receive 7% damage with knockback that can KO at 180%, which is pretty laughable, but I guess rather solid for such a quick move.

Although as said before at later percentages both hits don't even connect to each other, combined they can give Turtonator some quick hits that are out for a good while if used combined which due to being two moves can just be stopped midway. This move is probably one of the quickest the span across Turt's mushy weakspot stomach, so its likely simply put your best bet to ward off foes trying to hit you there. This move still has some rather poor ending lag though, so while reliable don't put it in your head that it's always the best melee move to use.

Side Tilt: Ember
Turtonator leans forward to the point where its arms almost touch the ground, as it then headbutts forward, although with its head facing forward still, so it'll hit most foes with its elongated nose in a literal nosedive. The lag is rather average on both ends, and while Turtonator doesn't extend its neck like in its godly ranged Up Smash there's some nice reach to the move, which visually looks a lot like Pikachu's Jab, although coming from a much much bigger character.
Foes hit by Turtonator's snout will receive 8% damage and solid horizontal knockback, though not the kind that would KO before 200%, it still launches foes a good distance away. At middle percentages this can lead into Turtonator following into the foe with a horizontal USpec or even a Flamethrower, but overall its a rather average move. It is, however, one of the best move's to knock foes into mines to either make them go boom or just activate said mine, although foes can at times just air dodge the mine and catch Turt off-guard.

While Turtonator's nose is the move's "tipper" in generic Smash swordsman terms, the rest of its head and neck are still hitboxes, and even if they're sourspots, they have their uses. Foe's hit by the rest of Turt's head receive merely 5% damage and very reduced knockback, which doesn't scale much and until high percentages usually causes the foe to end up a very short distance away from Turt. This allows the Detonator Pokemon to follow up with its more physical moves, like its other Standards or its FSmash.

This move's sourspot also naturally combos into another aspect of the move that was carefully omitted up until now: if Turtonator presses the FTilt input again right after this move, as if it were a Jab, Turtonator will use the fact that its in such a good pose where its nose is right in the front of its figure to then spit out a small fireball from its fire-blasting nose before, with some tad ending lag slightly higher than the regular move's lag, ending the move.
The fireball is very small, only about the size of a Pokeball, and travels a mere 1.5 SBBs away from Turtonator before disappearing into the air. It isn't a very fast projectile, so its best use really is at point blank after the move's first part, and while the sweetspot's knockback means the projectile will take a while to reach the foe and be potentially missed, the sourspot puts the foe right where its very hard to miss the ember.
Foes hit by the fireball take 4% damage and surprisingly vertical knockback, although its a bit more of a diagonal angle. This is one of the few times where Turtonator's combo moves lead it into the air, and it can do this to great effect in this move, either then following up the wisp with an Aerial or its very powerful aerial Fire Spin.
This move also has the boon of being one of the few projectile fire moves Turtonator has, and its quick speed gives it the boon of letting it set up smog explosions from a distance, although the fact that you need to input an entire move with average lag to it before spitting a fire ball does automatically mean this tactic can be rather telegraphed.

Down Tilt: Tail Stab
Turtonator swiftly turns to a pose in between facing the screen and just facing forward as it then strikes its tail across the ground in a stab-like movement, extending it half an SBB forward before pushing said tail back towards itself with a quick inwards push. This push isn't very instantaneous and happens just a bit after the tail has stopped moving, and while the tail is thankfully a disjoint hitbox, this still accounts this move with some bad ending lag, even if the starting lag is actually rather impressive, as Turtonator manages to go against its lardy slow nature for a quick stab with its long tail.
This attack deals 9% to foes, though if hit late it only does 6%. This move deals knockback that's in between low and average with its low to the ground knockback potentially knocking foes into mines at later %s, or simply leading to an easy follow up into a USpec. Even with ending lag problems, this move is quick at the start and can easily be used twice or so on a foe, and since it has a light chance of tripping the foe like most DTilts, you can make the most out of it being a breath of sunshine of actually being decently quick in Turtonator's overly slow quick.

This move's main appeal is probably its ability to easily shield poke foes. A lot of Turtonator's high damage attacks and traps will lead foes into shielding a good tad, so being able to poke out of the small openings near the bottom is hella nice. Like the Standards we've seen before this move has solid range (a trend that will sadly be broken in the next couple moves), so you can potentially catch shielding foes who with other character's shield pokes wouldn't be hit at that distance. Still, a combination of risky ending lag and a very low to the ground hitbox that can easily be short hopped out of the way makes this move potentially rather punishable at close range, while at the same time you still gotta watch out not to hit the target too late and damage them for less.

Up Tilt: Shell Shock
Turtonator leans its whole body forward, leaving its shell in an almost clean 180 degree angle as it looks upwards and has its arms almost touching the ground. The Detonator Pokemon then thrusts its shell upwards, alongside so also doing an inwards push of the arms, which also causes the shell's spike to pop out a bit. The spikes eventually return to their regular size right as Turtonator leans back to its regular pose, ending the move with some rather crummy end lag.
The spikes darting out helps the move out a good chunk, since they're disjoint hitboxes that add some better range to this attack which naturally is very pitiful in that aspect due to Turtonator crouching down during it, lowering its hitbox to a high degree. This of course also has its uses, since you can dodge attacks even better than with the crouch and potentially hit foes, although for the spikes on Turt's shell to hit a foe to its side they've got to be really close. Not to mention Turtonator then thrusts upwards, which doesn't make this cause the crouch to be obsolete or something, far from it.

This attack is the strongest of Turtonator's tilts, dealing 10% damage to foes and knocking them upwards a good chunk, for a KO at 170% or so. It can rather decently lead into other moves, but alongside being the strongest of the tilts, this move is also probably the hardest to put in practice, since its pitiful range makes it hard to hit foes who aren't plain almost on top of Turt, and as something like an anti-air, it's severely outclassed by a short hopped aerial or the move's big brother, the USmash, which has way more range and when used uncharged might as well be better than this move since this tilt isn't exactly an early or midgame move and isn't even that fast.
However, if a foe really is right above Turtonator, its best to use this move instead of the USmash due to it having a bigger hitbox horizontally, alongside its diminished lag making the play way less risky with the foe so up close.
Due to the similarity of the poses needed for each action, when used out of a crouch this move has its starting lag almost (I repeat almost) cut away. This isn't mutual and from a UTilt you won't be able to cut the speed for the transition to crouch, so it isn't spammable or anything, but since Turtonator's crouch makes its hurtbox be mostly its extra-defensive shell and it isn't even a character who needs a lot of speed so it isn't very bothered by the crouch walk's decreased speed, a player can adopt crouching into their playstyle, and so this move is suddenly very useful as an out of crouch option!

Dash Attack: Topple
Suddenly stopping its cumbersome running to a halt, a rather demented smile fills Turtonator's face as it raises both its hands to the air in its sides as it crashes down into the ground directly in front of it stomach first as it purposely slams the entirety of its heavy body into this attack. The stop before this move gives it some slow starting lag, and after crashing down Turtonator has to deal with the lag of lifting itself back up, and while the action itself isn't too slow, as Turtonator simply pushes the ground and uses the force to go back to standing, the fact that there's this animation at all gives this move bad ending lag.

While the lag is high, the damage Turtonator deals is too, dishing out 12% damage to any foe who gets caught under Turtonator's weight as it falls, with horizontal knockback that KOs at 120%. Should a foe get hit by this they'll surely be toast, and the knockback is high enough that they can easily be knocked into a mine no matter what distance, since the knockback is also rather low to the ground, a factor that does however bring in the problem of undisturbed bombs ruining your launch, a factor that doesn't usually happen with other moves whose horizontal knockback usually is more diagonal in nature. Should a foe get hit by Turtonator's backside or its head (which is the part of the hitbox that hits furthest away from Turt, so you could say it is its "tipper"), they'll only receive 8% and poor vertical knockback, which can easily lead into the foe punishing Turt as it still gets up. Yikes!

Like in its FSmash, if Turtonator topples over a mine it will press it like a button, and during the same timeframe as in that Smash it will explode violently in a mostly vertical explosion for the same damage and everything. Since this move is ungodly laggy its just as difficult to get this going as that Smash, although the fact that Turtonator is moving before this means foes can see Turtonator going to press the button, which can lure them in to try to stop it but just end up getting hit by the topple, although this situation can easily go in the wrong direction if the foe successfully hits Turtonator and the trap. Its all a matter of how Turtonator booby-trapped the field until this point and increased the pressure on the foe to watch out for explosions.

If you're playing Turtonator and feeling in the Ganon mood and were pissed off over Shell Trap dealing nerfed damage if turned during the move, today is your lucky day, as this attack has some Warlock Punch / Falcon Punch-like properties:
Should you input the direction opposite to the one Turt is facing during the time its still in its halt, Turtonator will instead Topple backwards, potentially landing on the foe with the same weight as before, but now with Turtonator's spiky shell. When the shell connects with a foe an aesthetic explosion will occur, though since smog clouds are a thing it isn't so aesthetic, although Turtonator will likely also be caught in the blast and receive damage, so doing this isn't recommended.
Foes hit by Turt's shell will receive an improved 15% damage with higher horizontal knockback that KOs at 90%, although the decision to change the place where you'll slam into pretty much doubles the move's starting lag. The sourspots are also basically the same but flipped to the other side, and they don't deal elevated damage or anything, so hitting a foe with it is very punishable. In general, this attack is very lardy and missable, but is quite potent when connected!

Grab and Throws

Grab: Tortoise Grapple
Turtonator puts both of his arms wide to its sides as it then tries to grapple any unsuspecting foe by violently swinging both arms inwards, causing any foe to be hit by them to be squeezed in between Turtonator's stomach and its arms, who with a strong grip it uses to the best that it can to hold onto the foe.

This is your usual low range, rather laggy grab that most of the Smash Bros cast has to stick with. Normally it is rather hard to connect with this move, but thankfully, while not directly related Turtonator's trap game not only puts the foe at the tip of their feet as they watch out for them, but the various explosions by them causes the foe to be inclined to shield. That's your moment!
For a Pummel, Turtonator does the rather generic-looking animation of squeezing and the unsqueezing the foe. This is a rather slow animation, so expect it to only land twice or even daresay three times before the foe escapes Turtonator's grasp. The damage each pummel deals, however, is pretty nice for its kind of move, being 3% a pop, so if you think you're in the spot for a pummel it can potentially deal some sweet damage before your throw!

Alongside this, Turtonator's pummel mixes quite well with Smog if the Detonator Pokemon managed to grab the foe in a smog cloud, and the poison gas' damage over time combined with the pummel's damage can lead to some solid damage before Turtonator even throws the foe! Turtonator is also recommended to grab foes inside clouds because, surprise surprise, a number of Turtonator's throws have fire in them! While Turtonator itself can potentially be caught in the blast, it might just be the risk you need to take to KO the foe.

Forward Throw: Gas Spew
Turtonator momentarily moves its arms to hold the foe by their sides, and almost as if scooping them up, it then pushes them away forward with both of its arms, knocking them away horizontally and very close to the ground, but at the set distance of 1.5 SBBs, dishing out a small 4% to the foe.

This isn't the end of it though, as in an attack that due to the set knockback is pretty much unavoidable Turtonator proceeds to cleanly transit into a pose where its got both its arms behind it as it leans forward and looking right into the foe breathes out a constant stream of smog, which while looking the same as the SSpec's smog, comes out looking more like that same input's Flamethrower. This poison stream of smog will damage the foe rapidly for 7% over the course of 5 hits, the first 4 hits dealing 1% and the final dealing 3% with horizontal knockback that ends the throw, knocking the foe away for a potential KO at 150%.

A rather average throw for what it's worth, this move has the boon of the smog cloud sticking around, and while for only 4 seconds as to not detract attention and use out of the regular Smog, it's still pretty freaking nifty and still deals the same damage to foes and can also explode when around a fire move in a bang that's a bit bigger than its size. This cloud has a more horizontally range than the regular Smog, being about as wide as a Battlefield platform, but also has diminished height, at only the height of a crouching Olimar, in general not adopting a regular Smog's more circular area.
At middle percentages this makes this move quite a treat and likely the recommended throw, as Turtonator can punish foes trying to advance towards it from the front, since the cloud gives any fire move of Turtonator's increased range due to the blast.

At mid-to-high percentages though, the foe's accumulated % will knock it around enough that it can potentially DI out of the smog cloud right before the final knocking hit, which easily lead to them punishing Turtonator, hampering the use of this move beyond midgame.

Back Throw: Shell Slam
Turtonator, still grasping the foe with one arm, moves the other to behind them as the magmatic turtle then swings said arm outwards with the foe still in front of it, stopping once its arm is outstretched to its side, which causes the foe to be knocked away behind Turtonator at the set distance of 2 SBBs away alongside a very low 3% damage. Bo-o-ring! Not so fast! As Turtonator, not even waiting for the foe's hitstun to end, the rude turtle it is, sprints backwards shell first into the foe for quite the attack. With an explosion on impact, this is certainly Turtonator's strongest throw, and deals a whole 10% damage to the foe, which combined with the previous damage deals a whole 13% to the foe.
If you want to go the extra mile, the explosion from this move is actually rather sizable and about the size of a Bumper, unlike other explosions in minor moves like the Dash Attack whose range isn't even worth mentioning since regardless of what you do Turtonator is always caught in the blast, and so if strategically placed right, you can potentially cause a foe hit by Turtonator to be affected by a smog cloud's explosion, but not Turtonator! Or if you want to play it simple, you can just knock a foe into a mine.

The knockback specifically is horizontal and in the direction Turt's shell was going. The knockback for this high power move isn't even too spectacular, despite this probably being Turtonator's best killing throw if it doesn't want to risk it, KOing foes at 140%. However, there is one factor that makes this move usable, and that is that Turtonator can throw foes over any ledges, and its high powered turbo shell crash (tm) into the foe is fast enough to go over ledges without even being affected by gravity, at least until the move ends. This will cause KOs to happen even closer to the blast zone and from a ledge you can potentially boost this move's kill power to at around 115% or so.
If this move ends in the air, Turtonator will be put in its regular air game, with no jumps used and the like, while the foe is well... launched to their doom. Its pretty easy to return to the stage with your recovery so no sweat.

Up Throw: Medium Rare Cooking
Turtonator throws the foe into the air in front of it, in a very small distance overall that just serves to have the foe be diagonally upwards in relation, not even damaging them, as Turtonator faces its snout right next to the foe as it breathes out repeatedly 4 fireballs directly into the foe, each about the size of Mario's fireballs and moving at a decently fast speed, and each also pushing the foe back diagonally a slight bit and dealing 2% damage, with the hitstun being enough to allow one fireball to always lead into the other, well at least until the higher percentages, although the fact that no one fireball does more than another doesn't mean you'll lose the special knockback inducing fireball or something.

In the end of it all, the foe isn't knocked away a whole lot, which of course isn't inherently bad, and while the tortoise is rather clumsy in the air, as shown in its Up Tilt it has a decent aerial combo potential, primarily due to its USpec, which it can easily use to, say, follow-up this move to turn it into lee-way for a KO move! Not to mention, should you place a smog cloud up high, as much as tons of other moves can activate it, this move is actually probably one of the best users of the smog if placed correctly, as if placed so the final fireball will be the one which will cause it to explode, not only will the foe receive the previous damage from the fireballs, but they also stay a decent timespan inside the cloud, which means they receive a good chunk of damage from the poison, all and all leading to this move potentially dealing a lot and ending very high into the sky, making it very easy to Star KO.

Down Throw: Matamata Slam
Turtonator turns to face in between looking at the screen and looking straight forward, as it then proceeds to grab the foe with only one arm, then raising said arm into the air. With the opponent suspended in the air, Turtonator then swiftly arcs the lifted arm downwards, slamming the adversary right into the ground and putting a good chunk of force behind the action. The foe will receive 8% damage in this very simple throw, with very weak knockback that scales rather weakly too, being an aerial plop that won't be KOing any time soon.

Again, not to snazzy of a throw, come to think of it the only one which launches the foe in an actual throw in the end, but that doesn't mean its worse than the others, far from it. A very weak knockback scaling means the foe will be left after the throw right around Turtonator, who can easily follow this up, be it something simple like a tilt, or, should you correctly read a foe's air dodge after the throw, something extreme like your all powerful scary Down Smash, with the move easily leading a foe right into a DSmash and getting killed if at the right percentages. Should their 50-50 go well, of course Turtonator will suffer from the Smash's starting lag and get punished, but should it go the other way it can shield and punish the foe instead! Turtonator's traps, of course, limiting the foe's range of options due to potentially causing a big boom, can help lead this boring old throw into a really cool combo into one of Turtonator's strongest moves. You can even use a Shell Trap predicting the foe to attack!

Should a mine be right next to Turtonator and it manages to have the slam cause a foe to hit the mine when knocked into the ground, the mine will either just get activated, which is still very nice and doesn't really stop the move's momentum much, as Turtonator can still easily follow up this move, or explode in the foe's face, dealing the regular explosion damage on top of the original throw damage, although Turtonator will also receive 5% damage from the blast as a side effect. This is quite terrifying for a foe, just getting grabbed and slammed into a trap, and may just lead foes to avoid being even close to a mine when Turtonator is around!

Aerials

Forward Aerial: Fire Arm
Extending an arm to its side, Turtonator suddenly sets it as it then strikes the flaming member forward in a horizontal arc in front of it, lashing it in front of itself as the arm leaves behind a fiery trail. The force behind this move is enough that due to being in the air, even after Turtonator has stopped the fire in its arm after it has already traversed its whole front, it has to transition the swing into a full on spin to gain balance at the end. The part after Turtonator has stopped setting its arm on fire is of course this move's ending lag and won't deal any damage to foes. Its pretty pitiful lag and its not like the landing lag is any better. Of course, on the flipside this move has pretty quick starting lag.

Foes hit by Turtonator's arm will receive 8% damage and knockback that while mediocre at first eventually scales to be very powerful, especially for its speed, KOing foes at 125%. This allows this move to be one of Turtonator's most useful aerials, as along being potentially a combo finisher or an easy follow-up to its aerially knocking moves, when short hopped it can easily be used as a move for knocking foes into mines, and if Turtonator ever decides to go offstage this is likely the move you'll want to use. Truly a versatile move! That is until you notice the hitbox isn't even that big and should you whiff you'll surely be punished, especially since Turt is in the air where it fares really badly.

This of course, is the reason why this move has a lovely synergy with Smog traps. Turtonator has had plenty of fire moves to abuse of such an interesting trap, but likely the one you'll most be using to make some clouds go boom is this attack. Fast and not too close to Turt, if only the arm part of Turtonator passes through a cloud the Detonator Pokemon will not be damaged. Alongside this, the smog cloud actually helps out with this move's problems, as the explosion it causes increases exponentially this move's rather small hitbox, and the fact that there's an explosion in its front will cause foes to not want to target the big guy while the explosion is still out, which is good enough time for Turt to go through the move's ending lag! Use this with an FThrow cloud and you've got quite the hitbox, which is basically all activated at once merely by Turtonator passing its arm through it. Overall a very useful tool for Turtonator that actually allows it to defend its cumbersome frame in the air, where its normally rather bad at moving about and getting around foes.

Neutral Aerial: Blaze Ring
Turtonator turns over to have its shell be facing the screen, as the Detonator then creates around the borders of the shell a fiery blaze, which it then releases as a ring of fire around Turtonator, which due to previously outlining the shell has the same spiky, craggy outline. The fire ring spreads out for a short distance before disappearing into the air, Turtonator following suite and turning back to face forward and end the move. This ending lag is pretty mediocre and is only just a bit quicker than the starting lag, which while leaning more to being slow, is still just average. And while the landing lag might just be longer than the other kinds of lag, it still isn't that bad, so this is overall a rather safe move.

The fire spreads out at a not-so-fast rate, but Turtonator can put this to good use, as this move has Sex Kick properties. While fresh out of the shell the fire deals 9% to foes, if hit right before the fire disappears, the opponent will merely receive 5.5%. The radial knockback from the move also follows the same principal, mediocre when clean and barely launching the foe if late. The clean knockback, while not KOing anywhere before 200%, has the property of spiking foes if they're hit below Turtonator, and while not too strong of a spike, its surely a safer alternative to knocking aerial foes into mines below than an aerial DSpec!

You can potentially use this move over the FAir for activating smog explosions due to the fire hitbox covering all around Turtonator, not needing to have the cloud be in front of you and potentially being protected on all other sides by the rest of the hitbox, but really, the starting lag before this move is enough that it can potentially be easily seen by the foe, who can air dodge or roll out of the explosion and punish Turtonator while it still in the move's rather lengthy animation. However, if you booby trap the ground with a mine you can actually make this work!

Back Aerial: Smog Ball
Turning its head to look over behind its shell like its commonly seen doing, Turtonator spews out a Pokeball-sized ball of poisonous smog behind itself, then turning back its head. While quick to end, the starting lag for this move also involves Turtonator having to blow in air before exhaling the toxins, which causes the attack's startup to be a bit on the slow side, which can lead into foes punishing Turt. Thankfully though, if Turtonator wants to hit a foe, if they're in range for this move they'll only really be able to hit its backside, which is especially good considering the Detonator Pokemon leaves its stomach open during the move, so only in a multiman smash or against smart minions can this ever be exploited.

The gas ball will travel 1.5 Battlefield platforms away from Turtonator before fading into the air and at the speed of a Villager's slingshot's projectile. Due to the placement of Turtonator's head, this projectile comes out just a bit angled downwards, although the trajectory is primarily horizontal. Foes hit by the gas will be knocked a rather small distance away alongside receiving 5% damage. Due to the range of it in general, this is a really cool move for Turtonator to have, and the ending lag being so low combined with a ranged move means this move can effectively used by the Detonator Pokemon to zone a foe and potentially follow up this move with a NAir or the like, with Turtonator's zoning game already being enhanced by the fact that all of its high power traps exerce tons of pressure into the foe already, so you can potentially use this move to get really good reads off of the foe and get your edge in the game.

If this smog projectile enters an SSpec smog cloud, it won't come out the other way and instead be added onto the cloud, which while not impacting size or damage output, will cause the cloud to stick around for 1 more second than usual. This isn't really that abusable since the move has bad starting lag and doing it twice would be a sin, but just adding another second to the timer once can impact more games than you can think. For reference, due to its intangible properties, after hitting a foe a gas ball will still keep going, and while it will only persist for a small time as to not cause the ball to hit knocked foes again, this can be enough for you to knock a foe into a gas cloud while the projectile still ensures the cloud doesn't disappear. This can potentially lead into devastating attacks like an explosion from a NAir!

FThow gas clouds are not affected by this move as to not steal the limelight of regular gas clouds, since they naturally just are a side effect from a simple throw.

Up Aerial: Tail Uppercut
Turtonator leans forward a good ton, putting the fact that it's in the air to good use, causing most of its shell to be facing upwards, as it then stabs the air above itself with its elongated tail, angling it in such a way that it'll be hitting right above Turt, going at about a 60 degree angle above the turtle, then retracting after its reached its decently long max distance, with some lag behind it but overall not a whole ton.

This is definitely Turtonator's most simple aerial attack. A simple upwards jab with its tail that deals 8% damage to foes with rather light vertical knockback, this can easily lead into itself a second time even with Turtonator's hefty frame. It can also lead into a USpec, granted likely a sourspotted USpec if Turtonator doesn't want to risk going a bit to the side after the move to connect the fire hitbox with the foe. All of this, of course, coming from this move's sweetspot, located on the diamond-shaped segment on the tail most distant from Turtonator, and if a foe is hit anywhere else it'll only deal 5% damage, with some yucky radial knockback. While not conventionally risky due to big explosions, its still a move in Turtonator's repertoire that while difficult to find safe situations to use in, is rather rewarding when actually correctly used, since it can easily bounce foes around in a combo!

Down Aerial: Shell Crash
Turtonator spins around vertically once, stopping once its spiky shell is facing directly downwards, as the Detonator Pokemon then tucks its head and limbs into the shell like in the Up Special as the lethal shell then propels itself downwards in a classic stall-and-fall!
Turtonator's shell will crash down into the ground at about the speed of descent of Kirby's Stone move, with the Pokemon's tail trailing behind the shell (although not as a hurtbox) and Turtonator's shell hat popping out. Foes hit by Turtonator's falling shell will receive 15% during drop, and if hit early enough will be meteor smashed, potentially into a mine and knocked right back into Turt again. If the foe is hit late, though, they'll only be knocked upwards, although "only" is probably an understatement since it still has the ability to KO foes at 130%. On landing, Turtonator will receive some very bad landing lag as it has to flip over (a turtle's mortal enemy) and readjust itself. To help it though, if Turtonator has landed from a height superior to the distance between Battlefield's main stage and its highest platform, when it hits the ground the power behind it will be enough to cause friction in the shell and cause it to explode, with the explosion's radius extending to Turtonator's sides and dealing 10% damage to any foe who was fortunate enough to not be hit by Turtonator, but unfortunate enough to be hit by the explosion, with vertical knockback that KOs just like the fall's knockback.
Should Turtonator fall from the sky any distance less, it'll simply create a basic shockwave once it hits the ground, which deals a meager 2% to foes with some flinching.

Like Turtonator's FSmash and Dash Attack, this move will trigger any mines Turtonator falls onto to explode after the same time period as those moves for the same devastating explosion. While Turtonator can be more easily seen and telegraphed as going to trigger a mine, since it will need to go to the air, stall, and then fall, but the fall itself is way less punishable than the laggy hitboxes of the other moves, and the blast itself as said before can cover for the fall's flaws.
If Turtonator explodes when landing and its inside of a gas cloud, the smog's explosion will happen after the falling explosion, so if a foe doesn't DI they can end up being hit by both. On the flipside, however, Turtonator having to receive two explosions in a row will cause the poor guy to receive 5% self-damage in return, mitigating the abuse of this deadly combo.

Final Smash
Molten Lava Land
The camera zooms in on Turtonator who, infused with the power of the Smash Ball, stomps violently on the ground in front of it, similarly to in its Down Special. Unlike in that move however, Turtonator won't cause a meager rock formation to jut out, but indeed cause the ground itself to rumble as soon various wide rock formations pop out of the ground, with their size and number differing with each use of the super attack. These deep black magmatic rocks won't damage foes at all, and can be stood upon and are generally solid, acting more like a part of the stage. Foes hit by these rocks while they rise will already receive 10% damage!

The foe shouldn't think of breaking these rocks or anything, since first off that isn't even possible, and second off they better guarantee they're on top of them, as soon a red hot swirling magma rises from the lower blast zone, only stopping once its reached the level of the highest part of the main stage, ie. rising to the point where the main stage is entirely gone. If the stage has platforms, they'll break for the duration of the Final Smash, and if it scrolls it'll stop doing so for the duration of the Smash.

Finally, everyone gains control again, although the foe is clearly put in a disadvantage as their only footing is the magma rocks created prior, as they definitely don't want to fall into the lava, which deals the same damage as Brinstar's acid. Turtonator, meanwhile, not only can survive in this lava, but can swim in it, paddling along it at the whopping speed of Sonic's Dash Speed and sticking only its shell and shell hat out of the lava. Turtonator can press the special button while in the magma to shoot away Pokeball-sized fireballs, which traveling at the speed of Fox's laser can deal 5% damage to foes and can be spammed very very easily, so this damage can accumulate easily. By inputting the regular attack button, Turtonator will leap out of the magma in a fiery body slam forward, looking as if he were some magma shark. This will damage foes for 20% damage and a KO at 100%, with the distance Turtonator travels being enough for it to pass through a magma platform and still fall into the magma at the other side.

Finally, after 8 seconds the rock formations will all explode in unison in a blast a bit bigger than the size of each rock, KOing foes at 80% and dealing 28%. The magma sinks back into the blast zone and the Final Smash ends.


Playstyle
Explosive Magma Demon


Turtonator brings into Smash a very interesting combination of high power, laggy explosive moves that have a high risk factor and can even damage the big guy when used, and traps meant to pressure the foe and limit their options. The Detonator Pokemon may look like a pure brute, but just relying on pure strength won't get you anywhere with it, since you'll just get predictable and be exploited by your core weakness: the fact that even as a super heavyweight who can take hits especially to the shell, that if you hit it from the front it'll definitely be knocked out easier than expected. With great power comes great risk, and if Turtonator just charges into the fight it will just get swept around due to its weakspot, which will obviously be the first thing the foe will be able to hit if you go in all out due to it being located in your front.

Even in its natural habitat Turtonator will prefer to use its smarts to disguise itself as rock to then surprise foes with its brute force. Turtonator's kit brings in two true traps, but also has plenty of other moves that can be used to trap a foe in the sense of limiting their options and binding their choices. Pressure is a key aspect in Turtonator's gameplan, since naturally its a slow character who when approaching can face a foe who has tons of options of what to do against its giant frame. Have traps at your side though, and of fear of the possibility of their high power explosions, the foe's option game is severely limited and simplified, and so Turtonator can easily read them and know how to react.

The poisonous smog Turtonator can produce with its Side Special are very interesting as traps; until Turtonator steps in and actually makes them explode, they aren't really that dangerous and only will cause some small damage over time to them. Have ANY of Turtonator's moves with the fire effect hit it and it will almost automatically explode in a deadly hitbox! This fact alone ramps up the scare factor of being in a smog area, with your pressure on the foe if used correctly potentially allowing you to plan ahead and dare I say control where you'll foe will go, just with some poison gas! A foe can of course just move the fight somewhere else, so if you just spit out some gas and just that you won't be going places, so you gotta be relentless with this junk! Don't think a smog cloud is just there to scare foes away too, since their explosions can be very effective for launching the foe into the air for approaches and of course killing them off. Moves like the FTilt can be used to cause explosions around foes for some awesomely ranged attacks, and of course a lot of times smog clouds can straight up directly power up some of Turtonator's most powerful moves like its devastating DSmash.
A lot of aerial moves can really work lovely with smog so don't keep your clouds close to the ground. Turt's FAir is probably one of the best moves to trigger explosions, and its Up Throw can potentially cause awesome Star KOs.

The Magma Mines are a bit more straightforward traps, but Turtonator still has to be tactical with them. Turtonator has plenty of horizontal knocking moves, so triggering them the first time can actually be done pretty easily. Heck, by utilizing itself, smog clouds and maybe another mine the Detonator Pokemon can force the foe to be hit by a mine. When disturbed, the threatening possibility of being knocked into a mine for high level damage can suddenly cause a foe to fear Turtonator's moves, and this caution with possibly the simplest of moves may cause them to slip up and fall prey to Turtonator's powerful attacks. This trap, however, can potentially be destroyed by the foe themselves, and when knocked a simple air dodge can be enough to pass right through a trap, so if a foe keeps their cool they can bypass this trap. Turtonator, as such, needs to keep an eye out for that and how to respond properly.

Alongside that, while its not directly a trap per-se, more of a semit-trap, is Shell Trap. As Turtonator's signature move it's a bit strange that Turtonator's other traps get more limelight during the set through interactions, but really Shell Trap is just as important as those traps if not more important, and doesn't even need any silly interactions! This move is Turtonator's cherry on top of its moveset, the final bomb. Everything Turtonator does in its set is to pressure foes with its potentially risky but very strong moves and its traps can be pretty much considered just the tools needed for this move to actually work, this laggy counter that only hits behind this very big but also cumbersome and slow character, which while pretty impossible to actually use properly in any other set, can prosper with Turtonator thanks to its terrific zoning game allowing it to find the perfect opportunity to use what is the strongest move in its set.

Turtonator's moveset in general features many high risk moves, and if a Turtonator player can succesfully command its traps well enough to diminish these moves' risk, they'll surely find their way to victory. Something like Turtonator's deadly Down Smash isn't even inherently that risky, but when you consider that you receive self damage it's probably one of Turtonator's riskiest, since blowing off 20% off of yourself and then taking a hit to the weak spot is very very dangerous.

So TL;DR, with Turtonator either you play stupid, get hurt and die, or you play smart, use your traps and use them as openings for your cool explosions that go boom boom. The end.
 
Last edited:

JOE!

Smash Hero
Joined
Oct 5, 2008
Messages
8,075
Location
Dedham, MA
AvX Update:

Both Captain America and Cyclops have been heavily edited,a s has the original post detailing some global mechanics (now linked by clicking their pictures). Check them out again if you haven't already!


PHASE ONE will be ending this Monday, Febuary 27th.

Please use this time to write up any posts relating to your MYMU before moving forward!
 

Chris Sifniotis

Smash Journeyman
Joined
Aug 19, 2013
Messages
265
Location
Sydney, Australia
NNID
chrissifniotis
"I'm back, and I'm bad; obviously within certain, sensible preset parameters!"

It's been a number of years since I've posted anything for Make Your Move, and in that time all I did was........well.........game. I've decided to retry, well after Smash Daddy asked me to come back, and restart my inferior movesetting with in fact a revision of one of my original movesets; Commander Keen!


the Title screen of the Commander Keen mod 'Battle of the Brains'. 'the Universe is Toast' was meant to be Commander Keen 6, but production of the games was cancelled and since then the modding community created their own ending.

Commander Keen 2.0 - the Ceilick Update
Commander Keen is the eight year old boy genius and one of the icons of early 90's retro PC gaming from id software, before they went all DOOM and junk. With an IQ of 314 (a less-than-subtle pi reference), Billy Blaze - Keen's alter ego - is the intergalactic genius, traveling through space in his home made Bean-with-Bacon Megarocket, restoring peace and defending the Earth from aliens.

In the first episode, "Invasion of the Vorticons", Keen explores the mountains of Mars before aliens from Vorticon VI steal parts of his ship. Keen fights the Vorticon aliens on Mars as well as the native Yorps and Gargs to reclaim the stolen parts, doing so he returns to Earth to find a Vorticon Mothership hovering above, preparing to attack the major cities. Keen sneaks towards the ship and infiltrates Bottom Galley, he quickly races to disable the eight Tantalus rays locked on Earth. As Keen goes through the Mothership he discovers the Vorticon aliens are under the control of a being called the "Grand Intellect" on their homeworld, so when Keen defeats the Mothership and returns home for rest, the next day he carries on to Vorticon VI to rid the galaxy of this Grand Intellect. Landing far from the Castle of the Grand Intellect Keen proceeds on foot through the region to enter the fort, discover who the intellect is and eliminate them. Upon arrival he finds that the Grand Intellect is his arch-nemesis Mortimer McMire, prepared to fight Keen in his terrible Mangling Machine. Keen triumphs and liberates the planet from McMire. After being awarded the Big V from the Vorticon King Keen learns that the Mortimer in the Mangling Machine was an android and Mortimer himself is alive and well, plotting a greater scheme.

Before that though, in his home Keen goes to bed and wakes up to find himself in the Land of Tuberia, brought there via the Dream Machine. Keen must quickly fight the land and eliminate king Boobus Tuberia in order to save himself and the other children caught in Tuberia. After beating the king he disables the Dream Machine and all of a sudden the world around him grew unstable as Keen himself fell asleep, returning home in his bed. In the second episode, "Goodbye Galaxy", months after Keen invents and new transceiver and catches wind of a new plot to destroy the galaxy, he flies to Gnosticus IV to visit the guardians of the Oracle there only to find the guardians kidnapped by the Shikadi race and sent to the Shadowlands. Keen explores and defeats the natives of the Shadowlands, saving the eight captured guardians - and the janitor - returning to the Oracle and finally learning about the Armageddon Machine, a massive space weapon designed to destroy large areas of space. Keen travels immediately to Korath III intending the destroy the machine, named the Omegamatic. From the bottom up, Keen disrupts the construction of, but not destroys, the Omegamatic and impedes the Shikadi's plan to destroy the galaxy.

Unknowing to Keen, still under the impression that Mortimer is dead, Mortimer hatches a new plan - one that causes Keen to respond to but regardless of his success doesn't cause any Mortimer setbacks. Keen's babysitter Molly was abducted by the Bloogs, an dim-witted alien race from Fribbulus Xax. In a perfectly executed plan Molly is abducted and a note is left for Keen to discover her location in the galaxy. Keen promptly traveled to Fribbulus Xax to save her from the Bloogs, as Mortimer expected. As Keen frees Molly McMire - the erstwhile Mortimer's sister, Molly reveals that Mortimer is alive and plotting once again to this time destroy the entire universe. Returning home Keen discovers the technology of the world is going wrong - all of it. By leaving the Omegamatic disabled instead of destroyed the newly recreated Armageddon Machine had fallen into the wrong hands, and Keen needed to remove the threat once and for all. Keen attacks three planets at the same time Fribbulus Xax, the homeworld of the Shikadi and Droidiccus Prime as Keen discovers that once again Mortimer McMire masterminds the attack. Keen for a third time proves his metal and defeats McMire.

However, thanks to that last installment for the Gameboy Color, the Keen universe fell off the radar not long after the release in 2001, while the modding community continues to produce its own games, including its own variation of how Tom Hall, creator of the series, intended to end the story with a third episode, "the Universe is Toast". In this moveset Keen features a number of his weapons and the legendary pogo stick he found all the way back on Mars in Keen 1. In fact his pogo is more than just a convenient excuse to add it to the aerials...

Unique Ability - Secret Second Jump Attack


Found in Commander Keen 1 Keen finds the legendary Pogo stick in a Martian shrine. The sign reads 'Behold the holy "POGO" stick.

Awwww yeaaa! You read that right. No Nigerian scam here. Inspired by Luigi's Down Taunt attack causing a Meteor Strike with immense knockback, Commander Keen is armed with a pogo stick that, when applied as the midair "second" jump, can cause a Meteor Strike effect to anyone who is just under the pogo stick at the time, causing no damage at all but sending them straight down to the ground as if they were dealt a downward blow equal to their current damage counter. The blow knocks out fighters at exactly 157% if the fighter is close to the top of the screen, closer to about 125% nearer to the bottom.

If Keen 'pogos' a fighter who is already on the ground, the pogo buries the fighter and depending on their current damage counter remains there for longer the higher the damage dealt; +.01 seconds/1%

Now I bet you're wondering why; why the hell give Keen a very powerful, easily accessible final blow maneuver? Simple, in normal gameplay Keen is a bit of a pushover. He has a number of useful moves, such as the Neural Stunner Side Special, the Pogo Kick Back Aerial, and the Impossible Pogo Up Special, but all these and much of the rest of the moveset are specialist attacks that tend to produce other effects, Keen's raw power is small due highly to the fact that Keen is small and lighter than the rest of the roster, and Keen is also highly reliant on his technology - even his trademark helmet plays a greater than expected role in his moveset. Keen actively avoids a physical confrontation, relying on his armaments to do most of the job for him.

That's why Keen has a secret Second Jump attack, virtually every other attack has nowhere near the same ferocity........well that and Keen does in fact use his pogo to kill small squishy enemies in Keen games. "Why not?!" I say!

Stats
Weight: 4
Size: 4
Ground Speed: 5
Traction: 8.5*
Air Speed: 7
Fall Speed: 5

As an eight year old boy genius Keen is naturally smaller and lighter, thus he is also naturally quicker on the ground. However Keen is unnaturally even more agile in the air - thanks in part to the pogo - where he has the greatest dominance in the heat of battle.
* = When Keen is moving on the ground, even running, his traction is absolute - Tier 10 - he stops dead without moving any further. Keen loses traction when he moves through the air and lands; this is reduced to Tier 8.5.


Special Moves

Default Neutral Special - Neural Stunner


-ZAP!-
Keen's most iconic weapon of choice, the Neural Stunner is one of Keen's most widely used weapon, featuring in the entire "Goodbye Galaxy" episode - Keen 4, 5 and 6 - and a modified version in Keen GBC. The Neural Stunner deals a low amount of damage - just 3%, its main propose however is to stun fighters. It is a Neural Stunner after all! Keen points his Neural Stunner and fires, the shot moves in a straight line until either it hits a fighter or wall, or leaves the screen; covering the length of the entire Final Destination platform in one second. When a fighter is hit from the Stunner shot, the fighter is stunned immediately and will remain stunned for up to one second before returning control to the player. The Neural Stunner is also chargeable; hold down the special attack button for up to one second to jack up the damage yield to a considerable 7% and the stunning effect can last for as long as two seconds.

The Neural Stunner is almost entirely a defensive attack; the damage yield is low or moderate when fully charged. The main use of the gun is to momentarily stop a fighter, this gives Keen the ability stop possible attack moments and grant him the opportunity to begin a combo.

Default Side Special - Flower Power


-Ring Ring Ring Ring!-
From Keen's most iconic weapon to his most obscure. Flower Powers make a single appearance in the lost episode "Keen Dreams", where Keen fights hordes of vegetable monsters in his dreams. In the game Flower Powers were projectiles Keen throw at enemies to transform them into Panting Flowers, massive plants that are both immobile and completely harmless. They normally stay like this for a few seconds before returning to their original form. In Smash Flower Powers work a bit differently; Keen throws a Flower Power at an enemy - the initial distance the projectile travels is a full Battlefield platform before it hits the ground, when it does the Flower Power bounces slightly and travels another quarter of a platform before stopping - when the Flower Power stops the projectile has just two seconds for any player to pick it up and throw it themselves, when they do though the Flower Power can't be used again if it misses. Once a Flower Power hits an enemy the victim fighter is flowered! Also, the time it takes for the status to wear off is lengthy - five entire seconds - and no amount of mashing will cause the status to change.

The attack is purely designed to rack up damage; with a standard attack generally dealing a total of 12% a well executed hit provides Keen the ability to reach kill shots much closer without putting himself into too much danger, however Flower Power requires precision because as soon as the projectile hits the ground, even during the second bounce anyone can pick it up and throw it back.

Default Up Special - Impossible Pogo


In essence this move is derived from a glitch in the game engine. While in the air when Keen pogos up and then removes the pogo stick, the player actually gains an extra tile of height.
In essence it's a trick rather than a weapon as such; it is when Keen pogos and reaches his maximum height, he removes his pogo and thanks to the inner workings of the game's engine jumps a fraction higher than using the pogo normally, reaching impossibly high sections of levels. In Keen the extra jump is only slight, in Smash the jump is a good deal higher than the second jump. Keen pulls out his pogo - if Keen hasn't already used his pogo second jump just before - and quickly jumps very high. If anyone is caught in Keen's upward path during this part of the move they are dealt a massive 15% damage and upward vertical knockback. If the same fighter is hit immediately after the first hit due to the knockback they are dealt another 1% per additional hit until they fall out of Keen's upward path.

Once Keen hits the apex of the initial pogo jump his replaces the pogo back to where he places it - wherever that is - and jumps a further amount of height before latching onto either a ledge he just reached or an 'imaginary ledge', an invisible ledge placed by the computer to complete the trick before disappearing immediately and causing Keen to fall down. During this part of the move Keen does not deal any damage but is invincible in order to complete the move. Like all other characters, if Keen is still in the air after an Impossible Pogo he falls down and cannot attack until he hits the ground or a platform. The height of the initial pogo jump is enough to cover the distance from the Final Destination platform to around two thirds up the screen, the second jump takes him an entire Keen height further up before latching onto a ledge. Despite its damage, during the initial pogo jump Keen can knockout fighters at around 265% primarily as the move being mostly an escape or a chance to grab a ledge.

Default Down Special - Boobus Bomb


In the original game the bombs are always happy, which is really weird considering their purpose.
A specialist bomb, the Boobus Bomb also appears in Keen Dreams, the lost episode of the Keen series of games. Keen pulls out a Boobus Bomb and throws it in front of him. The bomb is quite powerful, dealing 8% damage on contact with another fighter. Also, In Keen Dreams the Boobus Bomb explodes when it hits the boss, but does not if it misses and hits the ground. In Smash the bomb does exactly the same thing; if the bomb misses all the fighters and hits the ground it will not explode, it also will not detonate after any amount of time by itself - when the Boobus Bomb hits the ground it becomes a perfectly safe projectile item for anyone to use.

Aesthetically when the bomb is pulled out the bomb begins with a happy face! :) At this stage the bomb deals the 8% damage when the initial arch hits an enemy and will knockout consistently at 201%. If the bomb misses the face changes to a sad face. :( When this happens the overall power of the bomb is diminished; if the enemy is hit after the bomb bounces and doesn't pick it up the bomb deal just 4% damage and can knockout at 253%. However there is a 20% chance the Boobus Bomb, after the bomb stops completely the bomb may become an angry bomb. :mad: If the bomb is angry it can't be picked up, instead once anyone - including Keen himself - goes next to the bomb it explodes, causing an initial hitstun effect before knocking back the fighter. At this stage the bomb deals no damage but will knockout at 159%.

Standard Attacks
Neutral Attack
Due to Keen's over dependence on his weaponry, his physical attacks are poor. This can be noticed first in his rather puny Neutral Attack, a simple low energy jab. Keen rather slowly thrusts a fist at his eye level, each jab has a lengthy start up lag of about a third of a second and yields just 1% damage. The first initial hit has no end lag, however as the player continues to use Jab every subsequent hit doubles the damage yield, at the cost of increasing the end lag time by 0.1 seconds every time. The Jab is Keen's only way to start a consistent combo, and it's not a very good one. Keen can work up a decent 1-2-4% three-hit combo before running into the danger of being cancelled out, or worse counter-struck.

Dash Attack
Keen is not overly interested in physical confrontation, his Dash Attack is mostly a way to incapacitate as a long hated Brawl concept returns in the form of an attack. Keen quickly jumps out and sticks his leg out in front of him, tripping over anyone moving or attacking in his direction. The tripping action itself yields no damage, when a fighter hits the ground due to a Trip they suffer 4% damage and - due to the nature of the Trip - is forced to return to the battle from the lying position. It does not provide good damage yields or a KO opportunity, it does however provide a tactical advantage; by forcing a player to drop to the ground it both stops the imminent attack or position the attacker would have otherwise landed, and provide Keen the chance to counter-attack by forcing the attacker to waste time by first get up off the ground.

Side Tilt
Keen's tilt attacks are a step up from his rather ineffective Neutral and Dash Attacks; they provide a much better, albeit still lower than usual, damage yields and knockback. Keen dispenses with start up lag and quickly thrusts his fist straight in front, dealing an impressive 5% damage and horizontal knockback. While the damage yield is still below average the Punch is an effective way to jack up incremental damage and can be used in a moments notice. Keen's punches are so powerless that they knockout fighters when they are beyond heavily damaged - 314%. Use it when you manage to place yourself in Sudden Death.

Up Tilt
To aid Keen's attacks he employs his trusty helmet he "borrowed" from his older brother. Keen quickly jumps up and hits any fighters above him with his Green Bay Packers helmet, dealing a massive 9% damage, a slight hitstun effect and vertical knockback. The attack deals a great deal of damage and is a useful precursor to an Impossible Pogo, dealing even more damage and knockback. By itself the Headbutt can knockout fighters at around 214%

Down Tilt
Keen kicks low and attacks the legs of the fighter in front of him. The attack normally yields 6% damage and horizontal knockback, however Keen has a sweet spot effect; if Keen manages to kick the knees of a fighter, the attack yields 9% and instead of knockback the fighter experiences lengthy hitstun. This provides a unique opportunity for Keen to follow up a well placed sweet spot Kick with either a series of Jabs or any other powerful attack in the precious time the fighter is stunned; one full second. A kick without hitstun will knockout fighters at 223%.

Smash Attacks
Side Smash - Headbang
Keen's Smash attacks combine his array of weapons with trick moves that pack a powerful punch! Keen's fastest Smash is the Headbang; he quickly juts his head back to charge the move, shifting all his weight into his head. When he's ready Keen then throws his entire head and top of his torso forward, swinging his helmet over his top and down to roughly his stomach. Keen takes virtually no time at all to start charging the smash - 0.2 seconds - and when uncharged the attack deals 10%, knocking out by itself at around 294%; however the smash fully charges after 1.5 seconds and when fully charged deals 25% and produces a knockout consistently at 280%. Keen suffers considerable end lag but it does not expose him for longer than half of a second, depending on how charged the smash is.

Up Smash - Pogo Headbutt
The Pogo Headbutt is a rather unusual move; Keen pulls out his pogo and sets his chin on the handlebars, pressing down on the pogo with the weight of his head. The act of doing so will cause Keen to, when prepared, spring his head and thus his body directly upward to slam into anyone above him. The smash has 0.35 seconds of start up lag and can take up to 1.7 seconds to fully charge; when uncharged the attack deals 14% damage and deals vertical knockback, when fully charged however the attack deals 28% damage with vertical knockback. The Pogo Headbutt takes a lot of end lag time of about 0.6 seconds, however the attack will knockout a player at about 208%.

If Keen uses a midair jump and then once he lands immediately begins a Pogo Headbutt the start up lag is cancelled. This effect is really only useful in a situation where the player lands with an opposing fighter, either accidentally or deliberately, in front of Keen and thus presenting an opportunity to lay on a quick smash.

Down Smash - Pogo Hammer
Keen pulls out his pogo and - instead of mounting it - grabs the base of his pogo and prepares to swing the handlebars at the legs of any fighters in front of him. Keen takes 0.4 seconds of start up lag to set up his smash and when uncharged the attack deals 11% damage with a slight hitstun, but it takes Keen only 1.4 seconds to fully charge the smash and doing so deals 26% damage and horizontal knockback. In general the Pogo Hammer takes only 0.3 seconds of end lag and can knockout a fighter at 172%.

Keen can cancel the start up lag of the Pogo Hammer simply by starting another one within one second of the last Pogo Hammer.

Grab Attacks
Grab
Keen's grab game is particularly poor, it's the worst part of his moveset; no move deals more than 7% damage and only two throws make the grab game worth playing, but those throws are excellent KO opportunities. Keen grabs the fighter in front of him to deal any of the following attacks;

Pummel
Keen quickly juts his head forward into the fighter, using his helmet to inflict damage. Each time he slams his helmet it deals just 2% damage but the ending lag is short, only 0.25 seconds and thus can continue to pummel many times with higher damage counters.

Forward Throw - Throw
When he's finished with the fighter Keen tosses them forward in an almost directly straight trajectory, flying them one and a half Battlefield platform lengths slowly into the ground and dealing 5% damage when hitting the ground, the opposing fighter then tumble rolls another half a platform length before stopping. The major problem with this is it is the only Forward Throw move where the opposing fighter has the ability to escape from. The victim has 0.4 seconds to react in the air, but if they jump within that gap it counts as a second jump and the rest of the throw is cancelled out, giving the fighter the chance to counter-strike against Keen. To add to the throw's problems it cannot consistently knockout fighters until they have a damage counter of at least 288%.

Backward Throw - Hammer Throw
Keen can also perform a Hammer Throw; Keen spins around on the spot three times and then letting go behind him. The opposing fighter spins wildly in the air and moves very quickly across a large distance - covering the length of two and a half Battlefield platforms in the space of one second and dealing 4% when the opposing fighter first hits the ground. The speed and distance alone is generally enough to knockout the victim fighter at around 128%, however only the initial bounce can knockout at a low target. The full range of the throw is a total of four and a half Battlefields platforms, making this throw a very viable option anywhere on the stage - the first bounce covers two and a half platforms, the second covers one and a half and the last bounce covers only one half of a platform. Also, if the opposing fighter is not knocked out after the first bounce they can also escape the rest of the throw by jumping in the air during the subsequent bounces.

Up Throw - Ogop
..........it's a Reverse Pogo. Keen grabs onto the fighter and sets it upside down, placing the chin of the opposing fighter on the rubber stop of the pogo. Keen then presses down into the fighter's head and releases, letting the energy of the spring launch the fighter up and dealing 7% damage. The force of the vertical knockback is nowhere near as powerful as the Hammer Throw as the throw knocks out consistently at 238%, however combined with a good deal of pummels and the Impossible Pogo the Reverse Pogo can start one of the more unique combo opportunities that deal massive damage and explosive knockback. In general the Reverse Pogo is largely designed to set up a knockout opportunity using other moves to follow it.

Down Throw - Slam
Keen quickly slams the fighter into the ground and deals 6% damage with a Meteor Strike, causing the opposing fighter to bounce up to the height of about one and a half Keens. While with the Meteor Strike provides a useful knockout opportunity at around 170% if Keen performs the Slam on an edge, the less damaged fighter can easily turn the tables from the attack's side-effect of a lengthy end lag, Keen needs 0.7 seconds to recover from the Slam, making it really an end game option to knockout.

Pogo Poundin'
...that came out wrong...
Anyway, drawing from Keen's ability to attack in the air while jumping or pogoing each of his aerial attacks in one form or another uses the Pogo, even after a first jump the Pogo is used in the attacks while providing a costly disadvantage as each attack acts as a second jump in instances where an aerial attack is used before the Pogo second jump. Therefore, when Keen is executing ANY of these aerial attacks the player needs to be able to use them while being fully aware that they CANNOT jump any higher without using the Impossible Pogo.

Neutral Aerial - Poke-go
In mid-air Keen quickly jabs anyone in front of him with his finger, literally poking fighters. The attack is low level dealing just 5% damage, but the start up and end lag times are minimal - 0.1 seconds of start up lag and end lag each, as well as producing slight hitstun. The move has no knockback but is designed to allow speedy fighters to start an aerial combo.

Forward Aerial - Pogo Trick
Keen 'jumps' with his pogo stick in order to position bottom end in front of him, slamming the pogo stick into any fighter in front of him. The attack also deals 5% and deals a great deal of horizontal knockback, the attack alone can knockout fighters at just 128%. However the attack takes a lot of lag time in total - the attack has 0.5 seconds of start up lag and 0.55 seconds end lag, making the execution of the attack critical and should be attempted when the fighter is precise and skillful.

Back Aerial - Pogo Kick
The Pogo Kick is really just the Pogo Trick in reverse; Keen kicks the pogo stick backwards and jabs any fighter directly behind him. Compared to the Pogo Trick this attack is more powerful and quicker, making it the more preferred choice; the attack itself yields 7% damage and also deals horizontal knockback, it can also knockout fighter marginally better than the Pogo Trick - doing so consistently at 117%. To add to the attack's appeal the attack takes less start up time, about 0.3 seconds, however it too has lengthy end lag of 0.5 seconds.

Up Aerial - Aerial Headbutt
Running out of options Keen desperately tries to cover whatever exposed air he has above him by headbutting fighters on top of him and dealing a massive 12% damage with a lengthy hitstun, lasting 0.75 seconds. The attack doesn't have vertical knockback specifically but is still capable of knocking out fighters with a damage counter of 193%. An Aerial Headbutt is a mainly aggressive attack designed to start up a combo and rack up damage in the air rather than to knockout outright, the attack has no real start up lag, about 0.15 seconds, and no end lag at all.

Down Aerial - Pogo Drop
With his aerial play done Keen throws his weights down on the pogo stick, sending him down to the ground at an incredible speed, so fast that he can deal 17% damage to any characters caught under the drop with a Meteor Strike taking affect. The Meteor Strike can knockout fighters traveling down to the bottom at a staggering 84%, if however the fighter hits and bounces off the ground they can still be knocked out due to the bounce with a damage counter of 170%. The drop takes no time at all to start, just 0.1 seconds, and will travel the height of the top of the screen to the ground of Final Destination in one second with no end lag. However if the player does execute the Pogo Drop the drop cannot be cancelled out until Keen hits either a fighter or the ground, if Keen drops in open space next to the ground with no fighter to brake his fall he WILL be knocked out

Attacks + Plus
Two other attacks not yet covered are the Floor Attack and the Ledge Attack.

Floor Attack
Whenever Keen finds himself lying about on the job he can perform a jumpkick to get back up and injure other fighters trying to capitalize the situation. From the lying position, Keen quickly bends his legs straight up and then lifts off from the power of the kick, striking any fighters who would be in front of Keen under normal circumstances with 7% damage. The attack has a short but noticeable start up lag as Keen winds up the kick, about 0.35 seconds.

Ledge Attack
When under pressure and hanging from a ledge Keen uses his head...literally...some say a little too much...
Anyway, from the ledge Keen quickly pulls himself up over the threshold and charges at any fighter edge guarding (if that's not the right phrase do correct me), headbutting them and full speed and dealing a massive 10%, it's even has horizontal knockback but is not at all capable of knocking out a fighter. Keen isn't very buff and lacks physical strength, therefore the start up lag of the Ledge Attack is noticeable at 0.5 seconds, however the end lag is very very fast - 0.05 seconds - and gives Keen a nearly instantaneous return to the fight.

the Final Smash - GOD Mode
Reminiscent of retro games, former shareware and the Amigas that used to run them is the cheat activation of these games; the so-called 'God Mode'. In Smash Keen has the ability to break the fourth wall a bit and activate cheats to improve his fighting ability via his wristband computer. However, to power the hack he needs the immense energy of the Smash Ball. When Keen gets the Smash Ball and activates it he enables GOD Mode; the camera closes up on Keen as he quickly fiddles with his wristband computer, inputting a few buttons. Quickly the screen flashes two messages;

GOD Mode enabled

Jump cheat enabled

The two cheats have just been activated; Keen is now completely invincible to all attacks thanks to GOD Mode, Keen is also able to float and fly around the entire space of the stage with the Jump cheat. After the two messages go Keen looks at the screen and gives a thumbs up, activating one last message box, a generically made Level Message Box similar to those found in Keen games. These include;

Keen reaches the Final Destination.

Keen prepares for a siege in the Battlefield.
Keen is on the Miiverse stage. Call Nintendo!

The message is accompanied with the generic level start tune and the camera pulls out back to full screen, unknowing to the other fighters of Keen's final maneuver at the end.

While Keen has no damage increase in his attacks, knockback effects are increased in such a way that the general damage counter for knocking out fighters from attacks are halved. Add to that, never-mind his invincibility, Keen's special ability with his second jump and general domination in the air coupled with an inhibition of gravity's pull makes him one of, if not the, most dangerous fighters in the air. Players that can time their second jumps well will find it much easier to commit to these attacks with the Jump cheat. After ten seconds of GOD Mode, as long as Keen is on the ground or any of the platforms GOD Mode begins its deactivation process; when Keen lands on the ground after ten seconds he pulls out a K flag, similar to those he places as he completes a level, and plants it firmly into the ground, Kirby style. The action of the flag piercing the ground triggers an earthquake effect traveling around the entire stage. Every fighter caught standing on the ground or a platform at the time suffers no damage but are dealt an explosive knockback that knocks out at 64% in a direction in relation to where the K flag is planted on the stage. Half a second after Keen plants the flag another Level Message Box appears, signaling the end of the effect;

Keen returns to the fight in Super Smash Brothers.

The level end tune plays and the last two messages appear in quick succession;

GOD Mode disabled

Jump cheat disabled

Depending on how hard Keen fights the fighters it is possible to extract two points out of one fighter without the use of second jump attacks. The K flag tends to ensure a instant KO, the ten seconds leading to the K flag is key to applying heat to ripen fighters for the instant KO; fighters who are KOed just before or just after GOD Mode ought to be targets during the ten second frenzy and let the K flag deliver the final blow.

Keen's Playstyle - Pogo Spammer


Commander Keen plays a mostly defensive game, the fact that most of his physical moves are low yielding attacks with mostly below average knockout power fuels Keen's need to distance himself from the fight as well as his over dependence of his equipment. He therefore uses a lot of his equipment; the Neural Stunner, his helmet, most of all though Keen utterly spams the use of the Pogo stick, the second jump attack being one of Keen's most appealing moves.

The attack however isn't the only benefit to the Pogo; Keen's ground game is poor, his close combat fighting yields little damage and his speed, both attack speed and movement, on the ground is below the average. Most other fighters can pummel Keen with little difficulty due to these factors. Keen needs to take the fight to the skies to gain any domination. The Pogo then doesn't just provide an overpowered buff in specific situations, the Pogo is a valuable vessel to bring Keen to his battlefield and exact his revenge under his terms of battle. The Pogo is both his escape and his engine of war.

Paddle War - Extra Stuff
Custom Moves
Yip. This is going to go all Sm4sh on ya! Below are variations to Commander Keen's Special moves, they include entirely new weapons, variations to the original specials, even introducing a couple of cameos.

Custom Neutral Special 1 - Vorticon HyperPistol


In Commander Keen 2 Keen invades the Vorticon mothership and begins his quest by finding a nearly empty HyperPistol used by the Vorticon Elite, Keen keeps the pistol past the game and makes references to it in later games. In Smash Keen brings his trusty HyperPistol from the mothership to the fight. Keen pulls out his HyperPistol and fires a burst of blue energy, any fighter caught in the line of fire is dealt 8% damage; like the Neural Stunner though the pistol can be charged - with very different results. The maximum charge time of the HyperPistol is 1.5 seconds, but the effects of the shots vary depending on the length of time the pistol is charged.

First of all, the color of the shot changes the longer you charge the shot; an uncharged shot is blue, after 0.75 seconds the shot turns green, a fully charged energy shot turns red. As you charge the shot it cycles through the colors until you release the trigger. Secondly - and more importantly, charged shots produce additional electric or fire damage depending on the charge of the shot. An uncharged shot yields only the base 5% damage and brief hitstun, after just one-quarter of a second an electric damage bonus is added at a rate of +1% electric damage per 0.25 seconds - therefore by the 0.75 second mark the shot yields a total of 8% electric damage - this shot also stuns the fighter for 0.5 seconds. Only when the shot is fully charged does the damage bonus change to a fire damage bonus - when fully charged the shot fires a blazing 11% fire damage, the shot also delivers devastating horizontal knockback, a fully charged shot will knockout a fighter at 164%.

The reason why this is the case is simple, the HyperPistol has three settings; 'Stun', characterized as the blue shot, 'Disrupt', characterized as the green shot, and 'Fry to Delicate Brown', characterized by the red shot. The basic premise is that when used in good hands the pistol is most useful in different situations; the Stun shot is most useful in general battle for a rapid ranged response, the Disrupt shot is best to use in close combat - the stunning effect of the shot, while short and risky to execute, will be enough to deploy counter-strikes against fighters, the Fry shot is a very risky but powerful attack useful as a final blow KO shot.

Custom Neutral Special 2 - Raygun


Keen pulls out his Raygun from the very first Commander Keen game "Marooned on Mars". Compared to the Neural Stunner the Raygun is more powerful in that the shots fired deals more damage and can knockout, however compared to other attacks the power is actually still quite weak. Like the other guns the Raygun also charges it shots; an uncharged shot deals 4% damage and can knockout at 281%. The gun can charge up a shot for 1.2 seconds where a fully chagred shot deals 10% damage with explosive knockback, the effect of this can knockout fighters consistantly at 211%.

Aestheically the colour of the pistol Keen uses also changes. The Neural Stunner is green, the HyperPistol is cyan and the Raygun is red. Also all three pistols have unique lights around them that light up and flash as the guns charge their shots.

Custom Side Special 1 - Super Flower Power


The Super Flower Power is in fact a reference to Keen Dreams where the player picks up 5 ammo rather than any kind of powerup. In Smash this variation of the Flower Power move is in fact designed to mimic the actual effect in the original game. Keen throws a standard Flower Power projectile at a fighter, but instead of getting flowered the fighter transforms in a puff of smoke into a giant Panting Flower! For five entire seconds the fighter is stuck in this position and racking up damage in the process, 5% damage every second, before returning to normal. Unlike the Flower Power attack the projectile will not bounce and once it hits the ground an explosion animation is played that does nothing to anyone.

The major difference is that while Flower Power applies an effect on the fighter to rack up damage as the victim fighter continues to take even more damage, Super Flower Power directly deals a set amount damage within a period of time and immobilizes the fighter. When the fighter turns into a Panting Flower they gain Super Armour whereby the fighter cannot sustain anymore damage as the flower, only the damage from the effects of Super Flower Power. Once the fighter transforms out of the Panting Flower they lose the Super Armour.

Custom Side Special 2 - Magic Eyeball


The Magic Eyeball is also a reference from Keen Dreams where it is the single rarest item in the game providing 3 lives and 8 ammo. In Smash the Magic Eyeball is a different projectile with different effects entirely to the Flower Power. Keen throws the Eyeball in the same arch as with the Flower Power and it also explodes when it hits the ground, however anyone caught within its blast radius - its diameter is half of a Battlefield platform - becomes dizzy rather than flowered. Affected fighters will be dizzy for 4 entire seconds unless anyone lands a blow that is stronger than 8%. The Magic Eyeball is simply another attack designed to incapacitate more than to injure.

Custom Up Special 1 - Bounder Pogo


In Commander Keen 4 Keen encounters many curious creatures, the most curious of these are Bounders. Bounders are harmless creatures with a distinctive appearance, that of a red ball bouncing all over the place. In Smash Keen uses the Bouncer as part of an Up Special move; the move summons a Bouncer directly under Keen's pogo, the force of Keen bouncing on a Bouncer propels the pogo very highly - from the ground of Final Destination the Bounder springs Keen to over three-quarters to the top of the screen. Anyone caught in Keen's upward path are dealt 18% damage and upward vertical knockback, higher and more powerful then the Impossible Pogo. Meanwhile as Keen is launched into the air the Bounder drops down to the ground, if anyone is directly under the Bounder when it lands the fighter gets buried into the ground. When it does hit the ground the Bounder can then randomly bounces around the ground, consistantly jumping the height of the Battlefield platform from the ground. The Bounder moves randomly left and right, burying any fighters caught under it and pushing other fighters when they run into it. The knockout power of the jump is weaker that Impossible Pogo however; it knocks out at 284%.

Custom Up Special 2 - Mad Mushroom


As well as the Bounder Keen discovers an intriging enemy in Keen 4, the Mad Mushroom. In Smash Keen summons a Mad Mushroom directly under his pogo as he jumps up and away from it. The jump is exactly the same as the Impossible Pogo except that Keen does not put away his pogo stick and therefore does not get an extra jump after the fact. Also the Mad Mushroom doesn't move around once it's summoned, it simply jumps on the spot at the same height as the Bounder inititally before jumping twice at half that height. If anyone touches the Mad Mushroom they are dealt 3% damage and are pushed to the side - only the length of the fighter's width. Finally as Keen himself is trying to get away from the Mad Mushroom the jump is in fact more powerful than the Impossible Pogo as it knocks out fighters slightly easier - the move knocks out fighters directly above Keen at 230%.

Custom Down Special 1 - Moody Bomb
This variation is only slightly different to the Boobus Bomb; the Moody Bomb does not bounce at all, it covers the length of the initial arch of the Boobus Bomb. However the major difference is that when Keen pulls out the bomb its mood is set either at Happy, Sad or Angry. None of the mood's outputs and knockout power have changed at all and with a single bounce the bomb's range becomes much shorter.

Custom Down Special 2 - Bowling Bomb
This is a very different variation of the Boobus Bomb. Keen pulls out a Happy Boobus Bomb and instead of throwing it Keen bowls the bomb on the ground. The move itself is chargable for up to 1.5 seconds, however doing so increases the range of the bowl and not the power. As an uncharged bowl the bomb will travel up to two Battlefield platforms, but when fully charged the bomb will roll the entire length of the Battlefield ground. As soon as the bomb rolls the mood changes to Sick. :sick: As the bomb travels along the ground it will explode randomly; when a fighter is hit by the Sick bomb there is a 50% chance that the bomb will explode, otherwise the fighter is tripped. Either when the bomb stops rolling or when the bomb decides to the bomb explodes, dealing 10% damage and can knockout fighters at just 109%. The Sick Bomb is more powerful than any of the other moods but is limited by the possibility that the bomb won't explode at the right time, it is therefore prudent for Keen to charge the move for just the right amount to ensure the bomb lands at the right moment.

Entrance - The Bean-with-Bacon Megarocket swoops over the stage ground and Keen jumps out, ready for battle.


Taunt - Keen pulls a K flag and plants it into the ground.
Side Taunt - As a tribute to Tom Hall's sometimes brash humor, Keen pulls down his pants and moons at the screen. This is taken from Commander Keen 4 in the Pyramids of the Moons level.


Down Taunt - Keen sits down and reads.
Idle - After a few seconds Keen stares back at the screen, looking at the player with his hands on his hips. Two seconds after he shrugs and returns to his original pose.

Fanfare - 'Commander Keen's Fanfare' from Commander Keen 5.
Win Pose - Keen thumbs up at the screen in his trademark pose.
Lose Pose - Humbly, Keen claps to the winner.

Alternate Comtumes;
Default - Galaxy Outfit

1st Alt. - Gameboy Outfit

2nd Alt. - Yellow Shirt/Purple Helmet
3rd Alt. - Dreams Outfit

4th Alt. - Red Pyjamas/White Helmet
5th Alt. - Yellow Pyjamas/Purple Helmet
Alt. Char. - Andriod Dummy

Alt.Char. - Mortimer McMire
 
Last edited:

Reiga

He sold diddy for a switch
Joined
Dec 8, 2014
Messages
1,256
Location
White Noise
3DS FC
1461-7646-7368


MYM Universe: The Chosen Four
During the SNES classic Earthbound, the Universal Cosmic Destroyer Giygas, after failing to reclaim the knowledge of PSI from the humans in Mother 1, plans on using his limitless power to sentence all of life into the horrors of eternal darkness, and succeeds in doing so 10 years into the future.
In the present day, where this Embodiment of Evil's influence has already affected people, animals and objects alike, a meteor crashes into the small town of Onett, containing the time travelling alien Buzz Buzz, who tells Ness, who went to investigate it, that he and three others are destined to defeat Giygas, and are the Chosen Four!

And so begins the journey of Ness, then later Paula, Jeff and Poo, as they go through Eagleland to gain the power of the Earth through the 8 melodies to finally confront Giygas in the past! All while fighting zombies, cultists and dinosaurs along the funky journey.


Ness is a 13 year old kid who loves playing baseball, using baseball bats as weapons. As seen in Smash, he can also have yo-yos as weapons, and while any character can use them, Ness has probably been cemented as a yo-yo wielder. While Ness has psychic powers, unlike in Smash they're less of the offensive variety and more of the support and defense kind, leading Ness to, despite being the team leader, be the healer. Although, as the protagonist he also ends up especially stronger than his other party members after a power boost near the end of the game, and has his signature attack PK Rockin (or alternatively PK "your favorite thing"), which can deal some of the highest damage in the game.
Other than that, Ness is your usual silent protagonist. All brave and the like. The adaption for Ness in this movement will surely be more faithful to the games, now not needing to burden with having to represent the whole franchise in his moveset!


A sweet pre-school aide from the town of Twoson known around town for her psychic powers, in the beginning of the game Paula is kidnapped by cultists obsessed with painting everything blue, and telepathically messages Ness in his sleep to go help her, and after going through the Grateful Dead Valley Peaceful Rest Valley he beats the cult's leader and rescues Paula, who joins him in his quest.
While in another RPG Paula would probably be the pink clad healer, in Earthbound her high power PSI moves allow her to become the team's PSI Powerhouse, having access to all stages of PK Fire, PK Freeze and PK Thunder. Paula's weapon of choice is the frying pan, although its way less powerful than her PSI. She can also pray in battle, but that's useless am I right?


A genius boy from a boarding school in Winters, Jeff is contacted telepathically by Paula to save her and Ness in Threed after they get trapped there, causing the boy to go through all of Winters, meet a bubblegum monkey, the Loch Tess Monster and his absent father, who gives him access to his Sky Runner invention so he can save Ness and Paula, then joining them after exploding the machine through the ceiling of the trap they were in.
While the only member of the party without psychic powers, Jeff is far from useless, as with his enormous smarts he can fix broken gadgets and turn them into battle items and laser guns, scope out the foe for data and items, and even use items only he can use, like the Bottle Rockets he uses in his Assist Trophy and the deadly Heavy Bazooka! Who needs PSI when you've got a rocket launcher?


The party member with the most hilarious name, Poo is the prince of the floating land of Dalaam. He passed his whole life doing "Mu" training, and finishes the training by the time Ness and the gang reach Summers. Informed by his master that he is part of the Chosen Four, Poo then teleports straight ahead to join the party.
Poo surely is a bit of an oddball in the group. His PSI is an even mixture of both offensive and defensive psychic attacks, learning moves like PK Freeze and Brainshock. Later on into the game he's taken back into training by the Star Master to learn the art of the PK Starstorm, spending a chunk of the game outside of the party in the process. Of course, Smash Ness can just learn this difficult technique for his Final Smash because lol
Poo won't have any equipment and will only fight with his martial arts, although if your lucky enough or just grind for it, you can eventually find the "King" items, the only items Poo can equip and a series of items that include the wicked and highly sought after Sword of Kings, which probably any person who's played Earthbound will tell you is a hassle to get.

Poo also doesn't like foreign food. Yeah.


Special Mechanic:
SMAAAASH!! Attacks
Smash Bros has Smash Attacks and a critical hit in Earthbound is called a SMAAAASH!!, so why not mix the two? Every character in this movement, which is probably considered its own Earthbound Fighting Game, has their set of three Smash Attacks, but like many fighting games they can also have their own superpowered attack after racking up enough damage, which is their SMAAAASH!! Attacks!

Next to every fighter's HUD is a blue meter that fills up every time they successfully hit a foe and decreases when the user is hit by a foe. The meter has about 35 points and every successful hit of yours will net you 1 point, do the math and the meter probably won't be filling up too soon into the fight, although certain moves may increase the meter more than usual. When you're hit by an attack, though, the meter will dwindle by half a point.
SMAAAASH!! Attacks themselves are rather simple, each player has three of them and each overwrites a Smash Attack, and while you can still charge it the move's power won't scale. These attacks are very powerful and can easily KO a foe who slips in at the wrong time, although whiffing any is a bad move considering the character's meter will reset after a SMAAAASH!! Attack.​

Story Mode
The war against Giygas is over and the Chosen Four are hanging out in the tourist trap city of Summers because they're friends and junk. They get hungry and due to the resort city only having extra pricey restaurants, to save dough the gang grabs a snack from the Magic Cake lady's stand, hoping she's improved her recipe and isn't using "leftover ingredients" anymore. Sadly, this is not the case and the Magic Cake spirals the Chosen Four into a drug-ridden collective dream, where they're in a strange world with the same areas from Eagleland, but with weird Smash physics. Just like every video game character in a creepypasta 5 years ago, the Chosen Four are put into a coma, and to escape it they are forced by an unknown voice to duke it out! All while the Magic Cake lady is getting arrested or something due to giving drug laced pastries to children.
 
Last edited:

Crystanium

Smash Hero
Joined
Apr 28, 2008
Messages
5,921
Location
California
I added information on Samus' smash and aerial attacks, and I have made a few changes on her list of buffs. I also changed the picture.
 

Munomario777

Smash Master
Joined
Nov 18, 2014
Messages
3,253
Location
Charleston, South Carolina
3DS FC
0387-9596-4480
Switch FC
SW-8229-3157-8114

Welcome back to the MYM Comment Challenge! Round One has concluded after two weeks of MYM19, and we got a ton of specials-only Pokémon sets to kick things off. Not only that, but we got a total of 21 comments (not counting my own) posted in the thread! Just in the future guys, remember to send me your themes ahead of time, and also include "MYMCC" somewhere in the post for ctrl+f purposes.

The results are in, and next round's theme is...


ROOL MINI-REMAKE

Submitted by lucky winner Smady Smady , this round's theme will have you taking a moveset made by ancient MYMer
King K. Rool and making a specials-only set, assist trophy, or boss battle for the character. From MYM3 all the way to MYM11, any set he's ever posted is fair game. You can find a list of all his sets at the MYMer Encyclopedia – see if anything suits your fancy, as there's a lot of variety from which to choose. His movesets may be infamous in modern MYM, but this is your chance to take a crack at one of these characters and see what you can come up with!

And of course, don't forget to
comment and enter the drawing for next round! Just make sure you get your theme sent in ahead of time, and include "MYMCC" somewhere in the post.
 
Last edited:

Bionichute

Smash Champion
Joined
Jun 30, 2012
Messages
2,151
Genis


Genis is the main antagonist of Dobutsu Sentai Zyuohger. He is the leader of the Deathgaliens, less a species than a group of aliens who really like to destroy things. He hosts the Blood Game, a competition where he pits his two generals, Kubar and Azald, against each other to see who can destroy a planet first, and more importantly, see who can entertain Genis the most.

Genis doesn’t do much throughout most of the series besides sit on his throne in his spaceship, but he never comes off as lazy or ineffective, though he only participates once in the overall plot before the end game. After Cubal fails to overthrow him, Genis absorbs power from data he collected, becoming Shin Genis, as seen above. In this form he proves extremely powerful, capable of destroying an army of monsters on his own, and nearly killing the Zyuohgers themselves.

In the last episode of the series, its revealed that Genis is an evolved hivemind of Moebas, the foot soldiers of the season. This revelation provokes the only true emotion ever seen from him, and results in him killing his final and most loyal general, Naria, for having learned of it, despite her still declaring her loyalty to him.

This makes Genis a complete antithesis of the series’ theme, that being of connections. Genis is a collected body of creatures, a fact that he hates and reviles, despite claiming to be the most perfect creature in the universe. Throughout the series he remains cold and distant from every one of his minions, seeing them merely as players for his amusement. Killing Naria cut off the final connection could have possibly had, and proves as the final catalyst for the Zyuohgers defeating him.


Stats

Weight – 107
Run Speed – 1.7
Walk Speed – 1
Air Speed – 1.5
Fall Speed – 1.20

Genis is odd in stats, as he isn’t particularly fast. Not that he needs to be fast on his feet to deal some damage, but it can still be a detriment. His overall shape is reminiscent of Captain Falcon, but the two huge wings on his back add significant bulk to him. Compared to the Captain, Genis stands upright, in an incredibly menacing manner. Genis also has a floating ability, activated in the same way as Peach’s, and has the ability to use his aerials while it is activated.


Specials
Neutral Special – Death Laser


Genis doesn’t actually move during this move, as his wings being to glow yellow. He then fires out two large yellow lasers, which connect and fly into the ground. The laser fires, specifically, a Battlefield platform forward. The laser aims downwards and into the ground, and behaves like any other laser in Smash bros, dealing rapid hits of 2% if an opponent gets struck by it, with its potential damage rates ending up at around 12%. The laser, however, does not have much knockback to it. The laser also has a bit of start-up lag as the lasers have to fire and then connect before the hitbox begins, which isn’t a very long period anyway.

The laser is also fairly fast, being a laser, and is able to complete its full animation after under half a second, though the laser hangs for a bit after. Once the laser vanishes, however, which is also fairly laggy, the laser will leave behind a glowing yellow spot on the ground. The glowing spot roughly takes up half a Battlefield platform, and rapidly blinks on and off every frame After 10 frames of it blinking rapidly, the glowing spot will then burst into a gigantic explosion, around the size of a Bob-Omb explosion, but only dealing 10% damage, and the knockback being specifically upwards and back. The knockback is also around 1/3rd of a Bob-Omb explosion as well.

If the special attack button is held, the laser will actually continue across the ground, travelling for as long as you hold it down. It can be held for a ridiculously long time, as the laser will travel in a half circle motion around the entire stage, ending once it reaches above Genis’ head. The laser has completely infinite range, and will go off the sides of the stage as well. However, the laser grows weaker as it travels. The whole thing takes 5 seconds to fully pull off, with the damage going down to 1% at 2.5 seconds, while lowering to a measly 0.5% after 3 seconds.

The laser still leaves behind the glowing spots, however. It leaves one down for every 1.5 Battlefield platforms it travels, but only up to 3 of them before they stop appearing, and only when it passes over solid ground. With each added explosion, they grow weaker as well, despite the hitbox remaining the same. The second explosion lowers to 8%, while the third lowers to 5%. Knockback still remains the same, however, and can function as a juggling tool late into the move, as the explosion can easily bounce higher damaged opponents into the laser as it travels upwards.

The attack behaves significantly differently in the air. Genis will turn to face the camera, and then fire his two lasers down, one from each wing. The most significant change to the move is the two lasers, which function practically the same as they do on the ground, including being able to increase their range, meaning that you can effectively sweep the whole stage. Another major change is that the lasers don’t automatically start moving, like they do normally, and instead, fire directly down until you make them move. The last change is that you can only create two glowing spots at a time, which behave the same, only they explode at the same time on either side of Genis.


Side Special – Moeba Coins


Genis’ sword hand transforms back into a normal hand, and a small coin spawns from it. He then tosses the coin, which transforms into a Moeba. The summoning has obvious start-up lag to it, as it requires Genis to perform a brief animation to transform his hand, and pull out and toss the coin, ultimately making it incredibly laggy. The coin travels in a bit of an arc, flying half a Battlefield platform forward, before transforming. The coin is not a hitbox, and doesn’t hit the ground before transforming.


The Moeba stands at around Genis’ height, or it would if it stood up straight, but it hunches over, making it a bit shorter. Moebas are incredibly simple creatures, and will go after the first opponent who comes within 1 Battlefield platform of them. They chase opponents are a perfectly mediocre speed, and only have a single, bad jump. They are also very lightweight, around Mario’s weight, and only have 15% stamina.

Moebas have a single, basic attack, that being a slashing combo with their dual sided blades. The combo consists of a side slash that deals 2%, another side slash that deals 2%, and then a final hit that deals 3%. It has rather mediocre range, but is relatively quick, even if it is a bit slow for sword based move. The knockback on the final hit is also pitiful, showing just how weak a Moeba is. The end lag is also pretty bad. Of course, a single Moeba is but a blip on the radar of mediocrity, and that’s why Genis can summon more of them.

Holding the button down while using the move will cause Genis to pull out an extra coin after its held for 1/4th of a second, and then a second one at half a second. He then tosses all three coins into the air, and there you have it, a Moeba gang. Moebas are naturally better at working in groups, being Super Sentai minions, and tend to swarm on opponents. This is where their rather mediocre attack can come in handy, allowing them to bounce opponents between each other. It is is rather easy escape though, thanks to the end lag of the attack.

Finally, if you hold the button down for 3/4ths of a second, Genis will reabsorb the coins back into him, and instead wave his hand, causing a stack of giant, green transparent coins to crash down from above. This acts as a hitbox, behaving as a small shockwave effect that stretches out around 1/3rd of a Battlefield platform, and deals 5% damage. The hitbox only activates once the coins hit the ground, however. The coins dropping has a bit of lag to it, due to the coins having to drop from the top of the screen, but their fall speed is incredibly high, and Genis can move around again once his hand has been waved. The coins will then lift back up into the sky, revealing Genis’ assistant, Naria.


Naria is far more advanced than the Moebas. While you can have 3 Moebas on stage at a time, you cannot resummon Naria while she is already out, as she is an individual. She stands at exactly Genis’ height, and prefers to keep close to him, compared to the Moebas running off. Naria is slow, as she mostly walks around instead of runs, but her run speed is fairly good if she does have to run. She is also middleweight, and has 25% stamina.

Naria has two attacks, both involving her signature weapon, nunchakus. The first is a melee attack where she whips the opponent with a rapid combo, dealing 3% with every hit. The total amount of hits she can perform maxes at around 5, meaning the attack can deal a total of 15% damage. The final hit of the combo, despite doing the same damage, adds in rather strong knockback as well.

Naria’s second attack has her pointing her nunchaku forward, and firing blasts from it. Yes, a nunchaku gun. The blasts fire towards the ground, and are around the size of a 0% charged Super Scope shot, which they travel twice as fast as. If they hit the opponent, they’ll deal 3% damage each, and as Naria fires 4 shots, that can total up to 12% damage. There’s barely any lag between shots, making this a very easy attack to combo with. If the shots do manage to hit the ground, they will each create an explosion hitbox, resembling a shower of sparks bursting out of the ground. They’re much smaller than Genis’ explosions, each one taking up around Kirby’s height and width. They do, however, each deal heavy upwards knockback, and 8% damage.

There are other things that Moebas, and Naria, can do, but that’s for later, obviously.


Up Special – Death Wings

Genis splays his arms out, and bursts upwards into the air, still fairly motionless. This acts as a weak hitbox, signified by a short shockwave around Genis. The shockwave reaches out around 1/3rd of a Battlefield platform, and only exists for a few frames before it vanishes. The shockwave deals 5% damage, and knocks opponents away, with very specific vertical knockback, acting more like a push.

The takeoff of the move is fairly quick, taking 10 frames to perform, and the shockwave hitbox happening at around frame 5. Once the flight is completed, Genis gains freeflight abilities for the next 7 seconds, flying around at a 2 in Air Speed, but with more control due to you having more control. Genis is capable of using his specials and standards while flying as well. The move has a recharge period, which behaves exactly like R.O.B.'s.


Down Special – Moeba Split


Genis suddenly bursts into a cloud of yellow dots, vaguely forming into his standard character model. This lasts for 5 seconds, as long as you hold the button down, during which Genis becomes completely invincible to any form of attack, though he himself cannot return attacks, and can only move at his walk speed. Genis also becomes completely intangible, being a cloud and all. If an opponent walks through him, however, they will take 3% damage every 15 frames they remain inside him. Of course, considering Genis isn’t particularly large, this isn’t much of a problem.

However, if Genis walks through a Moeba, they will be absorbed into his collective. He will then begin to glow yellow. This grants him a buff, 0.5 to speed and jump height. Genis can absorb up to three Moebas into his body, the buff stacking each time. Absorbing a Moeba can grant a buff to one of your moves, but only once per Moeba absorbed. Genis’ yellow glow becomes more bright with each Moeba absorbed. Naria cannot become absorbed, however.

Death Lasers has a rather simple buff to it, being able to create 4 explosions at a time as well as an incredibly damage buff, at an extra 1%. Death Wings has an extra explosive hitbox added to the takeoff period, replacing the shockwave. It behaves similarly, but has a slightly bigger range, and deals 7% damage with decent knockback.

If he summons a Moeba during this time, they will be upgraded into a super powered Moeba, using the three that you just absorbed. This Moeba functions like a normal one, but has a x1.5 modifier to his attacks, and 25% HP, making it a lot tougher. A super Moeba counts as 3 Moebas, and will take all three of your charges, though you can reabsorb the Moeba to regain them.

Finally, holding the button while having a charge will cause Genis to turn into a full cloud, stretching thin to the size of a half completed Smart Bomb explosion. This turns Genis into a living obstacle, as the same 3% every 15 frames still applies here, only now Genis’ area of effect is much larger. The main downside of this is that you cannot move while using it.


Standards
Jab – Death Blade Combo

Genis rushes forward in a fairly standard three strike combo using his sword hands. The first attack has Genis simply swinging with the arm closest to the screen, which deals 4% damage. The second is a strike with the opposite hand, which also causes 4%. The final hit has Genis swing both of his sword hands outwards, dealing 5% damage.

The attacks are remarkably fast, even for a jab, and is considerably faster than even Link’s sword attacks. The final hit can deal a rather considerable amount of knockback as well, which is also a lot better than most jab finishers. After an attack, there will be a bit of a linger before the move completely cancels out. During this brief period, Genis can cancel the move by dashing, and enter a special dashing dodge where he leaves behind a trail of afterimages. He can eaither dash forwards or backwards.

If Genis has absorbed a Moeba, there will be an added effect, the blades leaving behind small trails of yellow energy as they swing. The yellow energy acts as a rather simple buff to the move, increasing each attack’s damage output by 1%, while also adding an explosion effect to the final attack if it manages to hit. The explosion adds a bit more lag to the final hit, but also increases the knockback considerably, turning it into a viable KO move. Of note, using the charge on this move will only count if you use all three attacks.


Forward Tilt – Death Missiles


Genis thrusts forwards a bit, causing a barrage of spike-shaped missiles to fly from his wings. Genis will fire out approximately 5 of them with a single press of the button. The spikes are rather small, equivalent in size to a Ray Gun shot, but fly in rather random arcs and angles, but specifically in the 5 main cardinal directions Genis is facing. Each missile flies forward approximately 1.5 Battlefield platforms before it explodes. The missiles explode once they either reach maximum range, or when they hit an opponent, the explosion acting as the hitbox. Its rather weak, dealing 5% damage, with alright knockback, the force of which will usually push opponents away from any other incoming missiles.

There is only a slight period of lag between when Genis can fire more missiles, ranging to an incredibly brief 5 frames, making it prime for spamming. However, with each mash, the missiles travel slightly less, around 1/5th of a Battlefield platform every time. This can be reset by simply waiting past the brief lag, usually having to wait around 100 frames before it resets.

Finally, when used with a charge, the missiles become full on homing, chasing after any opponent that comes within too close when Genis fires them. Only one missile, the first one that locks on, will be able to break from its range, allowing it to travel a full Final Destination worth of distance. The other four missiles are still bound to their smaller range. The main differences beside that is a sudden boost to start and end lag, both becoming much worse on both ends. It functionally removes the ability to spam it as well, and using it once it becomes available again will waste a charge, which you could use for something else.


Up Tilt – Death Flash

Genis leans down a bit, and then quickly jolts up, his wings unleashing a flash of light around him. The attack has a brief start-up period, but the attack comes out fast. The hitbox itself is a rouded flash of light that covers the entirety of Genis’ hitbox, and stretches outwards as well, of course, but not to any ridiculous degree. The flash is an incredibly brief hitbox, existing for a handful of frames before ending. Thankfully, its quick animation prevents any serious endlag, with only the start-up lag bringing any problems. The flash deals upwards knockback, as well as 9% damage.

With a charge, the attack’s start-up lag gets even worse, but the end result has the flash turning more into a large explosion. The flash gains far more range than it usually does, being able to fit thinner characters into while still leaving some room. This acts mostly as a powered-up version of the Up Tilt, as it deals increased damage, 12%, as well as stronger upwards knockback. However, it also adds on endlag, though not as much as the start-up lag.


Down Tilt – Death Mist


Genis quickly gets up from his crouch, and faces the camera, shooting two plumes of black mist towards the ground in a rather laggy attack, for a tilt. The lag is more comparable to that of a Smash than of a tilt. The plumes of mist aim slightly to the sides of Genis, but only barely leave his own model, hitting the ground directly. The attack is rather weak on its own, dealing 7% damage, and rather awful knockback as well.

However, attacking isn’t really the purpose of the attack. Once Genis has used the move, the ground beneath him will become corrupted by his cells, turning it into a silver and yellow metallic patch. This patch is around the size of Genis, plus the added section hit by the mist, totalling up to around 2/3rds of a Battlefield platform. This patch doesn’t really do anything to opponents, as they can simply walk on it no problem.

Genis can create two of these at a time, with every consecutive use erasing the oldest patch. The main effect doesn’t become active until you have two placed down. When Genis uses his Down Special while standing on a patch, his cloud form will be absorbed into the patch, and then reappear on the second patch. This is an amazingly quick teleportation effect, the animation completing in under 20 frames. There are several ways to play around with this move, though the teleportation effect is the most basic. Genis can also activate a special attack while teleporting, similar to a get up attack.

It can only be activated by pressing the attack button as soon as Genis begins to reappear from the other platform. This will cause Genis to begin reappearing earlier, only his torso appearing at first, allowing him to spin his swords in a circle around him. Due to the sword’s length, this has decent range, and actually speeds up the teleportation by a small amount, making it a perfect surprise attack. The swords deal 8% damage, and have considerable knockback as well.

In fact, every special can interact with the patches in some way. With the Neutral Special, the laser will actually travel through the platform, reversing its angle when fired through. Though you can’t move the laser once it hits a patch, you can keep it active for as long as it can usually stay by holding down the button.

With the Up Special, simply flying into the platform will cause the teleportation effect to activate, with around the same lag as well, only this keeps you in free flight mode. For the Side Special, If the coins are thrown so that they would finish above the platform, they will instead travel through the patch, and reappear through the other patch, where the Moeba will then emerge.

Opponents can destroy the platforms with lower angled attacks, as its hitbox is surprisingly big. The patches only have 25% stamina. The charge effect on this is fairly simple, as it simply increases the range of the mist when shot out. It’s a significantly larger area of effect, and will ultimately result in the patch being a full Battlefield platform wide, and its stamina boosted to 35%, making it last longer


Dash Attack – Death Cross

In a fairly standard dashing animation, Genis performs a dashing cross slice with both of his sword arms. This is a basic dashing attack, though it takes a bit to get started, as there is start-up lag as Genis has to cross his arms before swinging them out. Aside from the lag, the attack is remarkably quick, as Genis dashes forward 2/3rds of a Battlefield platform forward, dealing 10% damage to any opponents he hits, as well as fairly decent knockback.

The move has a special property where it doesn’t end if it hits an opponent. Genis can slide through any number of enemies, as long as they come within his range. There is also a lingering hitbox that stays for 15 frames after Genis uses the move, as he will continue to hold his swords out. This hitbox causes 5% damage, and has severely reduced knockback compared to the standard one, basically doing nothing.

There is another special property where the move can be immediately cancelled from a teleportation, similar to the basic teleportation attack. Like the teleport attack, this requires specific timing, even more than it due to you having to push the control stick to the side and hit the button in order to activate it. This cuts out a large amount of the lag, but also reduces the range of the dash.

The charge adds another effect. When the move is used with a charge, it will behave mostly the same, except that instead of launching foes when it hits, it will briefly stun them. They’re stunned for the entirety of Genis’ now horrible end lag animation, where here stands back up straight, and lets out a laugh, before an explosion happens behind him. This cuts out the lingering hitbox.

The explosion is comparable to the ones crated from the laser, though about half as large, and considerably weaker, only dealing 8% damage, with above average knockback. The knockback is always specifically in the opposite direction Genis came from, and the explosion can hit a maximum of three opponents at the same time, prime for launching them around.


Smashes
Forward Smash – Death Lash

One of Genis’ sword arms begins to glow yellow. He then spins around, slashing it, shooting off a laser slash. Before we get to the laser slash, which is a projectile, we’ll cover the main hitbox of the move. The spin slash has great range due to Genis’ sword arm, and manages to reach all around him as well. It has decent knockback to it, a bit mediocre for a Smash, and deals 12%-20% damage. The attack is also very quick, fitting of a sword based attack.

For the laser slash aspect, the distance of it changes depending on how long it has been charged. No charge makes the slash not fire at all, with the minimum being at least some charge. The minimum distance for it is basically directly in front of Genis, and the slash’s size is rather pitiful looking as well, only about one third of Genis’ body size. It also only deals 5% damage, with a very weak hitbox. It can be used to combo the main body of the attack into the small slash hitbox as well, and is the only version of it capable of doing this.

At maximum charge, the slash can travel a full Battlefields worth of distance, which is a ridiculous distance. Its size is also increased to slightly taller than Genis himself, and takes up a decent amount of space as well. It also deals a rather amazing 13% damage with good knockback at the start, but as it travels the damage lowers, about 1% every half a Battlefield platform. The thing also stops once it hits a single opponent.

However, if you shoot the lash into one of your minions, not only will it automatically pass right through them, but it will give them a boosted effect. Sending it through a Moeba will simply cause the effect to reset back to the start, with it resetting with each Moeba it slays. This also acts as a one shot to the minion, killing them instantly as it passes. As they die, a Moeba will explode, which functions as a medium sized hitbox that deals 4% damage. The move has a different effect when used on Naria.


When it passes through Naria, the slash will start to glow, and not only will regain its full damage, but will remain at it for its entire distance. It will also gain a piercing effect, meaning it can now travel through opponents. As it passes through Naria, she’ll let out a shriek of pain, and drops to the ground. She then starts to flash, like a character whose stamina has lowered. After 1.5 seconds, she’ll then explode. The explosion is functionally the same as the ones created from the Neutral Special, except slightly stronger, dealing stronger knockback and 15% damage. Once Naria has been killed like this, she cannot be summoned for another 10 seconds.

With a charge in effect, the slash will gain the piercing effect, but still lose damage over its travel. However, once the slash travels its full distance, it will explode, which still functions the same as the one from the Neutral Special, though in this case the explosion is nearly instantaneous, starting as soon as the slash hits its threshold.


Up Smash – Death Spikes

Genis turns to face the camera, as the tendrils on his wings begin to writhe around during the charge animation. The tendrils then burst outwards in upwards, mid, and downwards directions, on both sides of Genis. The tendrils each have rather devastatingly long range to them, and have a piercing effect as well, going through any opponents they hit. To put it in perspective, the only characters they cannot pierce through are wider ones like Bowser. Unusually for an Up Smash, this doesn’t have a fully upwards knockback causing hitbox, with which spike the opponent is hit by determining the knockback. It deals 14-26% damage.

If the spikes hit a minion Genis has summoned, they will be impaled on the spike. They aren’t dead, however, and Genis can move around freely with any number of Moebas, and even Naria, attached to his tendrils. If the Down Special is used during this time, glowing yellow energy will be sent through the tendrils, infusing the minions with Genis’ cells. This only works if Genis currently has a buff active, as it will then transfer said buff to the minion, signified by the minion now having a yellow aura. The yellow aura remains even after the buff vanishes.

If the Down Special is used again while the minions are infused with Genis’ cells, not only will Genis separate, but the minions will too. Rather painfully, as it is, as they struggle for a moment before bursting into a cloud of Genis’ cells. The clouds are around 1 third the size of the one created from the charged version of the Down Special. This functionally kills the minions, though Genis can absorb the clouds for charges, much like he can with a normal Moeba. Like with the Forward Smash, Naria cannot be summoned again until 10 seconds have past.

With a charge, the attack changes, with the tendrils now waving around instead of jutting out. This gives them a bit more area of effect compared to usual, as well as a more direct upwards hitbox. Striking a Moeba with the attack will instantly cause them to be absorbed into Genis’ body, giving him another charge, though Naria can still be infused with Genis’ cells.


Down Smash – Death Corruption

Genis lets out a roar, the most emotion he shows in all of his animations, causing a yellow energy shockwave on the ground around him. This is a fairly standard shockwave hitbox, though it stretches to different distances based on the charge. At lowest charge, it reaches about 1/3rd of a Battlefield platform away from Genis, while at maximum charge, it can reach a full Battlefield platform on either side. The shockwave itself, as a hitbox, exists mainly on the ground, though it rises up a small bit, but not enough to really count. The shockwave deals 13%-22% damage, with upwards knockback.

The shockwave, as it basses over the ground, will leave behind a trail of tiny glowing orbs that float up. This functions sort as a miniature cloud, like with the Down Special, but a lot weaker in comparison, only dealing 1% damage every 15 frames. Genis has infused his cells into the very stage itself! The ground will spawn 5 of the orbs every half a Battlefield platform the shockwave covers.

If Genis uses his Down Special on it, the orbs will be absorbed into his collective, giving him a damage boost, an extra 1% per every fifteen orbs Genis absorbs into himself, though as a buff this only lasts 5 seconds, even if you collect more than 15 orbs. The orbs will respawn after 10 seconds.

With a charge, the attack won’t do anything until you create a patch first. Don’t worry, this doesn’t use up a charge. Once a patch has been placed, the move is completely changed, and will instead result in the patch exploding, without the charge effect of a normal Smash attack. The size of the explosion depends on the size of the patch, though the explosion’s damage depends on the number of orbs currently out, with the maximum amount being around 90 orbs. If there are no orbs, the explosion deals 5% with very weak knockback, while with all 90, it will result in 25% damage, alongside some incredibly strong knockback.


Aerials
Neutral Air – Death Spread

Genis flashes his wings, causing a burst of his cells to fly out around him. This cloud is, like in most cases of the cells appearing, represented by a cloud of yellow particles. The cloud has rather standard range for an AoE aerial attack, covering just outside of Genis’s model, but enough to reliably hit. The cloud isn’t incredibly powerful, dealing 9% damage, though the knockback is fairly alright, strong enough to do its job and knock away opponents.

The move changes depending on how many charges you have, with each individual charge boosting the range of the cloud, but also increasing the start-up lag as well. With one charge, the cloud becomes only slightly noticeably larger, while at three charges the cloud becomes fairly massive, around the size of a Bob-Omb explosion in radius. The start-up lag goes from fairly quick to fairly slow, though the attack grants Genis a bit of a floating ability while he’s using it, though he will go back to falling once the cloud has been released.

The amount of time the cloud hangs around is dependant on the amount of charges as well. Without any, it exists for only a handful of frames, only serving to fulfill its main role as an attack. With all 3 charges, the cloud can hang around for almost a full second, having the standard poison effect that all other clouds have. However, Genis can reabsorb the cloud during this time as well. If Genis was gliding while the move was activated, he can reabsorb the move, but cannot use it again until he touches the ground.


Forward Air – Death Chop

Genis slashes forward with on of his blade arms. This move actually functions as an aerial combo, with Genis being able to follow up with a second chop, and then a double handed jab. The first hitbox is the same as most of Genis’ other sword based attacks, being quick, as well as having good range and dealing 4%. The second hit is also similar, but Genis really does do a chop, swinging his other blade downwards. This gives it more upwards and downwards range, though being a combo it doesn’t have knockback. It deals 5% damage.

The last hit is the double handed jab, which has better range than most of Genis’ sword moves due to him actually reaching out more. This is the heavy hitter of the combo, as it has a bit more start-up lag than the other two, but deals good knockback, as well as 7% damage, bringing the total damage to 16% damage.

Like with the standard jab, Genis can cancel out of the move by double tapping the control stick between each animation. The direction that is inputted will change the direction Genis will dash. He cannot dash upwards however, as inputting it for any upward direction will result in Genis entering his glide. The combo can only be used once while in the air, but the first hit can be used as many times as you like.

The charge of this move also acts like the one for the Jab, giving each slash an energy trail that grants a buff of 1%. It will also add an explosion effect to the final hit if it hits, increasing knockback, but also increasing both ends of the lag. Using all three only counts towards the use of one charge, though cancelling in the middle will result in a loss of charge.


Up Air – Death Drag

Genis transforms one of his sword hands back into a normal one, and whips it upwards, summoning a glowing yellow tendril made of his cells, which fires directly up in a quick animation. The tendril has decent range as it fires up, about half a Ganondorf, the only lag to it being Genis having to transform his hand, which in this case is fairly quick. It will only cause 7% damage on contact, but that’s because this acts as the first hit in a two-hit combo.

Once the tendril hits, it will lodge into the opponent, and then quickly lash them down towards Genis. Genis will then follow up with an upward sword strike into the opponent. This strike is equally quick, if not even faster, than the lash, and deals 7% more damage, as well as powerful upwards knockback. A charge will cause the tendril to have a piercing effect to it, as well as increasing its range, boosting it to 2/3rds of a Ganondorf. Though this will not allow Genis to perform this move on a second opponent at the same time, the tendril does get an extra 5% boost in damage when it passes through an opponent.


Back Air – Death Flap

Genis thrusts his wings backwards, shooting off a spark of his cells. Due to the wings’ size, the attack has some definite range to it, but it doesn’t go past standard melee range. The wing flap acts as its own hitbox, dealing a strong 9% damage, while also dealing decent knockback, but it will usually launch the opponent into the cloud of cells the wings shoot off, which deal a second hit of 6% damage.

The wings are a different hitbox entirely, forming an arc shaped cloud in front of where the wings hit. It isn’t remarkably large for a hitbox, but it forms before the wing hitbox finishes, allowing the combo. It also doesn’t cause any knockback, all of that is attributed to the wing hitbox. The cloud only lasts for a short time, 5 frames, though it does linger for a bit once Genis has finished the attack. With a charge, the size and duration of the cloud is increased, making it noticeably larger than normal, as well as making it into a fully lingering cloud that behaves like how all the other clouds in the set do, and boosts it to lasting around half a second.


Down Air – Death Lightning


Genis points one of his swords downward at an angle, it beginning to spark with electricity. He then fires a bolt of yellow electricity downwards, at the same angle. The lightning shoots off incredibly quickly, and is able to reach the ground from a basic double jump in under half a second. The lightning bolt’s standard size is comparable to that of an arrow shot by Link, though slightly thicker. It is also fairly long, at approximately a Battlefield platform in length.

The bolt has a stun effect when it hits an opponent, though its nothing too major, only for a handful of frames. This does let the lightning’s special property come into play, as it will drive itself into the opponent it hits. The bolt causes 2% damage for every frame it flies into the opponent, which can result in 12 perfect damage at most. When it hits the ground, the hitbox will remain until the entire lightning bolt disappears.

With a charge, the lightning gains another special property, signified by the bolt sparking a bit more. It mostly remains the same, damage included, but it gains a piercing effect, allowing it to deal upwards of 12% damage to multiple opponents. When it hits the ground, it will dissipate into it like normal, but instead of vanishing, it will leave behind a glowing yellow spot, like on the Neutral Special. This explodes, behaving exactly like that explosion as well.


Grab Game
Grab & Pummel – Death Infusion


Genis raises his hand, turning it back into a regular hand, and then juts it forward, causing a tendril made of his cells to burst from it and lash forward. This behaves like a tether grab, although it cannot grab onto ledges. It has the same reach as Link’s crossbow, but aimed slightly higher due to Genis’ taller stature. When an opponent is hit by the tendril, they will be dragged towards Genis, where he grabs onto their chest, or closest equivalent. If the opponent is within range of the tendril, but too short for it, the tendril will lash downwards into them.

Genis’ pummel is special. With each press of it, Genis can infuse the opponent with his cells, similar to what he can do to his minions on the Up Smash. This does behave differently however, with each pummel causing a poison effect on the opponent, with it causing up to 2% damage every second for the next 5 seconds. The damage is dependent on how many times Genis can infuse them, with it maxing out at 5 hits, 2% for each hit. This makes it so that the pummel is fairly fast for one, but the opponent will have to be low on damage (Or you get lucky) in order to land the 5th pummel.

Once the opponent has escaped, the poison effect will linger, as mentioned above. During this time, Genis can use his Down Special to perform a similar effect on the minions infused with his cells, though instead of killing them instantly, it will cause heavy upwards knockback, though it will only cause the total amount of damage that’s remaining, instead of a set number.

Minions, of course, can also be grabbed by the tendril. This will similarly drag the monster in, allowing you to use throws on them. Using the pummel, however, has a unique effect, as Genis will infuse his own cells into them. This causes them to grow giant… well, twice their usual size, not even as large as a Super Mushroom. However, Genis can do this multiple times to his monsters, until they do eventually reach the size of a Super Mushroom.

In this state, the monster’s animations are slowed down to half their usual speed, but their attacks are fully boosted to 2 times their usual strength. They’re also completely recovered, and get an extra 15% damage added onto their health as well. When a monster is defeated like this, they will burst into an explosion equivalent to their usual size, but deals the same amount of damage as the ones caused by the Neutral Special.


Forward Throw – Death Blast

Genis’ hand begins to glow with his yellow energy, before it fires off a blast into the opponent, launching them off. The blast is an incredibly powerful attack, acting as the best choice Genis has for a killing throw. It deals 11% damage, with great knockback, being able to KO at just over 100%. However, the attack is rather slow, as it requires Genis to charge it up for a moment before firing, though the end lag is significantly reduced.

Though the blast isn’t anything amazingly large when used normally, when used with a charge, it can be used to turn your opponent into a weapon. A Moeba charge will result in the blast becoming larger and even more powerful, the lag of the attack being significantly reduced, and the damage being upped to 15%. The downside is that, now, the opponent is only launched forward a set distance, specifically 3 Battlefield platforms. This turns them into a living projectile, however, with them being able to deal 7% damage to the first opponent they hit, as well as decent knockback. The charge effect is automatic when used on a grabbed minion, though in most cases it will usually kill a minion (or at least a regular Moeba) with a single use.


Up Throw – Death Toss

Genis lets go of the opponent, and then quickly snatches them by the arm. He then slams them downwards into the ground, causing 3% damage, before jerking them around a few times. Each movement Genis makes with them causes 1% damage, which totals to 4%. Finally, he tosses the opponent up into the air, dealing 2% damage, totalling at 9% damage.

The upwards knockback is decent, but is overall nothing too special for an Up Throw. The attack is also incredibly laggy due to the animation, taking just over a full second to perform, but this can be rectified with the use of a charge.

The charged version of this move will not actually change the animation, but it will turn the foe into a hitbox that deals double the damage caused to the grabbed opponent if an opponent is hit during a damaging part of the hitbox. Much like the Forward Throw, the opponent also becomes a projectile hitbox when thrown, though the range of it is not set like the forward throw. An opponent hit by the flying opponent will be dealt 6% damage. Like the Forward Throw, the charged effect is automatic when used on a minion, though it will usually not kill them in this case.


Back Throw – Death Link

Genis pushes the opponent backwards, and then shoots a tendril into them, before spinning them around and tossing them away. This acts as a fairly simple backwards throw, dealing 8% damage, with relatively decent knockback. But that isn’t all there is to the move. If you quickly pull back on the control stick before Genis throws the opponent, a tether effect will be activated, the tendril remaining lodged in the opponent

Like any tether, this limits how far Genis and his opponent can be apart, specifically they cannot be more than 4 Battlefield platforms away from each other, a considerable distance all considering. This tether has pretty standard behavior, opponents can tug at Genis, while Genis can do the same. The tendril will retract after 10 seconds. There are two major differences from a usual tether, the first being that the tether also adds in a damage sharing effect. Due to the opponent being connected to Genis via his cells, when Genis feels pain, the opponent will feel it as well.

The second main difference is that Genis can cut the tether himself. During this time, Genis can only use attacks not based around his swords, due to only one being available. However, when you input a sword move, Genis will cut the cell tendril, causing it to retract back into the opponent and then explode, dealing 18% damage and heavy upwards knockback. It’s a pretty powerful tactic, but it has a major downside to it. Due to the loss of that many of his cells, Genis’s stats will be reduced by a fourth, while his damage is cut by a third. This is a temporary effect, lasting 8 seconds. Genis can also cut the tether by activating his Down Special, which will cause the tether to retract into his cloud.

Charge is fairly simple, not changing the basic throw (Using the throw won’t use a charge as a result), but instead changing the tether, reducing the length of the tendril to 3 Battlefield platforms, allowing Genis to get closer. This behaves similarly when used on minions, except with one major change. Using the Down Special while connected to a Moeba will cause Genis to instantly absorb them, gaining an extra charge. There are also other uses to keeping minions close, obviously, but Genis will always have priority when moving around.


Down Throw – Death Absorption

Genis slaps the opponent to the ground, and shoots a tendril of his cells into them. The tendril will then begin absorbing the opponent’s health, dealing 8% damage to them, while healing Genis for 4% damage. Genis will then flick his hand upward, tossing the opponent away, acting as the primary knockback for the move, launching them at a somewhat forwards angle. It isn’t remarkably strong, but it works well. The attack is also fairly laggy, but goes a lot faster than the Up Throw does.

The charged effect of the throw isn’t particularly different, as it simply reduces the lag, while also boosting the amount Genis heals to 6%, without boosting the damage. However, if the opponent has been infused with your cells, Genis will automatically get an extra 2% damage heal by reabsorbing his cells, with the opponent also getting an extra 2% damage as well. This applies to both the charged and uncharged versions of the attack.

On a minion, the attack changes rather drastically, as Genis will begin to siphon all of their energy in an incredibly laggy process that takes just over a second and a half for a Moeba, or two seconds for Naria. This has Genis rapidly recover health, while draining the minion’s health, 1% at a time. Genis can cancel out of this any time by simply performing a different action, and he can also be knocked out of it. When a minion is fully drained, two things can happen, depending on which type.

On a Moeba, it will be entirely absorbed back into Genis’ body, while on Naria, she will enter a prone state, preparing to explode. This behaves exactly like Naria’s death when killed by the Forward Smash. Like with the opponent, if the minion is infused with Genis’ cells, he will reabsorb them, giving him an extra 2% health boost, but this does not effect the minion’s health.


Final Smash
Final Death

Genis has the Smash Ball, his power has reached unfathomable levels! Using this cuts to a cinematic shot of Genis’ spaceship, the Sagittariark, spinning in space. It then fires its arrow-like middle down towards the Earth, which in this case means the stage. The arrow strikes into the stage, acting as a massive hitbox that covers basically all of Battlefield in terms of size. It deals 30% damage, and massive knockback.

The arrow will quickly retract afterwards, but not without leaving behind a special gift. When it hit the stage, the arrow began to infect it with Genis’ cells, which results in a similar effect to the Down Smash, except across the entire stage. Genis cannot absorb the orbs created by it however, and the damage is increased to 2% ever 5 frames the opponent stays in the cloud.

This stays around for 5 seconds, and finishes with all the orbs gathering into the middle of the stage, dragging Genis along with him. When they all gather, they will then quickly transform Genis into a giant, remaining a bit into the background. He will then preform a cross slash attack with both of his now massive sword arms, each covering a massive section of the stage, having incredible knockback, and dealing 25% damage each.

At the absolute least, you will most likely KO every opponent on screen twice.


Last edited:

Reiga

He sold diddy for a switch
Joined
Dec 8, 2014
Messages
1,256
Location
White Noise
3DS FC
1461-7646-7368

«««««««««««««««««« ASSIST TROPHY »»»»»»»»»»»»»»»»»»
KANGASKHAN
Kangaskhan is one of the original 151 Pokemon yada yada yada and its regular form is boring as ****. Thankfully, this actually isn't even a Kangaskhan assist trophy at all, and actually an Assist Trophy for Rool's ultimate fighting kangaroo herself, because as soon as Kangaskhan appears she does her »»»»»»»»»»»»»»»»»»»»»»»»»»»Super Attack, becoming GIGA KANGASKHAN, a creature so amazing that Nintendo even stole its concept from Rool so they could do Mega Kangaskhan. Those dirty ****s!!

While not described in the Rool set, GIGA KANGASKHAN is about the size of Giga Bowser and is about as edgy as him too, with all of her plate-looking body parts becoming spikes, her teeth having grown, and the baby growing an emo cut. Said baby also grows in size to be about the size of a regular Kangaskhan.
Even in a bloodthirsty rage, GIGA KANGASKHAN's motherly nature won't allow its body to damage foes, but luckily for whoever summoned her, she eventually does kangaroo abuse and throws her joey while aiming at the closest foe, which explodes on impact with the floor, damaging foes for 5% damage when thrown and 10% during the explosion.
While at a rather slow rate that can lead to the summoner's foes dodging it, GIGA KANGASKHAN just keeps on throwing baby Kangaskhans that suddenly appear in her pouch due to her overflow of power. Eventually, after 4 Babykhans have exploded miserably, the last one will be filled with sadness over his dead brothers and commit sudoku with a pocket knife. Realizing her mistake, GIGA KANGASKHAN then disappears like all Assist Trophies.
 

IvanQuote

Smash Ace
Joined
Apr 7, 2014
Messages
853
Location
Looking for those who like Mighty No 9
NNID
ivanquote
3DS FC
1693-3075-2999
ROOL MINI-REMAKE

I am the shadow

The keeper of light
If you want the sun's power
Show me your own

Dullahan


Dullahan is the strongest of all of the Golden Sun Super Bosses. He can only be encountered at the back of a secret dungeon in both games he has appeared in, said areas can only be accessed once the player has accessed all 72 djinn, which is no easy feat. He guards the summon Iris, which is the most powerful summon in the series. Iriis causes tremendous amounts of damage to all enemies by hurling them into the sun, while simultaneously fully reviving and healing all of your party members, in and out of battle. Indeed, this summon will make the remainder of the game's battles trivial. However, to gain access to it, you must defeat Dullahan.

Now you might be asking, "what even is this set? King K.Rool never made a Golden Sun set!" You are correct, but K.Rool has made a Headless Horseman set. The myth of the Headless Horseman actually persists in different forms throughout many different countries. The one he made the set based off of is based on the American folklore from "The Legend of Sleepy Hollow"; Dullahan from Golden Sun is based on the figure of the same name in Irish folklore. Dullahan shares its appearance association with death with its namesake, therefore this makes the set a cop out viable set for the MiniMYM.

In Smash, if his armor did not tip you off, he is a heavyweight character. Standing at a height barely taller than Bowser, he will rank in the top 5 heaviest characters. Naturally, he is quite slow in the air and ground both and drops like a rock, but this is offset by his power and range of his mighty sword, which is the same width as but slightly longer than Cloud's Buster. His shield is quite large, but unlike Link's it is purely for aesthetics. Because he is a walking suit of armor, he has some natural super armor to it.

Specials
Neutral B (Fulminous Edge):

Dullahan.png

In Golden Sun, this is perhaps Dullahan's Strongest attack. His sword gets extended by a purple lightning, which he slams down on the opponent for great Jupiter elemental damage. In Smash, purple electrical energy starts to form in the mouth of Dullahan's shield as he draws his sword across it. This is a chargeable attack with similar mechanics to charging attacks like Samus' charge shot in the sense that you can dodge or roll out of it to keep a partial charge. This extends the length and raises the power of Dullahan's sword for a single attack. The length and power of the resulting move at full charge is double. At less than full charge, the maximum power and length multiplier is 1.5x, so the power scales really slowly at incomplete charges. Pressing B at full charge or double-tapping B at any charge will make Dullahan stick his sword up into the air, charging it with purple lightning (2%-18% depending on charge). This action launches the opponent skywards and can kill at 120%-200%, with the power growing with charge. Use this to catch opponents by surprise above you. Now that the sword is extended with lightning, the next attack input will be made stronger with a larger attack radius. This only affects sword-based moves, so using a move like the forward tilt, a shield bash, will waste the charge for nothing. Since most of Dullahan's moves are sword-based, this is rarely an issue. What is a much bigger issue however is that when Dullahan's sword is electrified, any attack that causes flinch will rid Dullahan of the charge power. Because of this, you should use a charged attack quickly as not to lose it, but precisely as not to waste it.


Side B (Crucible): As Dullahan holds his shield forwards, a quick blast of dark energy shoots out of the shield's mouth. It does little damage and knockback (5%, never killing), but if it hits an opponent, it "tags" them for 10 seconds. Only one opponent can be tagged at a time and you cannot continually refresh the tag by hitting them again with the attack. If the tagged opponent attempts to charge an attack such as a smash attack or PK Flash, or is holding a charge like Giant Punch, Charge Shot, or Limit Break, inputting this move again will "steal" the charge from the opponent and will allow Dullahan to use it for himself. Specifically, the opponent will briefly flinch as a shadowy version of the character appears out of the shield. The moment it materializes it will start inputting the given charge move from where the opponent left off. For example, if a tagged Mega Man is halfway done fully charging a forward smash, as soon as Dullahan inputs Crucible Mega Man will flinch, cancelling his forward smash as a dark Mega Man materializes out of the shield charging a forward smash from the halfway point.

The dark copies will only use fully charged version of the attacks however, leaving the copies very open depending on when the charge is stolen. Additionally, if the copies take any damage whatsoever, they will instantly be destroyed. At the same time, if they release the charged attack, the clone will vanish at that time too. There are several caveats to the rules:

  • If a character has multiple charges simultaneously, such as Samus holding a full Charge Shot while charging a Down Smash, the stolen move is whichever is the most recent (the Down Smash in this cast).
  • Only one move at a time will be stolen and only one dark clone can be on the screen at a time.
  • For WFT's Deep Breathing, the clone will always get the correct input if uninterrupted. Dullahan will then gain the stat buffs.
  • For Cloud's Limit Break, Dullahan will not get the stat buffs of Limit Break. The Dark Clone will immediately do Limit Blade Beam.
  • For Wario or Little Mac, Dullahan can only steal Wario Waft or KO punch if they are fully charged.
  • For Luigi's Green Missile, the clone will immediately use it once it is at max charge and thus will never overcharge


Up B (Haunt): Dullahan holds his sword and shield to his chest in a reverent pose as 7 small, ghostly lights appears around him. In this pose, he is suspended in midair, falling so slowly it appears as if he is in Witch Time. In this period, the will-o-wisps move away from Dullahan in the direction you tilt the control stick, forming a path in a manner very similar to Pac-Man's side b. The total length the path will be is a constant displacement of a Battlefield platform and a half. After about a second, the flame from Dullahan's neck will consume him, making him vanish. Once that happens, the seven flames will quickly explode in sequence, each blast being half the size of Din's Fire (6%, kills at 230%). Once it gets to the last flame, it will explode in the size of PK Flash, where Dullahan will leap out of the explosion with a small jump. This large explosion is weak despite its size and is not good at killing (9% killing at 200%). If B is tapped again before the flames reach the end of the line, the next flame set to blow will burst in a large explosion as Dullahan comes out of that one. The remaining flames will simply extinguish themselves if this happens. The sooner Dullahan jumps out of a flame, the more powerful it will be, with the first flame (20%) killing a 60%! Naturally this greatly nerfs his recovery and opponents have plenty of time to get out of the way on the ground, but if they attempt to edgeguard Dullahan try to catch them off guard with regard to the flame you burst out of. It may end up saving you and killing the opponent.


Down B (Elemental Swap): In Golden Sun, this "attack" changes the order in which your recovering Djinn will recover. In Smash, Dullahan bashes the opponent with his shield (6%). This is visually the same as his forward tilt, except dark energy is gathering in his mouth shield. If the opponent is hit, they are knocked back horizontally with low-moderate knockback, not killing below 300%. Additionally, it has the special effect of randomly swapping around 10 moves to be effected by Stale-Move Negation. Even if the opponent has no stale moves, they will randomly get 10 of their moves queued. However, moves that are already staled will be swapped around; random moves will not replace already staled moves in the queue list. Because of this, the opponent's attacks will do more or less damage than they would normally, possibly throwing off their combos. Take advantage of the confusion to deliver a killing blow.

Final Smash (Charon):
Dullahan.png
Dullahan will preform another signature move of his, Dark Contact. Out of his shield will come a hand of darkness reaching out 1/3 FD. Normally it only heals Dullahan, but in Smash anyone touched the hand will be sent into a cutscene where they are sent to the underworld by the boatman of the River Styx himself, Charon.


This is a moderately powerful attack (26%) that kills close to 80%. Like Bayonetta's Infernal Climax, this will auto-kill the opponent at over 100%, just like it can auto-kill in Golden Sun. However, since Dullahan is naturally a powerful opponent and can easily kill below 100%, this does not help Dullahan as much as it would others. Also, Dullahan will heal 20% for every opponent caught up in this attack. This makes it great for Dullahan to catch as many people in this attack as possible.


Story
Dullahan was guarding the Iris summon tablet as always when he was called upon to act as the Grim Reaper for the Smash Universe. He was to harvest the souls of the Mulit-Man Mii's and Smash Run enemies who were not allowed to turn into trophies upon grievous injury. The previous grim reaper, Rool's Headless Horseman, got into a complicated accident involving a pumpkin pie and thus could not return. Since all Grim Reapers are connected through their own Linkedin accounts, Dullahan was hired based on his credentials as "f**king overpowered boss". He is now a regular fighter who many who want a challenge try to defeat. He met Isaac again after he got his MYM and is one of the few he openly acknowledges as an equal due to gaining the power of Iris himself. When he's not taking challenges, Dullahan resides at the bottom of Charon Volcano, an odd place that mysteriously appeared after 6 mysterious figures just showed up. He liked the location due to his connection with the boatman of the same name.
 
Last edited:

Katapultar

Smash Lord
Joined
Nov 24, 2008
Messages
1,258
Location
Australia


Lucio Fulci is the primary antagonist of MYM11's secret Story Mode, or at least halfway before the Praetors took over. Not to be mistaken for his real life counterpart, Fulci was once a mortal man living in a quiet locale until it was one day infested by zombies. Zombies brought about the Necromancer God Romero, the final antagonist of MYM6's secret Story Mode. The zombie infestation of this time was sudden, even to the Palette (a villainous group led by Ganon, Wesker, Bowser, Envy, Ridley, Wily, Black Knight, Giovanni, Dracula), brought forth by assistance from Zant and The Count. The many villains and few heroes had to team to stop what could potentially become an apocalypse on the world, driving the zombies into a corner before ultimately banishing them to another dimension - along with their master and creator Romero. His deadly brand of zombies would not plague the world for a while, but there were many zombies throughout the various worlds that were based off of his still around, like Envy's Side Special zombies to name an example.

Romero and his zombies weren't the only ones to be quarantined from the MYM world: there were a select few survivors not yet zombified as well, with Fulci being one of those survivors. Through unknown means, Fulci would eventually gain supernatural powers reminiscent of Romero's, though he was still targeted by zombies as he was still mortal. It is said that Romero transferred his powers over to Fulci as he was fading over time - possibly with age or from a fatal blow received from the MYM6 cast - all for the sake of continuing the zombie apocalypse. Some even say that Fulci has no will of his own and is merely a puppet for Romero, or that perhaps the God is residing in his body, awaiting the apocalypse so he can see it play out for his own amusement, but none can say for sure. Regardless, the power changed Fulci to make him mad, and the zombies became more and more deformed over time, absorbing energy from the isolated dimension to gain their superhuman strength. Fulci kept trying to kill the zombies, but it was futile as they would keep rising no matter how many times he slew them. With no way to end his curse - the curse of an unhappy ending he so tells in his real life films - Fulci's desire became that of Romero's: to flood the world, all of existence, with zombies. In truth though, Fulci's existence was tied with the zombies' spawning, due to the power he gained from Romero, and his death would ironically put an end to all the zombies.

Fulci had no means of connecting with the "MYM World" despite his power, but one day he was contacted by Dr. Facilier - the secondary antagonist of the SM - and gave him the power of his "friends from the other side" in exchange for helping him reach his side. Facilier was tasked with collecting 3 cursed artifacts and gathering them atop a skyscraper of an inhabited city on the eve of Halloween, so that a portal would open to the "Gates of Hell" where Fulci and his zombie legion resided. One such artifact was "The Slab" belonging to King Ramses, the other the Pumpkin Sword belonging to the Fright Knight, and the final one a talisman that was in Facilier's possession. Ramses and Fright Knight would ironically go on to serve as Facilier's right and left-hand minions despite having had their artifacts stolen, as both were bringers of terror by nature. Through some events, a group of heroes unite and are able to defeat Facilier, who suffers an identical death to in the Princess and the Frog movie. Some of these heroes included Sayaka, Batman, Kyoko, Rapunzel (from Tangled) and Jack Skellington to name a few. The summoning ritual was halfway complete though, leaving the Gates of Hell half open and threatening to open over time if not quelled, thus the heroes had to venture into Hell to stop Fulci. Though the zombie armies were unrelenting, Fulci's death would end it all, and ironically gave him the peace he so desired for countless years. Hell would collapse, thus the heroes had to escape and got to enjoy a moment of peace afterwards...before the next, Phyrexian threat that was slowly approaching.

Fulci has never appeared in the MYM World since his death in MYM11, much like a certain...Rooligan, but the advent of Kristoph has allowed his kind to roam the world of the living once again. This is due to the "Rool Mini-Remake" as some would like to call it, where the deceased Kristoph's power is being channelled to revive beings of old as seen above with Kanghaskhan and the Dullahan. A fragment employed by the Koopalings of MYM19 - Roy, Jr. and Turtonator - is responsible for this, the reason for this particular focus on Rool is that they want to actually revive King K. Rool because he is familiar with their dad Bowser...or maybe they just want him in Smash 4? Either way, these actions are all caused by a misunderstanding, as Rool the MYMer has never made a set for his namesake. Though revived, these copies only have a temporary existence, and are attempting to take out all their rage on the current era for their deaths and being mocked so.


Asisst Trophy - Zombi
Breaking free from his confines, the man named Fulci drops to the floor and looks around in confusion. He does not appear to be familiar with the settings of Smash, and is in fact fearful for his life - did he somehow get amnesia now that his creator is dead? He behaves like the humans he can summon with his Side Special - fleeing to the corners of the stage on his feeble body - but his mere presence spawns 5 zombis during his stay, one every 5 seconds. These zombis spawn on random parts of the stage, and are hostile to all players - including the one who summoned Fulci.

:094:: Fulci's zombies are hideously deformed, in an advanced state of decomposition. They move slowly, no quicker than a strolling Ganondorf, but they have lightning-quick reflexes and superhuman strength in their hands.

They walk slowly - almost idling - toward the nearest victim. They can be attacked and flinch briefly when hit, but they don't take actual damage unless struck in the head. Once 30% is dealt to the zombie's head, it'll burst off in an explosion of gore and the creature will collapse and vanish.

When they're within reach, they strike out lightning-quick, going into a grab as they grasp the victim by the neck, the shoulder, or the back of the head. The grab in itself deals 10%. The grasped victim can't move or jump, but they do have about one second in which to attack and free themselves before the zombie launches into a vicious bite to the throat or shoulder. In this second, hitting the zombie's body does nothing; it's the head that must be struck, and fast, to cause it to loosen its hold. All the better if you kill it, because if you don't, it's liable to simply grab you again.

When a zombie bites you, it tears a chunk of flesh off, a small amount of blood dripping onto the ground. This deals 15% and increases the speed at which other nearby zombies approach you. It's all very well and good to walk around the stage dripping blood from many wounds. You won't be KO'd by the zombies' feast... unless you take at least four bites in two seconds, at which point the character screams and vanishes under the bloody pile.

When you jump over a zombie, it'll try to grab you out of the air if you're low enough. When you grab a zombie, it won't work; it'll grab you instead. When multiple zombies are holding you, you had best hit their heads quickly or you're liable to become a feast. Zombies are very slow to turn.


The difference here is that zombis need not to be struck in the head to be killed. Instead, this brings them down quicker needing only 20% to finish them, as opposed to their staggering 50HP reminiscent of the Romero type. Zombis are more susceptible to knockback, you can break their grasp with a solid attack, and their bite deals relatively high knockback - a detail Rool often forgot to mention in his later sets. If a zombi bites you at 150%, it's an instant death, or 30% earlier if there are multiple zombi clutching onto you at the same time. Overall, they're not as threatening as Rool made them out to be, but can still cause trouble in a FFA setting.

There is one way avoid the whole zombie mess, and that's to just go after Fulci and kill him. He has 15HP just like the humans he can summon, and will explode into a bloody gore mess when he is killed. This deals 1.1-1.5x the damage of the attack that killed him, depending on how strong it was. If there were any zombis out when this happened, they'll get even more motivated and will tirelessly pursue anyone who got some of the bloody mess on them. Fulci can be targeted by his zombies and turned into one, which needs to be killed to end the mini-apocalypse. If Fulci was damaged by an attack but not killed - unlikely given his meager health - portions of his flesh will fall off that can be thrown around like items, causing zombis to spawn near them if they were still onstage. These flesh bits deal no damage but can be splattered onto a surface - or even opponent - to have the zombis target them.

Eh, screw this. I just wanted an excuse to post more Story Mode, part of which was an idea for a big MYM11 SM I had long ago.
 

Munomario777

Smash Master
Joined
Nov 18, 2014
Messages
3,253
Location
Charleston, South Carolina
3DS FC
0387-9596-4480
Switch FC
SW-8229-3157-8114
// MYMCU //


The day begins, and I'm out of my bunk. Get dressed, eat breakfast, all that stuff. I step into the front room of the bunker, put on my jacket, and glance out the window. Nothing catches my eye; nothing shifts in the ruins. I reach for the door, but one of the new recruits stops me.


Why the heck are you going out there? Don’t you know what’s out there? You’re not even augmented or anything!


Why am I going out there?

I was there when it happened. I was there when this all started. ...Look, you ever heard the stories?


I… think I might've?


Nah, you’d remember if you had. You must be new here.

So, my story. I lived on the outskirts of the city – a couple dozen stories or so above the ground, somewhere in that direction. I point out the window. I remember what was on the news that day. A story about crystal miners losing contact with home base, stranded on some distant, sunless planet. No type of warning or foreshadowing or anything, it just sorta… happened. The Facility’s stocks fell like a rock... but this was the least of their concerns.

The explosion, a mile away, shattered my window as I fell onto the floor. The outskirts were sent halfway into ruin, let alone the industrial district itself.


He sits down, suddenly intrigued.


Within minutes, the streets flooded with soldiers in dully-colored, metallic exosuits, pouring out from the ruins of the Facility. They weren’t fleeing – it was coordinated.


I look out the window at the familiar streets and buildings, recalling what had happened several years before.

Screams of terror rang throughout the city, bullets and blades of light flying through the air. The braver of us attempted to fend off the threat. It’s not like they ever stood a chance; even by that point, the Metella had been developed further than most of us had even thought possible. They must’ve numbered somewhere in the thousands. Whenever our side did manage to knock one of ‘em out, it just
turned into some kind of weapon – guns, swords, shields, you name it – bolstering their allies’ firepower.


I pick up a chunk of crystalline rock lying on a table, examining it from multiple different angles.

The Facility had been running these experiments for years – y’know, ever since it’d been made legal – but it’d been kept under wraps aside from the occasional leak. Whatever they were doing in there, though, must’ve been unpleasant. They went too far, pushed their luck. And now we're all paying for it.


I barely got to ground level, watching as the tower – everything and everyone I knew – collapsed behind me as I ran toward the heart of the city. I was lucky to make it out alive. The resistance is all I have now. This battle is all I have now.


Why am I going out there? I can’t let this happen again. They need to be stopped, both for what’s still here and what isn’t. Look, we know there are still some of those crystals out there, and I’m not gonna sit around in here when we could be using those to make more of our men into Metella. I’m going to get one of those crystals, even if it means ripping it right out of a Metellum’s chest.


I step out into the ruins of the city – blaster in hand, job to be done.


// End transmission... //
// End cliche MYMCU exposition... //
 
Last edited:

ForwardArrow

Smash Ace
Joined
Aug 17, 2011
Messages
502

Boss Fight: Revenge of Romero
Long ago, the world was brought under siege by a zombie apocalypse headed by the godly Necromancer himself, George A. Romero. While ultimately through the combined power of many villains who were furious to have their plans ruined and a few meddling heroes, Romero was banished to another dimension. Left to waste away, Romero eventually formed a last ditch plan of using the puppet Lucio Fulci to attempt to bring about another zombie apocalypse, which as Kat has told us, failed miserably. With that, Romero was left to rot away in his dimension surrounded by his zombies, which became more and more outdated as minion technology evolved so any attempt to retake the world, even should he somehow escape, would likely be far less threatening today than it was back then. The situation was rather hopeless for Romero... until suddenly an opportunity presented itself.

In a recent era, the power of meme magic was fully discovered, and it turned out to be a far greater force than anyone could have anticipated. It was known to make entities like Prime Minister Honest, Zak Gramayre, and Mike Dawson far more dangerous than they had any right to be, but Kristoph brought it out to its fullest potential, and laid siege to MYM with the raw power of memetically stupid villains. With Kristoph's death he had channeled so much of this meme magic he practically became a living embodiment of it, and while his death supposedly was the end, it spilled into the land and infected it. This brought about the revival of many of Romero's worshippers and allies, including his most valuable minion Lucio Fulci. With Fulci alive in particular, it would make a viable distraction as nobody would honestly believe that Romero and Fulci could exist at the same time. Normally, the latter could only exist in his zombie creating state, but Kristoph's meme magic allowed Romero to break these rules and use Fulci as a distraction while he looked for a means to fight.

As it turned out while meme magic was powerful, Rool's sets were still so out of date and decayed they would never pose a threat in the modern day. Watching his comrades fall in battle, he realized the only way to defeat the modern era was to utilize the power of the modern era. While he considered searching for Kristoph's corpse, that had already been confiscated and would force Romero to fight in his decrepit state to take back. So instead he took his zombies and he dug, and dug, and dug, and deep beneath the earth he found what something that fascinated him, a strange metal slab. From within the slab a voice told him a story of what happened since the ending of the Great Meme Magic War of 2016.

Kristoph was stopped by the unlikely trio of Yangus, Metireon, and Jecht, and after that it looked like it was time to go home with the evil plaguing their world dead. However, Metireon had made a contract with an evil from another world, and that evil still wanted its chance to end the world, devour the souls of mortals, and rend all their efforts to nothing. Of course, the problem for Yldretch, the great evil controlling the monolith, was that Metireon had at one point told Yangus of the being he had made a pact with to stop Kristoph. Yangus promised Metireon that when it was over, he would help him finish off Yldretch once and for all, and Yldretch needed to prevent this. So he possessed a man to assist him, one known as Ivan the Quotable, to finish off Yangus and allow him to devour the souls of all the mortals of this world as well as Kristoph's meme magic.

The plan backfired when Metireon realized what was going on and took the hit intended for Yangus, leaving him too crippled to fight but allowing Ivan the Quotable to be captured and purified of his fit of insanity. With Metireon gravely injured and Yangus alone against a being that seemed beyond his abilities, a message was sent to call for help before Yangus entered Yldretch's homeworld. To his surprise, many came to follow Yangus. Jecht rejoined his old group for one last round, as well as Garnet and Yomi who had been instrumental in aiding the trio with new weapons and back up. Even Galf, who owed Yangus and Metireon for saving his dogs from the extremely competent double threat of Malomyotismon and Goronu, was willing to join them for the final bout against the almighty demon.

With their research, Garnet was able to forge new weapons specifically designed to kill Yldretch, making an anti-demon sword and blitzball for for Jecht, an anti-demon hammer for herself, anti-demon dog collars for Galf, anti-demon kunais for Yomi, and an anti-demon axe for Yangus. What followed was a long and brutal battle in which Yldretch defeated and nearly killed Garnet, Yomi, Jecht, and Galf, but was ultimately torn to shreds by the power of Axes of Evil powered by the souls and experience points of millions of Metal Slimes. Yldretch ultimately survived by evacuating to a new body, but the furnace of souls powering him he had worked so hard to build up was gone, meaning he had only managed to reassemble to an only moderately powerful state, one he couldn't use to influence the world beyond the monolith in. He was defeated, his plan was in shambles, and soon he was likely to be mocked for being overly edgy.

Even if he could acquire souls to restore his power, mockery is inherently something that weakens beings in this world and ultimately he had resigned himself to the belief he could never truly recover. Romero told Yldretch he had suffered a similar fate of having all his plans come crashing down in the end, and how he had become weak and frail now, only able to summon a few zombies. From there, they talked a long time. Romero about his love of the apocalypse, the death and screaming of sentient beings, and of horror aesthetics. Yldretch talked about his longing for power, and how he needed others to die to empower himself. Their desires meshed perfectly, and Romero determined that perhaps this would be a good final chance for them to get what they wanted and destroy the world of Make Your Move. Romero turned the monolith into a fully functioning portal and merged with Yldretch, and absorbed the souls of some of his fallen Roolian comrades with Yldretch's abilities to gain their powers. Romero, looking the same as before but with weird black ichor dripping from his limbs and a third red eye in the middle of his head, now possessed the power of an admittedly weakened demon god, and was ready to bring the world of MYM.

His first task was going to be simple, storm Jestro's castle and devour the souls of the countless monsters within his beloved book. Romero had no problem murdering Sombra and Tracer and turning them into zombies with his newfound power. In this desperate hour, Isaac and Painyatta rushed to the defense of castle Jestro, and soon realizing the power that Romero suddenly possessed, the otherwise villainous Agatio, Silent But Deadly, and Genis agreed to team up to defend Jestro. Now the battle to save the world from Romero's revenge begins. But surely, with two threats this powerful in their prime combining, they won't lose against the creations of mere newbies... right?

Part 1: Protect the Book of Monsters

Characters: Isaac, Painyatta, Agatio, Silent But Deadly, Genis
You will get one stock for each of these characters for this event, lose all five and its game over. The stocks carry over between the level and the boss fight, for the record. For the first part you will be put on a stage that looks like a big LEGO castle which you are standing on the roof of. There is a tower at the middle of the castle roof, on which rests the Book of Monsters. It will pop out one of the monsters from Jestro's arsenal at random to help you with each wave of Romero's minions as they come. Considering each wave is of 8+ minions, its hardly a fair fight, but at hopefully you can hold the line. The rest of the stage is a flat platform with two platforms about the same height above the ground as battlefield platforms, with the tower being a solid construct that goes up as high as Battlefield platforms. The stage is however, considerably wider than Battlefield. There are two entries through which the zombies will crawl out of, one in front of and one behind the Book of Monsters, but typically only 1-3 monsters per wave will appear from the back door, with the final wave having four.

The first two types of minions are familiar to readers of Romero, though they've undergone a couple modifications over the years. To start off with, we have the standard Romero zombie, and let's ask Rool what those are like

"A Romero zombie looks much like a regular person, with plain features. However, it has a noticably greyish tint to its skin, and is typically in a certain stage of decomposition, so it can look quite grotesque. These zombies are about as tall as Link, although it varies from corpse to corpse. They walk forward with a strange stumbling gait, but they aren't as slow as you'd assume; their speed is about equal to that of Ganondorf's walk by default. They cannot jump, nor can they turn quickly. A zombie is incredibly difficult to destroy and has 50% stamina; it also doesn't take knockback, only flinching back slightly upon taking an attack."

Zombies will move at Ganondorf's dash speed if they see a foe and gain one low reaching jump. They have a lunging bite that deals an underwhelming 10% and knockback that KOs at 150%, but that's not the primary threat of a zombie. At close range they have a grab and bite that deals 3% per bite at the rate of most pummels that do 2% which you can escape with grab difficulty. However, all the zombies in the match will charge right for the grabbed player, not increasing the grab difficulty once they get there but adding their pummels to the damage the opponent has to deal with. The zombies also have a slightly faster punch they will sometimes use instead of their grab, as the grab is somewhat laggy, which deals 8% and knockback that KOs at 175%.

The next familiar type is the child zombie. Rool will describe this one's basics to you below:

"A small - smaller than Mario -zombie will rise in front of him; this takes another second or so. There you are, with your very own zombie child. These behave like regular zombies, except that they are more than twice as quick, but their grip is incredibly weak and can be shaken off by simply pulling away. Their stamina is a mere 15% and they take knockback like a regular character. In short, these are no real zombies, or at the very least they can't serve the same purpose."

The zombie children however, have a goal other than just latching onto the opponent and eating their brains. They are actually more interested in the Book of Monsters, and if the player has enough other enemies around them holding their attention, 2-4 depending on how strong the zombie type is, the little monsters will run right for the book, able to wall climb up the tower at a slow pace. If they reach the book of monsters, they will grab it and attempt to escape off the side of the tower with it. If the book of monsters is taken, its game over.

There are three more types of threat. The first of which is a zombie demon. These are humanoid creatures about the size of Mario, with disturbingly long tongues and a vicious set of teeth and somewhat imp-like appearences. They move at Bowser's dash speed and have two jumps, as well as 35% stamina. They have a couple attacks, the first of which is a vicious bite that deals 13% and knockback that KOs at 120%, which it will only use in close range. This is surprisingly fast and causes a bleed effect on players for 3 seconds. While they're bleeding, they take 1% per second and zombies will always turn around to pursue them, and their bites deal double damage. Their lunging bite will also deal 16% and knockback that KOs at 100%.

The second attack they have is acid spikes they can shoot out of their back, which can be fired at both a straight forward angle and 30 degrees above and below. They fire three of these in rapid succession and each deal 2% and flinching, adding up to 6%. Its pretty annoying in conjunction with the other two types of zombie. The final attack they have is to launch their tongue out as a tether, wrapping around the player and tethering them to a within 1 battlefield platform tether range of the minion. They can still drag the demon around, albeit rather slowly, beyond that range, but it won't allow them to ever go faster than their walk speed. The tether will only go away when the demon dies. If the opponent stands still for any reason, most likely to use an attack the demon will reel them in at 1.5x Ganondorf's walk speed. Fortunately the tether is rather slow, and hitting the tether will deal half damage to the demon.

Demon zombies will, like zombie children, go for the book when the opponent is significantly occupied. Due to demons generally being much more competent than zombie children, this is kind of a big deal, but fortunately they are the least common type of minion. That said, unlike the zombie children they can actually defend themselves once they have the book with their first two attacks, though they won't use the tongue tether.

The last regular minion is a Fragment of Yldretch, a floating orb of black magic that has Yldretch's eye and mouth on it. It only has one attack, a laser beam that functions similar to ROB's laser that it charges up over 1.5 seconds. It deals 12% and knockback that KOs at 160%, and can pierce through zombies and Book of Monsters summons to hit you, albeit hitting zombies for half damage in the process(Book of Monsters ones take full damage). It will otherwise try to avoid players and camp behind minions, moving around at slightly below Jigglypuff's dash speed through the air. If it can help it, it won't shoot other zombies but it won't always avoid doing so if it means a good hit on you. If two beams collide the beam will turn into one that travels as fast as Falco's brawl laser, is 1.2x as long as the previous one, and deals 20% and knockback that KOs at 90%. It will also immediately curve to your current position. These are very rare in early waves, but show up in greater and greater quantities toward the end which will mean the powerful curving lasers will become an enormous threat. The fragment can be destroyed if it takes 10%.

The final minion is a special case. After any other type of minion dies, it will leave behind a corpse where it was killed. At the end of waves 3 and 5, whichever two battlefield platform sized section of the stage has the most corpses on it will spark with dark magic, causing all the corpses to merge into a huge flesh golem. This golem has 40% stamina for each zombie in it, plus 10% for each zombie child, 20% for each demon, and no additional stamina for each fragment of Yldretch. Its total size is equivalent to the combined size of all zombie minions comprising it, and it has a few attacks. It has Ganondorf's tilts, minus the suction effect on Up Tilt, and Donkey Kong's smashes, which start off a bit weaker than the base forms if you only have one zombie while having the same lag, but they get enhanced by a small amount for each zombie and zombie child in the fusion. Fragments of Yldretch actually provide more power to these moves than a zombie, as well as decreasing the lag of and adding a gradually increasing suction effect to Up Tilt with each fragment involved.

The other attack these can use is the acid spikes attack of the demon, firing out three for each demon in the fusion. The power of the spikes is still 2% and a flinch, but the last one will deal knockback based on the total number the foe was hit by, and if the initial spike misses the foe it will start trying to slowly angle the stream to hit them. Each fragment adds 1% to the damage done by individual spikes, as well as increasing the final knockback considerably. This attack is pretty annoying to dodge, though its not so bad until you have to fight one of these with friends...

You have to stop a total of five waves, each having between 8-15 enemies in it, the later waves tending to have more and higher quality enemies in it. One special thing to note is after the second wave, zombie Sombra will appear and try to steal the Book of Monsters, able to carry it like an item. After the fourth wave, zombie Tracer will appear to do the same thing. They have fairly bad AI though, so as long as you're careful you should be able to prevent this. Once the second meat colossus at the end of Wave 5 dies, we go to a cutscene.

Interlude

Jestro arrives home with a bag of rubber chickens, only to see his home is under siege by an army of zombies. Realizing to his horror that the Book of Monsters is in danger, he teleports onto the roof and throws rubber chickens at some incoming zombies to distract them. He dives for the Book of Monsters and goes to protect it from his adversaries, only for an smiling Romero to float in above him. The other characters try to stop Romero but are far too slow as Romero flies right at Jestro. Jestro throws many rubber chickens at Romero to try and stop him, but Romero ends up smashing Jestro through the roof of the castle and to the ground, holding up the book of monsters in triumph. However, he is then knocked backwards slightly by an acid hammer, as Fortis has arrived to interrupt Romero's plans. She tosses the book to Jestro, and gestures for him to hide it as the other characters descend into the room. Romero's face turns to an angry scowl as he opens a dark portal behind himself.

Part 2: Boss Fight

Romero is a bit smaller and scrawnier than Captain Falcon, being an old movie director rather than a superstar athlete. He can float around at a bit below Ganondorf's dash speed. He has a total of 500 stamina and is not flinched by attacks, and long duration traps will hit him once per second. He will almost certainly get out of those in under a second, so don't expect too much. Romero has several attacks, and will get considerably more aggressive in his patterns as his health drops, though he won't learn new attacks. Aqua Fortis is added to your party for this match, as the last playable character, and the one you previously had out is restored to full health.

The arena is a walkoff about 1.5x wider than Final Destination, with 5 platforms in an X-shape above the center. Romero will stay within three quarters of a battlefield platform of one of these five platforms at all times, and the platforms are each 1.3x the length of a Battlefield Platform.

Hell Portal

Romero raises one hand and opens a dark portal, from which will spill one of the minions from the previous level per second for five seconds. The portal can be destroyed early if it takes 40%. At larger amounts of health, it will spill primarily regular and child zombies, the latter of which are pretty useless now but will come in 2's compared to the other minions, and occasionally fragments and demons. Fragments and demons will increase in number when Romero is low on health, and zombie children will stop showing up. The portal has a radius equal to Bowser's width, and Romero doesn't tend to make them too frequently, like once every 20 seconds or so. When Romero is at 75 health or lower, he will straight up drop a flesh golem made of 3-4 zombies and 1-3 Fragments and Demons out of the portal as the last minion from each portal.

Flesh Golem
Romero will animate a 2 battlefield platform sized pile of corpses into one of the flesh golems with some dark magic. This functions the same as per usual, though for the record a flesh golem dropped out of a portal will actually leave a corpse that can be used for this, complete with all of the parts comprising it. The ones made like this will not leave anything behind. Romero is rather greedy with how big he wants the golems to get before animating them, but will get more frantic in doing so once he hits half health. If he gets to 75 health or less, he will actually start animating 3 battlefield platform sized piles of corpses, making for even scarier golems.

Twilight Orb
One of Romero's two "standard" attacks will have him throw an orb of twilight energy at the ground, using the power he got from Zant's soul. It will deal 18% and knockback that KOs at 100% while it flies, but when it hits any solid object it will explode into 8 smaller orbs that fly out in each cardinal direction. These only deal 4% and a flinch, but are pretty annoying, especially when you consider that this move actually does give Romero that much lag and he sometimes will almost outright spam this move. It also leaves little patches of the ground looking like the Twilight Realm from Twilight Princess, causing an area the size of a battlefield platform to deal 2% per second for its five second duration.

Zombie Claw
Romero's hand grows in size and becomes rather gorey looking, with ichor also dripping from it, before he lunges forward a battlefield platform in his other "standard" attack. This deals 28% and knockback that KOs at 70%, but is rather telegraphed and easily dodged or shielded. While this would not be an extremely threatening attack in the hands of another boss, it can be terribly frustrating to deal with given how much Romero will clutter the battlefield.

Gore Wizzerd
Romero will snap his fingers and cause his body to explode in a blast of gore, dealing 20% and knockback that KOs at 125%. He will then reappear 1.5 battlefield platforms away as the gore reassembles into his body. The teleport actually has about half a second before the explosion goes off, giving you a free hit if you're smart about it, but also allowing Romero to run away. He spams this to try and escape you at higher percents, with a smaller window provided to actually hit him as well.

Gorestorm
Romero's hands pop out of their socket as he shoots a stream of gore from it, similar to Samus' final smash. It is significantly weaker than said Final Smash, only dealing hits of 2% that add up to 38% and final knockback that KOs at 110% while covering an area about half as big, but Romero can angle it some while he's firing it out to catch people as they're moving. It is possible to outrun, but not incredibly easy, especially with other zombies running about. This does give Romero considerable lag and is a good moment to wail on him, fortunately.

The gore will be left around on the ground, and the zombies will be more than happy to gobble it up if they're nearby. Each firing of this will create a 2-3 battlefield platform width area of gore depending on how hard Romero angled it to try and hit you, and zombies passing by will eat half a battlefield platform of it. Consuming this will give them 20 additional stamina, and make their attacks and movement a fair bit faster while giving them an additional jump. Terrifyingly, a flesh golem can also do this, and each battlefield platform of meat qualifies as one zombie for a flesh golem. The gore also will slow players walking through it by 30% of their movement speed.

Into Red Smoke
Romero summons forth a cloud of red smoke by channeling Jafar that covers an area of 2x2 battlefield platforms, which will obscure him and all of his minions within for 4 seconds. Romero will not actually perform any actions while inside the cloud, other than float around at 1.5x his usual speed... and plant dark energy snakes once every second within the red smoke, which will then fire out in a fairly crazy movement patterns that are fortunately set, but very annoying to actually dodge if you're in their line of fire. The snake also deals 23% and knockback that KOs at 100%. The good news is, if you look closely at the cloud you can see the outline of the snake when its created, indicating where it is and what direction its pointing, so if you're paying close attention its easy to dodge out of the way of this attack. Paying close attention isn't necessarily easy though, and the tell becomes a bit fainter when Romero is at 150 health or less.

Sneak Attack
Romero turns invisible using the power of the many Roolian invisibility sets, as he presumably absorbed at least one of their souls. He will fly at double speed in this state and for four seconds will try to get behind your character's back. There are quite a few paths he can take to do this, but if you hit him at any point during this it will knock him out of the invisibility. There is a point halfway through where he will blink into visibility as the cloaking will fail to conceal him, giving you an idea to his location. He will not go for the backstab until the four seconds are up, and only if he actually is right behind your character. To make up for the weaknesses of this attack, its actually powerful enough to instantly kill your character, dealing 60% and knockback that KOs at 0%. He will also vary up the time he takes to between 3.5-4.5 seconds once he's below 250 health, and at 150 or less health the tell as to Romero's position becomes a fair bit fainter.

Miniboss
Romero summons Gengar, who is already a ghost so returning him to his former "glory" wasn't especially hard. He will then attempt to throw the Gengar at the player, with it not dealing damage on contact but rather taking off the top of the player character's head to tamper with their brain. For the sake of the synergy with the zombies however, Gengar will not put it back on because there's no way for the player to tell this was an illusion like Rool intended and the set is in fact, that tacky. This will deal the opponent 20% over the second Gengar is attached to them, and cause their attacks to have moderately increased start and end lag for 12 seconds. In addition, in those 12 seconds if the zombies collectively deal 50% or more with bite attacks, they will consume the opponent's brain, killing them instantly.

If the opponent does not get hit by Gengar, it will instead float up into the air as another minion, firing out a shadow ball once every second while dealing 4% on contact as electricity sparks through it for no logical reason. The shadow ball deals 12% and knockback that KOs at 200%, making it an additional annoying turret... with a whopping 70 stamina. Its a bit of a lose-lose situation with this attack, as Gengar will take this state if its shielded too. Good news is this is Rool's rarest attack, but he will start using it more often at 75 health or less.

I have not gotten into the worst thing about Gengar though, and that's that it will grow in size over the next 10 seconds, going from its regular Wario size to that of Giga Bowser. As it does so, it will fire larger shadow balls that deal increasing damage and knockback, up to 25% and knockback that KOs at 75% at max size. The shock effect on on contact will also be increased gradually up to 16% and a Zamus paralyzer stun, which is fairly terrifying in the context of Romero's other attacks. Once it reaches max size, the Gengar will also start throwing zombies as projectiles that deal 15% and knockback that KOs at 160%, and then become another minion. He can also throw the snakes made by Into Red Smoke if he's inside it, with the same telegraph as said move in terms of smoke visibility and half a second of startup lag.

After all of Romero's health is depleted, he will violently explode with dark magic, the world rid of his menace forever. You can faintly see a small portion of Yldretch sneaking out after he dies, still alive but looking rather ashamed of himself for participating in this farce. Congratulations!
 
Last edited:

Bionichute

Smash Champion
Joined
Jun 30, 2012
Messages
2,151
THE SANDS OF TIME


One day, Father Time was relaxing in his time dimension, as all time gods tend to do. He was sitting in his clock throne, reading TIME Magazine, and watching old documentaries on Netflix. Then, he got a phone call. The caller was the Grim Reaper, Father Time's worst enemy.

"What do you want this time, Grim Reaper?" Father time asked.

"Your time has come!" The Reaper shouted, obviously intoxicated. "I have unleashed the worst creations you forgot about, and they'll ruin the time stream!"

"Are you seriously trying to do that again?" Time asked, rather annoyed. "You know that's not how time works, right?"

"SHHHHHUT IT!" The Reaper yelled. "These four are the deadliest, absolute worst menaces to the universe! I will introduce them now! I'll send you pictures by text."

Father Time waited for a minute, watching the "Grim Reaper is typing" message for a good ten minutes.


"The Elves, with their complete lack of cohesion! Miracle Matter, with its absolute unplayability! Caterpie, with its obvious incompleteness! And Rocket Grunt, with absolute no thought put into it! These are the four horsemen of your apocalypse, Time!" The Reaper soon went offline after posting this.

Okay that was pretty bad. With these four demons running about, what could he do? Time thought for a while, before coming to a conclusion. These were some of the oldest creatures in the known MYMiverse, so what better way to deal with them than to summon some of the newest?

Using his connection to time itself, Father Time called upon some of the newbies of the world. These were Jestro, Turtonator, Tracer, and Genis. Unfortunately, the problem with pulling beings from time is that you have to explain it to them later.

"Whoa, you actually learn some magic there?" The Book of Monsters asked as it and Jestro popped into the time palace.

"I've been practicing, but I'm not that good at teleporting." Jestro retorted as he looked around the room. "Where are we anyway?"

"I dunno, but look at that guy!" Jestro looked over at the towering Genis, who glanced around the room himself, though in an almost bored manner. "Now THAT is a villain! Let's go talk to him!" Jestro walked nervously up to the monster. "Hey, big guy!" The Book of Monsters greeted. "Wanna help me destroy a kingdom?"

Genis let out a small laugh as he looked down towards the jester and his book. "Why help you? If you were worth anything, you'd be working for me." Genis let out a scoff. "Besides, I've destroyed planets, what's a single kingdom to me?"

"Oh, you think you're better than me just because you have a body?" The book yelled back, offended at Genis' comment. "Let's go, right now!"

Before the two could start fighting, there was a sudden loud noise. "TUUUUUUUUUUURT!" The two glanced over to the source of the noise, Turtonator.

"Is that one of your monsters?" Jestro asked the book.

"Why would I make a monster that looks like that?"

"I dunno, just looked fiery."

"Alright, what's going on here?" The three turned towards Tracer. "I was at the rub-a-dub having a rosy lee, and then suddenly I'm on my bottle and glass in this place!"

"Are you speaking english, lady?" Jestro asked.

Jestro suddenly had a sword to his throat. "Are you the one who brought us here, clown?" Genis asked the terrified jester. "I was in the middle of an exquisite game."

"Oi, I was too!" Tracer followed up. Turtonator finished by yelling its name very loudly.

"Are you guys all blind?"

The four turned to face Father Time, resting upon his throne. "I've been here for like, five minutes." He said.

Genis raised a blade. "You must be our captor."

"I guess captor is a way to put it." Time said. " I am Father Time, and I brought you guys here because I need to you to help."

"'Help' isn't a word in this book's dictionary." The Book of Monsters yelled. "That's what you get for picking an A-class baddie!"

'I really don't have time for this." Father Time groaned. "Basically, the Grim Reaper brought back four of the worst beings in the universe, who will destroy everything if you guys don't defeat them, got it?"

"Sounds like a real two and eight, some real Barney Rubble, china plate." Tracer said, leaving everyone confused. "But don't worry, you got a member of Overwatch here to help!"

"This could be interesting." Genis said, nonchalantly. "I suppose I could help this once."

Turtonator let out a honking noise.

"This might be a good way to whip some of the monsters into shape!" Jestro suggested to the upset book.

"I guess I don't really have a choice." The book grumbled. "I guess we're all helping."

"Good, now off you go." Father Time waved his hand, sending the four, uh, heroes off. Hopefully, this wasn't an awful idea.


Part 1 - Jestro vs. The Elves

This Story Mode consists of 5 main boss fights, the first four having a specific character fighting against a boss, each with four stock. In this fight's case, as seen above, we have Jestro fighting against The Elves. And I had to actually read parts of that set to make this.

The fight takes place in Santa's ruined workshop, which is around the size of Final Destination. At the center of the stage is the workshop itself, which has two workbenches on either side that act as thin platforms. They hover only slightly off the ground, around half of Ganondorf's height, and are mainly there for a bit of extra height. Both of the workshop's walls have been destroyed, leading out into the snowy fields on either side of the stage. These snowy fields lead to the blast zones of the stage. As a note, the top of the workshop is not visible.

At the center of the workshop is a large dollhouse, which the three Elves hide in for most of the fight. We'll go over them in detail as we continue. This fight acts as a wave based fight at first, with Jestro having to fight against the evil Elves' army of evil toys. They summon the toys by opening a window, and then chucking several bags of them onto the stage. There are four types of toys they can summon.

First is a toy soldier, a pretty basic minion that can only attack by firing a short ranged shot from its shotgun, though it deals decent knockback, and 8% damage. The toy soldier is fairly small, around Pikachu's height, but rather thin. Its also slow moving, goosestepping across the stage at Robin's run speed. However, its attack is quick to activate, and can blow the light Jestro away. Luckily, it only has 10% health. AI wise, toy soldiers only tend to wander around aimlessly, and attack only when Jestro comes near.

The second is a toy robot. The toy robot is slightly taller, around Jestro's size, but is much faster, moving at Mario's run speed. The robot will go directly after Jestro, with its main attack being a one-two punch combo. The punch is relatively quick, considering the robot's lack of elbows, and both punches deal 5% damage, with the second one dealing decent knockback. The robots are a lot tougher than any of the other enemies, having 20% damage. Fortunately, the robot has awful traction, and takes a while to actually fully turn around.

The third is a nutcracker, which is significantly more advanced than either of the last ones, having TWO attacks, rather than just one. Each nutcracker is slightly taller than the robot, mostly due to the hat, and is only slightly thicker than the toy soldier. They also carry spears, which they use for their first attack, a long range spear thrust that has around the same range as a standard sword, and deals 7% damage with below average knockback. The second attack is a biting attack, where it chomps forward several times in an incredibly close ranged hitbox. The chomp deals up to 12% damage if you get caught in it, with the last chomp dealing heavy knockback. Luckily, this attack is obviously telegraphed, and takes a while to start. The nutcracker has 15% HP.

The final enemy is the present, a Christmas present that hops around the stage. Only one of these appears per wave, and when destroyed causes a bunch of healing items to burst out of it. They usually tend to be the final enemy of the wave, and are there to make the onslaught a bit more bearable. The present is around Kirby's size, is incredibly slow, has no attacks, and has 5% HP.

The first part of the fight has you dealing with 3 waves of these enemies, each wave increasing the total amount, with the first having 30 enemies, and the last having 50. With the massive amount of enemies to deal with, its optimal to leave them to your own minions. Once you've dealt with the waves, the first Elf will emerge from the dollhouse.

The first is Bobby, the most immature of the three Elves. Bobby will exit from the dollhouse riding on a toy train, which starts flying through the air, somehow. The train is annoying, as it running into your minions will cause them to die instantly. Appearance wise, the train is seven carts wide, plus the front that Bobby rides around on, and is almost the full length of the main Battlefield platform. Defeating the train requires destroying all seven carts, each of which has 10% stamina.

Only the front of the train acts as a hitbox, and while it destroys minions instantly, it will only deal 10% damage to Jestro. The rest of the train acts as a moving platform, which is obviously hard to stay on. The best strategy for dealing with Bobby and his train is to throw the Book of Monsters off in a corner of the stage, and use Jestro's own set to destroy the carts when it goes after the minions you created.

Once all seven carts have been destroyed, this just leaves Bobby and the front of the train. A single smack to the front will cause Bobby to fall off it. On the ground, Bobby is worthless, and will actively run away from you. A single smack to him with any attack will cause the annoying Elf to fly directly into the blast zone, while also relieving him of all the sweets his was carrying, perfect for getting yourself ready for the next phase.

The second elf will emerge from the dollhouse. This is Stevie, the most annoying of the elves. As soon as he appears, he will construct a massive toy robot that he pilots from the top of. This is incredibly large, around the size of two Ganondorfs with Super Mushrooms. This is what the two platforms are for, as they will help you hit the head, the only part that counts as taking any real damage.

The robot has a few attacks, the first being a downward clamping attack that deals 10% damage. It has great range to it due to the size of the robot's arms, but is incredibly laggy. The second attack has the robot shoot a laser from its eyes, in the direction of wherever Jestro is. The laser beam is large, about 2/3rds the size of the Zero Laser, but is much slower, and has a completely different hitbox from it, only being able to deal one hit of 15% damage. The laser will travel until it hits something, whether that be the ground or the top of the screen. The final attack has it summon five toy robot enemies from its chest, rather simple.

Due to the robot's size, it can be hard to hit the head, even with the platforms, but just because you need to hit the head, doesn't mean the rest of it isn't capable of taking damage. Causing 50% damage to the robot's body will cause it to tip over and enter a stunned mode, its head lowered enough for Jestro to reasonably attack it. The best strategy for this is to have your minions attack the robot's body, while you dodge its attacks. Once the head has taken 100% damage, it will explode, leaving Stevie behind. Stevie behaves exactly like Bobby did, leaving behind healing items when killed.

The final elf will then enter the fray. However, instead of entering the stage on his own, Jerry, the only smart one of the Elves, will instead take control of the dollhouse, which will then grow a pair of mechanical wings, moving it to the foreground. The dollhouse is big, not as big as the robot, but larger than Bowser in both height and width. The dollhouse is the least complex of the three boss toys, but is the most deadly.

Its only attack is to drop down on top of Jestro and his minions. Like the train, this will instantly kill any minions it hits, but will also deal a devastating 30% damage with heavy knockback if it manages to hit the clown. There is some lag before the drop, but its mainly telegraphed by the wings not flapping for a moment. The house will also mostly go after minions when attacking as well. While the house is in the air, Jerry will throw out more bags of toys, causing more problems for you.

As you attack the house, it will gain visible cracks across it every 25% it takes, until it is finally destroyed after 150% damage. The house's destruction will reveal Jerry, who, again, behaves like the other two Elves, except he doesn't drop any items since hitting him ends the boss fight. That's the first of the four demons out of the way.

To be continued...
 
Last edited:

Smady

Smash Master
Joined
Apr 29, 2007
Messages
3,307
Location
K Rool Avenue
STORO


The Squeak Squad moveset by KingK.Rool was not his most iconic, but as Storo was fat this compelled a young and only slightly obese MasterWarlord to Super Vote it all the way back in Make Your Move 3. On retrospect, the ninja is simply underpowered and mediocre, Doc has terrible balance, Warlord may have been onto something as Storo brings the beef. He comes down in his very own UFO that he borrowed from Doc, and Rool managed to get across an aspect of Storo we all missed: a fat man who hoards random things he stole from his fellow villains, perhaps to fill a hole in his soul that can only be filled by collected trinkets from those he holds dearest? There's a lot of evidence to suggest Rool was subtly making digs at his big friend/wizard, MasterWarlord, but no one picked up on this at the time. Rool's message in a bottle moveset style won't soon be forgotten.

FATISTICS

Size: King Dedede
Weight: Bowser
Ground Speed: King Dedede
Air Speed: Bowser
Fall Speed: Bowser

Storo is fat, he is a super heavyweight, and he is slow. His two jumps aren't good, actually fairly mediocre and everything else about him is about average, but when he is so fat and not the slowest in the air he's not all that disadvantaged. He can't wall cling, he can't wall jump and he can't crawl. What a sad life this fat man leads, indeed!

SPECIALS?

NEUTRAL SPECIAL: EAT THE PAIN AWAY


Storo tosses out a random piece of food at a rate of 3 per second and has some lag on the end. This food can be eaten by foes if they're mean, the food will heal for 3-5% but there is a 1% chance that the food will be a big chocolate or strawberry cake and heal 20% instead. Storo will be motivated when he has food in his sights that is in the same range as Mewtwo's Disable range for consistency's sake. This will instead make him go 1.1x as fast for each food he sees and caps at 1.3x speed if he sees three or more bits of food in front of him. You see, Storo is a glutton for punishment and wants to salt the meat so to speak, so plays on the opponent's desire to eat the food that he made, eating it for himself at the last moment.

Storo will gain weight when he eats the food, this gives him an extra weight unit every time and caps insanely late. At the same time, each weight unit reduces Storo's speed in the air and on the ground to 0.99x its normal amount. Storo will maintain his weight every stock and there is a mechanic to burn the weight off. This requires dashing for 10m in Smash 4 and will burn off 1 weight unit, but this takes so long it will never be viable. Storo has to diet to burn those empty calories. But he's addicted to food! This creates a realistic dichotomy where Storo can become a HMA if he's blatantly a hippo and eats all he wants.

UP SPECIAL: DOC'S UFO


Storo comes down in his very own UFO! The classic Rool line brought to life as Storo summons Doc's UFO around himself for his recovery. This gives him the same recovery as ROB right down to having to wait for the fuel in the UFO to come back. Storo can't use any attacks during this as he's stuffed inside Doc's UFO but has full super armour, making this a fairly stall-y move! He can be grabbed out of the move however and if he reaches the point of no fuel, the UFO explodes and Storo falls into helpless almost to his sure death if he doesn't land on the ledge, and if he lands on the ground has bad end lag.

When Storo gets fatter it's hard to fit in Doc's borrowed UFO, his fat bursting out of the UFO's sides more and more. This works in the same way as Olimar's Smash 4 recovery in that it gets worse but without the plus side. Every 10 food that Storo eats, he will make the UFO's fuel go 3/4 as far, after 40 food this will make it go only 1/4 as far before it explodes from trying to maintain Storo who has outgrown his moveset. Maybe he has long outgrown the moveset hobby as a whole? In a mental and physical sense, perhaps Storo has long since outgrown his toys so to speak and should move on to more mature mediums.

When the UFO explodes, it's a bob-omb explosion that deals 15% and will KO at 90%, a strong KO suicide move! When Storo wants to finally end it all, he can opt to try and suicide bomb his enemies in Doc's UFO. Doc won't like that he wrecked his UFO, but I'm pretty sure Doc has moved on to other hobbies and left the Squeak Squad a long time ago.

SIDE SPECIAL: NINJA'S STAR


Storo takes out the ninja's star, does a cool looking spin, and tosses it forward! This is cloned from Greninja's Water Shuriken and will be able to be charged up as well for the same effect, just without the water aesthetic. Is this lazy design? Maybe, but it is fitting for the character to have lazy design. This deals the same damage and knockback too. The star can get stuck in Storo's food. This will make any character that tries to eat the food instead take a token 1% from the star and drop the food on the ground. Perhaps this is a way for Storo to force himself not to overeat but get all the benefits of the food, without worrying about other hippos blatantly stealing his food? Certainly that is a viable theory.

As the charge goes up, Storo has to do more of the cool dance, spinning around in place and doing taunt-like poses. As Storo gets fatter, this will become more difficult, raising the time it takes to charge the move as he slowly goes through the cool looking dance, balancing it out! Every 10 food will make the charge take 1.1x as long to finish and eventually will take 1.5x as long to charge at 50 food. He wants to look cool, even now when he is a hippo, how sad.

DOWN SPECIAL: DEDEDE'S HAMMER


Storo takes out Dedede's hammer, while this is his own hammer in Squeak Squad, Storo lost it on his way to the Smash 4 in the interluding years since his game and his MYM3 moveset. Storo charges up Dedede's hammer in the same way that Dedede charges his Jet Hammer down special. As the heat goes up, Storo starts to sweat the same way that Dedede does and takes 1% a second. This is in fact the best way to burn weight... literally! This will burn 2 food every second on top of the damage as Storo feels the burn so to speak. Storo must feel the pain of losing all his comfort food after indulging his id. Though perhaps this is not as painful as losing his friends, Doc and Ninja, who are no longer tagged in when he gets to 150% By coincidence this is the max rage percent in Smash 4, so maybe this was Rool trying to say something about a certain big guy's rage.

Storo will not do the same move as Dedede and instead opts to steal a much better move, Dedede's forward smash! At the end of the charge, Storo lets rip and whams the big hammer against the ground, dealing the same damage as Dedede's move but going up equivalently if the move goes over the normal amount of charge a charged move can. This can go up to dealing 45% damage and will KO at 60% if the move is charged for up to 5 seconds. The hammer will squash any food it hits and splash the contents of the food forward as a weak hitbox that deals 1% damage... but heals for 1% if it hits the foe's mouth, cancelling out any benefits. When Ninja's star is in the food, this instead hits the ninja star into the foe for the same damage!

That'll teach em for trying to be blatant hippos. At the same time, Storo's comfort food is destroyed. He'd been saving up that food since Doc and Ninja left the group! This makes Storo's rage permanently go up by as if he took 1% for every food he destroys, and can boost him over the normal 150% to a new cap of 250%, which will make him deal up to 1.25x the damage and knockback. This goes for any food that is destroyed in his direct vicinity but I felt like introducing this mechanic here on this move for some reason.
 
Last edited:

Slavic

Ask not the sparrow how the eagle soars
Joined
Jun 5, 2013
Messages
757
Location
taco bell, probablyn't
the skeleton

click here for more of the skeleton
- - - - - - - - / / / / / / / / - - - - - - - - / / / / / / / / - - - - - - - - / / / / / / / / - - - - -
\ \ \ \ \ \ \ \ - - - - - - - - \ \ \ \ \ \ \ \ - - - - - - - - \ \ \ \ \ \ \ \ - - - - - - - - \ \ \ \ \
Back in the golden yesteryear of 2010, Make Your Move newcomer Axx o Nn brought to life (or afterlife ehehe) the skeleton into a moveset. Though no introduction or names are given, a reverse Google search on the header image Mr. Nn included in his set brings up ‘Skeleton Dance’, a Walt Disney directed animation from 1929. Whether or not Axx o Nn is actually Walt Disney thawed from cryostasis was a point of great contention. Unfortunately, it was revealed that Axx was actually Rool thawed from cryostasis, much to everyone’s disappointment. The shift in assumed persona may indicate that this is not a set for Disney’s ‘Skeleton Dance’ but rather a borrowed image for the sake of conveying the concept of a skeleton as a whole. Don’t look now, but they are everywhere (there’s one in you right now, reader!). Close inspection of the skeleton’s Final Smash does reveal that King K. Nn was aware of Mr. Disney’s work, and decided the end of a set is the proper place to explain who the character is. With certain typographically based skeletons gaining exposure on the modern MYM scene, the skeleton brings its classical training to remake Axx o Rool’s set.
- - - - - - - - / / / / / / / / - - - - - - - - / / / / / / / / - - - - - - - - / / / / / / / / - - - - -
\ \ \ \ \ \ \ \ - - - - - - - - \ \ \ \ \ \ \ \ - - - - - - - - \ \ \ \ \ \ \ \ - - - - - - - - \ \ \ \ \


The skeleton is a fast runner, a quick faller, and a good jumper. This should be obvious given the musculature of the skeleton, but if that’s not descriptive enough I’ll break it down for you. The skeleton’s walk, dash, jumps, and even height are identical to Marth’s. Perhaps this is the skeleton of some alternate universe Marth, who is now dead? Due to not having an air capturing cape, however, the skeleton’s fall speed is actually around Ike’s more than Marth’s. The skeleton has low traction. The skeleton does not possess a lot of meat on its bones, unfortunately, giving it a miserable weight under Jigglypuff’s. Yikes. While definitely flimsy, the skeleton’s frailty manifests itself in a different way than other characters. The low weight is a result of how far the skull alone is knocked around, as the skeleton’s body takes only hitstun from attacks, essentially immune to knockback.

Sharp-eyed readers may notice that the skeleton, like so many of its brothers, is made of interconnected parts referred to in this set as ‘bones’, for simplicity’s sake. The skeleton is composed of 206 individual bones, but actually is broken up mechanically into fifteen bones; The skull, the ribcage, the pelvis, both arms (which are made up of an upper arm, lower arm, and hand), and both legs (made of an upper leg, lower leg, and foot). As the skeleton is damaged throughout the fight, it will lose bones for every 6% damage it takes. This may sound like a horrible mechanic. In reality it sounds like a xylophone. Jokes aside, it takes a whole 84% damage for the skeleton to be rendered only a defenseless skull, and the bones are knocked off sequentially, starting with the feet, then the hands, then the lower legs, then the forearms, followed by the upper legs and arms, the pelvis, and ultimately the ribcage.

Each bone weighs the same as the skull, and when hit by an attack that pushes the skeleton over that 6% increment the bone will be launched as though it were a separate character of that weight. The bones, should they hit foes by chance, will deal 5% damage and hitstun, a reminder that skeletons in any form are dangerous. If they land back on the stage, they will placate in that location unless disturbed, and after five seconds will return to the skeleton via bone magic. Very clever opponents will focus on throwing bones off stage, as once they have left the screen they are (mostly) gone for the rest of the stock. As one would expect, losing bones gives some disadvantages to the skeleton stat-wise. As the skeleton loses its leg bones, pelvis, and ribcage, its max speed decreases from Marth’s all the way past Robin’s when hopping around as only a skull. Jumps are similarly affected. The different bone combinations that the skeleton possesses are many, as bones will still return even if previous ones had been lost. This means the skeleton can be as ridiculous looking as a skull, the right hand, and an entire left leg with nothing else. The skeleton has unique standards for every combination of bones possible, which I can do because this is a mini and those standards will never get made. The skeleton’s Specials remain unchanged, thankfully, making this manageable.
- - - - - - - - / / / / / / / / - - - - - - - - / / / / / / / / - - - - - - - - / / / / / / / / - - - - -
\ \ \ \ \ \ \ \ - - - - - - - - \ \ \ \ \ \ \ \ - - - - - - - - \ \ \ \ \ \ \ \ - - - - - - - - \ \ \ \ \
Neutral Special - -// - - | - - //- Bone Throw -\\ - - | - - \\-
An uncreative name for an uncreative move. In an action performed by nearly every skeleton ever known to duke it out, the skeleton takes one of its own bones (the one next in rotation to be lost) and throws it forward in a wide but fast arc. While missing important elements for throwing such as arms and hands, the skeleton will harness bone magic to throw its bones instead. Similar to having a bone launched by an opponent attack, these weak projectiles will deal 5% with hitstun, meaning the skeleton should probably drink some more milk. The skeleton can perform this move pretty quickly, able to throw out about two bones a second, but should be careful as it can quickly run out of bones by spamming this move. The bones can, of course, be recovered after a few seconds, keeping the skeleton in relatively good shape. If the skeleton is just a skull, it will throw itself in this trajectory as a projectile, which can actually be a practical method of horizontal recovery.

That’s just if the move is tapped. By holding the input, the skeleton will perform the bone throwing action as normal, and should the bone hit nothing but stage this attack is unchanged. However, a ‘charged’ bone will instead imbed itself into the opponent’s exterior, physically attaching to the most similar external feature to that bone and creating an exoskeleton. Each bone attached to a foe will gradually lower their speed for each bone, making them a lumbering mass with fourteen bones coating them. On the downside, the skeleton’s bones are now bound to the foe, and won’t return on their own accord leaving the skeleton semi-permanently nerfed. What happens when the skeleton throws its final bone, the skull, using this move held? Well, should it hit an opponent, it will attempt to take control of their body; at least one bone must be present on the foe for this possession to work.


I’ve reposted the image from above. As you can see, the skeleton has friends. By attaching its skull to an opponent, it will compress their entire body into a new skeleton, made of a skull and whatever bones were attached to that opponent. In addition to gaining an ally, this will automatically kill the foe, which is neat. There’s about a second where the skeleton’s player is unable to perform any actions as a new the skeleton emerges from the ground with all its bones, this one being playable. This new skeleton friend will essentially be a duplicate of the skeleton, attempting to copy whatever non-special moves the skeleton uses at the same time as well as shadowing in movement.. This can be overwhelming as the maximum limit of skeletons on the stage is four (any more is a fire hazard). Skeleton friends have the same bone mechanics as the skeleton, except that bones that are knocked off disappear rather than landing on the ground. If there are any skeleton friends on the stage when the skeleton is KO’d, it will switch control to the oldest skeleton friend after the stock is lost rather than respawning normally.

Side Special - -// - - | - - //- Bone Taker -\\ - - | - - \\-
The skeleton takes a bone using bone magic, which has different connotations depending on how its used. A pale dusty aura appears in front of the skeleton, roughly the size of Kirby but floating at the skeleton’s skull height. Should a skeleton friend be in this aura, bones will be seized and added to the skeleton’s body in order of least importance, ranging from feet to ribcage. In addition to filling any gaps in the skeletons’ body, this serves as a way of boosting the skeleton’s effective health past its cap, as the skeleton can add multiple of any bone to its body. Should a skeleton friend be reduced to a skull only, it will disappear into some sublime bone dust, leaving the skeleton lonely.

This move is also important as this is the only direct way for the skeleton to reclaim bones bound to opponents. The forceful tearing of the foreign bone from the foe will deal a tasty 7% damage as well as adding the bone back to the skeleton. Diabolically, the skeleton can use this move on opponents who don’t have bones embedded in them. When this occurs, the skeleton will extract a bone at random from their body, pulling it out with even greater force than the former part of the move and will deal 10% as well as adding free bones to the skeleton. There is significant ending lag on this move, however, and can be freely punished on a miss. This is a crucial strategy, giving the skeleton an endless source of bones to build more complete skeletons with.

Up Special - - -// - - | - - //- Skeleton Dance -\\ - - | - - \\-


When used on the ground, the skeleton will get down with its bad self and dance. As long as the input is held, the skeleton will spin around as pictured above, becoming a self-contained active hitbox which damages foes for 6% a hit and a little stun. This can combo into itself a bit, but after a second of use the skeleton will pirouette, dealing a higher 8% damage and sizable horizontal knockback that can KO starting at 140%. The starting and ending lag exist, and are punishable if used off and on. This does make it tricky to hit the foe sometimes, which is where skeleton friends come into play. As seen above, the skeletons dance in a ring with interconnected hands, and possessing multiple skeletons on stage will cause this to occur. The damage on the moves and the timing of the pirouette are identical, but obviously cover a wider range, which can stretch over a third of Battlefield with four skeletons out.

In the air, this move is entirely different. The skeleton will deconstruct its body, creating a chain of bones with its skull on the end. This chain travels in an arc similar to Bone Throw but with more vertical reach. The range on this move is dependant on the number of bones inside of the skeleton, and every five bones are roughly equal to one Battlefield platform, maxing the skeleton’s range on this move at three platforms long. This whips opponents above the skeleton for 7% damage with decent knockback, KOing at 145% and above. With skeleton friends out, all their bones will combine with the skeleton’s, creating a much longer chain. In fact, with a maximum number of skeleton friends all with a maximum bone count, this move can reach distances of 15 platforms away! Very nice! However, because the skeleton doesn’t take knockback traditionally, it uses this solely as an offensive move unless it walks off the side of the stage.

Should this move be used by the skeleton whose only bone is the skull, and no skeleton friends are present, it will perform a pathetic vertical bite that lifts it about Kirby’s height. The bite will deal a paltry 3% flinchless damage, but will latch on until the opponent has struggled with attacks enough to knock the skull off. This can be a surprisingly effective recovery, as often the foe will need to land to use quick moves. On the flipside, the opponent can just let themselves fall off stage to effectively suicide KO the skeleton.

Down Special - - -// - - | - - //- Bone Fuse -\\ - - | - - \\-


This was originally the skeleton’s Final Smash, back in everyone’s favorite contest Make Your Move 8, but has since been downgraded to the skeleton’s Down Special. When using this move, the skeleton and any skeleton friends will begin dancing a different kind of dance, a solo skeletal boogy. This is not to seduce the opposing players but rather to harness the fickle nature of bone magic. After three seconds of getting down with their bad selves, all bones on the stage will return to the skeleton, a good way to ‘quickly’ get your body back together. SInce the skeleton can’t be interrupted proper while using this move, only have its bones knocked off, it is more fruitful for foes to target bones on the stage and hurl them away.

With skeleton friends on the stage, the skeletons will come together at the skeleton’s location to form some sort of skeletal beast like pictured above, but standing more bipedally. This skeletal beast has a ton of effective health as one might expect, and can also be produced by Bone Taker though this process will eat up a lot of time. This is the faster and superior way to do this, but it comes at some costs. With so much bone mass, the skeleton only has a little more speed and jumping abilities as when it is a skull, making it highly immobile in this state. Additionally, attacks are much laggier, making it far easier to stunlock the skeleton who normally has very quick attacks to avoid this issue all together. It’s a big tradeoff for the health boost, and players may want to back out.

Using this move again while there are no bones on the field outside of the skeleton will have this monstrosity perform its signature attack Rib Shatterstorm, an iconic move from MYM8. To quote Rool himself “The skeleton bursts his ribs in all directions and then attaches his head and arms directly to his legs, making him very short.” Such a brilliant move must remain in some form in this set. The explosion of bones will deal massive damage, with each bone hitting for 15% and knockback that can KO at double digit percentages! However, this separates the skeleton back into itself and its component skeleton friends, but this time they are simply skulls with hands and legs connected (making them very short). While this does give them a shallower health pool, their ground speed, attack speed, and jumps will be unaffected, while their height is lowered. A very nice combination. This move is hard to perform, though, as it will be rare for the skeleton to have every single bone on the stage as part of it without very careful planning
- - - - - - - - / / / / / / / / - - - - - - - - / / / / / / / / - - - - - - - - / / / / / / / / - - - - -
\ \ \ \ \ \ \ \ - - - - - - - - \ \ \ \ \ \ \ \ - - - - - - - - \ \ \ \ \ \ \ \ - - - - - - - - \ \ \ \ \

Final Smash
Skeleton Rift

Lifting its bony hands in the air, the skeleton uses the most powerful bone magic to produce a dark portal in the air above it. Out of this rift pours iconic pop culture skeletons, all with diverse skillsets! However, they are here to do one thing, and that is throw bones. For the next five seconds, the entire stage becomes a bone ridden bullet hell, with Powerful Bones going in every direction. These bones deal 25% damage but actually have very little knockback. This means this Final Smash is both cool looking and balanced, as the skeleton will have to finish up any kills with its own moves. After the ten seconds is up, all the skeletons will be sucked back into the rift and vanish. The skeleton is included in this. Should the match not be over by the end of the Smash, this will cost the skeleton one of its stocks. The skeleton better make quick work of foes with his cool friends before being banished back to the bone dimension.
- - - - - - - - / / / / / / / / - - - - - - - - / / / / / / / / - - - - - - - - / / / / / / / / - - - - -
\ \ \ \ \ \ \ \ - - - - - - - - \ \ \ \ \ \ \ \ - - - - - - - - \ \ \ \ \ \ \ \ - - - - - - - - \ \ \ \ \
 
Last edited:

Smady

Smash Master
Joined
Apr 29, 2007
Messages
3,307
Location
K Rool Avenue
Sombra is the last Muno set of opening day, sorry it took me this long to get to it. This is a far more creative set than Tracer in my opinion especially when it comes down to the melee, and I feel it's also a better characterized set than Tracer. Whereas in that set she was always kicking like she's Bayonetta, and wasn't firing her guns nearly enough (a criticism I failed to articulate) this set correctly gives Sombra set based around traps and a light amount of projectiles. It does seem as though you got rid of all the worst aspects that everyone complained about as well, a very smart choice of changes to help the set's quality. As a side note the write up at the end was very interesting to see your thought process when making the set.

The set does mostly a good job with the melee, simple moves like jab and the terraforming of up smash, the new bair and land mine are good moves in the playstyle. I always find myself learning new things about Smash 4, be it the characters or the engine, even when I read one of your worse sets. I would say this set falls short of the manipulative trap set it wanted to be as there's so many moves that come off as awkward. For example the uthrow based off Marth's kick as a combo starter, the creation of panels as big disjointed hitboxes on the aerials and standards, these are not bad concepts for a move but on these inputs seem a bit desperate. This is because of the fairly boring forward smash and ultimately while I like the limited terraforming of up smash is nice, these moves are a bit disjointed from the overall playstyle compared to just throwing out massive panel hitboxes. The hacking is not the best effect at its most inoffensive, but I can't blame you for that, this is pretty mandatory on the character. I think the problem with this set is that while you had a solid vision for the playstyle you didn't really carry it out properly throughout most of the set. There's some decent trap manipulation with the mine and a little bit with the hacking, but not much else of the set lends itself to this playstyle, instead it comes off as a pretty standard camper.

Jr. Troopa was a fun diversion from your usual style, not much in the way of constructions or complex mechanics in this one. It reminds me of sets like Slon or Galf that go for a melee focus. It’s good to see you incorporate mechanics like hitstun into a set on a fundamental level and see you try to balance out the huge advantage given by the bonus hitstun. The writing style is of course a treat and the character is a fun take on a bully that you manage to strike a chord with particularly well, falling in line with the kinds of characters you always exceed at in characterization.

This set definitely comes across as OP though, number one reason being that, as a cliff note, he has the bucket from Brawl G&W. This immediately makes his weight irrelevant and he is for all intents and purposes a heavyweight. That means that whereas a normal featherweight might only get 4-5 upgrades, Jr. Troopa can use them up far more liberally than should be possible. This is also bad in the context of moves like back throw that at ledge KO at 90% with max Rage. The bucket doesn’t make 150% easy but anything close to that KO throw percentage, a certainty with the bucket glitch, is very broken. It definitely needs a huge nerf. On a similar note, the upgraded up special recovery seems very powerful in this context, basically meaning he can recover from anywhere off stage with this and the bucket.

Up tilt was another move I disliked. I get that he has to upgrade it but being able to combo to 55% in any context is just terrible, I already hate Mario’s up tilt enough without making a clone of that move that is even more powerful. There are other moves that you’d want to upgrade first like the up special but that is itself a problem, there’s a handful of moves like the up and side special you’d want to upgrade every stock, when you have a limited amount of upgrades to hand out ignoring the bucket. Another move I didn’t like was fthrow, removing all hitboxes for 2 or 6 seconds seems kind of broken, essentially turning anything they do into lag. The 2 second version is not too bad but for 6 seconds off a throw, this seems like another move that is so centralizing it would turn the playstyle into a flowchart. I have already discussed all these issues with you, and without these, stuff like having a counter you can upgrade to be the best counter ever isn't so bad, but it's hard to judge at the moment.

Captain America managed to do a set for a very basic character and get decent mileage out of it, considering what you have to work with. I liked the specials and smashes, was less impressed by the set after that but it was at least the logical conclusion of this set after the beginning. I didn't mind the aerials, those were decent despite being fairly simple, but the throws seemed like they could've been improved easily from very elementary archtetypes. I also felt like in hindsight, the smashes didn't actually get all that much out of the level 3 super charge considering the rest of the set is mostly very standard melee without much flash and only works into the shield when he has the meter and the level 1, 2 or 3 charge that could've been incorporated in there later. I can respect why you chose not to go that route but I was hoping the set would maintain some of the more fun, if restrained flash seen in the first two sections.

Cyclops is randomly a character I mained in old Marvel games because I liked his reach and acrobatic attacks, he played a lot like a Smash character would, and this set does at least get those elements right. It's a pretty tough character choice when all he has is the visor, lasers and some martial arts, and your idea was to give him the ability to cancel his lasers out of other attacks. This works okay but it's not enough to give the needed substance to his melee, and a lot of the time comes across fairly arbitrary when he is allowed to do follow ups, though I was honestly a little confused about if he can just it after any move or only a select few that are directly mentioned. In general while Cap Am is more straightforward I did not fully understand all the formula and mechanics for the visor in this set. Compared to Cap Am with his shield and levels and bars of meter to burn through, Cyclops comes across as a lot less flashy which is somewhat ironic. Cap Am is definitely the better of the two, feels like something is missing here.

As one of the few gen 7 Pokemon to have sets thus far, Turtonator was a great representative of what these games were all about in the creative gimmicks almost every new design brought. Turtonator's neutral special reversal is pretty brilliant, and the smog is obviously very appealing to me when my favourite Pokemon is Weezing and I made a set with a very similar mechanic. It's cool to see a new set that actually makes a big deal out of the moves that blow up all the poison gas and have unique properties besides just that, the set has a very nice theme of heavyweight attacks, some Bowser inspiration, some Charizard inspiration just a little bit, and where it's new it feels a bit like the more sane parts of DM's hieroglyphic Magmortar set. Really just feels like a blast from the past with all these mechanics coming together and was a very fun return to form from you after a long time not making a set, think I had the most fun reading this one.

The set does mostly a good job of not falling off later and you have the signature enthusiasm throughout the entire set. It's not the tryhard "enthusiasm" that can get tiring, you are very self aware and trying to keep up interest as the set winds down. Saying that, the set can't avoid some obvious redundancy as it focuses a bit more on the smog/poison cloud explosions than the shell. The shell being the main focus would've required you work in the melee more into the smog, or work out parts of the smog to make it less central, but this is just so easy for the playstyle to mesh well and easy to see why you did it, and it's not like it's just "fire move makes poison gas explode slightly differently" each time. It could definitely have leaned a bit less heavily on this aspect though, if you had a few more melee moves focusing on the shell, maybe some intangibility or armour as you do already, shifting the balance a little. Still, a very notable improvement for you and was a fun read for me, definitely one of your best.

Commander Keen once again is a nice nostalgia trip for me as this was one of the first games I ever played, close to 20 years ago. It's very cool to see Keen in MYM and this time with a good improvement over the last edition, mostly in the characterization of the set. He does seem a bit too weak though, for example his side tilt would not actually KO in Sudden Death at first because this puts everyone at 300%, but it KOs at an insane 314% (though I do appreciate the pi reference for this character). The jab's first hit doing only 1%, and the dash attack specifically tripping people is also a bit much although it at least does damage when they trip, a chance to trip would make more sense rather than the very powerful guaranteed trip. The standards in general are very weak for Smash 4 standards when they KO in the 200s and could easily be reduced to just over half of that numbers and be balanced just fine for a weaker character.

The smashes are a similar deal here, where a 25% forward smash only will KO at 280% at best, weaker than some of his standards, that's incredibly weak. Damage tends to scale with knockback unless the move has some odd properties, such a high amount of damage and low knockback would lead to some weird results. You also don't need to state the charge time on smashes as it's always uniform in Smash 4 at 1 second, and the multiplier is always 1.4x as well. I do like the animations you chose for a lot of these moves though, like the use of the helmet in the up tilt and the hammer pogo in the down smash, I do feel that you could have gotten more out of them however, for example just pogo on top of the bomb to get a huge lift out of it, or hammer it into the ground even to make a mine, just some obvious interactions. The forward throw is also so awful I think it would never be used when the foe can cancel out of it and the KO percent at 288% is insanely bad considering that even Dedede could get a KO out of his terrible throws before that. The back throw also confuses me slightly, I would guess this only KOs super early next to ledge because of the bounces? The up and down throw do at least have decent balance but up throw may honestly be on the weak side.

I don't feel like the aerial mechanic is really necessary for making Keen even more weak, considering the aerials don't even do that much damage or knockback. While I do like the pun of the neutral aerial I'm not sure just poking people in midair is such a good idea for an attack outside of maybe the first part of a throw. The aerials actually have a pretty massive amount of power compared to the rest of the set, which is pretty surprising, but I never got a huge sense of Keen being an aerial fighter before this as he doesn't really focus on that or much else in all honesty. This is mostly a problem in the specials and smashes, which don't really set up any obvious playstyle for later. It's a shame as this set definitely gets the character correctly and it feels very fitting for a Keen set to be in this writing style and with all the wackiness of some of the moves, but there's simply not much depth to the playstyle at all, and the balance definitely has some major issues. Even with the aerials being very good KO moves, they eat up his second jump, which is not necessary and really cements his underpoweredness. Nonetheless this is a big improvement over the last version and I hope to see more of your sets, or even Commander Keen 3.0. Personally I'd like to see Mortimer. I recommend reading some other sets as well if you haven't already.

Genis was another great showing of your improvement Bio, and definitely can be argued as your best yet entirely on the basis of its consistency. Not every move is a winner but each move is at least relevant to the playstyle, even if it is not the most deep playstyle it's pretty well done. Where the set touches on the minion abuse and buffs that take advantage of them, as well as moves like the smashes that abuse them thoroughly, it's definitely at its best, and if anything I wish more of the set did this, as moves like up tilt and even the up special end up feeling fairly irrelevant. I'd also say it's a bit weird how central some moves are like back throw and down tilt, when the specials have some more generic moves, even if they are important to the character or fairly mandatory as his recovery.

The effects are quite cool in practice. The whole impaling minions onto yourself reminds me of my own Dr. Marcus set and it's used to pretty good effect here. I do think you could've gotten a bit more out of the concepts as a generic buff is not that exciting, the best you do is the stuff with the laser that kills both his normal and unique minions. It's also fairly cool that he can divide himself in half with the down tilt portal, though I feel like this would've been better if it worked into his attacks a little. It doesn't have to full Skeleton as that's kind of silly, but just a single move as you transition over with full lower or upper intangibility would be cool. The size increase on minions on pummel of all things is also kind of a weird input choice, but the effect itself is decently cool. Overall though this is definitely one of your best and has plenty of fun to it.
 
Last edited:

UserShadow7989

Smash Journeyman
Joined
Aug 13, 2007
Messages
306
o~~Challenger Approaching!~~o


o~~National Dex #12: Butterfree~~o

Debuting in the very first generation of Pokemon games, Butterfree is the final evolution in the Caterpie line. By evolving from Metapod at level 10, it sets the tradition of early Bug-type Pokemon to evolve early and drop off in usefulness later on. As its first and second stages appear in the wild in the game's first real dungeon, it's often the first fully-evolved Pokemon players will obtain.

Butterfree's wings are coated with highly toxic dust that serves both to rain-proof its wings, and to act as a defense against predators when shaken free. This is represented by its moves learned through leveling up including a number of 'Powder' moves (and Stun Spore). It also has a noted taste for honey, able to detect honey from even the tiniest patches of flowers from up to 6 miles away, extracting and carrying it back to its nest on its hairs.


o~Stats~o

o~ Jump ~~~ 9 ~o
o~ Aerial DI ~~~ 9 ~o
o~ Ground Speed ~~~ 7 ~o
o~ Weight ~~~ 3.5 ~o
o~ Size ~~~ 3 ~o
o~ Traction ~~~ 1.5 ~o
o~ Gravity ~~~ 0.5 ~o
o~ Fall Speed ~~~ 0.5 ~o
o~ Special ~~~ Crawl, Crouch, Hover ~o

Butterfree's wingspan is not part of its hurtbox, existing in the back- and foreground. As a result, it is just a hair smaller than Pikachu in height and width. The advantage this provides is reduced by Butterfree's means of movement; even when 'on' the ground, it flutters about high enough off of the floor that most down tilt inputs will just barely clip its feet, though it comes with the cost of sliding around a bit further than most characters out of a dash or turn.

Whether it is in the air or on the ground is telegraphed by its posture; when flying upright, it is on the ground, and when its body it perpendicular to the stage, it is in the air. It only touches the ground when it hits the ground after knockback, touches down in the middle of an aerial, or while crouching. It can make better use of its size by crawling, and can attack while crouched with a little additional start-up lag.

While airborne, Butterfree has the same number of secondary jumps as Jigglypuff, gaining the same height with each heavy flap of its wings. With its fall speed and gravity being lower than even Jigglypuff's by a hair, it can stay in the skies for an exceedingly long time. It should also be noted that Butterfree has near non-existent ending lag due to how it moves about on the ground and in the air.

Butterfree has the same weight as Peach; it has any durability at all, but isn't built to trade blows with heavyweights. Its mobility in the air is on par with Wario's, outdone by few, and its dash keeps pace with Diddy Kong's.


o~Specials~o

o~Neutral Special~o

Butterfree vigorously flutters its wings, dislodging a crate-sized cloud of sparkling dust centered on itself. This cloud descends at a rate of 2 Pokeball-widths per second, and any part of it that touches the ground disperses into nothing instantly. The dust is not solid, and does not block (nor obscure) movement or attacks. It does not inflict damage, knockback, or stun.

What it does do is impart one of several effects on any opponent that remains in contact with it for 1.5 seconds straight. The symptoms of the effect intensify for every additional 1.5 second stretch of exposure, to a maximum of three 'stages' of intensity including the default effect. The effect lasts for 2 seconds per stage of intensity, reverting through each stage as the duration runs down.

Intensity is signposted by the sparkling colors lingering on the opponent under an effect; a greater density of flickering lights indicating greater intensity, and they no longer flicker at maximum intensity. The color of these lights indicate which effect(s) the opponent is suffering from. Contact with any sort of dust cloud prevents the duration from running down, and resets the duration of an ongoing effect to the full duration of the current stage.

Time spent shielding does not count as being in the dust cloud, and attacks made by an opponent disperses the dust out of the area the hitbox passes through and a pokeball-sized gap around the edges of it. This can counter Butterfree's main area of denial effect, but time spent blowing away dust or shielding in place is time Butterfree can act freely, and can be somewhat predictable.

Butterfree can perform this input with minimal lag on either end, letting it pepper in a new effect whenever appropriate, though the clouds do not cover much of the stage. Different types of dust can overlap and, vitally to Butterfree's playstyle, all types of dust can be spread out by wind. Dust naturally spreads to fill the area of Butterfree's wind effects and hitboxes, giving Butterfree the ability to cover swaths of the stage with a single cloud, and to ensure it remains in place.

That all said, what the dust actually does is determined by making a directional input while holding the Special Button. Each effect is represented by differently colored sparkles, making it easy to see what effect is where.

o~No Input: Poison Powder~o

Purple in color, Butterfree's 'default' dust clouds inflict a poison effect. The opponent's damage percentage rises passively, 1% every second for every step of intensity. They take no hitstun or knockback, but this effect can quickly raise their damage percentage through the roof.

At the highest intensity, the opponent will also suffer 1.5x the normal damage and 1.1x the normal knockback from attacks, weakened as they are by the poison.

o~Up Input: Sleep Powder~o

Blue colored dust slows opponents down, taking off roughly 1/10th of their movement speed per level of intensity. While not directly detrimental to the victim the way other dust clouds are, Sleep Powder makes each patch of dust that much more dangerous by hindering their ability to escape.

Should the victim reach the maximum intensity of the effect, they collapse and fall asleep on the spot. The sleep effect is identical to the sleep effect caused by Jigglypuff's sing, lasting for the same duration or until they are no longer at the highest intensity, whichever happens first. Upon awakening, the effect is completely removed, as if they remained outside dust clouds entirely for the required amount of time.

As characters cannot fall asleep in the air, hitting this stage while airborne instead causes them to enter free fall for 3/4ths that duration (and like sleep, it can be ended early by hitting them).

o~Side Input: Stun Spore~o

Yellow in color, this dust hinders the opponent's ability to attack. The starting and ending lag of their attacks are multiplied by x1.X, where 'X' is the level of intensity of the effect. While Sleep Powder is better at keeping the opponent corralled in one place, Stun Spore makes it harder for them to do it to Butterfree.

At maximum intensity, the opponent begins to flinch periodically, roughly once every 1.5 seconds. This severely limits their ability to press the attack, forcing their actions into predictable intervals that can be planned around.

o~Down Input: Rage Powder~o

Deep red dust works to hamstring an opponent's defensive measures. While under the effects of Rage Powder, the opponent's shield shrinks and suffers damage at x1.X the normal rate, and the invincibility frames granted by dodging is reduced by X/10ths, where 'X' is the level of intensity of the effect.

At full intensity, the victim's shield will take 1.5x the normal damage upon being struck by any damaging attack, depriving them of a vital defense against Butterfree's attacks and, in particular, its dust clouds.


o~Side Special~o

Butterfree rears its head back, mandibles twitching. It abruptly lurches forward, spitting out sticky string. This disjointed hitbox can be angled up or down, 1.5 Pokeballs thick and reaching from Butterfree to just shy of a Battlefield Platform away.

It deals no damage or knockback, but the string spreads out into thin webbing on contact that briefly stuns an opponent, holding them in place and vanishing at the end of the stun. Butterfree gains a noticeable frame advantage on hit, while suffering highly punishable ending lag if it misses. It is only an active hitbox while moving (comparable in speed to Fox's Neutral Special), and only at the far end (stopping short if it touches a foe to apply this effect).

After the attack, the thread remains as an obstacle in the area it covers. Contact reduces movement speeds by 1/10th, stacking with other such effects, but not lingering past contact with the thread. It does not block attacks, and it has only 15% stamina that is eaten away with each damaging hitbox that passes through it (indicated by the thread thinning and fraying). It lingers until reduced to 0 stamina or Butterfree attempts to place a third thread, the oldest vanishing in the latter case.

Should the string ever overlap with dust from Butterfree's Neutral Special, some of that dust becomes embeded in the string; for all intents and purposes, contact with the affected portion of string will act as contact with that type of dust for as long as the string exists, giving Butterfree an unmoving area of dust it can draw upon with minimal maintenance.


o~Down Special~o

With slow, heavy flaps of its wings, Butterfree creates a small whirlwind. It appears in front of Butterfree when this input is used on the ground, and below Butterfree if used in the air, moving at 3/4ths the speed of Fox's Neutral Special projectile.

1 crate high and half as wide, this grab hitbox inflicts 8% damage and pulls those caught in it along its path with 3/4ths the normal grab duration, dispersing and tossing the opponent upward with very light knockback and brief grab armor should it reach the end of its range 3/4ths a Battlefield Platform away. Multiple opponents can be pulled in at a time. If the whirlwind collides with a solid wall, it moves upwards along the edge of the wall until it can resume horrizontal movement, counting the vertical distance towards its range.

A wind effect, it takes on the qualities of any dust it touches along the way, leaving a trail of dust out the top of its hitbox that is roughly half a crate in height, leaving a dust cloud of its size and shape where it finally disperses. Foes siezed early by the whirlwind will likely suffer the effects of any dust it passes through, should they have any appreciable damage.

Butterfree can charge the input up to a full second to empower the whirlwind; it appears after the starting lag as normal, and continues to grow and hold in place as the input is held, but is not an active hitbox until release. At full charge, the whirlwind's height and width are doubled, and its movement speed is halved. It moves the same distance, its lower speed meaning its effective presence is greatly increased.

Hitting Butterfree before the whirlwind moves cancels the move, and the whirlwind can be dispersed by any hitbox that inflicts more damage than the whirlwind does to a foe it grabs. Creating a new whirlwind causes the previous one to end prematurely the moment the new one begins moving. Should Butterfree move without flinching due to some effect, the whirlwind moves with it.

With this input, Butterfree can create a slow-moving wall, give old dust clouds a new lease on life, trap opponents relying too heavily on tapping the shield input to stay safe from dust effects, and space an opponent away from itself for some breathing room. As a regular attack, the move has a little too much start up to be useful consistently, more useful as a tool than a weapon.

Finally, by smashing the Down Special input, Butterfree can perform a different attack. The whirlwind takes on a grayish tint, and functions as the above, but with the following exceptions:

The whirlwind travels at the full speed of Fox's Blaster uncharged, with a similar adjustment from charging. The duration of its grab effect is halved, though it is not meant to inflict statuses so much as exploit them. Flashing lines of wind energy erupt in the whirlwind right before an opponent is released, dealing multiple hits of damage adding up to the normal amount.

The victim is shot up and out to the side from the whirlwind with medium knockback. When they reappear, they are noticeably lacking the sparkles of any dust effects, the built up powder effects having been blown away! In exchange, they suffer an additional effect depending on what dust effects they were suffering from.

Poison Powder has the rest of the damage it would've dealt added to the whirlwind's final hit, Stun Spore leaves the opponent stunned for X/3rds of a second after release but before knockback is applied, Sleep Powder leaves their movement reduced by X/5th the normal amount for X seconds after, and Rage Powder reduces their shield's remaining health by X/5th, 'X' being the steps of intensity of the corresponding effects before being removed.

Used too early, this variant sacrifices some of Butterfree's best assets for little gain. With proper timing and preparation, however, it can allow Butterfree to KO opponents it has no business finishing off so early.


o~Up Special~o

Butterfree squirms with exertion as its wings become a blur of motion. For the next 2.5 seconds, Butterfree can move freely in any direction with an increase to its movement speeds equal to Robin's walk speed, able to perform any non-grab input without stopping. This effect continues even when it 'lands' in the middle of the movement, giving it access to its ground inputs with this benefit as well. Its inputs have the starting lag increased by 1/4th to compensate, but with this heightened mobility, Butterfree's inputs become safe on hit for the duration in nearly any situation.

That's not the only benefit of its Up Special. As it moves, it leaves a tailwind in its wake that's as wide as its body that lingers 2.5 seconds after the speed boost ends. Anything moving with the flow of this tailwind receives the same speed increase as Butterfree, and those moving against it receive an equal movement debuff, even if falling. As a wind effect, dust will also spread along the path Butterfree took at this speed, leaving a finely drawn trail of dust. Opponent hitboxes that pass through this tailwind will erase that section of it, allowing the opponent to clear it the same as they would Butterfree's dust clouds.

Butterfree itself acts as a hitbox dealing 7% damage and moderate knockback. Should Butterfree be struck with an attack that inflicts hitstun, even one that would not out-prioritize the hitbox encompassing its body, its loses its speed boost and cannot use its Up Special again until it lands. It does not enter free fall, and the tailwind that was created is not dispersed until the normal conditions are met. Inputting the Up Special again allows it to voluntarily enter this state without being hit first, losing the benefits early in exchange for not entering free fall.

Should the Up Special's duration end while Butterfree is in the middle of an input, it cancels out of the input and either enters free fall (if in the air), or suffers from significant lag as it flaps vigorously to steady itself (on the ground).


o~Standards~o

o~Neutral Combo~o

Sparks of psychic energy flash before Butterfree, hitting a short distance ahead of it in a 90 degree cone. The corner of the cone barely touches Butterfree, with the end of the cone reaching about 3/4th Kirby's width away from it. Performing the first hit of the combo has a very small delay as Butterfree leans forwards, eyes glowing, but there is little end lag.

The first and second hit of this combo are identical, each doing 3% damage and light knockback, with little pause between the hits. If it continues using this input, the third hit onward deals only 1% damage and light knockback, pushing the opponent up and back with each hit and very slowly losing range as it stales.

The advantage of this move is how long it can keep an opponent in the combo; each hit does little damage, and they will eventually get free no matter how well Butterfree sets the move up, but it can keep an opponent in place long enough to inflict or worsen a dust effect.


o~Forward Tilt~o

Flicking its wings, Butterfree creates a crate-sized gust of wind in front of itself. This disjointed hitbox deals 4% damage and middling horizontal knockback, angled slightly upwards. The input is a little slow to come out, but has negligable ending lag, and its reach is excellent. The input can be angled as well, aimed 45 degrees up or down instead of directly ahead of Butterfree.

It goes without saying that this a wind effect, spreading dust through the affected area; handy for dealing with opponents dancing just out of reach should Butterfree time it right. The wind effect lingers for just a moment after the input and associated hitbox have ended, long enough for Butterfree to slip in its Neutral Special- or repeat the input.

Butterfree can create additional gusts after the first if the input is made in the middle of the move, skipping half of the starting lag in exchange for only dealing 2% damage and very slightly pushing the opponent back for each following input.

Opponents do not flinch from the extra hits, rendering it useless as a damage-racking or stalling tool against anything but an opponent already suffering from the worst of Stun Spore or Sleep Powder's effects. Instead, the new wind effect 'pushes' an existing wind effect it touches outwards, extending the range of Butterfree's dusts further.

By holding the input on the following gusts shortly, they result will emulate the first gust's qualities exactly, in exchange for the greater delay that leaves Butterfree vulnerable and ensures its existing wind effects will fade before its newest one can renew them.


o~Down Tilt~o

With an exaggerated flap, Butterfree kicks up grit and pebbles off of the ground, creating a small brown cloud that acts as a disjointed hitbox and deals 4% damage and flinching knockback to either side of itself. The cloud vanishes after 1.5 seconds, LONG after it ceased to be a hitbox, being a fancy Down Tilt that closely hugs the ground. Butterfree itself suffers very little end lag from this input, but opponents hit are pushed back and up slightly, and there is some start-up time to prevent easy combos.

However, while the cloud of dirt and grit is not a dust cloud, it still interacts with wind generated by Butterfree. If a portion of the dirt cloud comes into contact with a wind effect, that portion of the cloud is carried along by the wind, retaining its hitbox qualities and vanishing only with the wind effect.

It does not 'fill' the wind effect like proper dust clouds, but properly used, the slight push-back effect combined with the movement of a tailwind, whirlwind, or gust can rack up several hits if timed well. Regardless of what effects manipulate the dirt, all of it generated from a single use of Down Tilt vanishes after the normal duration; Butterfree cannot maintain it any longer than that, no matter how thorough its set up, or attentive its care.

Holding this input causes Butterfree to hesitate, performing a slightly delayed and slower flap of its wings; the dirt hitbox is slightly smaller, dealing only 3% and lasting 1 second instead, flinching an opponent hit without proper knockback. The only advantage to this version is the ability to adjust the timing of the hit, and to potentially avoid knocking an opponent out of a combo.

If Butterfree moves into the air during either input, such as from the effect of its Up Special, it cancels out of the input with little lag.


o~Up Tilt~o

With a sudden twirl, Butterfree creates a small gust of wind that shoots upwards. Butterfree's body acts as a sourspot hitbox, dealing three hits of 1% damage and flinching. The wind itself covers the upper third of Butterfree's hitbox, extending above its head a distance equal to its own height. Those hit by the wind suffer light upwards knockback and three hits of 2% damage.

During its twirl, Butterfree can move at half its dash speed in any direction, with just enough time to move a crate's width. Those caught in the proper hitbox are pushed in that direction with it, up until the last hit.

There's a little lag on either end of the twirl, which can be circumvented by holding the standard input to maintain the hitboxes. When held this way, the additional hits come at half the original rate, with the proper hitbox inflicting only flinching knockback, and the sourspot possessing no knockback or stun to speak of.

The ending lag increases if Butterfree held the input to a punishable amount as it takes a moment to shake off the dizziness, roughly putting it at the point Butterfree would be if it had just repeated the input normally. Opponents cannot be juggled due to the gaps between each hit and minimal knockback, merely taking an extra hit or two before falling to the ground next to Butterfree.

The point of continuing the input is the wind effect accompanying it. Butterfree, its hitboxes, the ground directly below Butterfree, and the air above Butterfree's hitbox out to half a Battlefield Platform are covered in a wind effect that blows dust upwards. This gives Butterfree the ability to form a tall wall of dust, and ensure its recent cloud will stick around for a while.

It should also be noted that holding the input as an attack becomes much more effective with the Up Special; Butterfree's body acts as a much more effective hitbox on top of being the sourspot for this move, and with the movement increase, it can actually juggle its opponent semi-competently. Not to mention how easily it can spread its dust in this state.


o~Dash Attack~o

Rearing back hard, kicking at the air for that extra little distance, Butterfree goes into a full-speed dive. The initial motion is quick enough to double as an odd command dodge with its narrow window of super armor frames at the start, leading into the actual attack portion of this input immediately after.

Butterfree levels out and skates just barely off of the ground a short distance, then pulls up harshly into a loop, ending just ahead of where it started. Its body serves as a hitbox that deals 3% damage and flinching, with the very end of its loop acting as a sweet spot that deals 6% damage and respectable medium knockback should it hit. Butterfree moves quickly enough that it can potentially chain the first hit into the second if using the input point-blank, though this is obviously difficult on anything except a well-timed counter due to the wind up.

While it is in the air, Butterfree can cancel out of the loop with any input, stopping on a dime and righting itself for minimal lag. This gives Butterfree a quick and safe way to pop up into the air in response to an opponent's attack. Butterfree's body also acts as a wind attack, dragging dust with itself as it pulls into the air and leaving a trail of it in its wake not unlike what would be left by its Up Special, letting it transition its set up into the air with itself.

This provides Butterfree a brief defensive zone as well, if following up on its Neutral Special or even its Down Tilt for an effect to leave in its path, albeit one that crumbles with one attack from an opponent or a well-spaced dodge roll. It can be used during its Up Special to create a more lasting defensive zone thanks to the lingering tailwind, or to rapidly gain altitude by cancelling it.

Lastly, holding the input can cause Butterfree to hesitate before charging forwards, adjusting the timing of the move and catching opponents that attempt to punish the attack off guard on a poor read. This also allows Butterfree to better adjust its aim while the Up Special is in effect.


o~Smashes~o

o~Forward Smash~o

A glow encompasses the edges of Butterfree's wings, and with a flurry of motion, it releases a sharp blade of wind and energy that flies forwards. The blade is a fast-moving wind effect. Contact with it deals 14~20% damage and high knockback, acting as a potent KO move.

The blade travels roughly 3/4ths of a Battlefield Platform from Butterfree, as wide as Kirby and as tall as Lucina. It covers the distance just a bit slower than Fox's Neutral Special, though the telegraphed start-up between releasing the charge and the attack itself prevents it from catching opponents off guard, as well as leaves Butterfree vulnerable.

Though it moves straight forward by default, Butterfree can choose to angle the attack up to 45 degrees up or down. By angling the attack during the start up animation, Butterfree can even 'spread' the hitbox out, halving the thickness of the hitbox and its damage and inflicting middling knockback in order to cover twice the 'height'.

The blade is a wind effect leaves a new dust cloud in the same dimensions as it at the very end of its flight path. Combined with the adjustable nature of the hitbox, Butterfree can spread dust over wide vertical swaths far from itself to set up for its other wind effects, and the attack itself is a useful KO move once opponents have had their defensive options parsed down and their damage raised up.

Dust has one more interaction with the blade of wind, however; the wind gathers dust into itself and gains the sparkling effect associated with it, inflicting it on the foe it hits. Being struck by the blade counts as having been in a cloud of each dust it touched for half a second + the time spent charging the attack, applying/advancing the effect a full stage of intensity on a fully-charged hit.


o~Down Smash~o

Butterfree faces (away from) the screen, wings aglow with silver specks of light. It flaps its wings slowly once, creating a disproportionately large burst of energy around itself. The hitbox is a dome of silver flakes, hitting around Butterfree out to half a Battlefield Platform in each direction. It inflicts 15~21% damage and strong knockback, and pushes anything around Butterfree out to the edge of the hitbox- shielding opponents, items, and dust alike.

The effect on its dust is a double-edged sword, creating a blind spot around itself and spreading any dust directly over it thin, but catching opponents against a wall with a thick cloud or spreading its influence in a hurry, usually depositing useful items in the same place as its hazard (and enemies as well at low percentages).

At half charge or greater, the area within the AoE is filled with lingering flakes of silver dust, strongly resembling those of Butterfree's Neutral Special creations in appearance. However, these flakes do not affect the opponent; they affect Butterfree.

Silver dust improves all of Butterfree's abilities, increasing in potency at half the speed at being lost at twice the speed; its attacks have their lag reduced by 1/10th per step, and their damage and knockback are increased by 1/10th per step (rounded up in the former case). The knockback and damage it takes are reduced by 1/10th per step, and its movement speed is increased by 1/10th per step. Its shield takes damage and dwindles 1/10th the rate, and it has an additional invincibility/super armor frame when it dodges or performs a move with them per step.

The dust generated by this effect vanishes on contact with the ground as normal, but falls at twice the speed and will also disappear after 3 seconds, with wind hitboxes resetting this timer as a reward for playing aggressively. If Butterfree fully charged this smash, it loses these drawbacks, functioning as normal dust.

This input suffers from somewhat long ending lag, cutting into the dust's duration. This move is a passable option against nearby opponents, but shines in a large skirmish or against opponents on approach. On top of being effective for ledge guarding, this is a very useful finishing move during Butterfree's Up Special to follow up a solid hit, ensuring opponents can't make it back- if done correctly. If not, Butterfree may find itself plummeting through the bottom blast zone itself.


o~Up Smash~o

A beam of psychic energy erupts from Butterfree's forehead, the psychedelic stream of shifting rainbow of colors and rings aimed straight up. The beam's hitbox is as wide as a Smash Ball and as long as a Battlefield Platform.

Butterfree can adjust the beam before it appears and as it continues on with the control stick, up to 45 degrees in either direction from its starting point, or cancel out of the move by shielding. Though narrow in its area of effect, the beam does quite a bit of damage- 12~24% damage in multiple hits of 2%, lasting for half a second at minimum charge, and a full second at full charge.

Only the final hit deals proper knockback, inflicting respectable knockback with the same angle of the beam. The hits leading up to it stop the victim's momentum entirely, holding them in place for the rest. This also means that if Butterfree moves the beam off an opponent, or cancels out of the move early, the remaining damage and the knockback of the move are not inflicted.

Cancelling out of the move by shielding is not lagless, Butterfree sliding back as if having blocked a hearty blow with its shield as it recoils from the sudden restraint of its power, meaning this isn't entirely safe to use. Butterfree will want to incapacitate or otherwise limit the movement of an opponent before using this input.


o~Aerials~o

o~Neutral Aerial~o

Butterfree does a quick twirl, sparkling with faint energy. This brief hitbox is very limited in reach, and inflicts only 4% damage and flinching knockback. The advantage of this input is its speed; the hitbox becomes active shortly into the animation, and the input as a whole is quick enough to slip between other moves easily. It is also very safe to use, a tiny smattering of super armor being present at the very start of the input.

Still, this input isn't great on its own, being better as filler to chain moves together better, or to interrupt an attack by an opponent who gets too close. With Butterfree's Up Special active, it becomes a passable attack option on its own, the damage from both inputs and Butterfree's mobility letting it juggle foes with impunity.


o~Forward Aerial~o

Humming with ribbons of green energy, Butterfree rushes forwards at Captain Falcon's dash speed, coming to a stop about 1.5 crate-widths ahead of where it started. Should Butterfree pass through an opponent in this state, it deals 7% damage and light upward knockback. It takes a moment to catch itself and stabilize its posture in the air, giving this move some ending lag that limits its usefulness as a recovery option.

From where Butterfree started to reaching just ahead of where it stopped, a brief wind effect follows in its wake, starting and stopping in time with Butterfree's ending lag.

Naturally, using this with Butterfree's Up Special can adjust the distance it travels using it more precisely, and even allows the player to adjust the path it (and therefore its hitbox and following wind effect) takes, aside from increasing its damage and allowing it some safety during the ending lag through mobility and the Special input's own hitbox.


o~Down Aerial~o

Light covers Butterfree's wingtips, and with a single flap of its wings, shoots downwards in the form of a blade of wind. The blade hits a short ways to either side of Butterfree, with passable reach below it. Contact normally deals 8% damage and minor downward knockback- too little to be called a proper meteor spike- but hitting the opponent just as the energy leaves the tips of Butterfree's wings has a small increase to the knockback that makes it far more worthy of the name.

Like many of Butterfree's inputs, this move generates a wind effect, though is unique in that the effect is aimed downwards. It spreads dust as wide as the hitbox and moves it half of the way down the blade's path, making it effective for a quick transition into a ground game, and putting a sizable area of dust around where Butterfree will be when the ending lag finishes, assuming it fast falls.

The hitbox itself starts far enough below Butterfree that this move will likely miss opponents directly in front of itself, despite the wide horizontal reach. A little on the slow side in terms of start up, though that can work to Butterfree's favor in letting it better adjust itself for the sweetspot, especially with Up Special active and/or an opponent with their movement restricted.


o~Back Aerial~o

Butterfree's antennae bend back, glowing faintly as it turns to look over its shoulder. The air distorts and ripples behind it from a sound wave. Reaching only a short distance, the hitbox deals 4% damage and slightly lengthier hitstun than normal, though the ending lag means Butterfree can't capitalize well on hit and is left vulnerable on a miss.

The hitbox does move with Butterfree, making it easier to land, but its main attraction is a small sweet spot close to Butterfree at the start of the input. Opponents hit by that sweet spot don't take extra damage, but are turned around akin to Mario's cape effect.

Whether the sweetspot is landed or not, an opponent who is hit in the middle of their own input suffers an additional hit of 5% damage, and the hitstun is lengthened a significant amount.


o~Up Aerial~o

Three wavy, colorful rings of psychic energy shoot straight upward from Butterfree, slightly staggered and travelling slowly. These are projectiles the width of a Smash Ball that can travel half a Battlefield Platform's length, moving at the speed of Ganondorf's Dash.

On contact, the rings do a mere 1% damage and light upward knockback, but significant hitstun, enough to juggle a foe caught above them upwards. At the end of their range, the projectiles flash and vanish, doing 4% damage and heavy upwards knockback.

Butterfree itself suffers little start-up or ending lag from this input, only inconvenienced by the time the attack takes to complete, which is covered by the helpfulness of the hitbox and the ability to continue moving as it plays out (albeit at half speed). The staggering of each projectile allows Butterfree to spread the rings out very slightly by moving as the input plays out, or very widely by the improved movement provided by the Up Special, which enhances Butterfree's mobility for this input.

A final power move, acting as a finisher to Butterfree's excellent juggles, and a solid anti-air effect for opponents that get up above it.


o~Grab and Throws~o

o~Grab/Pummel~o

Without much physical strength or reach to speak of, Butterfree resorts to a different method of grabbing its opponent. With a sudden lurch, it spews string a short distance ahead of itself, a grab hitbox with somewhat respectable reach. If it touches an opponent, they are wrapped in the goop, arms bound and feet stuck to the ground. On a success, Butterfree lazily lands on them and stares them in the eye.

Its pummel animation strongly resembles its Neutral Combo's, sparks of psychic energy bursting against the opponent for rapid hits of 1%. Butterfree can manage quite a few hits with its pummel before the grab ends, though it still comes up short in terms of damage compared to grapple-focused characters.

The main reason for Butterfree to hold its opponent is, naturally, to keep them within the effect of dust. While wrapped up in this manner, dust will stick to the victim as it would Butterfree's Side Special, ensuring they're stuck in the area until the grab's end.


o~Forward Throw~o

Butterfree vibrates its wings so quickly that they blur and emit a buzzing sound. Green trails of energy rush from Butterfree, ripping into the opponent and shredding through their bindings with enough force to send them flying. This move inflicts 11% damage and decent knockback, albeit hindered by being at such an angle that it KOs later than it should.

The opponent remains in place a split second before the knockback is applied, giving Butterfree that slight moment of freedom to move (but not nearly enough to attack again) and just slightly drawing out the opponent's time in the area they stood, for the sake of squeezing in that little extra dust. The angle also, if nothing else, gives Butterfree time while the opponent recovers to spread dust and strings, or perform its Down Smash.


o~Down Throw~o

Psychic energy coats the opponent's bound form, lifting them up above Butterfree's head, then slamming them against the ground harshly enough to break the strings attaching them to Butterfree. Most of the webbing disperses, leaving the foe prone against the ground where they stood with an extra 8% damage.

Traces of the webs continue clinging to the opponent for 3 seconds after, with time they spend attacking and dashing counting as half that. These webs can capture some of the dust the opponent moves through and hold the effect as the Side Special and Grab string would, if only for 1 second after the contact ended.

This greatly reduces the room for error in avoiding Butterfree's Neutral Special effects. Combined with leaving the foe prone and the grab itself, Butterfree can easily score an effect or increase its intensity by one stage. This throw does little else, of immediate strategic importance, however.


o~Back Throw~o

Pulling the opponent from the ground, Butterfree whirls them around itself once, then twice with immense speed, launching them from the strings that held them with great force.

Aside from a respectable 8% damage and medium horizontal knockback (making this throw one of Butterfree's better inputs for KOing off the side of the screen as opposed to the top or bottom), this input generates a small wind effect as the opponent moves through the area around Butterfree, dispensing dust from the strings holding the opponent around Butterfree and exposing the opponent to them briefly.

The throw itself takes about as long as Mario's similarly animated Back Throw, again milking the dust-retaining effect of Butterfree's grab for just that little bit.


o~Up Throw~o

Butterfree releases the foe and flaps its wings wildly. Harsh winds whip about the opponent and rip them from the ground, and as the string begins to vanish from their bodies, they are hurled straight upwards by a tremendous burst.

The opponent suffers 6% damage and heavy upward knockback. Further, the foe's flight path through the air and a small spherical area centered on where the throw took place (just barely wide enough to include Butterfree itself) is a wind effect left in its wake.

The opponent is not in the wind effect itself, the effect trailing behind them. This does mean the opponent can't come straight back down to fight Butterfree, assuming they survive, without also being exposed further to any dust that had been plaguing them in the grab. This gives Butterfree the option of either a very brief and small safe point to set up, as well as a source of dust in the air if it chooses to pursue its opponent into the skies.


o~Final Smash~o

Glowing with a strange energy, Butterfree lurches forwards, spitting out a massive cluster of string that reaches 2/3rds of Final Destination away from itself. Should it touch any opponent along the way, it forms a sphere of webbing around them as a grab hitbox, and continues onward to the end of its range. The hitbox is twice as wide as Butterfree is tall, in addition to its massive range.

Holding onto the mass of string, Butterfree turns sharply, swinging it around once, twice, and on the third swing, releasing it and sending opponents (still trapped in the spheres of string with the normal grab difficulty counting down from this point on) flying with heavy knockback.

The player of Butterfree is able to angle the swings up or down to catch opponents who moves off of the same horizontal plane as Butterfree by having it move left or right (causing it to tile down the string in that direction as it moves), or adjust by having Butterfree fly up or down (ascending or descending freely).

The string functions much like normal string does, in that any dust it touches comes to affect it, though in this case it affects the whole of the string (and thus any opponents trapped in the string or the cocoon they're left in following the throw itself). When the string bursts, any dust gathered busts out where the rest of the non-cocoon portions of the string were, acting as normal dust of those types.


o~Closing Thoughts~o

So I went and turned this into a full set, and I have to say, I'm very happy with it, if a little worried it went over kill on moves that count as wind effects. Overall I feel it's a fine set, though, and I'm happy to have made it.

Change Log:
2/12/17:
-Portions of Neutral Special dust clouds are destroyed by opposing hitboxes, rather than moved.
-Up Special tailwinds can also have parts removed this way.
-Removed the following from Side Special: "As an added bonus, Butterfree's sound and wind hitboxes cause the string to thrash about wildly, passing along the effects of those hitboxes to anything in contact with them at that point for half a second after the fact, albeit with all numerical effects (damage, knockback, duration of secondary effects) of non-powder moves halved."

2/13/17:
-Can now perform any input during Up Special aside from the Grab; Butterfree cannot use Smashes in the air, instead using inputs when airborne or grounded as normal.

2/19/17: (Thanks to FA for critiquing)
-Sleep Powder's duration now mirrors Jigglypuff's Rest.
-Whirlwind's grab duration is no longer increased by charge, merely the size and duration of the Whirlwind itself.

2/23/17:
-Clarified some details about Down Special's charged version (whirlwind is not an active hitbox during charge, moves with Butterfree when Butterfree is moved without flinching).
-Clarified what happens when the Up Special ends mid-input.
-Changed Butterfree's traction rating from 2 to 1.5 (yay arbitrary numbers!).

2/27/17:
-Full set up! Click here for the original comment challenge entry!

2/28/17: (Thanks Smady!)
-Corrected Sleep Powder's full intensity duration; it's supposed to be based off of Sing, not Rest.
-Rage Powder's full intensity effect now causes an opponent's remaining shield duration to be cut in half after blocking a hit, instead of instantly breaking on hit.
-Forward Smash now has one additional property: if it passes through a dust cloud before hitting, it counts the opponent as having spent half a second + the normal charge of the move in that type of dust cloud, potentially applying or intensifying the effect on hit.

2/28/17 (Continued, Thanks Jamie!):
-Down Special can now be smashed for a variant input. The opponent is shot out up and to the side for medium knockback, the damage is dealt with multiple small hits, and the animation is different. The opponent's powder effects are removed, but they suffer additional effects based on what kind of statuses they had at the time.

3/3/17 (Thanks, ForwardArrow!):
-Damage of Neutral, Forward, and Back Aerials increased by 2% a piece.

3/10/17 (Thanks, Froy!):
-Sleep Powder now has an effect that activates for opponents in the air (as sleep does not affect airborne characters).
-Slight Rage Powder nerf; at full intensity, attacks do half again the normal amount of shield damage.
-Removed the 'No Trip' ability, as random trips are not in Smash 4.
-Buffed Butterfree's Down Smash. Half charge or greater gets the original dust with the original drawbacks (falling twice as fast and having a set duration that needs wind hitboxes to reset it), full charge making the dust function as normal. The move also had its starting lag reduced, its main drawback simply being the ending lag discouraging spam.
 
Last edited:

JOE!

Smash Hero
Joined
Oct 5, 2008
Messages
8,075
Location
Dedham, MA


Visionary, playboy, billionaire, Tony Stark is one of the founding Avengers and - thanks to the constantly evolving Iron Man armor - one of the more formidable combat assets in S.H.I.E.L.D.'s arsenal. His cynical demeanor disguises a deep belief in himself and the power of the human mind to invent its way out of problems.


ATTRIBUTES

STATS:
Iron Man has great weight and gravity as expected given the suit's durability, and stands a good few inches taller than Captain America and Cyclops, though the other stats may be a bit weird to read. Tony's mobility in the Iron Man suit will vary greatly depending on if he has Power or not! More details on this are below, but the gist of it is that with power to burn, Iron man will be able to rocket along the ground in a low flight, have much better air control, and even have a very small 3rd jump available. If he runs out of juice so to speak, he will be reduced to the stats shown at the right, with the exception of the 3rd jump which is only available with power. His low/un-powered animations change to basic movement in the suit instead of boosting around with style, sucha s running instead of flying along the ground, and interestingly he falls much faster without the jets to keep him aloft though his gravity stays the same.

Weight: 108 (:4samus:)
Dash Speed: 2.2 (:4littlemac:) ~ 1.5 (:4luigi:)
Air Speed: 1.2 (:4zss:) ~ 1 (:4robinm:)
Fall Speed: 1.4 (:4palutena:) ~ 1.95 (:4dedede:)
Gravity: 1.107 (:4megaman:)
Jump: 30 Ground (:4peach:) , 28 Air (:4feroy:), ~ 20 Air (:4jigglypuff:)

Rolls: Poor
Wall Jump: No


POWER TYPE: SEGMENTED

Iron Man runs off of the miraculous Arc Reactor, a small fusion generator of his own design that glows prominently in his chest piece. Because of this, Iron Man actually Passively Regenerates Power at a rate of 1 Point per Second as long as he is not currently performing any "hard" inputs. This includes standing, walking, holding onto a grabbed foe / pummeling, and drifting through the air.

||||| ||||| ||||| ||||| ||||| ||||| ||||| ||||| ||||| |||||

Above his character portrait, his Arc Reactor's Power Meter is displayed in 10 individual segments, each segment being filled per 5 Power he gains. Unlike most other characters, there are many moves in his repertoire that have a mandatory power cost as opposed to optional special inputs or moves. These moves are still functional if he lacks power, but are generally just sort of worse off until Tony gets a moment to recharge.

As seen above, Iron Man's stats change to become somewhat ridiculous given his weight class and arsenal. As long as he has at least one segment of juice in the Arc Reactor, his stats will be stellar. Aside from stats, he also gets a boost of shielding if he has at least 5 segments of power. This shielding provides a 0.85x reduction in damage for Iron Man, making a 10% hit deal 8.5%, and so on. While it is not much at a glance, it is significant when it comes to his armor saving Tony's hide from high damaging moves combined with his weight and recovery!

Power will usually be fluctuating with Iron Man throughout the match as you zoom around, so it can be tough to keep track of at times. Just keep the two phases in mind when it comes to offensive or defensive strategies to get the job done. Or at least leave that to you on-board AI, Friday, as you make yourself look good for the paparazzi when you fight.


GUARD:

When Iron Man blocks, he has the somewhat standard "arms crossed" pose, though with the addition of extra panels opening from his forearms to help deflect damage. Without any power, the standard bubble shield is created by him blocking which behaves as normal.

If he has at least 1 Segment/Block of power, shielding will take on a much more polygonal / holographic look to it as Iron man activates his Deflector Shield! This has the same size, shape and properties as a normal shield at a glance, but knowing Stark it has some fancy features under the hood. First and foremost, this shield will absorb power from energy attacks at a rate of 0.4x damage dealt, similar to Cap's perfect shielding. Secondly, despite only having 1/2 the HP of a normal shield it will not put Iron Man into shield break if it is broken, instead it will only take away another bar of power. If he had no power when it was broken, then Tony will stumble backwards briefly with punishable lag, though still not as much as a normal shield break. Holding this shield out will deplete it's HP as usual, and for about every second of it being held out it will cost another bar of Power. Used in short spurts though, the safety afforded by the deflector shield can allow you to counter an attack as a foe breaking the shield carries no lag for Iron Man unless he also runs out of power.


SPECIALS

Shield Special: Arc Reactor
When grounded and given a moment to breathe, Iron Man will face the camera and pose a bit as his chest piece begins to glow, charging Power from his Arc Reactor!

Essentially the same in function as Cloud's Limit Charge, Iron Man's Arc Reactor will begin gaining power at a rate of 5~15 per Second, based on his current power level with less making for faster generation, and more making for slower. This will override his natural Power generation, but it will still take a relatively quick ~7 seconds to go from 0 to full using the reactor. Unlike Cloud, this has no function past 100% charge however.

If he ever has a moment to analyze the situation, it is usually a good idea to start charging up. However, this has a bit of commitment given that it has a little start up lag before charging, and he will actually take 1.15x damage from attacks in this somewhat vulnerable state. He can cancel the input rather quickly by letting go of Shield + B, but then the player would need to think quickly as to how to react to an incoming attack for defense as he cannot shield/roll out of the input normally.


Neutral B: Repulsor Blasts ---> Unibeam

A good option when the foe might be getting too close for comfort is your trusty Repulsor Blasts! A press of B will have Iron Man outstretch a palm in front of him as they trademark "WhiiirrrrrrrrrrPEW!" effect is played. The gold/white, half platform sized projectile created will shoot forward at lightning speed in a straight line for about the length of battlefield before fizzing out, hitting anybody in it's way for 8% damage and medium knockback at a 40* angle up and away. In the air, Repulsor Blasts are fired at a slightly downwards, 20* angle as Iron man tries to keep the aerial superiority, but hit the same in all regards.

Each blast fired will cost 1 Bar of your power, and despite having the same lag as your standard Ftilt, can be rapidly fired by tapping B rhythmically as Iron Man will shoot one hand, then charge up a blast with the other and repeat, overall being about as quick as Falco lasers. While great at keeping foes at bay, the power may leave something to be desired...

By Holding B for a moment, Iron Man will cross his arms across his chest for a moment, three times as much as the start up of a normal Repulsor Ray before opening up and firing the powerful Unibeam from the Arc Reactor! Costing 3-6 Bars, the Unibeam can be charged for the larger cost by continually Holding B, with it releasing once you either expend all available power or hit the 6 Bar limit, though Iron Man can also store Unibeam by cancelling the charge with Shield or Roll. Unibeam will travel outwards only 2/3 - 1 platform's distance as a solid beam hit box as opposed to a traditional projectile based on charge. Foes struck will take 20%-29% damage and impressive knockback that can KO as early as 110% as they get sent flying at a 30* angle at base, and easily before 90% if hit by a fully charged blast! Like the normal RB's, this is sent at a downwards angle when in the air, where it can KO even earlier near ledges. Unibeam is generally unsafe to just sort of toss out without storing the charge first, given it's high power cost and start up / ending lag both being punishable or avoidable, but when it actually is being sent out few things can really stand up to the sheer power.

If You do not have at least 3 Bars to spend, Unibeam cannot be used. If you have no power at all to try a RB, Iron Man will strike the pose and with 2x the start up lag produce a single blast that deals only 6% and is visibly weaker, though still have Transcendent Priority just like the normal blasts / Unibeam.

His bread and butter in most any situation, peppering the baddies with these is always a solid strategy before needing to get fancy.


Down B: Micro Munitions

With a bit of start up lag, Iron Man will gain a small glint in his eyes as a blue, holographic, spinning targeting icon appears in front of him for as long as he holds down the button. Moving the control stick then moves this icon freely around the screen as Tony asks, "Friday, lets see how many targets we're looking at...", or "Can I get a head count?" , or Friday herself stating "Scanning for enemy targets, sir..." . Each pass over an enemy leaving them with a smaller blue target somewhere on their body. Once the B button is released, panels open all over Iron Man's body as multiple small missiles are launched!

Each pass over an enemy that creates a target will cause a small missile to fly out and home in on them. On impact, the needle-sized missiles will blow up for a Kirby-sized explosion of 4% and light vertical knockback. The targeting module moves just as fast as the hand on the character select screen, allowing you to mark up to 10 targets at a time, or one guy back and forth up to 10 times, before automatically firing. You can hold it as long as you want though, but you must keep aware that while aiming you cannot do anything else until you actually fire. If you just pull this out in neutral, many opponents can simply take the time to approach, and the missiles themselves can be clanked to become inert. Though, given the essentially infinite range of the cursor it can be relatively safe, especially vs a foe in the air.

Each target you acquire will cost 1 Bar of power once you actually fire, acting as ammo. If you want to be a bit more economical though, you can always try to lock onto a target by holding the reticle on them for at least 20 frames, or 1/3 of a second, made slightly easier as when held near a target the reticle has a slight homing effect on their character model unless you move the cursor. Once done, a beep is heard as they gain a bright red target instead of the smaller, blue one of the micro munitions. Upon release, Iron Man holds a fist out as a panel on his forearm raises, revealing a STARK Anti-Tank missile! The size of one of Samus' Homing Missiles, this bad boy will shoot out just as fast and with the same homing properties as the Micro Munitions, but with a Bowser-sized explosion for 15% that launches foes back hard at the Sakurai angle. A foe standing at the ledge can be KO'ed cleanly at 160%, but can fall victim way sooner off stage or high in the air. The Anti-Tank Missile has no range limit just like the Micro Munitions, though it is a bit slower and it takes 3 Bars to use. Foes can dodge past the rockets as they fly, in which case they go rogue and in a straight line at the angle they were going infinitely until they hit something. You can have only two Rockets at a time, one for each arm, but can still supplement them with Micro Munitions. Just be careful as while you are targeting you don't become one yourself!

Missile Barrages are a somewhat risky but very powerful option in the Iron Man arsenal, given the start up lag when aiming as well as the severe power drain. Off of a hit and from afar though, you can rack up extreme damage or at least send a few out to keep a foe busy as you charge up. If you have no power, Micro Munitions cannot be used at all, sort of the trade off for being able to light everyone up.


Up B: Rocket Flight

Looking skyward, hands down and pointed to the ground, his hands back and feet ignite as Iron Man rockets upwards! Launching up about twice his height for the cost of 2 Bars, Rocket Flight is incredibly quick, and carries medium knockback armor as well. You can repeatedly use Rocket Flight as long as you have Power, and it can even be angled very slightly back and forth as he rises. Alternatively, you can hold B as you rise to continue accelerating and travel higher at a cost of 1 Bar per 2 character heights traveled. From ground level and with a full tank of gas, this allows the Iron Man armor to ascend to be one of the best reaching recoveries in the cast. Combined with his additional air jump and Side B, there is little places on Earth that Tony can't reach.

At the point of launch, there is a small meteor hit box for 5% at Iron Man's feet, but it is not much to write home about. The real offensive benefit is the Rocket Momentum he carries over to his aerials! As he uses Side or Up B, during the initial boosts from a tapped input he will deal an additional 1.3x damage and knockback with aerial attacks. Due to the nature of Up B, Up and Down air will be most useful to attempt out of an upwards rocket though the others can be just as good.

As a side note, if done from the ground, Iron Man will hover in place once he reaches max height. Hovering in place is cancelled by Jumping, Fast Falling or performing his Down Aerial, and lasts for a maximum of two seconds. This vantage point can allow him to perform delayed aerials, or simply rain down with his projectiles from relative safety. Hovering does not occur if B was held for extra distance.


Side B: Rocket Boost

From the air, Rocket Boost is essentially a carbon copy of Up B but sideways. Leaning to the side, Iron Man will boost forward 2x his height for 2 Bars with the same properties as before (including the medium armor on start-up), being able to hold the button and continue forward at a rate of 1 Bar per two Iron Man lengths, as well as cancel into an aerial for 1.3x the damage and knockback from the initial boost only. Upon activation, his boots behind him will be a hit box for 5% that knocks foes out and away weakly, though again nothing to write home about. That is unless you perform Side B in the opposite direction immediately after performing one! Iron Man will place his hands forward as he "brakes" in mid air, his palms / front half becoming a hit box for 10% and actually somewhat decent knockback that can KO around 160% or so. He then will turn around and perform a standard Side B in the other direction.

It should be noted that it is a bit easier to compare the speed of acceleration on his Side B's held speed vs his Up B's. When boosting, Iron man will initially travel at a 2.5 running speed, outpacing his natural 2.2 pace by a decent bit. After about 6 Iron Man lengths, he will be traveling at a clip of 3.5, matching the speed of a certain Blue Speedster! These boosts, on top of his natural movement capabilities make for a very powerful recovery and aerial presence, if costly. Iron Man will often need to land to recharge via his Arc Reactor or make the most of his attacks in order to charge up. If he has No Power available to boost, Tony is in a tight spot in this regard since Up and Side B will do laggy versions of his 3rd jump in each direction. A very, very far cry from normal flight given his also increased fall speed, though he can keep trying this to stall and drift in the air to save his normal jump.

From the ground, Rocket Boost behaves slightly differently. Boosting forward from a more vertical position, Iron Man will perform a set attack instead of being able to do variable aerials, that is unless he flies off a ledge and into the air. After 1 Iron Man length, he will attempt to knee the opponent as he decelerates for a decent 7% and weak-medium horizontal knockback at the Sakurai Angle. If you have 1 Bar to spend, Iron Man will do so by extending the same leg upon landing to perform a Repulsor - Kick! The visibly disjointed blast from his rocket boot is a clear sweet spot for 12% that sends foes out at a very shallow 25* angle, able to KO at the edge around 120% or so. The remainder of his leg is a 7% hit just like his knee attack, sending foes out at a 40* angle. You can often combo the knee into the Kick except for at high percents where DI can save the target, but in any case it is a great option coverage given the speed and distance.


AERIALS


Neutral Air: Power Discharge

Taking on a pose similar to his Shield Special, but facing forward rather than at the camera, various panels open on Iron Man as he sparks to life! Costing 1 Bar as the A Button is held, the discharge will deal one initial hit of 10% and electrical hit stun as foes are popped up and away with medium knockback. He then continues to spark and glow from the panels for repeated hits of 3%, totaling 12% if each connects.

The initial hit comes out very quickly, about frame 3 and is actually a slightly disjointed circle around himself. The continued sparks are much smaller, occurring around himself in spurts and thus are much lower priority. If he has no power, only the sparks will occur which come out on frame 6, which can still be decent as he drags foes around, and with virtually no landing lag, but is relatively unsafe to just attempt.

Iron Man's Powered moves are great, but keep in mind that he can always opt for an un-powered hit as well by Tapping the input as opposed to Holding it. This obviously allows him to gain power, alongside his Arc Reactor, but at the same time his powered hits are all quite appealing. Mixing and matching powered and un-powered moves opens up many routes for Iron Man, often if you use un-powered strikes to get a solidmeter, he can spend it all in a flashy combo of powered hits into something like a show-stopping Unibeam or Missile Barrage!

From Side or Up B, Nair will deal 13% ~ 16%, with the initial hit now being able to actually KO at 180%.

Forward Air: Iron Punch

Bringing his arm back for a bit of start up, Iron Man rains down with a vicious haymaker! Connecting with a solid, metallic sound on impact, foes struck by his fist will take 12% and be sent outwards at a 40* angle that can KO at around 135% near a ledge.

Relatively short ranged, this is remedied via Short Hopped Side B's to boost the damage as well as area to cover with his fist. While it is not that great of a combo option naturally, a 16% hit from boost can be followed up with Repulsor Blasts or Micro Munitions quite easily. The landing lag leaves some room to be desired, making this not to safe on shield unless boosted. A boosted F air will be a bread and butter KO move as well, able to finish a stock at about 110%.

If A is held, Iron Man will actually spend 1 Bar in order to propel himself very slightly forward with the punch, about 1/4 of a platform and deal a boosted 13% base damage, or 17% when boosting off of Up/Side B. This boost applies to your rocket momentum as well, allowing just a bit further reach with Side B, or a slight diagonal ascent with Up B on top of hitting just that much harder. This boost is certainly a welcome addition, but does add a small amount of end lag to the punch as Iron Man stabilizes slightly.


Back Air: Repulsor Palms

Spinning around, Iron Man will place both hands up, but at a slightly downwards angle just like an Aerial Repulsor Blast before firing a short ranged burst of energy! Covering the area of about the size of a crate item, this burst will deal 11% and blast foes out and away at a 50* angle with medium-high knockback that can KO at about 145% or so cleanly. Turning back around swiftly for a bit of end lag, the burst will also boost his horizontal momentum in the opposite direction momentarily to aide in recovery, or extend a Side or Up B by noticeable amount!

Costing 1 Bar to perform normally, B air is a great coverage tool given its large, transcendent range and positioning of behind and slightly below Tony. If he lacks power, or taps the input instead of holding, the burst from his palms really only cover the area right in front of them and deal a reduced 8% and no real momentum boost.

While it is tricky to hit directly from a Side or Up B, the hit now dealing 14% makes it a bit more viable to try, and the extra half platform it will cover certainly doesn't hurt! Unlike F air, this boost does not add any additional lag to the move.


Up Air: Repulsor Kick

Leaning back, Iron Man kicks a single leg upwards and fires off a burst from his rocket boot! Similar to his grounded Side B, the leg portion will deal 6% with the burst dealing 10%, and both sending vertically. As his boot flares up, his palms will too below himself to stabilize and provide the same, weak 5% meteor hit box as with Up B and Side B on take off, as well as lowering his vertical momentum slightly.

The boot's ignition is obviously a much stronger hit, but it does not last very long compared to the standard kick upwards. Able to KO vertically at about 150% from around a jump height, and even earlier from a boosted jump with a 13% hit, the flare on his boot is very rewarding to try and land even if it only lasts a couple of frames. The leg portion, dealing 8% with a boost, will linger on for about 10 frames total to make for a pseudo-sex kick upwards to help juggle, or to cover a long area when boosting sideways. Costing 1 Bar to use with the jets, if Iron Man is out of gas or taps the input, he will simply perform the kick without any sweet spot or momentum alteration.

Down Air: Billion Dollar Landing

Turning his body downwards into a dive fist-first, Iron Man plummets at his max flight speed + gravity and makes contact in the iconic "Superhero Landing" pose! His entire body is a hit box for 12% that will either Meteor a foe within the first 4 frames of plummeting, or simply hit them out and away at a 50* upwards angle until he either travels 5x his own height or hits the floor. On impact with the ground, the force is strong enough to cause a localized shock wave around himself that hits ground and foes alike in a small radius around Tony for 16% and strong 40* knockback that can KO at around 110% near a ledge.

Obviously having tremendous ending lag, Iron Man can at least take comfort in the extreme power as well as versatility of using this combined with his boosts. Usually the best bet is to be done from an Up B boost, during which you can cancel into D air almost immediately for hits of 16-21% damage that can in fact combo. Hitting with the meteor portion of the move can often knock a foe down to the ground at such a rate that Iron Man can meet or even beat them to the ground to link into the powerful landing hit box for a stellar 37% damage! This requires very strict spacing and percent ranged however, as often a foe either bounces off the ground or can even tech away to avoid the secondary landing hit from the combo. From a Side B, the dive gains more utility as a somewhat more traditional dive-kick style move as you now plummet at an angle, about 30* instead of straight down. This is a significant range increase which can allow you to hit in more situations, but does not offer the combo opportunity of Up B.

Landing or not, this move comes with atrocious end lag on a whiff unless you perform it inches from the ground to somewhat auto-cancel into your standard heavy landing lag you'd get from landing in special fall without a hit box, or at the very least a brief meteor hit box. Fortunately, speed is on your side when actually diving, as well as decent power which can allow Tony to plow through attackers straight into the ground and to safety more often than not. This is especially useful when you lack power as his fall speed increases, causing you to actually fall even faster.

If need be, Iron Man can hold the input to spend 2 Bars upon landing in order to create a shock-wave of energy that expands from his suit in a low-hitting ring on landing. This blue ring deals 8% as it expands across a platform's diameter and a solid "push" away, making D air somewhat safer but more expensive to land as the danger area for foes expands. This ring will not out prioritize the normal landing hit, making direct contact still great, but this could eve be worth it still if you know you might miss the dive. Something to note about the powered aerials is despite their potency, there are times where you may want to risk the more reckless or weaker versions to gain power back. Spending 2 Bars to make D air safer is great and all, but you could have gained nearly 3 if you hit it directly with no bars spent!


STANDARDS


Jab: Calculated Combo

Iron Man delivers a quick, left hook for his jab! Dealing 4%, his metallic fist certainly packs a bit of a wallop though it still mainly just keeps the foe in place with hit stun. Though what comes next in the combo is up to the calculations of his on board AI, Friday.

The follow up will differ per character based on one of three factors:

1) Do they outweigh / are they bigger than Iron Man? If so, Tony will quickly crouch and fire off a shocking palm blast downwards for 6% that will trip the larger foe to use their weight against them! Iron Man will also do this against foes that are significantly smaller than himself, like Pikachu, but instead of a trip it will pop them up and away like many two-hit jabs.

2) Do they carry a weapon? If so, Iron Man will visibly grab the arm/whatever holding it and deliver a swift kick away at a horizontal angle for 7% that forces them to drop the item they are holding. This also applies to characters who wield a weapon naturally, such as Thor or Gambit, but it will not disarm them.

3) Are they armored? If the foe is attempting to block Iron Man's jab, he will follow up his initial hit by holding up both palms and spurting out a delayed hit of 8% from both hands that hits significantly hard out and away at a 45* angle, actually able to KO at around 160%+ near a ledge! This burst does decent shield damage and push back, and can actually punish many out of shield options up close as the time between dropping shield and grabbing for instance, is just when the delayed blast will trigger. If a foe is being overly defensive, this of course will still just hit their shield and can be punished in return with patience.

All these options are marked by Friday stating "Go Low!", "Aim for the weapon!" or "They're armored!" to warn Tony of which option to take, and as a bit of an Easter egg. If none of the criteria are met above, Iron man will simply follow his left hook with a right hook that deals 5% damage and actual knockback that just spaces the foe away.


Side Tilt: High Frequency Laser

Standing still as he takes aim forward with one arm pointing forward, similarly to when he fires his Rocket from Down B, the top of Iron Man's fist will glint bright red for a moment before firing out a buzzing, thin, red laser!

This laser has transcendent priority just like with his Repulsor Attacks, but unlike them can slice right past multiple foes, obstacles and shields, except the one owned by a certain Captain of course. Foes struck by the laser will take multiple rapid hits that add up to 14% damage before being pushed back slightly, spacing them out towards the end of the laser's Platform-length range. After it's impressive 14 frame duration, Iron Man will hold his arm up as a small cartridge is ejected from it for some end lag. The laser can be angled up or down about 30* as well, allowing you to intercept foes from various points.

The laser is great, but costly at both 1 Bar of power as well as taking up time for it's aiming, duration and end lag where you expel the laser cartridge. If you do not have any power or merely tap the input, Iron Man opts for a far-reaching palm strike as he leans in and creates a spark at his hand for 8% and medium knockback at a 30* angle. Essentially a longer reaching but slightly slower version of Ganon's Jab, this strike can also be angled 30* up or down and is great to space a foe away and recuperate some energy. While costly, the pros definitely outweigh the cons of striking with the laser to pressure form afar as well as rack up decent damage. You can even potentially lock a foe long enough after sending out Micro Muntions in order to combo!

Up Tilt: Jet Uppercut

With a short amount of start up as Iron Man reaches back and crouches, his jets on his punching elbow and boots flare to life as he performs a rising uppercut! His fist and arm, and a bit of his torso make up a tall hit box that travels upwards high enough to meet a battlefield platform at knee-level before Iron Man falls back down for ending lag, giving the move impressive reach that is just under that of his grounded Up B.

Hitting in two phases,the initial jump near the ground launches foes upwards for a strong hit of 13% before tapering off to an 8% upper hit, both sending victims straight upwards. The power of the launch obviously is different based on early / late hits though, with the early hit being able to KO decently well at around 130%, and the later hit being a fine juggle option.

Costing 1 Bar to perform the Jet Uppercut, Tony can always opt to be a bit more economical with a Tap of u tilt rather than holding the input. The jets on his arm still flare up to deliver a punch for 11% and knockback halfway between the fresh and late hits of his normal U tilt, though with a mere fraction of the range. This is still good for following up with an aerial attack, or even other U tilts though in order to get back power. In a pinch, it can even score a late KO!

Down Tilt: Low Repulsor Kick

From a crouch, Iron Man will swiftly kick a leg out and activate his jet boot, sliding backwards! This move is a bit more complex than it appears at a glance, but works about how you would expect. Firstly, his foot is the sweet spot for 10% and knockback at a 30* angle outwards for medium knockback that hits far and low, great for poking and preventing folks from reaching a ledge. If you do not get the jet hit box, the rest of his leg deals 6% and pops the foe up at a 50* upwards angle with the same force as the sweet spot, but lesser damage and a better angle keeps them relatively close by. Finally, boosting backwards for 1/2 a platform's distance will create a backwards hit of 5% that hits out at the Sakurai angle weakly. It is almost a "flub" hit, but it is still present when foes are trying to deal with the attack especially since it covers essentially his whole body.

The raw range of the kick combined with the movement backwards creates what is essentially an incredible poking tool. Like with his other tilts though, this costs 1 Bar to scoot backwards with the sweetspot. With no power spent, he still performs the kick with a smaller spark at the end of his foot that still hits for 8% damage, and even manages to scoot backwards for 1/4 of a platform. It is still very safe and can still gimp, just less so than usual.

Dash Attack: Jet Tackle

From a dash, Iron man straightens up and puts his elbow / shoulder out to ram the foe at high speeds! Dealing 12-14% damage and hitting hard at the Sakurai angle, this dash attack relies on speed for it's power. As Iron man dashes, his acceleration will eventually take him to a 2.2 dash speed if he has power, in which case it will deal 14% and linger for a respectable distance of about a platform as he slows down. If done instantly from a dash, it travels half as far and only deals 12%. Both speed still hit hard and have the same frame data, its just the faster has an easier time landing with it's distance and higher damage. A high speed tackle can net late KO's at around 155%+, or at least bully people for space.

Without any power spent, Iron Man can only perform the 12% tackle as he doesn't jet around at full speed, but still covers a respectable 1/2 platform lunge. Something to note about the Powered Aerials and Standards is despite their potency, there are times where you may want to risk the more reckless or weaker versions to gain power back. Spending 2 Bars to make D air safer is great and all, but you could have gained nearly 3 if you hit it directly with no bars spent! Hitting basically any of these will still grant at least 1 Bar back as they generate at least 5 power (Jab combo will generate exactly 5.4). Combined with Arc Reactor, it should be rare that you are actually powerless for long, but it is good to know where you stand in the moments when you need to toss out a basic attack.


SMASHES


Side Smash: Repulsor Rays

Bringing both hands back as they "whiirrrrrrrRRRRR!" during the charge phase, Iron Man then puts both palms out and forward like a laggy, double Repulsor Blast as two solid beams emit from his palms!

Traveling out to a max distance of about Shulk's Fsmash, these two beams converge to produce a small sweet spot for 15%-21% and high knockback at the Sakurai angle, able to KO reliably well at around 125% from center stage. The majority of the beam will act as a sour spot though for 8-11% that sends in the same direction, just for less power due to the damage change.

A good compromise between a normal Repuslor Blast and the potent Unibeam, a sweet spot from this can often end a stock reliably where it could be tricky yet rewarding to hit the flashy Unibeam KO. With a cost of 2 Bars to attempt, F smash can still be used without power in two ways. A basic input will place both palms forward and deal a single hit of 11% that acts just like the sweet spot normally does, but with pitiful range. Fully Charging the input with no power will result in a standard, uncharged blast for "free", and can even generate Power on impact! You just have to find the time and safety to toss it out is all.

Up Smash: Repulsor Bomb

Holding both hands up as he takes a step forwards to brace himself, Iron Man fires two Repulsor Blasts together to create a large explosion of energy overhead! The combined energy will create a blue-ish sphere about the size of a Crate Item above Iron Man's head that hits for 16-23% and strong vertical knockback that can KO at around 120% on most characters, as well as further reaching "spikes" of energy that come off of the four corners of the move briefly that hit for 5-7% and extend the reach. These additional small beams coming off the main blast are fairly random, and are out prioritized by the main blast completely if a foe were in range of both, but they do offer a bit more dangerous coverage area to this unstable maneuver.

Like his other smashes, this costs 2 Bars to perform, and with no power can be fully charged to produce the basic variant. An unpowered, uncharged U smash will produce a small display of sparks from his hands as they face together for a much smaller hit box of 12% that can still KO at around 150%.

Having a great deal of disjoint above himself is nice, but as an easter egg that really only occurs with other Iron Men, two Repulsor Blasts hitting dead on will also produce the U smash explosion at the point of impact!


Down Smash: Backwards Jet

From a crouching position, panels will open up across the front of Iron Man as he charges up, before placing both palms out wide as he blasts off backwards! Essentially D tilt turned up to 11, this creates a large blast right in front of Iron Man that sends foes away for a total of 14-20% and potent 25* knockback away. While not having the raw power of his other smashes, that is quite a deadly angle and can often gimp foes. This will then blast Iron Man backwards a solid 1~ 1.25 platforms away (based on charge) with his entire body acting as a hitbox for 10-14% and medium-high knockback at the Sakurai Angle before skidding to a stop in his neutral position.

Spacing is the name of the game here as while much more committal than D tilt or Side B backwards, on impact it will push foes, shielding or not, away from Iron Man directly as he escapes backwards for a large net gain. This can be preferable to rolls most of the time given it gives you a hit box to work with, and all in all is not that much slower than a back roll on average. His natural rolls are also a bit poor as he sort of just quickly side steps or boosts a small distance back and forth, so giving himself some power to clear more distance is always welcome. Dash Cancelled D smashes are especially fun as a mix up on approach, granting a ton of breathing room to punish the foe further with projectiles!


Costing 2 Bars to perform, you can either fully charge to use the standard D smash or with a tap deal only 11% and scoot back 1/2 a platform, with your body dealing 8%. Still decent when used in conjunction with D tilt and reverse Side B's to keep your spacing game on point. Both D tilt and D smash cannot send Iron Man off of platforms like Side B can.


THROWS

Grab: Hovering Grasp

Reaching out with one hand, Iron Man grabs the foe and floats just above ground level with them. He interestingly has a great Dash Grab when he has Power thanks to a long swooping motion to grant great distance and duration, but otherwise the grab is unremarkable.

Pressing A will cause Tony to quickly pummel the foe with electrical pulses from his hand for 2% a pop, a good source of power with every 4 hits being able to fill 1 Bar.


Forward: Repulse

A simple but effective throw, Tony raises the victim up and expels them with a small Repulsor Blast from his hand for 6% at a 0* angle. Very fast, and sending the foe at a notorious Semi-Spike angle, this is his go-to combo throw. You can often get F throw - Repulsor Blast, F tilt, or Dash Attack very reliably, or even Side B / Aerial Side B if quick enough!

If you hold Forward momentarily, Iron Man can spend 1 Bar to briefly charge up a proper blast for 8%, increasing the damage and knockback. This can be useful when just wanting to jettison a foe offstage, but a quick F throw is also great when on stage.


Back: Repulsor Pop Shot

Turning with the enemy in the air, they are released at a high 50* angle up and away for 3% before Tony shoots a quick Repulsor Blast in their direction for another 6% and the normal knockback of the blast. This will almost always combo except vs very light or floaty characters who can manage to avoid the blast with hard DI. This is very useful as just a raw spacing tool given it sends enemies out and away into the air a good distance, allowing Iron Man to retaliate further with Micro Munitions or just fly after them with his jets.

If Back is held, Iron Man spends 1 Bar like a normal Repulsor Blast, hitting for 8%. This will be slightly slower to shoot given the slight charge up, but it is overall negligible. At lower percent there is barely any difference but at mid-high percent more characters may be able to dodge the shot than just the featherweights given the tiny gap between powered and un-powered shots.


Up: Aerial Superiority

Grabbing them with both hands, Iron Man rises up high enough to hover over a battlefield platform before spiking his opponent down at a 45* angle with a double Repulsor Blast! Dealing 12%, this can be a powerful throw and even a KO move at the ledge vs some characters at high percent, though this is dependent on his power gauge.

By holding Up, you can spent 1 Bar to rise up, and another to do a double-palmed blast as you hold the input, but there are a few variables to take note of. With only 1 Bar to spent, you will still rise up, but letting go right after this will replace the blast with a more standard "throw" downwards for 8% that is far weaker as both Iron Man and his opponent will probably hit the ground at the same time, the former of course needing to tech or ground bounce. With No Power spent at all, Iron Man just jumps slightly and tosses the foe down and away for 6%, bouncing them off the ground and generically popping them up.

This can be seen as an alternate to F throw when at low power as you can easily combo off of both to regain some momentum, though with 2 Bars to spend and some platforms to reduce the landing lag / ledges to send people off of, it is an overall very useful throw.


Down: The Daily Grind

Grabbing the foe close to his chest with both hands, Iron Man falls forward and rockets them across the floor! Dragging the foe a variable distance based on the power he can spend, he will travel a maximum distance of 3 Platforms before releasing the foe, dealing a hit of 2% per 1/4 platform for a maximum of 24% damage!

This can be extremely powerful, but of course has its limits. Each half platform he drags the foe will cost 1 Bar of power as he fights the foe into the ground, making a full drag cost 6 Bars. He also must be constantly holding Down or Down/Forward to continue the throw, and reaching an edge ends it automatically. Upon ending the throw, either by Iron Man letting go or hitting the end of the line, the foe will be left prone as Iron man swoops into the sky and turns around slowly a solid distance away, making it actually quite laggy for Iron Man as he then has to chase the foe down and away onto the ground to follow up.

With power to burn, this could be very very rewarding as it deals a solid amount of damage and leaves the foe vulnerable to Repulsor Blasts, Micro Munitions and Rocket Boosted Aerials. Though it can leave Tony vulnerable too as it is extremely expensive to attempt, and requires a lot of space. Without any power spent, Iron Man will boost forward half a platform and sort of tackle the foe into prone for 5%. As he gets up, both the victim and himself are frame neutral to make it a sort of poor option compared to his other low power throws.


SUMMARY:
Billionaire, Genius, Playboy, Philanthropist.....

Tony Stark has spent years perfecting the Iron Man armor to combat and survive pretty much anything it is thrown against. Alien Invasions, Killer Robots (which may or may not have been his fault), scientifically enhanced monsters, technological copy-cats and even his fellow Avengers all have put him to the test where he has prevailed again and again to truly earn his title of "The Invincible Iron Man"!

Comfortable at both up close and afar, Iron Man still specializes at mid range with many disjointed moves and boosting attacks to hit from specific distances. He supplements this with incredible movement capabilities both naturally and thanks to his Rocket Up and Side B's to make Iron Man adaptable to pretty much anyone thrown his way. That is, as long as the ol' ticker can keep up.

The Arc Reactor is both a Miracle and a Curse in that is allows Tony to manually generate power, but the reliance on it is evident with how often he will need to take a breather between spending power so freely on his very potent arsenal. Gaining it slowly and through select moves is good and all, but at no power he will often find himself getting a couple hits in, then spending it immediately to go back to zero due to the potency of his powered moves. Creating space with his various movement attacks like D tilt and D smash, or even just F smash / Repulsor Blasts to keep foes away can buy you precious time to charge up your shield special. A fully Charged Iron Man, as you can read above, can be truly menacing if he is allowed to be!

Time management is a crucial skill for any CEO, and especially important in the heat of battle as your racing heart drives not only you but a walking arsenal of high tech goodies. Keep this in mind and you'll be able to show any contender what the Iron Avenger is truly capable of!


EXTRAS:


FINAL SMASH : Hulkbuster Armor

The screen adjusts to frame Iron Man and a distance about two platforms in front of him as he asks Friday for a special request: "Hey, think you could call up Veronica for me?"

As he says this, a series of metal plates will fall down around the closest character with Iron Man's current color scheme and the "STARK industries" logo on there for good measure, the camera turning and zooming in on them as they attempt to break out while repeatedly being shocked by electricity totaling to 20%. After the cage is completed, the character will triumphantly break out only for the camera to turn back towards Iron Man as the helmet of the Hulkbuster Armor closes!


The Hulkbuster is like Iron Man to the Nth power. Built to take down the Incredible Hulk, this behemoth of modern tech stands twice as tall as Iron Man and is twice as heavy, boasting a whopping 160 weight stat! Not only that, but it reduces damage by a flat 7.5% on top of only taking 0.85x the damage, making a 10% hit deal a mere 1%, nothing to even flinch at as it won't even budge unless struck for more than 7.5% after the armor's negation. This allows exceptionally strong characters to harm and knock about the Hulk Buster, but come on... this thing was made for fighting The Hulk.

The Hulkbuster sports Multiple Arc Reactors, constantly charging Power at a rate of 2 Bars / Second at all times, making his ammo nearly a non issue as he goes to town on dangerous foes. Iron Man has full access to his normal moveset, though all damage is multiplied by 1.4x with certain animations changed to look more effortless, like U throw or even Unibeam only needing one hand to perform.

Certain moves change as well, such as Up and Side B causing his body to become a hit box for 10% and medium knockback up and away to those he hits, but most interesting is his Pummel. Placing the foe onto the ground as A is pressed, with his Free Hand Iron Man will begin rapidly pummeling the victim's face like a jackhammer at a rate of 8% a second for massive damage potential. Vs the Hulk, he will also say "Go to sleep go to sleep go to sleep" in an attempt to turn him back into Bruce Banner.

Overall, the transformation will only last about 16 seconds before Iron Man ejects and the suit itself flies up and away off the top of the screen harmlessly. It should be noted that Iron man can actually be interrupted as the suit's parts fly from off-screen and assemble onto himself if he does not manage to snag a foe in the Hulk-Proof cage when attempting to begin the final smash, but it is rare that they will be able to smack him hard enough to stop the process as he also gains the damage reduction properties the moment he gets his first piece of the Armor onto himself.


Up Taunt : Superior Tech!

Iron Man faces the camera and takes on a more exaggerated pose from when he charges the Arc Reactor as it glows brightly, and sparks fly across his body in a display of power. If he holds the taunt button, he will say "Superior Tech!"

Side Taunt : Friday / Tony Stark

Scanning the field with a noticeable holographic display over his helmet, his on-board AI Friday will chime in on the fight based on a few factors:

"The target has tremendous energy powers, be sure to keep the Deflector Shield on standby" vs characters like Cyclops or Thor who use heavy elemental effects.

"Downloading Fighting Patterns now..." vs characters such as Captain America or The Beast who are very melee oriented.

"Your energy is looking low, you should find some cover!" if his percentage is above 100% with no enemies nearby.

"The target looks fatigued, one last shot should do it, sir" if the foe is above 100% and nearby, and so on. Each variant will end with Iron Man saying "Got it" or "I see that..." to Friday in response.


Alternately, you can hold the taunt button to cause his helmet to flip open briefly, Tony will then try to talk some sense into his opposition, varying based on whoever is closest within a 2 platform range:

Vs Captain America: "Enjoying the Shield my dad gave you, old timer?"

Vs Cyclops: "You know, I know a fantastic eye doctor in Tahiti who could clear that right up..."

Each character has their own quip personalized for them, and will be noted in their extras section from now on!


(To be updated....)


Down Taunt : "Make a Move..."

Every conceivable weapon port and panel opens up on Iron Man's body as he points them forward, shouting "Make a move, Einstein" awaiting his enemy's response. This taunt can be held for up to one second, during which time any foe within 2 platforms in front of Iron man can taunt in response, causing Tony to reply with "... Smart Move" and ending the taunt.


Entrance : Superhero Landing

Slamming from the top of the screen in his iconic, Iron Man pose, Tony then goes into his neutral stance while occasionally saying "Guess I'm late to the party" if he is 4th-8th player.
 
Last edited:

IvanQuote

Smash Ace
Joined
Apr 7, 2014
Messages
853
Location
Looking for those who like Mighty No 9
NNID
ivanquote
3DS FC
1693-3075-2999
Ray


Raychel, also known as Mighty Number 0, is a robot created by the esteemed Dr. White. She is gifted with the extremely potent ability of absorbing Xels, fundamental building blocks to robots of the future as cells are to humans. However, Ray is but a failed prototype of the successful Mighty No. 9; while she can simultaneously tear apart robots and absorb their Xels with but one swipe of her powerful claws, her core is unstable, making her body deteriorate at an alarming rate. Abandoned by her creator, Ray’s constant pain and fear of oblivion has driven her to become a ravenous predator as she is forced to feed on any robot she finds to survive another day. While she does so, she hopes to find Dr. White once more to put her out of her misery, one way or another.


Statistics:

Size: (Fox) Physically, she is of similar body structure to Megaman, but her head shape makes her end up slightly taller.

Weight: (Marth) While Ray is a robot of similar stature to Megaman, her body is in terrible shape. With deterioration littering gaping holes across her body, she has much less mass.

Fall Speed: (Megaman) Like her spiritual predecessor, she falls rather quickly as a robot would.

Jump: (Samus) Ray’s jump is relatively strong. It allows her to follow opponents up into the air easily.

Air Speed: (Mario) Being in the upper echelon of air speeds, Ray is able toeasily follow the opponent for potent air combos.

Walking Speed: (Yoshi) Her walking speed is above average, giving her good ground movement for her tilts.

Running Speed: (Meta Knight) Always in a rush to end the battle, Ray can quickly reach the opponent.

Traction: (Mega Man) Average traction for Ray here.


Gameplay:

While the titular Mighty No. 9 plays in a manner similar to Megaman or his successor X, Ray more closely imitates Zero from later series. Lacking a natural buster weapon, she excels in powerful, close-ranged attacks with her claws. Here, she is a brutal rush down character capable of tearing apart the opponent with a barrage of fast and vicious attacks, with her claws attacking from all sides of Ray and adding more range to attacks than most characters of her class would have. While all these factors make for an amazing character, Ray has one fatal weakness, her deterioration.


In her home game, Ray’s health bar deteriorates at approximately 1/20 of her max health per 1.5 seconds. In the above picture, the red portion of her health shows how much has deteriorated. However, even if her health bar has completely deteriorated, this does not mean she dies. When you get hit by an enemy, the amount of damage you take is equal to the amount of health that has deteriorated, not the power of the enemy’s attack. On the plus side, whenever Ray defeats an enemy, she automatically absorbs them in most cases. This completely restores the amount of health that had been deteriorated (not lost). Ray’s general gameplay focuses on rushing through the stage as quickly as possible, traveling from enemy to enemy to conserve her health.

Unfortunately for Ray, this deterioration has carried over to Smash Bros. Ray has two forms of damage values: base damage and deterioration damage. On the HUD, there are two damage percentages; the regular one above the second one. When there is deterioration damage the second damage percentage number will appear as progressively darker shades of violet instead of the normal metallic gradient. Every 1.5 seconds, Ray will gain 10% in corruption damage, capping at 300% or 0% for stamina mode. For example, if Ray’s current base damage is 22%, after time the second number increase to 10%, its corruption value, then 20%, and so on. If Ray is hurt by any attack, the current corruption value becomes the new base value, which knockback will be calculated from, and the attack’s damage output is added on top of that. Also, rage is calculated from the corruption value, so if Ray is at base 0% and 180% corruption, her attacks will be boosted by rage. If one gets to that point however, Ray will almost definitely be killed by the next solid hit, so it is a risk that one must be very careful of. Getting rid of corruption is more straightforward however; all you need to do is hit the enemy with most any attack to bring the damage back to its base value. The exceptions to this are her Neutral Special (see below) and items, such as beam swords. Healing items are especially beneficial for Ray though, as they negate all corruption and heal off of the base damage. On a side note, even if she lacks corruption, getting hit or hitting in return will reset the corruption timer. For example, if Ray is taking continual damage from a flower or Pikmin, she’ll never actually gain corruption due to the rate of accumulating damage from these statuses.

In short, when playing as Ray, you’ll need to chase down and kill the enemy as quickly as possible to prevent the corruption from getting too large, or else Ray may see herself on the receiving end of an OHKO.


Specials:

Neutral Special (Variation Code: Battalion):


Transforming her right arm into a revolver cannon, Ray gains the power of Mighty No. 5, Battalion. Visually, she shoots out standard Mega Buster shots, like Megaman’s Jab, but the properties are quite different. First of all, Ray shoots the lemons twice as quickly and can shoot to 5 repeatedly given time before a 0.25 sec cooldown. Second, their range is much longer at 2/3 FD and their power is stronger (6% per bullet, launching at 15*), albeit not strong enough to kill below 350%, along with utilizing a small startup lag. Finally, using this move in the air will shoot the pellets twice as quickly as normally, diagonally downwards at 45*.


The aerial version is a bit weaker (3% per bullet, only flinching without knockback) with only 1/3 FD distance. This is the only move in Ray’s arsenal that does not deplete her corruption damage, so it is really risky to camp out the opponent with this projectile or else Ray may find herself on the receiving end of an OHKO. This attack on the ground is great for spacing and weakening the opponent over a distance while waiting for Rage to build. The aerial version on the other hand has the potential to gimp a recovering opponent and assist in dragging out combos. By hitting the opponent with various bullets from the air, you can either quickly land an aerial before leading up with a variety attacks.


Side Special (Buzz-Saw Dash):


This is Ray’s signature move and perhaps one of her most crucial. She dashes forward while spinning, her claws slashing all around her body like some hellish buzz saw. The move makes Ray travel 1/3 FD at a speed just slightly above her dash attack. She moves perfectly horizontally in the air as well, making it a good means of horizontal recovery due to not putting Ray into her recovery state. This attack hits multiple times (3% up to 3 times, last hit 5%), with the last one launching the opponent in a 30 degree angle. The knockback is not much at all, not killing below 200%, but it makes the move good for combos. Additionally, with its multiple hitboxes and high priority, it is a relatively safe way to initiate combos with Ray. However, this attack does little to shields, so it must be used with caution. It is better to use against airborne opponents because of this, but on the ground it should be used sparingly for the sake of unpredictability or after hitting the opponent with an airborne neutral special. After this attack, shorthopped aerials can work to carry on the combo at lower percentages or zair to end it at mid-percentages.


Up Special (Variation Code: Aviator):


Using the power of Mighty No. 6, Aviator, Ray has gotten the ability to lock on to enemies and home in on them with her signature dash. In this game, its execution is slightly different. Once the command is inputted, Ray will pause, greatly slowing momentum if in the air, and emit an aesthetic radar ring around her as she yells out, “Let’s do this!” If the opponent is at most 1/3 FD distance away from Ray, a reticule will appear on the target. After 0.75 seconds, she will home straight in on the closest targeted opponent with a green tinted buzz-saw dash, traveling bit under ½ FD before she stops.


This Buzz Saw Dash is a strong, single hit (13%, killing at 130%) launching 45% upwards, albeit with less priority so a well-spaced enemy attack could potentially break through and hit Ray. After hitting the opponent, Ray will be bumped upwards one midair jump height and will not put Ray into a recovery state. Due to the opponent’s position having the potential to greatly help or hinder her Ray’s recovery, as well as the fact that if Ray does not hit anyone she will enter a recovery state, this form of recovery is very risky. However, Ray will only go into recovery state if she does not hit a target while she is homing in on one. If no opponent is close to her, she will dash upwards by default, albeit a lesser distance than if she targets. Alternatively, upon pressing the B button again along with a control stick input, she will ignore any potential target near her and dash in the indicated direction instead. This manual input naturally has less starting lag than the homing variant and is generally less risky, but travels a lesser distance. Additionally, if the opponent is near the top of the screen, homing in on them with this move is a potent kill option. If you miss however, you are almost sure to die instead.


Down Special (Variation Code: Brandish):


After defeating Brandish, Ray can transform her right arm to gain a sword-like appendage. Upon activating this attack, she will perform a swift horizontal slice. This attack boasts 1.5x the range of her standard claw attacks, but is rather weak (3%), sending the foe horizontally and not being able to kill them under 450%. While this attack will not be one’s first choice for a killing move, the beauty lies in how it handles projectiles. It functions along the lines of Falco’s Reflector Void custom move, destroying most any projectiles it comes in contact with. This move is crucial to Ray’s arsenal, as it allows her to approach in spite of projectile-heavy opponents, mostly through short-hopping as Ray stops in place when using this on the ground. For combos, there are other better moves to use than this one. For punishing reckless opponents, look to the jab for roughly equal speed and more covered area. For locking, forward tilt is more beneficial. In general, if the opponent is projectile heavy, this greatly takes away their capabilities to camp in that manner.


Standards:

Jab:


Ray’s jab consists of two claw swipes, the first downwards and the second upwards (6, 5%). This attack, like all of Ray’s attacks as seen in the above pictures, has quite a long range as indicated by the exaggerated action lines. Due to the deceptively long range, Ray’s attacks can catch opponents who try to recklessly rush in and take advantage of her corruption. This attack in particular is quite good at taking advantage of rushing opponents because the quick vertical swipes catch airborne opponents. There is little endlag for this move, making it safe even if the opponent feints. Unfortunately, the attack is not the best tool in Ray’s arsenal. It is quite weak, killing at 247%, launching at a 53* angle. The other tilts do better at locking or setting the opponent up for aerial combos, so use them instead for those purposes.


Forward Tilt:


Ray does a quick swipe to the side (6%). Similar to Megaman, Ray can continue to use this attack while moving, but if you wish to mash this attack, there is a 0.5 second cooldown between swipes. Since Ray can walk during this attack, it is an ideal way to extend combos by locking a fallen opponent, most likely from an aerial neutral B. This kills at around 250%, so it can be used multiple times in a row before the opponent is forced too far away even at medium-high percentages. If they are launched too far to retaliate, follow up with a Buzz Saw Dash or a regular dash attack to continue a combo in the air or launch respectively.


Up Tilt:

She swipes her claw above her in an arc (9%). This is her strongest tilt in terms of knockback, killing at 180%. At low percentages it is a good tool to use once or twice in a row to send the opponent into the air for aerial combos. At mid to high percentages however, it sends the opponent up too far to make consistently reliable follow ups. Even still, this is a good way to get opponents into the air, which Ray can easily act upon. If you are feeling particularly gutsy, try to follow up with an Up Smash to kill.


Down Tilt:

Ducking, Ray swipes at the ground in front of her (7%). This knocks the opponent at an upwards angle, allowing for powerful aerial follow ups, especially with a uair. This attack is quite weak knockback-wise, killing at around 270% and being useful for starting aerial combos at higher percentages. At lower percentages, you may want to use an up tilt before going into the air to send the opponent at a more combo-friendly height. Also this can be used to poke at opponents over the edge and follow up with Buzz Saw combos. If the opponent is very close to the ledge when you poke them, you may want to follow up with a short hopped dair such that you land on the ground and they are spiked.


Dash Attack:

Ray thrusts a single claw out in front of her, as if to skewer the opponent (4, 7%). The first hitbox produces a large number of freeze frames if it connects with an opponent, and will freeze both Ray and the opponent for a short time before the second hitbox appears and knocks them away at a 20* angle, killing at 195%. Because of the freeze frames, it can be quite good on shields, either breaking it if they hold it for too long or hitting them with the second hit box if they exit too soon. If the opponent gets out of the attack safely however, Ray can be punished if she doesn’t move quickly enough. If she does land the hit, she can follow up at lower percentages with a Buzz Saw Dash.


Smashes:

Side Smash:


Ray crosses her claws and lunges forwards whilst preforming a cross slash. This attack is slow to start up as far as Forward Smashes go, but it has a deceptively enormous and disjointed hitbox, reaching above and below her by 1/3 Mario heights and even being able to hit an enemy on the other side of a SBB! Furthermore, it is capable of shattering full shields and is a very strong forward smash, easily Ray’s most powerful move (21%, KO’ing at around 80%, launching at 15*). This attack has abysmal ending lag however (0.8 seconds), where her upper body goes limp before she struggles to straighten herself back up while breathing heavily. Because this attack leaves Ray extremely vulnerable both before and after, using it at any time other than for a safe killing blow may spell immediate doom for Ray. If the opponent is on a stage with ledges the opponent can get stuck on, such as Lylat Cruise, the lower portion of this attack can be used to stage spike opponents with its disjointed hitbox. The same also goes if an opponent is standing on a Battlefield Platform, such that the opponent is not safe from this attack even when Ray is on the ground.


Up Smash:


Feet firmly planted onto the ground, Ray’s left claw starts burning red hot. She then stabs this claw upwards, creating an explosion through the force of the upwards stab (18%). This attack is similar in concept to Roy’s Up Smash, except the hitbox is a bit shorter, wider, and only one single hit. The hit launches upwards strongly and kills at around 105% uncharged. Despite Ray’s relatively short stature, the explosion’s hit box is large enough to hit from under the battlefield platforms, so it can be used as a powerful anti-air measure so to speak. Also, while it still has some endlag, it is not nearly as much as the forward smash’s, so this move would be made a bit safer.


Down Smash:


Ray preforms a crouching variant of her buzz-saw dash, spinning around like Sonic’s old down smash (5% for a max of 5 hits). This attack has quite a few other properties along with it though. For one, this attack has a medium-powered windbox that sucks nearby opponents, constantly pushing the opponent towards the center of the loop. Also, the knockback angle depends on where the opponent is at the end of the attack. If the opponent is on the edge of the revolution, they are sent 30* upwards away from the center of the loop. If the opponent is in the center of the loop however, the opponent is sent straight upwards instead. This attack is rather weak, killing between 160-190%, but the knock back can possibly lead into combos. If the opponent is careless in rushing towards you or charging an attack, you can quickly pull off a down smash and pull them in while they don’t expect it. If they are sent at an angle, at lower percentages you can follow up with a Buzz Saw Dash to chase. If the opponent is sent up, you can attempt to home in to launch with an Up B, but this will be detrimental if missed.


Aerial:

Nair:


Ray preforms a slice downwards and lets her claw linger in its final position. This attack has the properties of a “sex kick”, by which this means it is a single hit with a long hitbox and next to no startup lag or landing lag. Like most sex kicks, it is a bit stronger during the first few frames of animation (11% early, 7% late). Along with the aerial variant of the Neutral B, this attack is great for approaching and hitting grounded foes. The late hitbox does not KO at any reasonable percent and causes little landing lag, making it great to hit the opponent whilst landing or after an aerial Neutral B. If the opponent is prone, follow up with a couple side tilts into a smash attack or another powerful combo finisher. The early hitbox is still weak, killing at around 300% and launching horizontally, but it can make for a good wall of pain component to push the opponent off the stage. If the foe is at higher percentages when using the wall of pain, switch to a fair to get added range. This is one of the most diverse tools in Ray’s kit, leading most of her combo game. Make sure to take full advantage of it.


Fair:

This attack is similar to the nair in animation and launch angle, except she reaches forward more, extending the attack horizontally speaking (14%). This attack has a shorter duration overall, but has a bit more starting and landing lag to make up for it being stronger, killing at around 200%. Having quite good horizontal range, this move can carry an opponent off the map or at least prevent them from landing back on the stage. This attack should not be as overused like the nair due to some more landing lag, but it is quick and reliable nonetheless.


Bair:

Ray turns around and slashes horizontally with a single claw (16%). This is around the same duration as the fair but much shorter in range, about half the distance away from Ray’s body. This is a great killing and edgeguarding move, killing around 148%. It is not good for combos due to its knockback, but that is what makes it great at killing. Just make sure that you space it well so the opponent doesn’t retaliate if you miss.


Uair:

Ray performs a clawed uppercut. Her arm thrusts forward before sweeping upwards, so this attack covers both horizontal and vertical distance (13%). Because of this, Ray has a huge blind spot behind her, making correct prediction of DI very necessary. This attack is quite strong however, killing at 135%. The blind spot makes it difficult to juggle, but if you still have a jump in store, you could mix up the opponent with a bair, which could kill just about as easily. If you lack a jump but are still above the stage, try an Up B instead to home in on the foe behind you.


Dair:

Ray descends in a downwards spiral (2% for a max of 4 hits). This is a stall-then-fall attack knocks the opponent downwards, leading to a possible spike. If she hits the ground while the hitboxes are still active, she lands on her feet and swings her claws outwards to her sides whilst ducking (13%). While the aerial part is rather weak, hitting multiple times and dragging the opponent down with Ray, the landing hitbox is the strong part of the attack. If a grounded opponent is not careful or an aerial opponent is dragged down with Ray, they have a good chance of being KO’ed at around 113%. The cooldown of this attack is not all that good however, so Ray should be careful when using the grounded hitbox. Likewise, since Ray’s recovery is a bit short, using this attack over the edge of the stage is not the best way to use the move and may spell death for Ray as well.


Grabs:

Grab (Variation Code: Seismic):

After absorbing Seismic’s power, Ray’s right arm can turn into a drill attached to a cable. With this transformation, she can grab, or rather gore enemies from far away. When in the air, Ray can use this attack as a method of grabbing the ledge, improving her recovery.


Zair:

The extension of the drill has a sweet or sour hitbox. If the opponent is where the drill head ends up after its full extension, the opponent is hit several times for a lot of damage (4% for a max of 7 hits) but little knockback 30* upwards, not killing below 270%. If the opponent is any closer while in the line of fire, it is a single solid hit (7%) that launches the opponent horizontally. Since the drill head is quite sizable, it is easier to hit than other zair most others. In addition, this is Ray’s longest range attack that resets her corruption value. It has pretty bad ending lag however (0.5 seconds), so its power is offset somewhat.


Pummel:

Ray increases the torque on the drill for a split second (3%), digging into her opponent. It is relatively strong with medium speed, but not noteworthy otherwise. Before you throw the opponent, you should decide whether or not you want to pummel. Pummeling will restore the corruption Ray has, but it could also take away rage that could possibly KO the opponent from a throw.


F Throw:

Ray crosses her arms in front of the opponent and preforms a cross-slash right on top of them (13%, KO at 140%, launching at 15*). While naturally not as strong as its lookalike forward smash, the range is still comparable to that of the forward smash. This does not mean much for the grabbed opponent naturally, but any other opponent close by will need to stay away, as they can easily get hit by this attack. Similarly, while characters like Rosalina or Ice Climbers have means to protect themselves from throws, this specific throw is great for punishing the CPU controlled partner. Additionally, the move causes great shield damage to shielding opponents, so extraneous opponents should keep away from Ray.


B Throw:

Ray preforms a buzz-saw dash in place while still holding onto the opponent, sending the opponent at a 30* angle behind Ray, killing at 165%. Since the opponent is right in the center of the buzz saw, they are hit by a number of smaller hits (2% 3 times, 4% final hit). With the knockback, it has the most overall combo potential of all of her throws. You can follow up with a series of bairs to push the opponent offstage or a Side B into fairs or nairs.


U Throw:

Ray tosses the opponent upwards, skewers them once again with the drill, rises up to them, and then slams them downwards (6%, 7%). When Ray slams the opponent back down, they move near instantaneously, so unlike ROB’s infamous up throw you cannot instantly kill the opponent if the ledge slides out from under you. Ultimately, this attack bounces the opponent off of the ground in a teachable manner and leaves Ray in the air. If the opponent misses the tech, Ray can follow up with a fast-falling aerial or a down aerial, the latter of which is useful due to its grounded hitbox. If not, than a regular aerial move can be used to follow up, including a lingering nair to combo or a fair or bair to launch. This attack is quite tricky since the opponent can tech the final hit of the attack, so it is quite a mix up depending on how the opponent decides to react.


D Throw:

Ray mounts the now prone opponent, roars, and then tears into them with a flurry of savage claw slashes (total of 22%). This attack launches the opponent a good distance horizontally, but it is better for causing damage than KO’ing (152%). Additionally, this has no combo potential as Ray has lousy cooldown afterwards. In battles with multiple enemies, this attack is not recommended as Ray is left really open.


Final Smash (Berserker’s Anguish):

Ray lets out a ferocious roar and spits out a laser from her mouth, razing the ground in front of her. The area razed, extending about 1/3 FD, bursts upwards in an explosion. If the opponent is hit by the laser, they are stunned in place, at which point they will surely be hit by the upcoming explosion. If anyone is hit by the blast, they are thrown into a cutscene where Ray blows them to bits with a volley of mouth-lasers (41% total). Despite the non-physical nature of this attack, this attack will rid Ray of any corruption on her person and will prevent her from getting any corruption for 10 seconds after the attack ends. Aesthetically, the right side of her body will completely reform and not disintegrate until those 10 seconds are up. The power of this attack is pretty good, killing reliably at around 55%, but the real treat here is the lack of corruption for a time. For 10 seconds, Ray can attack with reckless abandon as she will not need to worry about being OHKO’d.


Palette Swap:

(Standard) Red

(Berserk) Purple


(Countershade) Green


(Beck) White


(Seismic) Orange


(Aviator) Cyan


(Dynatron) Yellow


(Black Zero) Black

Taunt:

Taunt 1: Ray temporarily changes into her berserker colors, faces the screen, and roars.

Taunt 2: Ray clutches her side and questions out loud, “Why was I created?”

Taunt 3: She explodes like her death animation in Mighty No 9, but as her Xels begin scattering, they stop and come back together and reform Ray. When she completely reforms, she lets out a painful gasp.


Misc:

Victory Pose 1: Ray appears REALLY close to the fourth wall, roars at the screen, and then vanishes.

Victory Pose 2: Clutching her right arm and looking exhausted, Ray says, “This should satisfy my hunger…for now.”

Victory Pose 3: She slashes one arm to the side and says, “I am now one step closer to finding…HIM!”

Victory Music: A variation on the main theme.

Entrance Animation: Ray spins onto the stage and roars.

Kirby Hat: Kirby gains a helmet that looks like Ray’s head. Also Kirby’s right arm and right foot appear to be disintegrating in a purely aesthetic manner.

Punch Out Title: Vermilion Destroyer


Home Stage: Wily Castle (adds tracks Allies Obstruct, Plundering Claw, and Mighty No. 9 Medley [Includes Avi's News Report, Crimson Stronghold, Trapped By Laser Light, Beyond the Watery Vortex, and The Machine Draws Near])

Series symbol: Beck’s Symbol - a triangle with circles on the points.


I made it through without taking a jab at the game! I actually love the game and really want a sequel, please don't lynch me.
 
Last edited:

Smady

Smash Master
Joined
Apr 29, 2007
Messages
3,307
Location
K Rool Avenue
Butterfree's the archetypal "move gas around" playstyle, in this case dust. The effects for the dust are very logical, although I think the final effect for the Sleep and Rage powders are a bit on the strong side. The set then goes on to the obligatory stuff like the tornado, the recovery using Butterfree's wings and the string shot that you'd expect, all linking in to the dust. Last contest we had Riki as the token dust set, and I don't feel like Slavic or anyone will fault me for saying this set does it much better as it's very focused on the playstyle all the way through, it's actually fairly impressive how much you manage to squeeze out of the concept, in a modern context we've not have a set that really goes for it with this playstyle and it's pretty cool to see.

When you get down to the melee in this set and later inputs, it is mostly moving around the dust and making use of the up special into other moves, which makes sense, and always tries to introduce new ways to combine the dust and other parts of the playstyle. There are quite a few neat little moves here that you put plenty of thought into. One thing I felt the set could've done better though is with the status effects that are inflicted by the powders. This ranges from effecting the foe's movement, their shield, just pure damage and paralysis, but mostly is just left to help Butterfree in a very general way. The paralysis and poison aren't easy to work into the set but you could've found a couple of moves to work that in. For example a move that deals all the remaining poison damage the foe would take or making the paralysis effect end early with a single move dealing a ton of hitstun would be cool and the other two effects have obvious stuff. That is really my only complaint though, this set is very solid and I found it pretty enjoyable.

Iron Man is definitely my favourite of these Marvel sets released so far and does what I think should be the standard for these meter sets: using up the meter on most, if not all moves for one purpose or another. It of course helps that Iron Man's power meter is one of the most segmented, with plenty of bars, and the first move in the set (shield special) is dedicated to giving a secondary way to charge it up. It's a very well done execution of the meter from both Cap Am and Cyclops that makes a lot of sense on the character, really making the meter feel like it's fitting on Iron Man. The way the meter gives him better stats honestly felt like more of a cliff note, but given how much you'll want to use up the power on all the moves, it makes sense it'd give some passive boost like Cloud's Limit does.

The individual moves have a lot of flair and I can see that this character's potentially really helped to give you plenty of room to be inventive. This is especially true in how the power is used, and it's a nice touch that his recovery or other certain moves are trash without the ammo in supply. The balance deserves credit here for not veering off too much into the trash area when he has no power with these moves, but doesn't make him an unstoppable monster when he has full power either and I am impressed how you managed to juggle the ammo bank mechanic while keeping in mind the type of balance you wanted in the end throughout the set. It was very cool for example to see a move from you like forward throw that lets Iron Man expend all his power to drag the foe cross the screen to do a powerful KO finisher, and the aerials that let you move around and such during the move were also welcome additions.

The use of technology in this set is pretty good for the most part. I liked how you divided up and differentiated the two types of missiles and utilized his lock on. I was less sure about the jab as it seems a bit too OP to just trip bigger characters, and really what is your complex with the big guys of MYM anyway Joe? I'm just kidding of course, but seriously the different reactions I think need some more detail on how they differentiate opponents given you could hit multiple at once. I also felt like just maybe you could've utilized some of his technology more in the set, I remember Marvel had moves where he shot off all these rockets out of his back, but maybe that's more a War Machine thing. Hope he gets a set out of this or a similar character does, as this set was a lot of fun to read.

I was hopeful about MN9 and not too happy about the resulting game, but I'll happily put all those feelings aside to take an objective look at Ray. Compared to your previous set for Milla, this is a big improvement for sure. I like all the animations and the moves feel very distinct. It feels a bit like Mega Man, as it should, but not quite as you mix in plenty of melee with the claws and give it plenty of bite to go along with the projectiles. I feel like the mechanic with the corruption could've been worked in in some way, even if it's not in the game it seems like an obvious thing to change for Smash Bros to let her use her corruption to buff her own attacks to make it not an entirely negative mechanic. If you chose not to change it, you could've at least made her on the more powerful side to make up for it. It would've been fun to see a more powerful set balanced around the fact it needs to land moves or passively get punished.

What is missing from this set that's a shame is actually making much use of the specials later in the set, and making the smashes more central as the core KO moves in this hypothetical playstyle. Without the Corruption mechanic lending much of a centre to the set, it feels a bit unfocused and disconnected despite having all the necessary moves to work into a playstyle, ends up feeling a bit like Mega Man minus the cohesive elements. This isn't too hard to just go directly fix by either giving corruption buffs to moves or making the set's balance have more fun with the fact she has a constant negative mechanic, make her be a bit more of a berserk character. As it just seems like it's lacking a key element to make it feel truly complete, but still shows a ton of progress since you made Milla.
 
Last edited:

JOE!

Smash Hero
Joined
Oct 5, 2008
Messages
8,075
Location
Dedham, MA
AvX Update:

Cyclops:

Power Type: Blaster Edited for better clarity.
Optic Blast End Lag 20 frames -> 35 frames
Combat X-Pertise Optic Attacks can now gain power if you hit targets marked by Side B.
Up Smash Damage on last hit 9% -> 10%
Smash Attacks all now "overcharge" when charged past max power. Every 5 points past max (up to 20) will increase the range by 1/4 of a platform, exponentially increasing the coverage!

Iron Man:
Unibeam has been altered to have a more variable Power Cost like with his Down Throw.


PHASE TWO : SETTING THE STAGE

For the second phase of your MYMerverse, you will be giving your world Stages to battle upon! Due by Next Monday, 03/06/2017, you should include the following details in a post:


1) You must make at least 1 stage from your Universe, including it's size and general design and what kind of gameplay is expected on it.
What kind of stage is it? Flat with walk offs, does it have walls, 18 platforms? Are the blast zones big or small? More importantly, what does it look like? Include a picture!

2) Your stage(s) must have an Alpha and Omega variant.

A unique mechanic introduced in Smash 4 is the Omega Stage. Essentially a boring "Final Destination" clone of the stage, I think we can crank that up a notch by separating into Alpha and Omega stage variants:
  • Alpha stages are the "fun" version of your stage, which includes all the features such as hazards, guest characters and the works! This doesn't always have to be "crazy", but you have full license to experiment!
  • Omega stages are the "competitive" versions of your stage, which by no means need to be a Final Destination clone. Essentially this alternate mode should turn off any sort of hazards or the like for your stage, and possibly changing the layout slightly.
Alternatively, the Alpha/Omega stages can be drastic aesthetic alterations such as a traveling stage going to a vastly different location with different lighting, and so on. As always, good luck and have fun!
 
Last edited:

brostulip

Smash Rookie
Joined
Jun 16, 2009
Messages
22
WARIO


Wario is a character everyone knows - hailing from the Wario Land series and eventually coming to Smash Bros and his own series of minigames named WarioWare, Wario has a long and storied history. He's famous for his greediness and being a typical strongman in the Wario Land games where he is a treasure hunter and uses his big muscles to beat up the baddies and steal all sorts of valuable relics. Wario has a rival, Captain Syrup, a fellow treasure hunter who tries to thwart Wario's efforts in the first and second game but later becomes a halfway-sidekick when the bigger threats in Wario World and shake It rear their ugly heads. Wario Land has been down in the dumps lately - will it make a comeback soon? The answer is no but we live in hope!

You may call the first half of Wario's life in the Wario Land series as his first phase. His second phase is the one he's in now and has him appearing in Wario Ware and Smash Bros. He has been interpreted as a gross, stupid and idiotic character who farts and eats garlic to transform into Wario Man. He's all comic relief and in Smash 4 even managed to lose the shoulder charge that is iconic in his Wario Land and Brawl appearances. The Wario Ware games are a simple collection of minigames and are not timeless in the same way as Wario Land so it is unfortunate this is what Wario has become in modern day. This moveset will focus on the old, classic Wario from the Land games and will appear in his classic yellow-purple overalls looks.

Height:4wario:
Width:4wario:
Weight - :4samus:
Jumps - :4wario:
Walk Speed:4luigi:
Dash Speed:4mario:
Air Speed - :4wario:
Fall Speed - :4wario:

Wario's largely the same he is in Smash 4 but has a few differences - he weighs a bit more, is slower on the ground and his animations are not the same. . .odd quality they are in Brawl and Smash 4 with fewer frame animations to make him look cartoonish. He's got filled in animations where he shakes his fat butt in his idle pose and picks his nose without doing it in a way that makes him look stupid. He sways from side to side and flexes his muscles not too dissimilar from how he does in the released Smash games. All in all, Wario plays the way you'd imagine he does if you played the Wario Land games and in particular Wario Land 1-3.

SPECIAL

Down Special - Treasure


A treasure chest that is half the size of a crate is taken out and slammed down by Wario to deal 5% damage and weakly hitting away enemies, in a slow animation. The treasure chest stays out and can be knocked around by Wario or his foes as if it was Bowser and can be knocked off stage, when it falls it has the same knockback as Bowser's dair but at half the power/damage. The treasure chest can be opened by Wario who then stands in front of it, shaking his rear at the camera for a moment as one of a few cycling chest-opening animations - it takes a short while for Wario to unlock the chest, a full second. If he's interrupted or stops Wario will be able to return to the chest later as will any enemies of Wario. Any character can do this by pressing up when next to a chest. Once the chest is unlocked or Wario continues, he quickly pops open the chest which then shoots out a bunch of coins and other bits of treasures that are collected up instantly by any character who touches them.

The coins will go to the character and if not in a coin match, will create a part of their HUD dedicated to showing how many coins they have, with treasures giving off an appropriate amount of coins. When a character has coins they will jangle and jingle when they move. coins will have a few effects on their stats, but are hit out twice as easily. For every coin a character has, their weight goes up 0.1, reduces traction and reduces jump height a tad (though at max only to half traction/height) - this won't go lower than Luigi's traction or Jigglypuff's jumps at the lowest. Coin collections max out at 100 coins worth of treasure that will give 1/4 of Bowser extra weight to a character. This is not always a good thing if taken to this extreme and this is unlikely to happen to an enemy of Wario - unless they're his team mate. Yes, enemies can be Wario's allies - he's always out for himself!

Characters' coins are anything but in the bank and Wario or anyone else can hit em out of each other. This is not the weird and random ways you get the coins to disperse in a Coin Match - instead the coins will come out when any character takes 5% damage and will shoot out multiple coins if they're hit for enough damage - 50% damage shooting out 10 coins at once if they had them and someone managed to do that insane damage. The coins will not go in a random direction and instead shoot out towards the way the attack came from - most of the time this will mean they go right to the character who hit the other guy to the benefit of Wario and other capitalistic go getters.

A treasure chest has 20 coins in it that will pop out in an explosion of coins that takes 5 seconds to finish, then the chest disappears. Coins shoot out over a platform's long area, random but making sure to cover every nook and cranny. This is why Wario may want to wait to open the chest until later in the match so his enemies don't steal from him - and when it has been unlocked, dealing the treasure chest 20% damage will force it to open too! The coins can stay on stage for up to 5 seconds and will then disappear too and Wario can gather them all up in that time. He can always summon a new treasure chest but can only have one out at a time, summoning a new one will destroy the old. Wario loses all his coins when he loses a stock and the same goes for any enemies. Other than the coins that are the same ones you see in Smash 4 the other valuables that come out randomly vary from a crown to a goblet - the kind of thing you'd expect to find in a treasure pit and give up to an extra 20 coins, but have around 1% chance to show up.

Side Special - Shoulder Charge


The classic shoulder charge of Wario! This has the same properties it does in Project M for the most part, except that as it charges up it can do far more charging and more damage, going up in power to do up to 20% damage and will KO at 70% if you get the full up to 2 seconds of charge down! This moves Wario across the stage at the speed of his bike at max speed to up to twice that speed at max charge. This move gets a huge benefit out of the super armour as Wario can charge past the foe doing weaker attacks. Wario gets a passive 5-10% of super armour from the move - ranging from default to the max charge - and this happens for the first second the move is out, this works in the way it does for the Koopaling Kart side b. This means Wario can get up to 16% super armour with the full charge and full coinage.

Wario can keep charging across the screen the same way he does in Project M and strengthen the move as he passes over his coins on the stage, as well as jump a single time in a similar way he does on his motorbike. The coins that Wario picks up will increase the strength of the move as if he charged it another 0.2 seconds per coin he picks up and so if he picks up a coin 10 times he will manage to get up to the max at default version of the move. This will give Wario the super armour for a further 0.2 seconds after he picks up a coin too, and the first time he picks it up Wario will do his classic "WAHAHA" laugh, once per time he does this attack! As the shoulder charge goes in a straight line this is a good move to pick up all the coin and treasures too. This makes it a good move for Wario to use after he's opened a chest to approach at the enemies.

At any point during a single charge Wario can press up to do a dodge into the background or foreground that looks as if he did a dodge, and will last for as long as one but only makes his head and feet not targets. This is because Wario is a thick character and his fat bottom and upper body won't poke into the other areas. The important part of this is Wario can run past solid parts of the stage like his own treasure chest - for example Wario can run into his chest exploding coins forward and then run to collect them all up without losing a beat, or run past for another example an approaching Mecha Koopa. Wario suffers minor lag after the 'dodge' is over too and stops being a hitbox for a very short but punishable moment after this so it's bad if Wario spams it in a predictable fashion. This is a good recovery move but not as good as the bike off stage for horizontal recovery without tons of coins falling off stage in his way, giving a small boost to Wario's speed if they fall on him, or he gets a lot of charge off from falling a long way in midair.

Up Special - Corkscrew


The same as in Smash 4 and goes as far as he does in Smash 4 using his whirly, random up b in that game, dealing 10% damage and medium knockback that will net a KO when foes are at high damage. This can transfer any momentum that Wario has into the air at the end of it, able to cancel into the up b out of the side b. This will go up to half longer in terms of distance if he has the max side b power going when he cancels it, and can make the move go up to double as far if he does it when coins are falling on Wario from above. This has super armour against any attack at the start for the same amount of time as the Dedede up b. The damage will deal up to 5% extra damage and KO sooner when he collects a coin, each coin making the move deal 1% more and Wario does a unique "WAHAHA!" as he collects the one coin.

Wario can do a ground pound on to the ground from above if the special button's pressed again, this looks the same as the Mii Brawler's side b Headache Maker. This will do from 13-18% damage as the move gets stronger and Wario gains fire around him as he falls further and will create a shockwave when he lands. The shockwave will be as big as Bowser Bomb's or get up to twice as large when Wario goes up to a battlefield platform long in the air as he goes down. The shockwave will launch enemies up and will deal 5-10% damage - not strong knockback but works into combos. Wario can't grab the ledge out of this however so is not good off stage unless as a suicide and gets no super armour. This does a weak pitfall effect on enemies too but only is useful for a combo.

The ground pound part of the move will pitfall a treasure chest into the ground permanently, as will any down hitting move like this if it deals over 12% - this drastically changes how it works. When the chest is hit up by moves it can be hit out of the pitfall if it's dealt 15%, but if it is whittled down without hitting it out of the pitfall the chest's top will explode off and shoot a geyser of coins and treasure up that will be a weak hitbox as it comes out for a stream of 1% for regular coins - random valuables can deal up to 5% and will add on to a single amount of knockback at the end of the move. A normal chest with all normal coins will deal 20% and KOs at 100% if the enemy manages to get hit by the entire move. Wario takes damage from this too but the geyser will shoot a Ganondorf and deal only half the damage and become collectable, then a Ganondorf after that become regular coins again.

Neutral Special - Hyper Suction


This is the same it's in Brawl but changed to be more the way that it works in Wario World and by Dedede in the Smash Bros games. Any characters who come in touching distance will be swallowed up and chomped on by Wario in the same way as normal, but by pressing the neutral b over and over Wario instead inhales in any near foes or his coins, or other not heavy items. They will be pulled in and all swallowed up by Wario, consuming coins in an instant. When he swallows up an enemy Wario has the same mechanics Dedede has - slowed down but can spit the enemy out who will be shot out as a hitbox that does 5% +1% for every extra 1/10th of weight they are heavier than Wario himself. This can be used to abuse a teams setting or do make a treasure chest explode earlier.

Wario sucks up the coins and they will be eaten, not the same way they are simply picked up. Wario eating coins will make him go much slower, slowing him down twice as much as when he just collects coins, but will give him twice the weight advantage too. Wario can never go above the previously established cap and if he gets that big he will refuse to inhale any more items. Wario's new positive body image can't stretch too far.

The inhale of the move is more useful because it can be cancelled out of once the inhale goes on for a half a second and will then add on a bit of time to the end lag of the move used but only making their end 1.1x slower as punishment. Wario can move around as he's inhaling after the first half a second to go at his walking speed and turn around at a slow tick. He can combine all these eating methods to pull in foes but walk out of the way of their attacks and finish up by punching them right in the face. This may not work out if they dodge that attack when they dodge or shield the attack so be smart and don't be greedy like Wario. Chests or other loose items can be pulled in too setting up for other moves in Wario's arsenal - including his side b.

SMASH

Forward Smash - Mega Toss


In true Wario World form Wario takes out a massive object from one of his games, ranging in size a little but generally around the size of Wario himself and throws it forward! Before it's thrown, Wario holds the object over his head as if to showboat. The object will explode on contact with anything solid and goes from half to a full platform in distance before it explodes into little pieces, 5 tiny hitboxes that all deal 2% and flinch knockback for a very short time. The object thrown deals 10/11/12/13% at no charge and will KO at around 120% and this reduces slightly for the bigger objects. What these objects range from are the one in the picture from Wario World to other random objects, the exact property of which is not too important and these are seen in the start of the move, which is pretty hefty! The ending of the move is quite fast by comparison.

Wario will pick up other things on the stage if he's touching them at the start of the move and this gives him a little less start up. This can be anything that is normally able to be picked up, for example a barrel or crate, and will throw them in the same arc he does his object. These will have the same damage and lag no matter what the object is - extremely powerful items will add up to 5% extra damage if they deal over 5% over the fsmash's normal damage. Wario can pick up his chest to throw and when it is thrown, will deal half of the throw's damage to itself when it hits a foe or solid object to potentially make it explode its coins all over the stage. When the chest has been buried in the ground this causes a cascade of rocks to fall around it dealing 10 hits of 1% in a very close range that only serves to combo into the move, but has very long start up to compensate.

The lag of the move is reduced when Wario has more coins, going down all the way to having the start up of the Fox fsmash - extremely fast! This is when he has all his coins, and with only a few the change is not too noticeable. Wario even adds a few percents to his damage when he's "stronger" too - adding up to 5% to the strength of the chuck, and triple that bringing down how low the foe has to be to get KOd. The foe can be picked up and thrown too by Wario if they are in touching range in a very small grab hitbox, this will KO instead at 80% on a midweight character when Wario chucks them away - this can be greatly reduced when Wario is fat, to the point he could KO Mario at 50% at max coinage. This is ironically much easier when the foe has taken the coins for themselves in a stock as they get away slower and is a huge punish on foes trying to outgreed Wario.

There's a moment before the object explodes on the ground that Wario might possibly charge in and use his side b to hit the object forward an extra platform or so. This is barely possible and will make Wario get pushed back slightly as he hits the object. This is made stronger and faster when Wario charges into coins first to get there, and will make the object deal 1-3% extra damage as well as suitable power increases. The other thing Wario can do is inhale up all the rocks and small pieces of the object that explode when it hits solid ground, adding 5 coins worth of bulk to himself. This takes long enough he could only hope to eat maybe 2 of these when he gets a long death animation after netting a KO so is not too useful.

Down Smash - Ground Pound


A normal Ground Pound compared to the one in up b, Wario pounds the ground for 15% at no charge and will make one big shockwave that does the same damage and has the same range as the shockwave in up b. This will quickly bury the treasure chest if on it on ground after dealing it 13% or more, this can be done in multihits unlike the usual rules if the multihits add up to 13% or higher. There's a close range hitbox that does half more damage and half more power to KO up instead as is shows in the image. This is powerful on top of the treasure chest or platforms as they're close to the top of the stage.

On a treasure chest and doing enough damage to have opened it, anyone standing on top of the treasure chest will be launched as the chest opens up and take 15% damage to be KO'd at 120%, even Wario. This can be used to recover off stage if the chest is damaged for long enough but is not useful unless a chest is damaged on stage then thrown off stage somehow, but can be used to get Wario high into the air to finish off a foe without using his jumps or up b. Any character launched up like this will be a hitbox of their own for their whole body that deals 10% damage +1% for every Kirby's worth of size they are bigger than Mario as a base.

Super heavy characters, anyone heavier than Bowser which can be achieved if they hoard enough coins, will not be launched by the chest and instead when it runs out of HP the chest will fail to open and instead crumple under their weight and spill its entire contents. This will make whoever is on the chest get the lion's share of the coins - taking around half of the entire contents immediately while 5 regular sized coins will be spilled on either side. Whoever this is - but especially Wario - can take advantage of this very easily and this move is very good to break the treasure chest on top of it and make shockwaves at the sides.

Up Smash - Shoulder Bash


A big shoulder bash up! Wario does a strongman flexing pose and launches himself up in the air a bit - the same way Bowser does on his usmash - this deals a little less damage and power as Bowser does in his usmash. Because Wario is not as big he's not got the range of the Koopa King. This has weak super armour on the upper part of Wario's big muscles on his upper body. This differs from the up b as Wario stops dead in his tracks at the end of the move and suffers a long ending after it's over. This can be done out of the side b's end momentum or a dash to get a huge amount of range - all very satisfying as Wario lets out of his infectious Wario grunts/laughs when he hits a foe.

I lied, what a stinker - this move can go further than I said when the smash is charged at all. This will make Wario go up to twice the distance Bowser's usmash goes in the air and can end up putting him on a platform at the end of the move or make him end up on a treasure chest or footstooling an enemy when the move's ending instead of the usual bad ending of the usmash. This is made easier when the foe is slower and greedy on the coins to make them unable to jump over or dash away from Wario. At the same time Wario when he's all fat or big on the coins will himself become a much bigger hitbox to land on the foe when he's shoulder bashing up or landing on a foe.

The end of the move is made faster for every coin Wario picks up. Each coin reduces the move slightly and the move becomes lagless when Wario collects 10 coins during the move, meaning the move can be cancelled into any other attack. A perfect lead into a chest exploding its coins out - if they're from a buried chest shootings its coin up that's even better! Speaking of treasure chests, this is a good one to use to get them into the air as they explode out their coins all over the stage further on because of them being launched in the air, but will come down later and spread them all on the ground around Wario too, for the best coverage of coins on the stage.

STANDARD

Jab - Punch, Punch, Headbutt

This is the same attack Wario uses as his standard attack in Wario World - two punches that each deal 3% and combo together finishing with a powerful headbutt for 4% but comes out a little slow for a jab. This will not KO until super late - think around the 200% mark. Wario has a special fourth jab hit where he does a much powerfuler headbutt that does 6% and KOs 150% but will never combo into the third hit, but becomes easier to land when the foe has gotten fat off the coins or is fat in general like most of Wario's enemies... and Wario himself lets be honest.

This is a great way to get coins out of enemies as the two first hits do 6% and will hit out a coin and the second hit - part of the jab combo - will get two coins to come out at once. The fourth hit when it lands will net another coin and that is more useful when the enemies have a ton of coins to steal in the first place. This is the go-to move when Wario's got to bust open his treasure chest too as it can't get out of the way for the fourth hit - all together this attack deals 16% and the chest has 20% health so will leave it very low if not destroy it outright. Wario can always stop the move after the first, second or third hit to come back to it later so is not left too easy to punish for enemies.

This is one of the best moves for when foes are being pulled in by the Hyper Suction and will hit the foe fast enough as a jab - even if it's not the fastest jab - and will then keep pulling them in enough to keep them comfortable combo'd all the way through even if they tried to roll out or dash away at the start. This will force enemies to do a punishable defensive option that Wario can then punish himself if he stops doing his second or third hits in time.

Dash - Corkscrew Conk


A leap and Wario spins in midair to deal 6% damage and will KO at 190% in midair - Wario lands and has bad lag but has super armour for the length of the move. Wario leaps two crates in distance forward and can jump on top of the treasure chest or other platforms lower than half more Wario's height, the height the leap goes. This takes Wario a good distance forward and he can leapfrog right over some foes or his chest from close up while hitting them on top, or when he's gone behind them to hit them back in the direction he came. This means he can hit them away and get their coin to come towards him as he jumps away - a bit of a hit and run job! Wario's becoming a mafia man like Carpaccio.

The leap can be changed by Wario holding the button when he's in midair to hunker down and come down at the ground doing a ground pound that deals 7% and a weak shockwave that barely goes around Wario's hefty body size. This will shoot foes up in the air weakly but will meteor smash foes downward in the air if he hits them in a similar way to the Mii Brawler's Headache Maker. This can be great when next to the ledge but Wario can't jump off stage - he's greedy but not crazy. This can mean Wario can pretend to jump over his chest then land on it with this and bust it open at the last second, or last on top of an enemy that is trying to duck the move. Wario can leap off normal platforms to land in the middle of them. This isn't all good though because Wario suffers very bad end lag if he does this, but can interrupt himself by landing on a stream of coins or something else that hits him out of the lag.

FTilt - Shoulder Bash


A big shoulder bash in place that has the earth-shattering visual that it does but put up to 11 for the length of the move going on. Wario deals 9% for this and it has good speed on both sides, this will KO at 120%, but the catch is that it doesn't go that far though it does move Wario forward a little, it does give him the same amount of armour that Little Mac has on the same move - ftilt. This budges the chest forward a good bit and when he can next to the rubble he makes from Mega Toss will launch it forward again a little to make it active again. More importantly this is great to use on enemies close to Wario to trade for coins - always a good trade!

This can be used out of the momentum you get in the side b to extend the amount that Wario travels up to a full platform and this will make him push anything on the ground that far too and buff the move's power considerably to do 1-4% extra damage and KO sooner too, but will lose the super armour when he moves further. This can be cancelled into at the end into the up b, this can combo a foe to KO enemies off the top quite decently and will combo well when the foe is a greedy thieving bastard. This can be a good surprise to catch foes out who try to avoid the move or game the side b when it has a deceptive amount of range.

This can be a great move to cancel into the up smash when it keeps up the momentum of the side b and its end lag is on the shorter side. Wario can defend his pile of gold coins by running over them with side b momentum or trade using the armour, a great fighting move, then use the coins in the up smash he just won to get the move down to lagless and still get a good anti-air out of it while not worrying about the end being slow. In addition this is a good move to use and the ground pound down smash to cover all the enemy's options as they try and roll behind Wario, giving him the ability to turn around with the armour and use the ground pound, each being viable options.

UTilt - Strongman Uppercut


This is the *NEW* Wario fsmash present in the new Smash Bros game that is really unfitting and terrible for what it replaced but is changed heavily and put here on a less offensive move. Wario rears back his fist as is shown and then he does a strong uppercut! This has a long start up as he rears up that takes almost as long as his fsmash but will deal 15% when it finally comes out and is super powerful at a diagonal, steeply upward angle to KO at 115%! This is one of Wario's strongest attacks and has very low ending so that foes can't possibly punish it. This is great to use when the foe is being sucked in by Hyper suction and ends up like a more useful version of Ganondorf's Volcano but not as slow.

The move's start up goes down like the up smash when Wario gets his coinage or other treasures, every coin he gets during the move will reduce the start up by 0.1 seconds and after just a few coins will make the start up skip to the uppercut instantly! Wario will like this a lot when he can use hyper suction first to get the ball rolling on the coins coming in and the foe, then clobber them all at once if they aren't paying attention! As the attack gets enemies far from Wario whether or not they die, it'll be the perfect way to hit three coins out of the foe and make it impossible for them to get those coins back in the immediate aftermath. This is great to use out of the side b too to make Wario dash in and get in the enemy's face right as he's doing the attack.

DTilt - Low Blow

A kick out below Wario in his quickest attack that deals 2.5% damage and almost no knockback but will combo into itself a good few times at 0%, and will combo twice - enough to get a coin - at most percents. This is the best way to get a couple of cheap coins and end up with the match reset in the most instinctual ways for a fight. This has a small chance to trip too, around the same that Ness' same move does and when you can repeatedly land it, yeah this is a pretty freaking cheap trick to pull out. Fitting, yes? Wario can pull in enemies by using Hyper Suction or abuse their greedy theft of his coins to punish their heavy weight - both making it more important to steal those extra coins AND easier to combo in the first place!

This is one of Wario's fastest attacks and will do a good job of hitting foes at the ledge without having to commit to anything that slow like a Mega Toss and is an integral part of Wario's playstyle when he tends to be, you know, in character and be mostly a slow fighter. This will be thrown out in place of the jab most of the time for the fastest attack and it doesn't have the best range - in fact, this is one of his shortest ranged attacks - but can be improved by many of Wario's attacks that let him slide right up to the enemies. This is a good one to use on the treasure chest to bring it down a tiny, tiny amount, maybe to play some hot potato with enemies who want those coins too - or just want to ruin Wario's fun!

AERIAL

Nair - Fatal Four Way


He turns to face the camera and puts out all his arms and legs and punches and kicks forward - four hitboxes that each do 5% damage and when Wario is not that giant, these can hit twice if the enemy is close! Wario is so strong he makes the very air itself shake. This is a jackpot because for every hit that lands Wario will get a coin from the enemy and out of his momentum based specials Wario can hit all around his body at the end to punish any approach the foe gives to him, an important all-around coverage move for a Brawler like Wario.

The move isn't very fast and has bad ending that is pretty slow but is sure to land on any nearby foe making it a good option to hit them out of the air as an anti-air. The addition of coins will make it harder for the enemy to avoid all the hitboxes at once. This is a good move to use out of the up b too as it will move Wario up for another hit-and-run style attack, Wario can do the same when he wants to move past the enemy and buffet them as he makes a pass.

Wario has good enough air speed to get around the treasure chest and land on it to nudge it one direction while it gets hit or hit it multiple times making it hard to tell if he's trying to open a chest, move it or simply land on it during the attack. The attack has fairly good landing lag - much faster than the ending - so Wario benefits a lot when he lands on the chest rather than finishing the move in midair. This makes it a good move to use when Wario is on the ledge to jump at the foe and land next to them if he can land the nair.

Fair - Big Boot


A big kick with big start up that is slow as heck, but has decent ending, this does 12% and will KO early as it sends the enemy at a straight angle forward and is a perfect gimp. In fact, this can KO at an early 100% on lightweights. This has a ton of start up to it and no way to reduce it - for example like the up tilt and smash - but Wario can get around the enemy easy enough using his up b, side b and his dash attack to get in position for this. It isn't much slower than his red rival's fair but the few degrees of added slow don't help.

This has a unique effect on anything solid, and has the same oomph to it that Wario's kicks do in the Mario Party games. Wario will kick away if control stick is held towards the solid object, be it his chest, the foe or the rubble he can create out of his Mega Toss. This will put him back a Bowser and stop any momentum he had dead in its tracks. He'll have a short spell to go into his side b or do his aerials when he's got the reversed momentum and get anything out of it - landing the attack has plenty of its own appeal too, kick two coins out of em and send em flying!

Uair - Big Headbutt

An orthodox headbutt that looks the same as Wario's headbutt up smash in Smash Bros and deals 9% - lower damage but the power isn't hugely reduced and will KO at 160%. This is, by the way, one of the only Wario Land attacks Wario has in Smash 3DS/U. Until the attack will KO the uair is a great juggle move and a good move to use after the up b gets Wario into the air or he jumps there. Wario headbutts into the background and this makes his head intangible during the short ending of the move but overall this doesn't have too much of a lag problem at the start or the end. This goes a good way horizontally too and is good coverage move to hit all around the head area of Wario.

Bair - Big Butt


A poke backward by Wario where he elbows and yes, pushes out his enlarged ass at enemies that does 5% at the... rear and 8% at the elbow. This will deal low knockback for the first hitbox and will be a good way to juggle the enemies back in the air and keep using the move over and over to net a KO, the second hitbox will end up able to KO at 180% and send the enemy at a steep low angle to make them go towards the bottom blast zone off stage as a good gimp move. This is average for the speed it comes out and ends and has high end lag but will end early Wario lands on the ground. This makes it a good mix to use with the nair and fair when going near the ground or high in the air.

Wario will grab his buttocks when an enemy attack lands right on his posterior as he does in the artwork for Shake It!. This will make him go half a Bowser forward on top of the normal knockback, on weaker moves this will get him out of combos that hit him in the back. This is good for Wario because when he can rush past the enemy in so many ways he'll get use out of an attack that will push him away when his back is turned to them, making it a good escape. The cost of this is that Wario takes an extra 2% damage on top of the normal damage the attack does, and this can stack up over time if he enjoys taking up the butt on a regular basis - like the Smash Bros Wario!

Dair - Butt Stomp

He turns to face the camera and turns head over butt in a stall and fall dair that makes Wario tumble down at the same rate that his normal one does, this deals 10% damage and average knockback for this type of move. When Wario hits the ground he will create a small shockwave that goes out a short distance and does 5% damage and makes foes go up, not a good KOer but will lead into an easy juggle! Wario has bad ending lag but he can cancel the move by pressing any other move when he's dropping after doing it for two Ganondorfs in the air and can then cancel the momentum into his side b or then his up.

An interesting combo is when he does his up b out of the attack as it will go against his momentum and keep him in place making him stay in place in midair but will not recover at all. Wario can cancel the dair into the side b and get a huge momentum boost from the move to go super fast but this will die down after the first little bit of the side b. This is good to then cancel into an aerial or another special - drop a chest on top of an enemy or pull enemies in as Wario passes to pull em off stage to get a KO that way.

The dair will get stronger as Wario falls further than the Ganondorfs he needs to go to cancel the move, after that every Bowser he falls after increases the power of the move by 3% and will make it KO a little earlier. This will max out at 20% damage that KOs at 60% - insane but not too viable. This is made easier because Wario gets stronger if he butt stomps into coins, each giving him the same 3% buff he gets falling normally, this is perfect to fall into the coin fountain of the treasure chest once it's been stomped into the ground.

This move will trample the chest into the ground due to its hitbox angle and repeatedly butt stomping a chest nets this result. Good luck approaching Wario as he butt stomps a chest. Luckily Wario can completely take out a chest if he's fallen to get the max 20% damage. The downside of the extra damage from the fall is Wario's butt becomes red hot and he is surrounded by fire when he lands and has to pat off the flames in minor pain. This is the most stupid Wario gets in this set.

GRAB

Grab - Shake It


Wario has the same grab he does in the normal smash Bros series because that's mostly okay. Nothing too changed here but he does have the capability to grab much better when he's dashing because he can increase his speed to great levels. When he does have an enemy grabbed, his pummel is the now classic Shake It move where he shakes them dry - dealing rapid hits of 1% damage 3 times a second! Each of these will send out a coin that Wario collects and is almost at the point of drooling at how many coins he is getting, at high percents he can make a small fortune off his pummel!

The coins out of the pummel will give a power up to Wario's throws and this means Wario has even more reason to want to pummel the enemy as much as he can before he goes for the throw. At the same time he doesn't want to let the foe get a grab release, just to get some coins!. . .or does he? This may not be the worst thing when Wario has some good moves to throw out in the frame neutral position.

Fthrow - Mega Toss


The enemy is grabbed by the middle and Wario puts them over his head, then tosses them forward! This takes longer to do if the enemy is heavier - possible given that they stole his coins - and if they are heavier, the throw will not throw them as far. This deals 10%. Mario will get thrown two platforms and this will KO when he's at 185% - not the most powerful KO throw - but on Bowser this will only throw him at half the distance, and throw him at a diagonal at the ground. This can be better though as this will throw the enemy down off the ledge and can even gimp them when they're at a high percent - or bounce them off the ground to combo them in the air! When the enemy is bounced off the ground the enemy will take another 2% damage as they hit the ground be it the battlefield or platforms or a wall that sends them back at Wario.

The enemy's weight has an effect on how much damage they deal to outsiders from the throw when they're being tossed by Wario. The smallest enemies deal only 5% damage to outsiders but the biggest ones, Bowser or larger, will deal 10%, and over that can go up to 15% for super heavyweights. This can make them bust open a treasure chest that Wario can then take the coins from. . .or if the enemy gets greedy and takes them, Wario can regrab em and take back what's rightfully his! As this can throw enemies into the chest this can make them hit open a chest buried in the ground that then launches them into the air as a combo.

Coins will power up Wario as he gets invigorated from his coins. Every coin will treat the enemy as though they weighed 10% less and will bottom out treating the foe as if they weight 3/4 the amount Jigglypuff does - this would make the move KO Jigglypuff at 120% when next to the ledge but can get most enemies that low who have sucky recoveries die much earlier. This can make Wario not throw the enemy at the ground and instead off stage and change the angle to go higher and then do a more useful throw instead.

Dthrow - Body Slam

The enemy is picked up and thrown to the floor dealing them 2% damage and then Wario follows up by jumping at them squarely with his stomach performing a perfect body slam! This deals 7% but can go up to 14% when Wario weighs more from the coins he's collected and at that point, the throw will KO at 140% - very powerful. This however takes a long time as the throw only improves its damage at the rate of 1% per 14 coins, taking 98 coins to get to this point. When it's lower this will send the enemy at the angle that it doesn't really achieve much for follow ups or as a KO throw but can improve to that point, eventually becoming one of Wario's strongest throws. Every coin that Wario pummelled out of the enemy will lend another half a percent of damage to this number but will only give half the yield in terms of power toward the KO throw percentage.

Bthrow - Wild Swing Ding


Wario grabs the enemy by their feet and swings them around, letting them go for 8% damage and high power! This will KO them at the same time as Mario's, but a bit sooner than that because of Wario's strength. Wario can swing the foe around much faster depending on weight as a visual the same way Mario can. Anything the enemy hits will be dealt 2% damage and this normally happens up to two times when the move is used at default. This can make the move deal 4% to anything or anyone hit by the swing ding.

Wario can hold back to keep swinging the enemy around as he can for incessantly long periods of time in Wario World, swirling them up to 5 times, but the foe can still escape the grab if he chooses to do this. This carries over the same grab difficulty the enemy had before the throw began and if they escape Wario is left in huge lag and the foe has good frame advantage on him. Wario will release them from the extra swings to deal an extra 1% for each swing however and they only take the same time 2 pummels do to perform.

The thing is though Wario can get faster in how fast he swings enemies by being heavier than em, and as we know he can get coins to get heavier, so this gives a reason for the enemy to want to not let him get too fat on the coins too. This can make him swing up to twice as fast and this throw maxes out with a crazy 18% damage after Wario swings the enemy around 5 times! This will KO at 145% - a mighty KO throw at this point. As the enemy goes around they will hit the other enemies in the match or other things - for example Wario's chest - and when swung around can deal up to 14% to them if they're stationary, stupid or held in place by an ally.

The move gets a natural boost from pummelled coins, this lets Wario move during the move and gets faster the more coins he has. When he has 8 coins, Wario moves at his dash speed A or B are held, A to go left and B to go right. This will get him closer to the ledge to then toss the enemy off the stage or bring them closer. This will make Wario spin a little ways off if he flubs the move and fails to throw the enemy at the end, making it hard for them to punish his mistake.

Uthrow - Piledriver


Wario picks the enemy up by the middle again and this time leaps into the air as tall as the top platform on battlefield before he crashes back down piledriving the enemy into the ground, dealing 12% damage and very powerful knockback to KO at the same percent as Charizard. Given Wario can do this on top of his chest this naturally has far more potential to KO earlier on the flattest of stages. There's a chance when Wario is going to KO the enemy off the throw he will end the move by saying "have a rotten day!"

This is one of the core throws to improve from the coins because it will make Wario jump higher. Every coin he gets from the pummel will make Wario leap an extra Kirby height in the air and after 10 coins will max out at making Wario leap a full half greater height than the top blast zone on battlefield, this will deal 20% to the enemy and KO 20% lower than the Charizard uthrow. This can be countered when the enemy takes a lot of Wario's coins. This will not only KO the enemy sooner but will make them deal 20% to anyone or anything they hit on the way down, breaking open chests they hit and then will shoot out coins all over the stage like a pinata.

FINAL SMASH

Super Piledriver


Wario does a super long grab that makes him dash across the whole stage or dash forward in the air for the same distance that Ganondorf goes in his final smash. When he grabs any enemies Wario will laugh heartily and chuck em on the pile over his head and then land on the ground - or on nothing in midair - and then leap off the top of the stage. There will appear Wario's planet he won in Wario Land - the same graphic used for Greninja's moon in his final smash. Wario can press any button at this point to end the final smash early by mega tossing all the enemies into the moon, causing it to explode and deal 35% damage to foes that will KO at 60%. This will cause a rain of coins to come down on the stage, raining 30 coins down over 5 seconds where Wario first used the final smash.


Wario will then give the enemy a good pounding - in particular if they're his Smash doppelganger who likes to fart - punching, kicking, headbutting and so on for 10 hits that all do 3% each then grabs everyone again and piledrivers back down to the stage. On the way down the camera pans the same way it does for Olimar's final smash and the bodies of Wario's enemies become heated up from coming down from the great height. When they land Wario's piledriver causes 15% and a massive explosion and he says "have a rotten day!" This will KO enemies at about 90% - this isn't counting the 45% damage so will really KO at 45% and on multiple enemies too for a clean house.
 
Last edited:

Bionichute

Smash Champion
Joined
Jun 30, 2012
Messages
2,151
NEW YORK CITY


New York City is the main location for most of Transformers: Devastation. In the game, Megatron finds out that a lost Cybertronian ship is buried under the city, and uses its technology to begin cyberforming (A process similar to terraforming, only for robots) the planet. This stage is primarily based on that.


(enjoy my awful drawing skills)

The stage is similar to that of Onett, being a flat plain with some buildings in the way of the blast zone. Two of these buildings are placed on the main plain of the stage, those being the shorter ones. The stage is specifically sized for transformers characters, meaning that any other character on the stage look a bit odd. Size-wise, the shorter buildings are only slightly taller than Mario, making them very short for most characters.

The taller buildings exist in the background of the stage. They are partially cyberformed, meaning they have rather meaningless purple metal stuff on them. A bit of the cyberformations have popped out into the main part of the stage, turning them into thin platforms. Other than those, there are no other interactions with those buildings.

In the middle of the stage is a building a bit more into the background, marked by the large X that I drew, because I'm too lazy. Anyway, every once in a while, a large purple claw (Seen in the background of the top picture) will rise out from behind the building, and then slam down into the open area in the middle of the stage. This is the only real obstacle of the stage, but its remarkably large.

The arm is powerful, dealing 20% damage and incredibly heavy knockback once it strikes down. It strikes quickly as well, with the only real telegraphy being it rising from behind the building. Once the arm strikes, it will remain there for a few seconds, acting as a completely solid wall that takes up the entirety of the middle section. After its finished, it will rise back up, and head back behind the building.

The stage, in size, is comparable to Onett, but a bit bigger in order to make room for the claw. The blastzones are also a bit farther in size compared to Onett's as well.

The background of the stage has a very large Decepticon tower, visible from any part of the stage, with a swarm of Insecticons hovering around it. Other details include a number of destroyed buildings.

The Omega version of the stage is completely flat, with everything in the stage prior being reduced to rubble, including the claw, which lays on the ground, deactivated. The only structure that remains is the Decepticon tower. It has also turned to night, and the Insecticon swarm in the background has turned into a tornado that swirls up into the sky, well off-screen. The stage's specs remain the same, however.


SOUND TEST


The Transformers Theme Song
Theme Song
Main Menu
Devastator
Menasor
Blitzwing
Motormaster
Constructicons
Soundwave
Megatron
The Touch
Instruments of Destruction
Til All Are One
Transformers EVO
Praise be to Decepticon
 

ForwardArrow

Smash Ace
Joined
Aug 17, 2011
Messages
502
Wario
I should probably tell you that releasing this set early before editing did a bit of a disservice to you, as the writing in that version was a lot more confusing. As is, with the nature of the coins being less extreme its easier for me to compliment the set, as honestly you have a kind of fun system going on here. The fight over treasure chests is a decently entertaining one with Wario having a fair few tools to give himself the advantage, and I like the buffs that some attacks get by collecting coins mid attack. The more static ones are less inspired, but serve adequate purposes as a reward. The whole momentum cancelling stuff the set has, now that its a bit more clear how it works, is admittedly kind of interesting as a way to Wario to slide around, pick up coins in large amounts, and abuse them to give Up Smash zero lag. It admittedly doesn't have tons of substance on every input, or even as many inputs as I'd like, but the playstyle flows pretty solidly and the idea here is a nice break from all your projectile sets last time.

Unfortunately, what I believe to be the best and worst parts of the set both come from the coin mechanic, specifically the statistical change to foes. Now admittedly, its not super extreme compared to before, but the coins affecting enemy stats becomes quite bad when there's absolutely no way to get rid of the coins. If you take 50%, you lose a grand total of 10, which isn't that much in the grand scheme of things. There's no way to get rid of them on your own, so if the stat adjustments screw up how you play your character you're just out of luck. Yeah, if it was a negative status effect that lasted a few seconds or the character had a way to get rid of, it could be made sense of, but when its basically a permanent thing it becomes a much bigger issue. I don't even really think it makes a whole lot of sense for the opponents to forcibly be weighed down by coming into contact with a coin anyway, they're not magnetizing to their body or what have you. This isn't insanely hard to fix though, just make it so coins the opponents collect don't make them heavier, and just make them vanish, which messes with a few of the set's mechanics but you could probably work something out to replace it(or just make the coins come back out with shake it anyway with no stat alteration).

Aside from that, I basically just have some nitpicks. Wario's Side B going around solids feels like a whole mess of logical issues in terms of how it would interact with certain stages, the Star Fox ones being a big example of a stage I could see it get very glitchy as written. The logic is pretty bizarre too for how the animation goes around solids, and I'm not sure the treasure chest even should be solid in the first place, though having the top be a platform is fine. And while its a small thing, the Bair feels really odd, I get that its to mitigate the downside of getting combo'd so heavily but the animation for it just feels... off and nonsensical. On the plus side, the set does have funny writing and while I find Brawl Wario to at least be an interesting moveset, it does a good job of showing how unfaithful Smash is to the high points of Wario's career. I definitely think this set shows positive growth for you Brostulip in many areas, its just I can't really give it a thumbs up as is.

Butterfree
I am amused to see what feels like a proper evolution on my very first moveset come out a whole 9 contests later, and maybe that's a bit self-indulgent to say but the similarities are there. You have a juggling set with wind hitboxes pushing around clouds that disappear as they reach the ground. The improvements on the formula are practically immeasurable though, as Butterfree puts all its powders on one input, has them go up in stages for a more dynamic and interesting system of rewards, and actually bothers to have some depth to its standards beyond just some basic juggling. I mean there is that, but its executed pretty solidly and substantiated by a number of cool concepts, like the Silver Wind buff and the Down Tilt rocks. Nevermind the rather cool payoff tool that Down Special's charged variant provides, its all pretty solid stuff which I can't really find a whole lot to complain about. It's mostly just unambitious, with a lot of moves amounting to just a wind repositioning effect(with care put in to make it not just "spam this to shove wind around", admittedly), and I'm not entirely sure how the balance of this set plays out, as on paper the damage percents are a joke but the ways Butterfree can magnify them sound actually a little scary. I guess it comes down to how good the player is, which is what I like to see, but its pretty hard to tell which side of the balance spectrum this set leans toward.

Genis
Let me get the negative out of the way first, because this set's admittedly not flawless. While I'll give props to how Genis uses the minions, the minions themselves are very underwhelming and have fairly little substance to them, with no new abilities gained when you make a giant one and Naria's ability set feeling very shallow for being his second in command and requiring a decent investment to make. This isn't helped by my other problem, the fact that generally speaking this set feels kinda weak. The numbers are just overall quite low across the board, with it generally feeling egregious to sacrifice a minion or three for what feel like small buffs and effects, the explosions from Neutral Special are honestly not all that powerful. With the way things stack, I'd be careful about raising his power too much, but maybe push the strength of Naria's self destruct a little higher along with raising her stamina for example, and give the giant Moeba a new attack. Down Smash has a rather egregious exmaple where in order to get the max power version you need NINETY orbs when a fully charged version produces 10. I like the potential high reward of that for a use of one Moeba charge, but I'd both tune down the max requirement and increase the max power(to something like 33%/60 orbs, IDK).

You know all that said, I had a lot of fun with Genis and am really just nitpicking numbers and small minion movepools. The way the minions are used is enjoyable in just how willing Genis is to murder them, and you get a surprising amount of depth out of expending them for charges, impaling them on your body, exploding them, expanding them, etc. It really doesn't run out of interesting inputs at any point compared to your other sets, actually staying really consistent in the grab game and not falling off much in the aerials either. The use of his ability to turn into a cloud-like hivemind is abused in some rather fun ways here to give him a lot of substance to how he actually fights the foe, even if his minions are a little underwhelming by themselves. He has his share of minion buffs I'd like more if the minions were competent enough to use them, but yeah its all good stuff. Also, I have to say the character actually sounds pretty cool and amusing from the description, and you did a good job of fleshing out his characterization in the set. I can't help but get a chuckle out of the fact that he explodes Naria in three separate moves in the set.

Seriously this is very safely your best Bionichute. I thought the organization felt oddly more like that of a long time veteran, and reading it the quality feels up to that par too.
 
Last edited:

IvanQuote

Smash Ace
Joined
Apr 7, 2014
Messages
853
Location
Looking for those who like Mighty No 9
NNID
ivanquote
3DS FC
1693-3075-2999
So, since my MYMUniverse is based on an unreleased fan fiction, I could just make whatever I want, right? I will add pictures later

Charon Stadium

Planet Charon is a neighboring planet of Pluto, the main setting of my fan fiction. Even though Pluto is constantly at freezing temperatures, there is still a thriving civilization there. Charon on the other hand is completely desolate of any and all life. It is completely made of rock where no wind blows, the temperature is at a constant 134*F, the sky is permanently cloudy, and everything is in a sepia tint. It is as if any and all time has stopped. The only thing to make note of are the various rocks floating in place and its massive volcano. Said volcano has no lava in it at all and is more or less a fissure that leads all the way down to the planet's core. Perhaps the secret to this planet lies down there? The Plutonians never really shared this curiosity and neither did their leader. What they wanted to do was build a stadium there to have high-octane sports far, far away from any civilization. The most popular sports was, of course, fighting tournaments. Like any other story that has no clue what to do with the plot in between major events, the fighting tournaments feature tons of mindless action for thousands of blood-hungry spectators to enjoy. What a perfect place to put a smash stage!

Layout 1: The Stadium
This stage mainly takes place on the platform the finals are on. It is a round, squat cylindrical platform that is suspended above the volcano's mouth by 4 thick sets of heavy chains. Any paint that was on the platform has been worn away through the heat of many battles. Despite this, it shines in comparison to the dull rocks and the even more nondescript sky. Around the lip of the volcano are black metal bleachers that can house thousands of spectators. The entrances to these seating locations come from a variety of metal catwalks and bridges that snake all around the mountain. All spectators are required to climb the mountain though these paths, as they must endure the hardships of climbing to sympathize with the fighters. Also this is totally not a rip off of Pokemon Colosseum's Mt. Battle, but despite my state of denial feel free to use it as a point of reference to visualize it better.
This format is the same size a Final Destination and in fact the Omega Form is just this one phase. It is roughly the same shape as Pyrosphere Omega. Despite what some more tournament aficionados may say, this layout is quite boring, favoring campers. After around 30 seconds, the heat of the battle makes the stage go into its second phase.


Layout 2: Falling
The chains snap. The platform and all of the combatants go into free fall as they fall into the volcano's mouth, dropping deep into the planet. In this state, it is similar to the first phase, except at the edges of the screen are the walls of the volcano's throat. On top of that, the gravity is greatly reduced, increasing jump height, air time, and upwards knockback. Because of the walls, the only way to kill opponents is off the top or off the bottom, the former being much more reliable due to the low gravity. A cave of life also forms below the main platform in the form of one of the spare chains. The chains are attached to the stage, creating a flat platform 2/3 the width of the main platform with both of the platforms' centers aligned. This creates 2 situations: stay on top and risk being killed easily off the top or stay on the bottom and have a difficult time killing others. Finally, the walls of the volcano have a unique property. If you wall cling to them or wall jump or tech off of them, you will be instantly carried up off the top of the stage and killed, like a vertical Big Blue road. You are only safe if you bounce off of them, so try to stay clear of them. After about 15 seconds, the platform stops falling.

Layout 3: The Core
The main platform crashes into the ground, being embedded onto it halfway. If the opponent is under the platform as it lands, they are treated as if the rafters in the Boxing Ring fell on them, killing them off the top at around 60%. The layout now is a simple walk off layout with a really high ceiling, along the lines of Tortimer Island. Unlike the last phase, it makes killing off the top a lot more difficult, shifting the advantage to ground-based characters like Little Mac. This sole part is the reason this stage is banned in tournaments, because walk-offs are the worst thing to ever happen to any stage ever, right? This stage lasts for about 30 seconds. All the while, the color changes from sepia back to normal colors, red and orange.
After the 30 seconds are up, it turns out the planet was frozen in time and time starts to move again. The inside of the volcano, as well as the rest of the planet is one giant ball of magma. The ground turns into lava such that the only safe ground is the stadium platform. The lava in this form is solid like the stage builder stuff. The ceiling is still small, but ground-based characters have much less of an advantage now due to the smaller movement room and lava on all sides. This phase lasts for 10 seconds.

Layout 4: Going Up
The above image is not entirely accurate because of space reasons. In reality, the volcano is erupting now and the platform is being pushed up by lava. There is even lava extending extending along the sides (still solid). It lasts for 10 seconds and even though the ceiling is comparatively lower, the gravity is much, much higher, making it extremely difficult to KO opponents. If anything, you'll just bounce them bounce back and forth between the lava spouts. After the 10 seconds is up, the platform will be launched out of the volcano and will go into free fall, losing the chain platform beneath somwhere between layouts 3 and 4. It now resembles layout 1, with normal gravity and ceiling, but the lava on the sides is now like the lava spray from Norfair, meaning the player can be launched through it. This free falling section lasts 10 seconds, during which the lava under the platform and the lava on the sides will thin out, disappearing completely after 5 seconds. Also, now the background is completely molten and volatile and the clouds are black, shooting down lightning and meteors that explode in the background. After the free falling is up, the platform will land again.

Layout 5: Slider
The platform will start sliding down the side of the volcano, which is at a 30 degree angle approximately. This follows the same rules as Summit falling down the mountain. If you hit the front of the platform, you will get launched forwards and if you fall off in back you get carried off screen. Nothing much to say except that this part of the volcano is surprisingly not molten. It lasts for 15 seconds until it reaches the bottom of the volcano.

Layout 6: A Sea of Fire
Once it reaches the bottom, it falls into a sea of lava. This is exactly the same as Layout 3 Part 2, except with a normal sized ceiling and the lava is liquid like Norfair instead of solid. This makes it possible to spike an opponent off the bottom of the stage. It lasts for another 15 seconds. The thing about this planet is that it is in fact a very young planet, being just a molten ball of magma. However the planet was frozen at a very specific period in time. If you recall geology class, what happened to the Earth after it was pure magma. That's right...

Layout 7: Rain!
The sky turns a bright neon green as a heavy storm pours down not unlike that of the Tower of Fate in Shovel Knight. Heavily contrasting the bright red and orange of the lava, the green starts to form an actual sea over the lava. Along the sides of the platform is now water instead of lava. Because of this, swimming is now a mechanic that needs to be played around, greatly increasing survivability. Also the platform is about as slippery as ice due to the rain. This now lasts for 45 seconds. After this point, the screen will flash white for a second as the screen visibly shatters, setting the platform back to its chained up self in the sepia world. Was what happened before just an illusion? Or was another force at work here?

Music List:
¿Dónde jugarán los niños? - Mana
Ik Leef Niet Meer Voor Jou - Marco Borsato
Semifinal Match - Pokemon Colosseum
Lost Courage - Dragon Ball Z: Budokai Tenkaichi 2
Scorch 'n Torch - Donkey Kong Country Tropical Freeze
Flame Core - Sonic '06
Magma Rock - Golden Sun The Lost Age
MYM Universe Main Theme Barber Shop Acapella Remix - (Forward Arrow, Smash Daddy, Frozen Roy, JOE!, and Master Warlord)
 
Last edited:

Slavic

Ask not the sparrow how the eagle soars
Joined
Jun 5, 2013
Messages
757
Location
taco bell, probablyn't
NO TARDIES DAY


No Tardies Day is the catalyst of the fourth episode of Kill la Kill, Dawn of a Miserable Morning, where all the no star students of Honnoji Academy must make it to school on time or be permanently expelled and be kicked from their homes. While everyone has trouble making it to school on time every now and again, Honnoji Academy makes this a true test, pitting 999 deadly and impossible traps against the students who brave the hazardous migration to maintain their status as students. Deprived of Senketsu, Ryuko Matoi is forced to make this journey in just her pajamas accompanied by Mako Mankanshoku and their new ‘friend’ Maiko Ogure. Traversing loop-de-loops, machine gun gangs, crocodiles, and even cheese traps, they barely make it to the school on time.


This stage is in a format as dreaded as No Tardies Day itself: a scrolling stage, which carries fighters from trap to trap to trap. As the stage moves, Honnoji Academy is seen in the background, drawing closer and closer as fighters move along. The stage moves at an actual fair pace, allowing Ganondorf to run along comfortably for most of the stage, and the highlighted section above shows the size of the playable screen. The first trap players will come across is a giant ferris wheel, rotating at a brisk pace clockwise with backwards facing spikes on platforms. The spikes serve as those from Rumble Falls from Brawl, which alone should say about the joy of this stage. As fighters move past the wheel, a single platform is provided on the left side of the screen. Jumping upon this, fighters will need to climb onto the backs of the spiked platforms, fighting for space until it is possible to safely stand on the structure of the wheel itself. A loop-de-loop juts out from the top of the stage at this point; the spikes on the loop once again act the same as the ones from Rumble Falls.

Once on the longer platform, fighters will travel to a pool of water with three pass-through platforms over it. The stage will actually slow down and linger here for a ten seconds. Fighters can focus on actually fighting here, but should they be knocked into the water, a large crocodile will jump out of the water and attempt to eat them a la Summit. Once the stage starts again, it will rise upwards with several smallish platforms to jump through. Competition for space here is tight, and is a main location where fighters will be KO’d. In the final stretch, fighters will board a bus just big enough for a few fighters. Again, space is coveted as the bus accelerates, turning the ground into a fast-moving hitbox similar to F-Zero stages. The ceiling will close in for a moment, ruining fighters’ days who are launched into and off the top of the stage back off the bus. This travels for five seconds before slowing down and stopping, dropping fighters right in front of Honnoji Academy! However, the whole school topples over, revealing it was a cardboard cutout the entire time! Honnoji Academy is way back in the background as the stage loops back again, ad nauseum.

This stage is brutal, eliminates many fighters unfairly, and is generally unfun for all but the fastest and most determined characters. Many will point at this stage to showcase issues in production and design without realizing that the stage is intentionally designed to be brutal and only played about once a year.

Ω


Of course, No Tardies Day is only a problem for no-star students who are allotted no special privileges. Luckier one, two, AND three star students are permitted to use special express cable cars, running to and fro Honnoji Academy on a constant loop. For the elite competitive players of Smash, the Omega form provides such a cable car for fighters to play upon. It’s a roomy cable car with plenty of space on the roof for combat, and a single solid platform in the middle of the stage. The cable car is stable and on an endless loop, with No Tardies Day happening in the background of the stage. Additionally, several one star students are seen lounging within the comfy confines of the cable car.

MUSIC
Suck Your Blood
Light Your Heart Up
Ambiguous

EVENT
NO TARDIES DAY!


Playable Character(s): Greninja
Other Character(s): Captain Falcon, Fox, Sonic

Goal: Survive the Stage
Stock: 1

It’s No Tardies Day and these fighters are having none of it! As Greninja, make it to Honnoji Academy without falling victim to any of the schools traps. This time around, however, the stage is traveling at a higher speed, making the stage much more demanding! Opponent fighters can be fought and KO’d, and they will certainly fight back, but they will always respawn. Focus on survival! Success on this event will unlock the Maiko Ogure trophy.

DAWN OF A MISERABLE MORNING


Ira Gamagori stood at the base of Honno City, looking up at Honnoji Academy towering over all. Gamagori glanced at his watch, which read back ‘4:29’ A.M. It was the day of No Tardies Day at Honnoji Academy, a day for every student to show that they are worthy of the institution and their home. A simple walk to school lacked enough discipline for Gamagori, and so he oversaw the production of an obstacle course across the entire city, only active for No Tardies Day. As the clock rolled over to ‘4:30’, the whole city kicked to life, as sidewalks and roads lifted, contorted, and were bordered with spikes. Whole constructions with the single insidious purpose of expelling students came out from the ground. Pools of water filled with crocodiles were uncovered, and everywhere traps were generated. Gamagori closed his eyes and contemplated the path in his mind. The only way to ensure the traps were at their deadliest was for the disciplinary chair to subject himself to them. Gamagori opened his eyes and stepped forward as he prepared for this gauntlet.

Character(s): Ira Gamagori

This stage is a greatly expanded version of No Tardies Day without the loop, and with a nightlife background rather than the normal sunlit atmosphere of the stage. On top of that, this stage no longer autoscrolls, with the camera centered on Gamagori as long as he isn’t knocked way off stage or falls in a pit. The stage follows the same basic format as before, with three individual sections of the stage. The first section has a focus on platforming, taking about a fourth of the full course of the stage with rotating and floating platforms adorned with devastating spikes. For Gamagori, this is the most difficult part of the stage as his poor air stats may lead to slipups and deaths. Luckily, there are no enemies for this portion, allowing Gamagori to focus on his mobility.

The second part of the stage also takes around a fourth of the total stage. Here, several pools of water with platforms stand in Gamagori’s way. Falling in the water isn’t an instant kill, but the massive crocs that leap from the water will drag him to a watery grave. Gamagori will still have sections he has to platform unless he’s a real good swimmer, and will also have to deal battle with some smaller crocodiles. Each of these crocodiles have a chunky 50 stamina, making them fairly durable. Gamagori can choose to ignore some of them, as they lay dormant unless Gamagori encroaches on their space, but some are specifically placed in key locations. They have two biting attacks. The first is a multi-gnashing move, quick cheap hits of 3% each. The low damage allows Gamagori to shake them off just fine, but the damage can rack up pretty quickly if he doesn’t deal with the gators, which leaves him susceptible to the second move. This is a massive bite, with fair lag, which deals 9% damage and big knockback, able to KO Gamagori from 95%.

Past the gators, Gamagori reaches the second half of the stage, a long stretch littered with terrain-interrupting buildings. The bus from the stage is seen inactive on the side of the stage as well. No shortcuts for Gamagori, that would lack total discipline. This final stretch is fairly free of platforming outside of jumping over small shacks, but is swarmed with citizens of Honno City. The first of these is a breast-feeding mother with a machine gun, taken straight from Kill la Kill. Armed with a baby as a shield, she has only 20 stamina, making her pretty easy to knock away. However, the mother greatly outranges Gamagori, able to pelt him with three round bursts of 3% damage bullets. At a quick firing rate, Gamagori will have a lot of damage thrown at him throughout this segment of the stage. Other civilians carry spiked chains, flailing at Gamagori at close range for hits of 5% damage. Gamagori can take these hits nicely as well, brushing them off and able to KO these punks after 30 stamina. The final civilian, and enemy, in this stage are grandmas with rocket launchers. Carrying a measly 15 stamina, these grandmas rely on two things; their rocket launchers provide them superior range, and by this point in the stage Gamagori likely has accumulated a great deal of damage. The rockets explode for 15% damage and launch Gamagori far off, able to KO at 80% and beyond. After this section of the stage, Gamagori reaches Honnoji Academy and the Stage Complete message pops up on the screen.

---

Gamagori clapped his hands together, brushing the dust off as he cracked his neck. The disciplinary chair gave an approving look to nearby students who had helped set this year’s traps up while he kicked a stray crocodile off his leg. Gamagori entered a cable car to return to the bottom of Honno City to ensure all students were traveling as expected, when a gleam of light caught his eye. From the west, a great ray of light filled the sky, illuminating everything as Gamagori looked on with a concerned expression.
 
Last edited:
Top Bottom