• Welcome to Smashboards, the world's largest Super Smash Brothers community! Over 250,000 Smash Bros. fans from around the world have come to discuss these great games in over 19 million posts!

    You are currently viewing our boards as a visitor. Click here to sign up right now and start on your path in the Smash community!

Data Kadano's perfect Marth class -- advanced frame data application

Kadano

Magical Express
Joined
Feb 26, 2009
Messages
2,160
Location
Vienna, Austria
Do you know any effective ways of punishing when people when you dthrow/fthrow them into the corner and they DI away and misstech/tech in place to get the slide off?
Yup, see index in post #1 → Fox / Falco → Dthrow near ledge linked post.
 
Last edited:

Tee ay eye

Smash Hero
Joined
Jun 1, 2008
Messages
5,635
Location
AZ
Ah, I actually remember reading that a long time ago and forgot :p

Thanks. Hmm... is there a significant difference between missed tech slide off and tech in place slide off?
 

Kadano

Magical Express
Joined
Feb 26, 2009
Messages
2,160
Location
Vienna, Austria
Ah, I actually remember reading that a long time ago and forgot :p

Thanks. Hmm... is there a significant difference between missed tech slide off and tech in place slide off?
Zero difference (post-slide off, before that the hurtbox alignment is different). Same sliding speed on ground, same animation after sliding off, same aerial movement speed.
 

Kadano

Magical Express
Joined
Feb 26, 2009
Messages
2,160
Location
Vienna, Austria
Kadano, what process do you use for testing DI followups?
Calculate the hitstun at every percent that might have followups for both high and low port number, then check in-game whether these values are accurate (there is some ambiguity in how hitstun is counted). Then I try different timings for all the followups, and whenever one connects in time, I add it to the followup table.
I use Dolphin with save states in develop mode for this.
 

Darktruite

Smash Rookie
Joined
Dec 23, 2015
Messages
5
Location
Strasbourg,France
Hey Kadano do you know how hard / easy it is to tech-chase falcon using forward throw ? How fast does Marth need to react ? Can u regrab any combinaison of DI / tech ?
 

QuantumKiller

Smash Cadet
Joined
Oct 10, 2014
Messages
72
Location
Texas
NNID
ShreckIsDreck
3DS FC
1435-5574-6890
I recently did what looked like an up-b cancel ledgegrab on yoshi story (similar like cloud's up-b cancel in smash4). It made the up-b sound that comes out on frame 1 but then I just grabbed ledge. I think it has something to do with randall and Marth's ecb but I can't recreate it. Maybe it was Marth landing on randall and sliding off during his up-b startup that cancelled it to a ledgegrab. I wasn't able to see myself landing on randall because it was so quick but I think I did. Also, I did it while randall was still out and it looked like this after I grabbed. What do you think it was?


ridemyboat

Smash Apprentice
Joined
Aug 13, 2015
Messages
152
Calculate the hitstun at every percent that might have followups for both high and low port number, then check in-game whether these values are accurate (there is some ambiguity in how hitstun is counted). Then I try different timings for all the followups, and whenever one connects in time, I add it to the followup table.
I use Dolphin with save states in develop mode for this.
Thanks, thats very helpful.
 

Kadano

Magical Express
Joined
Feb 26, 2009
Messages
2,160
Location
Vienna, Austria
Side-B pseudo-jump flag refreshing
Some specials lift an aerial user up once, but will not do so when used again before landing. This includes Marth's side-B, Mario's and Dr. Mario's side-B and down-B, Luigi's down-B, Mewtwo's side-B and a few others.

Upon landing, the flag for the pseudo-jump lift effect is reset, so the next time the move is used, it will lift the user again (and set the flag back to 0). If a character has more than one move with pseudo-jump properties, each of them has its own flag, yet all flags are reset upon landing¹.

However, not every way of transitioning from air to ground is counted as landing, as far as the pseudo-jump flag is concerned.

These ways of landing do refresh the flag:
Landing – the generic impact landing animation from empty jumps, including auto-cancels, and ASDI down on the ground
LandingFallSpecial (LFS) – the landing animation from airdodges (thus including wavedash and waveland) and some specials (mostly up-Bs)
• Some special moves, even though they don't enter LFS:
- All variations of Marth's side-B
- Mewtwo's side-B
-¹ Mario's, Dr. Mario's and Luigi's down-B
-¹ Mario's and Dr. Mario's side-B

¹ These moves will only refresh the flag of the move that is being used while landing. For example, if you deplete both Mario's down-B and side-B while recovering and then land on the stage while in side-B animation, the side-B pseudo-jump flag will be on, but the down-B flag will still be off.


These ways of landing do not refresh the flag:
LandingAir* – all landing animations from aerial A attacks (AttackAir*), regardless of whether they are L-canceled or not
• Most special moves that don't go into Landing or LandingFallSpecial upon touching the ground (for Marth, this includes neutral-B and down-B – his side-B is an exception and up-B goes into LFS).
No-impact landing
Hard collision (teching / missed tech)
Soft collision (landing from weak hitstun animation)

What to take away from this
:
Use at least one wavedash whenever you want to move somewhere so that your side-B pseudo-jump flag is always ready.
If you want to edgeguard somebody far down, where you will need to rely on your pseudo-jump to make it back to the ledge, use a wavedash to go to the ledge / to drop from the stage.
After a successful recovery to the ledge, do at least one reverse ledgedashstall¹ (aka haxdash) before deciding on a way to get back onto the stage. Marth does not have the best options for that, so the chances of you getting hit offstage are pretty high. In that case, the ledgedashstall at least ensures you still have your pseudo-jump flag for recovering from the hit again.

¹Fully intangible if done right, see information in this thread's OP.
 
Last edited:

tauKhan

Smash Lord
Joined
Feb 9, 2014
Messages
1,349
I also tested collision (-> DownBound), all techs and aerial hitstun -> grounded hitstun transition, none of those refresh the marth's side-b either.
 
Last edited:

DCW

Smash Apprentice
Joined
Oct 18, 2015
Messages
104
Location
Georgia
Last edited:

Kadano

Magical Express
Joined
Feb 26, 2009
Messages
2,160
Location
Vienna, Austria
Question: can you tilt turn out of dash, or will only a smash turn work to trigger the Turn animation?

The only reference I could find was T tauKhan saying "Tilt turn cannot be done during dash" in reply to a thread by Gravy, but that would seem to contradict Kadano Kadano 's picture of the inputs for pivot dtilt, which show a tilt turn rather than a smash turn input for the pivot.
Yeah, my map is not accurate unfortunately, I'll have to re-do it. Sorry about that, I guess I was not thinking clearly or in a hurry when I created it.
 

DCW

Smash Apprentice
Joined
Oct 18, 2015
Messages
104
Location
Georgia
Yeah, my map is not accurate unfortunately, I'll have to re-do it. Sorry about that, I guess I was not thinking clearly or in a hurry when I created it.
No problem. I take it, then, that only a smash turn can trigger the Turn animation out of dash, like T tauKhan said.

I asked because I'm trying to find an explanation for something I noticed while investigating pivot dtilt. First, some context: for humans to do a pivot dtilt, probably the best way is to do a quarter-circle pivot (press the controller in the opposite direction of your dash, then down into the crouch zone on the next frame). Kadano Kadano pointed out in a post on the Marth FB group that one must hold down for Turn1-3 and then wait until Turn4 or later before inputting down+A to avoid getting a dsmash rather than the desired dtilt. While testing this, I discovered that you have to wait longer for some turn angles. Specifically, some turn angles require you to input down+A on Turn 5 or later to avoid the dsmash.

Here's an example I found using the 20XX frame advance feature that others can test for themselves. Suppose Marth is dashing left. If you input a turn directed at a certain angle down and to the right, then hold down for Turn1-3, inputting down+A on Turn4 will trigger dtilt, as expected. However, if your turn input is *full right*, then holding down for Turn1-3 and inputting down+A on Turn4 will trigger dsmash. This example shows that the angle of the turn influences whether you must wait until Turn4 or Turn5 to trigger dtilt with down+A, which I didn't expect. I haven't seen this mentioned anywhere else.

My two questions are: 1) why is this happening, in terms of game mechanics; and 2) what turn angles allow dtilt on Turn4?

At first I thought that the answers to (1) and (2) derived from the difference between smash turns and tilt turns, but if tilt turn out of dash is impossible, my theory fails. So I'd appreciate any ideas/answers!
 
Last edited:

Sycorax

Smash Ace
Joined
Jul 7, 2014
Messages
502
Location
Atlanta, GA
No problem. I take it, then, that only a smash turn can trigger the Turn animation out of dash, like T tauKhan said.

I asked because I'm trying to find an explanation for something I noticed while investigating pivot dtilt. First, some context: for humans to do a pivot dtilt, probably the best way is to do a quarter-circle pivot (press the controller in the opposite direction of your dash, then down into the crouch zone on the next frame). Kadano Kadano pointed out in a post on the Marth FB group that one must hold down for Turn1-3 and then wait until Turn4 or later before inputting down+A to avoid getting a dsmash rather than the desired dtilt. While testing this, I discovered that you have to wait longer for some turn angles. Specifically, some turn angles require you to input down+A on Turn 5 or later to avoid the dsmash.

Here's an example I found using the 20XX frame advance feature that others can test for themselves. Suppose Marth is dashing left. If you input a turn directed at a certain angle down and to the right, then hold down for Turn1-3, inputting down+A on Turn4 will trigger dtilt, as expected. However, if your turn input is *full right*, then holding down for Turn1-3 and inputting down+A on Turn4 will trigger dsmash. This example shows that the angle of the turn influences whether you must wait until Turn4 or Turn5 to trigger dtilt with down+A, which I didn't expect. I haven't seen this mentioned anywhere else.

My two questions are: 1) why is this happening, in terms of game mechanics; and 2) what turn angles allow dtilt on Turn4?

At first I thought that the answers to (1) and (2) derived from the difference between smash turns and tilt turns, but if tilt turn out of dash is impossible, my theory fails. So I'd appreciate any ideas/answers!
Any frame that the control stick is at or below (x,-0.2875) starts the "countdown" to disable the dsmash zone and replace it with dtilt. You can perform a smash turn in the area below the vertical dead zone, i.e. angled down, which will start the countdown one frame earlier than if you did a straight right smash turn.
 
Last edited:

DCW

Smash Apprentice
Joined
Oct 18, 2015
Messages
104
Location
Georgia
Any frame that the control stick is at or below (x,-.02875) starts the "countdown" to disable the dsmash zone and replace it with dtilt. You can perform a smash turn in the area below the vertical dead zone, i.e. angled down, which will start the countdown one frame earlier than if you did a straight right smash turn.
Exactly what I was hoping for. Thank you! Does y<= -.02875 refer to any control stick position below horizontal?

I'd like to learn more about describing control stick positions with (x,y) coordinates, and about "countdowns" to disable smash zones. Do you know of any references on either subject that I could look at?
 

Sycorax

Smash Ace
Joined
Jul 7, 2014
Messages
502
Location
Atlanta, GA
Does y<= -.02875 refer to any control stick position below horizontal?
Yes. There was a mistake in my original post though. "-.02875" should have been "-0.2875". If the Y coordinate is between (inclusive) 0.275 and -0.275, then the game counts it as a straight left/right input.
I'd like to learn more about describing control stick positions with (x,y) coordinates
http://smashboards.com/threads/the-specifics-of-trajectory-di.437171/
"countdowns" to disable smash zones
There is a 4 frame window for direction+A smash attacks. You can press A at the same frame as a smash directional input, or on one of the three subsequent frames. For example, you can dash for 3 frames and then press A to do a forward smash. Only after the stick has been pushed in a certain direction for 3 or more frames will a tilt be possible along with a full directional input. Otherwise, you need to tilt the stick lightly into one of those tilt attack zones shown in Kadano's input map.

I hope this makes sense. There's actually a lot of nuance to it and to describe it completely and precisely would take a lot of time and effort.
 

Bones0

Smash Legend
Joined
Aug 31, 2005
Messages
11,153
Location
Jarrettsville, MD
Any info on reaction tech chasing Falcon with Marth?
No hard data, but Druggedfox has a video discussing the mu which basically everyone should consider valuable (he goes off on a tangent in the first video but starts back up in the second).


Last edited:

Vivec

Smash Rookie
Joined
Feb 25, 2013
Messages
16
Hard data is sort of what I'm hoping for, but thanks for the response. Personally, I've tried reaction tech chasing with grab using an initial dash to follow di away or walk to follow the closer di before tech, but I don't have a good response to missed tech aside from just an fsmash read off the throw. Even jabs seem to be too laggy to prevent a good follow-up if the Falcon sdi's them. Any idea what I should do to deal with Falcon's missed tech on reaction?
 

Bones0

Smash Legend
Joined
Aug 31, 2005
Messages
11,153
Location
Jarrettsville, MD
Hard data is sort of what I'm hoping for, but thanks for the response. Personally, I've tried reaction tech chasing with grab using an initial dash to follow di away or walk to follow the closer di before tech, but I don't have a good response to missed tech aside from just an fsmash read off the throw. Even jabs seem to be too laggy to prevent a good follow-up if the Falcon sdi's them. Any idea what I should do to deal with Falcon's missed tech on reaction?
Dash grab if he rolls, grab if he stands, and shield grab if he GUAs. This is the same general outline other characters use to techchase, though you can certainly make it more complicated if you want (e.g. PS fsmash GUA). You can also crouch like adevs said so that it's easier to react to GUA, but to grab roll behind you will need to smash turn and to grab stand you will need to shield or JC first.
 

Vivec

Smash Rookie
Joined
Feb 25, 2013
Messages
16
Thanks, guys. Looks like I have to be fairly patient for this tech chase to pay off.
 

ridemyboat

Smash Apprentice
Joined
Aug 13, 2015
Messages
152
Marth uthrow followups on Captain Falcon
╔══════════╤═══════════╤═══════════╗╔═════════════╤═════════════╤═════════════╤╗
║Frames of │... Damage │104W Frame ║║... Guaranteed followups on CF ......... │║
║. Hitstun │before hit │ advantage ║║.. (no DI) ..│ forward¹ DI │ backward DI │║
╟──────────┼───────────┼───────────╢╟─────────────┼─────────────┼─────────────┼╢
║...... 33 │....... −1 │....... −1 ║║.............│.............│.............│║
║...... 34 │.... 0 - 3 │........ 0 ║║.............│.............│.............│║
║...... 35 │.... 4 - 8 │........ 1 ║║.............│.............│.............│║
║...... 36 │.... 9- 12 │........ 2 ║║.............│.............│.............│║
║...... 37 │... 13- 17 │........ 3 ║║.............│.............│.............│║
║...... 38 │... 18- 21 │........ 4 ║║→B ..........│.............│.............│║
║...... 39 │... 22- 26 │........ 5 ║║→B ..........│ →B, utilt ..│←B...........│║

║...... 40 │... 27- 30 │........ 6 ║║→B, regrab ..│ →B, ut .....│←B, Tut......│║
║...... 41 │... 31- 35 │........ 7 ║║→B, r..... ..│ →B, ut,ft...│←B, Tut......│║
║...... 42 │... 36- 40 │........ 8 ║║→B........ ..│ →B, ut,ft...│←B,TDr,Tfa,ft│║
║...... 43 │... 41- 44 │........ 9 ║║→B,bsuair ...│ →B, ut,ft...│←B,TDr,Tfa,ft│║
║...... 44 │... 45- 49 │....... 10 ║║→B,bsu,ut ...│D→B, .. ft,FS│←B,TDr,Tfa,ft│║
║...... 45 │... 50- 53 │....... 11 ║║→B,bsu,ut,bFSD→B, fa,ft ..│←B,TDr,Tfa,ft│║
║...... 46 │... 54- 58 │....... 12 ║║→B,bsu,ut,bFSD→B,Dfa,ft,FS│←B,TDr,Tfa,ft│║
║...... 47 │... 59- 63 │....... 13 ║║→B,bsu,ut, FSD→B,Dfuaft,FS│←B,TDr,Tfa,ft│║
║...... 48 │... 64- 67 │....... 14 ║║→B,ua, ut, FSD→B,Dfua .,FSD←B, Dfua, FS│║
║...... 49 │... 68- 72 │....... 15 ║║.. ua, ut,bFSD→B,Dfua ,DFSD←B, Dfua, FS│║
║...... 50 │... 73- 76 │....... 16 ║║.. ua, ut,PFSD→B,Dfua ,PFSD←B, Dfua,PFS│║
║...... 51 │... 77- 81 │....... 17 ║║.. ua, ut,PFSD→B,Dfua ....│D←B, Dfua ...│║
║...... 52 │... 82- 85 │....... 18 ║║.. ua, ut,PFS│... Dfua ....│.... Dfua ...│║
║...... 53 │... 86- 90 │....... 19 ║║.. ua .......│... Dfua ....│.... Dfua ...│║
║...... 54 │... 91- 95 │....... 20 ║║.. ua .......│... Dfua ....│.... Dfua ...│║
║...... 55 │... 96- 99 │....... 21 ║║.. ua .......│... Dfua ....│.... Dfua ...│║
║...... 56 │.. 100-104 │....... 22 ║║.. ua .......│.............│.............│║
║...... 57 │...105-108 │....... 23 ║║.. ua .......│.............│.............│║
║...... 58 │...109-113 │....... 24 ║║.. ua .......│.............│.............│║
║...... 59 │...114-117 │....... 25 ║║fj ua .......│.............│.............│║
║...... 60 │...118-122 │....... 26 ║║fj ua .......│.............│.............│║
║...... 61 │...123-127 │....... 27 ║║fj ua .......│.............│.............│║
║...... 62 │...128-131 │....... 28 ║║fj ua .......│.............│.............│║
║...... 63 │...132-136 │....... 29 ║║fj ua .......│.............│.............│║
║...... 64 │...137-140 │....... 30 ║║fj ua .......│.............│.............│║
╚══════════╧═══════════╧═══════════╝╚═════════════╧═════════════╧═════════════╧╝


Notes:

[Because one line and thus hitbox class includes a range of 4%, these are approximations and this chart is only accurate to 3%]
[when I run out of space, I leave out commas. This still keeps the individual actions separate; they don’t get combined or anything]
T indicates turning before doing the action mentioned afterwards.
D indicates dashing before doing the action mentioned afterwards.
P indicates pivoting (dash → turn) before doing the action mentioned afterwards. For no DI, it does not matter whether you start by dashing left or by dashing right. For DI left / right, you always need to dash in the direction your victim DI’d in.
→B, ←B: Dancing Blade, the arrow indicates the necessary orientation. Depending on the victim’s DI, this can convert into subsequent ↔
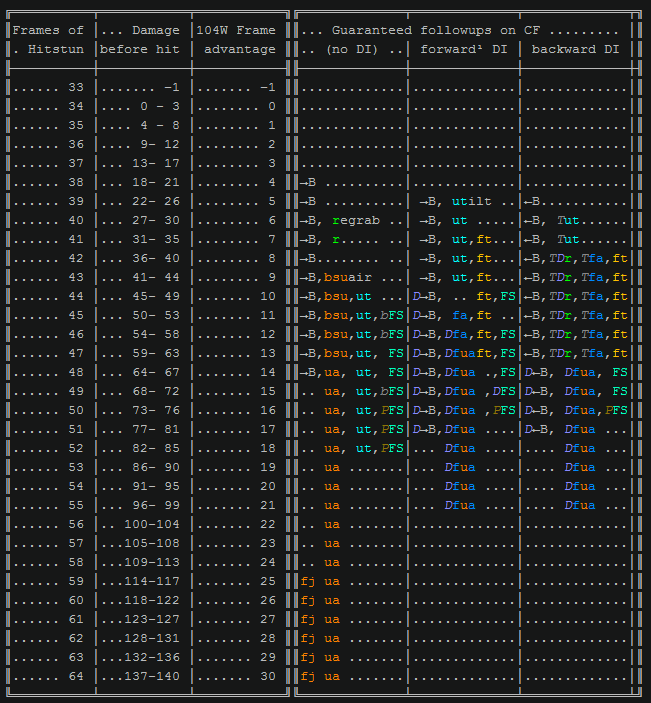
B slashes into a long combo. Good DI (away or behind) escapes everything beyond the first slash, though.
regrab: standing regrab for no DI, JC grab for forward / backward DI.
utilt: utilt, only mentioned when it lands a good hitbox. (For example, on no DI you can connect with it starting at 22%, but you only get the 45° knockback hitbox which has zero combo potential at low %. Things like this or jabs will be left out by me.)
fair: short hop tipper fair, good for starting combos against CF. At low %, DI away will escape most subsequent hits, though (due to his high fall acceleration).
fua: Both tipper fair and tipper uair hit.
uair: short hop uair.
bsuair: backwards short hop instant uair. This needs frame perfection at 43HS/⊗ [43 frames hitstun, no DI].
FS: tipper forward smash.
bFS: Backward fsmash (in the opposite direction you are facing during the uthrow animation).
DFS: Dash fsmash, also known as small step fsmash.
ft: forward tilt.

Full jump uair might combo even longer on no DI.

Edit: I can make gfycats of some followups and link them from the table. Please state requests like this: “44HS, no DI, Dancing Blade” or “40%, backward DI, regrab”. If you want to see more – eg the longest possible string from Dancing Blade if it isn’t DIed – please be very precise about what you want to see.If you have a decent PC (2.4 GHz dual-core with dedicated graphics card or better) you can also easily test things like this by yourself using Dolphin and a hacked Melee iso.

Edit2: Link to the first post about this with additional explanations and one large .gif: http://smashboards.com/threads/kada...data-application.337035/page-16#post-16603455

Also, please don’t tell me that CF has not 3 discrete options to DI Marth’s uthrow, but more like 100. I know that, of course, but three options have been enough work for me. If CF DI’s to the left “softly” or “weak” or whatever you want to call it, your followups will be between (no DI) and (backward DI), so I hope you can come up with the options that work by yourself.
For the followups on full forward di, marth can dash and fair until about 137%.
 

Dr3amSm4sher

Smash Cadet
Joined
May 26, 2015
Messages
54
Is it me or are there sometimes when I swear I'm DIing hard away from certain chaingrabs only to see myself go nearly straight up and down or barely to own side like half DI. This only seems to happen when getting uthrow and then regrabbed very quickly immediately into another uthrow. Im holding away during my entire air time and ill just go straight up and down. Am I just bad?
 

Shiftyy

Smash Cadet
Joined
Jun 14, 2014
Messages
32
Is it me or are there sometimes when I swear I'm DIing hard away from certain chaingrabs only to see myself go nearly straight up and down or barely to own side like half DI. This only seems to happen when getting uthrow and then regrabbed very quickly immediately into another uthrow. Im holding away during my entire air time and ill just go straight up and down. Am I just bad?
What matchup?
 

Dr3amSm4sher

Smash Cadet
Joined
May 26, 2015
Messages
54
Fox vs marth and in the fox ditto. Just characters with relatively quick uthrows. It seems to fix itself when I reset the stick to neutral and then DI from there.
 

Shiftyy

Smash Cadet
Joined
Jun 14, 2014
Messages
32
Fox vs marth and in the fox ditto. Just characters with relatively quick uthrows. It seems to fix itself when I reset the stick to neutral and then DI from there.
Only explanations I can think of is controller defect, or you don't DI fast enough. In my experience, the faster throws aren't reactable, you have to expect them and be DIing already when you get grabbed.
 

Signia

Smash Lord
Joined
Feb 5, 2009
Messages
1,157
For the throw combo charts, are they tested with port priority or no? 1 frame advantage or not?
 

Kaoak

Smash Cadet
Joined
Aug 2, 2014
Messages
60
I noticed that your gif referring to the difference in maximum aerial velocity from PAL to NTSC had several frames where Marth's drift wasn't affected. Could we see a representation of this same difference while Marth is recovering back to stage with drift and double jump and when he is dash jumping.

Also on an unrelated note, does Marth's back throw have any value as a DI mixup? Could it potentially combo into up b / ftilt / fsmash against certain characters at certain %?

Also Falco chaingrab flowchart when?
 

Sprenzy

Smash Apprentice
Joined
Apr 12, 2016
Messages
93
Hey kadano, Why do we have to learn frame data? I'm pretty sure that no one can comprehend frames in real time therefore it is of no use
 

heyitshoward

Smash Apprentice
Joined
Oct 20, 2014
Messages
82
Hey kadano, Why do we have to learn frame data? I'm pretty sure that no one can comprehend frames in real time therefore it is of no use
I am not Kadano nor am I sure you're not trolling but I'll give you a serious response anyway

There are lots of applications to knowing frame data or melee mechanics. You may not be able to distinguish individual frames with your eyes but since melee runs at 60 fps knowing how long things take is very important.

How often do you hear the following statements:
"I think I could have jumped out of that"
"That's not real"
"That's not safe"

With frame data you can know. It's not to say that you should know what every individual frame looks like but frame data is important because it can tell you definitively that yes, you could have jumped out or no, that combo wasn't guaranteed, or yes, double lasers from the edge are not safe.

Sometimes it's obvious, like stomp knee. Stomp knee is so guaranteed that at many percents on much of the cast Falcon doesn't even have to hit his L cancel to be able to connect with the knee, and you're still in hitstun the whole time.

But sometimes it's not obvious, and especially in tighter situations where it's not (which you can see linked in the OP) you want frame data to be able to show you what the best options are and how long you have to do them and whether it's guaranteed or not.
 

6VI6

Smash Apprentice
Joined
Sep 29, 2011
Messages
121
Spent a bunch of time looking at it and it looks like PewPewU tried to jump out and fair but the jump animation was cancelled by him slipping off
 

SpyderJ

Smash Rookie
Joined
Jun 18, 2015
Messages
1
Location
Phoenix, Arizona
Quick question on the matter of shield dropping. Is it possible (while adhering to the Axe method) to go from the West gate to the SW gate too quickly? Now i'm talking a fraction of a frame in speed and this is in regards to Jeff/Axe himself being the one doing it since I can rarely replicate the problem he occasionally has while playing due to how quick he is. I previously thought that this wouldn't be the case as I myself and I assume most others somewhat hug the side wall of enough that the shield drop will happen when landing on one of the 3 proper angles of -0.66250, -0.67500, & -0.68750.

Also I myself am often able to shield drop even without landing on one of those marks as with a controller that can perform it properl, even if it lands a -0.7000, it still drops through due to it passing through the previous values for enough time (Still fractions of frames, though I do not have the equipment nor the software to be able to break this down so as to properly understand why this occurs) So I was wondering if there is a conventional explanation for this, or if it is just because of what I previously though in that it passes through the proper values for long enough to allow it to still work. This in effect helps answer the first question as well.
 
Last edited:

Sycorax

Smash Ace
Joined
Jul 7, 2014
Messages
502
Location
Atlanta, GA
Quick question on the matter of shield dropping. Is it possible (while adhering to the Axe method) to go from the West gate to the SW gate too quickly? Now i'm talking a fraction of a frame in speed and this is in regards to Jeff/Axe himself being the one doing it since I can rarely replicate the problem he occasionally has while playing due to how quick he is. I previously thought that this wouldn't be the case as I myself and I assume most others somewhat hug the side wall of enough that the shield drop will happen when landing on one of the 3 proper angles of -0.66250, -0.67500, & -0.68750.

Also I myself am often able to shield drop even without landing on one of those marks as with a controller that can perform it properl, even if it lands a -0.7000, it still drops through due to it passing through the previous values for enough time (Still fractions of frames, though I do not have the equipment nor the software to be able to break this down so as to properly understand why this occurs) So I was wondering if there is a conventional explanation for this, or if it is just because of what I previously though in that it passes through the proper values for long enough to allow it to still work. This in effect helps answer the first question as well.
I find it hard to understand what you're saying since your writing is excessively pseudo-formal, but I think I can answer your question.

Regarding the first paragraph: You can't move too fast. The fastest you could do it is that one frame your Y-input is above -0.66250, and then the next frame it is within (-0.66250, -0.67500, & -0.68750). The game polls your controller for inputs at a regular intervals for fractions of a frame. All that is required is that your control stick be in that zone when the input is polled. If your control stick is in the shieldrop zone for 1/10 of a frame, but not during the input polling, the game will never know.

Regarding the second paragraph: What you described is the slow shielddrop method. It is described here. Tilting the stick slowly enough will open up all lower values for shield drop.
 
Top Bottom