Mr.Bazerkus
Smash Journeyman
Please Vote Based on the moveset who would win in a SSB Battle. This isn't a thread to see which moveset is better. This is just if these movesets where implented into the game which one would win. And don't iuse your prior knowledge of the character just base your decision on the movesets.
Happy voting
Week 1: MegaMan Zero vs Protoman.exe
From Chris Lionheart
From Sonic Boom
Happy voting
Week 1: MegaMan Zero vs Protoman.exe
Code:
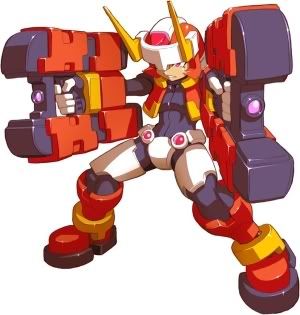
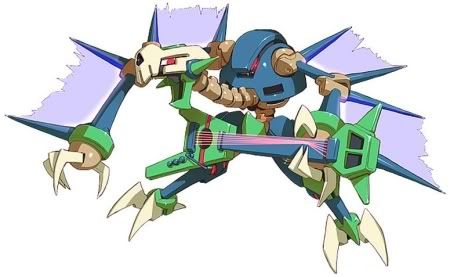
[B][COLOR=Red][U][SIZE=6]Megaman Zero[/SIZE][/U][/COLOR][/B]

[IMG]http://www.freewebs.com/dablakdragon1/megaman%20zero.jpg[/IMG]
[B]^Zero with the Zero Knuckle^[/B]

[SIZE=5]"I never cared about justice, and I don't ever recall calling myself a hero... I have always only fought for the people that I believe in. I won't hesitate... If an enemy appears before me, I will destroy it!"[/SIZE]

[B][COLOR=red][U][SIZE=4]Story:[/SIZE][/U][/COLOR][/B]
At the beginning of Mega Man Zero, Zero was discovered in suspended animation by a human scientist named Ciel, who leads a band of Reploid freedom fighters. Ciel used the Cyber Elf Passy to revive Zero, who in turn saved Ciel from the forces of Neo Arcadia. Zero, however, was suffering memory loss due to "hibernation sickness." As it turned out, Neo Arcadia was the government of the world at this time period. Reploids were discriminated against and often deemed Maverick and terminated without justifiable cause. Copy X, a ruthless, conceited clone of the real X, was in charge of this policy. Zero agreed to join Ciel's team in fighting this oppression of Reploids.

[B][COLOR=red][U][SIZE=4]Playstyle:[/SIZE][/U][/COLOR][/B]
Zero's playstyle revolves around far reaching sword attacks, unconventional specials, and comboes.
Some of his primary comboes of choice are:
Bair->Fair->Nair or Bair->Fair->Uair
Bair->Uair
Bair->Nair
Bair->Neutral B (when it is still the Zero Knuckle)
Nair->Dair (this one is unreliable but possible)
F-Throw-> Nair
Up Throw->Uair Juggle
Neutral A->F-Tilt->L-Dash+Dash Attack
Neutral A->F-Smash
Neutral A->D-Smash

Zero players should try to stay near their opponent and rack up the pressure. If their foe is air-based, U-Tilt spam can be pretty annoying for them. Overall, Zero performs best on the ground. L-Dashing gives him excellent mind-games and he has a variety of useful ground comboing tools (F-Smash, F-Tilt, Neutral A, Dash Attack, etc.)

Zero's foes should try to force him into the air, where he performs considerably worse, if possible. Projectiles are effective against him as with all other primarily weapon based characters, but he has a great approach reducing the effectiveness of camping. The most important thing is to keep a level-head and don't fall victim to his mindgames.

[B][COLOR=red][SIZE=4][U]Unique Mechanics:[/U][/SIZE][/COLOR][/B]
[COLOR=Yellow][B]L-Dash-[/B][/COLOR]
Zero must hit the L-Button to dash. He dashes rougly one fourth of Final Destination and can go through players. He has super armor during the first few dashing frames. This can be cancelled by using your dash attack. You can also Tap Dash, dashing only a short distance to make use of the super armor frames more effectively. The Tap Dash takes you about as far as Wolf's F-Smash. If you jump while dashing, it will greatly increase your forward momentum. Dashing can only be used on the ground so this is of little to no use in recovering. You can also turn around and reverse your dashing duration at any time in the dash. Excellent for mind games. The dash has some beginning lag so spamming for constant super armor isn't an option.
[COLOR=yellow][B]Constant Move Speed-[/B][/COLOR]
Zero has no walk. He moves at a pace between that of a walk and a dash.
[B][COLOR=yellow]Water Jump-[/COLOR][/B]
Zero can jump on water, allowing him to traverse over it without drowning.
[COLOR=yellow][B]Shield Boomerang-[/B][/COLOR]
Zero's shield is different from that of the rest of the cast. It reflects projectiles. It only protects one side of Zero, but can be aimed left, right, and up. The Shield can't be broken but auto-ends after 2 seconds. If you hold it for the entire two seconds, Zero will throw the shield like a boomerang, dealing 5% damage and low knockback. It travels just like Link's boomerang except that it is thrown in the direction that it was last aimed. While it flies, it deflects (not reflects) projectiles. Zero can't shield until it returns to him.

[B][COLOR=red][SIZE=4][U]Default Stats:[/U][/SIZE][/COLOR][/B]
Height- 4/5 (rougly human size)
Weight- 4/5 (lighter than Bowser but still pretty heavy)
Movement Speed- 2.5/5
L-Dash Speed- 5/5 (Between CF and Sonic)
Attack Speed- 4/5
Power- 2.5/5
Attack Reach (Not Including Projectiles)- 4/5
First Jump- 4/5
Second Jump- 2/5
Falling Speed- 4/5
Recovery- 2-3/5
Final Smash- ?/5
Traction- Unaffected (Special Foot Chip)
Dodges- 5/5
Crouch- None
Crawl- No
Wall Jump- Yes
Wall Cling- Yes, 3 seconds.
Glide- No

[B][COLOR=red][SIZE=4][U]Animations:[/U][/SIZE][/COLOR][/B]
[COLOR=yellow][B]Movement-[/B][/COLOR] A typical looking run. Pumps his fists as he runs. His hair moves with the wind.
[COLOR=yellow][B]First Jump-[/B][/COLOR] Raises both arms over his head as he jumps. One knee is jutted out like in Falcon's Fair. His hair rises upwards initially, but falls back down.
[B][COLOR=yellow]Second Jump-[/COLOR][/B] Jumps up, bringing his arms back down to his sides.
[COLOR=yellow][B]L-Dash-[/B][/COLOR] One arm is in front of Zero, with the elbow outwards. The other arm is behind Zero, ready to slash. An effect similar to Fox illusion appears behind Zero's path. A dustcloud appears behind the illusions.
[B][COLOR=yellow]Shield-[/COLOR][/B] Zero pulls out the Shield Boomerang (see Shield Boomerang mechanic).
[B][COLOR=yellow]Sidestep-[/COLOR][/B] Zero kneels down while sliding to the side. He then slides back.
[COLOR=yellow][B]Forward Roll-[/B][/COLOR] Zero teleports (a common reploid ability) a short distance ahead. Works kind of  like Mewtwo's aerial dodge.
[B][COLOR=yellow]Back Roll-[/COLOR][/B] Zero teleports a short distance backwards. Works kind of like Mewtwo's aerial dodge.
[B][COLOR=yellow]Air Dodge-[/COLOR][/B] Same as Mewtwo's in Melee.
[B][COLOR=yellow]Weapon Carry-[/COLOR][/B] Holds weapons the same as the Z-Saber
[B][COLOR=yellow]Homerun Animation-[/COLOR][/B] Spins around with the homerun bat. Only 360 degree homerun in the game. Its a bit slower than others as he brings the bat in front of him first.

[B][COLOR=red][U][SIZE=4]Specials:[/SIZE][/U][/COLOR][/B]
[B][COLOR=yellow]Neutral B- Zero Knuckle[/COLOR][/B]
Zero reaches out and grabs the opponent with the Zero Knuckle. He then squeezes them, dealing 5% damage. This move has average reach. The priority is high. This has average lag on both ends. He throws the foe after squeezing them, sending them flying with good knockback.
While holding the foe, he steals a power from them changing the Zero Knuckle into a new weapon based on that character for the remainder of Zero's stock. If you want to get rid of that power hold B and press any taunt button. This will return it to the Zero Knuckle state.
[B]Mario- FLUDD Blaster[/B]
Works just like Mario's Down B.
[B]Luigi- Green Fire Knuckle[/B]
The knuckle spits out a green fireball that deals 2% damage and flinching. It works just like Luigi's fireball except that it bounces off of walls and other surfaces.
[B]Bowser- Inferno Gun[/B]
The Zero knuckle becomes a short-ranged flamethrower that deals explosive fire damage. Ok reach, fairly low beginning lag, average ending lag, decent priority, and decent knockback.
[B]Peach- Metal Turnip Gun[/B]
Shoots out a turnip that works exactly the same as Peach's turnips. Effects are based on the face of the turnip. Average lag on both ends.
[B]Wario- Tire Gun[/B]
Shoots out a tire that travels like the Ice Climber's ice block. This is the only projectile affected by traction as it loses control on ice, moves quickly downhill, and moves slowly uphill. It goes as far as the stage allows or until it looses its momentum. Fairly low lag on both ends. Deals 3% and low knockback.
[B]Yoshi- Egg Gun[/B]
Shoots an aimable egg. It deals the same damage and slightly lower knockback than Yoshi's Up B but it cracks and releases its yolk, slightly increasing its hitbox upon contact with a surface. Fairly low lag on both ends.
[B]Donkey Kong- Coconut Gun[/B]
An aimable gun that fires a powerful, but somewhat slow moving coconut. It has some downwards pull, reducing its long-range effectiveness, but unless fired into the air, it should be effective. Average lag on both ends. Deals 5% damage and good knockback.
[B]Diddy Kong- Peanut Gun[/B]
Fires a fast moving peanut that travels in an arc. Works much like Diddy's neutral B except that it cannot be charged.
[B]Samus- Missile Launcher[/B]
Works just like Samus's missile except with a wider explosion and 1% lower damage. The missile is red.
[B]Zero Suit Samus- Whip Gun[/B]
Fires out a whip that grabs the foe and throws them a good distance behind Zero. Deals 5% damage. Fairly low lag on both ends. Great reach.
[B]Pit- Sparrows[/B]
Fires out... A SPARROW?! The sparrow is made of blue light and flies in an upwards slope. Keeps going until it hits something or leaves the stage. Low lag on both ends. Deals 3% damage and very low knockback.
[B]Link and Toon Link- Crossbow[/B]
The Zero Knuckle turns into a crossbow that fires a straight-forward projectile that deals 5% damage and good knockback. Flies quickly. Travels the distance of Final Destination. High lag on both ends. Does good damage to shields.
[B]Zelda- Din's Blaster[/B]
Works just like Din's Fire.
[B]Sheik- Needler[/B]
Fires out red needles at a constant speed as long as you hold the B button. Each needle deals flinching and 1% damage. These are easy to DI out of. They explode upon contact, extending the hitbox a bit. Somewhat high beginning lag but low ending lag.
[B]Ganondorf- Gerudo Dragon[/B]
Changes Zero's neutral B into Ganondorf's Side B.
[B]Captain Falcon- RISING FALCON[/B]
Fires out a fiery Falcon similar to Sparrows. This flies much slower and deals great knockback and 5% damage. Average lag on both ends.
[B]Pokemon Trainer (Any Pokemon)- Pokeball[/B]
Fires out a Pokeball that catches anyone (friend or foe) that it hits. It releases them after 2 seconds. Any damage done to them while in the Pokeball is dealt to them, similarly to Yoshi's neutral B. They can be shot off the stage if the Pokeball nailed them in midair and they don't escape in time. The Pokeball travels at about the speed of Snake's grenade, but in a straight-horizontal trajectory. It travels the distance of Final Destination.
[B]Pikachu- Lightning Rod[/B]
A weaker version of Pikachu's Down B occurs, dealing 5% and ok knockback to those struck. It gives Zero energy, healing him for 3% damage. Fairly high lag on both ends.
[B]Jigglypuff- CD Blaster[/B]
Shoots out a CD player that plays Jigglypuff's singing. Puts anyone hit by it to sleep for about a second and deals 3% damage and no knockback. This projectile flies at an average speed and travels half the distance of Final Destination. High lag on both ends.
[B]Lucario/Mewtwo- Shadow Gun[/B]
Changes Zero's Neutral B into Shadow Ball.
[B]Ike- Aether Gun[/B]
Shoots out a spinning sword. It works just like the flipper item and heals Zero for 1% for every point of damage dealt by it for as long as it is on the field. Only one can be out at a time and firing another one causes the previous one to disappear.
[B]Marth- Counter Blast[/B]
Works just like Marth's counter.... or not. Instead of slashing, Zero will fire a spread of bullets in all directions, dealing 3% damage and flinching to anyone hit by them. The bullets fly half the distance of Final Destination and travel at a fast speed.
[B]Ness- PK THUNDA[/B]
Works just like Ness's PK thunder.
[B]Lucas- PK FIYAH[/B]
Works just like Lucas's PK fire.
[B]Fox- Illusion Blaster[/B]
Fires out an illusion of Zero that travels the distance of Zero's L-Dash and deals 3% damage and decent knockback to anyone struck by it. Low lag on both ends. Possible mind-game use.
[B]Falco- Reflector Ball[/B]
Works like Mario's fireball except that it reflects projectiles that hit it. Deals 1% damage and stun to anyone hit by it. Travels about 1/4th of the distance of Final Destination.
[B]Wolf- Claw Gun[/B]
Shoots out a claw rougly the distance of Samus's Side B. If it hits it sticks into the foe dealing an initial 5% damage plus 1% damage per second the foe is stuck on it for a maximum of 3 seconds. Opposing controller input can reduce this duration. Average lag on both ends.
[B]R.O.B.- Spinning Top[/B]
Works like ROB's Down B. The top is larger and moves left and right unpredictably. It is slow.
[B]Sonic- Spring Gun[/B]
Whoever this hits is forced to jump the distance of Sonic's Up B into the air. This puts them into a helpless state. Deals 3% damage. The projectile moves quickly and travels about 1/3 the distance of Final Destination. Fairly low lag on both ends.
[B]Metaknight- Tornado Blaster[/B]
Fires out tornado that moves around unpredictably and catches foes in it the same as the Mach Tornado, dealing the same damage and knockback. It moves around the stage fairly slowly. Unlike the Mach Tornado, DI can easily be used to escape it.
[B]Kirby- Vacuum[/B]
Pulls the opponents torwards Zero. No other effects. Low lag on both ends. Great reach.
[B]Dedede- Reverse Vacuum[/B]
Pushes opponents away from Zero. No other effects. Low lag on both ends. Great reach.
[B]Olimar- Metal Pikmin Gun[/B]
Fires out a robot Pikmin o.O. This works like an ordinary Pikmin with no additional effects. Deals 2% per second it latches on.

[B][COLOR=yellow]Side B- Satellite One[/COLOR][/B]
Press Side B to change your first Satellite Cyber Elf randomly. Cyber Elves appear as a solid circle surrounded by a single ring that releases glitter-like light. Satellite elves fly behind you and passively (in most cases) aid you. The Cyber Elves consist of the following:
Mailla- A pink cyber elf. Reduces the effectiveness of enemy energy based projectiles by healing you for 2% each time you get hit by one.
Balette- A red cyber elf. Makes you run faster (making you go from a 2.5/5 speed to a 4/5 speed.)
Biraid- A green cyber elf. Reduces your falling speed.
Pitopah- Clings to an enemy like a Pikmin dealing 1% per second and slowing them down a bit if it hits them. You must press Side B to send it out.
Pitopuh- Same as Pitopah
Beenipe- Shoots out weak bullets at regular intervals (one every 2 seconds). Each bullet deals 1% and flinching if it hits. It targets a random foe each time. The bullets travels half of Final Destination at a rather fast speed.
Beetack- Same as Beenipe
Archim- Shoots a small explosive at a low arch towards the ground once every 3 seconds dealing 2% damage and low knockback if it hits a foe. Travels a short distance, rougly 3 body lengths ahead of Zero.
Archil- Same as Archim

[COLOR=yellow][B]Down B- Satellite Two[/B][/COLOR]
Press Down B to change your second satellite elf randomly. These elves are shown by a solid circle surrounded by a ring that releases glitter-like light. The elves are the same as Satellite One. Only one of the same elf can be out at a time.

[B][COLOR=yellow]Up B- Recoil Rod[/COLOR][/B]
Release B to stab with the recoil rod, sending yourself slightly in the direction opposite of the direction you stabbed. Hold B to charge it. A fully charged Recoil Rod grants a great push (about that of Lucas's Up B when it hits him) in the direction opposite of the stab direction. It takes about 2-3 seconds to fully charge it. The charge can be stored. This rod deals 5% damage and low knockback uncharged and 10% damage and great knockback fully charged. This move has good reach uncharged and great reach fully charged. Great priority. This does not leave Zero helpless, but, due to charge time, his falling speed will make any subsequent uses of this move much less effective. The best thing you can do is follow this up with Tenretsujin for a slight increase in recovery distance.

[B][COLOR=red][U][SIZE=4]Normal Attacks:[/SIZE][/U][/COLOR][/B]
[B][COLOR=yellow]A- Triple Slash[/COLOR][/B]
One press of the A button causes zero to slash once horizontally and twice vertically very quickly, dealing 1%, 1%, and 3% damage.This move has very little beginning lag and a lower duration than you would expect, but the end lag is punishable. The last hit deals ok knockback. Great priority. Great reach.

[B][COLOR=yellow]Dash Attack- Gale Attack[/COLOR][/B]
This is only usable during your L-Dash. Zero says "HUH!", while stabbing forward with his Z-Saber. The Z-Saber makes a large arrow shape. You keep moving forward while using this, but the dash ends after the attack ends. The move has high priority and deflects most projectiles, with the exception of explosives. This deals 6% damage and good horizontal knockback if it hits. The reach of this move is amazing considering it lasts for about half a second during your dash.

[B][COLOR=red][U][SIZE=4]Tilts:[/SIZE][/U][/COLOR][/B]
[B][COLOR=yellow]Forward- Zaneidan[/COLOR][/B]
Slashes downwards with both hands and fires a wave that travels about double the distance of Wolf's F-Smash. The sword deals about 5% damage and average knockback. The wave deals 3% damage and low knockback. Being struck by the sword also means you are struck by the wave, dealing 8% and average knockback. This sword has great reach. This move has average lag for a tilt. The priority is a bit on the low side.

[B][COLOR=yellow]Up- Z-Buster[/COLOR][/B]
Zero fires a a large bullet from his Z-Buster upwards. This deals decent knockback and strikes for 5% damage. It travels very far, not disappearing until it leaves the stage or hits something. Low lag on both ends. This move bounces off of walls or other objects other than foes that it hits. Its only real use to to annoy aerial based foes with a rather spammable anti-air projectile.

[B][COLOR=yellow]Down- OrbitShield[/COLOR][/B]
Zero throws his Shield Boomerang. It travels around him like a satellite somehow, reflecting projectiles that come into contact with it. If it hits someone it deals 5% and decent knockback to them. Great reach all around and excellent priority. Has a roughly 1 second duration and considerable lag.

[B][COLOR=red][U][SIZE=4]Smashes:[/SIZE][/U][/COLOR][/B]
[B][COLOR=yellow]Forward Smash- GroundSplitter[/COLOR][/B]
Zero quickly slams his sword into the ground. When it hits the ground, rocks are released. This move has a very high reach, greater than that of an Ike F-Smash in front of you (but not striking at all behind you or above you.) This deals 10.....15% damage and great knockback. This move has low beginning lag but almost a second of ending lag so use it wisely. The move has high priority.

[B][COLOR=yellow]Up Smash- Double Recoil[/COLOR][/B]
Zero pulls out 2 recoil rods and stabs above him with great force. This has great reach and deals 12....17% damage and high knockback. This move has fairly high lag on both ends, being Zero's strongest and slowest smash. This move has great priority.

[B][COLOR=yellow]Down Smash- CrawlShield[/COLOR][/B]
Zero throws his shield boomerang like a bowling ball. It travels across the ground and returns to Zero after travelling about 1/4th of Final Destination ahead. This has the best reach of Zero's smashes and deals 9....14% damage and good knockback. The boomerang reflects projectiles that hit it. This move has average smash lag on both ends. You can't use your shield until it returns.

[B][COLOR=red][U][SIZE=4]Aerials:[/SIZE][/U][/COLOR][/B]
[B][COLOR=yellow]Nair- Sword Spike[/COLOR][/B]
A simple downwards slash. This has great reach and fairly low lag on both ends. The move deals 8% damage and deals good knockback downwards and behind you. Due to its weird nature it probably isn't good for leading into comboes, but could make for a psedo-meteor. Decent priority.

[B][COLOR=yellow]Fair- Thousand Slash[/COLOR][/B]
Using his recoil rods, Zero stabs forward multiple times quickly, dealing 2% per hit and very little knockback. This can be spammed for an aerial infinite A combo of sorts. Decent damage racking move, but DI allows foes to escape fairly easily.

[B][COLOR=yellow]Bair- Reversal[/COLOR][/B]
Zero reaches behind him and grabs. If a foe is grabbed they are thrown in front of you. This move deals 5% damage and low knockback. The priority is average. The reach is good. The primary use of this move is to combo the foe. At percentages lower than 150% it is rather easy to follow up into a Nair, Fair, or Uair if the opponent doesn't react.

[B][COLOR=yellow]Uair- Heaven's Splitter/Tenretsujin[/COLOR][/B]
Zero jumps up a bit and slashes upwards. This looks much like Roy and Marth's Up B but only goes about half the distance of Roy's Up B. This deals 10% damage and good upwards knockback. It is about as fast as Marth's Up B. This move has great reach and great priority. Low beginning lag. The ending lag is a bit on the high side. This can help in recovery a little, but only if it is used to make that last desperate grab for the edge, otherwise the ending lag will stop you from taking advantage of it.

[B][COLOR=yellow]Dair- "V Shot"[/COLOR][/B]
Zero shoots his Z-Buster downwards, firing two large bullets that split into an upside down V shape. If an opponent is close enough, they may be hit by both bullets. Each blast deals 5% and low knockback. The bullets bounce off of the floor if they don't hit an opponent first, forming a larger and wider upwards V shape if both do so. The hitbox gets weirder as the distance increases so this isn't exactly the best dair in the world for accuracy. Still it isn't easy to predict and can confuse and annoy enemies. Low lag on both ends.

[B][U][COLOR=red][SIZE=4]Miscellanious Attacks:[/SIZE][/COLOR][/U][/B]
[B][COLOR=yellow]Ledge Attack <100%- Single Slash[/COLOR][/B]
A simple slash out of a jump. Exactly the same as the first slash of Marth's Nair, except without sweetspots.

[B][COLOR=yellow]Ledge Attack >100%- Triple Slash[/COLOR][/B]
A triple slash out of a jump. This deals as much damage as Marth's Nair does total divided evenly among the 3 slashes. The last slash deals good knockback.

[B][COLOR=yellow]Get Up Attack <100%- Spin Slash[/COLOR][/B]
With the Z-Saber in his right hand, and the recoil rod in his left, Zero jumps up and spins, hitting on both sides and dealing 6% damage and average knockback. Great reach and priority.

[B][COLOR=yellow]Get Up Attack >100%- Dual Slam[/COLOR][/B]
With the Z-Saber in his right hand, and the recoil rod in his left, Zero jumps up. He slams his weapons on each side of himself, while facing the screen. He then slams both weapons upwards. Each hit deals 8% damage and great knockback. Long duration and punishable for a get up attack. Great reach and priority.

[B][SIZE=4][COLOR=red][U]Grabs/Throws:[/U][/COLOR][/SIZE][/B]
[B][COLOR=yellow]Grab- Z-Seizer[/COLOR][/B]
Zero grabs his opponent with his left hand. This has average grab stats.

[B][COLOR=yellow]Grab Attack- Hilt Bash[/COLOR][/B]
Zero bashes his opponent in the head with the hilt of his Z-Saber... ouch. This deals 3% and is slower than most grab attacks.

[B][COLOR=yellow]F Throw- 360 Slash[/COLOR][/B]
Releases the foe and quickly performs a strong 360 degree spin slash, with most of the strength focused at the foe. This hits the foe for 7% and great horizontal knockback. Anyone in front of Zero also takes 7% damage and great horizontal knockback. Anyone behind Zero takes 5% damage and decent horizontal knockback.

[B][COLOR=yellow]B Throw- *** Kicker[/COLOR][/B]
Zero throws the opponent behind him and quickly kicks them right in the ***. This deals 9% and average horizontal knockback.

[B][COLOR=yellow]Up Throw- Double Tenretsujin[/COLOR][/B]
Zero releases the opponent and quickly performs a Tenretsujin (his Uair) that deals no knockback and 5% damage, followed by a second Teretsujin that deals good knockback and 5% damage. Long duration for a throw, so punishable in team matches. This is interesting because it puts Zero a considerable distance in the air without using his jumps.

[B][COLOR=yellow]Down Throw- Curbstomp[/COLOR][/B]
An awesome character deserves an awesome move. This is pretty self-explanatory right?
Deals 12% and no knockback.

None of these grabs/throws can chain.

[B][COLOR=red][U][SIZE=4]Final Smash:[/SIZE][/U][/COLOR][/B]
[COLOR=yellow][B]Hacker Cyber Elf-[/B][/COLOR]
Zero uses a random hacker elf:
[B]Metoras-[/B]
All of your foes become Mettaurs, weak enemies from the Megaman universe, for 10 seconds. They become as light as Kirby and fight with weak and predictable pickaxe moves.
[B]Kynite-[/B]
All small enemies (Kirby, Jigglypuff, Ivysaur, Squirtle, Pikachu, etc.) take 30% damage and very high knockback. Kills at 80%.
[B]Stopalla-[/B]
All enemies are stunned for 7 seconds. Unaffected by enemy controller output.
[B]Hanmarga-[/B]
All opposing damage percentages are doubled. For example, if you were in a free for all against a Metaknight with 30% damage, a D3 with 50% damage, and a Snake with 70% damage, the Metaknight would have 60% damage, the D3 would have 100%, and the Snake would have 140% damage.
[B]Byse-[/B]
Items drop twice as often for 20 seconds. Byse isn't selected when items are off.

[B][COLOR=Red][U][SIZE=4]Taunts:[/SIZE][/U][/COLOR][/B]
[B]Up- Assassination Pose[/B]
Zero switches his sword to under-handed and slashes in a wide arc, hitting on both sides of himself. This deals 10% and high knockback, but it is slow.
[B]Side- The Knuckle[/B]
The pose pictured.
[B]Down- "The wind in my hair."[/B]
Same as Ike's, but his hair acts like the cape.

[B][U][COLOR=red][SIZE=4]Lose Pose:[/SIZE][/COLOR][/U][/B]
Zero plants the Z-Saber in the ground and claps, the Zero Knuckle glowing brightly.

[B][COLOR=red][U][SIZE=4]Victory Poses:[/SIZE][/U][/COLOR][/B]
[B]Up- Z-Whip[/B]
[URL]http://membres.lycos.fr/rykakun/megaman_zero002.jpg[/URL]
[B]Side- Turning His Back[/B]
[URL]http://www.rpgfan.com/pics/megamanx-cm/art-004.jpg[/URL]
[B]Down- Sword-Drawn Stance[/B]
[URL="http://www.snesclassics.com/wallpaper/1280/Megaman20Zero20Wallpaper.jpg"]http://www.snesclassics.com/wallpape...0Wallpaper.jpg[/URL]

[B][COLOR=red][U][SIZE=4]Pros:[/SIZE][/U][/COLOR][/B]
Heavyweight
Possesses some killing moves.
No problem racking damage.
Possesses some comboes.
Variety of special abilities with the Neutral, Side, and Down Specials.
Cyber Elves are very useful.
Can be hard for the foe to predict.
L-Dashing is very useful for mind-games and approaching.
Great reach.
Potentially effective Final Smash.
Over 9000 times more awesome than Proto Man.

[B][COLOR=red][U][SIZE=4]Cons:[/SIZE][/U][/COLOR][/B]
Large target.
Unpredictable for the user as well.... lots of random specials.
Recovery takes some getting used to.
High learning curve.
Effectiveness is partially based on your opponent's character (Neutral B).
Some of the comboes feel.... weird, particularly Nair->Dair.
Random Final Smash.
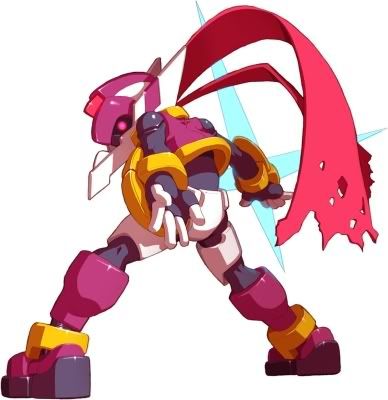
Code:
Protoman.exe moveset
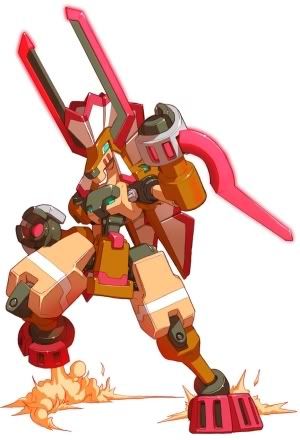
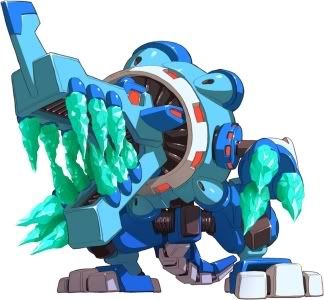
[CENTER][FONT=Fixedsys][COLOR=Red][FONT=Courier New][SIZE=7]****Protoman.EXE****[/SIZE][/FONT]
[URL="http://img378.imageshack.us/my.php?image=protoman4cq1.jpg"][IMG]http://img378.imageshack.us/img378/7402/protoman4cq1.th.jpg[/IMG][/URL]
Megaman.EXE’s number one rival has slashed his way into the fray!
[SIZE=5][B][U]Background[/U][/B][/SIZE][/COLOR][/FONT][/CENTER]
[FONT=Fixedsys][COLOR=Red]
[COLOR=DarkBlue]This Protoman hailing from the Battle Network Series, has always been both a friend and rival, but even as a rival, he will help. He is known to be one of the hardest Navi’s to face in the game. Despite the original Proto Man using a blaster, this one uses a wide array of sword attacks!
Protoman.EXE’s operater, Chaud Blaze, once trained 10 hours a day for years. Because of this, both he and Protoman have fast reflexes, and can always think ahead.
Though both himself and his operator can act severely strict and cold hearted, they both become more social when meeting Megaman.EXE and his operator Lan, over time.[/COLOR]
[CENTER][B][U][SIZE=5]Stats[/SIZE][/U][/B][/CENTER]
[COLOR=white]Damage Dealing = 8 (Combo ability is decent, and most of his attacks deal good damage)
KO Power = 7 (Most of his KO attacks are either short in range or easily seen coming, but overall, powerful)
Weight = 5 (He’s digital!)
Speed = 7 (Fast attacker, but not THE fastest attacker, but enough to get the opponent DELETED)
Walking/Running = 7 (Good in both, very fast either way)
Range = 8 (Disjointed hitboxes on most attacks make the Navi)
Recovery = 4 (Offstage is not Protoman’s calling. Difficult aerials and an easily gimpable recovery destroy Protoman’s ability to get back onstage)
Jump = 8 (good first jump, good second jump, and has wall jump)
Traction = 10 (10 hours of training a day = quick reflexes)
[CENTER]Extra Assets:
Wall Jump: Yes
Wall Cling: No
Crawl: No
Swim: Yes
Glide: No[/CENTER]
[/COLOR][CENTER]
[B][U][SIZE=5]Main Pros and Cons[/SIZE][/U][/B][/CENTER]
[COLOR=DarkBlue]Pros:
•Overall fast attacks on the ground.
•High Priority on main damage-rackers.
•Great ground game.
•Has a counter.
•Good range due to sword.
Cons:
•Predictable Finishers and slightly limited in options
•No projectile
•Fairly tall
•Light for his size(A little heavier than Marth)
•Aerials can be powerful, but most are hard to use.
[/COLOR]
[CENTER][B][U][SIZE=5]Special Moveset[/SIZE][/U][/B]
[/CENTER]
[COLOR=White]
Standard Special:
Varial Sword (5%-15%):
An attack that can be charged by pressing B repeatedly once, twice, or thrice.
If pressed once:
Short Sword: (5%)
Protoman will unleash a quick, but low knockback attack mainly used for slight spacing and a combo starter to another attack. This attack has low range compared to his other attacks.
Good spacing means easy KO. Despite this attack being weak, it has high sheild breaking properties. Abuse this effect.
If pressed twice:
Long Sword: (15%)
Protoman will take a step forward and slash with a sword twice his character length. Slow start-up, but great knockback.
Great if you need to cancel out dashes and grounded approaches. The versatility in this attack is incredible if used correctly.
If pressed three times in succession or more:
Wide Sword: (11%)
Protoman will slash with a wide attack, hitting even characters slightly above and below him. Overall average knockback. Verticle range is slightly farther than ShortSword. Horizontal range is slightly higher and Marth’s Ftilt. It puts up a shield between you and the opponent, making this worthwhile. Also destroys short hopped approaches.
Forward Special:
Samurai Sword: (14%)
Protoman dashes forward (about 1/3 of Final Destination, he will stop at edges if used on the ground, although if used in the air, Protoman will continue on until reaching the climax of the dash, or if he hits someone, and fall into Helpless Mode) and slashes behind, in front, and above him. Protoman will slash below him if used in the air. Range is about the size of ShortSword. Medium Knockback. Can be cancelled in the air (You have about 5 frames to do so).
A great approach option, as it attacks even those in the air and behind him.
This attack is easily seen coming under quiet circumstances, as Protoman will say "Hmph!" before the initial dash.
Upwards Special:
Step Sword: (9%)
Protoman will charge up for a second (during this one second, you can push the control stick in a direction to decide where Protoman will move to) and then run towards the direction inputed. He will dash as far as Samurai Sword. At the end of the dash, Protoman will slash forward, dealing 9 damage and high knockback. Does not have the 16 directions that Fox, Wolf, and Falco can choose from. Medium range.
An attack only used for recovering, and is only decent at best. The swipe at the end of the dash should swat away any edgeguarders, but most will be able to read you if you try to attack them with it.
Downwards Special:
Guard: (10%)
Unlike most counter attacks, this one must be charged. The guard will only work when fully charged (3 seconds).
When finished charging, Protoman will start to flash red. When Special Down is pressed again, Protoman will set up a shield. When attacked, Protoman will quickly step behind the attacker, and slash forward, it will stun the opponent in its place. Protoman will then step back to the place when it was before. The opponent will be invincible and stunned until Protoman gets to the original area from which he came.
It stops you and your opponent in place, so it feels like a new sleight,but overuse may lead to predictability[/COLOR]
[CENTER][B][U][CENTER][SIZE=5]Grounded Attacks[/SIZE][/CENTER]
[/U][/B][/CENTER]
[COLOR=darkblue]Neutral Jab:
Switch Blade (3%, 4%, 4%)
Protoman will first slash upwards, then downwards, and then he will step forward and slash in a similar fashion to Ike's Ftilt. Good range on all slashes.
Easily jab-cancelled after the second slash, this attack is good if you are running out of options. Initial hit starts on frame 2.
Forward Tilt:
Stab Rush: (7% + 3%)
If pressed once, Protoman will lunge forward then retract back, stunning the opponent in their place for a few frames. If pressed again short after the initial lunge, Protoman will step forward and push the opponent away. Slight knockback on second hit only. Nearly no start up or ending lag. Good range on both hits, with the first being slightly better, but it won't matter as Protoman takes one step forward on the second push.
Easily Protoman's best tilt, this tilt does quick damage and the second hit gives you breathing room for another follow up.
Downwards Tilt:
Foot Swipe: (5%)
One of the few attacks that are not sword-related, Protoman will simply drop-kick the opponent. Somewhat laggy ending, and may trip foes. Medium range, half of what Fire Sword is.
Despite the laggy ending, you should be able to follow up with a forward tilt. Master this attack, if you can use this in the right situation, you can easily rack up good damage on your opponent(s).
Upwards Tilt:
Crescent Clash: (3%)
Facing up, Protoman slashes upwards in a crescent motion. Very Low Knockback, High Range. Can combo into another Upwards Tilt.
Forward Smash:
Fire Sword: (15%)
Looking angered, Protoman takes one step and fiercly slashes forward. If fully charged, anyone hit by the attack will have a burn effect, dealing 2 damage per second over a time of 3 seconds. High knockback, Laggy start up. Has the best horizontal range out of all of Protoman's ground attacks, slightly more than two character lengths.
Incredible range on this attack. Landing this attack usually means your opponent off the edge. All opponents should be wary of this, as you won't use it much, only in the best situations.
Downwards Smash:
Wind Sword: (9%)
Protoman will spin around with his sword angled downwards. Has a great wind push effect if you are a character space away from the sword, and didn't get hit by it. High knockback, laggy start up. Medium range, compared to his other large ranged attacks.
Punish badly placed rolls with this attack. The wind push is handy if a foe is walking forward to you.
Upwards Smash:
Lance: (15%)
Protoman will stab his sword downwards, unleashing a huge branch that comes up from behind him, inflicting damage and knockback to anyone it touches. High knockback, like the rest of his smashes, also a somewhat laggy start up. Incredible range, think of Cold Stab but upwards and a little shorter.
Protoman's main way to get rid of aerial fighters. With great range and good knockback, this can set up for an Upwards Aerial.
Dash Attack:
Sword Rage: (13% per hit)
While dashing, Protoman steps ahead, then will slash three times in front of him. All three do good knockback. Very slow ending lag, medium start up lag.
Great way to punish, can kill at high percents.[/COLOR]
[CENTER][U][B][SIZE=5]Grabs[/SIZE][/B][/U][/CENTER]
[COLOR=white]
Grab:
Protoman's grab range is sub par, but his pivot grab is great.
Pummel: (2%)
Protoman will knee the held foe.
Just an average pummel. Not too fast, not too slow.
Forward Throw:
Chain Reaction: (3%, 4%, 7%)
Protoman slowly tosses the opponent forward, then kicking him, and THEN finishing it off with a wide slash. Mid knockback.
A high damaging throw. Good for early damage racking.
Backwards Throw:
Slam!: (5%)
The foe is tossed on the ground, then bouncing off. Little knockback.
Not much is put into this attack, although it's possible to combo this attack into a Long Sword or Forward Smash at low percents, if the opponent isn't wary.
Downwards Throw:
Blade Bounce: (5%, 7%)
Protoman slowly sets the opponent on the ground, then he slashes downwards, making the foe bounce upwards. High knockback.
A great KO move. Start's KO'ing mid weights at around 110% on Final Destination.
Upwards Throw:
Toss Up: (3%)
Protoman quickly tosses the held foe up. Low knockback. A combo starter. High hitstun.
The hitstun on this is so great, Protoman can regrab and launch this attack again. Only work's until around 20%, and then the foe oddly gets their low hitstun back.
[/COLOR]
[CENTER][U][B][SIZE=5]Aerial Attacks[/SIZE][/B][/U][/CENTER]
[COLOR=darkblue]Neutral Aerial:
Electric Charge Blast: (10% or 7%)
Protoman will glow red, and shortly after, he will spin around, sword facing out, and an explosion will arise around him. Very high knockback, high start up and medium ending lag. A very devastating attack, although very easy to punish. If Protoman hits the ground while using this attack, an explosion will still arise, but only 7% and half the knockback. Medium range, but the explosion is all around him.
Easily a good punishment attack if your opponent broke their shield or you blocked a very laggy attack.
Forward Aerial:
Sonic Boom: (11%)
Protoman will slash forward quickly, and a small wave will be sent off (not a true projectile). A very quick attack, no landing lag, and very little start up and ending lag. One of his only well-rounded aerial attacks. Great range.
Short Hop these and you have a good approach. Protoman's poor air game is only there if a foe is approaching from behind. A good Protoman will never let that happen.
Downward Aerial:
Cold Stab: (15% when tipped, 7% if not)
With his sword slightly frozen, facing the screen, Protoman will stab down, dealing slight upward knockback when not tipped, but incredible downwards knockback when tipped. Can freeze at mid percents, if tipped. Horrid ending lag.
Largest range of all of Protoman's attacks, (even though the sweetspot is low and small) so take care of it. Goes about a character height downwards.
This attack is a very situational move. Protoman should take advantage of this if the time is right. Powerful attack and decent damage, if the opponent makes it back.
Backwards Aerial:
Twister: (4% x 5 hits)
In the air, Protoman will turn around and rotate his arm in a circle. Very easy to DI out of, although at the end is a hit with great knockback. Low start up and ending lag. Not a very good attack if you're opponent is ready and moving at low percents. Low range.
Upwards Aerial:
Triple Sky Slash: (3% per hit)
A flurry of three hits, and on the last hit, Protoman's sword will glow silver, unleashing a wind push effect to anyone who is near but didn't get hurt. High range. Little ending and start up lag, making it the other well rounded aerial of Protoman's. [/COLOR]
[CENTER][U][B][SIZE=5]Misc Moves[/SIZE][/B][/U][/CENTER]
[COLOR=White]Get-Up Attack:
Spin Sword: (5%)
Protoman will spin around, slashing anyone that is around his range. Low knockback. Low range.
Ledge Attack Below 100%:
Quick Slash: (5%)
Protoman will hop onto the stage and do an overhead slash. Low forward knockback. Quick start up.
Nothing too special, but it is deceptive in that it is quick and has a decent range.
Ledge Attack Over 100%:
Slow Start: (7%)
Protoman will struggle on his way up, then doing a slash with his sword. Medium knockback, very slow start up, sends opponents backwards off the stage. Good range.
If you can pull this attack off, then the odds are in your favor for the moment, as the opponent is now offstage, ready for some Forward Aerials.[/COLOR]
[CENTER][U][B][SIZE=5]Final Smash[/SIZE][/B][/U]
[COLOR=darkblue][B][U]Delta Ray Edge![/U][/B][/COLOR][/CENTER]
[COLOR=darkblue]
20% per wave, and great knockback each.
A destructive attack indeed. Protoman will start to glow, and create a huge slash. Then, Protoman will fly to the center of the screen, sending off 7 huge attack waves in random directions. Protoman is completely invincible during the time, and the first slash is just for show, it does not actually hurt anyone.
Protoman jumps in the CENTER of the stage and shoots all around him, so it may be easy to dodge if you can predict where he shoots, which is randomly.[/COLOR]
[CENTER][U][B][SIZE=5]Playstyle[/SIZE][/B][/U][/CENTER]
[I][CENTER][B]Protoman.EXE is a character that can be very adaptive in battle. Players will need to take advantage of this.[/B][/CENTER]
[/I]
[COLOR=White]In the beginning of the match, Protoman is easily at his best. Approach with Samurai Sword or short hopped Forward Aerials, both attacks have great range. If you play defensive at this time, Protoman won't be at full potential. Protoman's attacks easily degrade, so switching to grab and pummel mid life can help you greatly.
Protoman is very good at defensive manuevers, mainly because of his great range and dodges. At high percents, most would focus on landing as many hits as they can, but also living to high percents. Being offensive at this time will either get you KO'd or get your opponent worn down for another gimp.
Many of Protoman's attacks are situational, so you will need to recognize when to use the right attacks at the right time. Also work on keeping pressure off yourself, but on your opponent. Pressure will give you less thinking space.
To get KO's, Downward Throw and all of Protoman's smashes will work. Despite the latter being mostly laggy, you can decieve your opponents by using the smashes' great range or simply shield grabbing one of THEIR KO moves (which isn't that simple all the time).
[/COLOR][/COLOR][/FONT]From Sonic Boom