
Julz
Smash Apprentice
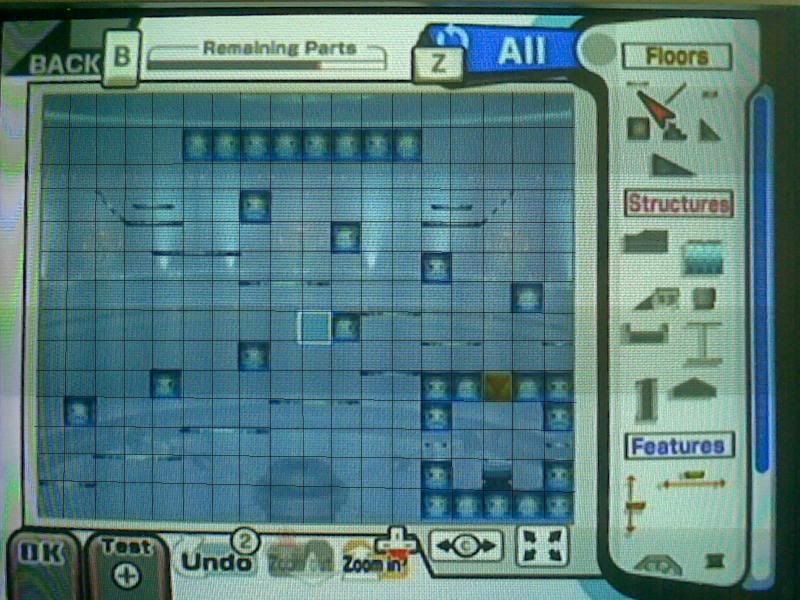
I've been changing my controller configurations A LOT since the beginning of brawl and I've been using this custom stage to practice Samus' basics for every time my controls have been changed. I think it'll be useful for those going through the same situation as I have or for anyone just needing practice using Samus for whatever reason. So here it is:

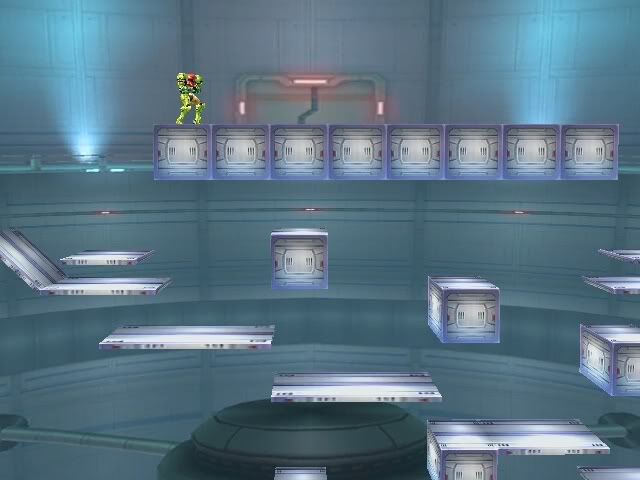
The top part is generally a flat platform, which can be used for practicing moves that rely on dashing.
This should save you from having to switch to Final Destination. The catchments at the edges stop you from falling all the way down, also providing as markers for when zair will grapple the edge.
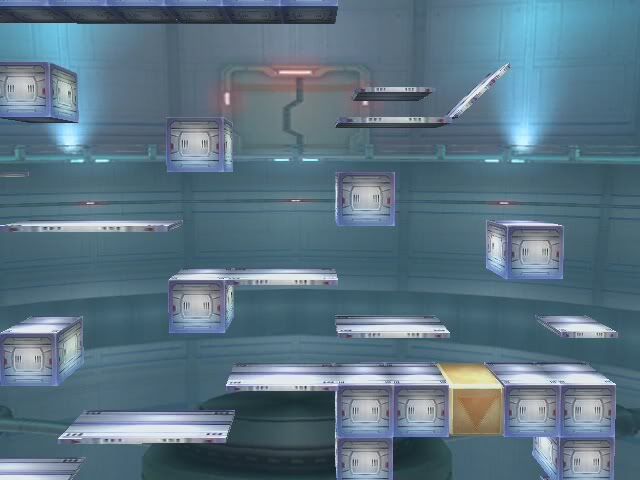
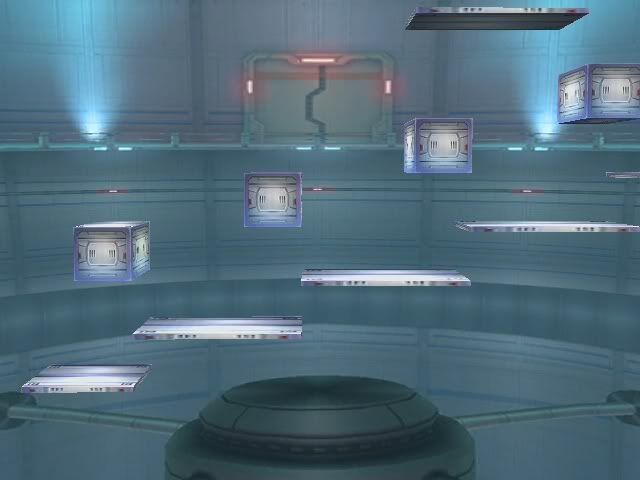
These two areas (each going in opposite directions) are for practicing your ledge hop zairs. It also helps you practice how to maximize the height gained from each ledgehop as you attempt to grapple from block to block.
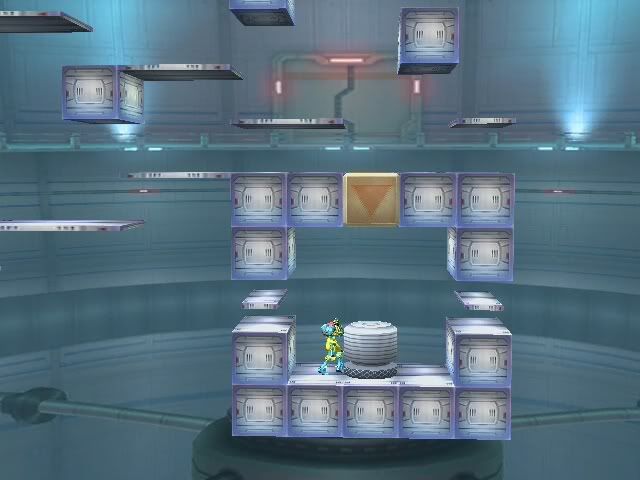
This last area is designed for aiming your zairs, charge beam, and super missiles after a short hop within the center of the square shaped room. The exits of the room act as target practice. A character is roughly one block in height so if your projectiles hit the block above then you would have missed the character in a real game. The small platforms at those exits act as markers for the short characters.
Unfortunately, I couldn't get a decent image from the stage builder point of view but hopefully it should be clear enough to make out.
So there you have it. Any feedback or opinion is appreciated.
The top part is generally a flat platform, which can be used for practicing moves that rely on dashing.
This should save you from having to switch to Final Destination. The catchments at the edges stop you from falling all the way down, also providing as markers for when zair will grapple the edge.
These two areas (each going in opposite directions) are for practicing your ledge hop zairs. It also helps you practice how to maximize the height gained from each ledgehop as you attempt to grapple from block to block.
This last area is designed for aiming your zairs, charge beam, and super missiles after a short hop within the center of the square shaped room. The exits of the room act as target practice. A character is roughly one block in height so if your projectiles hit the block above then you would have missed the character in a real game. The small platforms at those exits act as markers for the short characters.
Unfortunately, I couldn't get a decent image from the stage builder point of view but hopefully it should be clear enough to make out.
So there you have it. Any feedback or opinion is appreciated.
")