I'll save the Hall of Fame team until later in this post. You'll understand why once you keep reading. I can tell you know the same 6 Pokemon from my team are still there, a.k.a:
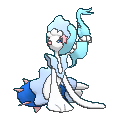
- Azura the Primarina
- Toucan Sam the Toucannon
- Puka the Alola Raichu
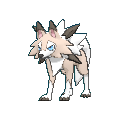
- Selkie the Midday Lycanroc
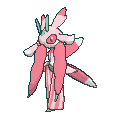
- Mata Hari the Lurantis
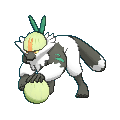
- Urlacher the Passimian
So the only thing I had left to do in the story was defeat the Pokemon League. It's structured much like in the 5th generation and 6th generation games (minus OR/AS), except this time, the Elite Four have a team of 5 Pokemon much like generations 1-4 and OR/AS.
And I'm going to say this right now. I adore the new Elite Four theme! When I first listened to it back when it was leaked, it struck me as odd at first because it sounded like one of those fanmade Pokemon tracks you find on Youtube, but it grew on me overtime to the point that it is tied with B/W/B2/W2's theme for my favorite Elite Four battle theme in the Pokemon series. I recommend giving it a listen as you read what's to come. You'll definitely enjoy it!
I wish the track was a bit longer since it loops around the one minute, though this isn't the first time we had a short Elite Four track. Hoenn's was roughly a minute long too, and it was SO damn good (2nd favorite Elite Four theme in a main series Pokemon game).
Here's a breakdown how each of the Elite Four Battles + The Final Battle went:
Elite Four Battle #1: Hala - Fighting type
Toucan Sam one shotted his Hariyama with a single Drill Peck. Next came his Crabominable. I debated who would work best against it, but after some thinking, I went with Urlacher. I did the Z-move to one shot, so I didn't have to worry about his ace Pokemon for the rest of the battle.
Now it was time to fight his Primeape. I tried to use Puka against it, but turns out Primeape was the faster Pokemon. It got a Pursuit that dropped Puka's HP to yellow, while I got one Psychic on it that dropped it to Red. Both Hala and I healed up for the turn. Primeape than abused Outrage for three turns, and I had to keep Puka during it. Once it got confused, Hala used another Full Restore in the process. Predicting another Outrage abuse incoming, I switched into Azura to negate the carefully predicted attack. Primeape got one Cross Chop on her, but it wasn't too serious. One Moonblast finished Primeape, and the same for his Bewear. The only Pokemon left standing was his Poliwrath. I tried to use Mata Hari against it. The Poliwrath brought Mata Hari's HP from to the half-green range. Mata Hari almost KOd it... leaving only a single HP left on it. Poliwrath does another Submission to KO her, but it KOs itself in the process thanks to recoil. Hala has been defeated!
Overall thoughts: Not a bad fight; pretty decent. Primeape was the main worry here because of its fast speed, Psychic-type coverage thanks to Pursuit, and its Outrage attack. Hariyama and Crabominable were the easier members to deal with. Bewear is manageable if you have a good special attacker for it. Poliwrath could be trouble, but Submission also damages it back.
Elite Four Battle #2: Olivia - Rock type
Her Relicanth used Yawn on Mata Hari from the get go. Thankfully, she OHKOd it that same turn. Her Alola Golem came next. I tried to use Urlacher's Bulldoze against it because of Golem's quadruple weakness to Ground, but it only brought its HP to somewhere in the green portion of its health. Alola Golem used Thunder Punch on Urlacher, but thankfully, Urlacher didn't get paralyzed. I decided to use Close Combat to get it over with, and Alola Golem gets KOd.
Olivia's next Pokemon was Carbink. I brought back Mata Hari to deal with it. She used Leaf Blade to lower its HP to yellow, but then Carbink used Reflect. That combined with its already high Defense stat made it a chore to take out. Leaf Blade didn't KO it, and Olivia used a Full Restore to start things back from 0. Mata Hari got another Leaf Blade on it to lower its HP done a notch. I then used Solar Blade to lower its HP to a range that I can kill it with Leaf Blade. The plan works, as Carbink's low HP is low enough for Mata Hari to get the KO with a more simple attack. She also tanked the Moonblasts pretty well thanks to her decent Special Defense stat, and the stat changes didn't bother her at all because she's a physical attacker, not a special one.
Now it was time to deal with her ace Pokemon, Midnight Lycanroc. I switched into Azura to deal with it. Unfortunately, Midnight Lycanroc outsped it and used its Z-move to OHKO her. I had to switch into Urlacher to tank the next few hits while restoring her for what was coming. During this part, Midnight Lycanroc kept spamming Rock Climb; thankfully, it didn't do too much damage to Urlacher, nor did it confuse him in the process. Urlacher then KOd it with two Brick Breaks.
The final Pokemon left to deal with was her Probopass. Azura came back ready for action. She used Oceanic Operetta to sing a devastatingly powerful song... but I completely forgot Probopass had Sturdy. Ouch. What's worse is that Probopass got the Thunder Wave that same turn... luckily, the power of Pokemon Refresh allowed Azura to recover from it the same turn. Olivia then used her Full Restore on Probopass when I tried to finish the battle with Aqua Jet. The next turn, I used Sparkling Aria to lower Probopass's HP to red (I didn't think it'd be this bulky) and Probopass gets another Thunder Wave... and Azura doesn't recover from it this time. The stakes are high! Fortunately, she survived the paralysis and KOd the Probopass with Aqua Jet. Olivia has been defeated!
Overall thoughts: While this fight was perfectly manageable for me, I'd say that if there was any Alola Elite Four battle that I had to pick as the hardest, it'd be this one; it's surprising too considering the number of weaknesses Rock-types have. Her Relicanth is doable if you have a Grass-type, but be warned that it knows Yawn, so pray to the gods your Pokemon KOs it the same turn it uses this sleep-inducing move. Carbink is a chore to take out, especially when it sets up Reflect. Her Probopass can actually be pretty annoying to deal with thanks to Sturdy and Thunder Wave; if you're going to use your Z-move on it, be sure you do small damage to it first before going for the full blow. Midnight Lycanroc and Alola Golem were the easier members of her team to deal with. Midnight Lycanroc got my Azura with its Z-move, but I think I could've KOd it the same turn it used it if Mata Hari was out in the field instead of Azura thanks to Lurantis's Rock-type resistance and high Defense stat.
Elite Four Battle #3: Acerola - Ghost type
After two of the Elite Fours being Kahunas, you'd expect the other members would be the other Kahunas as well. Looks like that's not the case. It surprised me that Acerola was a member of the Elite Four since she's only a Trial Captain, not to mention she looks really young
(she's a precious cinnamon roll after all). Thankfully, we have backstory why that's the case. Turns out Nanu declined the offer of becoming the Elite Four because he was really surprised by the news, so Acerola took over in her stead. It also turns out she became an Elite Four member for her own personal reasons: that is, wanting to become a Champion herself.
I like how she reiterated she's a descendant of the Alola royal family by wording it in a clever way: "bringing an old royal touch to the Pokemon League." Actually, saying that out loud makes me think that perhaps she does fit quite well into the Elite Four quite well considering her roots. Also, her dance right before the battle was adorable, and so was her battle sprite and her basic animation during the battle. She's the most adorable character in this game after all, alongside Lillie.
Now onto the battle!
I completely forgot she was going to open with a Sableye. I started with Selkie instead when it should've been Azura. When I switched out, Sableye got the Confuse Ray on her. Looking back at it though, it wouldn't have mattered if Azura was in the lead position at the beginning, because it turns out Sableye outsped her. Sableye gets one Shadow Claw, and Azura hit herself in confusion when she tried to use Moonblast. With her HP now in yellow, I had to use the Full Restore to heal her. Sableye get another Shadow Claw, and next turn it confuses Azura yet again. Fortunately, Azura bypasses the Confusion and one shots the Sableye with Moonblast.
Next came Acerola's Dhelmise. Toucan Sam returned to deal with it. He got a Drill Peck to lower its HP to the red portion. Dhelmise used Slam on Toucan Sam; luckily, he didn't get paralyzed from it. Acerola then used a Full Restore to heal Dhelmise. Toucan Sam responded with another Drill Peck, but Dhelmise survives yet again. Acerola uses another Full Restore, leading to another Drill Peck that barely keeps the ghostly Seaweed Pokemon alive. She didn't use another healing item the next turn though, so Toucan Sam finally gets the KO.
Acerola then sent out Froslass while Selkie came back. Froslass apparently outspeeds her. She tries to get a Blizzard on her, but she missed. Selkie tries to pull off a Stone Edge... but she missed as well. The drama heightened when Froslass used Confuse Ray the next turn. Great, not only do I have to pray for a successful Stone Edge, I also have to pray for she won't be affected from confusion in the process. Selkie manages to bypass the first turn of confusion, but she missed Stone Edge for the second time in a row. Arghhh! That's it, I'm playing it safe and using Accelrock. Confusion tries to get Selkie once more, but Selkie bypasses it again and succeeds with one Accelrock. Froslass tried to use another Blizzard, but she missed again. The next turn, Selkie finally snapped out of confusion and landed the kill with one more Accelrock. This phase was both the most frustrating and the most hilarious part of the battle overall (frustrating because of confusion and Stone Edge misses, hilarious because both Selkie and Froslass were missing with their strongest attacks).
Now it was time to deal with her ace Pokemon, Palossand. It was Mata Hari's time to shine. She started off with a good Leaf Blade to it to lower its HP to yellow. That same turn, Palossand got the Iron Defense, sharply raising its Defense stat to the point that I figured another Leaf Blade wouldn't kill it next turn; thus I decided to go for the Solar Blade for a better chance of a kill. On the first turn of charging, Palossand used its Z-move. Great, this might not go well. Mata Hari could potentially die this turn, and that could be bad because that would require me to use Azura against Acerola's ace Pokemon, which wouldn't be a good thing because I knew it had Giga Drain for Water-coverage. Luckily, Mata Hari hanged on with just 14 HP AND she got the KO with Solar Blade
Only Acerola's Drifblim was left. I started out with a Crunch from Selkie, but the attack didn't as much as I thought it would do against it. Drifblim used Focus Energy that turn, a.k.a. a breather attack. I used Rock Slide the next turn to finish it off. Acerola has been defeated!
Overall thoughts: I'd say this is a very close second for hardest Alola Elite Four battle, though I can definitely see why many others would consider this one to be the hardest. Confuse Ray is always a pain to go through, especially when a fast Pokemon like Froslass uses it. I guess the main reason why I didn't consider this the hardest Alola Elite Four battle was because luck was on my side when it came to confusion; in other words, it didn't get too annoying. Even though I tried to use Stone Edge a few times, I think Froslass could've been more doable if I went with Accelrock right away. Sableye was a bit annoying with Confuse Ray, but when confusion isn't a problem, a strong Fairy-type attack does the job (even better if you have a fast Pokemon that uses said attack). Palossand can be scary with its high Defense, potentially boosted with Iron Defense, and Z-move. Try to avoid using Water-types because it has coverage for them via Giga Drain. Someone like Lurantis can do the job. Dhelmise is probably the easiest member to deal with, especially when Toucan Sam has that high Attack-stat + Drill Peck to give it some serious pressure.
In all, I'd say this was another fair and enjoyable fight. I'm glad precious cinnamon roll Acerola put up a really good fight!
Elite Four Battle #4: Kahili - Flying-type
A wing-symbol on the top of the door? Aw yeah, we finally have a Flying-type Elite Four. I've been wanting this to be a thing for years!
And it seems like the surprise of the Elite Four just keeps on going. Since Kahuna Nanu declined the offer, I guess Kahuna Hapu declined it as well. Looks like that was the case, but who could fill her place in the Pokemon League? That's when I enter the doors and find a female golfer standing at the end. She introduces herself as Kahili, and she explains she was an island champion years ago. Following that, she has traveled the world to improve her skills as both a trainer and a golfer, and when she got the Alola Pokemon League invitation, she came back to Alola because the offer was too good not to pass up.
Well folks, looks this Kahili is the same one that was alluded to in the Sun and Moon demo, and her coming back as an Elite Four member only heightens the hype.
I also want to point out something interesting about her. Look at the color of her golf club, and then look at the Pokemon next to her.
Looks familiar? It sure does. The colors of her golf club are the same colors of Toucannon's beak. It's a very interesting detail because Toucannon also happens to be her ace Pokemon.
Now onto the battle!
Kahili opened with Skarmory, while I started out with Puka. Puka did some serious damage via Thunderbolt, but Skarmory barely survived thanks to Sturdy. Kahili then used a Full Restore. Thankfully, she didn't use it again next turn, so Puka was able to knock out the Skarmory pretty easily. Her Mandibuzz was next. Azura came out and delivered a strong Moonblast, but Mandibuzz barely survived. That's when things got a bit rough; Mandibuzz managed to use Flatter on Azura to confuse her, and Kahili used another Full Restore. Fortunately for me, Azura bypassed the confusion and OHKO'd Mandibuzz with another Moonblast. Looks like that Flatter attack was a double-edged sword.
Kahili then sent out her Crobat, while I sent out Selkie. Selkie used Accelrock to deliver some large damage from the get-go, but even more confusion troubles have to set in with Crobat using Supersonic on her. However, I realized Crobat was probably going to use an attacking move next turn, so I used a Full Heal on Selkie to remove the confusion. It was a good prediction, because it turned out Crobat used Air Slash that same turn. Selkie followed up with another Accelrock, and Crobat was finished.
And now it was time to deal with Kahili's ace Pokemon: Toucannon. Knowing it has the Flynium Z, I switched into Puka and it had it use its signature Z-move (a.k.a. not Gigavolt Havoc) to KO Toucannon to avoid the trouble. Her final Pokemon was a Baile Oricorio, and that was a really easy Pokemon to take out. Feather Dance lowers the Attack stat instead of Special Attack, so Azura one shotted it using Sparkling Aria. Kahili has been defeated!
Overall thoughts: Definitely the easiest of all the Alola Elite Four battles, at least in my opinion. Skarmory can be knocked out very quickly with a strong special attacking Fire or Electric-type; just remember it has Sturdy. Mandibuzz and Crobat are probably the more annoying members of team to deal with thanks to their confusion moves. However, with Mandibuzz's case, Flatter is a double-edged sword, as the Special Attack boost can give you the extra damage you need, while priority attacks can make quick work of Crobat. I haven't seen how much of a fighter her Toucannon can be, but do keep in mind that its speed is not the best. Baile Oricorio is a joke to defeat. Though she may've been the easiest for me, her fight was enjoyable, and I do like Kahili since she's the only member of the Elite Four that isn't a Kahuna or Trial Captain (at least currently a Trial Captain, because I think she once was one).
Final Battle: Professor Kukui - Balanced
And now it is time for the final battle... against Professor Kukui? It was a shocker at first, but it made sense after thinking about it: the dude is the one that made the Alola Pokemon League happen. Also, props to Kukui for being the first Pokemon Professor to serve as the final battle in the story. I remember one of the earlier X/Y rumors would be that the professor would be the Kalos League champion. Now, it seems like those rumors came into fruition a generation later, but with Kukui being more of a "final challenge" instead of a champion.
And his battle theme is really good! If you've been listening to the Elite Four theme I've posted earlier, pause it now and have this theme play for the remainder of this post. It's worth the listen!
I really like how it incorporates the main Pokemon theme and the Alola theme into it. It brings a sense of nostalgia and fits really well for a 20th anniversary game.
Now onto the battle!
The battle started out with Mata Hari against Kukui's Midday Lycanroc. I knew Lycanroc had the potential to be a pain to deal with: not only does it have a high Attack and Speed stat, but it also knew Stealth Rock. I predicted it would probably open with a Stealth Rock. I could've opened with Azura to use Aqua Jet from the get-go, but I feared the attack wouldn't be powerful enough to KO it from the get-go. Thus, I decided to take the riskier route and use Mata Hari instead; after all, she had a Quick Claw to potentially strike before Lycanroc, had a high Attack stat that could easily OHKO Lycanroc with Leaf Blade, and had a much better Defense stat compared to Azura.
And oh man was I in for a treat. Want to know the first thing that happened in this battle?
Mata Hari's Quick Claw came into effect and allowed her to OHKO Lycanroc before it could set up Stealth Rocks. Now that was awesome!
Kukui sent out Braviary. Selkie tried to use Stone Edge, but she missed. Braviary then set up a Tailwind. I succeed with a Stone Edge next turn, but Braviary survives with just 1 HP due to sheer hax. It then used Whirlwind, forcing Urlacher to switch out. Knowing the Tailwind was probably going to make Braviary outspeed Urlacher, I brought back Selkie. Selkie used Accelrock, and I was surprised to see Braviary was quite the bulky fellow (I never used a Braviary before, nor do I remember its stat spread); its HP was still in the green zone, and when I tried another Accelrock after Braviary used Brave Bird, it barely survived. It even set up another Tailwind.
Then Kukui withdrew Braviary for Magnezone to negate the next Accelrock. This forced me to send out Urlacher to deal with it, but on the same turn, Magnezone got the Thunder Wave and paralyzed him. What was even scarier was that its Thunderbolt delivered some really strong damage to Urlacher, and the paralysis got him for a turn. I had to use the Full Restore to fix that. Surprisingly, Magnezone used Flash Cannon that same turn, who also managed to avoid it thanks to the power of Pokemon Refresh. A sighed out of relief when I learned Urlacher was faster than Magnezone, as it managed to lower its HP to yellow with a single Bulldoze. Sadly, Magenzone got another Thunder Wave on Urlacher, and Kukui makes
another switch out! Braviary comes back to the field, so I had to bring back Selkie as the eagle Pokemon sets up another Tailwind. Thankfully, Kukui didn't use the Full Restore when it still had that single HP from earlier, so Selkie finally killed it with Accelrock.
Next Pokemon to deal with was his Snorlax. This was my biggest worry going into the fight because I know how defensive this Pokemon is. I planned to save my Z-move for it. Urlacher came back to the fight, but it got paralyzed for two turns in a row when it tried to use its Z-move. Snorlax was abusing Body Slams during this phase, but Urlacher dodged one of them thanks to Pokemon Refresh magic. The Tailwind eventually fades, and it turns out Urlacher was still faster than Snorlax when paralyzed. He managed to get the Z-move to OHKO Snorlax! Glad I didn't have to worry about it.
Now it was time to fight Decidueye, Kukui's ace Pokemon. It was pretty easy to deal with. It got the first attack with Brave Bird and did some huge damage to Toucan Sam, but Decidueye got enough recoil damage for Toucan Sam to finish it off with a single Drill Peck. Kukui's next Pokemon was Alola Ninetales, and this one was even easier to deal with than his Decidueye. All it took was two quick Accelrocks from Selkie and it was finished (Ninetales went for the Safeguard during this, which would prove to be pretty pointless).
And now the final Pokemon standing in my way: Magnezone. I brought Urlacher back to deal with it. I used the Full Restore to heal him up and remove the paralysis from earlier. Magnezone then used its devastating Thunderbolt attack to deal some large damage to Urlacher. Getting nervous, I start to think the only way I can effectively deal with it is by healing spam the next few turns so that Magnezone runs out of PP for Thunderbolt, so I healed again while Magnezone went for another Thunderbolt. That's when it hit me next turn: "Dude, have you seriously forgotten that Urlacher outspeeds Magnezone. Just go for that final Bulldoze." I did exactly that, and Magnezone finally went down. Professor Kukui has been defeated!
Overall thoughts: A really fun fight! The battle was a decent challenge and definitely a huge improvement from the disappointment that was Diantha. Kukui made some pretty smart switch ins, and he has some pretty clever strategies under his coat. Midday Lycanroc can potentially be annoying thanks to its Attack and Speed stats combined with Stealth Rock, so I consider myself really lucky that I managed to kill it with before it could do its thing. I thought Snorlax was going to be trouble, but it seems like one good Fighting-type Z-move was enough to do the job. Decidueye and Alola Ninetales were very easy to deal with. Braviary and Magnezone gave me the most trouble. For Braviary, it was because of its bulk and Tailwind set-up. For Magnezone, it was because of Thunder Wave and its really powerful Thunderbolt attacks boosted by its already high special attack stat and STAB. Between the two, I'd say Magnezone was the biggest worry for me in this battle. In all, for a battle that marks the first time the Pokemon Professor served as the final battle, Kukui was a great opponent.
As for some concluding thoughts on the Alola Pokemon League, it's a huge improvement from X/Y's Pokemon League. All four battles were a good and fun challenge.
The Entire Ending:
One thing I liked from the get-go was when Kukui mentions,
"It's like I told you before, the strongest moves you can use are the same ones a Trainer and their Pokemon choose together in the heat of the moment--when it really counts... I told you, didn't I? Up there on Mount Hokulani." It's pretty clever how he previously mentioned that when we were on the mountain directly across from the one the Pokemon League was located on, back when the League was still under construction. Now, he brings it up yet again, this time right after the final battle.
The Hall of Fame sequence was pretty cool. It was no longer just the entire team surrounding the player. It starts out with the 6 Pokemon in your team arriving toward the player character through shooting stars in the night sky, once they all land, then it does the turning-around-the-player for the rest of it. The music also fit the scene pretty well.
The Elite Four then walk up the stairs to congratulate me, and Kukui mentions that a big festival will be hosted to celebrate the crowning of Alola's first champion. I think this detail is worth emphasizing. For the first-time, the player character becomes an ACTUAL champion, and it's best emphasized not only though the festival, but also through the dialogue of other characters that come up to you and say, "You better be ready to defend your title," and indeed so, because the League Title Defense mechanic represents this perfectly.
The entire festival was really great to watch. Some of the highlights from what I remember:
- Gladion watching Lillie from behind a rock, smiling to himself because he's happy to see his sister feeling great again, then walking away.
- Precious cinnamon roll Acerola joining in on the Kiawe and the female dancers with her own cute little twirl
- All the Trial Captains and Kahunas doing their signature Z-move poses with Hala in the lead, with Nanu revealed to be hiding behind a rock doing the Dark-type Z-move. That was a pretty funny moment! Too bad the dude couldn't stay for the entire festival; looked like he had to leave to do some police work. At least he managed to say goodbye to the player before departing.
- The Battle Royale going on, and the Kukui x Burnet moment during it.
- Hau and Acerola jumping together. They both have the same energetic jumps!
- Hilarious moment of Kiawe passing out towards the end of the festival. Yep, that's what happens when you dance too hard.
- Lillie's words to the player character during the second half of the festival; it was pretty sweet how Lillie thought of her mother during it and how she wished she was there. The way she walked up to the player character made it look like she was about to confess yet again, but judging by her dialogue, it sounded like she was going to talk about something else.
- The Welcome to Alola theme playing when Kukui and everyone else give their final messages to the player character at the conclusion of the festival.
Lillie also takes me to the Ruins of Conflict halfway through the festival so that I can catch Tapu Koko. I debated about using the Master Ball since I've heard how challenging it is to catch, but I decided to test my luck and see how it goes. I threw the Quick Ball right away, but it only got one shake. I then weakened Tapu Koko using Leech Life from Mata Hari, followed with a Poison Jab afterward. The Poison Jab even poisons Tapu Koko in the process. Welp, looks like this next turn will determine whether or not I'll use the Master Ball or not. I threw a Dusk Ball, and... I caught Tapu Koko with my second ball. That was pretty awesome!
The next day, Hau rushes into my house to hurtingly bring me over to Hau'oli City, where its revealed that Lillie will be departing for Kanto region for two reasons:
- Although her mother has been recovering from Nihilego's poison, she still hasn't completely recovered. Lillie wants to go to Kanto because Bill could help with removing the poison. After all, Bill did fuse with a Pokemon back then. IMO, this was a really neat detail, not to mention I consider this to be generation-1-pandering done right compared to the Alola Formes.
- She wants to become a Pokemon Trainer so that she can become stronger herself. This right here is another amazing moment that demonstrates how much Lillie has developed. At the beginning of your adventure, she didn't enjoy Pokemon battles because she didn't like how Pokemon hurt each another. Now, she's ready to undertake them in order to improve herself.
And her entire departure scene was pretty sad, with the music and the situation added the feels. I also couldn't help but feel bad for Hau during this. You can tell that he has a big crush on Lillie, because he tells her out of sadness that he will right her a huge letter, and once she leaves, he starts crying. We've seen Hau being quite the happy and optimistic fellow the entire game, so to see him sad hurts. What makes it more tragic for him is that Lillie has feelings for the player character instead of him; if Hau found out about this, I think it could be heartbreaking for him. Kukui leaves some really comforting words for him though, and it makes Hau smile again.
The ending credits was pretty nice. It has Lillie opening up a package of photographs of all the characters we've met during our adventure and seeing what they've been doing lately. Some of my favorite pictures shown:
- Really cool shot of Hau and Hala riding on the Tauros with Tapu Koko flying in the background.
- Great photograph of Hapu and Mina bonding with each other.
- Badass shot of Guzma and his Golisopod
- That picture of Faba and Wicke with the Aether Foundation employees and the Clefable, Bewear, and Alola Grimer
- Plumeria having an older sister appearance with two Team Skull Grunts in the background looking funny; her Salazzle looked pretty adorable in this scene
- Adorable shot of Silvally licking Gladion
- Great photograph of Kukui with his wife, though I personally think Kukui looks better with his hat on.
It ends with a sweet picture of Lillie and Solgaleo with some parting words from Lillie and a clip of what else was in the package: namely the photo of her, Hau, and the player character at Hau'oli City from the start of the game, the letter (presumable written by Hau), and the Island Trial stamp case.


praline dunno if you heard, but Symmetra is getting major changes for the next patch. They're already up on the PTR.


